Type 4 curly hair has a way of making mediocre styling plans look worse than they are. Flat styles sag. Tight headbands pull. Loose pins slide out. And yet, when the shape is right, the same coils can look full, deliberate, and expensive in the best sense of the word — not “done to death,” just beautifully arranged.
The thing most people miss is that type 4 curly hair is not one texture. 4A, 4B, and 4C can all live under that umbrella, but the curl pattern, shrinkage level, and softness at the ends can change the whole feel of a style. A look that depends on length may need stretch. A style that depends on hold may need gel or a firm set. And anything that tugs too hard at the hairline will show up fast.
That’s why the smartest styles for tight curls do three things at once: they respect shrinkage, they protect the ends, and they don’t ask the hair to be smoother than it wants to be. Some days that means a puff. Other days it means twists, braids, buns, or a short cut with shape doing the heavy lifting. Small difference, huge payoff.
1. High Puff for Type 4 Curly Hair
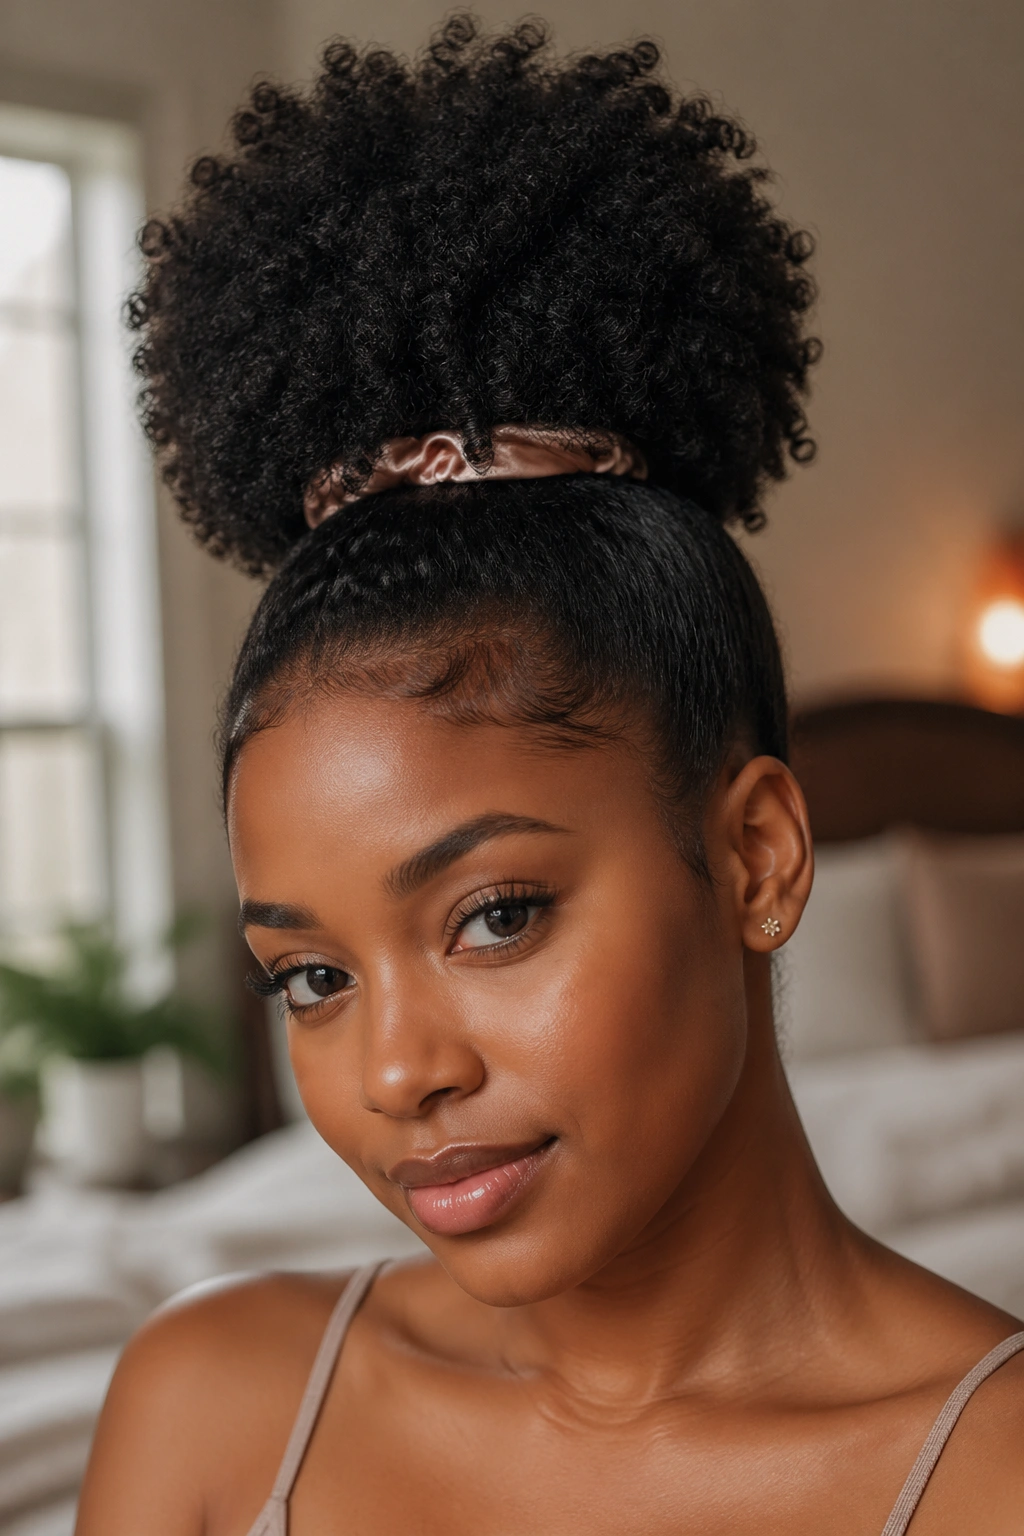
A high puff is the style that rescues a rough morning without pretending you had time you didn’t have. It works because it turns shrinkage into height, which is exactly where type 4 curls usually look strongest. The crown gets the attention. The ends stay soft. And the whole style reads as intentional even when the rest of the day is chaos.
Why It Stays So Popular
The base matters more than the puff itself. Smooth the perimeter with a light gel or edge control, gather the hair with a stretch-friendly band, then stop before the pull gets too tight. If the band is digging in, the puff will look sharp for about ten minutes and then start to feel annoying. Not worth it.
A little lift at the roots makes a big difference here.
- Use a satin scrunchie or wide elastic so the band doesn’t chew up the hair.
- Stretch the crown gently first if your curls shrink hard.
- Fluff the puff upward with your fingertips, not a comb.
- Leave the hairline soft if you want the style to feel less severe.
Tip: Place the puff slightly higher than you think you should. The extra inch changes the whole shape.
2. Defined Twist-Out
A good twist-out does not look crunchy or stiff. It looks like your coils were persuaded, not forced. On type 4 curly hair, that matters because definition can disappear fast if the hair is separated too early or if the twist pattern is too loose to hold shape.
Why It Works
The twists create a roadmap for the curl. Once they dry, the hair remembers that pattern and springs into a soft, stretched coil pattern with more visible length than a wash-and-go usually gives. Smaller twists make a tighter result. Chunkier twists leave a fuller, fluffier finish. Neither is wrong; they just tell a different story.
How to Get the Best Shape
Apply styling cream or a curl custard to damp hair, not dripping wet hair. Twist firmly from root to end, then let the style dry completely before unraveling. That last part is where patience pays off. If the hair is even a little damp inside, the twist-out can puff out in the wrong places and lose the crisp bend you wanted.
Quick reality check: Separate the twists with oiled fingertips, not dry hands. Dry fingers create frizz fast.
3. Braid-Out with Chunky Sections
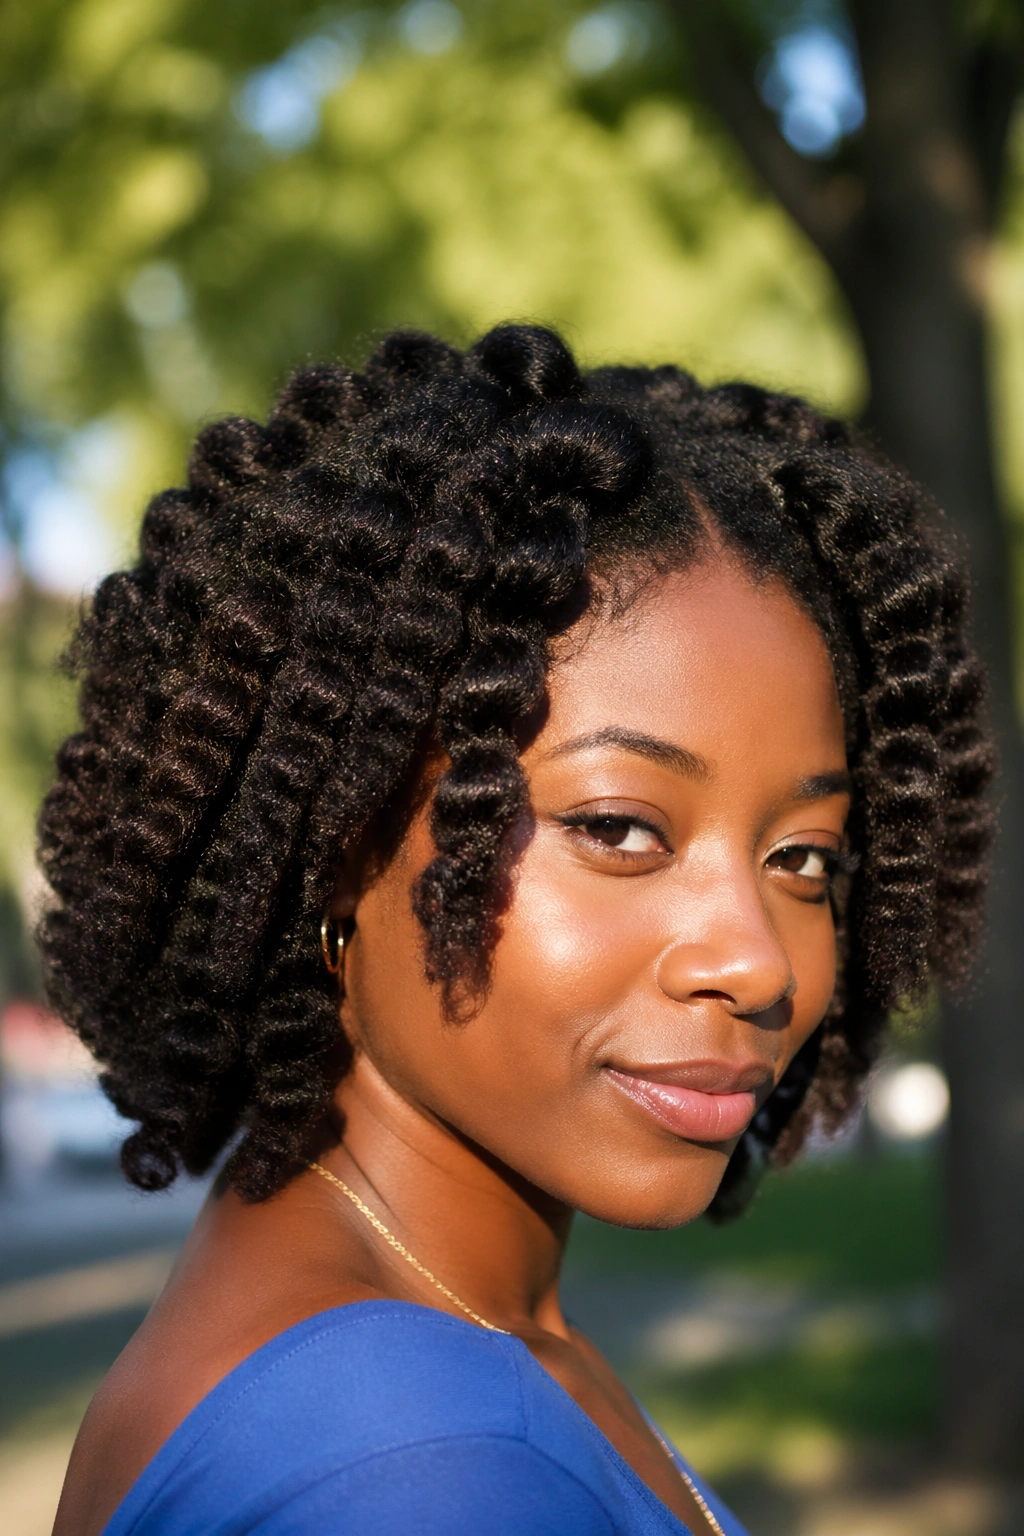
A braid-out gives type 4 hair a more stretched, zigzag pattern than a twist-out, and that’s exactly why it looks different. The braid grip changes the way the hair sets, so the finished style often has more length at the ends and a more pronounced texture along the shaft. If you like volume without losing the feel of the curl pattern, this one earns its place.
The section size changes everything. Bigger braids give you a loose, fluffy result. Smaller braids create more uniform definition and usually last a little longer before the roots start puffing up. A braid-out also behaves well when the air is dry, because the strands are already arranged in a pattern that doesn’t collapse as fast.
Don’t braid wet hair too tightly. That’s where people run into trouble. Wet hair swells, shrinks, and fights back as it dries, so a tight braid can leave dents or even stress the strands near the roots. A medium grip is enough.
Wear it when you want hair that feels textured, not polished to the point of stiffness. It has a softer edge than a twist-out, and I mean that in the good way.
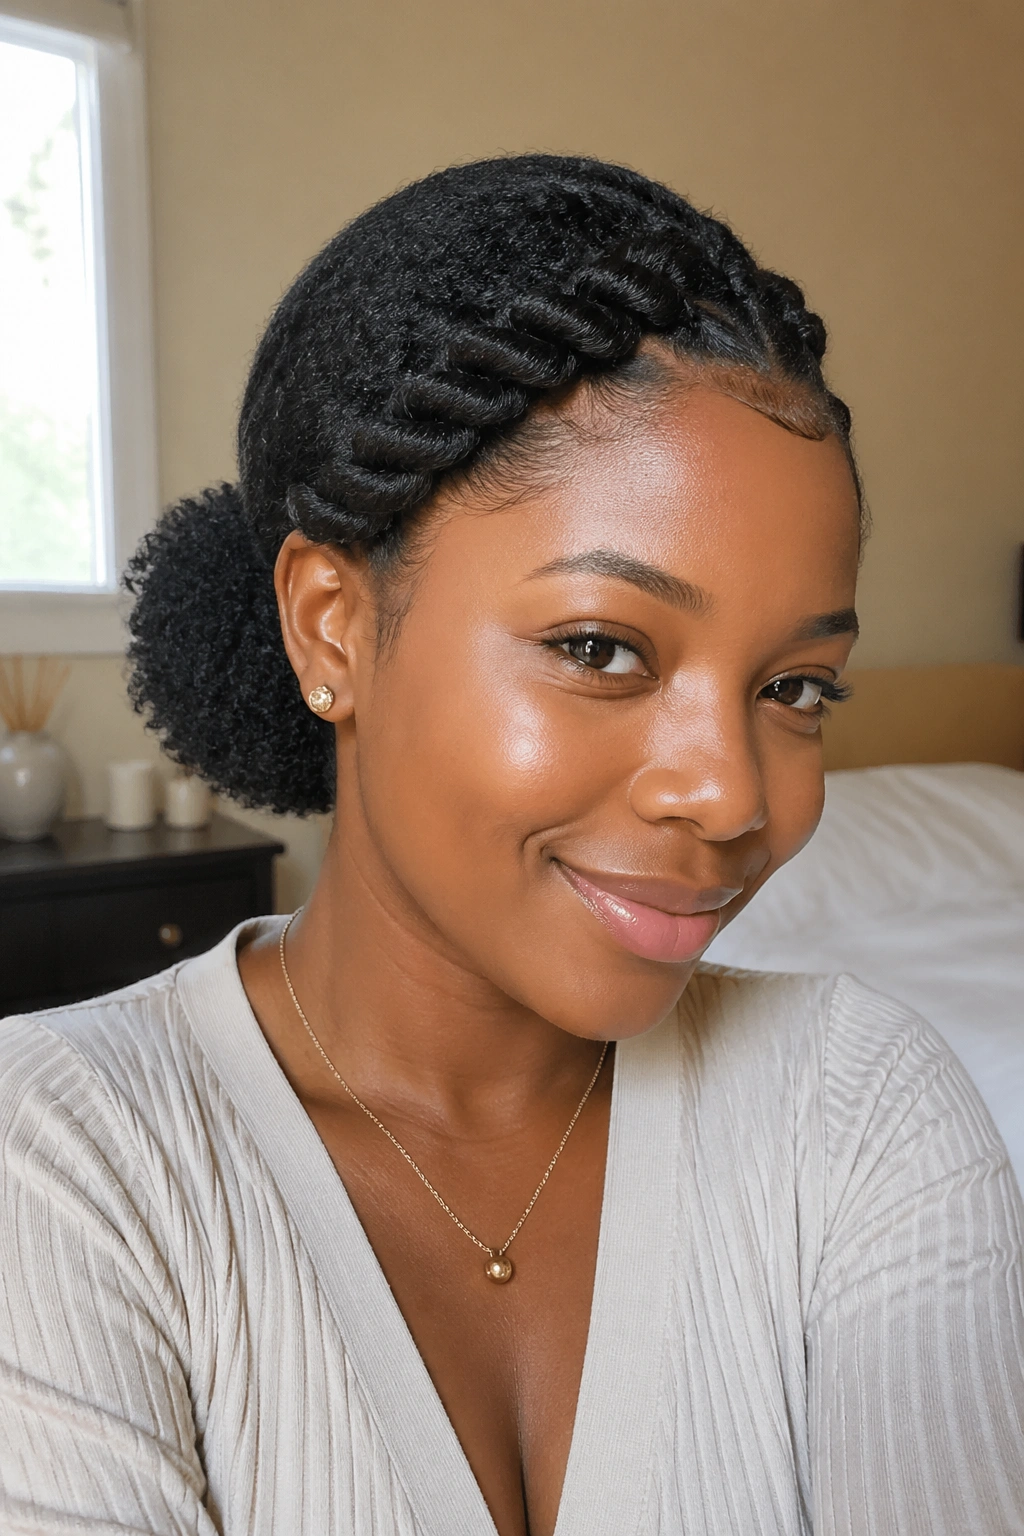
4. Flat Twists Into a Low Bun
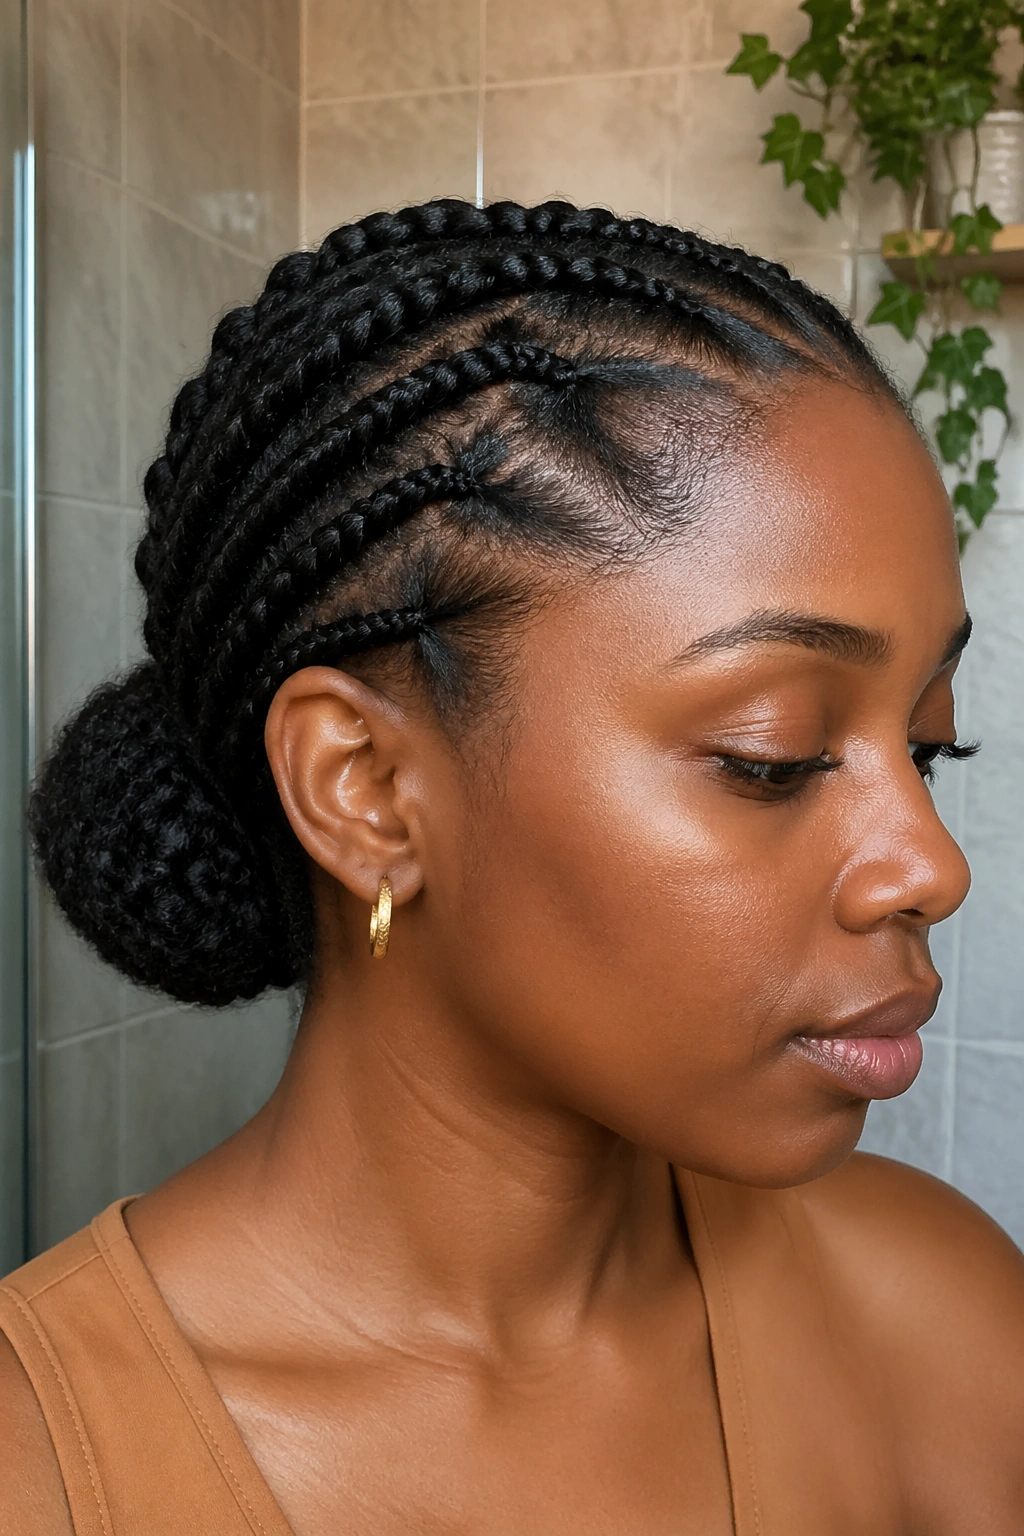
Want something neat that still leaves the texture intact? Flat twists into a low bun hit that middle ground nicely. They keep the front and sides close to the head, which helps with frizz and makes the style feel tidy, but the bun at the nape keeps the look from turning severe.
How to Place the Bun
Start the flat twists at the hairline and guide them toward the back of the head. Once they reach the nape, gather the remaining length into a bun and pin it in place with U-pins or a few small bobby pins. Keep the bun slightly loose if your hair is dense. A tight bun on type 4 curls can feel bulky in a bad way, like the style is fighting the hair instead of working with it.
This is one of those styles that looks more complicated than it is. The parting does the visual work. The bun is just the landing spot.
A light mist of water and leave-in conditioner before twisting makes the whole style easier to manage. If your roots are dry, the flat twists tend to look rough no matter how neat your parting is.
5. Bantu Knots
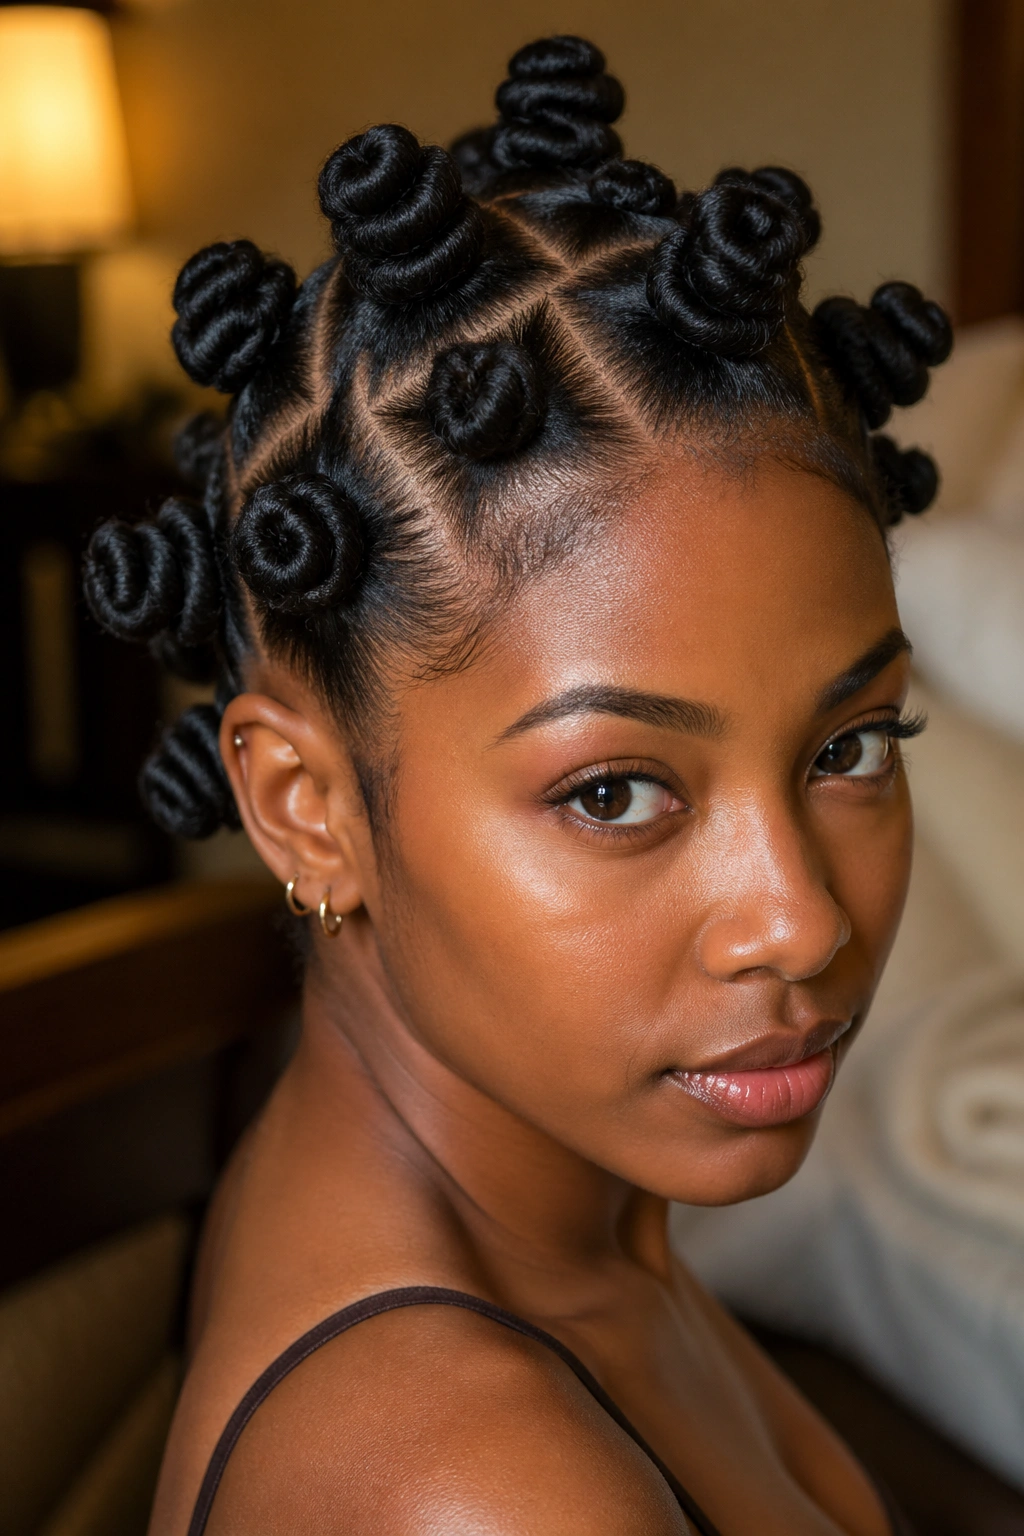
Bantu knots are one of those styles that look bold even when they’re done small. On type 4 curly hair, they give you shape, scalp access, and a set that can later be taken down for a knot-out with a springy, rounded pattern. Two styles in one. Hard to complain about that.
The size of each knot changes the mood. Small knots sit closer to the head and feel more sculpted. Larger knots look playful and can be easier if your hair is dense or longer. Sectioning matters here, too. Clean parts make the style look sharper, and uniform sections help the knots dry at roughly the same pace.
Watch the tension near the scalp. If you pull too hard while wrapping the section into the knot, the hairline will tell on you by the end of the day. Start at a comfortable base, then coil the length around itself until it forms a neat little knot. A dab of cream helps the ends stay smooth.
If you unravel them later, wait until the hair is fully dry. Damp knots are a shortcut to frizz.
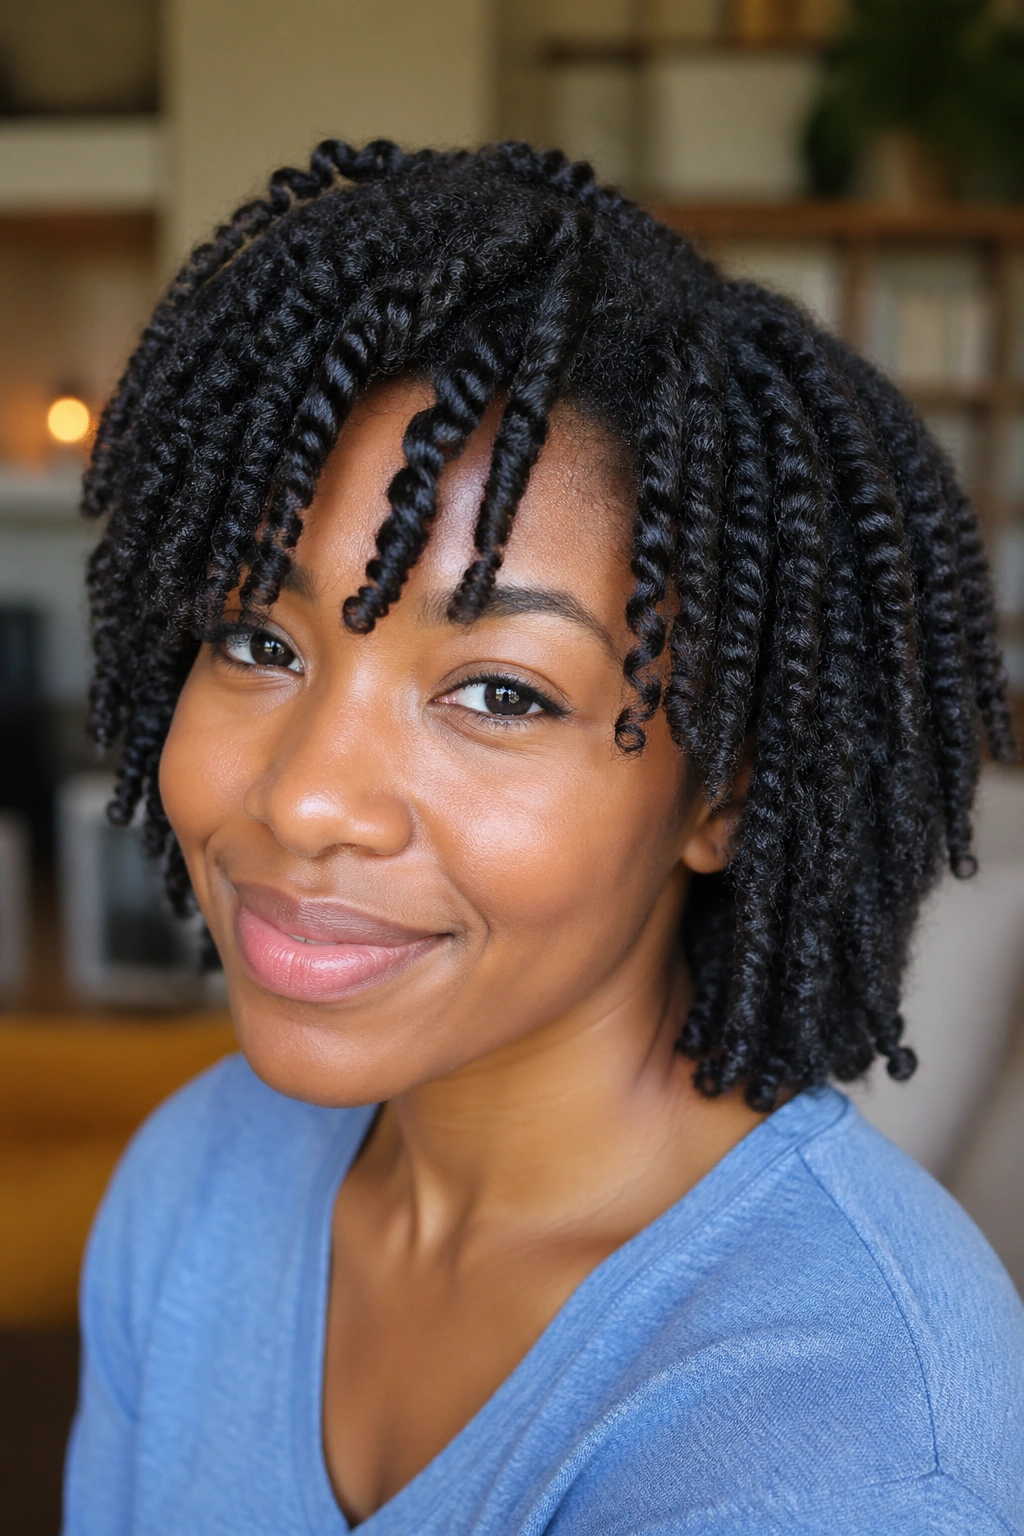
6. Mini Twists
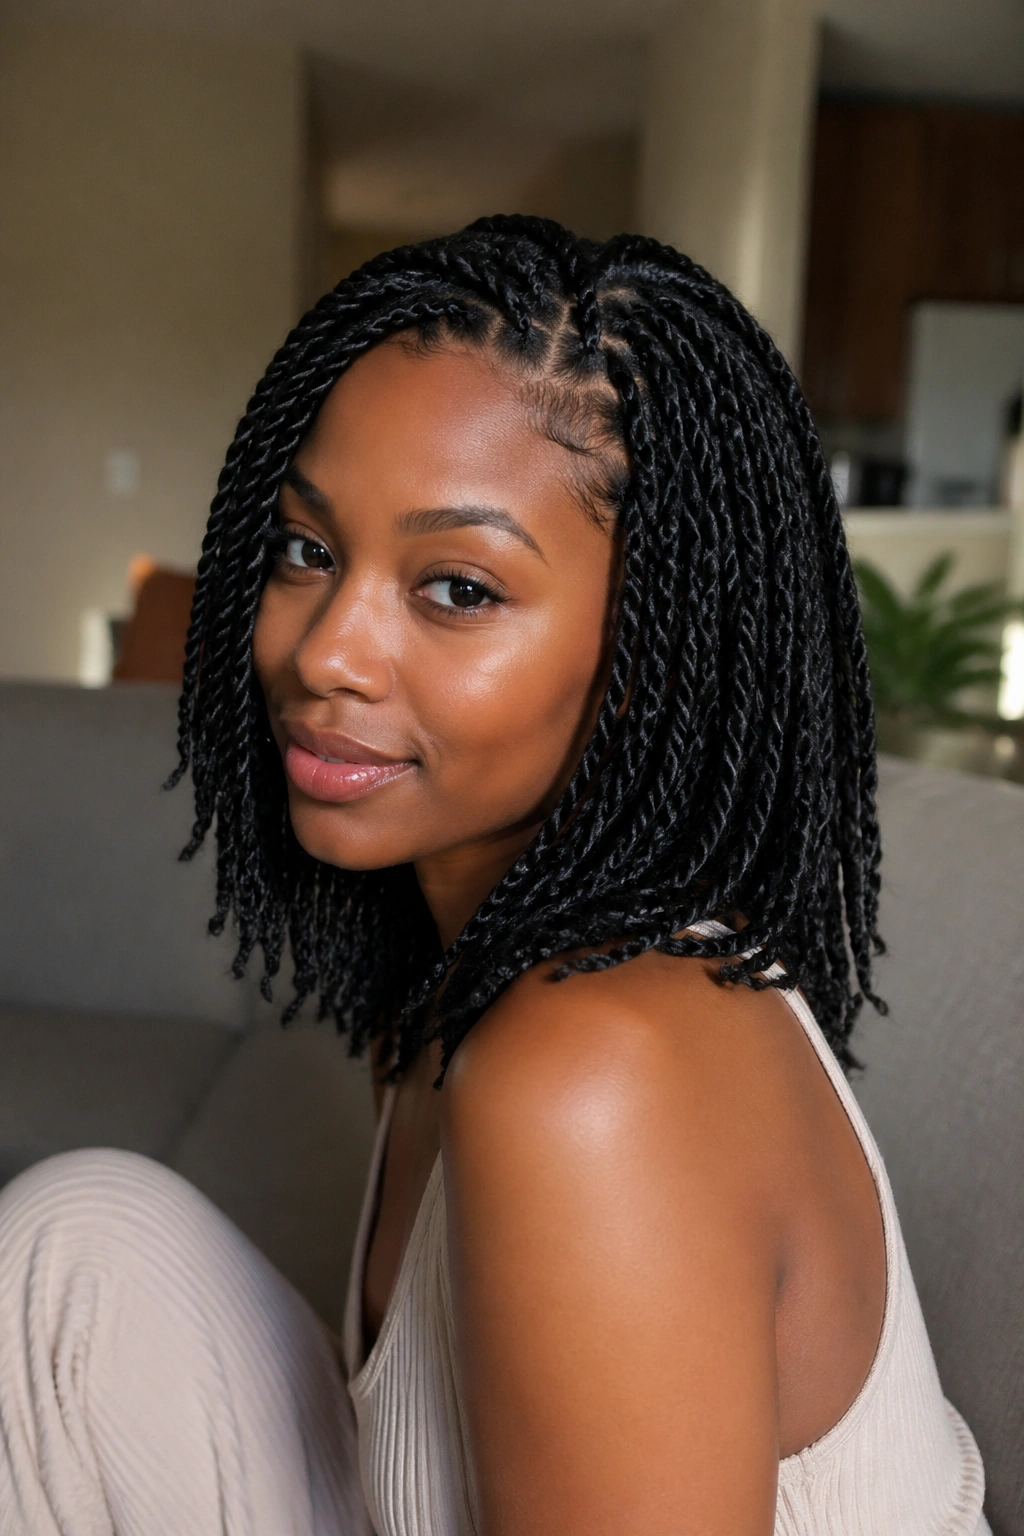
Mini twists are the style I’d hand to anyone who wants low fuss without giving up texture. They’re tiny enough to look polished, but they don’t ask for daily rebuilding. That’s a huge deal for type 4 curly hair, especially if your strands like to tangle when left loose for too long.
They also age well. Day one looks neat. Day three still looks good. By day five, the roots may soften a little, but the style usually keeps its shape if you sleep with a satin bonnet or scarf. That kind of staying power is why people return to mini twists over and over.
The real trick is not overloading each section with product. Too much cream can make the twists feel heavy and slow drying down. Too little leaves the ends fuzzy. A small amount of leave-in, followed by a light styling butter or gel, usually lands in the sweet spot.
And yes, they take time. Worth it, though. Especially when you want your hair to behave while you handle the rest of your week.
7. Crown Flat Twist Updo
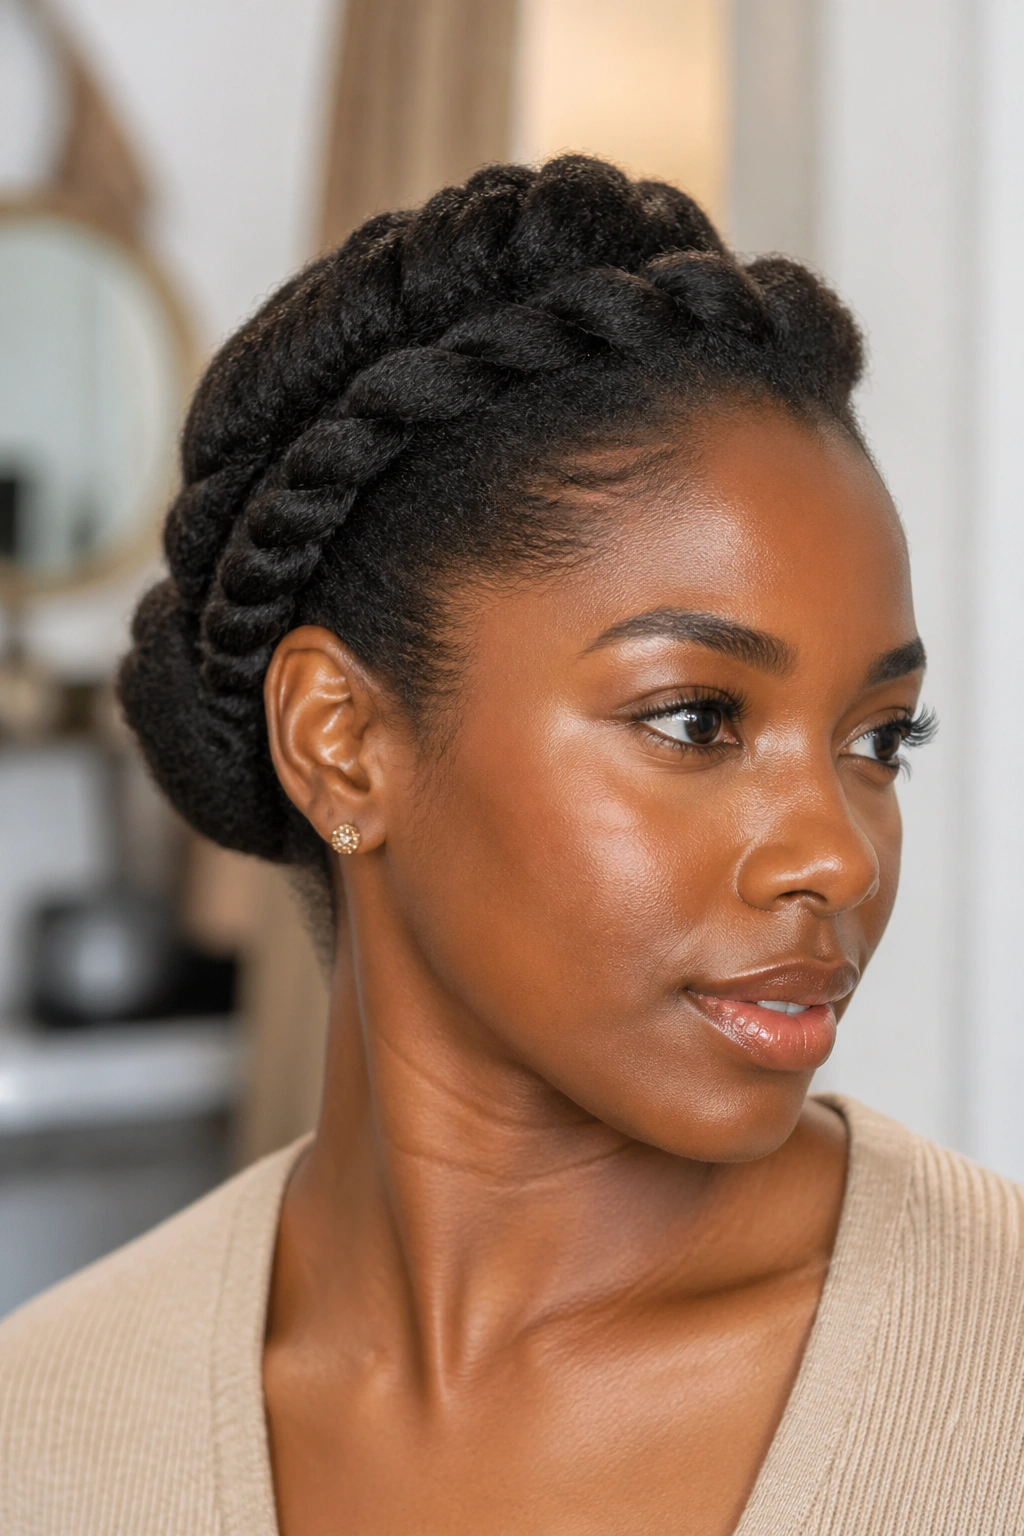
A crown flat twist updo gives the head shape before it gives the eye any texture. That’s why it looks so elegant on type 4 hair. The twists curve around the crown, often starting near one temple and traveling across the top or around the perimeter, while the ends disappear into a tucked bun or hidden pin-up at the back.
What Makes It Different
Unlike a basic bun, this style uses the braid-like line of the flat twist to frame the face. The result feels structured but not stiff. You get a clean neckline and a lifted crown, which can be useful when you want the hair off your shoulders without flattening the style into something boring.
It works especially well on hair that has a little stretch already. Blow-dried, banded, or previously set hair tends to twist more cleanly and stay neat longer. If the hair is very shrunken, the twists may puff out faster, which is not a disaster — just a different look.
Pin the ends where they won’t poke. That sounds obvious, but hidden pins have a way of becoming very obvious halfway through the day.
8. Side-Part Frohawk
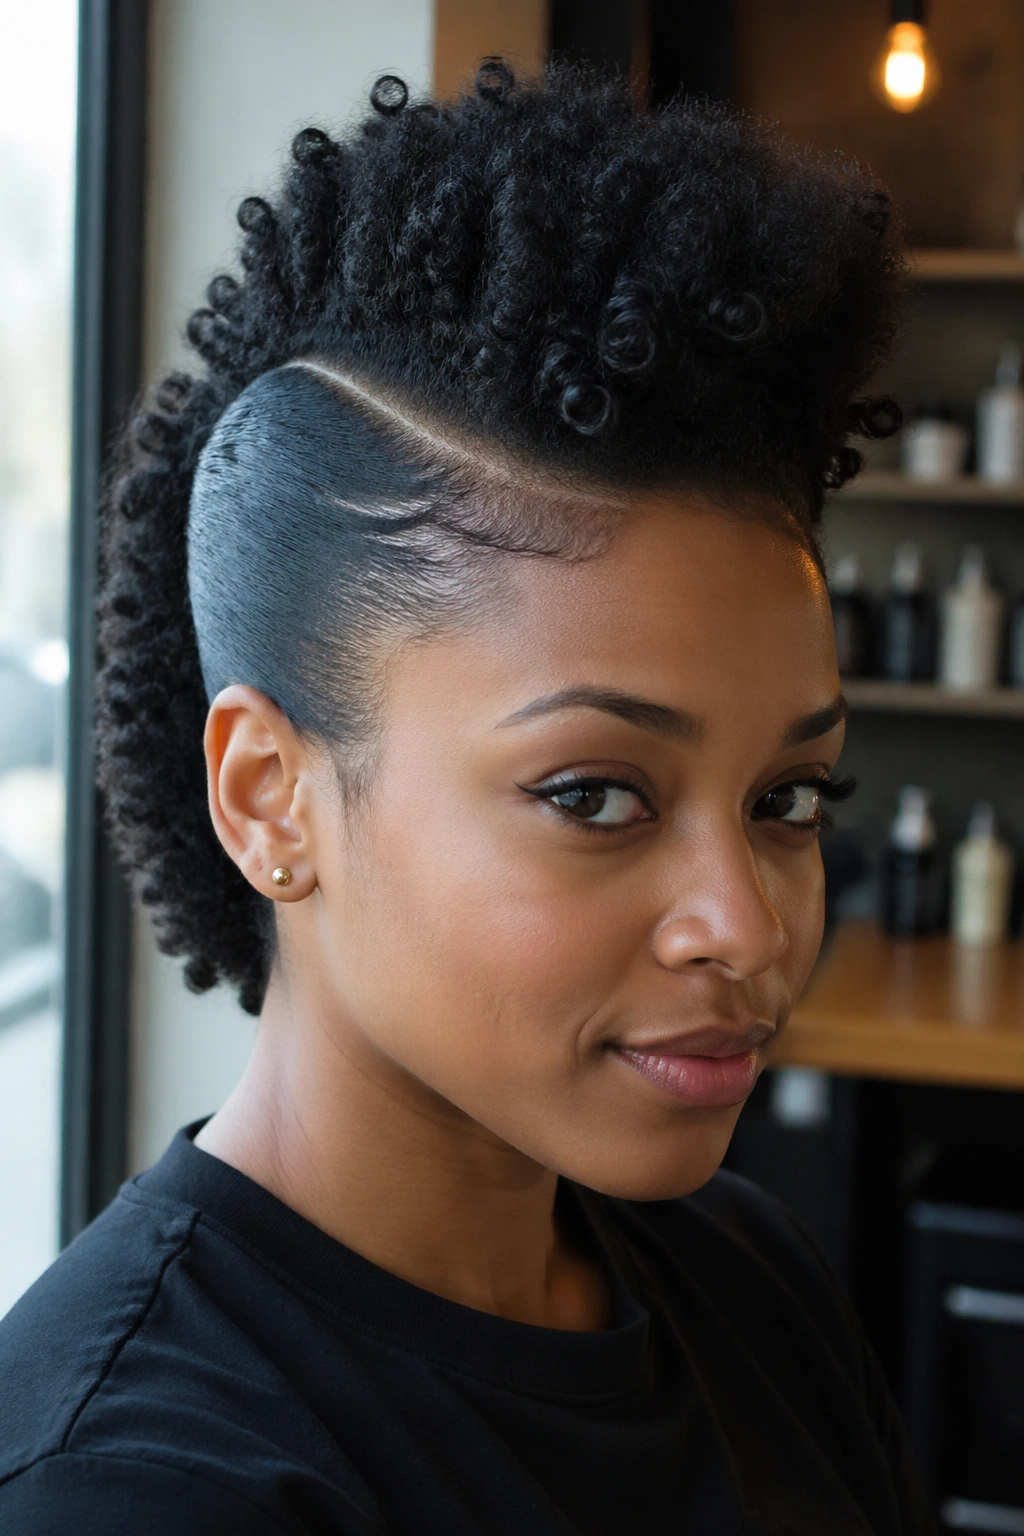
A side-part frohawk has attitude, but not the fake kind. One side gets slicked, braided, or pinned close to the scalp. The other side carries the volume, usually in a central ridge that runs from the hairline to the nape. On type 4 curls, that contrast is the whole point.
Think of it as a shape style. The middle section does the talking. The sides behave. If your hair is thick, you can leave the center loose and let the sides disappear into cornrows or flat twists. If your hair is shorter, a set of tight two-strand twists in the center gives enough lift without needing a long length to sell the shape.
A frohawk does ask for balance. Too much product on the sides makes the style look greasy. Too little hold and the sides spring back out. A small brush, gel at the roots, and a few strategic pins usually do the job.
It’s one of those styles that looks good with earrings, but that’s not the only reason it works. The silhouette is strong enough on its own.
9. Wash-and-Go for Type 4 Curly Hair
Can type 4 curly hair do a wash-and-go? Absolutely. It just rarely looks like the loose, airily separated version people imagine. On tighter coils, a wash-and-go is about definition and shrinkage control, not about making the hair pretend it’s another texture.
How to Get Hold Without Crunch
Start on soaking-damp hair, then apply leave-in and a styling gel in sections. Some people rake the product through. Others use shingling, which means smoothing the product over small pieces so the curls clump more cleanly. Both work. Shingling usually gives more definition and takes longer.
Drying matters a lot. Air-drying can work if you have time and the room is warm enough, but a diffuser can set the shape faster and help with root lift. If the hair stays damp too long, the style loses crispness near the scalp and can get puffy in odd places.
This is the style for people who want to see their pattern, not hide it. It may not last as long as twists or braids, but it gives a clean, lively look that feels honest about the texture. That honesty is part of the appeal.
10. Space Buns with Curly Ends
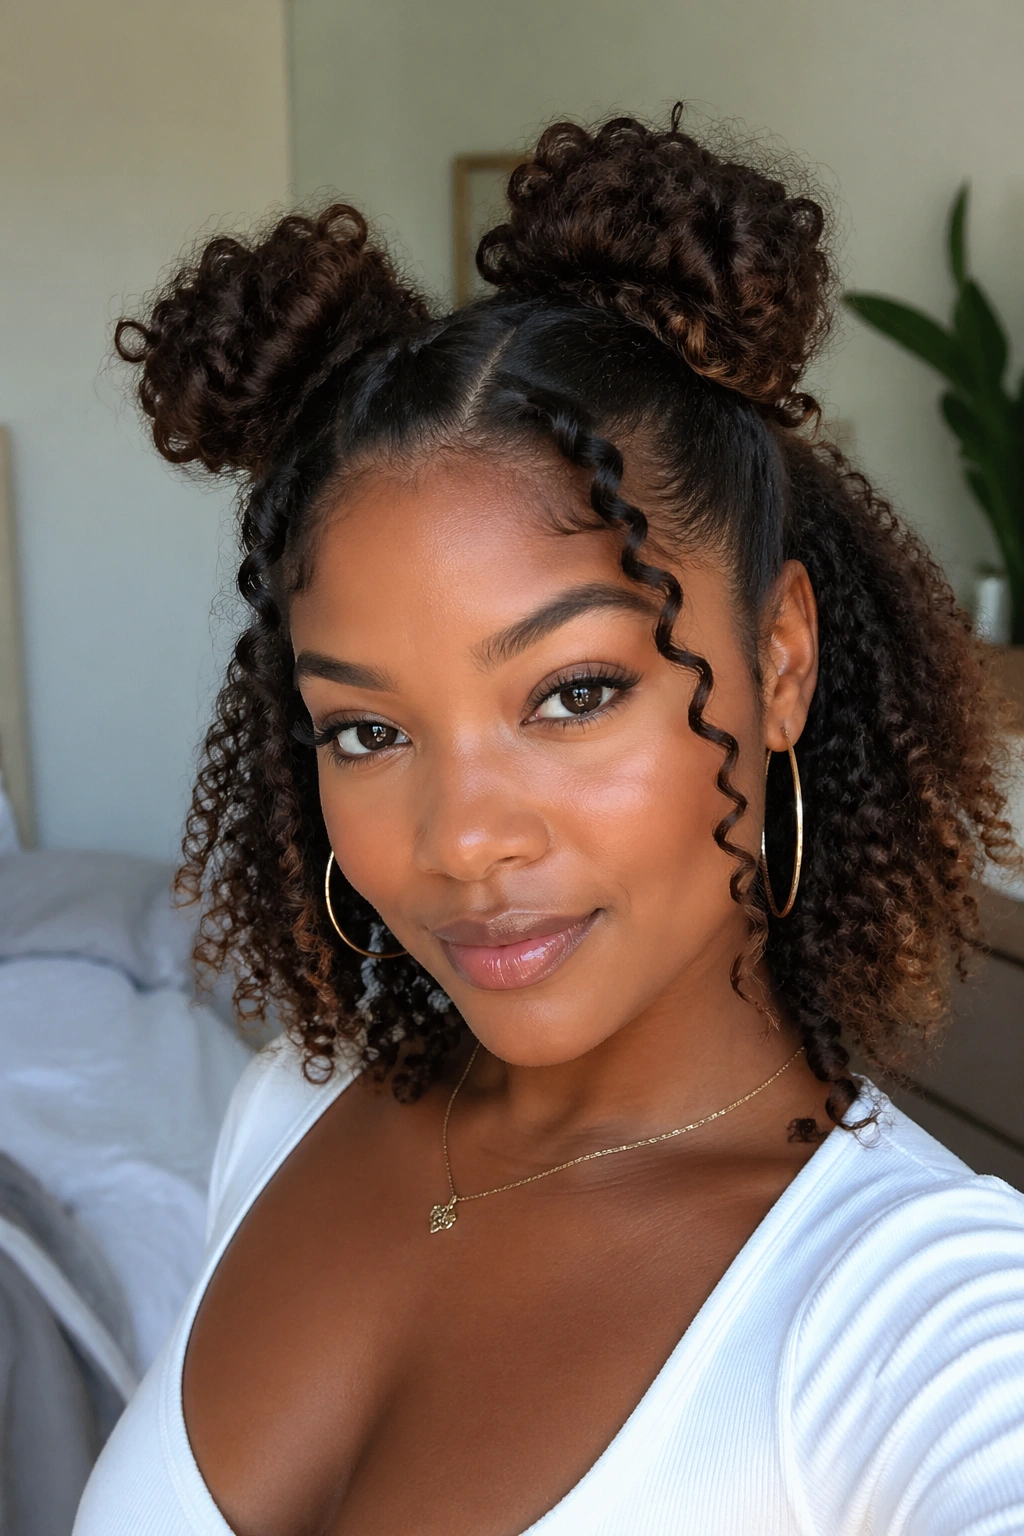
Space buns can look playful or polished, depending on where you place them and how much hair you leave out. On type 4 curly hair, the bun shape gets extra dimension because the coils build their own little volume even before you fluff them. That means the style works even if your hair isn’t long in the straightened sense.
Make the parts clean if you want symmetry. A center part gives the classic split look. A side part makes the buns feel more relaxed. Either way, leave the ends soft instead of trying to force them flat. The little frizz halo around each bun is part of the charm.
You can do this on stretched hair for more length, or on shrunken hair for a rounder, fuller finish. Both work. The style changes mood depending on the prep, and that’s a nice bonus when you want the same idea to do different jobs.
A few pins under each bun help the shape hold. Don’t pull the hair too tightly at the temples. Space buns should look fun, not strained.
11. Halo Braid Around the Hairline
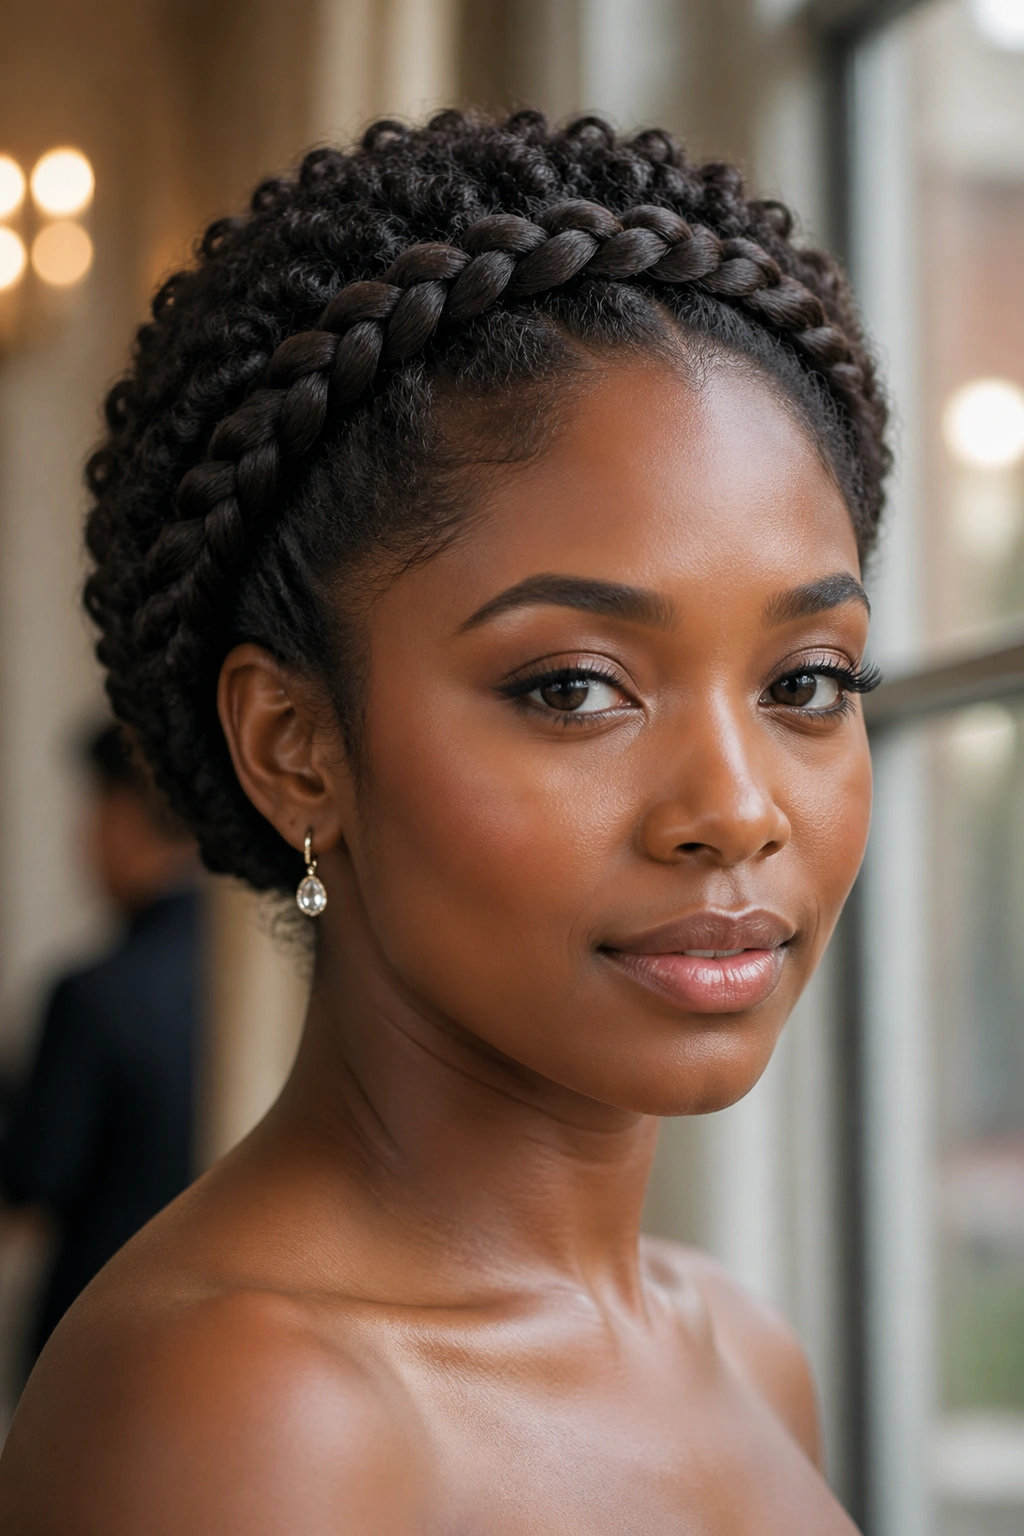
A halo braid wraps the head like a frame, and that frame is what makes it feel special. Instead of piling all the hair up or back, the braid travels around the crown or along the hairline, leaving the rest tucked away or braided into the path. On type 4 hair, the braid line looks bold because the texture gives it thickness.
Key Details That Matter
- Part the hair cleanly before you start. A wobbly part shows.
- Keep the braid close to the head so it lays flat without sagging.
- Tuck the ends securely under the braid path or pin them at the back.
- Add a little oil or cream only where needed; too much makes gripping harder.
This style is a favorite when you want the face open and the hair controlled. It also plays nicely with earrings, necklines, and formal clothes without demanding a sleek blowout first.
If your hair is very dense, don’t try to rush the braid. Break it into sections and pin as you go. That’s slower, yes. It also gives a cleaner finish and less arm fatigue, which matters more than people admit.
12. Two-Strand Twist Ponytail with Beads
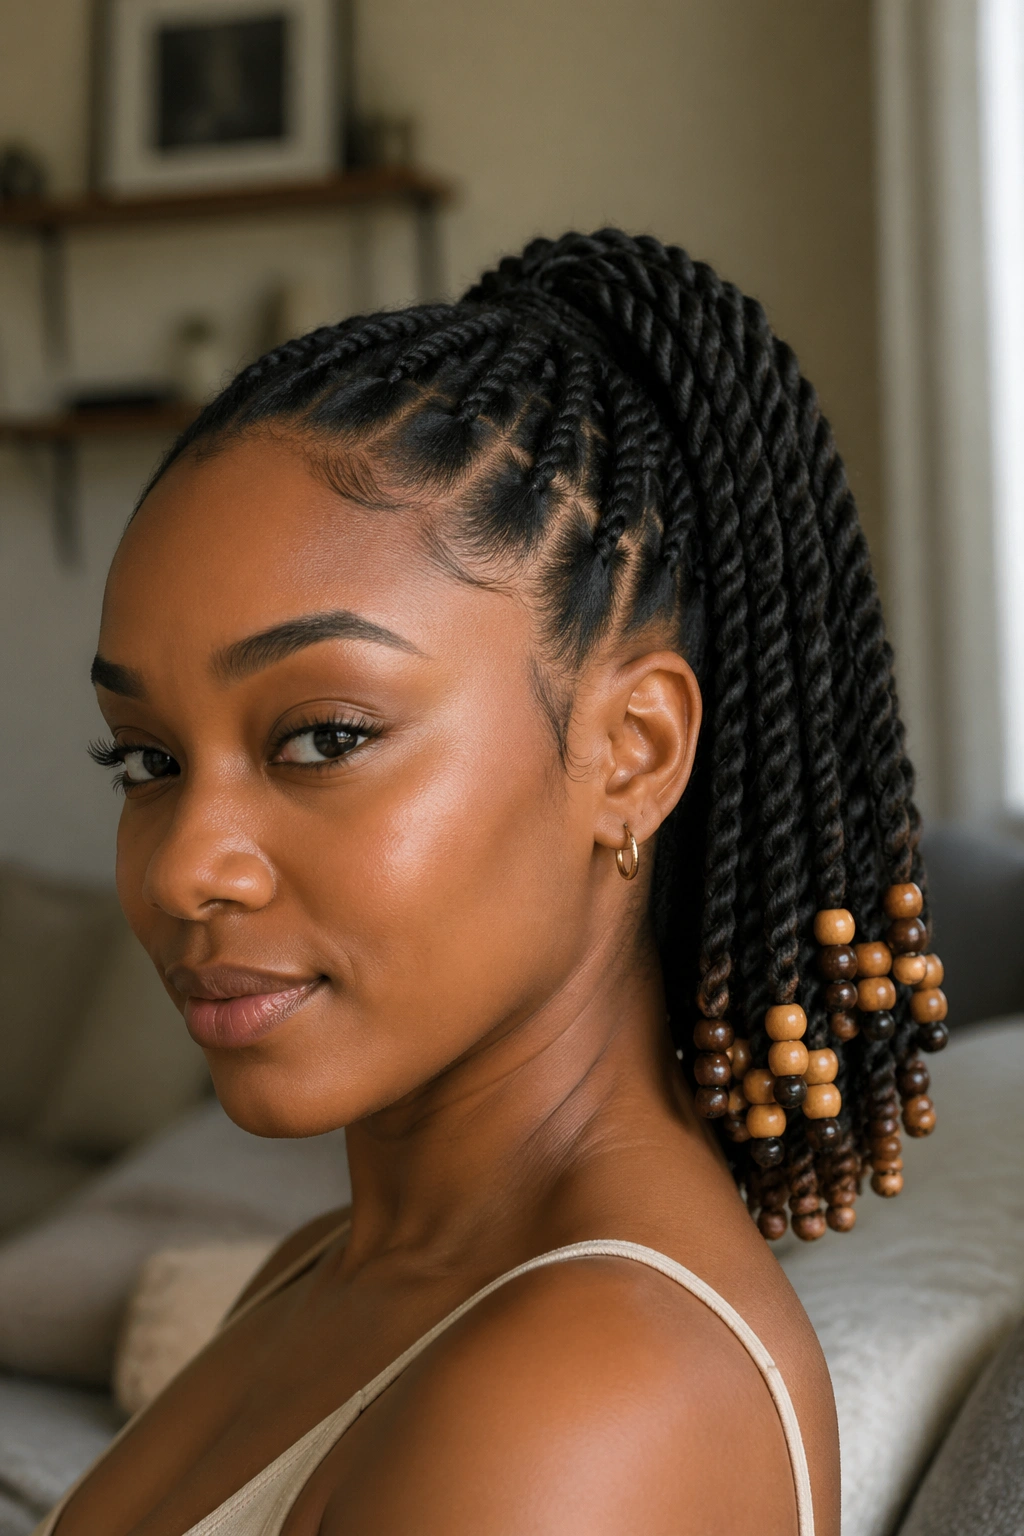
A two-strand twist ponytail keeps the texture visible while pulling the hair back enough to feel neat. That combination is the whole appeal. You twist the sections first, then gather the twists into a ponytail, where they hang with extra movement and weight. Add beads if you want the ends to have a little sound and swing.
The style works on medium to long type 4 hair, but it can be adjusted for shorter lengths by making the twists smaller and the ponytail lower. A few lightweight beads at the ends are enough. Heavy beads can tug at fine edges, and nobody needs that drama.
What I like about this style is the rhythm. It feels structured at the roots and loose at the ends. That contrast keeps it from looking flat. If your hair is very thick, secure the ponytail base with a strong satin band before adding the decorative pieces.
A little shine cream on the twists makes the parts look cleaner. Use it lightly. Overdoing it makes the twists slippery, and slippery twists don’t hold their ponytail shape for long.
13. Low Afro with a Clean Shape-Up
A low afro gives type 4 curls room to breathe without asking for a high puff or a stretched finish. The profile stays rounded and close to the head, which makes the style feel grounded and easy to wear. A clean shape-up at the edges sharpens the outline, so the style looks intentional even when it’s very simple.
This is a good choice if you like your hair to look full but not tall. The silhouette sits lower than a puff, so it can feel more balanced on shorter faces or when you want the volume to sit around the head instead of above it. A pick at the roots can add lift, but don’t drag it through the ends. That’s how people create fuzz where they wanted fluff.
It helps to trim the outline every so often so the shape stays even. Not a huge cut. Just enough to keep the perimeter tidy. A low afro is one of those styles that rewards regular care without demanding a complicated routine.
14. Cornrows into a Bun
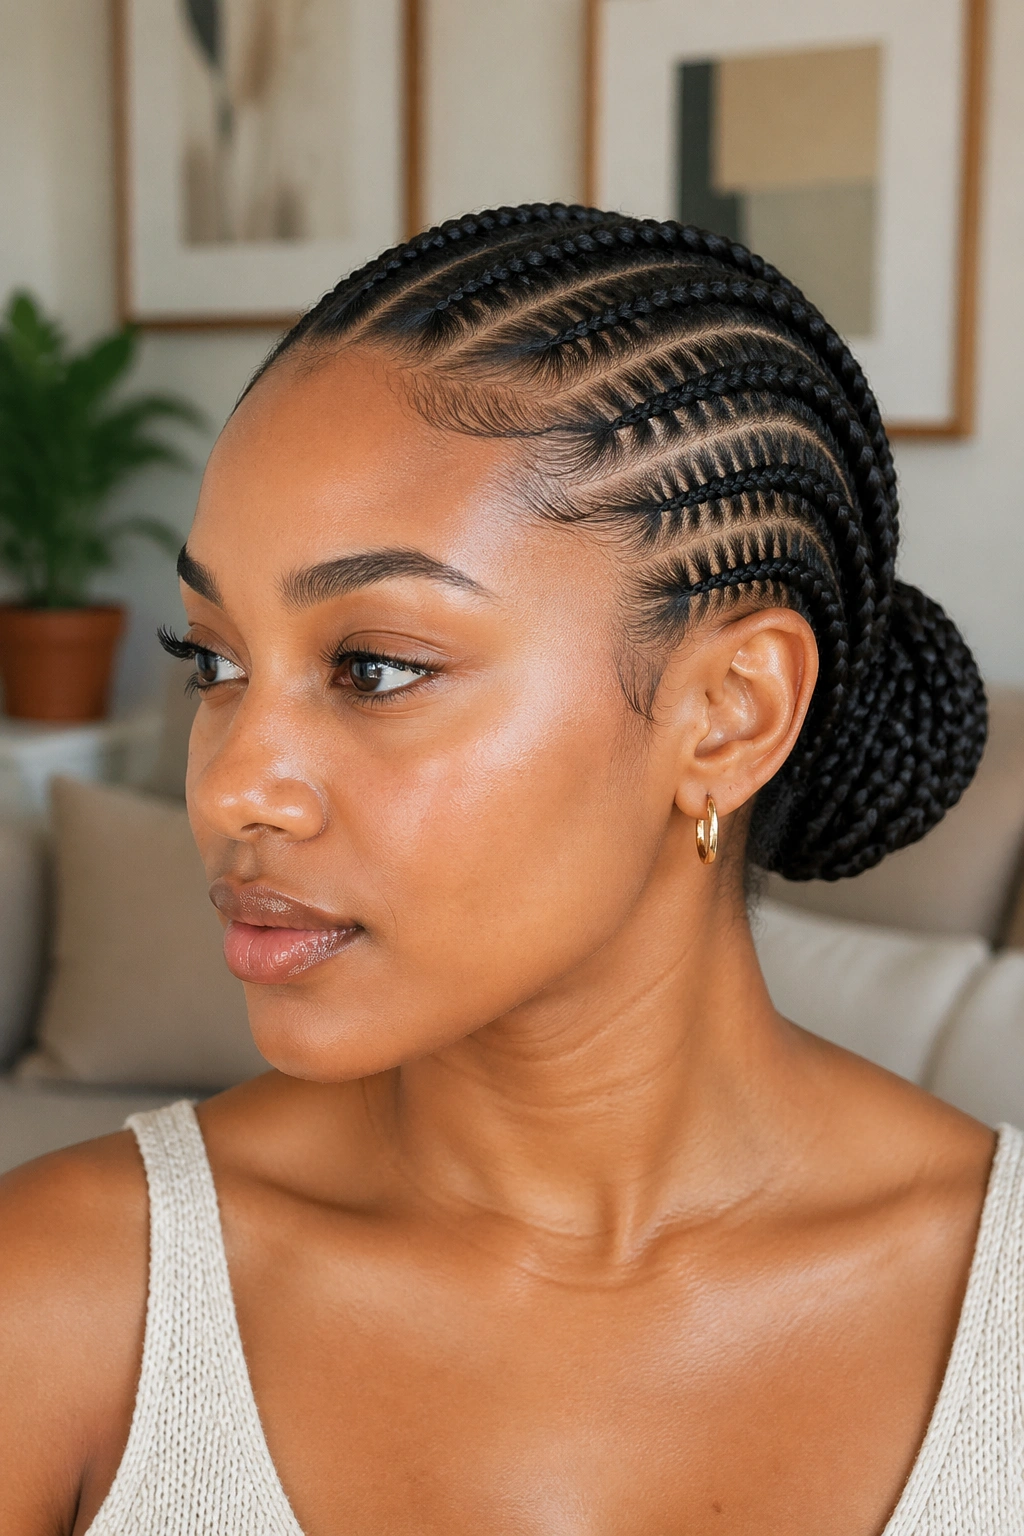
Cornrows into a bun are a classic for a reason. The scalp stays neat. The hair stays tucked. And the bun at the back gives the style a finished shape that can read casual or formal, depending on how tight the parts are and how smooth the front looks.
How to Keep It Comfortable
The biggest mistake is tension. Cornrows should feel secure, not painful. If the roots sting, the style is too tight. That may sound blunt, but it matters. Tight braids can stress the edges fast, especially around the temples and nape.
A middle part or side part changes the whole mood. Feed-in cornrows make the braid line look fuller near the base, while simple straight-back rows keep the style cleaner and more athletic. Once the braids reach the back, twist or wrap the remaining length into a bun and pin it low.
This is the style I’d pick for long days, humid weather, or any stretch where you need your hair to stay put and keep looking tidy. No drama. No constant fixing.
15. Faux Locs Updo
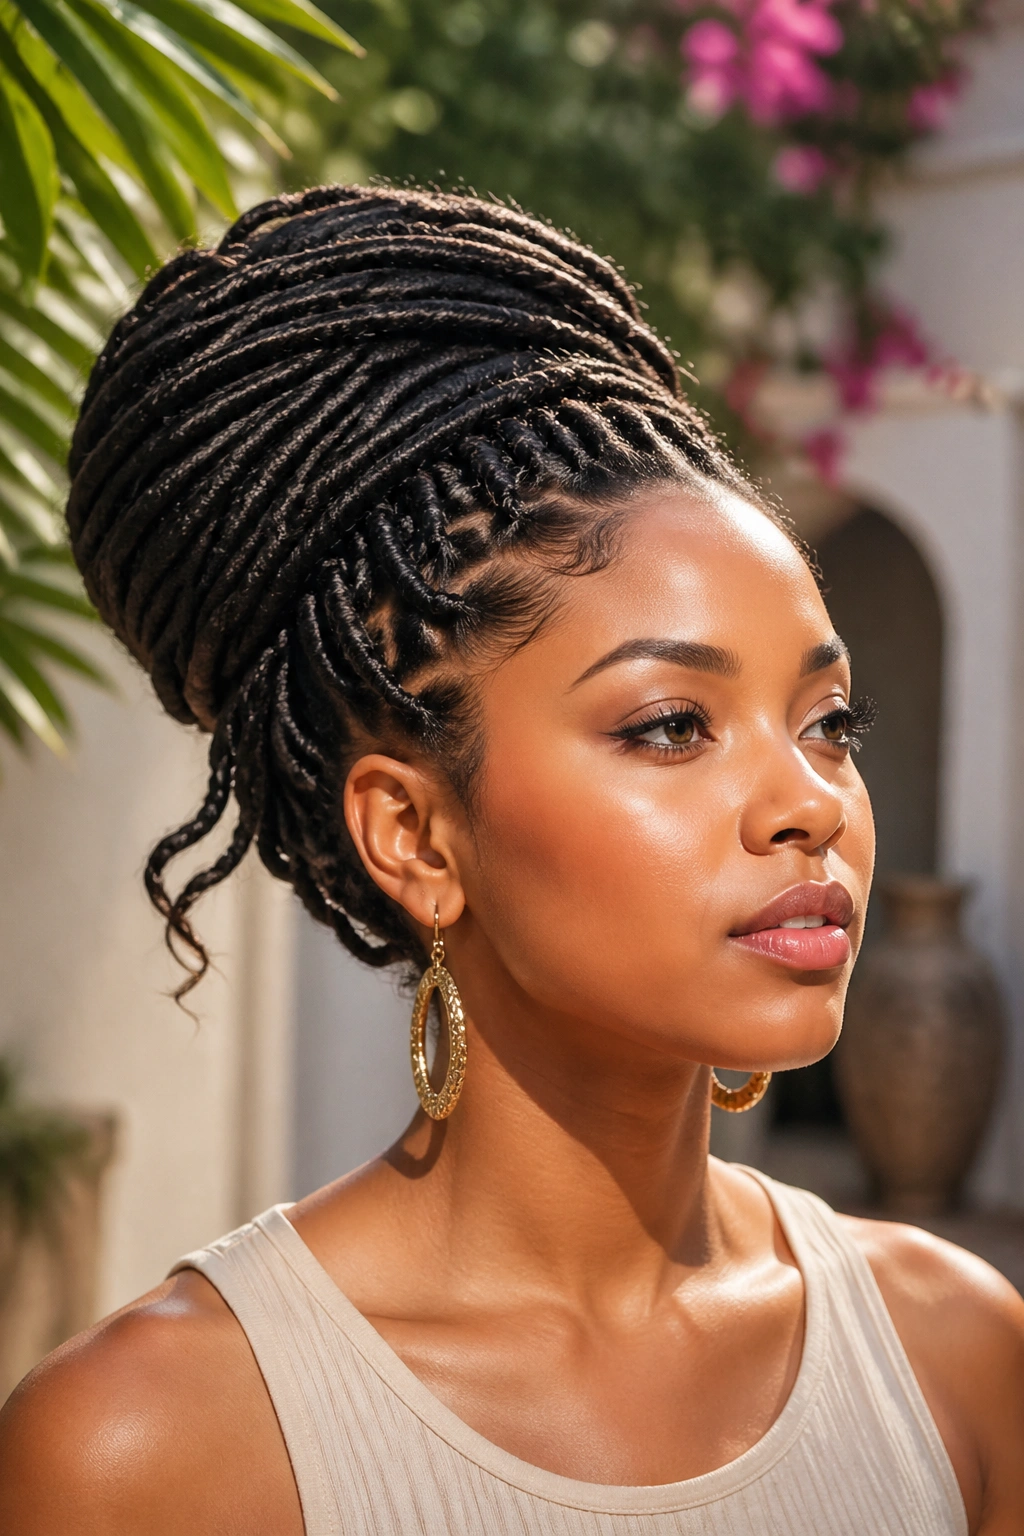
Faux locs in an updo can look heavy in photos, but on the head they often feel surprisingly manageable if the weight is distributed well. The trick is not to fight the locs into one flat shape. Let them stack, wrap, and loop in a way that follows their own bulk.
A bun made from faux locs works best when the locs are pinned in sections, not yanked into one giant knot. Start with a low base, then wrap the length around itself and secure it in layers. If the locs are long, leave a few ends tucked just enough to create texture around the bun.
This is a style that benefits from balance. Too much pinning in one spot and the weight pulls there. Spread the pins across the base and through the wrapped sections so the pressure gets shared.
It’s a good option when you want a fuller, more dramatic silhouette without leaving the neck completely bare. Add a cuff, a few beads, or none at all. The loc texture already does a lot of the visual work.
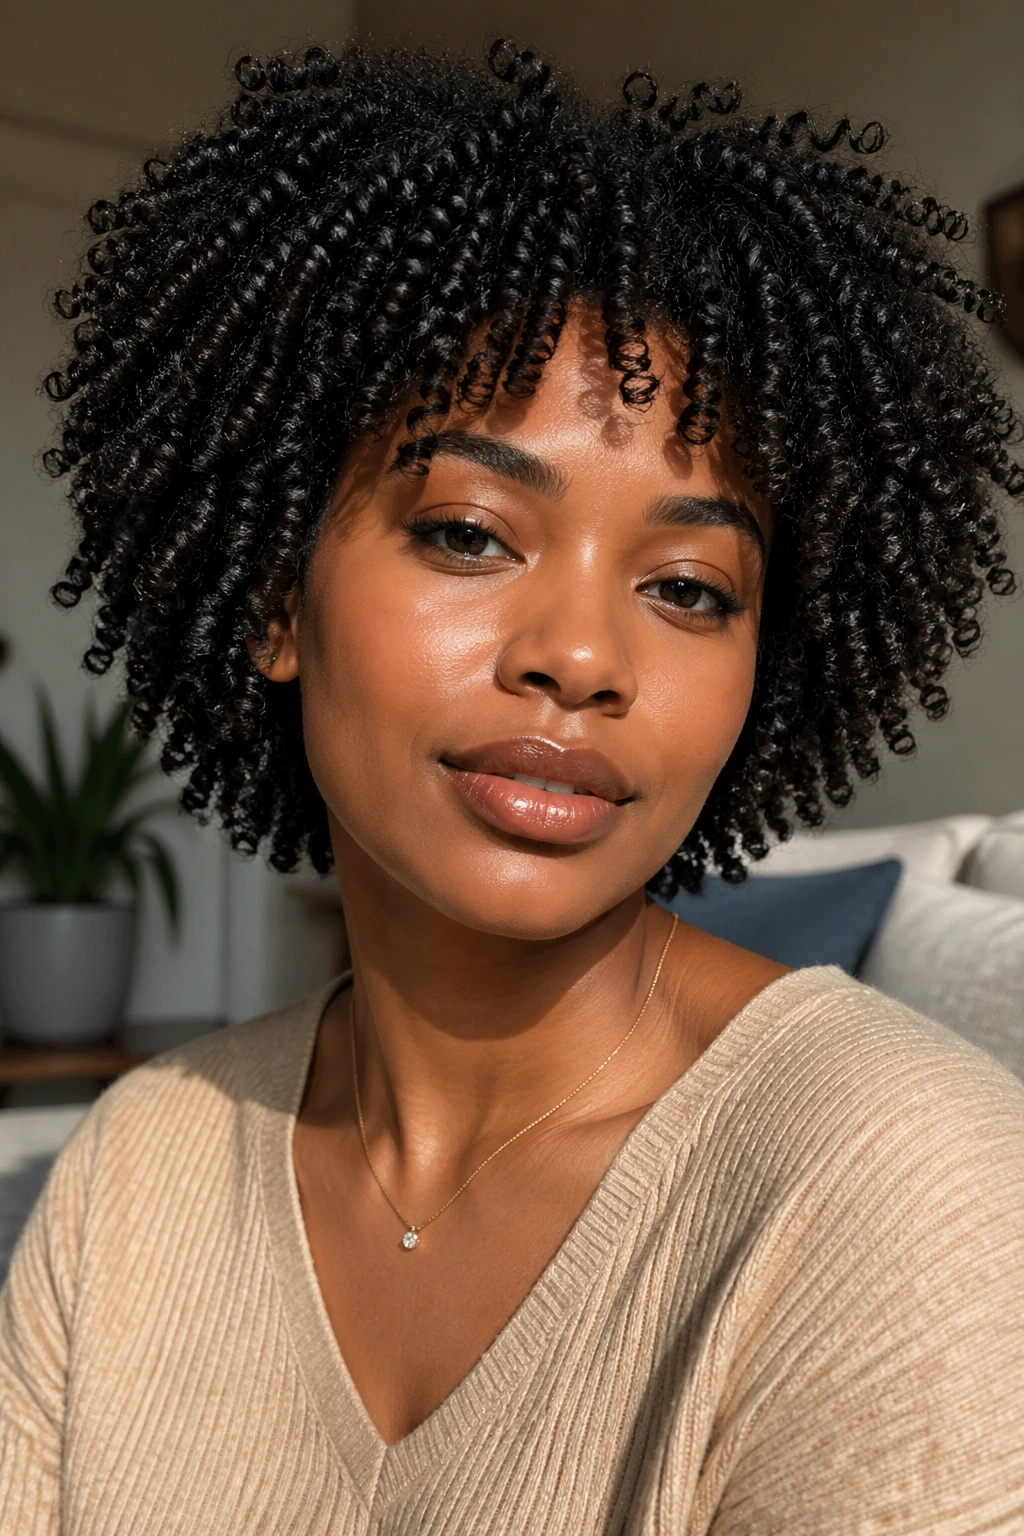
16. Finger Coils on Short Type 4 Hair
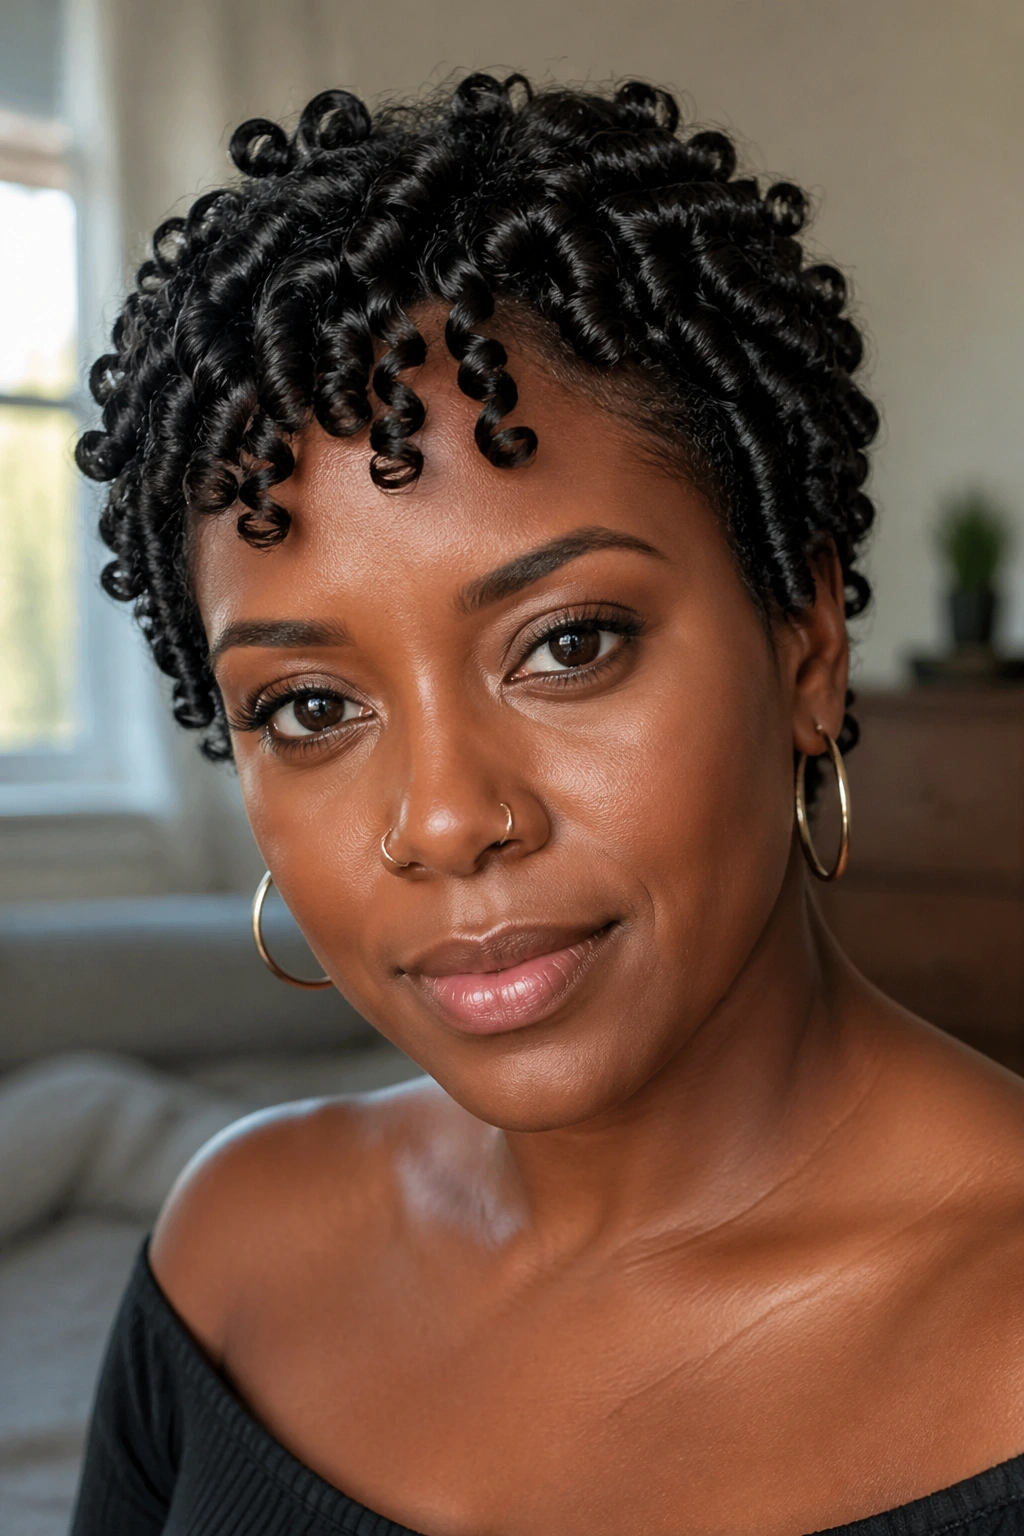
Finger coils are patient work, and short type 4 hair wears them well. Each coil becomes a little sculpture, especially when the cut is tapered or the length sits close to the scalp. The look is crisp, defined, and a touch formal, even when the rest of the outfit is casual.
How to Make the Coils Hold
Work on damp hair with a small amount of cream and gel. Take tiny sections — smaller than you think you need — and wrap each one around your finger until the strand springs into a coil. If you rush this step, the coil won’t hold its shape and will unwind into a messy bend instead of a clean spiral.
Drying time is part of the deal. Coils need to set fully before you separate or fluff them. If you touch them too soon, they lose definition fast. That’s the tradeoff: a little extra time for a very neat finish.
Finger coils are especially useful when you want the texture to look precise. They also work nicely as a base for a later twist-out, which gives you two styling paths from one prep session.
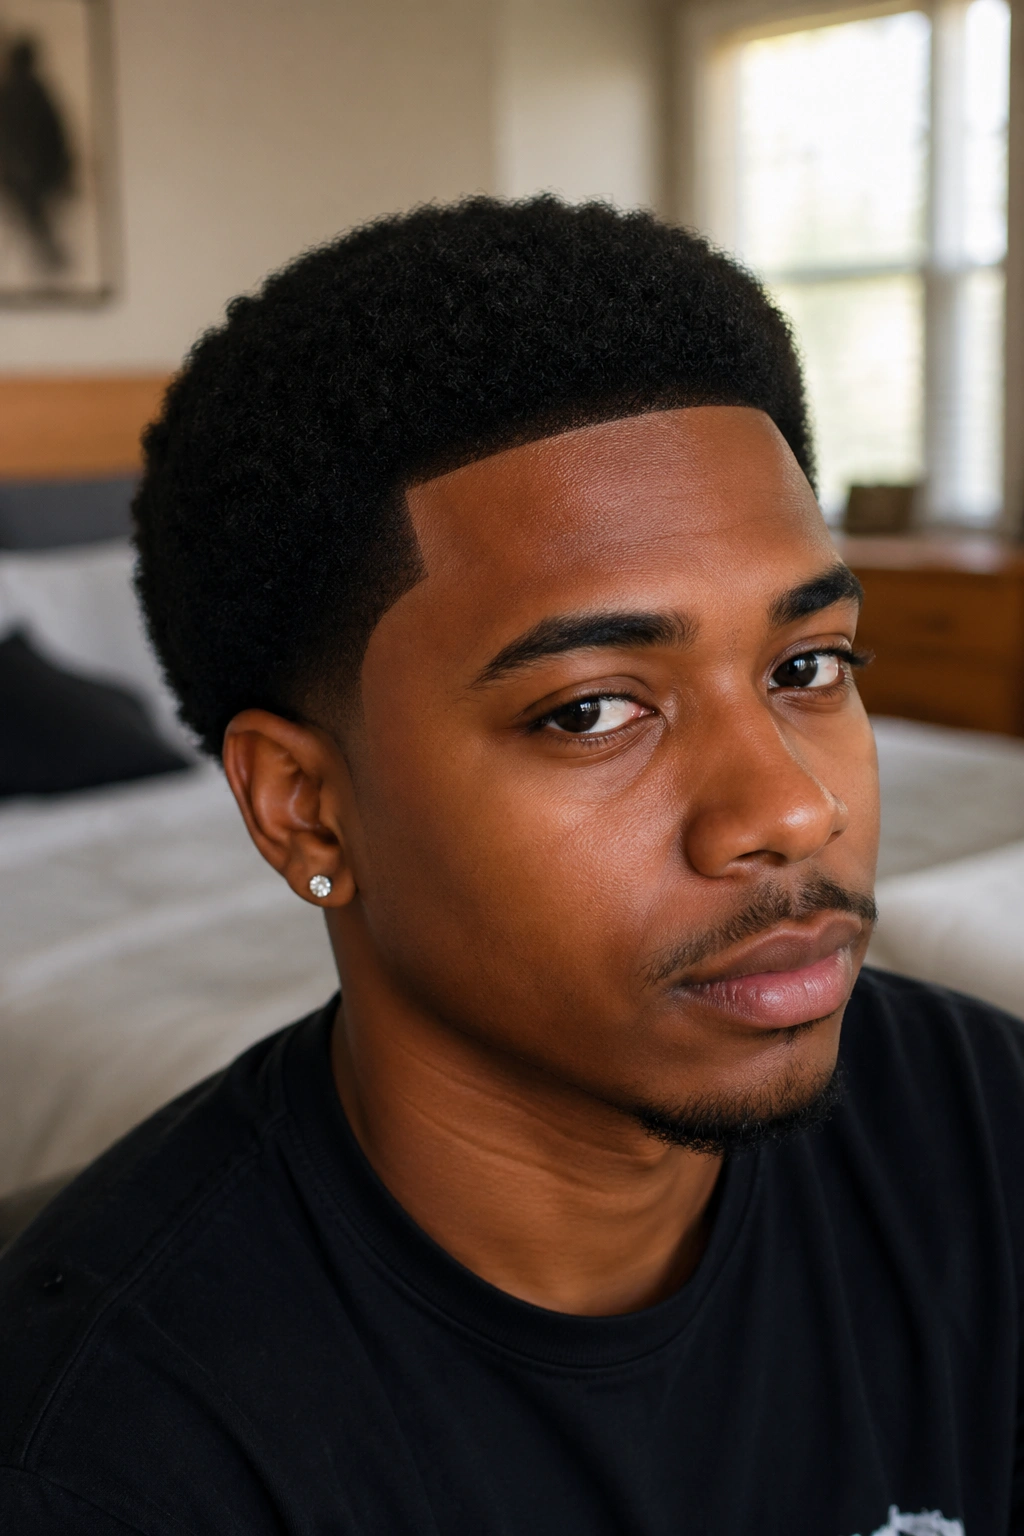
17. Tapered Cut with Sculpted Top
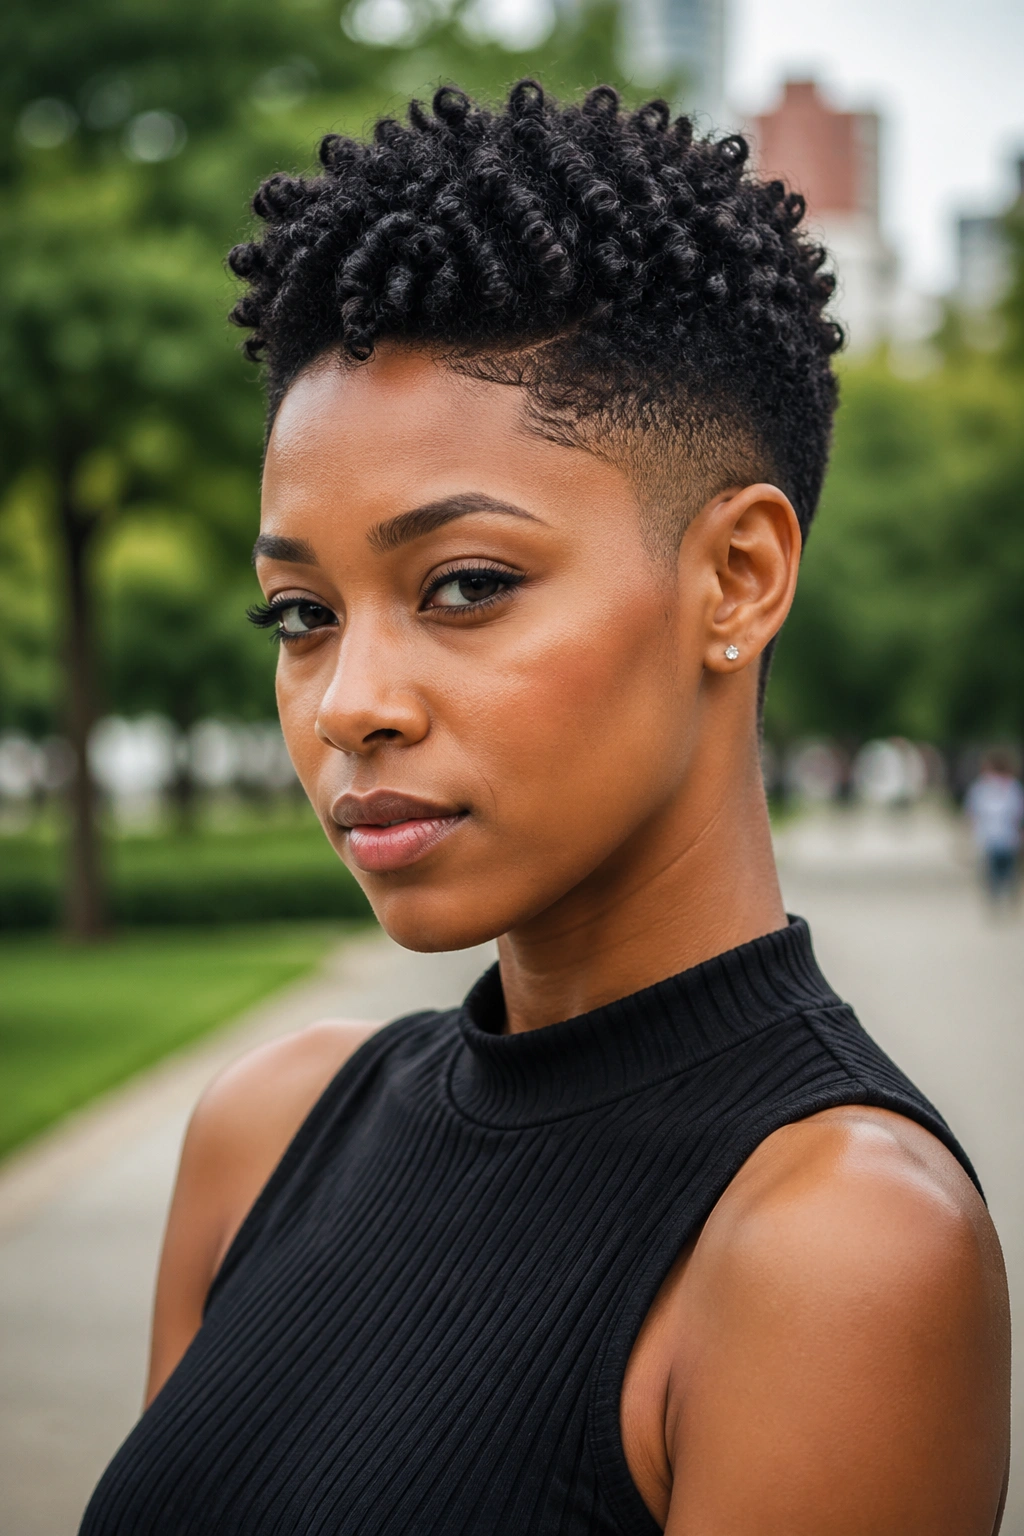
A tapered cut is one of the smartest hairstyles for type 4 curly hair if you want shape without daily negotiation. The sides and back stay shorter, which lowers the amount of shrinkage you have to manage, while the top keeps enough length to show off coils, curls, or a twist-set finish. The haircut itself is doing half the styling for you.
That’s why this cut feels so strong. It gives the hair architecture. You wake up with shape already in place, and the top becomes the visual anchor. Finger coils, a picked-out crown, or a shaped wash-and-go all work here because the taper controls the outline.
Short hair can be the loudest style in the room.
If you’re tired of buns that need five pins and a prayer, this cut may feel like a relief. The downside is obvious: you give up some ponytail options. But if you care more about clean lines and easy mornings, that trade can be a win.
18. Half-Up Half-Down on Stretched Hair
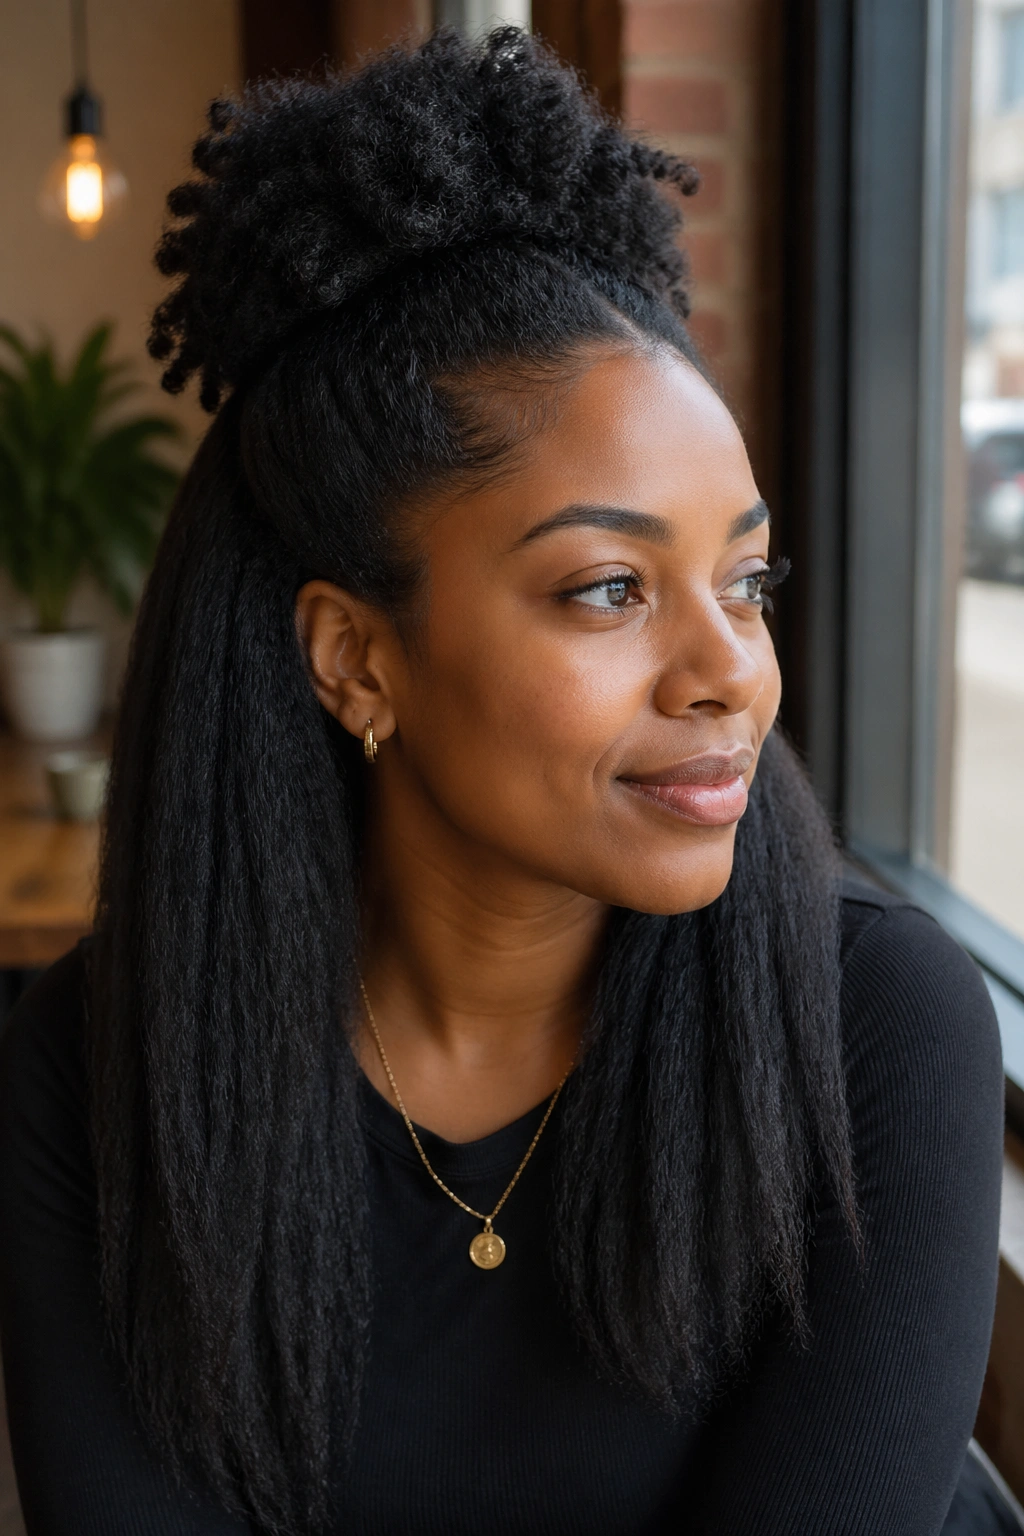
A half-up half-down style gives you the best kind of contradiction: some volume up top, some length left loose, and enough structure to keep the look from collapsing. On stretched type 4 hair, it shows the texture without letting shrinkage swallow the silhouette.
What Makes It Different
Unlike a full puff or a full bun, this style splits the job in two. The top section gets gathered into a puff, knot, bun, or small ponytail, while the bottom section falls freely. That bottom section can stay twisted, braided, blown out, or softly stretched from the last set. The point is to keep movement.
Parting the hair from ear to ear usually gives a balanced shape, but a higher section can make the top feel more dramatic. If the hair is thick, secure the top part with a band that has enough stretch but not so much grip that it dents the roots.
This style works on days when you want length visible but don’t want all of it in your face. It’s easy to dress up with clips or leave plain and still have it look finished.
19. Rolled Tuck-and-Pin Chignon
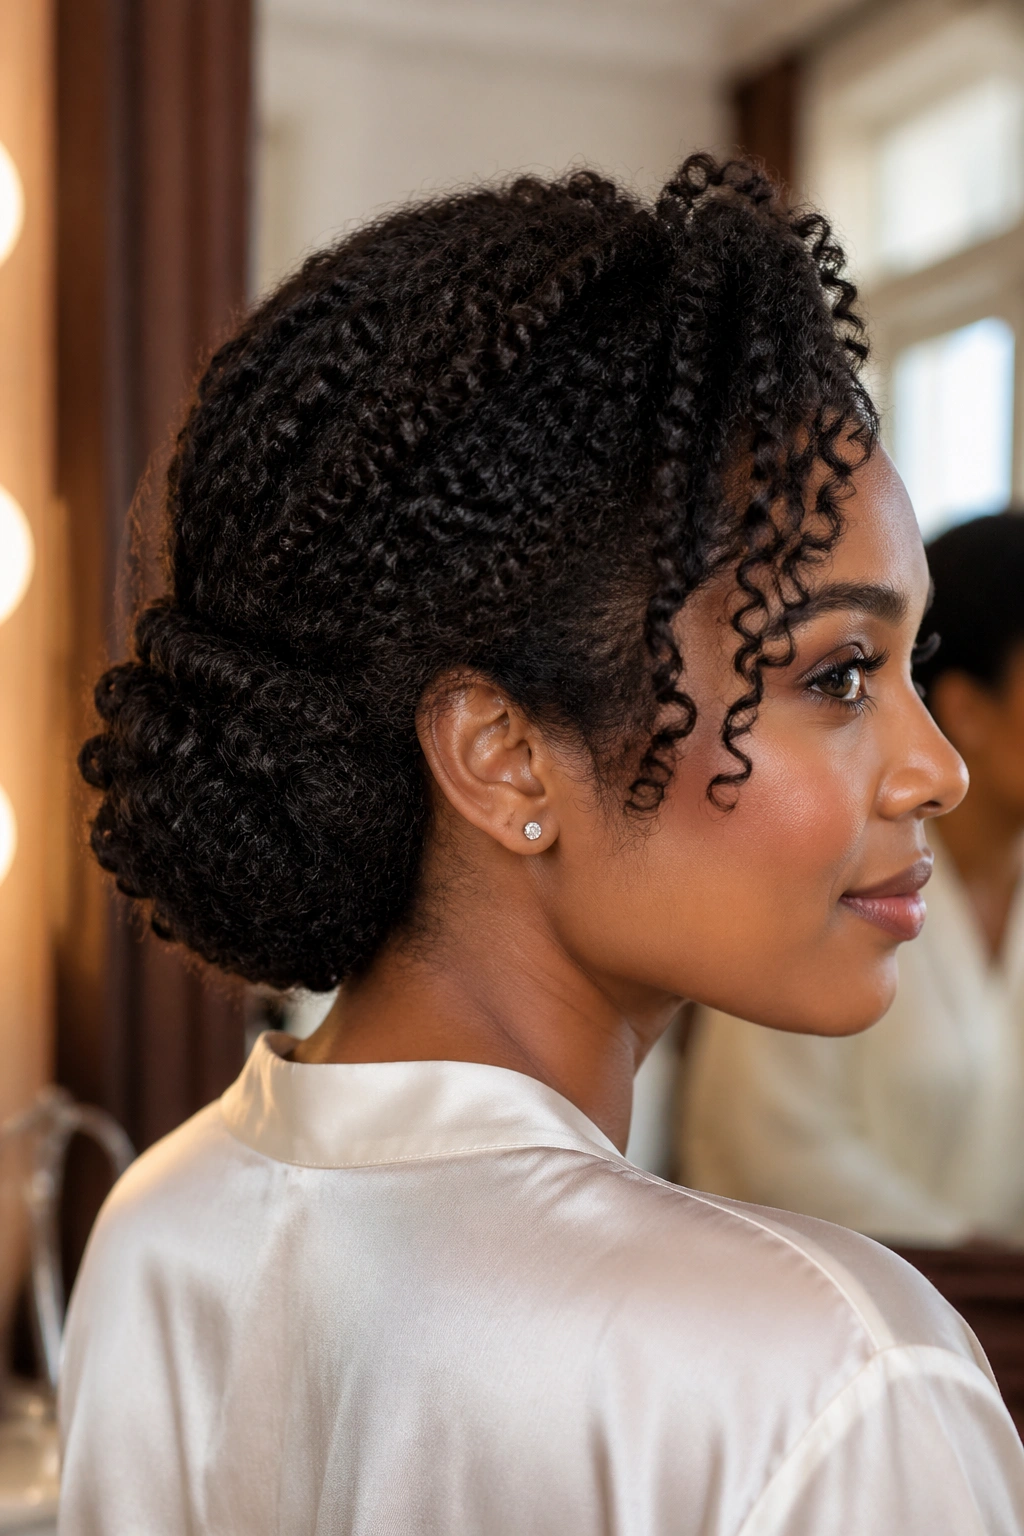
A rolled tuck-and-pin chignon looks refined because it hides the ends instead of letting them float around. On type 4 hair, that tucked finish feels elegant without needing a silky blowout. The texture stays present, but the shape becomes the main event.
Want the cleanest result? Start with stretched hair, a twist-out, or a set that has some direction to it. Then roll sections upward or inward toward the nape, pinning each fold as you go. A rat-tail comb helps with parting, and small U-pins tend to hold the tucked layers better than giant clips.
The style can be low and neat or slightly fuller and looser. I’d avoid making it too perfect. That kind of stiffness rarely lasts on textured hair anyway, and a little softness around the edges usually looks better in person.
It’s a solid choice for dressier events, but it also works for days when you want the ends protected and the neckline clear. Practical and polished. Rare combination.
20. Headwrap Puff with Hair Left Out
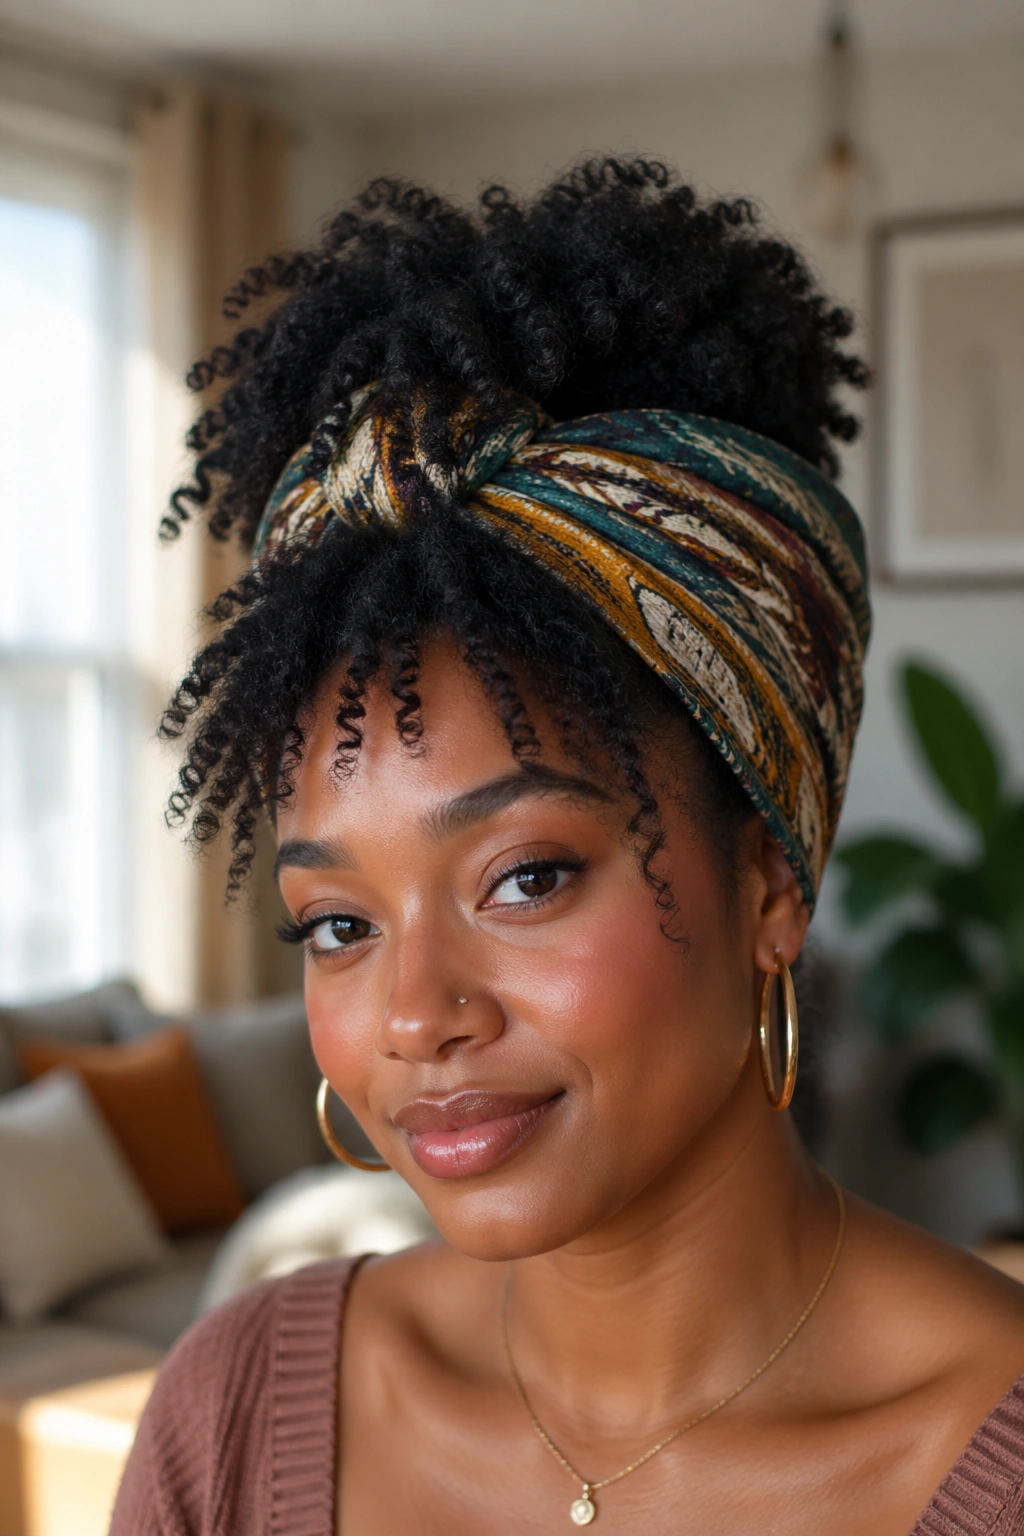
A headwrap style can solve a lot of problems at once, especially when your hair wants moisture, rest, or a break from hands-on styling. Leave part of the puff out, wrap the front or sides with a fabric band, and let the texture peek through. The result feels quick, but not careless.
Choosing the Wrap
A wide wrap gives you more coverage and less pressure at the hairline. Thin strips can slip or dig in, which gets old fast. Cotton and satin-lined wraps usually hold better than slick fabric, especially if your hair is freshly moisturized and slightly soft.
This style is useful on days when the roots are not cooperating or the ends need hiding. It also saves a style that’s halfway done but not quite ready to be worn out. There’s no shame in that. Half the job with type 4 hair is knowing when to stop fiddling.
A bonus: the wrap lets you control the look without flattening the puff. That balance is harder to get than people think.
21. Side-Swept Afro with Barrettes
A side-swept afro has softness in the front and body everywhere else. Shift the hair to one side, pin a few pieces back with barrettes, and let the rest of the shape stay loose. On type 4 curls, the asymmetry keeps the style from feeling bulky, which is useful when the hair is full and wants to expand in every direction.
Barrettes do more than decorate. They help anchor the front so the sweep stays where you placed it. Use two or three along the heavy side, not a whole row of hardware. Too many clips can start to look forced, and the style is better when it feels easy.
This is one of my favorite quick fixes for a grown-out twist-out or an afro that needs a shape refresh. A little moisture, a pick at the roots, a few clips, done. No dramatic reworking.
If you like texture but want the face partially open, this style sits in the sweet spot.
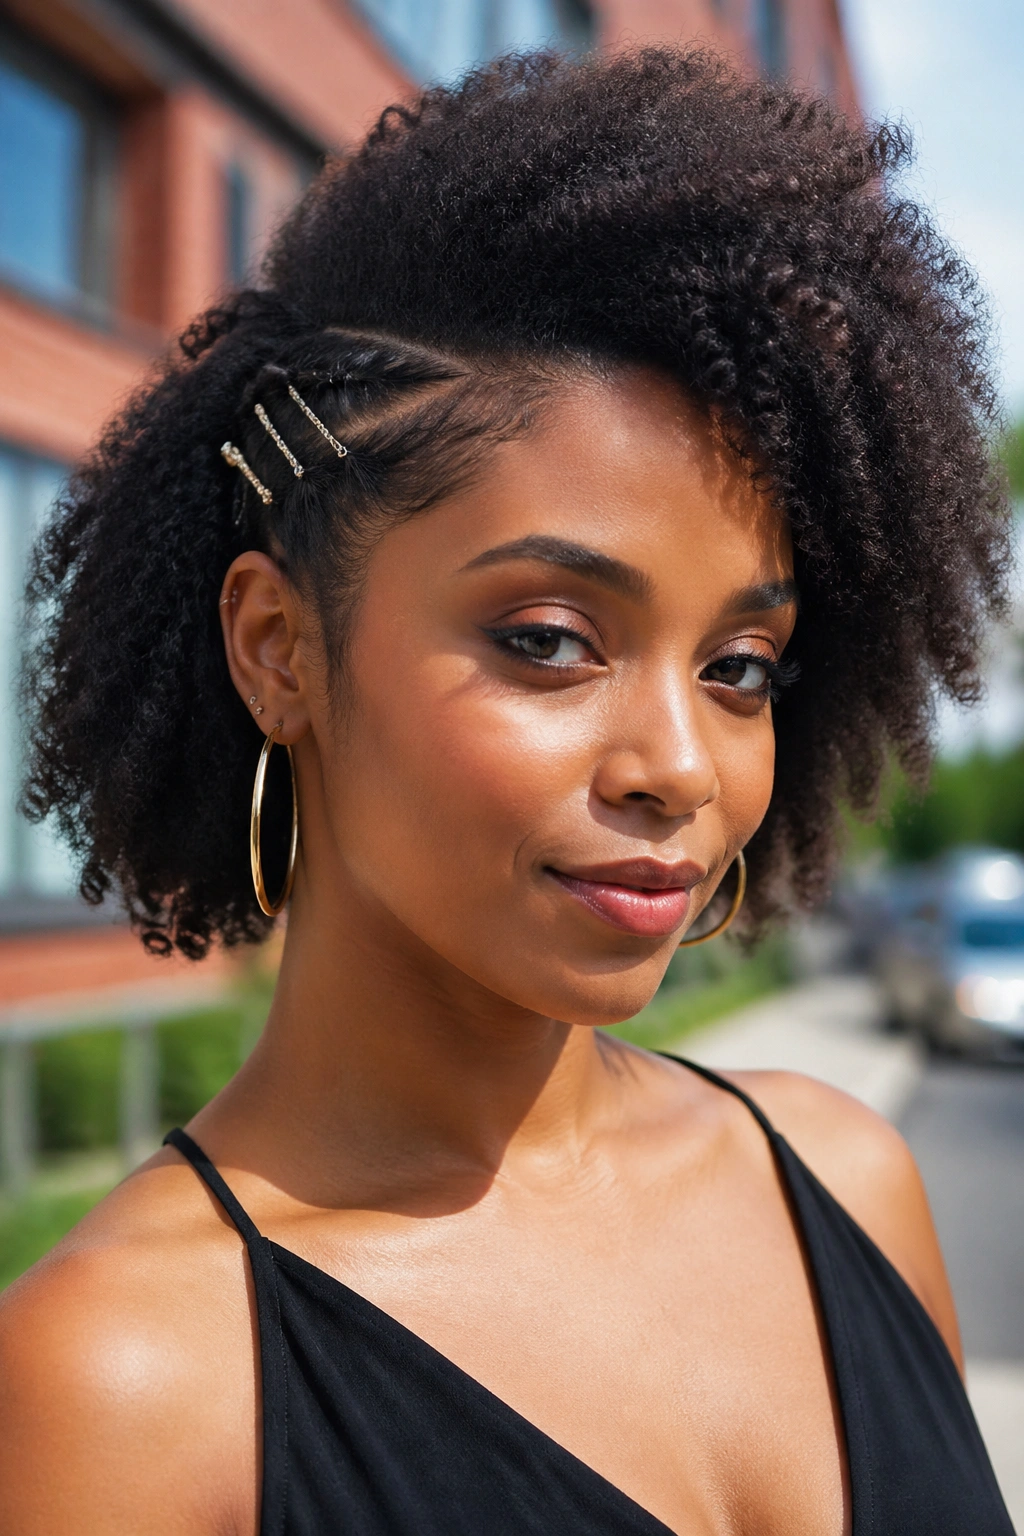
22. Low Puff with Twisted Front
A low puff is the quieter cousin of the high puff, and that’s part of why it works so well on type 4 curly hair. The shape sits closer to the nape, which softens the silhouette and makes the style feel less top-heavy. Add a couple of flat twists or flat-twist-like sections at the front, and the whole look gets a cleaner frame without losing texture.
How to Keep the Front Smooth
Use a small amount of gel at the front only, then brush the hair back gently before twisting or slicking it into place. The puff itself should stay fluffy. The front should stay neat. That contrast is what makes the style look finished.
- Place the puff low enough that it doesn’t pull at the crown.
- Twist the front sections back toward the puff, not upward.
- Secure with a soft band or scarf while you finish the rest of your routine.
- Fluff the puff last so you don’t disturb the front.
This style is a strong choice when you want control without stiffness. It keeps the hair out of the face, protects the ends, and still lets the texture be the star.
A good satin bonnet at night helps a lot here. Small thing. Big difference.
A strong style on type 4 curls is rarely about one miracle product. It’s usually about the shape, the tension, and the way the ends are treated. Keep those three things in mind, and the style choices open up fast.