



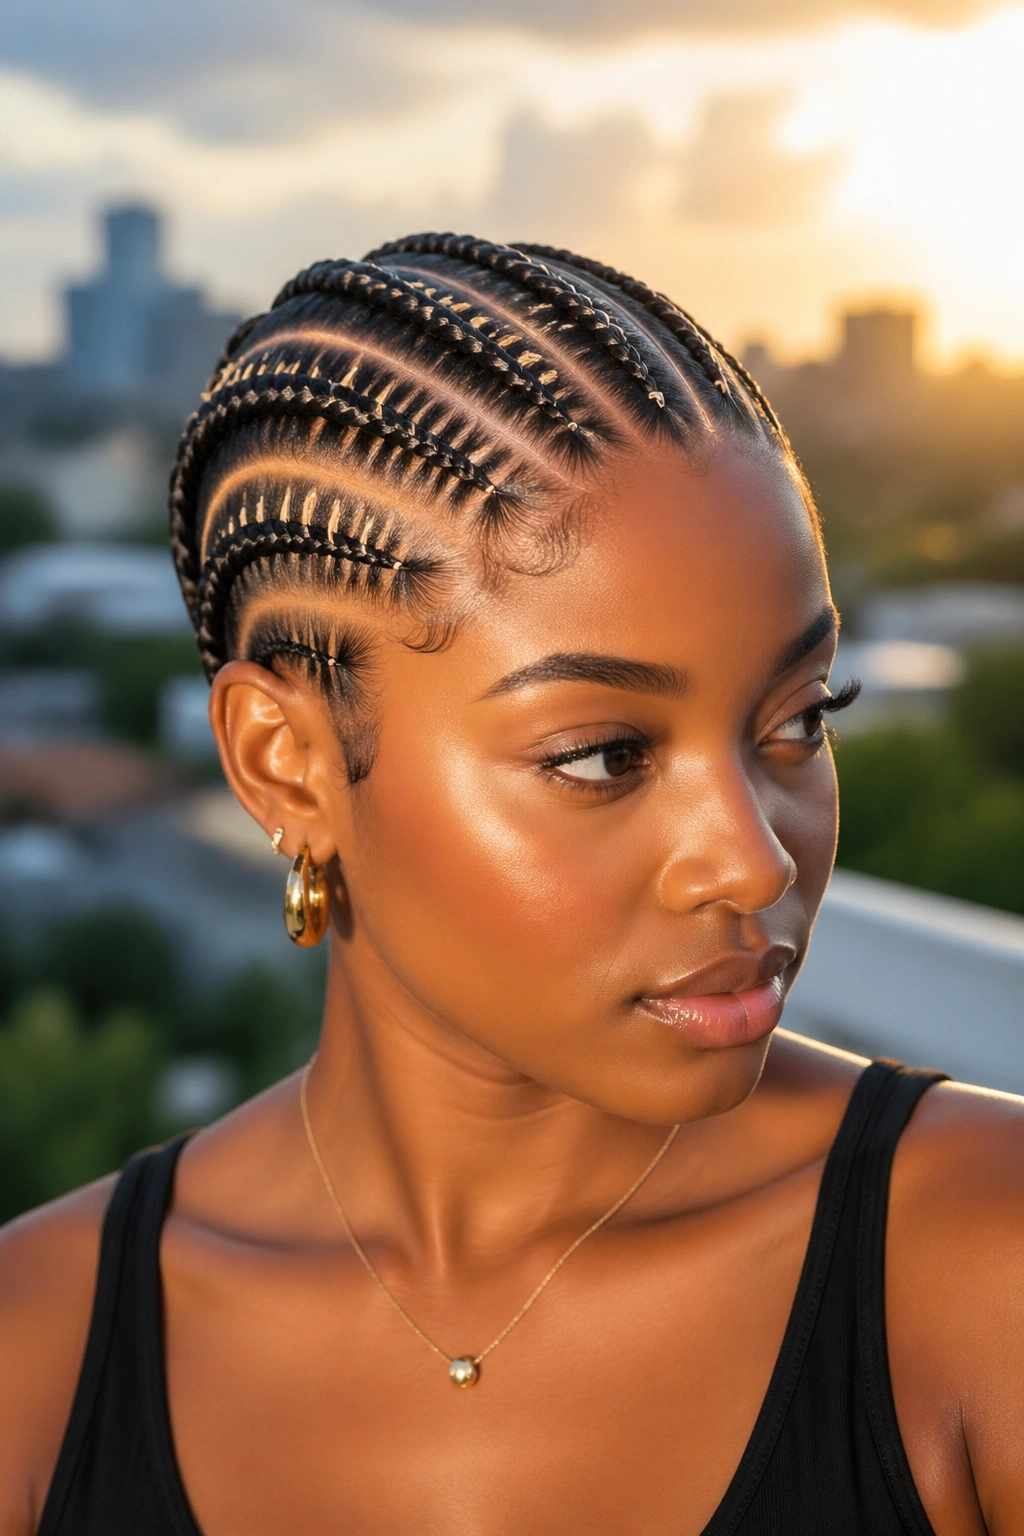
Stitch cornrows on natural hair hit a particular kind of perfection. The horizontal lines that run between the braids look like sewing stitches across the scalp — clean, evenly spaced, precise enough to read as deliberate art. When the technique is right, a stitch cornrow doesn’t just sit on the head. It draws the eye along every inch of the part.
The technique itself is fussier than standard feed-in cornrows. Each “stitch” is a tiny section of hair lifted from the bottom of the braid path and woven across the existing braid before continuing forward. Done well, those stitches create the parallel ridges that define the style. Done sloppily, they look like uneven bumps along the braid.
These 22 stitch cornrow styles work specifically on natural hair — no extensions required, no chemical relaxers, no flat-ironing trickery. The curl pattern of natural hair is what gives stitches their texture and dimension, so embracing the coil rather than fighting it is the foundation of every style here.
What Makes Stitch Cornrows Different
A standard cornrow incorporates new hair into the braid as it travels along the scalp. A stitch cornrow does the same thing, but with a deliberate horizontal pattern showing between each addition.
The “stitches” are the rows of hair you can see crossing the braid at regular intervals. They look like the laces on a sneaker or the seams on a tailored garment. The visual impact comes from how regular those rows are — every stitch the same width, every gap between stitches the same length.
Stitch braiding originated as a way to make feed-in cornrows look more architectural. Over the years, it’s become its own technique, often used on natural hair without any added extensions because the natural hair texture holds the stitch lines so well.
Why Natural Hair Holds Stitch Patterns So Well
Coily and curly textures grip themselves. That grip is what locks each stitch in place as the braider moves forward. On straight or relaxed hair, stitches can slide and lose definition because there’s no friction holding them. On 4A through 4C natural hair, the texture holds the pattern indefinitely.
Natural hair also creates more visual texture between stitches. The slight fuzz at the base of each stitch — the kind of texture chemically processed hair doesn’t have — adds a soft contrast to the sharp horizontal lines. That softness is what makes stitch cornrows on natural hair look organic rather than industrial.
Most importantly, natural hair stitch cornrows last longer. The friction that locks the stitches in place also keeps the braid from loosening at the root. A two-and-a-half to three-week wear time is realistic.
Hair Prep for Sharp Stitch Lines
Stretched hair is mandatory. Not bone-straight, but stretched enough that the curl pattern doesn’t shrink the parts closed within minutes. A blow-out on cool air with a comb attachment, or an overnight braid-out, gets you there.
Wash with a clarifying shampoo a day or two before the install. Build-up from previous products fills the cuticle and makes hair resistant to gripping cleanly during stitch work. Clarify, deep condition, then air-dry to about 80 percent before braiding.
Light leave-in cream is the only product needed during install. Heavy butters or thick gels coat the hair and prevent the stitches from showing crisp lines. The cleaner the hair surface, the sharper the stitch.
Tip: Section the hair into the planned braid count before starting any stitching. Work one braid at a time, fully complete, before moving to the next. Trying to advance multiple braids simultaneously throws off the stitch spacing.
Tools That Affect Stitch Quality
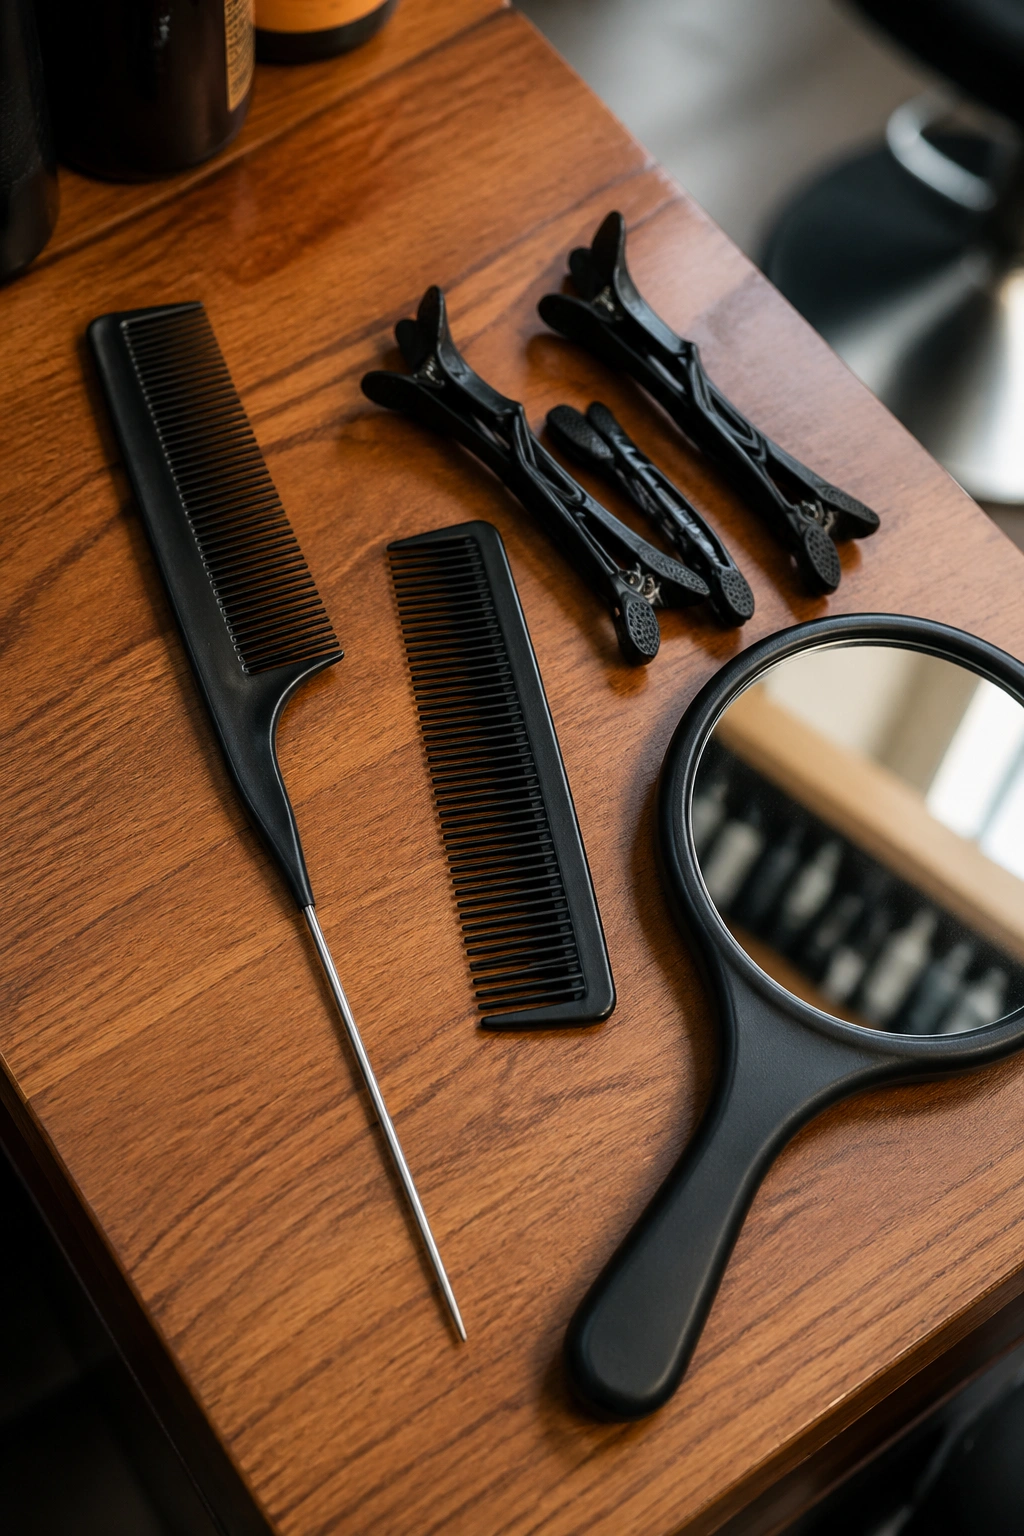
A pin-tail comb with a long, slim tail. The tail is what creates each stitch by lifting tiny sections from below the braid. A short or thick tail makes uneven sections, which makes uneven stitches.
A small fine-tooth comb for smoothing each section before it gets braided in. Even a single tangled strand in a stitch section throws off the line.
Sectioning clips that don’t snag — duck-bill clips with rubber-coated teeth or jaw clips with smooth interiors. Avoid metal clips with grooved teeth that catch and break hair when you remove them.
A handheld mirror to check from behind. Stitch work is judged from angles you can’t see while braiding. A two-mirror setup (wall mirror plus handheld) is the standard for self-installation.
How Long Stitch Work Takes
A simple straight-back stitch with five braids takes about three to four hours on natural hair. Each stitch adds time compared to a feed-in. Multiply by braid count for any pattern more elaborate than straight-back.
Stitch crown work or stitch designs with curves take five to seven hours. Don’t underestimate the time. A rushed stitch braid loses the stitches halfway through, and the second half looks like a regular cornrow with random bumps.
Block out the afternoon. Eat first. Use the bathroom first. Stitch braiding doesn’t pause well — once you’re in rhythm, breaking momentum costs more time than the break itself saved.
1. Five Stitch Cornrows Straight Back
The classic. Five evenly spaced stitch cornrows running from a clean front hairline to the nape of the neck. Each braid features 8-12 stitches depending on hair length.
Why It Works
- Uniform pattern reads instantly as professional work
- Five-braid spacing is balanced for most head sizes
- Natural hair texture between stitches adds visual depth
- Easy to maintain because the pattern is symmetrical
The stitches should be uniformly spaced — about 1 inch apart on shoulder-length natural hair, scaling proportionally for shorter or longer lengths. Measure with a comb tail to keep the spacing consistent across all five braids.
Tip: Finish the ends with a single dab of edge gel rolled into a tiny coil. No extensions needed; the natural hair length defines where each braid stops.
2. Stitch Mohawk With Loose Sides
A bold pattern that runs only down the center strip of the head. Three to four stitch cornrows form a mohawk-like band from forehead to crown to nape. The hair on either side of the mohawk strip stays loose as a defined curl-out.
The mohawk strip is where the precision lives. The looser sides give the style a softer overall silhouette so the mohawk doesn’t read as harsh. The contrast between sharp stitch work and soft natural curls is the entire visual.
This is a strong choice for someone who wants stitch work without committing to a full-head install. The loose sides take 10 minutes to refresh in the morning. The mohawk strip lasts two weeks without much maintenance.
The width of the mohawk strip matters. Too narrow and it looks like a single thick braid. Too wide and the side curls have nowhere to breathe. Three inches across is the sweet spot.
3. Side-Swept Stitch Cornrows
Bold claim — side-swept stitches are the most flattering cornrow shape for round and oval face shapes.
The braids start from a deep side part and angle dramatically across the head, sweeping down behind the opposite ear. Each braid carries its stitch pattern at the same angle, so the stitches themselves slope rather than running horizontally.
The angled stitches create a sense of motion. The eye travels along the slope rather than stopping at each horizontal stitch line. It’s a more dynamic look than straight-back stitches, and it tends to slim the appearance of a wider face by drawing focus diagonally.
The side part should be deep — about 3 inches off-center — for the angle to read clearly. A shallow side part doesn’t give the stitches enough slope to look intentional.
4. Stitch Cornrows With Edges Laid
The braiding pattern itself is straightforward — five to seven stitch cornrows running back. But the front edges receive aggressive baby hair styling, with swooping curves, swirls, and patterns laid along the hairline using edge gel and a toothbrush.
Why this gets its own entry: the edge work transforms the entire perception of the style. A simple stitch cornrow with sloppy edges looks unfinished. A simple stitch cornrow with crisp edges looks intentional and elegant.
How to Style It
Apply a pea-sized amount of edge gel to the toothbrush. Sweep the brush along the hairline in S-shaped curves, working in tiny sections at a time. Tie a silk scarf around the head for 15 minutes after laying the edges to set them.
Different baby hair patterns suit different face shapes. Long sweeping curves elongate. Tight swirls add fullness at the temples. Pick the pattern that complements the face beneath.
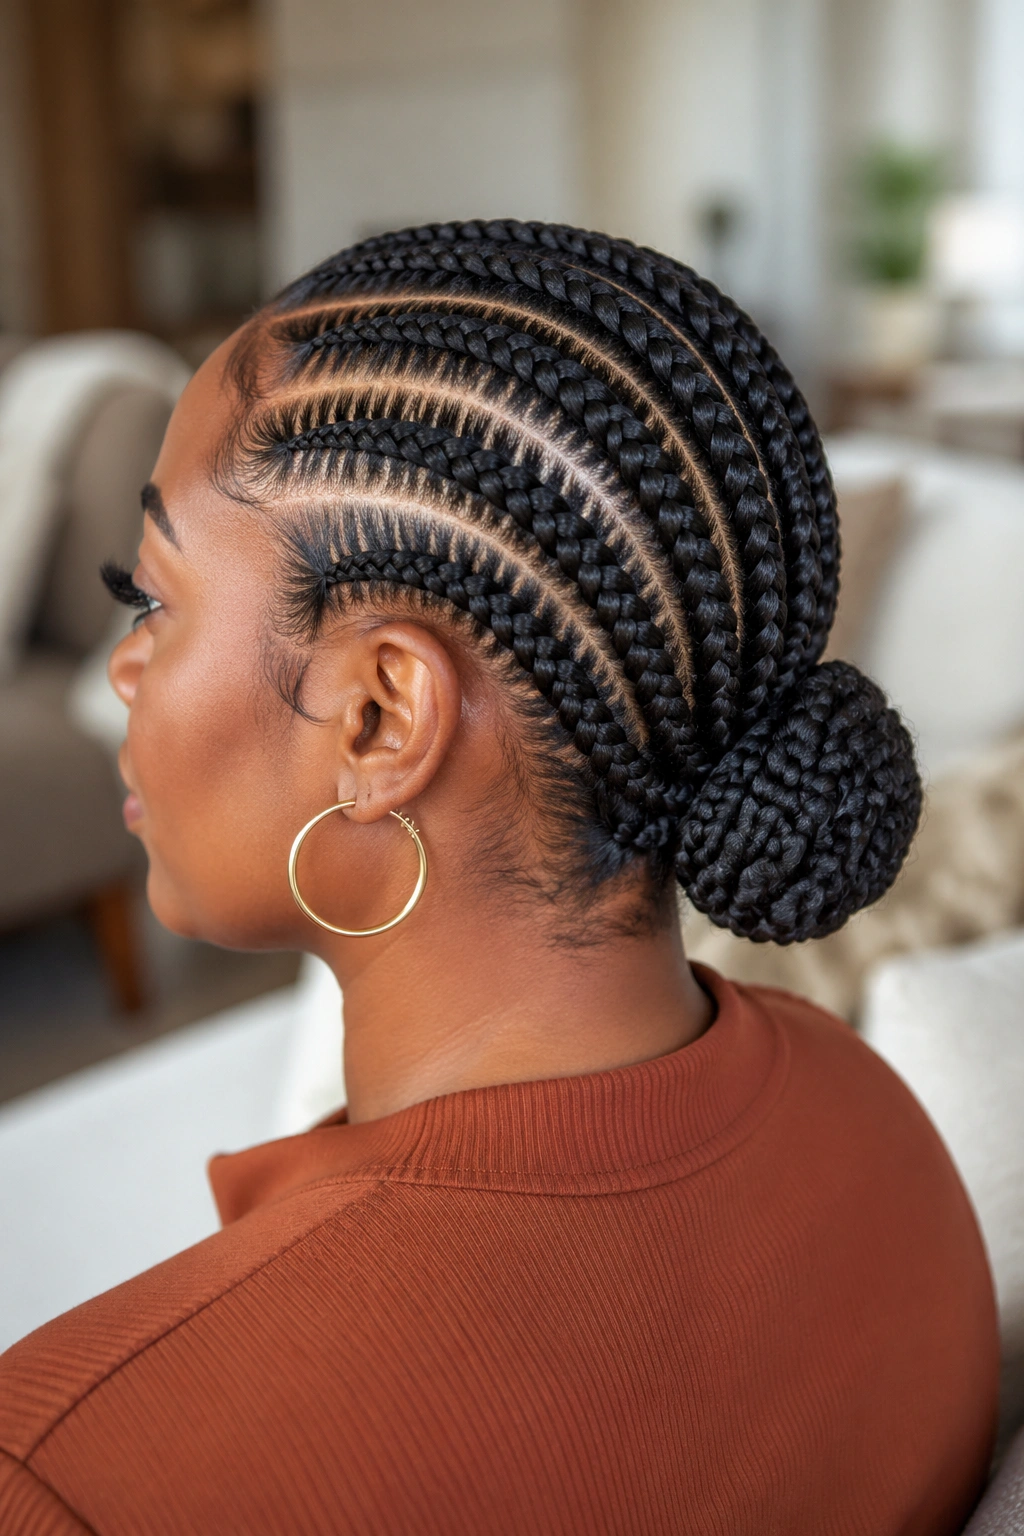
5. Stitch Cornrows Into a Bun
The braids start at the hairline and travel back, but instead of finishing at the nape, all braids gather into a single low bun at the back of the head.
A single bun anchors the style and prevents the braid ends from fraying or tangling during daily wear. It also gives the look a polished, formal quality that flowing braid ends don’t have.
Wrap the bun with a scarf for sleep instead of stuffing it into a bonnet. The bun shape compresses inside a bonnet, which dents the bun’s roundness. A flat scarf wrap preserves shape better.
The bun can be neat (smoothed and held with hair pins) or messy (loose ends visible, deliberate volume). Both work depending on the desired vibe — neat for formal, messy for casual cool.
6. Zigzag Stitch Cornrows
Question: what happens when stitch braids follow zigzag parts instead of straight ones?
Answer: the parallel horizontal stitches contrast with the angled braid path, creating a complex visual that’s part architectural, part organic. The stitches stay horizontal even as the braid itself zigs and zags, producing a checkered-like pattern across the head.
How to Use It
Each zigzag segment should be at least 4 inches long for the stitch pattern to register before the next angle change. Shorter segments make the stitches look broken. Longer segments make the zigzag feel timid.
This is a more advanced style. The braider has to maintain stitch consistency through every angle change without letting the stitch spacing collapse at the bends. Two-braider work is common for complex zigzag stitch installs.
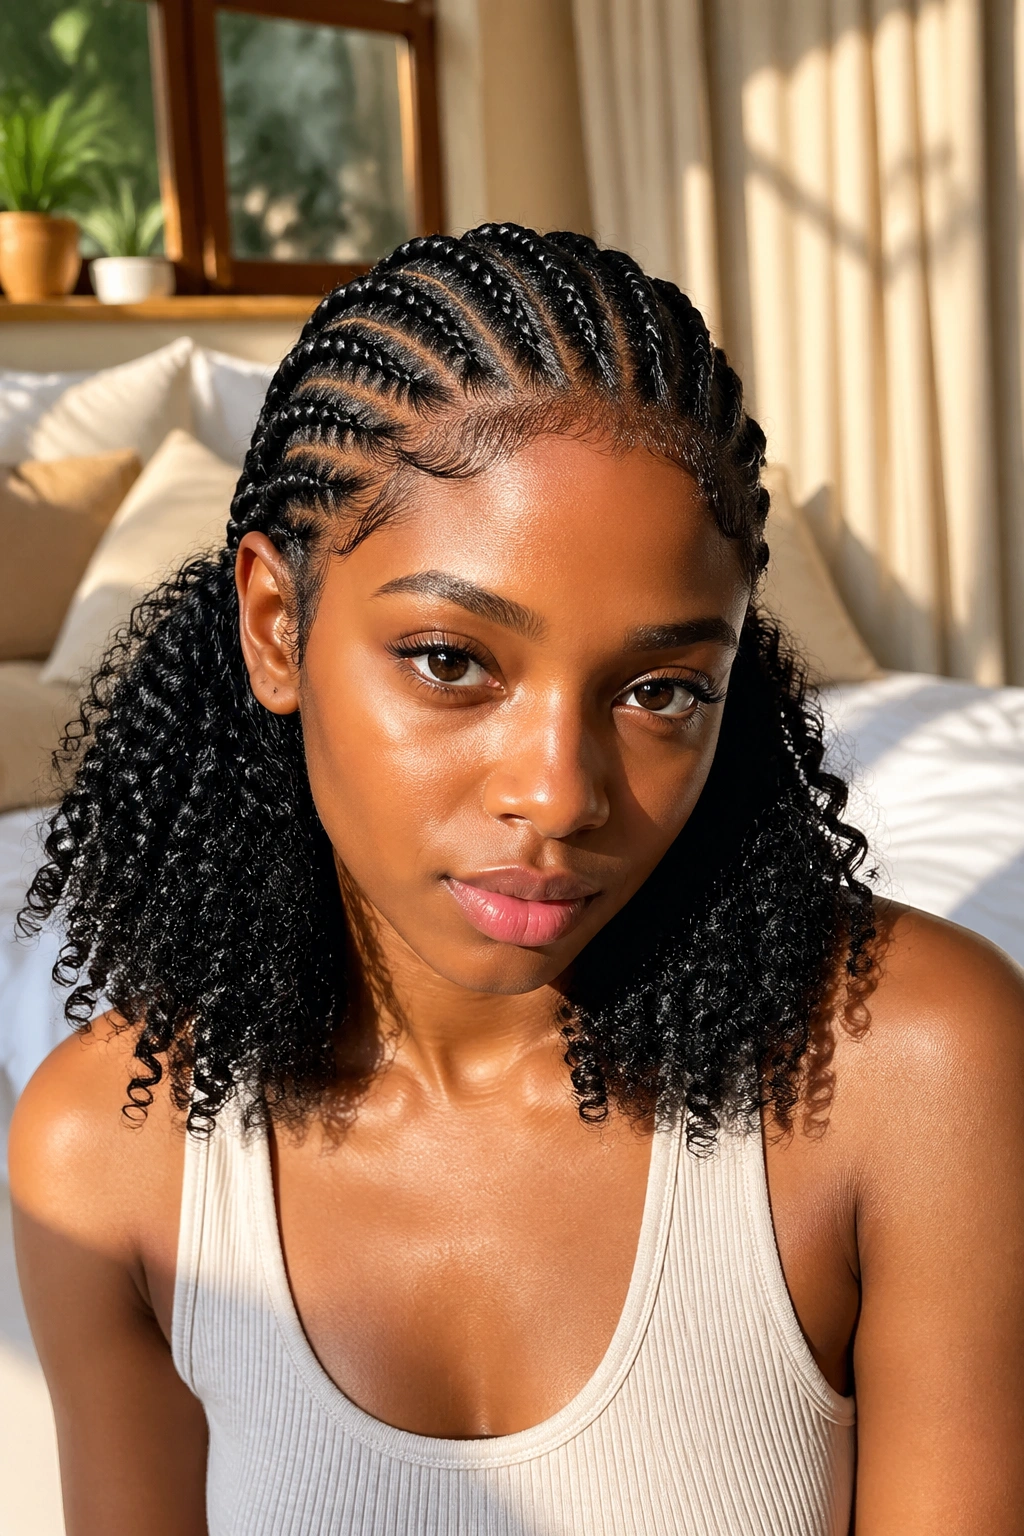
7. Stitch Cornrows With Curly Ends Out
The braid covers the top two-thirds of the hair length. The bottom third is released as natural curls.
Stitch detail concentrates at the crown and mid-head, where it’s most visible. The curl pattern at the ends gives the style softness and movement that pure stitch work can’t.
This style works only on hair long enough that two-thirds of the length still produces visible curl when released. On shorter hair, the released portion disappears against the scalp.
To maximize curl pop at the released ends, twist the unbraided length the night before takedown and let it set under a satin scarf. In the morning, separate the twists gently with fingers — never a comb, which fluffs the curl into frizz.
8. Single Stitch Cornrow Down the Middle
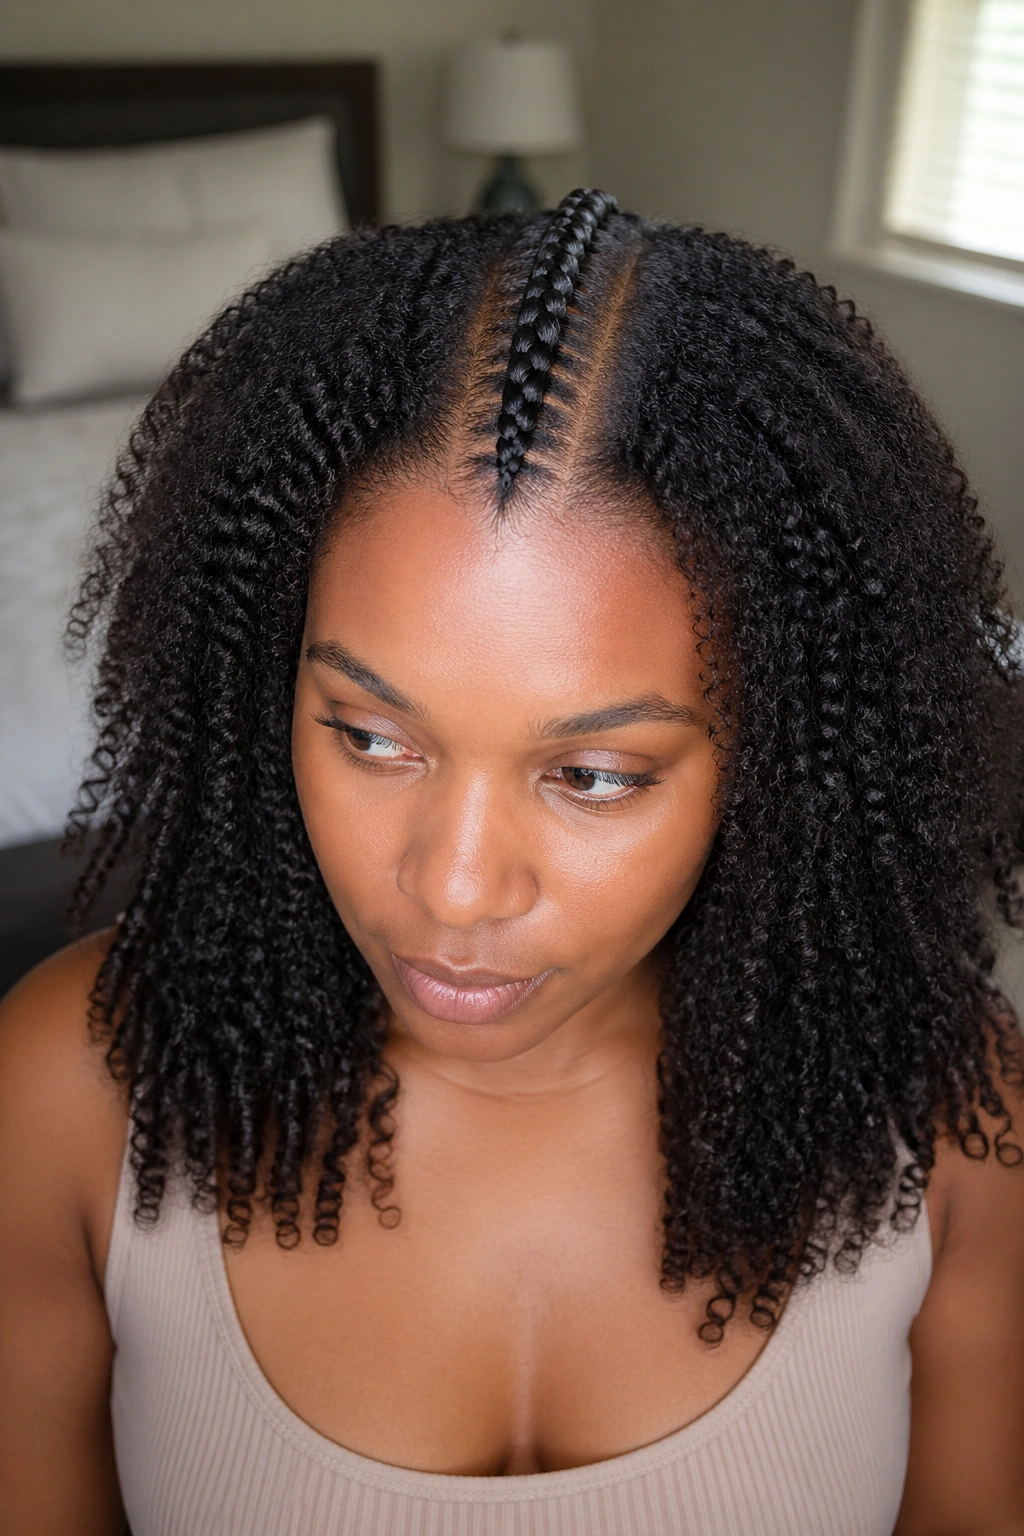
One thick stitch cornrow runs straight down the center part of the head. The rest of the hair on either side stays loose as a wash-and-go or twist-out.
Minimal commitment, maximum statement. This single braid takes 30 minutes to install but delivers the entire visual benefit of stitch work — the parallel lines, the architectural quality, the precision feel.
This is the entry-level stitch cornrow. Try it before committing to a full-head install. Decide whether you actually like the stitch aesthetic on your face shape and hair density before scheduling four hours.
The single braid can be styled multiple ways once it’s in. Pull it back into a half-up half-down. Add a small bead or charm at the end. Wrap a thread or fine ribbon around the base for a pop of color.
9. Stitch Cornrows With Asymmetric Pattern
Standard cornrow patterns are symmetric. This isn’t.
The left side of the head has three closely spaced stitch braids angled toward the back. The right side has five wider stitch braids angled toward the front. The two sides meet at the center crown but don’t mirror each other.
The asymmetry is the point. It reads as fashion-forward, intentionally off-balance, designed to be noticed. It’s not a style for someone who wants to blend in.
Who This Is For
People who treat their hair as a statement. Performers, artists, anyone whose look is part of their work. The asymmetric stitch cornrow photographs distinctly from any angle, which suits anyone who needs visual identification on stage or screen.
The asymmetry works best when both sides have clearly different braid counts. Three on one side, five on the other reads as deliberate. Three versus four reads like a mistake.
10. Stitch Crown With Free Back
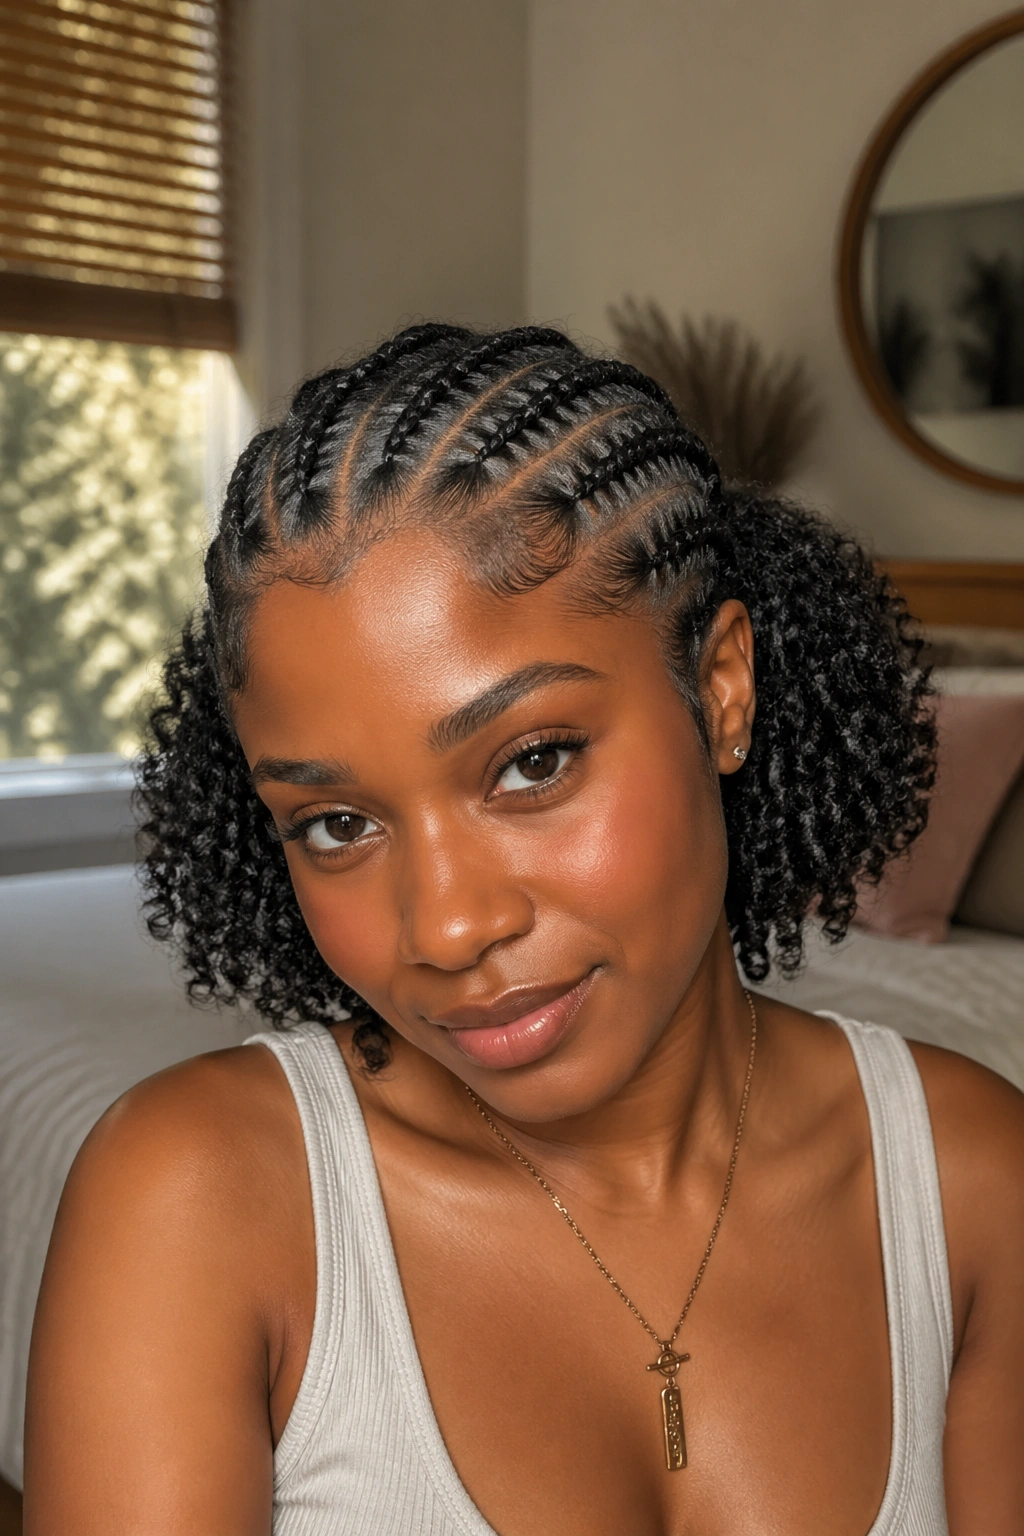
The top of the head — from the front hairline back to the crown — features dense stitch cornrow work. The back of the head, from the crown to the nape, stays loose with natural hair worn out.
The crown has six to eight small stitch braids. The back is a defined curl-out or a fluffed twist-out.
Why split the head this way: the crown is the most visible part of the head from straight-on angles. Concentrating the stitch work there delivers maximum visual return for the install time. The back, which is less visible in most settings, stays in a softer free style.
Sleep care is hybrid. Bonnet for the crown, pineapple wrap for the back. Or a single wide silk scarf that covers both regions in one piece.
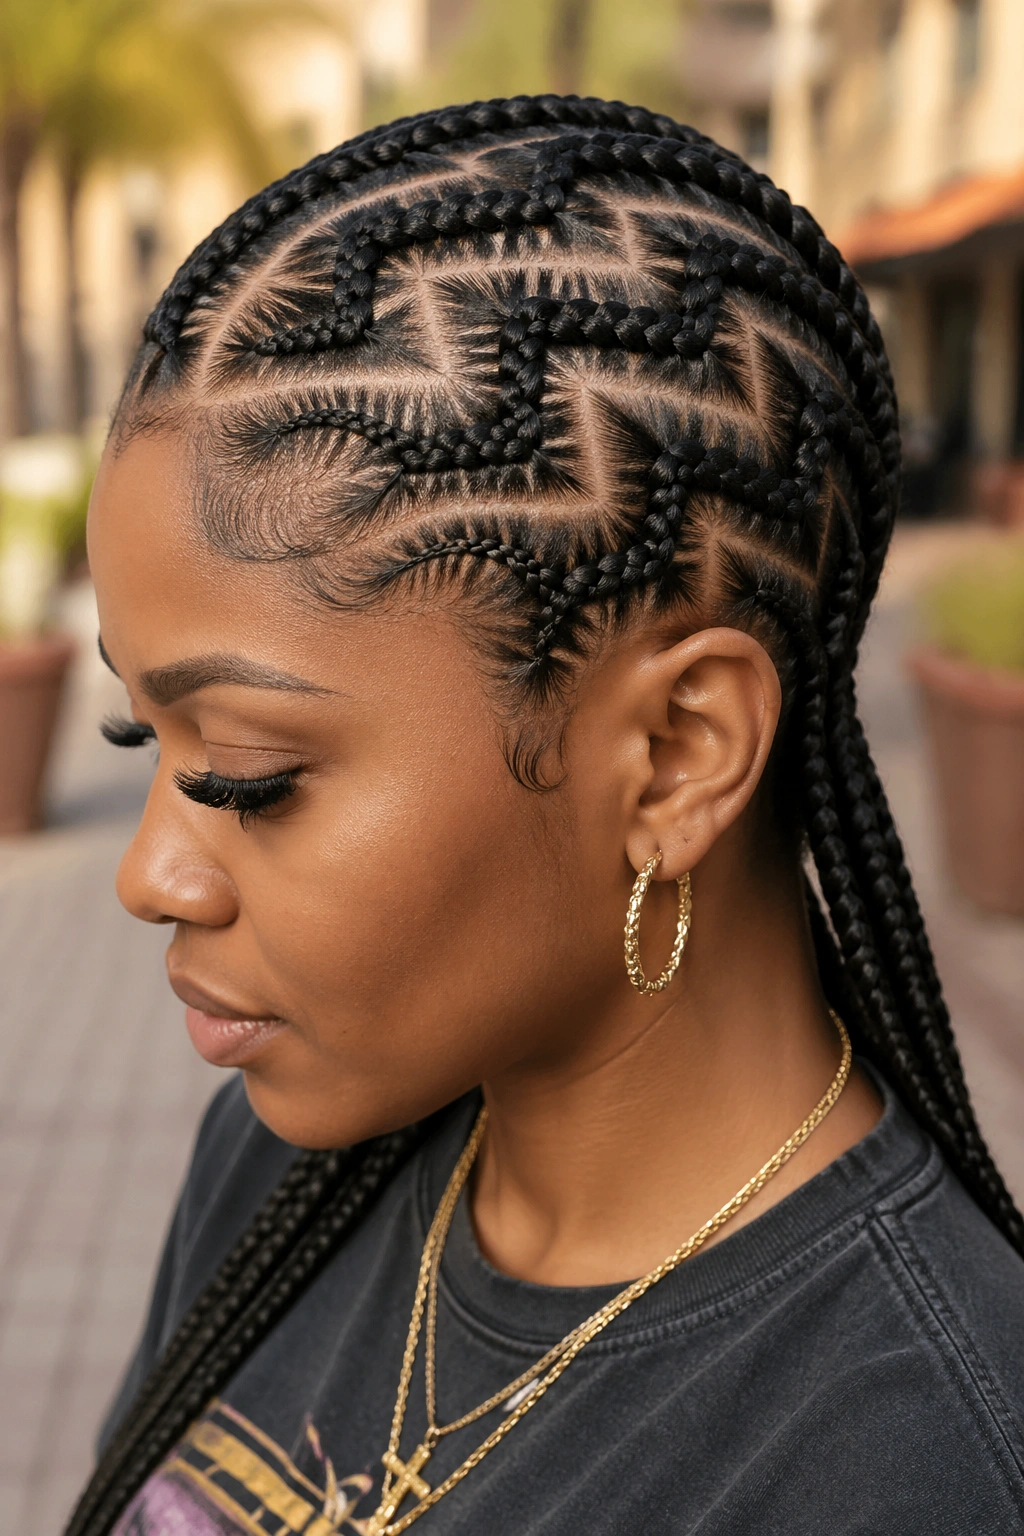
11. Tribal Stitch Cornrows
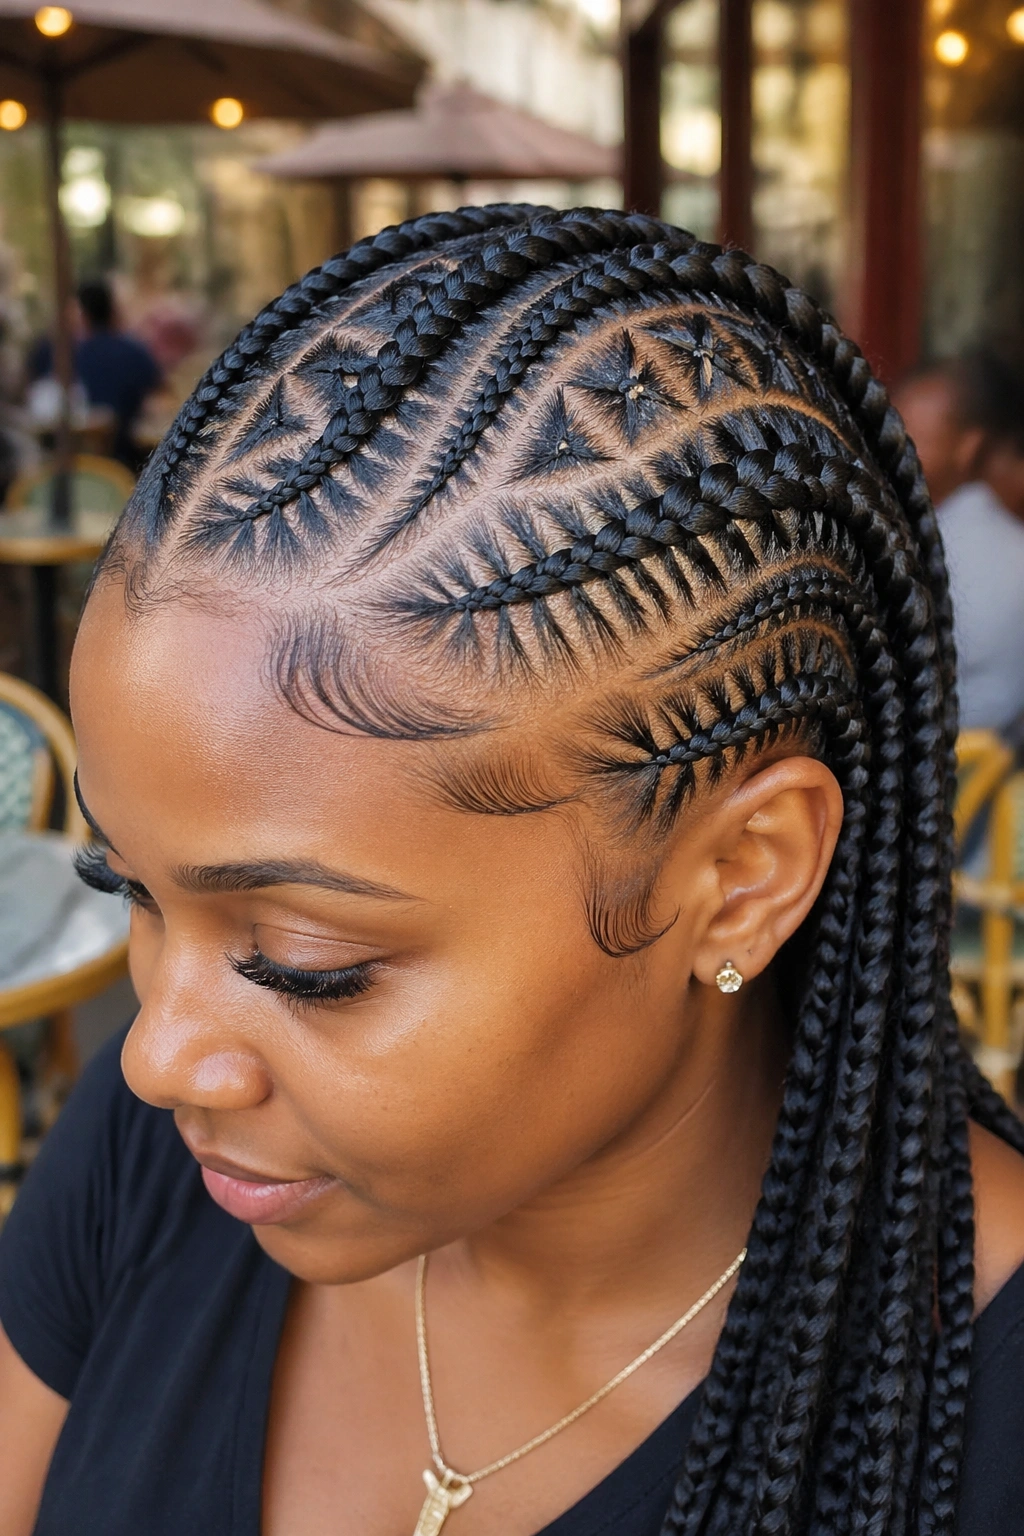
Inspired by historical African braiding patterns, tribal stitch cornrows feature elaborate part designs combined with the stitch technique. Triangular parts, diamond shapes, and curved lines create a complex base, and stitch braids run along each path.
These are traditional designs with deep cultural roots. The patterns often carry symbolic meaning in their original contexts — patterns associated with specific tribes, regions, or life events.
Approach tribal stitch designs respectfully. Research the pattern’s origin if you’re drawing from a specific tradition. Acknowledging the heritage of a style is part of wearing it well.
The install time is significant — five to seven hours for an elaborate tribal stitch design. The result is a style that reads as art and history simultaneously.
12. Stitch Cornrows With Cuffs and Charms
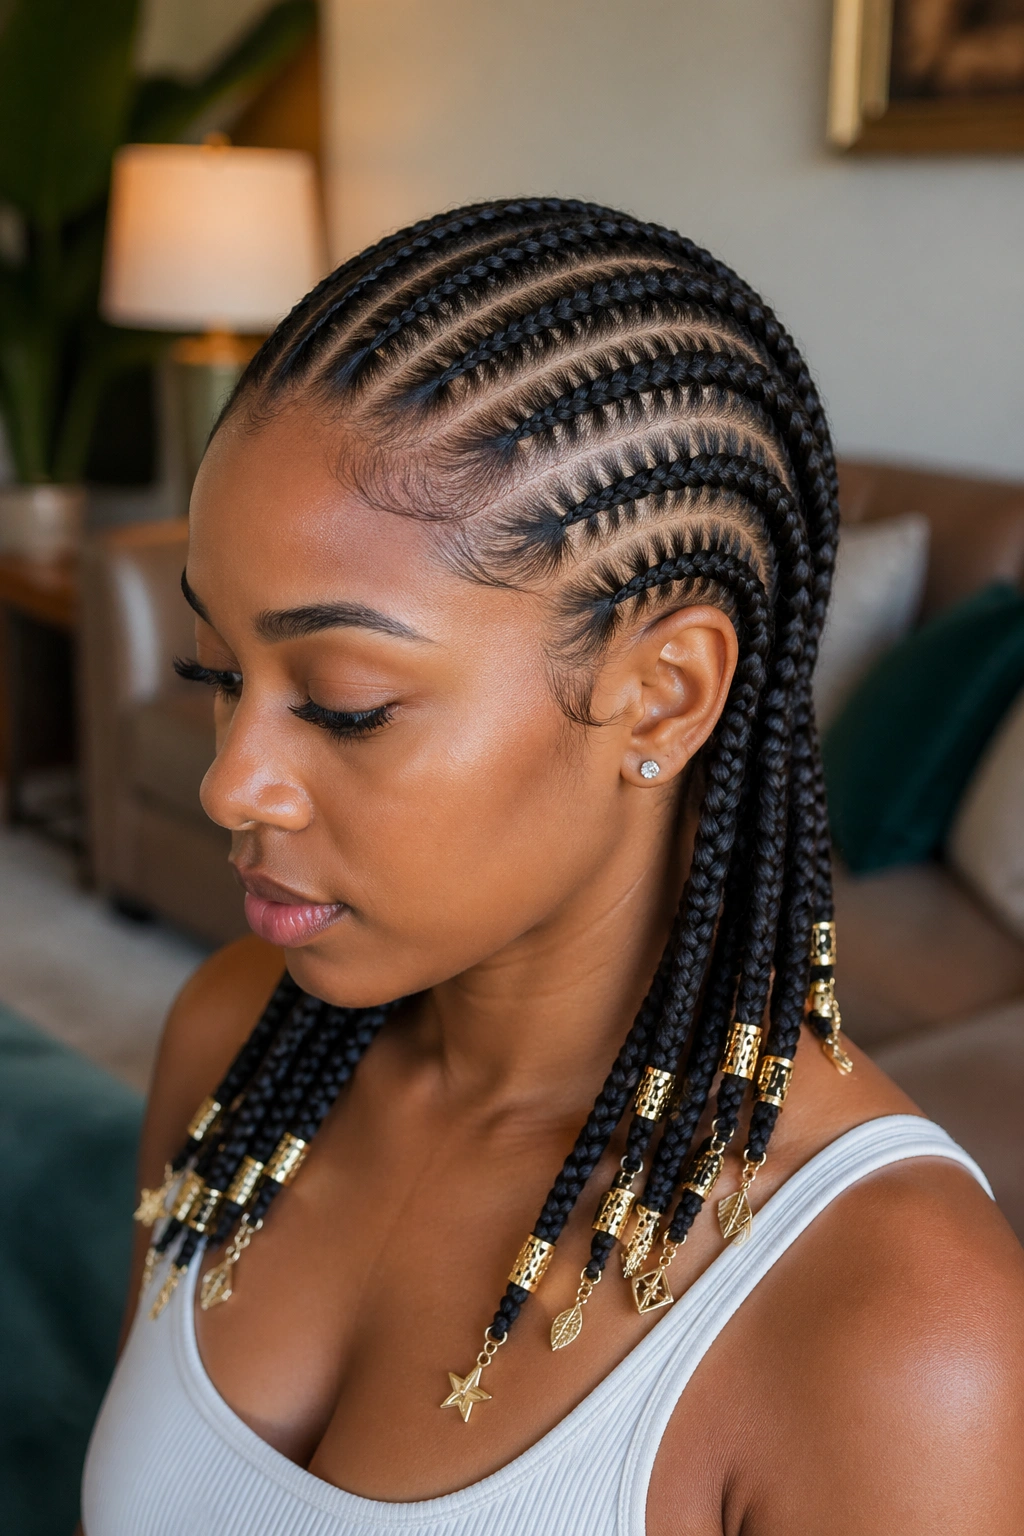
Standard stitch cornrows enhanced with metal cuffs slid onto the braids and small charms attached at the ends.
Cuffs add weight that helps the braids hang straight rather than puffing out from the scalp. They also catch light and add a metallic shimmer to the otherwise matte braid surface.
What to Watch For
Cuff quality matters. Cheap aluminum cuffs leave gray marks on the hair as they oxidize. Solid brass or sterling silver cuffs cost more but don’t transfer color.
Styling Tips
Place cuffs at the lower third of each braid, not at the end. End placement makes them slip off. Mid-braid placement holds them in place by friction with the braid above and below.
One to three cuffs per braid is the right scale. More than that overloads the braid and pulls down on the scalp.
13. Stitch Cornrows In a Heart Pattern
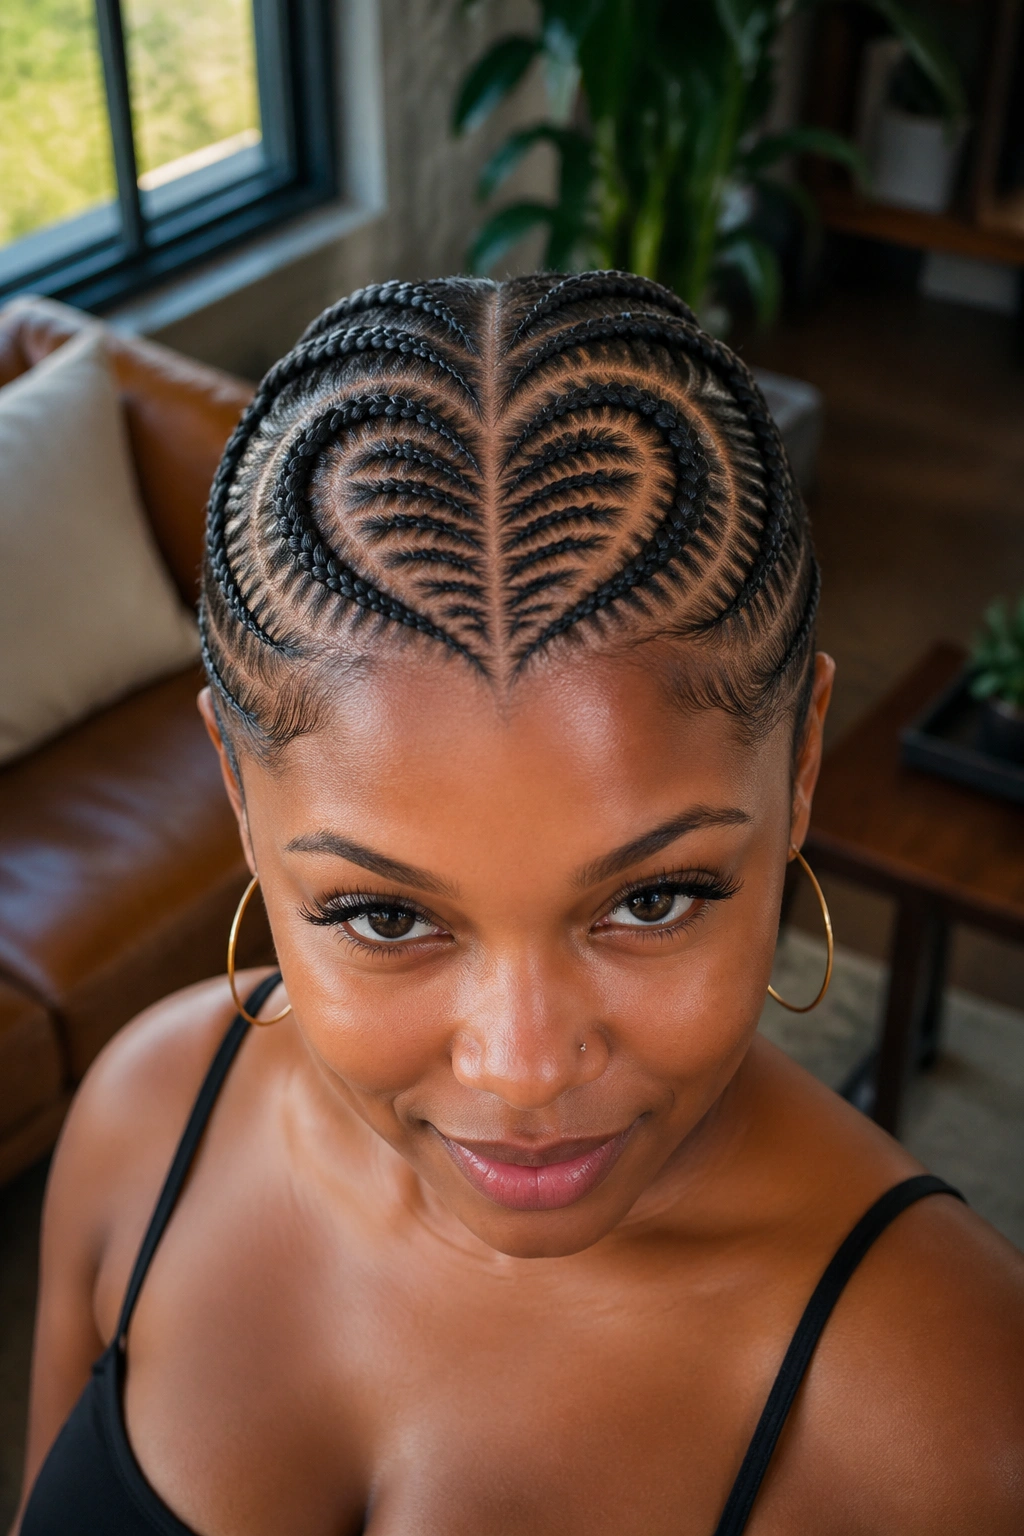
Two stitch cornrows curve outward from a center point at the front of the head, swoop down and around, and meet again at the bottom — outlining a heart shape across the scalp.
The space inside the heart is filled with smaller stitch braids running parallel to the heart’s curve. The space outside the heart features straight-back stitch braids.
Heart-shaped designs work for romantic occasions but also as everyday styles for those who like a softer geometric pattern. The curves of the heart counterbalance the rigid horizontal stitches, giving the whole style movement.
Sketch the heart with the comb tail in soft sweeps before committing. Refine the lines until both halves of the heart match. Asymmetric hearts look like crooked V shapes — the symmetry is the difference between cute and crooked.
14. Stitch Cornrows With Headwrap Crown
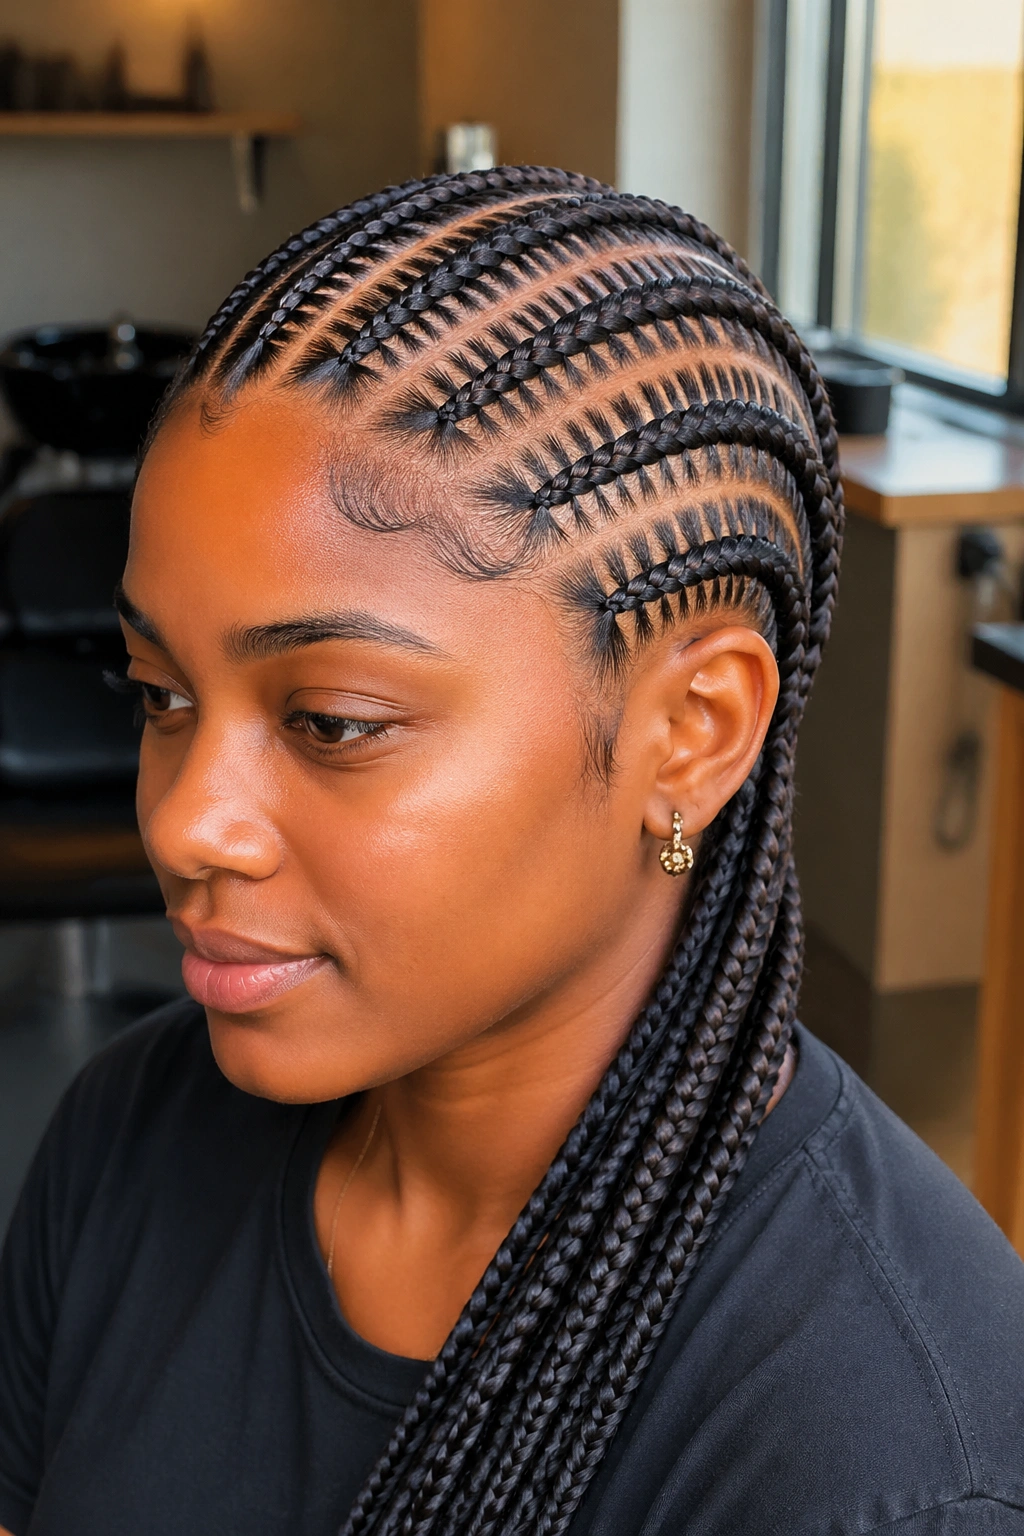
Stitch braids run from the hairline back to the nape, but the crown of the head is wrapped with a fabric headwrap or scarf instead of being braided.
The wrap adds color, fabric texture, and a different visual element. It also covers any lifting or fuzziness at the crown if the braids start aging past the two-week mark.
This style hybrid is great for stretching the wear of stitch cornrows. As the install ages and the crown fuzzes, the wrap conceals the imperfection. You get an extra week of wear by leaning on the wrap as a styling element.
The wrap needs to be wide enough to cover the front-to-mid crown but not so wide it interferes with the braid path. About 4 to 6 inches wide works for most head sizes.
15. Stitch Halo Around the Head
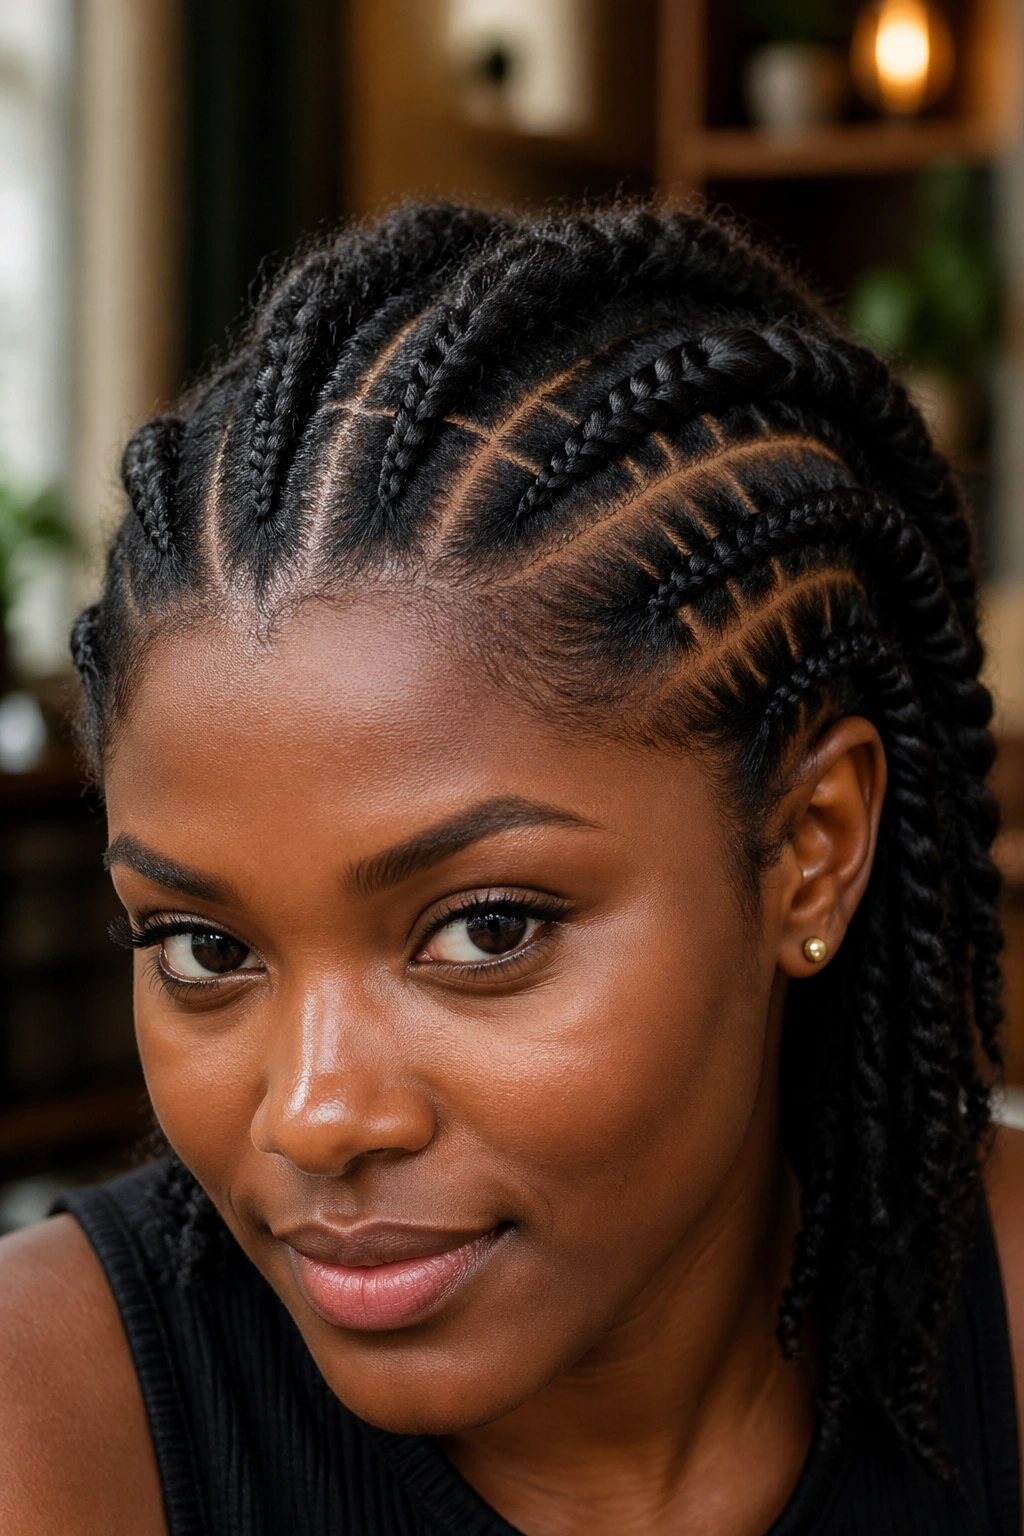
Stitch braids form a continuous halo around the perimeter of the head, all originating from the same circular base. The braids start at the front hairline, travel along the sides of the head, and meet at the back, creating a circle of stitches around a central crown.
The center of the crown can be left as a small puff, twisted into a coil, or covered with a single medallion or charm.
The halo pattern is striking from above and from the front. From the back, it reads as a continuous circle of braids, which is unusual enough to draw attention.
This style requires the braider to maintain consistent stitch direction around the curve of the head. The stitches all need to angle toward the center, which means each braid travels with a different orientation depending on its position around the halo.
16. Stitch Cornrows With Loose Bangs
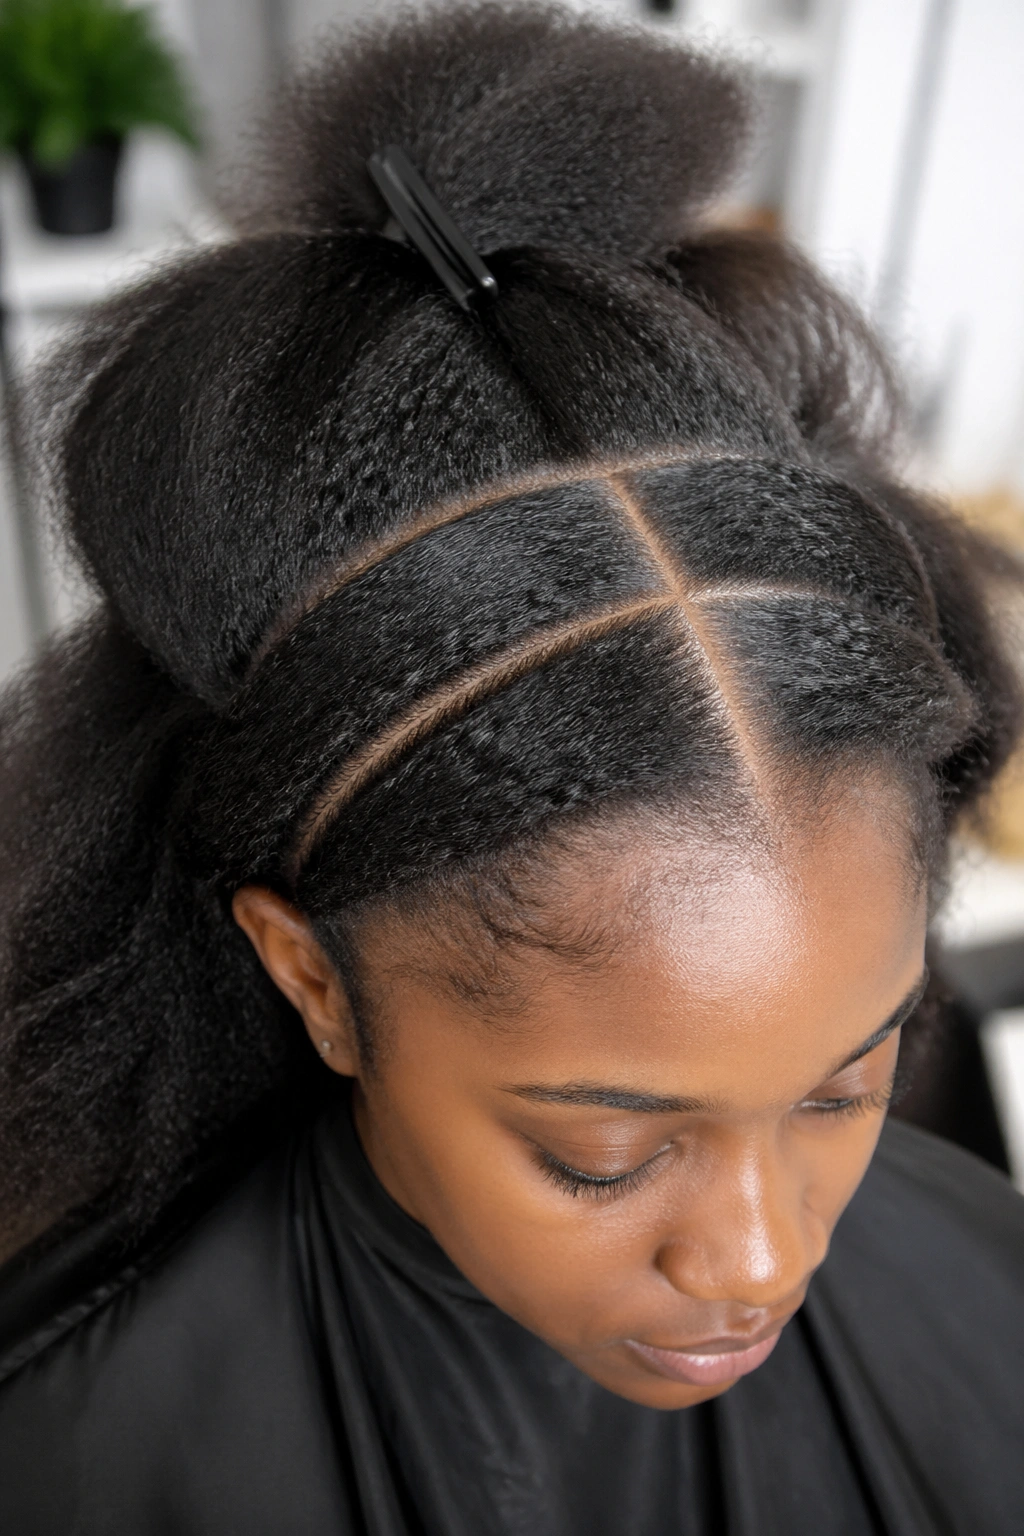
The hairline is left out as natural curl bangs framing the forehead. Behind the bang section, stitch cornrows begin and run back across the rest of the head.
The bangs are leave-out — natural hair that’s been twisted and released to enhance the curl pattern. They sit forward of the braid line and conceal the braid starting point.
This style is flattering for those who feel exposed by a fully pulled-back hairline. The bangs soften the front of the face and add an organic curl element without disrupting the architectural quality of the stitch braids behind.
Maintain the bangs separately. They need their own moisture spray and refresh routine. Don’t try to extend the braid moisturizing routine to cover the bangs — different textures need different care.
17. Stitch Cornrows With Side Cornrow Accent
Most of the head features classic straight-back stitch cornrows. One side of the head — typically above one ear — has an additional small accent cornrow with a unique pattern: tighter stitches, a different angle, or a curve that breaks from the straight-back pattern.
The accent breaks the symmetry of the main pattern. It draws the eye to one specific spot on the head, creating a focal point.
Why It Works
A pure straight-back can feel monotonous on its own. A single accent breaks that monotony without redesigning the entire style. It’s a low-effort way to add visual interest to a basic install.
The accent can be color (a single braid with a contrasting extension), shape (a curved braid among straight ones), or scale (a much thicker or thinner braid). Pick one variation; combining all three overcomplicates the look.
18. Stitch Cornrows With Triangle Parts
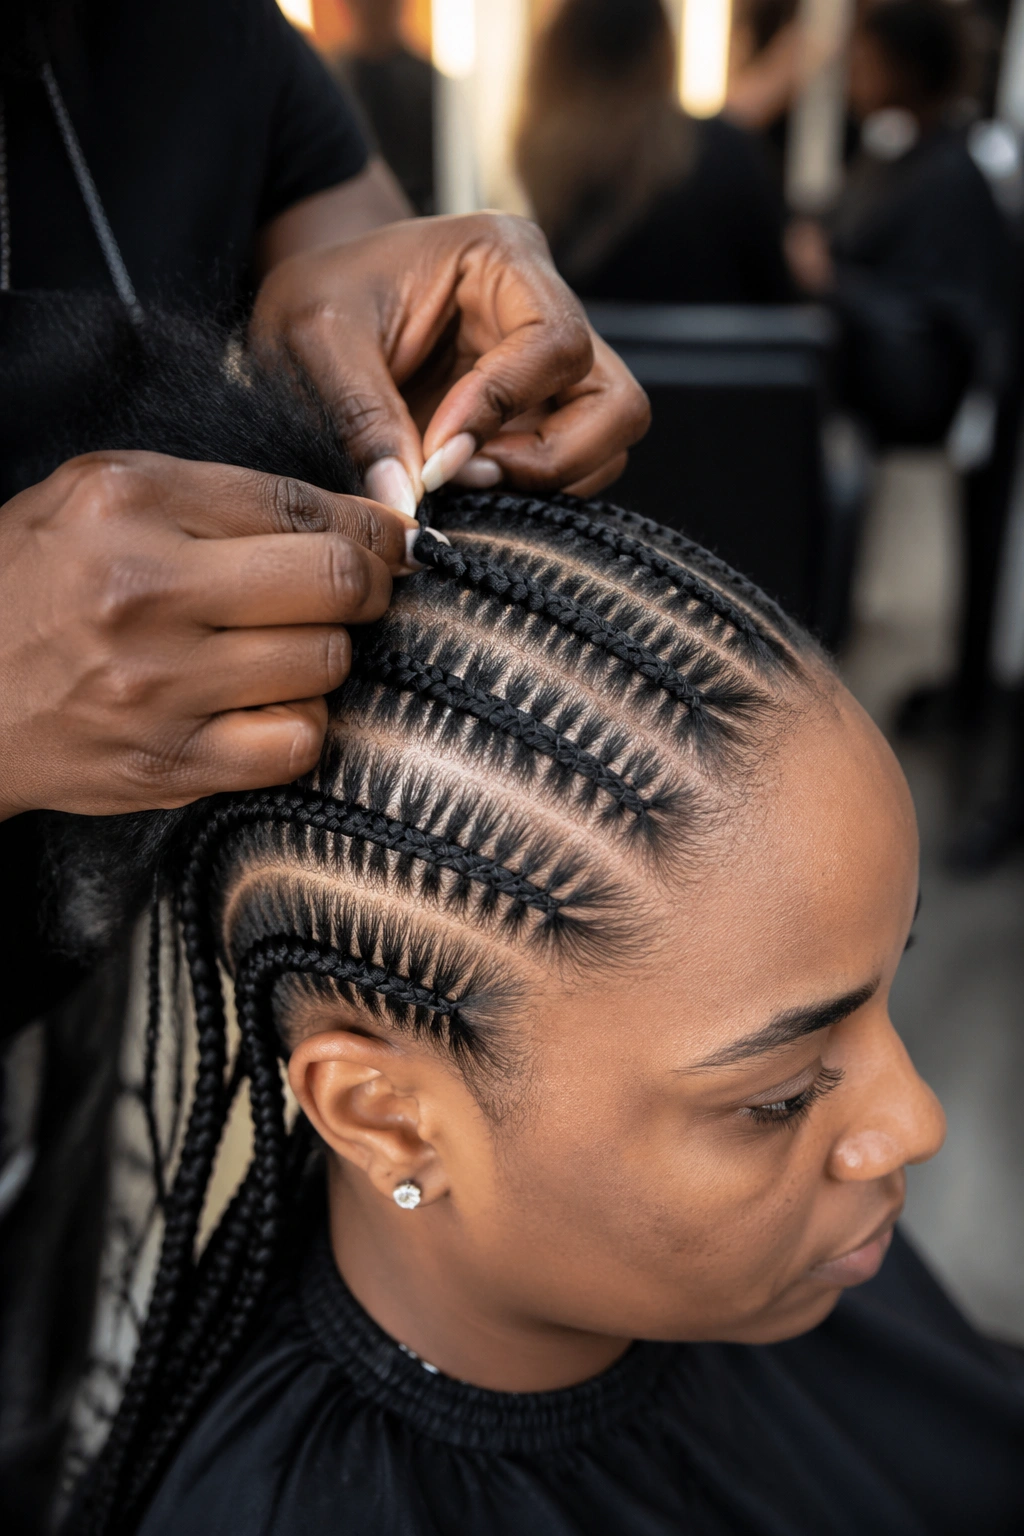
Each braid originates from a triangular section rather than a rectangular one. Triangle parts give the stitch braids a faceted base that catches light differently than standard parts.
Triangle parts also distribute hair tension differently. The wider end of the triangle holds more hair, which makes the base of each stitch braid sturdier. This translates to longer wear without lifting at the root.
Five to seven triangle-based stitch cornrows is the standard count. The triangles need to fit together cleanly across the scalp without leaving gaps or overlaps.
This is a strong choice for those who get cornrows often and want a slight variation on classic stitch work. The triangle parts deliver subtle uniqueness without changing the overall silhouette.
19. Stitch Cornrows With Beaded Tips
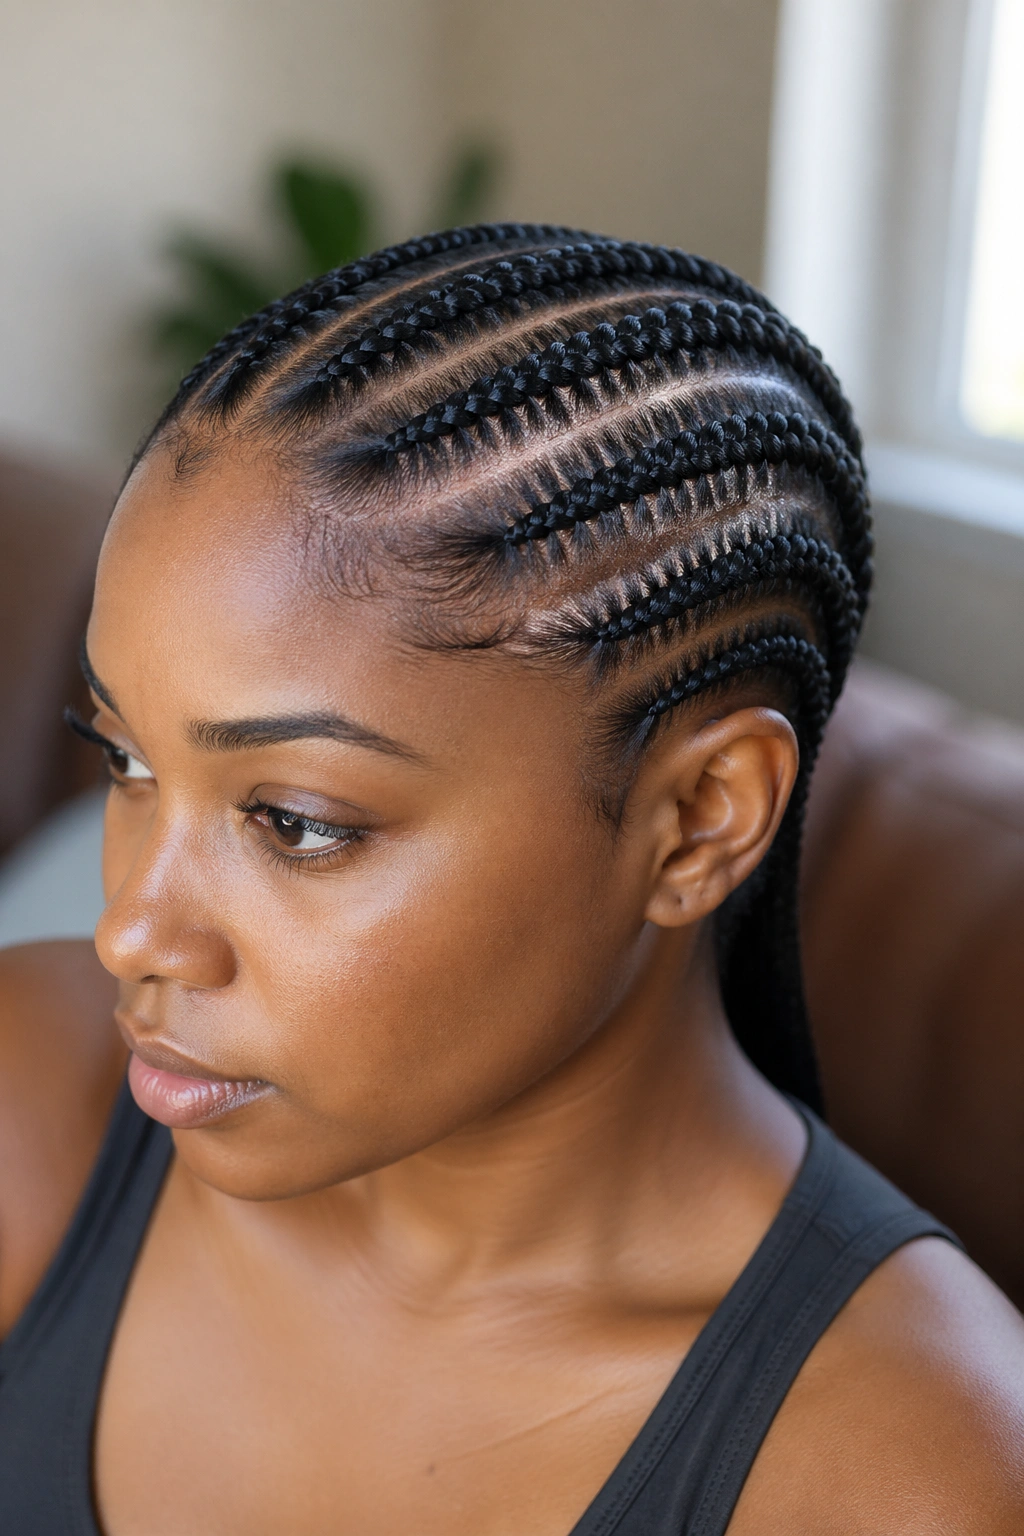
Brief scenario: someone who has stitch cornrows installed and wants to elevate them without redoing the entire style.
The mechanism is simple — bead the braid tips. A few beads on each braid end add visual weight that makes the whole installation feel more deliberate and finished.
- Wooden beads keep the look earthy and natural
- Glass beads add color but are heavier on the ends
- Silver or gold metal beads contrast against dark hair colors
- Mixed bead patterns (alternating colors) read as more playful
Keep beads light. Stitch braids on natural hair without extensions are thinner and lighter than feed-in versions, so heavy beads pull at the ends and break them.
The beaded tips also weigh the braids down enough to make them hang straight, which helps stitch cornrows that tend to puff up at the ends.
20. Stitch Cornrows With Pop of Color
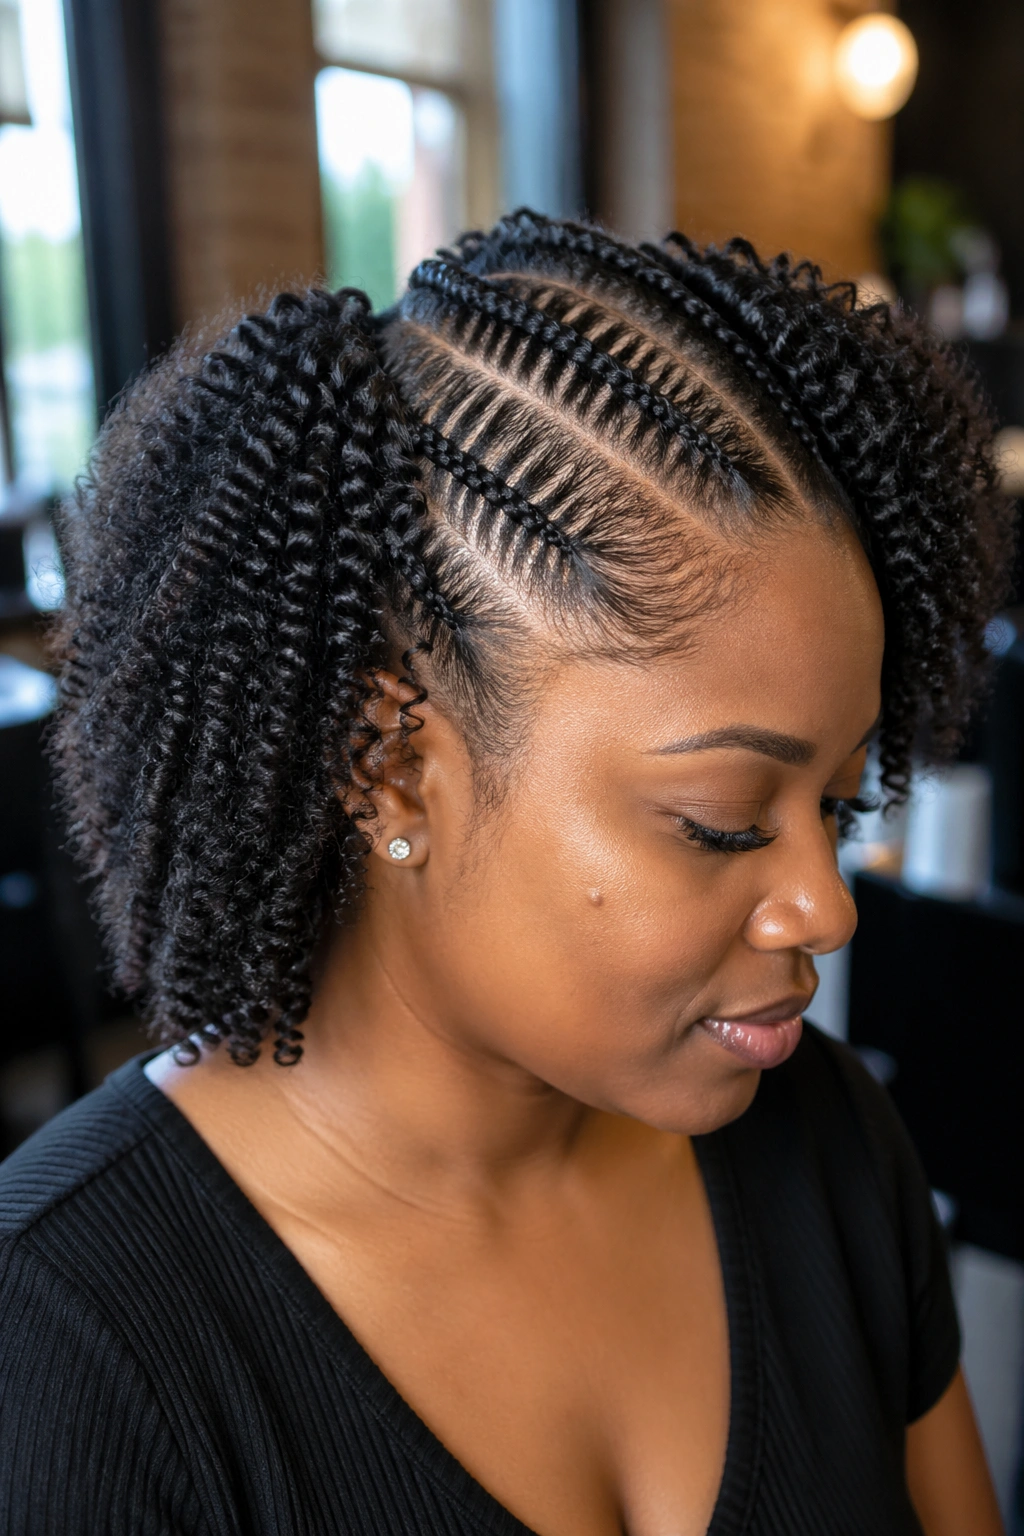
A single stitch braid is installed with a colored extension hair piece woven through it. The rest of the braids are pure natural hair.
The color choice is the whole statement. A single bright braid in burgundy, copper, blue, or platinum stands out against the natural-color braids around it. It’s a way to wear a hair color without committing to dyeing the actual hair.
The colored extension washes out at takedown — no permanent change to the natural hair underneath. This makes color experimentation low-risk.
Position the colored braid where it’ll be most visible — usually the second or third braid from one side, where it sits in the line of sight without dominating the whole head.
21. Stitch Cornrows for Short Natural Hair
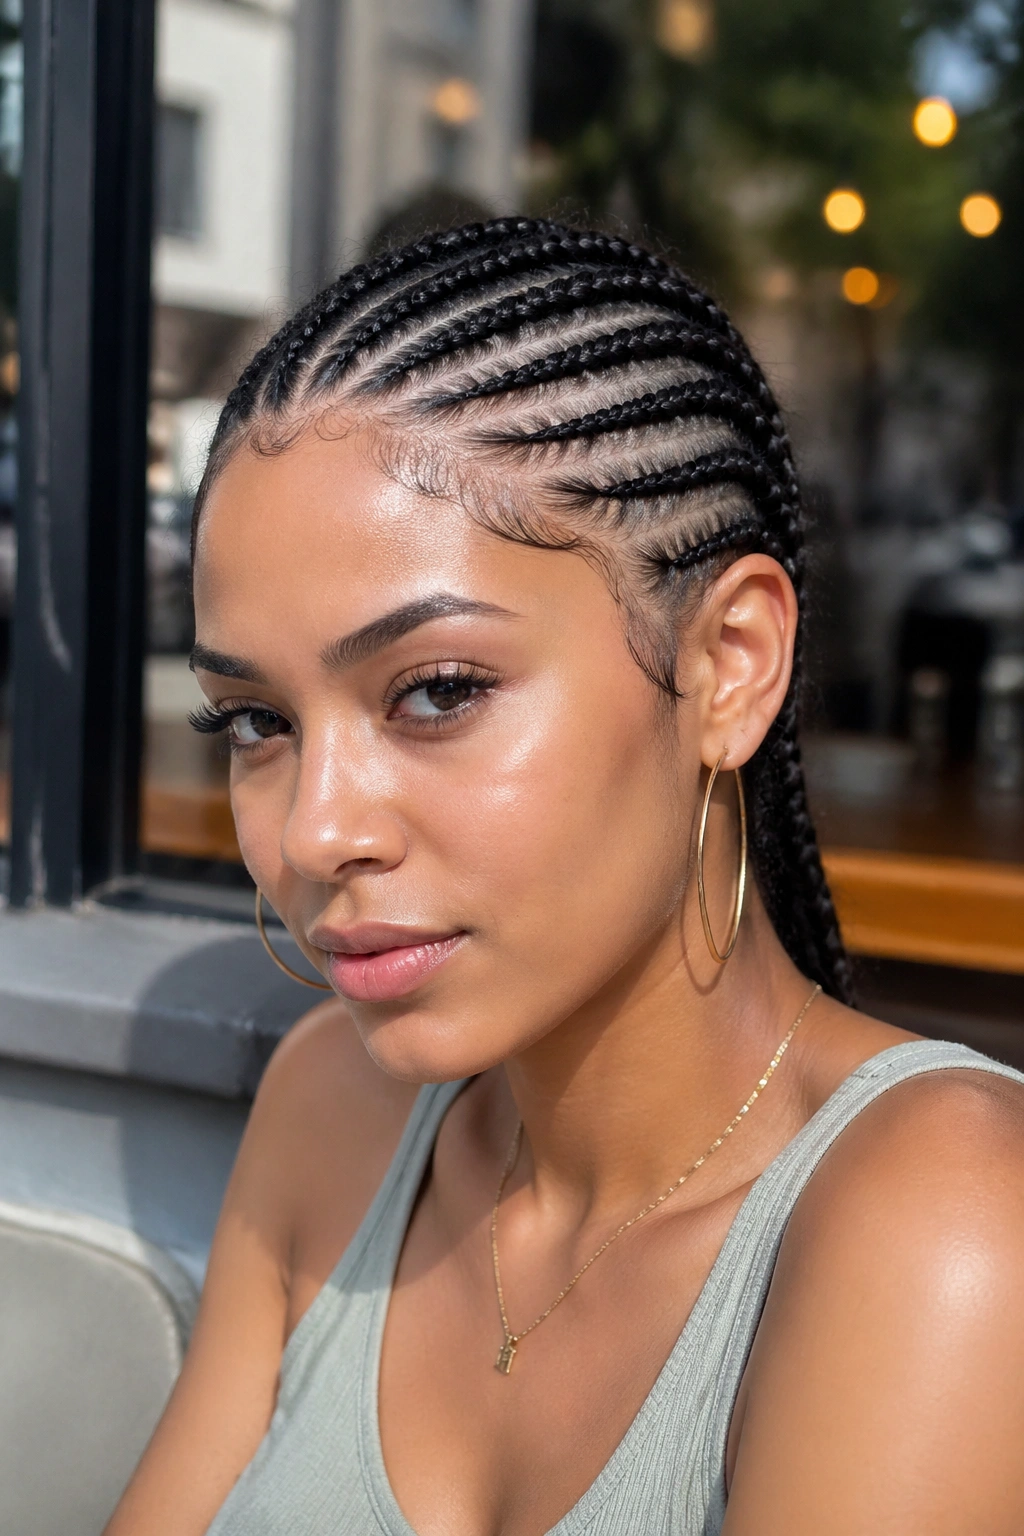
Unlike longer-hair versions, this style accommodates hair that’s only a few inches long. Stitches are spaced closer together — about half an inch apart instead of the standard one inch — to maintain visual density on shorter braid lengths.
The braid count drops slightly. Three to four braids instead of five to seven. Fewer braids on a short head looks intentional; too many braids on short hair looks crowded.
Who This Is For
People with TWAs (teeny weeny afros) or growing-out cuts who want to wear stitch cornrows without waiting for length. Hair as short as 3 inches can hold a stitch pattern if the braider scales the technique appropriately.
The challenge is keeping the braid from popping out the back as it ends. A small clear elastic at each braid tip secures the short ends and prevents the braid from unraveling within hours.
22. Stitch Cornrows With Twisted Crown
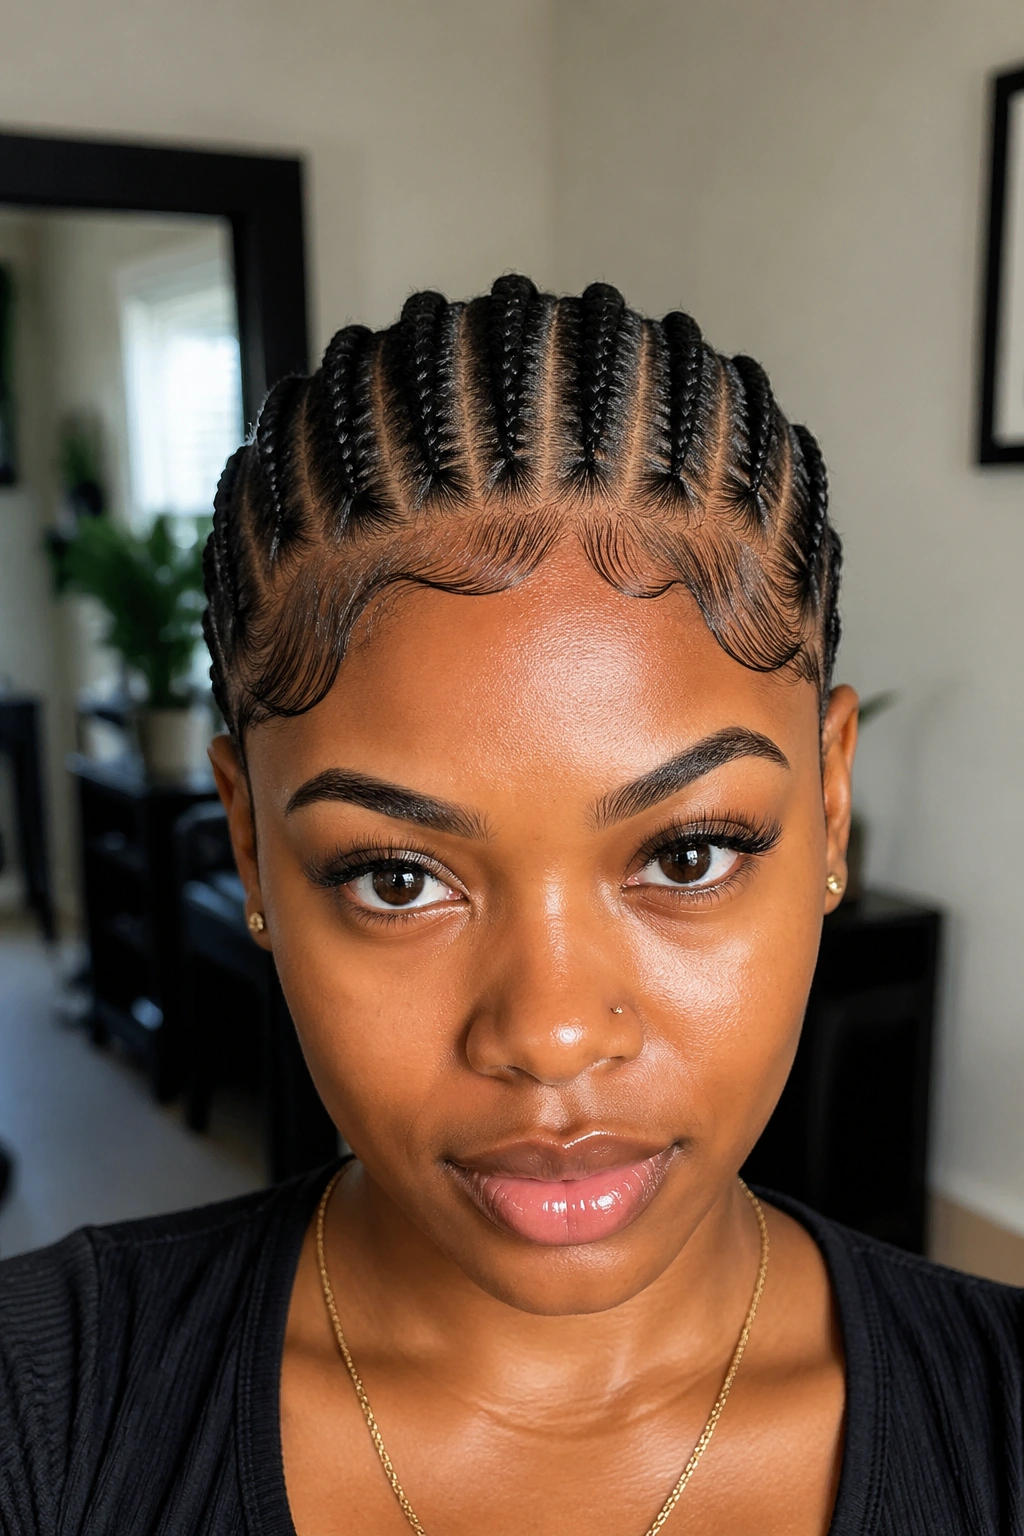
Stitch cornrows cover the sides and back of the head. The top of the head — where the cornrows would normally start — is replaced with two-strand twists or a flat twist crown design.
The contrast between sharp-line stitches on the sides and softer twists on top creates a textural mix. The twists are quicker to install than stitch braids, so the overall style takes less time than a full stitch install.
The transition from twist to stitch braid happens at the crown. The twist ends are gathered into the start of the stitch braid, which then travels down the side of the head. This handoff has to be clean — a sloppy transition shows where the technique changed.
This hybrid style is good for natural hair that responds well to twists. Not every texture twists cleanly, so do a small twist test before committing to the design.
Maintaining Stitch Cornrows on Natural Hair
The single most important maintenance task is moisture. Natural hair under tension needs more hydration than loose natural hair, and stitch cornrows pull tighter than feed-in cornrows because of the technique.
Water-based spray daily. A mix of distilled water, a teaspoon of leave-in conditioner, and a few drops of light oil. Spritz along the parts and the visible scalp. Avoid drowning the braid surface — water saturating the braid causes it to swell and lose shape.
Oil the scalp two to three times a week. Natural oils like jojoba, sweet almond, or avocado oil sit lightest on the scalp without clogging follicles. Apply with a nozzled bottle directly into the parts.
Don’t oil the braids themselves. Oil on the braid surface attracts dust and lint, which dulls the stitch lines and makes the whole style look matted.
Sleep Care for Stitch Pattern Preservation
Satin or silk every night. A bonnet that fully covers the head without compressing the stitches. Look for bonnets with deep elastic that sits well off the hairline, away from the most-tensioned part of the install.
For longer braids, a bonnet may not contain everything. A satin pillowcase as the second line of defense catches braid tails that hang outside the bonnet during sleep.
Side-sleepers and stomach-sleepers face more friction than back-sleepers. If the stitch pattern starts looking rough by day three, it’s a side-sleeping issue. Try training yourself to sleep on your back for the first week of a new install — even partial back-sleeping reduces wear.
Wash Day With Stitch Cornrows In
Yes, you can wash stitch cornrows. Here’s how to do it without destroying the pattern.
Dilute a sulfate-free shampoo with water in a squeeze bottle — half and half. Apply along the parts only, not the braid surface. Massage the scalp gently with fingertips. Rinse thoroughly under low-pressure water.
Conditioner gets the same treatment. Diluted, applied to the scalp, rinsed completely. Avoid leaving conditioner on the braids — it dries to a film that dulls the stitch lines.
Pat dry with a microfiber towel or an old cotton t-shirt. Air-dry for at least two hours before bonnet-ing. Damp braids in a bonnet smell within a day.
Wash every 7-10 days. More than that ages the install fast. Less than that leads to scalp itch.
Takedown Without Breaking the Hair
Stitch cornrows take longer to take down than feed-in cornrows because the stitches grip the hair more firmly. Plan for 90 minutes to two hours for a full takedown.
Saturate the hair with a slippery conditioner — something heavy and rich like a moisturizing rinse-out. Let it sit for 10 minutes before unbraiding. The conditioner slips the braid apart and reduces breakage.
Unbraid one braid at a time. Don’t try to undo multiple stitches simultaneously. Work from the bottom up — release the end first, then unwind each stitch back toward the scalp.
After all braids are out, finger-detangle gently before any combing. Hair that’s been in tension for two-plus weeks releases shed strands during takedown — let those come out naturally rather than pulling them.
Deep condition immediately after takedown. The hair has been holding moisture in a contained shape. Released hair needs hydration and protein rebalancing to spring back into healthy curl.
Choosing the Right Stitch Cornrow Style
For first-timers, start with five straight-back stitch cornrows. The pattern teaches the technique without overwhelming, and the install time is manageable at three to four hours.
For those who already wear stitch cornrows regularly, try the side-swept or zigzag variations. They build on the same technique while introducing new visual elements.
For statement occasions, the heart pattern, the asymmetric design, or the tribal stitch styles deliver maximum visual impact.
For shorter hair, stick to the short-natural-hair variation, which is built to accommodate length limitations without looking compromised.
Match the style to the season of life. A four-hour install requires the bandwidth to sit, plus two-plus weeks of disciplined nightly care. If the next two weeks include high-stress events or travel that won’t allow proper maintenance, push the install to a calmer window. Stitch cornrows reward patience and care — both at install and across their full wear time.
