4C hair and cornrows have a complicated relationship. The coils are tight. The shrinkage is real. The density varies wildly from the front to the crown to the nape. And anyone who’s tried to freehand a clean center part on 4C without proper prep knows the frustration of watching sections pop out after an hour. But when cornrow styles for 4C hair are done right — with the correct tension, the right moisture balance, and parts that respect how the hair actually behaves — the results hold for three to four weeks without looking tired. That’s what separates good cornrows from forgettable ones.
The texture itself is an advantage, not a problem. 4C holds grip. It stays put once braided. The coils lock into the plait and refuse to slip the way looser curl patterns sometimes do. Most braiders who work primarily on 4C say it’s the easiest texture to keep neat over long stretches — once you get past the first 48 hours.
So let’s talk about what actually works. Not the generic advice. The specific moves.
What Makes 4C Hair Different
4C isn’t just “tighter curls.” The structure is more fragile at the bends, the strand diameter is often finer than people assume, and it drinks water faster than looser patterns. That changes how you prep for cornrows.
Shrinkage ranges from 70 to 80 percent when wet-to-dry. A head that looks like it’s 4 inches long will actually braid out at closer to 10. That matters for planning length, for figuring out how much extension hair to add, and for setting your client’s expectations before the first part is made.
The cuticle on 4C is raised and can snag easily on dry combs. Work in damp sections. Keep a spray bottle with water and a few drops of jojoba oil within arm’s reach. Spritz before detangling every single section, not just the first one.
Density matters more than length. A high-density 4C head needs smaller parts than the same style on lower-density hair. Go too big and you lose definition in the braid itself.
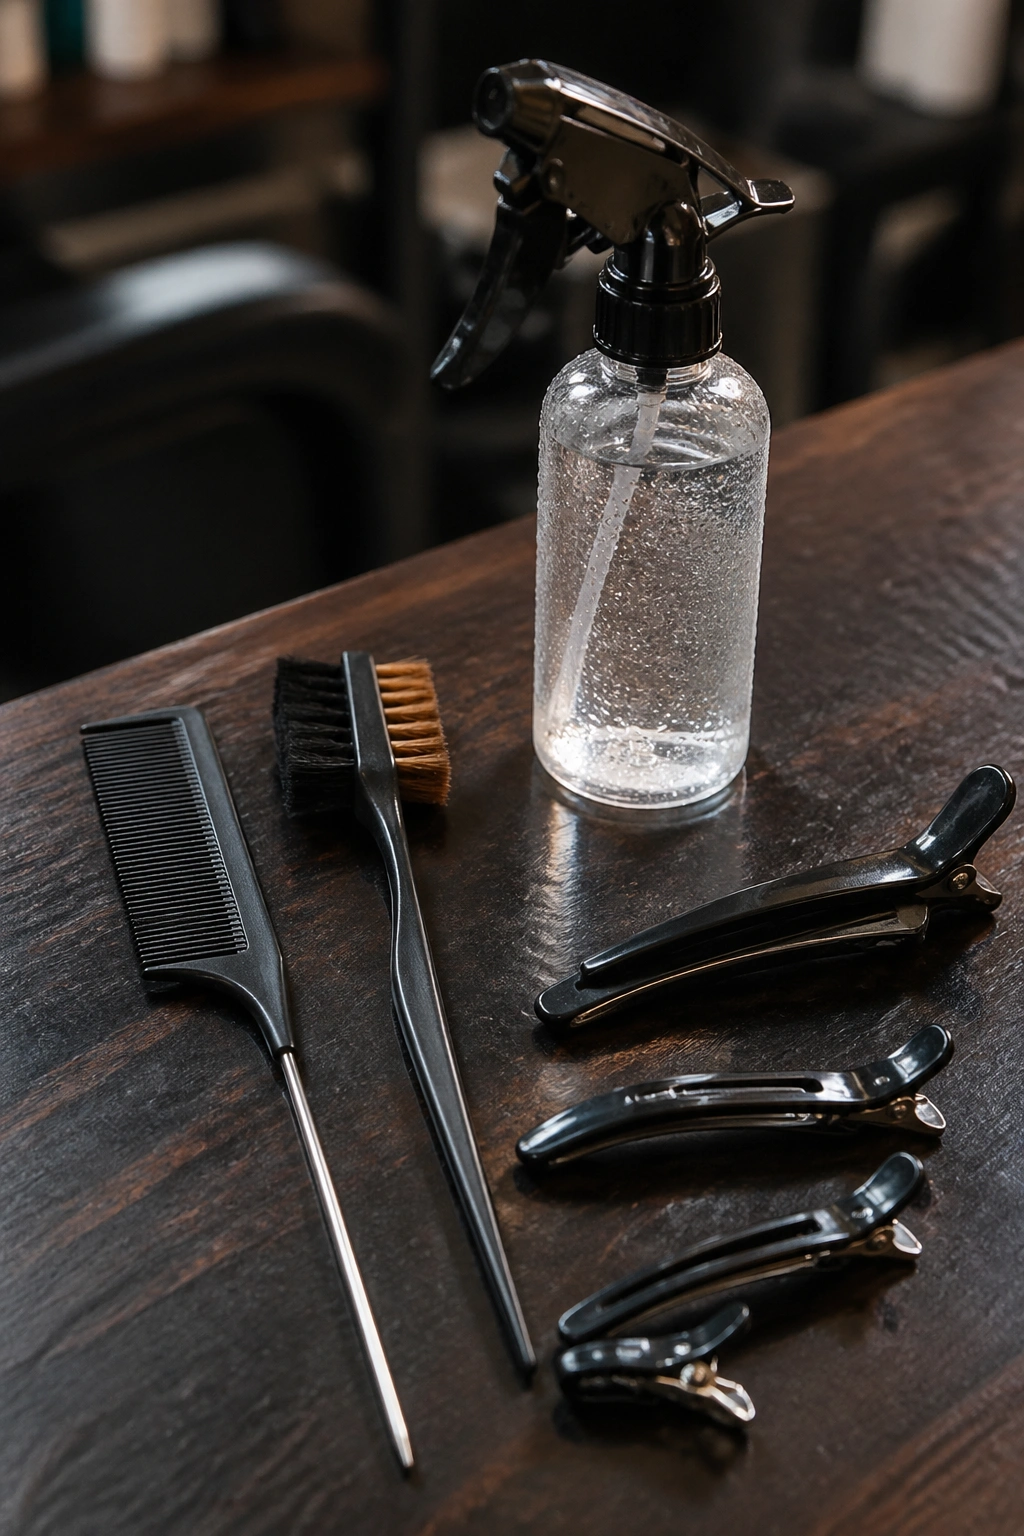
Essential Tools for Clean Cornrows on 4C
A rat-tail comb with a metal end is non-negotiable. Plastic tips snap on thick sections and leave wavy parts that never recover. The metal tail glides through damp 4C and cuts clean lines from hairline to nape.
Edge brush with double sides — stiff boar bristles on one end, softer nylon on the other. The stiff side lays baby hairs. The soft side blends and smooths the surface without flattening the curl pattern on the edges.
A spray bottle with water, aloe vera juice, and a pea-sized amount of conditioner is my preferred rehydration mix. Keep the nozzle on mist, not stream. You want to dampen, not soak.
Tip: Pre-stretch 4C with a blow-dry on cool setting or banded overnight stretching. Don’t braid on fully shrunken hair — the tension distribution is uneven and the parts won’t hold.
Clips. Plenty of them. Jumbo butterfly clips for the crown, smaller duckbills for the face-framing sections. Sectioning without enough clips is how braiders end up with hair snaking into parts they’ve already finished.
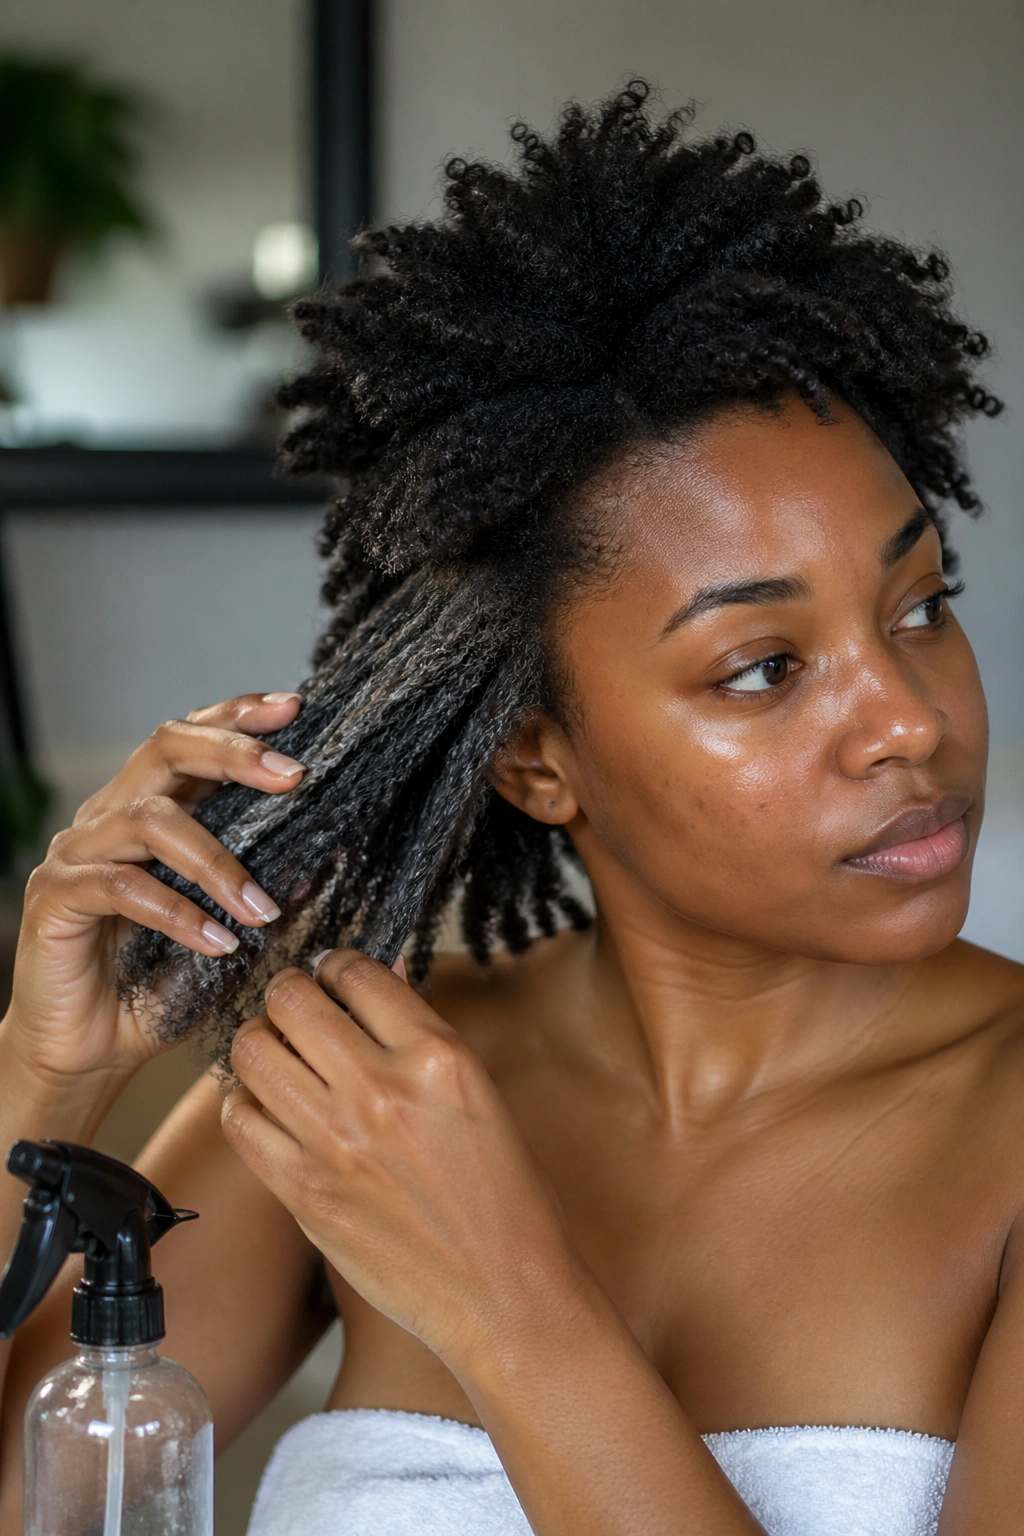
The Moisture Prep That Actually Works
Dry 4C under a cornrow is a recipe for breakage around weeks two and three. The braid tension plus the natural dryness of the coil pattern compounds, and by day 14 you see lifting at the base and frizz along the shaft.
Wash with a sulfate-free cleanser the day before. Deep condition for at least 30 minutes with heat. Rinse with cool water to seal the cuticle. Air-dry to about 70 percent before stretching.
The night before braiding, apply a leave-in conditioner and a light oil — argan or grapeseed work without weighing down the strand. Braid down in loose plaits and tie with a satin scarf. This lets the hair stretch without heat damage.
On braid day, spritz lightly with your rehydration mix as you section. Don’t saturate. Wet hair braids tighter than damp hair and that extra tension is what causes bumps and traction patches two weeks in.
Parting Patterns That Hold on 4C
The parts are the skeleton. Crooked parts on 4C show more than on other textures because the scalp contrast is sharper. Clean parts. Every time.
Use the rat-tail comb in one confident stroke from front to back. If you wobble, start over — don’t try to correct a wavy part by going back over it. That creates the fuzz that shows up in photos even when the braids themselves are flawless.
For a basic straight-back, measure parts at roughly three-quarters of an inch for medium density, half an inch for high density. Adjust based on how thick each section feels under your fingers.
Zig-zag parts need practice. Start by marking three anchor points along the diagonal, then connect them with the comb. Trying to freehand a zig-zag end-to-end without anchor points is how you end up with parts that look more drunk than deliberate.
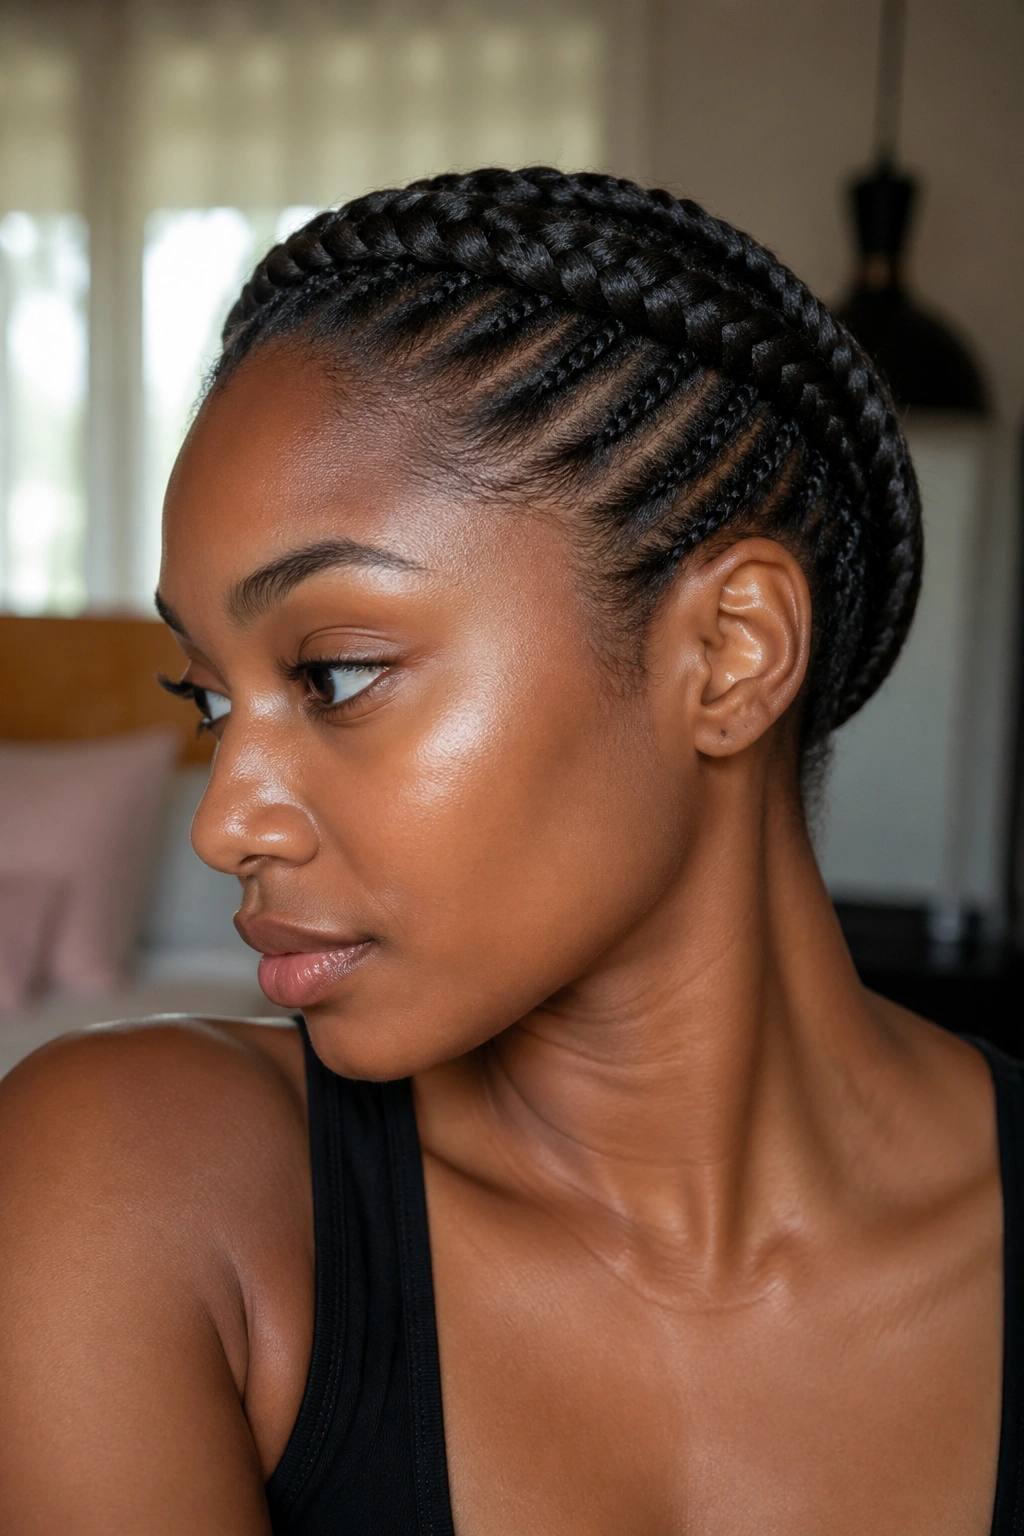
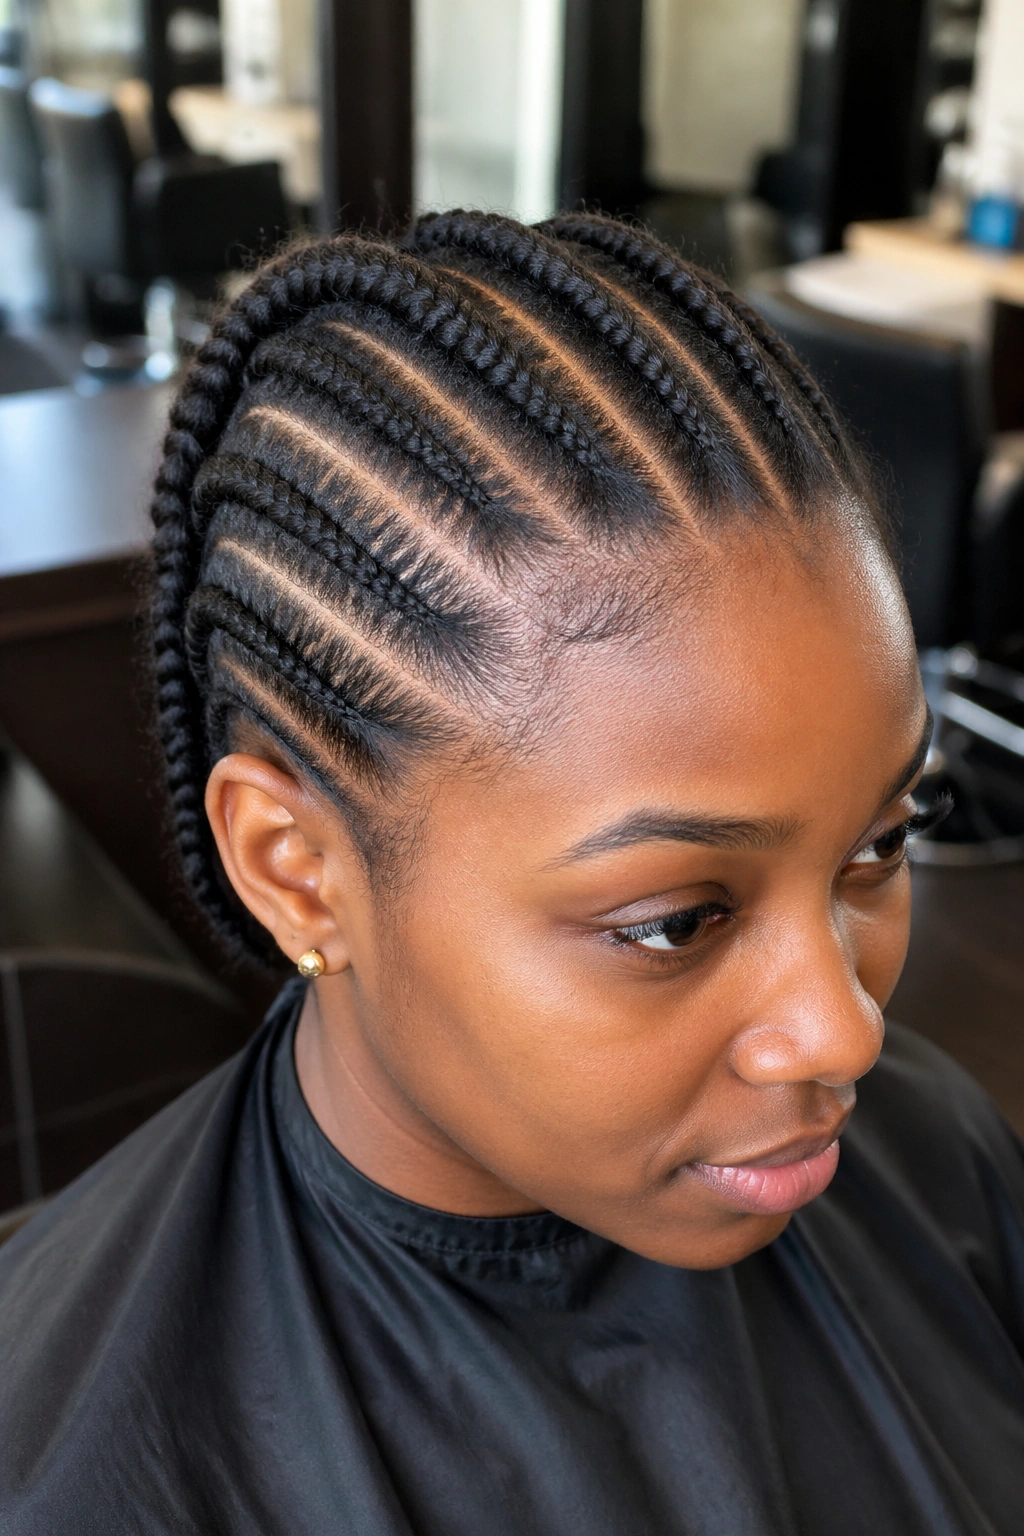
1. Classic Six Straight-Backs
The six-braid straight-back is the foundation every other 4C cornrow style builds on. Six is the sweet spot — big enough to show off thickness, small enough to part cleanly without sections fighting each other.
Why Six Works on 4C
- Sections stay wide enough to hold the density of 4C coils without the braid looking skinny at the ends
- Easier to maintain — you can moisturize scalp between rows without disturbing the cornrow itself
- Takedown is quick, usually 20-30 minutes compared to 45+ on finer cornrow sets
- Photographs well for all face shapes because the parting is symmetrical
Tip: If your hairline is thin at the temples, add a seventh braid near the ear on each side to reduce tension on the main two outer braids.
Six straight-backs let the natural thickness of 4C do the talking. The braids themselves look full, the scalp shows just enough to make the parts crisp, and the silhouette works for anyone regardless of face shape or head size. This is the one I recommend to anyone getting cornrows for the first time on 4C.
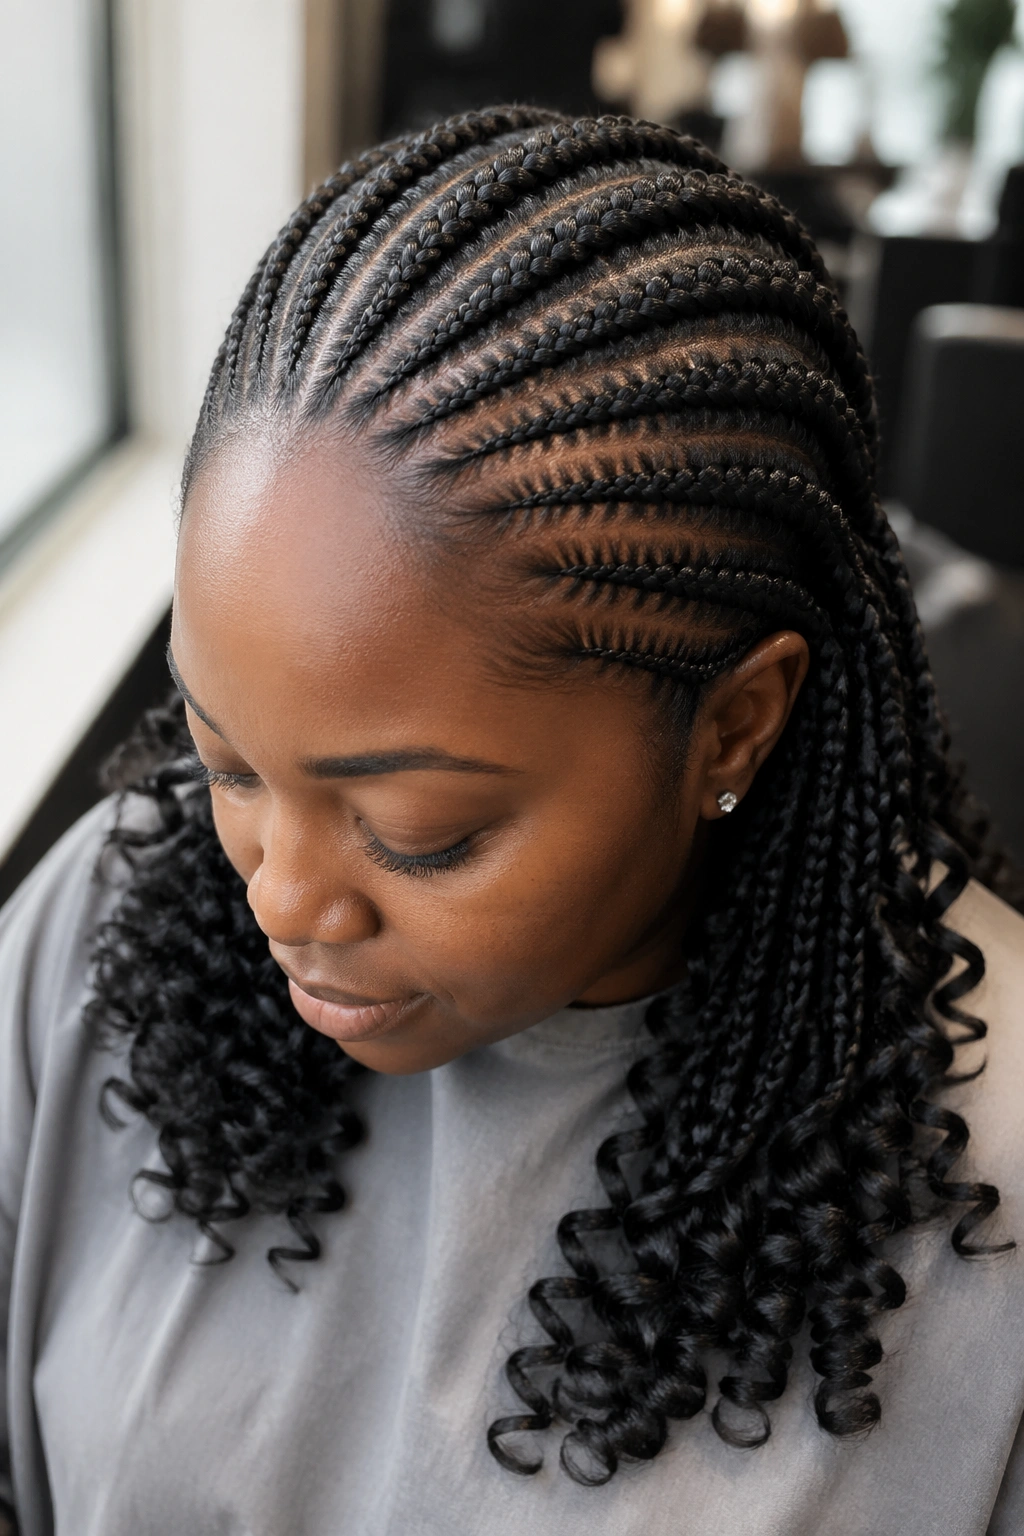
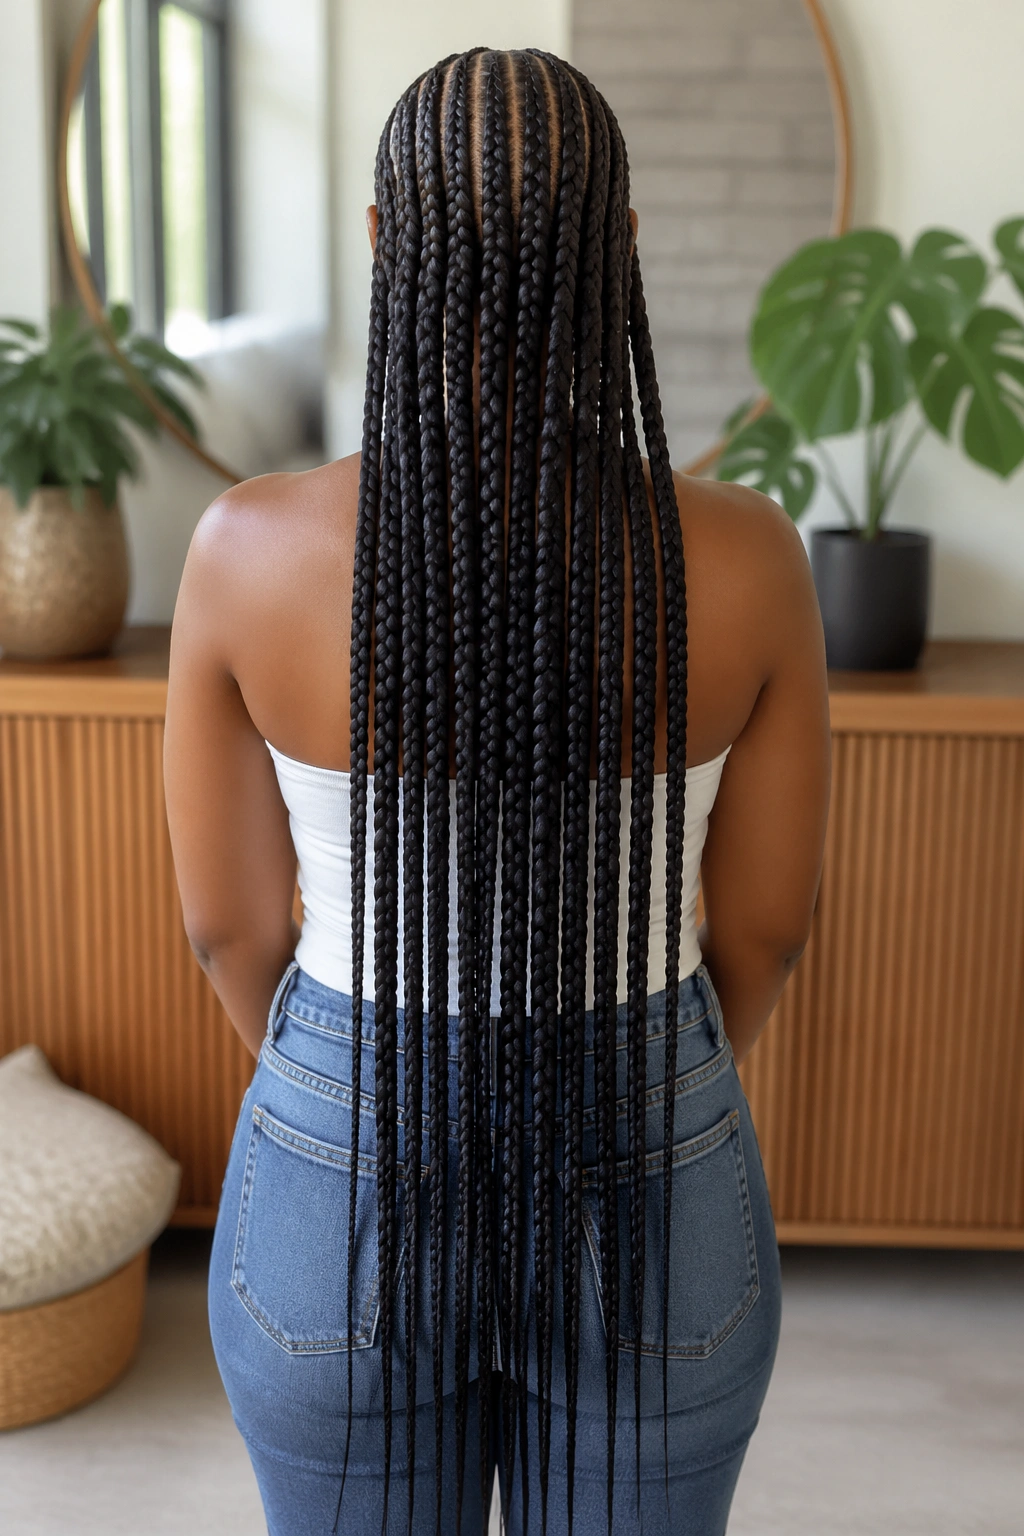
2. Feed-In Straight-Backs With Waist-Length Ends
Feed-in extensions on 4C solve two problems at once. They add length, and more importantly, they hide the density transition at the nape where 4C often thins naturally.
Feed-ins work on 4C because the texture grips the kanekalon immediately. You don’t get the slipping you sometimes see on looser curl patterns, where the extension fiber slides free during the first braid pass. On 4C, the coils lock around the synthetic fiber on contact.
The technique: start the cornrow with your natural hair alone for the first inch, then feed in small pieces of pre-stretched kanekalon in increasing sizes. The first feed-in is about two grams. The next is four. By the third feed, you’re adding eight grams per section and the braid starts to thicken gradually instead of popping up fat at the hairline.
Waist-length feed-ins sit between 32 and 36 inches of finished length. That’s longer than it sounds. The braids will brush your lower back when you sit, and the weight distribution needs to be even or you’ll feel pulling at the crown by day three.
Pre-stretch your kanekalon before feeding. Shake out the pack, pull it gently by hand, and dip the ends in hot water for two seconds. This removes the wire-straight look and helps the extension blend with the 4C shrinkage pattern along the braid.
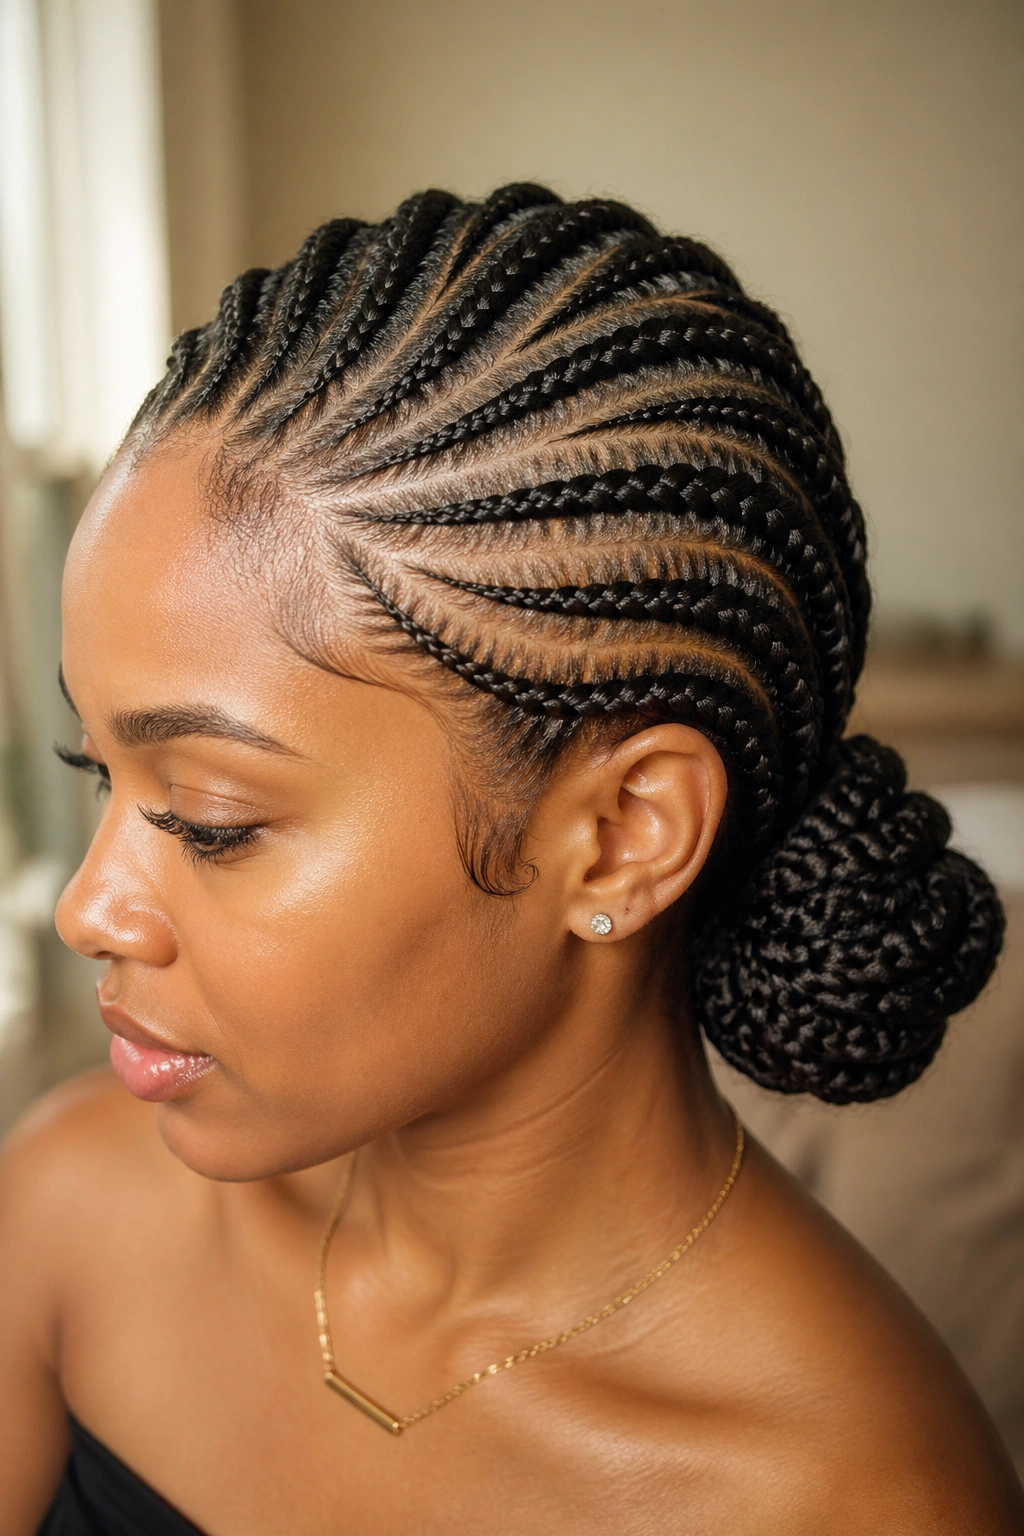
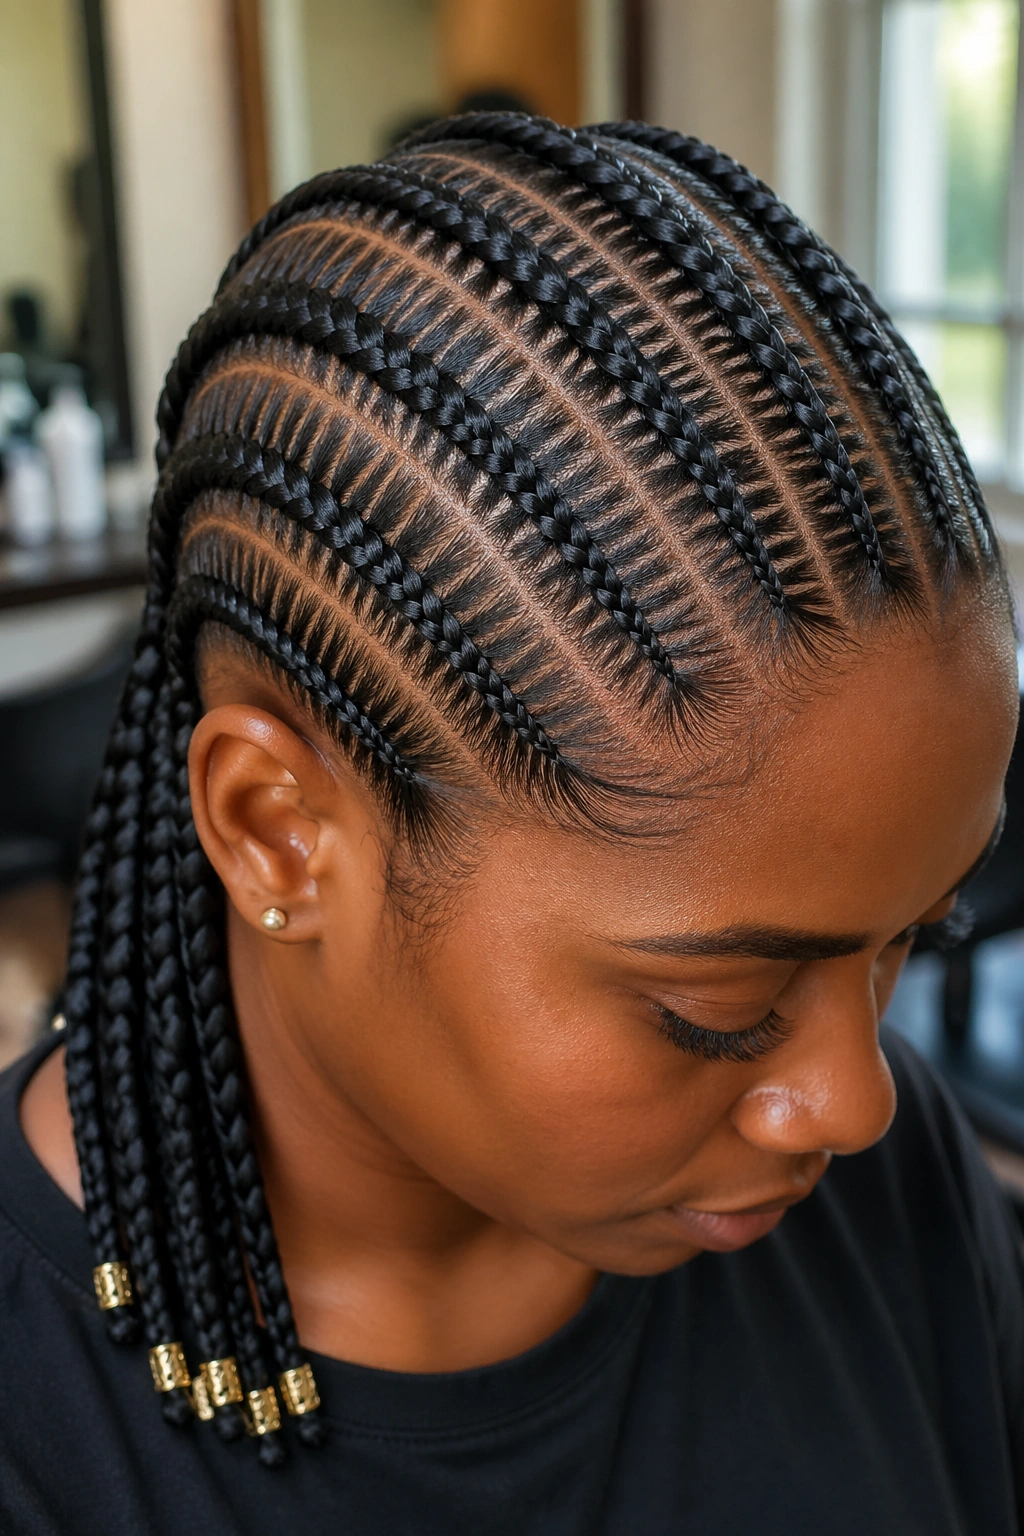
3. Stitch Cornrows With Micro Detail
Ever seen cornrows that look like they have little bars running across them, almost like piano keys? Those are stitch cornrows, and on 4C they’re a revelation.
The stitches are created by pulling thin sections across the braid as you go, which creates the horizontal lines visible on the surface. On 4C specifically, the texture holds these stitches tighter than on any other hair type. They don’t fuzz out the way they do on looser patterns.
How to Style It
Lean into the detail. Keep the back simple — six to eight stitch cornrows going straight back — so the eye focuses on the texture rather than complicated parts. Add gold cuffs at the tip of each braid, or let the ends hang free if you’ve used feed-ins.
The time commitment is real. A full head of stitch cornrows on 4C takes four to six hours depending on braider speed. It’s worth it for special occasions, work events, or any time you want cornrows that look like they cost three times what you paid.
Maintenance is where stitch cornrows shine on 4C. The tight texture keeps the stitches visible for the full two to three weeks. By week three on looser hair, the stitches blur into the braid. On 4C, they stay sharp.
4. Lemonade Braids With Side Sweep
A brief scene: someone at the salon shows you a phone picture of Beyoncé in the Lemonade visuals and asks if that’ll work on her 4C. The answer is yes — with adjustments.
Lemonade braids are side-swept cornrows that start at one ear, curve across the crown, and flow down the opposite shoulder. The asymmetry is the whole point.
On 4C, the curve of the braid pattern needs wider parts than on looser textures because the density wants to fight the direction. If your parts are too narrow, the braid rolls inward and the clean curve becomes a lumpy diagonal.
- Start with the front section sectioned off separately — this is your “side”
- Part diagonally from the crown down to the opposite temple
- Begin the braids at the part line, not at the hairline, to get the curving motion right
- Use feed-ins to add length and weight on the sweeping side
The closing insight most articles skip: Lemonade braids put more tension on one side of the scalp than the other. Alternate which side you wear the braids on if you do this style back-to-back. Otherwise you’ll notice thinning at one temple after a few months of consistent side-sweeps in the same direction.
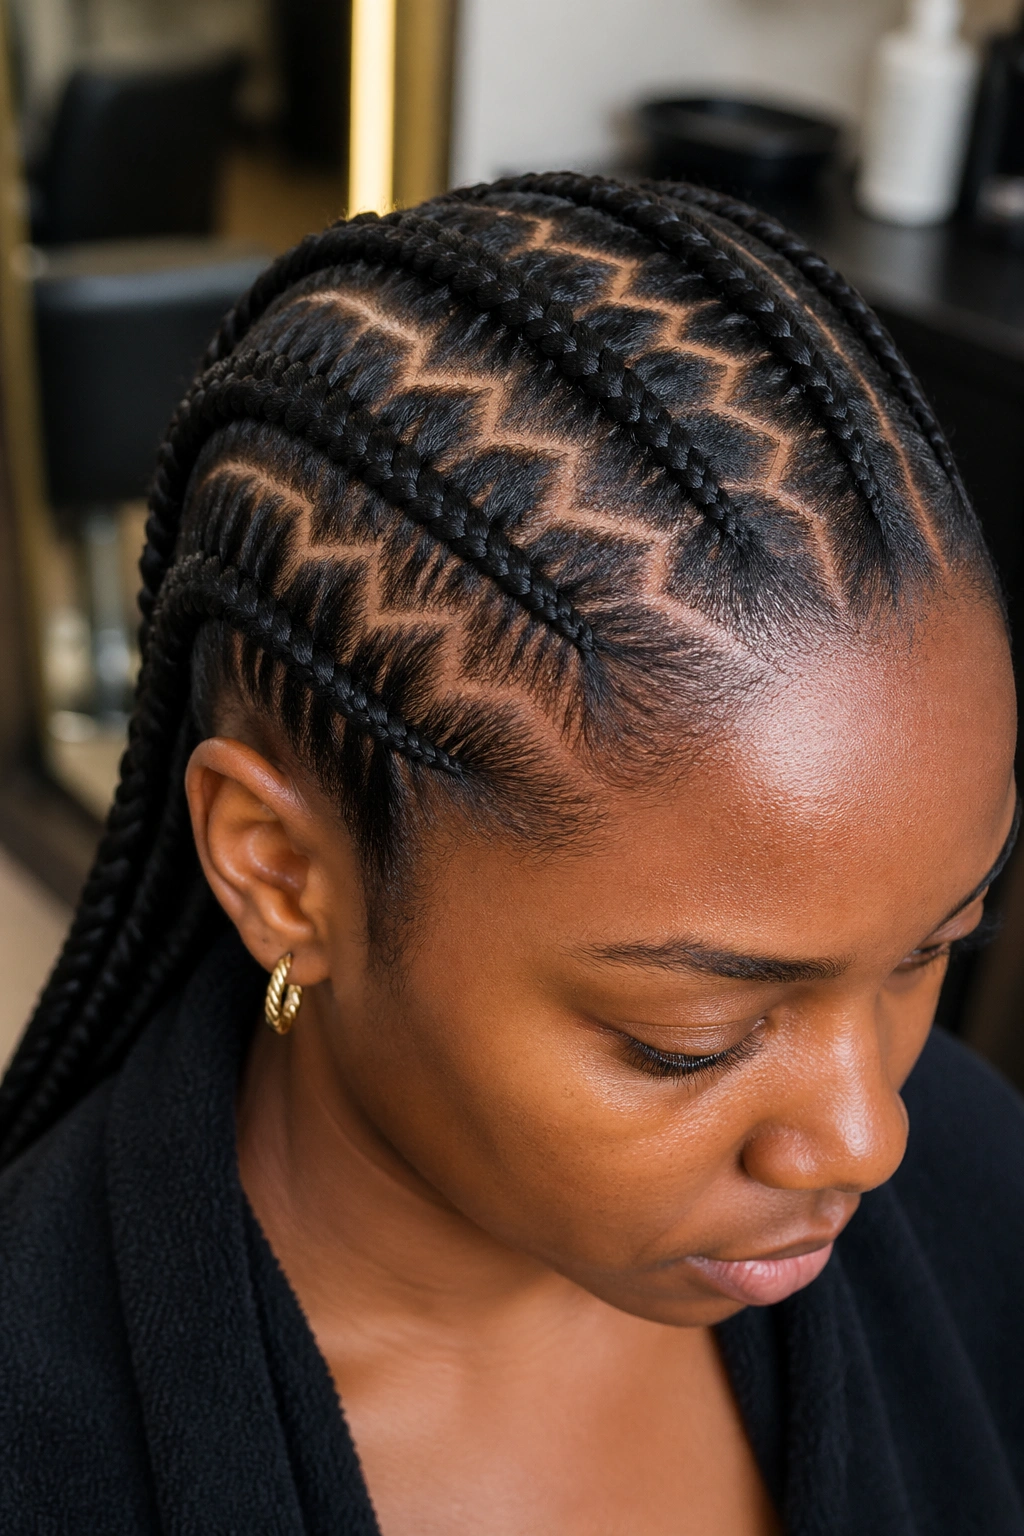
5. Zig-Zag Parts With Straight-Back Braids
Zig-zag parts turn a basic straight-back into something that reads intentional and intricate without adding hours of braiding time. The parts do the heavy lifting.
Mark three to four anchor points along each diagonal. Connect them with the rat-tail comb in firm, confident strokes. The zig-zag can run horizontal across the head or vertical from hairline to nape — both work on 4C, but vertical is more forgiving for beginners.
4C holds zig-zag parts well because the coils stay in their lane once parted. On looser textures, hair from adjacent sections tends to creep back across the part as the wearer moves around. That almost never happens on 4C.
Aim for sharp zig-zag angles, not soft curves. The contrast between the crisp geometric parts and the soft coil pattern of 4C edges is what makes this style work visually.
6. Jumbo Cornrows — Three Braids Only

Three cornrows. That’s it. One down the center, one on each side.
Jumbo cornrows on 4C read bold and minimal at the same time. The parts are about two to three inches wide, which means each braid carries a huge amount of hair. On lower densities this looks thin and sad. On 4C, it looks commanding.
Expect the braid itself to be roughly an inch thick at the root and taper to about half an inch at the ends. If you’re adding feed-ins, keep them modest — too much kanekalon on a three-braid style tips it from minimal to costume-y fast.
Jumbo cornrows are a great protective choice for workout weeks. The big sections mean less time in the chair (two hours max for a full head), and takedown is a breeze — under 10 minutes usually.
7. Side Cornrows With Braided Bun
Unlike freehand buns that pile loose hair on top, a side-cornrow bun uses braids as the structural base. The bun becomes part of the design rather than an afterthought.
What’s different: the cornrows don’t end at the crown. They continue into the bun itself, coiling around each other to form the shape.
Best for: anyone who wants a protective style that reads polished enough for a wedding, work event, or formal setting but stays cornrow-based rather than crossing into full updo territory.
My recommendation: ask your braider to leave the last three inches of each cornrow un-plaited if you want a softer, more voluminous bun. Fully braided ends create a tighter, more sculpted bun. Either works — it’s a texture preference.
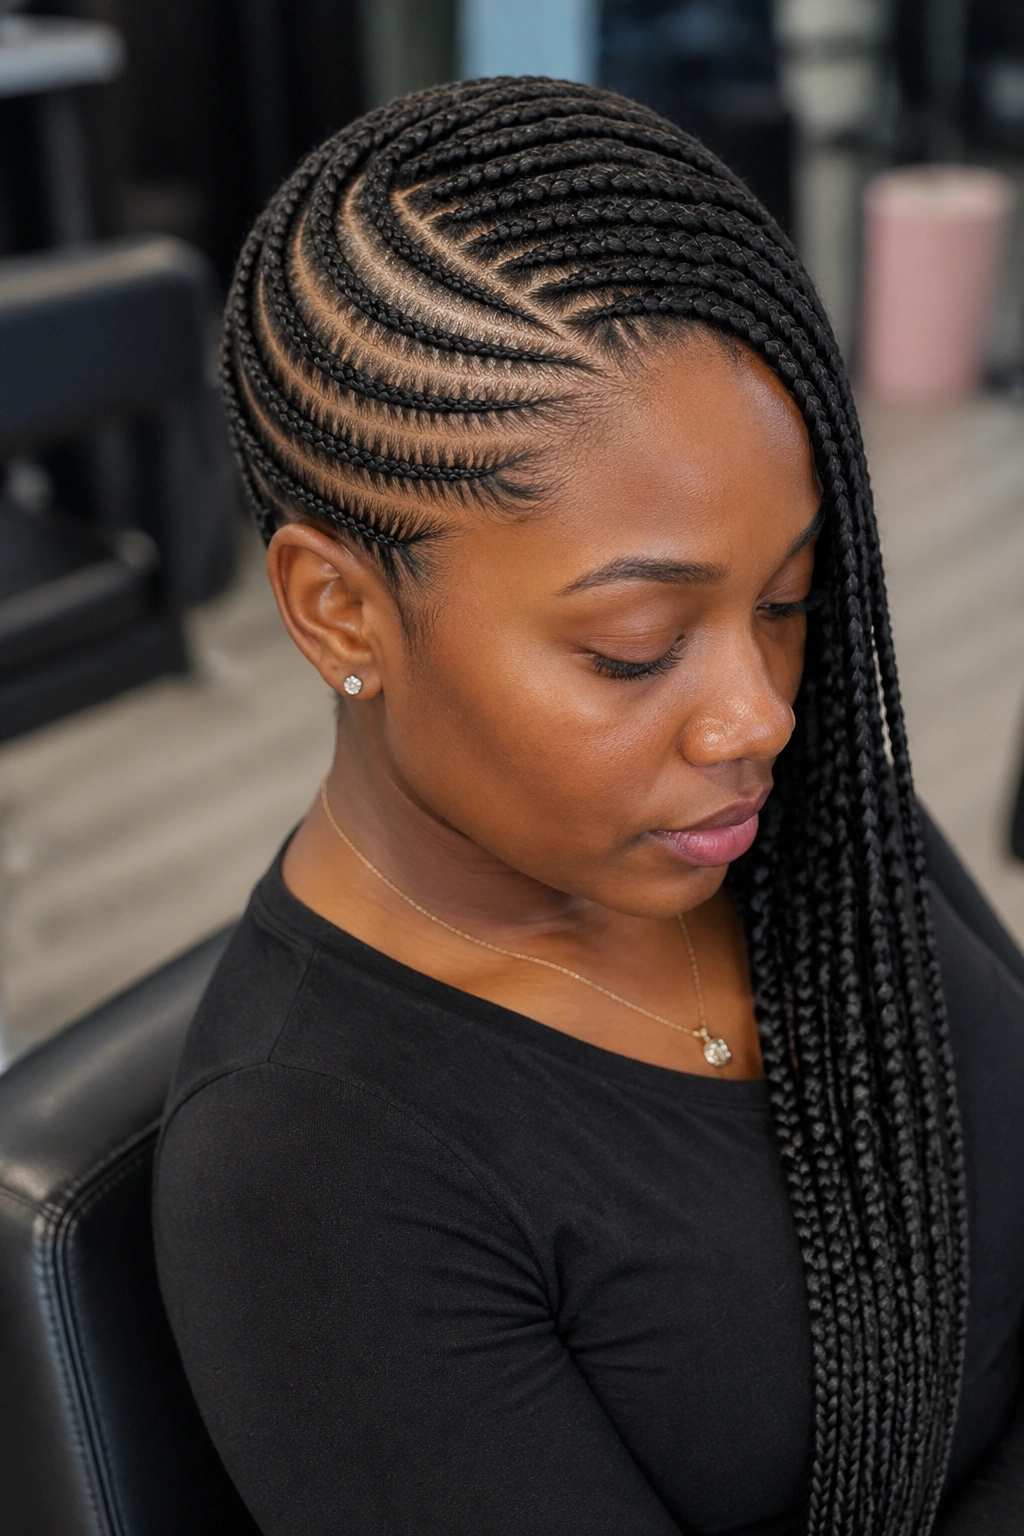
8. Cornrows With Swirling Crown Pattern
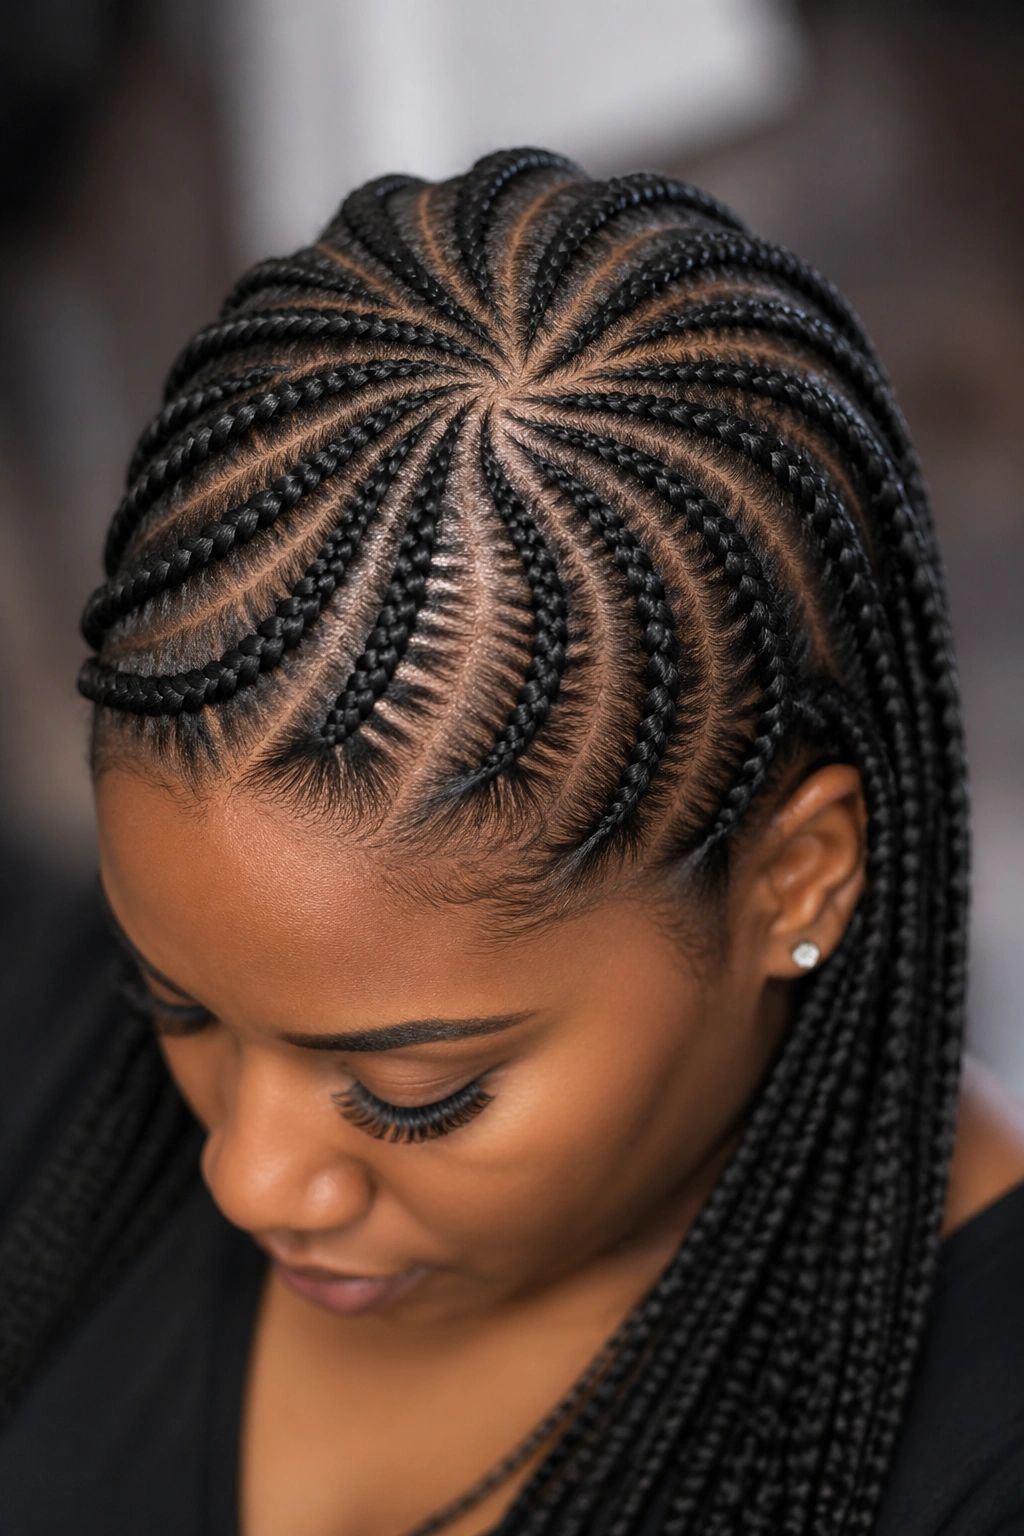
A swirl pattern on the crown turns a basic cornrow set into something architectural. The braids radiate outward from a central point like spokes on a wheel, or they spiral inward in concentric loops.
The parts need to be planned before the first braid starts. Mark your center point with a small dot of edge gel or a colored clip. From there, draw the spiral lines with your rat-tail comb, checking symmetry from multiple angles.
On 4C, the crown tends to be the densest area of the head. This is an advantage for swirl patterns because the braids stay full even as they curve. On thinner textures, the middle of the spiral often looks sparse.
The rest of the head — the sides and nape — can be simple straight-backs that flow into the spiral. Don’t compete with the crown. The swirl is the focal point; everything else supports it.
Takedown on swirl patterns takes longer than straight styles. Budget an extra 15-20 minutes because the curves mean you can’t work sequentially the way you can with parallel braids.
9. Half-Up Cornrow Crown
Only the top half is cornrowed. The bottom half stays loose, blown-out, or in a defined twist-out.
This style works beautifully on 4C that’s been stretched. The cornrowed crown section creates a clean, structured top while the loose lower section shows off the texture and volume of 4C at its fullest.
The Catch
The loose section needs real definition or the style reads unfinished. A two-strand twist-out the night before braiding gives the loose portion shape without relying on excessive product.
Keep the crown cornrows small — four to six braids max. Larger braids make the transition from cornrow to loose hair look abrupt instead of gradual. Smaller braids blend into the loose section more naturally.
Half-up styles are ideal for hot climates or workout weeks when you want a protective style but aren’t ready to commit to a full head of cornrows. The loose section gives airflow and lets you refresh with a quick re-twist overnight.
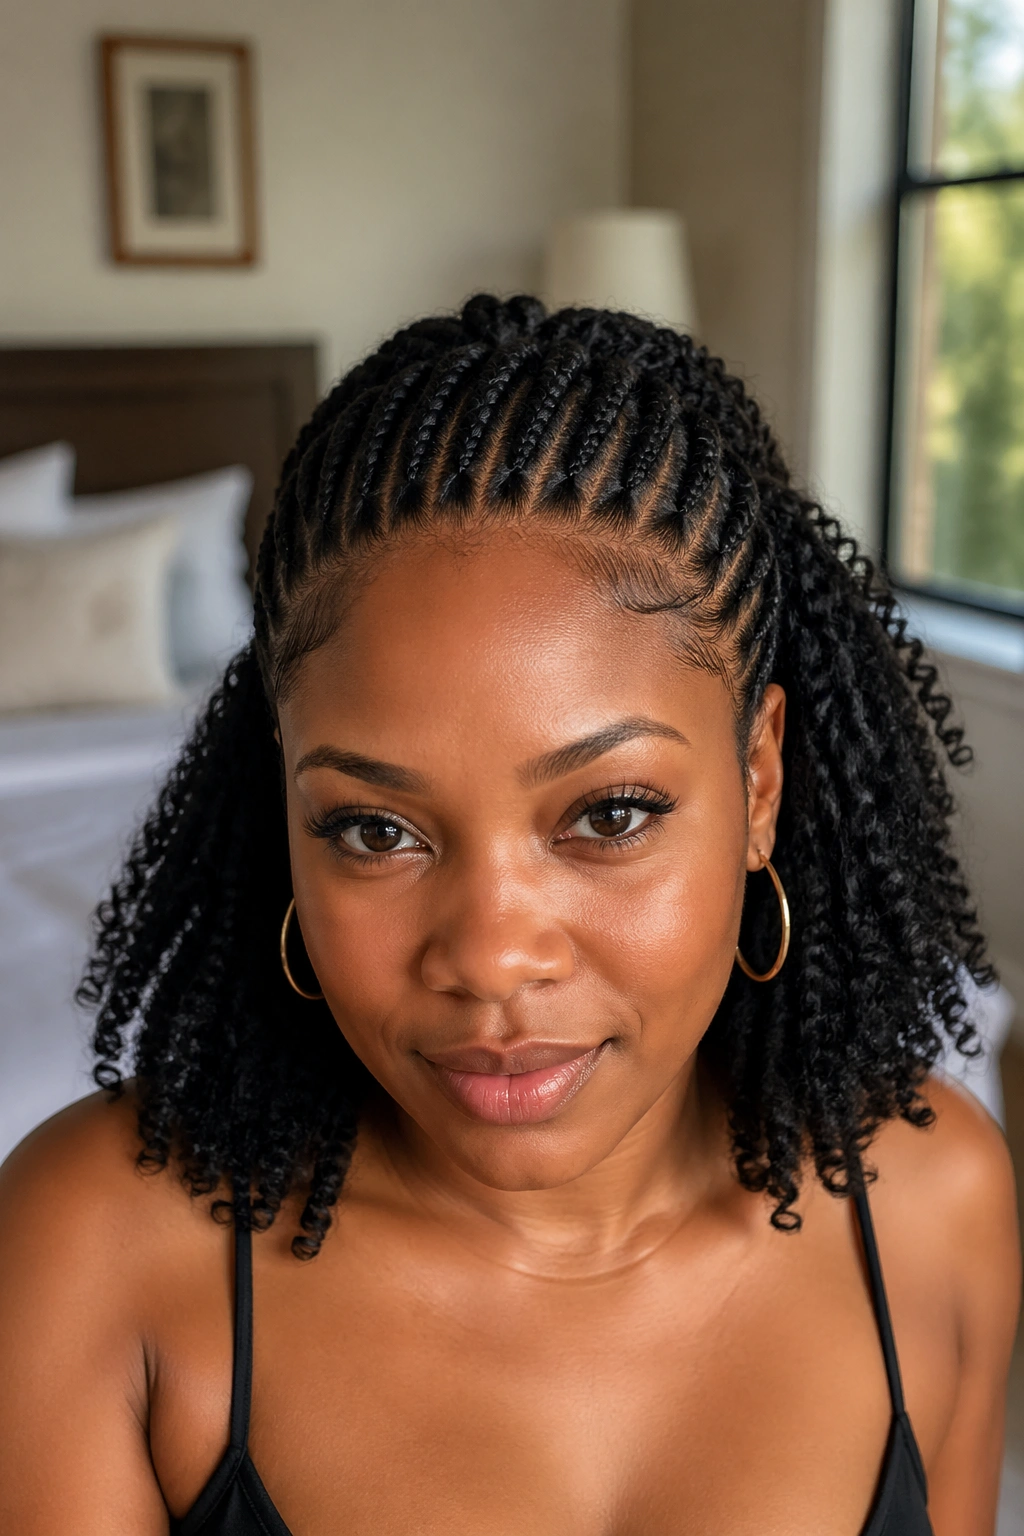
10. Cornrows With Kinky Curly Feed-Ins
Most feed-ins use straight kanekalon. Kinky curly feed-ins match the natural texture of 4C instead of fighting it.
The extensions come pre-textured in coil patterns that range from 4A to 4C. Match your own texture as closely as possible. Too loose and the extension stands out; too tight and the blend doesn’t work either.
Start the cornrow with your natural hair, then feed in the kinky curly extension. Braid for about 4-5 inches, then leave the rest of the extension unbraided and curly. The ends puff out into a natural-looking flare that blends seamlessly with the feed-in portion.
This works especially well for anyone transitioning from relaxed to natural, or for protective styling while letting new growth breathe without visible line demarcation between natural and extension.
The downside: kinky curly extensions tangle more than straight ones. Detangle nightly with a wide-tooth comb and fingers before bonnet. Skip this step and by day 7 the ends will look matted.
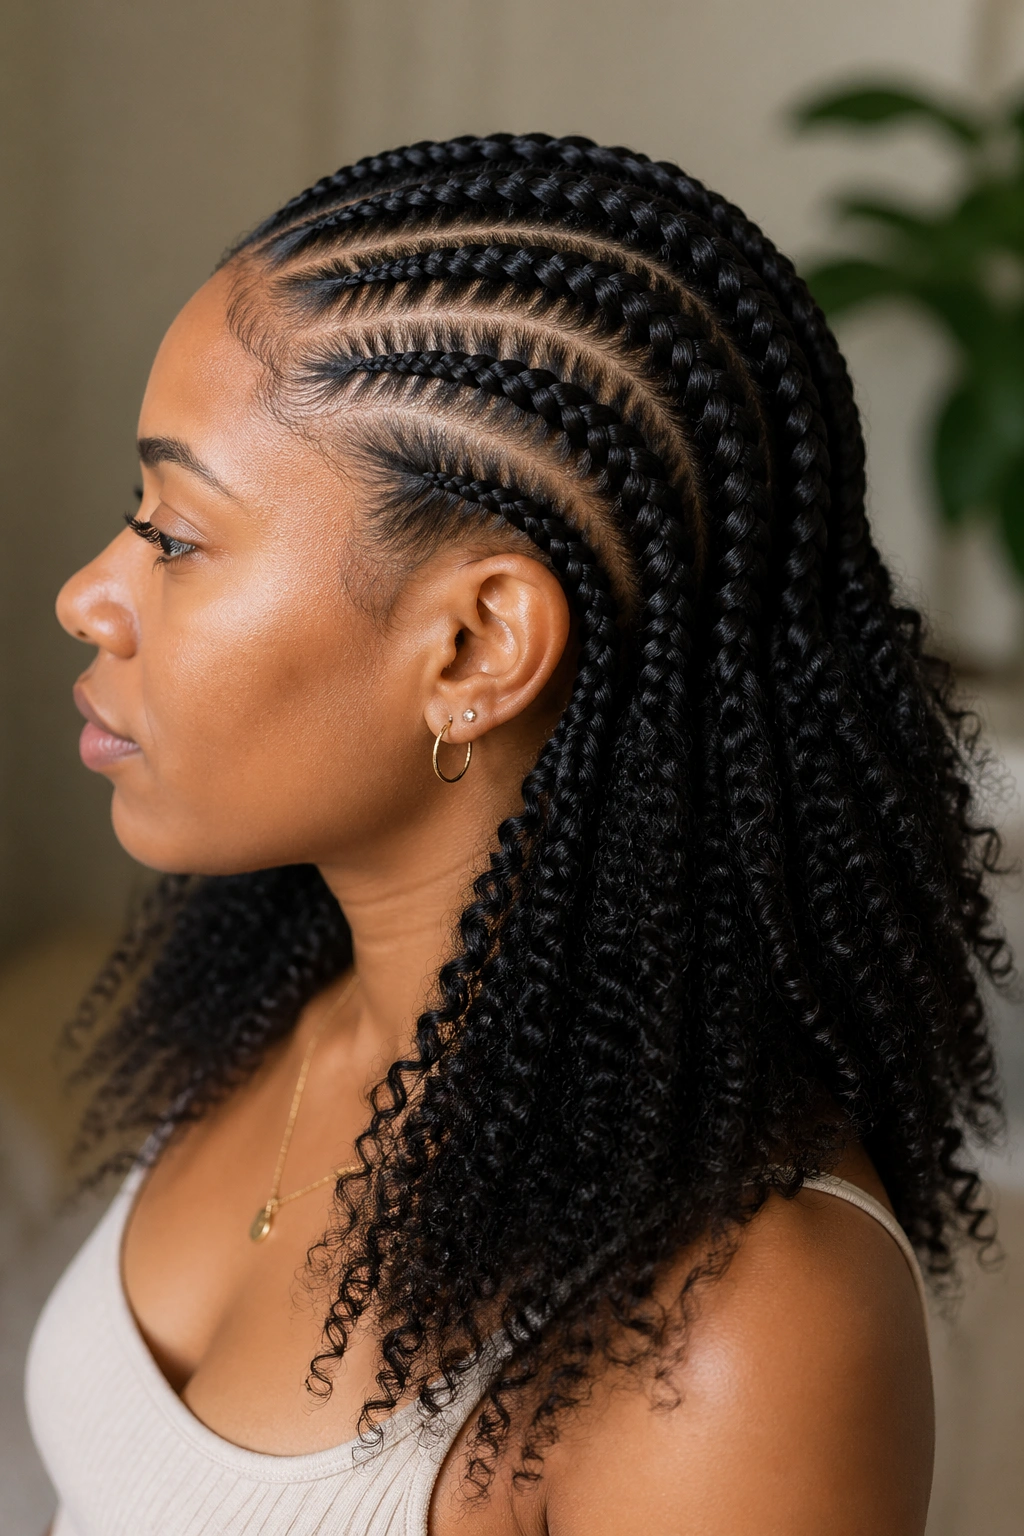
11. Goddess Braids With Curly Hair Bulk
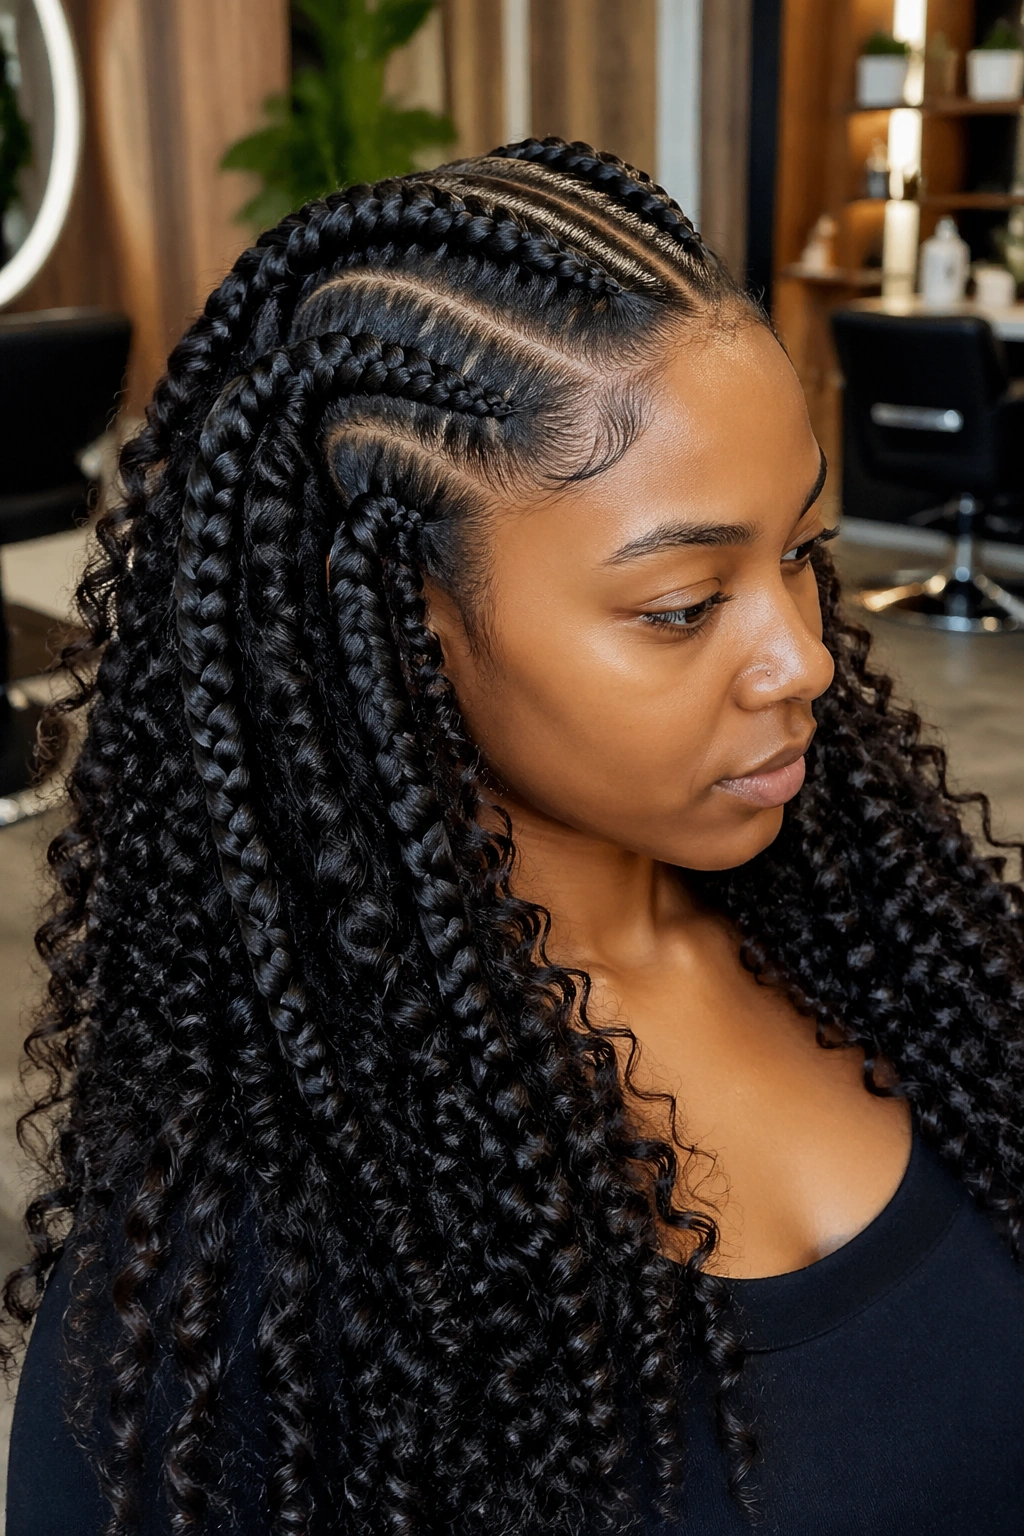
Goddess braids sit in a different category than standard cornrows because of the bulk and the curly accents. On 4C, they work because the natural texture amplifies the fullness.
The base cornrow is chunky — bigger than Lemonade braids, closer to jumbo size. Curly human hair is added at intervals along the braid to create cascading curls that spill out between the woven sections.
A quality note: use human hair for goddess braids, not synthetic curly. The synthetic curly extensions get frizzy within 48 hours and unravel by day 7. Human hair holds the curl pattern for the full life of the braid.
Plan for six to eight goddess braids total. More than that and the curly bulk becomes overwhelming; fewer than that and the style loses its signature look.
Goddess braids are heavy. Really heavy once you add the curly human hair bulk. Expect your neck and shoulders to ache for the first two days as your body adjusts to the added weight.
12. Criss-Cross Cornrows
Criss-cross is exactly what it sounds like: two sets of cornrows that cross over each other on the crown or along the side, creating woven, basket-like patterns.
Start with your base cornrows going one direction — diagonal left-to-right works well. Then create a second set going right-to-left, weaving them over and under the first set at the crossing points.
What to Watch For
- The crossing points need to be planned. Random crossings look messy
- Use bobby pins to hold the first set in place while you braid the second set
- 4C density can make the crossing points bulky — use smaller braids at the crossing zones to compensate
- Finish with edge control along the crossing lines to keep the geometric shape crisp
Criss-cross works best on medium to high-density 4C. Low-density hair doesn’t give you enough material to create clean crossings without the scalp showing through in awkward places.
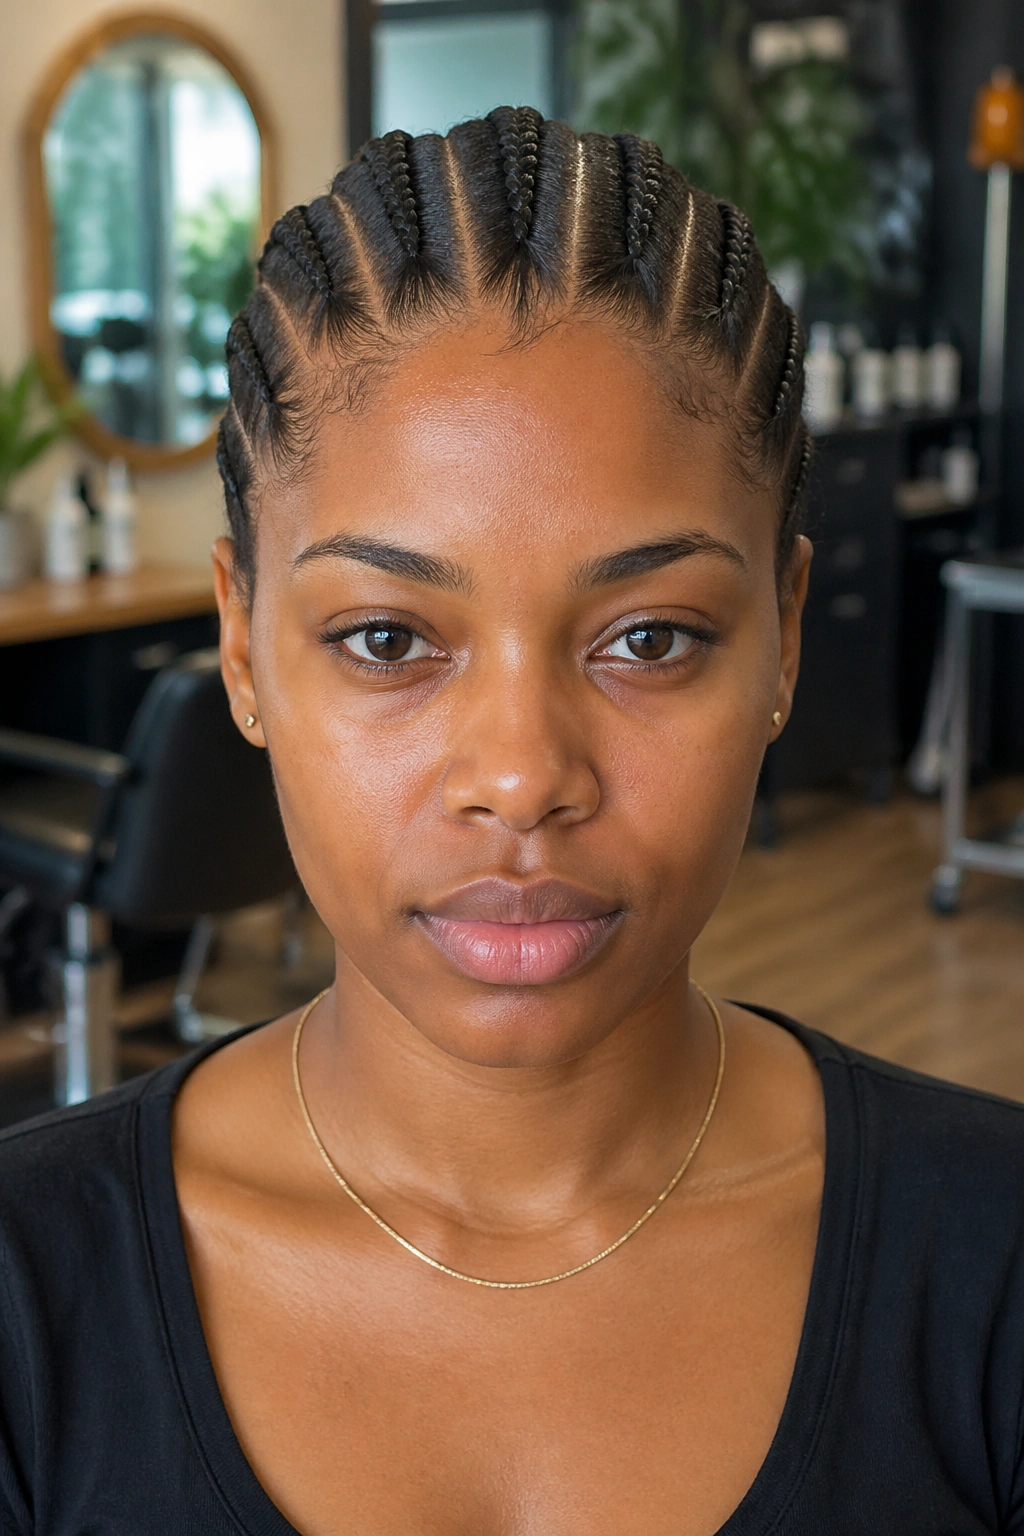
13. Small Cornrows All Over

Forty to sixty tiny cornrows covering the entire head. This is a commitment style — six to eight hours in the chair, two to three weeks minimum wear to justify the time investment.
The advantage on 4C: maximum scalp coverage, maximum protection, and a finish that reads elaborate without needing complicated parting patterns. The density of small braids is the design.
Parts are a quarter to half an inch wide. Expect your braider to use three-strand feed-in technique on the smallest sections because there’s barely enough hair per part to work with.
Wash days are tricky with small cornrows. Dilute shampoo 1:1 with water in an applicator bottle, work it through the parts with your fingertips (not nails), and rinse thoroughly with lukewarm water. Pat dry — never rub.
Small cornrows hold their shape longer than any other cornrow size on 4C. I’ve seen them look fresh at week four with proper scalp care and nightly bonnet wear.
14. Cornrows Into Ponytail
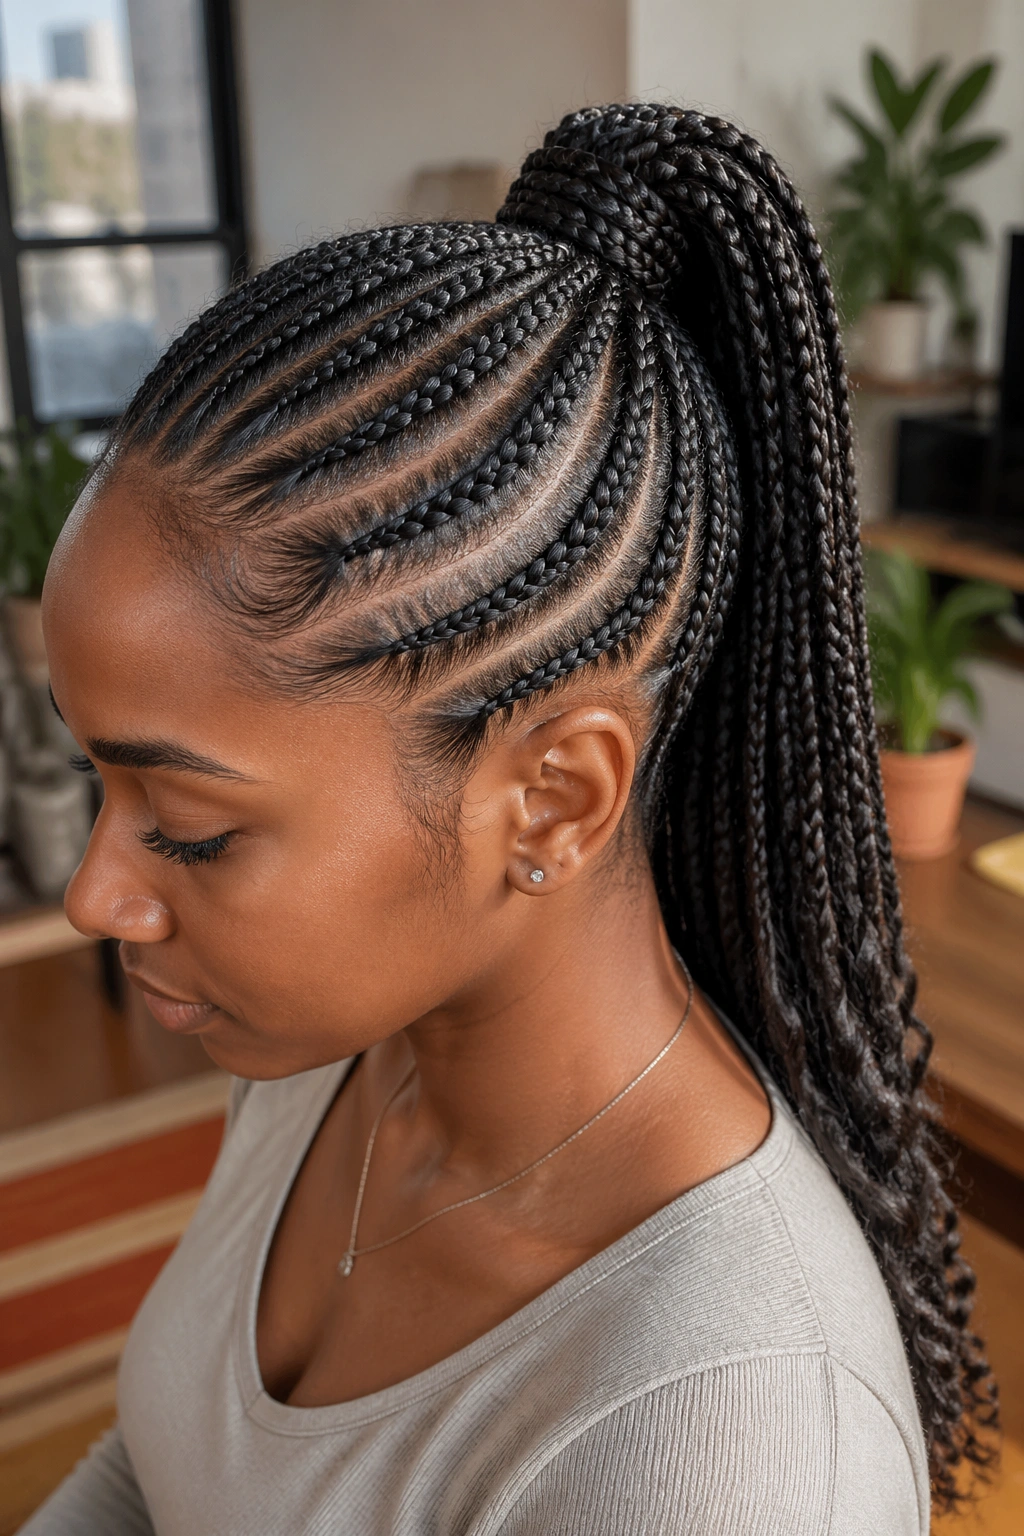
The front and sides are cornrowed back and collected into a high or low ponytail. The ponytail itself can be your natural hair (on stretched 4C), a drawstring piece, or a kanekalon wrap-around.
High ponytail placement sits between the crown and the top of the head — anywhere lower looks like an afterthought. Low ponytail placement sits at the nape or just above.
Pro tip that saves this style: the cornrow ends need to be tucked into the ponytail base, not left dangling underneath. Loose braid ends peeking out ruin the clean transition from cornrow to pony.
For added polish, wrap a small section of hair around the base of the ponytail to hide the elastic. Secure with a bobby pin tucked underneath.
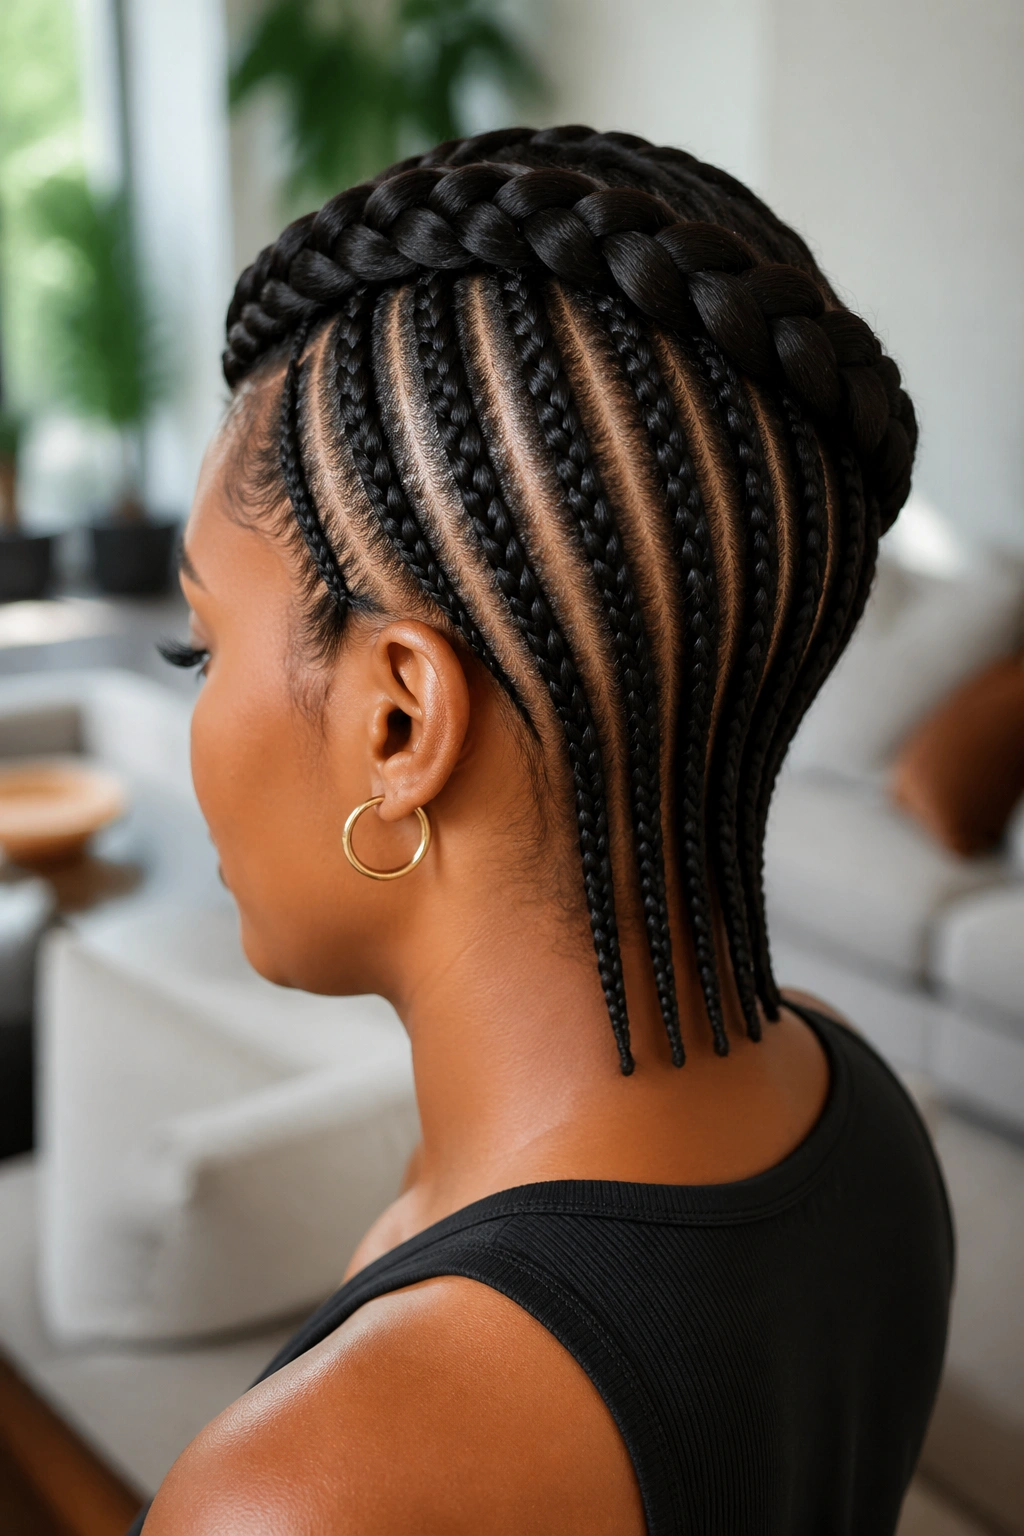
15. Ghana Braids With Tapered Ends
Ghana braids are a specific technique where each cornrow starts thin at the hairline and gradually thickens as it moves back. The name comes from the West African origin of the style.
On 4C, the taper is more pronounced because the hair density builds up naturally toward the crown. The starting point at the hairline uses just your natural hair. By the crown, feed-in extensions have added significant thickness. The visual effect is braids that look like they’re gaining substance as they flow back.
Six to ten Ghana braids is the standard count. Fewer than six looks too chunky; more than ten loses the taper effect because each braid ends up too thin.
The tapered ends can be left straight, curled with hot water, or capped with beads. I prefer hot-water curls — they soften the severity of the long braids and the curl pattern mimics 4C’s natural coil.
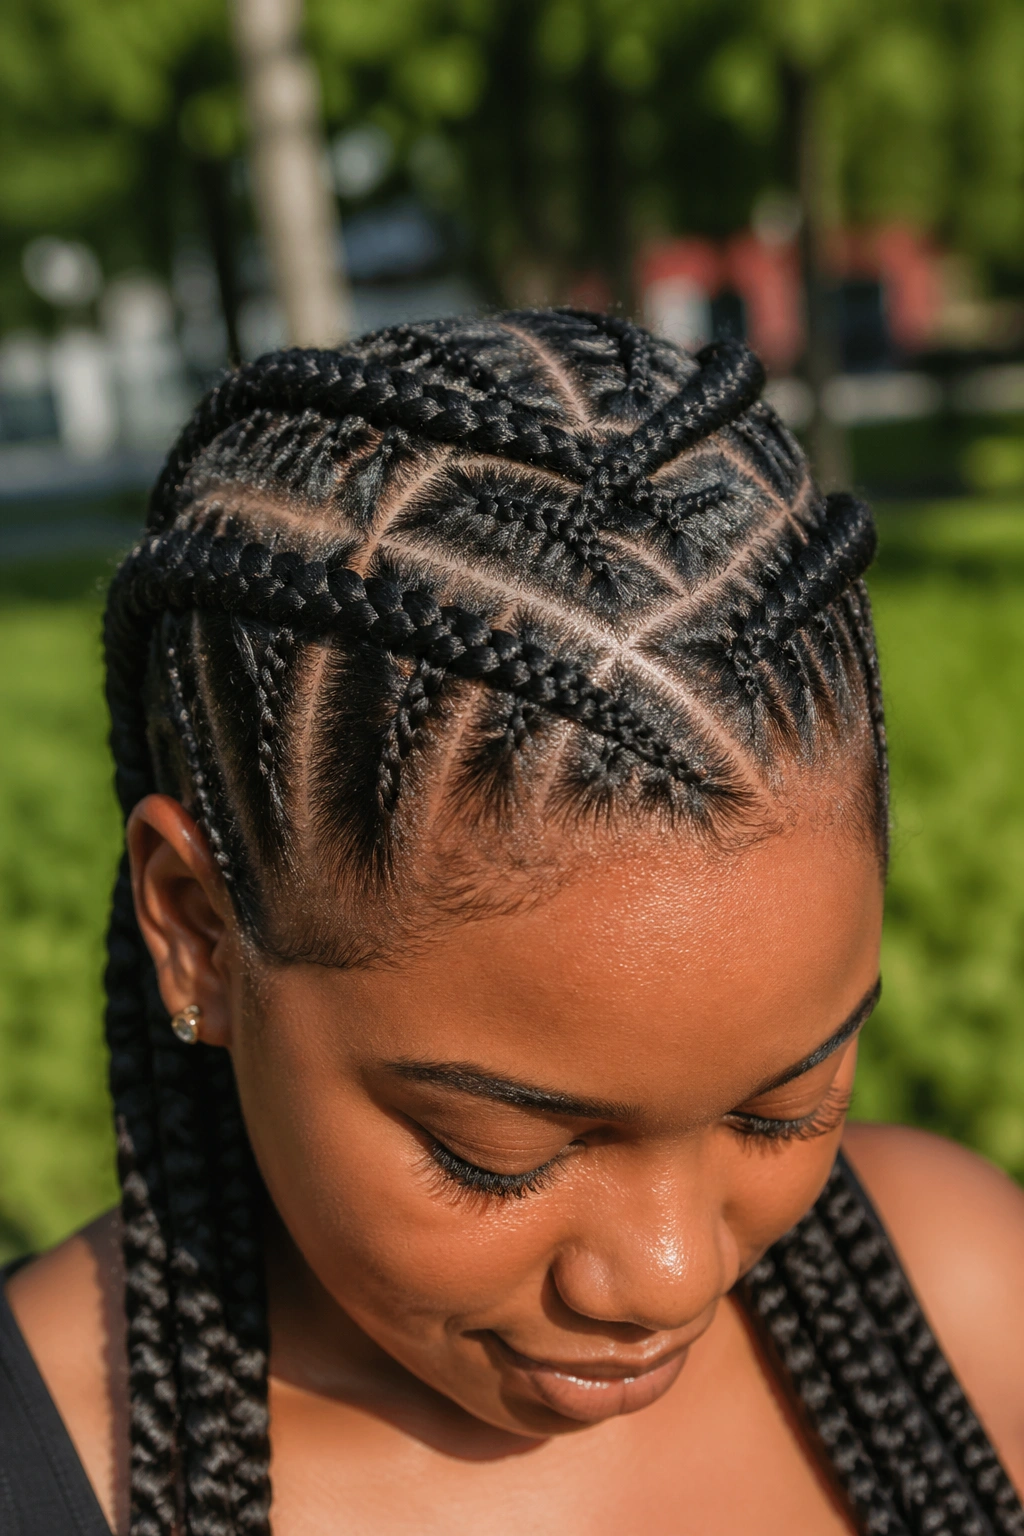
16. Cornrows With Triangle Parts
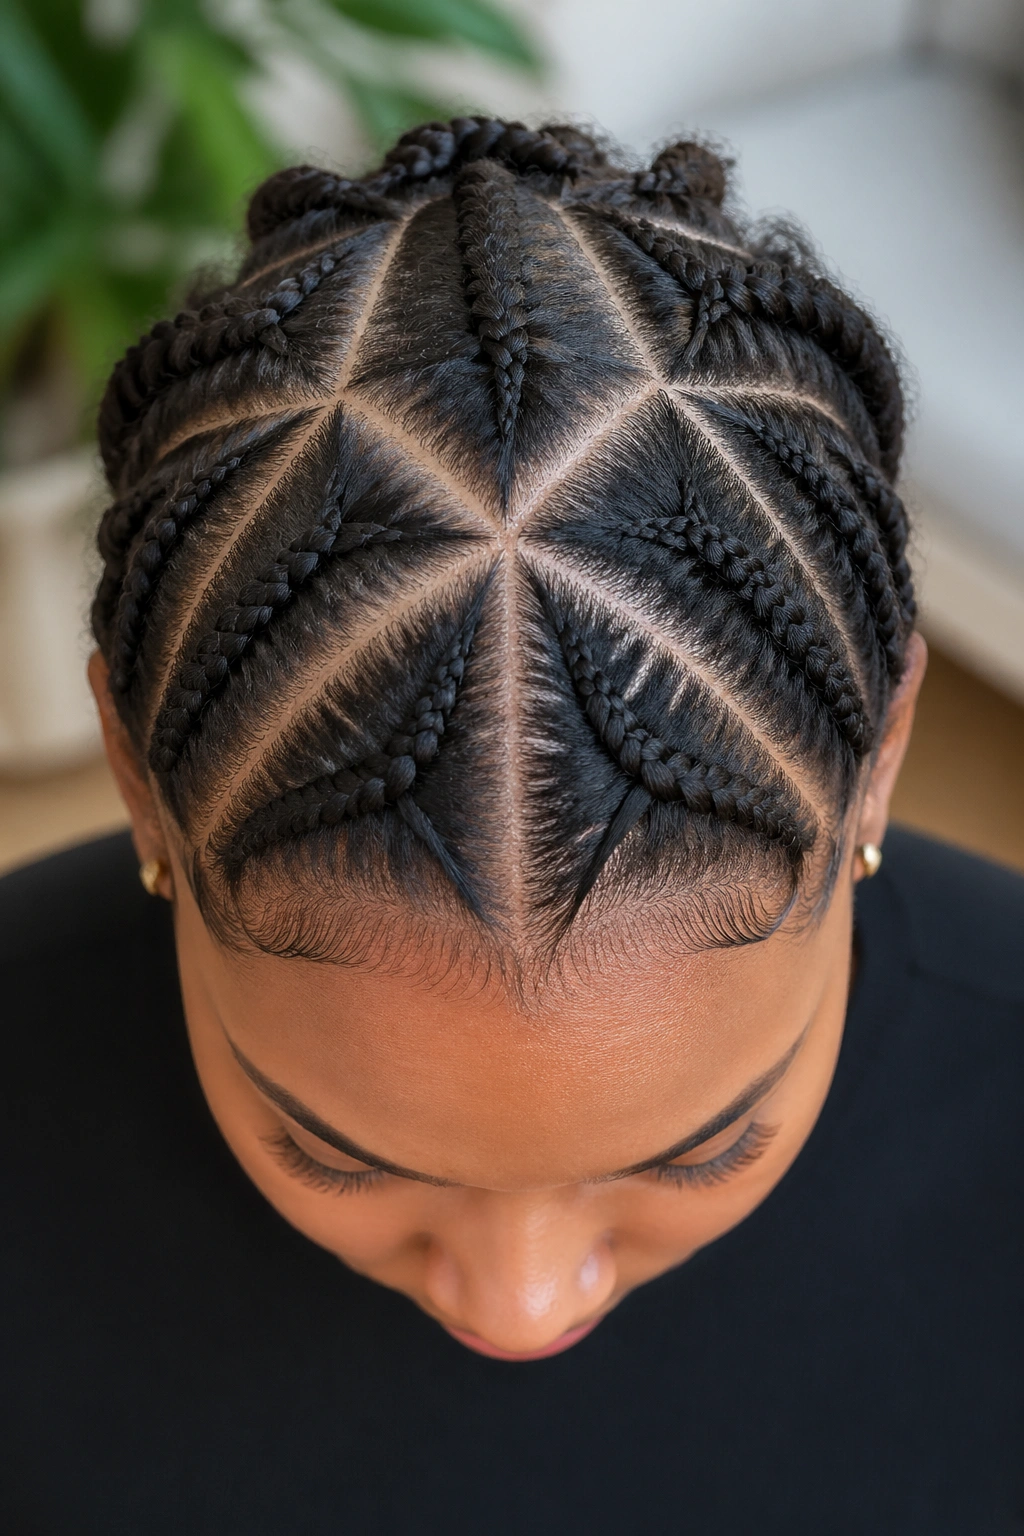
Triangle parts turn the scalp grid into a geometric pattern that’s visible even when the braids themselves are simple.
Each braid sits inside a triangle-shaped section rather than a rectangular one. The base of the triangle sits at the hairline or the nape, and the point meets at the crown.
Triangle parts work on 4C specifically because the texture holds the point of each triangle cleanly. Softer textures blur the point where three sections meet; 4C keeps it sharp.
Plan six to eight triangles total. Map them out with edge gel before the first braid — once you start braiding, you can’t easily adjust the triangle angles.
This style photographs exceptionally well from above, making it a favorite for content creators and wedding hairstyles where overhead shots are expected.
17. Halo Cornrows
One continuous cornrow that circles the entire head like a crown or halo. No start, no end — the braid feeds back into itself in a closed loop.
The technique is called crown braiding and it takes practice. Most braiders specialize in this style specifically because the circular motion is different from straight-line cornrow work.
On 4C, the halo works because the texture grips itself at the closure point. The end of the braid blends into the beginning without showing a seam, which is the whole point of the style.
Halo cornrows are low-maintenance once complete. No ends to worry about, no dangling braids to tuck or style. The whole thing sits close to the head and holds shape through workouts, sleep, and wash days.
This is a good style for anyone going through a big transition or recovery period — post-surgery, postpartum, during chemo regrowth — because it requires almost zero daily upkeep.
18. Crown Braid With Straight-Back Nape
The top of the head gets a single large braid that wraps across the front like a headband. Below that, straight-back cornrows flow down the back of the head.
This is a two-technique style. The crown braid uses natural hair only (no extensions in most cases), and the straight-backs underneath can be with or without feed-ins.
The visual effect separates the style into two clear zones: decorative crown on top, functional braids below. It reads elegant and old-world when done well.
Plan the crown braid first. It sets the starting point for the straight-backs below. If the crown is crooked, every braid under it will look off-center.
19. Cornrows With Beaded Ends
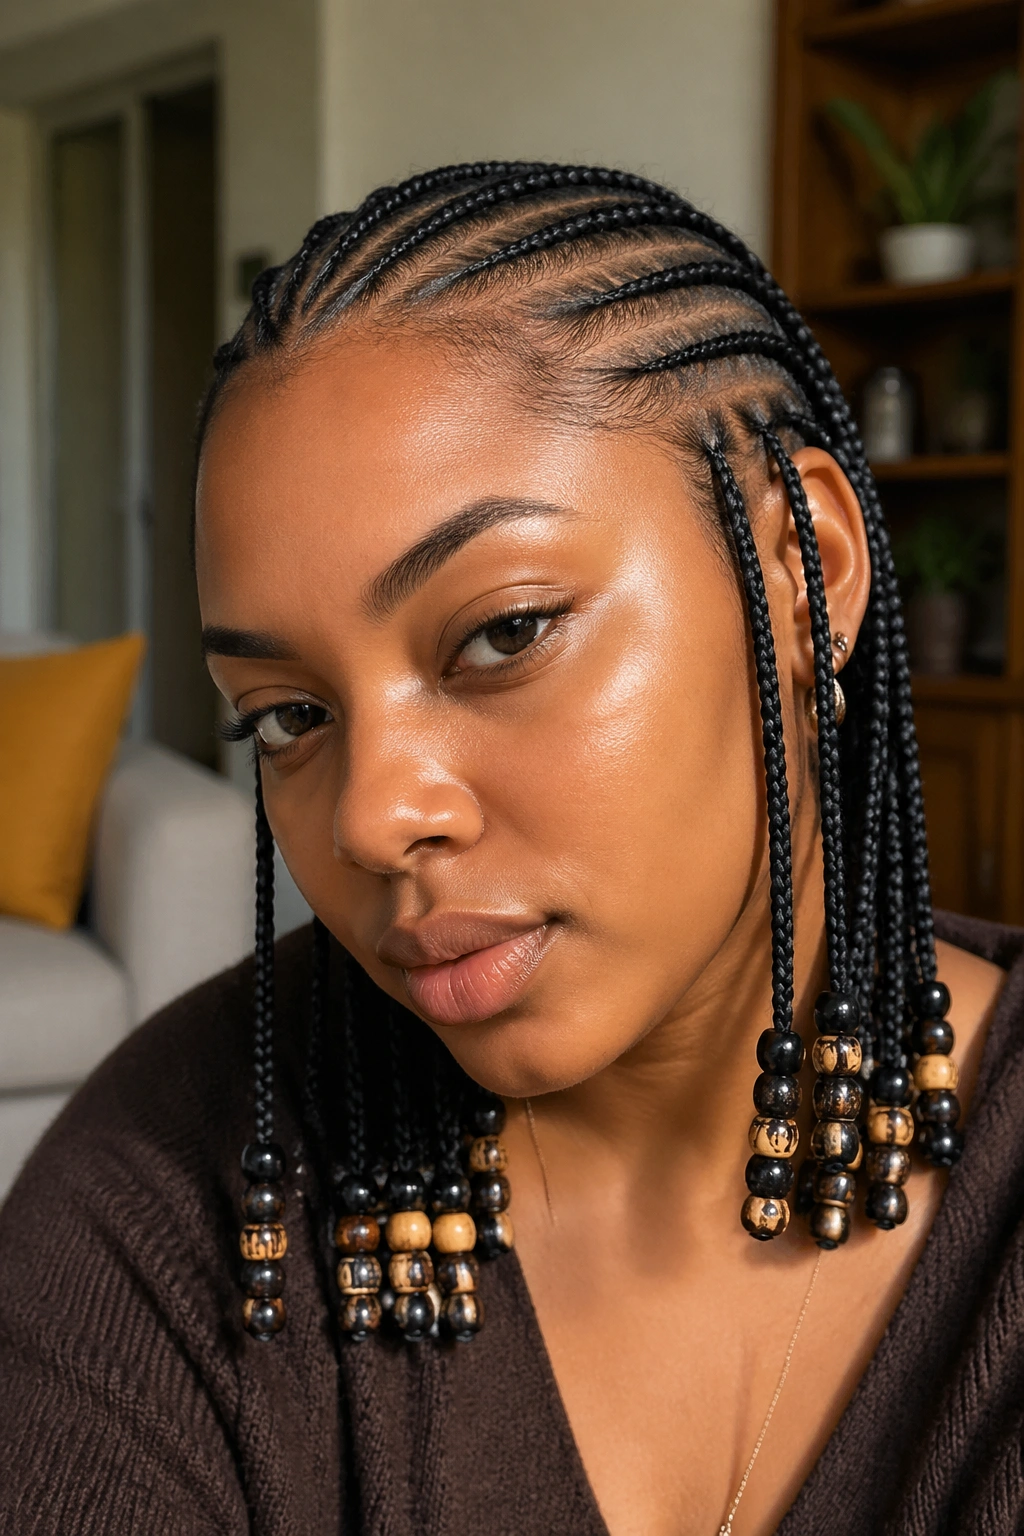
Beads transform cornrows from a braid style into jewelry. On 4C specifically, beads weight the ends and create movement that makes the braids swing rather than hang static.
Wooden beads are traditional and lightweight. Glass beads add more weight but can crack during sleep. Metal beads (cowries, cuffs) last longest but require careful placement to avoid scalp scratches.
Styling Tips
- Add beads in odd numbers on each braid — 3, 5, or 7. Even numbers look mechanical
- Vary the bead sizes within each braid: large at the top, medium in the middle, small at the tip
- Use a beader tool (looks like a small crochet hook) to thread beads onto finished braids. Manual threading damages braid ends
- Secure the bottom bead with a small elastic band to prevent the whole strand from slipping off
Beads work for every length from mid-back to waist-length cornrows. Shorter than shoulder-length looks sparse; longer than waist makes the weight uncomfortable.
20. Mohawk Cornrows
A mohawk cornrow style sends braids from the sides up toward a central ridge on top of the head. The sides can be cornrowed close or shaved.
On 4C, the mohawk works because the texture naturally stands up in the central section. You’re not fighting the hair to create height — it wants to be there.
The side cornrows should angle upward at about 45 degrees. Too flat and you lose the mohawk silhouette; too vertical and it looks like a single braid with side wisps.
The central top section can stay loose (for a puff effect), twisted, or braided in one large cornrow running front to back. Each creates a different vibe — puff reads soft, braid reads sharp.
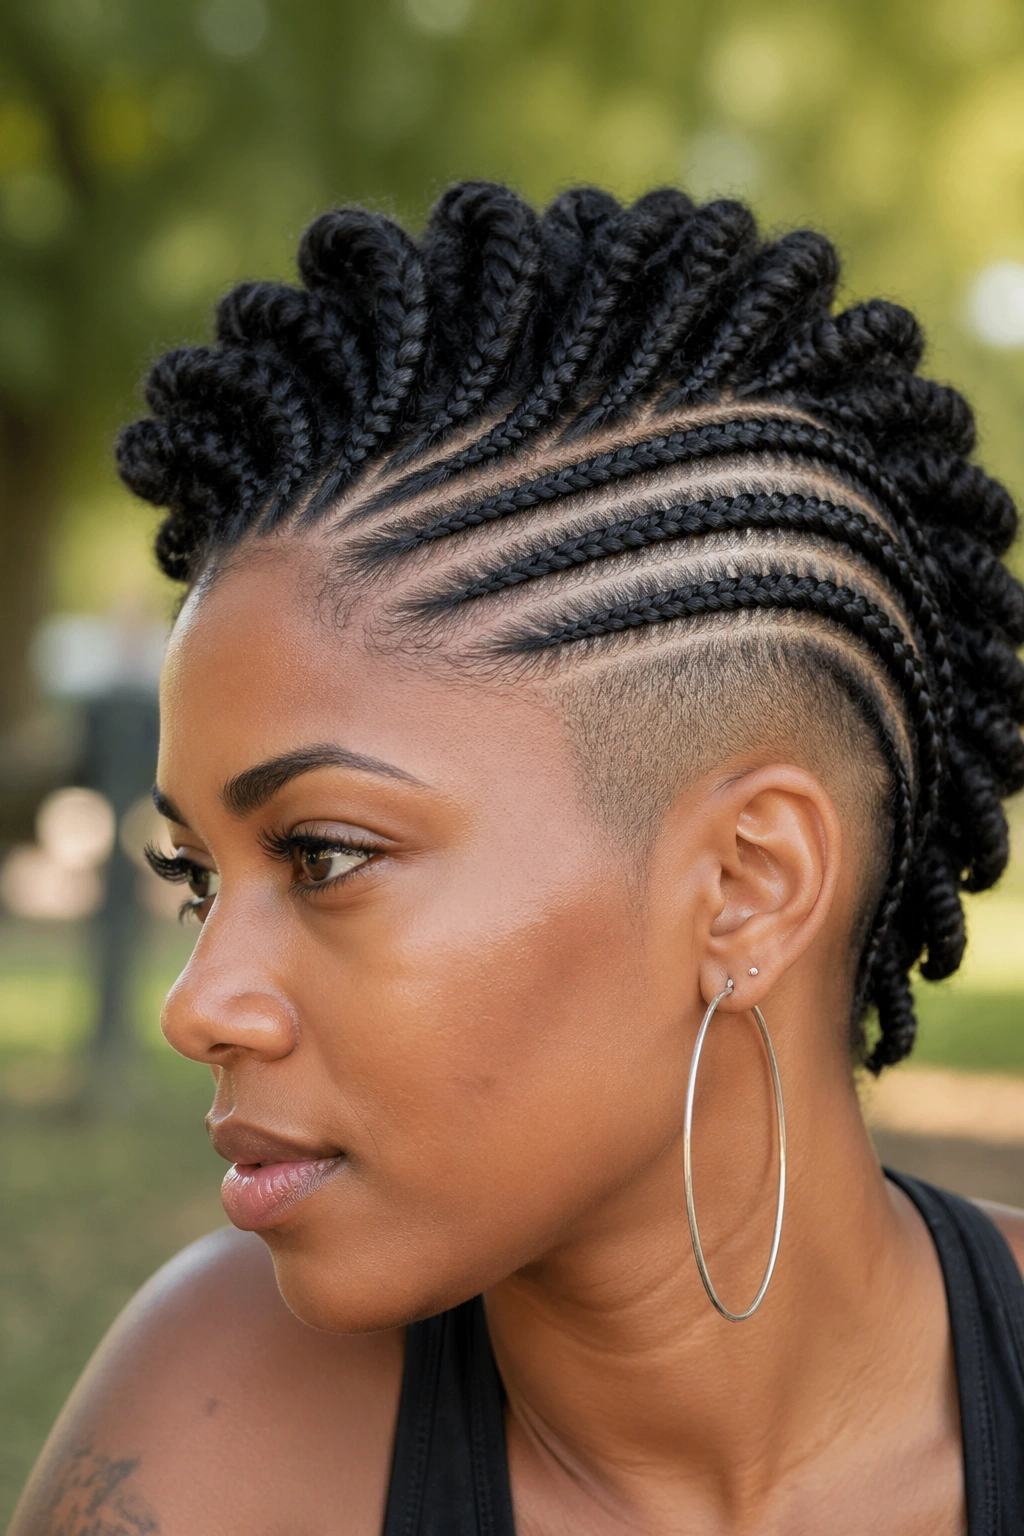
21. Cornrows With Shaved Sides
Shaving the temples and leaving cornrows on top is a bold look that works on 4C because the contrast between the shaved section and the braided section is extreme.
The shaved area can be clean (fully shaved) or designed with clipper patterns — straight lines, swirls, geometric shapes. Each creates a different energy.
Position the cornrows to start above the shaved line. The first braid should sit cleanly along the border, not dangle into the shaved section. Ask your braider to trim any loose strands that cross the line.
This style reads edgy, confident, and unapologetic. It’s not for everyone — but for the right person, nothing else hits the same.
Regrowth happens fast. Expect to touch up the shaved section every 2-3 weeks to maintain the clean contrast.
22. Dookie Braid Cornrow Hybrid
Dookie braids are thick, chunky individual braids — not cornrows. But a hybrid style cornrows the front and transitions into dookie braids at the nape.
The cornrowed front section keeps the style sleek and structured. The dookie-braided back adds volume and drama.
The transition zone is critical. The cornrows need to end in a way that flows smoothly into the individual braids. Most braiders will cornrow to the crown, then split each cornrow into 2-3 individual braids that continue down.
Who This Is For: anyone who loves cornrows but wants more visible texture and volume in the back. Great for photography, events, and stage performances.
The weight of dookie braids pulls on the cornrow bases. Don’t wear this style for more than 2-3 weeks maximum — the tension on the transition points can cause breakage if worn longer.
23. Asymmetric Cornrows
One side of the head has more braids than the other. One side has complex parts; the other has simple straight-backs. One side ends at the shoulder; the other ends at the waist.
Asymmetry creates visual interest without requiring complicated technique. It’s a lazy designer’s favorite move — looks intentional, takes less planning than symmetric patterns.
On 4C, asymmetric styles need to be balanced in volume even if the details differ. If the heavy side has five chunky cornrows, the light side should have eight smaller ones to keep the overall silhouette proportional.
The parting line between the two sides can be straight, zig-zag, or curved. Zig-zag adds the most drama; straight reads cleanest; curved reads softest.
24. Tribal Pattern Cornrows
Tribal patterns draw from West African, East African, and diaspora design traditions. They include intricate parts, braid-within-braid techniques, thread wraps, and bead accents.
This isn’t a single style — it’s a category. Each braider brings their own regional influence. Ethiopian albasso patterns look different from Nigerian suku styles or Fulani braid traditions.
Do your research before booking. Bring reference photos that match the specific tradition you want to honor. A good braider will tell you whether they have experience with that style or refer you to someone who does.
Respect matters. Tribal patterns have meaning within their cultures of origin. Wearing them is a celebration, not a costume — and knowing the history adds depth to the experience.
25. Curved Cornrows With Scalp Bun
The final style combines curved cornrow patterns with a small bun at the crown where all the braids meet. The result looks like a waterfall flowing into a small pool.
Each cornrow follows its own curved path from the hairline to the crown. The curves don’t match each other — some sweep left, some sweep right, some loop around — creating a flowing, organic pattern.
At the crown, all the braids gather into a single point and either get tied into a small bun or extended into feed-ins that cascade down the back.
This is an advanced style. Budget 5-7 hours for a full head, and choose a braider who specializes in curved patterns rather than straight-back work.
The finished look is sculptural. Each braid reads as a separate design element rather than one of many parallel lines. It’s the kind of style that turns heads and earns comments for weeks.
Maintaining Cornrows on 4C Hair
Daily care is the difference between cornrows that look fresh at week three and cornrows that look tired at week one.
Every night, wrap with a satin or silk bonnet. Cotton pillowcases strip moisture from both your natural hair and any extension fibers, and the friction causes fuzzing along the braid shaft.
Every morning, check your parts. If you see lifting at the base of any braid, spritz lightly with water mixed with leave-in conditioner and press the section flat with your fingertips for 30 seconds. Don’t tug — just hold.
Scalp needs attention twice a week minimum. Use a lightweight oil (jojoba, grapeseed) applied with a dropper along the parts. Massage gently with fingertips to work it into the scalp without disturbing the braid pattern.
Avoid heavy butters and thick creams on cornrows. They build up, attract lint, and cause the scalp to itch as the buildup accumulates under the braids.
Scalp Care Between Washes
4C scalp under cornrows can go dry, oily, or both in different zones. The solution isn’t more product — it’s targeted application.
For dry areas: tea tree oil mixed with jojoba in a 1:10 ratio. Three drops along the part line, massaged in with fingertips.
For oily or itchy areas: witch hazel on a cotton round, applied directly to the scalp between braids. Dries quickly and doesn’t disturb the braid.
For flaking or buildup: diluted apple cider vinegar (1 part vinegar to 3 parts water) in a spray bottle, misted onto the scalp and left for five minutes before patting dry.
Cowashing between full washes keeps cornrows fresh without the disruption of a full shampoo. Use a conditioner with slip, apply along the parts, rinse gently, and air-dry with a microfiber towel.
Takedown and Post-Cornrow Care
Takedown is where breakage happens if you rush. 4C that’s been in cornrows for 3-4 weeks has shed hair trapped in each braid. Unbraiding too fast pulls that shed hair out at the root instead of releasing it gently.
Start by spraying each braid with water mixed with conditioner to soften the tension. Let it sit for 5-10 minutes before you begin unbraiding.
Unbraid from the tip upward, not from the base down. Work slowly. Use your fingers first, a wide-tooth comb second. Never yank.
Expect to lose 50-100 strands per braid during takedown. That’s normal — it’s weeks of natural shedding releasing at once, not breakage from the style itself.
After every braid is out, detangle the whole head in sections with conditioner on damp hair. Deep condition for 45 minutes with heat. Give your hair a week of loose styles before any new protective style.
Choosing the Right Style for Your Face and Head Shape
Round faces benefit from styles with height and length — Ghana braids with tapered ends, mohawk cornrows, side cornrows with a bun that sits on top rather than at the nape.
Oval faces can wear nearly anything. The shape is balanced enough that almost any cornrow pattern will flatter.
Square faces soften with curved cornrow patterns — swirling crowns, goddess braids with curly accents, asymmetric patterns that break the angular jawline.
Heart-shaped faces balance with volume at the chin level — cornrows that end around the shoulders rather than waist-length, styles with bangs or fringe feed-ins.
Head size matters too. Smaller heads look overwhelmed by too-long feed-ins. Stop at mid-back rather than waist-length. Larger heads can carry longer styles without the proportions looking off.
The right cornrow style isn’t just about what’s trending — it’s about what your face, head, lifestyle, and hair density can actually wear well for weeks at a time.