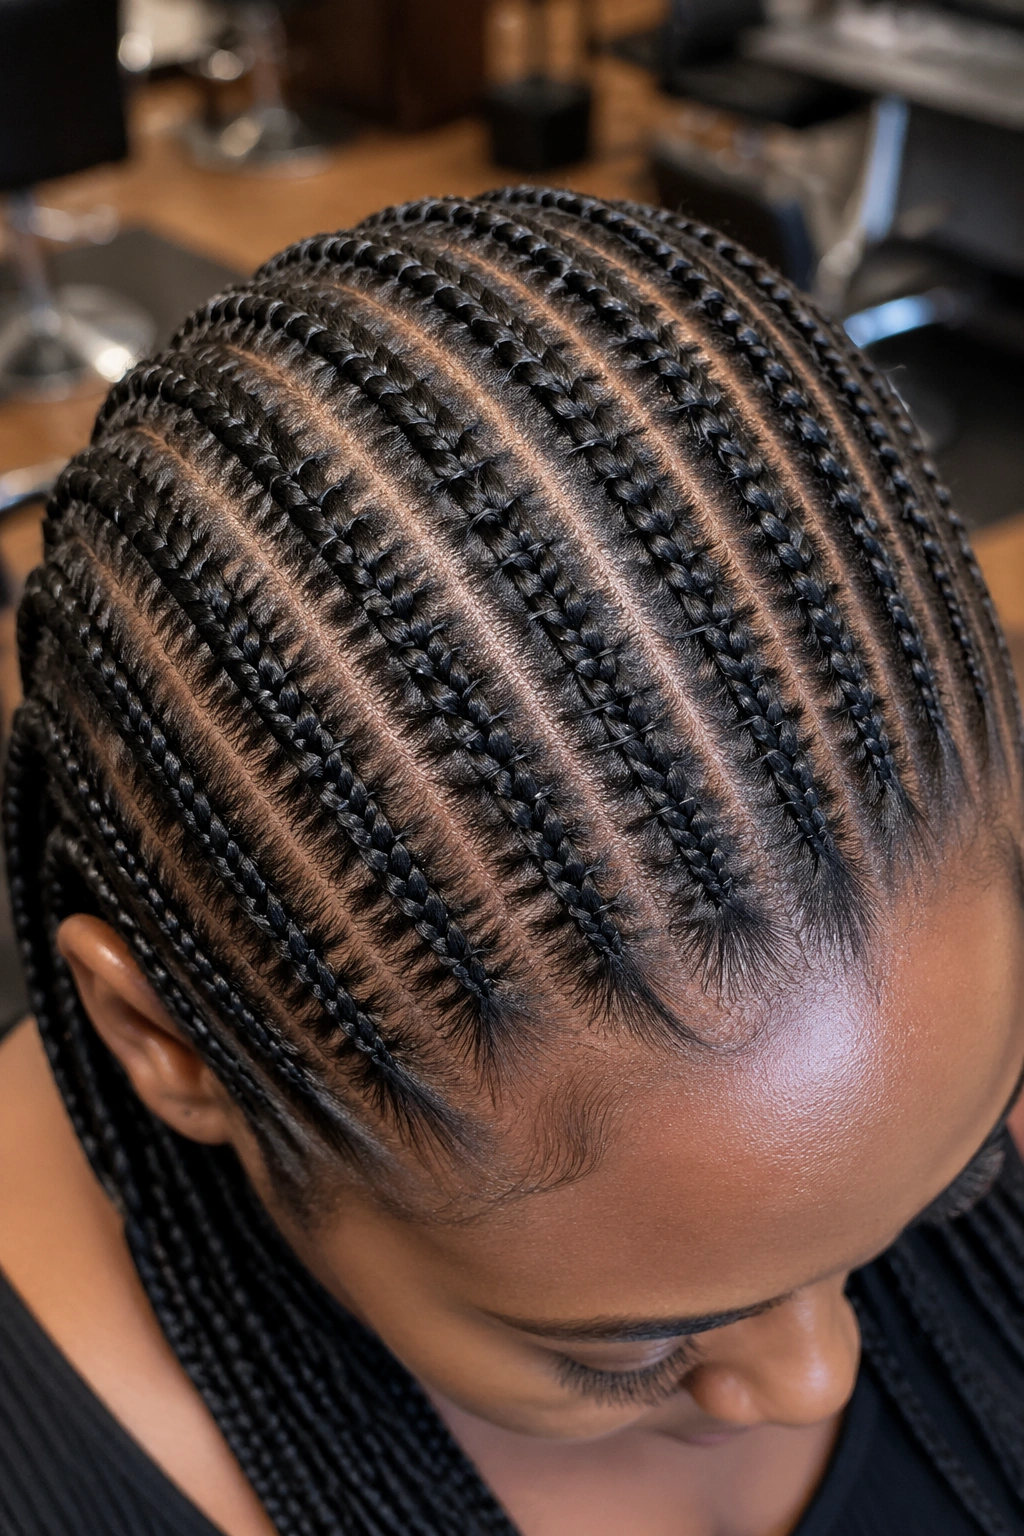
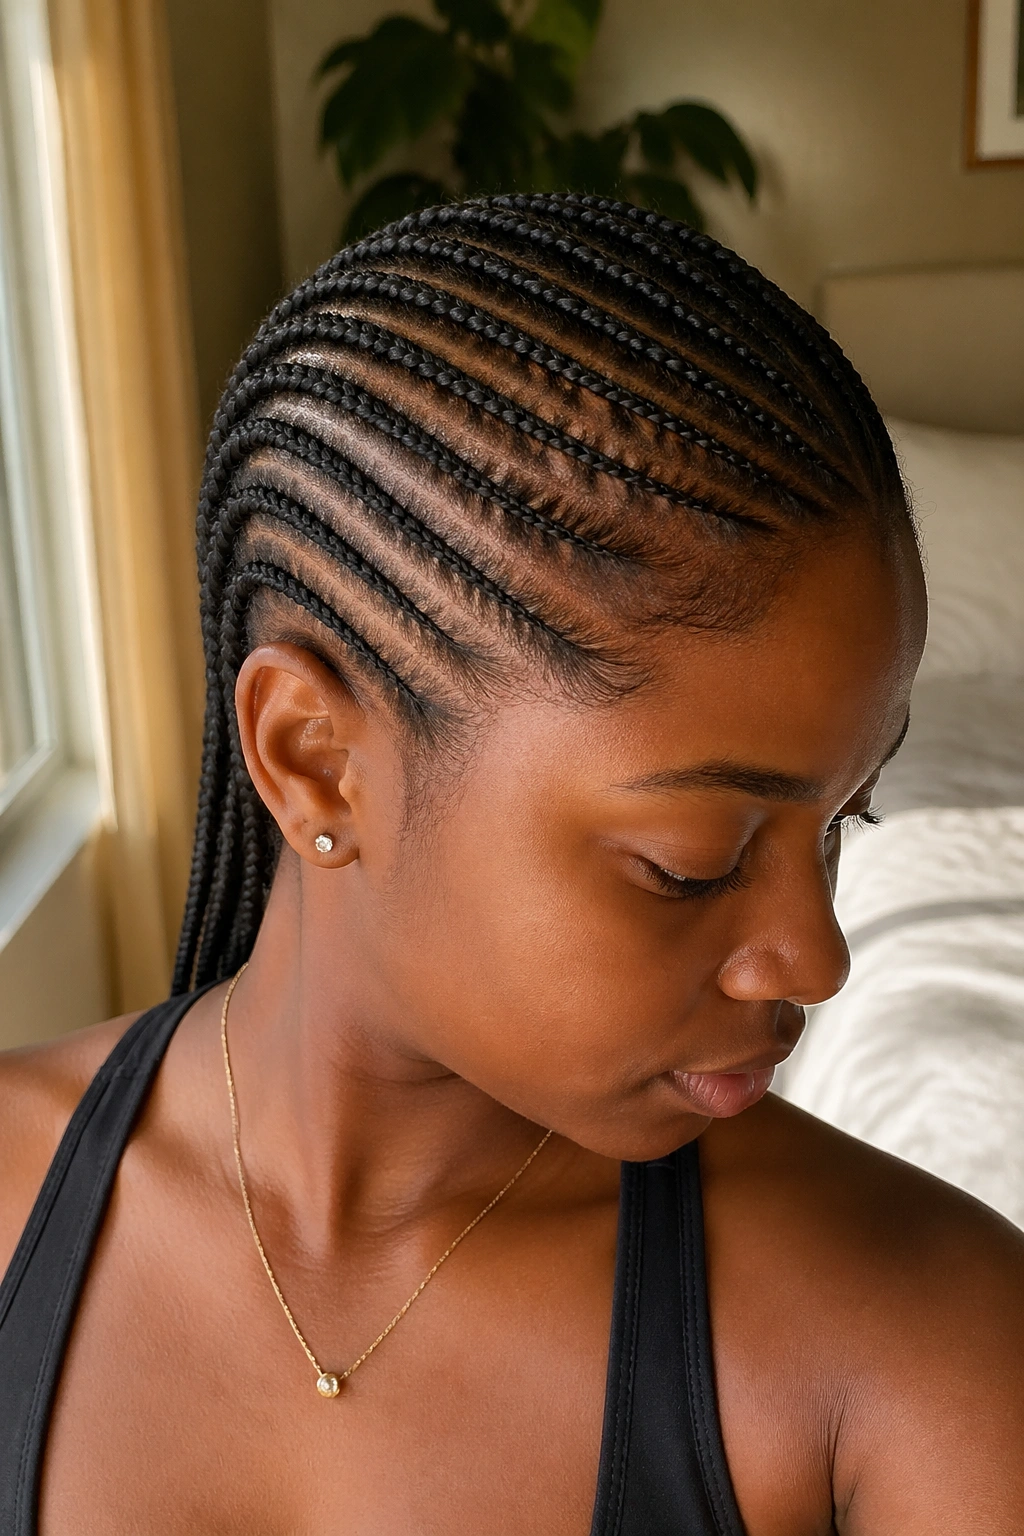
Small straight back cornrows are the workhorse of protective styling. Tight, neat, low-profile, and long-lasting — they’re the style you choose when you need your hair off your face for weeks, when you want something that reads polished in any setting, and when you’re not in the mood for drama. They don’t shout. They work.
The scale is what separates these from their chunkier counterparts. Where jumbo cornrows span an inch or more across, small straight back cornrows measure closer to the width of a pencil or narrower. Dozens of them fit across a single head, lined up in tight parallel rows flowing from the hairline to the nape.
And that density is the whole point. More braids means more surface coverage, longer wear time, and a cleaner scalp design. Done well, small straight back cornrows look like precision work — because they are.
What follows walks through 25 variations, from the purest straight-back install to styles that add color, detail, length, or structural twists while keeping the small-scale braid aesthetic intact.
What Counts as “Small” in Cornrow Sizing
Cornrow sizing gets fuzzy because different braiders use different systems. For this list, small means braids under 1/4 inch wide at the widest point of the braid. That’s roughly the width of a standard pencil or slimmer.
Go under 1/8 inch and you’re entering micro braid territory — a whole different beast with longer install times and higher scalp tension risk. Small straight back cornrows hit the sweet spot between medium scale and micro detail.
Why Small Scale Works So Well
Small cornrows lay closer to the scalp. Less braid bulk means less space between the braid and the skin underneath. This creates that signature sleek profile that photographs cleanly from any angle.
They also last longer. More braids distribute hold across more points — so when a section gets a little fuzzy at the hairline, the 20 neighboring braids still look crisp. Large cornrows show frizz immediately. Small ones hide minor wear for extra days.
The trade-off is install time. Where eight jumbo cornrows go in under an hour, 20-40 small cornrows can take 4-6 hours depending on head size and braider speed. Budget accordingly.
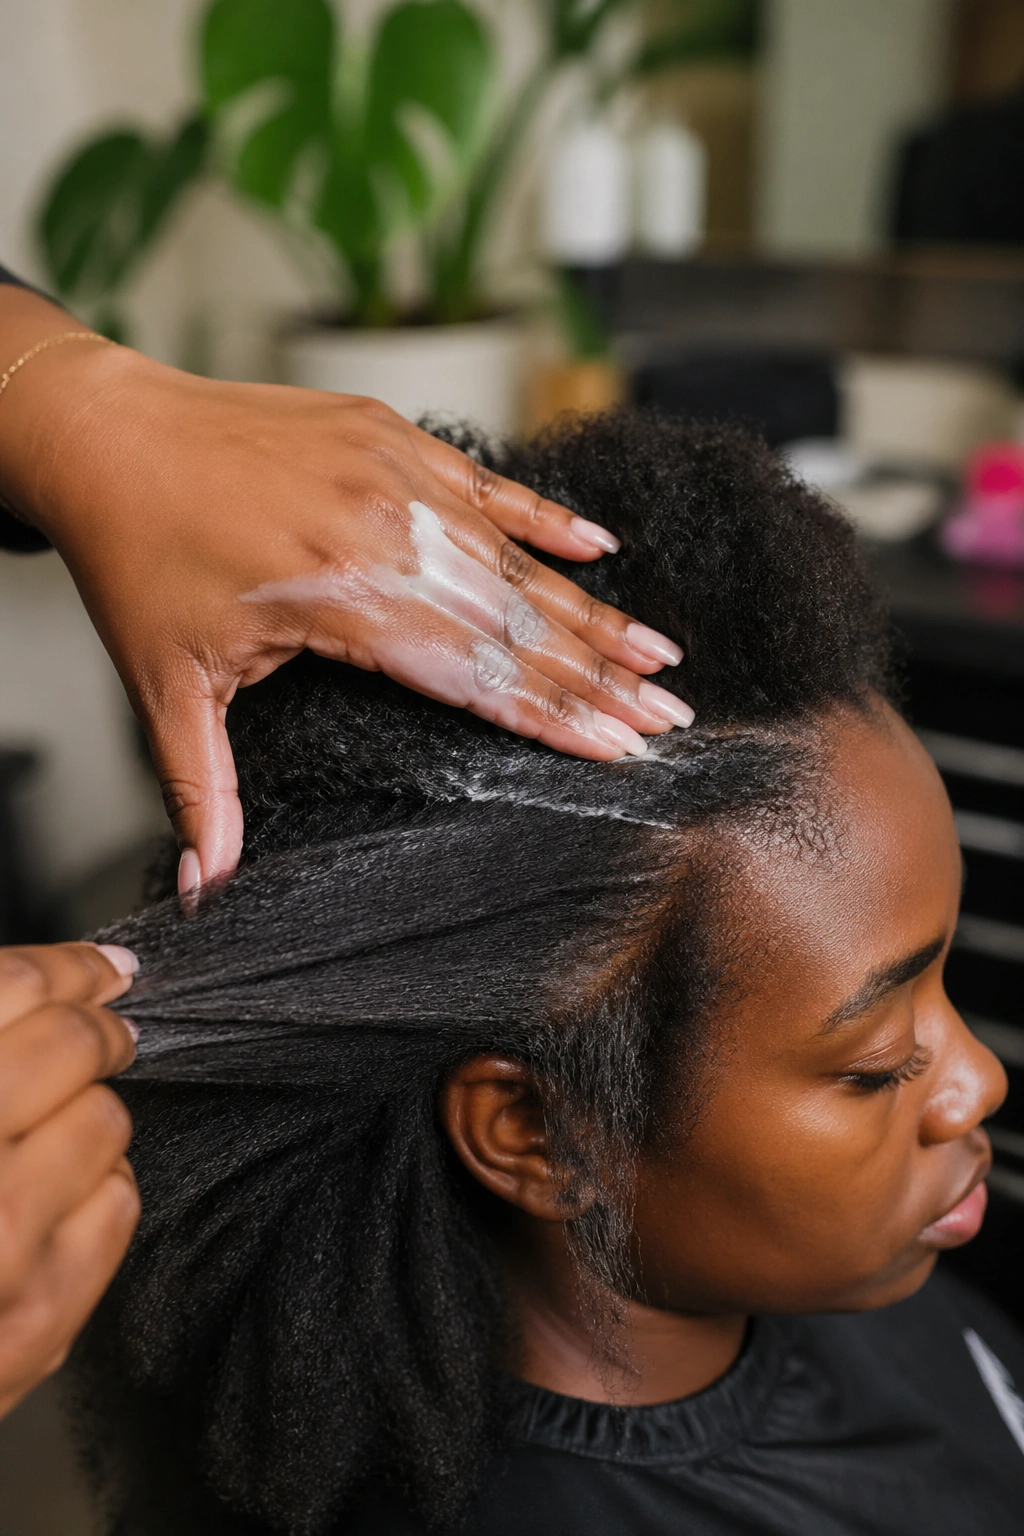
Prep Routine for Dense Installs
Wash with a clarifying shampoo two days before install. Condition deeply. Apply a leave-in and stretch the hair — blow-dry on cool setting or braid-stretch overnight.
The day before install, sleep with the hair in loose twists or a pineapple under a bonnet. This keeps the stretch without adding heat damage and makes the hair easier for the braider to part.
On install day, edges get edge gel applied thinly along the hairline. Not heavy. A dime-sized amount spread across the full perimeter is plenty. Let it dry fully before any parting begins.
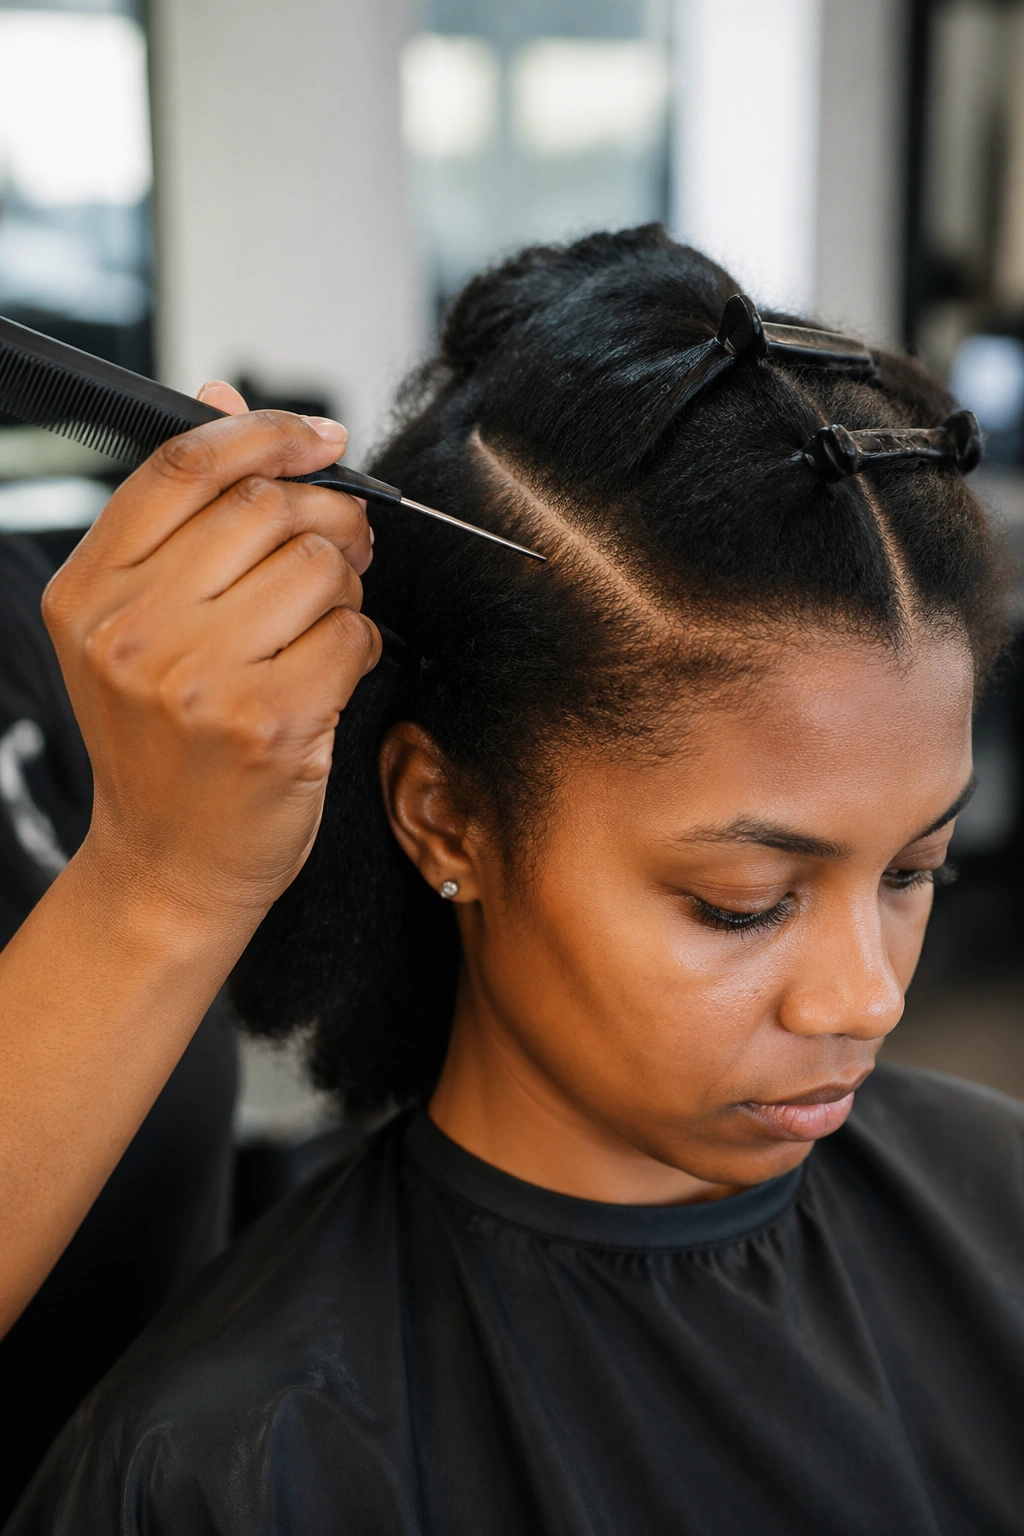
Tools That Actually Matter
Rat-tail comb — the finest-pointed tip you can find. Small cornrow parts need precision that a blunt tip can’t deliver. Sharp, thin, dense tooth.
A good jar of firm-hold styling gel. Thick consistency. Alcohol-free. Strong enough to keep stray hairs in line but not so flaky that it falls out of the braid by day three.
Clear elastic bands in the smallest size available. Small cornrow ends need small bands. Big bands leave visible bulk at the tip.
A water-and-conditioner spray bottle. For dampening sections that stiffen up between braid starts. Never spray heavy — just enough to soften.
Tension Management Is Non-Negotiable
Small cornrows carry tension differently than larger ones. Each braid pulls a narrower section of hair but pulls it tightly to create the small scale. If every one of 30+ braids is slightly too tight, the cumulative pressure on your scalp can cause damage.
Signs the braids are too tight: throbbing during install, small white bumps at the hairline within 12 hours, itchy sensation at the root that doesn’t ease with scalp spray, any amount of pain that lasts past day two.
If you feel pain after install, loosen the affected braids or take them down. Long-term, repeated over-tight small cornrows are one of the most common causes of traction alopecia at the temples.
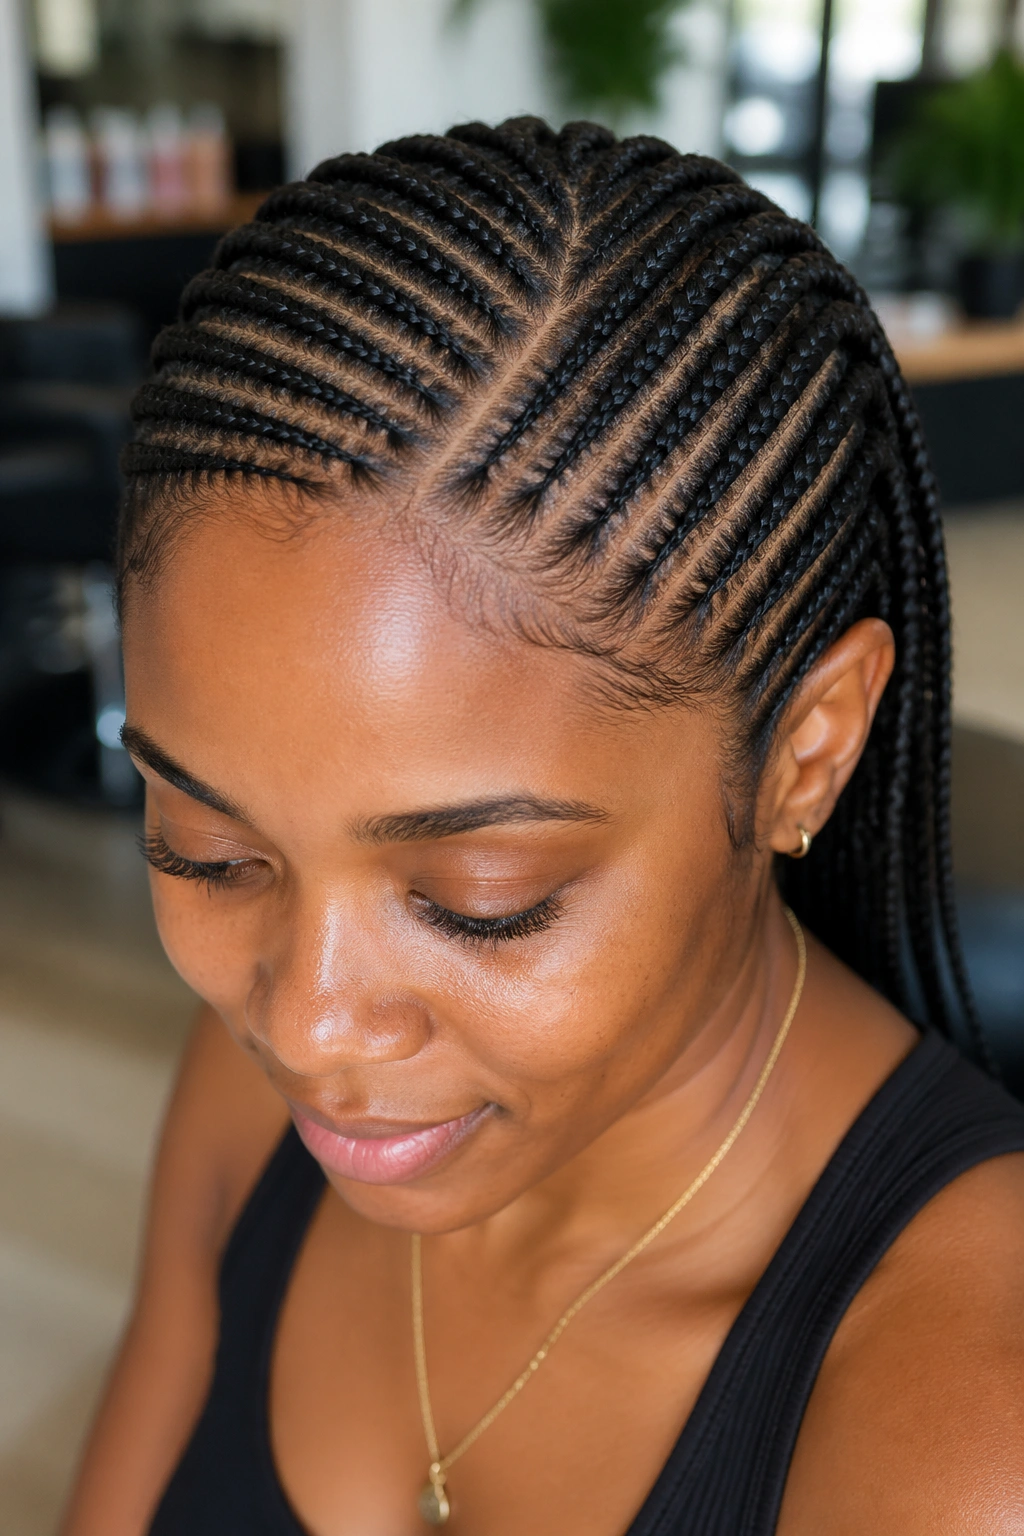
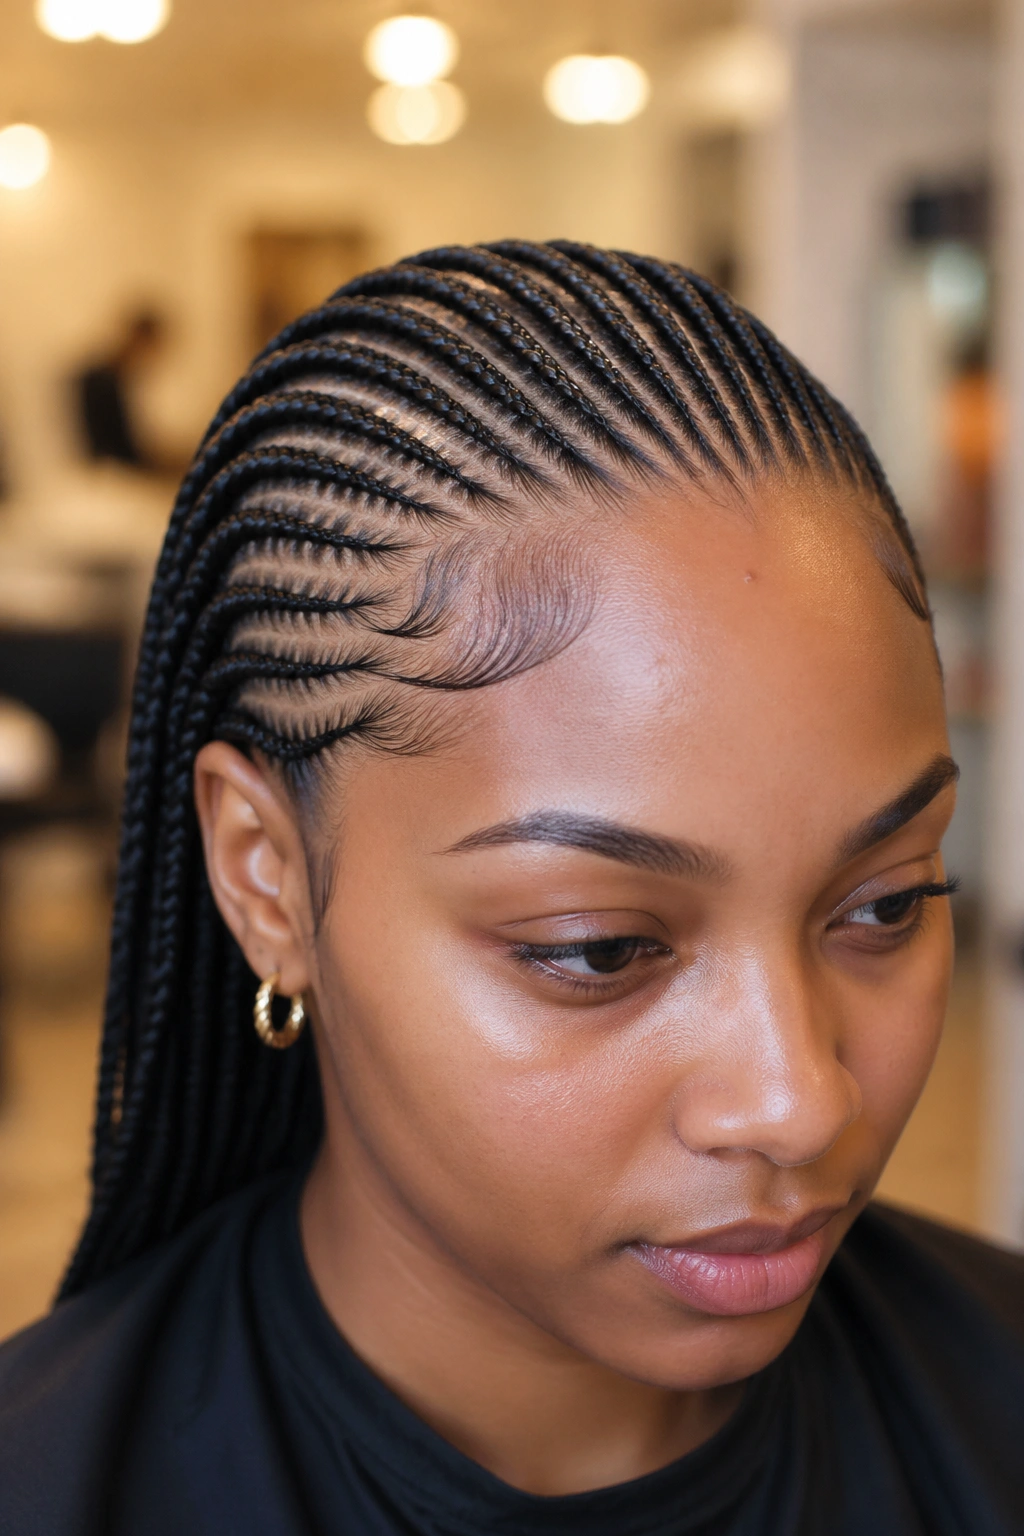
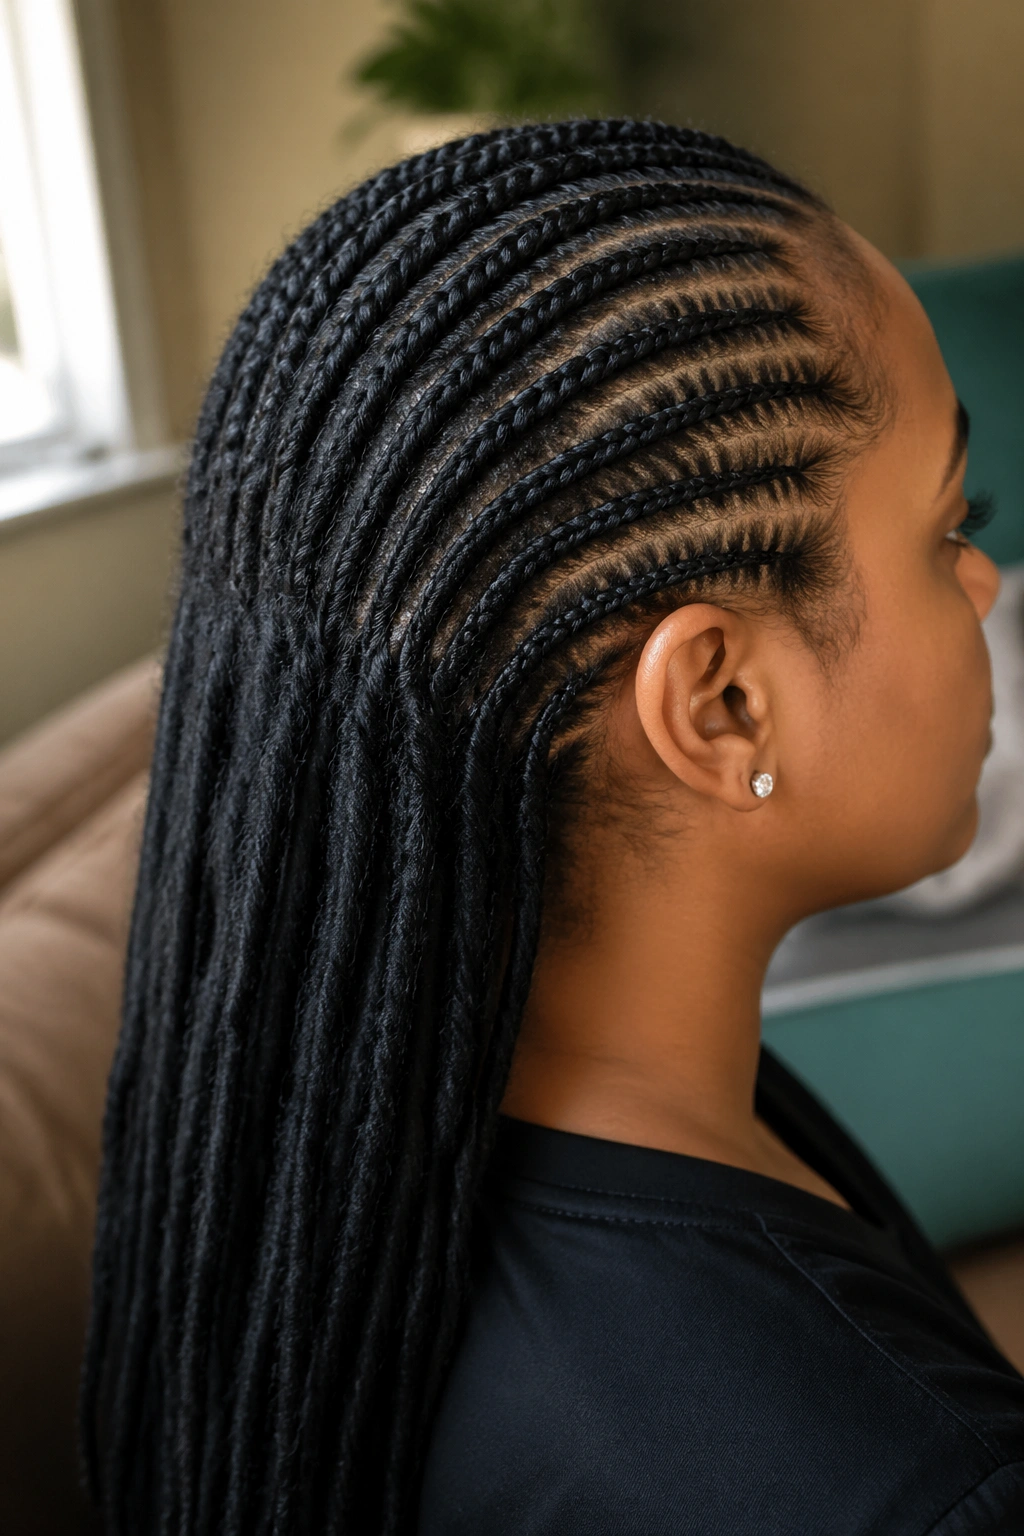
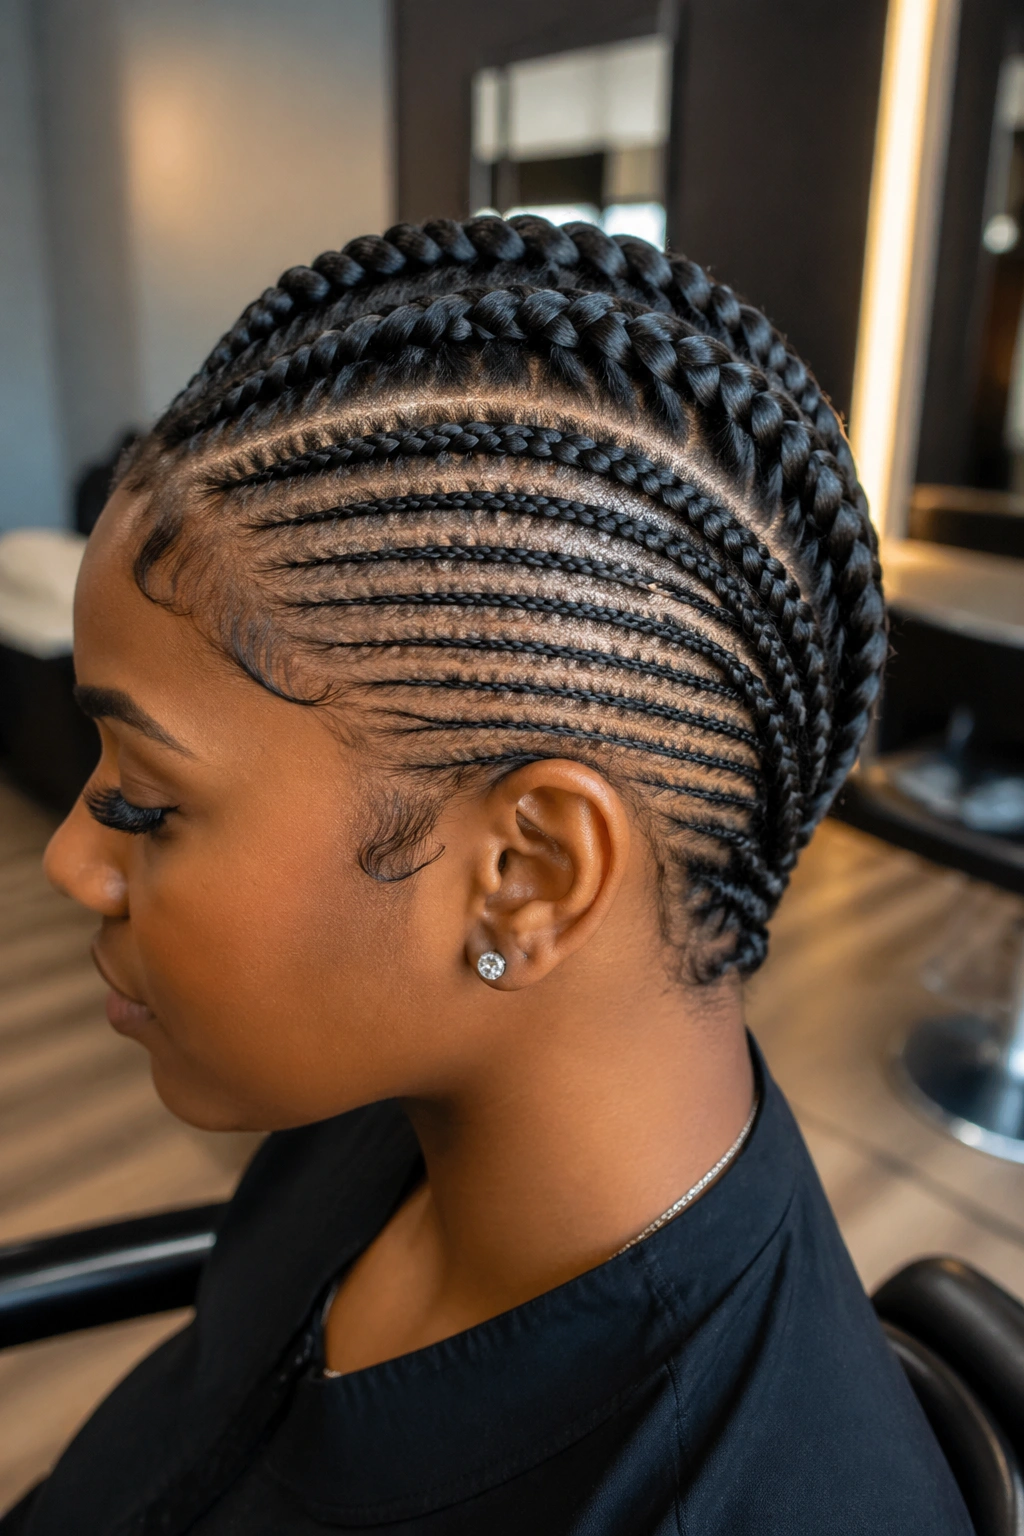
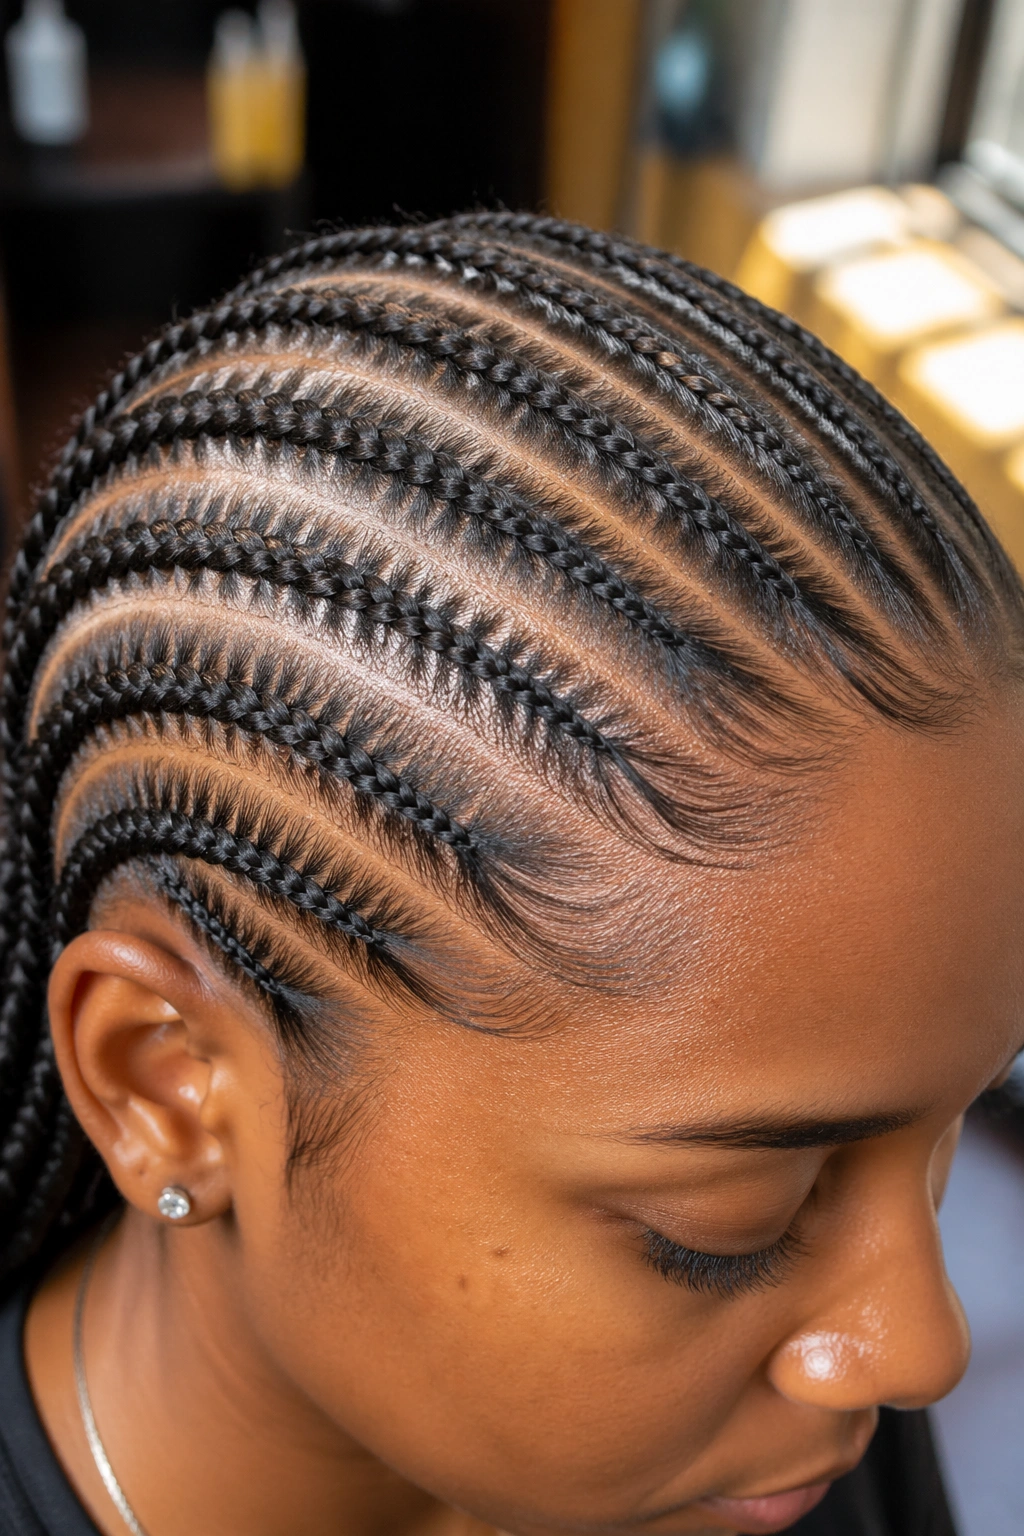
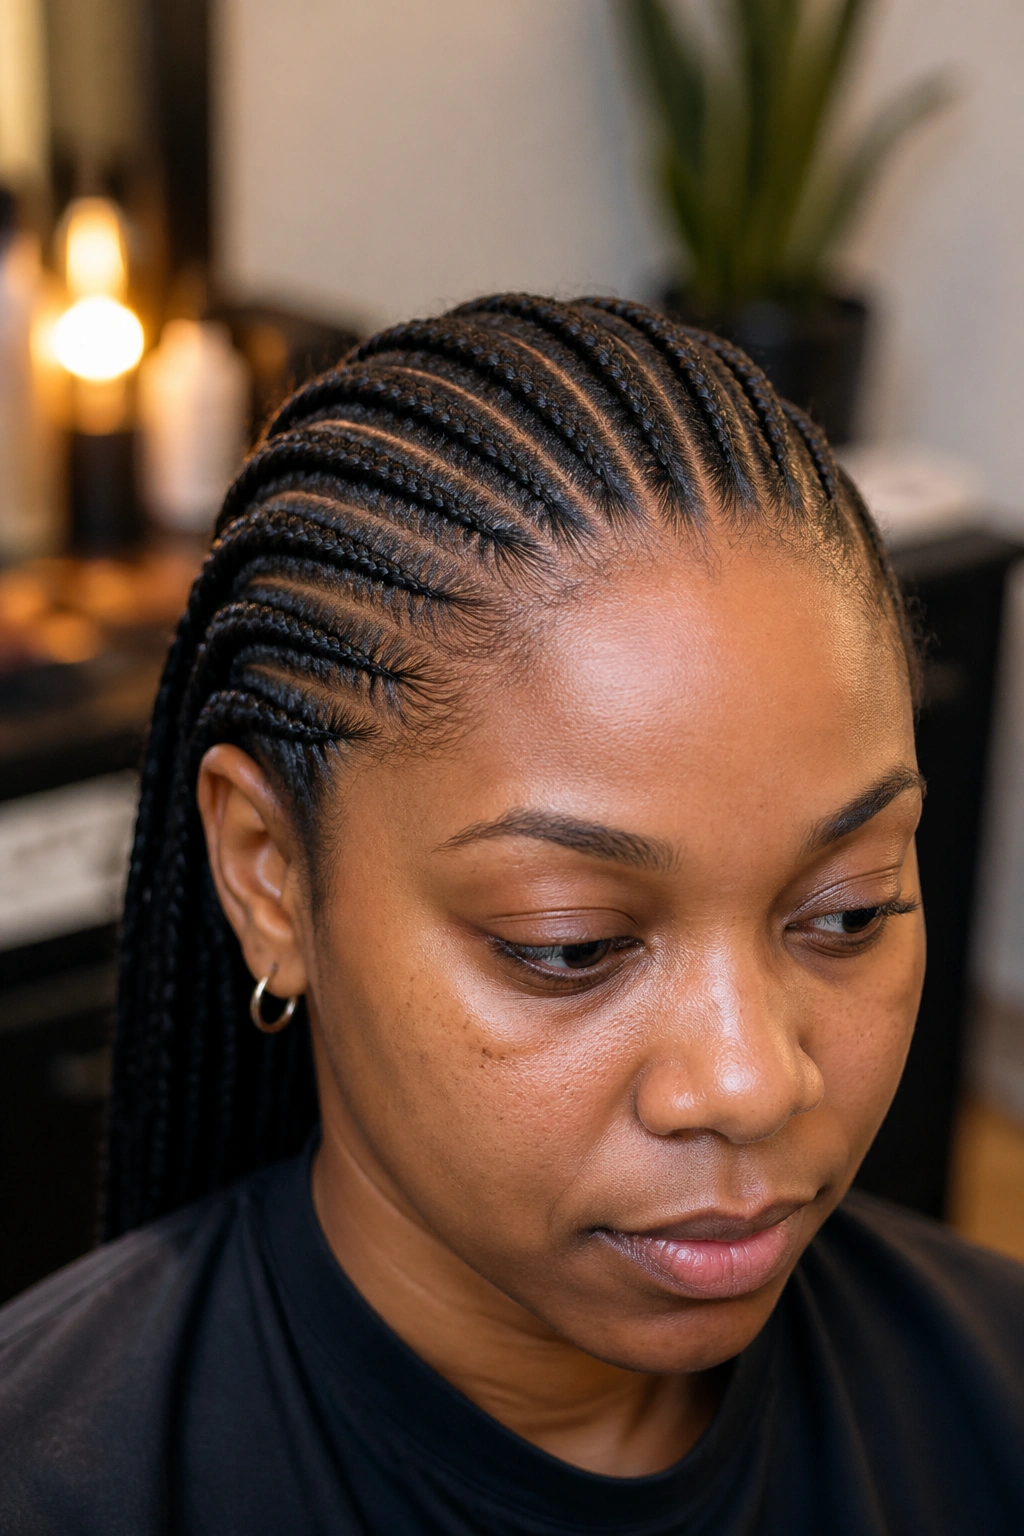
1. Classic Small Straight-Backs
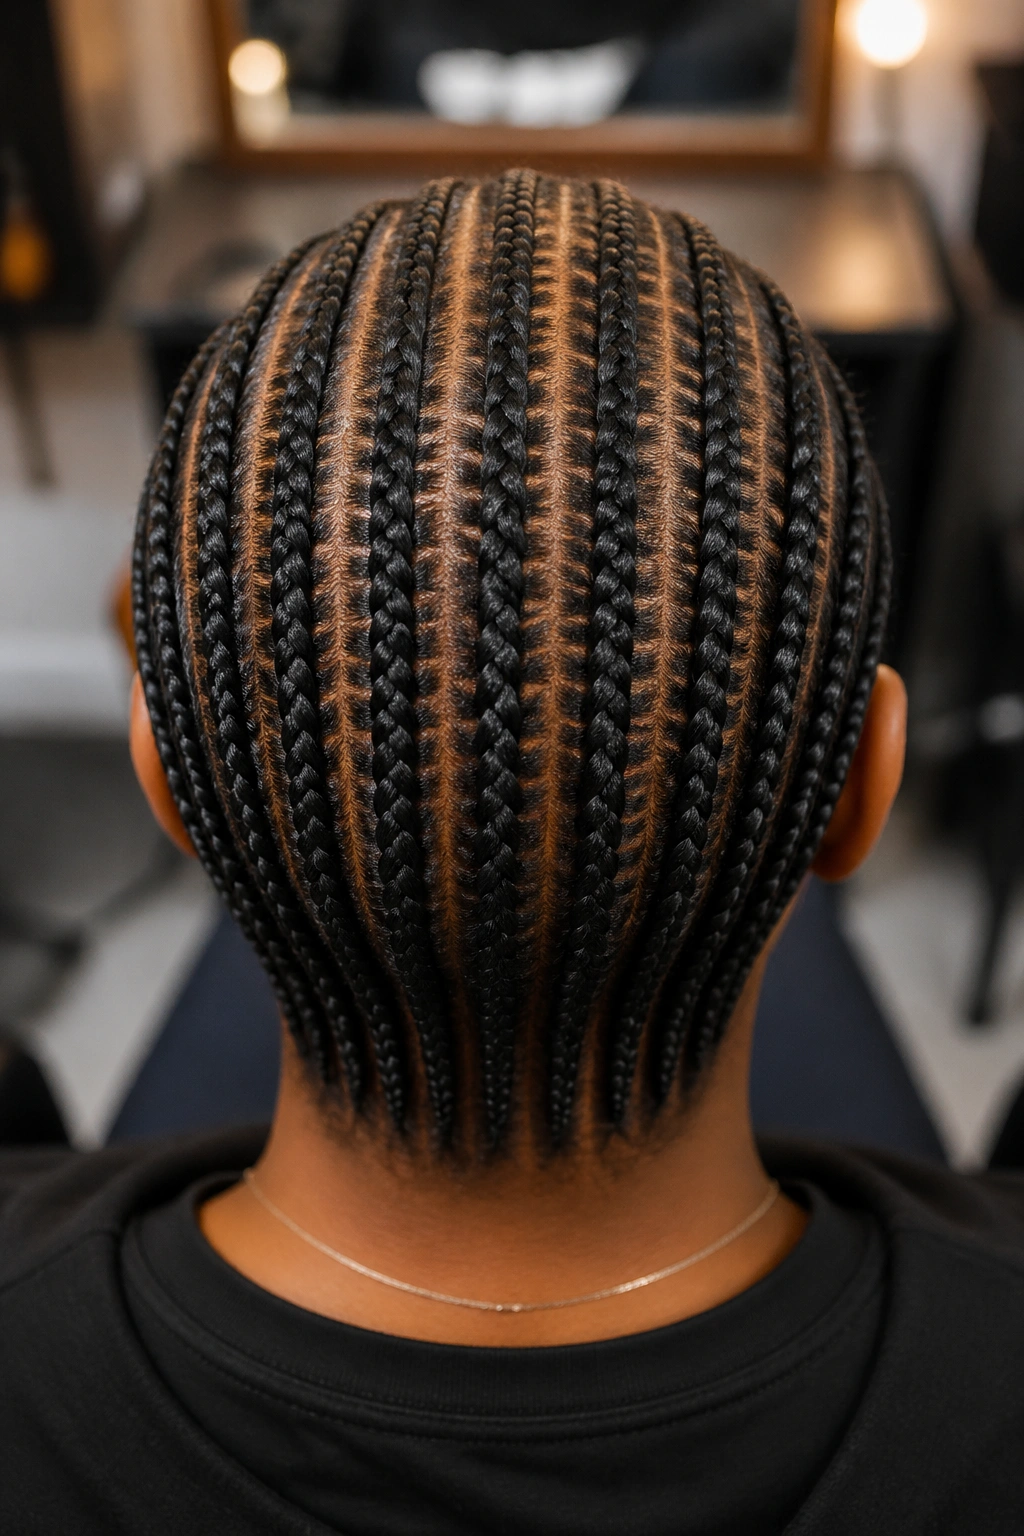
Twenty to twenty-four small cornrows running from forehead hairline to nape. Even spacing. Uniform width. No added detail. This is the template — the base style that every other variation on this list builds from.
The beauty lives in the precision. A slightly uneven part shows up more on small cornrows than on any other scale. The cornrows themselves can be perfect, but if the spacing drifts by even a few millimeters between braids, the whole install reads off.
Budget 4 hours for DIY installation. Professional braiders often complete this in 2.5-3 hours.
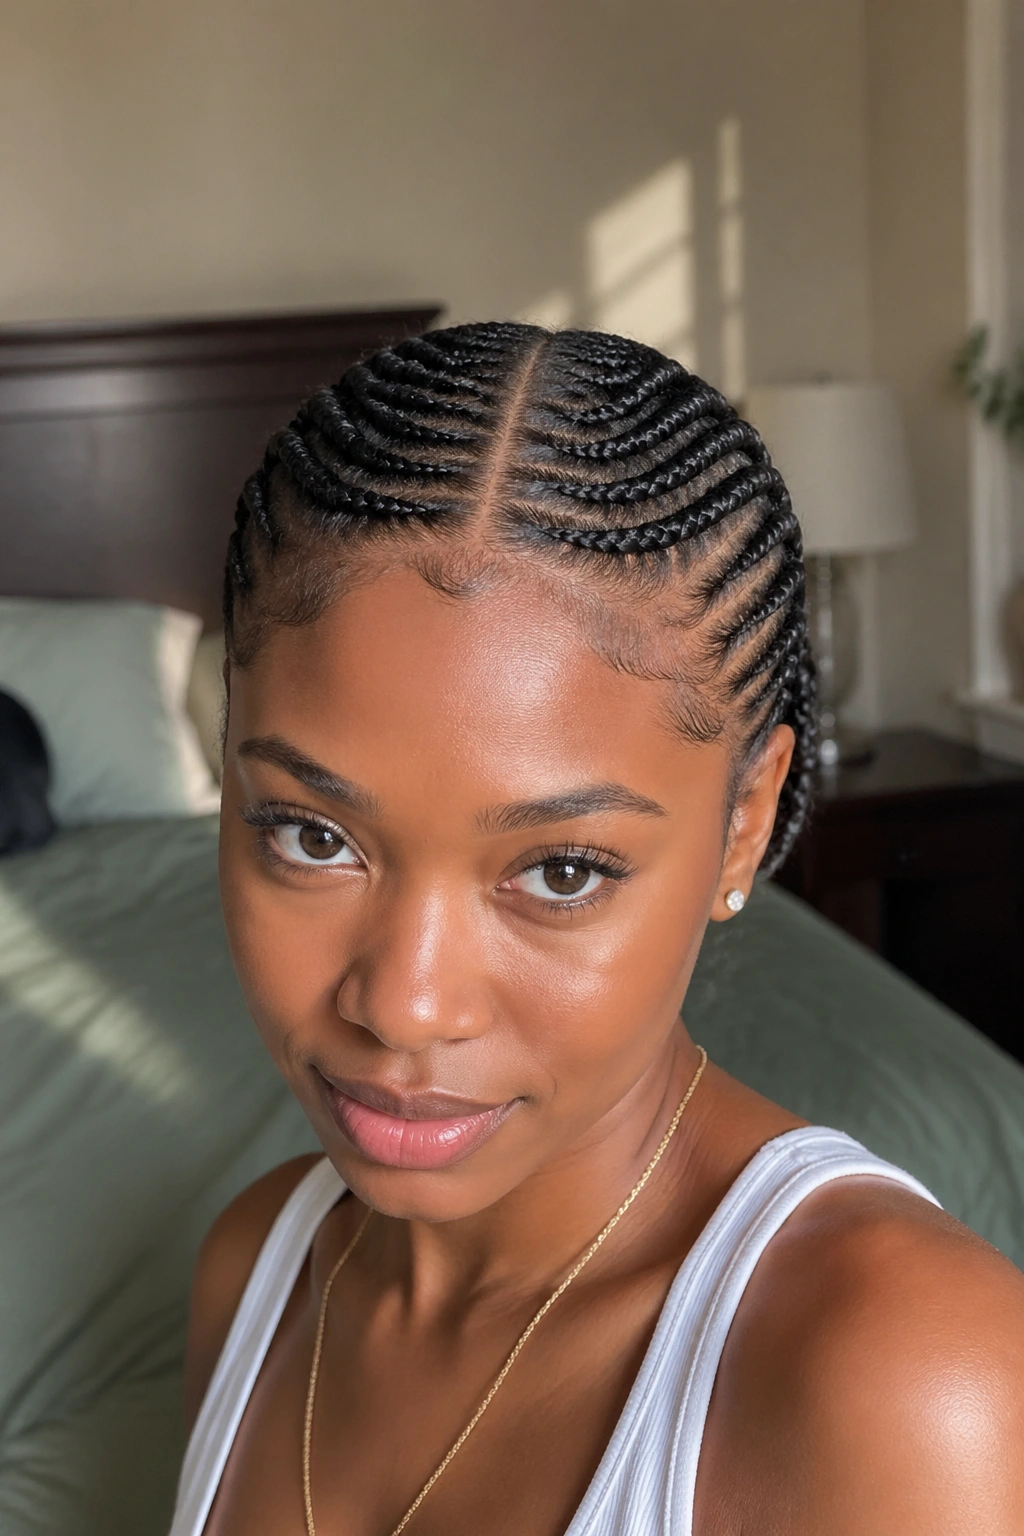
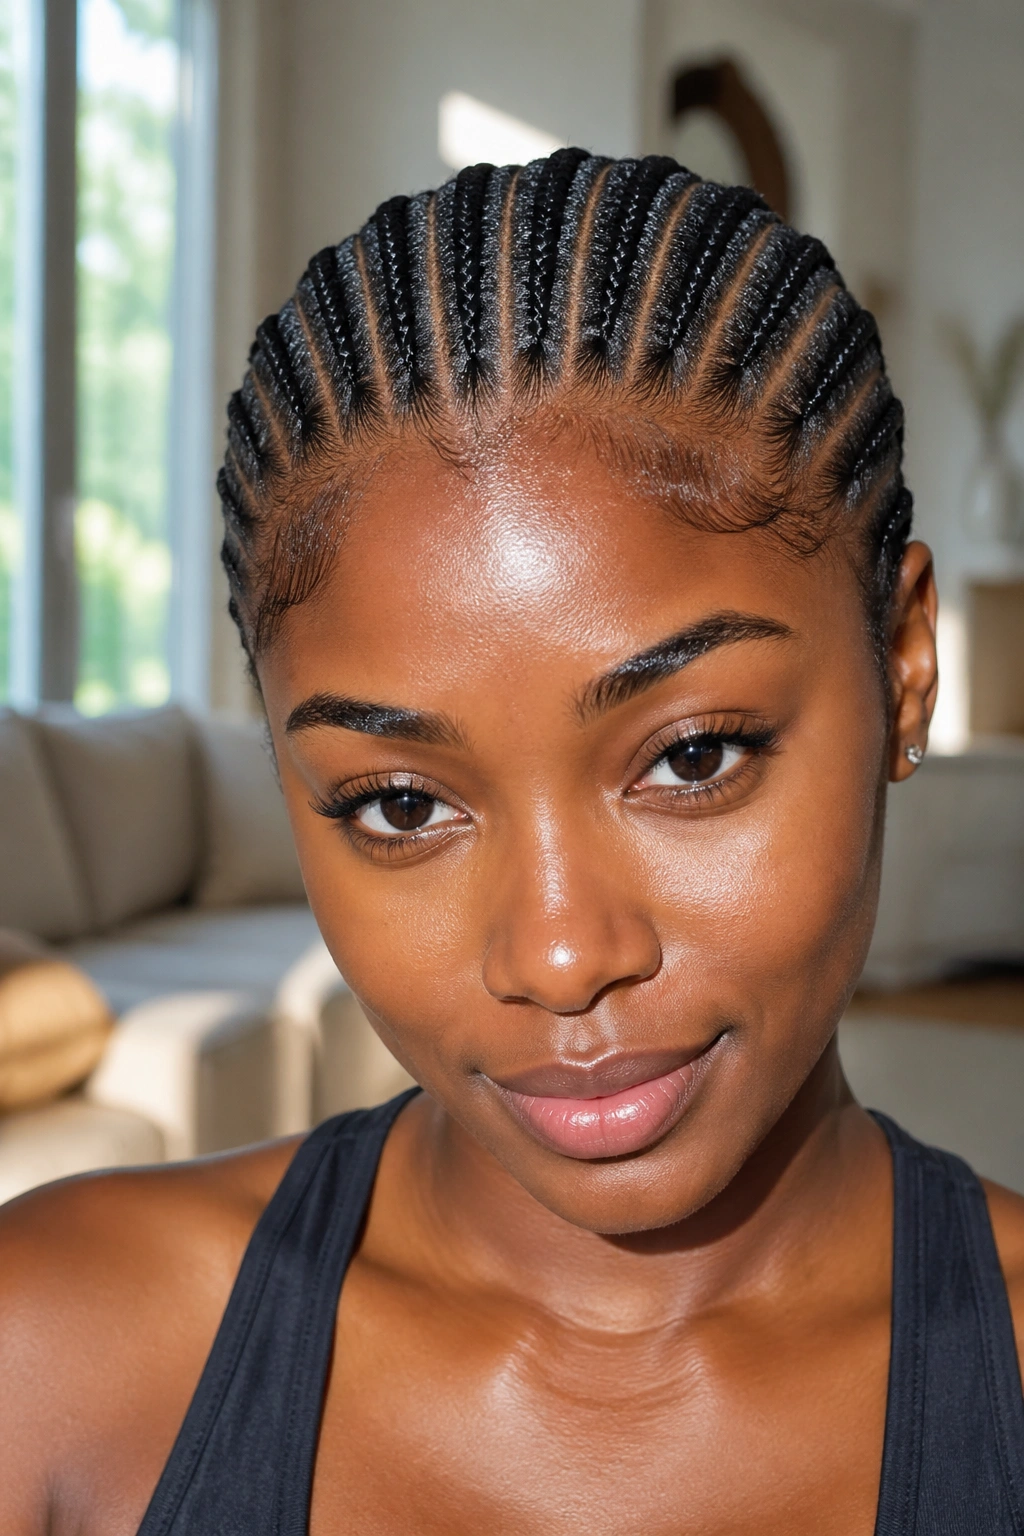
2. Small Cornrows With Exposed Middle Part
What Makes It Different
A visible straight middle part runs from forehead to crown. The cornrows flow off both sides of this part, curving slightly outward before running straight back. The exposed scalp line becomes part of the design.
- Dampen the middle part area extra thoroughly before parting
- Use a rat-tail comb to drag one clean line from front hairline to crown
- Work the first cornrow on each side close to the part
- Gel the middle part strip to keep it visible and sleek
Tip: If your middle part tends to curve due to uneven hair growth, anchor the comb against your finger as you drag to force a straight line regardless of natural patterning.
3. Small Cornrows With Feed-In Hair
Adding small amounts of kanekalon as the cornrow progresses gives length and a bit of thickness without changing the scale of the braid at the scalp. The feed-in technique keeps the cornrow small at the root while letting it grow slightly thicker toward the ends.
This is useful when your natural hair is shorter than you want the final braid to hang. Small cornrows with feed-ins can extend past the shoulder while keeping the installation small and neat at the hairline.
Feed in only 2-3 strands of kanekalon at a time. Bigger bundles break the smooth small-scale look.
4. Small Cornrows With Beaded Ends

Beads work particularly well on small cornrows because the scale of the bead complements the scale of the braid. Chunky wooden beads on micro braids look unbalanced. Small glass beads or medium-weight metal beads on small cornrows sit proportional.
How to Style It
Thread each bead onto the braid before securing the end with an elastic. For permanent attachment, use bead-and-string technique — thread beads, then tie the braid tip in a small knot that passes through the bottom bead and holds everything in place.
Choose beads in colors that complement your skin tone. Warm undertones pair with gold, copper, amber. Cool undertones pair with silver, blue glass, clear crystal.
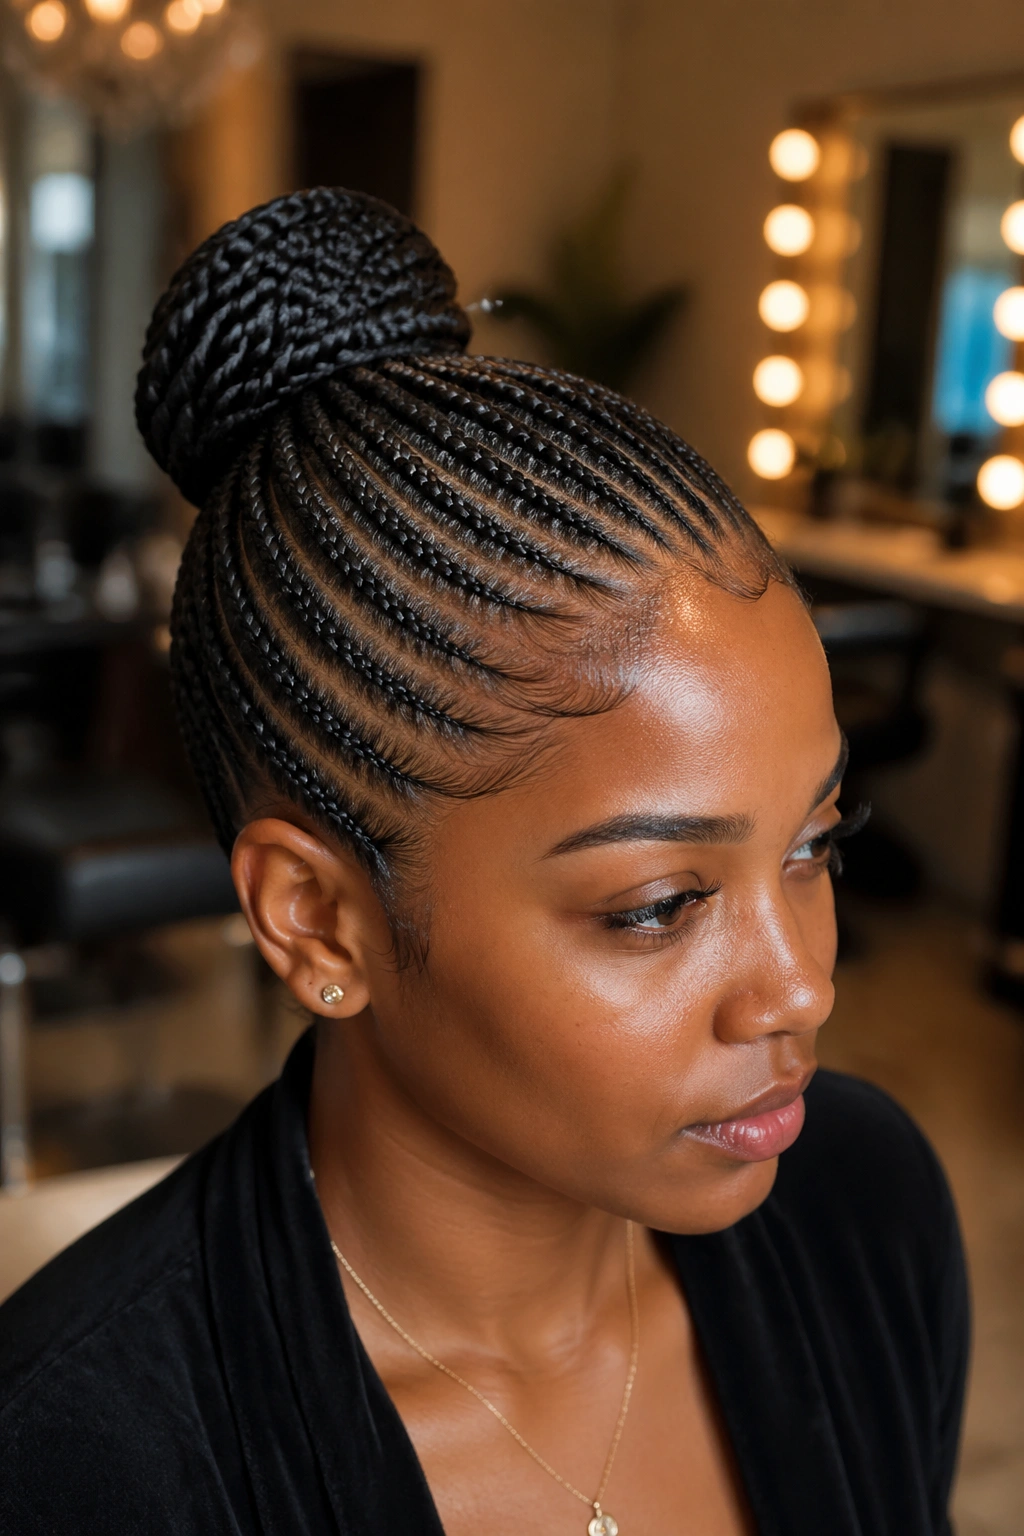
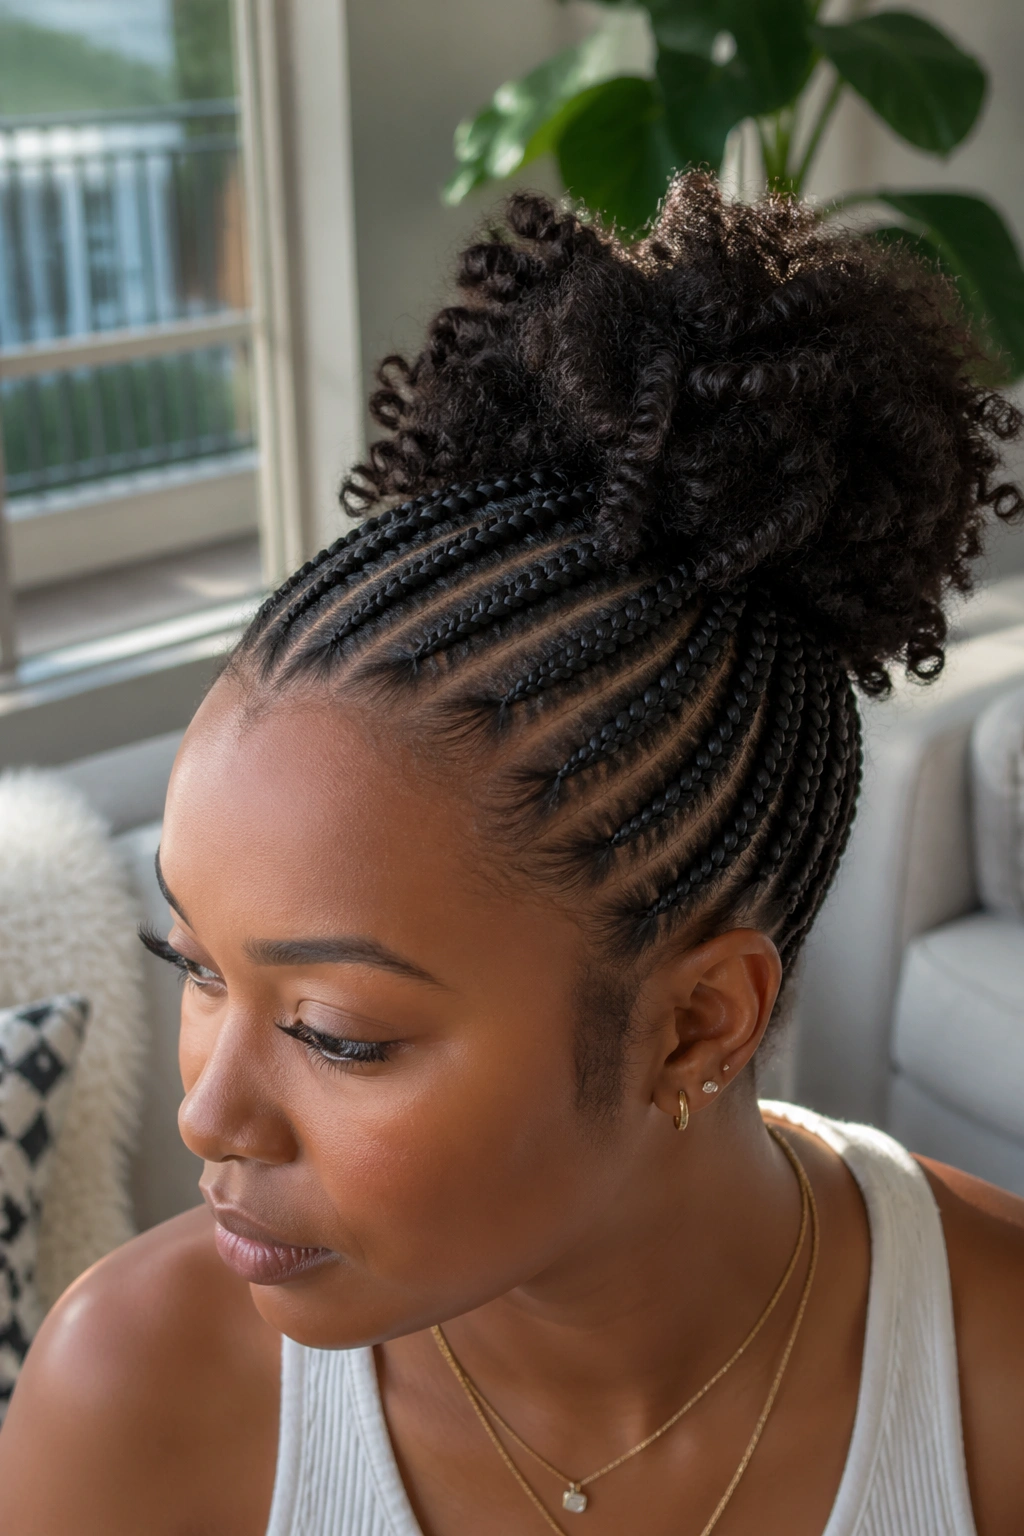
5. Small Cornrows Into a Bun
Is it possible to wear small cornrows in a more formal setting without them reading too casual?
The answer is the bun finish. All small cornrows flow into a neat bun at the back, either at the crown or nape. The cornrow portion stays sleek and protective, while the bun adds a polished silhouette that reads dressy.
How to Use It
Install small cornrows normally. When every braid is finished, gather all of them together at the desired bun position. Secure with a thick elastic. Twist the length of gathered braids around the elastic and pin under with U-pins.
For a bigger bun, use a donut form underneath. The cornrow tails wrap around the donut to hide it while creating volume.
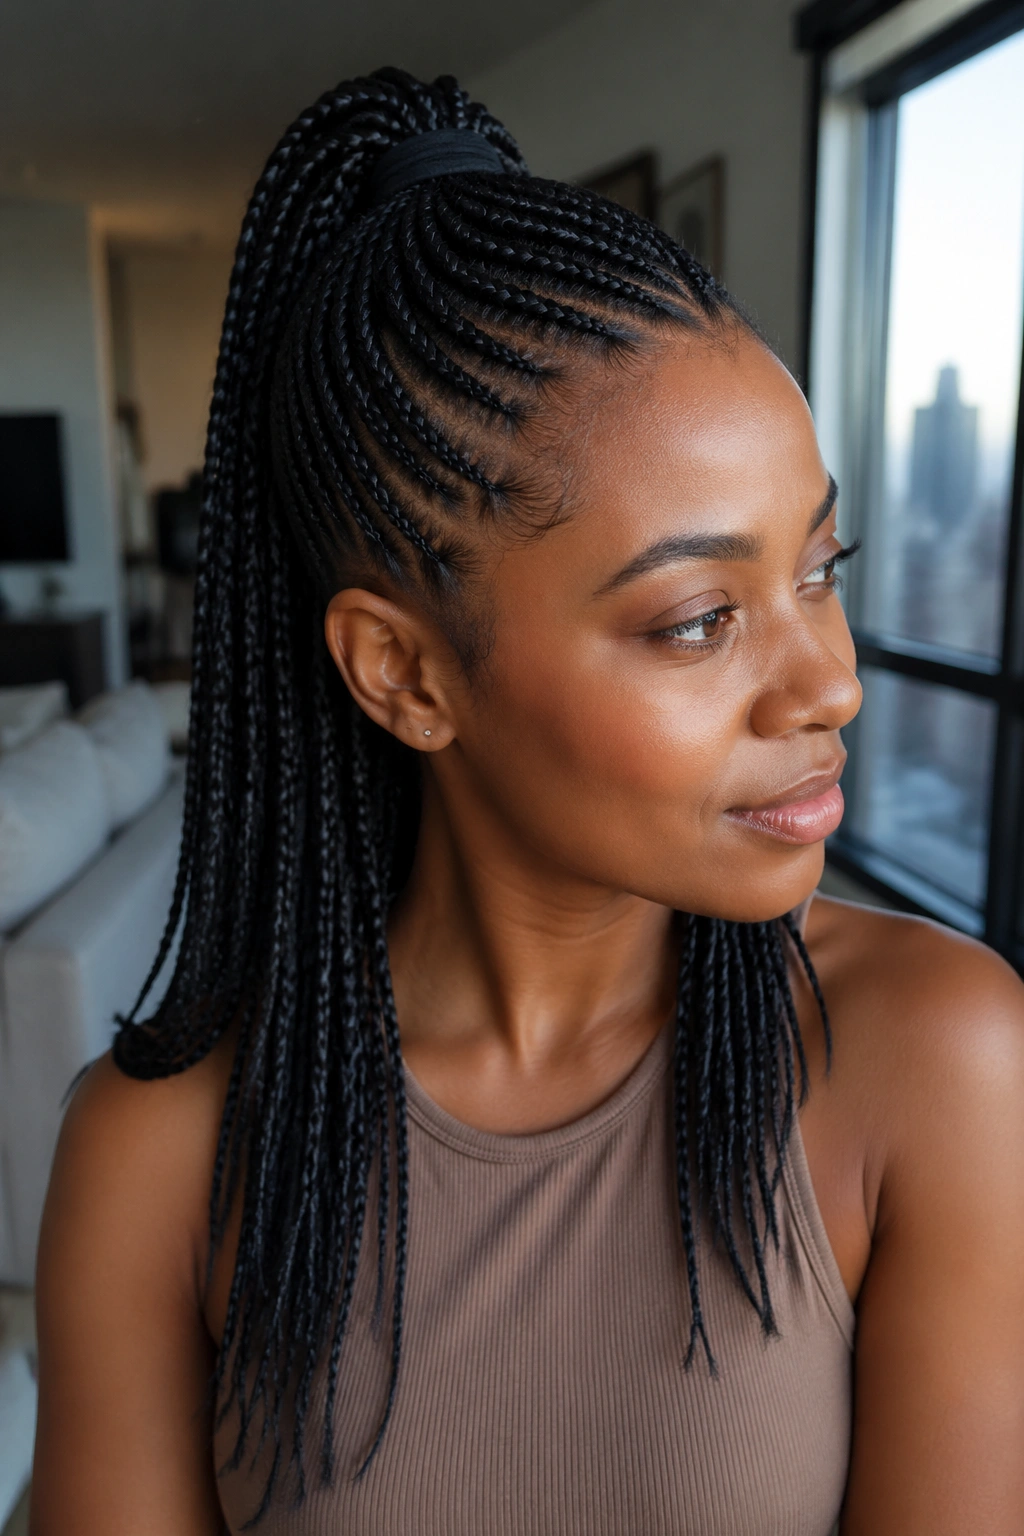
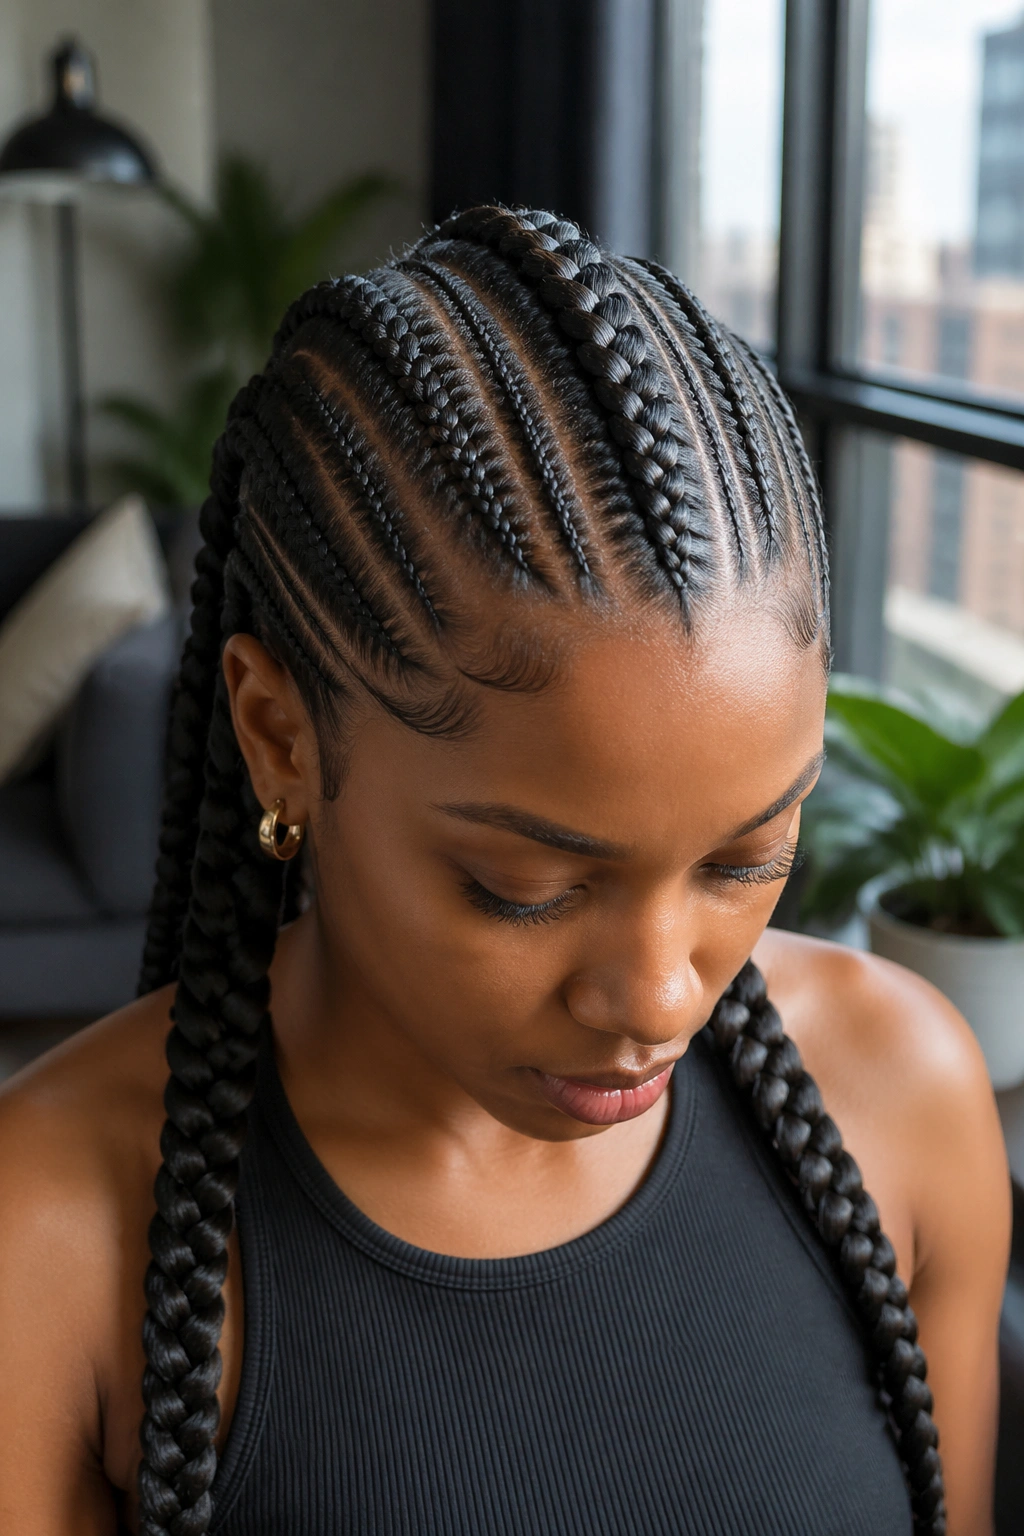
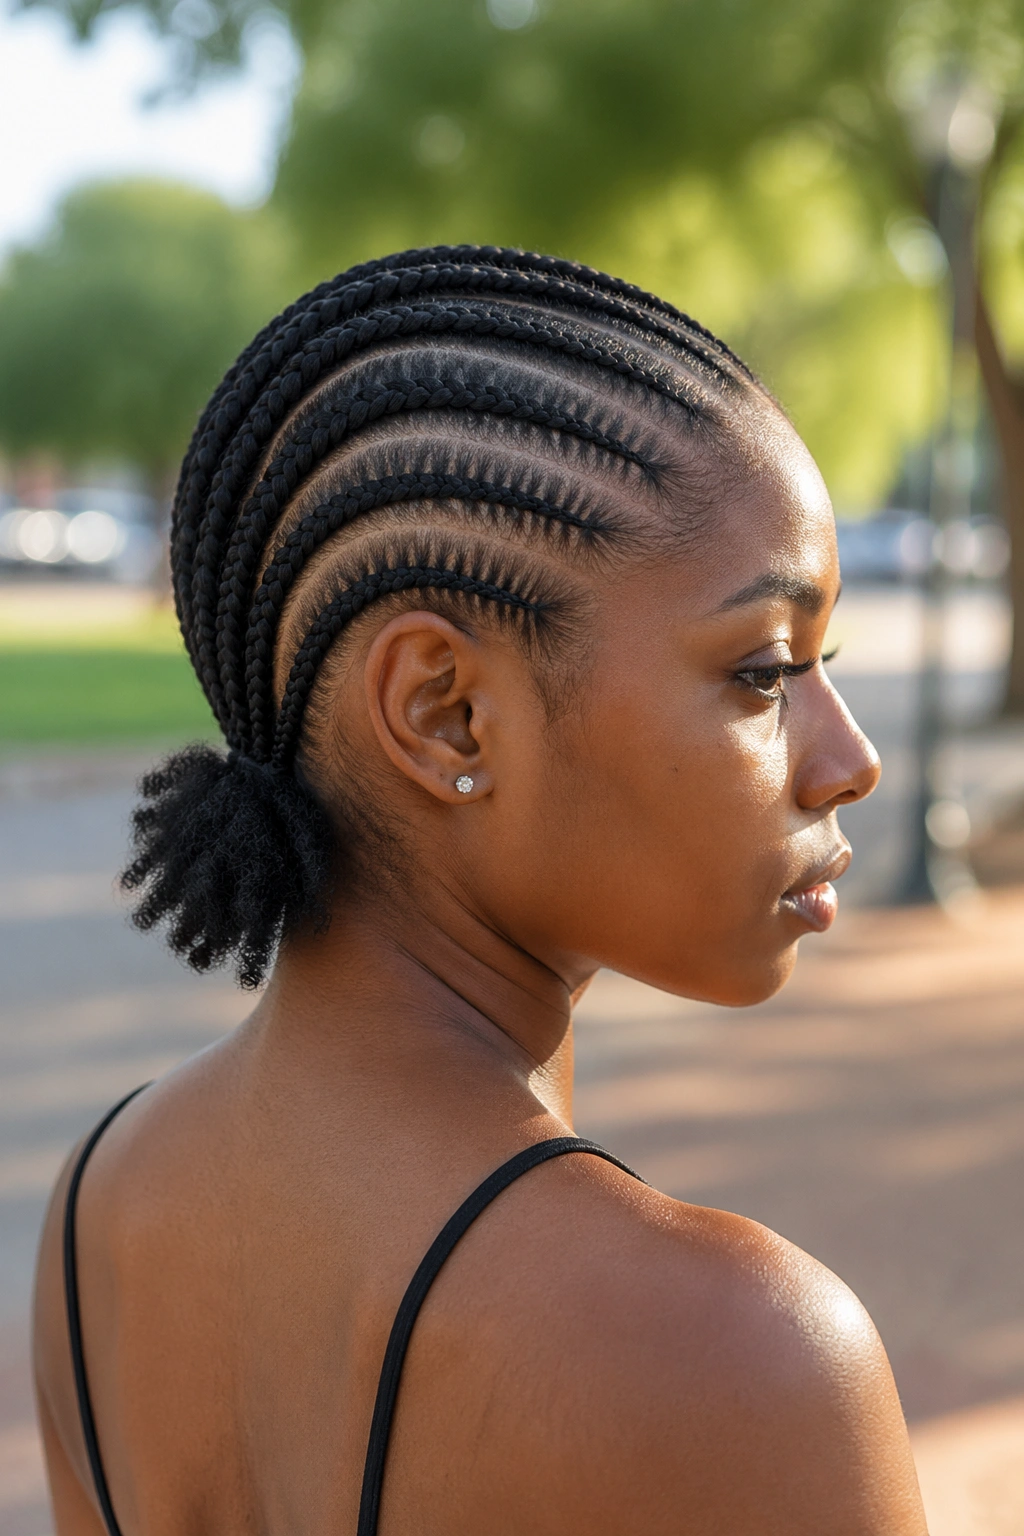
6. Small Cornrows With Ponytail Finish
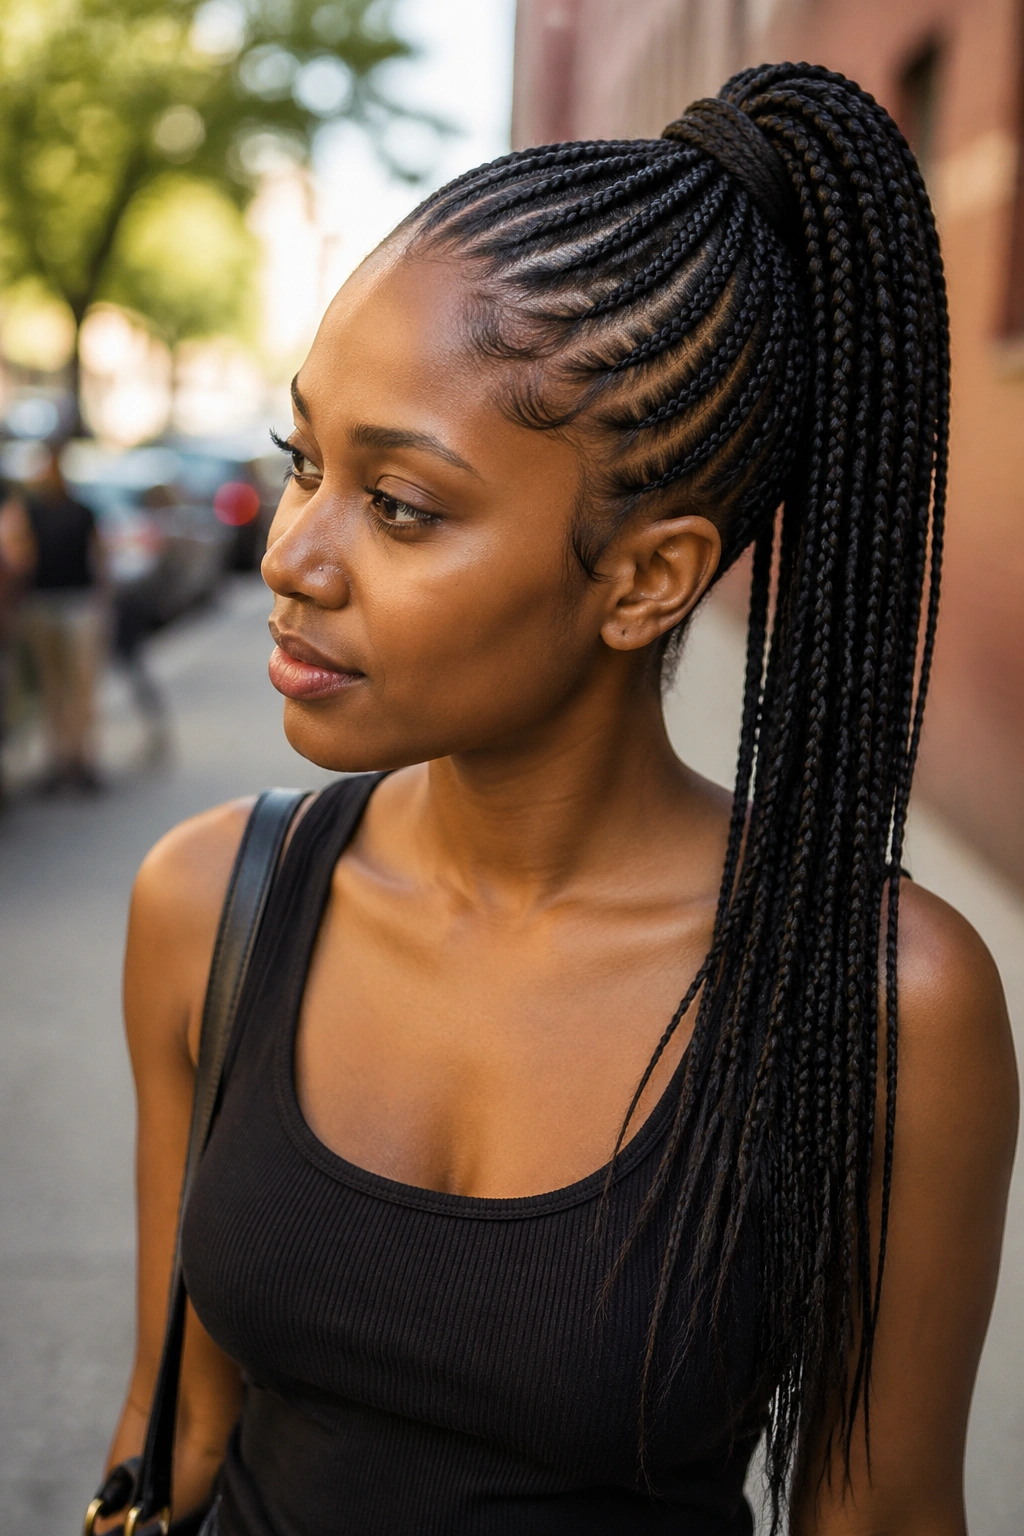
Similar to the bun variation but with the braids hanging as a ponytail instead of wrapped into a bun. Medium or high ponytail placement. The hanging braids create a thick, defined ponytail without the need for extensions.
Best for: active days, workouts, keeping hair off the neck in heat. Also great for showing off the full braid length when you want to emphasize how long the install runs.
7. Small Cornrows With Color Accents
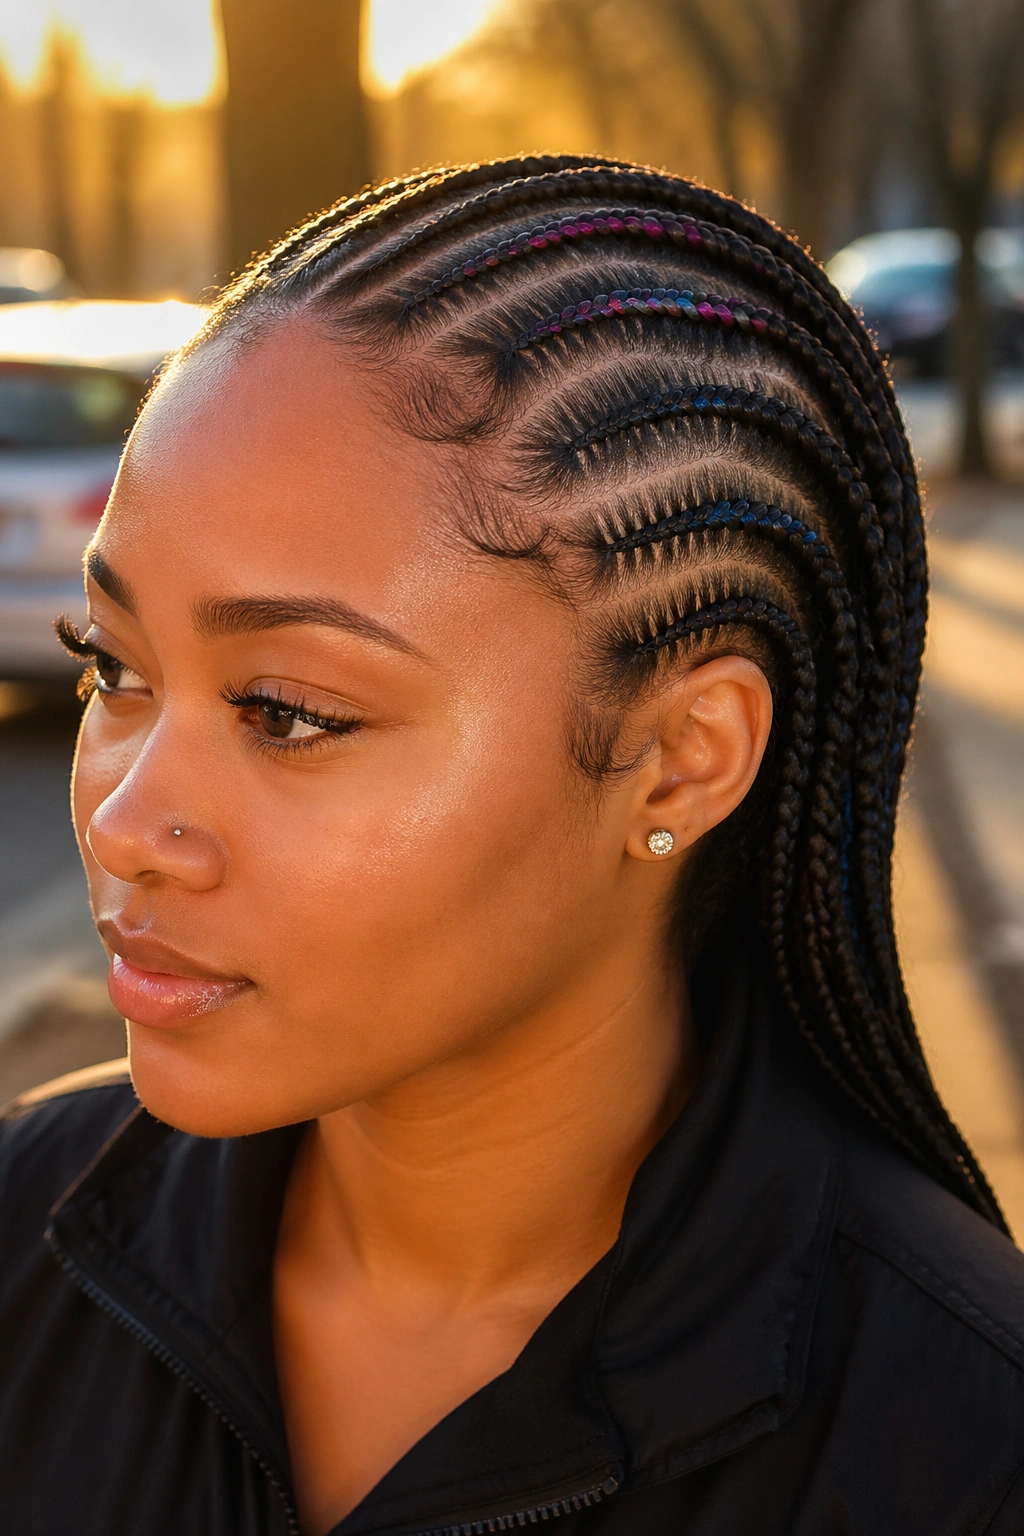
A brief scenario — you want color in your style but you’re not ready to dye your natural hair. Small cornrows with feed-in color handle this problem gracefully.
During install, feed in small pieces of colored kanekalon (burgundy, blonde, copper, blue) into specific cornrows — usually a cluster of 2-3 along one side or the front. The color reads through the entire length of those specific braids while leaving the rest of the install natural.
Takedown removes all color. No commitment. No damage to natural hair.
- Place color on the side that faces most conversations (usually your dominant side)
- Cluster 2-4 colored cornrows together rather than scattering them evenly — clusters read bolder
- Match color intensity to skin undertone the same way you’d pick lipstick
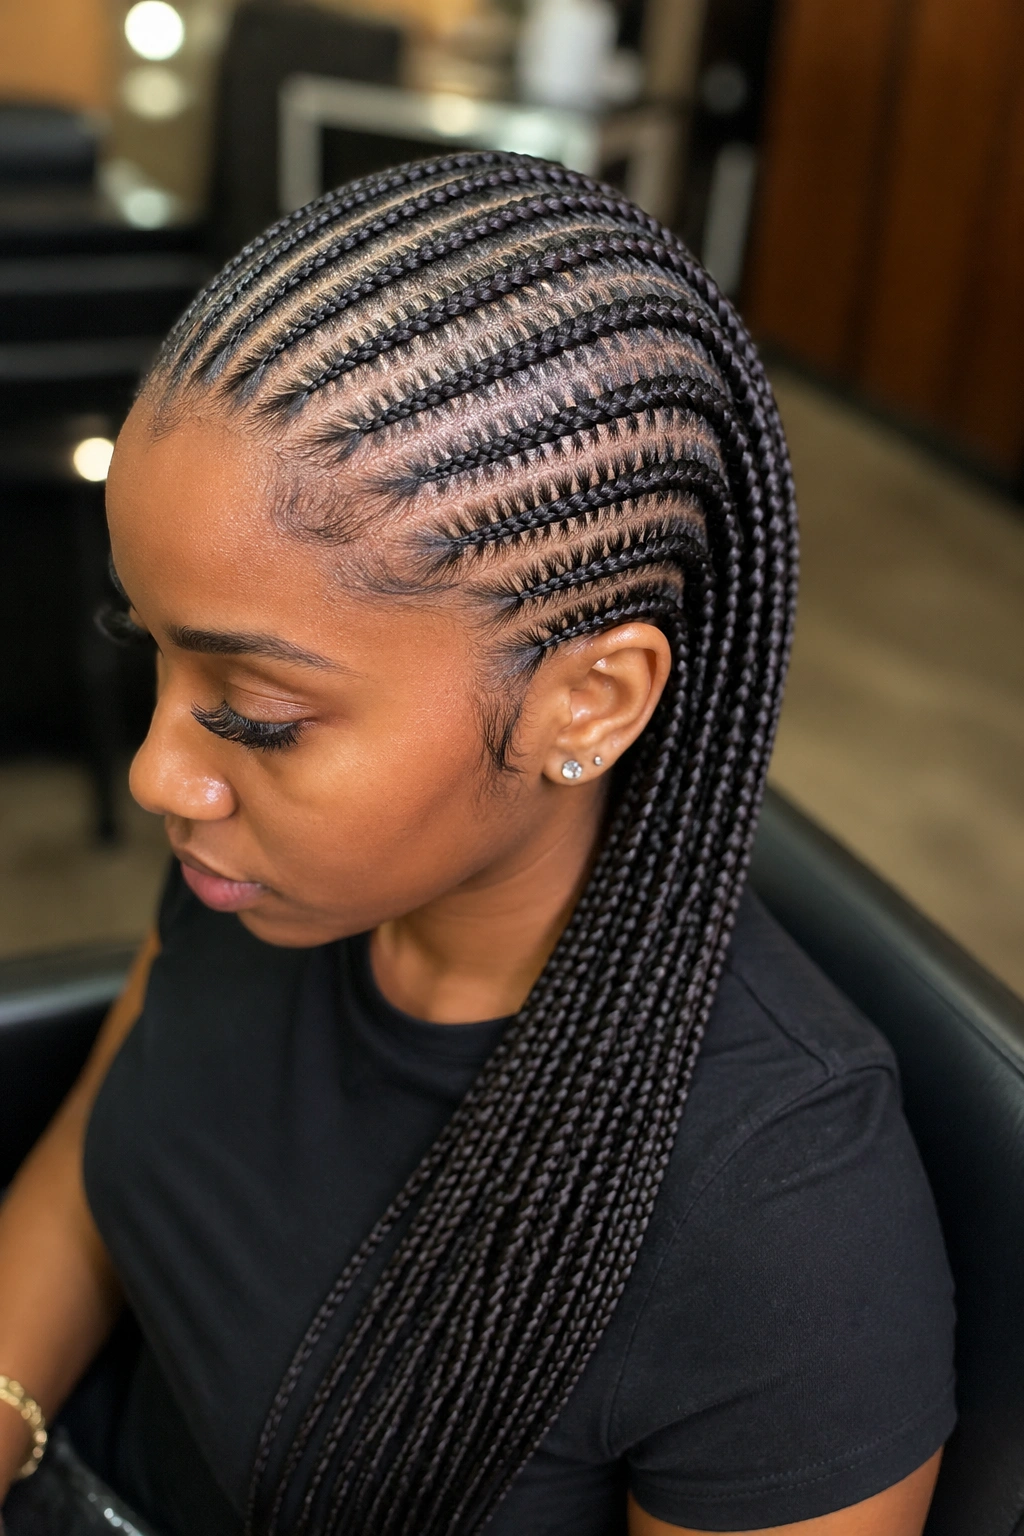
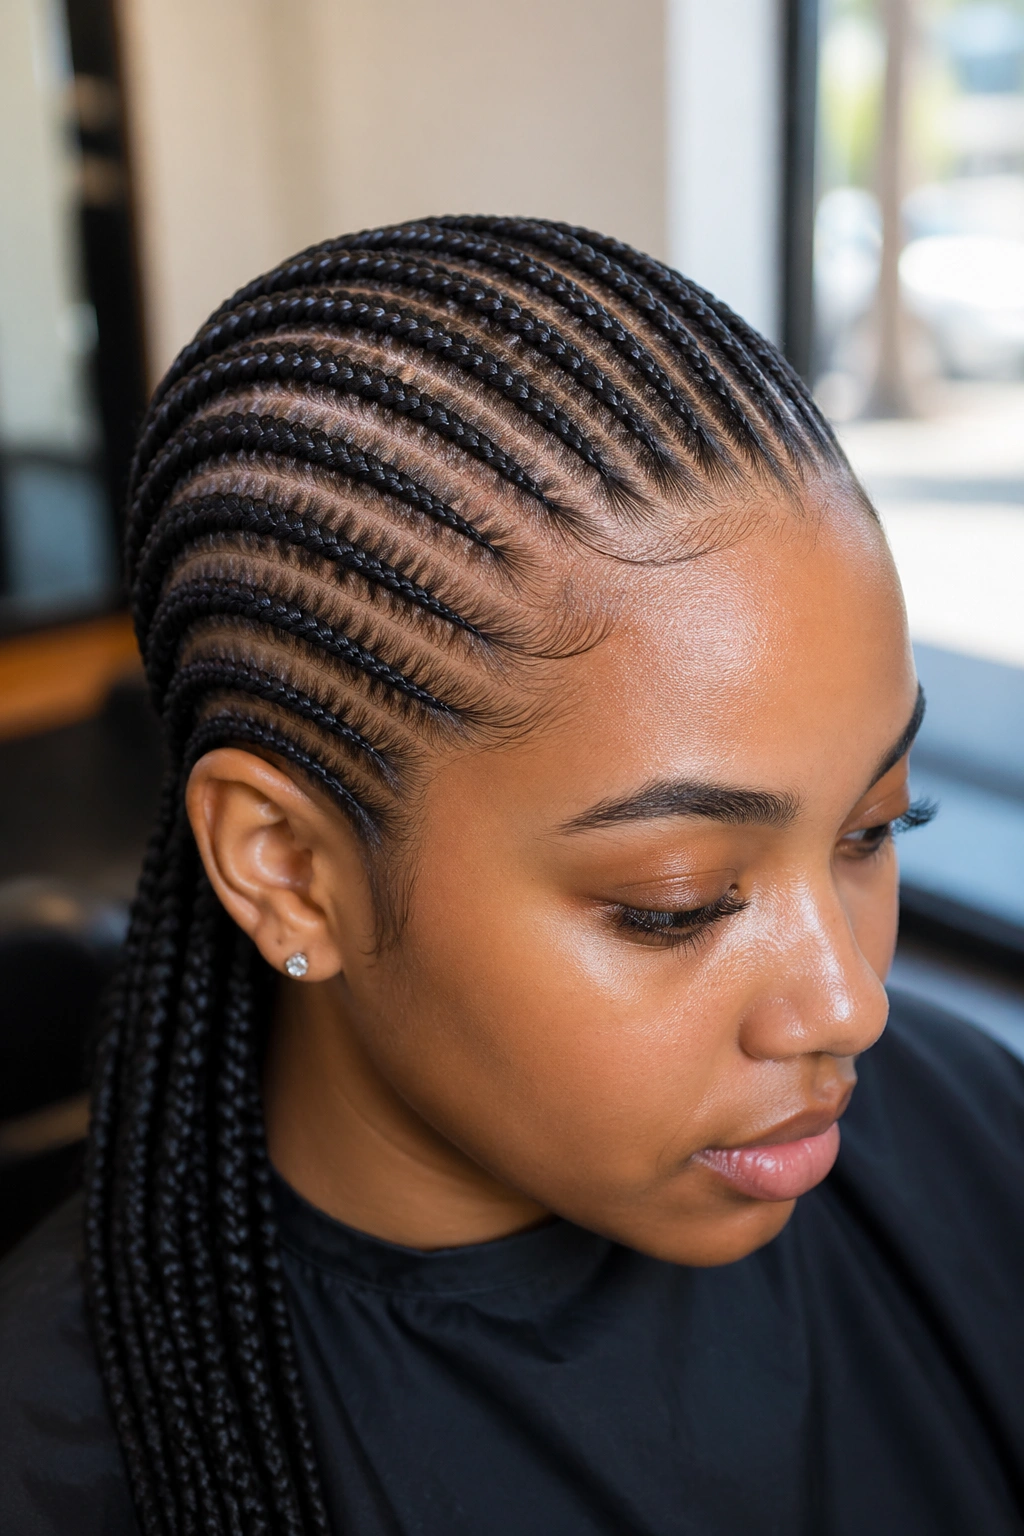
8. Small Cornrows With a Deep Side Part
The side part sits deep — starting at the outer edge of one eyebrow and traveling back at a clean diagonal. One side of the head holds significantly more braids than the other, creating an asymmetric silhouette that reads dressed-up.
A heavy side part on small cornrows works in professional settings where you want the braided style to read sharp and intentional rather than casual.
9. Small Cornrows With Stitch Detail
Stitch cornrows have small horizontal ridges running perpendicular to the braid direction, giving a knitted or woven appearance. When applied to small cornrows, the stitch detail becomes fine and almost lace-like.
This is the longest-install version of small straight-backs on this list. Expect 6-7 hours for a full head. The result photographs incredibly well — every line and ridge catches light differently.
Worth the time for big events, photoshoots, or any install you plan to wear for the full 4-6 week protective styling window.
10. Small Cornrows With Highlights
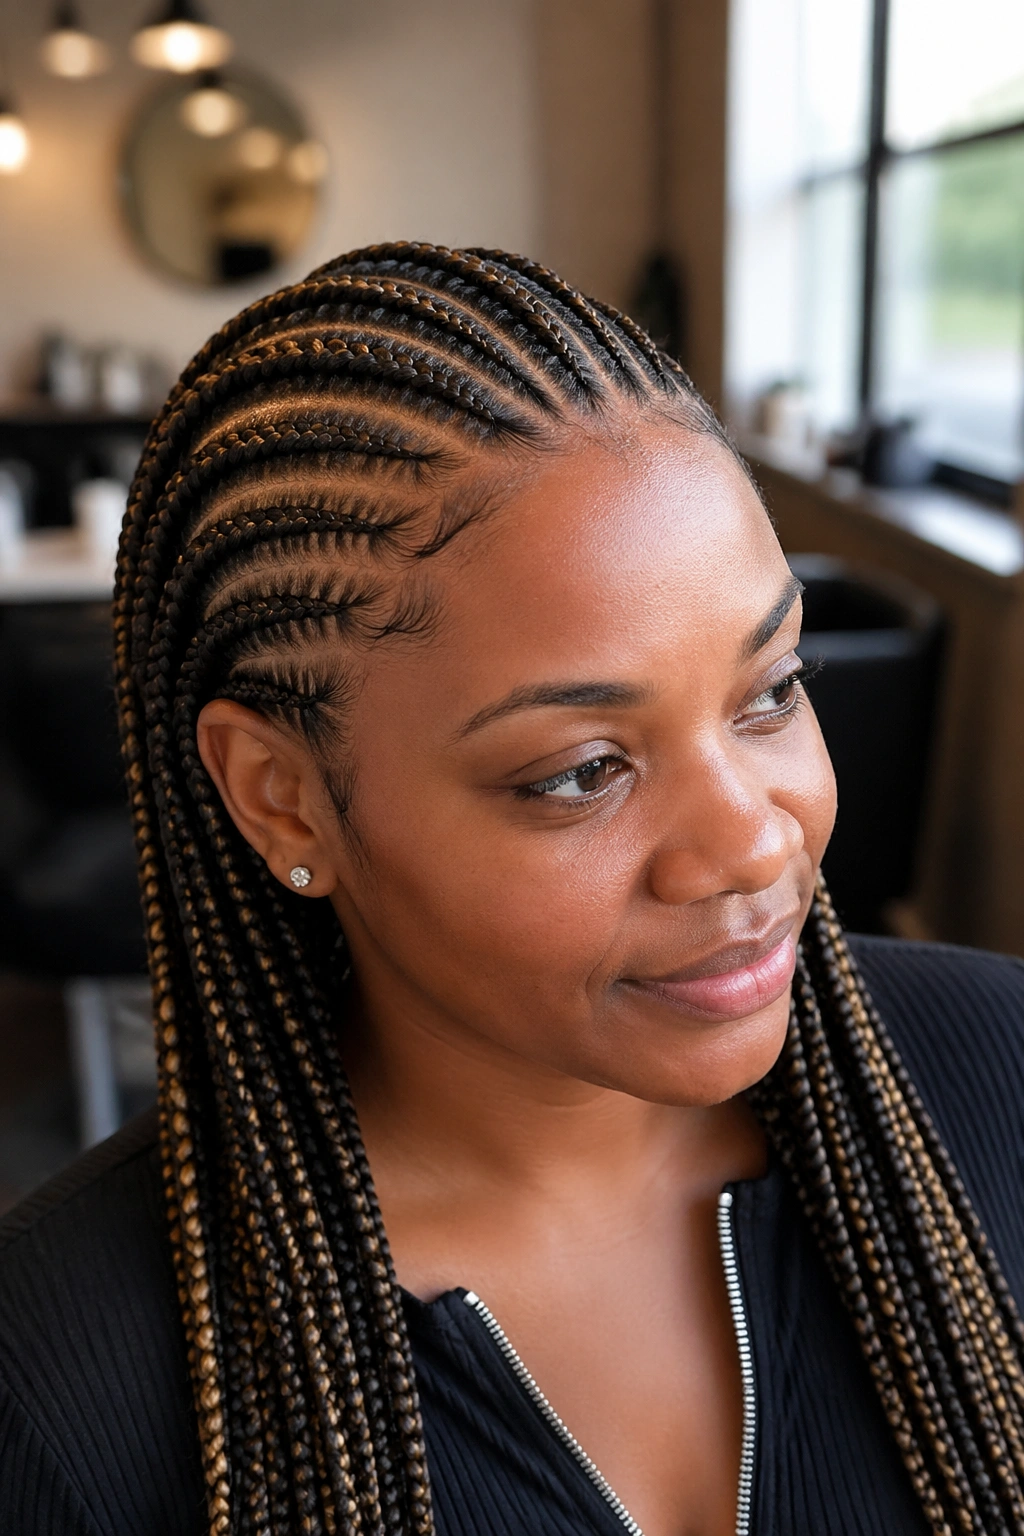
Differing from all-color feed-ins, highlights involve using naturally-colored kanekalon that’s just a shade or two lighter than your natural hair. Honey brown on dark brown. Auburn on black. Caramel on dark auburn.
The effect reads like an expensive highlighting job without any chemicals. The highlight distribution can be even across the head or concentrated around the face and crown where highlights tend to appear naturally.
11. Small Cornrows With a Curved Hairline
Instead of straight cornrows starting at a straight hairline, the front braids follow a curved pattern that hugs the shape of the face. The curve is subtle — maybe 1/2 inch of deviation from straight — but it softens the overall look and can help balance certain face shapes.
Round faces benefit from slight curves that add vertical motion. Long faces benefit from flatter curves that add horizontal interest.
12. Small Cornrows Half-Up Half-Down
The front and top half gets gathered into a high cornrow section. The back half hangs loose as individual braids or is tied into a low ponytail. This creates a layered silhouette with visible separation between the two sections.
Use a clear or thin fabric band at the gathering point. Avoid heavy scrunchies — they add visual bulk that competes with the precision of the small braids.
13. Small Cornrows With Scalp Spray Shine
A styling choice rather than a braid pattern change. After installation, a high-shine scalp spray or shine gel is applied along every part. The finish reads glossy and polished — closer to a magazine-shoot aesthetic than an everyday install.
Don’t overdo it. Shine products attract dust and can flake if built up over multiple applications. A single even coat on install day, refreshed every 5-7 days with a light mist, maintains the shine without buildup.
14. Small Cornrows Into Dreadlocks
A transitional style. The cornrows at the top eventually release into faux locs, Senegalese twists, or actual beginning-stage dreadlocks at the bottom. For people starting a loc journey, small cornrows provide a protective base while the ends take on a different texture.
The cornrow-to-loc transition needs careful installation at the stopping point to avoid bumps. A skilled braider blends the two textures without a visible bulge.
15. Small Cornrows With Hairline Baby Hairs
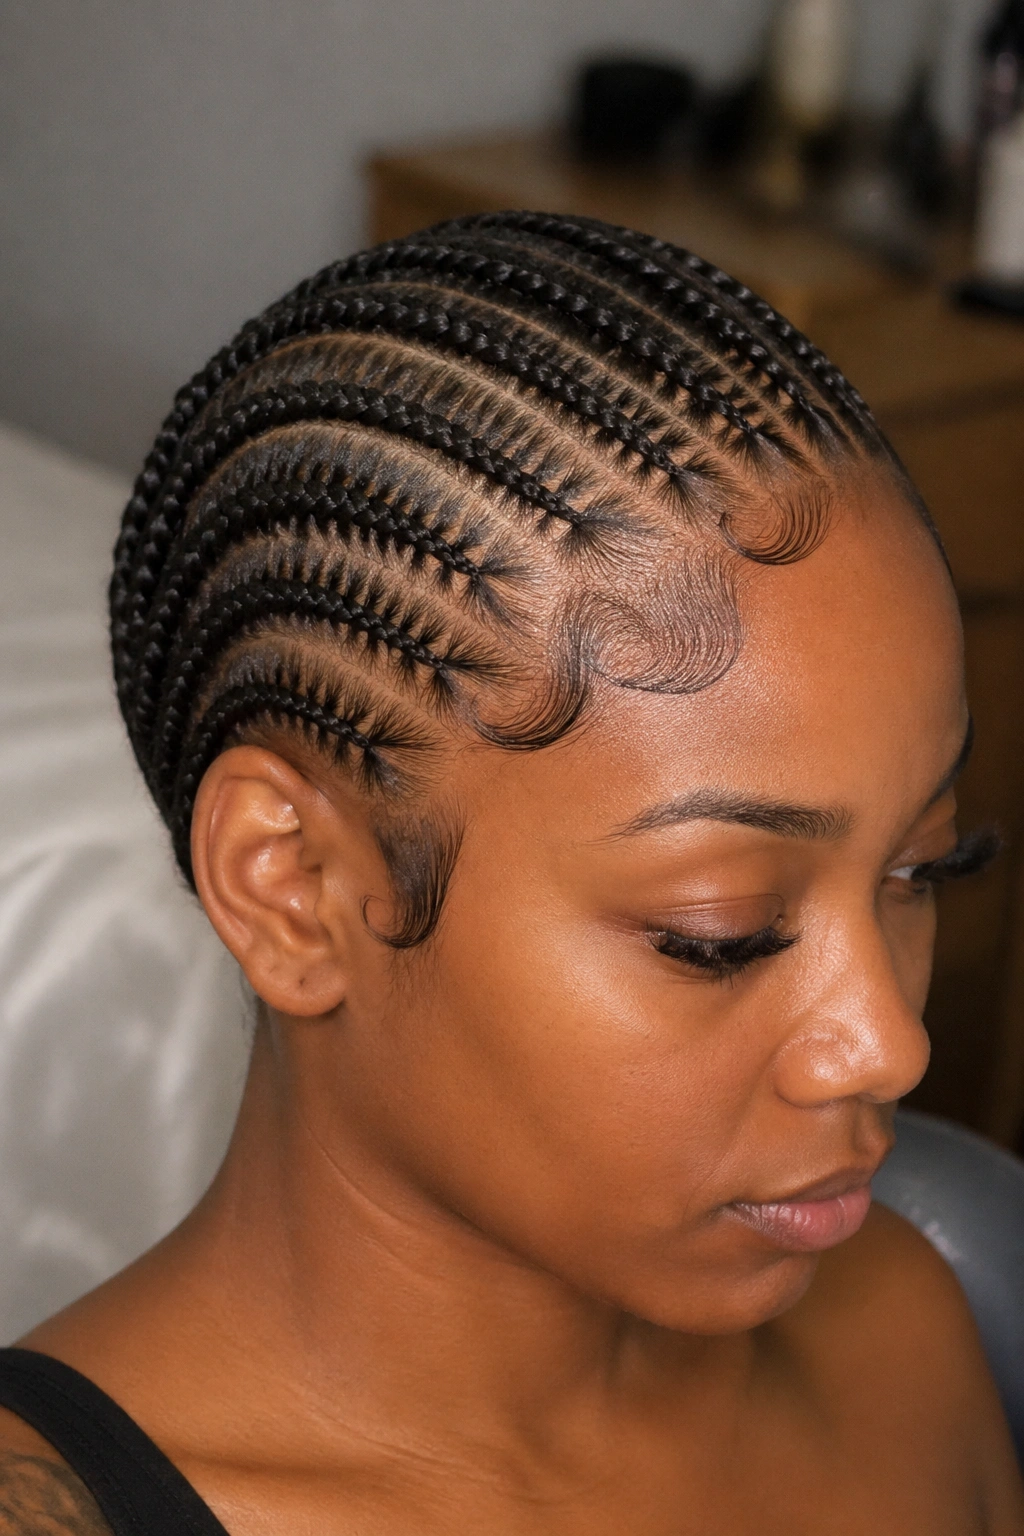
The cornrow install stays classic. The styling addition is laid baby hairs along the hairline — swirled, swooped, or geometrically shaped with edge gel and a fine-toothed brush.
Baby hairs read finished. Without them, small cornrows can look a little clinical — precise but cold. Baby hairs add the human touch, the detail work that reads personal and stylist-done.
Practice baby hair design on flat hair before doing them over small cornrows. The baby hair placement affects the read of the whole install.
16. Small Cornrows With Decorative Cuffs
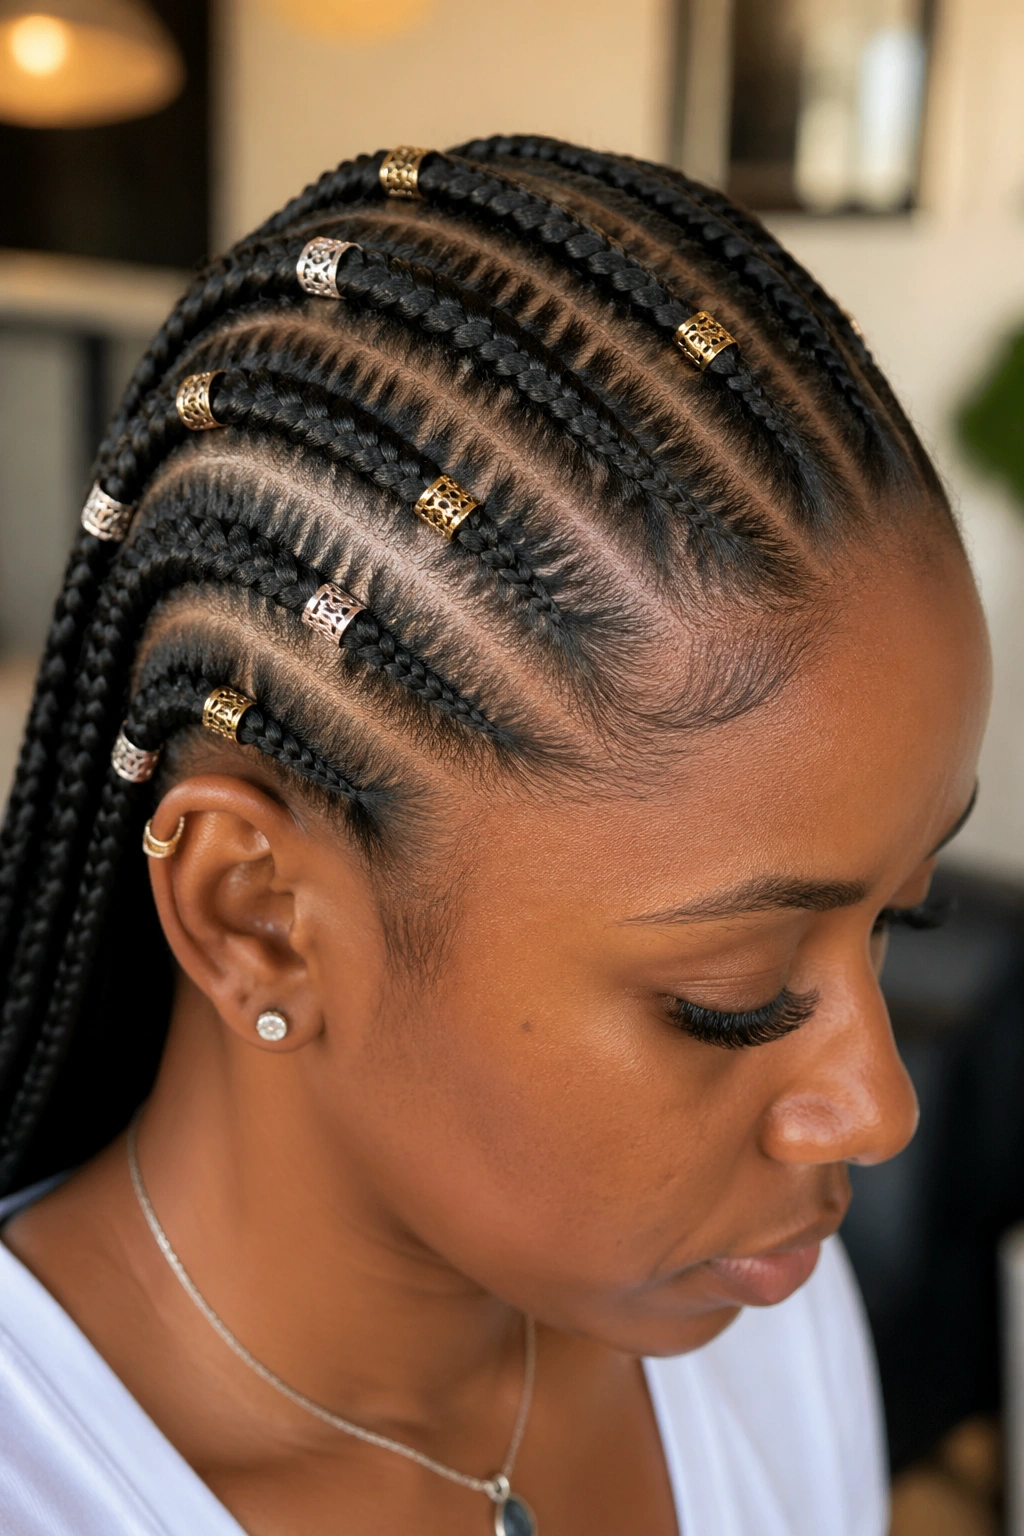
Metal cuffs — gold, silver, rose gold — threaded onto individual cornrows at random or strategic placements. The cuff scale should proportion to the small braid scale. Tiny ring cuffs (6mm-8mm) work better than large chunky cuffs.
Styling Tips
Group 2-3 cuffs on certain braids rather than single cuffs on many braids. Clustering reads intentional. Scattering reads haphazard.
Most cuffs have a small pressable mechanism that compresses around the braid to hold. Don’t compress so tight that the cuff damages the braid — just firm enough that it doesn’t slide off.
17. Small Cornrows With Jumbo Accent Braids
A contrast pattern. Most of the head gets small cornrows. One or two jumbo cornrows placed at the center, sides, or front create a focal point that breaks up the uniform small scale.
The jumbo accents draw the eye. Position them where you want attention — face-framing along the hairline, running down the center of the head, or off to one side as an asymmetric statement.
18. Small Cornrows With Open Top
The back and sides get small cornrows. The top of the head remains loose — usually styled into a puff, a high bun of natural hair, or a twist-out. The cornrow sections contain most of the head while the crown stays free.
This variation needs a clean transition line between braided and loose sections. A sharp part along the perimeter of the loose section prevents fuzzy bleed-over.
19. Small Cornrows With Faux Undercut
No actual shaving. The small cornrows on the sides are installed so close together and so tight that from certain angles they read like a shaved undercut. The top braids are slightly larger or styled differently to emphasize the contrast.
Particularly photogenic from side angles. The “shaved” effect catches light and creates a sculpted profile without the commitment of actual shaving.
20. Small Cornrows With Diagonal Direction
Rather than running straight back, all small cornrows flow at a diagonal across the head — usually from the right temple toward the left nape, or reversed. The diagonal direction creates visible motion across the head even when still.
This variation requires more skill at the parting stage. Consistent diagonal parts across 25+ braid sections is harder than straight back parts because every part has to match the same angle rather than the same direction.
21. Small Cornrows With Gold Thread
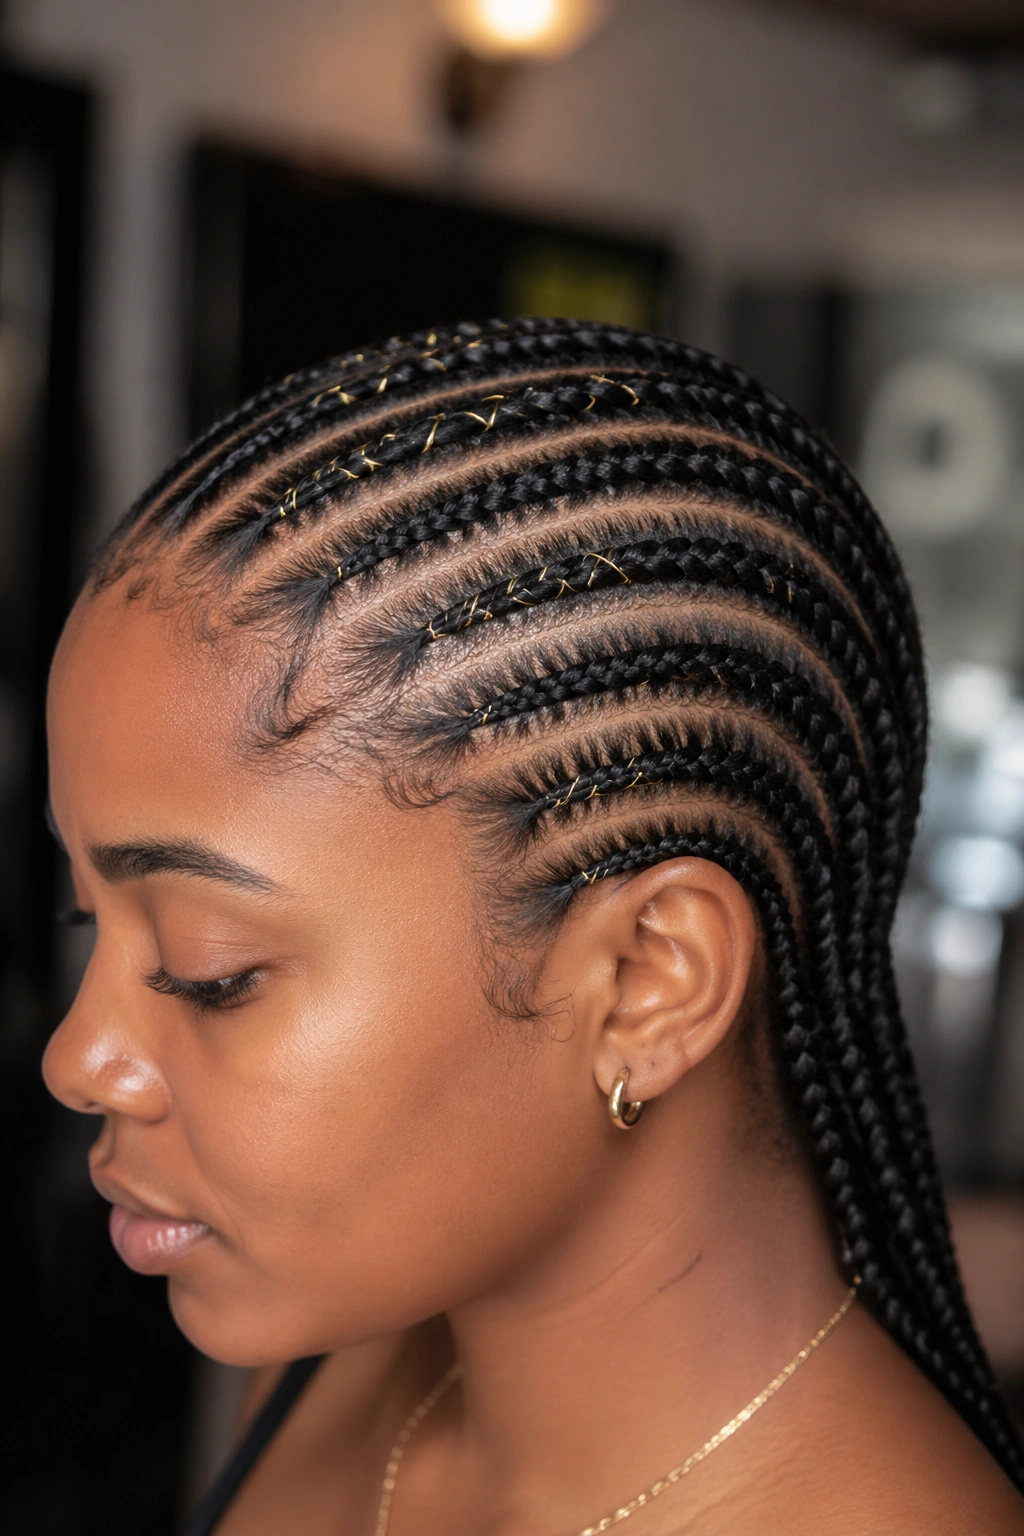
String thin gold thread or decorative braiding cord through select cornrows at install time. The thread wraps around the braid in a spiral or weaves in and out at intervals, adding a metallic line detail.
Use jewelry-grade thread rather than sewing thread — sewing thread frays and breaks within days. Thin leather cord or metallic embroidery floss holds up for the full install period.
Remove the thread before washing. Water can tarnish certain metal threads.
22. Small Cornrows With Natural Gray Accents
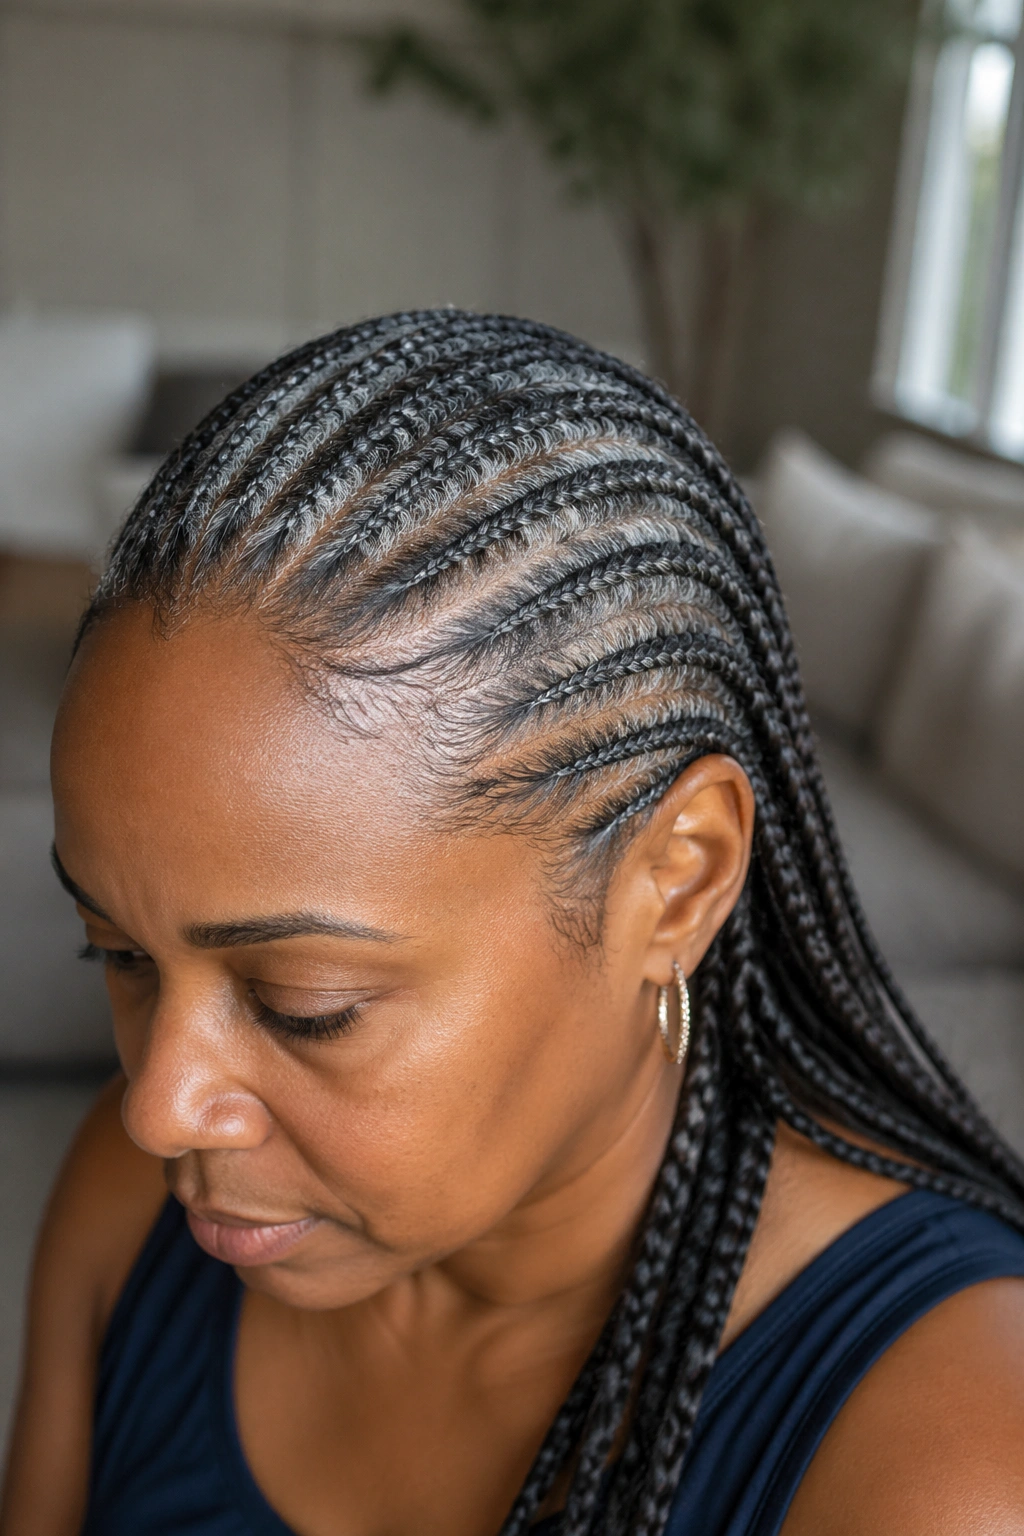
For those whose hair naturally contains some gray strands, small cornrows can be installed in a pattern that emphasizes or blends the gray. Separate the gray strands into their own small cornrows for visible silver lines across the scalp — or distribute them evenly for an overall salt-and-pepper effect.
No coloring needed. This is purely a patterning and sectioning choice that works with your existing hair.
23. Small Cornrows With Goddess Touch
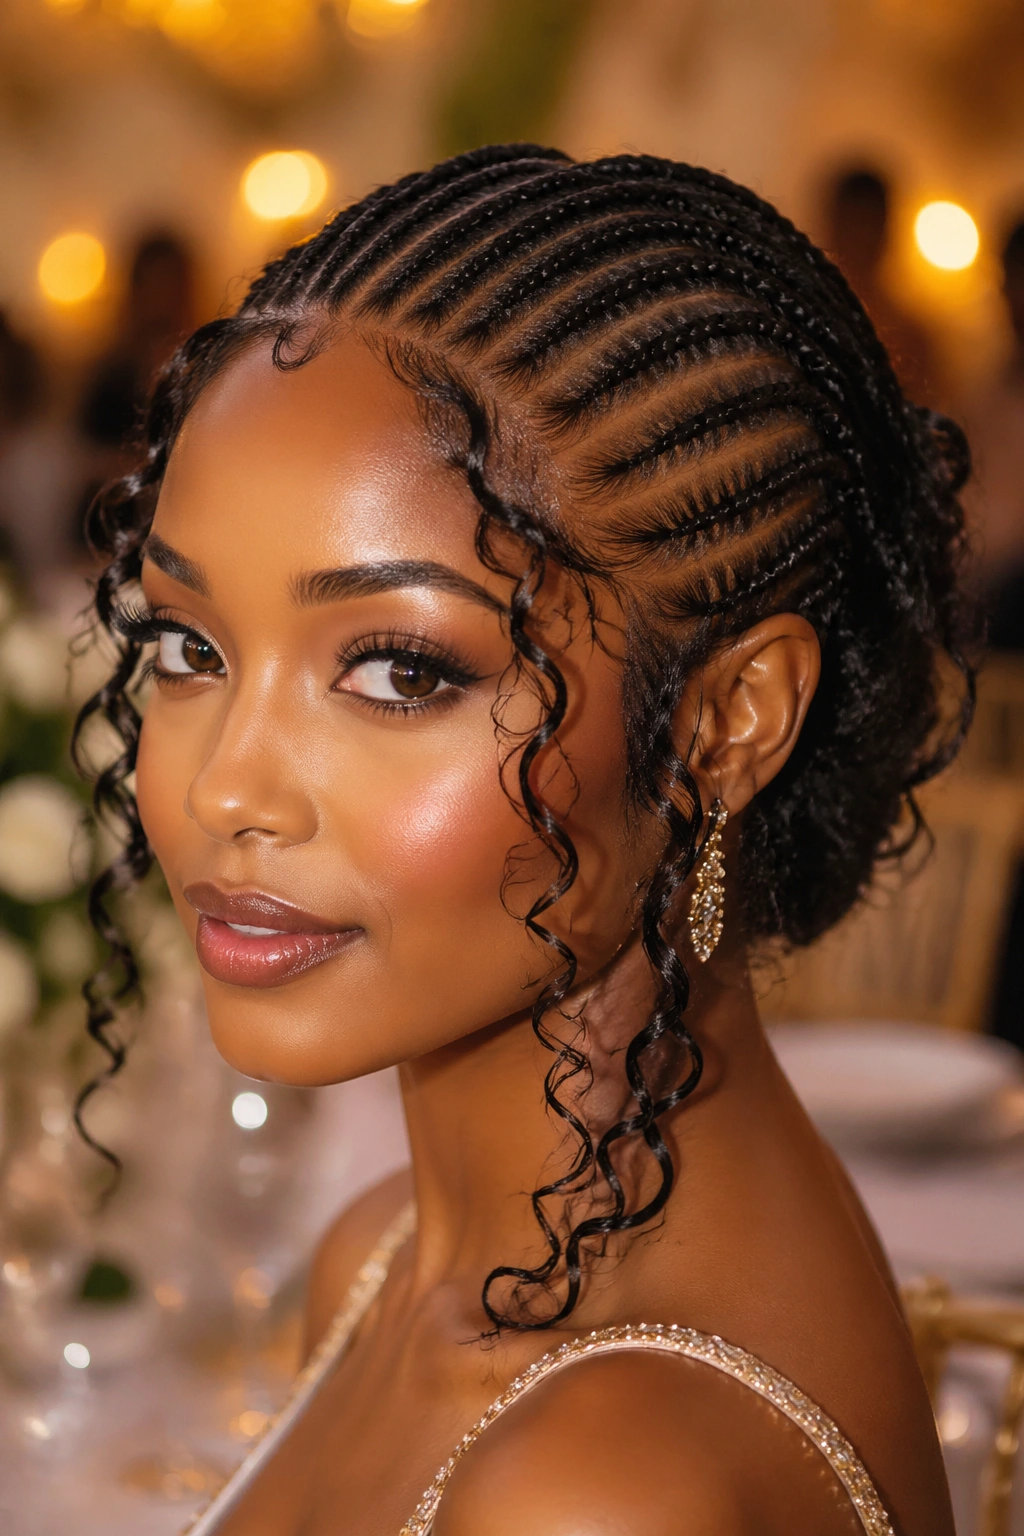
The cornrow base is small and tight. The ends are left with tendrils of loose curl or wave hanging free — usually framing the face. The contrast of structured small braids and free-flowing face-framing pieces reads romantic.
Best wedding or formal event version of small cornrows on this list. Also works for photoshoots where you want softness alongside precision.
24. Small Cornrows With Cross-Over Pattern
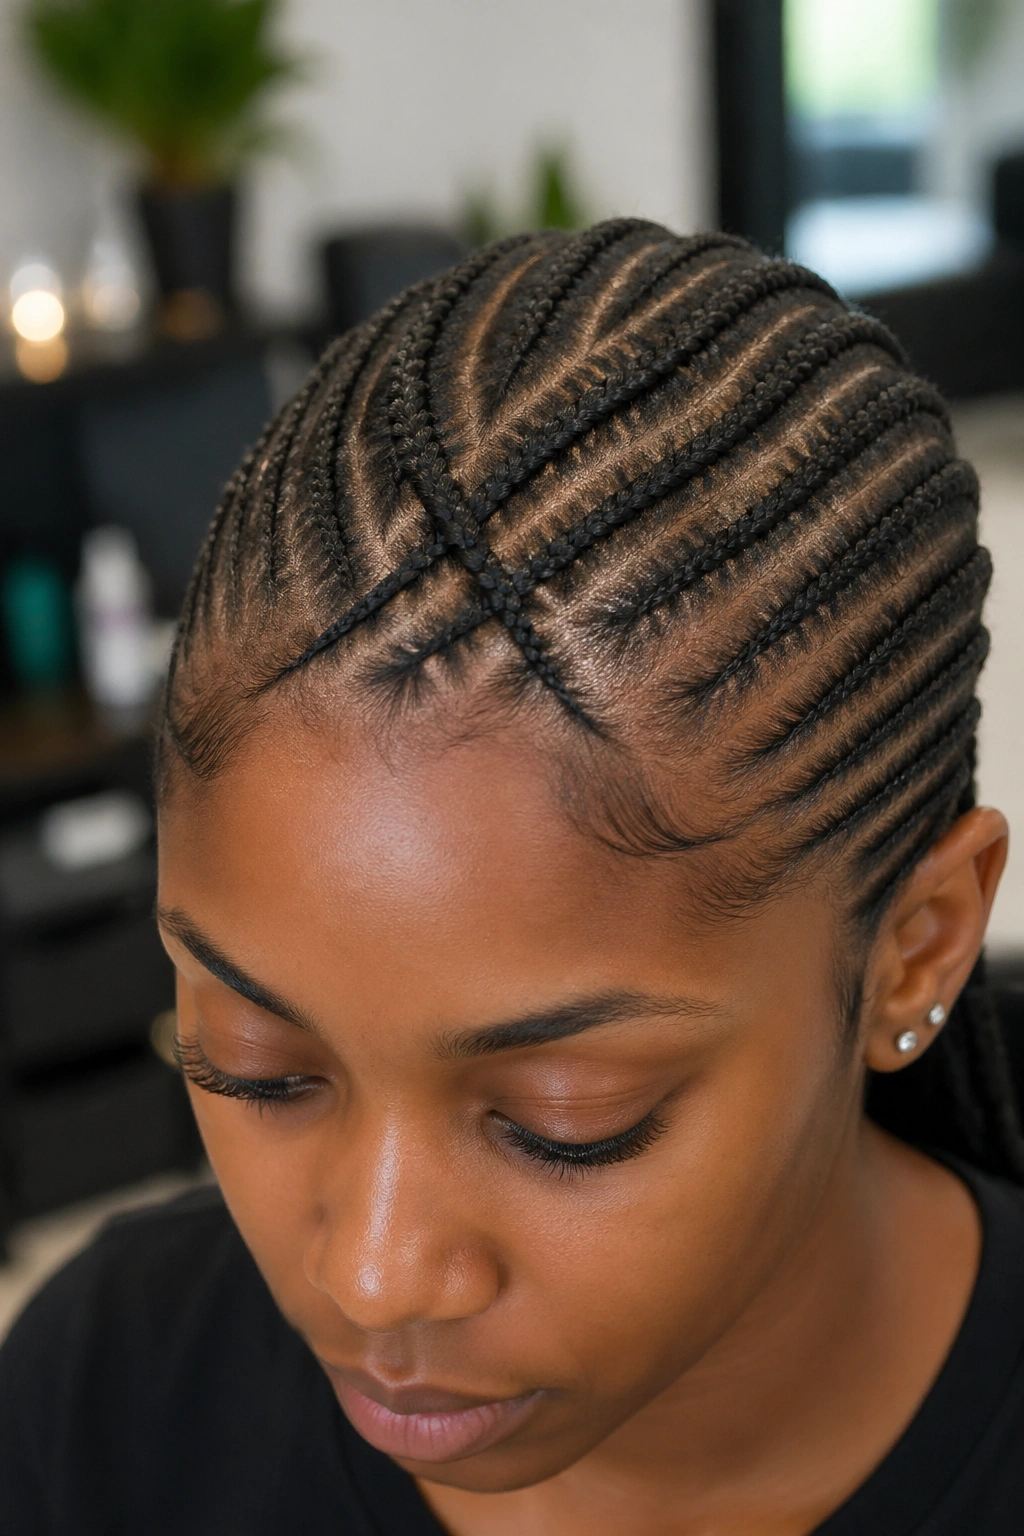
Two or three cornrows on the front cross over each other in an X or V pattern before continuing straight back. The crossover creates a geometric design element at the front of the head that reads modern and structured.
Practice the crossover on a mannequin first. Getting the braids to interlock cleanly without bulging requires specific technique — the braider has to transition one cornrow over another while keeping both close to the scalp.
25. Small Cornrows With Freeform Ends
Maintenance Notes
The last 2-3 inches of each cornrow remain unbraided. The free ends fluff out in natural texture, creating a soft halo of loose hair at the nape. This reads playful and somewhat undone in a stylish way.
Keep the free ends moisturized with a light leave-in. They can dry out faster than braided sections because they’re exposed to air and friction from collars or bags.
Refresh the free-end texture every 2-3 days with a small amount of curl cream scrunched in. Don’t comb — combing breaks the natural curl pattern and creates frizz.
Weekly Maintenance to Extend Wear
First wash: 7-10 days after install. Use diluted shampoo in a squeeze bottle applied to the parts only. Massage gently. Rinse thoroughly. Follow with diluted conditioner along the length. Squeeze out excess and air dry.
Nightly: silk bonnet or satin scarf wrapped around the head. This is not optional. Cotton pillowcases dry out the braids and cause frizz at the contact points.
Edge touch-ups as needed. A small amount of edge gel on a soft toothbrush can smooth fuzzy hairline hairs every 2-3 days.
Scalp spray once a week minimum. Light oil spray or water-based braid spray applied directly to the parts, not the braids themselves.
Scalp Health Under Long-Lasting Installs
Small cornrows often stay in for 4-6 weeks. That’s a long time for the scalp to go without direct access to air and product.
Build a scalp care kit: a scalp oil in a bottle with a pointed applicator, a water-and-conditioner spray, a clarifying shampoo for wash days. Apply scalp oil weekly. Spray the parts when they feel dry. Wash every 1-2 weeks on the 4-week mark, less frequently on shorter wear periods.
Avoid heavy oils that weigh down and attract dust. Light oils like grapeseed, jojoba, or sweet almond absorb faster and leave less residue.
If you feel itching that doesn’t respond to spray, examine the scalp carefully. Excessive flakes, redness, or unusual tenderness might mean it’s time to take down the install early.
Takedown Process for Dense Small Cornrow Installs
Plan for 90 minutes to 2 hours for full takedown. Small cornrows take down slower than larger ones because there are more of them.
Work top to bottom or back to front — a consistent direction prevents missing sections. Spritz each braid with water and conditioner before unraveling. Unbraid from the bottom up, using fingers first and a wide-tooth comb only for stubborn knots.
Expect shed hair. A 4-week install on small cornrows releases more shed hair at takedown than a 4-week install on jumbo cornrows because more sections held more hair in place.
After full takedown, do a detangling session with conditioner on damp hair, then shampoo and deep condition. Give the hair a day or two of rest before the next install.
Picking the Right Variation for Your Face and Head
Round face: small cornrows with a deep side part or a middle part that adds vertical motion.
Heart face: small cornrows with curved hairline or face-framing goddess tendrils to soften the jaw area.
Oval face: most variations work — go by preference and occasion.
Long face: small cornrows with side-swept sections or asymmetric bun placement to add horizontal balance.
Smaller heads benefit from thinner, more densely packed small cornrows. Larger heads can handle slightly wider small cornrows without losing the scale.
Common Mistakes With Small Cornrows
Starting on dirty hair that slips under gel.
Installing too tight because you think tighter equals longer-lasting (it doesn’t — it equals damaged).
Forgetting to stretch hair before parting. Shrunk 4C hair resists clean parting and creates lumpy braids.
Skipping the scalp care routine during the install.
Wearing cotton sleep caps or pillowcases instead of silk or satin.
Leaving the install past 6 weeks and dealing with matting at the roots.
Small straight back cornrows are the kind of style that quietly carries you through seasons of your life. They’re not flashy. They’re not trendy. They just work — clean, protective, polished, predictable in the best way. Find your rotation variations and you’ve got a styling system that holds up to every kind of day.