Long hair plus straight back cornrows is a combination most braiders will admit they love working on. The length gives the braids drama. Each row grows into a real tail — not a stub, not a tucked end, but something that swings when you move. Straight back cornrows for long hair read differently than the same style on shoulder-length. The proportions shift. The head looks sleeker, the face reads softer, and the back of the head becomes its own canvas.
But long hair brings complications. More tangling at the roots during the parting stage. More weight at the ends, which means more tension on the scalp if the braids are tight. Longer wash times. And the braider has to be more patient, because every small mistake in the parting shows up ten times as obvious when it runs all the way to the middle of the back.
I’ve been wearing my hair in straight back cornrows for longer than I can count. Every version has taught me something. The thick ones last longer but feel heavier. The thin ones look cleaner but fuzz faster at the edges. The key is learning which configuration suits your own length, density, and lifestyle.
What follows is 22 completely different ways to wear straight back cornrows on long hair. Some are sleek and corporate-friendly. Some are bold and statement-making. Some make clever use of accessories, colors, or density tricks to shift the look entirely. Each one works for hair that hits at least the middle of your back when stretched, though most suggestions scale up to waist length or beyond.
Before the styles themselves, a few foundational notes worth reading if you’re not already a seasoned wearer.
Why Long Hair Changes the Cornrow Math
A full head of shoulder-length hair might need 2 hours for a straight back install. The same head at waist length can need 4-5 hours. The parting doesn’t change — the braiding time does. Each row takes longer because each strand is longer to weave.
This also means your braider’s pricing might jump for long hair. That’s not a gouge — it’s fair. Ask upfront so there’s no surprise when you sit down.
The other big shift — long hair usually does not need extensions unless you’re going below the waist. Your natural length carries the style. This saves money and keeps the braid truly yours.
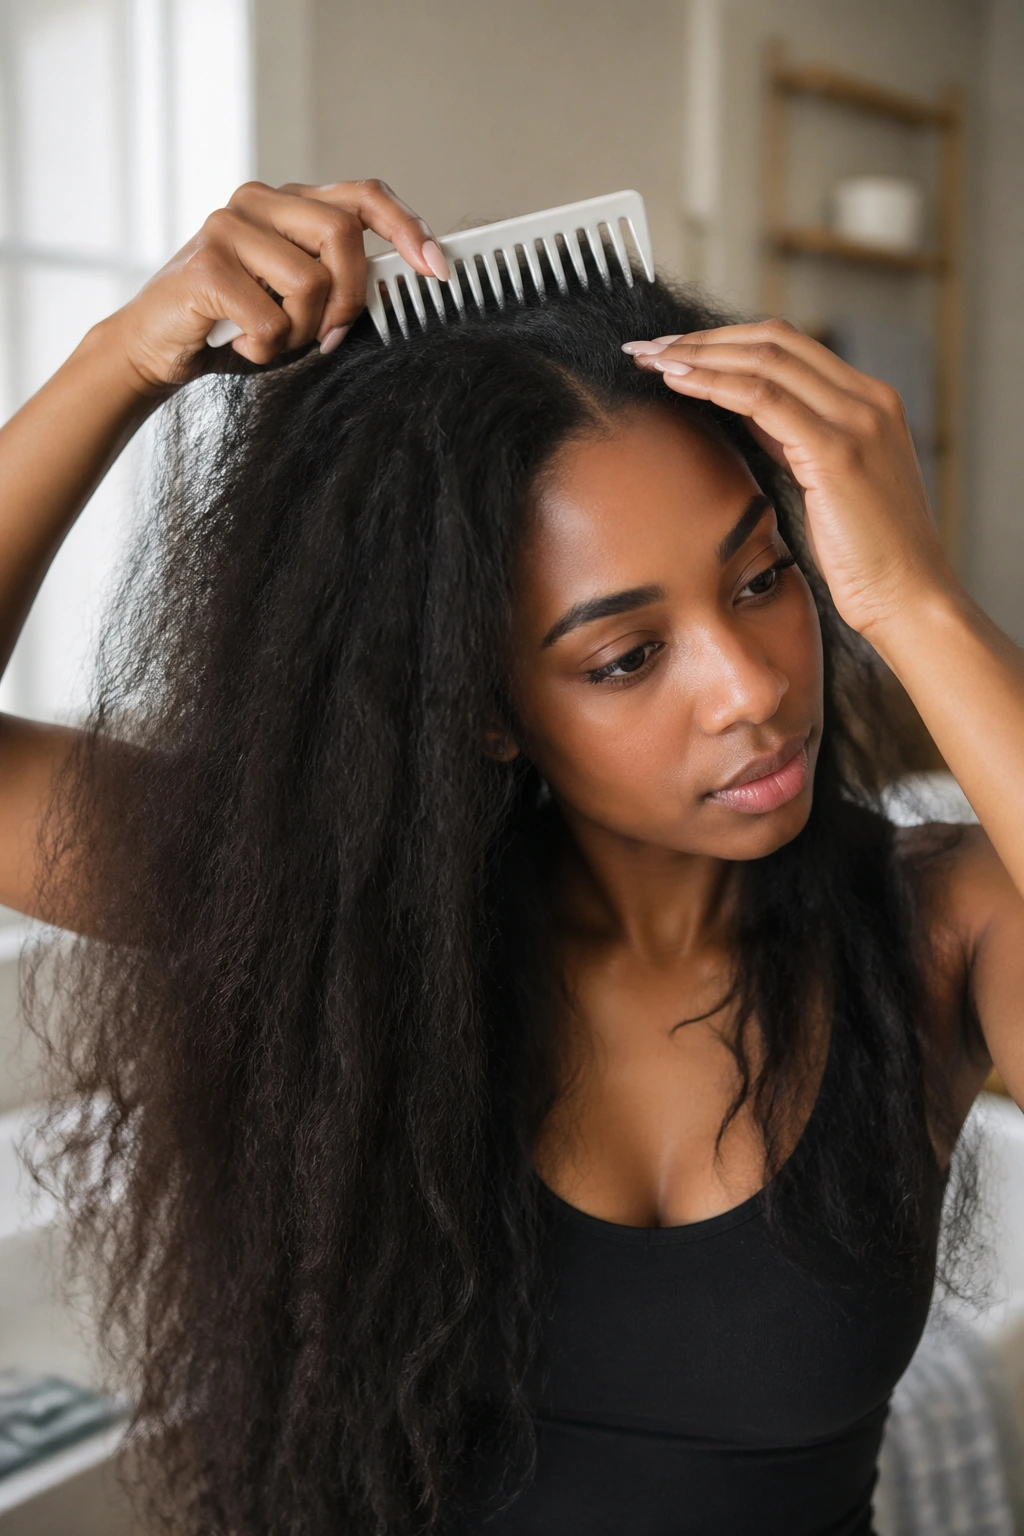
Prep Tips Specific to Long Hair
Detangle fully before you even think about braiding. A long, tangled head will slow a braider down enormously and can lead to breakage as they work through knots row by row. Finger detangle first, then work through with a wide-tooth comb, starting at the ends and moving up in 4-inch sections.
Blow-dry or stretch — your call. Some braiders prefer stretched hair (bantu knots overnight, twist-outs, banding). Others prefer a low-heat blowout. Damp hair is a no from every angle. It leads to mildew and makes the braids lose tension as they dry.
Trim your ends. Old split ends that get braided into a cornrow turn into visible fuzz at the base of the braid within a week. If you haven’t trimmed in a few months, do it before the install.
Parting Patterns That Flatter Long Hair
Long hair shows parting lines more dramatically. A crooked part that might go unnoticed on a 5-inch cornrow is glaringly obvious on a 20-inch one. Straight back works best when every row is precisely parallel.
For a traditional straight back, the number of rows should scale with your head size and density — 10 rows for average, 12-14 for denser hair, 8 rows for a bolder statement look. Ask for your braider’s recommendation based on your scalp showing through the parts.
The most common mistake — rows that start parallel but drift apart at the back. A good braider uses their thumb to check every row against the neighboring one before moving to the next strand.
Tools and Products That Save Long Hair
Edge control that doesn’t flake. A setting spray for added hold. A microfiber towel for drying the scalp without roughing up the braids. A silk or satin pillowcase — not just a bonnet, the pillowcase too, because long braids often flip out of a bonnet overnight. Silk scrunchies for loose tying. And a wide-tooth comb reserved only for braid days.
Skip the heavy oils during the install. Save them for post-install scalp care.
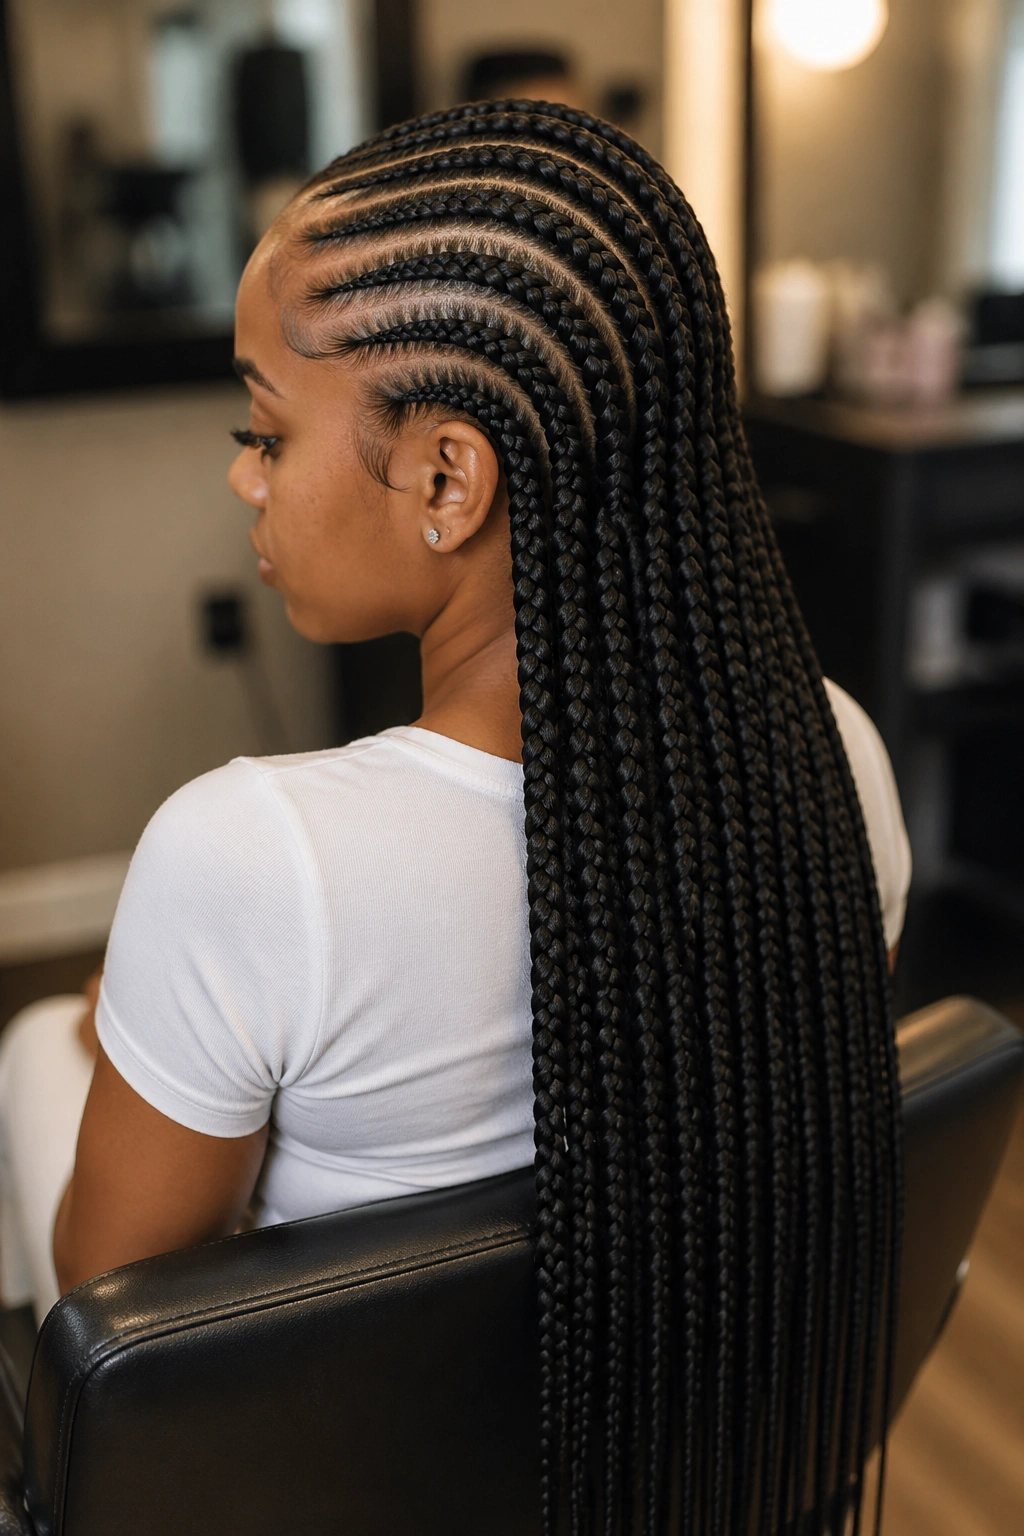
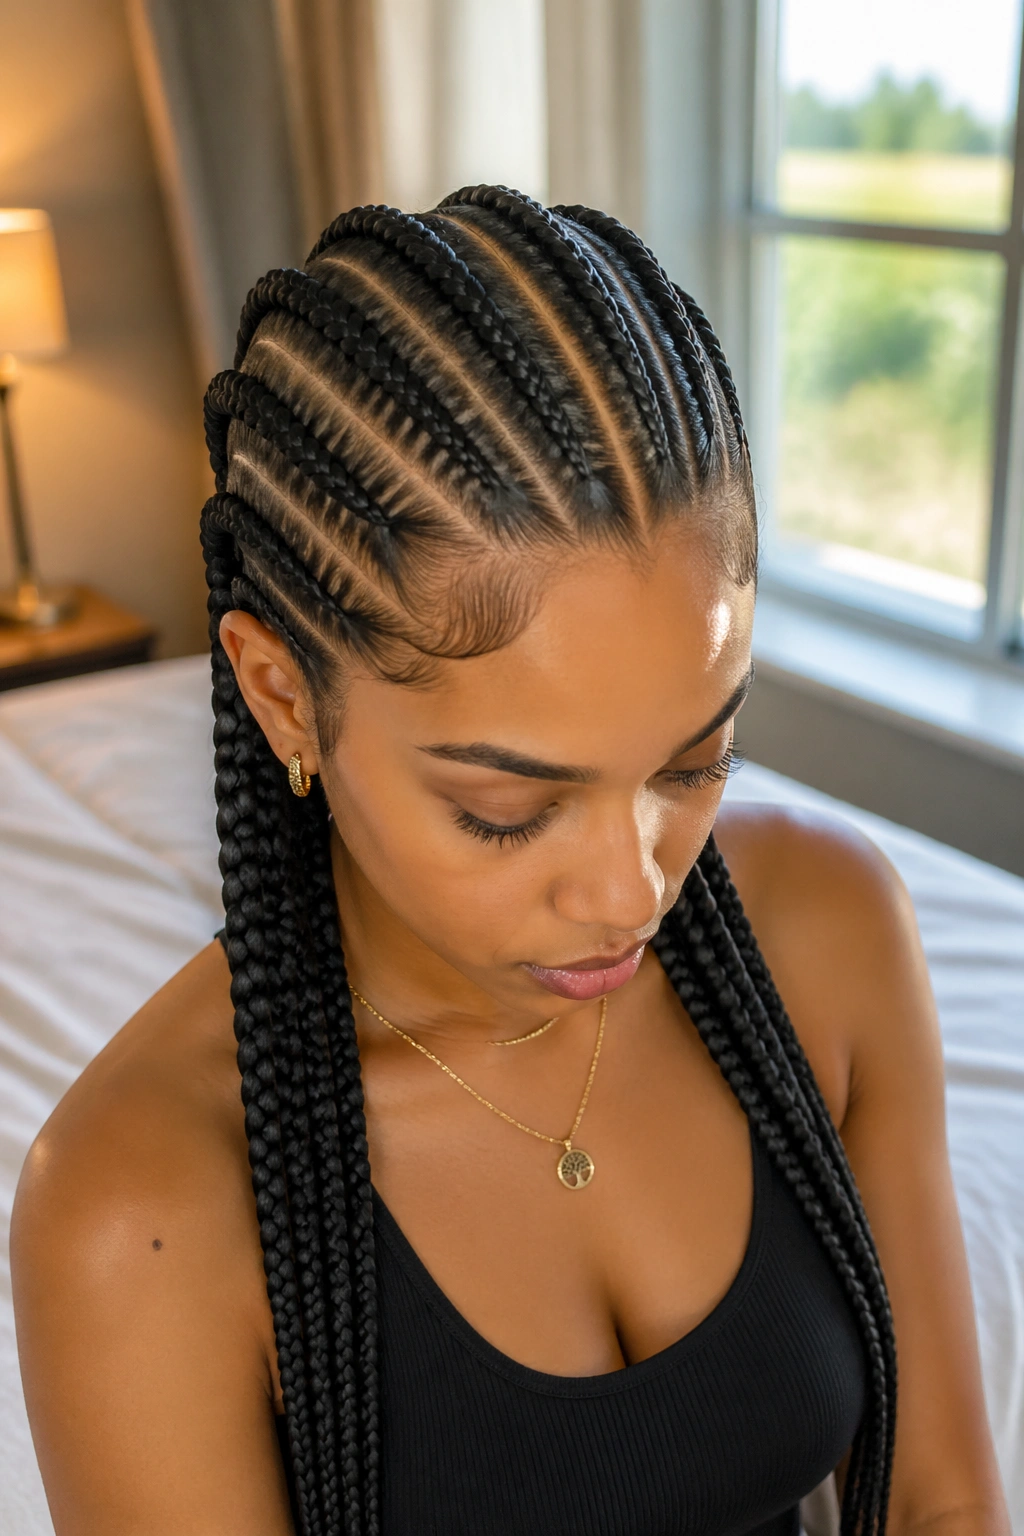
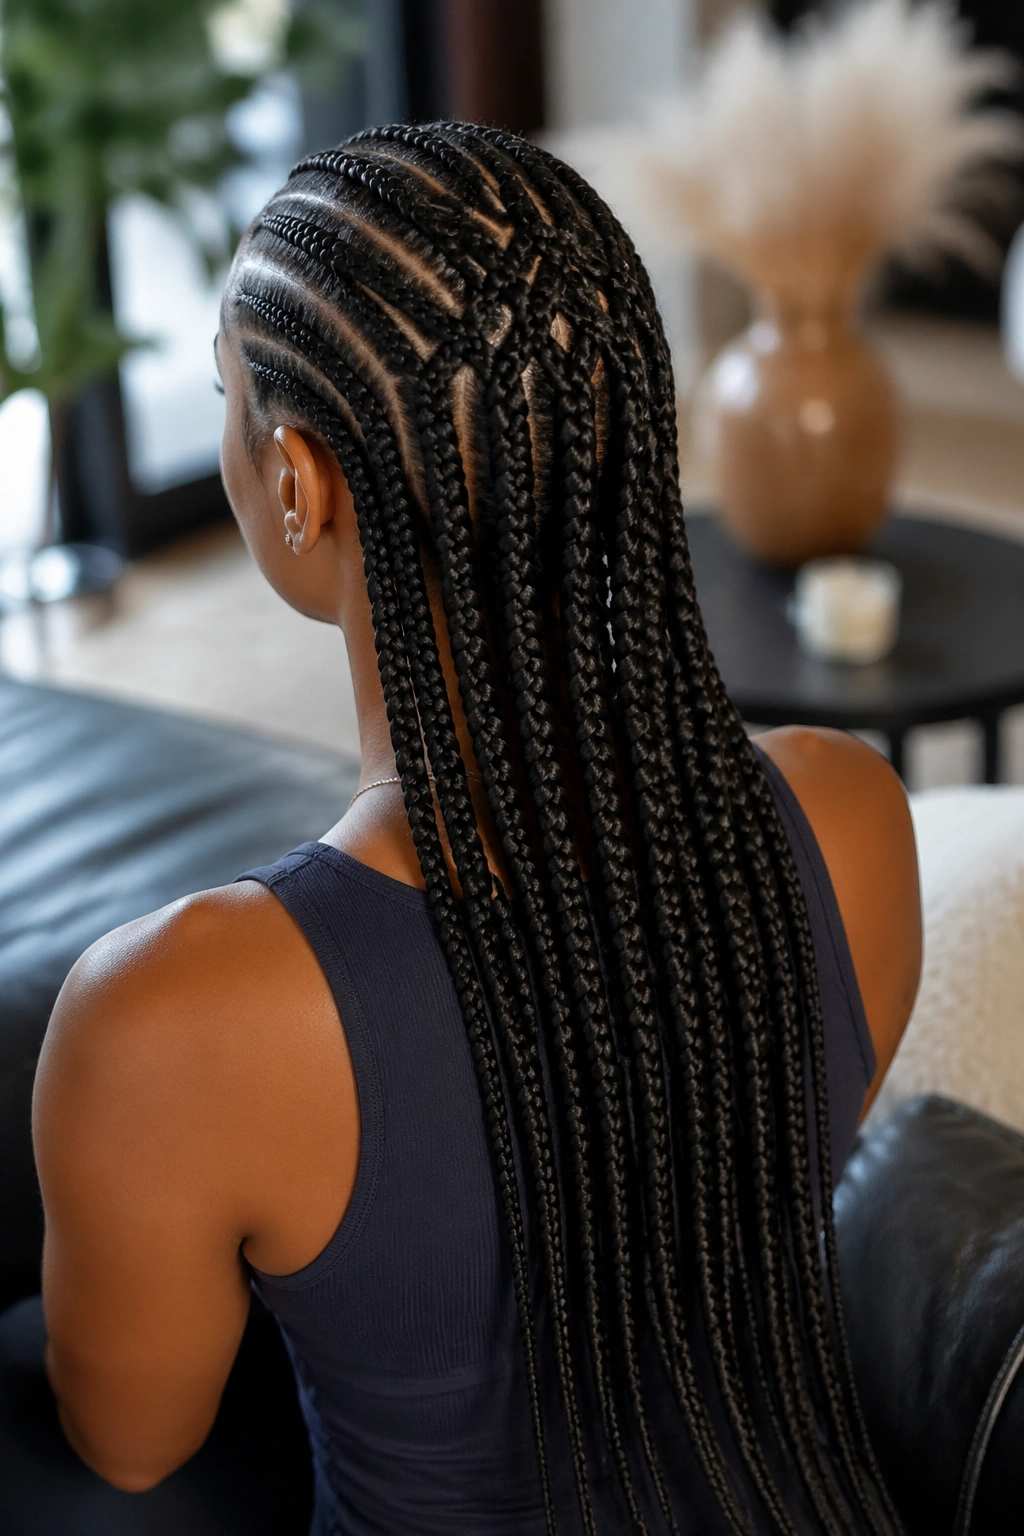
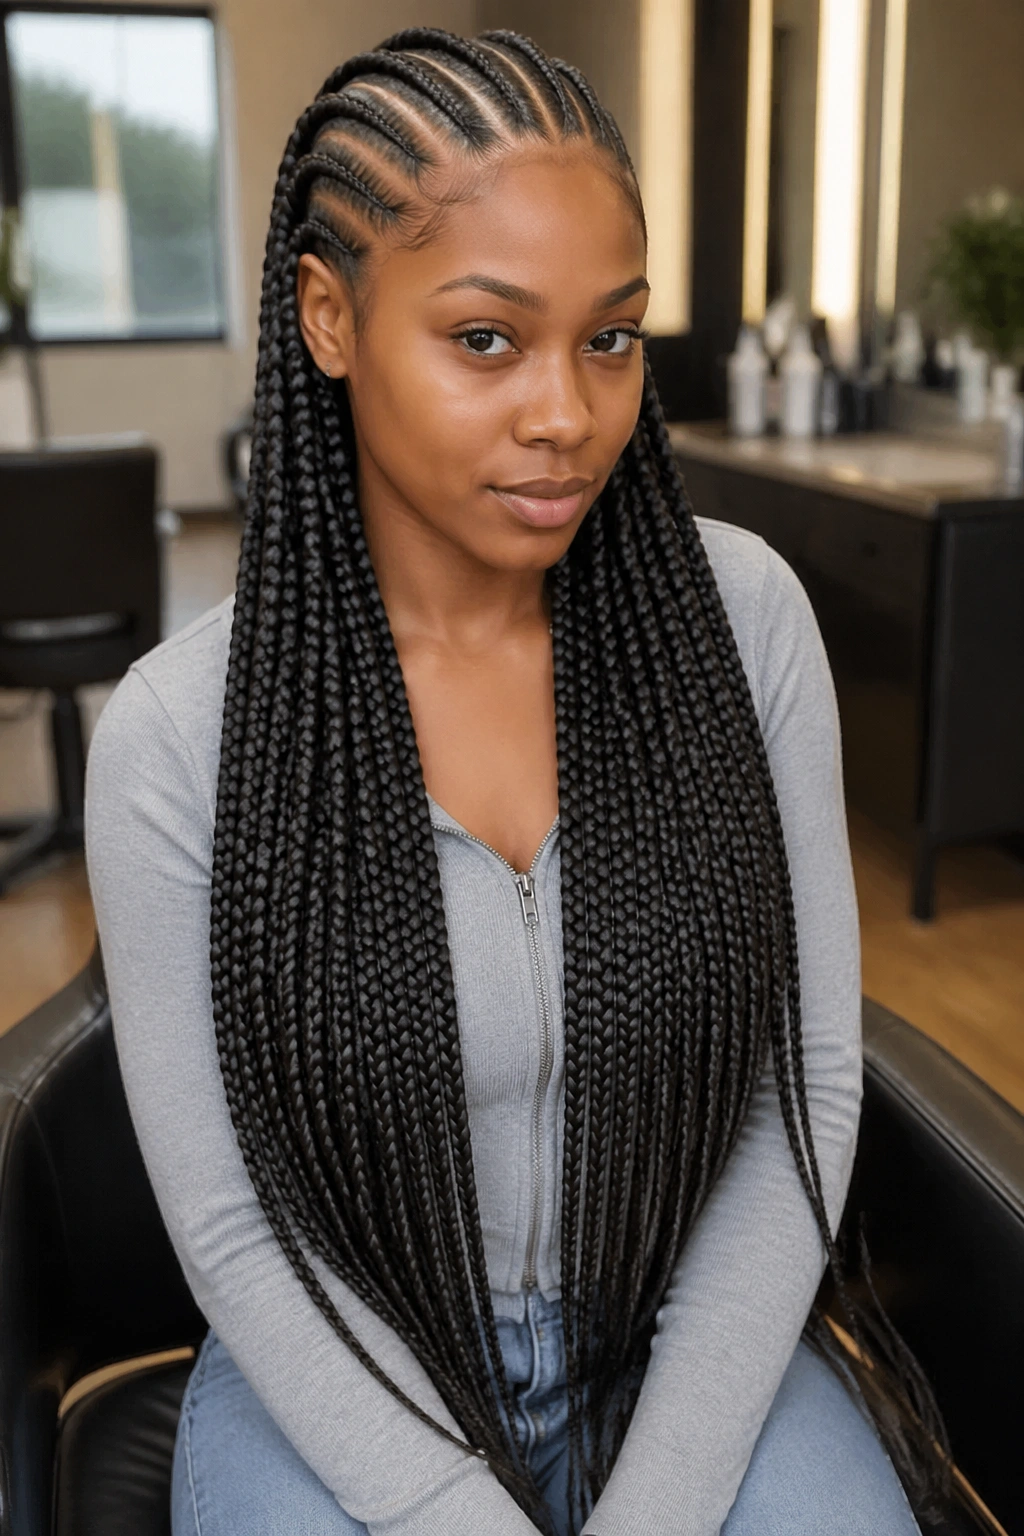
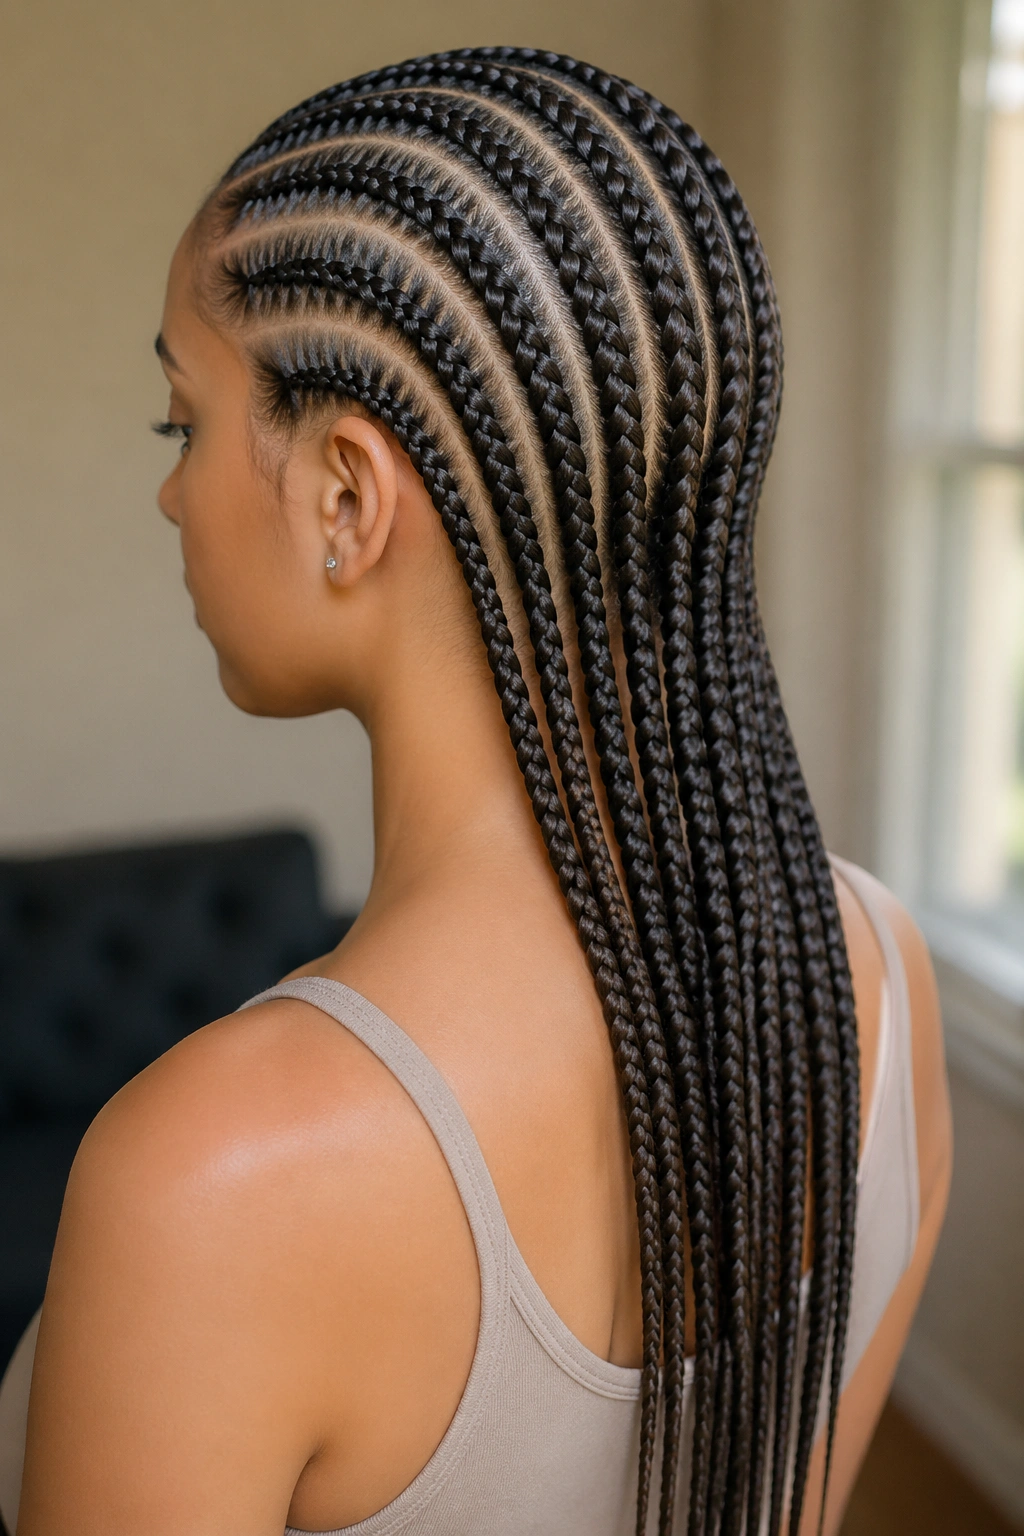
1. Classic Straight Back Cornrows Reaching the Lower Back
The foundation look. Ten evenly spaced cornrows running from the hairline to the nape, then continuing as finished braids to wherever your natural hair lands — ideally at or below the mid-back. No extensions. Just your own length, showcased.
Why It Works
- Clean and professional — passes any dress code
- Shows off natural length without needing extensions
- Lasts 4-5 weeks with proper care
- Low tension if done by a skilled braider
Key detail: each braid should taper slightly toward the end rather than stay uniform width. That taper looks more natural and frames the silhouette better.
2. Ten Cornrows With a Deep Side Part
All ten rows shift to sweep across a deep side part instead of running straight from center. The part sits about 3 inches off-center, creating a fuller side and a tighter side. All braids funnel diagonally backward.
Unlike the symmetrical classic, this version tells a story. Your eye follows the line of the part across the crown and down into the braids. It flatters faces with strong features — high cheekbones, a square jaw, a prominent forehead.
Best for long hair because the diagonal direction translates into a fuller fall of braids on one shoulder. Shorter hair loses this drape effect.
Side parts don’t hide regrowth as well as center parts. After week 3, the side part will start to show a thicker roots line on one side. Something to plan around for events.
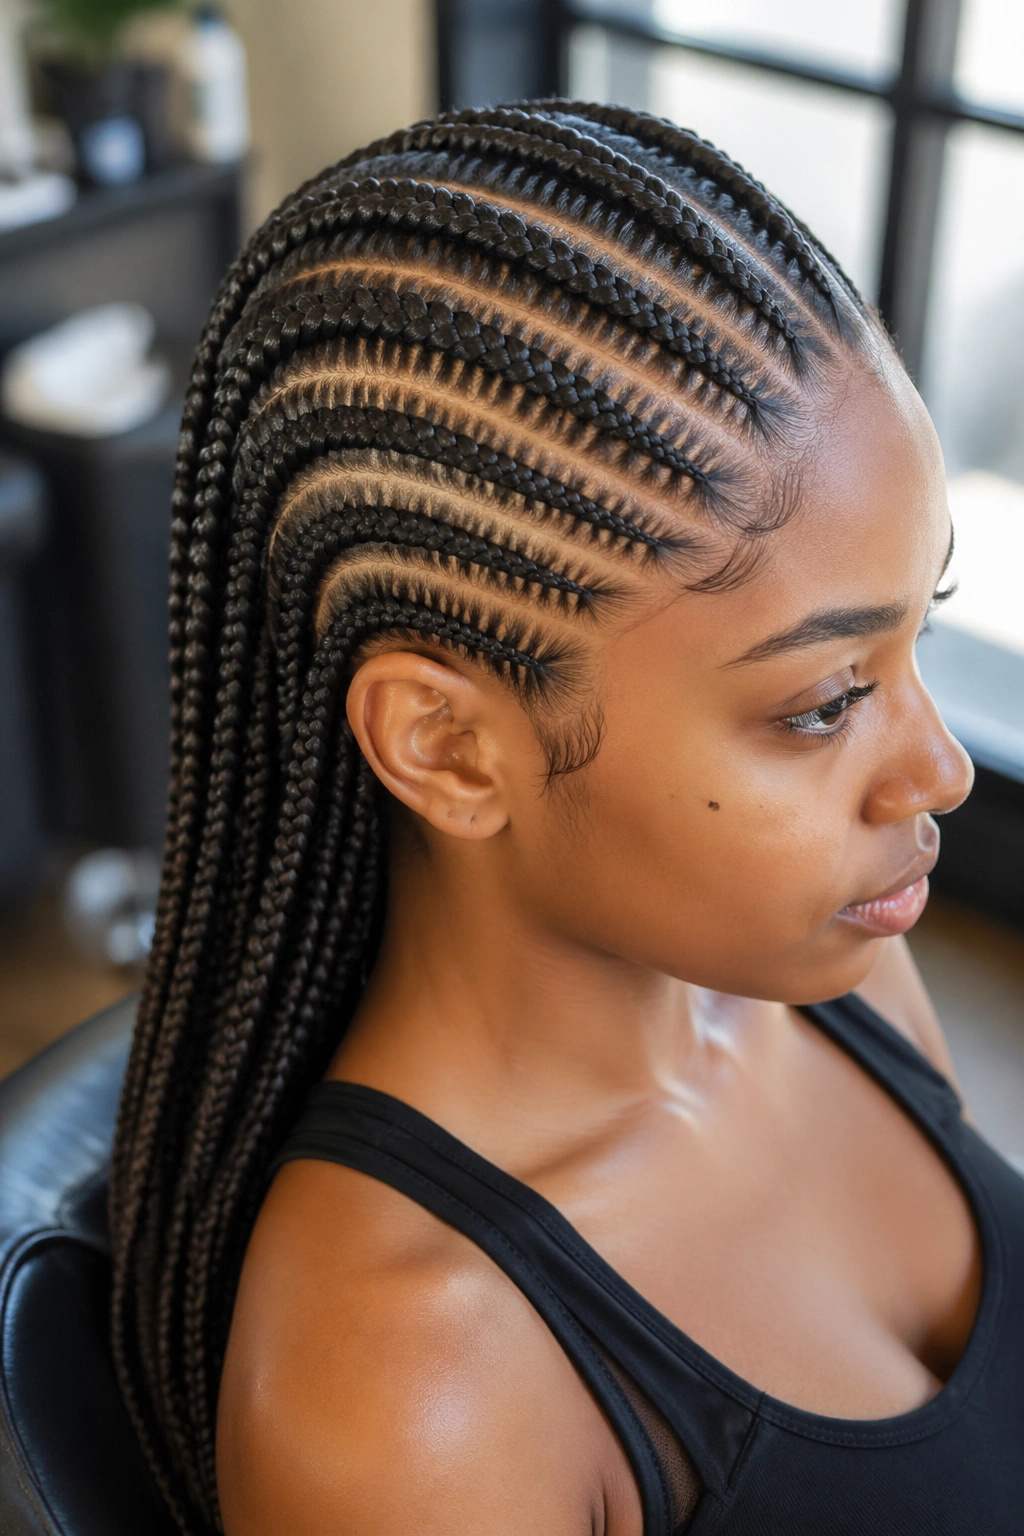
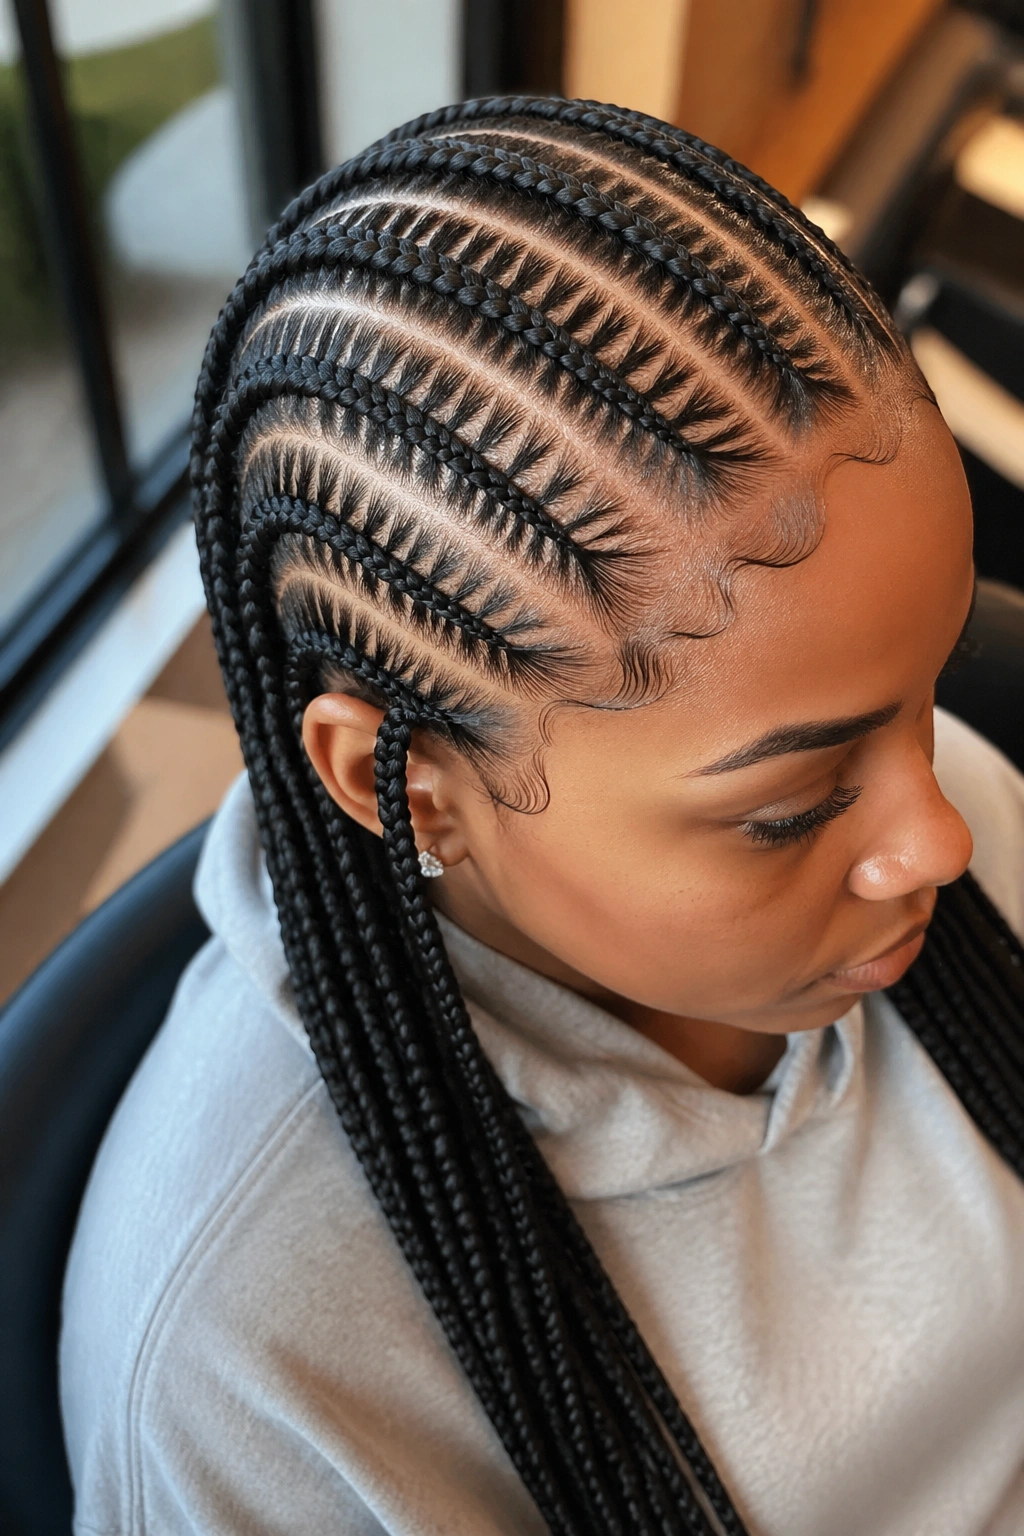
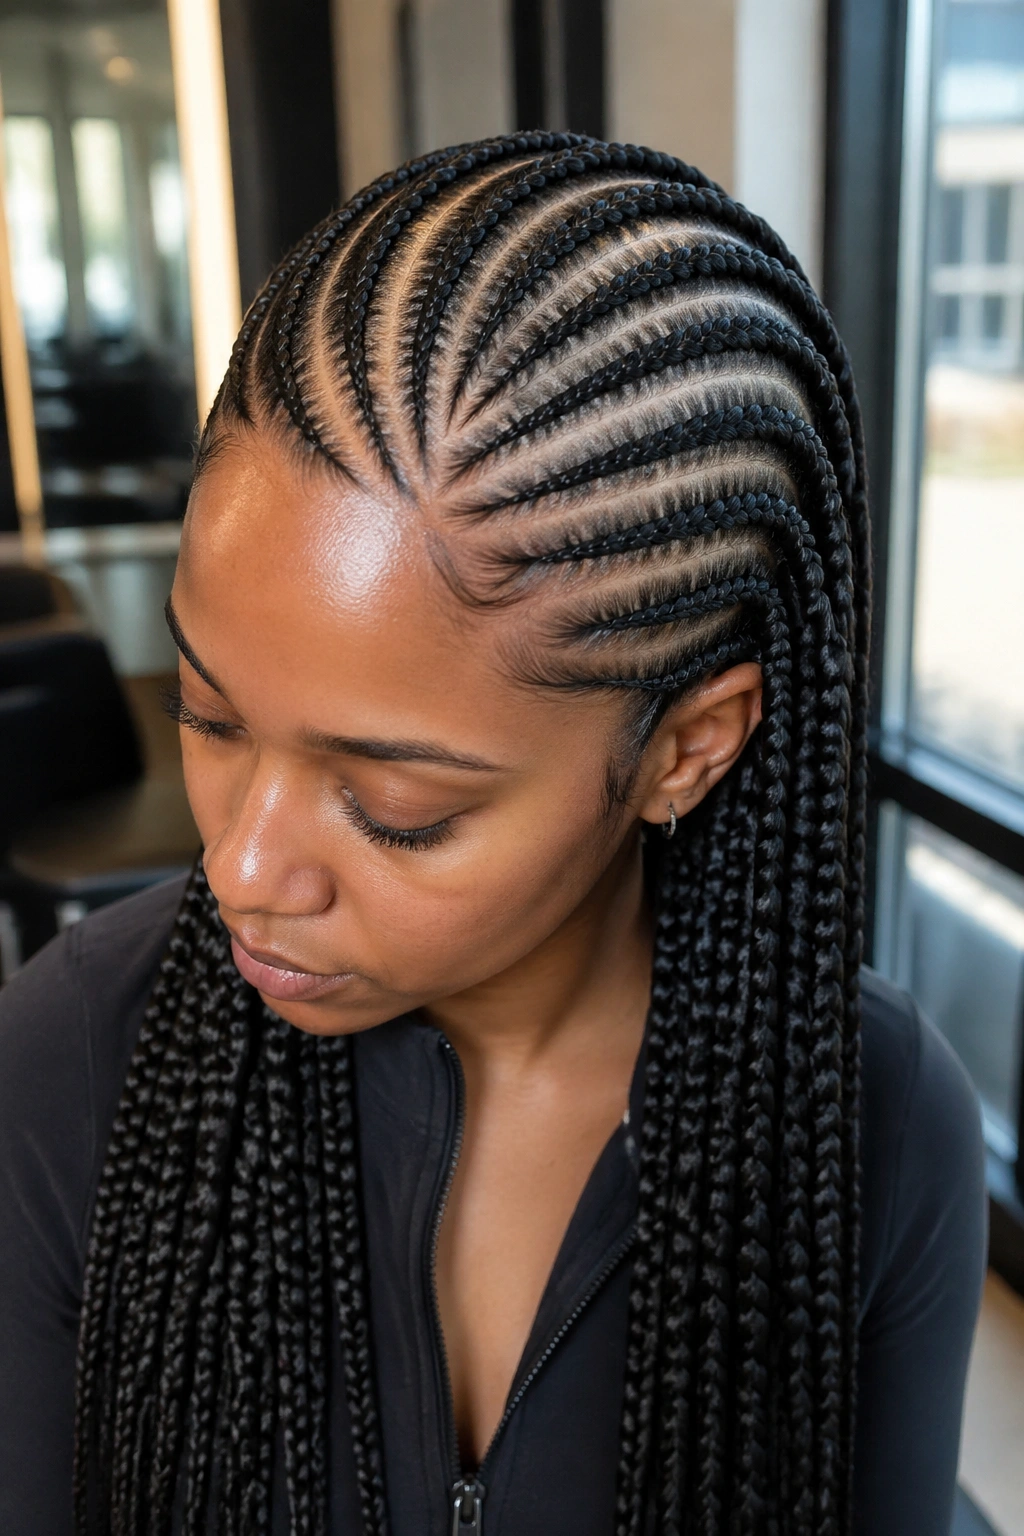
3. Thin Straight Back Cornrows — 14 Rows
A denser version with 14 instead of 10 rows. Each braid is thinner, and the effect reads as more intricate and delicate. Requires more time in the chair but ages better because the extra rows disguise any loosening at the roots.
The catch: each thinner braid has less weight to carry long hair cleanly. By the end of the install, the tips can look wispy. Consider sealing the ends with a dab of leave-in cream and rolling them briefly with flexi-rods for a uniform finish.
Great for those with thick, dense hair that would overwhelm a 10-row count. The extra rows distribute the volume.
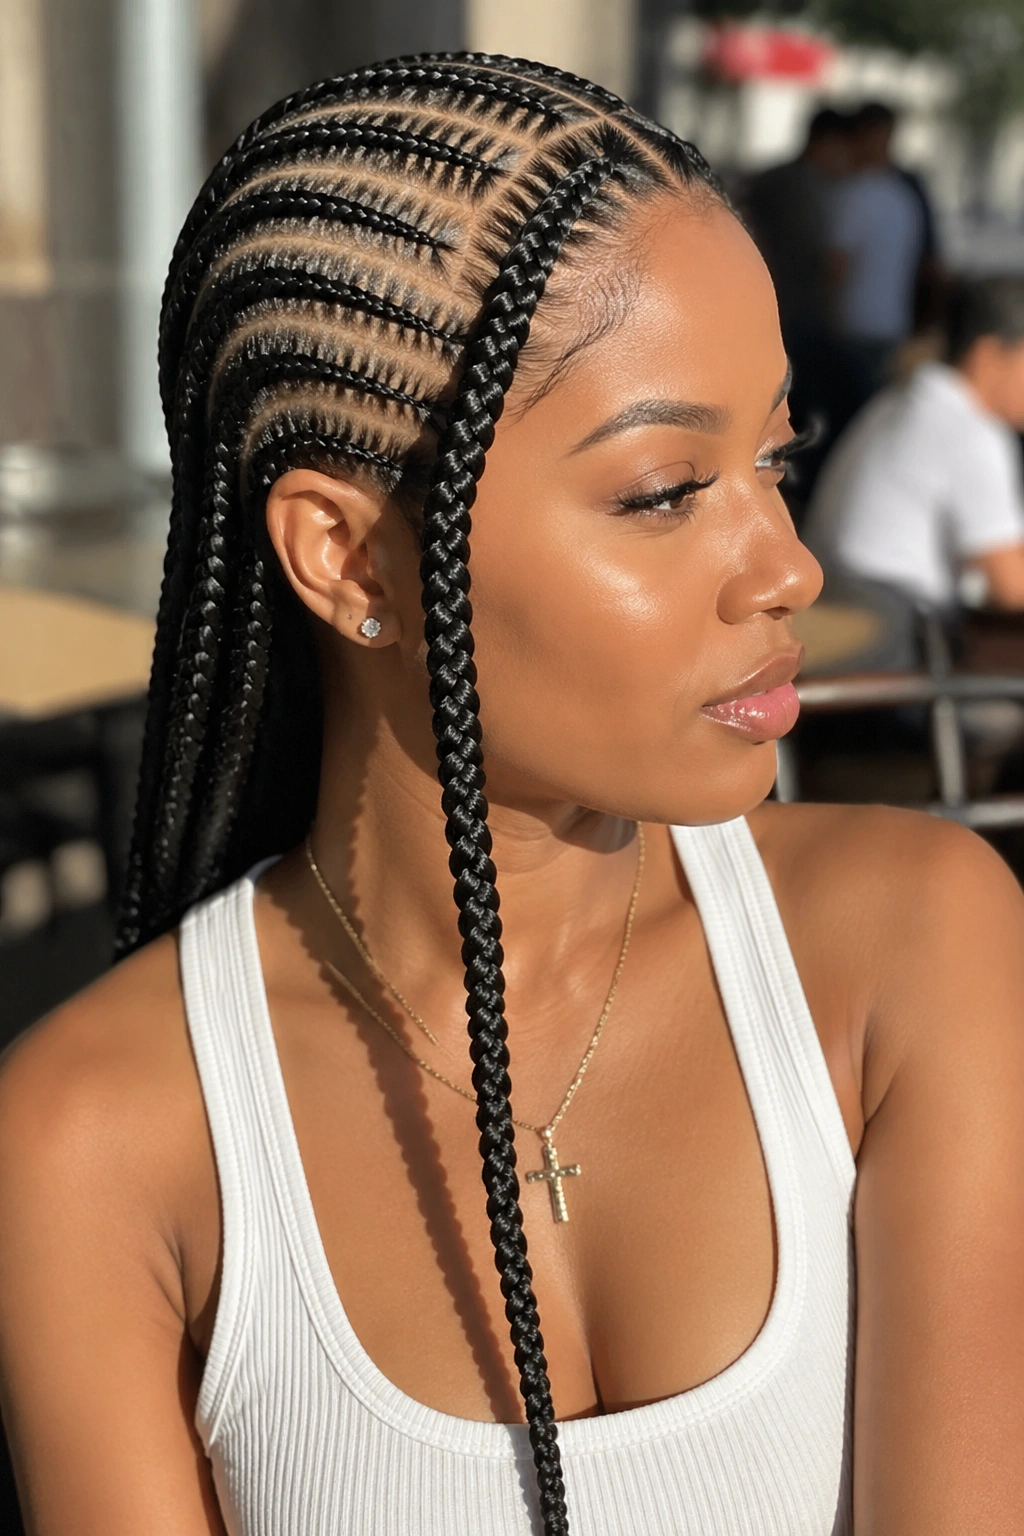
4. Bold Straight Back Cornrows — Only 6 Rows
Cut the count in half. Six wide, confident braids running straight back, each one thick enough that it swings like a rope when you turn your head. This is the boldest version of straight back.
Six rows is a statement. You’ll get comments. The wider braids also hold up longer to tension, which means less fuzz after the first week.
Who this is for — anyone tired of delicate braid styles and ready to commit to something with presence. It works especially well on hair that’s been color-treated with highlights that catch the light along the length.
Six rows also means faster installs — sometimes as short as 75 minutes for a skilled braider on long hair.
5. Straight Back Cornrows with Feed-In Extensions for Waist Length
Your natural hair alone might reach mid-back. Adding feed-in extensions can take the final length to your waist or lower. The extensions get fed in gradually as the braider works back from the hairline, so the transition from natural hair to synthetic is invisible.
This is the red-carpet approach. Long and dramatic, with perfectly uniform ends at the bottom.
Kanekalon is the standard choice. Two 165-gram packs usually cover a full head of 10-12 rows. Pre-stretch the kanekalon before installing to eliminate the shiny, plasticky look many people hate.
Expect about 5 hours in the chair. Bring snacks.
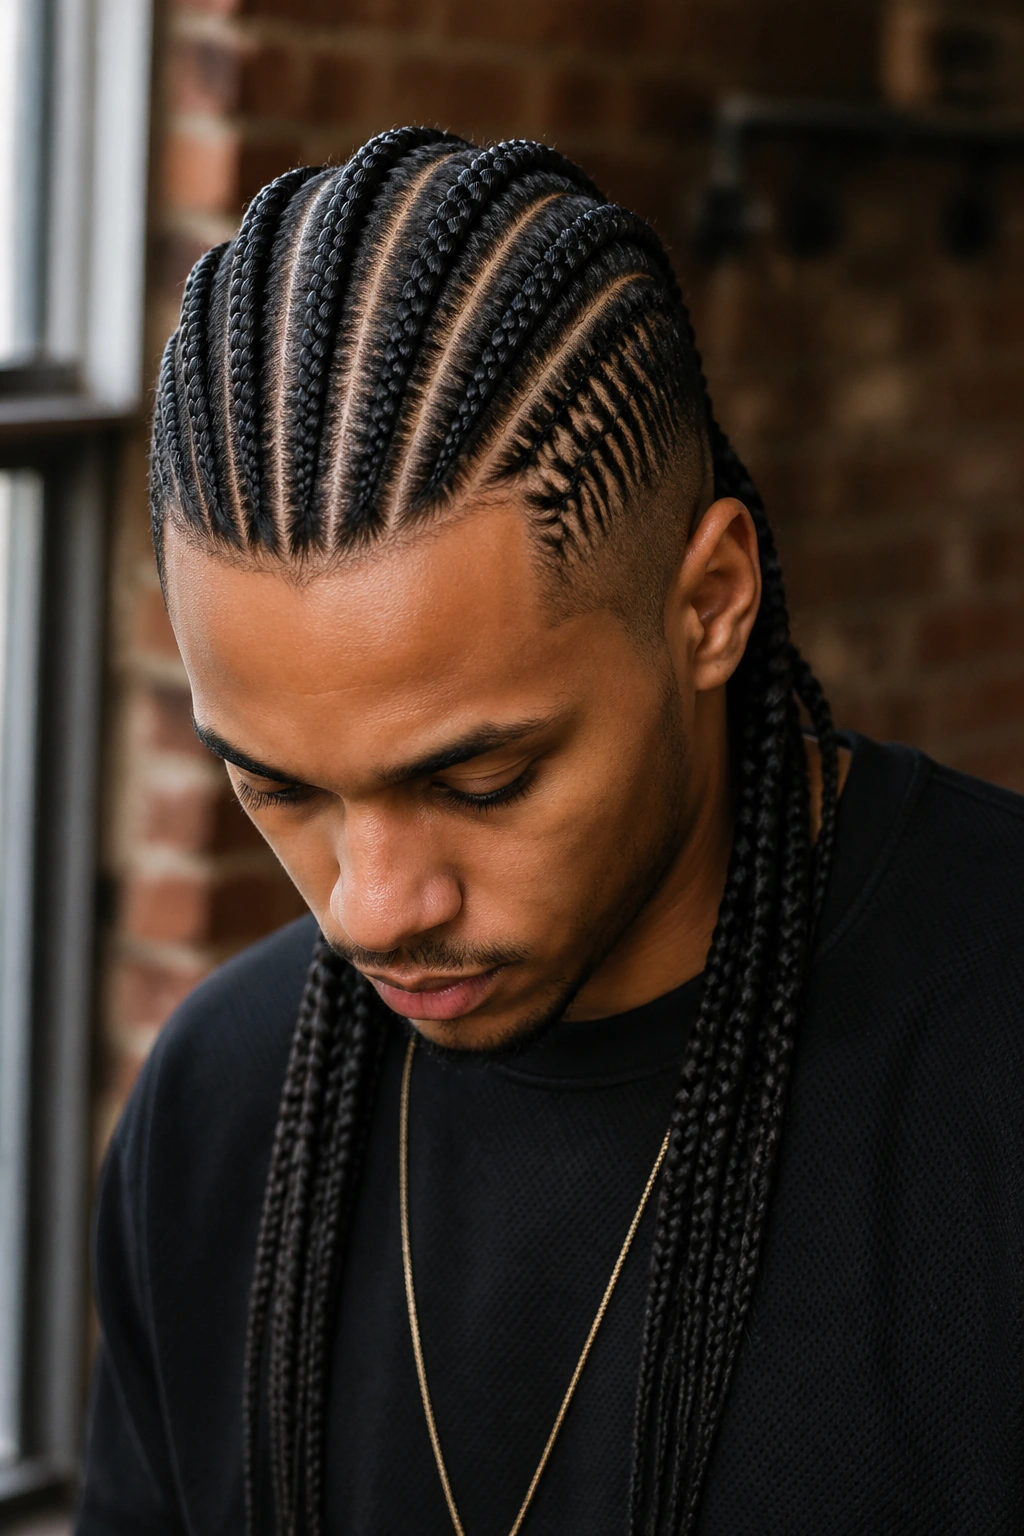
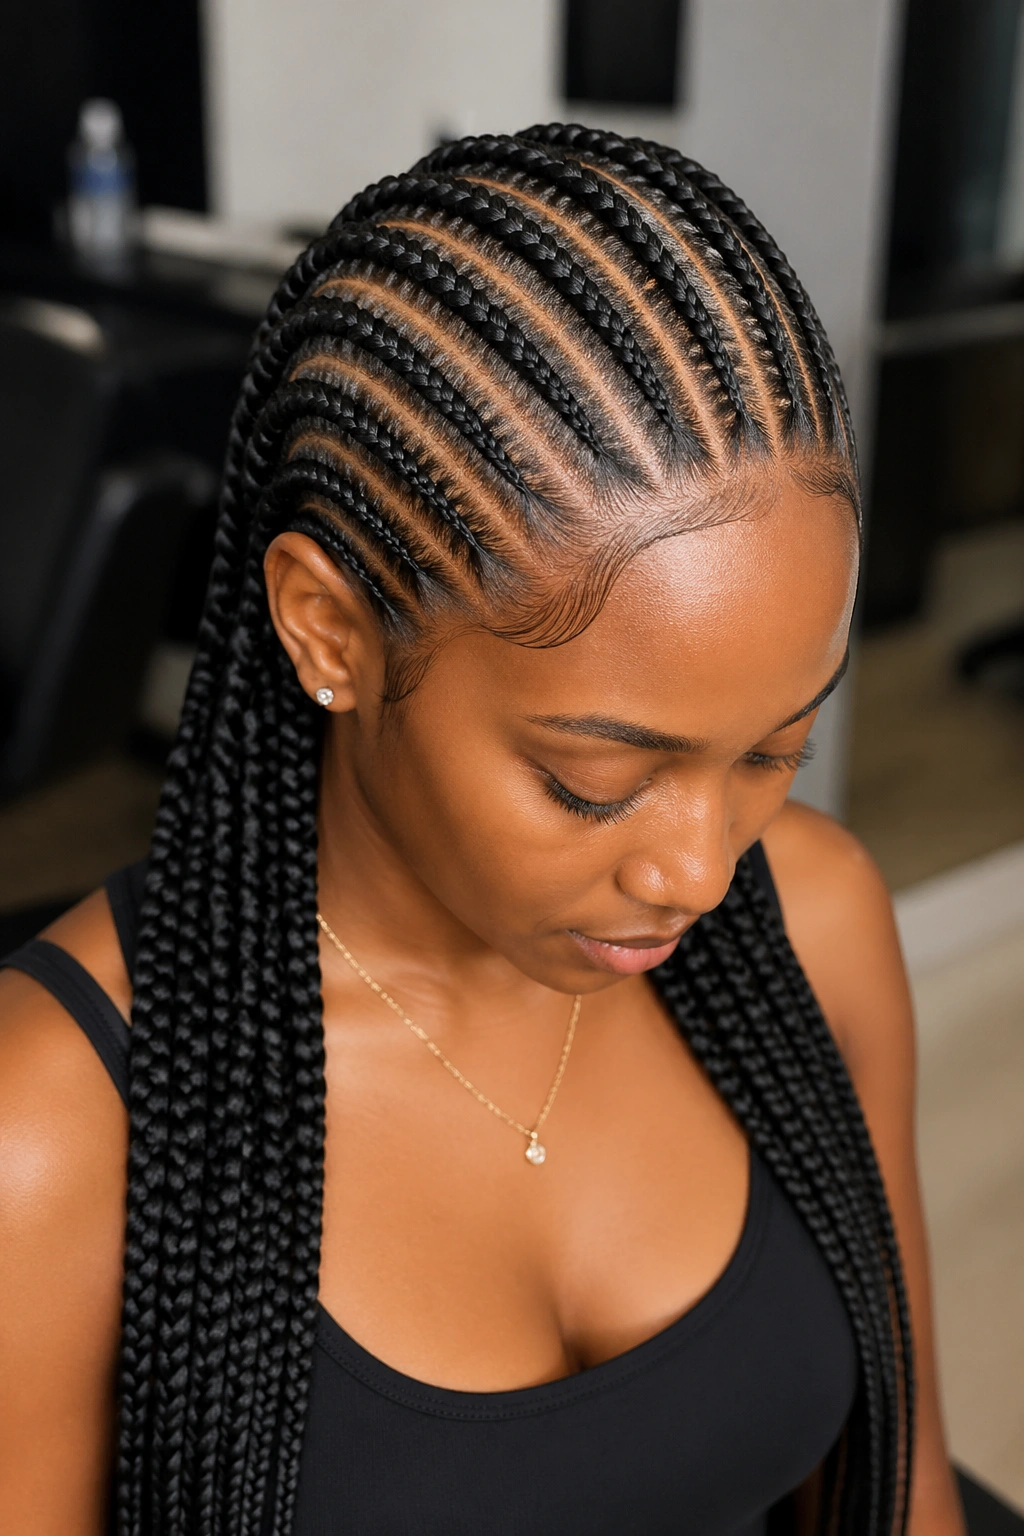
6. Tight Straight Back Cornrows With Edges Laid
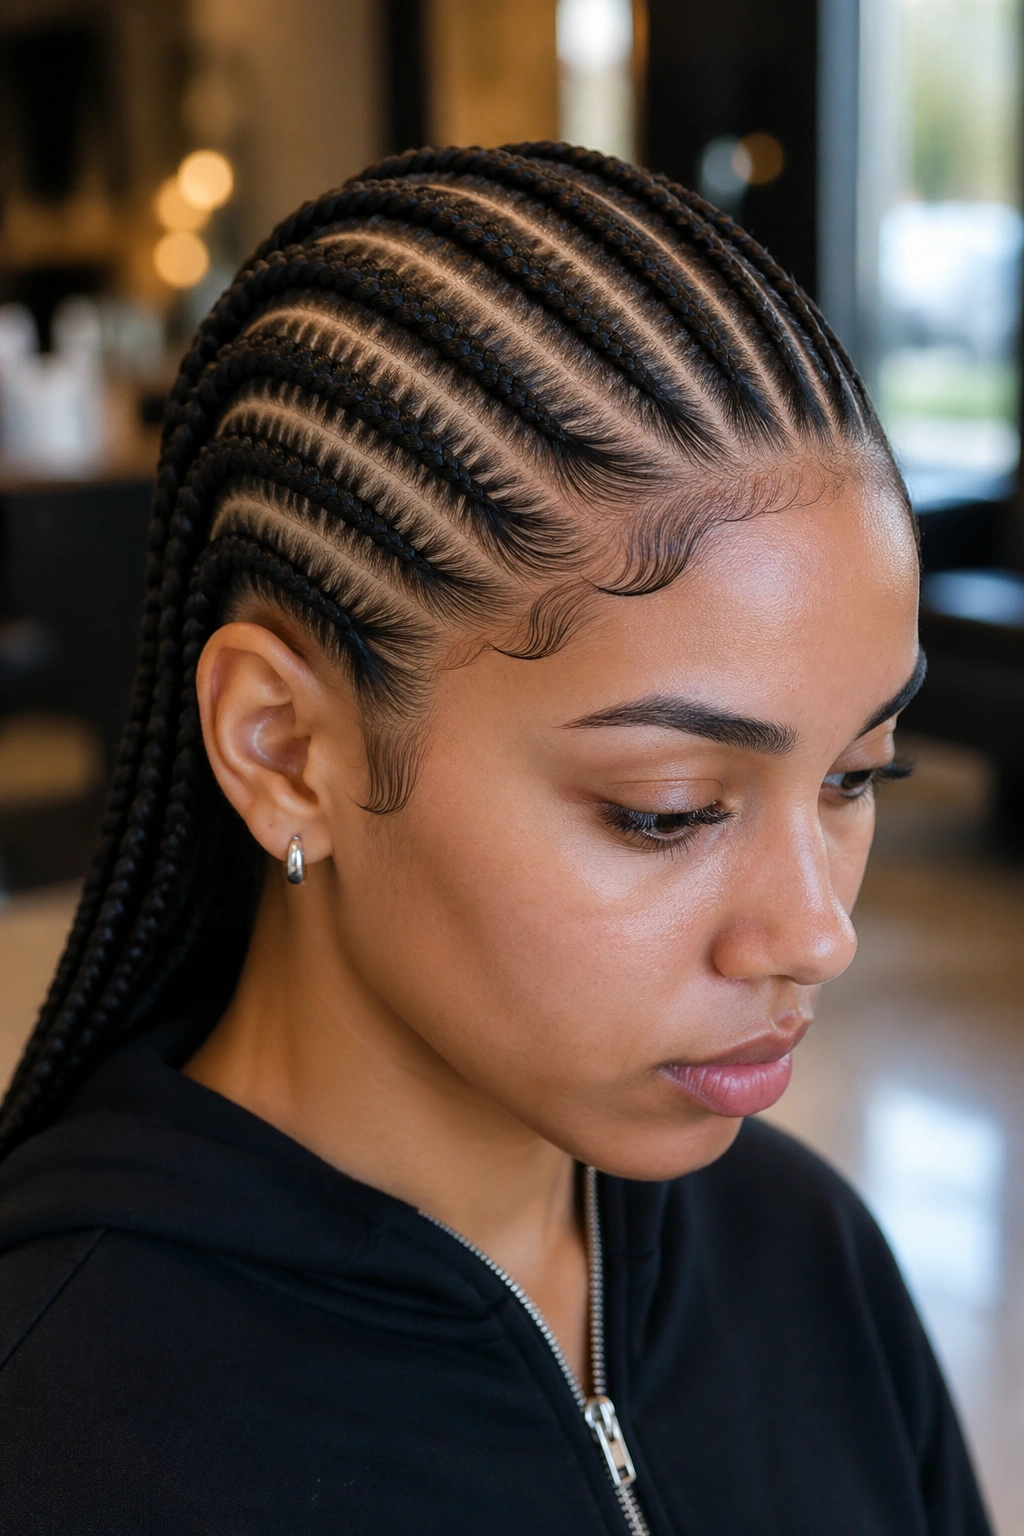
The sleekest version you can get. Ten rows braided with serious tension, edges laid with a firm-hold gel and a toothbrush, and the whole front hairline sitting dead flat against the forehead.
This is the style for interviews, weddings, and photos. It reads formal without being fussy. The tight finish makes the braids look almost sculpted.
Styling Tips
- Use a gel that doesn’t white-cast on the scalp
- Lay edges in small swoops, not giant side curls
- Mist setting spray over the edges and wrap briefly with a satin scarf to set
The tight finish holds up about 1.5-2 weeks before needing a re-lay of edges.
7. Straight Back Cornrows Ending in a High Ponytail
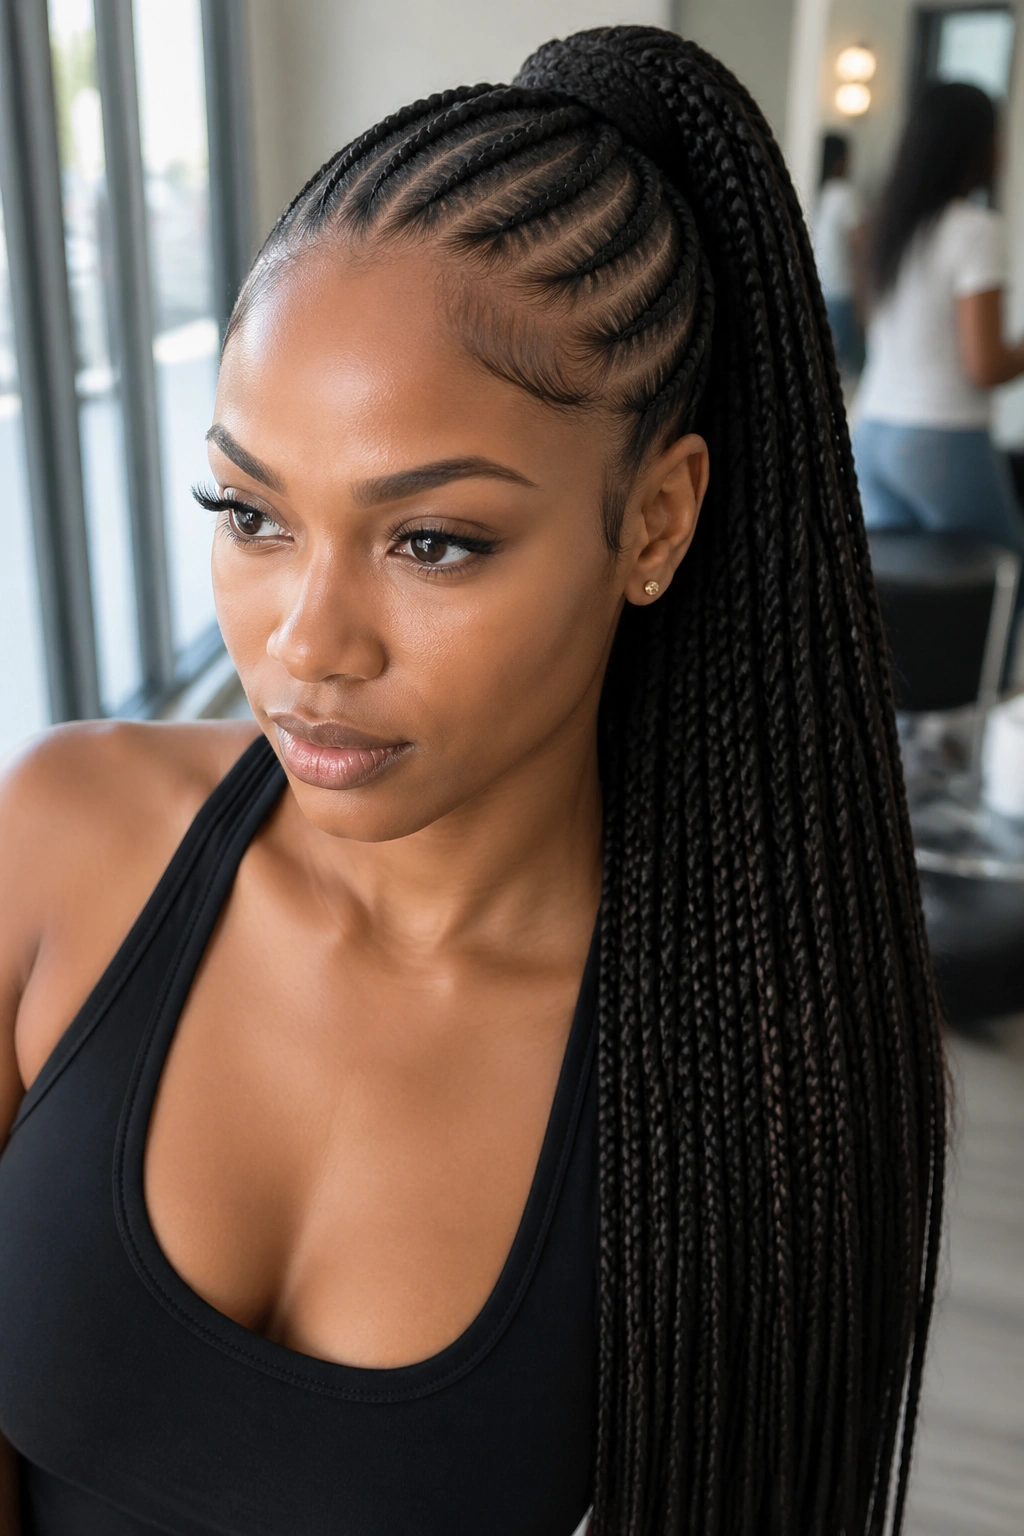
All ten rows running straight back and gathering at the crown into a single high ponytail. The ponytail can be your natural hair finished with a silk wrap, or an extension that drops to the waist.
The high gather creates a lifting effect on the face. It pulls the features up slightly, which many people find youthful and flattering.
Hidden benefit: if your edges are fresh on install day, the ponytail accentuates them. A clean, low-maintenance style that looks polished.
The tension at the gather point is higher than other styles. Don’t wear this every install — alternate with lower-gathered looks to give your edges and crown a break.
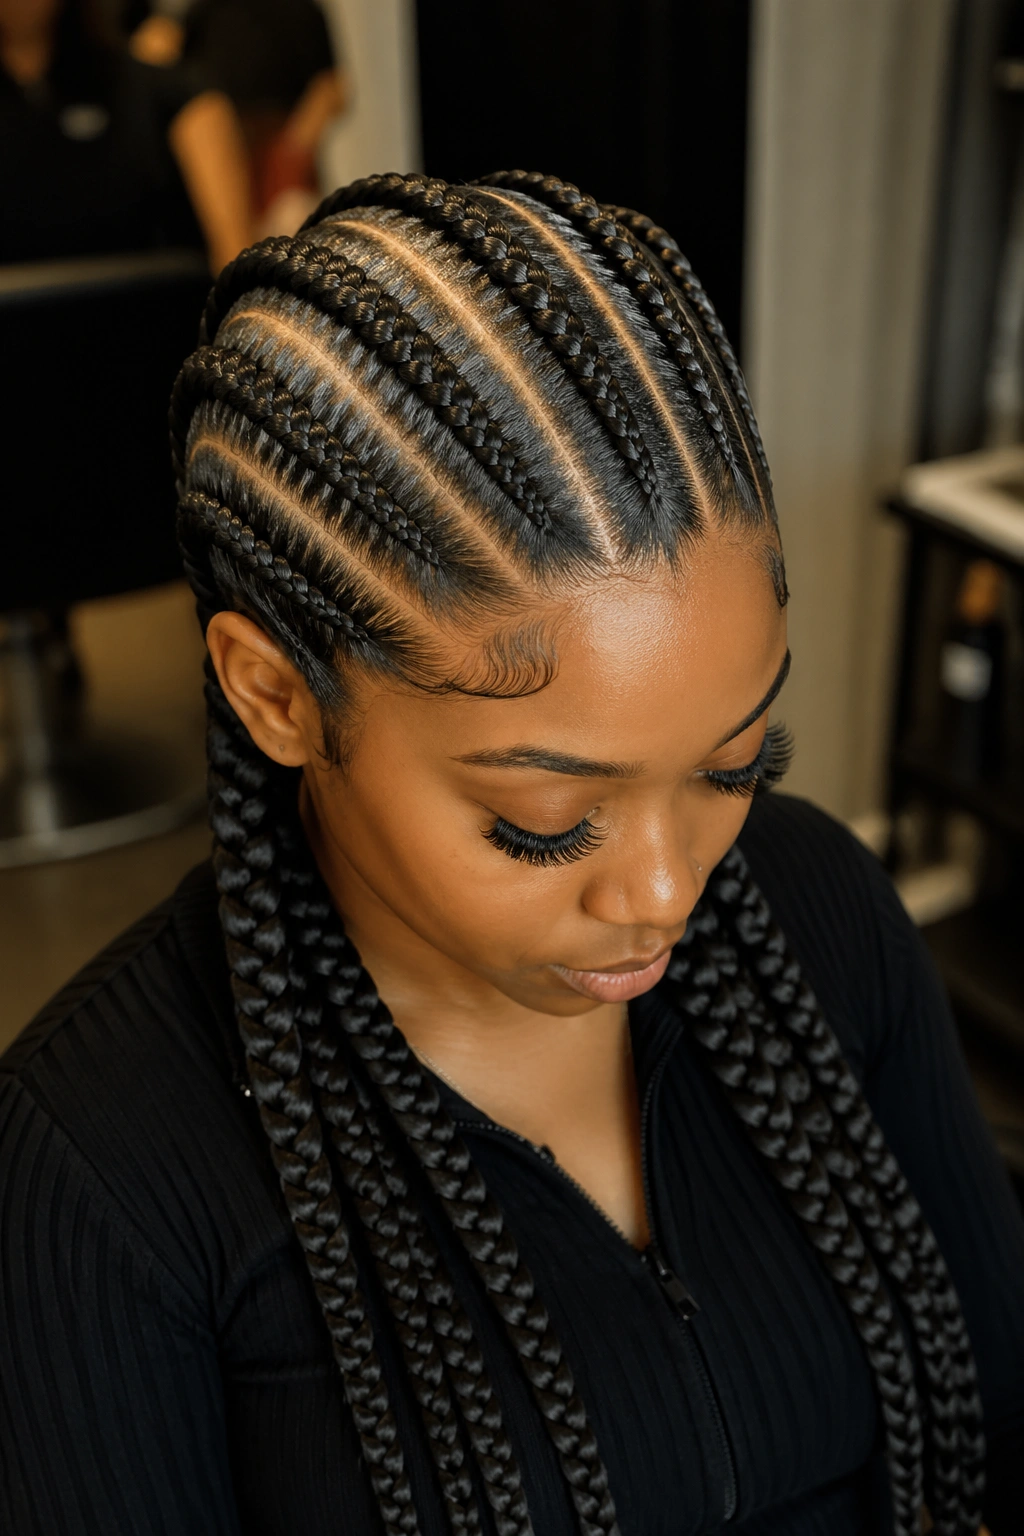
8. Straight Back Cornrows with Alternating Widths
Ten rows, but alternating wide-thin-wide-thin across the head. Creates a rhythm that reads as intentional design rather than uneven braiding.
The wide braids should be roughly twice the width of the thin ones. Your braider needs to commit to the pattern — halfway widths look like mistakes.
It flatters wide foreheads by breaking up the horizontal line of the hairline with varying thicknesses.
Who this is for — anyone who wants visual interest without full design work or extensions. It’s a subtle move that rewards a second look.
9. Long Hair Cornrows With a Single Beaded Row
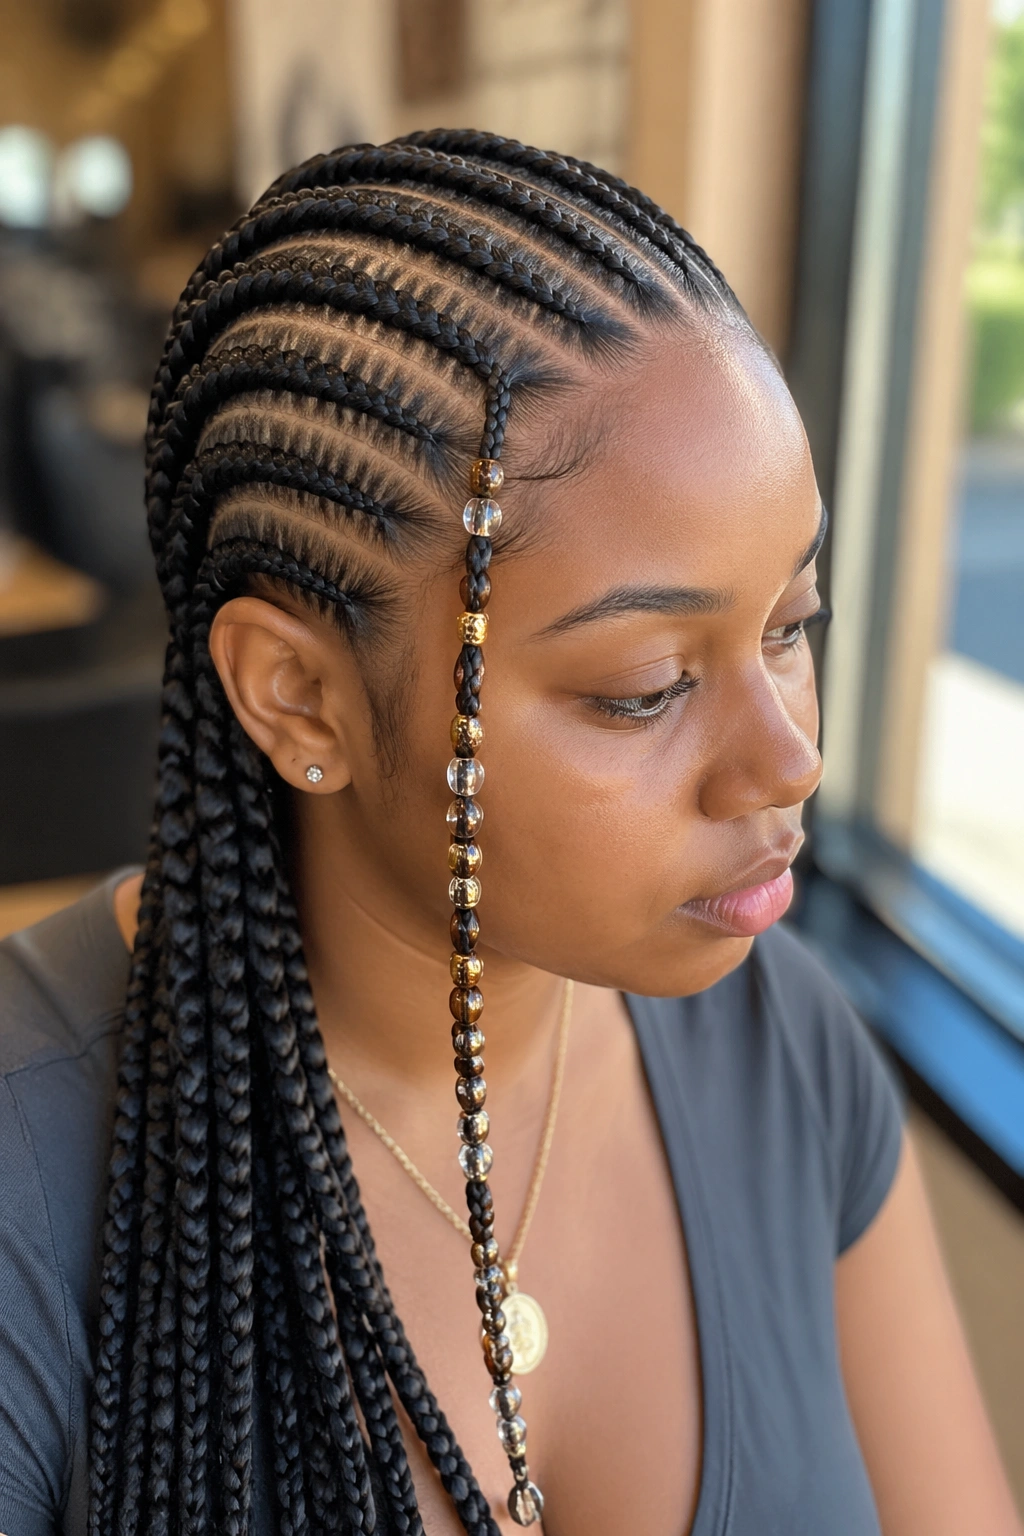
Nine standard cornrows plus one braid threaded with small ceramic or wooden beads from scalp to tip. The beaded braid stands out among the smooth rows and creates a focal point.
Pick the braid closest to where you part your bangs or frame your face. That placement draws the eye to your features rather than away.
Beads need to be strung onto a thin cord first, then the cord gets braided along with the hair. Loose beads sliding up and down don’t hold their positions well and make noise when you move.
The beaded braid stays fresh for about 2 weeks. Replace beads earlier if they crack or chip.
10. Straight Back Cornrows With a Curved Accent at the Temple
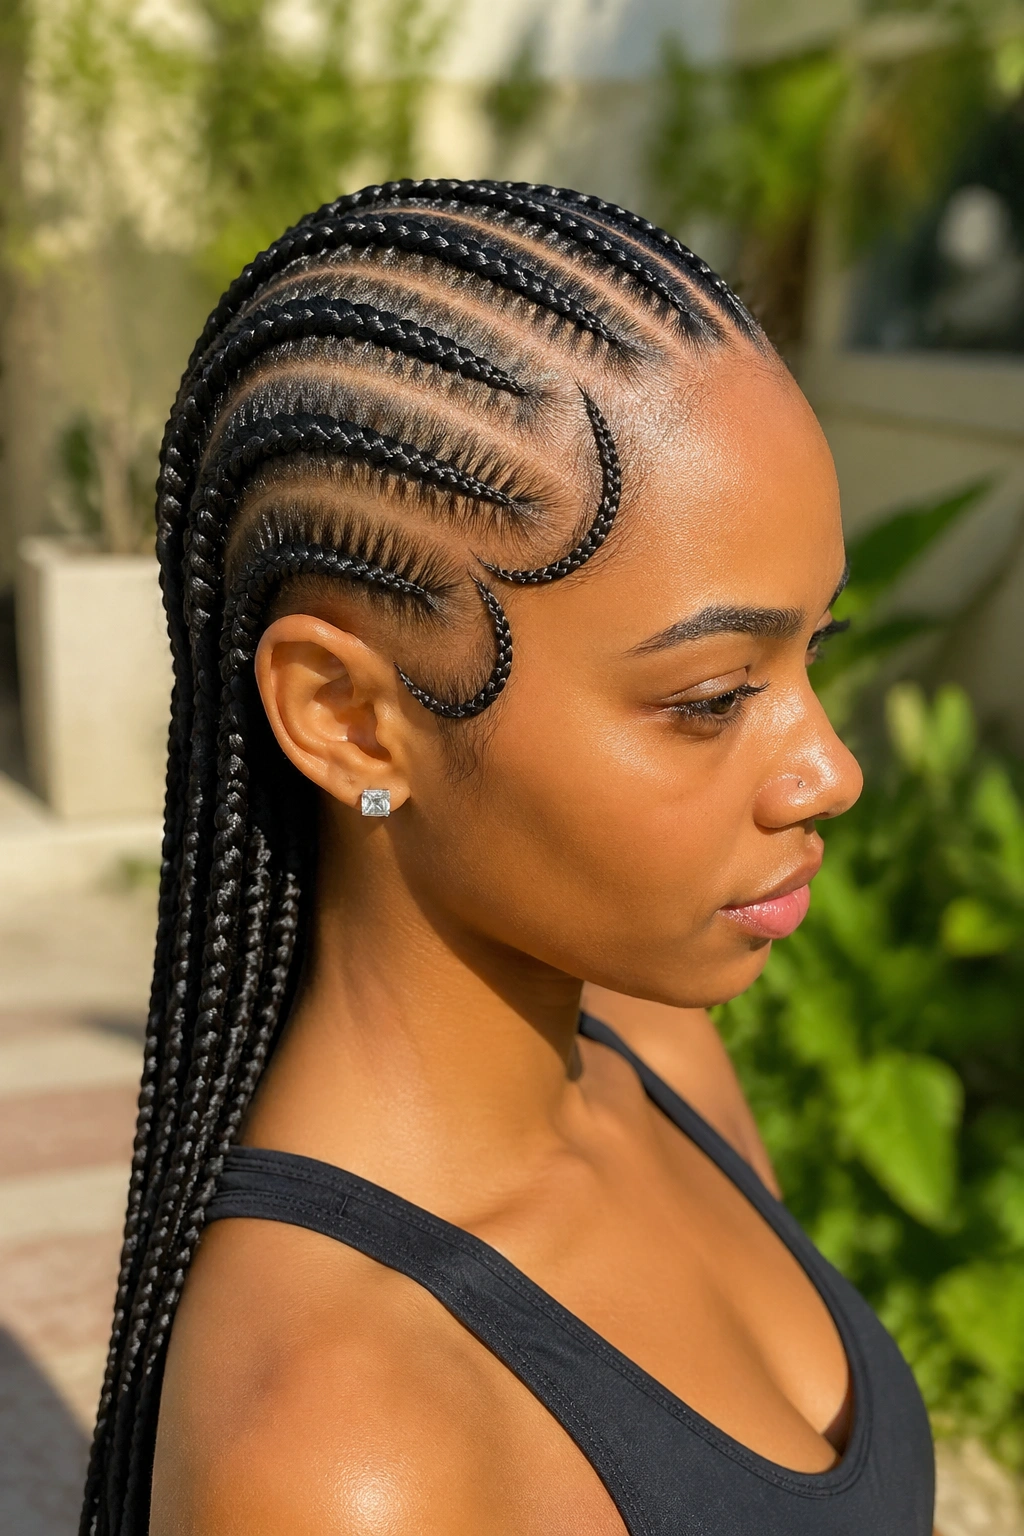
Eight straight back cornrows and two smaller braids that curve dramatically around the temple before joining the back rows. The curve creates a detail at the front that sets the style apart from plain straight back.
The curved braids require the most skill in the set. Every other row is straightforward — the curves are where the eye lands, so they need to be clean.
What Makes It Different
A standard 10-row set has all rows parallel. This version intentionally breaks that parallel with two curving accents. The asymmetry gives it edge.
Curves lose definition first. By week 3, the front accent may need a tiny re-touch of gel to maintain the clean arc.
11. Long Straight Back Cornrows Wrapped into a Low Bun
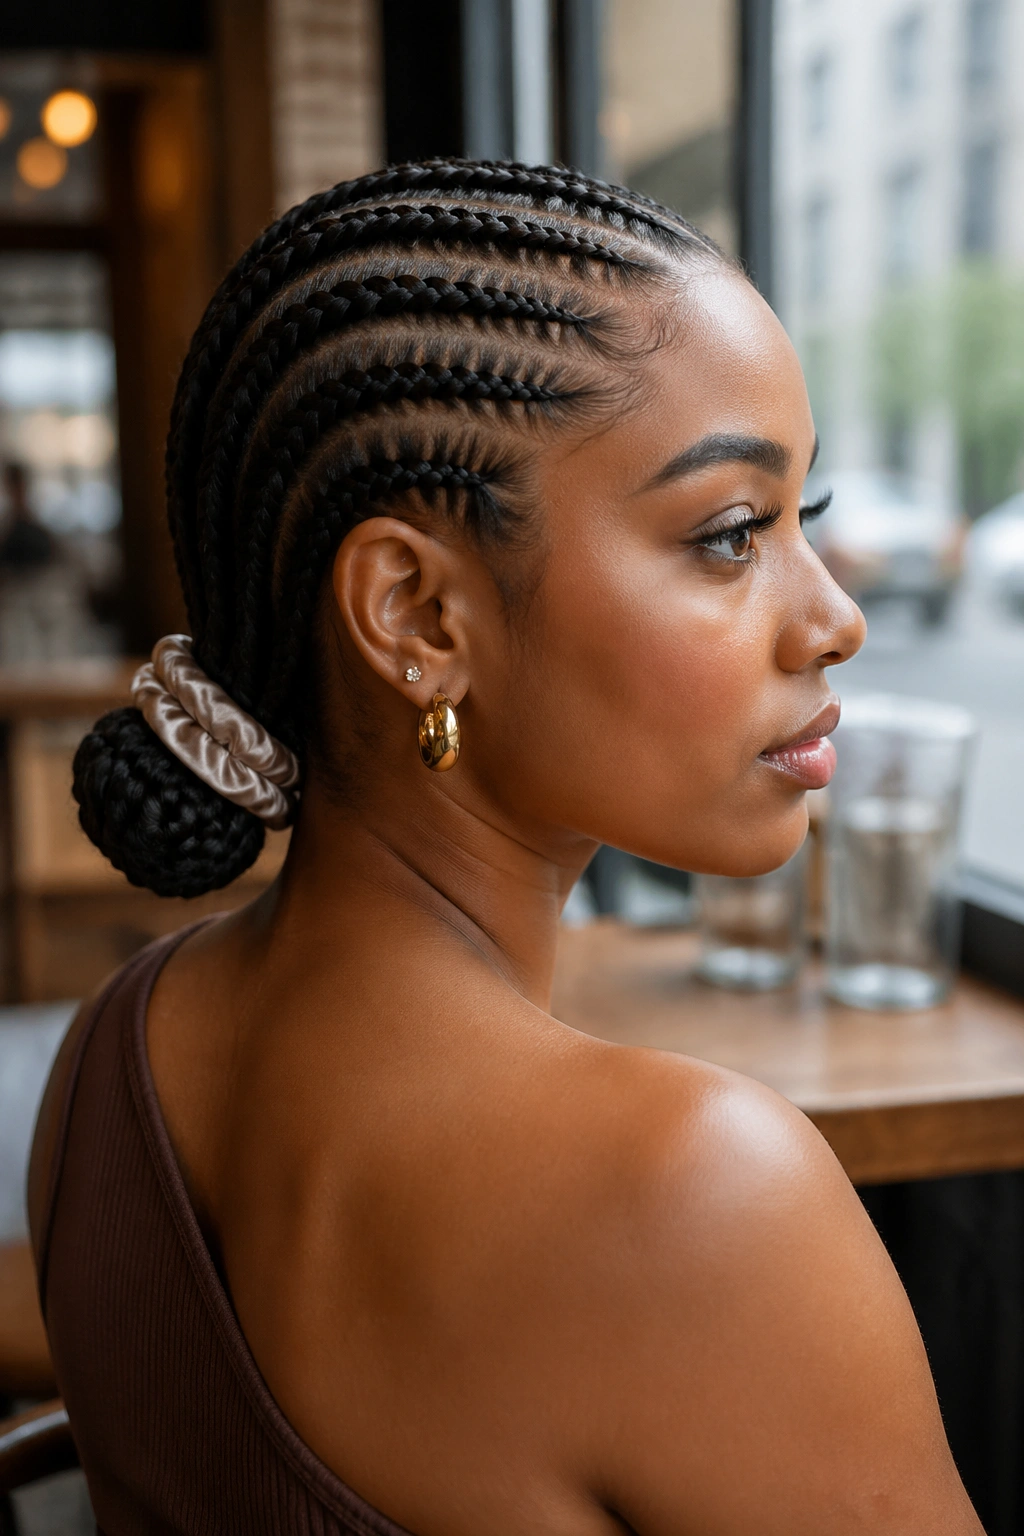
All ten braids gathered at the nape and wrapped into a low, clean bun. This takes the usual loose-long look and turns it into an updo in seconds. The bun can be tightly coiled or left slightly loose for a more casual effect.
For formal events, secure with small bobby pins tucked invisibly into the bun. For daily wear, a silk scrunchie holds everything without damaging the braids.
The weight of long braids can pull a bun down over the course of a day. Consider using two scrunchies stacked for extra hold, or repositioning the bun every few hours.
This is the style for workouts, hot days, or any situation where you need hair up and out of the way.
12. Straight Back Cornrows With Scalp Art Between Rows
The braids themselves are straight back, but small decorative lines, dots, or curves are drawn between them using edge gel or temporary scalp color. The scalp becomes the canvas.
This technique has deep roots in Black hair culture and shows up in historical photography from West Africa. The designs can be simple chevrons or elaborate patterns depending on skill.
Note: this looks best in photos and person. It’s a committed style that attracts attention.
Scalp designs last about a week before the gel flakes and needs to be removed or redone. A specialized scalp dye (wash-out, safe formulation) can extend the look to 3-4 weeks.
13. Straight Back Cornrows With Hair Jewelry
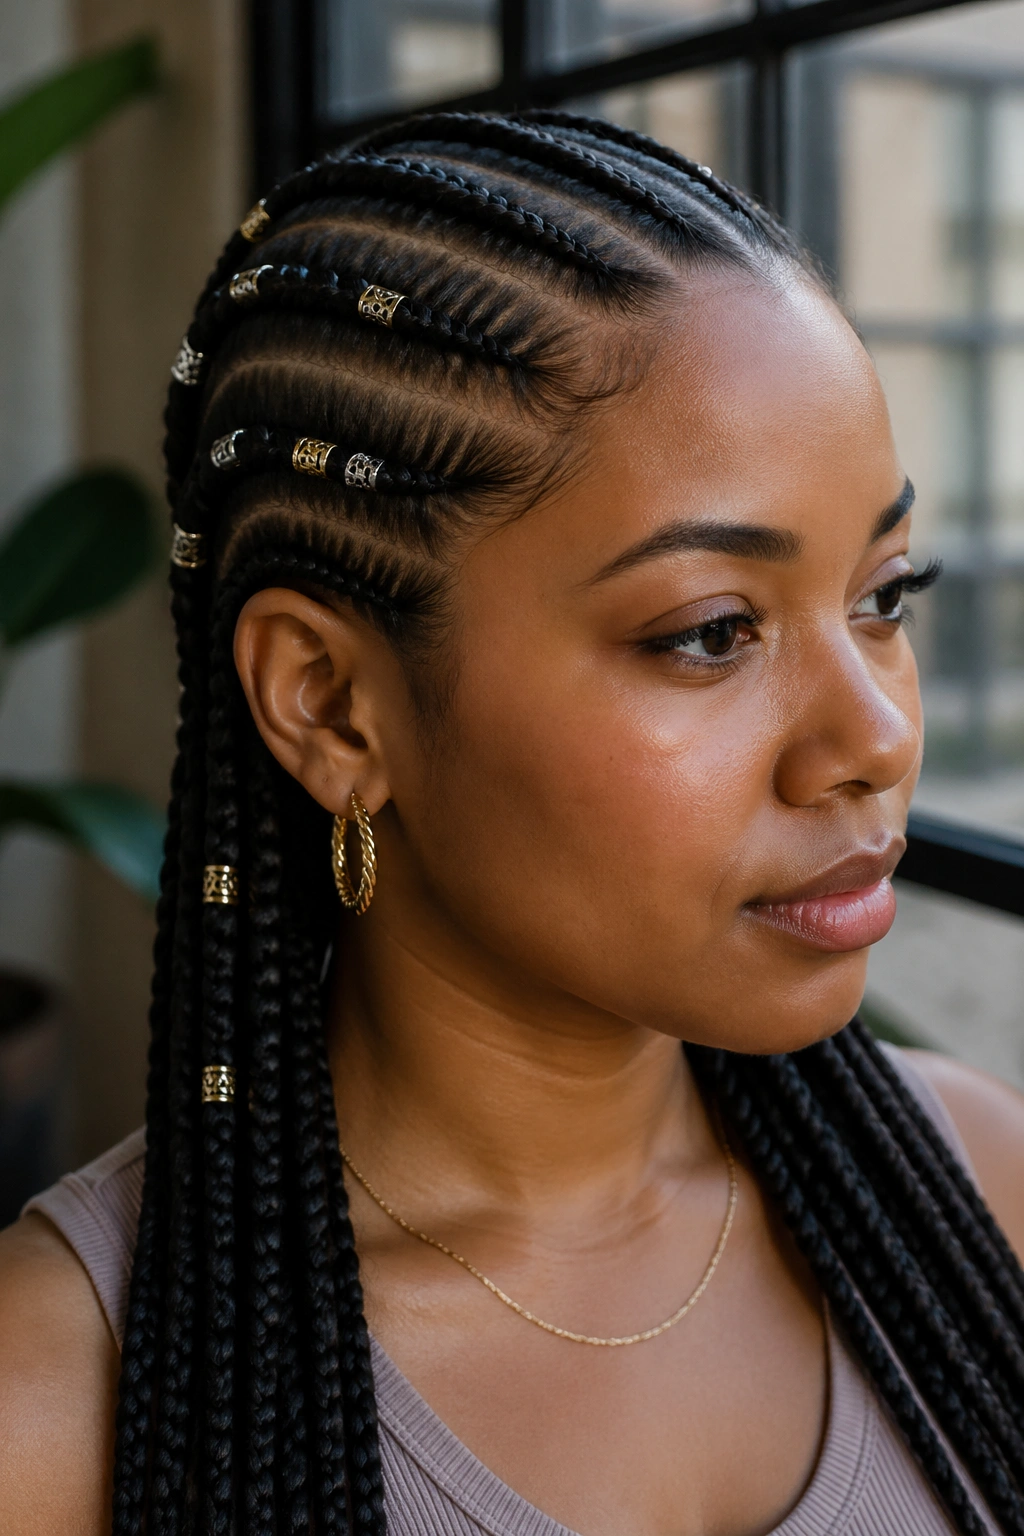
Small gold or silver cuffs placed at intervals along several of the braids. Not every braid — usually alternating, or just 3-4 of the ten, to keep it from looking overdone.
Cuffs sit best about 4-6 inches from the root. Any higher and they look like they’re riding up. Any lower and they weigh down the tip.
The cuff should slide on with slight resistance — not freely floating. If it spins loose, crimp it gently with pliers. Too tight and it damages the braid fibers.
Gold cuffs photograph well against darker hair. Silver works better against highlights or colored braids.
14. Straight Back Cornrows with a Cascading Side Braid
Ten standard rows in the back, plus one thicker braid that starts at the hairline near the temple and cascades freely down the side of the face rather than joining the back rows. The side braid acts almost like a decorative fringe.
It frames the face without requiring bangs. Especially flattering for round faces because the side fall creates vertical emphasis.
The cascading braid can be braided tighter for a sleek look, or looser for a more bohemian feel. Both work depending on the mood.
Maintenance is a little higher on this style — the side braid touches your face and shoulders often, so it frizzes faster than the back rows.
15. Straight Back Cornrows With a Middle Part Creating Two Zones
A clean middle part that splits the head into two symmetrical halves, with five cornrows running back on each side. The part line is the visual anchor. Everything radiates from it.
The middle part is more forgiving on long hair than on short hair because any slight drift gets masked by the length. Still, a sharp, consistent line from hairline to crown matters.
Best for face shapes with good central symmetry. If your nose or chin sits slightly off-center, a side part tends to flatter more.
The middle part makes the forehead look wider. If you have a narrow face, that can be a plus.
16. Straight Back Cornrows in a Mohawk Strip Pattern
Instead of full coverage, the cornrows run only down a center mohawk-width strip, with the sides of the head braided flat into smaller, close cornrows or left shaved for an edgier look.
This is a hybrid style. Part cornrow, part mohawk, part editorial.
The center strip is where most of the visual weight sits. Those braids should be the longest and most defined. The side cornrows are supporting actors.
Who This Is For
- Those comfortable with bolder styles
- Anyone with a narrow head that suits vertical emphasis
- People whose edges can handle the more dramatic tension at the strip’s borders
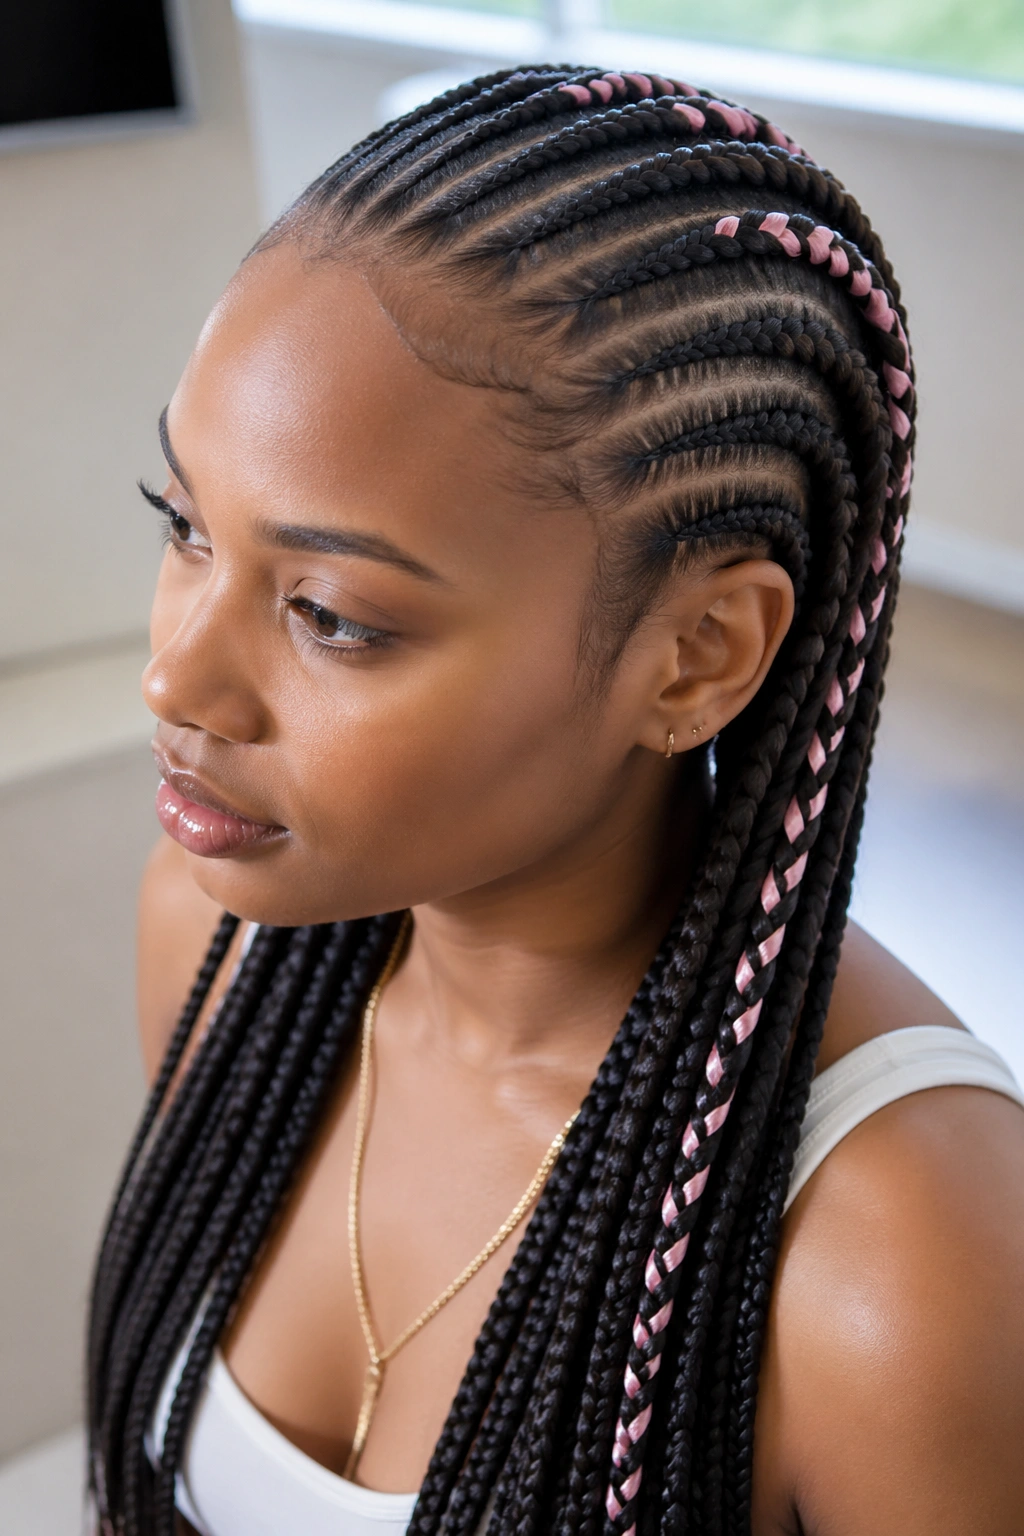
17. Straight Back Cornrows With Colored Streaks
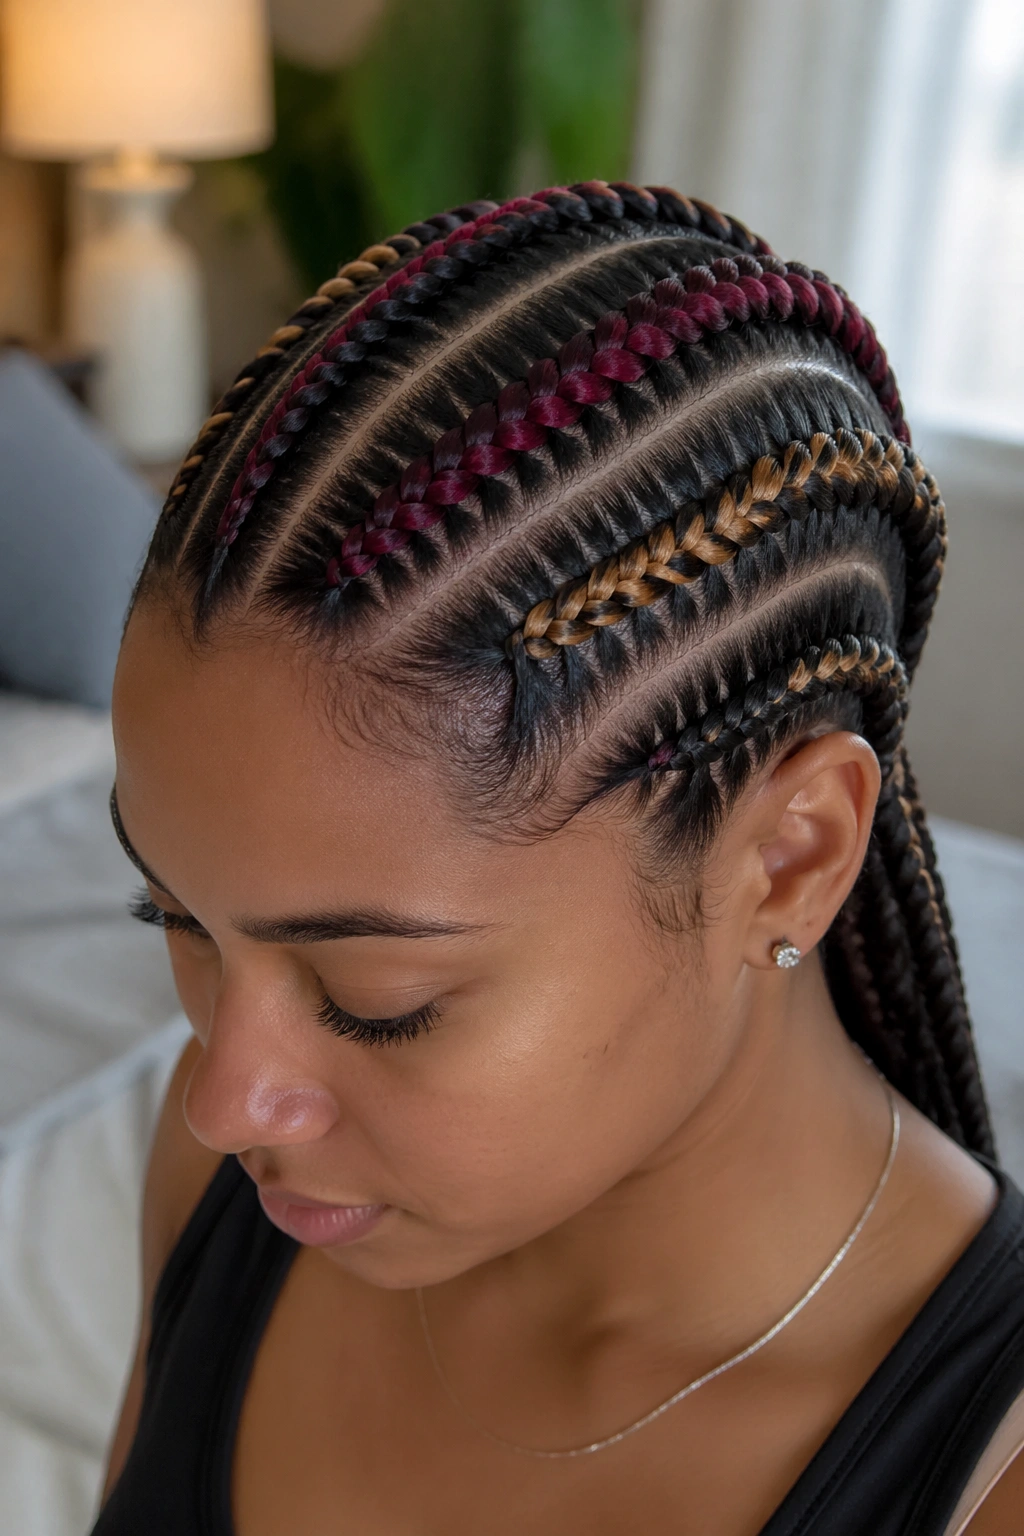
Two or three of the cornrows braided with colored kanekalon woven in — a burgundy, a honey blonde, or a deep auburn. The color shows as streaks through the set without committing to full color.
Placement matters. Place the colored braids symmetrically (rows 3 and 8 of 10, for example) or group them (rows 5, 6, 7) for different visual effects.
Symmetric placement reads as designed. Grouped placement reads as a color block.
Color rinses slightly in the first few washes. Expect a less vibrant shade by week 2. Plan any photos for the first 10 days.
18. Straight Back Cornrows That Terminate in Curly Ends
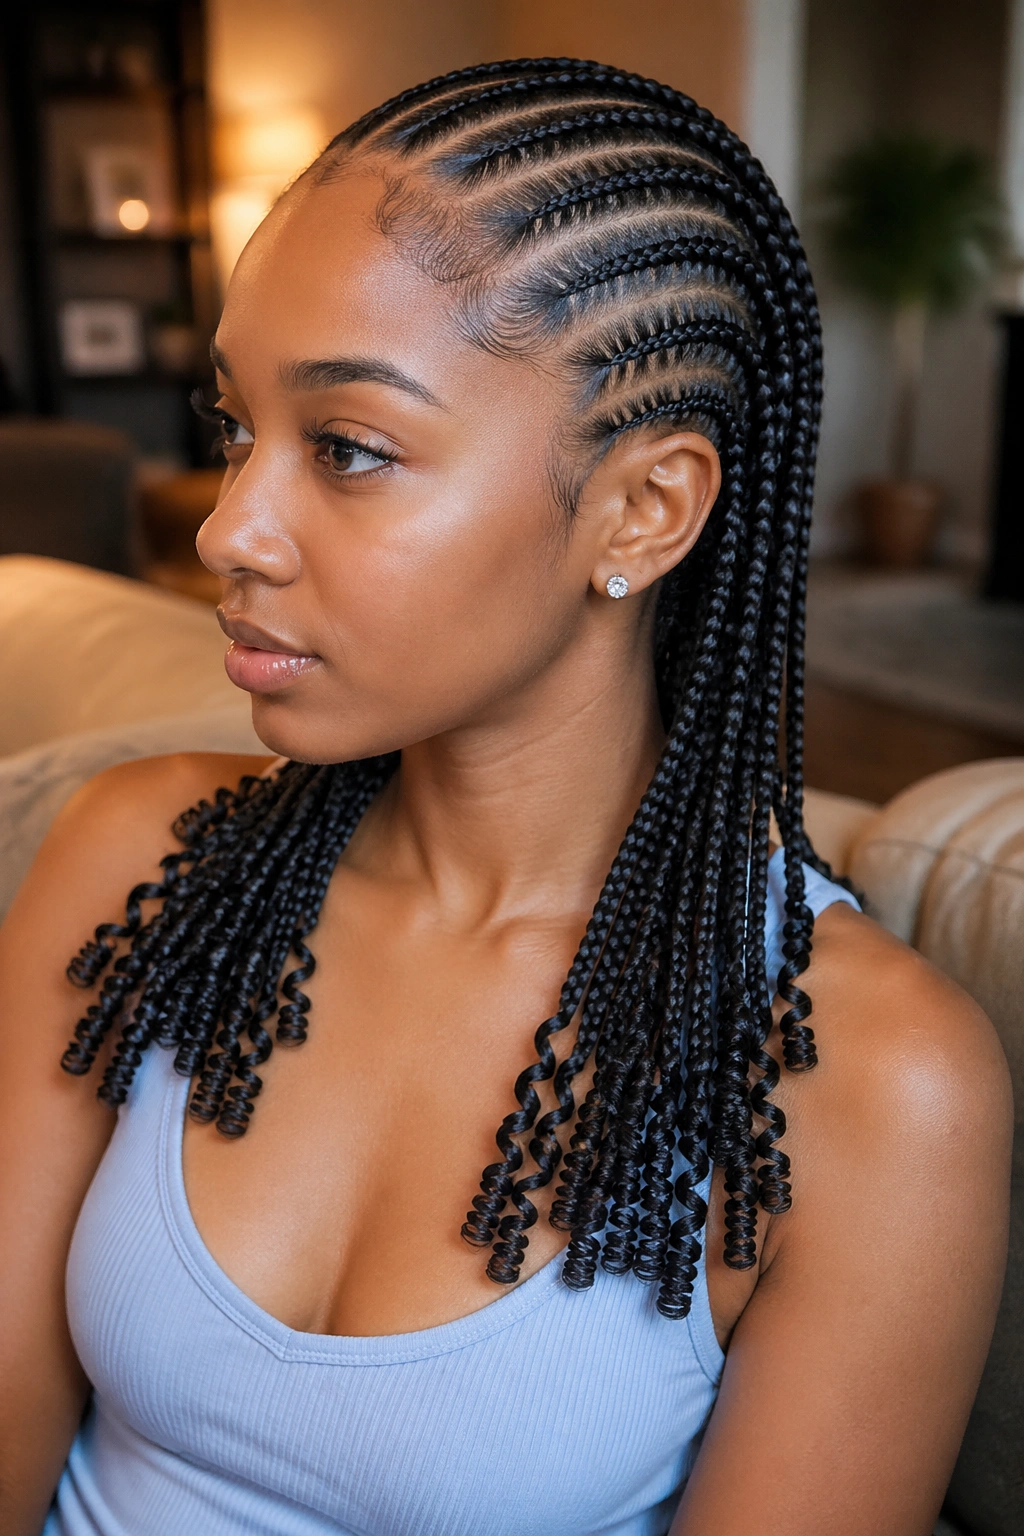
Ten cornrows running straight back, but instead of sealing the ends with extensions or tuck-unders, the natural hair is allowed to finish as tight spiral curls. A perm rod setting overnight (or a flexi-rod set) creates the curl before the braids are installed, so the ends emerge as ringlets.
The contrast is everything. Sleek braids on top, loose curls at the bottom. It softens the structured look without compromising protection.
Curls need refreshing every 3-4 days with a curl mousse or light cream. Otherwise they flatten into ordinary wavy ends.
This style works best for natural hair types that curl well with minimal effort — 3B to 4A.
19. Long Straight Back Cornrows With a Woven Pattern at the Back
The cornrows run straight back for most of the head, but near the crown, two or more adjacent braids weave under and over each other in a small decorative pattern before continuing straight down.
The weave is a back-of-head detail. Most people won’t see it unless you turn. But when you do, it’s a surprise design element that shows skill.
This style is worth the extra 15-20 minutes your braider will need. It elevates a classic into something distinctive.
Woven patterns hold shape about 2 weeks before loosening noticeably. After that, they blend back into straight-back rows — still a nice look, just less dramatic.
20. Straight Back Cornrows with a Ribbon or Fabric Woven Through
A long ribbon of silk, velvet, or patterned fabric threaded through one or two of the cornrows. The fabric gets woven in during the braiding process so it’s integrated, not wrapped around after.
Silk ribbon gives a luxe, bridal feel. Velvet reads as rich and slightly gothic. Patterned fabric — ankara prints are a popular choice — honors cultural traditions.
Pick a fabric thin enough to braid smoothly. Anything too thick distorts the braid shape.
Wash carefully. Water can ruin silk or velvet. Spot-clean the scalp instead, or plan on removing the fabric before washing and re-installing after.
21. Straight Back Cornrows With Zigzag Parts Between Rows
Ten braids running straight back, but the parts between them zigzag in a subtle geometric pattern. The braids themselves remain perfectly straight — only the scalp design between them carries the zigzag shape.
The effect is graphic. It reads as intentional design without changing the basic straight-back silhouette.
Zigzag parts need a skilled hand. Each point of the zigzag should be consistent across all 9 parts between the 10 rows. Inconsistency looks like mistakes.
First-week polish is at its peak. By week 3, the zigzags start to fuzz where the points meet the braid bases. Still looks good, just less crisp.
22. Straight Back Cornrows with an Ombre Extension Effect
Ten rows braided with an ombre extension hair — darker at the roots, transitioning to lighter tips. The transition happens along the length, not at a visible line.
Ombre extensions are widely available in kanekalon. Popular combinations include black-to-honey, black-to-blonde, dark brown-to-copper, and burgundy-to-auburn.
The effect reads as sun-kissed length without any actual dye on your natural hair. That’s the selling point — color without commitment.
Placement of the transition line affects the look. A higher transition (starting near the shoulders) reads more dramatic. A lower transition (starting near the mid-back) reads more subtle.
How to Keep Long Cornrows Looking Fresh Beyond Week 2
Long braids face a unique maintenance challenge. The length provides protection but also collects more friction against clothing, pillows, and chairs. Friction is the enemy of a clean install.
Sleep matters most. A satin bonnet that actually covers all the braids — not a tiny one that leaves the tips hanging out. If your braids are longer than the bonnet, wrap the tips in a silk scarf before putting on the bonnet. Double layer protection.
Every 4-5 days, do a light scalp cleanse. Mix equal parts water and apple cider vinegar in a spray bottle, mist the scalp, then rinse the scalp (not the length) with cool water and dry thoroughly. This prevents buildup and itch.
Moisturize the length with a lightweight leave-in conditioner — nothing heavy. Heavy products sink into the braid structure and never rinse out fully, which leads to the gray-dusty look by week 4.
Washing Long Cornrows Without Destroying the Install

Wash day for long cornrow styles is its own skill. Most people either skip it entirely (leading to scalp buildup) or overdo it (leading to frizzed-out braids by week 3).
The middle path — wash once a week, focus on the scalp, skip heavy conditioning on the length. Use a sulfate-free clarifying shampoo diluted with water, apply only to the scalp through the parts, lather gently with fingertips, and rinse thoroughly.
After washing, press the braids with a microfiber towel. Don’t rub. Rubbing creates frizz. Then let them air dry for at least 2 hours before wrapping for sleep — damp braids under a bonnet grow mildew.
Some prefer dry shampoo formulated for braids. It works for stretching wash days by 3-4 extra days but isn’t a long-term substitute for water.
Taking Down Long Cornrows Without Losing Length
Takedown is where many people damage the length they worked so hard to grow. The rush to unbraid after weeks of wear leads to yanking, tangling, and breakage.
Work in sections. Undo one braid fully before starting the next. Don’t try to unbraid five at once — the hair gets tangled among itself during removal.
Apply a generous amount of slippery conditioner or a dedicated detangling cream before you start. The hair has been in a pattern for weeks; it needs lubrication to slide apart cleanly.
Use your fingers more than any comb. Fingers can feel a tangle before they pull on it. A comb can’t.
Plan for takedown to take about a third of the install time. So a 4-hour install might need 90 minutes of careful takedown.
Picking the Right Density for Your Long Hair
Hair density affects how cornrow styles look on long hair far more than length does. Thick, dense hair in 10 rows looks heavy and substantial. Thin, fine hair in 10 rows can look wispy and show too much scalp.
If you have fine hair, consider 7-8 rows instead of 10. Fewer, slightly thicker braids carry the length better.
If you have super dense hair, go up to 12-14 rows. More rows prevent each braid from looking like a rope and distribute the weight.
Medium density — the 10-row count usually works perfectly. It’s the default for a reason.
Your braider can tell you after one parting test. If the scalp shows more than 2-3 millimeters between rows, go denser. If the hair piles on top of itself, go lighter.
The Straight Back Style Worth Revisiting Most

If you had to pick just one of these 22 to wear for a year, the classic straight back with 10 rows is the answer. It works for every setting, every face shape, and every hair density. It’s the baseline you can always return to after trying more adventurous versions.
The others exist for variety, for events, for moods, for the stretches of the year when you want something specifically dramatic or specifically understated. But the classic is what you learn on, what you master, and what you come back to when you want to look put together without thinking too hard.
Long hair deserves the long-form cornrow treatment. The length is the asset, the braids are the frame, and the combination is what makes long-hair cornrows so much more visually striking than the same braids on shorter length.