



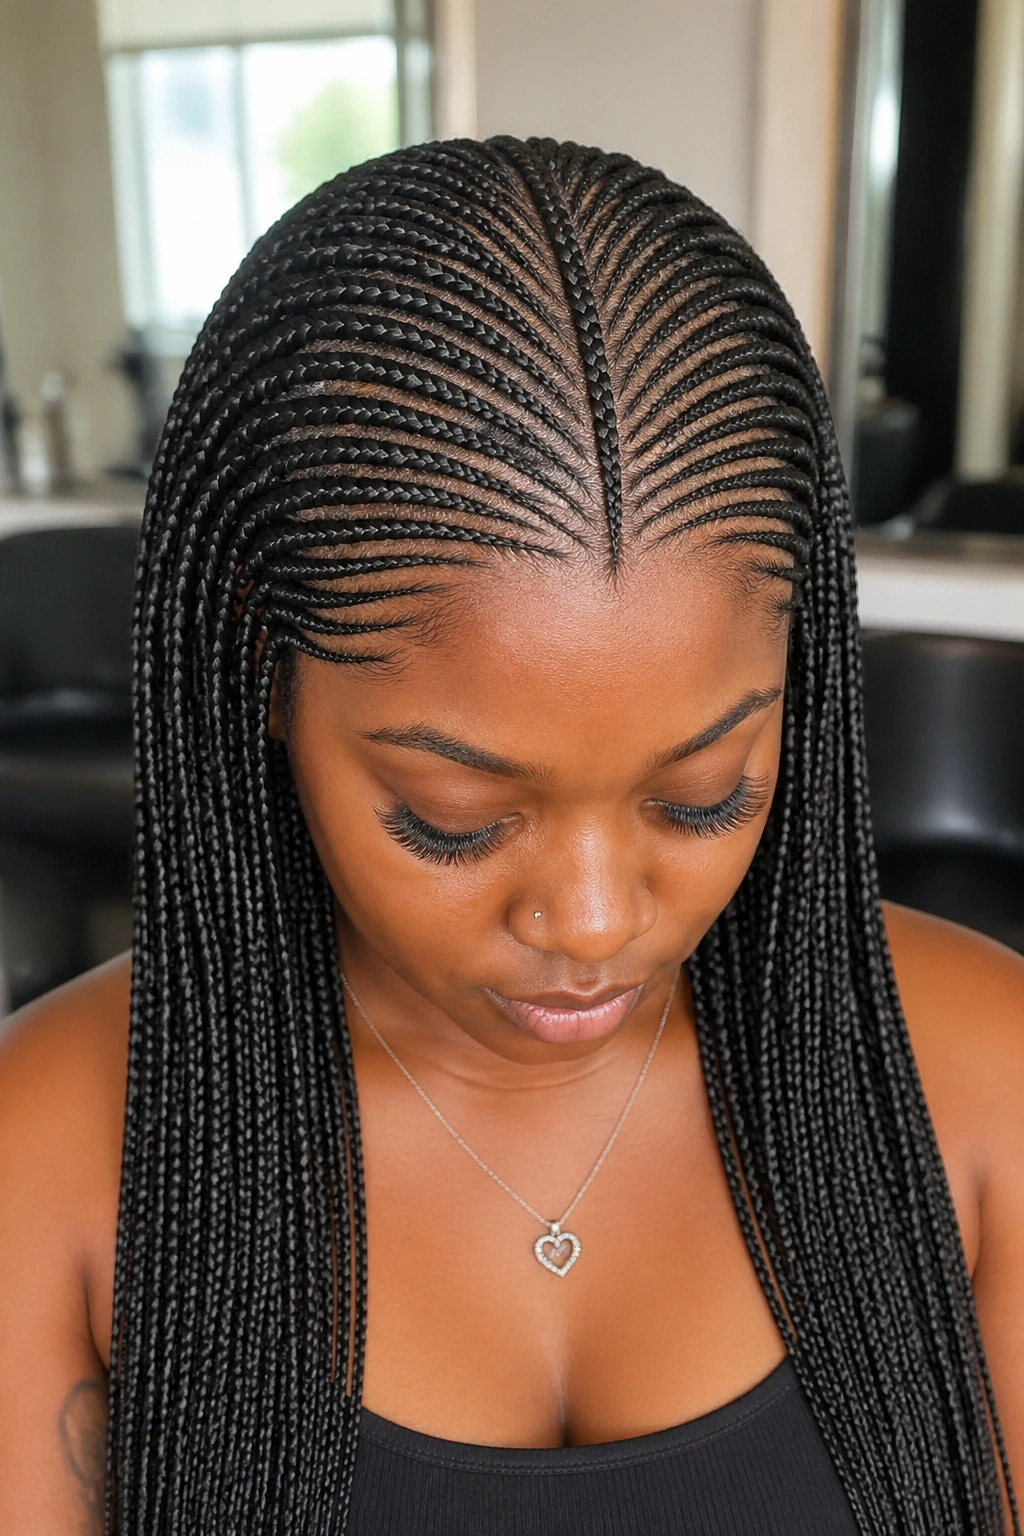
Fishbone cornrows look like what they sound like — intricate braided patterns that fan out from a central spine, mimicking the skeletal framework of a fish. The style pulls its name from that fishbone silhouette, where thin feeder braids run diagonally into a thicker central cornrow. It’s bold. It’s ancient. And it has been worn by Black women for centuries across West and East Africa long before it hit magazine covers and runway shows.
What makes fishbone cornrows different from standard cornrows comes down to the parting. You’re not just running straight lines from hairline to nape. You’re creating a V-shape or zigzag pattern where each small braid feeds into a main one. Think of it as braided architecture. Every section has a purpose, and every angle is deliberate.
Fishbone cornrows work on 4C hair beautifully because the texture holds the parts sharp. They also hold up well on relaxed hair, transitioning hair, and locs-in-progress. The style lasts 2 to 6 weeks depending on your maintenance routine and how tight the braider works the base.
The Cultural Weight Fishbone Braids Carry
Fishbone braiding isn’t a trend that popped up yesterday. The pattern shows up in historical records from Nigeria, Ghana, and parts of Ethiopia. Women used fishbone braids to signal age, marital status, tribal affiliation, and even readiness for motherhood.
When enslaved Africans were forcibly brought to the Americas, they carried these braiding techniques with them. Fishbone patterns became a silent language — sometimes literally. Historians have documented enslaved women braiding escape routes into their hair, with curved fishbone paths representing rivers and straighter lines representing roads.
That history sits in every fishbone braid you wear. It’s not costume. It’s continuity.
Tools You Actually Need Before You Start
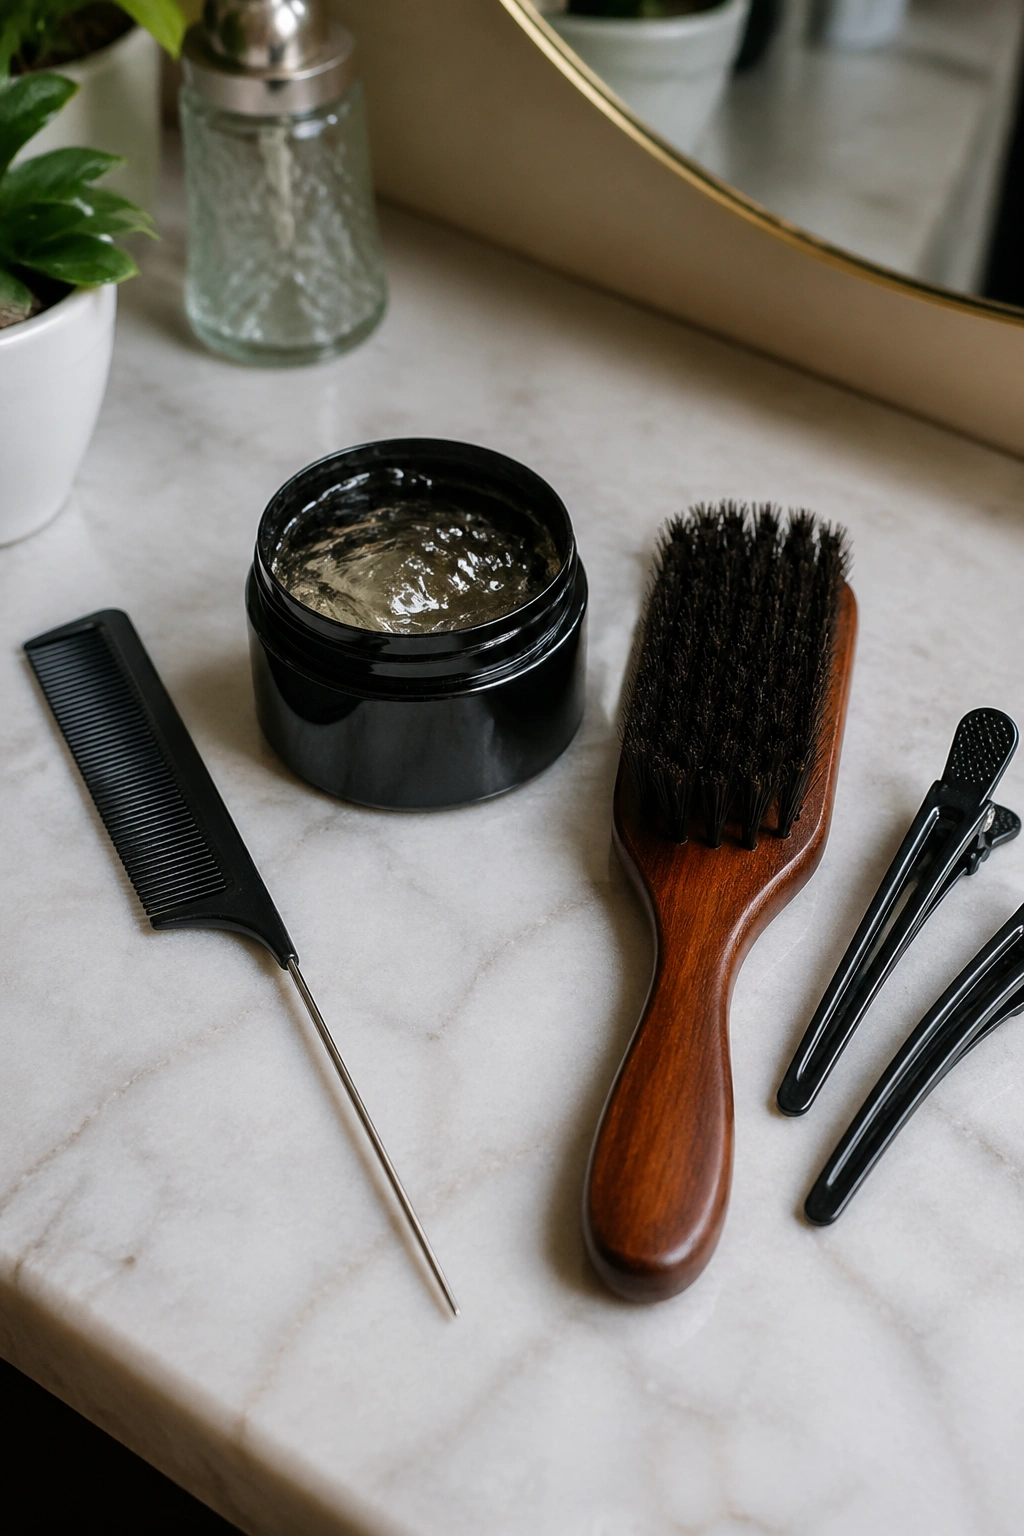
Skip the giant pack of random combs and cheap gels. You need four things that actually matter. A rat-tail comb with a fine metal tip for parting. A jar of firm-hold edge gel — Eco Styler Olive Oil or Got2B Glued both work, though the Got2B holds longer. A smoothing brush with boar bristles. And hair clips or duckbill pins to section off what you’re not working on.
If you’re adding extensions, kanekalon hair is standard. Get pre-stretched if you want less frizz on day one. Three to four packs handle most full heads.
For the base prep, you want clean hair that’s been stretched. Wet braiding on 4C hair can lead to mildew and breakage at the roots. Blow-dry on low heat with a comb attachment, or let your hair air-dry in chunky twists overnight.
Prep Your Scalp Before the First Part
The scalp underneath a fishbone style stays covered for weeks. Treat it now.
Wash with a sulfate-free clarifying shampoo to clear buildup. Follow with a moisturizing deep conditioner — something with shea butter, aloe vera, or hibiscus. Rinse thoroughly. Don’t skip this step. Product residue left under braids becomes bacterial buildup by week 2.
After drying, apply a light scalp oil. Jojoba and peppermint work well because they don’t clog. Avoid heavy grease like traditional hair food — those sit on your scalp and suffocate follicles under braids.
The Foundation Technique Every Fishbone Style Shares
All fishbone patterns rely on one base skill. You part a section diagonally, then feed in smaller parts as you go. The main braid stays flat. The feeder braids angle in at roughly 30 to 45 degrees.
Cornrow technique matters. Use under-hand strokes — stitches that lay flat rather than poke up. Over-hand braiding creates a rope-like raised braid, which ruins the clean fishbone look.
Keep tension consistent. Not too tight at the hairline. Bumps, tenderness, or little white dots on the scalp mean your braider went too hard. Speak up in the chair.
1. Classic Center-Spine Fishbone
The original. One thick cornrow runs straight down the center of the head from forehead to nape, with smaller fishbone feeders diving in from both sides at matching angles. It’s symmetrical, clean, and reads as formal without feeling stiff.
Why It Works
The centered spine balances the face, which helps when you’ve got strong cheekbones or a heart-shaped forehead. The feeders create visual motion without adding bulk. And because the main braid runs down the middle, you can accessorize with a single strand of gold cuffs or beads without the style looking cluttered.
- Best for: oval, heart, and square face shapes
- Hair length needed: at least 3 inches of natural hair
- Extension weight: 2-3 packs of kanekalon
Tip: Ask your braider to keep the spine braid slightly thicker than the feeders — about 1.5 times the width. That contrast is what makes the fishbone effect pop.
2. Asymmetrical Side-Swept Fishbone
Instead of a center spine, the main cornrow runs along one side of the head — usually from the temple down to the opposite shoulder. All feeders angle into it.
This is the fishbone you wear when you want edge without chaos. It photographs well because the diagonal line draws the eye across the face, and it sits gorgeously with hoops.
The challenge with asymmetrical fishbone is tension balance. One side of your head carries more braid weight than the other, which can pull unevenly if your braider doesn’t adjust. A good stylist will use smaller feeders on the heavier side to compensate.
Sleep on a satin pillowcase with the braid weight on the opposite side from where you usually lay — rotate sides every few nights to prevent the hairline on the heavy side from weakening.
3. Double-Spine Fishbone
Two main cornrows run parallel, about 2 inches apart down the crown, with feeders flowing into each from the outer sides. The space between the two spines creates a kind of braided avenue.
How to Style It
Some braiders fill that middle channel with tiny stitch braids or flat twists. Others leave it smooth with just a gel-laid scalp stripe. Both look great — the twist-filled version reads more traditional, the smooth version looks sleeker and edgier.
This one suits longer face shapes because the parallel lines add width visually. On round faces it can close off the forehead too much.
Who this is for: Women with thicker, denser hair who want a protective style with built-in design complexity.
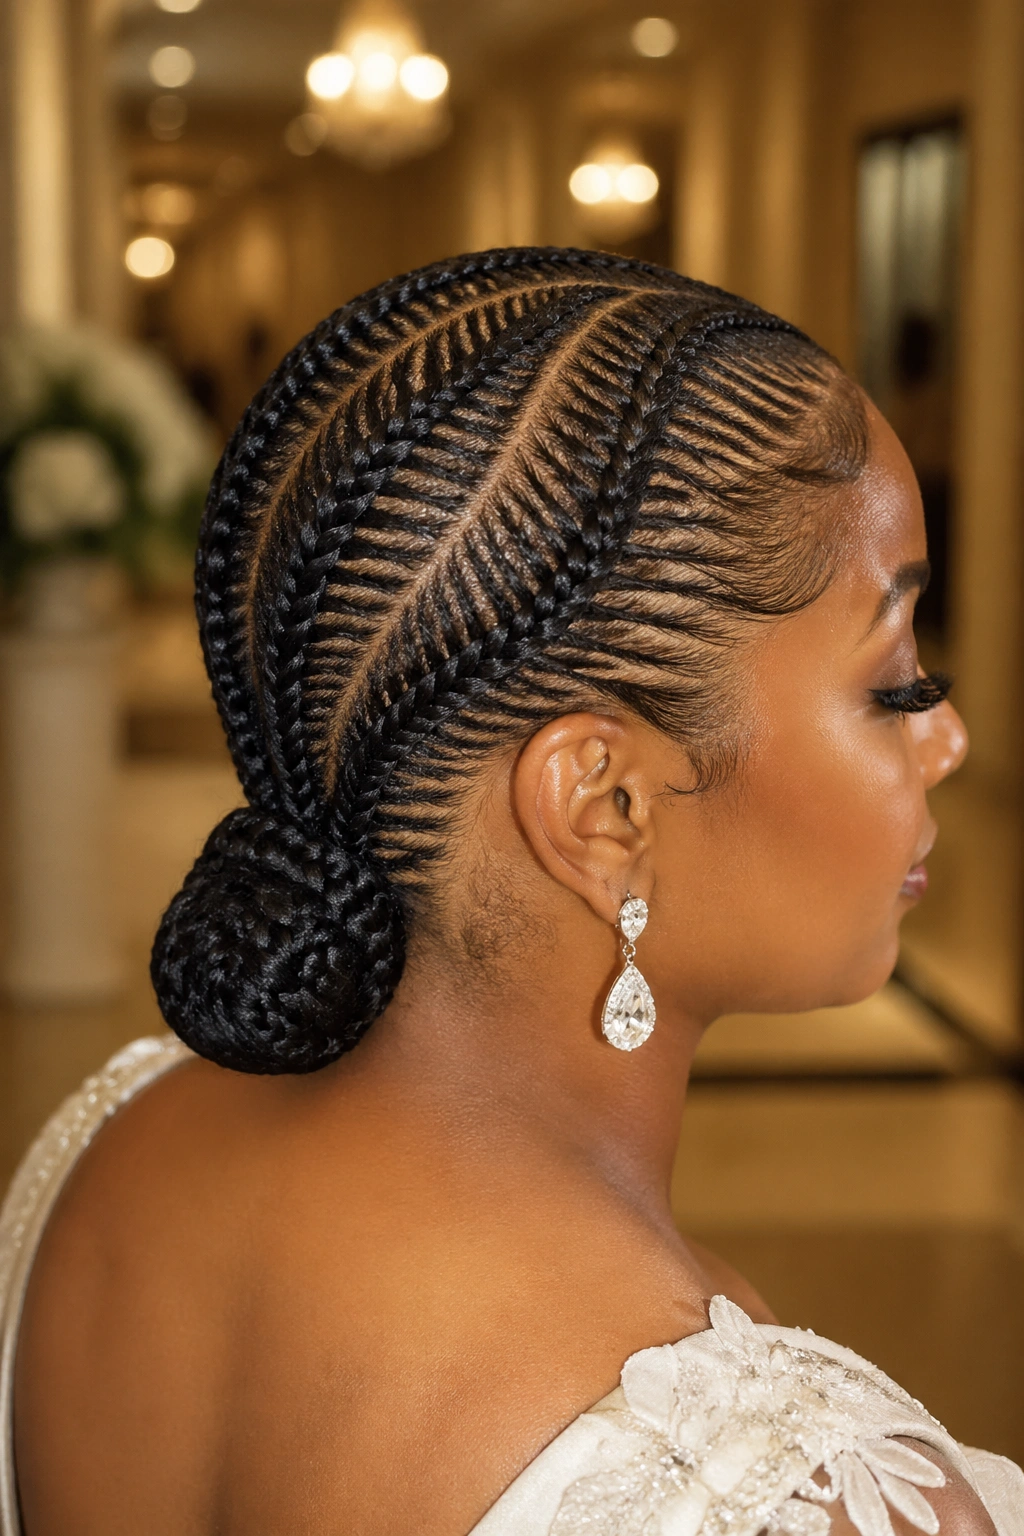
4. Fishbone into a Low Bun
The classic fishbone pattern runs from the hairline down to about ear level, where everything collects into a low bun at the nape.
This is my pick for weddings, graduations, or any event where you want your face open but the style to have architecture in it. The bun can be wrapped with jewelry cord, a gold cuff, or nothing at all.
Because all braid weight sits at the nape, it’s heavy. Expect 2 to 3 hours of install time minimum. Longer if you’re using feed-in extensions for length.
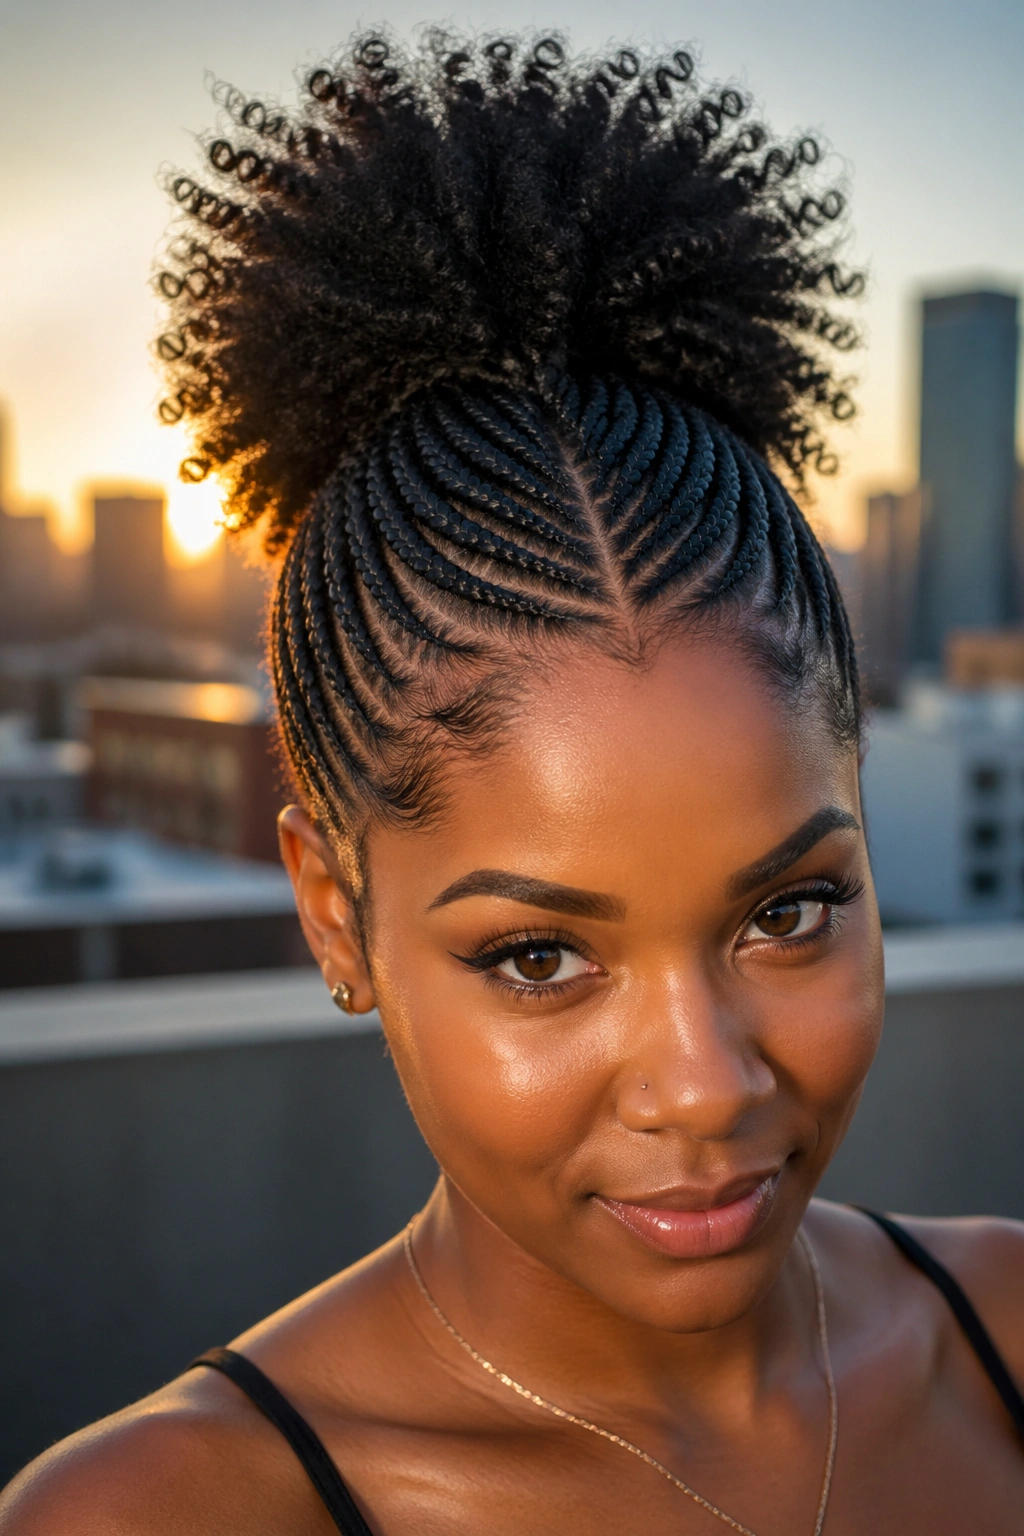
5. Fishbone with High Ponytail Puff
A question I get asked often — can fishbone handle a high ponytail? Yes, and it’s one of the most flattering ways to wear the style.
All feeders angle up toward a central point at the crown, where everything gets gathered into a puff or ponytail. The upward angles give you an instant face-lift effect. It’s the cornrow equivalent of a good push-up bra.
How to Wear It
The puff works best with either your natural hair pulled out at the gather point or a small drawstring ponytail piece that matches your texture. Avoid anything too silky — the contrast between straight synthetic hair and the textured cornrow base looks off.
Wrap the base of the ponytail with edge gel and a satin scarf for 10 minutes after install to melt the braids down smooth.
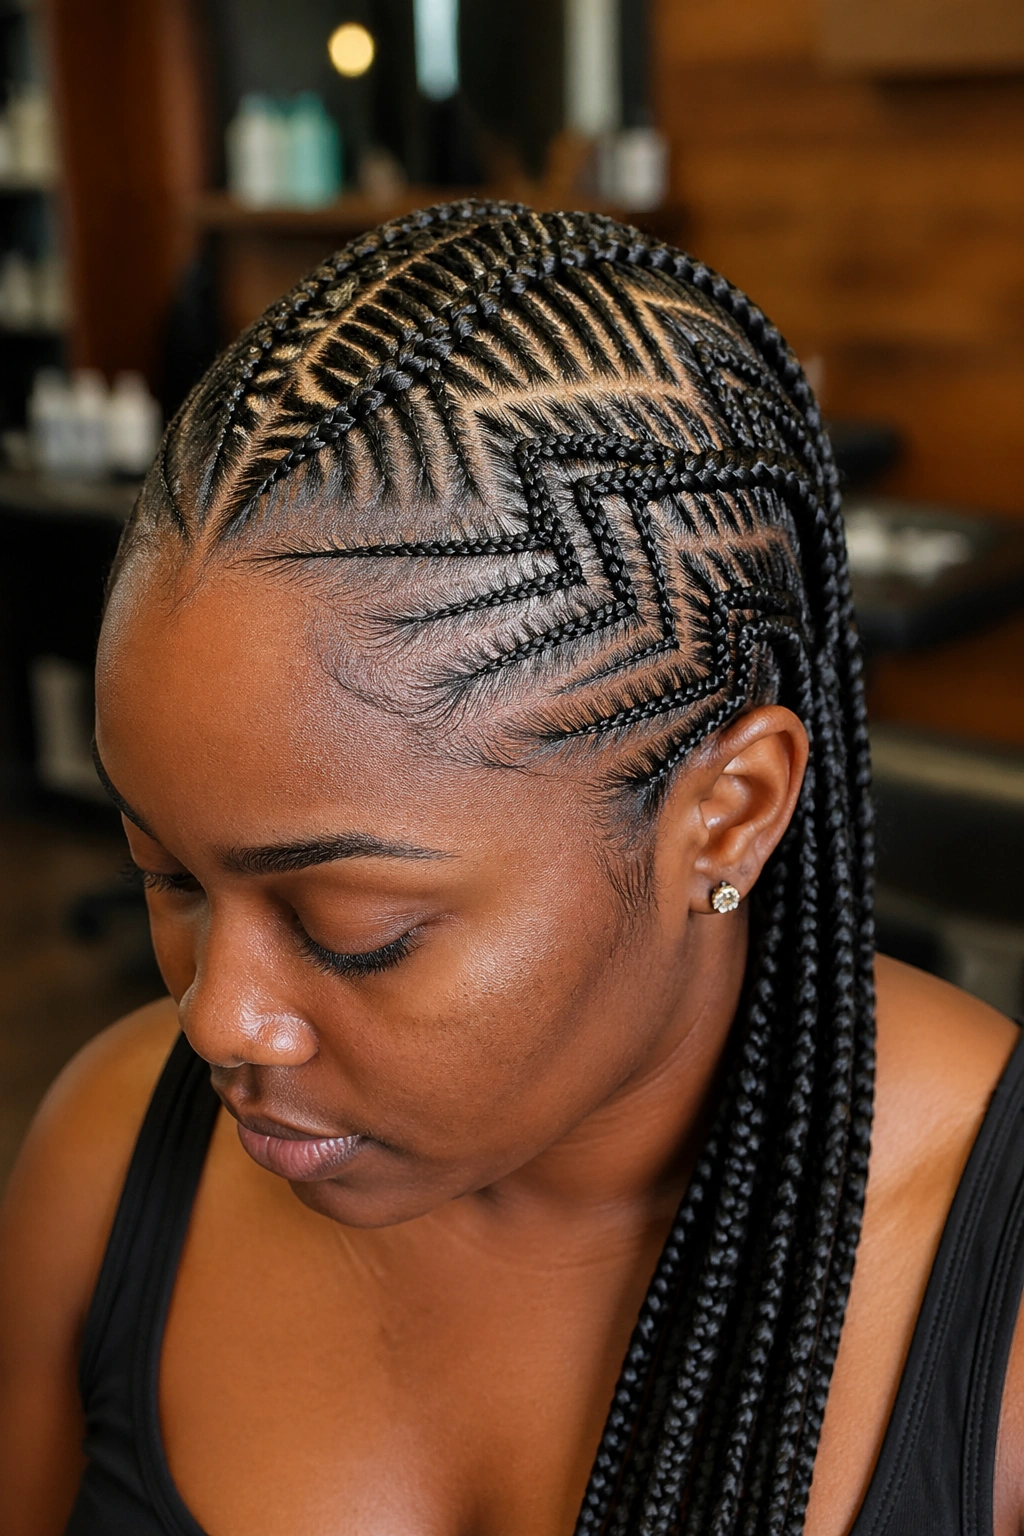
6. Zigzag Fishbone
Where classic fishbone uses straight diagonal feeders, zigzag fishbone bends the feeders into sharp Z-shapes before they feed into the main braid. Each small feeder changes direction at least twice.
The pattern looks like lightning running alongside a river. It takes more time — usually 4 to 6 hours for a full head — and needs a braider with real parting skill. Not every stylist can do zigzag parts cleanly.
Go for this when you want something unmistakably handmade and unmistakably artful. It’s not a style for people who want to blend in.
7. Small-Part Micro Fishbone
The feeders here are tiny. We’re talking 30 to 40 micro-sized braids feeding into a center spine, compared to the 8 to 12 feeders on a classic fishbone.
More parts means more visual detail. It also means more scalp tension if the braider isn’t careful. The style can last 6 to 8 weeks because the tightness of the parts keeps frizz at bay longer than a chunky fishbone.
Bring a pillow to the chair. You’ll be there for 8 hours.
8. Large-Part Bold Fishbone
Flip the script on the micro version. Here the feeders are thick — sometimes as wide as the main spine itself. You might only get 5 or 6 feeders on each side.
This is the fishbone that reads graphic. Strong lines, strong negative space on the scalp, strong statement. It works particularly well on shorter natural hair because the fewer parts means less strain on your real length.
Tip: Pair large-part fishbone with a bold lip color. The scale of the braids calls for scale in the makeup.
9. Fishbone with Beads at the Ends
Wooden beads, gold-tone beads, glass beads — pick your style. Each feeder ends in 2 to 4 beads threaded onto the braid tip.
Beaded fishbone is the style I recommend for little girls’ first braiding appointments. The beads make the style feel celebratory and they give kids something to play with that doesn’t ruin the braid. For adults, you can go minimalist with 2 small beads per braid or maximalist with clusters of 8 to 10.
Heat-seal bead tips with a lighter to keep the beads from sliding off. Or use small rubber bands if you prefer no flame.
10. Fishbone with Cowrie Shells
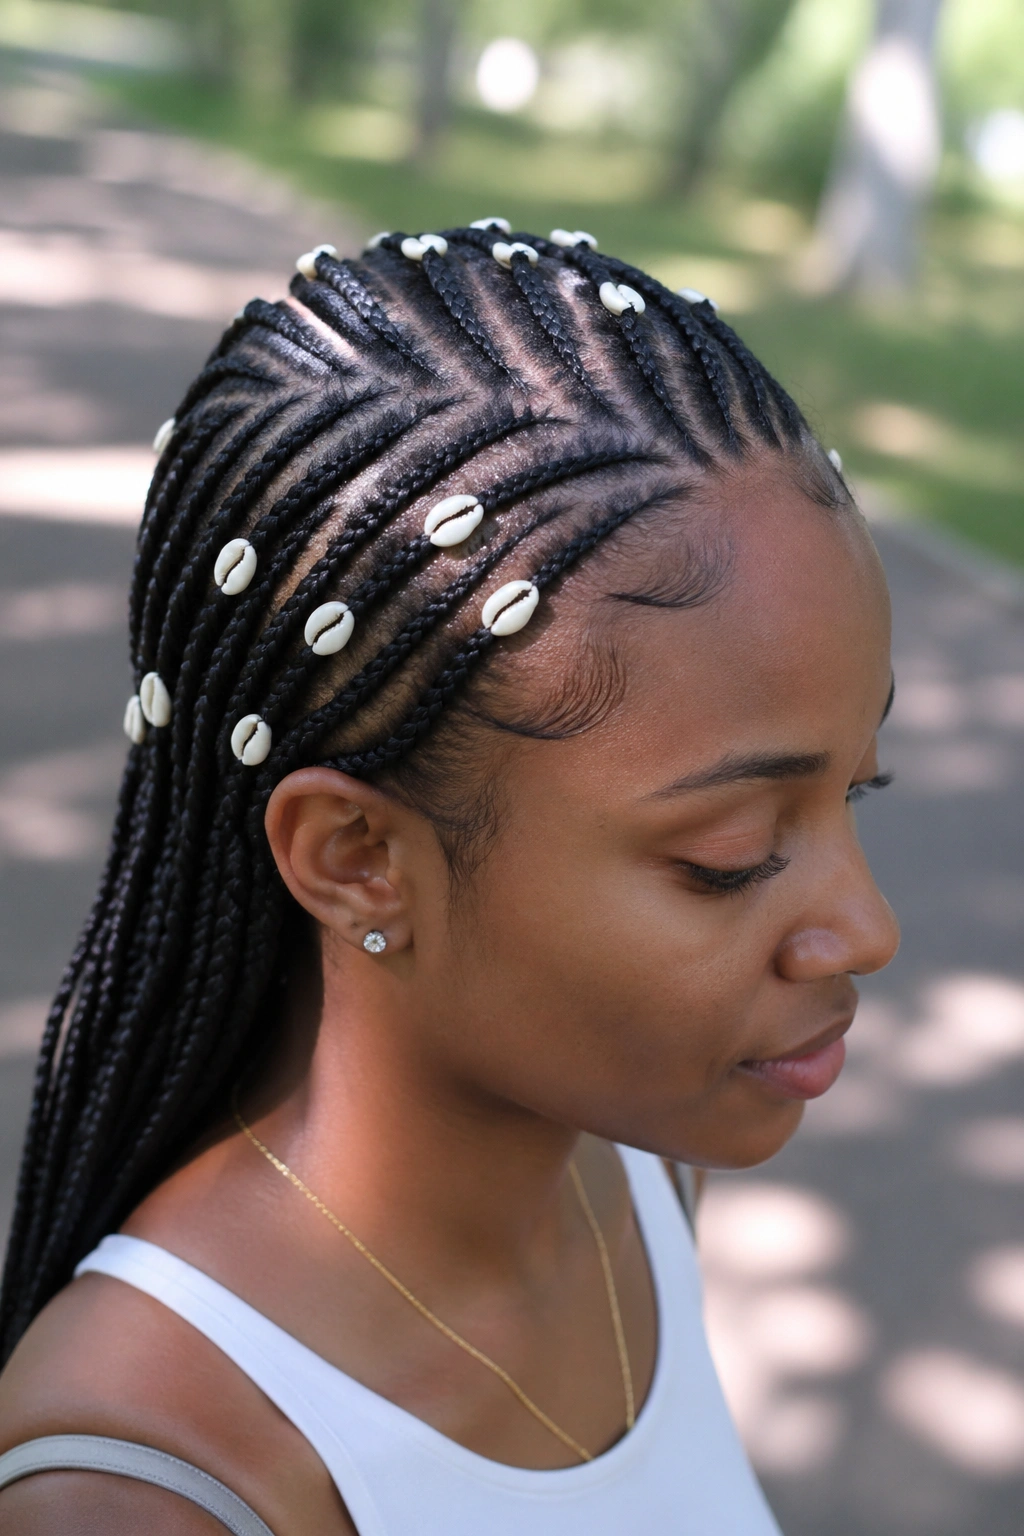
Cowrie shells thread onto braids through a natural hole at the back of the shell. They’ve been part of African braiding traditions for thousands of years — used as currency, spiritual symbols, and adornment.
On fishbone braids, cowries look best when spaced unevenly. Cluster 3 on one braid, 1 on another, skip the next two. That rhythm reads as intentional rather than decorative. Symmetrical cowrie placement on every single braid reads as overly formal and kills the organic feel.
Cowries are light but they do add weight over time. Don’t load every single braid or you’ll be fighting neck strain by day 3.
11. Fishbone Bob
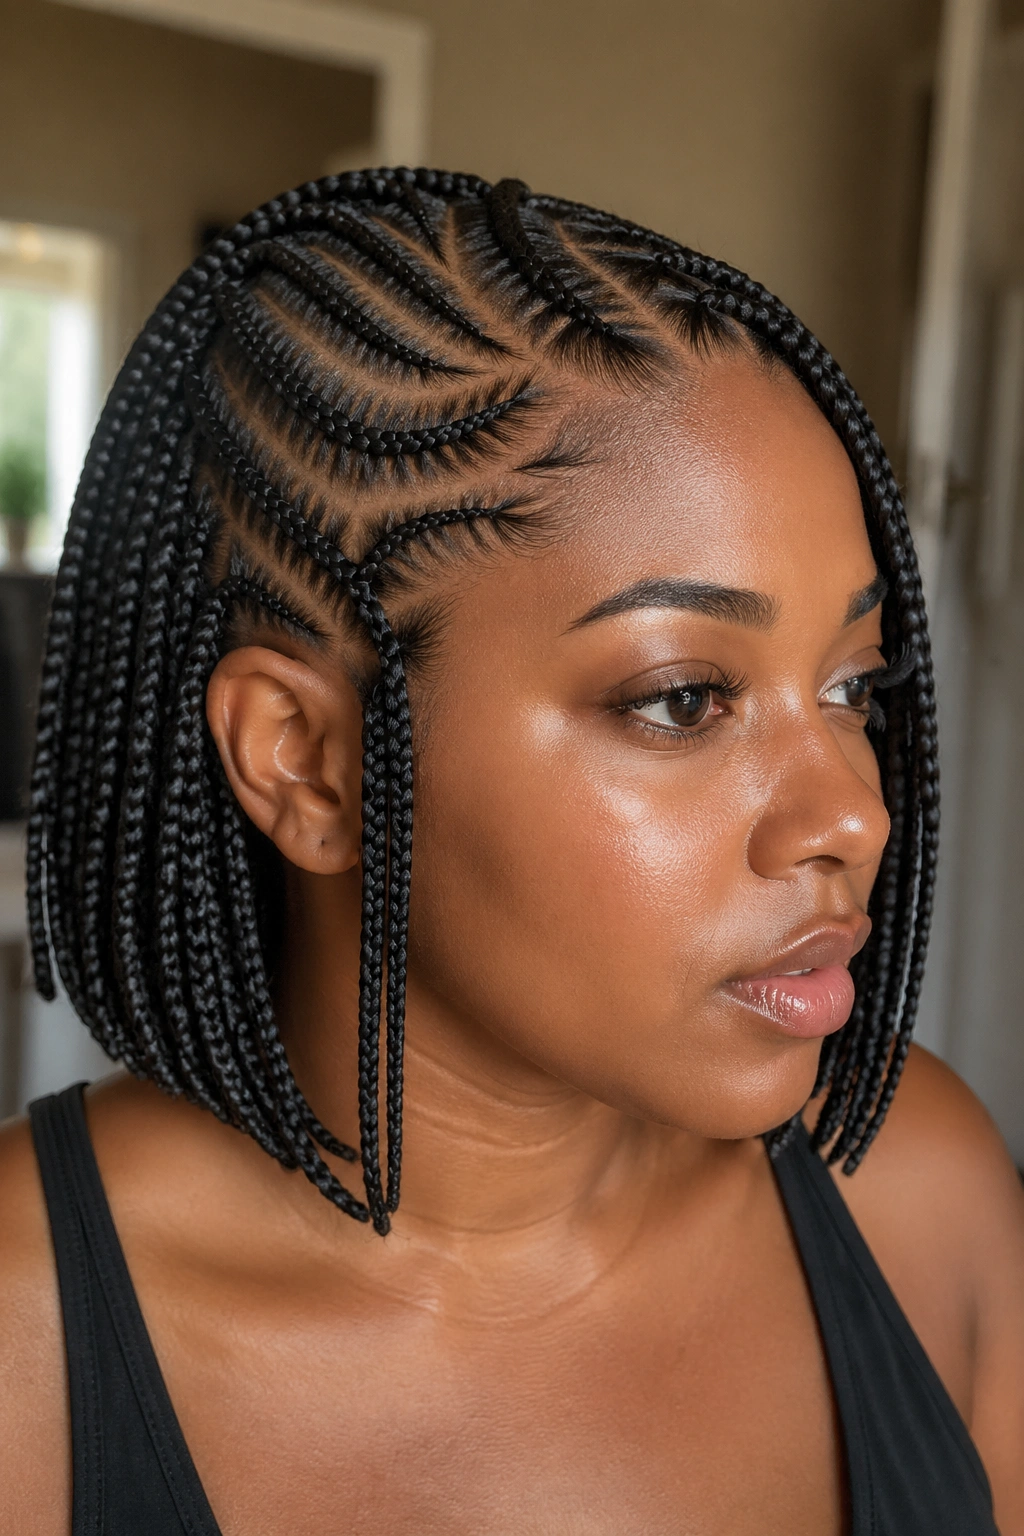
Cut your extensions to bob length — roughly chin to collarbone — before install. The fishbone pattern runs down into the bob, creating a blunt-ended silhouette with visible braid architecture up top.
What Makes It Different
Most cornrow bobs use the same thickness of braid throughout. Fishbone bob uses graduated thickness. The main spine carries more visual weight at the scalp, and the feeders taper as they reach the bob line.
This cut suits women who want the protective benefits of braids without the dramatic length. Easier to sleep on. Lighter on the neck. Faster to wash.
Best for: Anyone new to cornrows who’s unsure about committing to long braid extensions.
12. Waist-Length Feed-In Fishbone
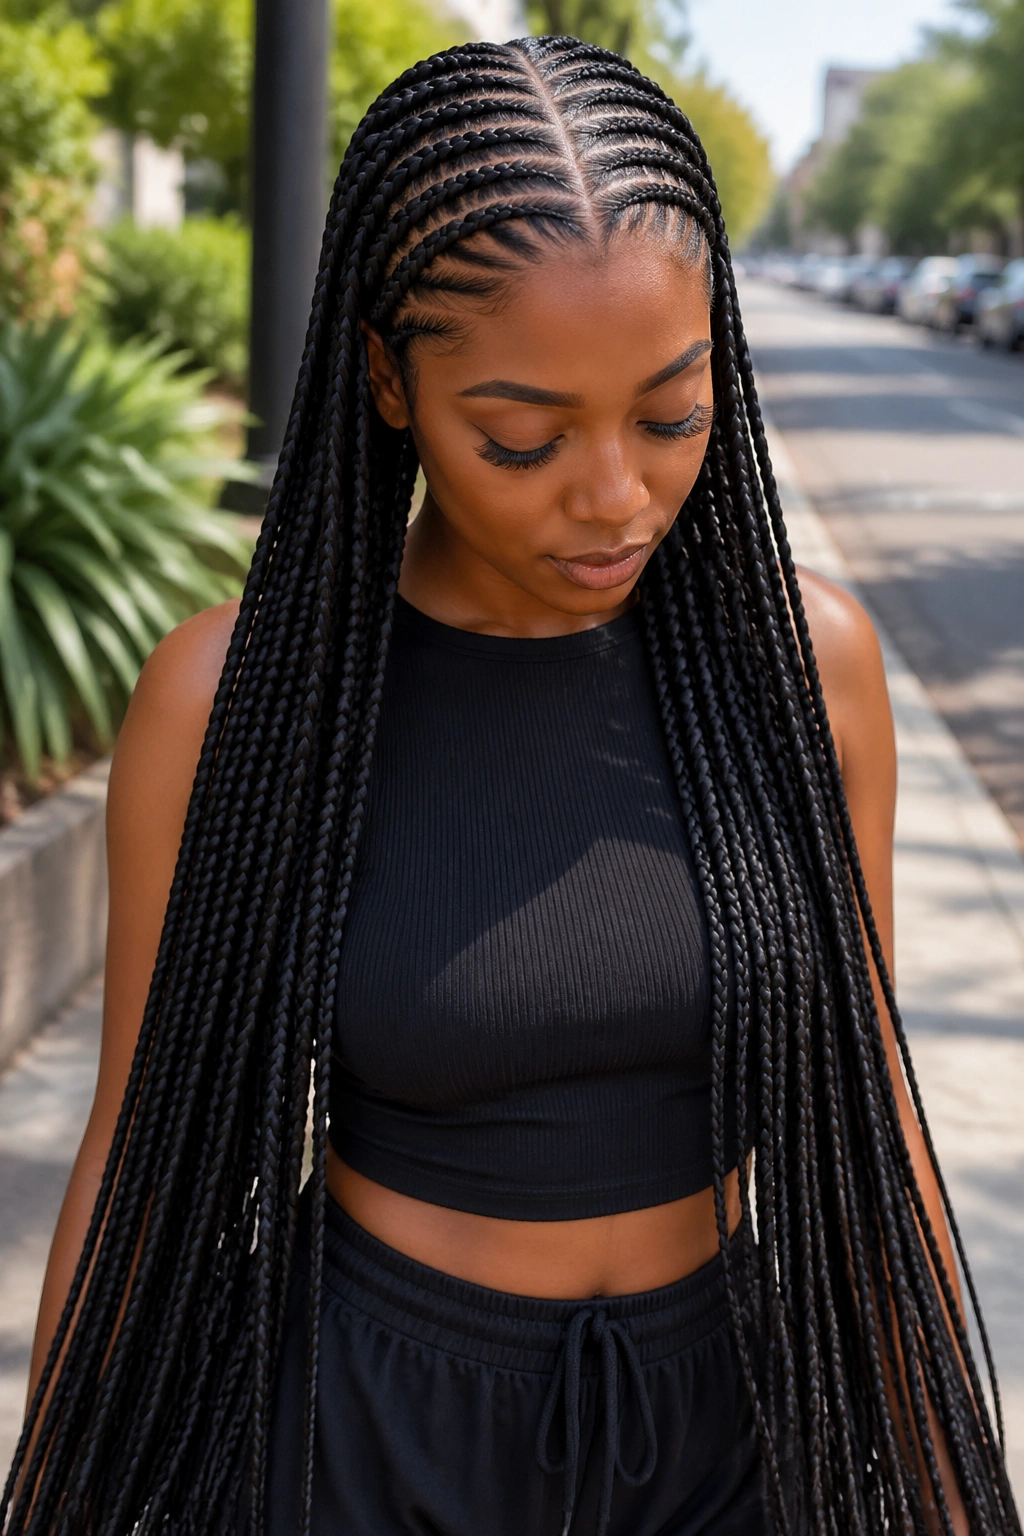
The opposite end of the length spectrum. Feed-in extensions carry fishbone braids down to waist level or longer. You need 4 to 5 packs of kanekalon minimum.
The style is heavy. Your scalp will feel the weight for the first week. After that, your muscles adapt and it becomes normal.
What I love about waist-length fishbone is how the braids move when you walk. The feeder pattern creates a layered effect, so the ends swing independently rather than falling as one solid curtain. It’s the kind of style that looks great in slow motion on any video you post.
13. Fishbone into Goddess Curls
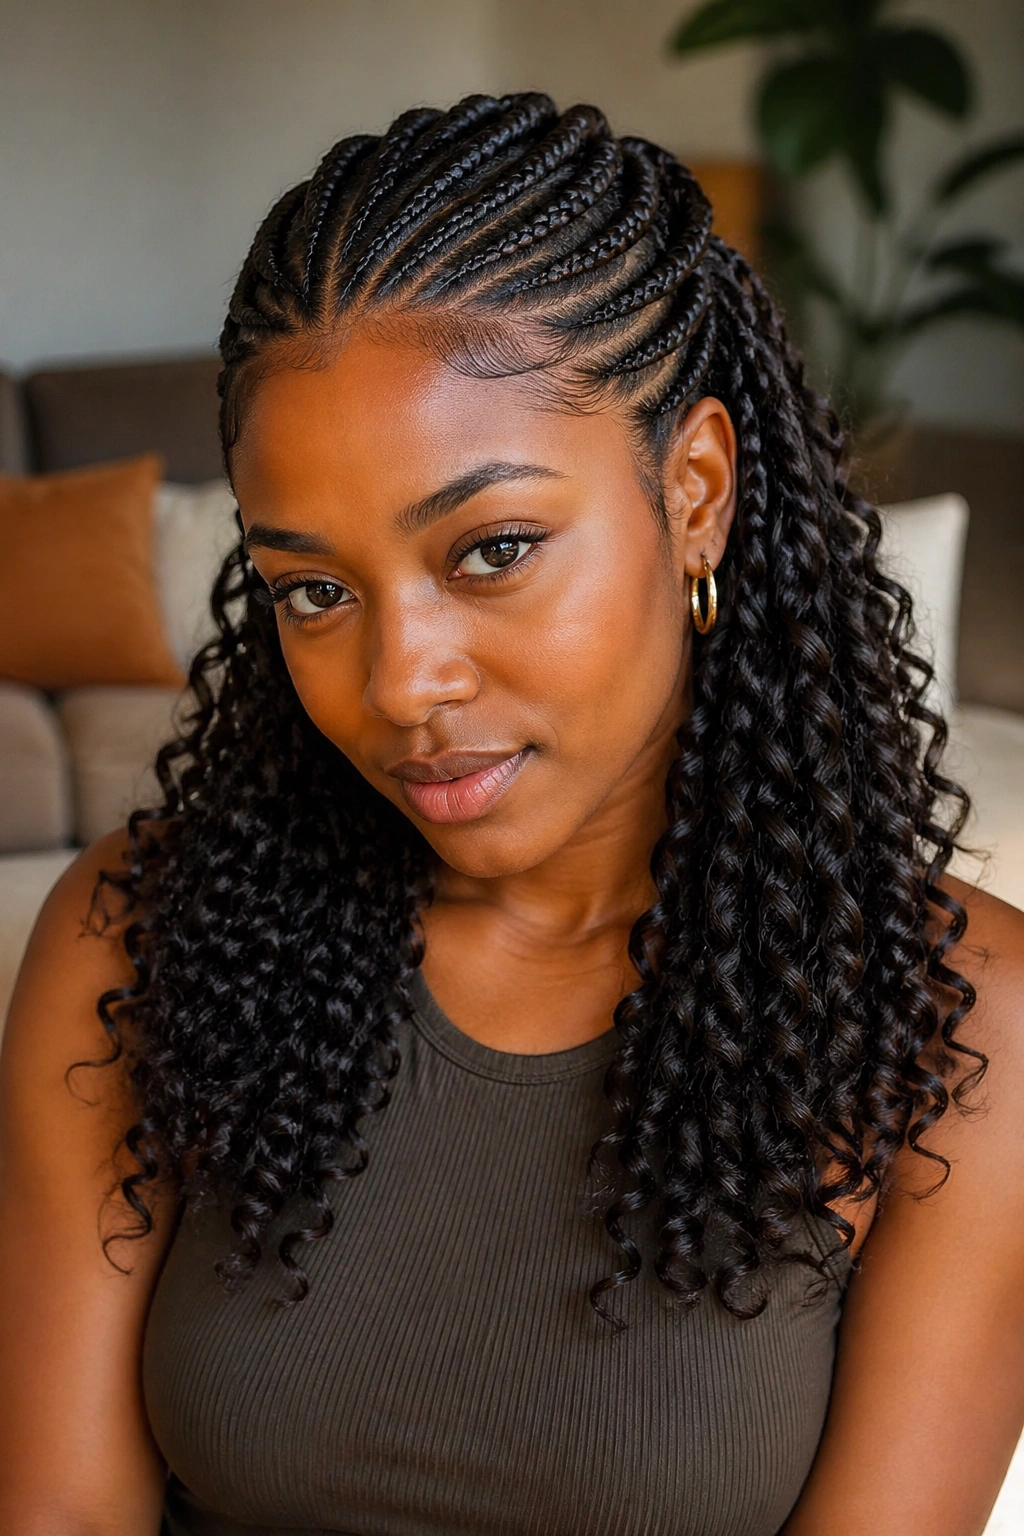
Braid the cornrows about two-thirds of the way down. Leave the last third as loose curly extensions — Spetra or Outre Xpression pre-curled hair works.
The contrast between sharp cornrow architecture up top and soft curls at the bottom is where this style earns its name. It’s goddess because of that softness.
Wet the curl portion with a leave-in spray each morning to refresh. The curls will tangle slightly by day 4 or 5 — use a wide-tooth comb or just your fingers.
14. Colored Fishbone with Ombre Feeders
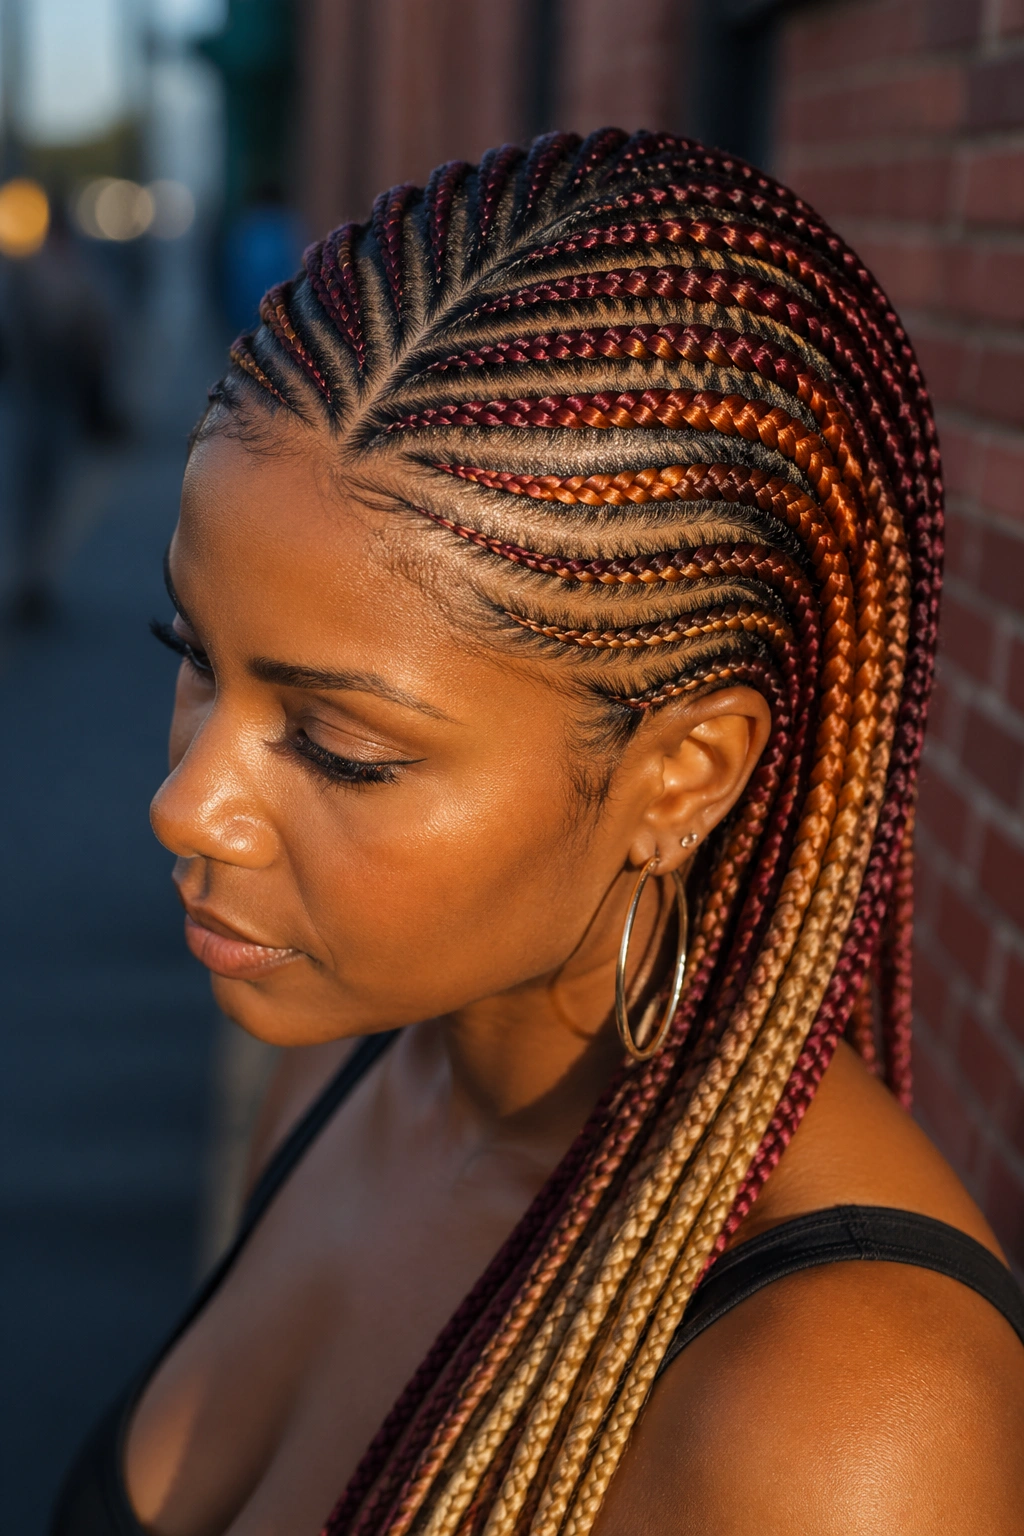
The main spine stays your natural hair color. The feeders transition to a second color — burgundy, honey blonde, copper, or deep purple are my favorites.
Getting clean color separation requires the braider to work each feeder with the colored kanekalon from root to tip without blending it into the spine braid. This takes skill. Ask to see their portfolio before committing.
The color catches naturally when the braided pattern shifts. You don’t need dramatic color contrast — even a subtle tonal shift between base and feeder reads as intentional.
15. Fishbone with Heart Part
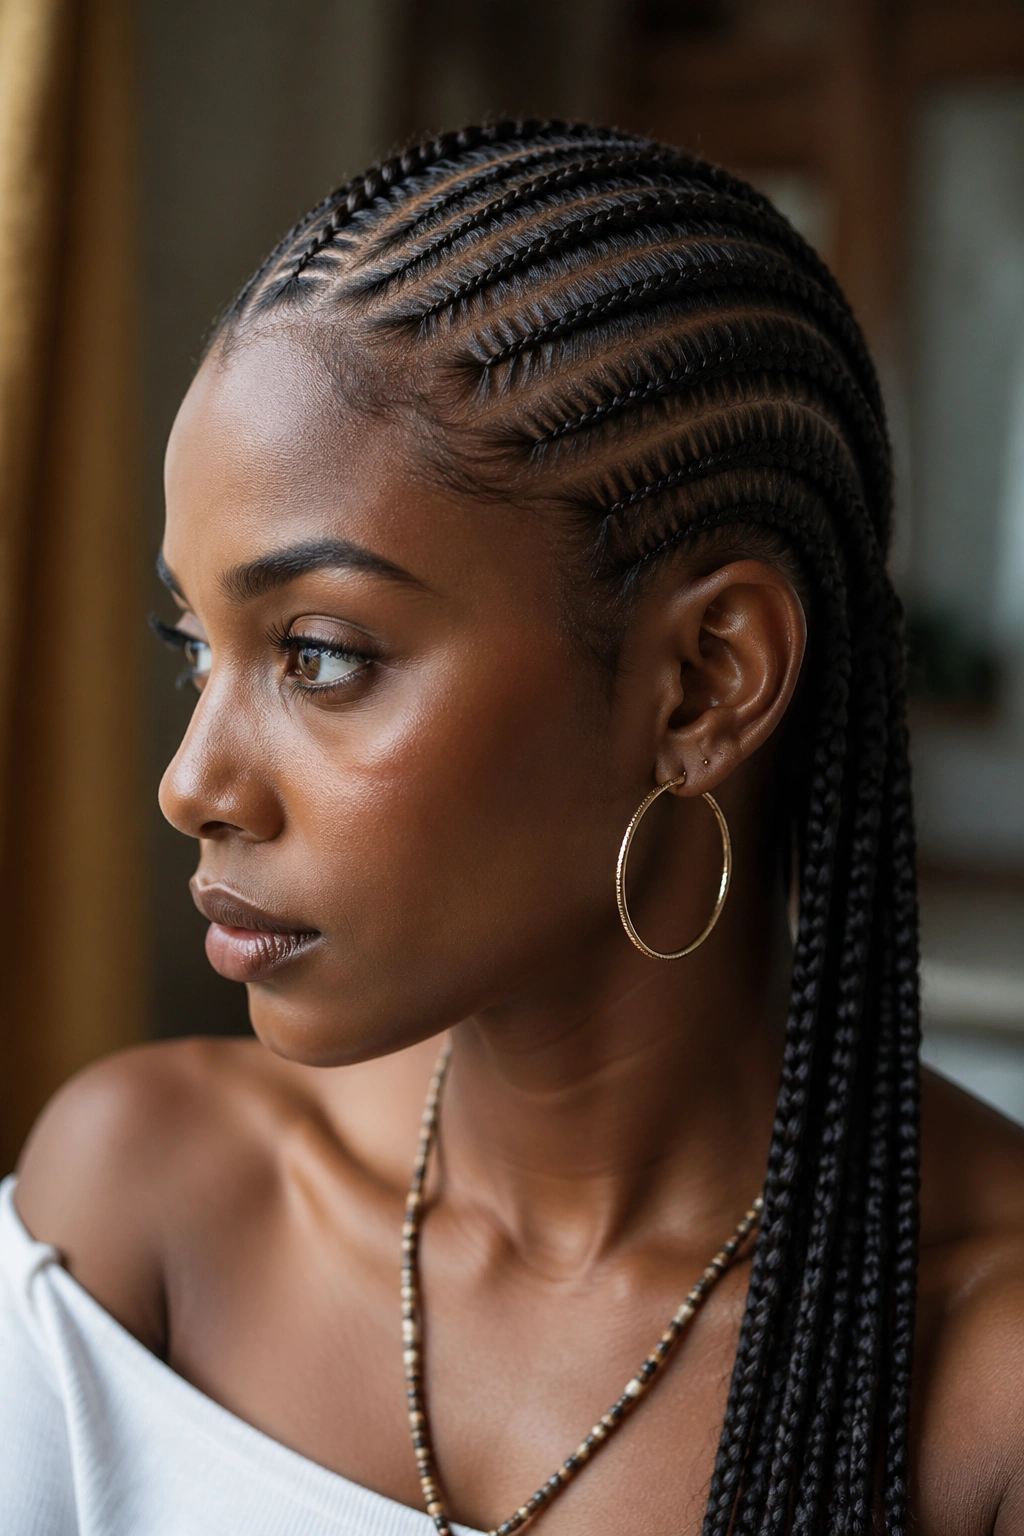
A classic heart-shaped part at the back of the head, with fishbone feeders filling in the interior of the heart shape.
Who This Is For
This one is playful. It suits younger women, celebratory events, and anyone who wants their braided style to have a clear focal point at the back. It photographs best from behind, so plan for someone to take that shot.
The heart part requires exact precision. A braider who rushes will end up with an asymmetrical heart, which looks more like a crumpled balloon than a love symbol. Budget 4 to 6 hours minimum.
Tip: Outline the heart shape with a thin gel application before the braider starts parting. That wet outline serves as a visual guide.
16. Fishbone with Middle-Part Split
The fishbone pattern mirrors itself perfectly across a clean middle part. Left side feeders angle left, right side feeders angle right, both spines run parallel about 4 inches apart.
Symmetry is the whole point here. It’s an optical trick — your face becomes the center of a natural V-shape. This does wonders for softening a strong jaw or balancing a wider forehead.
Keep the middle part clean. Apply edge gel along the exposed scalp line every few days to maintain the sharp reveal.
17. Fishbone with Crown Ring
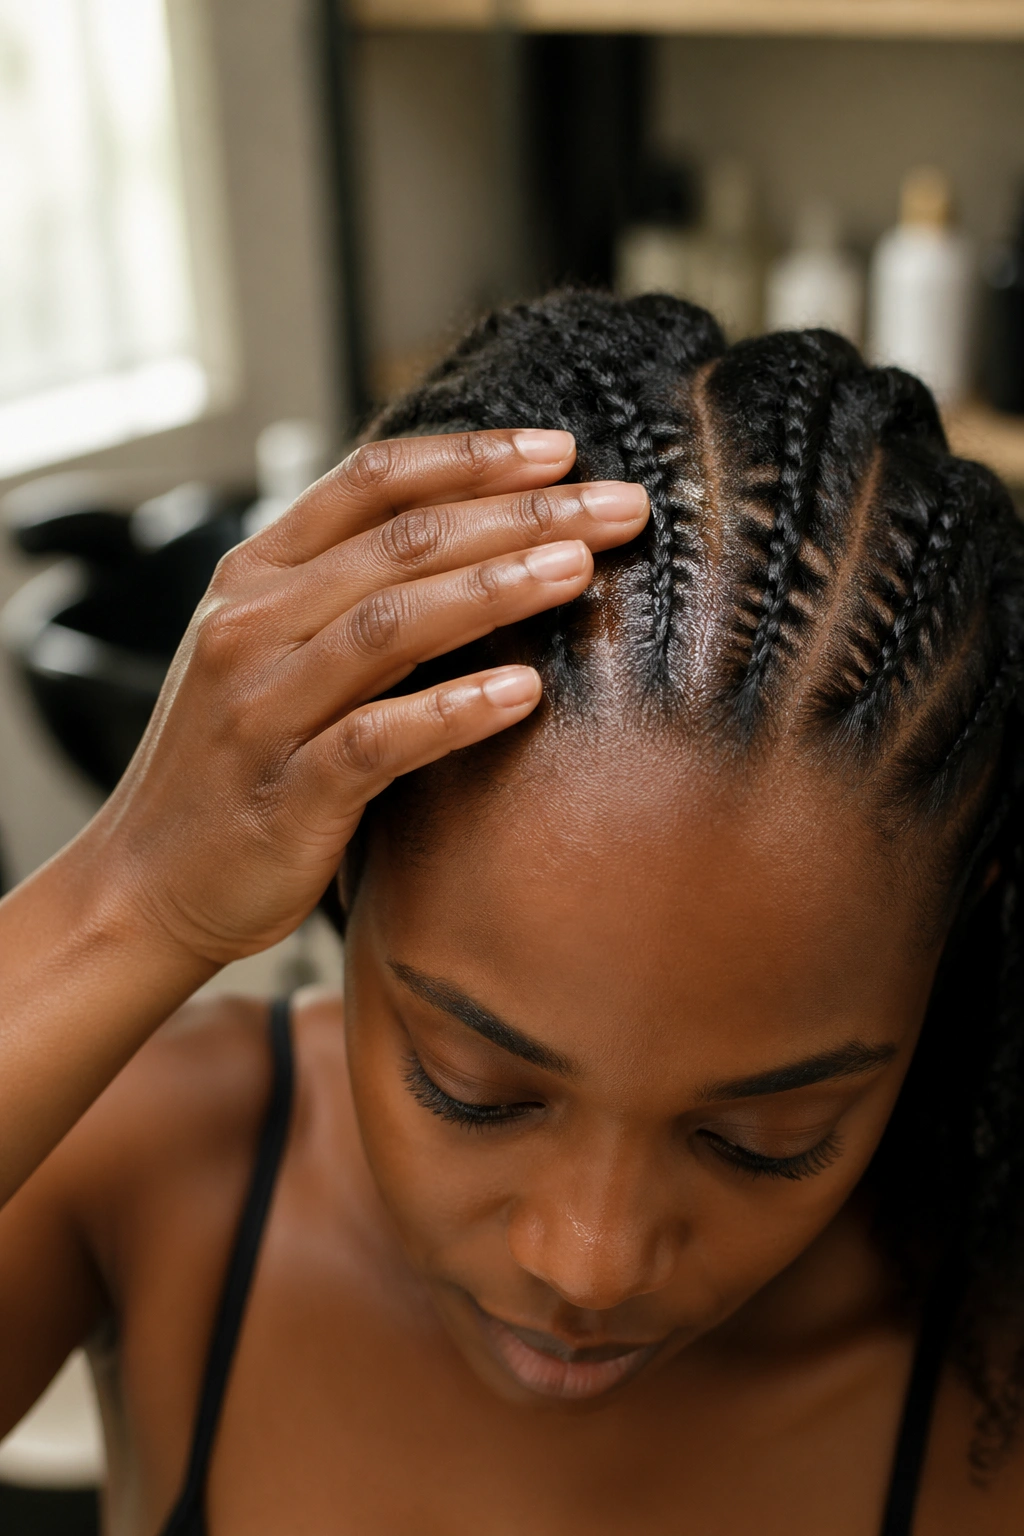
All feeders radiate outward from a central circular parting at the crown of the head. The crown ring itself stays unbraided — usually treated with gel and wrapped with a gold band or left clean.
This style reads regal. It’s the cornrow version of a halo. The challenge is keeping the crown ring crisp through wear — scalp oils and sweat will dull the gel outline by day 5 or so. Touch up every 3 to 4 days.
Works best on round or oval heads. Square head shapes can make the crown ring look awkward.
18. Fishbone Mohawk
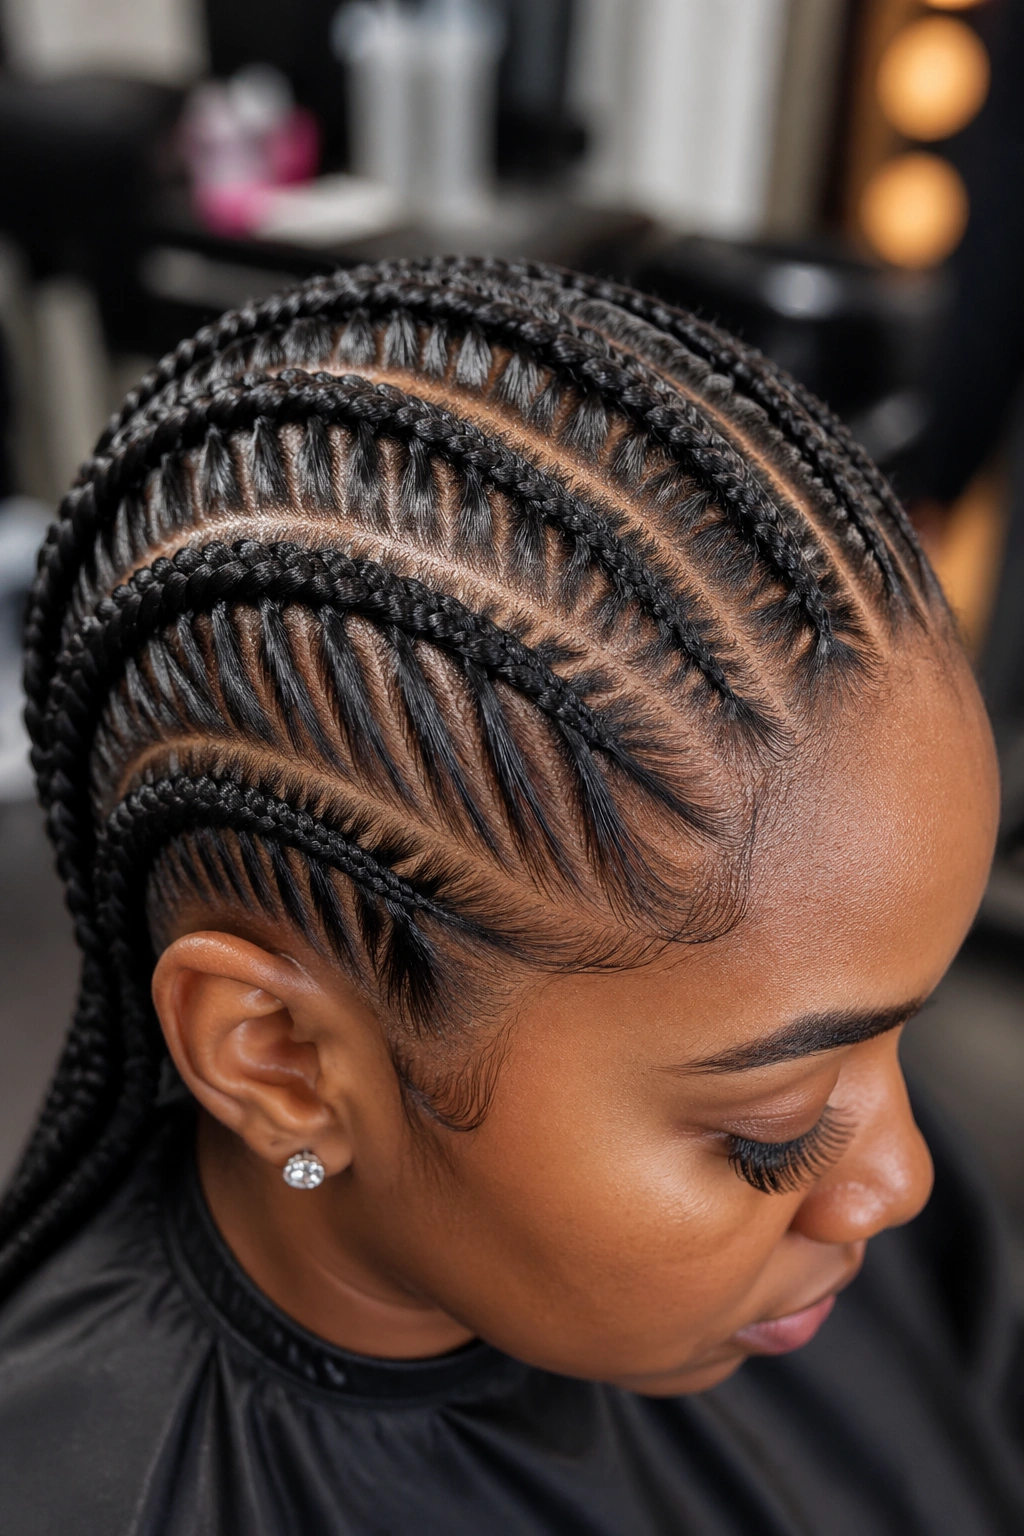
All feeders angle toward a raised central ridge of hair that runs front to back down the crown. The ridge can be styled flat as a cornrow itself, pulled up as a faux-hawk, or wrapped into a braided bun.
This is the fishbone style with the strongest attitude. It works equally well for a music festival or a formal event depending on how you finish the top.
The sides can be taken short — almost shaved look — with the feeders angled sharply up into the mohawk. Or you can keep the sides with more braid length. Your call.
Styling Tip: If you want the mohawk to stand up, use pipe cleaners hidden inside the top braid as a framework. Sounds unhinged. Works every time.
19. Fishbone with Side-Swept Bangs
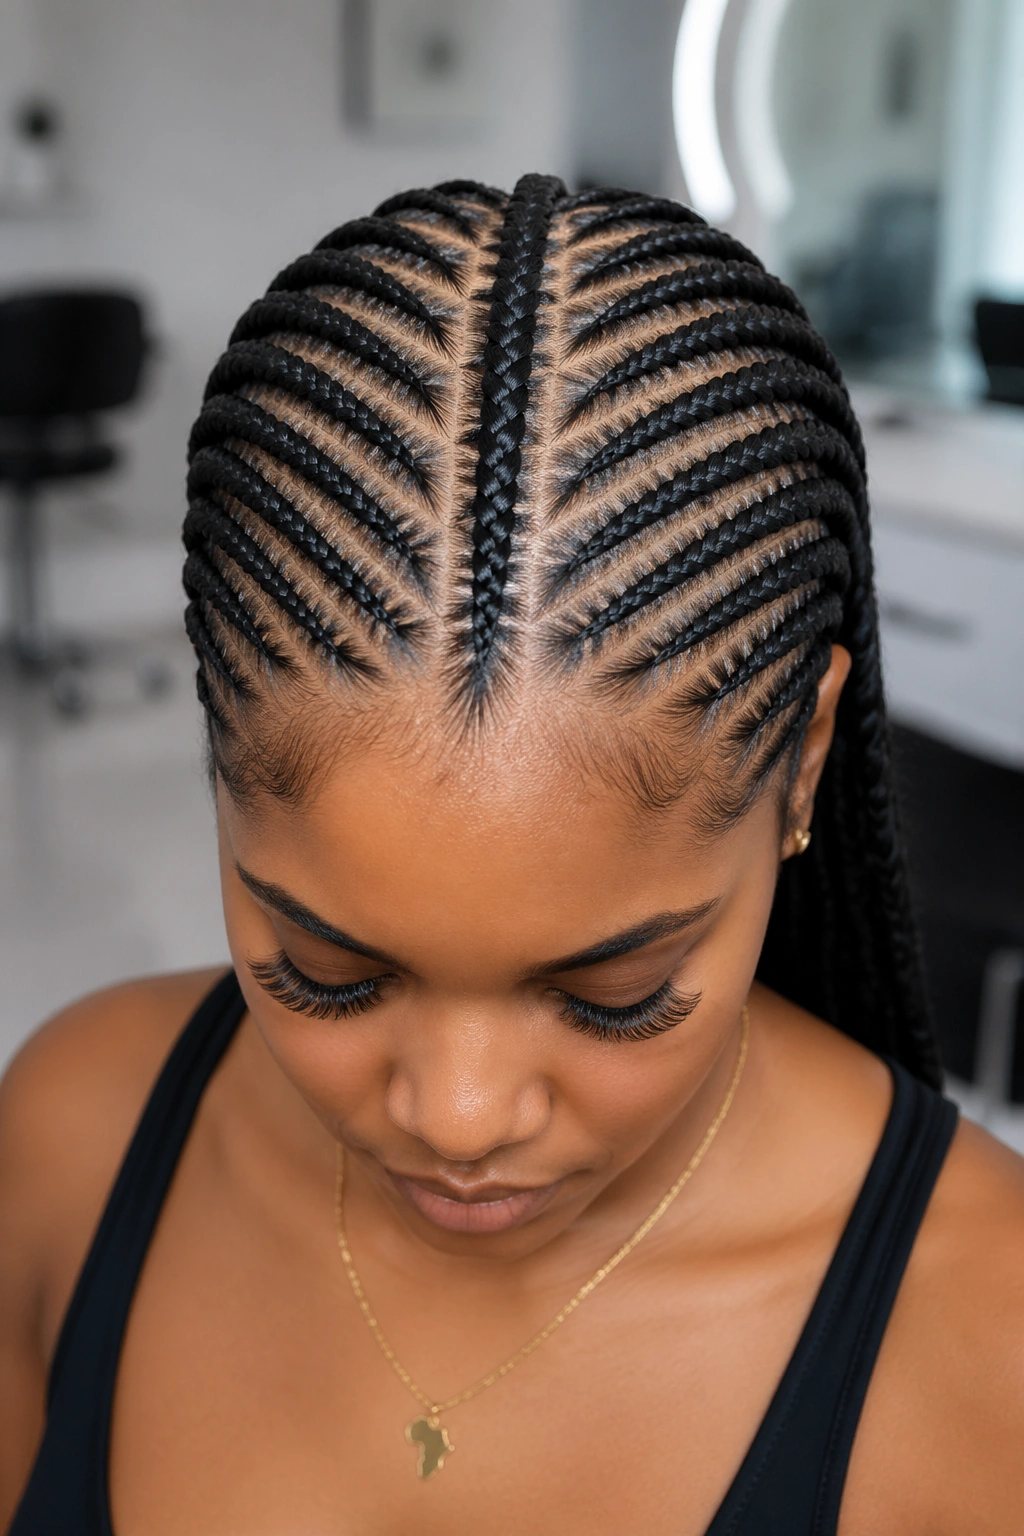
The front 3 inches of the fishbone pattern angle sharply across the forehead to form a swept fringe. The bang section is usually built with 4 to 6 small feeder braids that hang loose rather than anchoring into a larger braid.
Bangs soften the whole look. If you usually find cornrows too stark on your face, this version gives you the structure without the severity.
The bang section requires the most maintenance. Expect some frizz at the front hairline by day 6 or 7 — smooth with a pomade and a satin scarf nightly.
20. Fishbone with Halo Part
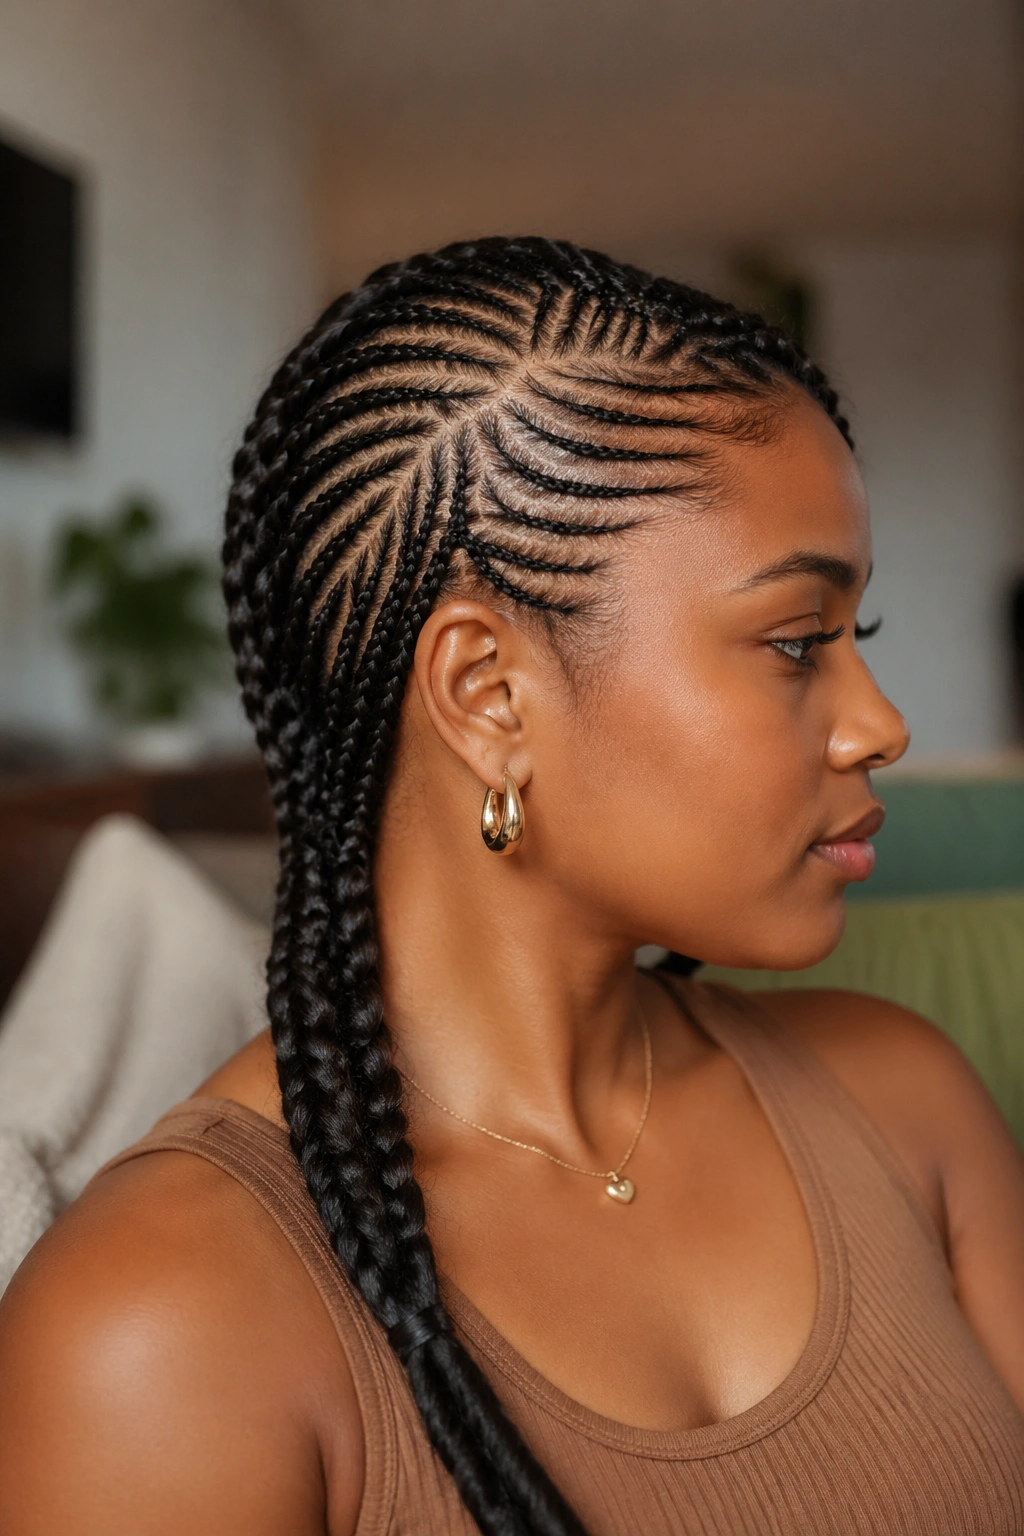
A clean circular part runs around the entire head about 2 inches above the hairline. Above the halo, fishbone braids angle down from the crown into the halo line. Below the halo, braids angle down into a collected base at the nape.
The halo divides the head visually into two separate braided zones. It’s architecturally complex and reads as high-end salon work even when you do it yourself at home.
Budget 6 to 8 hours. This is not a quick style.
21. Stitch Fishbone Fusion
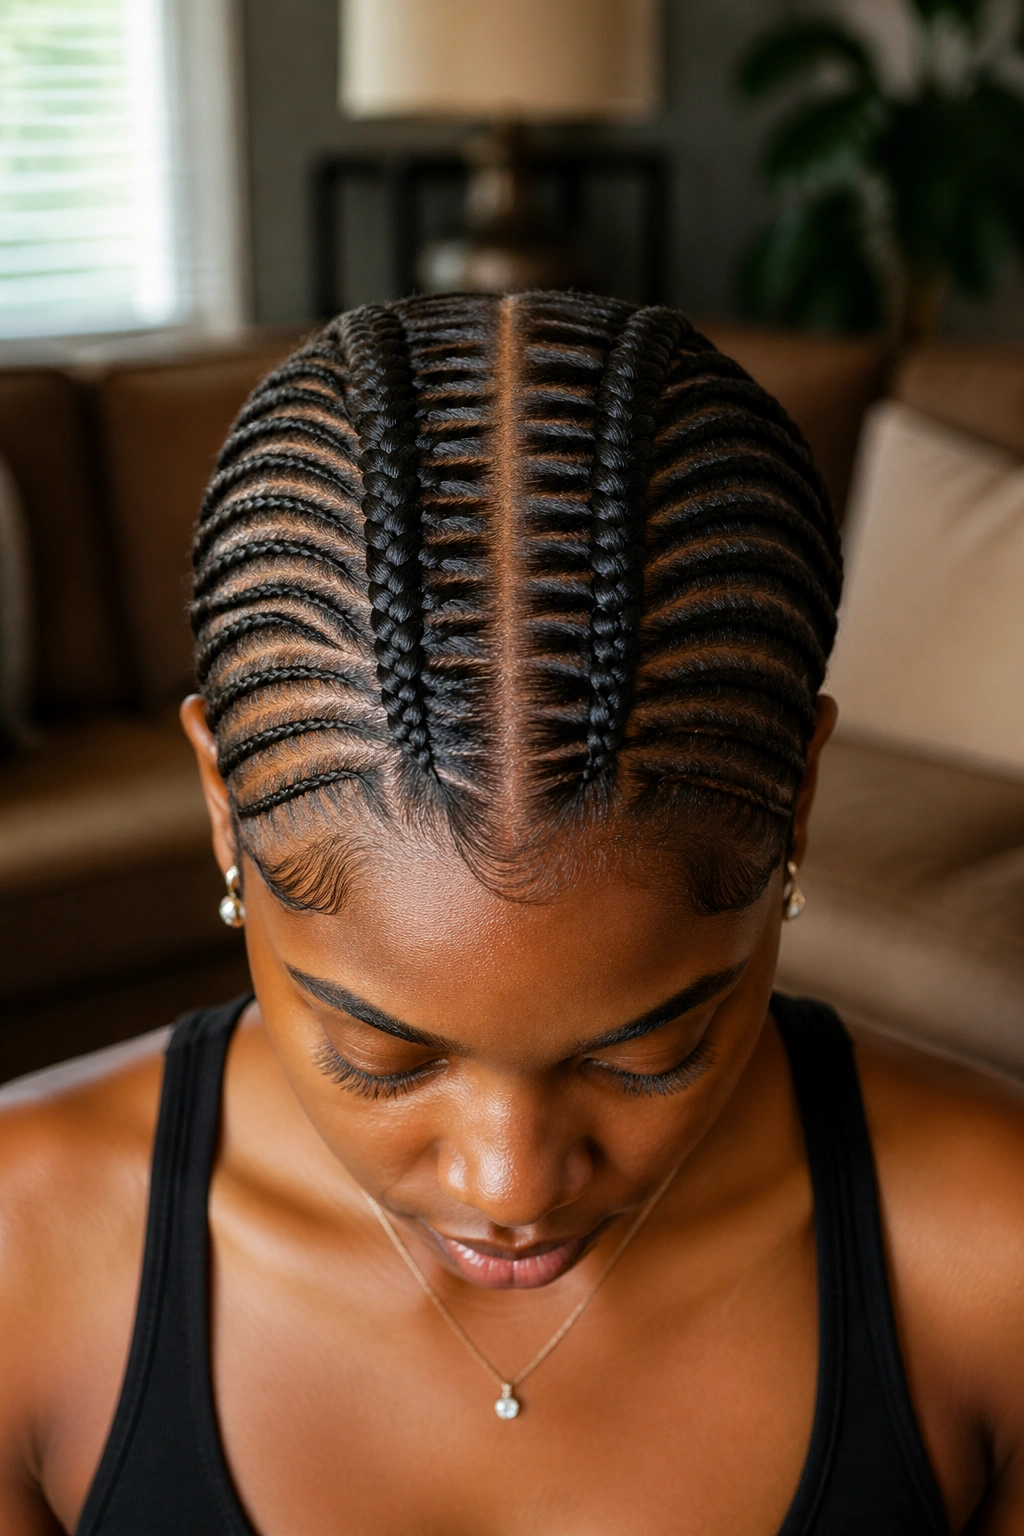
Blend two braiding techniques — stitch cornrows and fishbone. The main spine gets stitch-braided with visible horizontal stitch lines on the scalp. The feeders are traditional fishbone without stitching.
What to Watch For
Stitching the spine adds serious texture. But done wrong, it can compete with the feeder pattern and make the whole style look busy. A good braider will use subtle stitches — 4 to 6 per spine — rather than aggressive ones that cover the whole cornrow.
The fusion style holds particularly well on fine hair. Stitching creates friction between the natural hair and the extension, which helps prevent slippage at the root.
22. Fishbone with Baby Hair Laid
The fishbone pattern is the base — whichever version you chose from this list. Then the baby hair around the hairline gets sculpted into swoops, swirls, or decorative curves that frame the face.
Baby hair styling is its own skill. A good edge brush, firm-hold gel, and patience. Work in small sections — quarter-inch at a time — and let each swoop set before moving to the next.
Laid edges photograph beautifully but they require commitment. You’ll redo them every 2 to 3 days to keep them crisp. If you’re not willing to touch them up, skip this version and let the hairline be natural.
Sleep Care That Actually Protects Braids
The first night with fresh fishbone braids is the hardest. The braids are tight, your scalp is tender, and rolling over feels like a war crime.
Use a satin bonnet or a silk sleep cap. Cotton pillowcases steal moisture from your braids and your natural hair under them. A satin pillowcase is a decent backup if you hate bonnets.
Don’t tie the bonnet too tight at the forehead — that compression flattens your edges and creates creases in the braids by morning.
Washing Your Braids Without Ruining Them
Wait at least 7 days after install before washing. Earlier than that and you risk loosening the tension at the roots.
Use a diluted sulfate-free shampoo — squeeze it through the braids rather than rubbing. Rinse thoroughly. Follow with apple cider vinegar diluted 1 part ACV to 4 parts water, massaged into the scalp to clear any residue.
Dry completely before sleeping. Wet braids trap mold and mildew, especially at the nape where airflow is lowest. A blow-dryer on cool setting or a bonnet hood dryer for 30 minutes does the job.
Taking Down Fishbone Braids Safely
Don’t rush the takedown. Rushing is how you lose hair.
Saturate the braids with a mix of conditioner and warm water. Section off a small area and unbraid gently, working from the tip up to the scalp. Use your fingers first, then a wide-tooth comb only after the braid is loose.
Expect shed hair. Weeks of braiding accumulate anywhere from 100 to 500 strands of natural shed hair tangled in the braid. That’s not hair loss — it’s hair that would have shed daily anyway, now coming out all at once.
Deep condition immediately after takedown. Your hair needs the moisture after weeks under extensions. Leave the conditioner on for at least 30 minutes under a plastic cap.
Choosing the Right Fishbone for Your Hair
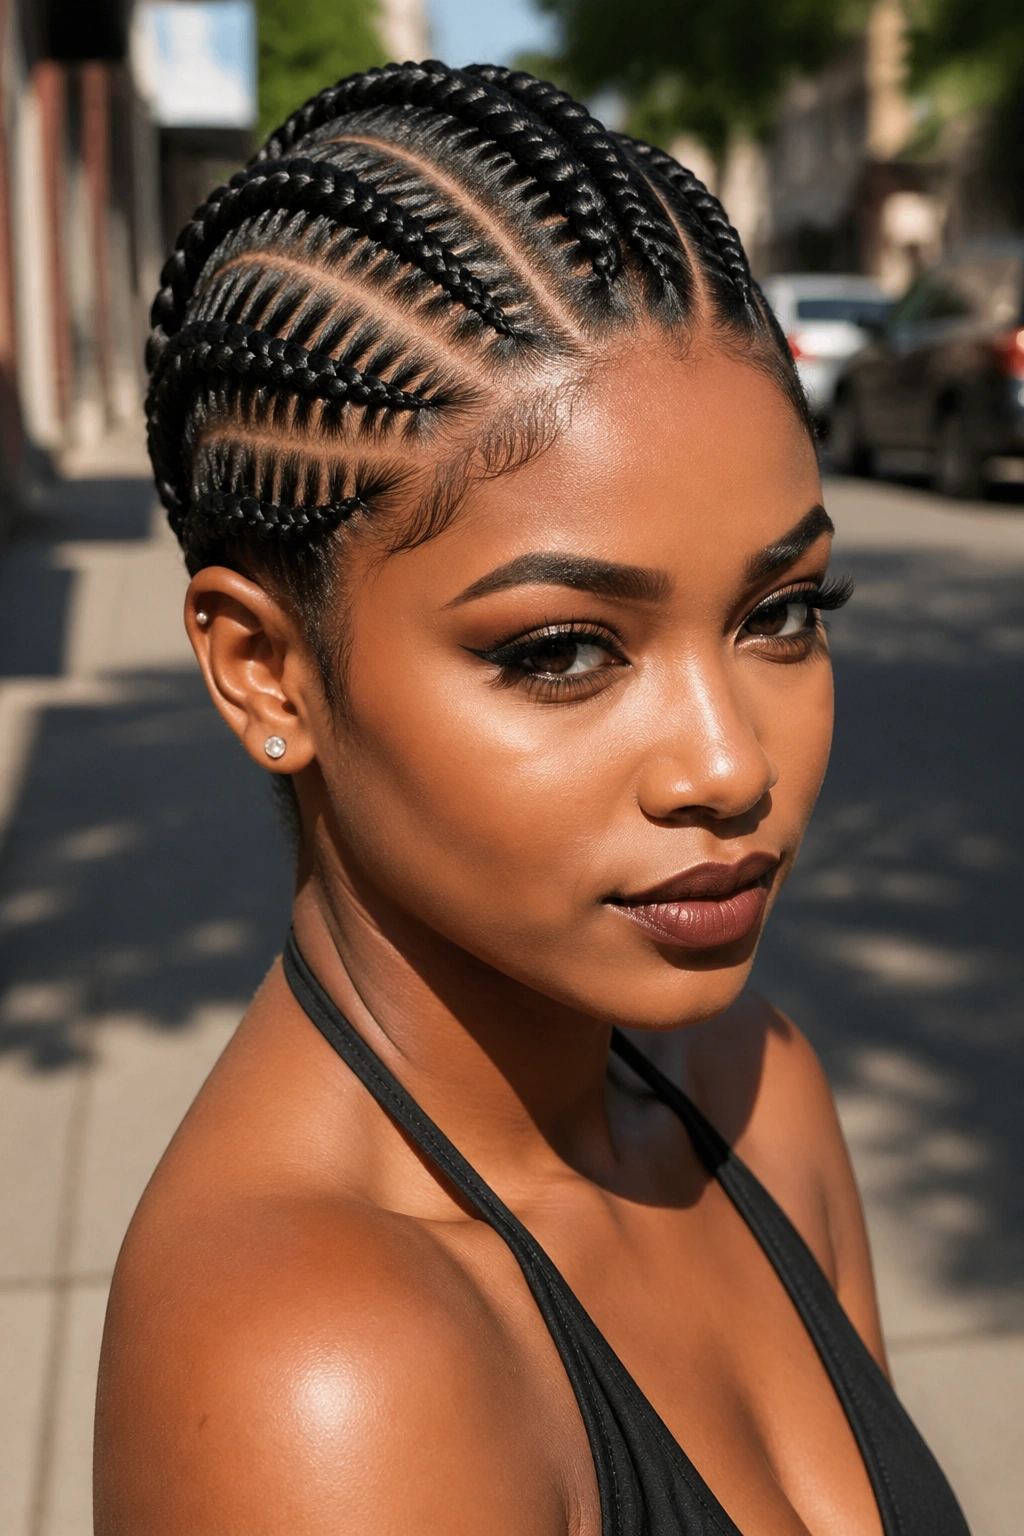
Thin or fine natural hair does best with smaller, lighter fishbone variations — think micro fishbone, or the fishbone bob. Heavy extensions on fine hair pulls at the roots and can cause traction alopecia over time.
Thick 4C hair can handle almost any fishbone variation. The natural volume supports the braid weight well. Go for double-spine, halo, or waist-length styles if you want maximum drama.
Transitioning hair needs a gentle fishbone — classic center spine with medium-thick feeders works without stressing the line of demarcation between textures.
Consider your lifestyle. Someone who works out 5 days a week will sweat through elaborate styles fast. Simpler fishbones with less scalp-exposed patterning hold up better for active lifestyles.
Budget matters too. A skilled braider who can do complex fishbone patterns charges 150 to 400 dollars for an install. Cheaper braiders often cut corners on parting precision, which is the whole point of fishbone.
Common Mistakes That Ruin Fishbone Braids
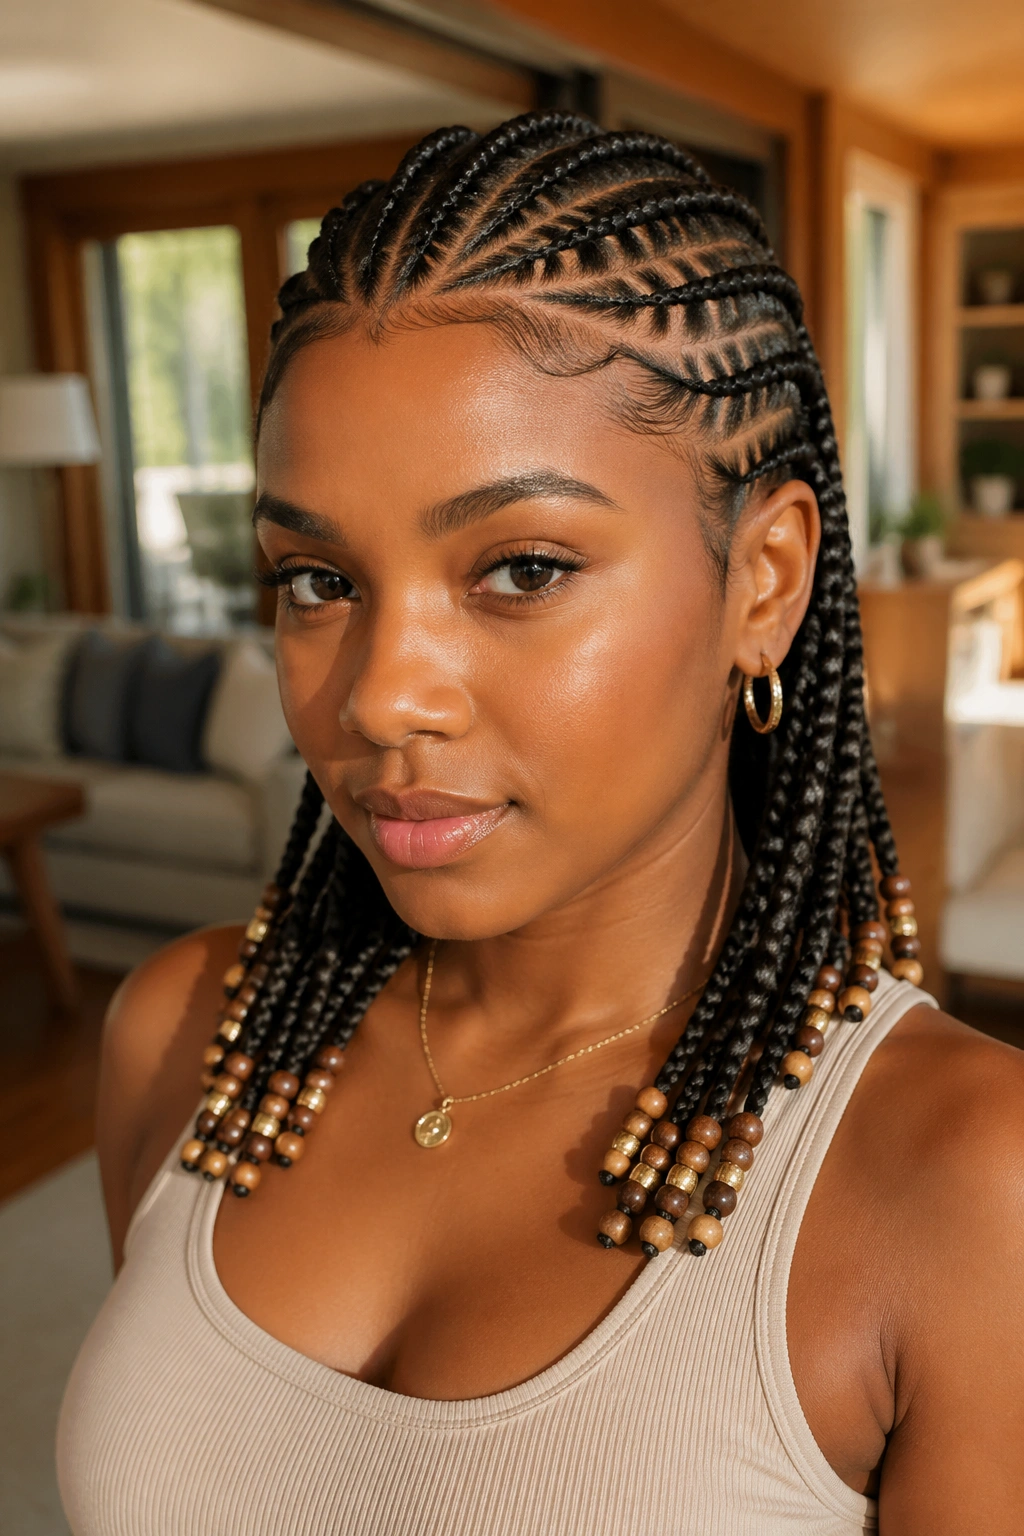
Over-tightening at the hairline is the single most common issue. If you feel pulling pain during install, stop and ask for adjustment. Pain is not part of the process.
Skipping scalp oil between install days. Your scalp still produces sebum, but the braids block natural distribution. Apply a light oil every 2 to 3 days at the parts.
Leaving braids in past 6 weeks. Matting starts around week 5, and by week 8 you’re looking at a difficult takedown and real breakage risk. Set a calendar reminder when you install.
Sleeping without a bonnet. Even one night on cotton wrecks your edges for the week.
Using heavy products like butter or coconut oil melted through the braids. These attract lint and dust, which become visible on the braids and look dirty by day 10. Stick to light leave-in sprays and jojoba-based oils.
Rushing takedown. I mentioned this already but it bears repeating — takedown is where most braid wearers lose the most hair. Slow and methodical wins every time.
Fishbone cornrows pull together history, technique, and personal expression in a way few other styles do. Whether you go for the architectural formality of a halo pattern or the playful energy of beaded feeders, you’re working within a tradition that has been refined for generations. The pattern on your head connects to pattern work being done by women across the diaspora — right now, and for as long as there have been Black women braiding Black women’s hair.
Pick the version that fits your face, your hair, and your life. Find a braider whose portfolio matches your vision. And give the style enough time in the chair to be done right the first time.
Your hair deserves that care. So do you.
