A fishtail braid can make long hair look pulled together in a way a plain ponytail rarely does. The pattern has that nice little trick of seeming more complicated than it is, which is half the appeal.
Long hair changes the game. It gives a fishtail ponytail enough length to show off the weave, enough weight to keep the tail from floating away, and enough surface area for texture, ribbons, or a wrapped base to actually matter. A thin braid on short hair can vanish. On waist-skimming hair, it has somewhere to go.
The catch is that long hair also shows every sloppy step. If the crown is flat, the style can look dragged down. If the ends are too silky, the braid slips apart. A little grip at the roots, a tidy elastic, and a few small crossovers fix most of that. Tiny things. Big difference.
These 23 fishtail ponytails lean in different directions—sleek, messy, romantic, sporty, and a little dramatic when you want them to be. Some are the sort you can build in ten minutes before leaving the house. Others belong at dinners, weddings, or anywhere a plain ponytail would feel underdressed. First up is the low version I trust most.
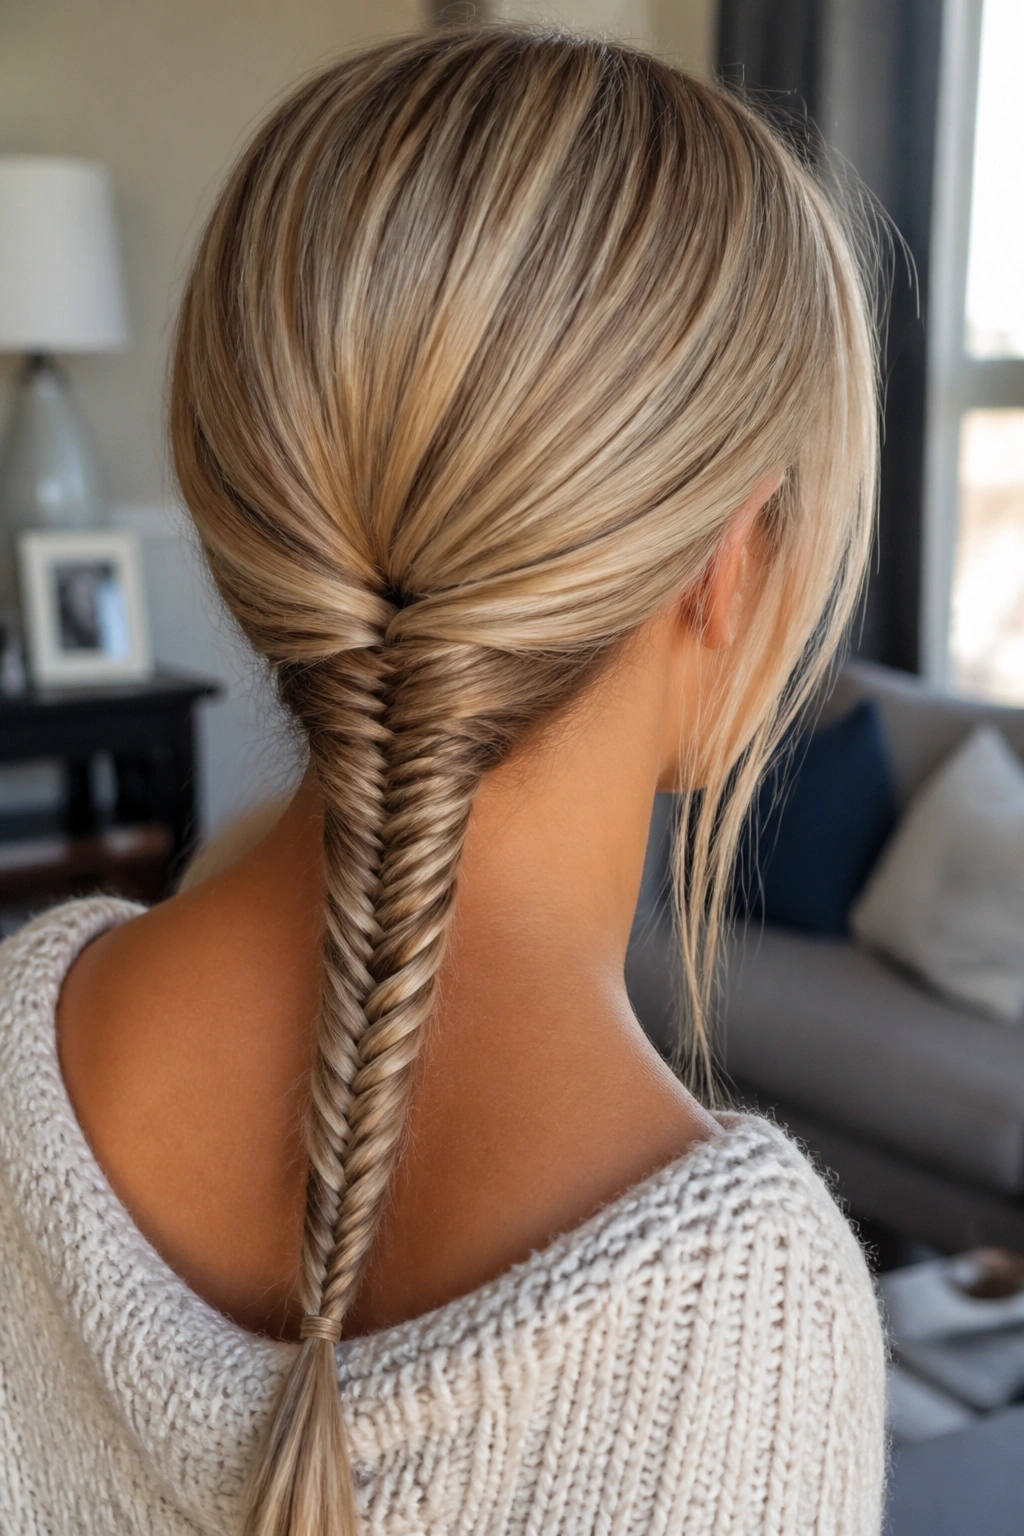
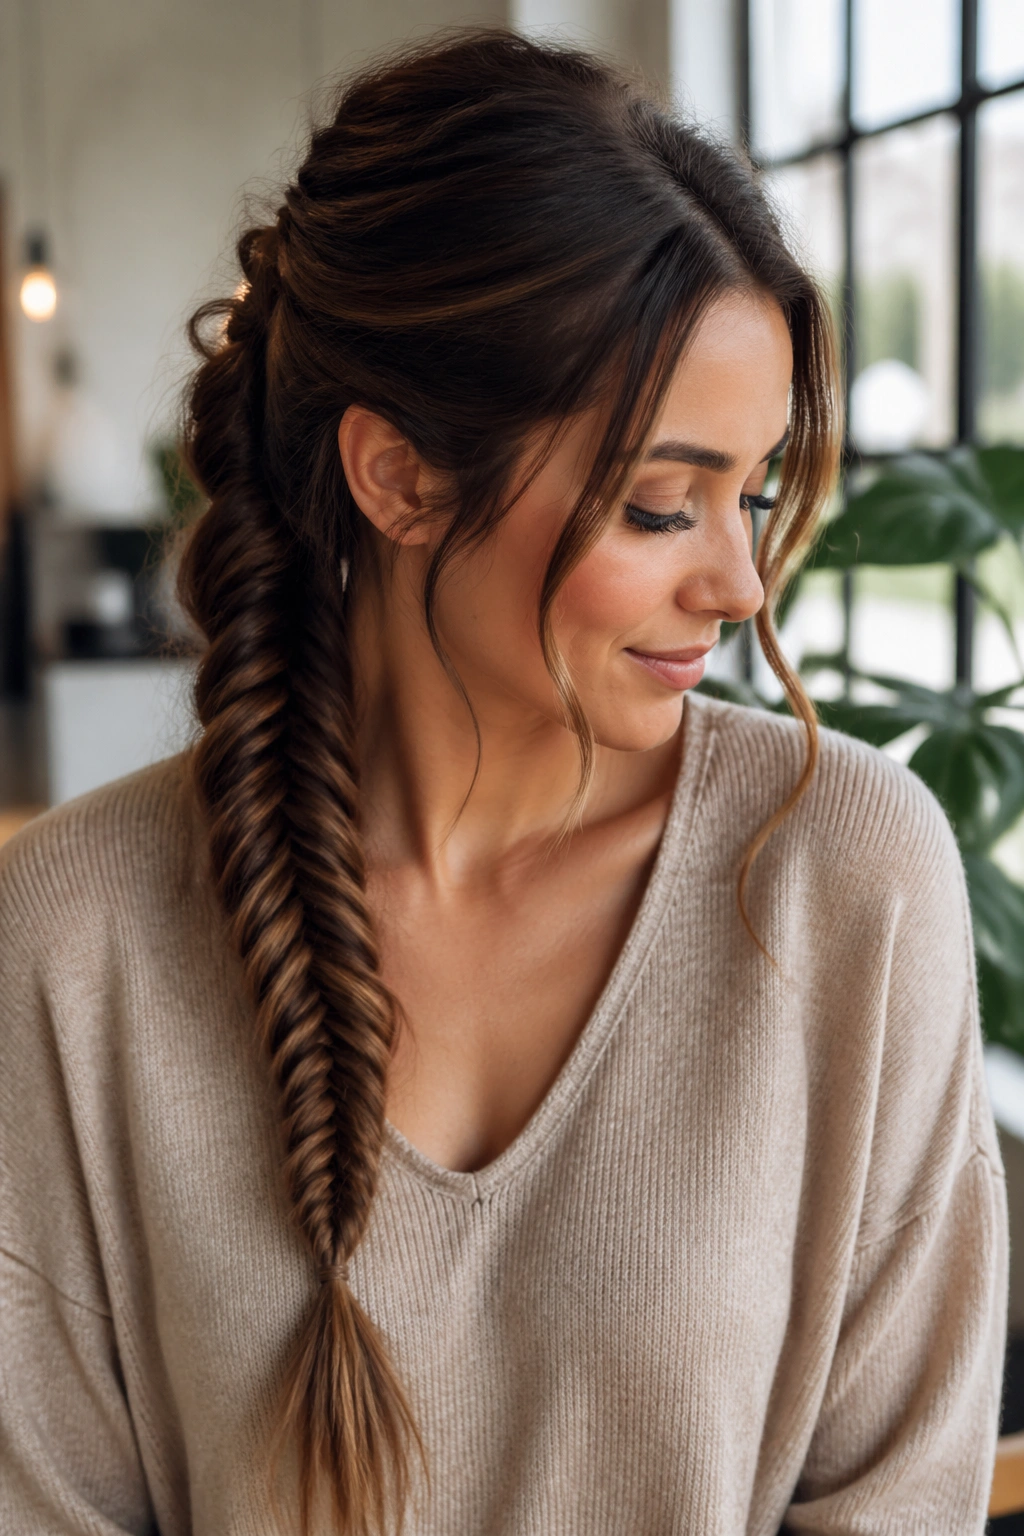
1. Classic Low Fishtail Ponytail
A low fishtail ponytail is the one I reach for when long hair needs to behave. It sits at the nape, so the weight of the length helps the braid fall neatly instead of ballooning out at the crown.
Why It Works on Long Hair
The low placement gives you room to build a clear fishtail pattern with small, even sections—about 1/4 inch at a time if your hair is thick. That smaller weave keeps the braid readable all the way down the tail. A 1-inch wrap of hair around the elastic also cleans up the base fast.
- Best with a center part or a soft off-center part.
- Good on second-day hair with a little natural grip.
- Easy to wear with collars, scarves, and coats.
- A light mist of shine spray on the last 4 to 6 inches keeps the ends from looking dry.
My favorite detail: keep the crown a touch loose and the braid itself a touch snug. The style looks softer that way.
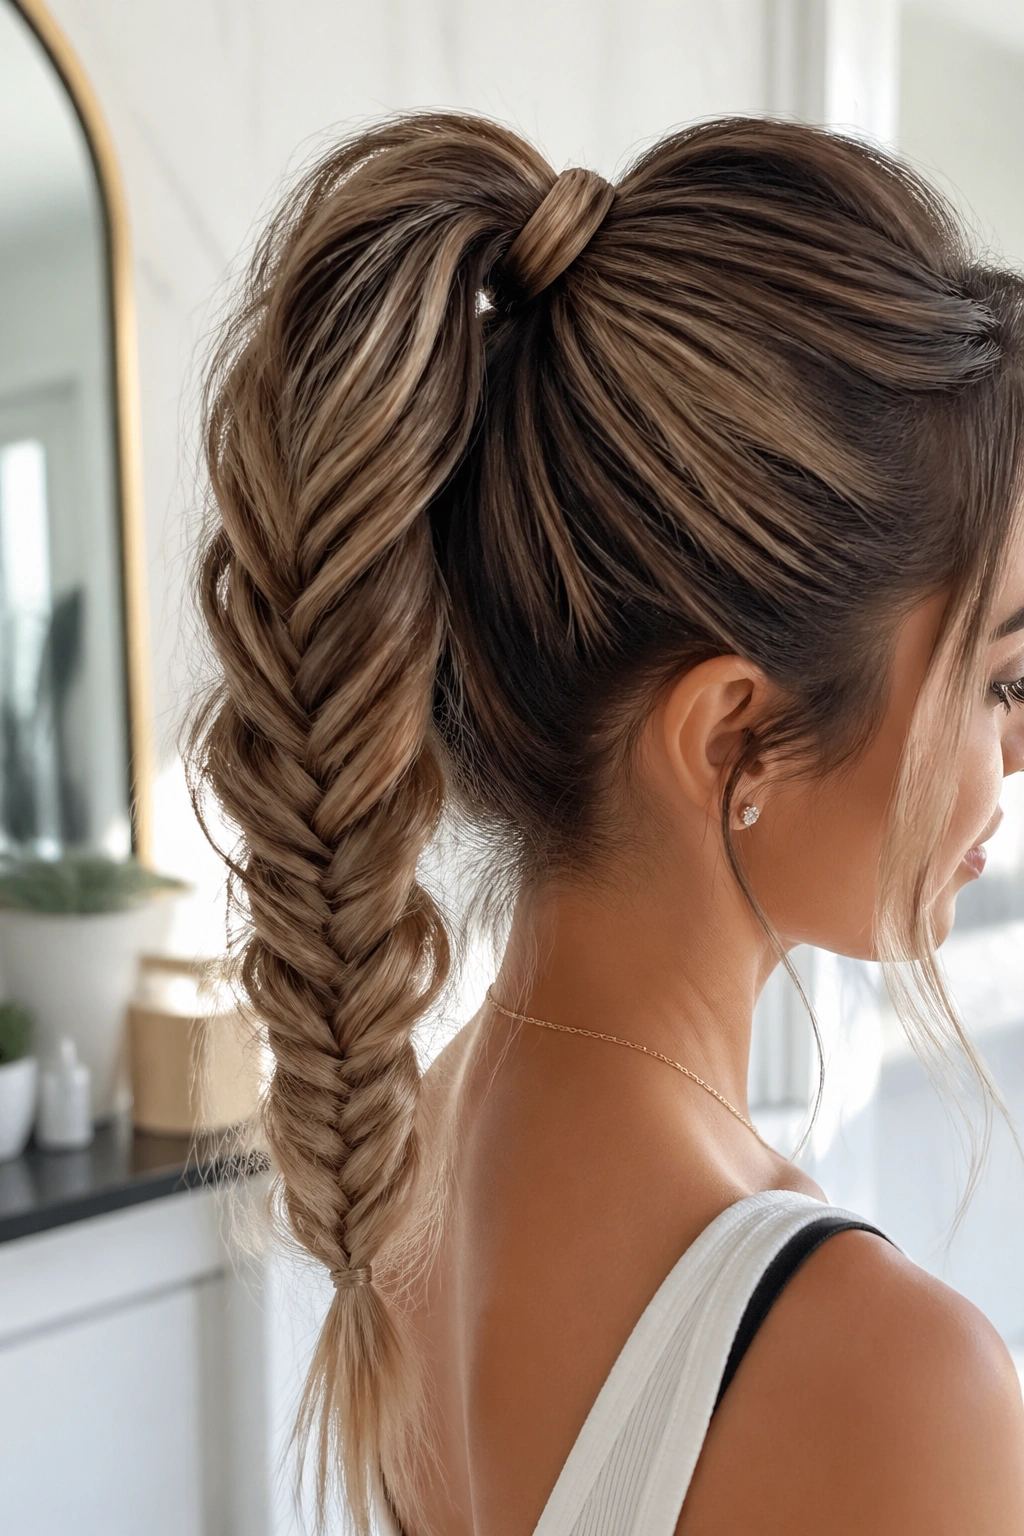
2. High Fishtail Ponytail With a Wrapped Base
High ponytails can look sharp in a good way, but they can also look severe if the finish is too tight. The fishtail softens that edge. It gives the tail texture, which keeps the style from feeling like a gym pony that got dressed up at the last second.
The base should sit at the highest point of the crown, or just behind it. That placement gives lift, especially on long hair that tends to drag downward by lunchtime. I like a snag-free elastic for the first tie, then a thin wrapped strand over the top so the base looks clean instead of bulky.
This version needs more root control than the low one. A small amount of mousse at the roots, brushed through before blow-drying, helps the pony stay up. If your hair is heavy, pin the elastic to a hidden bobby pin anchored under the top section. It sounds fussy. It is worth it.
The result feels sporty and polished at the same time. That combo is rare, and I never waste it.
3. Side-Swept Fishtail Ponytail
Picture hair swept over one shoulder and the braid hanging like a rope of polished texture. That’s the charm here. The side placement gives long hair a softer line, and it stops the style from looking too symmetrical or too stiff.
A deep side part—about 3 inches from the center, sometimes a bit more—makes the shape feel intentional. Pull the ponytail slightly below the back of the ear, then guide the fishtail over the same shoulder. If your hair is layered, leave the front pieces a little longer so they can blend instead of sticking out like little flags.
Quick Details That Matter
- Use a soft brush to smooth the side with the most hair first.
- Secure the tail before braiding so the shoulder placement stays put.
- Keep the braid slightly loose through the middle for movement.
- A single tucked bobby pin at the nape stops the pony from sliding back.
This one is especially good with long earrings. Not delicate little studs—something that can hold its own next to the braid.
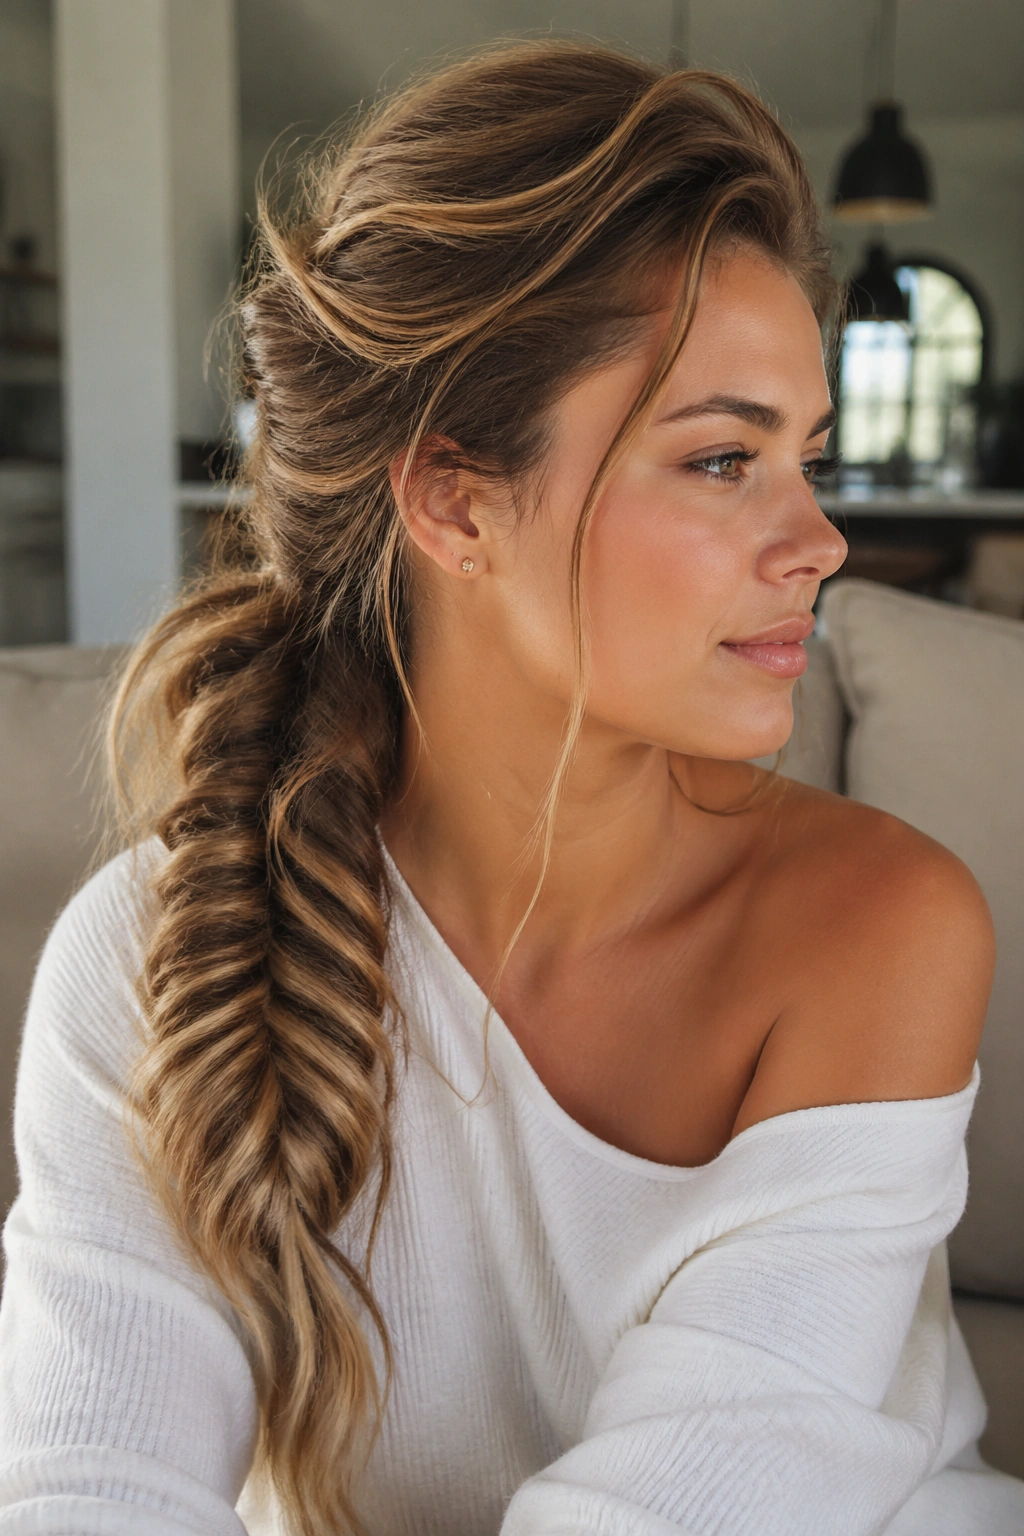
4. Messy Fishtail Ponytail With Crown Lift
Want the braid to look lived-in instead of stiff? Start by refusing to over-comb the top. A messy fishtail ponytail works because it keeps a little air at the crown and a little softness around the hairline.
Backcomb the roots at the crown just once or twice with a fine-tooth comb, then smooth only the top layer. That gives you lift without making the hair feel like helmet hair. After the pony is secured, gently tug the braid outward at each rung once it’s done. Not hard. Just enough to widen it by a few millimeters.
How to Keep It Soft, Not Sloppy
A few face-framing wisps help, but keep them narrow—about 1/2 inch each. Bigger pieces can turn the style fuzzy fast. A dab of dry shampoo at the roots also helps if the hair is freshly washed and too slippery to hold shape.
This version has a relaxed, slightly undone feel that suits weekends, casual dinners, and long hair that looks better with some movement. It’s not meant to be perfect. That is the whole point.
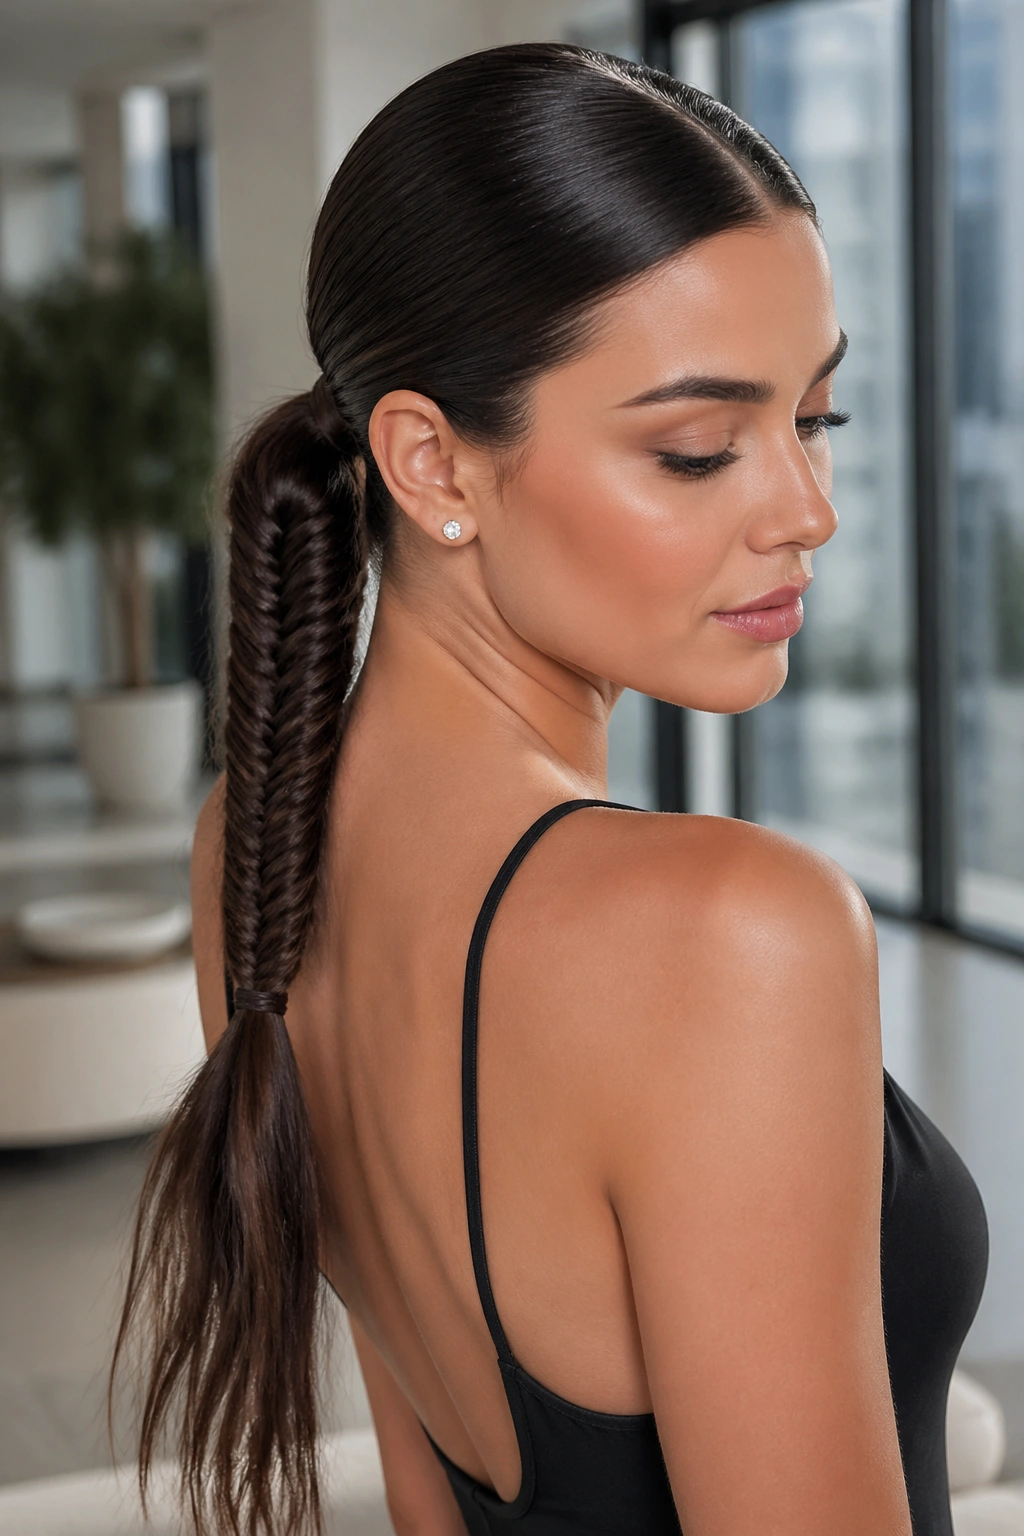
5. Sleek Center-Part Fishtail Ponytail
The cleanest fishtail ponytail is also the most unforgiving. Every bump shows. Every uneven section shows. If you enjoy a sharp finish, though, this one delivers it in a way that feels polished without needing much decoration.
Start with a crisp center part and smooth the hair with a paddle brush and a light serum from mid-length to ends. I would not overload the roots. That just makes the base collapse later. A flat iron pass at 320–350°F can help on hair that flips or frizzes, but only if the hair is fully dry and protected first.
The ponytail should sit low or mid-height, depending on your face shape and neckline. Keep the fishtail tight through the first third of the braid, then ease up slightly so the tail doesn’t look rigid. A narrow wrap of hair at the base makes the whole thing read cleaner.
This is the one I’d pick for a black dress, a blazer, or anything that needs a harder edge.
6. Face-Framing Fishtail Ponytail
Unlike a fully slicked-back ponytail, this version gives the face some breathing room. Two slim pieces left out near the temples—about 3/4 inch to 1 inch wide—change the whole mood. Suddenly the braid feels softer, less severe, and a lot easier to wear.
The face-framing pieces should be shaped, not random. Curl them away from the face with a 1.25-inch iron or bend them lightly with a round brush if your hair holds shape easily. That little curve keeps them from sticking straight forward and making the style look accidental.
This style is good when you want the braid to feel pretty but not precious. It flatters long hair because the loose pieces break up the length around the jaw and collarbone. I like it for narrow faces, strong cheekbones, or anyone who wants a ponytail that doesn’t pull every strand backward.
Keep the braid itself simple. The side pieces are the point. Overworking the tail just takes attention away from them.
7. Bubble-Accent Fishtail Ponytail
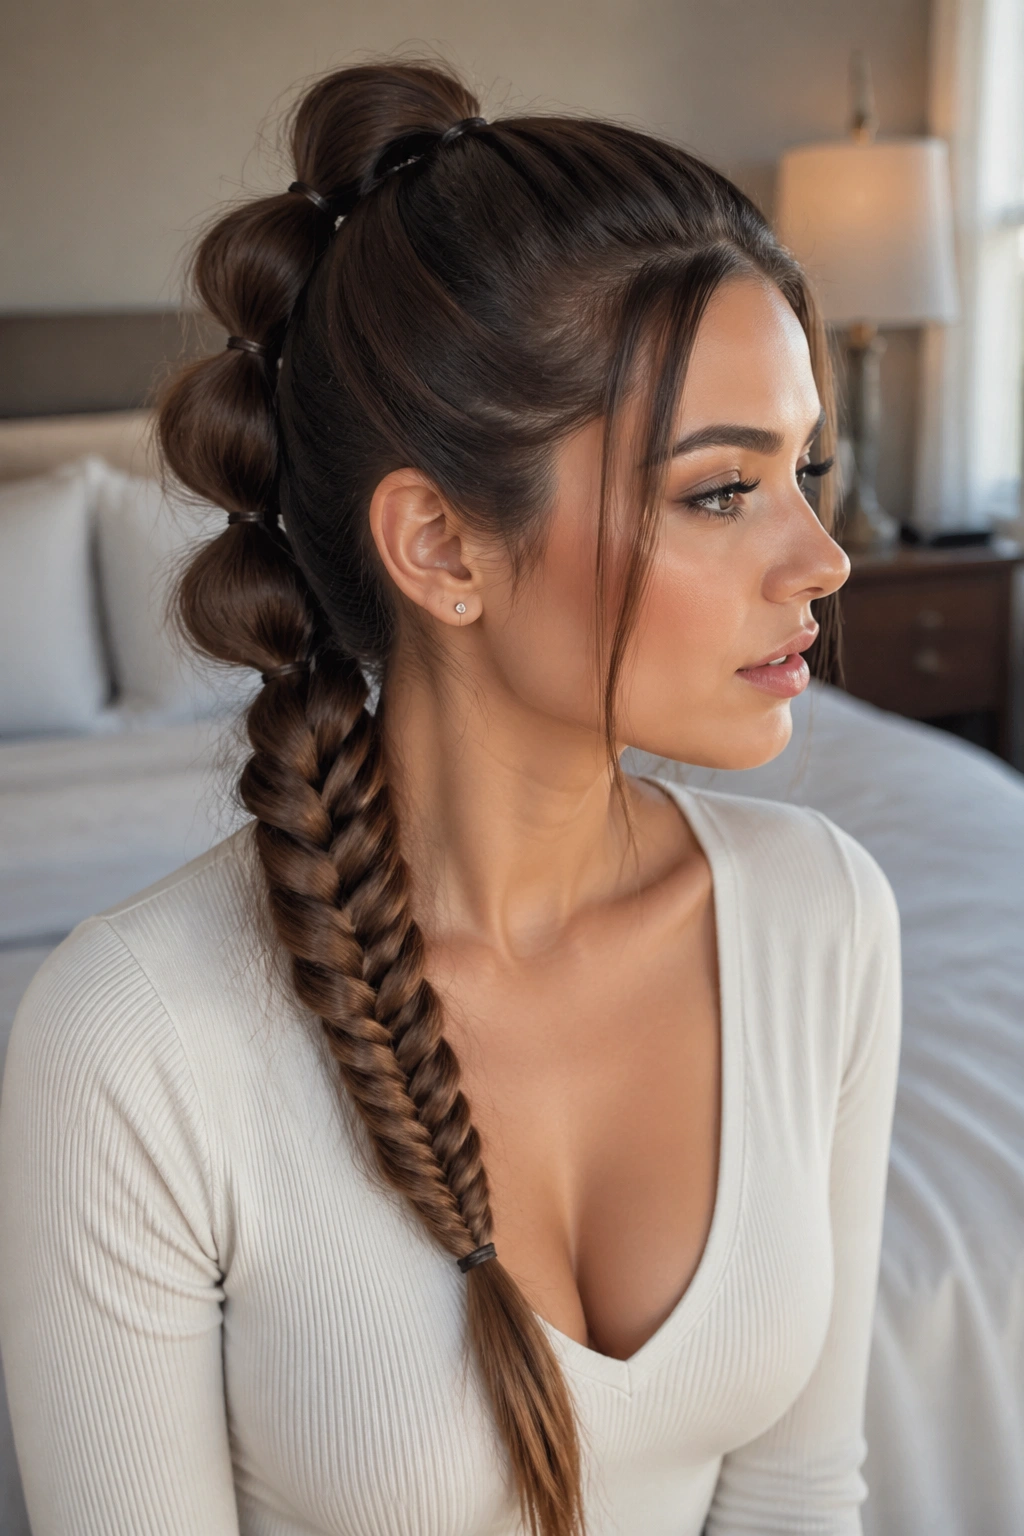
A bubble accent adds shape before the fishtail even starts. It’s a smart move for long hair that feels too flat in a straight braid, because the little puffed sections give the eye something to follow.
Tie the tail with clear elastics every 2 to 3 inches, then gently tug each section outward until it rounds out like a soft bubble. Once you reach the lower half of the length, switch into a fishtail braid. That contrast—rounded at the top, woven at the bottom—keeps the style from looking one-note.
What to Use
- Clear elastics that don’t snag.
- A tail comb for even spacing.
- A light texturizing spray if the hair is freshly blown out.
- A few small bobby pins to hide flyaways near the crown.
Best tip: keep the bubbles slightly uneven in size. Perfectly matched bubbles can look stiff. Small irregularity reads better.
8. Half-Up Fishtail Ponytail
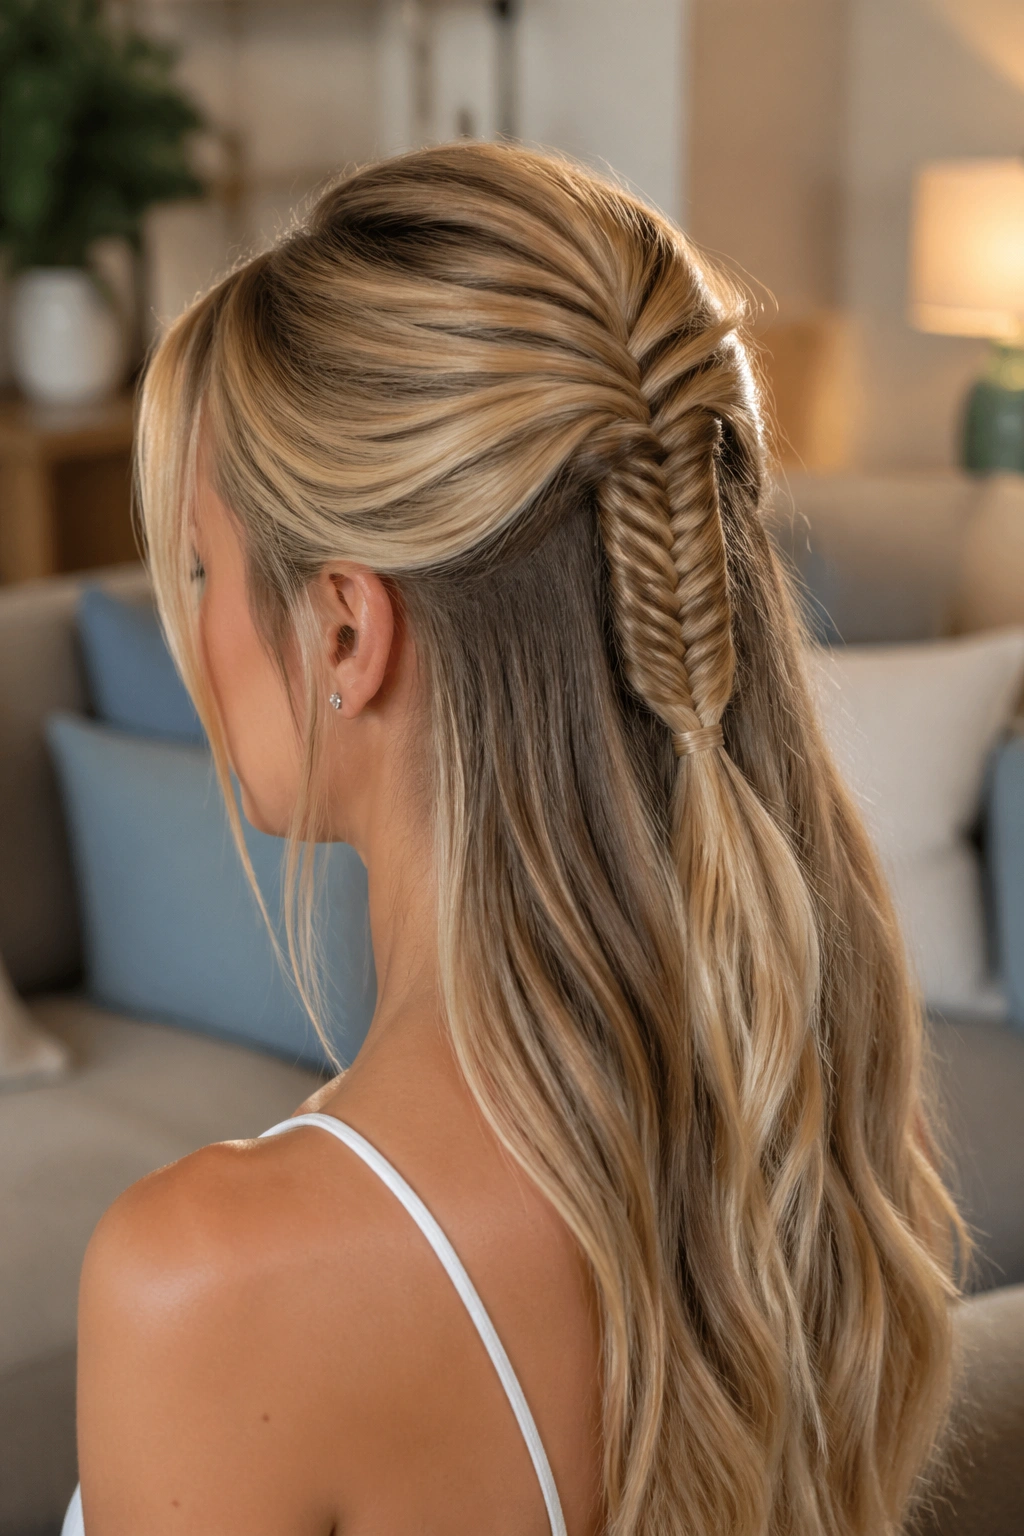
A half-up fishtail ponytail gives you the braid without giving up the length. That matters on very long hair, where a full ponytail can sometimes feel heavy before you’ve even left the house.
Take the top section from temple to temple, or slightly wider if your hair is thick, and secure it at the back of the crown. Then fishtail that section while leaving the rest loose and soft underneath. The lower hair becomes the backdrop, which makes the braided section stand out more.
The shape works especially well when the ends are waved or curled. Straight lower lengths can look a bit severe beside a textured half-up braid. A loose bend through the bottom half gives the whole style better balance. If your hair is layered, this is also one of the easiest ways to keep shorter top pieces from dropping into your face.
I like this for daytime because it’s practical and a little pretty at the same time. No drama. Just good structure.
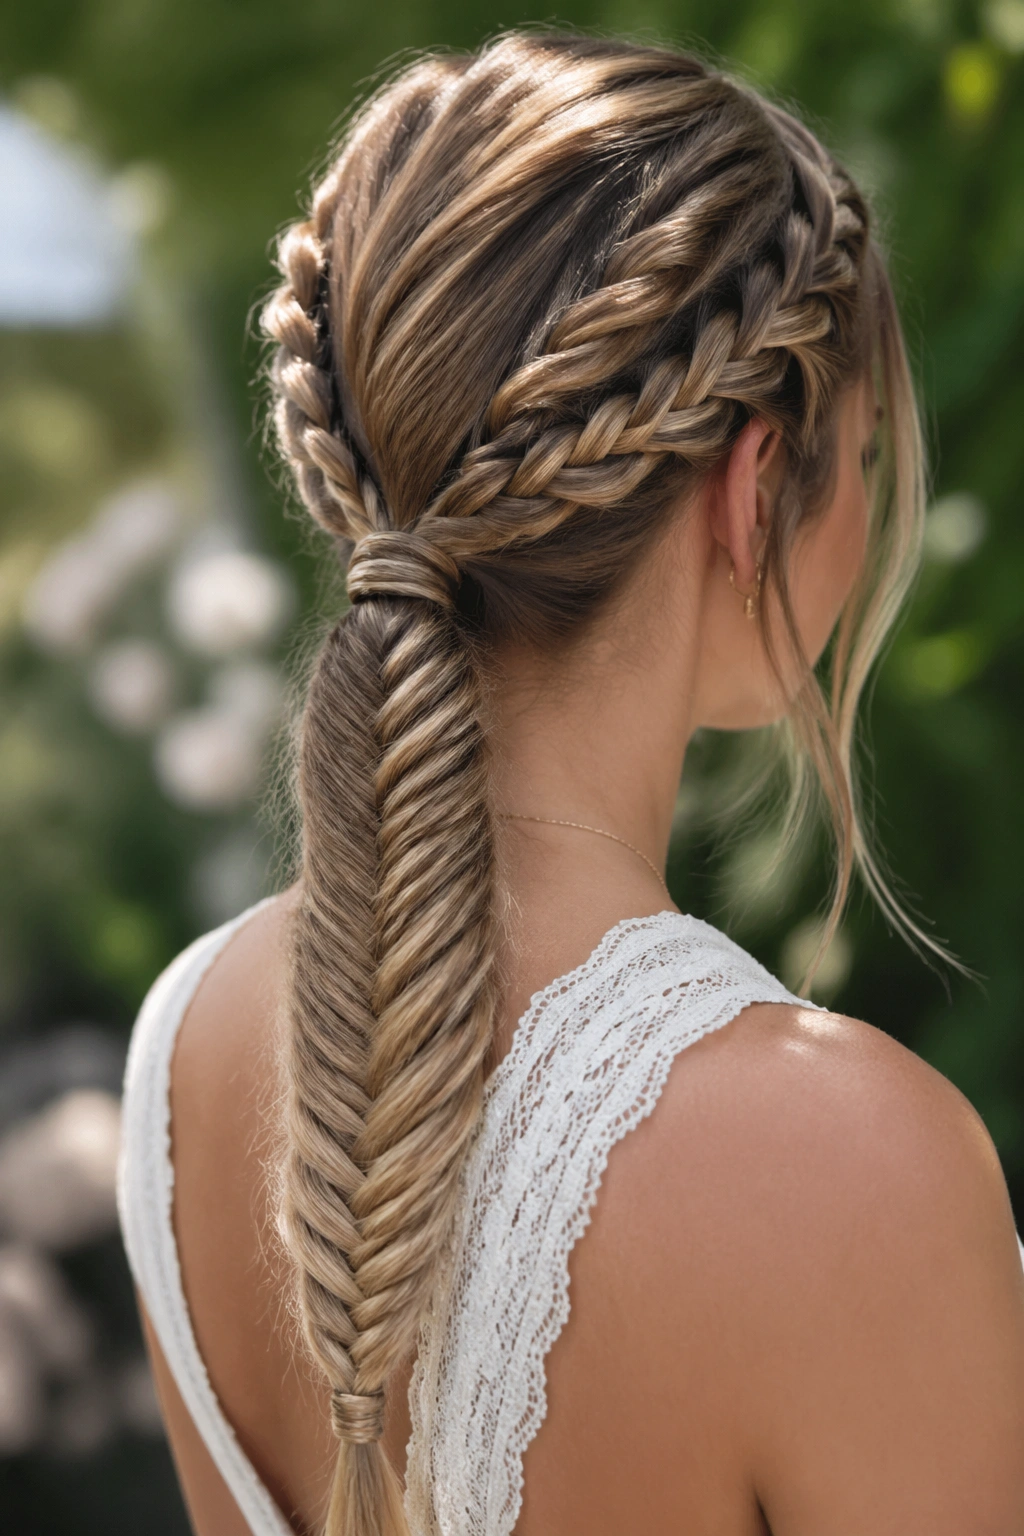
9. Crown Braid Into a Fishtail Ponytail
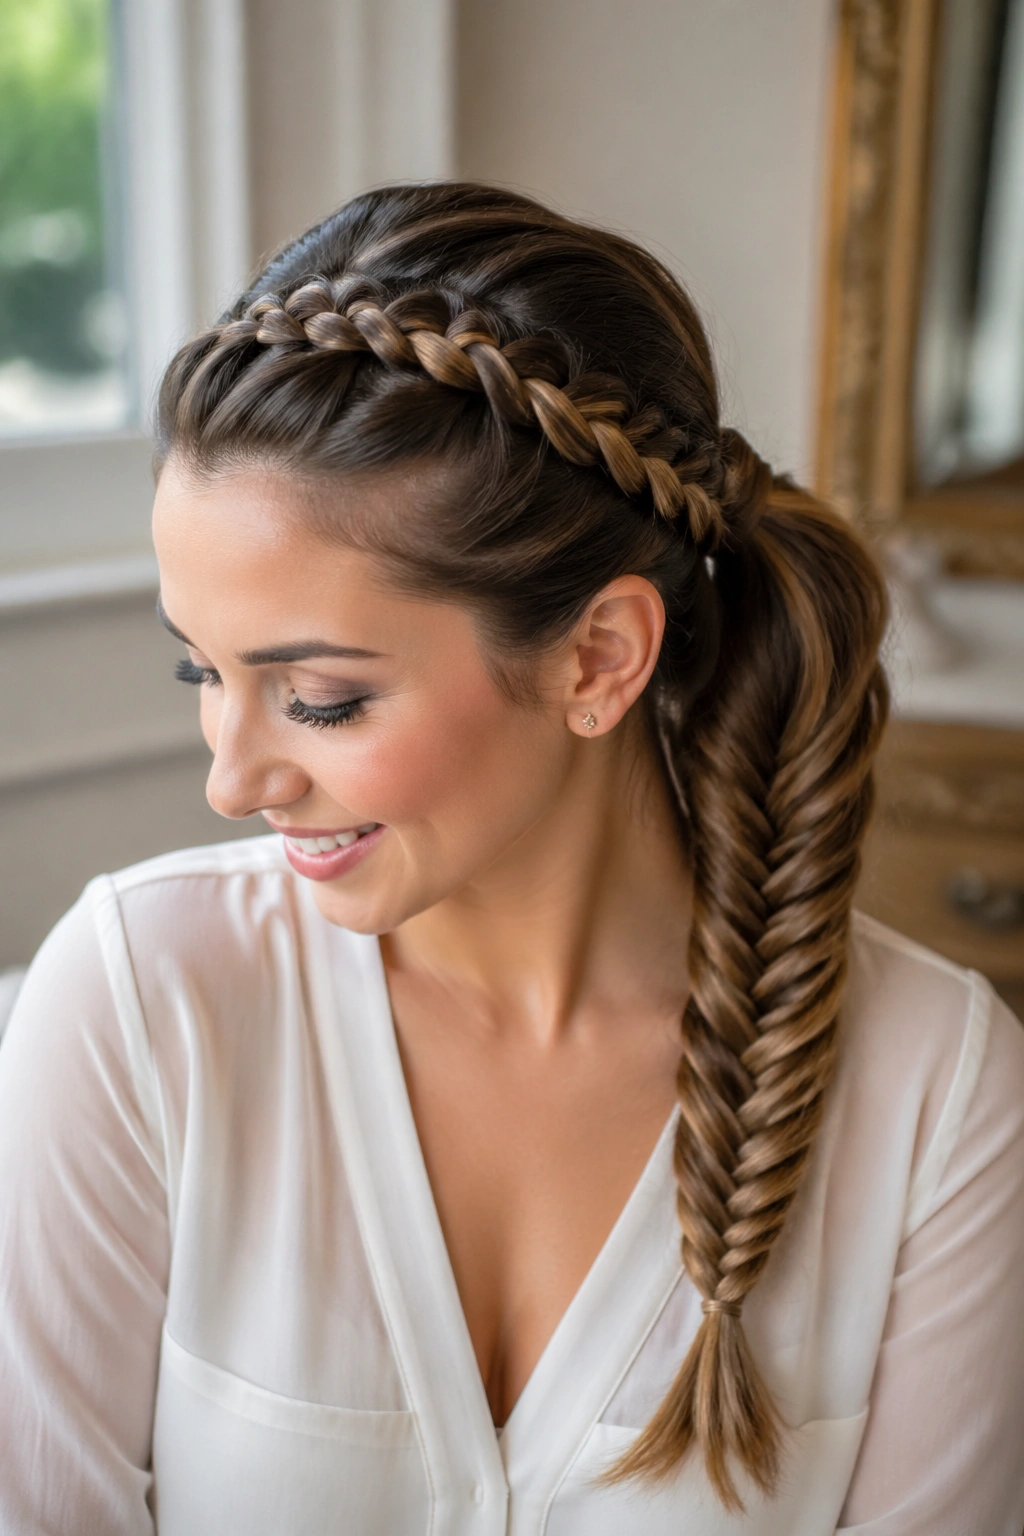
This one has a small bit of theater to it. A braid traces along the crown first, then disappears into the ponytail at the back, where the fishtail section takes over. The result looks like you spent longer on your hair than you probably did.
Start the crown braid close to the hairline, keeping it narrow—about 1/2 to 3/4 inch wide—so it doesn’t swallow the whole head. Let it arc from one temple toward the opposite side, then gather everything into a mid-height pony. The fishtail tail gives the end of the style a bit of weight, which keeps the crown braid from feeling unfinished.
This style is good for events, especially when you want the top to look detailed and the length to stay visible. It works best on hair with a little grip, not freshly conditioned silk. A tiny amount of dry shampoo near the roots can help the crown braid stay put.
Elegant, but not fussy. That’s the sweet spot.
10. Ribbon-Woven Fishtail Ponytail
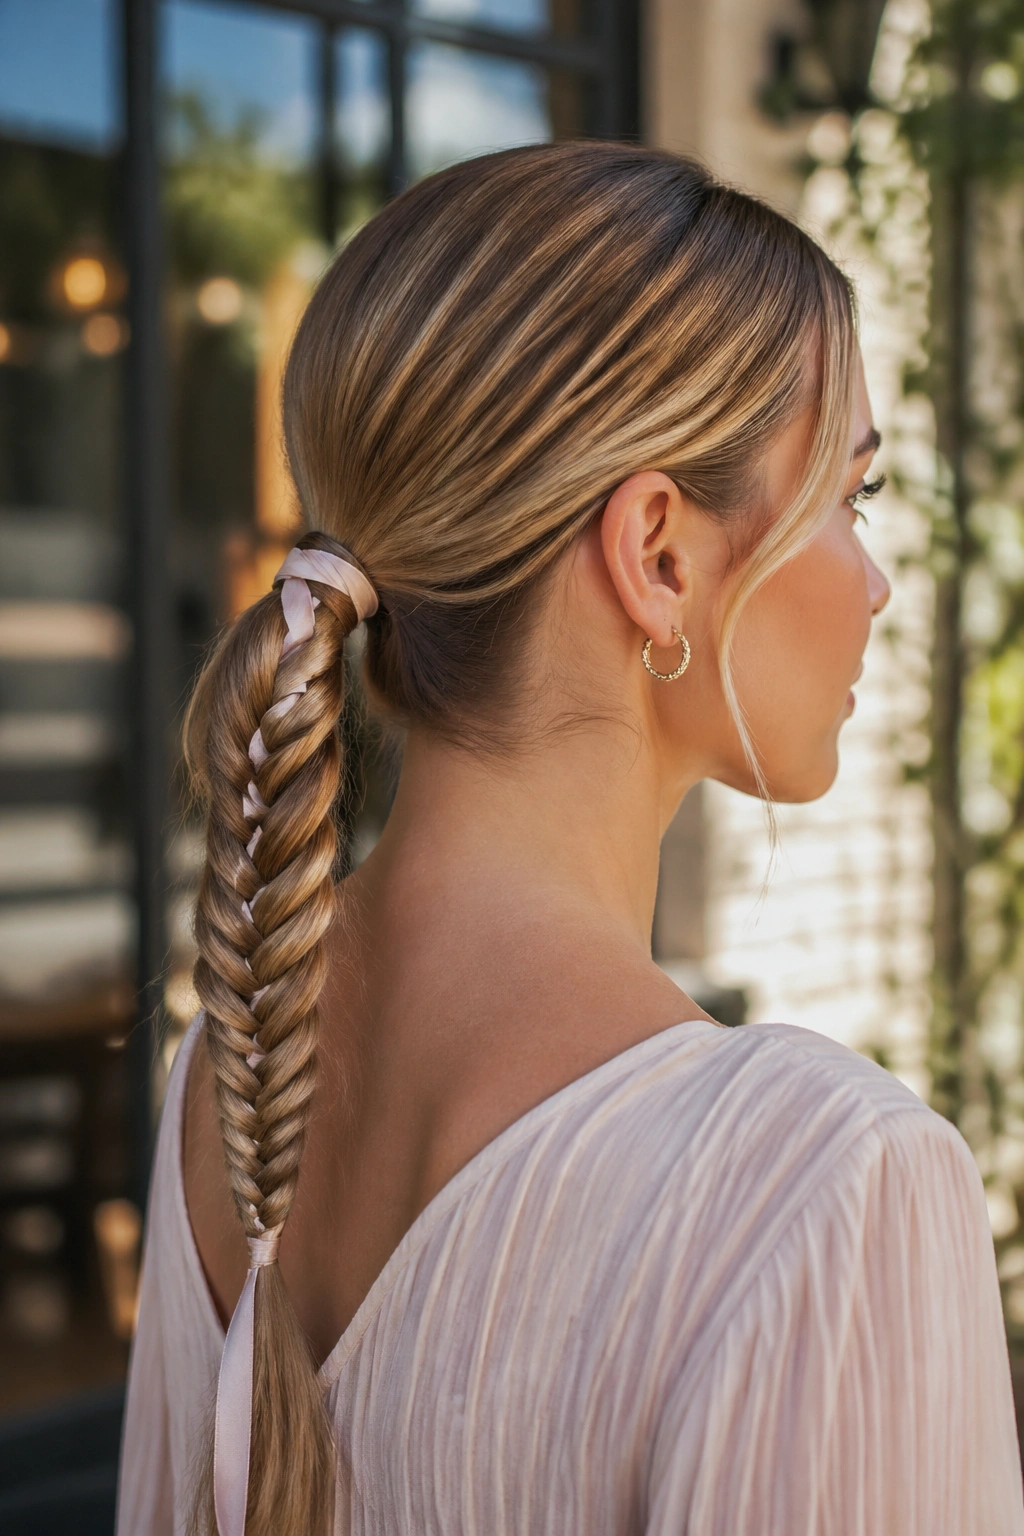
A narrow ribbon changes the whole feel of a fishtail ponytail. Satin makes it softer. Grosgrain makes it more structured. Either way, the color sitting inside the braid turns a simple style into something with personality.
Choose a ribbon that is about 1/4 inch to 1/2 inch wide and at least 30 inches long for long hair. Tie it under the ponytail elastic so the ends stay even, then weave it through the braid as you work down the length. You can keep it tight and neat, or let it show in loose loops if you want a more relaxed finish.
A Small Detail That Helps
Match the ribbon texture to the hair, not just the outfit. Matte hair plus shiny ribbon can look mismatched if the contrast is too hard. A soft satin ribbon against shiny straight hair usually feels easier on the eye.
This style is excellent for weddings, graduations, or any day when the braid needs one extra notch of polish. It also photographs well in a straightforward, clean way because the ribbon gives the braid a clear line.
11. Scarf-Tied Fishtail Ponytail
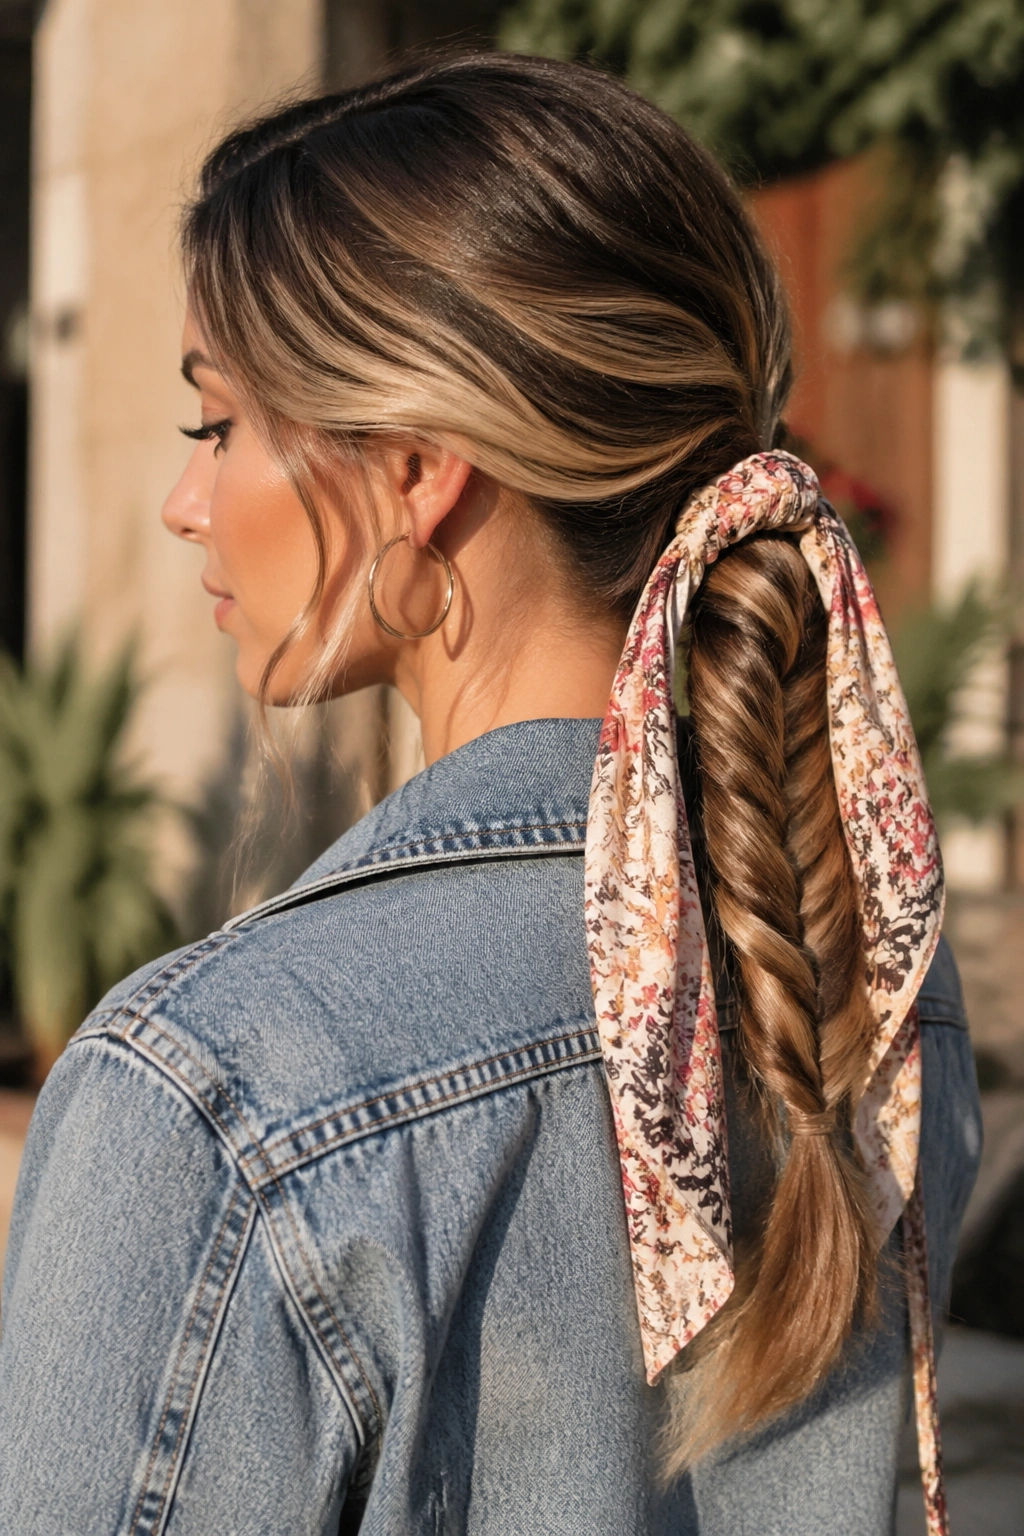
A scarf does what hair products can’t: it adds pattern. A silk square folded into a strip can make a fishtail ponytail feel easy and a little romantic, especially on long hair that needs a visual break near the base.
Tie the ponytail first, then knot the scarf around the elastic so the ends drape down the braid. If your hair is slippery, use a clear elastic underneath the scarf tie. That gives the style a firmer anchor and keeps the scarf from rotating during the day.
I like smaller scarves best here. A 20-inch square folded into a narrow strip is plenty. Oversized scarves can swallow the braid, and that defeats the point. Let the scarf stay part of the ponytail, not the whole show.
This version feels more casual than the ribbon style. It works with denim, linen, and soft knits, which is why I keep coming back to it when I want the braid to look a little less formal.
12. Curly-End Fishtail Ponytail
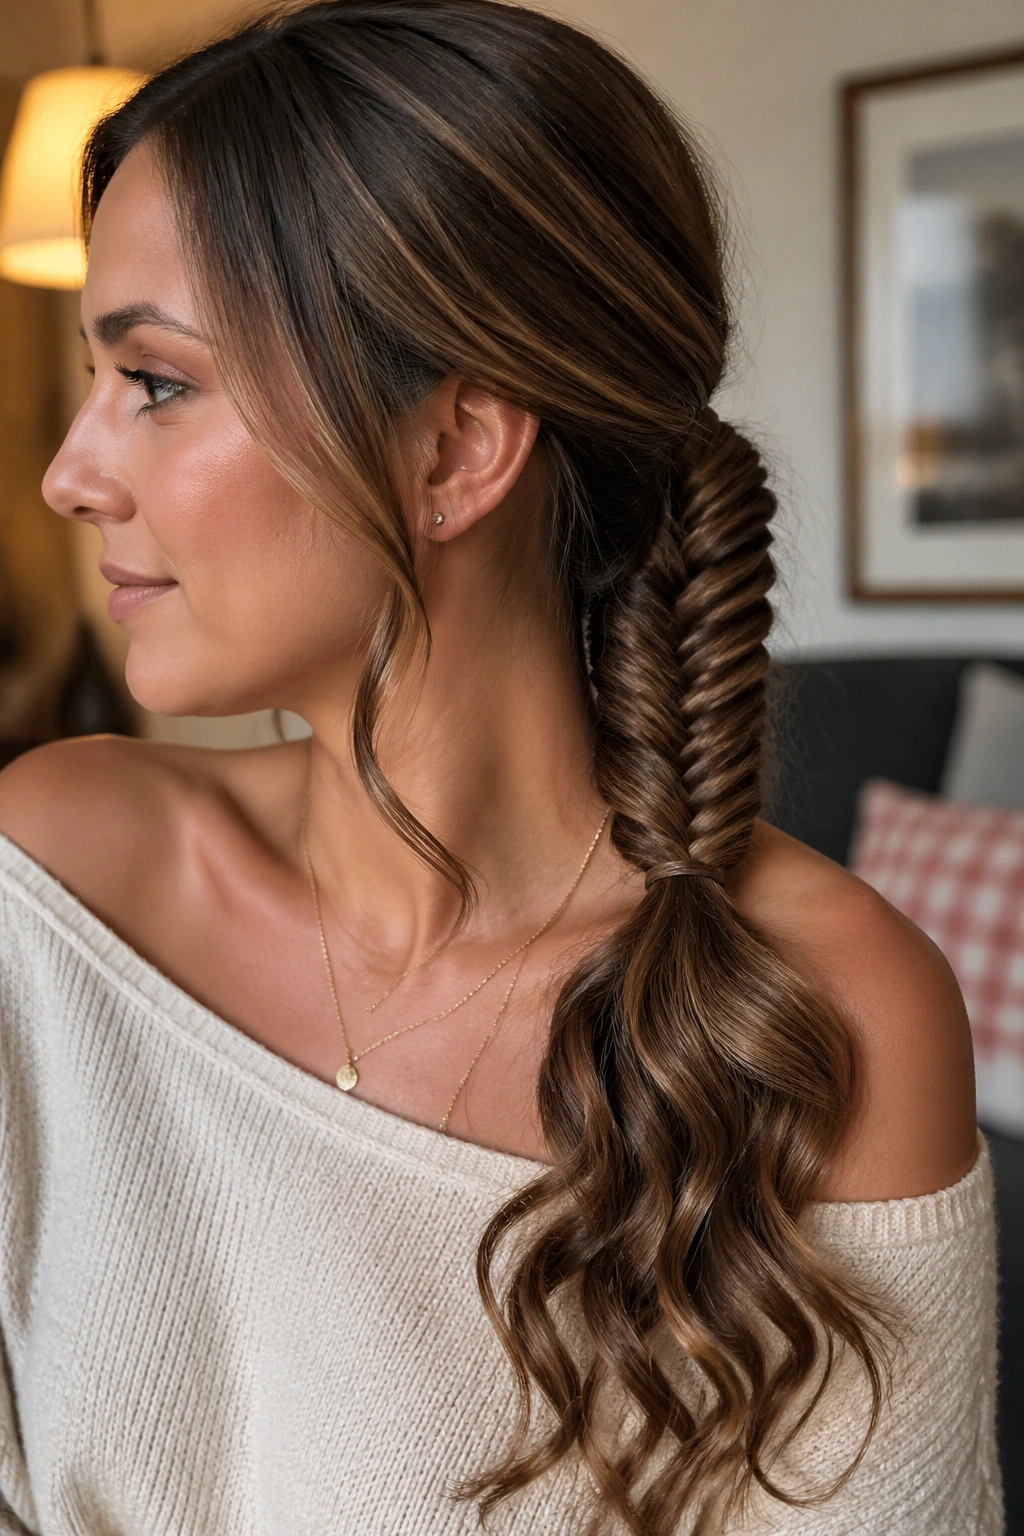
Straight roots with curled ends can save a braid from looking blocky. Long hair, especially when it’s heavy, sometimes needs the lower half to bend away from the center line so the style has shape.
Start with the top section smooth and secure the ponytail where you want it. Fishtail the length halfway down, then leave the last 6 to 8 inches out and curl them with a 1-inch iron. The contrast between woven braid and curved ends keeps the whole tail from looking too dense.
What Makes It Different
- The braid stays neat at the top.
- The ends add bounce instead of hanging flat.
- Layered hair blends better when the last section is curled.
- A light mist of flexible hairspray keeps the curl from dropping too fast.
This one is a smart choice for thick long hair that tends to look heavy in one long line. The curl at the bottom softens everything just enough.
13. Beach-Wave Fishtail Ponytail
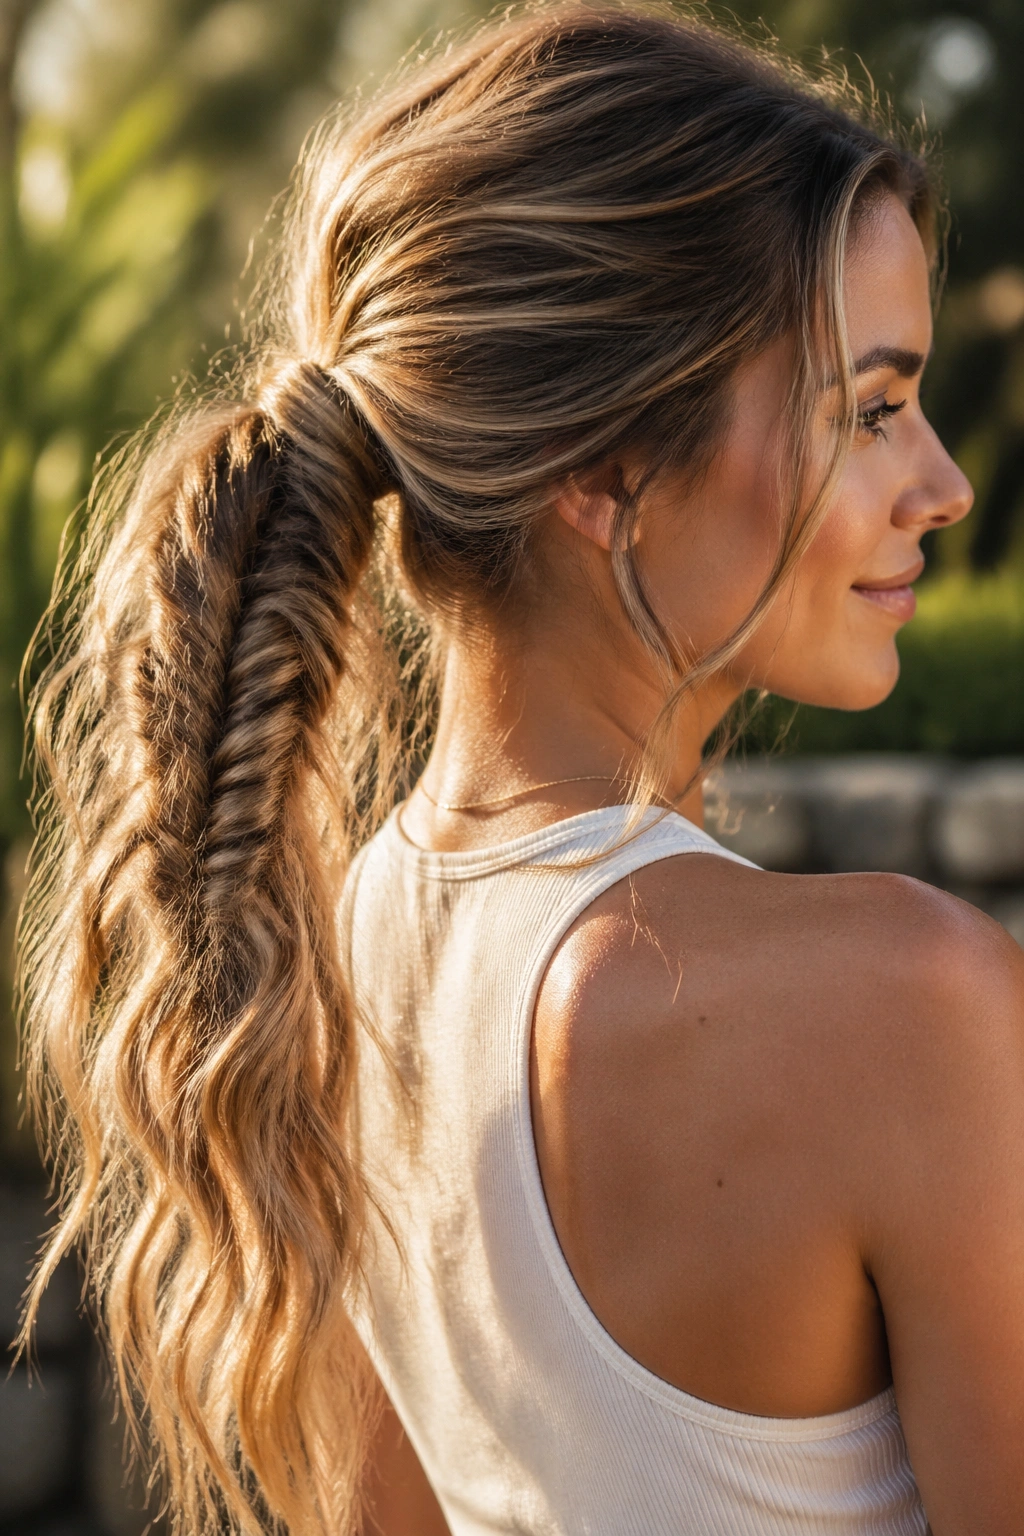
The beach-wave version lives on texture. If your hair is naturally a little wavy, this style is almost easy. If it is pin-straight, you’ll want to add some bend first or the braid can look too neat for the mood.
Rough-dry the hair, mist through the mid-lengths with texturizing spray, and use your fingers instead of a brush when you gather the ponytail. A mid-height placement works well here because it keeps the look relaxed. Then braid loosely and pull the edges apart by a few millimeters to keep the weave from getting too tight.
How to Get the Right Finish
The braid should look touched, not overdone. If the ends are sprayed stiff, the whole style goes dead. If the roots are too flat, the braid loses the easy movement that makes this version work.
This style suits weekends, travel days, and long hair that behaves better when it has a little grit. It looks best when the pieces move slightly as you walk. Stiff hair kills the effect.
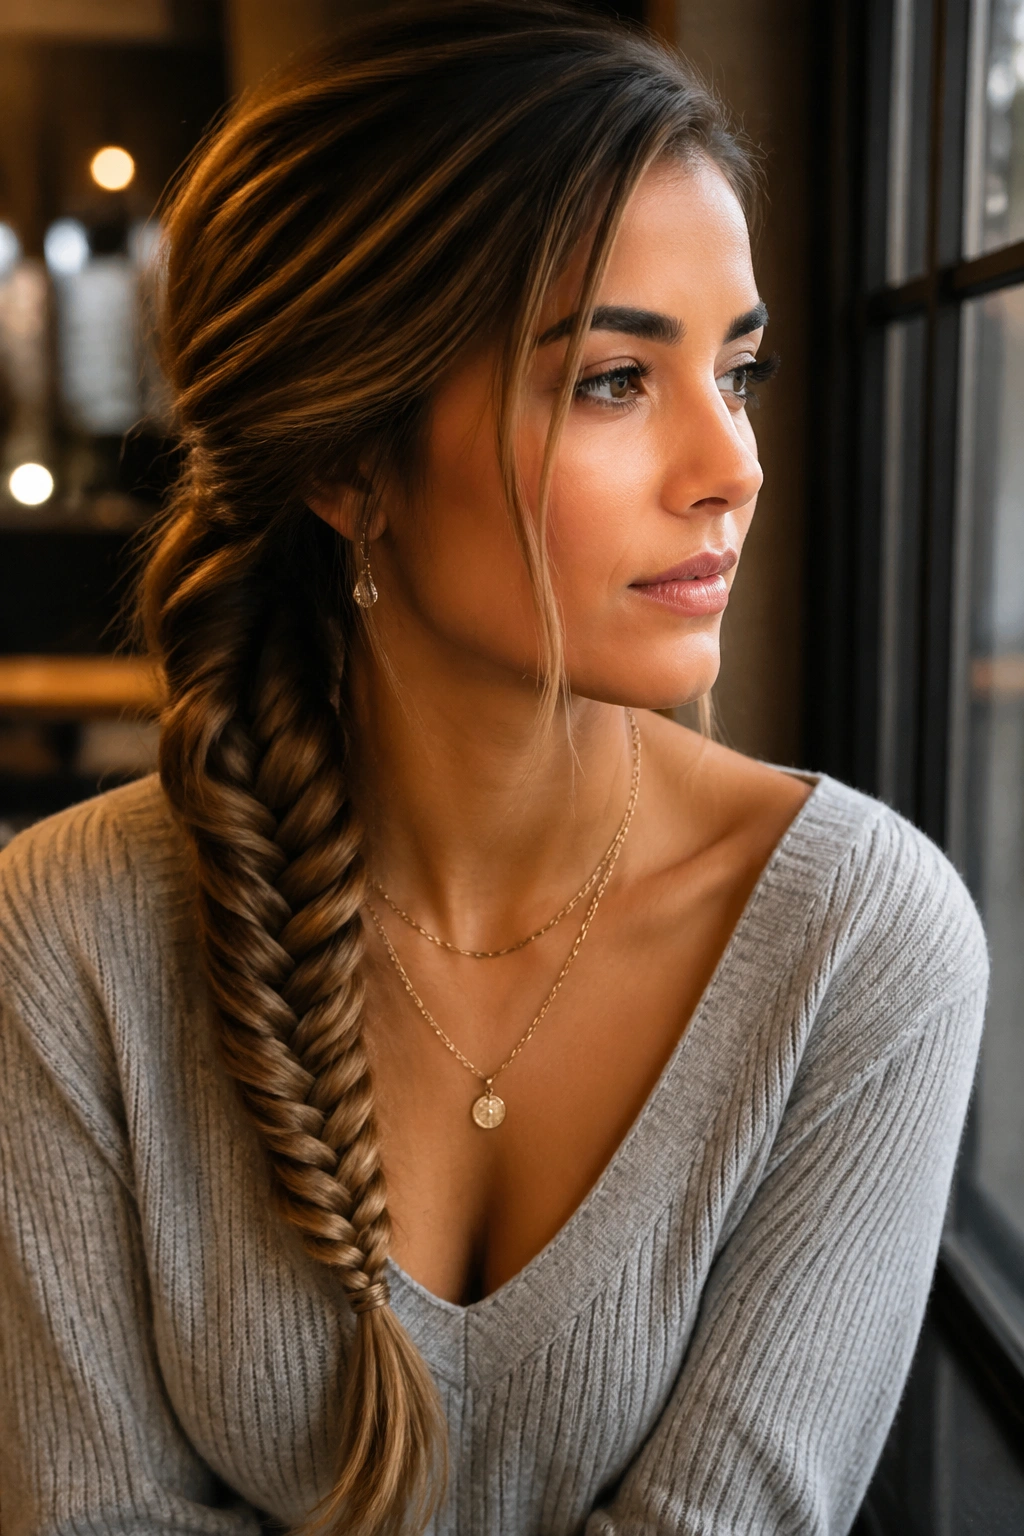
14. Deep Side Part Fishtail Ponytail

A deep side part does more than shift the part line. It changes the whole balance of the face. The fishtail ponytail then drapes to one side in a way that feels a little dramatic, but not in a loud way.
Make the part about 3 to 4 inches from the center, then smooth the heavier side back toward the nape before tying the pony. The braid can sit low and slide over one shoulder, which looks especially good on long hair because the full length stays visible instead of bunching at the back.
This style is kind to grown-out layers. The part helps short front pieces lie flatter, and the side sweep hides unevenness better than a strict center part. A dab of serum on the ends keeps the finish glossy.
I tend to pick this one when I want the hair to look deliberate without looking severe. It has edge, but not too much. That’s a nice place to be.
15. Pull-Through Fishtail Ponytail
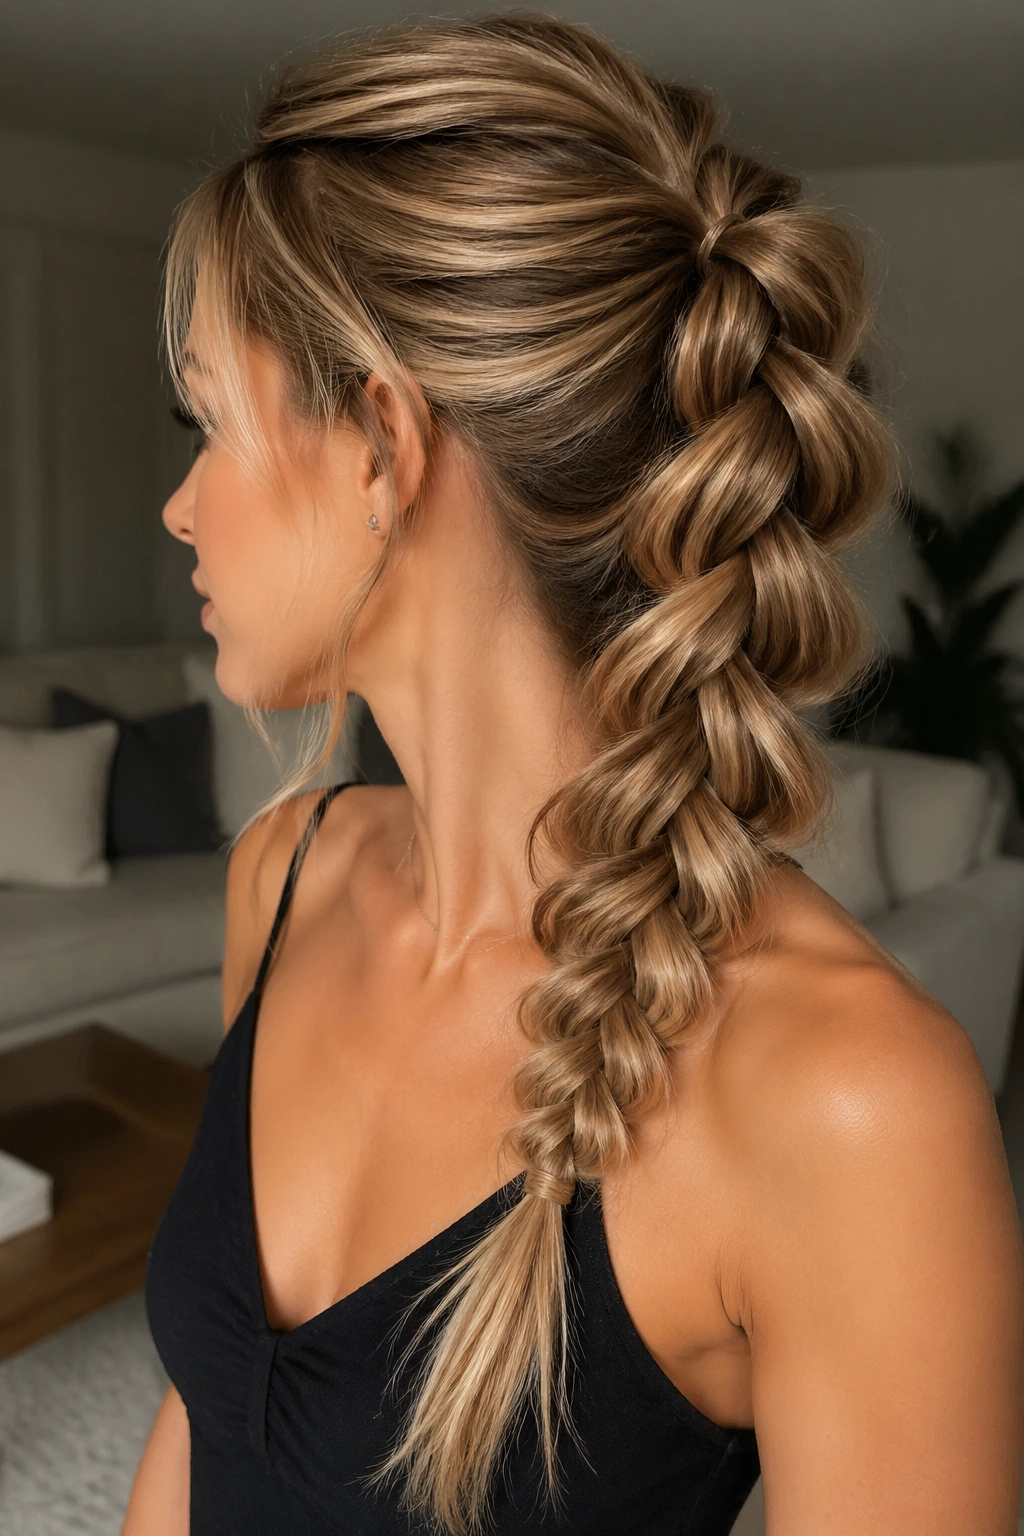
If your hands get tired halfway through a classic fishtail, the pull-through version is the easier cousin. It creates the same stacked feel, but the sections are tied and folded instead of woven one sliver at a time.
Use 4 to 6 mini elastics down the length of the ponytail, depending on how long your hair is. Divide the tail into pairs, pull the lower pieces through, and gently fan each section out before moving to the next. Then finish the very end with a few fishtail passes so the style still earns its name.
This is a good pick for thick long hair because it builds volume without making your fingers cramp. It also holds shape well, which makes it handy for days when the braid needs to last past lunch.
The trick is not to make the loops too tight. Leave just enough space so each section can puff out a little. That’s where the body comes from.
16. Double-Braid Into One Fishtail Ponytail
Two smaller braids feeding into one larger tail give this style a fuller look from the start. That makes it useful on long hair that feels a little too plain when it’s gathered in one section only.
Start with two narrow side sections, braid each one briefly, then join them into a single ponytail at the back. From there, continue with a fishtail braid. The setup adds structure near the crown, which is a nice fix for hair that tends to collapse flat the second it’s tied back.
How to Use It
This style is good if you want the braid to look built, not just tucked together at the end. It also works well on very long hair because the combined sections create a stronger base before the fishtail begins.
A small elastic at each braid end helps keep the join clean. If the braid tails feel bulky, tuck them under the main pony before you start the fishtail. That keeps the finish from getting messy in the wrong way.
17. Braided Mohawk Fishtail Ponytail
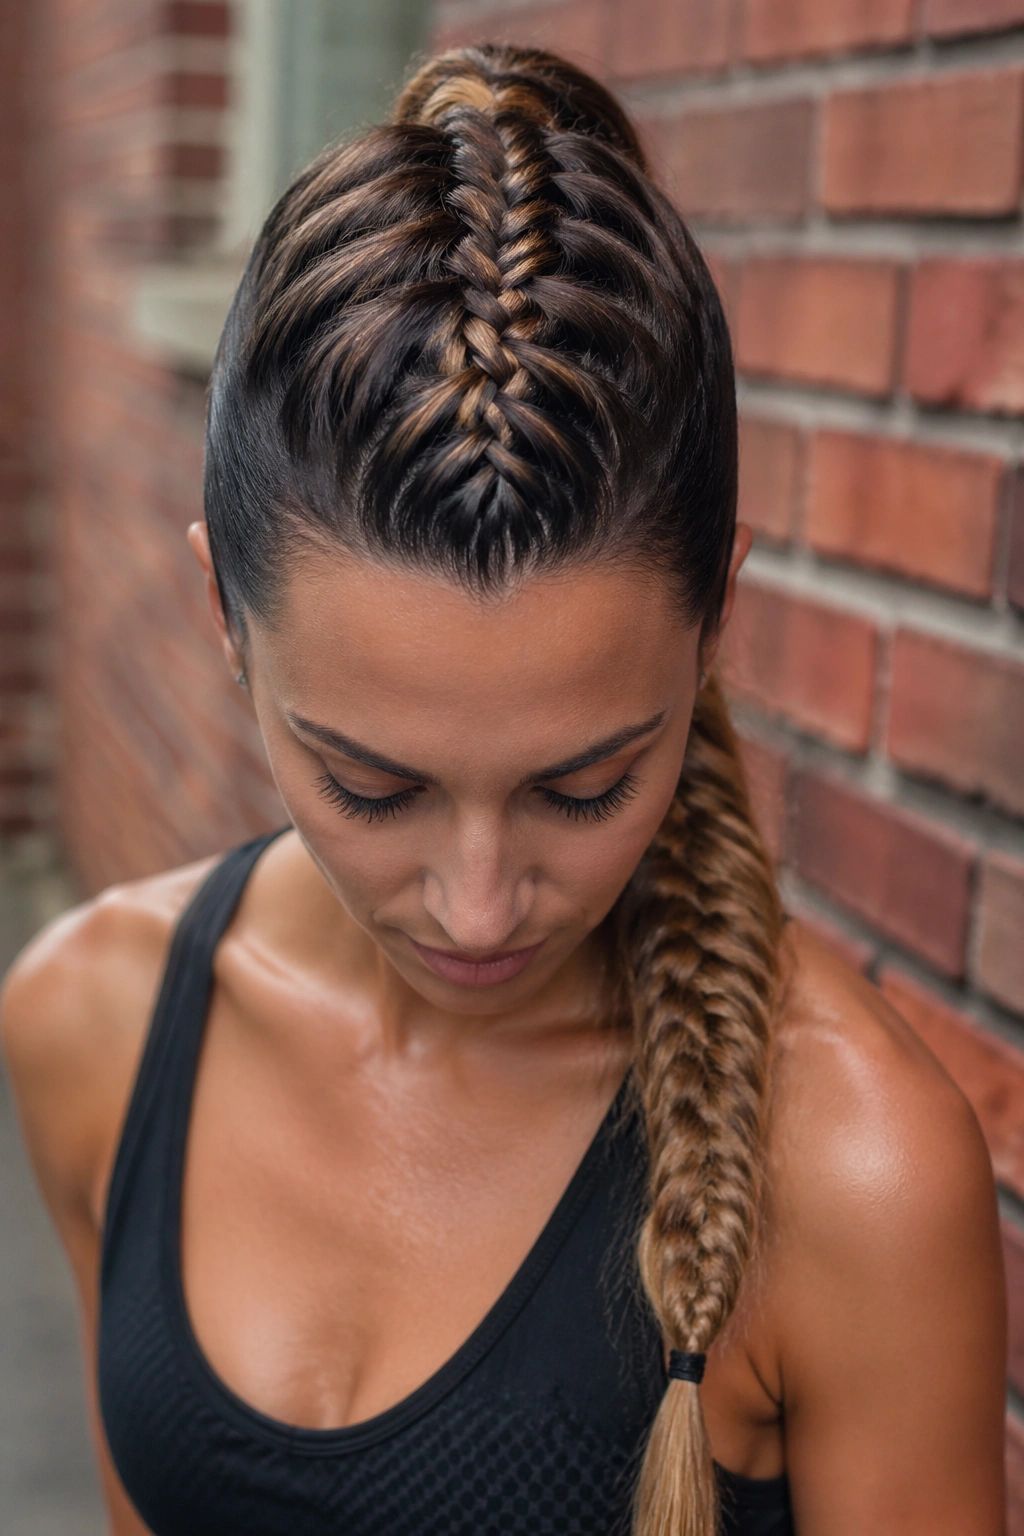
This one has more edge than the others, and I like that. A braided mohawk shape leaves the sides flatter and pushes the focus straight down the center line before the fishtail ponytail takes over.
Keep the center section fairly wide—maybe 2 to 3 inches across at the front—and braid it from the hairline back toward the crown. Pin the sides close to the head, then gather everything into a ponytail and fishtail the tail. The profile looks taller, which can be a good thing on long hair that needs some lift.
The finish works best when the braid on top is snug and the tail is a little looser. Too much looseness at the crown makes the mohawk shape disappear. Too much tightness in the tail makes the length feel harsh. Somewhere between the two is the sweet spot.
This is the style I’d pick when the outfit already has a strong shape—sharp shoulders, chunky boots, a jacket with structure. It can handle that energy.
18. Waterfall Braid Into a Fishtail Ponytail
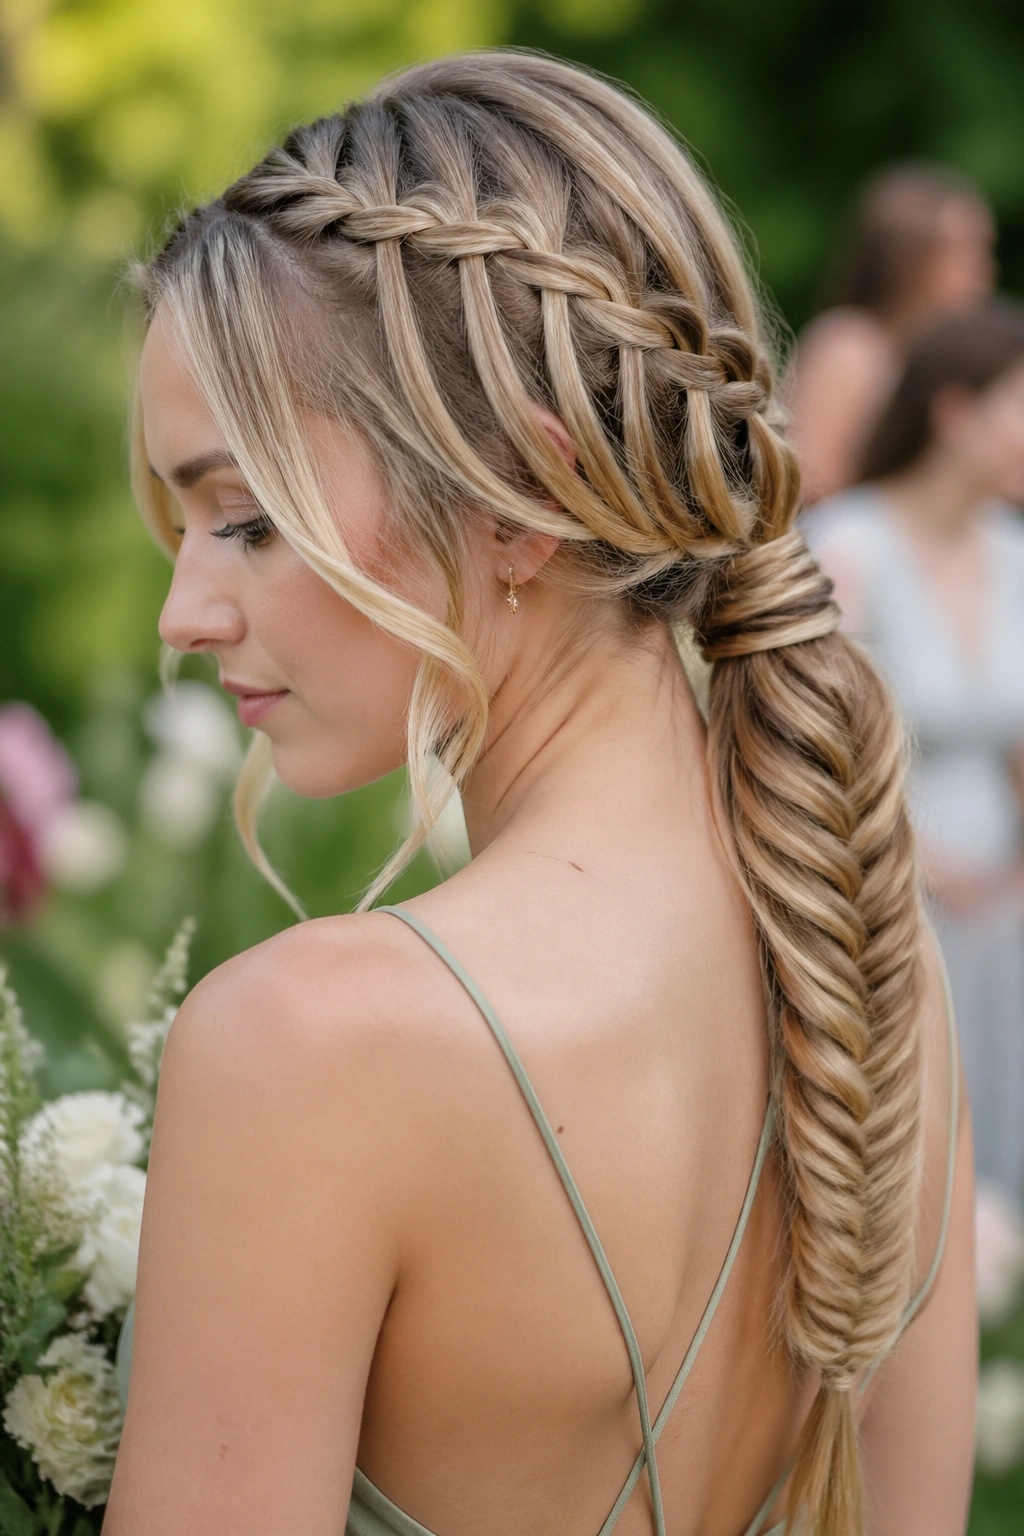
A waterfall braid gives the front a softer, more intricate look before the ponytail begins. Strands drop through the braid on purpose, which leaves little openings and movement near the hairline. Then the fishtail tail ties everything together at the back.
This is one of the prettiest choices for long hair because it makes use of both the top and the length. The waterfall section should stay narrow, around 1/2 inch wide, so it doesn’t take over the style. Once the braid reaches the point where you want the ponytail, secure it and let the loose lengths fall into the fishtail.
It suits events where you want detail near the face but don’t want the whole head braided. Weddings, dinners, formal photos—this is the lane. The braid near the crown should be tidy, but the tail can be a little softer.
I would avoid making the waterfall too loose. If the hanging pieces get floppy, the braid loses its shape fast.
19. Twisted Crown Fishtail Ponytail
A twisted crown is quicker than a full braid, and that matters when you want the top to look done without spending forever on it. Two rope twists from the temples can meet at the back and feed neatly into a fishtail ponytail.
Take a 1-inch section on each side, twist each piece back toward the nape, then pin or tie them together before collecting the rest of the hair. The twists add texture near the hairline, which keeps long hair from looking flat at the top. After that, the fishtail tail takes over and gives the style its length.
Why I Like This One
- It takes less finger work than a full crown braid.
- It hides grow-out around the temples.
- It leaves the rest of the hair free to show off its length.
- It’s easy to make look softer with a few face pieces.
A loose twist looks better than a tight one here. Tight twists can look ropey in a bad way. Soft twists sit more naturally.
20. Fishtail Ponytail for Thick Long Hair
Thick hair needs a different touch. Tiny fishtail sections can turn into a wrestling match if the ponytail is dense, so I prefer bigger crossovers and a firmer base when the hair has serious volume.
Use a strong elastic, then split the tail into slightly larger pieces—closer to 1/2 inch than a pencil width. That keeps your hands from getting lost in the hair. If the ponytail still feels bulky, secure a second elastic about 3 inches below the first before you start braiding. It gives the tail more control and stops the base from sliding open.
This style looks best when the braid is full and a little chunky. Resist the urge to over-tighten it. Thick hair already brings the volume. The braid just needs to guide it.
A light smoothing cream on the ends helps, but do not coat the whole length or the braid can puff unevenly. Thick hair usually behaves better when it has a bit of hold and not too much slip.
21. Fishtail Ponytail for Fine Long Hair
Fine long hair needs a different kind of help. Too much product can make it droop, and too little grip makes the braid unravel. The trick is to build shape at the roots and keep the tail from getting too polished.
Start with dry shampoo or texture powder at the crown, then backcomb only the top 1 inch of hair before tying the ponytail. That little lift makes a huge difference. In the braid itself, gently pull the edges outward after each few passes so the tail looks wider than it really is.
This is the style where a fishtail braid earns its keep. Fine hair can disappear in a standard ponytail, but the woven texture gives it more visual weight. A soft bend in the ends helps too, because pin-straight ends can look thin fast.
I would avoid heavy oils here. They flatten everything. A mist of flexible hairspray is enough if you want the braid to hold shape through the day.
22. Low Glam Fishtail Ponytail
A low glam fishtail ponytail is what happens when the braid gets dressed up properly. The base sits low and clean, the tail stays smooth, and one small accessory does the heavy lifting.
A side part or a slight off-center part keeps the look from feeling too rigid. Wrap a narrow strand around the elastic, then add one pearl pin, a slim barrette, or a small metal clip just above the base. Keep the accessory close to the ponytail rather than floating higher up. That placement feels more refined.
What Gives It the Glam Look
The braid itself should be neat, but not stiff. A little shine at the crown, a clean wrap, and ends curved under slightly with a 1.25-inch iron give the style enough finish for evening wear. It is not about piling on decoration. It’s about keeping every line clean.
This is my pick for dinners, formal events, and any outfit that needs a hairdo with structure. The hairstyle does not shout. It just holds its ground.
23. Gym-to-Evening Fishtail Ponytail
A good gym-to-evening style needs one thing above all: it has to survive a day. This fishtail ponytail starts secure and can be loosened later, which is what makes it useful on very long hair.
Begin with a high ponytail and a strong elastic, then leave the tail alone until you’re ready to change the mood. Later, tug the crown loose by a few millimeters, smooth any dents near the hairline, and turn the tail into a fishtail braid. If the base needs hiding, wrap a 2-inch section of hair around the elastic and pin it underneath.
The best part is that the style changes without starting over. The structure is already there. You’re just softening it. That makes it practical for long days when you do not want to redo your whole head of hair before dinner.
Keep a spare elastic and two bobby pins in your bag. That tiny backup saves more styles than a full can of hairspray ever will.
Final Thoughts
The best fishtail ponytail is not the one with the most braid work. It’s the one that fits your hair’s weight, texture, and shape at the crown. Long hair gives you options, but it also punishes lazy placement fast.
If your hair is heavy, choose a base that can hold it. If it’s fine, build grip before you braid. If the length is layered, soften the front and keep the tail a little looser. That’s the part people miss. The small stuff decides whether the style looks done or merely tied back.
Keep a clear elastic, a tail comb, and one good pin nearby. That’s usually enough to turn a plain pony into something worth wearing twice.