



There’s something classic about pin curls on natural hair that never gets old. The technique has roots in vintage glamour — think finger waves, old Hollywood, the kind of set that took all evening and held all week. But pin curls aren’t a relic. Adapted for natural hair textures, they’re one of the most creative, low-manipulation, heat-free styling options available — producing everything from tight, defined spirals to loose, voluminous waves depending on how you approach them. And they require nothing more than your fingers, some product, and a handful of bobby pins.
What Makes Pin Curls Different from Other Setting Techniques
Pin curls sit in their own category because they combine the organic quality of finger curling with the structural precision of a setting technique. You’re not wrapping hair around a rod or a straw — you’re coiling it on itself and pinning it flat to the head (or propped away from it) to dry in that shape.
The direction, size, and positioning of the pin curl — whether it’s flat against the scalp or propped outward, whether it’s a clockwise or counterclockwise coil, whether the section is large or small — all determine what the finished curl looks like. This level of control is genuinely exciting for natural hair stylists who want to sculpt a precise look rather than relying on a standard technique.
Pin curls on natural hair can produce tight ringlets, soft waves, vintage-inspired finger waves, or a combination of textures within a single style. The variation possible within one technique makes pin curls one of the most versatile styling methods in natural hair.
Understanding the Two Main Types of Pin Curls
Flat pin curls — where the coiled section is pinned directly against the scalp — produce tight, close-to-the-head waves and curls. They work beautifully for vintage wave patterns and for styles where the curl should lie relatively flat rather than bouncing free.
Stand-up pin curls — where the coiled section is pinned so that it stands away from the scalp rather than lying flat — produce curls that bounce outward and have more volume and movement when released. These are better for naturals who want a defined but free-looking curl pattern rather than a vintage wave effect.
Product Selection for Pin Curls on Natural Hair
Pin curls live or die by product selection. Without the right products, the curl won’t form cleanly, won’t hold its shape during drying, and won’t look defined after the pins come out.
The ideal product for pin curls on natural hair has slip (to help you coil the section smoothly), definition (to set the curl pattern within the section), and hold (to keep the curl in its pinned shape as it dries). Most naturals achieve this with a combination of leave-in conditioner and a medium-hold gel or curl custard.
Heavy butters and oils should be avoided as primary setting products — they don’t provide the hold needed for pin curls to set properly. Use them as finishing products after the pins are out and the curls are fully formed.
For natural hair specifically, start the process on freshly washed, conditioned hair while it’s still damp. The hair is most cooperative in this state, and the product distributes more evenly on damp than dry hair.
How to Execute the Pin Curl Technique
The physical process of creating a pin curl is simple but requires intentional practice to become consistent. Take a subsection of product-applied hair — about a half inch to one inch wide, depending on the curl size you want. Use your fingers to coil the section in a circular motion, either flat against the scalp (for a flat pin curl) or away from it (for a stand-up pin curl). The coil should be tight and consistent — a clean circle of hair, not a loose, random wrap.
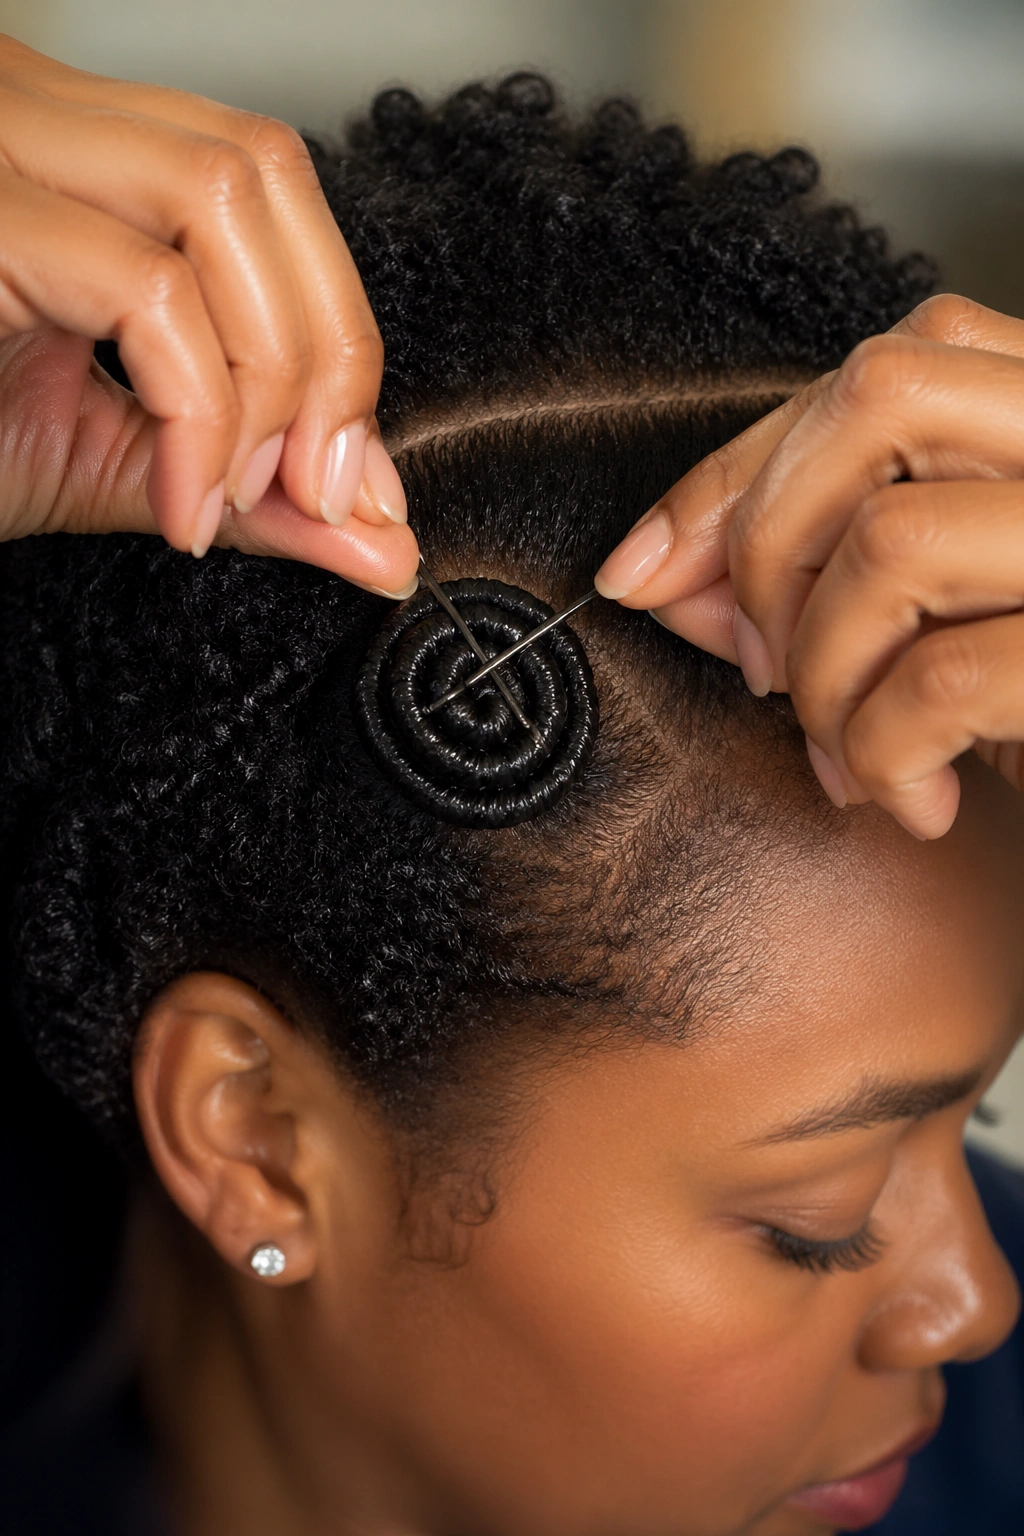
Once the coil is formed, hold it in place with one hand and use the other to slide two bobby pins — criss-crossed in an X pattern — through the coil to hold it in place. The X pattern distributes the tension more evenly and holds the coil more securely than a single pin.
The direction of the coil — clockwise or counterclockwise — matters for the finished style. Curling in the same direction on adjacent sections creates a wave pattern. Alternating directions creates a more independent, stand-alone curl pattern. Decide which look you want and be consistent throughout the head.
Drying and Removing Pin Curls Without Frizz
Like all setting techniques, pin curls require complete drying before pins are removed. Removing pins from partially wet hair is the fastest way to get frizzy, undefined curls that immediately lose their shape.
Air drying takes four to eight hours depending on hair density. A hooded dryer cuts that to 30-60 minutes on medium heat. When drying under a hooded dryer, check the curls by pressing a coil gently — if it feels cool and firm, not damp or soft, it’s done.
Removing pins carefully is as important as placing them carefully. Slide each pin out slowly, supporting the curl as you remove the pin so the coil doesn’t spring loose and frizz. Let the curl stay in its coil shape for a moment after the pin is removed before you begin separating. Then use oiled fingertips to gently open each curl from the outside inward.
1. Classic Flat Pin Curls
The classic flat pin curl is the foundational technique — the style that every vintage hairstyle manual taught, and the one that looks most intentionally structured when complete. On natural hair, flat pin curls produce a smooth, close-to-the-head wave pattern that’s sophisticated and deeply elegant.
Work on damp natural hair with leave-in conditioner and a medium gel applied to each section. Coil each half-inch section clockwise against the scalp — all sections going in the same direction creates the wave pattern. Pin with criss-crossed bobby pins. Work from the front hairline backward across the head. Let dry completely under a hooded dryer.
How to Achieve Perfect Classic Pin Curls
- Keep all coils going in the same direction for a uniform wave pattern
- Section the hair in clean, even rows for visual uniformity
- Apply consistent product amount to each section — inconsistency here shows in the finished style
- Remove pins one at a time, don’t rush the separation — this is where patience pays off
The result is a smooth, defined wave pattern on natural hair that reads as genuinely vintage-inspired and beautifully intentional.
2. Stand-Up Pin Curls for Volume
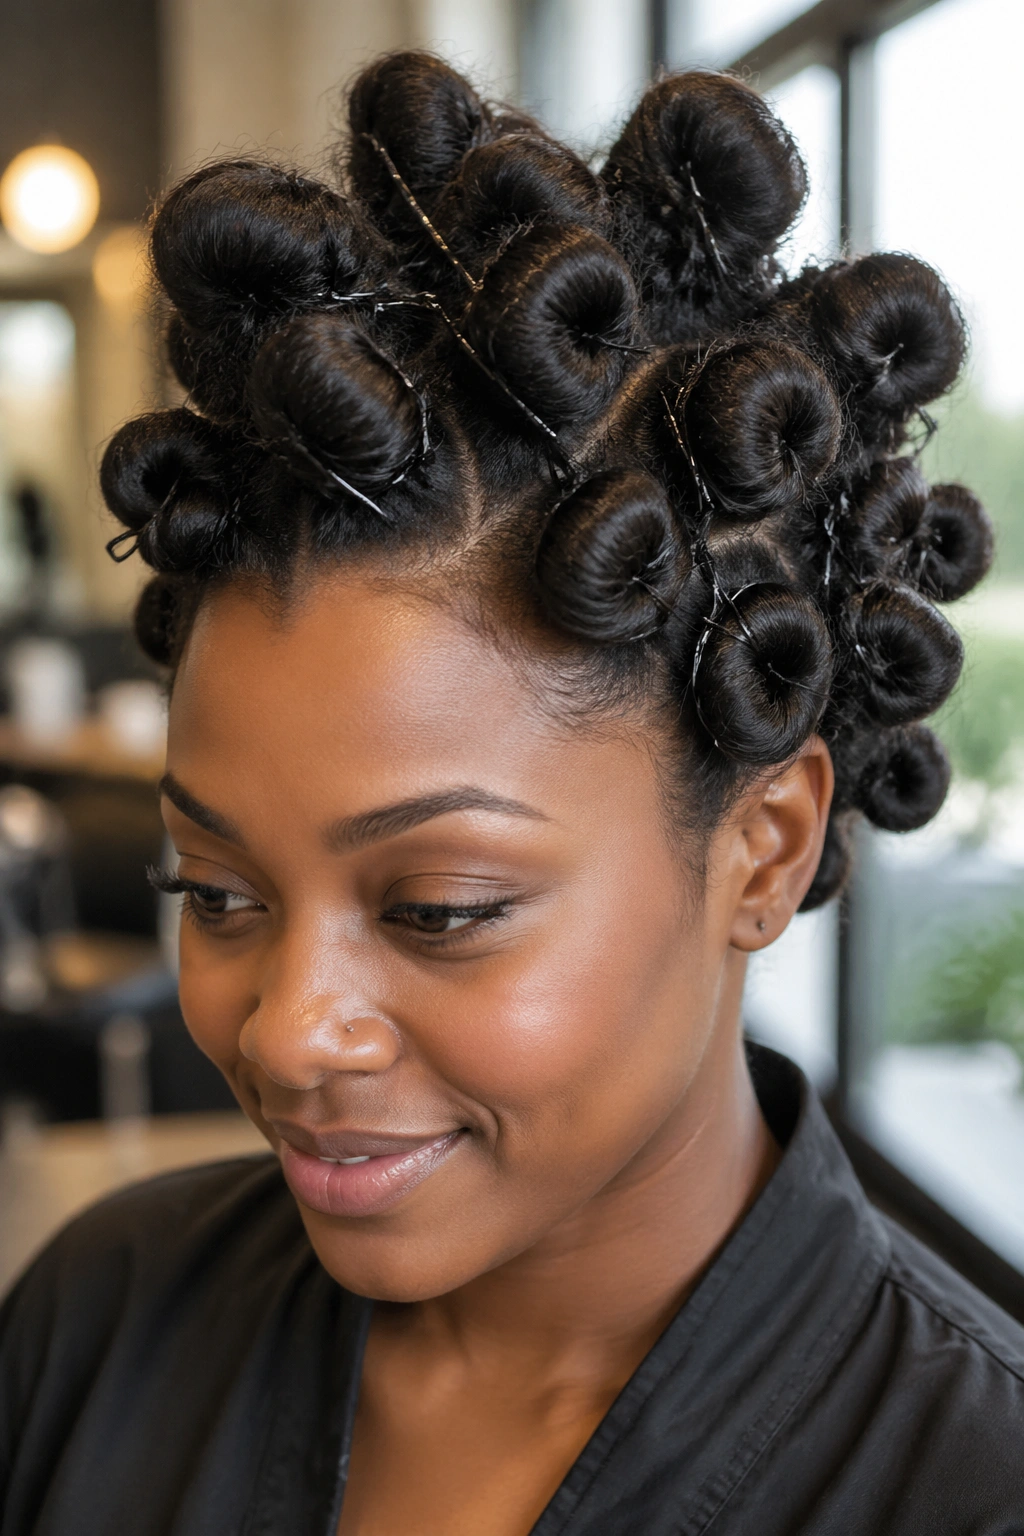
Stand-up pin curls are the natural hair answer to big, voluminous curls without a wand. Instead of lying flat against the scalp, these coils are pinned so they stand upright — the resulting curls bounce outward when released rather than lying close to the head.
Coil each section away from the scalp and pin at the base with criss-crossed pins. The coil should be propped upward, not pressed flat. When released after drying, these curls have significantly more volume and lift at the root than flat pin curls. The overall effect is fuller, more dramatic, and more suited to naturals who want their curls to have presence and movement.
This version works especially well on shorter to medium natural hair where the stand-up curl has somewhere to go without being too heavy to hold its shape.
3. Pin Curls as a Wash-and-Go Enhancer
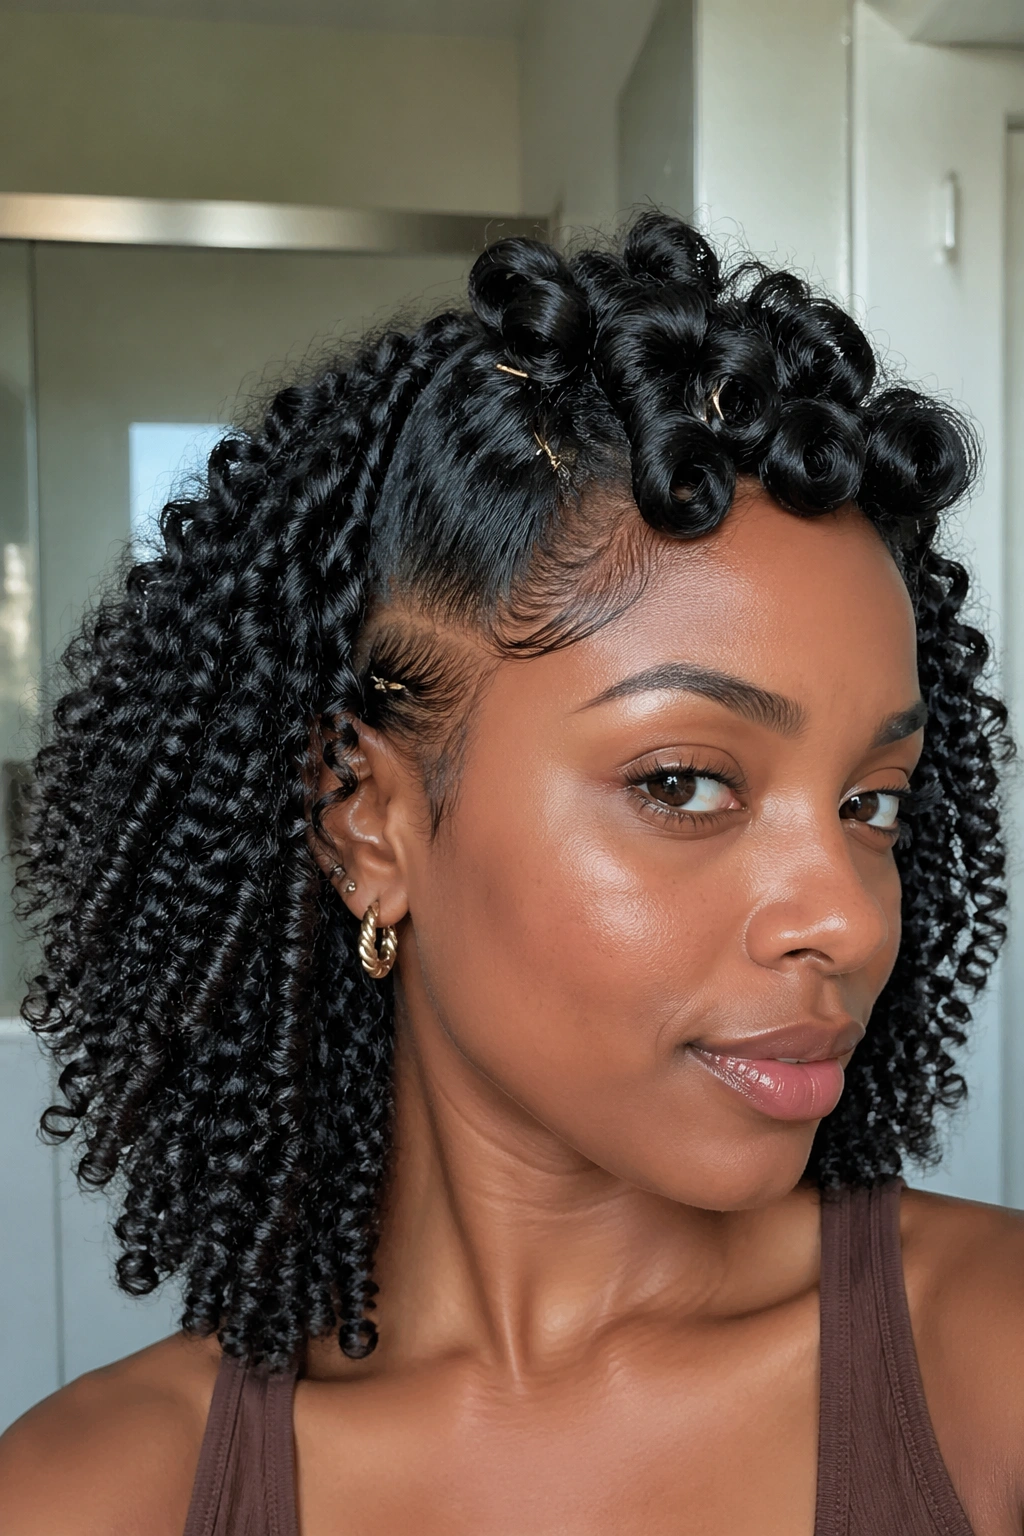
The wash-and-go is a beloved natural hair technique that doesn’t always produce the defined results every natural hopes for. Pin curls applied selectively to sections that need more definition turn a mediocre wash-and-go into something spectacular.
After applying your wash-and-go products to the entire head, take the sections that have lost definition — usually the crown and the front sections — and coil them into stand-up pin curls. Leave the well-defined sections alone. Let everything dry. Remove the pins from the pin-curled sections only, and let those sections join the naturally dried sections.
This selective technique adds definition where it’s needed without over-manipulating sections that are already well-defined. It’s efficient, smart, and produces great results with minimal product and effort.
4. Pin Curl Set on Stretched Natural Hair
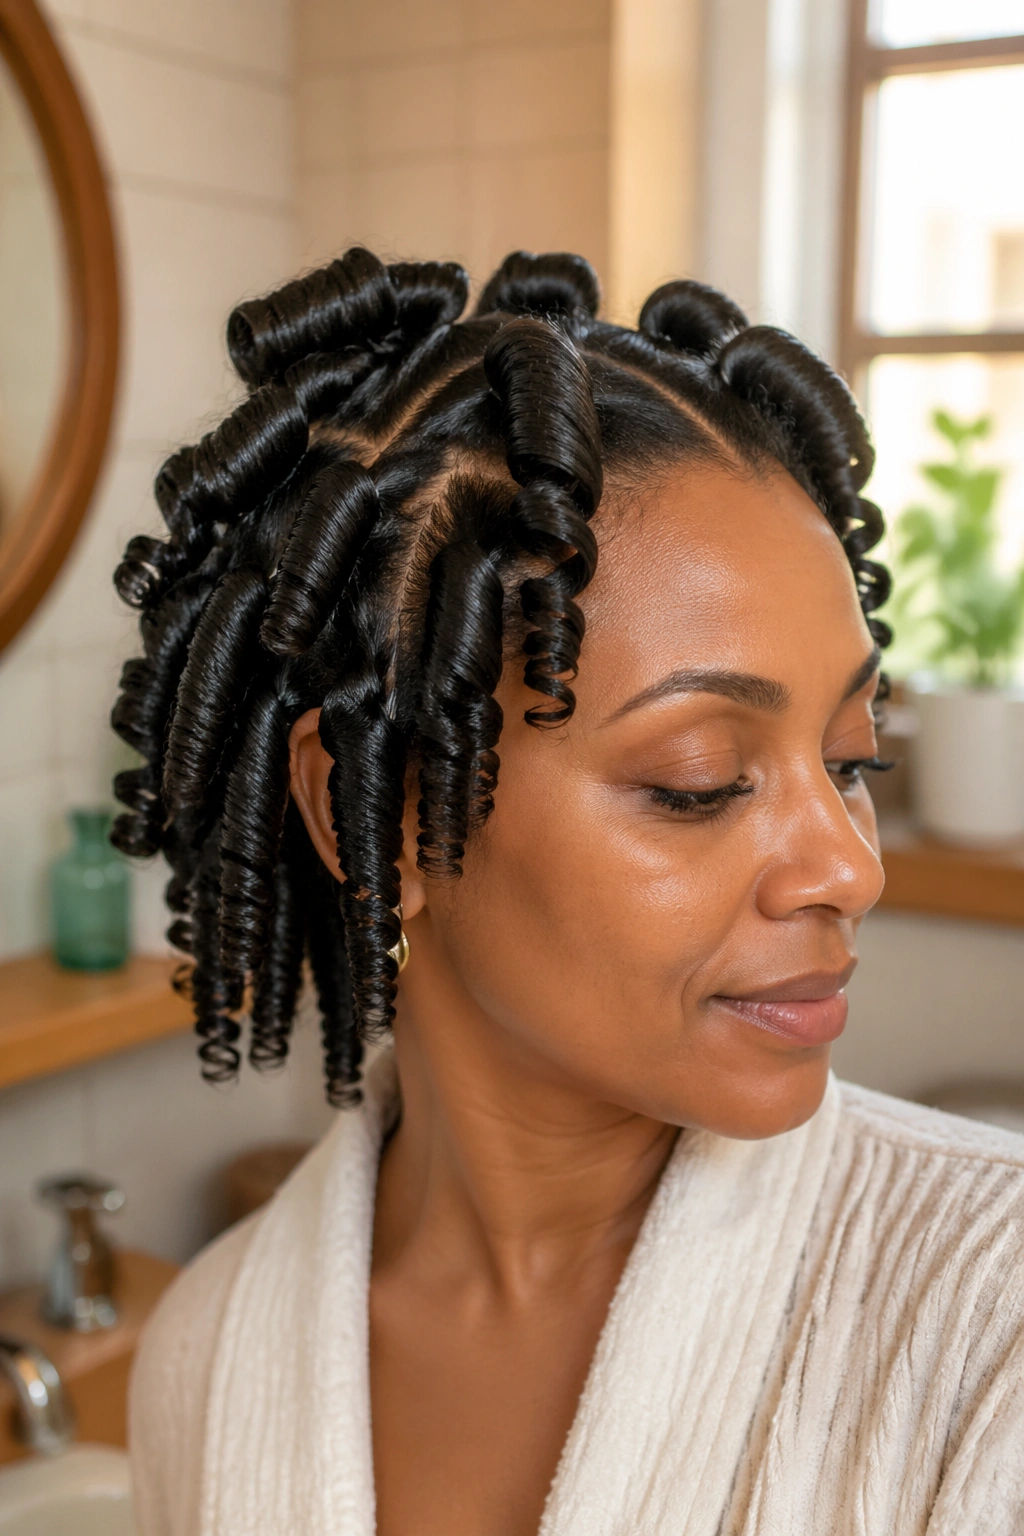
Stretched hair — hair that’s been blown out, banded, or threaded before styling — produces pin curls with significantly more length and elongation than pin curls set directly on unstretched natural hair. For Type 4 naturals who want to show more of their length, this is the technique.
After stretching the hair using your preferred method, apply leave-in and gel to each section and coil into stand-up pin curls. The stretched sections are more cooperative during the coiling process and the resulting curls are longer, more defined, and hang more freely when released.
This technique bridges the gap between stretched styling and defined curl styling — you get the length show of a stretched style and the definition of a pin curl set in the same look.
5. Pin Curl Updo
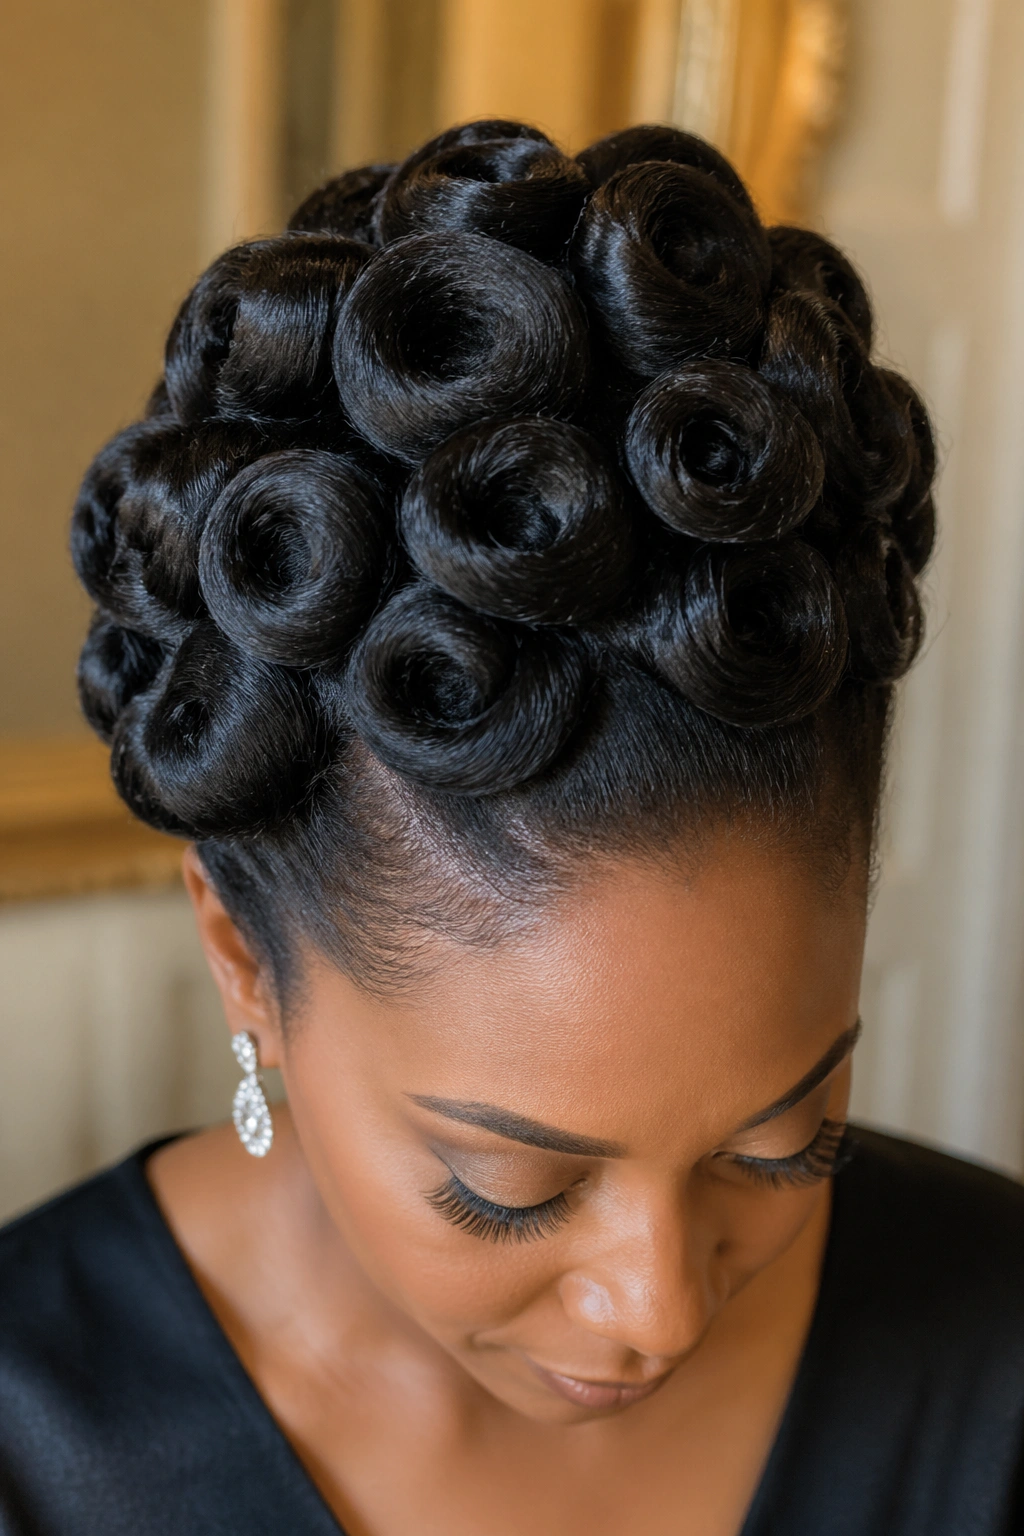
A pin curl updo is a style where the pin curls themselves become the updo, rather than styling the hair into an updo after the curls are formed. The effect is a beautifully textured, organized updo that looks like it required professional skill to create.
Work through the entire head coiling each section into flat pin curls, all going in the same direction. Instead of releasing them after drying, simply remove the pins while keeping the curls in their coil shape. Arrange the dried coils — still round — across the head in a deliberate pattern: all pulled toward the back, arranged in a side-swept pattern, or stacked at the crown. Secure with fresh bobby pins inserted invisibly inside each coil.
The result is an updo made entirely of organized, defined curls — dramatic, elegant, and surprisingly easy to execute.
6. Pin Curls with a Deep Side Part
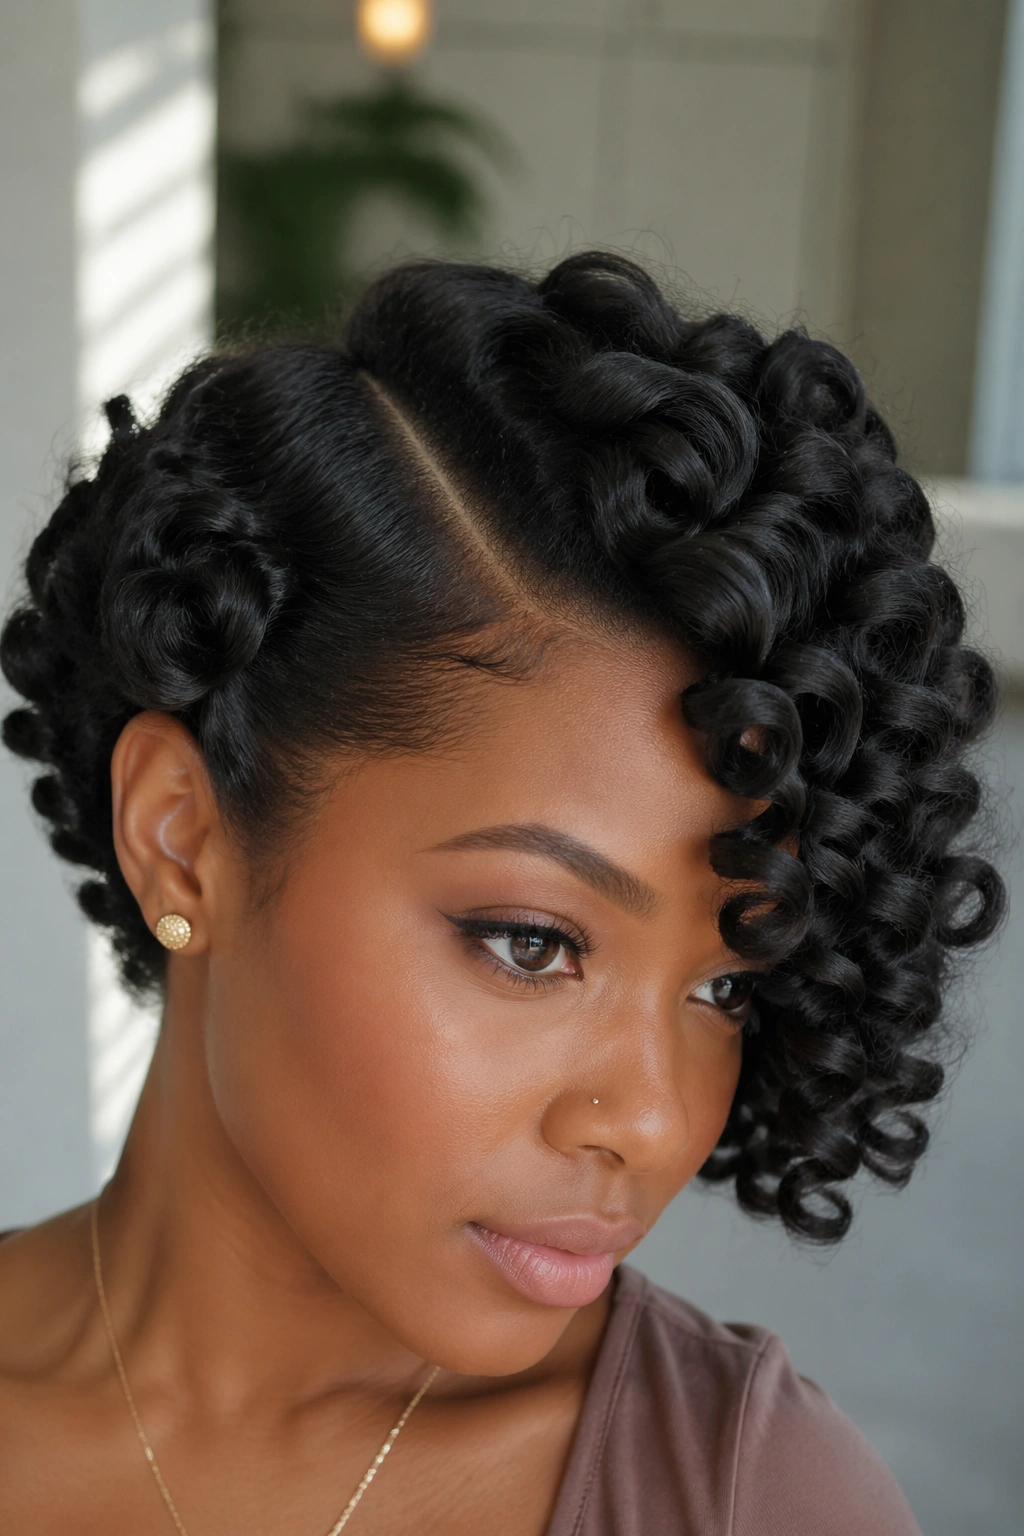
A deep side part changes everything about a pin curl set. It creates asymmetry that makes the style feel editorial and fashion-forward rather than simply classic.
Before setting any pin curls, establish your deep side part using a rat-tail comb. Part from the hairline on one side all the way back to behind the ear. Then set the pin curls through the rest of the head, keeping the coils consistent in direction but allowing the part to dictate how the front sections are oriented — the heavy side falls forward and downward, the lighter side swept close to the head.
When the curls are released, the deep side part gives the finished style a dramatic, swooping silhouette that’s visually striking and deeply flattering on most face shapes.
7. Vintage-Inspired Finger Wave Pin Curl Combination
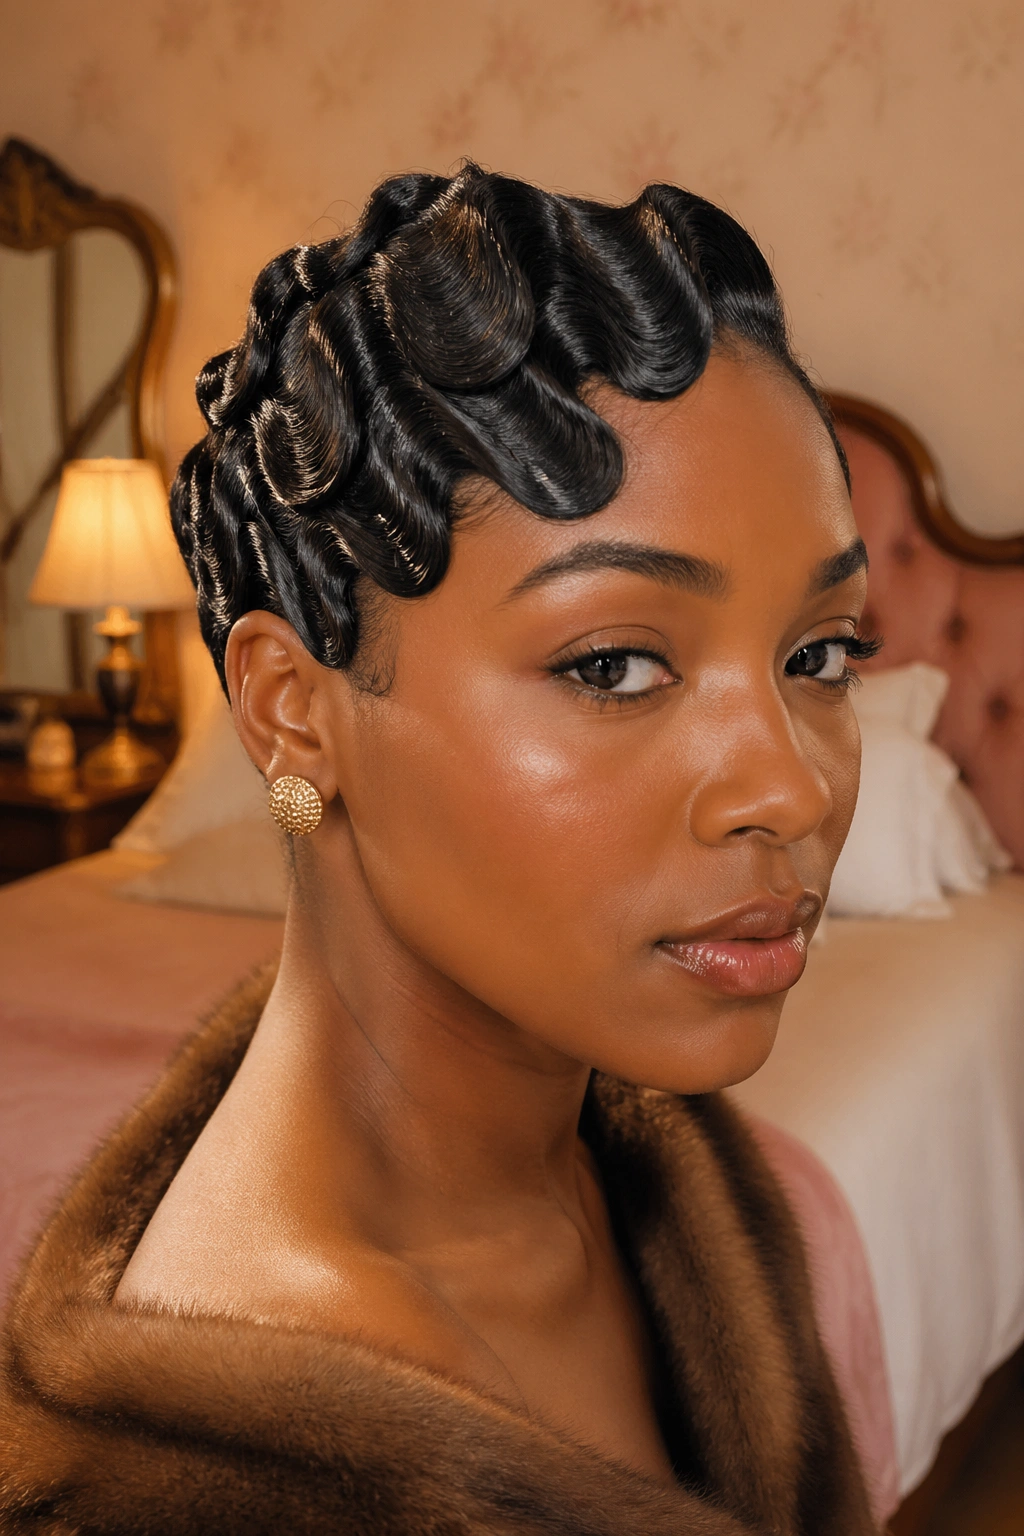
A hybrid of finger waves along the hairline and pin curls through the rest of the head creates a style that’s pure vintage glamour, updated for natural hair.
Apply a strong-hold gel to the hairline sections. Use a fine-tooth comb and your fingers to sculpt gentle S-wave patterns along the front and sides of the head, pressing the waves flat against the scalp and securing with bobby pins placed along each wave trough. Behind and above this waved section, coil the remaining hair into flat pin curls all going in the same direction as the wave.
Let everything dry under a hooded dryer or under a mesh hair net overnight. Release the pins carefully, remove the finger wave pins, and use a wide-tooth comb very gently to define the wave pattern at the front.
8. Pin Curls for Natural Hair at Night — Maintenance Style
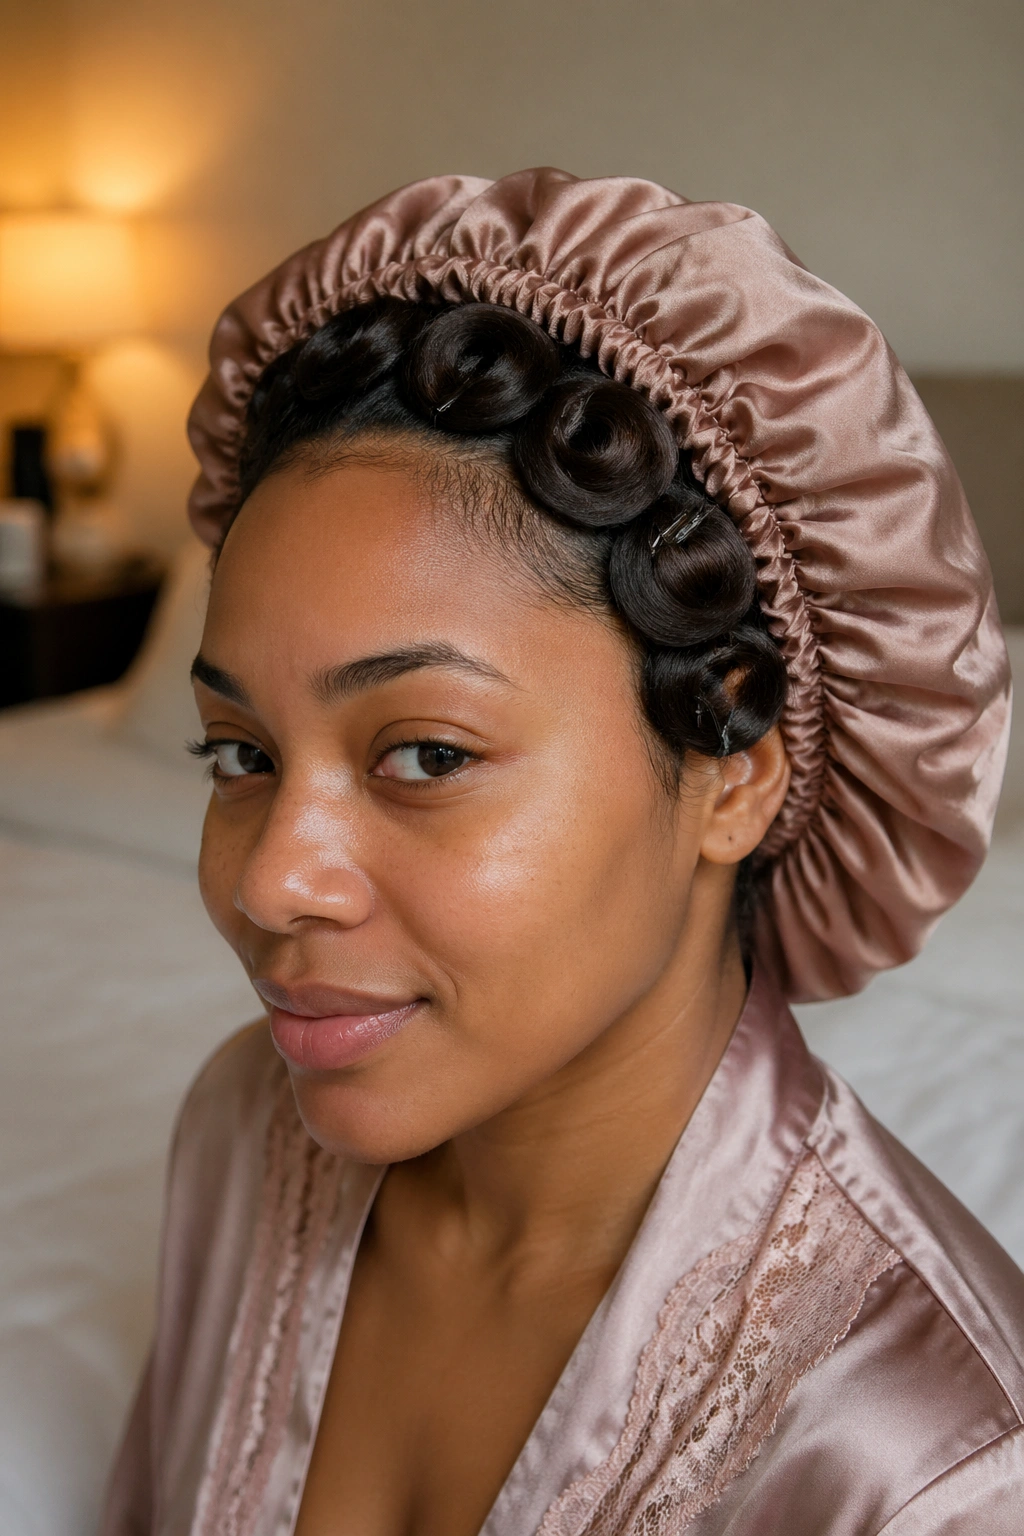
Pin curls are one of the most effective nighttime curl maintenance techniques for natural hair. After a day of wearing wand curls, rod curls, or a wash-and-go, re-curling the sections into flat pin curls overnight is a way to refresh the definition and extend the style by two to three additional days.
Lightly mist the hair with a water and leave-in conditioner mixture. Take each section and coil it into a flat pin curl, all going in the same direction. Cover with a satin bonnet. In the morning, remove the pins and separate gently. The refreshed curls have gained back some of the definition lost during wear and are fully set for another day.
This technique is especially useful on day two and three of a wand curl or rod curl set.
9. Pin Curls on Natural Hair Without Heat — Complete No-Heat Style
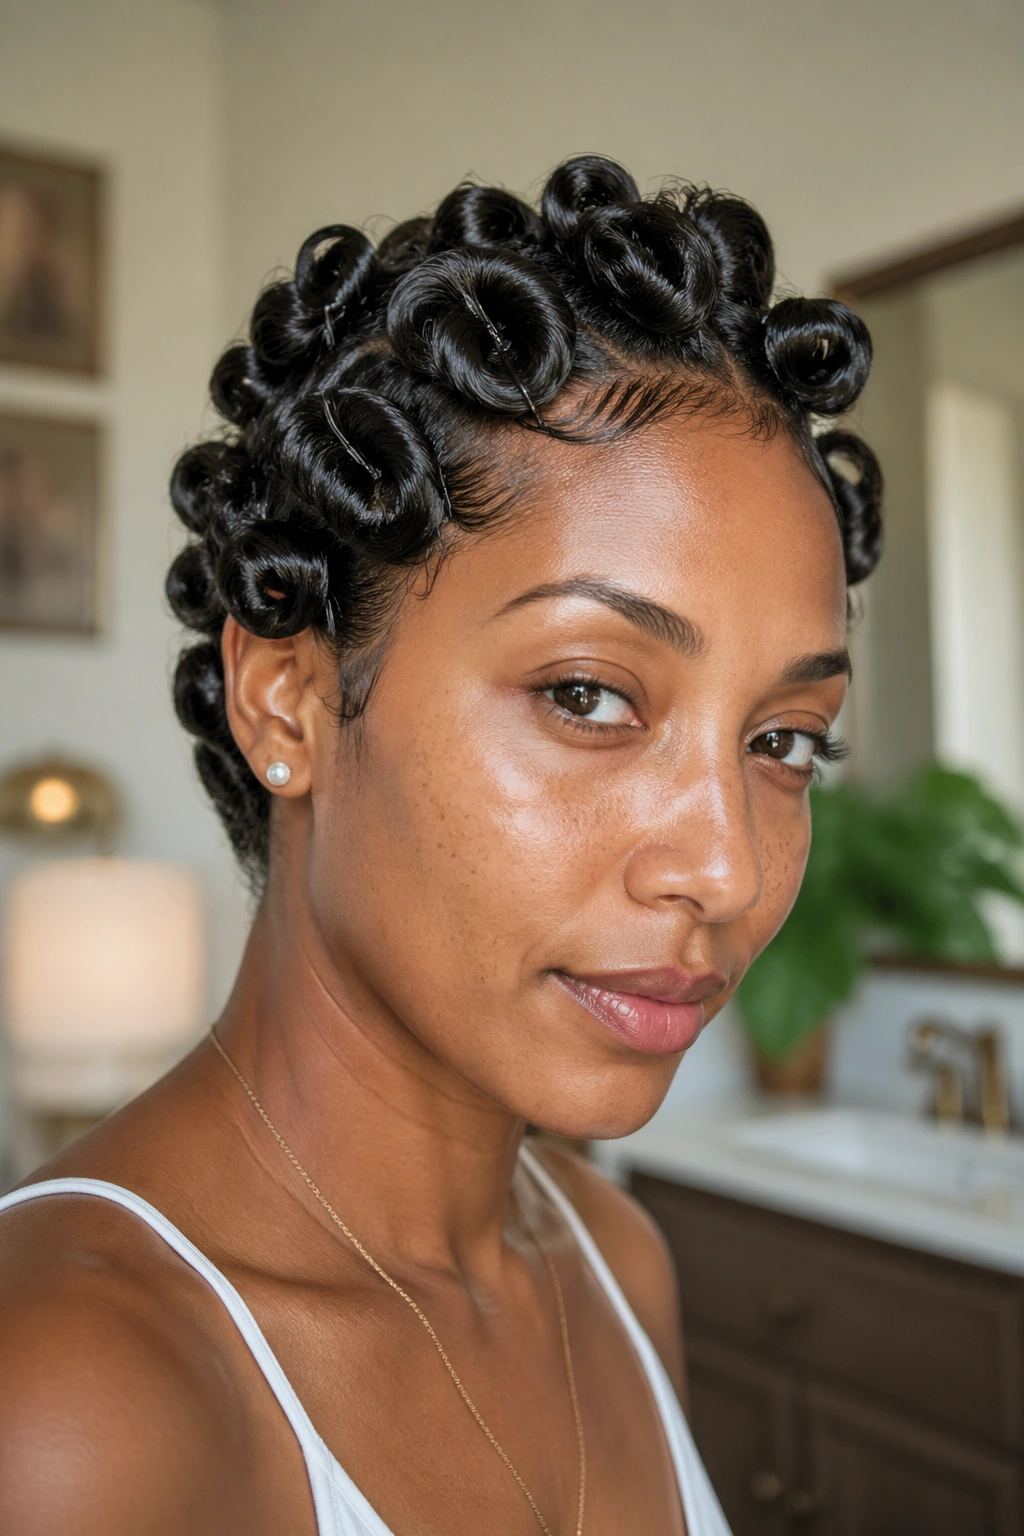
No heat, full definition. Pin curls on damp natural hair without any heat tool involved — no wand, no dryer, no flat iron — are a genuinely complete styling technique.
Work through the entire head setting pin curls while the hair is still damp from washing. For best results, sit under a hooded dryer (this counts as gentle heat but not direct heat) or simply air dry. If air drying, this is an overnight technique — set the curls before bed, cover with a bonnet, and let dry overnight.
In the morning, remove pins carefully, separate gently, and the result is a fully defined curl pattern created with zero direct heat. It’s as protective as a styling technique gets while still producing visible definition.
10. Pin Curls Combined with Two-Strand Twists
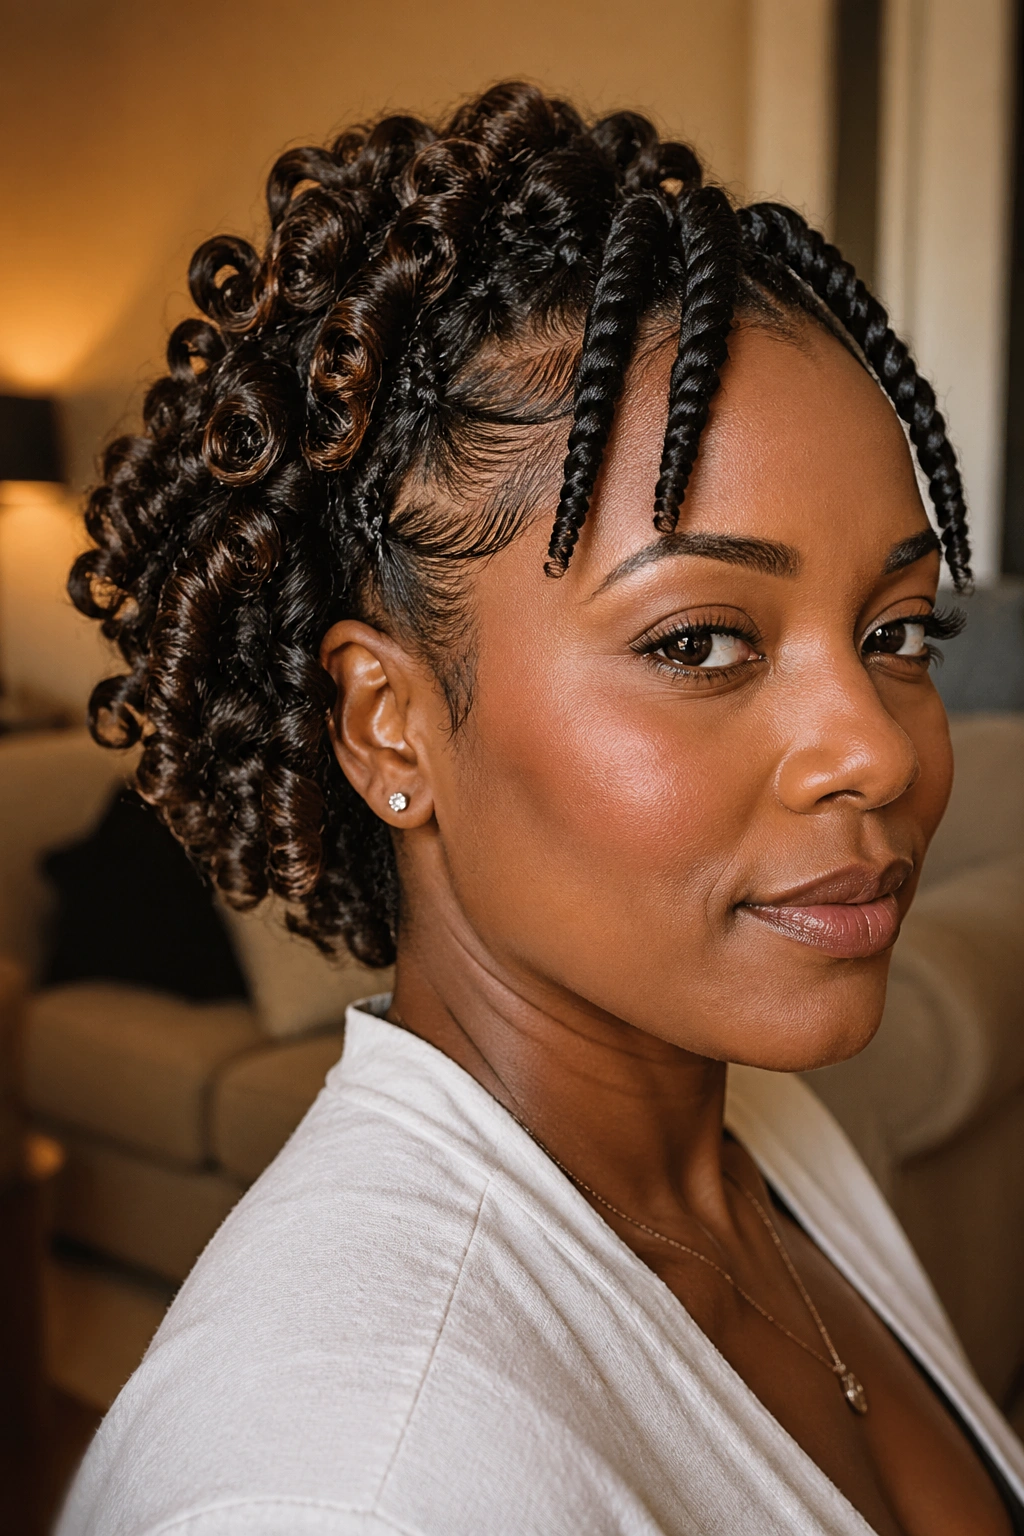
Mixing two-strand twists and pin curls in a single style creates a multidimensional look that’s visually fascinating. The structure of the twist and the rounded form of the pin curl are different enough to create interesting textural contrast when combined.
Twist the front sections of the hair — from the hairline to about two inches behind it — in small, neat two-strand twists. Let the twist ends join the main hair and include them in pin curls behind the twisted section. Or leave the twists separate and coil the remaining untwisted hair in pin curls.
When released, the twist sections unravel into a slightly different curl pattern than the pin curl sections, creating two distinct but complementary textures that make the style look deeply interesting and intentional.
11. Pin Curls for Short Natural Hair
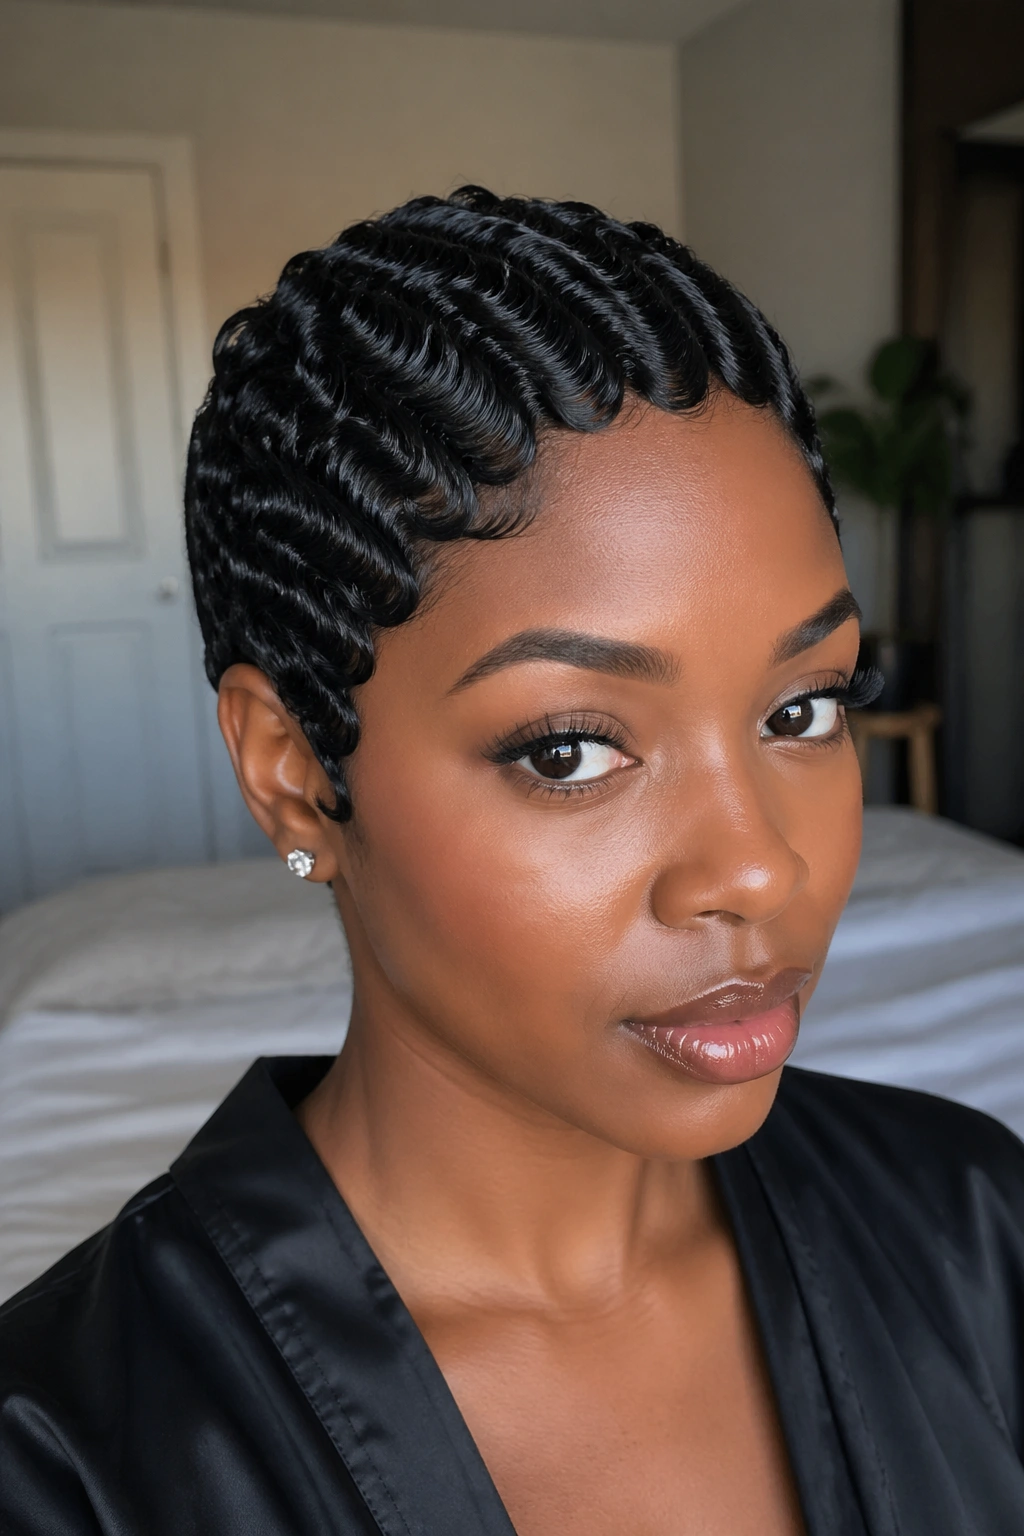
Short natural hair is an excellent pin curl candidate — the technique produces tight, defined curls that give TWAs and close-cut naturals more visible style than a simple puff or unset coil pattern.
Use very small sections — about a quarter inch — and small criss-crossed pins. On very short hair, you’re essentially pressing small, tight circular coils flat against the head and pinning them. Even when the hair is only an inch or two long, the pin curl sets a shape that’s visible and beautiful when released.
The result on short natural hair is a tightly textured, intricate-looking style that has a unique, sculptural quality. It photographs strikingly well, especially with the edges laid and defined.
12. Pin Curls with a Satin Scarf Wrap
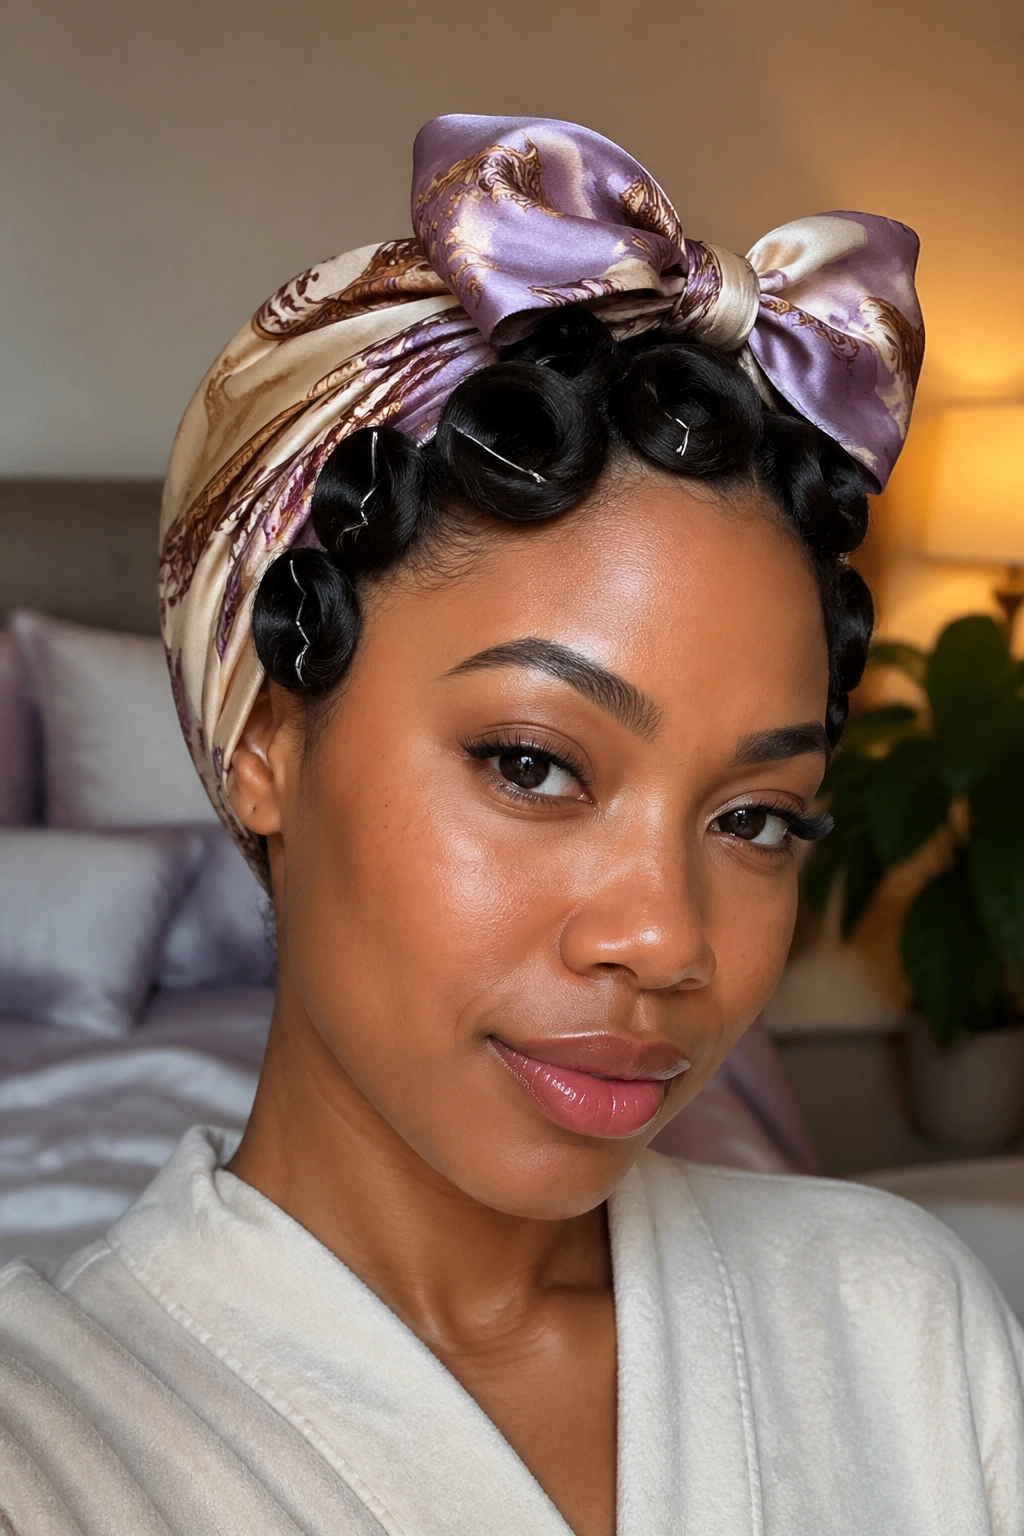
Wrapping a satin scarf over a freshly pinned curl set is an excellent technique for achieving smooth, defined pin curls on natural hair without a hooded dryer and without the long air-drying wait.
After setting all the pin curls on damp hair, wrap a large satin or silk scarf over the entire head, covering all the pins. Tie it securely at the front. Go to bed with the scarf in place. The warmth from your head and the close wrap of the scarf create a mini greenhouse effect that helps the hair dry and set more efficiently overnight.
In the morning, remove the scarf and the pins carefully. The curls will be more set than if you’d simply air-dried without the wrap, and the satin surface means less frizz and more definition.
13. Pin Curl Frohawk
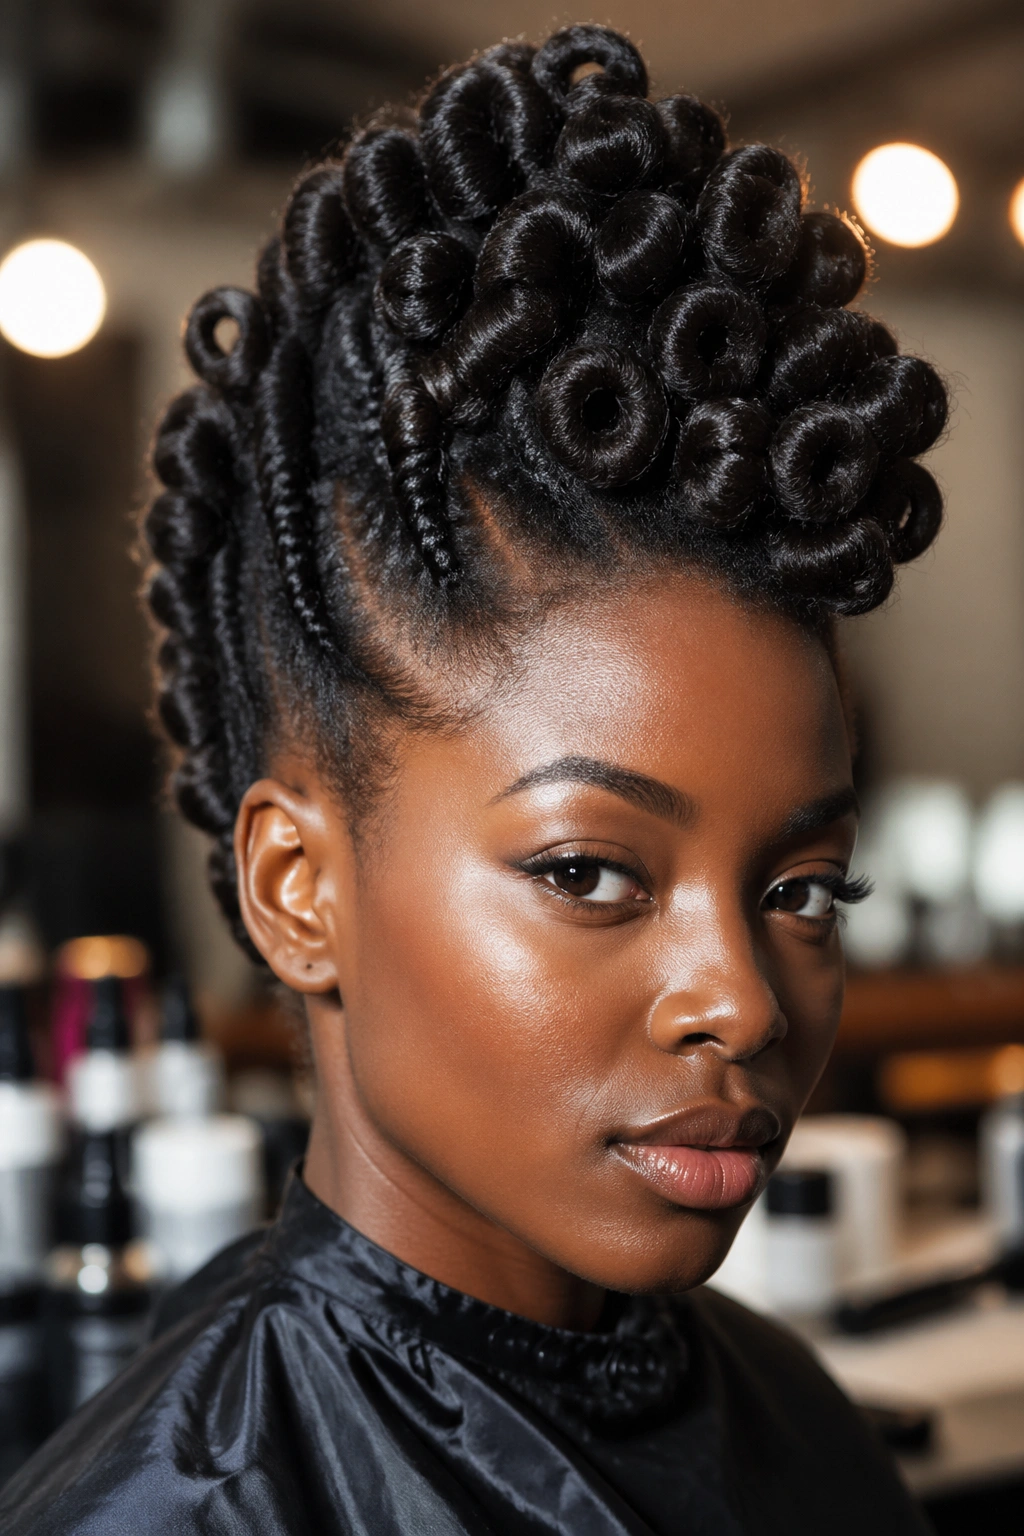
A pin curl frohawk takes the classic frohawk concept and executes it in pin curls — creating a style that’s bold, graphic, and beautifully textured.
Part the hair into a central mohawk strip and two side sections. Set the central strip in stand-up pin curls from front to crown. On the side sections, set flat pin curls that are angled upward — the intention is to have them, when released, sweep upward toward the central strip rather than hanging downward.
When released, pin the side section curls upward and inward using bobby pins, creating the faux-mohawk shape. The central strip’s stand-up curls bounce freely in the center. The resulting style has the graphic silhouette of a frohawk with the beautiful definition of pin curls.
14. Pin Curls for Naturals in the Humidity
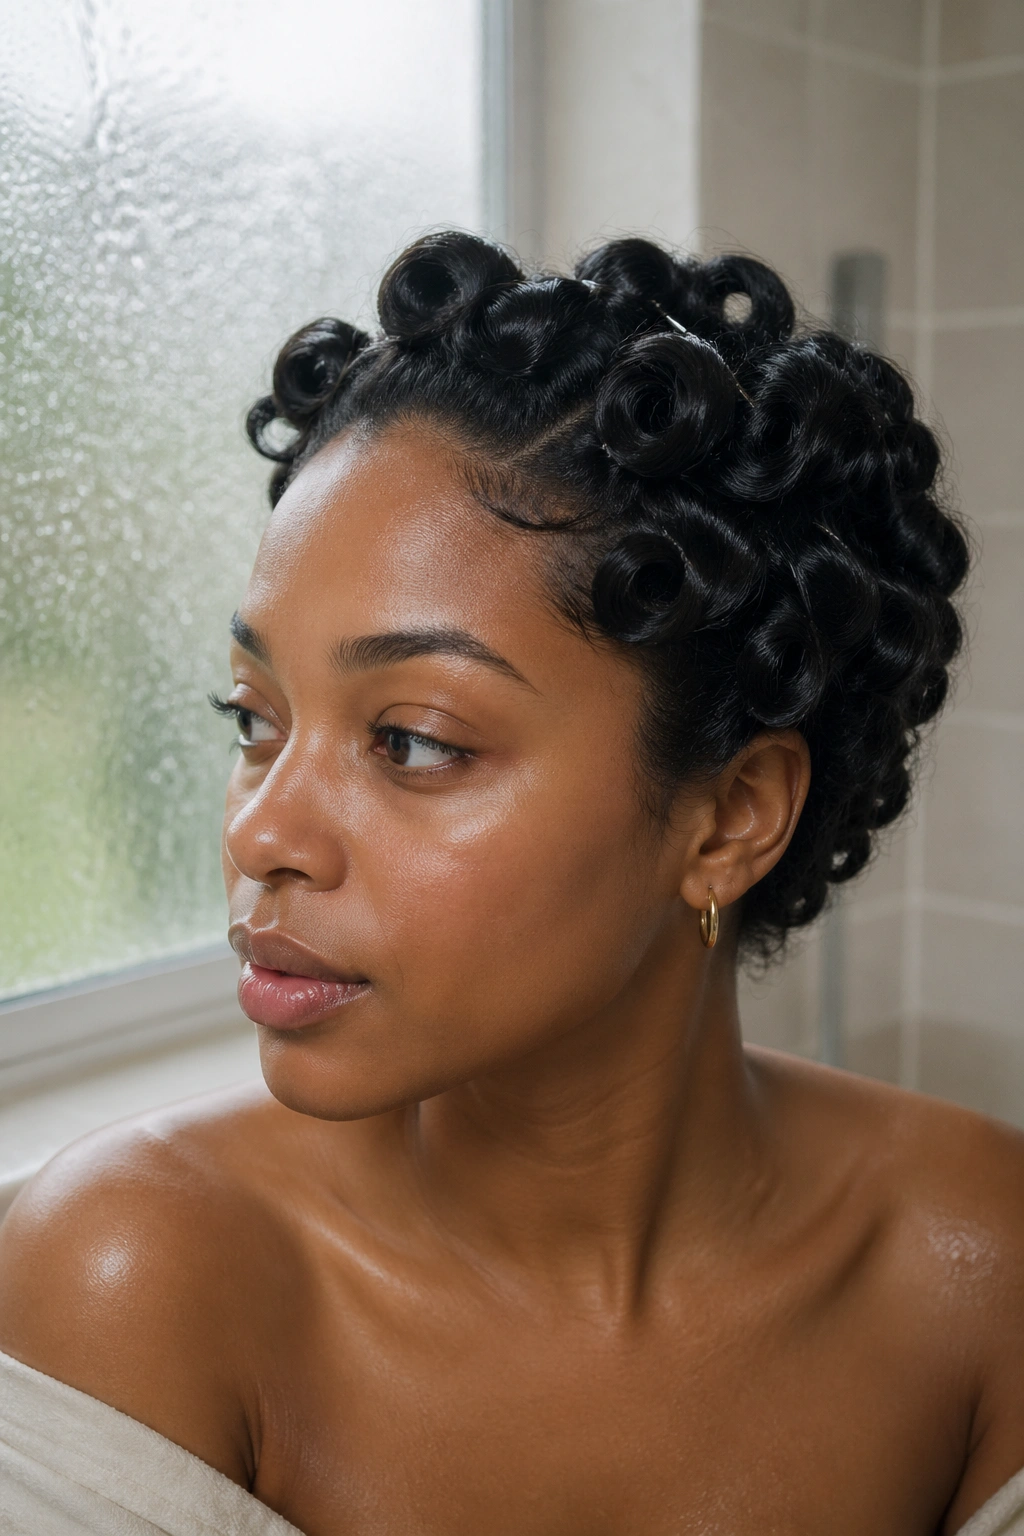
Humidity is the enemy of many natural hair styles. But pin curls — particularly those set with a strong-hold gel — hold up better in humid conditions than many heat-styled looks. The reason: the pin curl set is sealed during the drying process in a way that makes the pattern more resistant to atmospheric moisture.
Apply an anti-humidity gel or a gel with a strong hold — products containing polyquaternium or strong-hold polymers work best — before setting the pin curls. Let dry completely before removing the pins. Once removed and gently separated, the curls have a better chance of maintaining their definition through a humid day than curls set with lighter products.
Finish with a light anti-humidity serum or spray over the separated curls for extra protection.
15. Pin Curls as a Bridal or Formal Style
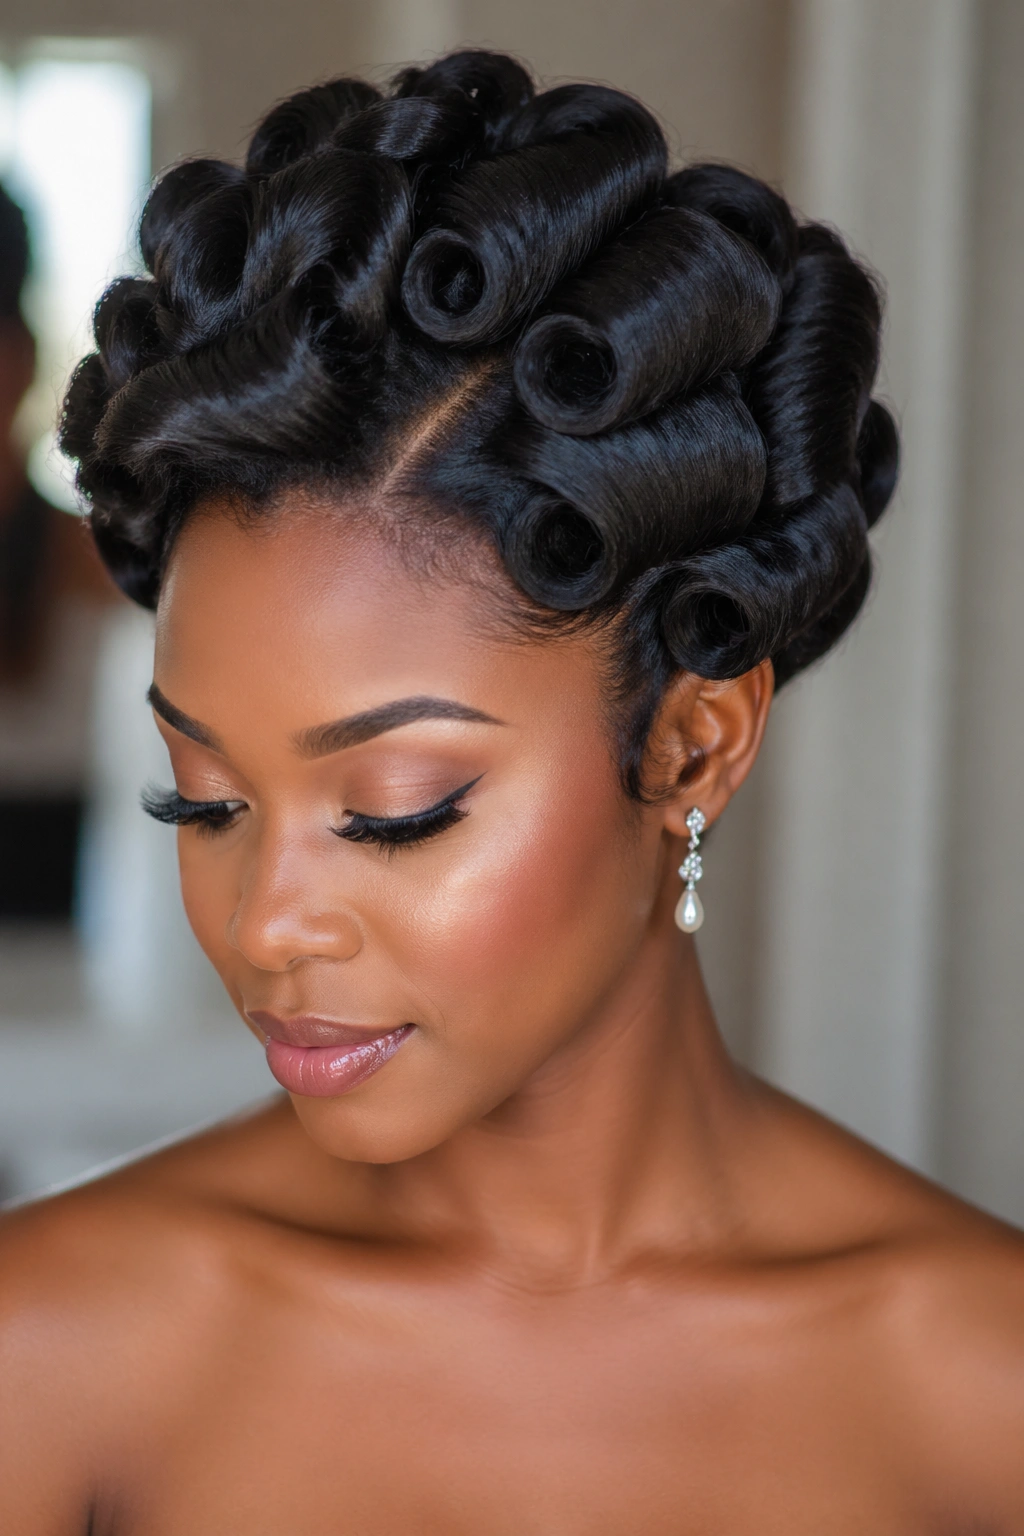
For weddings, formal events, and high-stakes occasions, pin curls on natural hair offer something that few other techniques can: a formal-looking, fully defined style without any heat risk on the day itself. The set is done the night before, the style is fully formed by morning, and the day-of process is just pin removal and gentle separation.
Use the smallest sections possible for the most defined, precise curls. Apply a professional-grade setting lotion or a strong-hold gel for maximum longevity. Dry completely under a hooded dryer for best results. Remove pins extremely carefully and separate with oiled fingertips.
Finish with a few drops of a shine serum over the surface of the curls. The result looks salon-quality because the technique, when done with care, produces a genuinely professional level of definition.
16. Refreshing Pin Curls by Re-Pinning
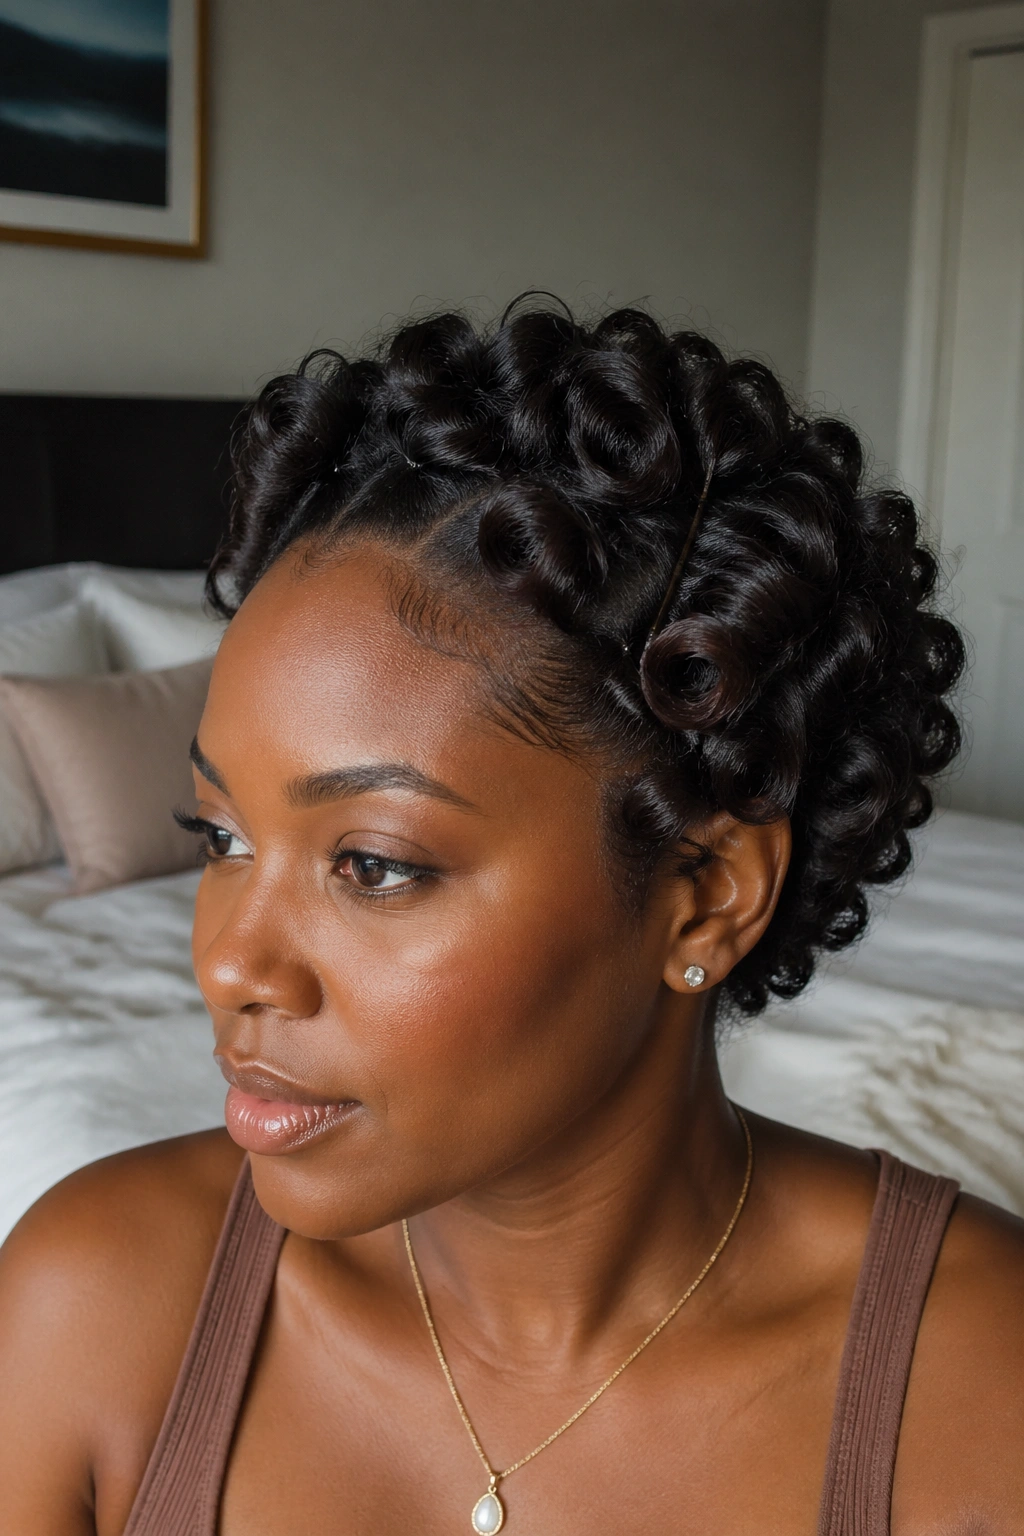
When a pin curl set begins to soften after a few days of wear, re-pinning the sections overnight is one of the most effective ways to restore definition without starting over with a full wash day.
Lightly mist the sections that need refreshing with a water and leave-in mixture. Re-coil each softened section into a flat or stand-up pin curl using fresh gel applied to the damp section. Pin, cover with a bonnet, sleep. In the morning, remove the pins and the refreshed sections have regained their definition and join the still-defined sections of the style seamlessly.
This is especially effective on days three through five of a pin curl set. It’s a fraction of the effort of a full re-do but produces results that extend the life of the style significantly.
17. Pin Curls for 4C Hair — Specific Technique Adjustments
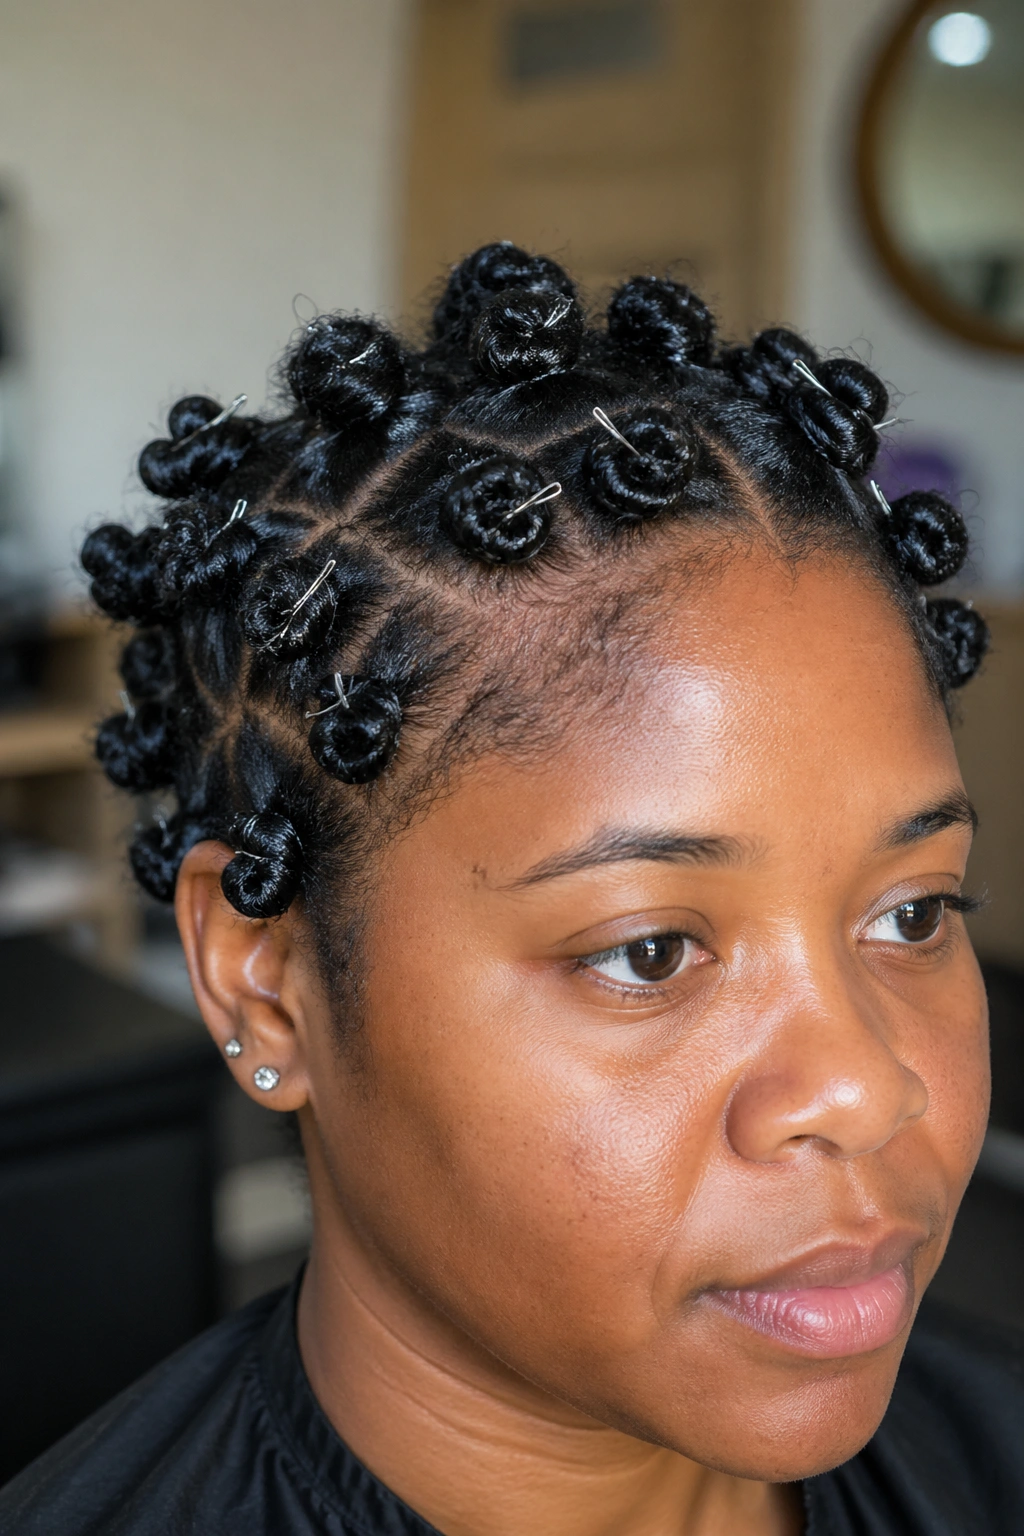
4C hair has the tightest coil pattern of all natural hair types and requires some specific adjustments to the standard pin curl technique to get the best results.
Work on soaking wet 4C hair for maximum product absorption and strand elasticity. Use a generous amount of leave-in conditioner — more than you would for looser textures — before applying gel. The leave-in is essential for preventing the pin curl from drying out, which would create brittle, undefined curls rather than soft, springy ones.
Work in slightly smaller sections — about a quarter inch — to ensure that the tight 4C coil pattern has enough product support throughout every strand. Dry under a hooded dryer rather than air drying to reduce the time the wet, product-loaded hair sits before setting, which can lead to product separation and uneven results.
18. Pin Curls on the Perm Rod Out
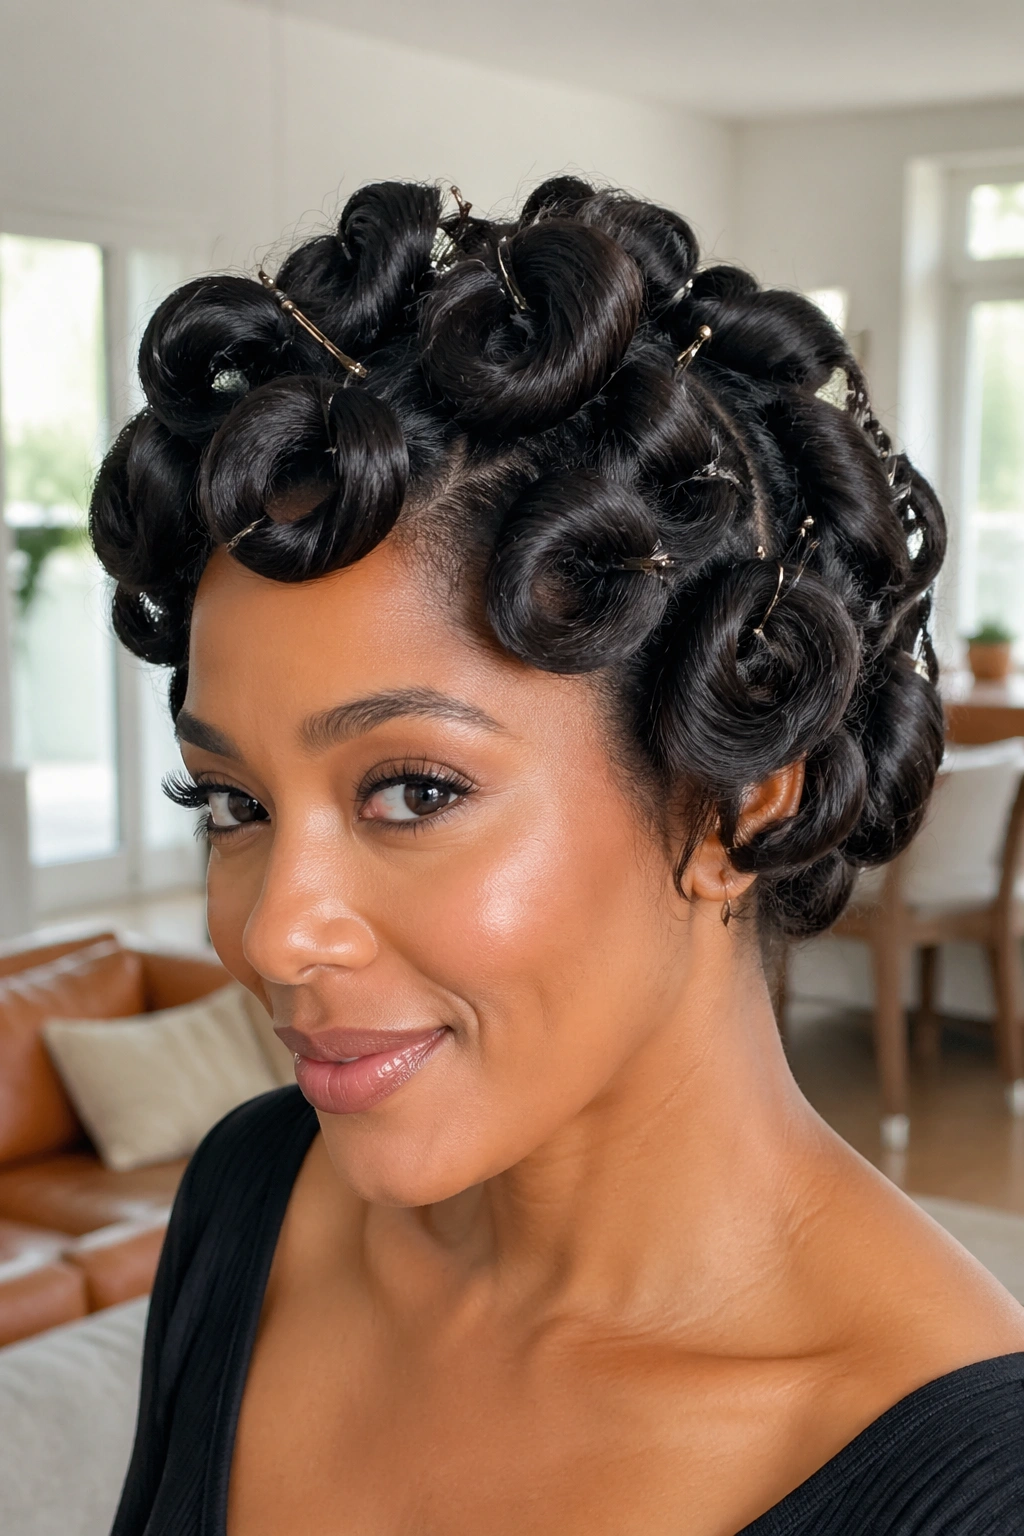
A perm rod set that’s a few days old can be refreshed and extended by coiling the loosened rod curls into pin curls overnight. The existing curl pattern in the hair — even softened — responds well to re-setting, and the pin curls recreate some of the definition from the original rod set.
Apply a small amount of fresh gel or curl cream to each loosened section before re-pinning. The new product layer reactivates the hold and adds moisture. In the morning, remove pins and gently separate — the curls have a slightly different character than the original rod curls, but the definition is restored and the style looks refreshed.
This is week-two technique for naturals who do a rod set one week and want to extend the style into a second week without a full re-do.
19. Pin Curl Set with Section Size Variation
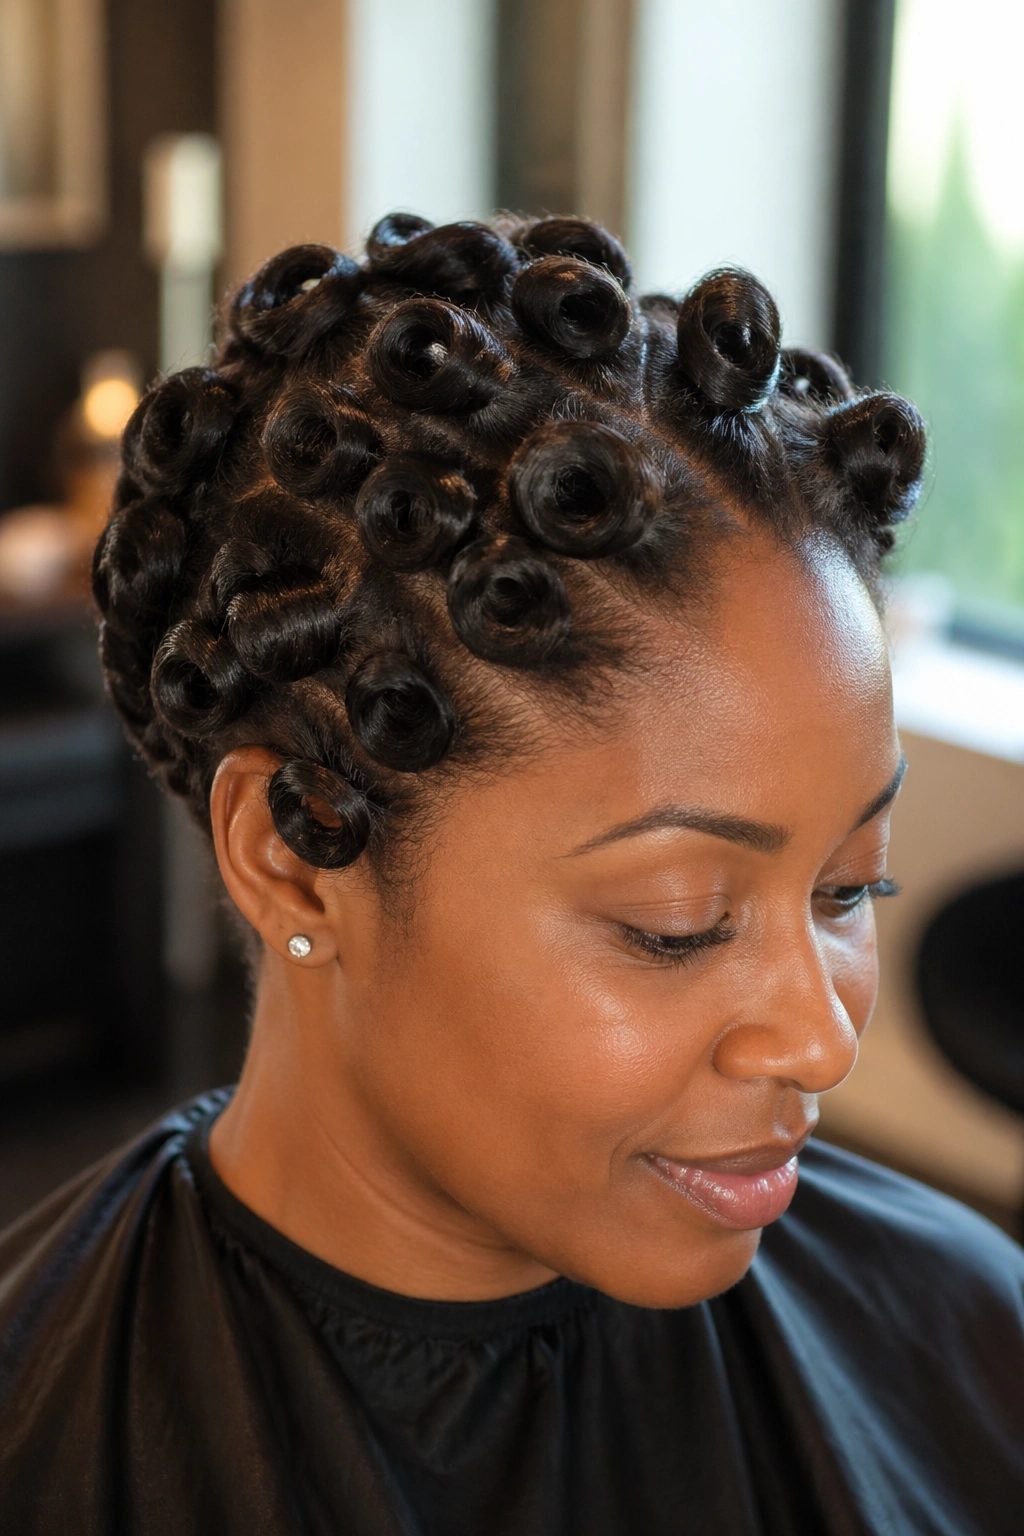
Using different section sizes deliberately across the head is an advanced pin curl technique that produces a style with natural-looking variation — some sections have tight, defined spirals and others have looser, bigger curls, creating dimension and visual depth.
Use quarter-inch sections at the front and crown for tight definition in the most visible areas. Use half-inch sections on the sides and back for slightly looser curls that add volume. Use three-quarter-inch sections at the nape for the loosest curls that give the style a soft, romantic feeling at the back.
This graduated approach creates a style that evolves from its tightest, most defined point at the face to its softest, most voluminous point at the nape — which is an extremely flattering and visually sophisticated result.
20. Common Pin Curl Mistakes and Their Fixes
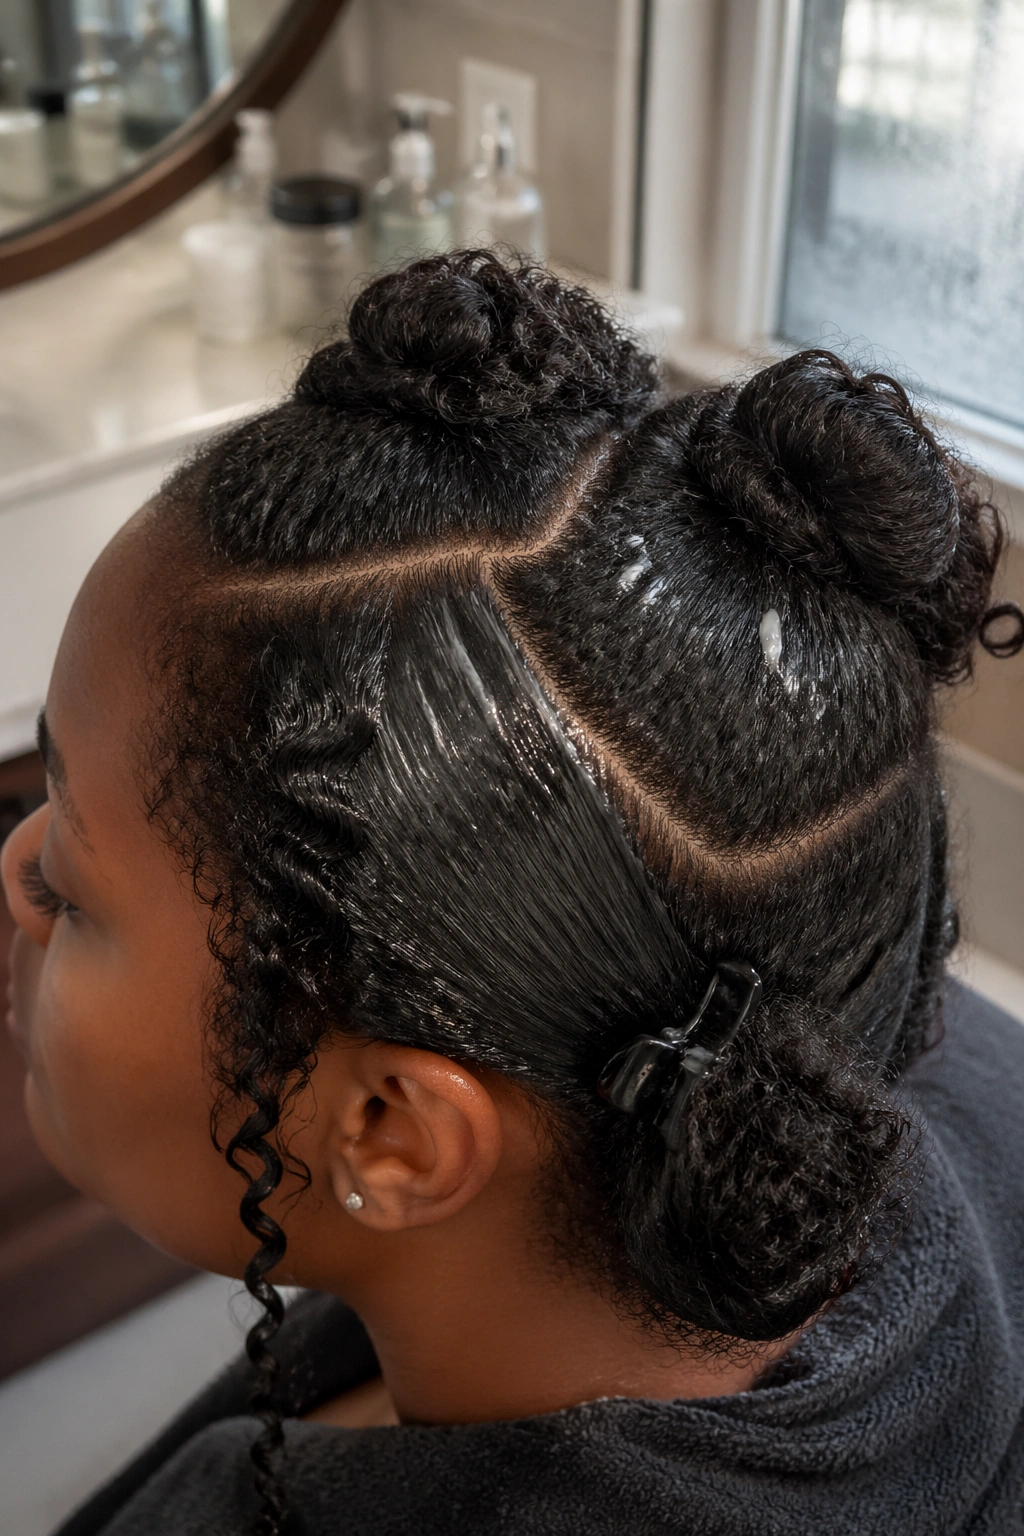
Curls that don’t hold their shape after pins are removed. Almost always a product issue — not enough gel, or a gel with insufficient hold for your hair type. Fix: increase the amount of gel used and try a firmer-hold formula.
Frizzy results after pin removal. Most commonly caused by removing pins while the hair was still slightly damp. Fix: always test one pin curl before removing all pins, and wait until the test curl feels cool and springs back firmly.
Uneven curl sizes across the head. Caused by inconsistent sectioning. Fix: use a rat-tail comb to create precise, even parts throughout the head before beginning.
Bobby pins leaving a dent in the curl. This happens when the pins press against the outer coil surface. Fix: push the pins through the center of the coil rather than clamping them around the outside.
21. Pin Curls as a Gateway to Learning Natural Hair Styling
For naturals who are just beginning their styling journey, pin curls are an excellent first technique. The materials are minimal and cheap. The process is forgiving — if a coil goes wrong, you simply unpin and redo it. The results improve quickly with practice. And the technique teaches you something fundamental about how your natural hair holds a shape, how it responds to product, and how long it takes to dry — knowledge that transfers directly to every other styling technique you’ll learn.
Start with a partial pin curl set. Pin curl just the front sections — six to eight curls across the hairline and crown — while leaving the rest of the hair in its natural state or in a puff. Observe how those pinned sections look compared to the unset sections. Notice what the curl looks like when the pin is removed carefully versus when it’s removed quickly. These observations teach you more about your hair in one session than any number of tutorials.
22. The Day-After Pin Curls Look
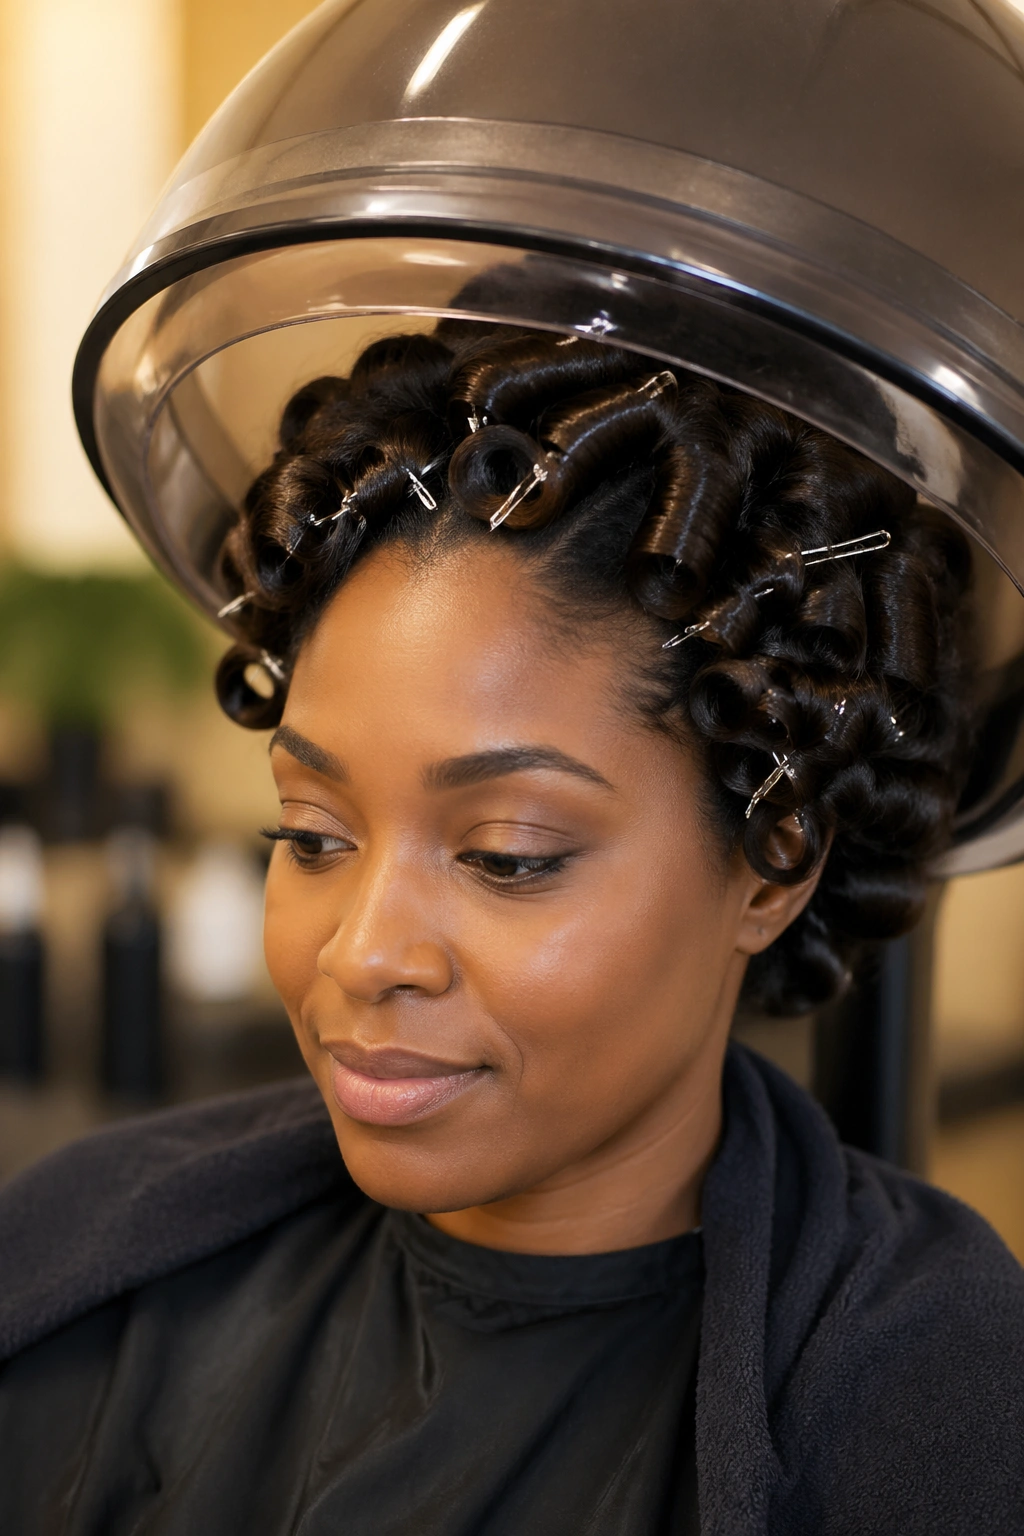
Some of the most beautiful pin curl results don’t appear on day one — they appear on day two, when the curls have had time to settle, loosen slightly, and blend with each other into a cohesive, organic-looking style.
Fresh pin curls on day one often look very precise and intentional — which is beautiful in its own right. But after one night in a satin bonnet with a loose pineapple, day two pin curls have softened just enough to look less “set” and more like naturally brilliant hair. The individual coils open slightly, the volume increases, and the style takes on a life of its own.
Many naturals actually prefer day-two pin curls to day-one. If you fall into this category, you’re not making an error — you’ve discovered that some styles genuinely need time to become their best version.
23. Building Consistent Pin Curl Results Every Time
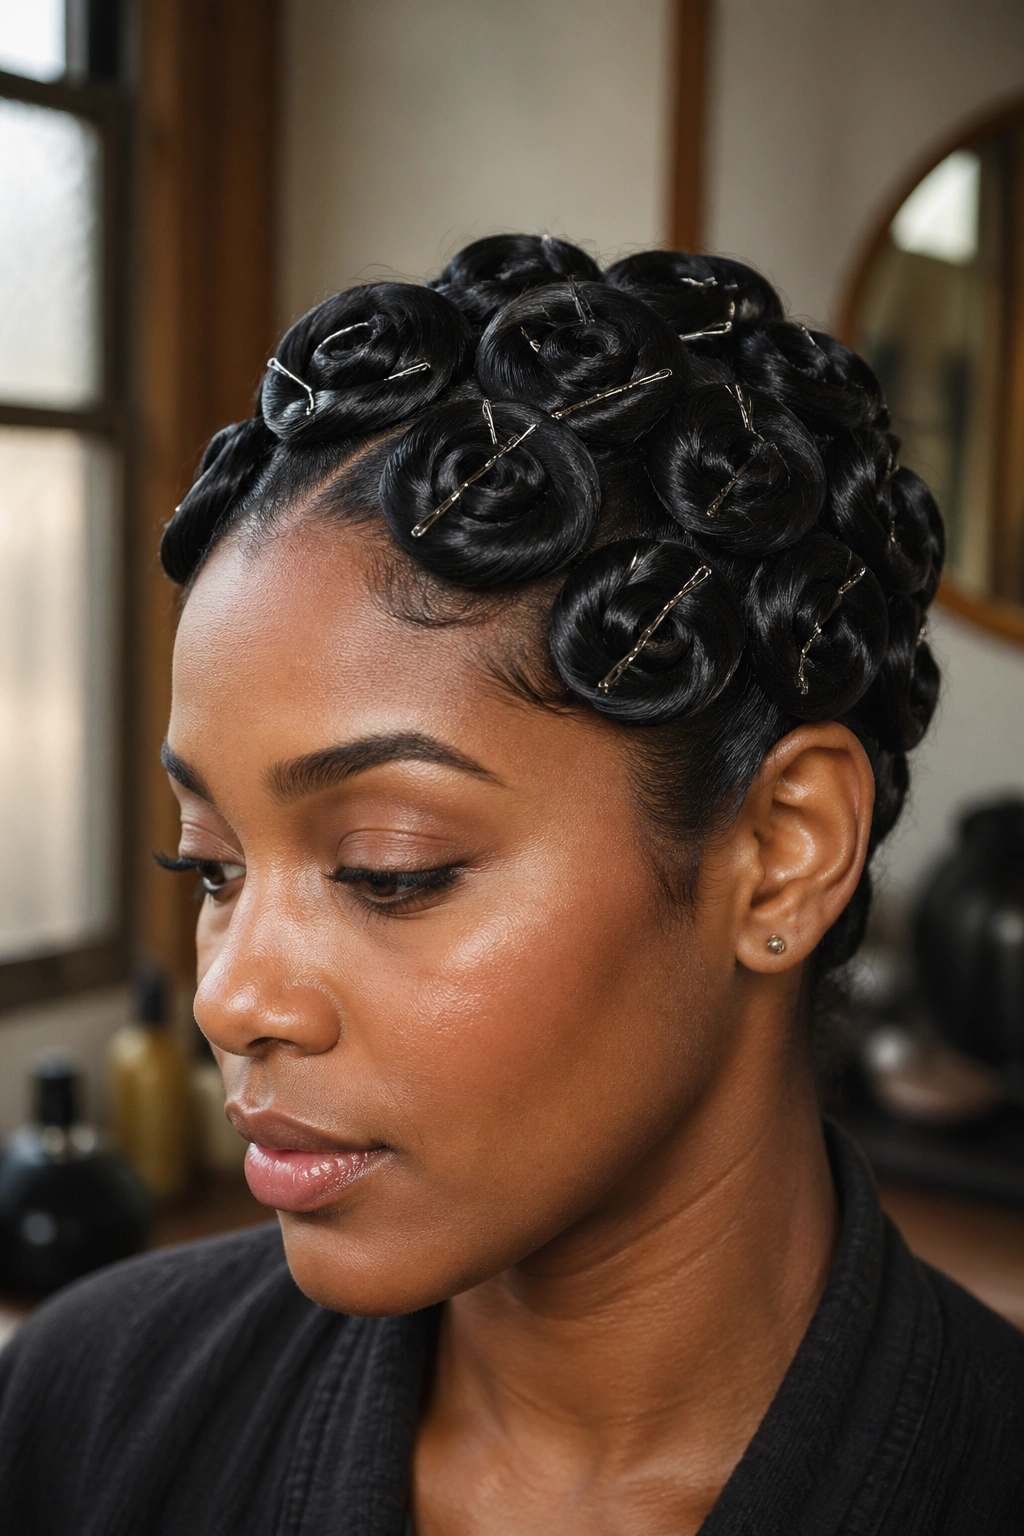
Consistency is the hallmark of a developed natural hair styling practice. The first few times you attempt pin curls, the results might vary — some curls defined, others not, some areas holding well and others frizzing. This variability is normal and expected.
The path to consistency is systematic practice with one specific set of variables at a time. Use the same products until you understand exactly how much to apply and in what order. Use the same section size until you’ve produced a uniform result. Use the same drying method until you understand exactly how long your specific hair needs.
Once you’ve established a baseline that produces consistent results, you can begin varying one element at a time — a different product, a different section size, a different pin orientation — and observe the specific effect that change has. This methodical approach is how experienced naturals develop the deep knowledge of their own hair that makes their styling look effortless. It never was effortless. It was practiced until it became second nature.
