The morning struggle is real, especially when you are trying to get a child out the door with hair that looks polished, intentional, and sturdy enough to last through school, recess, and whatever else the day throws their way. Parents and caregivers know the routine: you start with good intentions, but by the time you reach the school drop-off line, the intricate style you spent twenty minutes on is already fraying at the edges. This is exactly where the weave ponytail becomes a secret weapon. It is not just about adding length or volume; it is about creating a protective base that keeps the natural hair tucked away, hydrated, and styled in a way that minimizes daily maintenance.
When you use high-quality extension hair or braiding hair, you move from the realm of “quick fix” into the territory of long-lasting, reliable styles. The key to making these looks work for children lies in the foundation. You have to ensure the natural hair is properly prepped—moisturized, detangled, and secured firmly—before you even think about attaching the weave. Whether you are dealing with fine, straight textures or dense, coily hair, the principles remain the same: gentle tension, scalp health, and using the right products to lay edges without causing breakage.
There is a misconception that weave styles are only for adults, but when done with a light hand and the right amount of tension, they are incredibly practical for kids. They offer a break from daily combing and heating tools, which is arguably the most valuable benefit for hair health. If you are ready to move beyond the basic high pony and explore styles that are both functional and visually interesting, the following options provide a roadmap for everything from casual school days to special events.
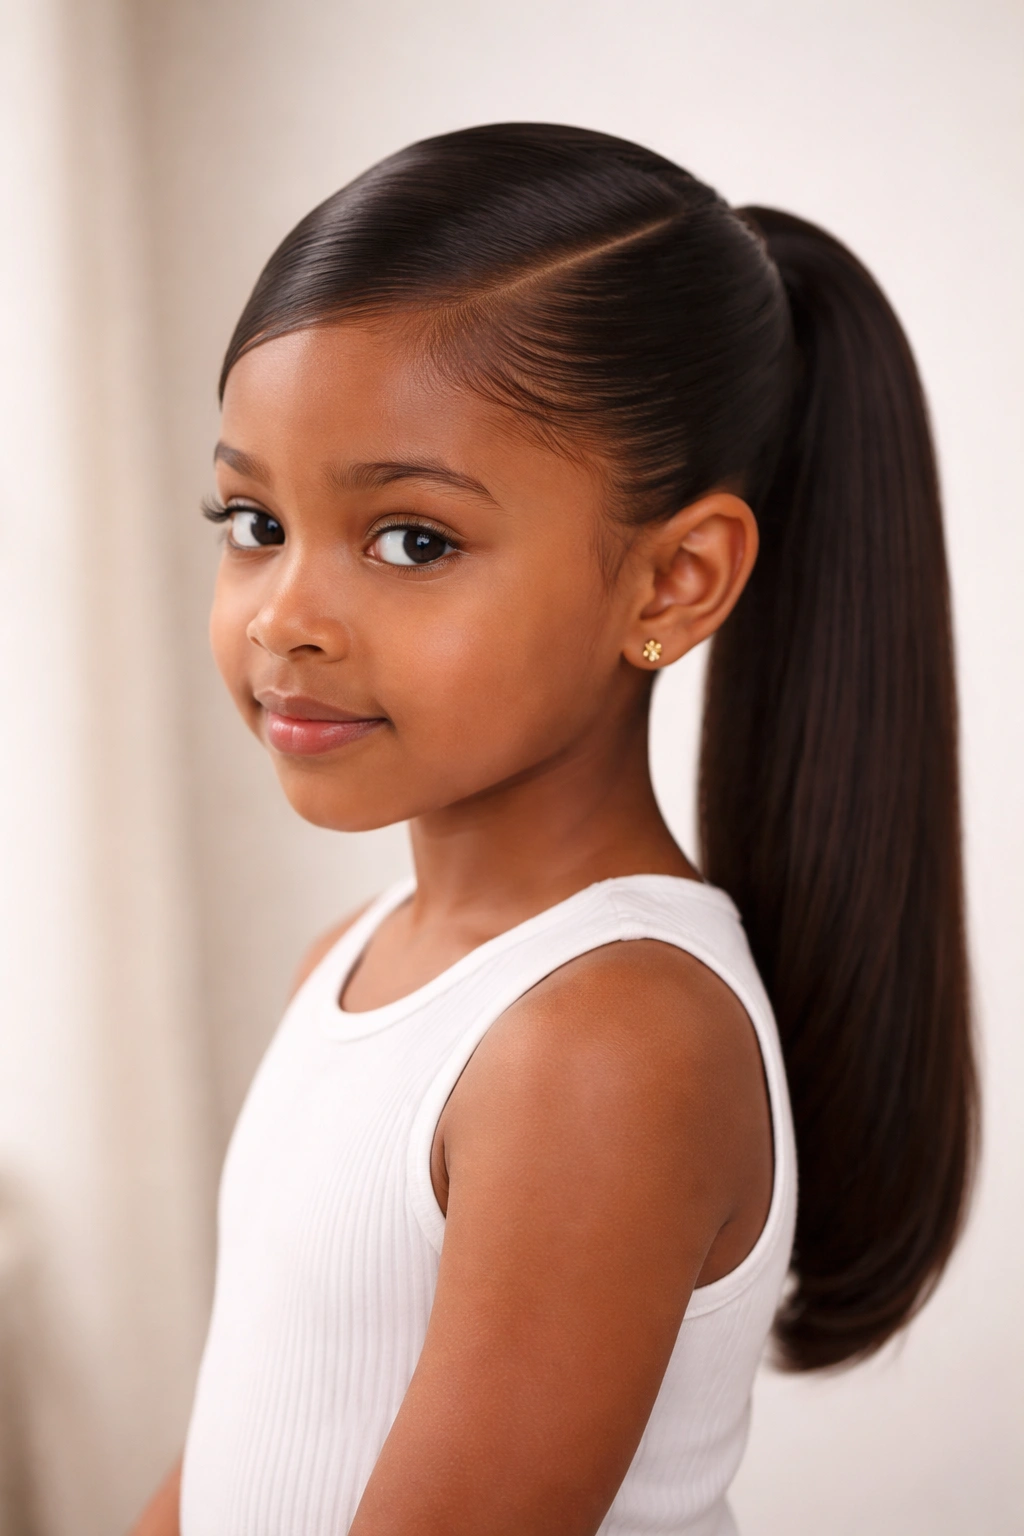
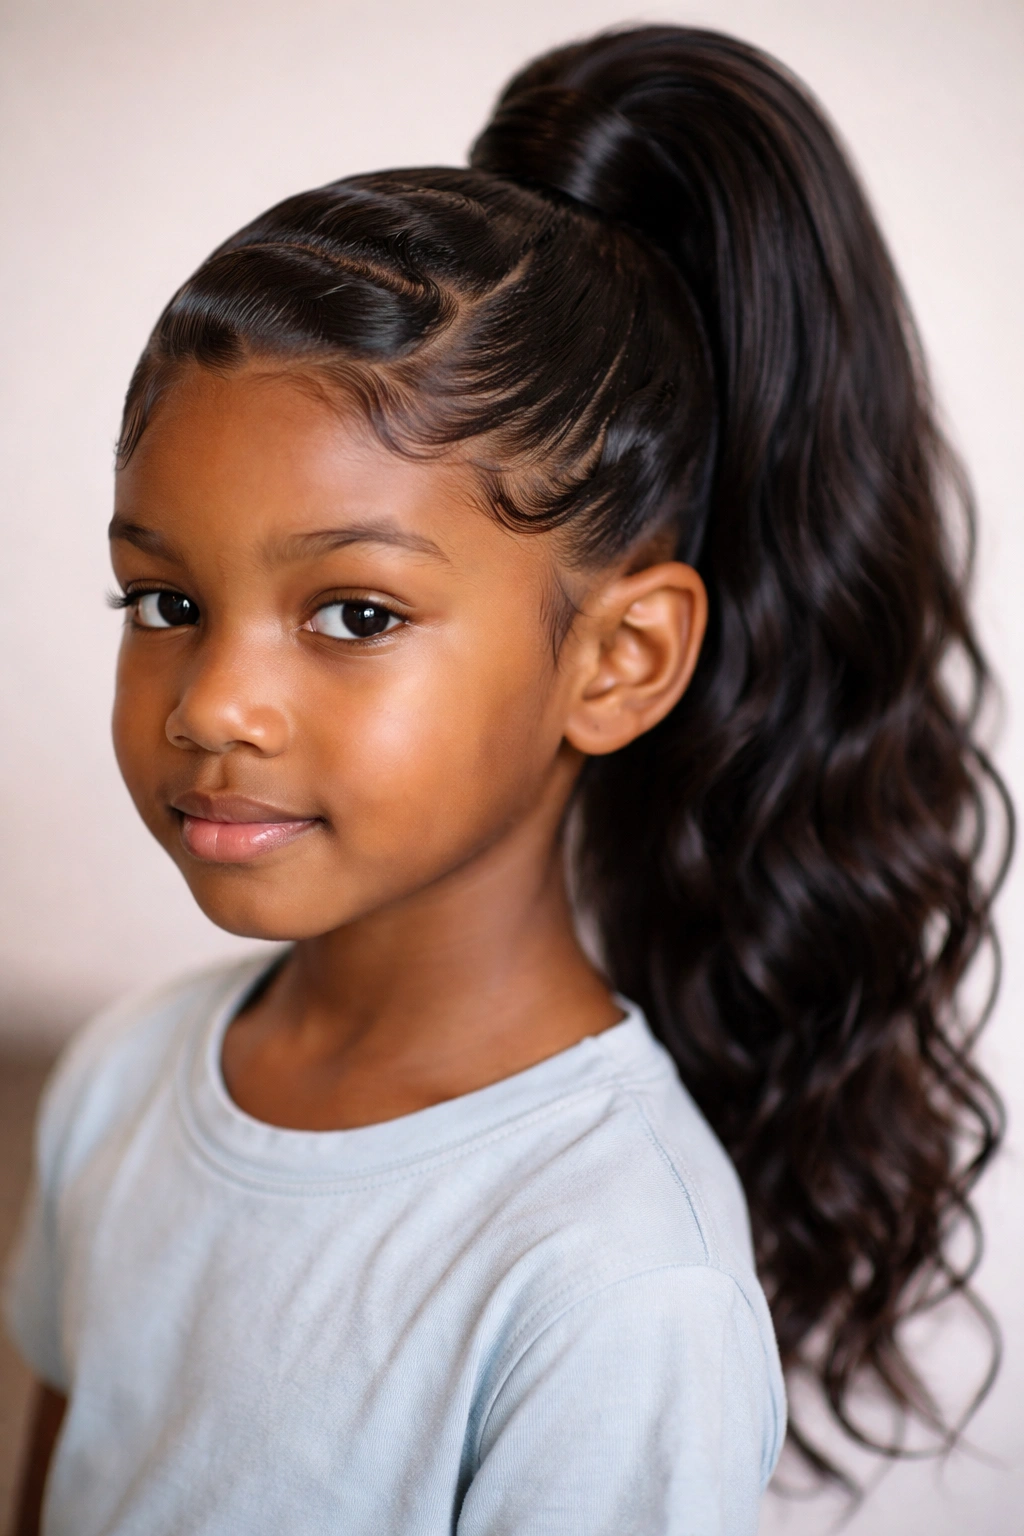
1. Sleek High Ponytail with Straight Weave
The sleek, high ponytail is the gold standard for versatility. It pulls the hair back, creating a clean canvas that works just as well for a dance recital as it does for a regular Tuesday in the classroom. The foundation must be perfectly smooth. You achieve this by working in sections, using a firm-hold styling gel or pomade to ensure the natural hair is laid flat against the scalp.
The Mechanics of the Smooth Base
The secret here is the direction of the brushing. As you pull the hair up toward the crown, use a soft-bristle brush to eliminate any bumps. Once the natural hair is secured into a tight puff or bun, you wrap the weave extension around the base. Use a small piece of the extension hair to cover the hair tie itself—this simple step transforms a DIY style into something that looks like it came straight from a professional salon chair.
Maintenance Tips for Straight Hair
- Use a silk or satin scarf at night to keep the edges laid flat.
- If the weave hair gets frizzy, run a tiny amount of lightweight hair serum through the length.
- Avoid heavy oils near the roots, as they can cause the style to slip and lose that crisp look.
Pro tip: Use a rattail comb to create a sharp center or side part before you begin the brushing process to add an extra layer of precision.
2. Curly Wrap-Around High Pony
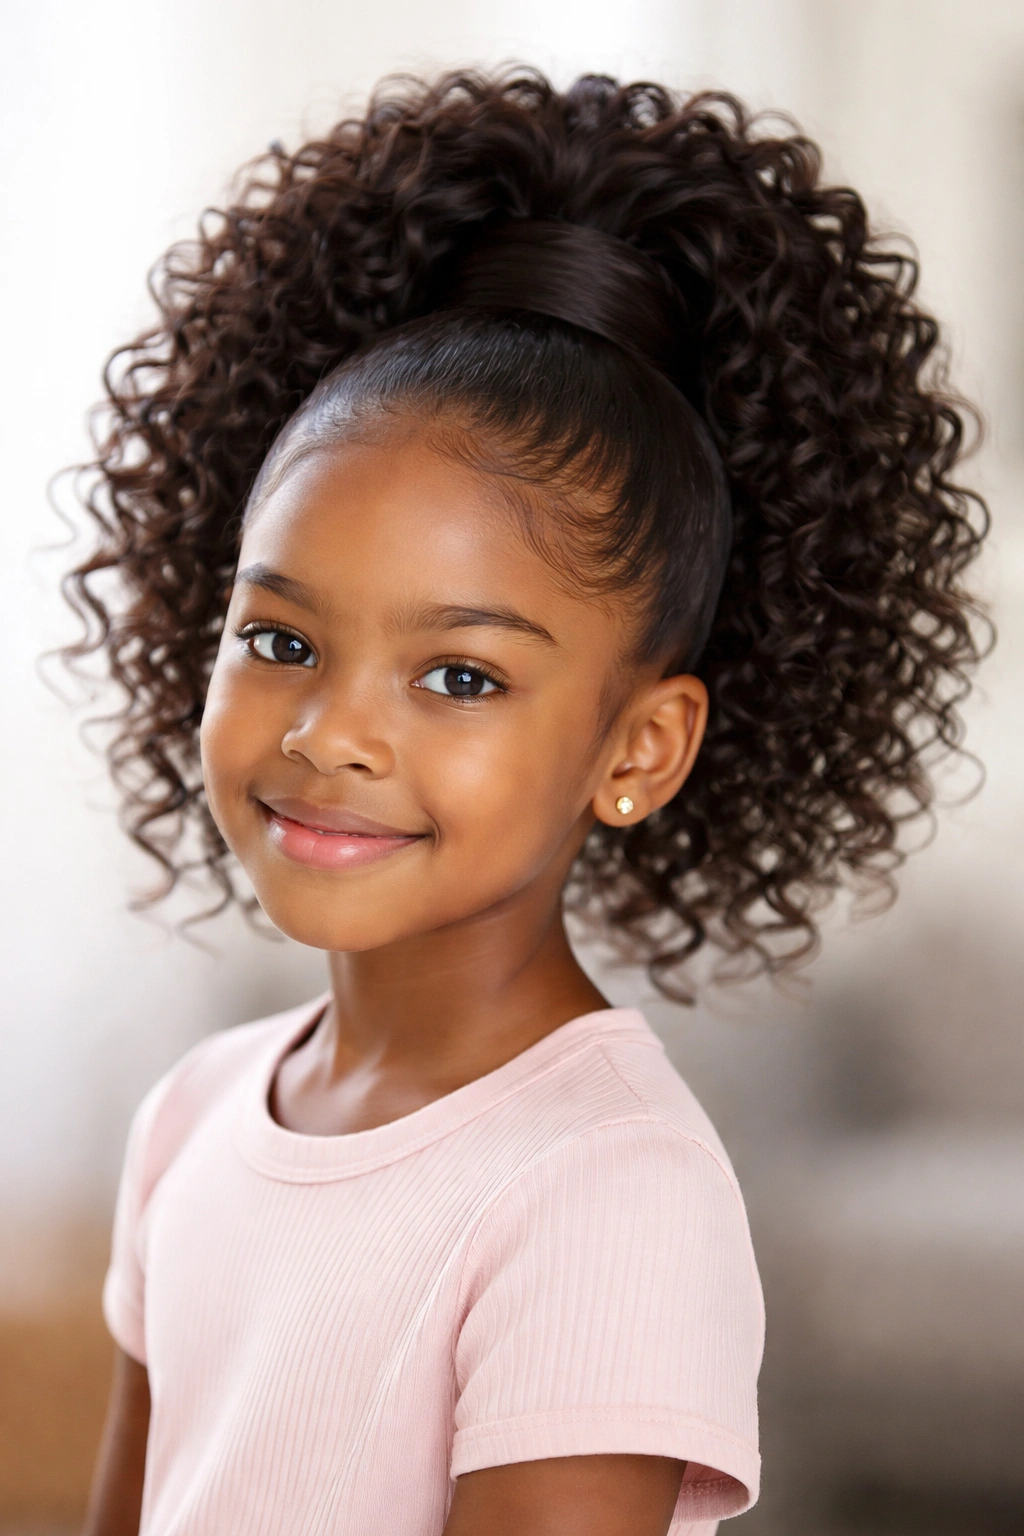
Curly weave ponytails offer a playful, voluminous alternative to the straight look. This style is fantastic because it requires less manipulation of the weave itself; you want the curls to be bouncy and full, not perfectly still. The contrast between a very slick, straight-laid natural hairline and the wild, textured volume of the curly weave creates a balanced, professional aesthetic that is hard to beat.
Building the Volume
Start by securing the natural hair into a high, sturdy base. When attaching the curly weave, you have two main options: a wrap-around draw-string ponytail or a bundles-and-wrap method. For kids, the draw-string version is often better because it is lighter and easier to remove at the end of the week. Make sure you use enough hair to create density, but avoid making it so heavy that it pulls on the natural hairline.
Why It Works for Active Kids
Unlike straight styles that can look “stringy” if they get a little windblown or sweaty, curly weave hair actually improves with a bit of messiness. It holds its shape well throughout the school day and looks perfectly intentional even after a few hours on the playground. It is a lower-maintenance option that still feels high-effort and polished.
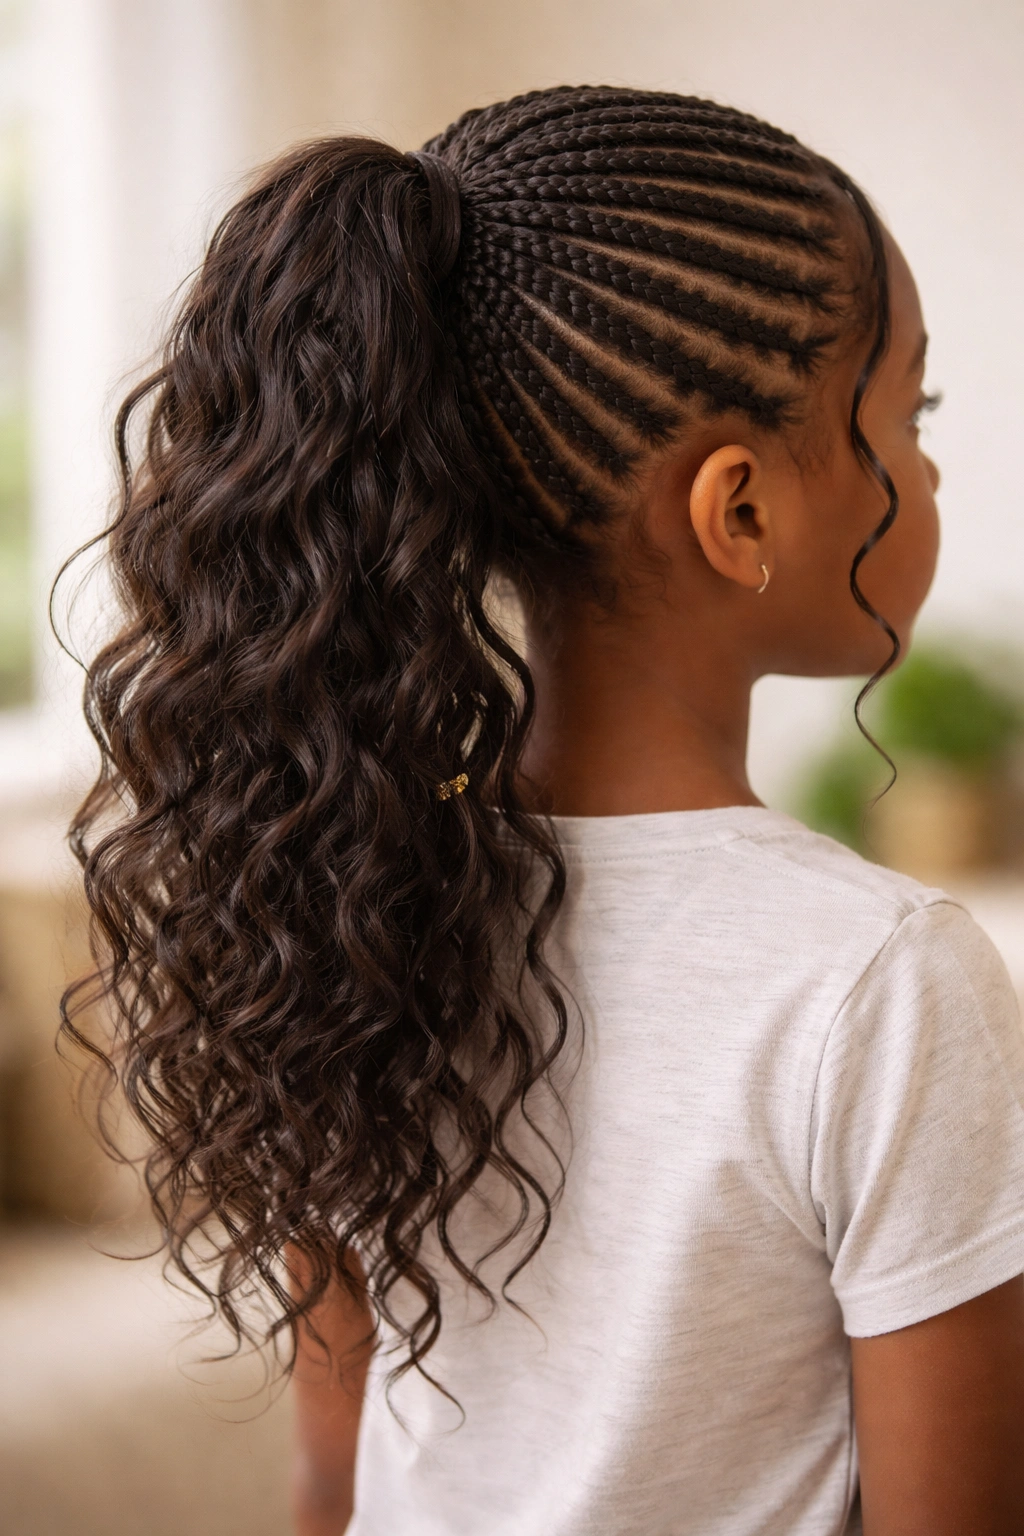
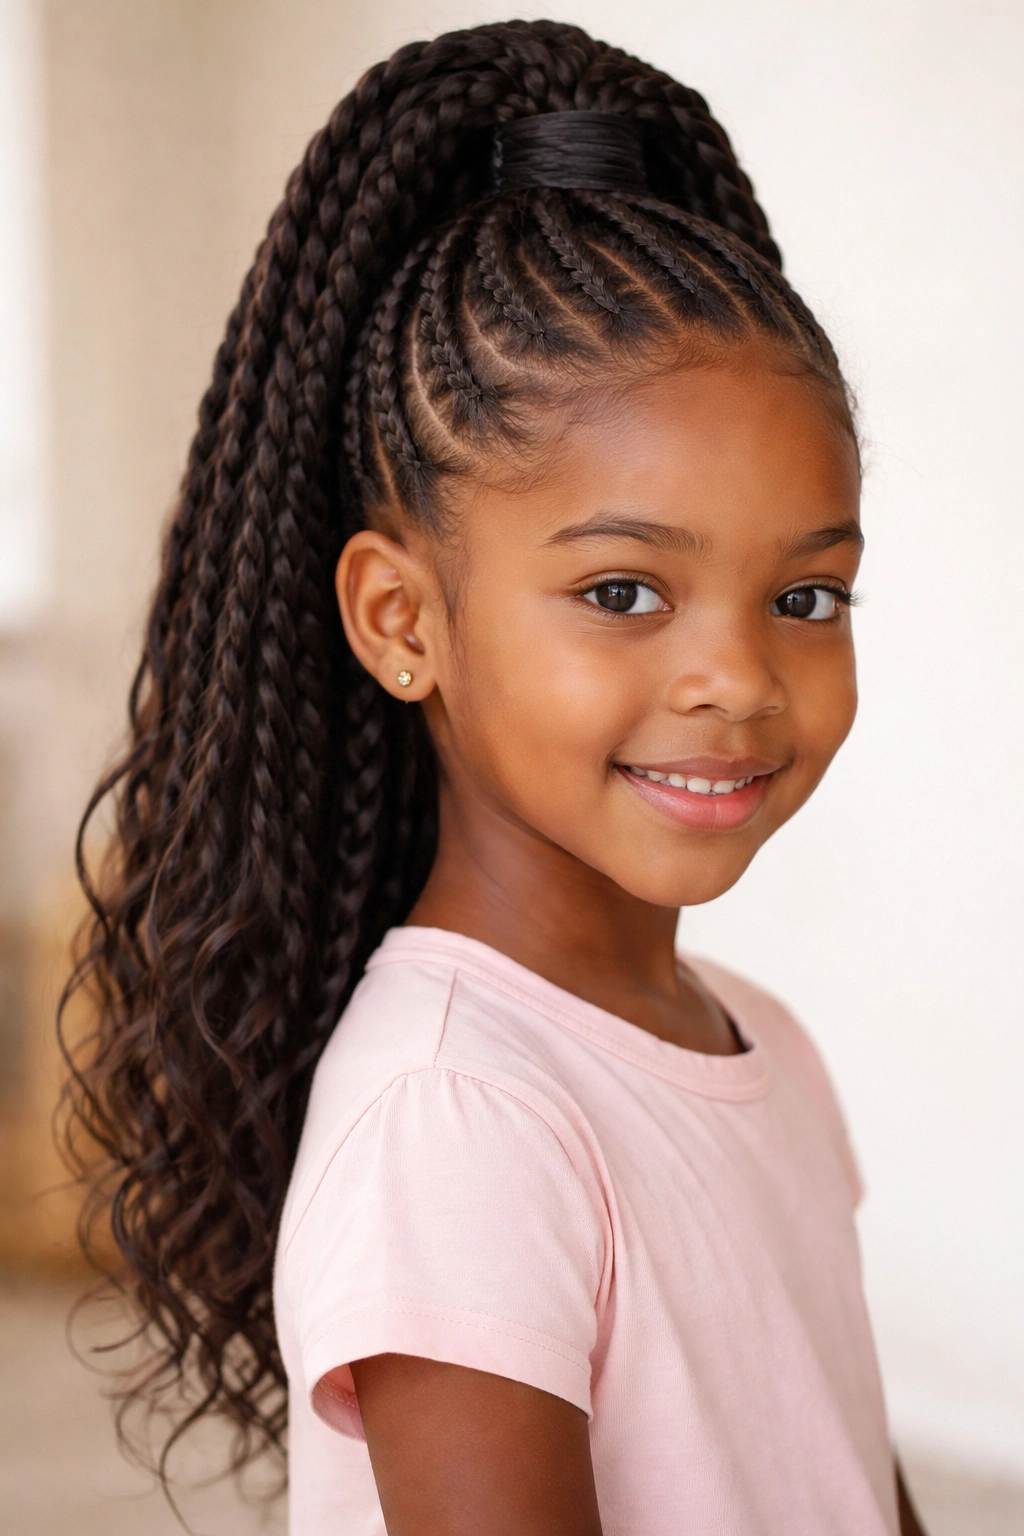
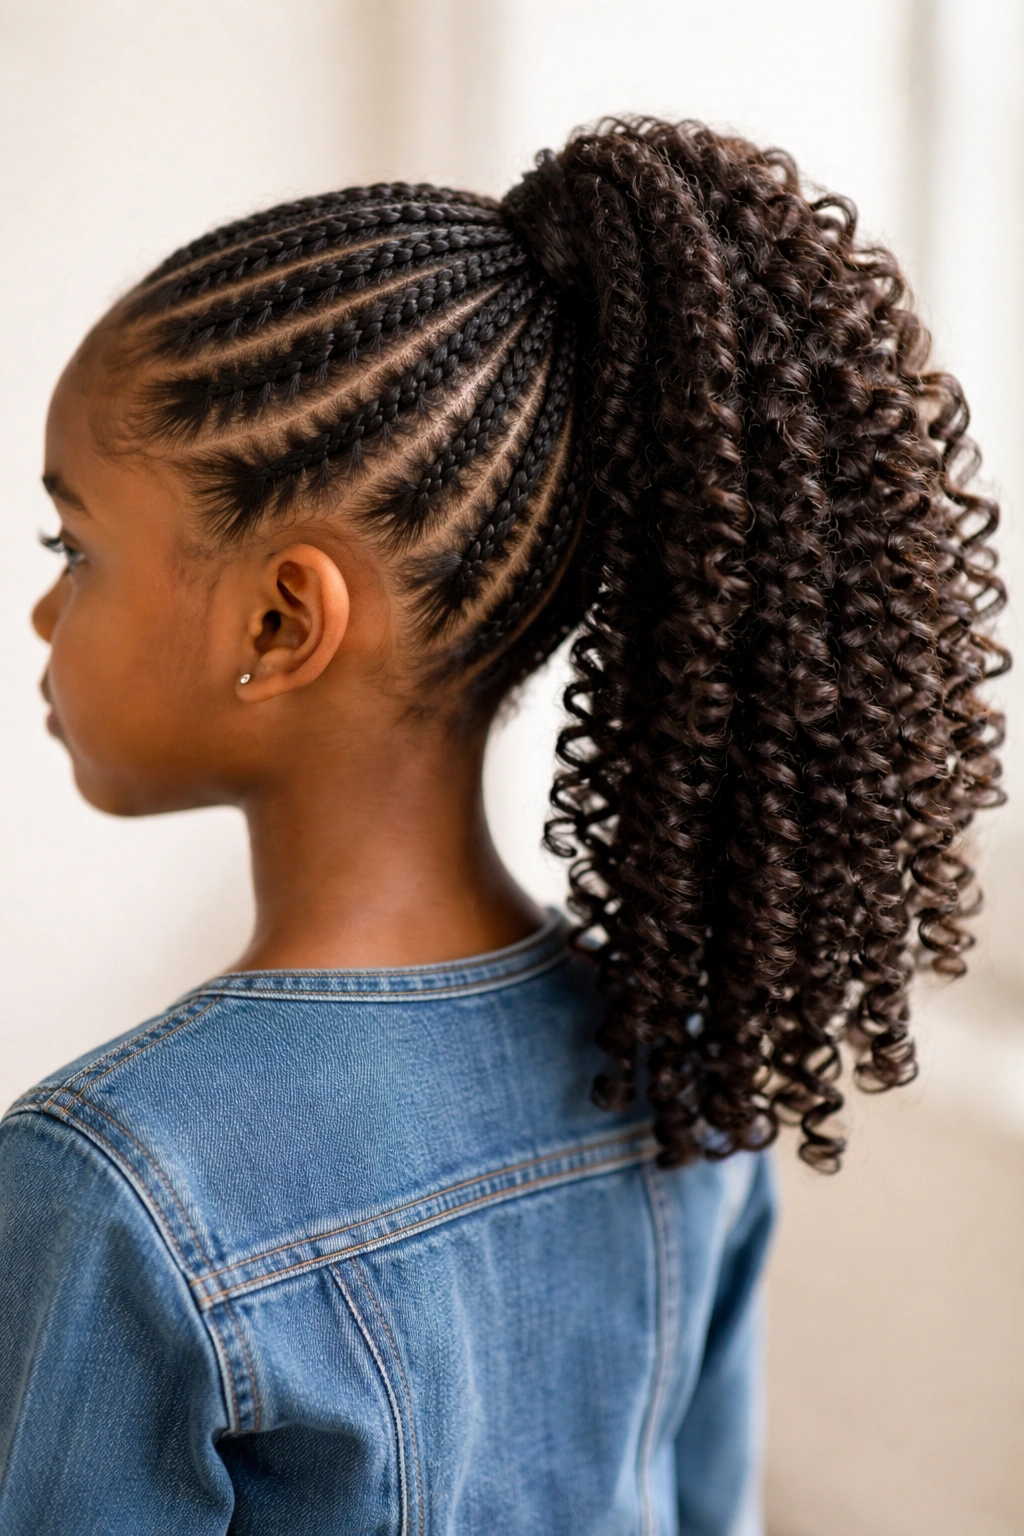
3. Braided Base with Straight Pony
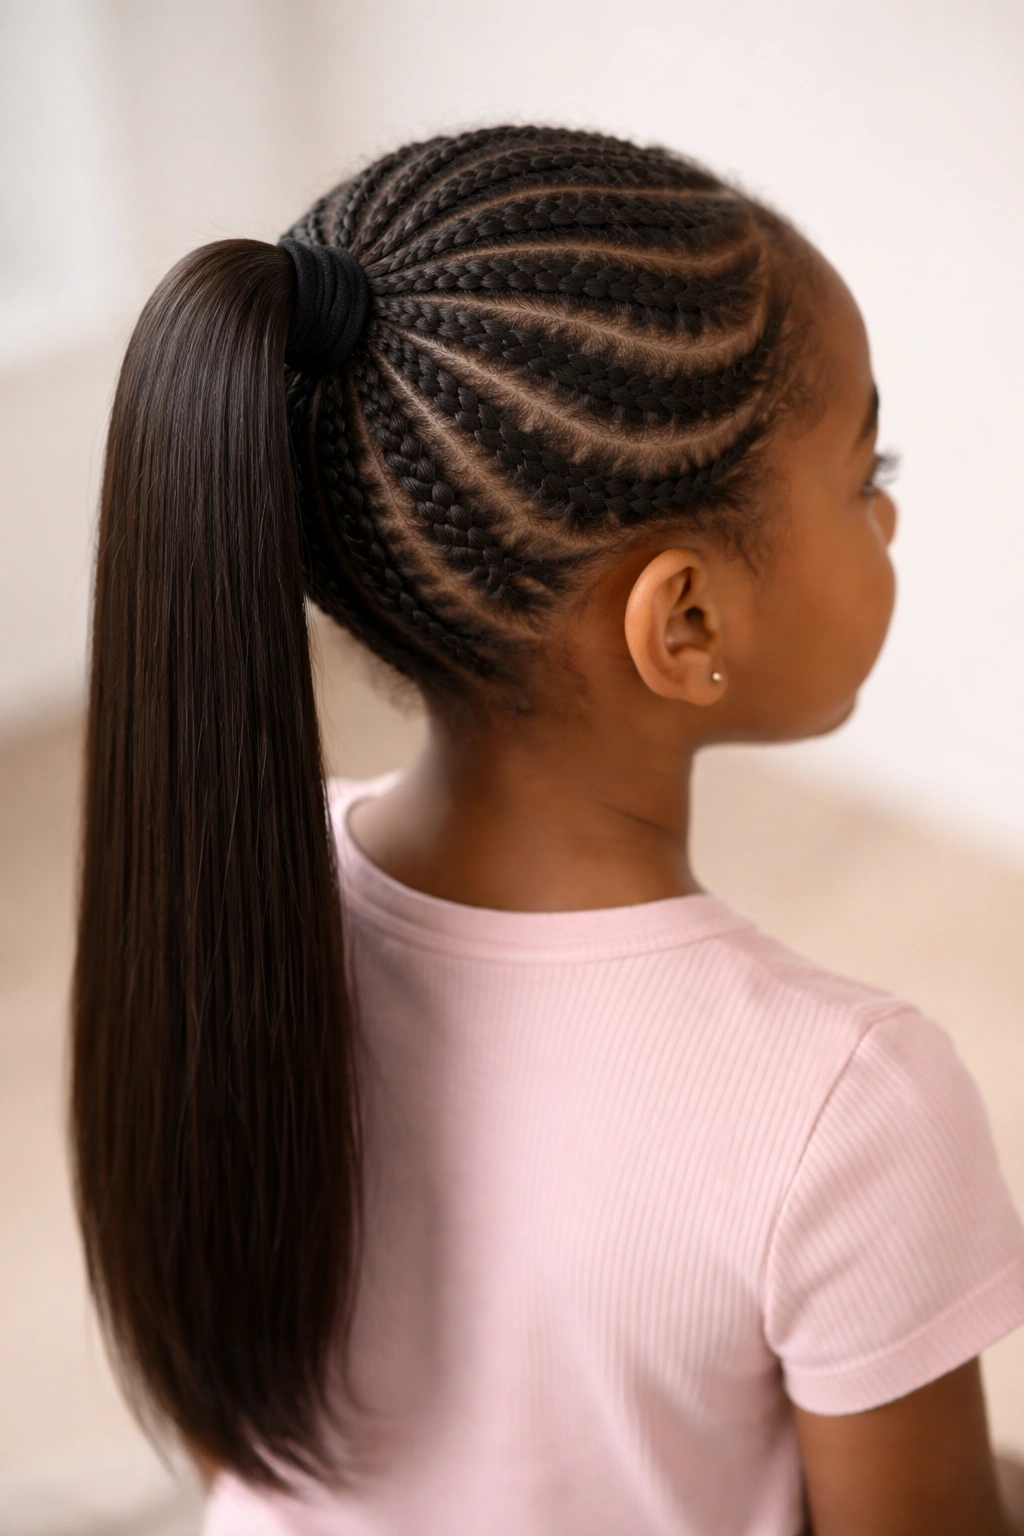
If you want a style that will last for more than just a day, a braided base is the way to go. Instead of simply slicking the hair back with gel, you cornrow the natural hair into a circular or starburst pattern leading up to the crown. This takes the pressure off the hair follicles, as the weight of the ponytail is distributed across the braided foundation rather than pulling on a single point.
The Durability Factor
Because the natural hair is braided down, it is effectively in a protective style. You can leave this style in for several days, provided you keep the scalp clean and the edges moisturized. It is the perfect choice for busy weeks when you know you will not have time for morning hair routines.
How to Blend the Weave
- Use a crochet needle to pull the extension hair through the braid if you are not using a draw-string piece.
- Ensure the color of the extensions matches the child’s natural hair closely, or use the color difference to create a fun, two-toned look if desired.
- Keep the braids tight, but not too tight—if the scalp looks red or inflamed, the tension is excessive.
4. Criss-Cross Feed-in Braids into Pony
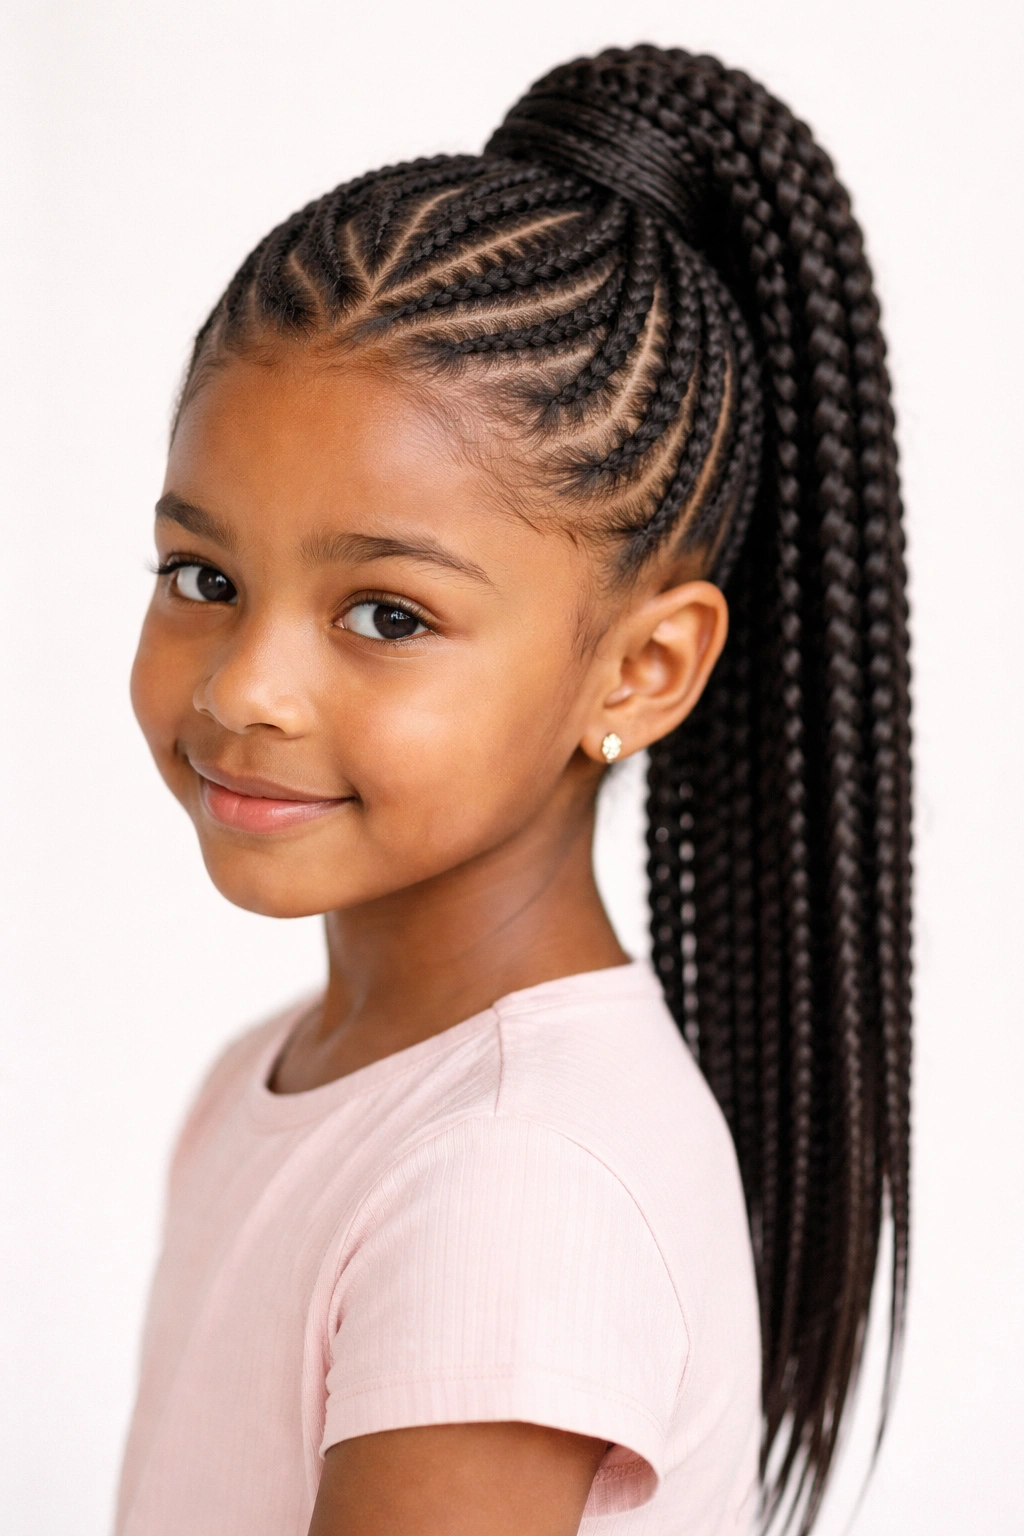
This style is a visual stunner that leans into the artistry of braiding. You create a series of feed-in braids in a criss-cross pattern across the scalp, which all feed into the high ponytail base. It is a bit more labor-intensive than a standard sleek ponytail, but the payoff is a style that is incredibly secure and looks very sophisticated.
Why This Style Succeeds
The criss-cross pattern is not just aesthetic; it’s structural. Each braid acts as an anchor for the ponytail. When the child runs, jumps, or plays sports, the hair stays put. This is the ultimate “activewear” hairstyle that still looks refined enough for a nice outfit.
Essential Tools for the Look
- Edge control: A non-flaky, firm-hold product is non-negotiable for the braids.
- Fine-tooth comb: Necessary for those clean, geometric parts.
- Boar bristle brush: To smooth out any frizz around the braids.
Remember: Always use a moisturizing leave-in conditioner on the natural hair before braiding. The hair needs to be flexible to avoid breakage during the braiding process.
5. Jumbo Knotless Braid Pony
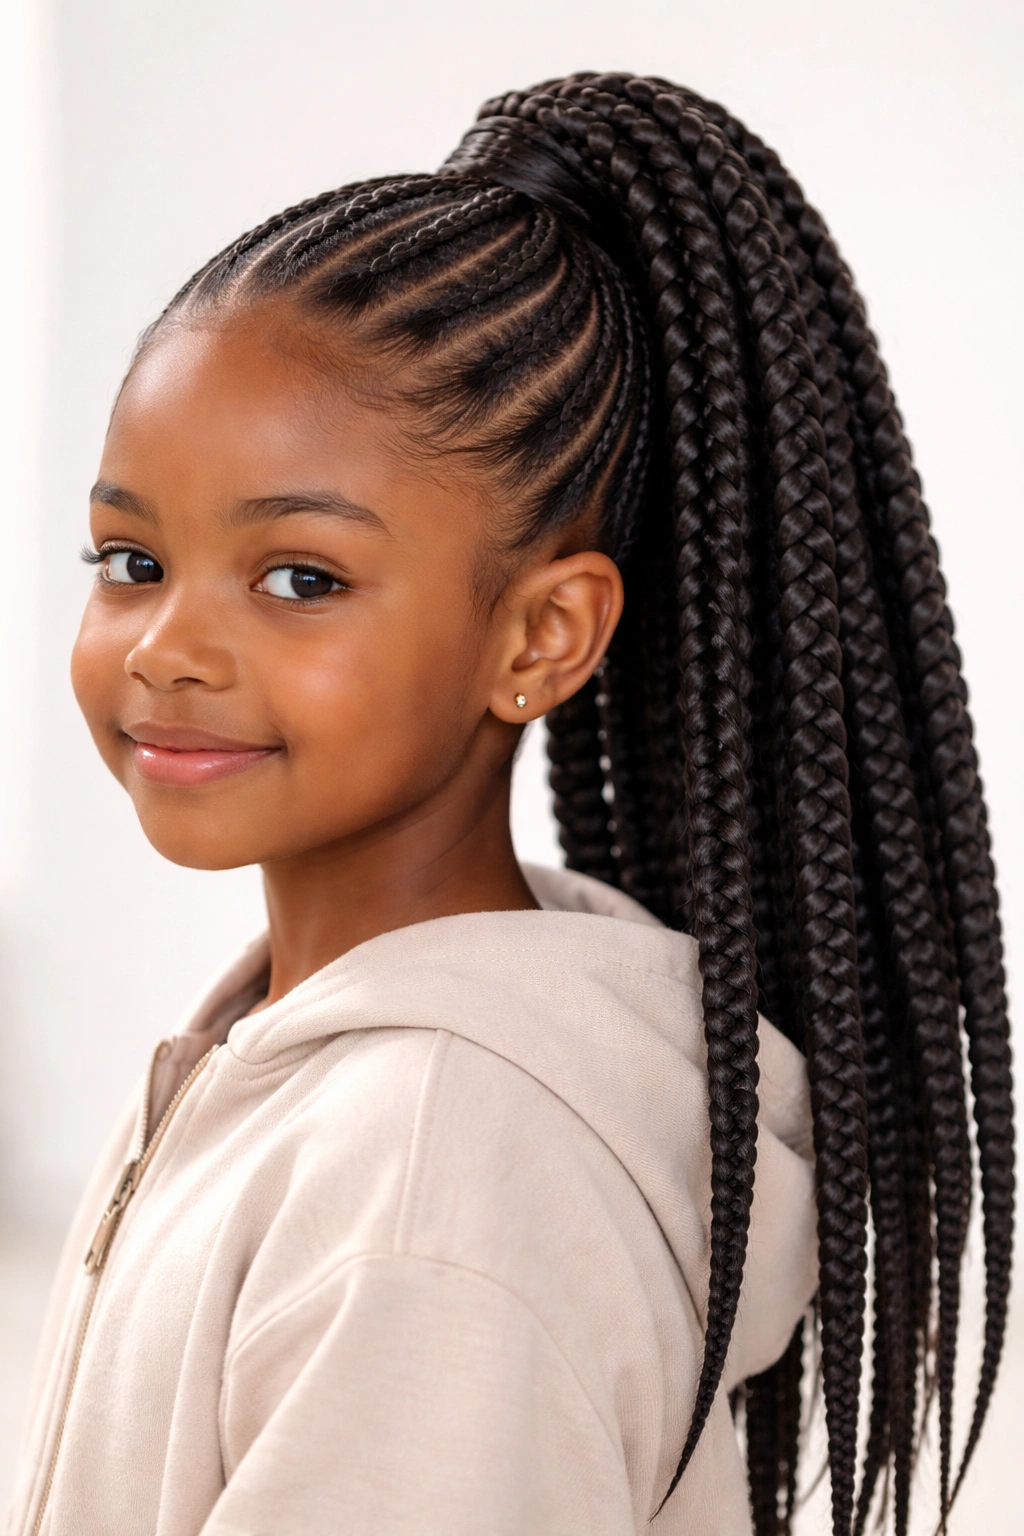
Knotless braids have surged in popularity for good reason: they are gentle on the edges and lay flat from the very beginning. Adapting this into a ponytail means taking the jumbo knotless approach—using thicker sections—and pulling them into a high, sleek ponytail instead of leaving them to hang down.
The “Less Is More” Approach
With jumbo braids, you can finish the styling process much faster than with small, intricate braids. Because the braids are thick, there are fewer of them to manipulate. The result is a bold, modern look that emphasizes the child’s facial features and offers a great deal of versatility.
Styling the Pony
Once the knotless braids are done, you have a few options. You can gather all the braids into one high ponytail, or you can split them into two high pigtails. The weight distribution is excellent, making it a comfortable long-term style. Just be sure to tie the pony with a coated hair tie or a scrunchie to prevent the braids from snagging.
6. Side-Parted Sleek Pony
A side part brings an element of maturity and classic style to a ponytail. It shifts the center of gravity of the look and frames the face in a more dramatic way. This works exceptionally well for older children or special occasions where you want a “dressed up” appearance.
Executing the Perfect Part
The key is to create the part while the hair is soaking wet or damp with product. Use the edge of a rattail comb to slice a clean line starting from the temple and going back to the crown. Brush both sides of the hair down firmly toward the base. You might need to use a bit more edge control on the side with the larger section of hair to keep it from poofing up.
When to Choose This Style
This is an excellent option for school photos, holiday events, or any day where the ponytail needs to look intentional and well-structured. It takes a bit more precision than a center-parted style, but the visual impact is worth the extra few minutes of careful combing.
7. The “Bubble” Weave Pony
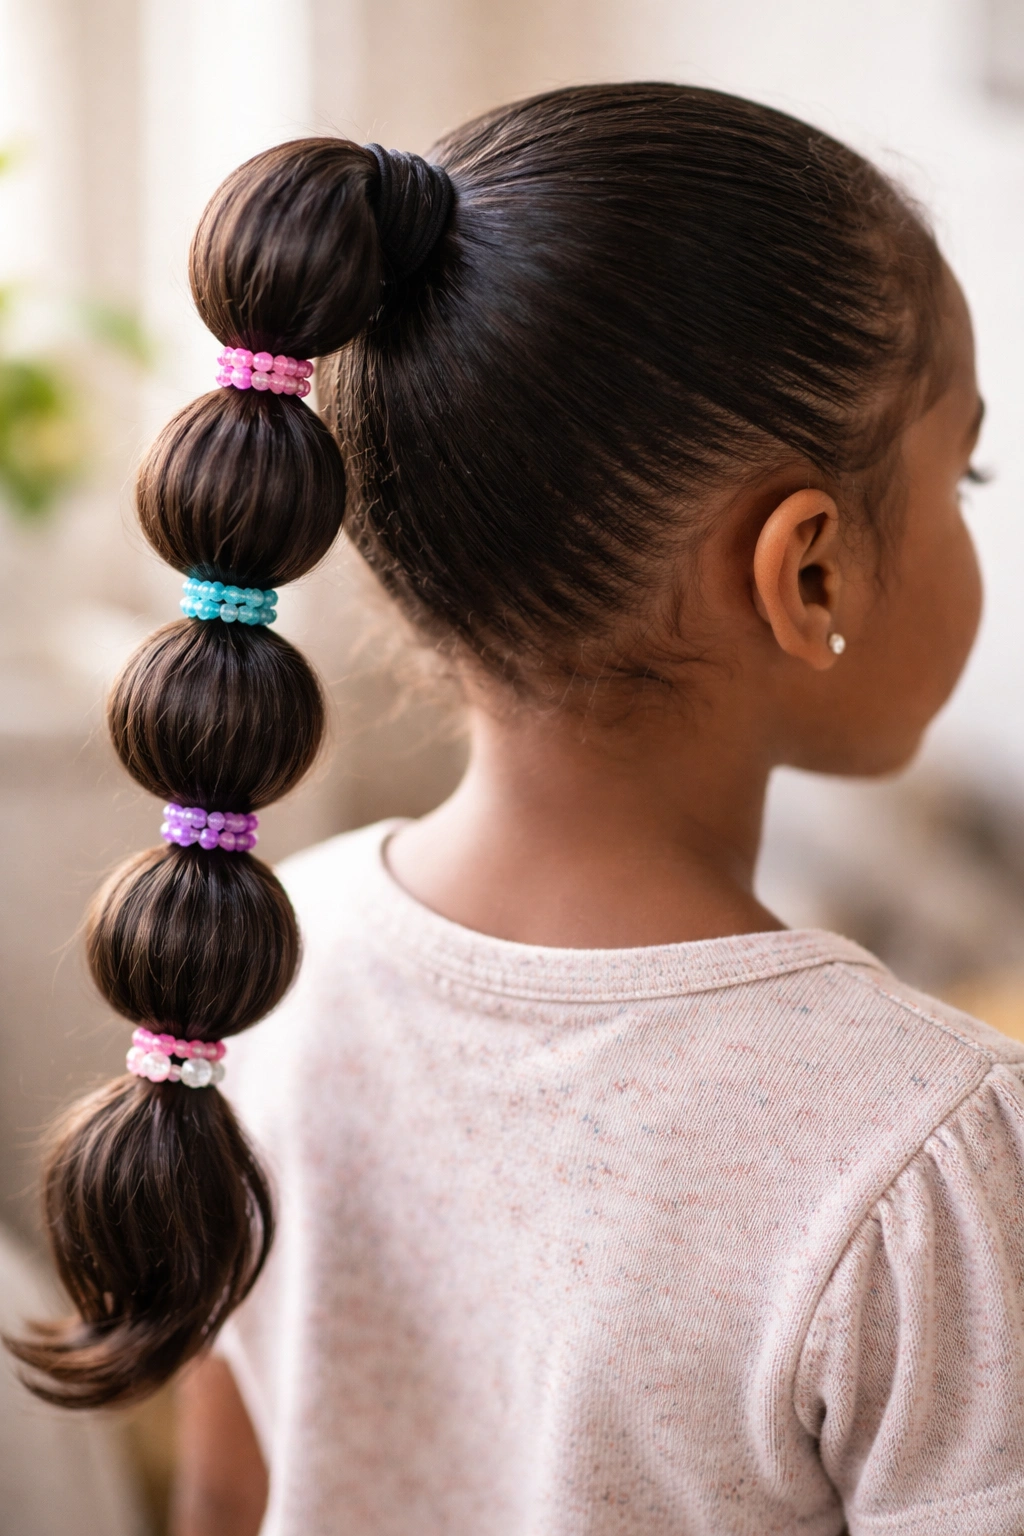
The bubble ponytail is a fun, textured style that uses hair ties to create distinct sections down the length of the ponytail. It is a fantastic way to add interest to a plain weave ponytail without needing to master complex braiding techniques.
Creating the Bubbles
After securing the weave ponytail to the base, you place hair ties at regular intervals—usually every two to three inches—down the length of the pony. After placing each tie, gently tug at the hair between the ties to puff it out into a sphere or “bubble.” This creates a structured, architectural look that kids usually love because it feels a bit adventurous and out of the ordinary.
Customizing the Look
- Use color-coordinated elastic bands to match an outfit.
- Use clear bands for a more sophisticated, “floating” look.
- Add small hair charms or beads at the base of the ponytail for extra flair.
Pro tip: If the weave hair is very silky, you might need to backcomb (tease) the hair slightly between the bands to keep the bubbles round and voluminous.
8. Half-Up, Half-Down Weave Style
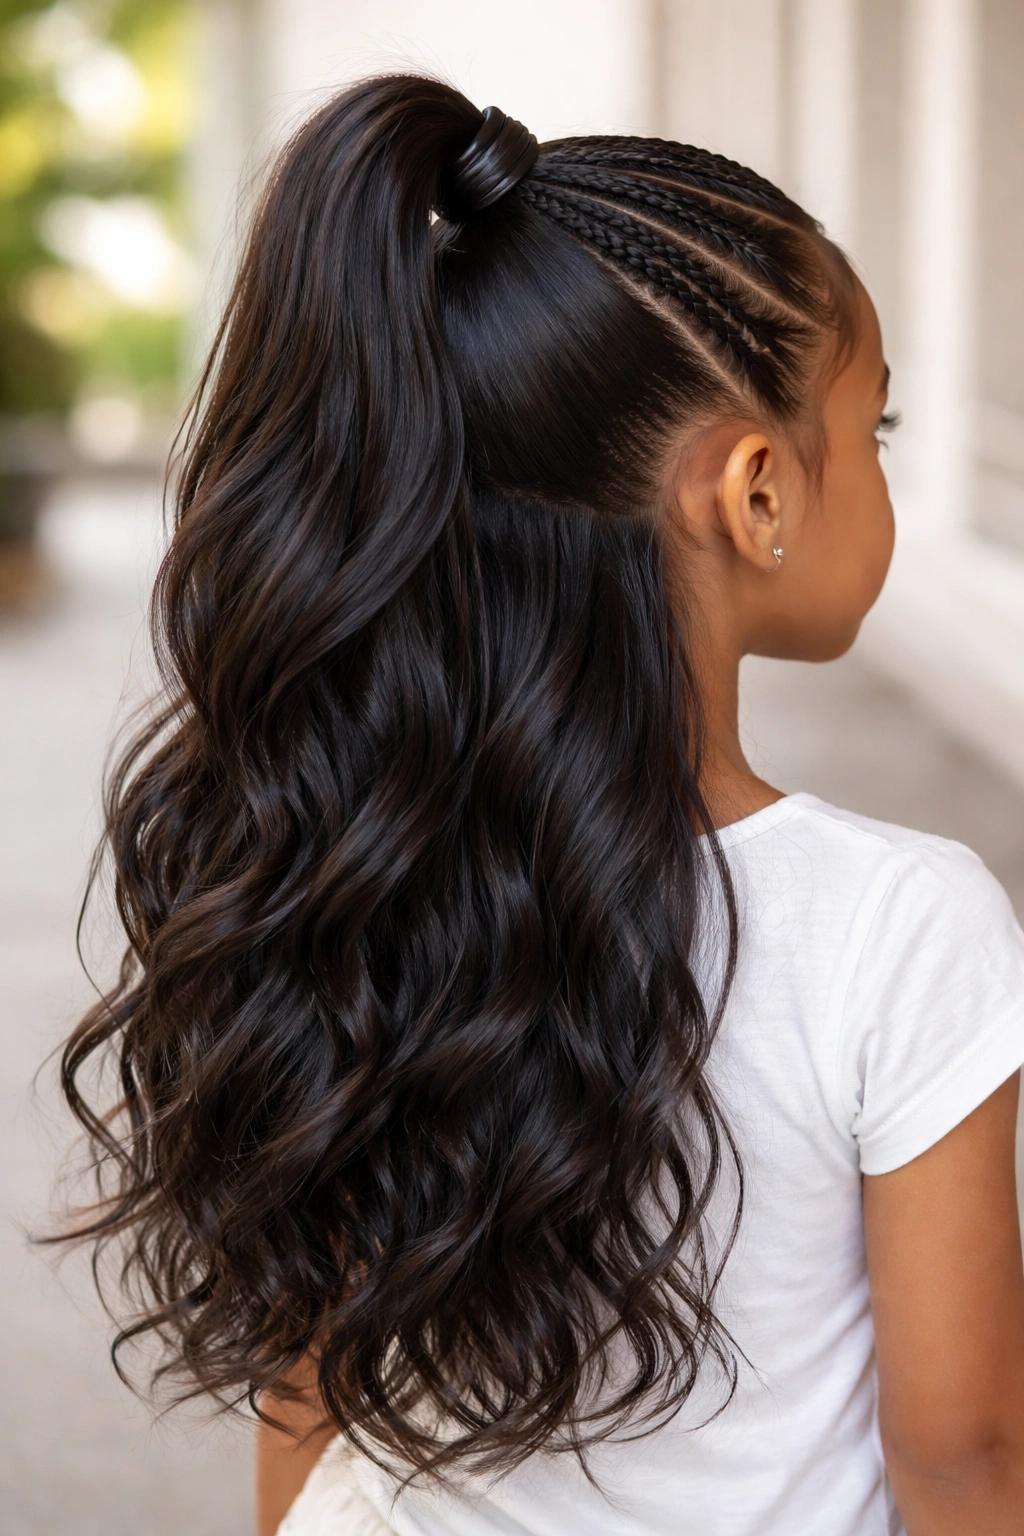
Sometimes you don’t want to commit to a full ponytail. The half-up, half-down style offers the best of both worlds: it keeps the hair out of the face while still allowing the child to enjoy the length and movement of the extensions.
Balancing the Sections
Divide the hair into two sections, typically a horizontal part from ear to ear. The top section is gathered into a high, sleek ponytail, while the bottom section is left free-flowing. You can attach a weave bundle to the top ponytail for height and drama, while the bottom section can be curled or straightened to match.
Why This Style Is Practical
This look is very forgiving. If the natural hair in the back is not perfectly matched to the weave texture, it is less noticeable than it would be in a full ponytail. It is a stylish option for growing-out phases when you want to experiment with length but aren’t ready for a full-head weave.
9. Low Sleek Pony with Deep Wave Texture
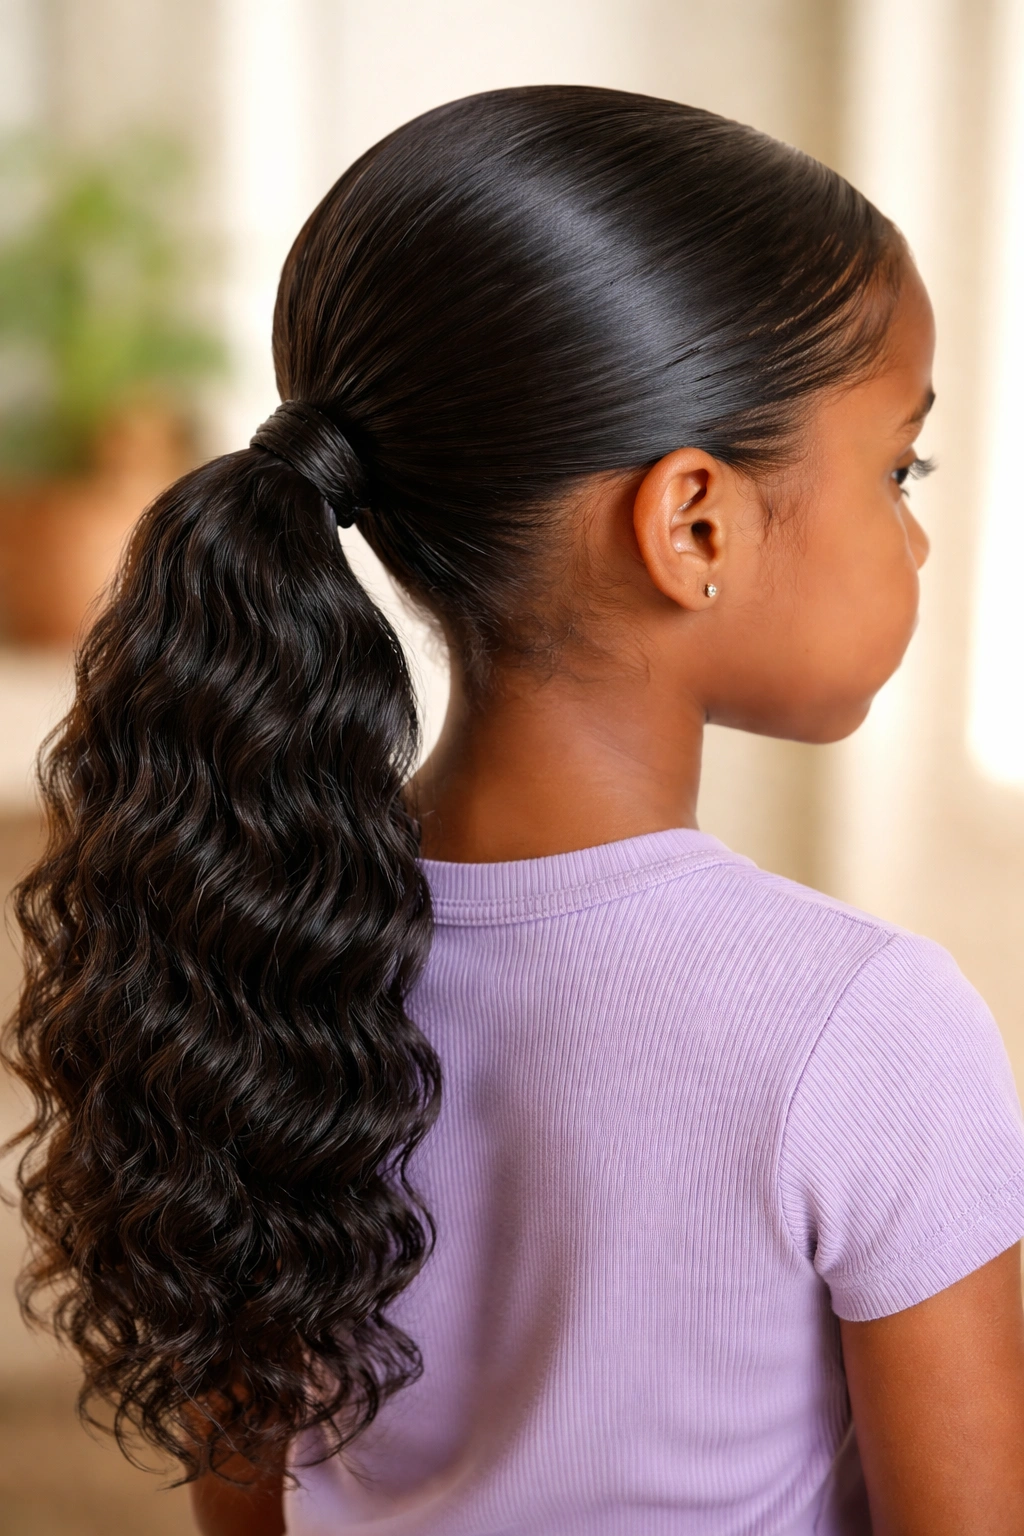
High ponytails get a lot of love, but the low ponytail is the epitome of effortless chic. A low, sleek ponytail with a deep wave or water-wave texture is perfect for a more relaxed, polished look. It is comfortable, doesn’t pull on the hairline, and is very quick to install.
Achieving the Smoothness
Because you are pulling the hair down toward the nape of the neck, gravity is working with you, not against you. Start by moisturizing the hair thoroughly so it lays flat without needing excessive gel. A low ponytail is also much easier to secure if the child has a lot of hair, as it doesn’t require defying gravity to stay in place.
Texture Matters
Deep wave weave hair looks best when it is defined. Use a light curling cream or mousse on the extensions to keep the waves frizz-free. If the hair is too dry, the waves can look frizzy rather than defined. A little bit of product goes a long way here.
10. Bohemian/Knotless Braided Base Pony
The bohemian style—often characterized by curly tendrils left out of the braids—is a beautiful, softer take on the braided base ponytail. By mixing knotless braids with “boho” curls throughout the length and the base, you get a textured, romantic style.
The “Boho” Effect
When you install the braids, leave small sections of the weave hair loose at intervals. This creates a wispy, organic look that is very popular. When you gather these braids into a ponytail, those loose strands add a whimsical, soft element that contrasts perfectly with the structure of the braids.
Care and Upkeep
The biggest challenge with bohemian styles is tangling. Because you have loose, synthetic or human hair curls mixed in, you have to be diligent.
- Detangle the loose curls daily with a wide-tooth comb.
- Use a spray bottle with water and a tiny bit of conditioner to refresh the curls.
- Do not let the child sleep on the loose curls without a bonnet; they will mat overnight.
11. Two-Tone (Color) Weave Pony
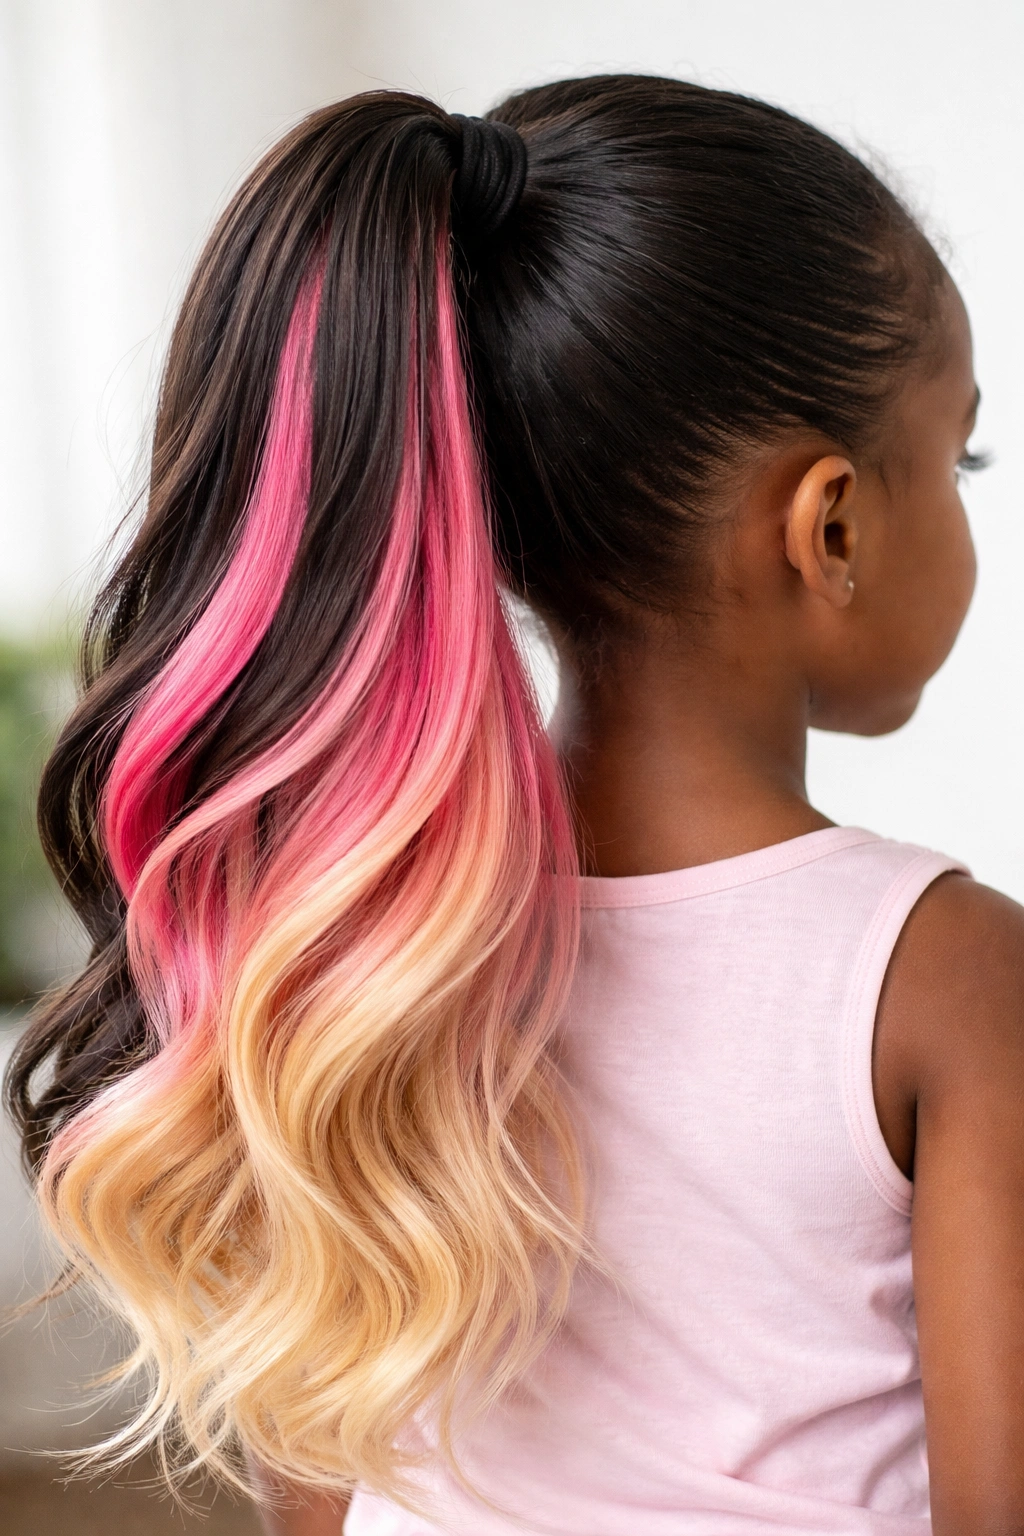
Kids love color, and a ponytail is the perfect, low-commitment place to introduce it. By using weave hair that features highlights, ombre ends, or even bright fashion colors (like blue, pink, or purple), you can give the child a vibrant new look without using any harsh dyes on their natural hair.
Choosing the Placement
You can incorporate the color in a few ways:
- Peek-a-boo: Use a dark base and add lighter/colored tracks underneath.
- The Dip-Dye Effect: Use an ombre weave where the roots match the natural hair and the ends transition into a bright color.
- High-Contrast: Use a bright-colored drawstring ponytail as the main attachment for a bold, singular block of color.
Why It’s a Great Choice
It is completely temporary. If they want a change, you simply remove the ponytail. It is a wonderful way to let a child express their personality through their hair while keeping their own hair healthy and natural.
12. High Pony with Curly Ends (Wand Curls)
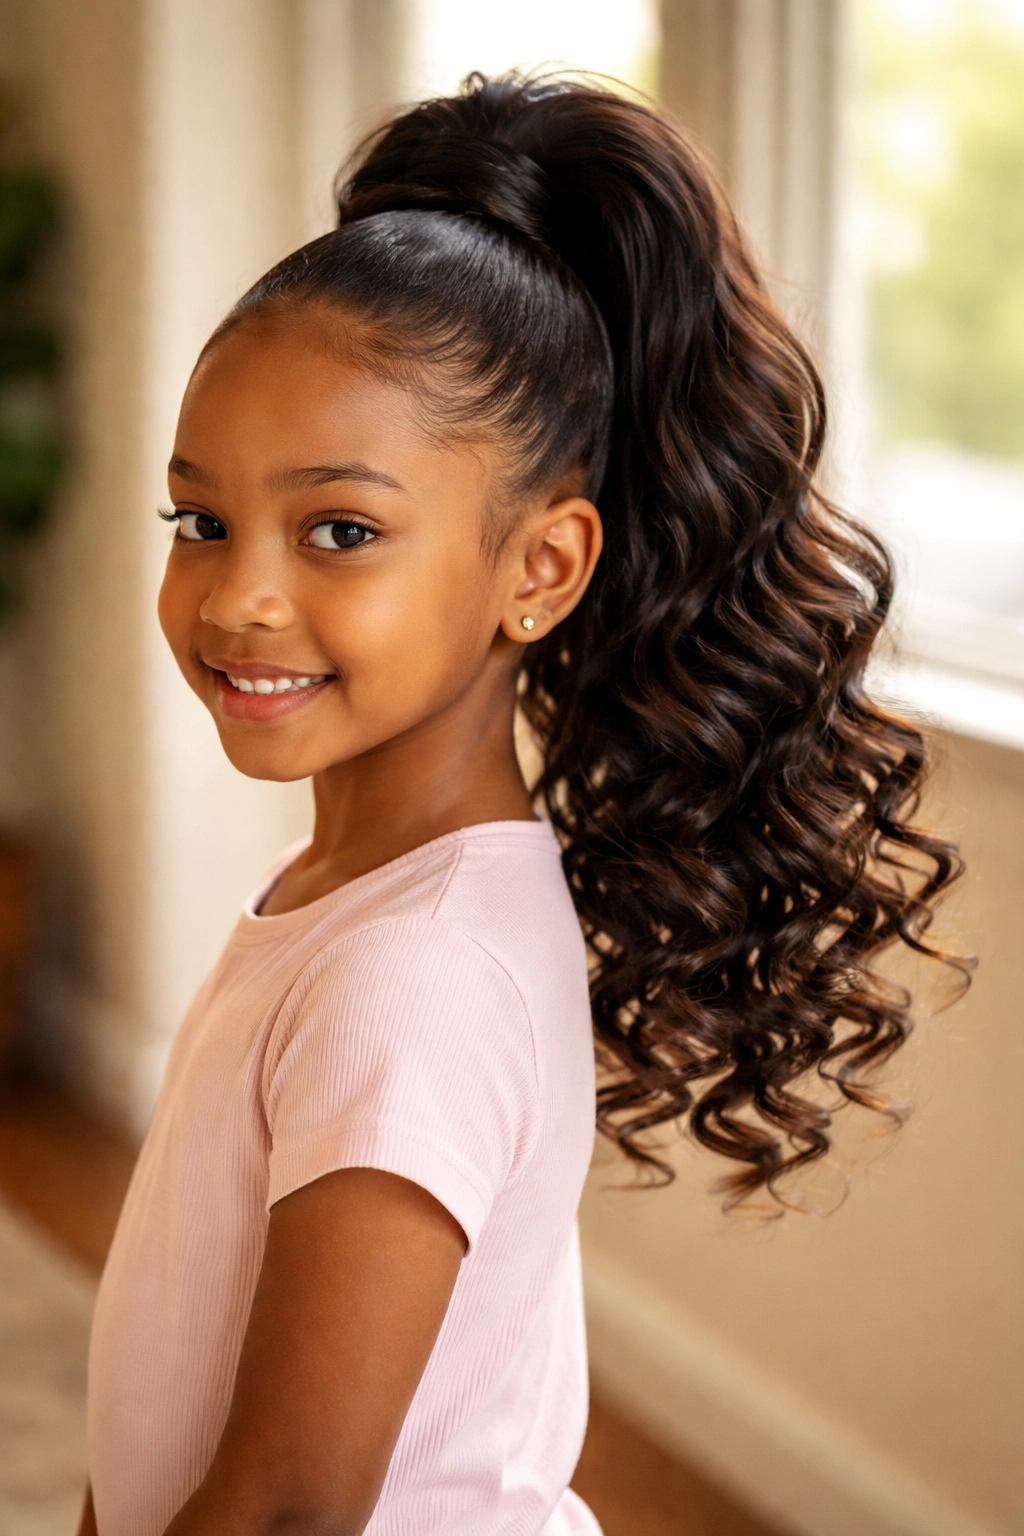
If you have a high, sleek ponytail made with straight weave hair, you can instantly upgrade it by adding curls to the ends. Using a curling wand or hot water set, you can create luscious, bouncy curls that start from the mid-shaft to the tips.
How to Style
- Heat Safety: Always use a heat protectant spray on the weave hair, especially if it is synthetic. If it is synthetic, never use a curling iron unless the packaging specifically states it is heat-resistant.
- The Hot Water Method: If the weave is synthetic/braiding hair, wrap the ends around a perm rod and dip them in near-boiling water for a few seconds. This creates perfect, uniform curls that last.
- The Wand Method: If the weave is human hair, use a curling wand at a moderate temperature.
The Result
This gives you a style that is sleek at the top but full of movement at the bottom. It is sophisticated, fun, and works for almost any occasion.
13. Heart-Parted Braided Base
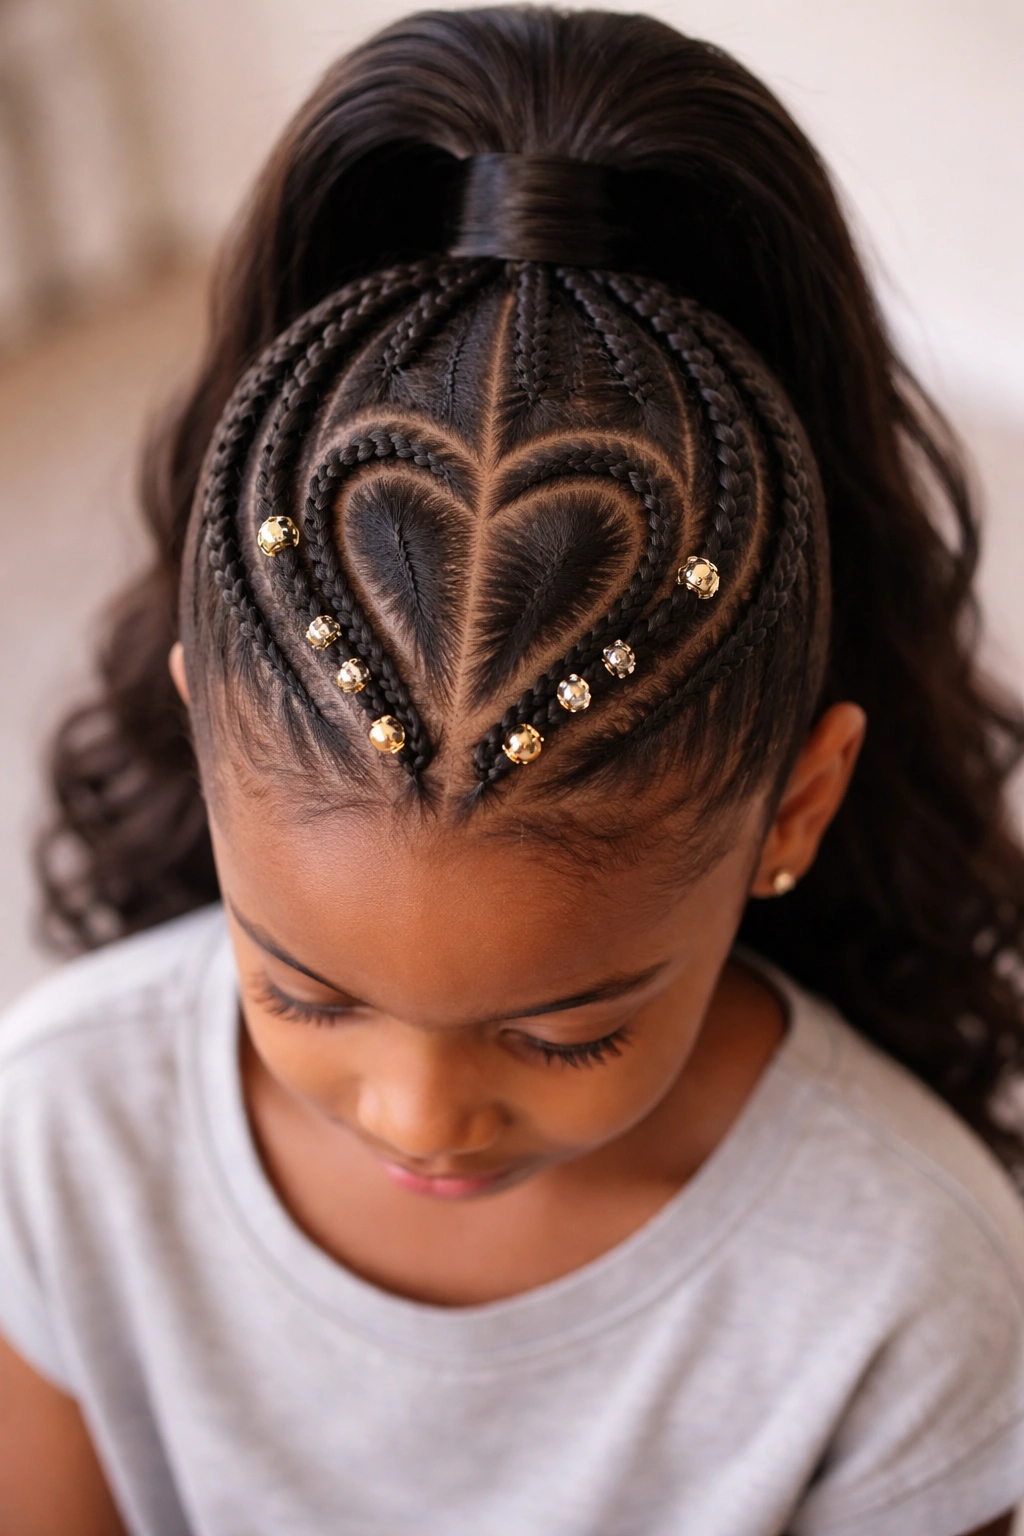
This is a stylistic choice that involves creating a literal heart-shaped part in the natural hair. It is a labor of love, requiring patience and a steady hand, but the results are incredibly cute and unique.
The Process
You map out the heart shape on the crown of the head. You braid the hair around the heart first, then braid the hair inside the heart, ensuring all braids lead toward the center to form the ponytail base. The space between the braids can be adorned with beads or gold cuffs for extra detail.
Who This Is For
This is perfect for birthdays, Valentine’s Day, or just because you want to do something special. It requires precision, so allow yourself plenty of time. If you are not comfortable free-handing the heart, use a white eyeliner pencil to draw the shape on the scalp first—it wipes off easily and ensures perfect symmetry.
14. Twisted Base Pony
Instead of braids, you can use two-strand twists as the base for the ponytail. Twists are generally faster to install than braids and can offer a more defined, chunky texture that looks beautiful when gathered into a ponytail.
Building the Twists
Part the hair into sections and create neat two-strand twists. As you move toward the crown, you can combine the twists into a single high ponytail. This creates a very cool, geometric look that is sturdy and holds up well to active play.
Why It Works
Twists create less tension than braids if done correctly. They are also much easier for a beginner to master. If you can twist hair, you can do this style. It is a great entry-level protective style that looks like it took hours.
15. High Pony with Beaded Accents
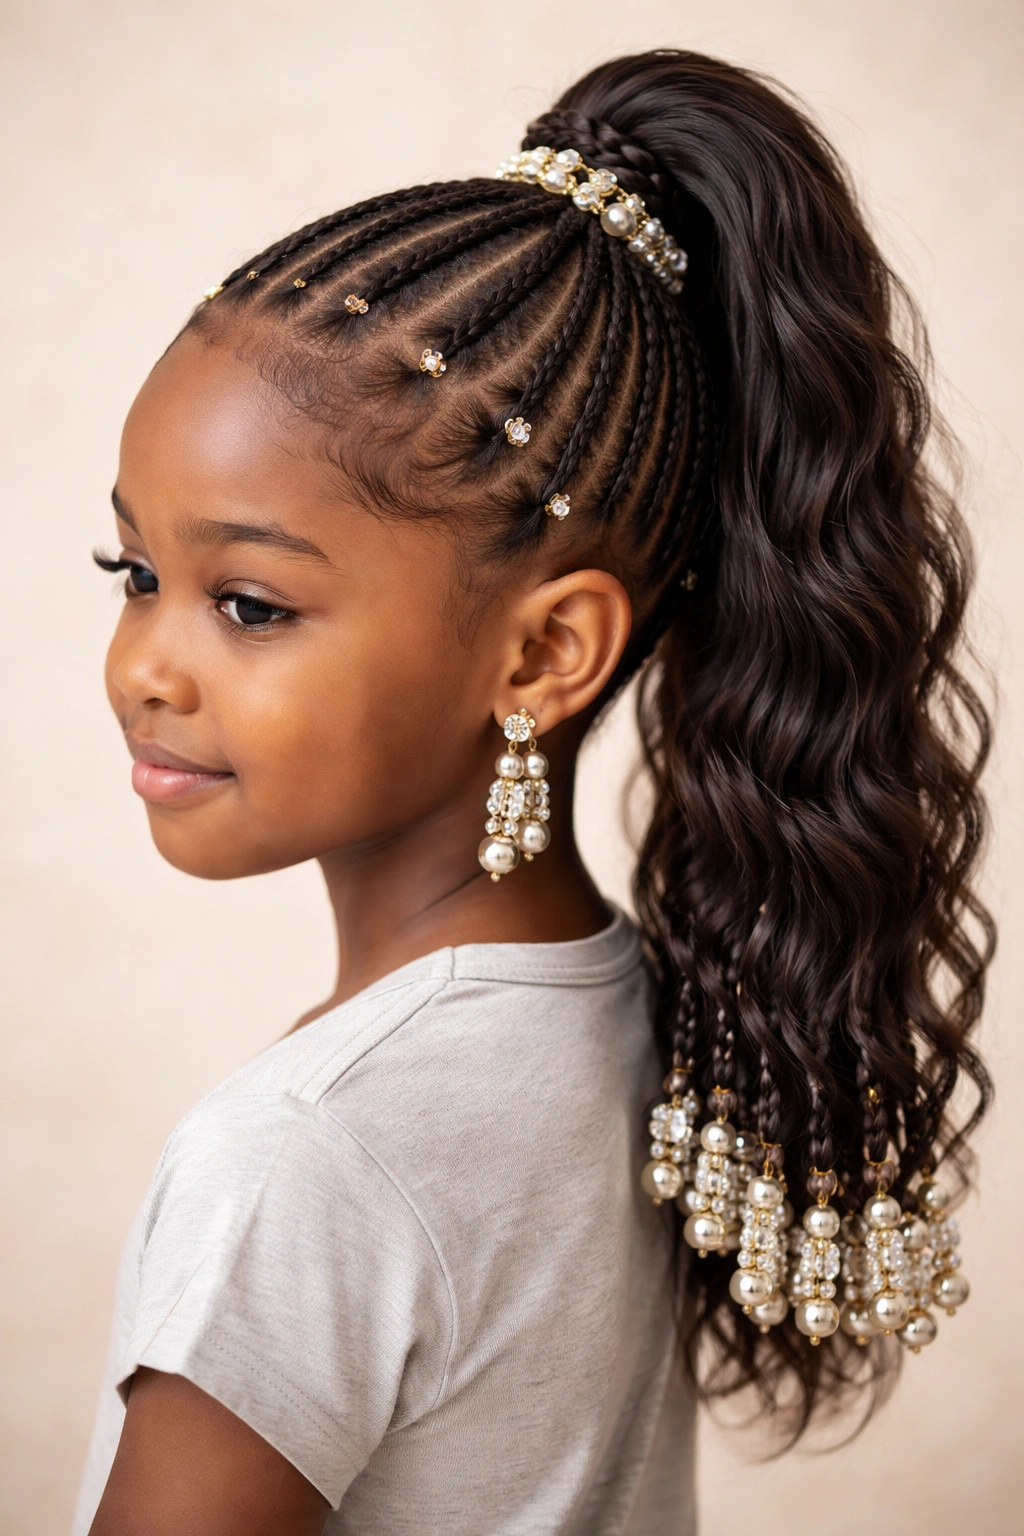
Beads are a classic addition to children’s hairstyles, and they integrate beautifully with weave ponytails. By adding beads to the base or the individual strands of the natural hair before pulling it back, you add weight, shine, and sound to the style.
Incorporating Beads
- The Base: Add beads to the ends of the braids that form the base of the ponytail.
- The Edges: Add small, clear beads to the braid patterns along the hairline.
- The Pony: If you have a braided ponytail, add beads to the ends of the braids within the ponytail itself.
The Aesthetic
Beads are not just decorative; they help weigh down the hair, keeping braids from unraveling. Choose colors that coordinate with school uniforms or favorite outfits. Always ensure the beads are secured with a rubber band at the end of each braid so they don’t slide off during the day.
16. Sleek Top Knot Pony
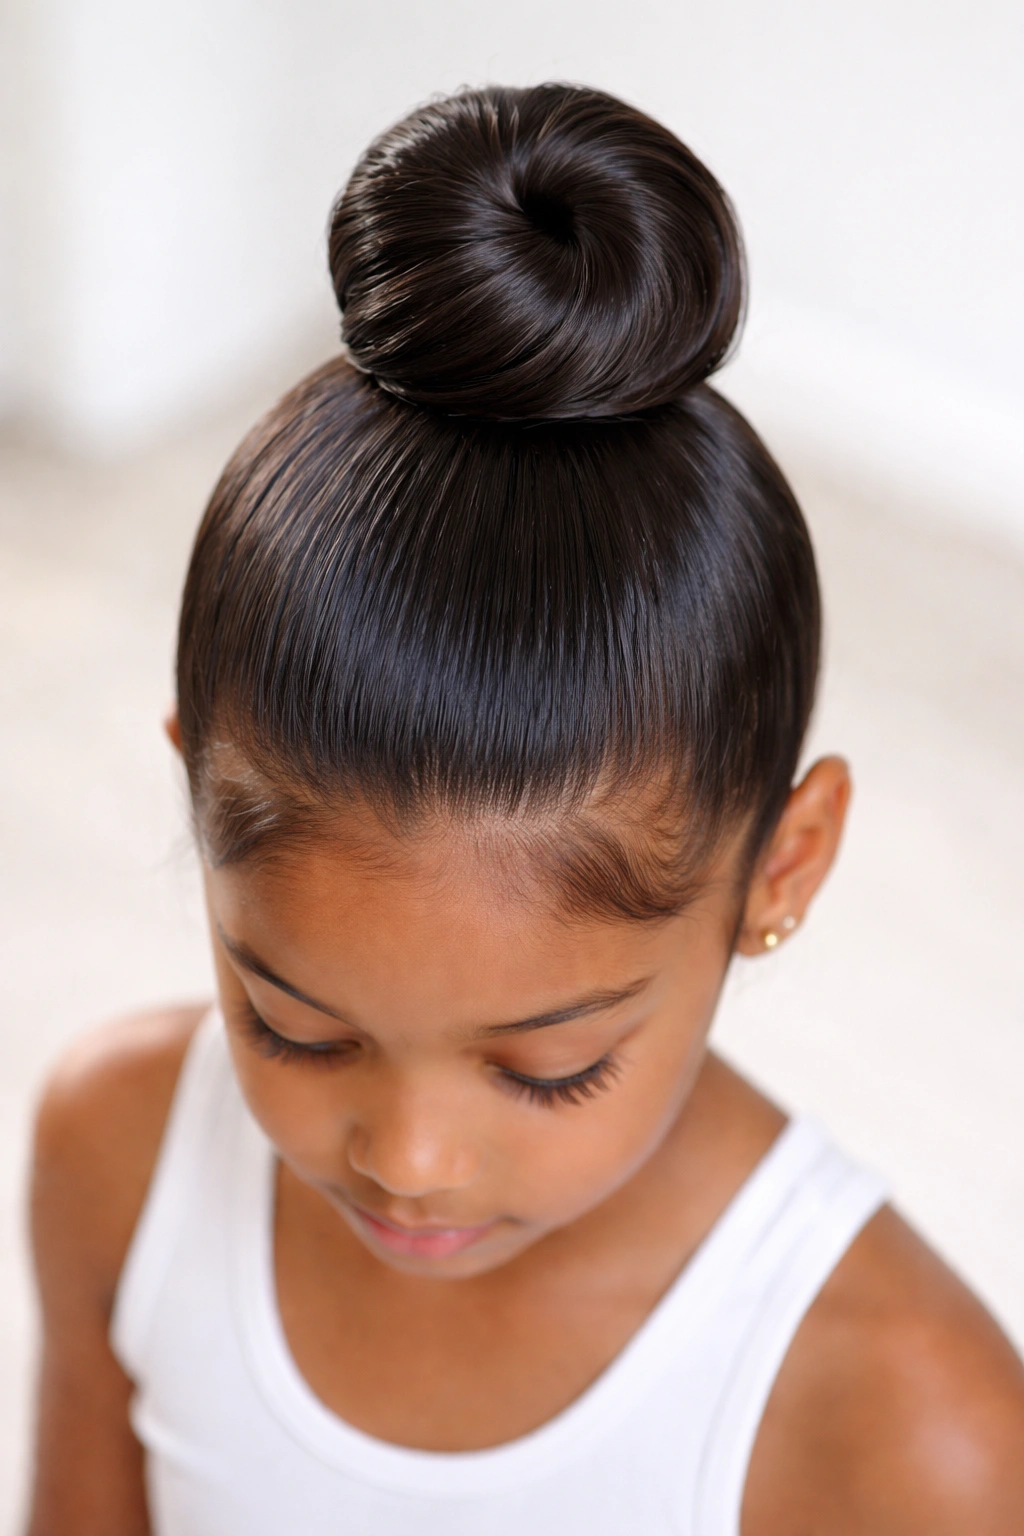
The top knot is often seen as a casual, messy bun, but a “sleek top knot pony” takes that concept and makes it precise. You secure the hair into a high ponytail, and then instead of letting the length hang down, you twist the ponytail into a sleek, sculptural bun right on top of the head.
Achieving the Sculpted Look
The hair must be perfectly smooth. Use a good gel and a brush to lay the natural hair flat. Once the ponytail is secured, twist the extension hair tightly and wrap it around the base. Secure it with bobby pins, but make sure the pins are hidden.
Versatility
This style is incredibly practical for sports or dance classes where hair must be completely off the face and neck. It is elegant enough for a formal event but secure enough for the most vigorous physical activity.
17. Side-Swept Bangs with High Pony
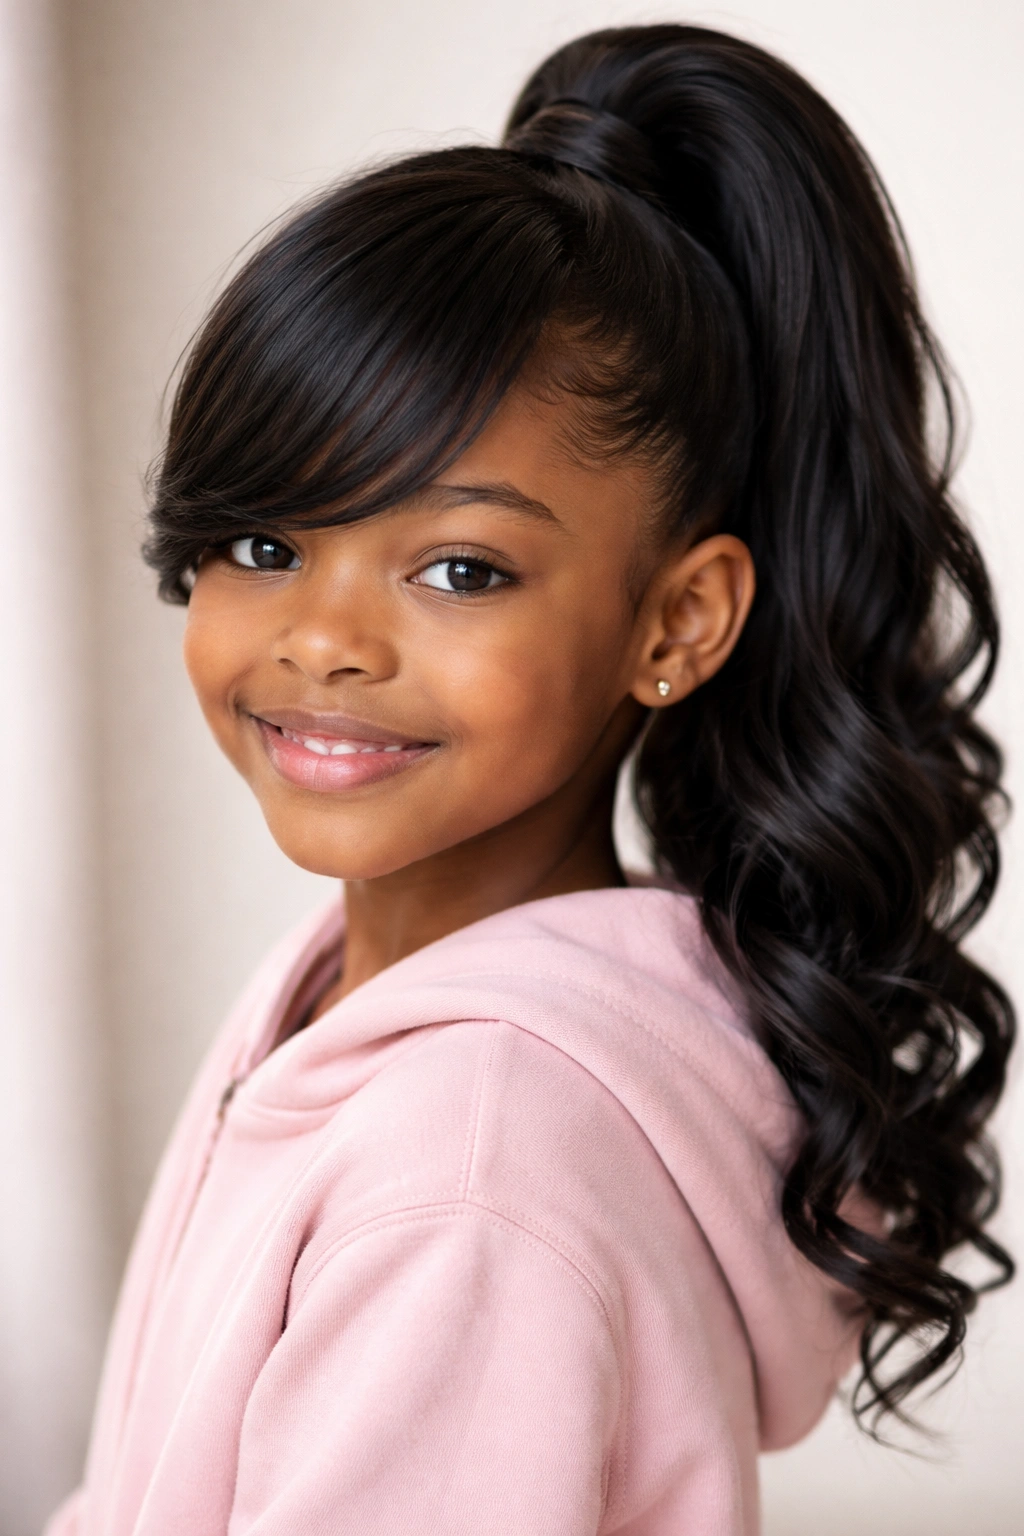
If you want to frame the face without cutting the child’s natural hair, side-swept bangs are the answer. You can create the illusion of bangs by pulling a small section of the weave hair forward, or by utilizing a separate clip-in bang piece that matches the weave ponytail.
The Illusion
The key to making fake bangs look real is the blend. You must ensure the transition from the “bang” to the rest of the hair is seamless. Using a flat iron to gently curve the bangs toward the face makes them look natural rather than stiff or fake.
Style Impact
Bangs change the shape of the face immediately. They add a youthful, sweet element to the ponytail, making it feel less severe and more balanced. It is an excellent way to soften a very tight, high-tension ponytail.
18. Finger-Wave Base into High Pony
This is for when you want a truly artistic, vintage-inspired look. Instead of simple cornrows or a slick-back, you style the natural hair at the front into finger waves using a firm-hold gel, then feed the rest into a high weave ponytail.
Why It Stands Out
Finger waves are a timeless technique that immediately elevates a style. It requires a bit of skill—you use a rattail comb and your fingers to create the “S” shapes—but the result is incredibly sophisticated. It is a show-stopping look for special occasions.
Pro Technique
- Work with very damp hair.
- Use a high-quality styling gel that dries clear and doesn’t flake.
- Once the waves are in place, use a fine-mesh scarf to tie them down while they dry to ensure they set perfectly flat.
19. Kinky Straight Textured Pony
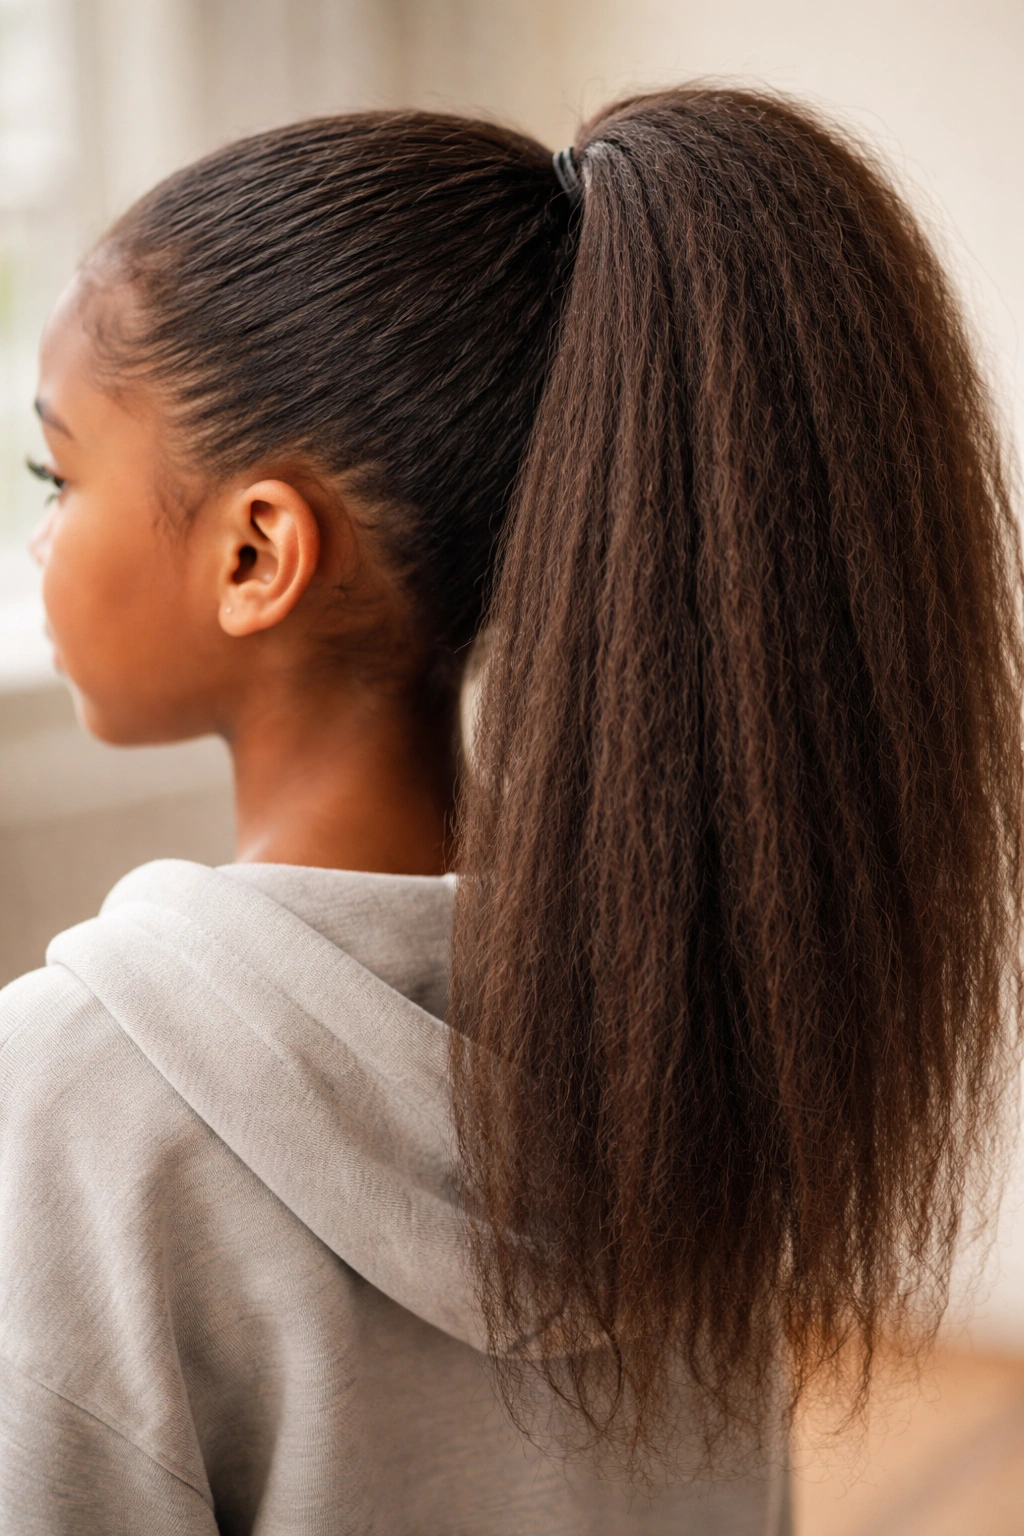
Not every weave pony needs to be silky straight. A kinky straight texture—which mimics the appearance of natural, blown-out Afro-textured hair—is a fantastic, natural-looking option. It blends incredibly well with natural hair that has been blow-dried or straightened.
Blending Tips
Because the texture is coarser, it creates a very natural-looking volume. You don’t need to worry about it being “too shiny” or looking synthetic. It creates a bold, full, and textured ponytail that looks like it belongs to the child’s own natural hair.
When to Use
This is the perfect everyday style for someone who wants to embrace a more natural aesthetic. It is less fussy than super-silky hair and holds styles like buns and high puffs much better.
20. Ponytail with Added Ribbons
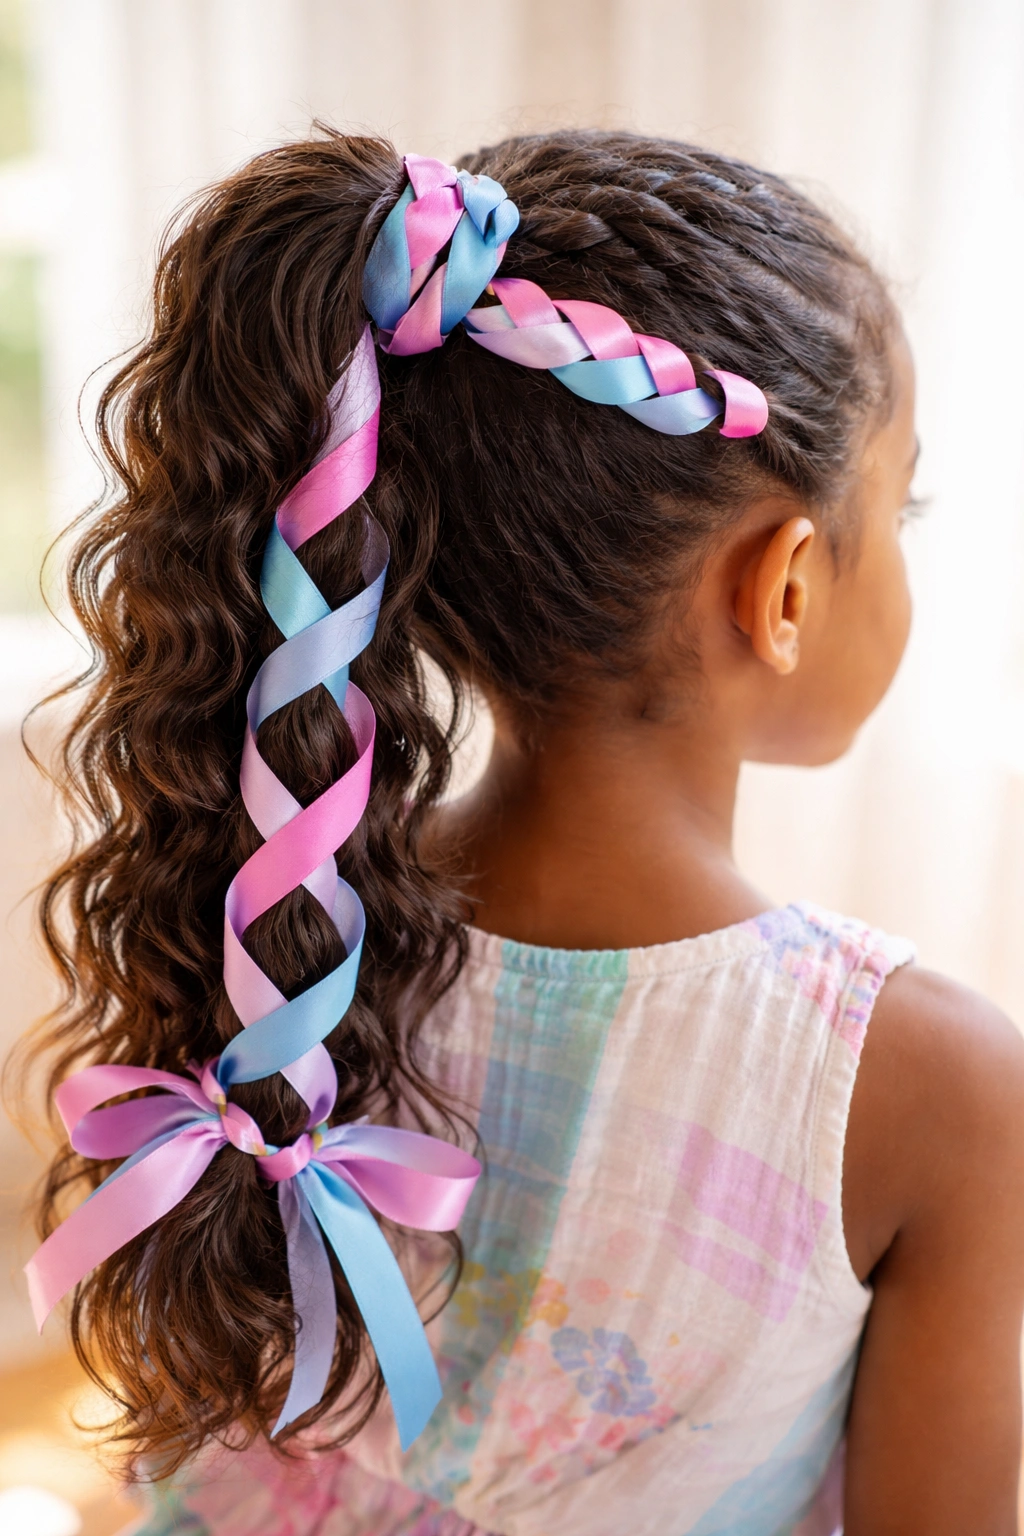
Ribbons are an underrated hair accessory. Weaving satin or grosgrain ribbons through the braids that form the base of your ponytail adds a pop of color and a soft, feminine touch.
How to Incorporate
- Braid the ribbon into the hair as you create your cornrows.
- Wrap the ribbon around the base of the ponytail once it is secured.
- Tie small bows at the end of the braid sections if you are doing a braided ponytail.
The Vibe
Ribbons are perfect for younger children. They add a whimsical quality and can be matched perfectly to any outfit. They are gentle on the hair and provide a great alternative to plastic beads or metallic cuffs.
21. The “Top Bun” with Hanging Ponytail
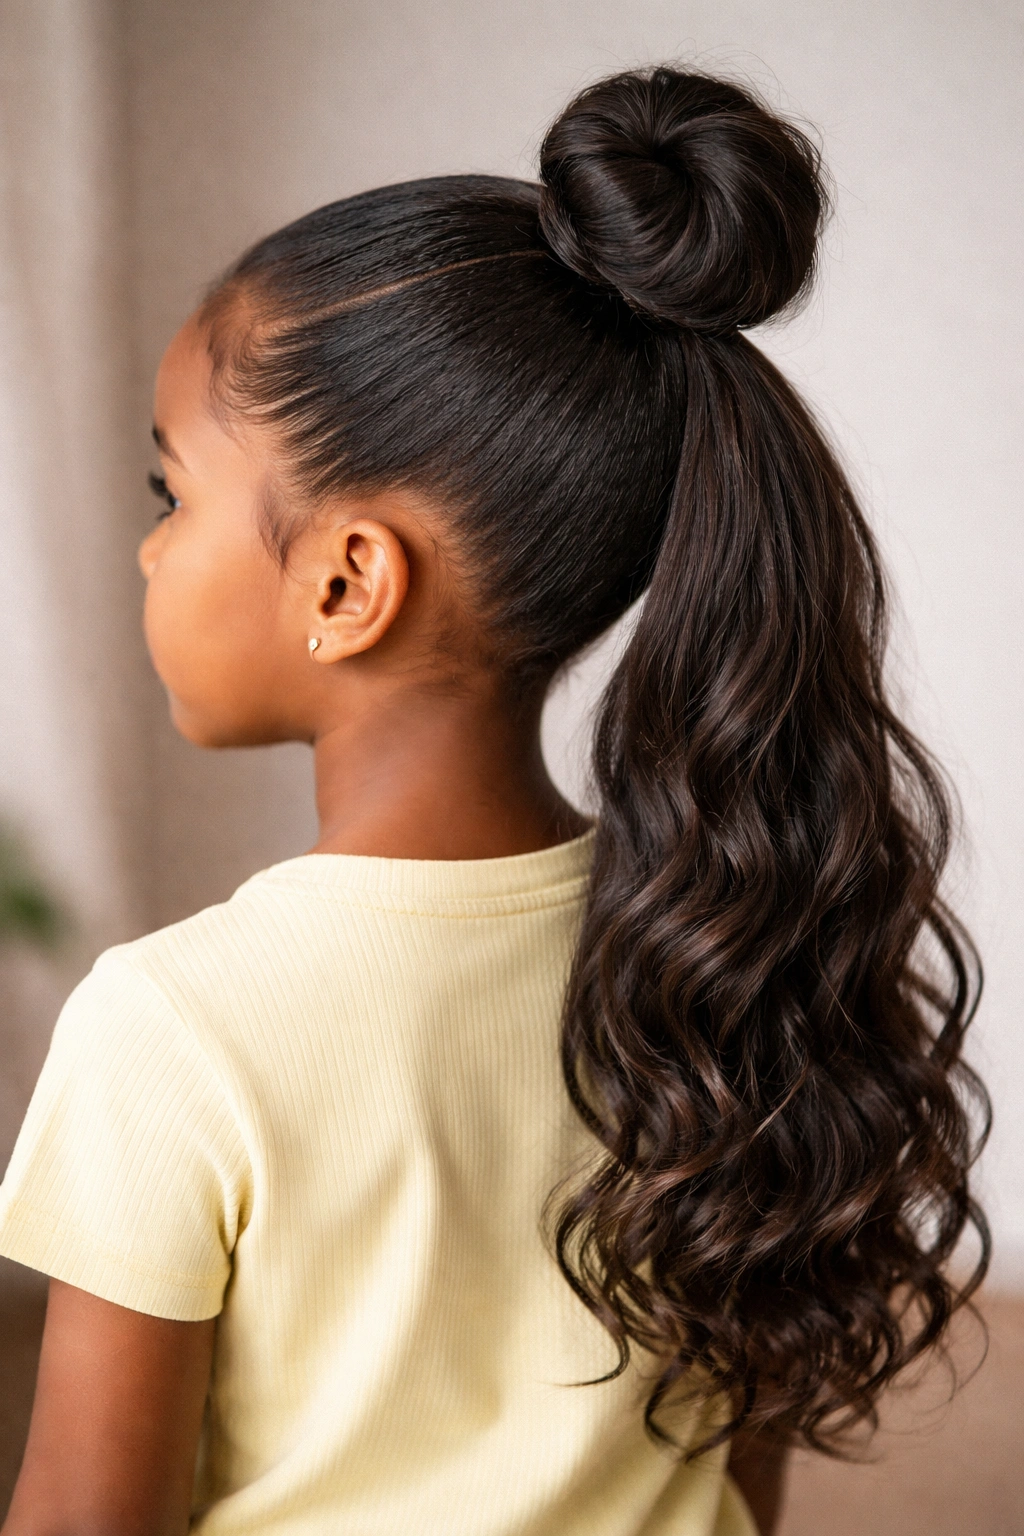
This is a two-in-one style. You create a small, tight top knot or bun on the crown of the head, and then attach a longer ponytail just below it. It creates a tiered, high-fashion look that is very popular right now.
Execution
This style relies on clean parting. You section off the crown of the head for the top bun. You then take the remaining hair and ponytail base and secure it. It is essentially a half-up style, but with a more structured, modern silhouette.
Practicality
It keeps hair off the face like a top knot, but gives you the length and “swish” of a full ponytail. It is a great way to showcase a large amount of hair without it feeling too overwhelming or heavy on the head.
22. Cornrowed Base with Coiled Ends
This look features cornrows that go straight back into a high ponytail, but instead of the ponytail being straight or wavy, the ends of the weave are tightly coiled. You can achieve this by using perm rods on the ends of the weave and dipping them in hot water.
Texture and Structure
The contrast between the tight, orderly lines of the cornrows and the wild, bouncy energy of the coiled ends is visually captivating. It is a style that looks great from every angle.
Maintenance
The coils will need a bit of care to stay defined. A light oil-free sheen spray is all you need to keep them looking fresh. Remind the child not to pull at the coils, as that will turn them into frizz.
23. Messy/Boho High Puff Pony
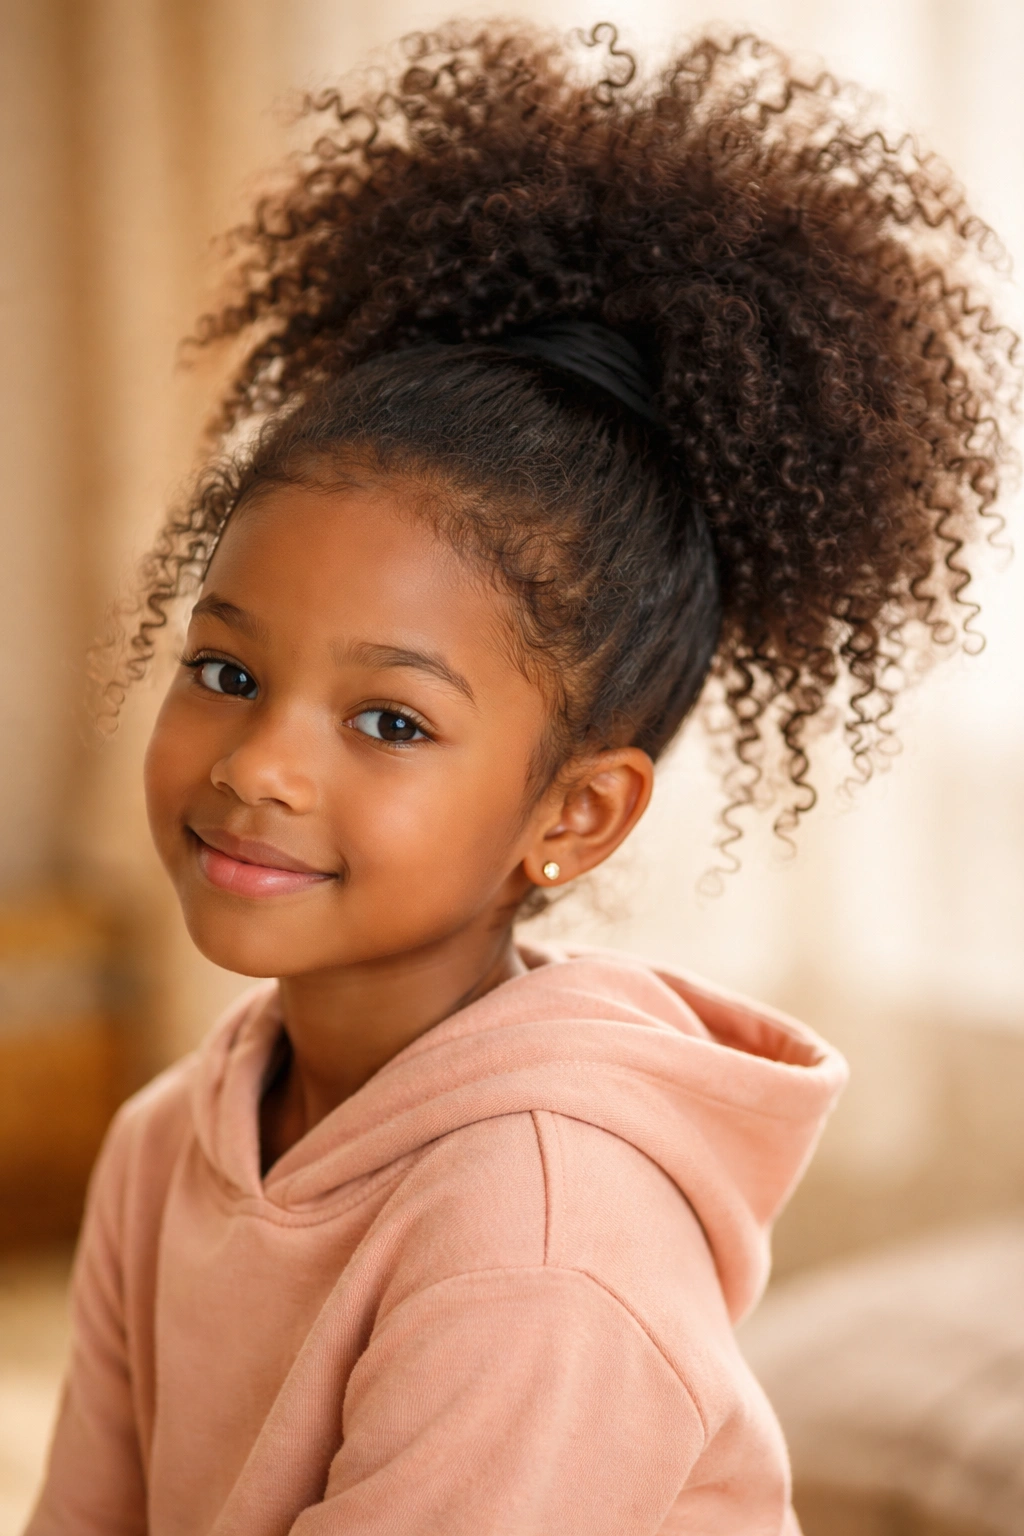
Sometimes, the “perfect” look isn’t the goal. A messy, high-puff ponytail using kinky-curly weave hair creates a fun, voluminous look that celebrates texture. It is arguably the easiest weave style to maintain because it is supposed to look a bit wild.
Creating the Puff
Secure the natural hair in a high ponytail. Take a large bundle of kinky-curly weave hair, secure it around the base with a drawstring or pins, and then pick it out with a wide-tooth comb or a hair pick to create a large, rounded “puff” or afro-style ponytail.
Why Parents Love It
It takes minutes to install. It doesn’t require heat, extreme tension, or hours of braiding. It looks fantastic on all hair types and offers a great, protective option that still feels playful and youthful.
Final Thoughts

The beauty of incorporating weaves into your child’s hairstyle rotation is the freedom it provides. You are not just choosing a style; you are choosing a way to protect the natural hair from the daily wear and tear of brushing, detangling, and heat styling. Whether you opt for a sleek, high-fashion ponytail or a braided base that will last through a busy school week, the key is always in the foundation.
Take the time to moisturize and prep the natural hair, handle the edges with care, and always remove extensions gently. When these styles are executed with patience and the right techniques, they aren’t just a styling choice—they become a reliable tool in your parenting arsenal, saving you time in the morning while keeping your child’s hair healthy, vibrant, and styled just the way they like it. Find the styles that work best for your schedule and your child’s personality, and don’t be afraid to experiment with textures, colors, and accessories to make each look your own.