A ponytail sounds like the simplest thing in the world — gather, tie, done. For afro hair, it’s almost never that simple. The hair type that naturally grows up and out instead of down does not take kindly to being forced flat against the scalp, and every tight pull near the hairline is a small negotiation between the look you want and the edges you refuse to sacrifice.
That’s exactly why afro ponytails deserve their own conversation. Done right, a ponytail on thick, coily, kinky, or 4C hair is one of the most striking styles a Black woman can wear. It frames the face, shows off texture, and swings from corporate-polished to festival-ready in about ten minutes flat.
Done wrong, it leaves you with a sore scalp, broken baby hairs, and a permanent dent where the elastic lived. I’ve seen both outcomes enough times to know the difference comes down to technique, not genetics.
What follows is twenty of my favorite looks, ordered loosely from the quickest beginner-friendly options to the more elaborate styles that deserve their own Saturday afternoon. I’ll tell you exactly how to get each one, what tools you’ll need, and — honestly — which ones are worth your time and which ones look better in photos than in real life. Before the list itself, a few short sections on prep, tools, and the quirks of afro hair that nobody seems to mention. Skip them if you’re in a rush. Read them if you want your pony to actually last.
What Makes Afro Hair Different When You Pull It Into a Ponytail
Let me start with something the generic beauty magazines rarely mention: the exact qualities that make afro hair beautiful — its volume, its density, its springy coils — are also the qualities that make a classic ponytail tricky.
Straight hair lies flat. It gathers into a ponytail the way water gathers in a bowl. You catch it, twist it, tie it, move on.
Afro hair does none of that.
The strands twist, curl, shrink, and multiply in volume depending on how wet or dry the hair is. A single puff of 4C hair in its shrunken state might look five inches long. Stretch it straight and it’s fifteen. That shrinkage changes where the ponytail base sits, how much tension lands on your edges, and how balanced the final shape looks from the front. It’s a structural difference, not a preference difference.
Density is the other half of the story. Afro and kinky hair types often pack thousands more strands per square inch than straight textures. Forcing all of that volume into a tiny two-finger-wide rubber band is asking a lot of both the hair and the scalp. This is where tension headaches come from — literally. If you’ve ever taken down a tight pony and felt like you could breathe again, that’s why.
The takeaway is simple but worth saying out loud: afro hair deserves a different ponytail approach than straight hair does. Bigger ties, lower tension, smarter prep. Once you accept that, every single style in this guide becomes significantly easier to pull off.
The Tools and Products That Actually Earn a Spot in Your Kit
You don’t need twenty-seven products to do a ponytail well. You need maybe six that genuinely work. Skip the rest.
A wide satin or cloth-covered elastic. Thin rubber bands shred coily hair. Look for one that’s at least half an inch wide when stretched and soft to the touch — the kind that feels like ribbon, not rubber.
A boar bristle brush and a soft denman. The boar bristles give you smoothness at the hairline without yanking. The denman is the one you reach for when you’re trying to define curls around the crown. Different jobs, both essential.
A strong-hold edge gel or pomade. This is the single most important product in the kit if you want your baby hairs to lie down and stay that way through a full day. If the gel is runny enough to pour, it won’t hold past lunchtime. You want something thick enough to stand up in the jar.
A silk or satin scarf. Not optional. After you style the pony, tie the edges and base down for about ten minutes before you leave the house. This is the difference between a pony that lasts two hours and one that lasts eight.
A fine-mist spray bottle filled with water and a splash of leave-in conditioner. Afro hair is easier to manipulate when slightly damp, not soaking wet. A light mist is your best friend.
Bobby pins — the coil-friendly kind. The flat little ones designed for straight hair will slip out of dense natural hair in seconds. Look for pins with a ridged or wavy shape that actually grip the strand.
Honest aside: skip the overpriced “miracle curl cream” everyone on social media keeps pushing. A good flaxseed gel or a simple shea-and-water leave-in does more for your pony than any of the trendy jars at a beauty counter.
How to Prep Your Hair Before You Ever Touch a Hair Tie
Prep is the part everyone wants to skip and everyone regrets skipping. Think of it like stretching before a run — boring, but you pay for it if you don’t.
Start on clean, fully moisturized hair. Not soaking wet, not bone dry. Slightly damp is the sweet spot. If your hair is completely dry and feels brittle, mist it with water and leave-in until it’s pliable but not drenched.
Detangle in sections. I mean it — sections. Four is a good number. Clip the top away, work on the back first, then move up. Use a wide-tooth comb or your fingers, starting from the ends and working toward the roots. If you start at the root, you’ll rip through every knot on the way down, which is exactly how afro hair snaps.
Apply a leave-in and a few drops of a light oil from the mid-shaft to the ends while the hair is still slightly damp. Avoid the roots for now. That’s where tension builds, and heavy product at the root makes the elastic slip.
For a sleeker pony, brush the hair forward toward the hairline before you flip it back. This gets everything moving in the same direction and prevents lumps at the base. For a more voluminous shape, do the opposite — fluff the roots, lift them up, and let gravity do less of the work.
Last step before you tie: stand in front of a mirror and turn your head slowly side to side. If you see bumps or uneven patches, smooth them out now. Once the elastic is in, it is ten times harder to fix.
Protecting Your Edges While Still Getting a Sleek Look
Edges are sacred. Everyone knows it, and yet every week I see someone on social media post a gorgeous sleek pony and a breakage disaster three months later. The two things are not unrelated.
Here’s the truth most stylists dance around: you cannot get a runway-sleek afro ponytail without some tension. What you can do is minimize the damage so your hairline stays intact.
Use product, not force. A thick edge gel lets the hair lie flat without you having to drag the brush ten times over the same spot. One slow, firm pass with a boar bristle brush should be enough. If you’re brushing five or six times, you’re using the wrong product.
Tie down after styling. A silk scarf for ten minutes while you do your makeup sets the edges in place without you needing to re-brush later.
And for the love of your own hairline — stop picking at your baby hairs all day. Every time your fingertip grazes them, you’re lifting a strand that was supposed to stay flat. Leave them alone until you wash next.
If you notice your edges thinning or your hairline receding, take a full two weeks off from tight ponies. Wear puffs, braid-outs, or loose twist-outs. Your edges grow back faster than you think — but only if you stop pulling on them.
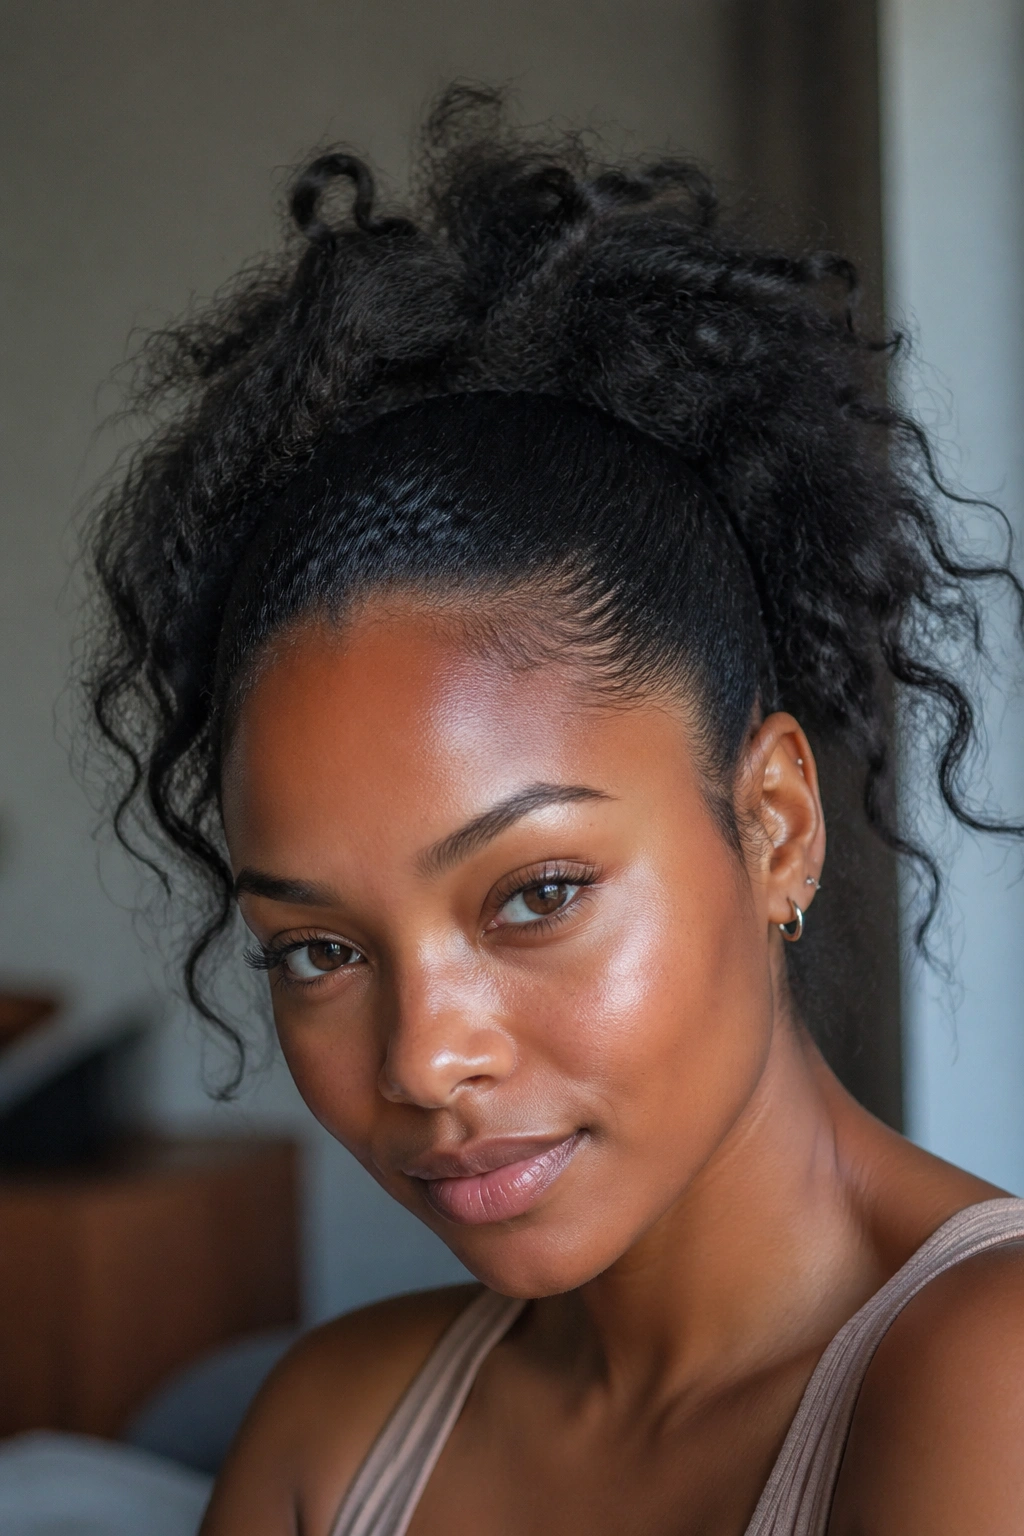
1. The Classic High Afro Puff Ponytail
If you only ever learn one afro ponytail, make it this one. The high puff is the default. It’s the style every Black woman figures out sometime around middle school and never fully outgrows, and there’s a reason — it works on almost every length, every texture, and every face shape.
The move is simple. Gather your hair at the crown using a wide elastic headband (NOT a thin rubber band — that’s a common beginner mistake), leaving the front and sides slightly loose. Then fluff the gathered hair upward and outward into a rounded shape. That’s the puff. The ponytail part is just the base.
What makes a great high puff is the shape — not the size. You want it round, full, and balanced, not lopsided or pulled so tight that it flattens against the back of your head. Use your fingertips to pat the outer edges into a clean circle once it’s in place.
Humidity is its best friend and worst enemy. A slight damp means your curls pop and the shape holds. Too much damp and it goes stringy. A quick mist with water and leave-in hits the sweet spot.
This is the style I’d recommend to any beginner who’s never touched an afro ponytail before. It forgives a lot. Uneven gathering, slightly crooked base, a bit of frizz — all of it disappears into the overall fullness. Start here, master the prep, and every other ponytail on this list becomes easier.
2. The Low Slicked-Back Pony With Laid Edges
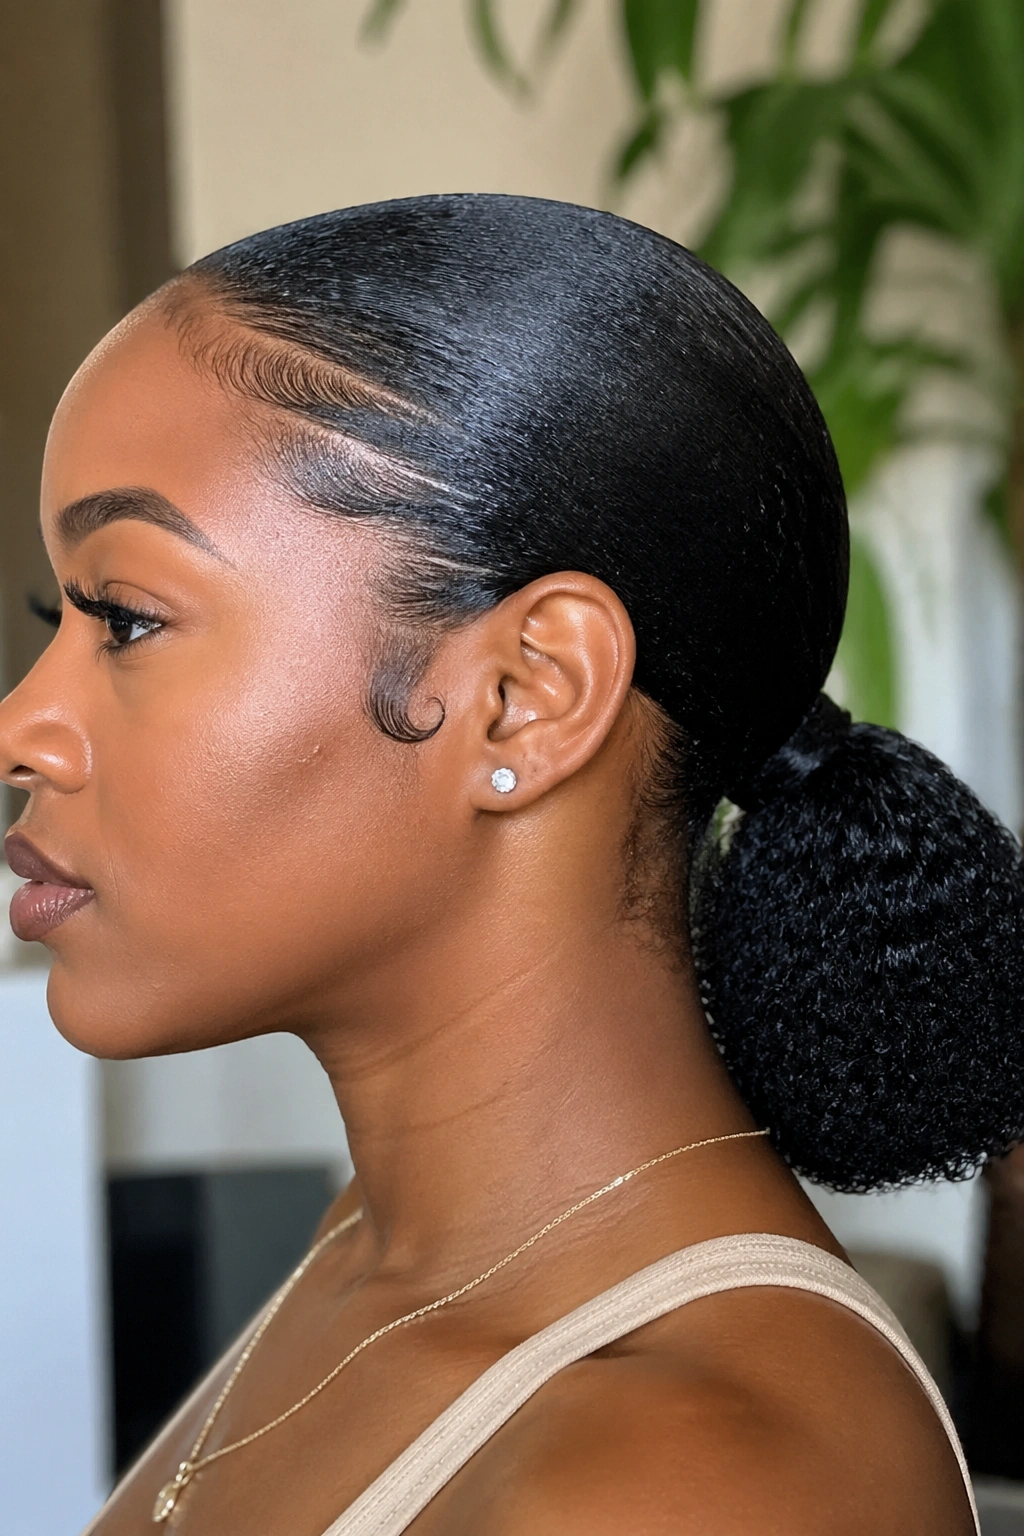
A low pony is what you reach for when you want something that reads professional without reading boring. Dinner reservations. Meetings. Any time you want your outfit and your earrings to do the talking.
Why the Low Position Works for Coily Hair
Pulling hair back into a low ponytail puts the tension at the nape, which is the part of the scalp that can actually handle a bit of a pull without your edges paying the price. It’s also the easiest position from which to make the hair look genuinely sleek, because gravity is working with you instead of against you.
How to Get a Clean Finish
- Start with stretched hair. A blow-out with a diffuser or an overnight braid-out makes this style a thousand times easier than attempting it on shrunken coils.
- Apply a generous amount of smoothing gel — about a tablespoon for most hair densities — starting at the front and working back with a boar bristle brush.
- Use two hair ties: a small one to anchor, and a larger wrapped one on top to cover it cleanly.
- Take a small section of hair from the ponytail itself, wrap it around the base to hide the elastic, and secure with a bobby pin underneath.
- Lay your edges last. Do this AFTER the pony is tied, never before — otherwise you’ll disturb them while gathering.
Pro tip: if you want extra length hanging from the pony, this is the style that blends best with a wrap-around clip-in. Match your texture and nobody will know.
3. The Side-Swept Curly Puff
There is something about a puff that sits slightly to one side — not quite off-center, not quite on the temple — that changes the whole feel of the face. It softens everything. It frames the cheekbones. It tilts the eye toward the neckline. I’m a little obsessed with this variation, if I’m being honest.
The side-swept puff works best on medium to longer afro hair because the shape needs enough volume on top to drape toward the ear. If your hair is extremely short, you can fake it with a headband-covered elastic and some strategic fluffing, but the real version shines once you have at least three or four inches of stretched length.
Gather the hair diagonally. Instead of pulling straight back, sweep everything from the left ear toward the upper-right crown (or the reverse, depending on which side flatters your face better). Tie it there, loosely, and then use your fingers to coax the puff into a soft slant rather than a hard circle.
The finished look has a casual elegance to it that feels almost vintage. It works with hoop earrings. It works with a red lip. It works when you’re just running errands in a t-shirt and you still want to look like you thought about your outfit for more than thirty seconds.
One warning: keep the opposite side of the hair smooth. If you leave too much volume on the low side, the asymmetry looks accidental instead of intentional. A light application of edge gel on the side you’re sweeping from will give you that clean, pulled-together contrast.
4. The Bubble Ponytail With Chunky Twists
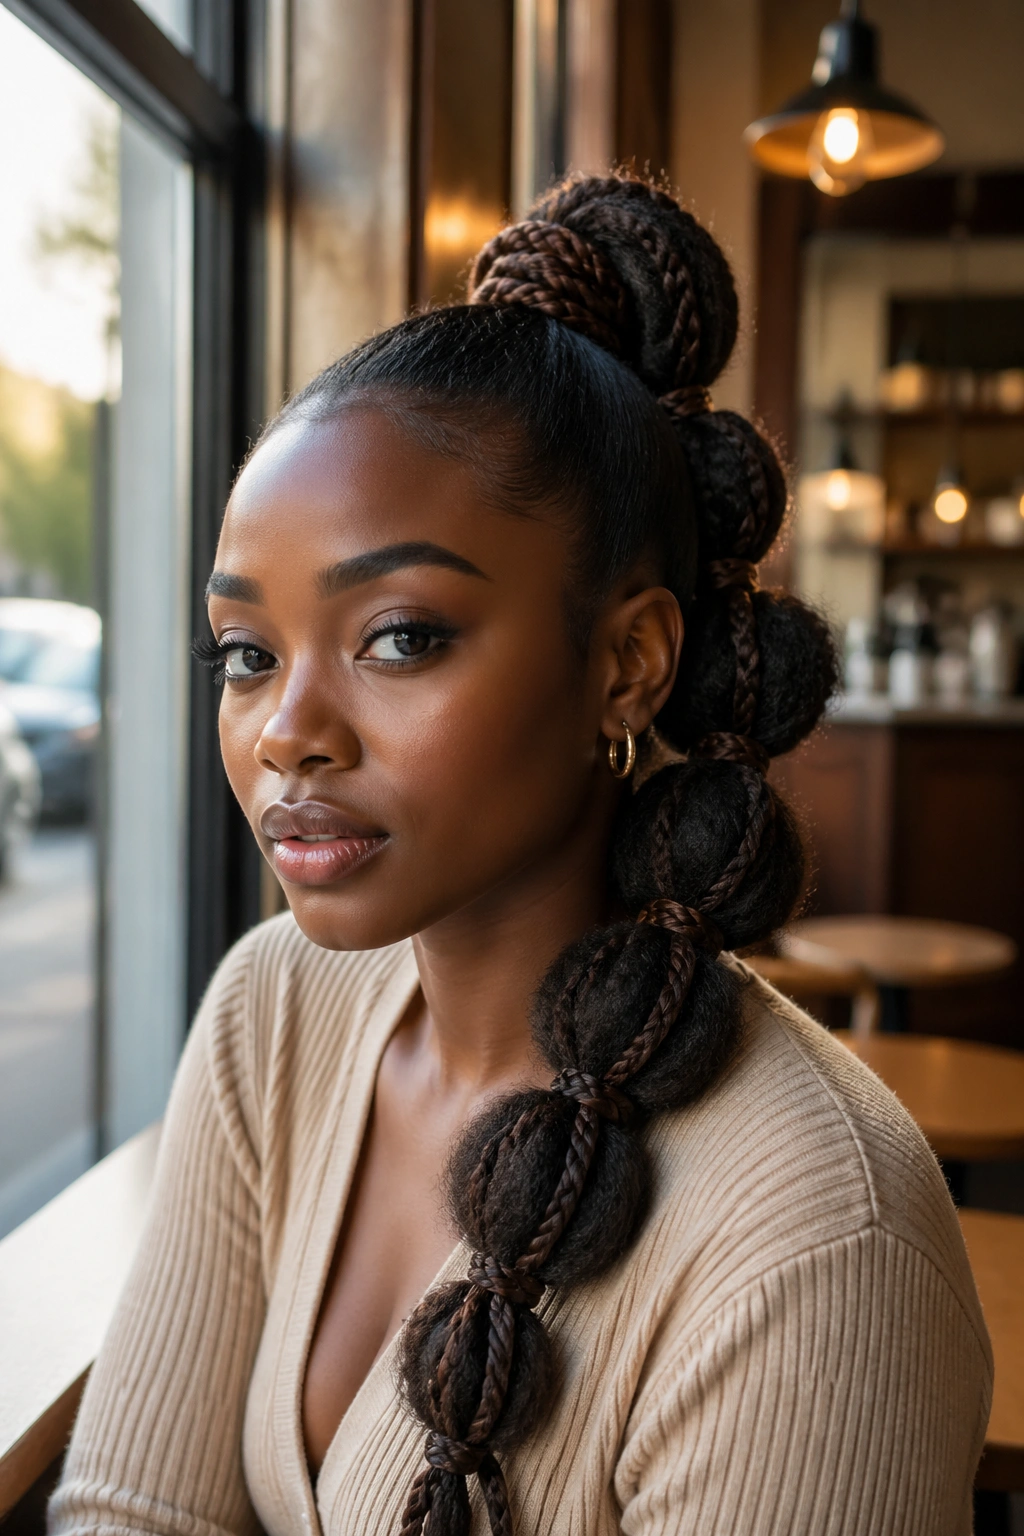
Picture this: you have a friend’s birthday dinner in two hours, you already washed your hair this morning, and you want something that photographs well without taking forever. This is the style for that exact moment.
A bubble ponytail is just a regular pony that’s been sectioned into several round puffs along its length using a few extra elastics — usually three or four, evenly spaced. On afro hair, you add a twist: twist sections of the hair between each elastic into chunky two-strand twists, which adds definition and texture that a plain bubble pony can’t match.
Here’s what you’ll need and what matters most:
- Four to five satin-covered elastics in a color that matches your hair
- A light hold smoothing cream, not a heavy gel
- Patience for the first two bubbles — after that, it goes fast
- A wide-tooth pick to fluff each bubble as you build it
The key move is fluffing each bubble outward after you tie the next elastic below it. Pull the hair gently between the two ties in every direction until the section looks rounded and full, then move to the next one. Don’t try to fluff the top bubble first — it’ll collapse when you work on the one below it.
This style photographs beautifully from every angle, which is why it’s a favorite for weddings, parties, and any occasion where someone’s going to put a camera in your face. In person it looks playful and architectural at the same time.
5. The Half-Up Pineapple Ponytail
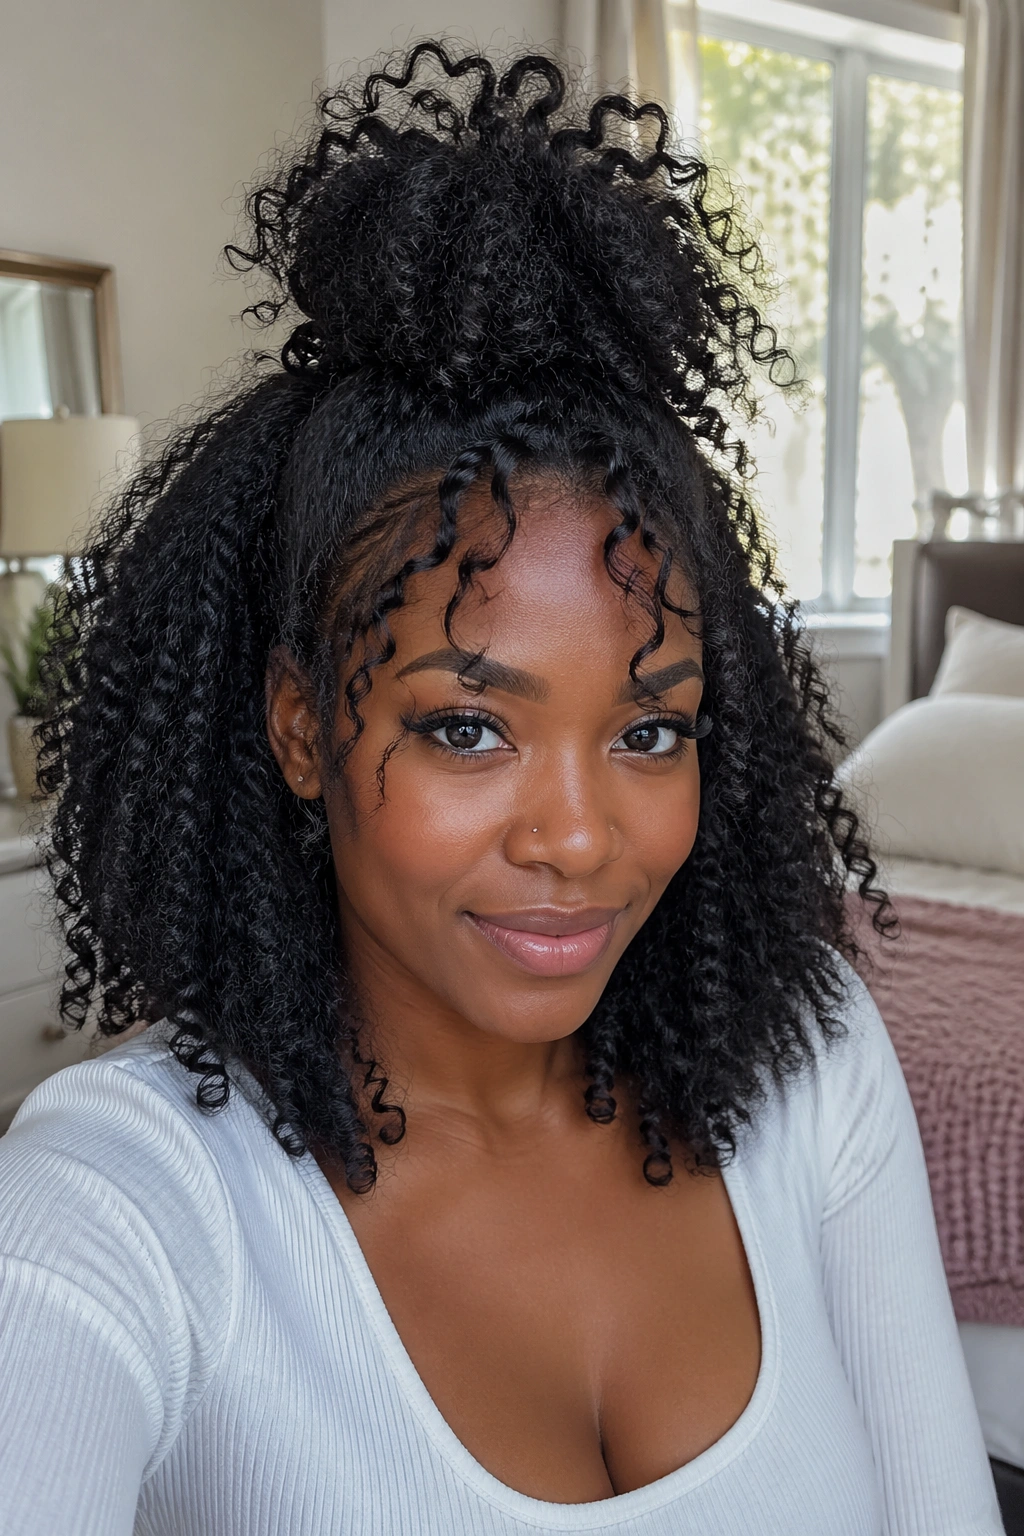
Is the pineapple a ponytail? Technically, yes. Functionally, it’s in its own category — and for wash-day-two or wash-day-three, it might be the most useful style a natural can learn.
A pineapple is when you gather all your hair on top of your head, loosely, with a satin scrunchie or cloth headband, without tying it tight. The curls cascade forward like the fronds of — you guessed it — a pineapple.
What Makes It So Forgiving
Unlike a traditional pony, the pineapple is designed to be loose. The whole point is to lift the hair off the pillow at night so you don’t crush your curl pattern, while still looking cute enough to wear out of the house the next morning. It protects your curls AND gives you a style you don’t have to hide.
How to Make It Look Intentional
The half-up version keeps the bottom of the hair down, resting on the shoulders, and only lifts the top half into the pineapple. This is the move that transforms it from “I just woke up” to “I did this on purpose.” Start with your curls already defined from a wash-and-go or a twist-out. Use your fingers to gather the top third of the hair — imagine drawing a horizontal line from ear to ear — and loop it into a soft scrunchie without pulling tight.
Fluff the gathered section forward so it droops toward your forehead. Leave the edges and baby hairs slightly loose around the face. Done.
This is the style I wear on gym days, errand days, and honestly any day when I want to look polished in under ninety seconds.
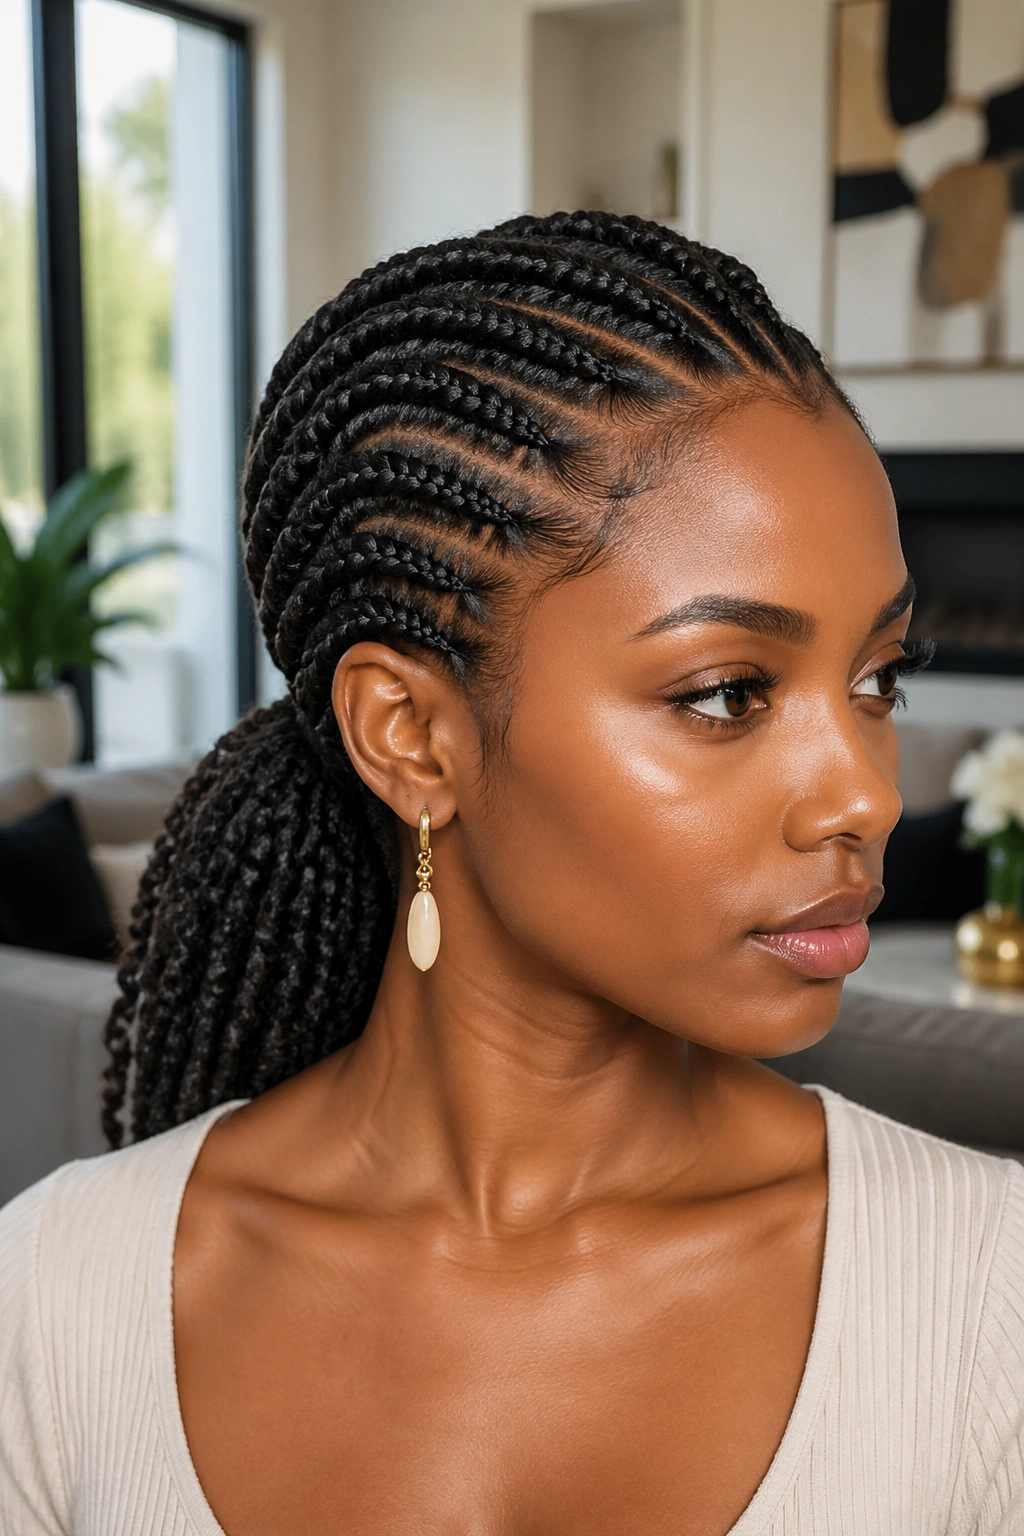
6. The Jumbo Braided-Base Ponytail

If you’ve ever seen a Black woman walking down the street with a long, sleek ponytail that reached halfway down her back and wondered how on earth she got all that volume to disappear into such a clean base — the answer is usually a braided base.
The Structure
The technique is old and elegant: you cornrow the front portion of your hair into three to five neat braids that all lead to the same point at the back of the crown, then gather everything into a single ponytail at the end of those braids. The braids do the work of smoothing the front. The gathered ponytail at the back does the visual heavy lifting.
Why It Holds Up So Well
- The tension is distributed across multiple braid rows instead of being concentrated in one pull
- Your edges stay protected by the structured braid pattern
- The style lasts for seven to ten days with nightly scarf care
- You can swap the pony at the back for a different extension any time you want a new look
Who Should Try It First
This style is perfect for anyone who wants a two-week protective style but doesn’t want to commit to a full head of braids. It’s also an excellent move for a wedding guest who needs her hair to survive from the ceremony through the reception without budging.
The catch: if you’ve never cornrowed your own hair before, plan a solo practice session or book a stylist. The front braids need to be even and tight enough to lay flat, which is a skill that takes a few tries to build.
7. The Wrap-Around Ponytail With a Gold Cuff
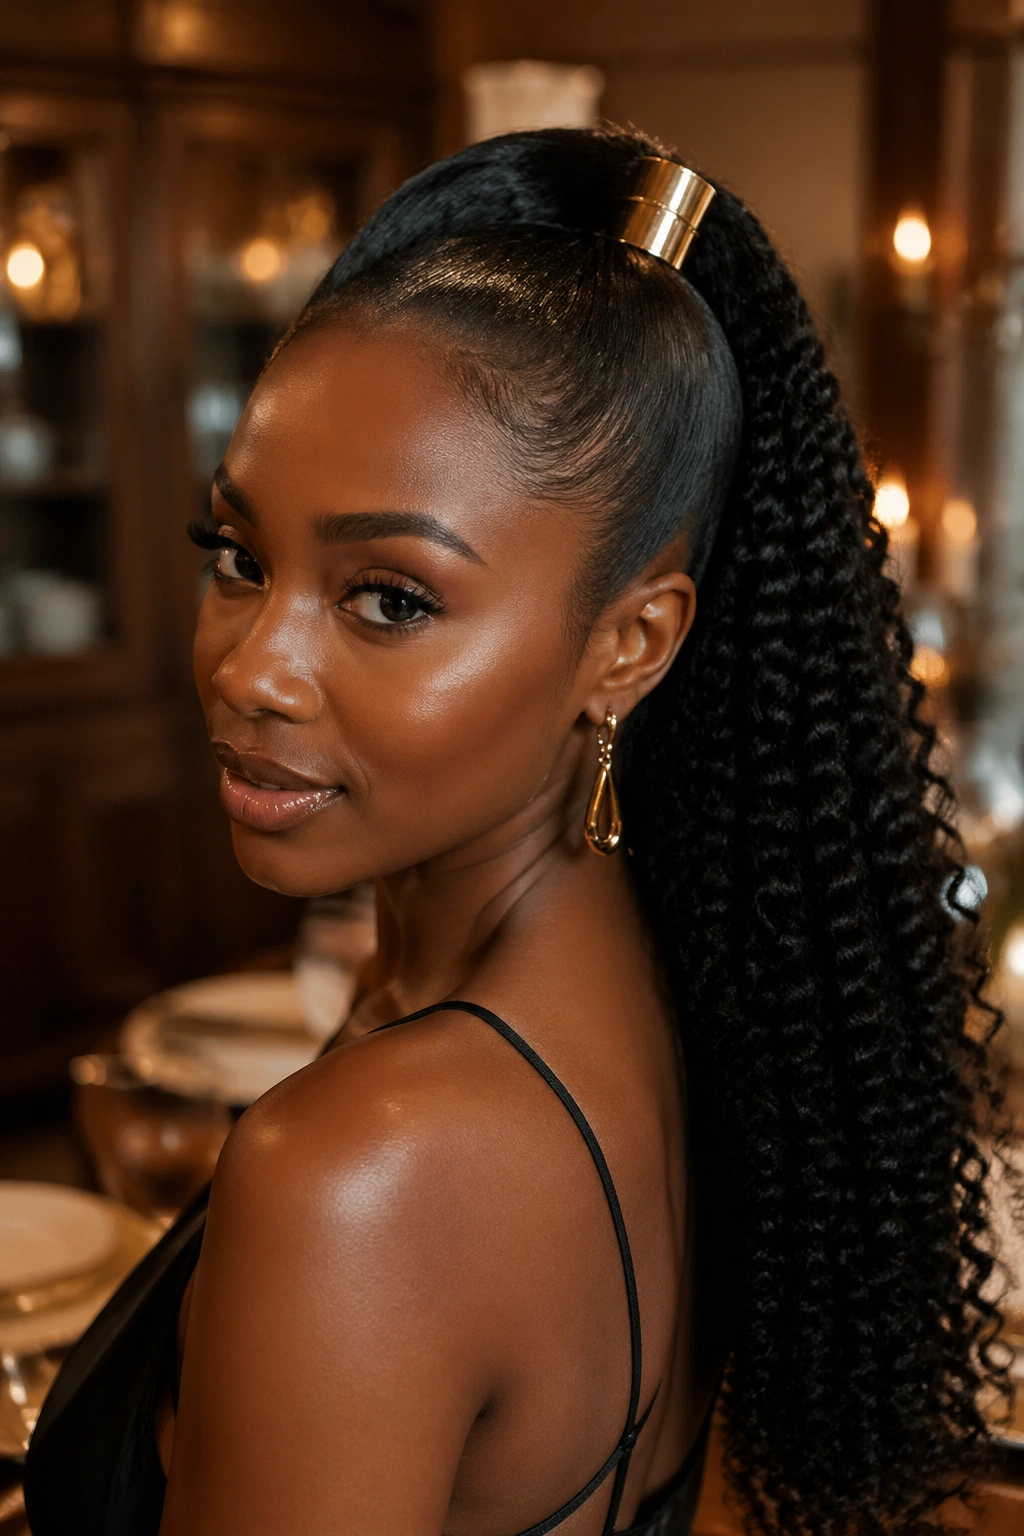
A plain ponytail and a ponytail with a single gold cuff wrapped around the base are not the same style. One of them is functional. The other is a statement.
Unlike a basic elastic that gets covered with a piece of hair, a metal cuff — think brass, gold-tone, or antique bronze — sits visibly on display at the base of the pony. It’s the kind of detail that reads as jewelry, not just a hair accessory, and it completely transforms the aesthetic.
What makes it different from a plain wrap? Effort and intention. A wrapped ponytail is what you do when you want the look to say “I dressed up for this.” The cuff adds a metallic, almost ceremonial quality that pairs beautifully with earthy tones, gold jewelry, and brown-skinned radiance.
Who this style is best for: anyone going to an event where you want your hair to be a conversation piece without being loud. Think engagement parties, gallery openings, dinners where the dress code is vague but leaning elegant. It’s also a favorite for Afro-fashion editorials because of how photogenic it is under warm lighting.
My specific recommendation: skip the cheap plastic cuffs that look metallic but snap within a week. Invest in a real metal cuff — they start around fifteen dollars — and you’ll reuse it for years. Bonus points if you find one with an engraved pattern that nods to West African or Sudanese goldwork.
8. The Curly Drawstring Ponytail
A drawstring ponytail is the single best-kept secret in the natural hair world. I don’t think that’s an overstatement.
Here’s why: a drawstring pony is a pre-made hair piece that attaches to your existing hair with two small strings, tightened and tied under a bun of your own hair at the crown. No glue. No clips. No weaving. You can put it on in ninety seconds and take it off in about ten.
For afro and curly hair textures, there are drawstring pieces designed specifically to match 3C, 4A, 4B, and 4C coil patterns. The curl match is dramatically better now than it was a decade ago — if you shop carefully, you can find one that’s genuinely indistinguishable from your own hair in a photo.
What I love about this style is the flexibility it gives you. Your natural hair is still protected underneath, barely touched, with just a small section gathered to hold the drawstring in place. You can wear a waist-length curly pony one day and go back to your twist-out the next. No commitment. No damage.
The catch: you have to find the right curl pattern match, and you have to learn to blend your own hair into the drawstring piece with a little product. If the blend is bad, it’s obvious. If the blend is good, nobody will know.
For anyone dipping a toe into ponytail extensions for the first time, I’d start here. Lower risk than a sew-in, lower cost than a full wig, and you can take it off the moment it stops being fun.
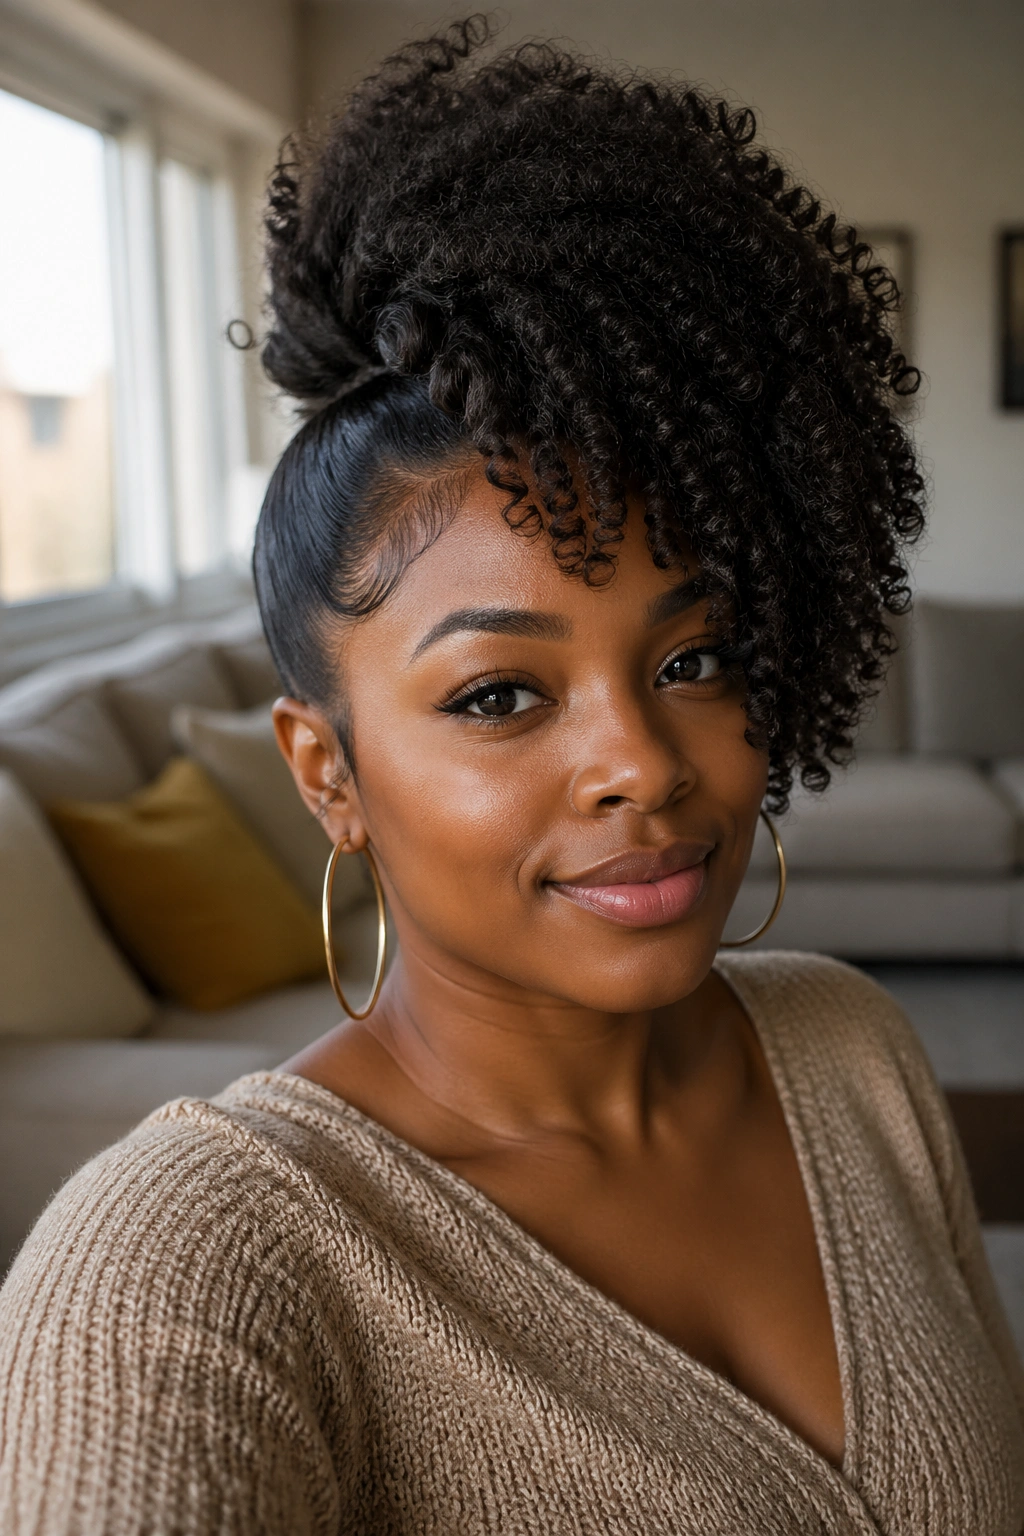
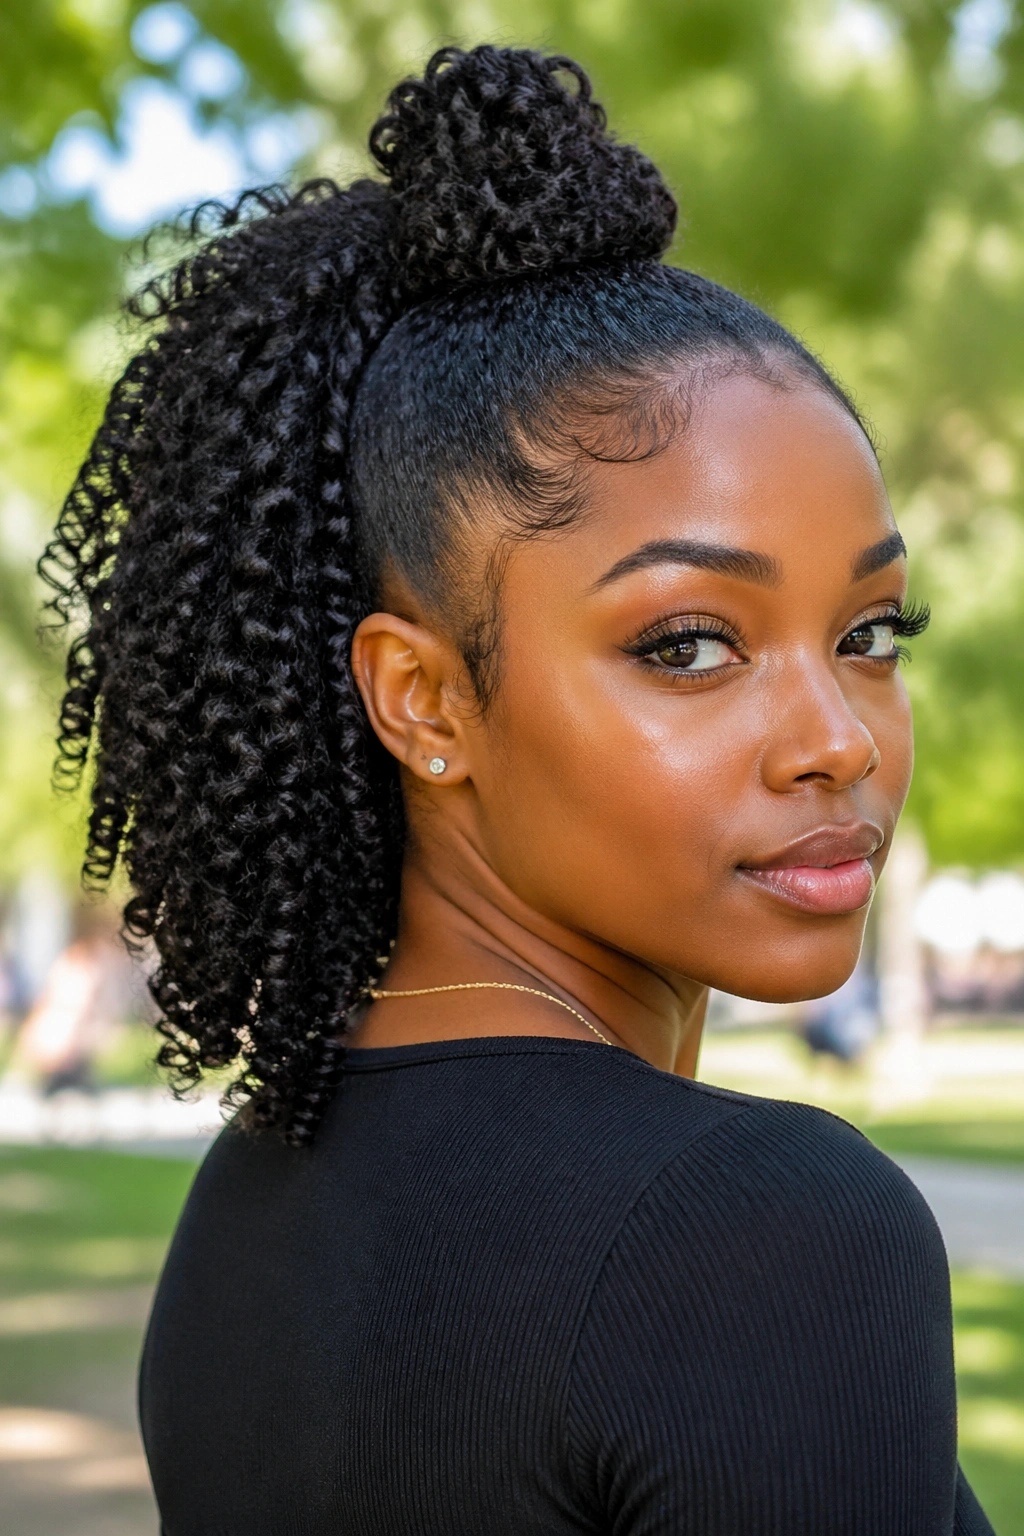
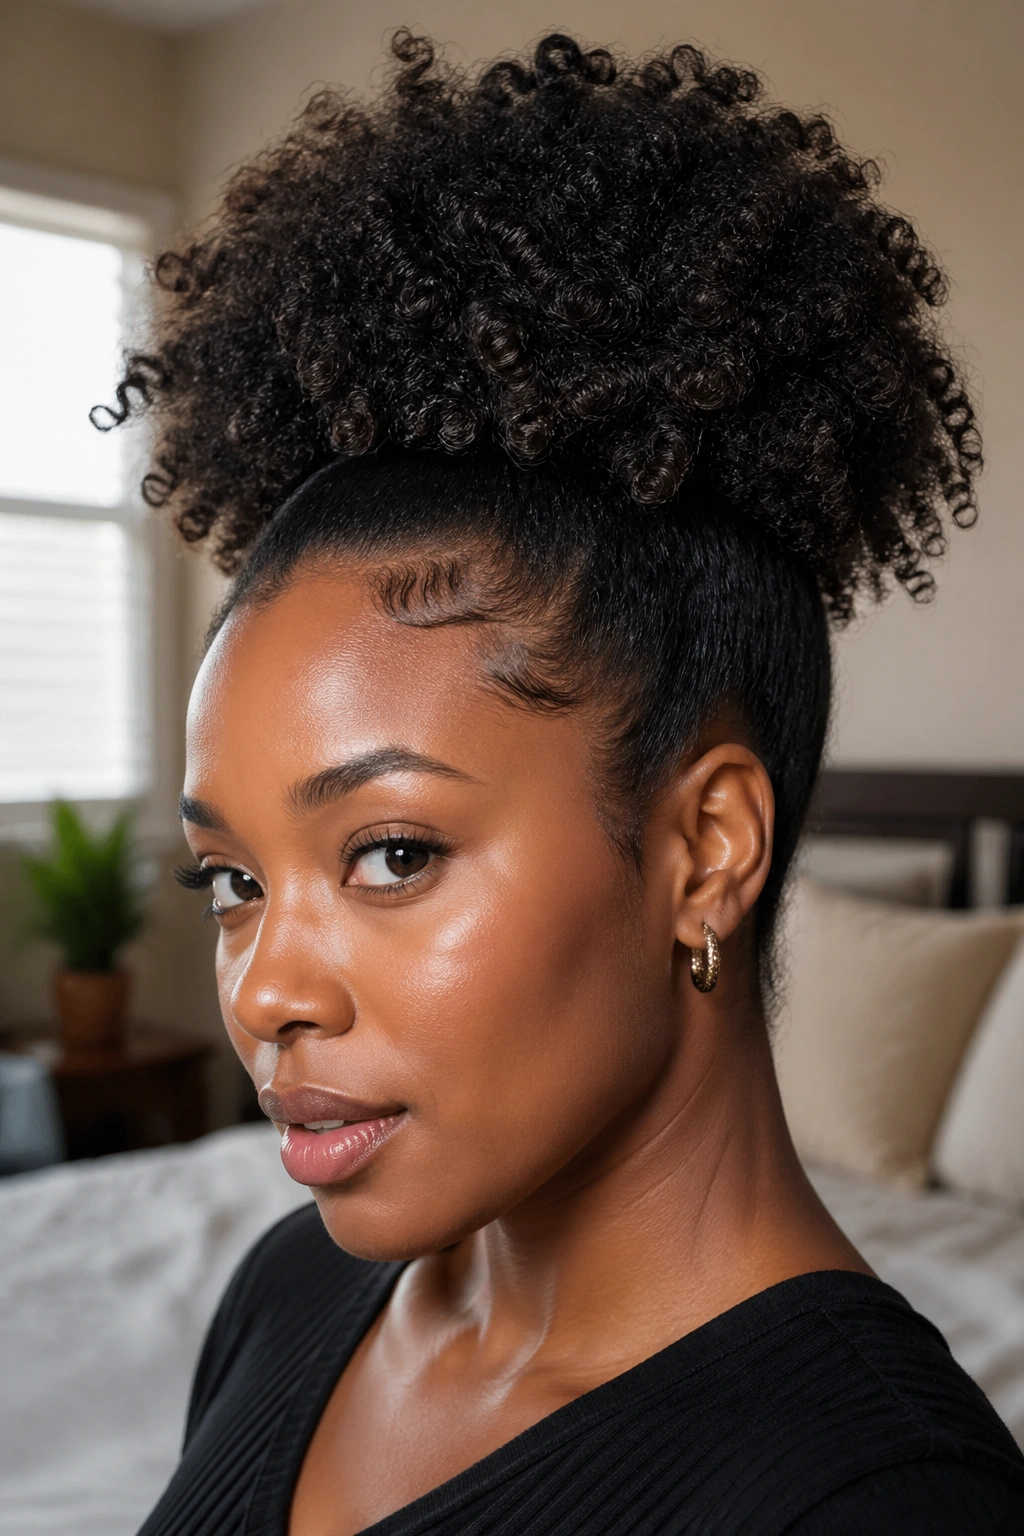
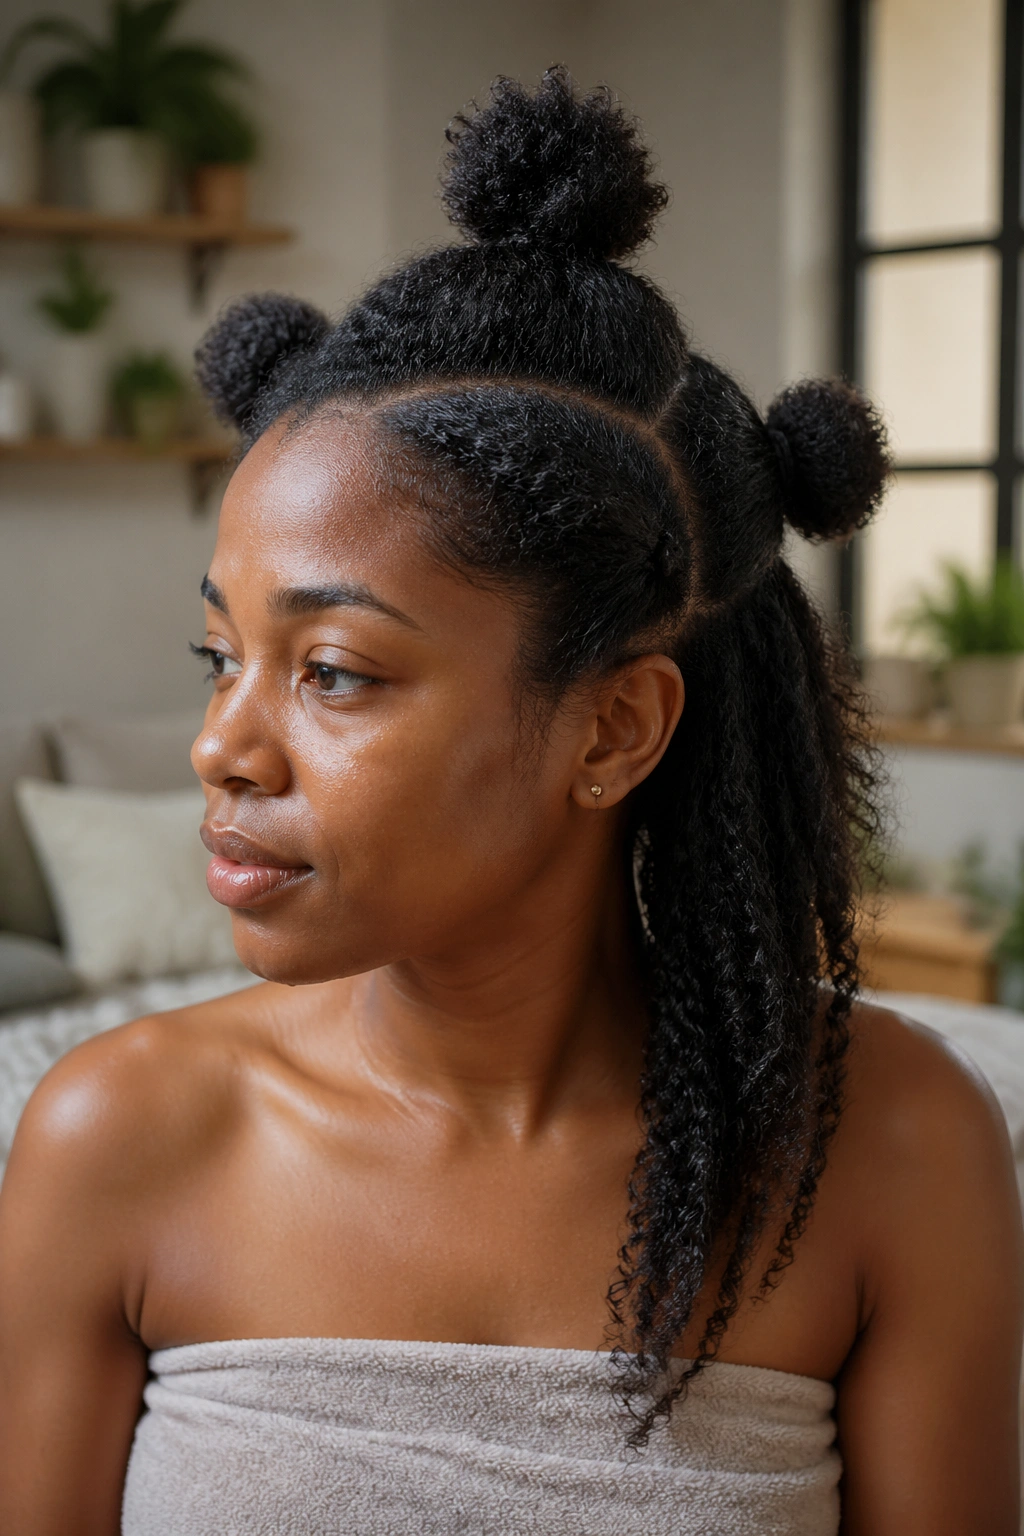
9. The Coily Top-Knot Ponytail
A top-knot ponytail is what you get when a regular top-knot decides it doesn’t want to be rolled all the way in. The hair gathers high on the crown, twists once or twice at the base, and then explodes upward into a loose cloud of coils. It’s half bun, half puff, all attitude.
This one is underrated. Most styling guides treat the top knot and the puff as the same thing, but they’re not. The top knot has more structure at the base — usually a small coiled bun or twist — and the puff sits above it like a crown. On longer afro hair, the contrast between the sleek base and the wild top gives the style a sculptural quality you don’t get from a flat gather.
The prep matters more here than with most styles on this list. If your hair isn’t stretched at all, the top of the knot will collapse into the base and you’ll lose the sculptural shape. A quick five-minute blow-out on the cool setting, or an overnight banded stretch, is enough to give you the lift you need without damaging the coils.
Once the base is anchored with a couple of bobby pins, leave the top alone. Do not fluff it obsessively. Do not pat it into a perfect circle. The beauty of this style is that it’s slightly wild and asymmetrical, and the moment you try to tame it into a symmetrical puff you lose all its character. Step away from the mirror earlier than you think you should.
Paired with hoops and a bold lip, this is one of those styles that feels effortlessly glamorous. It belongs on a dinner date or a music festival or a random Tuesday when you just want to feel like the main character.
10. The Sleek Bubble Pony With Tiny Hair Gems
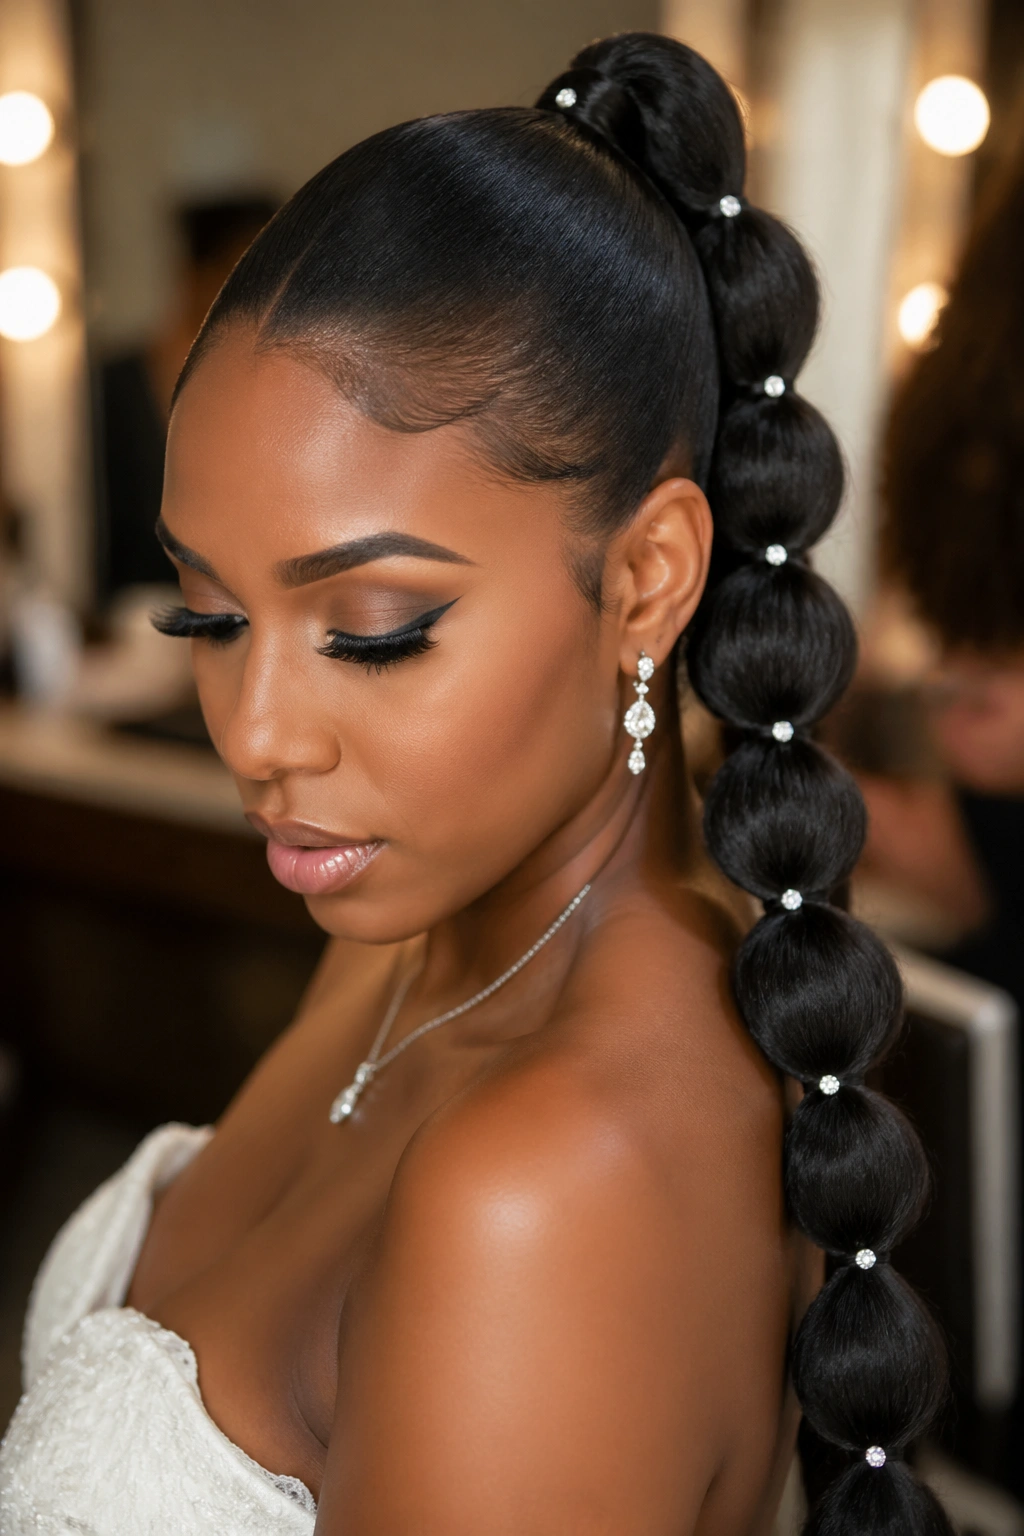
Imagine a bubble ponytail — from number four on this list — but instead of chunky twists between each bubble, you add tiny crystal gems along the length. The effect is subtle from a distance and stunning up close, like catching a flash of light every time you turn your head.
This style works especially well for events where you’ll be photographed a lot. Weddings. Graduations. Birthday photoshoots. The gems pick up whatever ambient light is in the room and throw it back, which is why they look so magical in photos.
Here’s what makes this version different from a basic bubble pony:
- The base needs to be extra sleek — any frizz distracts from the gems and ruins the contrast
- Each bubble should be smaller and tighter than a normal bubble pony, which means using five or six elastics instead of three or four
- The gems are applied with a dab of clear gel to keep them stuck without damaging the hair
- A final mist of light-hold hairspray helps everything stay put
The honest trade-off: this style takes longer than almost any other pony on this list. Plan forty-five minutes minimum. That’s not because it’s hard — it isn’t — it’s because the detail work with the gems cannot be rushed without looking sloppy.
Save this one for occasions. It’s not an everyday style, and trying to make it one will burn you out. But for the right moment, the payoff is unbeatable.
11. The Intentionally Messy Textured Ponytail
Is a messy pony just a lazy pony with better marketing? Mostly, yes — but there’s actually a technique to making it look intentional rather than accidental.
What Separates Polished Mess From Just Mess
The difference is contrast. A great messy pony has one clean, deliberate element — a smooth crown, a tight base, or a neat hairline — while the rest of the hair is allowed to do whatever it wants. That contrast is what tells the viewer you made a choice instead of running out of time.
How to Build the Look
Start by laying your edges down crisp and smooth. This is the deliberate element that anchors the rest of the style. Then gather the hair loosely at the crown or mid-back, tie it without yanking, and pull out a few strategic pieces around the face. Use your fingers — not a comb — to rough up the pony itself. Pull a little here, fluff a little there, leave a wave sticking out of the side.
Don’t touch it for a while. Let the shape settle. Come back in ten minutes and fluff one or two more spots if needed.
The messy pony is a weekend style, a creative-job style, a “I look like I have a life outside of work” style. It is not the move for a job interview or a conservative workplace. Know your audience.
If your workplace tends toward the formal end, save this one for after-hours and swap to number two when the alarm goes off on a Monday.
12. The Flat-Twist Crown Into a Low Ponytail
Flat twists are the underrated cousin of cornrows. They take half the time, produce a similar smoothing effect across the crown, and — when you combine them with a low gathered pony — they create one of the most elegant protective styles you can do on natural hair.
How the Structure Works
You flat-twist the front and top sections of your hair (usually four to six twists, running diagonally backward from the hairline) and let them feed into a gathered low ponytail at the nape. The twists lie flat against the scalp, keep the front of the hair smooth, and give the whole style a tailored, finished look.
Specific Benefits Over a Plain Low Pony
- Much less tension on the edges because the twists carry part of the pull
- Adds visual interest to what would otherwise be a plain style
- Lasts up to a week with proper night care
- Doubles as a protective style since the front is fully covered
- Transitions easily into a twist-out afterward if you take the twists down at the end
The Learning Curve
Flat twisting on your own hair takes practice. The twists need to stay even in size and tension for the finished look to feel clean. Give yourself three or four attempts before you judge your skill level. Most people get noticeably better between attempt two and attempt three.
Once you have the technique down, this is a style you’ll reach for again and again. It photographs well, lasts for days, and doesn’t require any heat.
13. The Cornrow-Fed Long Ponytail
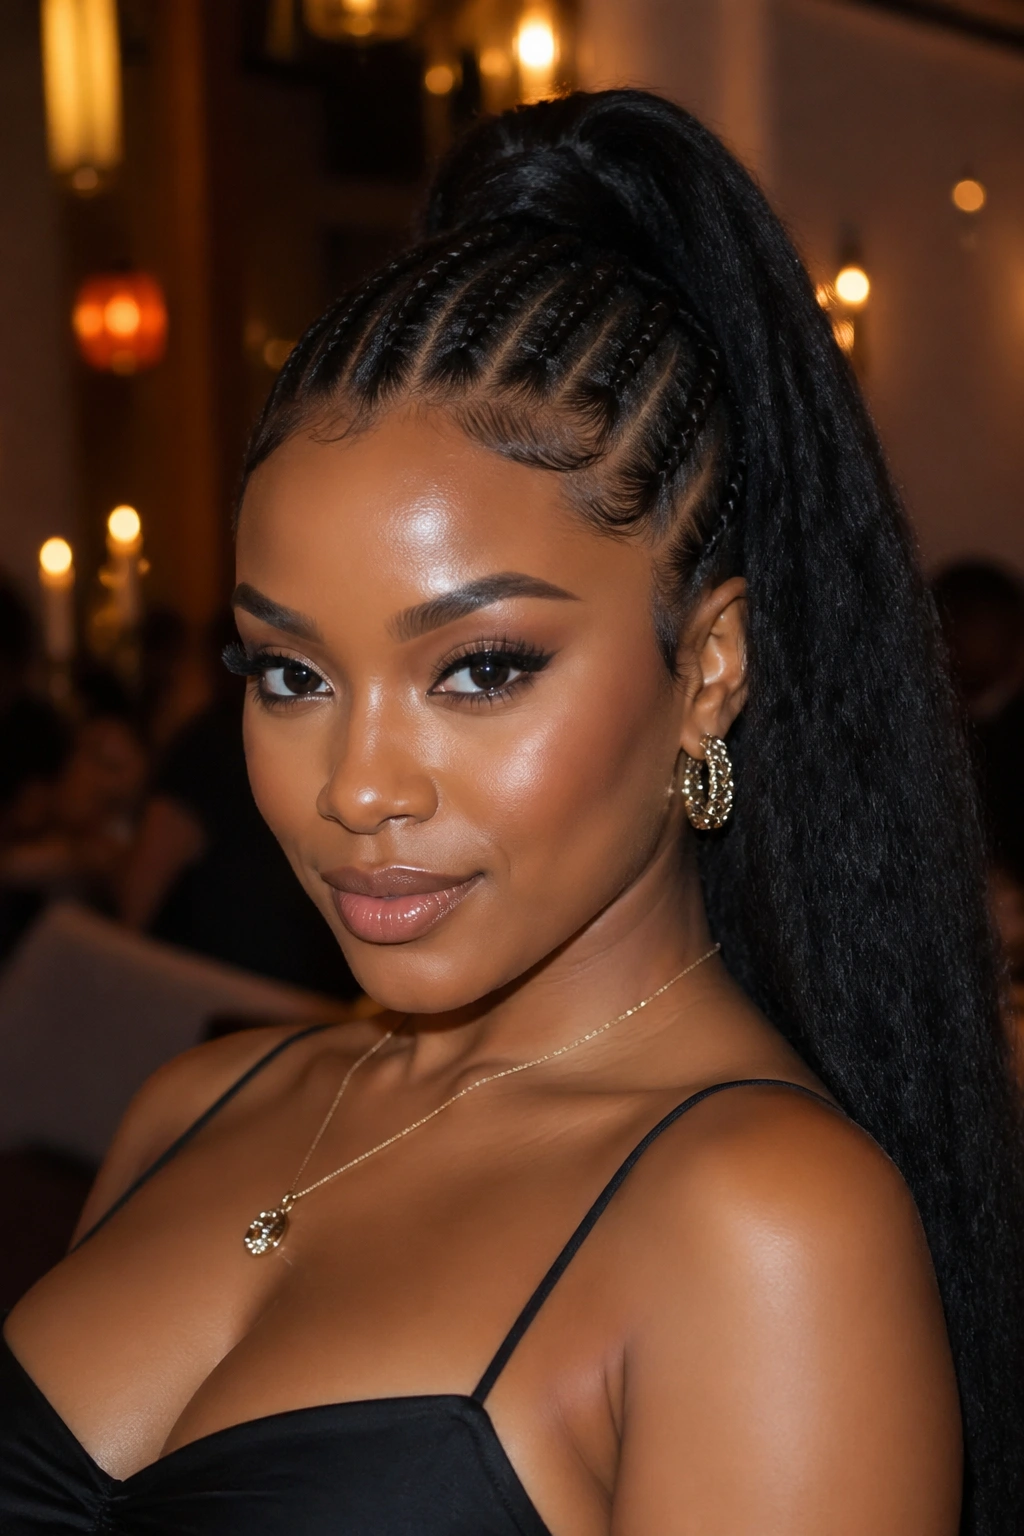
Unlike a drawstring ponytail that attaches with a string, a cornrow-fed pony is built from the ground up: the front and sides are cornrowed into a center point, and extension hair is braided into the cornrows as they meet, creating a single long ponytail that flows straight out of your own hair.
What makes this different from other extension styles is the seamlessness. Done well, there is no visible join between your natural hair and the extension. The cornrows hide the transition completely, and the length and volume you end up with look organically yours — if yours happened to grow to your lower back.
Who it’s best for: anyone who wants long hair drama without committing to a wig or a full sew-in. Also anyone with a big event — a wedding, a birthday photoshoot, a professional headshot — and only one day to prep.
My specific recommendation: use kanekalon or synthetic-blend braiding hair that matches your natural curl pattern if you want a textured result, or stretched straight braiding hair if you want a sleek finish. Stay away from the ultra-glossy synthetic that looks plastic in photos. Spend the extra ten dollars for the matte versions. The quality difference is night and day.
Be honest with yourself about your cornrowing skills. If you can’t braid your own front cleanly, book a stylist or ask a friend. A sloppy front ruins the whole illusion, and the cost of a stylist is worth it for a style that lasts over a week.
14. The Chunky Two-Strand Twist Ponytail

A chunky two-strand twist pony is one of those styles that rewards you for not overthinking it. You gather the hair into a high or mid pony, divide the ponytail portion into four to six thick sections, and twist each section into a chunky two-strand twist that hangs freely from the base.
The aesthetic is powerful and a little tribal in its visual language — which is to say it draws on the long tradition of twisted hairstyles across the African diaspora, and it shows. This is not a subtle style. It’s designed to be seen.
Thickness is everything. The twists need to be genuinely chunky. If you divide the pony into twelve tiny twists, you end up with something closer to micro-twists and you lose the impact. Four thick twists hit harder than twelve thin ones every single time. Don’t be afraid of the bulk.
Product-wise, a little bit of twisting cream or a light butter goes a long way. Too much and the twists look greasy under light. Too little and they unravel within an hour. A quarter-sized amount for the whole pony is about right for most hair densities.
The twists can stay in overnight, which means this is one of the rare styles where day-two actually looks better than day-one. The slight loosening adds movement and softens the initial tightness of the twists. Sleep on a satin pillowcase, wake up, tie on a scarf while you get ready, pull it off on your way out the door. Done.
Paired with big hoop earrings and minimal other accessories, this style carries itself. No bow, no gem, no cuff required.
15. The Ombré Clip-In Afro Ponytail
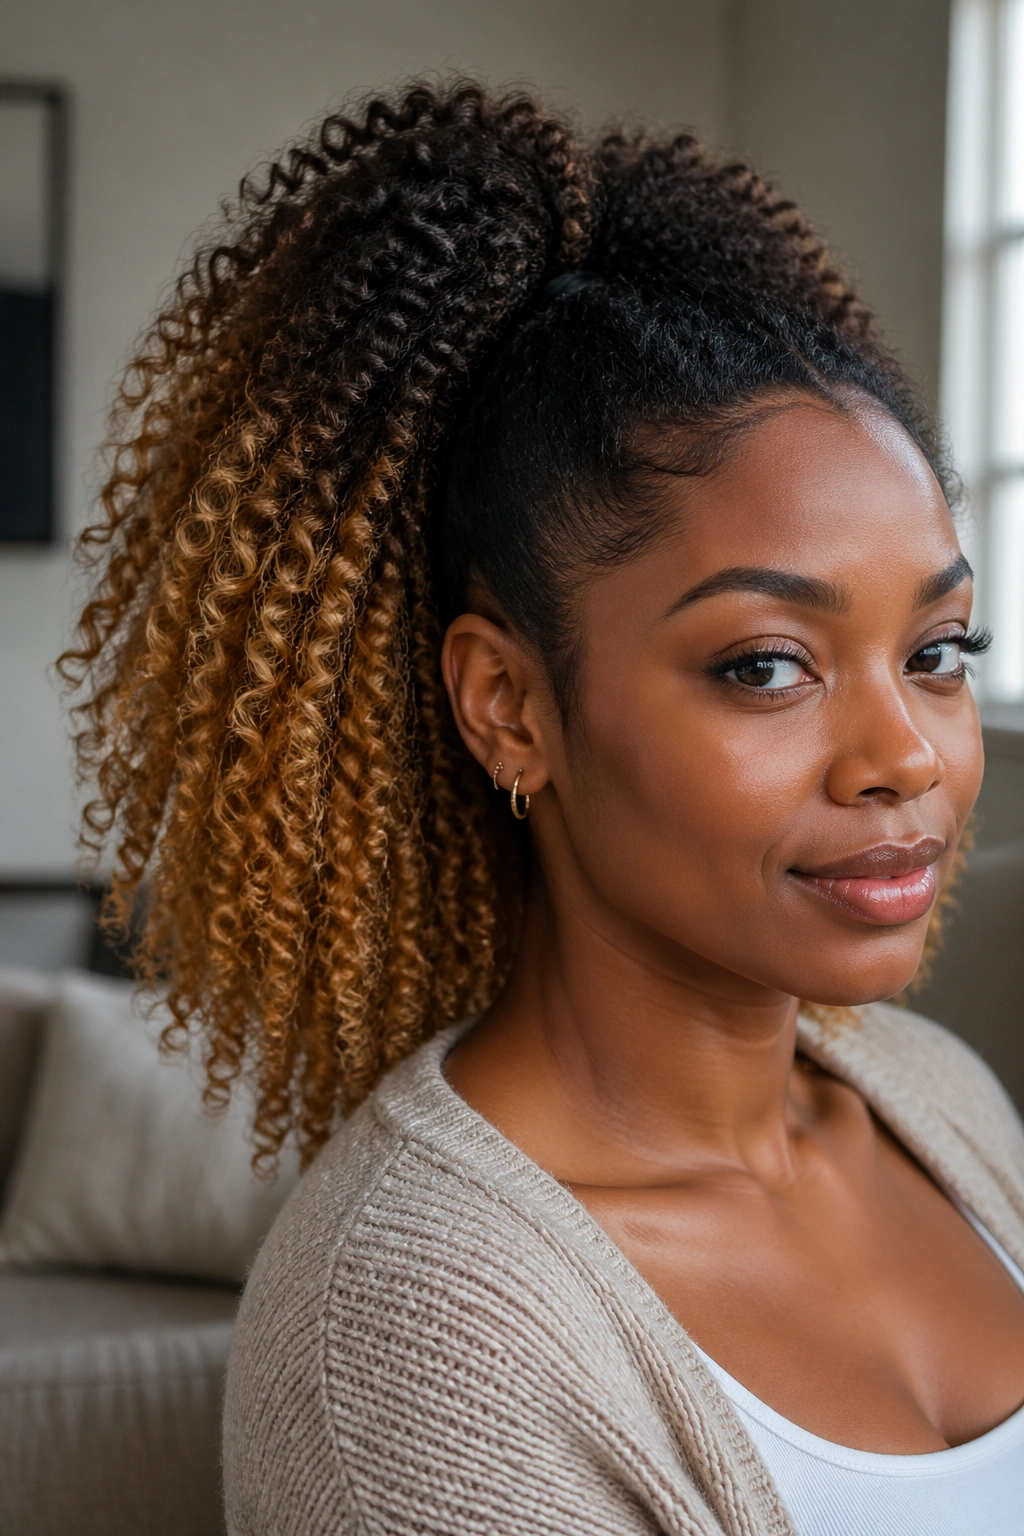
The ombré clip-in is the style that lets you try a new hair color without actually coloring your hair. I cannot overstate how useful this is.
A clip-in ponytail with an ombré effect — darker at the root, lighter toward the ends — gives you the visual impact of a professional color job without any bleach, any damage, or any commitment. You clip it in when you want it. You take it out when you don’t. Your natural hair stays exactly the way it was.
The specific move that makes this style work on afro textures is matching the curl pattern of the clip-in to your natural texture. A straight clip-in on natural hair is the fastest way to make the whole thing look fake. Look for a clip-in ponytail that’s specifically cut and styled for Afro or curly hair, with coils that blend into your own at the base.
Honey blond, caramel, or copper ombré tones tend to read best on darker skin. If you want something more dramatic, burgundy or wine tones are worth trying too — they photograph beautifully and don’t wash out the warmth of melanin-rich skin the way cooler tones sometimes do.
The catch with clip-ins is weight. A heavy clip-in pulls on your own hair at the attachment point, and over hours that pull becomes uncomfortable. Look for lightweight fibers and high-quality clips. If the pony starts to feel heavy after two hours, it’s not the right piece.
16. The Double Afro Puff Pigtails
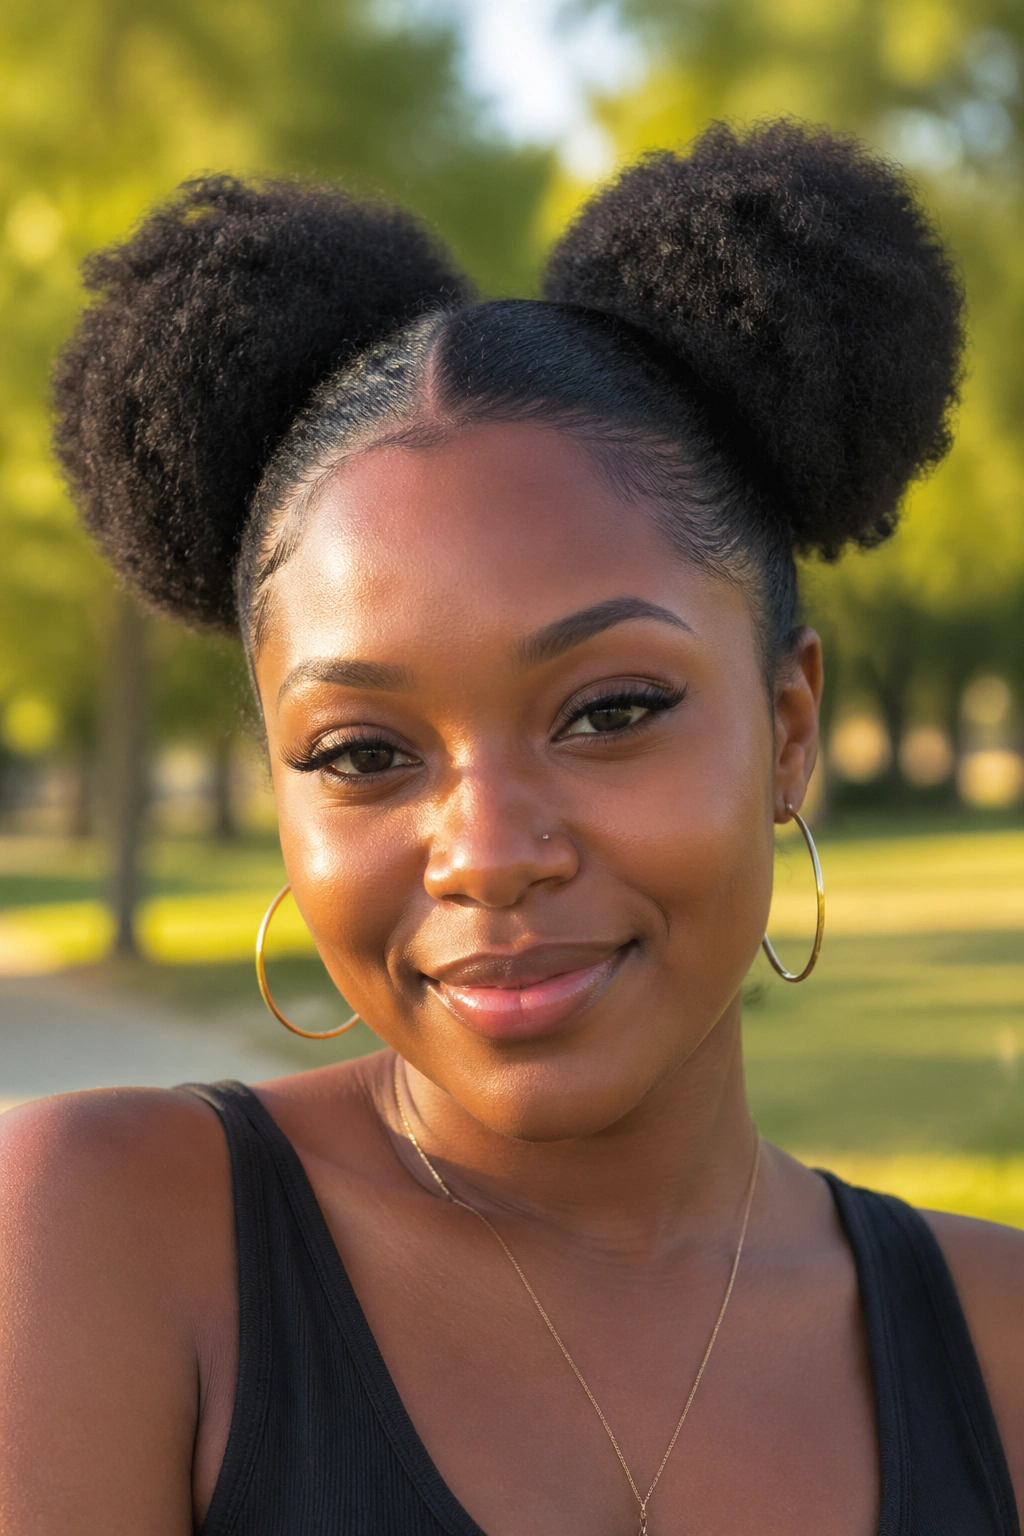
Two puffs instead of one. That’s it. And somehow the addition of a second puff changes the entire energy of the style.
Picture this scenario: you’re getting dressed for a casual outing — a friend’s barbecue, a farmer’s market, a coffee with someone you haven’t seen in a while. You want something that looks adorable without looking like you tried too hard. You want your face to be the focus, not the hair. This is the style.
The double puff is built the same way as the single high puff, just divided down the middle. Part the hair straight down the center of the scalp, from the forehead to the nape, using a rat-tail comb. Gather each half into its own elastic at the same height on either side of the head. Fluff each puff into a round, even shape.
Here’s what matters most for making this look intentional:
- The part down the center must be clean and straight, not zig-zagged or wandering
- Both puffs need to sit at exactly the same height — uneven placement reads as a mistake
- Keep them symmetrical in size, using a hand mirror to check the back if needed
- Pick a puff height that flatters your face (lower for round faces, higher for long faces)
The vibe this style sends is playful and youthful without being juvenile. It works on women in their twenties, thirties, forties, and beyond. What changes is the styling around it — with hoops and a red lip, it reads adult. With a bucket hat and overalls, it reads carefree. The puffs themselves do not age you.
17. The Fulani-Inspired Braided Ponytail

The Fulani style draws from the traditional hairstyles of Fulani women across West and Central Africa, and it has influenced natural hair fashion for generations. At its heart, it combines cornrows running along the sides of the head with a long, loose ponytail or braid flowing from the crown.
What Makes It Distinct
The signature move is a center cornrow that runs from the forehead straight to the crown, often flanked by smaller braids on each side that curve backward. Small beads, shells, or cowries are threaded into the ends of the braids for decoration. The back is gathered into a long ponytail — either the natural hair, a braided extension, or a mixture of both.
How to Adapt It for Everyday Wear
- Skip the beads if you want a more modern take — the cornrow structure alone is striking
- Use gold or brass cuffs at the base of the pony for a subtle homage to the traditional jewelry
- Keep the center cornrow perfectly straight; this is the visual anchor of the whole style
- Leave a few baby hairs loose around the temples for softness
- Let the ponytail fall naturally without over-styling
Important Context
If you wear this style, wear it with respect for its origins. The Fulani braiding tradition is centuries old, rooted in cultural identity and signaling marital status, age, and tribal affiliation in different regions. Black women wearing this style are honoring their heritage or connecting to the broader African diaspora — it’s not a costume.
This is one of the most meaningful styles on this list, and one of the most beautiful. When it’s done right, it stops traffic.
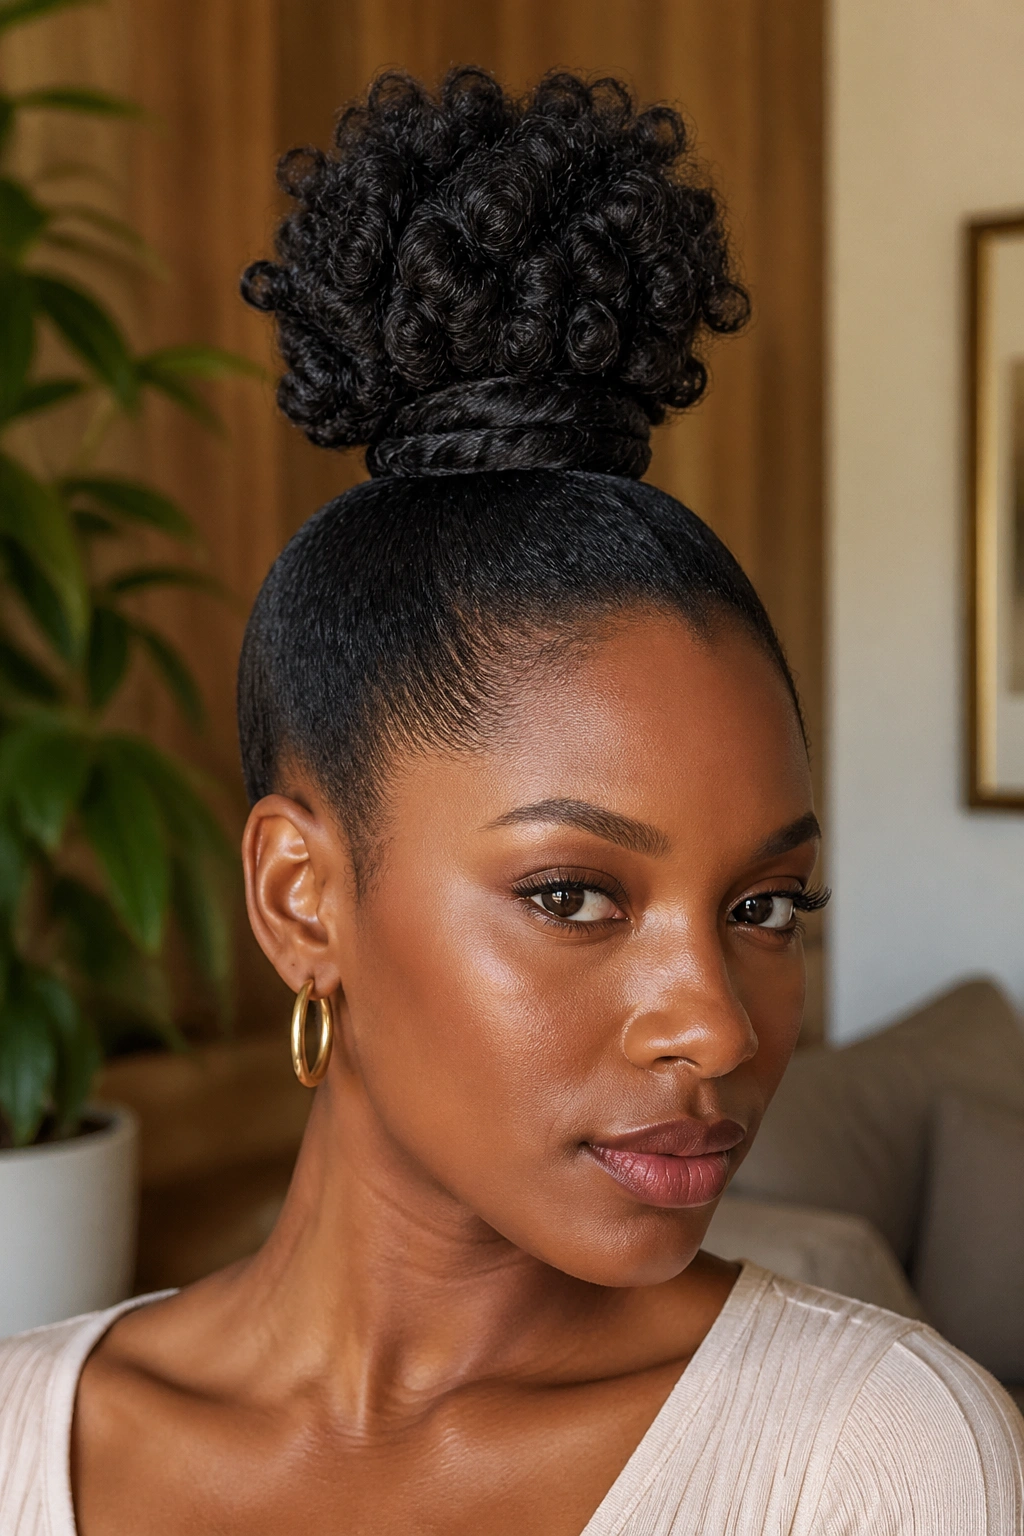
18. The Bantu-Knot-Tipped Ponytail
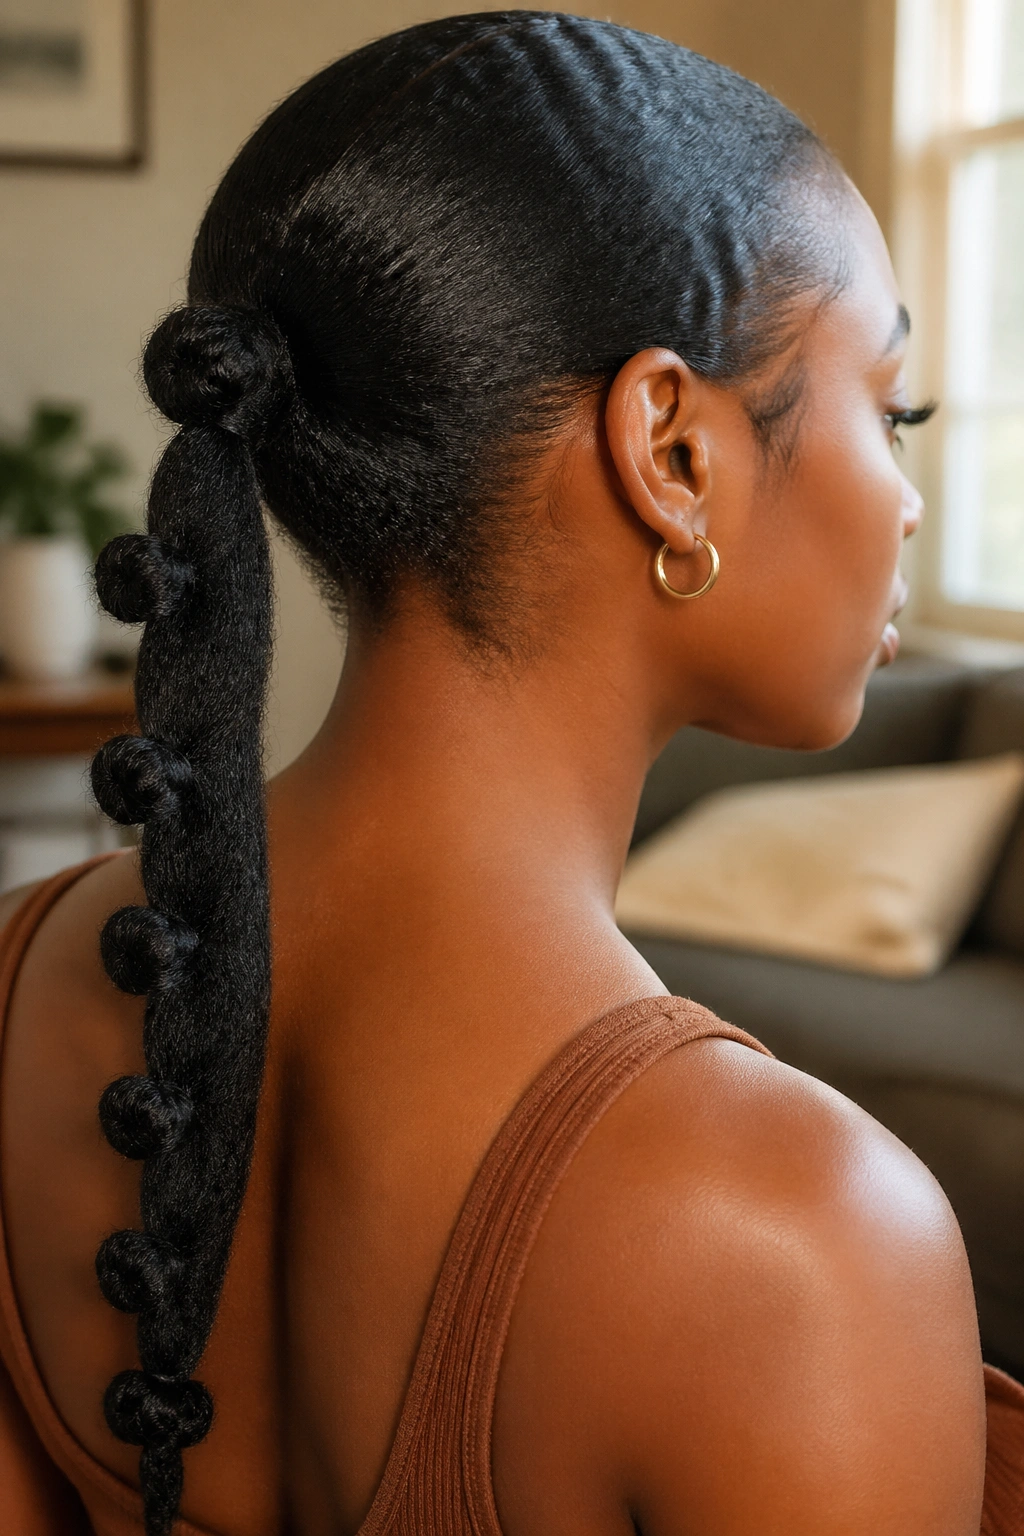
Why would anyone put Bantu knots at the tip of a ponytail? Fair question. The answer is that it solves a specific problem: how to get visible texture and sculptural interest on a ponytail that’s otherwise plain and smooth.
What It Looks Like
Imagine a sleek low or mid ponytail that flows out of the back of your head and then, halfway down its length, transforms into a series of small Bantu knots arranged in a neat column. It’s a contrast of smooth to textured, straight to geometric, plain to ornate — all in a single style.
How to Build It
Start with a traditional low ponytail on stretched hair. Lay your edges. Wrap the base. Once the pony is secured, divide the ponytail portion into eight to ten small sections. Take each section, twist it tightly, and coil it into a small Bantu knot, securing with a bobby pin. Space them evenly along the length of the pony.
The knots can stay in place for the event, or you can unravel them at the end of the night for a textured curl pattern that lasts another full day. Two styles in one, essentially.
Who This Is Actually For
This is a style for someone comfortable spending a little time on their hair. It’s not a five-minute pony. It’s a forty-five-minute sculptural project, and the people who love it tend to be the ones who genuinely enjoy the act of styling itself.
If you hate fussing with your hair, skip this one and stick to number two or number five. If you find hair styling relaxing, you’ll fall in love with this one the first time you wear it.
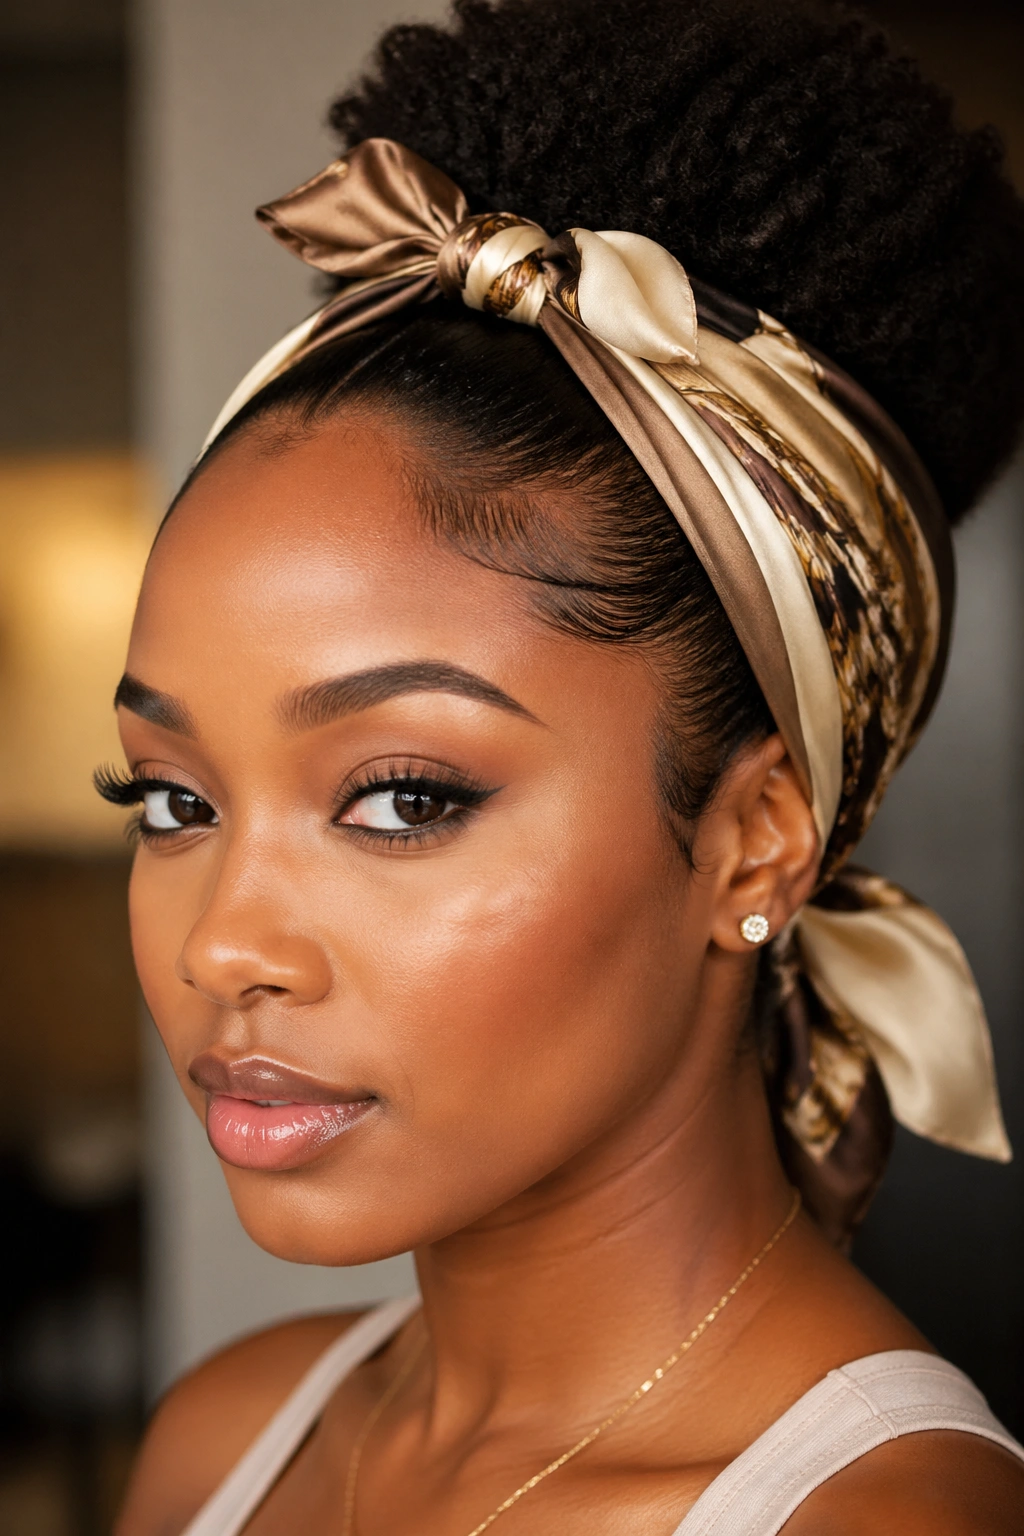
19. The Ribbon-Wrapped Low Ponytail

A ribbon-wrapped pony is a sleek low ponytail with a length of ribbon — silk, velvet, grosgrain, whatever you like — tied in a bow at the base or wrapped up the length of the pony.
Unlike a cuff or a bead, the ribbon is soft, colorful, and completely customizable. You can change the ribbon for every outfit. Pink velvet for a date. Cream silk for a wedding. Emerald green for a holiday dinner. The base style stays the same; the accessory does all the work.
Compared to a plain low pony, this version feels deliberately feminine and slightly vintage. It reminds me of portraits of women from the nineteen forties — that era’s obsession with clean hair and a single defining accessory. On afro hair, the effect is fresh rather than dated, because the texture of the pony itself keeps the look grounded in the now.
My specific recommendation: start with a velvet ribbon about an inch wide. Velvet holds its shape, doesn’t slip against smooth gel, and photographs richly under warm lighting. Silk is stunning but harder to manage. Skip grosgrain unless you want a preppy-schoolgirl vibe — which is a valid choice, just know what you’re signing up for.
This style is one of my go-to picks when someone asks me for a low-effort, high-impact look. Total styling time: maybe fifteen minutes. Visual return: enormous. It’s the kind of move that makes people assume you spent an hour getting ready.
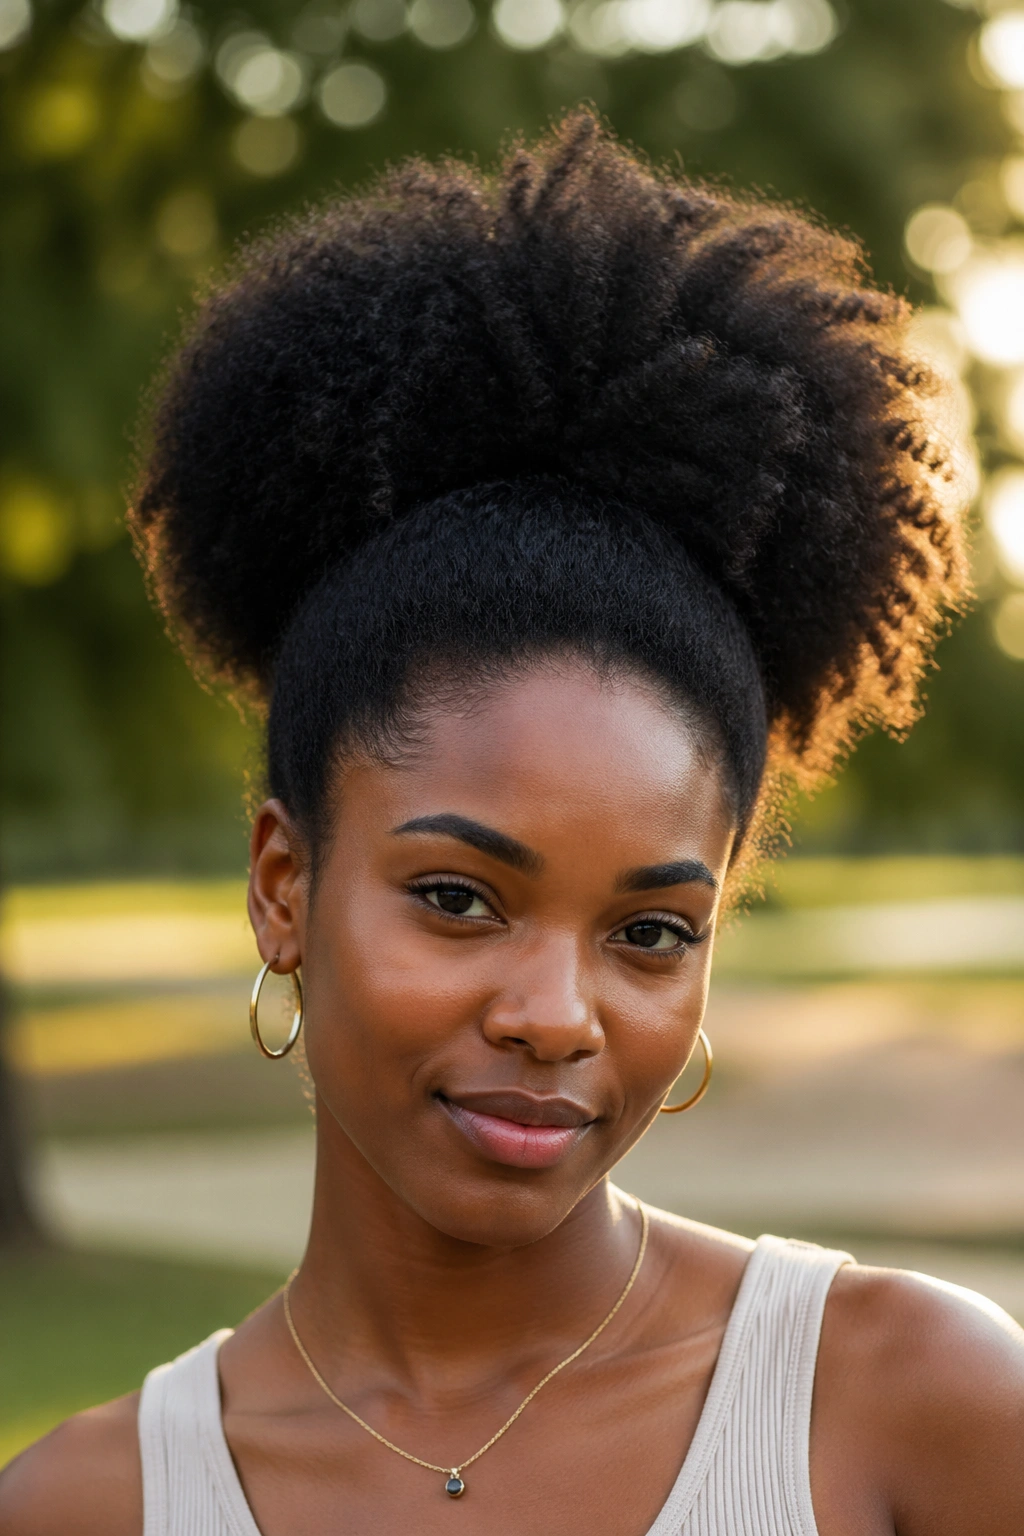
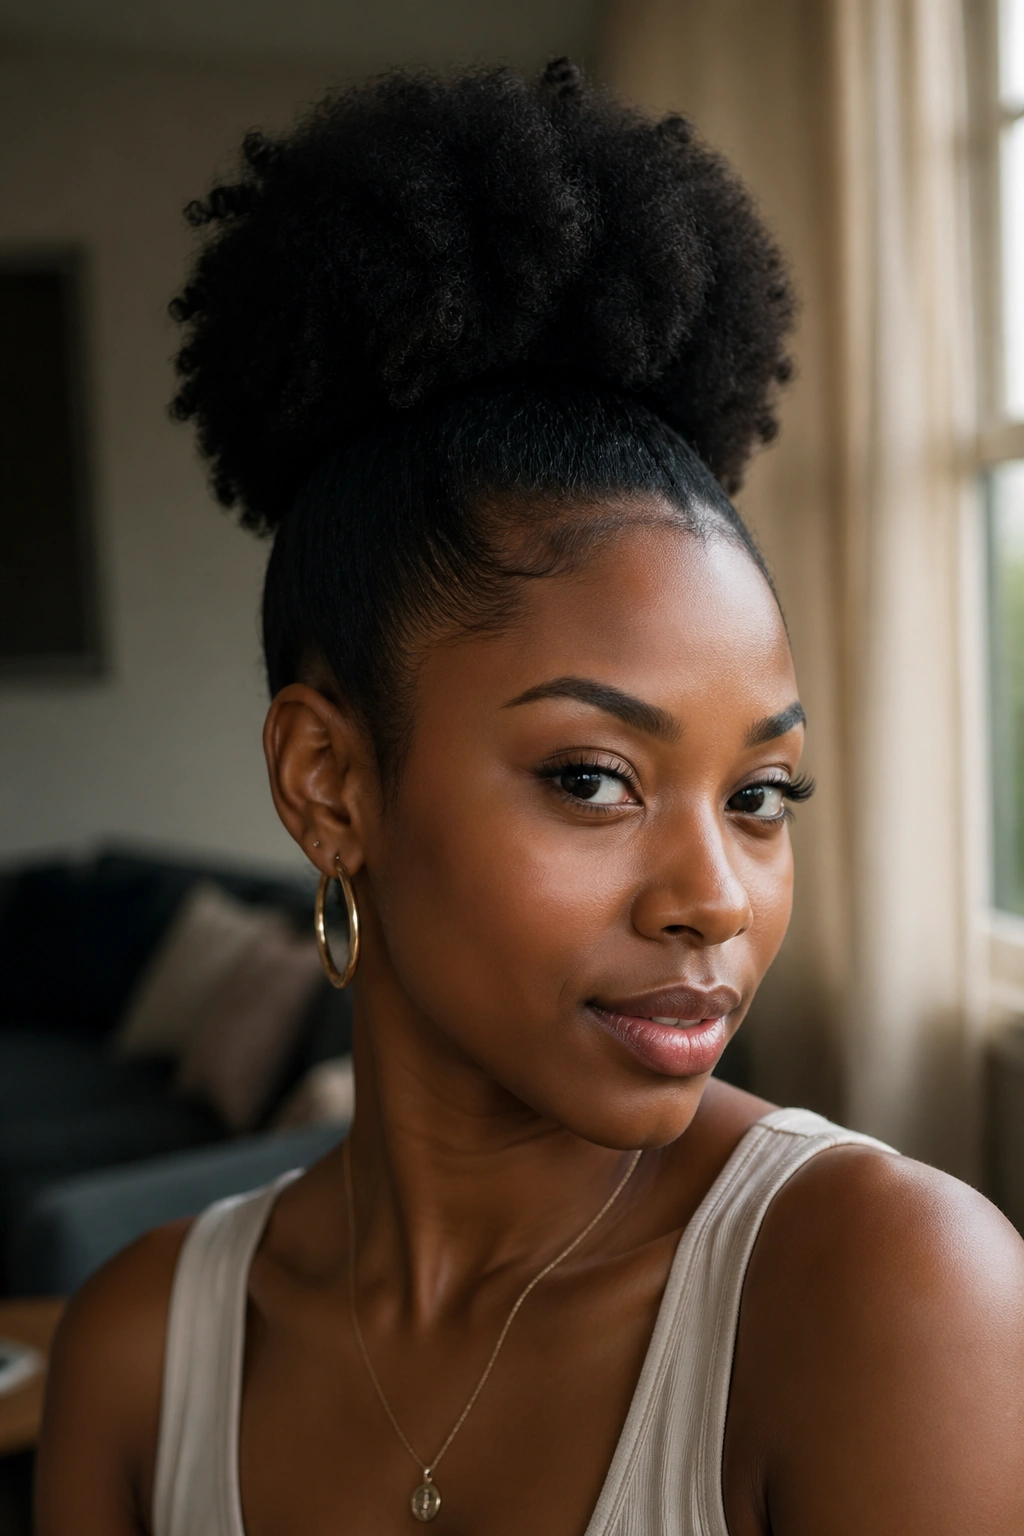
20. The Voluminous Natural Afro Ponytail
I saved this one for last on purpose. It’s the one I wear most often, and it’s the one I think most natural-hair beginners should learn before they touch any of the more elaborate styles on this list.
The voluminous natural afro pony is exactly what it sounds like: no extensions, no braids, no wraps, no cuffs, no ribbons. Just your own hair, gathered loosely at the crown or mid-back, left to its full natural texture, and fluffed into the biggest, roundest, most gravity-defying shape it can hold.
This is the style that celebrates what afro hair does on its own, without any editing. No tight pulling. No flattening the curls. No forcing the pony to look “neat” in a way that works better for straight hair. You gather, you tie, you fluff. That’s it.
Here’s the thing I wish someone had told me years ago: the bigger the pony, the less tension you actually need at the base. Counter-intuitive but true. When the hair is fluffed into a massive round shape, the visual weight distributes across the volume, not the elastic. That means less pull on your edges. Less scalp strain. Less damage.
Use a wide fabric-covered elastic. Pull the hair back just enough to hold the shape, not a hair’s breadth tighter. Fluff generously in every direction until the pony looks like a round cloud behind your head. Leave the baby hairs however they want to behave — slicked, loose, wavy, doesn’t matter. The vibe is celebratory, not controlled.
This style pairs with almost everything. Jeans and a tee. A cocktail dress. Athleisure. A suit. The hair is the statement, and the outfit supports it.
If you take one thing away from this entire guide, let it be this: your natural afro does not need to be corralled into a shape that doesn’t fit it to count as a “done” hairstyle. A full, voluminous, unapologetic pony of your own coils is one of the most powerful looks a Black woman can wear. Period.
How to Make an Afro Ponytail Actually Last Without Wrecking Your Hairline
The best styling in the world doesn’t mean much if your pony falls apart by noon or leaves a bald spot behind by next month. Longevity and hair health are the twin goals, and they mostly come down to a handful of non-negotiable habits.
Tie loose, not tight. This is the habit most people get wrong, and it’s the one that matters most. A ponytail should feel secure, not painful. If your scalp feels tight within five minutes of tying, you’ve pulled too hard — take it down and start over. Your edges cannot grow back from repeated micro-trauma, so don’t inflict it.
Use fabric, not rubber. Plastic and rubber elastics don’t just pull hair out when you remove them. They also snag individual strands while you’re wearing the style, leaving you with invisible broken hairs all over your scalp. Satin-covered or cloth-covered ties pay for themselves in two weeks of reduced breakage.
Rotate your ponytail position. Don’t wear a high pony seven days in a row. The same spot of scalp gets repeatedly stressed, and that’s how traction alopecia starts. Alternate high, mid, low, side, and protective styles throughout the week.
Sleep in a scarf. I know. Everyone says this and everyone’s tired of hearing it. But silk or satin at night reduces friction, keeps moisture in, and protects the shape of your pony so you don’t have to rebuild it from scratch the next morning. It’s five extra seconds at bedtime and it changes everything.
Take regular breaks. For every week you wear a ponytail-based style, take a day or two off in a loose puff, wash-and-go, or braid-out. Your scalp needs recovery time just like muscles do.
How to Turn a One-Day Style Into a Three-Day Style
Most afro ponytails are perfectly capable of lasting longer than a single day — most people just don’t know the tricks to extend them.
Tie down the edges with a satin scarf overnight, wrapped firmly but not painfully. This sets the baby hairs back into place while you sleep, so you wake up with a hairline that still looks fresh instead of frizzy.
Mist the pony itself lightly in the morning with a mix of water, a touch of leave-in, and a few drops of light oil. Not soak it — just refresh it. Then re-fluff with your fingers.
Touch up the edges with a dab of fresh gel and a soft boar bristle brush if needed. One careful pass is usually enough. More than that and you’re disturbing the hair underneath, which leads to frizz and breakage.
If the ponytail base has loosened, don’t re-tie it tighter — that’s how you break the hair at the tie point. Instead, add a second elastic on top of the first one to give it a little more hold without yanking.
By day three, most ponytails want to become something else. That’s fine. Lean into it. Take down the bottom and turn it into a twist-out. Pull the whole thing into a low bun. The transition from day-one pony to day-three bun is one of the best natural hair hacks going, and it extends the life of a single styling session dramatically.
Common Ponytail Mistakes That Quietly Damage Afro Hair
Some damage happens in a moment. Some happens over months, so gradually you don’t notice it until you look at an old photo and realize your hairline used to sit half an inch lower.
Mistake one: tying wet hair tight. Wet afro hair is at its most fragile. Pulling it into a tight pony while it’s soaking wet stretches the strands well past their breaking point. Wait until it’s at least eighty percent dry before you tie anything tight.
Mistake two: using the same exact elastic position every day. Even a soft elastic creates a compression point. That point, hit day after day in the same spot, is where the hair thins first. Move the tie a centimeter up or down each day.
Mistake three: brushing the pony base repeatedly. Each pass of a brush with tension pulls out a few strands and breaks a few more. Pick a smoothing product that holds the look in one or two passes. If you’re brushing and re-brushing, your product isn’t strong enough.
Mistake four: ignoring tension headaches. If your head hurts from a style, your hair is telling you it’s under too much stress. The headache isn’t a normal side effect of a pretty ponytail. It’s a warning sign. Redo the style looser, or take it down.
Mistake five: skipping the take-down routine. When you’re done with a pony at the end of the day, don’t just yank the elastic off. Loosen it gently, work the tie out of the hair without pulling, and then massage the scalp for thirty seconds to restore circulation. It sounds small. It isn’t.
Paying attention to these five quiet habits will add years to the health of your edges and density. None of them require any special product or fancy technique. They just require noticing.
Picking the Right Afro Ponytail for Your Face, Mood, and Occasion
Not every pony fits every moment. Matching the style to the context is half the battle, and getting it right can make even a simple look feel custom-made.
For round faces, high puffs and mid ponies add length to the face and balance out the width. Low pigtails can accentuate roundness in a way some people love and others don’t — try it and see.
For long or oval faces, side-swept puffs and mid-level ponytails flatter the most because they add width at the cheekbones. Avoid very tall top-knots that stretch the face even longer.
For square jaws and strong angles, soft textured styles like the messy pony or the coily top-knot soften the face beautifully. Sleek styles work too, but consider leaving a few pieces loose around the face for contrast.
For heart-shaped faces, low ponies and chunky twists balance the wider forehead by adding visual weight at the neckline. Bubble ponies also work especially well.
On occasion: everyday errands, work, and school can handle just about any pony on this list, but the high puff, the half-up pineapple, and the double pigtails are the most low-effort winners. For professional settings, the low slicked-back pony and the flat-twist crown read polished and appropriate. For special events, the bubble pony with gems, the Fulani-inspired braided pony, the ombré clip-in, and the ribbon-wrapped low pony deliver the most dramatic results with the least effort.
For date nights, I’m partial to the side-swept curly puff or the wrap-around pony with a gold cuff. Both of them frame the face in a way that reads soft and confident at the same time, and they photograph beautifully in low, warm lighting.
Final Thoughts Before You Grab That Hair Tie
Here’s the one thing I hope sticks with you from this whole guide: afro hair does not need to fight its own nature to be beautiful. The best ponytails on natural hair work with the texture, the volume, and the density — not against them.
If a style hurts to wear, it’s wrong for your hair, not your hair’s fault. If a tutorial tells you to slick every strand into a surface smoother than a billiard ball, it’s either pushing product you don’t need or setting you up for breakage. And if someone tries to tell you that a “polished” ponytail means a flat, stretched, straight-looking ponytail — they don’t understand what afro hair is capable of doing on its own.
Start with one or two of the styles that caught your eye. Practice them. Get your prep routine dialed in. Build up your tool kit slowly. And don’t chase every trend — pick the three or four looks that feel genuinely like you, and rotate those on repeat.
Your edges, your coils, and your scalp will thank you. Your photographs will look better. And the confidence that comes from knowing you have a go-to ponytail for any occasion is the kind of quiet advantage that changes how you walk into a room.
Grab the hair tie. You’ve got this.