Wedding and gala hair is its own sport. It is not regular styling, and anyone who tries to treat it that way ends up with a look that falls flat by the fourth dance. The stakes are different — the photographs matter, the lighting is harsh, the hours are long, and your hair has to survive hugging, dancing, crying, eating, and possibly a rainstorm between ceremony and reception. That is a lot to ask of any hairstyle. For afro-textured hair, it is even more to ask, because the styles that photograph well under flash bulbs are not always the styles that hold up for ten hours straight.
I have done formal hair for more weddings than I can count — my own, friends’, relatives’ — and the lessons are remarkably consistent. The styles that work are the ones designed for endurance, not just for the ceremony photo. You want something that looks intentional at hour one and still looks intentional at hour nine. That rules out a lot of the Pinterest classics, which look stunning in a curated photo and collapse by mile three of the night.
This piece covers twenty-three afro styles worth considering for formal events, from the sculptural high updos that belong at a black-tie gala to the looser, softer looks that fit outdoor garden weddings. I will walk you through prep, shape, accessories, and the honest endurance ratings for each. Some of these I wear for special occasions myself. Others I have only admired on other people. All of them are built to hold.
One more thing before we start. A wedding or gala is not the day to try a brand new style. Do a test run at least two weeks before the event, in the same humidity and temperature if possible, and wear the finished style for at least four hours to see how it ages. The hair gods punish improvisation.
What Makes Formal Afro Hair Different
Formal styles share a handful of qualities that casual styles do not need. Structure — they have to hold a specific shape without drooping. Balance — the weight has to be distributed so you can move your head without feeling like you are wearing a helmet. Polish — every stray hair that would be fine in everyday wear reads as sloppy in a photograph. Durability — they survive ten hours of activity. And finally, elegance — they pair with the dress and the occasion without fighting either.
Hitting all five at once takes planning. A wash-and-go is effortless but not structured. A protective braid is structured but not always elegant. A high updo is elegant but not always durable. The sweet spot is a style that compromises the least on any of these five.
Most of the styles below are meant to last ten hours. Some are meant to last longer — through a destination wedding with morning prep, a beach ceremony, a cocktail hour, and a late reception. I will note which ones are in the shortest category and which ones you can set at 7 AM and still love at midnight.
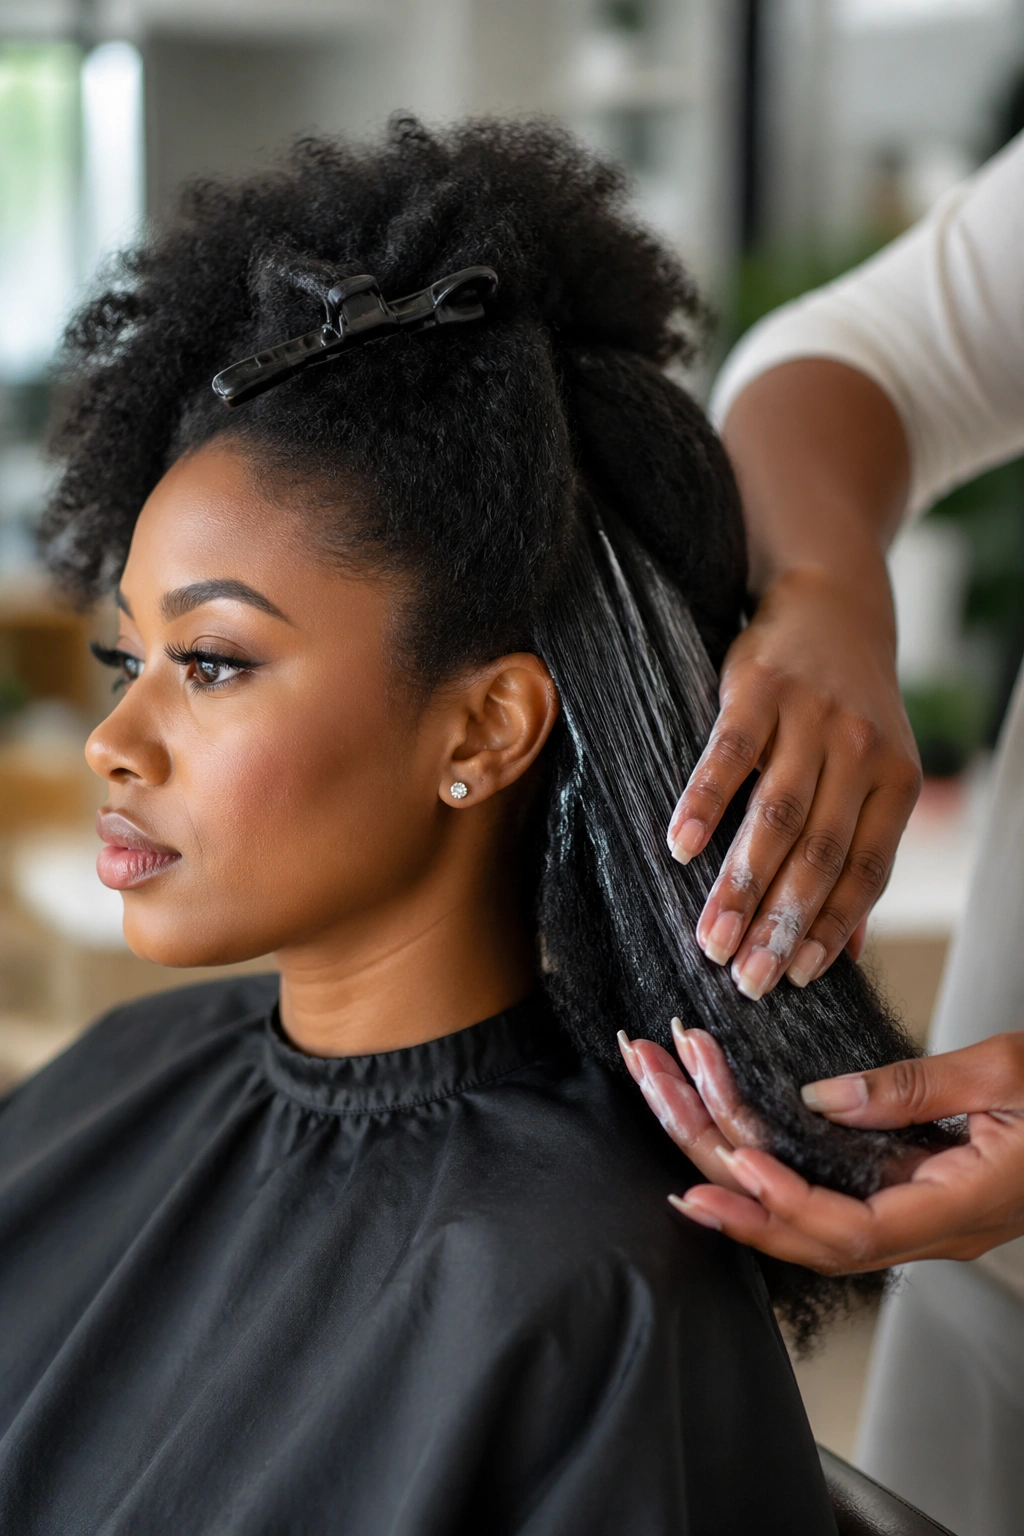
The Prep That Makes or Breaks Your Formal Look
Start the prep a week before, not the morning of. A deep conditioning treatment five to seven days out gives your hair time to absorb moisture and rebound to its natural texture. A protein treatment the same week strengthens strands against the manipulation they are about to endure.
Two days before the event, wash and stretch your hair. Use whatever stretching method you prefer — banding, bantu knots, heatless rod sets, blow-drying with a tension tool. Stretched hair is easier to manipulate into formal shapes and takes less product to control. Do not wash the same day as the event unless the style specifically requires damp hair.
The morning of, moisturize lightly with a leave-in, then seal with a lightweight oil. Heavy products make formal styles look greasy under bright lights. A light hand reads cleaner on camera.
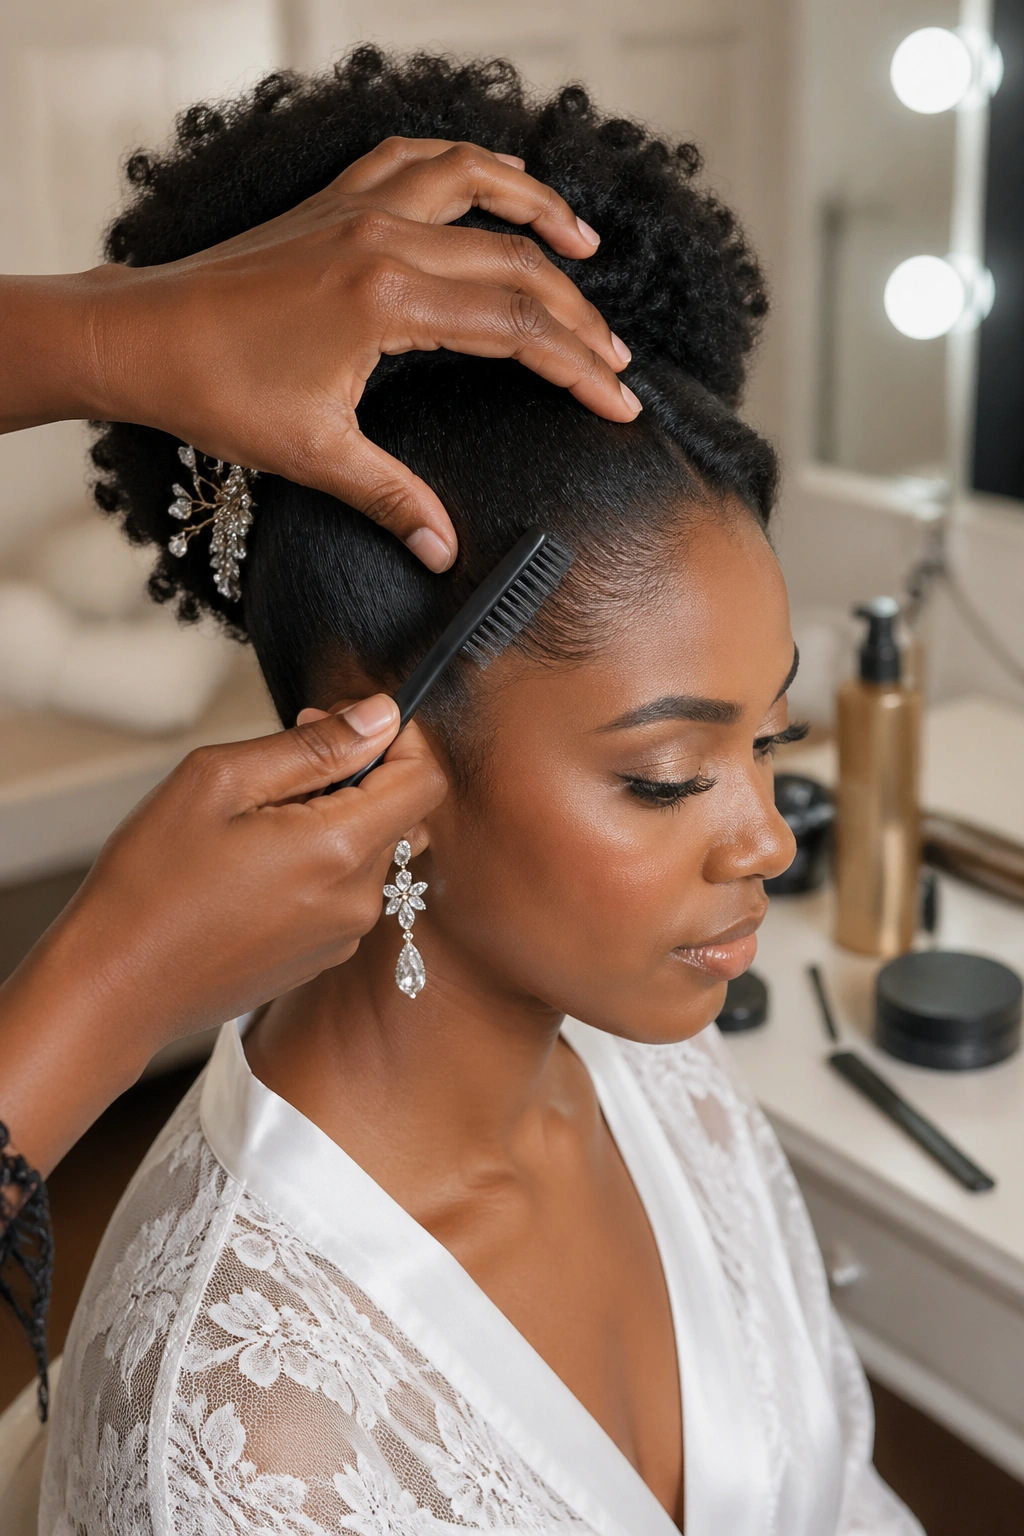
Tools You Need for Formal Styling
You need more tools than you think. A quality detangling brush. A rat tail comb. Sharp sectioning clips. Strong hold gel. Edge gel. Hair pins in a matching color — not the black ones from the drugstore, but the color-matched kind that actually disappear into your hair. A shine spray that does not leave residue. A setting spray for longer hold. Bobby pins and U-pins (U-pins are essential for heavy updos and most people skip them).
Also essential: a camera or mirror setup where you can see the back of your head. You cannot style what you cannot see. Prop a phone on a tripod behind you if you have to.
One tool that matters more than most: a fine-tooth smoothing brush for the front section. The front of a formal style is what lives in every photo you will ever take at this event. A smooth, polished front is not negotiable. A slightly messy back can read as textured. A messy front reads as sloppy.
Understanding the Dress Code
Black tie means ultra-polished. White tie means ultra-polished plus traditional. Cocktail is flexible. Garden party or beach wedding is softer and more romantic. Formal daytime wedding is somewhere in between. The dress code dictates the style category you can choose from.
For black tie, think sculptural updos, elegant low buns, and polished curls with decorative pins. Skip anything that reads as casual, beachy, or bohemian.
For garden and beach weddings, the opposite applies. Flowy half-up looks, soft twist-outs with fresh flowers, and loose puffs all work. A rigid high bun reads as out of place at a beach ceremony.
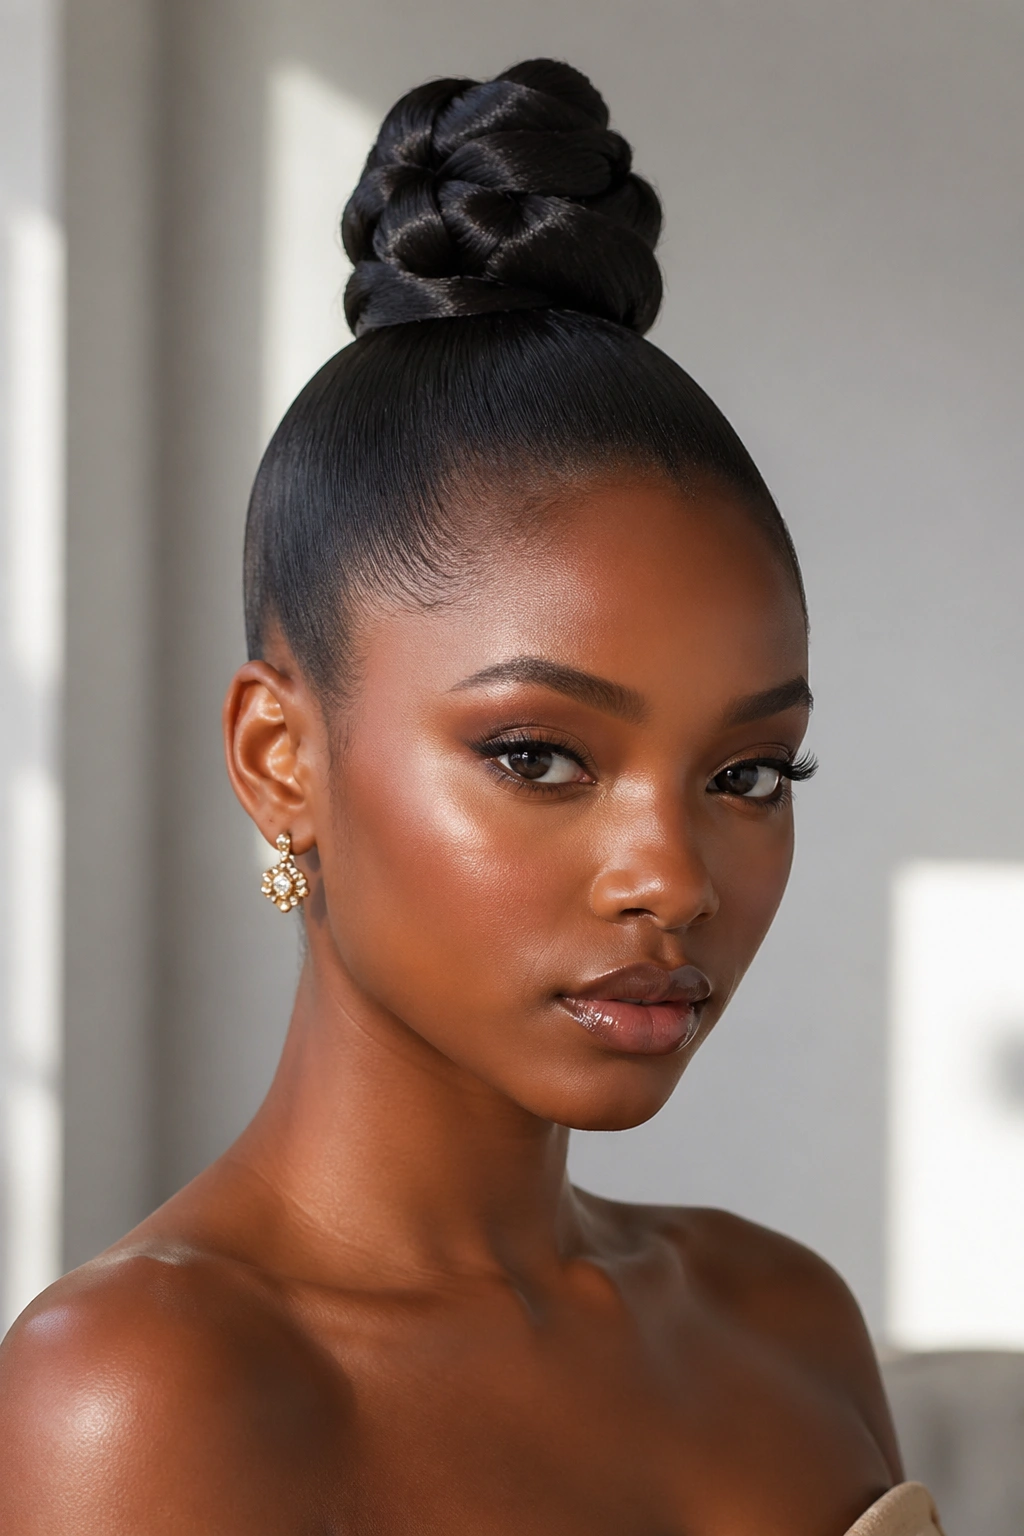
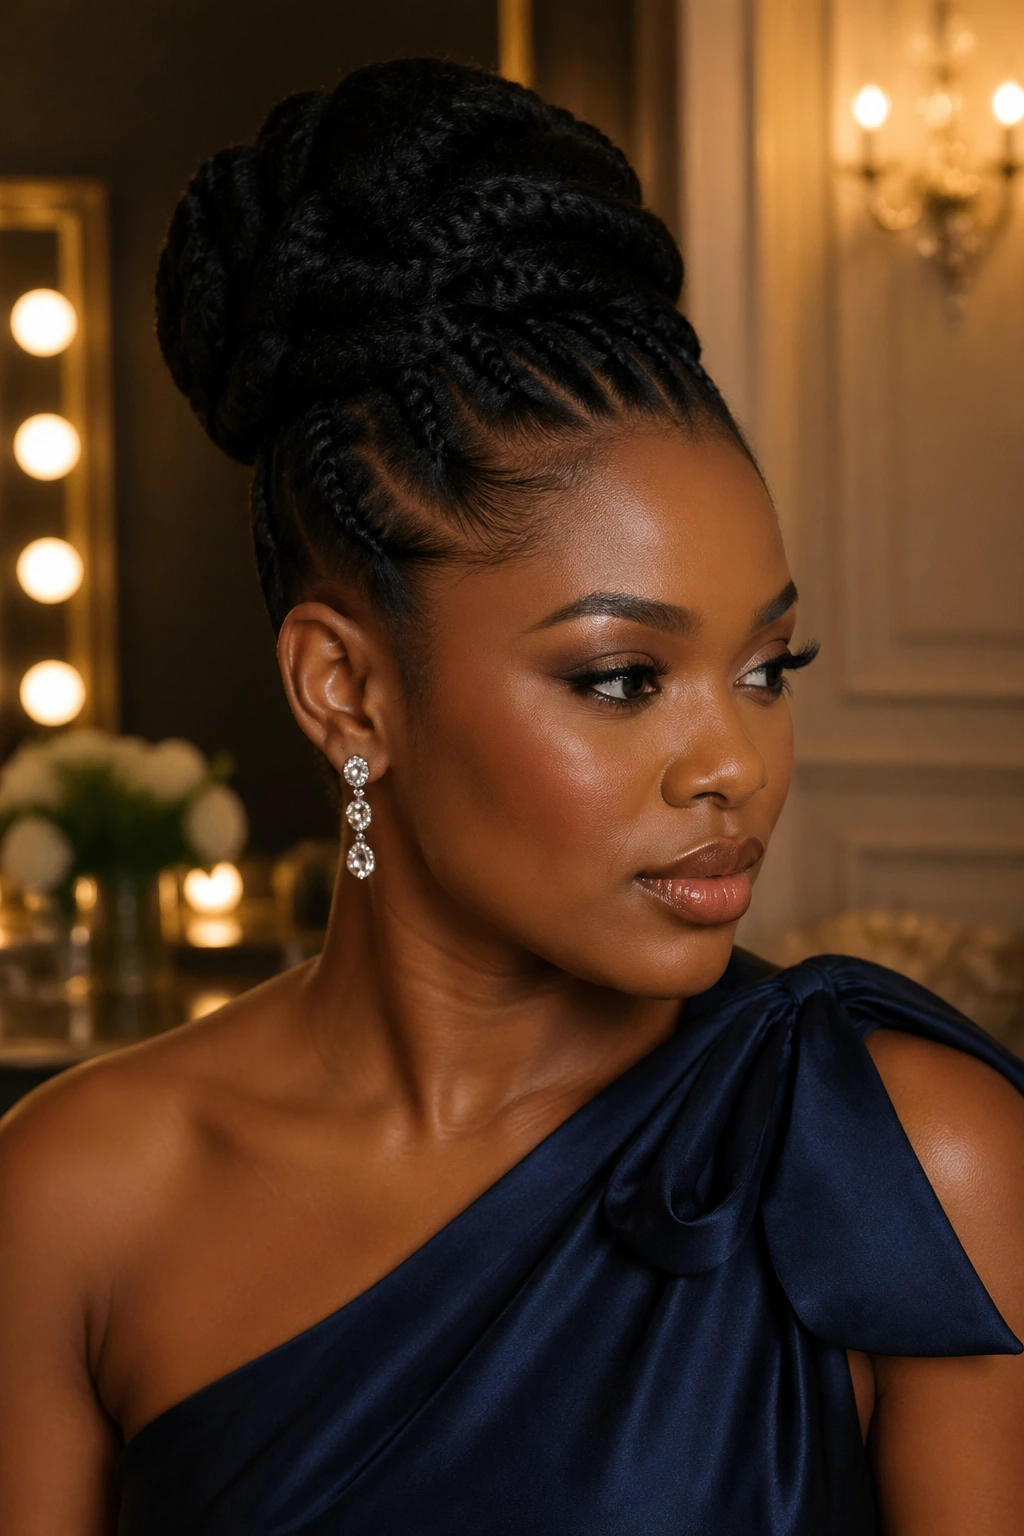
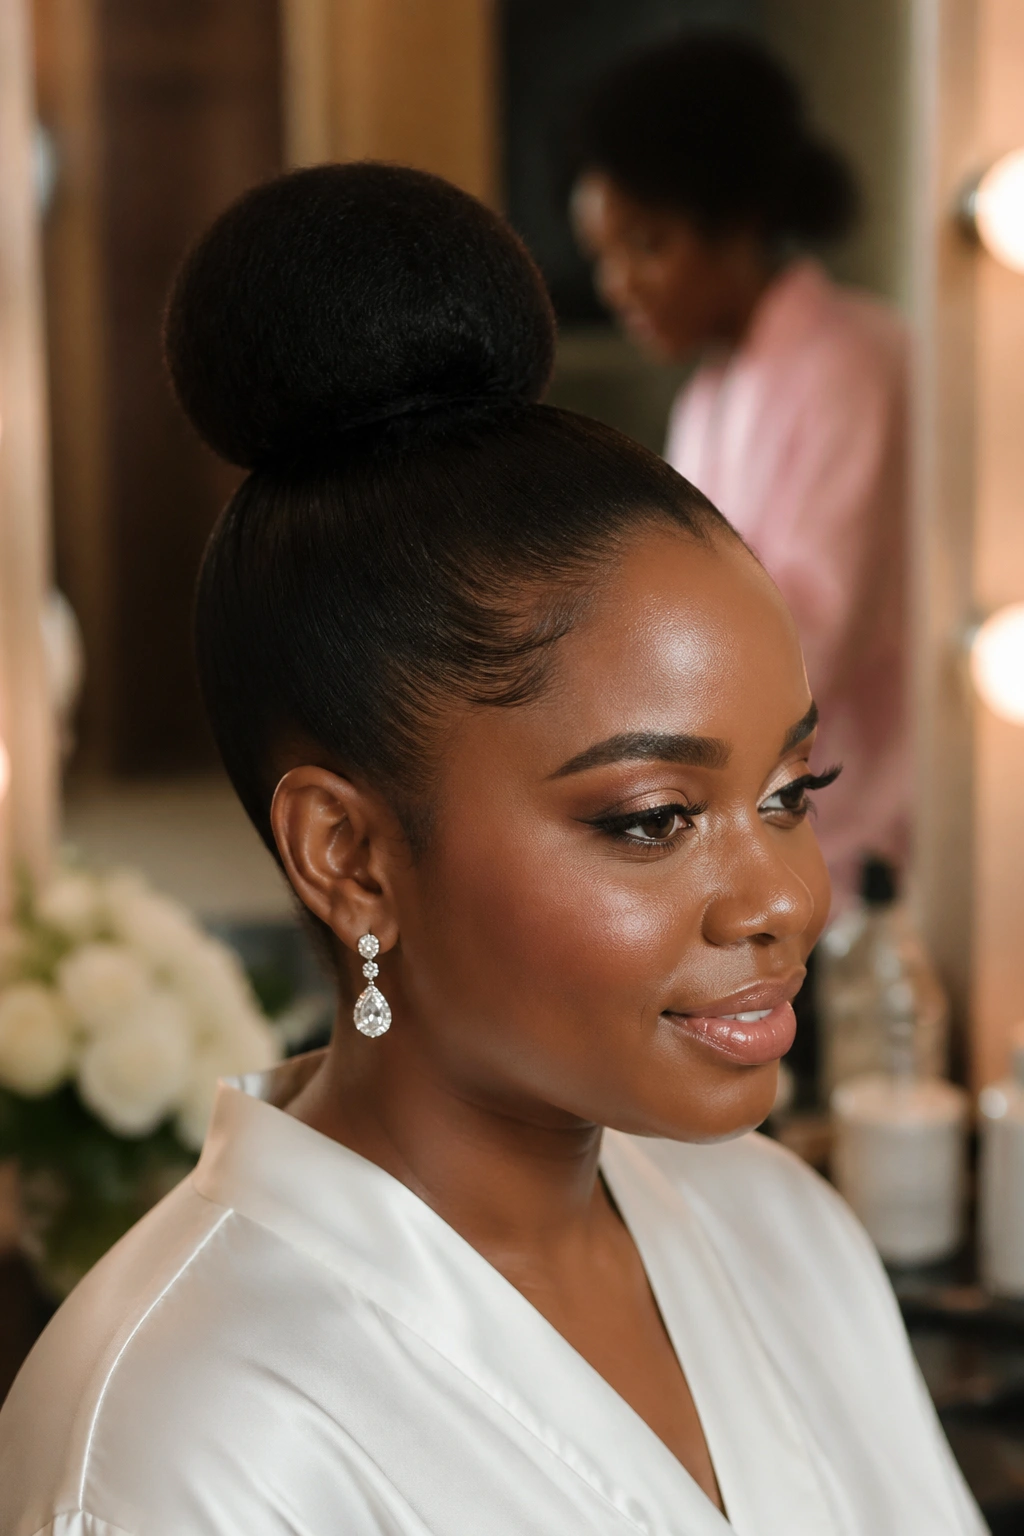
1. The Sculpted High Bun
The classic formal afro look. A smooth, high bun sitting high on the crown, with the sides pulled back tight and a front section slicked flat. It is the look that says “I am here to be photographed, and I know my angles.”
Achieving this requires a stretched base — either naturally blown out or set flat on rollers — so the hair bends smoothly into the bun shape without lumps. A filler — a hair donut or foam insert — adds volume and structure so the bun holds its round shape for the entire event.
How to Get the Most From It
Build the bun around the filler with small sections pinned one at a time rather than wrapping the whole ponytail at once. Small sections create a smoother, more uniform surface.
- Use a matching-color hair filler, not just black
- Spray flyaways with hairspray applied to a toothbrush, not directly
- Secure with U-pins, not bobby pins, for heavy fillers
- Tip: Place pins at angles that cross each other inside the bun — straight pins slip, crossed pins lock.
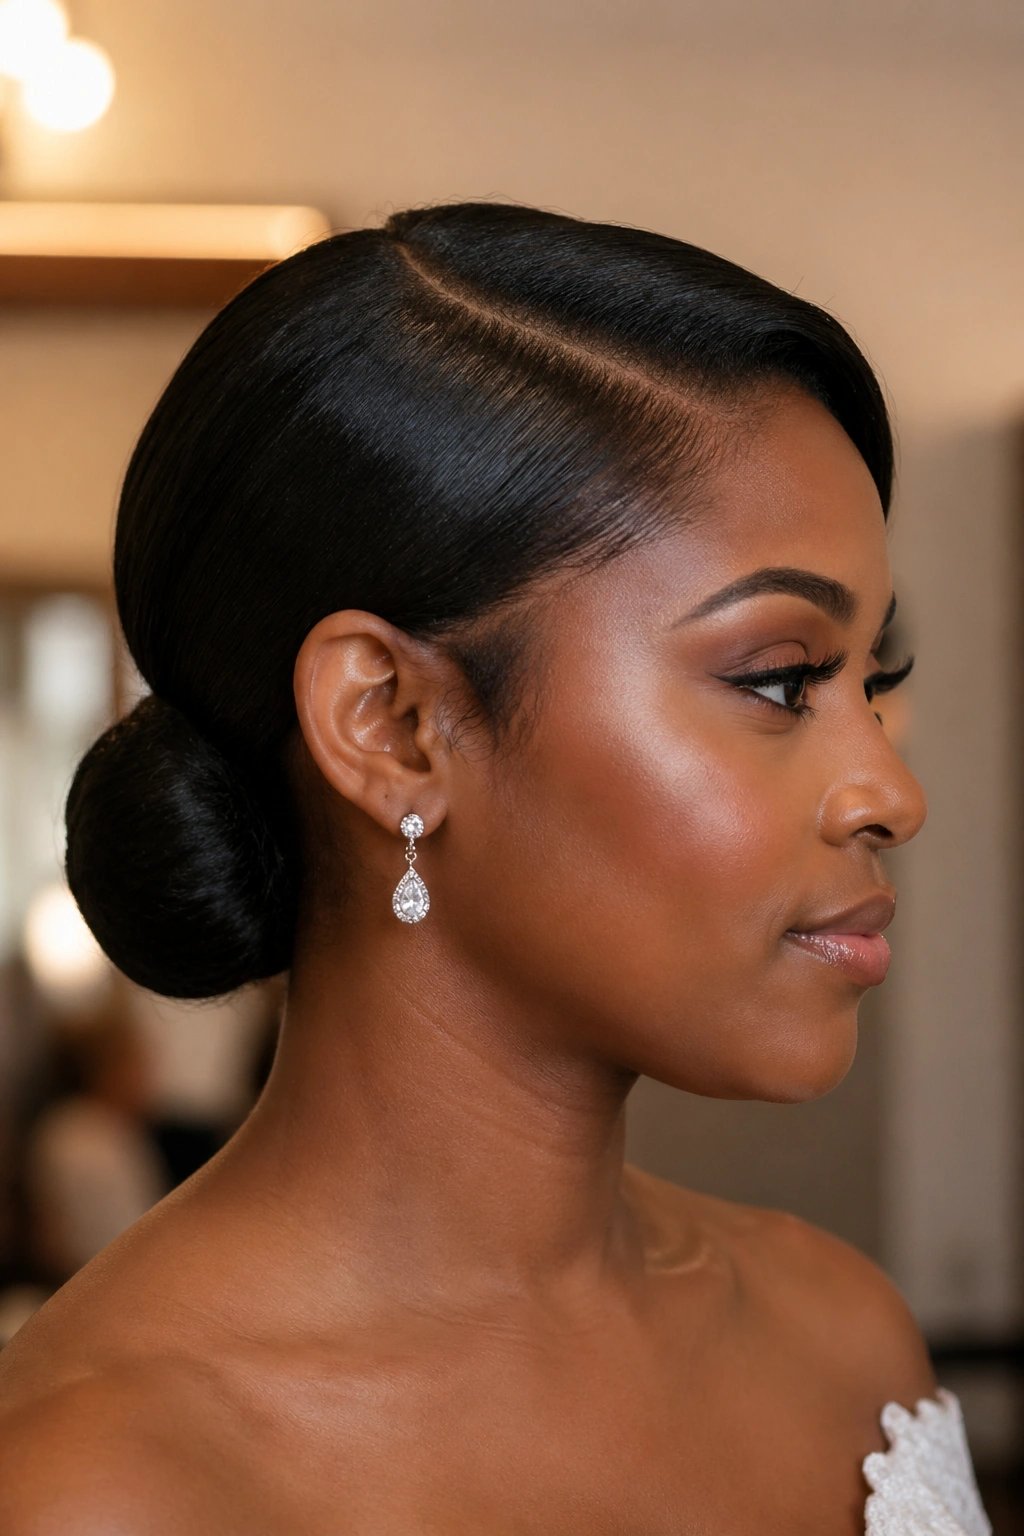
2. The Low Chignon with a Side Part
The low chignon is an elegant, understated choice that works across every dress style from simple to elaborate. Sitting at the nape of the neck, it keeps attention on the face rather than competing with it, and it pairs perfectly with statement earrings or an elaborate neckline.
A deep side part adds drama without changing the silhouette. The key is making the side part razor-straight and securing the front section with invisible pins so nothing falls forward during the event.
This is one of the longest-lasting styles on this list. Set at 8 AM, and it will look identical at midnight if you prepped it properly.
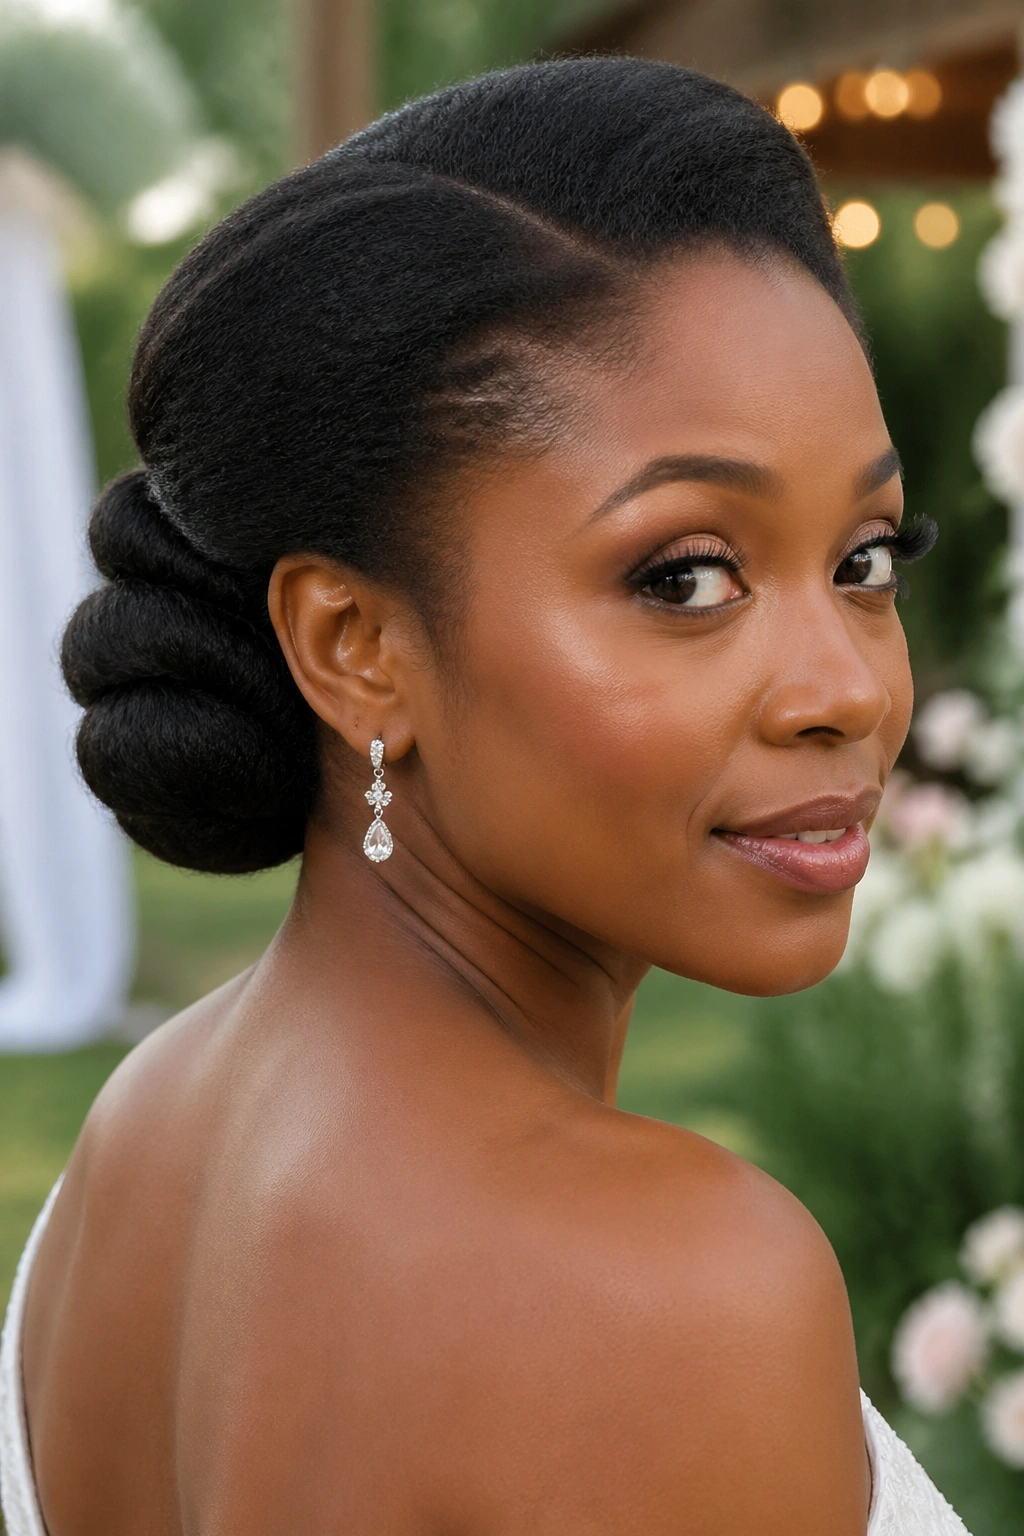
3. The Roll and Tuck
Imagine taking the bottom half of your hair, rolling it upward into a neat barrel shape, and tucking the ends inside. The result is a soft, full, low-volume updo that reads as romantic and slightly vintage. It works beautifully for outdoor weddings and daytime events.
The roll is harder than it looks. The trick is to roll around a hidden structure — a foam tube, a sponge insert, or just a rolled sock — so the finished shape does not collapse. Your hair provides the surface. The structure provides the body.
Pin generously. A roll and tuck with too few pins sags into a messy loop by the end of the reception.
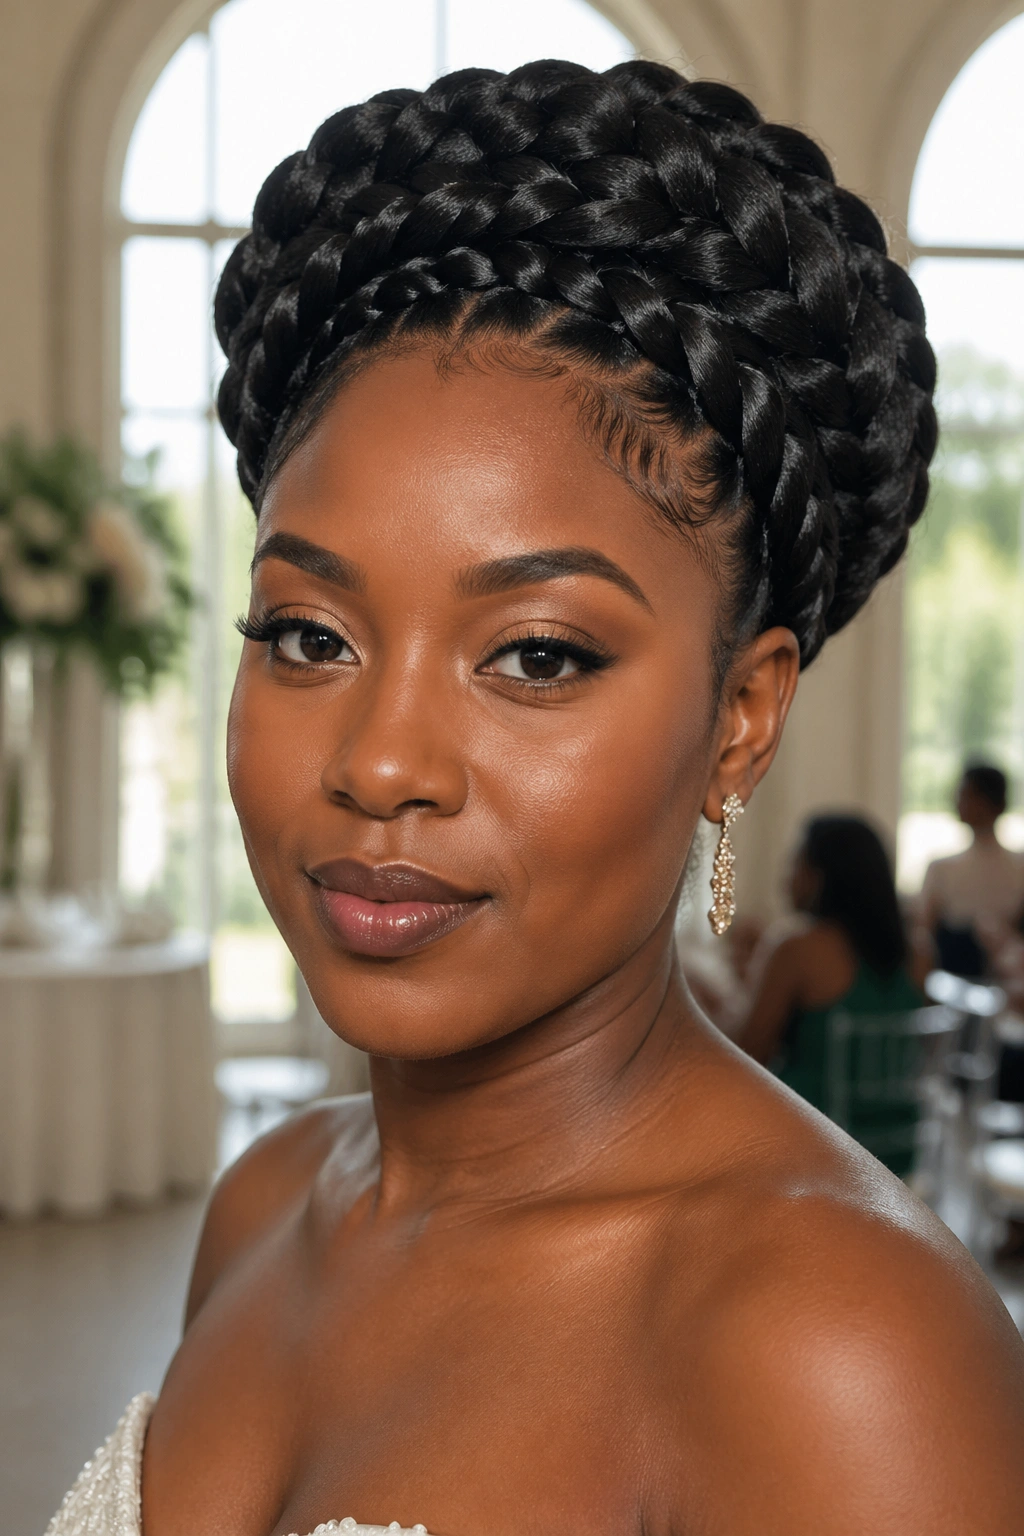
4. The Crown of Braids
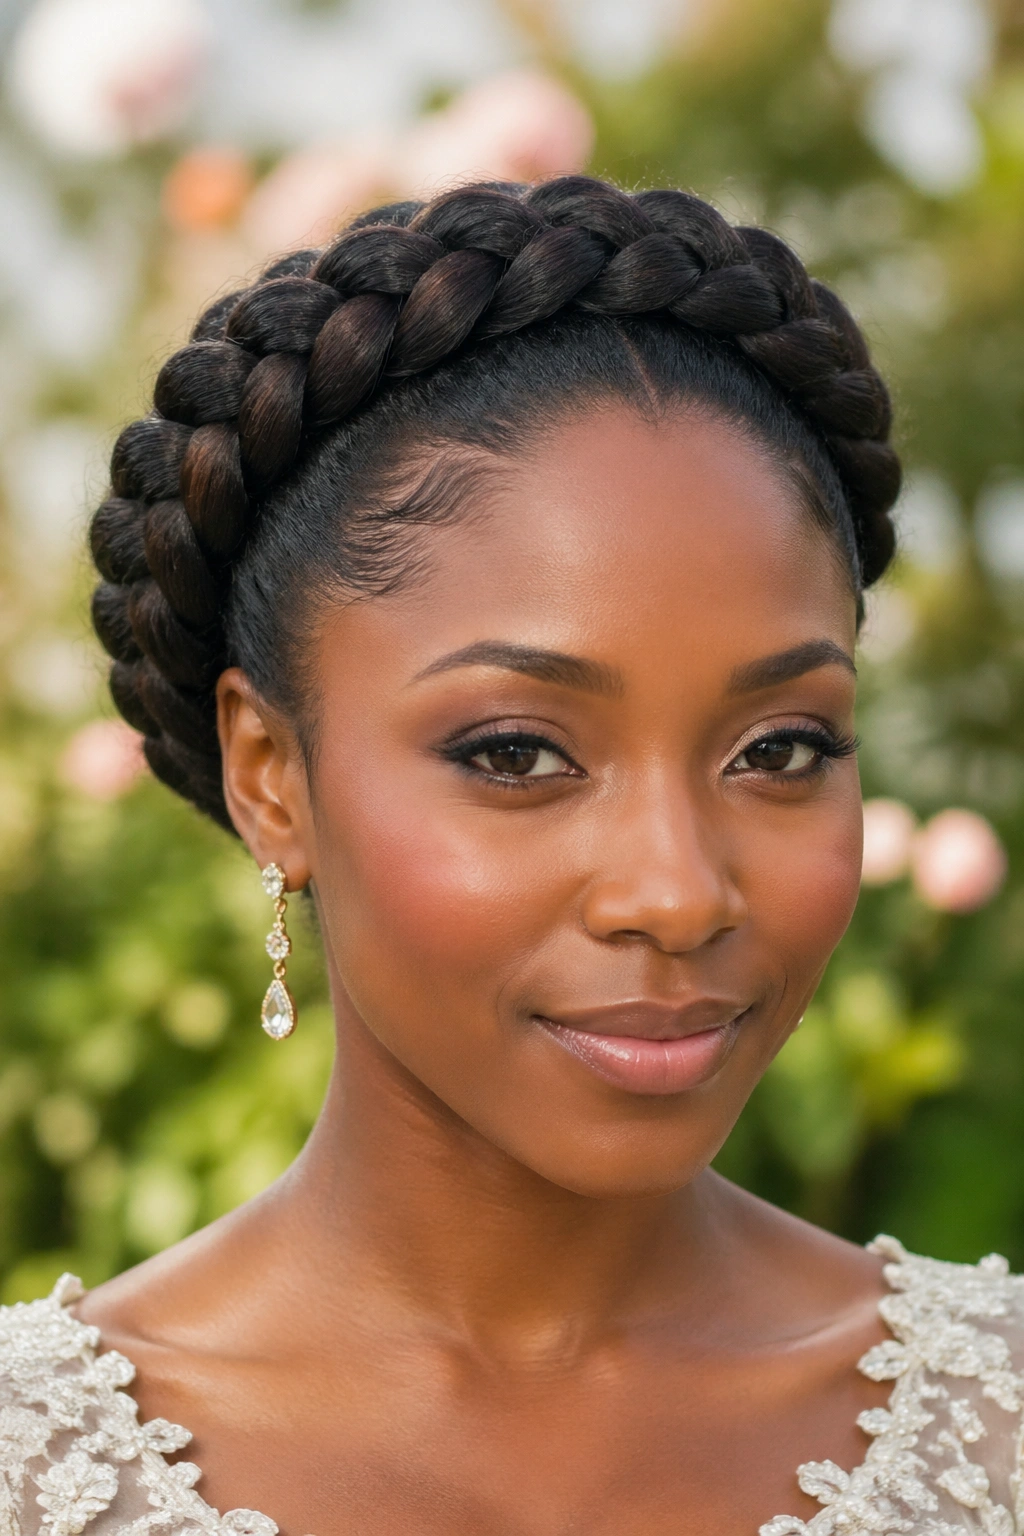
A regal, architectural look where braids circle the entire head like a crown, creating a natural halo of texture. Best for longer hair that can produce two thick braids, one on each side, that meet at the back to form the crown shape.
This is probably the most endurance-friendly style in the list. Braided hair holds up through everything — dancing, crying, hugging, a sudden rainshower. It does not smudge, sag, or unravel easily if it was braided tightly to begin with.
The downside is that it reads as traditional and slightly conservative. If you want something edgy, this is not the one. If you want something timeless, nothing beats it.
5. The Full Sculptural Afro
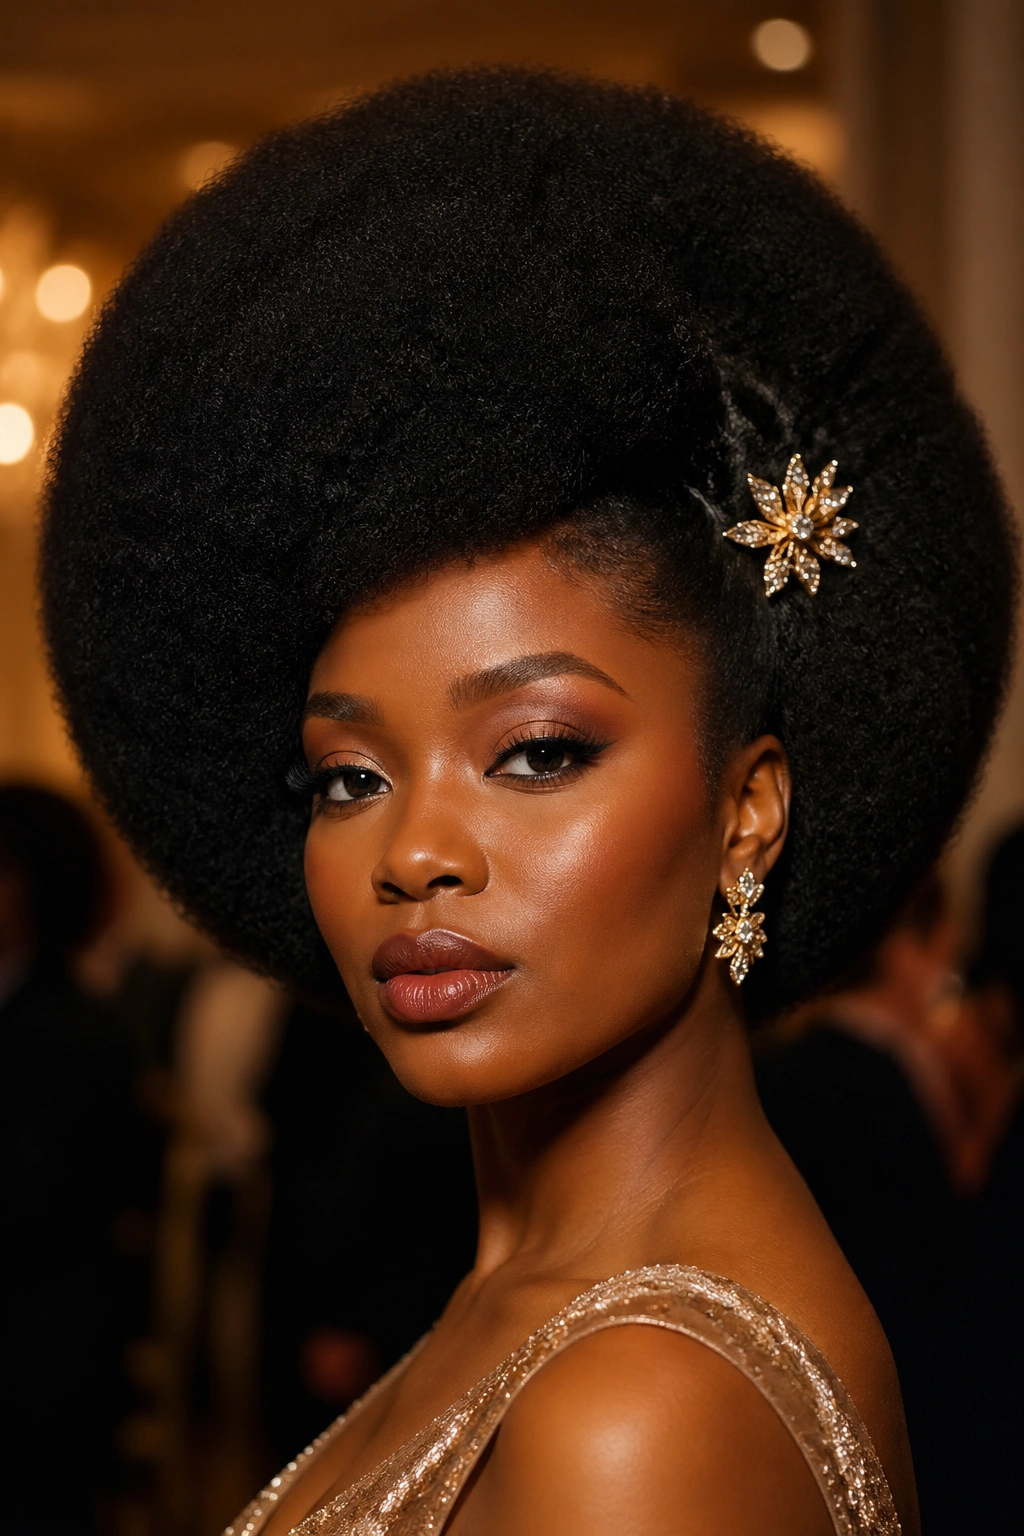
The full afro is formal when it is shaped with precision. Most people underestimate how glamorous a well-groomed afro looks in a black-tie setting. It is bold, unapologetic, and photographs like a dream under bright light. The key is the shaping. A random fluff-out reads as casual. A carefully trimmed, symmetrical halo reads as couture.
Block out at least ninety minutes for the shaping. Stand in front of a bright mirror, work from multiple angles, and trim in small motions. Spend extra time on the perimeter — that is what reads in photographs.
Add decorative elements. Gold clips, pearl pins, or a single fabric flower pinned at the temple elevates a plain afro into a formal statement. Jewelry is not optional for this look — it is what turns it from “natural” to “formal.”
Touch-ups during the event are minimal. Bring a pick comb and refluff at the root every couple of hours.
6. The Sleek Ponytail With a Wrap
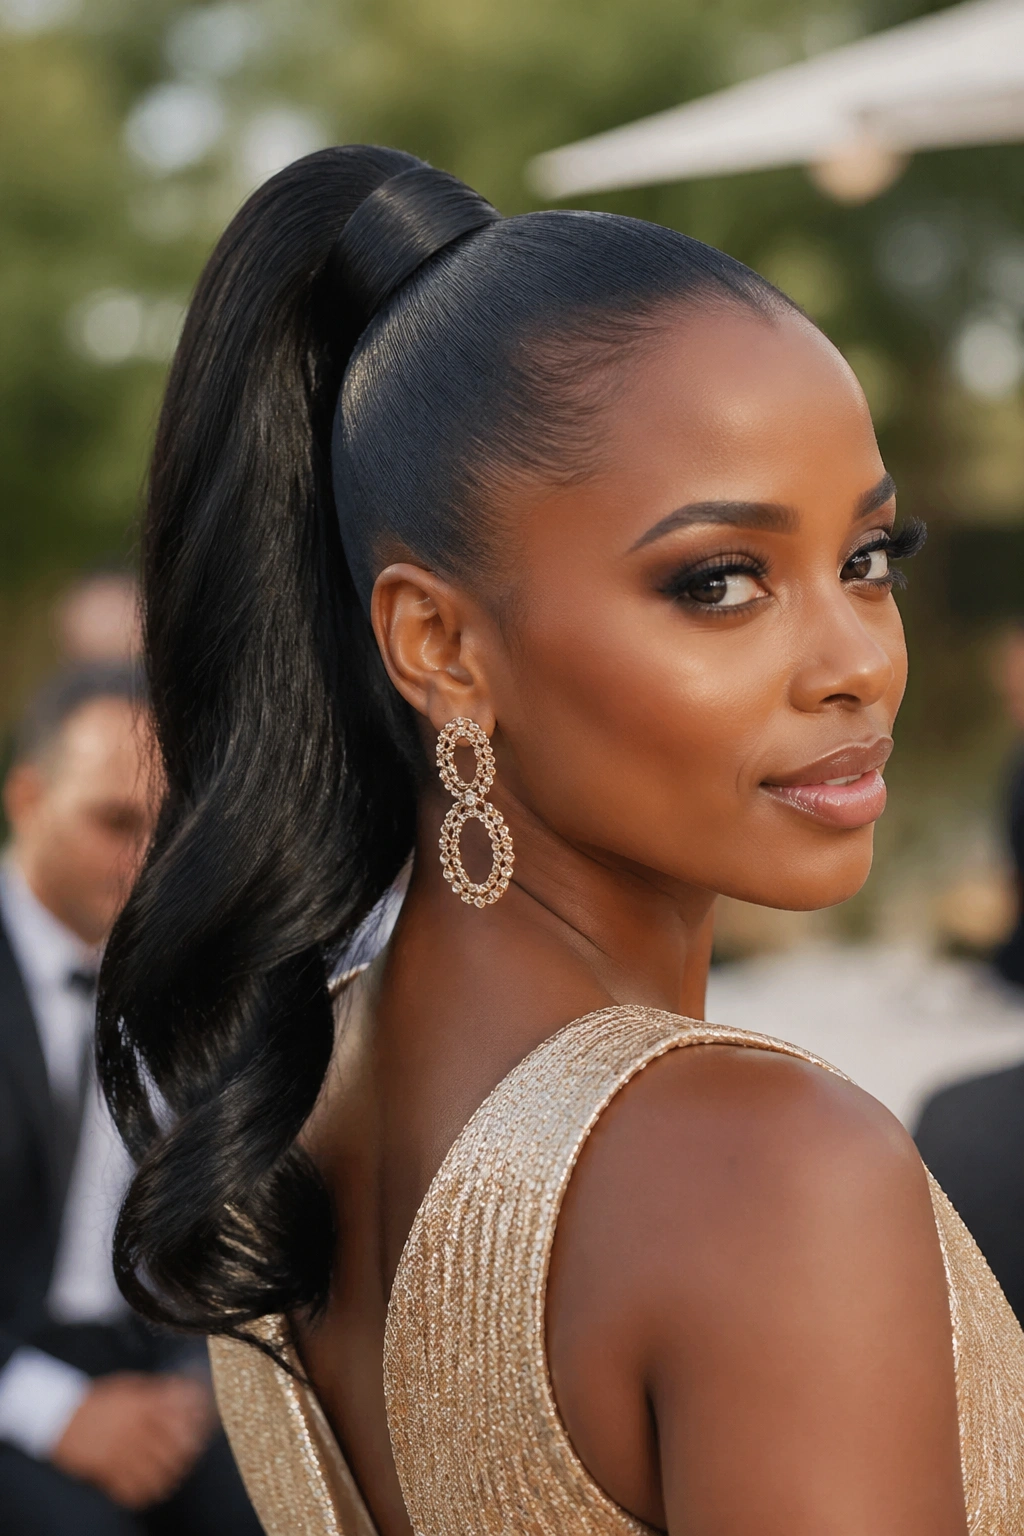
A high, tight ponytail with a section of the ponytail wrapped around the base to hide the elastic. It is simple in structure but reads as elegant when the base is flawlessly smooth and the length of the ponytail is either fully stretched or curled into defined waves.
This look pairs especially well with a simple, clean-lined dress — a sleek ponytail against an off-shoulder column dress is one of the most flattering formal combinations I have ever seen.
The challenge is holding the ponytail against the weight of longer hair. Use two elastics stacked together, or a strong ribbon elastic wrapped multiple times, to keep the ponytail from sagging over the night.
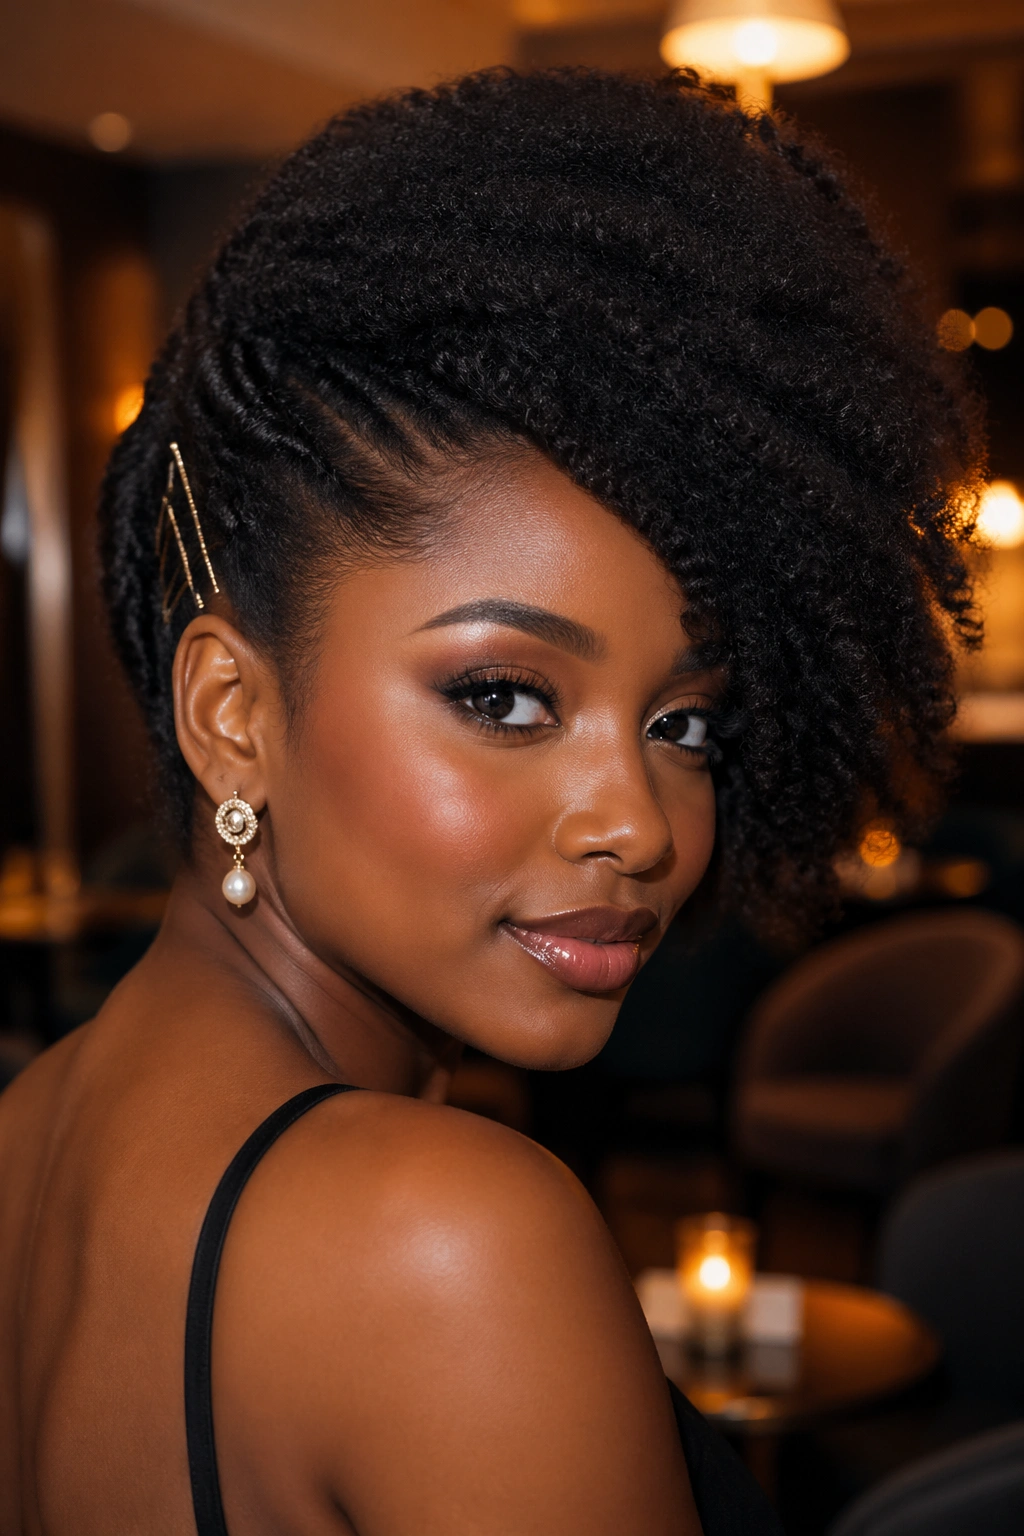
7. The Pinned-Back Twist-Out
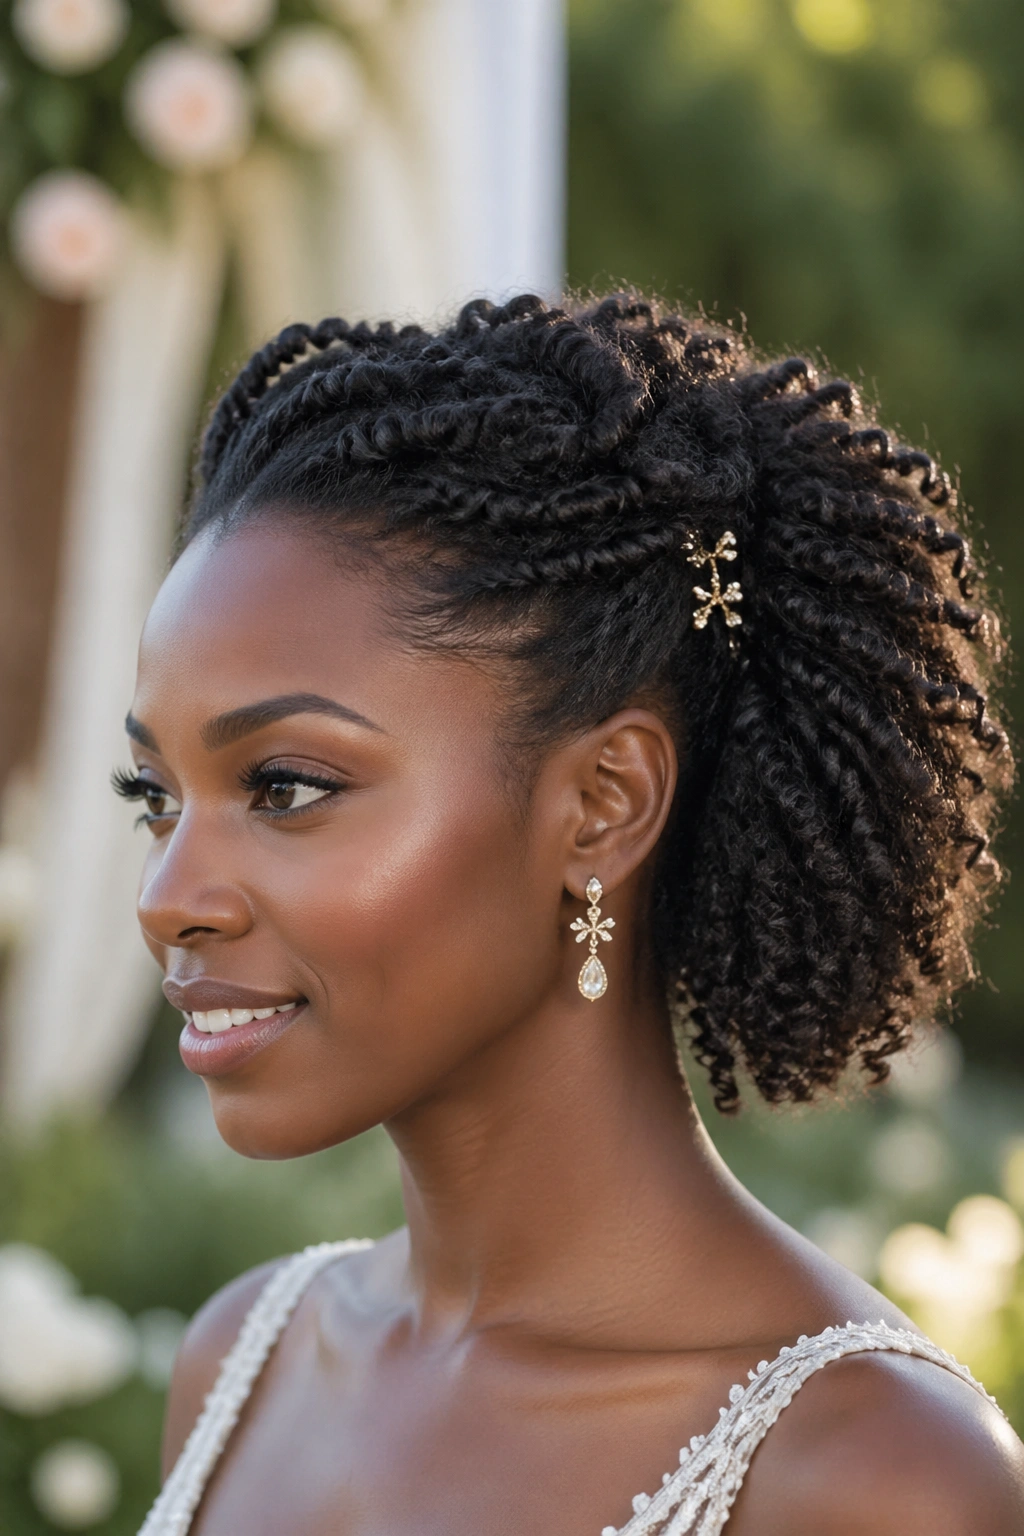
A twist-out as a formal style sounds too casual, but it works when you pin the sides back and leave the back in its full textured state. The combination of polished sides and textured back creates an interesting half-formal, half-bohemian vibe that fits garden weddings, daytime ceremonies, and outdoor gala events.
Two-strand twist your hair the night before for the most defined pattern. Unravel in the morning, pick the roots gently for volume, then pin the front sections back with decorative clips. The pins become jewelry.
This is a softer alternative to the rigid updos that dominate formal styling. It reads as effortless, which is the hardest look to actually achieve.
8. The Finger Waves with a Low Bun
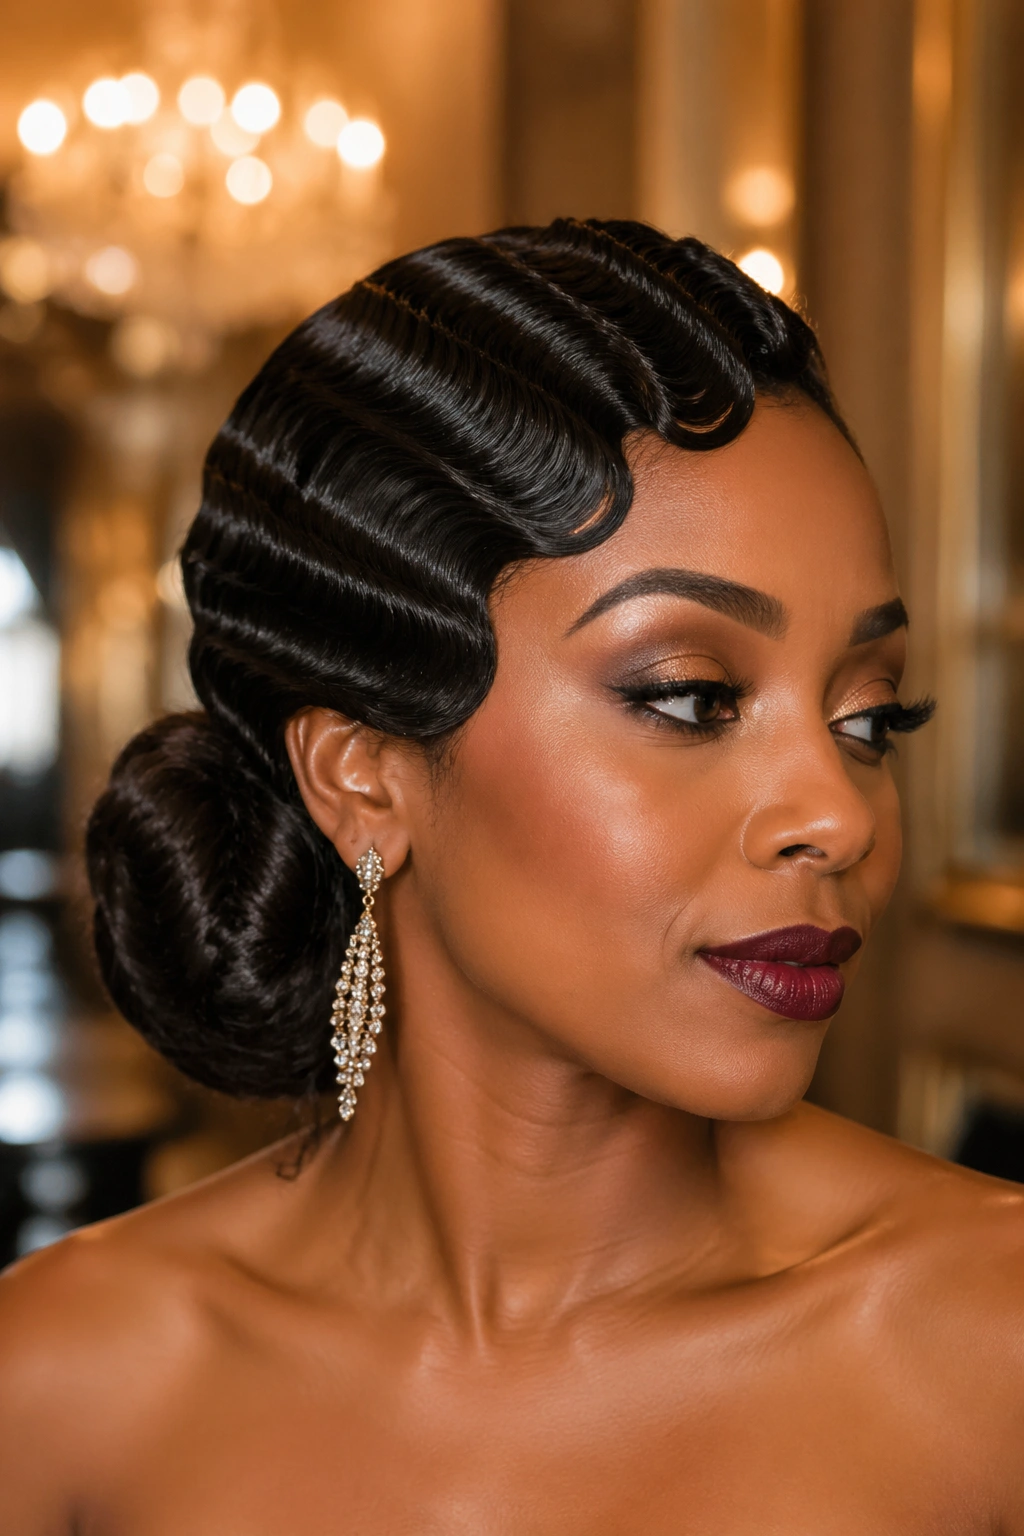
Finger waves on the crown with a low bun at the nape is a vintage-inspired look that has earned its spot in modern formal styling for good reason. It is dramatic, architectural, and deeply flattering on afro hair because the texture holds the wave shape far better than straight hair ever could.
Why It Works
Afro hair naturally wants to coil, and finger waves channel that tendency into a precise, controlled pattern. The hair cooperates instead of fighting you. With the right gel and a stiff comb, you can set finger waves that last ten hours.
- Use a strong-hold gel, not a styling cream
- Set the waves before doing the bun, never after
- Let the waves dry fully before touching them
- Tip: A silk scarf pressed gently over the waves for fifteen minutes right after setting locks them in without flattening them.
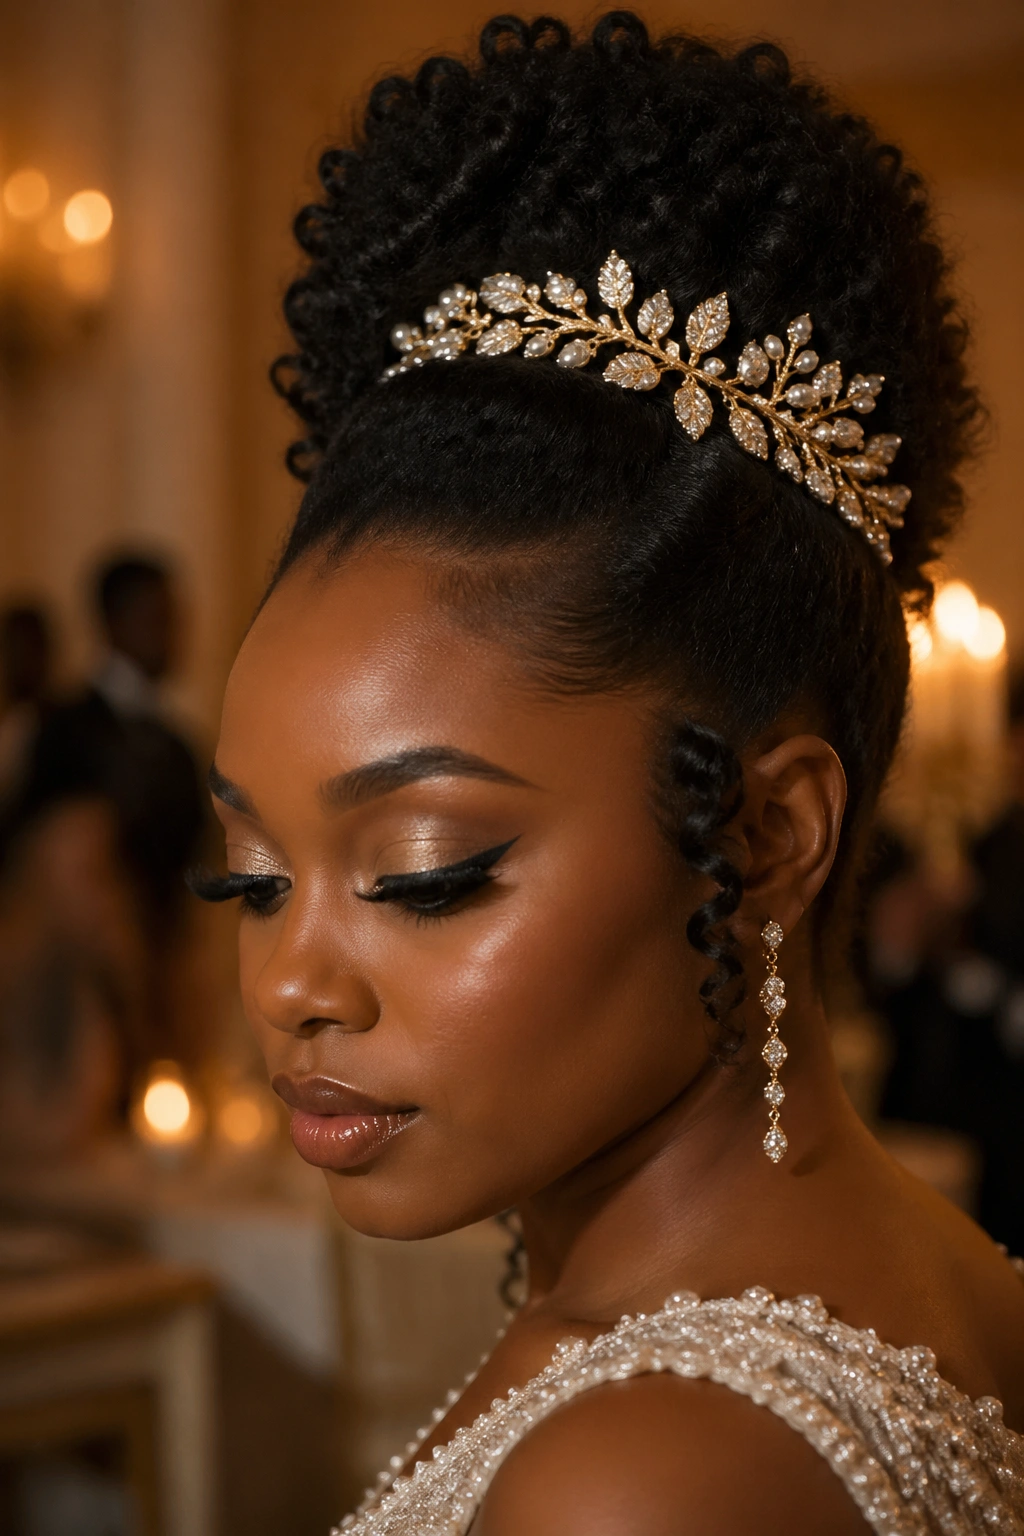
9. The Accented Puff With Pearls
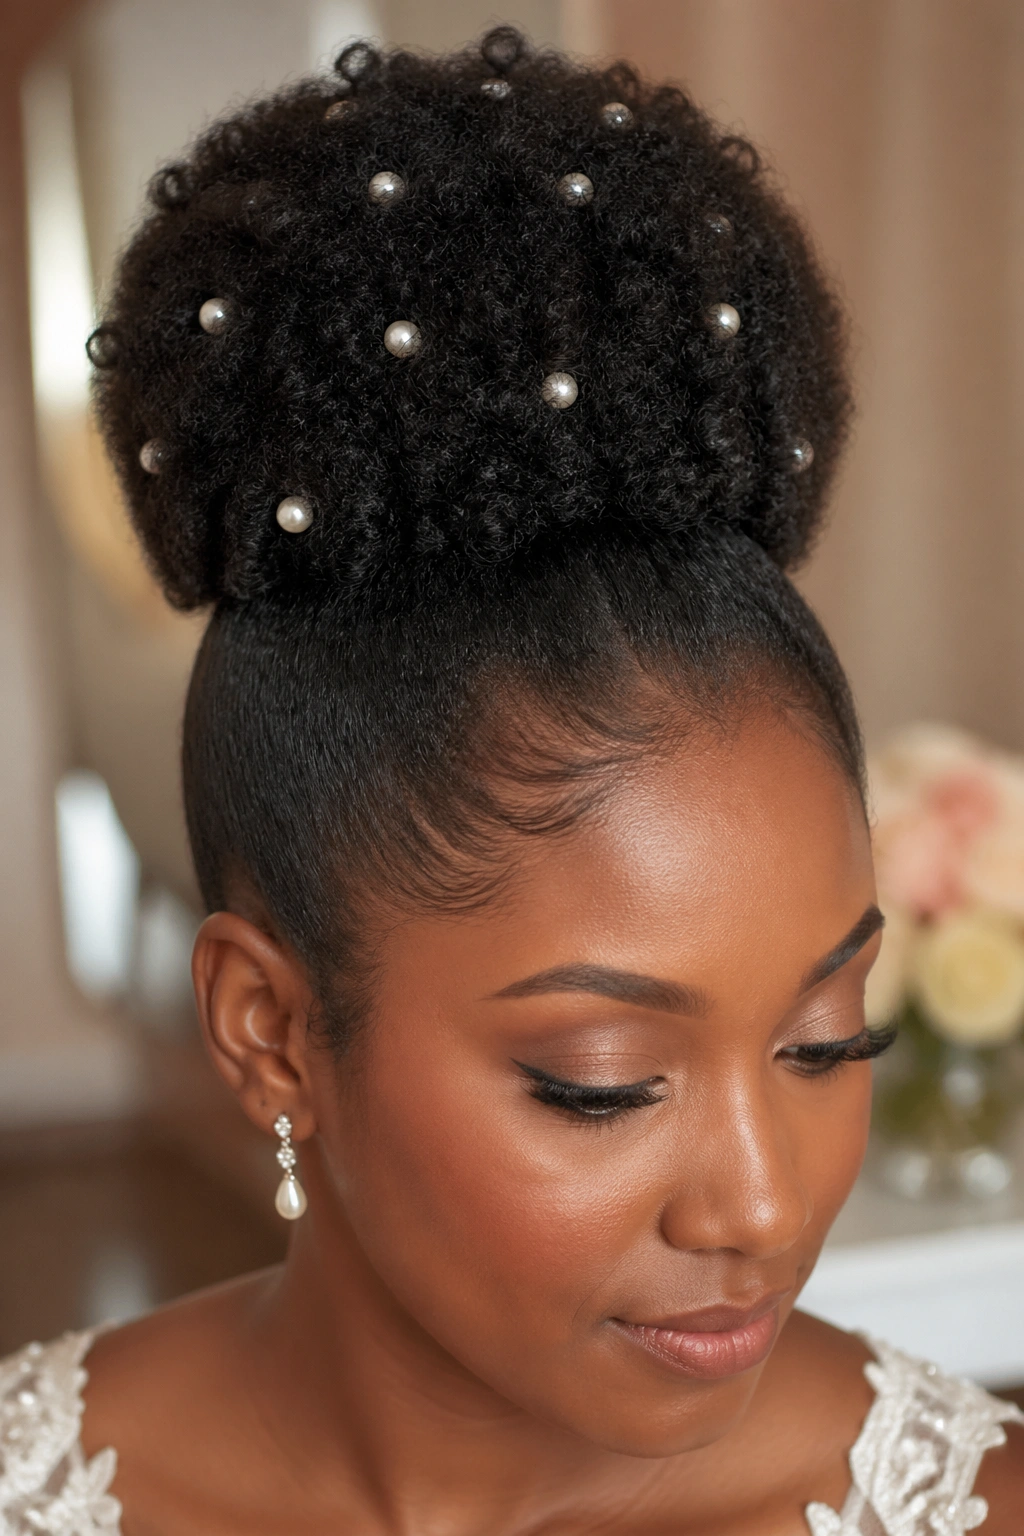
A high puff gathered at the crown with small pearl pins scattered through it like stars. The pearls add formality without adding weight, and they photograph beautifully under any lighting condition. It is one of the fastest formal looks to achieve — probably thirty minutes including the pearls — which makes it a lifesaver for crunched timelines.
The puff has to be fuller than it would be for casual wear. Use a hair donut underneath for structure if your natural density is not enough. Layer the pins in varying depths across the surface of the puff so they catch light from different angles.
Pair with pearl earrings to tie the look together. Everything does not have to be pearl, but an echo of the same element reads as intentional.
10. The Side-Swept Afro
An afro with all the volume swept deliberately to one side creates an asymmetrical silhouette that reads as modern and editorial. It is a favorite of mine for cocktail-hour events where you want to stand out without being the most formal person in the room.
The sweep has to be secured. Pins at the temple and behind the ear on the low side hold the shape in place. Without pins, the volume settles back to center within an hour.
This look pairs best with drop earrings that emphasize the low side of the sweep. Heavy stud earrings fight the asymmetry and look cluttered.
11. The Box Braids Styled Up
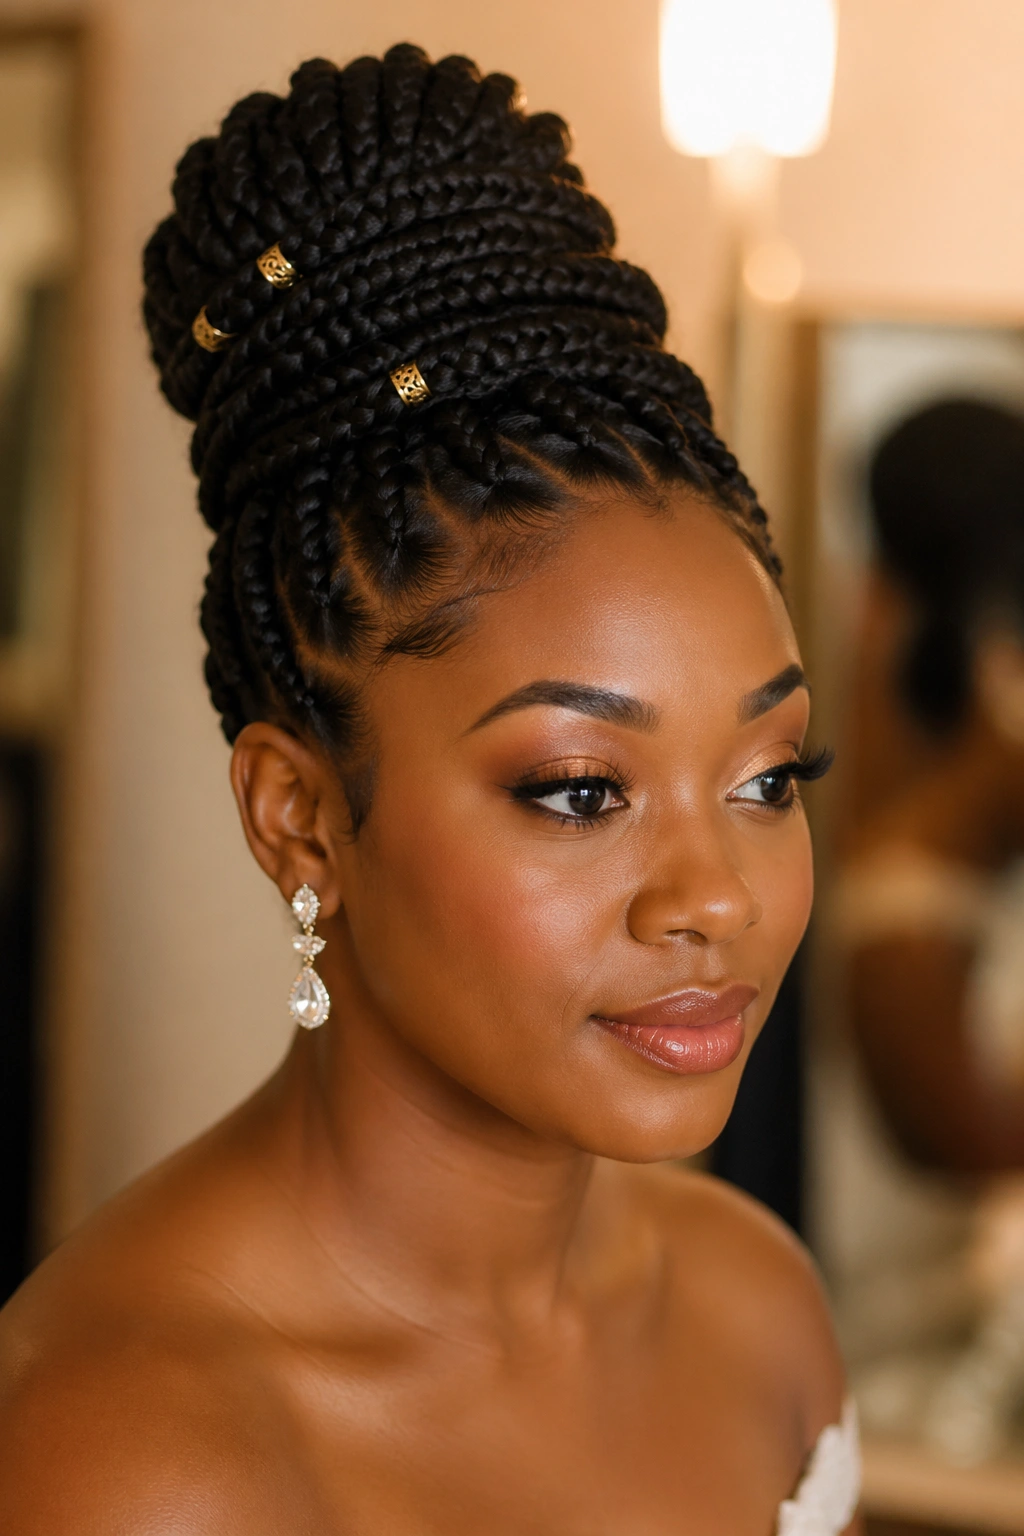
Pre-existing box braids can absolutely be styled for formal events. Gather them into a high bun, wrap them around the head into a crown, weave them into a pinned updo — box braids are flexible enough to become nearly any formal silhouette.
The trick is adding polish. Smooth the baby hairs with edge gel and a toothbrush. Spray any stray ends with a light setting spray. Accessorize with gold cuffs on select braids or small pearls woven into the updo.
Box braids as a base mean you do not have to worry about your hair holding up — the style is already durable. You just have to make sure the finishing touches look formal, not casual.
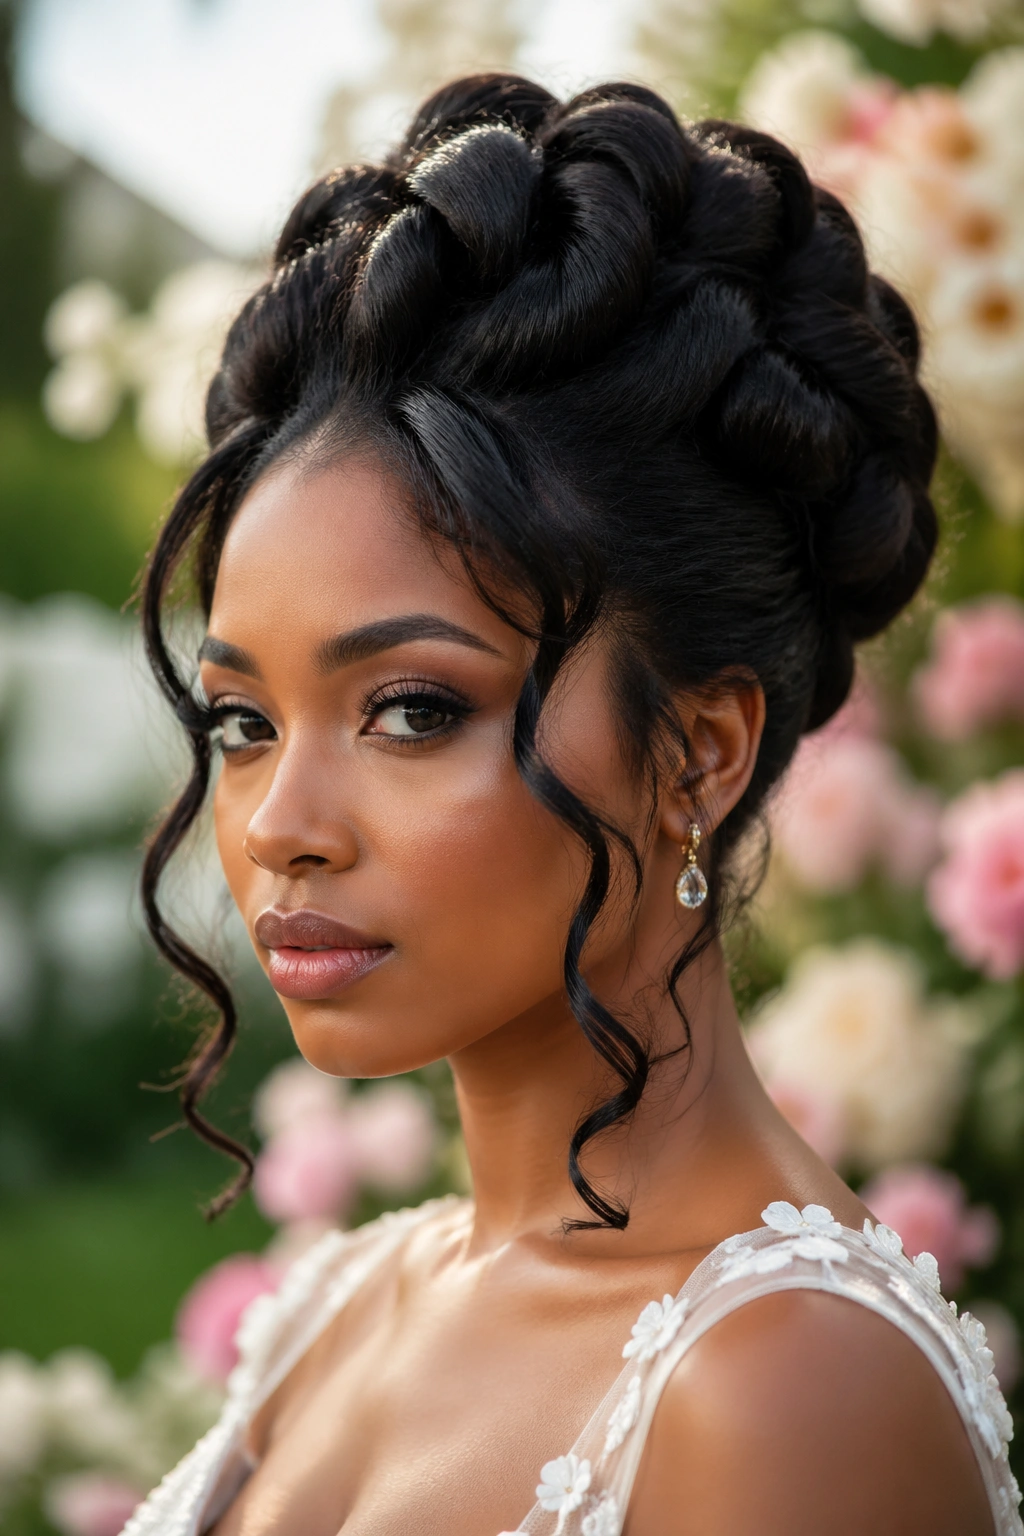
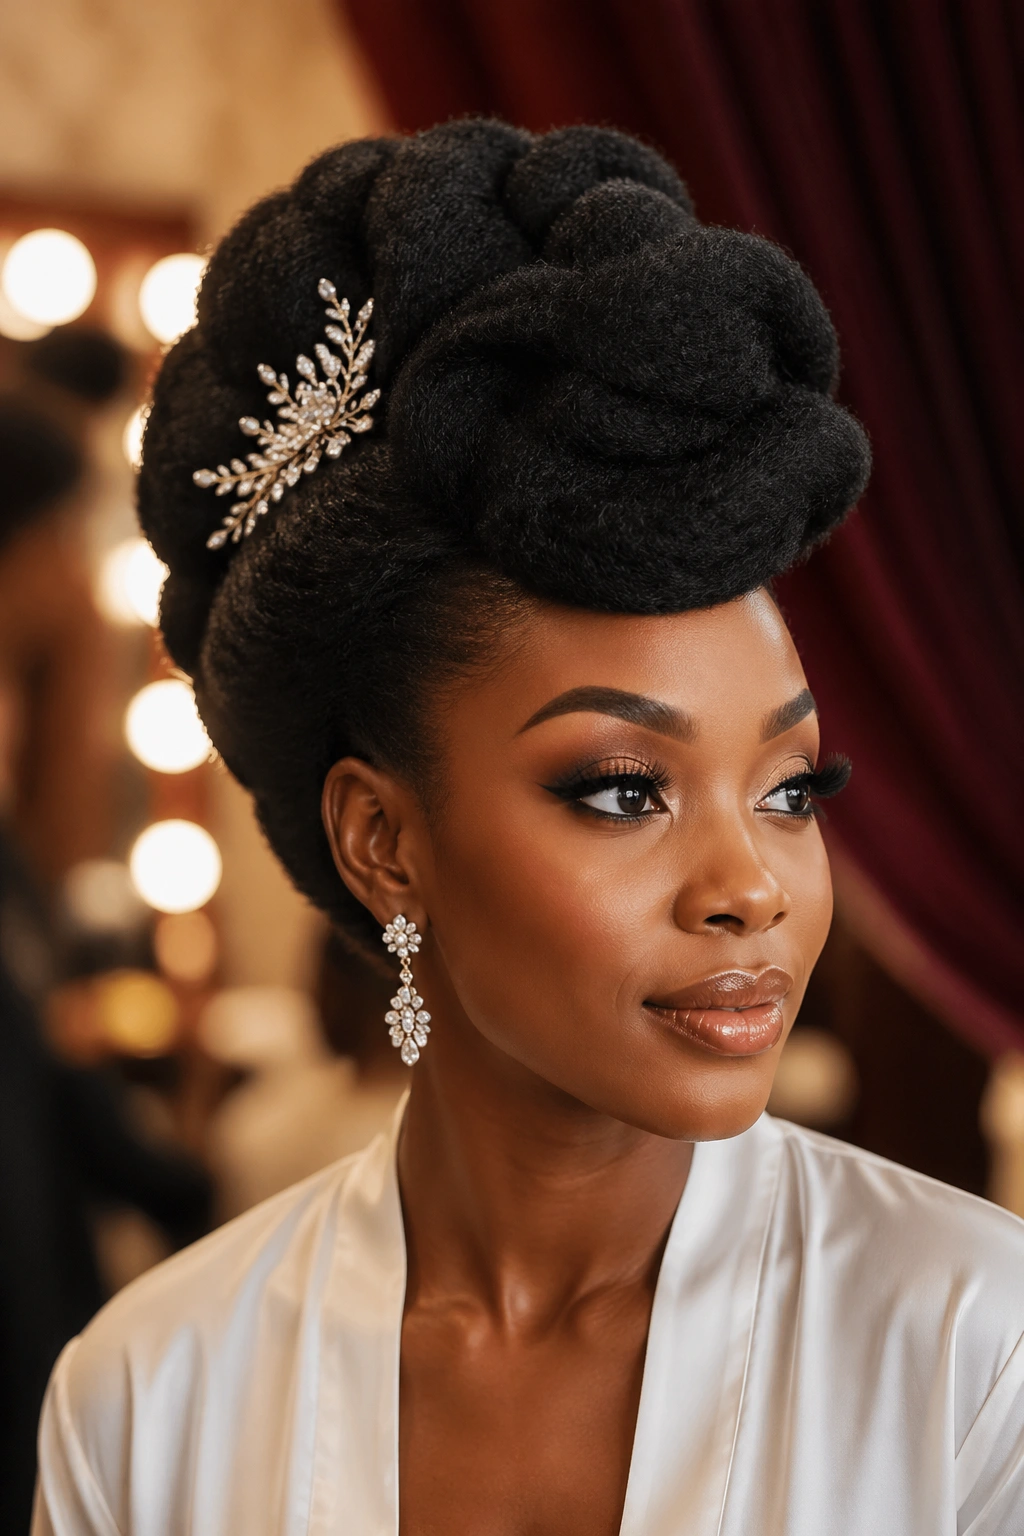
12. The Goddess Braids Crown
Goddess braids — thicker, more textured cornrows — can be styled into a crown that frames the face dramatically. Unlike tight cornrow crowns, goddess braids sit bigger on the head and catch light in a softer way.
This look takes longer to create — probably two and a half hours if you are braiding from scratch — but the finished result lasts two weeks or more if you want to wear it beyond the event itself.
For a wedding, goddess braids work exceptionally well with a simple dress because the hair itself is the ornament. Over-accessorizing fights the natural texture of the braids.
13. The Voluminous Half Up
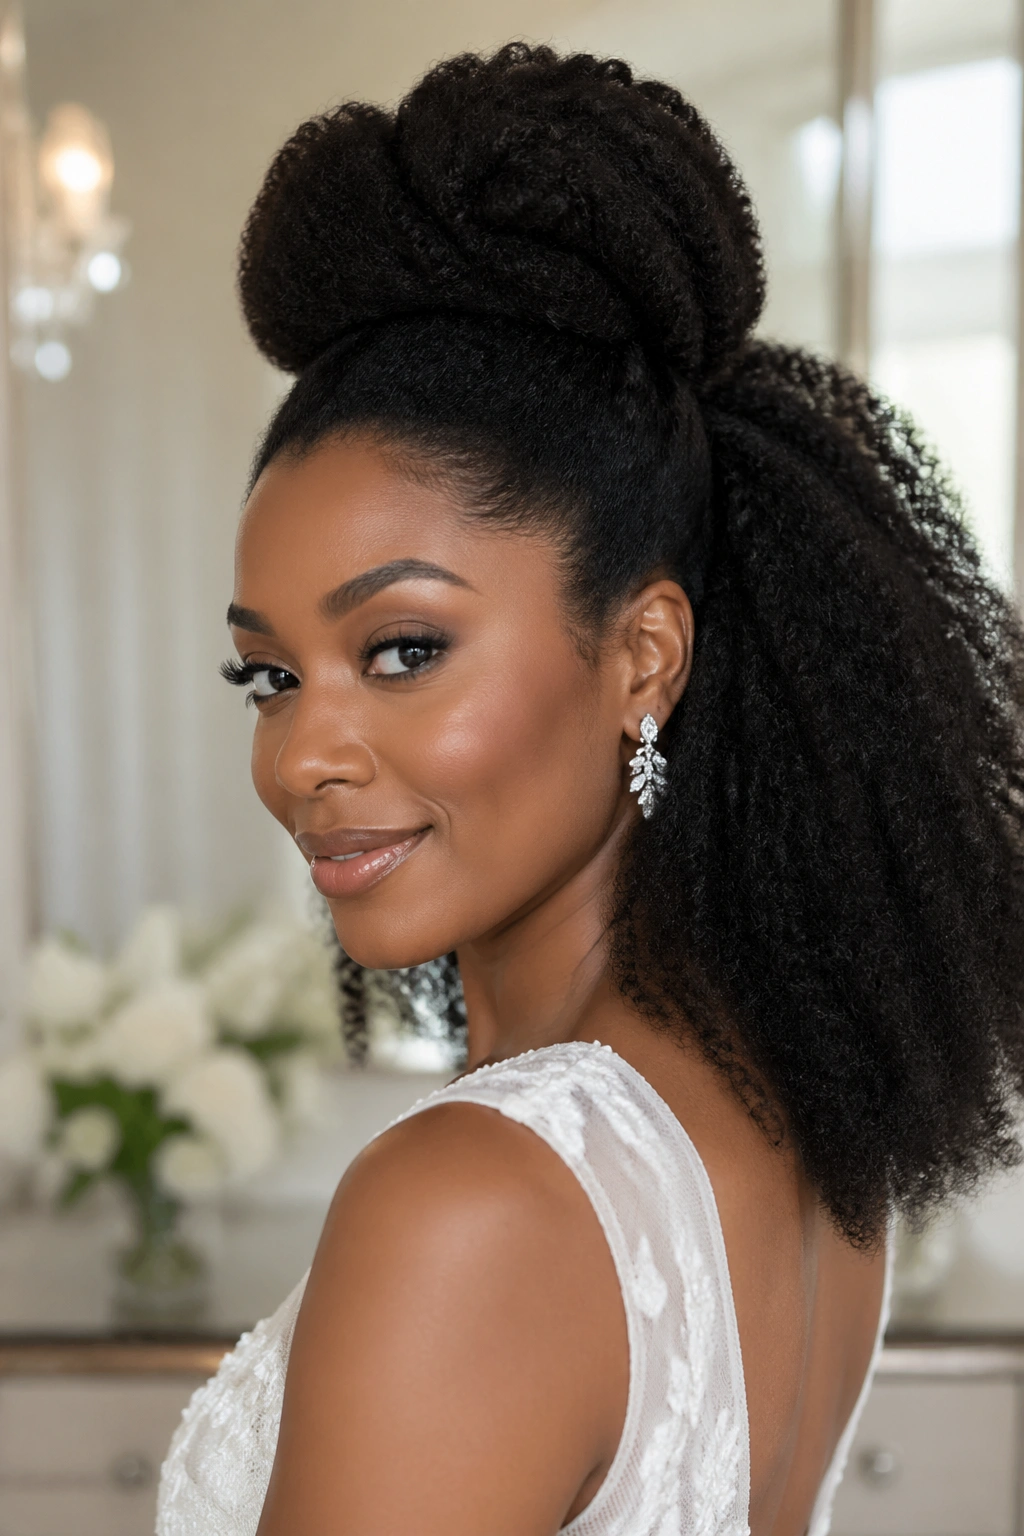
A half-up look where the top section is gathered into a large, voluminous twist or bun while the bottom section remains in full afro texture. The contrast between the controlled top and the free bottom is the entire appeal.
Who This Is For
Anyone who wants a formal look that still reads as “me.” The half-up preserves the visual identity of an afro while adding structure at the crown. It is the compromise look for people who do not want to disappear their natural texture completely for one event.
The top section needs enough volume to register as intentional. If your hair is thinner or shorter at the crown, add a small filler or a matching clip-in puff underneath.
14. The Sleek Updo With a Knot at the Top
A modern minimalist look where all the hair is pulled back tight, gathered at the crown, and tied into a structured knot or small bun. It is the most fashion-forward option in the list, reading as editorial rather than traditional.
This style demands a perfect base. Any lump, bump, or unruly section shows under bright light. Plan on using more gel than feels comfortable to lay everything flat and polished.
Pair with minimalist accessories — a single pair of hoops, one delicate necklace, a clean-lined dress. The hair is the statement. Everything else is background.
15. The Rolled Updo With Soft Tendrils
A structured updo with a few deliberately released tendrils framing the face. The tendrils should be curled into soft waves before being released. Not straight wisps, not flat strands — curled, intentional, romantic.
This look is the textbook garden wedding style. It reads as soft, elegant, and slightly vintage without being costume-y. It pairs well with flowing chiffon dresses and natural outdoor settings.
The tendrils require their own treatment. Curl them with a small wand before the updo is built, then release them at the very end. Curling after the updo is constructed is how you burn your ear.
16. The Decorative Hair Jewelry Accented Style
A style built around a specific piece of hair jewelry — a gold comb, a beaded band, a vintage barrette — where the jewelry is the focal point and the hair is shaped around it. The jewelry chooses the style, not the other way around.
This works best when you already own a piece of hair jewelry that you love. Shopping for hair jewelry for a specific event usually results in something too matchy or too forgettable. The best pieces are ones you have collected over years.
Place the jewelry where light will hit it during the event. Think about where you will stand, which direction the sun will come from, and whether indoor lighting will be warm or cool. The right placement can turn an okay piece into a showstopper.
17. The Bantu Knot Out Updo
A bantu knot out — unraveled bantu knots that created defined ringlets — can be swept into an updo that pairs the spiral texture of the knot-out pattern with the structure of a formal bun. The result is a textured updo with more visual depth than a sleek one.
This style works better for shorter hair. Long hair bantu knots become too heavy and the defined spiral pattern loosens by the time you style it. Medium-length hair is the sweet spot.
Unravel the knots three to four hours before the event, then let the pattern set before sweeping it into the updo. Rushing the unravel produces a frizzy mess instead of crisp spirals.
18. The Sleek Low Bun with a Bow
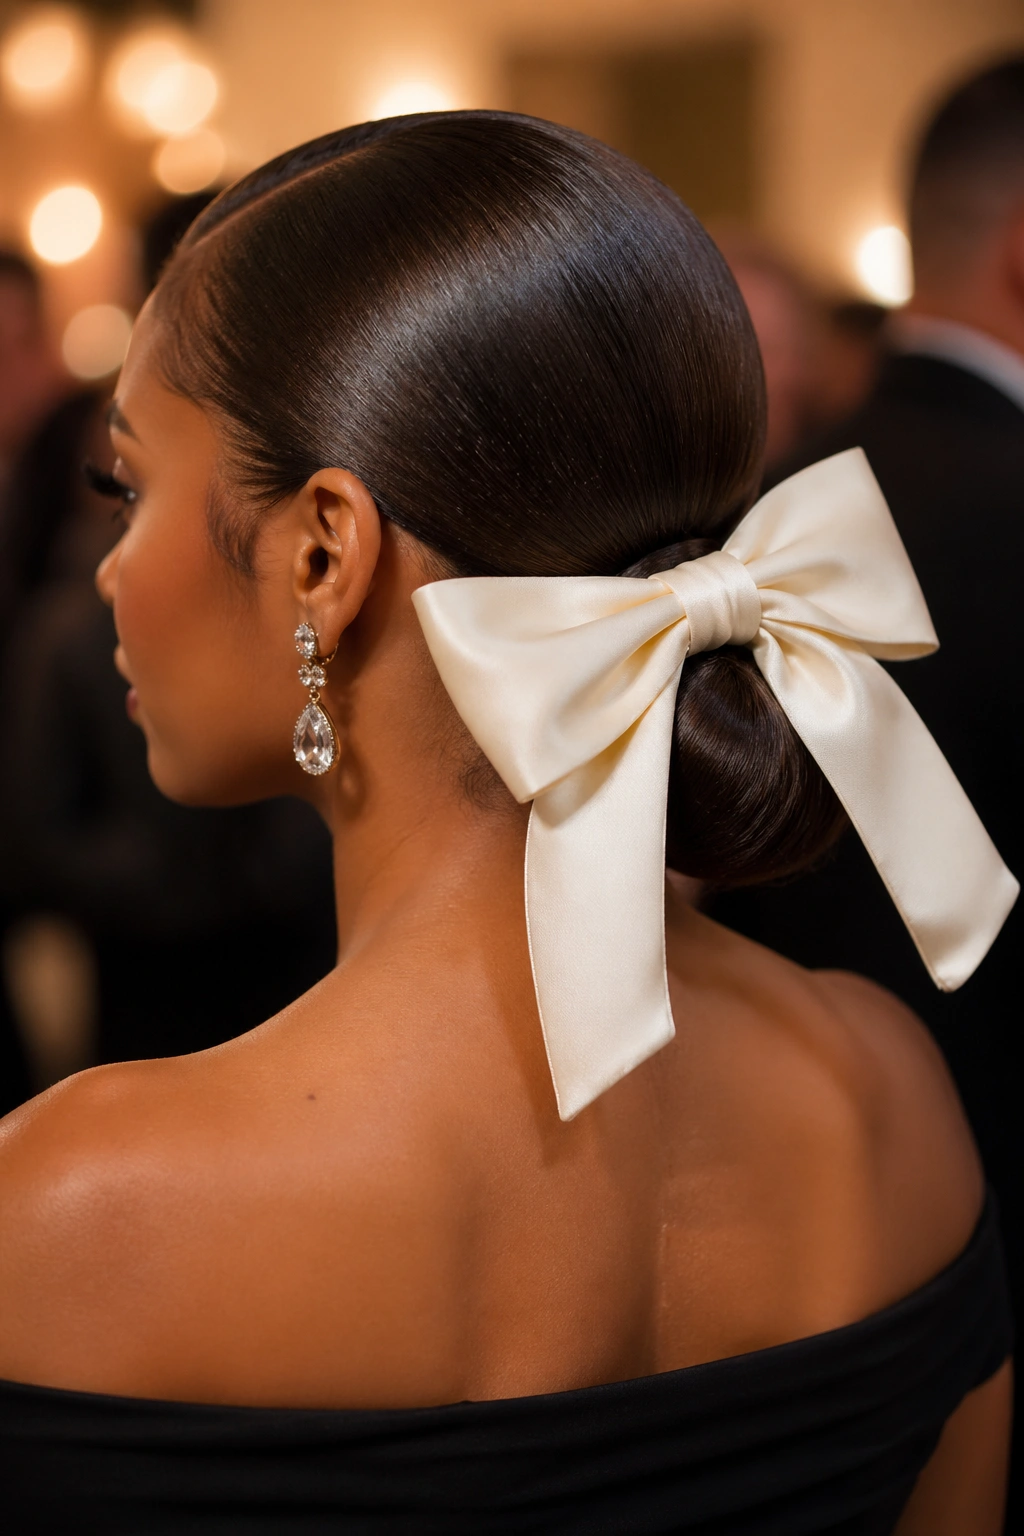
A low, clean bun tied with a large fabric bow — silk, velvet, or satin — sitting below the bun at the nape. The bow is oversized deliberately, about the size of your palm, to read as intentional.
The bow is not an afterthought. It is the whole point. Without it, the low bun is plain. With it, the look becomes editorial and charming.
Choose a bow color that contrasts with the hair. Black hair with a white silk bow is classic. Dark hair with a gold velvet bow is glamorous. Dark hair with a navy satin bow is subtle and sophisticated.
19. The Curled Cascade
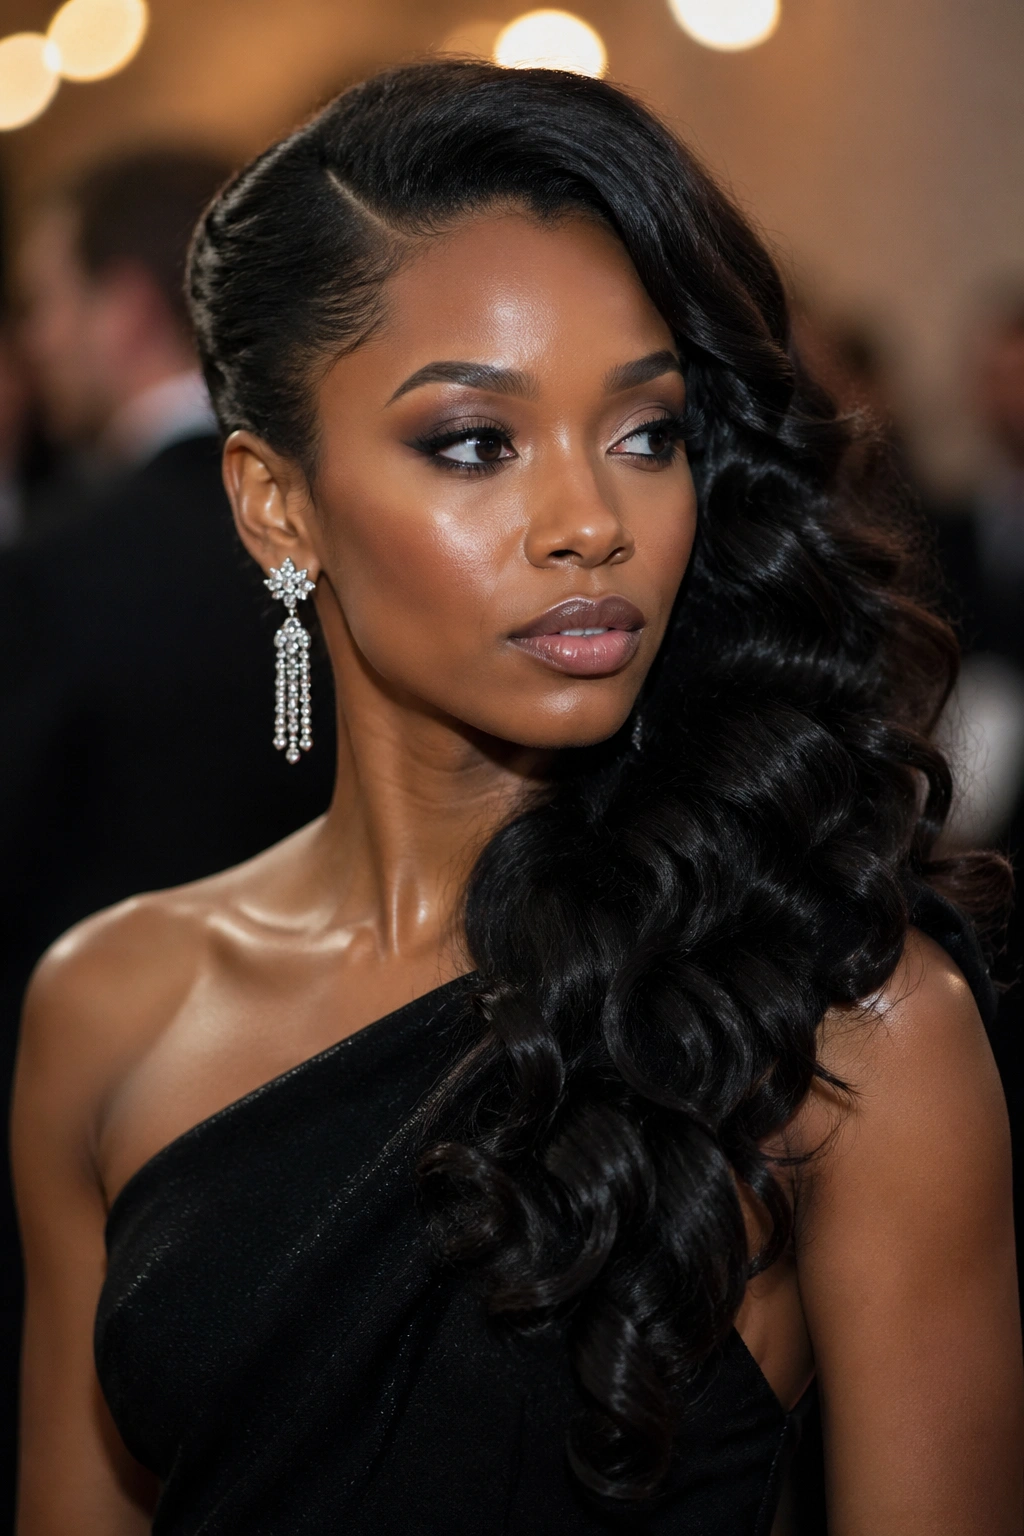
Long stretched afro hair curled into cascading waves that fall over one shoulder. Half of the hair is pinned back on the opposite side, leaving a dramatic curtain of curls falling asymmetrically. It is a classic red-carpet look that works for formal events too.
Use a large-barrel curling wand for this style — small curls read as casual, large waves read as formal. Wrap sections in alternating directions to avoid the uniform-curl look that photographs flat.
Finish with a light shine spray, not hairspray. Hairspray leaves the curls stiff and unnatural. Shine spray keeps them moving.
20. The Slick Back Bun With Baby Hair Art
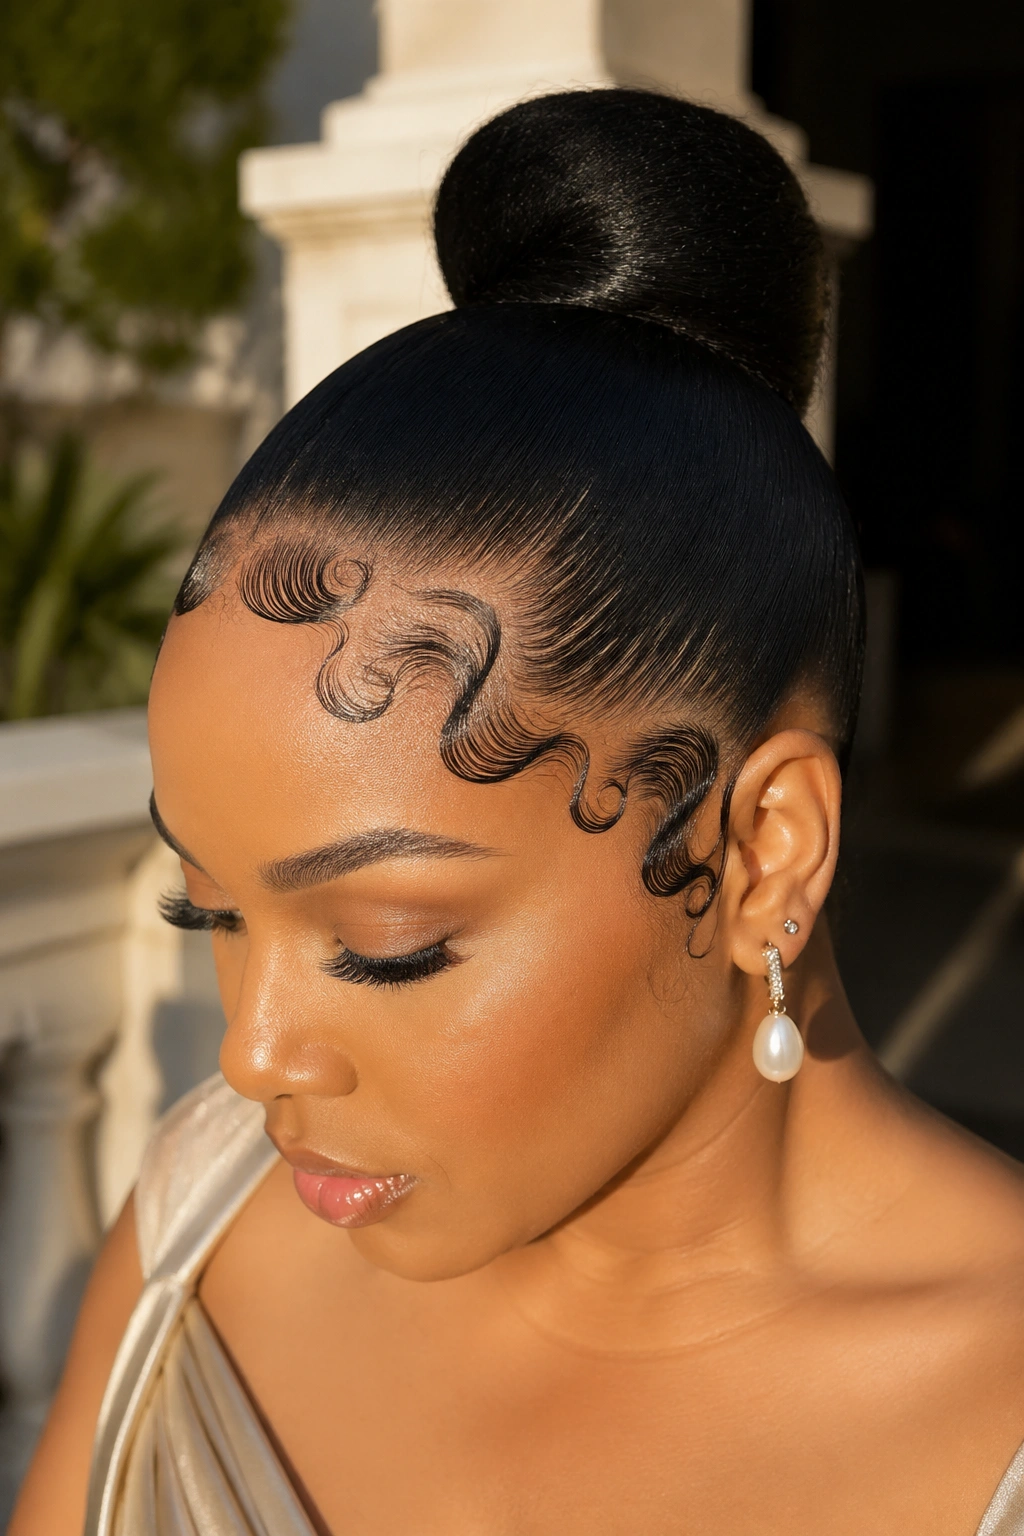
A completely slicked-back bun where every strand of hair is pulled flat, and the front hairline is decorated with elaborate baby hair swirls. The baby hair becomes the artistic element, transforming a basic bun into a statement look.
What to Watch For
Baby hair work requires practice. Done well, it reads as intricate and personal. Done poorly, it reads as smudged and rushed. If you have not done baby hair art before, this is not the event to learn.
- Use a thick edge gel, not a light one
- A small detail brush works better than a toothbrush for tight curves
- Set baby hair with a scarf pressed on for ten minutes to lock the shape
- Tip: Photograph your baby hair work in bright natural light before leaving — if the swirls do not read clearly on camera, redo them before the event.
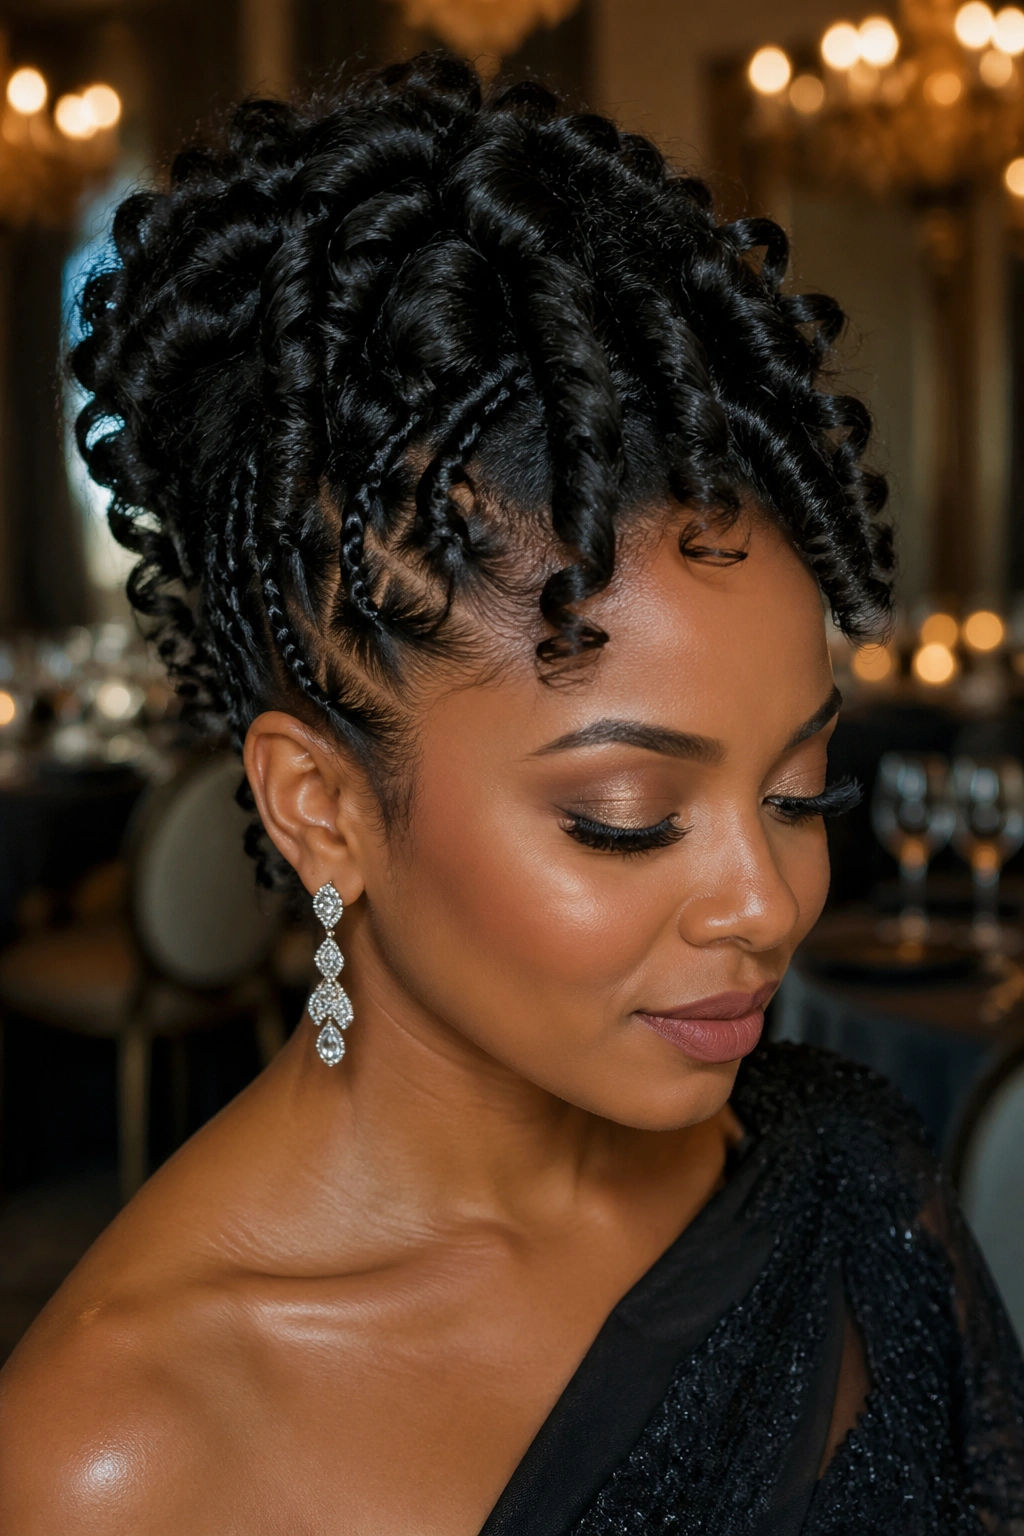
21. The Coiled Afro Updo
Small coils, either naturally formed or finger-coiled with gel, gathered into a high updo so the surface texture of the style is entirely made of tight spirals. It is one of the most texture-forward formal looks you can choose — a celebration of natural curl pattern rather than a suppression of it.
This style photographs beautifully because the individual coils catch light differently from straight hair, creating depth and dimension that flat finishes cannot match. Under a wedding photographer’s lens, it glows.
Setting the coils takes the longest of any style on this list. Plan on three hours of finger coiling before even beginning the updo. It is worth the time.
22. The Puff With Face-Framing Tendrils
A simple, high puff at the crown with two deliberately released front sections left to frame the face. The puff is the structure; the tendrils are the softness. Together they balance formality and grace.
This is one of the easiest formal looks to execute if your hair is already in good shape. The whole thing can be built in thirty minutes with practice. It is also one of the most forgiving if something goes wrong — a loose section can be repinned quickly without redoing the whole style.
The tendrils should be curled softly rather than left straight. Straight tendrils read as escaping hair. Curled tendrils read as designed.
23. The Elegant Faux Hawk Updo
A faux hawk styled up for formality — the center strip of hair rises into a structured crest while the sides are slicked back or pinned flat. It is the edgiest formal look on this list, suited for galas rather than weddings, and for people who want to push the boundaries of what formal hair can be.
Unlike a casual faux hawk where the texture is loose and spiky, the formal version is smooth and sculptural. The crest is shaped with gel and hairspray into a clean curve rather than spikes. It reads as couture rather than rebel.
Pair with a sharp, angular dress — a column gown, a structured jumpsuit, a deep-V neckline. Soft flowing dresses fight the architecture of the hair. Clean lines amplify it.
Making Your Style Last the Whole Night
Spray your finished style lightly with setting spray. Not hairspray — setting spray. It is lighter, more flexible, and less likely to leave a helmet texture under lights.
Carry a small emergency kit in a clutch: three bobby pins in a matching color, a small bottle of edge gel, a mini comb, and a handful of U-pins. If something slips or shifts, you can fix it in a bathroom mirror in under a minute.
Avoid the photo booth hair crush. If the event has a photo booth, photograph yourself early in the night when the style is freshest. Late-night photo booth shots are almost always when things start to fall apart.
Mistakes That Ruin Formal Afro Hair
Over-gelling the front section. A slick front needs less gel than you think. Too much creates a greasy shine that photographs badly and attracts lint from clothing.
Skipping the trial run. If you have not worn the style for at least four hours before the event, you do not know how it ages. Trial runs prevent day-of disasters.
Matching everything exactly. A formal look benefits from contrast. Gold pins in black hair stand out. Pearl pins in dark hair pop. Matching pin colors to hair color makes the accessories invisible.
Forgetting about the back. Guests at weddings and galas are constantly behind you during the event. If the back is sloppy, it reads as sloppy.
Over-accessorizing. One statement piece is elegant. Three statement pieces compete. Pick the one focal point and let it shine.
Coordinating Hair With Your Dress
A column dress with clean lines pairs with a clean, minimalist updo. A flowing chiffon dress pairs with softer, more romantic styles. A sequined or heavily embellished dress pairs with simpler hair so the two do not compete.
Think of hair and dress as a conversation. One talks loudly, the other listens. If both talk loudly, the look becomes noise.
Color matters too. Warm-toned dresses pair with warm-toned hair accessories (gold, copper, bronze). Cool-toned dresses pair with cool-toned accessories (silver, platinum, pearl). This rule is small but it makes a big difference in photos.
Final Thoughts on Formal Hair
The best formal afro hair is the hair that makes you feel powerful when you walk into a room. It is the style where you forget about your hair within ten minutes because you trust it, and you spend the whole evening focused on the people and the moment instead of worrying about what your hair is doing.
Pick a style that fits the event, fits your dress, and fits your personality. Prep thoroughly. Do the trial run. Bring the emergency kit. And then — this is the important part — stop thinking about it. Formal hair is armor. Wear it and go.