



Cornrow updo styles take the discipline of cornrows and lift them off the neck. Whether the destination is a low bun, a sculpted crown, a stacked side roll, or a high topknot, the cornrows do the foundation work and the updo finish does the styling. Twenty-five cornrow updo styles follow, each one structured differently from the last — different gather points, different shapes, different occasions, different levels of complexity.
Updos read formal. They show off the neck, the jawline, and the shape of the head in a way that loose hair never quite manages. Cornrow updos do all of that while keeping the front clean, the parts visible, and the design intentional. They’re the hair equivalent of a tailored jacket — structured, deliberate, and worth the effort.
Why Cornrows Make a Better Updo Foundation
Loose hair fights an updo. Strands slip, flyaways escape, the gather looks messy by hour two. Cornrows hold. They give the updo a smooth, flat surface to build from, and the gather point itself becomes a clean focal point rather than a frizzy bundle.
A cornrow updo also lasts longer than a loose-hair updo. A loose-hair updo is a one-day style. A cornrow updo can hold for two to three weeks with appropriate care. The braids do the structural work; the updo styling on top is what changes day to day.
Cornrow updos also distribute weight more evenly. The hair is locked into braids before the gather, so the gather itself only has to hold the braid mass — not the full weight of every individual strand pulling in different directions.
Choosing the Right Updo for the Occasion
Not every cornrow updo suits every event. A high topknot reads athletic and casual. A low chignon reads polished and formal. A side roll reads romantic. A wrapped braid crown reads bridal.
Match the updo’s energy to the event you’re wearing it to. A low bun for the office. A high gather for the gym. A wrapped crown for a wedding. A side roll for a dinner date.
Cornrow patterns themselves should match the destination updo. Straight-back cornrows work best for back-gathered updos. Curved cornrows work best for crown-wrapped or halo-style updos. Diagonal cornrows feed cleanly into side-gathered updos.
Hair Prep for Updo Foundations
Wash with a clarifying shampoo, deep condition, apply a leave-in, and stretch the hair before braiding starts. Updos demand smooth foundations — the gather point shows every flaw in the cornrow that leads up to it.
Trim split ends if your hair is long enough that the ends will be visible in the updo finish. Updos that gather and tuck the ends hide them; updos that wrap or trail with the ends expose them.
Key prep tip: stretch the hair fully before installing the cornrow base. Shrinkage at the cornrow stage causes the gather to bunch up unevenly later.
Tools for Cornrow Updos
- A rat-tail comb for parting and shaping
- Strong hold edge gel
- Hair pins (bobby pins and U-pins both)
- Hair ties matched to your hair color
- A donut or bun form for fuller updos
- A small comb for back-combing into the base
- Hairspray for finishing
- A satin scarf for sleep protection
The pins matter. Don’t cheap out. Quality stainless-steel bobby pins hold longer than the painted ones that bend after one use. U-pins are different from bobby pins and serve a different role — they’re for anchoring buns from inside without pulling the hair flat.
Updo Building Blocks
Most cornrow updos use one of four base techniques: the gather (cornrows feed into a single point), the wrap (cornrow ends braid into a single tail then wrap), the tuck (cornrow ends fold under and pin), or the layered fold (multiple gather points stacked).
Combinations of these create most of the styles below. Recognizing which base your chosen style uses helps you understand how to install it.
A Brief History of Updos in Black Hair Culture
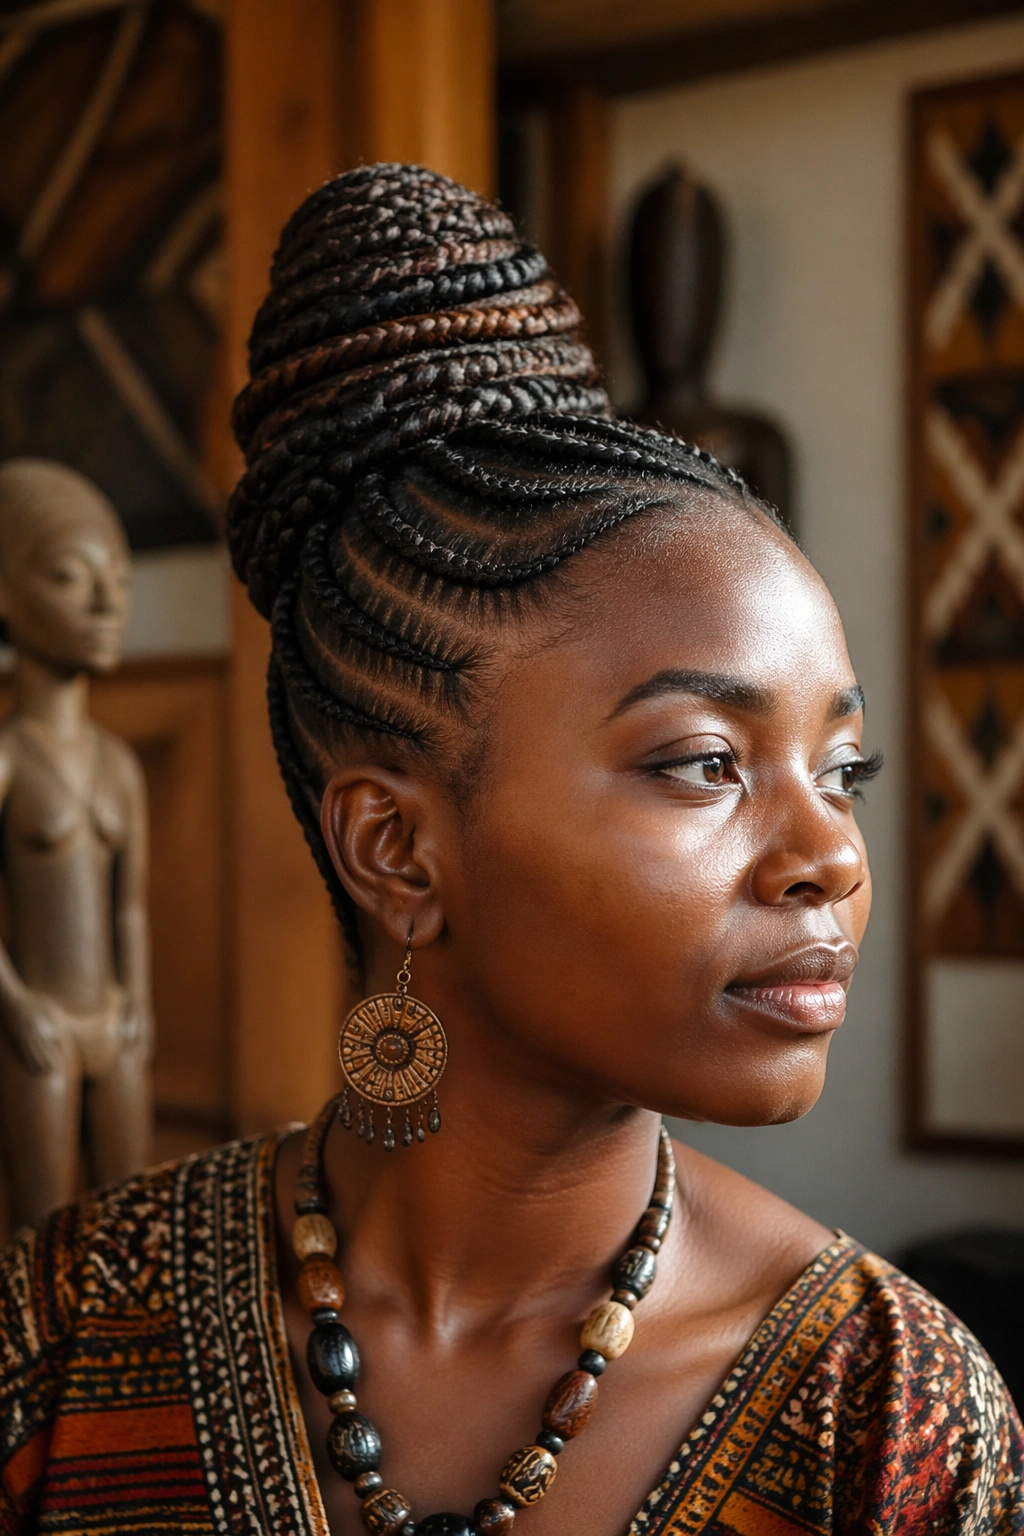
Cornrow updos appear in West African art going back hundreds of years. The wrapped crown, the gathered topknot, the layered side roll — all of these have variants that show up in historical sculpture and oral tradition. Cornrow updos were status markers, cultural identifiers, and ceremonial styles long before they became fashion editorials.
When you wear a cornrow updo today, you’re participating in a long, rich tradition. The shapes are not new. The presence of these styles is part of why braided hair holds the weight it does.
1. Low Bun With Five Straight-Back Cornrows
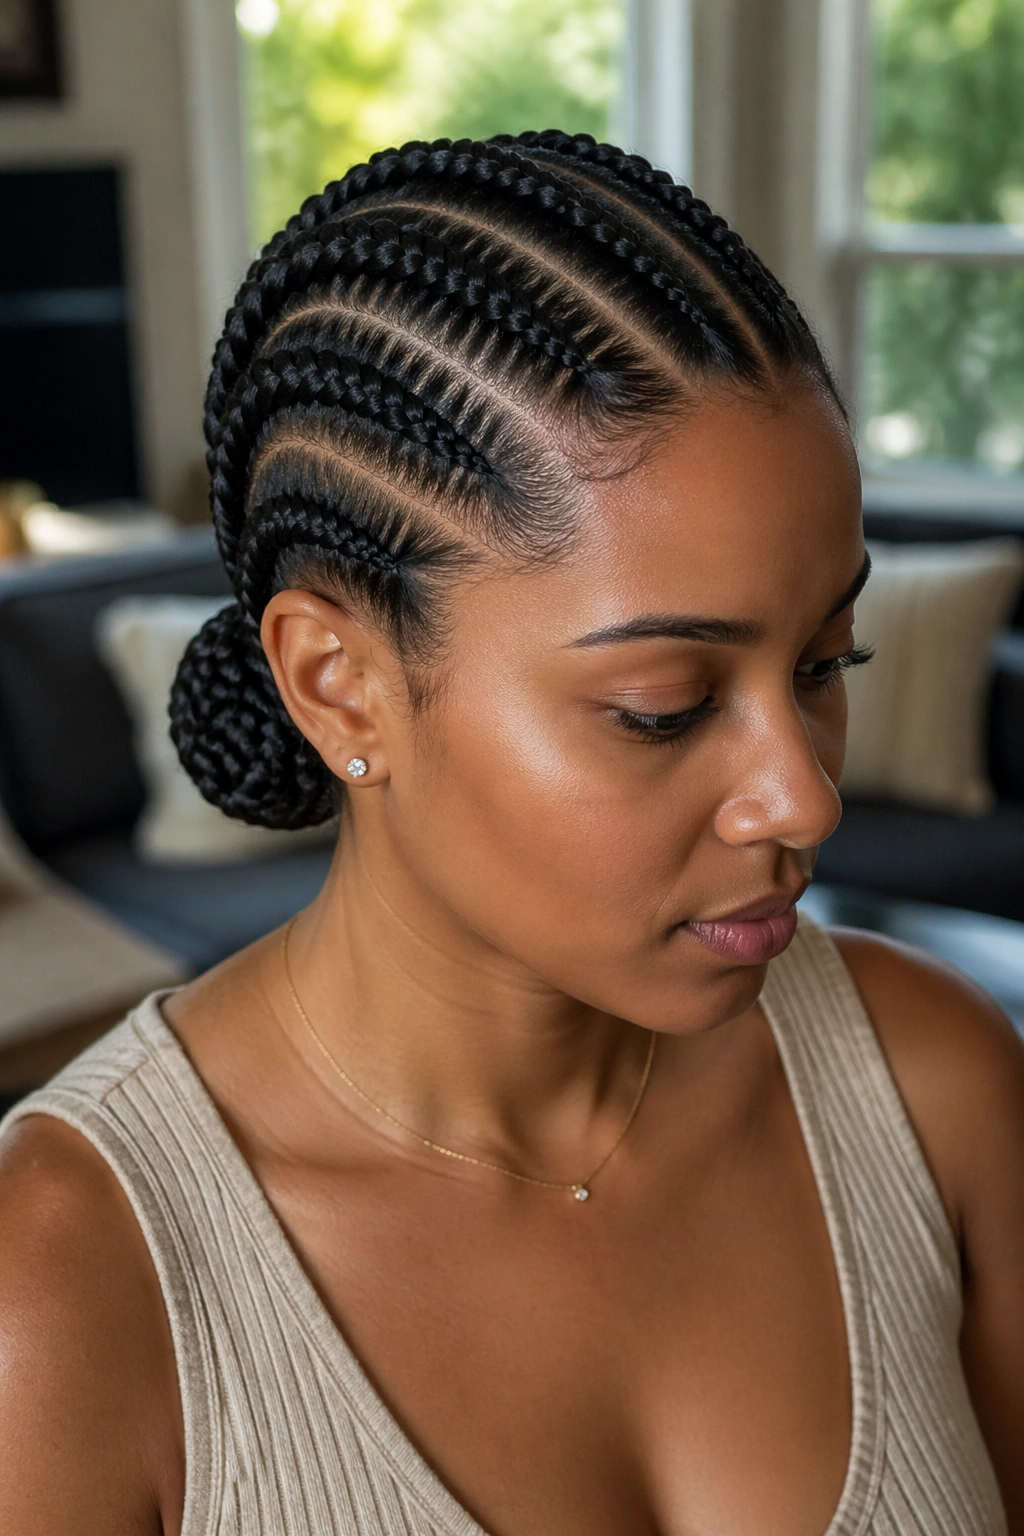
Five cornrows running straight back from a clean center part, gathered at the nape into a low, neat bun. Classic, clean, suits any occasion from office to evening.
Why It Works
- Five cornrows distribute weight evenly across the head
- A low bun reads polished without being severe
- Comfortable to sleep on (the bun sits low, not pressing into the pillow)
- Works with extensions or natural length
The bun shape depends on the length of the cornrow tails. Short tails make a small tight bun. Long tails make a fuller wrapped bun. Either reads clean if the foundation is smooth.
Best tip: pin the bun in five spots — top, bottom, left, right, and center — to keep it secure all day.
2. High Topknot With Three Chunky Cornrows
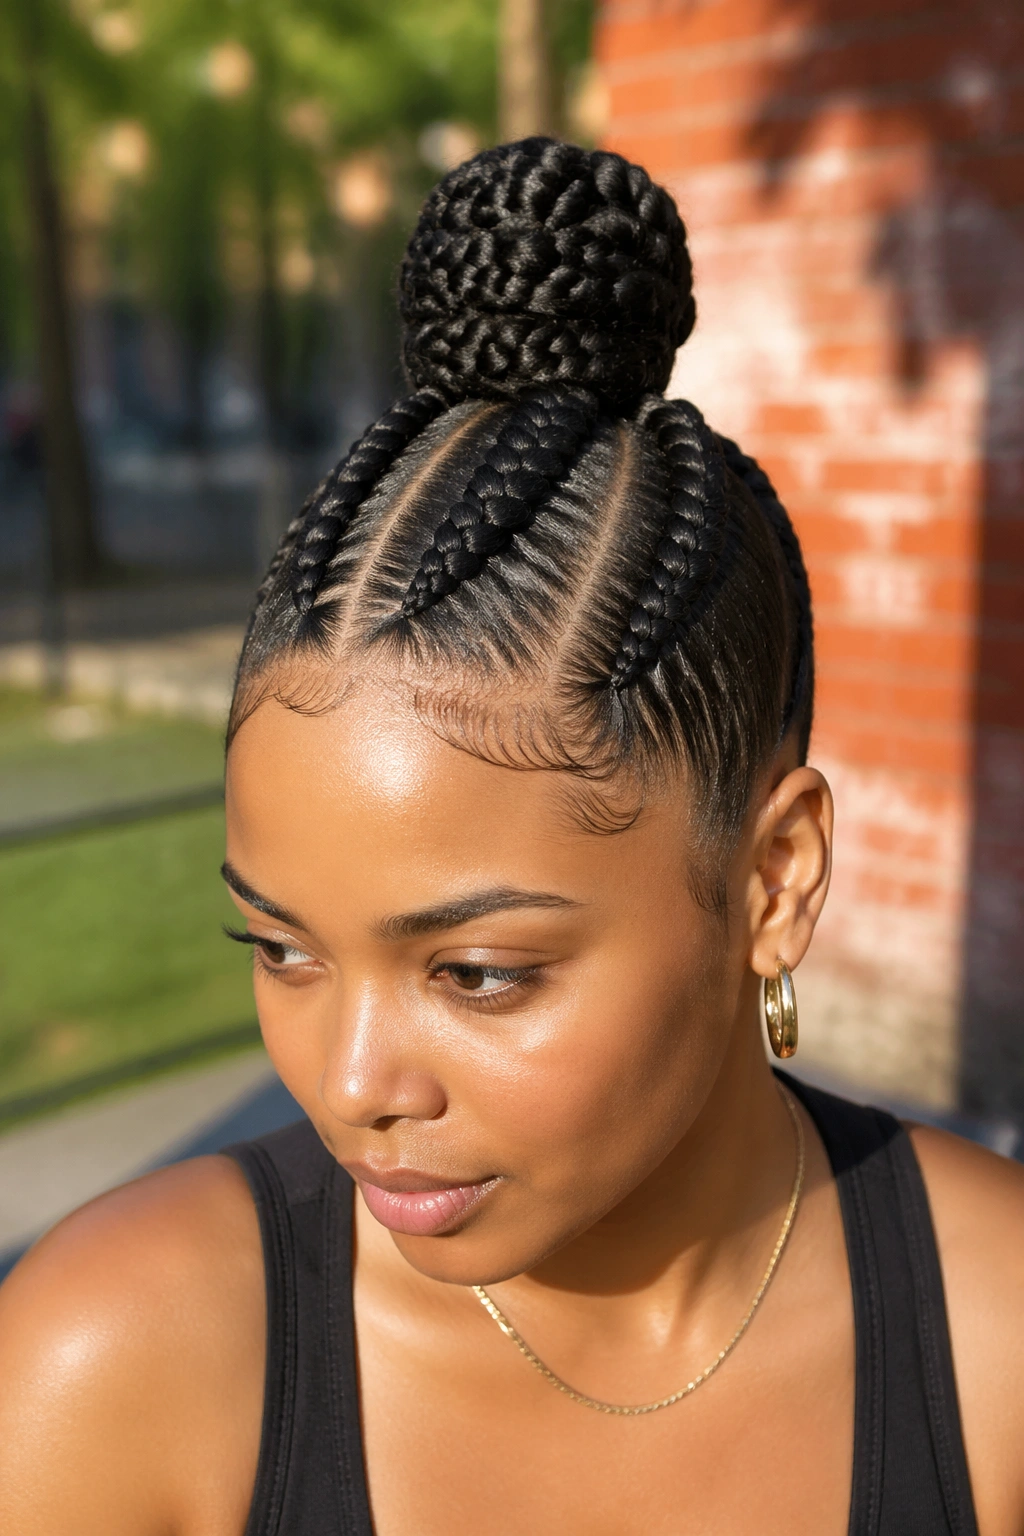
Three thick cornrows running straight back from a center part, gathered at the very top of the head into a tall topknot. The topknot sits high, reads athletic, and shows off the head shape.
Unlike a low bun, a high topknot draws the eye upward. It elongates the neck visually and frames the face from above rather than below.
The cornrow base is what keeps a high topknot from looking sloppy. Loose hair gathered high frizzes and sheds; cornrows gathered high stay slick.
Who this is best for: anyone with a long oval or oval face shape. Round and short faces can carry a high topknot but might prefer a mid-height gather instead.
3. Cornrowed Crown Braid
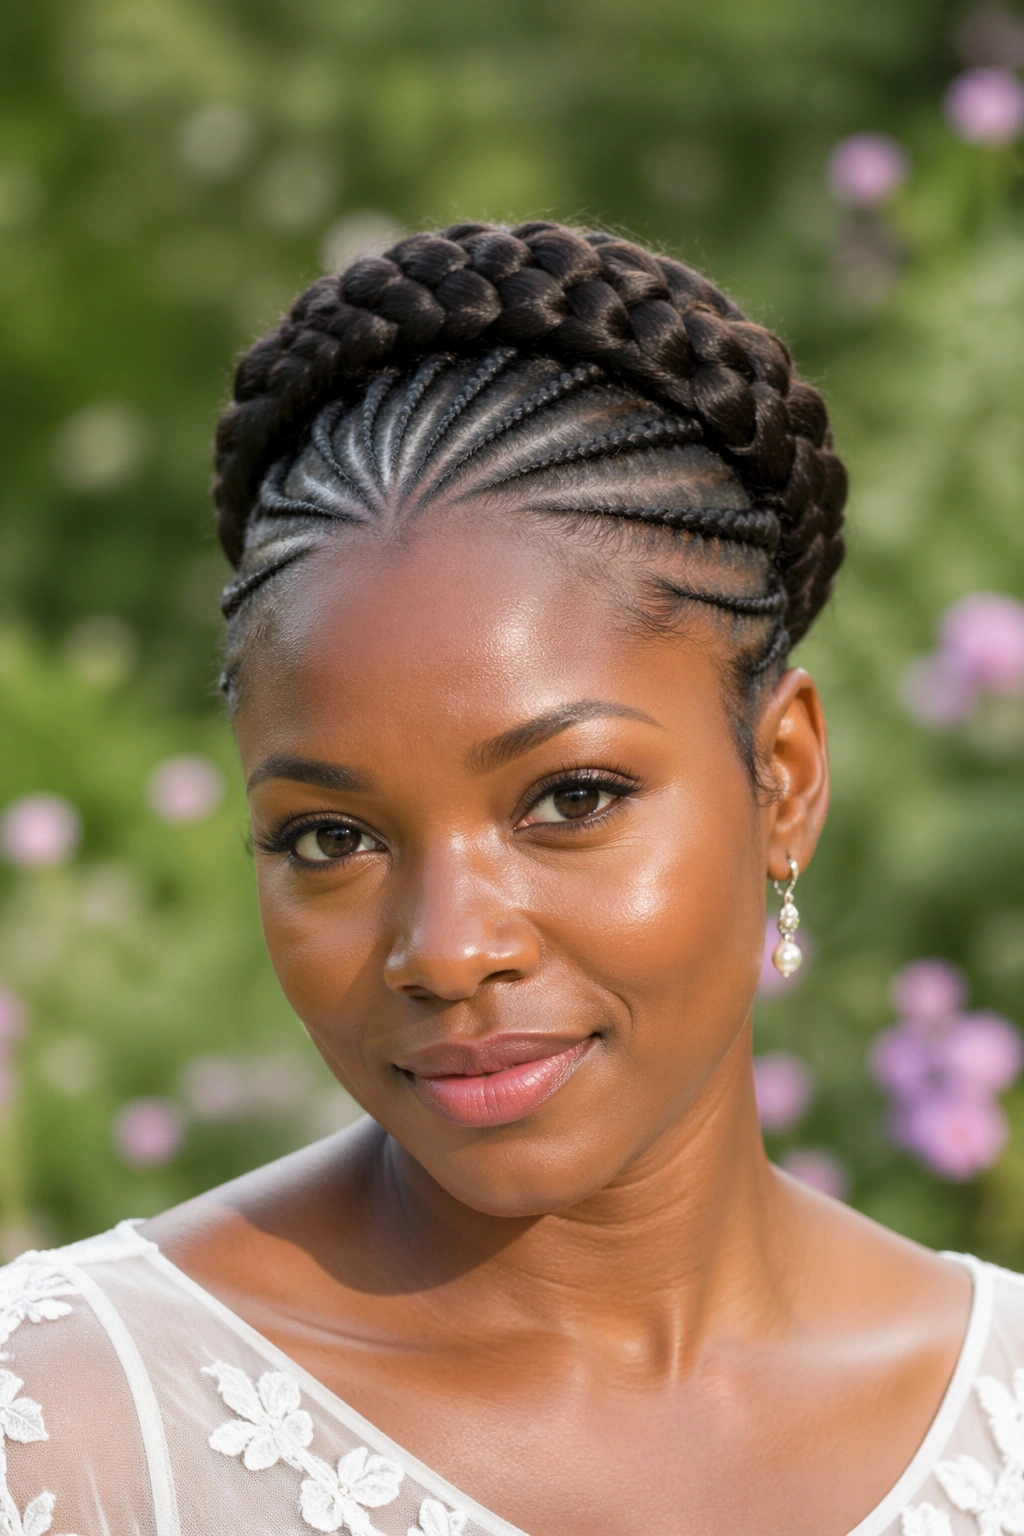
Cornrows on the perimeter of the head, with the cornrow ends braided into a single thick braid that wraps over the crown like a halo. Pin in place and tuck the tail under.
The wrapped braid is the focal point. It needs to be flat, not a tight rope. Press the finished braid between your palms before wrapping. Pin at four to five points along the wrapped length to keep it secure.
Picture a classic crown braid silhouette — the kind you’d see at a wedding — but built on a cornrow foundation underneath instead of loose braided hair. Cleaner, longer-lasting, more deliberate.
4. Side Bun With Asymmetric Cornrows
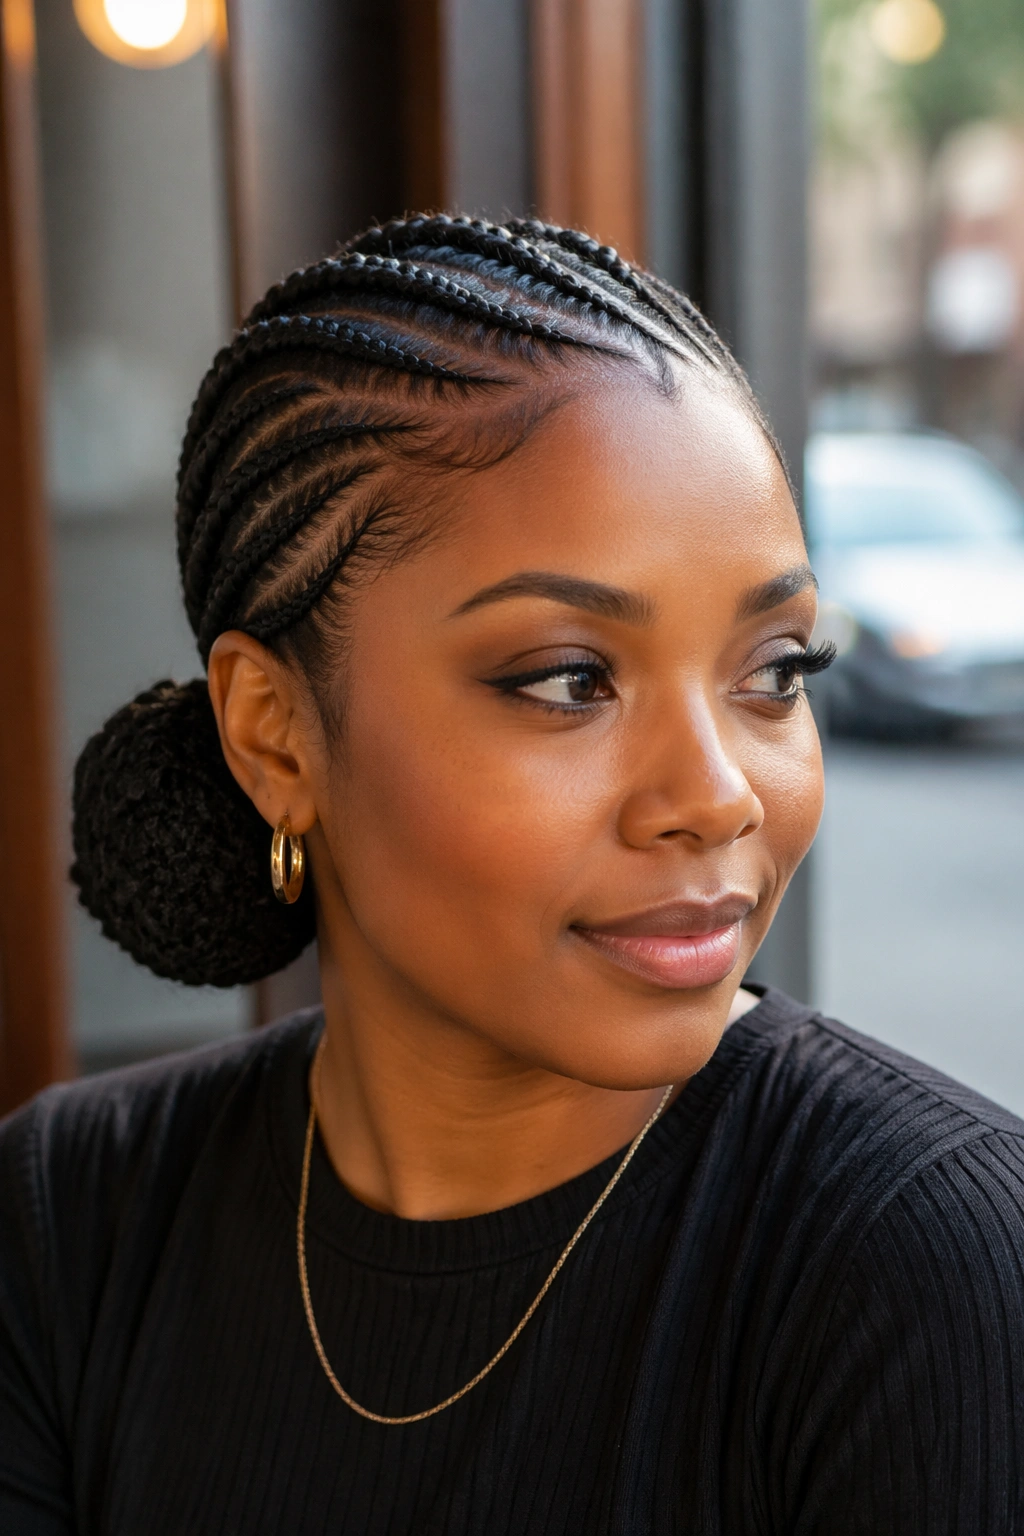
Cornrows running diagonally from a deep side part toward one shoulder, gathered into a low side bun behind the ear. The asymmetry is deliberate — the bun isn’t centered.
A side bun reads softer and more romantic than a back-centered bun. It frames one side of the face and leaves the other side open.
The cornrows have to angle toward the bun position. Straight-back cornrows can’t gather to a side bun cleanly — the geometry doesn’t work. Diagonal cornrows that already lean toward the bun side feed in naturally.
- Part the hair deeply on one side (the side opposite the bun)
- Cornrow each row at a 30-45 degree angle toward the bun side
- Gather all cornrow ends behind the ear on the bun side
- Twist the gather and pin into a small loose bun
5. Stacked French Roll Updo
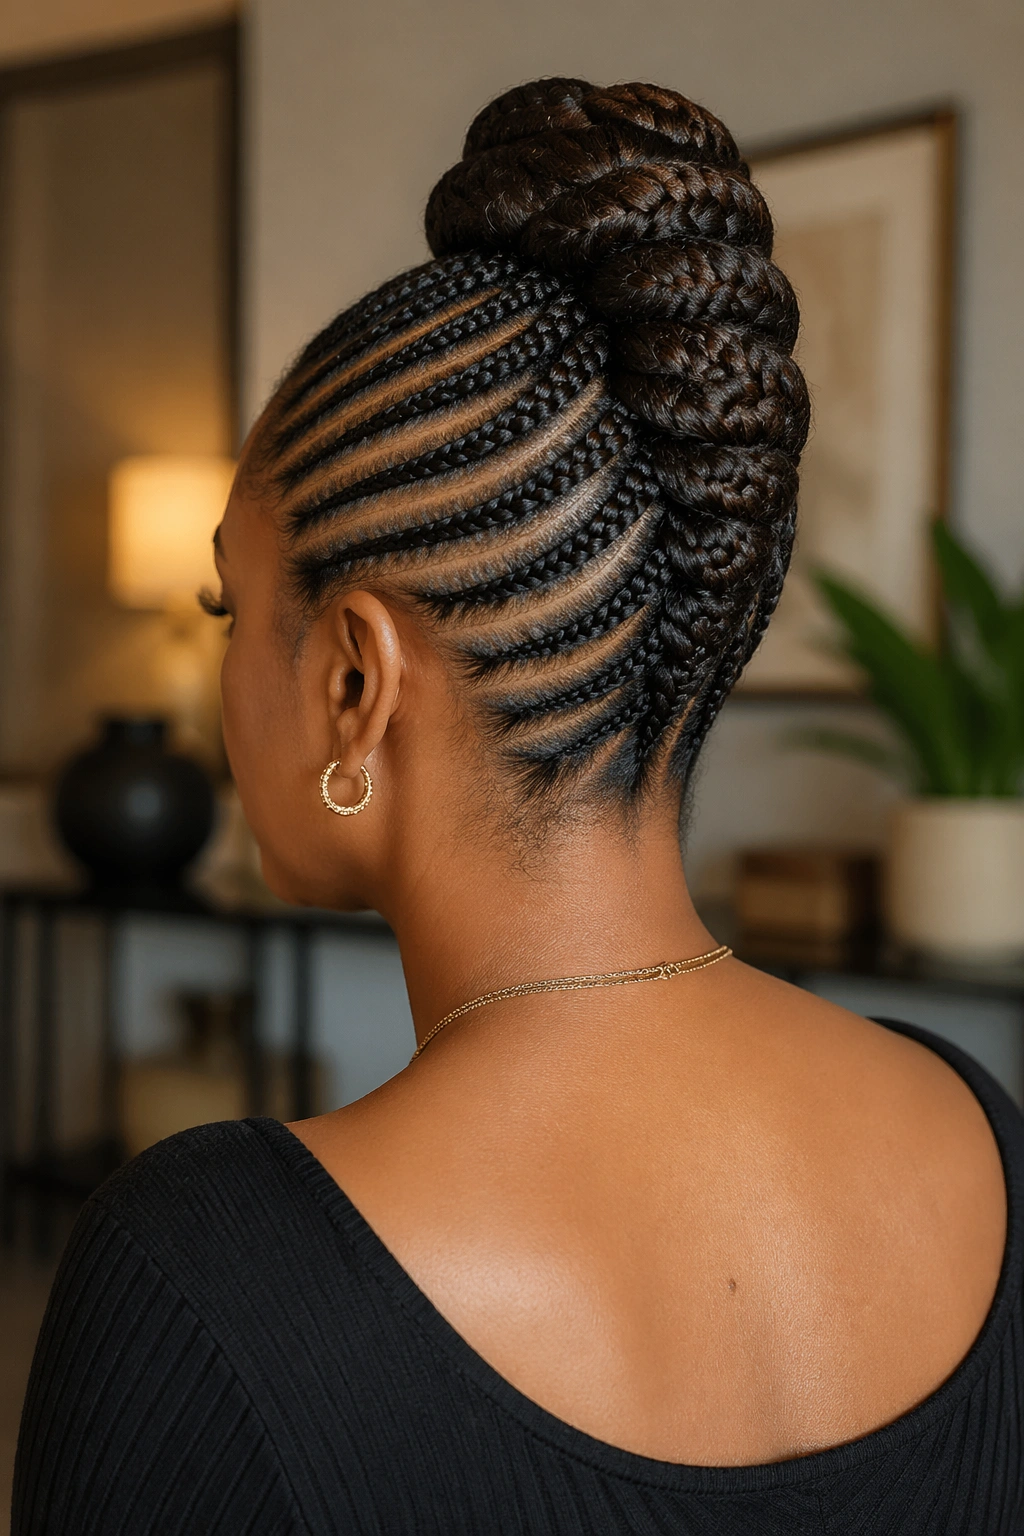
Cornrows gathered at the back of the head and rolled into a vertical French roll. The roll runs from the nape up to the crown, pinned along its center seam.
Bold fact: a French roll dates back centuries and remains one of the most flattering updos for any face shape.
Cornrows feed into a French roll cleanly because they’re already smooth and sectioned. The roll itself is formed by gathering the tails, twisting them upward, and folding the bundle into a vertical column against the back of the head.
Pin the roll along the inside seam — not the outside. Pins should be invisible. The seam itself is hidden against the head, so pins placed inside the seam don’t show.
6. Cornrow Updo With Loose Curly Bangs
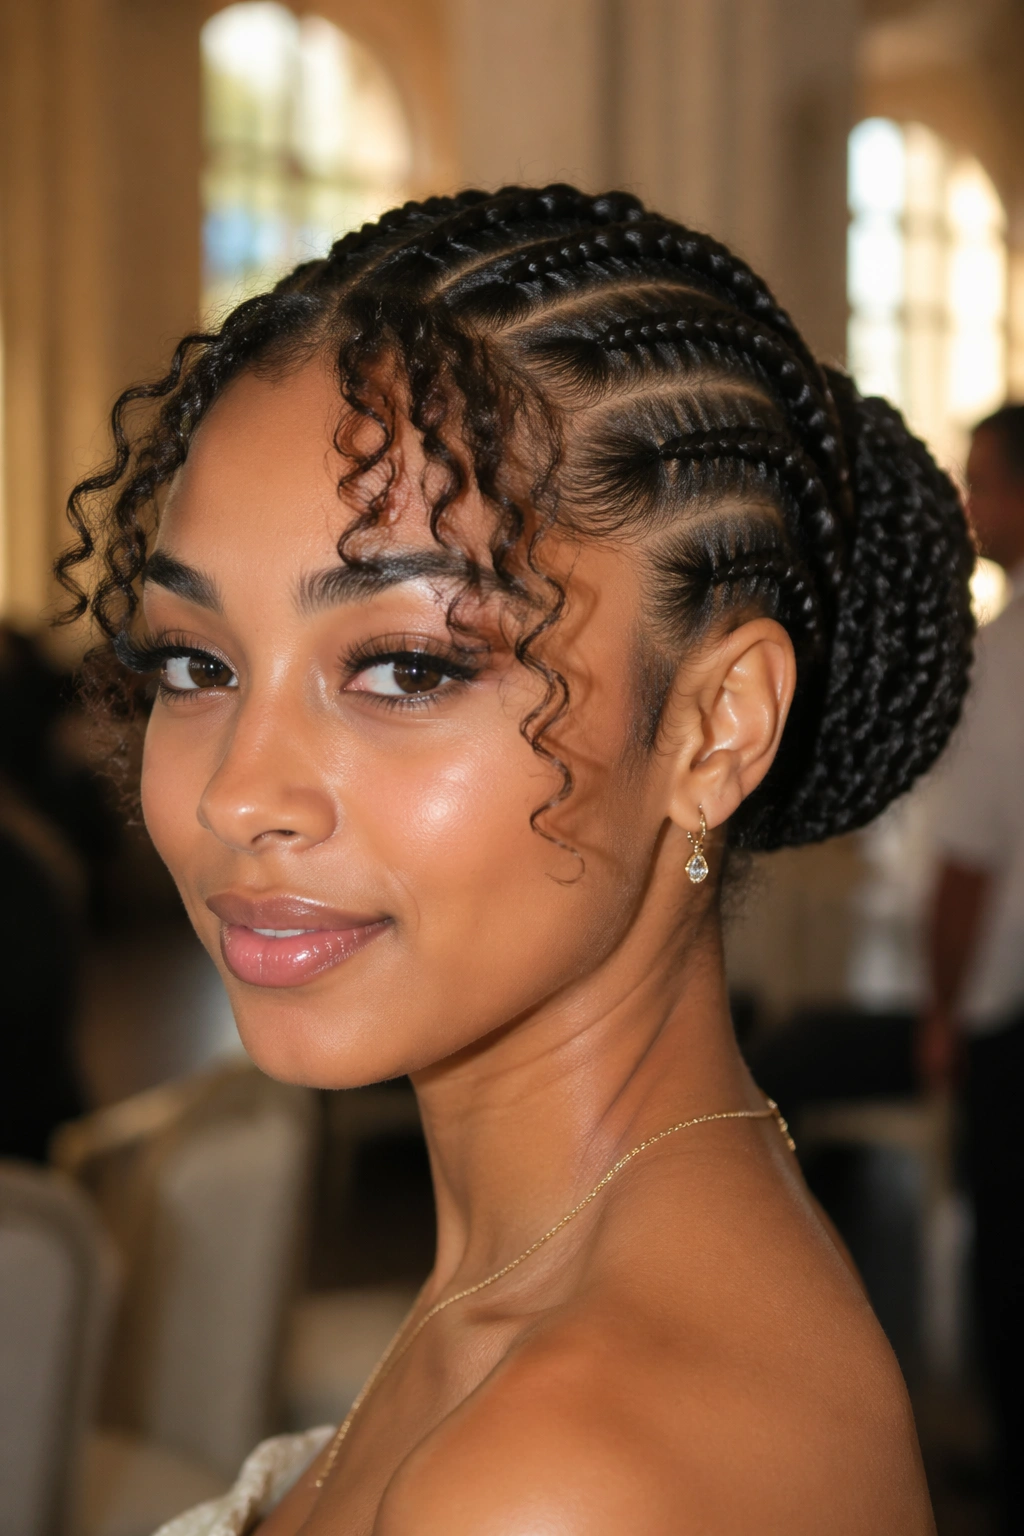
A back-gathered cornrow updo paired with face-framing curly bangs left loose at the front. The contrast between the structured back and the soft front frames the face beautifully.
The bangs can be your natural hair (if it’s long enough at the front) or curly extension pieces pinned in at the temples. Either reads cute and intentional.
The bangs should fall just past the eyebrows or onto the cheekbones — not so long they obscure the face, not so short they look choppy.
This style pairs especially well with formal events because the bangs add softness that pure-cornrow updos can lack.
7. Pin-Up Style With Cornrowed Sides
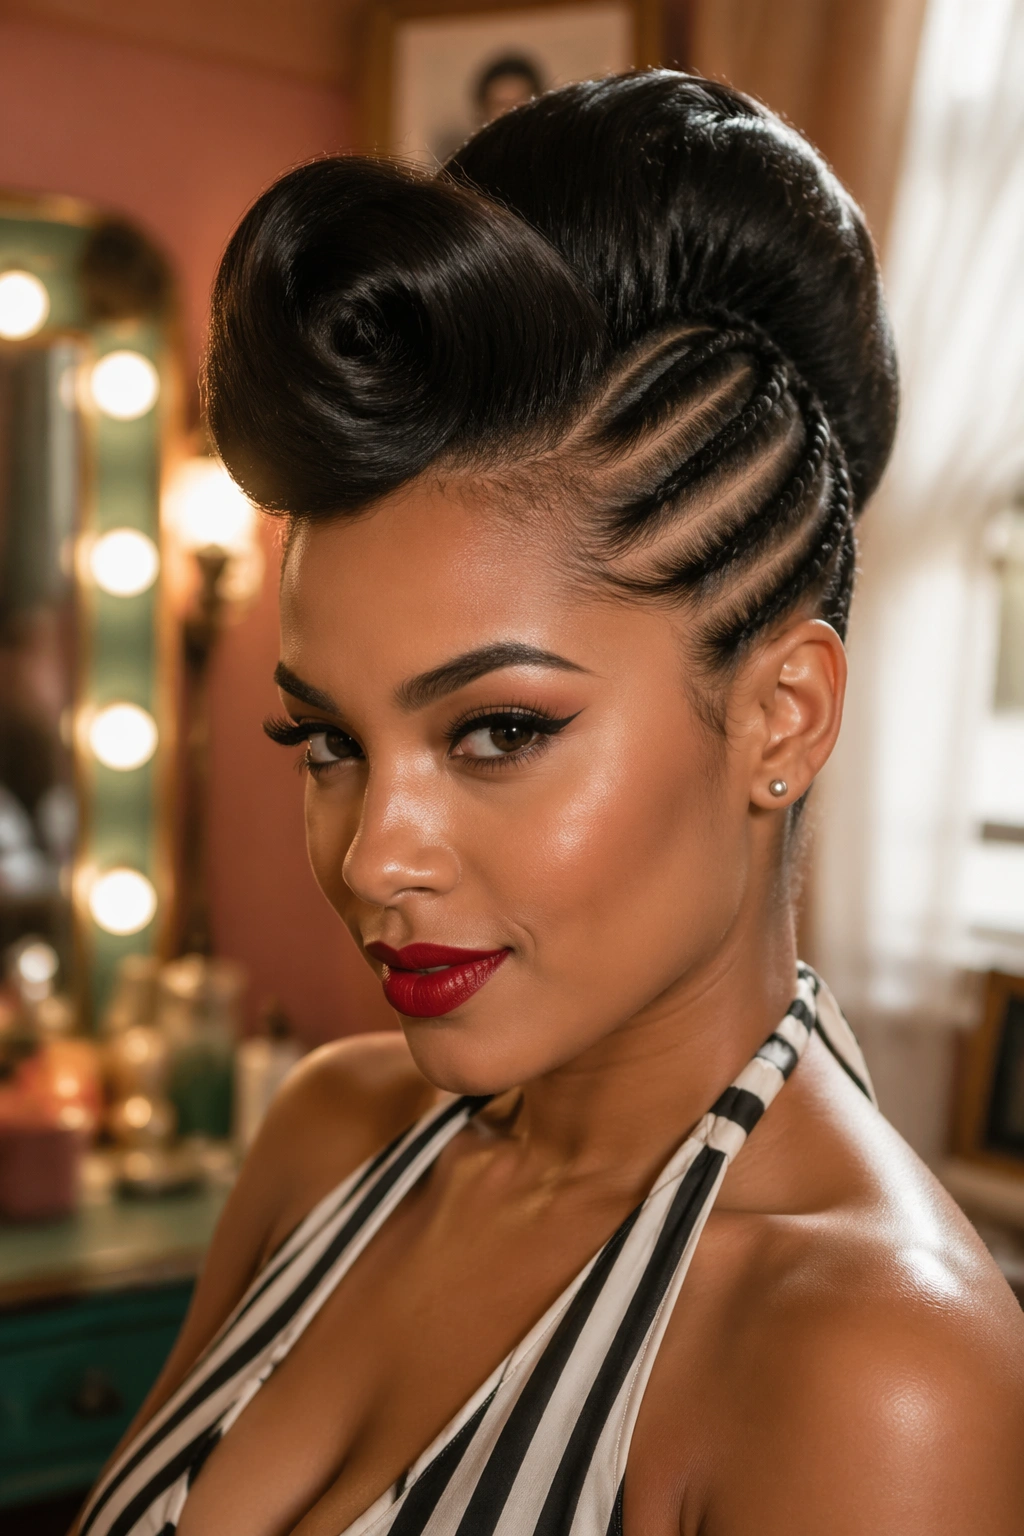
The two sides of the head are cornrowed flat — three cornrows on each side curving back — and the top hair is rolled and pinned in a vintage pin-up shape. The cornrowed sides keep things sleek; the pinned roll on top adds structure.
Picture a 1940s pin-up roll silhouette built on a cornrow foundation. The roll sits high at the front and tapers back into the gathered cornrows.
The pinned roll requires teasing for volume. Lightly back-comb the loose top hair, smooth the surface, then roll forward and pin the underside.
8. Cornrows Into a Bantu Knot Updo
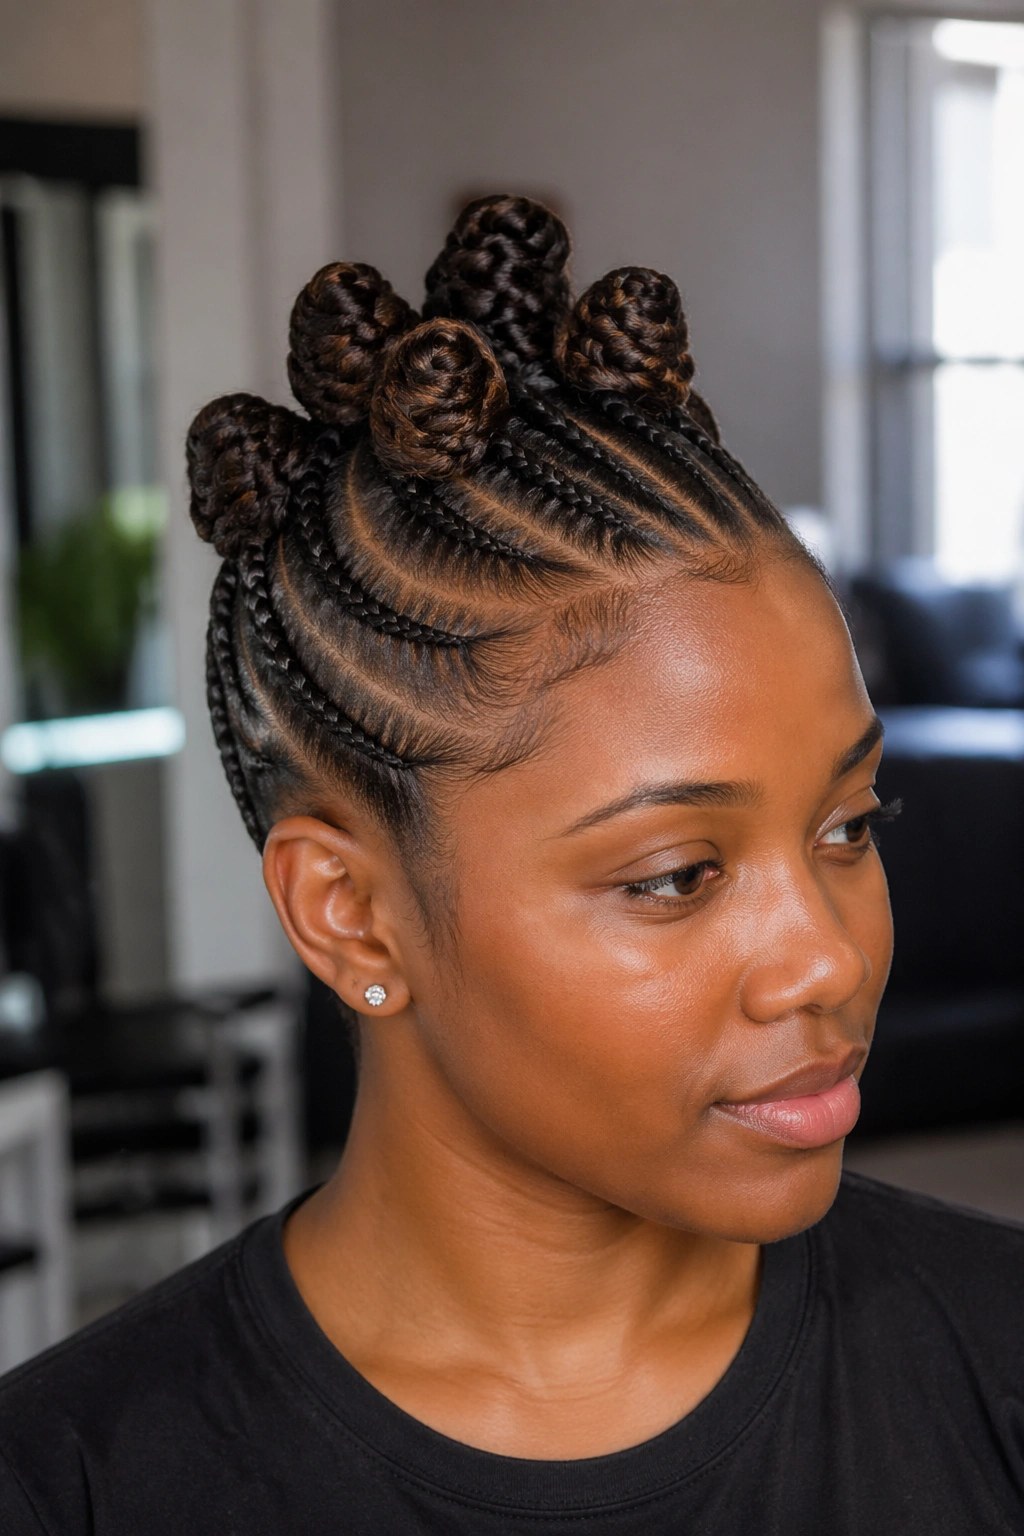
All cornrows feed up to the crown where their tails are wrapped into multiple small Bantu knots. The knots cluster at the crown like a small crown of coiled buns.
Unlike a single bun, a multi-knot updo creates texture and dimension. Each knot is its own small sculpture. Five to seven knots clustered together reads designed and intentional.
Wrap each knot tight enough to hold but not so tight it pulls at the cornrow base. Secure each knot with a small rubber band or a single pin pushed through the base.
When you take down the knots a few weeks later, you have defined curly ends on top of cornrowed sides — a built-in second style.
9. Cornrow Pompadour Updo
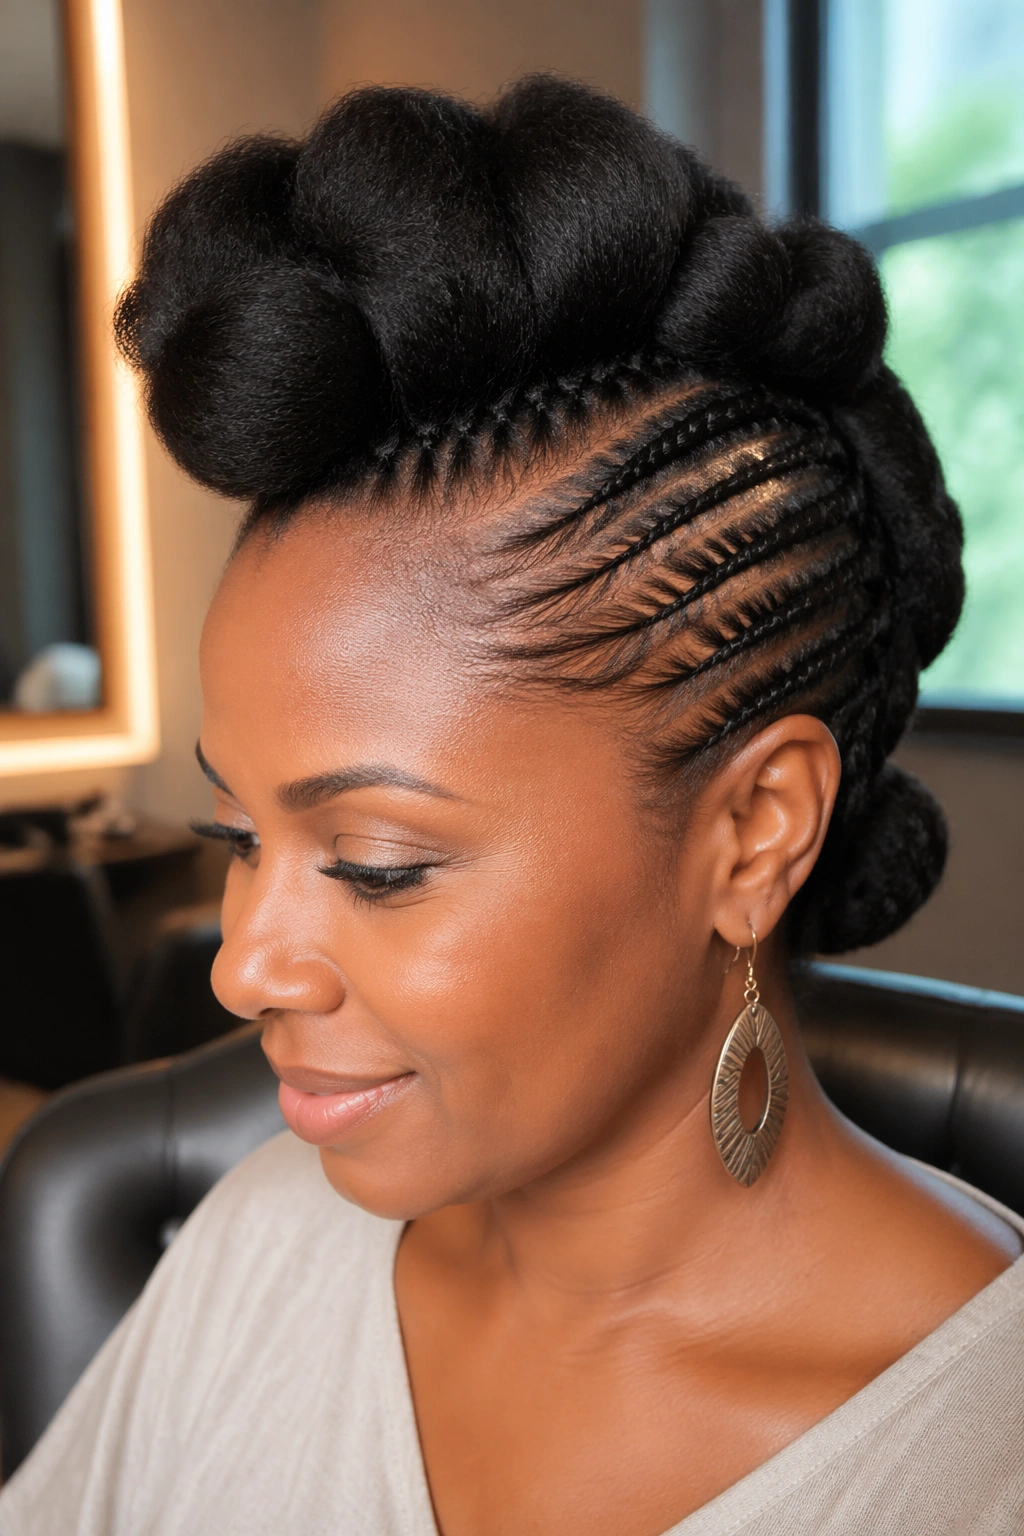
A cornrow base with a high front pompadour — the front section of hair (or extension) is rolled forward and pinned into a tall standing shape at the front of the head. The cornrows behind feed into a low gather at the nape.
Pompadour styles read bold and high-fashion. A cornrow pompadour combines that bold front with the structured cornrow back.
The pompadour itself is built up using a roll of synthetic hair or a pomp form pinned underneath the front section. The hair drapes over the form and pins into place at the crown.
How to Style It
- Start with a cornrow base running from the crown to the nape
- Leave the front 4-6 inches of hair loose for the pompadour
- Tease the loose front for volume, then drape over a pomp form or rolled extension
- Pin the back edge of the pomp into the cornrow line at the crown
10. Twisted Halo Updo on a Cornrow Base
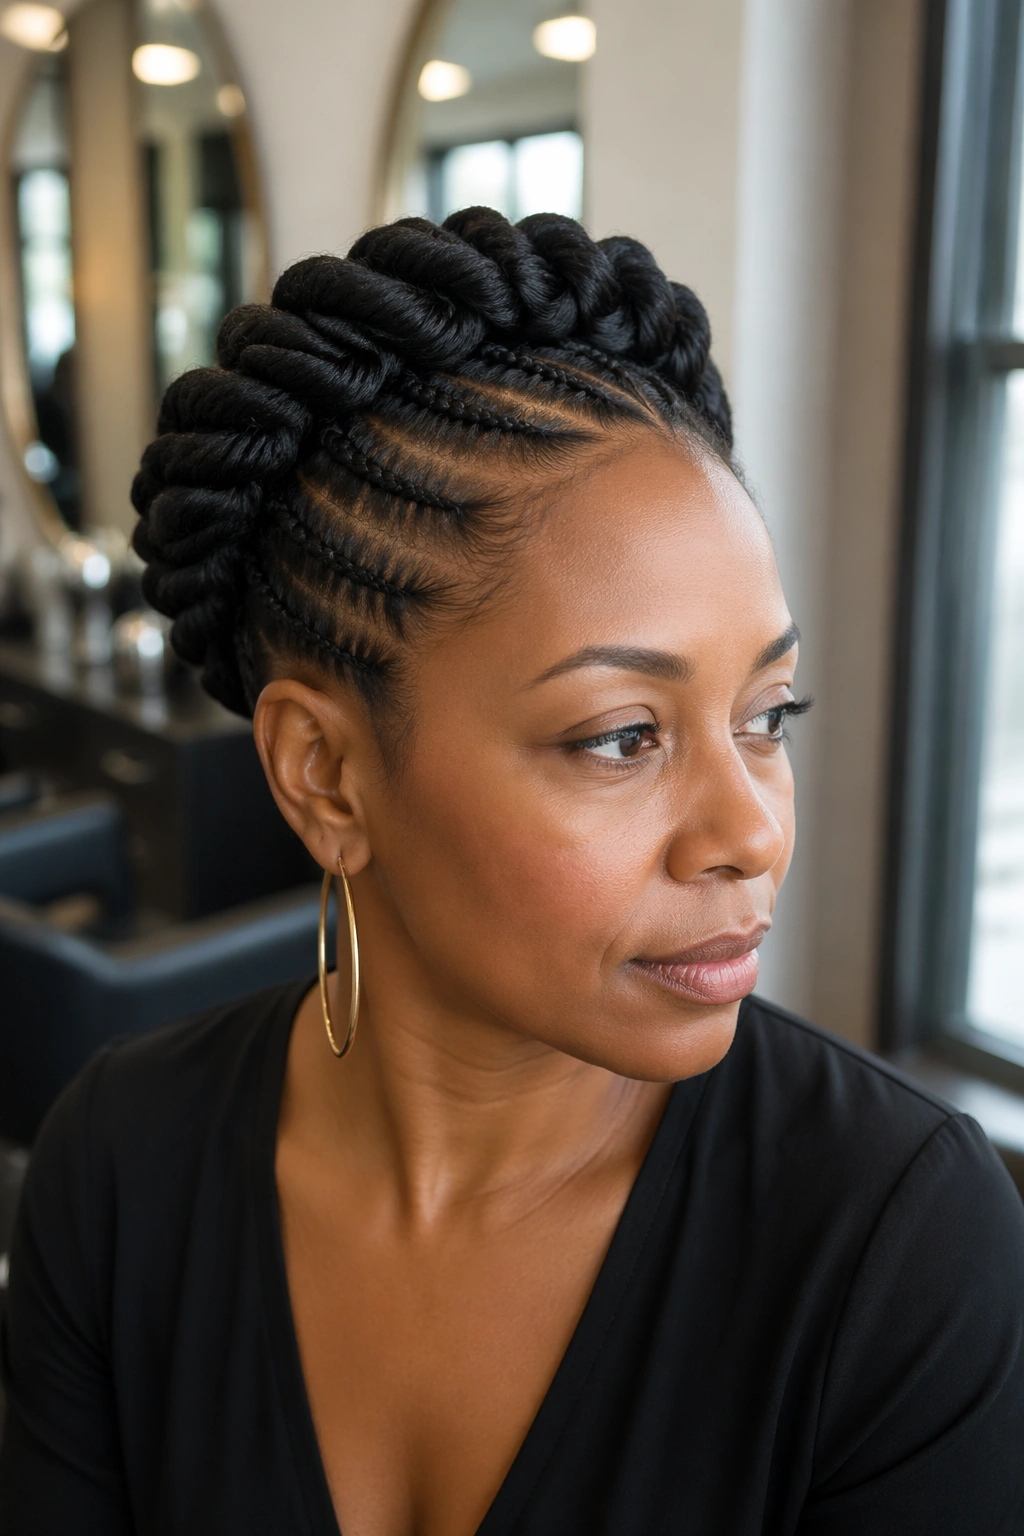
Cornrows on the perimeter of the head, with the cornrow ends two-strand twisted into a single rope that wraps around the head like a halo. The twisted rope is thicker and more textured than a standard braided crown.
A two-strand twist halo has more dimension than a three-strand braid halo. The rope texture catches light differently and reads softer.
The twist needs to be tight enough to hold its rope shape. A loose twist will untwist when you wrap it. Twist firmly, lock the end with a small clear elastic, then wrap and pin.
11. Cornrow Updo With a Curly Crown Puff
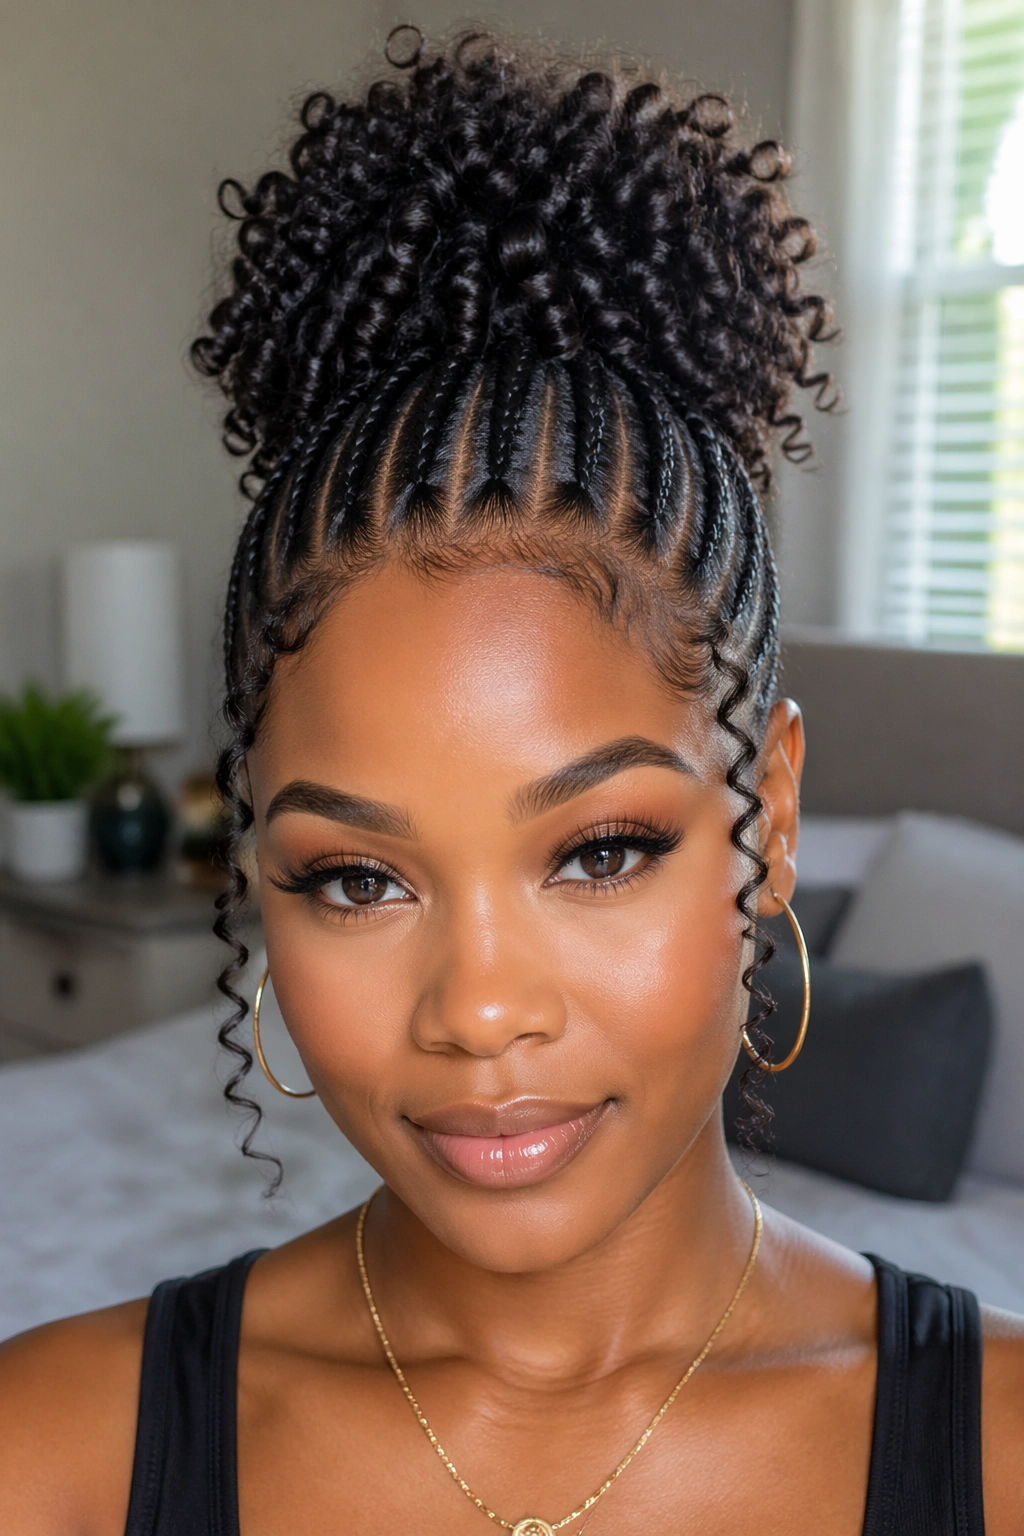
A back-gathered cornrow updo with a separate curly puff sitting at the very top of the head. The puff is either natural curly hair (if you have length) or a curly extension piece.
The puff is the design feature. The cornrow updo is the foundation that supports it.
The puff should be sized proportionally to the head — too small reads accidental, too big reads costume. A puff about the size of a small grapefruit usually hits the right scale for most head sizes.
Mist the puff with a curl-defining spray daily. The puff is the most visible part of the style and needs to look fresh longer than the cornrow base does.
12. Cornrow Wrapped Bun Updo
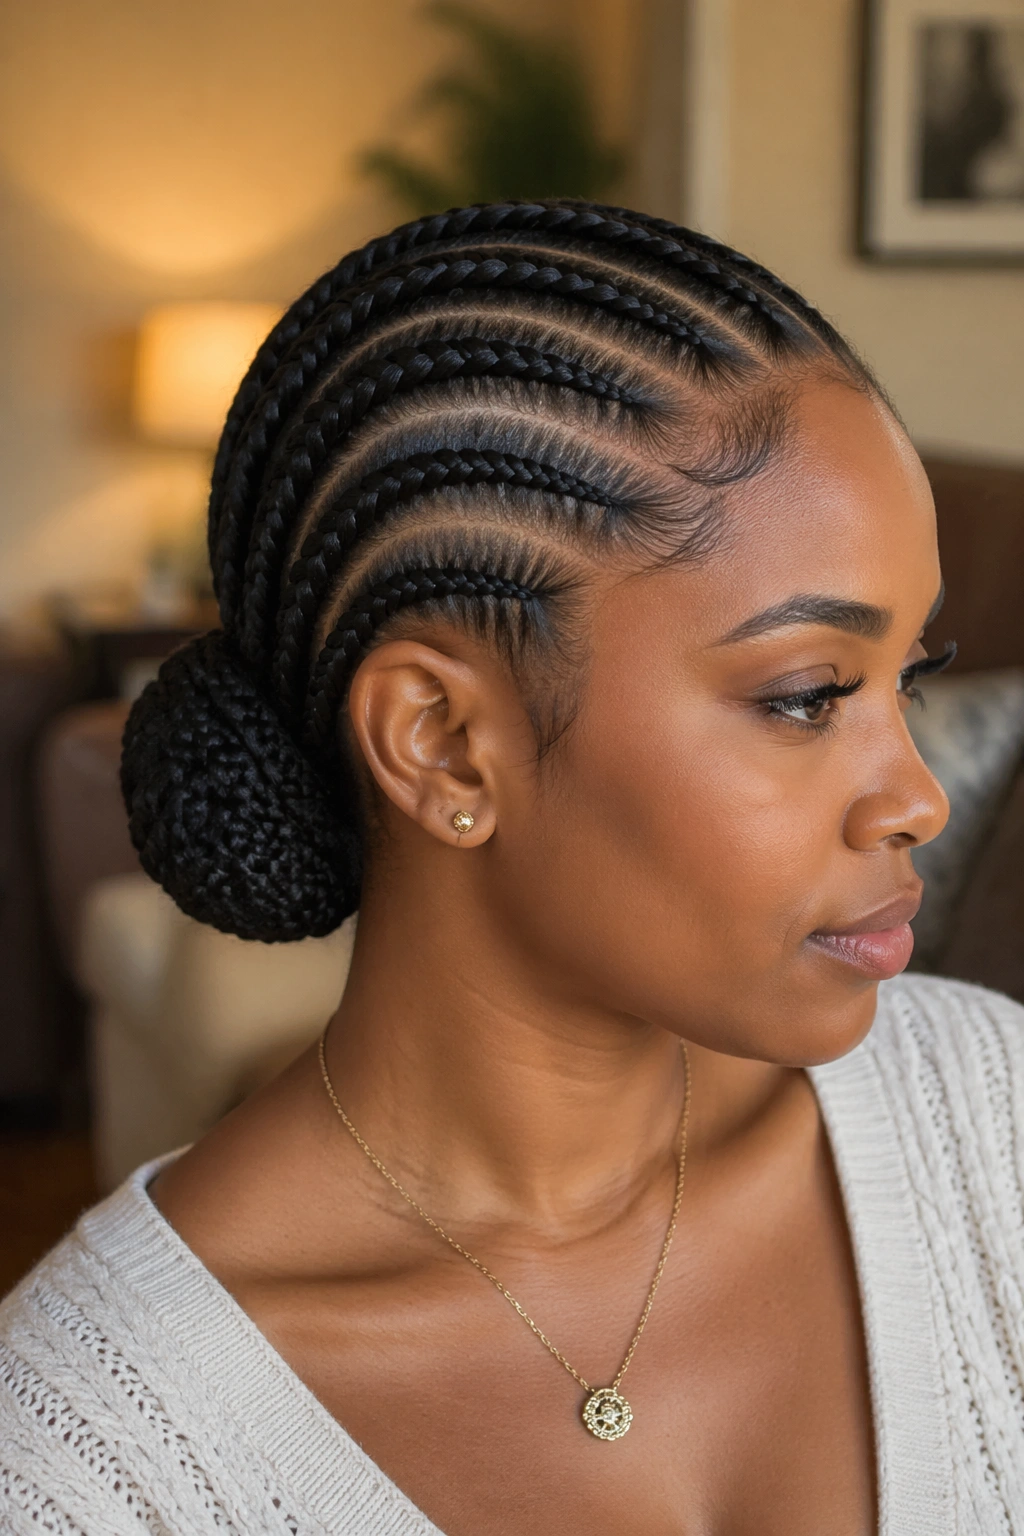
Cornrows feeding into a low bun, with one extra cornrow wrapped around the base of the bun to hide the tie. The wrap-cornrow is the design detail.
The wrapping cornrow is usually a smaller braid pulled from one of the existing cornrow tails. After the bun is gathered and pinned, the wrap-cornrow is tucked around the base and pinned underneath.
This is a small detail that elevates a basic bun. Without the wrap, the bun looks like a standard low bun. With the wrap, it reads styled and intentional.
Best for: anyone wanting a basic updo to read more polished without adding installation complexity.
13. Side-Swept Updo With Wrapped Braid
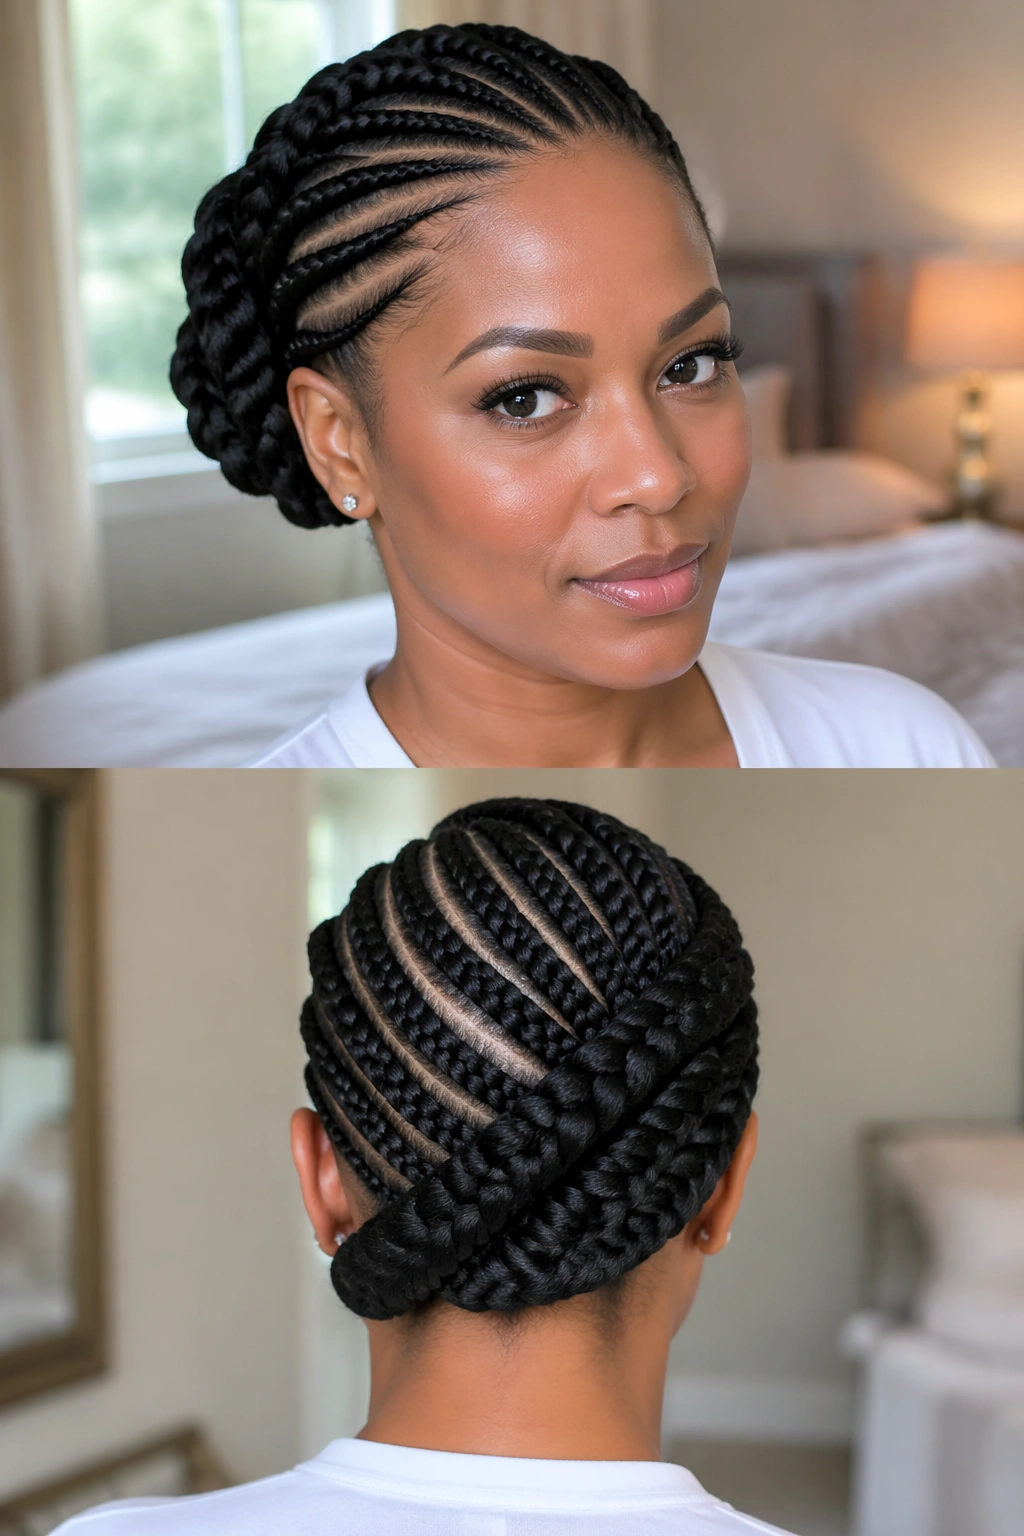
Cornrows swept to one side of the head, gathered behind the opposite ear, and braided into a single long braid. The braid wraps across the back of the head to the opposite side and pins.
Picture an updo that crosses the back of the head diagonally — cornrow on one side, wrapped braid on the other. The crossing creates a clean diagonal line across the back.
This style reads dramatic from the back view and clean from the front. The cornrow front looks like a side-swept sleek style; the back reveals the wrapped braid detail.
14. Mohawk-Style Cornrow Updo
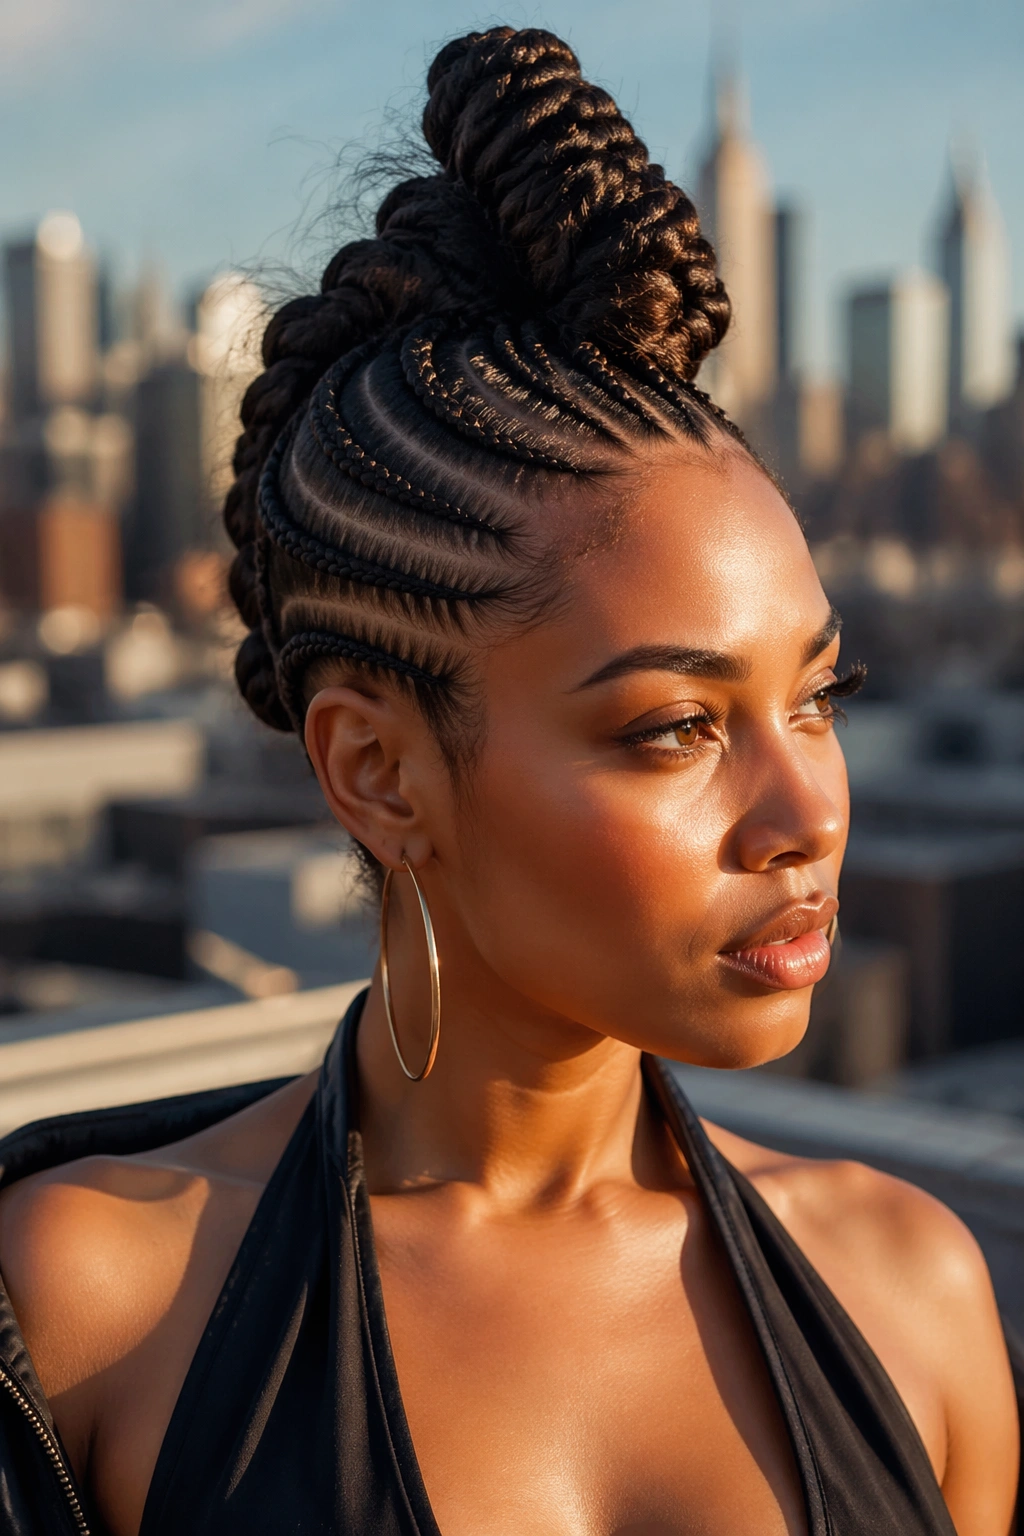
The hair on either side of a center strip is cornrowed flat against the scalp, and the center strip is gathered into a series of bumps, knots, or twists running down the center top of the head. The mohawk reads bold and architectural.
Unlike an actual mohawk haircut, this is all built from the existing hair. The sides only look shaved because the cornrows lay so flat.
The center strip can be styled in many ways: a single tall braid, a row of Bantu knots, a series of twisted bumps, or a tall topknot rising above the cornrowed sides.
Who this suits: anyone who likes architectural, design-forward styles. Anyone who wants a statement updo that reads avant-garde rather than traditional.
15. Cornrow Updo With Statement Headband
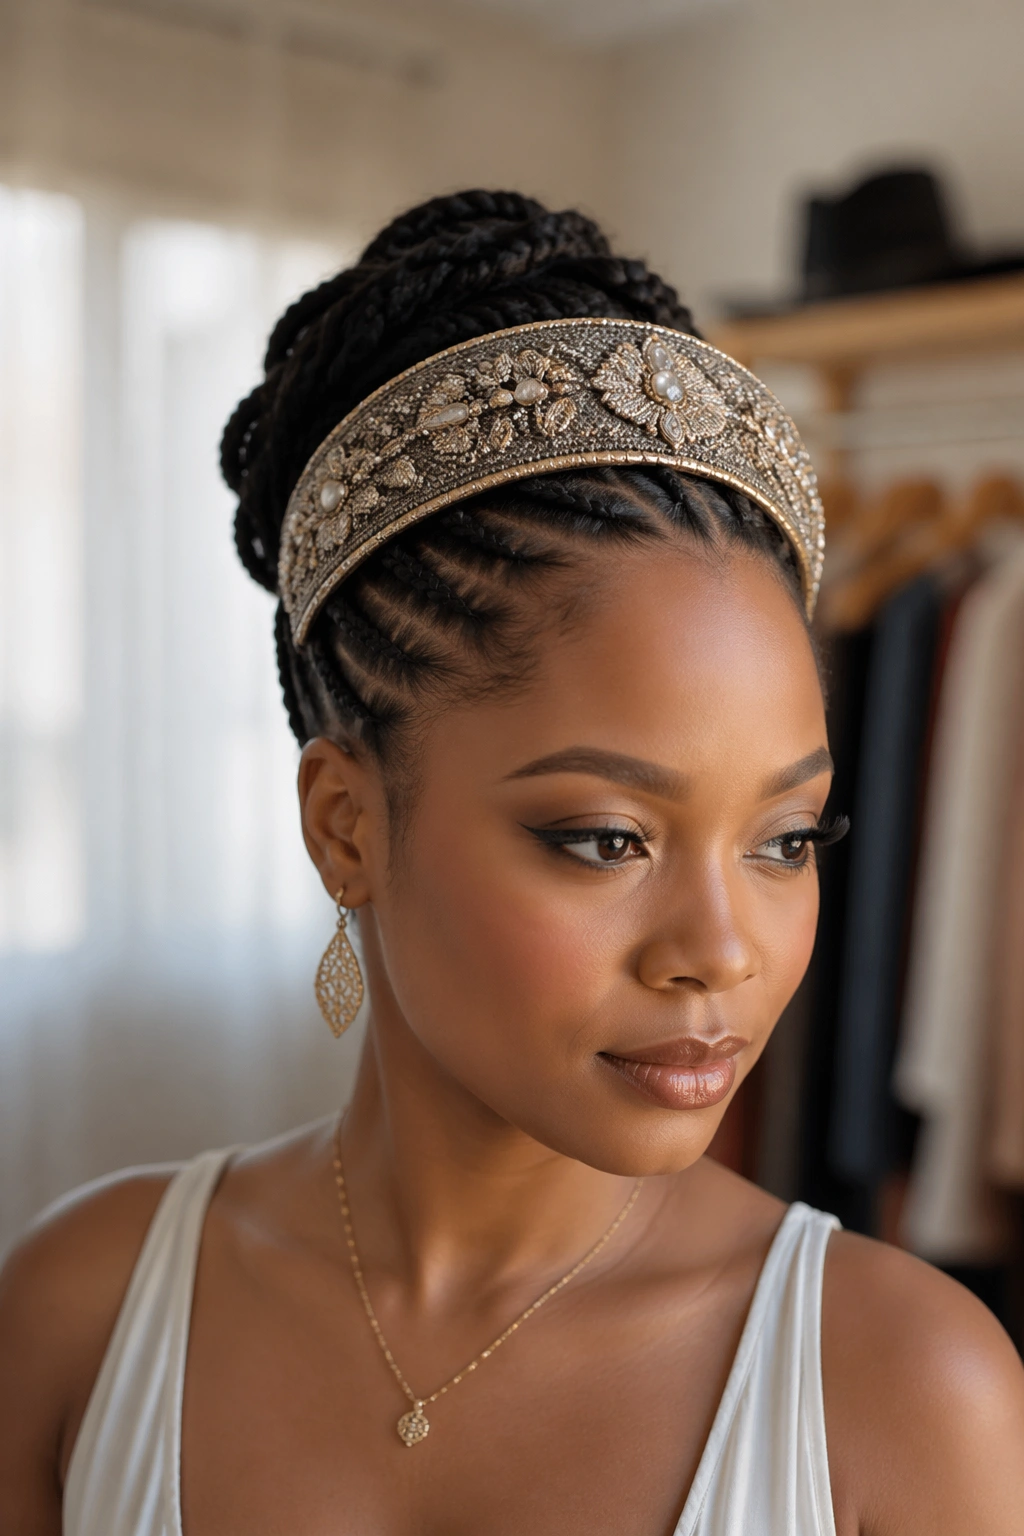
A simple cornrow updo paired with a wide ornate headband — embroidered, jeweled, beaded, or made from a printed fabric. The headband sits across the front of the head, adding an accessory layer to the cornrow base.
The headband is the design star. The cornrow updo is the foundation that lets the headband sit cleanly without competing with the hair.
Pick a headband proportional to the updo. A small headband with a big topknot looks unbalanced. A wide headband with a low neat bun reads harmonious.
16. Layered Updo With Vertical Cornrow Stacking
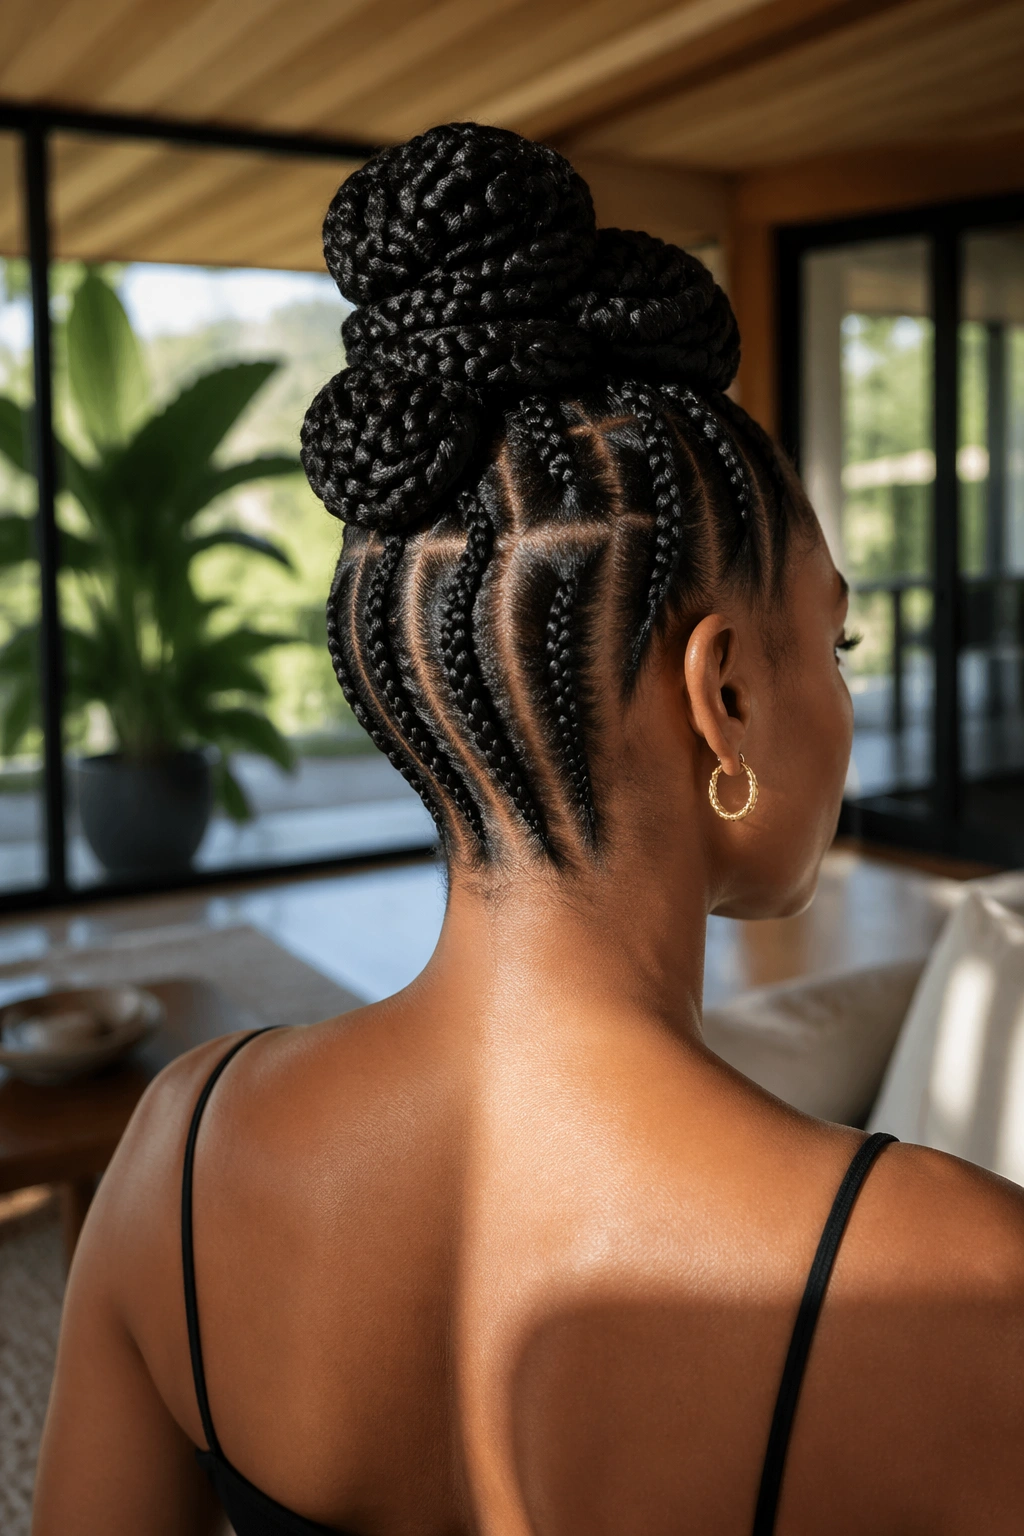
Cornrows running vertically from the nape upward, with each cornrow ending in a different position to create a stacked, layered visual. The layering creates a textured, sculpted updo without relying on a single bun or wrap.
Bold fact: this style is one of the most architectural cornrow updos and demands serious braider skill to execute cleanly.
The cornrows are different lengths to create the stack. Some end at the crown; some end at the mid-back; some end at the nape. The varying termination points create the layered effect.
The result reads more like a sculpture than a hairstyle. It’s the cornrow updo for someone who wants their hair to function as art.
17. Cornrow Updo With Decorative Pins
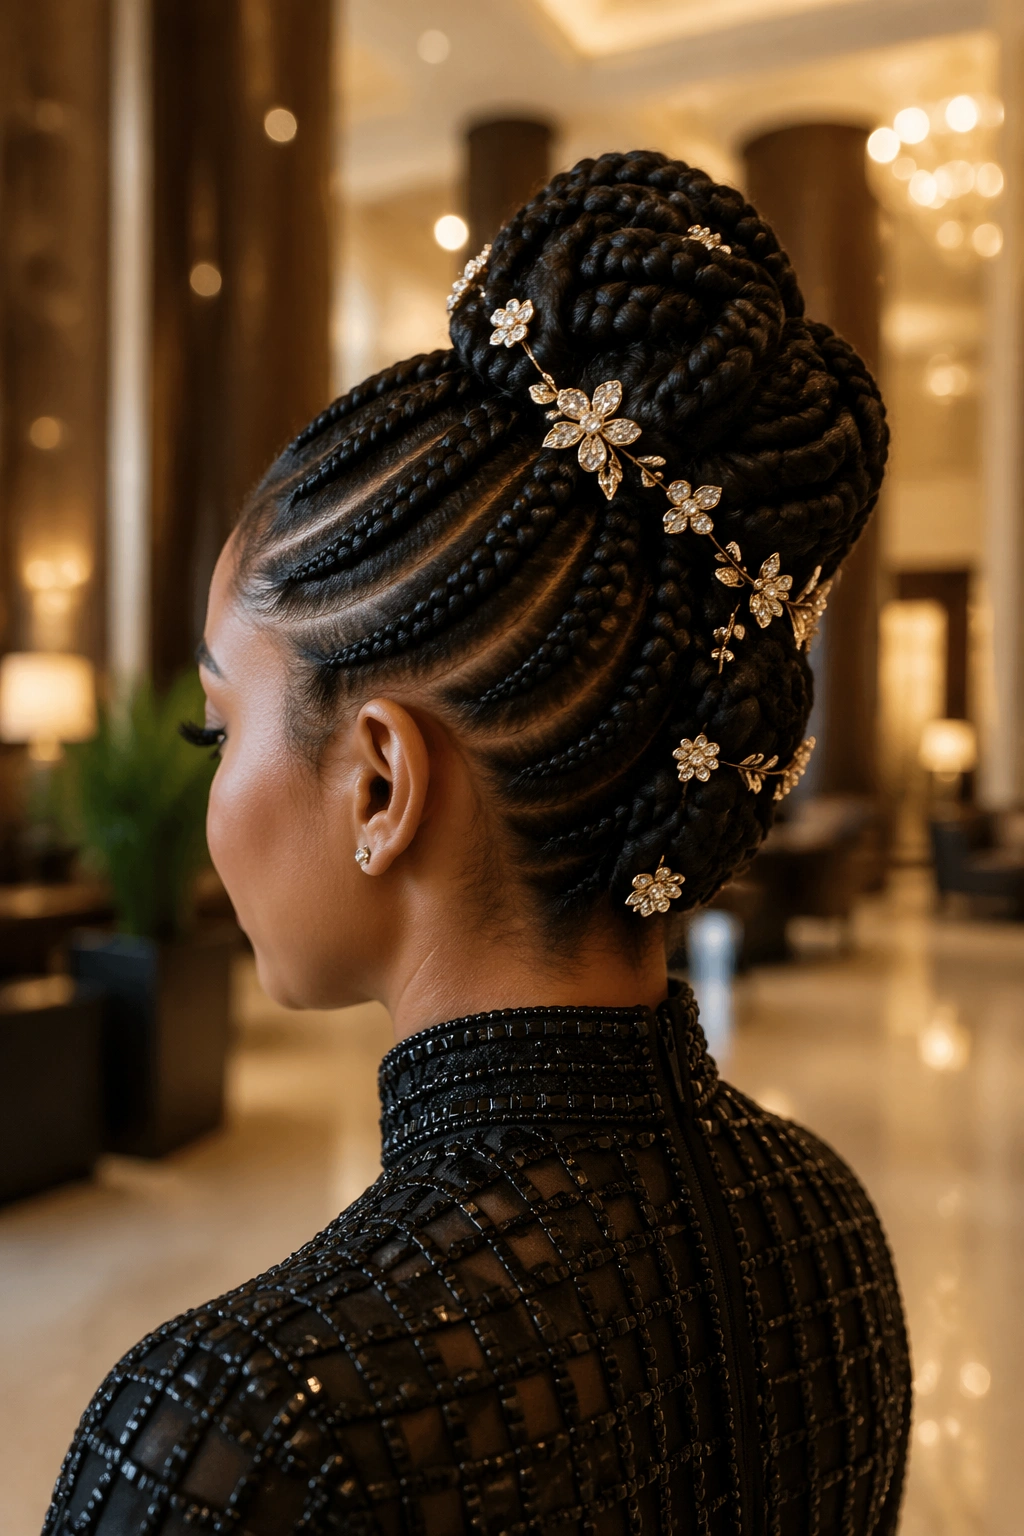
A simple cornrow updo accessorized with decorative hair pins — pearl pins, jeweled hair sticks, gold-toned U-pins with ornate tops. The pins do double duty: they hold the updo and they decorate it.
Decorative pins are the easiest accessory upgrade. They take a basic updo to a formal updo with five minutes of styling effort.
Place decorative pins where they enhance the structure — at the gather point, around the bun perimeter, or scattered through the cornrow lengths visible above the gather.
The Catch
Heavy decorative pins can pull the updo slightly out of position over hours. Use them in moderation. Three to five pins is usually enough; more starts to feel like wearing a tiara.
18. Cornrow Updo With Twisted Top Section
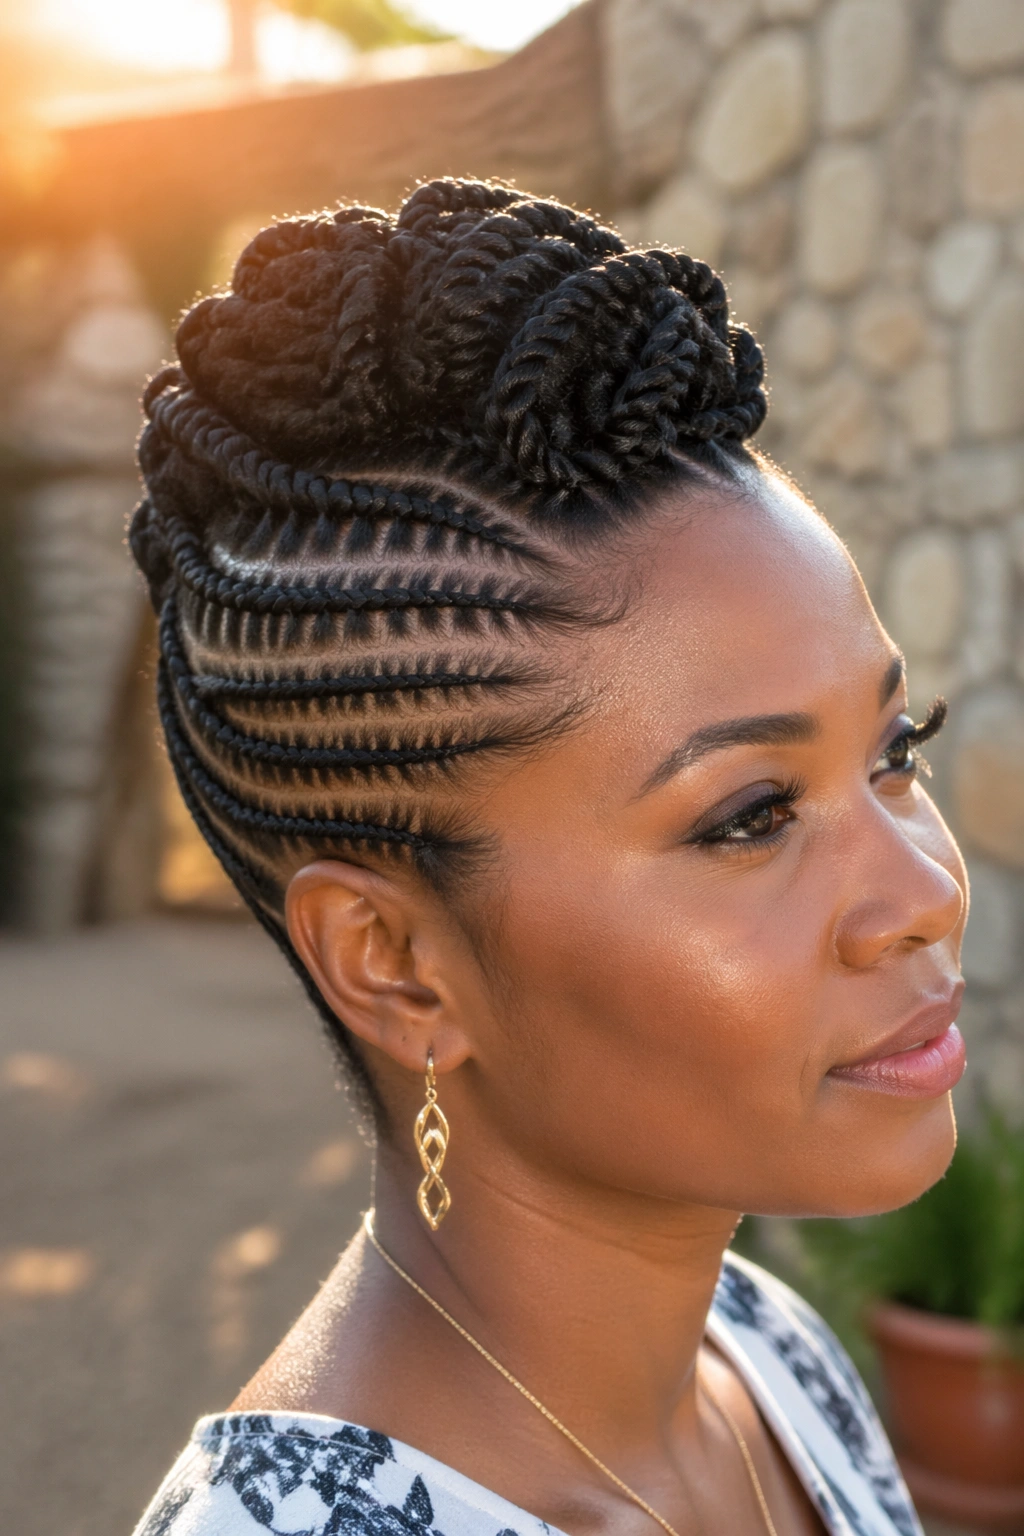
Cornrows for the back and sides, with the top section of hair (or extension) two-strand twisted and pinned into a sculpted shape at the crown. The twisted top adds texture against the smooth cornrow base.
Picture a cornrow updo with a textured twist sitting like a small sculpture at the top of the head. The two textures together create visual interest.
The twisted section can take many shapes: a simple flat coil, a stacked spiral, a twisted bun, or a draped twist that wraps to one side.
19. Cornrow Bouquet Updo
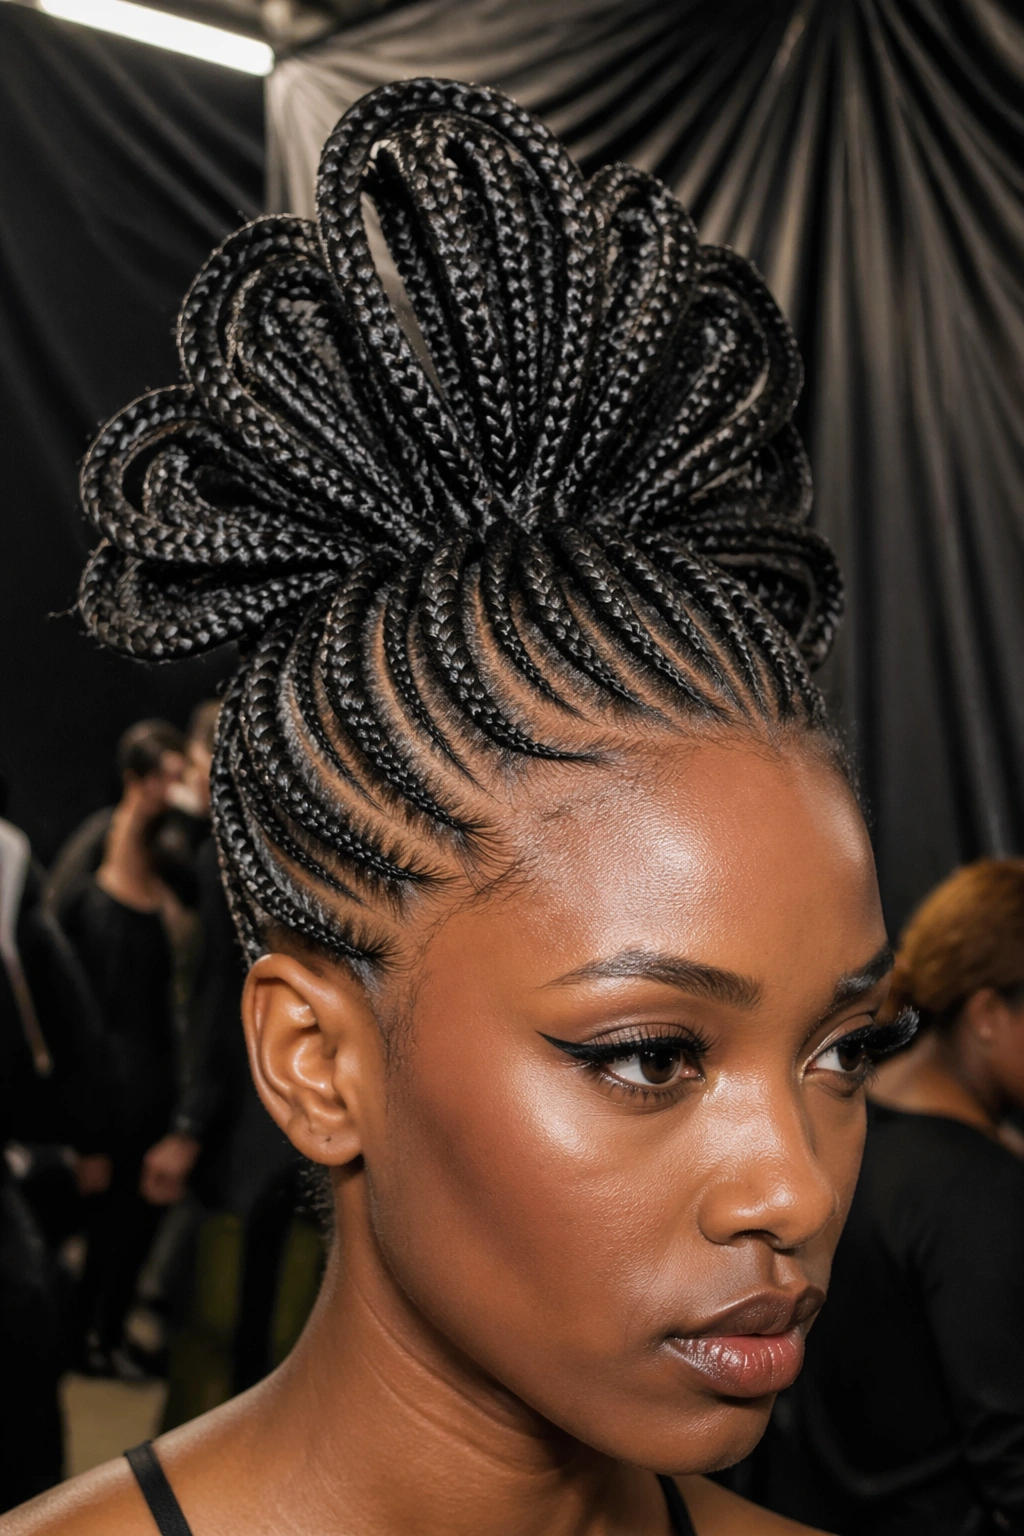
All the cornrow tails gathered at the crown and arranged in a bouquet shape — fanning outward from the gather point in a deliberate sculptural arrangement. The “bouquet” reads like a sculpture of braids fanning from the head.
This is an avant-garde style. It reads more editorial than everyday. The bouquet shape needs to be arranged carefully — the cornrow tails are pinned individually to maintain the fan shape.
Who this is best for: photoshoots, fashion events, anyone who wants their cornrows to be the main visual statement of an outfit.
20. Cornrow Updo With a Single Long Braid Trail
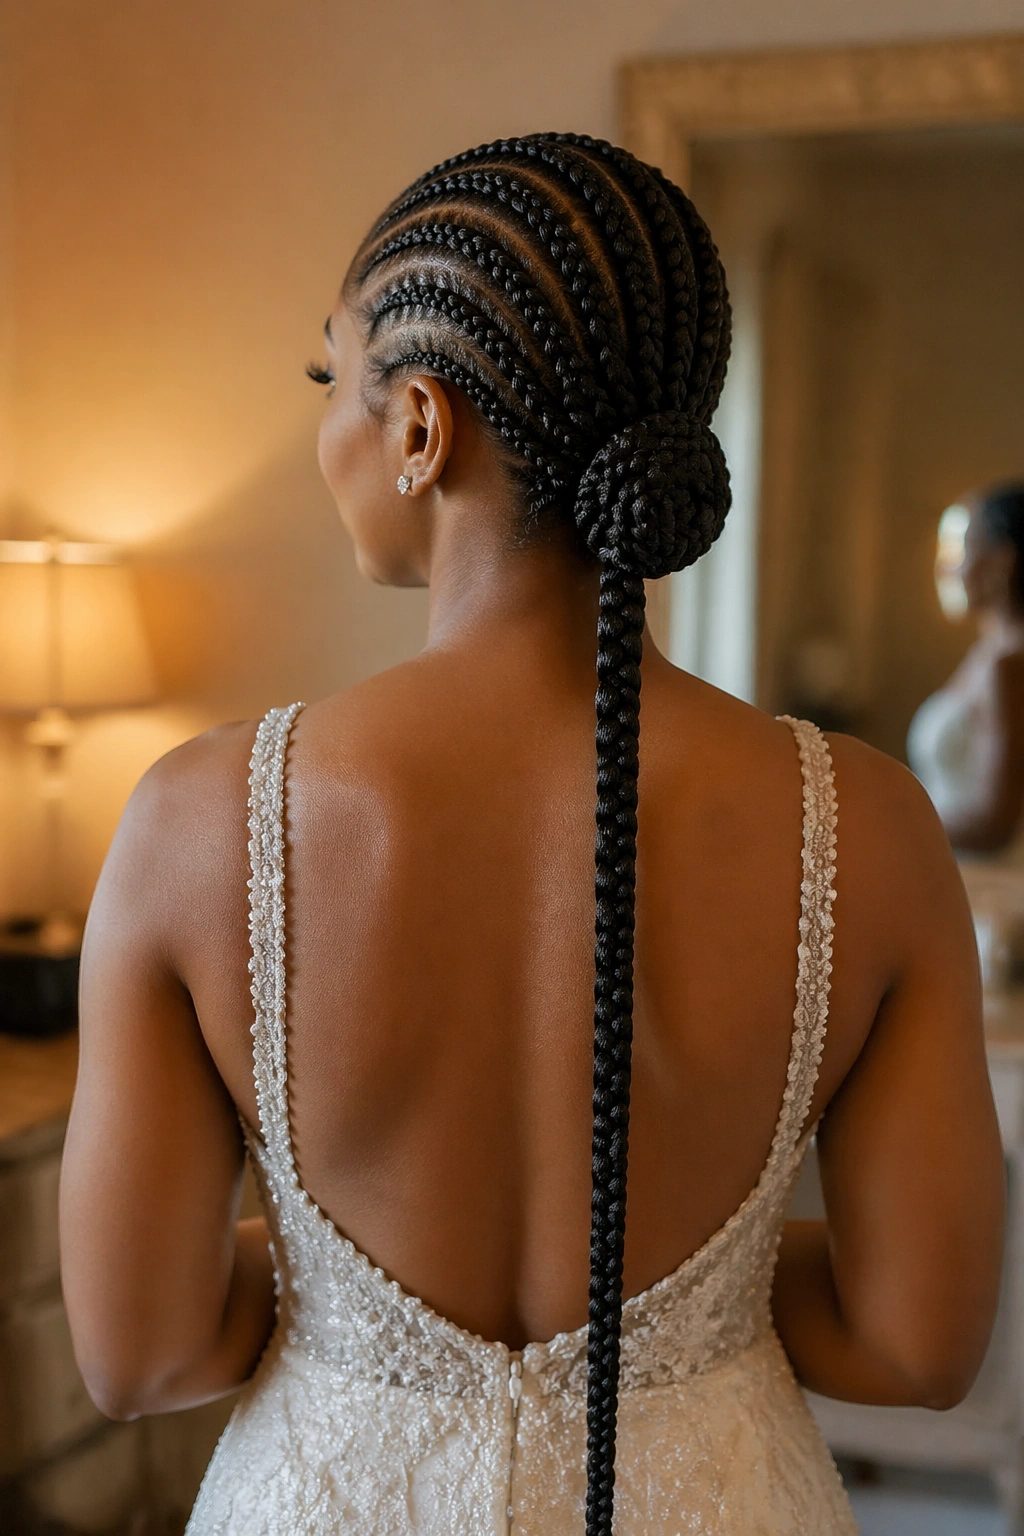
A back-gathered cornrow updo with one very long braid (made from one of the cornrow tails or added extension) trailing down the back. The trailing braid extends past the gather point — sometimes to the waist or below.
The single long braid reads dramatic and bridal. It’s the style for events with a long aisle to walk down or a long staircase to descend.
The trailing braid should be the same color as the rest of the cornrows. A contrasting color reads costume; a matching color reads elegant.
- Set up the cornrow base with one row reserved as longer than the others
- Gather the rest of the cornrows into the updo at the crown
- Let the reserved long row trail down the back from the gather point
- Braid the long trail into a thin three-strand braid for added drama
21. Cornrow Updo With Sculpted Edges
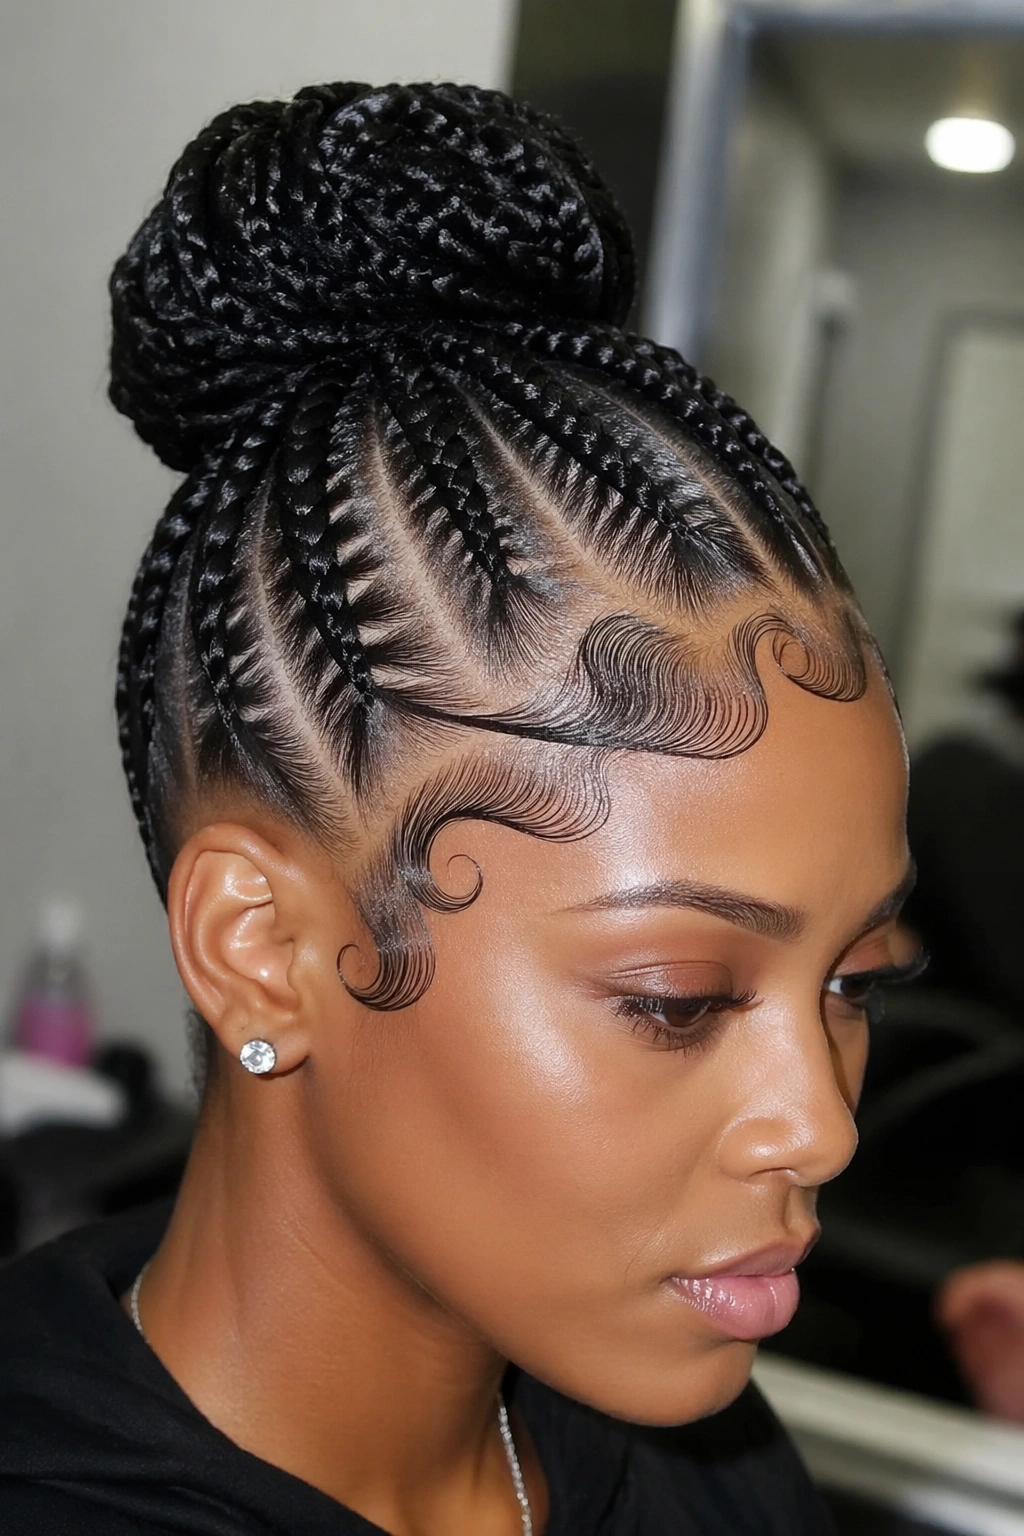
A simple cornrow updo paired with intricate baby hair sculpting at the hairline. The edges are art — swirls, swoops, geometric shapes — using strong-hold edge gel and an angled brush.
The edge sculpting is the design element. The updo is the supporting foundation. Together they create a balanced, intentional look.
Edge sculpting requires patience. Each design element is built up in thin layers of edge gel, set with hairspray, and refined with a small brush. The full edge design can take 20-30 minutes.
The design needs to hold for the duration of the event. Strong-hold edge gel plus a final mist of light hairspray creates designs that last 8-10 hours of wear.
22. Cornrow Updo With Rolled Sections
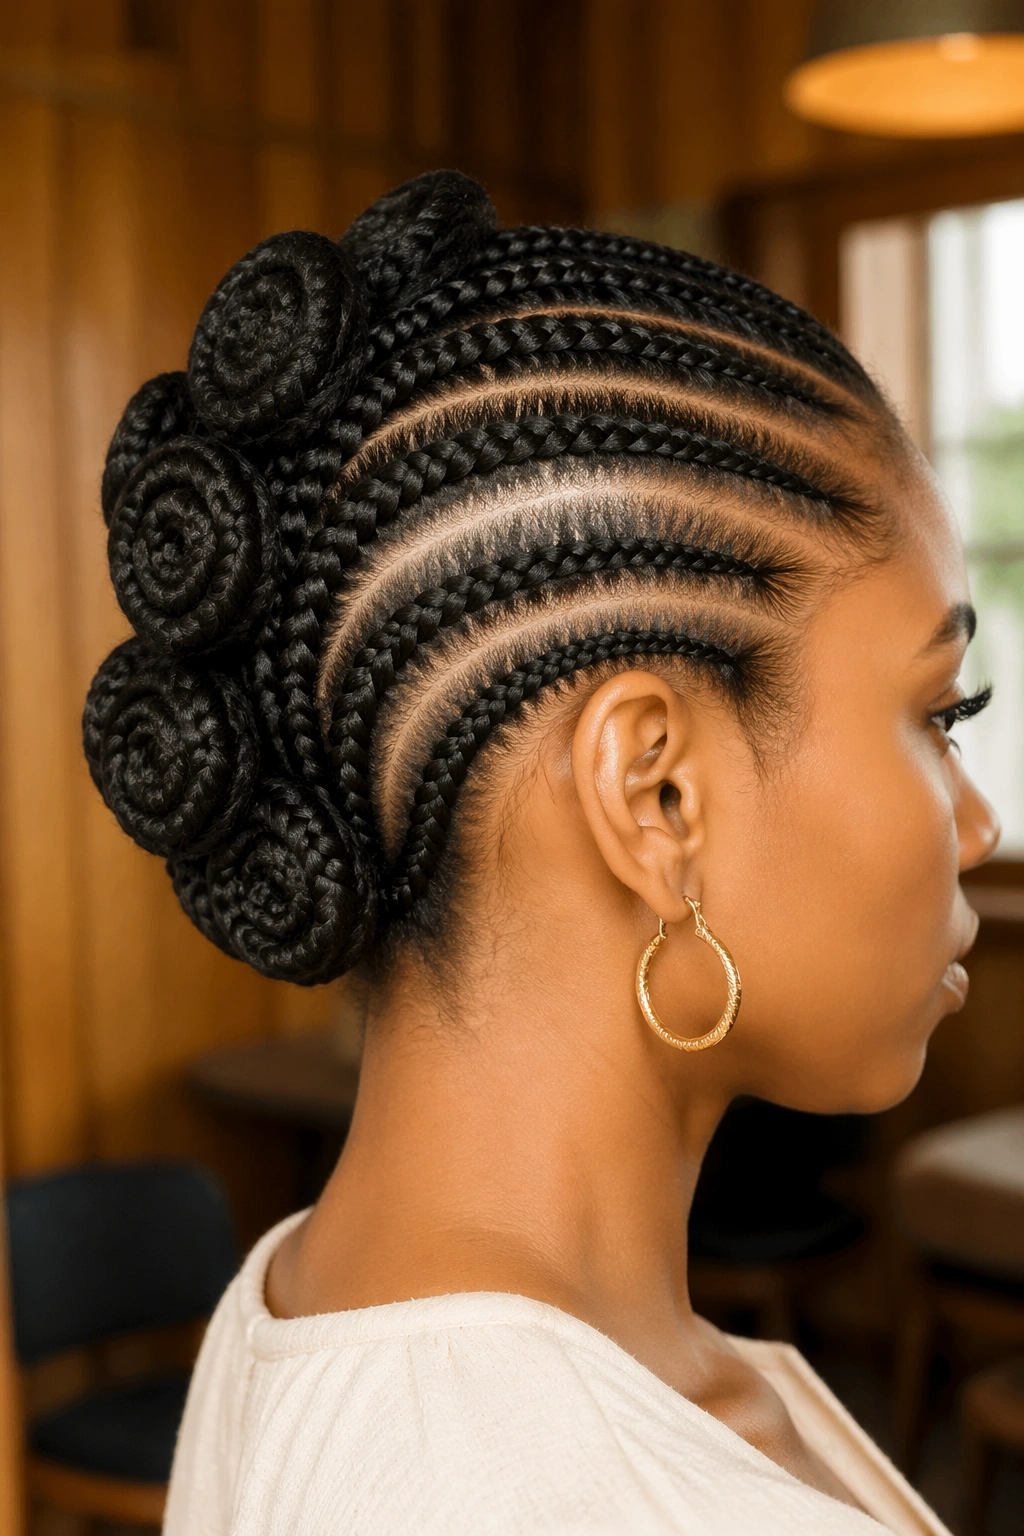
Cornrows gathered into the updo, with sections of cornrow tails rolled and pinned in different positions across the back. The rolls create visible texture and dimension across the back of the updo.
Picture multiple small rolls — three or four — pinned at staggered heights and positions across the back of the head. Each roll is its own small design element; together they create a textured tapestry of braided hair.
The rolls are formed by taking a section of cornrow tails, rolling them around a finger, and pinning the rolled coil to the head. The roll holds its shape if pinned firmly.
23. Cornrow Updo With Headwrap Accent
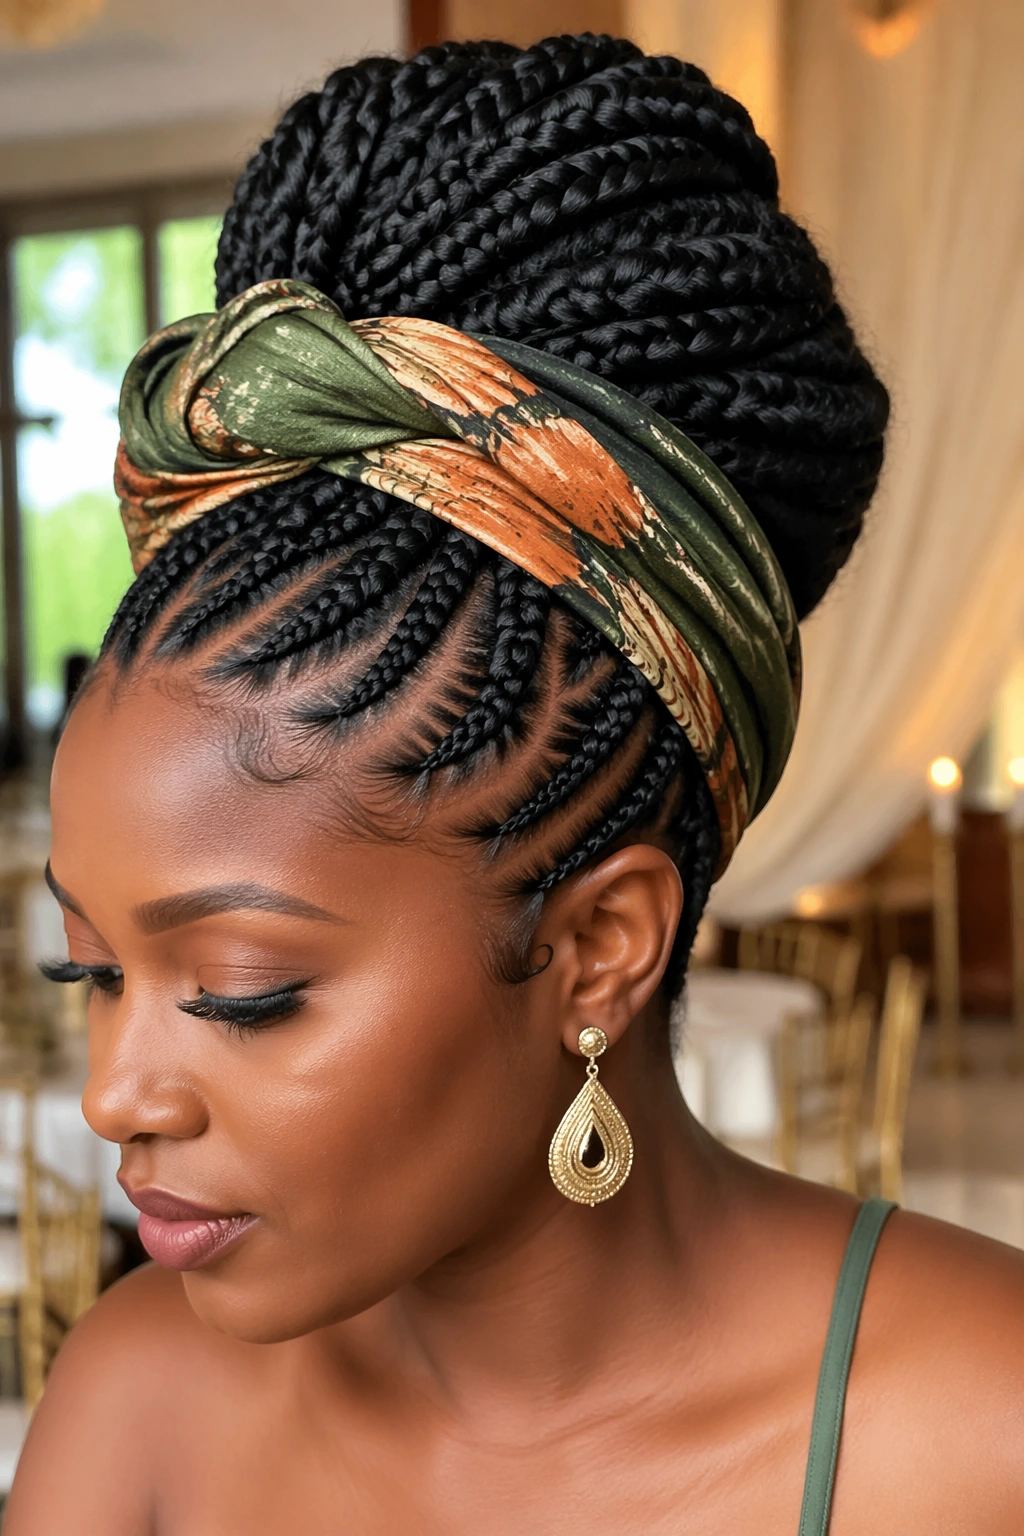
A cornrow updo paired with a small headwrap or scarf wrapped around the gather point. The wrap adds color, texture, and a fabric element to the otherwise pure-hair updo.
The wrap goes around the bun base or the crown gather, not over the whole head. It’s an accent, not a coverage piece.
Fabric choice matters. Silk reads dressy; printed cotton reads casual; ankara reads bold. Match the wrap to the event.
24. Two-Tier Cornrow Updo
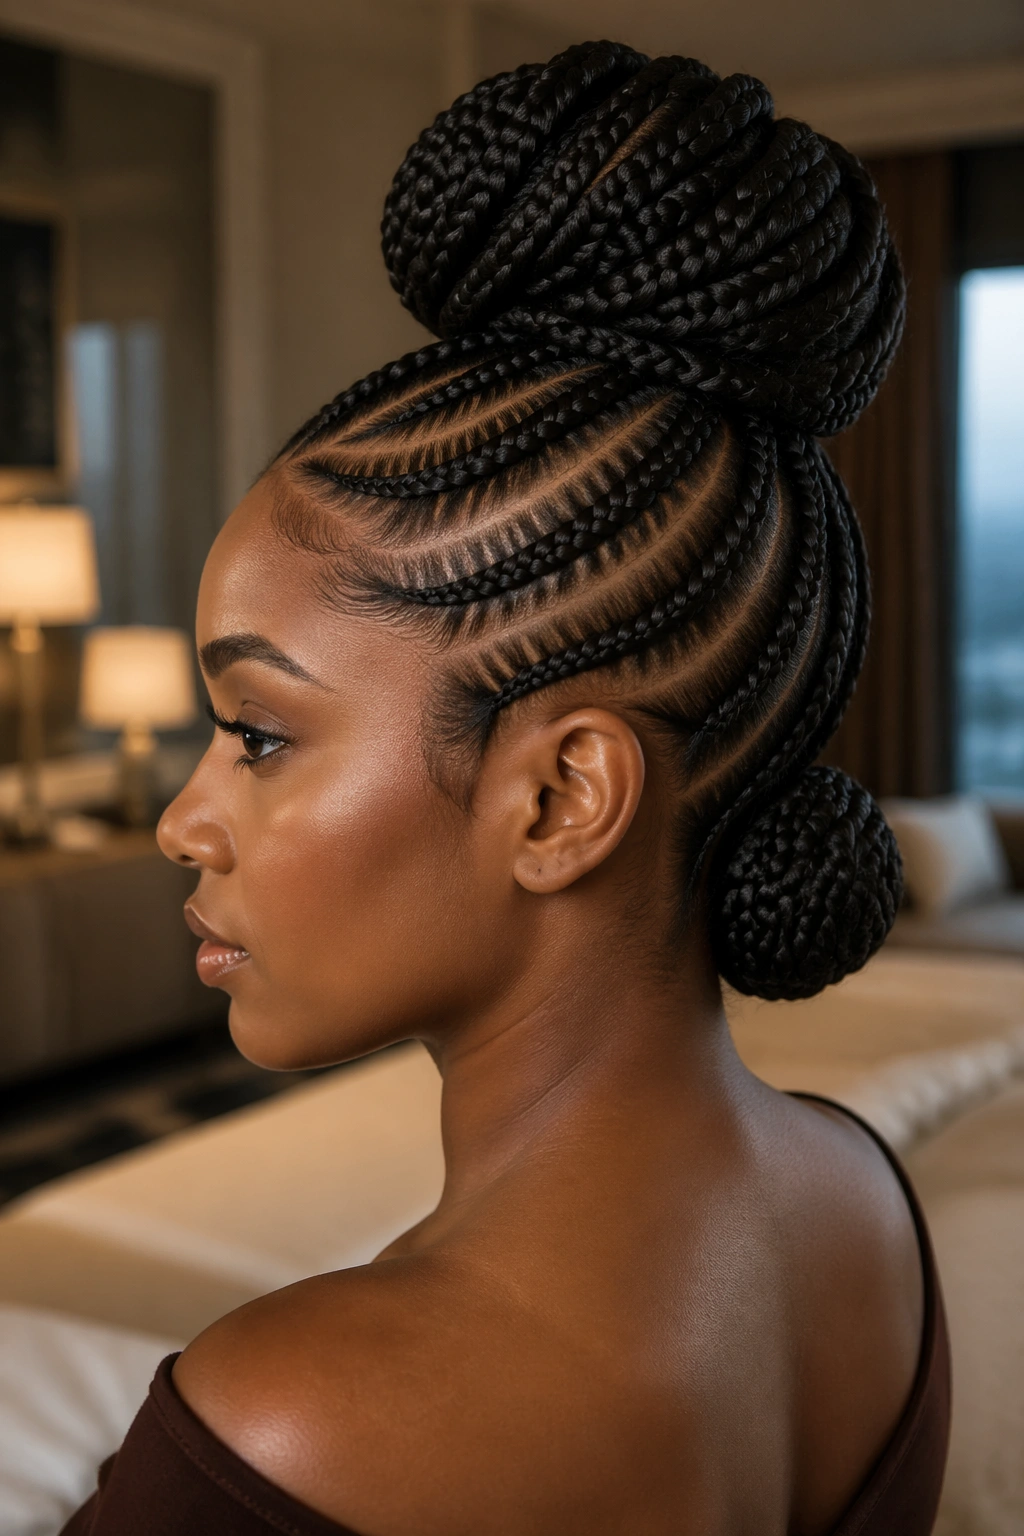
Cornrows gathered into two separate updo points — one at the crown and one at the nape — creating a two-tiered structure. The crown tier is smaller; the nape tier is fuller.
This is a more architectural style. The two tiers read deliberate and sculpted.
The cornrows that feed into each tier are separated at the parting stage. The top portion of the head feeds to the crown updo; the bottom portion feeds to the nape updo. Plan this at the cornrow installation, not after.
Two-tier updos read formal and editorial. They’re for events where the hair is meant to be a centerpiece.
25. Cornrow Updo With Loose Tendrils
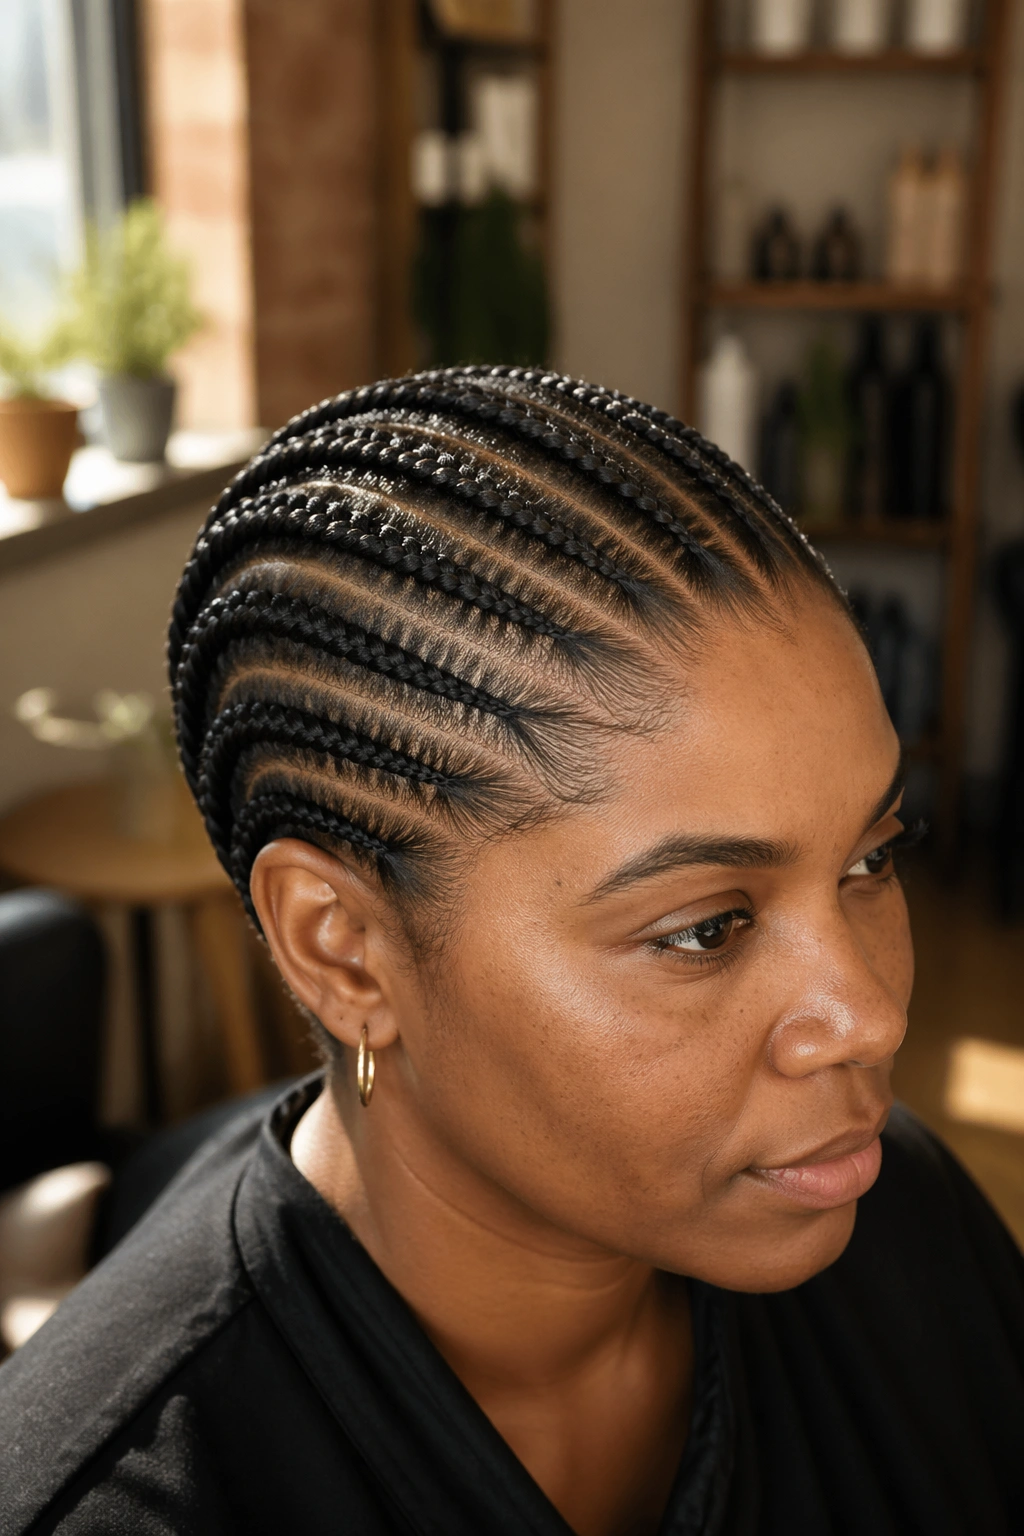
A clean cornrow updo with a few intentional tendrils left loose around the face — the most romantic version of a cornrow updo. The tendrils soften the structured updo and frame the face naturally.
Tendrils should be 4-6 inches long, falling at the temples or in front of the ears. They’re not flyaways; they’re deliberately pulled out before the cornrows are installed.
Mist the tendrils with a curl-defining spray to give them shape. Loose tendrils that look frizzy and accidental ruin the effect; defined tendrils that curl deliberately enhance it.
This style reads bridal, formal, or romantic depending on the rest of the styling. It’s the most face-framing of the cornrow updos.
Building a Lasting Updo Foundation
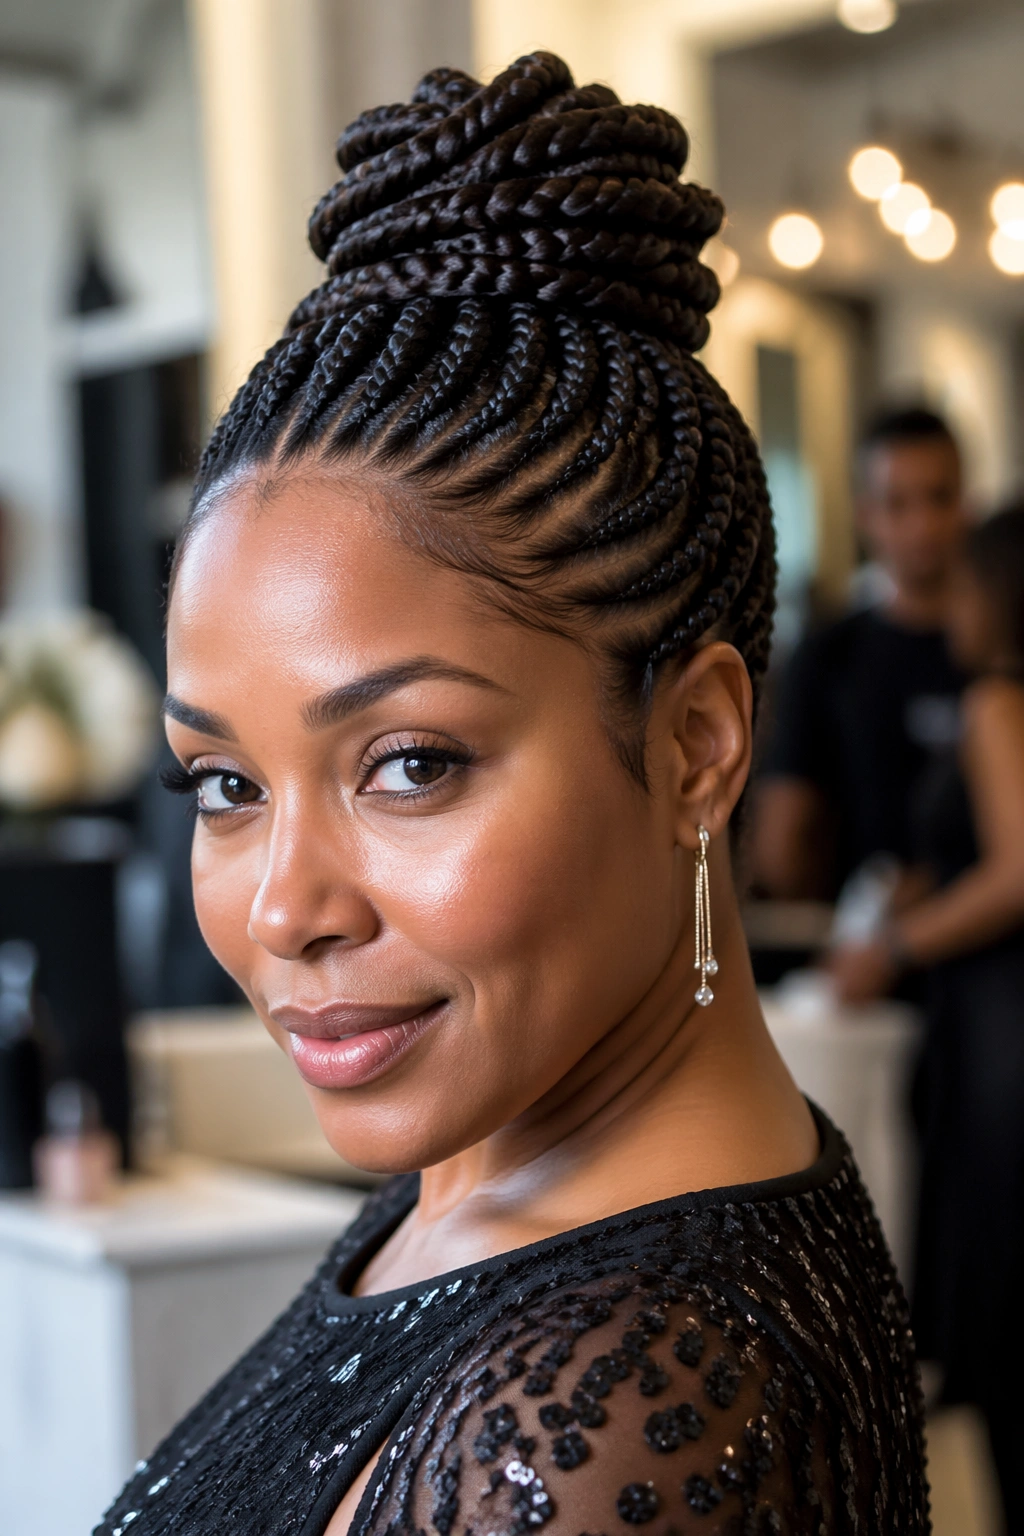
A cornrow updo lasts as long as its foundation does. If the cornrow base is sloppy, the updo unravels by day three. If the base is clean and tight, the updo holds for two to three weeks.
Take time at the cornrow installation stage. Don’t rush. Each row should be smooth, evenly tensioned, and parted cleanly. The updo built on top is only as good as the foundation under it.
Edge work matters too. The hairline of an updo is the most visible part. Apply edge gel with a small brush after the updo is in place. Smooth, defined edges make the whole updo read polished.
Sleep Care for Updos
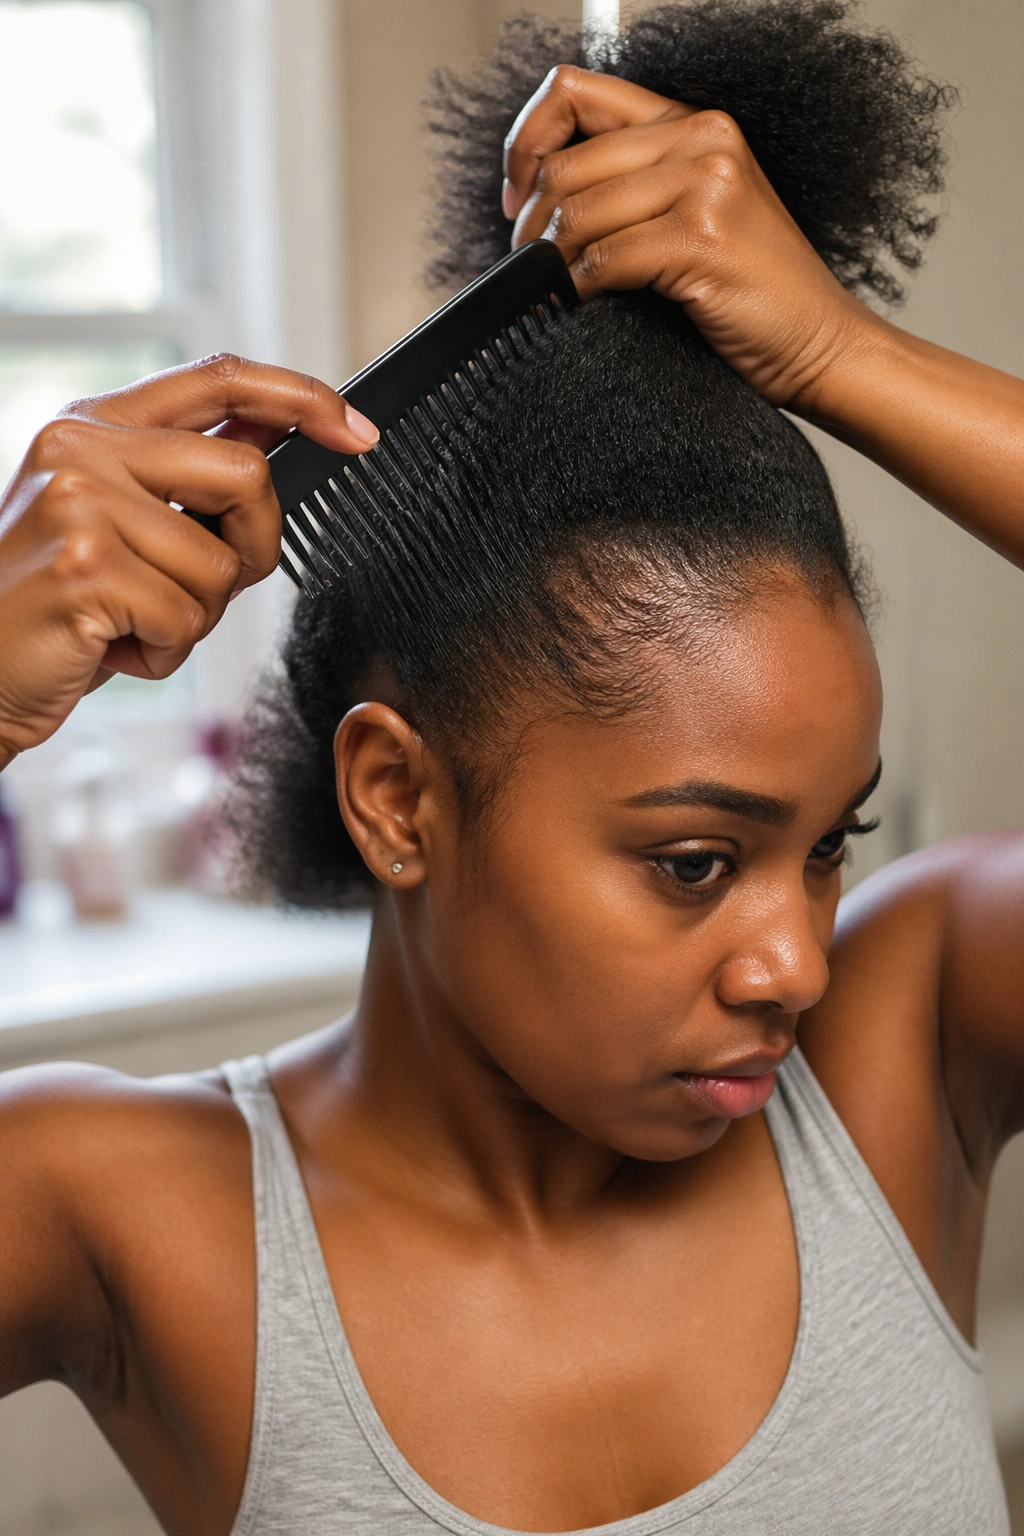
Updos can be slept on if cared for properly. Wrap the updo loosely with a silk scarf to keep the gather point intact. Don’t tie the scarf so tight that it presses the updo flat — a loose wrap protects without crushing.
For high updos (topknots, sculpted crowns), consider sleeping on your side or back to avoid pressing the gather. Stomach sleeping crushes high updos within hours.
A satin pillowcase under the scarf adds an extra layer of friction protection. The two together extend updo lifespan by days.
Refreshing the Updo Between Wash Days
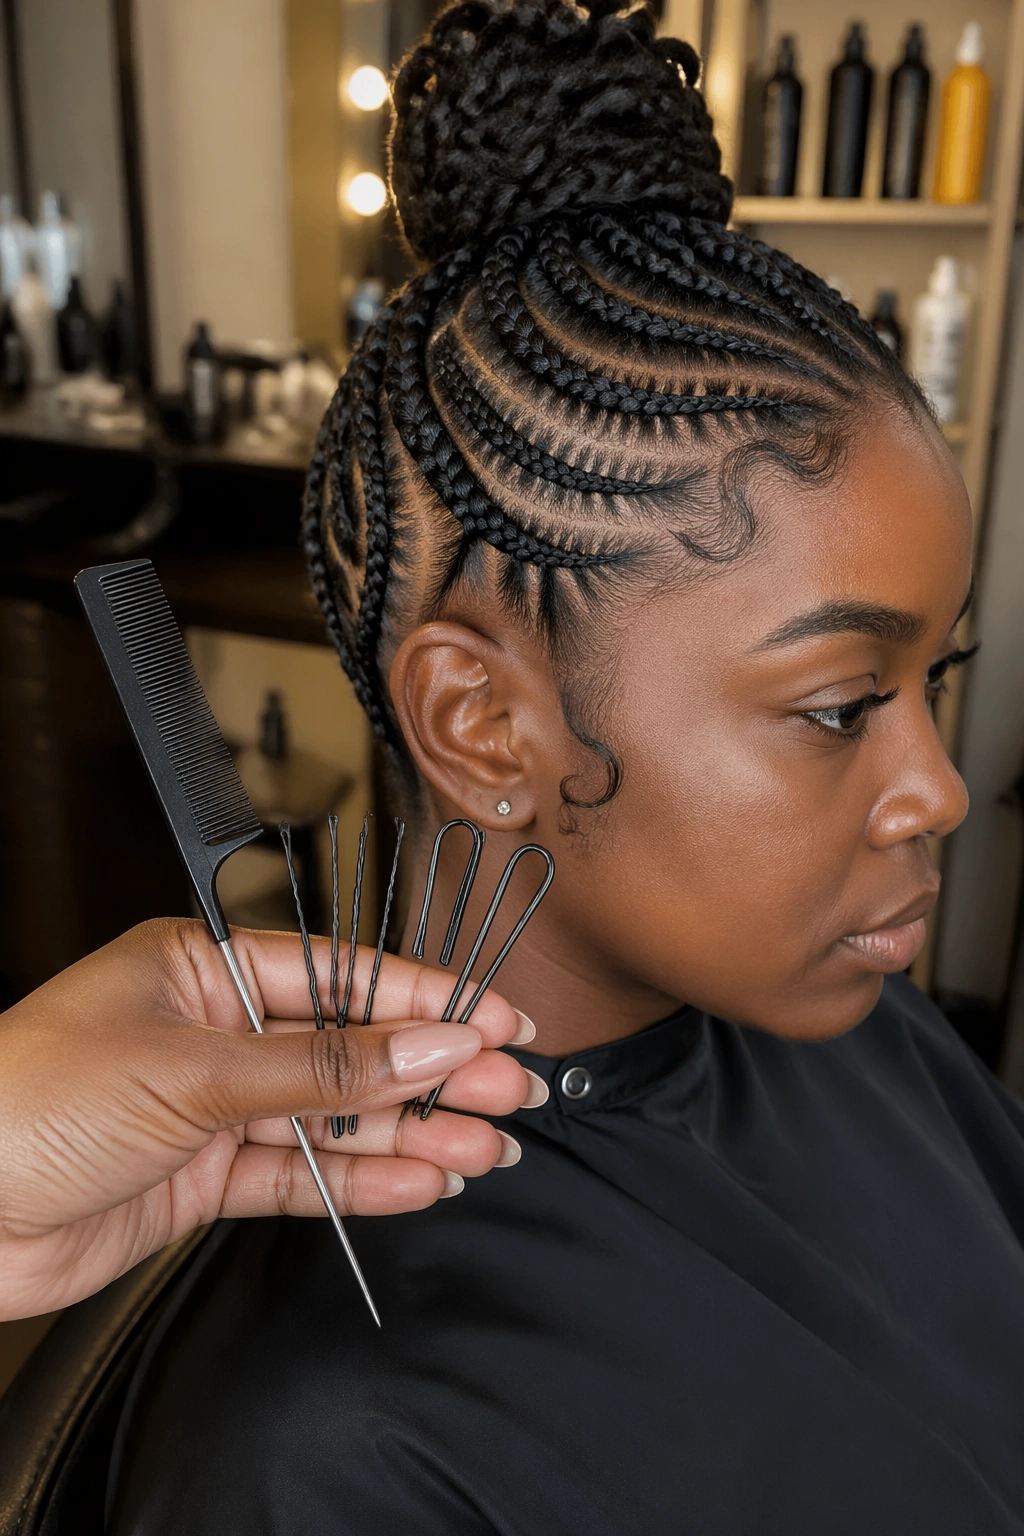
Updos need refreshing more often than down styles because the gather point loosens with daily activity. Every two to three days, smooth flyaways with a small amount of wax or pomade. Re-pin any pins that have shifted. Mist with a flexible-hold hairspray.
Edge gel touch-ups every other day keep the hairline looking fresh. Apply with a small brush, build up gradually, and set with a quick spray.
If the gather point is sliding loose, re-pin underneath rather than pulling the whole updo tighter. Tightening the whole updo can cause discomfort and damage.
When to Take Down an Updo
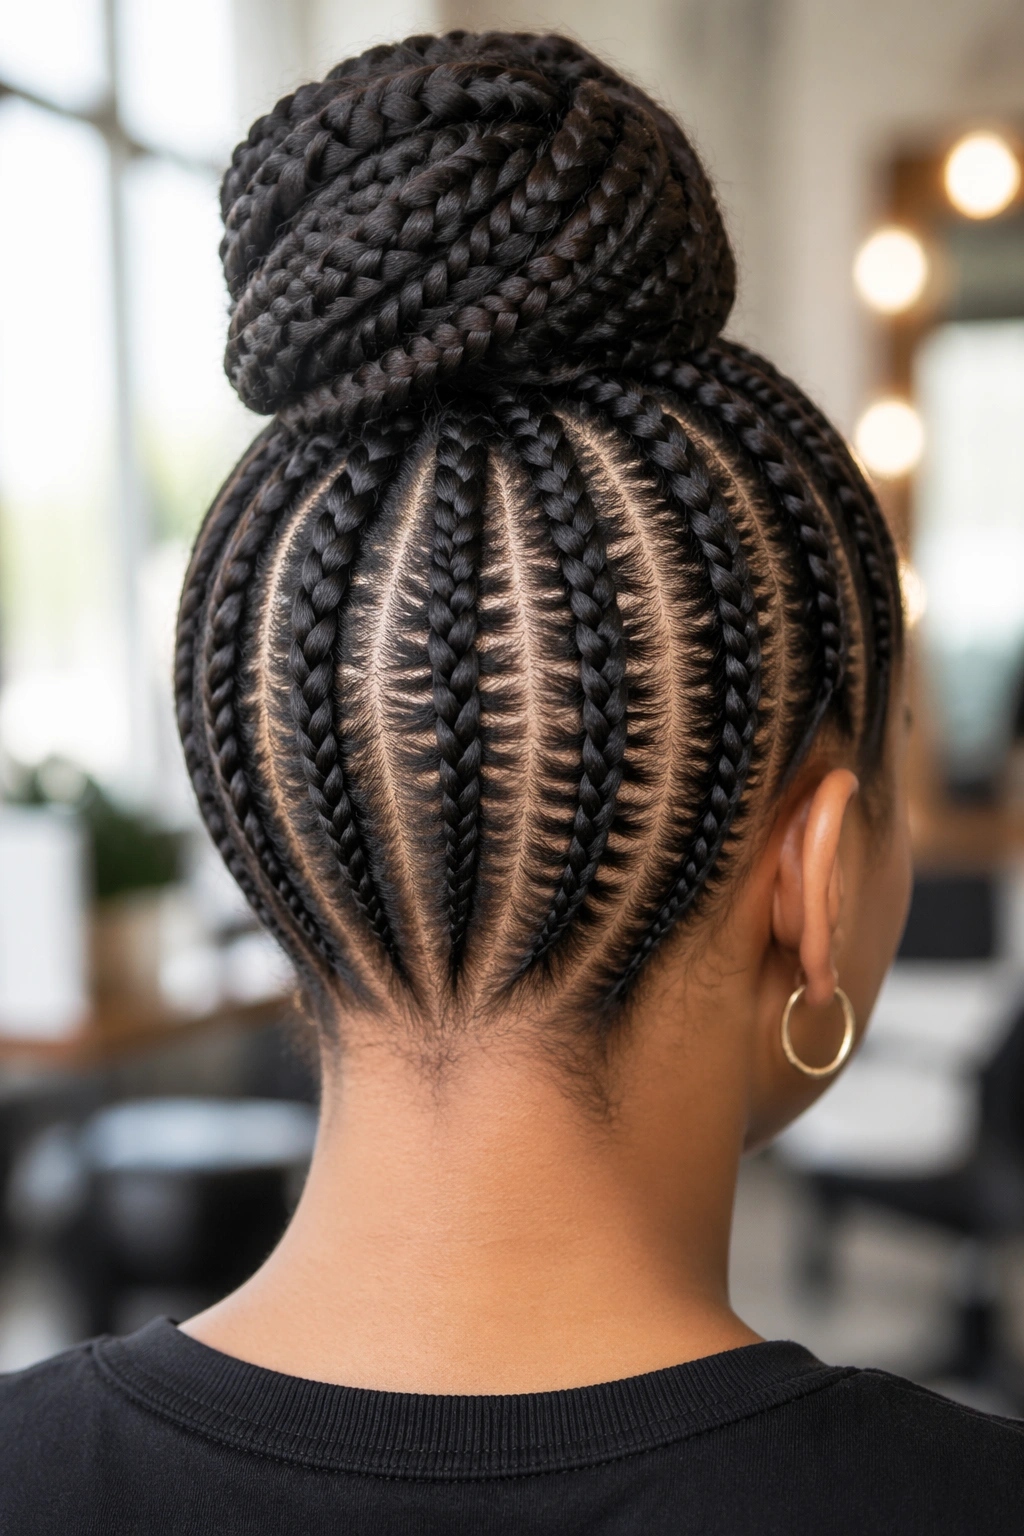
A cornrow updo can hold for two to three weeks before needing takedown. By week three, the cornrow base is starting to lift, the gather point is loosening, and the edges are showing wear.
Signs to take down:
- Cornrow lift visible at multiple roots
- Gather point that won’t stay smooth even after re-pinning
- Itching or tightness that doesn’t respond to scalp oil
- Edges showing tenderness or breakage at the hairline
- Visible buildup of product or shed hair at the gather
Takedown starts with removing all pins and accessories. Then unwrap the gather slowly, working from the outside in. Once the gather is undone, unbraid each cornrow from the tip up. Spray with water-and-conditioner mix throughout to ease detangling.
A clean wash and deep condition after takedown is non-negotiable. Cornrow updos put extended tension on the scalp, and a proper reset day restores moisture and circulation.
Cornrow updos are the most versatile category in the cornrow family. They suit weddings, work weeks, gym days, and editorial photoshoots — sometimes the same week. Choose the right structure for the occasion and any of the 25 styles above delivers.
