



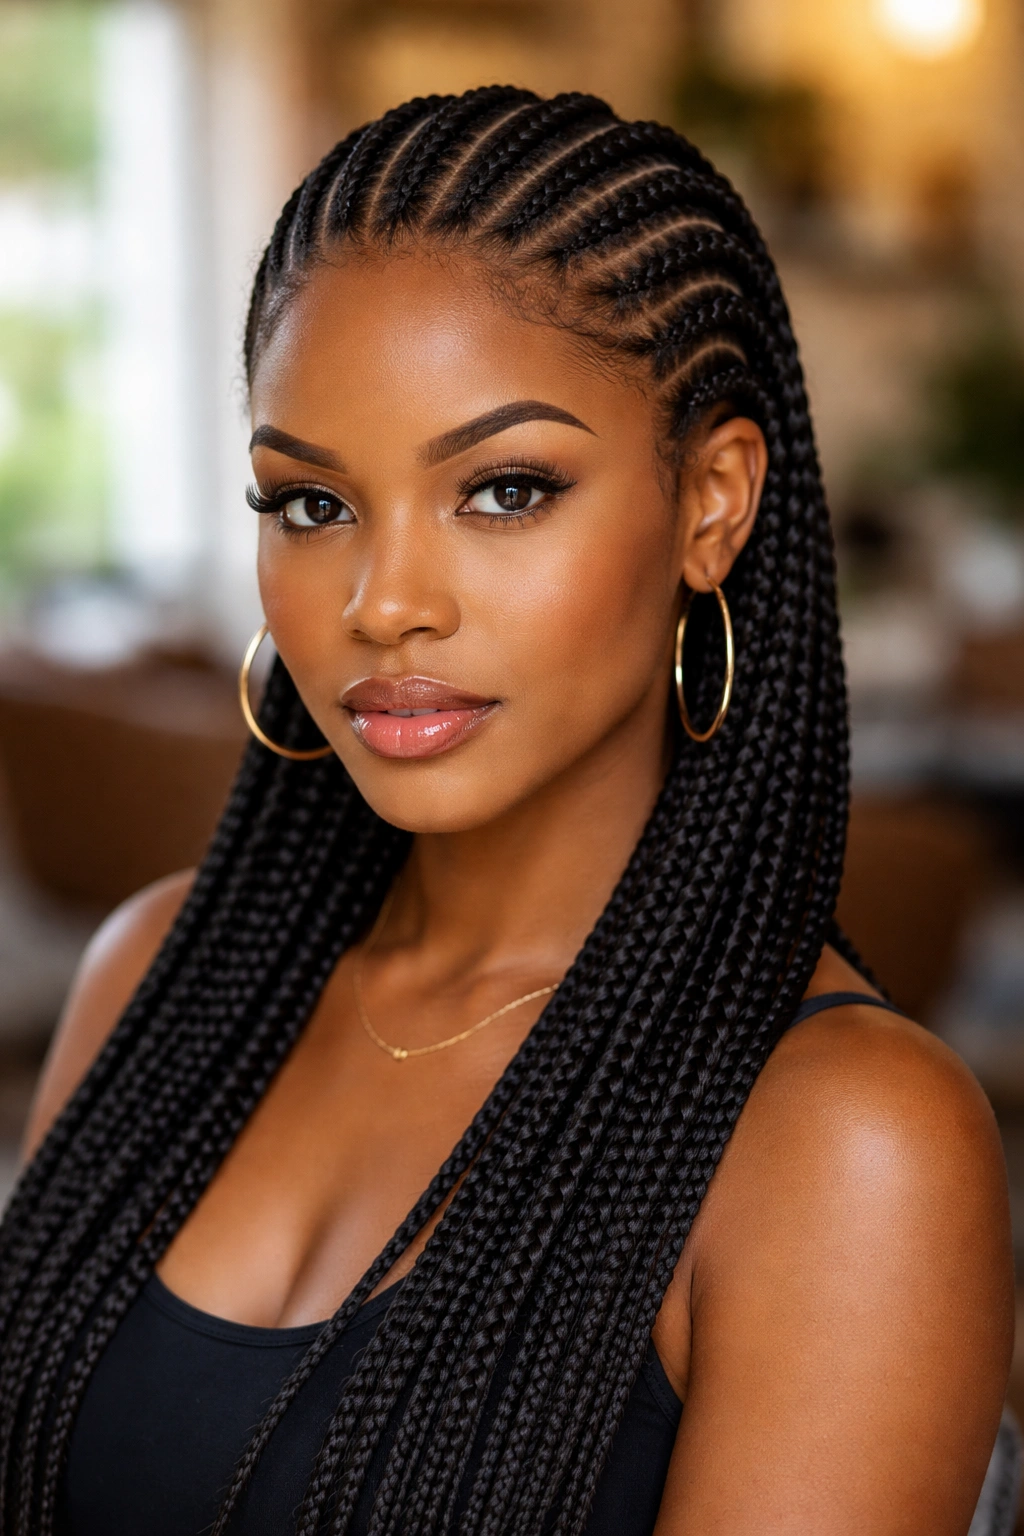
All back cornrows are the oldest trick in the book for a reason. They lay flat. They pull everything away from the face. They protect your ends while showing off your parting skills. And they photograph beautifully from every angle without trying hard. But flip through enough inspiration photos and you’ll notice something — no two all-back cornrow styles are quite the same, even though the basic direction is identical. The magic lives in the details. The part count. The thickness. Whether the braider uses feed-ins or not. Whether beads punctuate the ends. Whether the parts are ruler-straight or curved like a windswept landscape.
I’ve worn all-back cornrows through sweaty summers, damp winters, long-haul flights, and a week in the Caribbean. The style sits in that rare category of hair that handles almost anything you throw at it. But the style itself is less of a single idea and more of a family — 25 distinct cousins, each with their own personality. This roundup breaks them down one by one, so you can pick what actually fits your head, your hairline, and your real life.
What Makes All Back Cornrows a Staple
All back cornrows are the foundation every other cornrow pattern builds on. Learn these first. Master the tension, the feed-in rhythm, the part placement — and every zigzag, heart shape, or crown wrap becomes easier.
The direction matters more than beginners realize. Hair pulled uniformly backward sits flatter than hair pulled at angles, which is why all-back versions tend to hold longer than diagonal patterns. The scalp tension is evenly distributed. The growth pattern doesn’t fight the braid direction.
Worn simply, all back cornrows can read as minimalist. Worn with feed-ins and beads, they can read as ceremonial. The style carries across contexts — gym, office, wedding, beach — which is why most braiders can do some version of it in their sleep.
Prep That Makes or Breaks the Finish
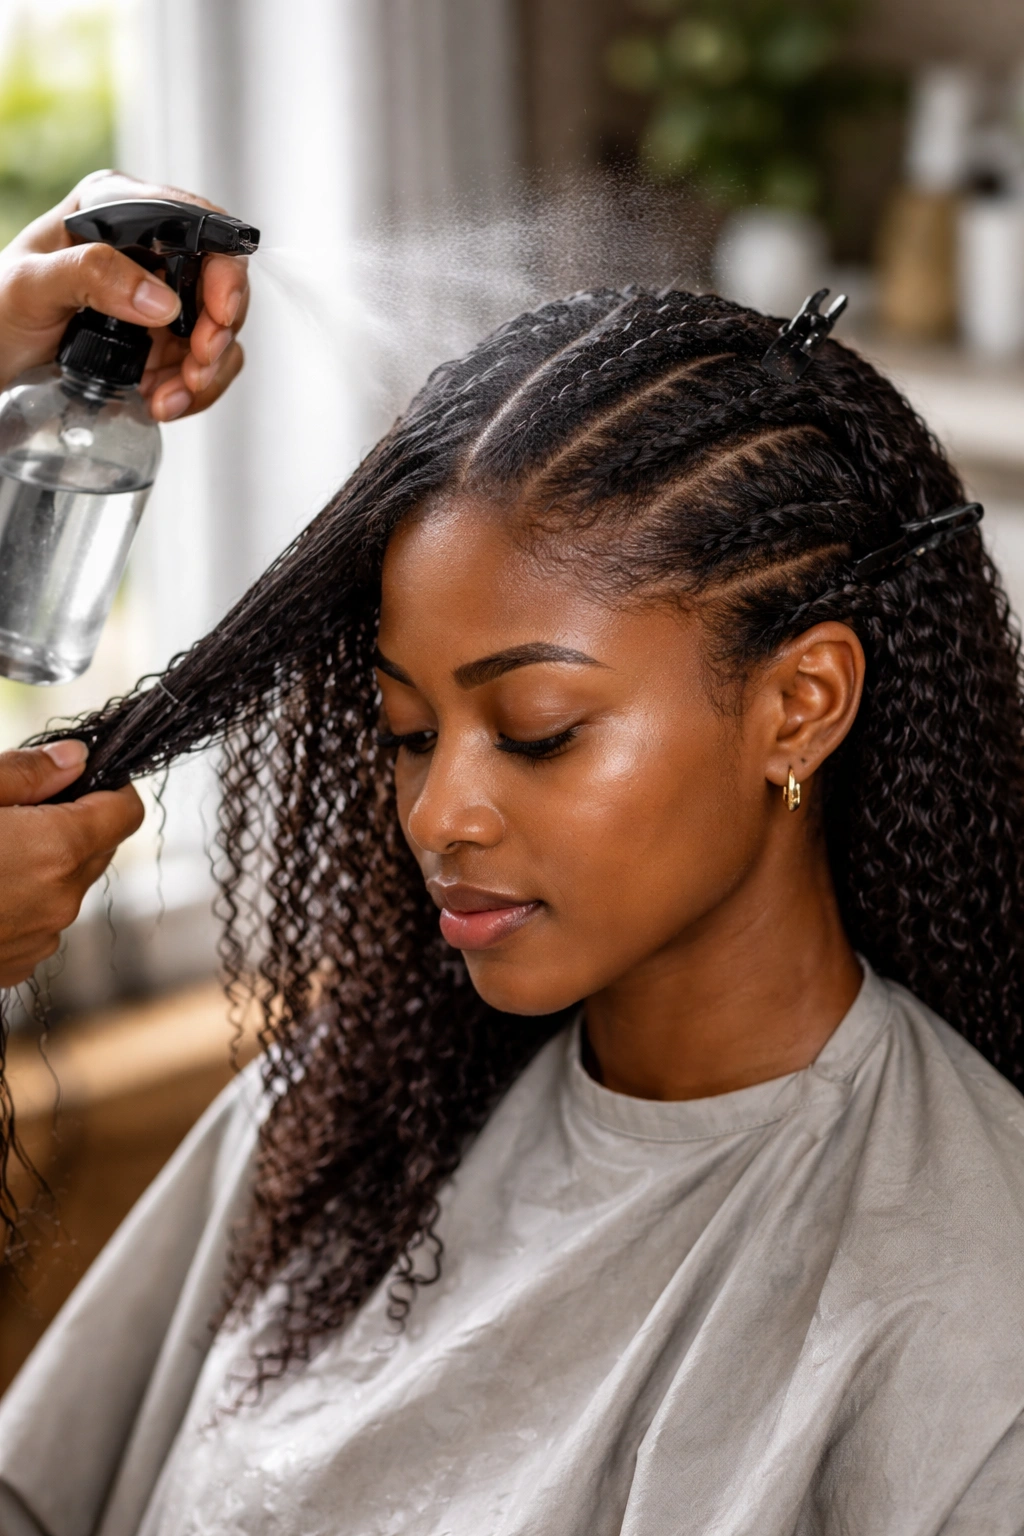
Wash day before braid day. Skip this and you’ll regret it by week two.
Clarify with a gentle sulfate-free or a mildly chelating shampoo if you’ve had a lot of product buildup. Deep condition for 30 minutes with heat, then stretch the hair — blow-dry on medium tension or use the old-school banding method overnight. Stretched hair parts like butter. Shrunken hair fights you.
Section into four, clip each section up, and work on one at a time. Mist with a water-glycerin spray as you go to keep each section pliable. Never try to cornrow bone-dry hair. It snaps at the parts and frays in the palm.
One rule that changes everything: trim before you braid. Even a small dusting removes frayed ends that would otherwise tangle inside the braid and cause fuzzing by day four.
Tools Worth Keeping in Your Braiding Kit
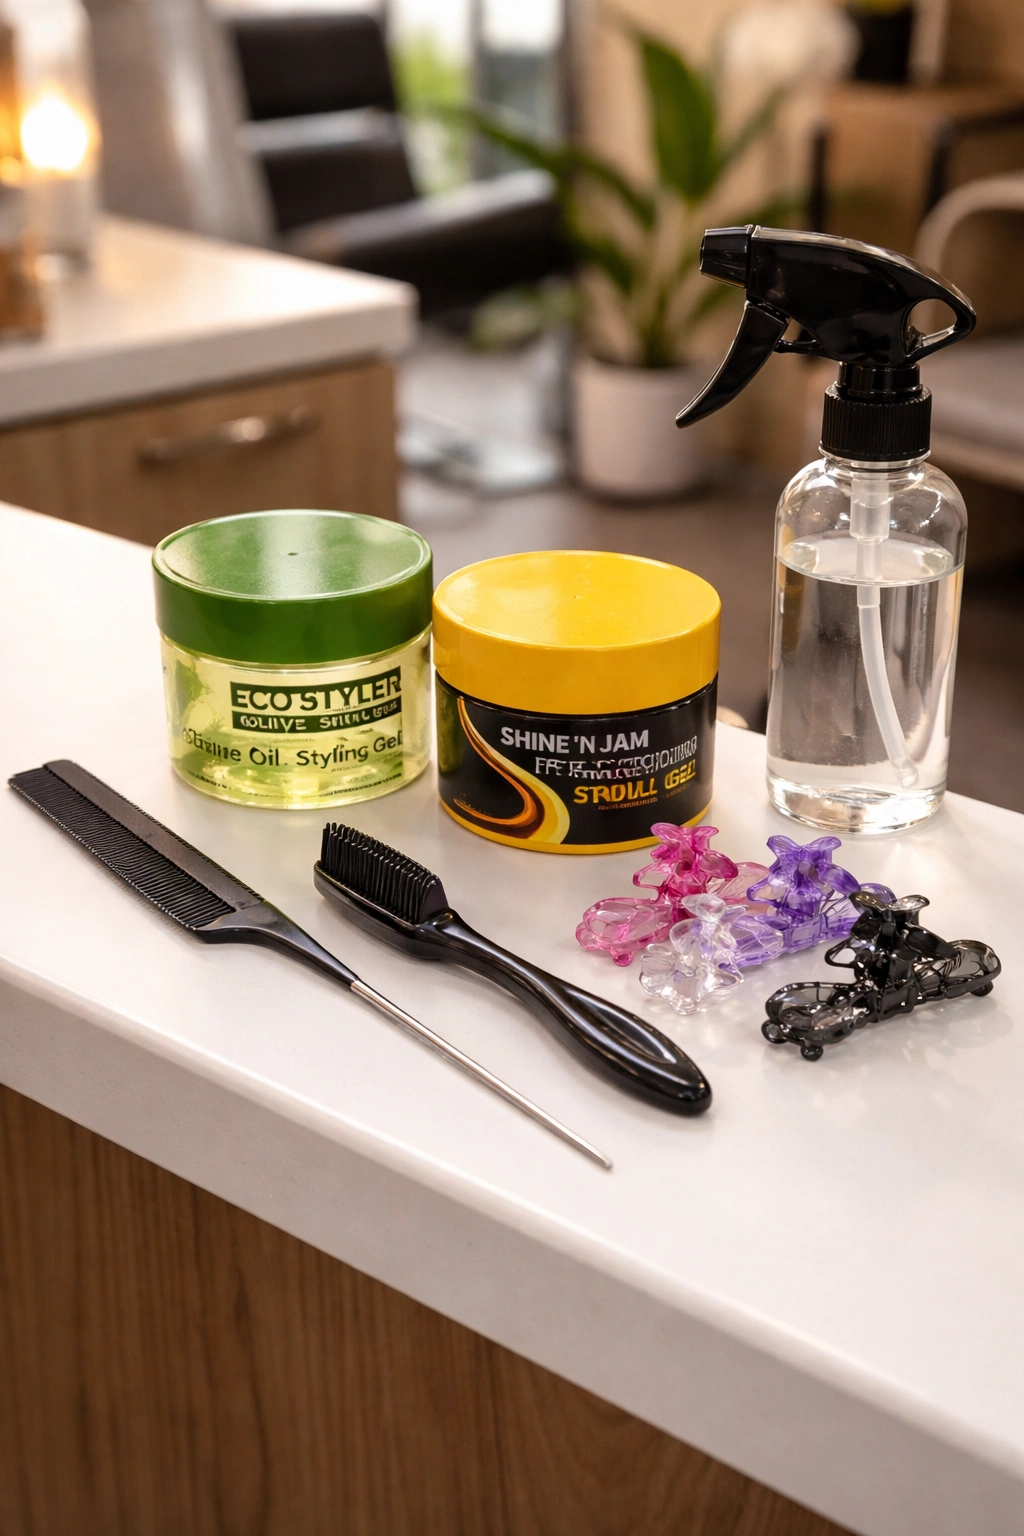
A rat-tail comb with a metal point for parting. A soft boar-bristle edge brush. A medium-hold gel for smoothing along the braid. A strong-hold edge gel for edges only. Butterfly clips for sectioning. A water-and-leave-in mist bottle.
That’s the core. Everything else is optional — though a good set of bead applicators makes bead-heavy styles five times faster.
On gel choice: if you’re braiding yourself, avoid mint-heavy gels that numb the scalp. You’ll end up braiding too tight without realizing. Neutral formulas let your scalp give you honest feedback.
Understanding the Feed-In Versus No-Feed Decision
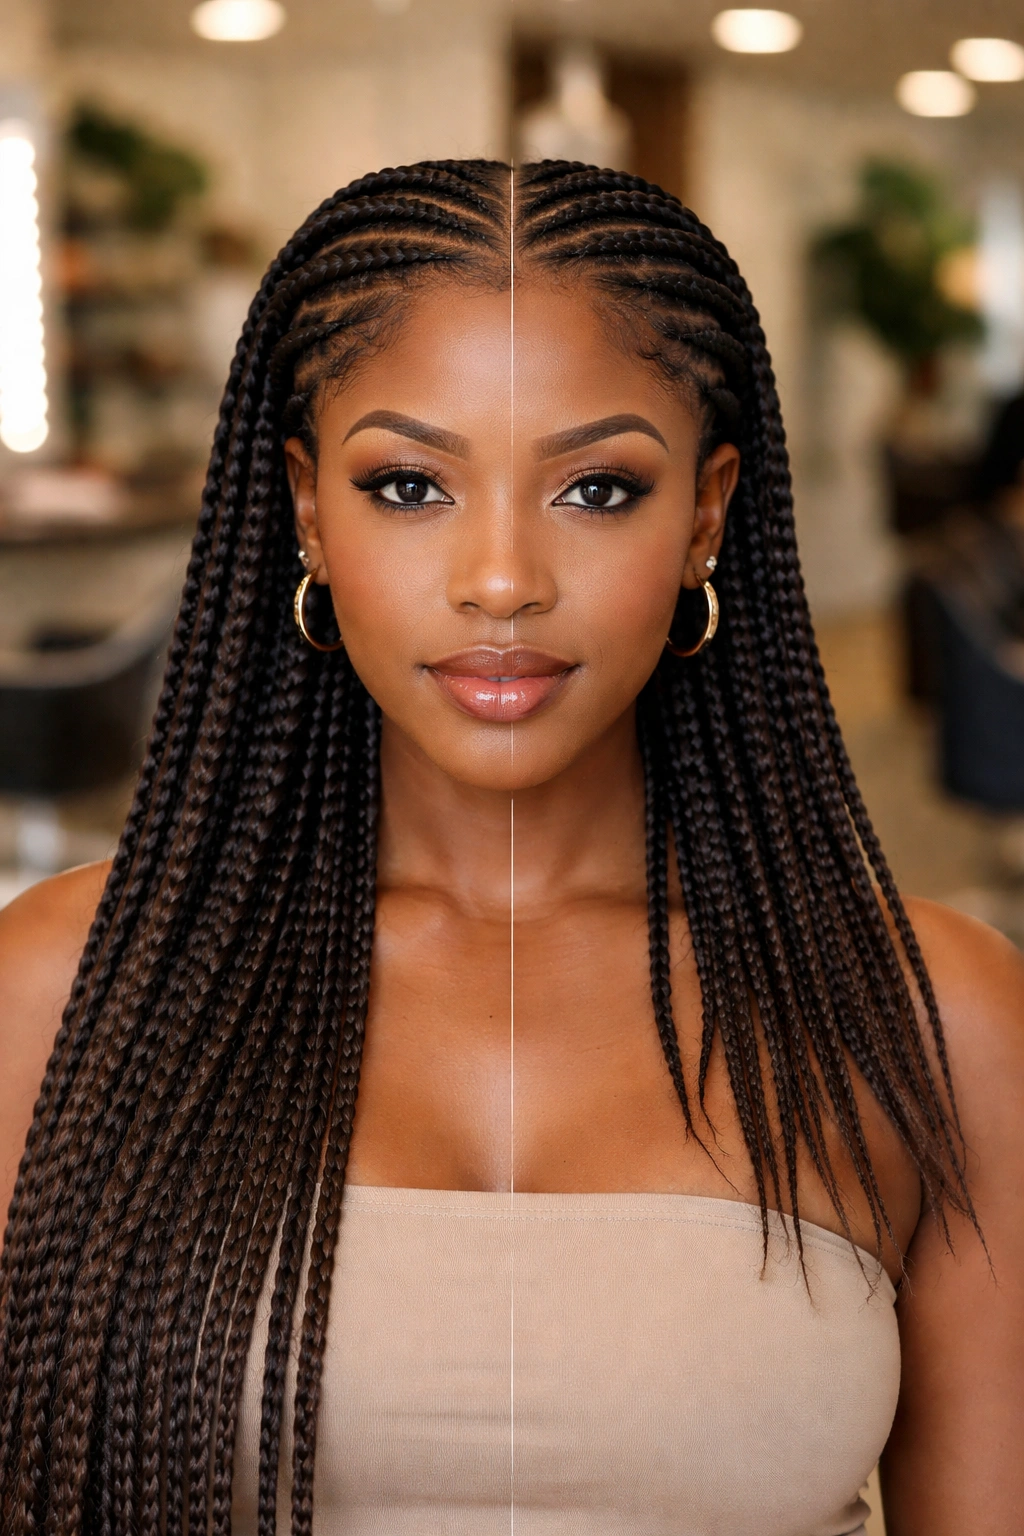
Every all-back cornrow decision starts here. Do you add extensions, or do you work with your natural length only?
Feed-ins add length and fullness. A 6-inch natural hair base can reach mid-back with good feed-in work. But feed-ins add weight, which pulls on the roots over time.
No-feed cornrows use only your real hair. They’re lighter, healthier for fragile hairlines, and last longer in terms of scalp comfort — but shorter in visual length.
I swap between them depending on the season. Winter I’ll go feed-in for dramatic length under coats and scarves. Summer I’ll stay no-feed because heavy braids plus heat is a miserable combo.
1. Classic Straight-Back Cornrows
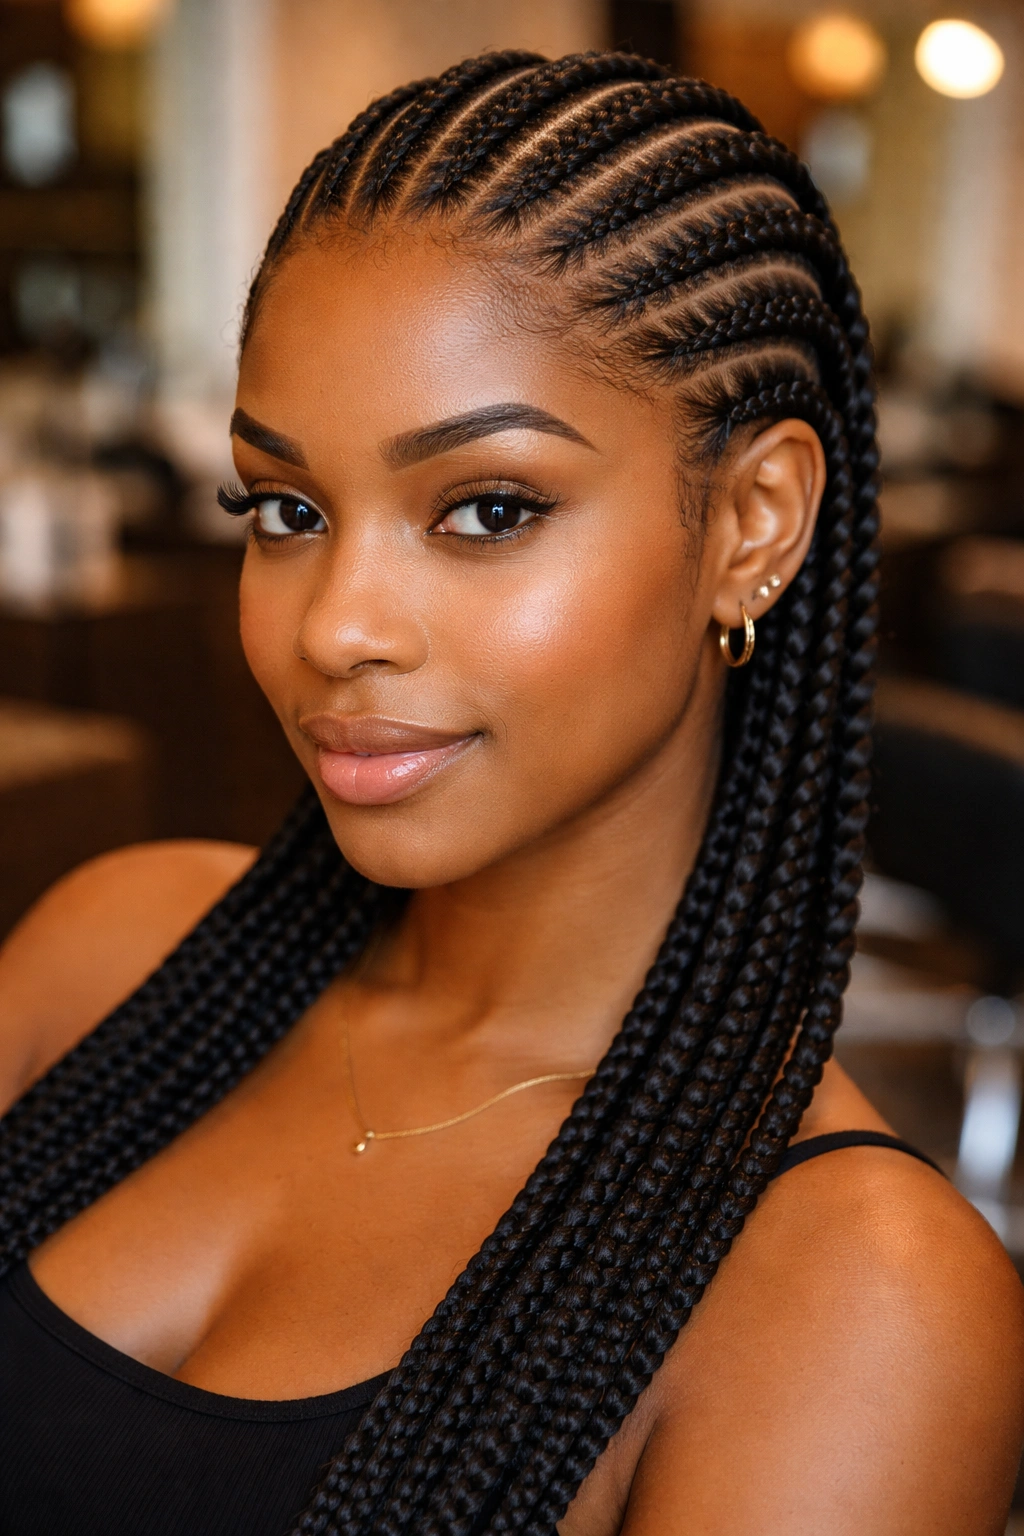
The style every Black girl knows from childhood. Ten even parts running from forehead to nape, no embellishments, no feed-ins, no drama.
Why It Still Matters
The straight-back is the most honest test of a braider’s skill. There’s nowhere to hide — uneven parts show, tension mistakes show, sloppy work shows. When it’s done well, straight-back cornrows read as understated elegance.
- Best on natural hair 3+ inches long
- Holds 2-3 weeks with basic aftercare
- Reads professional in any workplace
2. Feed-In Cornrows With Tapered Ends
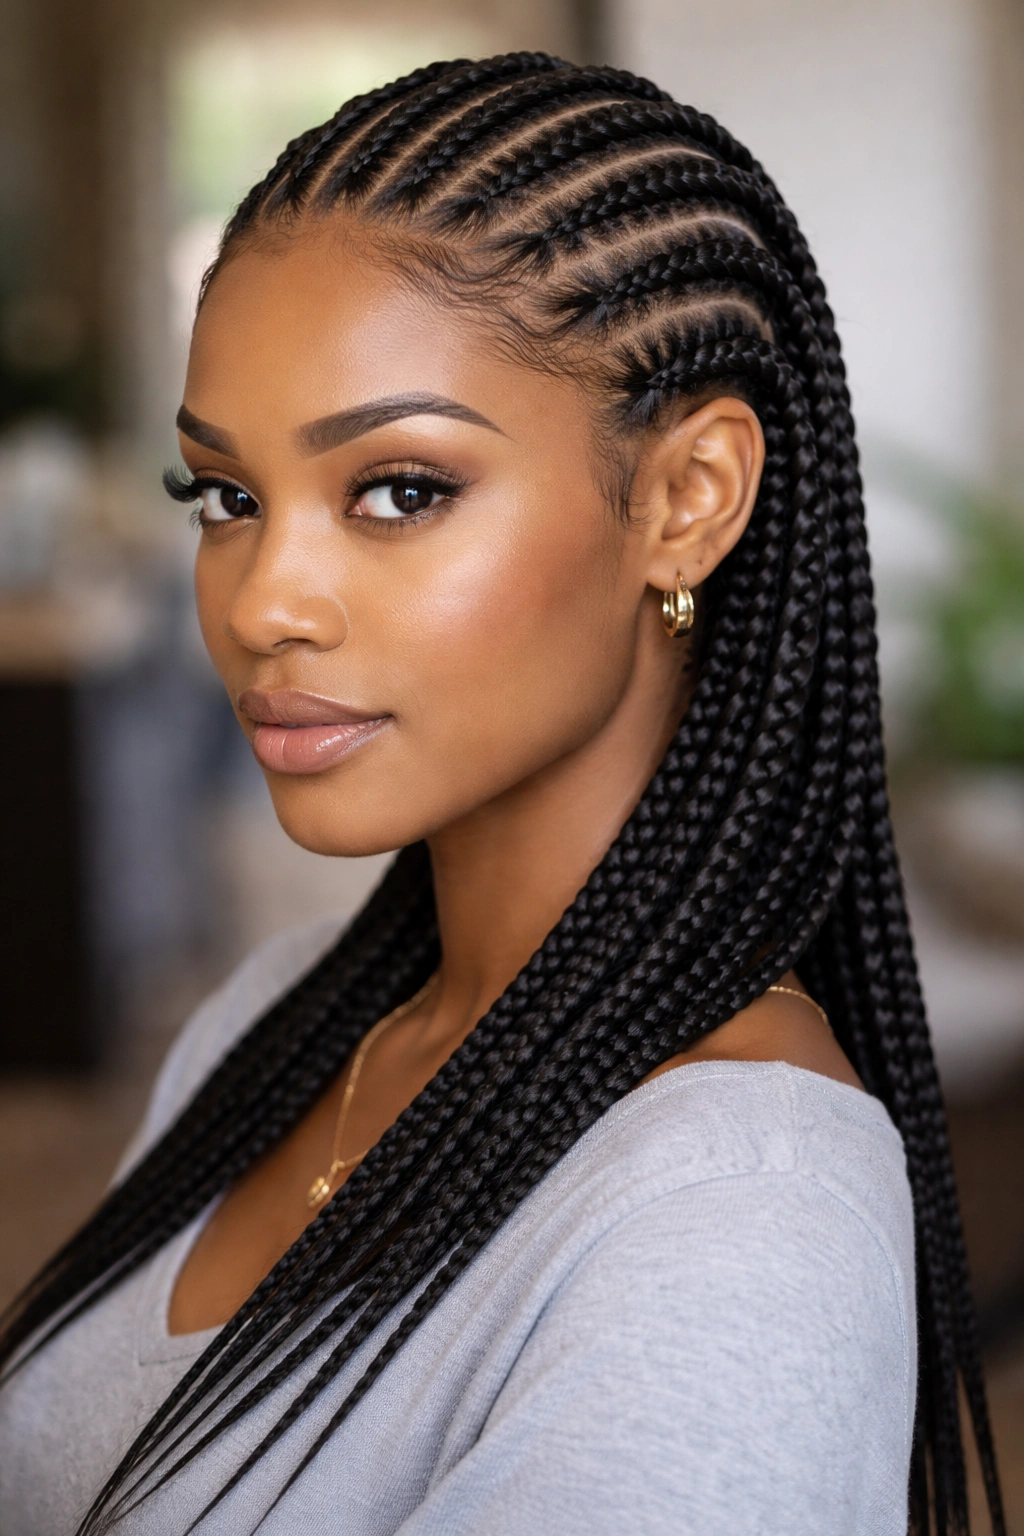
Feed-ins transform the straight-back into something that reads as deliberately styled. The kanekalon feeds in at three points — an inch from the root, mid-length, and again near the ends — so the braid tapers rather than ending in a lumpy bundle.
This is the version most braid salons default to. It’s the middle ground between natural length and full extensions, giving you roughly double your real-hair length in a clean, proportional way.
What most people get wrong is the feed-in timing. Adding all the kanekalon at the start creates a thick root that looks unnatural. Staggering the feed-in is what makes the braid look like it grew out of your head.
3. Stitch Braids Straight Back
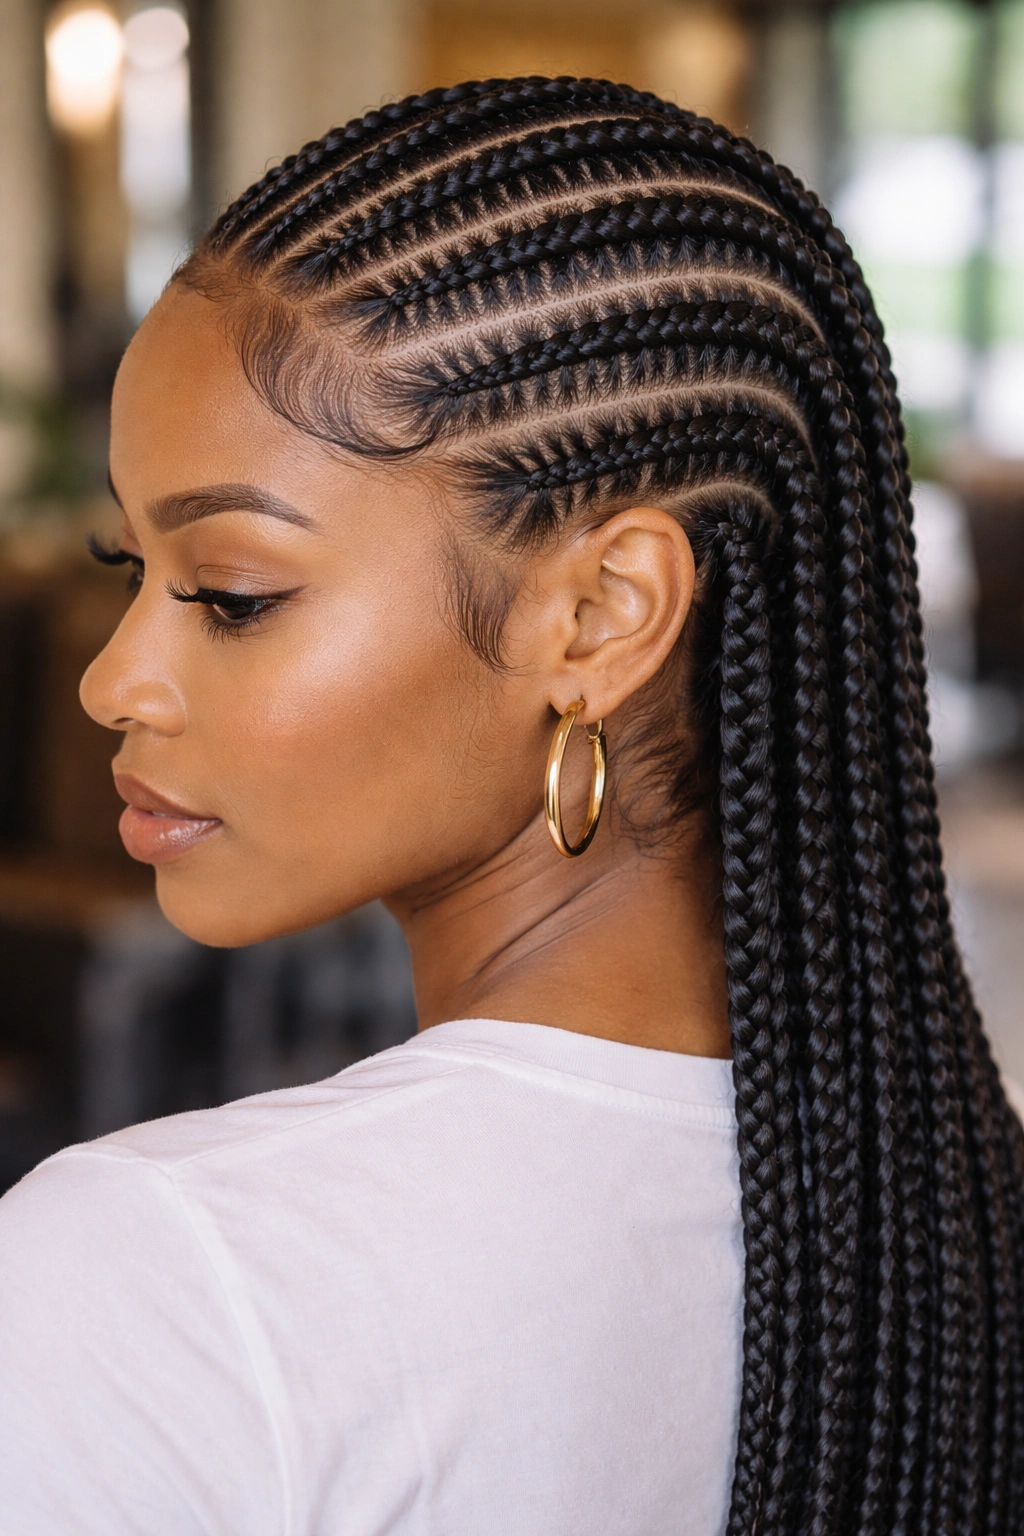
Stitch braids are the precision version of all-back cornrows. Between each pass of the braid, the braider cuts a horizontal stitch line in the scalp — a tiny, razor-clean part that breaks up the otherwise continuous braid line.
Bold statement: stitch braids are the single most flattering all-back variation for any face shape. The horizontal lines create visual breaks that soften the vertical pull of the braids.
The technique is demanding. Every stitch has to be the same distance from the last, and every stitch on the parallel braid next door has to line up with it. Done right, the parallel stitches form rows across the whole head like a grid.
4. Jumbo All-Back Cornrows
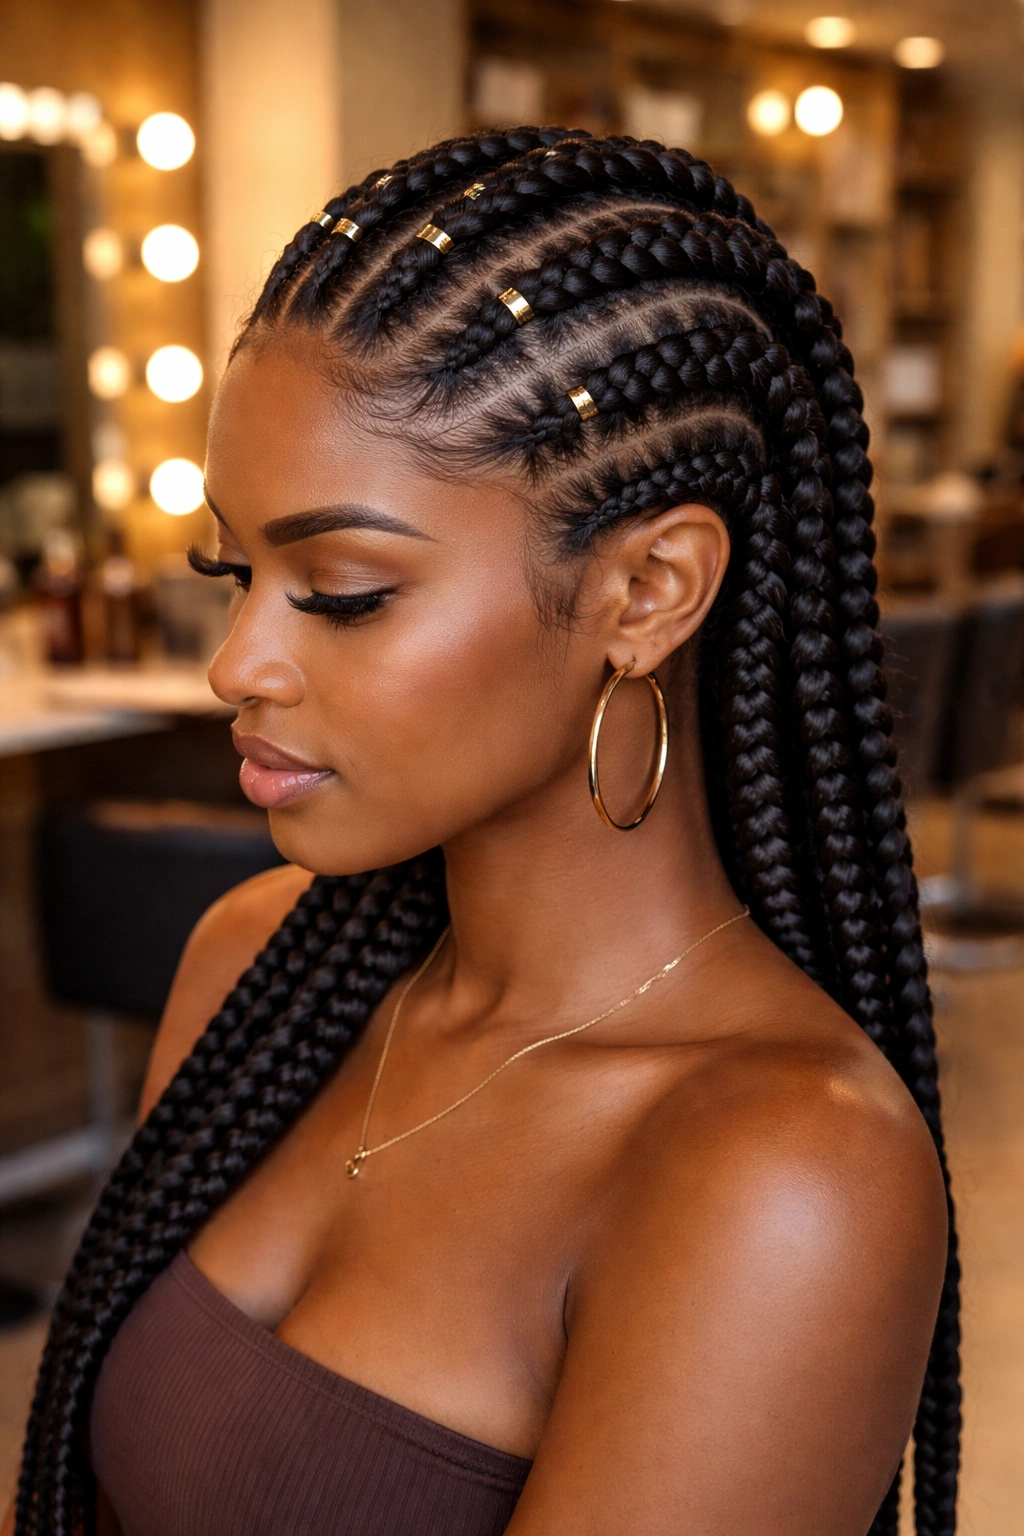
Jumbo means thick. Five to seven cornrows instead of the usual ten to twelve, each one two fingers wide at the base. The result is a style that takes 45 minutes instead of three hours and reads as powerful rather than delicate.
Is jumbo less protective than thin? Slightly, yes. Thicker braids put more tension per braid on the scalp, which is why the style is better for stronger, healthy hairlines.
How to Style It
Minimal accessories work best. Two or three gold cuffs total across the whole head. Anything more and the visual balance collapses under the size of the braids.
5. Micro All-Back Cornrows
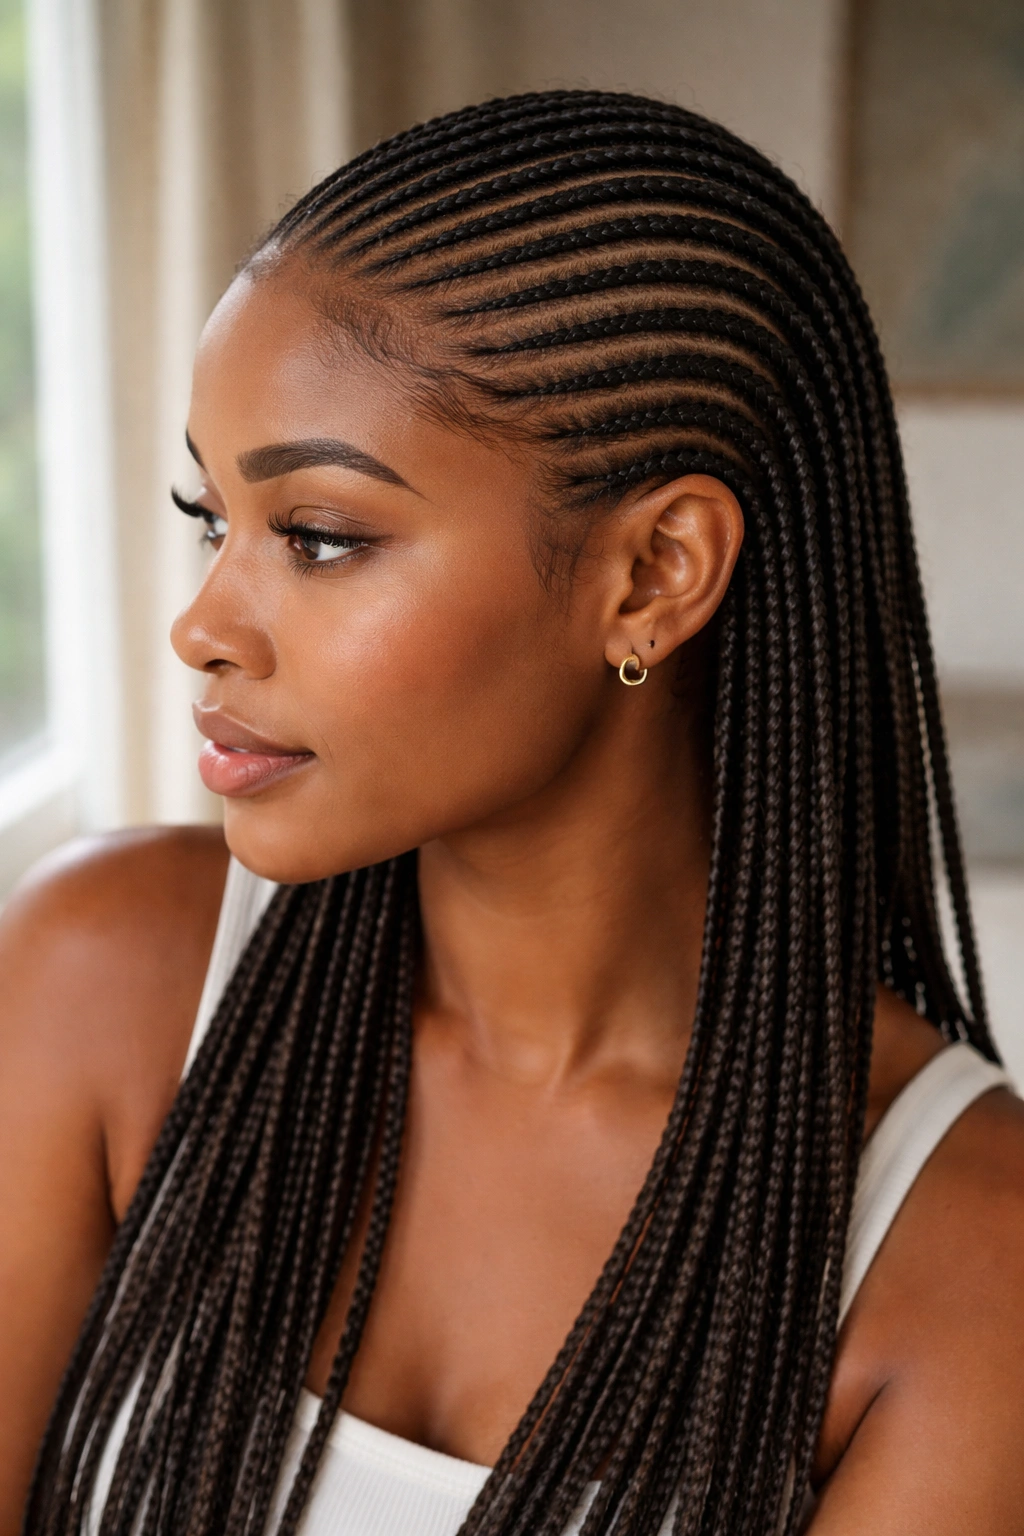
On the opposite end of the spectrum from jumbo, micro cornrows pack 40-60 thin braids across the head. The finish reads almost like a textured fabric — intricate, dense, and detailed.
Micros take the longest to install (5-7 hours) and the longest to take down. They’re the most protective once they’re in, though, because each section is so small that the hair inside barely moves.
Best for: women who wear their hair in one style for 3+ weeks at a time. The install time only makes sense if you’re going to get your money’s worth.
6. Cornrows With Beaded Ends
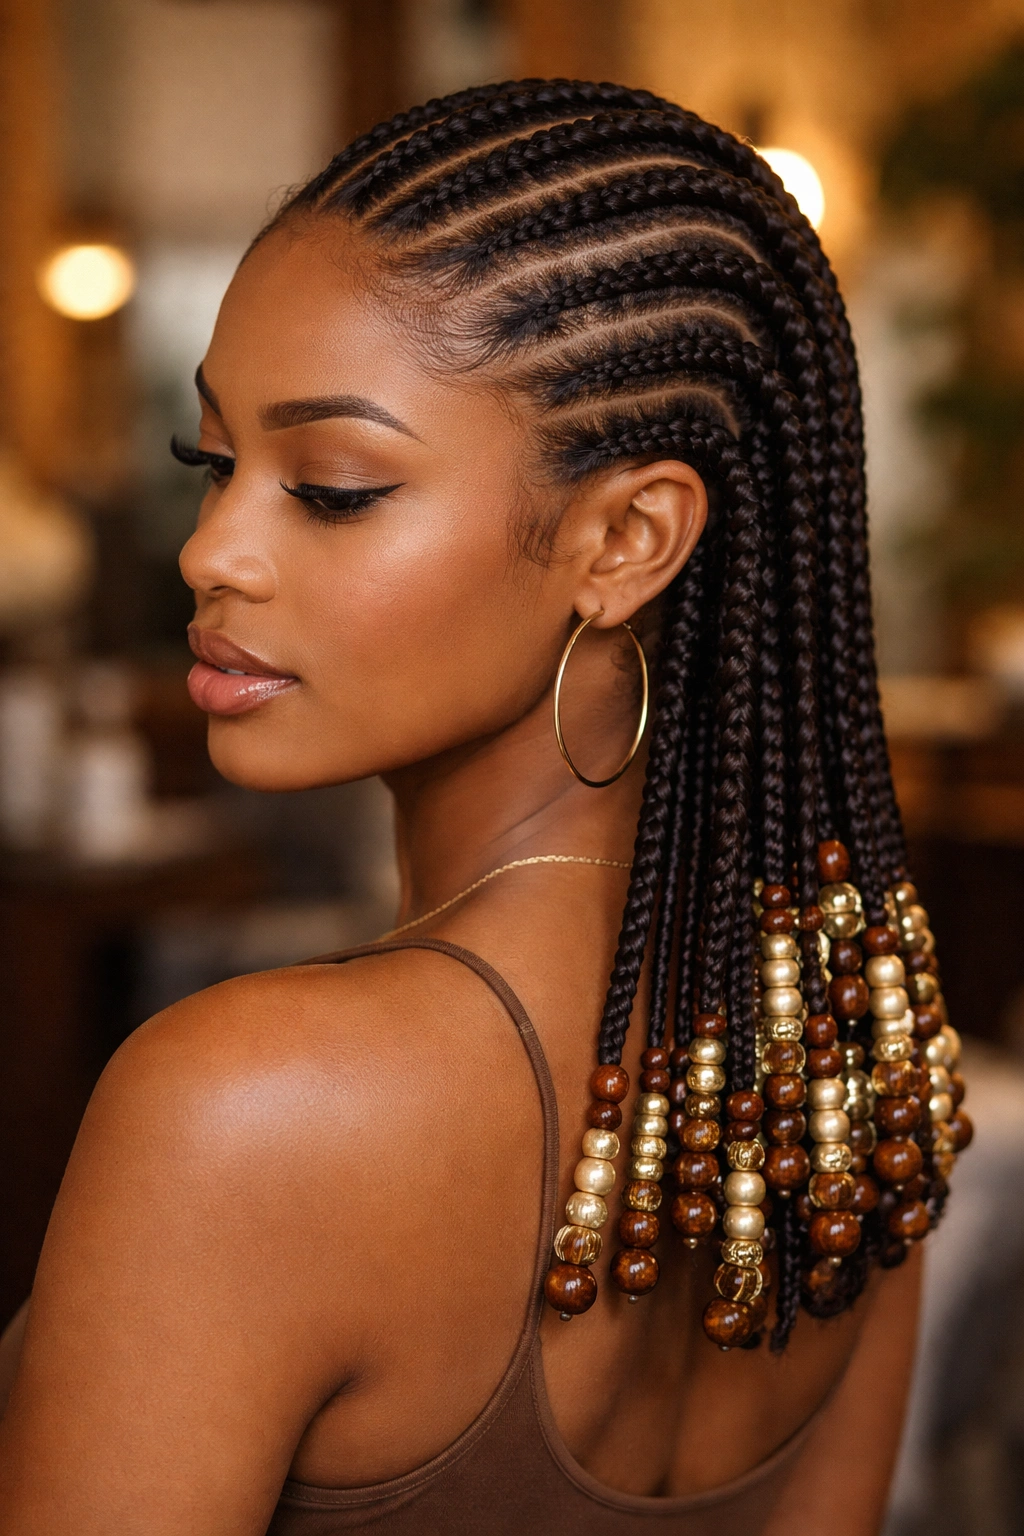
Ends gathered, sealed with a clear elastic, and threaded with 5-8 beads each. The beads can be wooden, metal, glass, or plastic.
- Wooden beads: understated, earthy
- Gold metal: statement, wedding-appropriate
- Clay or ceramic: cultural, handmade feel
- Matte black: modern, minimal
Tip: match your beads to your earrings for a cohesive finish. Mixed metals on braids and ears makes the whole silhouette feel busy.
7. Zigzag Parted Straight-Back
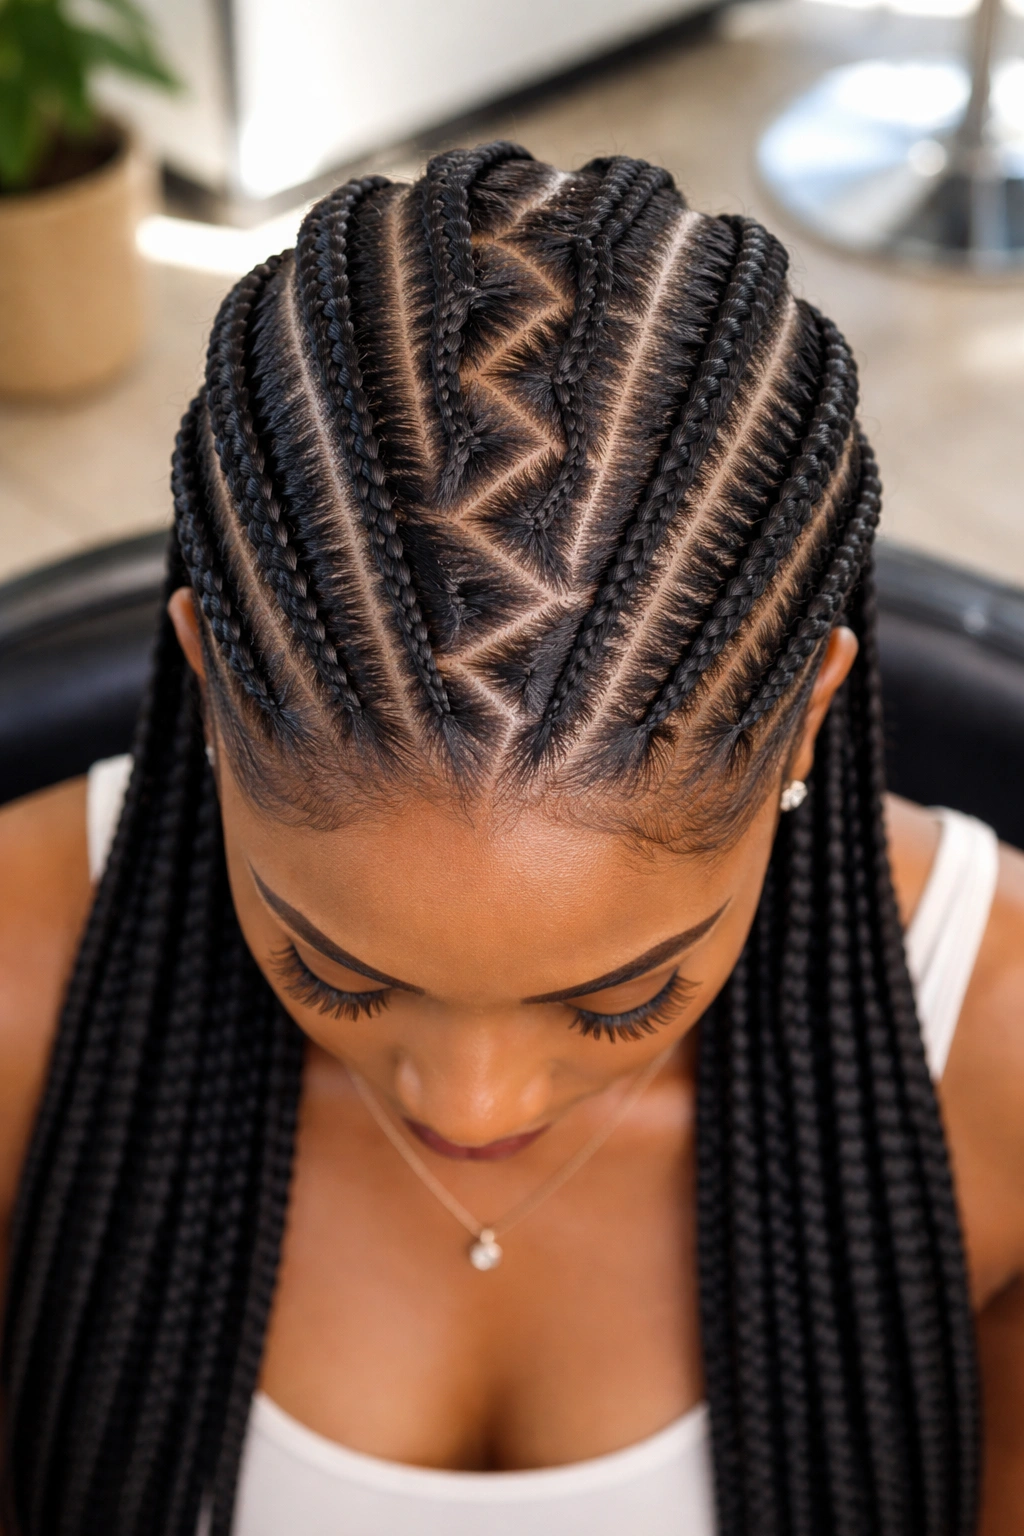
The braids themselves run straight back, but the parts between them zigzag instead of running in straight lines. From the top of the head, the scalp looks like a lightning map.
The rhythm of the zig has to be consistent. Measure with the rat-tail comb handle or use a zigzag-cutting hair tool to keep the angles uniform. Drifting angles ruin the whole effect.
This variation photographs best from overhead angles. It’s a style that rewards you taking a mirror selfie or having someone shoot the top of your head.
8. Double-Tier All-Back
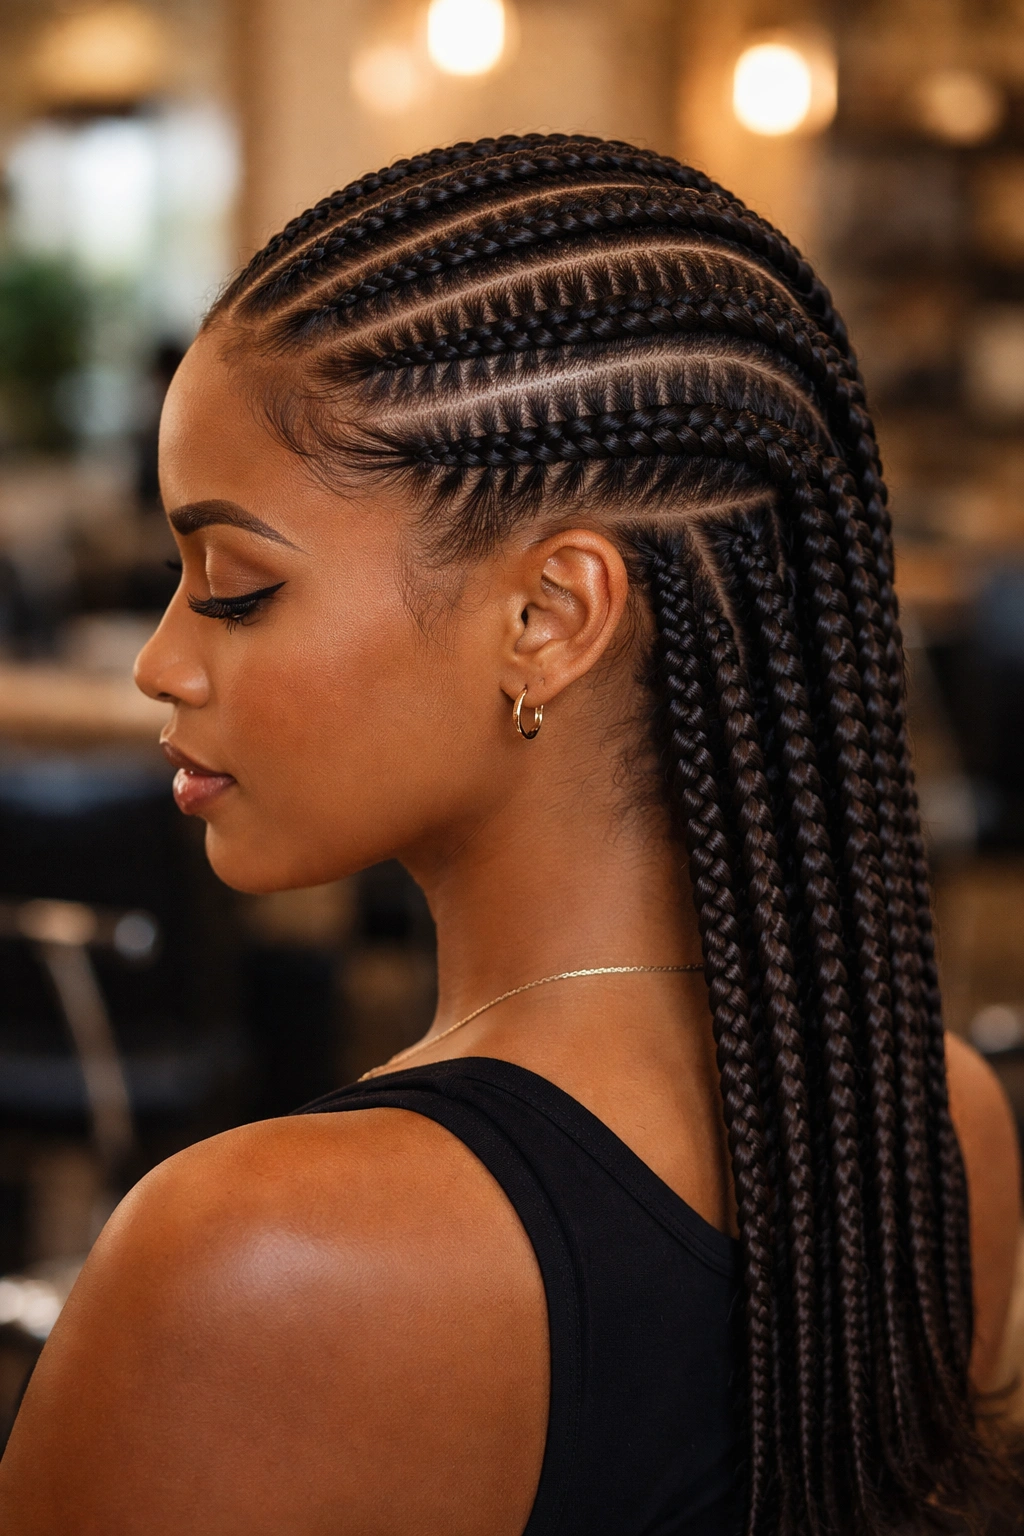
Unlike a standard single-direction cornrow pattern, the double-tier splits the head into two levels. The top half is cornrowed back, and the bottom half is cornrowed in a second, parallel pattern — usually slightly smaller or in a different finish.
The horizontal part dividing the two tiers creates a visual boundary that flatters longer face shapes. It breaks up the vertical sweep of an all-back pattern with a deliberate pause.
Who this suits: women with longer natural hair who want structure without losing length.
9. All-Back With Curly Ends
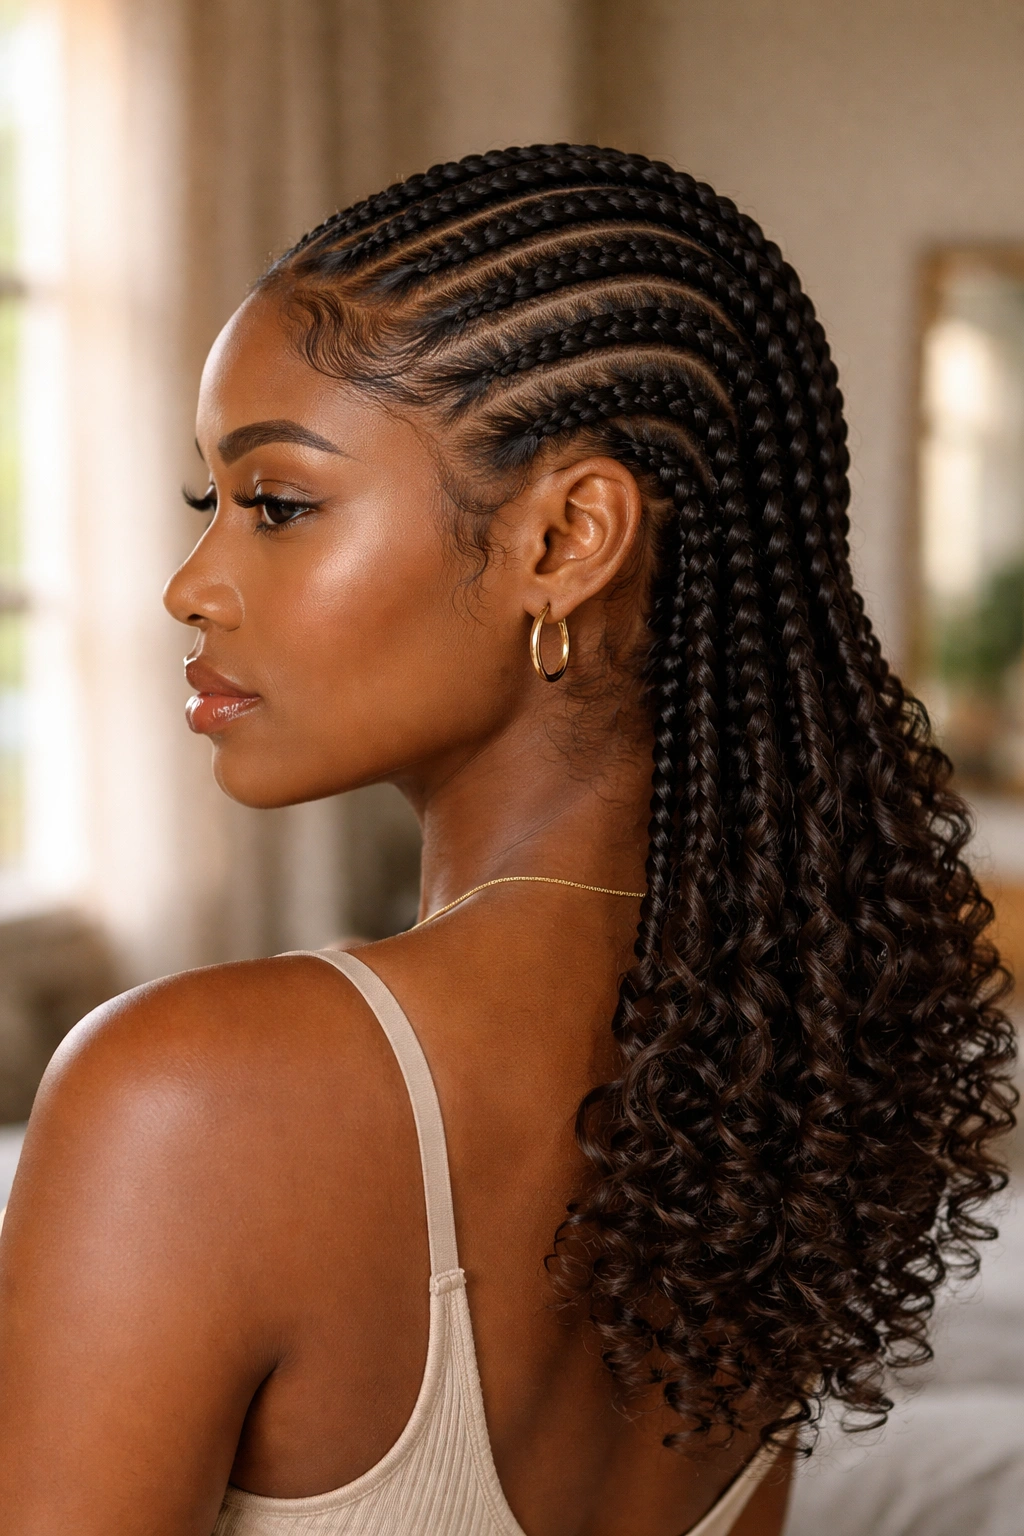
All cornrows run back flat to the nape, then the ends are left loose and curled. The curl can be achieved with flexi-rods, perm rods, or braid-out texture.
The contrast between sleek and soft is the whole style. Pulled too tight at the roots and the curls look awkward. Too loose and the cornrows fuzz. The balance has to be dialed in.
Styling Notes
Curls last about a week before they loosen. Refresh with a light mousse and a quick re-rod overnight. Don’t wash the curls — water flattens them and you lose the contrast that makes the style work.
10. All-Back Cornrows Into a Ponytail
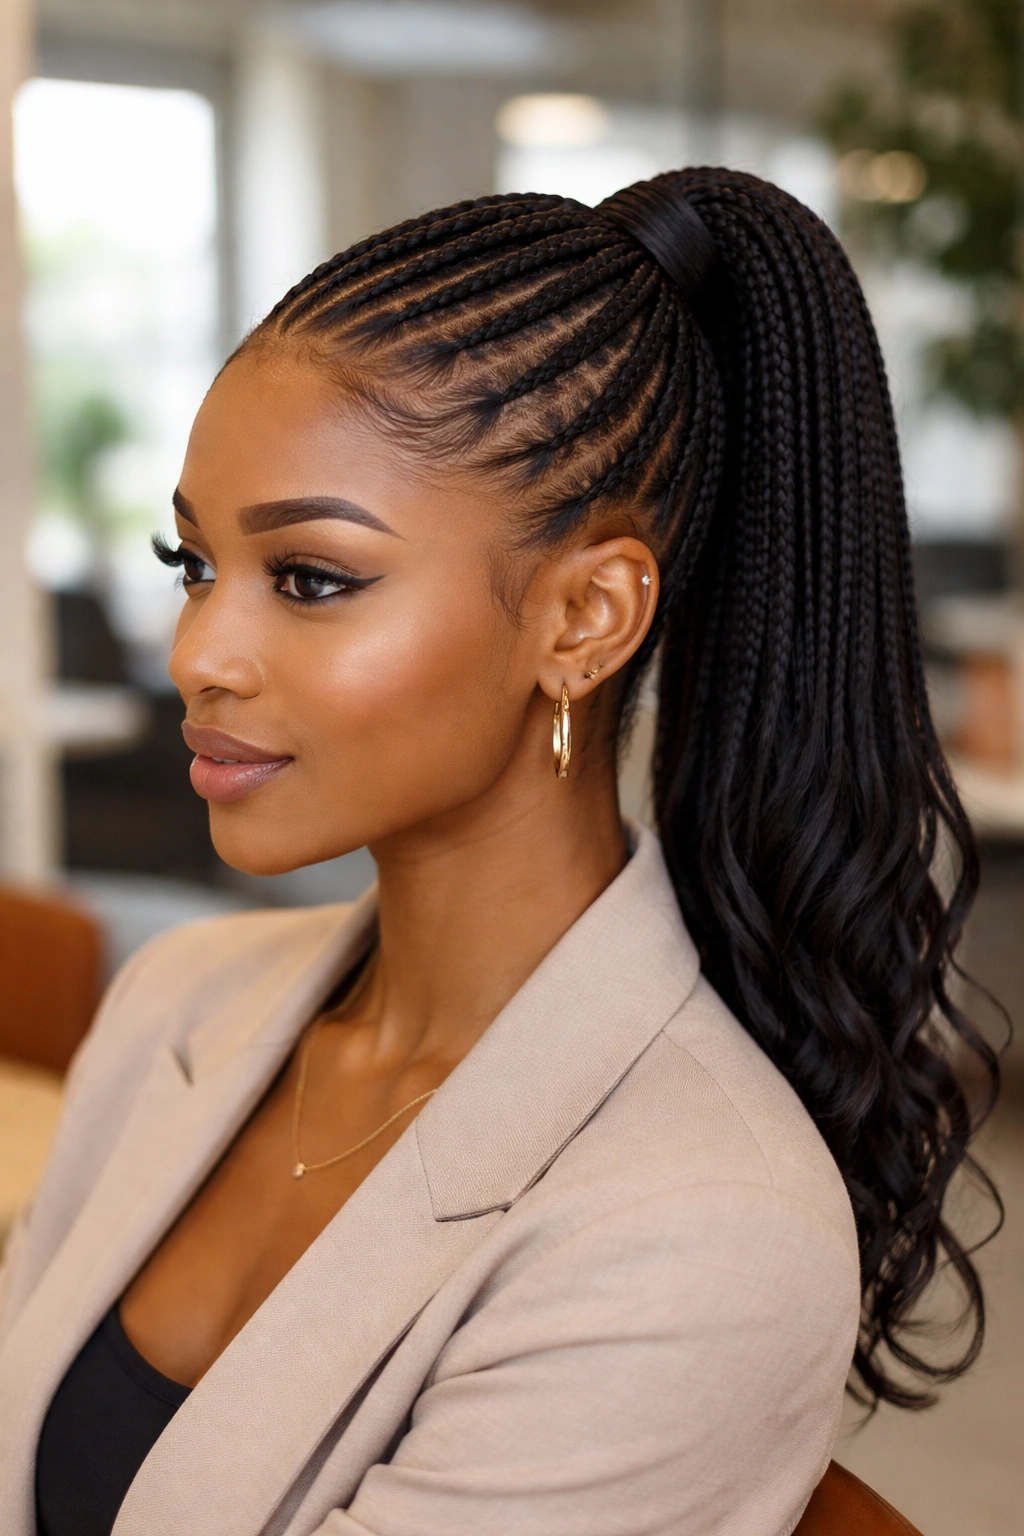
Every braid gathers into a single high or low ponytail at the nape or crown. The ponytail can stay as braids (wrapped, twisted, or left loose) or get a curly extension added for contrast.
Low pony reads as professional. High pony reads as playful. Middle pony — the one that sits right at the occipital bone — photographs especially well because it lifts the face without looking stretched.
This is one of the fastest all-back variations to do at home if you’re braiding yourself. The cornrows only need to reach the gather point, so you don’t have to worry about long braiding all the way down.
11. Thick-and-Thin Alternating Cornrows
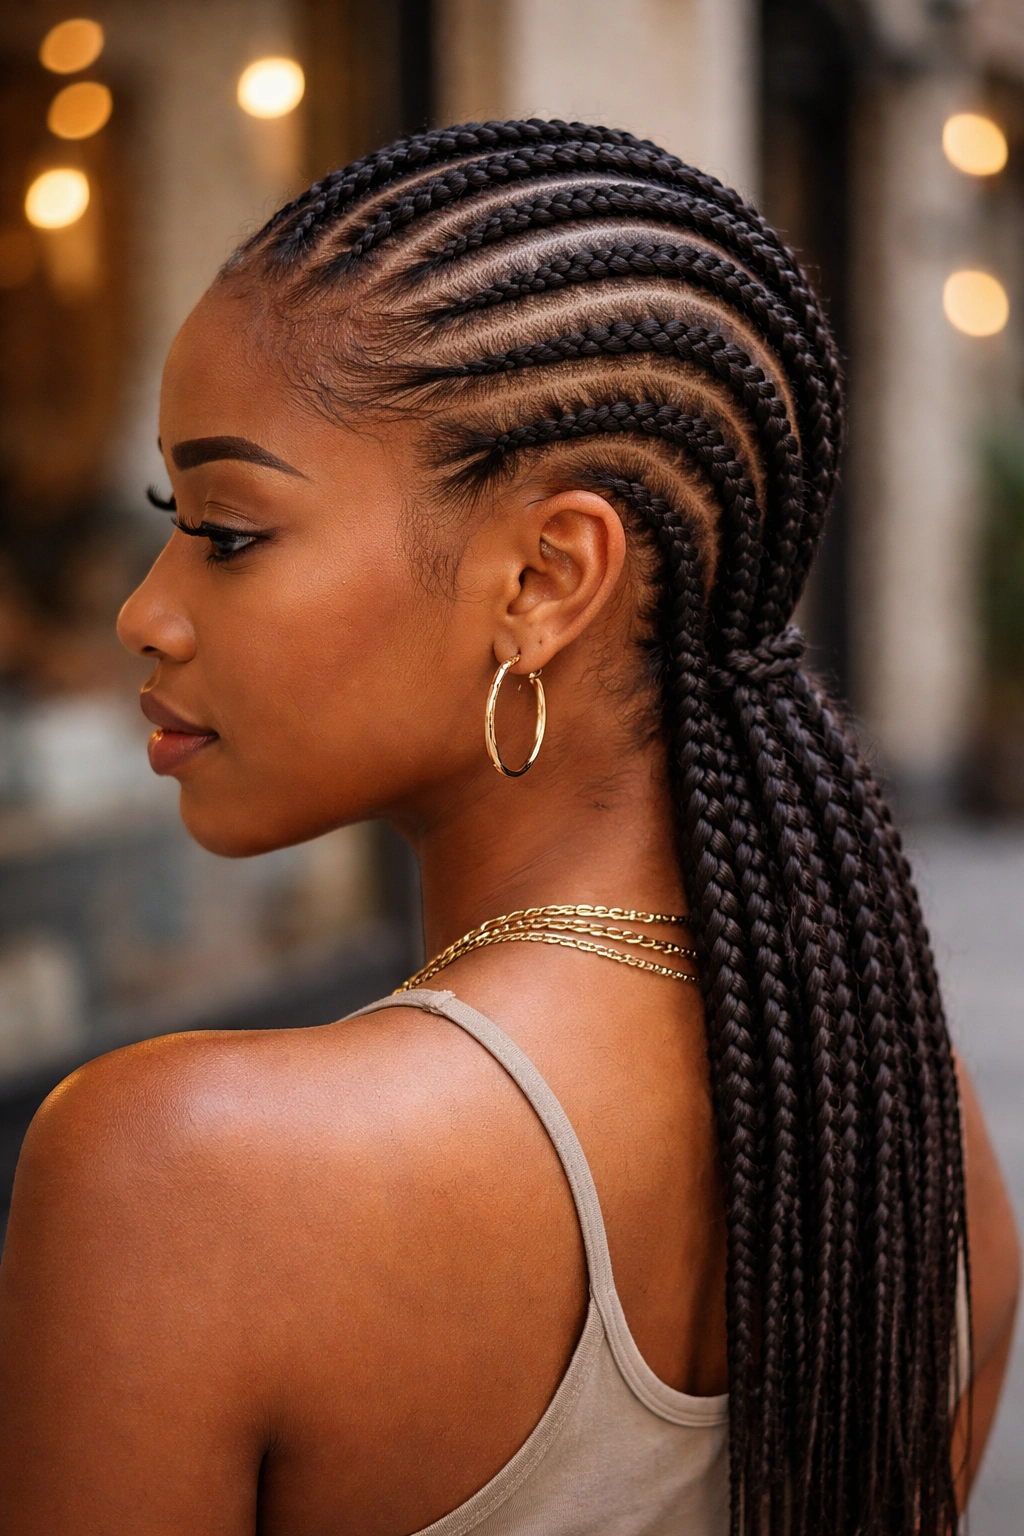
Alternating one thick cornrow, one thin, one thick, one thin — straight back. The visual rhythm is what sells it.
Does the pattern need to be perfectly symmetrical? No, and that’s the point. Slight asymmetry gives the style a handmade, artistic feel rather than a robotic precision.
The thick braids hold more weight. The thin ones fill the space between. If your hairline is fragile, keep the thick ones toward the crown and the thin ones at the perimeter to reduce edge tension.
12. Asymmetric All-Back With Deep Side Part
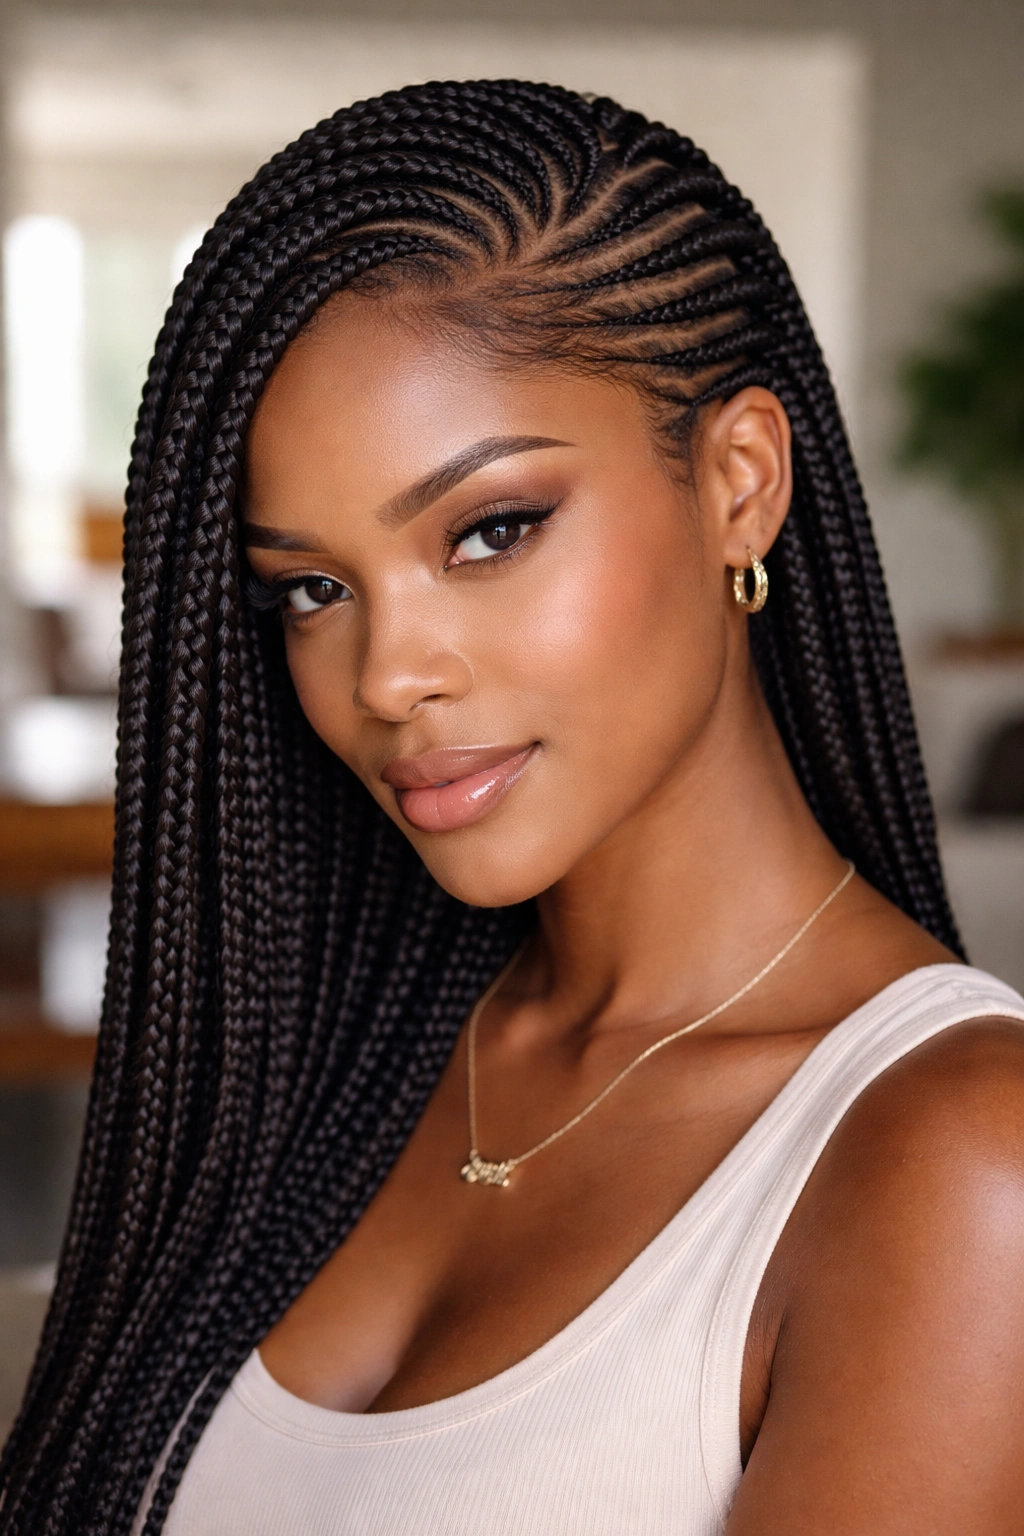
A deep side part — closer to the crown than the temple — shifts the entire pattern to one side of the head. The braids still run back, but they fan from a single origin point rather than sitting in parallel lines.
This is one of the most face-flattering all-back variations. The asymmetry softens square jawlines and draws the eye across the face rather than straight up.
The deep side part also hides thinning temples better than a center part. If one side of your hairline is weaker, part on the stronger side and let the hair fall toward the weaker one.
13. Stitch Braids With Beads
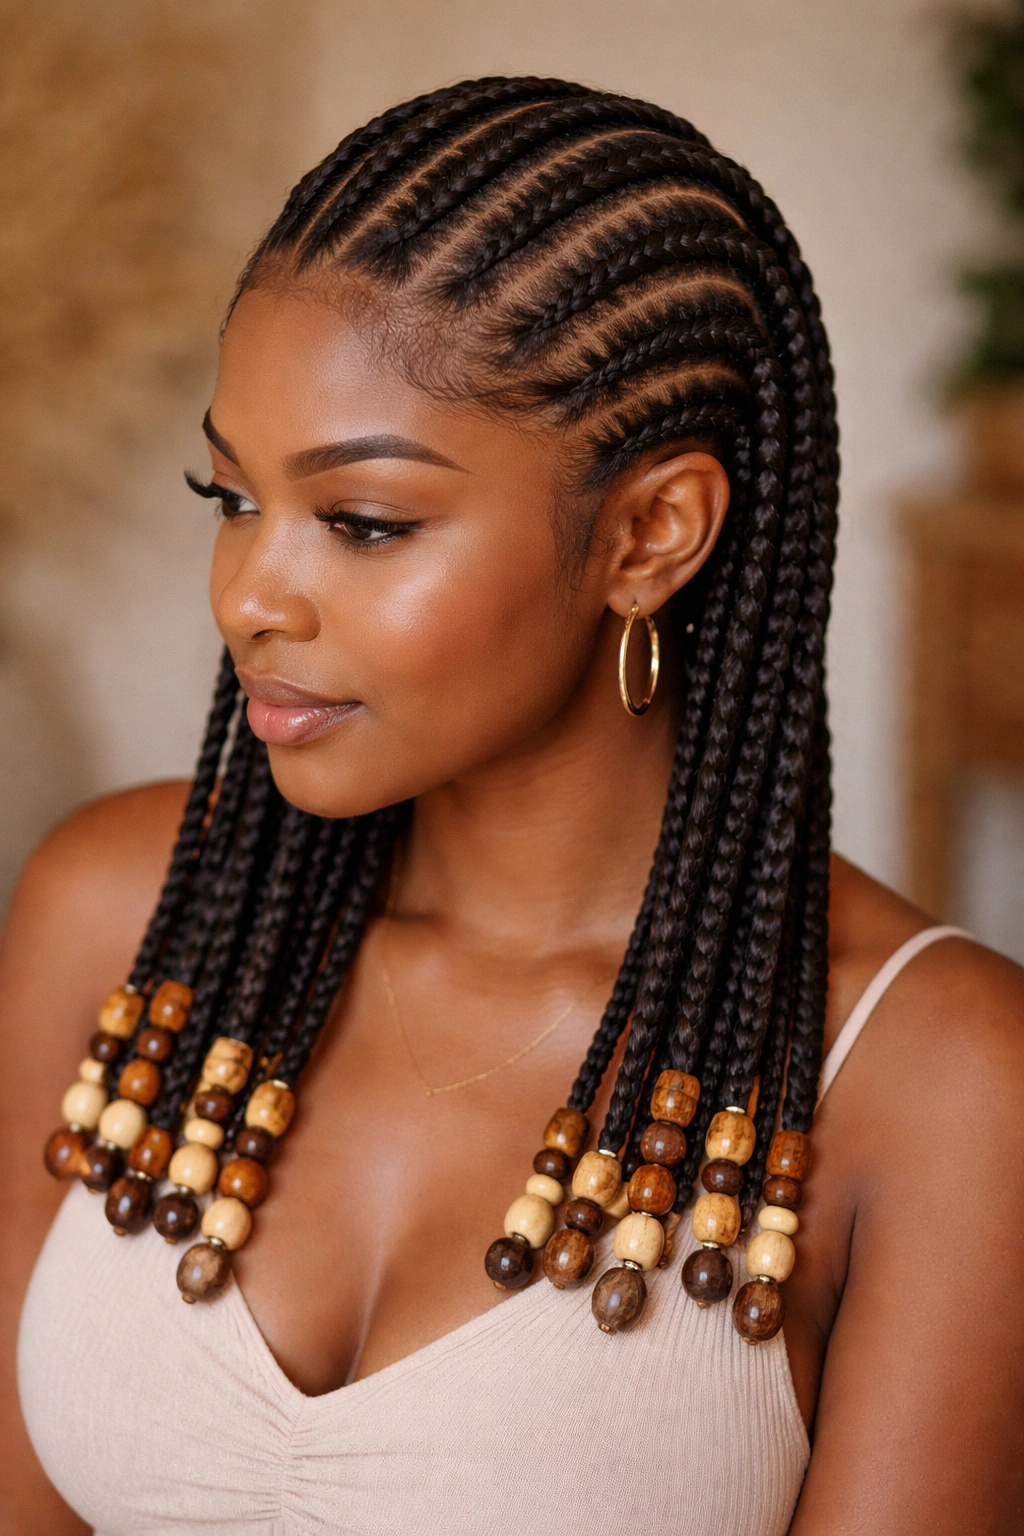
Take the stitch braid precision and punctuate the ends with beads. The combination reads as ceremonial — cleaner than freehand cornrows, warmer than plain straight-backs.
Use fewer beads than you think. Three to five per braid is elegant. Ten per braid is heavy and pulls on the roots all day.
Experience says: wooden beads or painted wood-pattern beads look more expensive than plastic ones in photos. The grain catches light differently.
14. All-Back With Rubber Band Partitions
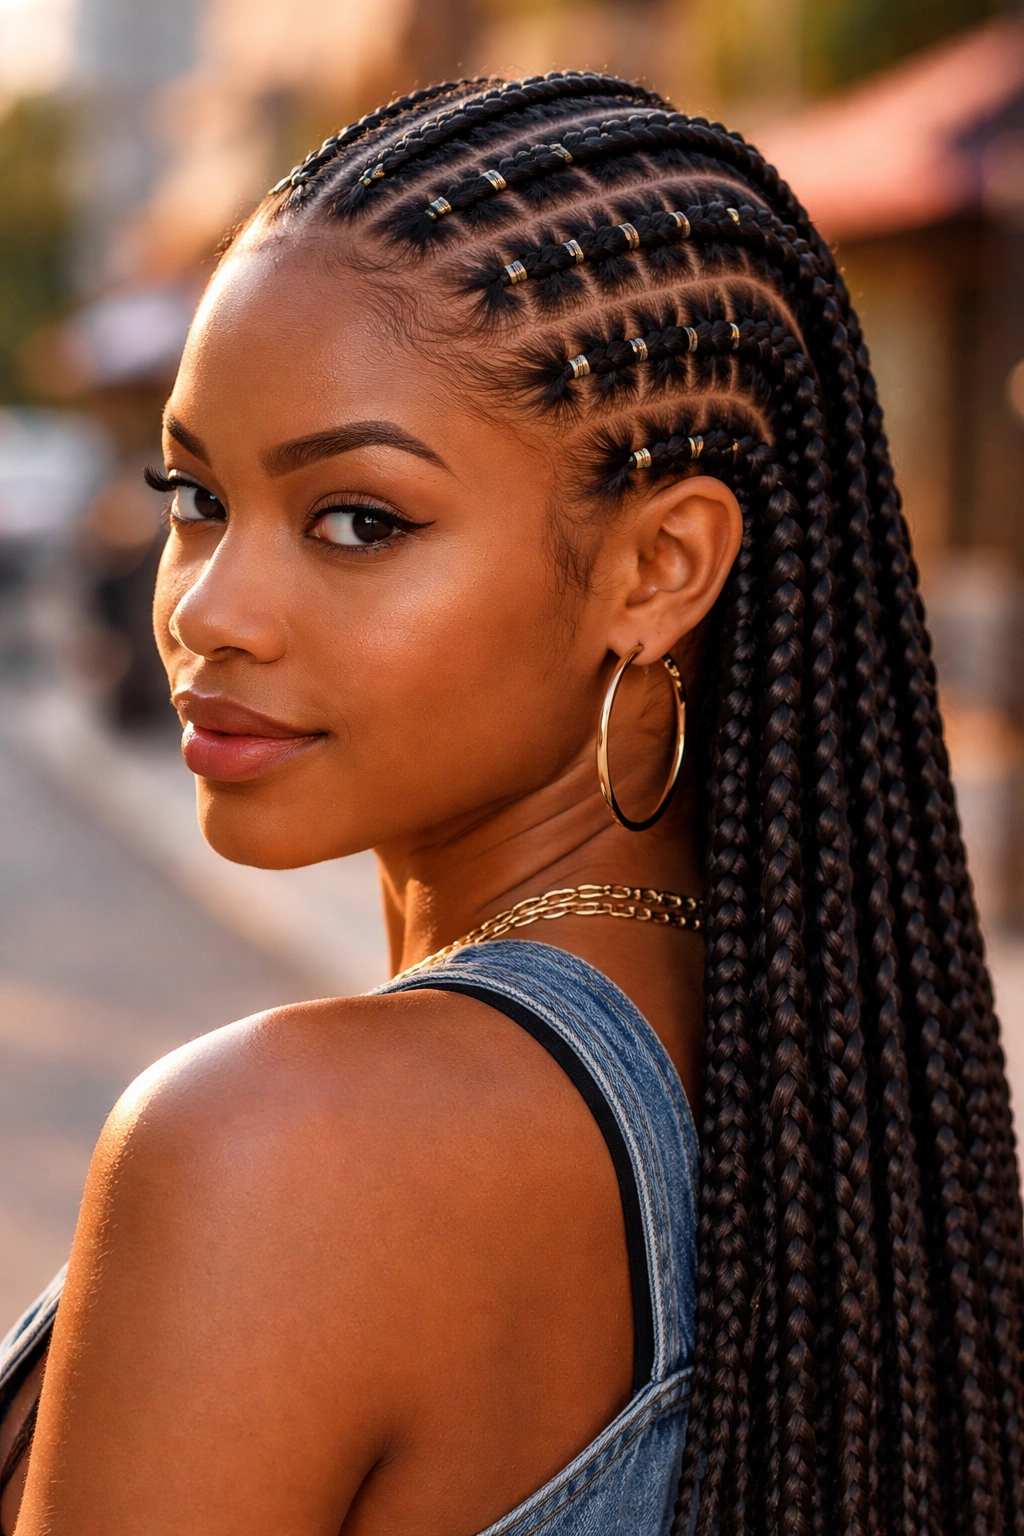
Tiny rubber bands at the base of each cornrow create a visible “pop” of segmentation where the braid meets the scalp. The look is younger, playful, and has a 90s-R&B music video energy.
Use clear rubber bands for invisibility or colored ones for a statement. Don’t mix colors unless you’re going for rainbow — two colors typically looks messy.
This style tends to get more scalp tension than others because the rubber band creates a specific pull point. Keep it in for 2 weeks max, then switch it out.
15. Wavy-Parted All-Back
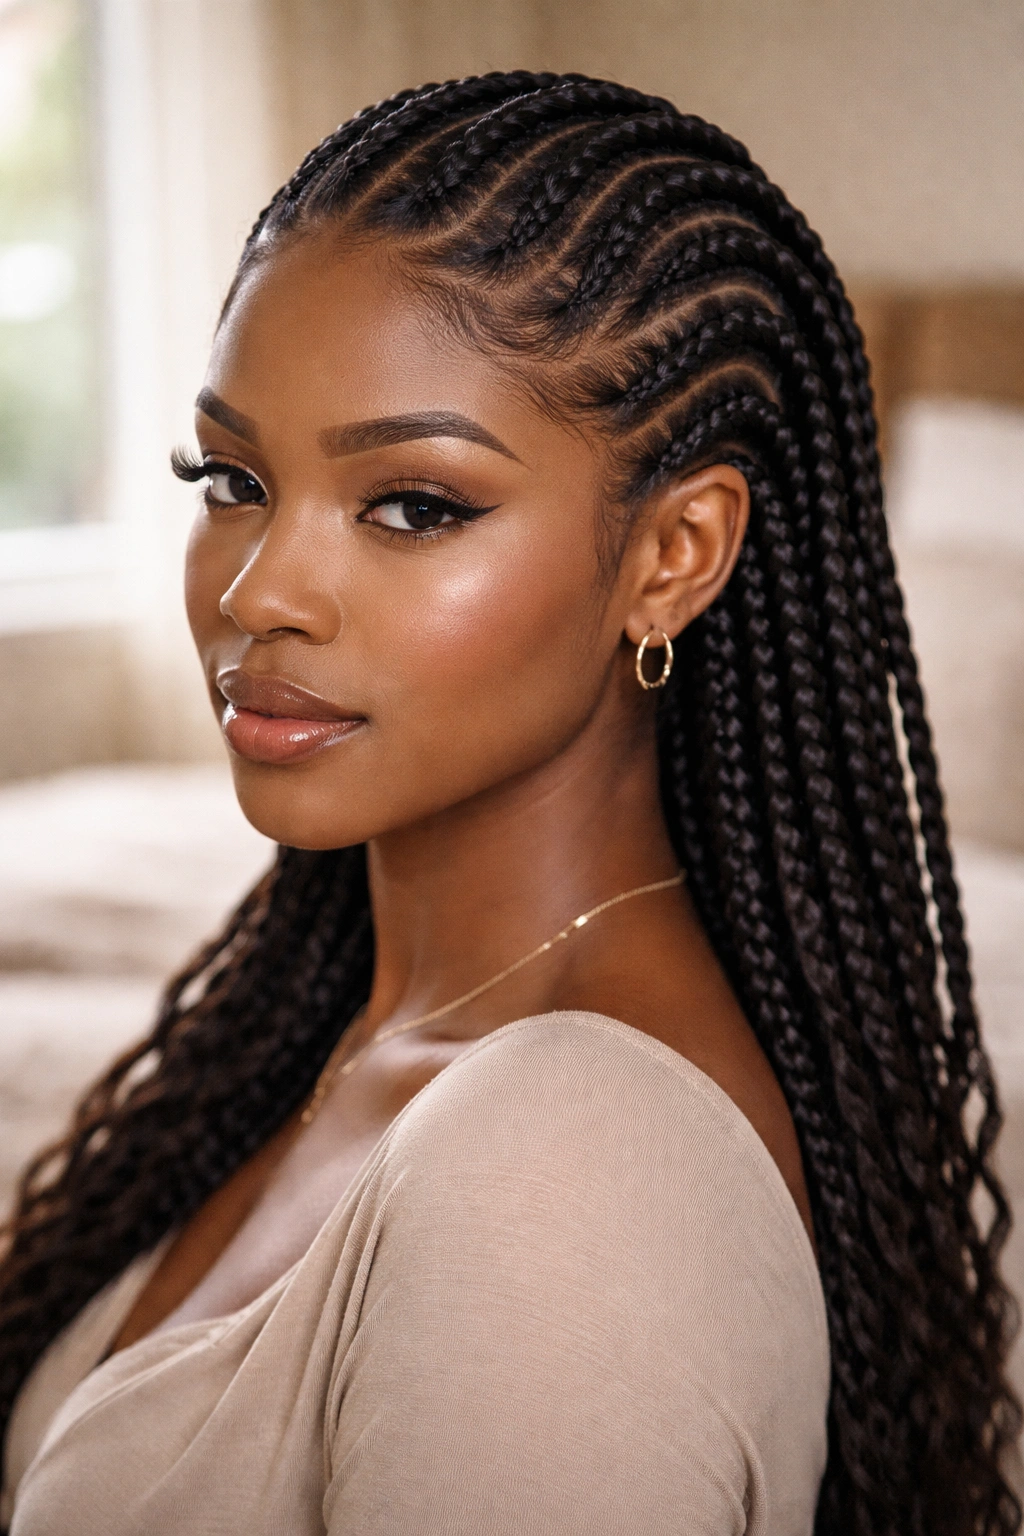
Parts curve gently like ocean waves instead of running straight. The braids themselves run back, but the lines between them undulate across the scalp.
- Parts curve at 2-3 waves per head
- Waves should be consistent amplitude
- Works best with 8-12 total cornrows
Who this suits: women who find zigzags too harsh but straight parts too plain. Waves hit a middle mood that reads feminine without being fussy.
16. Long All-Back With Feed-In Extensions
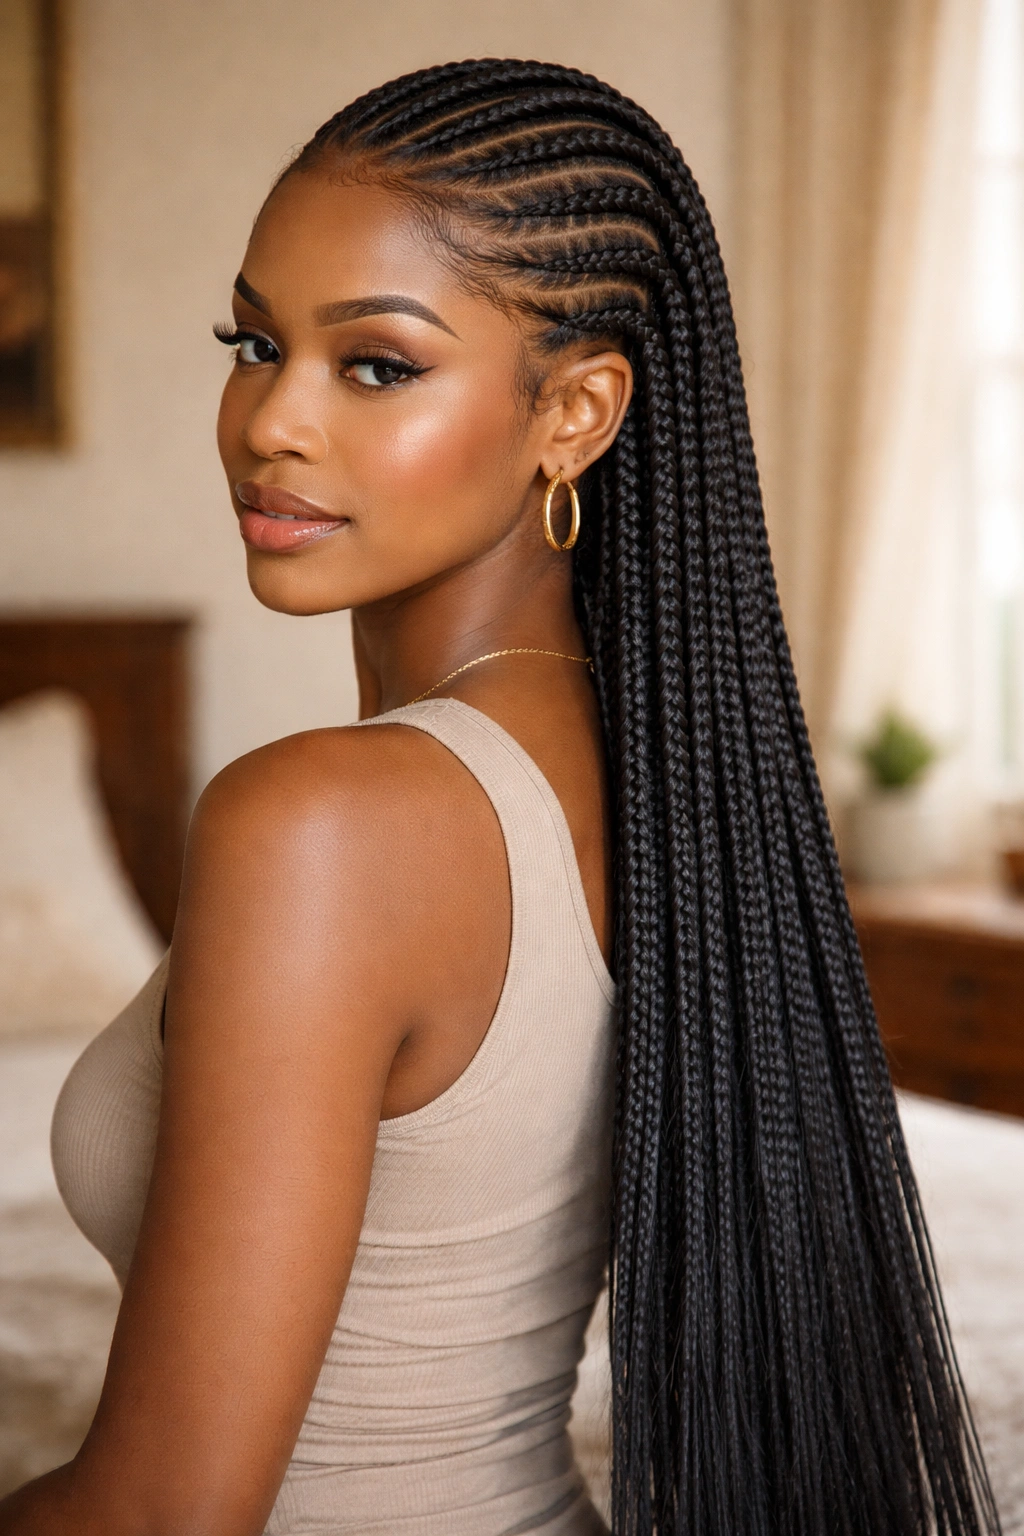
Using pre-stretched kanekalon, feed-ins can take a 4-inch natural base to waist-length braids. The extensions add weight, so the style calls for stronger scalp tolerance and a willingness to sleep with the braids properly tied.
Matching extension color to your real hair at the root is what makes the feed-in invisible. If your natural color is 1B (off-black), don’t use a pure black extension — the difference shows up in sunlight.
Maintenance Notes
Long extensions put more constant pull on the roots. Mist more often, oil the scalp twice weekly, and baby-pink your nape at night to keep the braid ends from tangling while you sleep.
17. All-Back With Two-Tone Color
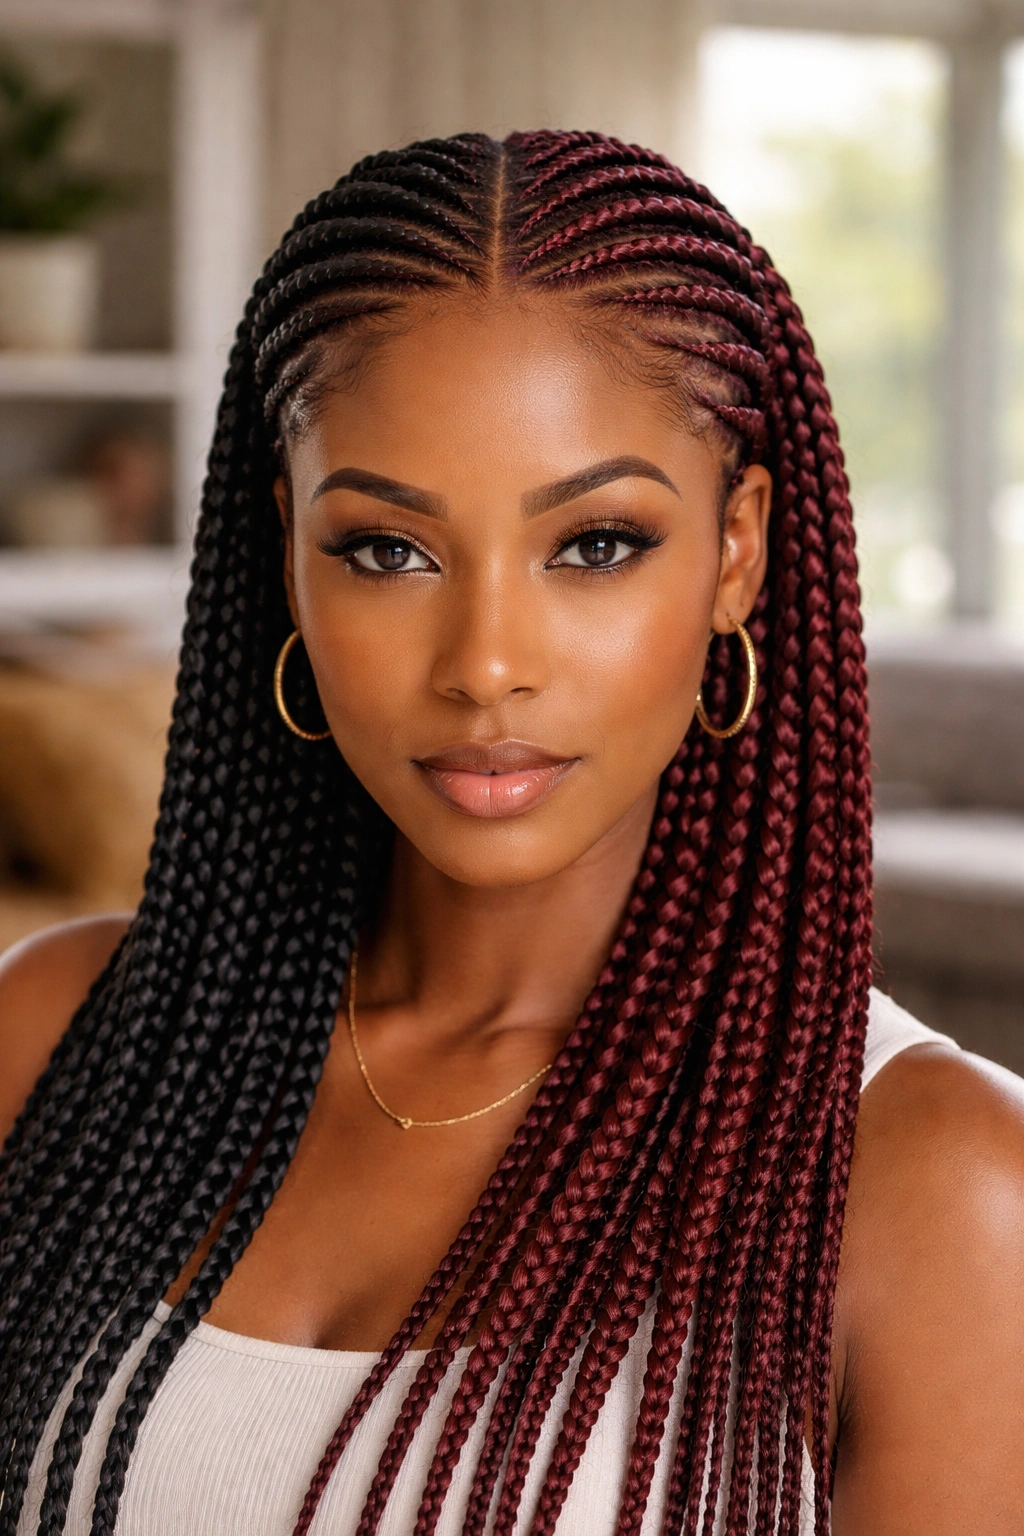
One half of the cornrows in your natural color, the other half in a contrast — burgundy, honey, copper, or silver. The split can run down the middle of the head or diagonally from one temple to the opposite nape.
This is the most visually dramatic all-back variation on the list. It’s also the most polarizing — some will love it, some will hate it.
Commit fully or skip it entirely. A half-hearted two-tone with barely visible contrast reads as uncertain rather than intentional.
18. Triangle-Parted All-Back
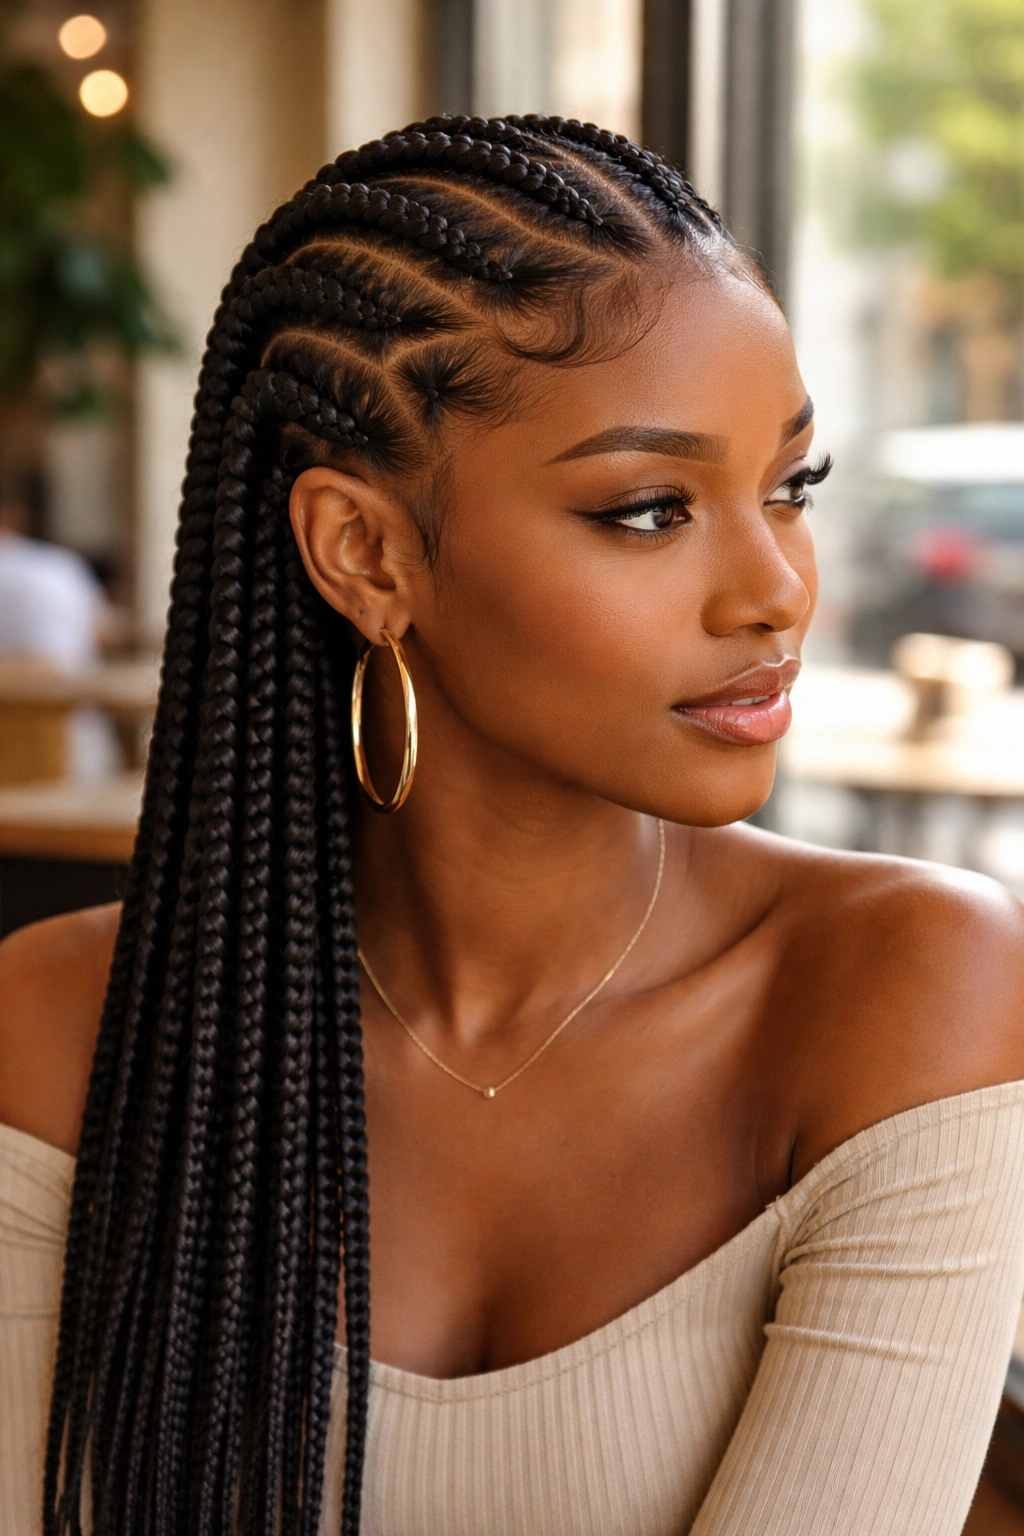
Each braid starts at a triangle-shaped base instead of a rectangle. The triangles alternate point-up and point-down across the hairline.
The triangle base is subtle from a distance but gives the front of the head a distinctive finish up close. It’s a detail-oriented style for women who notice things like this.
Who this suits: anyone who finds traditional rectangle parting too predictable. The triangle adds geometric interest without changing the overall silhouette.
19. All-Back Cornrows With Scarf Wrap
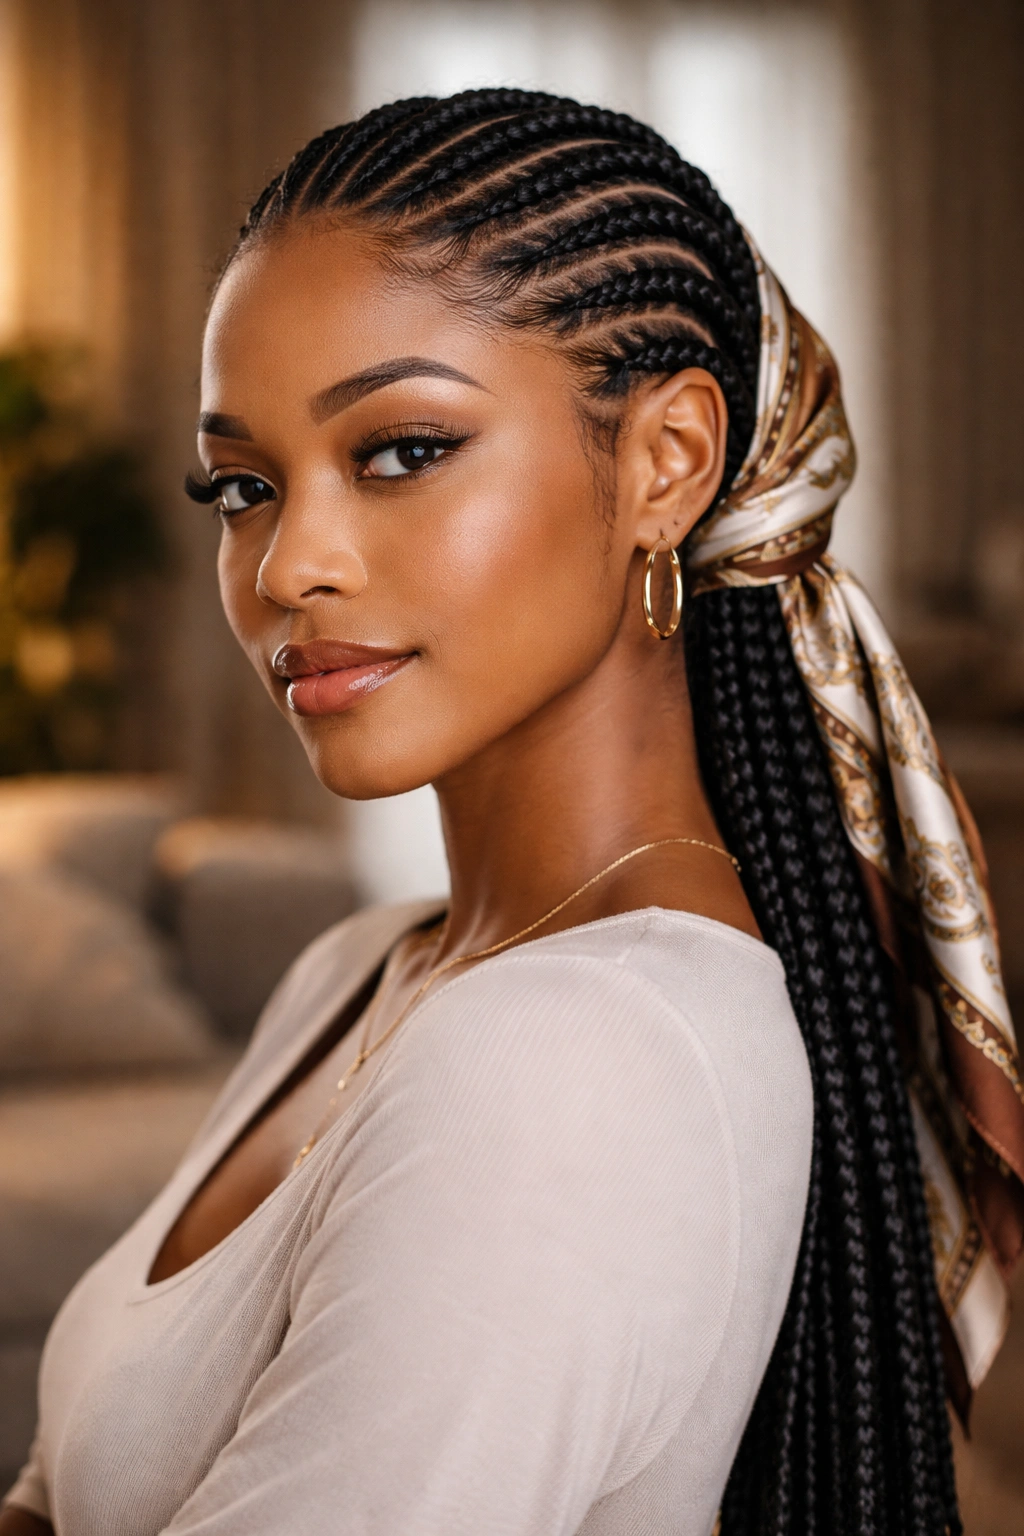
Cornrows plus a decorative silk or satin scarf wrapped around the head. The scarf can wrap the entire front, just the crown, or tie off at the nape with ends trailing.
The scarf does triple duty: decoration, edge protection, and an alternative to redoing edges when they fuzz. It’s practical and stylish at once.
Silk scarves read as elevated. Cotton headwraps read as casual. Match the material to the occasion and you can’t go wrong.
20. All-Back With Cuff Accents
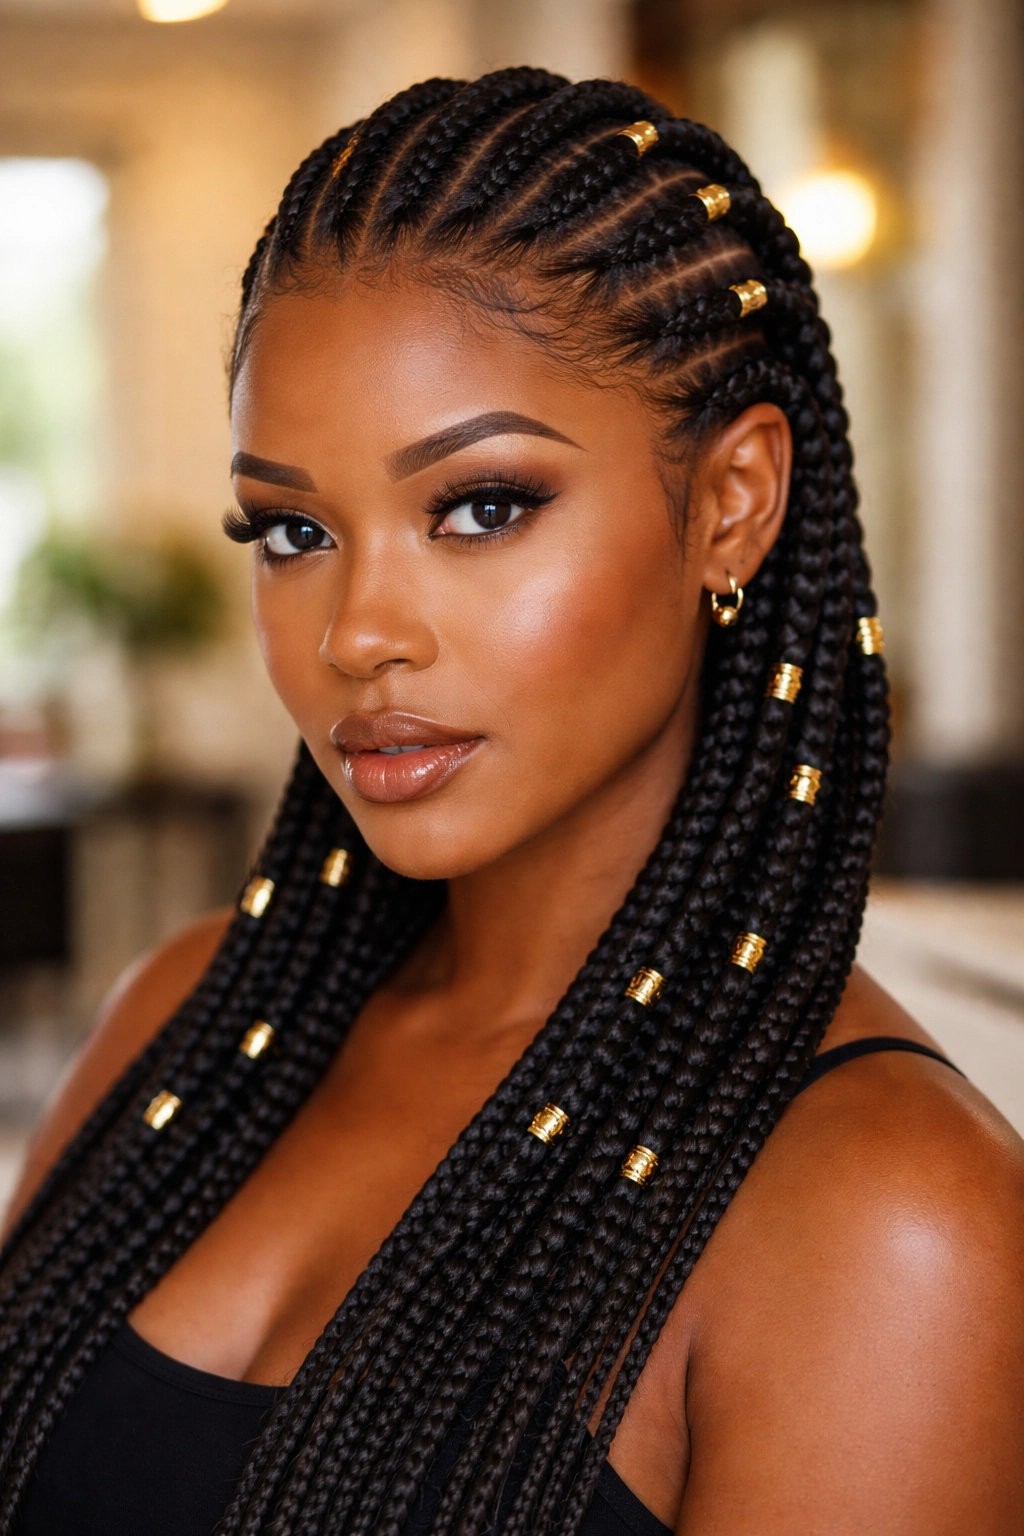
Gold, silver, or wooden cuffs placed at consistent intervals along each braid. Odd numbers — three, five, or seven cuffs per braid — always look better than even numbers.
Cuff placement rule of thirds: one at ⅓, one at ⅔, one near the end. Or just one halfway down for a minimalist approach.
Avoid heavy cuffs on thin braids. The weight pulls the braid sideways and distorts the line.
21. Cornrows With Side-Swept Bangs
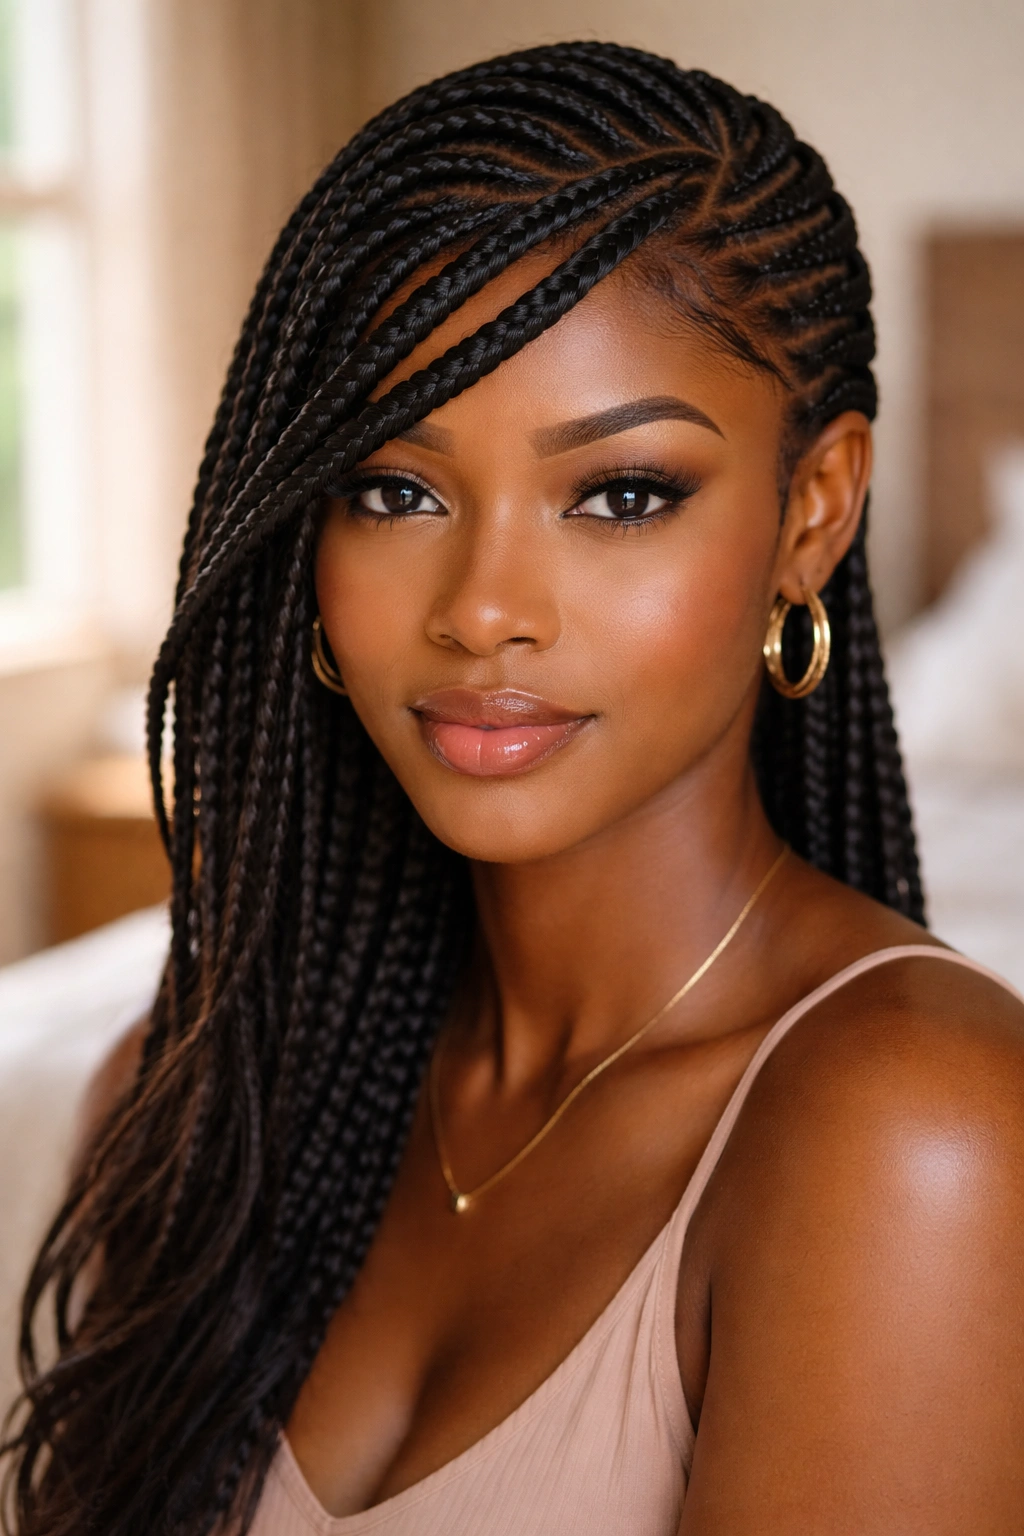
The main pattern runs all-back, but one or two cornrows at the front sweep across the forehead as a braided bang. The bang softens the forehead frame and adds a feminine touch to an otherwise straight-back style.
This works especially well for women who want to hide a large forehead without committing to regular bangs.
22. Razor-Part All-Back
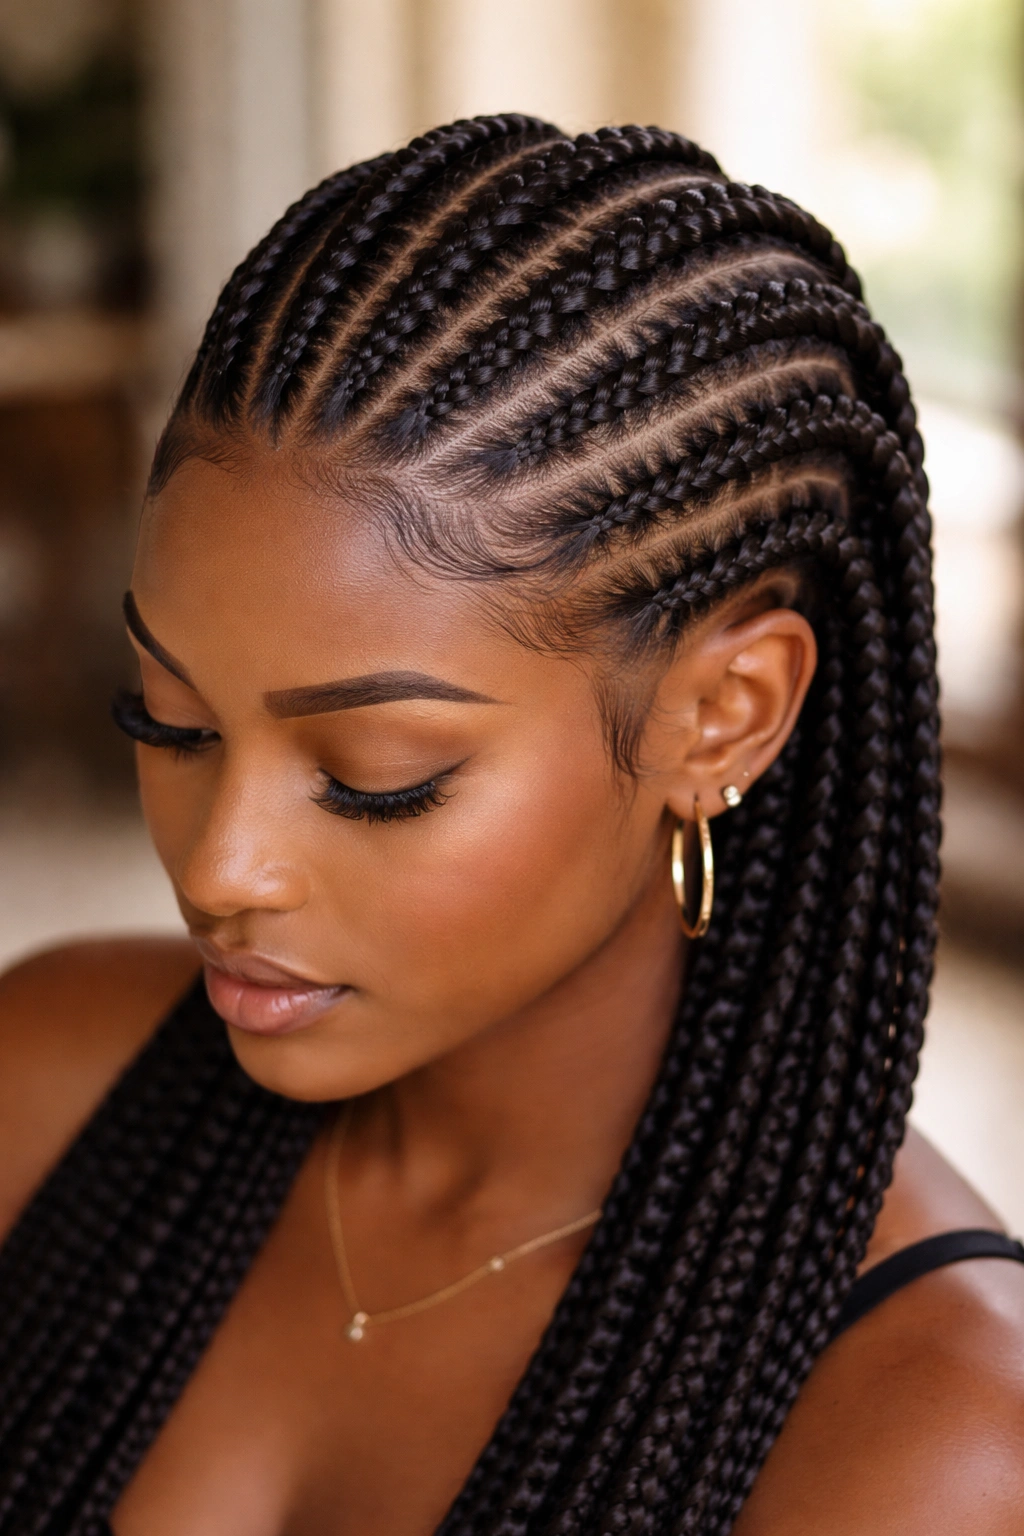
Parts so sharp they look cut with a blade. This is less a separate style and more a technique applied to any all-back variation — but it’s worth its own entry because the finish is dramatically different from softer parts.
Sharp parts require a steady hand, a fresh gel application, and a tail comb dipped in water or gel to cut clean lines. Dry combs drag and blur.
The Catch
Razor parts blur fastest as the hair grows. Touch them up weekly with a comb and a small amount of edge gel to keep the sharpness.
23. All-Back With Beaded Accents in the Middle
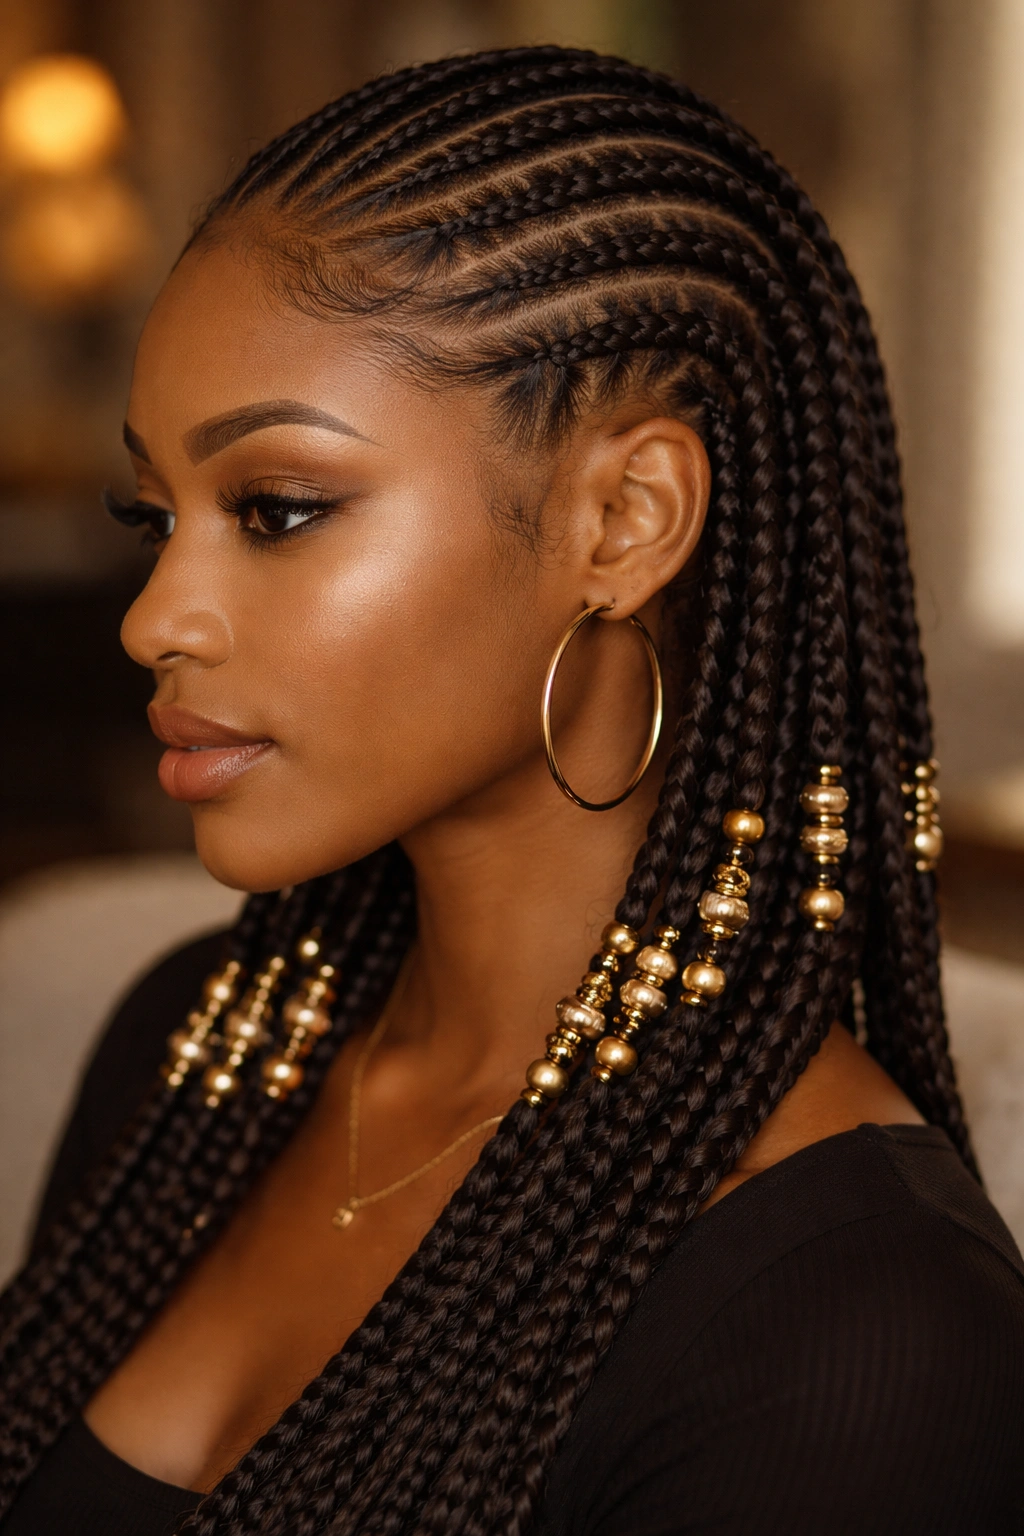
Beads threaded not at the ends but at a single point along the length of each braid. Usually halfway down, like a decorative belt.
This is a less common placement and reads as more editorial than traditional ends-only beading. Use metal beads for a structured look or wood for warmth.
The beads need to stay in place, so secure them with a tiny invisible elastic on either side of the bead. Otherwise they slide down over the course of a day.
24. All-Back Cornrows in a Low Bun
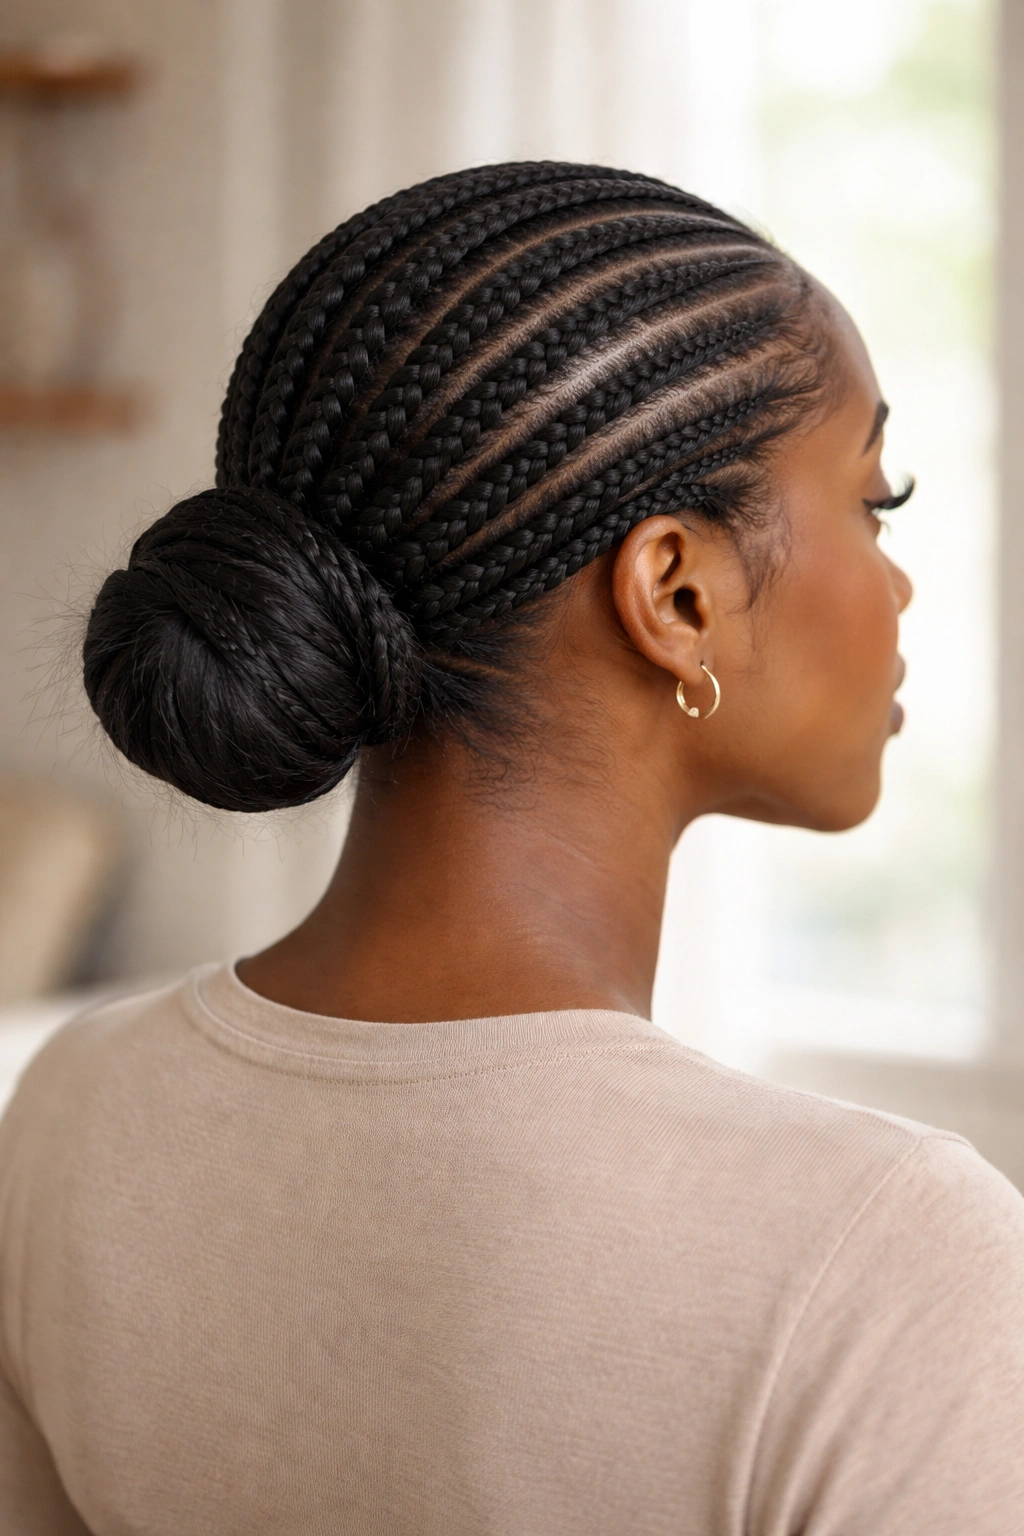
All braids gather at the nape and wrap into a low bun. The bun can be sleek and tight or softer with a few deliberate flyaways.
A sleek low bun pairs with blazers and formal wear. A softer version pairs with casual weekend outfits. The same base cornrow pattern shifts contexts based on how you finish the bun.
Low buns also put less tension on the scalp than high buns. If you’ve been wearing a high pony for weeks and your edges are complaining, switch to a low bun for a break.
25. All-Back With Mixed Braid Sizes
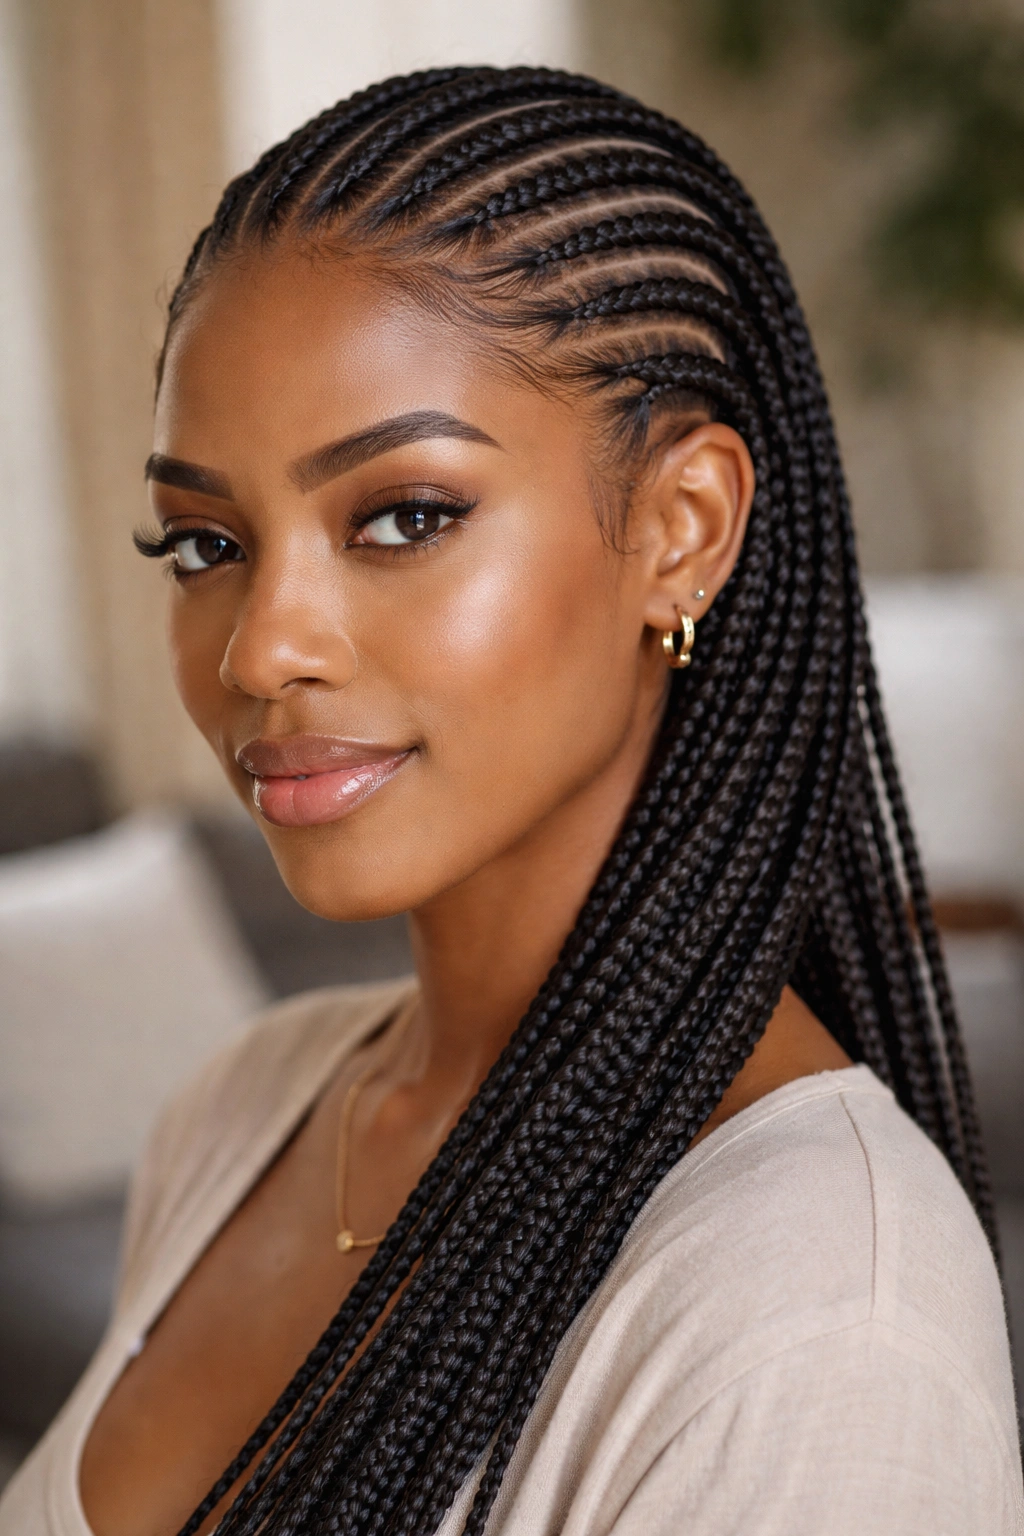
Unlike uniform sizing, this pattern mixes thin and medium braids in a non-alternating way — maybe three thin, one medium, two thin, two medium, one thick. The irregular rhythm reads as organic and intentional rather than random.
The key is that the braider has a plan. Random-looking doesn’t mean actually random. Each braid size is chosen for its position and what it does to the overall silhouette.
Who this suits: women who want something one-of-a-kind without the time commitment of truly custom freehand shapes.
Aftercare: What Actually Keeps Cornrows Fresh
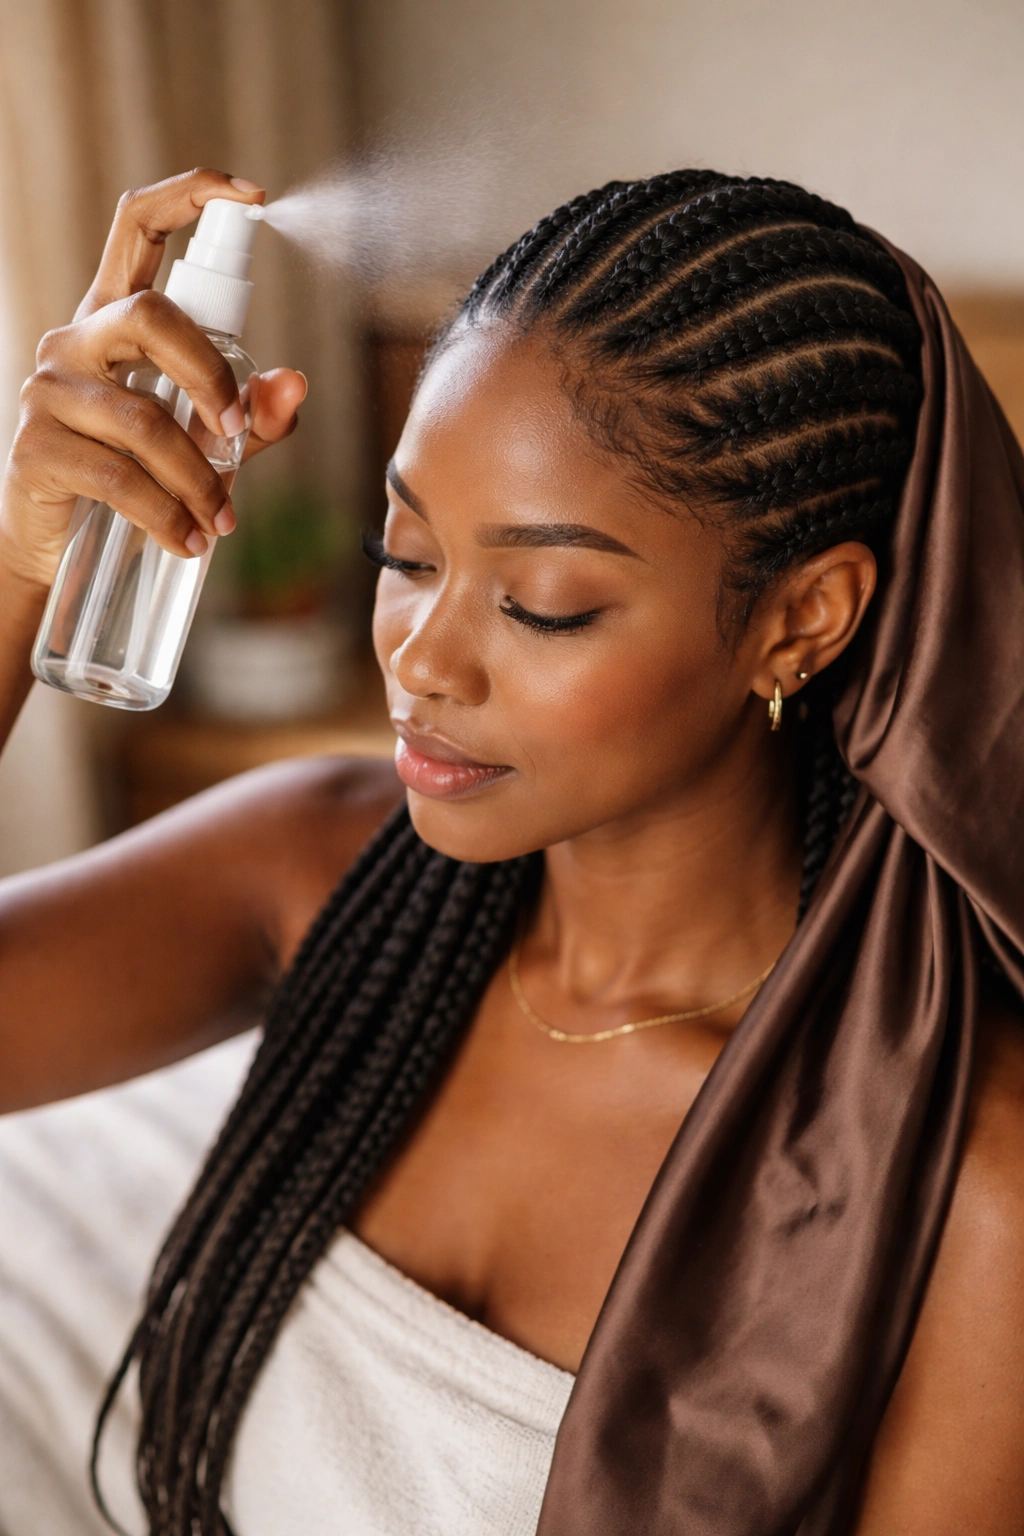
Mist every other day with a water-and-leave-in mix. A quick spray along the parts is enough — no need to saturate.
Oil the scalp twice a week with a light, non-clogging oil. Apply with a nozzle bottle directly to the parts, then massage gently with fingertip pressure. Heavy butters and creams sit on the scalp, trap lint, and cause itching.
At night, tie down with a satin scarf or sleep on a satin pillowcase. Cotton is the enemy of braid longevity.
Every 10-14 days, wash the cornrows. Dilute sulfate-free shampoo 50/50 with water, apply along the parts, massage with fingertip pressure, rinse thoroughly, and dry completely with a hooded dryer or blow-dryer on cool.
Wash-Day Routine for All-Back Cornrows
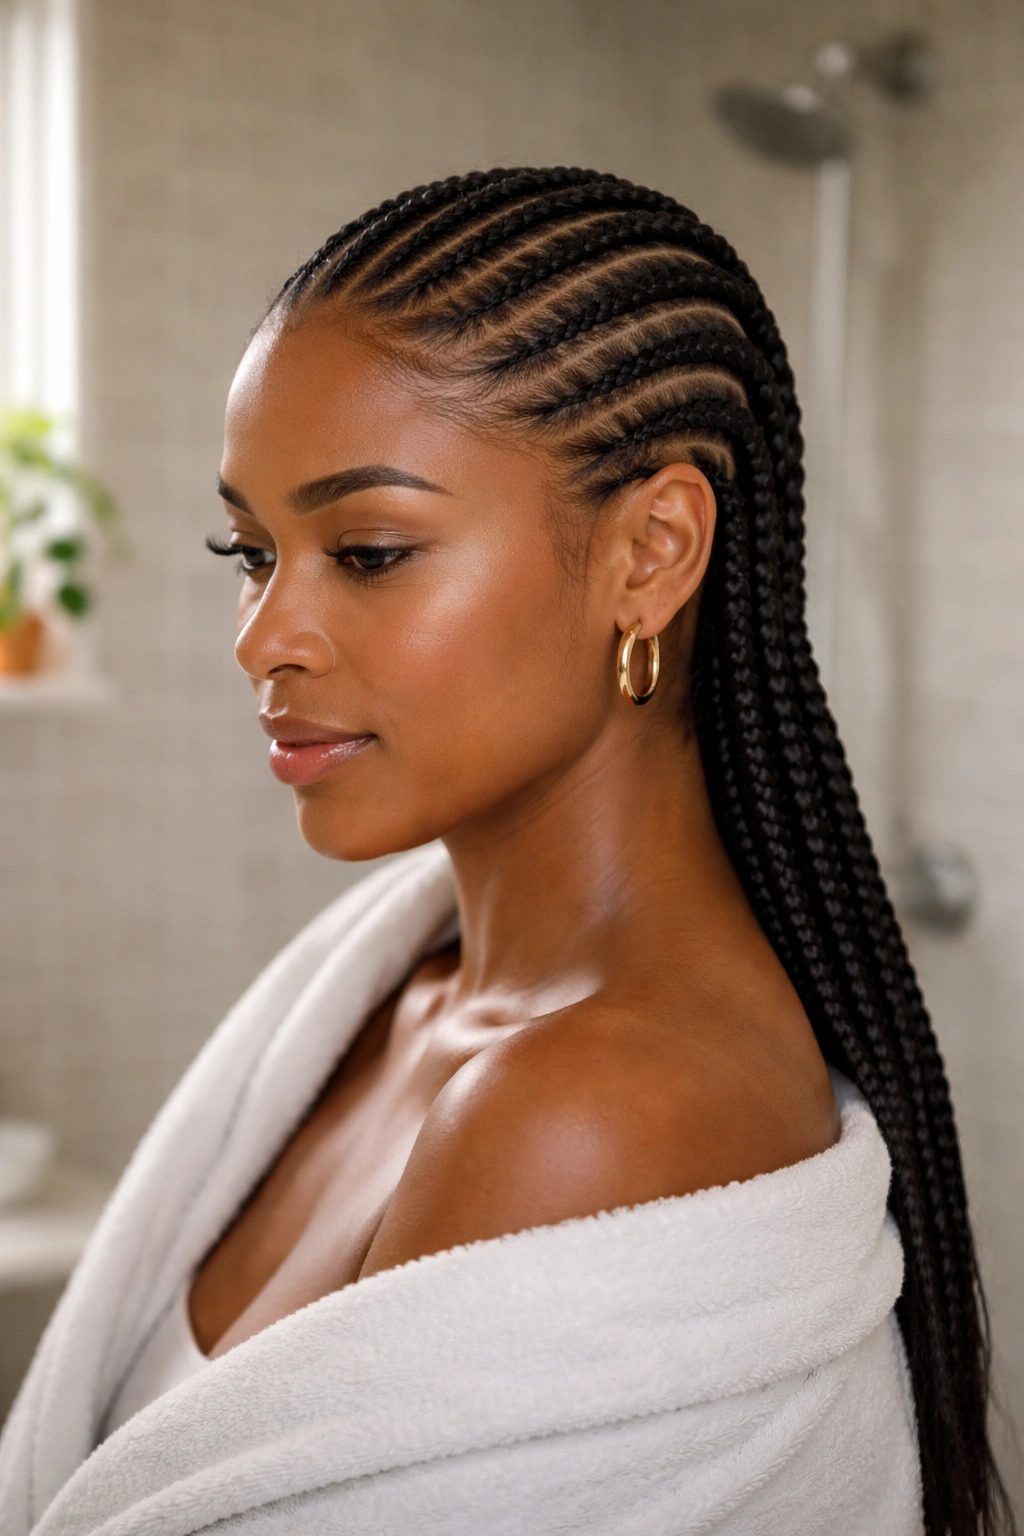
The wash is where most people mess up. They either skip it (and get buildup and itching) or they scrub it (and frizz the whole style).
Start with a dry pre-rinse: mist the scalp with apple cider vinegar diluted 1:4 with water. Let it sit 5 minutes. This loosens buildup before the shampoo touches it.
Shampoo in the shower with the squeeze-bottle application. Work along each part. Don’t rub the braids themselves — they don’t need it.
Rinse longer than you think. Residue causes the itching that makes people overwash. Two full minutes of rinsing under warm water gets the scalp clean.
Skip conditioner on the braids unless you’re taking them out soon. Conditioner loosens the braid and shortens lifespan.
Dry completely. Damp scalp under braids is a mildew problem. Hooded dryer on low for 30 minutes, or diffuse on cool for 20-25 minutes with careful attention to the nape.
Taking Down All-Back Cornrows Without Losing Length
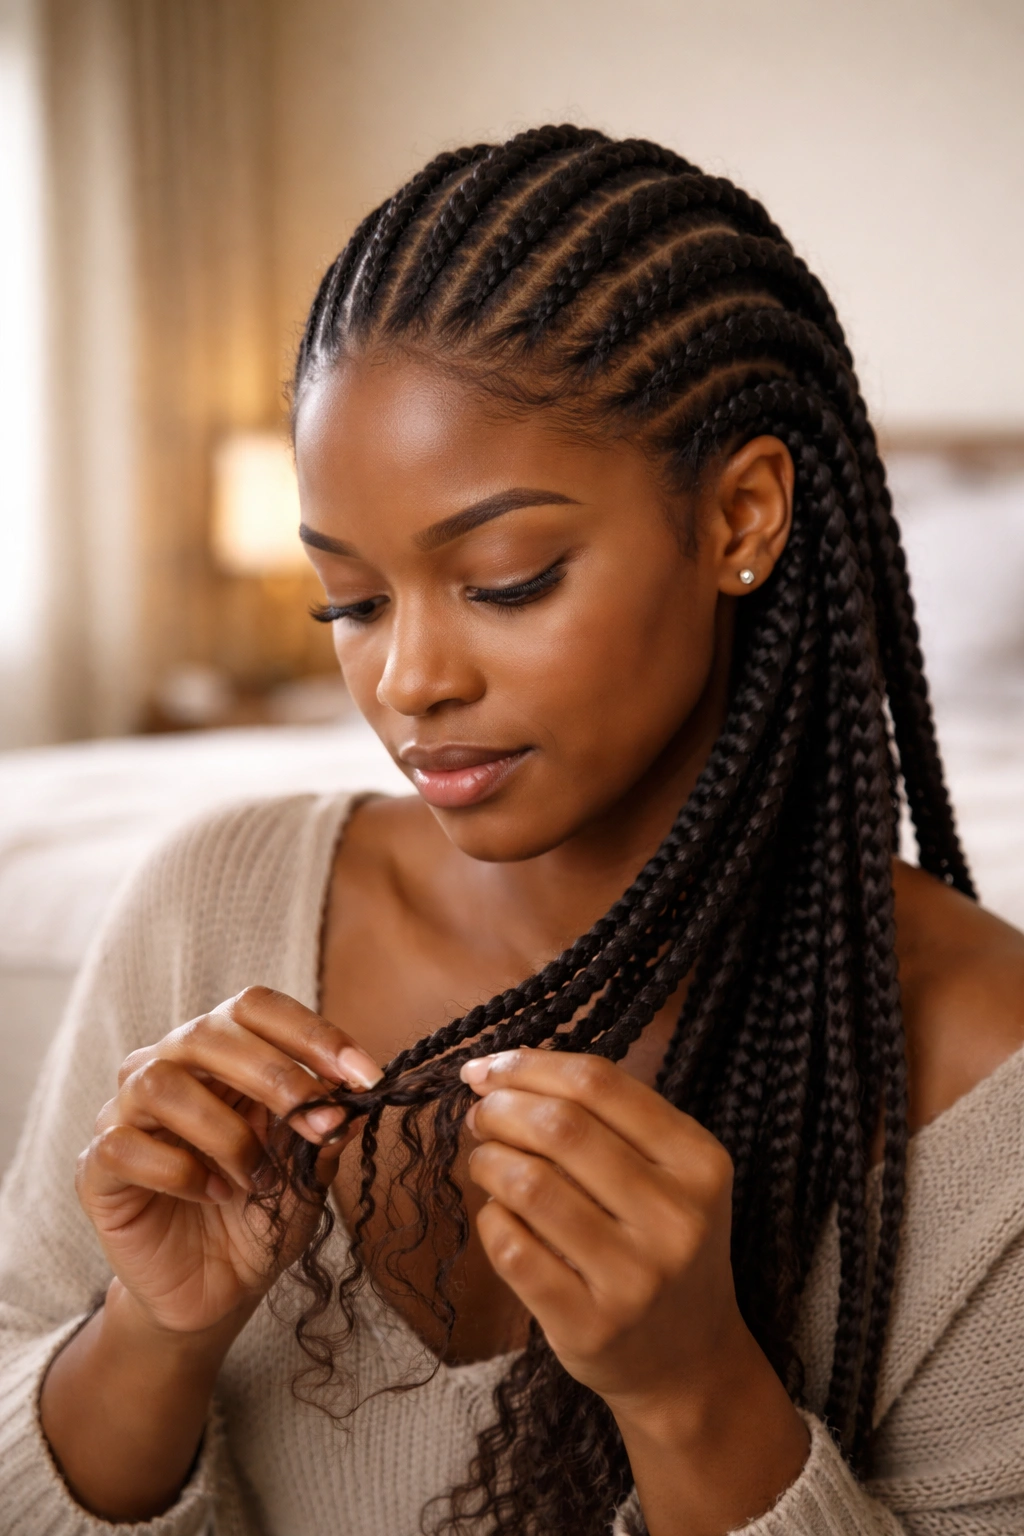
Never take cornrows down dry. Saturate each one with a detangling spray or a conditioner-and-water mix before you unravel.
Work from the ends up. Unravel the braid completely, finger-detangle, then comb through with a wide-tooth comb.
Shed hair will collect inside every braid. That’s normal — you shed about 100 strands a day, and those strands get trapped inside the cornrow. The loss you see at takedown isn’t real breakage, it’s accumulated shedding.
Wash immediately with clarifying shampoo, deep condition 30+ minutes, and trim any rough ends before the next style.
Picking the Right Variation for Your Life
Start with the time you can actually give to this. A micro all-back that takes 6 hours and lasts 4 weeks makes sense if you can commit to the install. A jumbo all-back that takes 45 minutes and lasts 2 weeks makes sense if you want to change styles often.
Factor in your face shape, but don’t overthink it. Most all-back variations work on most faces once the part is placed well. The bigger question is your lifestyle, your hairline strength, and your aesthetic preference.
Active women: stick to medium-sized braids with light or no feed-ins. Heat, sweat, and heavy extensions are a frustrating combo.
Corporate women: straight-back, stitch braid, or sleek low-bun finishes read as professional in any dress code. Save the statement color and shaved sides for jobs where that makes sense.
Fragile hairlines: go larger, not smaller. Small braids create more tension points; larger braids distribute weight better.
Common All-Back Mistakes to Avoid
Going too tight. A headache in the first hour means the braids will damage your follicles over weeks. Loosen specific sections immediately — most braiders will oblige without ego.
Skipping the stretch. Unstretched shrunken coils can’t be cornrowed properly. They fight the gel, fight the braid, and fuzz in days.
Over-greasing. Heavy products on the scalp trap lint, block follicles, and cause itching that leads to scratching and breakage.
Leaving them in too long. Three to four weeks is the sweet spot for most variations. Six weeks max for the larger, lower-tension styles. Anything beyond that and takedown gets brutal.
The final takeaway: all back cornrows reward the small, unglamorous details — a clean part, honest tension, a satin scarf at night, a fresh wash every two weeks. Pick the variation that fits your actual life, not the one you saved on your moodboard. Fit the style to the person, not the other way around, and the braids will thank you with a clean finish and a length you didn’t realize you had.
