



Medium wavy hair has a real advantage at a wedding. It already has shape, it already has movement, and it usually sits in that useful middle ground where it can look dressed up without turning stiff or overworked. That matters for bridesmaids, because bridesmaid hair has a hard job: it has to look polished in photos, stay put through hugs and dancing, and still feel like actual hair instead of a helmet.
The tricky part is restraint. Medium waves can look soft and expensive when they’re handled with a light hand, but they can also fall apart fast if the pins are sloppy or the product is too heavy. I’ve seen that happen more times than I can count. A style that looked gorgeous at the chair can lose its shape after forty minutes if the crown was overloaded with spray or the ends were curled too tightly and brushed into mush.
That’s why bridesmaid hairstyles for medium wavy hair work best when the styling has a clear plan: decide where the structure lives, where the softness lives, and where the hair should be allowed to move. The looks below cover that range from clean and low to romantic and loose, with plenty of practical detail so the style you choose still looks good after dinner, a few tears, and a long stretch on the dance floor.
1. Soft Half-Up Twist with Loose Waves
A soft half-up twist is the first style I’d hand to a bridesmaid who wants something pretty but not fussy. The top section gets gathered from each temple, twisted back once or twice, and pinned just below the crown so the rest of the waves can fall freely. It frames the face well, and it keeps the top half from puffing out in humid air.
Why It Works
Medium wavy hair already has enough bend to make this style look finished. You don’t need a lot of teasing, and that’s the point. The twist gives shape; the loose ends keep it from feeling too formal.
- Keep the twist wide, about 1 inch thick on each side.
- Use two crossed bobby pins rather than one large clip.
- Curl the lower length in alternating directions so the waves don’t clump.
- Finish with a flexible-hold spray, not a stiff lacquer.
Best tip: leave the ends brushed out just enough that the texture reads soft, not ringleted.
2. Center-Part Glossy Waves with Tucked Front Pieces
A center part makes medium waves look sharper in a hurry. That clean line gives the style a little backbone, especially if the dress has a simple neckline or the bridal party is wearing matching earrings. The rest is all about shine and control. Smooth the front pieces, let the waves fall evenly, then tuck the hair just behind the ears with two tiny pins hidden under the top layer.
The front section should be polished, not flat. A tiny amount of smoothing cream on the mid-lengths and ends is enough. Too much serum makes the hair slide and can flatten the wave pattern into a dull sheet.
I like this style on medium hair because it doesn’t fight the length. The waves land around the shoulders, which gives movement when you walk, and the center part keeps everything looking deliberate. It’s one of those styles that looks more expensive than the effort it takes, which is probably why it keeps showing up at weddings.
3. Low Twisted Chignon with Wavy Ends
Need something that will survive a long dinner and a packed dance floor? This is the one. The hair is gathered low at the nape, split into two sections, and twisted into a compact chignon with a few wavy ends left out on purpose. Those loose ends keep the bun from looking severe, and they also help the style suit medium length instead of pretending the hair is longer than it is.
How to Wear It
Keep the bun small and centered. If it sits too high, the style starts to fight the proportions of medium hair. If it’s too loose, pieces drop all evening.
Use U-pins for the main hold and a couple of smaller bobby pins to catch the flyaways. A light mist of spray at the very end is enough. The goal is not shellac. The goal is shape.
The loose ends should curl softly around the neck. That little detail makes the style feel finished rather than clipped in.
4. Braided Crown into Flowing Waves
A braided crown works beautifully when you want the hair to feel romantic without losing length. The braid starts near one temple, tracks around the head like a narrow band, and stops just shy of the other ear so the rest of the waves can flow out underneath. It’s a good choice for medium hair because the braid doesn’t need endless length to look intentional.
The trick is width. A thin braid reads more delicate, while a braid that’s too thick can crowd the head and make the style feel heavy. About three fingers of hair is enough for most medium lengths.
- Loosen the braid edges after it’s secured so it doesn’t look tight.
- Anchor it with small pins that match the hair color.
- Let the waves start below the braid line, not from the roots.
- Add a tiny floral pin if the bridal party is carrying a soft color palette.
The crown braid gives shape to the top half and leaves the rest free. That balance is the whole charm.
5. Side-Swept Old-Hollywood Waves
A side sweep changes the whole mood of medium wavy hair. Instead of splitting the texture evenly, you move the part deep to one side, build a strong wave pattern through the lengths, and let the fuller side fall over one shoulder. It feels classic, but not stiff. The secret is to curl the hair in the same direction first, then brush it into a soft S-shape once it cools.
The side that’s tucked back should stay sleek. I like using a single pin cluster hidden behind the ear so the front stays controlled while the rest of the hair moves. That small bit of structure keeps the style from slipping flat by the second hour.
This look shines when the dress has an open neckline or one shoulder detail. Medium hair is a good length for it because the wave pattern can sit across the collarbone without getting weighed down. Longer hair can drag the shape down. Medium hair keeps it tidy.
6. Bubble Braid Half-Up
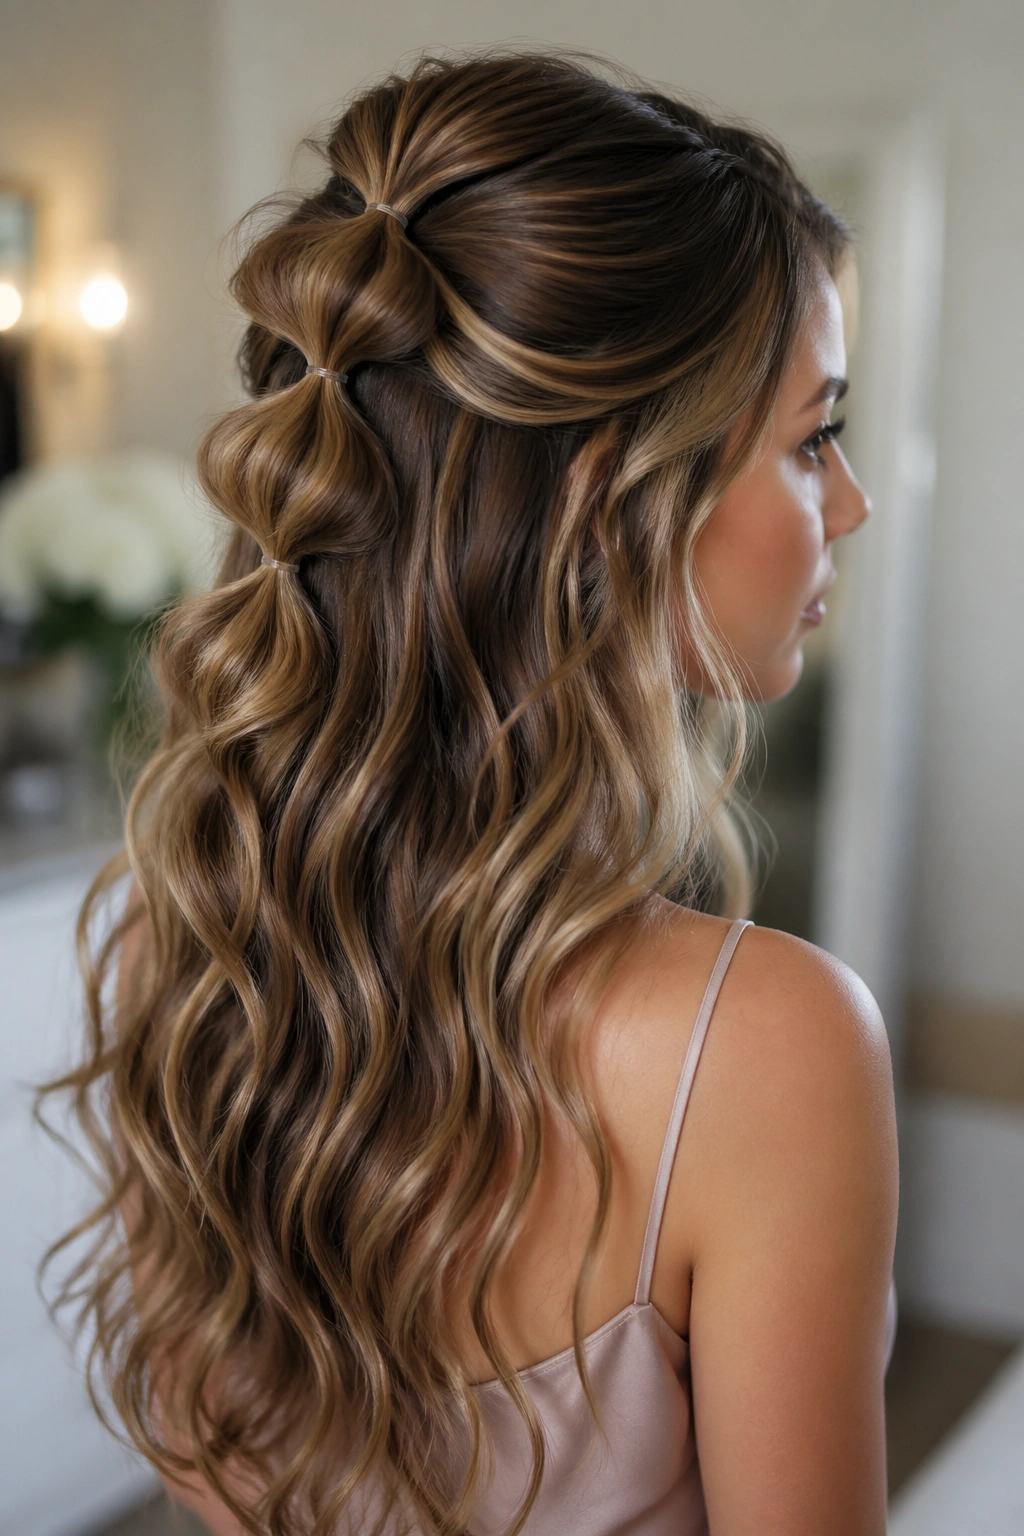
A bubble braid half-up brings a little sculpture to the usual bridesmaid wave without making the hair feel overdone. The top section is pulled back, secured with clear elastics every 1½ to 2 inches, and then each section is gently puffed out to form soft bubbles. The rest of the hair stays wavy and loose.
Unlike a plain half-up twist, this one gives visible rhythm from the back. The bubbles catch the eye from a distance, which makes it useful when the bridal party is standing in a line and you want each head to have some shape of its own.
What to Watch For
The bubbles should be even, but not rigid. Pull them to the size of a walnut or a small plum, depending on the amount of hair.
A light texturizing spray on the section before you tie it helps the bubbles hold their shape. Finish by curling the loose lengths in broad sections so the pony area doesn’t feel disconnected from the rest.
7. Wrapped Low Ponytail with Soft Waves
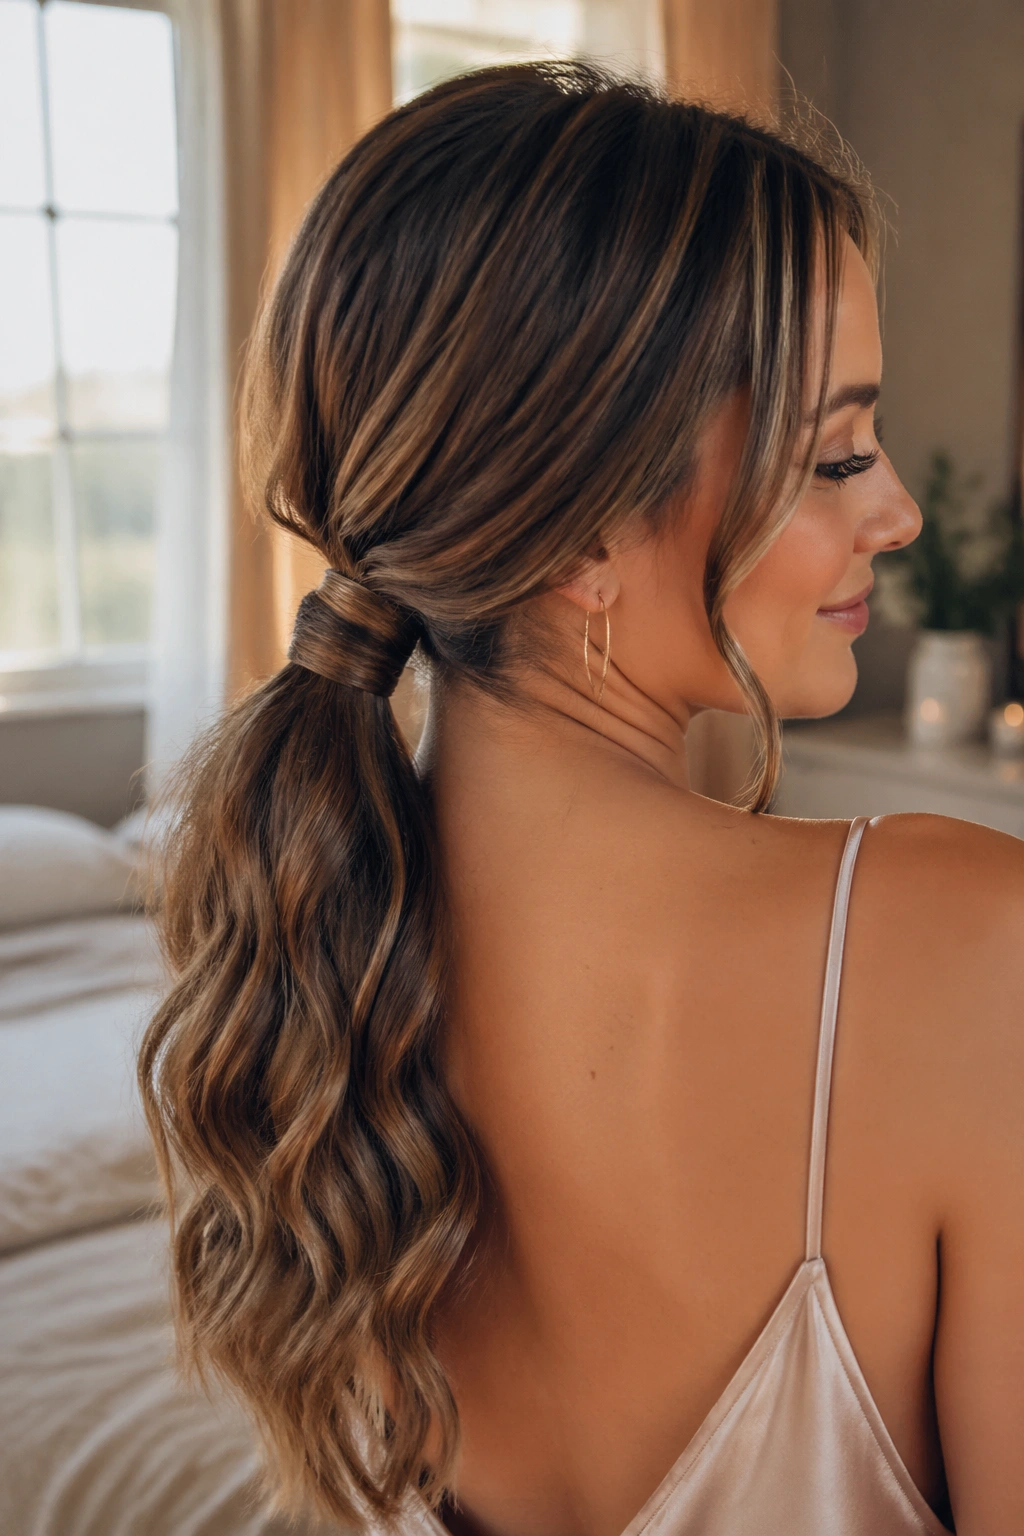
A low ponytail can look formal when the base is clean. That’s the whole trick. Pull the hair to the nape, secure it with a narrow elastic, then wrap a 2-inch strand around the band so the tie disappears. The tail stays wavy and loose, which keeps the style from feeling too sporty.
This is a smart choice when the wedding involves heat, movement, or a long day outdoors. The hair sits close to the head, so it won’t flop around every time someone leans in for a photo or a hug. Still, it doesn’t feel severe because the wave pattern stays visible in the tail.
If the hair is layered, leave the ends slightly separated instead of brushing them into one smooth sheet. That little bit of separation gives the ponytail life. A soft mist of spray at the base and a dab of shine cream on the wrapped section is enough. No one needs a crunchy ponytail at a wedding.
8. Double Twist with Pearl Pins
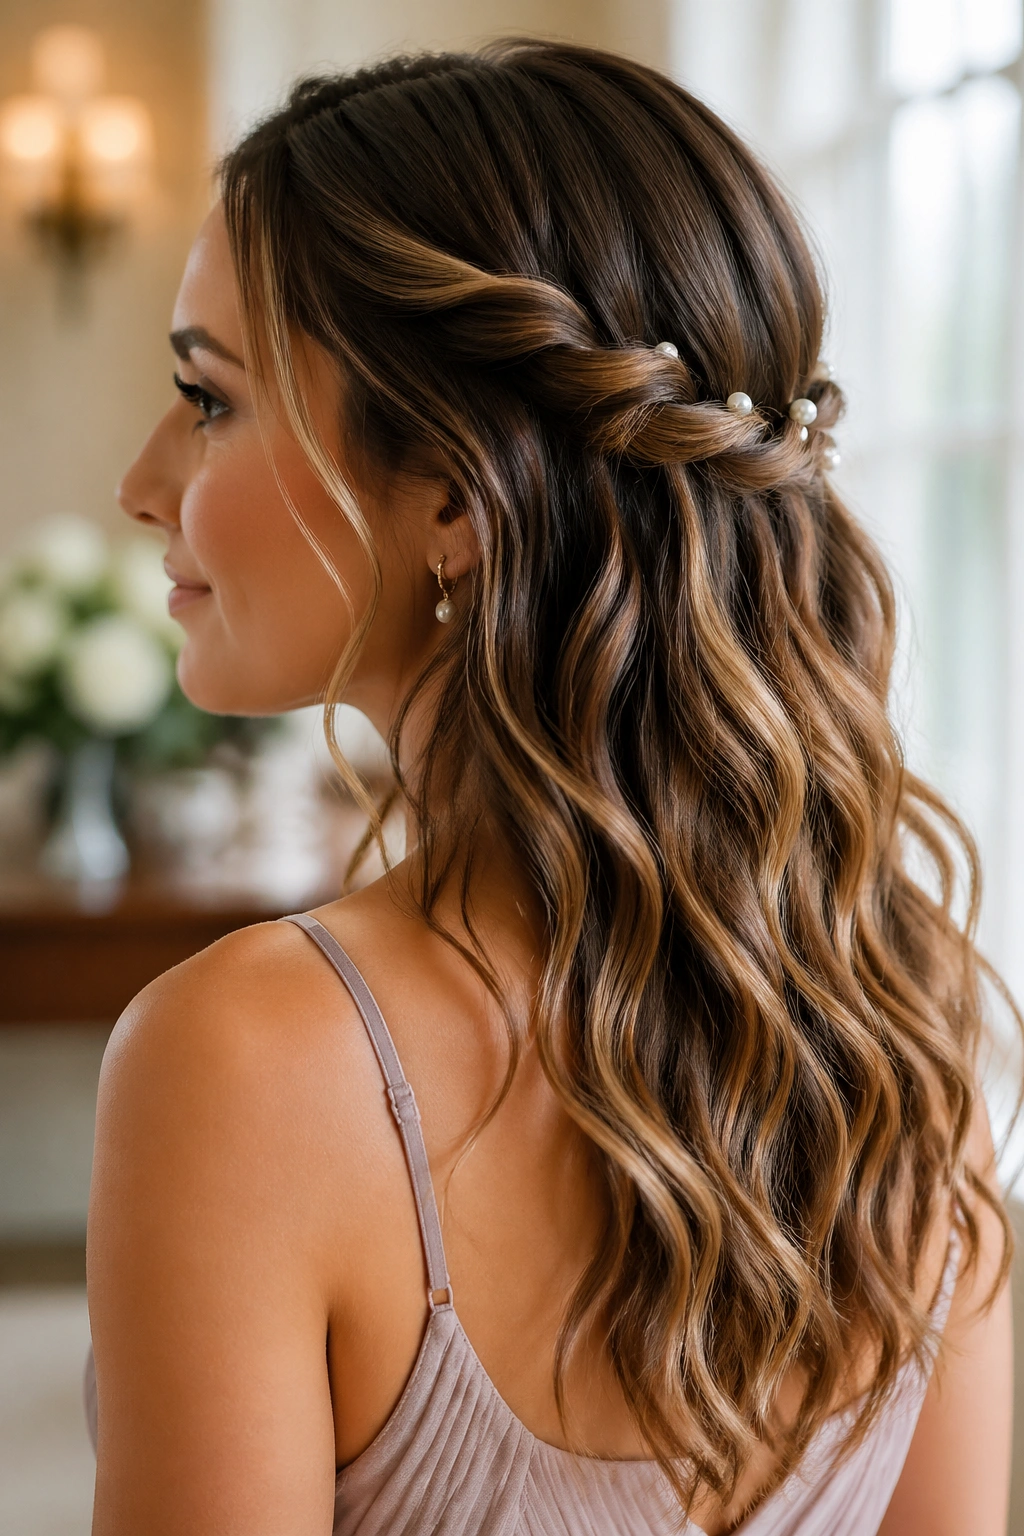
What if you want something small, but not plain? This is the answer. Two twisted sections are pulled back from each side of the face and joined at the back, then finished with pearl pins placed in a line or tiny cluster. The waves beneath stay open, which keeps the look light.
How the Pins Should Sit
The pins should sit low enough to hide in the twist, but not so low that the whole accent disappears into the hair. Think about the shape of a small comet tail — visible from the side, subtle from the front.
Pearl pins work best when they’re used sparingly. Three or four is enough for medium hair. More than that starts to read bridal-party costume rather than hair design.
This style is a nice match for dresses with detailed bodices or beaded straps. The hair stays calm while the accessories do a small amount of talking. That restraint gives the bridesmaids a coordinated look without making every head identical.
9. Curtain Waves with Subtle Crown Volume
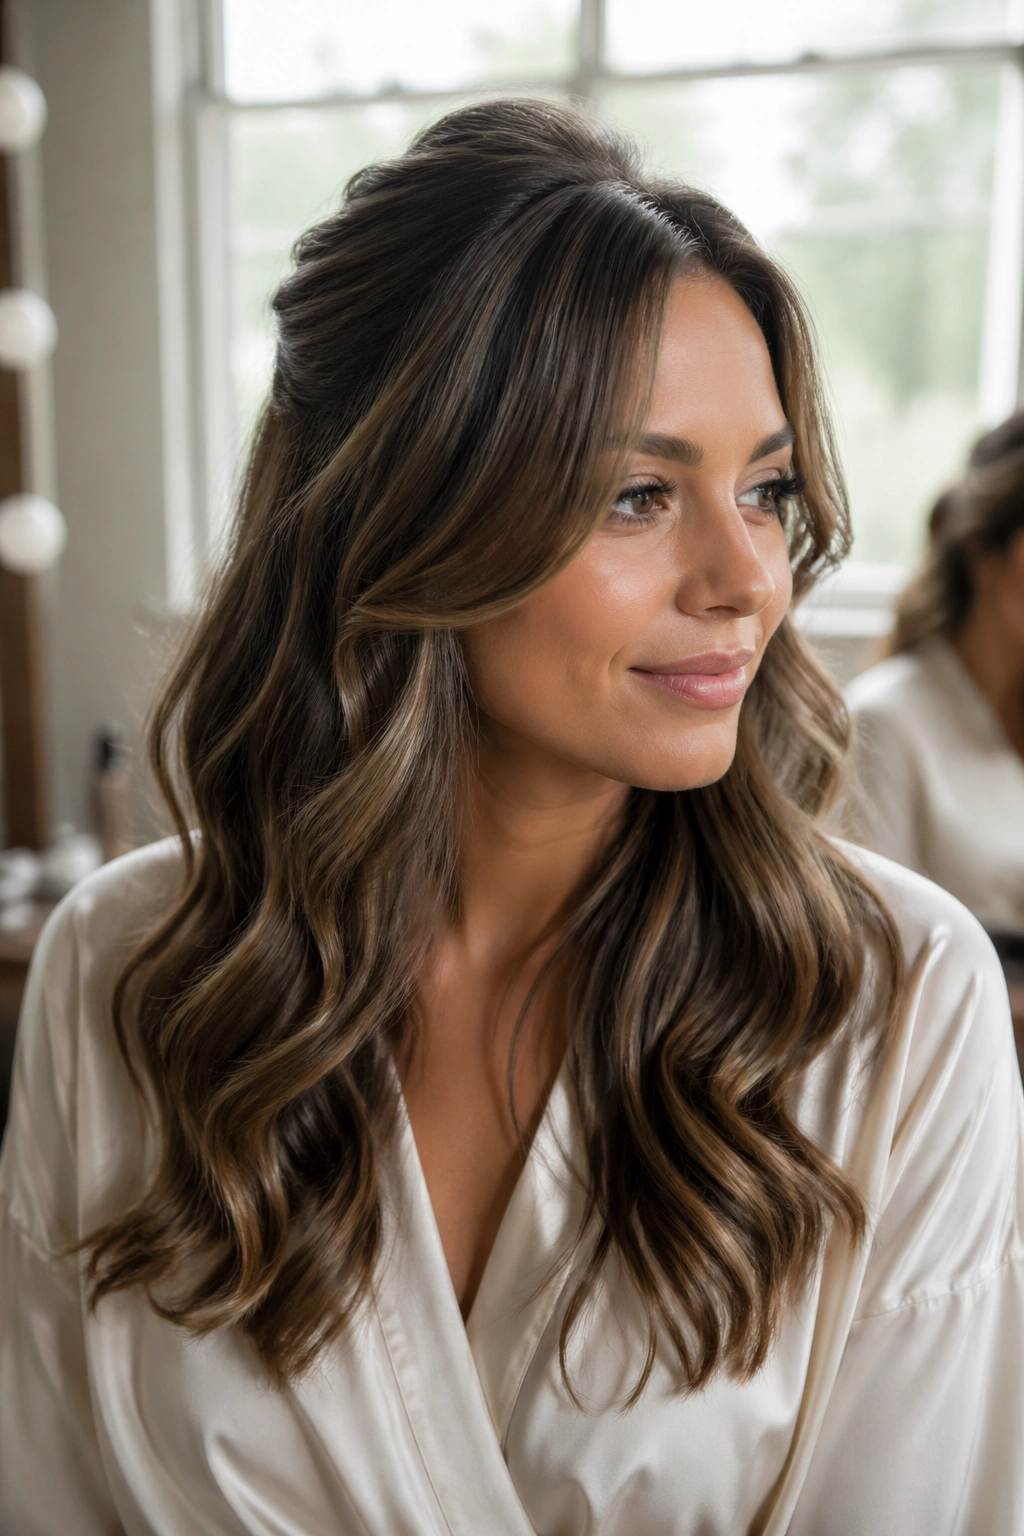
This is the style I reach for when the bridal party has mixed dress necklines and you need one hair look that flatters almost everything. The center or slightly off-center part opens the face, the crown gets a gentle lift, and the waves fall in long curtains around the cheeks and shoulders. Nothing is too sharp, but nothing is limp either.
The volume belongs at the crown, not the sides. A tiny backcomb under the top layer — just one or two strokes — gives enough lift to keep the style from sinking. Then the surface is smoothed over so the teasing doesn’t show.
- Use a 1¼-inch iron for broad, soft bends.
- Clip the front pieces while they cool so the curve stays open.
- Keep the ends brushed out.
- Finish with a light mist from below, not a heavy spray from above.
The result is airy, not messy. That distinction matters.
10. Waterfall Braid over Medium Waves
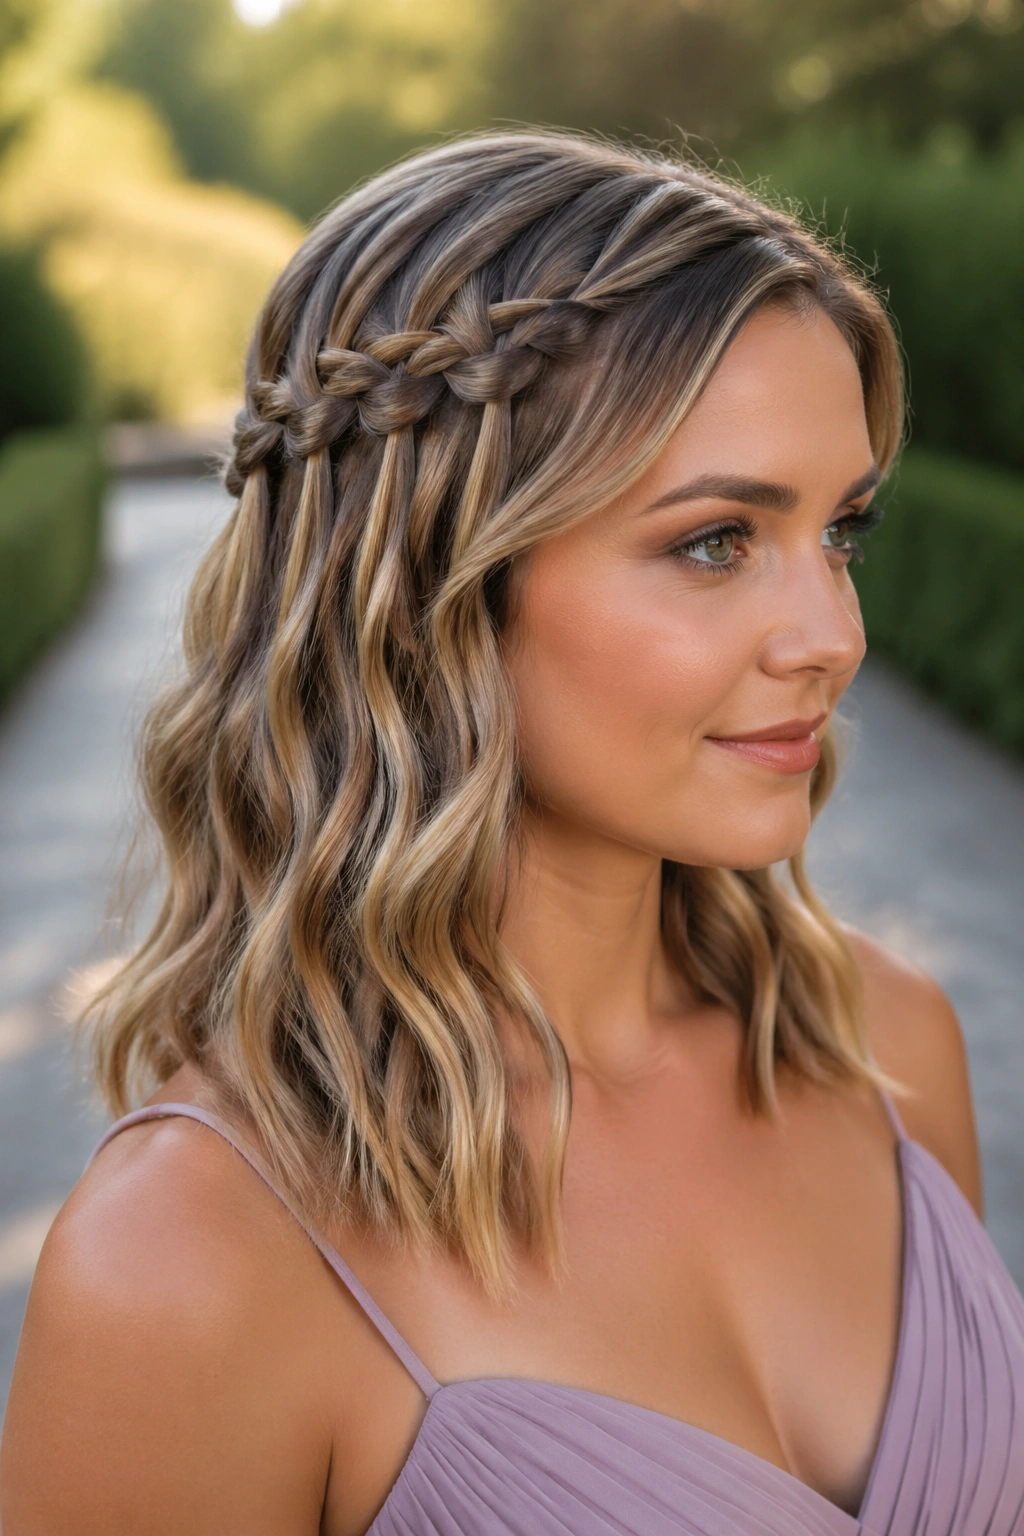
A waterfall braid gives you decoration without locking all the hair away. The braid runs across one side of the head, and every time one strand drops through the braid, a new section is picked up so the hair looks like it’s spilling through the weave. On medium wavy hair, that effect lands right in the sweet spot between polished and relaxed.
Unlike a full braid, this style leaves most of the length exposed. That makes it a good fit for bridesmaids who want to show off their waves instead of hiding them. It also works well when the hair has a shoulder-length cut with a few layers, because the braid doesn’t depend on long ends to look finished.
The braid should be snug at the start and looser through the middle. If it’s too tight, the pattern turns flat and the opening strands lose their softness. A small clear elastic at the end helps anchor the braid where it meets the loose waves.
11. Low Knot with Soft Tendrils
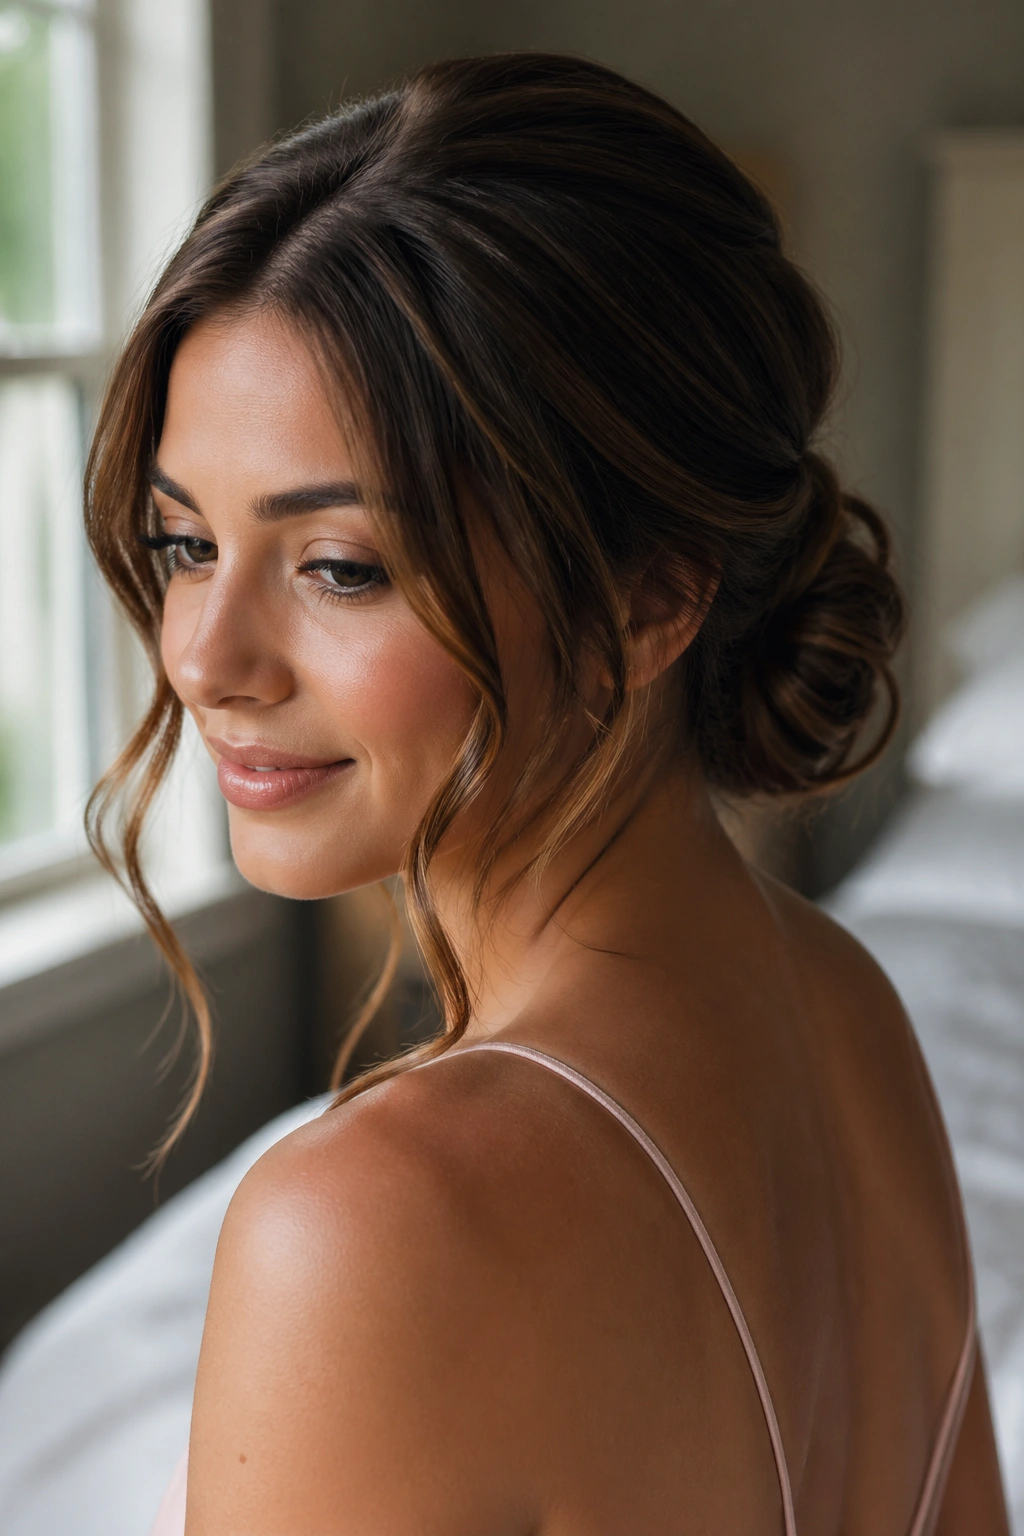
A low knot is one of the calmer bridesmaid styles, and that’s why it works. The hair is gathered at the nape, twisted into a rounded knot, and pinned so the shape sits low and compact. The soft tendrils around the face and neck do the rest of the work.
The key is not to overpull the crown. Medium hair can look strained if you yank it too tight, and once the crown starts to show gaps, the whole style reads tired. Leave a little ease at the top and let the knot feel hand-shaped rather than sculpted into a perfect ball.
The tendrils matter more than people think. Two face pieces, one piece near the ear, and a curled bit at the nape make the style feel deliberate. If all the loose pieces are the same length, the result can look dated. A little unevenness is better. It gives the style motion when the bridesmaid turns her head or laughs, which she will.
12. Wavy Lob with Metallic Clip at the Temple
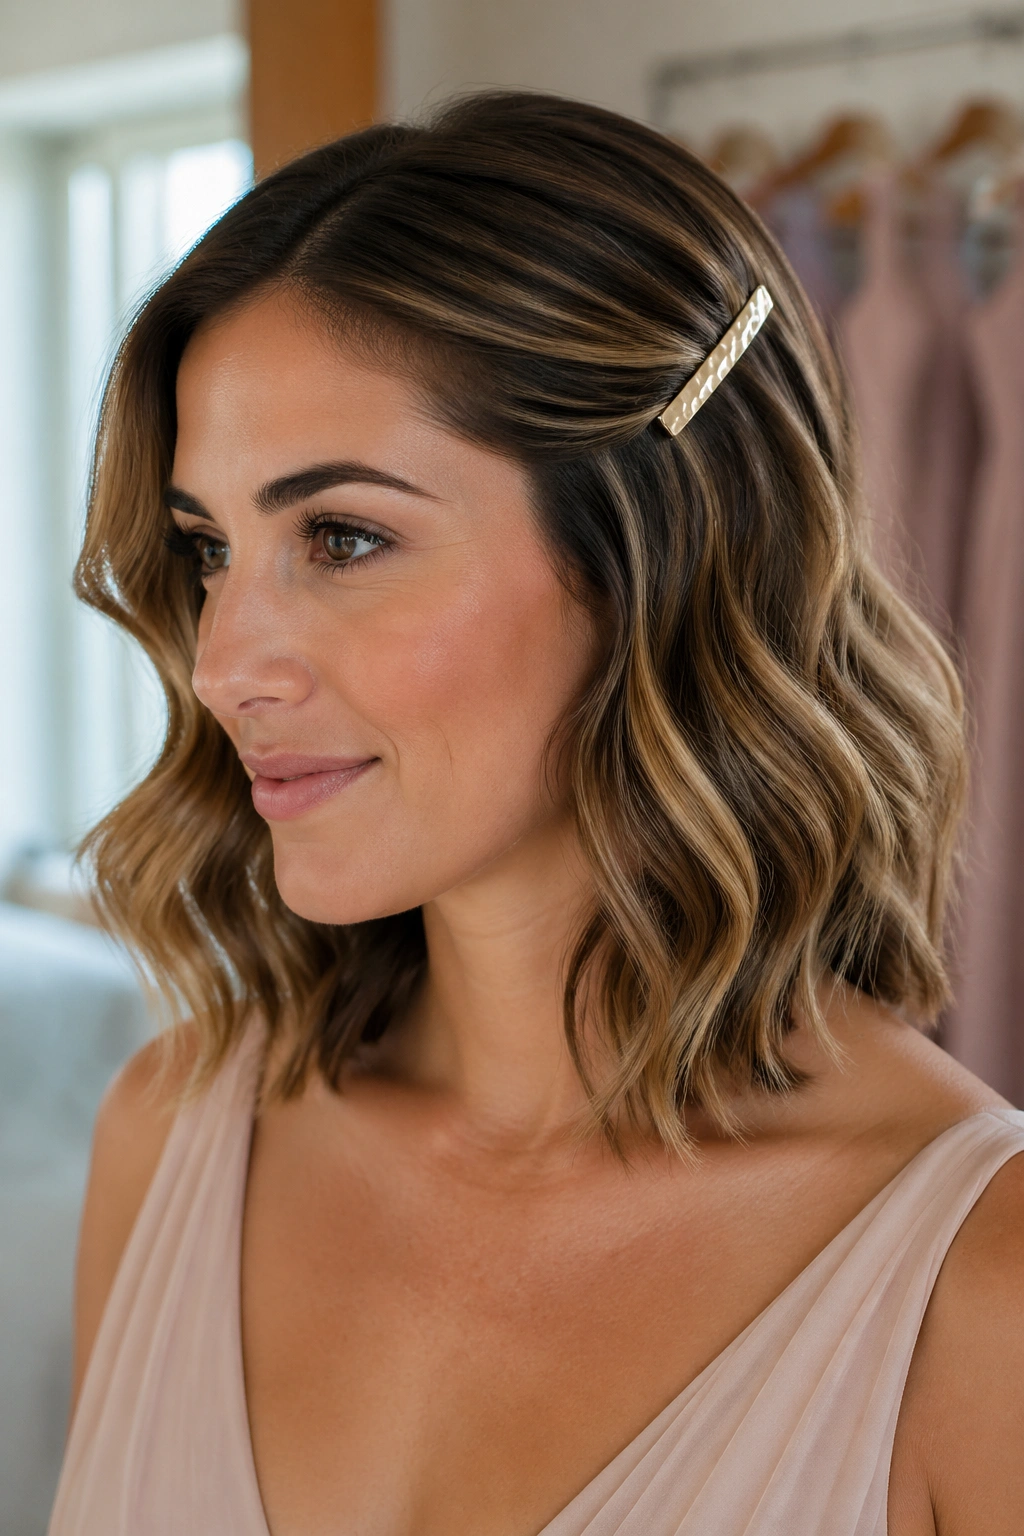
Sometimes the cleanest bridesmaid hair is the one that barely pretends to be complicated. A medium lob with soft waves and one metallic clip at the temple does the job neatly. The waves give texture, the clip gives shape, and the whole style takes only a few careful seconds to tidy.
What Keeps It from Looking Casual
The clip should sit above the widest part of the cheekbone, not down by the ear. That higher placement lifts the face a little and stops the style from drifting into everyday territory.
Choose a clip that’s about 2 to 3 inches long. Smaller pins disappear too easily in medium waves, while oversized barrettes can swallow the whole side of the head. Gold, brushed silver, and pearl-accented metal all work well if they match the jewelry.
This is a good option when dresses are busy and the hair should stay quieter. A lot of wedding styling gets ruined by overdoing it. This one knows when to stop.
13. Dutch Braid into Loose Waved Ponytail
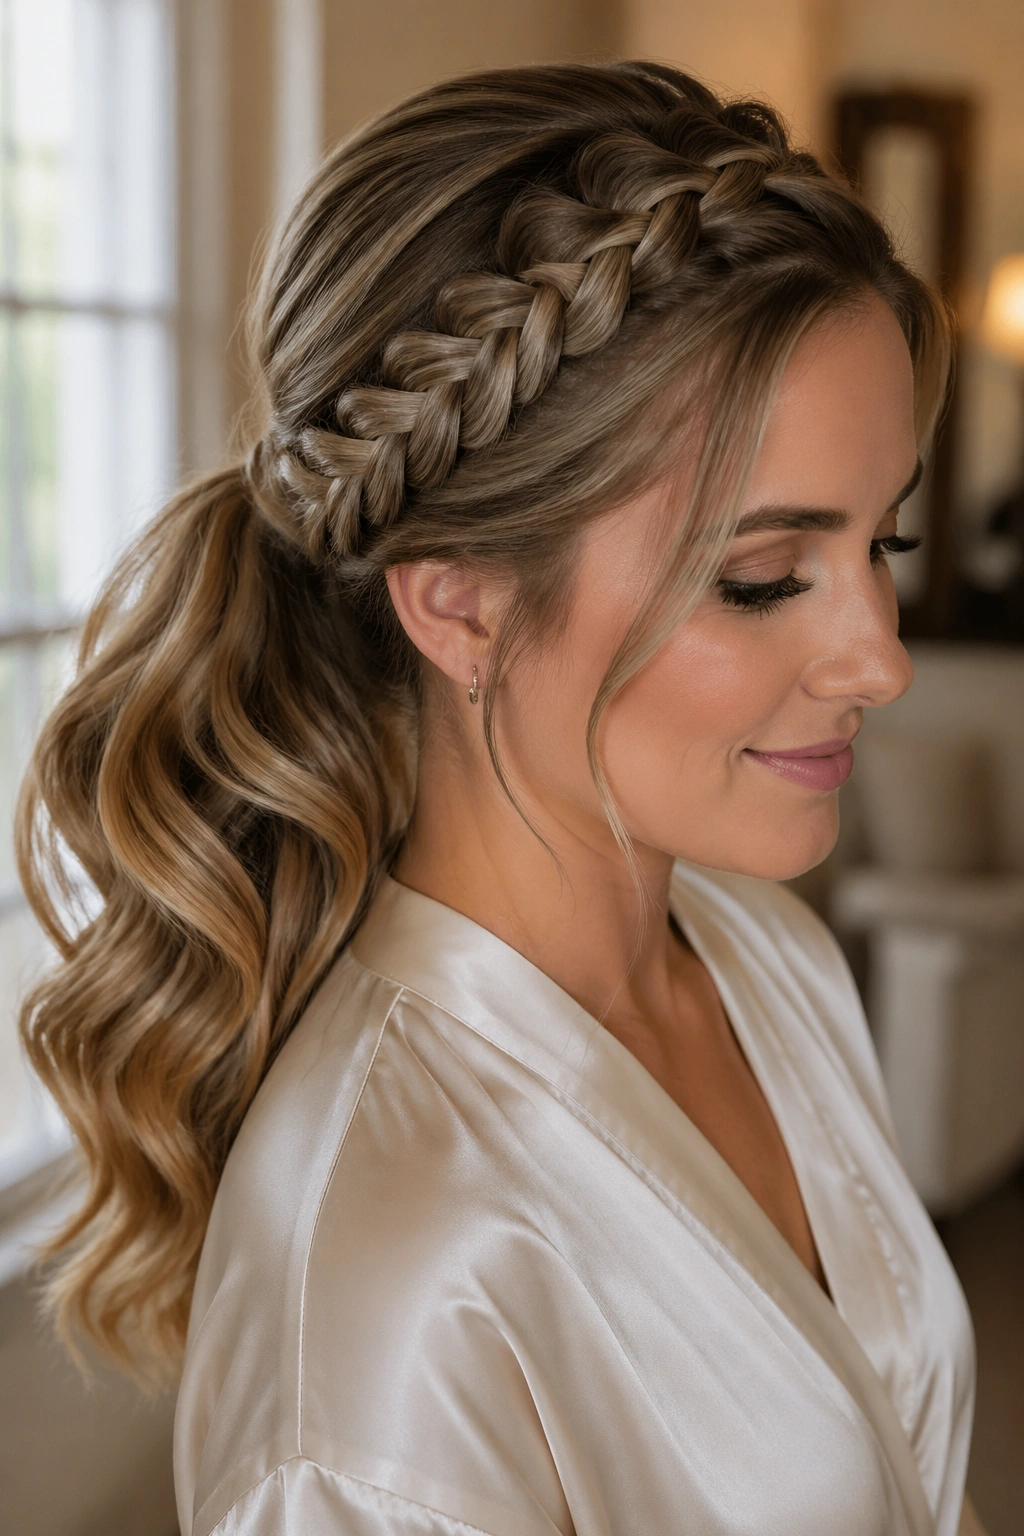
Want braid detail without the feeling of a school-day plait? Start with a Dutch braid at the hairline and carry it back to the crown, then gather the remaining hair into a low ponytail and curl the tail in broad sections. The braid adds structure near the face, while the ponytail keeps the rest soft.
The braid should stop before it gets too narrow. If you keep braiding all the way down, the style starts to lose balance on medium hair. Stopping at the crown gives the braid room to breathe and leaves enough hair in the tail to show off the waves.
Fine hair benefits from a little root grip at the braid base. A dusting of dry shampoo or texture powder helps. Thicker hair usually needs an extra pin at the join where braid becomes ponytail. Either way, the finish should look smooth at the top and touchable in the tail.
14. Loose French Twist with Wavy Finish
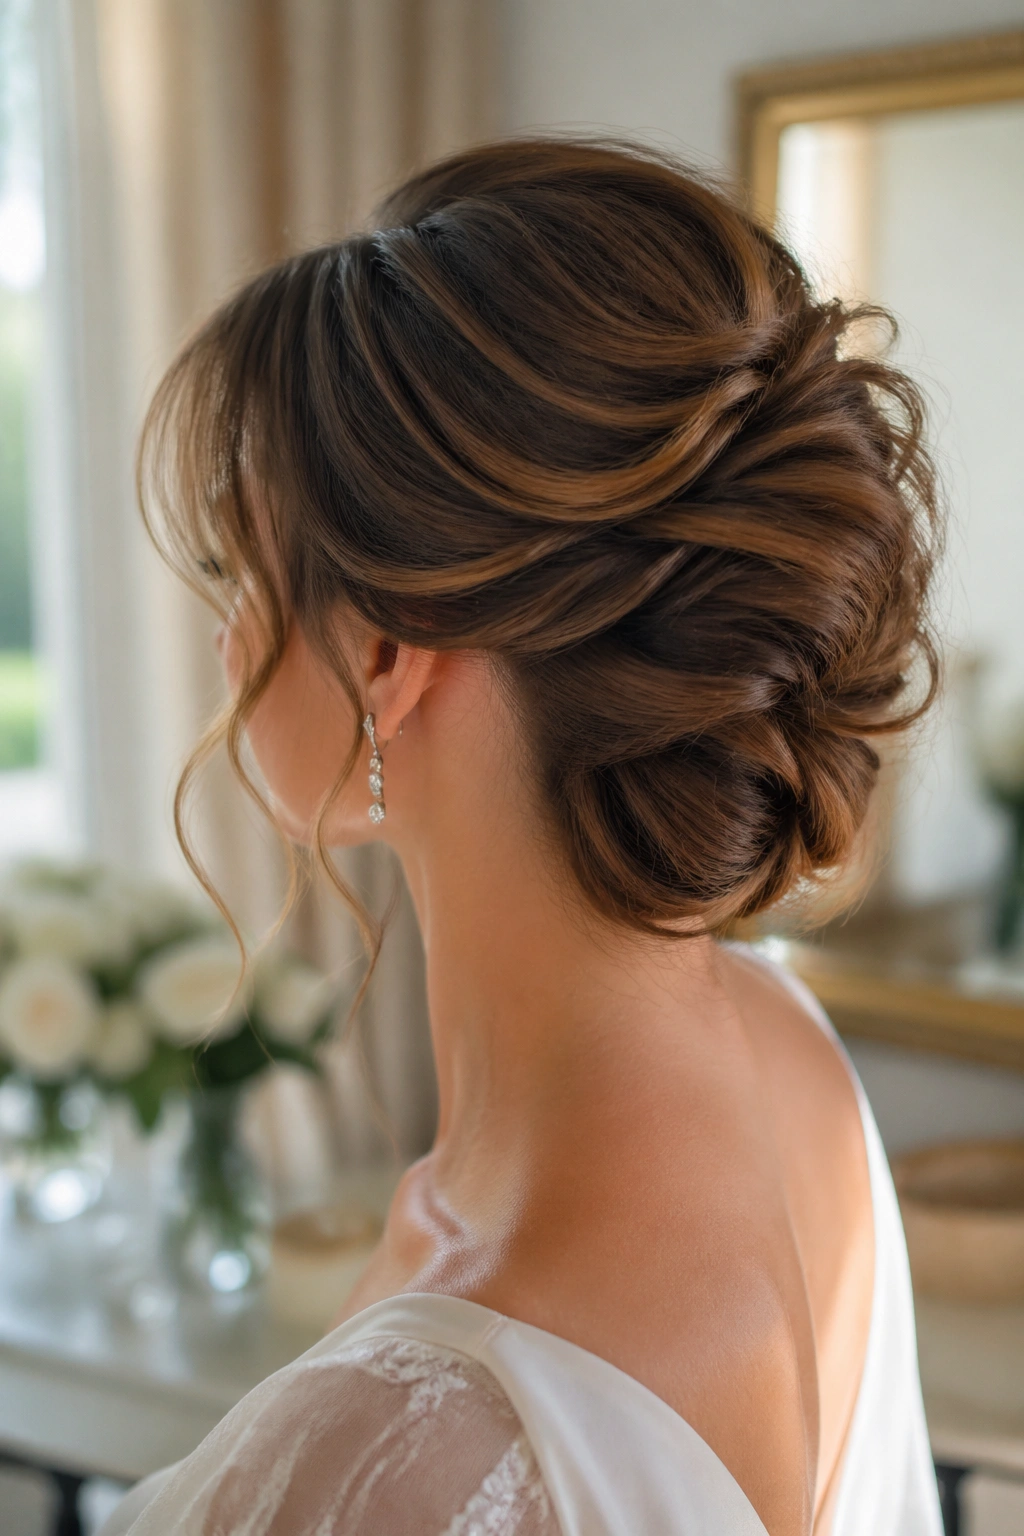
A French twist can feel too formal if it’s pulled tight, but a loose version with wavy finish lands in a better place for bridesmaids. The hair is gathered at the back, rolled upward, and pinned along the spine of the twist, while a few wave pieces are left soft around the top and sides. The shape reads elegant, but it still has some air in it.
This version works well on medium length because the hair doesn’t need to cover a huge vertical space. In fact, too much length can make the twist look dragged down. Medium waves sit neatly in the shell of the twist and don’t spill out unless you want them to.
Use U-pins for the body of the twist and a couple of smaller pins for the surface. That combination holds better than a handful of random bobby pins shoved in at different angles. It also feels less fussy when the hair is touched up later.
15. Asymmetrical Pinned Side Sweep
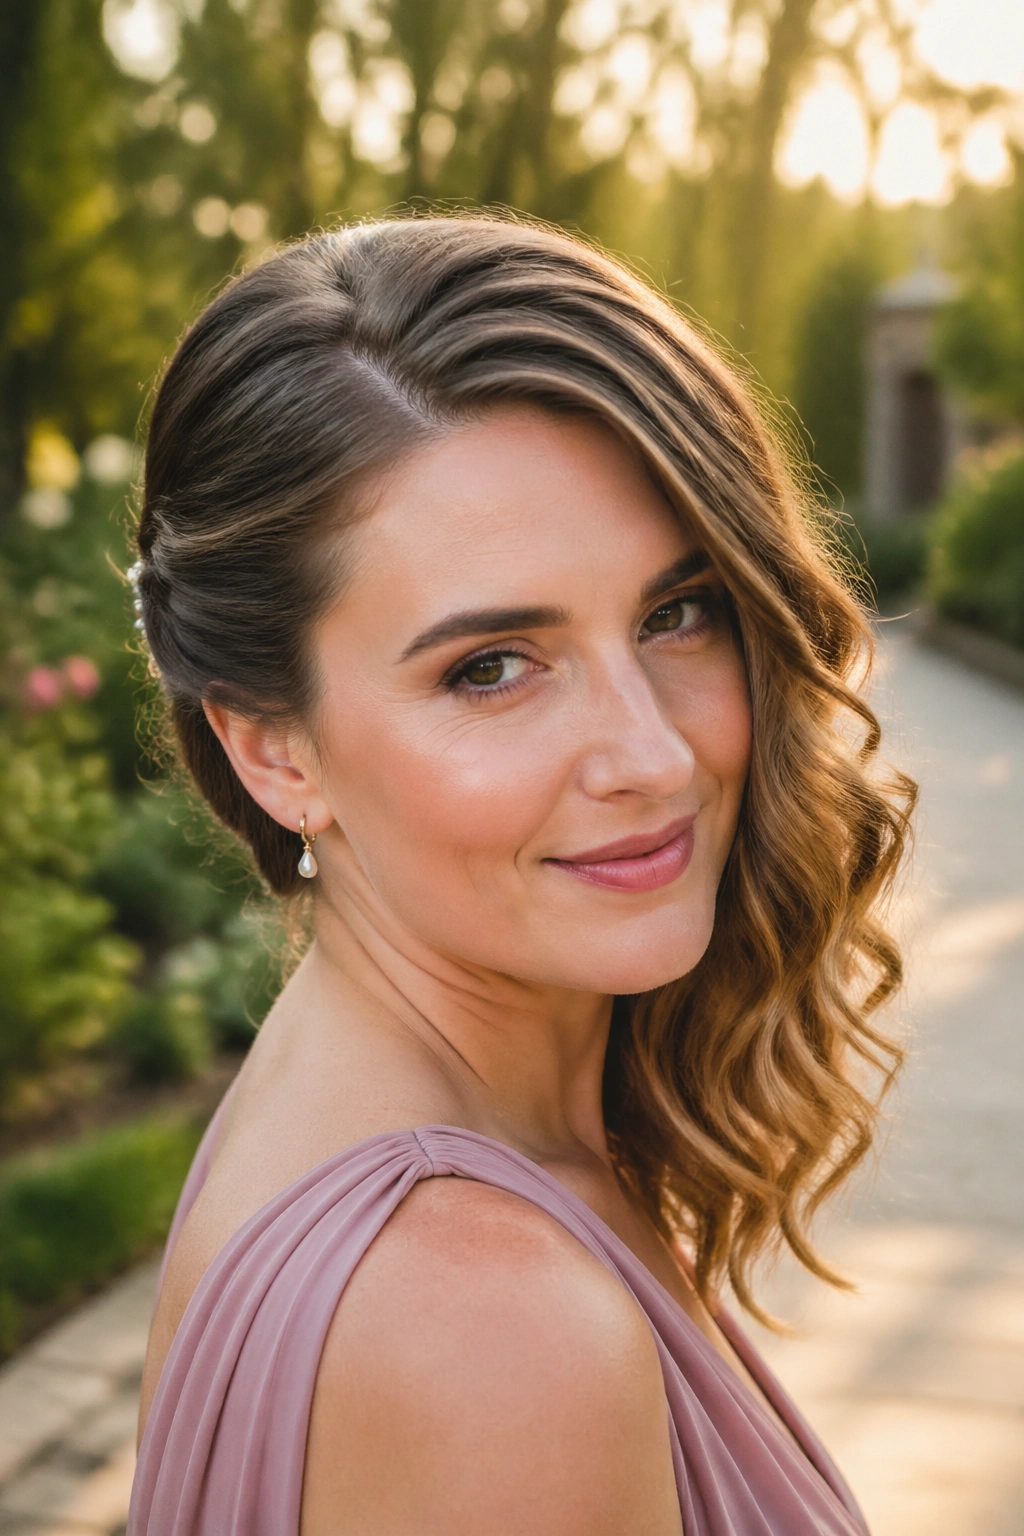
A side sweep gives medium wavy hair instant movement. Instead of balancing the hair evenly, you sweep most of it to one side, pin a section behind the ear, and let the opposite side stay fuller. The result is dramatic in a quiet way, which is a nice thing to have around matching dresses.
The styling works especially well with one-shoulder necklines, halters, or dresses with an interesting back. The hair doesn’t compete. It simply follows the shape of the outfit and then stays out of the way.
Curl the exposed side away from the face so the wave opens outward rather than collapsing inward. Then use three crossed pins behind the ear to hold the tucked side. A single pin is never enough on wedding hair. It might hold for a toast. It will not hold for a full evening.
16. Modern Finger Wave Front with Soft Ends
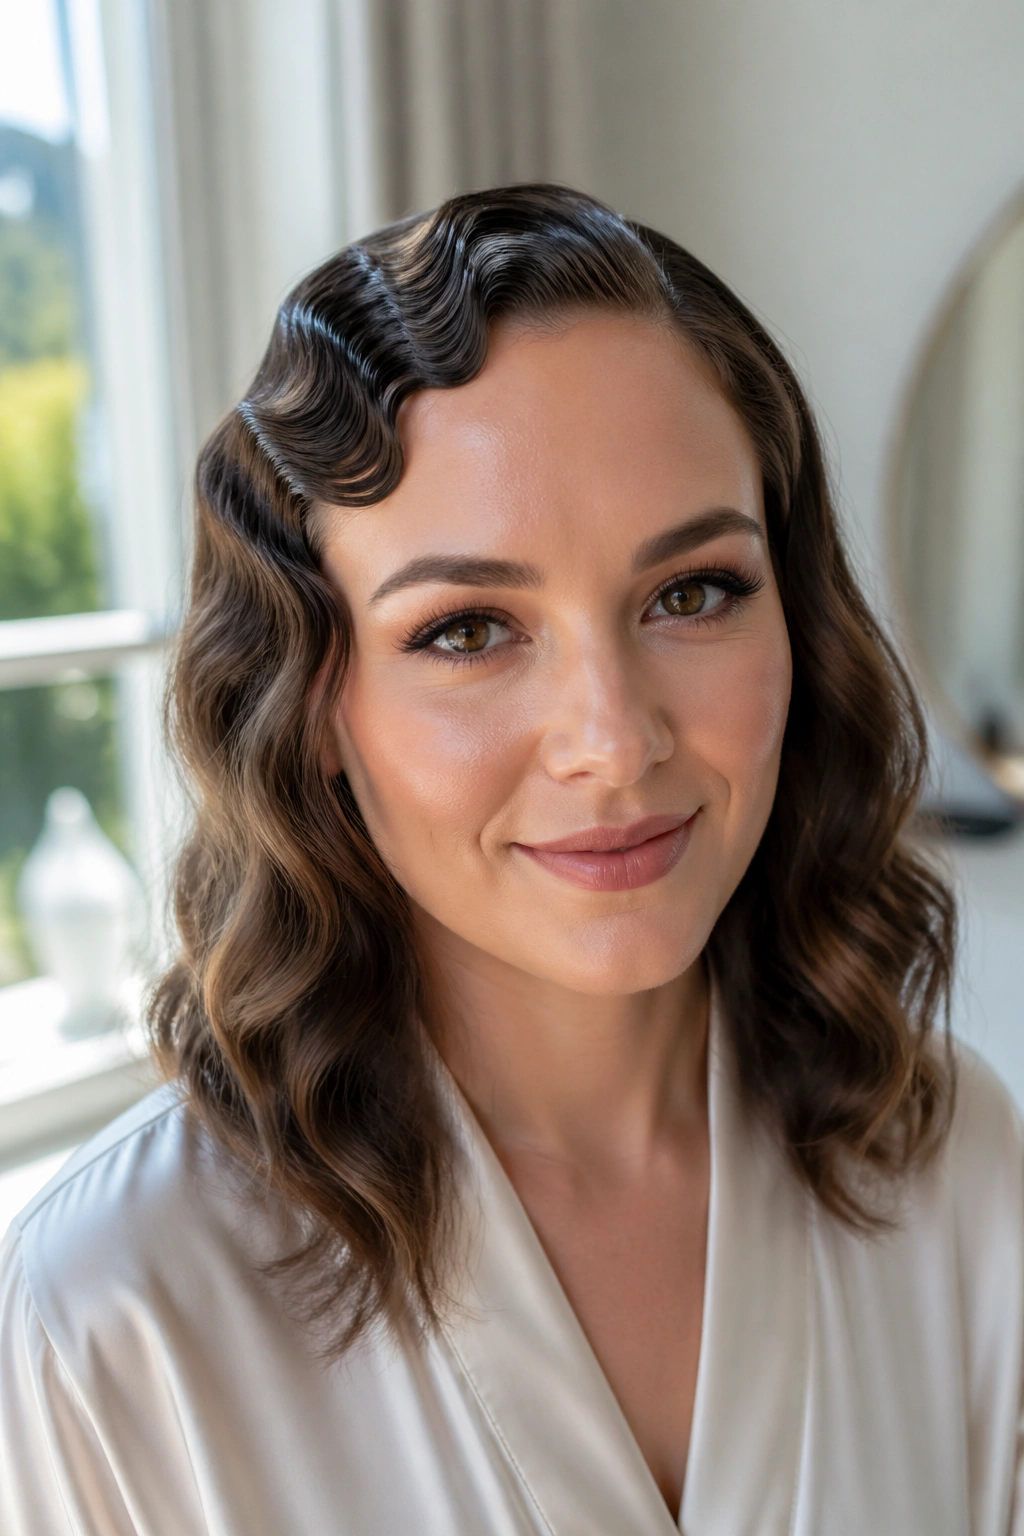
A small section of finger waves at the front gives medium hair a sharp edge without turning the whole style retro. The front 2 inches are shaped into smooth ridges with a little gel and a fine comb, while the rest of the hair stays in soft, brushed waves. That contrast is the point.
The waves should stop around the temple, not march all the way across the head. Once the finger-wave area gets too wide, the style starts looking like a costume. Keep it narrow and controlled, and let the rest of the hair stay loose. That keeps the look modern.
This works well when the bridesmaids want something memorable but not loud. It also photographs clearly from the front, because the wave pattern frames the face and the soft ends keep the style from feeling hard. A tiny clip or pin near the part can finish it, but the front shape does most of the work.
17. Twisted Halo with Loose Ends
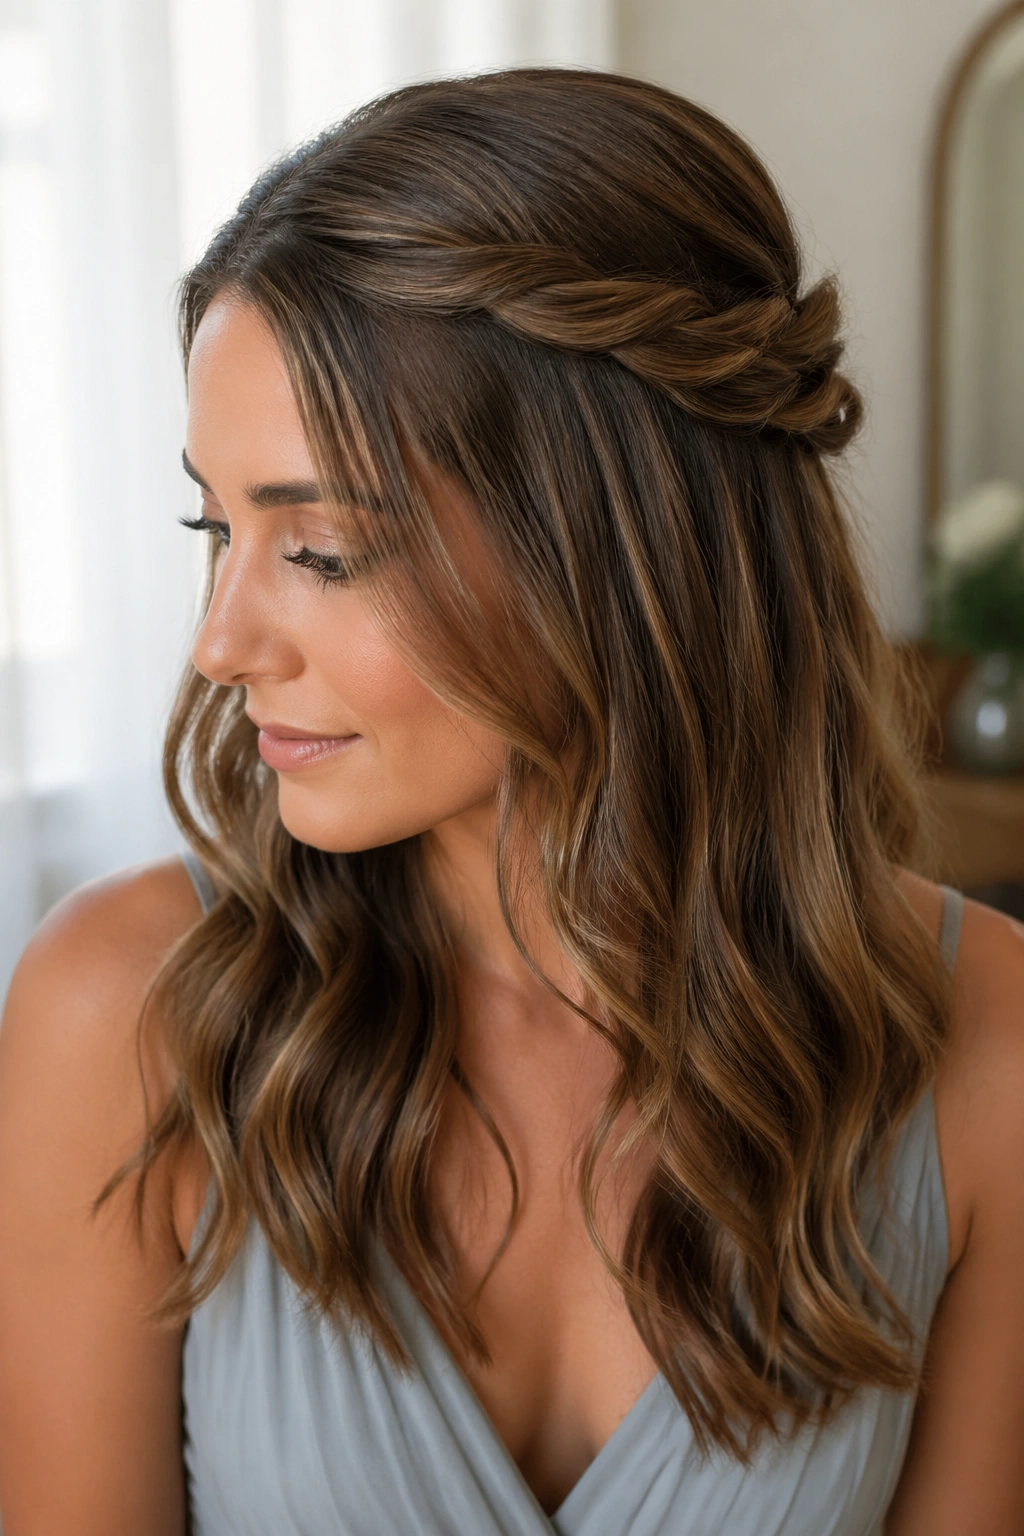
This is the quietest way to make medium hair look styled. Two side sections are twisted back toward the crown, meeting behind the head like a soft halo, and the remaining ends are left loose or tucked low so the waves can still move. It feels gentle, almost calm, which is not a bad thing when the dress already has plenty going on.
Where It Shines
A twisted halo suits lace, chiffon, and any dress with a soft neckline. The hair frames the face without crowding it, and the twists keep the sides under control if there’s a breeze or a long day of movement.
- Use 6 to 8 pins in total.
- Keep the twist loose enough that you can still see the texture.
- Let a few ends fall at the back if the hair is layered.
- Add one small floral pin if the bridal party needs a shared detail.
The halo shape works because it gives structure right where medium hair often needs it — at the sides, where pieces can otherwise flop.
18. Minimalist Barrettes on One Side
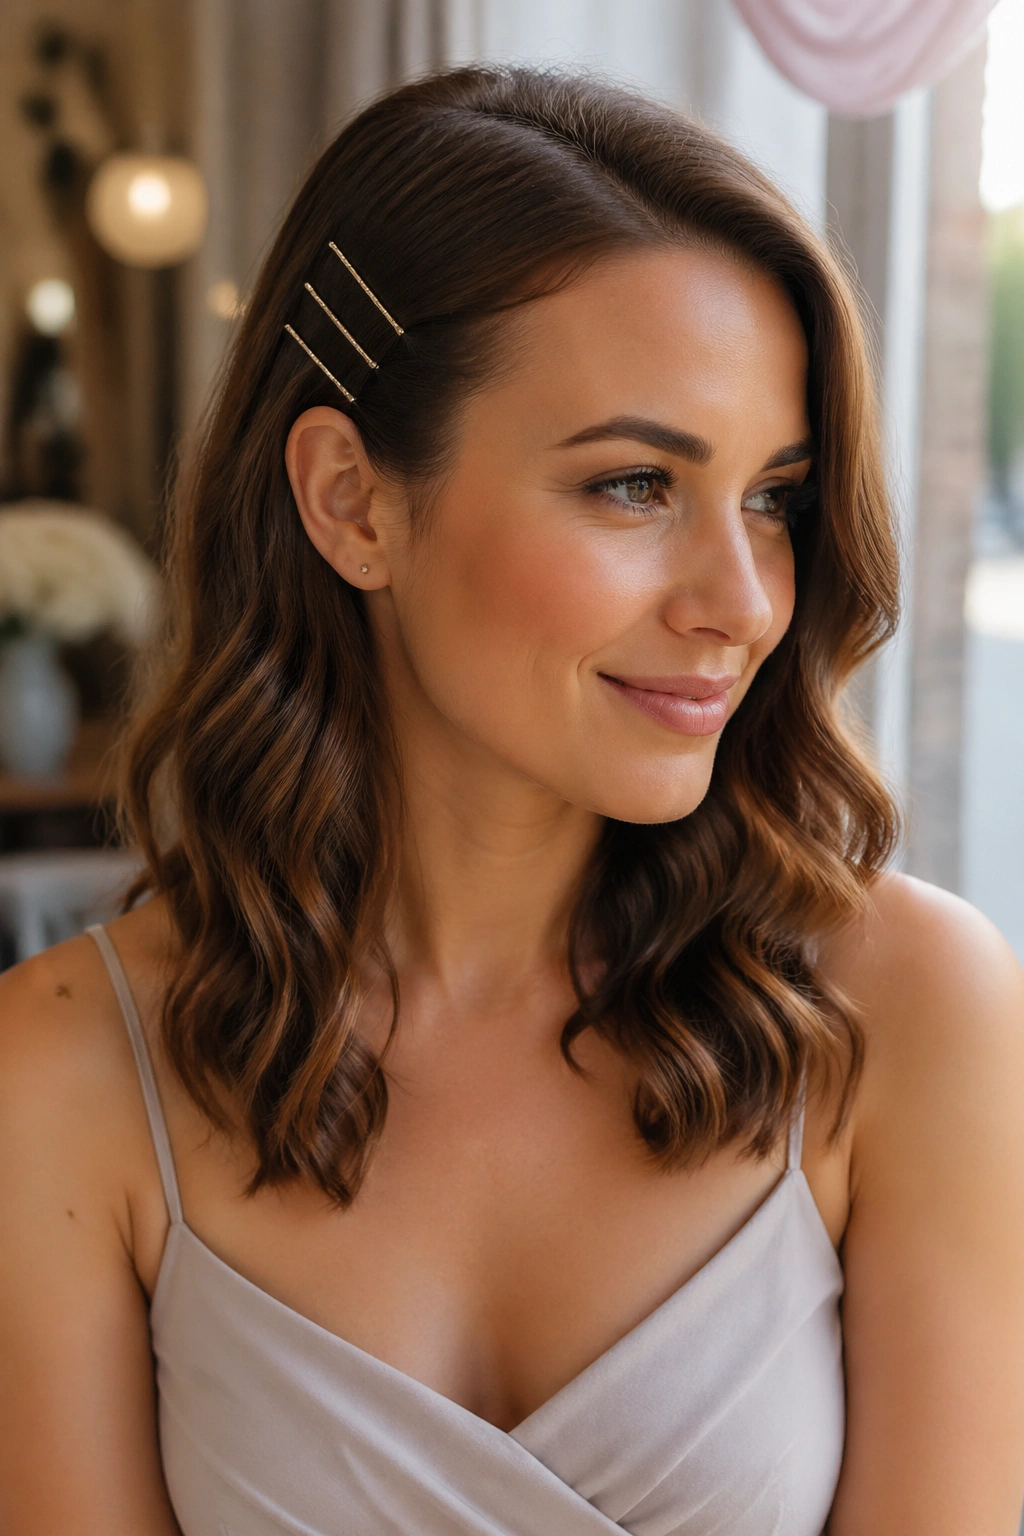
Sometimes two small barrettes do more than a full updo. On medium wavy hair, tuck one side back and place two or three slim barrettes in a diagonal line near the temple. Leave the rest of the waves open and soft. That’s it.
Less is more here. If the barrettes are too chunky, they can swallow the side of the face and make the style look heavy. Slim metal or pearl-flecked clips keep the look light and tidy. They also work well when the bridesmaid is already wearing statement earrings, because the hair doesn’t steal the whole show.
A nice detail: place the clips slightly apart instead of stacked tightly together. That gives the eye a small path to follow. It sounds tiny. It isn’t. Small placement choices like this are what make a simple style look deliberate instead of thrown together.
19. Ribbon-Wrapped Ponytail
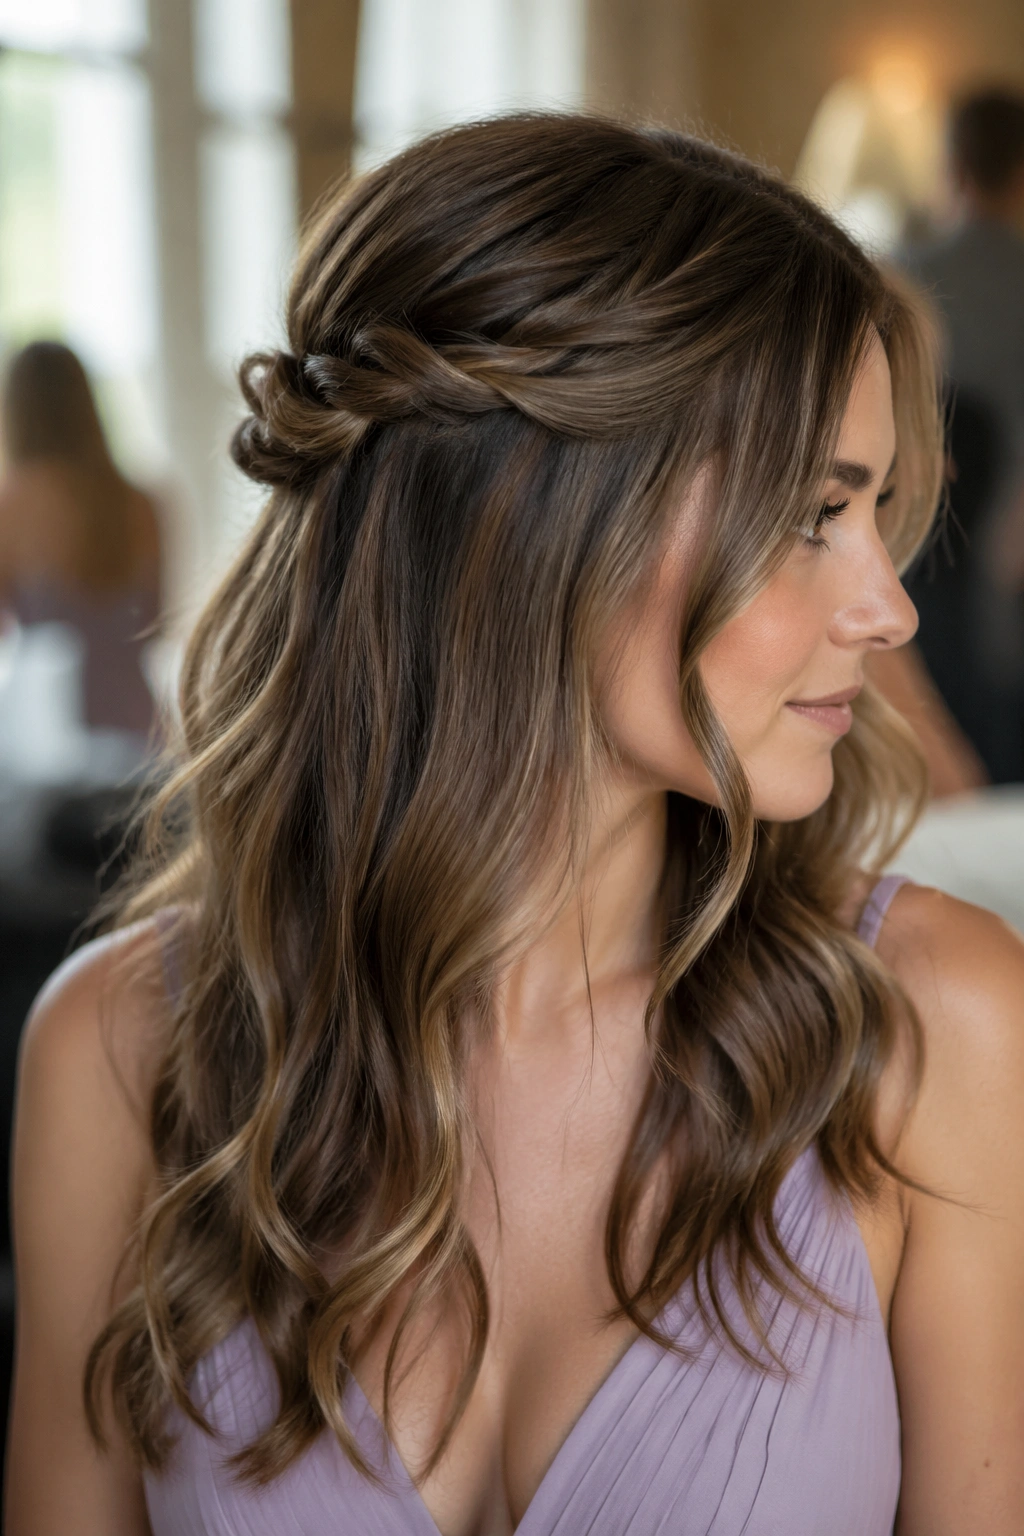
A ribbon-wrapped ponytail feels softer than a regular wrapped pony because the ribbon changes the mood straight away. Pull the hair into a low ponytail, wrap a satin ribbon around the elastic, and let the ends trail a few inches or tie into a neat bow beneath the base. The waves stay visible through the tail, which keeps the style from feeling flat.
The ribbon color can mirror the dress fabric, the bouquet, or even the shoes if the bridal party wants a tiny thread of cohesion. A ½-inch or ¾-inch ribbon is usually enough for medium hair. Wider ribbon can overpower the ponytail and make it look wrapped for a gift instead of styled for an event.
A low pony works here because it leaves the wave pattern intact. If the pony sits too high, the ribbon starts to fight the neck line of the dress and the whole thing looks busy. Keep it low, smooth the crown, and let the tail do the talking.
20. Half-Up Knot Stack
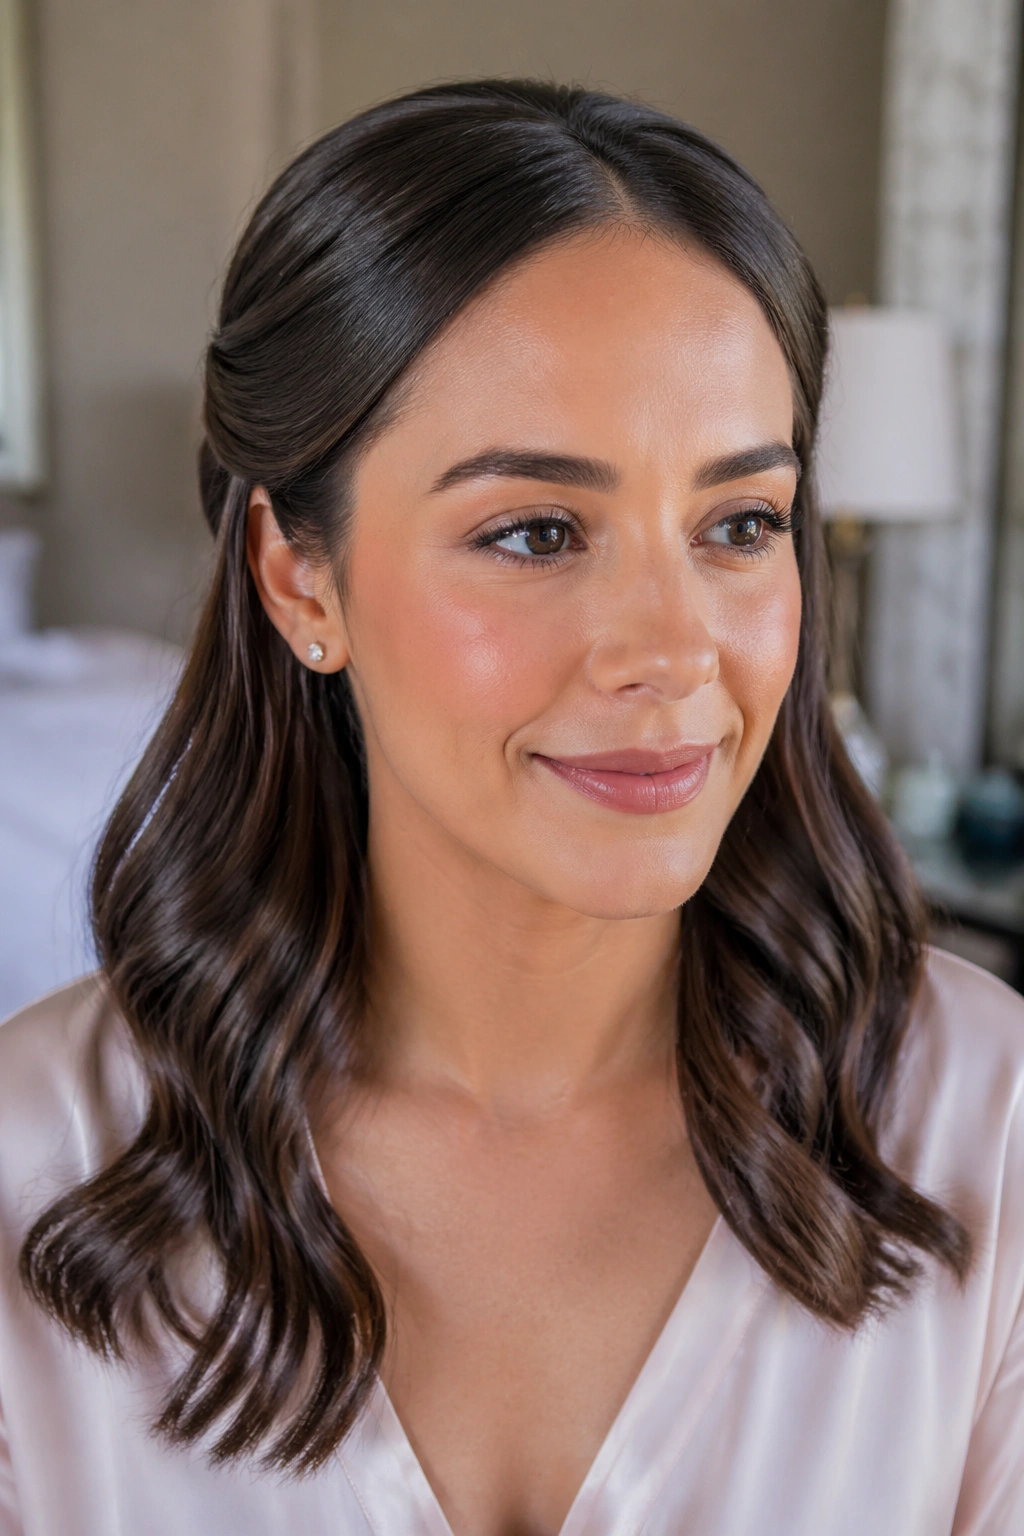
A stacked knot gives you height without a full updo. The top half of the hair is gathered and twisted into one small knot, then a second twist is placed underneath it and pinned so the two layers create a little cushion. The loose lower half keeps its waves, so the style still feels airy.
The knot stack is useful on medium hair because the length is enough to build the shape, but not so long that the style becomes heavy. It sits neatly at the back of the head and gives the crown a small lift, which helps if the dress has a simple front and the hair needs to carry a little more visual weight.
Use hidden pins through both knots so the upper piece doesn’t slide. If the hair is thick, two pins are never enough. Three or four, set in different directions, usually do the job. The finished look is tidy, but not severe.
21. Braided Side Accent with Open Waves
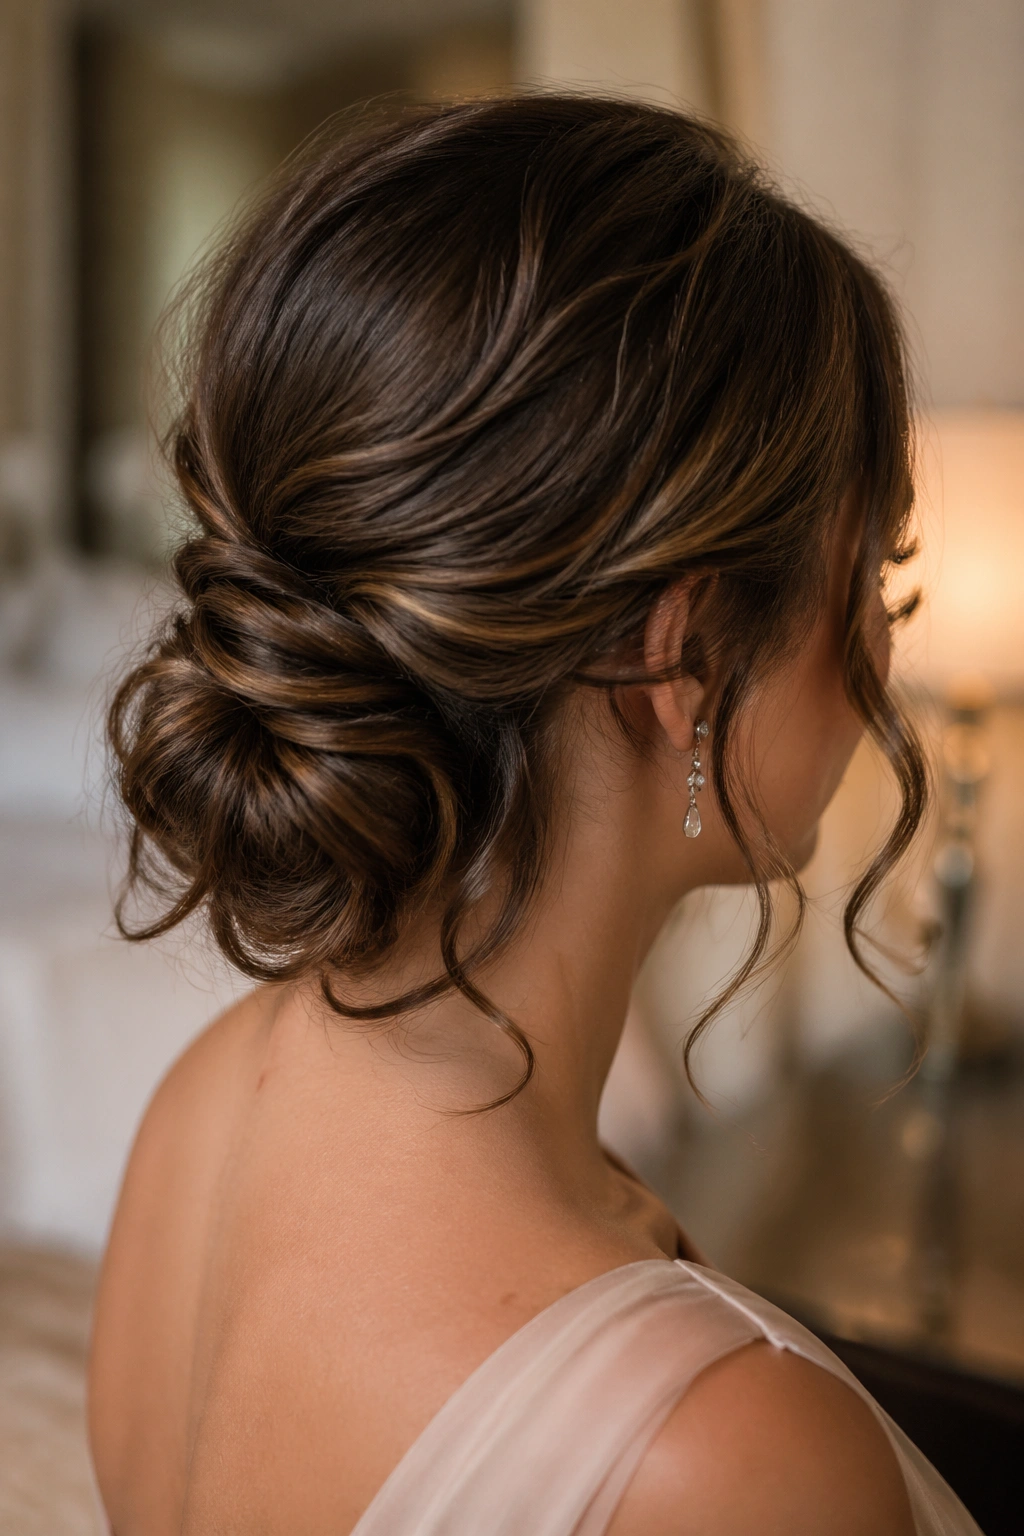
Yes, one small braid can carry a whole bridesmaid style if the rest of the hair is handled well. A narrow braid runs along the hairline or just above the temple, then disappears into the loose waves around the shoulders. It gives the style a little edge without changing the basic shape.
The braid should be thin enough that it looks like a detail, not a second hairstyle. If the hair has layers, braid the longest front section and leave the shorter face pieces out. That keeps the front from fraying or sticking up at the end of the braid.
What to Avoid
Do not pull the braid too tight. A rigid braid sits oddly against soft waves and can make the whole style look patched together.
A tiny clear elastic hidden under a curl keeps the end neat. After that, the waves can stay relaxed and brushed out. It’s a small accent, but it adds just enough direction to keep medium hair from feeling too free-form.
22. Retro Flip with Brushed-Out Waves
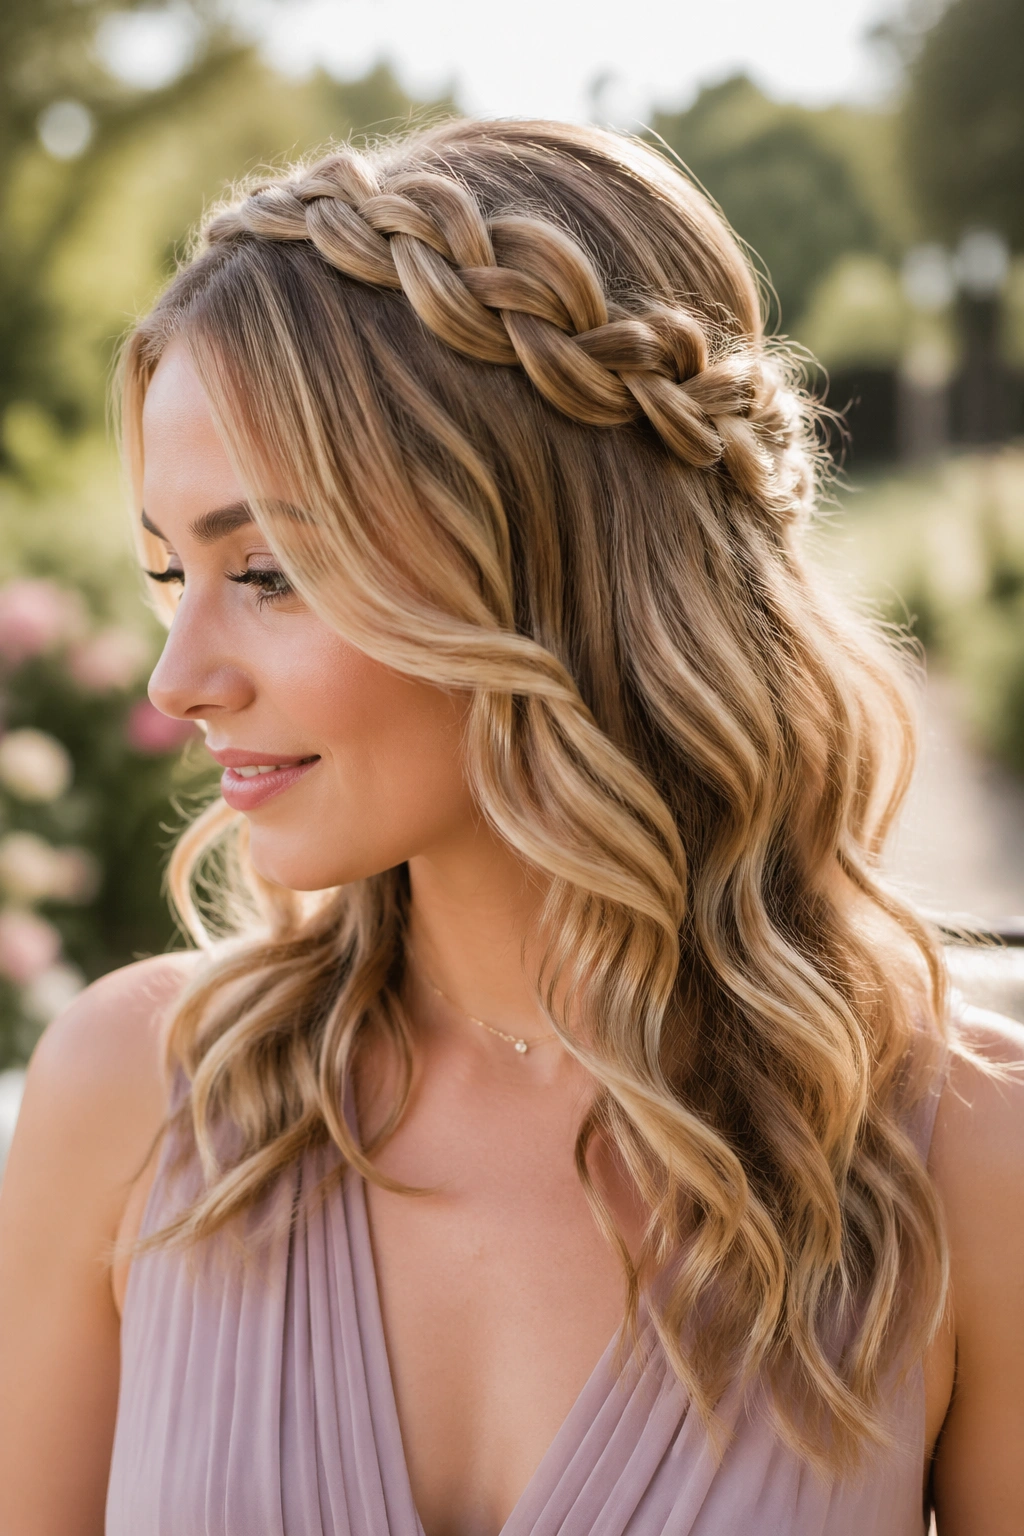
Medium wavy hair takes to a retro flip better than people expect. The roots are smoothed, the lengths are waved, and the ends are directed outward just a little so they flick away from the neck and shoulders. It feels playful without becoming costume-y.
The important bit is the end shape. The flip should start about 1 inch from the tips, not halfway up the strand. That keeps the style modern and keeps the wave pattern visible through the middle of the hair. After curling, brush the lengths gently so the bend softens and the finish looks smoother.
- Best with a side part or a soft off-center part.
- Use a 1¼-inch barrel for the bend.
- Hold the flip in place with a short burst of spray, then leave it alone.
- Works well with dresses that have a vintage cut or clean lines.
This one has personality. A little of that goes a long way.
23. Messy Low Bun with Curled Pieces
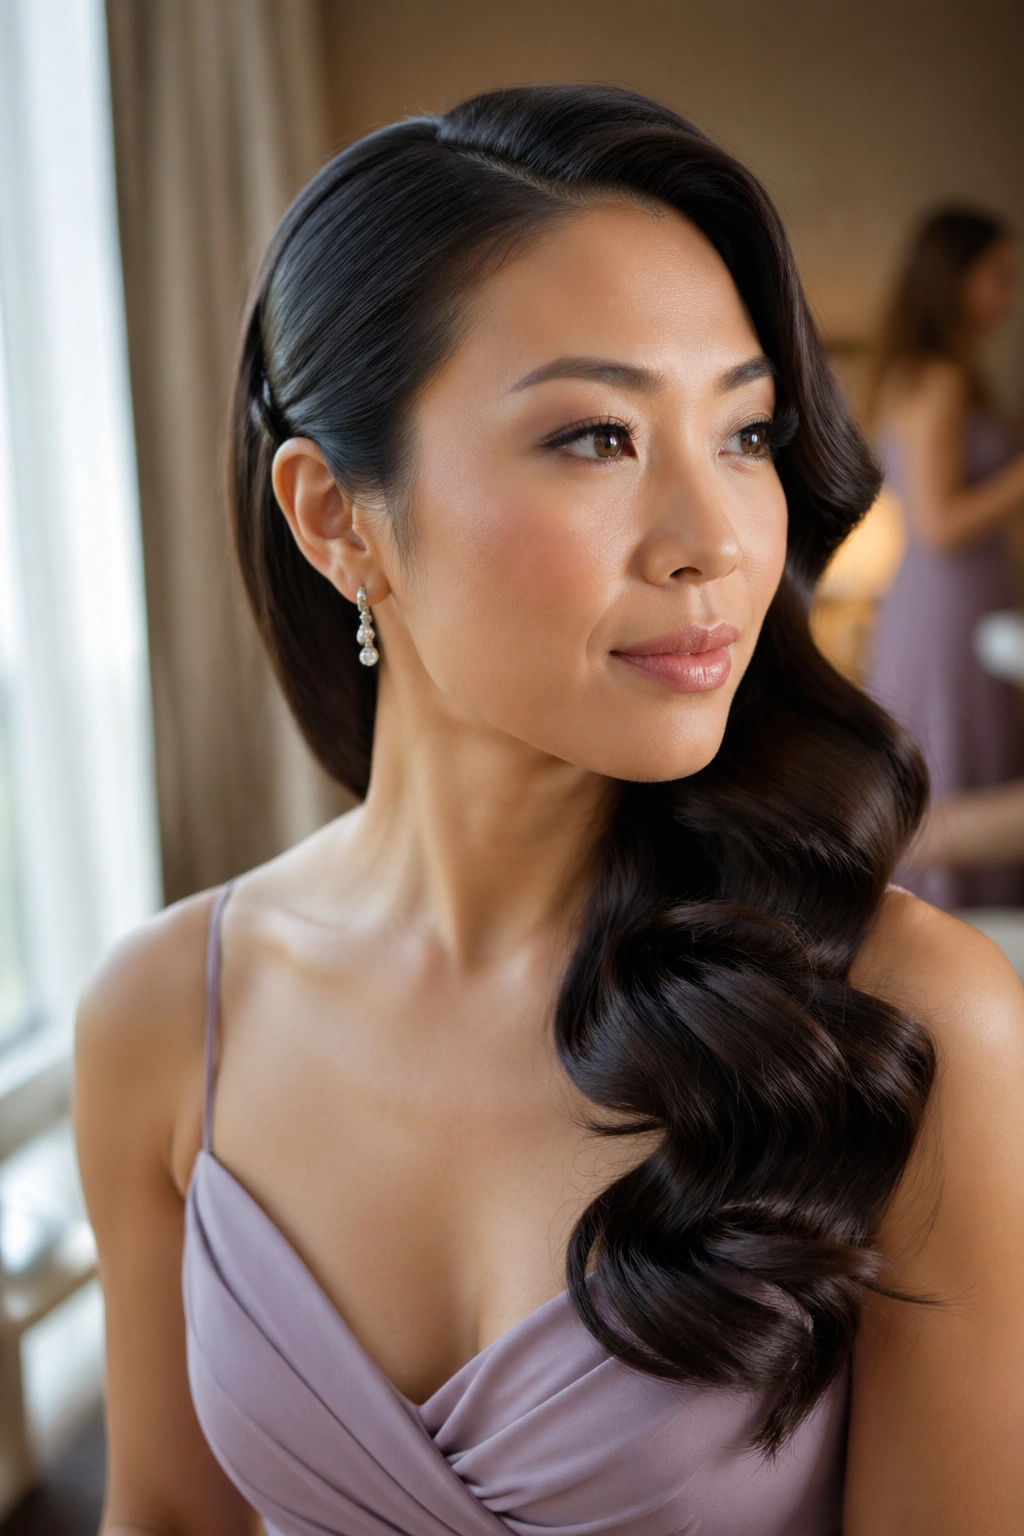
A messy low bun can be lovely on medium wavy hair if the mess is controlled. The bun sits low at the nape, the surface stays loose enough to show texture, and a few curled pieces are left to fall around the face and neck. The result feels soft, not sloppy.
The biggest mistake is stretching the crown too much. Medium hair shows tension quickly, and a bun that’s pulled too hard can expose the shape underneath in a way that looks unfinished. Leave a little lift at the top and keep the bun compact.
Use texture spray before pinning so the hair has grip, then add a light mist once the bun is formed. The curled pieces should be intentional — not random strands that escaped. Two around the face and one near the ear usually do the job. More than that starts to lose shape.
24. Veil-Friendly Brushed Mermaid Waves
Brushed mermaid waves work well when a veil will sit near the crown or when the dress already carries a lot of detail. The hair is waved with a larger barrel, cooled in clips, then brushed into soft, wide bends that sit smoothly under the veil comb. The shape is gentle, but it still reads as styled.
Tighter curls can fight with a veil. Brushed waves sit flatter and make the veil easier to place, which saves time and a lot of fiddling at the last minute. Medium hair is a good length for this because the wave pattern lands right across the shoulders and chest without getting swallowed by extra length.
Why It Holds Its Shape
The wave starts below the cheekbone and gets stronger toward the ends. That gives the top section enough calm for the veil, while the lower section still has movement.
A boar-bristle brush or a very soft paddle brush works better than a fine comb here. You want the bend softened, not broken apart. A little shine spray on the ends finishes it nicely.
25. Coordinated Waves with Different Pin Placement
This is the style that solves the bridal-party-matching problem without making everyone look cloned. Every bridesmaid wears the same medium wavy base — same barrel size, same loose finish, same soft bend through the lengths — but each person gets a different pin placement or accessory so the hair still feels individual.
One bridesmaid can tuck one side back with a pearl comb. Another can wear a small barrette near the temple. A third might have a side twist pinned low behind one ear. The texture stays unified, which matters in photos, but the details shift enough that each head has its own shape.
That approach works because medium wavy hair already gives you flexibility. You can keep the overall plan the same and still adjust the part, the tuck, or the accessory to flatter the face in front of you. It saves a lot of chair time, too. One styling formula, three or four different finishes, and nobody looks like they were copied and pasted.
Medium wavy hair is generous like that. It holds shape, but it doesn’t demand a single answer, and that’s exactly why it works so well for bridesmaids.
