



A side bang on wavy curly hair can look sharp and easy, or it can fall into your eye, puff up at the root, and spend the rest of the day arguing with humidity. The difference usually has less to do with the bang itself and more to do with where it starts, how long it’s left, and whether it was cut with the curl pattern in mind. That little front section is a troublemaker if you treat it like straight hair.
With side bang styles for wavy curly hair, the magic lives in the bend. A good fringe should move with the wave, not fight it. It should soften the face, skim the cheekbone, and still leave enough length that you are not stuck trimming it every three weeks. I’m also a fan of leaving more length than you think you need; curl shrinkage can eat up a surprising amount, and cutting too short is the fastest way to turn a cute idea into daily frustration.
There’s no single right answer here. A heavy side fringe, a wispy sweep, a shaggy face-frame, even a tiny temple curl can all count as a side bang if the cut and styling make sense together. The trick is matching the shape to your density, your curl type, and how much effort you want to spend in the morning.
1. Long Feathered Side Bangs That Blend Into Loose Waves
Long feathered side bangs are the easy win for wavy curly hair. They don’t announce themselves the second you walk in, which is part of the appeal. The front section falls softly from the temple toward the cheekbone, then melts into the rest of the hair instead of stopping in a hard line.
Why this one works so well
Feathering removes the blunt edge that makes bangs feel too heavy on textured hair. Ask for the ends to be point-cut or sliced lightly, not chopped straight across. The shape should feel airy, but not so thin that it disappears when your waves dry.
A side sweep like this is especially good if your wave pattern is loose and uneven around the front. The longer length gives the curl room to settle. It also means you can tuck it, pin it, or wear it across the forehead without that awkward halfway-grown-out look.
- Best with shoulder-length hair or longer
- Ask for the shortest point to land around the eyebrow or upper cheekbone
- Works well with a center part that shifts slightly off-center
- Styles nicely with a diffuser on low heat for 5 to 7 minutes
Tip: keep the root of the bang lifted while it dries. A clip at the base for 10 minutes can stop the front from collapsing flat.
2. Deep-Part Side Fringe With a Clean Arc
A deep part changes everything. Seriously. If your curls already want to fall in one direction, using that habit instead of fighting it gives the side bang a cleaner line and a more intentional finish.
The arc matters more than the length here. You want the bang to sweep from the part, curve across the forehead, and land near the outer brow or cheekbone. On wavy curly hair, that curve helps the front blend into the rest of the cut instead of sitting like a separate piece.
This style is especially helpful if one side of your face feels fuller than the other, or if you want a little extra lift at the crown. A root spray or a small amount of mousse at the part can keep the bang from separating too far and showing a bare scalp line.
Try it with a side part that starts about 1 to 1½ inches off center. Any farther and the shape can get too dramatic for everyday wear.
3. Curved Curtain Bang Sweep to One Side
Why does this style feel so easy? Because it borrows the best part of curtain bangs—the soft split at the center—then pushes one side farther across the face. You get movement without a blunt edge, and you keep some flexibility if the curls decide to live their own little life.
On wavy curly hair, this works best when the shortest point is still long enough to curl back into place. I usually like a cut that starts around the bridge of the nose or slightly lower, then opens into longer pieces that can be swept right or left. That gives you options on days when one side is doing more than the other.
How to ask for it
Tell your stylist you want a curtain bang that can be worn as a side sweep, not a strict fringe. Mention that you want the front to blend into face-framing layers, with no blunt shelf. If your hair shrinks a lot, ask for the first cut to land longer than the eyebrow by at least half an inch.
How to wear it: twist the damp bang once, let it set for a few minutes, then separate it with your fingers. That tiny twist helps the bend fall in the direction you want instead of fanning out.
4. Razor-Soft Shag Side Bangs
A shag and a side bang are natural friends. The whole point of a shag is movement, and the side bang keeps that motion going right through the front of the face. The result is messy in a good way, not messy in a “I overslept and gave up” way.
Razor-soft ends can help here, but only if the hair is dense enough to handle it. The goal is not to thin the bang into nothing. It is to remove weight from the ends so the front sits in a soft diagonal instead of forming a chunky curtain. If your waves tend to puff, keep the layers internal and leave the outline a little fuller.
What to ask for
- A shag cut with a side-swept front section
- Length that starts around the eyebrow and drops toward the cheekbone
- Light texturizing only at the ends
- A little extra weight left near the temple if your hair is fine
I like this one on people who air-dry a lot. It forgives a rough finish. Even if one side dries a little stranger than the other, the cut already has movement built in.
5. Face-Framing Layers That Become Bangs
This is the quiet one on the list. No dramatic fringe. No big reveal. Just front layers that begin short enough to behave like a side bang when you sweep them over.
It’s a smart option if you keep flirting with bangs but haven’t wanted to commit to a shorter piece at the forehead. The first layer can start near the cheekbone, then slide into the rest of your hair. On wavy curly hair, that softness looks expensive without trying too hard, which is a phrase I rarely use but, here, it fits.
The nice part is flexibility. On wash day, the front can sit forward as a soft bang. On day two, you can pin it, tuck it, or let it blend into the rest of the shape. There’s no awkward line to grow out because the “bang” is really just the shortest face-framing layer.
If you want something low-risk, start here. It gives you the feeling of side bangs without the maintenance drama.
6. Micro Side Bangs for Tight Curls
Micro side bangs are not for the shy. They’re short, expressive, and they need a curl pattern that can hold shape without turning fuzzy at the ends. On tighter curls, a tiny side fringe can look sharp and playful in a way longer bangs can’t.
The key is cutting them dry, or almost dry, so the stylist can see the true spring of the curl. A micro side bang that looks perfect wet can shrink into a much shorter shape once it dries. That’s not a surprise you want on your face.
Unlike long sweeping bangs, this style is about seeing the curl itself. The front pieces sit above the brow, angle slightly to one side, and let the rest of the hair do the heavier lifting. It’s best for people who like a little edge and don’t mind the bang becoming a real feature.
If your curls are dense, keep the bang narrow. Too much hair at that length can turn boxy fast.
7. A Curly Pixie With a Side Sweep
Short hair and side bangs can be a very good match, especially when the cut has enough length on top to create a soft sweep. A curly pixie with a side bang gives the face shape, a little height, and way more movement than a blunt mini fringe.
This style lives or dies by the top length. Too short, and the bang spikes up instead of sweeping. Too long, and it falls into the eyes every 20 minutes. The sweet spot is usually just long enough to tuck behind one brow and soften toward the temple.
What makes it work
The front section should be slightly longer than the crown, so the side bang has somewhere to go. A small amount of cream—think a dime-sized amount, not a handful—keeps the curl from separating into frizz. If you like a piecey finish, use less product and finger-style it while damp.
This cut is good if you want a side bang but don’t want the weight of longer hair on your forehead. It’s light, fast, and a little bold. Not fussy.
8. Heavy Side Fringe for Thick Waves
Thick wavy hair can carry a heavier side fringe better than most textures. That’s the honest truth. When the hair has enough density, a fuller bang looks lush instead of bulky, and the side sweep gives it movement so it doesn’t sit like a helmet.
The trick is controlling width. A heavy side fringe should be dense at the root but still taper softly at the ends. If the section is too wide, it starts swallowing the forehead. If it’s too narrow, the whole point of the thickness disappears.
I like this style on people who want a noticeable front shape without constant trim appointments. Because the bang is fuller, it grows out more gracefully. You can also push it farther across the forehead or split it a little if you need a change.
A light internal layer can help the bang fall instead of puffing. Just don’t let anyone thin it to death. Thick hair needs structure, not mercy.
9. Wispy Side Bangs for Fine Curls
Fine curly hair can wear side bangs, but it needs a gentle hand. A wispy side bang should look soft and deliberate, not sparse in a sad way. The goal is to keep enough hair in the section that the bang still shows up after it dries.
This style works best when the bang is cut with a bit of diagonal length, starting near the brow and sliding into the cheekbone. The ends should be light, but not razor-thin. If the section is over-thinned, fine curls can separate into two or three lonely pieces and lose the shape entirely.
A small mousse at the roots helps the front stay lifted. Heavy cream is usually a bad trade here. It can weigh the curl down and make the bang stick to the forehead by noon, which is not a cute look on anyone.
Short version: keep the section narrow, keep the product light, and let the wave pattern do the rest.
10. Pinned-Back Side Bangs for Busy Mornings
Some side bangs are built for days when you want the shape but not the fuss. Pinned-back side bangs give you the front softness without requiring the hair to behave perfectly. That matters more than people admit.
I’ve always liked this option on second- or third-day wavy curls. The bang keeps its memory from the original style, but a small clip or bobby pin moves it off the face and turns the whole thing into a relaxed half-up look. It feels casual, but not careless.
Key details to remember
- Use a clip with a flat grip so it doesn’t snag
- Pin the bang at the temple, not right on the part
- Leave a little bend at the ends so the front doesn’t look stiff
- Mist the section with water before pinning if it’s gone frizzy
This style is less about the cut and more about the daily habit. Still, it’s worth having a side bang that can survive real life.
11. Wolf Cut Side Bangs
A wolf cut and side bangs go together like they were invented in the same messy, charming afternoon. The shorter crown layers support the fringe, while the side bang keeps the front from looking too severe.
What makes this different from a shag is the contrast. The crown is choppier, the bottom is longer, and the side bang bridges the two. On wavy curly hair, that bridge matters because it keeps the hair from ballooning at the sides. The bang gives the front a direction, which makes the whole shape feel more controlled.
This is a good cut if you like volume and a little attitude. It also works well when you want to stretch time between trims. The side bang can grow out into the layers without looking awkward right away.
Use a diffuser and keep your hands out of the front while it dries. If you keep touching it, the bang will separate and frizz faster than the rest of the style.
12. Arched Side Bangs for Round Faces
Arched side bangs create lift where round faces often want it most: up high, near the temples. Instead of cutting the fringe straight across or letting it drop too low, the shape curves upward a little before sweeping down. That small change shifts the eye line.
The arch should be subtle. You are not drawing a rainbow on your forehead. You’re creating enough height to lengthen the face visually, then letting the bang taper into the cheekbone. On wavy curly hair, the curl itself helps build the arc, so the cut only needs a gentle guide.
Who this suits best
People with full cheeks, softer jawlines, or hair that naturally forms a rounded silhouette. The style also plays nicely with glasses because the upward curve leaves a little space near the frame.
Keep the shortest point around the outer edge of the brow rather than the center. That keeps the bang from collapsing too low. A root lift spray can help, but don’t go wild with it. Too much product at the root and the front gets stiff.
13. Temple-Start Side Fringe
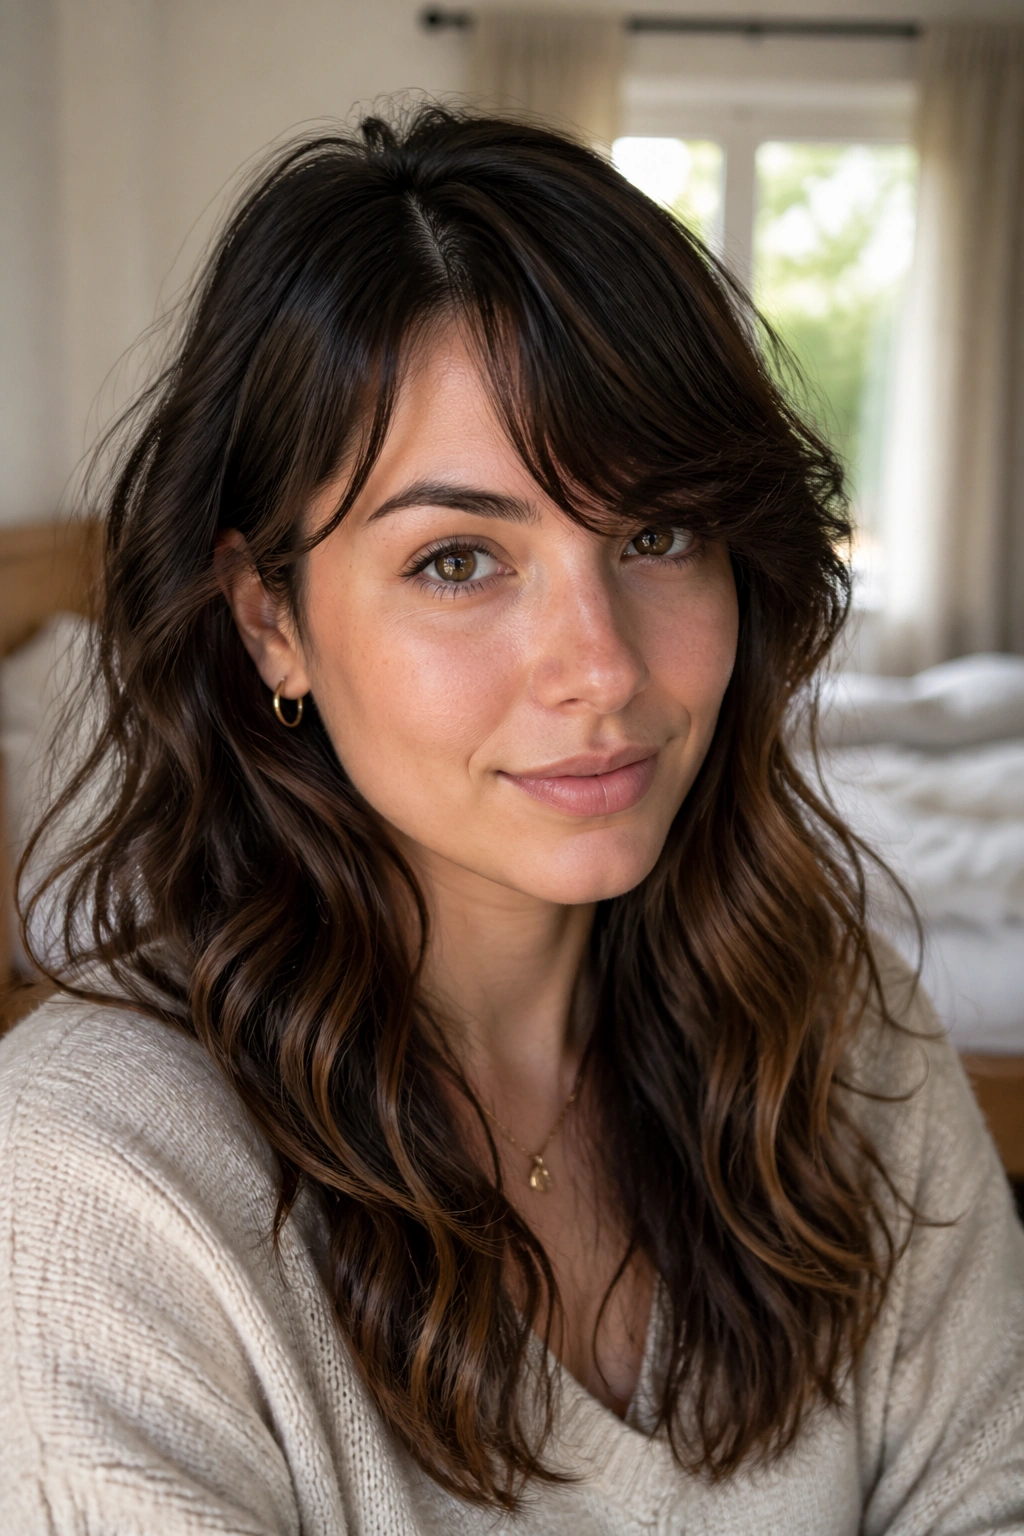
Temple-start bangs are a quieter version of side bangs, and I think they’re underrated. The front section begins farther back, near the temple, which makes the fringe feel softer and less obvious. It’s the kind of detail that looks natural even when it’s very intentional.
Why it works
By starting the bang back from the hairline, you avoid taking too much hair off the forehead. That matters on wavy curly hair, where shrinkage can make a small fringe look much shorter after drying. The side sweep also gets better support because it has a longer runway from the temple down toward the cheek.
A temple-start fringe is a nice middle ground if you want movement without a full bang commitment. It can be tucked, pinned, or worn forward depending on the day. And because the section is narrow, it grows out with less drama than a heavy bang.
Ask for the shortest piece to sit near the upper brow line when dry, not wet. That one detail saves a lot of regret.
14. Bottleneck Side Bangs for Wavy Curly Hair
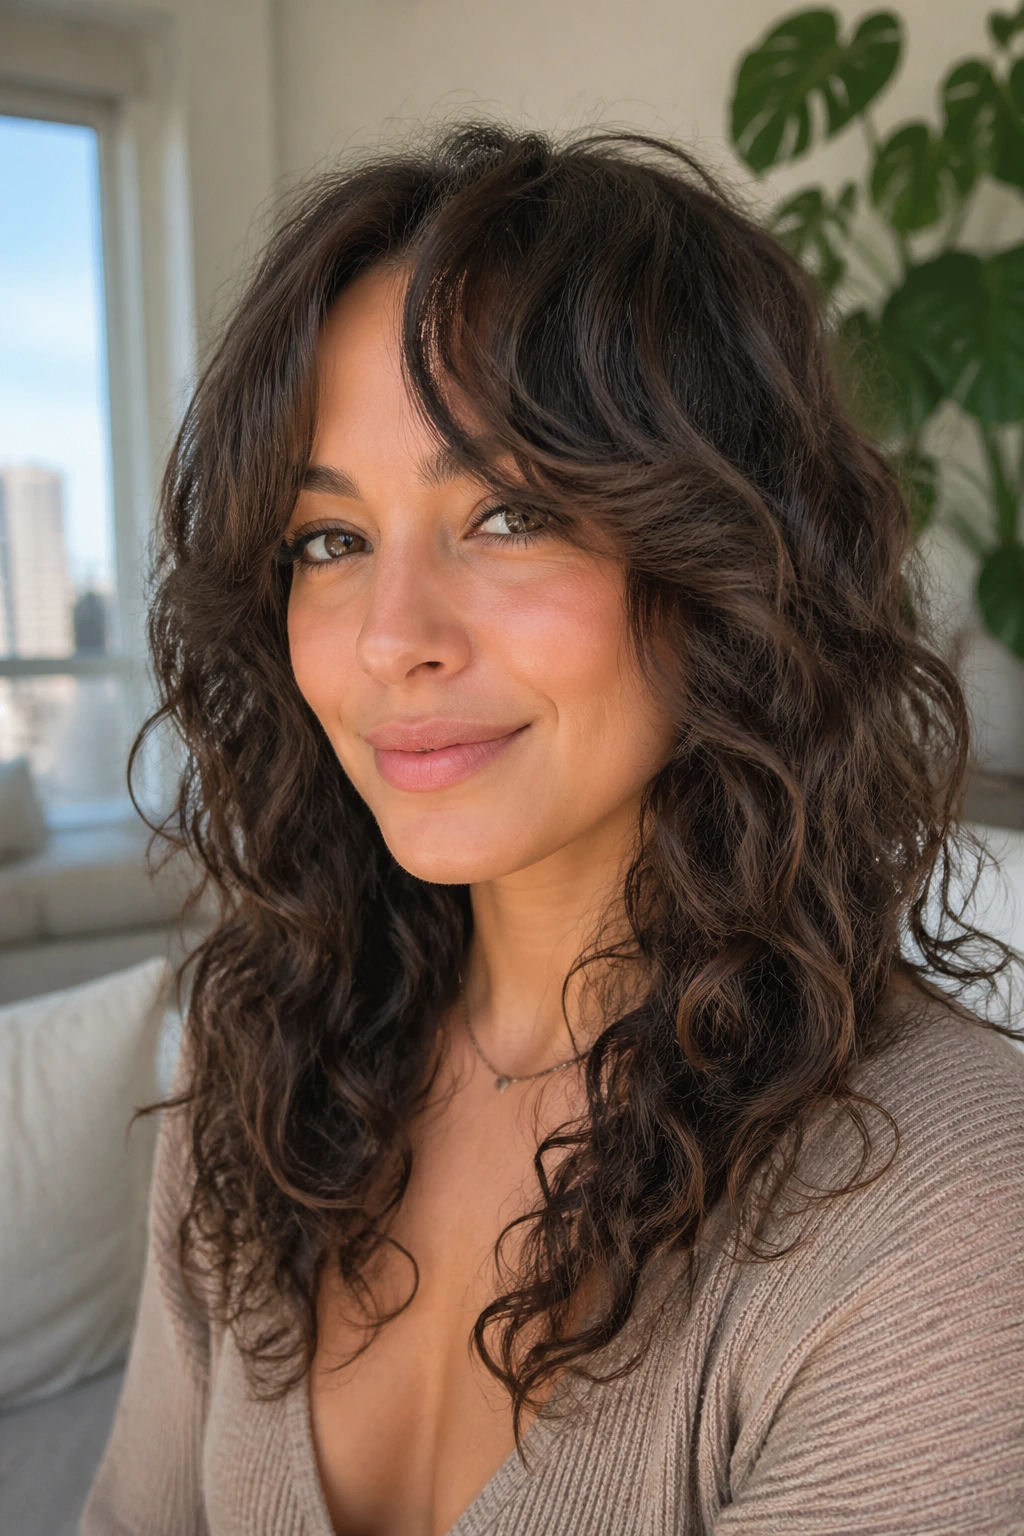
Bottleneck bangs usually split in the middle, but on wavy curly hair they can be swept to one side and still keep that gentle narrowing at the center. The shape starts a little fuller near the middle of the forehead, then narrows and opens out toward the sides. It sounds fussy. It isn’t.
The reason this style works so well is that it follows the face instead of cutting straight across it. The center is soft, the side sweep is flattering, and the longer outer pieces merge into the rest of the hair. If your curls are a mix of loose waves and tighter bits, that flexible shape handles the variation better than a blunt fringe.
I like this one for people who hate being locked into one part. You can wear it left, right, or slightly split. It still looks like the same haircut.
Keep the front section hydrated, but not drenched. A little curl cream on the mid-lengths is enough. The roots should stay light so the bang doesn’t cling to the skin.
15. Shoulder-Length Shag With a Side Sweep
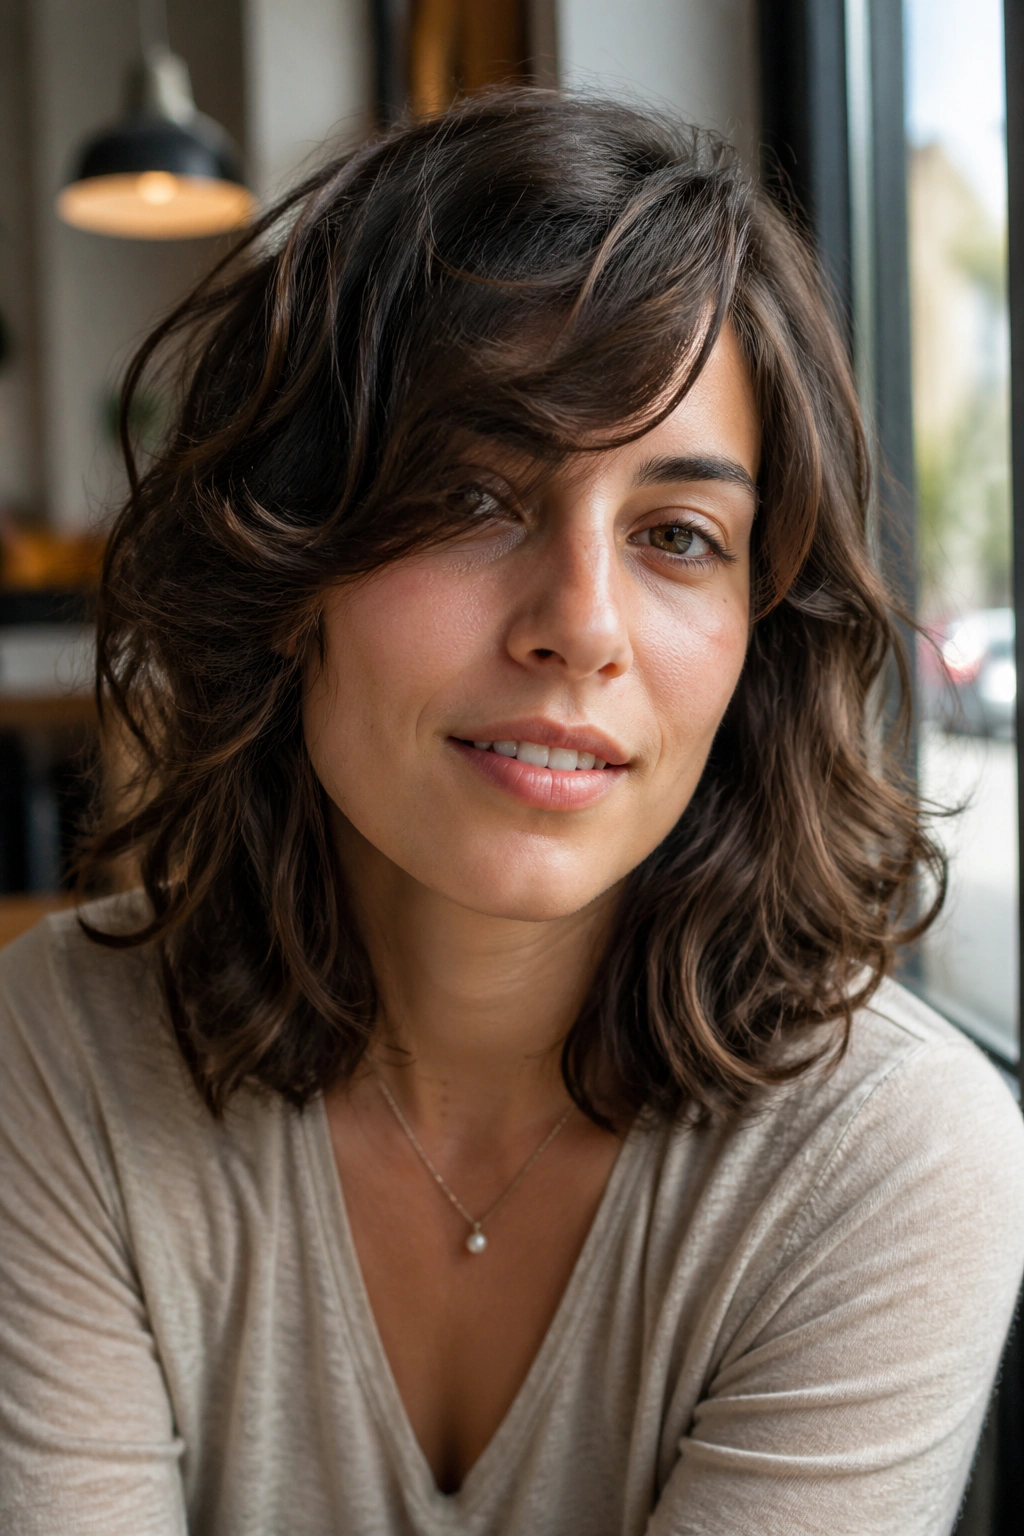
Shoulder-length shag and side bang is a classic pairing for a reason. The length gives the fringe somewhere to land, and the shag layers keep the whole cut from feeling heavy around the face. It’s one of those shapes that can look polished on purpose or charmingly undone, depending on how you style it.
Why does it hold up so well? Because shoulder-length hair sits in that middle zone where waves still bounce, but they’re not so long that the front gets dragged flat. The side bang can curve out from the brow, skim the cheek, then fold into the layer around the jaw. That line is flattering on almost everyone.
How to wear it
Start with a center-ish part, then push the front bang to your stronger side. Use a diffuser on low speed for a few minutes, then stop touching it. The more you play with the front while it dries, the more likely it is to separate into frizz. That’s the part people always ignore and then blame the cut for later.
16. Dry-Cut Side Bangs With a Natural Finish
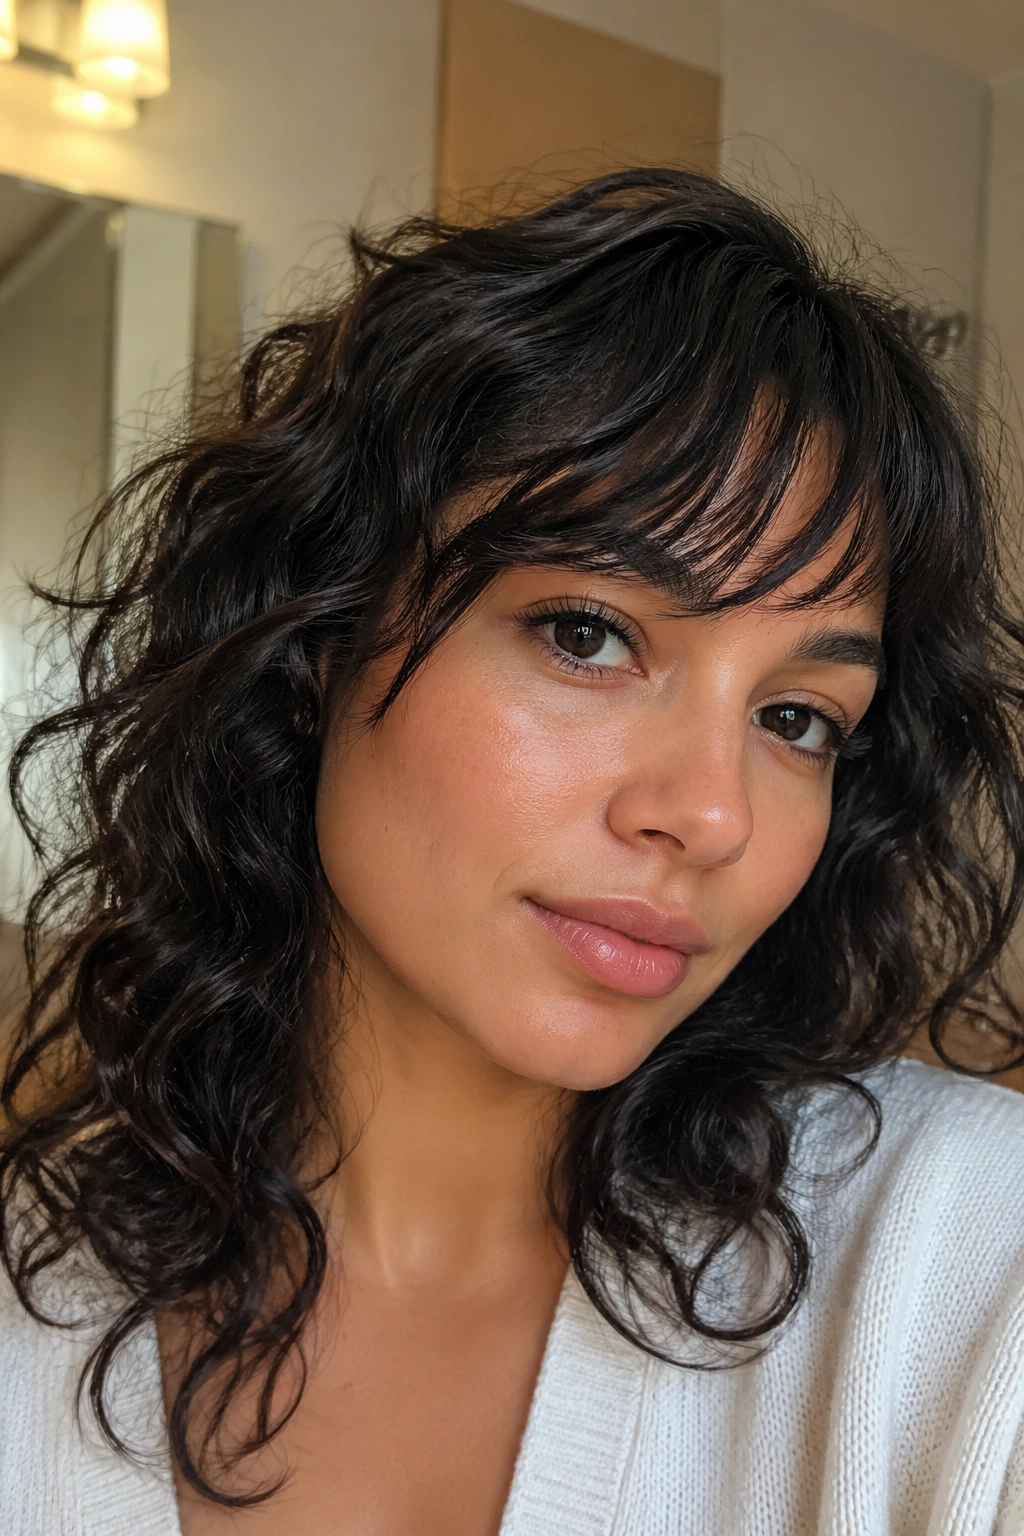
A dry-cut side bang is not a style in the flashy sense, but it matters enough to count here. On wavy curly hair, cutting the fringe dry lets the stylist see the actual shape, the real shrinkage, and where the front wants to fall. That makes the result much more wearable.
Here’s the basic idea: the hair is cut in its natural state, then refined in small snips until the sweep lands where it should. No guessing. No cutting a wet curl and hoping for the best. If your texture has a lot of spring, this method can save you from ending up with a bang that lives halfway up your forehead.
What to look for in the cut
- Small vertical sections, not one blunt slice
- Length left longer near the outer edge
- No heavy texturizing at the root
- A soft diagonal line when the hair is relaxed
It’s one of those behind-the-scenes choices that makes the style easier to live with. Less drama. Better payoff.
17. Lob With Bent Side Bangs
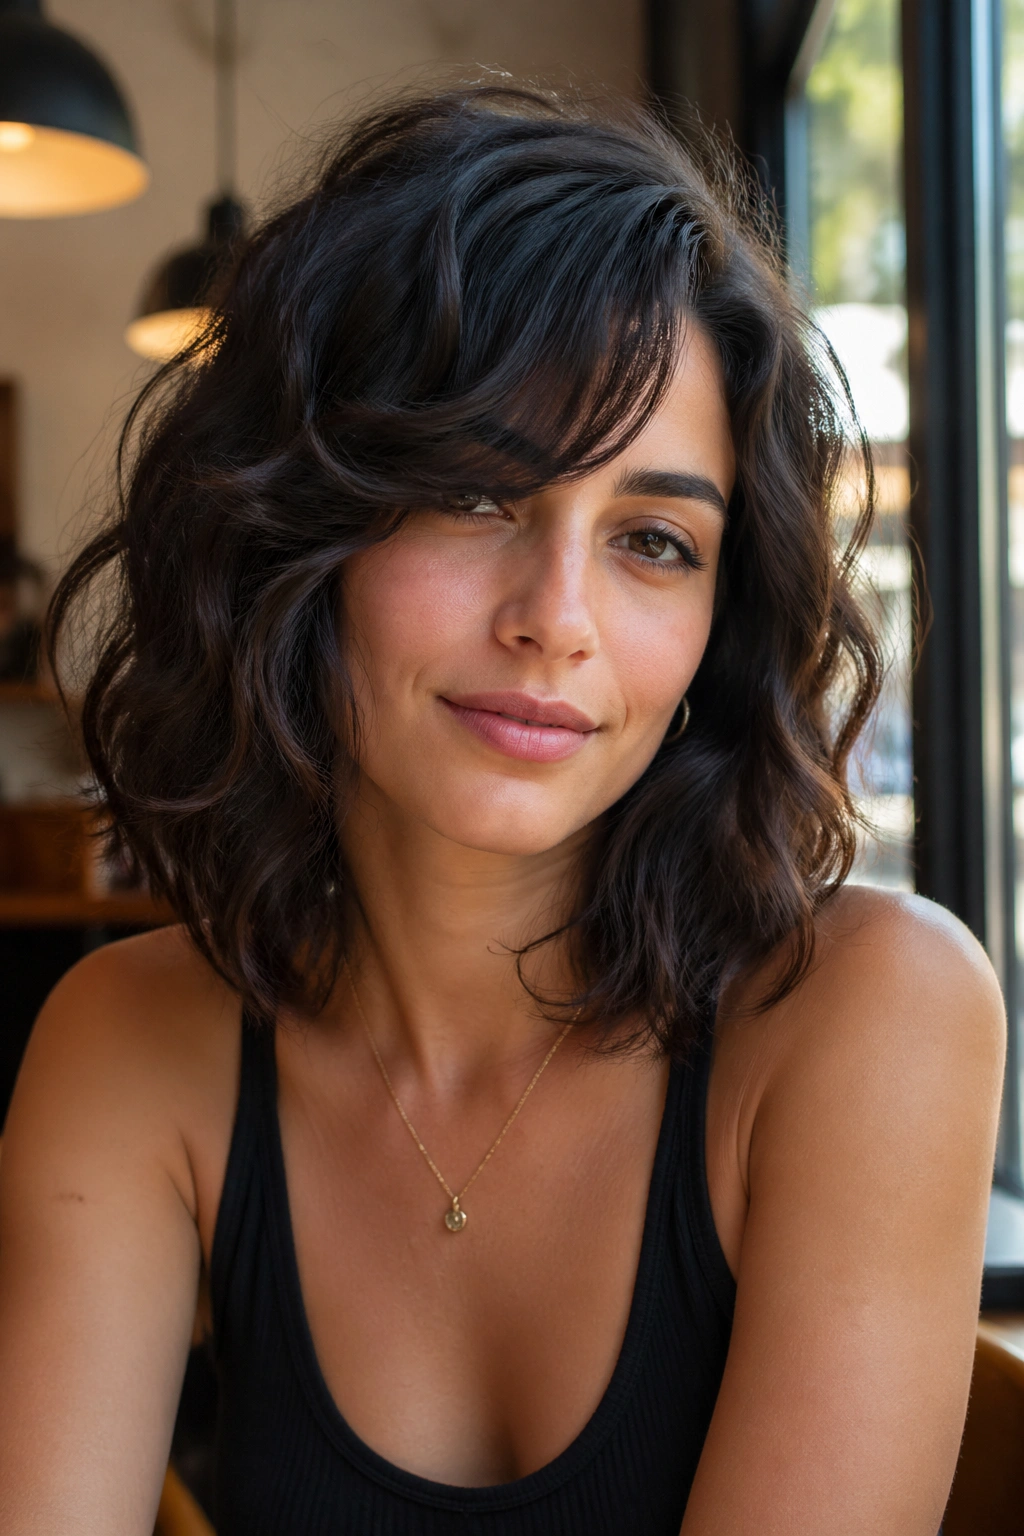
A lob and a side bang is such a sensible pairing that people almost forget to mention it. The length sits around the collarbone or just above it, which gives the front enough weight to fall into a soft bend instead of popping out in random directions.
The bang itself should be long enough to skim the eye line or the upper cheekbone, then curve away from the face. On wavy curly hair, that bend is the whole point. It softens the front, keeps the shape feminine without getting too sweet, and gives the lob a little motion when the rest of the hair is left loose.
A round brush isn’t required, but it helps if you want a more polished finish. Wrap just the bang area for a minute or two, then let it cool before touching it. That tiny bit of control can keep the front from puffing up.
If you like hair that looks done without feeling stiff, this is a solid place to land.
18. Flipped-Out Retro Side Bangs
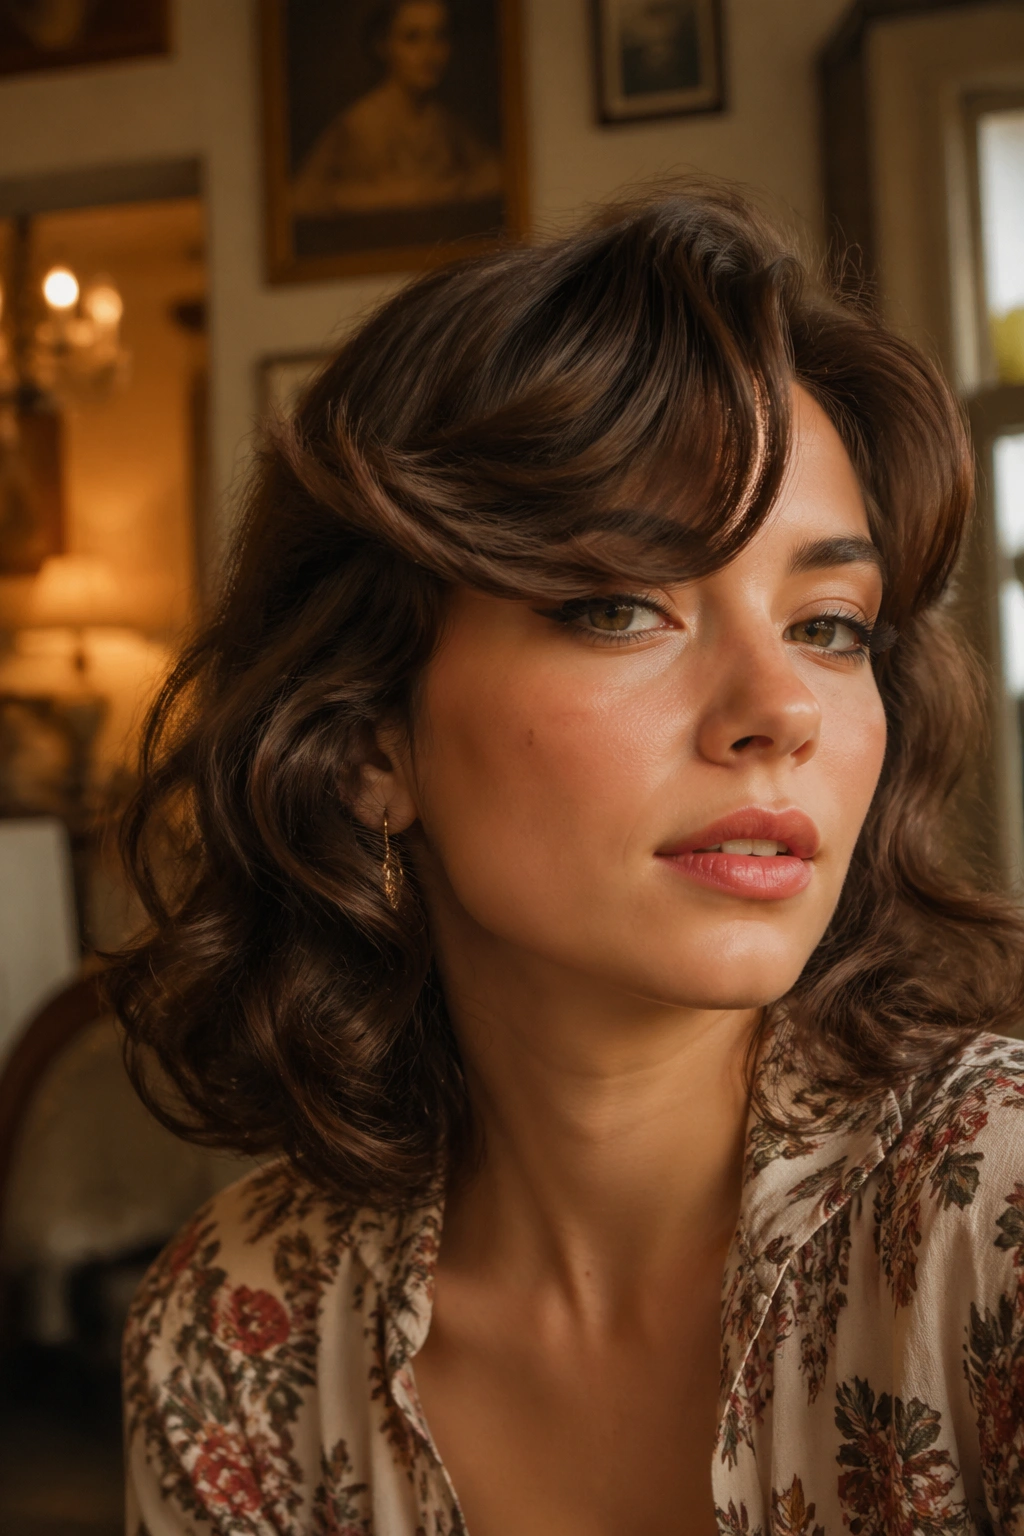
Retro side bangs have a little attitude. They curve away from the face, often with a soft flip at the end, which gives the haircut a playful shape that works especially well with wavy hair. If your hair already has body, the flip looks intentional instead of overstyled.
This is not the same as a sleek side bang. A sleek bang hugs the face; a retro one bends out and moves. The difference is small in theory and obvious in the mirror. On curly texture, the flip can happen naturally if you dry the front with tension and then release it before the ends flatten completely.
This style is good for people who like a bit of vintage shape without committing to full-on pin curls. It also pairs well with a lob, a shag, or shoulder-length layers. I’d skip it if you hate having to reshape the front during the day.
Use a touch of mousse and a wide brush if you want the curve to hold. Too much oil makes the flip droop.
19. Tapered Nape With a Side Fringe
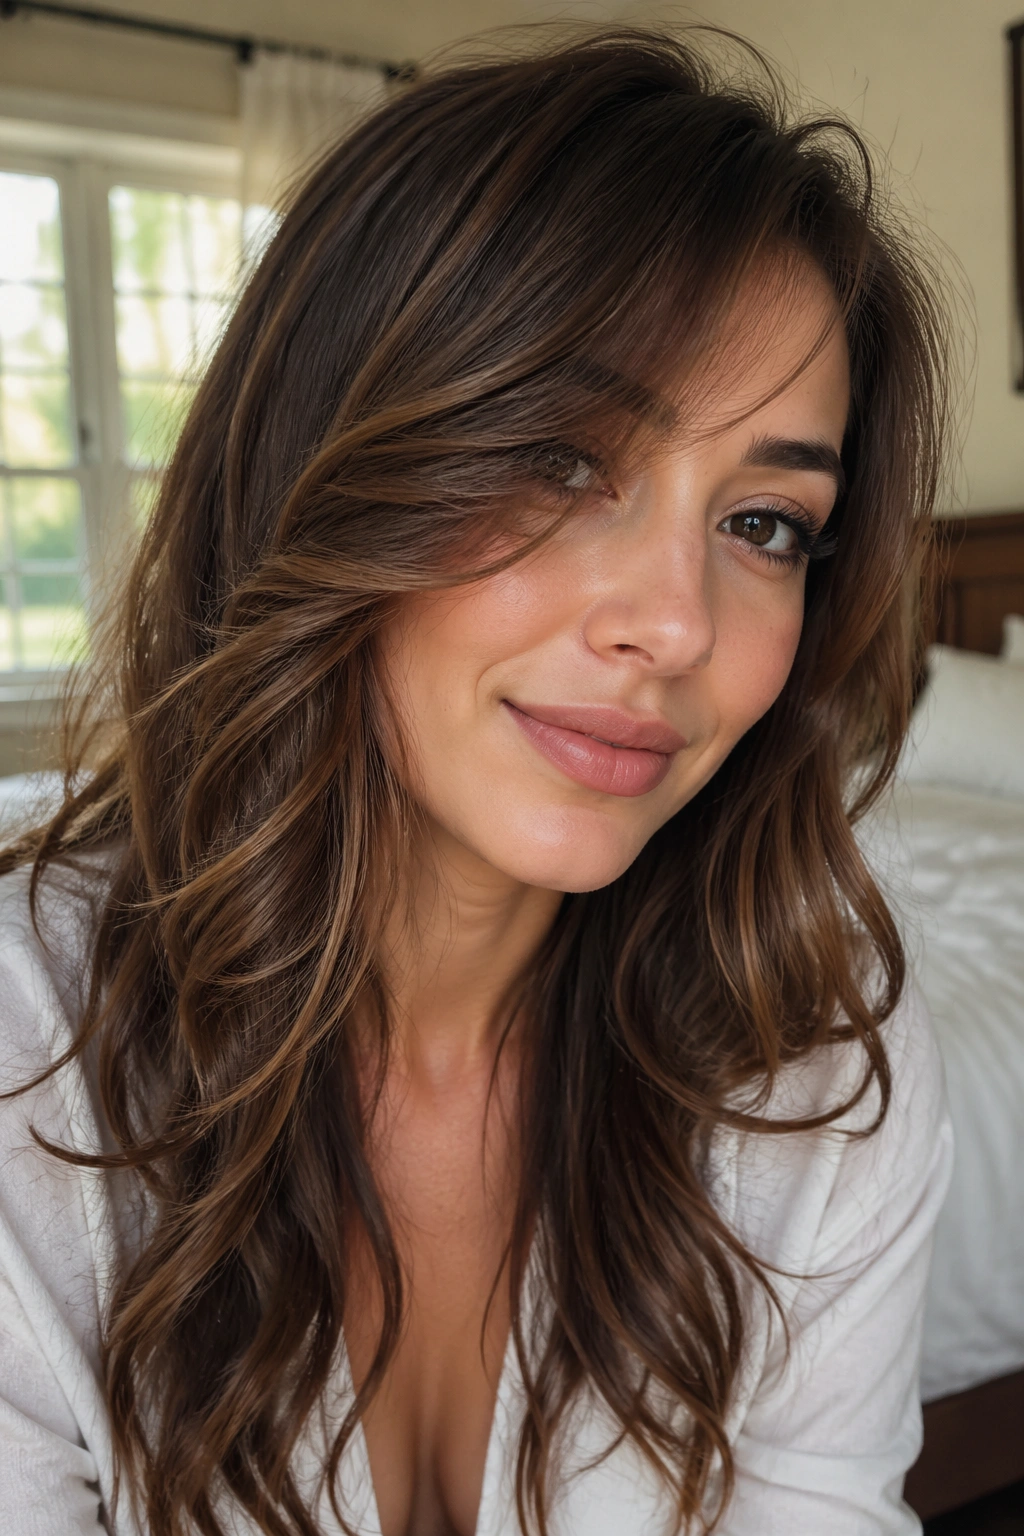
A tapered nape and side fringe might sound like two separate ideas, but together they create a really balanced cut. The shorter back keeps the shape light, while the side bang adds softness right where the face needs it. On wavy curly hair, that contrast can keep a short cut from looking boxy.
The fringe should not be too thick here. A narrow side section that drops from the temple toward the cheekbone is enough. Since the back is tapered, the front can carry a little more visual weight without overwhelming the cut.
Why it works
The shape opens up the neck and jawline while still leaving the forehead area softer. That matters if you want structure but not severity. It also gives curl patterns room to stack without making the whole head look round.
A cut like this benefits from a little definition cream at the ends and a blow-dry or diffuse session at the roots. If the roots stay flat, the side bang loses the balance that makes the style interesting.
20. Big Ringlet Side Bangs
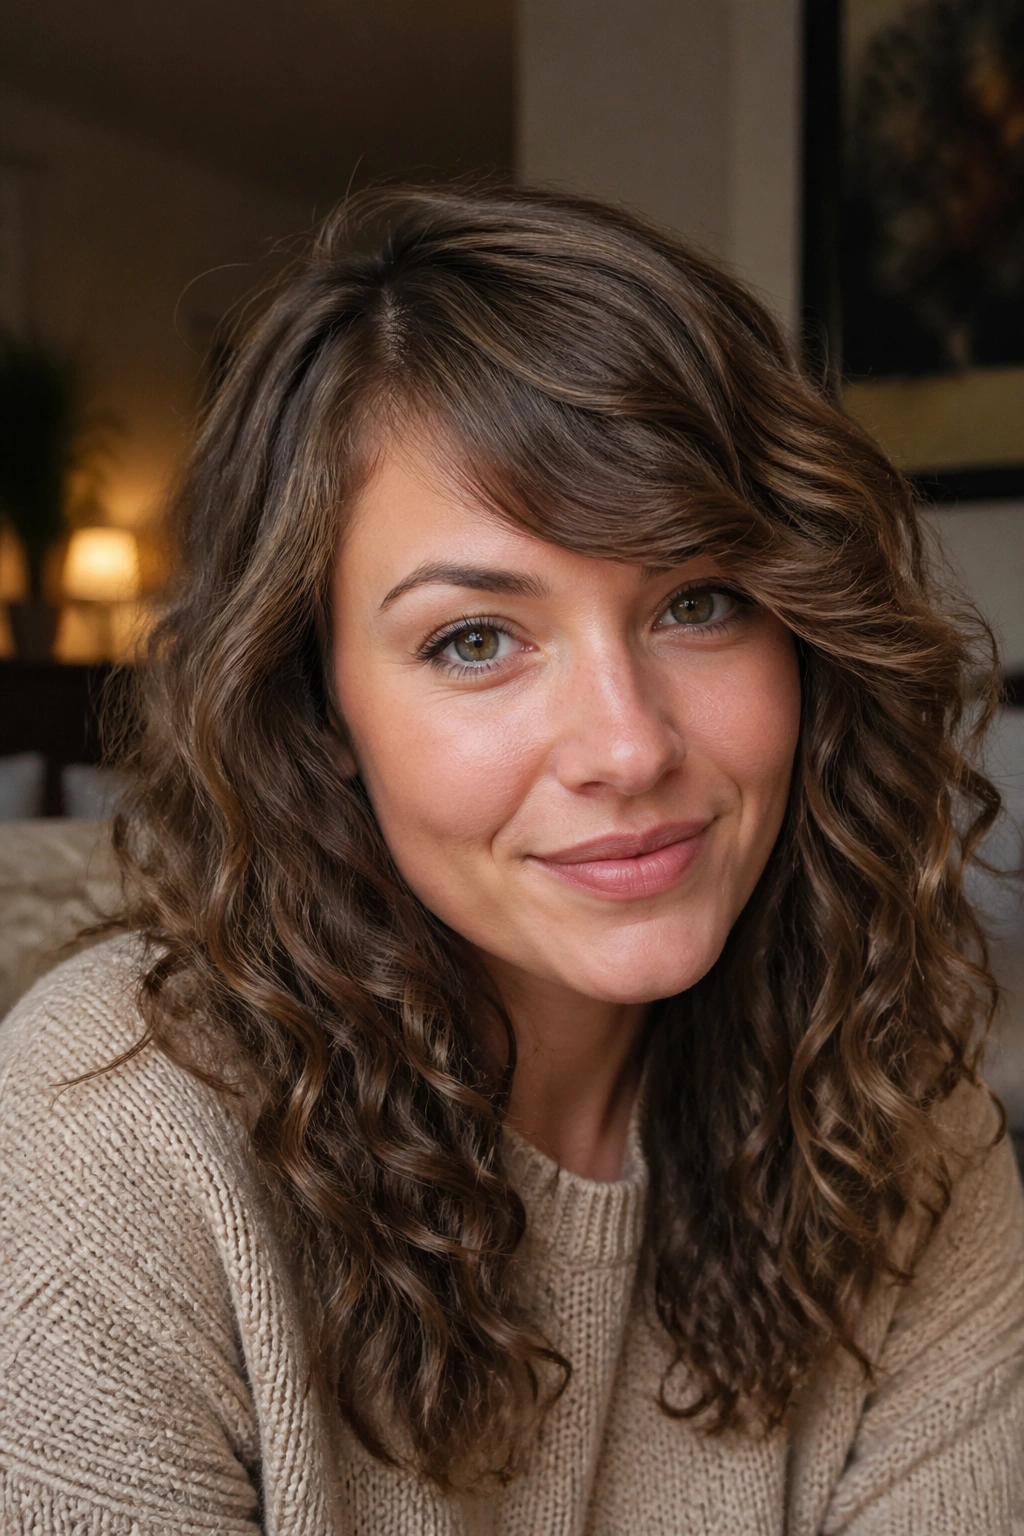
Big ringlets can make a side bang look lush in a way looser waves never quite do. The bang becomes a feature, not a detail. That’s either exactly what you want or too much hair near your face. No middle ground, really.
The key is leaving enough length for the ringlet to form before it hits the forehead. If the bang is too short, the curl springs up and turns into a tiny coil at the hairline. If it’s too long, the shape drags and blocks the eye. Somewhere between the brow and cheekbone usually lands well.
I like this style on dense curly hair because it holds shape for hours. The ringlet frames the face and adds movement even when the rest of the style is simple. If you want it to look controlled, separate the curl once after drying and stop fussing with it.
A soft side part helps the ringlet settle into one direction instead of splitting awkwardly.
21. Sleek Root-Smoothed Side Bangs
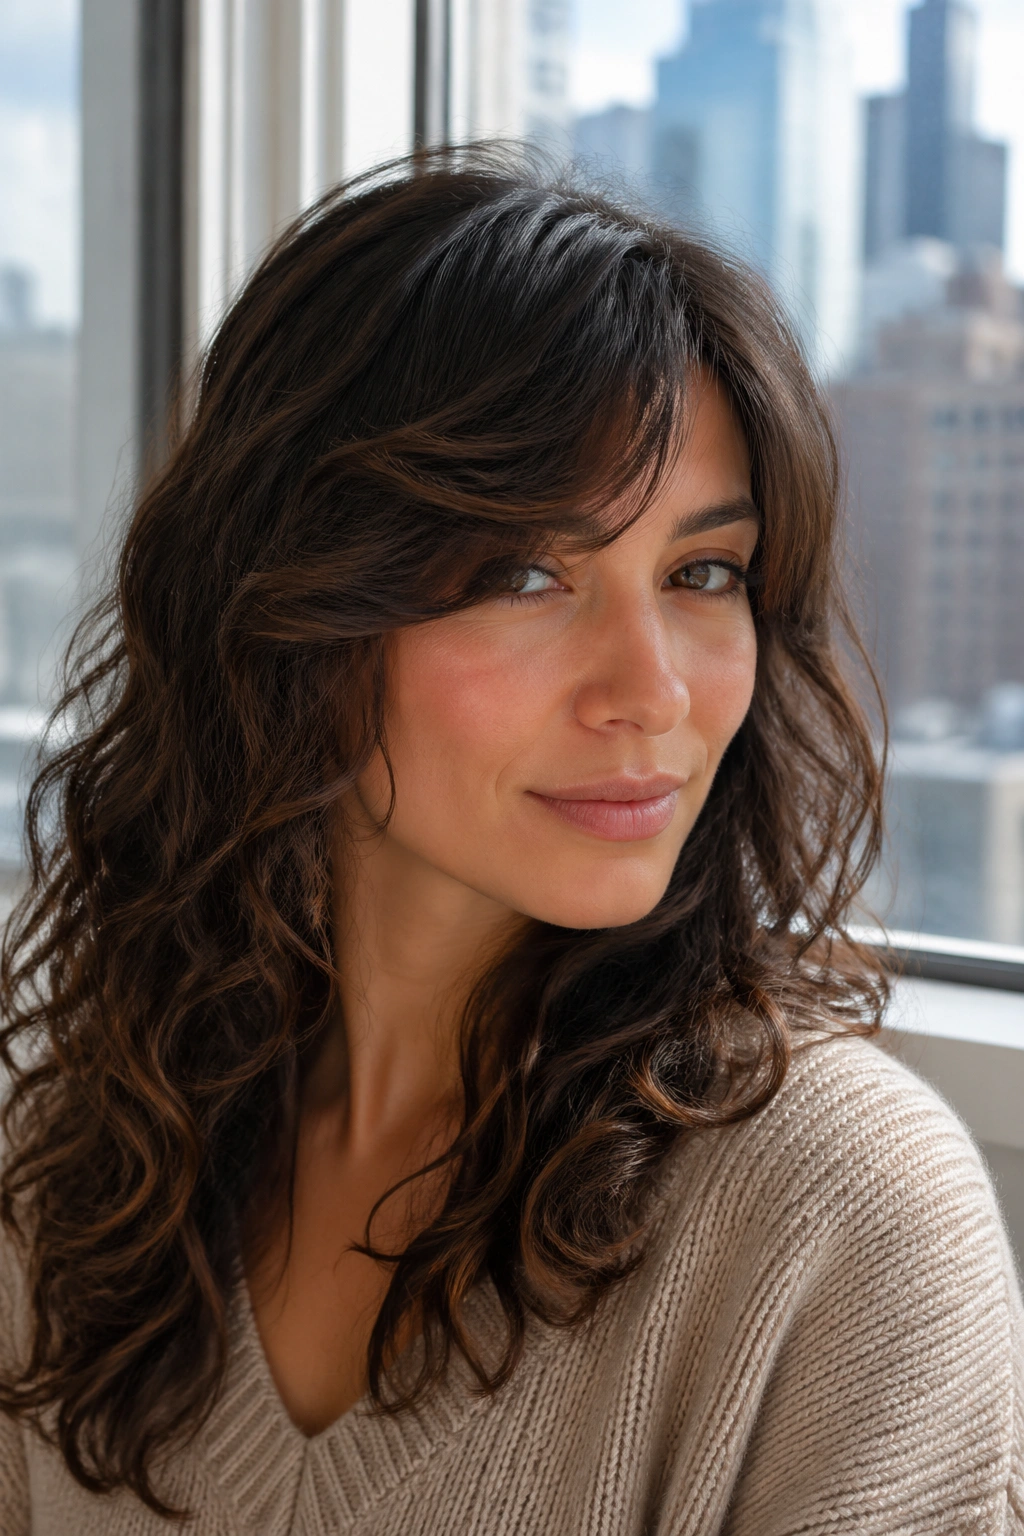
Can wavy curly hair wear a sleek side bang? Yes, but the trick is smoothing only the root and leaving the rest of the texture alone. That keeps the style from looking like two different heads joined together, which is the main risk with this kind of finish.
A small brush and a low-heat dryer setting are enough for most of the work. Aim the airflow at the root for about a minute, then let the ends keep their wave. The bang should bend softly, not become pin-straight. If you flatten the whole front section, the contrast against the rest of the hair can feel harsh.
How to use it
Apply a tiny amount of smoothing cream at the root only. Use a comb to direct the front to one side while it dries. Then leave the ends alone. You want polish at the scalp and movement through the length.
This style is especially good for workdays or events where you want the fringe to stay out of your eyes. It still feels like textured hair. Just neater.
22. Invisible-Layer Side Bangs
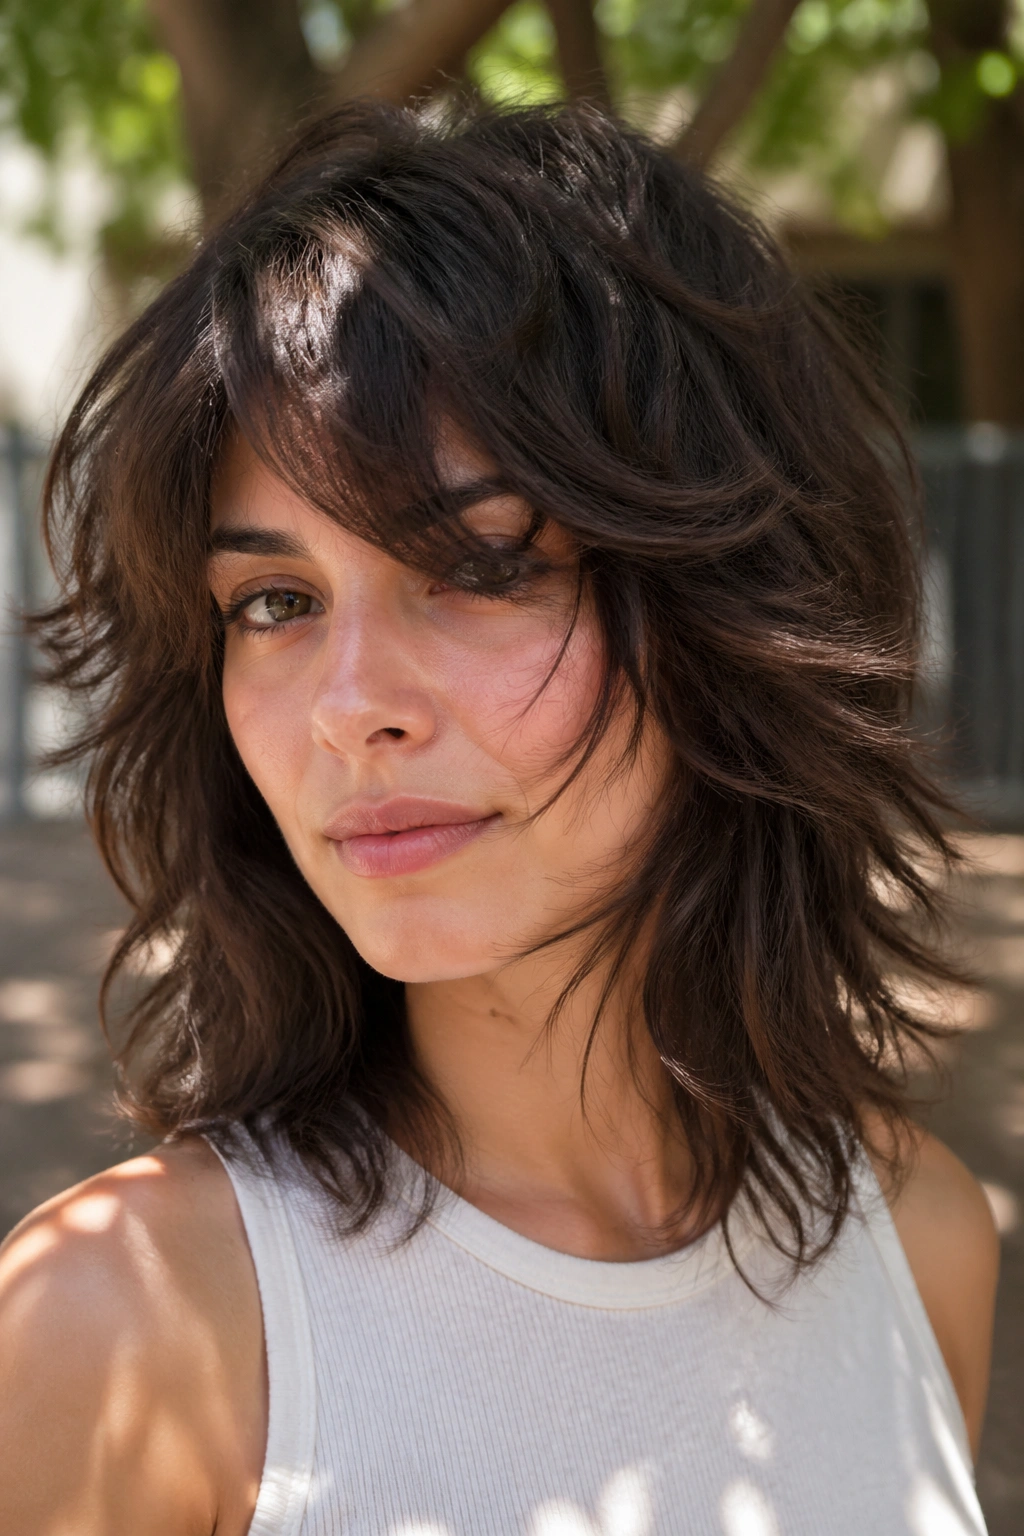
Invisible layers are the sort of thing people notice without realizing what they’re seeing. The bang isn’t a separate chunk of hair. It’s the shortest part of a layered front that quietly sweeps into the rest of the cut.
That makes this style excellent for wavy curly hair that changes from day to day. Some mornings the bang looks fuller, some mornings it disappears into the layers, and both versions still work. The haircut is doing the heavy lifting, which is exactly what you want when your texture has a mind of its own.
Key details
- The front shortest point sits around the cheekbone
- Layers should be soft, not choppy
- The bang should blend into the front pieces within 2 to 3 inches
- Works best when the curl pattern is not too tightly packed at the hairline
This is a quiet haircut. No hard line. No obvious fringe. Just enough shape to keep the front interesting.
23. Temple-Length Side Bangs
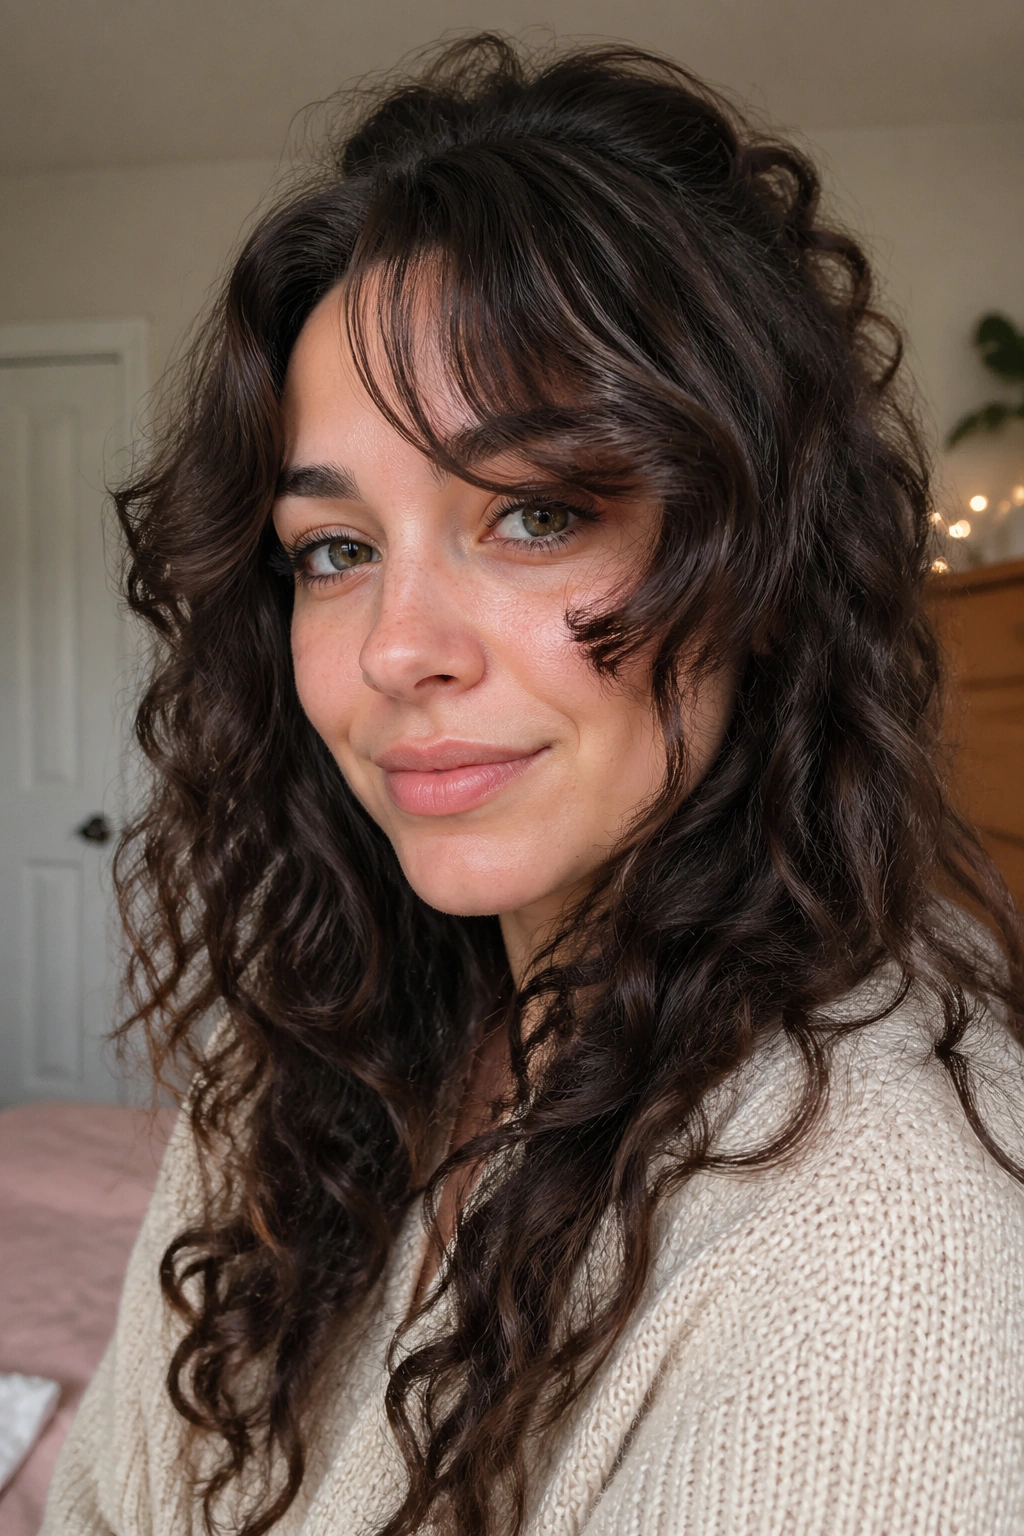
Temple-length side bangs are long enough to feel safe and short enough to count. That’s their sweet spot. They start near the temple and drop to the cheekbone or jawline, depending on how much wave shrinkage your hair tends to have.
The length gives you flexibility. You can wear them forward as a side sweep, push them behind the ear, or let them soften the front of a half-up style. On wavy curly hair, temple-length bangs often look better than ultra-short fringe because they keep their shape even on humid days.
I think this is one of the most practical options on the whole list. It’s easy to grow out. It doesn’t demand perfect styling. And if you decide you’re done with bangs, the pieces already live in the zone where they can become face-framing layers without a weird in-between stage.
Ask for the shortest point to sit below the brow when dry. That little extra length is insurance.
24. Split Side Bangs That Open at the Center
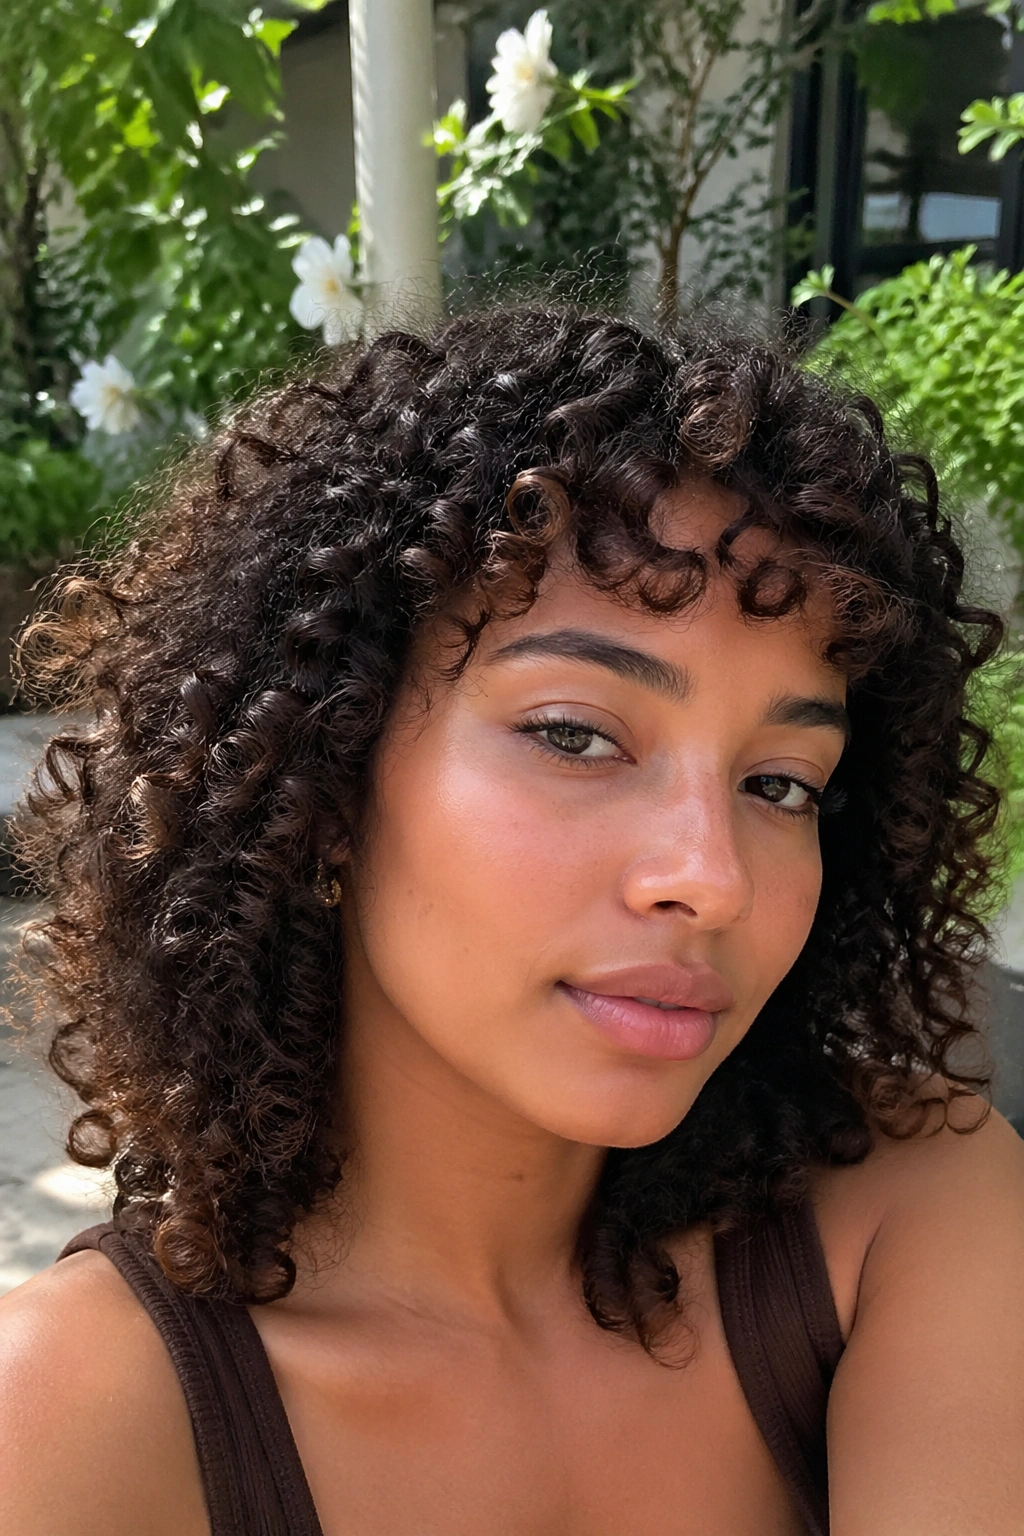
Split side bangs are a good answer for people who want a soft fringe but don’t want hair sitting on the forehead all day. The bang opens near the center, then sweeps to both sides with one side carrying more weight. It’s a small difference, but it changes the whole feel.
Unlike a single heavy side fringe, this shape lets the front breathe. That matters for curls, which can bunch up and shrink in a way straight hair never will. The split keeps the front from getting too dense and gives the face a little lift.
This style suits high foreheads, longer faces, and anyone who likes a bit of softness without full coverage. It also helps if one side of your hair is more cooperative than the other. You can let the stronger side do most of the work and let the weaker side stay lighter.
Use your fingers to separate the front while it’s damp. A comb can make the split too sharp and too neat.
25. Soft Mullet Side Bangs
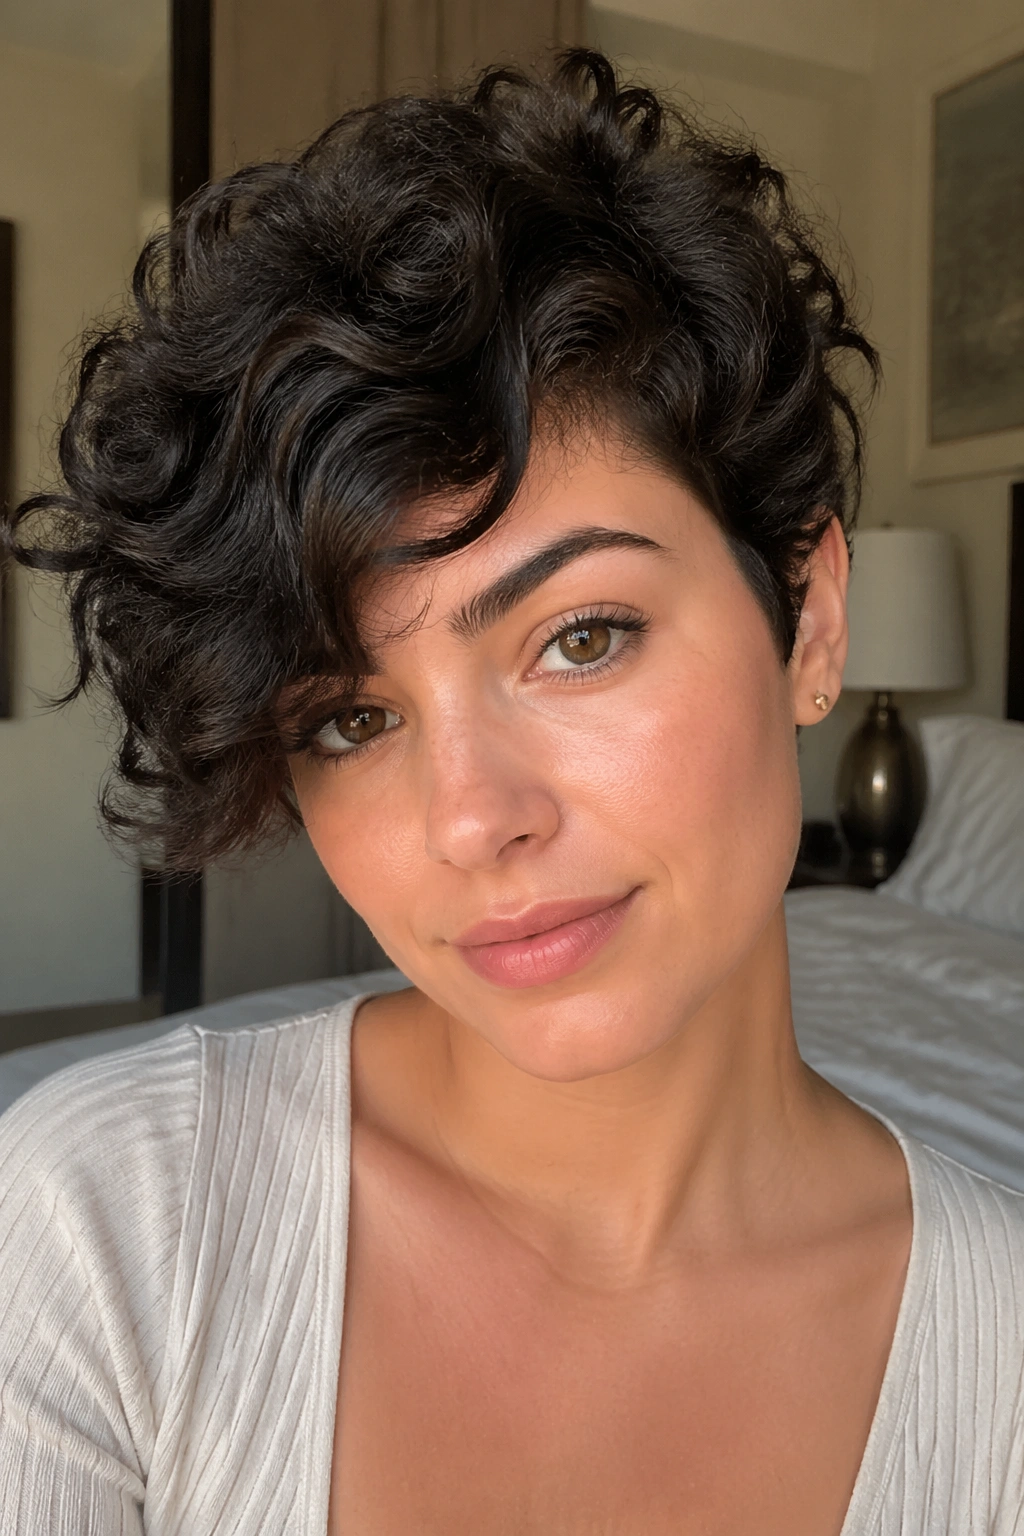
A soft mullet with side bangs sounds more daring than it actually is. The cut has a bit more length in the back, shorter layers around the crown, and a front fringe that sweeps sideways instead of falling straight down. On wavy curly hair, it can look relaxed and surprisingly pretty.
What keeps it from feeling too extreme is softness. The side bang should blend into the shorter crown layers, not cut off from them. If the transition is too abrupt, the front looks like an afterthought. If it’s gradual, the whole cut feels designed.
This is a good pick for people who like texture and don’t want a polished salon look every day. It’s also a nice choice if your curls need room to spring. The shape already has movement, so you’re not fighting the hair for volume.
I’d keep the front a little longer than you think. Grow-out on this shape is more forgiving when the bang is not clipped too close.
26. Diffused Side Bangs for Wavy Curly Hair
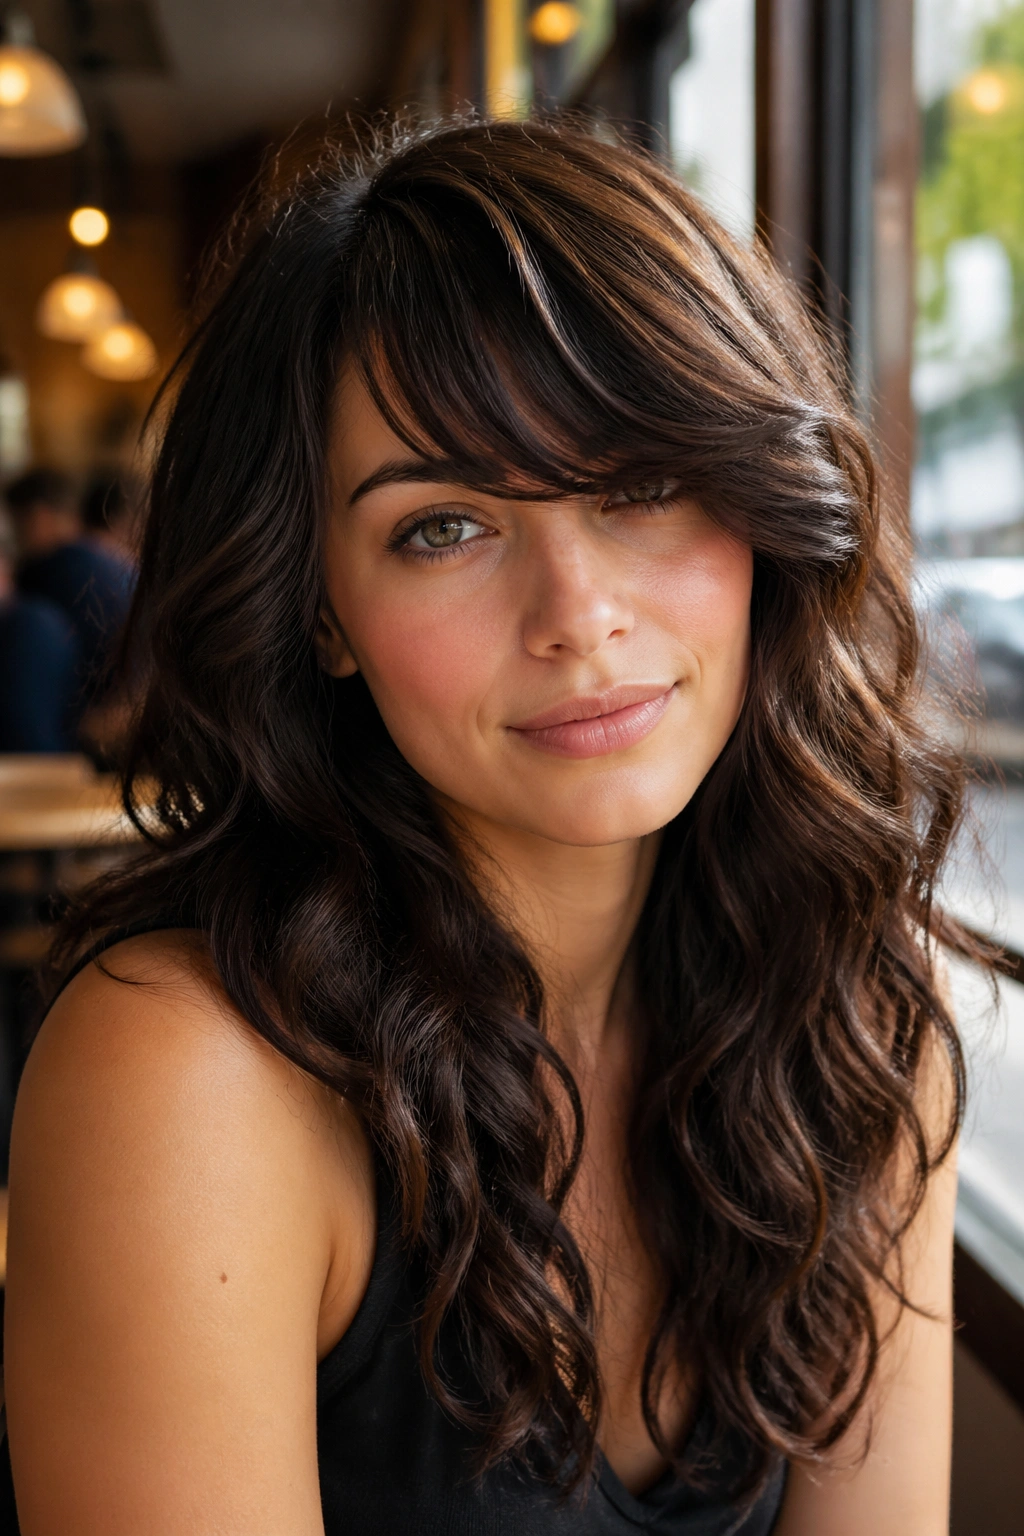
A diffuser can make or break side bang styles for wavy curly hair. The front section needs lift, direction, and enough drying control that it doesn’t collapse into one flat ribbon or puff into a frizzy cloud. The diffuser helps with all three if you use it carefully.
Start by sectioning the bang away from the rest of the hair. Cup the front into the diffuser bowl and hold it still for 20 to 30 seconds at a time on low heat. Then release, shake the roots lightly, and repeat. Don’t hover the dryer back and forth like you’re trying to dry a wet countertop. That just makes the curl frizzier.
What to watch for
- Keep the airflow low and steady
- Stop when the bang is about 80 percent dry
- Let it cool in place before touching it
- Use a tiny amount of gel if the front frizzes fast
This method is less about the cut and more about the finish, but the finish is what people see first.
27. Braided-Crown Side Bangs
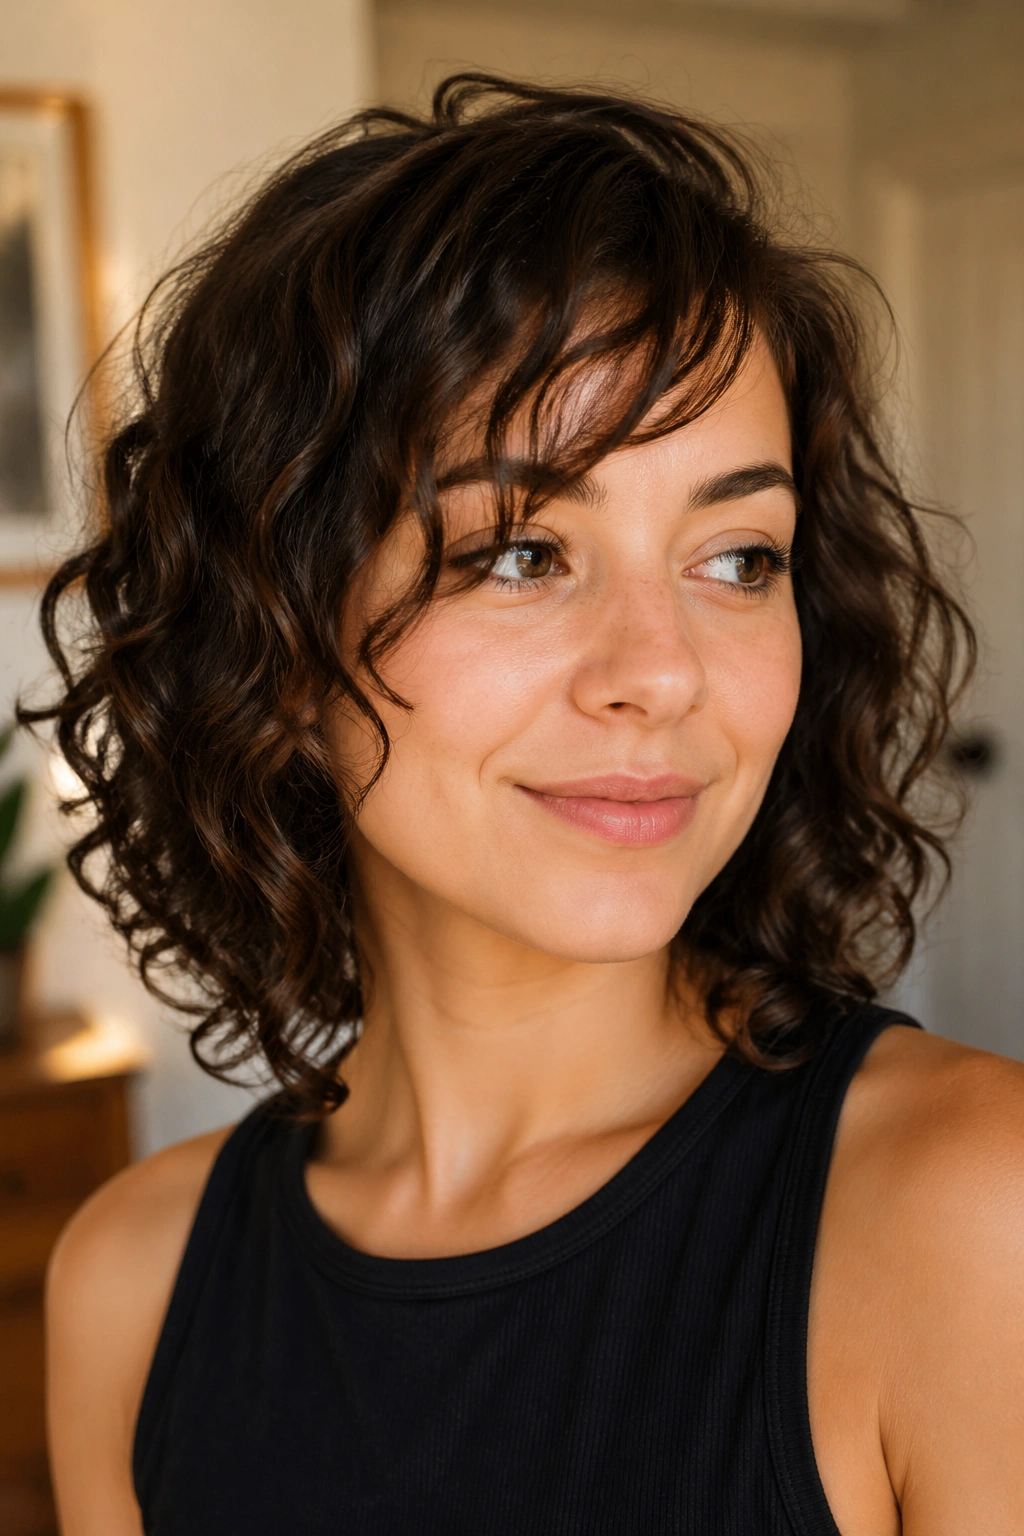
Braided-crown side bangs are a nice fix for days when the front needs taming without being hidden. A small braid from the temple area can pull the bang to one side while still leaving some texture visible. It works especially well on longer wavy curls.
Why bother with a braid at all? Because it keeps the front controlled without forcing it flat. The braid also adds a little detail near the face, which can make even a simple haircut feel more styled. If your hair is layered, keep the braid loose so it doesn’t grab too much of the shorter front pieces.
How to get it right
Start the braid just behind the hairline and angle it back toward the crown. Leave the bang section slightly loose at the front so it can puff a little and stay soft. Secure it with a small clear elastic or a pin that matches your hair color.
This is a good style for humid days, gym days, or any time you want your bangs off your face without losing the shape completely.
28. Glasses-Friendly Side Bangs
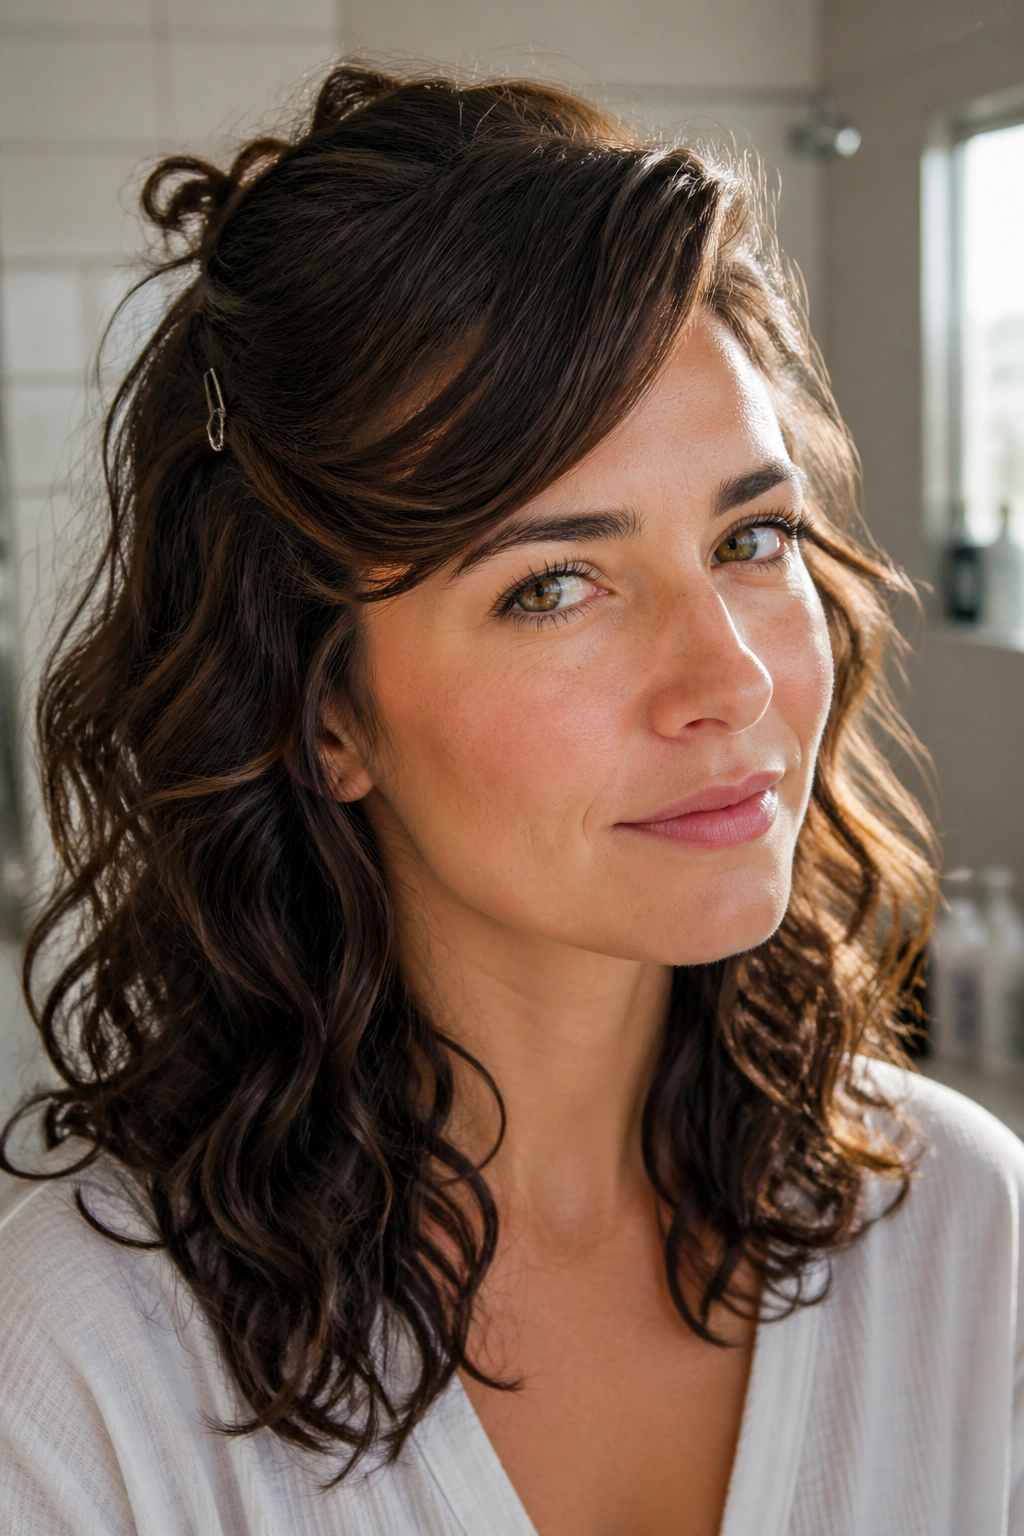
If you wear glasses, side bangs need a little more strategy. The bang should end above the frame, fall beside it, or sweep over it in a way that doesn’t crowd the lenses. When the cut sits right, the whole face looks balanced. When it doesn’t, the frames and fringe start competing.
The safest option is a slightly longer side sweep that starts near the temple and ends around the brow tail or upper cheek. That gives the front enough length to move without falling directly into the frame. Wavy and curly textures usually handle this well because the bend keeps the bang from lying flat across the lenses.
- Keep the shortest piece just above or beside the frame line
- Avoid heavy product near the temples
- Ask for a soft diagonal, not a blunt curve
- Tuck one side behind the ear if the frames feel crowded
A glasses-friendly bang should frame the face, not chop it into pieces. Small difference. Big result.
29. Long Mermaid Side Bangs
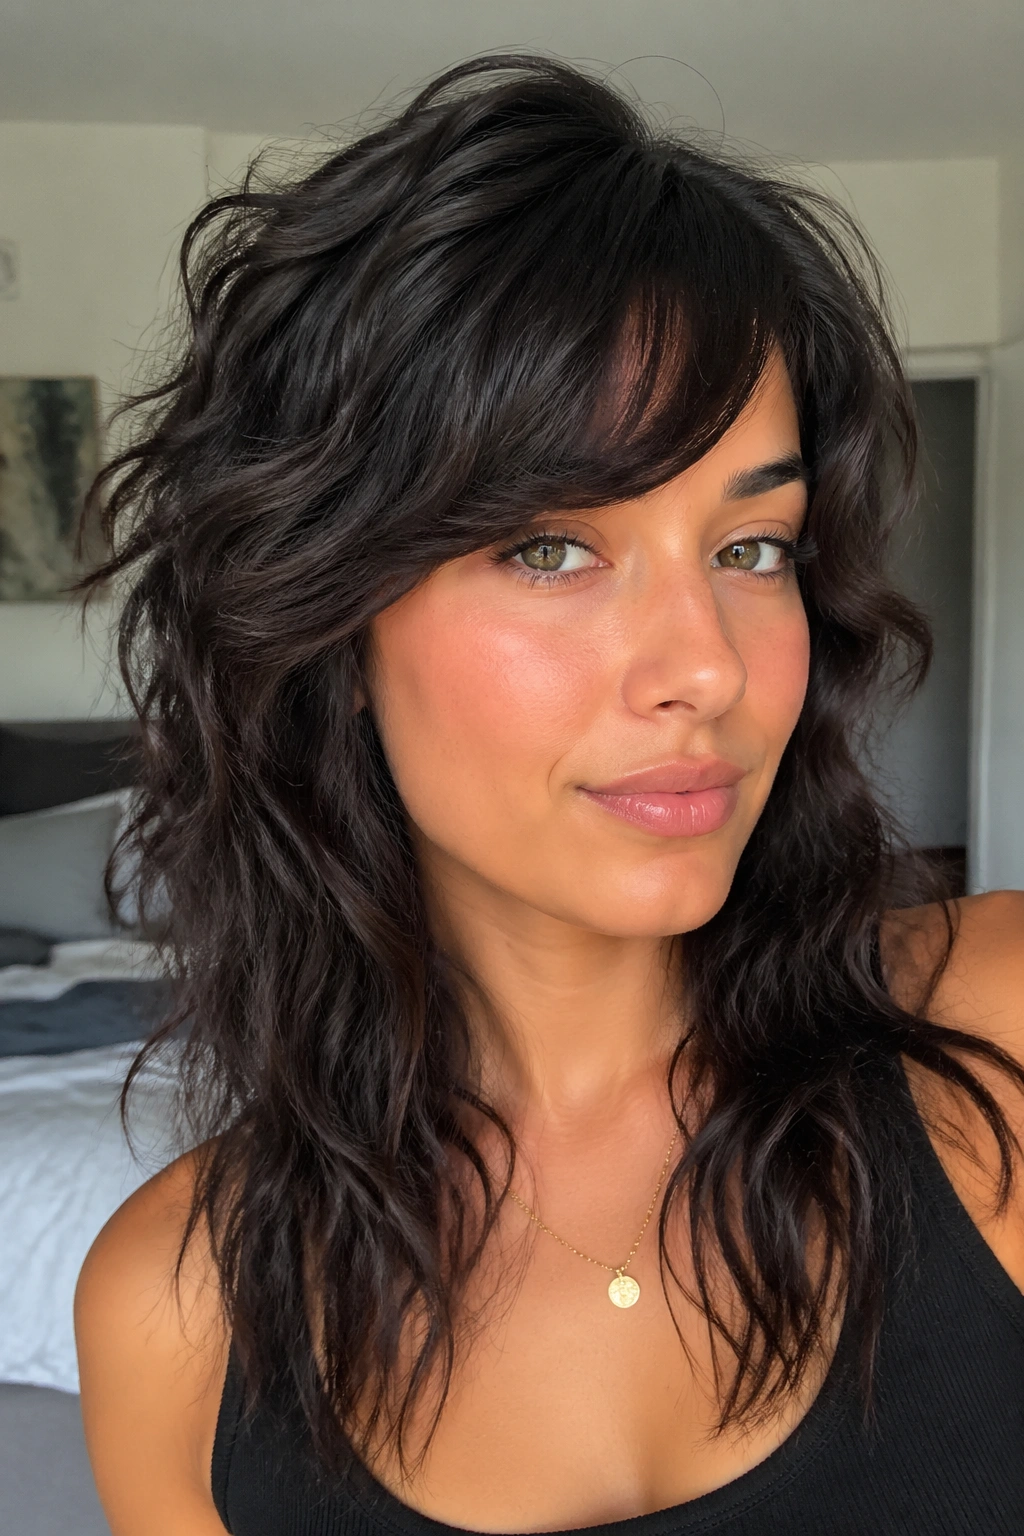
Long mermaid side bangs are for people who want softness and length above all else. The bang starts as a face-framing section, then stretches long enough to blend into the rest of the hair almost immediately. On wavy curly hair, that length gives the front a dreamy, loose shape without sacrificing movement.
This style looks especially good when the hair is past the shoulders and the front layers are already carrying some weight. The side bang can slide across the forehead, catch a bit of wave, and then disappear into the longer sections. It’s low drama. Which, honestly, is why it works.
I like this option for people who are nervous about commitment. You still get the bang feeling, but you’re not locked into a short front that needs constant attention. It also grows out gracefully, which is more than I can say for a lot of fringes.
Use a wide-tooth comb or your fingers when the hair is damp. Tight brushing can pull the front too straight and ruin the softness.
30. Tucked Side Bang Sweep
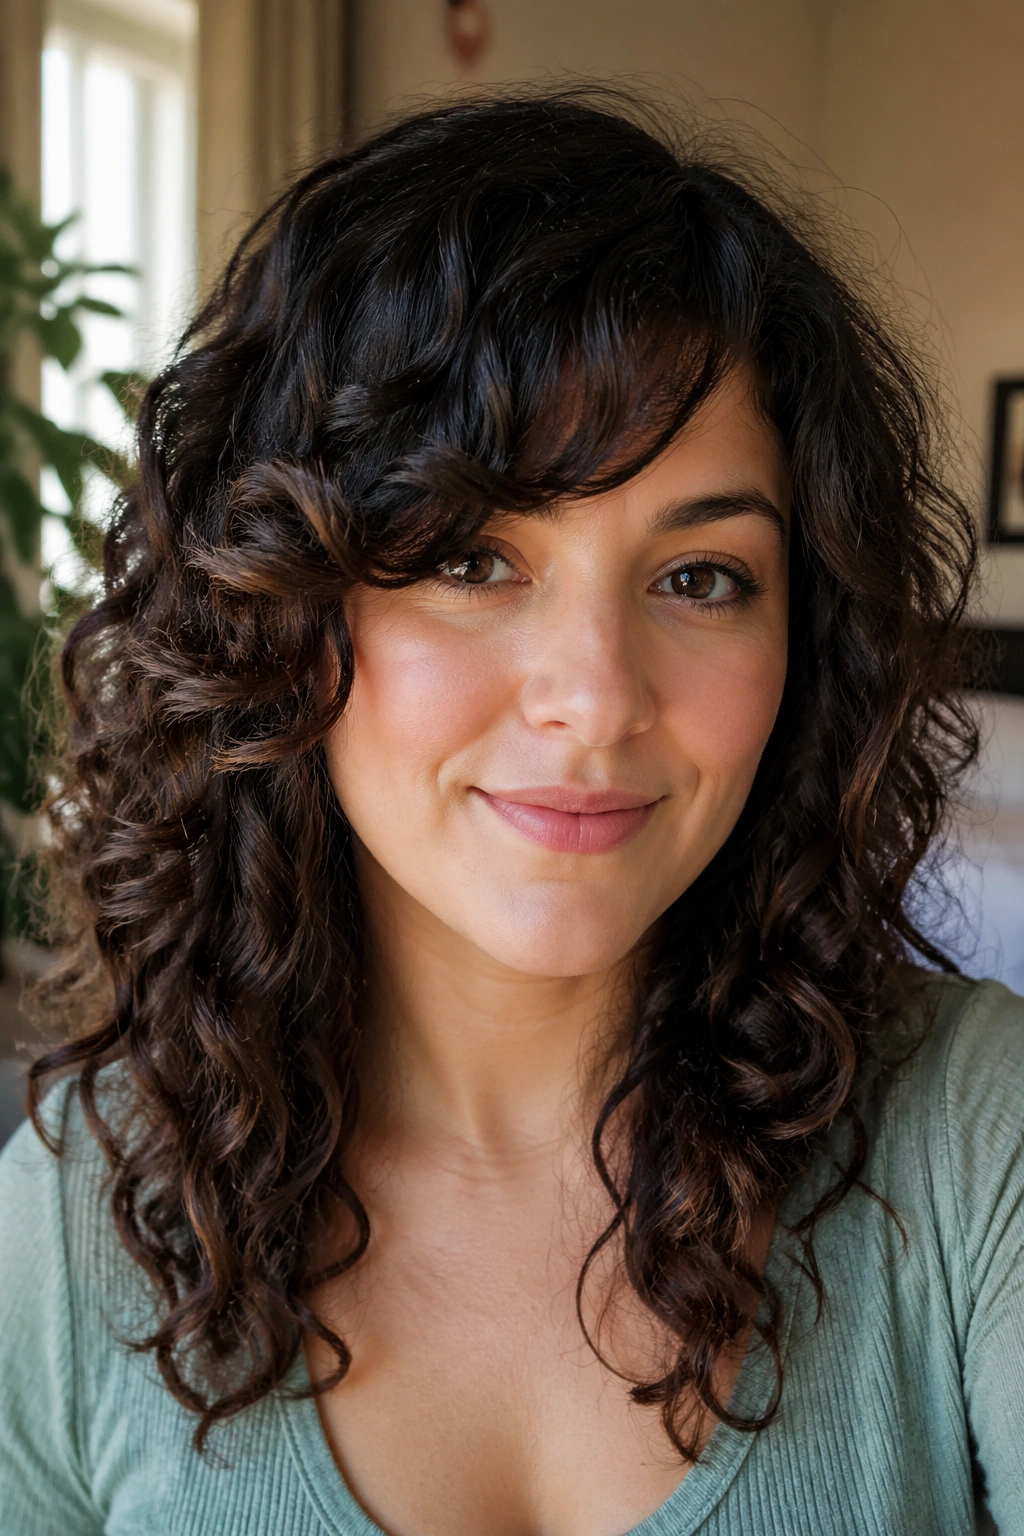
A tucked side bang sweep is one of the easiest styles to live with because it gives you options. The bang can fall forward, slide behind the ear, or sit half-tucked so a few curls stay out and a few stay in. That flexibility is gold when your wave pattern changes from day to day.
The cut should be long enough to survive a tuck without springing into an awkward kink. Usually that means the shortest point lands around the eyebrow or just below, with the outer edge dropping toward the cheekbone. On wavy curly hair, that length lets the front move while still cooperating with clips, pins, or your own hands.
If you want one side bang style that can do errands, work, dinner, and a wash day, this is the one I’d start with. It is not the flashiest look on the list. It is the most forgiving, though, and forgiving hair usually gets worn more often.
A good side bang should feel like part of your haircut, not a chore you have to manage every morning.
