A middle part ponytail on long hair can look razor-clean or completely flat, and the difference usually comes down to two inches at the scalp. That’s the part most people rush. The line in the center shows everything, which is why the style can look expensive one day and oddly lopsided the next.
Long hair makes the whole thing more interesting. The weight gives you a beautiful swing through the lengths, but it also drags the crown down if the base isn’t set properly. A tail comb, a firm elastic, and a little product at the hairline can change the outcome fast. So can the placement of the ponytail itself. A low tie feels polished and steady. A high tie feels sharper and more dramatic.
A blunt elastic alone rarely wins.
The best middle part ponytails for long hair work with the length instead of trying to hide it. Some lean sleek. Some lean soft. A few use braids, wraps, bubbles, or ribbon because long hair can carry details that shorter hair just can’t. That’s the fun part, honestly. Long hair gives you room to play without the style falling apart in ten minutes.
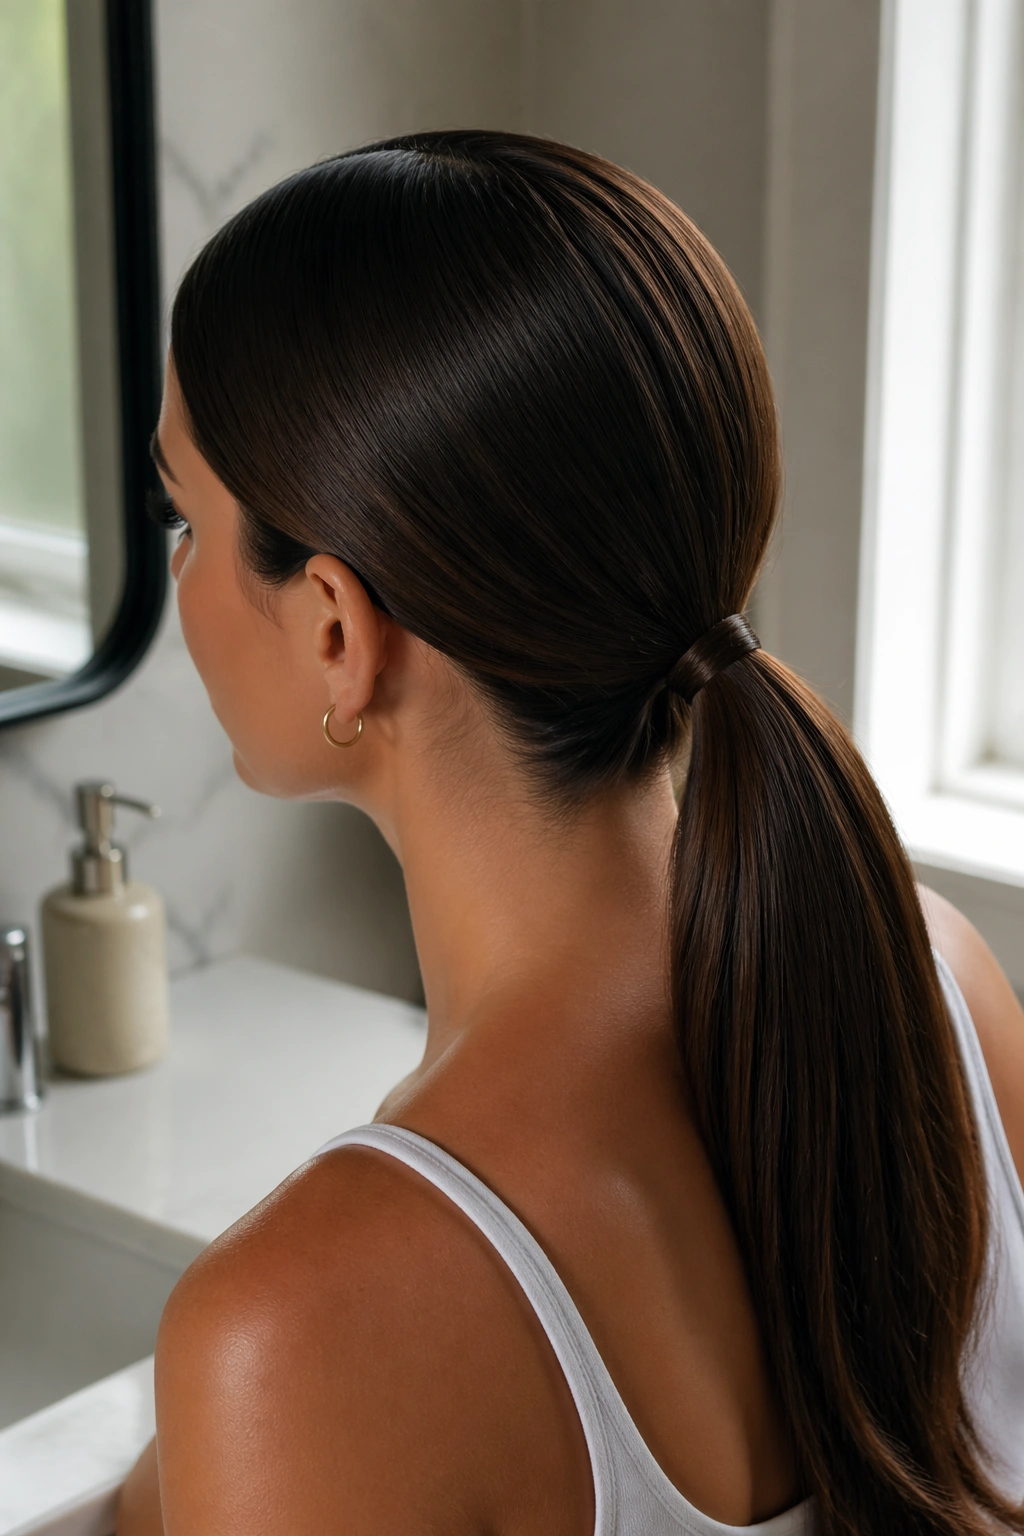
1. Sleek Low Middle Part Ponytail
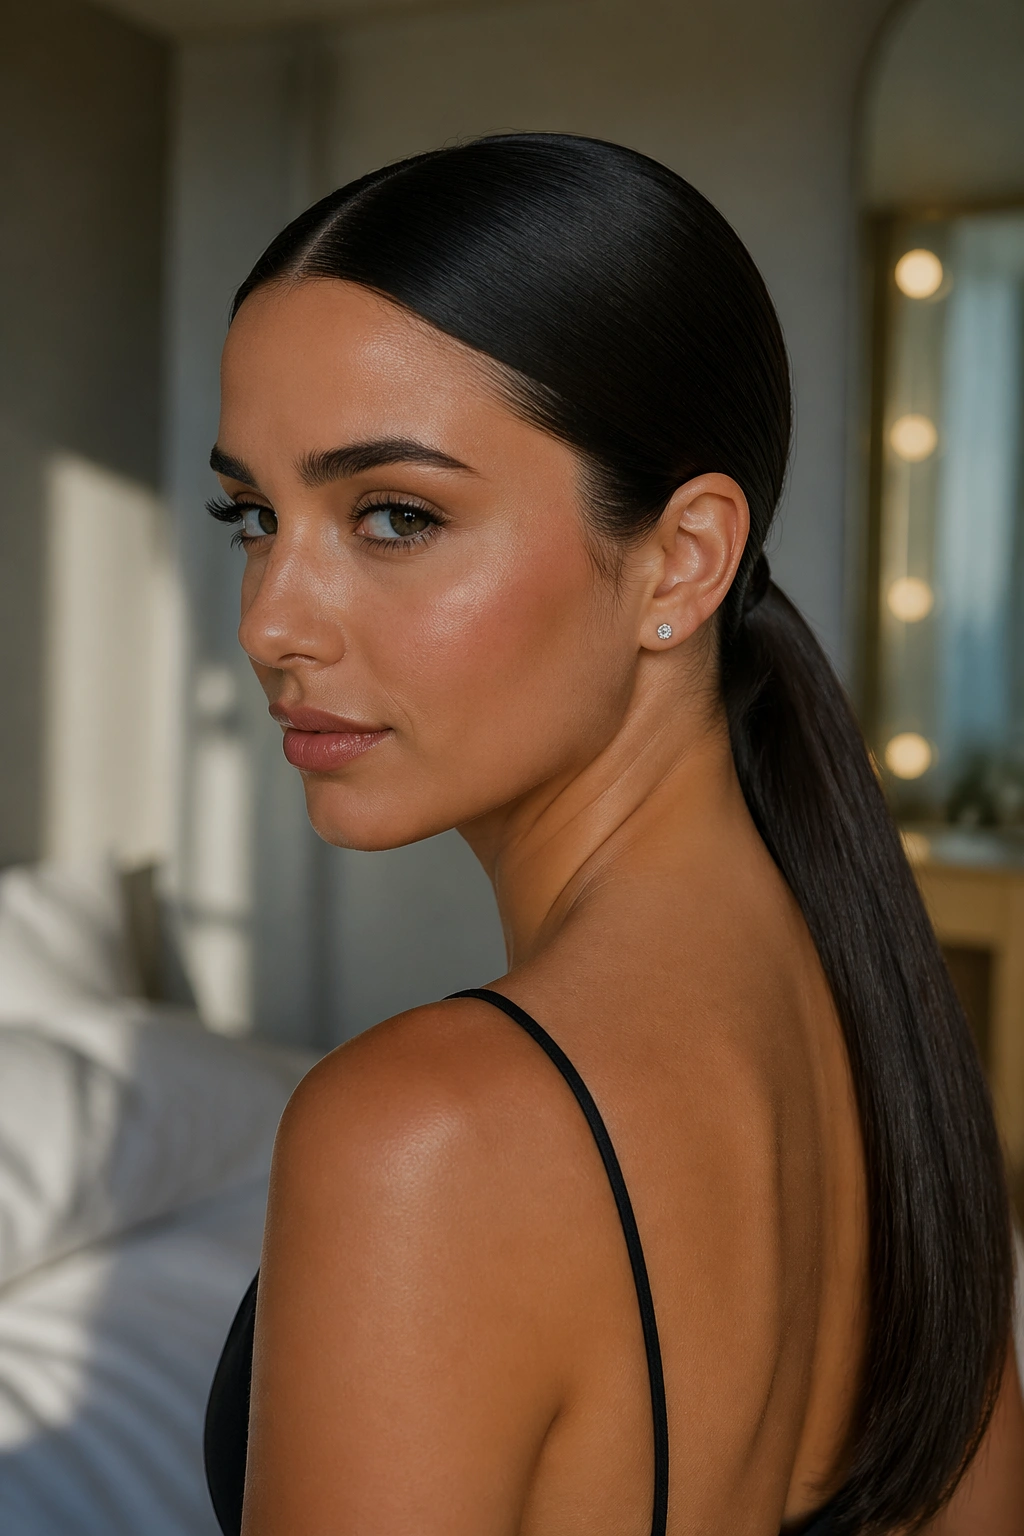
The low version is the one I reach for when I want the hair to behave. It sits at the nape, keeps the center part clean, and lets the length do the talking instead of piling volume on top of volume. On long hair, that matters. A low base keeps the ponytail from puffing out at the crown, which is where a lot of people lose the shape.
A tiny amount of smoothing cream on the top layer helps, but don’t drown the hair in product. You want the strands to lie down, not turn greasy. Brush from the part back in short strokes, then secure the pony about 1 to 2 inches above the nape if you want a little movement, or right at the nape if you want it stricter.
- Best with straight or softly waved hair
- Use a fine-tooth tail comb for the part
- Wrap a 1/2-inch strand around the elastic for a cleaner finish
- Works for dressy events and office days
My favorite trick: mist the brush, not the hair, if the flyaways are stubborn.
2. Bubble Ponytail Down the Back
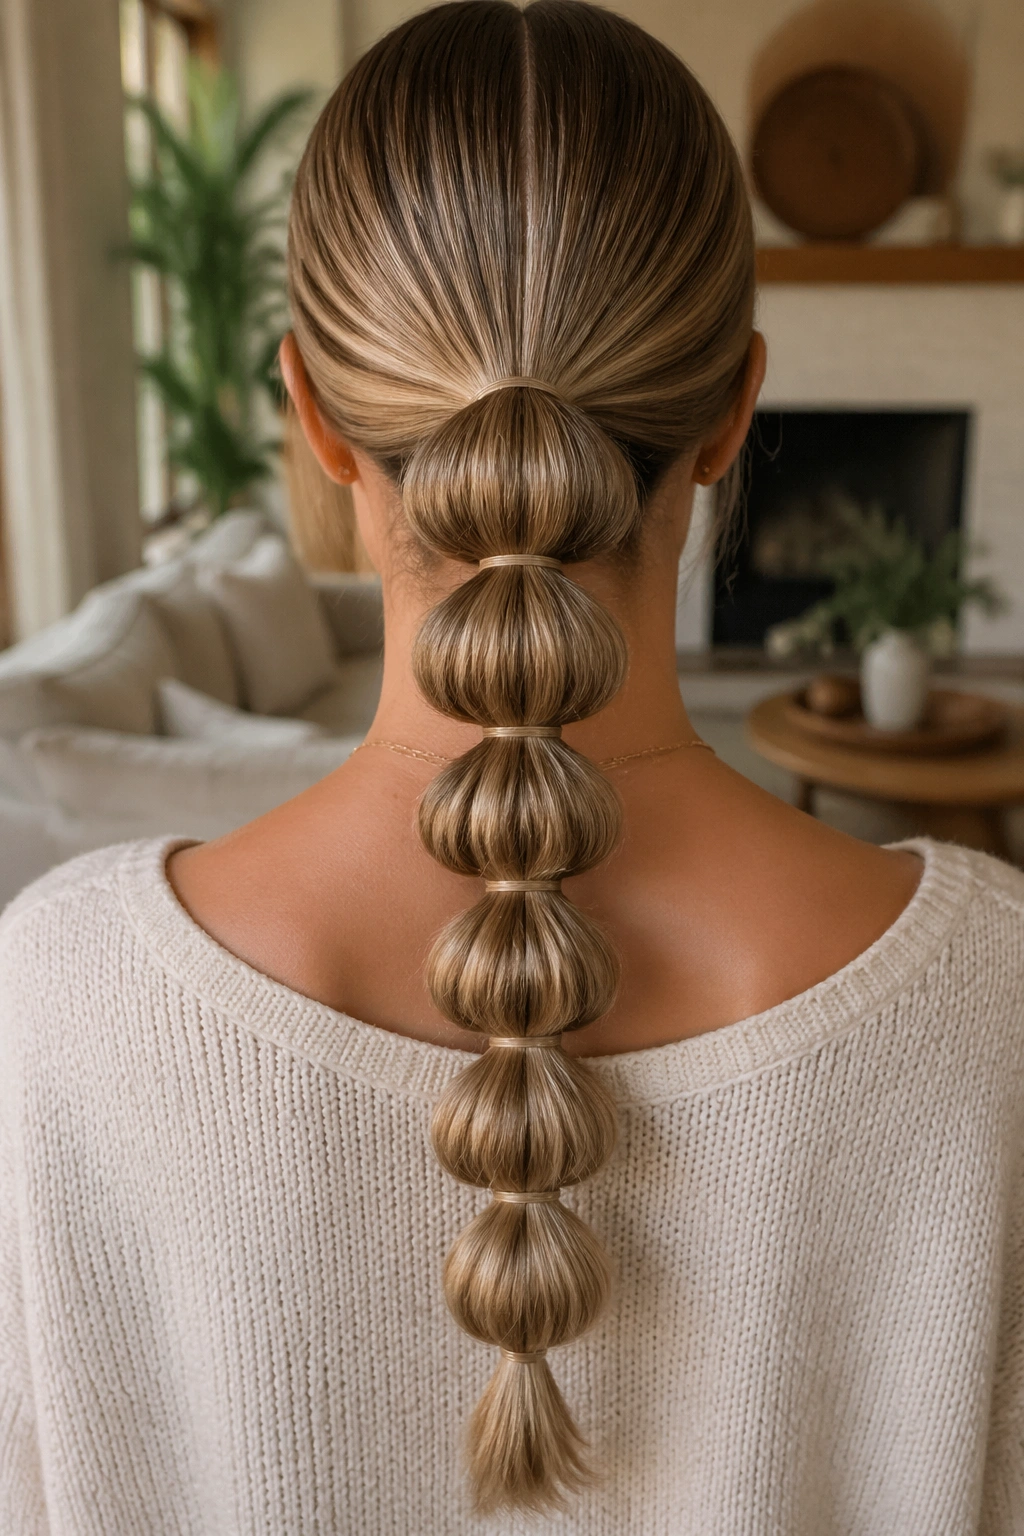
Bubble ponytails look almost playful on long hair, which is exactly why they work so well. You get a strong center part up top, then a chain of rounded sections that trail down the back like little soft drums. The length gives you room for four, five, sometimes six bubbles without the style running out of shape too early.
The key is spacing. Leave about 3 to 4 inches between elastics, then gently tug each section outward until it looks full but not uneven. If you pull too hard, the bubbles collapse and start looking lumpy. If you barely tug at all, the style looks unfinished. That middle place matters.
This one shines when the hair has a bit of grit. Freshly washed hair can slip. Day-two hair usually holds the sections better, especially if you smooth the part first and then mist the tail with a light texture spray.
One small detail makes a big difference. Make the bubbles slightly smaller near the top and a touch larger toward the ends. The eye reads that as intention, not accident.
3. Wrapped Low Ponytail with a Hidden Elastic
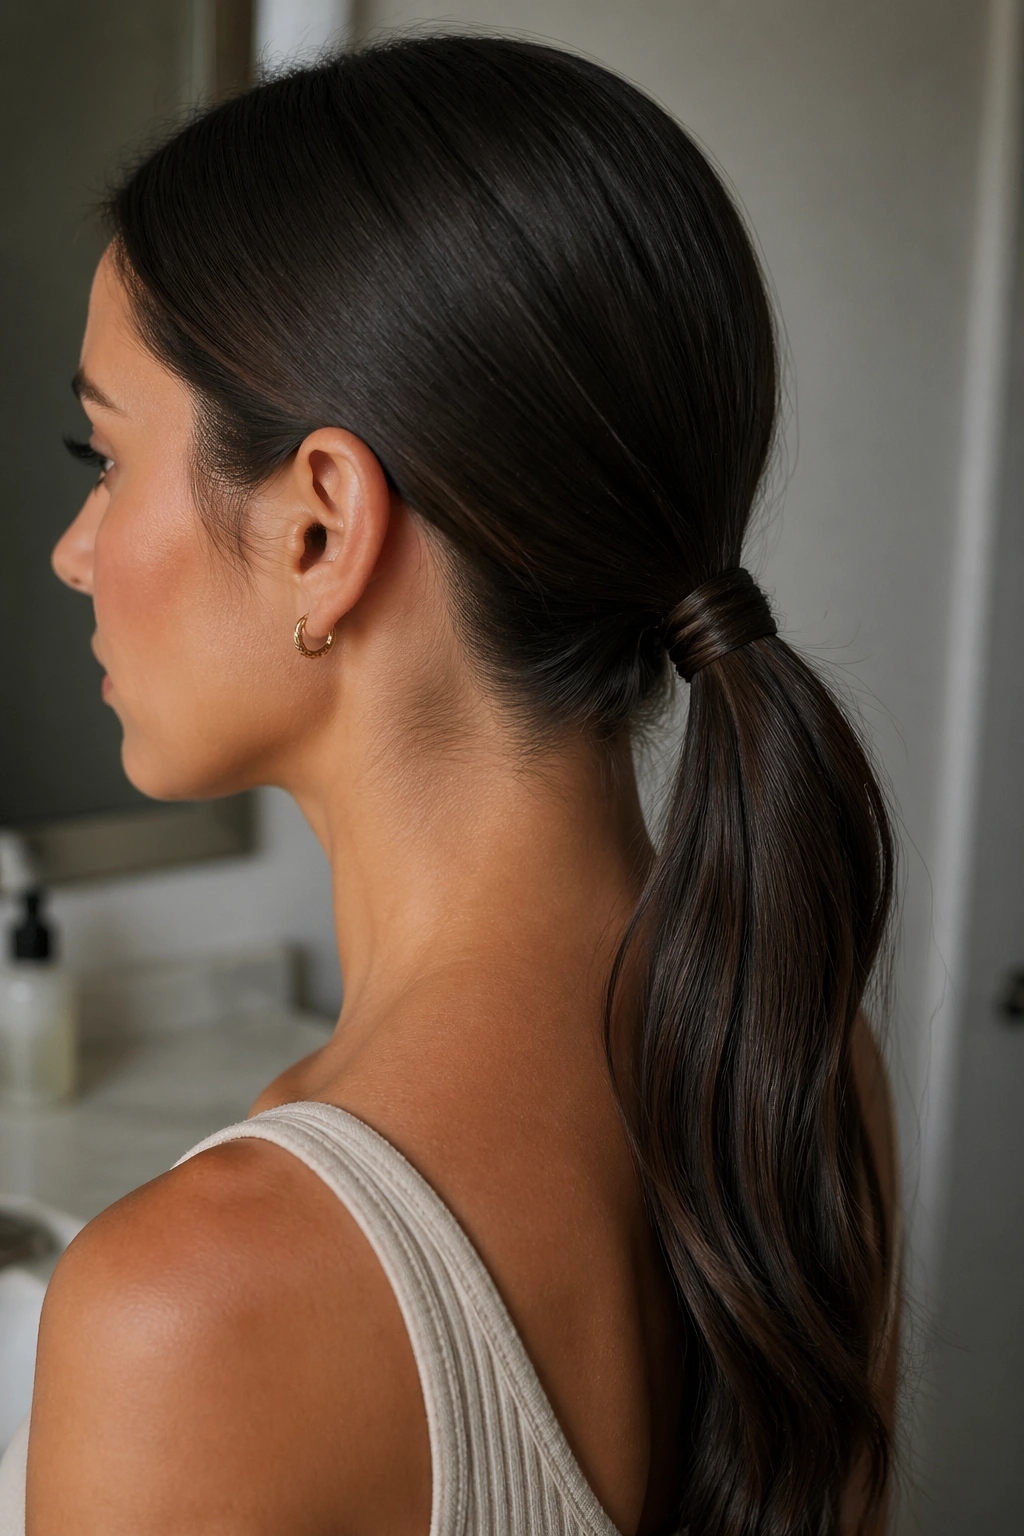
Why do some ponytails look polished even before you notice the hair itself? Because the elastic disappears. A wrapped low ponytail does that sneaky little bit of work in the best way, especially on long hair where the tail can carry a clean, uninterrupted line.
Pull the hair into a low center-part ponytail, then take a 1/2-inch strand from underneath the tail. Wrap it around the elastic in a tight spiral and pin the end underneath with a bobby pin. If your hair is silky, use two pins crossed under the wrap. That keeps the strand from sliding loose by lunchtime.
How to Keep the Wrap Flat
Press the wrap down with your fingers after pinning it. If it looks puffy, it was wrapped too loosely. If the section is too thick, it starts looking bulky instead of sleek.
The style works especially well when the rest of the hair is ironed straight or blown out smooth. You get clean lines at the top and a glossy tail below. Simple. Sharp. No fuss.
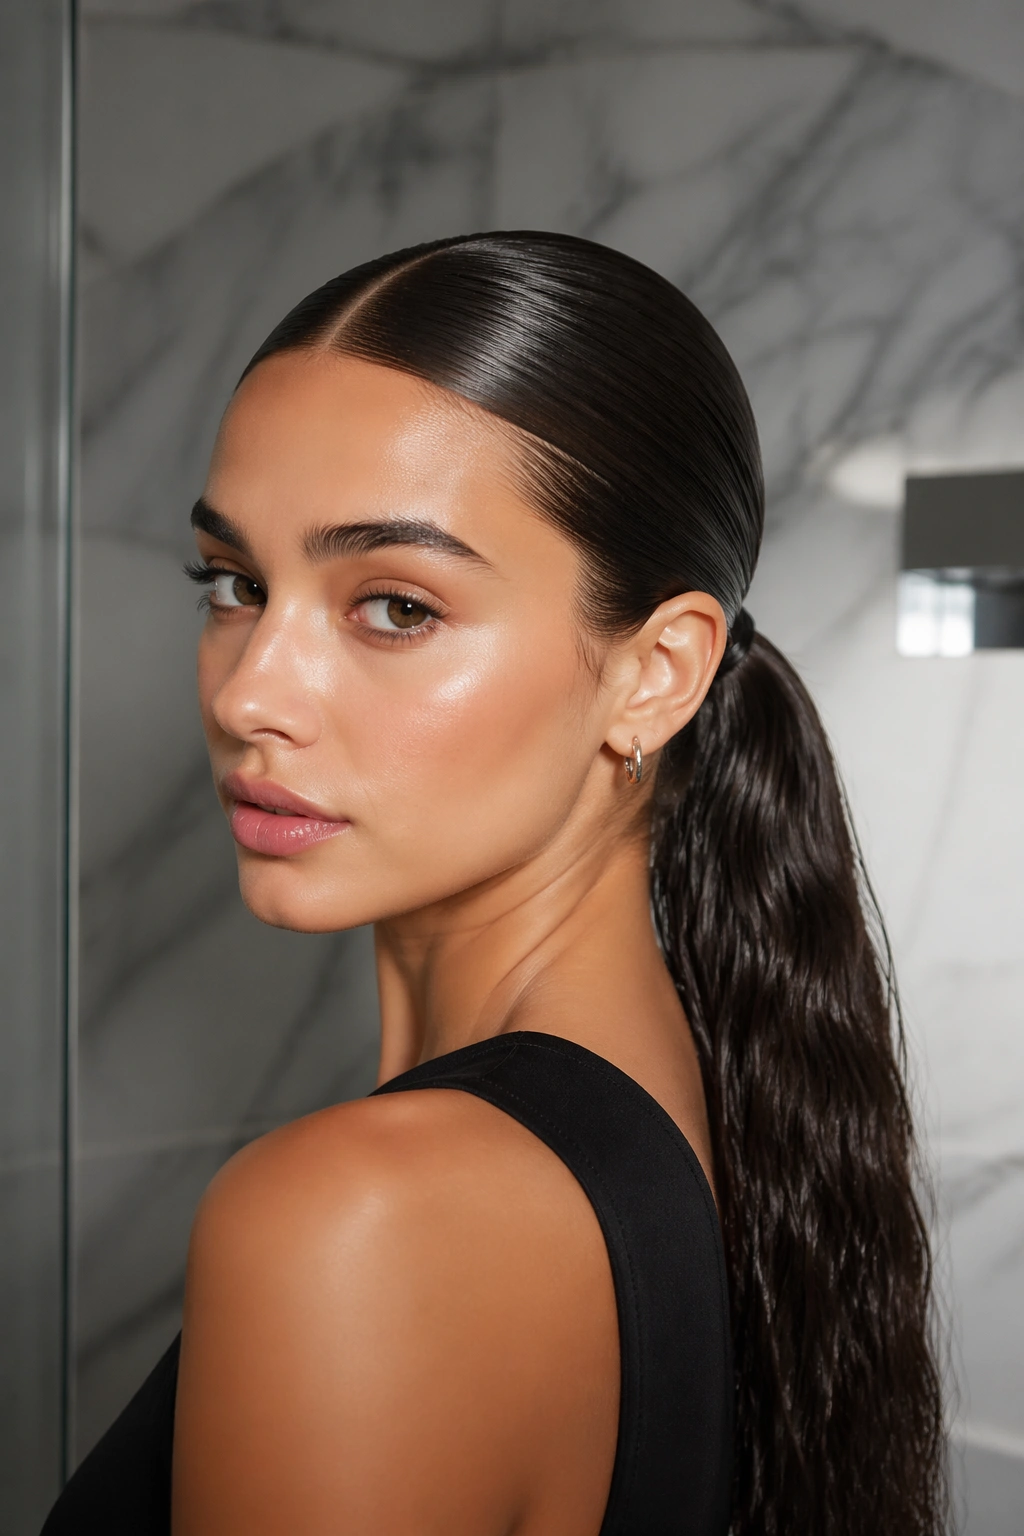
4. High Snatched Middle Part Ponytail
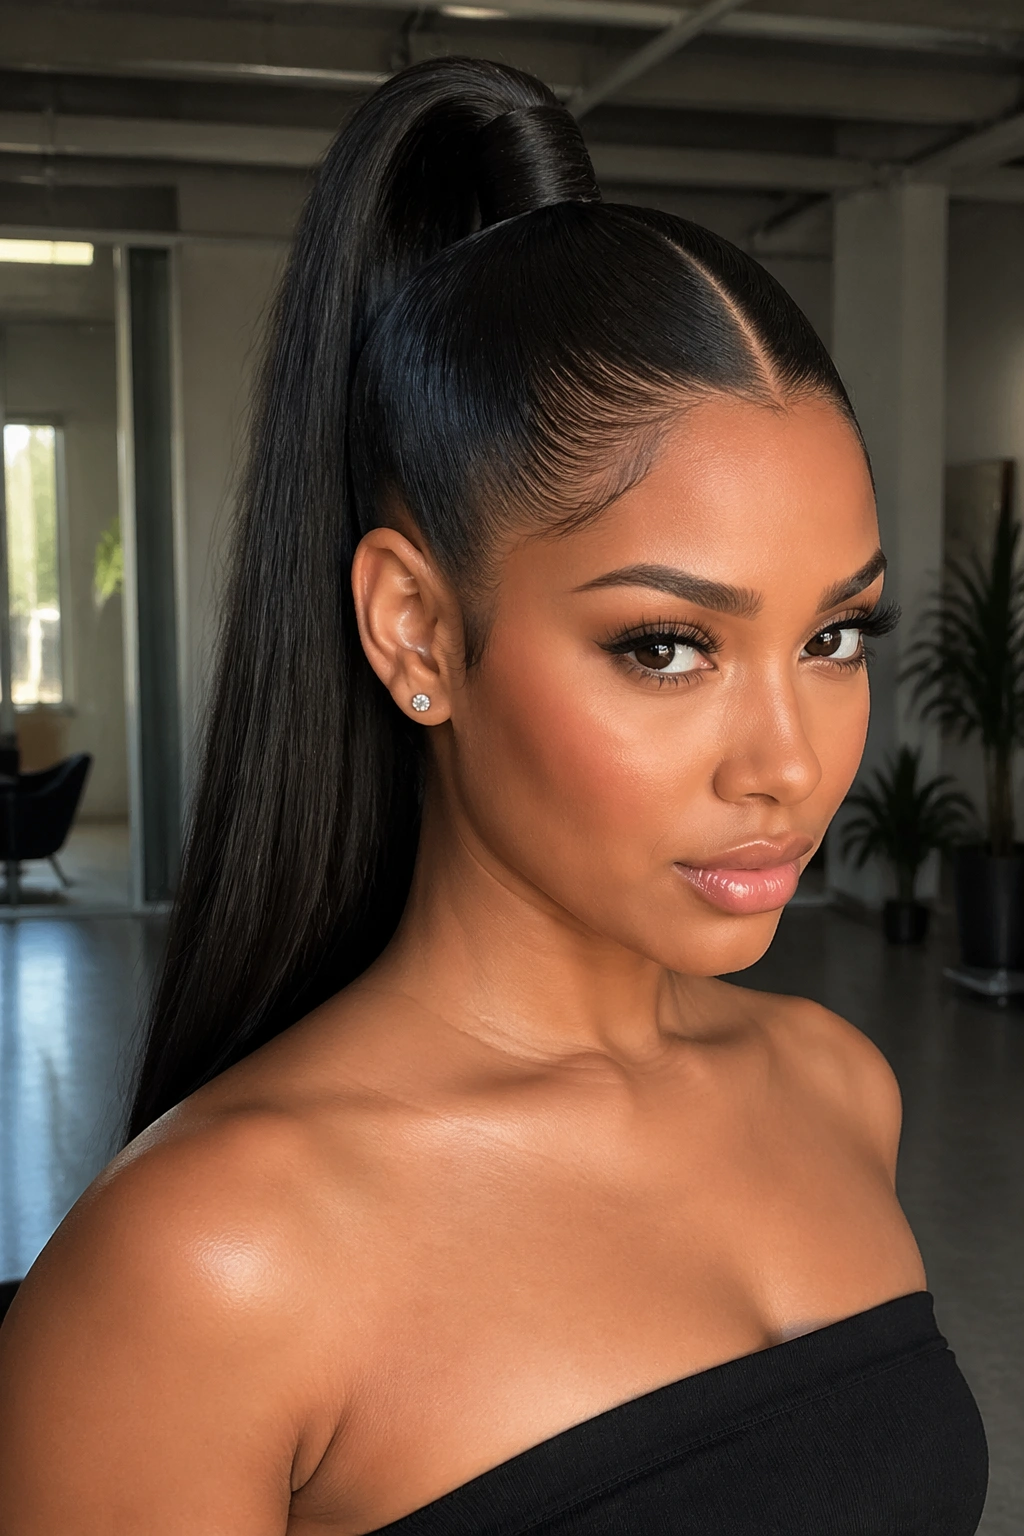
A high middle part ponytail changes the whole face in one move. Lift the base to the crown, smooth the sides back hard, and the style goes from casual to sharp fast. Long hair helps here because the tail has enough weight to swing instead of sticking straight out like a broom.
Use gel or edge control along the front hairline if your hair likes to puff. Then brush upward in small sections toward the crown, not straight back from the ears all at once. That little angle gives the face a cleaner line and keeps the center part visible. Tie it high, then tug the top slightly for height if you want a touch less tension.
This is one of those styles that looks best when it’s balanced. Too much volume at the crown can make the pony feel top-heavy. Too little, and it sags before you leave the house.
If you want the most drama with the least effort, curl the ends of the tail with a 1-inch iron and leave the last inch straighter. The contrast reads well on long lengths.
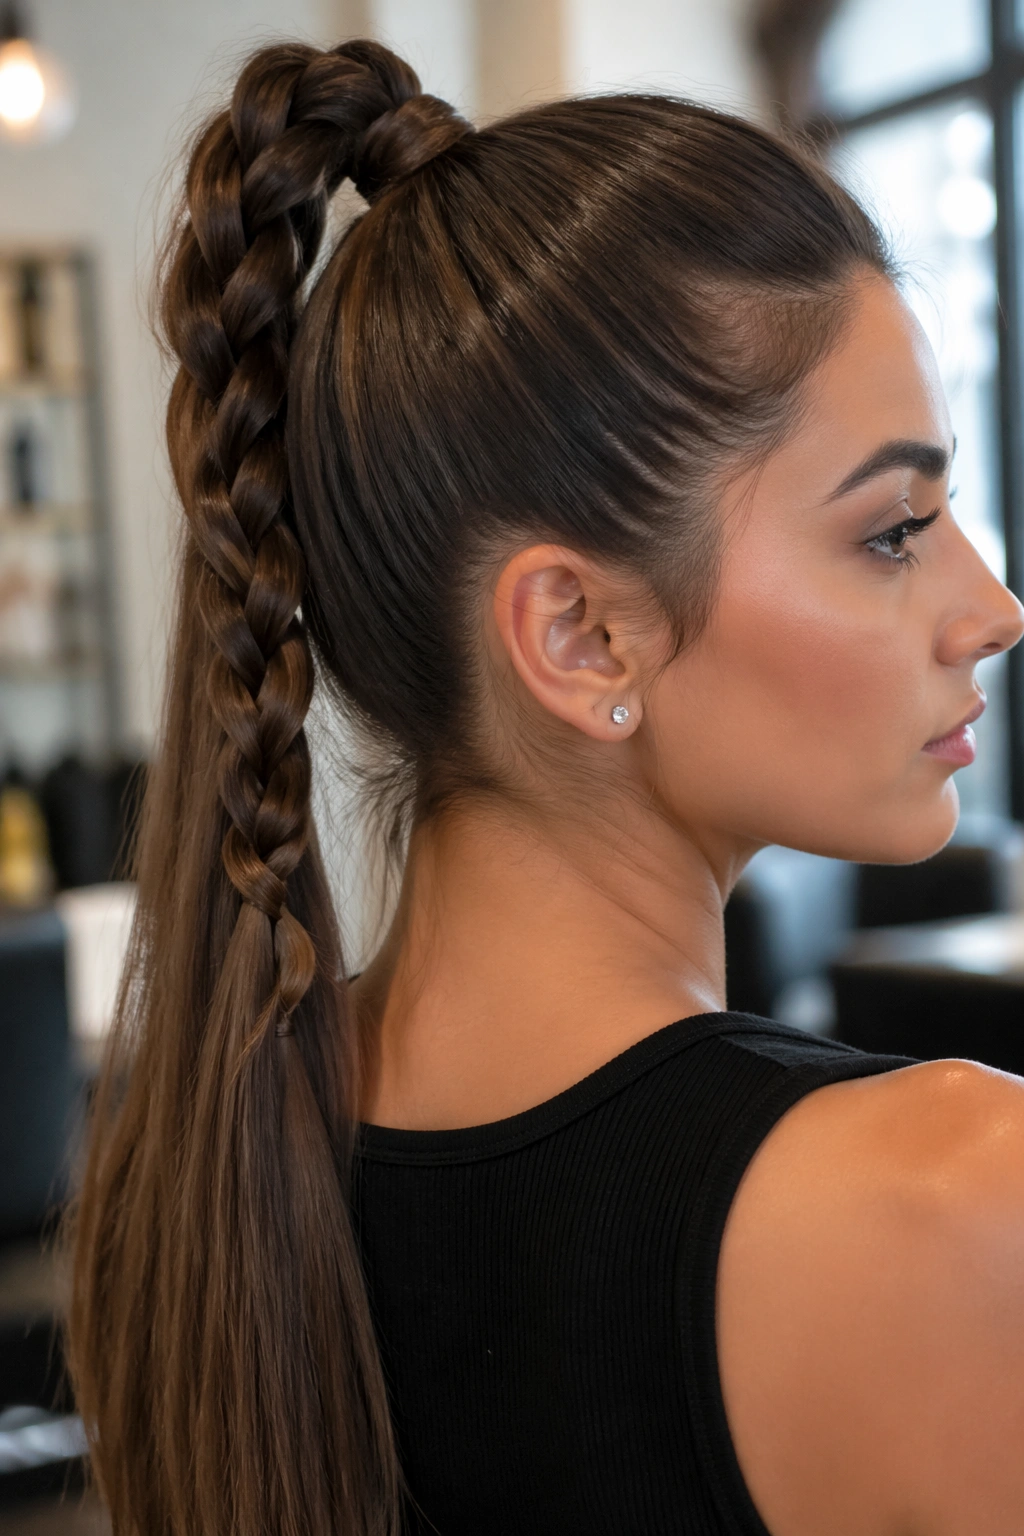
5. Braided Low Ponytail
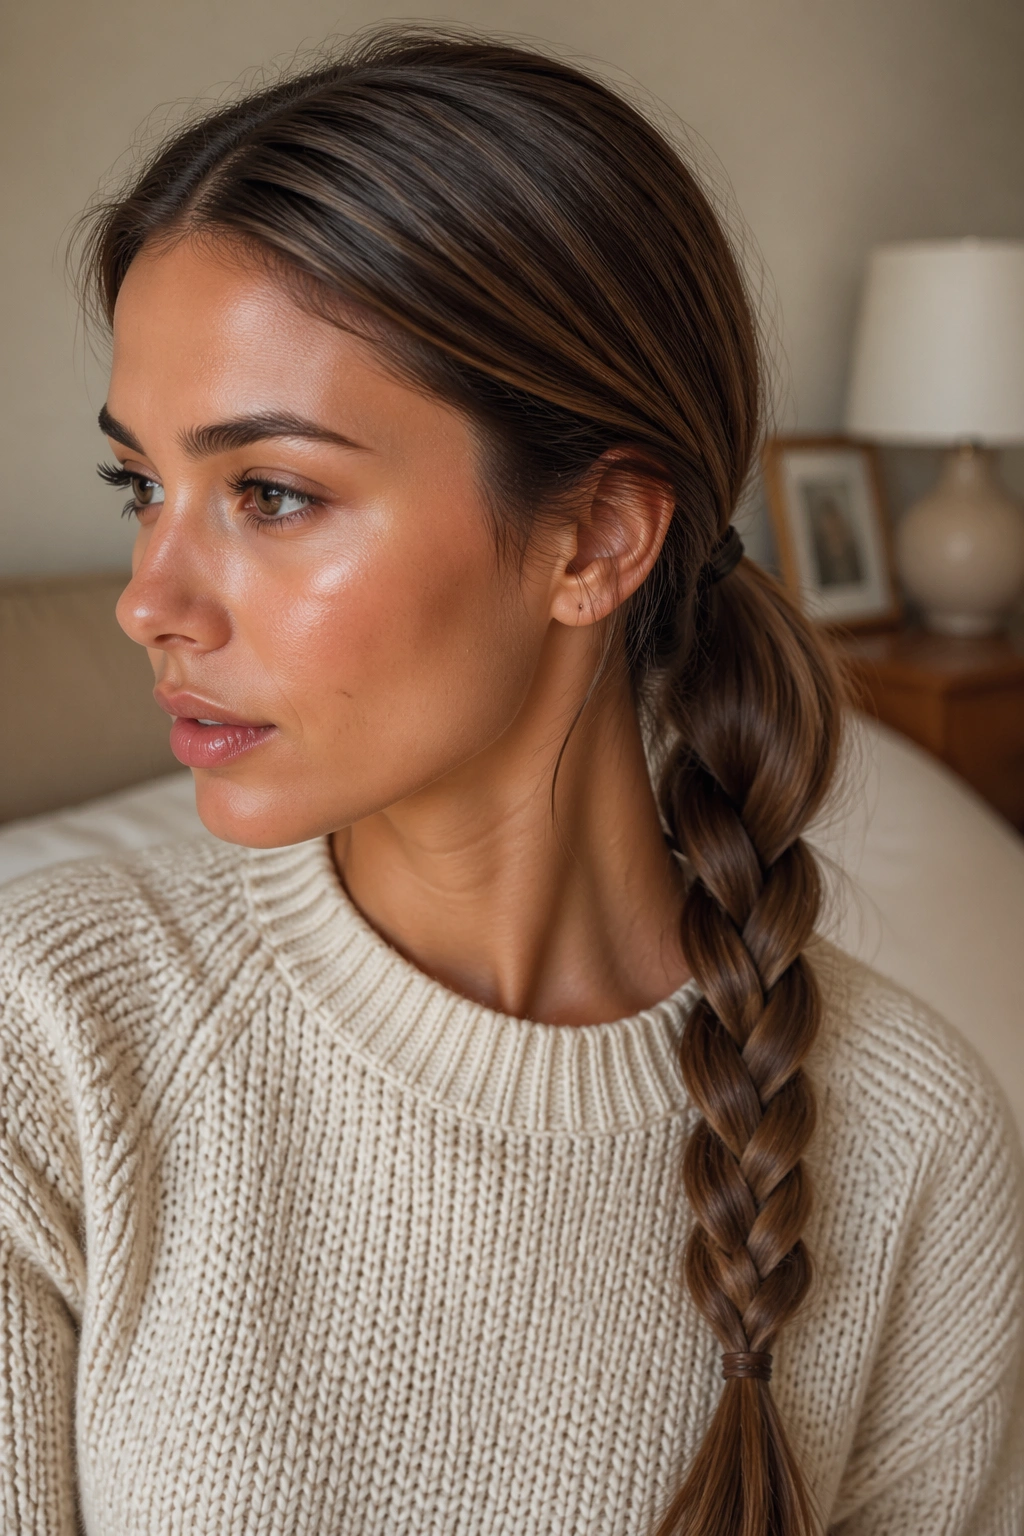
A low ponytail with the tail braided is one of the easiest ways to make long hair look more finished than it actually was. The top stays smooth and centered. The braid keeps the tail from getting stringy or too wide. It’s a cleaner look than a loose pony, and honestly, I think it’s underrated.
A classic three-strand braid works fine, but a slightly looser weave looks better on long hair because it shows off the length. Start the braid right below the elastic and keep the sections even. If the hair is layered, use a touch of cream on the ends before you braid. That cuts down on the little wispy bits that poke out.
Compared with a plain low ponytail, this version feels more contained. It’s the one to wear when you want movement without a lot of fluff. It also holds up better in humidity, which is a nice side effect.
Finish by pancaking the braid gently from the outside edges if you want it fuller. Not too much. Just enough to widen each loop a bit.
6. Curled Ponytail with Soft Ends
There’s a reason curled ponytails keep showing up in formal hairdos: long hair takes a curl and holds the shape in a way shorter hair sometimes can’t. A middle part plus soft curls through the tail gives you structure at the top and movement at the bottom.
I like this version with a low or medium base. Keep the crown smooth, then curl the tail in alternating directions with a 1 to 1.25-inch iron. Don’t start every curl at the exact same point. That’s how you get that too-perfect pageant look. Instead, begin some curls a few inches lower so the pattern feels softer and less obvious. After the curls cool, brush them out once with a wide paddle brush or your fingers.
The ends matter more than people think. If they’re too straight, the style can look unfinished. If they’re curled too tightly, the whole pony starts looking old-fashioned. Soft bend is the sweet spot.
This is a good pick when you want the ponytail to feel dressed up but not stiff. It reads polished in photos and still moves when you turn your head.
7. Rope-Twisted Ponytail
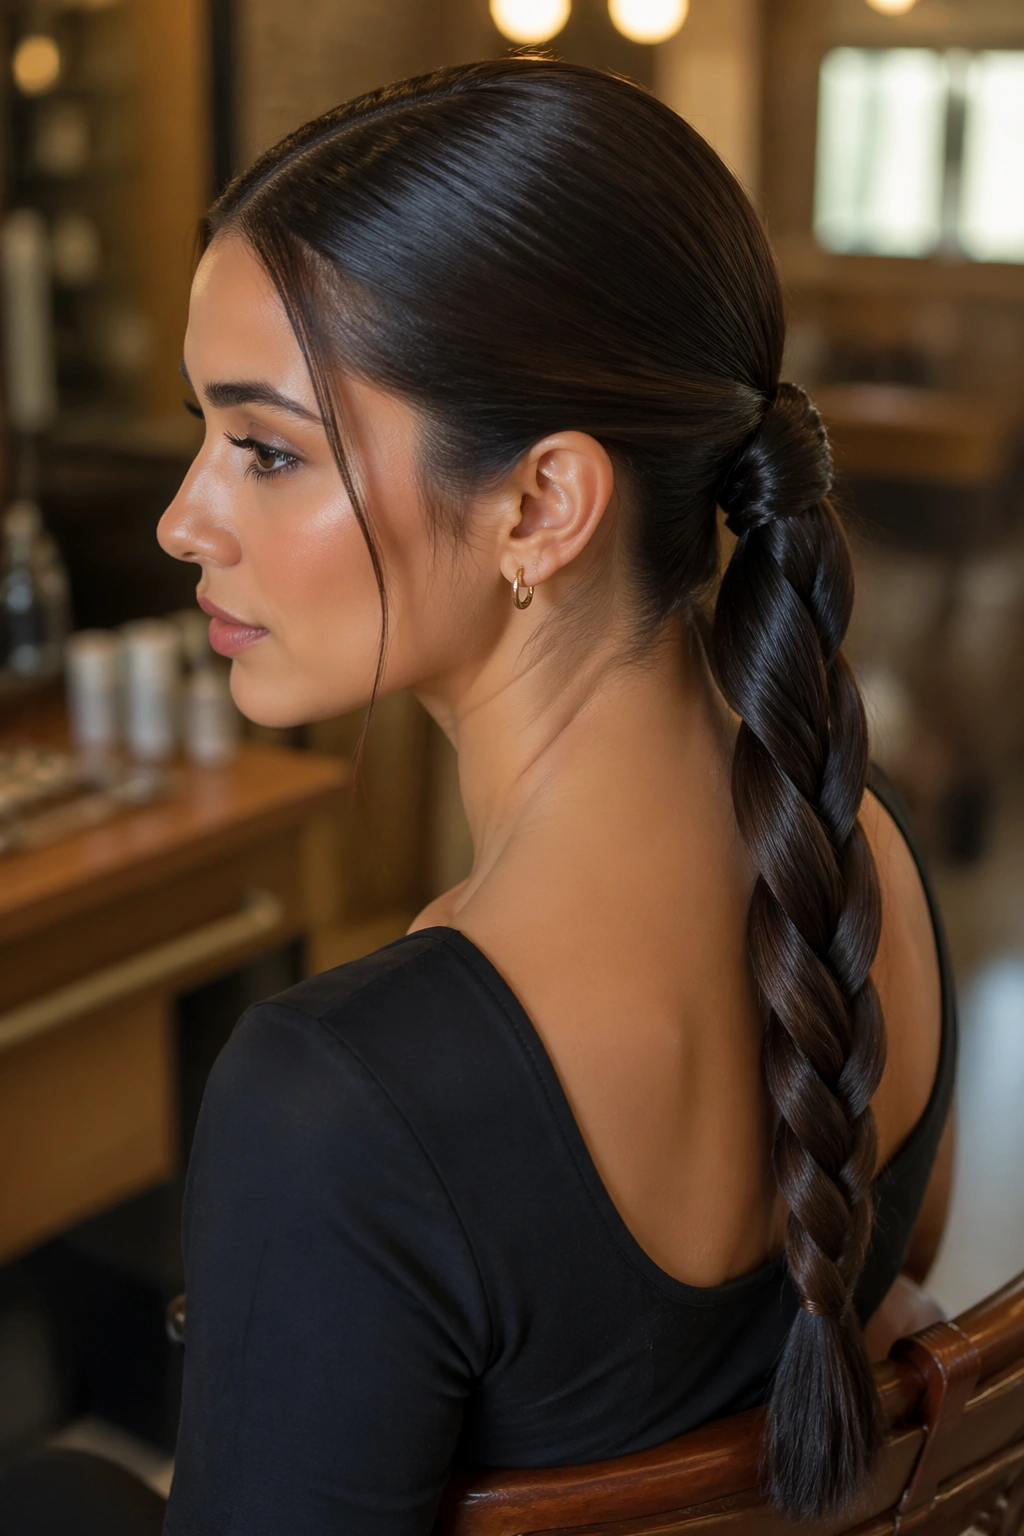
Rope twists are one of those styles that look much harder than they are. Split the ponytail into two sections, twist each section in the same direction, then wrap them around each other in the opposite direction. The result is tighter and sleeker than a loose braid, and long hair makes the twist look more dramatic because there’s enough length for the pattern to stretch.
This style is great when the hair is thick. A standard braid can feel bulky on very dense hair, while a rope twist often lays flatter and stays neater at the ends. Use a clear elastic at the bottom so the twist doesn’t unravel while you work.
- Best for thick, long hair
- Fast to do on second-day hair
- Holds well with a small amount of styling cream
- Looks especially good with a low center part
A rope twist is also one of the few ponytail finishes that looks better if it isn’t too perfect. A little asymmetry gives it life. A dead-straight, machine-tight twist can feel severe, and that’s not the mood here.
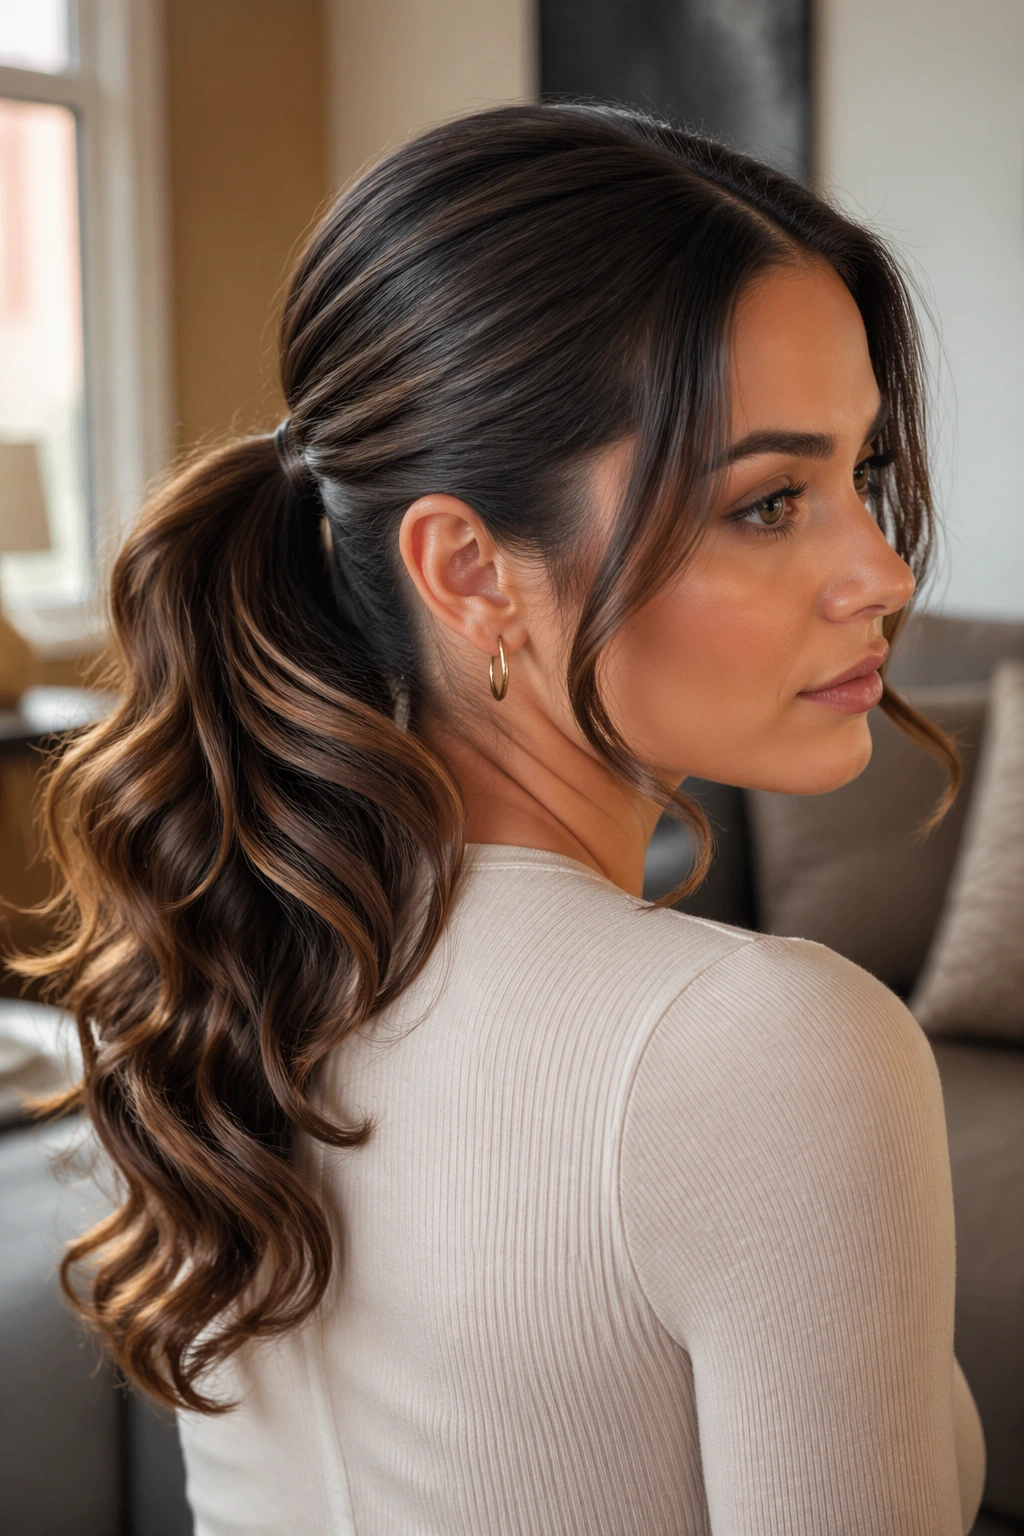
8. Voluminous Wavy Ponytail
Why does a wavy ponytail feel softer than a straight one? Because the texture breaks up the lines. A center part can be crisp, but the tail itself doesn’t have to be. When the lengths move in loose bends, the whole style feels lighter and a little less serious.
How to Keep the Crown Airy
Tease just the root area at the crown with a fine comb, then smooth the top layer over it. You want lift, not a nest. A tiny spritz of texturizing spray at the roots helps the volume stay without making the hair sticky. After that, gather the hair loosely at the back so the waves don’t get flattened into the elastic.
This version works best when the waves are not identical. Curl a few sections away from the face, a few toward it, then brush them out. That uneven finish is what makes the pony look full instead of styled within an inch of its life.
If your hair is very long, the waves will open up more toward the ends. That’s good. It gives the pony a soft, waterfall feel instead of a stiff rope of curls.
9. Scarf-Tied Ponytail
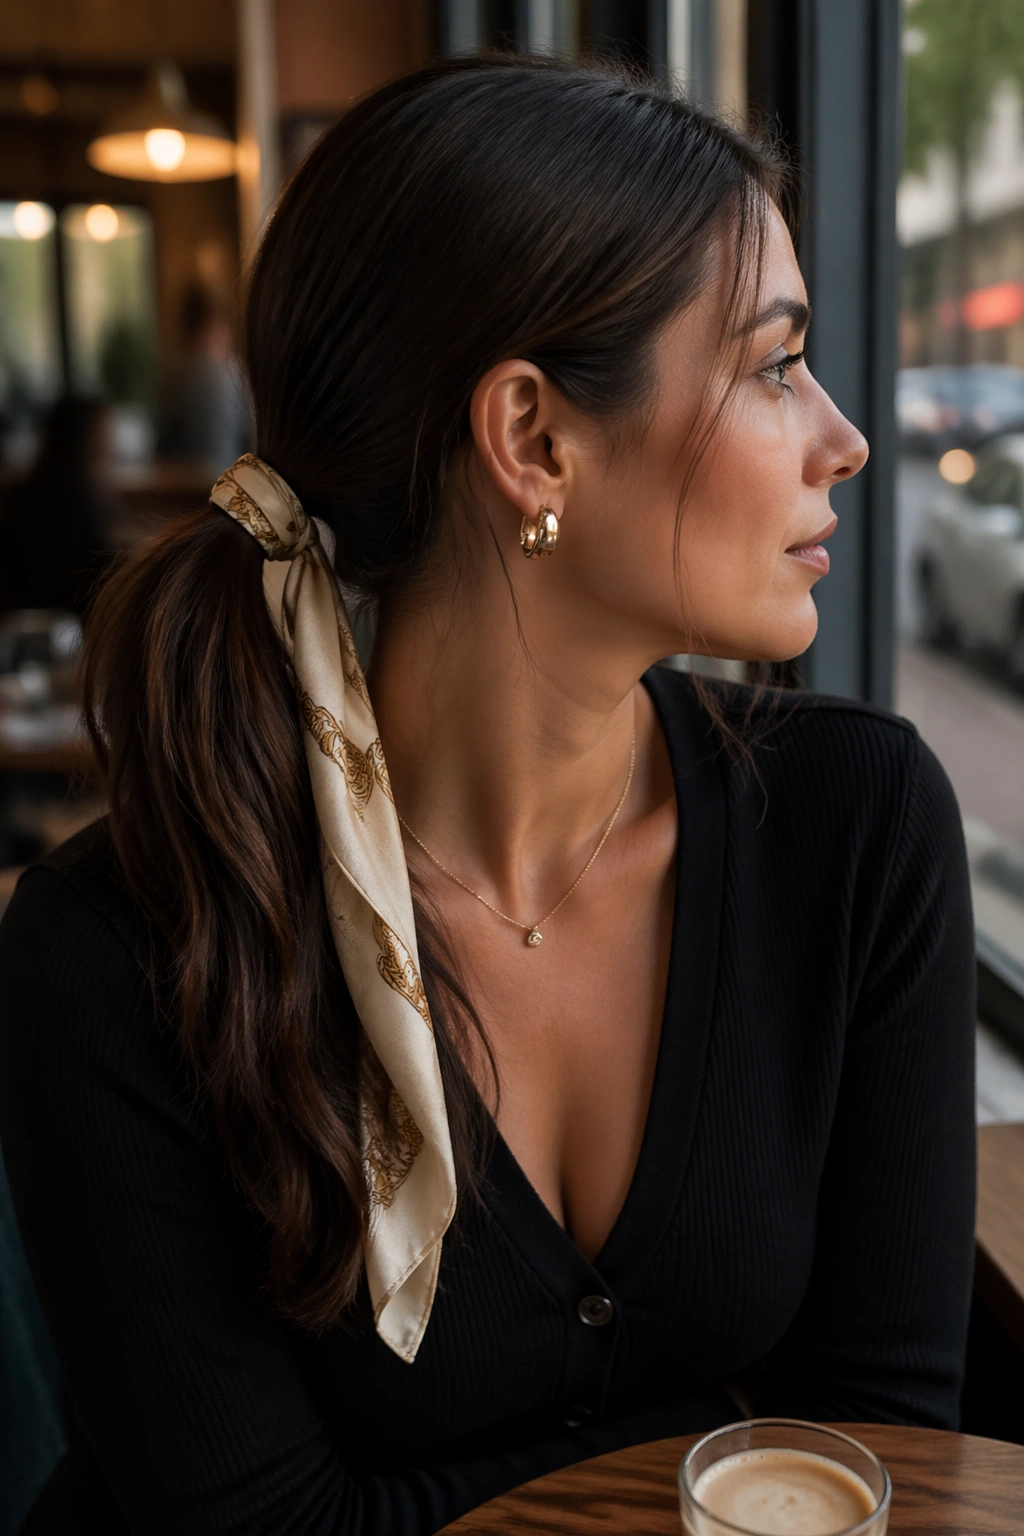
A scarf changes the mood fast. One simple tie around the base and the ponytail stops looking basic. On long hair, the tail of the scarf can trail alongside the hair and create a nice vertical line, which works especially well with a middle part that already gives the face a clean frame.
Pick a silk or satin scarf that’s about 2 inches wide if you want subtlety, or wider if you want the tie to show. The trick is to secure the pony first with a regular elastic, then knot the scarf over it once or twice so it doesn’t slide. A slippery fabric alone won’t hold enough tension.
The scarf is useful for another reason: it covers a less-than-perfect elastic without making the style feel heavy. That’s a small detail, but it matters. If the hair is very smooth, I’d pin the scarf tail underneath the base so it doesn’t drift around.
This is the ponytail I’d choose when the outfit already has one strong detail and the hair needs only a little support. It doesn’t fight for attention.
10. Fishtail-Braided Ponytail

A fishtail braid gives long hair a bit of structure without making it look stiff. The weave is finer than a regular braid, so the tail ends up looking intricate and narrow, almost like a woven ribbon of hair. On long lengths, that pattern really shows.
Start with a smooth center part and a low or mid ponytail. Divide the tail into two sections, then keep pulling tiny outer pieces from each side into the opposite section. Small pieces matter here. If the sections are too big, the braid turns chunky and loses that delicate look. A quarter-inch grab is usually enough.
Unlike a standard braid, a fishtail takes a little more patience. It is worth it. The finished style has enough detail that you do not need much else, which is nice if you hate piling on pins and accessories.
For extra fullness, pull the finished braid apart gently from the sides. Stop before it starts looking frayed. A slightly undone fishtail looks modern; a shredded one looks like it lost a fight with a brush.
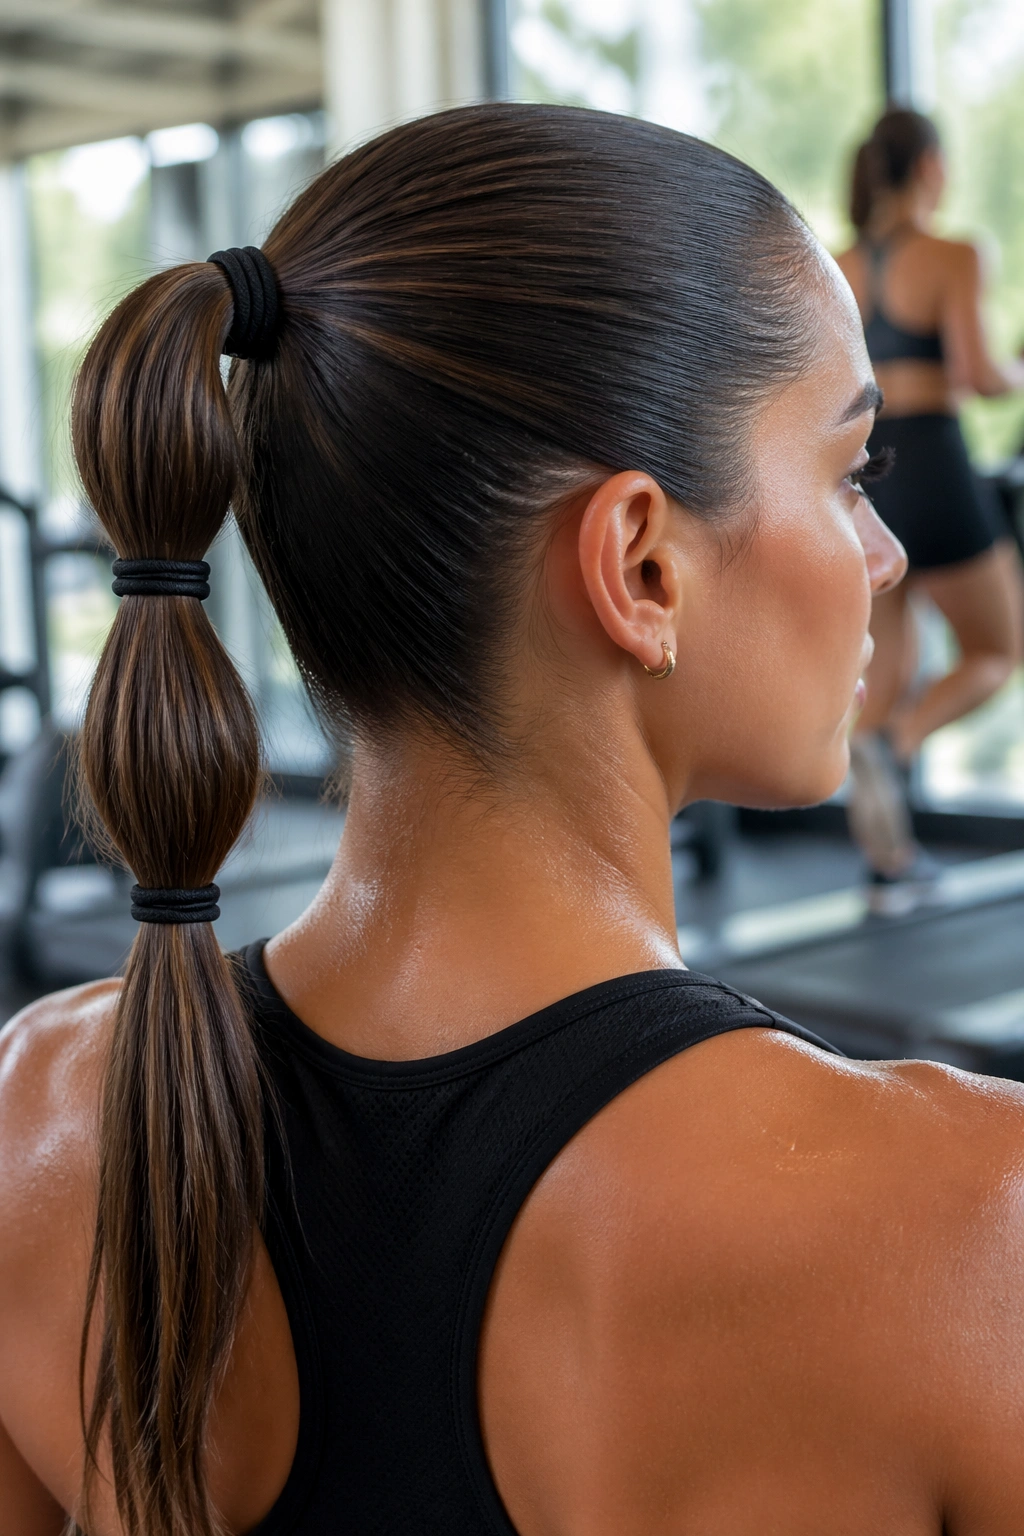
11. Double-Banded Ponytail
Long hair gets heavy. That’s the whole point and the problem. A double-banded ponytail solves the sagging issue by giving the tail more support than one elastic usually can. Tie the base first, then add a second elastic 3 to 4 inches lower, almost like a built-in brace for the length.
It’s a practical style, but it doesn’t have to look sporty. If the top is sleek and the tail is brushed smooth, the extra elastic just reads as structure. You can even hide the second band by taking a thin strand of hair and wrapping it over that section, which makes the style look more intentional.
This is a smart choice for very long hair that tends to droop halfway through the day. The second band keeps the lower half from feeling too loose and helps the tail keep its shape. If the hair is layered, it also stops shorter pieces from sticking out at odd angles.
A small thing: use elastics that match the hair color as closely as possible. A stark black band on light brown hair can pull the eye in the wrong way.
12. Crimped Texture Ponytail
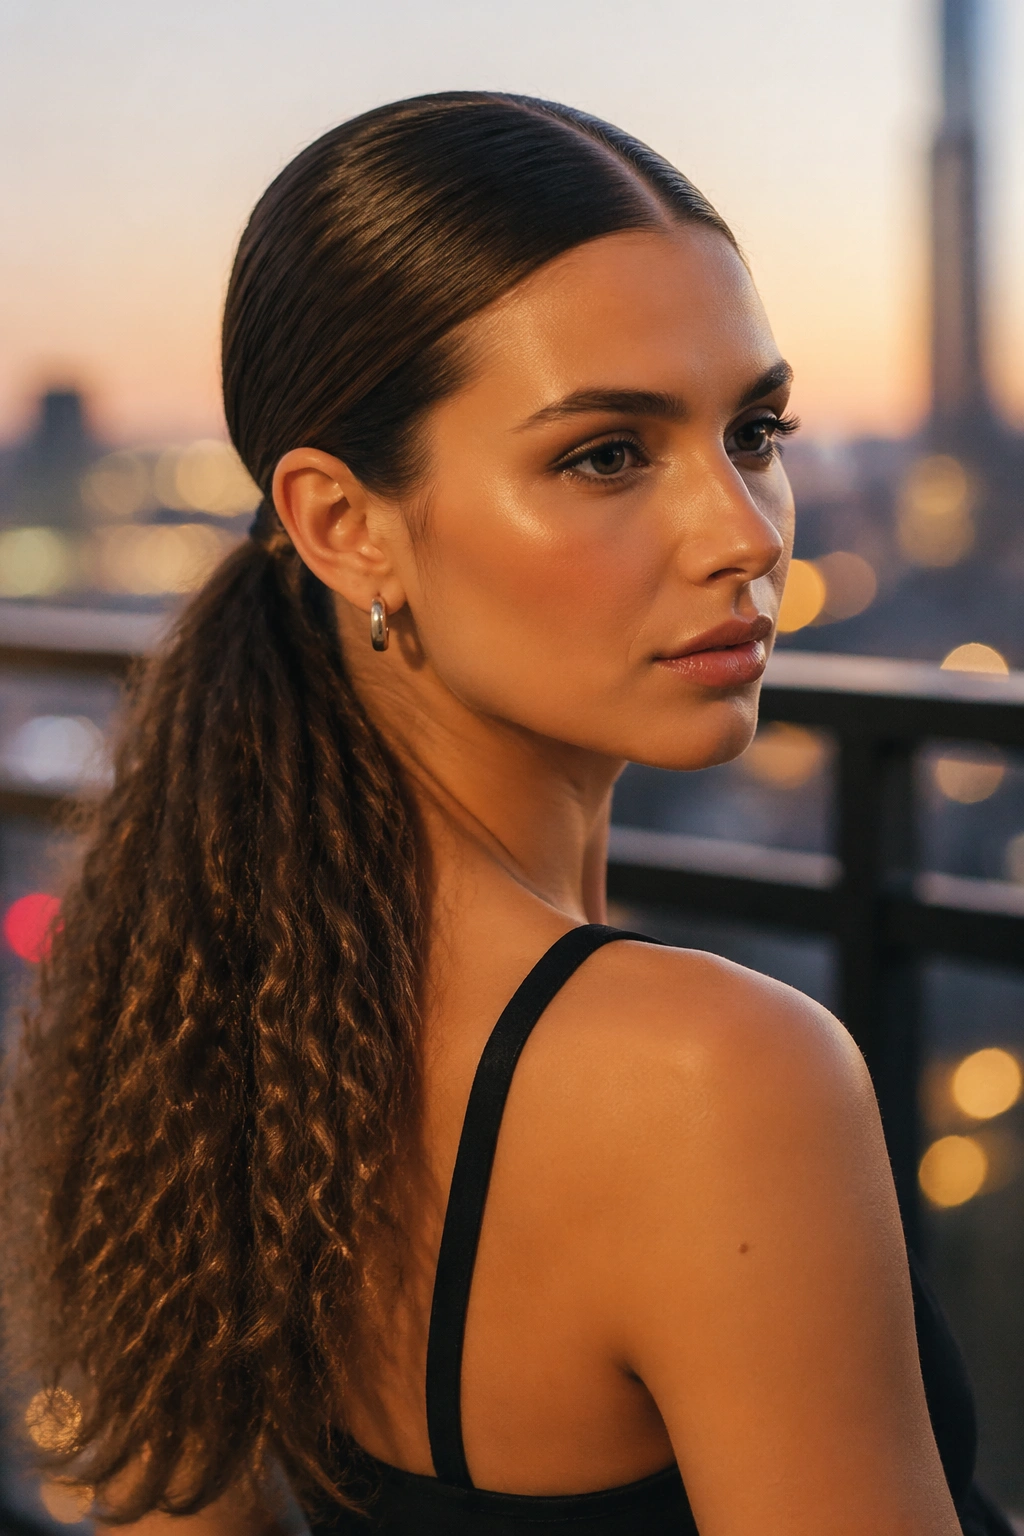
Crimped texture is unapologetic. It brings a little edge to a middle part ponytail and makes long hair look thicker than it really is. The tiny zigzags catch light differently from straight hair, so the whole tail gets a fuller, denser feel.
You do not need to crimp every inch of the length. A few sections through the tail are enough. Start with the midlengths and work down, leaving the top smooth so the middle part stays crisp. That contrast is what keeps the style from reading as costume-y. If every part of the head is crimped, the shape gets noisy fast.
This is one of the better styles for long hair that looks limp when left straight. The texture gives the pony some grit, and grit helps the tail stay in place. A little hairspray at the ends will keep the crimp from relaxing too quickly.
I’d wear this one when the goal is personality, not softness. It has a bit of attitude, and that’s the point.
13. Face-Framing Tendril Ponytail
A middle part can be beautiful, but it can also feel strict if every strand is pulled back. Leaving a pair of face-framing tendrils softens that edge immediately. The pieces don’t need to be thick. In fact, thin tends to look better. Aim for strands that are about 1/2 inch wide at the temples.
Where the Tendrils Should Sit
Let them fall just in front of the cheekbone or curl them away from the face with a 3/4-inch to 1-inch iron. If they end too far forward, they can look accidental. If they’re too short, they don’t do much at all.
This style works especially well with long hair because the ponytail itself can stay tidy while the front pieces do the flattering work. It gives you softness around the face without sacrificing the clean line of the part. That balance is why people keep coming back to it.
Keep the rest of the hair smooth enough that the tendrils look chosen, not escaped. A little shine serum at the ends helps. Too much product at the front, though, and the pieces stick to the skin in an unhelpful way.
14. High Braided Ponytail
A high braided ponytail reads louder than a low one. The base sits near the crown, so the braid starts from a point that already has energy, then the tail pulls the eye downward in a long clean line. On long hair, that extra length turns the braid into a feature instead of a tidy afterthought.
This version feels different from a low braided ponytail because the shape is more vertical. You get lift at the top and a tighter pull through the sides. That makes it useful when you want the face open and the neck visible. If the hair is layered, secure the base with a small clear elastic first, then add a second stronger one over it. Layers can slip out of a single tie more easily than people expect.
It’s also a style that shows off thickness. A skinny braid can still look nice, but long hair with real density makes the tail look substantial. If you want to keep it from feeling too severe, tug a few outer pieces from the braid once it’s finished.
A little looseness near the crown helps. Too much and the whole thing collapses.
15. Ponytail with Curled Ends
Sometimes the smartest move is to keep the base simple and save the effort for the last 4 inches. A middle part ponytail with curled ends does exactly that. The top stays neat, the tail stays long, and the ends get just enough bend to look finished instead of flat.
This is especially useful if your hair is very straight and tends to look thin at the bottom. Curling only the ends gives the length a bit of shape without forcing the entire ponytail into waves. Use a 1-inch iron and wrap just the last section of hair around the barrel for a few seconds. That small curl at the bottom keeps the line from dragging.
The style works at almost any height, but I think it looks best at low or medium level. A high pony with curled ends can feel too airy. Low keeps it grounded.
A nice bonus: it’s fast. You can smooth the base, tie the pony, curl the ends, and be done before the rest of your outfit is even sorted.
16. Minimalist Straight Ponytail
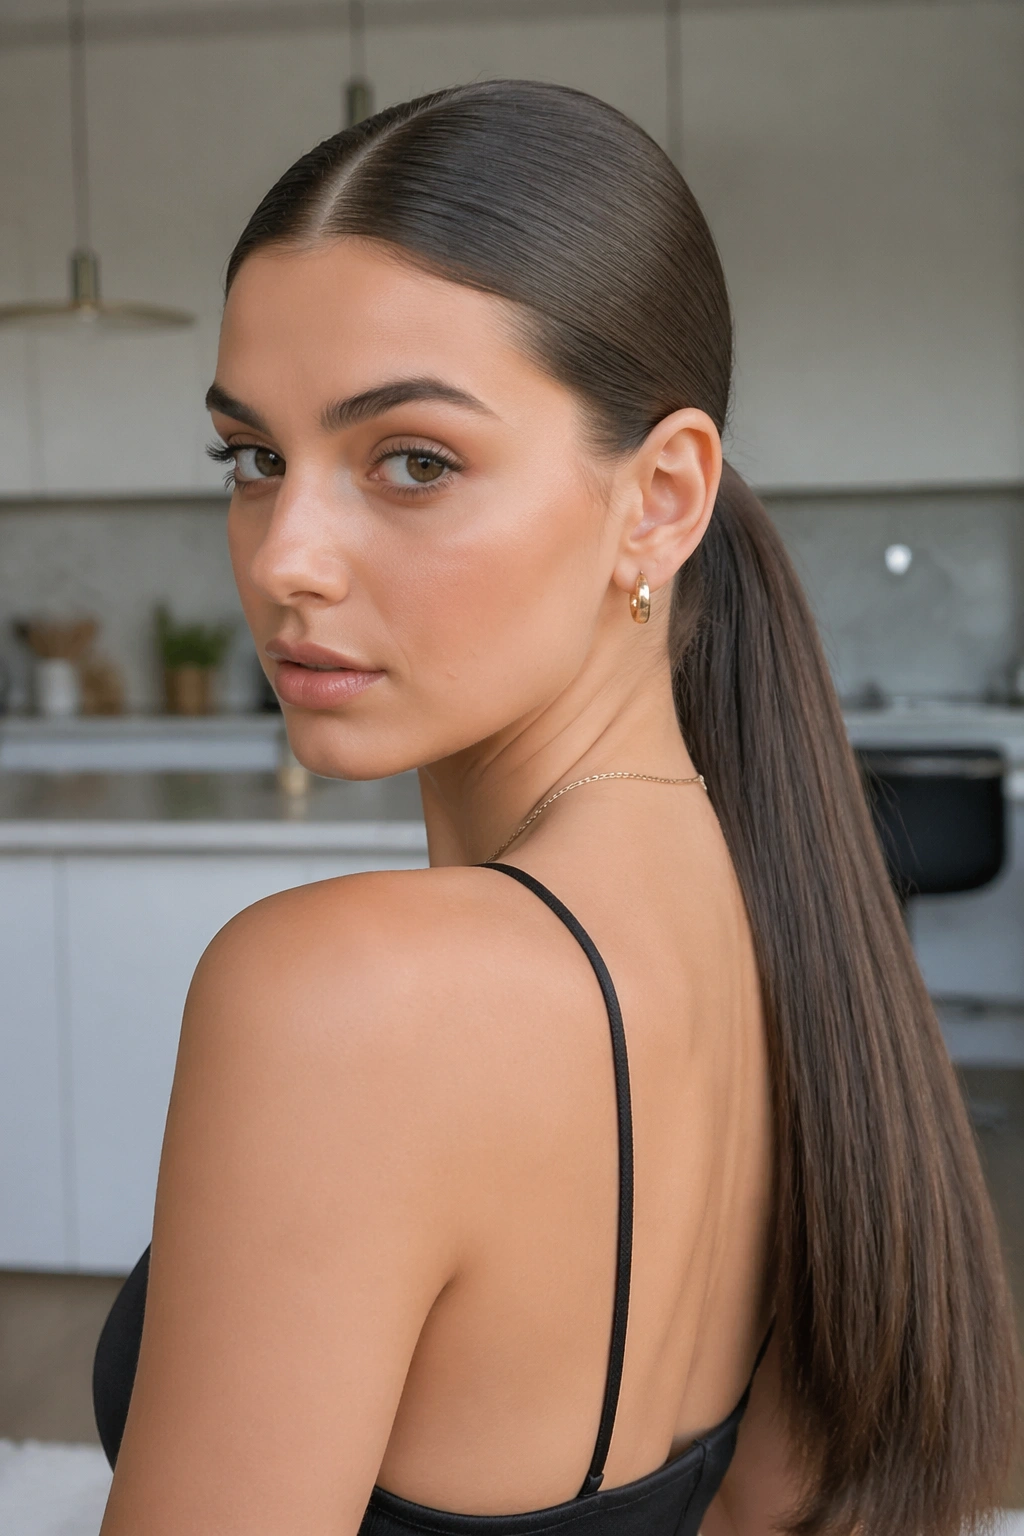
There’s nowhere for mistakes to hide in a straight ponytail. That’s why it feels so good when it’s done well. A clean middle part, a flat crown, and long glassy lengths create a shape that’s blunt in the best way.
Use a paddle brush or a boar-bristle brush to smooth the hair back in sections, and work slowly around the ears so you don’t trap bumps. A tiny amount of serum through the midlengths and ends can help the tail lie flat without making it greasy. If the hair is naturally frizzy, pass a flat iron over the top layer only. Don’t chase every strand. That often makes the style look too processed.
- Best for naturally straight or relaxed textures
- Looks strongest when the ends are all one length
- Works well with a middle part that’s measured, not jagged
- Needs a strong elastic so the base stays tight
This is one of those styles that looks quiet from far away and expensive up close. The shine does the work.
17. Sporty Ponytail with Elastic Stack
A stacked elastic ponytail is the answer when one tie doesn’t seem to hold the length. Long hair can be sneaky heavy, and a single elastic sometimes starts slipping after an hour of movement. Two or three elastics spaced about 1 inch apart fix that problem without changing the shape much.
The center part keeps the front clean, while the stacked ties support the tail down the back. It’s especially useful if you’re moving around a lot or if the hair is thick enough to drag on itself. The style doesn’t have to look athletic, either. Keep the top sleek and the tail smooth, and it reads neat rather than gym-only.
I like this for hair that’s been curled or waved lightly before being tied back. The extra structure keeps the style from collapsing into a single heavy mass. If you want the tail to feel softer, loosen the segment between the first and second elastic by a quarter inch. That small adjustment gives the pony some breathing room.
No glamour trick here. Just smart support.
18. Pearl-Accent Ponytail
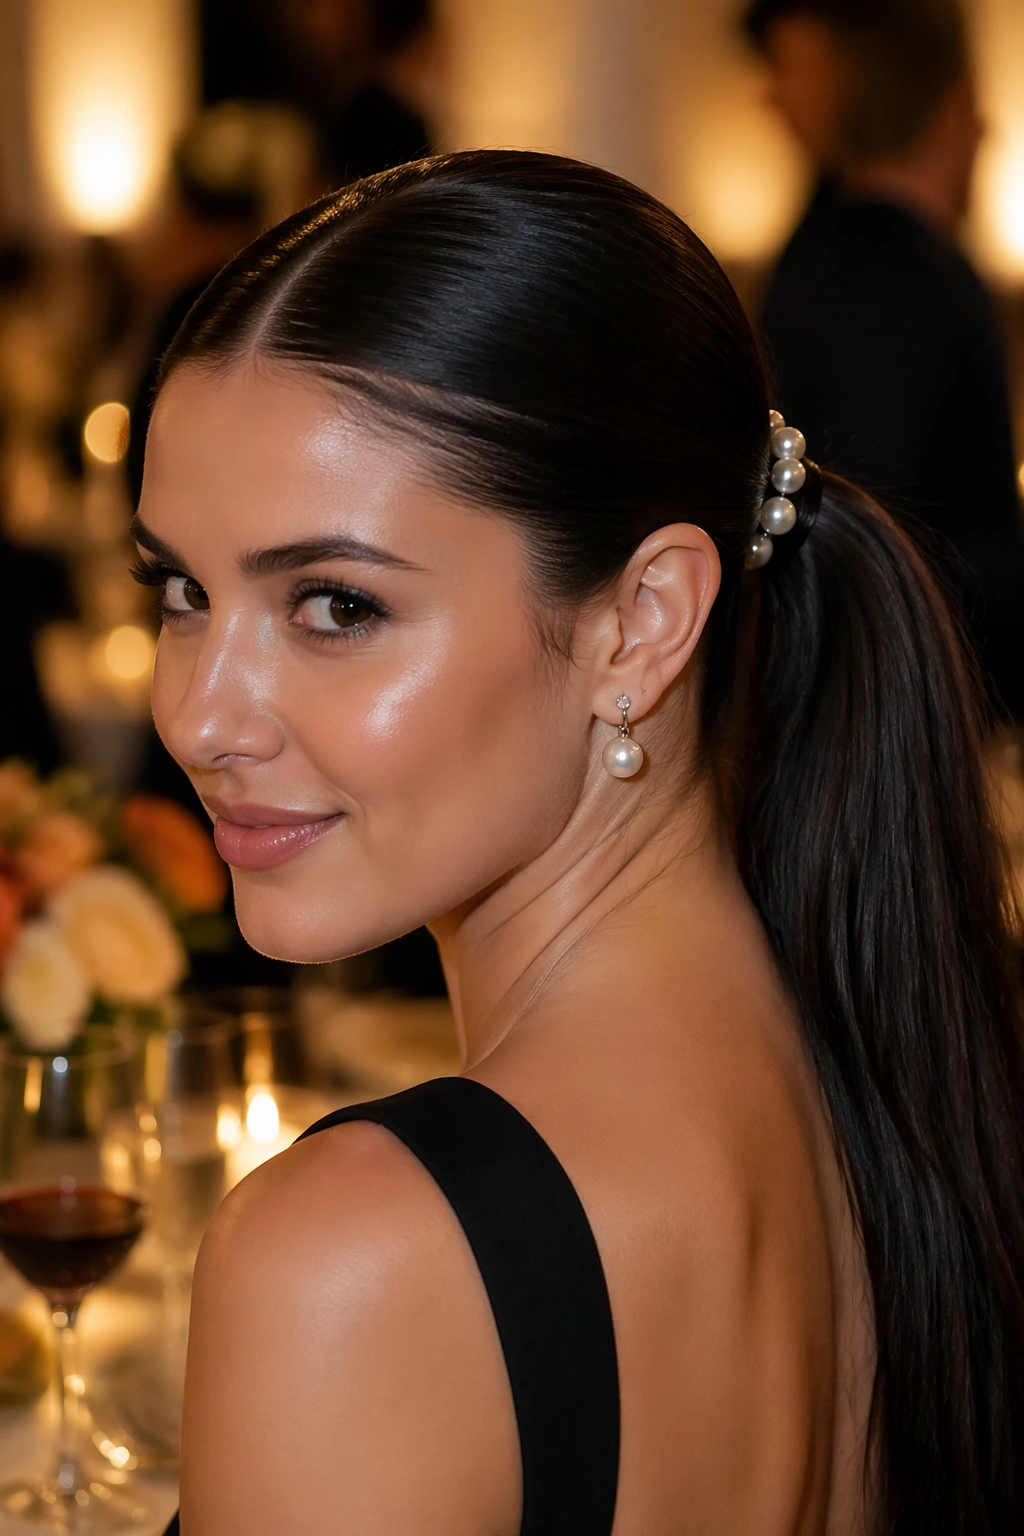
Pearl accents change a ponytail fast. Three or four small pins along the base, or a single pearl-tipped clip tucked beside the elastic, turn a simple center-part pony into something that feels finished. Long hair gives the details enough room to show, which is why this works better on longer lengths than on cropped tails.
The cleanest version keeps the pony itself sleek and lets the accessories do the talking. Place the pearls either symmetrically along both sides of the base or stacked just above the elastic in a neat line. Too many and the style starts looking crowded. Three small points of shine usually do the job.
This is one of those styles that works for dinners, events, or any day you want the hair to look considered without being fussy. A plain elastic disappears. Pearls don’t. That’s the point.
Keep the rest of the finish restrained. A smooth crown and lightly polished ends let the accents stand out. If the hair is very textured, the pearls can get lost in the surface.
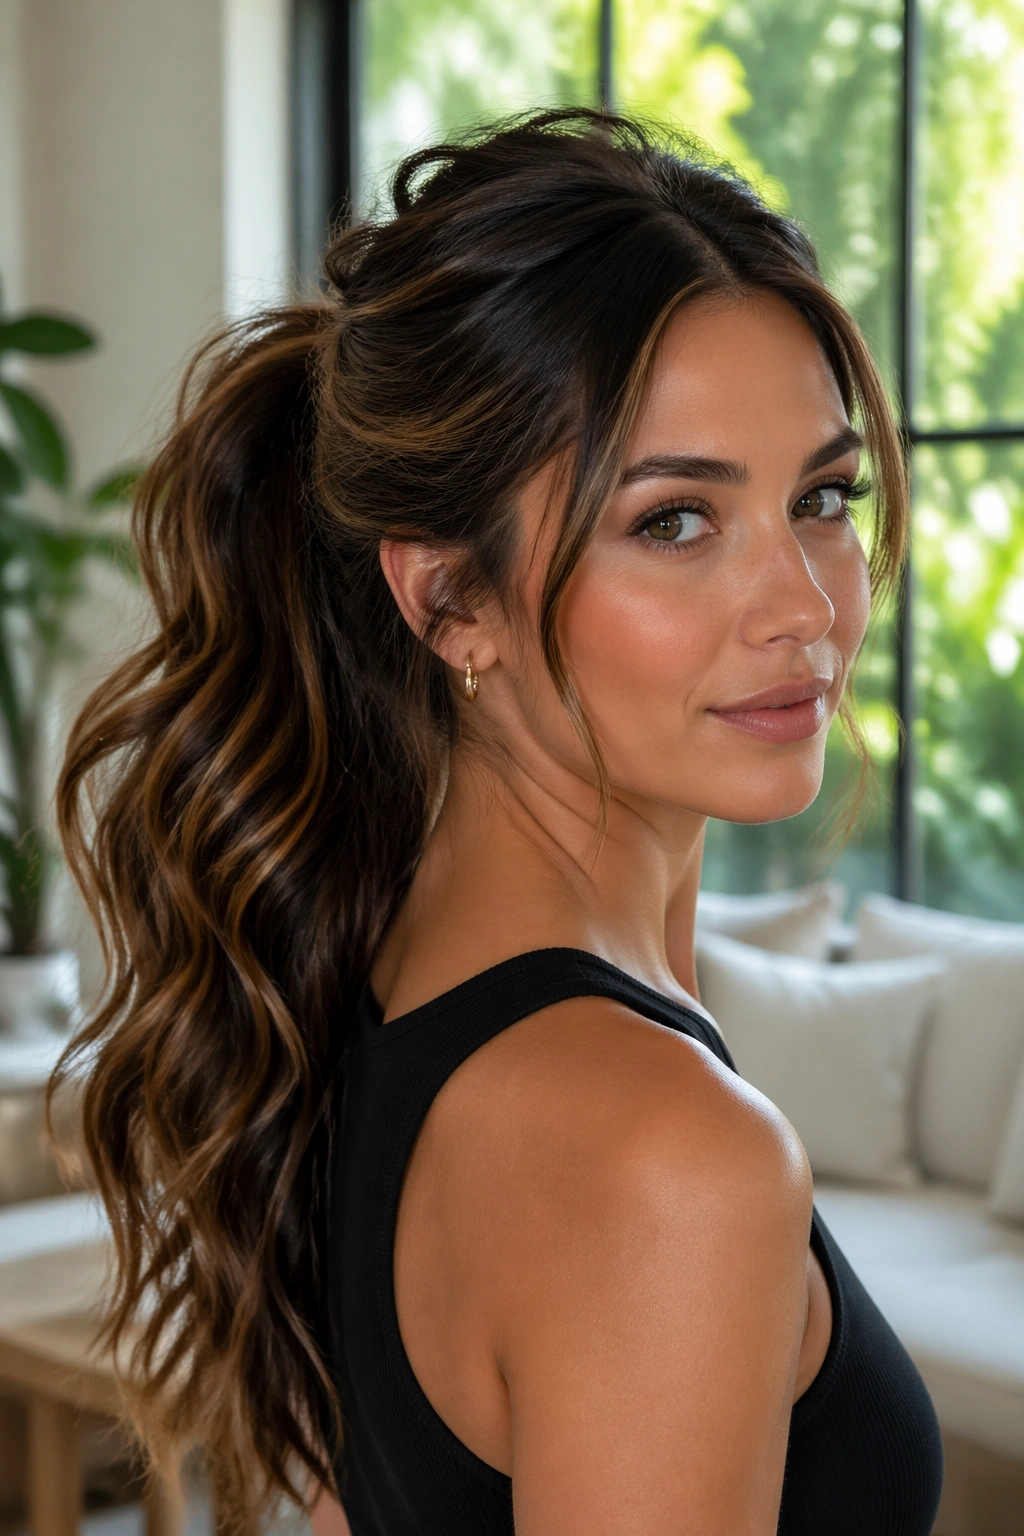
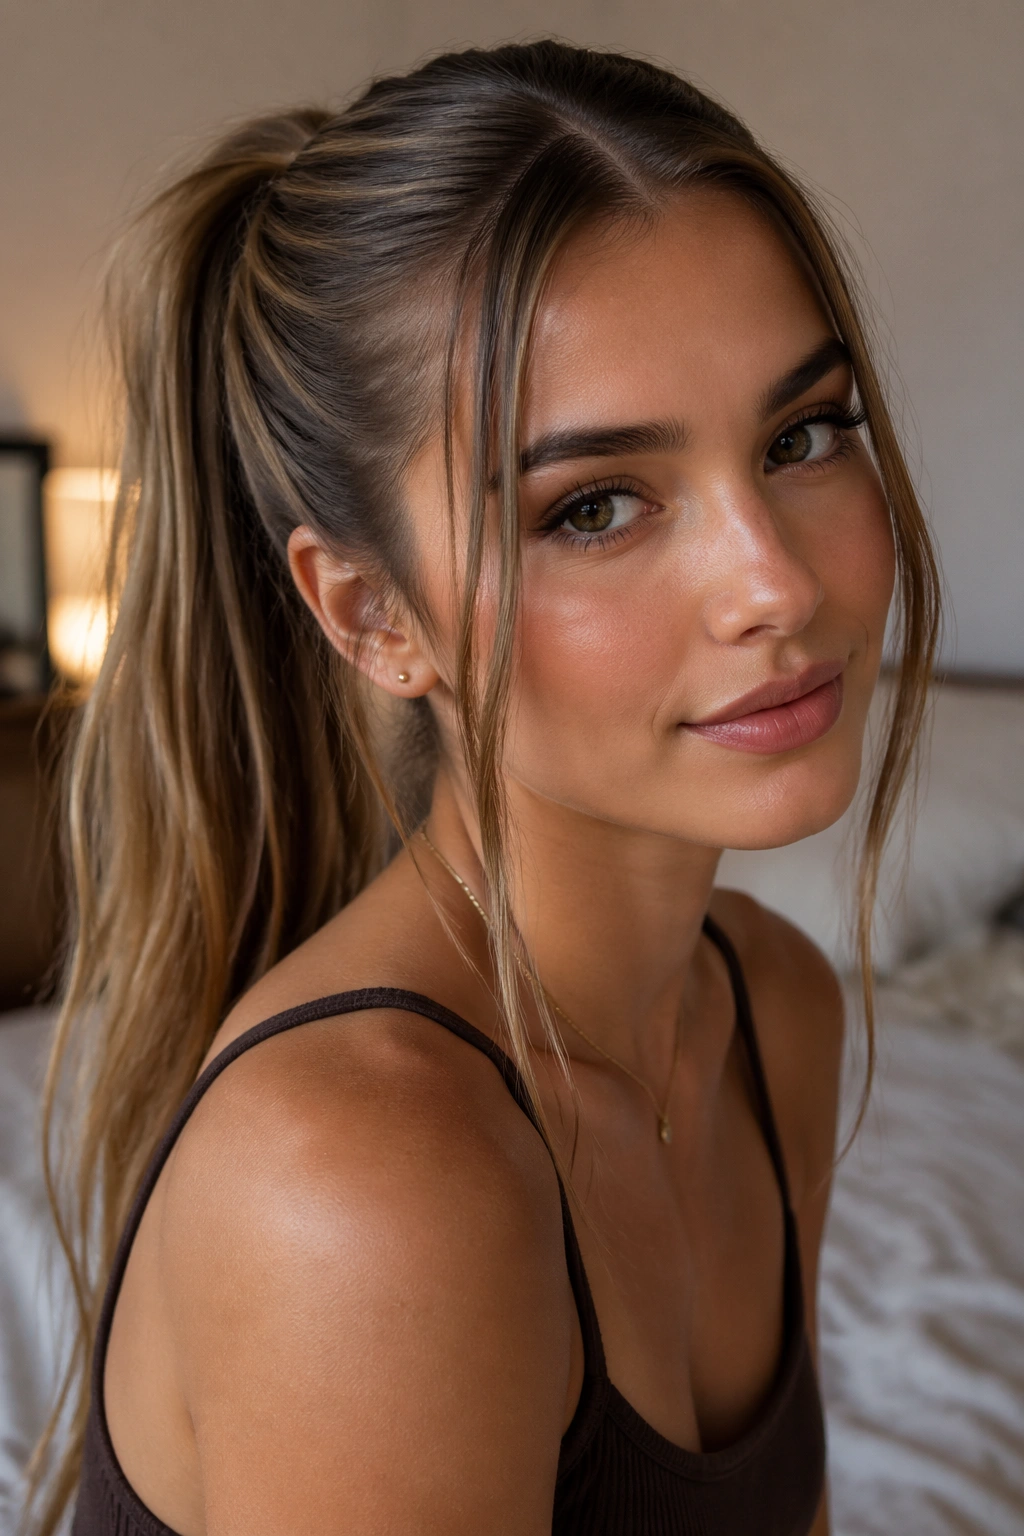
19. Soft Glam Crown-Lift Ponytail
A little lift at the crown changes the whole mood. Not a teased mess. Just enough root support to keep the top from lying flat against the head. That subtle height makes a center part feel more flattering on long hair, especially when the tail itself is heavy.
Backcomb the hair under the top layer at the crown with a fine comb, then smooth a thin section over it so the tease stays hidden. Tie the pony at mid-height, where the lift and the length can balance each other out. If the base is too high, the style can feel top-heavy. Too low, and the lift disappears.
The Best Parting Ratio
Keep the center part narrow at the hairline and let it widen slightly as it reaches the crown. That little shift helps the front read intentional instead of overly severe. It also makes the style softer around the face.
I like this one when the rest of the look is simple and the hair needs a bit of shape without turning into a full updo. It’s clean, but not flat. That distinction matters.
20. Dutch-Braided Base Ponytail
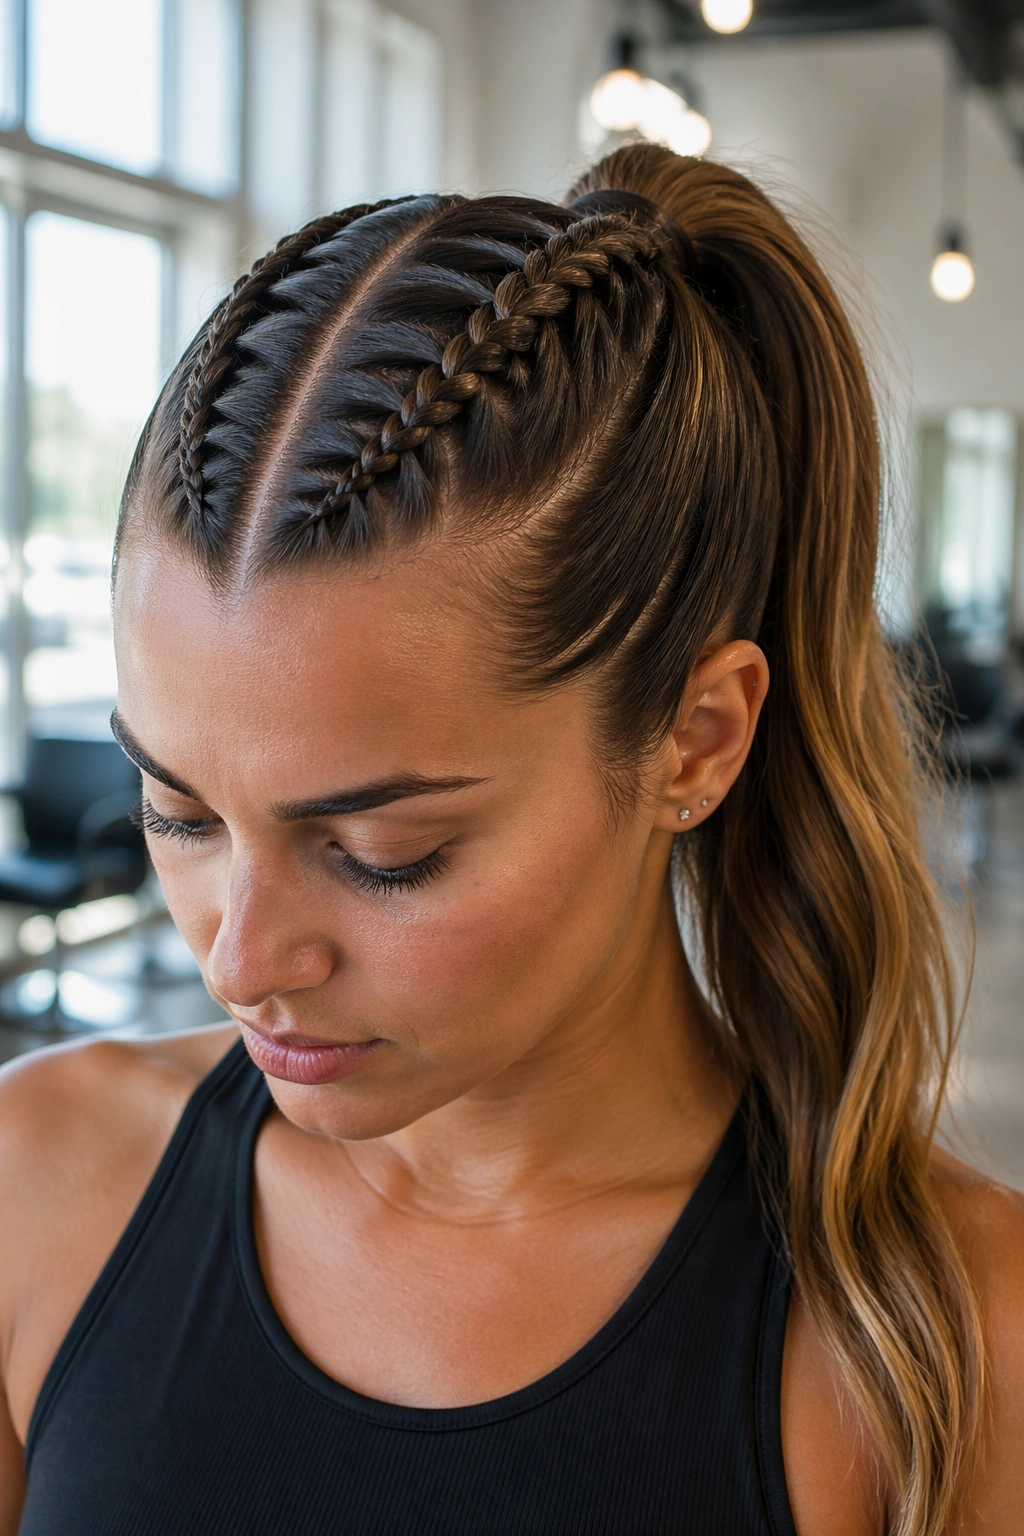
A Dutch-braided base gives the ponytail a built-in frame. The braids sit tight against the scalp on both sides of the middle part, then the rest of the hair gathers into a long tail. It’s one of the most practical middle part ponytails for long hair if you want the front pieces locked down.
Unlike a simple gathered pony, this style keeps the edges from flaring out. The braid creates a visual line that leads straight into the tail, which looks especially good on thick hair. You only need to braid 1 to 2 inches back on each side before tying the ponytail, so it doesn’t become bulky.
This one is ideal when the weather is windy or the day is long and busy. It stays neat because the braid does half the work of a hair tie and half the work of a headband. That’s probably why it keeps showing up in real-life styling instead of just on mood boards.
If your hair is layered around the face, tuck the shorter bits into the braid with a little styling cream. It helps the front stay smooth.
21. Bubble-and-Braid Hybrid Ponytail
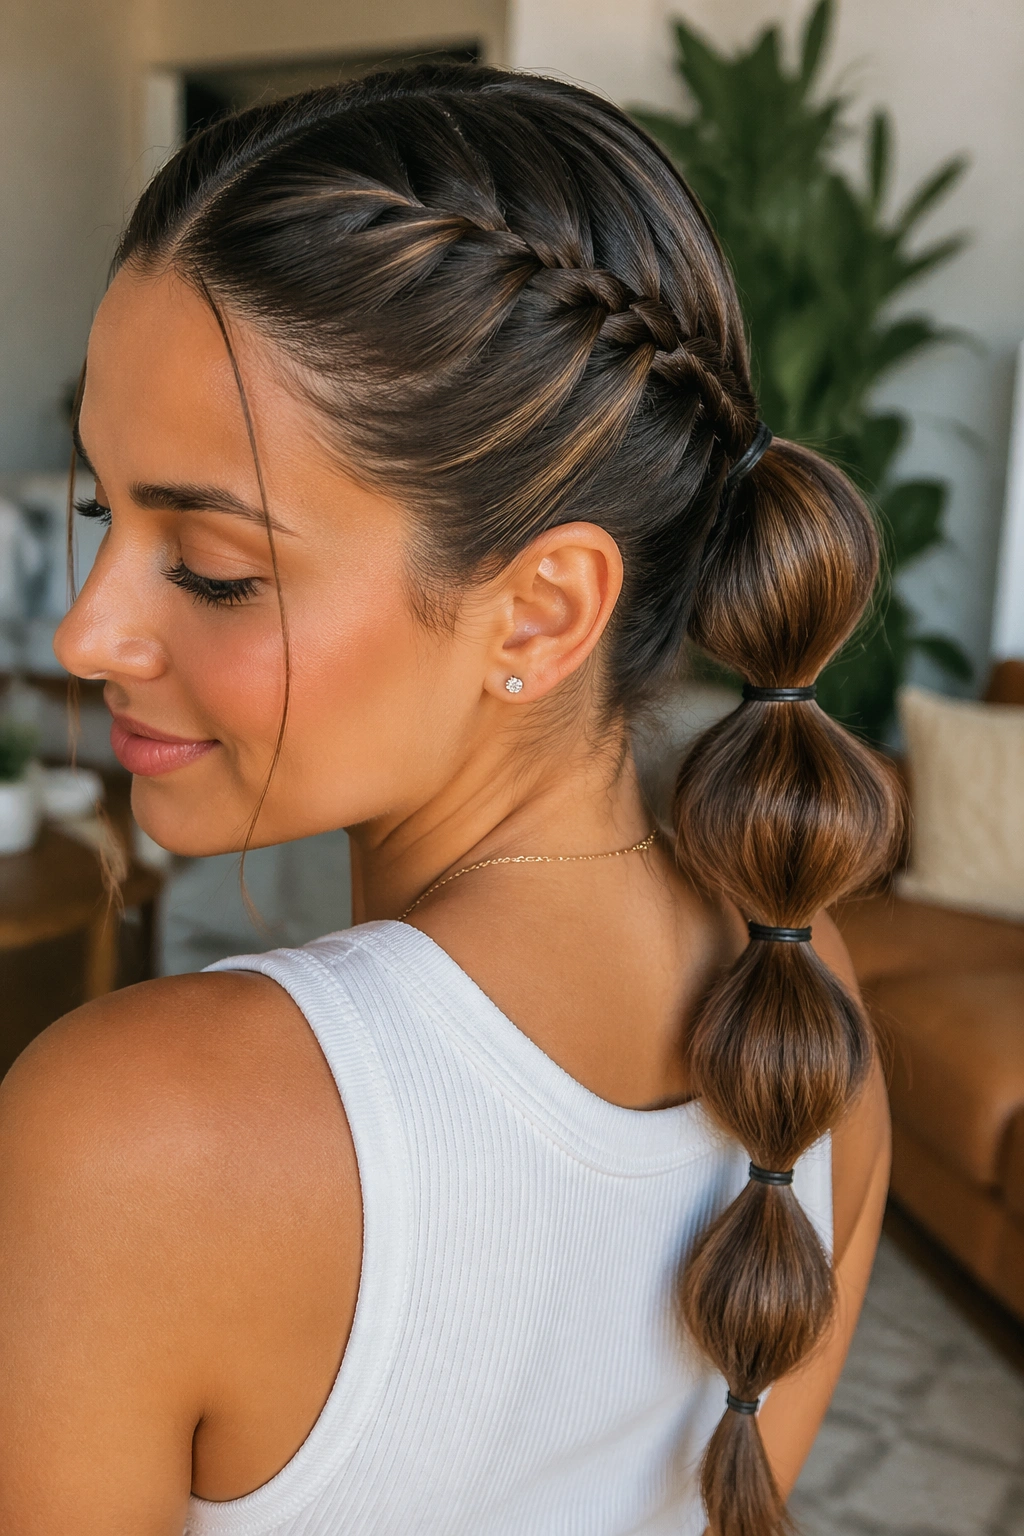
This style has personality. Start with a braid for the top section, then switch to bubble sections through the rest of the tail. On long hair, the mix of shapes looks deliberate and a little unexpected, which makes it more interesting than a plain braid or a plain bubble pony.
The braid near the base keeps the front clean and controlled. The bubble sections lower down break up the length so it doesn’t hang as one solid block. Leave 2.5 to 3 inches between each elastic once you switch from braid to bubble, then puff the spaces evenly with your fingers.
- Best on very long hair
- Looks good with clear elastics
- Works when the hair has some texture already
- Needs a firm base so the top doesn’t loosen
The best part is that it gives you two finishes in one style without looking fussy. If you like the idea of detail but hate a lot of pinning, this one has a nice balance.
22. Wet-Look Middle Part Ponytail
The wet look is not subtle. That’s exactly why it works. A middle part with a glossy, slicked-down finish makes long hair look sharp and deliberate, almost like a runway version of the everyday ponytail. You need a strong gel or styling cream for the top and a shine product for the lengths.
Work the product through damp or slightly damp hair, comb the part straight, and keep the sides tight while the hair dries. If you wait too long between product and combing, the finish gets patchy. That’s when the style starts to look greasy instead of sleek. There’s a difference, and it’s not small.
This ponytail likes smooth hair textures best, but it can also tame frizz-prone lengths if you use the right amount of product. The rule is simple: more shine at the crown, less on the ends. Heavy product on the tail makes the long hair hang limp.
I’d save this one for a dressier outfit or when you want the hair to look almost sculpted. It has edge.
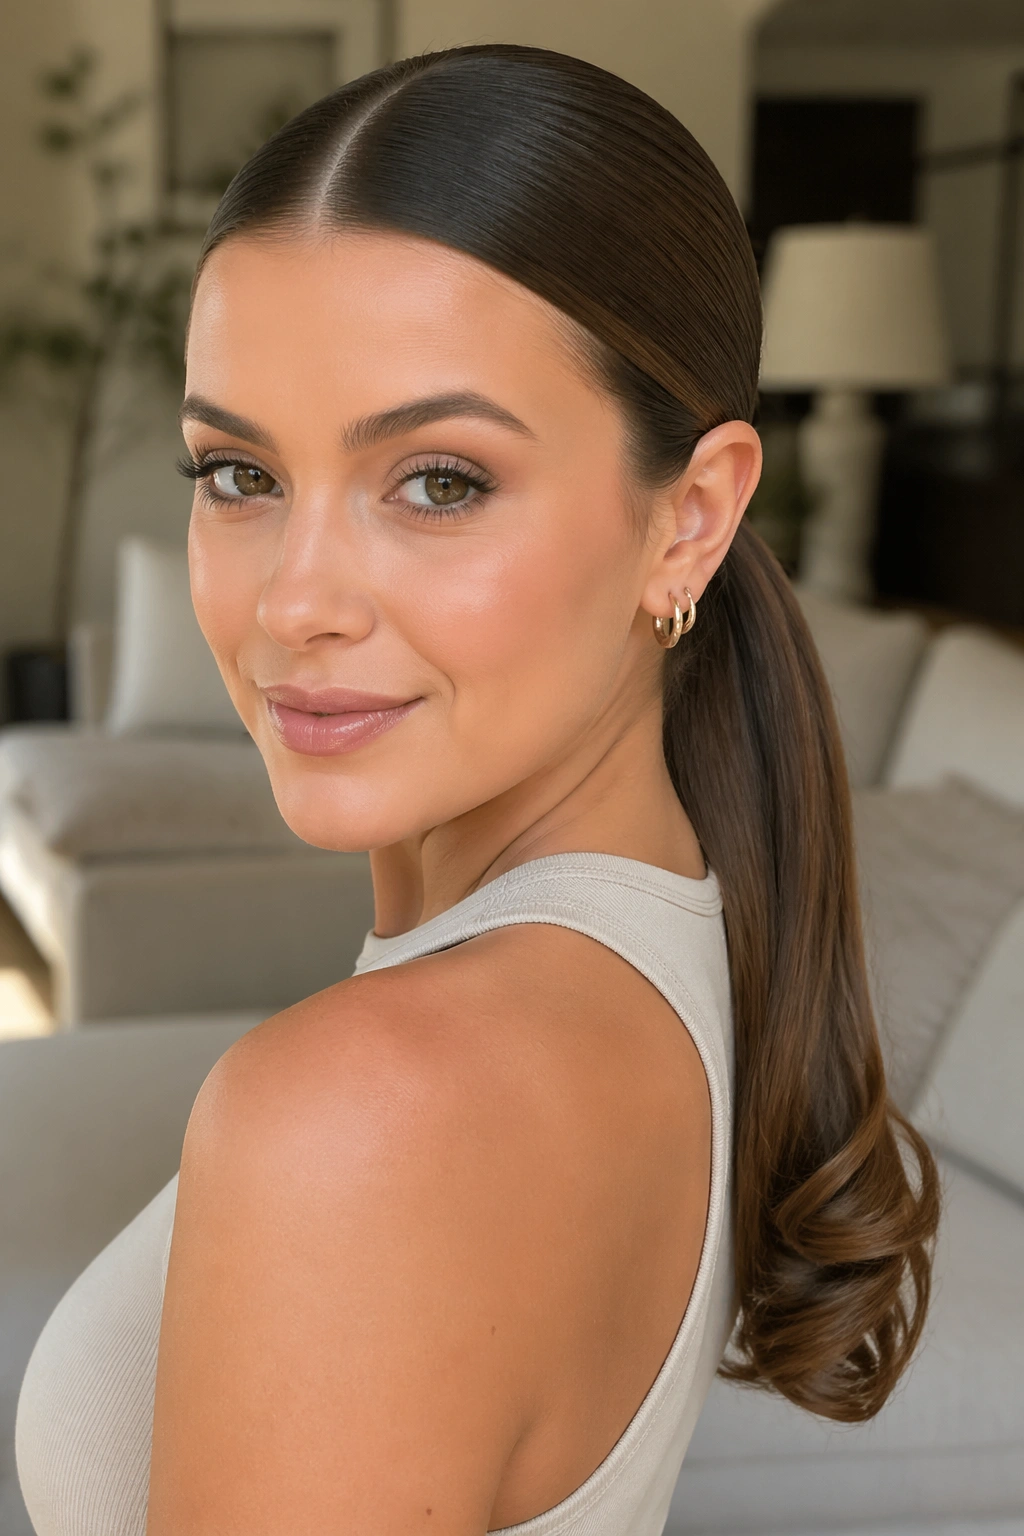
23. Loose Romantic Low Ponytail
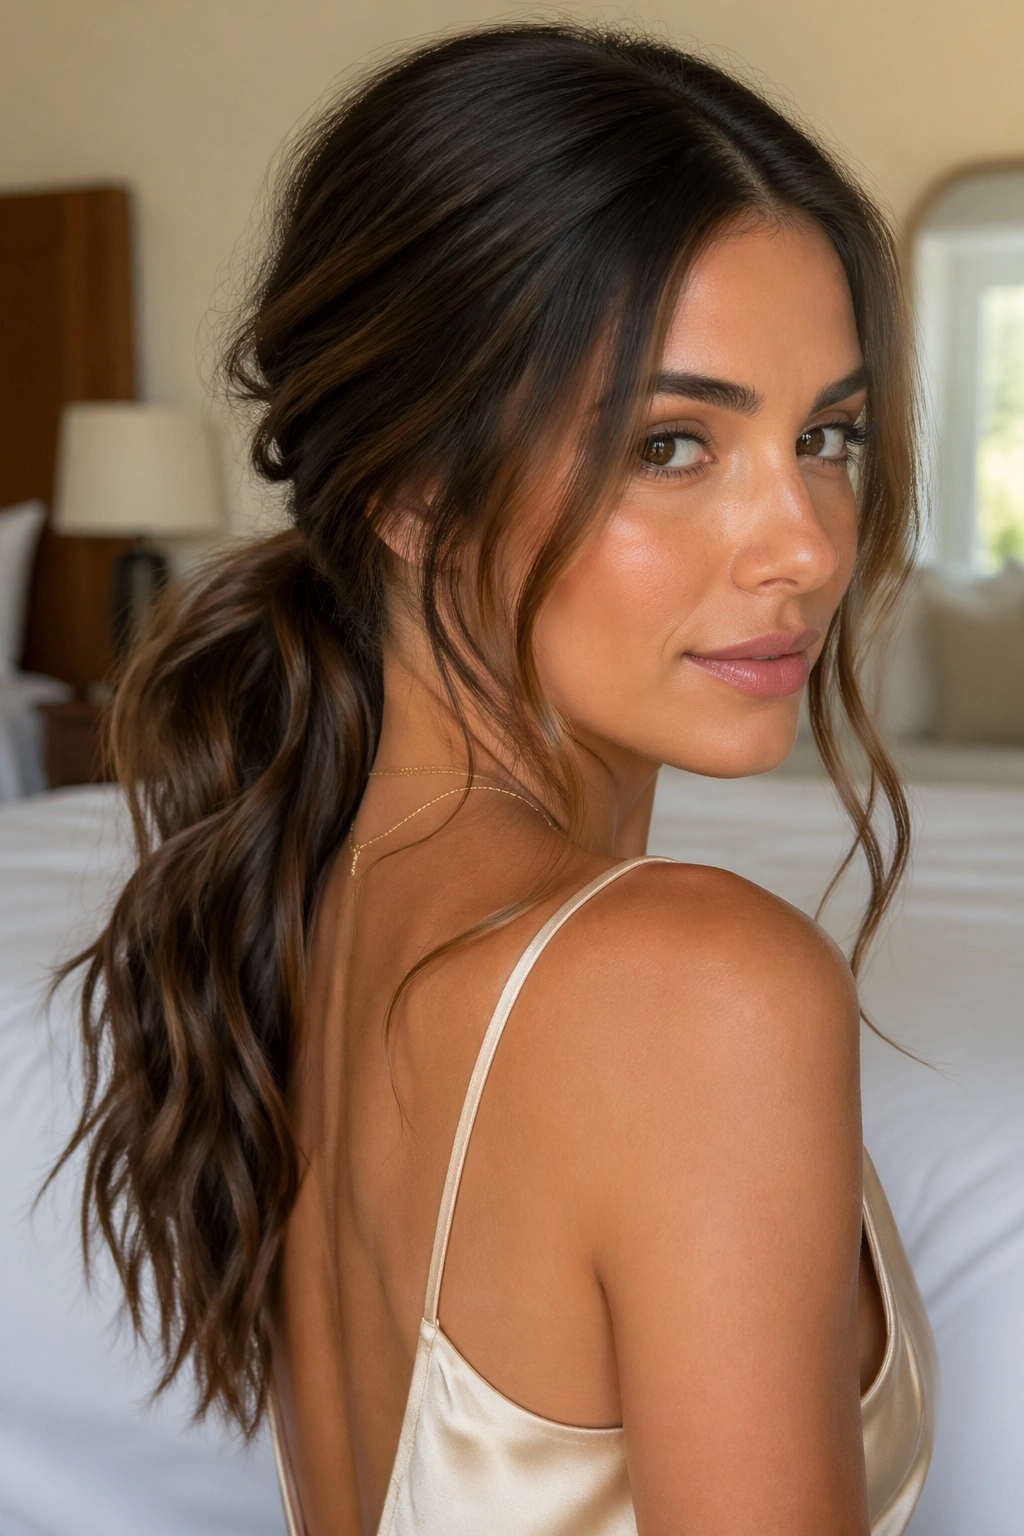
A loose low ponytail can still feel polished if the middle part is clean and the texture is controlled. The trick is to keep the front neat and let the tail relax a little. Long hair gives this style enough length to drape softly instead of puffing out too early, which is why it works so well.
Start by bending the hair lightly with a curling iron or a big-barrel wand, then brush it out until the waves are soft. Tie the pony low, loosen a few strands around the temples, and pull a tiny bit of volume at the crown. Not much. Enough to keep the head shape from going flat, not enough to make it messy.
This style is nice when you want the hair to feel gentle rather than strict. It has that soft, touchable quality people usually want from “romantic” hair, but it still behaves. That’s the useful part.
If you’re going to leave pieces out, keep them intentional. Two thin face-framing tendrils are enough. Ten loose strands are not.
24. Ribbon-Wrapped Ponytail
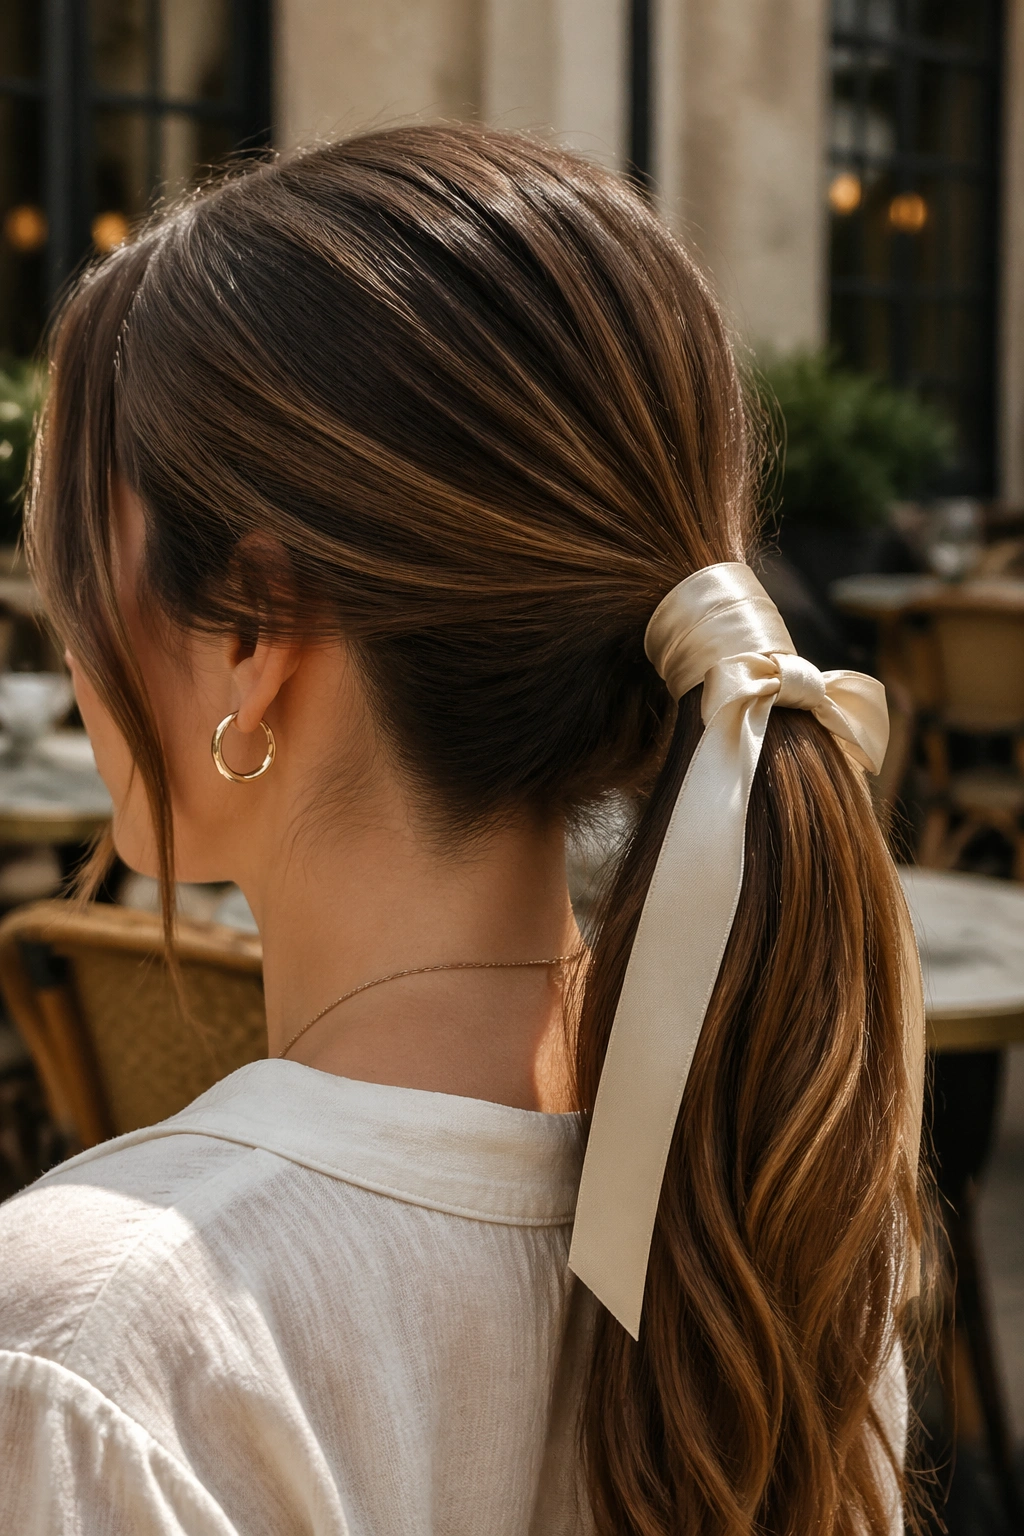
A ribbon does for a ponytail what a good frame does for a photograph. It gives the whole thing a finish line. Wrap a satin ribbon around the base of the ponytail, knot it once, then let the tails hang down beside the long hair. On long lengths, that extra ribbon tail becomes part of the shape instead of disappearing.
How to Tie It So It Stays Put
Secure the ponytail first with an elastic. Then place the ribbon over it and cross the ends twice before knotting. If the ribbon is slippery, tuck a bobby pin through the knot from underneath. That keeps it from spinning around the base.
This is a simple way to make a middle part ponytail look more dressed up without changing the shape of the hair itself. It’s useful when you want the style to look finished but don’t want braids, curls, or extra pins.
A narrow ribbon feels sweet. A wider one feels more graphic. Both work. I lean toward satin because it lays flat and doesn’t snag the strands the way rough fabric sometimes does.
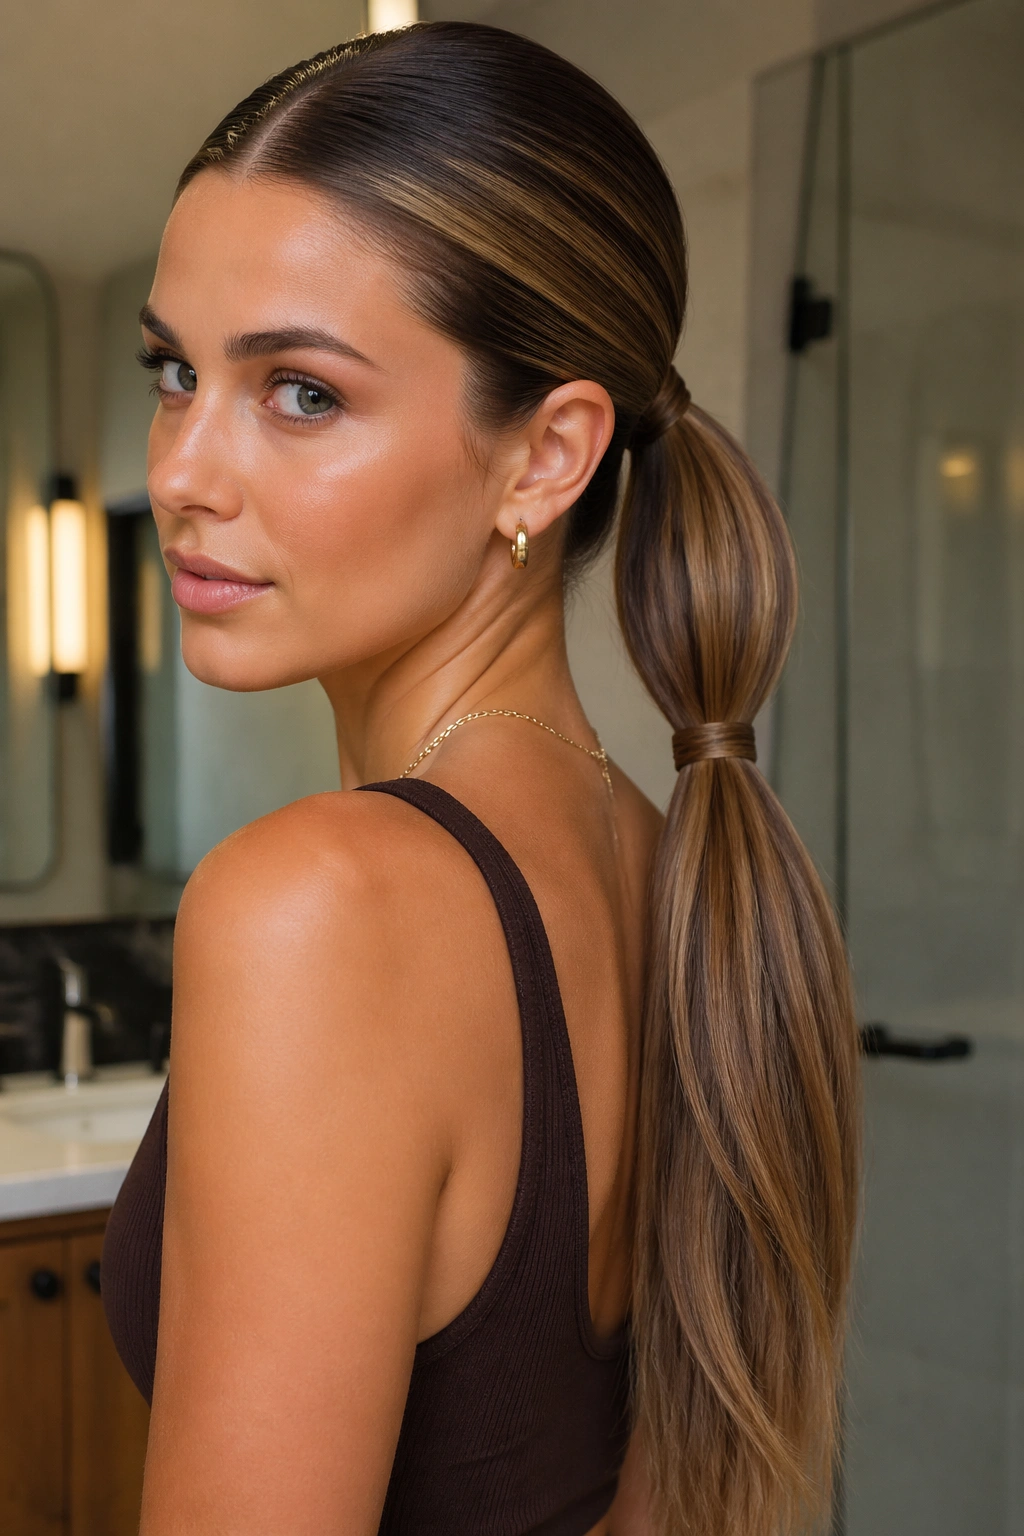
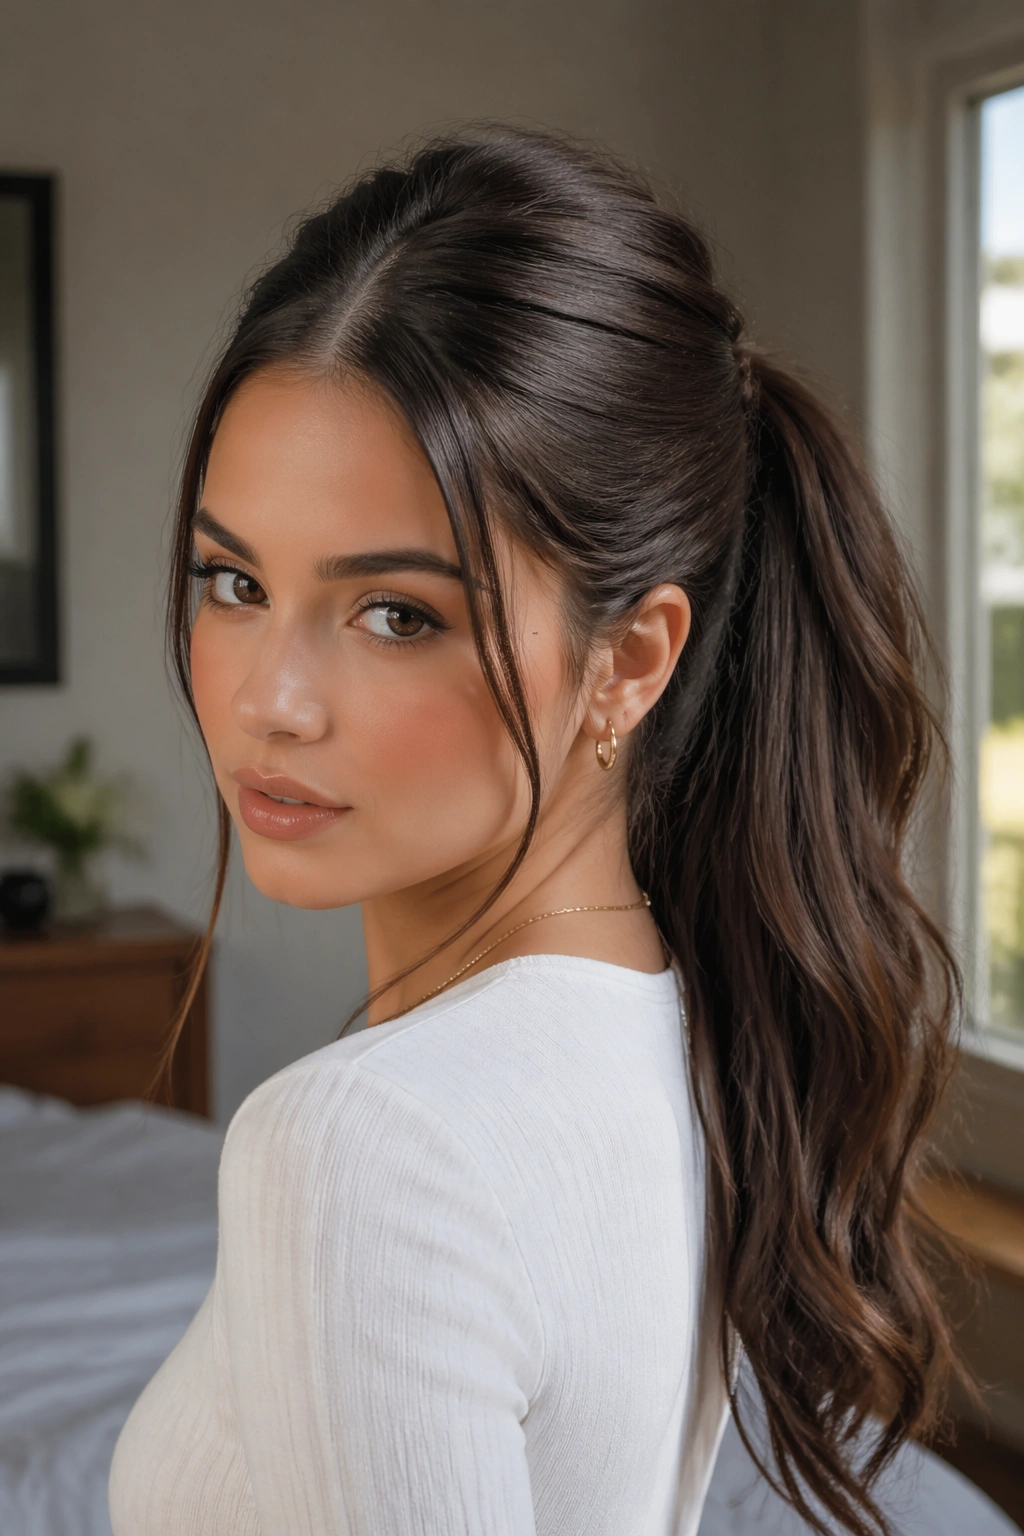
25. Medium-Height Every Day Ponytail
This is the one that earns a permanent spot in the rotation. A medium-height ponytail with a clean middle part, a smooth crown, and a slightly loose tail works in almost any setting because it sits between strict and casual. Long hair gives it enough weight to look deliberate, but not so much that it feels formal.
Place the base about halfway between the crown and the nape, then brush the sides back in even strokes. If the top needs help, use a light mist of hairspray on the brush rather than spraying the head directly. That keeps the finish smoother and avoids the crunchy halo effect that can happen fast.
The style is useful because it does not demand perfection. A tiny bend in the tail is fine. A wrapped elastic is nice, but not required. A bit of root lift is better than none, yet it doesn’t collapse if you skip it. That flexibility is a gift when you’re short on time.
If you only wear one of the middle part ponytails for long hair on a regular basis, make it this one. It handles a workday, a dinner plan, and a last-minute errand run without looking overdone.