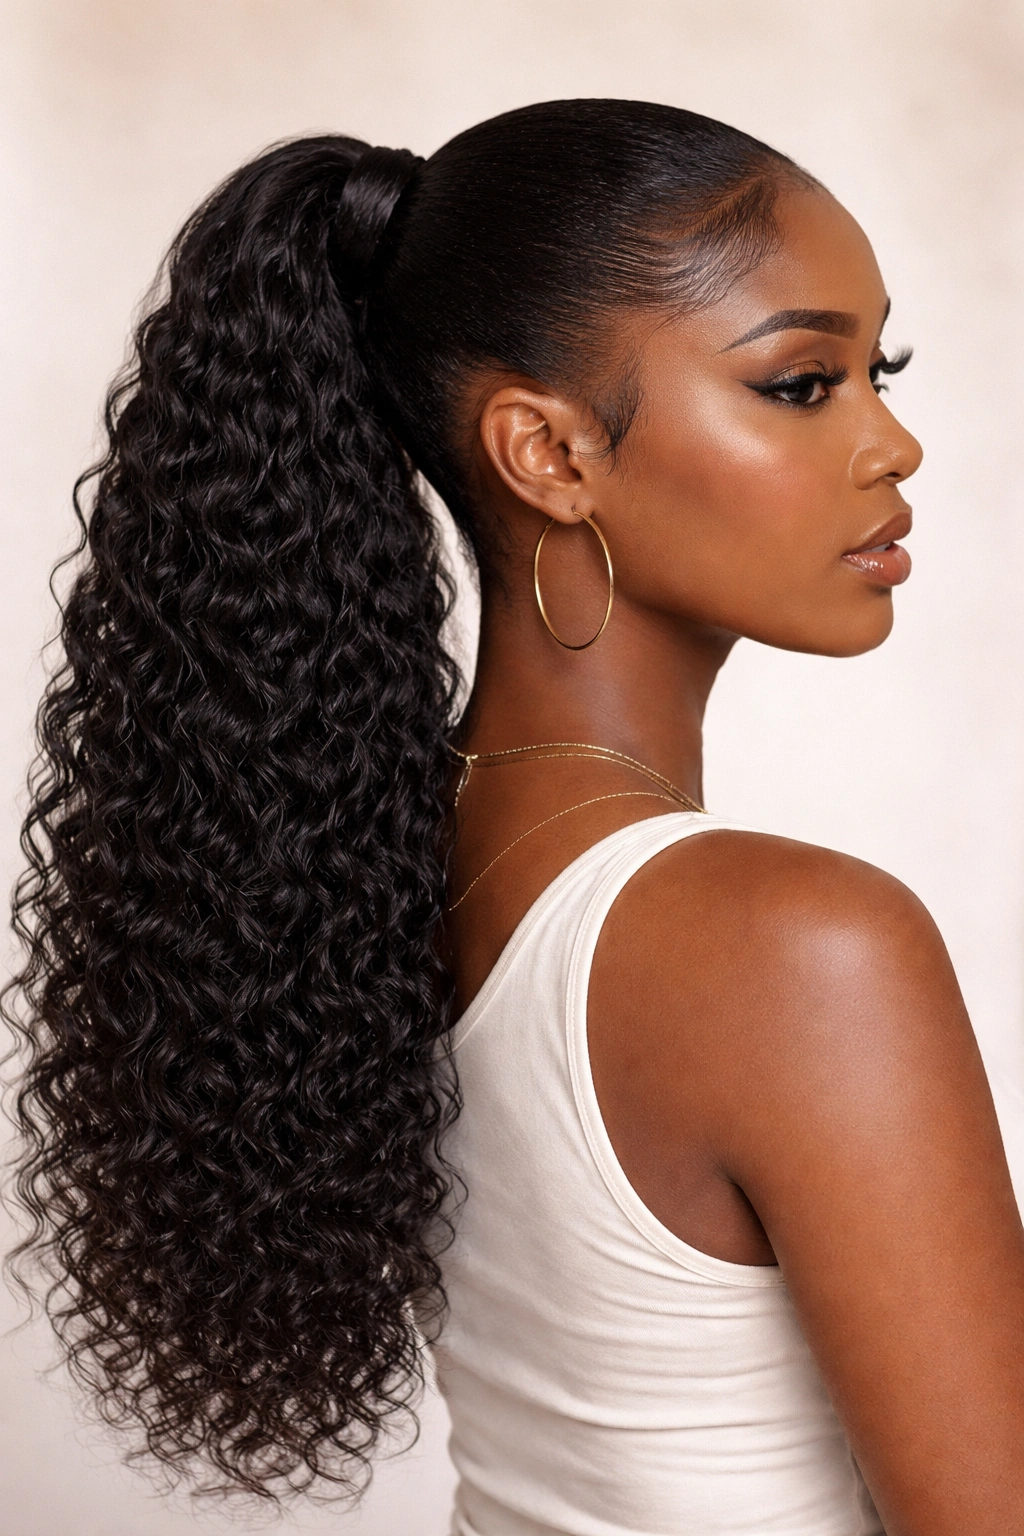
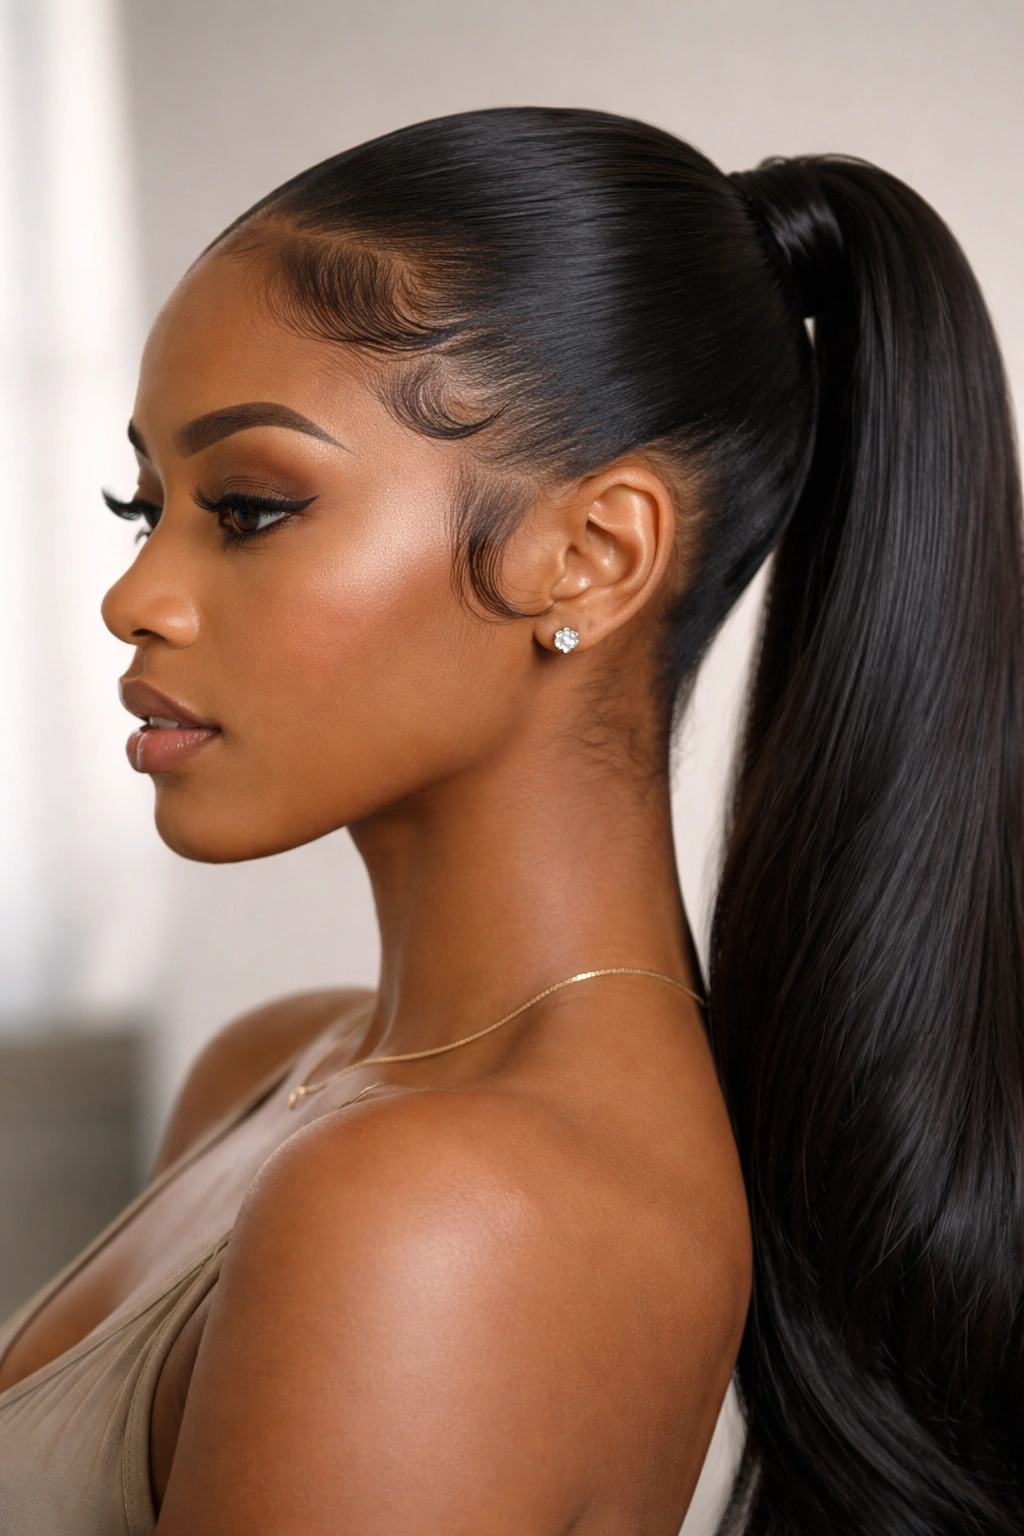
Mastering the sleek ponytail on 4C hair is less about forcing your hair into submission and more about understanding the mechanics of high-density, tightly coiled textures. You aren’t fighting your hair; you are creating a clean, structured foundation that allows the density of your coils to act as a sleek, sophisticated canvas. Many people struggle because they try to treat 4C hair like looser textures, applying weak-hold products that can’t withstand the natural tension and shrinkage of the coils.
Achieving a truly snatched look requires three things: moisture, the right hold, and, most importantly, patience. The tension of the coils is high, which means that once you brush the hair, it wants to revert back instantly. You have to lock that shape in place before it has a chance to pull back. It is about working in sections, using firm-hold gels that don’t flake, and—this is the non-negotiable part—using a silk scarf to set the style while it dries.
Stop worrying about trying to get your hair “bone straight” at the root. That often leads to heat damage or breakage. Focus instead on smoothing and elongating. When you treat the styling process as a method of stretching rather than just pinning, the results are much more durable and your hair stays healthy underneath the style.
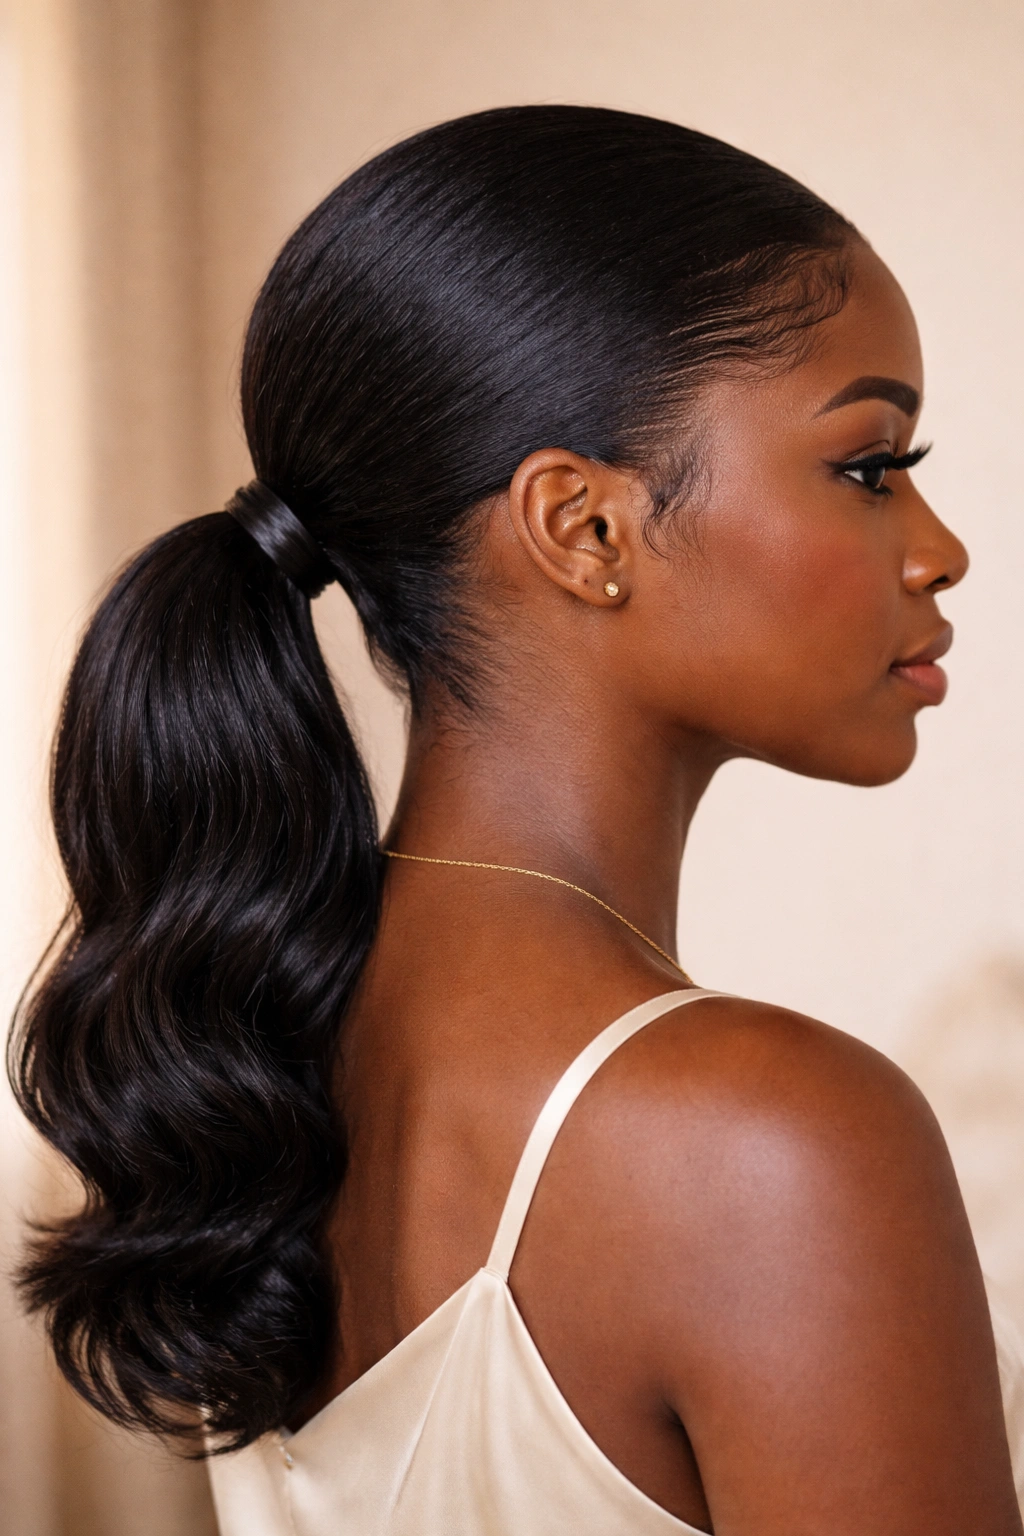
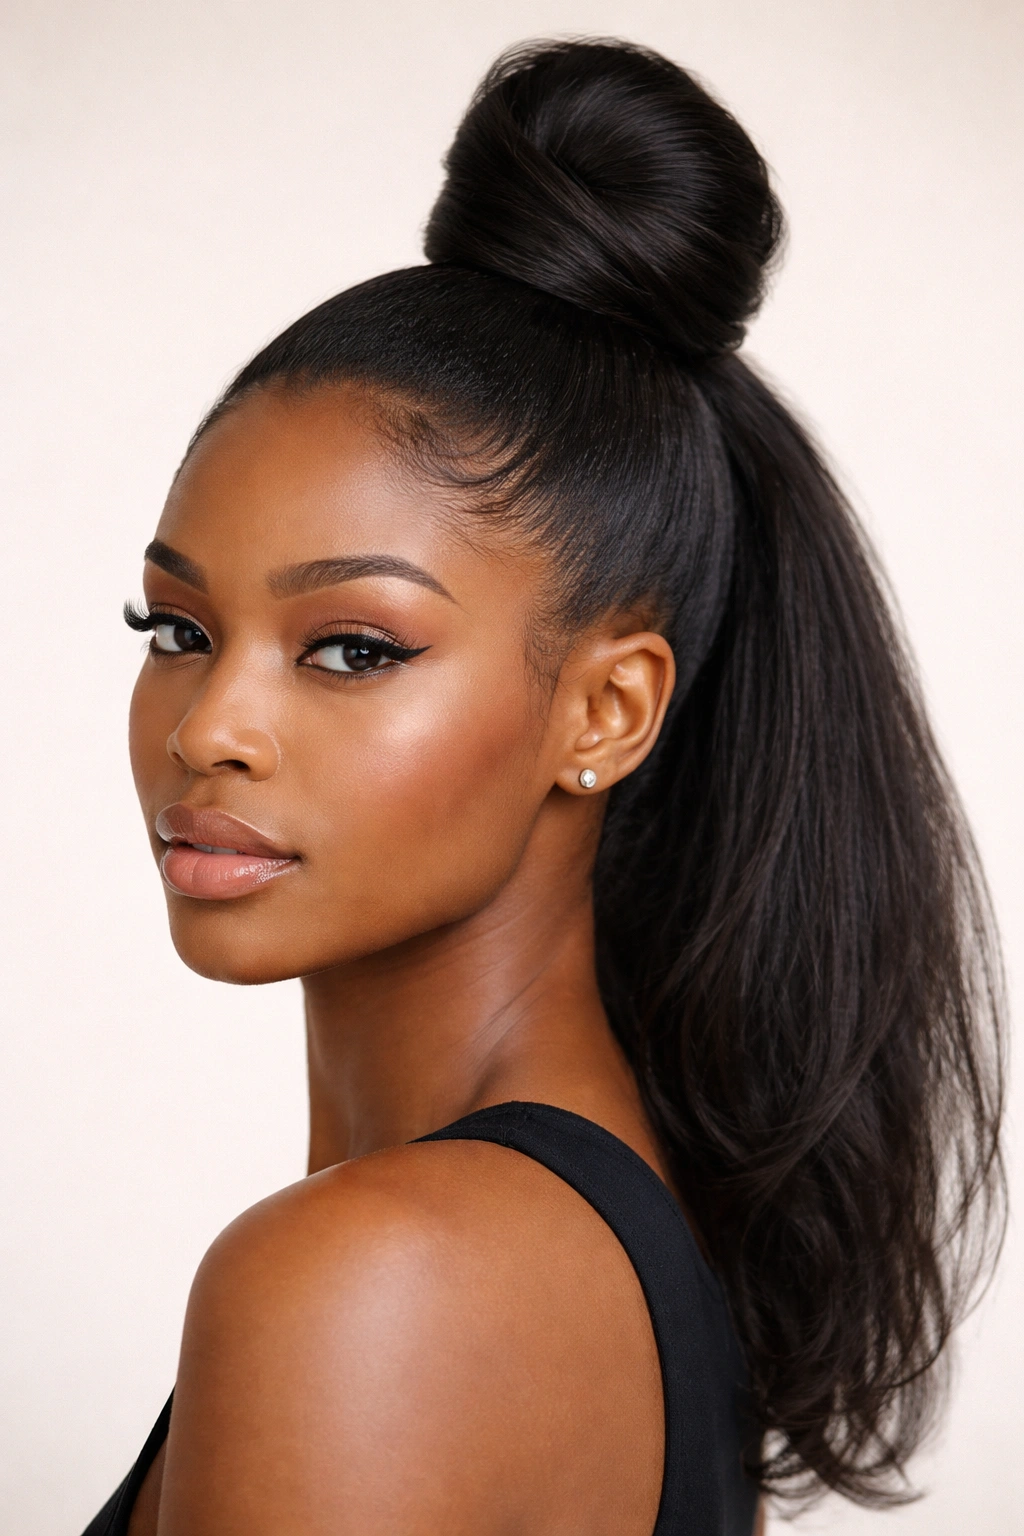
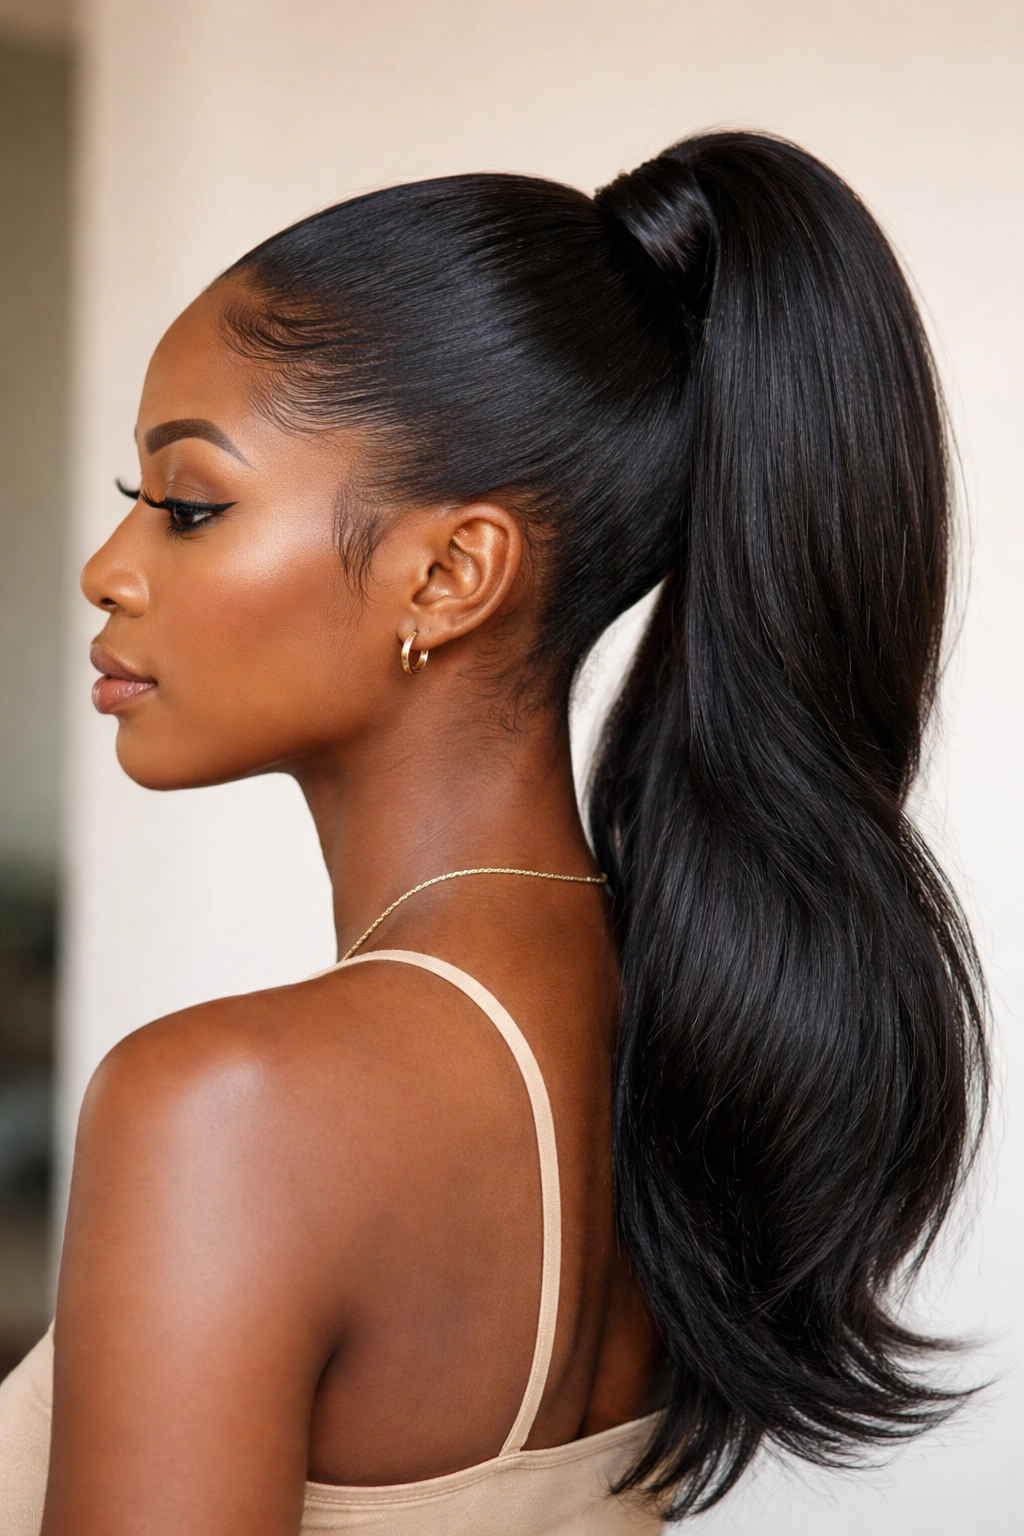
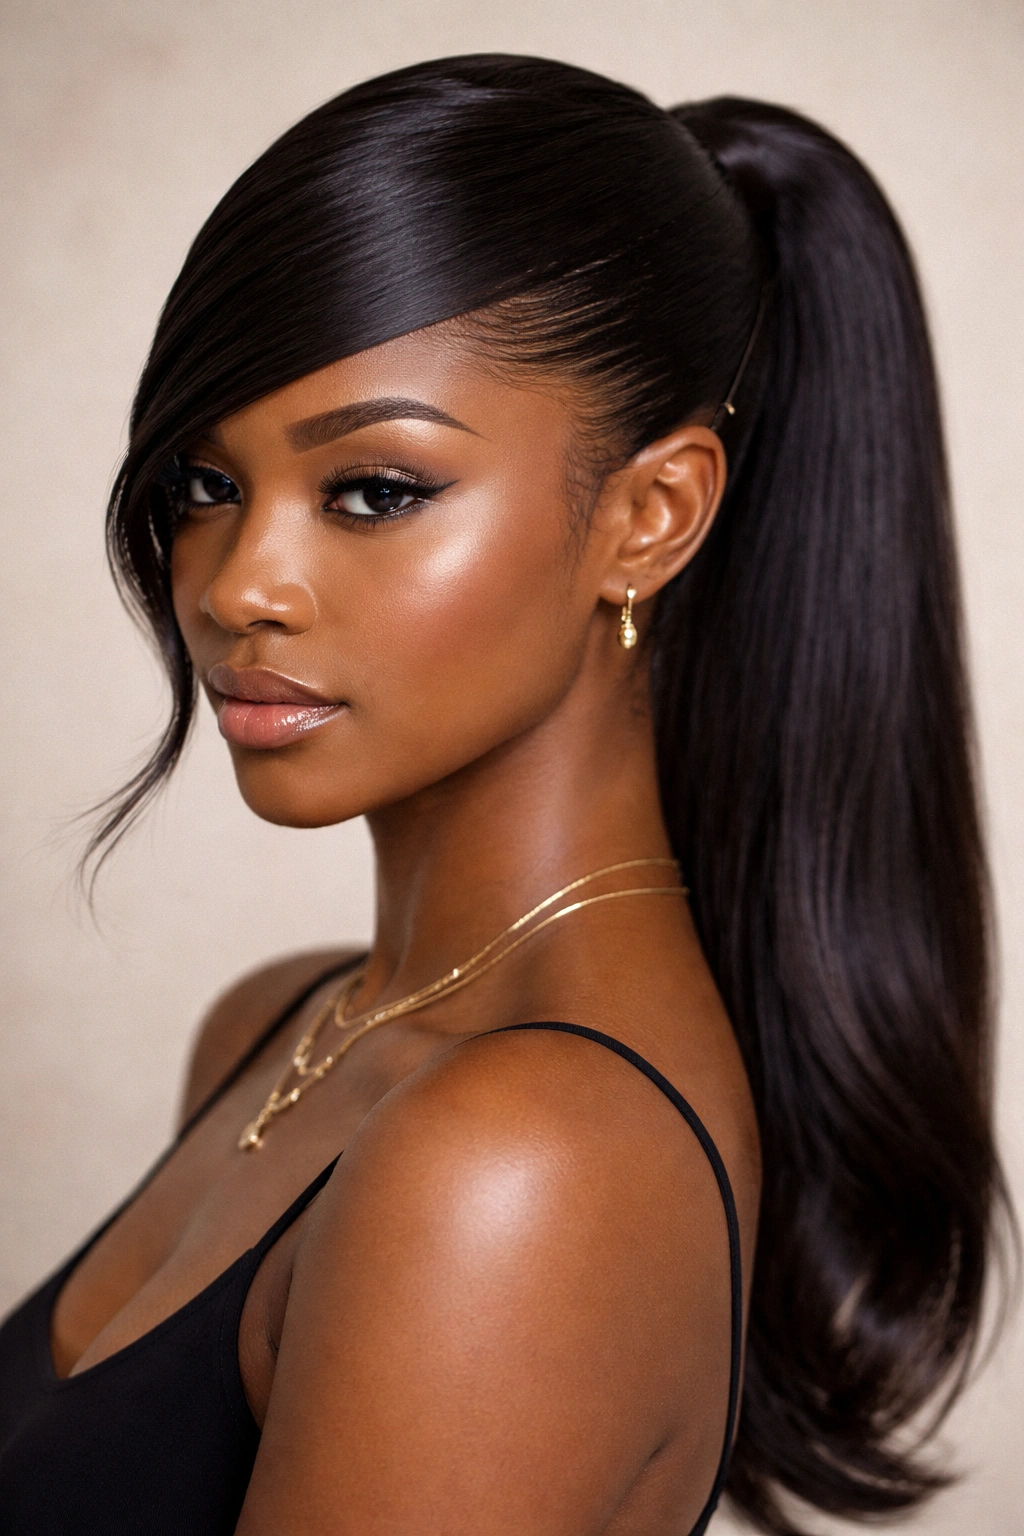
1. The Classic High-Sleek Pony
This is the standard, the baseline, and the ultimate test of your technique. A true high pony pulls the face upward, creating an immediate, clean aesthetic that works for almost every occasion. The key here is to brush the hair upward while your head is tilted forward. This ensures the back of the neck is smooth when you stand upright.
How to Build the Base
You need to work in small, manageable sections. Start by applying a moisturizing leave-in conditioner to the roots, followed by a thick, firm-hold gel or pomade. Use a hard-bristle boar brush to pull the hair toward the crown. If you find your hair is creating “bumps” at the nape, keep your head tilted forward until the very last elastic is secured.
Finishing the Look
Once the base is secure, take a small strand of hair from the ponytail, wrap it around the base to hide the elastic, and pin it underneath. This one detail changes the entire look from casual to professional. Spray a light, oil-based sheen over the crown to add a healthy glow without weighing the coils down.
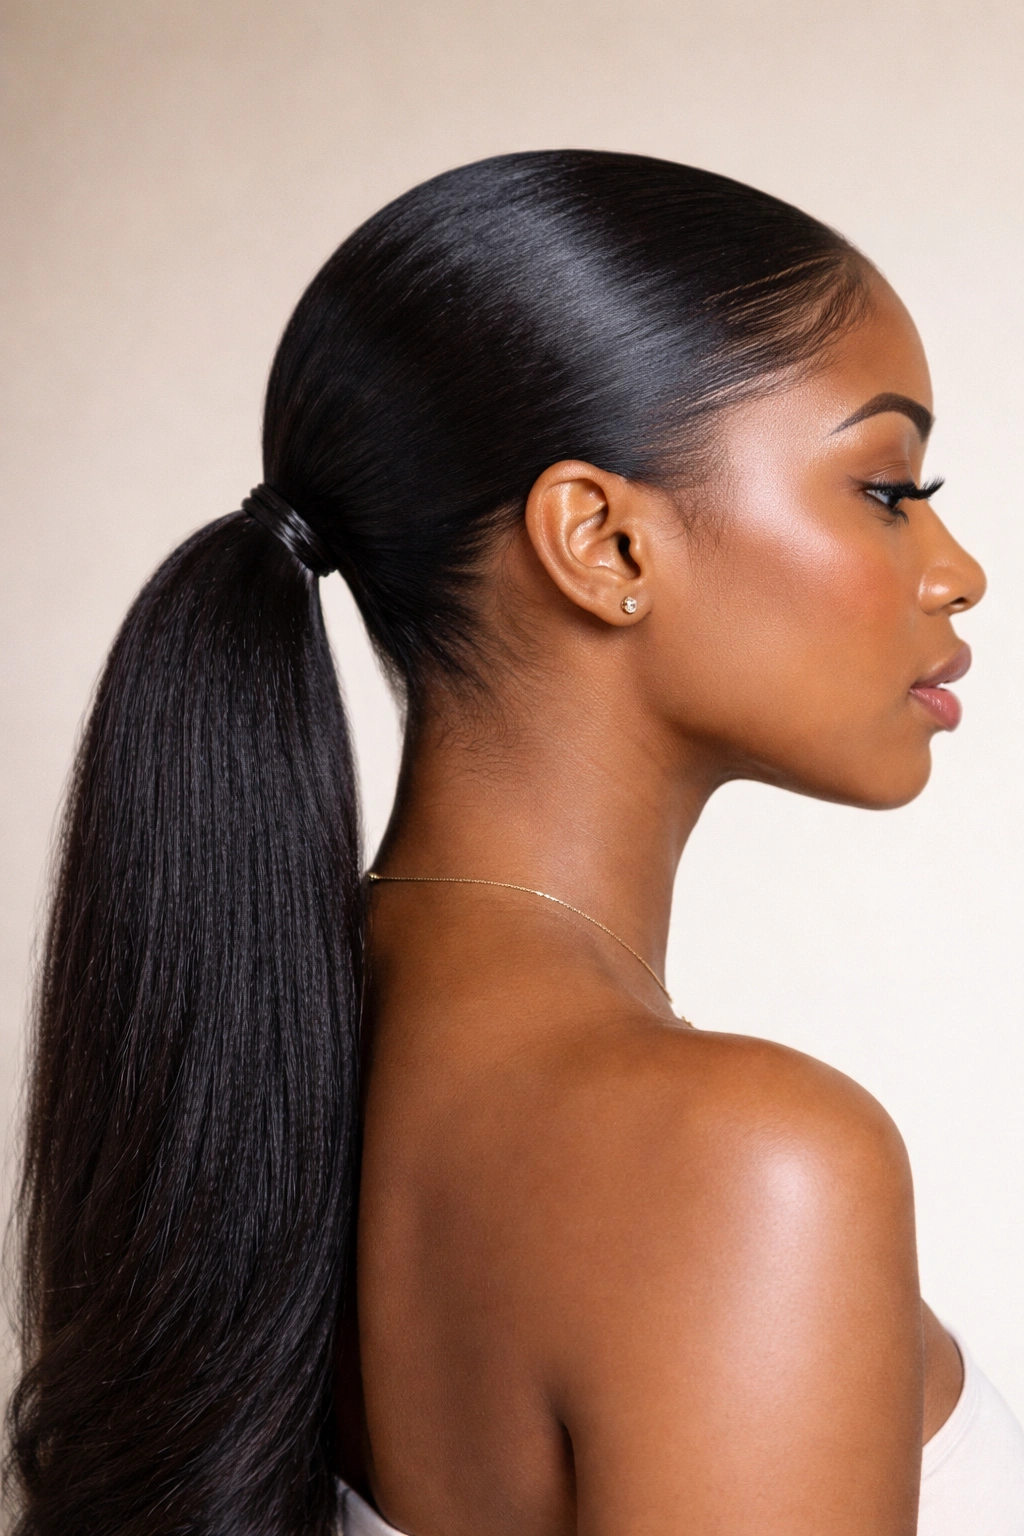
2. The Sleek Low Nape Pony
There is an effortless elegance to a low ponytail that rests right at the nape of the neck. It feels more grounded and often lasts longer because there is less tension on the hairline compared to a high pony. This style is excellent if you want to avoid pulling on your edges too aggressively.
Why This Works
The weight of the hair acts in your favor here, pulling naturally downward. You won’t need as much product as you would for a high pony because you are simply guiding the hair into place, not defying gravity. Use a cream-based styler rather than a stiff gel for a softer, more touchable finish.
Styling Tip
Parting your hair down the center or to the side before you begin makes this look incredibly intentional. Use a rat-tail comb to create a sharp, clean part that extends back to the crown. It frames the face beautifully and adds a structural element that prevents the style from looking messy as the day goes on.
3. The Side-Parted Sleek Pony
A deep side part can completely transform the shape of your face and the overall vibe of your ponytail. This style channels a classic, Old Hollywood glamour but keeps it modern and functional for 4C textures. The drama of the side part demands a clean, crisp finish.
Getting the Part Right
Use the arch of your eyebrow as a guide for where the part should start. This creates the most flattering angle. Ensure your part is razor-straight; a wiggly or jagged part will ruin the clean aesthetic. You might need to use a bit of edge control directly on the part line to keep those little hairs from popping up.
Managing the Volume
Since 4C hair has significant volume, a side part can sometimes make one side of your hair look much heavier than the other. Use a sturdy hair tie to anchor the ponytail, and then use hidden bobby pins to secure the excess hair on the “heavy” side to keep it perfectly smooth against your scalp.
4. The Middle-Parted Sleek Pony
If you want something symmetrical and balanced, the middle part is your go-to. It is arguably the most minimalist look you can achieve. It strips away the extras and highlights your facial features, making it a powerful choice for both day and night.
The Technical Challenge
The middle part is unforgiving. If your hair is not evenly parted, it will be obvious immediately. After parting, use a light pomade to “train” the hair to lay flat on either side of the part. If you have any stubborn cowlicks at the front, use a small, warm (not hot!) flat iron to gently smooth them down before applying gel.
Setting the Style
Because you want the hair on both sides of the part to be mirror-image sleek, you must set this style. Tie a silk scarf tightly over the front section—right over the middle part—and leave it on for at least 20 minutes while you do your makeup or get dressed. This compression is vital.
5. The Tucked-In Ends Pony
Sometimes, the best look is the one that keeps things simple and protected. The tucked-in ends pony focuses on tucking the ends of the ponytail underneath itself, creating a rounded, chic silhouette. This is great for hiding ends that might be a little dry or prone to frizz.
The Roll Technique
Instead of letting your ponytail hang loose, take the entire length of your ponytail, roll it inward toward the base, and pin it to create a low, rounded bun-like shape. It retains the sleekness of a pony but looks like a sophisticated updo. Use large hairpins—not tiny bobby pins—to secure the roll so it doesn’t sag.
Why This Matters
If you are trying to retain length, this style is a winner. It keeps your ends protected and tucked away from the elements. It looks deliberate and polished, and no one needs to know you did it because your ends were feeling a bit rough.
6. The Wrapped Braid Pony
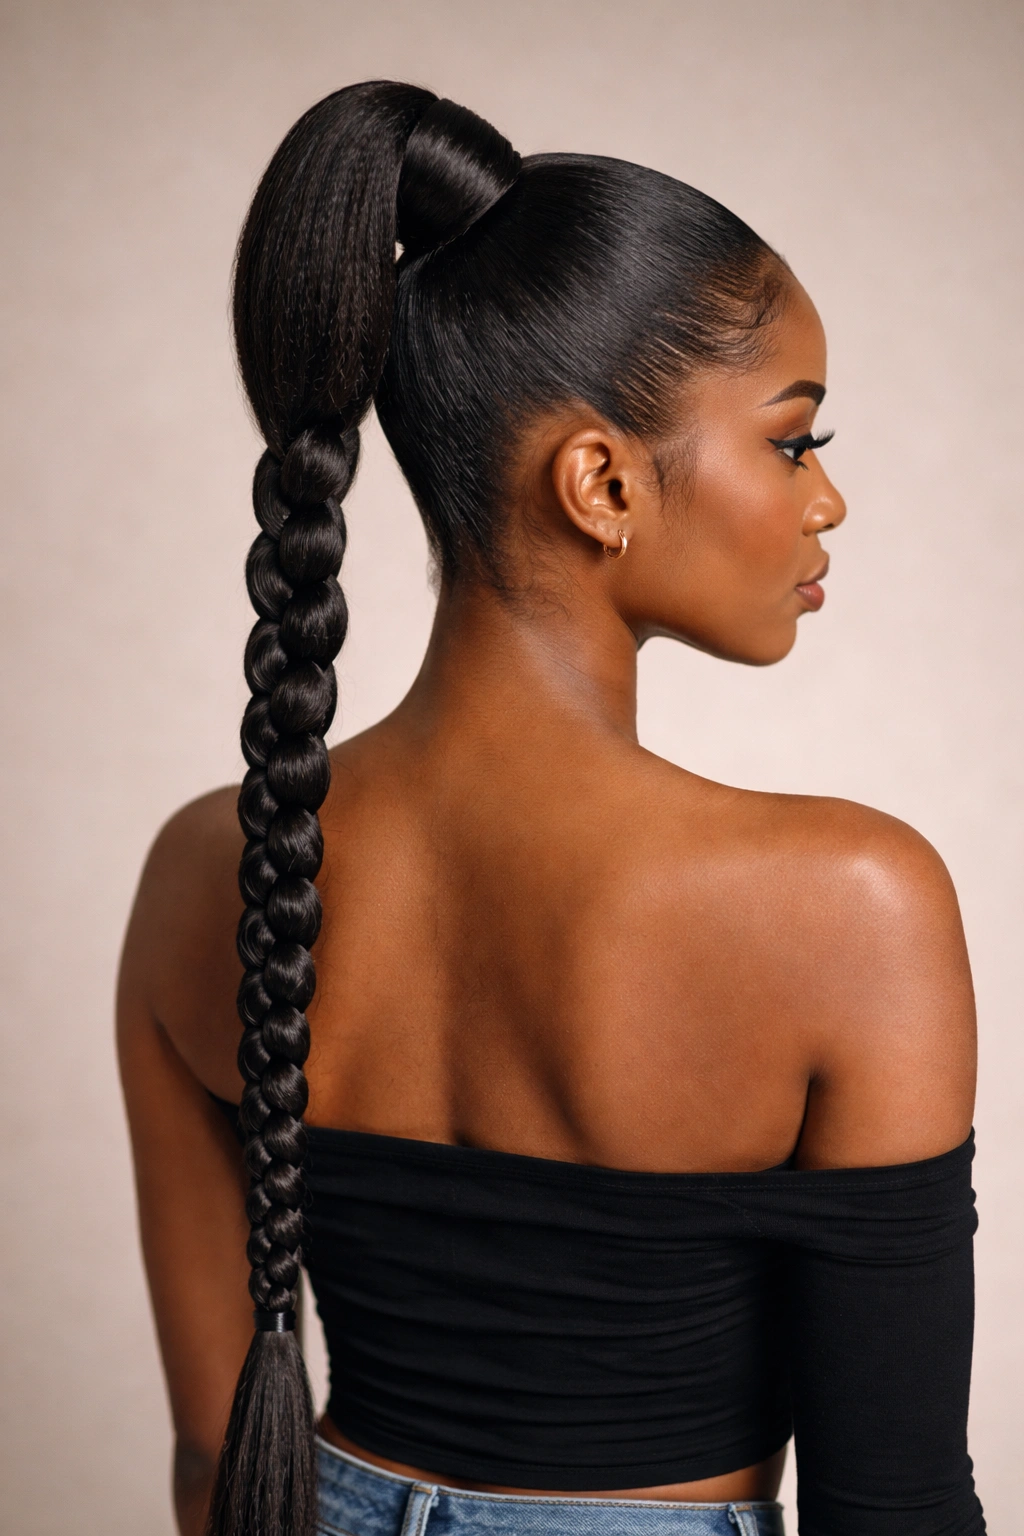
This style adds texture and interest to an otherwise simple sleek ponytail. You pull your hair into a sleek, high ponytail, but instead of leaving the hair loose, you braid the length of the pony.
Achieving the Braid
You can do a single, tight three-strand braid, or go for a feed-in look. A single, thick, smooth braid is elegant. Use a tiny bit of pomade on your fingers as you braid to ensure no loose hairs poke out of the braid itself. This creates a cohesive, high-fashion look.
Adding Length
If your natural ponytail isn’t as long as you’d like for a braid, this is the perfect time to wrap in braiding hair. Secure your natural hair in a small bun, attach the braiding hair, and then braid the extension hair in with your own. It adds volume, length, and that polished “finished” look that is hard to achieve with short natural hair alone.
7. The Bubble Ponytail
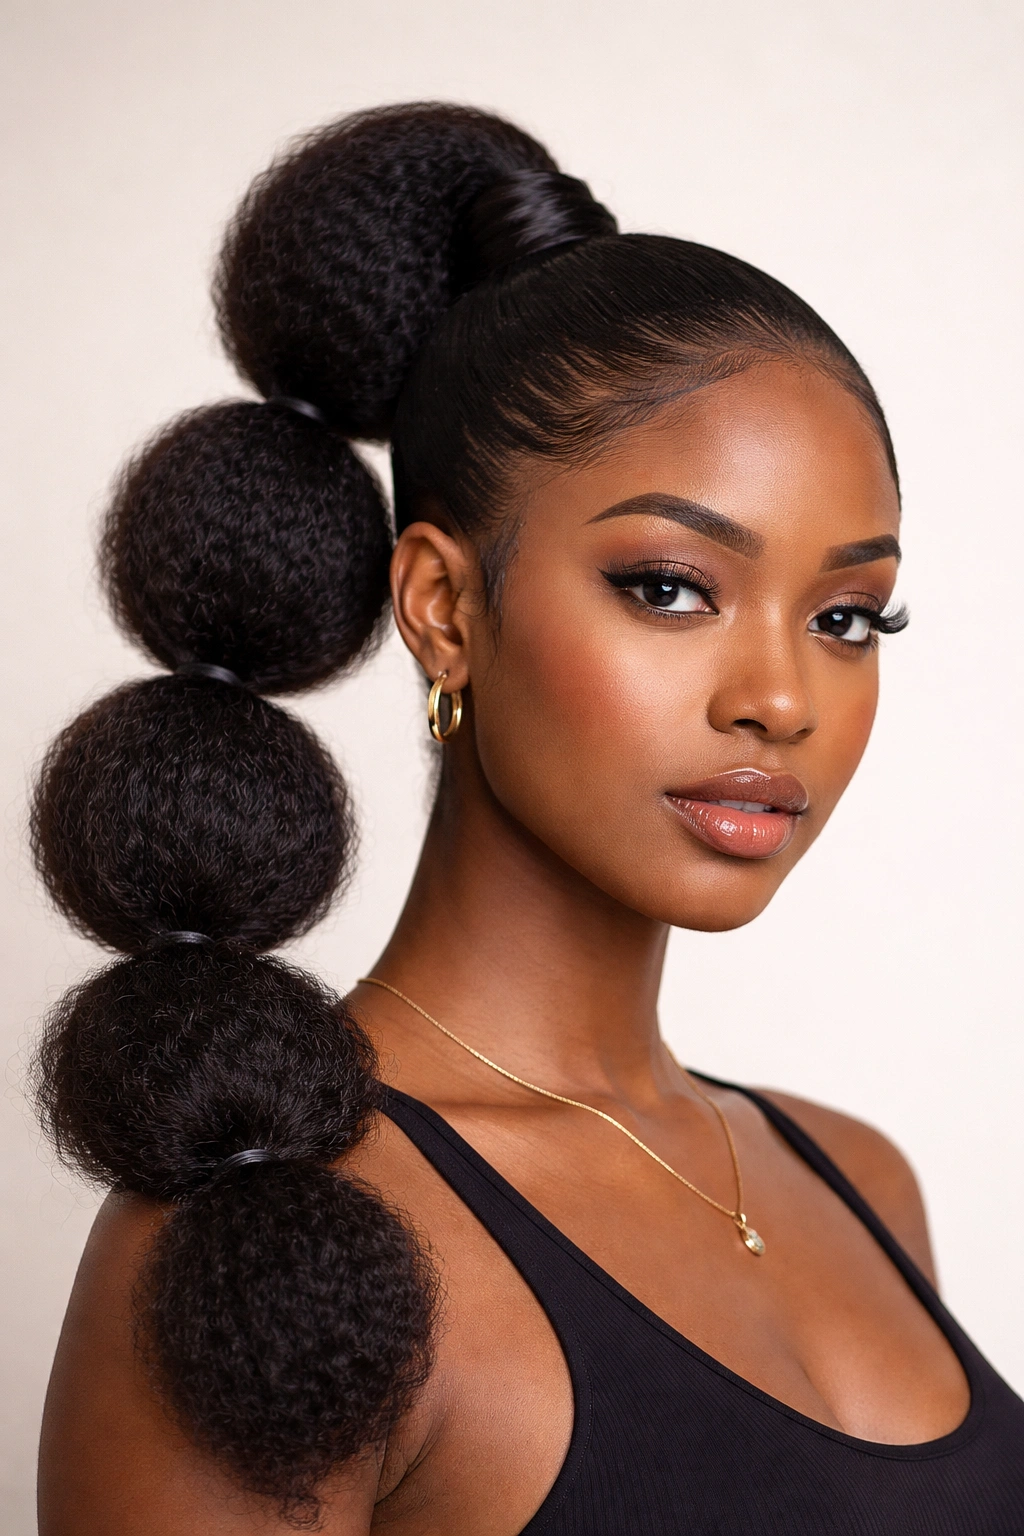
This look is fun, playful, and surprisingly easy to do on 4C hair. It involves creating a sleek base and then segmenting the ponytail into “bubbles” using small elastics. It creates a bold, sculptural shape that really shows off the density of your hair.
How to Create the Bubbles
After securing your base, place an elastic about two or three inches down the ponytail. Fluff the hair between the two elastics to create volume. Repeat this process until you reach the ends. If your hair is dense, the “bubbles” will be full and lush, which is the whole point.
The Secret to Fullness
Do not pull the hair too tight at each segment. The looser you pull the hair out to form the bubble, the rounder and more voluminous it will look. You can even use a little texturizing spray on the hair between the elastics to help it hold that shape without collapsing.
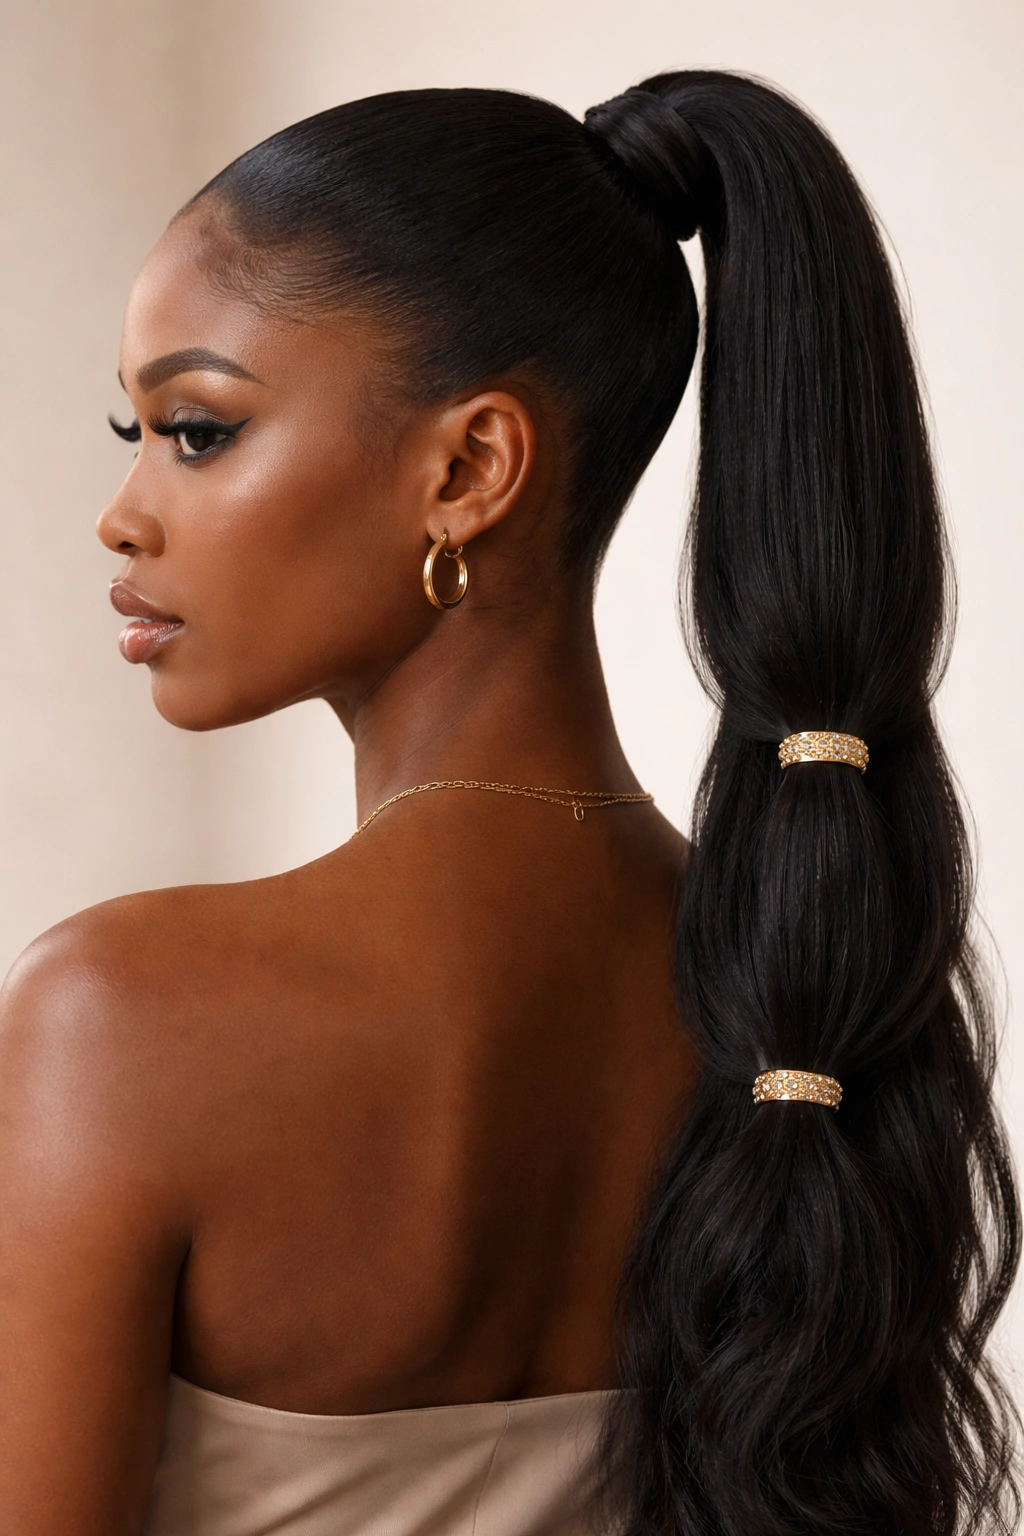
8. The Double-Banded Sleek Pony
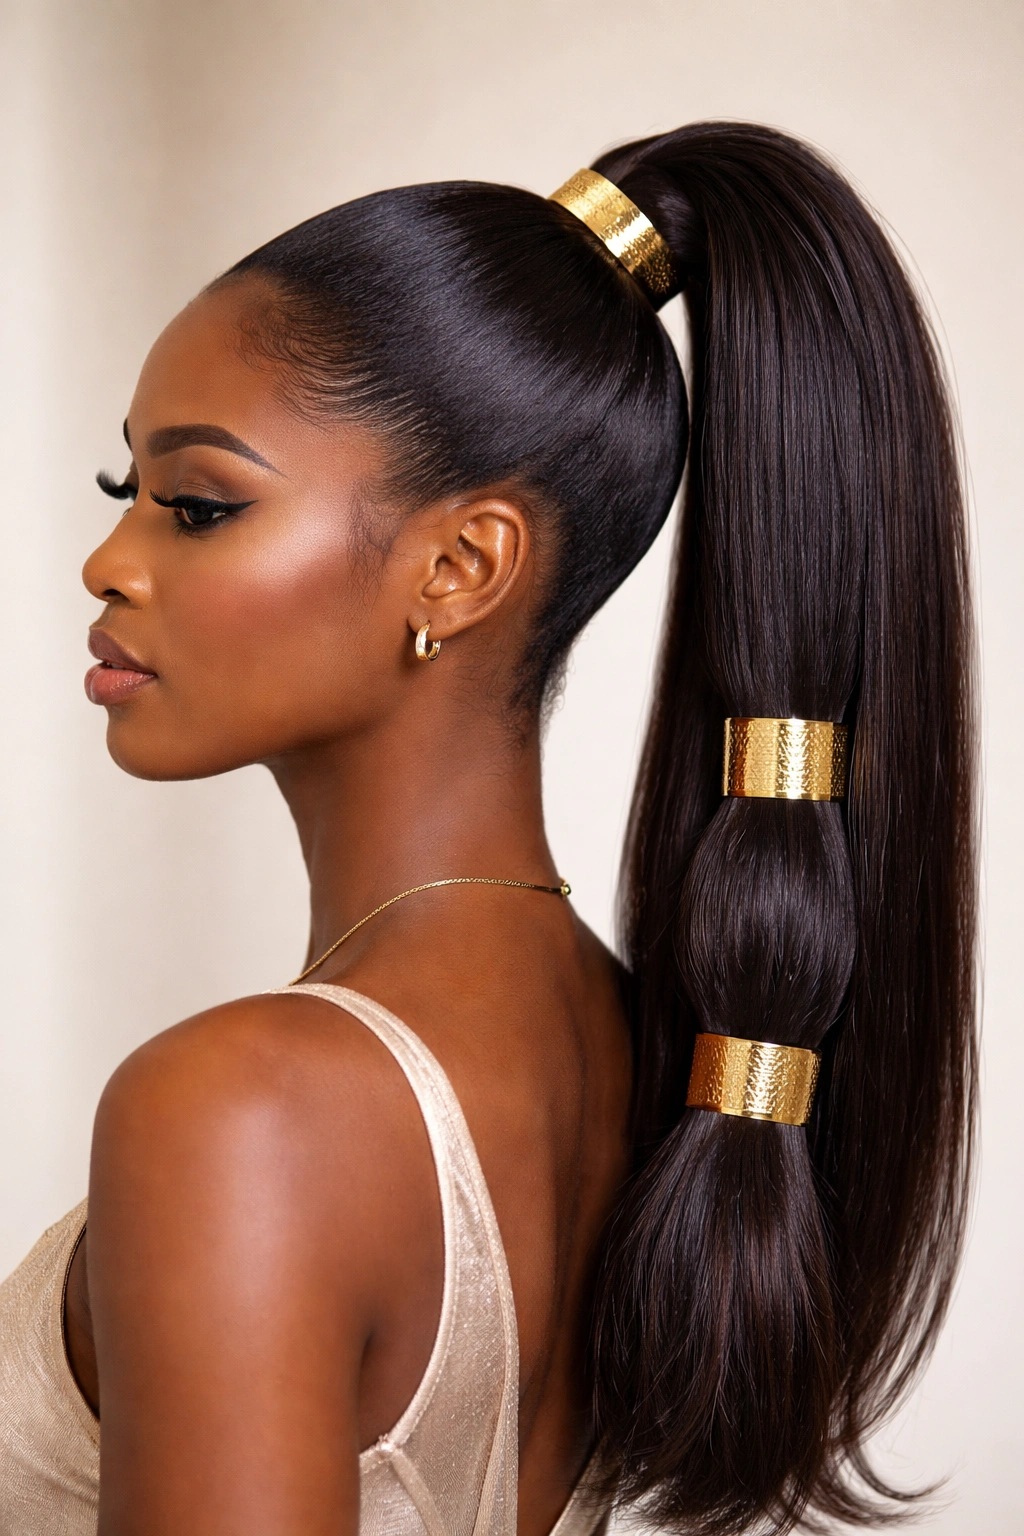
This is a variation of the bubble pony but uses decorative, metallic, or leather bands instead of hidden elastics. It’s an easy way to elevate a standard look into something that looks like you spent hours on it, even if it took ten minutes.
Choosing Your Accessories
Go for gold or silver cuffs that wrap around the hair. These hide the elastic and add a touch of luxury. You can find these at most beauty supply stores. They are essentially split tubes that you click together over your hair.
Positioning
Space the bands evenly down the length of your pony. If you place them at varying intervals, it can look a bit disorganized. Symmetry is key with this style. It works best if the bands have a bit of weight to them so they keep the hair pulled taut.
9. Ponytail with Face-Framing Tendrils
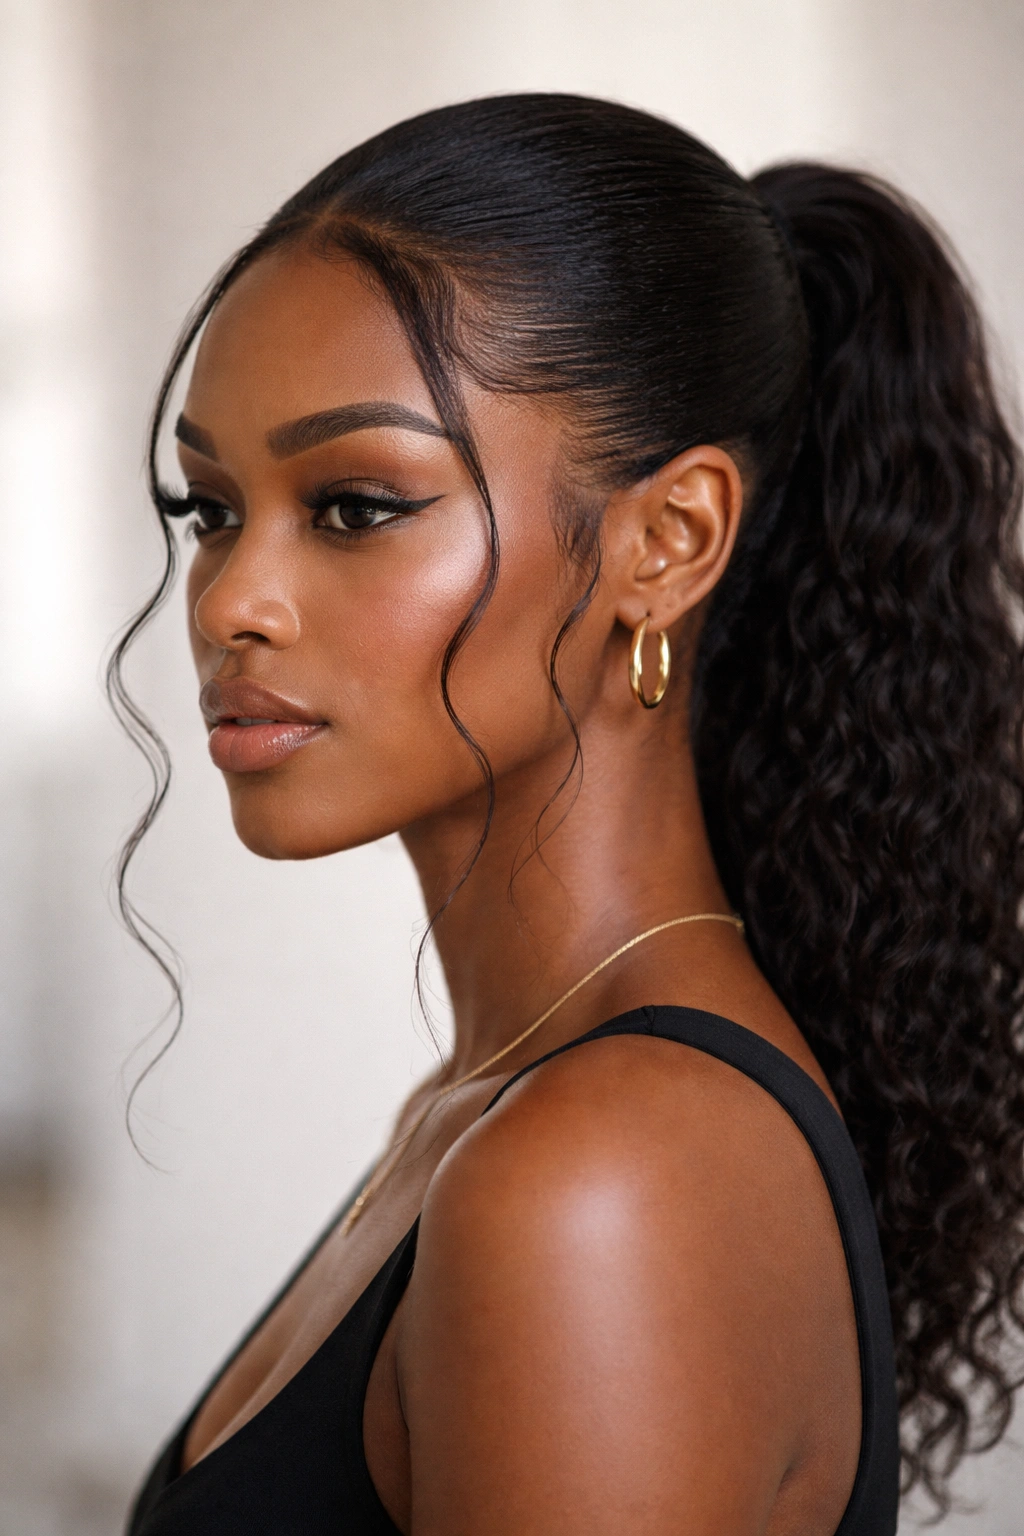
If you find that a totally slicked-back look makes your face feel exposed, adding tendrils is the answer. This softens the entire silhouette and gives the style a romantic, lived-in feel.
Cutting the Tendrils
You don’t need to cut your actual hair short. Just pull out a few thin sections of hair near your temples or behind your ears before you slick the rest back. If you are worried about commitment, you can just leave thin strands out during the styling process.
Styling the Tendrils
You want these to look intentional. Use a tiny curling wand to add a slight wave to the tendrils, or use a little edge control to smooth them into a slight curl near your cheekbone. It’s a small detail, but it makes the style feel much more intentional and less “done.”
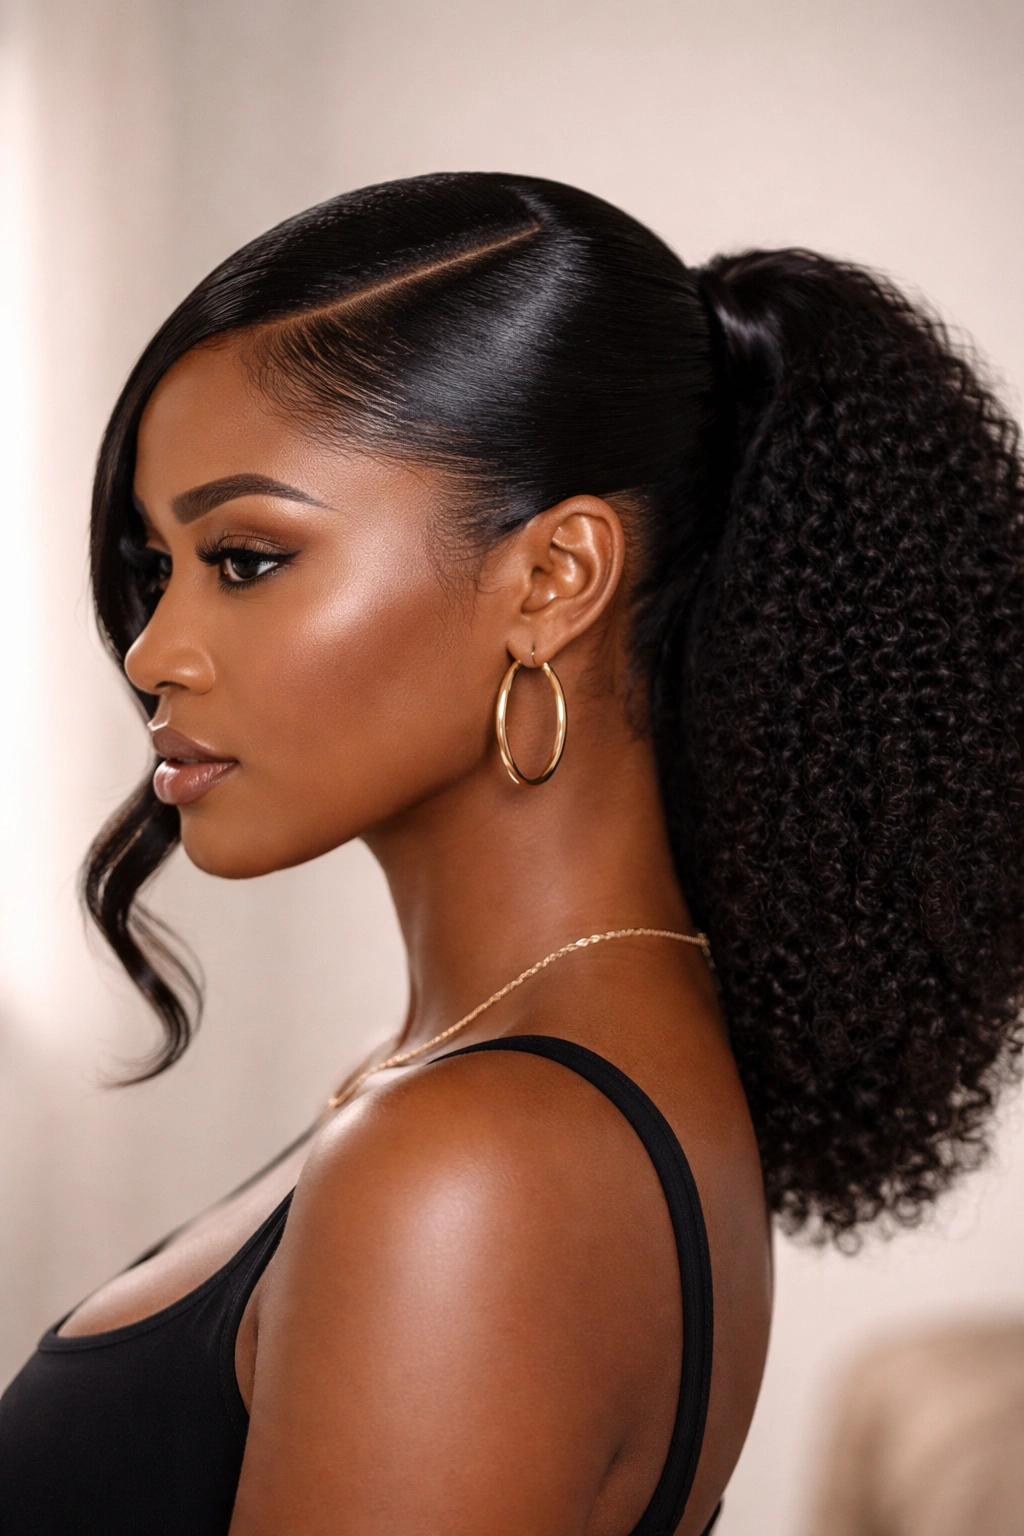
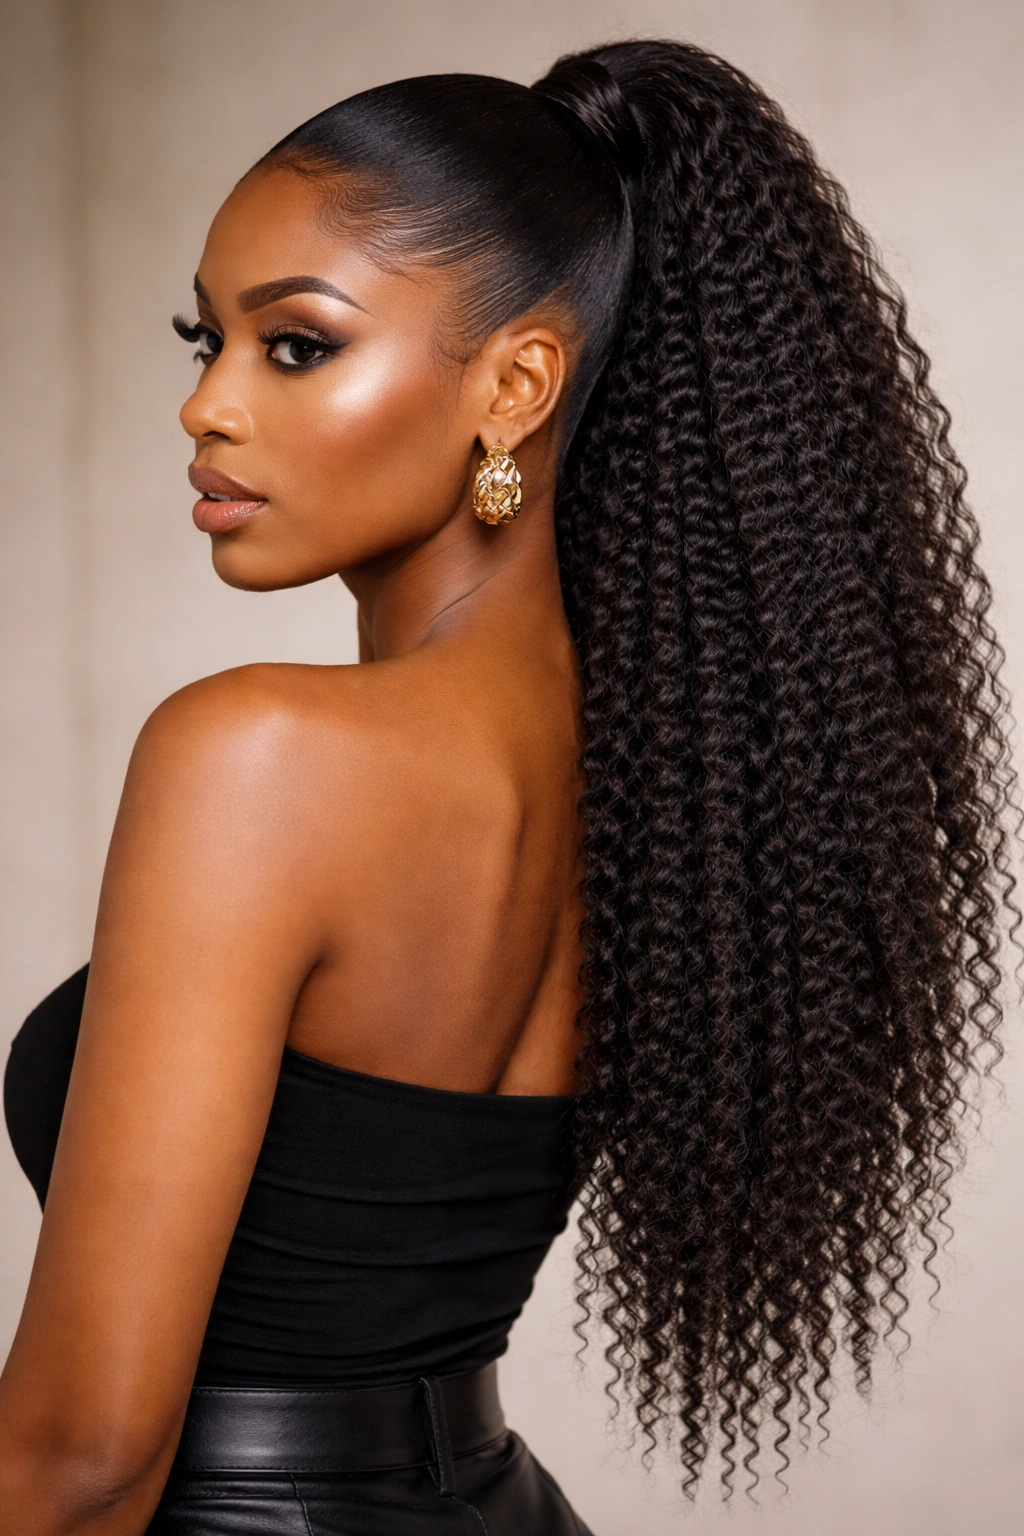
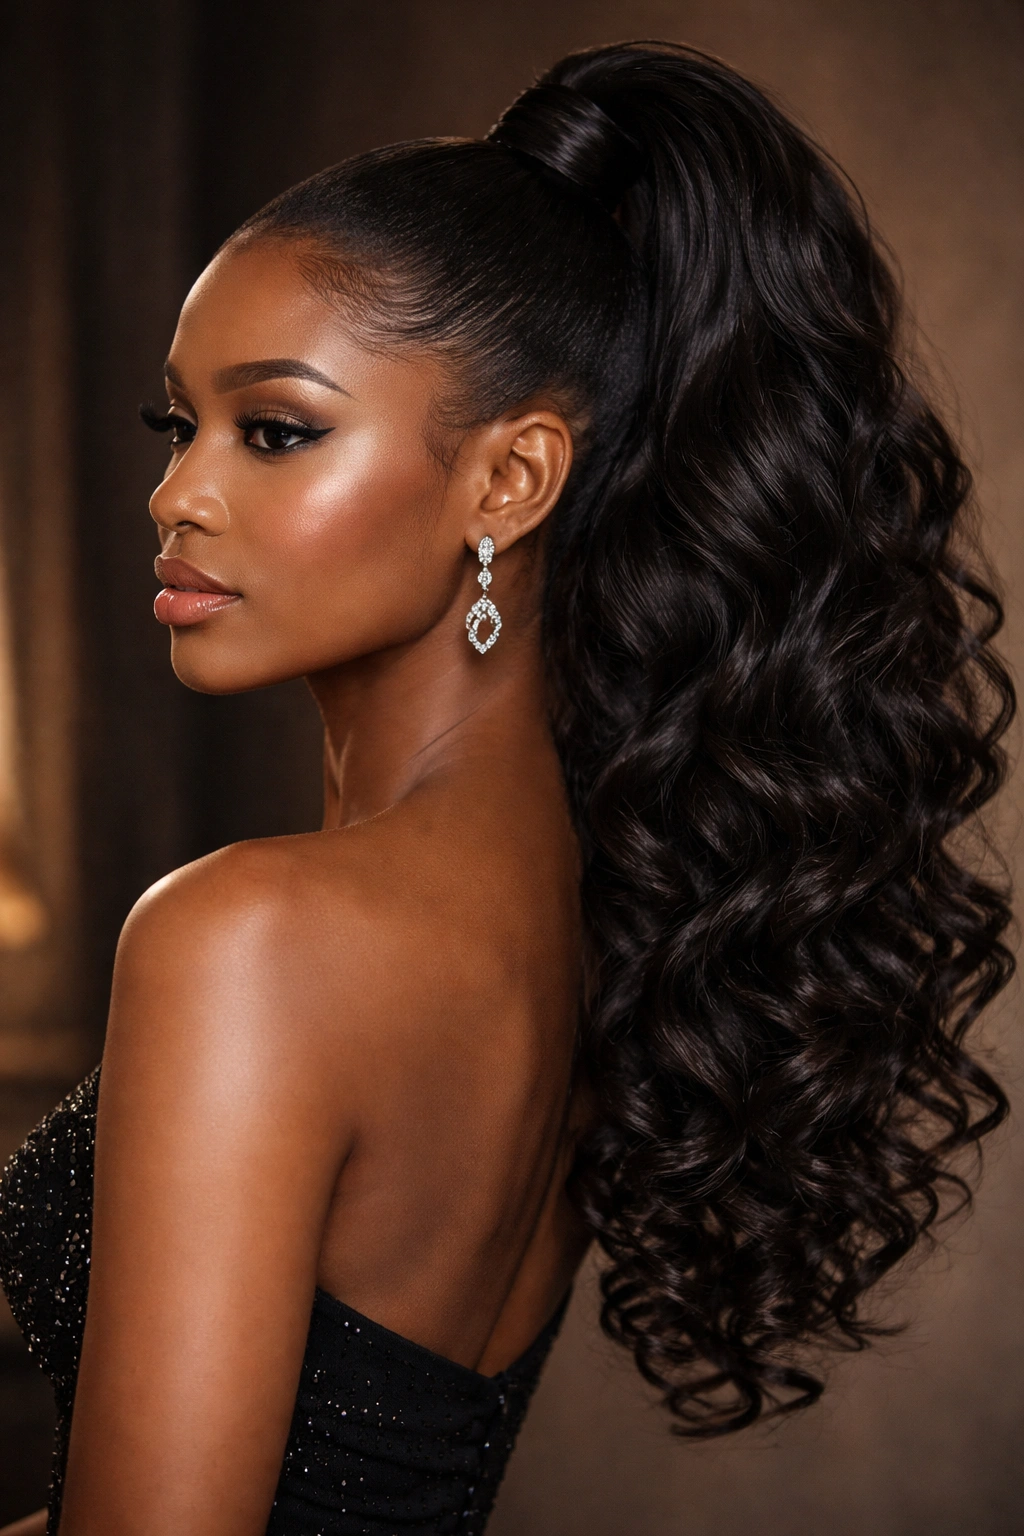
10. Deep Wave Sleek Pony
This is the “sleek on top, texture on the bottom” look. You slick the roots down perfectly, but instead of straightening the ponytail, you attach a deep-wave or curly bundle that matches your natural texture.
Matching the Texture
The trick here is finding extension hair that has a similar “kinky” or “coily” pattern to your own. If the extension hair is too silky, it will look disconnected from your roots. Look for “kinky curly” or “4C clip-in” extensions.
Blending
Once you attach the extensions, take a small piece of the hair and wrap it around the junction where your natural hair meets the extensions. This blends the two textures together and hides the hair tie, making it look like the hair is growing directly out of your head.
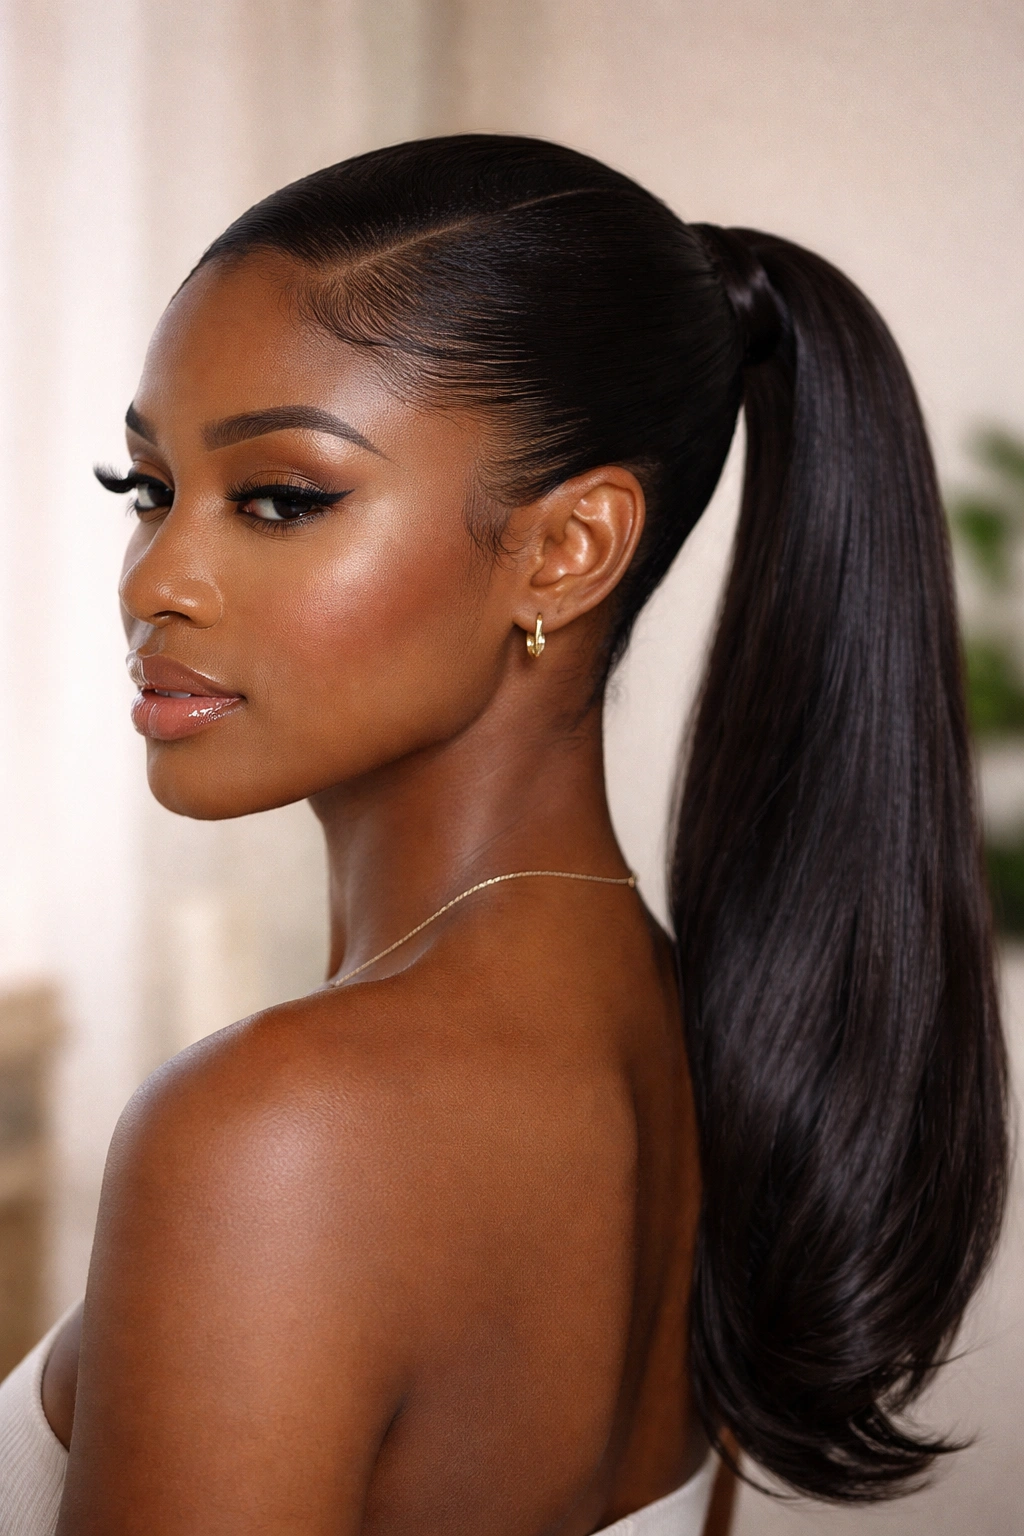
11. Sleek Ponytail with Added Hair (Weave)
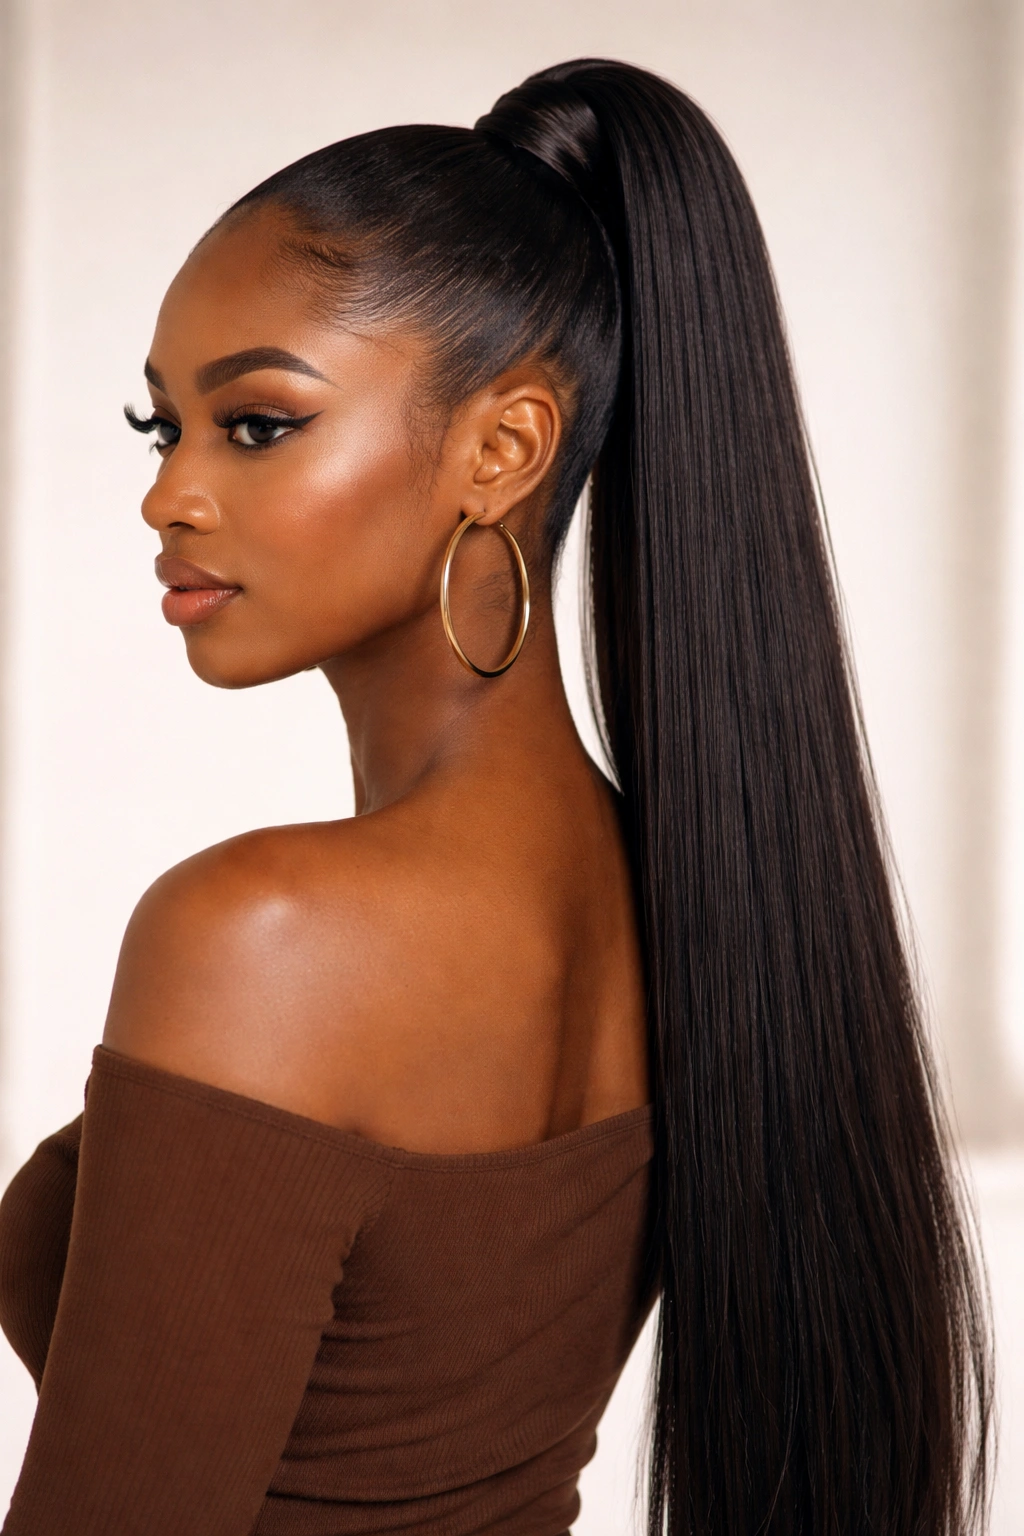
Sometimes you just want the drama of a long, heavy ponytail. A sleek high ponytail with a long, straightened extension is a staple for a reason. It is sharp, clean, and incredibly versatile.
Prepping the Extension
If the hair is straight, run a flat iron over it once before attaching to ensure it’s perfectly smooth. If you are using pre-straightened hair, it should be ready to go. The key is in the base. If your natural hair isn’t secured tightly, the weight of the extension will cause the ponytail to sag throughout the day.
The Foundation
Secure your natural hair in a small, tight bun. Pin the extension to the base, or wrap it around if it has a comb attachment. Use a generous amount of holding spray or a light mist of oil to keep the synthetic or human hair extension looking shiny and smooth.
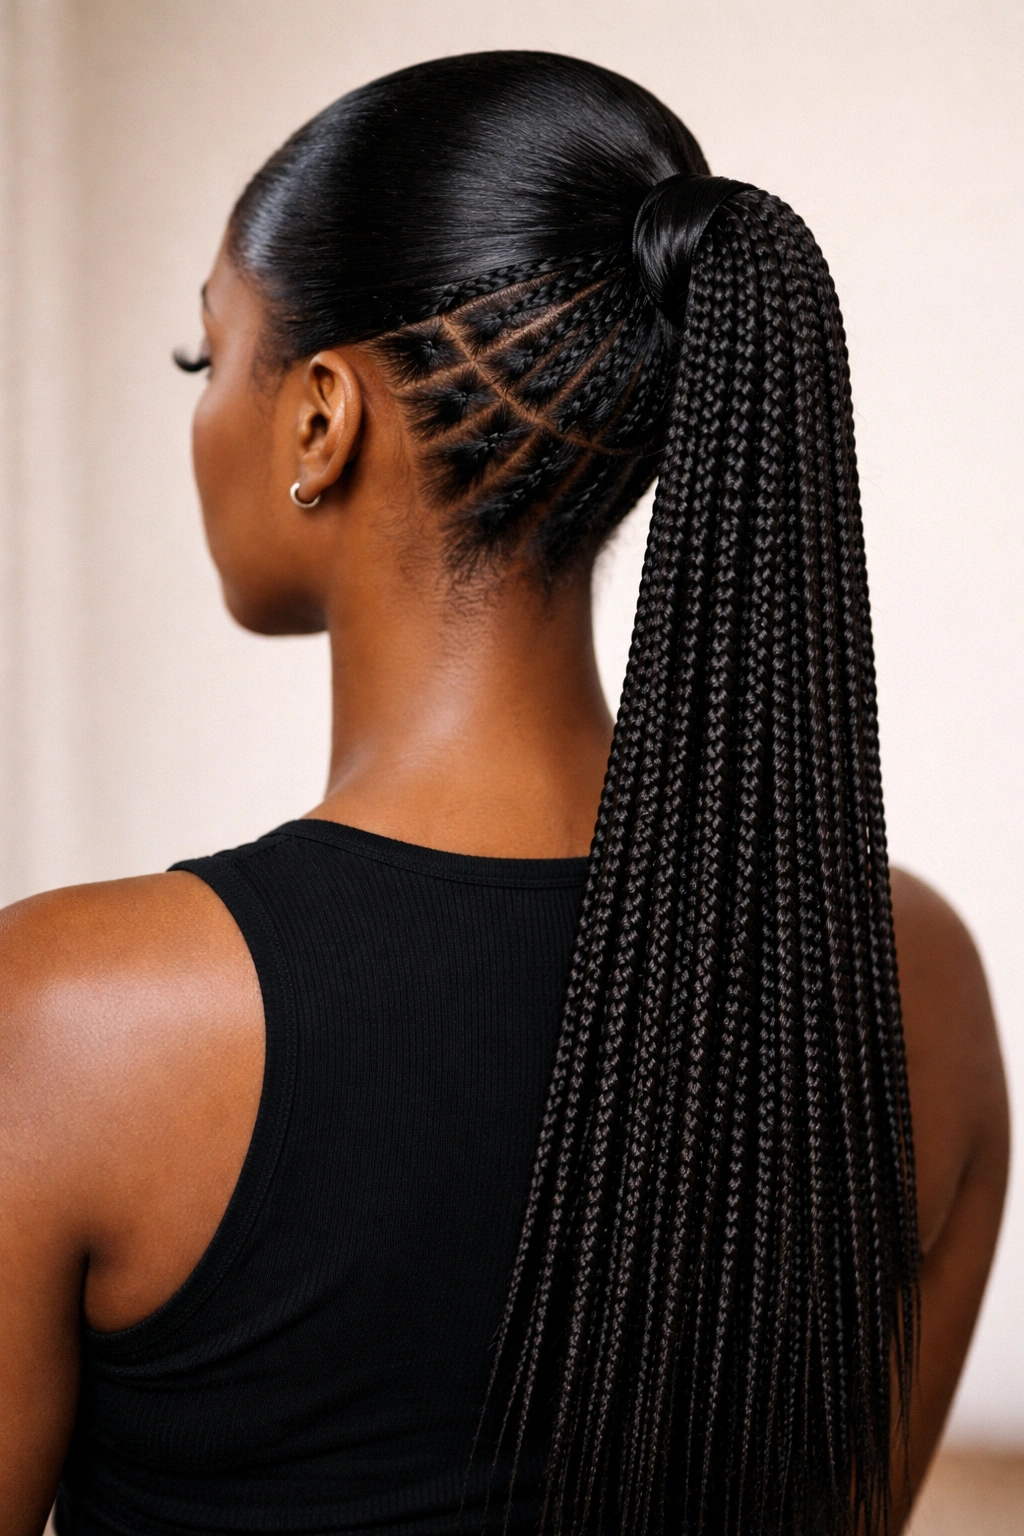
12. Slicked Back with Cornrow Bases
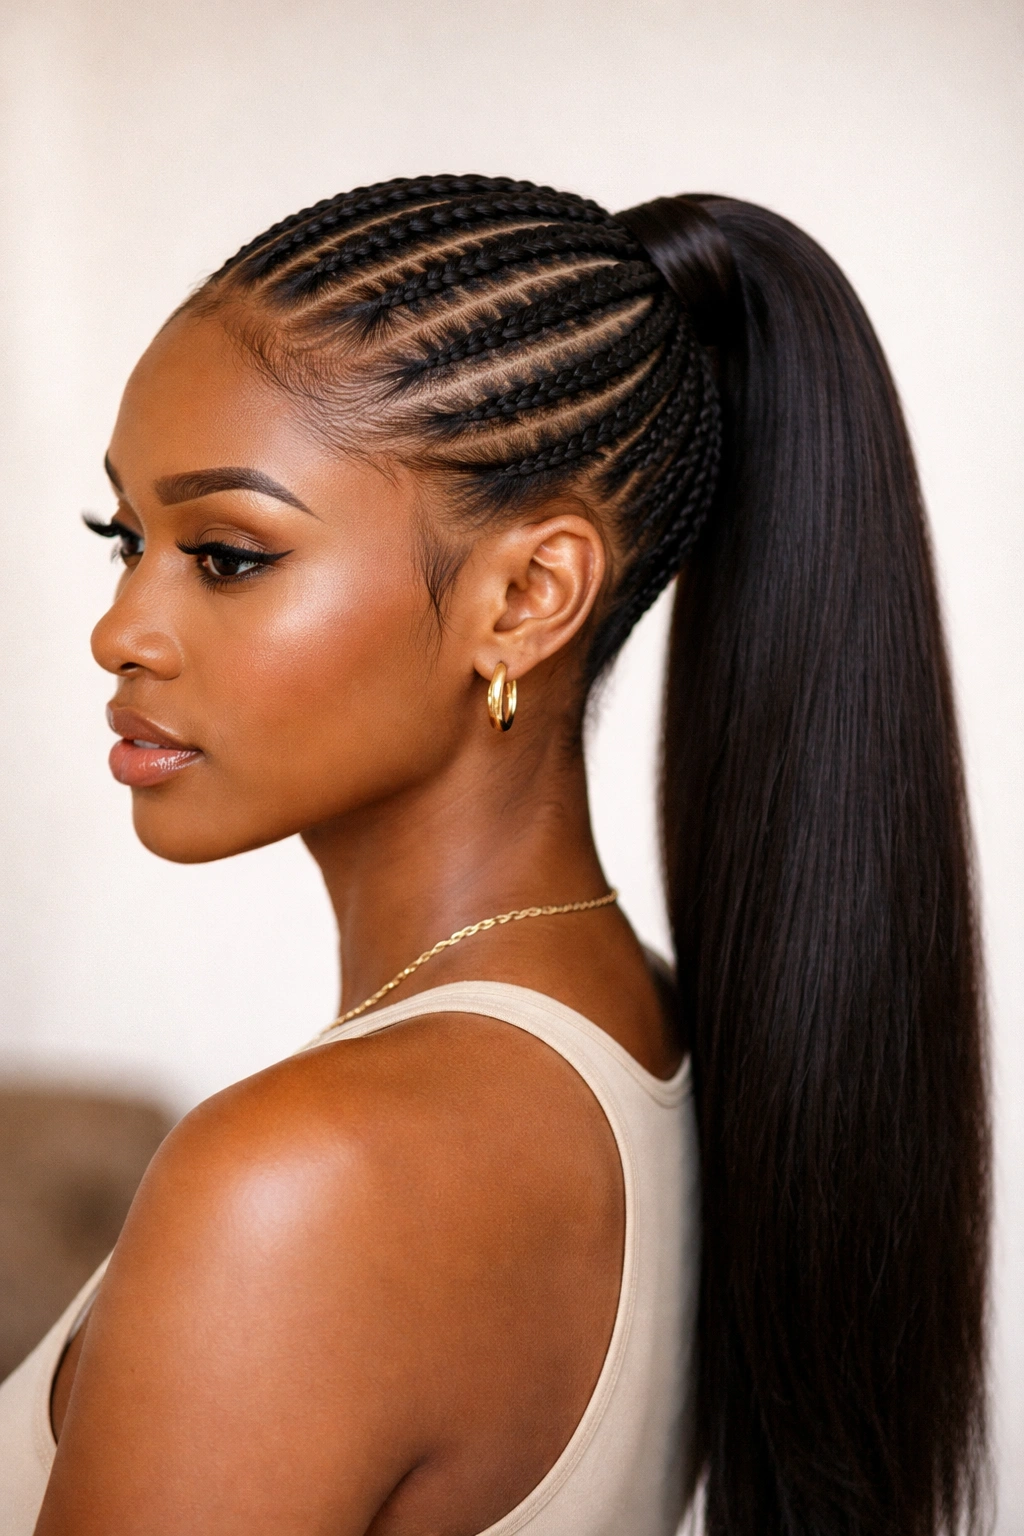
This is a protective style hybrid. You cornrow the front section of your hair back toward the ponytail base and slick the rest of the hair into the pony. It adds a design element that makes the style look much more intricate.
The Cornrow Detail
You can do straight-back cornrows, or try a “zigzag” or “swirl” pattern for something more unique. The hair that is not in cornrows should be gelled down heavily to blend into the ponytail. It looks like you have a custom hair design without having to do a full head of braids.
Durability
Because your hair is braided down at the root, this style is incredibly long-lasting. You can wear this for several days. Just tie it down at night with a satin scarf, and in the morning, touch up the edges with a bit of edge control, and you are ready to go.
13. Half-Up, Half-Down Pony
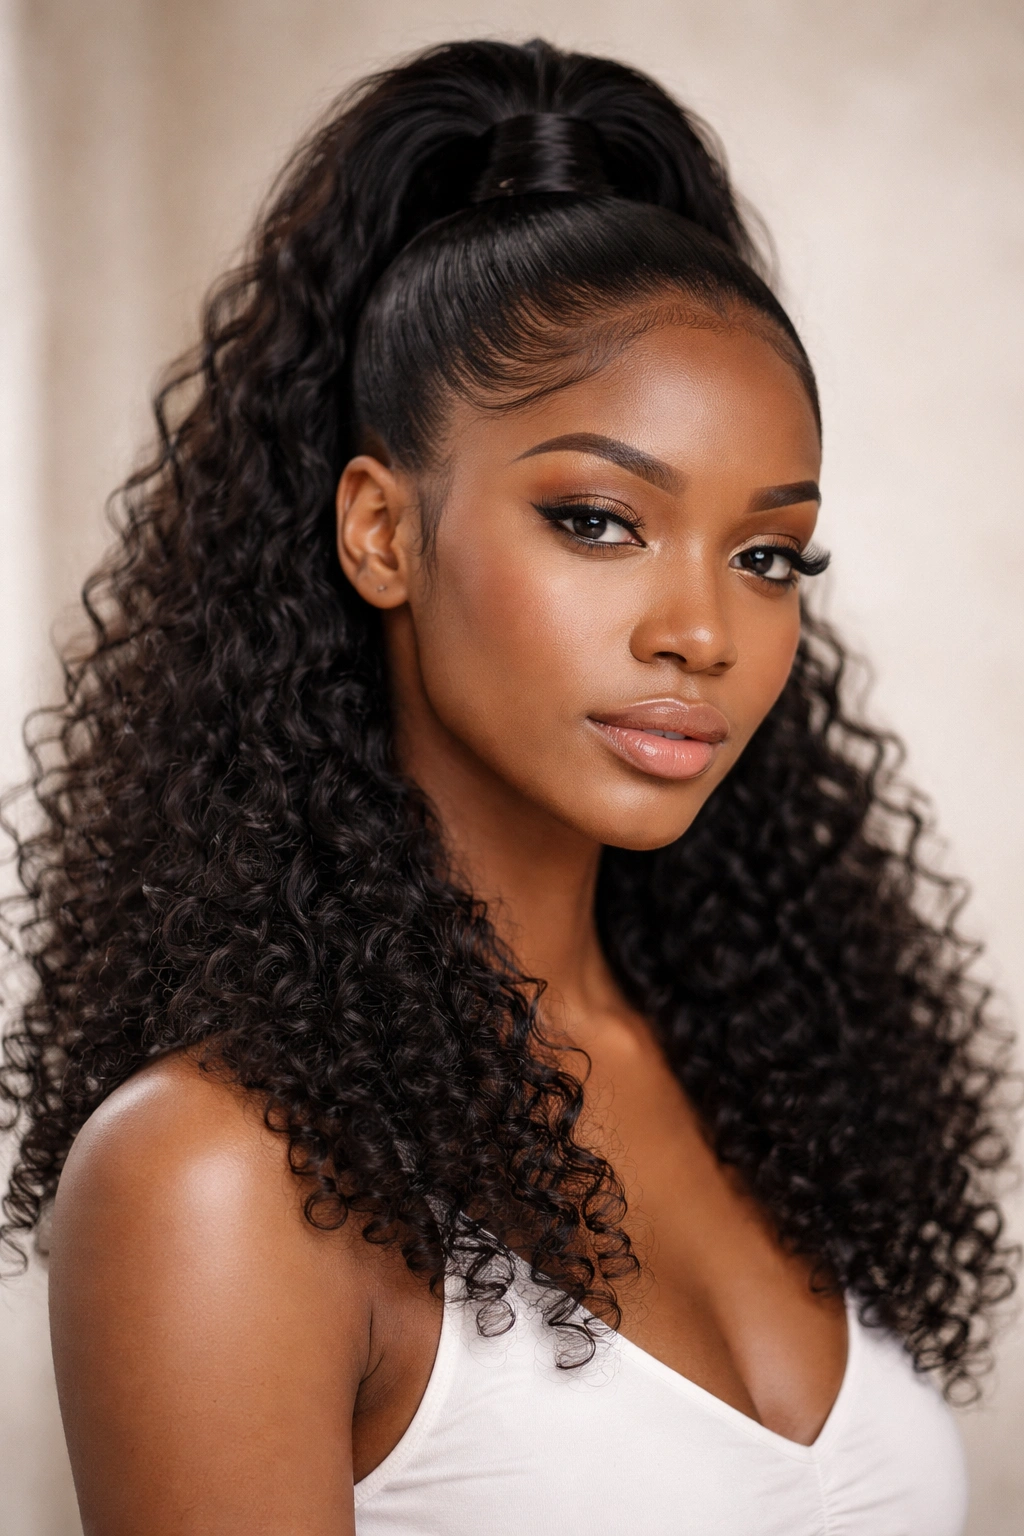
This is the best of both worlds. You get the sleekness of a ponytail, but you still have the volume and body of your natural hair left out. It is a very flattering style for those who don’t want to completely slick back their entire head.
Creating the Section
Part your hair from ear to ear, creating a top section and a bottom section. Secure the top section into a high ponytail. You can then leave the bottom section in its natural texture, or define it with a curl cream.
The Balance
The key is to make sure the top ponytail is tight and sleek, contrasting with the volume of the hair left out. Use a firm gel on the top section to ensure that sharp contrast. If the top section is loose, the whole look just appears unfinished rather than intentionally styled.
14. The “Top Knot” Pony Variation
This is a high ponytail that is twisted or wrapped at the very top to create a sleek, elevated knot. It’s like a ponytail and a bun had a baby. It creates a very structural, architectural look.
Creating the Knot
Secure your hair in a high ponytail. Instead of letting the length hang, twist the hair around itself to create a tight, sleek knot. Use bobby pins that match your hair color to secure the ends tightly so they don’t stick out.
Why This Style Rocks
It’s perfect for warmer months or if you just want your hair off your neck completely. It’s also very easy to maintain. Unlike a long, swinging ponytail that can get tangled, this knot stays exactly where you put it all day long.
15. Ponytail with Jeweled Accessories
Sometimes, the sleekness is just the canvas. Adding jewelry—beads, cuffs, or even small rhinestones—can take a standard pony into high-fashion territory.
Placement
Don’t overdo it. One or two gold cuffs on the ponytail, or a row of small, clear rhinestones along the part line, is enough. You want to enhance the style, not distract from the slickness of the hair.
The “Sleek” Rule
Because the accessories draw the eye, your hair must be perfectly smooth. Any frizz or bumps will be amplified by the shine of the jewelry. Spend extra time ensuring your roots are laid flat before you add any accessories.
16. Sleek Pony with Crimped Texture
Crimped hair has made a massive comeback. Adding a crimped texture to the ponytail section gives it incredible volume and an 80s-inspired, high-fashion edge.
The Crimping Process
You can use a crimping iron on the ponytail extension (don’t do this to your natural hair; it is too damaging). The contrast between the sleek, gelled-down roots and the crimped, voluminous length is striking and modern.
Volume Management
Crimped hair takes up a lot of space. If you are doing this, make sure your ponytail base is very secure, as the crimped hair will have more weight and “puff” than straight hair. You might need an extra elastic or a stronger hair tie to keep it from slipping.
17. Braided Sleek Pony
We touched on the wrapped braid, but this is different. This is a ponytail where the base is sleek, but the entire ponytail is made up of multiple smaller, distinct braids that are all joined together.
The Grid
To make this look cohesive, part the back of your head into small squares or triangles before gathering them into the ponytail. It creates a clean, graphic look at the crown of your head that is visible even when the hair is tied back.
The Finish
Keep the braids uniform in size. If one braid is huge and another is tiny, the look will appear chaotic. Use a small amount of pomade on each braid to keep it sleek and free of flyaways.
18. The “Twist” Pony

Instead of a braid or a loose ponytail, create a sleek, two-strand twist. It mimics the look of a rope and feels very sophisticated.
How to Twist
Divide your ponytail into two equal sections. Twist each section in the same direction, then cross them over each other in the opposite direction. Continue this all the way to the ends and secure with a small, clear elastic.
Maintenance
This style can unravel if you aren’t careful. Use a setting mousse on the ponytail before you start twisting. It will help the hair hold the twist shape much better than it would if you twisted it dry.
19. Slicked High Pony with Loose Curls
This is a classic evening look. You slick the hair back into a high, tight pony, but you leave the extensions curled into loose, romantic ringlets.
The Curl Pattern
The key here is the size of the curl. A loose, barrel-wave curl looks more “sleek” than a tight, springy curl. Use a large-barrel curling iron on your extensions to get that soft, cascading wave pattern.
Styling
After you curl the hair, use your fingers to gently rake through the curls once. Do not brush them out completely, or you will lose the definition. You want a structured, intentional wave, not a frizzy mess.
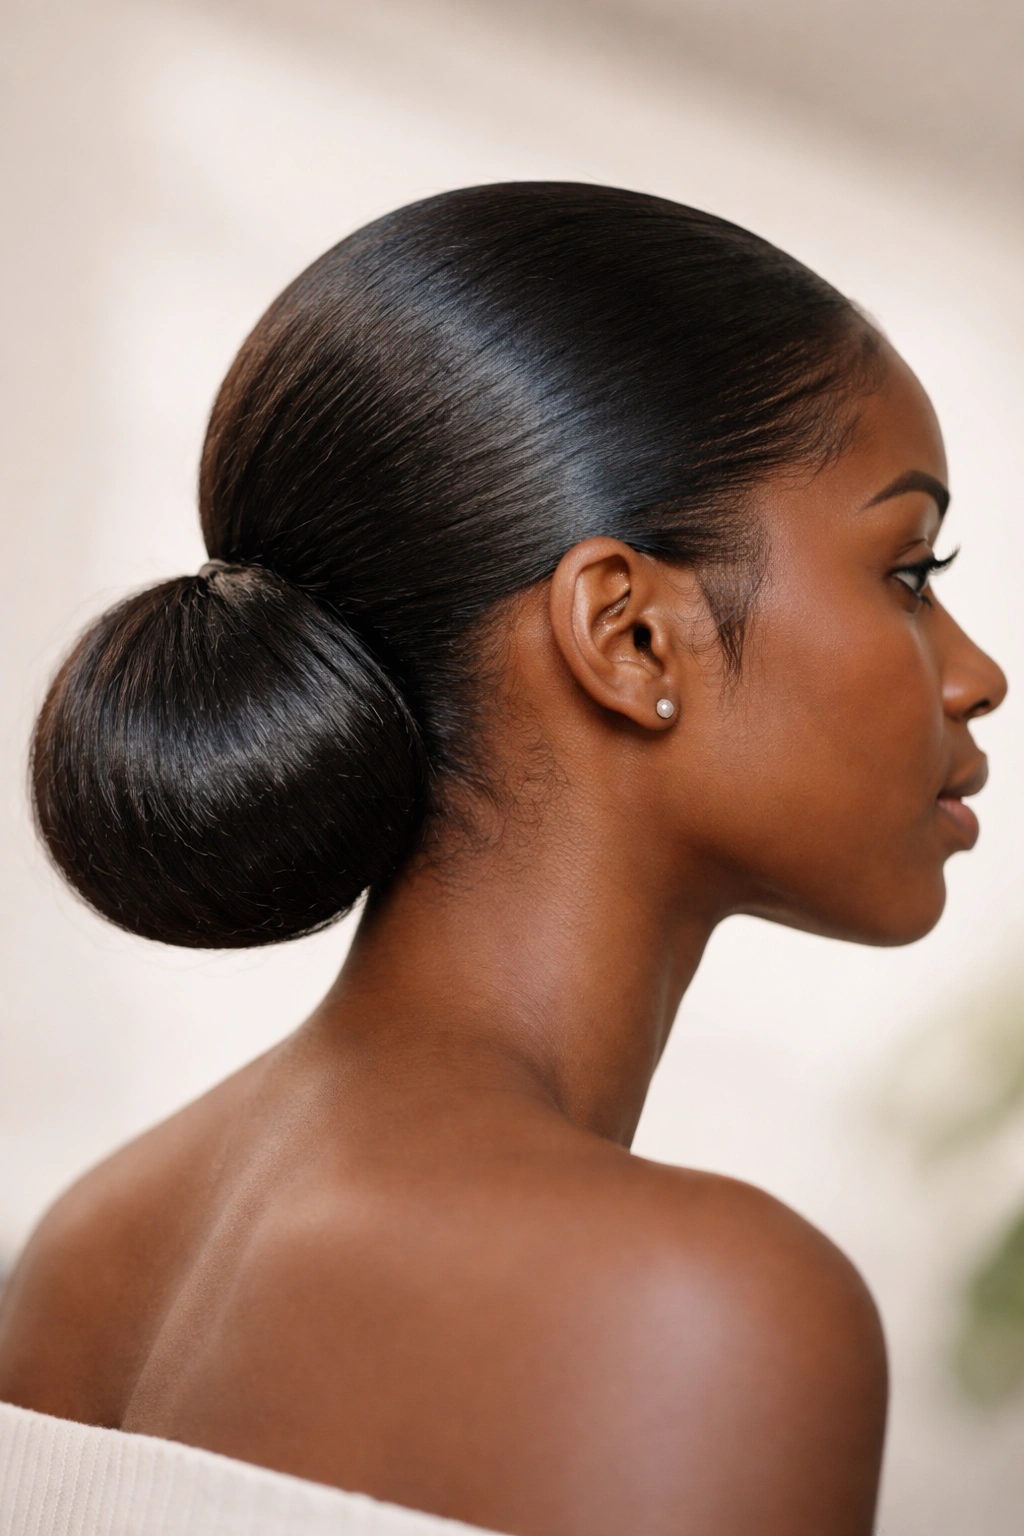
20. The “Chignon” Pony Hybrid
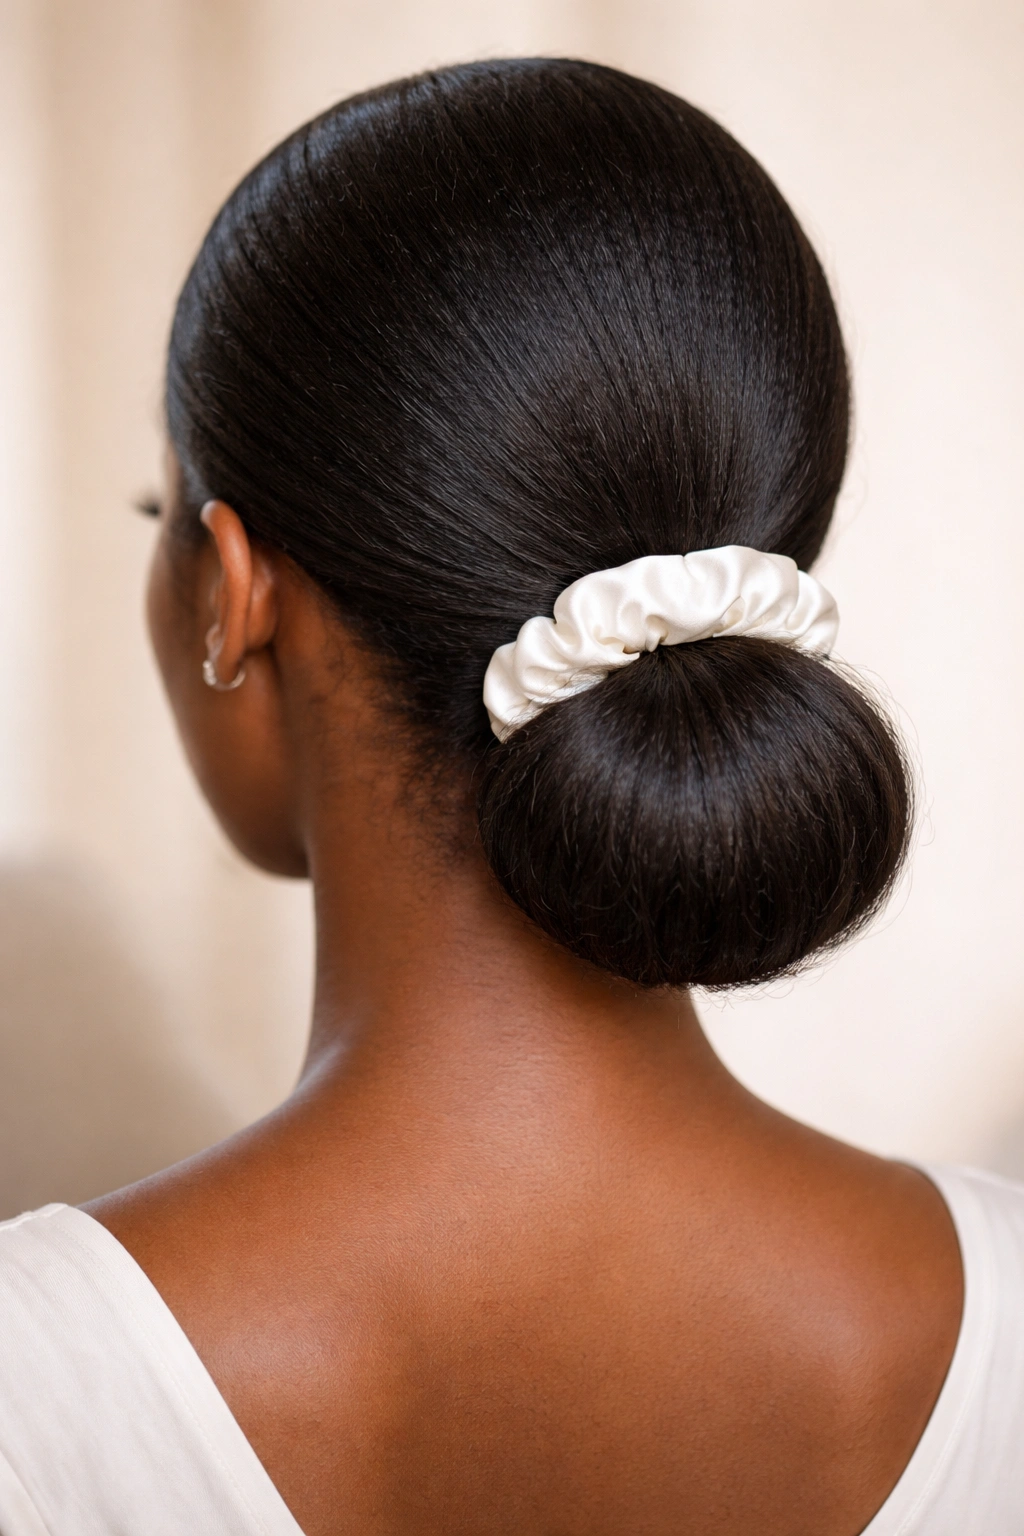
This style sits between a low ponytail and a chignon. You secure your hair at the nape, but then tuck the ends under to create a soft, rounded shape that sits right against the neck.
The Shape
It’s soft, elegant, and very easy to achieve. After tying your low pony, take the ends of the ponytail, fold them upward, and tuck them into the hair tie at the base. It creates a loop that looks very polished.
Accessory Touch
This style looks fantastic with a silk scrunchie or a decorative pin at the base. It hides the elastic and adds a touch of texture to the nape of the neck, which is often a neglected area in styling.
21. Asymmetrical Sleek Pony
If you are bored with the center-back ponytail, try moving it to the side. An asymmetrical ponytail, positioned just behind one ear, is chic, youthful, and frames the face in a completely different way.
The Angle
It shouldn’t be too low or too high; it should sit at a diagonal angle, right at the crown. This placement is flattering for almost any face shape. You still slick it back with the same rigor as you would a high pony, but the placement changes the entire dynamic.
The “Sweep”
Because the pony is to the side, the hair on the “empty” side of your head will be perfectly smooth. This is a great opportunity to do some intricate edge work or a swooping pattern with your baby hairs to complement the asymmetry.
22. Sleek Pony with Micro-Braids
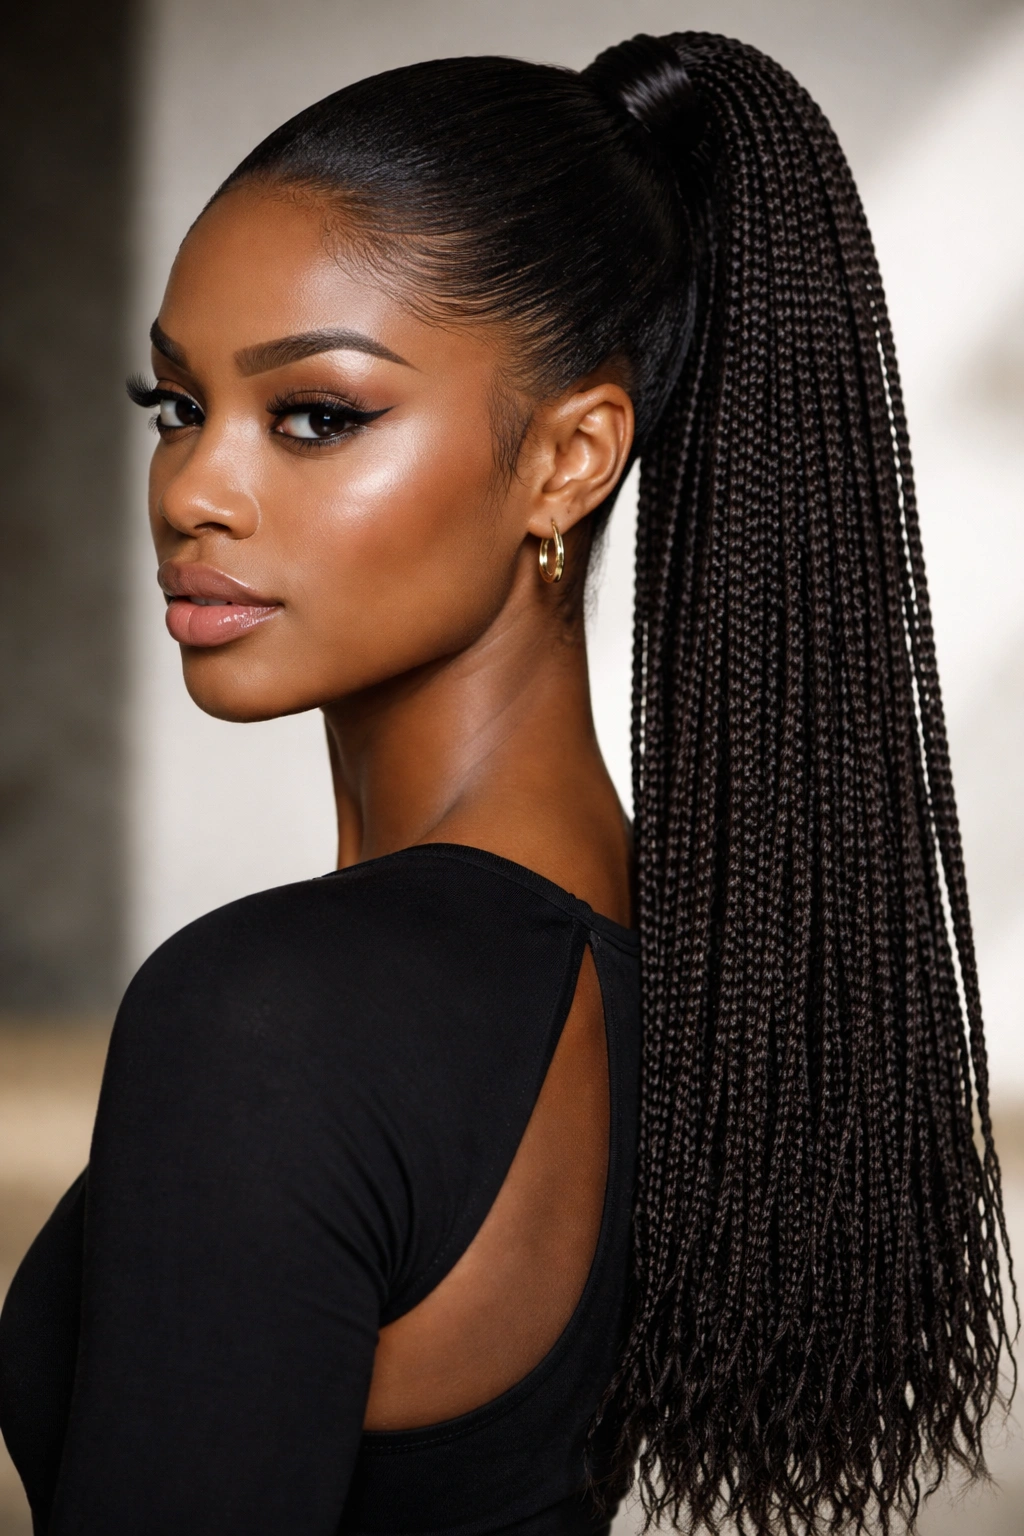
This is a protective style that looks like a high-fashion editorial. The front of your hair is sleek, but the ponytail is a dense collection of dozens of tiny, shoulder-length braids.
The Effort
This is a time-intensive style. You need to prep the ponytail section with micro-braids before attaching it to your sleek base. However, the result is incredibly durable. You can wear this style for weeks.
The Visual
The mix of the perfectly smooth gelled roots and the intricate, texture-heavy braids is stunning. It’s a great way to protect your ends while still having the versatility of a ponytail.
23. Double-Stacked Ponytail
If you have a lot of hair and one ponytail is too heavy, or if you want extra height, use the double-stack technique. You create two ponytails—one on top, one underneath—and combine them.
Why This Works
It distributes the weight of the hair better than a single pony. It also creates a much fuller, taller ponytail that doesn’t droop. When you combine the two, they act as one, but the volume is significantly amplified.
Blending
Make sure the base of the top pony is positioned so it covers the base of the bottom pony. If you don’t do this, you will see two distinct hair ties, which ruins the illusion. Use a wrapping piece of hair to conceal the joint of the two ponytails.
24. Sleek Pony with Swooped Edges
The “swoop” is a staple in the world of 4C styling. It involves using edge control to create distinct, sweeping shapes with your baby hairs along the hairline.
The Technique
Use a small, firm-bristle toothbrush or a dedicated edge brush. Work in tiny sections. Apply a small amount of gel, create the curve, and then—this is the secret—use a small strip of silk or paper to hold the swoop in place until the gel sets.
The Balance
Don’t overdo the swoops. If you have too many, it looks cluttered. Stick to a few elegant curves around the temples and the center of the forehead. A few intentional, well-placed swoops are far more impactful than a frantic, busy hairline.
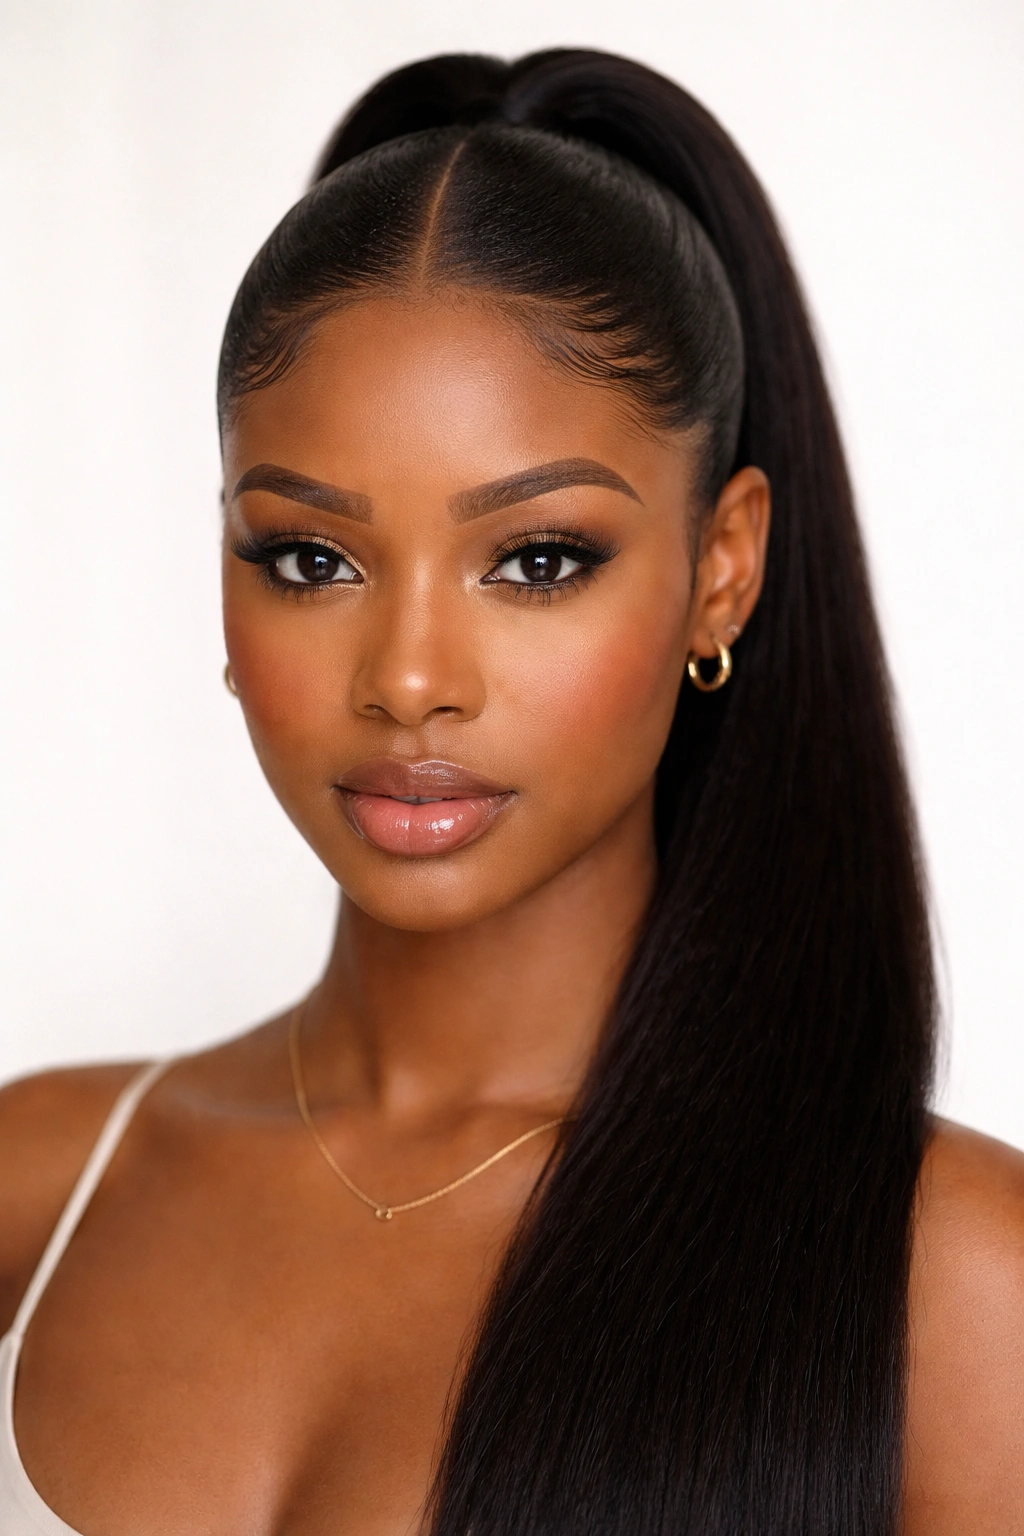
25. The Minimalist Low Pony
Sometimes, the most powerful look is the one that says, “I didn’t try too hard.” The minimalist low pony has no parts, no accessories, and no bells and whistles. It is just sleek, shiny hair pulled back.
Achieving Perfection
Because there are no parts to distract the eye, the focus is entirely on the texture of your hair. Ensure it is moisturized to the point of shine. Use a hair oil or a shine spray that doesn’t just sit on top of the hair but actually reflects light.
The Texture
The ponytail itself should be left in its natural 4C state, perhaps slightly elongated with a hair dryer, but not straightened. The contrast between the glass-like roots and the beautiful, dense, natural texture of the ponytail is the essence of this look.
26. High Pony with Scarf Wrap
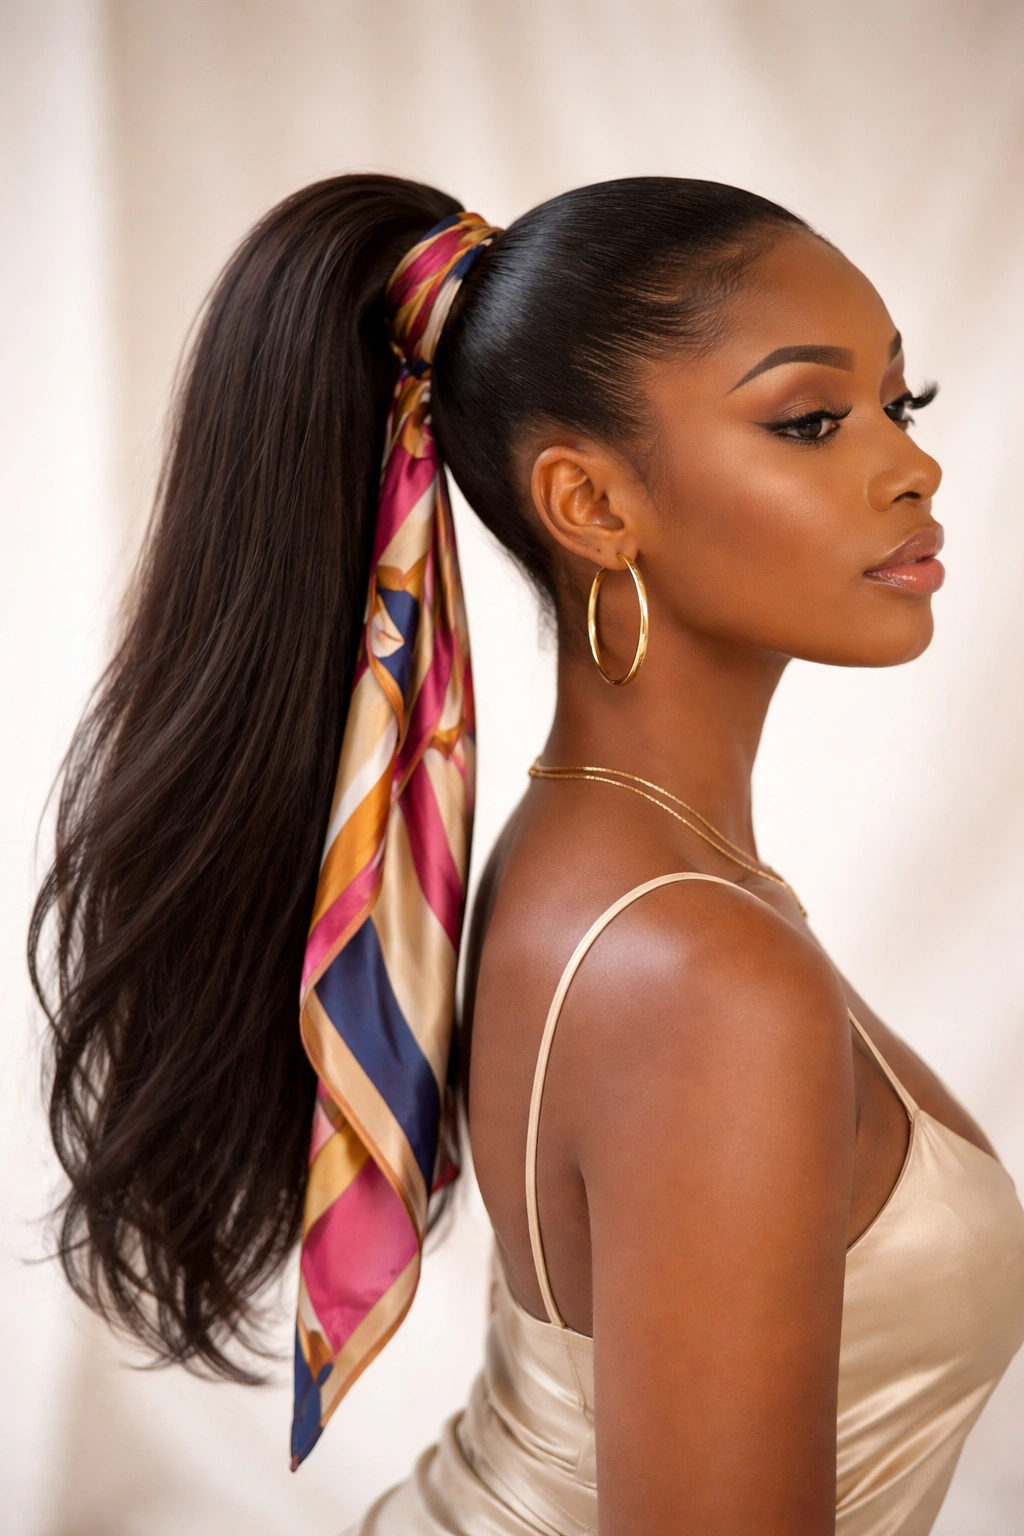
A scarf wrap can instantly hide an imperfect base or add a splash of color to your outfit. It’s a great way to accessorize a high, sleek ponytail.
Choosing the Scarf
Use a thin, silk scarf. A bulky cotton scarf will make the ponytail look unbalanced. Fold the scarf into a long, thin strip, wrap it around the base of your ponytail several times, and tie it into a small knot or a bow.
Styling the Ends
You can let the ends of the scarf dangle down alongside the ponytail for a dynamic, flowing look. It adds movement to the style and breaks up the monotony of the hair itself.
27. Side-Swept Sleek
This is similar to the asymmetrical pony, but here, the hair is brushed across the forehead and then back into the ponytail. It gives the illusion of side-swept bangs without the commitment of a haircut.
The Illusion
As you brush your hair back, bring a section of the hair across your forehead, then tuck it behind your ear as you pull it into the ponytail. It requires a lot of gel to hold that position, but the result is a sophisticated, face-framing style.
Fixing the “Flip”
If the hair keeps popping up, use a small bobby pin hidden behind the ear to anchor that side-swept piece. The hair on top of the pin will conceal it, keeping the look seamless and sleek.
28. Ponytail with Ribbon Embellishment
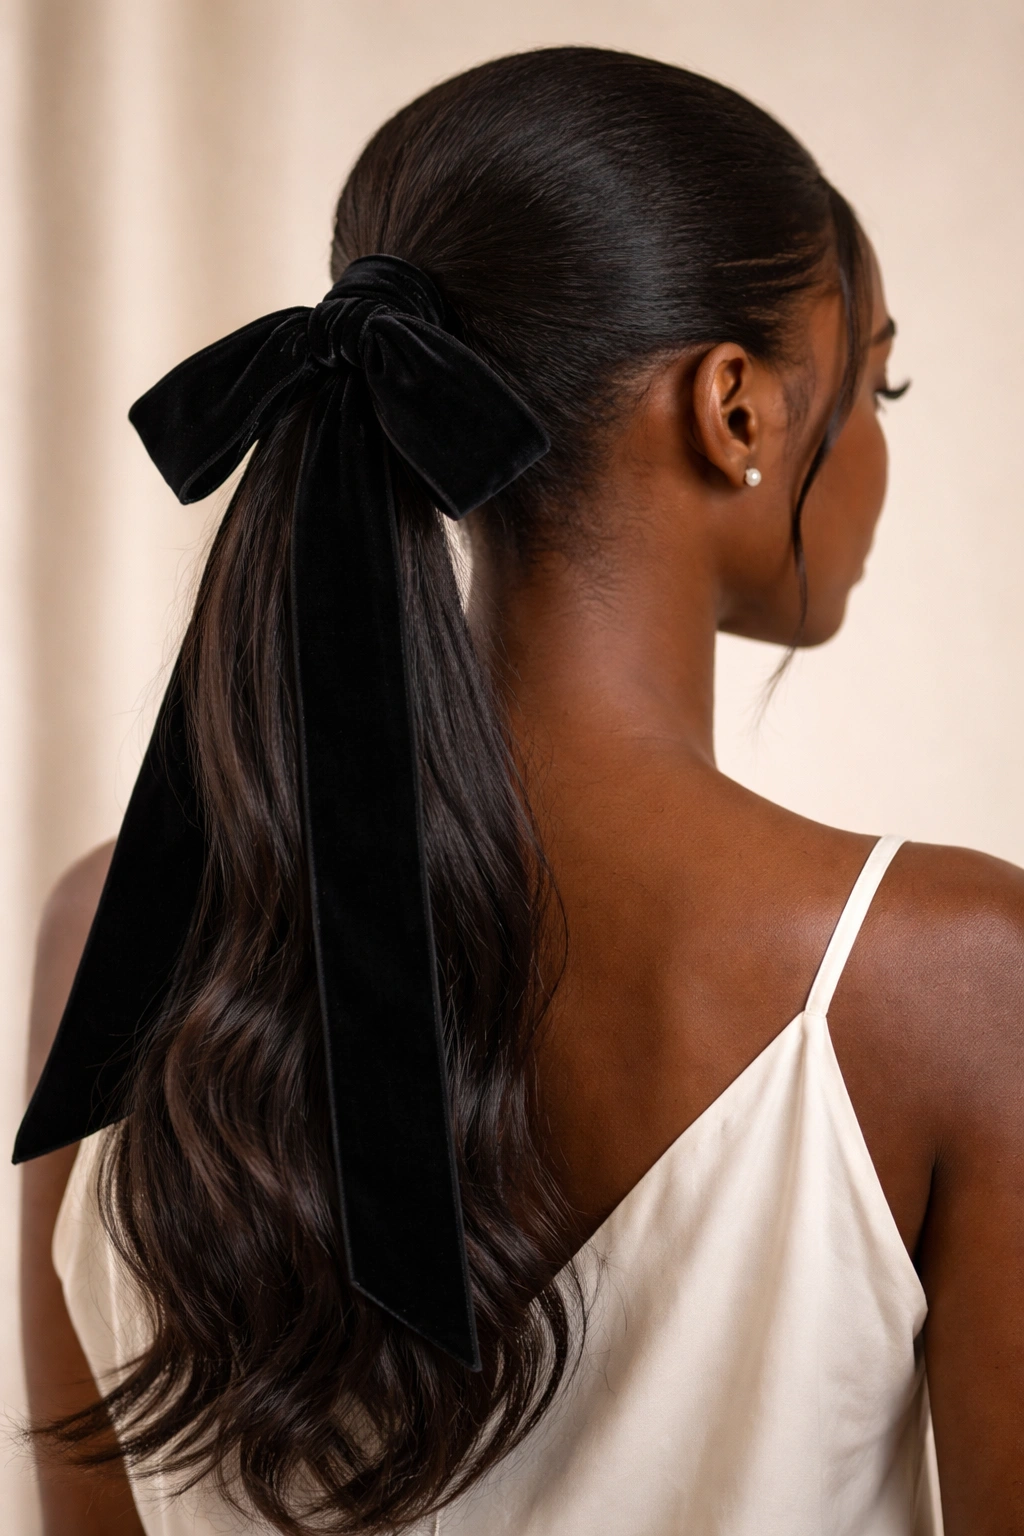
Ribbons are incredibly trendy and add a soft, feminine touch to an otherwise sharp, sleek ponytail. You can tie a long, velvet or satin ribbon around your hair tie.
Length Matters
Use a long ribbon that is at least as long as your ponytail. The ribbon will cascade down with your hair, creating a beautiful, elegant line. It’s a very simple trick that adds a high-fashion flair.
The Knot
Tie the ribbon into a loose, simple bow. Don’t make it too tight or stiff. A soft, slightly undone bow looks much more expensive and intentional than a stiff, uniform knot.
29. Slicked Back with Beaded Ends
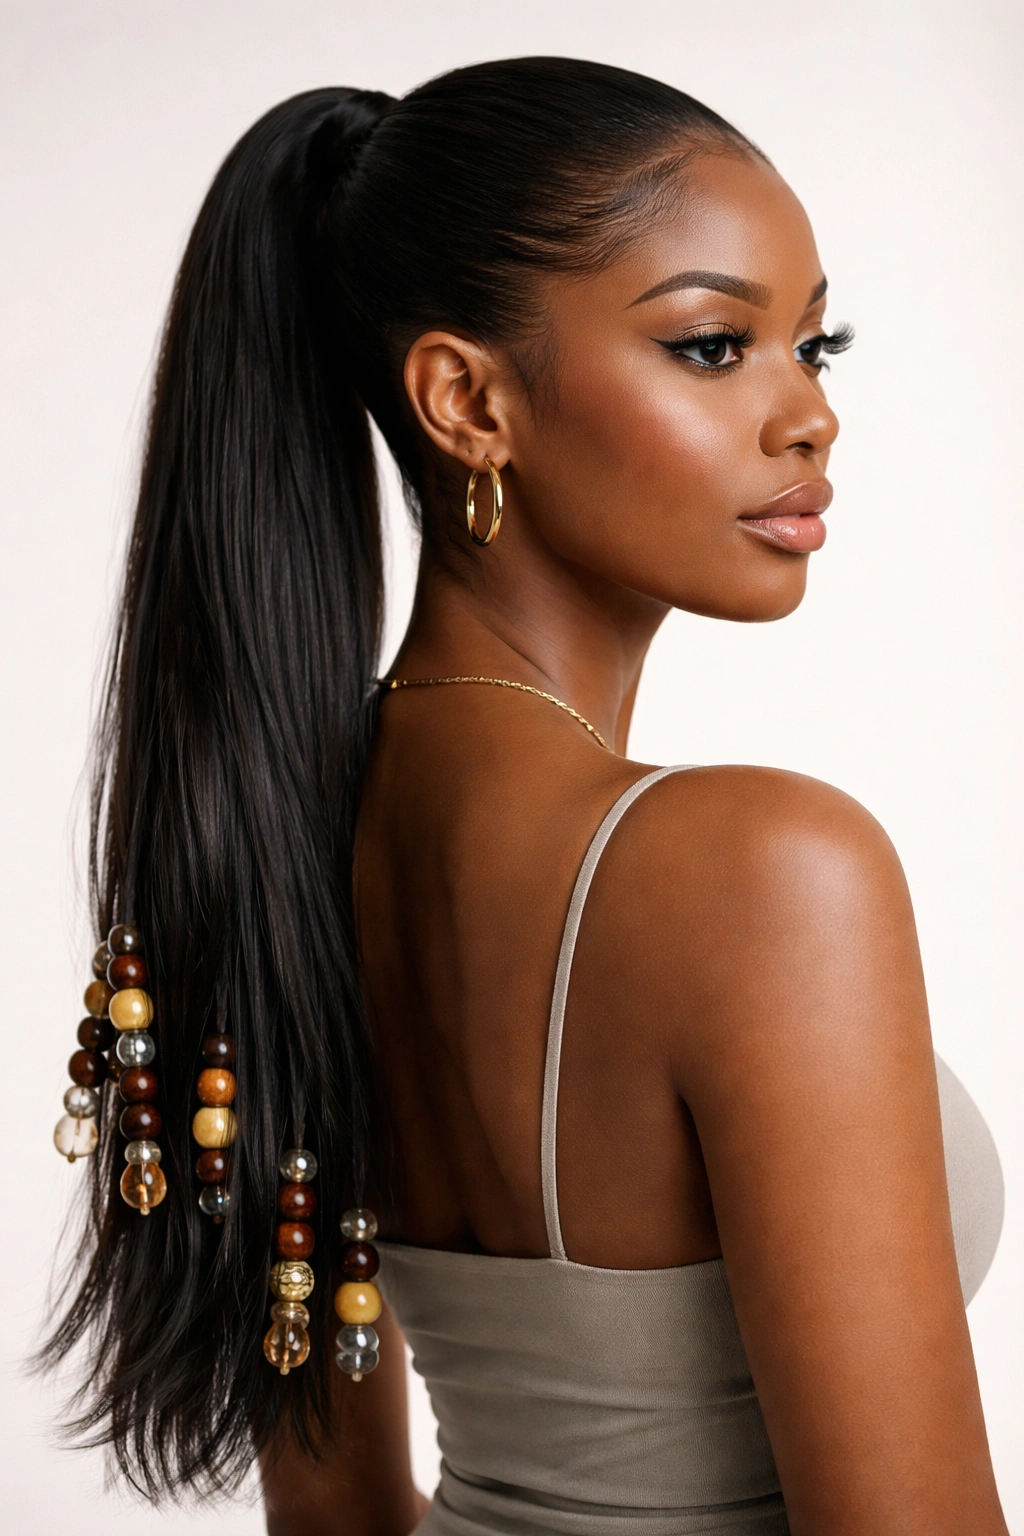
This is a nod to traditional braiding styles. Slick the front of your hair back into a pony, and then place beads on the ends of your ponytail hair.
The Beads
Use wooden, metallic, or clear plastic beads. The weight of the beads will help to naturally elongate your ponytail, keeping it from shrinking up. It’s a functional and decorative choice.
The Distribution
You don’t need a bead on every single strand. Place them sporadically throughout the ends of the ponytail for a textured, boho-chic look. It adds sound and movement every time you turn your head.
30. The “Crown” Sleek Pony

This style creates a braided “crown” or “halo” effect around the base of the ponytail. You part a section of hair around the perimeter of your head, braid it, and then wrap that braid around the base of the ponytail.
The Engineering
This is complex, but it looks incredibly regal. You need to be very careful with the tension here. If the braided crown is too tight, you will get headaches; if it is too loose, it will sag.
Securement
Use tiny U-shaped pins to secure the braided crown to your head. They are easier to hide than standard bobby pins and provide a more secure hold for heavy, braided sections. It’s the ultimate “queen” hairstyle.
Final Thoughts

Sleeking 4C hair is a practice of respect. Your hair is dense, it is resilient, and it has a mind of its own. When you stop trying to flatten it into submission and start working with it—using the right moisture, the right tension, and the right setting methods—the styles are endless. Whether you are aiming for a minimalist look or something that requires hours of braiding and accessorizing, the foundation remains the same: a clean part, a firm hold, and the patience to let your hair set.
Don’t be discouraged if your first attempt isn’t perfect. The “sleek” look is a skill that improves with every iteration. You will learn how much gel your hair needs, which brushes work best for your density, and how long your hair needs to sit under a scarf to reach that mirror-like finish. Keep it moisturized, protect those edges, and enjoy the versatility of your crown.