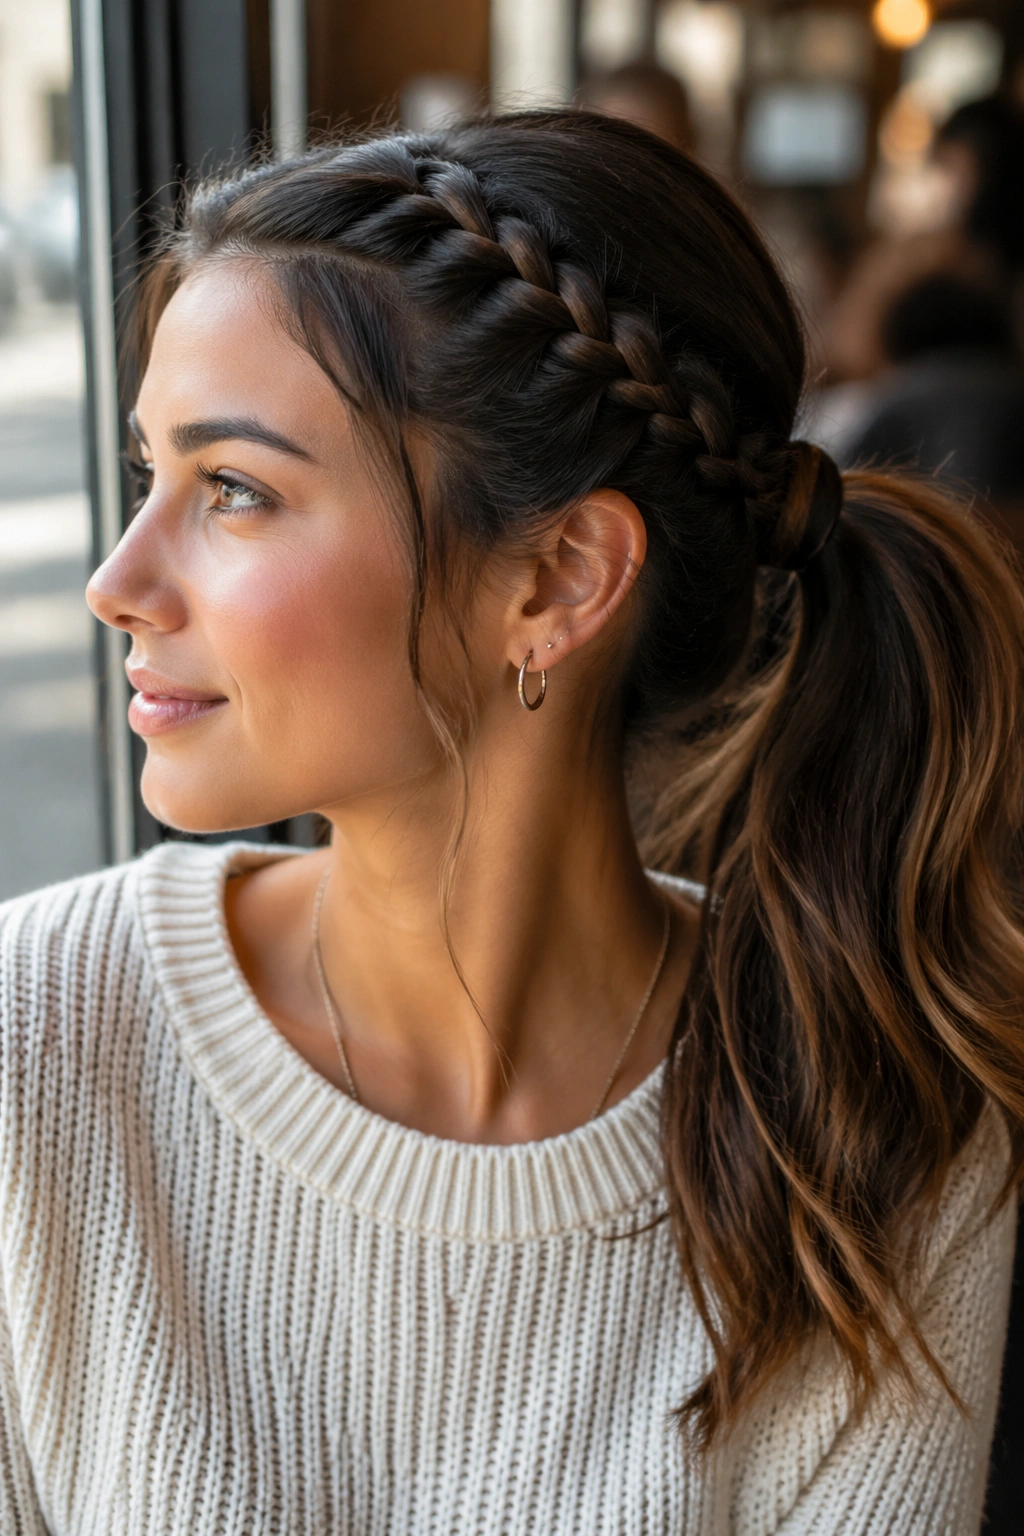
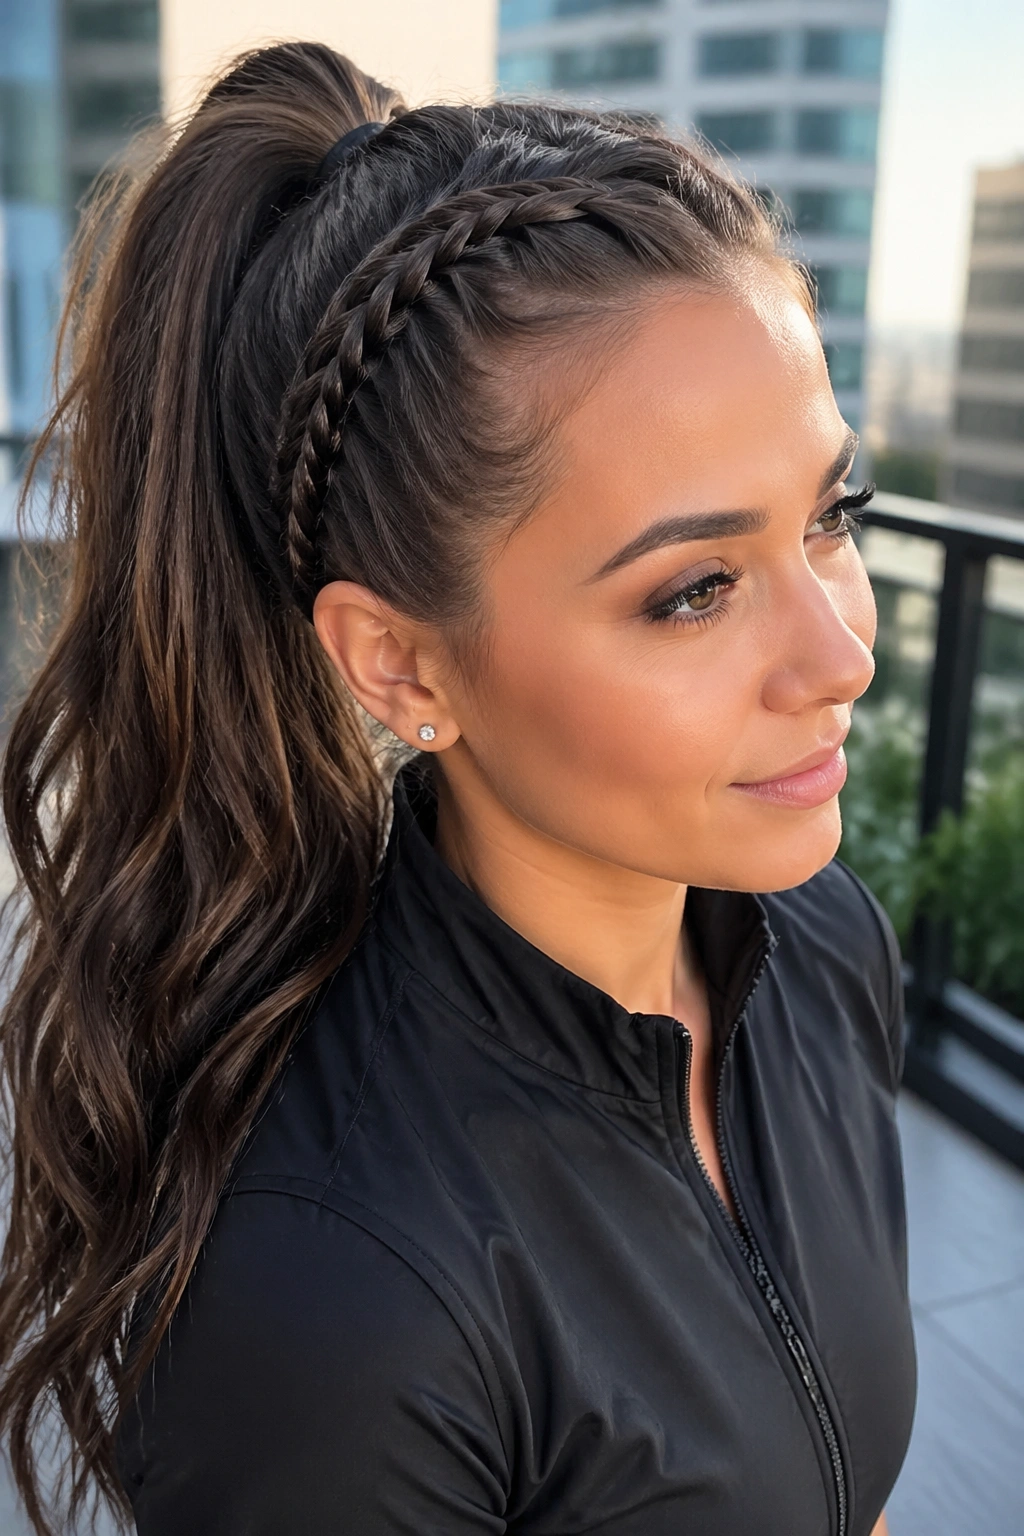
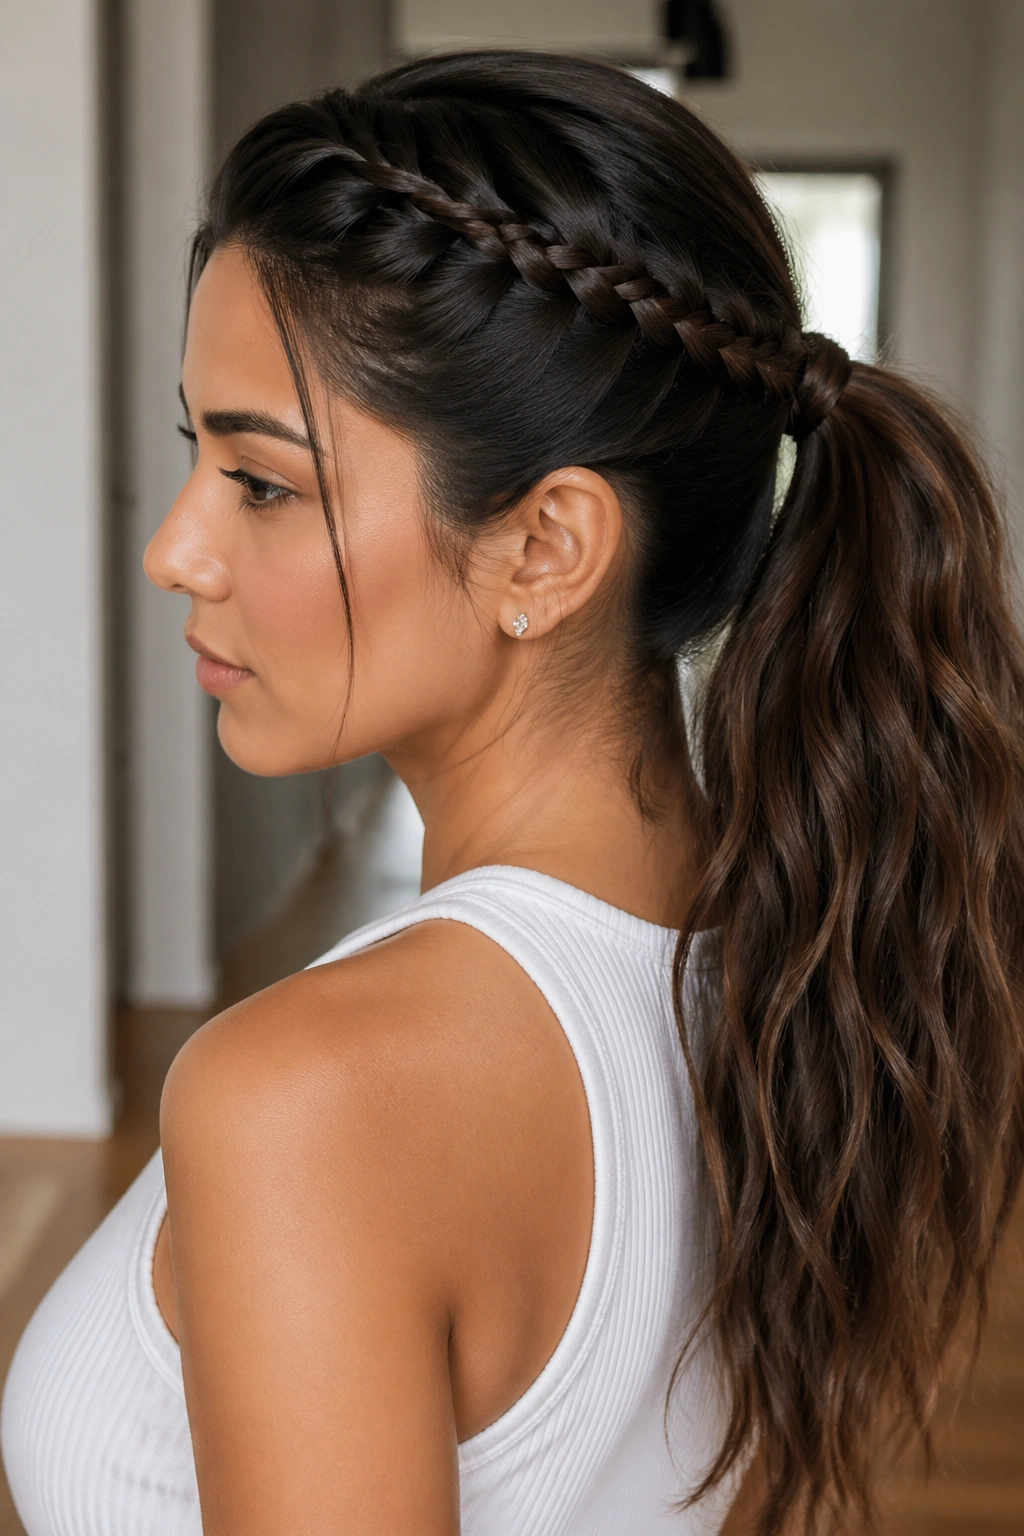
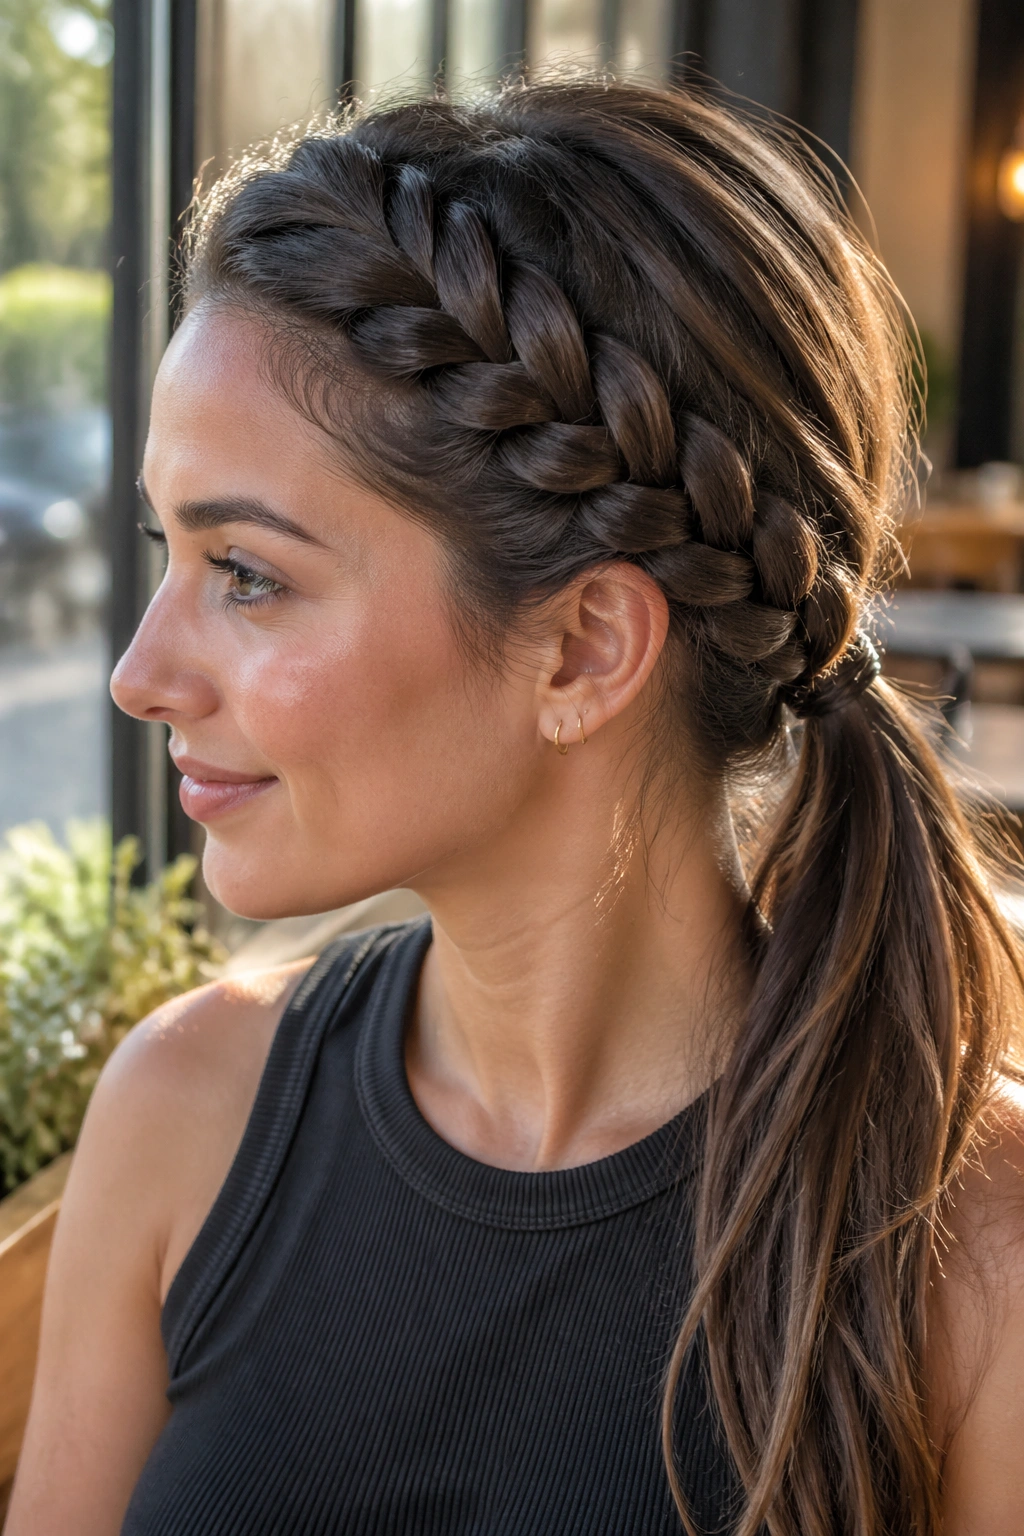
Side braided ponytails have a sneaky little talent: they make messy hair look deliberate. A plain ponytail can go flat fast, especially if the front pieces keep slipping loose or the crown starts puffing up by midday. A braid on one side changes that. It gives the style a line, a grip point, and a cleaner shape at the hairline.
The neat part is not magic. It’s sectioning, tension, and where you anchor the elastic. A smooth side part, a close braid at the temple, and a base that’s wrapped instead of left bare can make a simple ponytail hold its shape far longer than people expect. I usually reach for a rat-tail comb, a small boar-bristle brush, a touch of gel or edge control, and clear elastics. Nothing fancy. Just the right tools in the right order.
These styles also do a nice job of walking the line between polished and wearable. Some versions look sharp enough for a blazer. Others feel softer, easier, and a little more playful. The braid pattern changes the mood, but the same rule keeps all of them neat: smooth the roots, secure the base, and don’t let the braid get too loose too early.
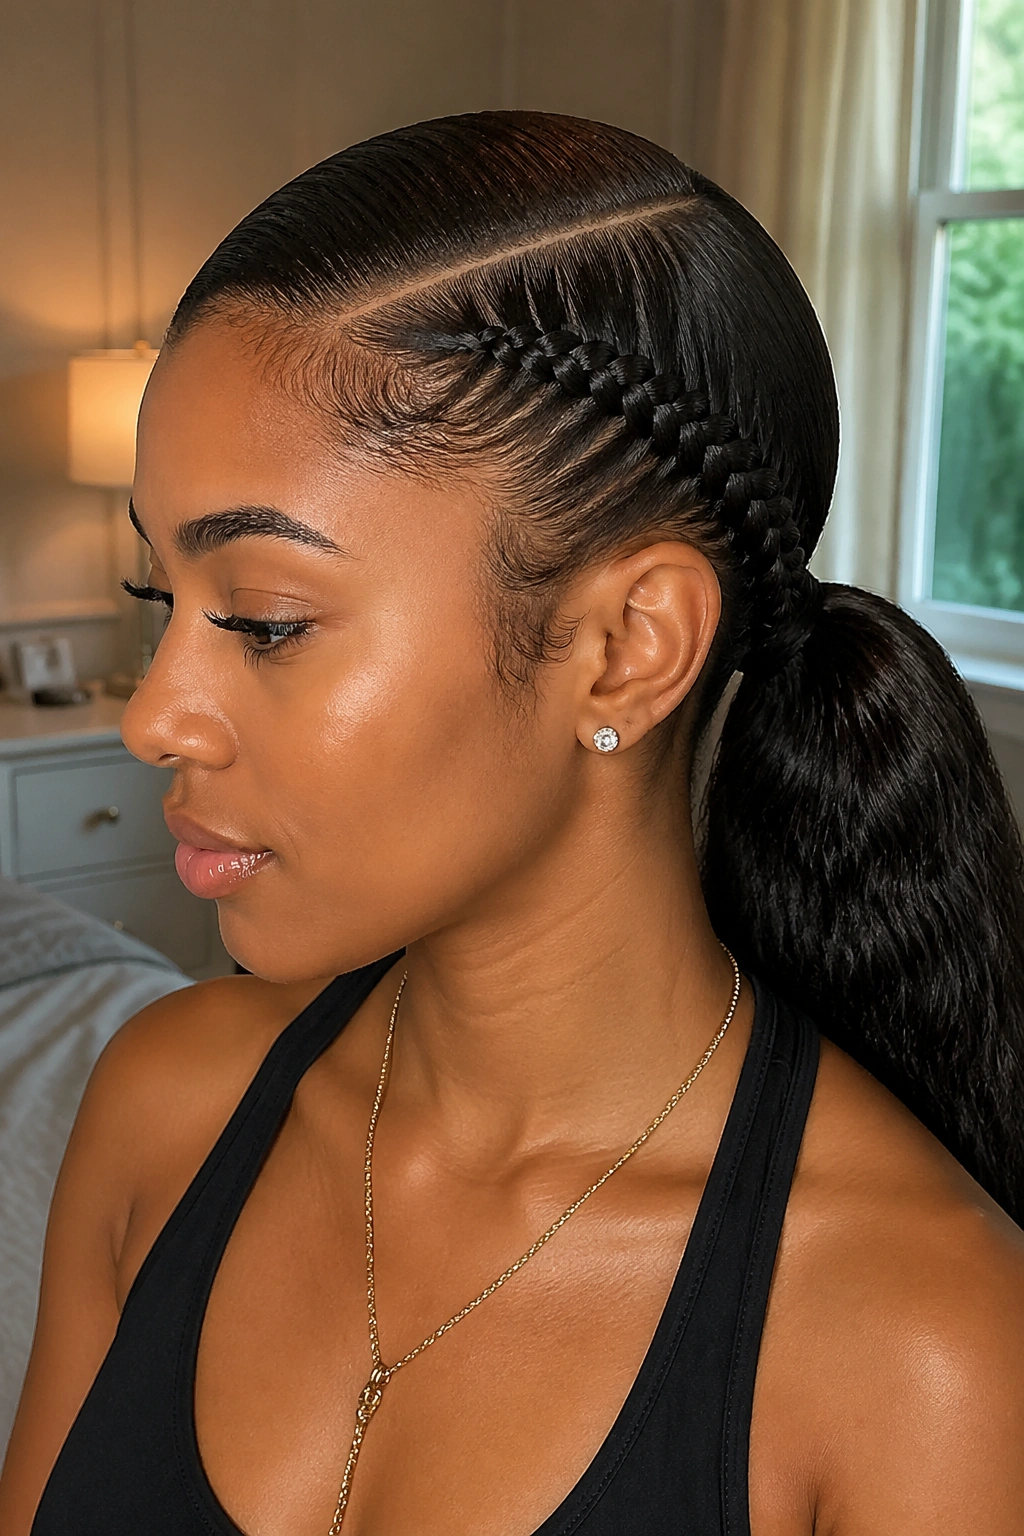
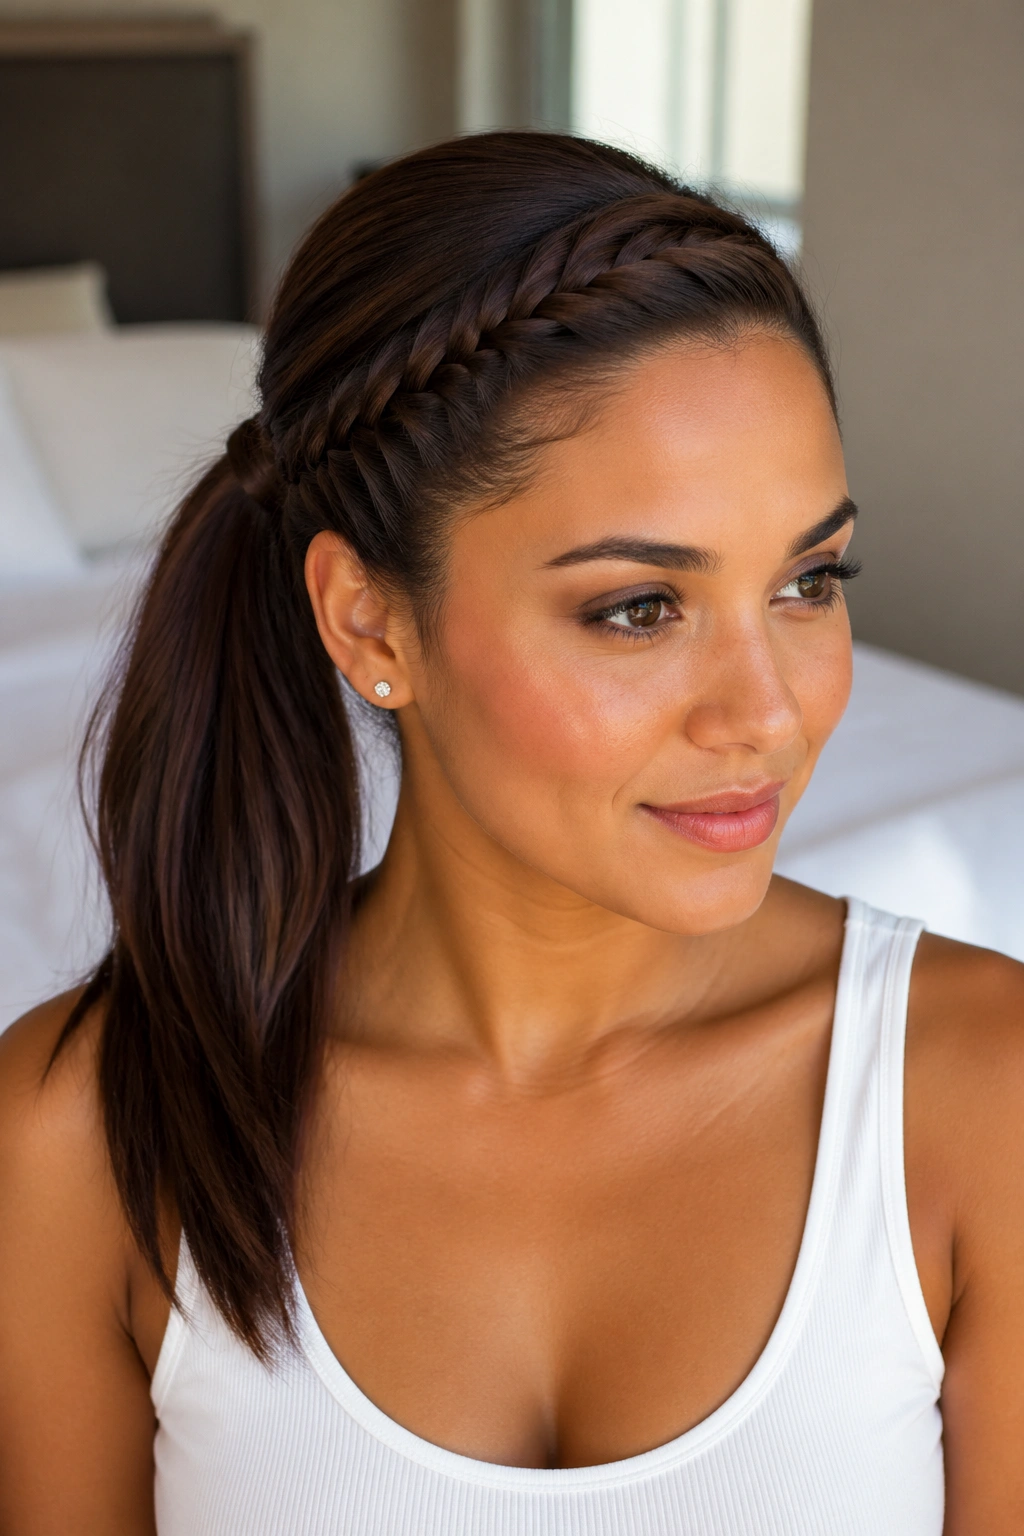
1. Deep Side Part Low Cornrow Ponytail
A deep side part and one tight cornrow can make a low ponytail look far more finished than a basic pull-back ever will. This version works especially well if your hair tends to swell at the root or if you want the front completely under control. The braid hugs the scalp, so the style stays put instead of slipping around while you move.
Why It Stays Neat
The scalp-hugging part is doing most of the work here. A cornrow lays flatter than a loose braid, which means fewer bumps and less frizz at the crown. Keep the part clean and the sections small, and the style holds its shape for hours.
- Use a rat-tail comb to draw the part in one clean sweep.
- Apply a thin layer of gel or edge control before braiding.
- Gather the rest of the hair low at the nape and secure it with a strong elastic.
- Wrap a small strand around the elastic if you want the base to look smoother.
Best for: thick hair, coily textures, and anyone who wants a tidy profile from the front and side.
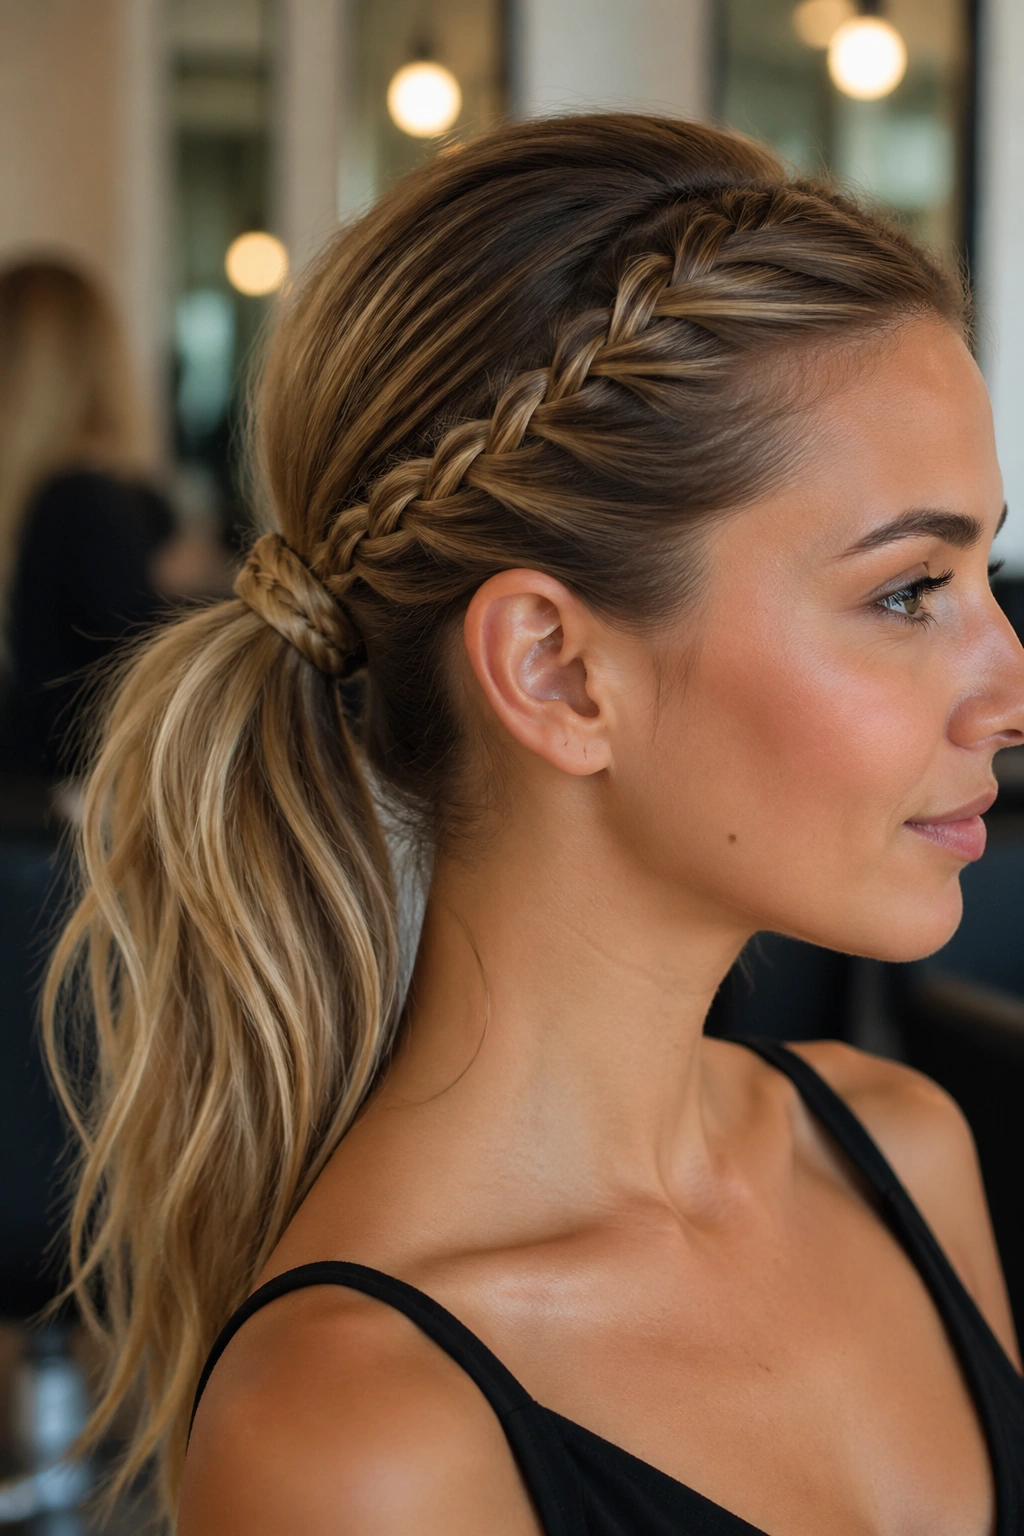
2. French Braid Swept Into a Low Ponytail
What makes a French braid so reliable in a side ponytail? It keeps collecting hair as it moves, so the braid gets more anchored the farther it goes. That makes it a smart pick when your front layers tend to fall out of a regular ponytail.
This version has a softer look than a cornrow, but it still feels controlled. Start near the temple, braid diagonally toward the ear, then let the rest fall into a low ponytail. If your hair is slippery, mist the roots with a light styling spray first. Dry hair can work too, but a little texture usually helps.
How to Keep the Front Smooth
Brush the top section back before you start braiding.
Then smooth each new piece into the braid with your fingers so you do not create little ridges at the part line. A flat finish matters more than perfect symmetry here. One slightly uneven cross will show less than a puffed-up crown.
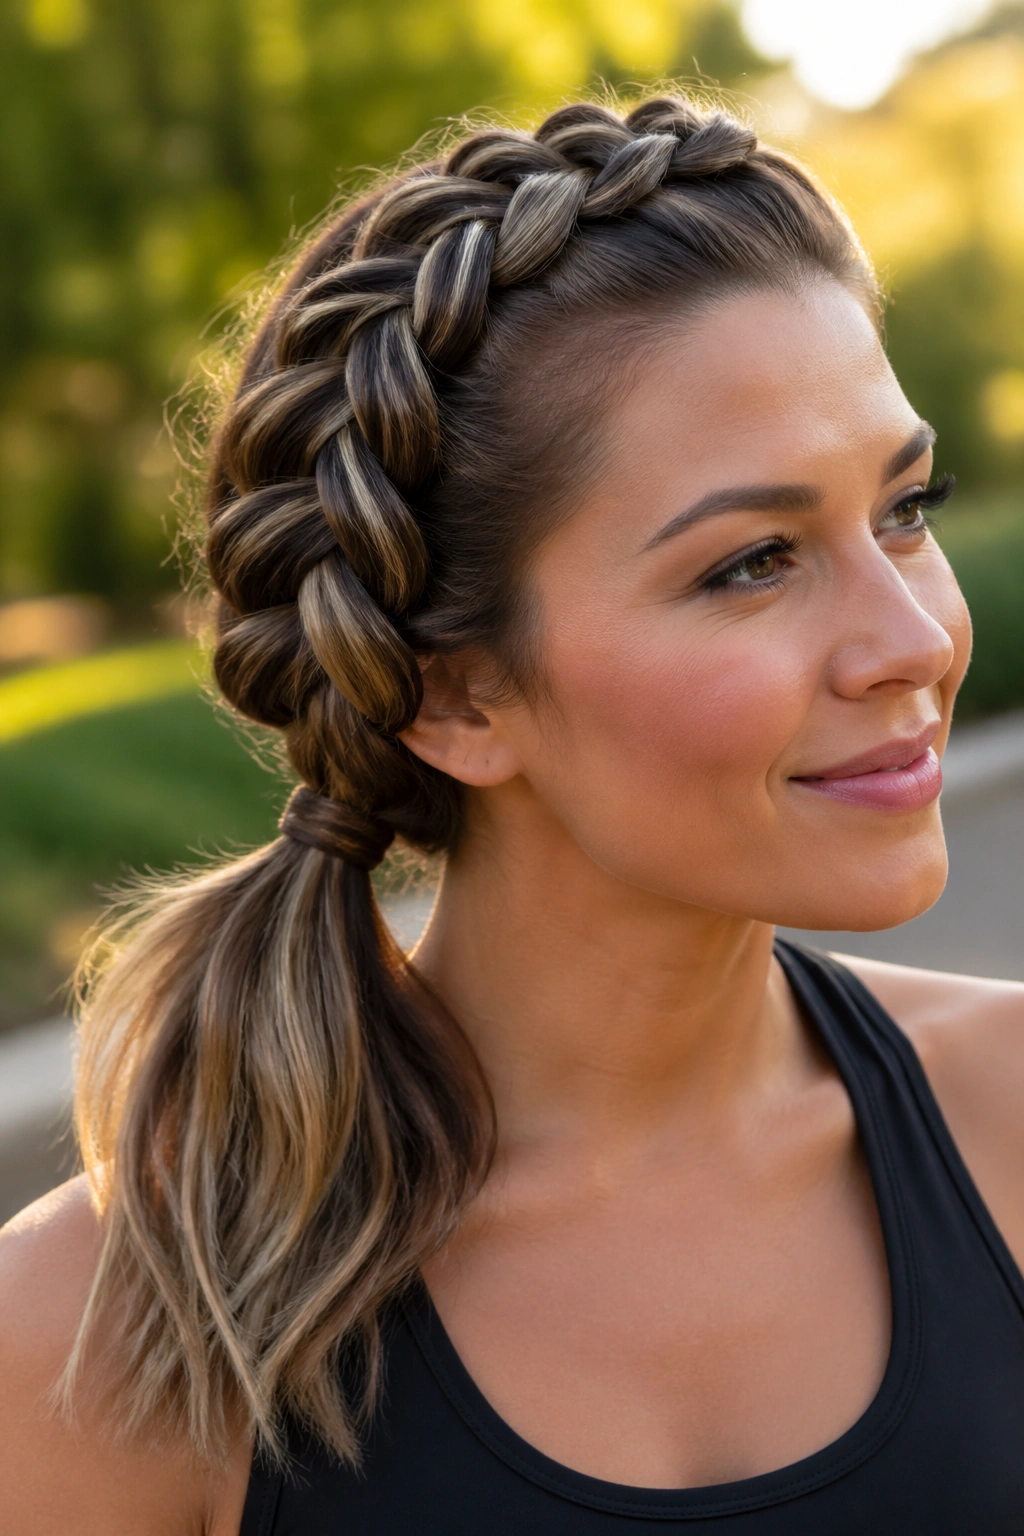
3. Dutch Braid Coiled to One Side
A Dutch braid is the one that sits raised on top of the hair, and that extra height gives the style a sharper look. When you sweep it to one side and finish it in a ponytail, the braid becomes the visible feature instead of hiding in the background. It reads clean and structured.
This is a good choice if you want the braid to show up in profile or in photos. The raised pattern catches the eye fast, especially on medium to thick hair. Keep the braid tight at the beginning, then secure the rest of the ponytail with a firm elastic. If you leave the tail too loose, the whole style starts to sag.
- Use medium tension, not a death grip.
- Keep the braid close to the head for the first few inches.
- Tie the ponytail low or mid-height, depending on how much lift you want.
- Finish with a light mist of hairspray, not a heavy shell.
Pro tip: a Dutch braid looks best when the base is smooth and the braid itself is the part with texture.
4. Fishtail Side Braid With Straight Tail
A fishtail braid has a tighter, finer look than a three-strand braid, and that detail makes it feel neat right away. The pattern looks intricate, but the trick is really just tiny sections and patient hands. Once it’s secured into a side ponytail, the effect is crisp without looking stiff.
I like this version on straight or lightly wavy hair because the tail stays sleek while the braid adds all the texture it needs. If you pull the fishtail apart too much, it loses that tidy shape. Keep the loops close, and don’t pancake the braid unless you want a softer finish.
The straight tail matters too. Run a flat iron through the ponytail only if your hair already tolerates heat well. Otherwise, a smoothing cream and a fine-tooth comb will do enough. The braid does the visual heavy lifting.
5. Rope Twist Side Ponytail
A rope twist is one of the fastest ways to get a side braided ponytail look without dealing with the usual three-strand hand pattern. It uses two sections twisted in the same direction, then wrapped around each other in the opposite direction. That gives you a smooth, cable-like braid that stays compact.
This style is especially handy for fine hair and second-day hair. The twist grips better than a loose braid on slippery strands, and it does not need a lot of length to look finished. If your hair is layered, keep the twist snug and secure it every few inches with tiny elastics before gathering everything into the ponytail.
The clean finish comes from the prep. A small amount of pomade or styling cream at the roots helps the strands stay together, and a soft brush keeps flyaways down. Skip the heavy product load. Too much makes the twist look greasy instead of sleek.
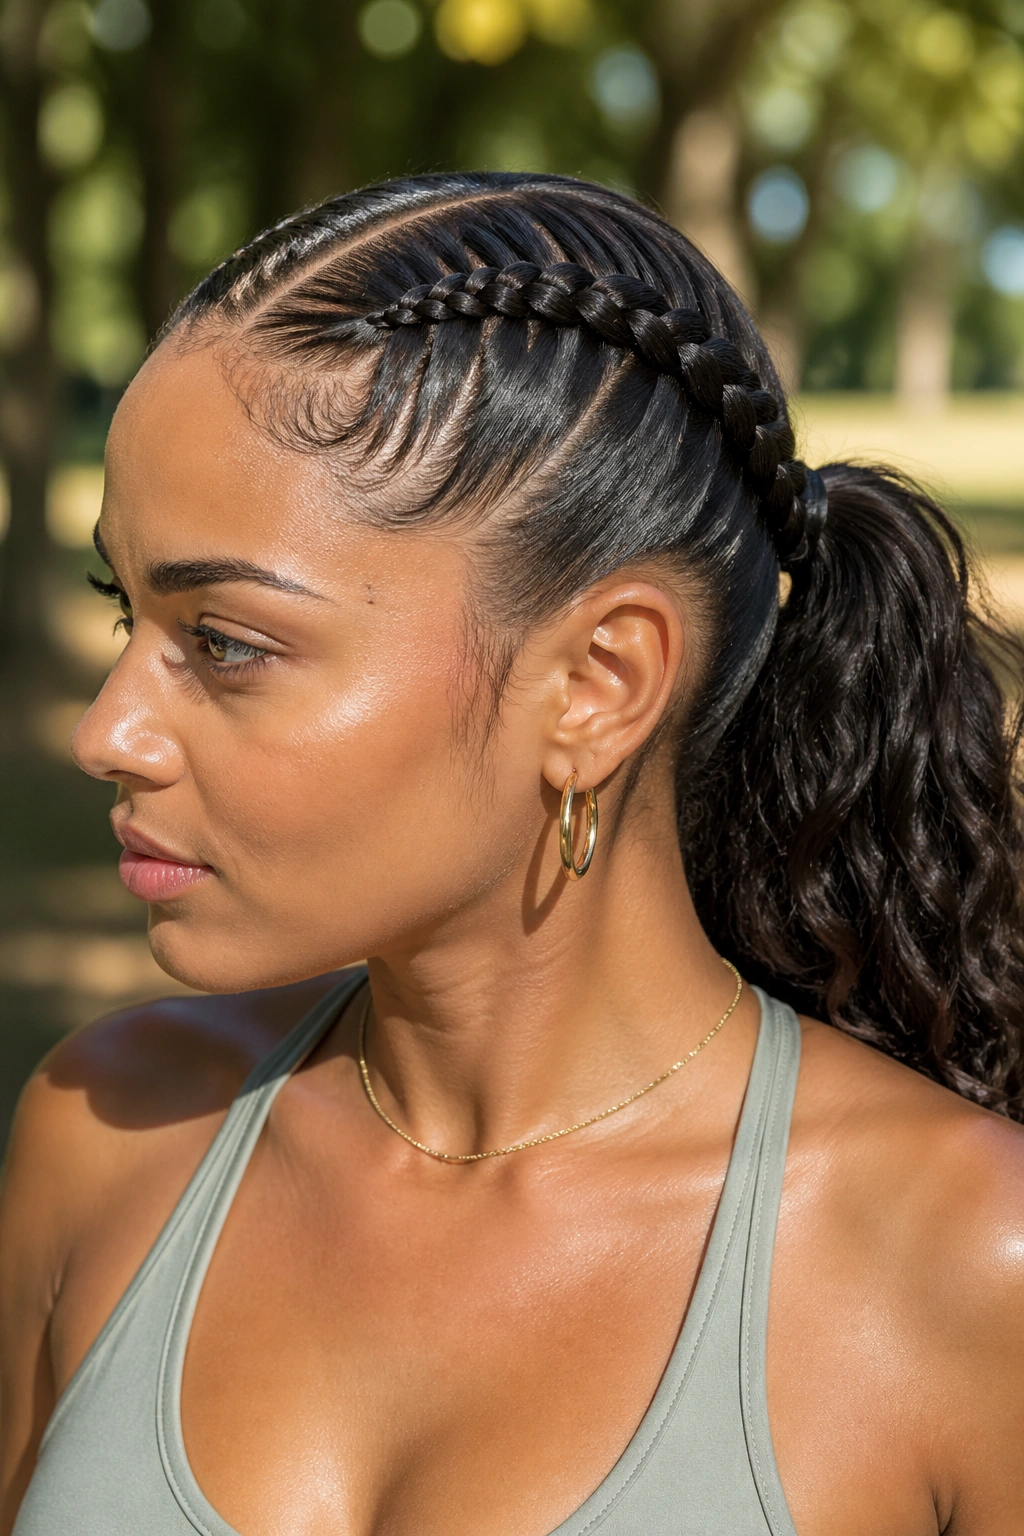
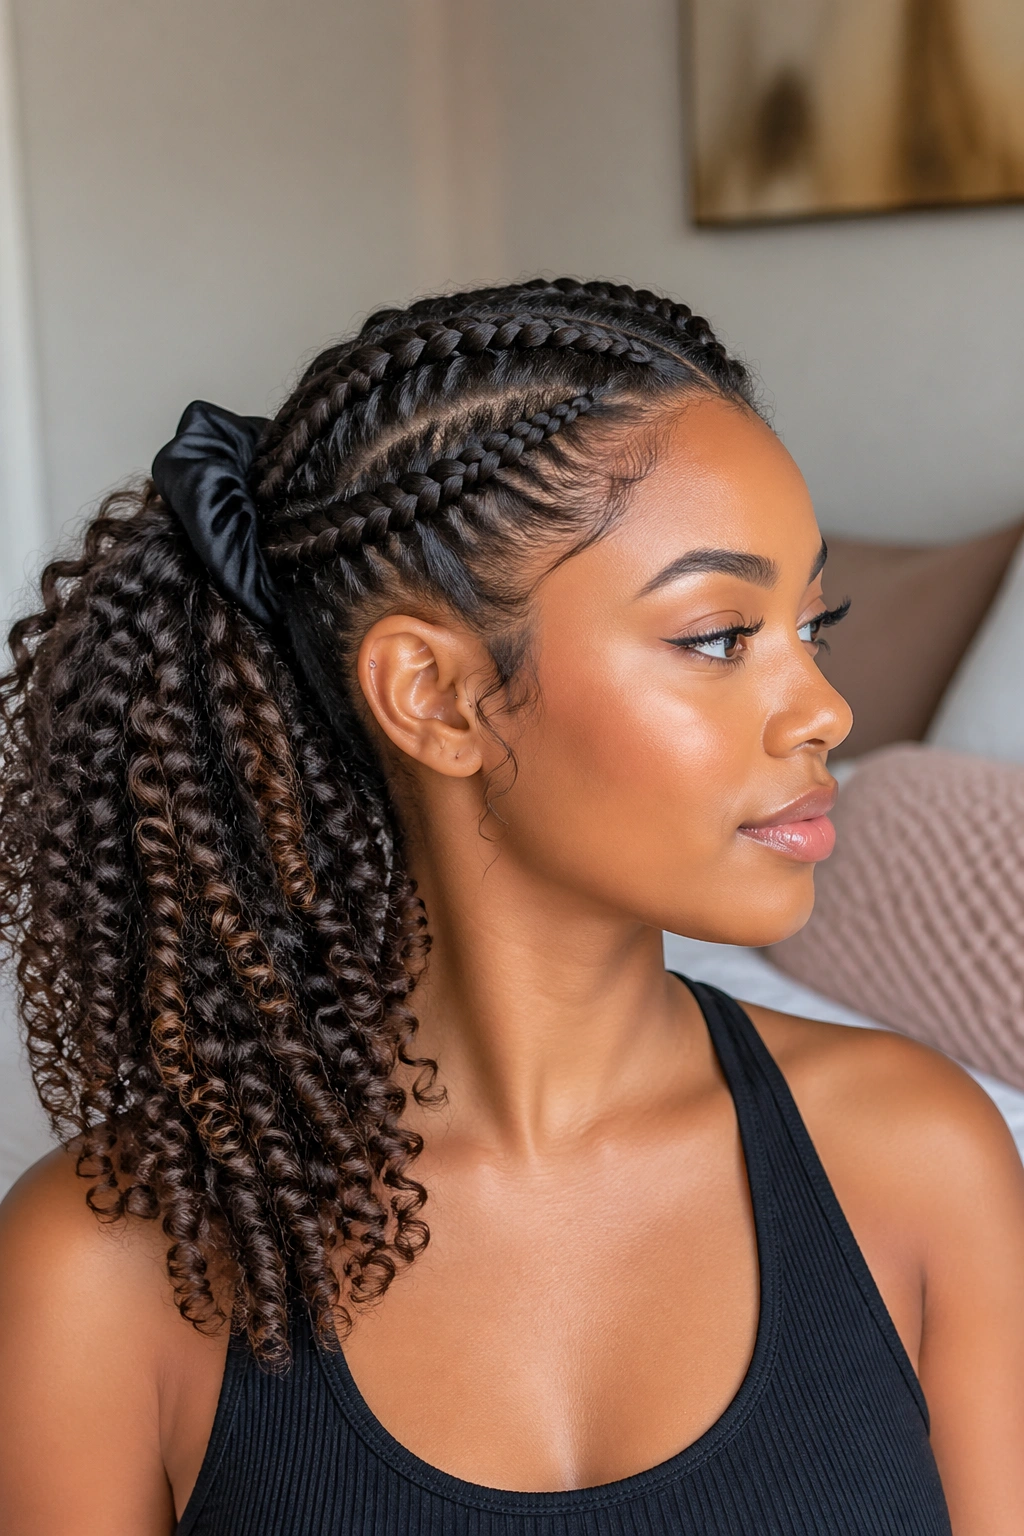
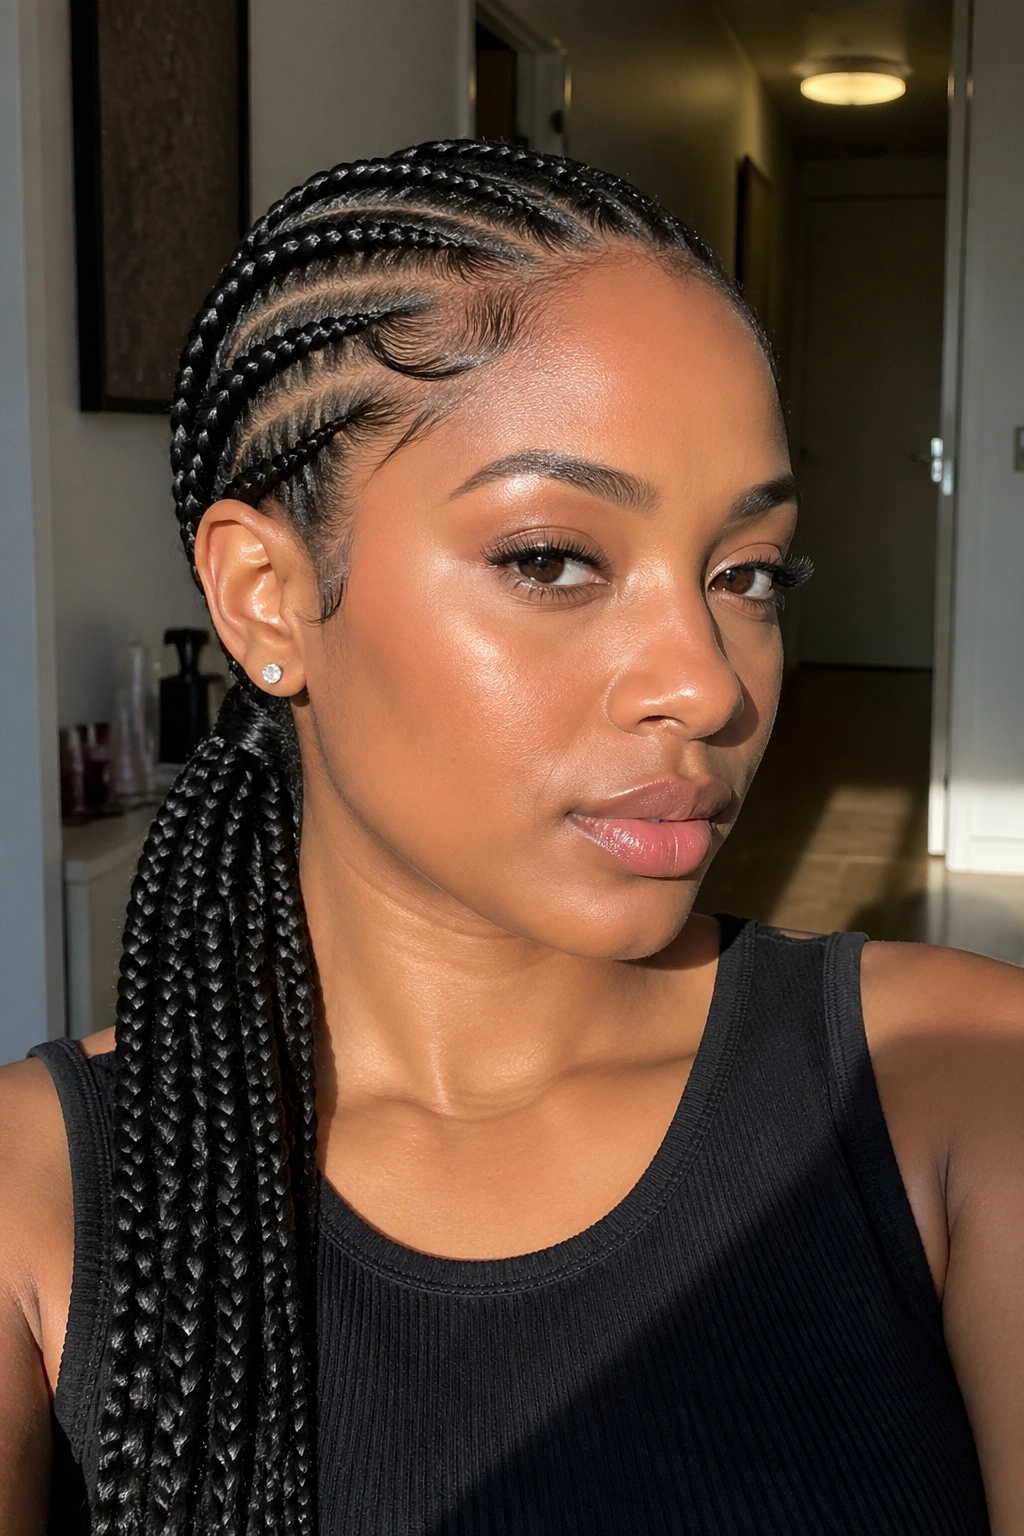
6. Feed-In Side Braids Gathered Low
Why do feed-in braids stay so neat? Because the braid starts slim and builds gradually, instead of beginning with a bulky chunk at the root. That gradual start lays flatter against the scalp, which is exactly what you want when the goal is a side braided ponytail that does not puff up halfway through the day.
How to Get the Most From It
Feed-in braids are a strong choice for protective styling and for anyone with thicker hair that needs a cleaner outline. The braid can start right at the temple, curve gently toward the nape, and then join a ponytail that sits low and controlled. It is a tidy shape, full stop.
Use a precise part and keep the sections even.
That part is worth the extra minute. If the braid starts crooked, the whole ponytail will read that way too. Seal the ends with a clear elastic, then smooth the ponytail base with a little gel or foam if you want extra hold.
7. Sleek Ponytail With a Side Braid Front Sweep
This is the style I reach for when I want the front of my hair to stay put. One small braid sweeps from the temple back toward the ear, and the rest gets pulled into a sleek side ponytail. The effect is simple, but it solves a real problem: face-framing pieces that keep escaping.
A front sweep braid also helps if you’re growing out bangs or layers. The braid gives those shorter sections somewhere to go, instead of leaving them to fray around your face. Keep the sweep low and close to the hairline so it looks intentional, not like you ran out of ideas halfway through.
Use a brush to flatten the top, then finish with a thin layer of gel or edge control. If the braid is too loose, it loses the sleek feeling fast. If it’s too tight, it can start to look harsh. Right in the middle is the sweet spot.
8. Wraparound Braid Over the Elastic
You can take an ordinary side ponytail and make it look far more polished just by wrapping a braid over the elastic. That little finish hides the band, locks the base in place, and gives the style a cleaner edge. It sounds small. It is not.
This version works well when you want the ponytail to look neat from every angle, especially the back. Braid a side section, bring it across the ponytail base, and pin it underneath with a bobby pin. The wrap should sit flat against the head, not float on top of the ponytail like a loose ribbon.
- Keep the braid thin enough to bend easily.
- Pin the end under the ponytail, not at the side where it can poke out.
- Use two bobby pins in an X if your hair is heavy.
- Smooth the wrap with your fingers before setting it with spray.
Tiny detail, big payoff. The wrapped base is what turns “pretty ponytail” into “finished style.”
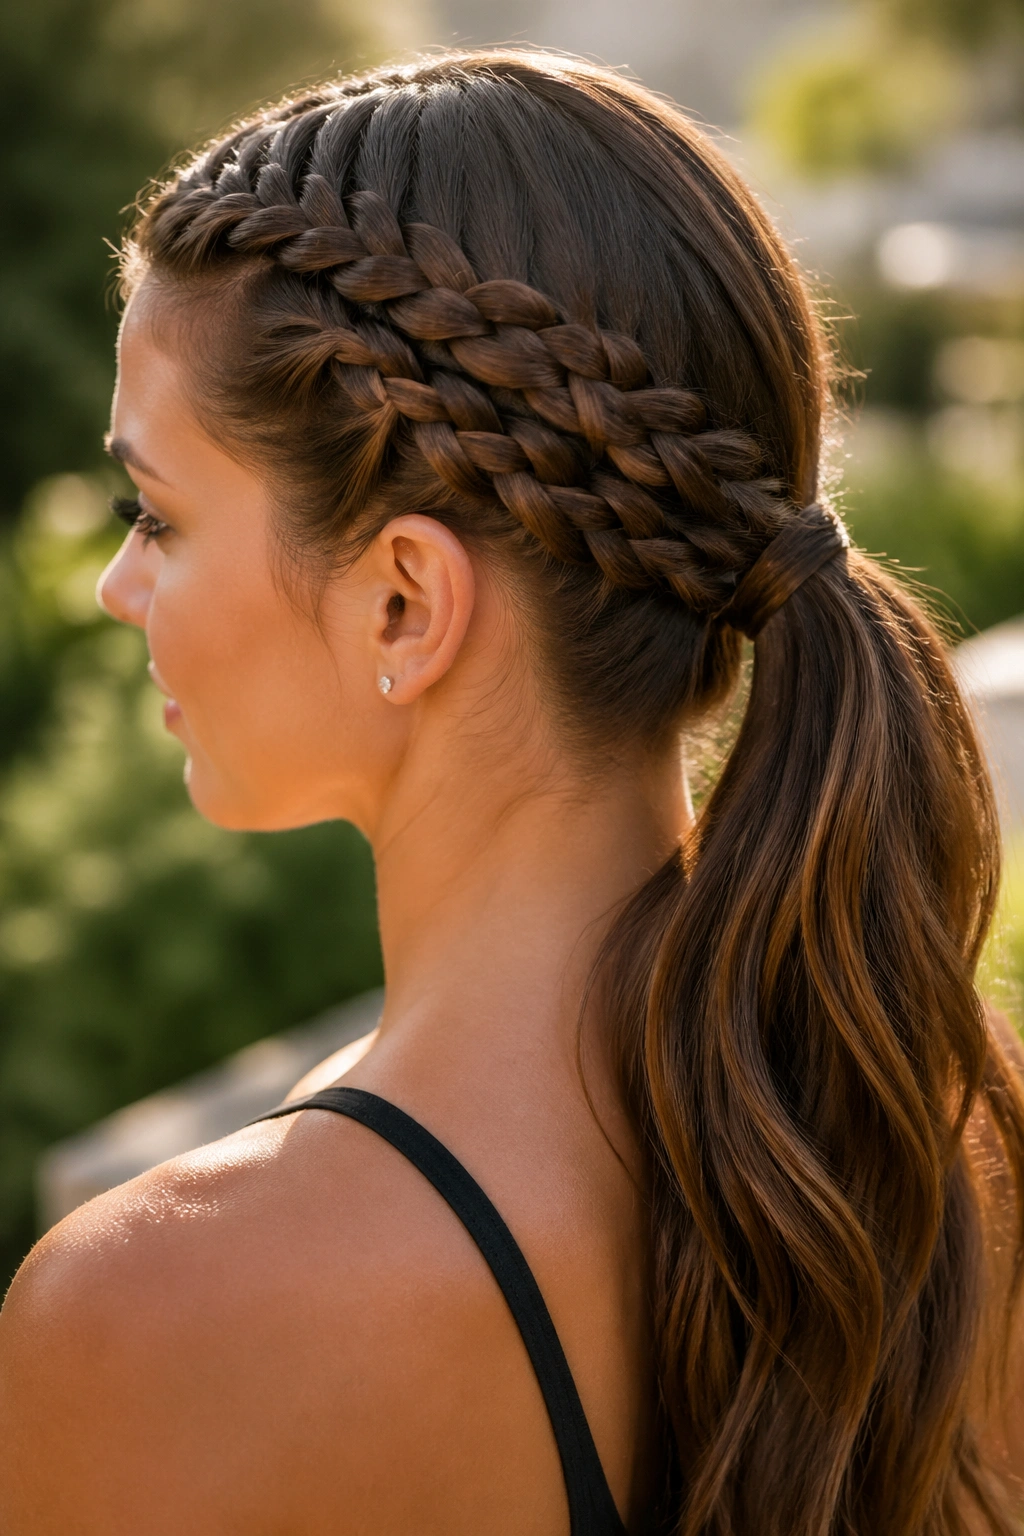
9. Side Cornrow Crown Into Ponytail
A side cornrow that arcs like a partial crown gives the ponytail a very secure backbone. It starts near the hairline, follows the curve of the head, and feeds everything into the ponytail at the back or lower side. The look feels controlled from the first inch to the last.
This is one of my favorites for active days because it stays close to the scalp and does not wander. It also works beautifully on textured hair, where a smooth crown and a fuller ponytail can balance each other well. Keep the braid narrow if you want the style to feel light. Go wider if you want a stronger visual line.
A little gel on the part helps, but don’t pile it on. The goal is a clean crown, not a crunchy helmet. If the braid starts looking fuzzy before you even finish, your sectioning probably needs to be tighter.
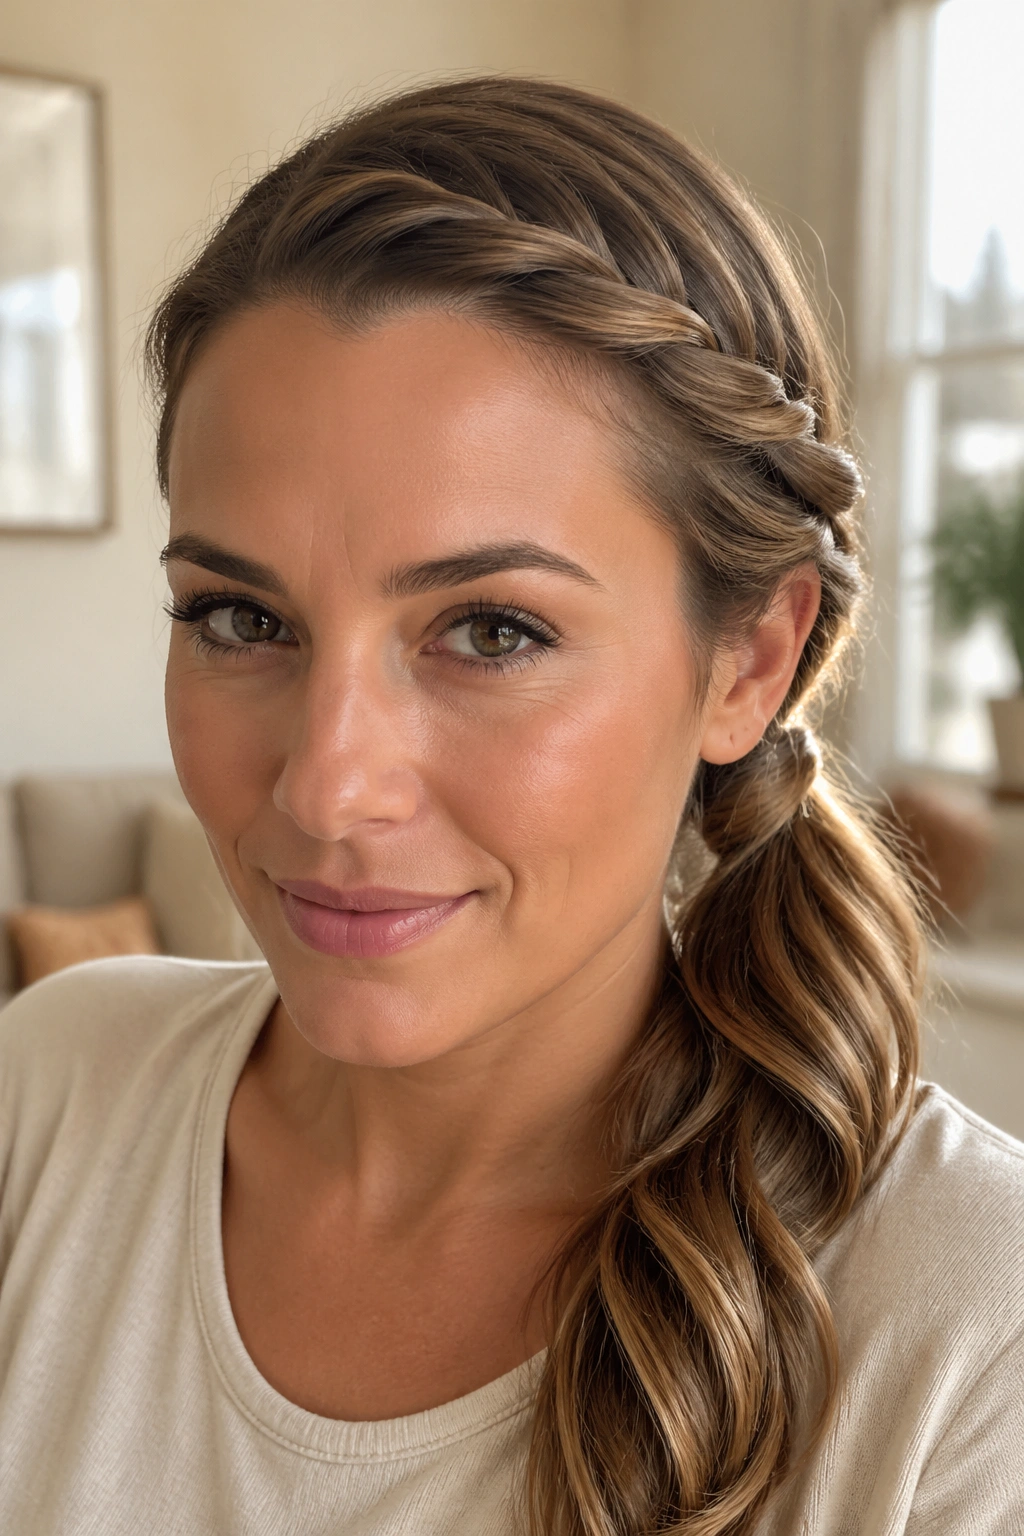
10. Curled-End Side Braid Ponytail
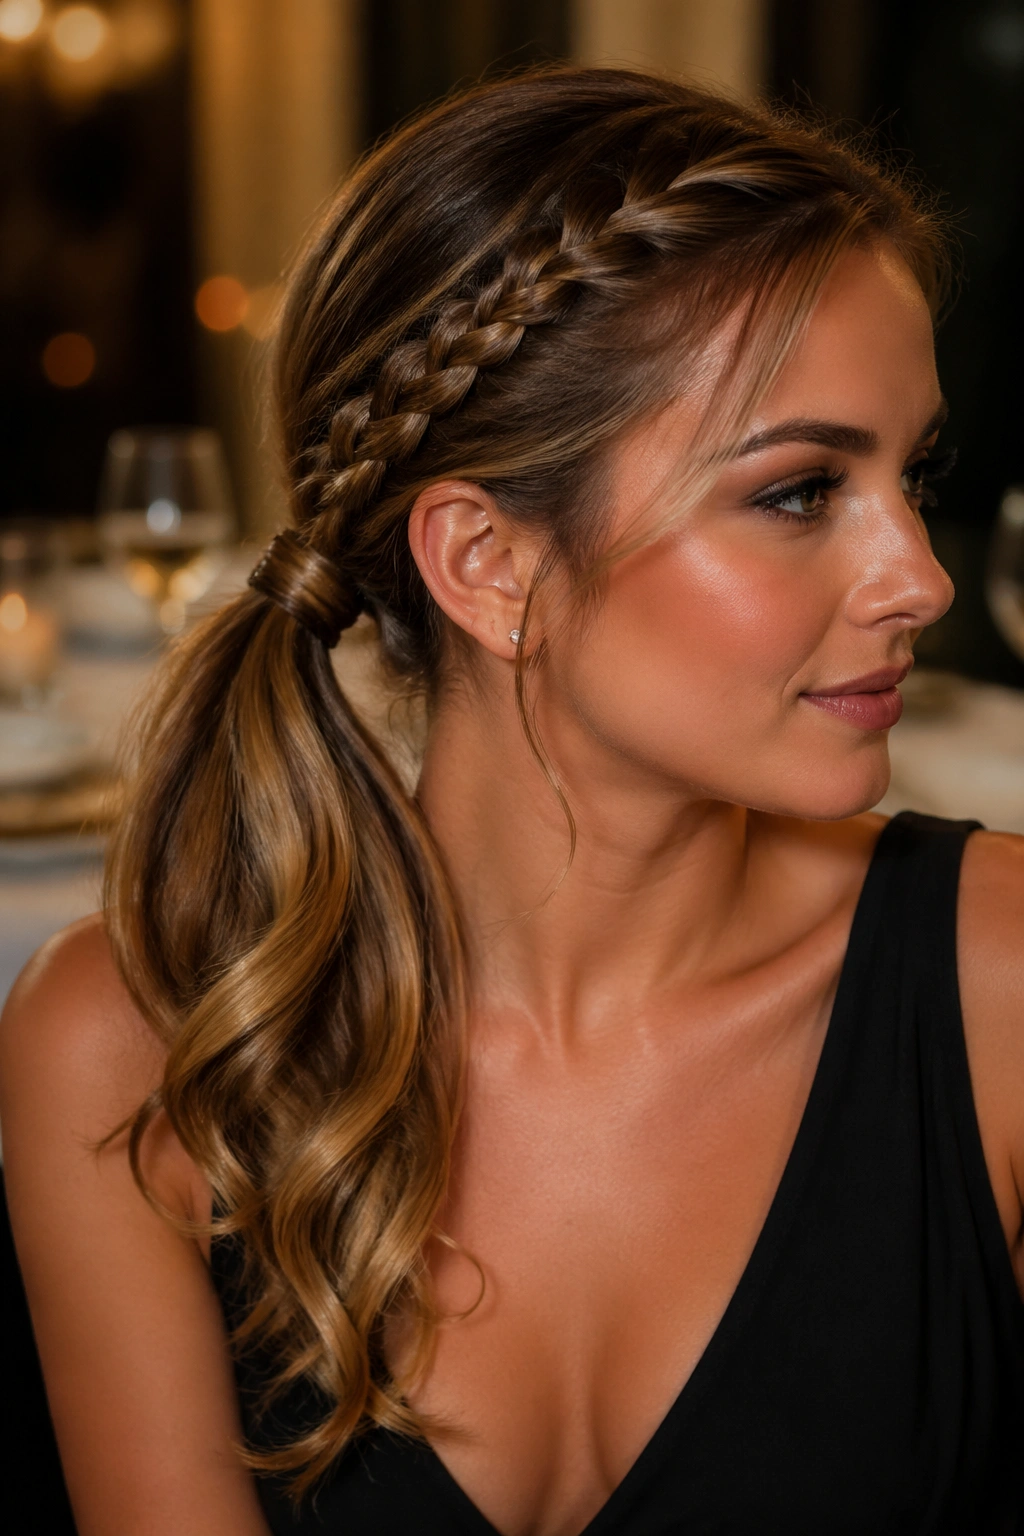
A straight tail can feel too plain when the braid at the side is already doing something interesting. Curled ends fix that. They add shape and movement, which makes the whole ponytail feel softer without messing up the neatness at the roots.
This version works especially well for events, dinners, or any day when you want the braid to stay polished but the tail to feel a little dressed up. The braid keeps the front controlled, and the curls keep the end from hanging flat. I like to curl only the lower half of the ponytail so the top stays smooth.
Use a one-inch curling wand if your hair holds heat well, or set the tail in loose rollers if you prefer less heat. Brush the curls lightly so they form soft bends instead of ringlets. Too much hairspray will make the tail feel stiff, and that ruins the point.
11. Bubble Side Braid Ponytail
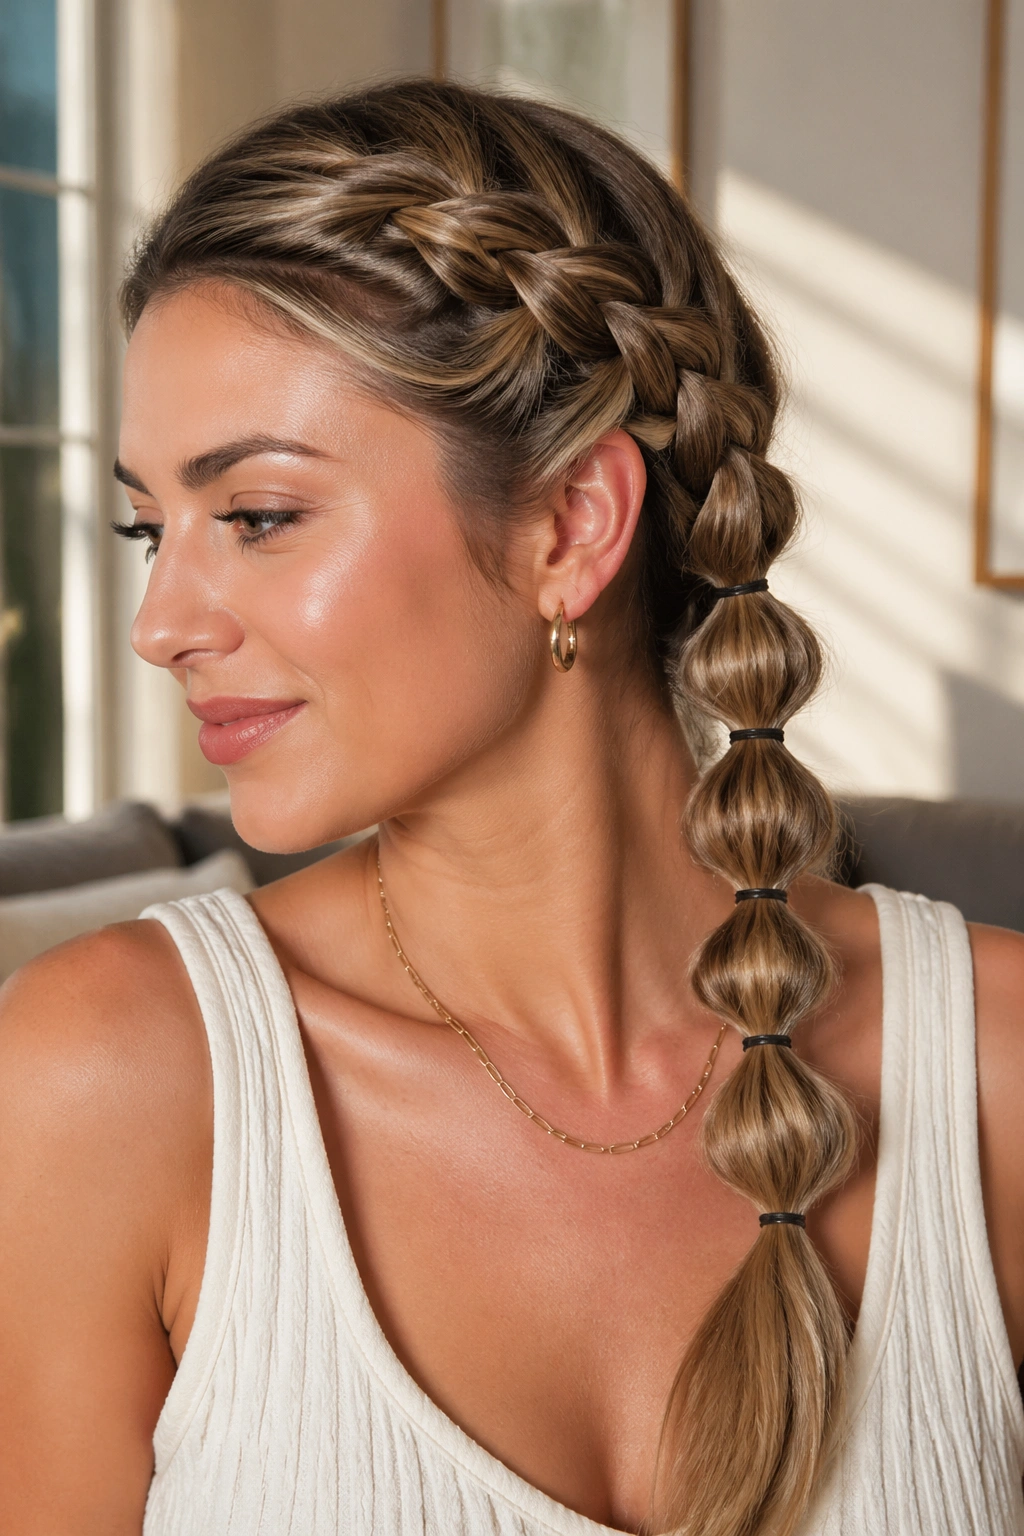
Why does a bubble braid feel so clean? Each elastic creates a stopping point, so the hair cannot slip and blur the shape the way it can with a loose tail. That makes bubble side ponytails surprisingly good when you want a playful style that still looks controlled.
How to Keep the Bubbles Even
Start with a side braid at the front or along the side of the head, then carry the ponytail down and add clear elastics every 1½ to 2 inches. Gently tug each section outward so the bubbles fill out without looking lopsided. If one bubble gets bigger than the others, pinch the next one a little more to balance it.
This style works well on long hair and on layered hair that needs structure. The elastics do the neatness for you. That’s the beauty of it. If your hair is very fine, a touch of texturizing spray before you start will help the bubbles hold their shape instead of collapsing.
12. Lace Braid Into Mid Ponytail
A lace braid is the cousin of a French braid, except you only add hair from one side as you move along. That one-sided feed gives the braid a softer line, which looks lovely when it sweeps into a mid-height ponytail. The shape feels gentle, but it still keeps the front controlled.
This is a smart pick for shoulder-length hair because it uses less length than a low braid. You do not need a long tail to make it look complete. A mid ponytail can sit right at the point where the braid finishes, so the whole style feels connected instead of split into two separate pieces.
Keep the braid close to the head and avoid pulling the new sections too wide. A lace braid can look airy, but airy is not the same as loose. If you want it to stay neat, the tension should be firm from the start.
13. Zigzag Part Side Braided Ponytail
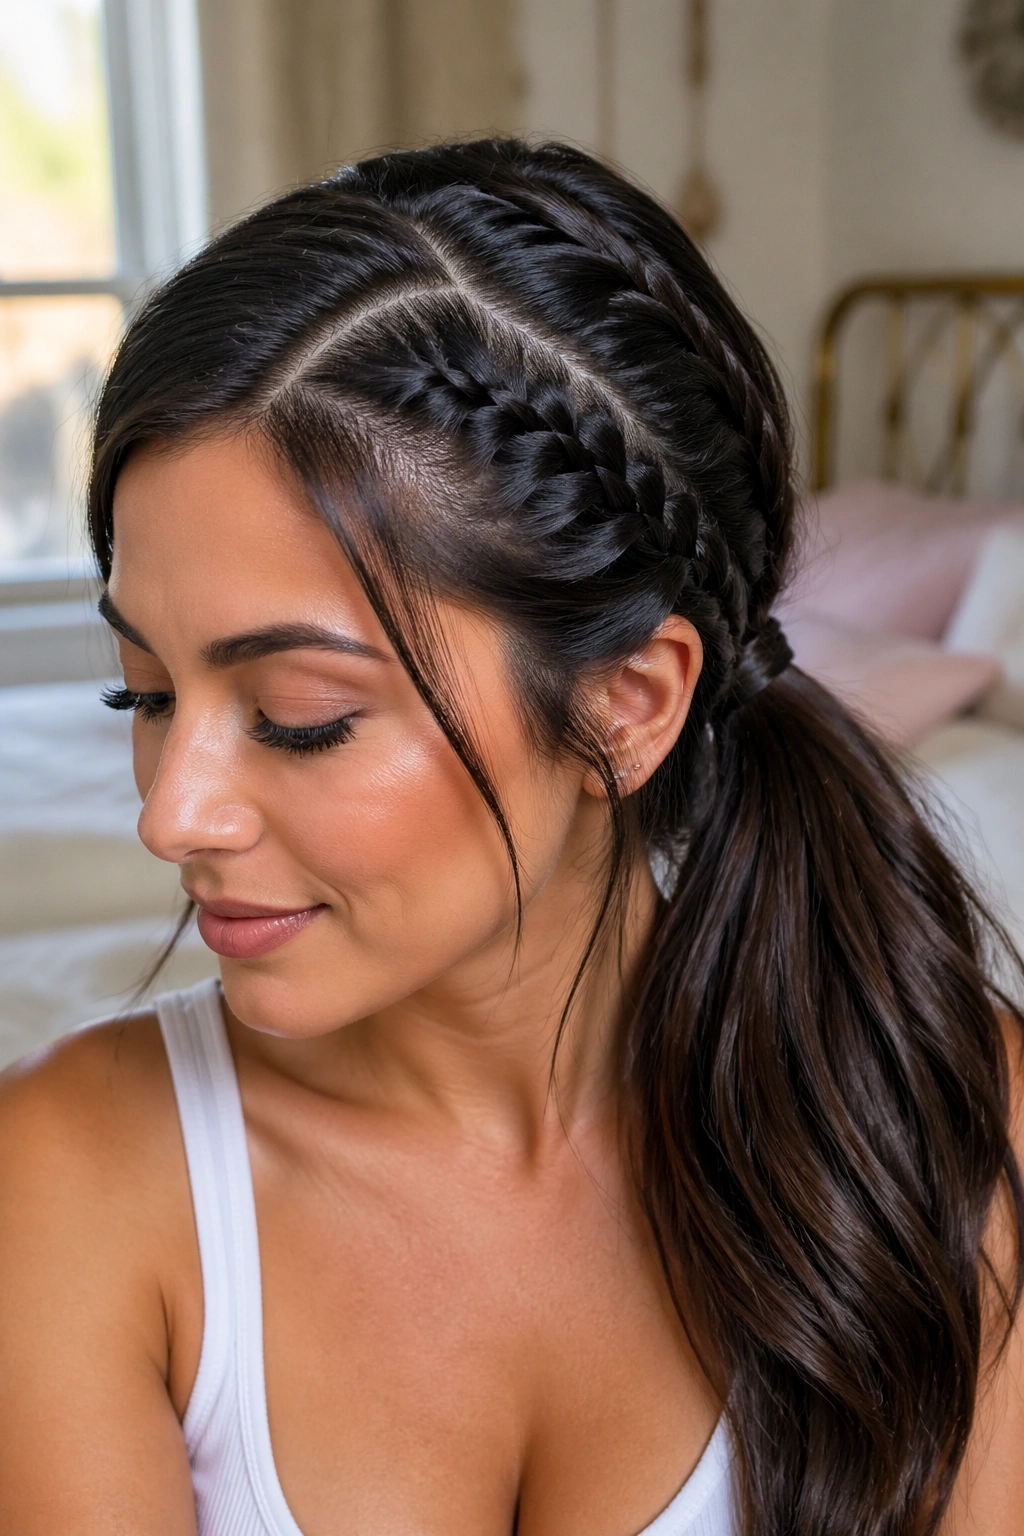
The part is the star here. A zigzag line gives the hairstyle more energy right away, and it still stays neat because the turns in the part help hide tiny flaws in the sectioning. On straight hair, that can be a lifesaver. On textured hair, it adds shape without needing extra accessories.
What Makes It Work
Use the tip of a rat-tail comb and keep the zigzags shallow. Deep angles can look messy fast.
The smaller the turns, the cleaner the finish. Once the part is drawn, braid the side section as usual and gather the rest into a ponytail that sits low or mid-height.
A zigzag part is one of those details people notice even if they do not know why the hairstyle looks better. It gives the eye something to follow. If you pair it with a smooth root and a tight elastic, the style looks sharper than a plain side part without asking for much extra effort.
14. Twin Side Braids Into One Ponytail
Two side braids feeding into one ponytail make the style feel more secure at the temples. It is also a nice fix if one braid alone looks a little too sparse. The twin lines give the hair a fuller frame, and the ponytail in the back ties it all together.
Compared with a single braid, this version reads more balanced on finer hair. The extra braid adds visual weight without needing more product or more length. I like it when the hairline needs control but I do not want the style to feel heavy.
Make both braids sit at the same angle so they meet cleanly at the ponytail base. If one starts higher than the other, the whole thing can tilt. That small detail matters more than people think. A clean meeting point is what makes the style look intentional.
15. Ribbon-Laced Side Braid Ponytail
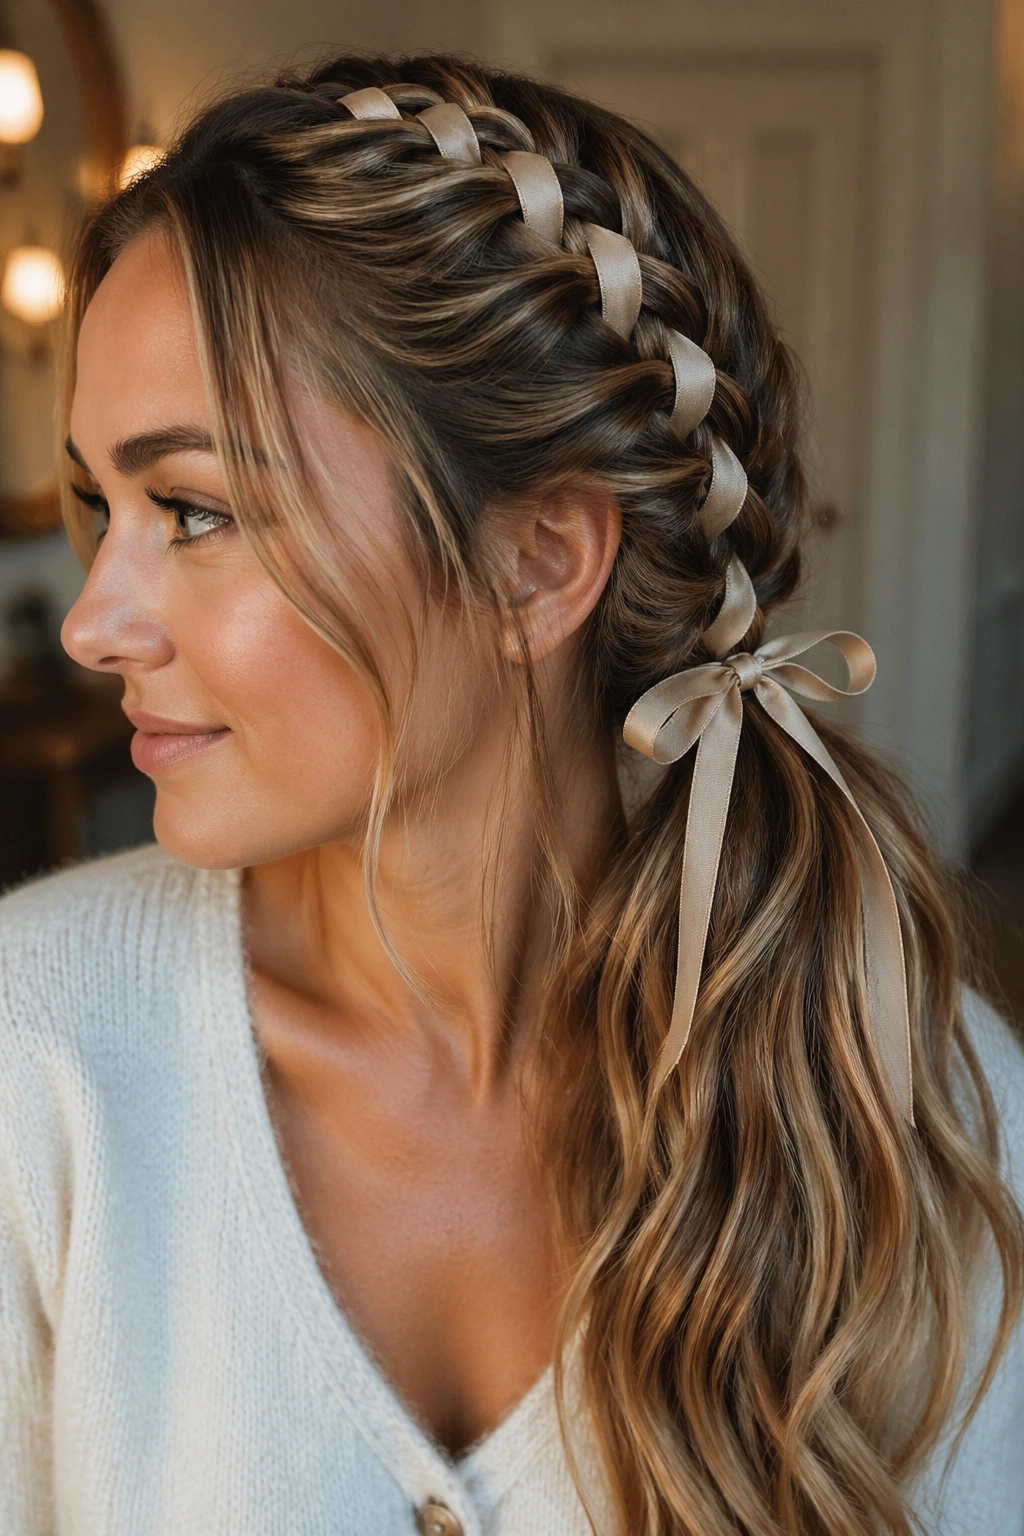
A ribbon changes the mood fast. Woven through a side braid and tied into the ponytail base, it adds color and a clean visual seam without making the hair look overloaded. The trick is to choose a ribbon that stays flat, because thick, slippery satin can slide around if the braid is too loose.
This style is especially nice when you want something softer than jewelry but more polished than a plain braid. A ¼- to ½-inch ribbon usually works well. Thin enough to thread cleanly, wide enough to show. Keep the ribbon matte if you want the braid itself to stay the focus.
Tie the ribbon near the start of the braid, then keep the tension even as you work down. If the ribbon twists, pause and flatten it with your fingers. That tiny reset keeps the whole braid from looking tangled halfway through.
16. High Side Braid Ponytail
Can a side braid still feel sleek when the ponytail sits high? Absolutely. Raising the ponytail shifts the whole style upward, which can be a relief if low ponytails make your neck feel crowded or if you want more lift at the crown. The braid still does the neatness work; the height just changes the attitude.
How to Keep It From Sagging
Start the braid near the temple and angle it toward the crown before gathering the ponytail.
That diagonal path helps the style hold its shape better than a braid that drops too fast. Use a strong elastic and wrap a small strand around the base if the ponytail feels loose.
This look works well on thick hair because the height removes some weight from the neck. It also shows off the braid a bit more. If your hair is fine, tease the crown very lightly before smoothing it back. Not a lot. Just enough for lift.
17. Side Braided Ponytail for Natural Curls
Leave the curls alone where you can. That’s the cleanest way to make this style work on natural hair. A side braid at the front or along one side keeps the top controlled, while the rest of the curls go into a ponytail that still shows off texture instead of flattening it.
The braid should be snug, but not tiny. Too much tension can pull the curl pattern tight at the roots and make the style look stiff. A satin scrunchie or a covered elastic is a better choice than a hard rubber band, because it holds without chewing up the curls.
Mist the hair lightly with water and leave-in conditioner before styling if the curls need help settling. Then smooth the braid with a small amount of cream. The neatness here comes from definition, not from trying to erase the texture.
18. Textured Tail With a Sleek Side Braid
This style works because it gives you two different finishes in one look. The braid on the side stays sleek and controlled, while the ponytail tail keeps a little texture and movement. That contrast keeps the hairstyle from feeling too stiff.
I like this version when a perfectly straight ponytail would look flat or too formal. The braid handles the structure at the front, and the textured tail adds softness. You can build the texture with a braid-out, a soft wave, or even a few bends from a flat iron if your hair takes heat well.
The important part is keeping the top smooth. If the root area frizzes, the contrast stops looking intentional and starts looking unfinished. Use a soft brush and a light serum before tying the ponytail. Then leave the tail alone so it keeps that easy movement.
19. Side Braid and Scarf-Wrapped Ponytail
A scarf does more than decorate a side braided ponytail. It hides the elastic, calms flyaways near the base, and adds a second layer of hold. That matters on humid days or any day when hair likes to puff up before lunch.
Fold the scarf into a thin strip and tie it around the ponytail base after the braid is secured. Silk or satin works best because it slides less and sits flatter. You can let the ends hang down, or tuck them in if you want the style to stay compact.
- Choose a scarf that is narrow enough to knot without bulk.
- Tie it snugly, then check that the braid still lies flat.
- Tuck short scarf tails under the knot if you want a cleaner finish.
- Match the scarf to your shirt or earrings if you want the whole look to feel thought through.
The scarf gives the ponytail a finished edge without making it fussy.
20. Crisscross Braid Into Low Ponytail
Compared with a standard braid, a crisscross pattern gives the ponytail a more sculpted look. The sections cross over each other in a way that creates a subtle grid, and that grid sits flat when it’s done well. It is a neat style, but it does ask for patience.
This one works best on thick hair or hair with a little texture, because the crisscross sections need enough body to stay visible. Keep the crossings tight and even. If one section loosens, the pattern starts to blur. That’s the tradeoff. It looks precise, but it also shows sloppy hands fast.
A low ponytail keeps the style grounded and keeps the braid from fighting the rest of the hair. Add a simple elastic, then wrap the base with one tiny strand if you want the finish to look cleaner. Small step. Big difference.
21. Side Braid With Knot Detail
Can a side braided ponytail look polished and still feel a little playful? Yes, if you build in a knot detail near the base. The knot can be made from two slim sections of hair, or from the braid itself if you loop it before securing the ponytail. Either way, it gives the style a little structure without making it fussy.
How to Do the Knot Without Bulk
Keep the sections thin.
That is the whole trick. If the knot uses too much hair, it turns chunky fast and starts pulling at the ponytail base. A clean knot should sit flat and almost disappear into the style until you notice it.
This version works well for medium-length hair and for anyone who likes a detail that feels deliberate but not overdone. The knot draws the eye to the side of the head, then leads it into the ponytail. It is a neat little visual turn, and it helps the style stay in place too.
22. Side Braided Ponytail for Short Hair

Short hair can do this, and sometimes it looks cleaner because there is less length pulling the style down. A side braid on a bob or lob keeps the front controlled, and the ponytail can sit lower and smaller without looking out of place. That makes the shape feel tidy, not sparse.
The main job is to catch the shortest layers before they escape. Use a little pomade on the temples and behind the ears, then pin any stubborn pieces as you braid. If the ends poke out, tuck them under the elastic instead of trying to force them into a longer tail than the hair can give you.
A side braided ponytail on shorter hair often looks strongest when it is kept compact. Do not stretch it into a style it does not want to be. A neat, smaller ponytail beats a lopsided one every time.
23. Side Braid and Hair Jewelry Ponytail
Hair jewelry belongs on the braid, not all over the ponytail. That’s what keeps this style neat. A couple of small cuffs or rings along the side braid add shine and shape, while the ponytail itself stays clean and uncluttered.
This version works well on straight hair, braided hair, and even box braid ponytails if you want to mix texture with metal accents. Place the jewelry evenly so the braid does not look crowded on one side. Two or three pieces usually do the job. More can start to feel noisy.
Keep the ponytail base simple. A smooth elastic and a wrapped strand are enough. If the jewelry is doing the decorating, the rest of the style should stay quiet. That contrast is what makes it look polished instead of busy.
24. Tucked-End Side Braided Ponytail
A tucked-end ponytail is one of the neatest looks in the whole group because nothing swings loose at the bottom. The ends are folded under, pinned in place, or hidden beneath the ponytail so the shape stays compact. It feels controlled from every angle.
This is a good pick for office days, formal events, or any time you want the style to sit close to the head. The side braid gives the shape, and the tucked finish keeps the length from competing with it. It also helps hide layered ends that would otherwise stick out at odd angles.
Use a little smoothing serum on the ends before tucking them. That keeps the fold flat and cuts down on little fuzzy bits. A strong-hold spray on the base helps too, but only a light mist. Too much and the tuck gets crunchy.
25. Double-Wrapped Elastic Side Ponytail
The finish matters more than people admit. Two wraps at the base of a side braided ponytail can make the whole style look more deliberate, even when the braid itself is simple. One wrap holds the ponytail. The second hides the first. Tiny move, cleaner result.
This version works with almost any braid pattern, which is why I like it as a final polish. Once the ponytail is secured, take a thin strand from underneath, wrap it around the elastic twice, and pin it underneath with a bobby pin. Keep the strand flat while you wrap so it does not twist and puff up.
A little shine spray at the roots helps, but don’t soak the hair. The goal is smoothness, not slip. If the base is neat, the braid reads as sharper too. That last little wrap has a habit of making everything else look better.
The common thread through all of these styles is simple: a clean part, a braid that starts close to the scalp, and a ponytail base that is actually secured instead of just gathered. Get those three things right, and the rest becomes a question of shape and mood.