A bubble low ponytail can rescue a flat hair day faster than almost anything else. The shape gives you lift where a plain low ponytail can feel sleepy, but it stays easy enough to wear with a blazer, a slip dress, or a sweatshirt and earrings.
What makes bubble low ponytails so useful is the contrast. Smooth roots at the crown, then a series of soft, rounded sections down the length. If the spacing is even and the tension stays steady, the style reads polished. If the bubbles are uneven or pulled too tight, the whole thing starts to look fussy. That part matters. A lot.
The good versions are rarely complicated. A fine-tooth comb, a few small elastics, a little texture spray or shine serum, and some patience with section size usually do most of the work. On straight hair, the bubbles hold shape with a bit more product. On wavy or curly hair, the natural body helps, but the sections need more control at the base so the shape does not blur.
Below are 27 bubble low ponytail ideas that cover sleek versions, soft romantic ones, party-ready styles, and practical looks that actually work on different hair types and lengths. Some are clean and minimalist. Some feel a little dressy. A few are the sort of style you can wear to lunch and still keep for dinner.
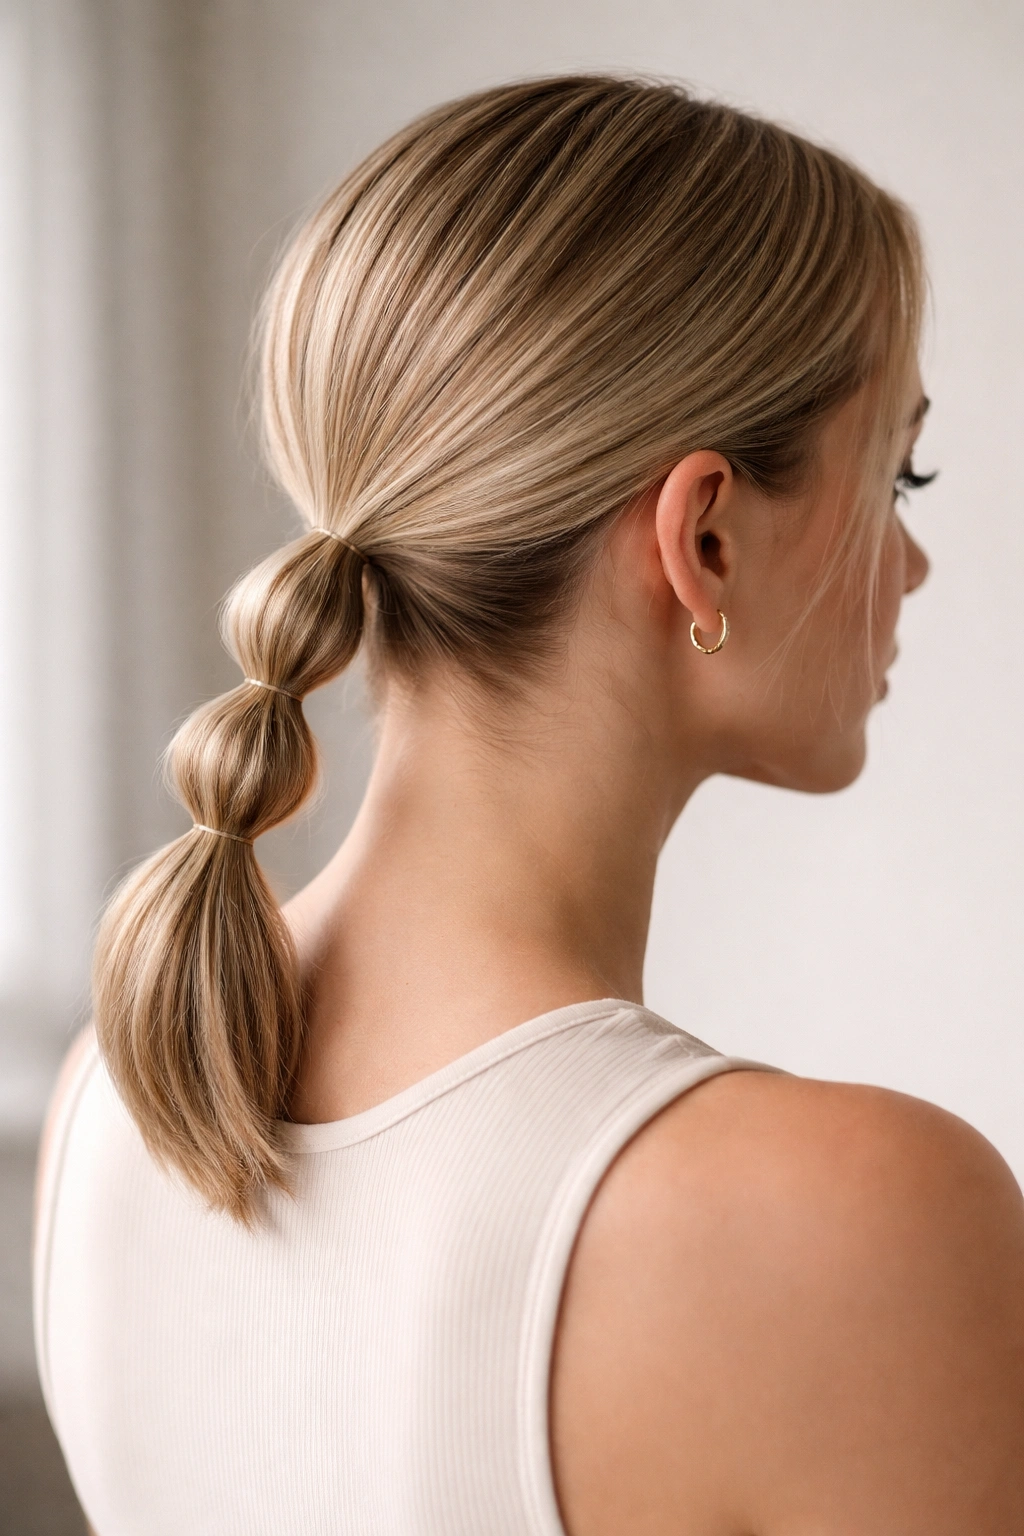
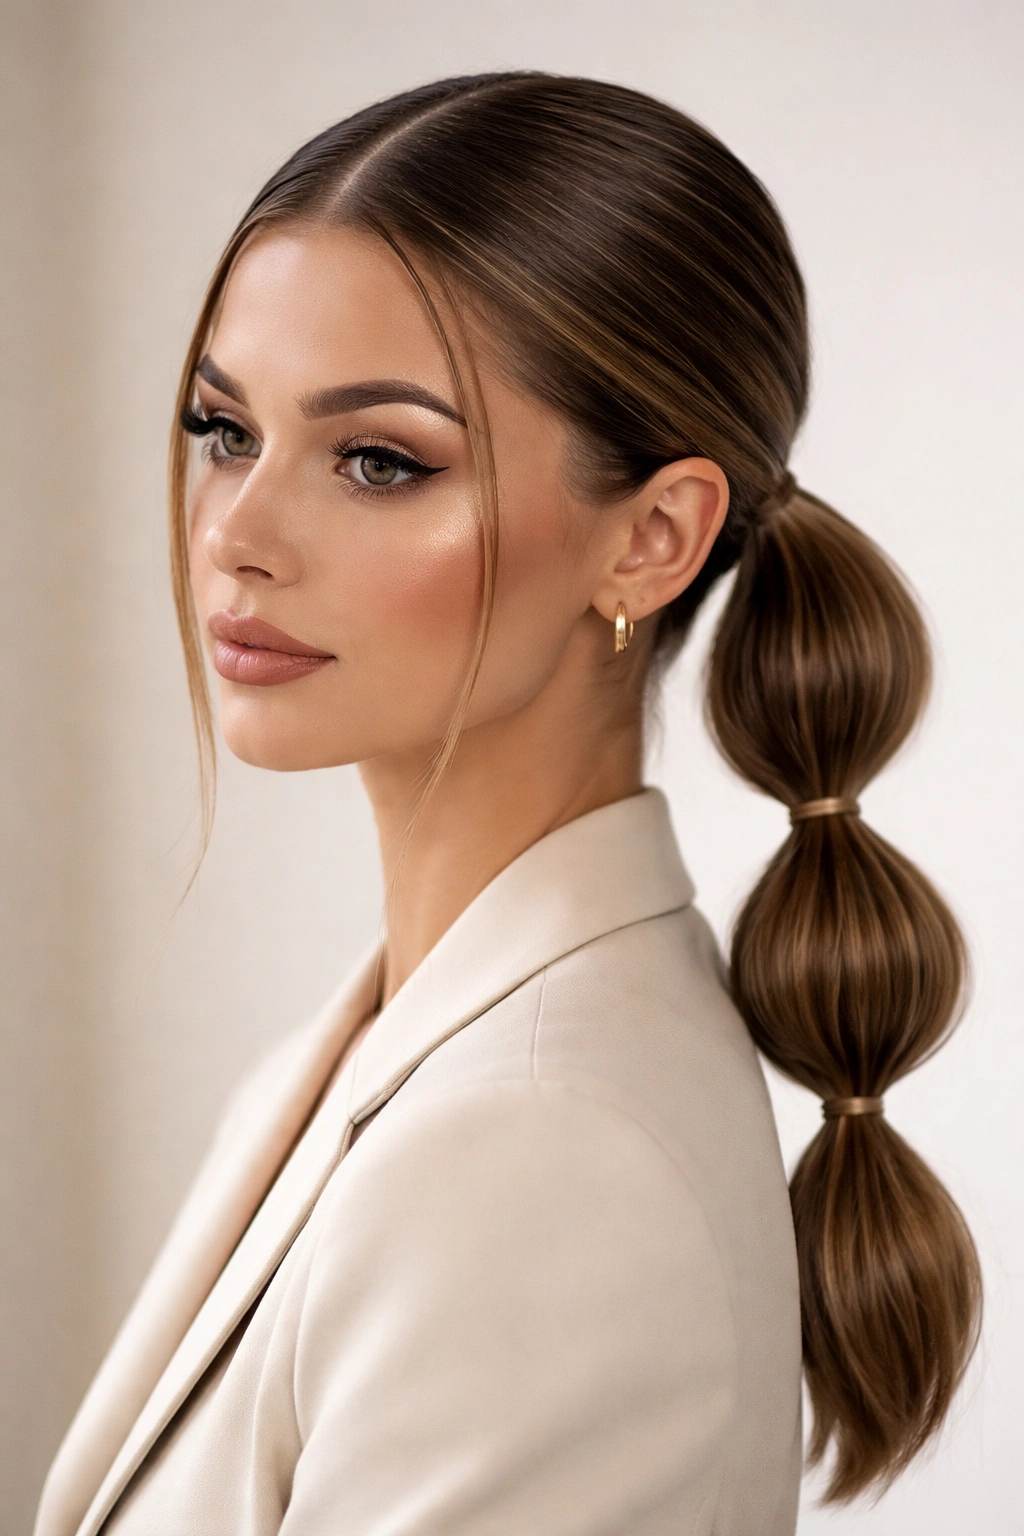
1. Sleek Bubble Low Ponytail With a Center Part
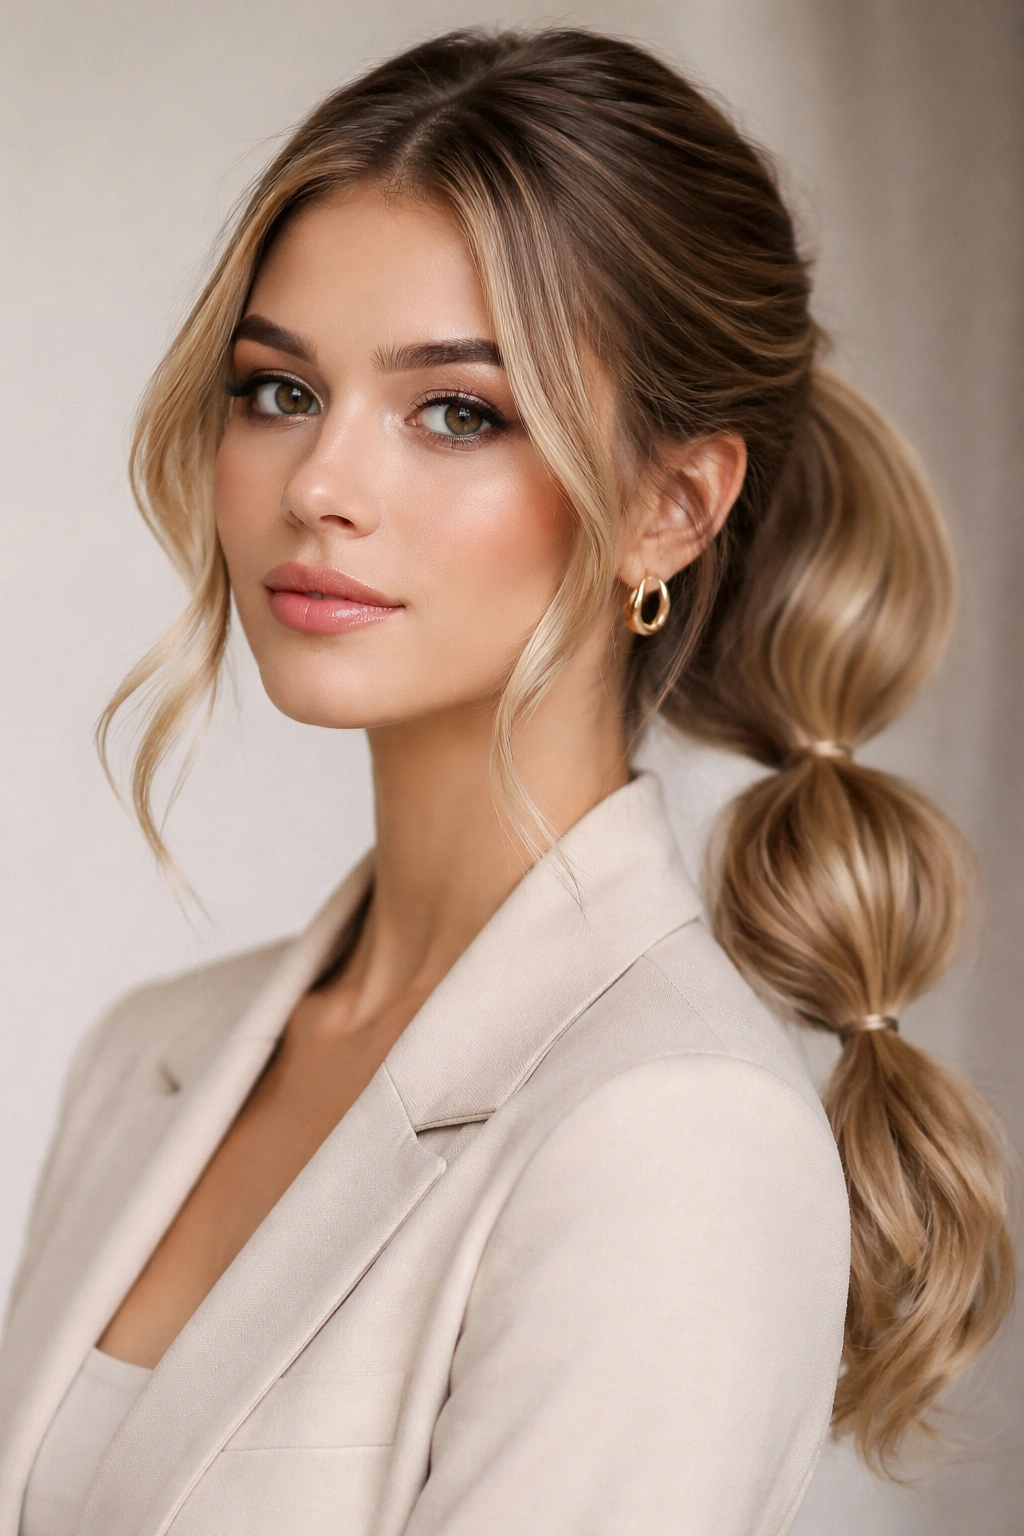
A center part and a glassy root line give this bubble low ponytail its cleanest shape. It’s the version I’d reach for when you want the bubbles to feel deliberate instead of playful. The middle part pulls the eye straight down the face, which makes the low ponytail look longer and neater at the same time.
Why it works
The trick is tension. You want the hair at the crown smooth, but not puffed so tight that it starts to split around the temples. A dab of shine cream on the top layer helps keep flyaways down, then the bubbles can do the talking. On shoulder-length hair, space the elastics about 2 to 2½ inches apart. On longer hair, 3 inches usually looks better because the bubbles need room to round out.
A clean center part also makes this style easier to wear with sharp outfits. Tailored jackets, big hoops, even a crisp white shirt — all of them sit well next to this version.
Best detail: keep the first bubble closest to the nape a little smaller than the others. That tiny taper makes the whole ponytail look more finished.
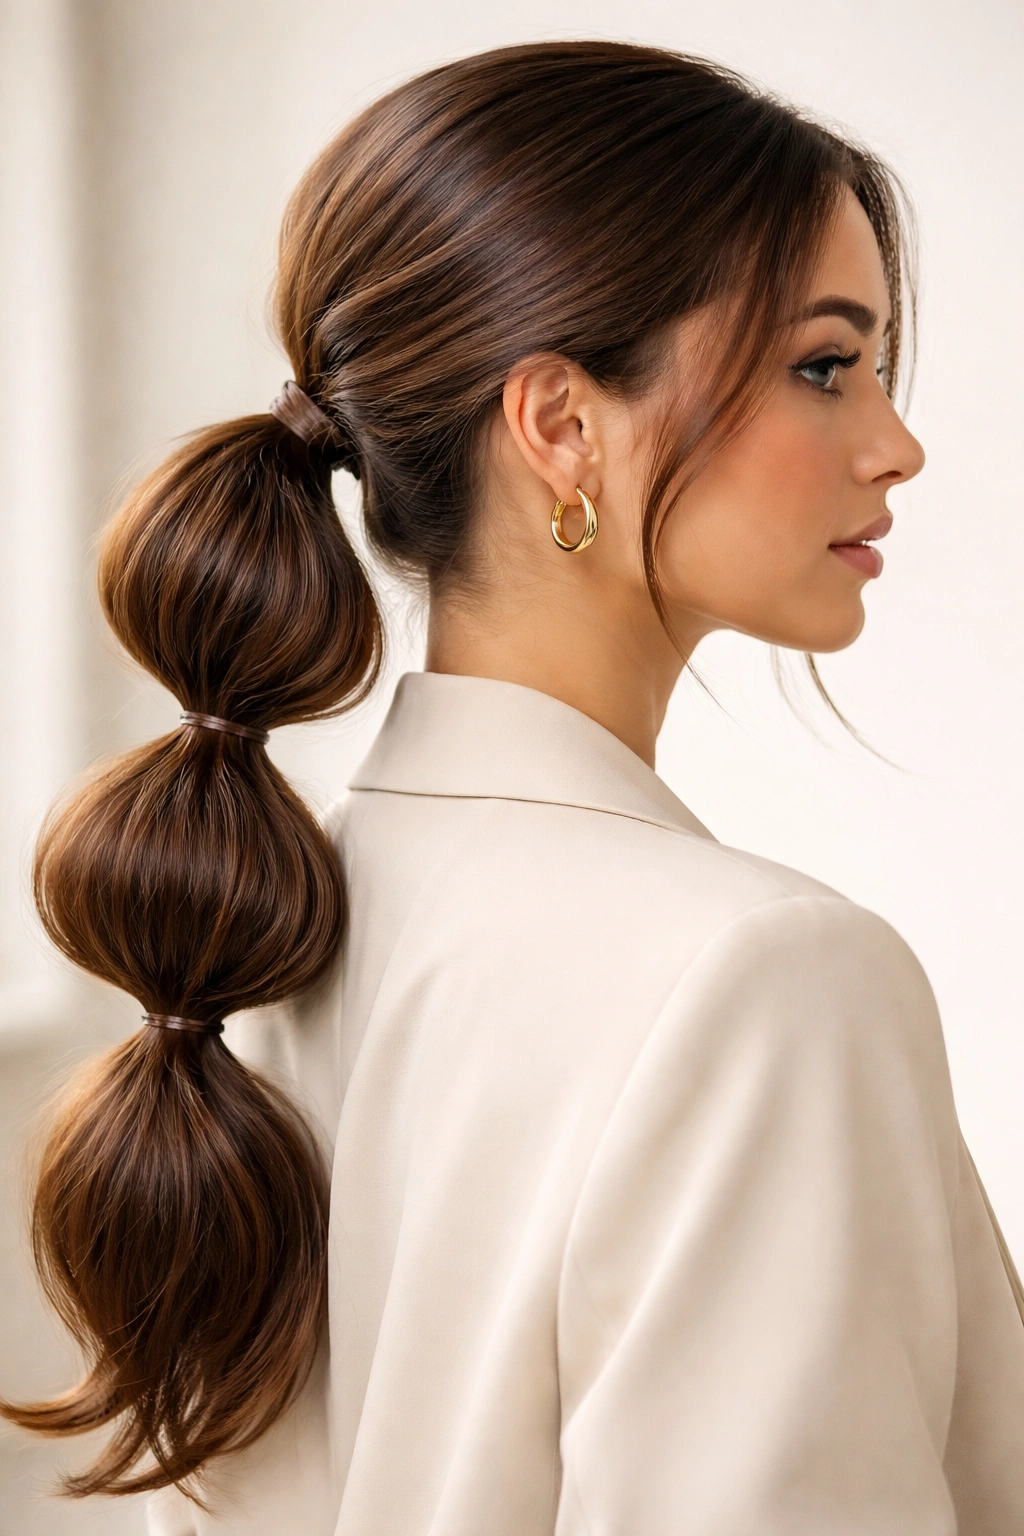
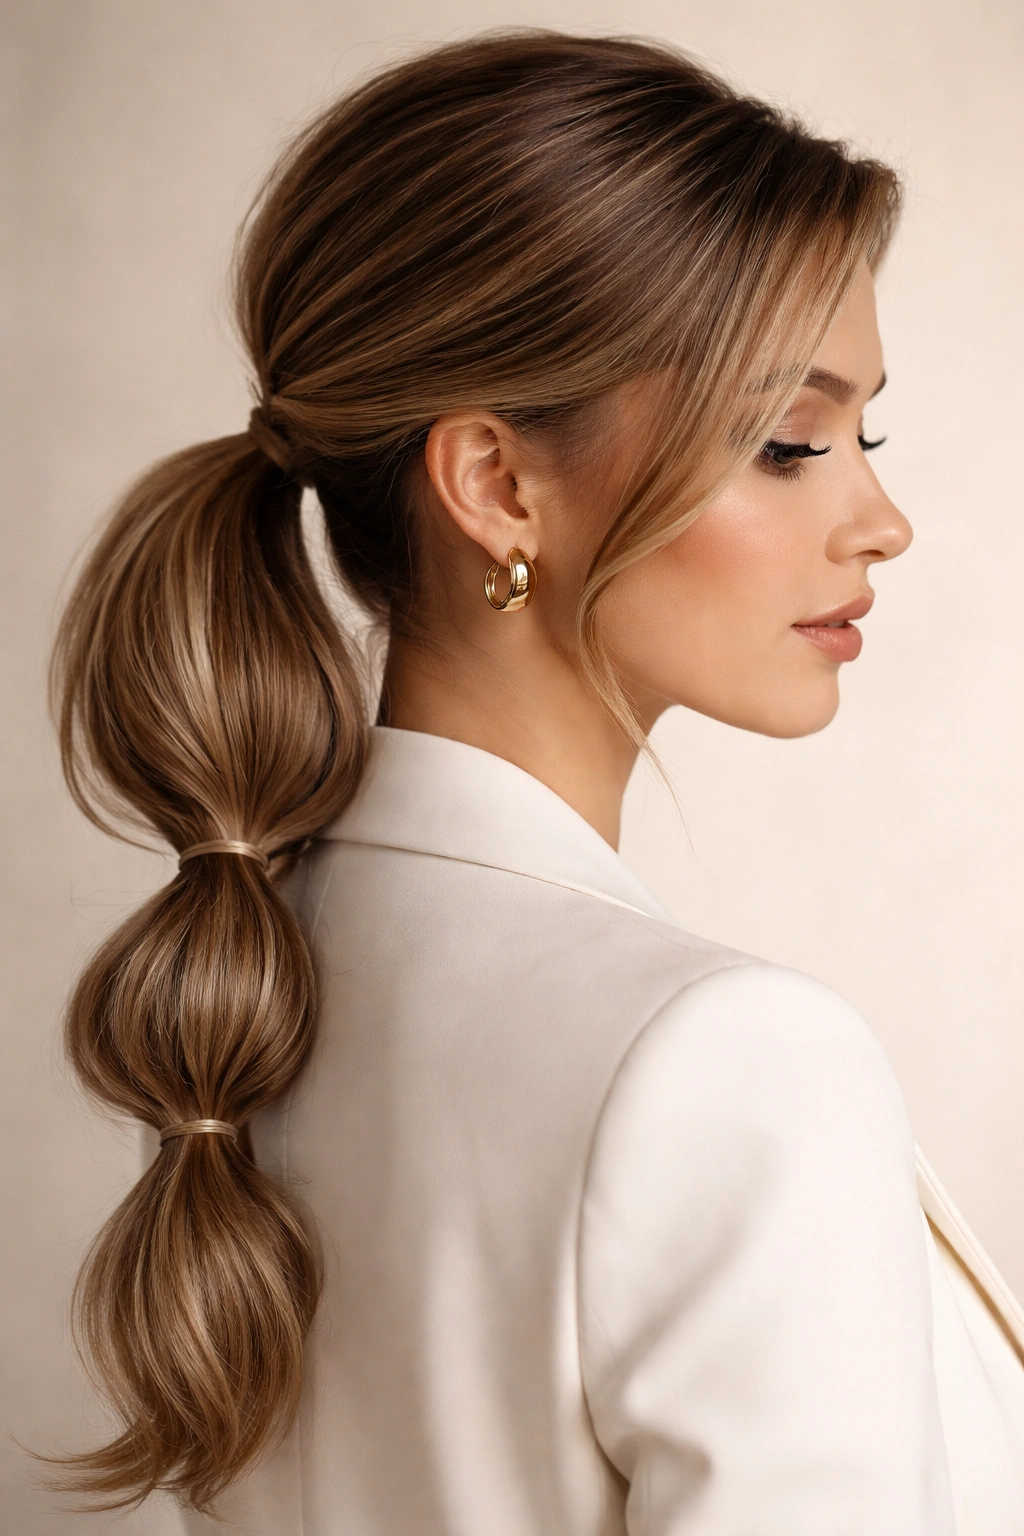
2. Deep Side-Part Bubble Low Ponytail
Want something softer and a little less strict? A deep side part changes the mood fast. It gives the crown instant height on one side, and that small shift makes the bubbles feel more relaxed even when the ponytail itself is neatly tied.
The parting matters more than people think. Move it farther over than you normally would, then smooth the heavier side back with a brush and a touch of styling cream. The lifted front area gives the ponytail a nicer profile from the side, which is where this style often looks best anyway.
This version is especially useful for fine hair, because the side part creates the illusion of more root lift. It also helps if your face tends to disappear under a dead-center part.
How to wear it: keep the first bubble slightly lower and softer, then make the sections gradually more defined as you move down the tail.
3. Wrapped Elastic Bubble Low Ponytail
Visible elastics can be practical, but wrapped ones look cleaner. That’s the whole appeal here. After you secure each bubble, wrap a thin strand of hair around the elastic and pin it underneath so the band disappears. The style still has that bubble structure, but the finish feels custom and a little more expensive.
This works especially well when your hair color is uniform. A single wrap strand blends in better, and the bubbles read as shape rather than as a stack of rubber bands. If your hair is layered, choose a section from underneath the ponytail for the wraps so the shorter top layers don’t poke out.
Use a light mist of hairspray on the wrapping strand before you twist it around the band. That tiny bit of grip helps more than people expect.
Best for: weddings, dinners, interviews, or any day when you want the ponytail to behave itself.
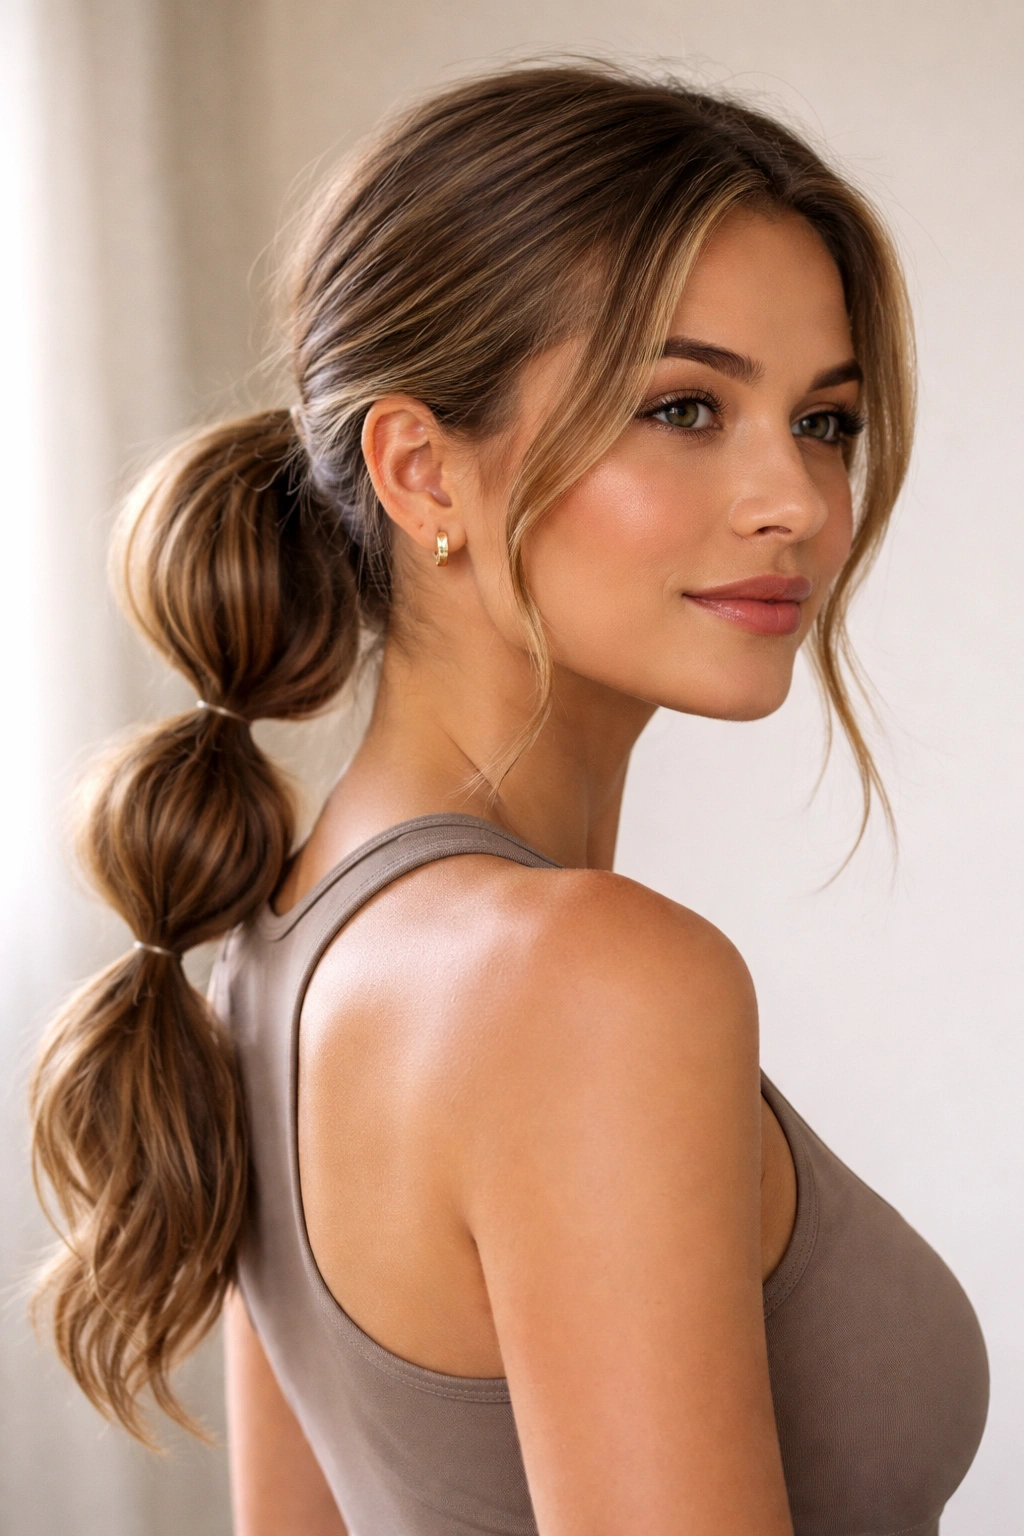
4. Bubble Low Ponytail With Soft Face-Framing Pieces
Pulling every strand back is not the move here. A few loose pieces near the temples and cheekbones can take a bubble low ponytail from strict to soft in one minute. The key is restraint. You want face-framing pieces, not a shaggy mess.
If your hair is straight, bend those front pieces with a 1-inch iron so they curve away from the face instead of hanging flat. If your hair is already wavy, a bit of smoothing cream at the front and a light touch of hairspray at the ends is enough. The bubbles stay the focal point, but the loose pieces give the style some breathing room.
This version is especially kind to high foreheads and sharper jawlines. It softens the outline without hiding the structure of the ponytail.
Small rule: leave the shortest face-framing pieces around cheekbone length. Anything shorter tends to stick up and look accidental.
5. Ribbon-Tied Bubble Low Ponytail
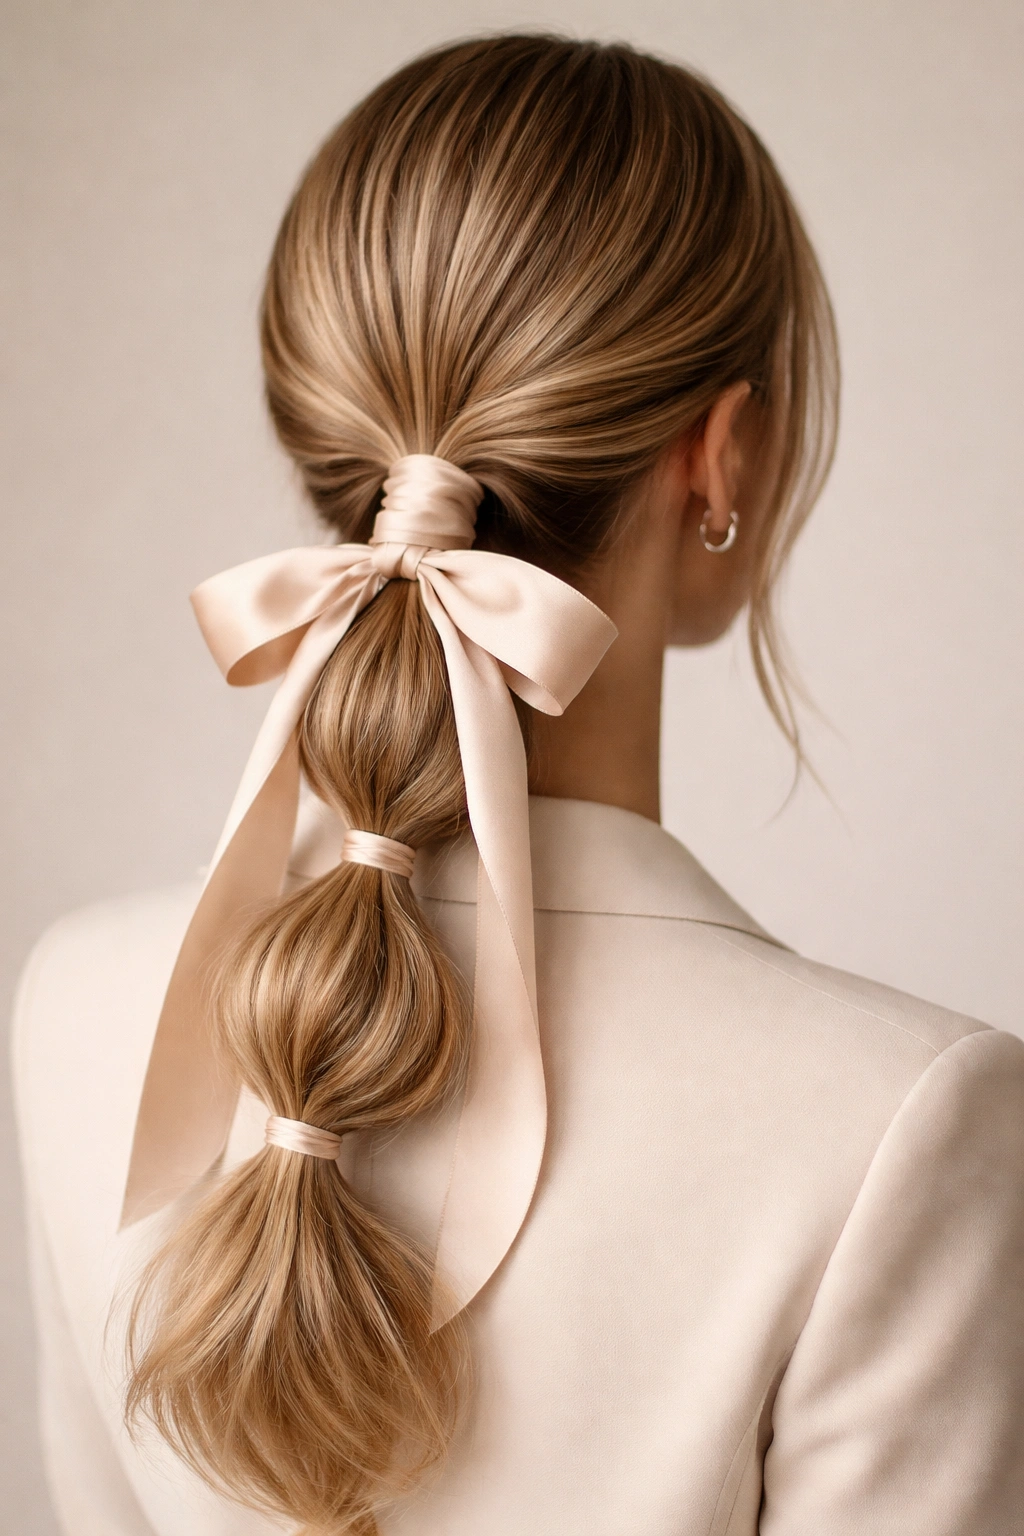
A satin ribbon changes the whole mood of the style. It adds softness, a little movement, and just enough color to keep the ponytail from feeling plain. You can tie the ribbon around the base of the ponytail, weave it through a few bubbles, or finish the tail with a bow at the end.
How to choose the ribbon
- 1-inch satin ribbon works best when the ponytail itself is sleek and narrow.
- Grosgrain ribbon holds its shape better on textured hair.
- 18 to 24 inches of ribbon is usually enough for a bow and a few loose tails.
- Matte finishes look calmer; shiny ribbon reads more formal.
The ribbon should support the hair, not fight it. If your dress or top already has a lot going on, use a quiet neutral like black, ivory, taupe, or deep navy. If the outfit is plain, the ribbon can carry more of the visual weight.
Tip: tie the ribbon after the last bubble, not before. That keeps the spacing cleaner.
6. Scrunchie-Stacked Bubble Low Ponytail

Soft, a little retro, and easy to read from across the room. That’s the point of a scrunchie-stacked bubble ponytail. Instead of tiny invisible elastics, you use mini scrunchies at each section so the bubbles feel cushioned and a bit more playful.
This style makes sense on medium or thick hair because the scrunchies can handle volume without looking squeezed. Velvet gives the bubbles a richer outline, while jersey or satin makes the shape feel lighter. If your hair is very fine, smaller scrunchies work better than chunky ones; too much fabric will swallow the bubble.
The whole thing can look too casual if the scrunchies are mismatched, so pick one palette and stay in it. Two tones are fine. Five is where it starts to drift.
Best use: casual Fridays, brunch, concerts, or any day when you want a ponytail with some personality.
7. Bubble Low Ponytail for Curly Hair
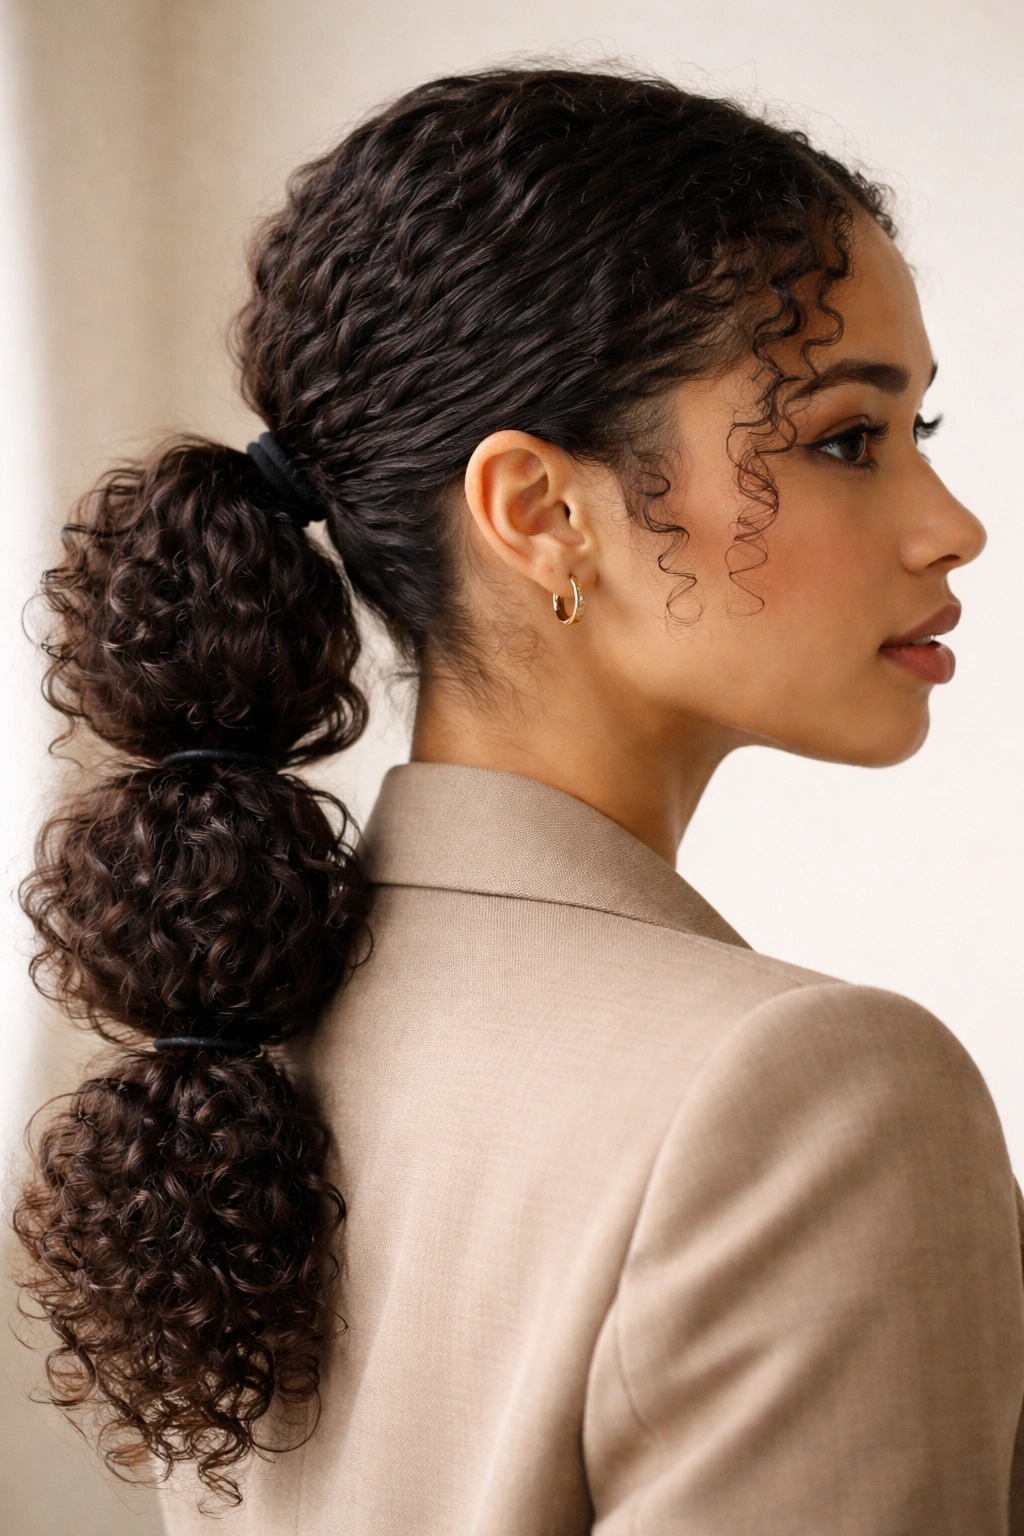
Curly hair gives this style a different life. You do not need to force the curls flat before building the bubbles; in fact, the shape usually looks better when the curls stay intact. The bubbles become sections of controlled fullness instead of puffed-out loops, which is exactly why this version has so much charm.
The base needs the most attention. Smooth the crown with a curl-friendly gel or cream, then gather the ponytail low without brushing out the pattern. From there, use elastics spaced to let each section round out naturally. If your curls are tight, the bubbles may only need a little finger fluffing. If your curls are loose, you may want to tug each section gently from the sides so the shape reads clearly.
The ends are the part people overwork. Leave them alone unless they’re sticking out in a wild way.
Best result: a ponytail that still looks like your curls, only neater and a bit more sculpted.
8. Wavy Textured Bubble Low Ponytail
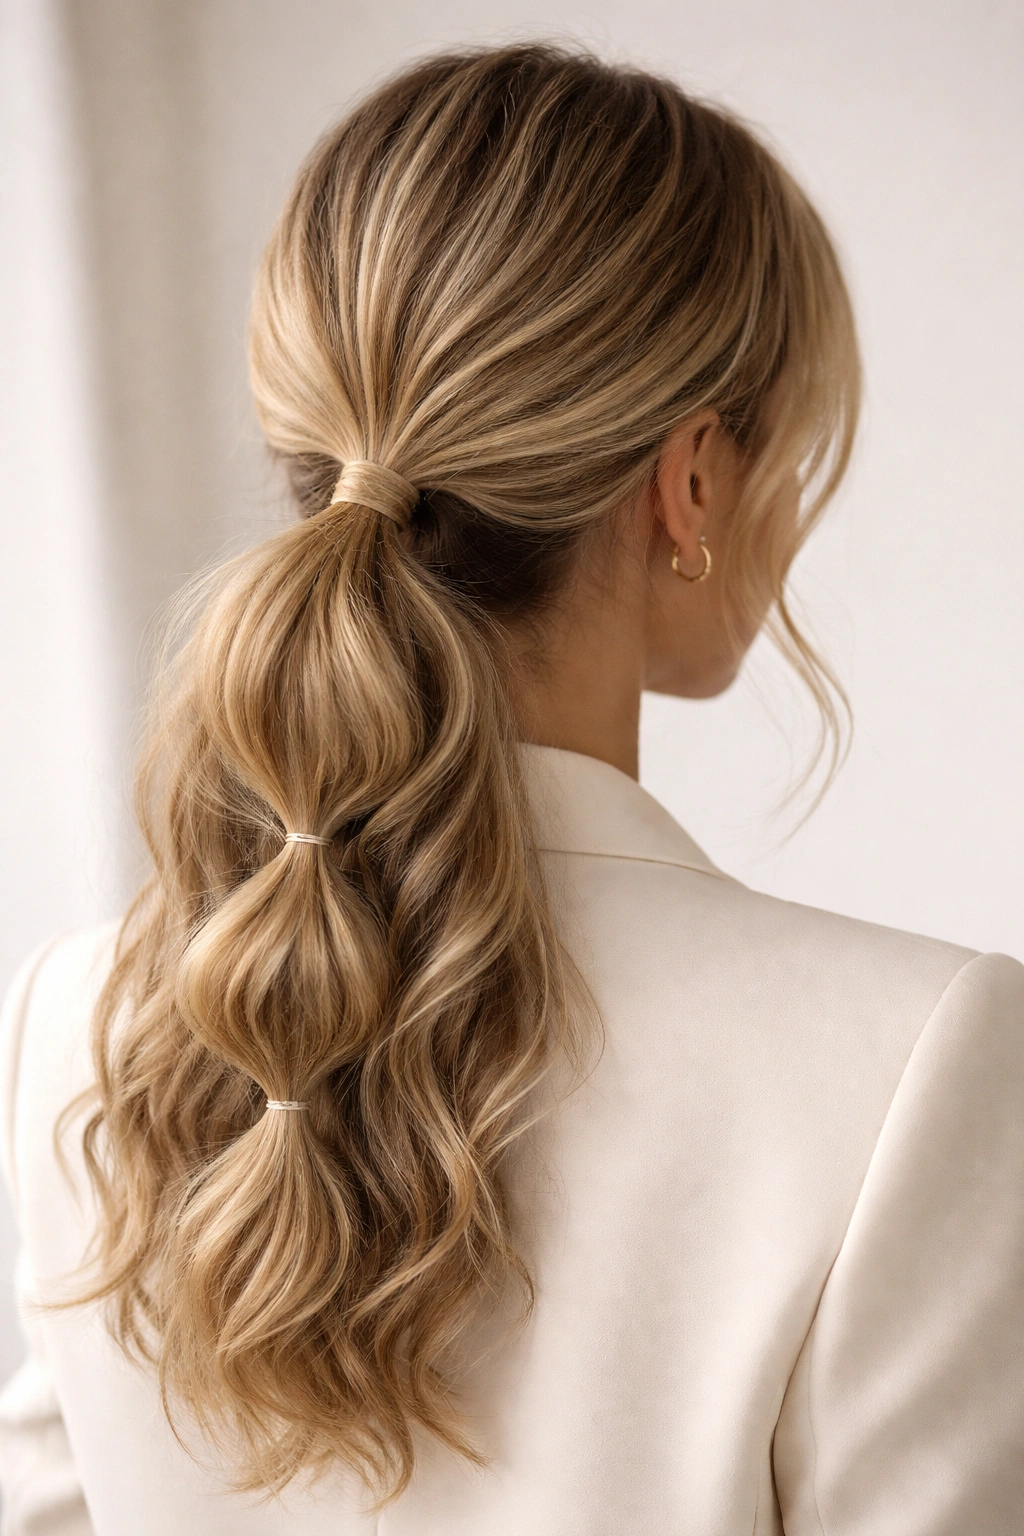
I like this one because it looks finished without demanding perfect hair. Soft waves give the bubbles something to sit on, and the tail gets a little built-in movement that straight hair sometimes lacks. If your hair already bends a bit, you are halfway there.
What makes it different
A wavy base makes each bubble feel fuller, even when the ponytail itself is not especially thick. That helps layered cuts, which can sometimes look thin in a strict ponytail. A light mist of texture spray at the mid-lengths is usually enough. If you curl first, keep the bend loose — the bubbles do not need tight ringlets to look good.
A lot of people over-tease this style. Don’t. A little body at the roots is enough. If you rough up the waves too much, the bubbles lose their rounded shape and start to look frizzy instead.
How to wear it: let a few ends bend out naturally. That tiny bit of imperfection keeps the style from feeling overdone.
9. Micro-Bubble Low Ponytail
Three tiny elastics can change the whole silhouette. Micro-bubbles are neat, modern, and unexpectedly chic on shorter ponytails or finer hair that gets overwhelmed by big sections. The bubbles sit close together, so the result feels delicate rather than dramatic.
This version works best when the sections are narrow and the tension stays even. Use clear elastics if you want the shape to look minimal, or tiny black bands if your hair is dark and you want the sections to disappear. The spacing usually sits around 1 to 1½ inches apart, which is tight enough to keep the profile sleek.
Micro-bubbles are also a smart choice if you do not want the ponytail to stick out too far from the back of the head. The shape stays compact, which makes it easier to wear under a coat collar or with a high neckline.
Tip: the smaller the bubble, the neater the crown has to be. Messy roots fight this style.
10. Oversized Bubble Low Ponytail
Bigger bubbles make a bigger statement. This version uses wider section spacing and a little more fullness in each loop, so the ponytail feels bold from the first glance. It is especially good on thick hair, because the natural density keeps the bubbles from collapsing.
The trick is not to overdo the number of sections. On medium-length hair, three or four large bubbles often look better than six smaller ones. Give each section room to expand, then tug the sides only after the elastic is secure. If you pull too hard, the shape turns lumpy instead of round.
Large bubbles pair well with statement earrings, strong shoulder lines, and outfits that already have sharp shape. They hold their own.
Best detail: keep the final bubble slightly smaller than the rest so the tail tapers instead of ending in a blunt lump.
11. Braided Crown Into a Bubble Low Ponytail
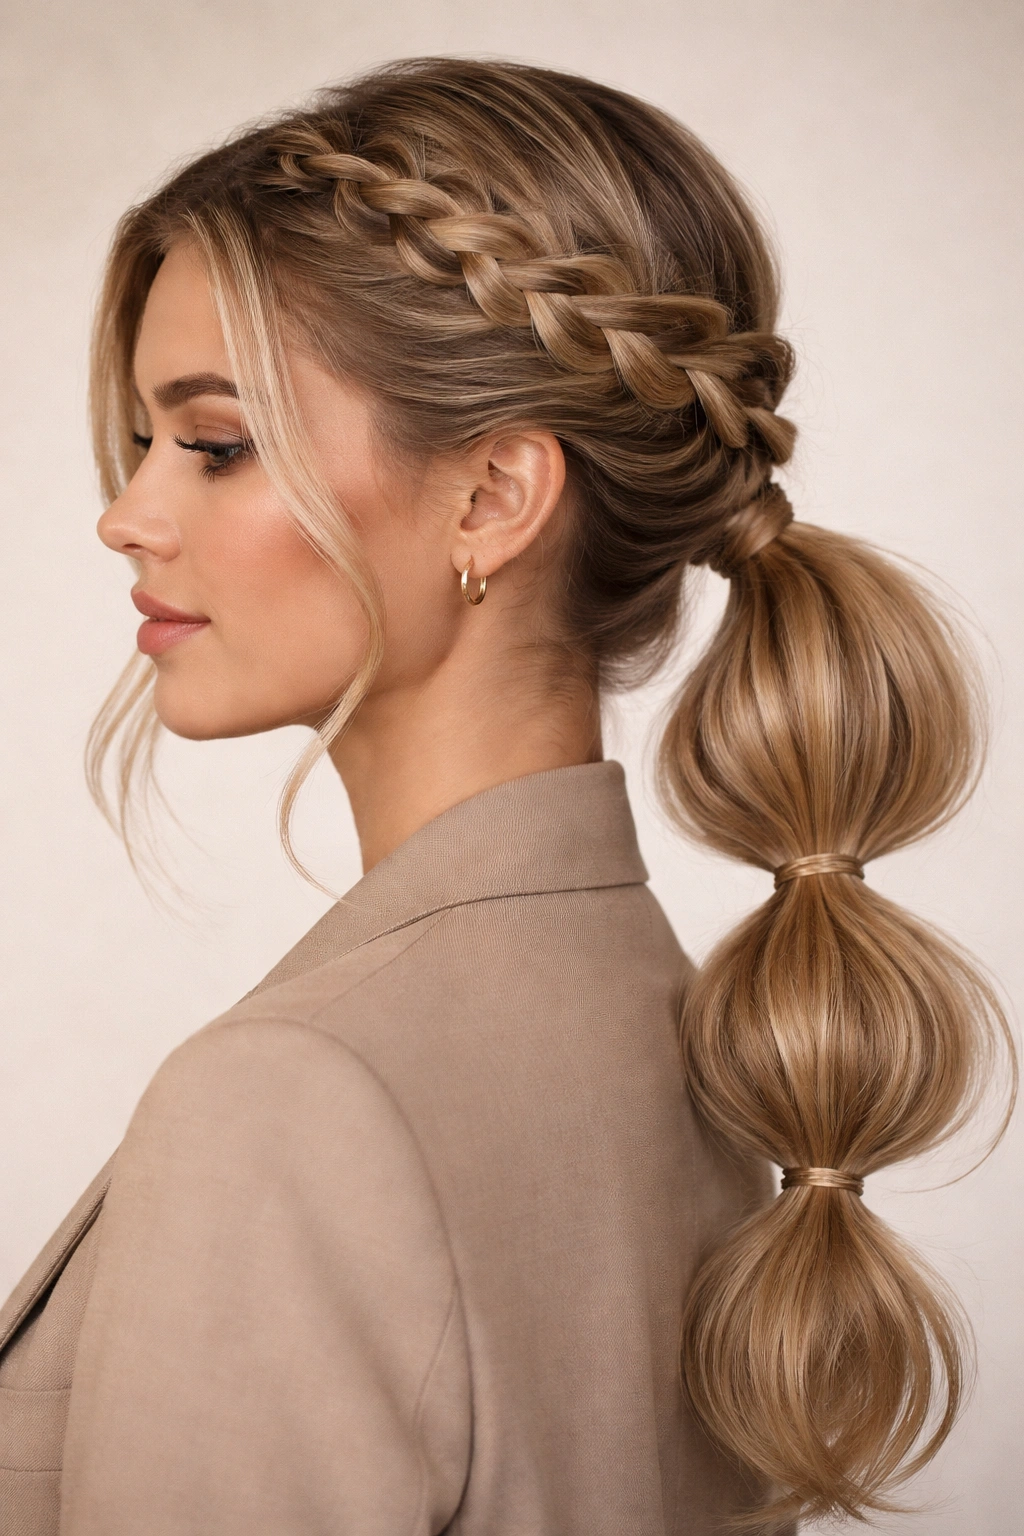
Want the front of the style to look more built-in? Add a braid along one side or across the crown before gathering the hair low. It gives the ponytail a more finished transition from top to tail, which is handy when you want texture without losing polish.
Why it works
The braid controls the hairline and keeps the front from puffing out. It also adds a second texture, which makes the bubbles feel more layered. A loose three-strand braid is enough; you do not need anything fancy. Feed it into the ponytail at the nape, then keep the first bubble small so the braid and tail blend together.
This is one of those styles that looks more complex than it is. The braid does most of the visual work, and the bubbles finish the line.
How to style it: keep the braid loose enough to show width, but not so loose that pieces fall apart before the ponytail is tied.
12. Twisted Side Sections Into a Bubble Low Ponytail
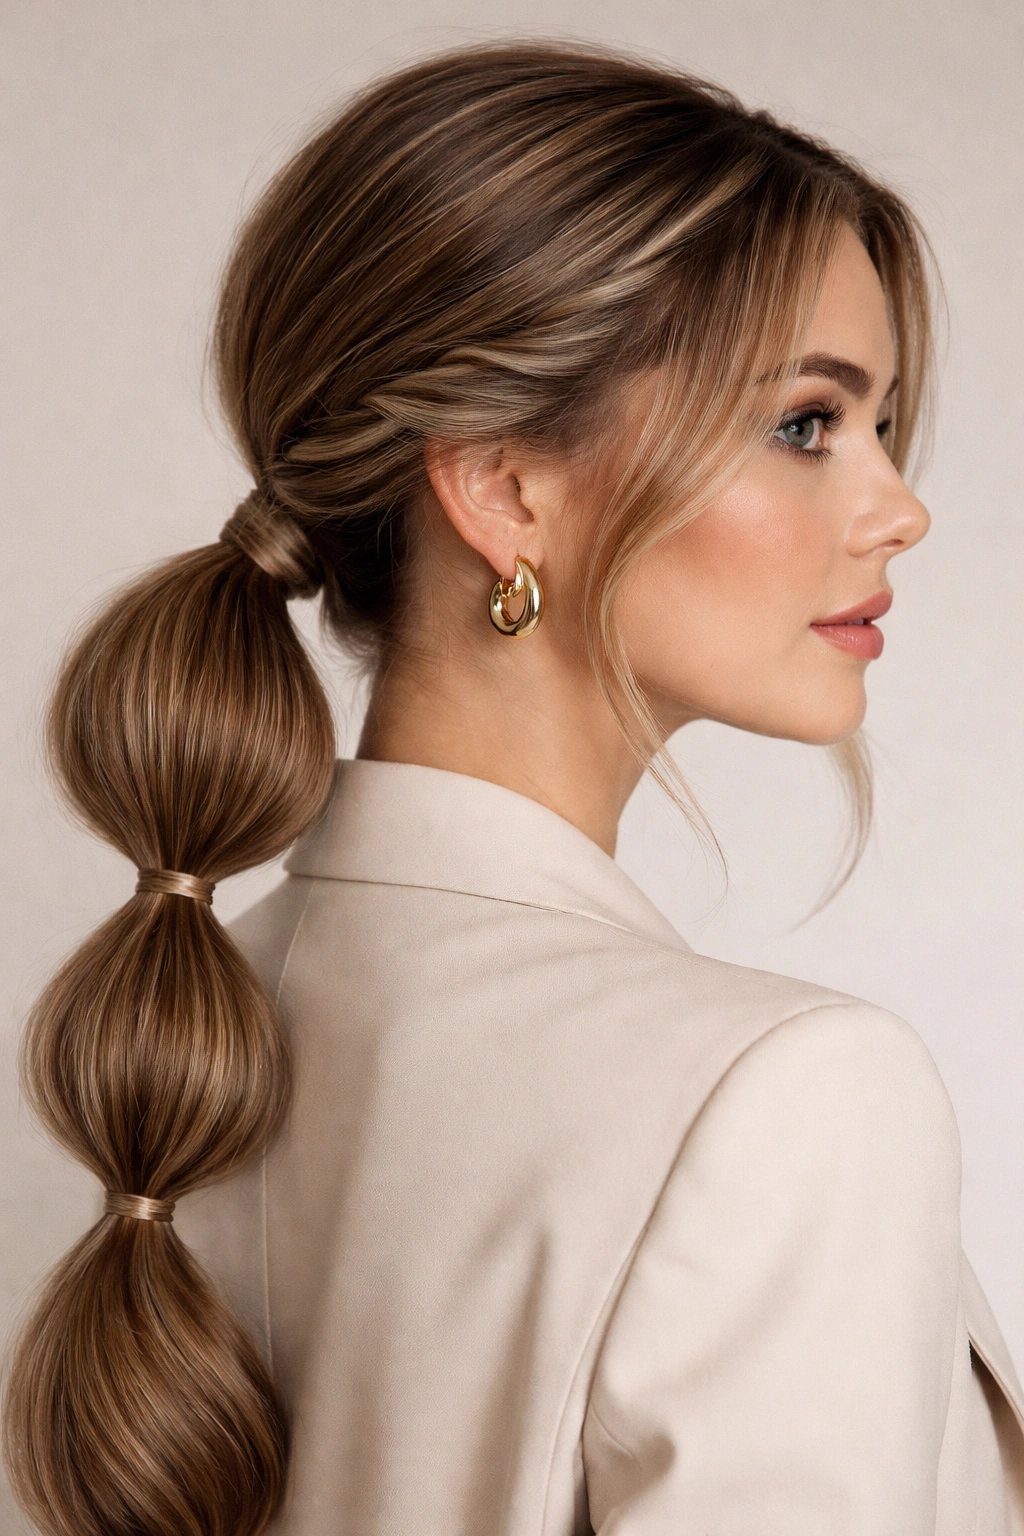
Two rope twists can do the job of a fancier updo without turning the whole style into a project. Twist the side sections back from the temples, pin them at the nape, and then tie the rest into a bubble low ponytail. The result feels polished but a little softer than a braid.
This is especially helpful if your hair has layers that like to slip out around the ears. Twists hold those shorter pieces closer to the head, and the ponytail behind them gets more attention. The twists also work nicely with straight hair because the texture contrast is strong enough to read clearly.
Do not twist so tightly that the sides look rope-like in a stiff way. A little looseness keeps the shape elegant.
Best tip: secure the twists with pins before you create the ponytail. If you wait too long, the shape tends to loosen while you’re working.
13. Bubble Low Ponytail With Pearl Pins
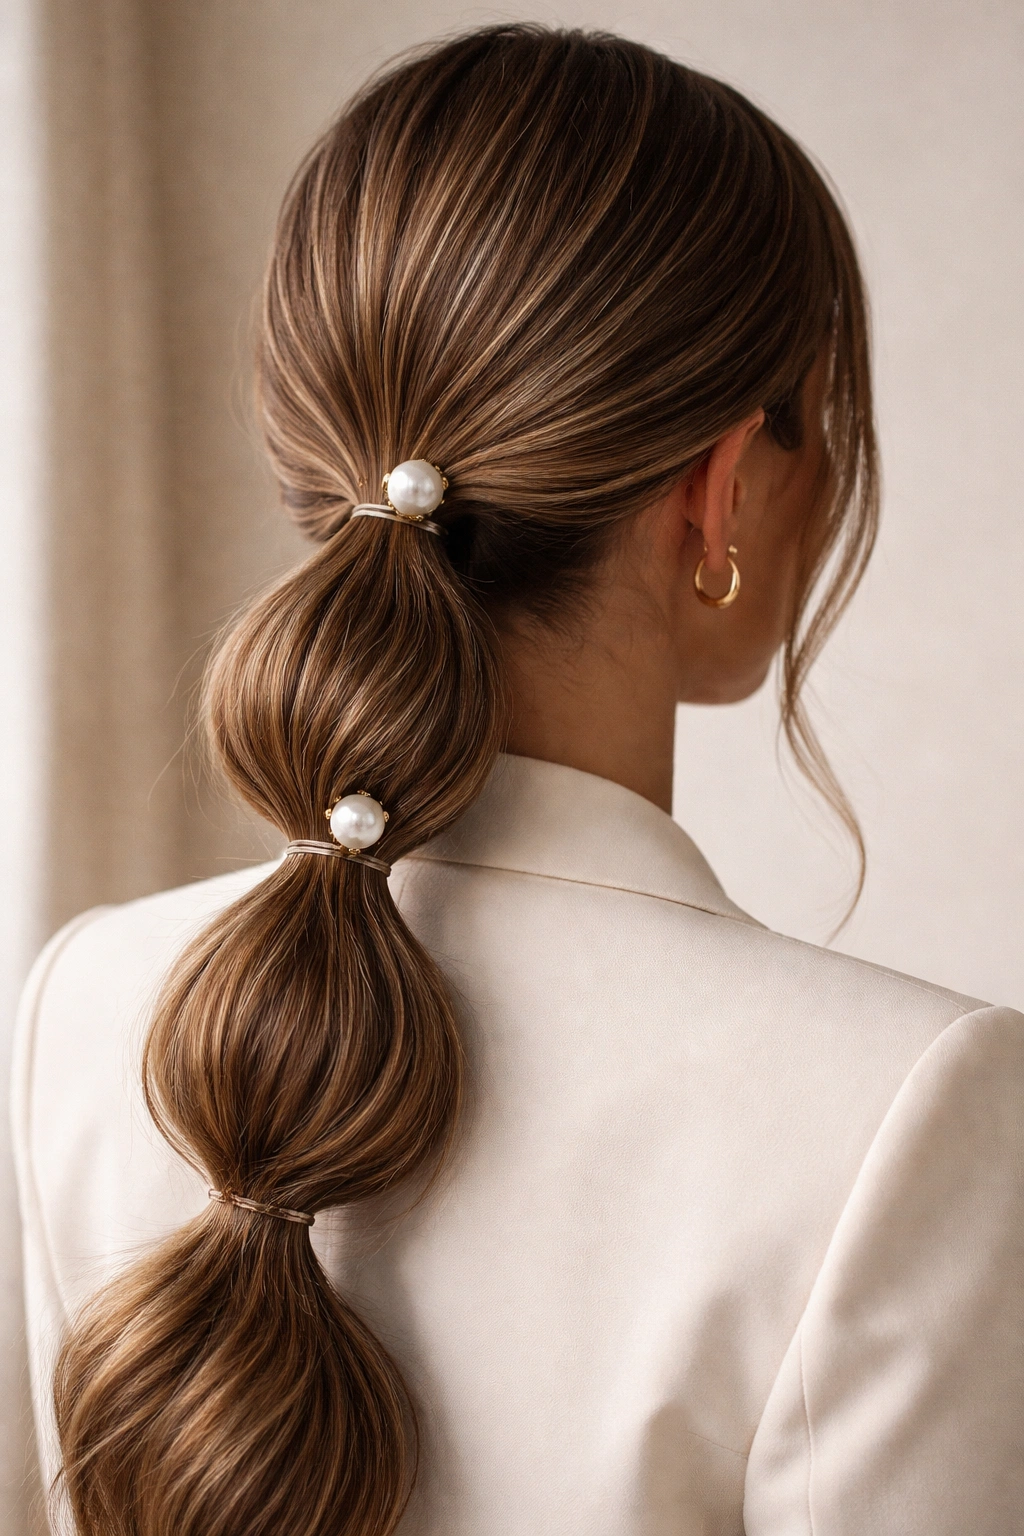
A row of pearl pins changes the tone fast. It takes the bubble ponytail from everyday to dressed-up without adding much weight, which is exactly why this version shows up so often for formal events. The pearls act like little markers along the shape.
Placement matters
- One pearl pin near the base is enough for a clean, minimal look.
- Two pins staggered along one side feel a little more ornate.
- Small flat-back pearls stay in place better than heavy jeweled clips.
- Use them after the bubbles are finished, not before.
The best part about pearl pins is that they work with both sleek and textured hair. On smooth hair, they look crisp. On wavy hair, they soften the edges a little.
Tip: don’t scatter pearls all over the tail. A few well-placed pins look deliberate. Too many start to look like costume jewelry.
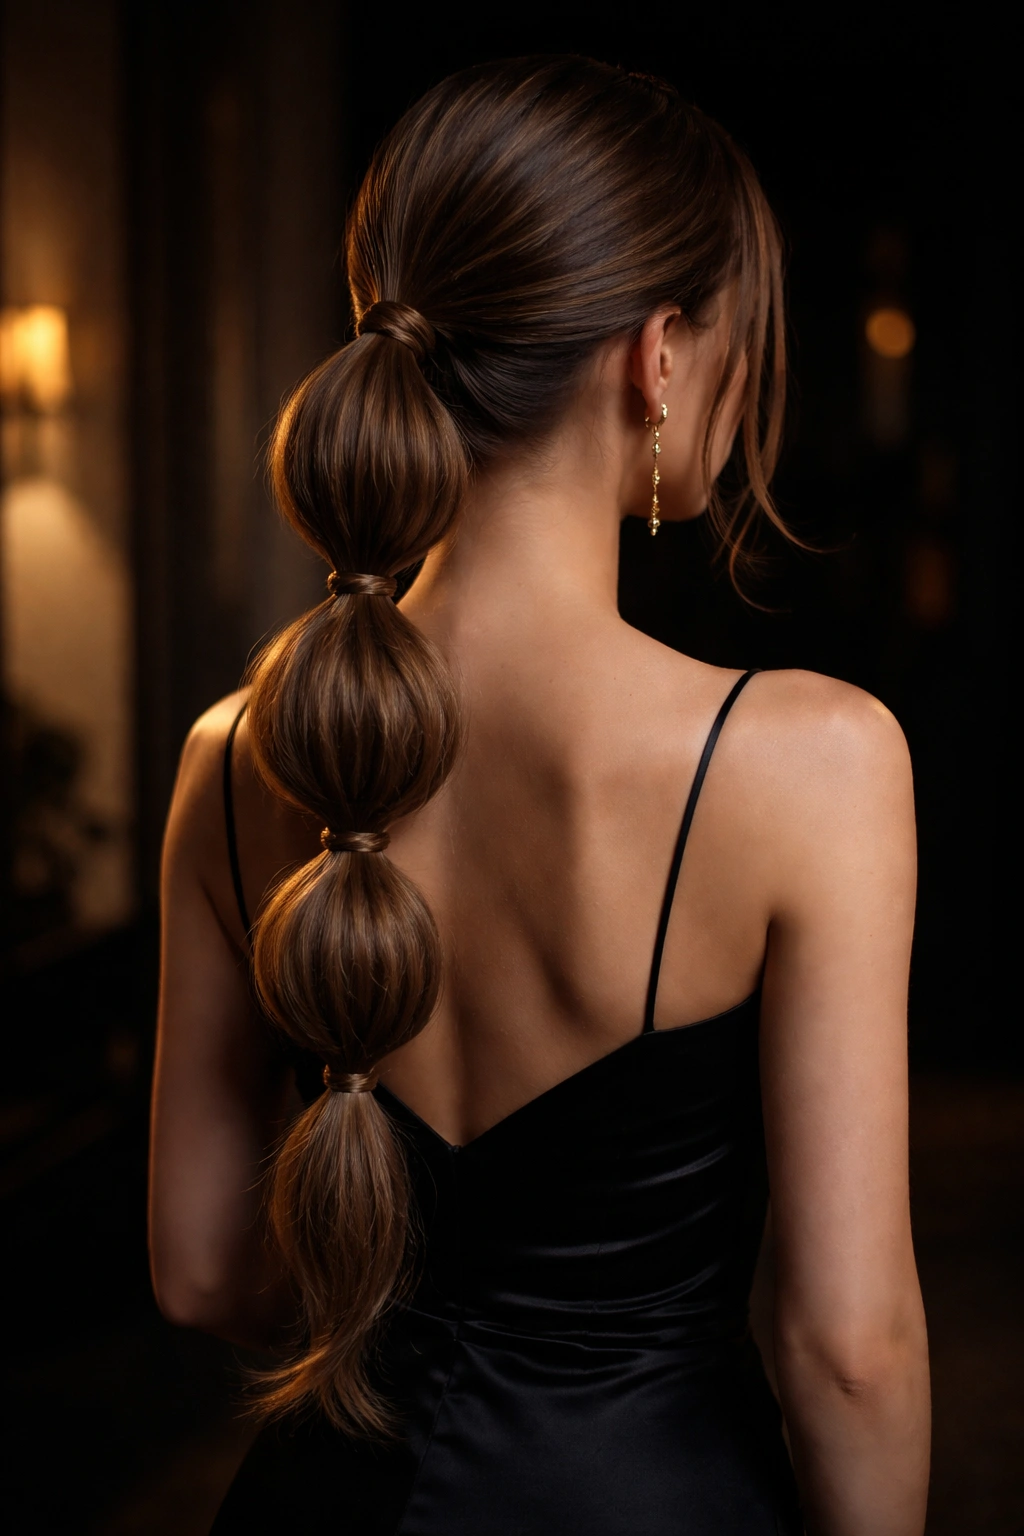
14. Matte-Luxe Bubble Low Ponytail for Dark Hair
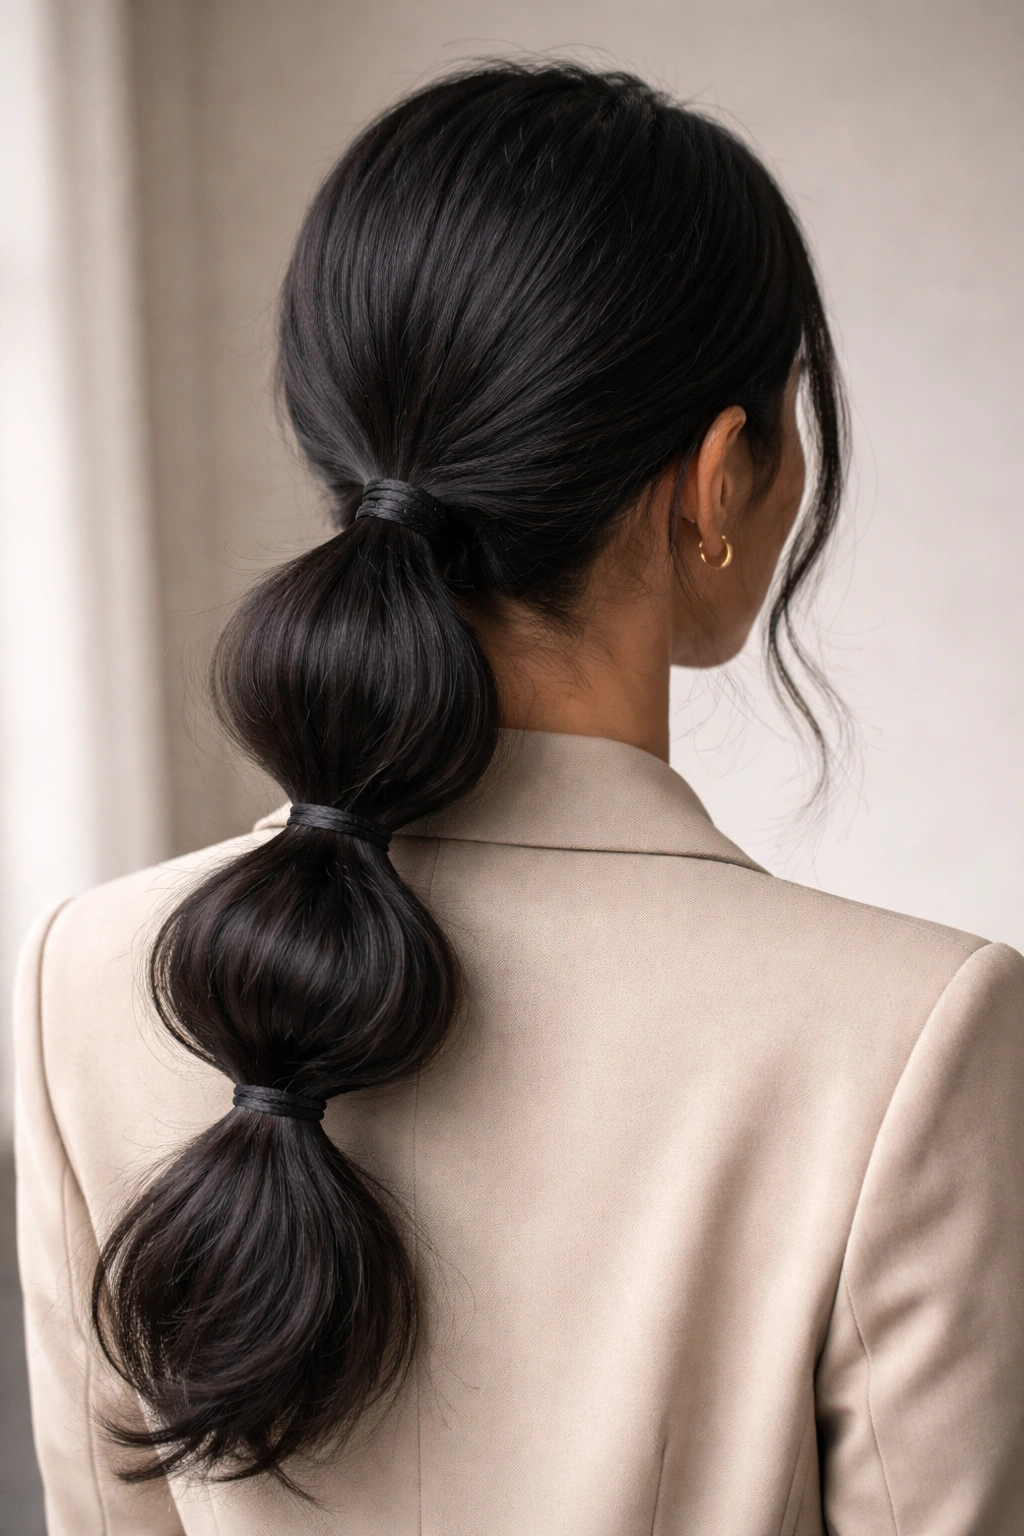
High shine is not always the answer. On dark hair, a touch of matte texture can make the bubbles easier to see, because the sections catch light differently when the surface is a little less glossy. That tiny shift gives the shape more definition.
Use a lightweight texture powder or dry paste at the roots and through the tail, then smooth the top layer just enough to keep the line neat. What you want is control, not a wet finish. Dark hair can swallow detail if everything is too polished, and bubble ponytails need visible shape to work.
This version feels a bit editorial and a little less sweet than the ribbon or pearl styles. It pairs well with strong makeup, clean tailoring, or anything with a sharp neckline.
Best detail: if your hair is very dark, make the bubbles slightly fuller than usual so the silhouette reads from a distance.
15. Fine-Hair Bubble Low Ponytail With Light Teasing
Fine hair likes support. Without it, the bubbles can collapse before you even leave the house. A little teasing at the crown and inside each section gives the ponytail enough body to hold its shape, and the trick is to keep the teasing hidden.
Start by smoothing the outer layer, then lift a thin section underneath each bubble and backcomb just a few strokes at the base. That creates a cushion without making the style look frayed. A texturizing spray helps, but skip heavy oils; they flatten fine hair fast.
If your hair tends to slide, use snug but snag-free elastics and think smaller with the bubbles. Tiny to medium sections hold better than huge loops that need more hair than you have.
Quick rule: tease the underside, not the top. Nobody wants a bubbly ponytail that looks dusty.
16. Thick-Hair Bubble Low Ponytail With Clean Sections
Thick hair makes a bubble low ponytail look full in a way that’s almost unfair. But it can also turn bulky fast if you do not keep the sections neat. The goal is shape, not mass.
A wide-tooth comb helps keep the ponytail smooth without flattening it completely. Secure the base tightly, then create fewer, larger bubbles instead of crowding the tail with too many elastics. On dense hair, each section needs a little room so the bubbles can round out instead of sticking straight out like stacked sausages. That sounds blunt, but you know the look.
Strong elastics matter here. Thin bands can snap or slip when the weight of the hair pulls down. If your hair is very heavy, use two elastics at the base and shape the bubbles after the ponytail is anchored.
Best tip: clip each finished bubble out of the way while you build the next one. It keeps thick hair from getting tangled halfway through.
17. Gym-to-Dinner Bubble Low Ponytail
A bubble low ponytail is one of the few styles that can move from sweaty to presentable without a full reset. If your hair has already been tied back, brushed out, or dampened a little, you can work with that texture instead of fighting it. That’s the charm.
The secret is in the restart. Smooth the roots with a bit of leave-in conditioner or water on your hands, gather the ponytail low, and make the bubbles simple and clean. Slightly imperfect lengths can actually help here, because the style reads as relaxed rather than precious. If there’s a little natural wave left from a workout or a braid, leave it in.
This version is not meant to be fussy. It’s meant to save time and still look intentional.
Best for: people who want one style that can survive a long day without looking like it was built in a mirror for an hour.
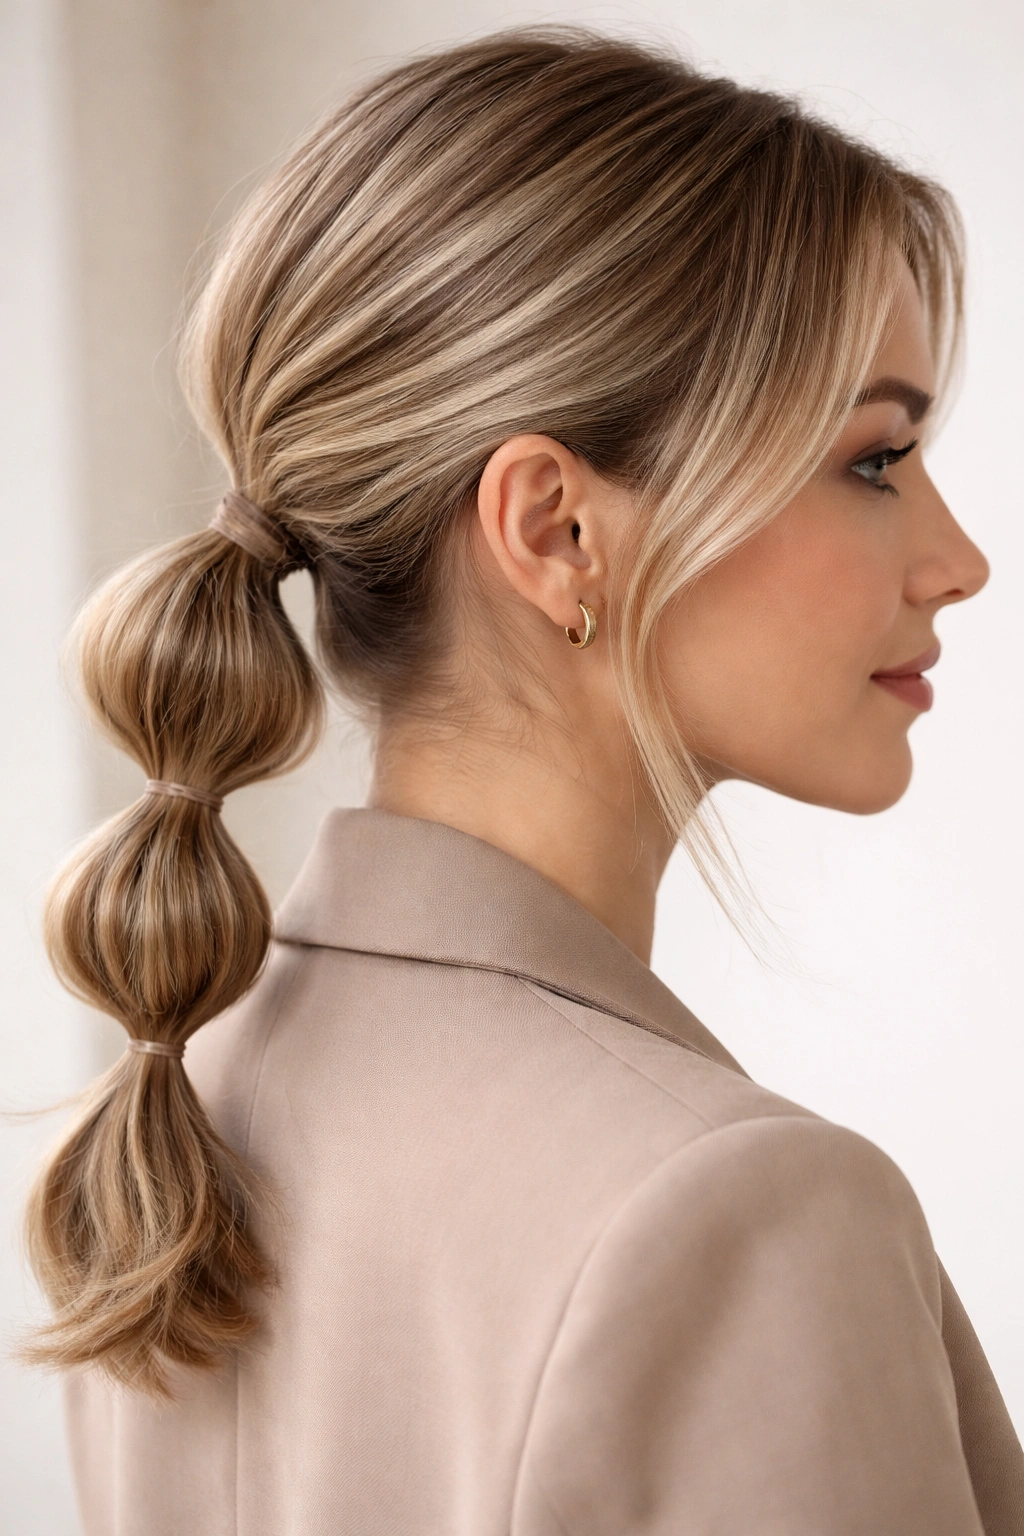
18. Work-Friendly Bubble Low Ponytail
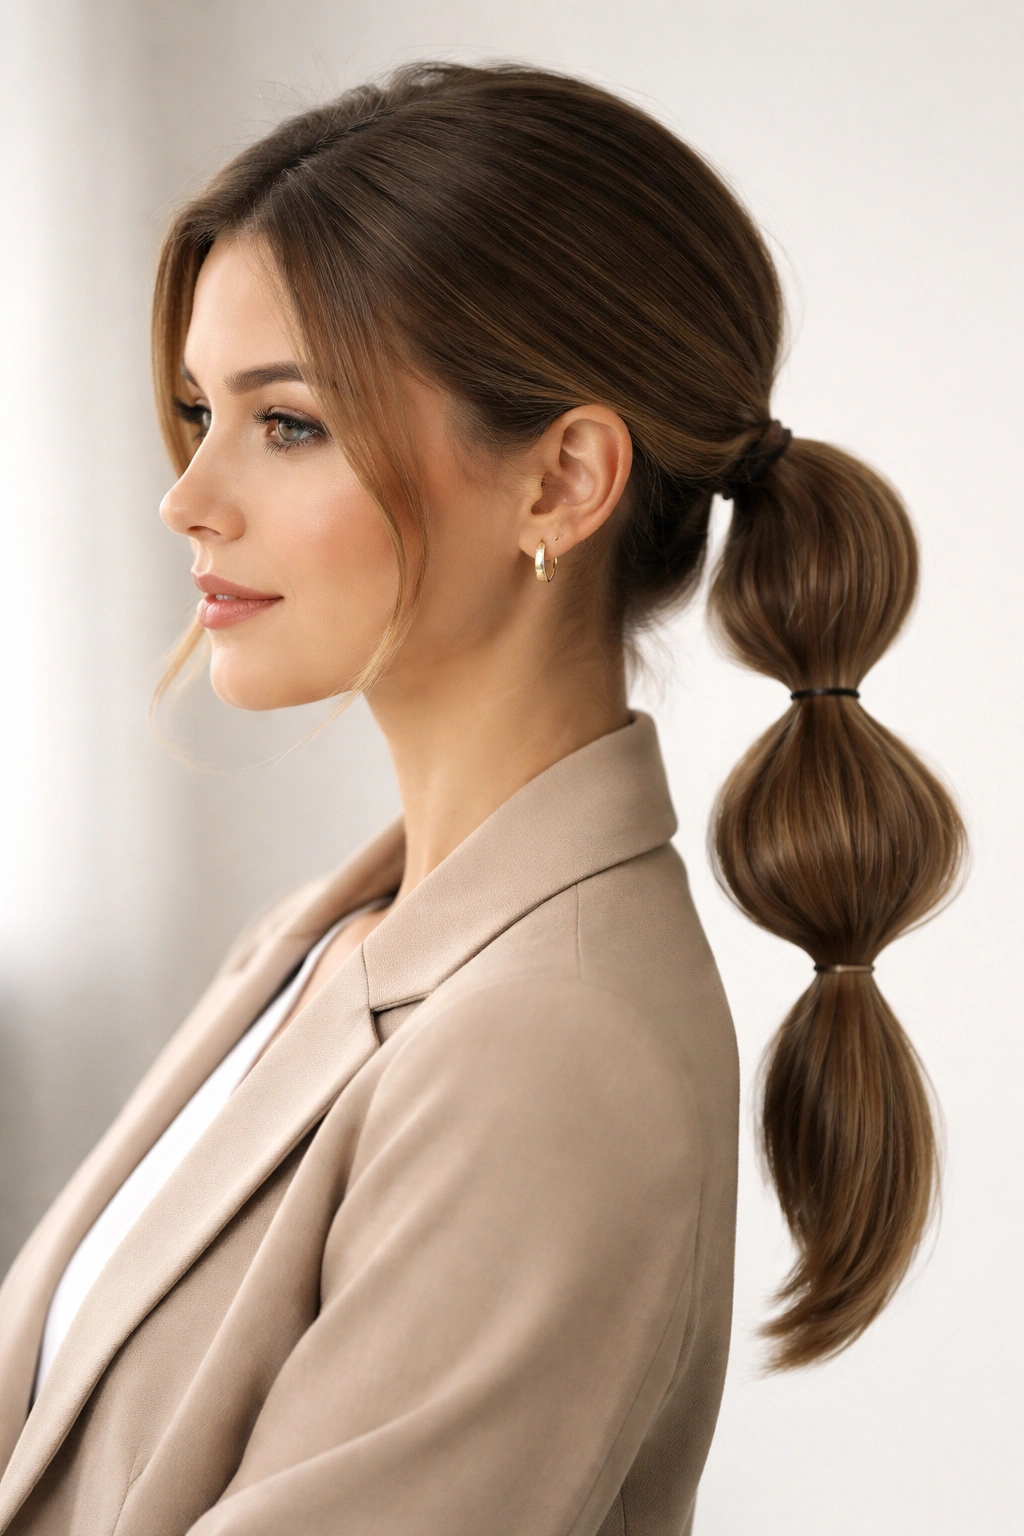
Need a style that says “put together” and not “trying hard”? Keep the bubbles modest, the parting clean, and the accessories minimal. A work-friendly bubble low ponytail sits low on the neck, holds its shape, and stays out of your face without looking casual in a sloppy way.
A center part or a soft side part both work. What matters more is the finish at the crown. Smooth the roots, tuck in flyaways, and stop after three or four bubbles if your hair is medium length. Too many sections can make the style feel more playful than polished.
Keep it office-safe
- Use clear or hair-matched elastics.
- Skip oversized bows and chunky clips.
- Keep the bubbles even, but not stiff.
- Leave the tail neat enough to brush over your shoulder without snagging.
One good rule: if the top of the hair looks tidy, the rest of the ponytail can stay simple.
19. Bubble Low Ponytail for Weddings and Dressy Events
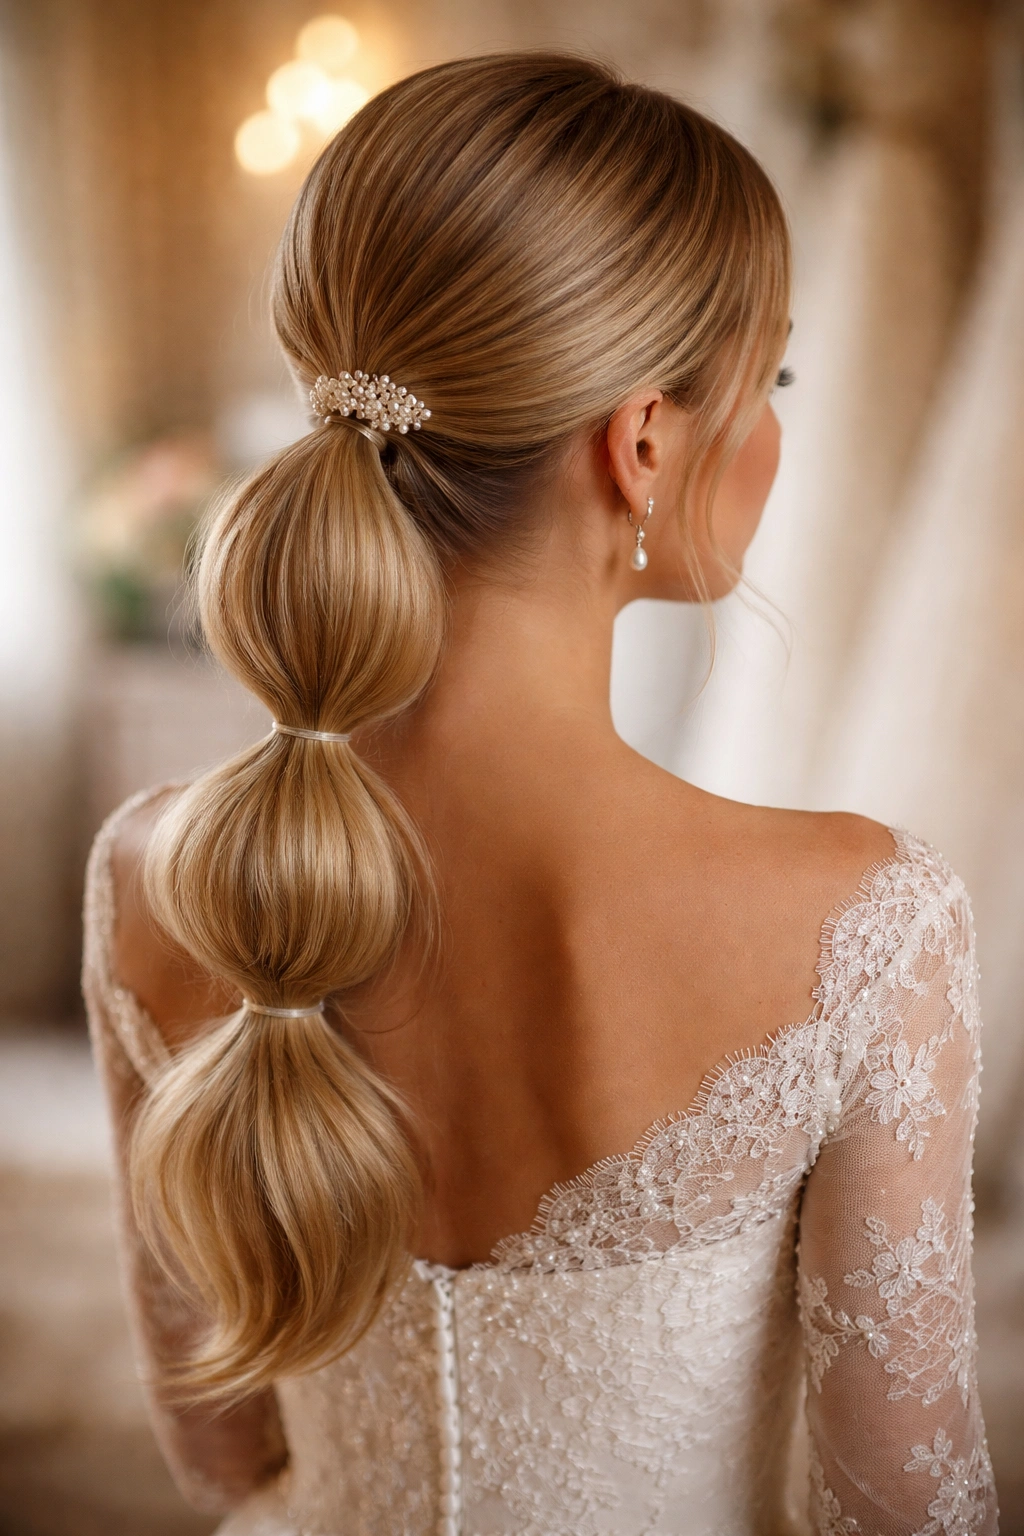
Unlike a classic low chignon, this keeps the length visible. That’s the reason many people reach for a bubble low ponytail when they want a formal style that still shows off the hair itself. It works well with dresses that have open backs, strap details, or simpler necklines where the hairstyle can become part of the outfit.
The finish should feel soft, but not loose. Smooth the top, keep the bubbles round, and add one accent — maybe a hair vine, a pearl pin, or a small twist at the base. If the dress is ornate, the ponytail should be quieter. If the dress is simple, the hair can carry a little more shape.
This is one of the rare styles that can look refined and slightly playful at the same time.
Best detail: make the lower bubbles a touch looser than the top ones so the tail moves naturally when you walk.
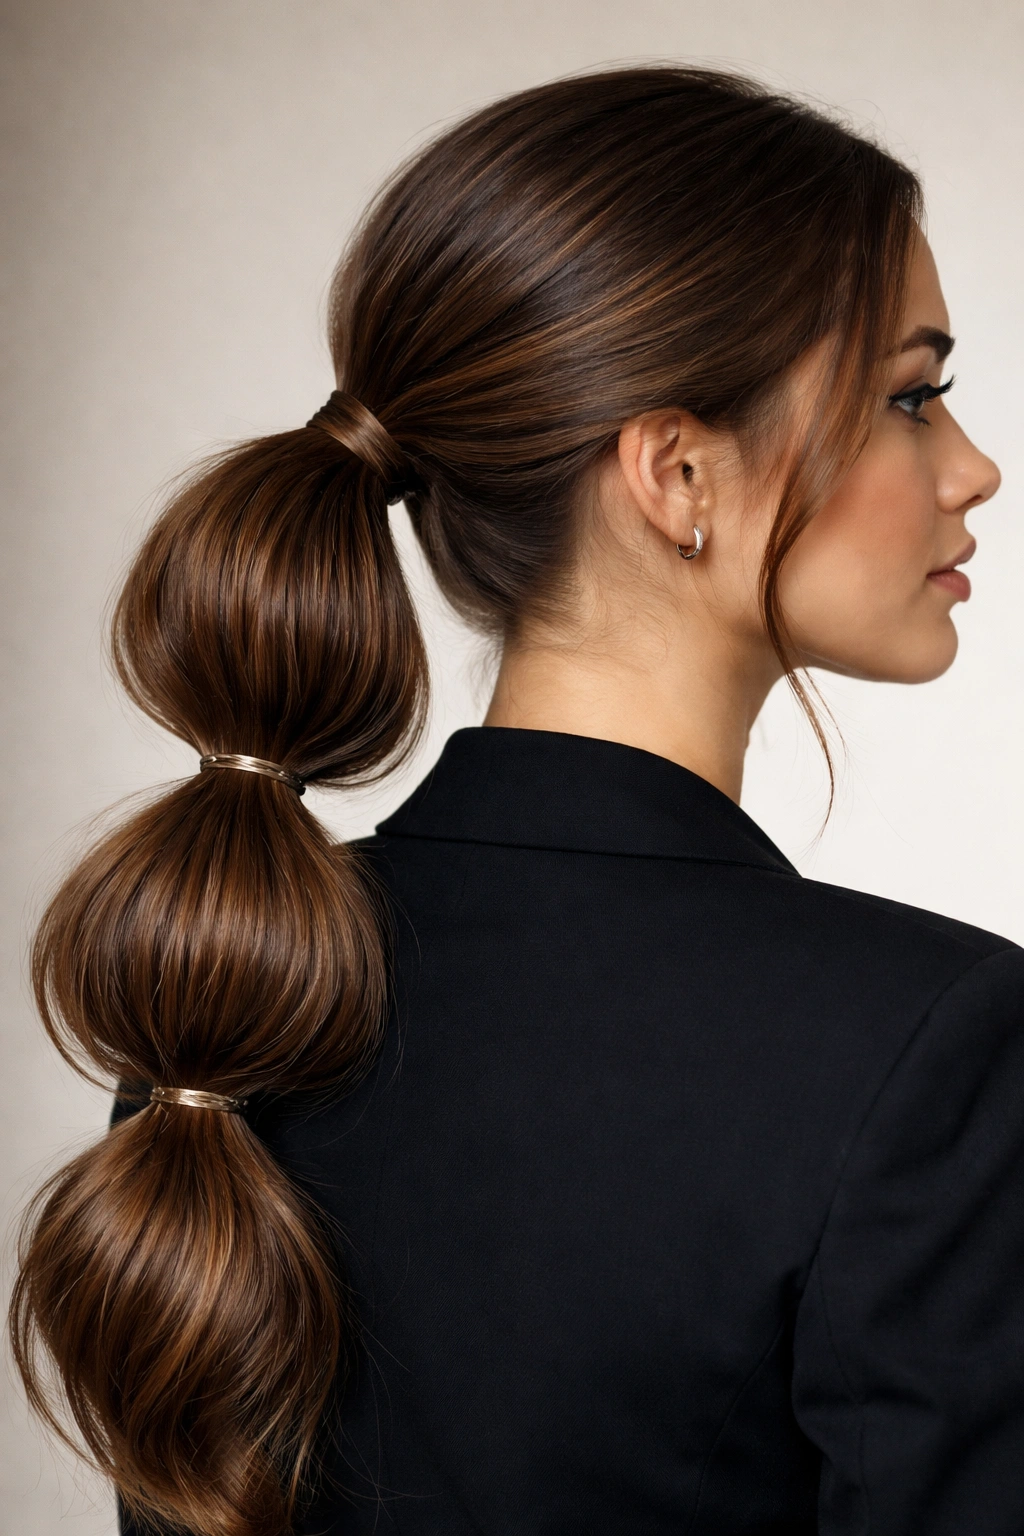
20. Bubble Low Ponytail With Metallic Cuffs
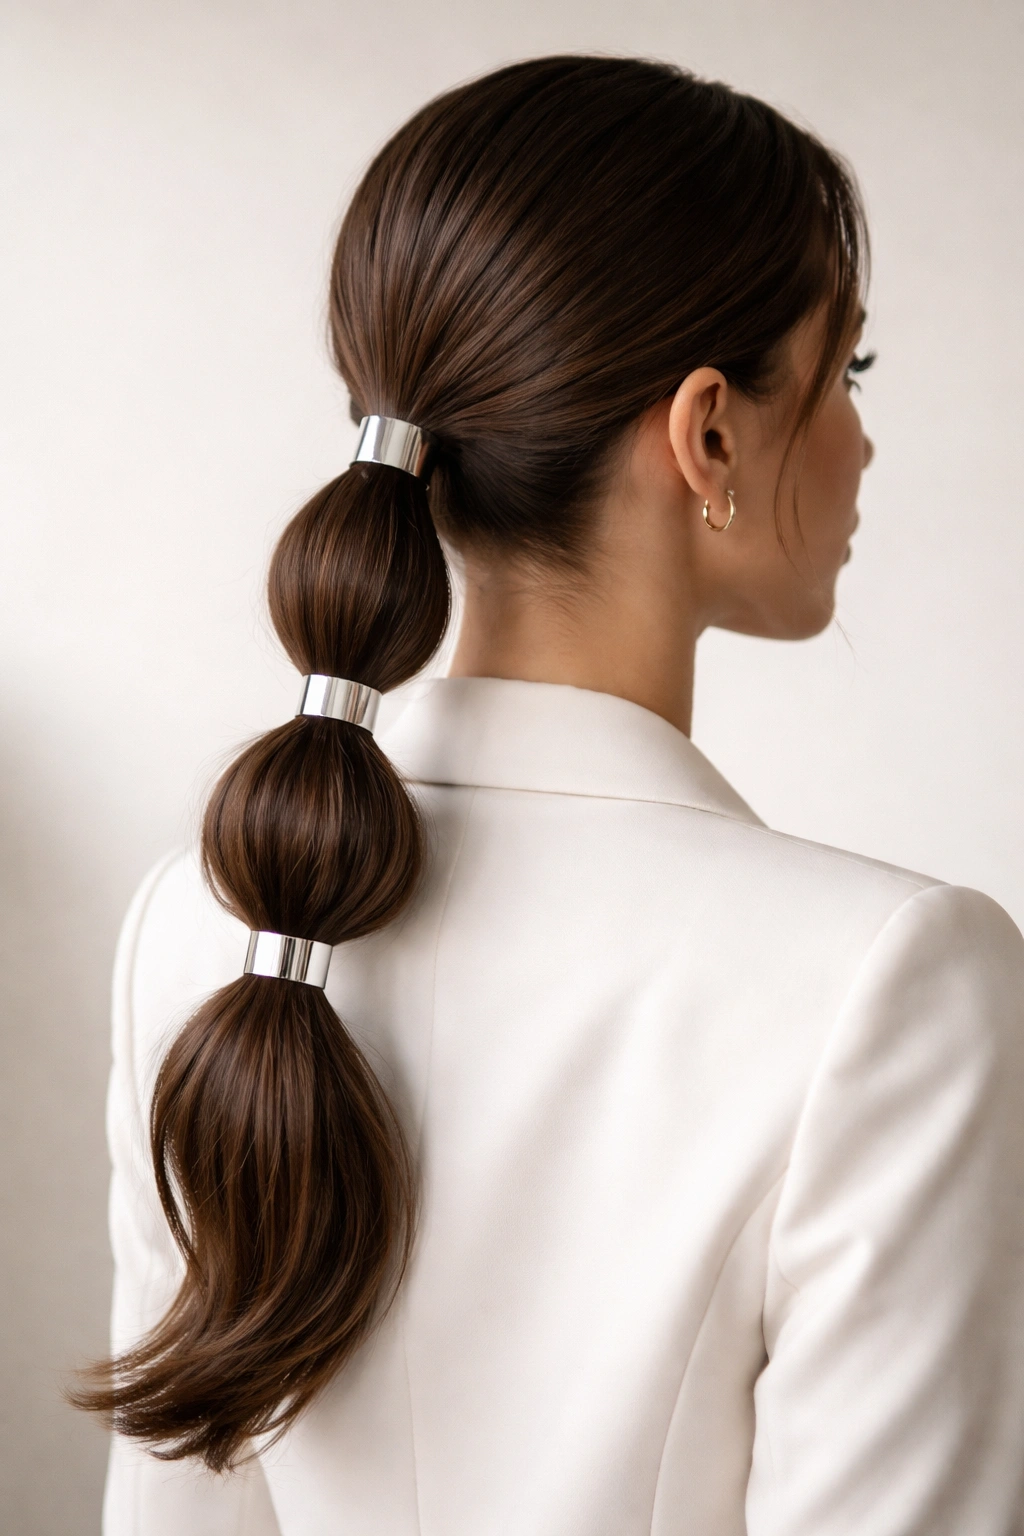
Tiny metallic cuffs can sharpen the whole look. They add a little edge, a bit of shine, and a more graphic line down the ponytail. If you like accessories that read from across a room, this is the version to try.
The key is not to overload the tail. One cuff on every bubble can work, but on finer hair it may start to feel crowded. Sometimes the best move is to place cuffs on every other elastic and let the hair in between do the work. Gold gives warmth, silver feels cooler, and gunmetal lands somewhere in the middle.
This version looks especially good with simple clothes. A plain knit, a black top, or a clean blazer gives the metal space to matter.
Tip: use lightweight cuffs. Heavy ones can drag the sections down and flatten the bubble shape by the end of the day.
21. Bubble Low Ponytail With Alternating Bubble Sizes
The best bubble ponytails do not have to be even. Alternating sizes gives the style more rhythm, and it keeps the eye moving down the tail instead of stopping at the first section. A larger bubble in the middle, smaller ones near the top and bottom — that’s enough to make the ponytail feel more designed.
This works best on long hair because there is room to vary the spacing without making the tail look cramped. You can start with a medium bubble at the nape, stretch the second one a little more, then bring the third back in tighter. That back-and-forth shape keeps the silhouette interesting.
What to watch for
- Don’t make the gaps random. Vary them on purpose.
- Keep the largest bubble in the center or slightly lower.
- Leave the last section smaller so the tail tapers cleanly.
- Use enough product that the shorter bubbles do not slip flat.
Best use: creative outfits, evening events, or any day you want the ponytail to feel more sculptural than sweet.
22. Bubble Low Ponytail for Short Hair
Can this work on collarbone-length hair? Yes, and the answer is in the spacing. Shorter hair needs smaller gaps between elastics and a tighter overall shape, but the look still comes through if the crown is tidy and the sections are controlled.
A little texturizing spray helps the hair stay where you put it. So does a gentle bend at the ends, since very straight short hair can make the bubbles look thin. Keep the ponytail low, make three or four bubbles at most, and let the tail stay compact. You are not trying to fake extra length. You are trying to create a shape that suits the length you have.
What makes it work
- Use mini elastics that disappear into the hair.
- Pull the bubbles outward only a little.
- Smooth the crown more carefully than the tail.
- Pin short ends underneath if they poke out.
Best tip: a short bubble ponytail looks stronger when the first bubble is neat and the later ones are slightly looser.
23. Bubble Low Ponytail With a Braided Base
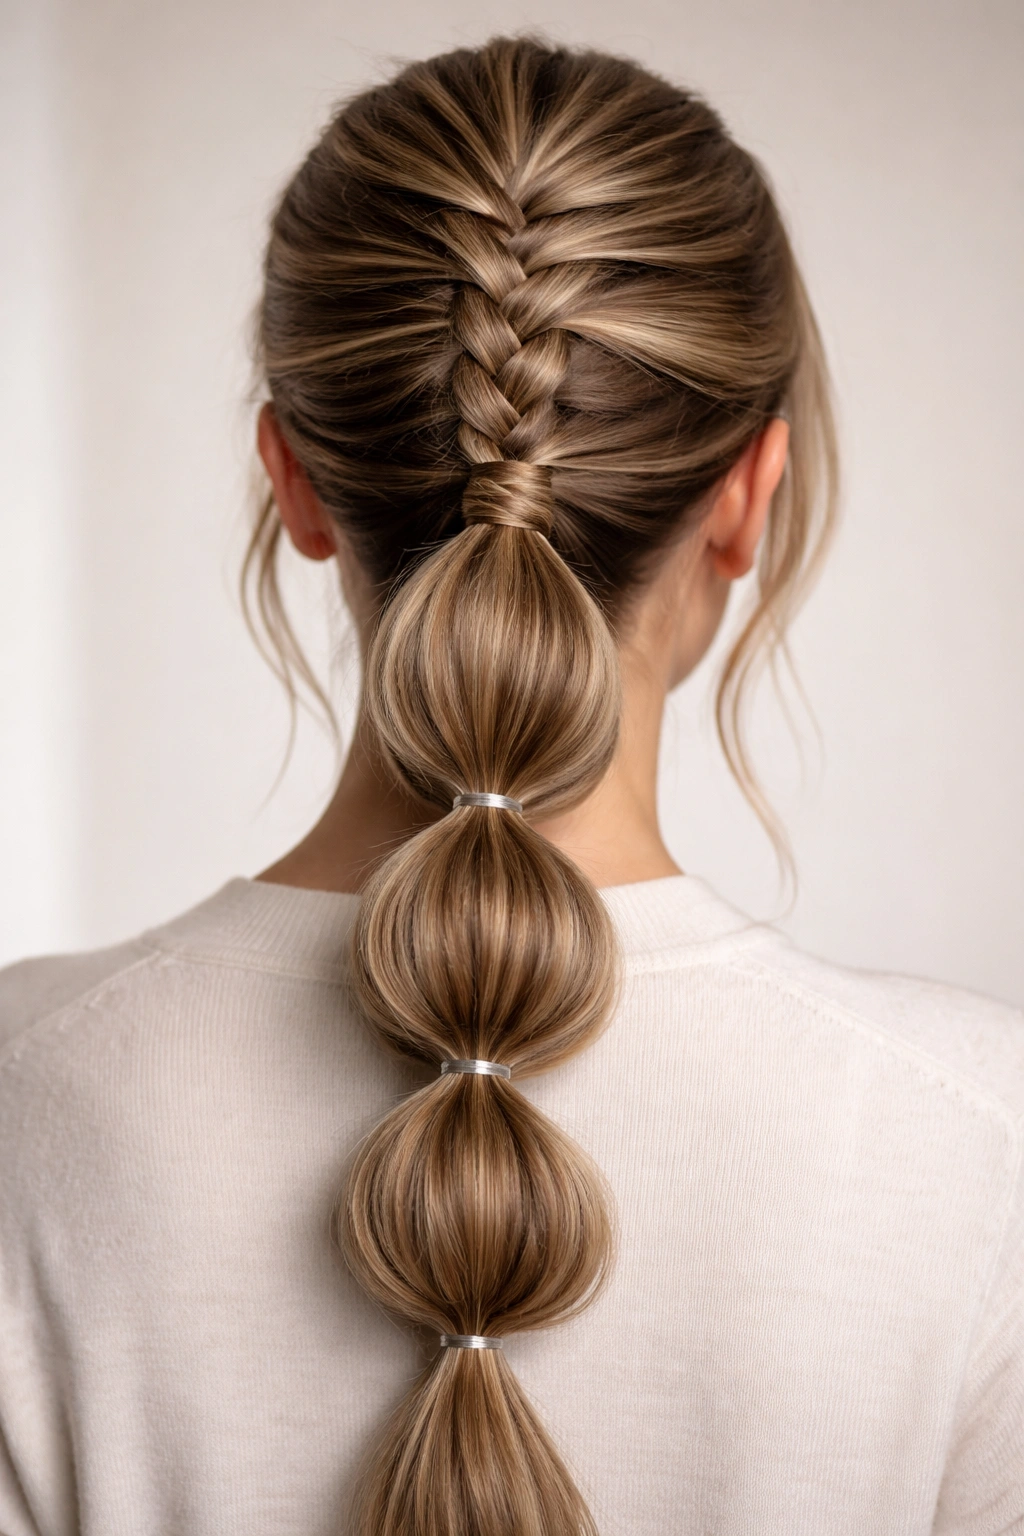
A braided base gives the ponytail a little grip right where it usually needs it most. Instead of starting the bubbles immediately at the nape, braid a small section from the crown or side into the low ponytail, then let the bubbles begin after that. The braid acts like a built-in anchor.
This hybrid style is useful when your hair is layered or slippery. The braid keeps the upper part compact, and the bubbles add the rounded shape people actually notice. If you have a wide neckline or a dress with an open back, this version keeps the back of the hair visually interesting without requiring much extra work.
Keep the braid flat and controlled. A puffy braid plus big bubbles can become too much texture in one place.
Tip: if the braid is small, keep the first bubble immediately after it slightly tighter so the transition feels seamless.
24. Bubble Low Ponytail With Crisscross Elastics
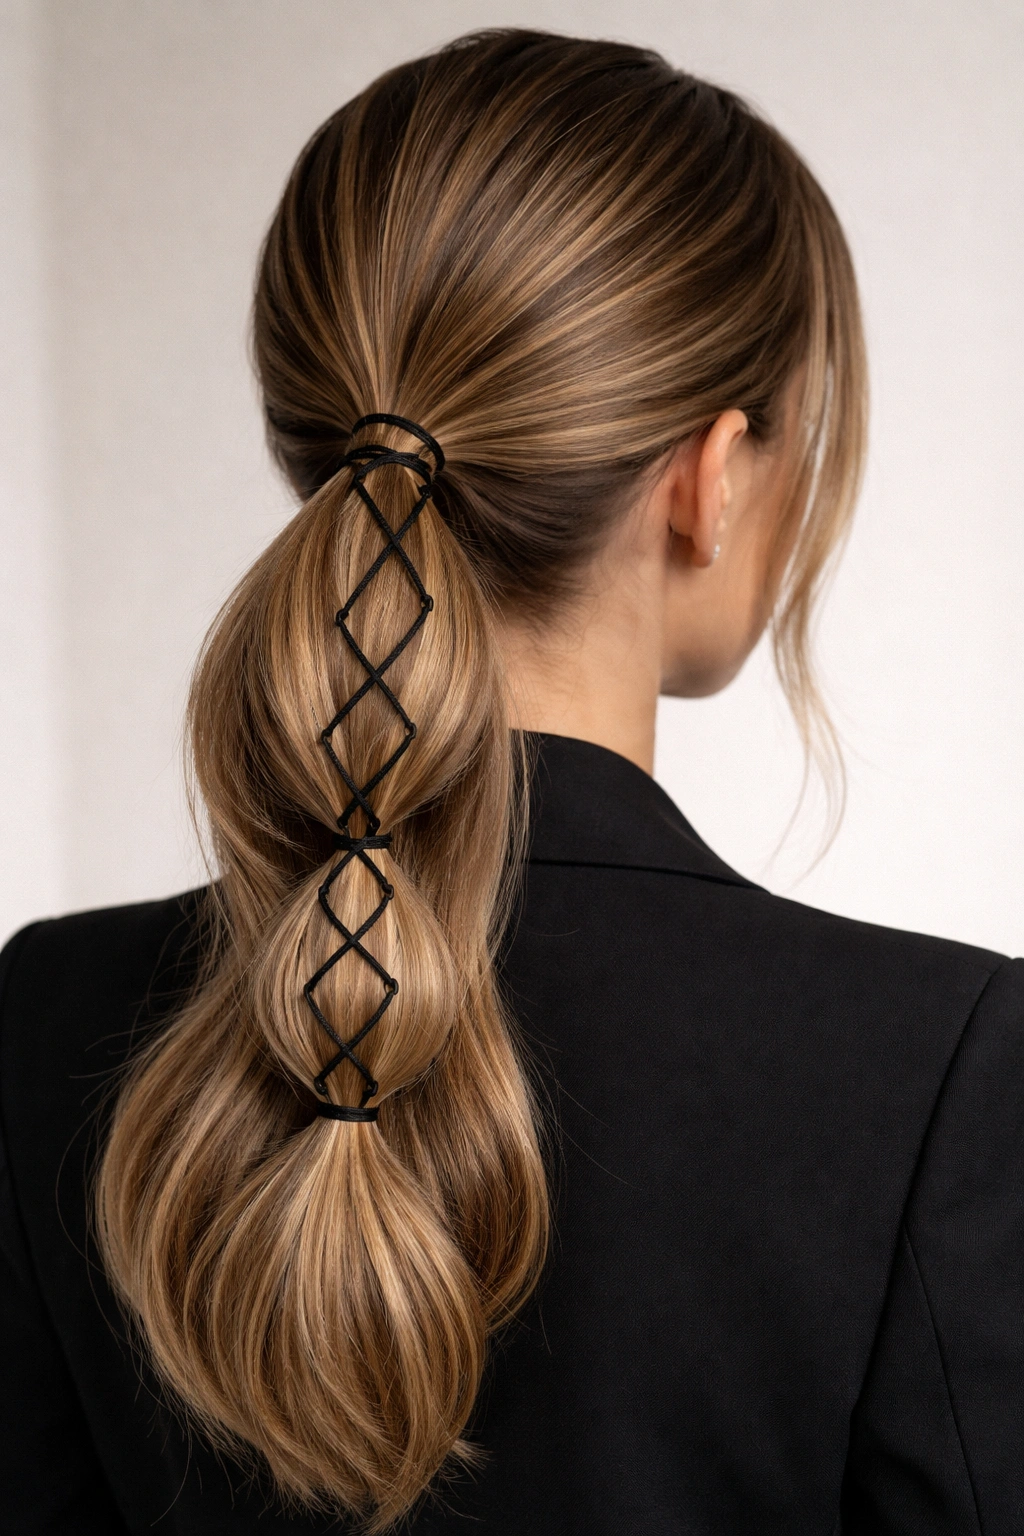
A little engineering can make the style look more expensive. Crisscross elastics — where two small bands overlap or wrap in a lattice-like pattern — give the ponytail a sharper, more detailed finish. It sounds fussy, but once you’ve done it a time or two, the structure is straightforward.
This version is for people who like precision. You section the tail carefully, secure one elastic, then create the next section so the bands read like a pattern rather than a stack. The bubbles end up looking more architectural, which is a nice change if you are bored of soft, loose ponytails.
Keep in mind
- Use a tail comb so the sections stay equal.
- Test the tension before you commit to the whole tail.
- Keep the base smooth, or the crisscross detail gets lost.
- Practice once before an event if you’ve never done it before.
Best result: a bubble ponytail that looks thoughtful from every angle, not just the front.
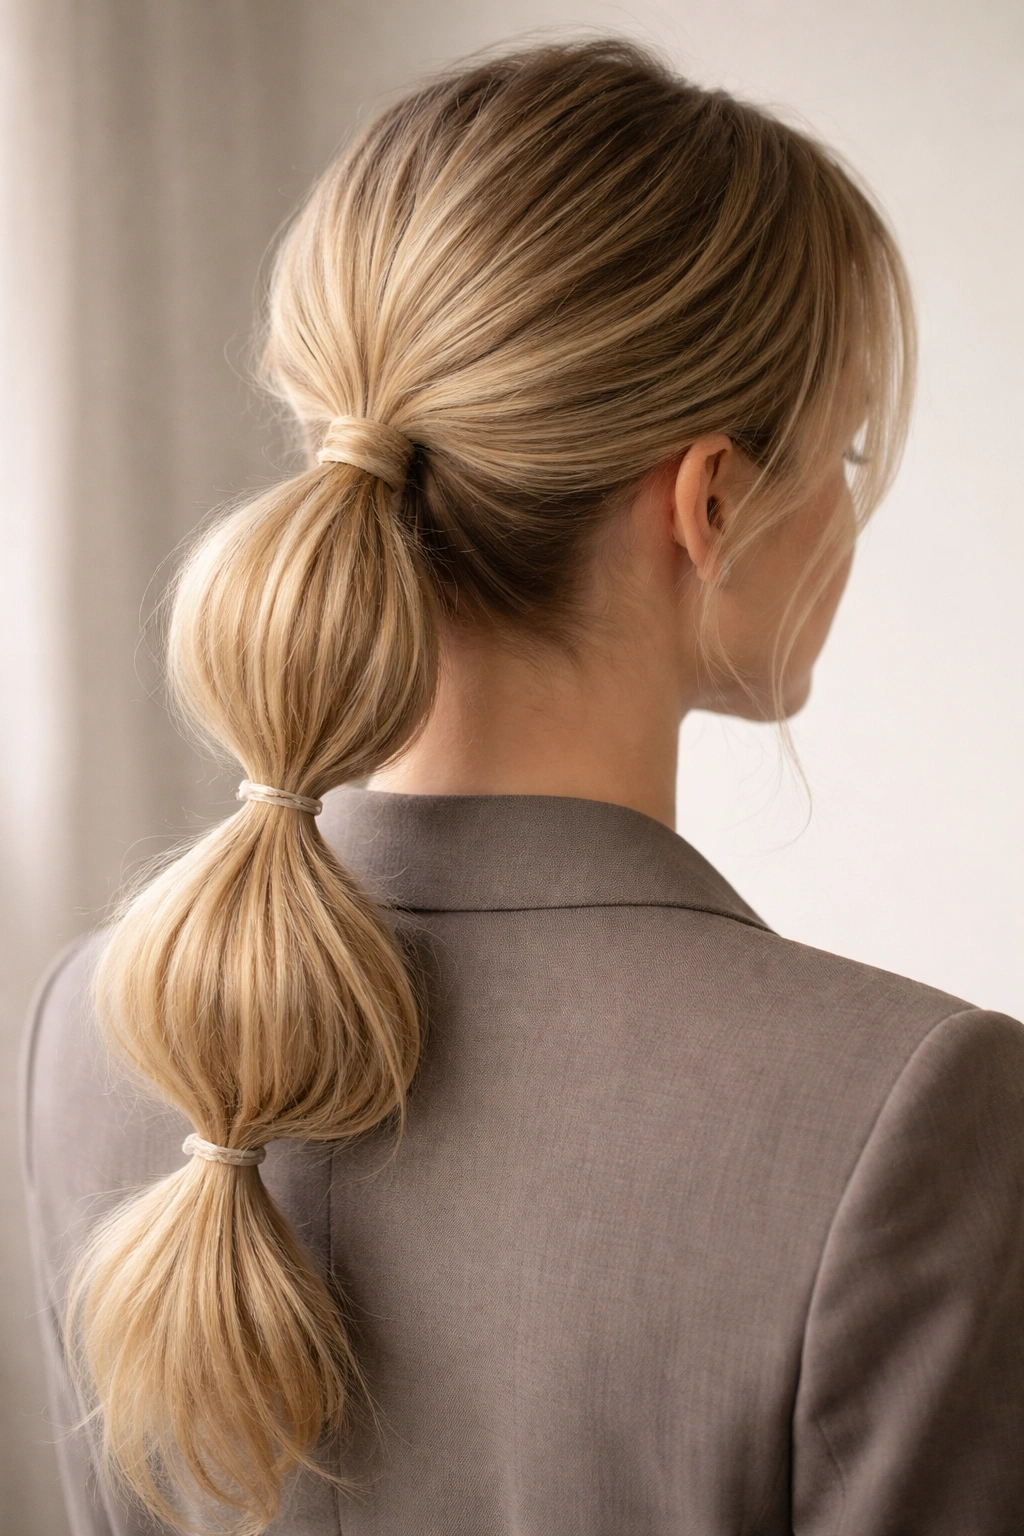
25. Minimalist Bubble Low Ponytail With Clear Elastics
Invisible elastics let the shape do the talking. On blonde, brunette, highlighted, or balayaged hair, clear bands disappear enough that the bubbles become the focus. The style feels cleaner and less decorated, which is useful if you prefer simple clothes or do not like obvious hair accessories.
Clear elastics are not perfect on every hair color. On very dark hair, they can still show a little, so use the smallest bands you can find. The bigger point is the finish at the crown: a minimalist bubble ponytail depends on neat parting and smooth roots because there are no bows, pearls, or ribbons to distract the eye.
This is the version I’d choose for everyday wear when I still want the hair to look intentional.
Tip: keep the bubbles consistent in size. Minimalist styles depend on line and rhythm more than decoration.
26. Boho Bubble Low Ponytail
Soft bends, a few escaped pieces, and a tail that moves when you walk — that’s the feel here. The boho bubble low ponytail is looser than the sleek versions, but it still needs structure or it turns into a messy ponytail with bands in it. There’s a difference.
Finger-comb the hair instead of brushing it flat, then leave some air between the bubbles so each section can puff up a little. A textured wave or soft bend in the mid-lengths helps a lot. If you want a more relaxed finish, pull a few strands out around the temples and behind the ears. Not too many. Just enough to soften the outline.
How to keep it from falling apart
- Secure the base tightly before tugging any bubbles.
- Use light texture spray, not heavy cream.
- Keep the bubbles slightly uneven on purpose.
- Finish with one small ribbon or cord if you want an extra touch.
Best detail: this style looks better when it moves, so don’t over-spray it into stiffness.
27. Editorial Sleek Bubble Low Ponytail

If you want the sharpest version, go sleek and keep the bubbles crisp. This is the bubble low ponytail that looks strongest with bold makeup, a strong neckline, or a clean monochrome outfit. The hairline should be smooth, the part exact, and the bubbles rounded enough to show shape but not so fluffy that they drift soft.
A light gel or edge control product at the crown helps a lot here. Brush the roots flat, secure the ponytail low, and shape each section with steady hands rather than aggressive tugging. The finished tail should taper a little toward the end so the silhouette feels intentional from top to bottom.
This version doesn’t need extra decoration. The shape itself is the statement.
Best tip: keep the final bubble smallest. That taper gives the whole ponytail a cleaner exit line, which is what makes the style feel sharp instead of heavy.