



Humidity is rough on wavy hair because it does exactly what you don’t want it to do: it lifts the cuticle, swells the strand, and turns a defined bend into a wider, fuzzier shape. Some people fight that with a ton of product and a prayer. Usually, that just leaves hair crunchy at the roots and still puffy by noon.
The better move is to choose a shape that works with your wave pattern instead of pretending humidity doesn’t exist. A style with a controlled crown, a secure base, and a little softness around the face tends to hold up far better than loose waves left to defend themselves. That’s the basic math of humid-weather styling. Less exposed hair usually means less visible frizz.
Wavy hair has a sweet spot in damp air. It still wants movement, but it does better when the movement is organized—braided, clipped, pinned, or gathered in a way that keeps the important parts calm. The trick is not making every strand behave. The trick is giving your hair a shape that stays good even after the air gets sticky.
1. Low Claw-Clip Twist
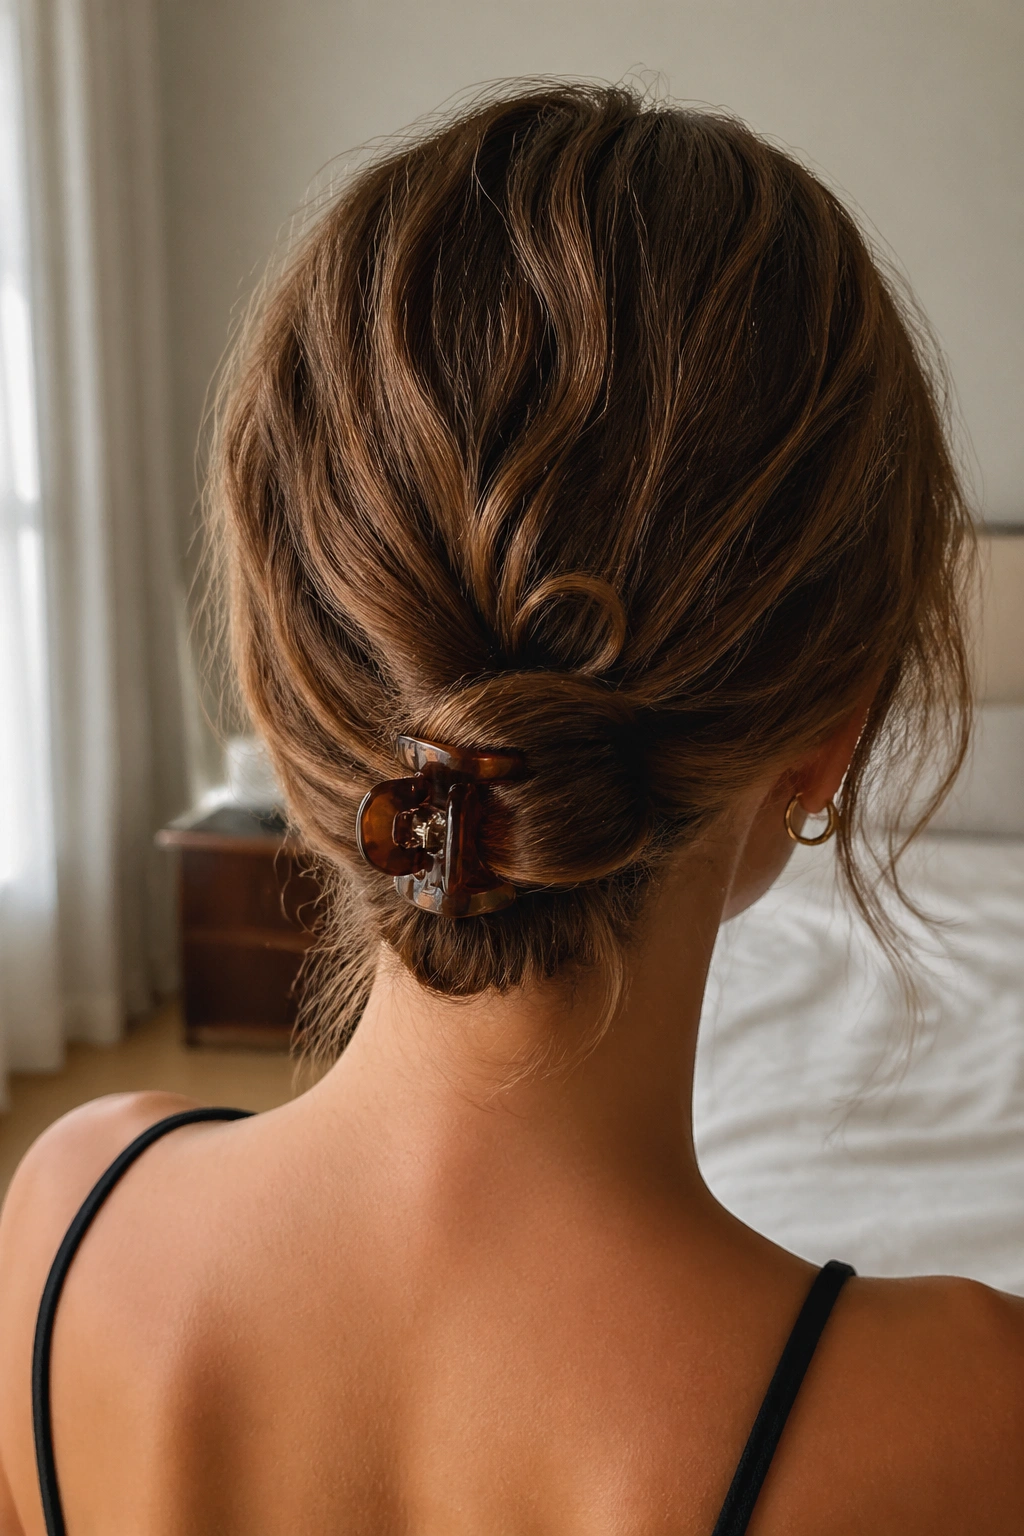
A low claw-clip twist is one of those styles that looks casual and stays useful. Pull your wavy hair to the nape, twist it once or twice, and let the ends fold up into a clip that sits low on the back of your head. The crown stays flatter, which matters because that’s where humidity loves to build a halo first.
I like this style because it never asks for perfect symmetry. If one side is a little looser than the other, it still reads as intentional. Use a medium or large clip with teeth that actually grip the hair, not one of those slippery decorative ones that slides out after a subway ride or a grocery run.
A small amount of mousse through damp hair helps the twist keep its shape. If your hair is thick, split it into two low sections and twist them together before clipping. That gives the bun more structure, and structure is what keeps humidity from flattening the whole thing into a sad puff by lunch.
2. Deep Side Part With a One-Side Tuck
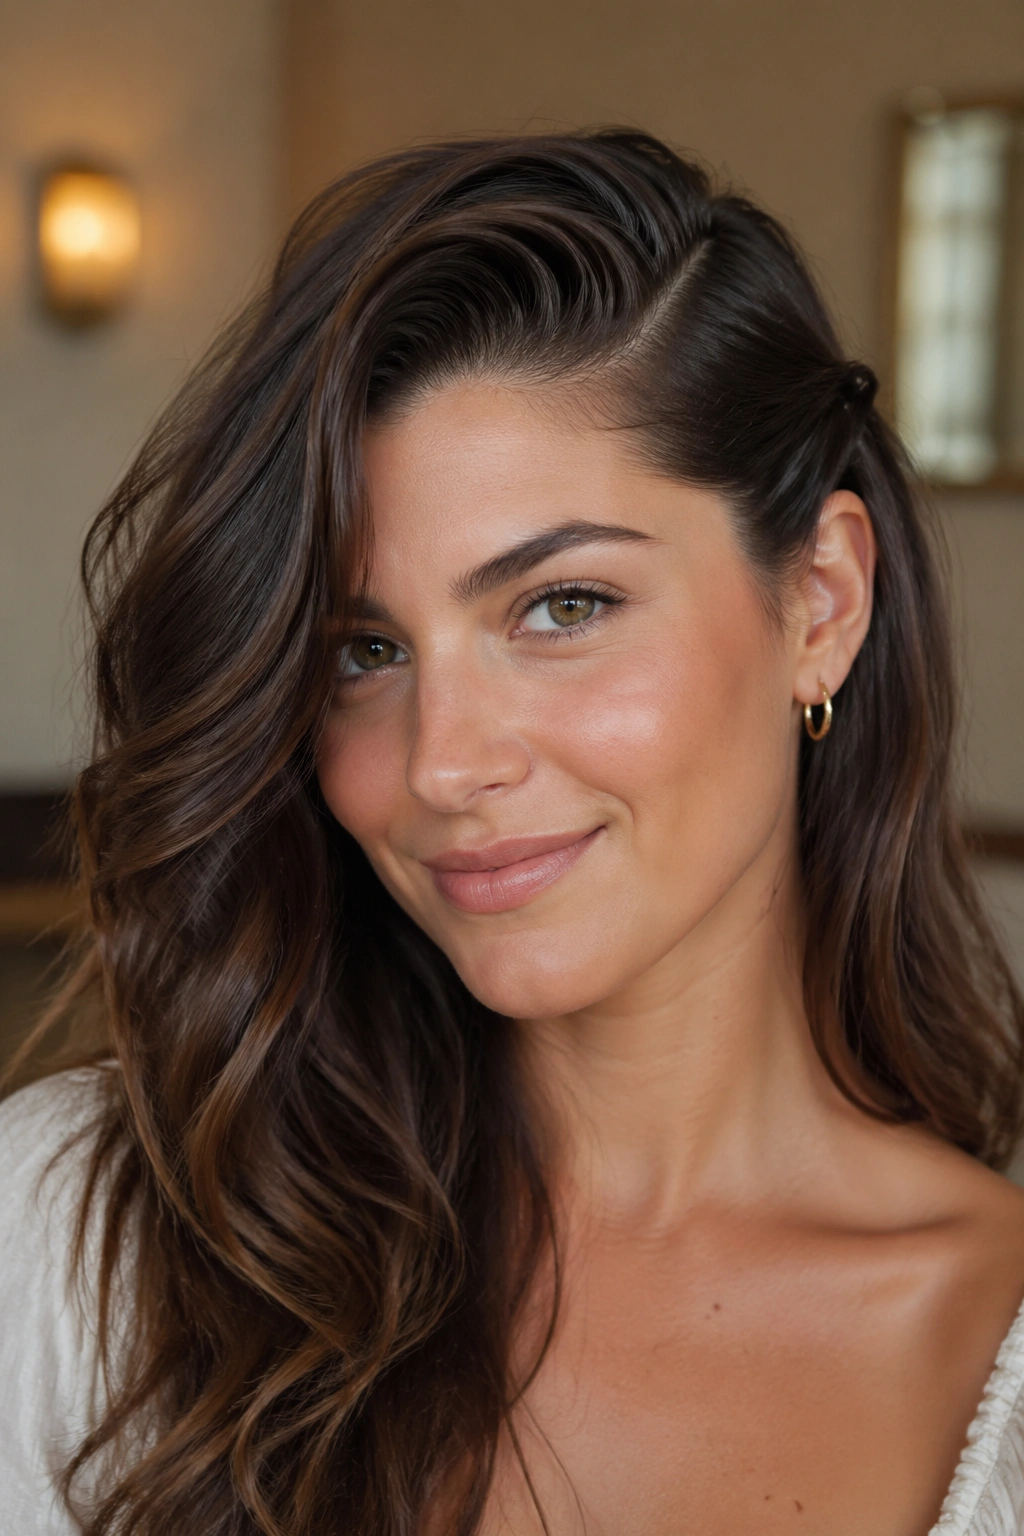
Why does a side tuck work so well when the air feels wet? Because it changes where the volume lands. Instead of letting humidity widen your whole head, you pull some of that movement to one side and pin it down near the ear, where it looks polished instead of frizzy.
How to Wear It
Start with a deep side part while your hair is still slightly damp, then smooth the front section with a pea-sized amount of cream or serum. Tuck one side behind the ear and secure it with a flat pin under the top layer. Leave the other side loose so the wave pattern has room to show.
This style is especially good if your hair gets puffy at the temples. The part gives your face a little shape, and the tucked side keeps the front from blowing up when the weather shifts. It’s simple. It works. And it doesn’t require you to rebuild your whole style every three hours.
3. Half-Up Mini Ponytail
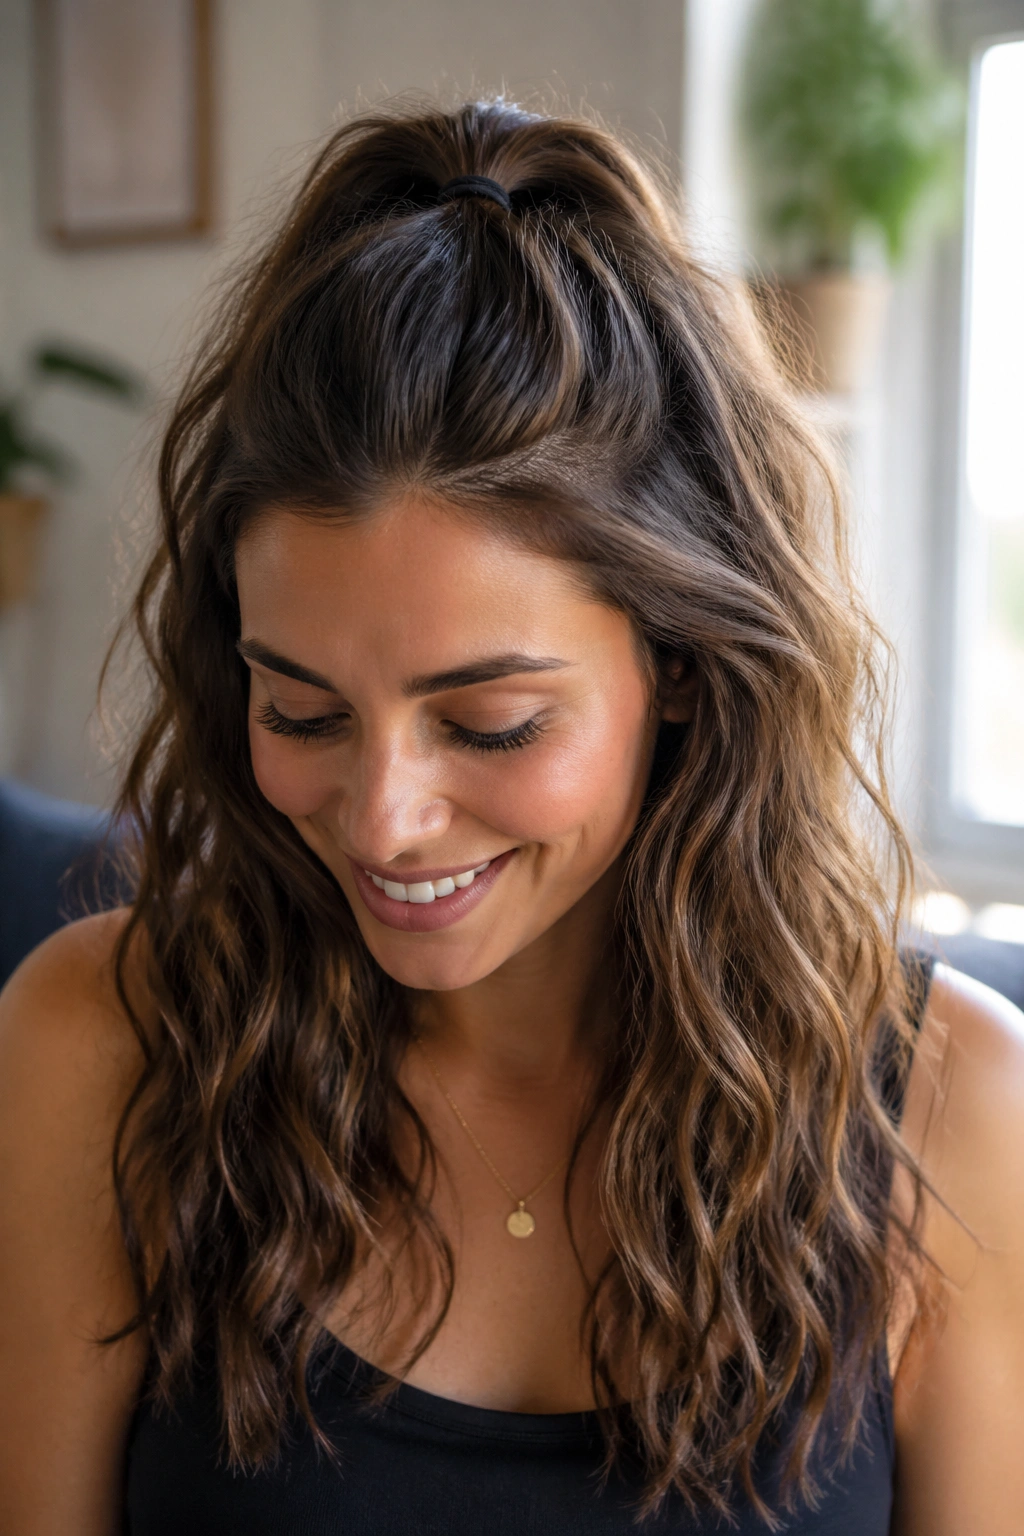
A half-up mini ponytail is the kind of style that solves the worst part of humid hair without making you look like you gave up. Pull back just the top third of your hair, secure it with a small elastic, and let the rest stay loose. The crown gets control; the length keeps its movement.
- Grab hair from the temples back to the crown.
- Smooth the section with your palms instead of a brush if your waves are already set.
- Place the elastic about 2 inches above the occipital bone.
- Leave the lower layers untouched so the wave pattern stays soft.
This is a good one for medium-length waves that frizz at the top before anywhere else. The half-up section acts like a lid. It keeps the root area from expanding while the bottom half still looks like hair you meant to wear on purpose. Add a clip or barrette over the elastic if you want the style to feel less sporty and more finished.
4. Side French Braid Into a Low Bun
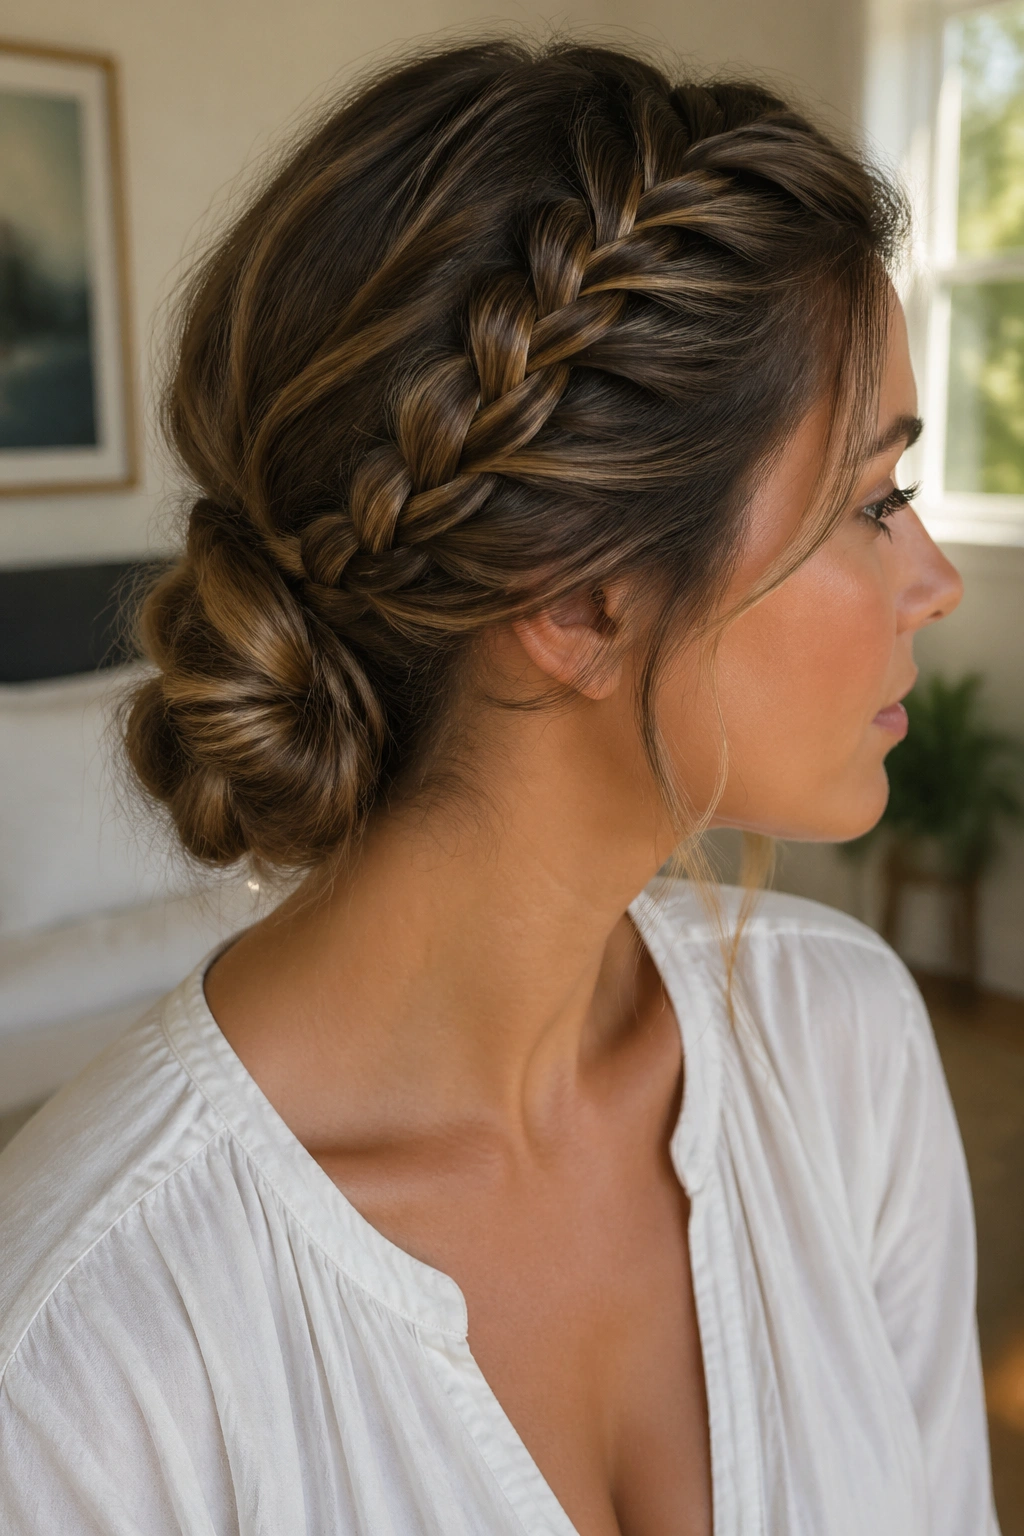
A side French braid into a low bun has a nice practical edge to it. The braid starts at the hairline, takes the fluffiest front pieces out of play, and feeds into a bun at the nape where humidity has a harder time making a scene. It’s the kind of style that looks a little more put together than it feels to do.
The nice thing about this one is the braid does half the work for you. Once the front section is braided tight enough to stay flat but not so tight that it pulls, the rest can be twisted into a low bun with a few pins. Don’t chase perfection here. A little texture in the braid keeps the style from looking stiff, and wavy hair wears that texture well.
I reach for this when I know I’ll be outside for a while. It survives wind better than a plain bun, and it handles sweat at the hairline without turning into a puffball.
5. Rope-Braid Ponytail
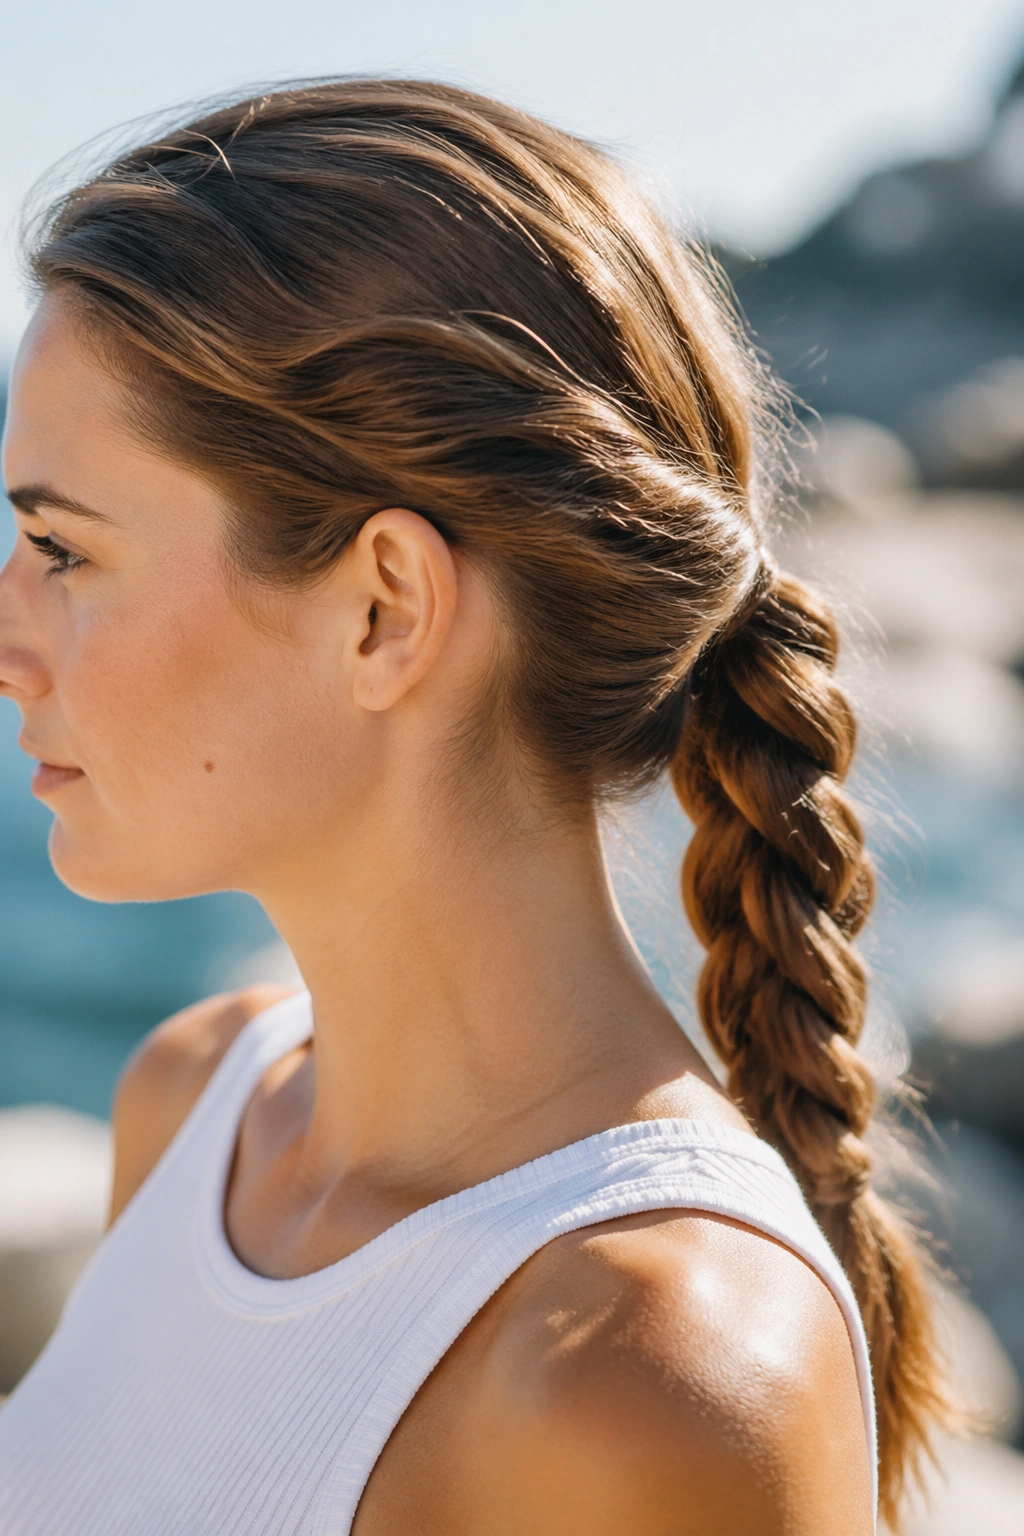
Unlike a regular ponytail, a rope braid has built-in tension. You split the ponytail into two sections, twist each one, then wrap them around each other so the shape locks in. That little twist makes a real difference in humid weather because the strands are less likely to spread apart and go fuzzy.
The rope braid also looks good when the wave pattern isn’t fresh. Day-two or day-three hair often has enough grip to hold the twist without slipping, and that’s the sweet spot. Put a little smoothing cream on the ponytail before twisting, especially on the outer layer where frizz shows first.
This style works best when you want length but don’t want your hair hanging loose against your neck. It keeps the shape tidy and still gives you a bit of swing at the ends. If your ponytail is thick, secure the base with a strong elastic first, then twist the length so it doesn’t unravel halfway through the day.
6. Bubble Ponytail With Soft Waves
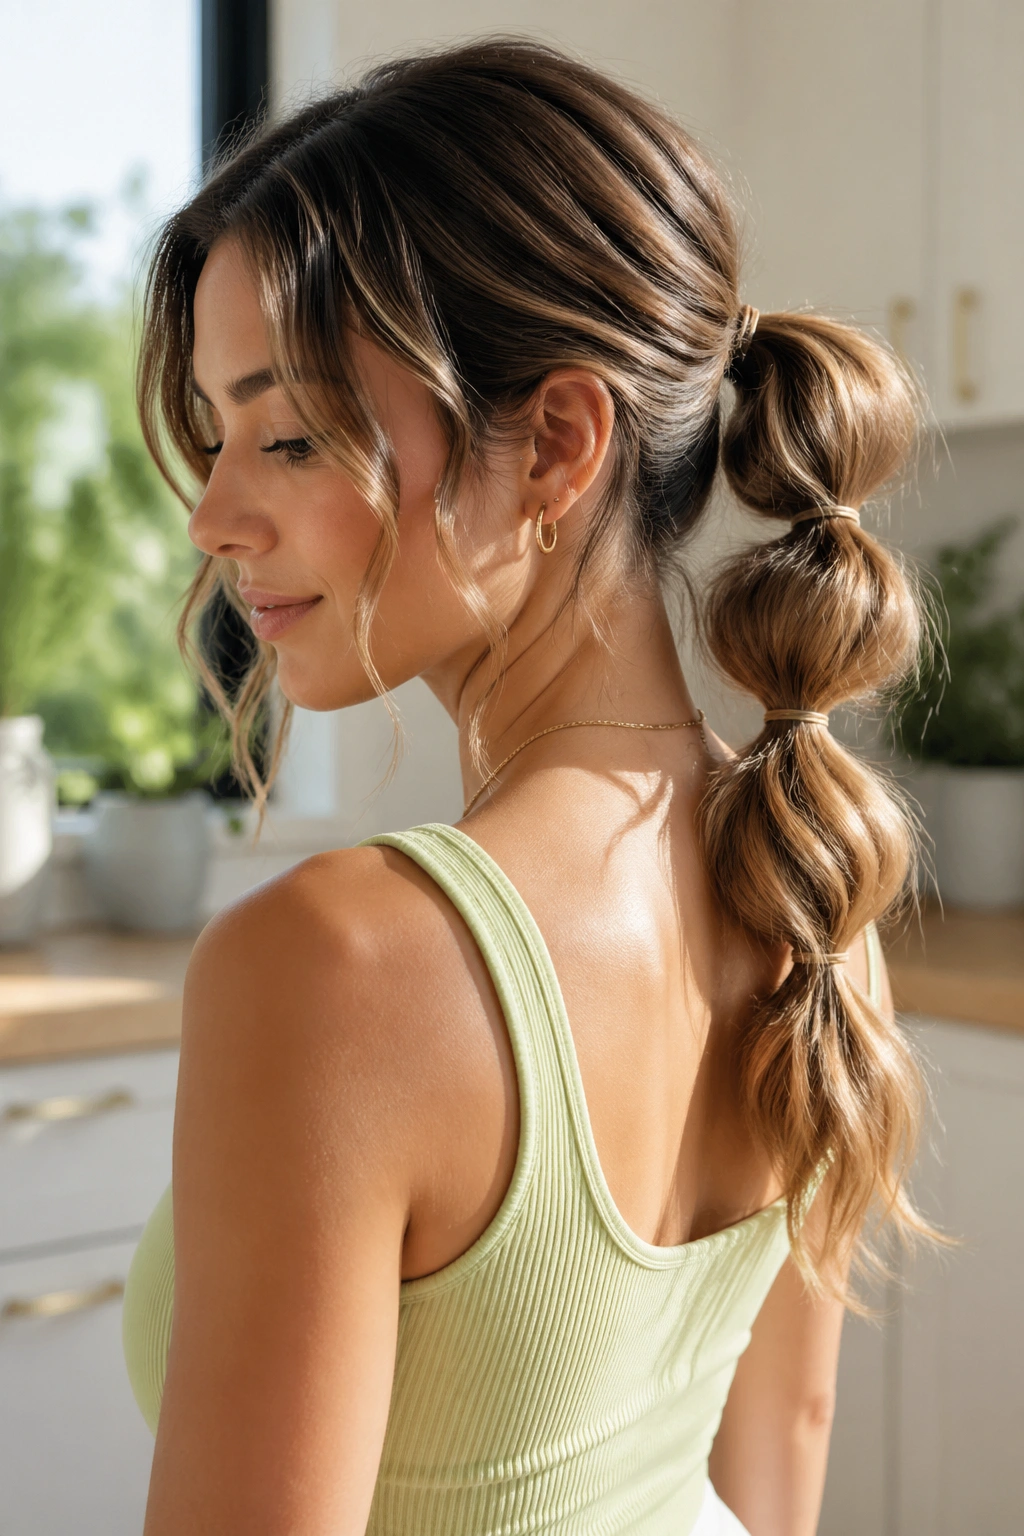
A bubble ponytail looks playful, but it’s also practical in humidity. Start with a regular ponytail, then add small elastics every 2 to 3 inches down the length. Gently pull each section outward until it puffs into a round bubble. The hair stays gathered, so it can’t frizz out in every direction at once.
That shape is the whole point. Humid air makes loose ends expand, and the bubble sections keep the expansion contained. You still get volume, but it’s organized volume. If your waves are already large and loose, this style can make them look deliberate instead of chaotic.
Use clear elastics for a clean look, or switch to fabric ties if your hair is more delicate. I’d avoid overbrushing the ponytail before you section it. A little texture actually helps the bubbles hold better, and overly smooth hair tends to slide out.
7. Slicked Roots and Loose Ends
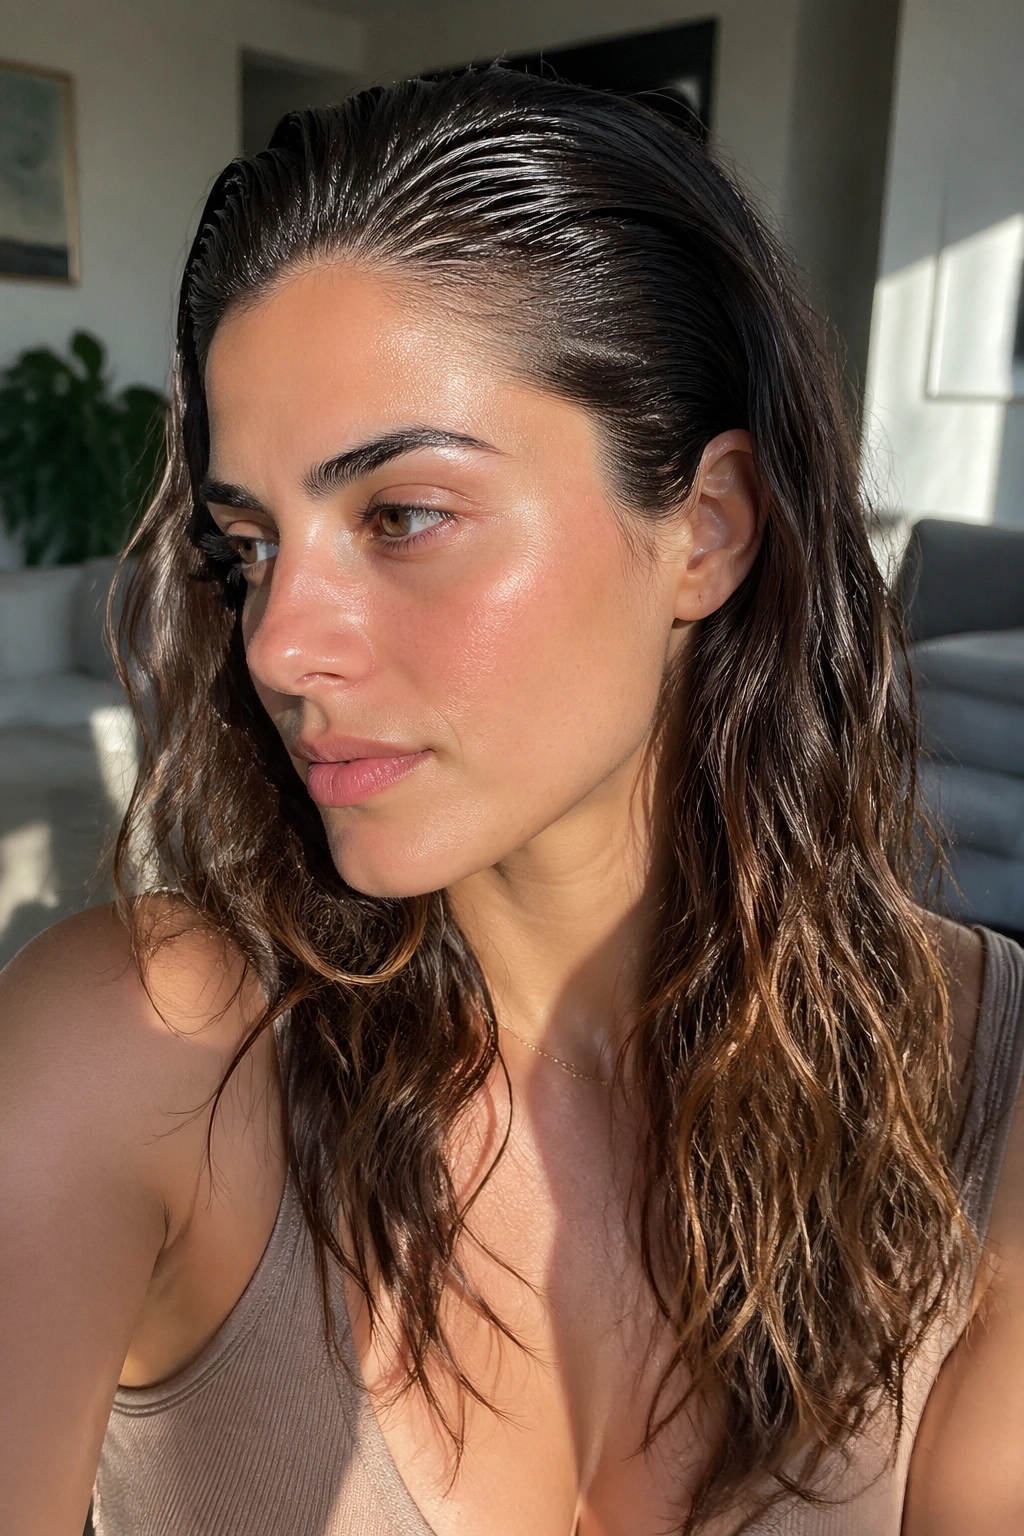
The slicked-root look is useful when the crown is the part of your hair that freaks out first. Smooth the top with gel or a strong cream, brush it back, and leave the mid-lengths and ends loose. You’re not flattening the whole head. You’re just controlling the part that humidity attacks fastest.
What to Smooth
Focus on the front hairline, temples, and top few inches around the part. A toothbrush or small edge brush can help if you want that root area cleaner. Keep the product light enough that the back of your hair still moves.
What to Leave Alone
Leave the wave pattern from the ears down as natural as possible. If you slick everything, the style can end up looking stiff and far more obvious than you want. Humidity is already doing the hard work; you do not need to overcorrect it.
This style reads polished, but it’s not precious. That’s why it works. The roots stay calm, the ends still have personality, and the contrast between sleek top and loose bottom keeps the whole thing from going flat.
8. Crown Braid Headband
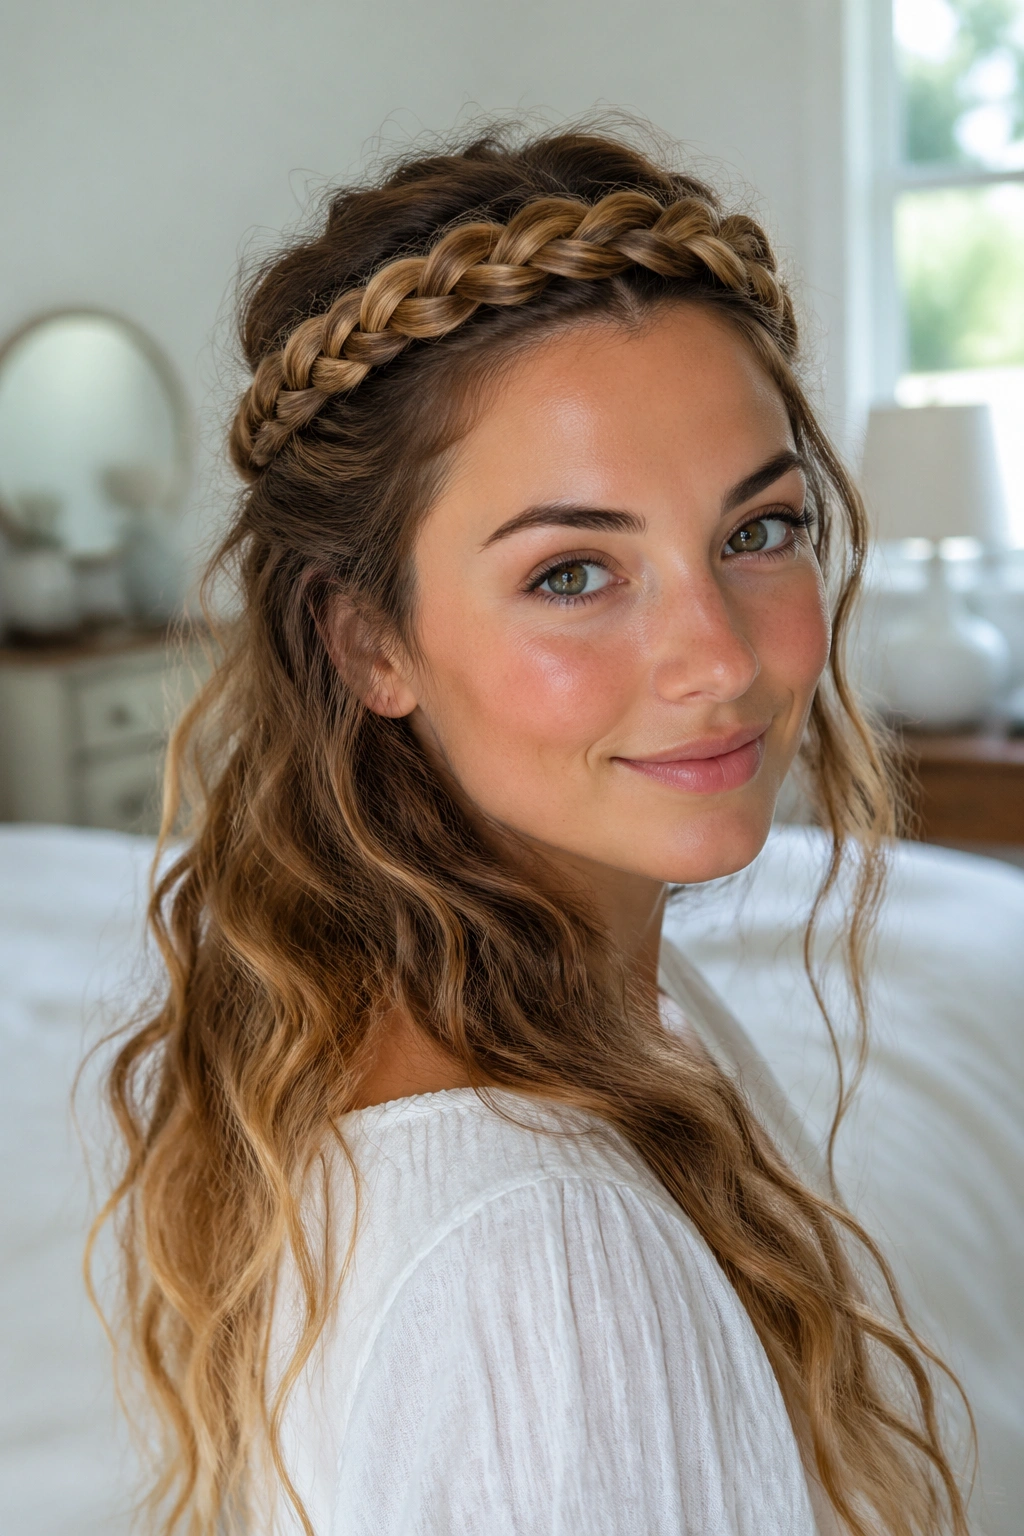
Can a braid act like a built-in humidity shield? Pretty much. A crown braid headband keeps the front layers off your face and stops the hairline from turning into a frizz zone. It also gives you a clean frame around the face without pinning back the entire head.
Start braiding near one temple and guide the braid across the top of the head like a headband. Secure it behind the opposite ear, then let the back fall loose in waves. If your hair is a little dirty, even better. Slightly lived-in texture gives the braid more grip and helps the finished style stay put.
This is one of my favorite styles for wavy hair because it solves a real problem without looking like a compromise. You still see your waves. You just don’t have to negotiate with every little flyaway near your forehead.
9. Low Chignon With a Wavy Tail
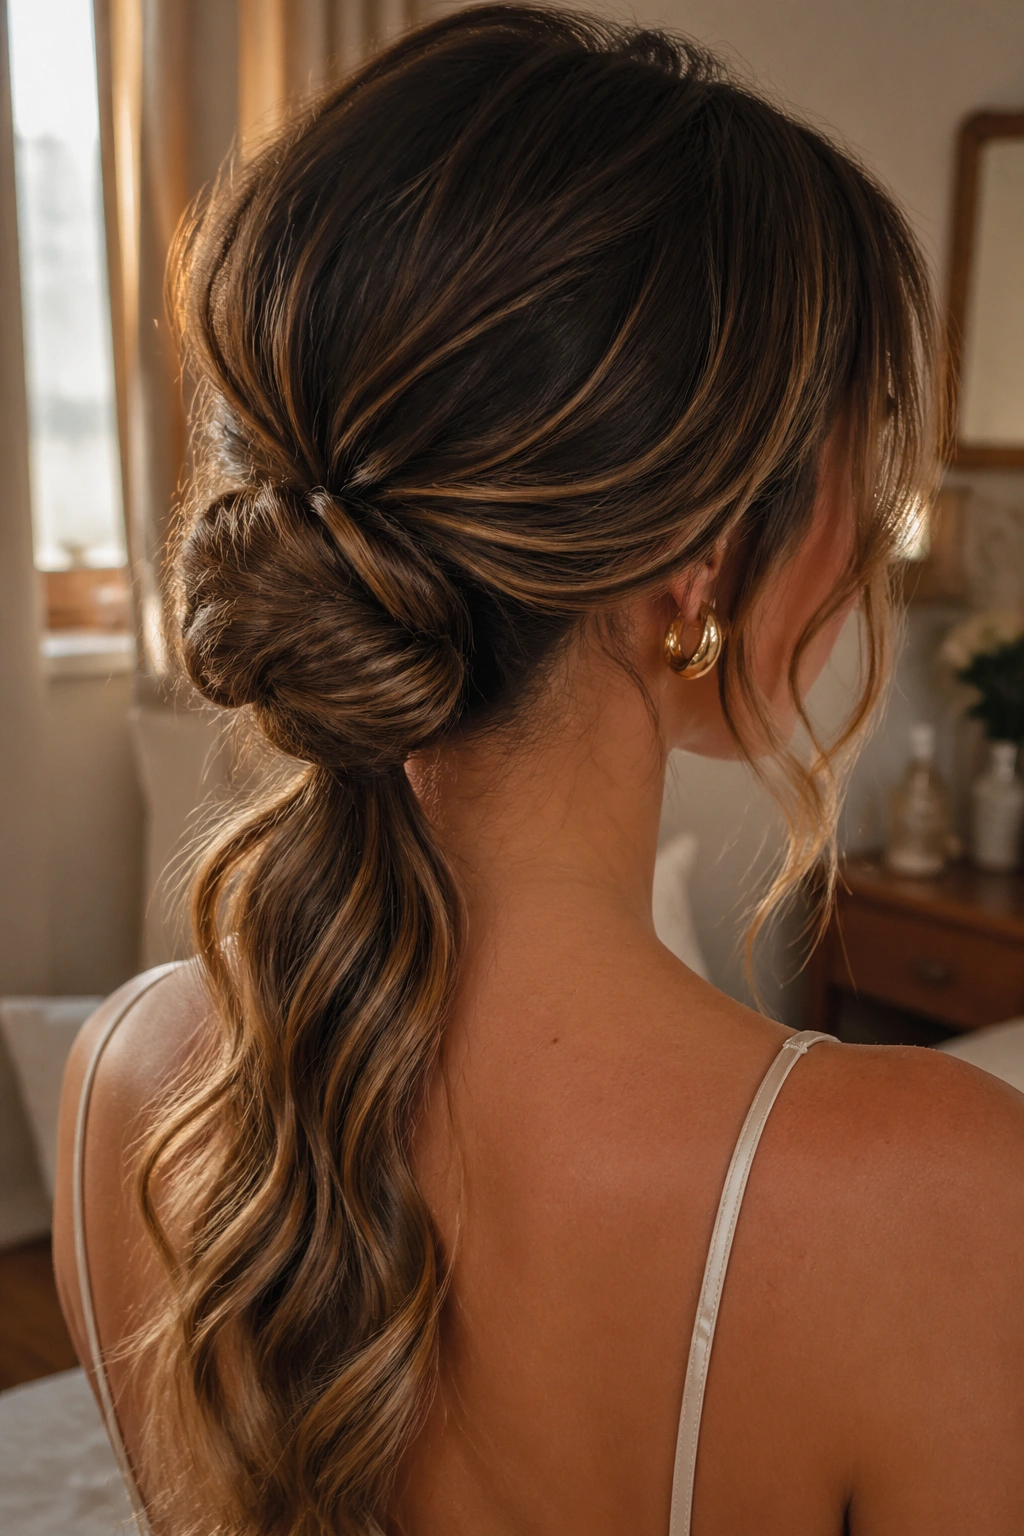
A low chignon with a wavy tail is a neat answer for days when you want structure but not stiffness. Gather the hair at the nape, twist it into a compact bun, and leave a short tail of ends out instead of tucking every last piece under. That tail softens the look and gives the style a bit of movement.
- Smooth the top lightly with your hands or a soft brush.
- Secure the base with an elastic first.
- Twist the length into a bun and pin it with U-pins.
- Leave the last 2 to 3 inches free if your length allows it.
That small bit of looseness matters. A fully tucked bun can start to look severe as soon as humidity hits, while the chignon with a tail keeps the finish softer. It also tends to sit better on wavy hair than a super-tight ballerina bun, which can flatten your natural texture in a way that feels a little unforgiving.
10. Loose Pineapple Bun
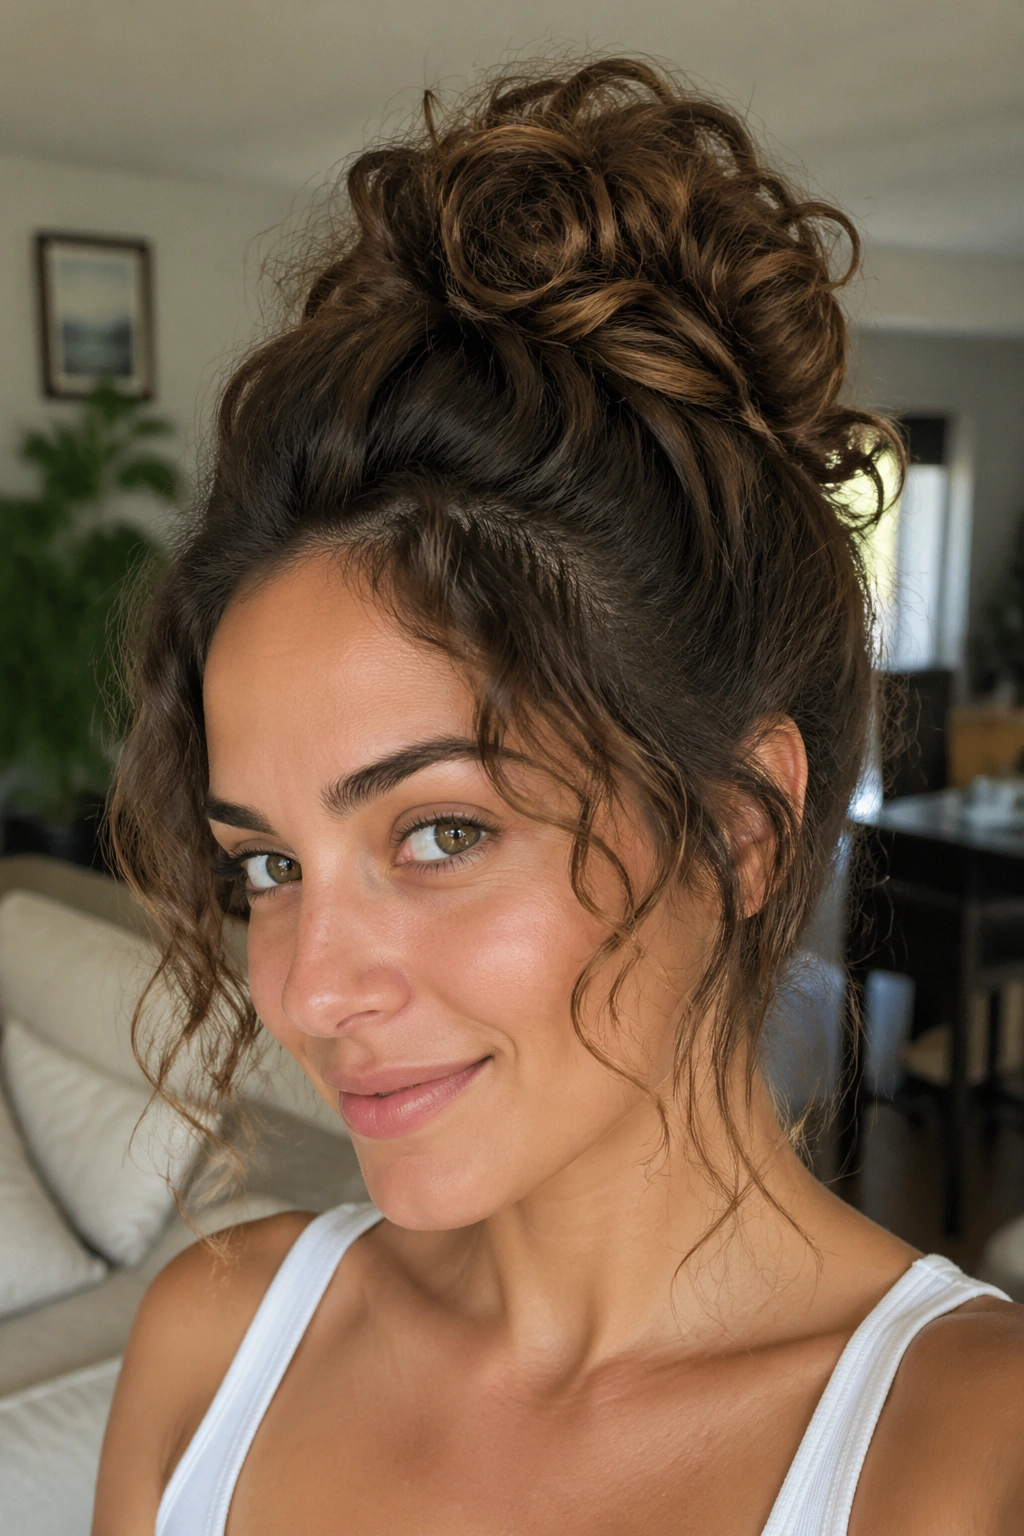
The loose pineapple bun is not the tiny top knot some people wear to bed. This one sits high, but it stays soft and airy. Gather your waves toward the crown, twist them loosely, and secure them so the ends can fold over rather than stretching tightly across the scalp. The goal is height with a little freedom.
That freedom helps in humid weather. A high bun keeps most of the hair off your neck, which is a small mercy on sticky days, and it reduces the amount of length exposed to damp air. If your waves are long, the tucked ends create texture instead of a hard knot shape.
I like this style for casual days because it looks better when it’s not too polished. A few face-framing strands are fine. A little frizz around the bun is fine too. The whole point is to keep the hair contained without forcing it into something it will fight back against.
11. Silk-Scarf Ponytail
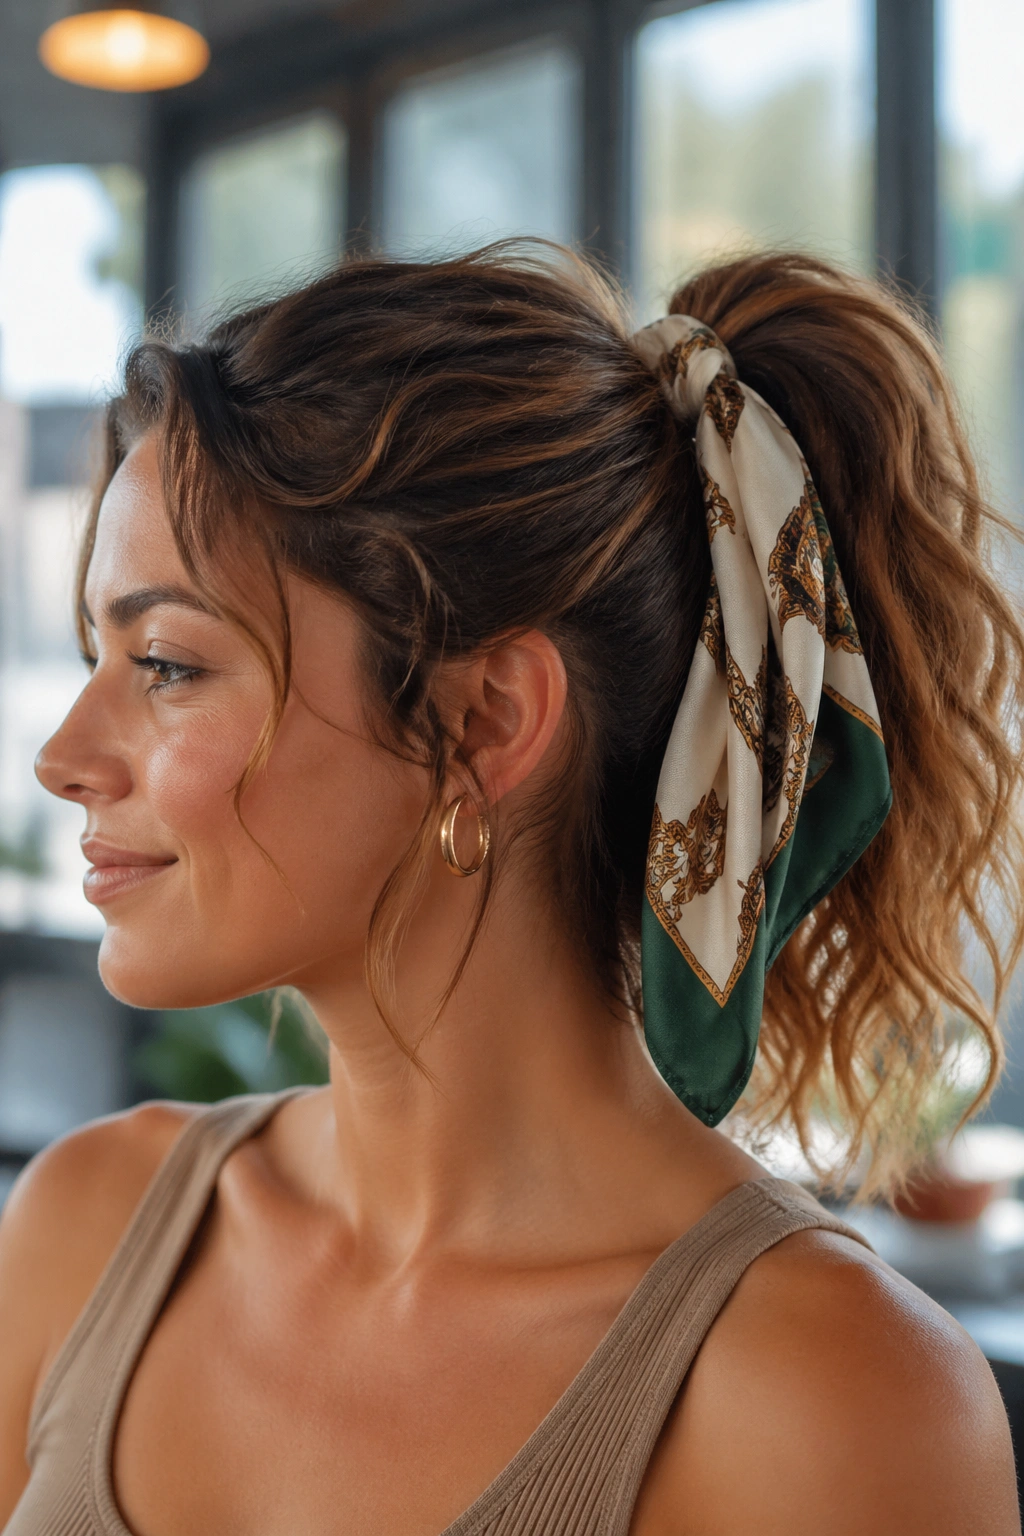
A silk-scarf ponytail is one of the easiest ways to make a plain ponytail hold up better in humidity. Tie the ponytail first, then wrap a silk scarf around the base and knot it neatly. The scarf adds style, but it also reduces the chance of little flyaways popping out at the elastic.
Unlike a plain elastic, the scarf gives the ponytail a bit of weight and softness. That helps the hair sit in one direction instead of expanding outward at the base. It’s a small fix, but small fixes matter when your hair is already trying to swell in the air.
Choose a scarf that isn’t too slippery. A scarf with a little texture stays in place longer, especially on fine wavy hair. If your hair is thick, secure the ponytail first with an elastic and then use the scarf as the visual finish. That way you get hold and style in one move.
12. Double Mini Braids and Open Waves
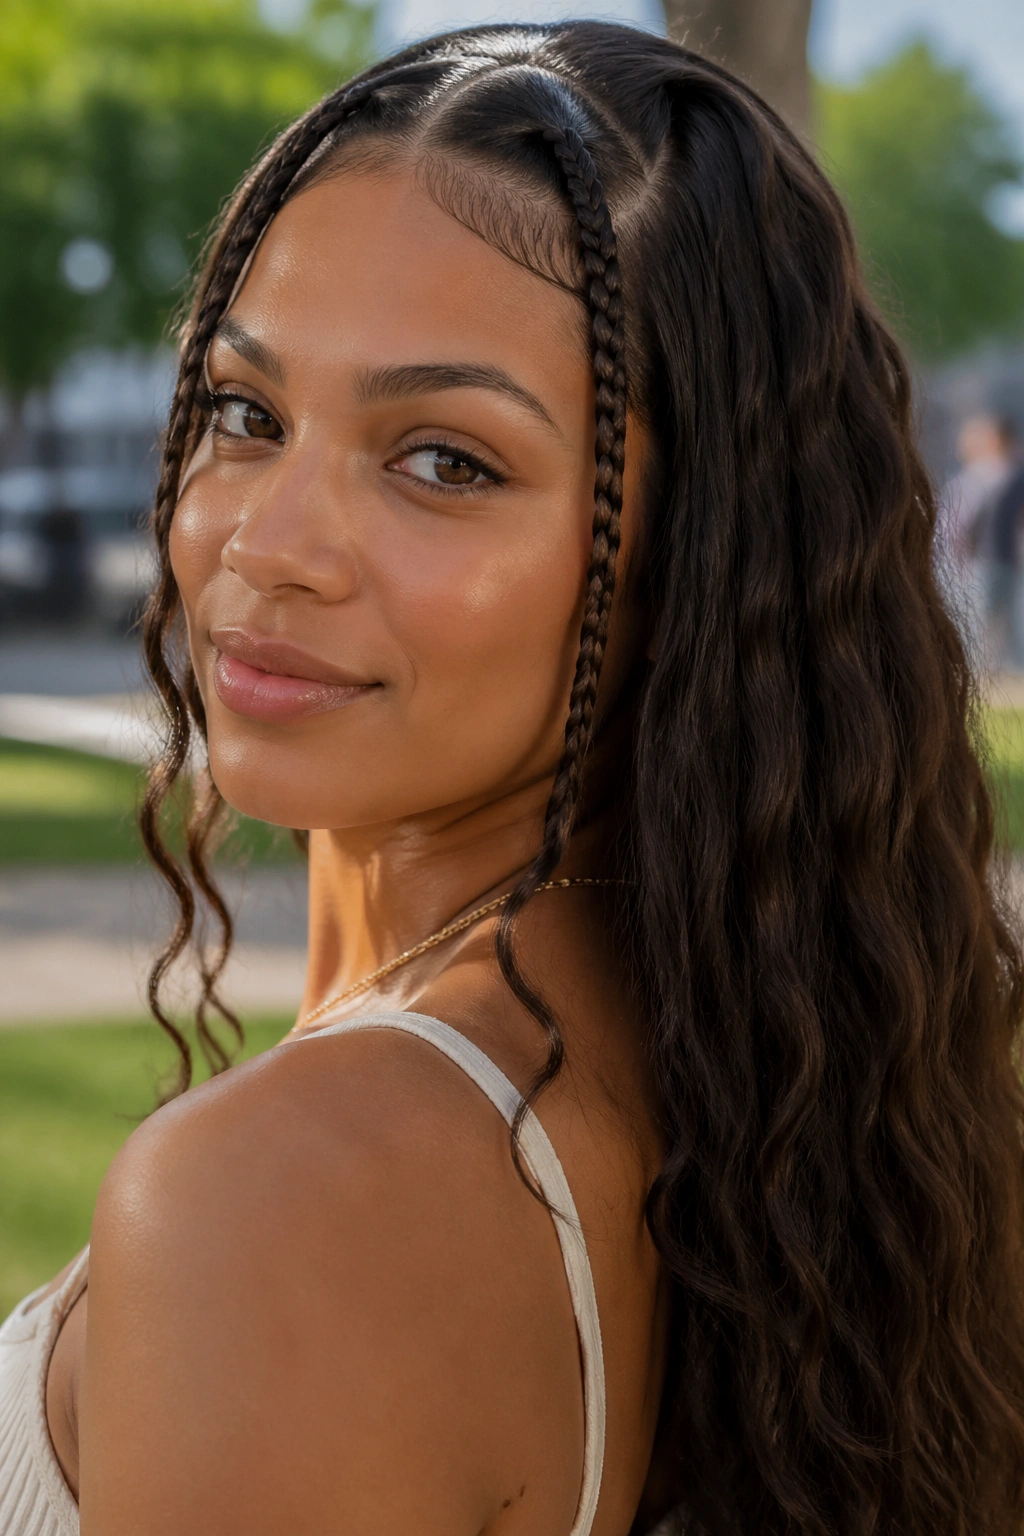
Two small braids at the front can calm down a whole head of wavy hair. Part off sections from each temple, braid them back toward the ears, and secure them with tiny elastics. Leave the rest of the hair open. It’s a simple split between control and softness.
Why It Helps
The front pieces are usually the first ones to puff up in humidity because they’re the most exposed. Braiding just those sections keeps the hairline cleaner while the back still moves naturally. The result feels lighter than a full braid and less fussy than pinning everything back.
How to Wear It
Keep the braids narrow, about finger-width or a little smaller. If they’re too big, they start to dominate the style and flatten the face. If they’re too tiny, they disappear into the wave pattern and lose the point. This style is especially good for thick hair because it cuts down on bulk where the frizz usually shows first.
13. Wrapped Low Ponytail
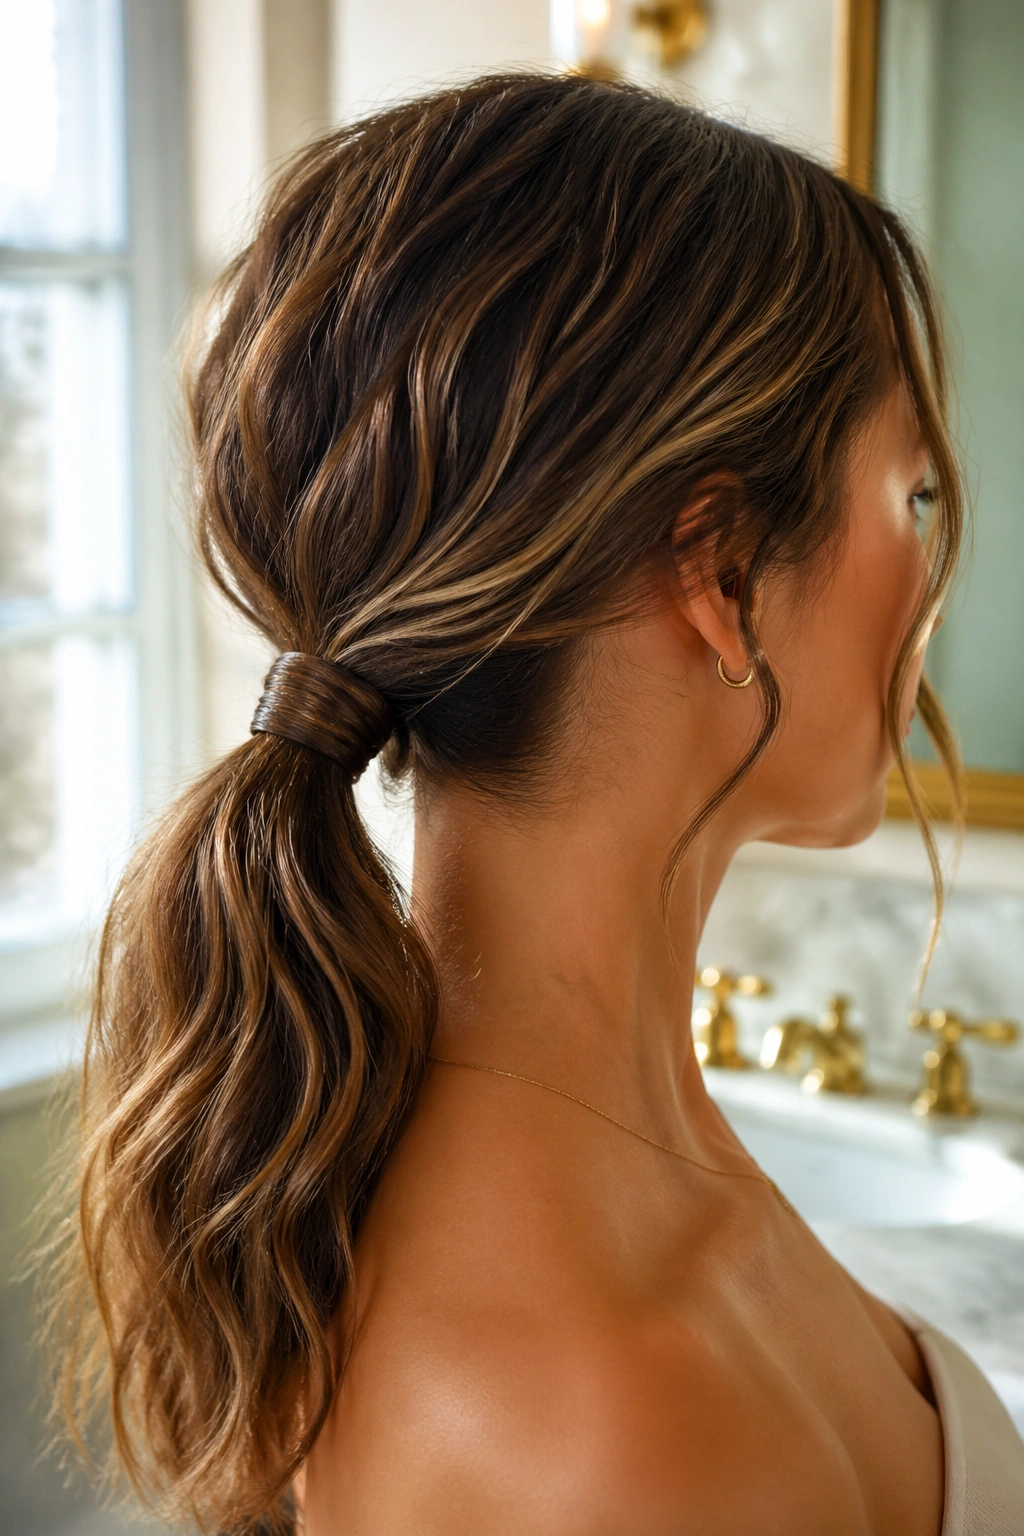
A wrapped low ponytail is polished in the nicest possible way. Pull the hair into a low pony, take a 1-inch section from underneath, and wrap it around the elastic until the band disappears. Pin the end underneath with one bobby pin. Done well, it looks cleaner than a regular ponytail without demanding a lot from your hair.
Humidity tends to make elastic lines look messy fast. The wrapped section hides the band and gives the base a smoother finish, which makes the whole style look more intentional. If your hair is wavy, you can leave the ponytail itself a little textured instead of brushing it glass-smooth.
A light mist of flexible-hold spray over the top section helps, but keep it away from the ponytail length if you want movement. This style works for work, dinner, and any day when you need your hair to cooperate but don’t want it pinned up completely.
14. Twisted Half-Up Knot
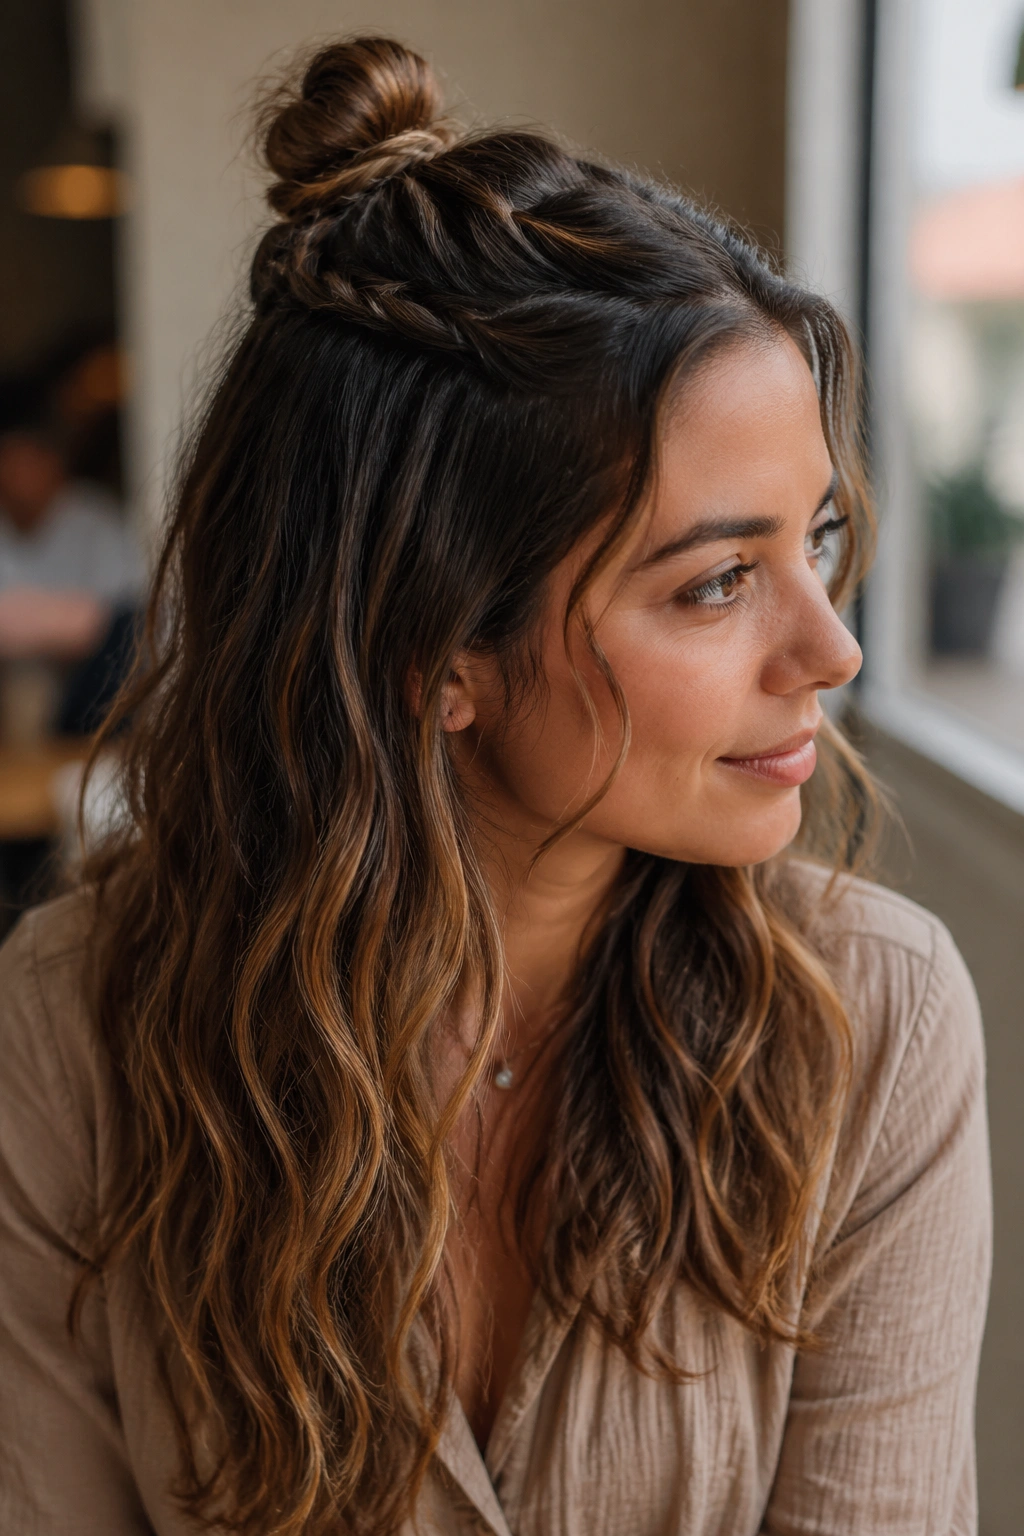
A twisted half-up knot gives you a softer version of the classic half-up style. Take two sections from the temples, twist them back, and tie them into a small knot at the back of the crown. Pin the knot underneath if the hair is slippery. The lower half stays loose, but the top half gets enough structure to resist humidity.
There’s a reason this one hangs on so well. Twists are easier to control than loose front layers, and they sit flatter against the head. That flatter shape matters when the weather starts pulling volume outward. The knot also adds a little texture without making the style look formal.
This is one of those styles that works on both fresh and second-day waves. If your hair is a little rough around the edges, even better. The knot likes texture, and the loose lengths below it keep the whole thing from feeling overworked.
15. Pinned-Back Face-Framing Waves
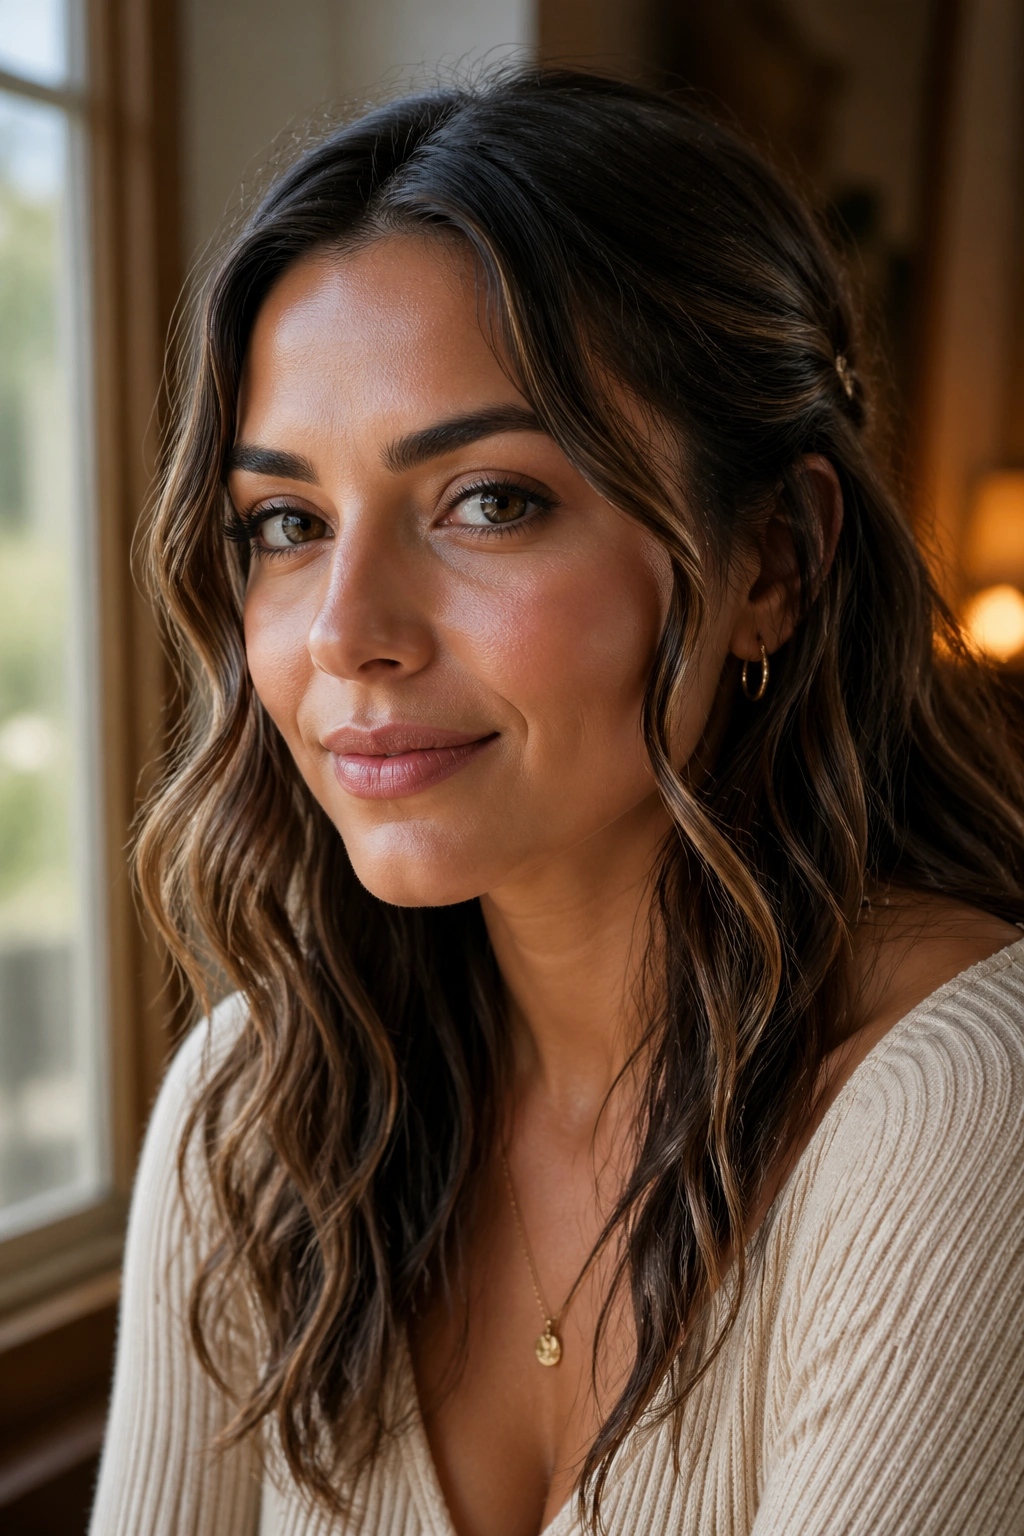
Sometimes the smartest move is not to fight the whole head of hair. Pin back just the pieces that bother you most. Take the front wave pieces, shape them the way you like, and secure them behind the ears or at the temples with two to four small pins. Leave the rest alone.
That sounds almost too simple, but it’s often the fix that makes humid weather bearable. Face-framing pieces tend to separate, swell, and stick to the skin first. Pinning them back keeps them visible but controlled. You still get the softness of loose waves without having to keep your hands in your hair all day.
Use pins that match your hair color if you want the look to disappear a bit. If you want the style to feel more finished, choose decorative clips and place them in a clean line rather than scattering them randomly. Placement matters here. A lot.
16. Side Braid Into a Loose Ponytail
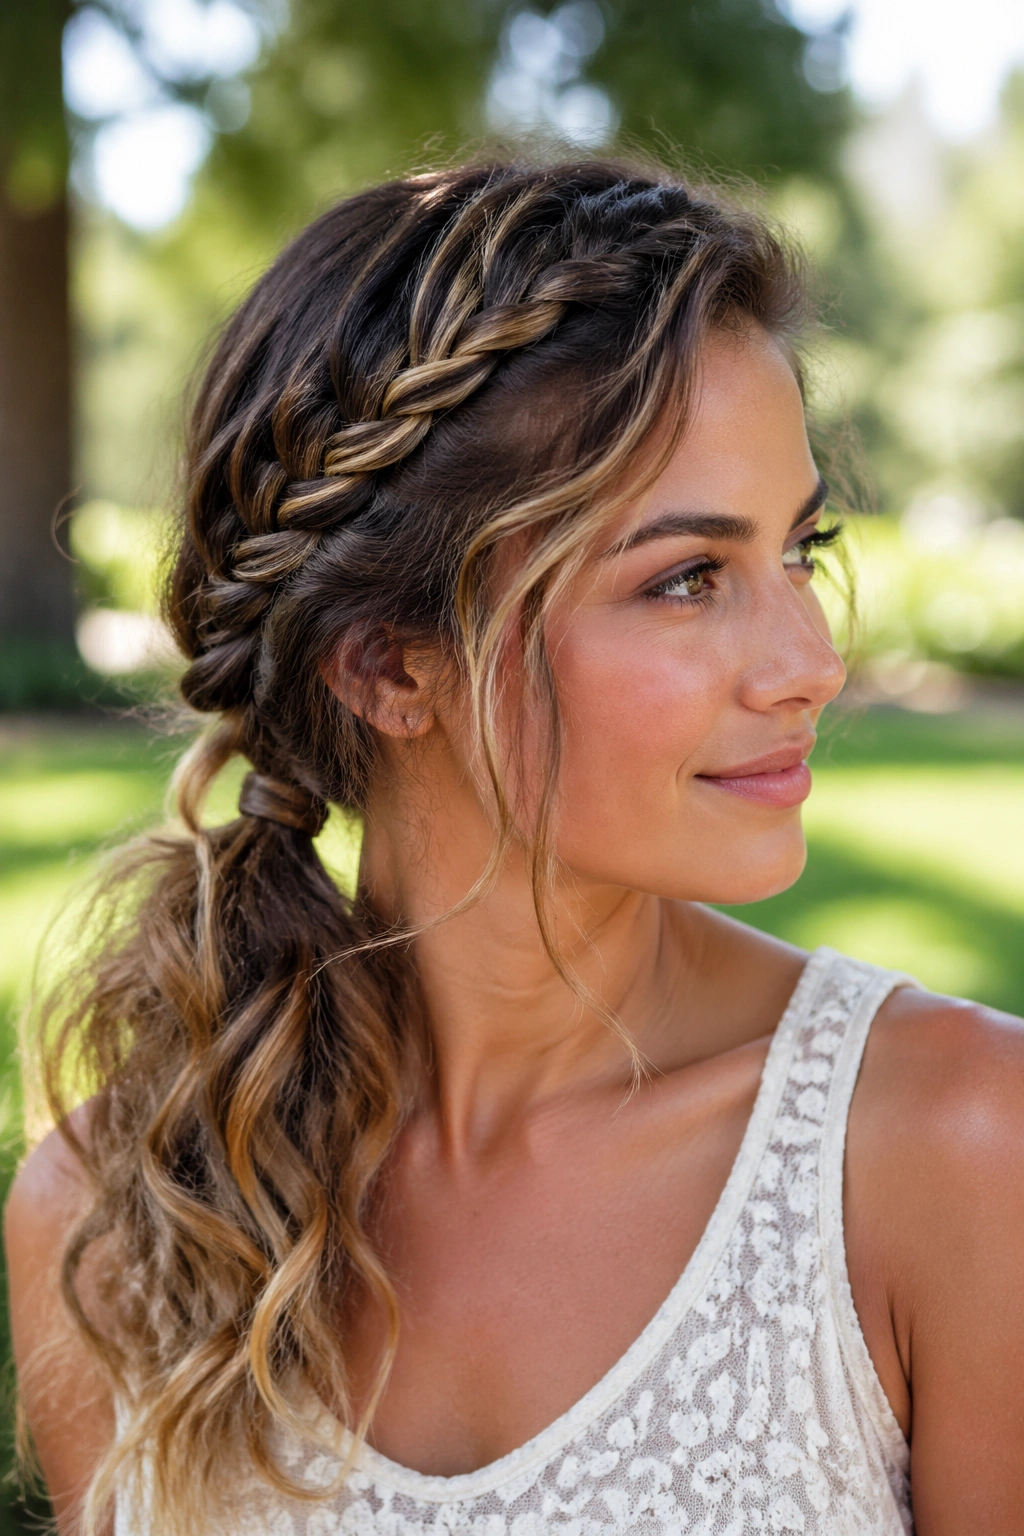
A side braid into a loose ponytail gives you control without too much structure. Braid one side from the front hairline back toward the ear, then gather the braid with the rest of the hair into a low ponytail. The braid handles the front frizz, and the ponytail keeps the shape relaxed.
Unlike a full braid, this style leaves more of your wave pattern visible. That’s useful if you like your hair to feel soft instead of tightly contained. It also gives the eye a single focal point, which makes the whole style feel deliberate even when humidity starts to rough up the ends.
A soft elastic at the ponytail base works better than a hard one. If your waves are fine, tug the braid a touch to give it width before joining it to the ponytail. If they’re thick, keep the braid snug so it doesn’t puff out at the sides.
17. Messy Top Knot With Tendrils
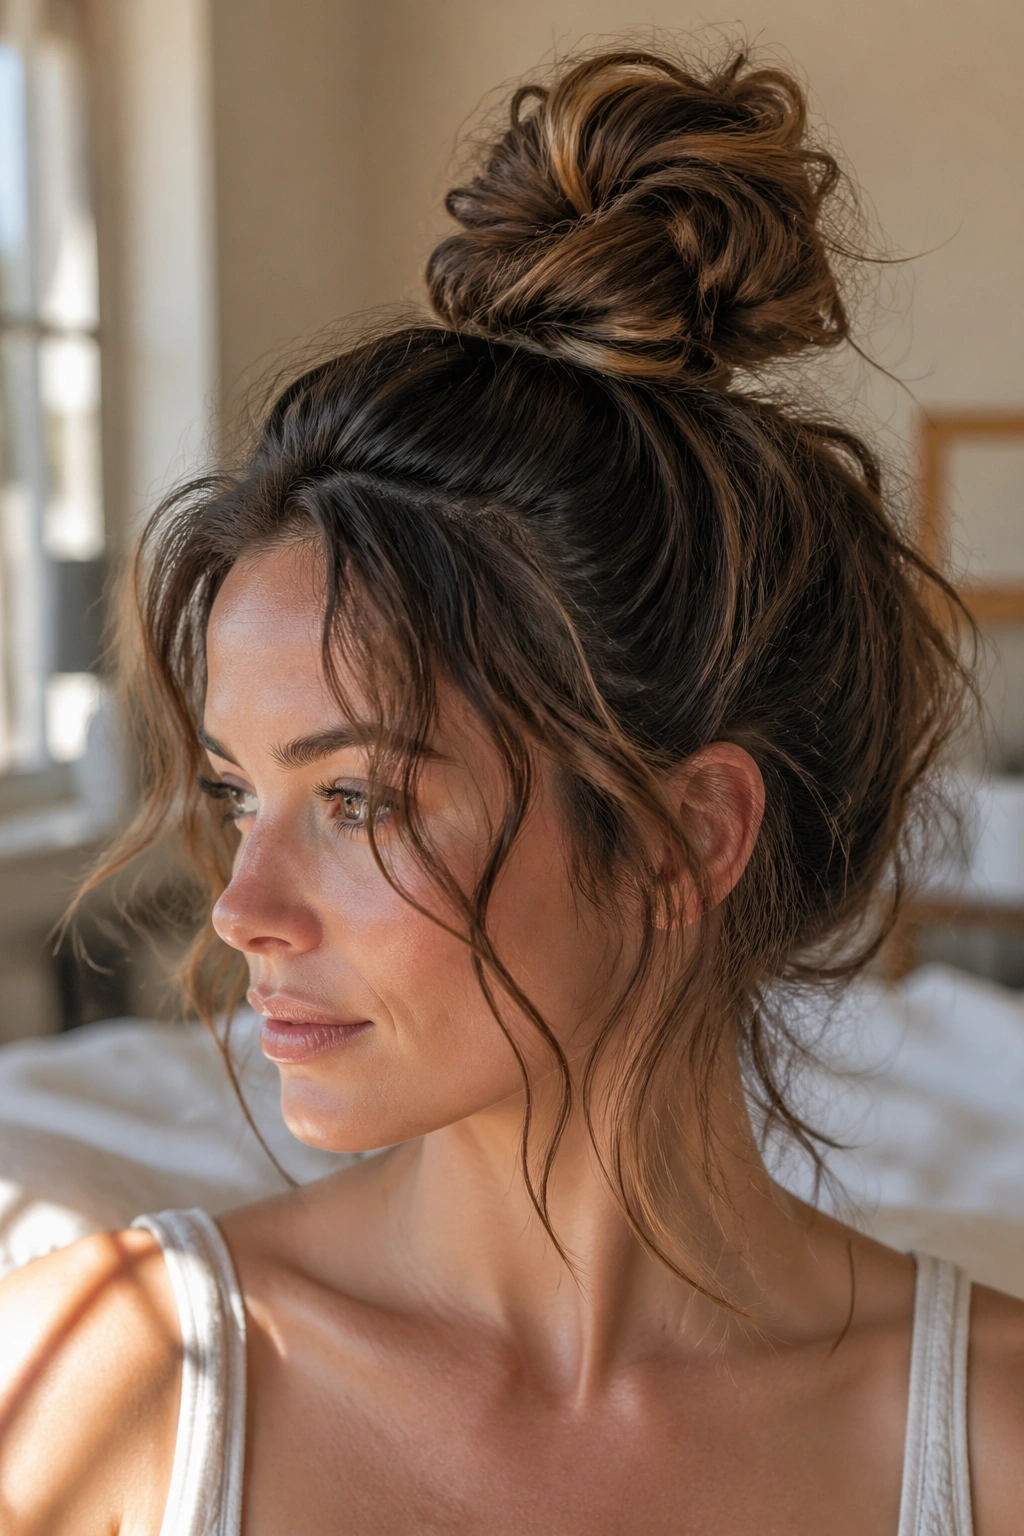
A messy top knot is a humidity classic for a reason. Gather the hair high, twist it into a knot, and leave a couple of narrow tendrils loose around the face. Those little pieces keep the style from looking severe, and they give the front of your hair a chance to move without ruining the rest of it.
The important part is not making the knot too neat. If you smooth every strand into place, humidity can make the style look flat and heavy. A little texture helps the knot feel casual and keeps it from collapsing when the air gets damp. Dry shampoo or texture spray at the roots can give the bun a better grip.
I’d use this one on days when I want my hair off my neck first and foremost. That’s the honest appeal. It’s fast, it survives heat, and it still looks better than the panicked ponytail most of us throw up when the weather turns sticky.
18. Side-Swept Waves With Hidden Pins
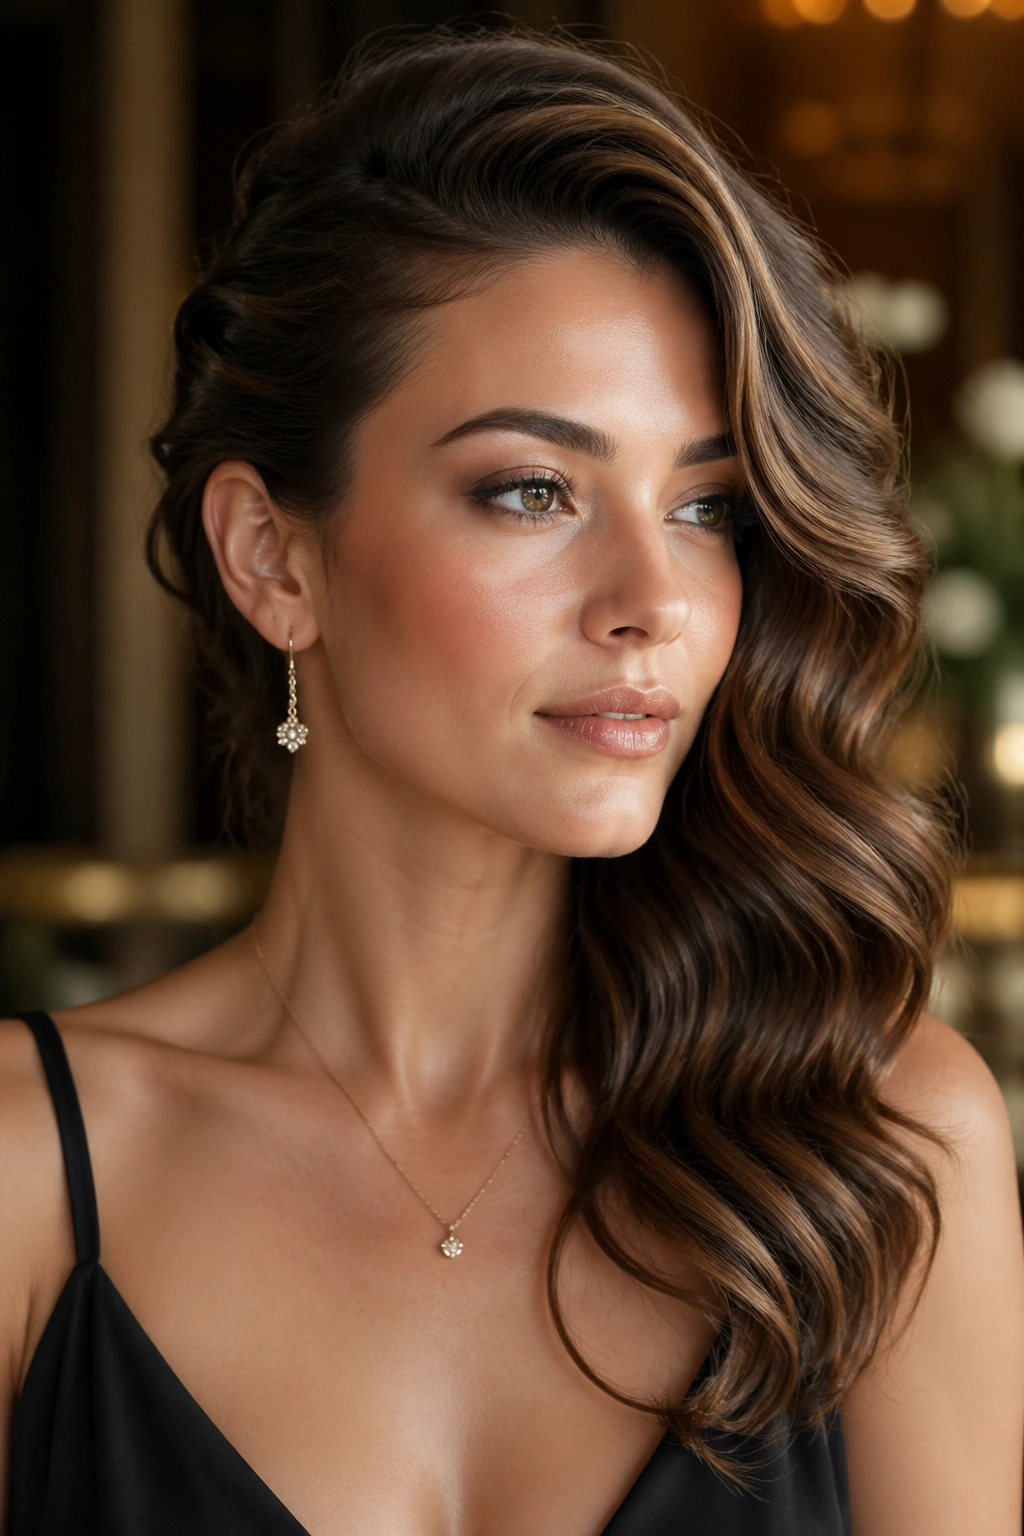
What if you want to keep your waves down and still stop them from eating your whole face? Sweep the hair to one side, pin the back section under the top layer, and let the length fall over one shoulder. The hidden pins keep the style secure, while the side sweep makes the frizz read as volume instead of chaos.
What Makes It Work
The asymmetry gives the waves a shape to follow. Instead of spreading evenly across the head, the hair falls in one direction, which makes it easier to control when moisture starts changing the texture. It’s a quiet trick, but a useful one.
A Good Time to Wear It
This is a strong pick for dressier outfits, one-shoulder tops, or any moment when you want to keep your hair down without letting it expand on both sides. Use two or three bobby pins tucked just under the top layer, and keep them snug enough that the hair won’t slide during the day.
19. Dutch Braid Into Loose Ends
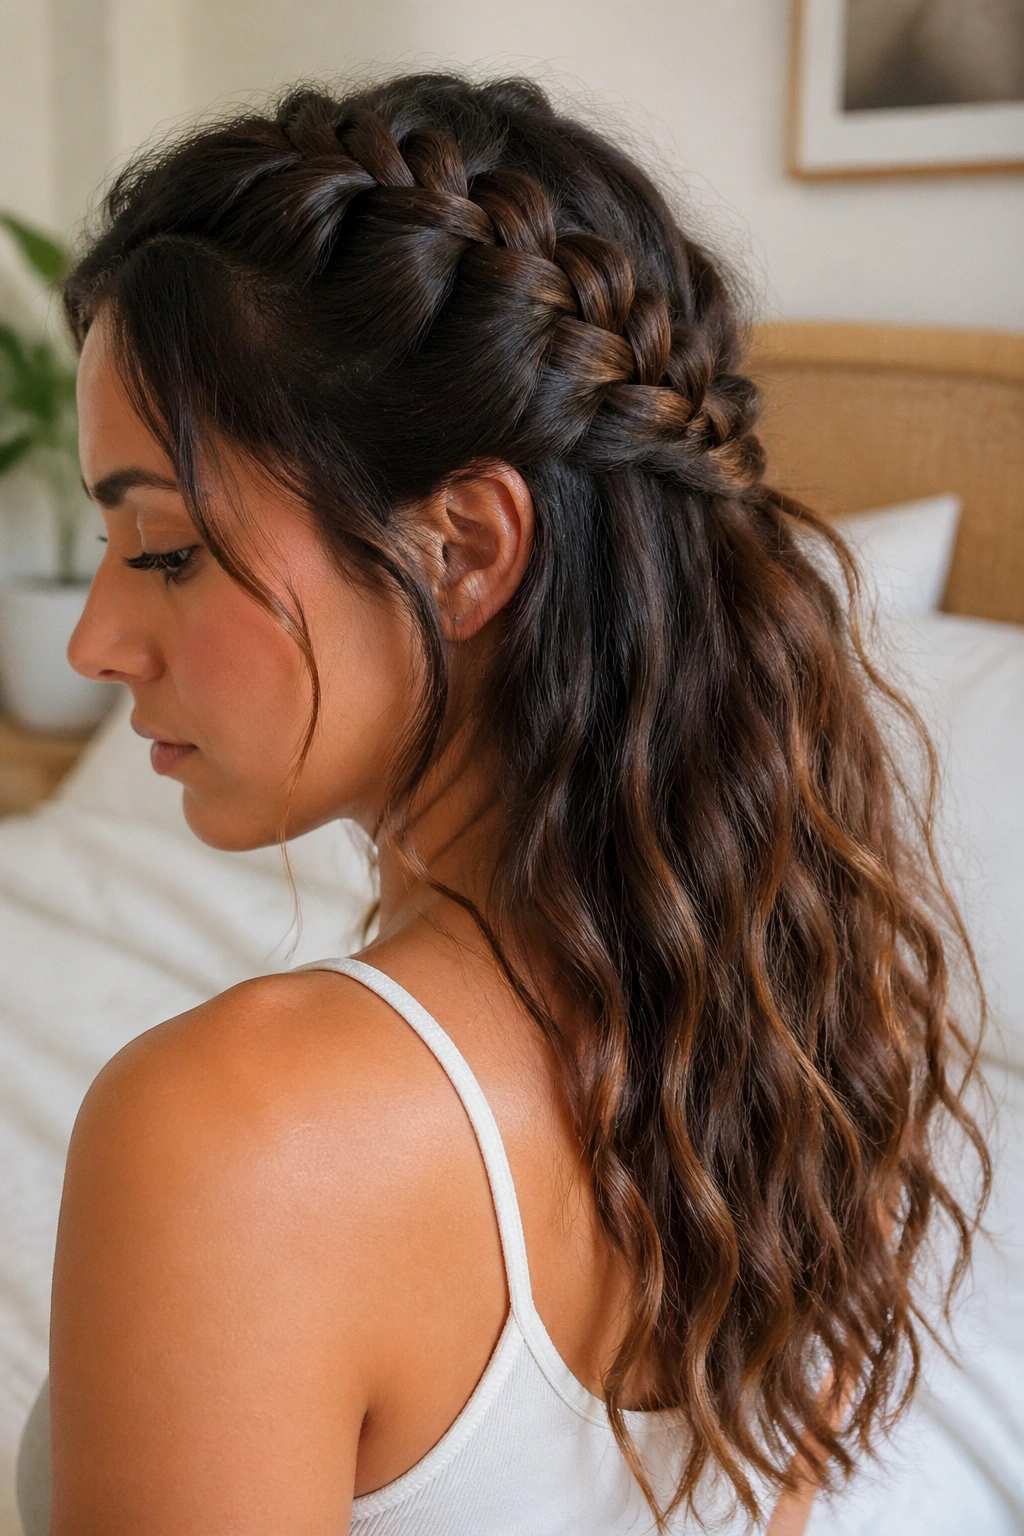
A Dutch braid is a stronger option than a standard braid because it sits on top of the hair and creates a more defined ridge. Start at the hairline and braid down the back or along one side, then stop around the occipital area and leave the remaining ends loose. That mix of braided control and open length works well in humid air.
- Begin with a clean part or a deep side part, depending on how much face-framing you want.
- Braid firmly enough to stay put, but not so tight that it pulls the scalp.
- Secure the braid with a small elastic before the loose ends start.
- Let the remaining length keep its wave pattern.
The nice thing about this style is that the braid carries the visual weight. The loose ends can frizz a bit and it still looks finished. That makes it a better humid-weather choice than a simple three-strand braid, which can sometimes feel too plain when the weather is doing the most.
20. Air-Dried Shaggy Lob
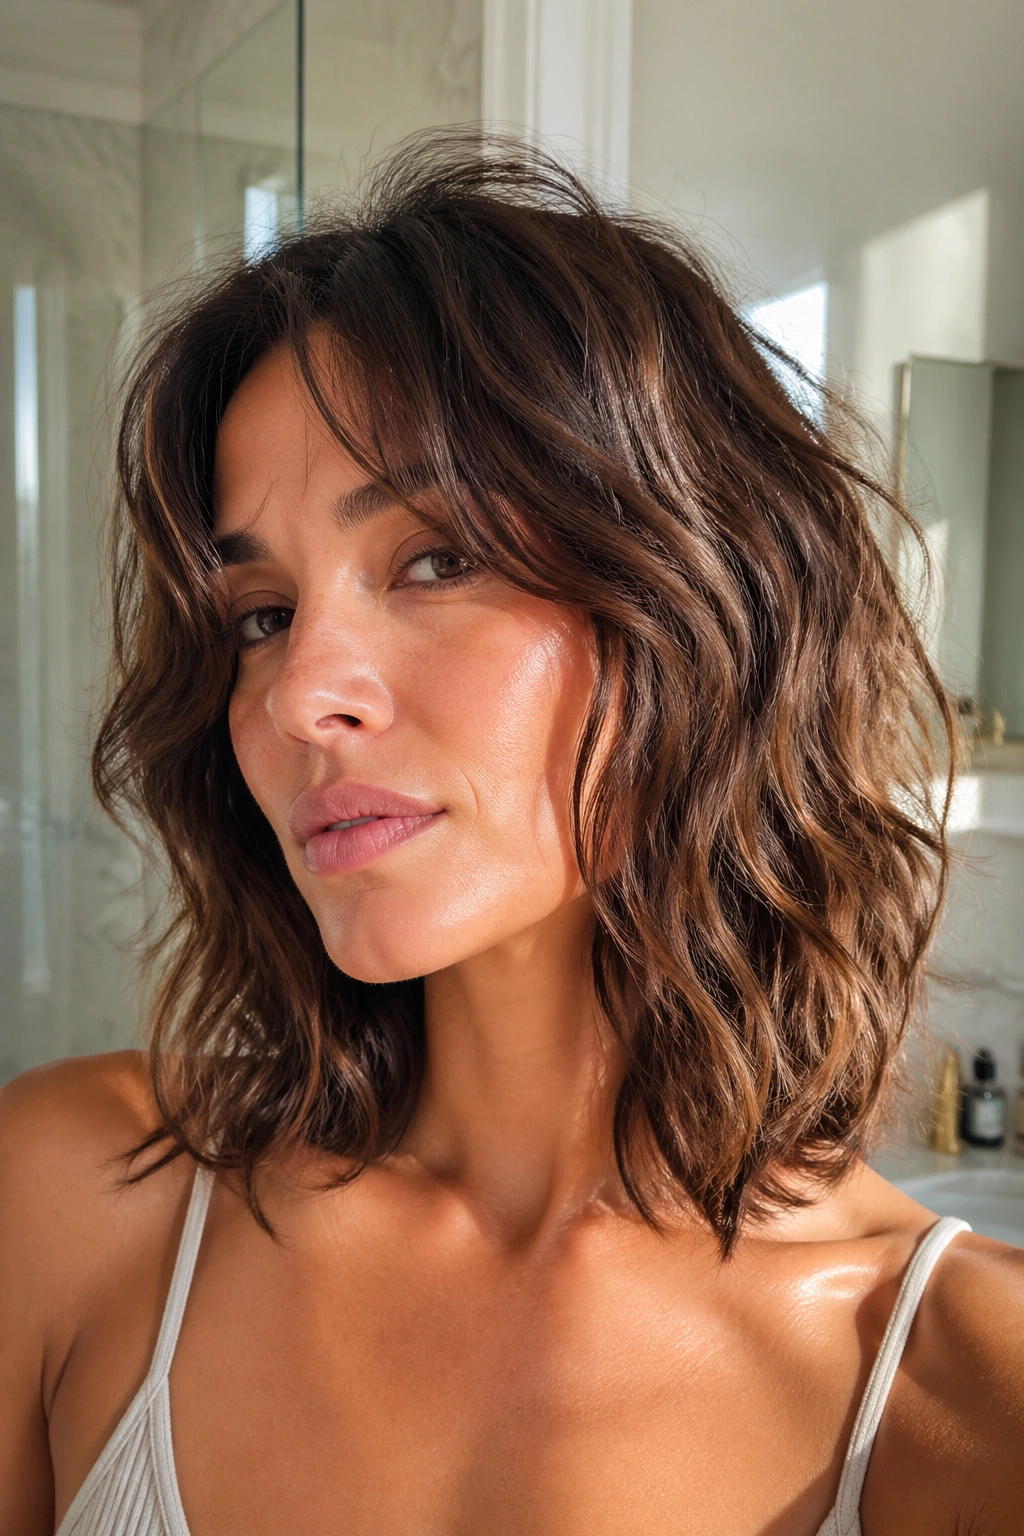
A shaggy lob is one of the few haircuts that can make humid weather behave. The layers do a lot of the work, so the style doesn’t collapse when the air gets wet. If you have a shoulder-length lob with wavy texture, rough-drying it with a little mousse and then letting it air-dry most of the way can give you a shape that actually improves when it’s not overhandled.
The key is light product. Heavy creams can make a lob sit too flat at the roots and too swollen at the ends. A foam or mousse gives enough hold to define the bends without weighing down the cut. Scrunch the hair upward, then leave it alone for a while. The less you touch it while it dries, the better the shape tends to hold.
This is the style for people who want a real haircut solution instead of a styling trick. It’s not glamorous in a polished-salon sense. It is practical, and practical wins when the air feels like soup.
21. Sleek Low Bun With a Soft Bend
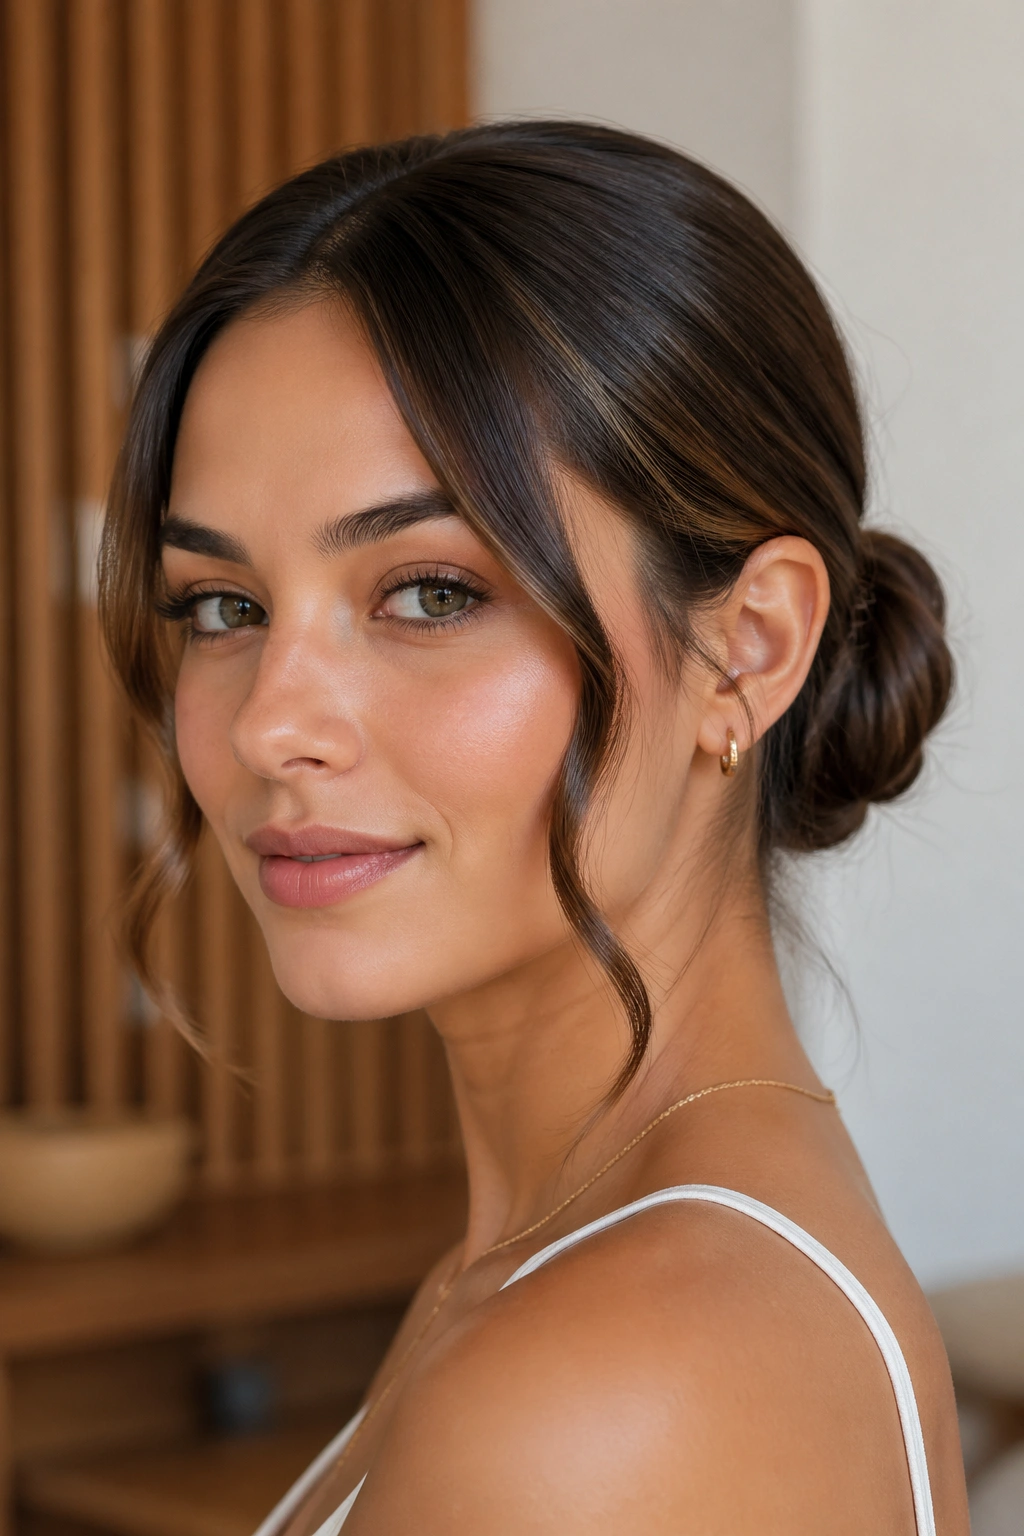
A sleek low bun sounds strict, but it does not have to be severe. Smooth the hair back, gather it low, and twist it into a bun while leaving a tiny bend in the front or at the ends. That small bit of softness keeps the style from looking too formal, and it gives wavy hair a little breathing room.
Unlike a tightly wound ballet bun, this version works with the hair’s natural bend. The top stays controlled, which matters in humidity, while the bun itself can be looser and more forgiving. Use a light gel or smoothing cream at the hairline, then pin the bun with enough support that it won’t sag once the air gets damp.
I’d wear this to anything that needs a neat finish. It handles heat well, and it does not need constant adjustment. If your hairline tends to puff up first, this style is one of the most reliable ways to keep that area under control without looking overly styled.
22. Half-Up Claw Clip Roll
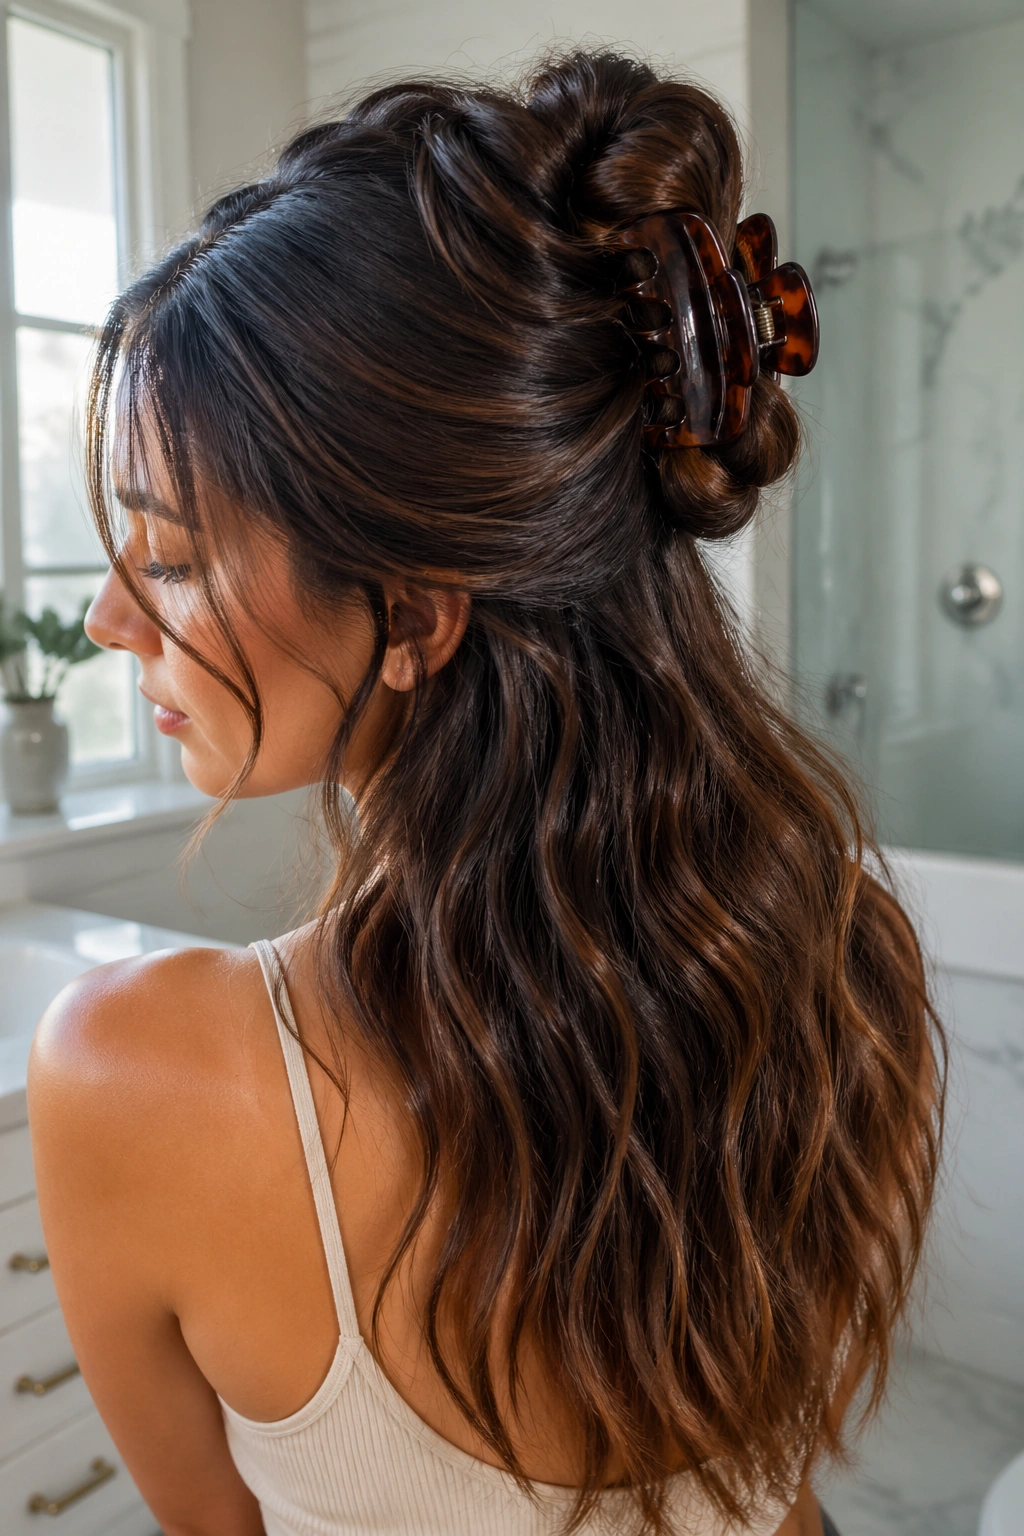
A half-up claw clip roll is one of the fastest humid-weather fixes for wavy hair. Take the top half of your hair, roll it once or twice toward the crown, and clip it horizontally. Leave the lower half loose so the wave pattern still shows. The clip catches the bulk before it can frizz outward.
Why the Roll Matters
A straight pull-back can tug on the front pieces and create a bump that falls apart later. The roll helps the hair fold into itself, which sits flatter and usually stays put longer. That’s especially useful if the crown gets puffy before the rest of the head does.
How to Make It Last
Use a clip with strong spring tension and wide teeth. Small clips tend to slide right out of wavy hair once humidity softens the strand surface. If your hair is very thick, twist the top section before rolling it, then clip it in place. That extra twist gives the style a little backbone.
23. Braided Crown Into a Ponytail
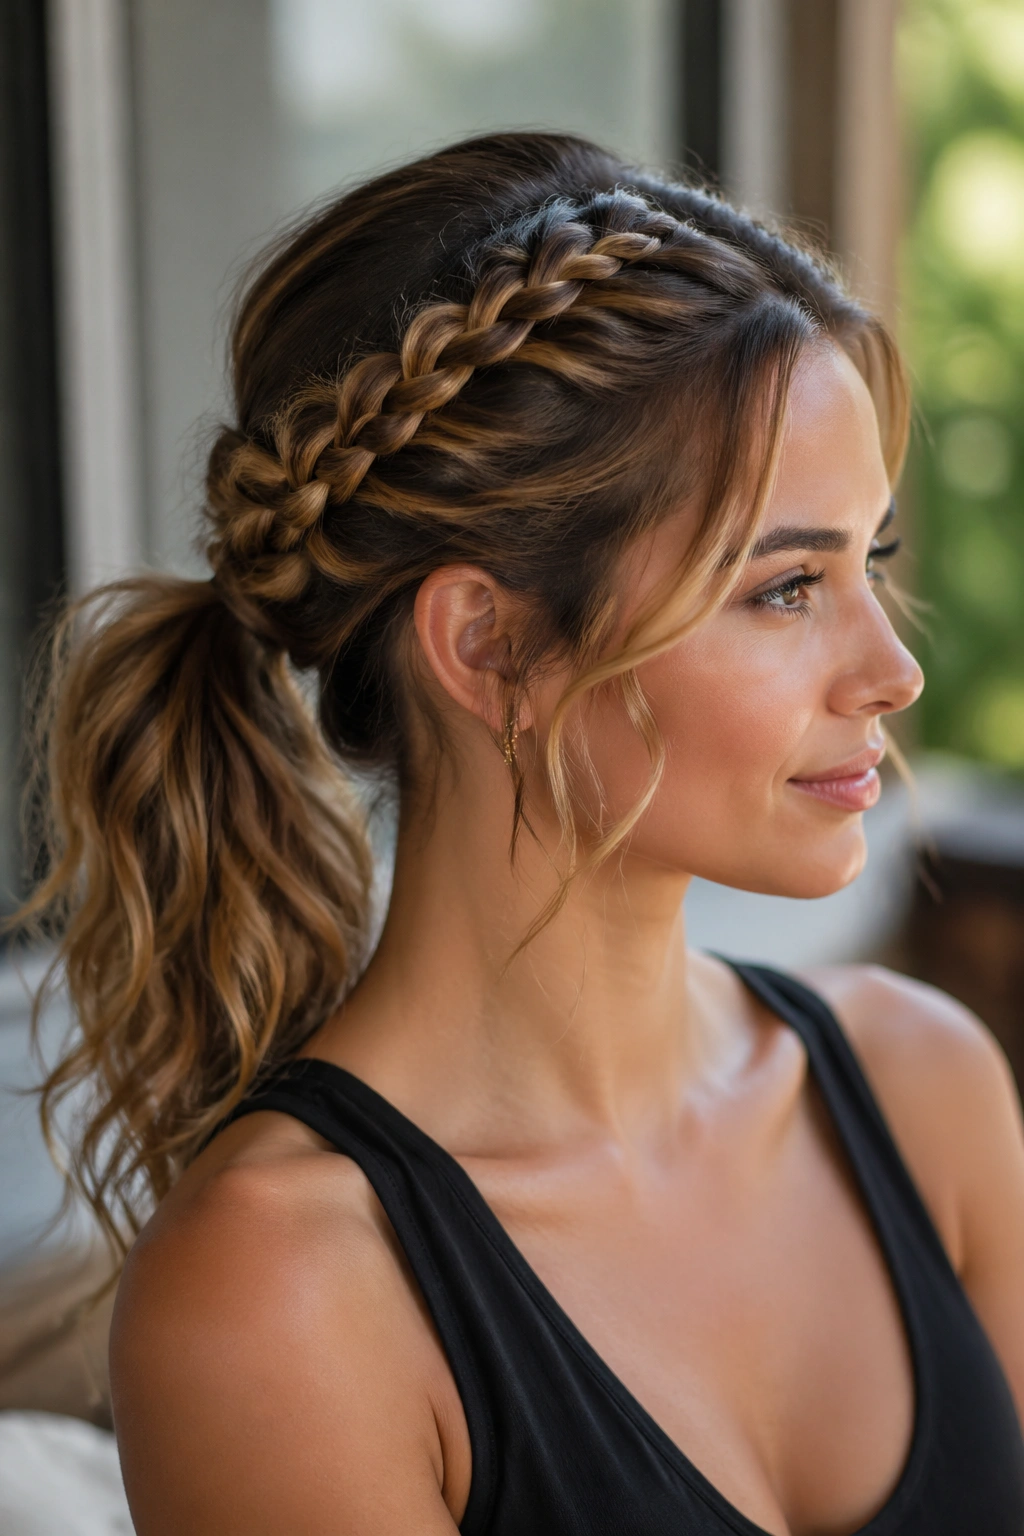
A braided crown into a ponytail is the kind of style that handles the top half of your head first, which is exactly where humid weather can cause the biggest mess. Braid along the crown from one side of the head to the other, then gather the rest into a ponytail at the back. The braid acts like a track that keeps the front in line.
The ponytail gives you movement. The braid gives you control. That balance is why the style works. If you only wear a ponytail, the crown can puff. If you only wear a braid, the style can feel too tight. Put the two together and you get a shape that looks cleaner for longer.
A little finishing spray on the braid helps, but don’t drown it. The goal is not shellacked hair. It’s a controlled top section with enough softness around the ponytail to keep the style looking lived in.
24. Braided-Base High Ponytail
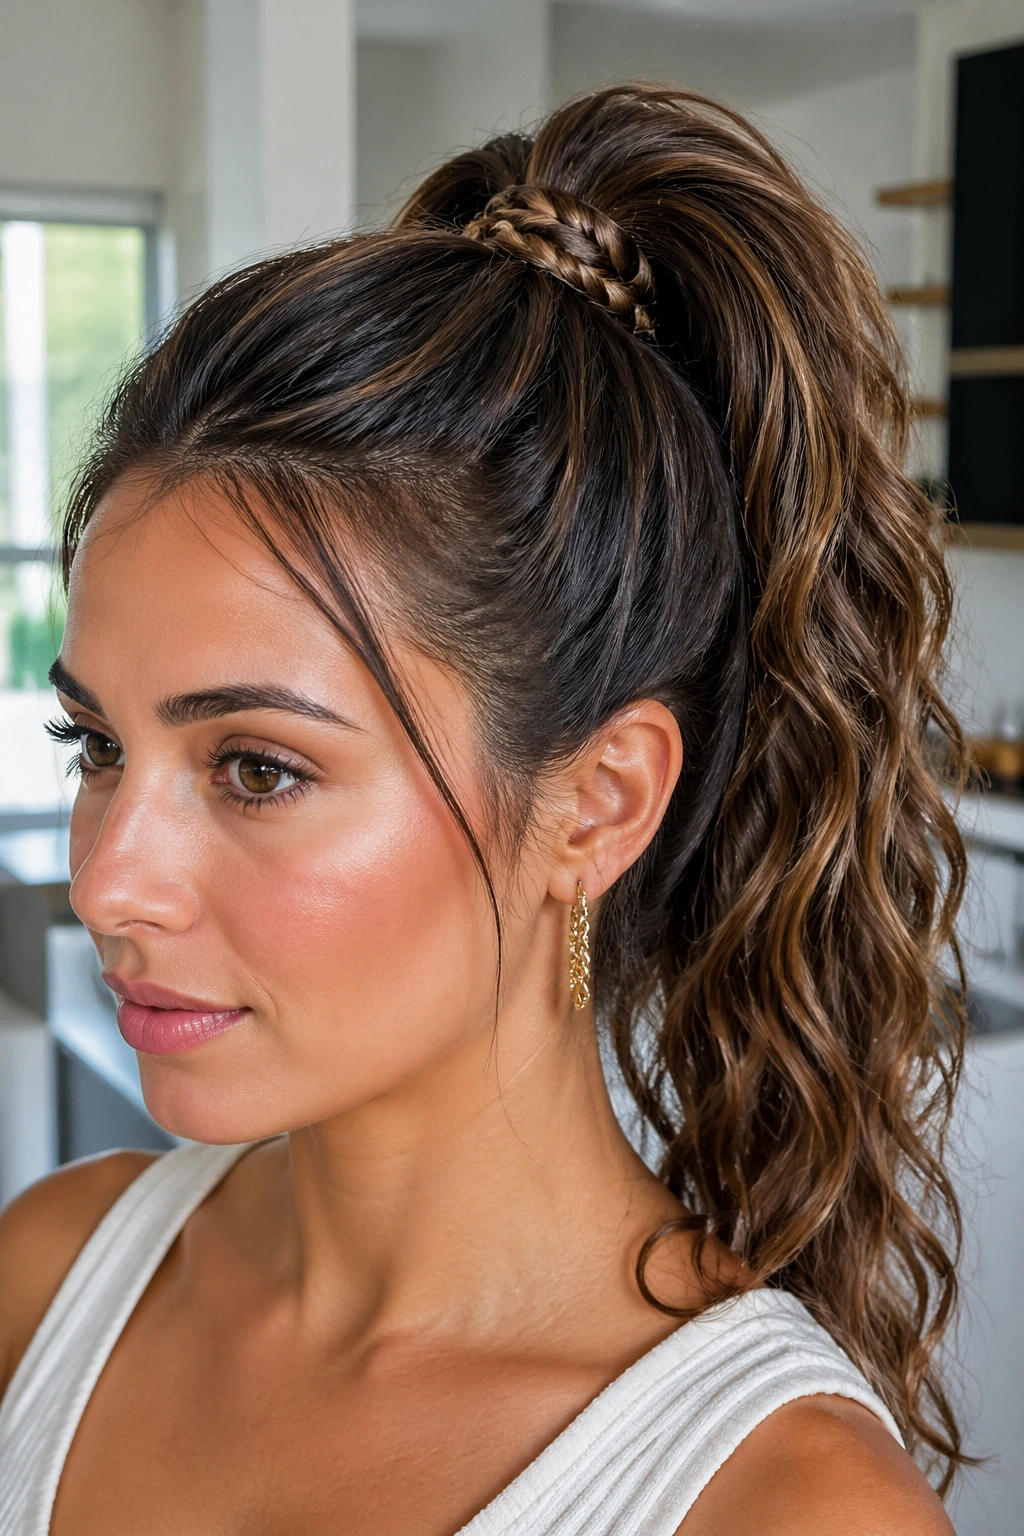
A high ponytail with a braided base is a strong choice when you want height and hold. Start by braiding a small section near the crown or around the base area, then pull the rest of the hair into a high ponytail and wrap a strand around the elastic. The braid hides the rough parts and gives the style a tighter anchor.
- Use a brush only on the crown if you want a smoother top.
- Keep the ponytail itself slightly textured so it doesn’t slip.
- Secure the base with a strong elastic before wrapping.
- Pin the wrapped strand under the ponytail so it doesn’t unravel.
This style is good when humidity would usually make a plain high ponytail frizz at the base within an hour. The braid gives the crown a finished look and helps the ponytail sit higher without losing shape. It’s a little more effort than a basic ponytail, but not by much.
25. Tucked Wavy Lob
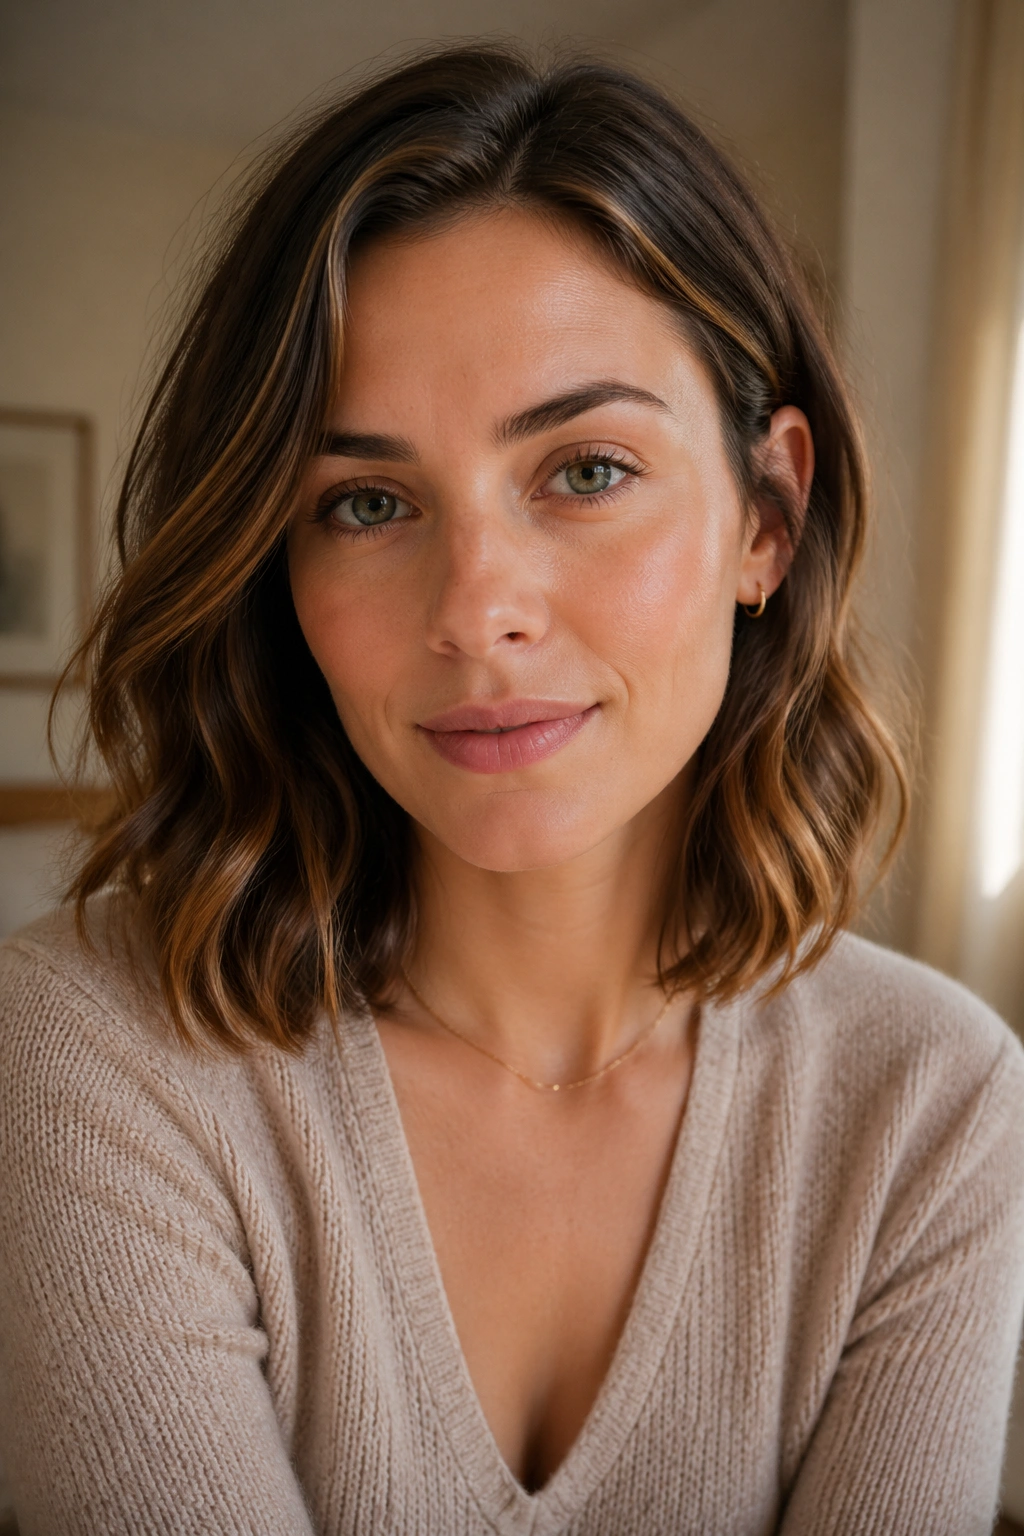
A tucked wavy lob is a smart answer for shoulder-length hair because the ends are the first part to rub against clothes, necks, and the damp air. Tuck the front sections behind the ears, leave the wave pattern loose through the middle, and let the ends rest against the collarbone instead of fighting them into something too perfect.
This works because a lob already has some built-in shape. You do not need to force much. A soft side part, a couple of hidden pins, and a small amount of anti-frizz cream on the ends are often enough to keep the style tidy. If your waves are fine, this can look airy and polished. If they’re thicker, it looks fuller and more intentional.
The key is to stop before the hair gets overhandled. Humidity punishes overstyling. A tucked lob survives because it keeps the important parts simple.
Final Thoughts
Humid weather does not mean your wavy hair has to lose the fight. It just means the style has to do a little more of the work. Braids, low twists, tucked sections, and smart half-up shapes all help because they control the places where frizz shows first.
The styles that last longest are usually the ones with a calm crown and a contained base. Loose waves can still be part of the look, but they do better when they’re given a frame.
Pick one style that matches your hair length and your patience level, then keep it in rotation. That’s the honest answer. On sticky days, consistency beats reinvention.
