



Ringlet curls are the natural hair style that makes people look twice — those long, spiral curls that bounce with every step and catch light from every angle. Ringlet curls for natural hair have a dramatic, romantic quality that’s unlike any other curl style in the natural hair repertoire. They’re long, defined, and springy — distinct individual spirals rather than the broad clumping of a wash-and-go or the tight uniformity of a coil set. Getting ringlets on natural hair takes specific techniques and the right product combination, but when you get it right, the results are the kind of hair day that makes you cancel plans just to stay out in the world a little longer.
What Makes a Ringlet Different from Other Curl Styles
The word “ringlet” is often used loosely in natural hair conversations, but there’s a meaningful distinction between a ringlet and other curl patterns that’s worth understanding.
A ringlet is a long, distinct spiral curl that hangs down from the root and maintains its individual spiral shape from top to bottom — like a spring or a corkscrew. It’s not a clump of waves (that’s more of a wash-and-go pattern), not a tight compact coil (that’s a finger coil or sponge coil style), and not a flat wave (that’s a twist-out or braid-out). A ringlet has height, it has length, and it hangs as an individual spiral.
The key to ringlet formation is elongation combined with definition. Short hair can’t show a true ringlet because there’s no length to hang and spiral. And undefined hair clumps rather than forming distinct spirals. You need both length (at least two to three inches of stretched hair for a visible ringlet, more for dramatic ones) and product that defines individual strands into spiral groups.
This means ringlet styles tend to suit naturals with at least medium length natural hair, though techniques like stretching can help shorter textures achieve more of a ringlet-adjacent look.
Which Natural Hair Textures Produce Ringlets Most Easily
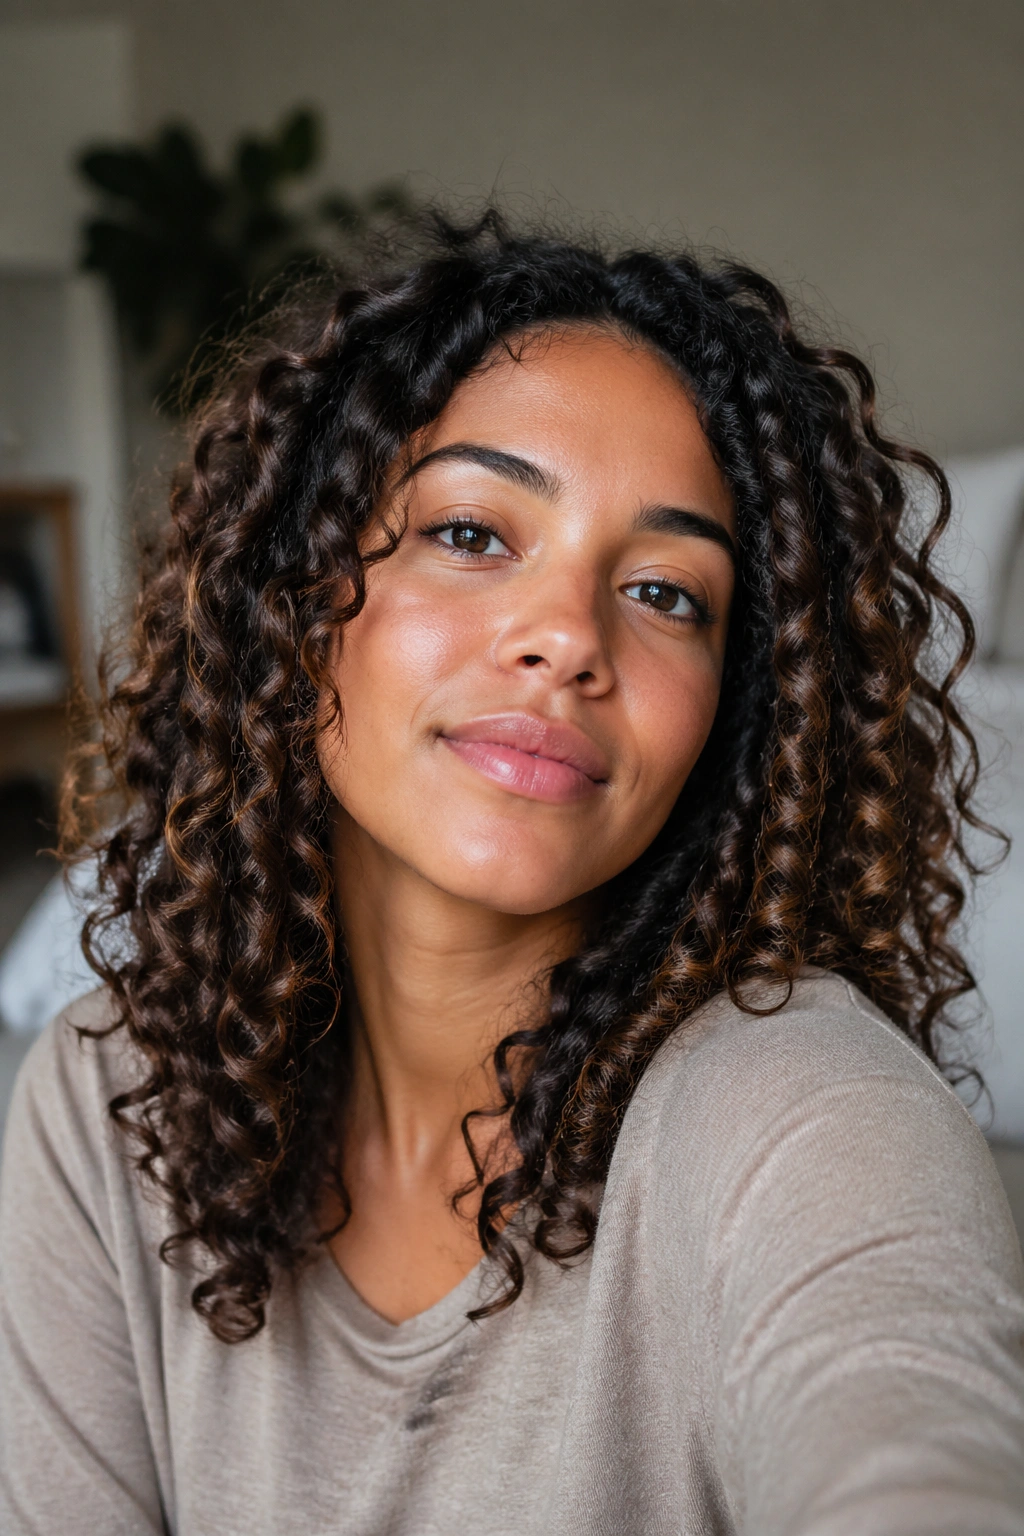
Ringlet curl styles are most naturally achievable on specific curl types — understanding where your texture falls helps you set realistic expectations and choose the right technique.
3a, 3b, and 3c textures are the natural territory for ringlets. These textures have enough loose curl structure to form distinct spirals when the hair is long enough and properly defined. For these naturals, ringlets often happen on their own with just the right products — the challenge is getting even, consistent definition rather than some sections forming ringlets and others not.
4a textures can absolutely achieve ringlet curls with the right technique — typically involving more product, more intentional manipulation (like finger coiling or shingling), and sometimes some light stretching before styling. The resulting ringlets are tighter and springier than on looser textures, which creates a beautiful, distinctive look.
4b and 4c textures can achieve a ringlet aesthetic through intentional techniques like curl sets and flexi rod sets that impose a ringlet-shaped pattern on the hair rather than relying on the natural spiral. These heat-free setting methods create dramatic ringlets that are every bit as beautiful as those that form naturally on looser textures.
The Best Products for Ringlet Curl Definition
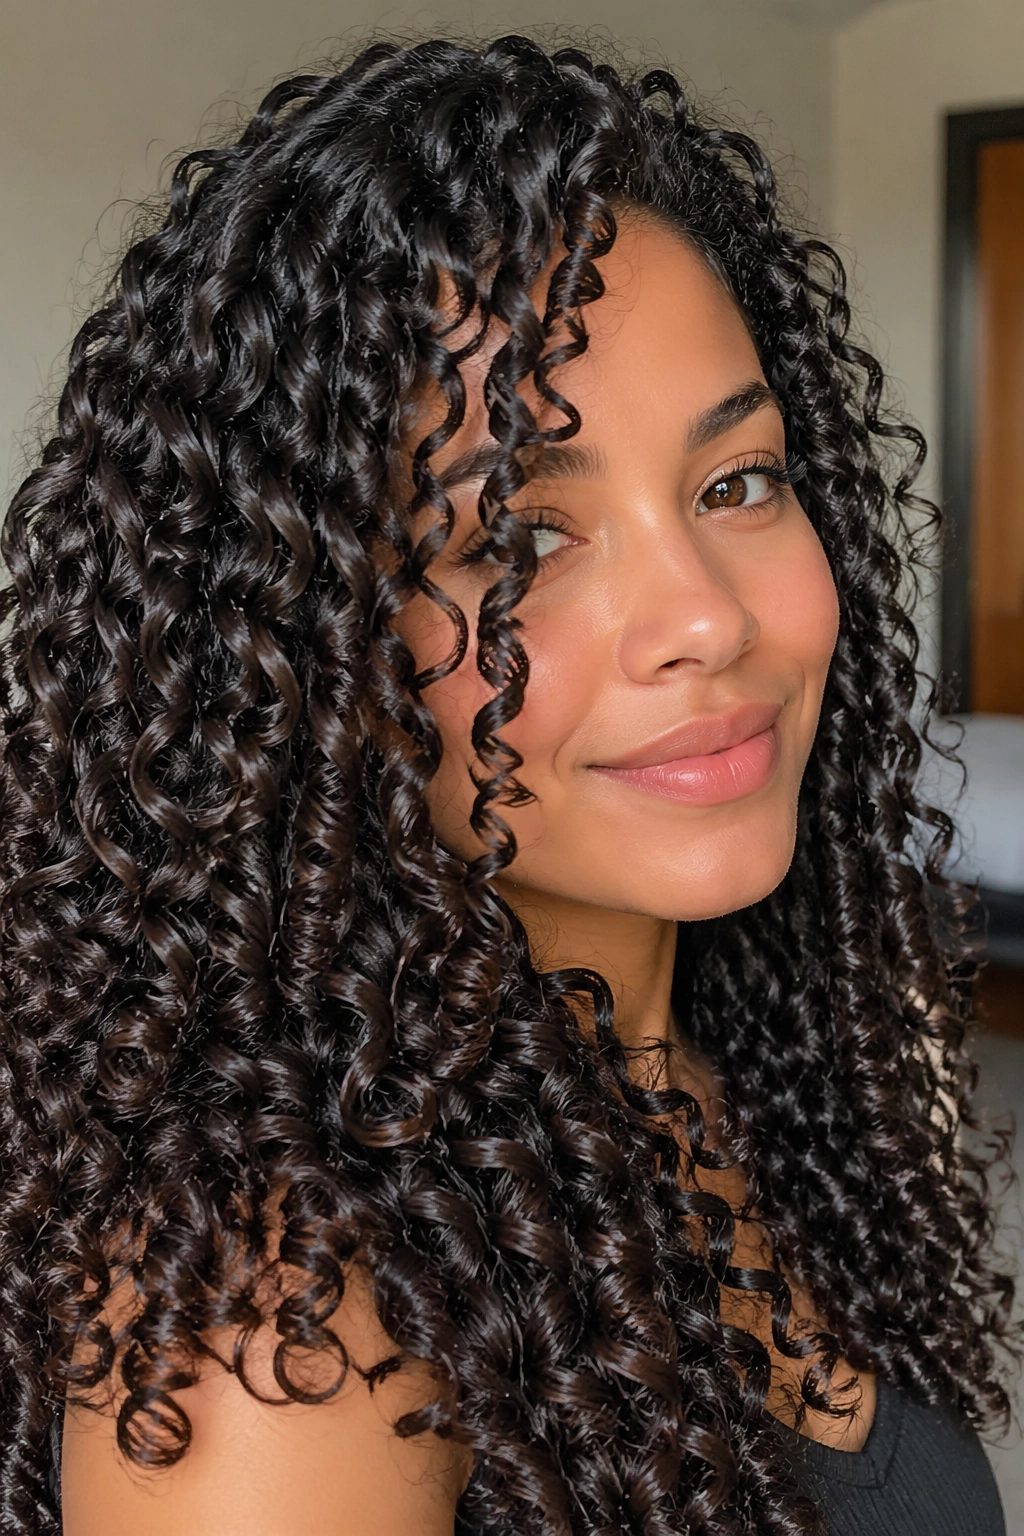
Getting ringlets requires products that strike a very specific balance: enough hold to maintain the spiral shape, enough moisture to keep the hair from going dry and crunchy, and enough slip to allow the hair to form clean spirals rather than clumping into undefined masses.
Curl creams with good slip are the foundation. A cream that coats each strand evenly allows the hair to group into ringlets naturally rather than forming random clumps. Look for cream formulas that aren’t too heavy — very heavy butters can weigh ringlets down and cause them to lose their spiral shape and fall limp.
A flex-hold gel applied over the cream gives ringlets their longevity. The gel creates a soft cast around each ringlet that holds the spiral shape through hours of wear, humidity, and normal movement. The best ringlet-defining gels have a medium hold — soft enough to move naturally but strong enough to maintain definition.
For extra shine, which is essential to the visual impact of ringlets, a lightweight serum or oil applied after the style is fully dry gives each spiral that luminous, glossy appearance that makes ringlets so striking.
Techniques for Creating Ringlets on Natural Hair
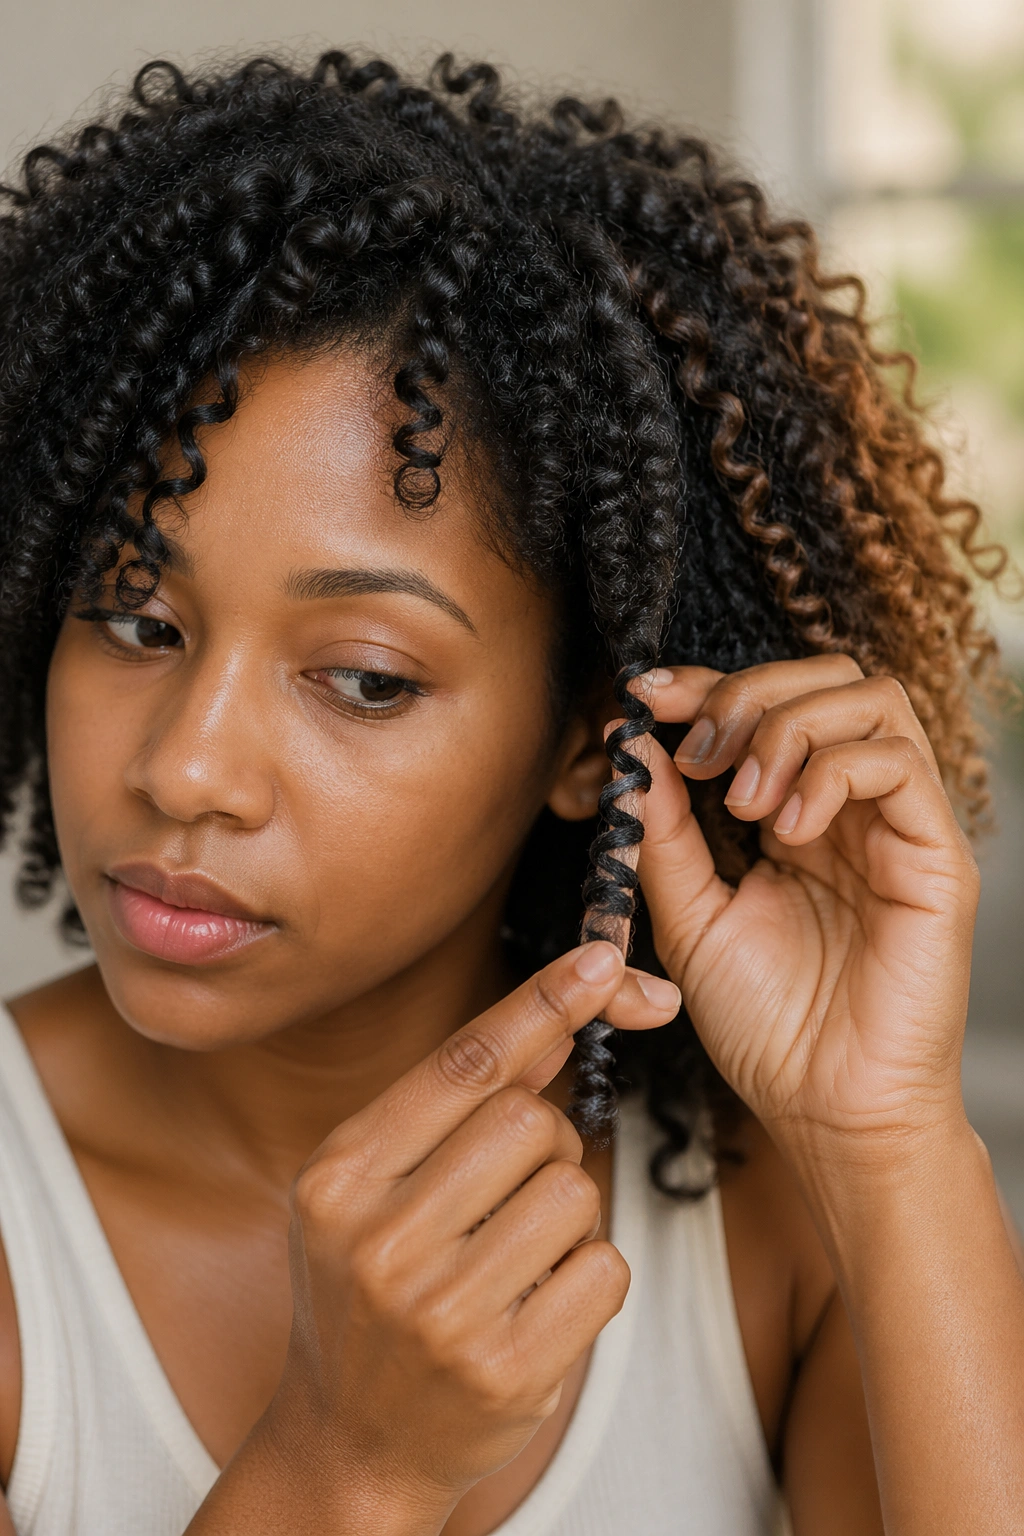
There are several paths to ringlet curls on natural hair, and the best one for you depends on your texture, length, and how much time you’re willing to invest.
Finger coiling on longer hair creates true ringlets by wrapping larger sections around your finger from root to tip. The longer the section, the longer and more dramatic the resulting ringlet. This is the most precise and most controllable method for creating ringlets on any natural hair texture.
Flexi rods and perm rods — heat-free setting tools — wrap sections of hair in a spiral around the rod and, when removed after drying, produce perfect spiral ringlets. This is the go-to technique for 4b and 4c textures who want dramatic ringlets that the hair wouldn’t form naturally on its own.
The shingling method allows longer natural hair to form its own ringlets by applying product to individual strands and letting the natural curl pattern elongate and group into spiral shapes as it dries. It’s the least manipulative approach and works best on textures that naturally form ringlets with some encouragement.
Protecting and Maintaining Ringlet Curl Styles
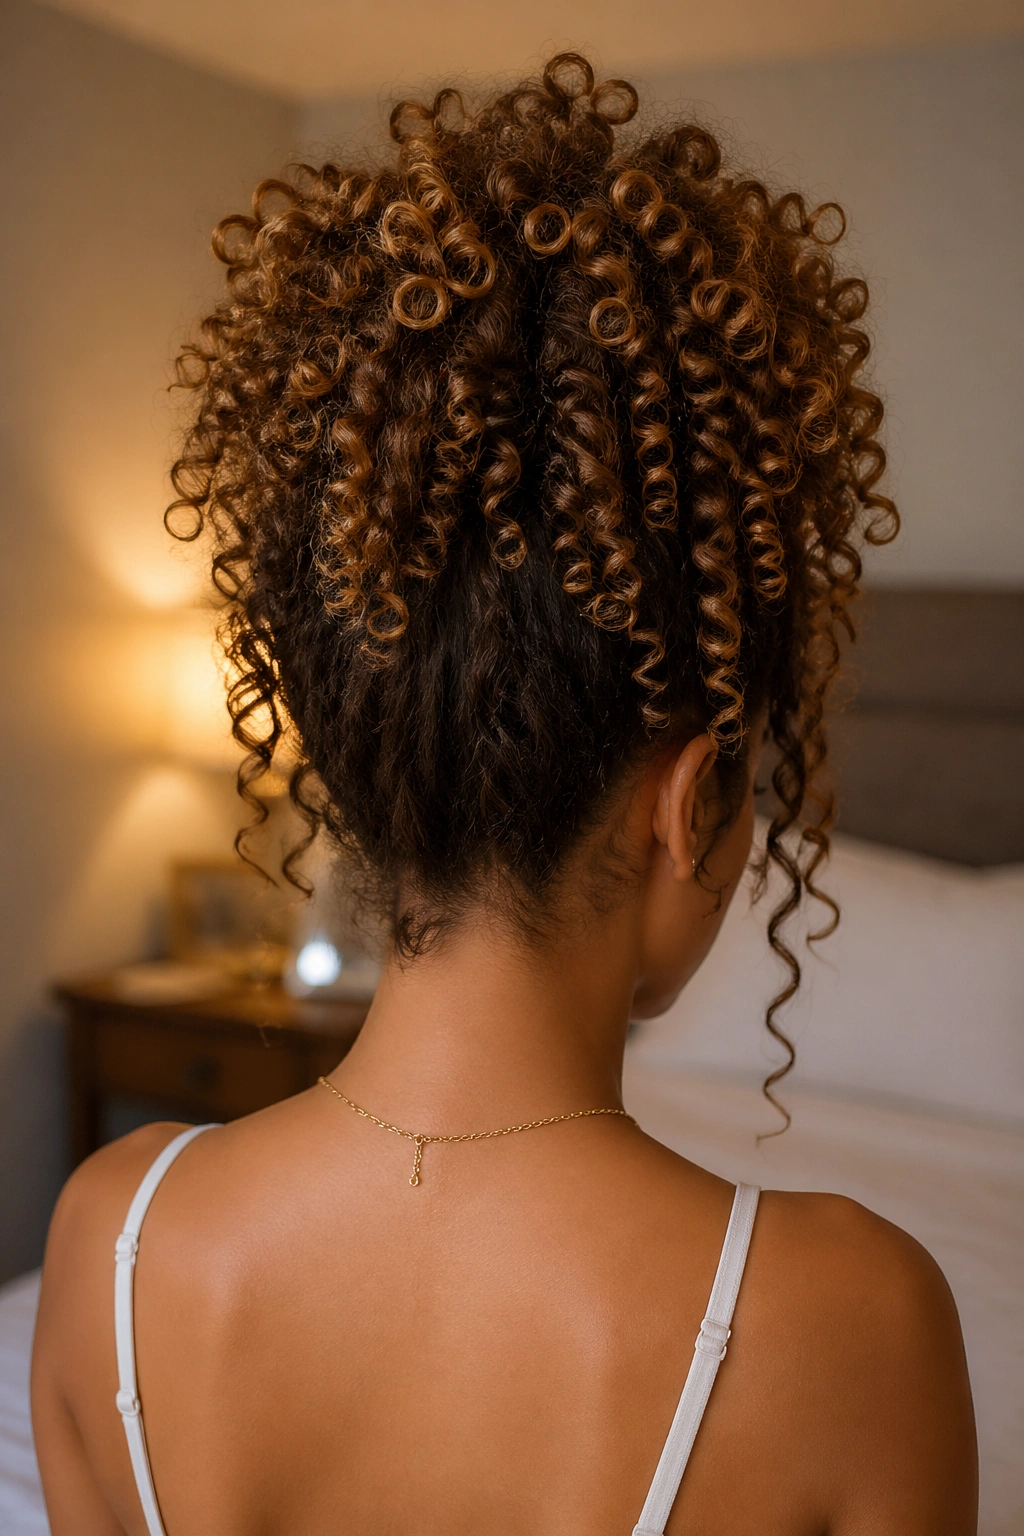
Ringlet curls are fragile in one specific way: they lose their individual spiral definition when disturbed. That means nighttime protection and careful refreshing are essential to getting more than one day out of a ringlet style.
The pineapple is your best friend for ringlet preservation. Gather all your ringlets at the very top of the crown in a loose pineapple each night — the key word is loose. Tight gathering compresses the ringlets and destroys their spiral shape. Loose gathering keeps each ringlet more or less intact so it falls back into shape in the morning.
For extra protection, use a satin bonnet over the pineapple. This prevents the friction that would otherwise separate ringlets into frizz overnight.
Refreshing ringlets is simpler than you might expect: mist lightly, smooth a tiny amount of gel over any sections that have lost their spiral shape, and re-coil with your finger where necessary. The ringlets will settle back into their shape quickly as the light refresh dries.
1. Classic Finger-Coiled Ringlets
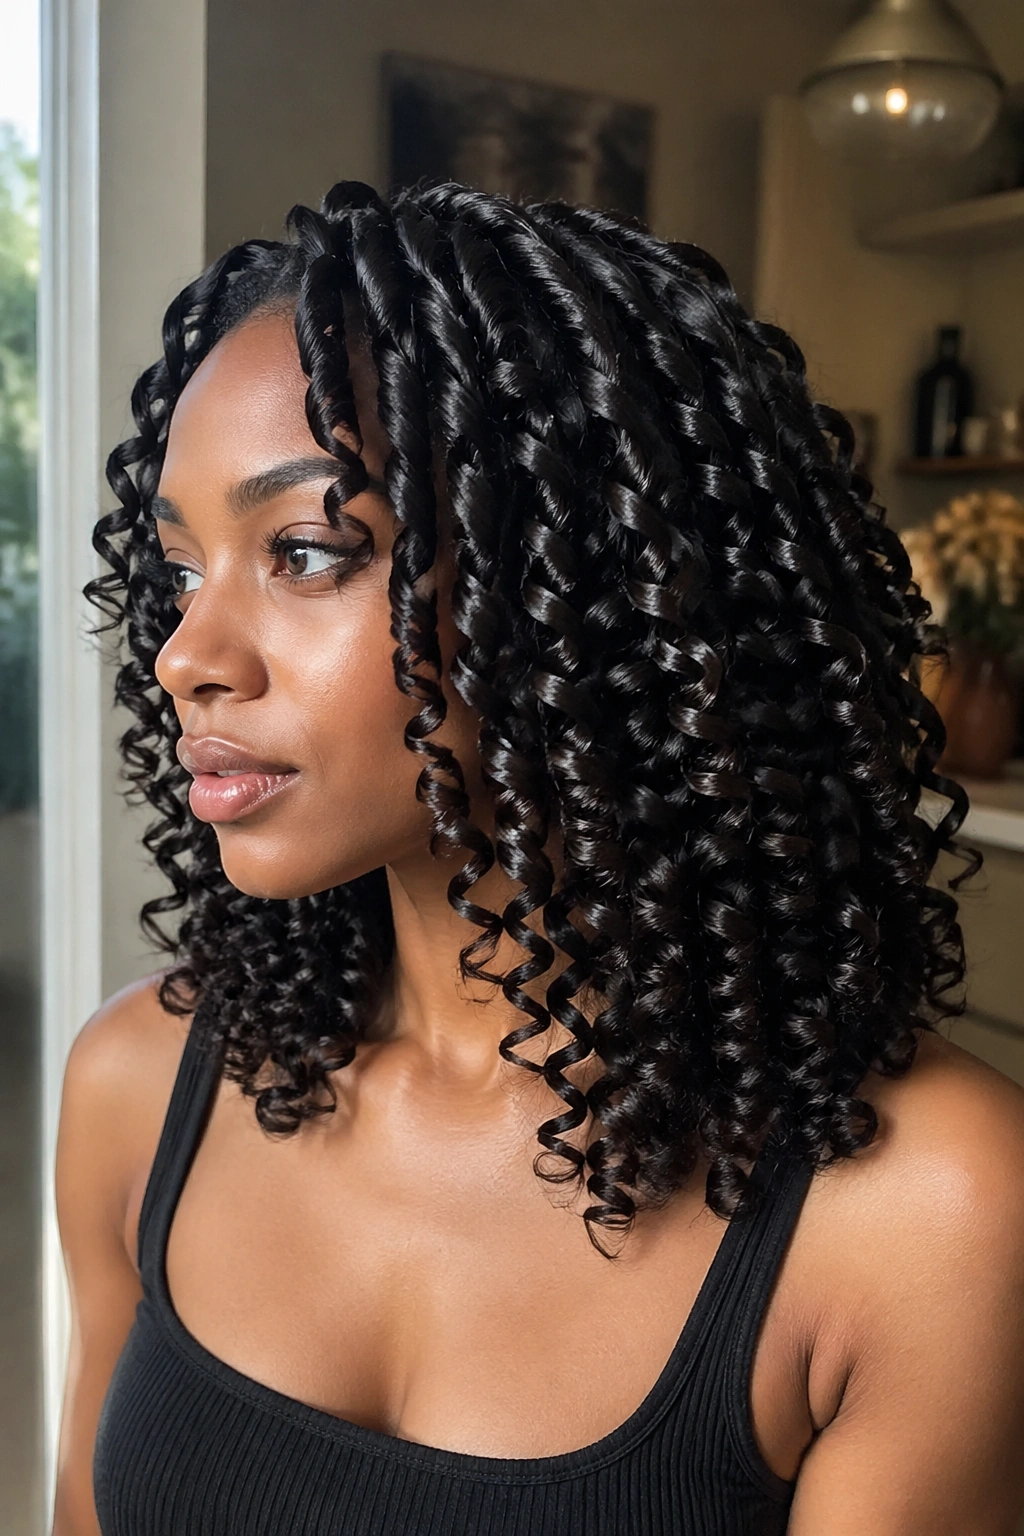
Finger coiling is the technique that gives you the most control over ringlet size, shape, and consistency. Apply your leave-in, then your curl cream, then take sections roughly the size of a marker and wrap each one around your finger from root to tip.
The longer the hair, the more dramatic the resulting ringlet. On shoulder-length or longer natural hair, finger-coiled ringlets are absolutely spectacular — long, bouncy spirals with real movement and presence.
How to Achieve Classic Finger-Coiled Ringlets
- Start on deeply conditioned, wet hair
- Apply leave-in to each section
- Add curl cream and distribute evenly
- Wrap each section around your finger from root to tip
- Let fully air dry or diffuse on low
- Apply a light serum for shine once fully dry
2. Flexi Rod Ringlet Set
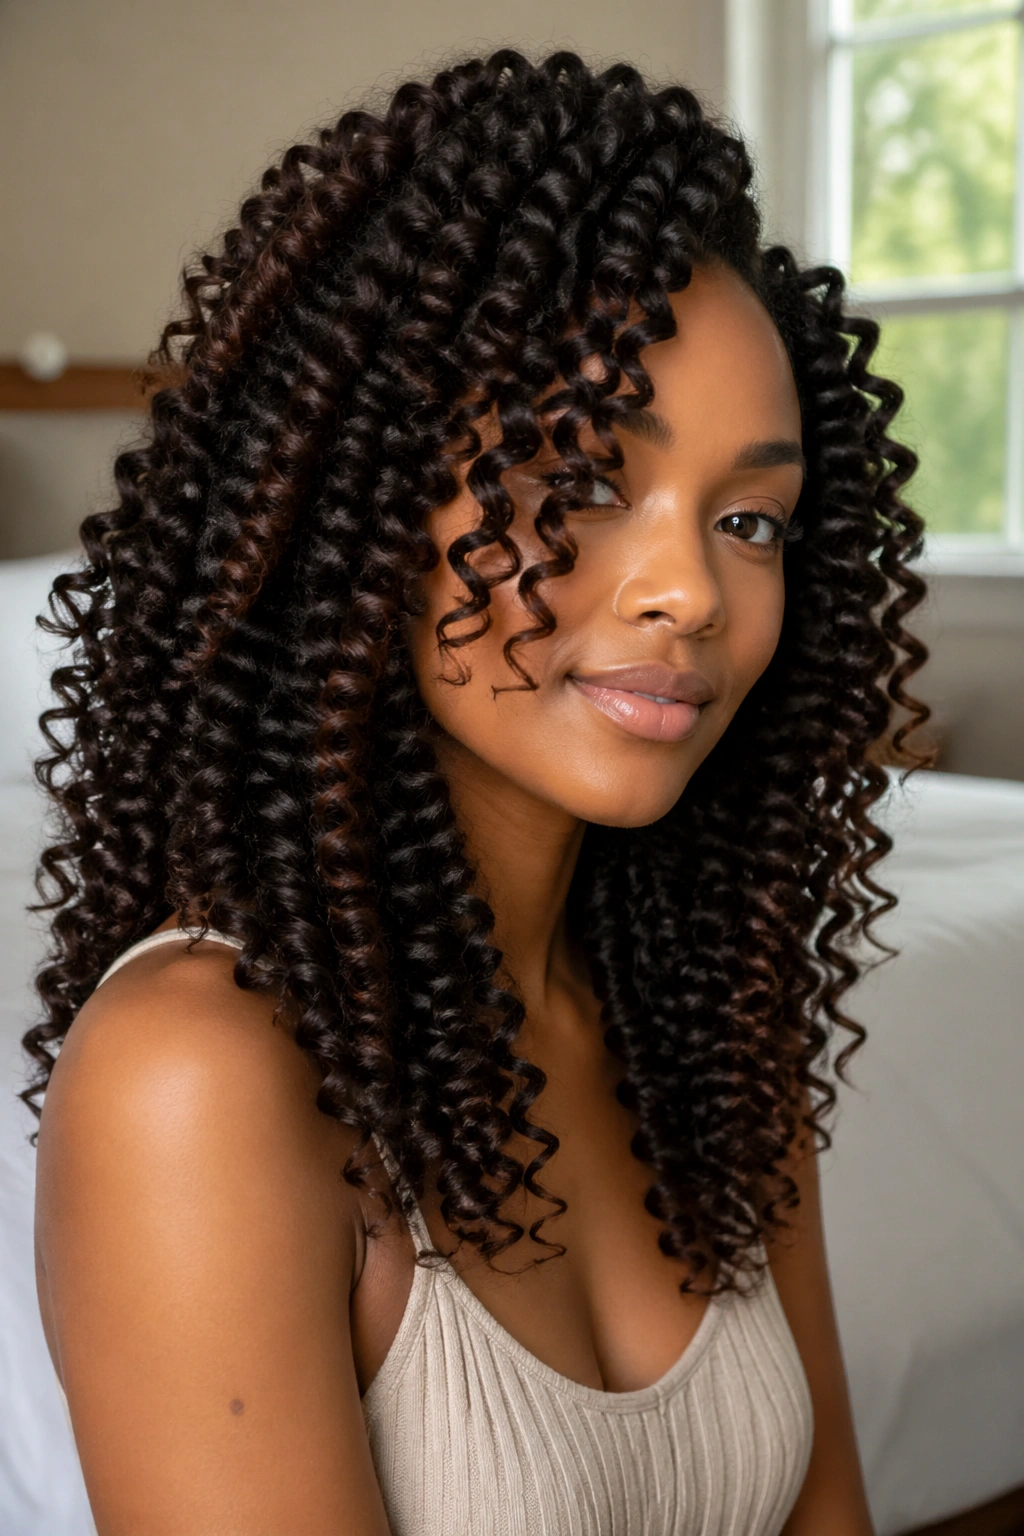
Flexi rods create the most uniform, dramatic ringlets available to natural hair — and they work on textures that don’t naturally form spirals. Apply product to each section, wrap around a flexi rod from tip to root, bend the rod to secure it, and let dry overnight under a hooded dryer or at room temperature.
The size of the rod determines the size of the ringlet. Smaller rods create tighter, more compact spirals. Larger rods create loose, romantic ringlets. Most naturals use a combination of sizes — smaller at the nape and sides, larger at the crown and top — for a graduated, dimensional look.
3. Perm Rod Ringlet Set
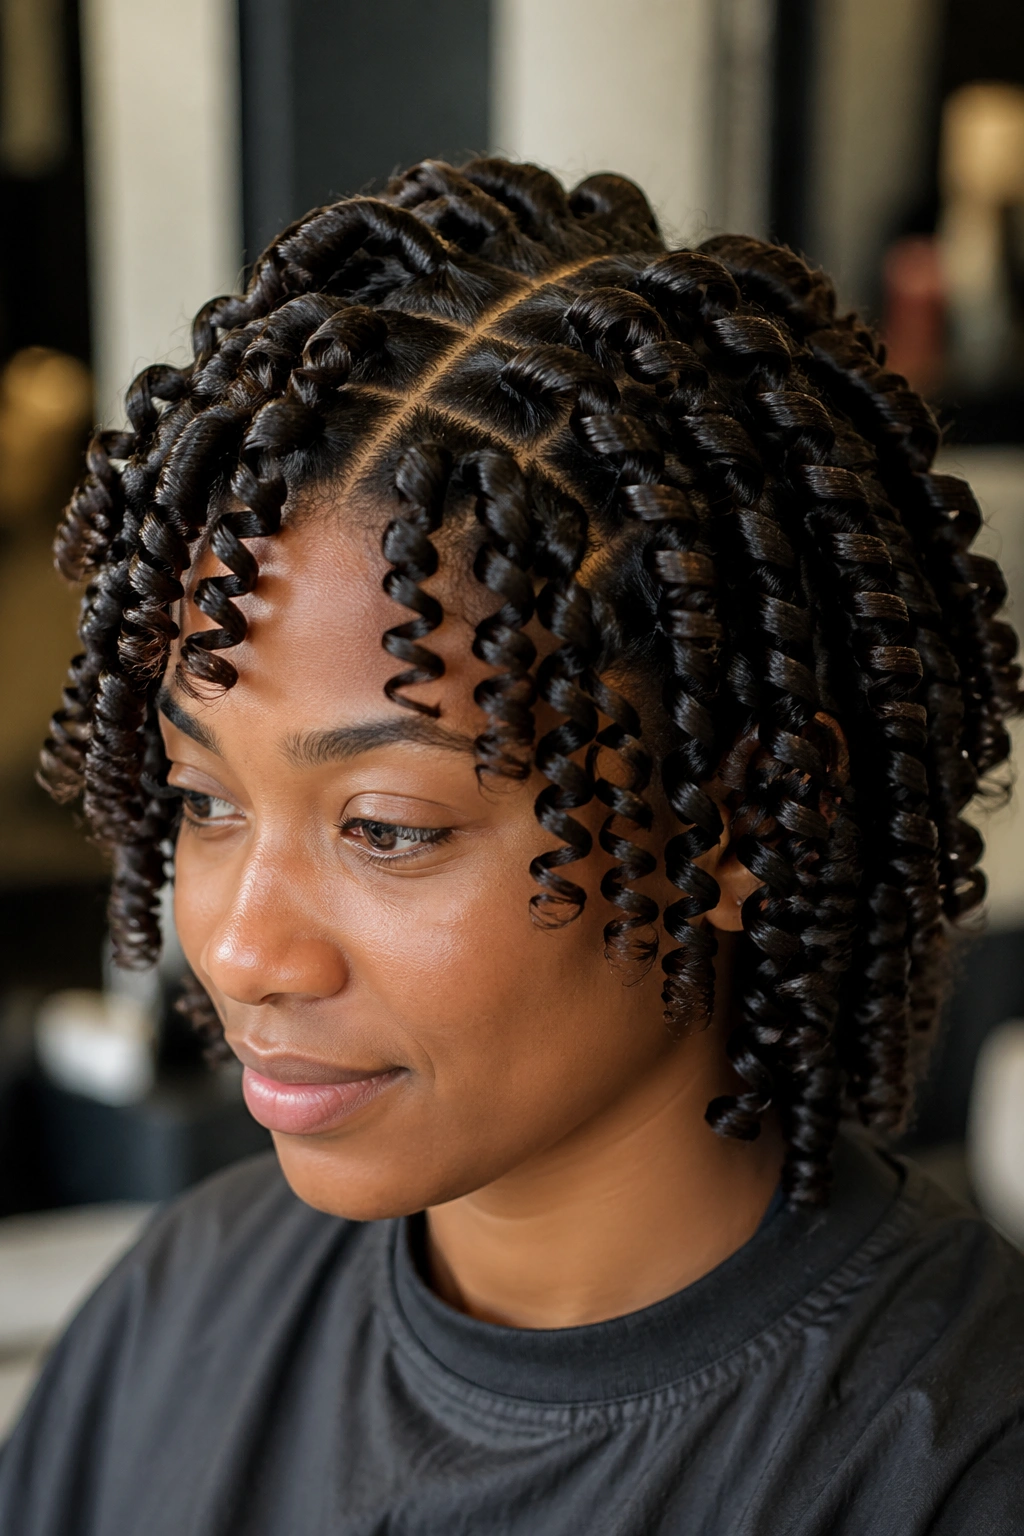
Perm rods are similar to flexi rods but have a uniform cylinder shape that creates a more consistent, uniform ringlet than flexi rods. They also create more defined, tighter spirals, which can be incredibly beautiful on medium to tight natural textures.
Perm rod sets are a time investment — setting the rods can take two to four hours on thick hair — but the resulting ringlets last a full week or more with proper nighttime protection. That makes the time cost very reasonable.
4. Shingled Natural Ringlets
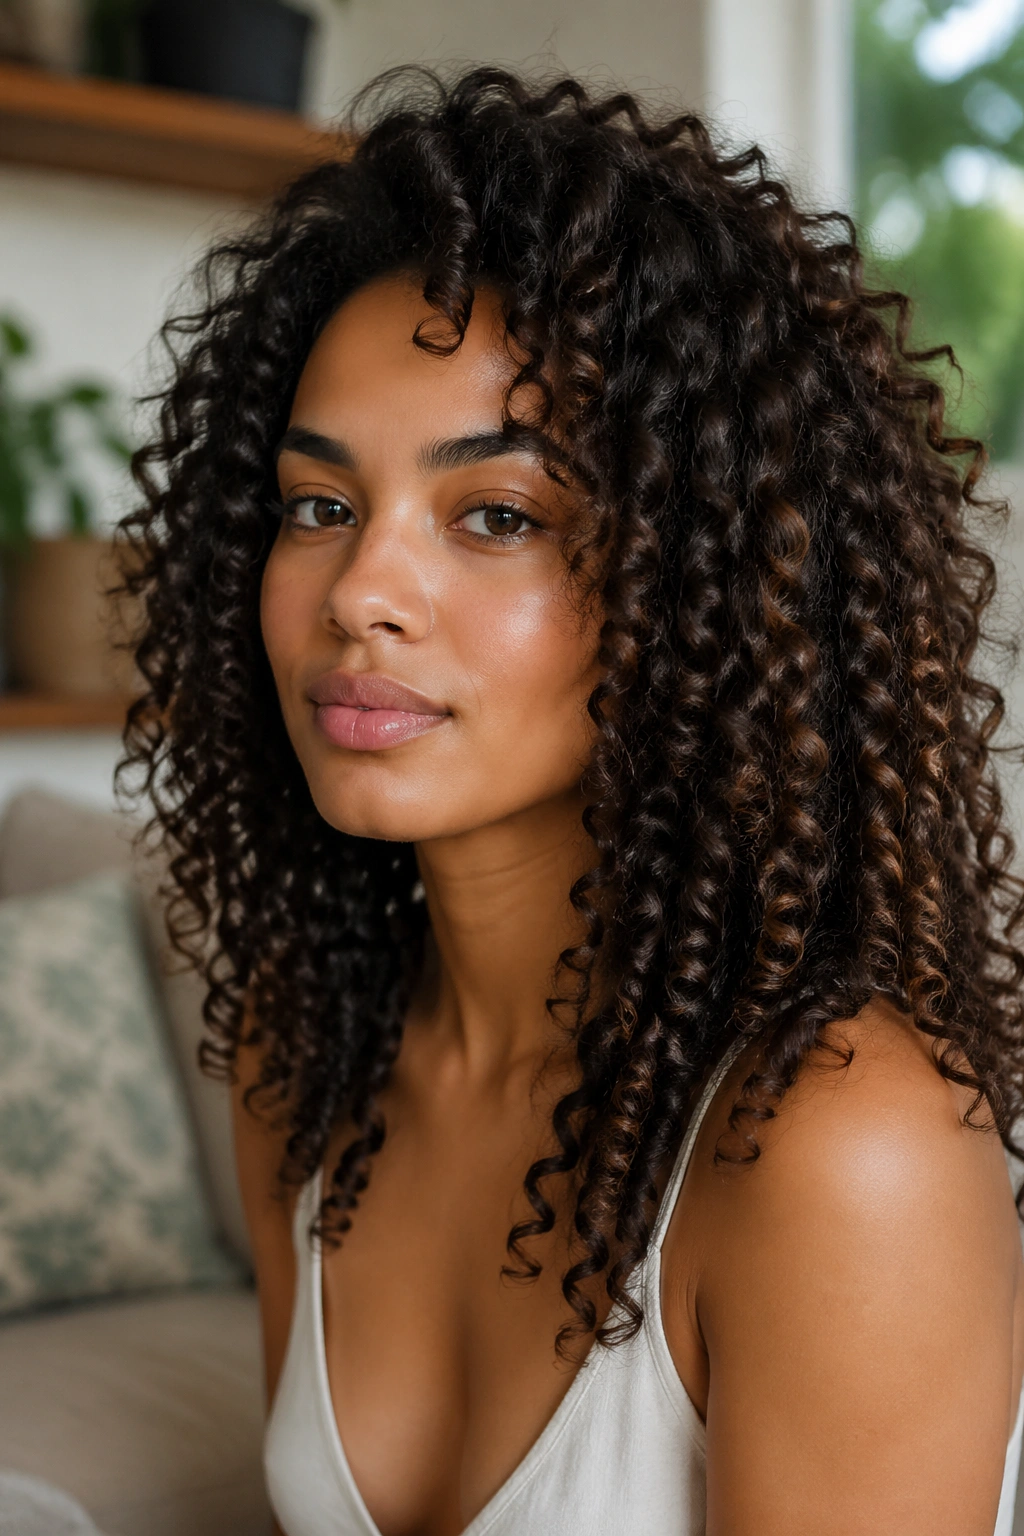
On 3a to 4a textures with two or more inches of stretched length, the shingling method can produce organic ringlets that form on their own as the hair dries. Apply a generous amount of curl cream or gel to each one-inch section, smooth it from root to tip, and let the section hang as you move to the next.
The result is a style where the natural curl pattern elongates into loose, spiral ringlets — less precisely uniform than a finger coil set but with a more natural, organic quality.
5. Ringlet Curl Half-Up Style
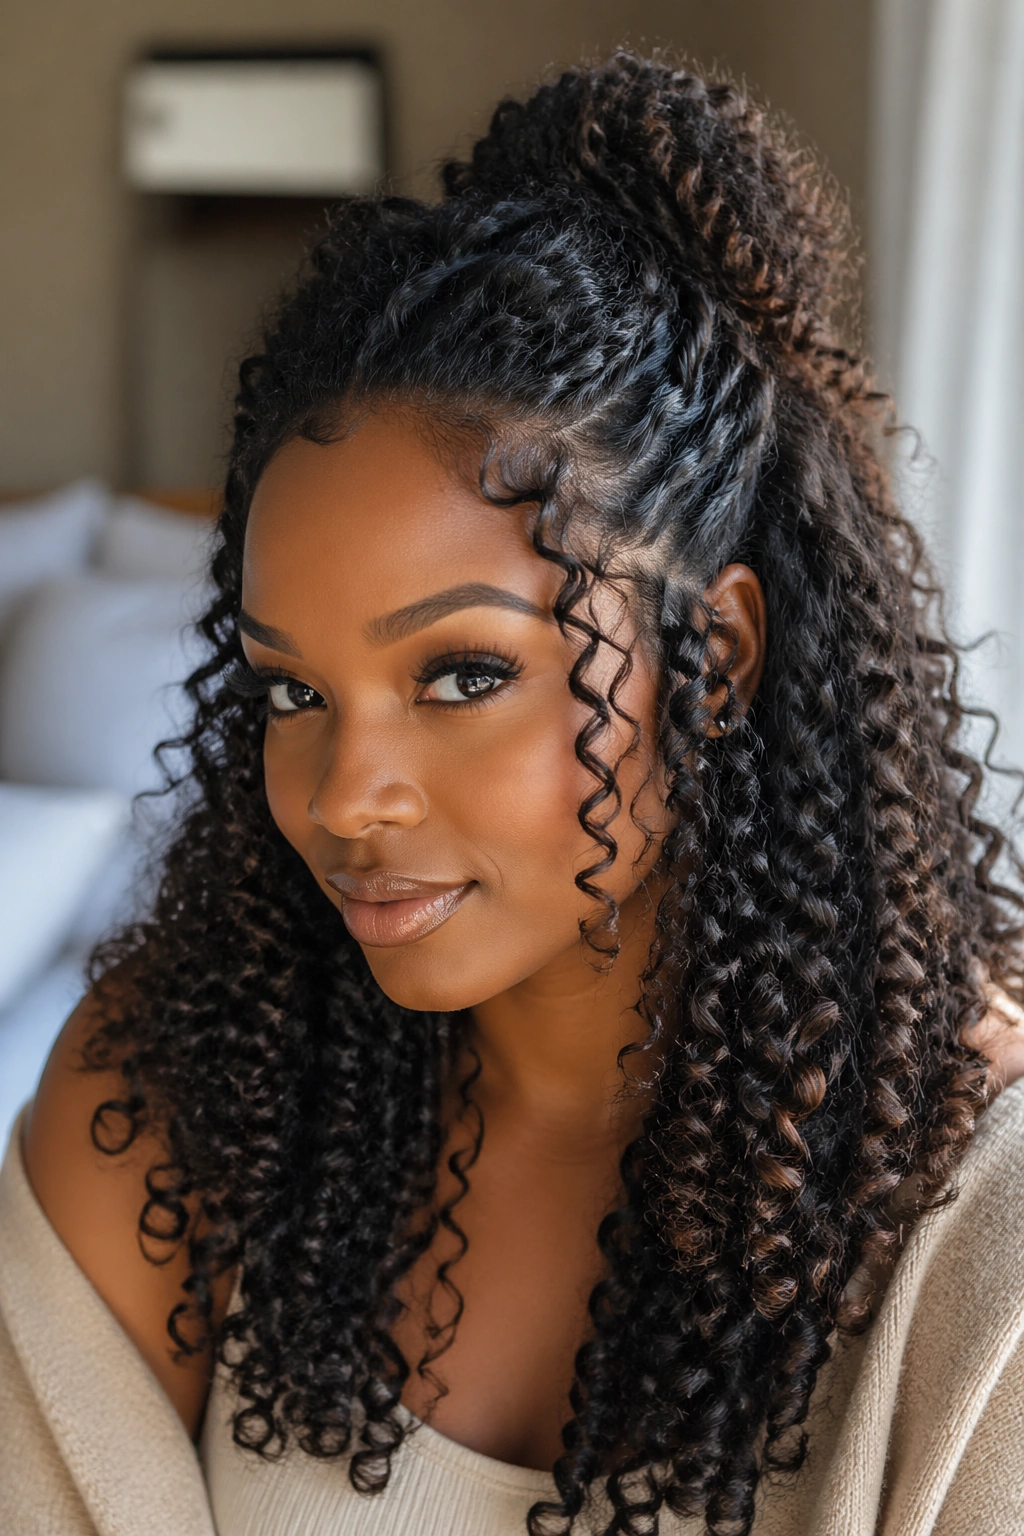
Pull the top section of your ringlet style into a half-up pony or gathered bun, letting the bottom section hang free in its full ringlet glory. The contrast between the gathered top and the free-hanging ringlets below creates a style that’s simultaneously polished and dramatic.
Half-Up Ringlet Styling
- Let ringlet style dry completely first
- Gather the top section loosely with a satin scrunchie
- Pull a few ringlets forward at the temples
- Secure without tension to preserve the ringlets below
Add a silk ribbon or decorative clip to the gathered section for a romantic finishing touch.
6. Ringlet Curl Updo
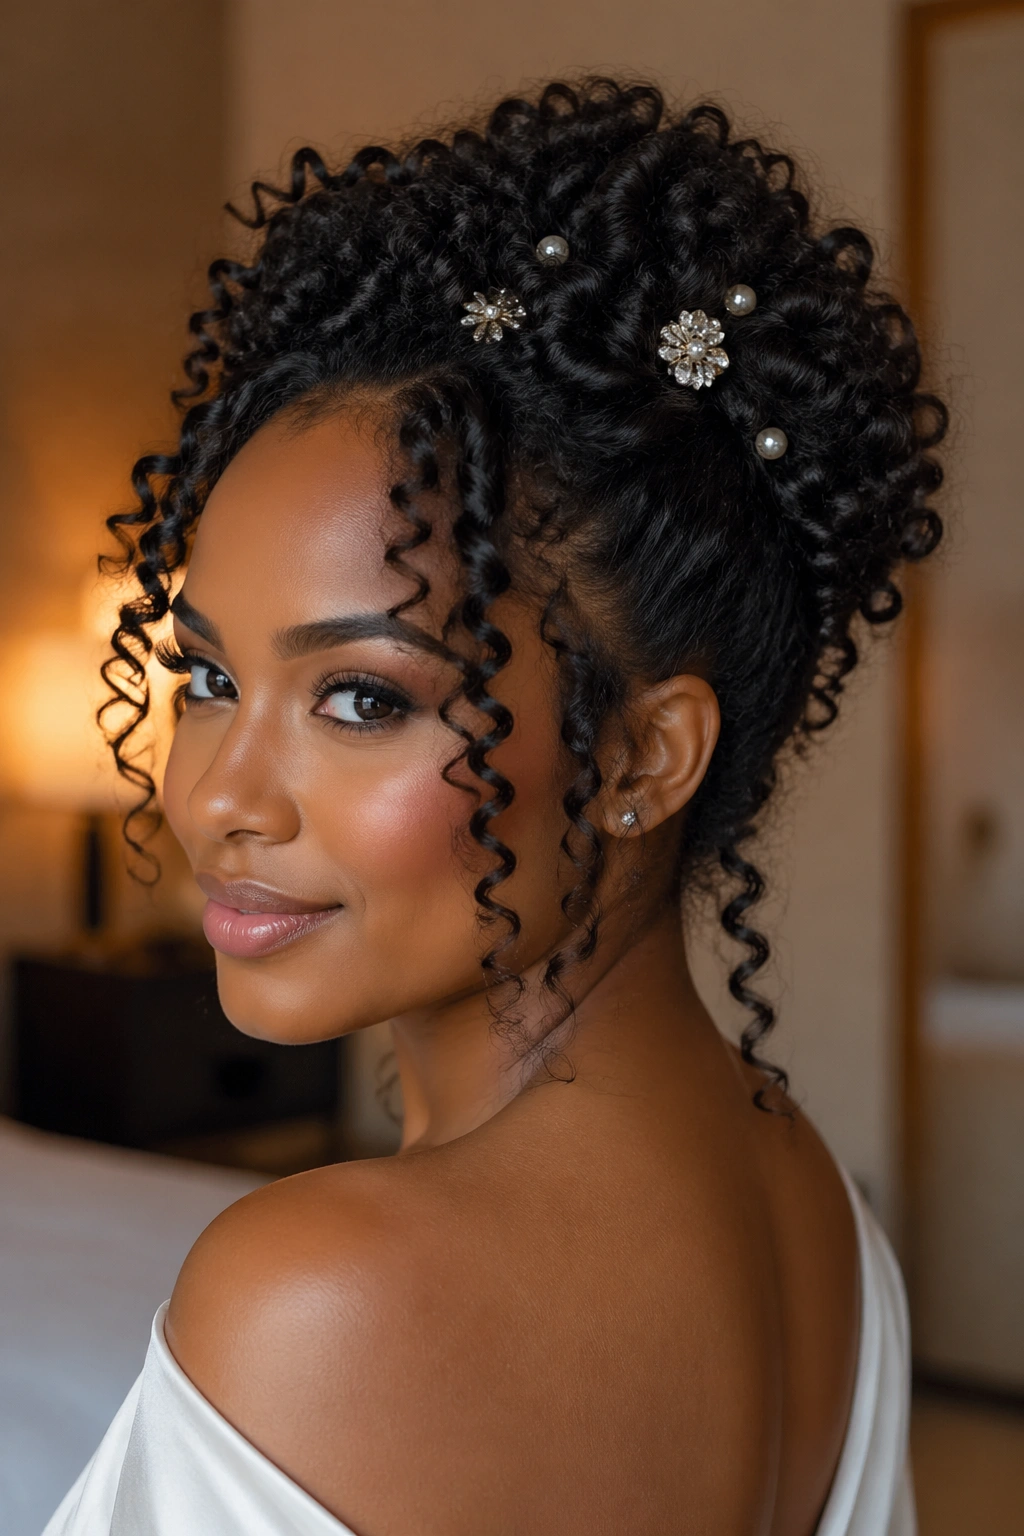
Pin your ringlets into a loose, textured updo where individual spirals are visible at the hairline, nape, and crown. This is one of the most elegant natural hair updo styles possible — the individual ringlets give the updo genuine texture and dimension rather than looking like a smooth, undifferentiated mass.
Pull individual ringlets loose at the face and nape to soften the overall look. Use decorative pins or gold accessories in the gathered section for formal occasions.
7. Ringlet Curl Bob
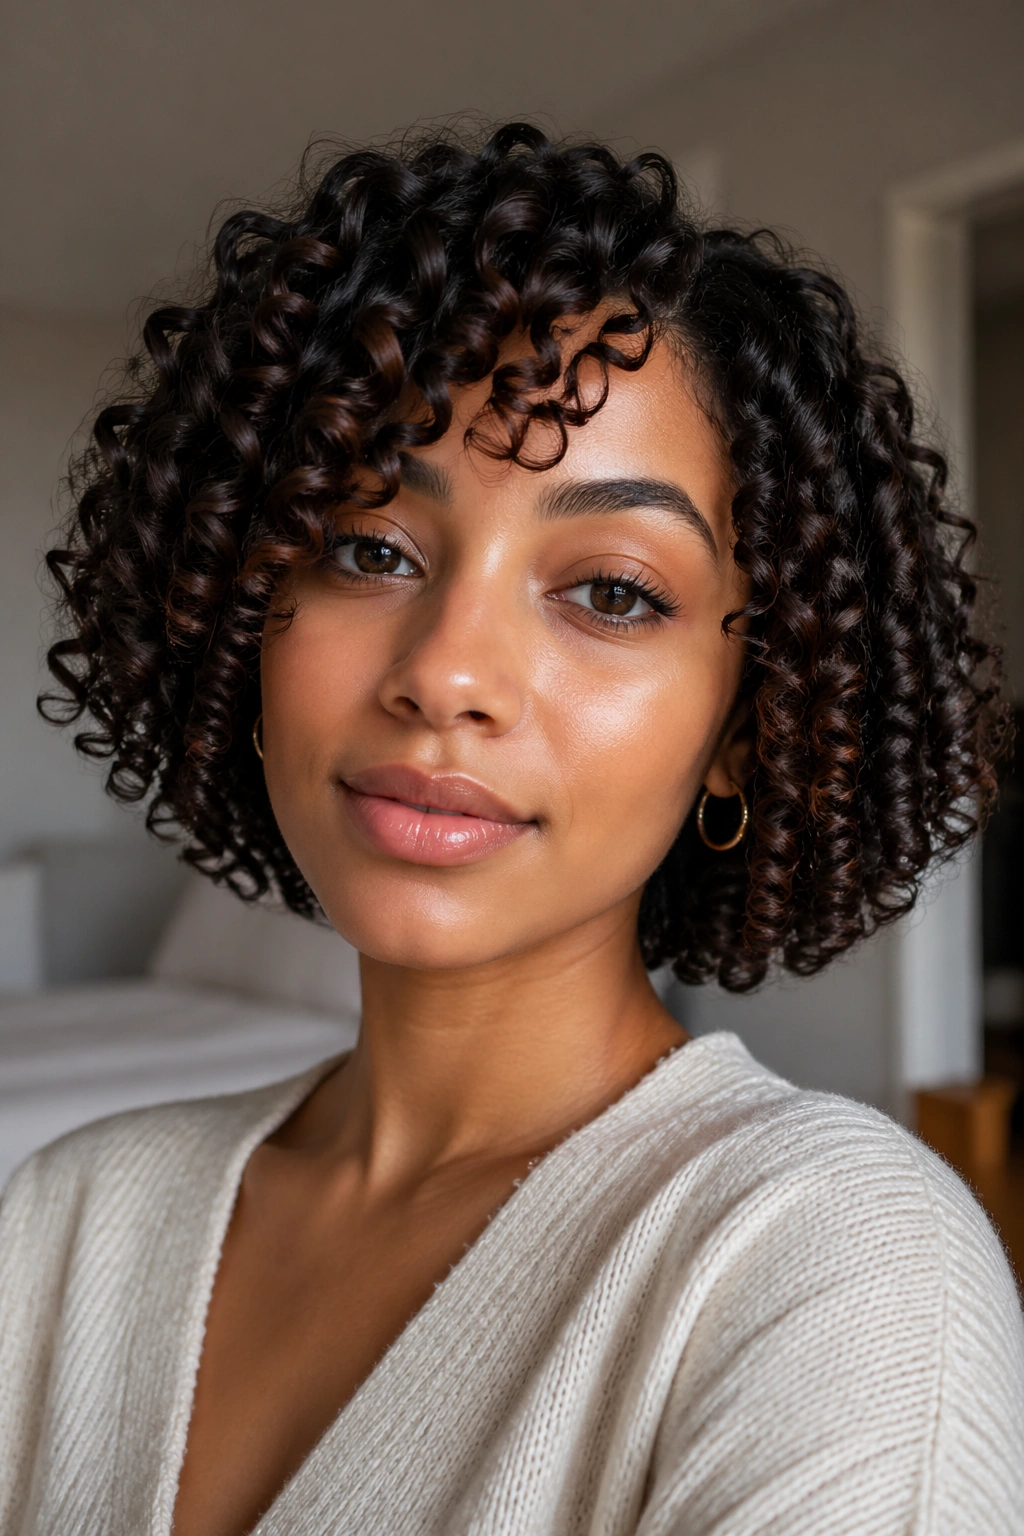
For naturals with natural hair at chin to shoulder length, a ringlet curl bob showcases the spiral pattern in a contained, structured silhouette. The ringlets hang to roughly the same level, creating a bob shape that’s defined by texture rather than a cut.
This style requires careful product application on the ends — the last inch or two of each ringlet needs extra product to encourage the spiral to close on itself rather than frizzing out. Apply a little extra cream to the ends and smooth them with your fingers as the hair dries.
8. Ringlet Curl Side Sweep
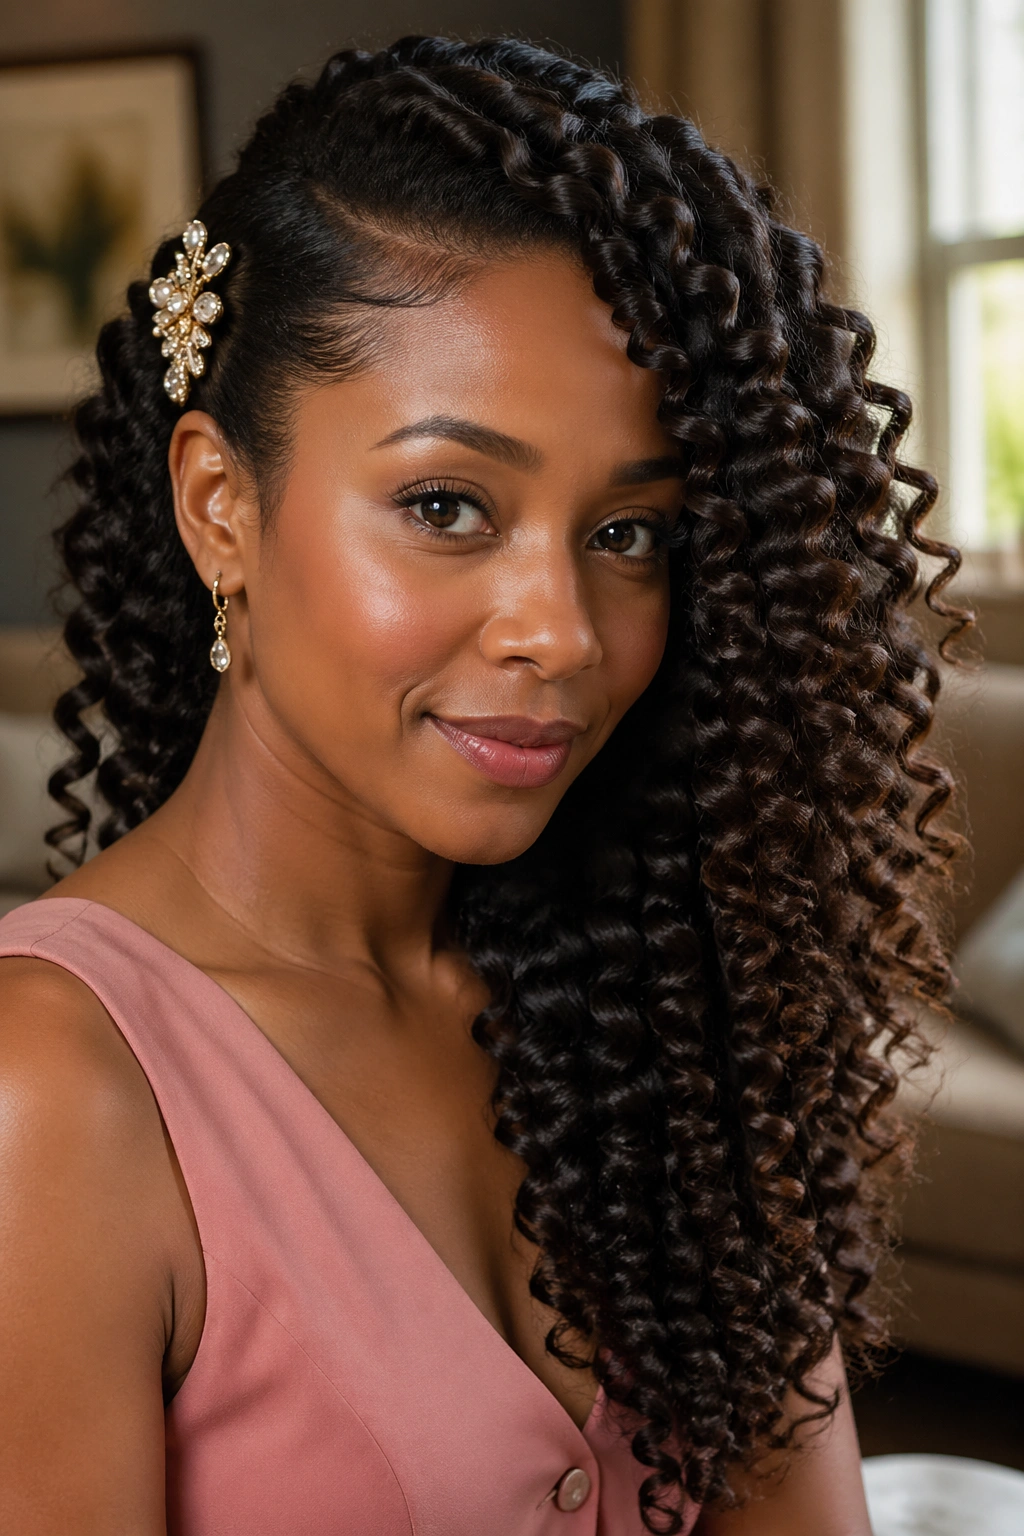
Use a wide-tooth comb or your fingers to gently sweep all your ringlets to one side, securing them above one ear with a decorative clip or pin. The ringlets cascade down the other side in a dramatic, romantic sweep.
This style is absolutely beautiful for formal occasions — it has the glamour of a professional style with the authenticity of natural hair.
9. Ringlet Curl High Pineapple Style
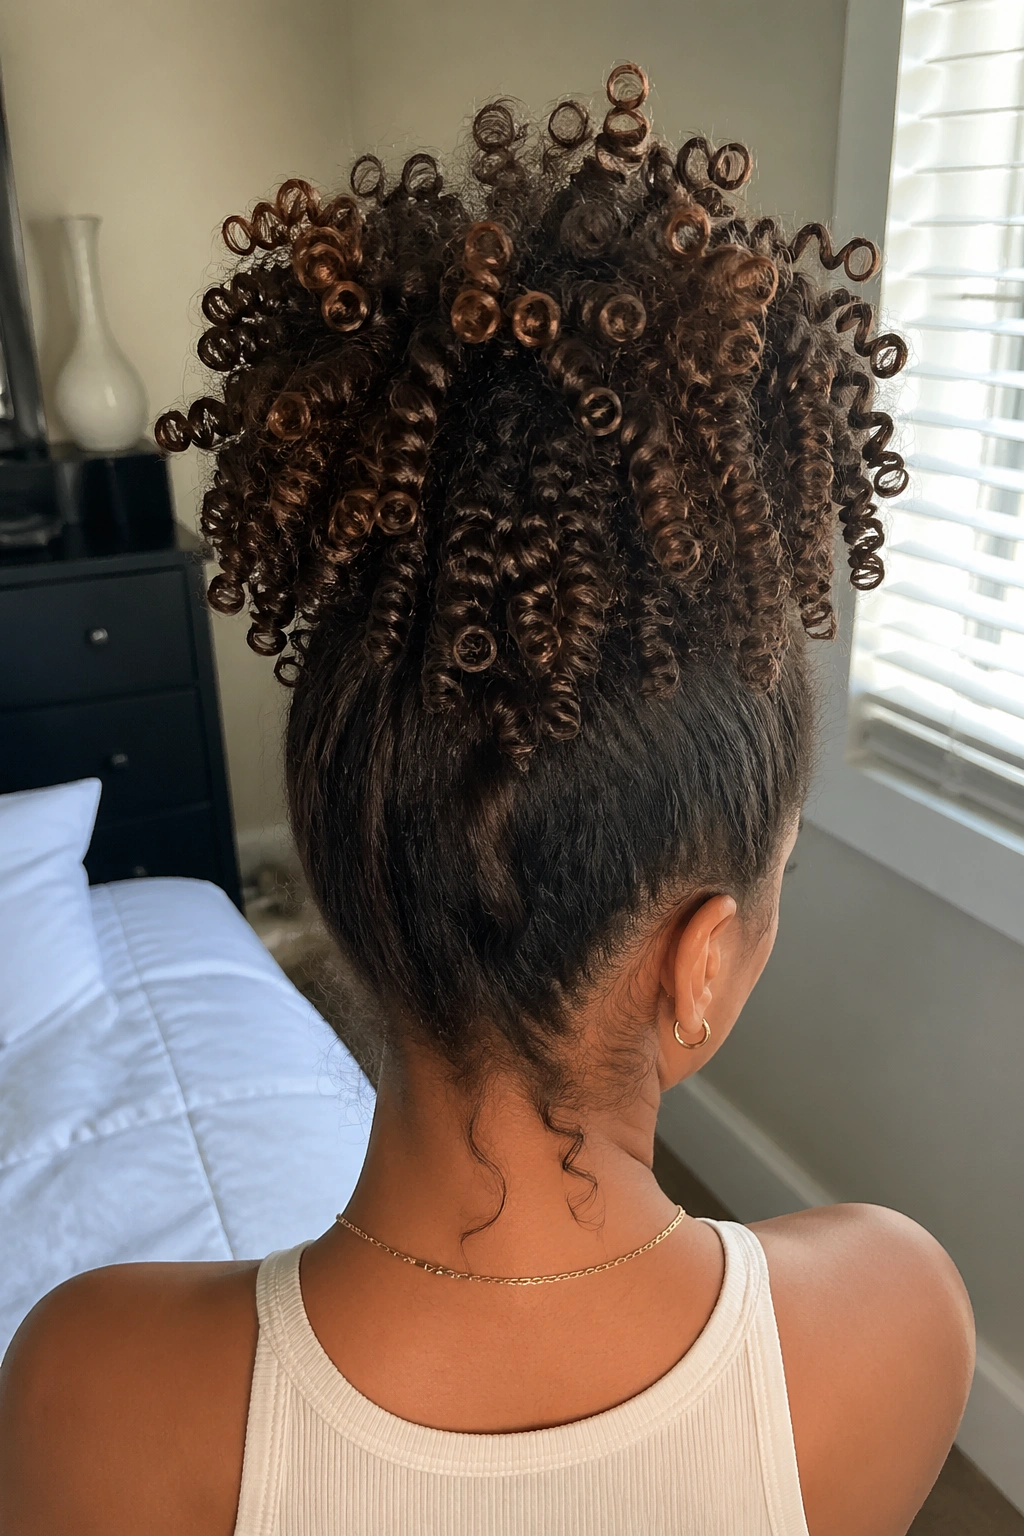
Gather all your ringlets loosely at the very top of the crown in a high pineapple, letting the ringlets fan outward from the gathered base. As a deliberate daytime style, the ringlet pineapple has incredible volume and presence.
The ringlets at the outer edges of the pineapple catch light as they move, creating a style that looks truly spectacular from any angle.
10. Ringlet Curl with Headband
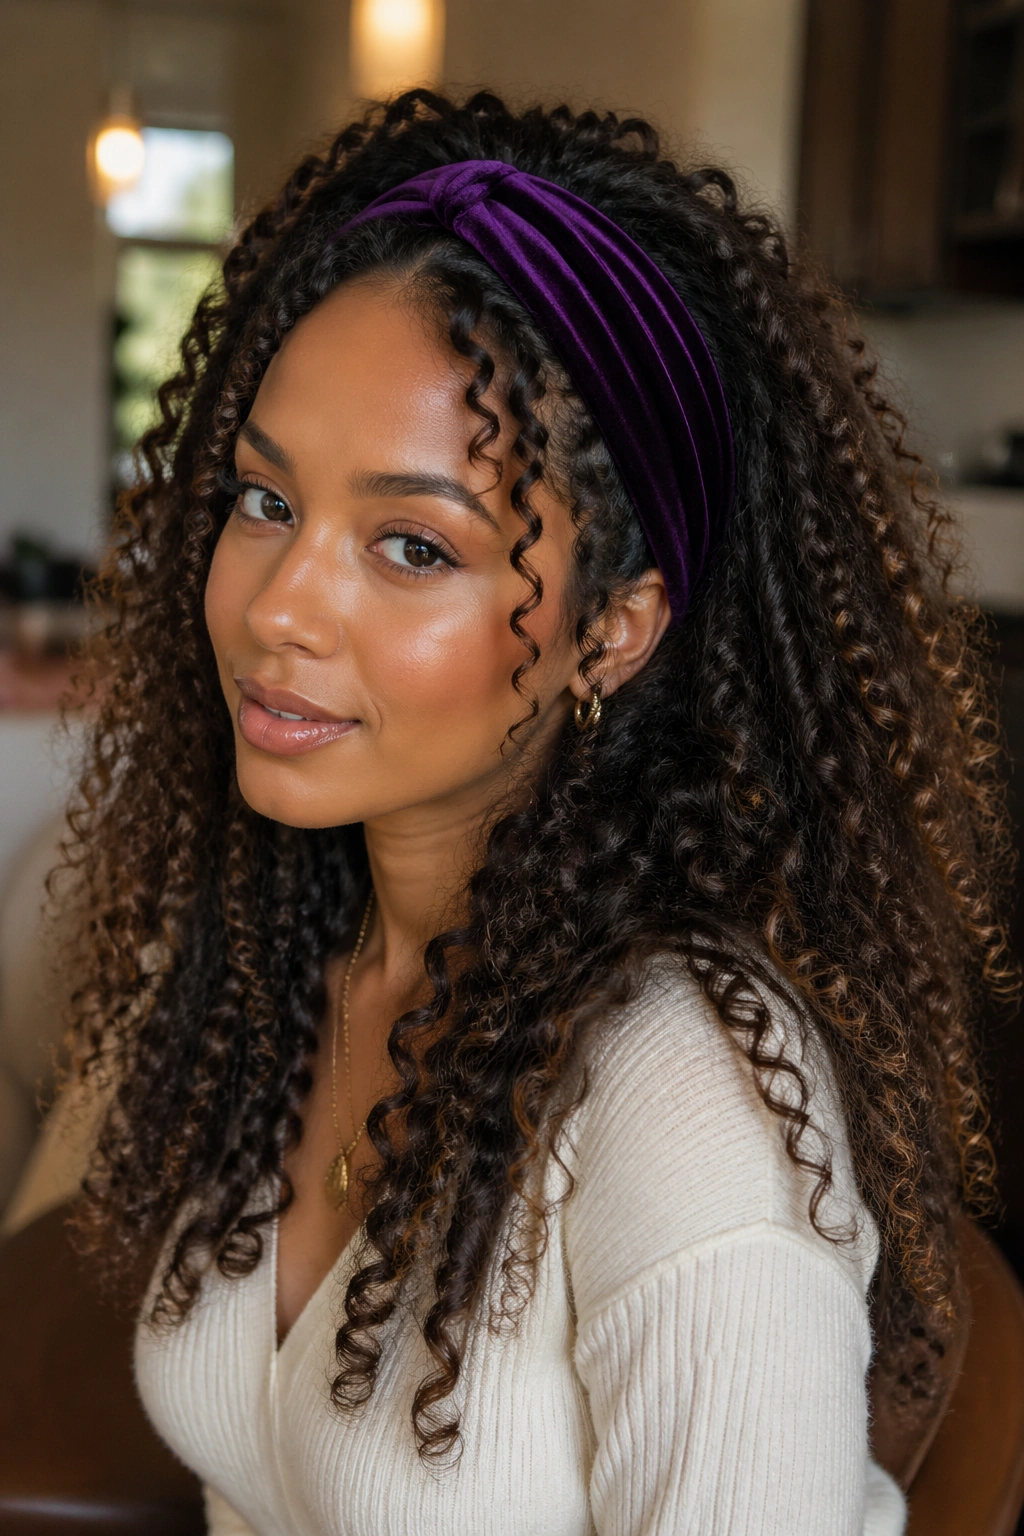
A wide headband — especially a velvet or satin one — pushed back from the hairline creates a structured frame for your ringlets. The headband holds the front ringlets back from your face while the rest cascade freely.
Choose a headband in a jewel tone — deep red, emerald green, navy blue — for a rich, intentional contrast against your natural hair.
11. Ringlet Curl Tapered Style
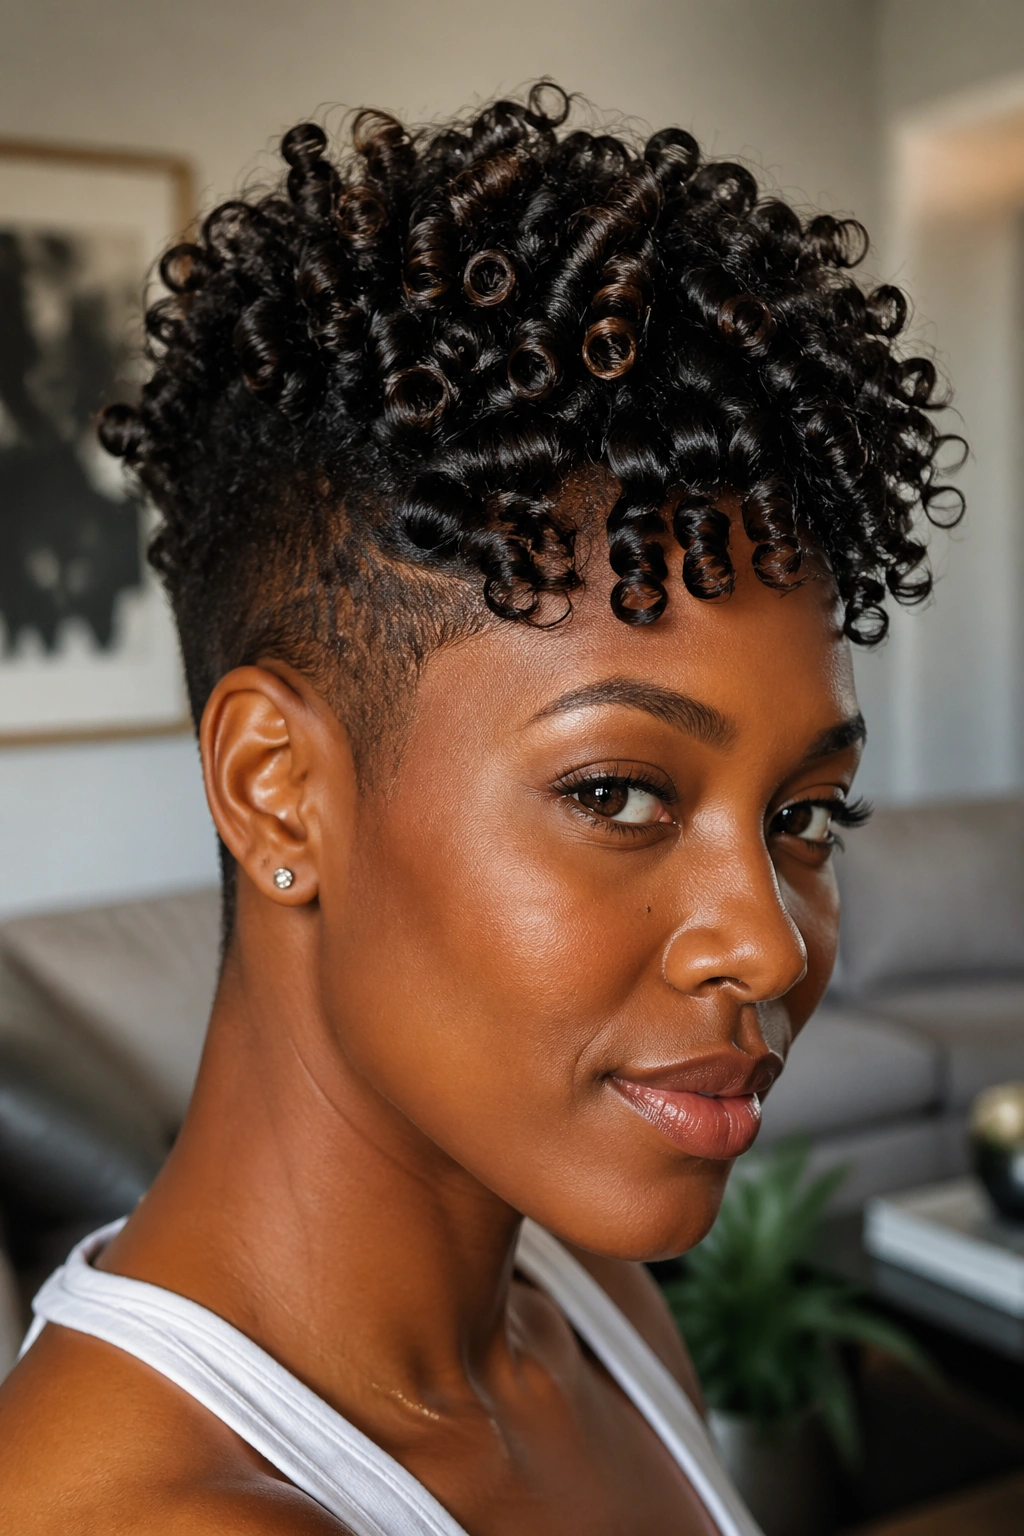
A tapered cut with ringlet definition on the longer top section is one of the most architecturally beautiful natural hair styles possible. The short sides show the texture close to the scalp, while the longer top section develops into distinct ringlets that stand in contrast to the close-cut perimeter.
Work the most product into the top section to ensure the ringlets are as defined as possible — that’s where all the visual focus is in this style.
12. Ringlet Curl Frohawk
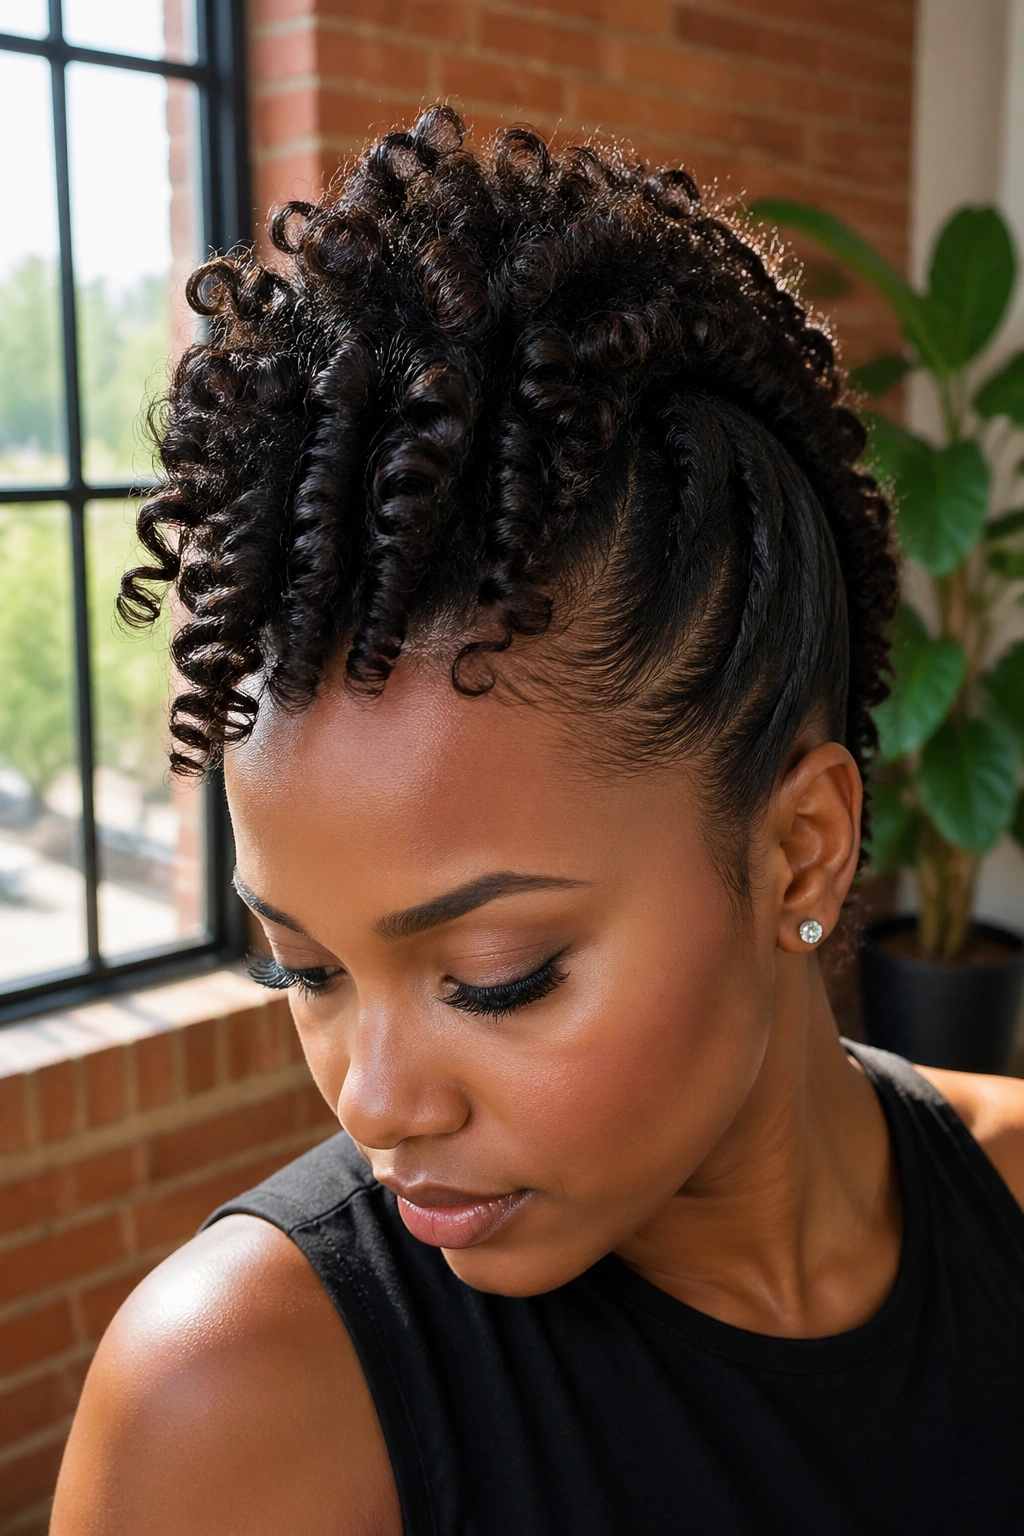
Pin the side sections of a ringlet style flat while letting the center strip stand in a frohawk formation. The individual ringlets in the center strip create a textured, three-dimensional mohawk that looks both bold and refined.
Apply extra hold product to the center strip before the sides go up for maximum definition and staying power in the most visible section.
13. Ringlet Curl with Gold Accessories
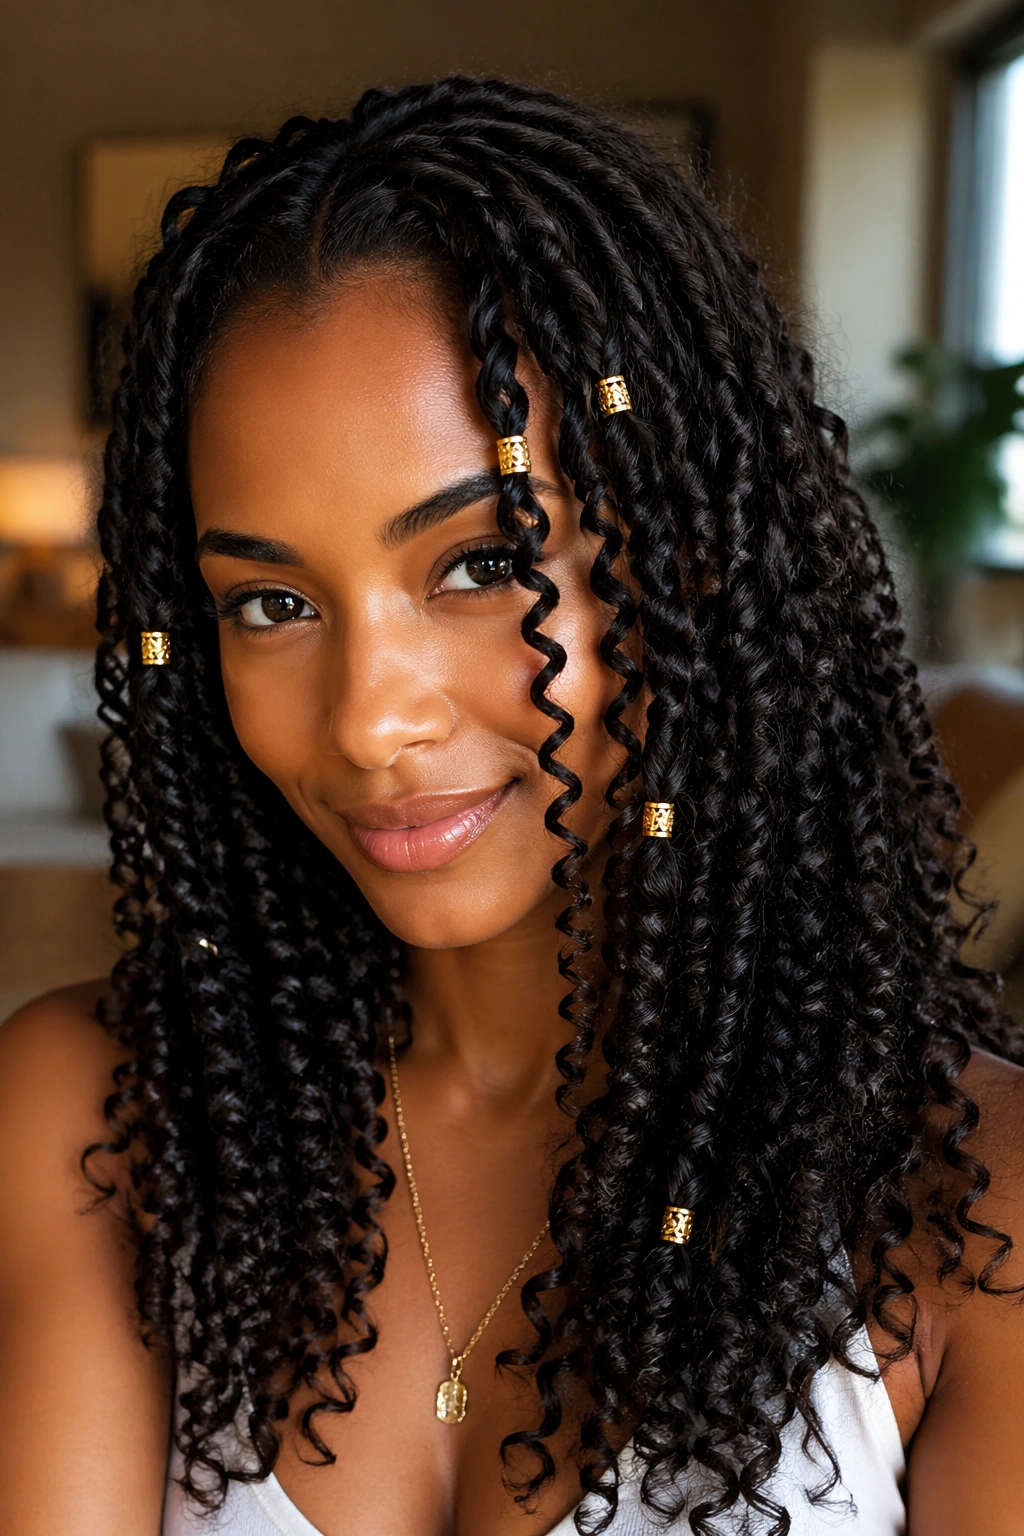
Thread individual gold cuffs onto single ringlets — some near the ends, some mid-shaft — for a luxurious, goddess-like aesthetic. The gold catches light as the ringlets bounce and move, creating a genuinely beautiful accessory effect that enhances rather than distracts from the natural texture.
Use restraint — three to five cuffs scattered through the style is more impactful than covering the entire head.
14. Ringlet Curl Protective Updo
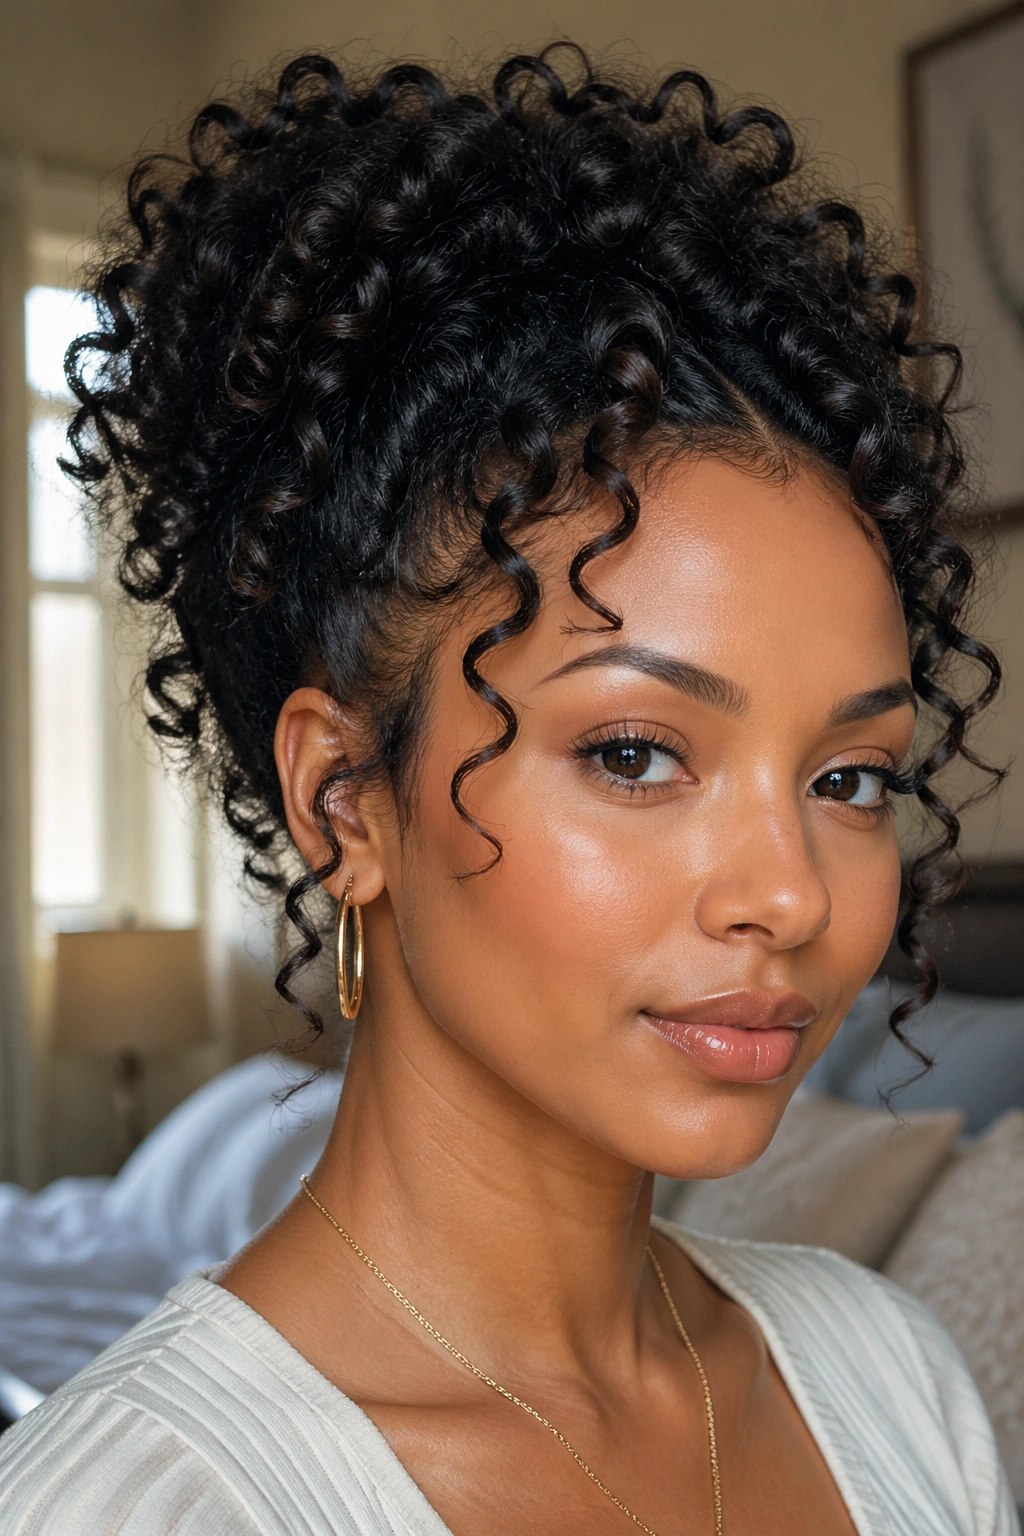
Gather your ringlets into a loose protective updo that tucks your ends away while still showing ringlet definition at the edges and crown. This is a great option for stretches when you want to protect your ends without doing a completely hidden protective style.
The ringlets visible at the hairline and crown make this look intentional and beautiful — it’s not the “I’m hiding my hair” look but the “I styled my hair with purpose” look.
15. Ringlet Curl Defined Bangs Style
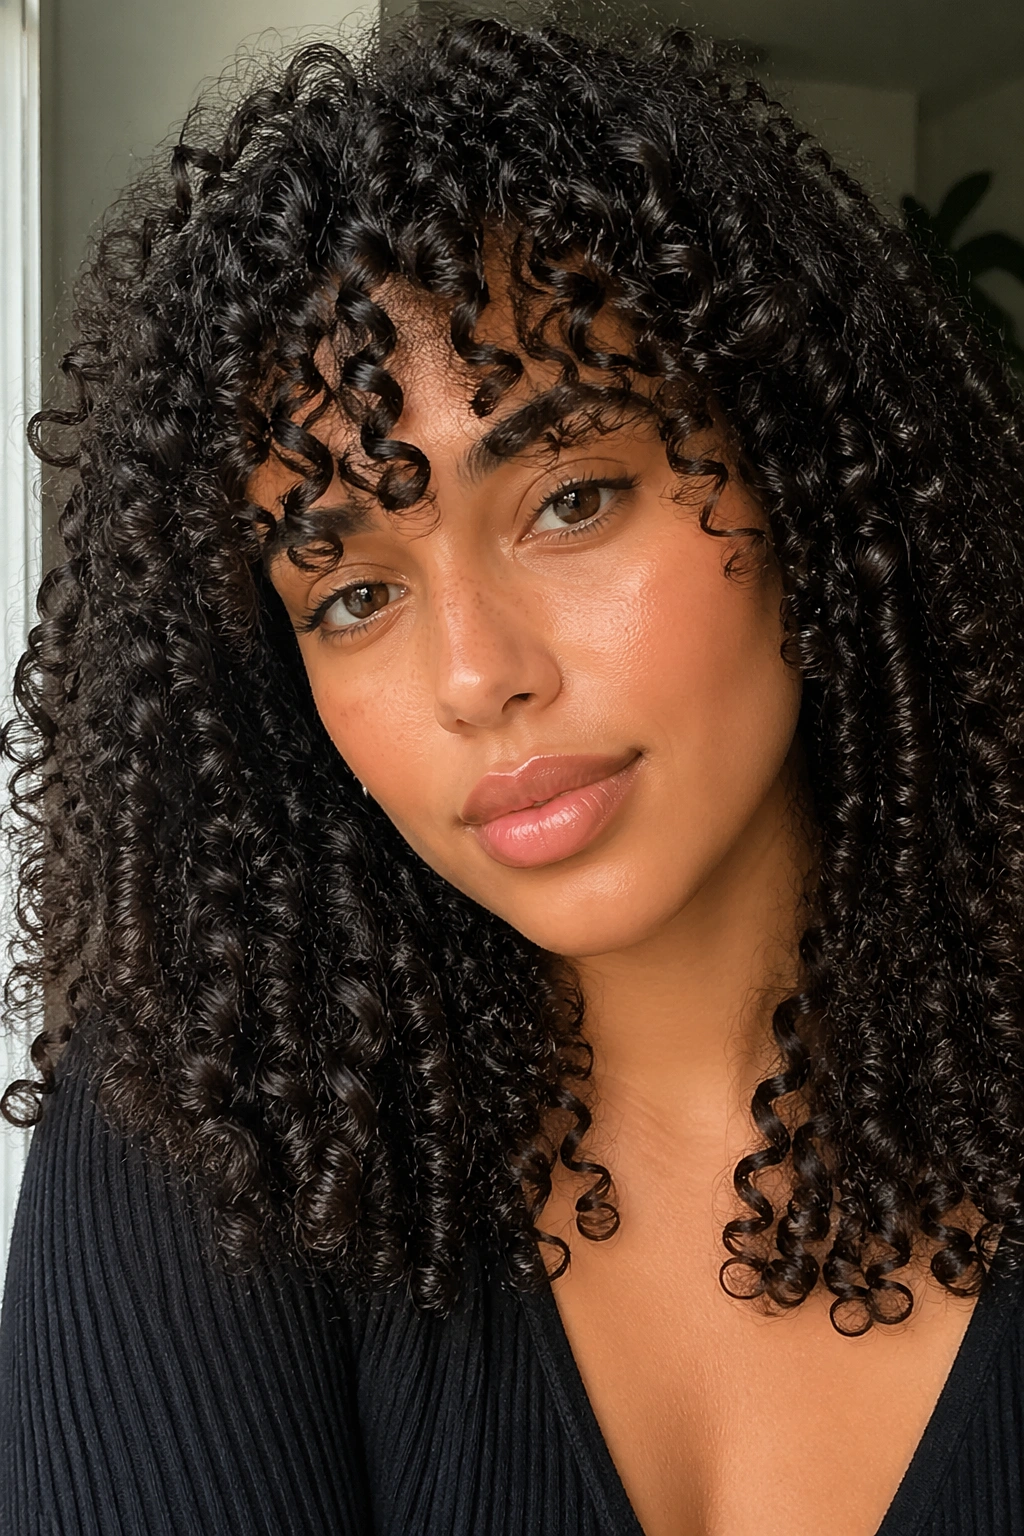
If your ringlets are long enough to fall over your forehead, allow or encourage a few ringlets to fall forward as a curly fringe. Define these front ringlets with extra care — using a little extra gel and finger coiling precisely — so they frame your face beautifully.
This fringe of ringlets draws attention to your face and creates a distinctive, romantic style that’s genuinely unusual and beautiful.
16. Ringlet Curl with Silk Scarf
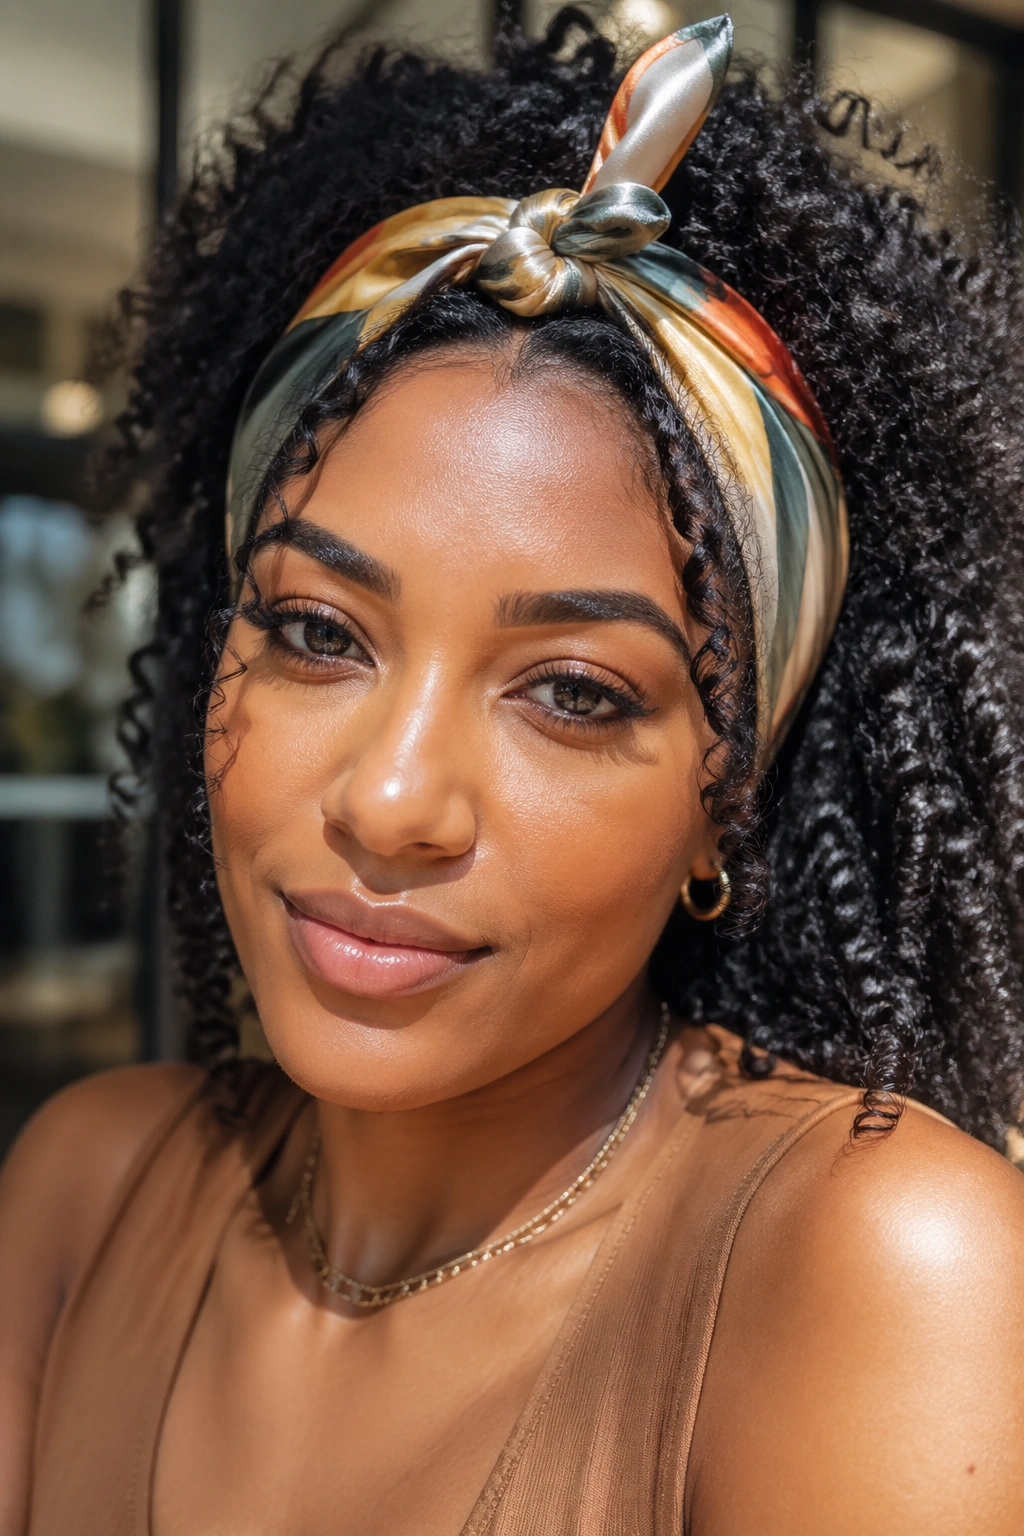
Wrap a silk scarf along the hairline — tied at the top or at the side — and let your ringlets fall freely from behind it. The silk scarf frames the face and adds color, while the ringlets create movement and texture beyond the scarf.
This is a quick way to add a completely different dimension to your ringlet style without touching the curls themselves.
17. Ringlet Curl Space Buns
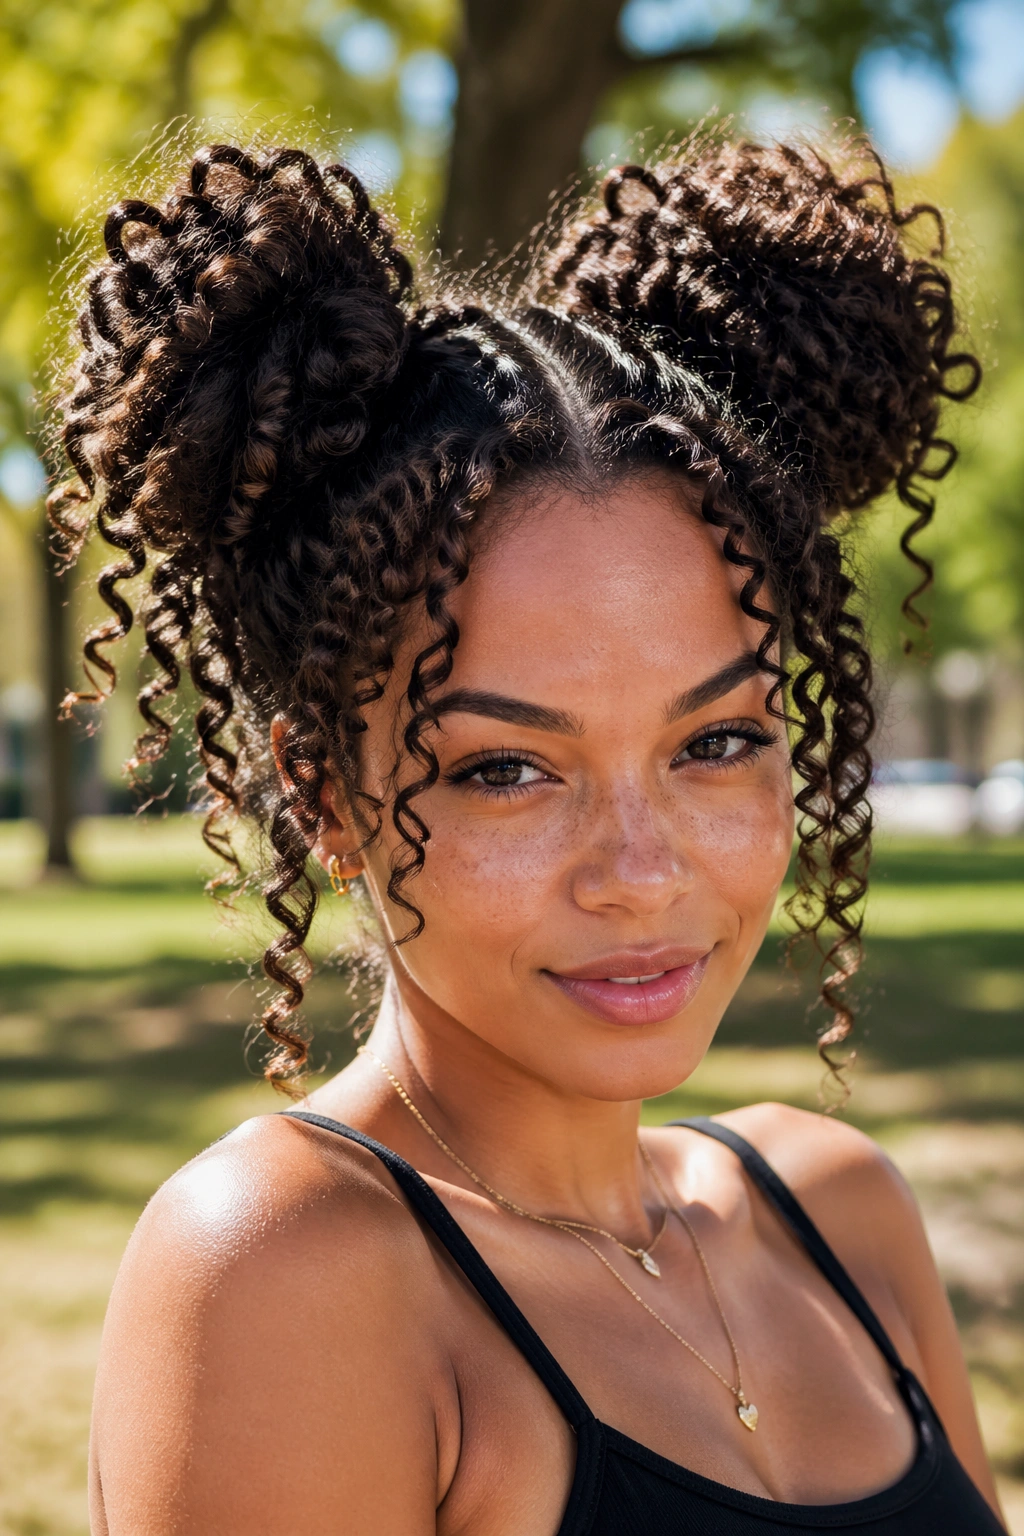
Divide your ringlet style down the center and create two loose, high buns. The individual ringlets that escape around each bun — or are allowed to hang down from the bun base — carry their spiral definition with them, creating a textured, dimensional space bun look.
This is the most playful version of the ringlet style — casual enough for everyday wear but striking enough to get compliments everywhere you go.
18. Ringlet Curl Braided Crown
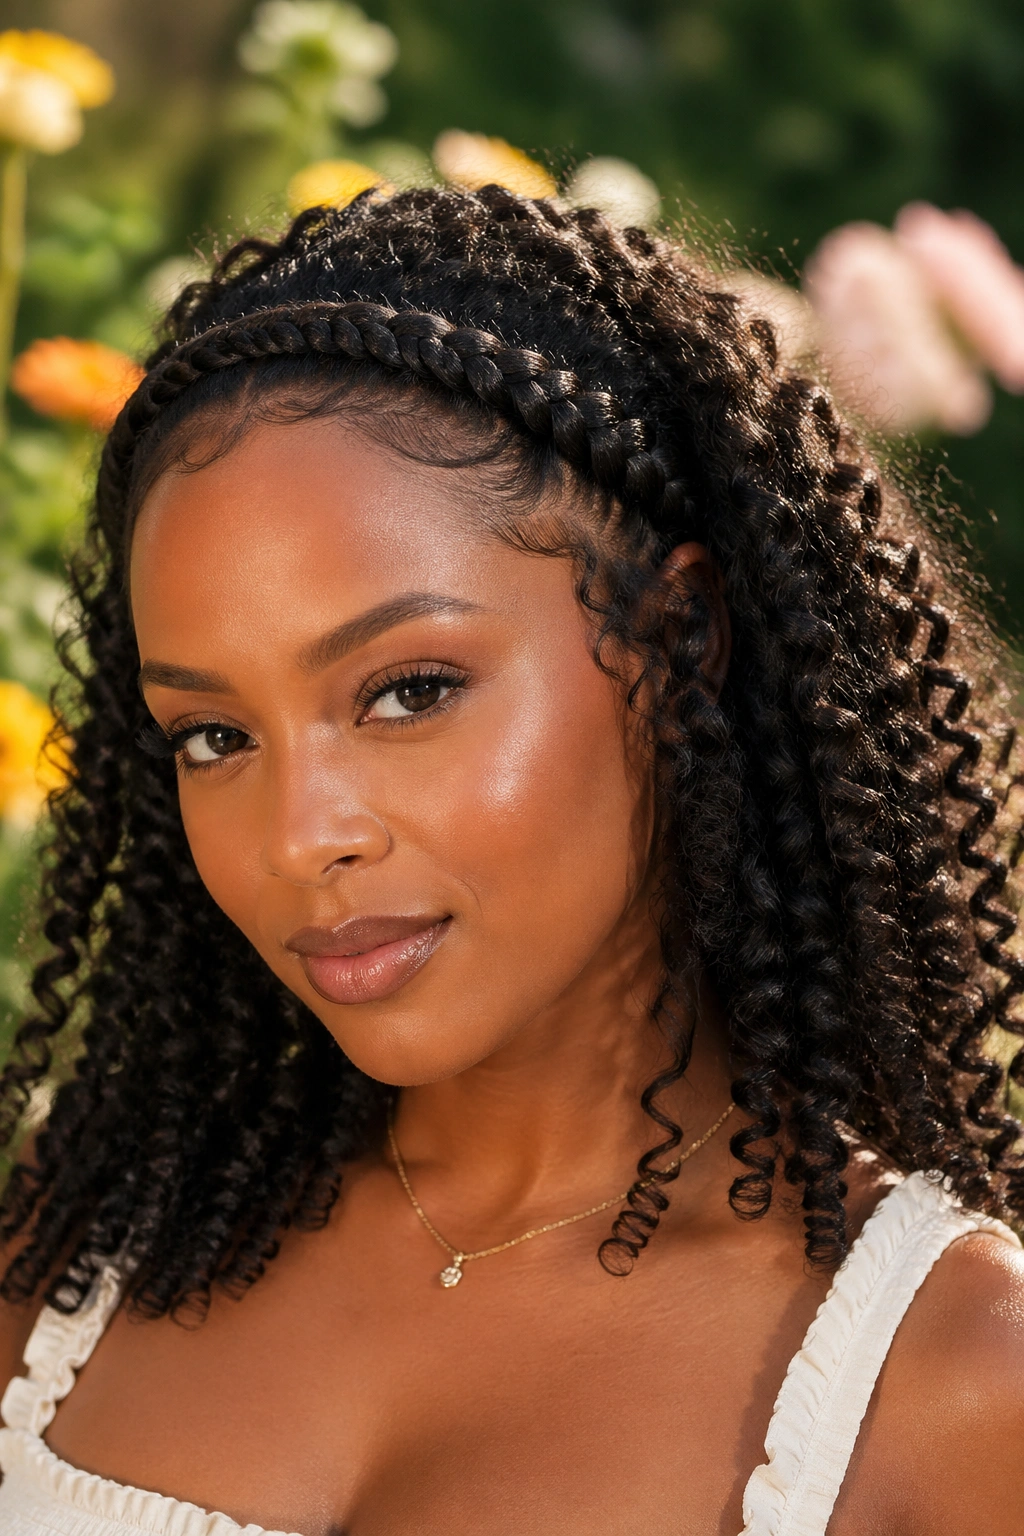
Create a simple flat braid or twist across the front of the hairline as a crown, then let the remaining ringlets cascade freely from behind the crown braid. The braid creates a structured, clean element that contrasts beautifully with the free, spiral ringlets behind it.
This style works beautifully for outdoor events, formal occasions, or any time you want your natural hair to look deliberately styled without spending hours on an elaborate updo.
19. Ringlet Curl Wet Look
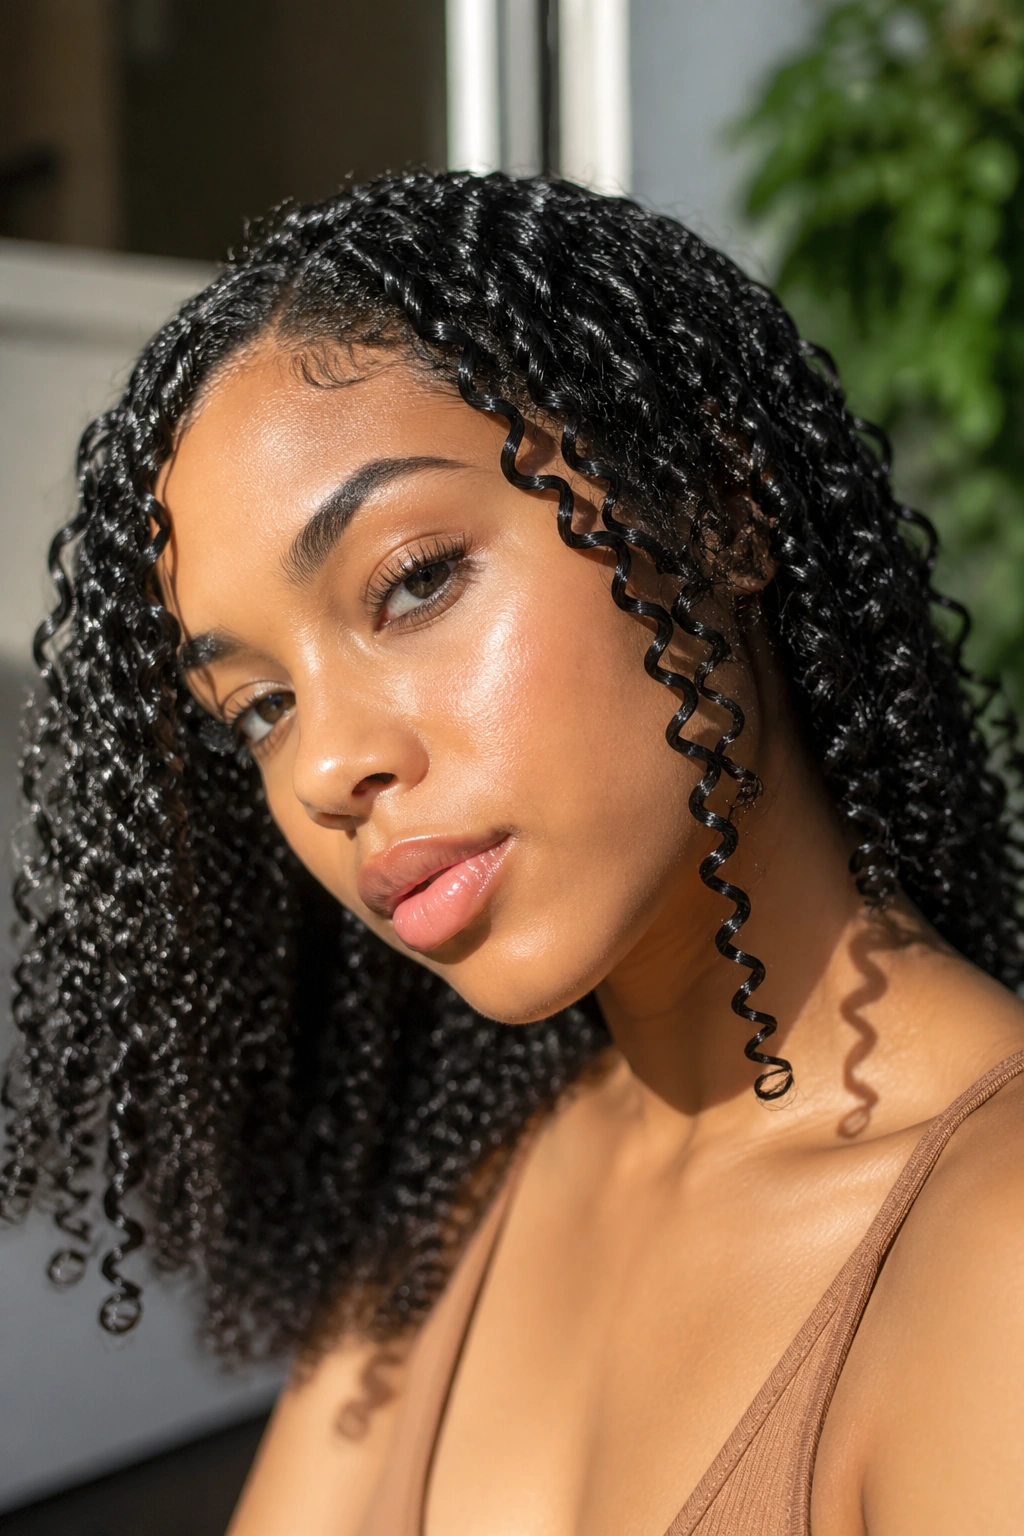
Apply an extra layer of gel over defined ringlets and smooth each one with your fingers before letting them dry. The extra gel creates a wet, glossy look that lasts through the entire day — each ringlet maintains its spiral shape with a sleek, defined appearance rather than a soft, fluffy one.
The wet look ringlet style is polished and dramatic — especially beautiful in natural sunlight.
20. Ringlet Curl Mohawk
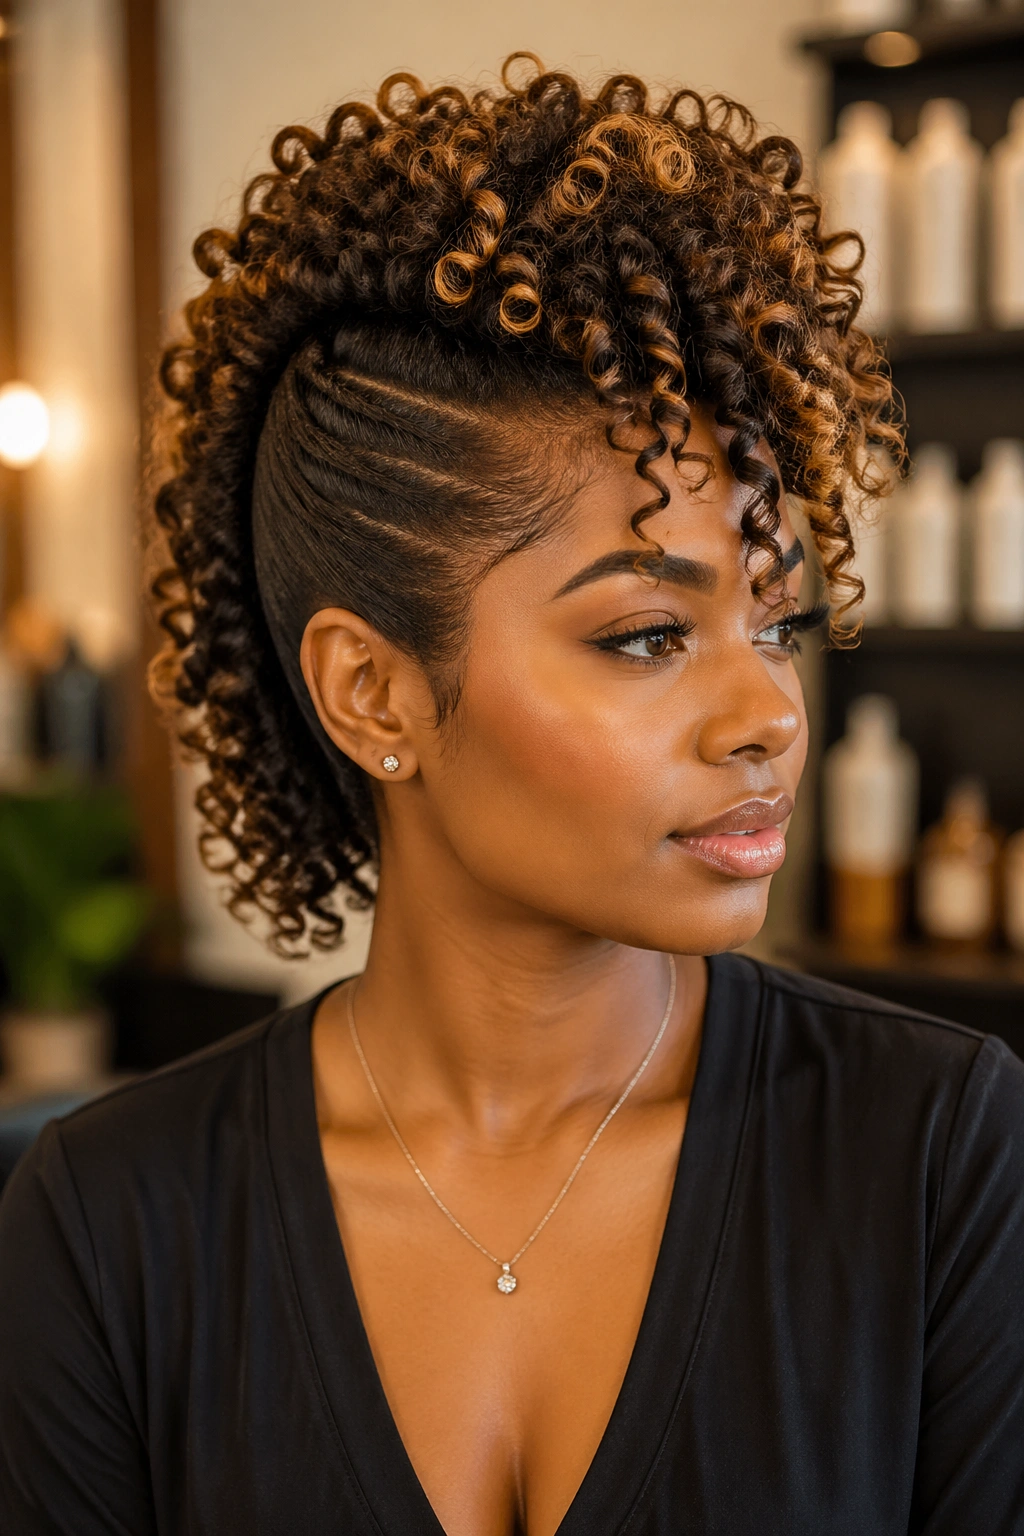
Create a ringlet style across the full head, then pin or braid the sides flat while the center strip of ringlets stands tall. The individual spirals in the mohawk strip are the visual focal point, so give that section extra product and extra definition.
The mohawk with ringlets is bold but never harsh — the softness of the spirals tempers the boldness of the silhouette for a look that’s fashion-forward without being intimidating.
21. Ringlet Curl Stretched-Out Style
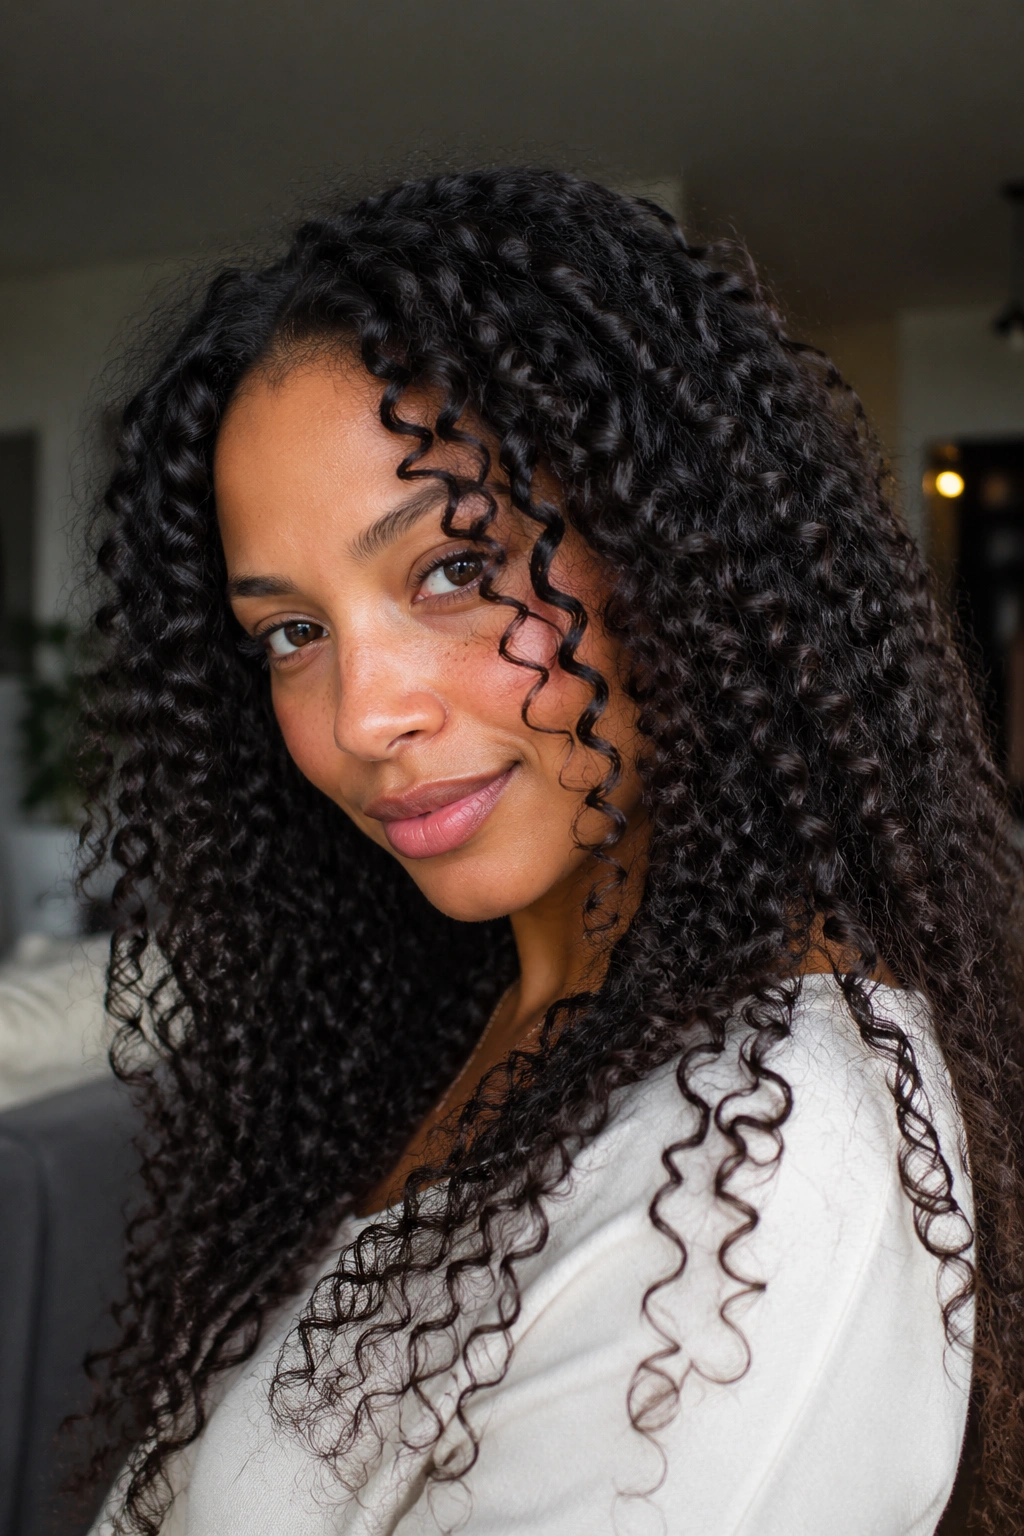
Over the course of two to three days, natural hair movement gradually stretches ringlets from tight spirals into slightly elongated, looser curls. This “day three ringlet” look has a beautiful, effortless quality that’s different from the crisp definition of day one.
Embrace this natural evolution rather than fighting it. The slightly stretched ringlets have their own appeal — more movement, softer texture, and a lived-in look that’s genuinely beautiful.
22. Ringlet Curl Pinned Crown Style
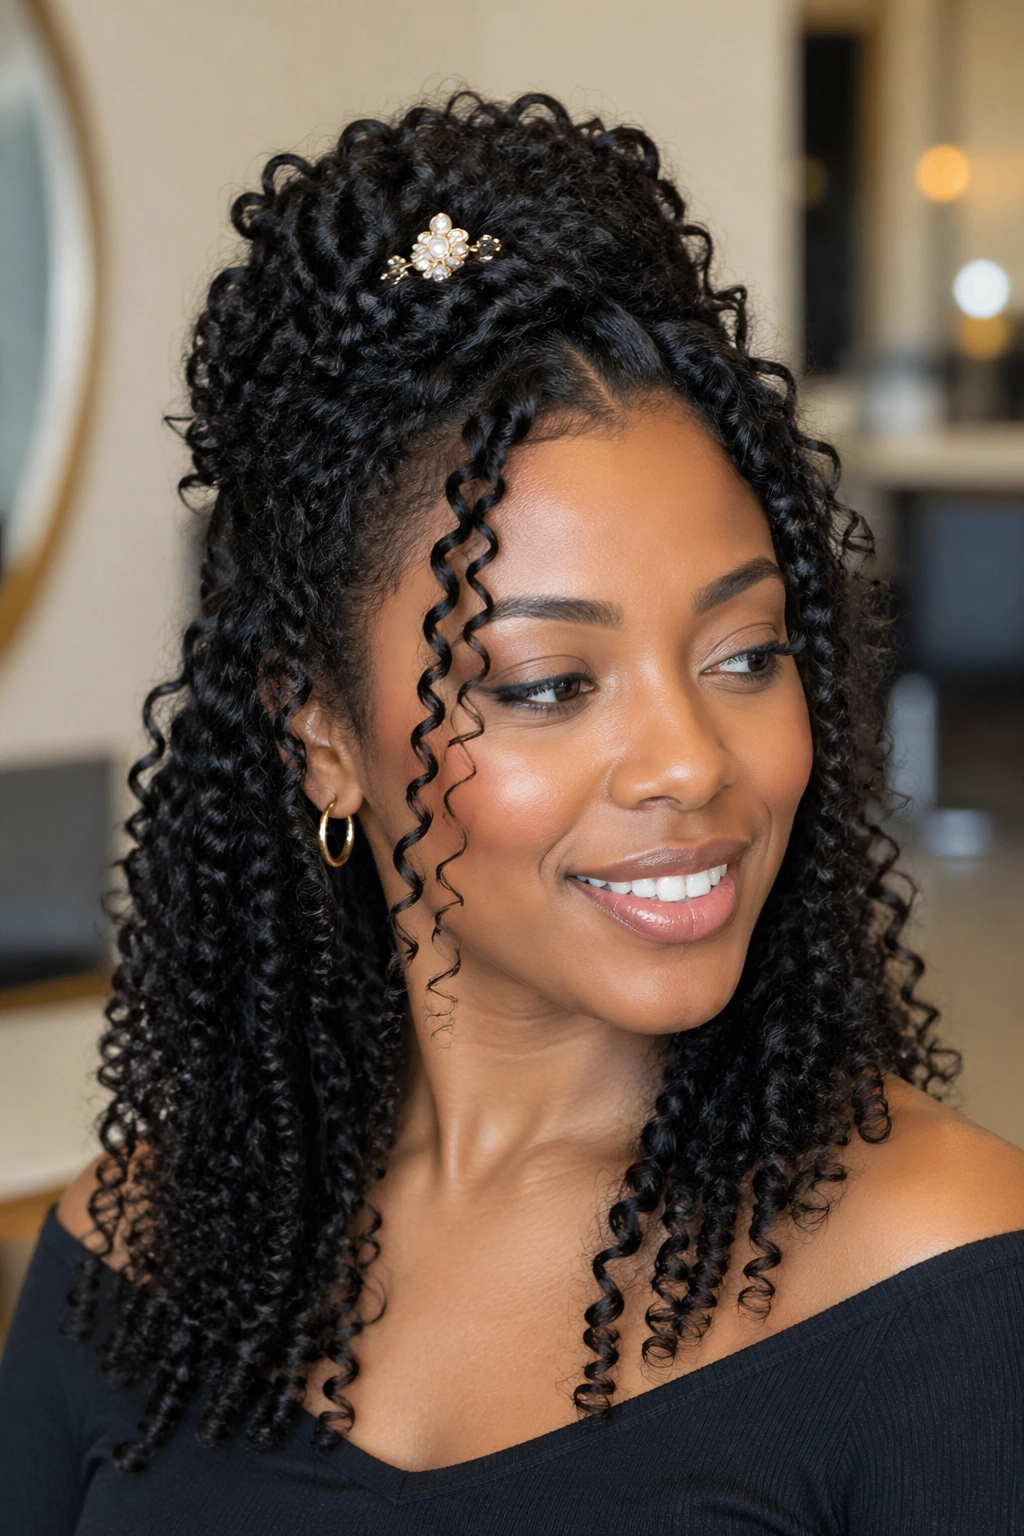
Pull a section of ringlets from the crown forward and pin them to the side or back with a decorative pin, creating a crown effect where some ringlets are pinned up and the rest hang freely. This simple manipulation creates a style that looks like significantly more effort than it actually requires.
23. Ringlet Curl Multi-Part Style
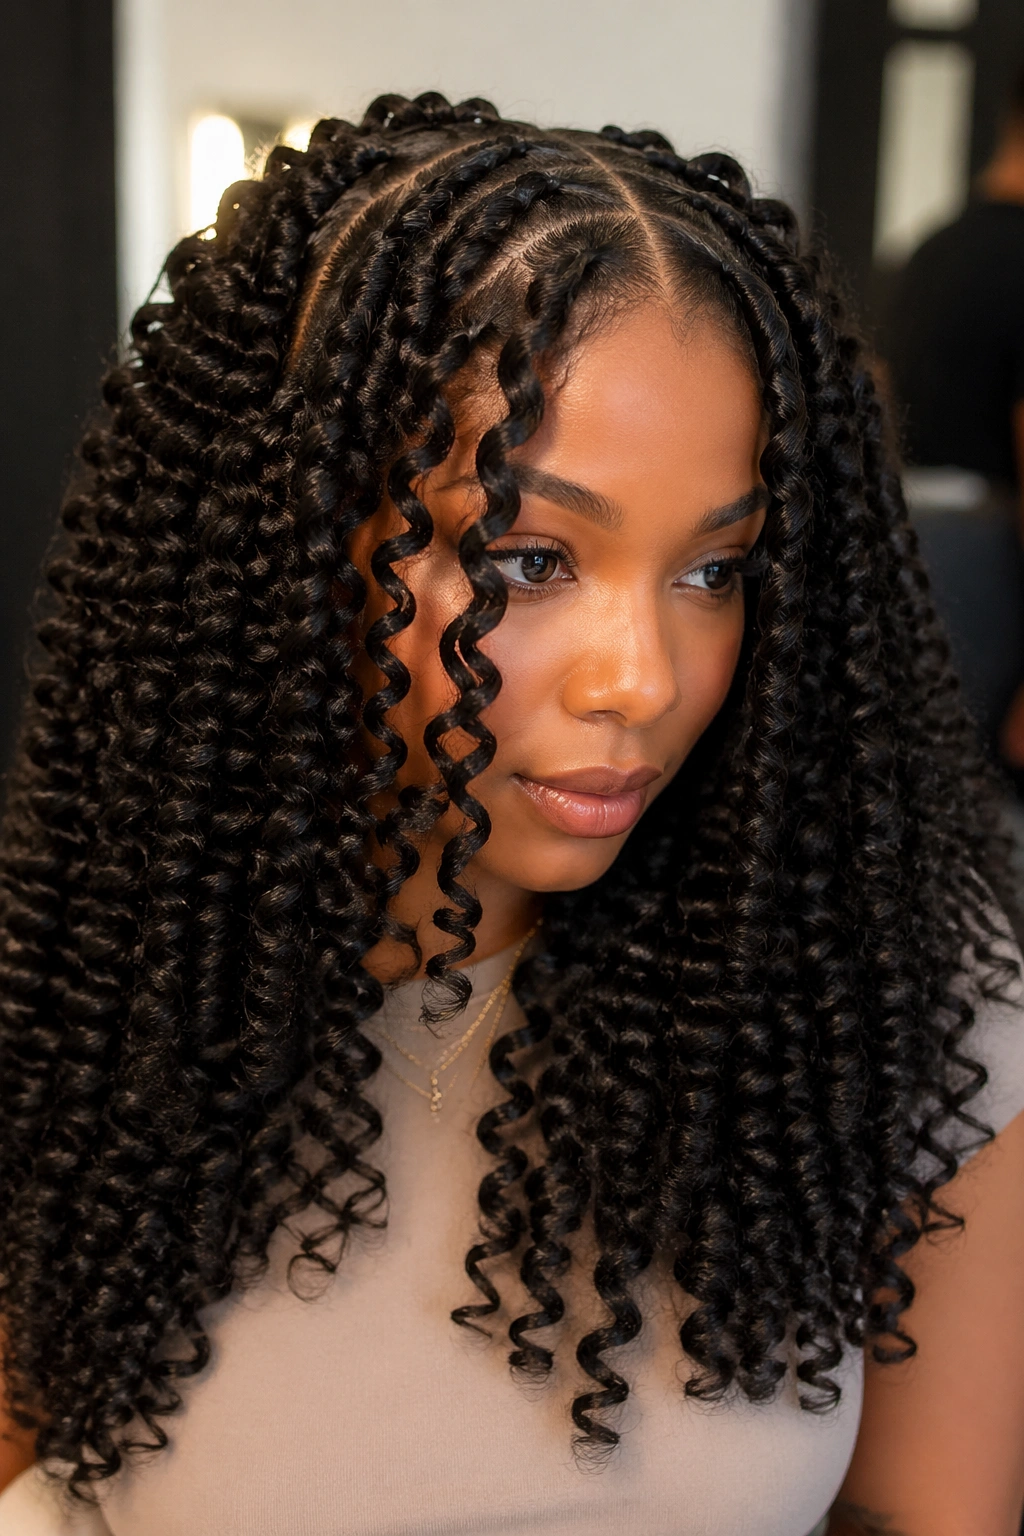
Create three or four deliberate parts across the head — not a single center part, but several parallel or radiating parts — and allow the ringlets to hang from each section in a deliberate, graphic arrangement. The parts create structure and intention within a ringlet style.
This works particularly beautifully on longer ringlet styles where the length allows the sections to hang distinctly.
24. Ringlet Curl Low Manipulation Maintenance Style
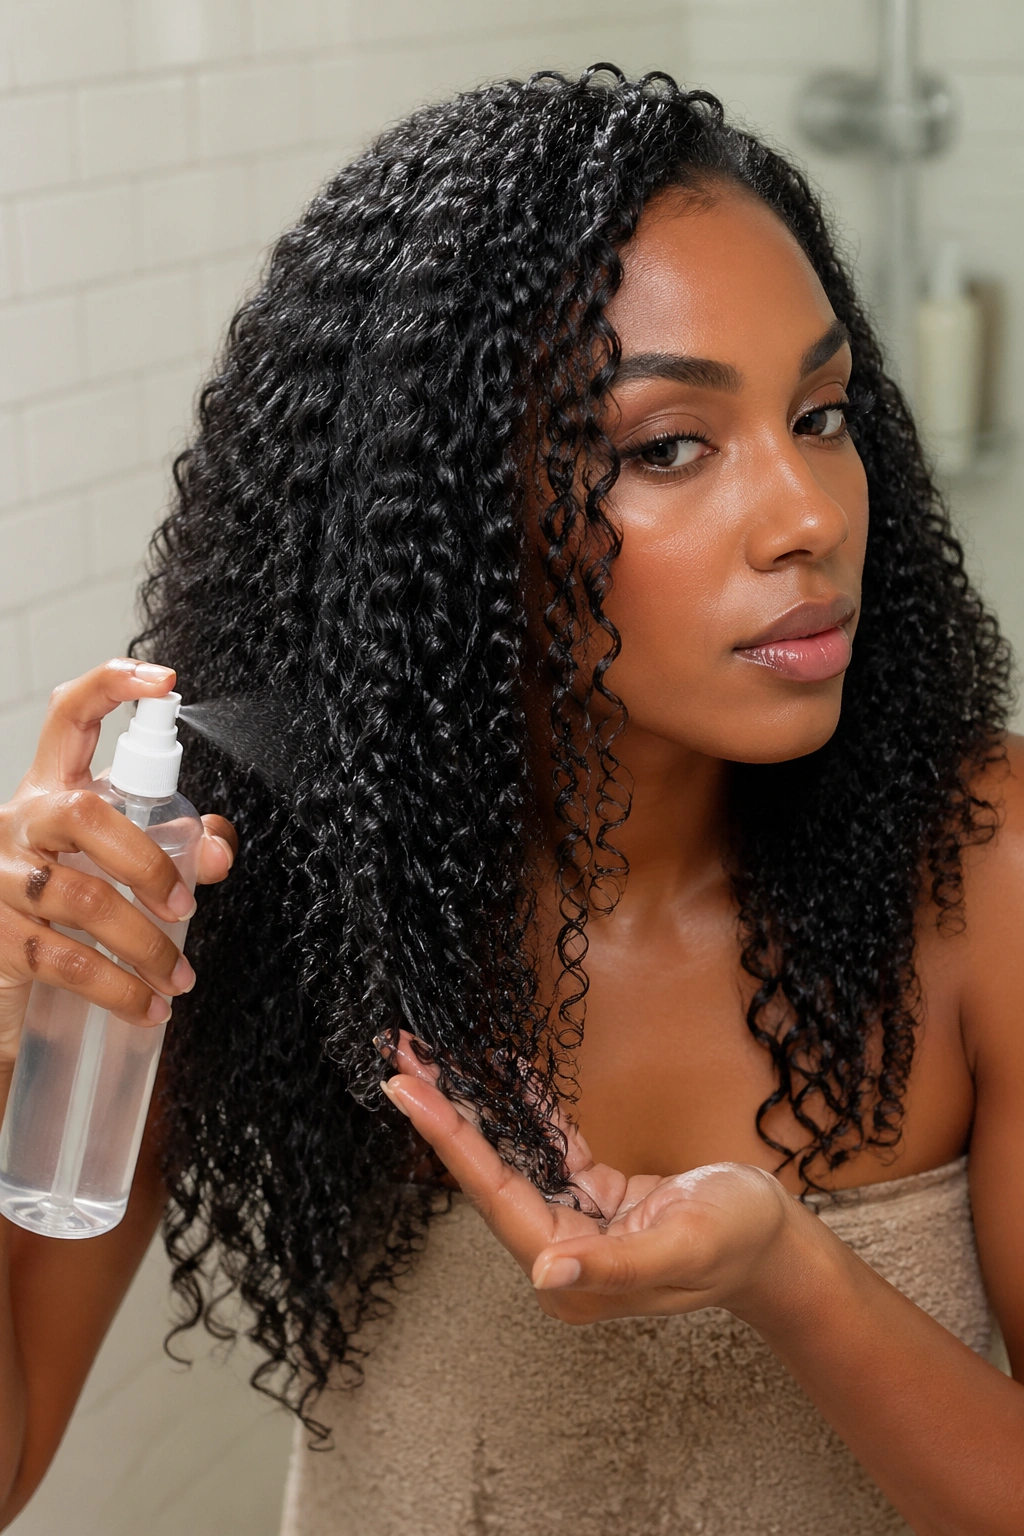
Rather than restyling when your ringlet definition starts to loosen, switch to a low manipulation maintenance mode: mist with water, smooth on a little gel with your palm (not your fingers, which would disturb individual ringlets), and let the style resettle without touching.
This approach can extend a ringlet style by two to three additional days without restating from scratch.
25. Ringlet Curl Defined Loc Transition
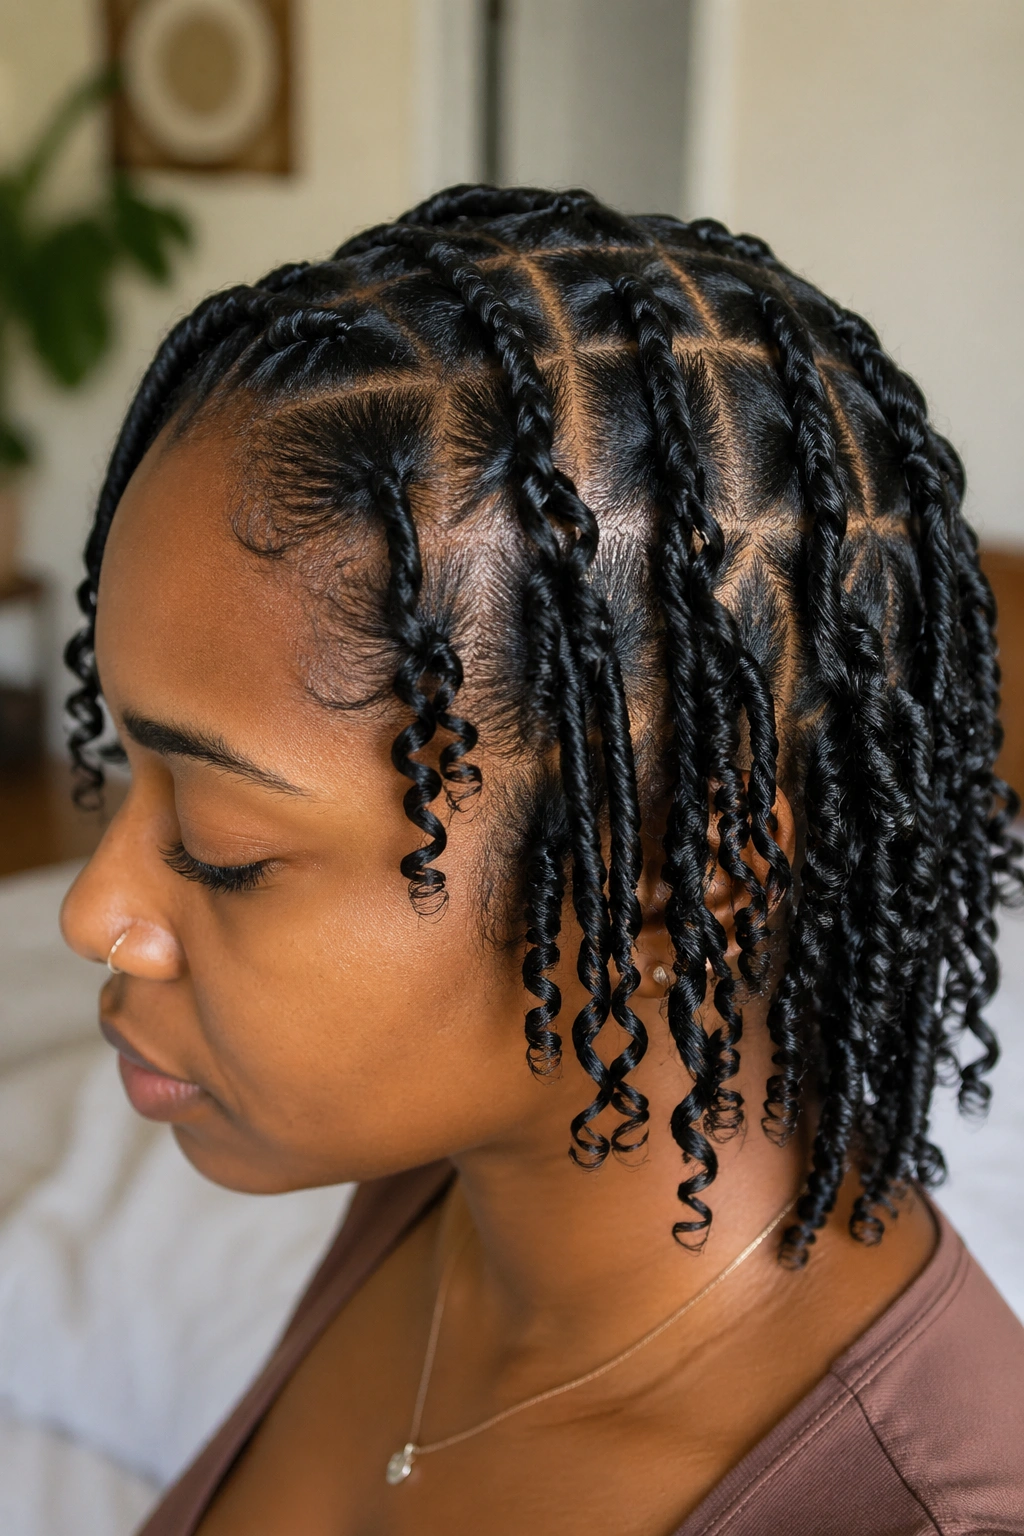
For naturals transitioning to locs using the coil or comb coil method, ringlet definition during the starter loc phase creates a starter loc that looks beautiful as a standalone style during the formation period. The ringlet pattern in each section becomes the foundation of the loc’s eventual shape.
26. Ringlet Curl Glossy Finish Style
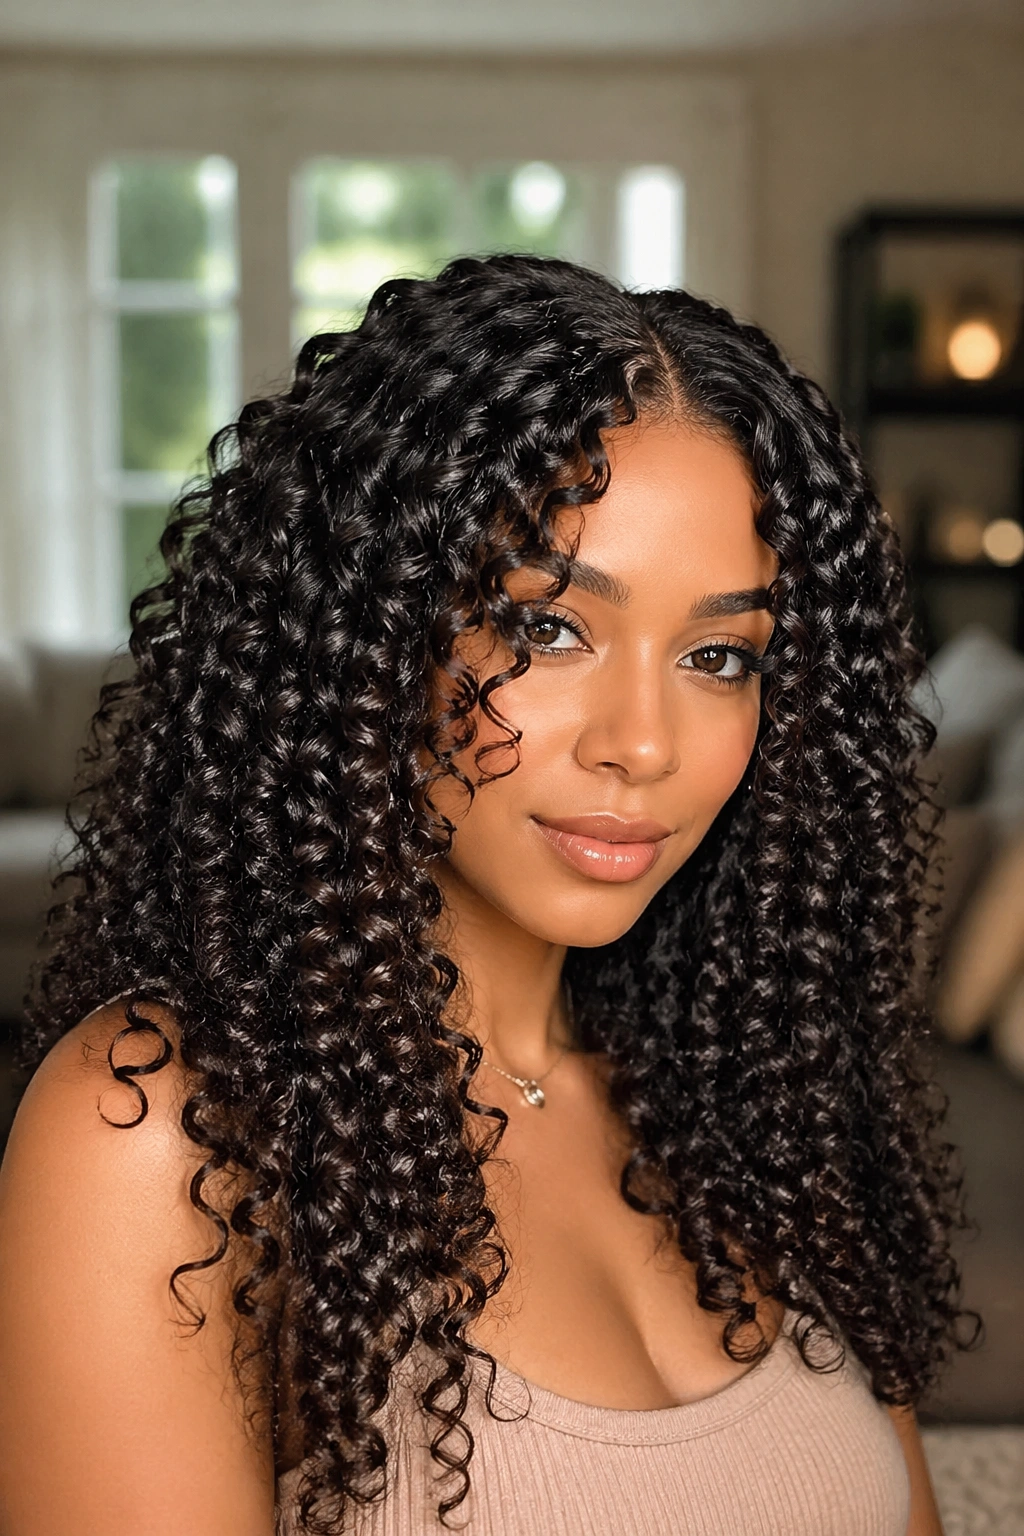
After your ringlet style is completely dry, apply a shine serum or light hair oil — just a dime-sized amount, emulsified in your palms — and smooth it lightly over the surface of the ringlets. Don’t disrupt the individual spirals; just add a superficial sheen.
The glossy ringlet finish is the version of this style that looks the most professional and polished — it’s the difference between beautiful curls and editorial-quality ringlets that look intentional and absolutely stunning.
The Patience Required for Ringlet Curls
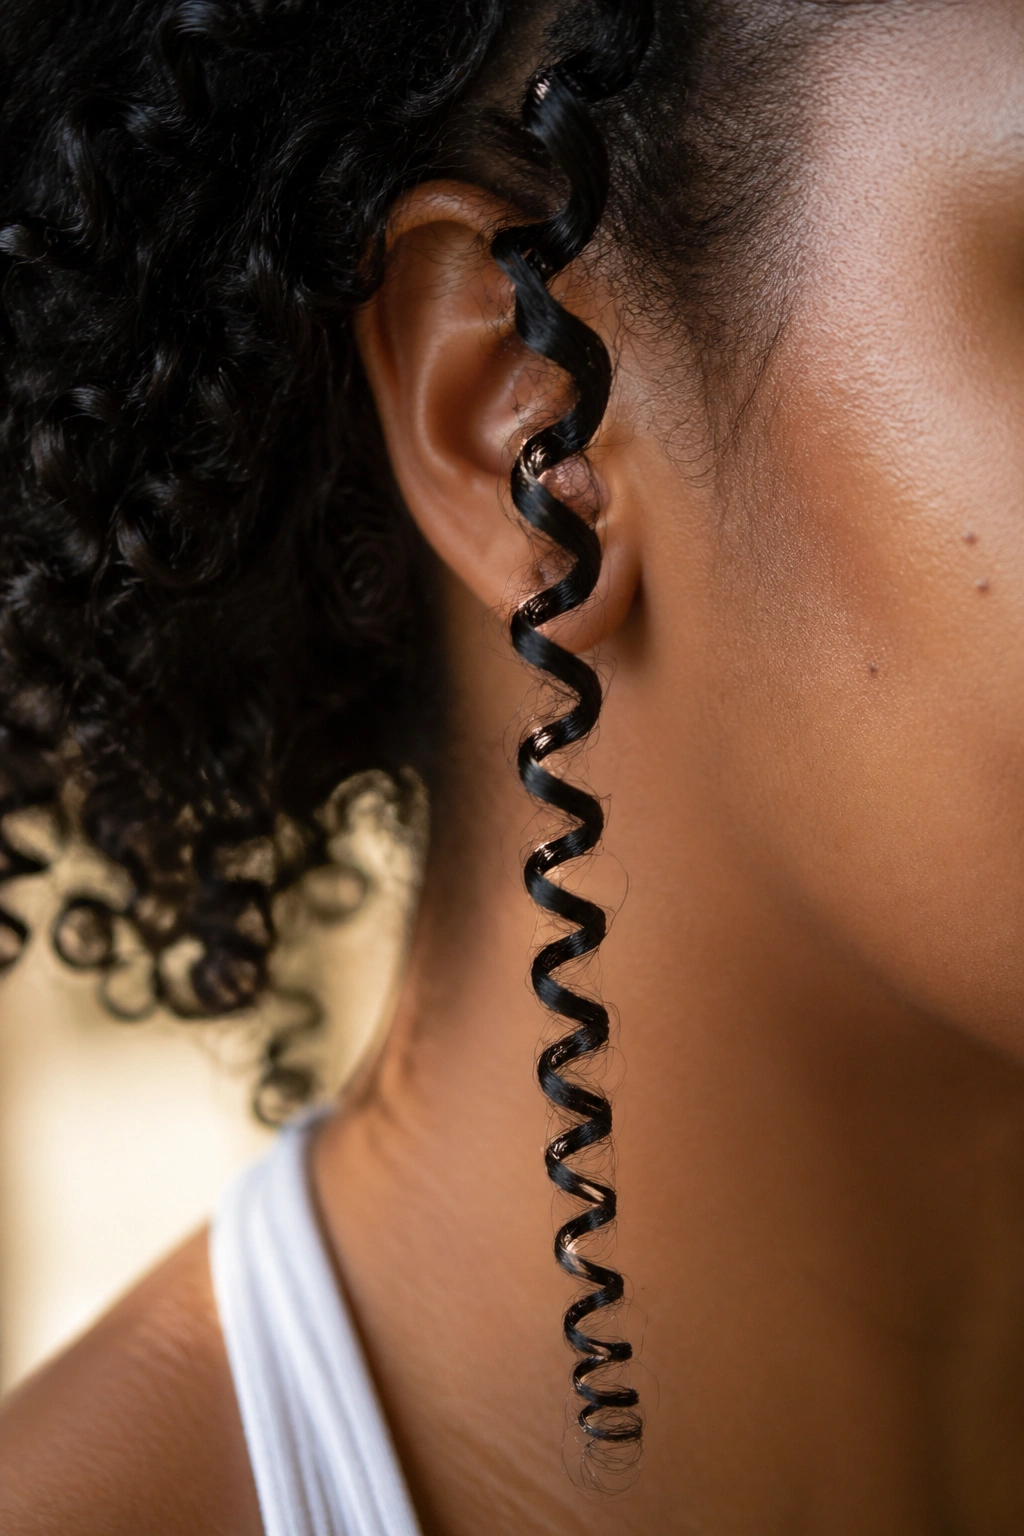
Of all the natural hair styles out there, ringlet curls are among the least forgiving of impatience. You have to deep condition. You have to apply product properly. You absolutely have to let the style dry completely before touching — probably the hardest rule to follow when you’re excited to see the results.
But the wait is worth it every single time. Fully dried ringlets are defined, bouncy, and glossy. Ringlets touched mid-dry are frizzy, puffy, and disappointingly undefined. The only variable is patience, and it’s entirely within your control.
Develop your ringlet routine over several wash days, adjusting product amounts and techniques each time until you find the combination that gives your specific hair its most beautiful spiral definition. Natural hair care is personal — what creates perfect ringlets on one person’s hair might need adjustment for yours. Trust the process, take notes on what works, and celebrate every gorgeous ringlet style along the way.
