High ponytail buns for Black women have a way of doing three jobs at once. They pull the face up, keep the hair off the neck, and still look polished enough for dinner, work, a photo session, or a day when you want your hair to behave and stay out of the way.
The part most people underestimate is the base. A bun built on stretched curls will sit differently from one built on cornrows, locs, twists, or a full ponytail extension, and that difference shows up fast once you start moving around or the weather gets humid.
That base decides everything.
I also pay attention to tension before anything else. If the style is yanking at the temples or flattening the hairline too hard, it’s not a win just because it looks neat from the front. A high bun should sit high, not hurt.
The styles below lean into different moods and different hair setups: sleek, braided, fluffy, sculpted, protective, and a few that feel a little dressier than the usual everyday bun. Some are fast. Some take a hand mirror, a few pins, and a little patience. All of them work with the texture, not against it.
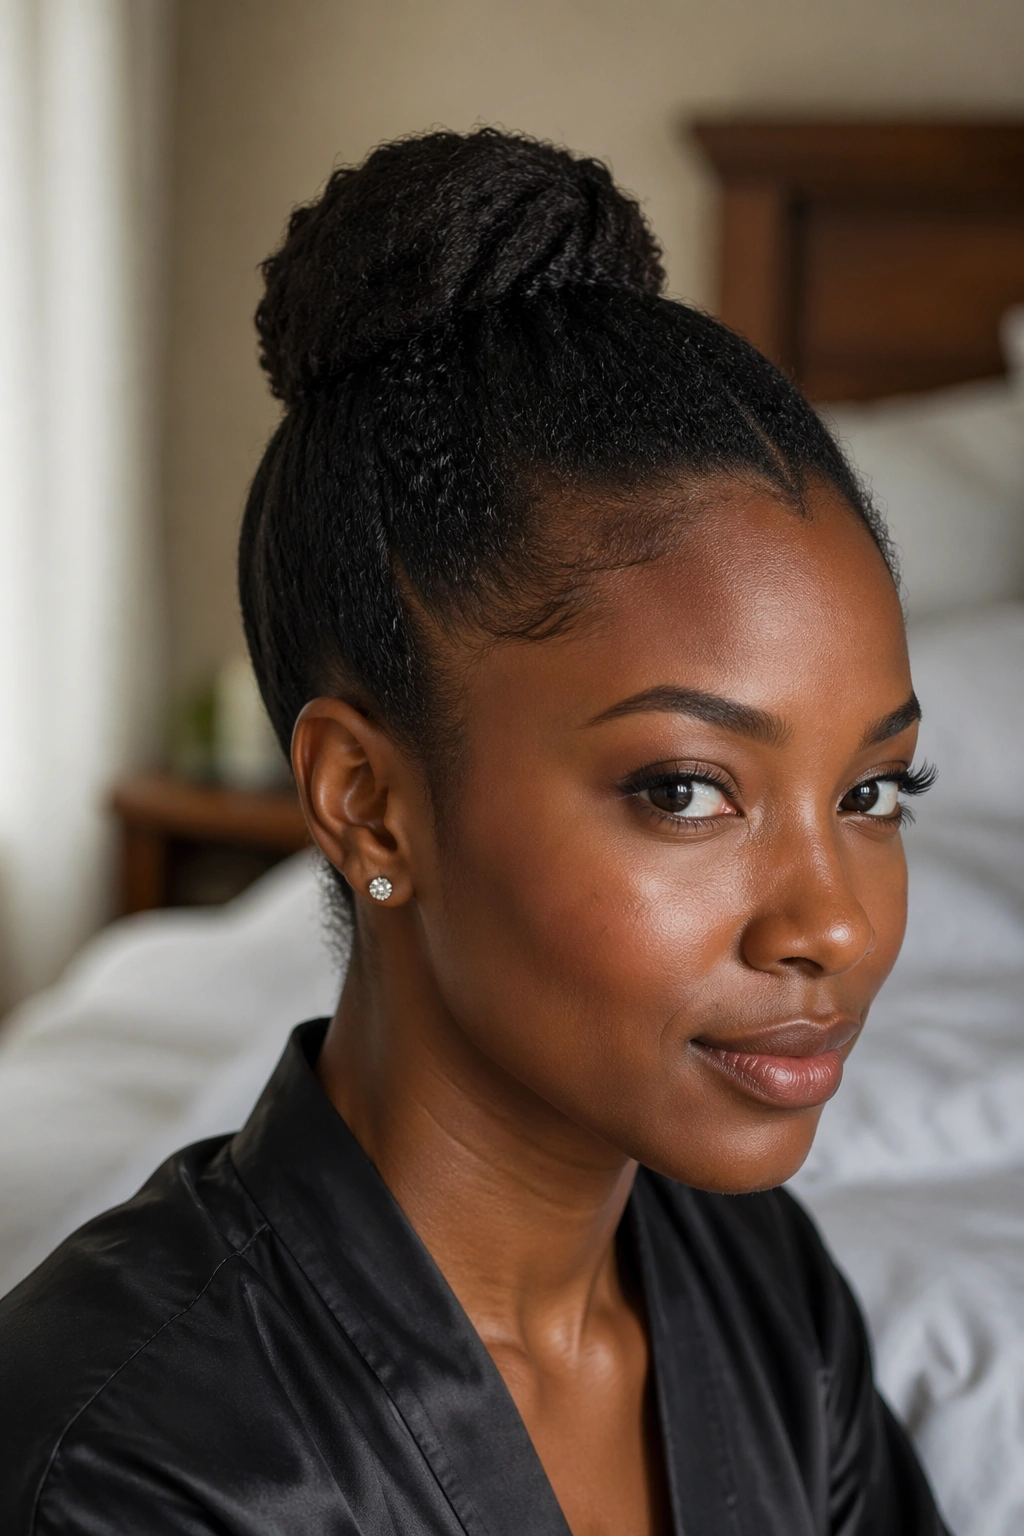
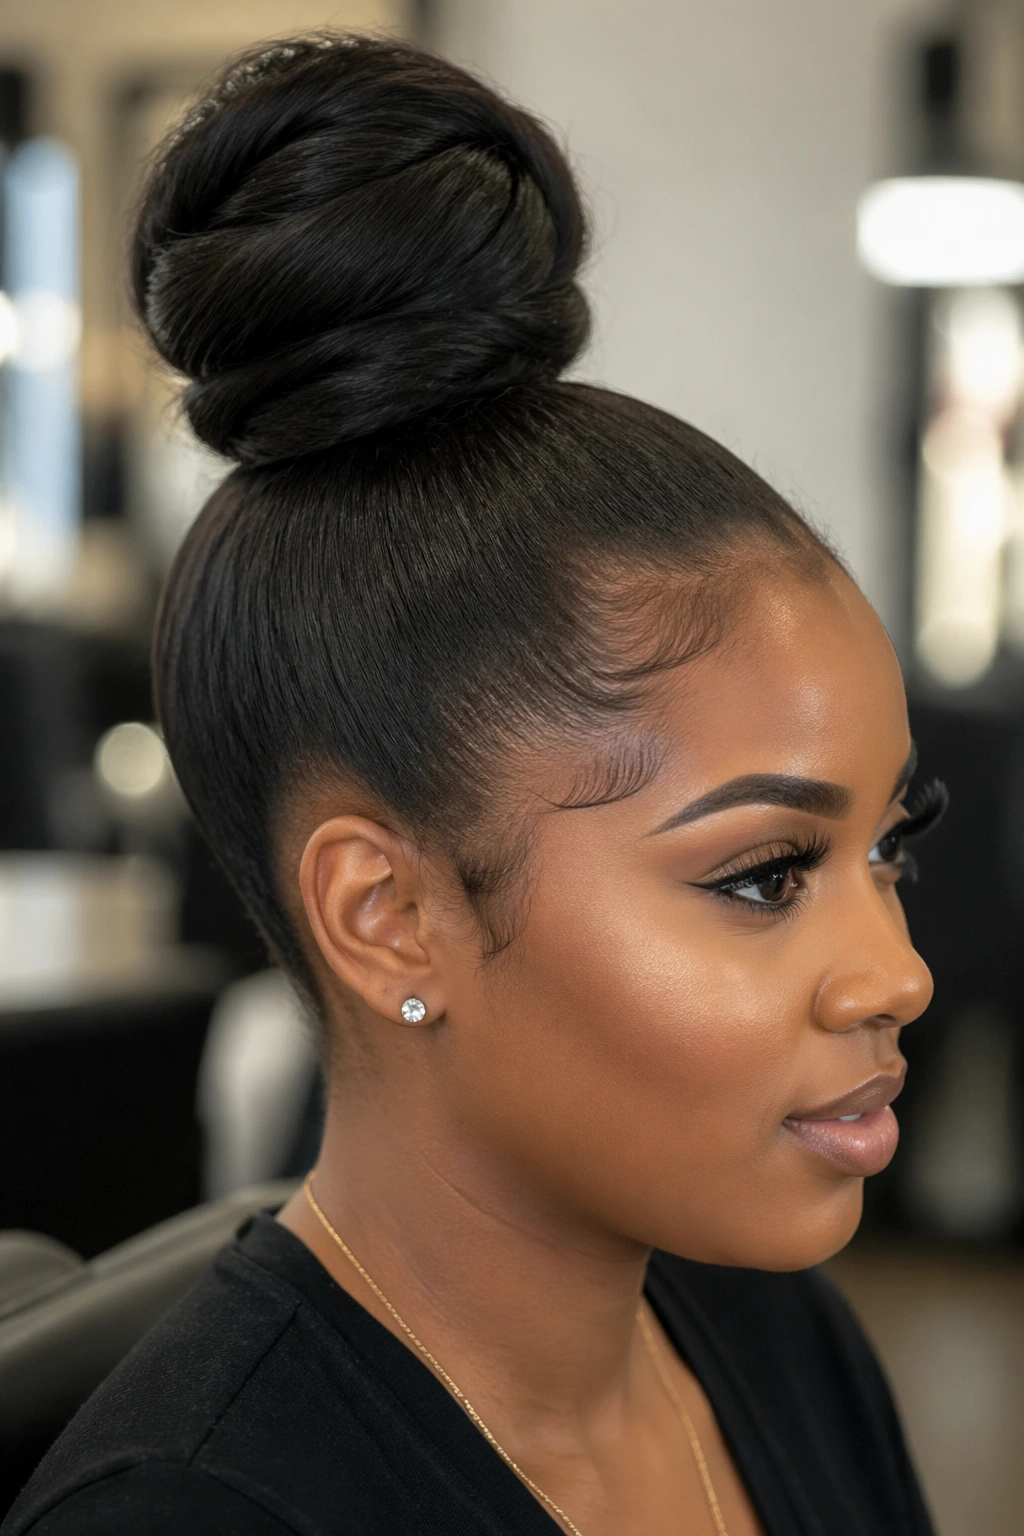
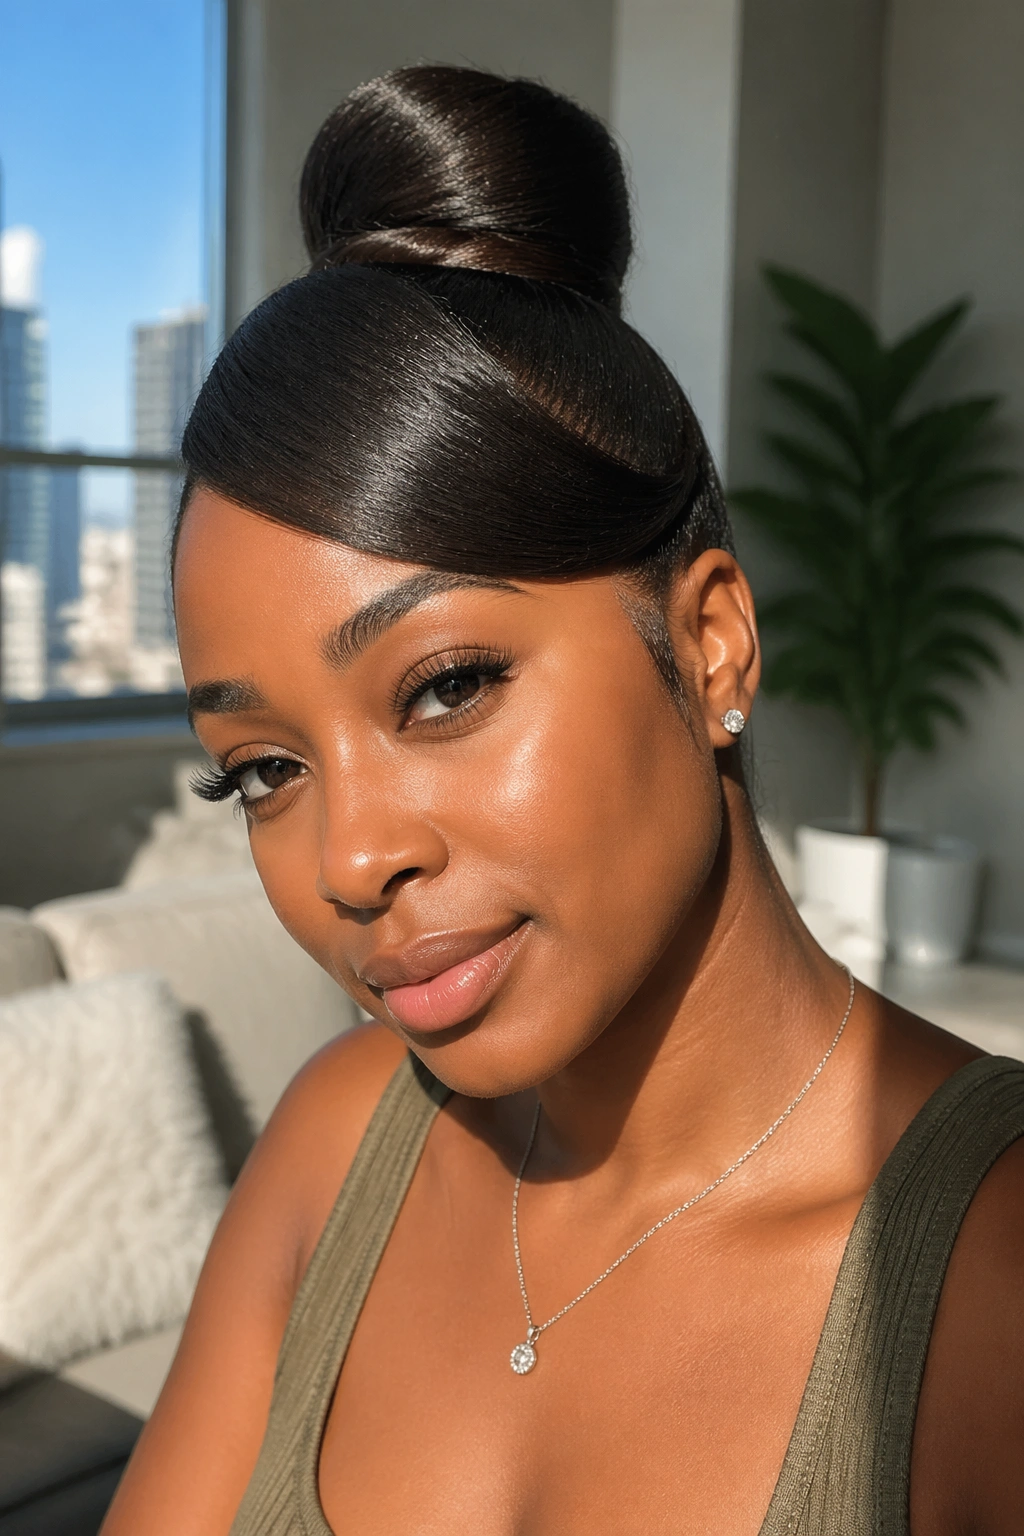
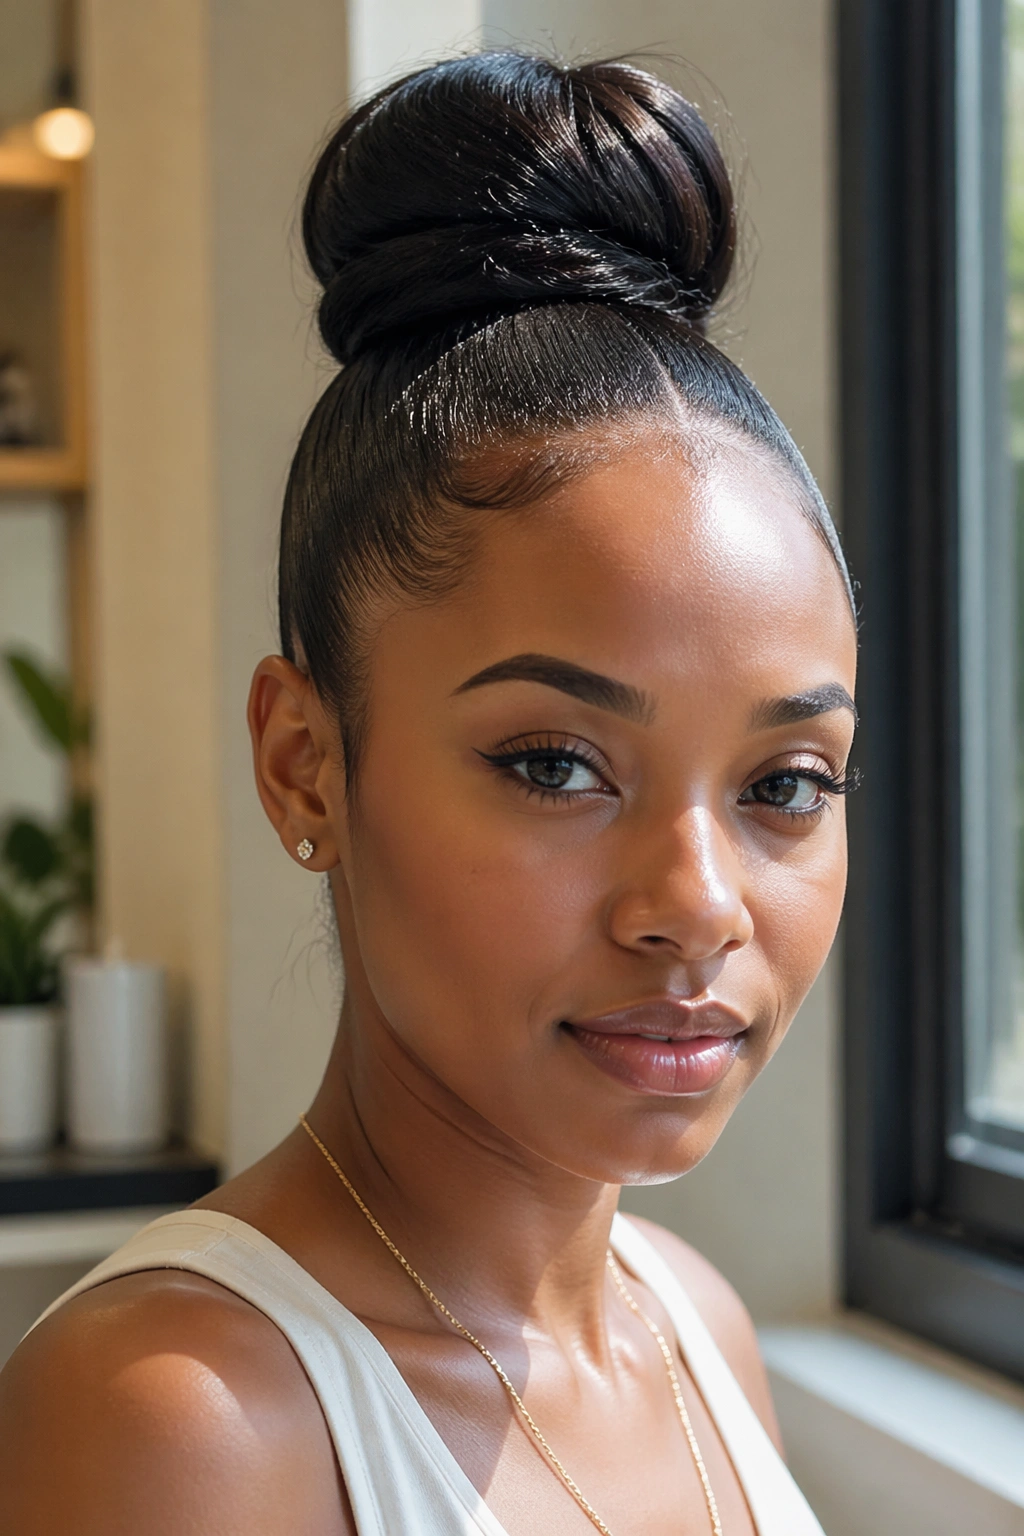
1. Sleek Wrapped High Bun
This is the cleanest look in the bunch. The hair is brushed up to the crown, smoothed flat, and wrapped around the base so the bun reads as one polished shape instead of a loose coil. On stretched 4A to 4C hair, it sits closer to the head and looks sharper for longer.
Why the Wrapped Base Matters
A firm brush, a little gel, and a satin scrunchie do most of the work here. I like to wrap the ponytail first, then build the bun with the ends, because that keeps the shape tight without making the crown bulky. If you want more fullness, add a small piece of wrapping hair and pin it under the bun so the join disappears.
Quick tip: Cross 4 to 6 bobby pins over the base in an X shape. It holds better than placing them all in the same direction.
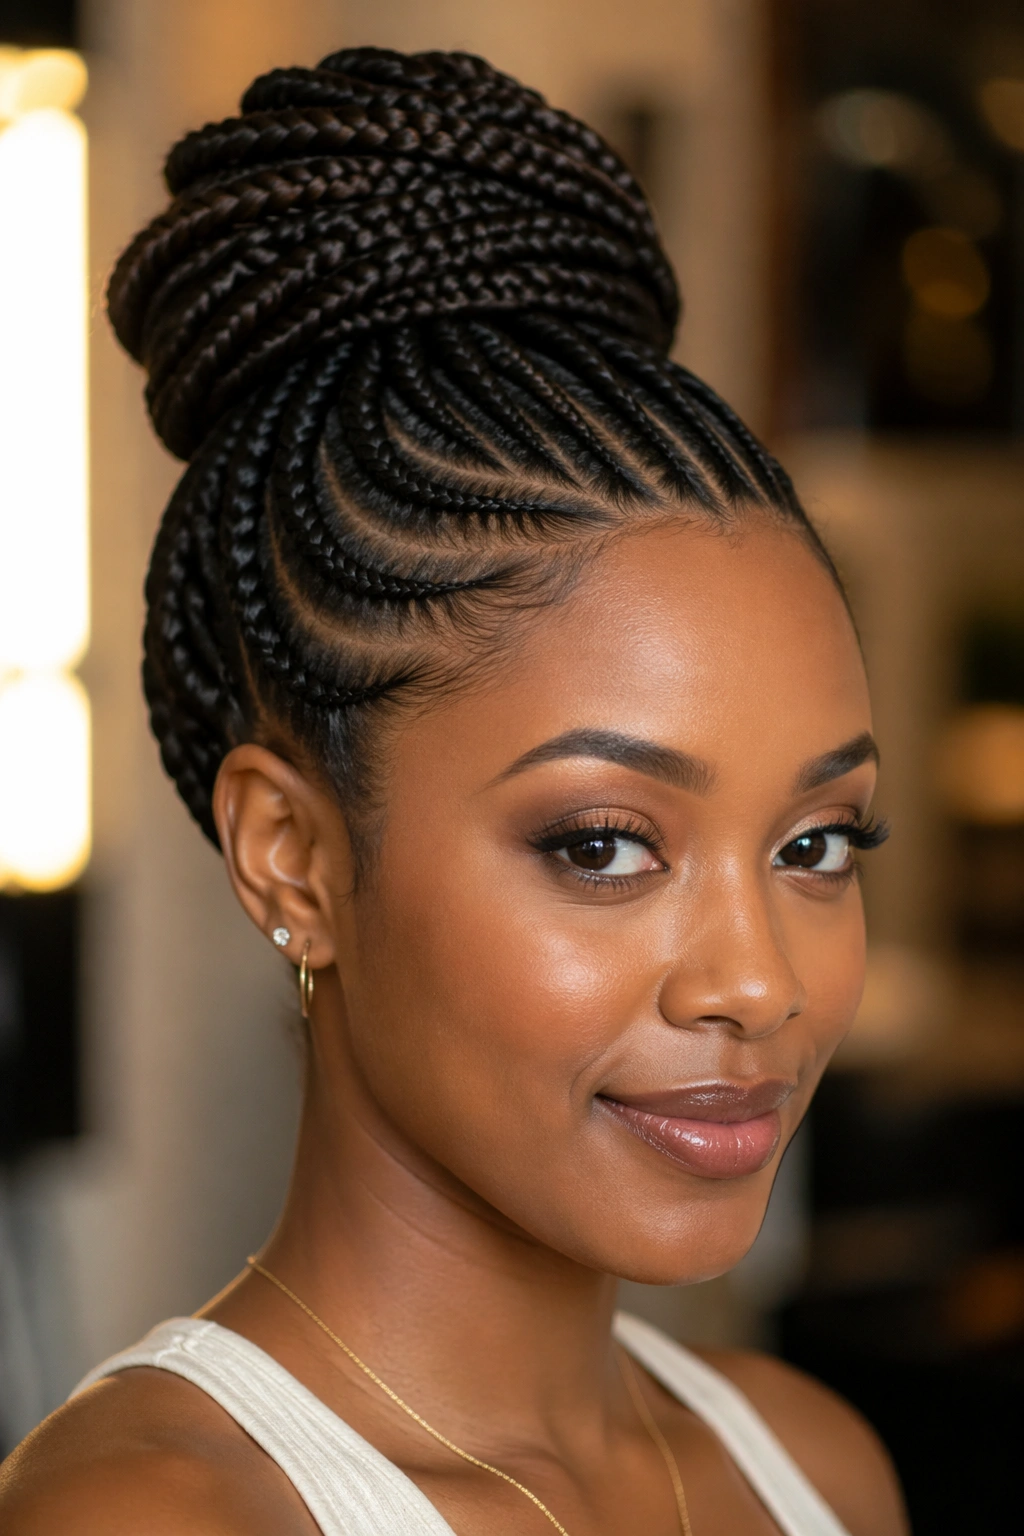
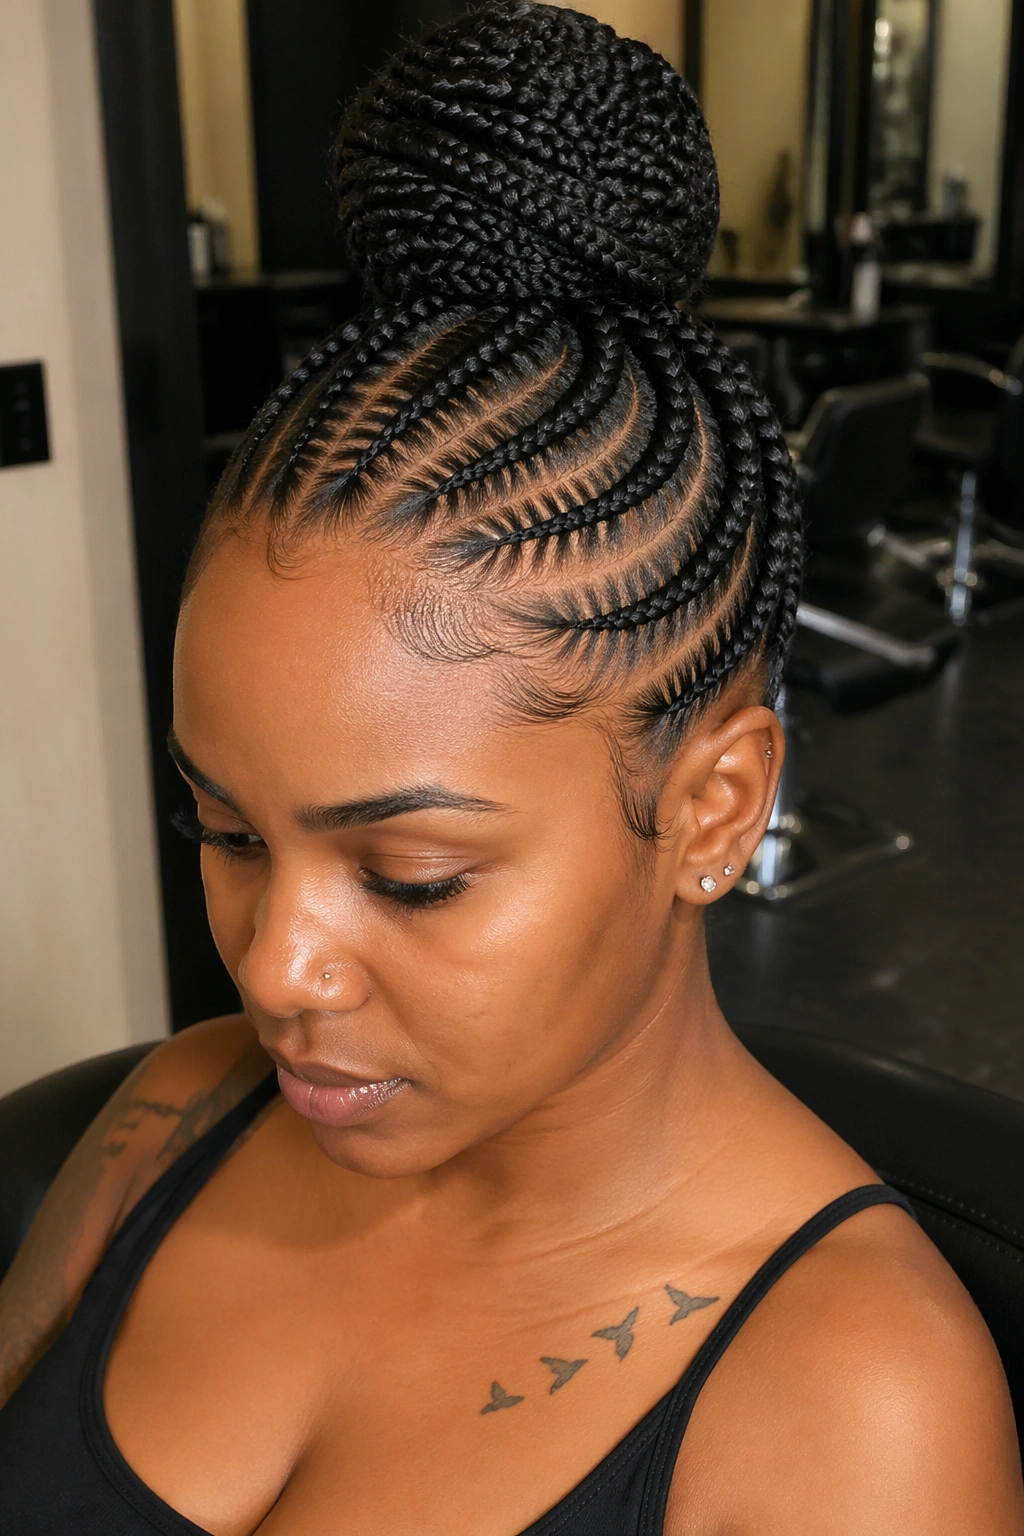
2. High Bun With Cornrow Base
Cornrows make a high bun stay put. Simple as that. Once the braids are directed up toward the crown, the bun has a firm path to sit on, which is why this style works so well for long days, travel, or anything that involves a lot of head movement.
A straight-back pattern gives a crisp finish, but a curved braid path can soften the look if you want something less severe. The bun itself can stay compact or be built out with added hair if you want more height. Either way, the scalp feels secure without needing constant adjustment.
This is the one I’d reach for when I want the style to last and I do not feel like checking a mirror every hour. No drama. Just hold.
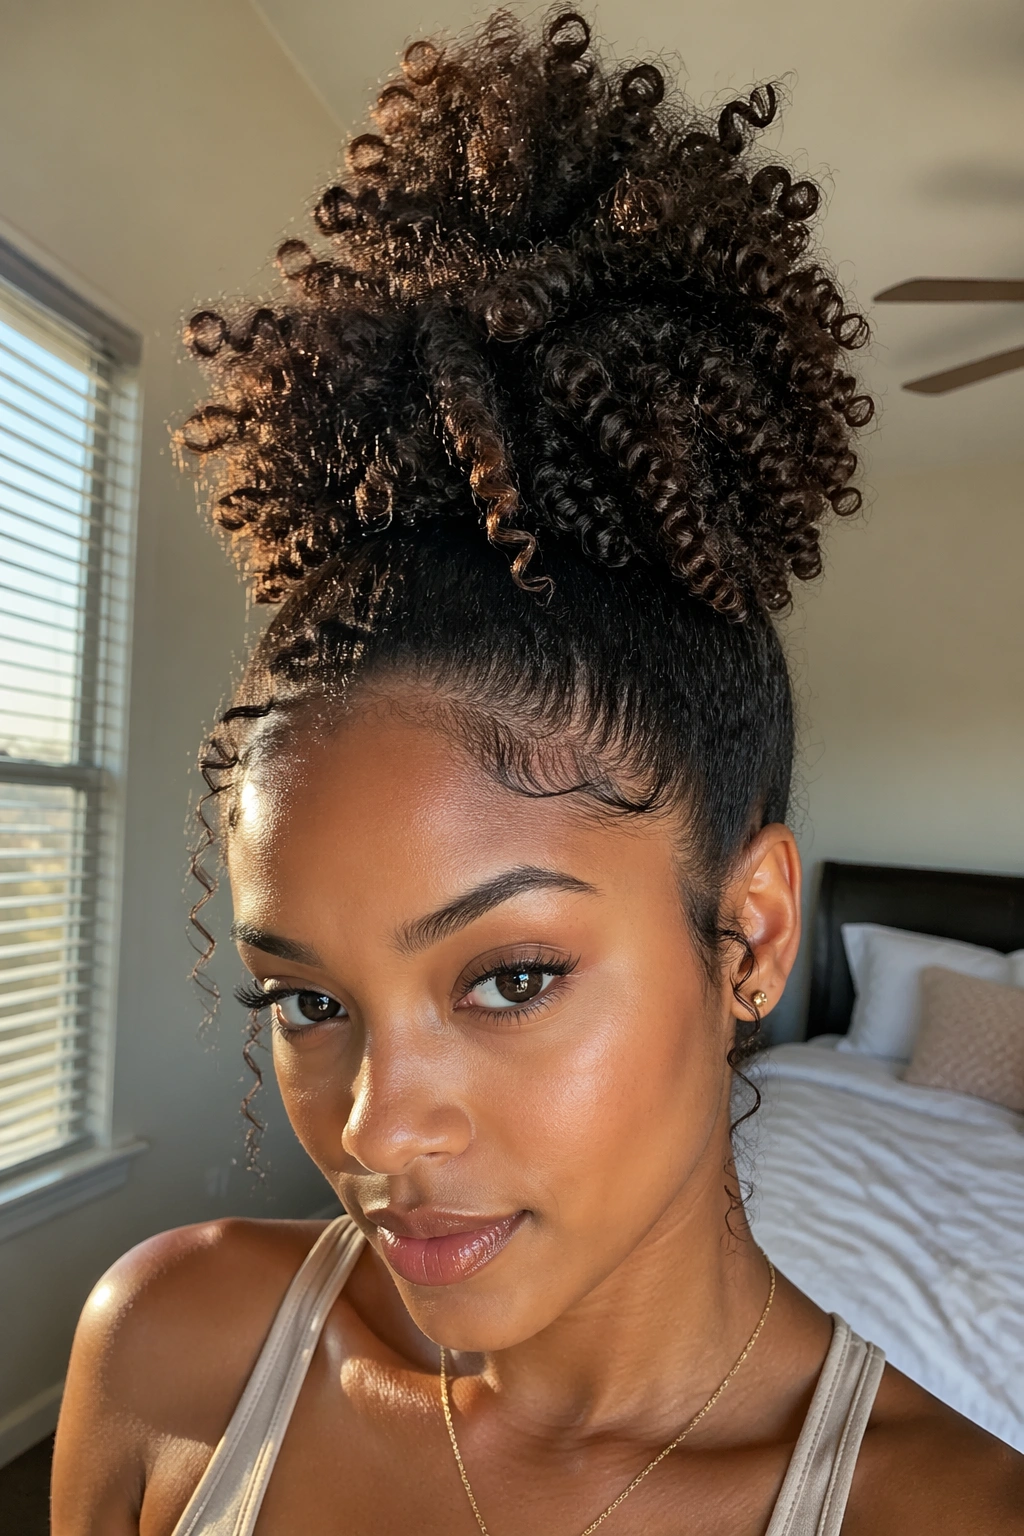
3. Pineapple Puff Topknot
Why does this style look so full even when the hair is not packed down? Because it keeps the curl pattern loose and lifted instead of forcing everything into a tight knot. A pineapple puff topknot is a smart choice when you want volume at the crown and a soft, airy finish.
How to Wear It
Use a stretch-friendly band, not a tight elastic, and stop before the puff gets squeezed into a tiny ball. I like leaving a little softness near the front so the shape stays round instead of turning into a cone. If your curls are freshly washed, let them dry well first or the puff will flatten faster than you want.
This style is especially good on twist-outs and stretched curls. It looks casual, but not sloppy. That’s the line.
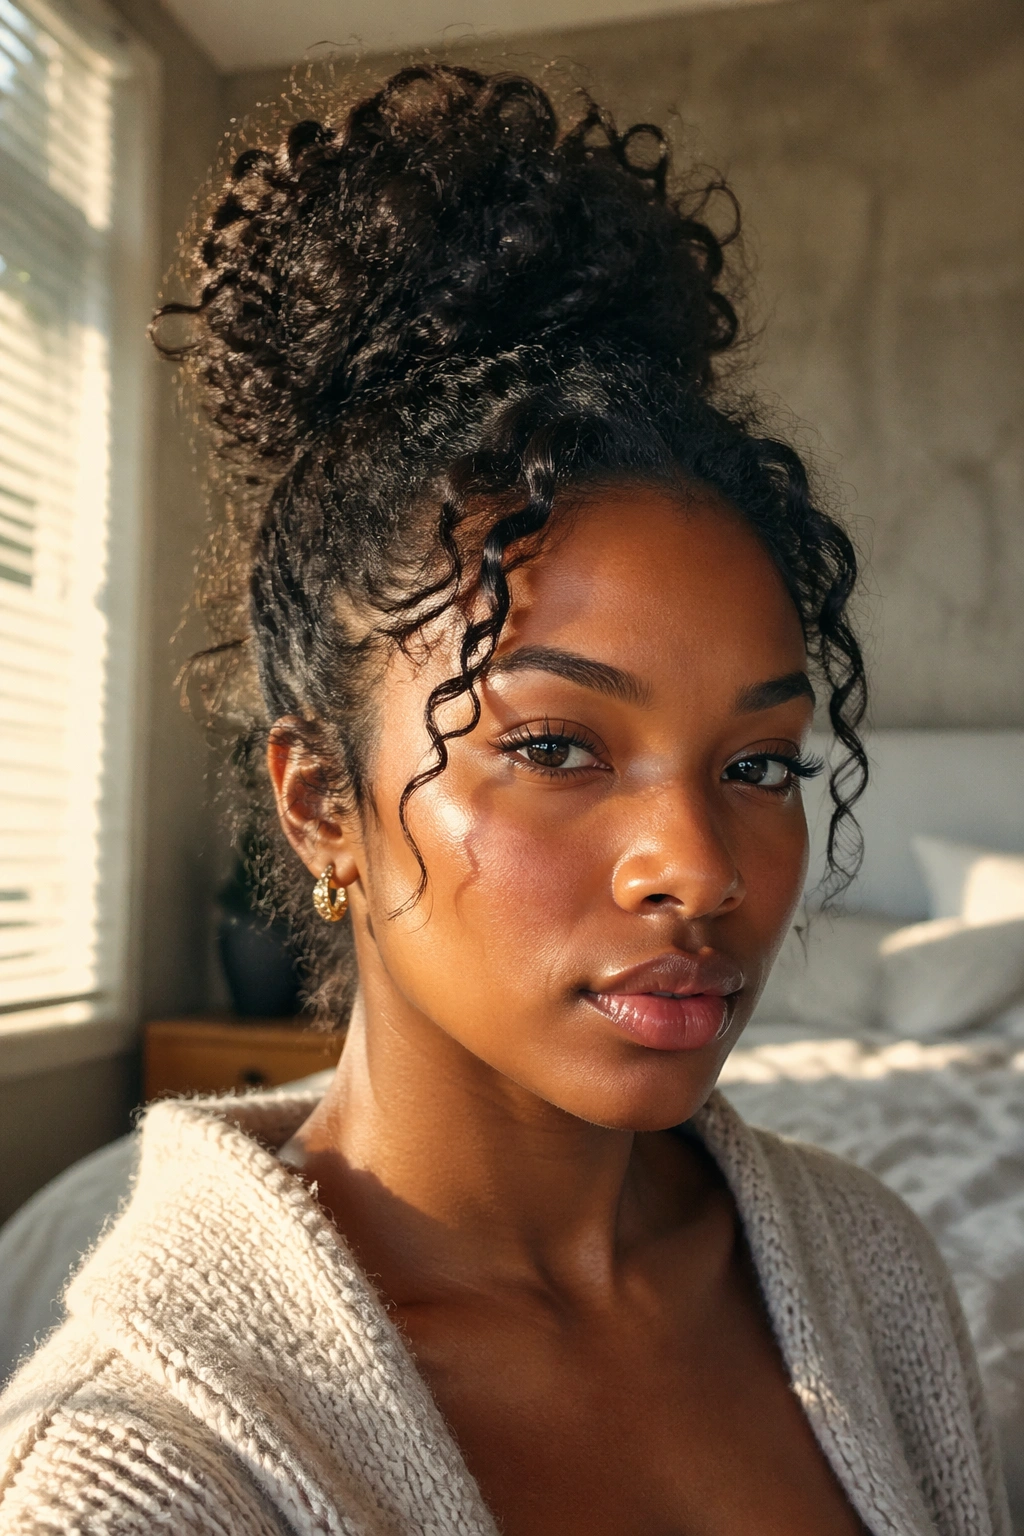
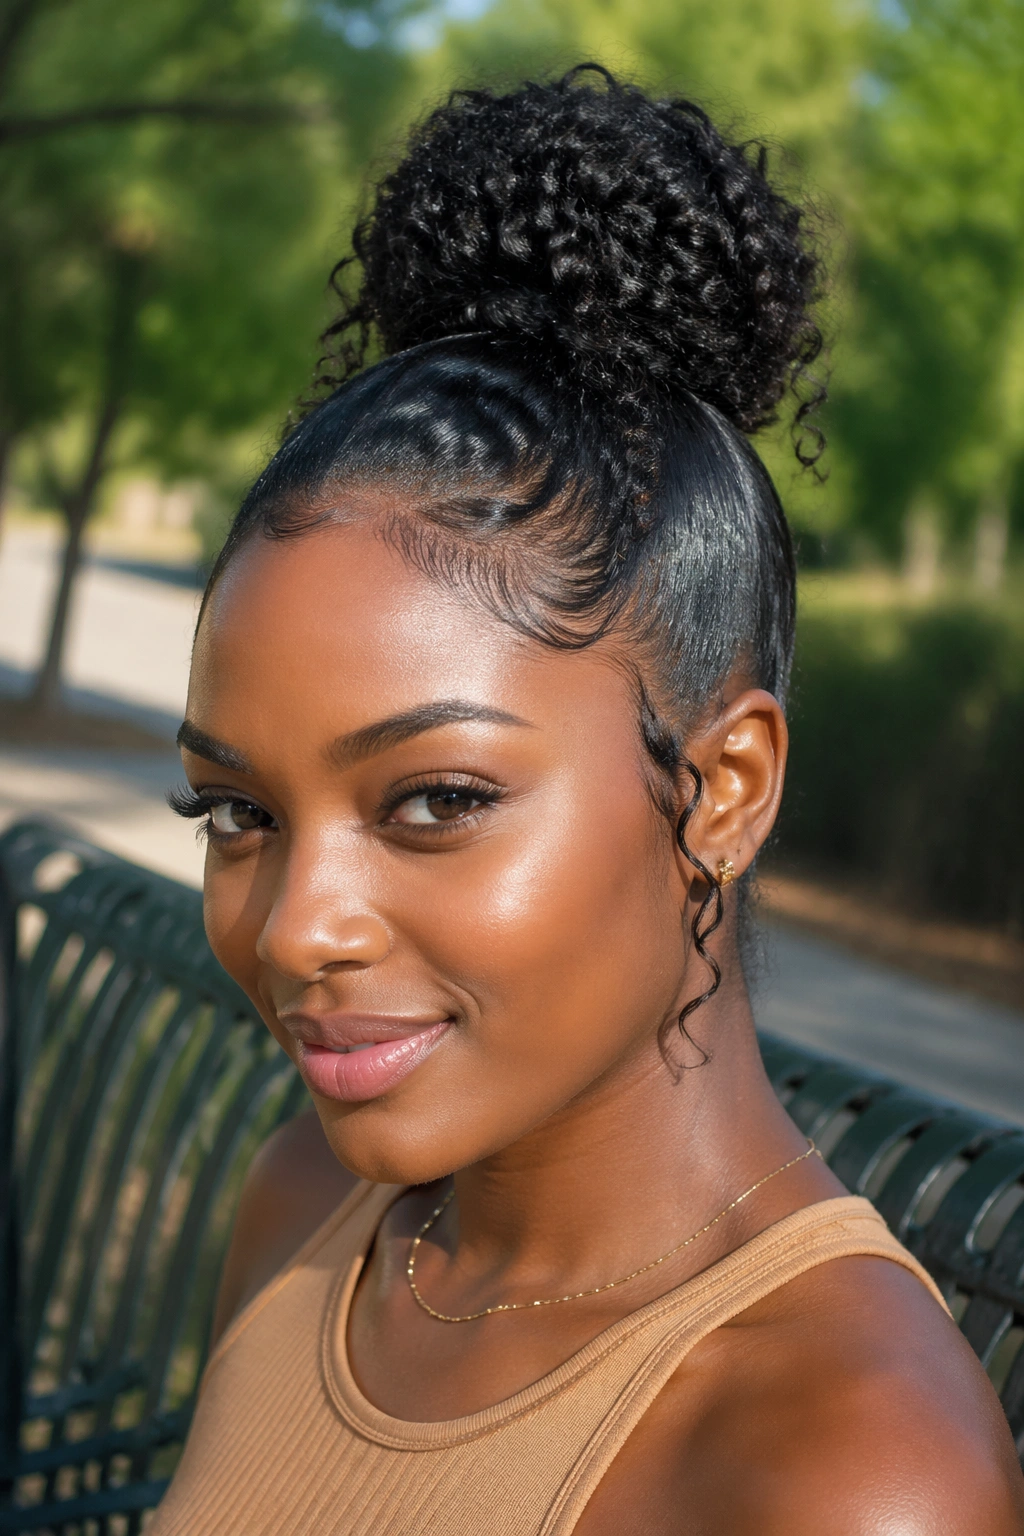
4. Curly Ponytail Coil Bun
This one lets your curls stay visible. Instead of hiding every strand, the ponytail is gathered high, then wrapped into a bun with a few curls left out around the edges or tucked halfway in. The result feels softer and more natural than a fully slicked style.
Best Details to Watch
- Use a moisturizing curl cream or setting mousse so the ends keep shape.
- Let the ponytail cool or dry completely before wrapping it.
- Leave 2 to 4 curls free if you want movement around the face.
- Secure the bun with pins underneath, not on the surface where they’ll flash.
A style like this works well when you want height but still want your coil pattern to show. It’s especially nice for wash-and-go hair that already has definition. I like that it doesn’t force the texture into something it isn’t.
5. Jumbo Braid Crown Bun
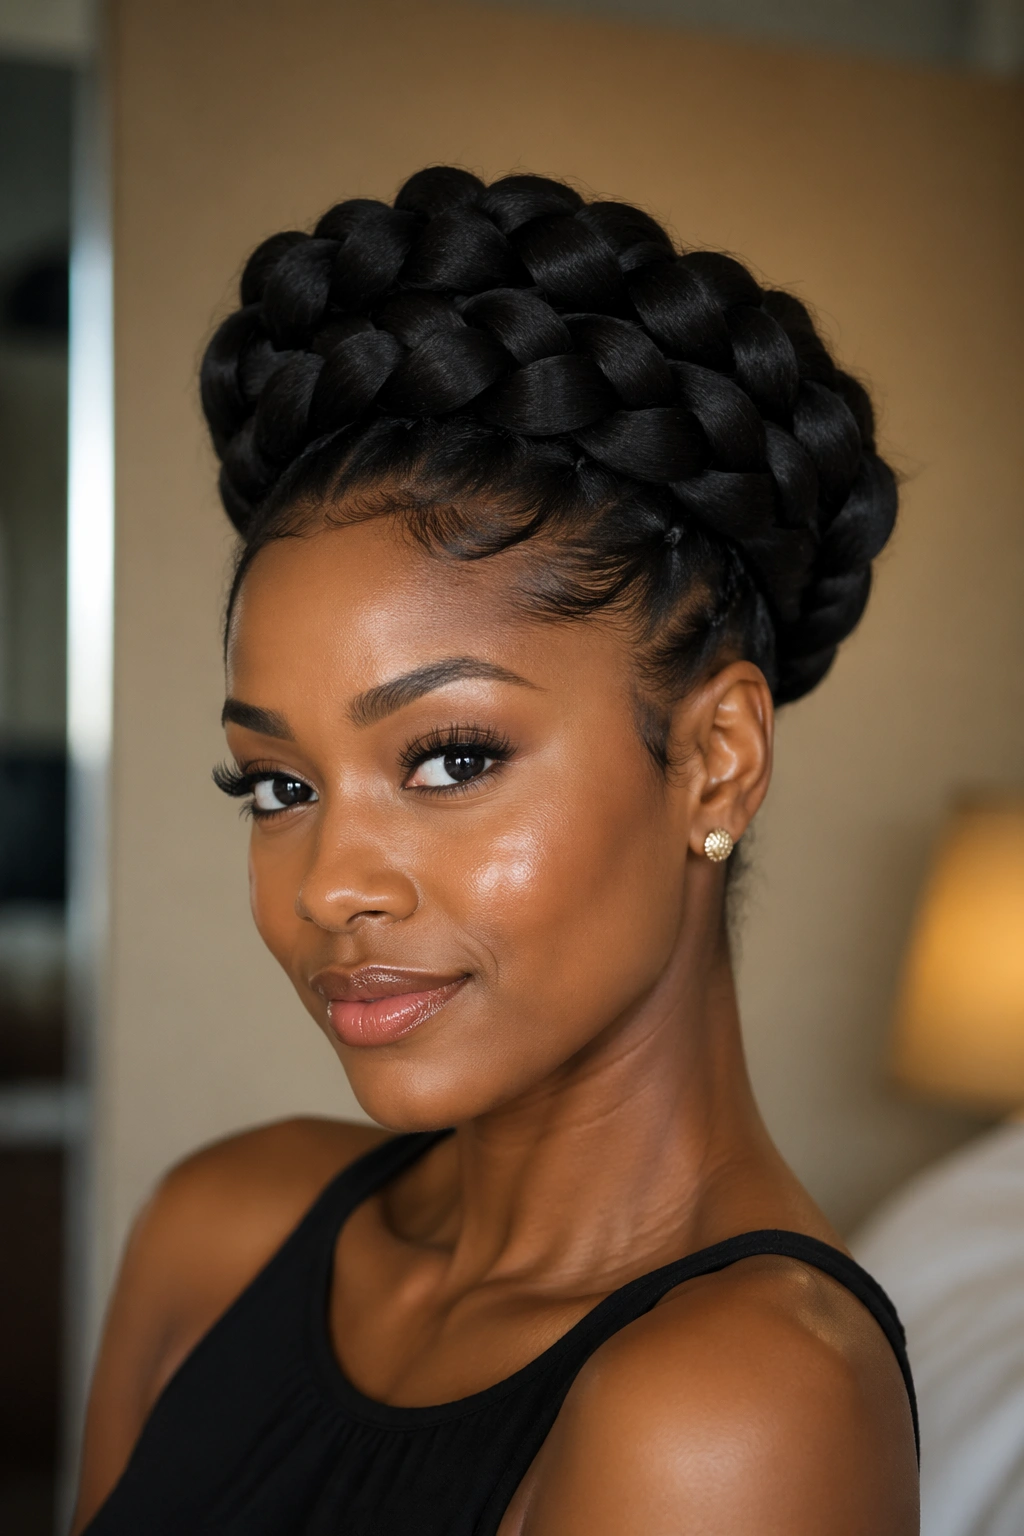
A single thick braid can make a bun look heavier, fuller, and more sculpted without much extra work. The braid gives the bun a strong line, so even a simple wrap reads as intentional instead of plain.
This one is a good pick if you wear added hair or already have long natural length. The braid can be coiled into a large circular bun, or it can be folded once and pinned to create a smaller shape with more height at the crown. Either way, the size of the braid is doing some of the visual work for you.
I like this style when the outfit is simple and the hair needs to carry the look. A plain black dress. Gold earrings. Done. The braid bun handles the rest.
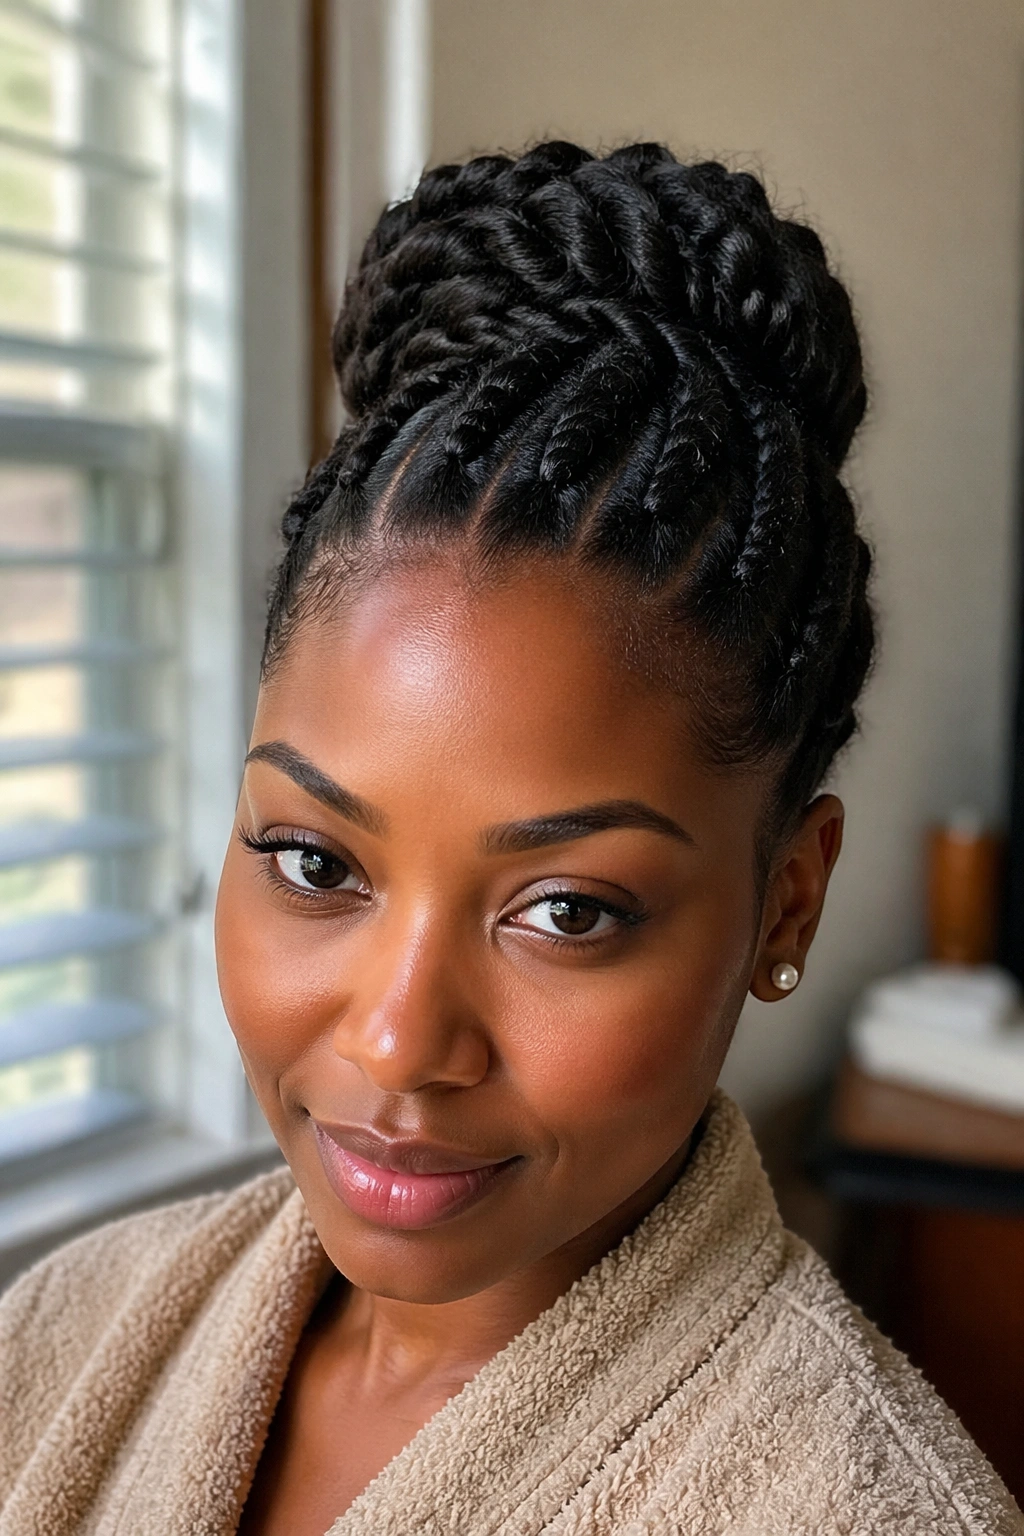
6. Rope-Twist Top Bun
Unlike a braid bun, this one feels a little softer around the edges. Two-strand twists hold a high bun with less stiffness, so the final shape has more movement and a little more texture showing through.
It’s a nice fit for stretched natural hair, twist-outs, or medium-length hair that needs help staying together at the crown. Twist the hair in medium sections, coil the twists into a bun, and pin them from the underside so the front stays smooth. If the bun starts to look flat, fan the twists slightly before pinning.
This style is for anyone who likes structure but not too much structure. Clean enough for a meeting, soft enough for a weekend.
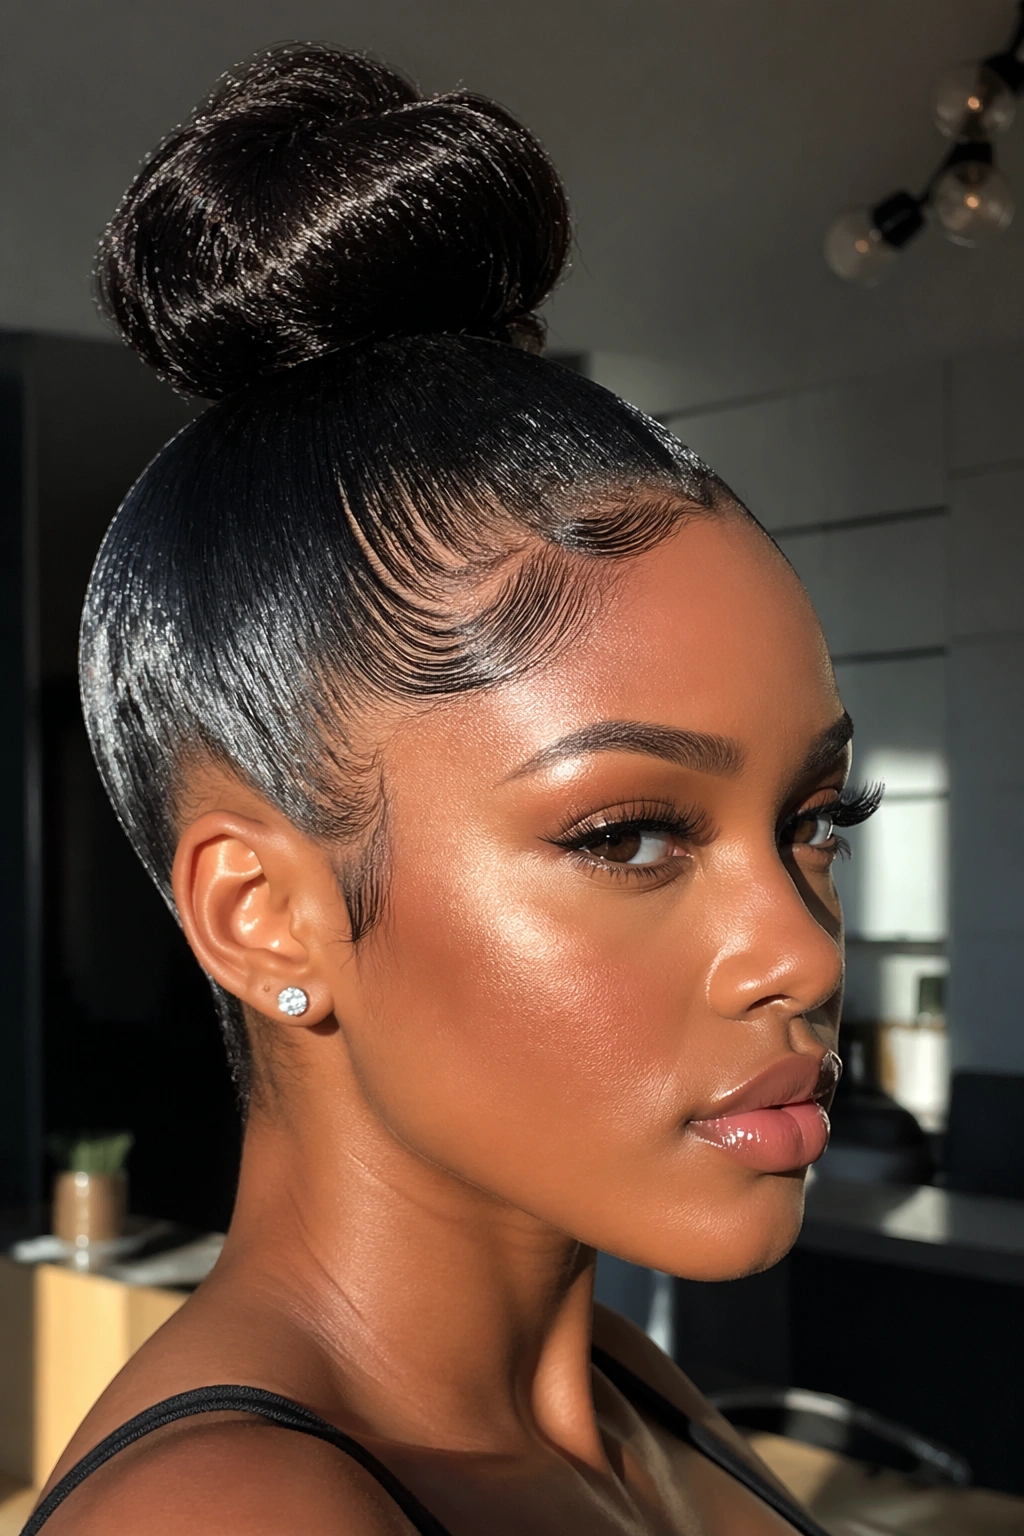
7. Center-Part Sculpted Bun
A center part changes the whole mood. Instead of all the attention going to the bun, the eye gets pulled down the middle first, which makes the style feel balanced and neat. On Black hair, that symmetry can look especially sharp when the sides are smoothed well.
What Makes It Work
The part needs to be straight and deliberate. I like to draw it with the end of a tail comb, then smooth each side separately before gathering the ponytail. If your hair is dense, use a little styling foam before brushing so the part stays visible and the crown lies down better.
- Keep the part narrow if you want a sleek finish.
- Use a silk or satin scarf for 10 to 15 minutes before leaving.
- Finish with a light shine spray, not heavy oil.
This one feels dressy without trying too hard. It’s tidy, and that matters.
8. Deep Side-Part Bun
A side part gives the face more shape than a center part does. It softens the top of the head, shifts the weight a little, and lets the bun feel more relaxed even when the sides are slicked down.
This look works well if you like a bit of drama near the hairline. A deep side part can also balance fuller cheeks or a stronger jawline, which is why I see it work on so many face shapes. The bun itself can stay compact, but the front section should be brushed in the direction of the part so the whole style flows the same way.
I like this one when the outfit already has clean lines. It plays well with sharp collars, hoops, and bold lipstick. Small details matter here.
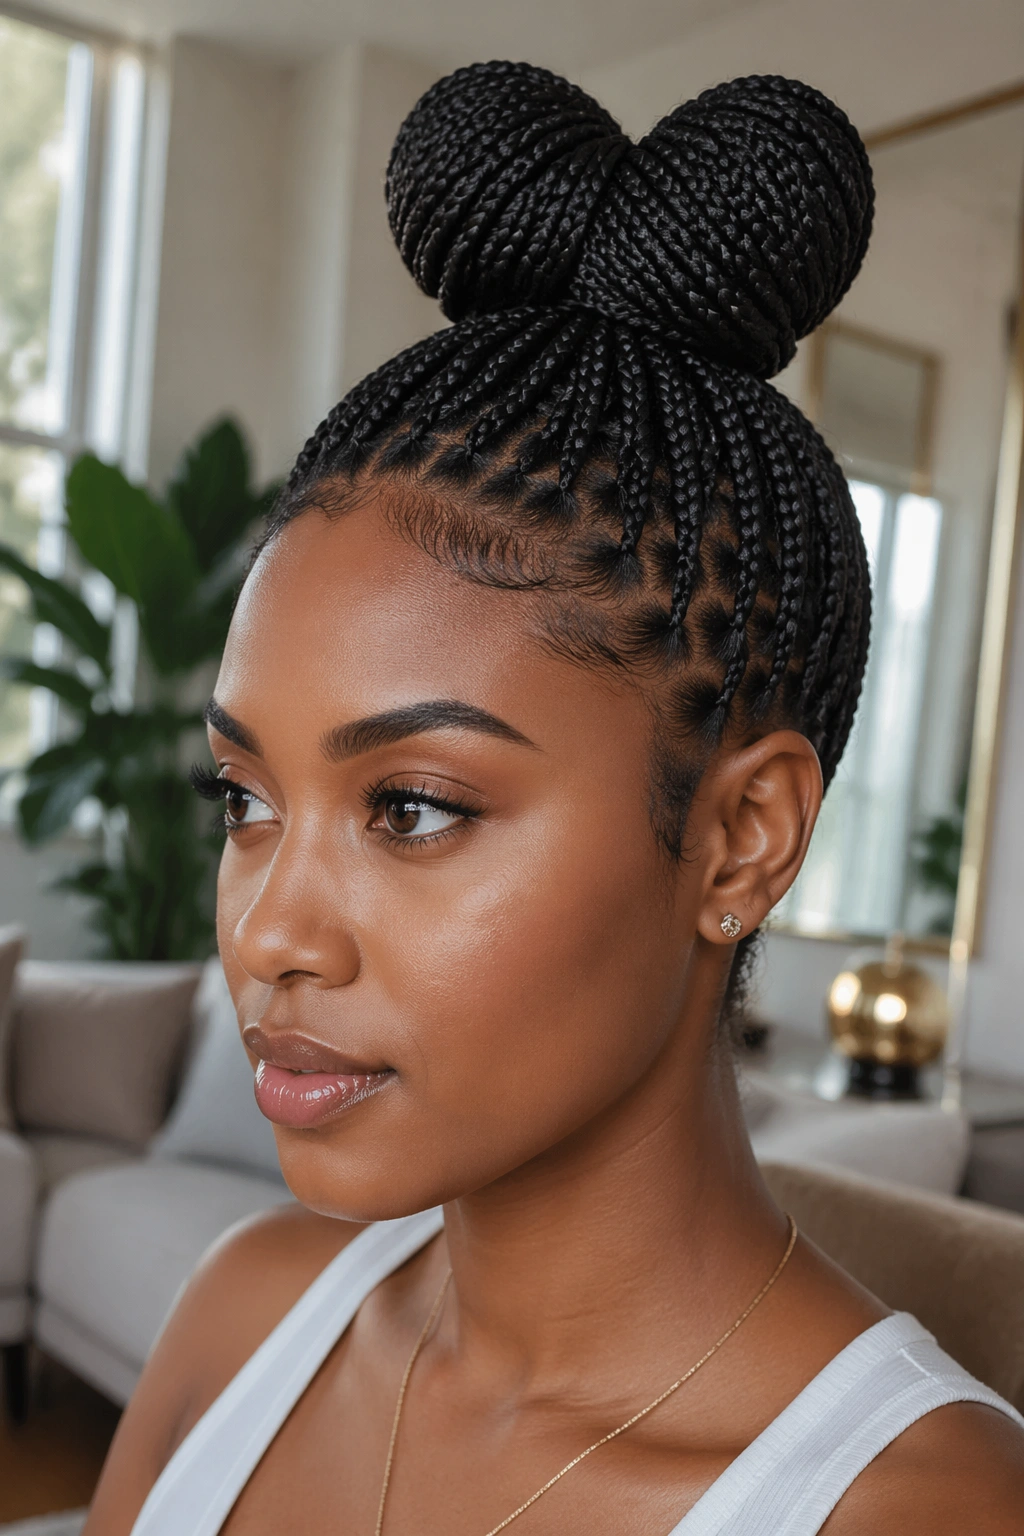
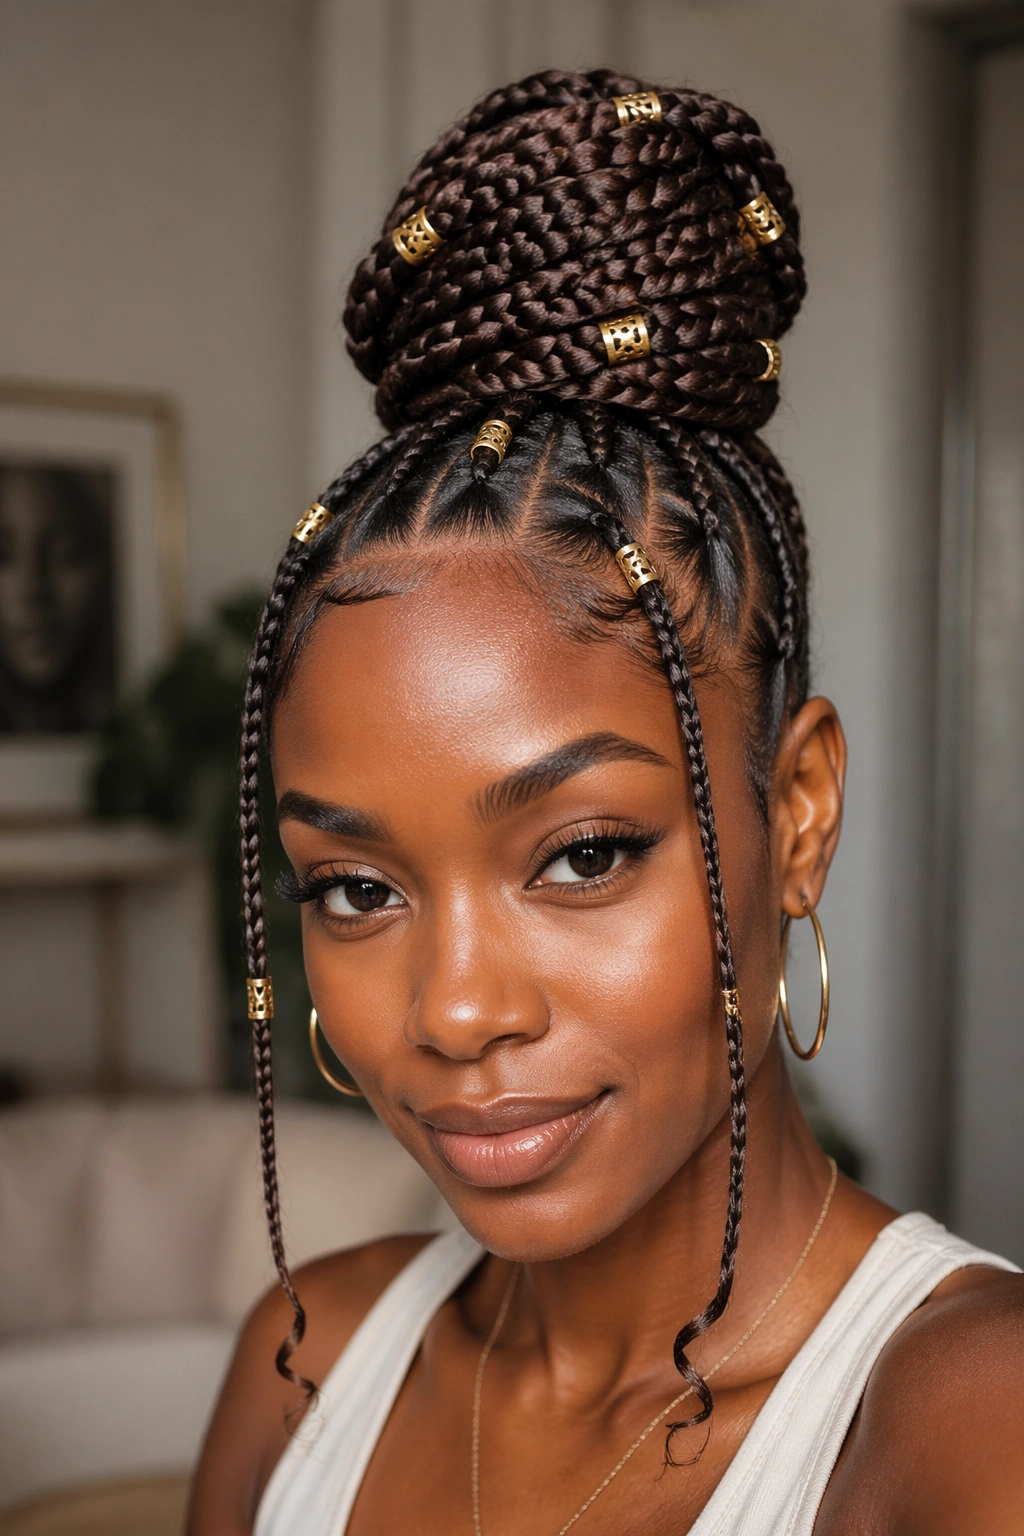
9. Feed-In Braid Bun
Feed-in braids make a high bun look built, not just pulled up. The braids start small at the scalp and grow thicker as hair is added, which gives the style a smooth, sculpted path toward the crown. That line is half the appeal.
How to Get the Shape Right
Ask for 6 to 8 feed-in pieces if you want the bun to sit full but not bulky. Too few braids can leave the style looking sparse, and too many can make the crown feel crowded. Keep the feed-in neat at the root and let the braids fan into the bun with enough tension to hold, but not so much that the scalp feels tight.
This is one of those styles that looks expensive in a quiet way. The braid pattern does the talking before the bun even comes into view.
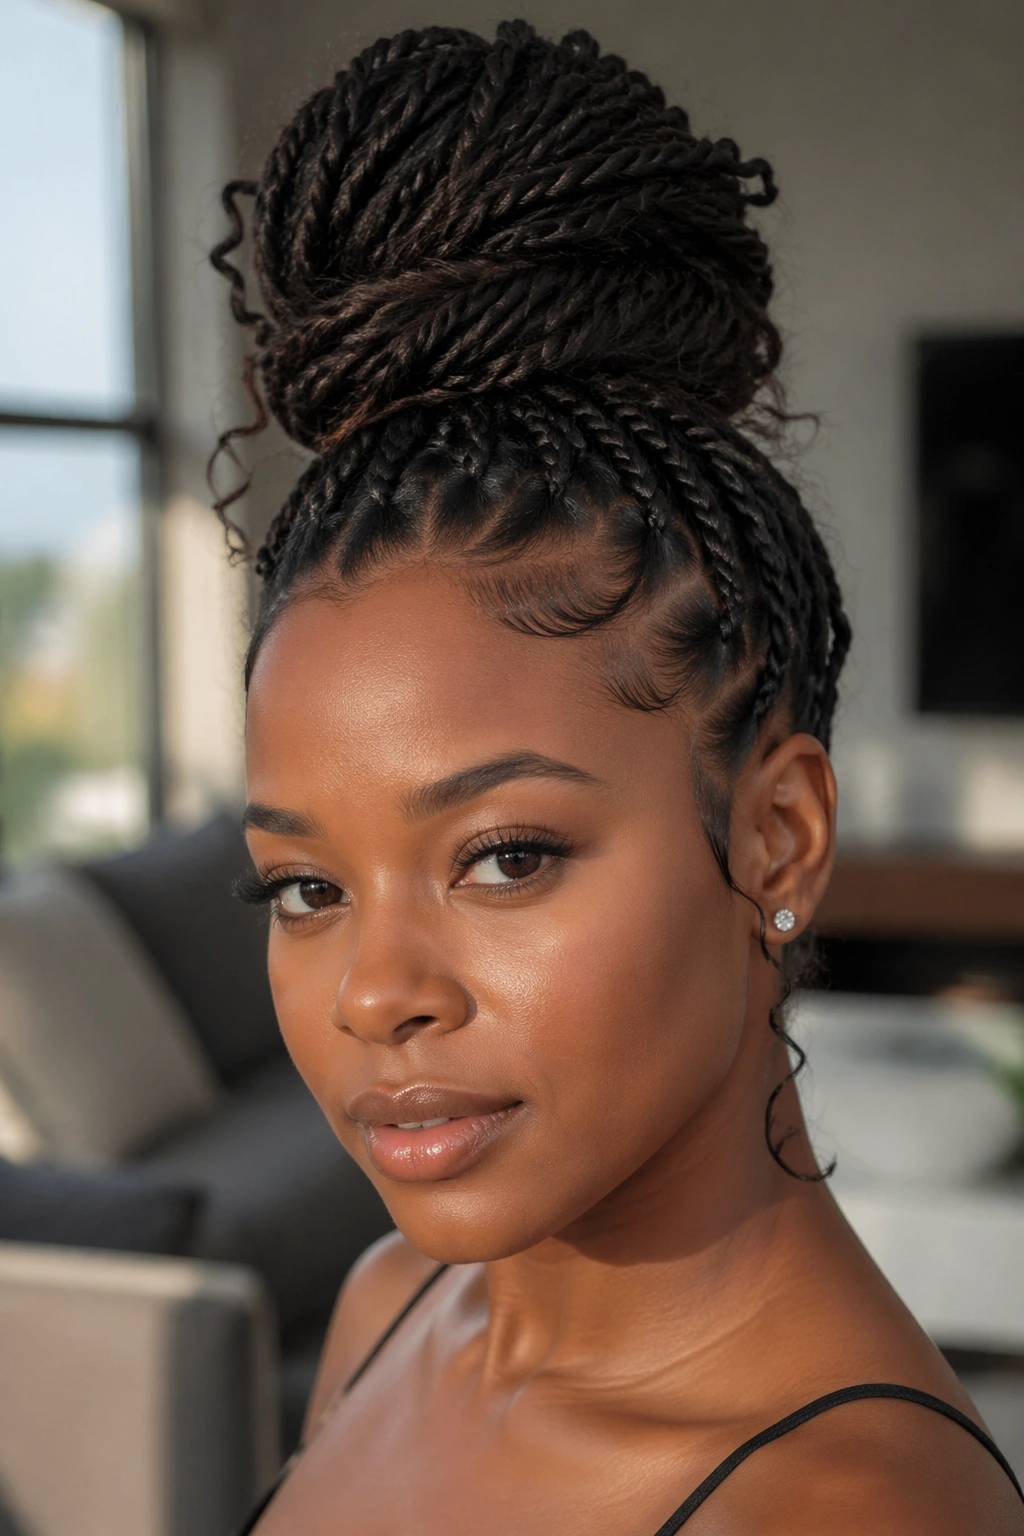
10. Knotless Braids Updo Bun
When your scalp is tender but you still want height, knotless braids are the move. They spread the weight more gently at the root, which makes a high bun easier to wear for long stretches without that pulled feeling at the front.
The bun itself can be wrapped tightly or left a little fuller depending on how many braids you have. I like to fold the braids into two loops before pinning, because that gives the bun more grip and keeps the ends tucked away. A few decorative pins can help, but don’t overdo it. Too many shiny clips can make the style feel crowded.
This is a good choice for people who like the look of braids but want a little less strain. Comfort matters. So does the silhouette.
11. Loc Bun With Wrapped Ends
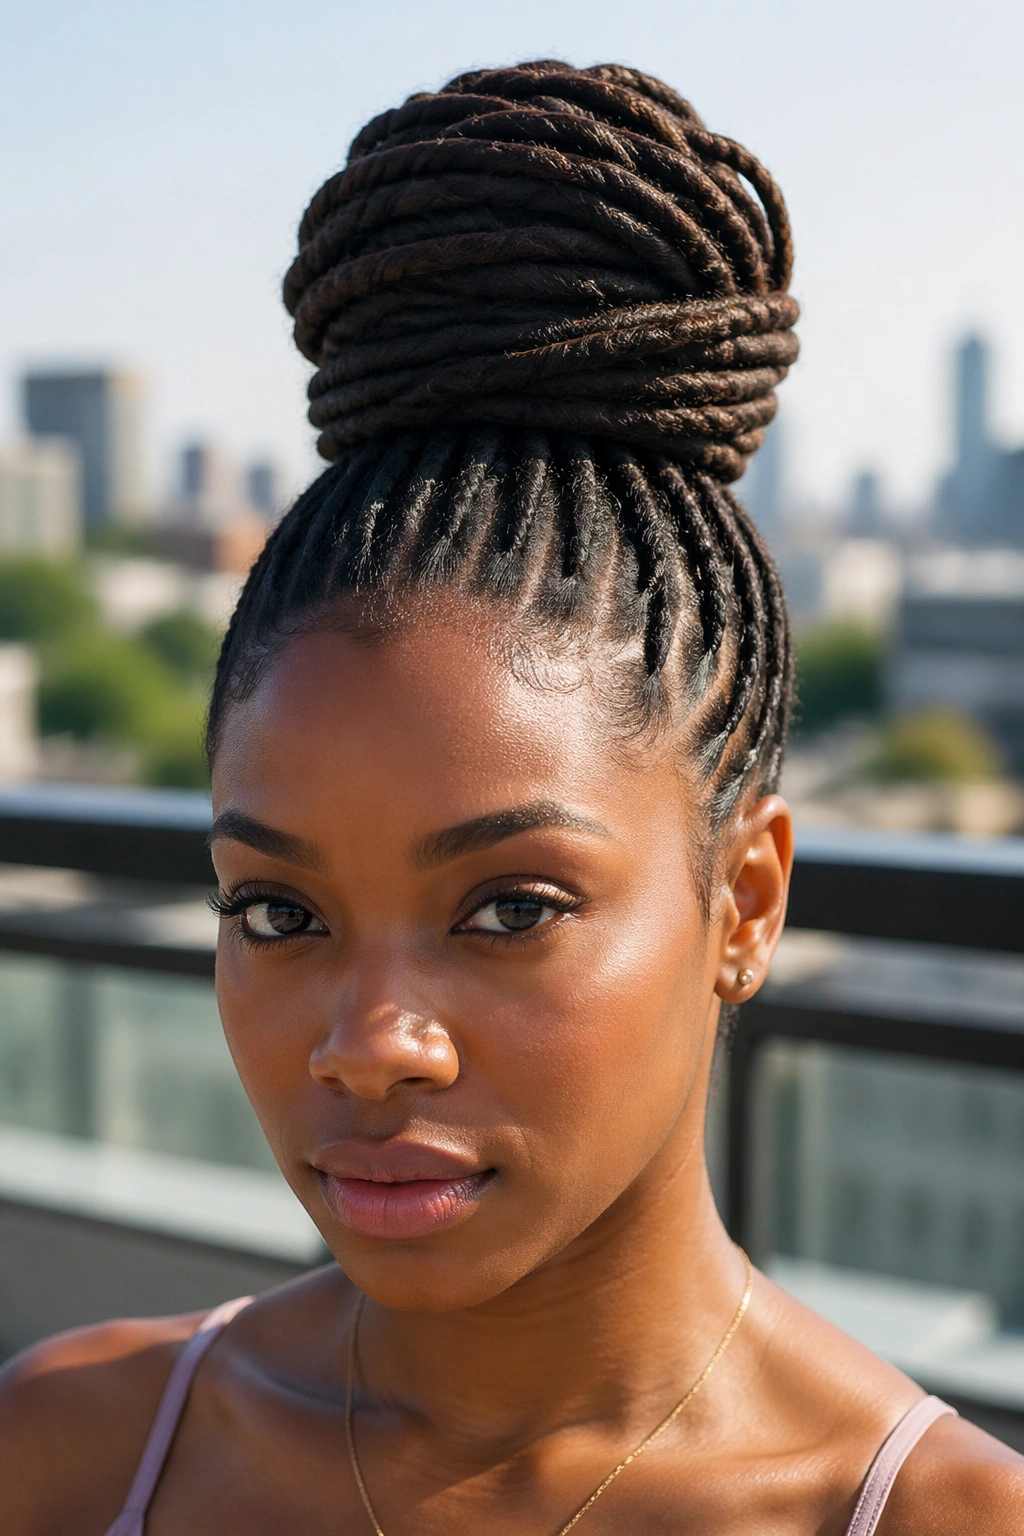
Locs make a high bun feel grounded and strong. The shape is usually fuller than a braid bun, and the texture gives it a heavy, rope-like look that is hard to fake with other styles.
I like wrapping locs in a spiral rather than forcing them into a tight ball. That keeps the bun from becoming lopsided, especially if your locs vary in length or thickness. A strong hair fork or a few sturdy pins can help, but the bun should still feel secure before you walk away from the mirror.
There’s a nice honesty to this style. It doesn’t pretend to be sleek. It just sits there with confidence.
12. Flat Twist Halo Bun
A flat twist halo gives the bun a frame, and that frame changes everything. The twists trace the head first, then pull upward into the high bun, so the eye gets a line to follow before it reaches the crown.
Why It Feels Different From Cornrows
Flat twists leave a slightly softer ridge than braids do. That makes the style gentler on the eye and often a little easier to wear if you want texture at the scalp without the sharper braid lines. It’s also a good option for thick natural hair because the twists can hide a lot of volume cleanly.
This works best when the sections are even and the ends are tucked neatly. If the twists start feeling loose, pin them before they get a chance to puff out. The bun should look deliberate from every angle.
13. Short Natural Hair Tucked Bun
Short hair can absolutely do a high bun. It just needs a different approach. Instead of trying to force everything into one big ponytail, you work in sections, tuck the ends upward, and pin them into a compact crown shape.
The Short-Hair Method
- Stretch the hair first with a blow-dry, banding, or a twist-out.
- Use a creamy styler so the ends stay soft.
- Secure the top section with a small elastic or bungee tie.
- Tuck the back and side pieces with bobby pins, one section at a time.
This style is especially useful for TWA lengths and tapered cuts. It may not look like a giant bun, but that’s not the point. It gives height, shape, and a clean finish without asking for hair that isn’t there.
14. Extension-Added Full Bun
Sometimes the bun needs more hair than your own length can give it. A ponytail extension or bun piece solves that fast, and the best versions blend so well that you stop noticing where your hair ends and the added hair begins.
A good match depends on texture. Coily wrapping hair tends to blend better with natural hair, while smoother pieces work when your own hair has been pressed or stretched. Wrap the added hair around the base in a single direction so the bun doesn’t look pieced together from different angles.
This is the style for people who want volume without waiting on growth. No shame in that. Hair pieces exist for a reason.
15. Bubble-Banded Bun
Why does this one look playful even before the bun starts? Because the ponytail is sectioned with small bands first, which creates round little bubbles along the length before everything gets coiled at the crown. It adds shape before the bun even shows up.
How to Use the Bubble Sections
Use 3 to 5 bands, spaced evenly about 2 to 3 inches apart, depending on your length. Keep the sections puffy enough to show, but not so tight that the hair starts sticking out. Once the tail is secured, coil the last section into a bun and pin it down.
This style works nicely when you want something a little different without giving up the high-bun shape. It reads young, but not childish. That’s a rare line to hit.
16. Gold-Cuff Braided Bun
Braids and gold cuffs are a natural pair, and a high bun gives the cuffs a place to shine without taking over the whole head. The metal catches the eye in small spots, which is better than covering every braid with decoration.
I like adding the cuffs after the bun is already secure. That way you can place them where the braid curves upward or where the bun feels visually plain. A few cuffs on the front braids are usually enough. If you add too many, the style starts to feel heavy and a little noisy.
This is a good choice for anyone who likes detail. Not everyone wants that, and that’s fine. But if you do, it works.
17. Headscarf-Wrapped Bun
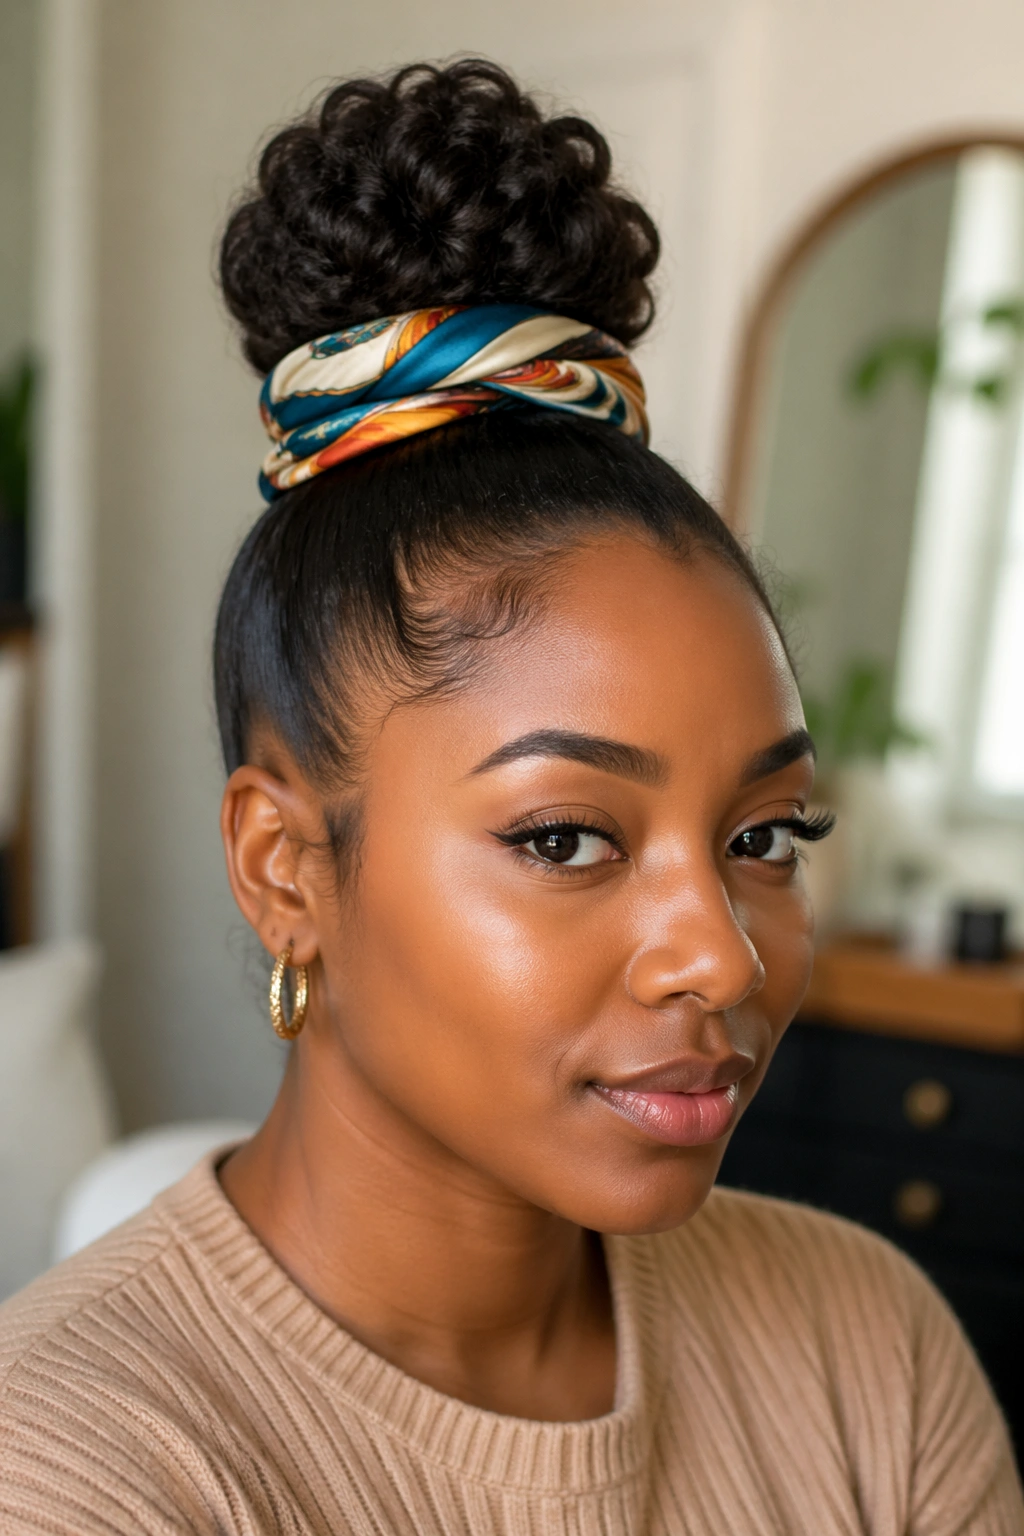
A scarf changes the feel of a high bun fast. It can protect the hairline, hide a less-than-perfect base, and add color without making the style harder to wear. Silk and satin are the best choices if you want the wrap to glide instead of snag.
Best Ways to Wear It
Tie the scarf at the base of the bun, not across the widest part of the crown, unless you want the front to read more like a wrap than a bun. A narrow scarf can sit like a band, while a wider one can cover the elastic completely. If the bun is already polished, the scarf becomes the accent. If the bun is a little messy, the scarf can cover that too.
I like this on days when the hair needs a break but I still want the whole thing to look finished.
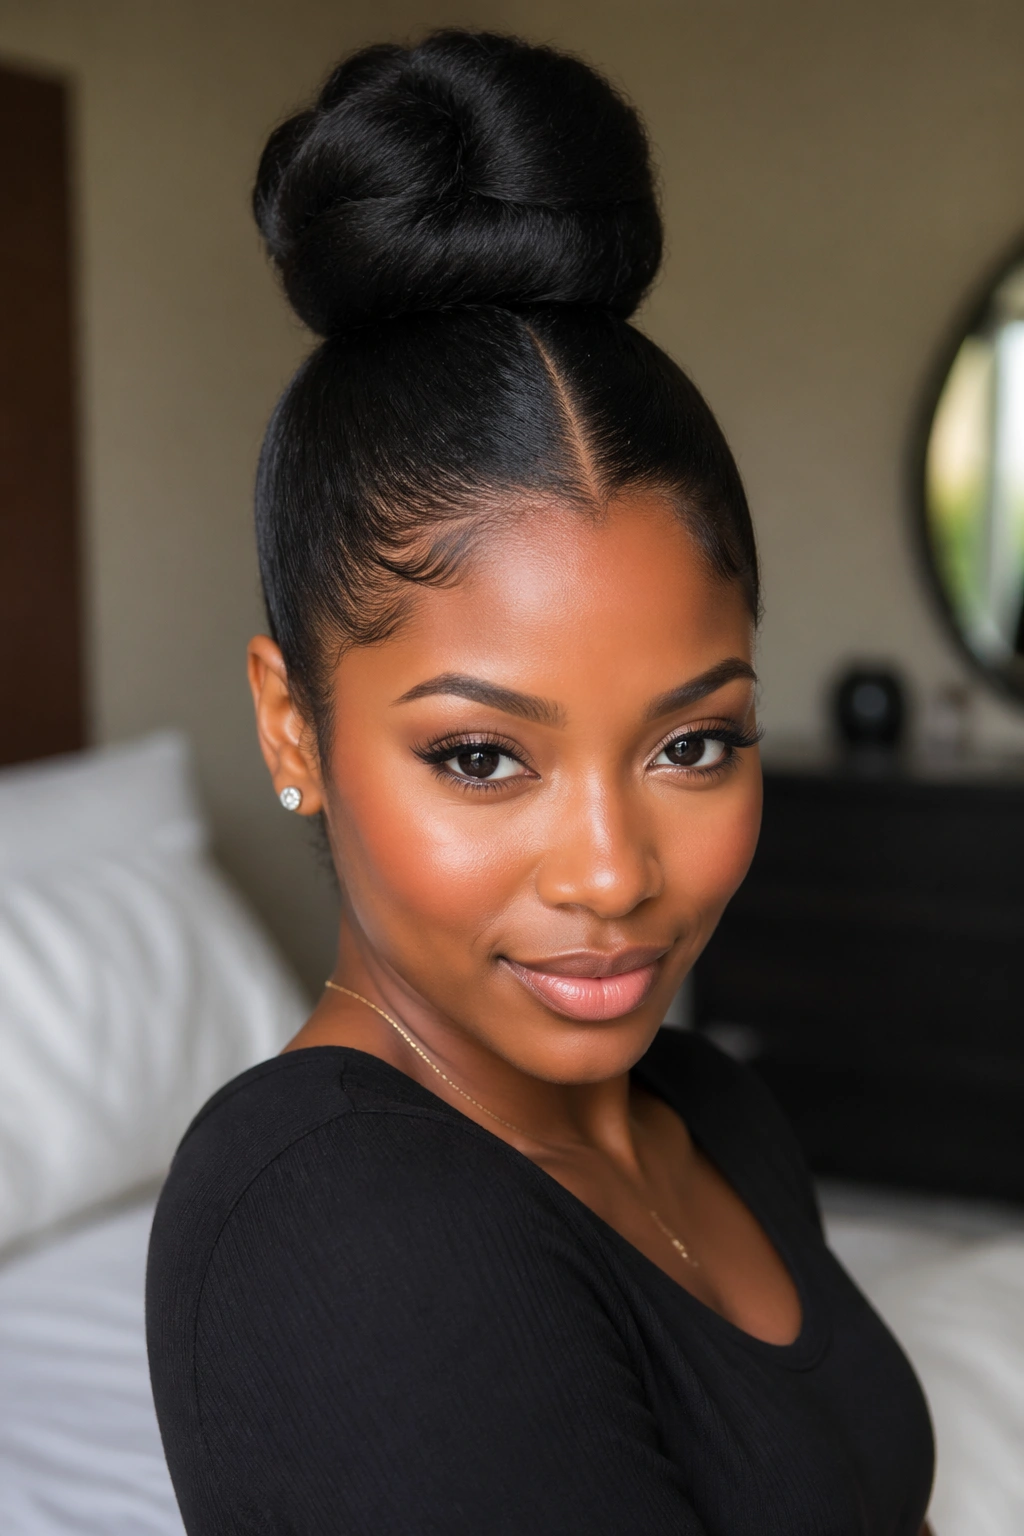
18. Wet-Look Gel Bun
A wet-look bun is all about shine and clean edges. The hair is smoothed tightly from the front to the crown, and the surface has that fresh, slick finish that sits between polished and severe.
This style works best when you don’t mind a firmer hold product and you’re okay with a look that can feel a little crisp. It’s not the bun I’d wear if I wanted softness. I’d wear it when I want the shape to be obvious from across the room. The trick is to use enough gel to lay the hair down, but not so much that the roots flake or build up white crust.
If you like a neat profile and don’t mind the maintenance, it does the job. Fast.
19. Soft Messy Coil Bun
Not every high bun needs to look controlled. A soft messy coil bun keeps a few curls loose, lets the shape breathe, and gives the whole style a lived-in feel instead of a formal one.
What Makes It Work
- Gather the hair loosely at the crown first.
- Twist or coil the ends without flattening them too much.
- Pull out 2 or 3 small pieces near the front if you want softness.
- Use pins underneath so the top stays loose but not undone.
This is one of my favorites for wash-and-go hair or twist-outs. It lets the texture stay visible, which matters. The style reads relaxed, but there’s still enough structure to keep it from turning into a puff with a hair tie.
20. Side-Swoop Smoothing Bun
A side swoop changes the mood immediately. The front section is brushed across the forehead and over to one side before the rest of the hair gets pulled into the bun, which gives the style a bit more shape around the face.
That sweep works especially well when you want to soften a high crown or break up a very tight, very straight front. I like using a light styling foam first, then brushing the swoop into place while the hair is still damp enough to cooperate. Once it dries, the curve holds better and the bun feels more finished.
This look has a little attitude to it. Not loud. Just enough.
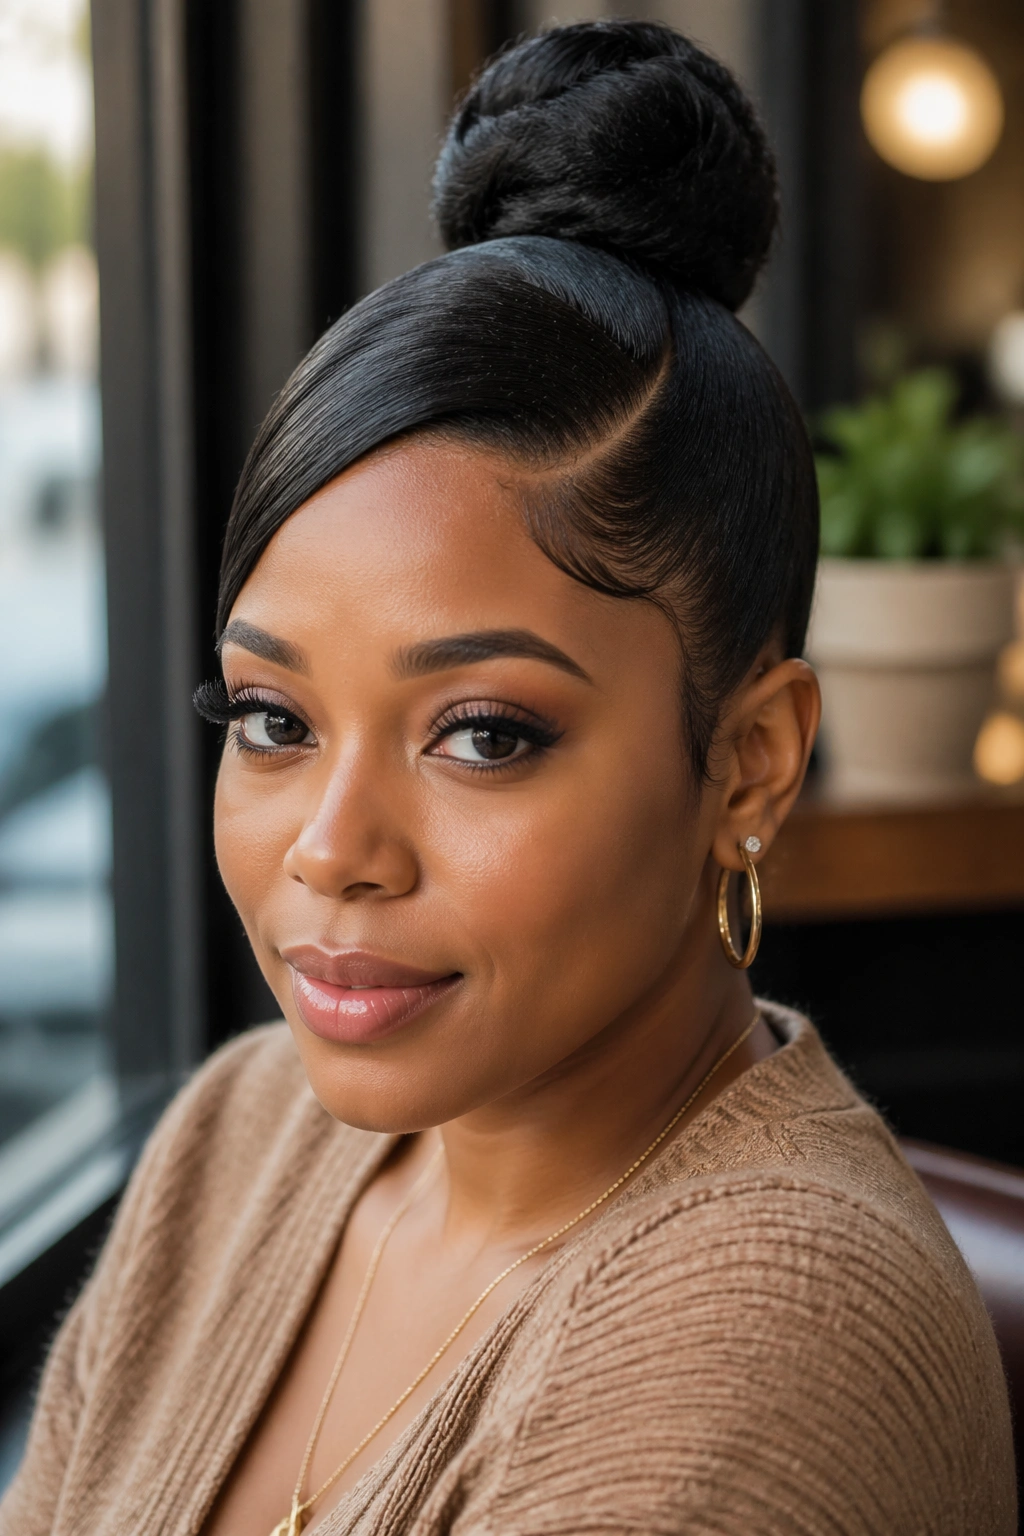
21. Sculpted Event Bun
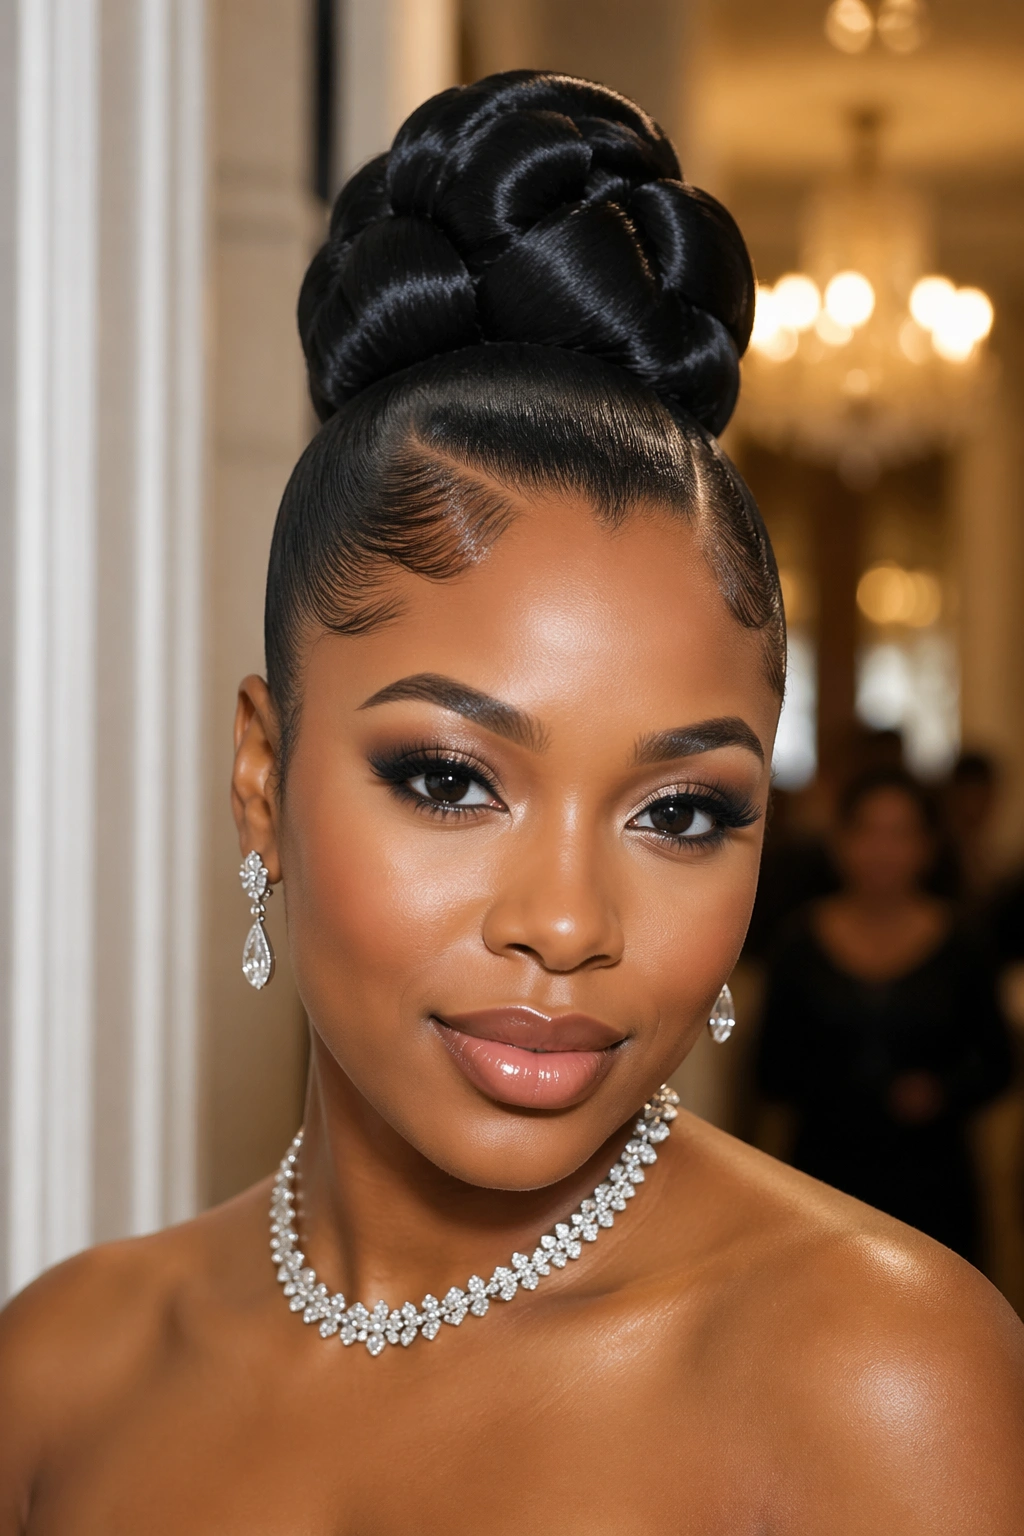
What do you wear when the bun needs to look formal from every angle? A sculpted event bun. It’s the version that uses precise parting, careful pinning, and a shape that stays clean under bright light and camera flashes.
The Structure Behind the Shape
The bun starts with a smooth crown and usually a firm ponytail base. From there, the hair is folded in sections instead of wrapped randomly. That makes the final shape look architectural, almost like a knot that was built on purpose. Strong pins matter here, and so does patience. Rushing this style shows.
I’d save this one for weddings, ceremonies, graduations, or any day when the hair needs to stay still and look sharp all the way through. It takes more work, but it earns it.
22. Sweatproof Gym Bun
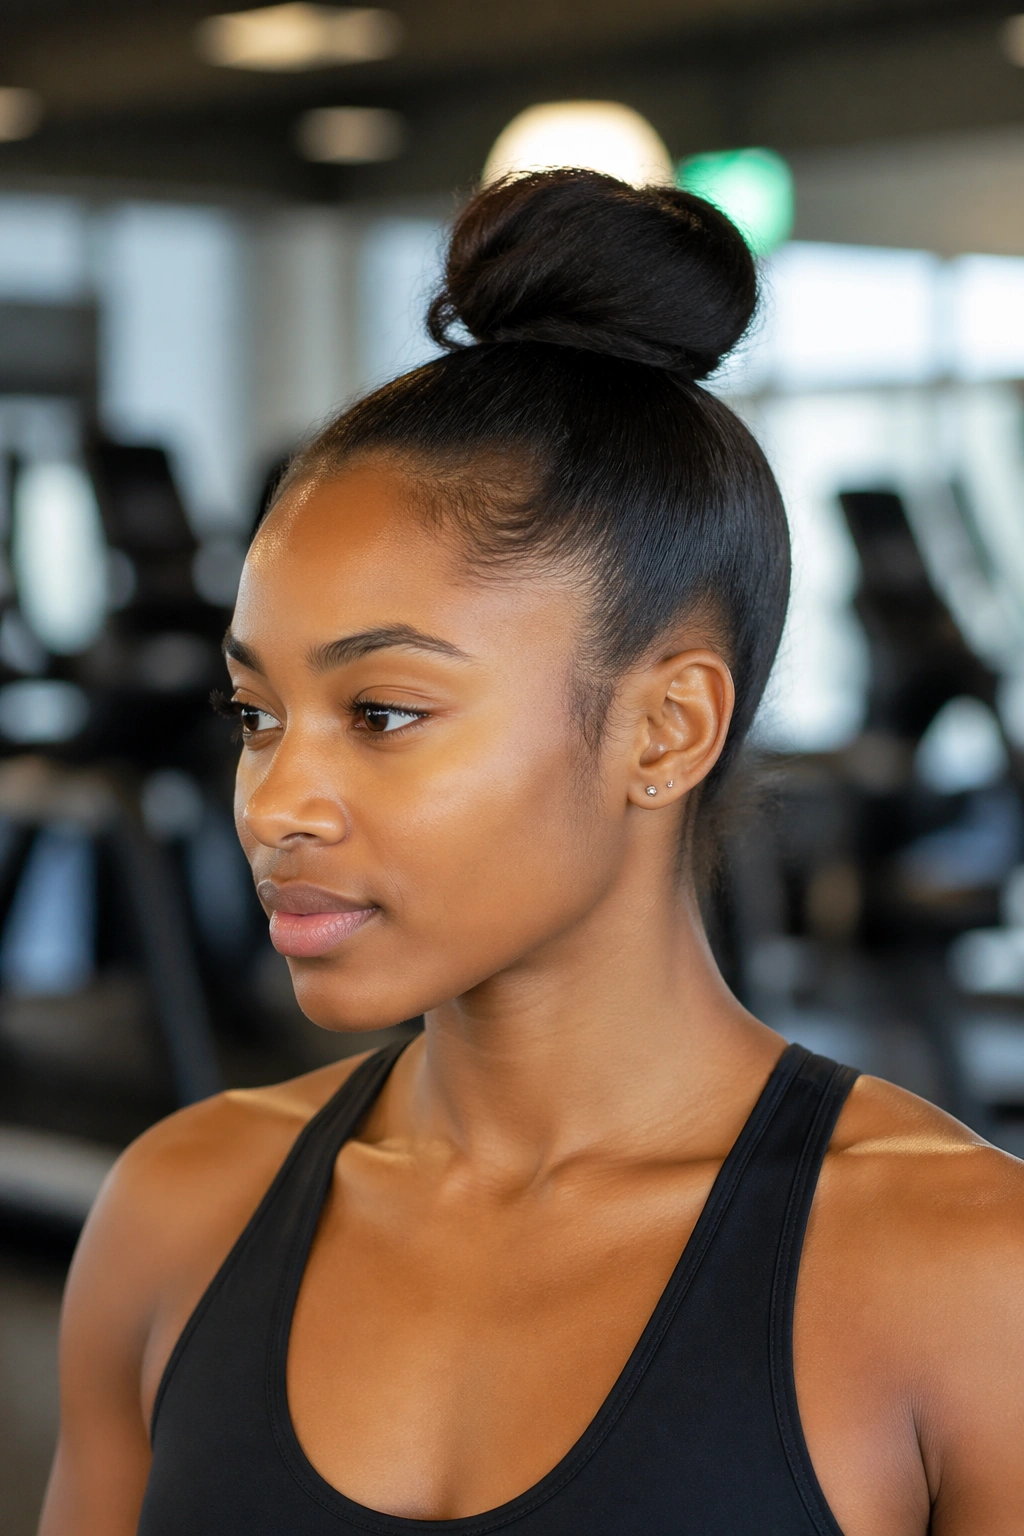
A workout bun should stay put without dragging on the scalp. That’s the whole point. The best versions are high enough to keep the neck free, but loose enough at the root that you don’t finish your set with a headache.
Gym-Day Details That Matter
- Use a wide elastic or coiled band that won’t slip when you sweat.
- Keep the base smooth, but not painfully tight.
- Tuck the ends inward so they don’t bounce around.
- Avoid heavy oils that can make the band slide.
This is not the style for dramatic volume. It is for function, first and always. If it survives cardio, weights, and a long walk home, it did its job.
23. Braided Crown With High Bun
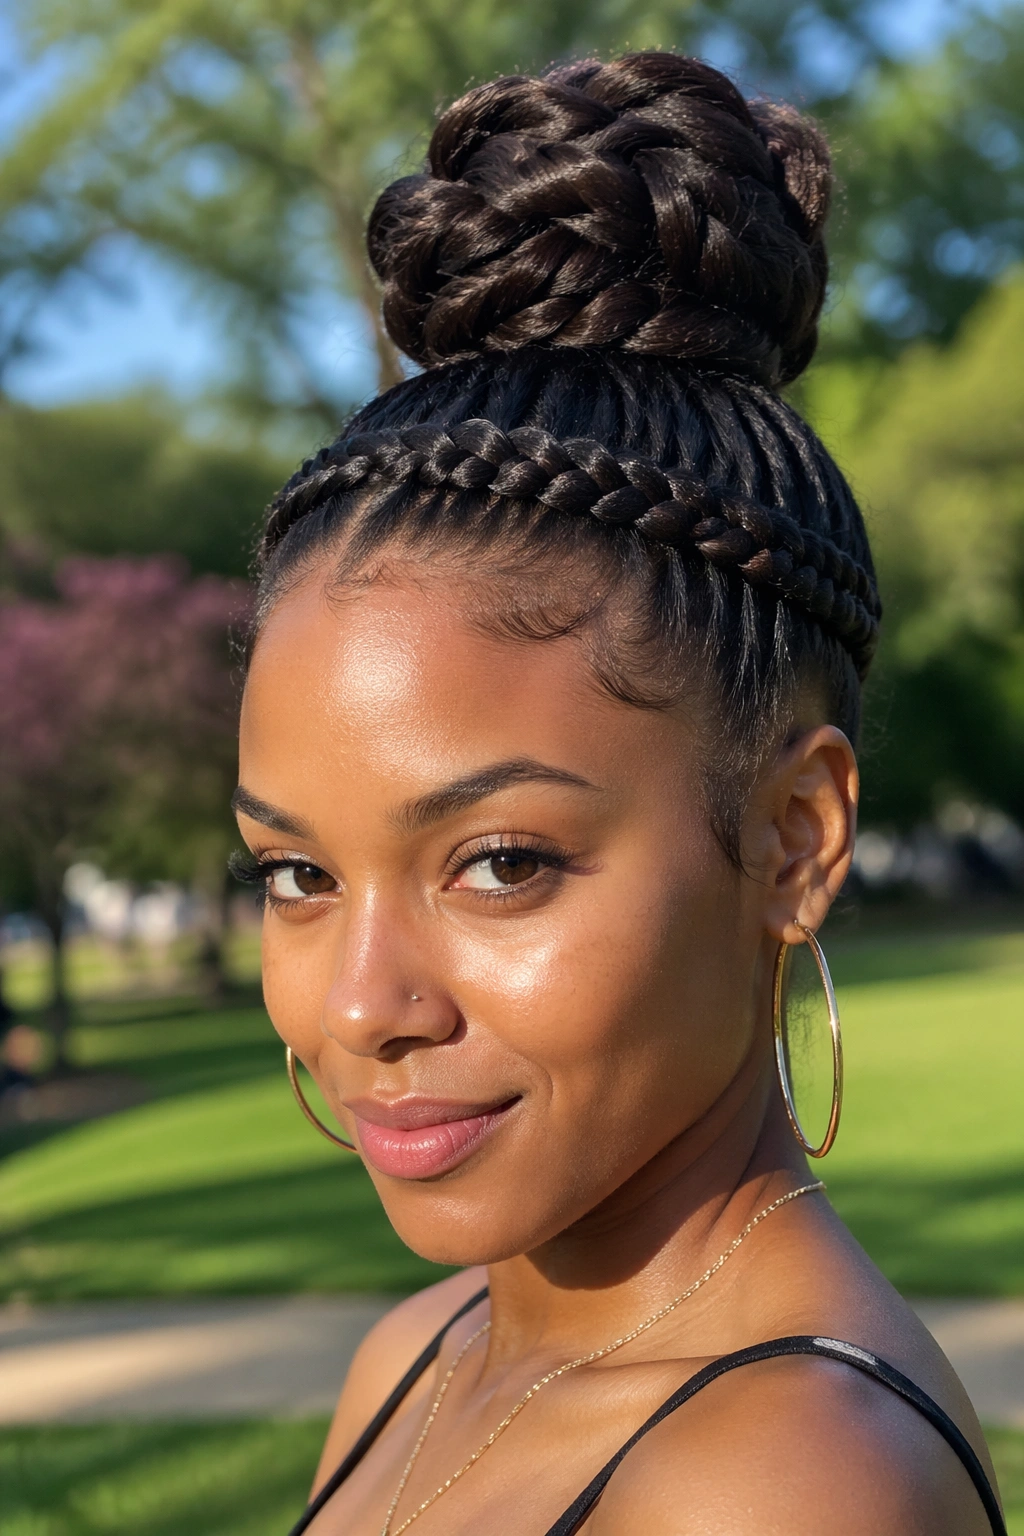
A braided crown gives the bun a halo effect at the hairline, which makes the whole style look more finished before you even get to the crown. The braid pattern frames the face, then feeds upward into the high bun so the top reads as one connected shape.
I like this version when I want something protective but still pretty from the front. It works with box braids, knotless braids, or even added braid hair if the natural length is short. Keep the crown braid snug enough to hold, but not so tight that the first hour hurts.
This style has a soft, romantic feel. It’s one of the few buns that looks right with a dress and sneakers or a blazer and denim.
24. Curly-Ends Wrap Bun
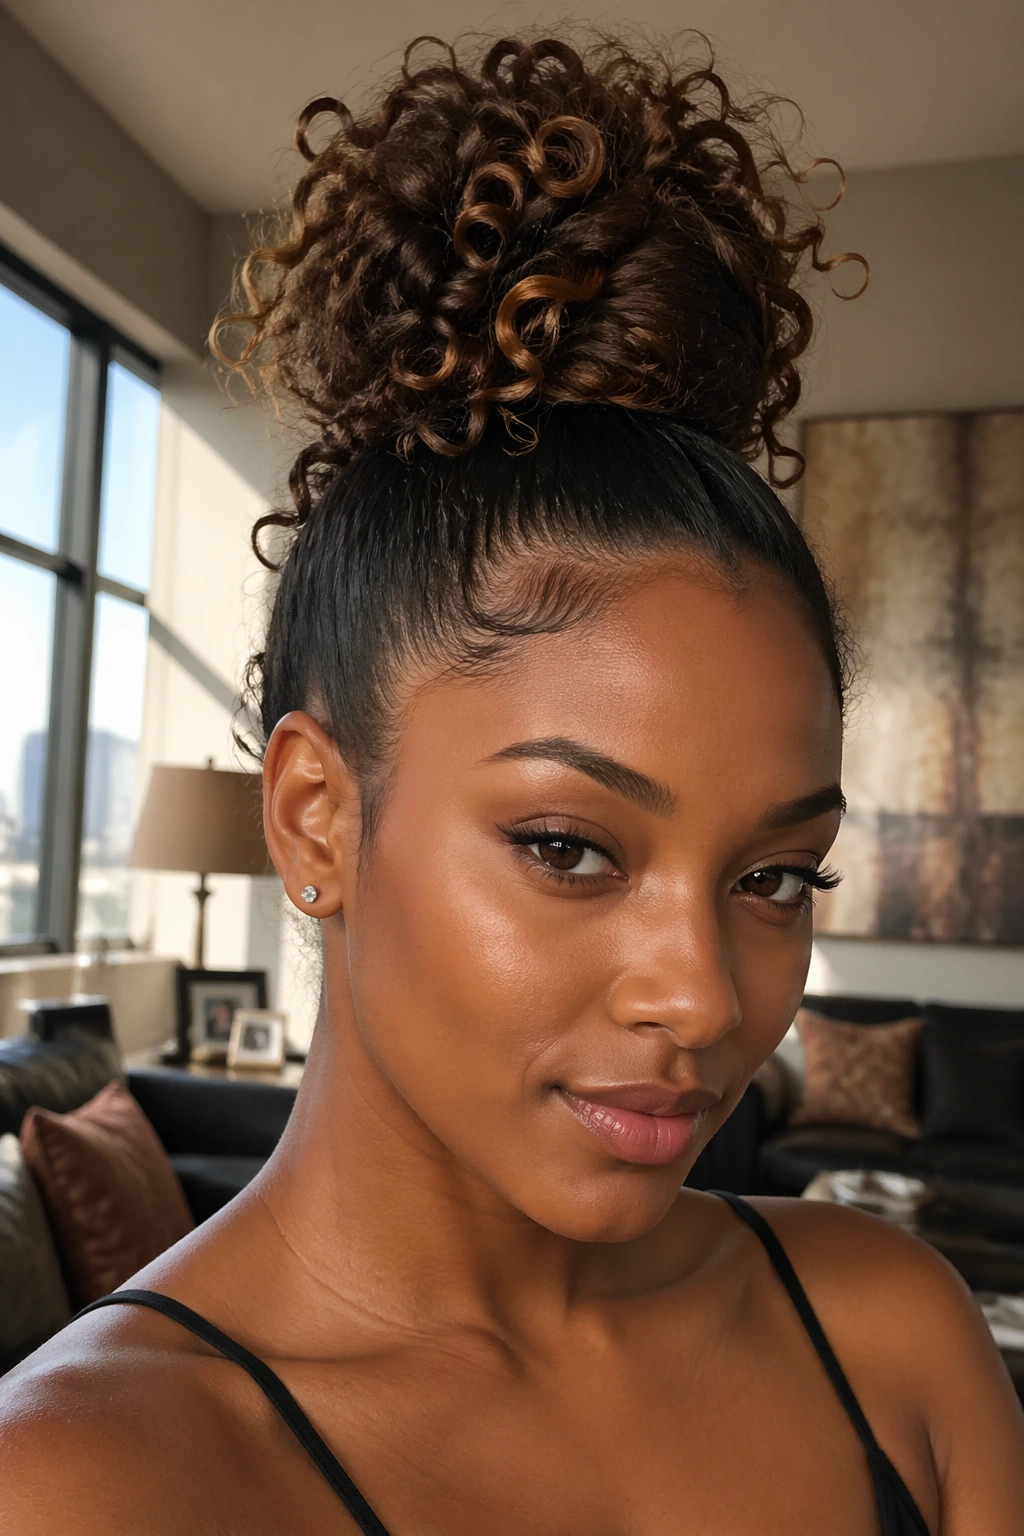
This bun keeps a little curl on display instead of tucking every inch away. The ponytail is gathered high, wrapped around the base, and then the ends are left to curl outward or tucked only halfway in so the texture stays visible.
That works especially well if your hair holds a coil pattern at the ends or if you’ve added curled extension hair for fullness. Use a small curling wand or flexi rods on the exposed ends if they need a little shape. The key is not to over-smooth the life out of it.
I like this one because it sits between polished and playful. It feels finished, but not stiff.
25. Chunky Twist-Out Bun
A twist-out bun gives you volume without losing the twist pattern completely. The hair is stretched just enough to lift at the roots, then gathered high so the bun keeps that chunky, airy texture.
How to Keep the Texture Visible
- Separate the twist-out gently before gathering it.
- Don’t brush it too hard or you’ll lose the pattern.
- Use a moisturizing cream instead of a heavy gel.
- Pin the bun in 2 or 3 main spots so it stays rounded.
This style is a strong choice for 4B and 4C hair because it lets the texture do the work. The bun ends up looking fuller than a slick style and softer than a braid bun. That middle ground is why I keep coming back to it.
26. Tapered Nape High Bun
A tapered cut changes the whole silhouette, and I love that. The clean nape makes the high bun feel lighter and more modern, because the visual weight sits at the crown while the back stays neat and open.
This style works best when the top has enough length to gather into a compact bun while the sides and nape are kept close. You can slick the top section, leave the fade visible, or tuck the short pieces into the shape if you want a smoother outline. A little edge work around the hairline can make the whole thing look more deliberate.
It’s a smart style for anyone who wants the bun to show off the cut instead of hiding it. The fade becomes part of the look.
27. Beaded Celebration Bun
Why save beads for the bottom half of a style when they can frame the bun too? A beaded celebration bun uses braids, accents, or small sections with beads to add movement before the hair is gathered high. The sound and weight are part of the charm, as long as you keep the placement controlled.
A Few Placement Rules
- Put the beads on the visible braid sections, not all over the bun.
- Keep the count modest so the style doesn’t get too heavy.
- Choose one metal tone or bead color and stick with it.
- Test the bun’s balance before you leave the house.
This is the kind of style that works for birthdays, photos, parties, and any day when you want the hair to feel a little festive. Small details go a long way here.
Final Thoughts
A good high ponytail bun is never only about the bun. The parting, the base, the tension, and the texture all decide how the style behaves once you leave the mirror. That’s why the same bun can look soft on one head and severe on another.
If you want the safest place to start, pick the version that matches your hair state instead of fighting it. Sleek hair wants a sleek bun. Braids want structure. Curls want room to breathe. That choice saves time, and it usually looks better too.
And if you’re stuck between two options, follow the hairline. If the style sits there comfortably, you’re probably on the right track.