4A hair makes a ponytail look fuller, sharper, and a little more alive than straight-texture versions ever can. The trick is not forcing the coils into submission. It is choosing a shape that respects shrinkage, keeps the hairline calm, and lets the texture do the heavy lifting.
That matters because 4A strands change personality fast. A style that looks neat right after styling can puff out after a humid commute, and a ponytail that felt secure in the mirror can start tugging at the temples by lunch if the base is too tight. Tension is the enemy. So is overloading the front with product until it turns chalky and flakes on your collar.
I like ponytails on this texture because they can be polished or playful without hiding what the hair actually is. A rat-tail comb, a soft brush, a satin scrunchie, and a little gel or edge control will take you farther than a drawer full of extras. The styles below cover sleek, fluffy, braided, twisted, and accessorized looks, so you can pick one that fits your length, your mood, and how much patience you have that day.
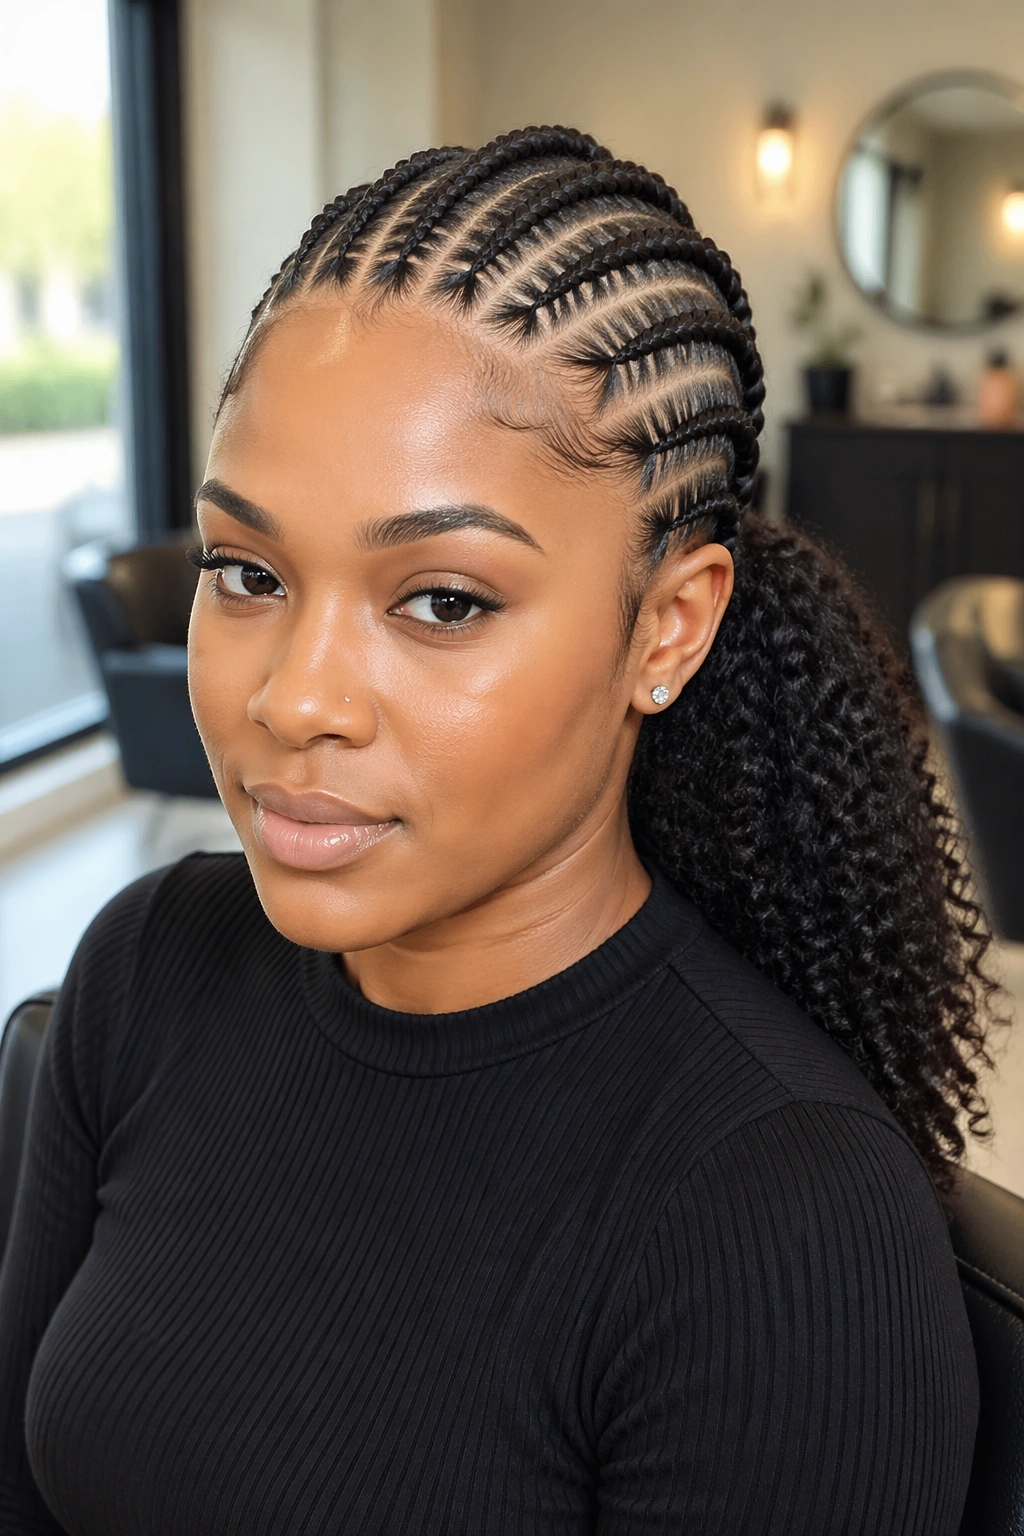
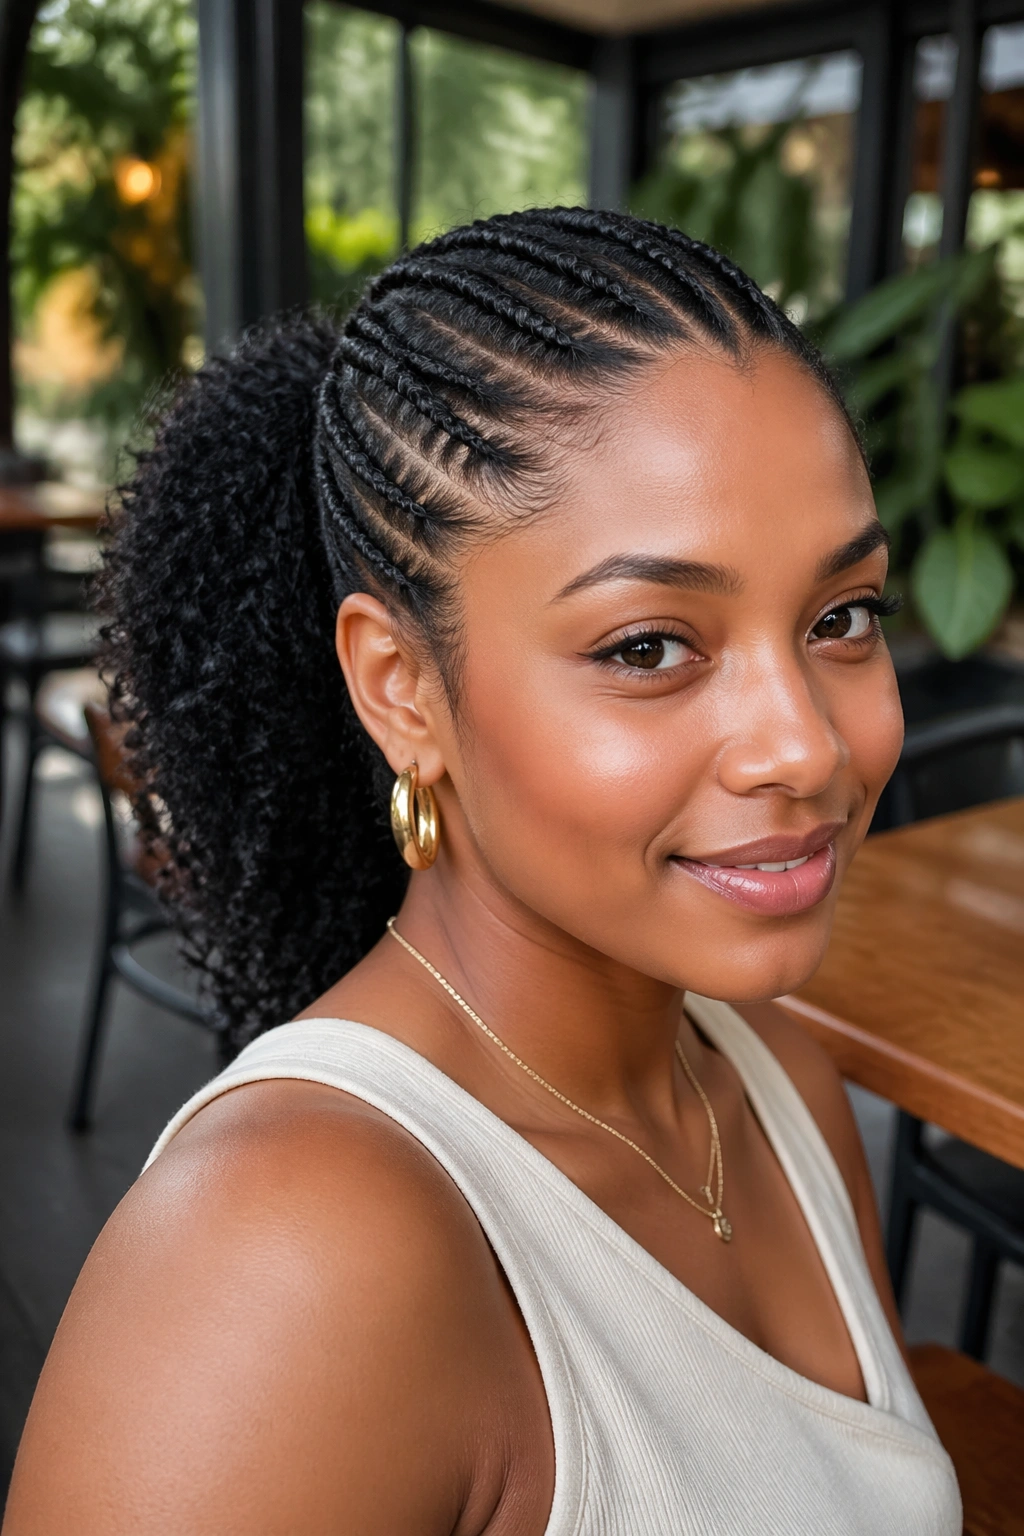
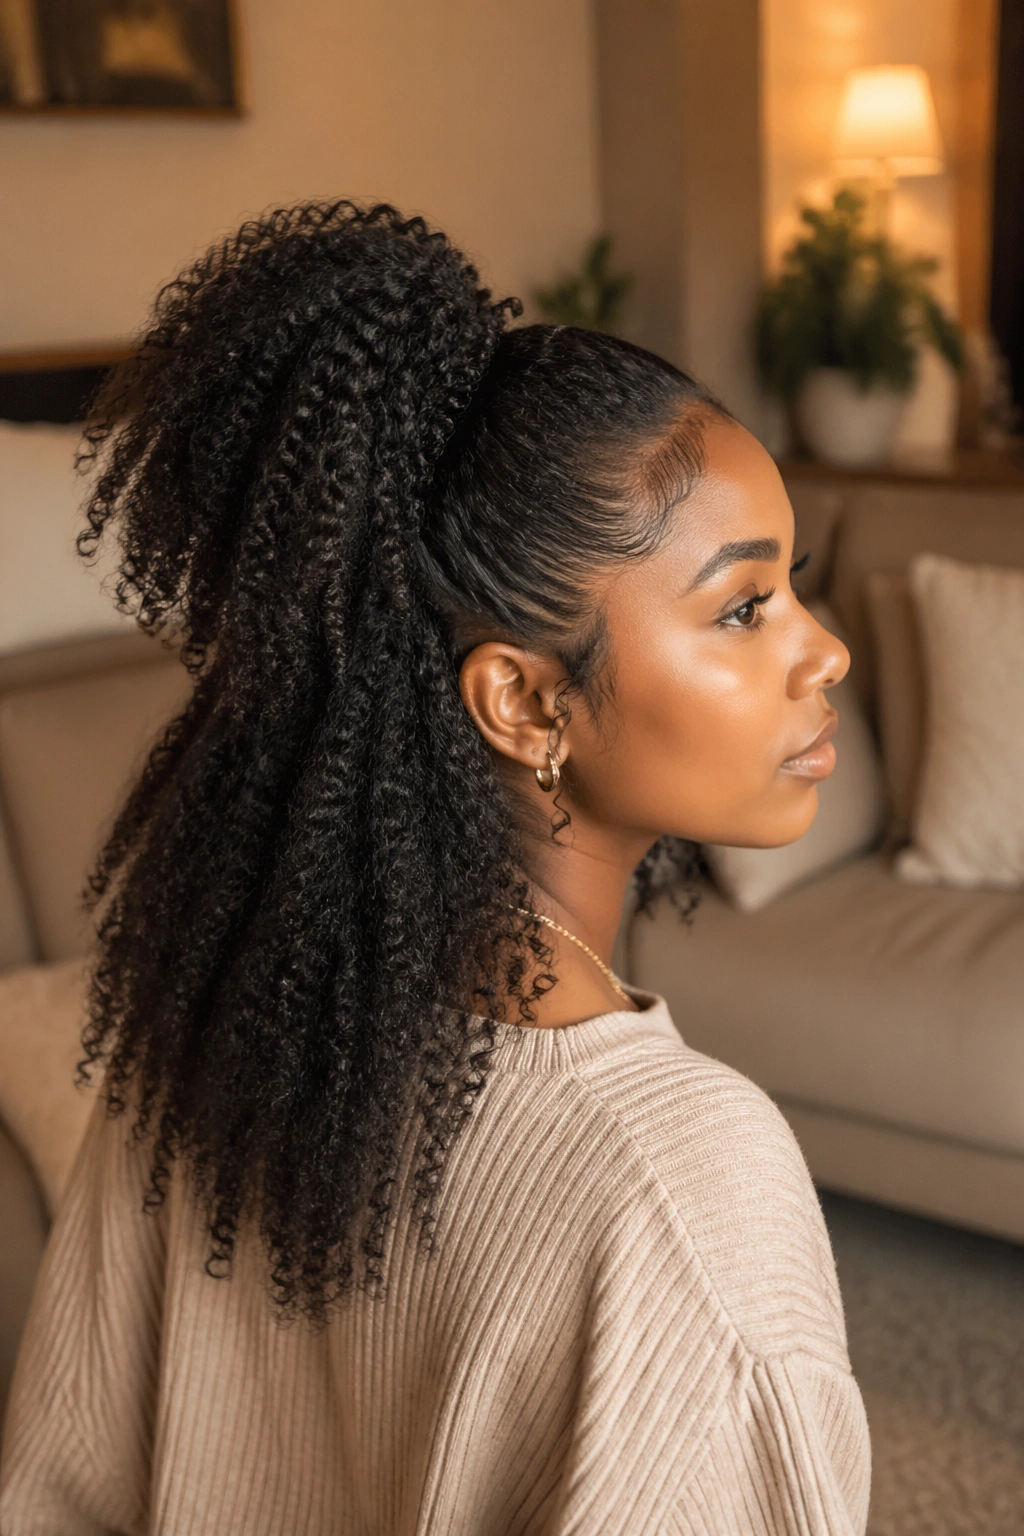
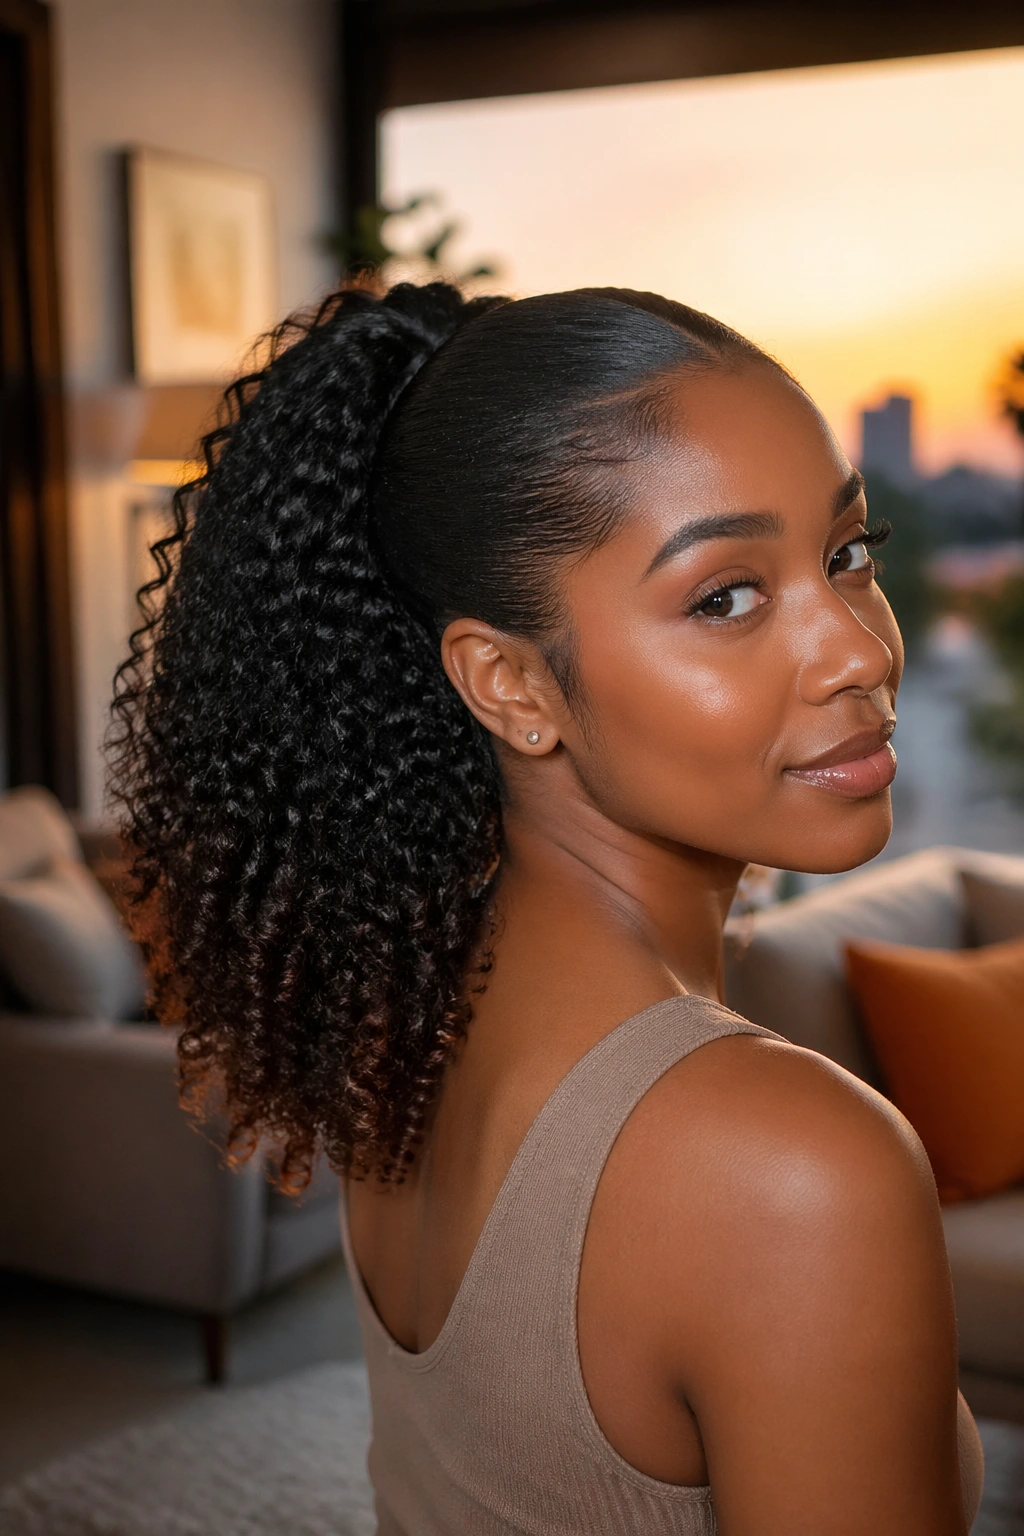
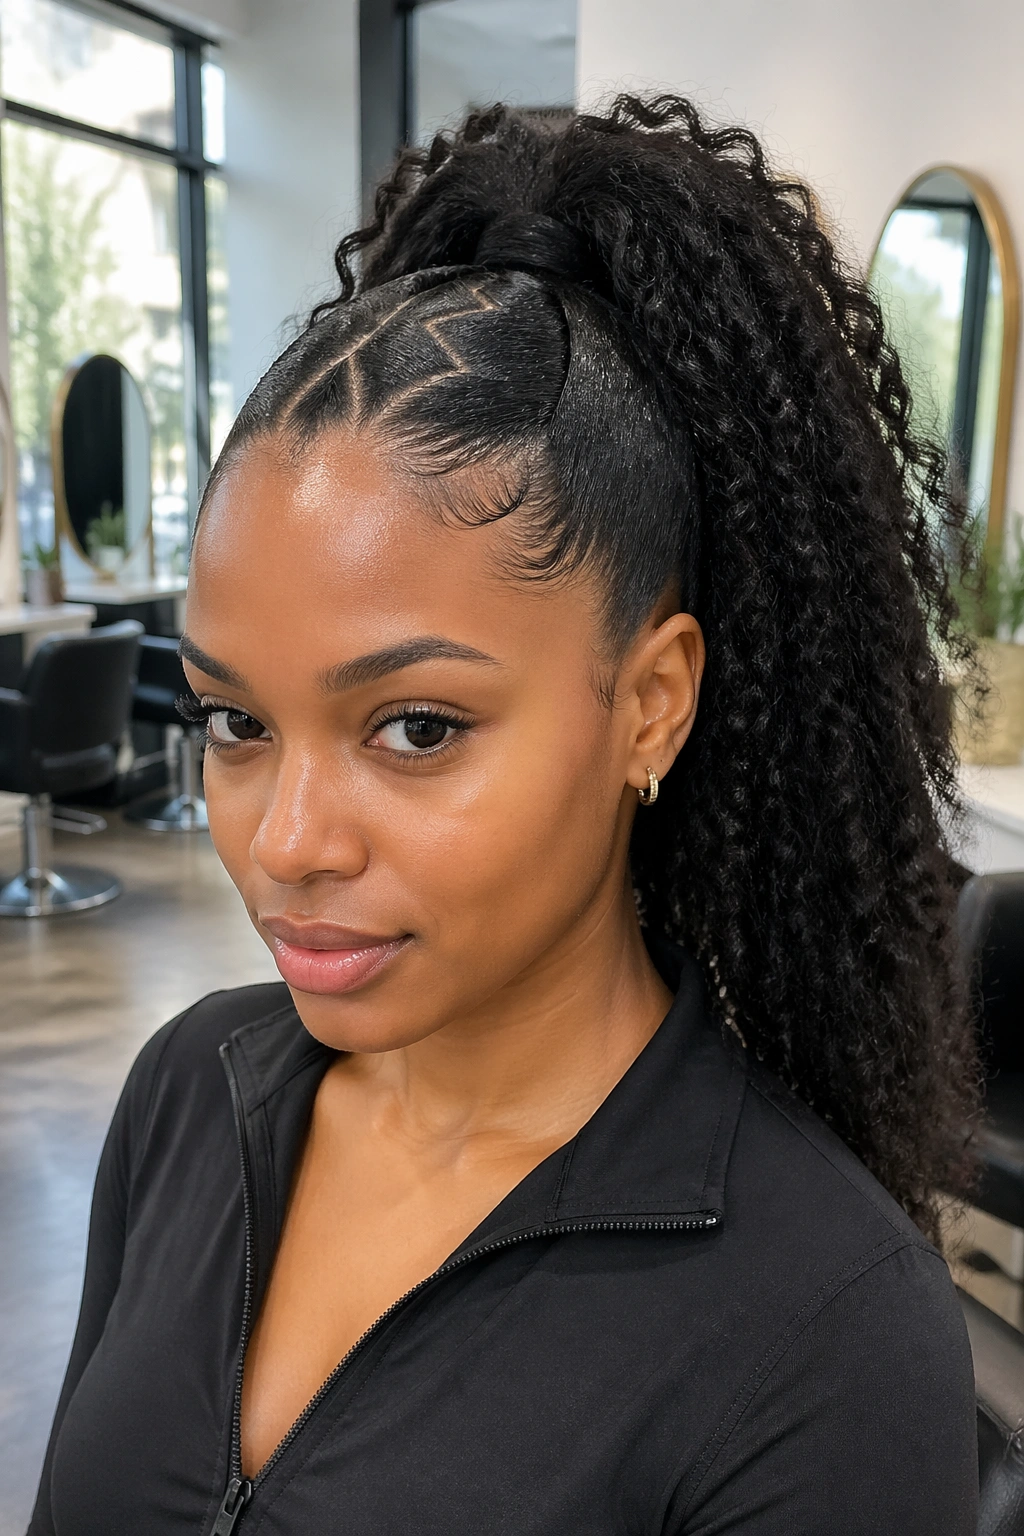
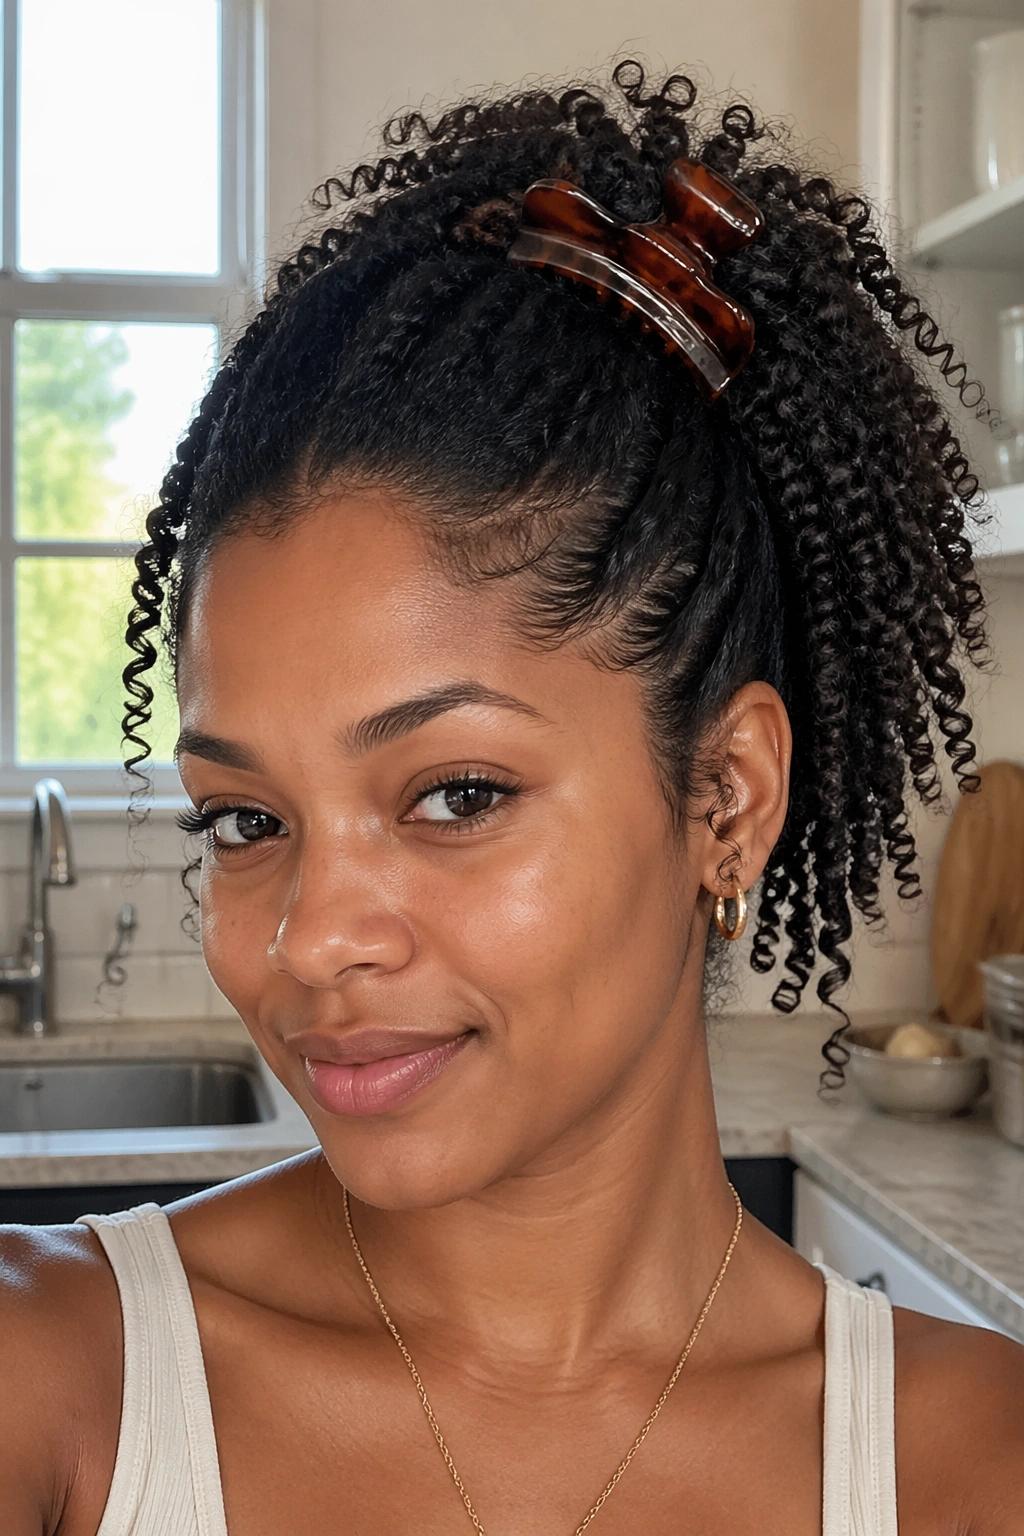
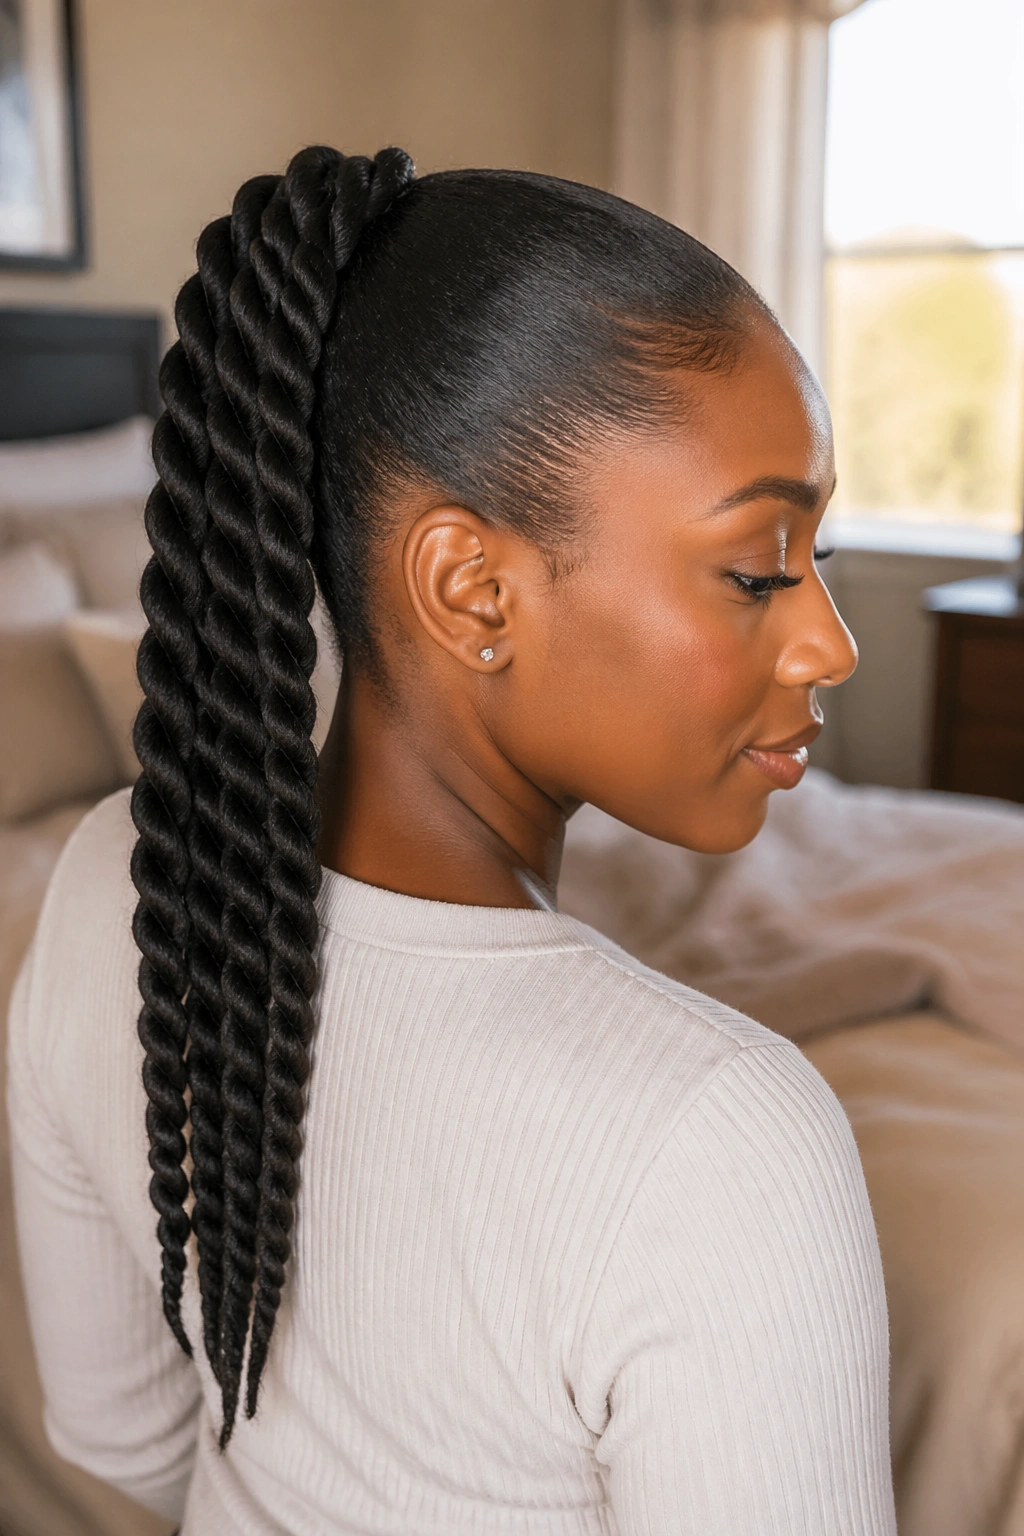
1. Sleek High Ponytail
A sleek high ponytail on 4A hair has a very specific energy: clean at the crown, full in the tail, and sharp enough to make the whole face look lifted. The front is where the work happens. If you rush that part, the style reads tired instead of crisp.
What Makes It Work
Stretch the hair first if you can. A light blow-dry on low heat, a loose banding set, or even a few chunky twists overnight can cut down the shrinkage that makes high ponytails collapse. Then smooth the hair upward in small sections, not one giant push. That gives you a flatter base and fewer bumps.
Use a gel with hold, not a mountain of it. Too much product on 4A roots tends to sit on top instead of gripping the hair. I like to brush upward, tie the base with a satin scrunchie, then wrap a scarf around the hairline for 10 to 15 minutes so the crown sets without looking stiff.
A Few Details That Matter
- Keep the ponytail a little above the crown for lift.
- Smooth with a boar-bristle brush if your hairline tolerates it.
- Wrap a small strand around the elastic for a cleaner finish.
- Add a tiny bit of oil only to the tail, not the roots.
Skip the temptation to pull it tighter for a cleaner look. On 4A hair, a slightly softer base with a good set usually looks better than a painfully tight one.
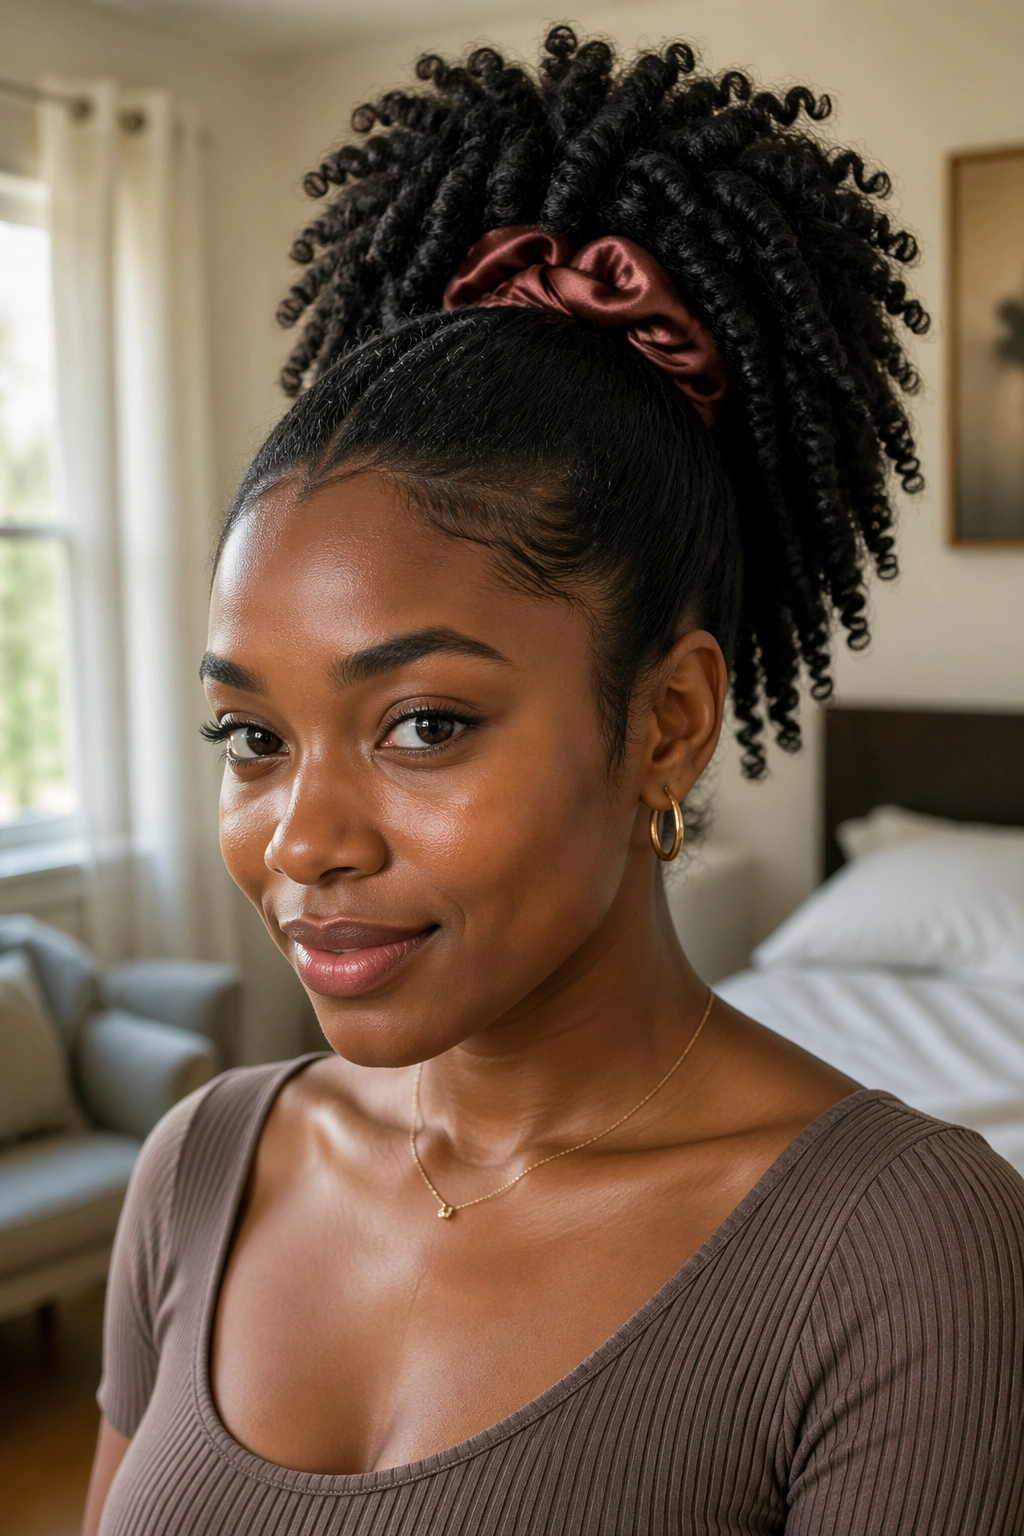
2. High Puff Ponytail
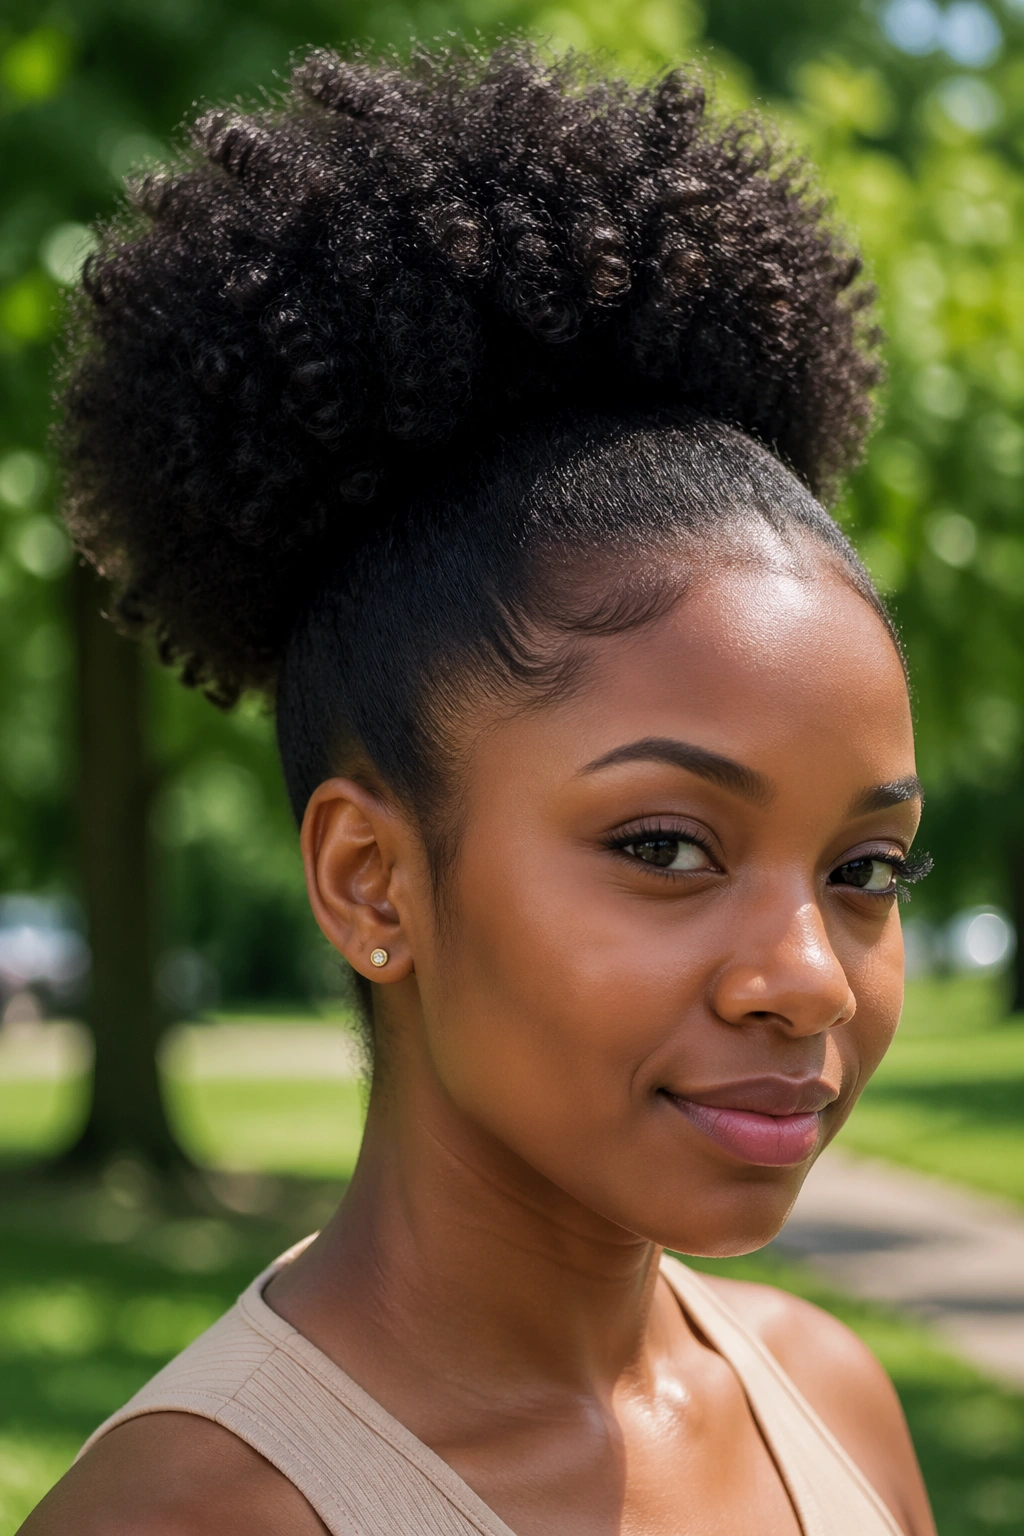
A high puff ponytail is what happens when you stop fighting the coil pattern and let it be big on purpose. It is one of the easiest styles to make look intentional on 4A hair, and honestly, that is part of why it works so well.
The puff sits high, so the hairline stays visible and the shape has room to expand. If your hair is stretched, the puff looks round and dramatic. If it is freshly washed, it looks softer and cloudier. Both versions work. The main difference is how much shrinkage you want to keep.
My preference is to gather the hair with a wide elastic or a puff cuff rather than a skinny band. Thin bands can dig in and leave a line through the back of the head. If you want the puff to look fuller, fluff the sides after it is secured and leave the front a little less polished. That contrast gives the style character.
One sentence, because it matters: a good puff should feel secure, not trapped.
3. Bubble Ponytail
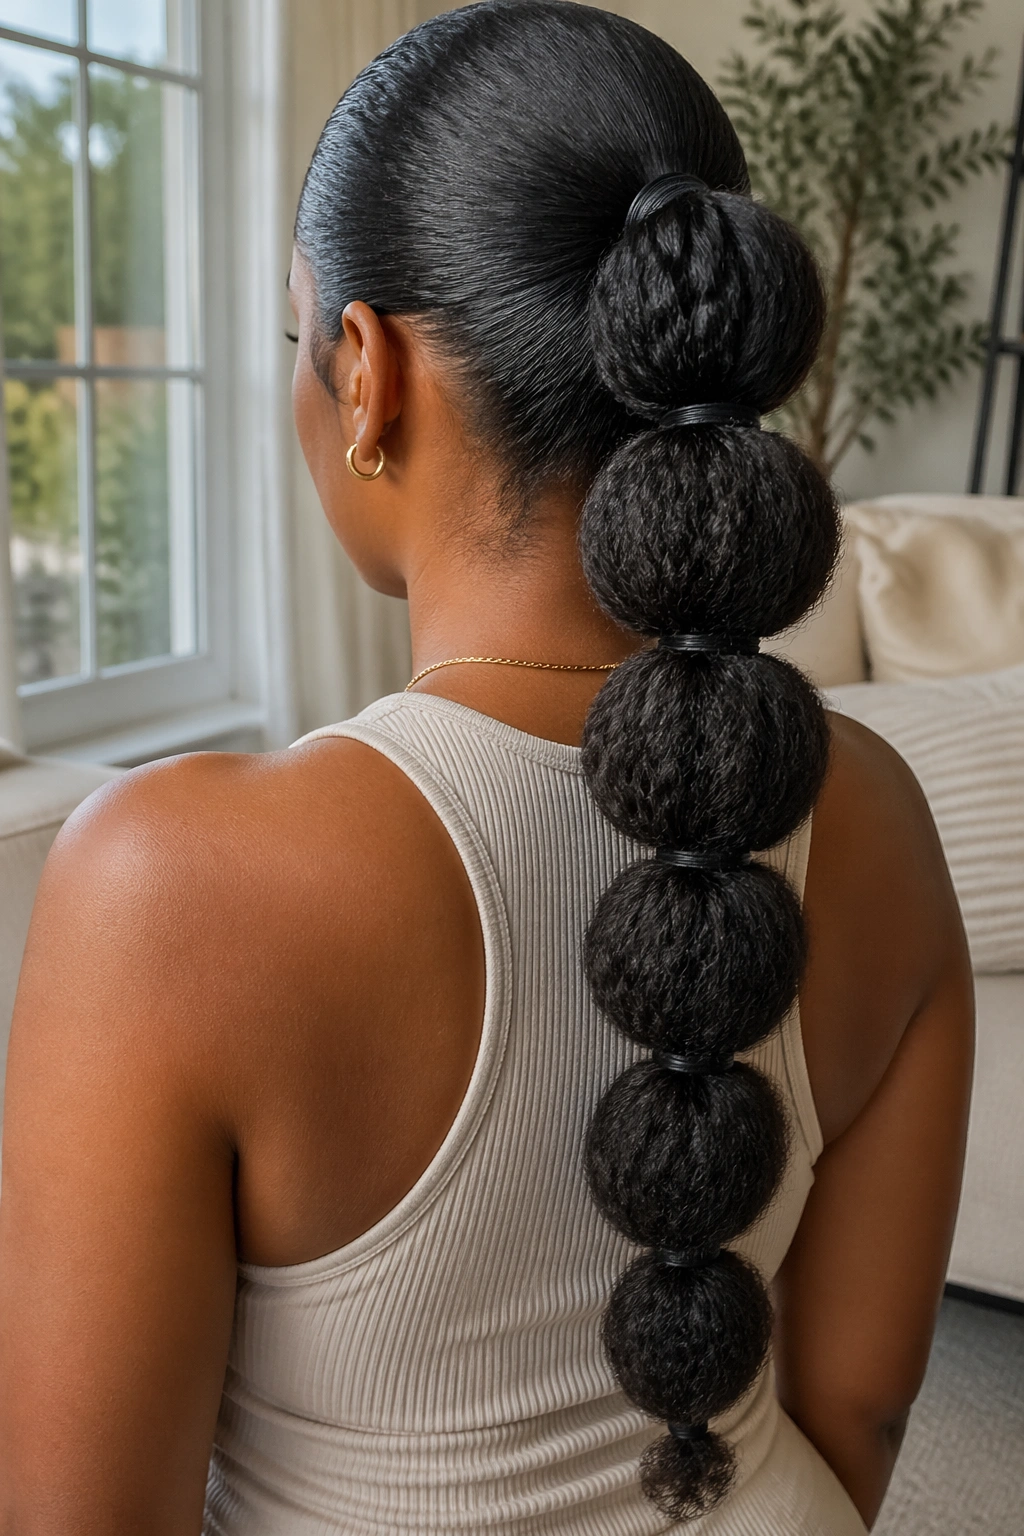
A bubble ponytail looks playful, but on 4A hair it also solves a real problem: long tails can lose shape fast, especially when the ends are soft or layered. The bubbles hold the form for you.
Start with a regular ponytail, then place small elastics every 2 to 3 inches down the tail. Gently pull each section outward until it rounds into a bubble. If your hair is dense, make the bubbles a little smaller and use more sections. If your hair is stretched and long, you can keep the intervals wider and let the tail hang lower.
The Part People Miss
The first elastic matters most. Set it snugly, because the whole style hangs from that base. After that, go light. A little mousse or setting foam between sections helps the bubbles stay puffy instead of frizzy. If you want a softer finish, use covered elastics so the bands disappear into the style.
This one loves a satin scarf set after styling. Ten minutes is enough to help the front smooth down without crushing the shape.
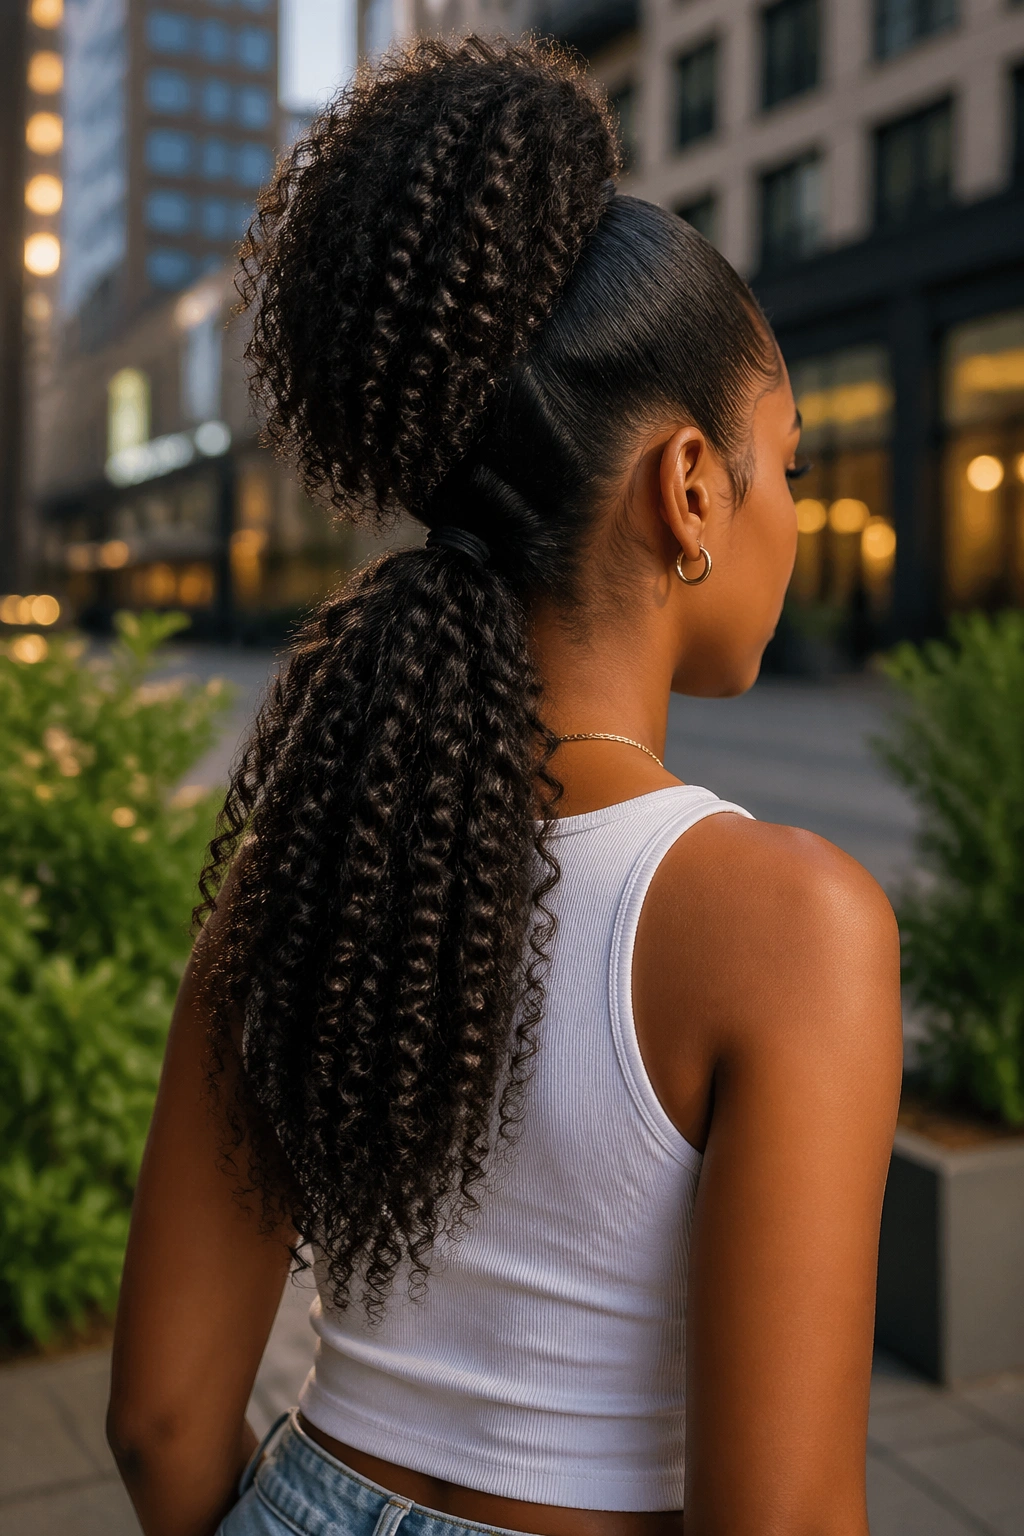
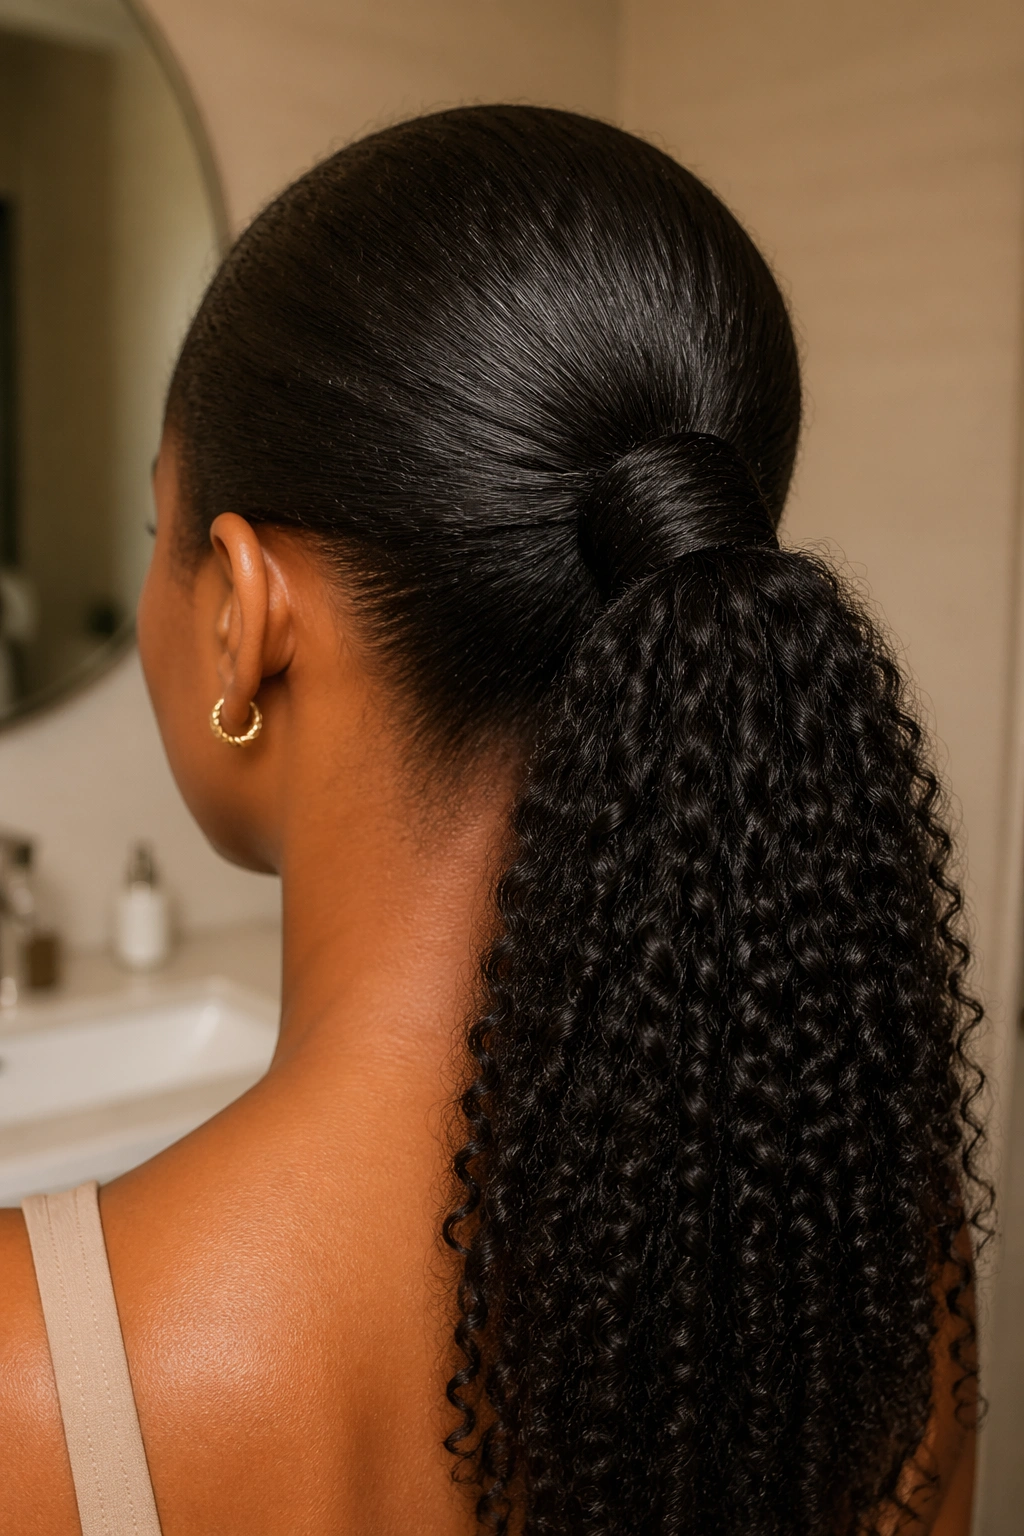
4. Low Ponytail With a Middle Part

A low ponytail with a middle part is one of those styles that looks quietly expensive without trying too hard. It flatters 4A hair because the center part draws the eye straight down, and the low placement keeps the silhouette long instead of bulky.
The part has to be clean. Use the tail of a rat-tail comb and make the line while the hair is damp or lightly misted, then press the roots flat with your palms before brushing. A little gel at the part and a touch more at the nape help the style stay neat through the day. I would not pile the product on the whole head. That only makes the roots tacky.
This look works especially well if the hair has been stretched first. A stretched base gives the ponytail a smoother fall, while the texture in the tail keeps it from looking flat. If the hairline is sensitive, leave a few tiny coils near the temples instead of forcing every strand into place. It looks softer and feels better.
5. Side-Swept Ponytail
Why does a side ponytail look so good on 4A hair? Because the coil pattern gives the tail body, and the off-center placement keeps the shape from feeling stiff. It is a good move when you want something with a little personality but not a full style overhaul.
Put the base just behind one ear or slightly lower at the back of the neck. If you want the style to read dressy, smooth the front across with a deep side part and keep the tail full. If you want it relaxed, leave the front a little looser and let a few coils sit around the face. That gives the style movement.
How to Keep It from Sagging
- Place the elastic lower than you think you need.
- Secure with a wide, snag-free band.
- Add a pin underneath if the hair is heavy.
- Keep the tail fluffed, not packed down.
A side ponytail can slide if the parting is sloppy. Take the extra minute to make the section line clean. It pays off.
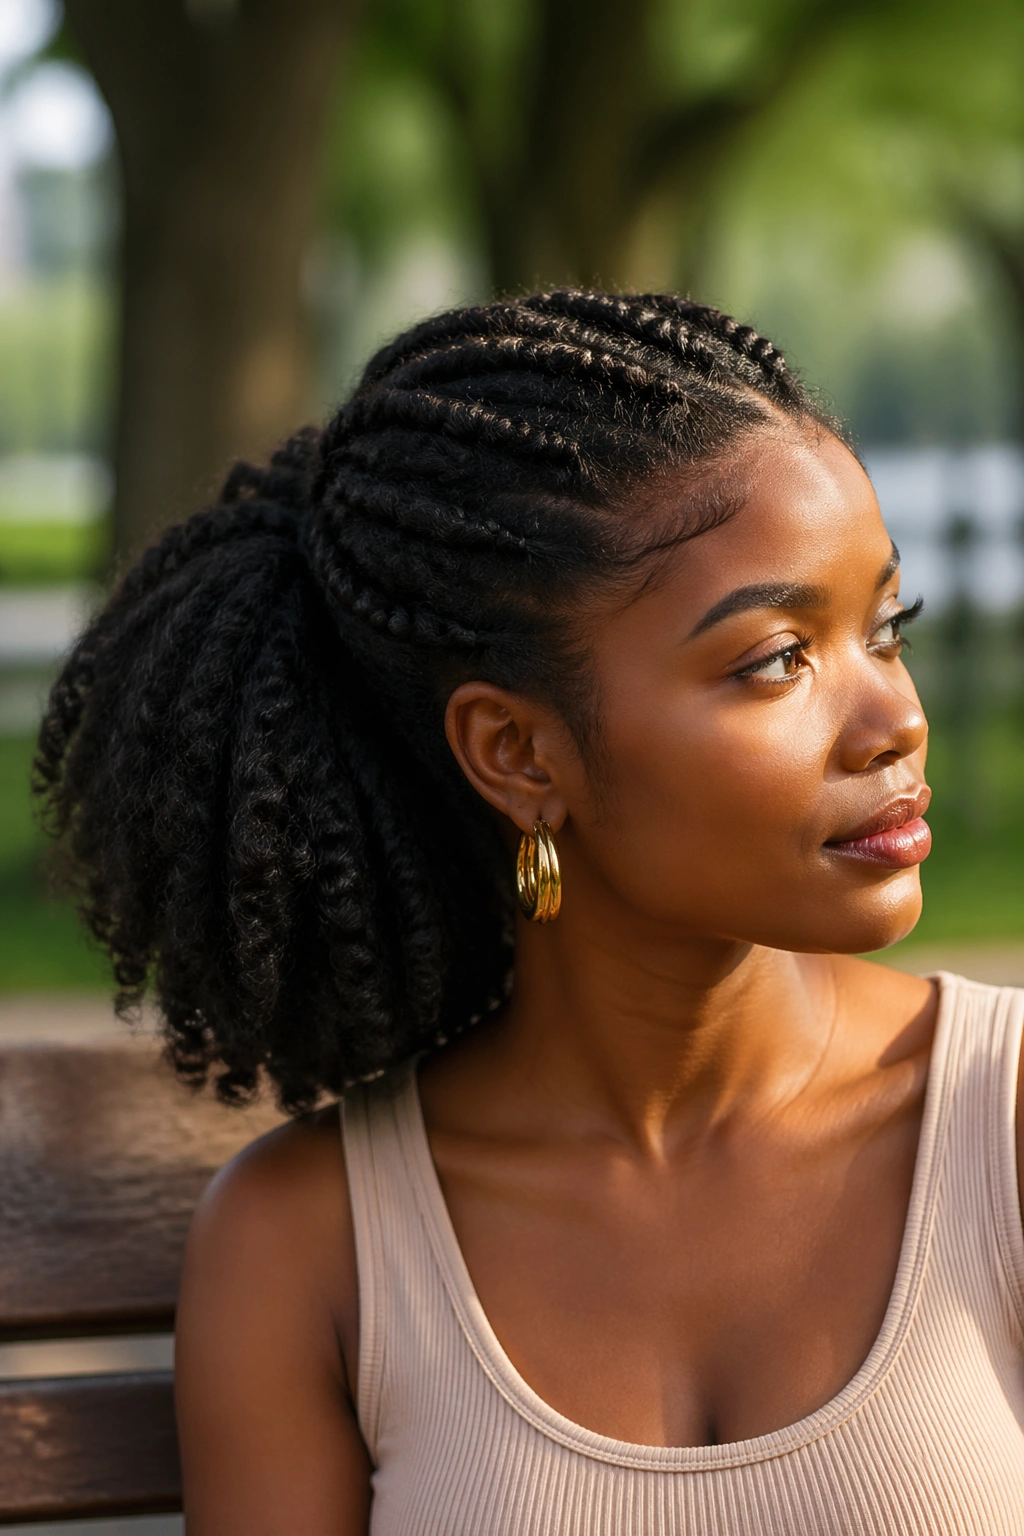
6. Braided-Base Ponytail
A braided base gives a ponytail a built-in anchor, and that matters on 4A hair because a plain elastic can shift once the roots soften. The braid keeps the front tidy while the tail stays loose and full.
You can braid just the front section into the ponytail, or braid around the perimeter and let everything gather at the back. Both versions work. The first gives more lift. The second feels more protective. If you are wearing it for more than a day, I’d lean toward the perimeter braid because it spreads tension out more evenly.
This style also solves a common problem: the hairline that puffs up halfway through the day. A braid keeps the roots flatter for longer, especially if you set the front with a little mousse before braiding. Once the ponytail is secured, wrap a small strand around the base so the elastic disappears.
Good detail, not fuss: the braid should feel firm, never tight. You want tidy, not sore.
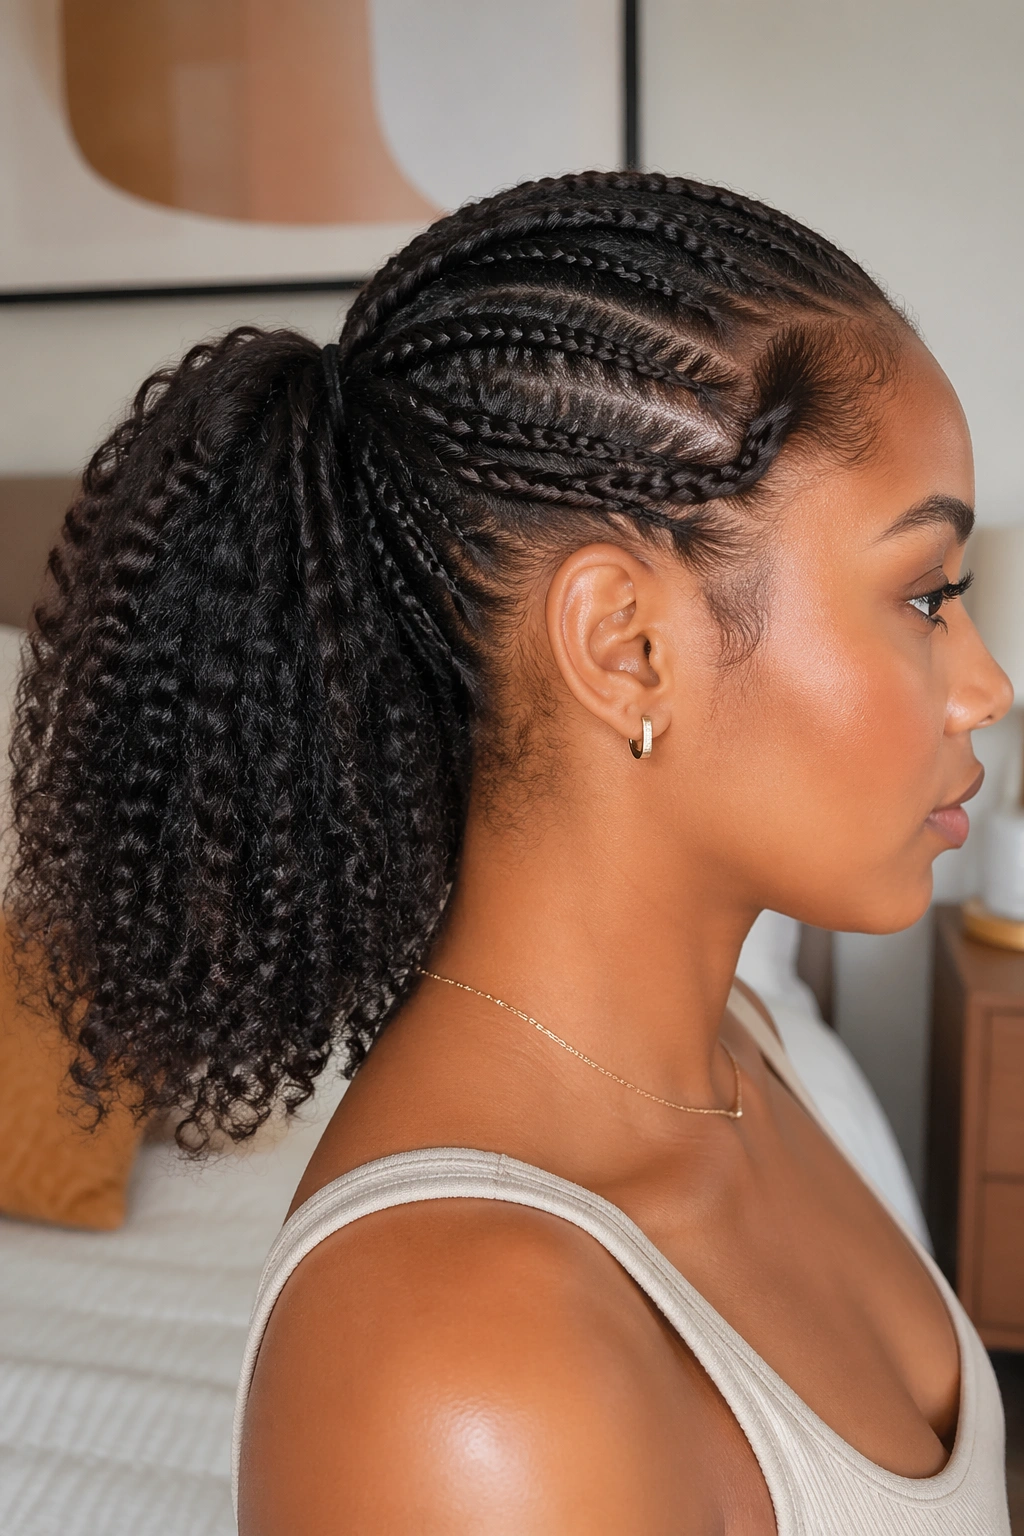
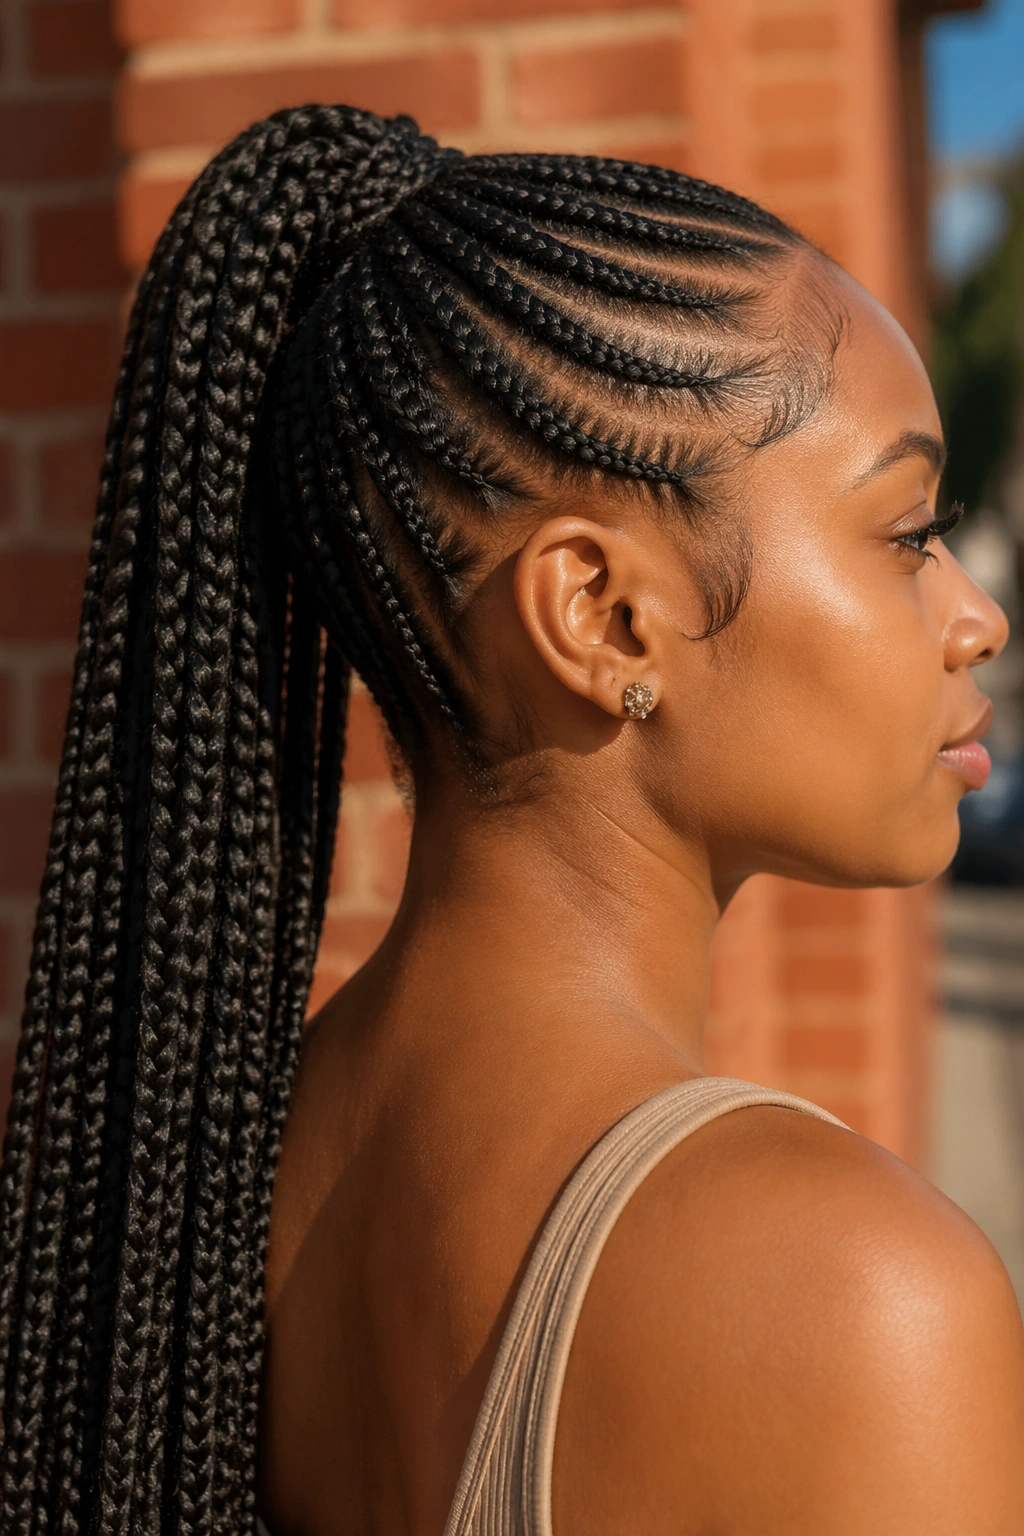
7. Cornrow Ponytail
A cornrow ponytail is the style I reach for when I want the hair off the face and the roots tucked away. On 4A hair, cornrows can hold the front down neatly while the ponytail itself stays full or braided.
Straight-back cornrows are the cleanest option, but curved parts or feed-in rows can look more sculpted. Either way, the roots need a light hand. If the braids pull at the temples, the style has already gone too far. Tightness is not a finish. It is a warning.
A small amount of scalp oil is enough. Too much makes the rows look greasy and can loosen the grip. I like to braid the base into a ponytail at the nape or crown, then decide whether the tail should stay loose, be braided, or get twisted. The style lasts longer when the scalp is dry before you start and when the parts are crisp from the beginning.
No shame in this one being a low-maintenance week style. That is exactly what it is good at.
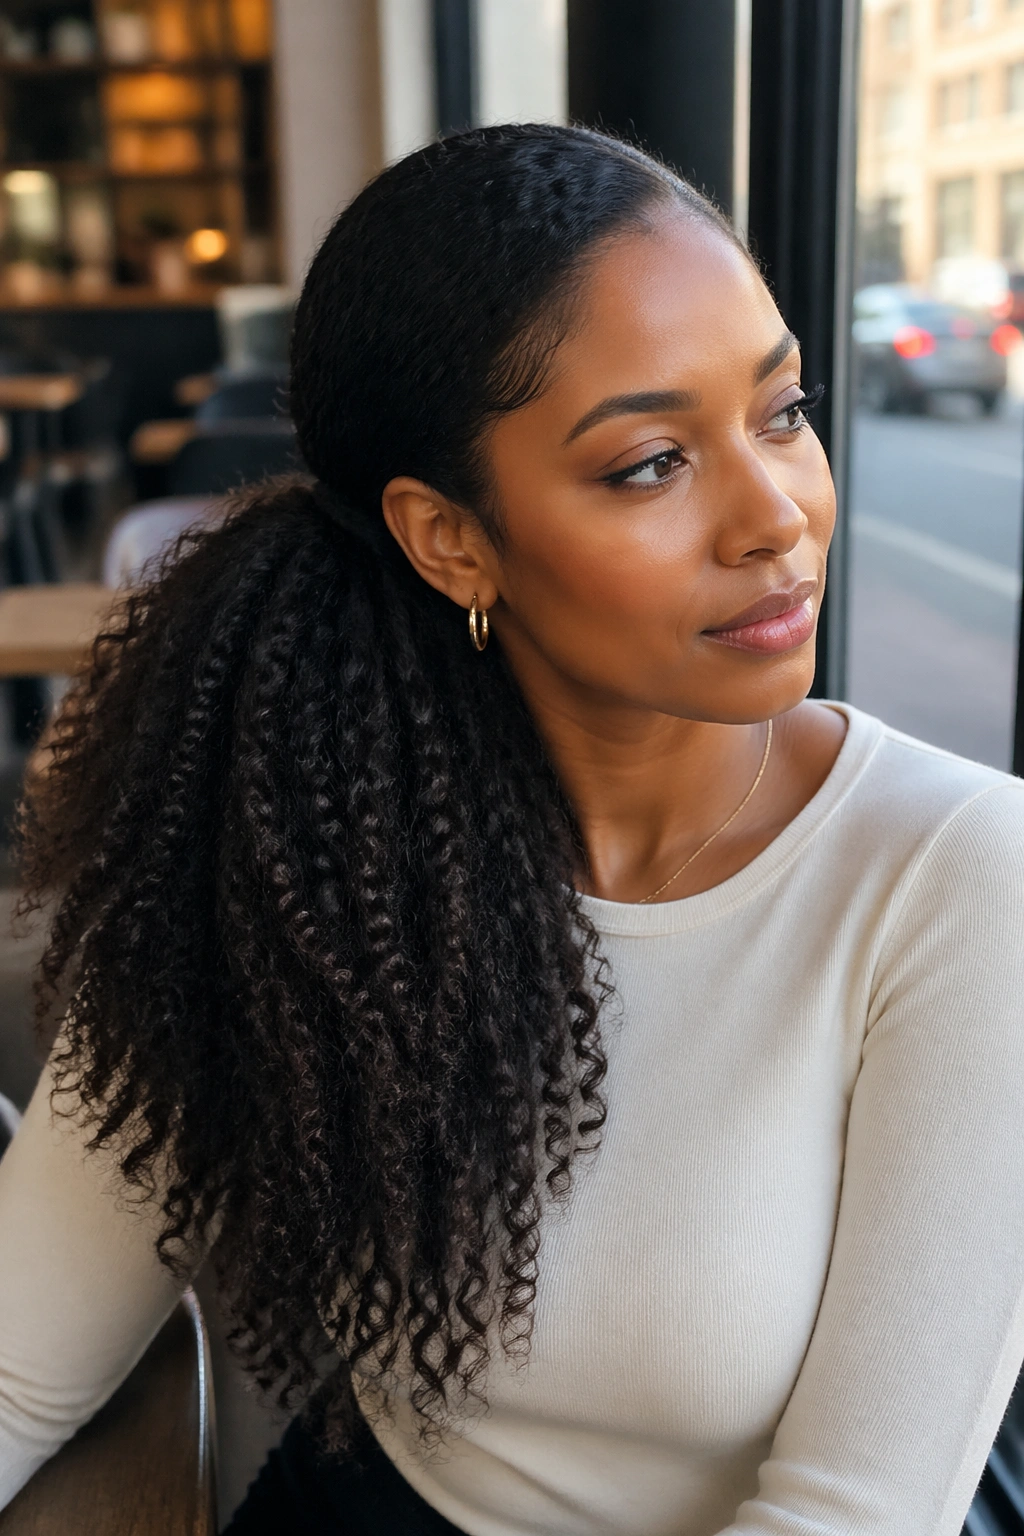
8. Two-Strand Twist Ponytail
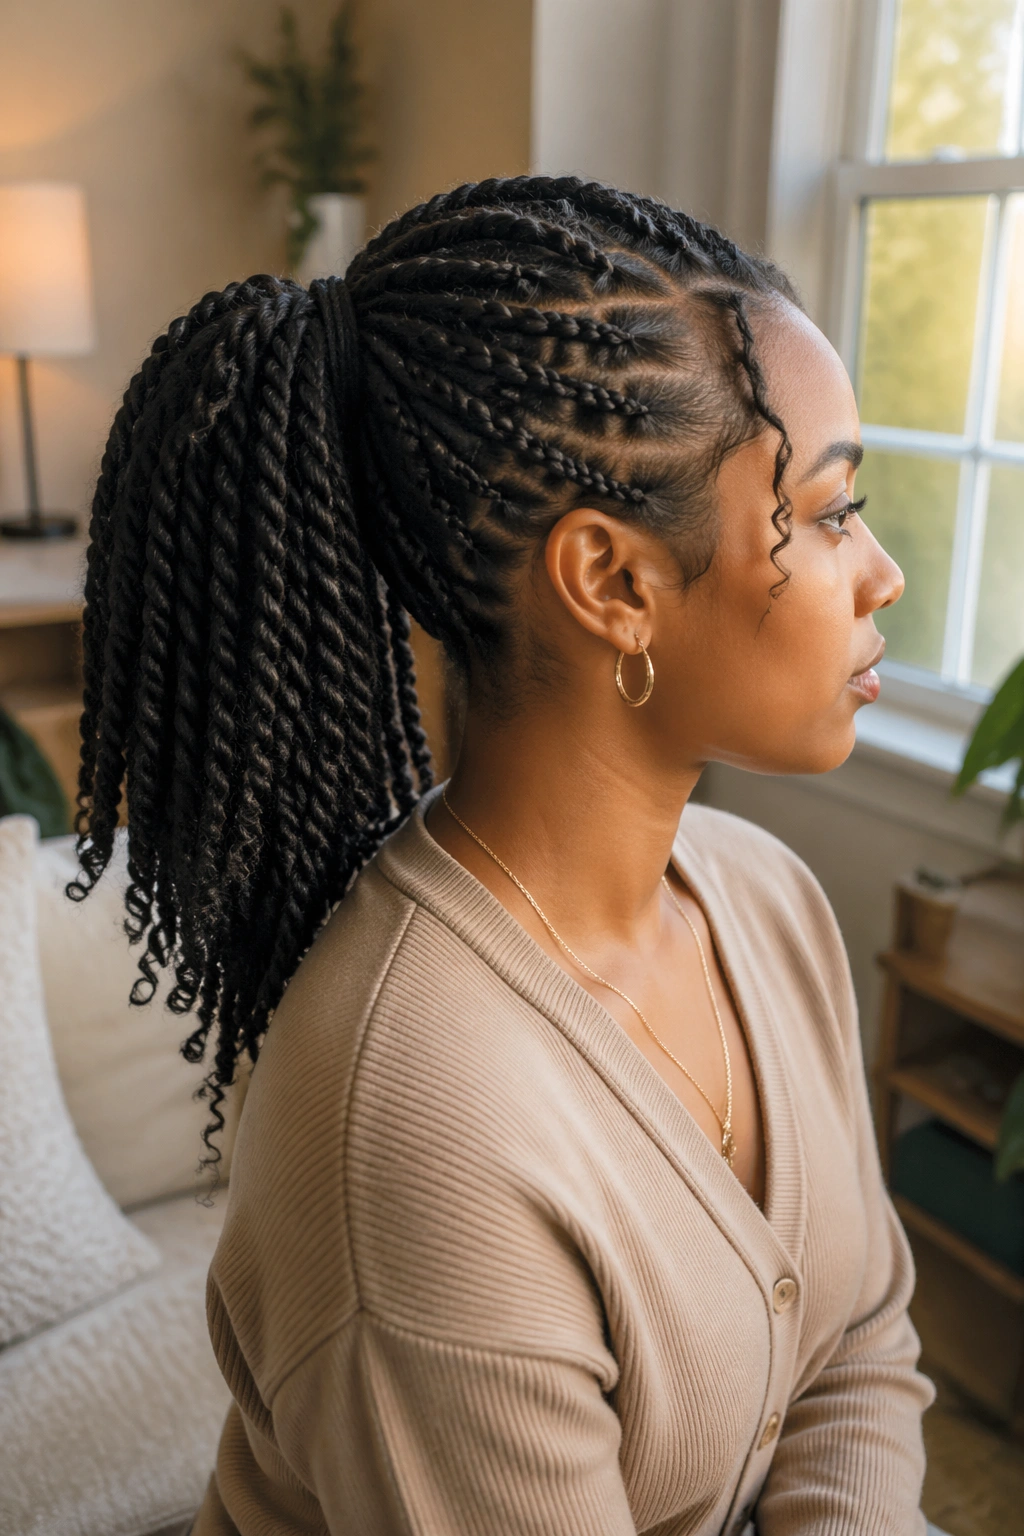
A two-strand twist ponytail gives 4A hair a rope-like finish that still shows off texture from a distance. It is a strong choice when you want something soft but not frizzy, neat but not flat.
Gather the hair first, then divide the tail into two large sections and twist them over each other all the way down. If the hair is stretched, the twist hangs longer and looks more defined. If it is shorter, the coil pattern makes the twist look thicker, which I like. It reads full instead of thin.
Small Moves That Help
- Smooth the tail with cream before twisting.
- Keep the sections even so the twist does not wobble.
- Twist the ends tighter and seal them with a flexi rod if they want to unravel.
- Finger-fluff the twist a little after it sets.
This style is forgiving, which is rare. If one side of the head is denser than the other, the twist hides the difference better than a sleek ponytail does.
9. Flat-Twist Ponytail
Flat twists into a ponytail are one of the most useful styles for 4A hair because they hold the roots down without the same finger strain as tight braids. The scalp pattern looks neat, and the ponytail gives the style a clear finish instead of letting it stop halfway.
I like this style when the hair has been stretched a bit and the sections are easy to grab. Two flat twists can meet at the back for a simple look. Four or six twists create more visual detail. The number depends on how much scalp design you want showing.
Twist Pattern Matters
If you twist in the same direction on every section, the rows usually look cleaner. Add a touch of mousse to the part lines before you begin, then smooth the twists with your fingertips as you go. That keeps the ridges defined without making the hair crunchy.
This is a good style for people who want a ponytail that lasts a few days but still feels light. It is especially nice in warm weather, because the scalp can breathe better than it does under a heavy slick-back.
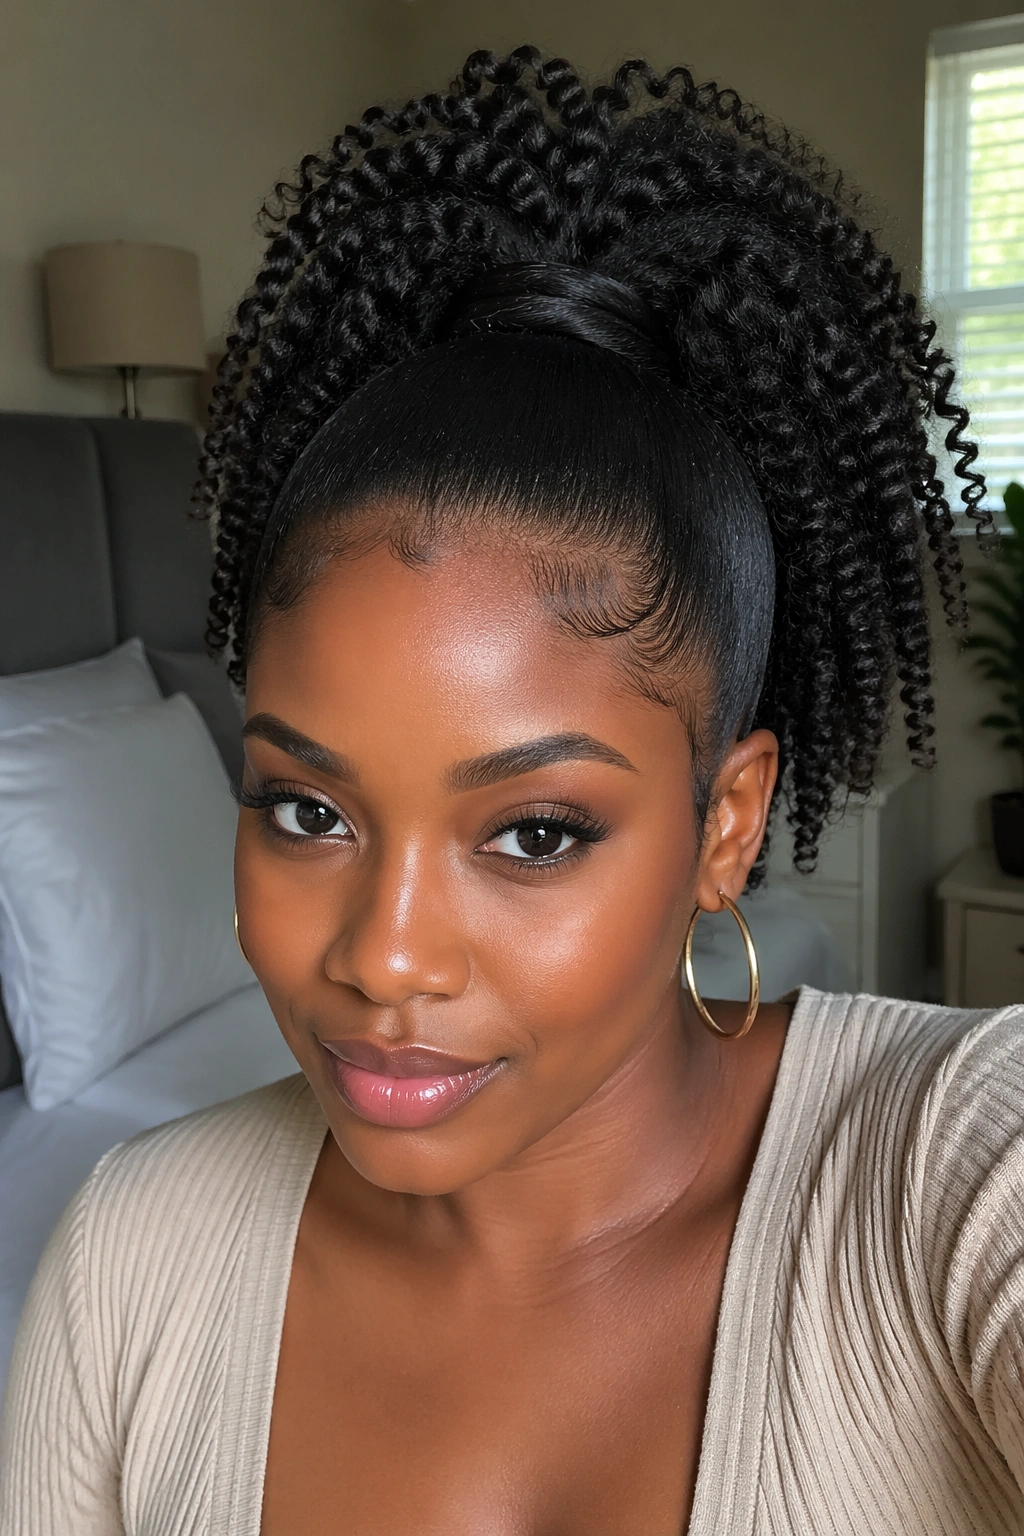
10. Pineapple Ponytail
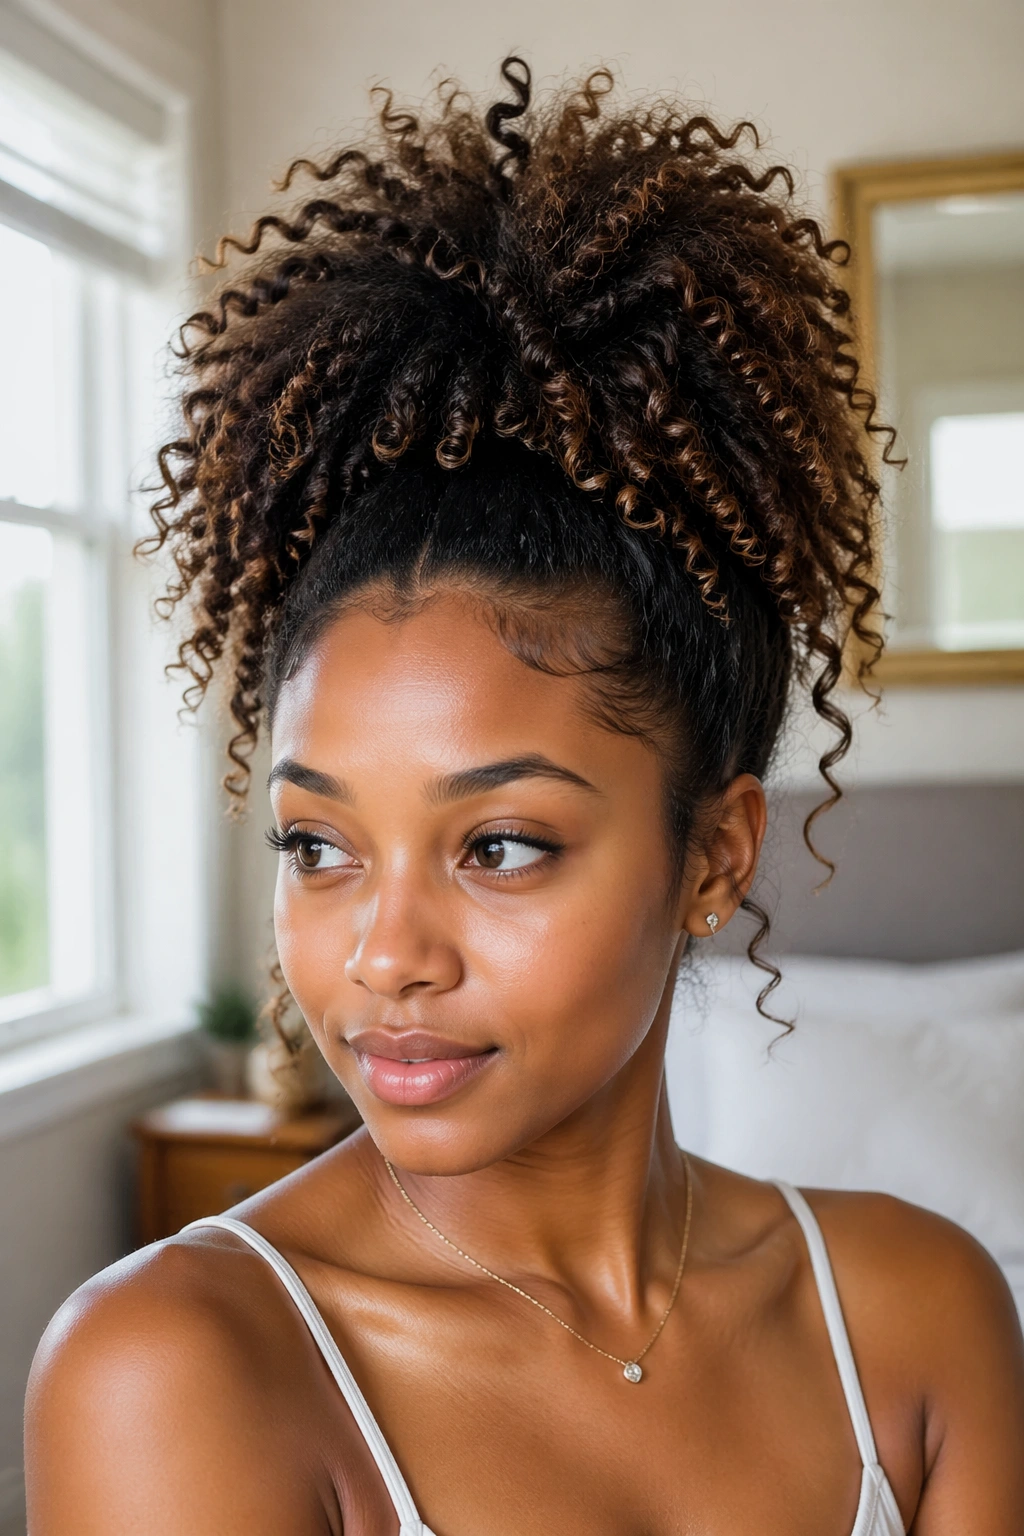
A pineapple ponytail is not just for bedtime, and I will happily argue that point. On 4A hair, it works as a high, loose ponytail that keeps curl shape intact while giving the crown a big, soft silhouette.
The placement is high, almost at the top of the head, but the hold should stay loose enough that the coils are not smashed. Use a satin scrunchie or a wide elastic and gather the hair by hand instead of brushing it into submission. That preserves the shape and avoids that stretched, dented look some people get from tight bands.
This style shines on second-day hair, twist-outs, and braid-outs because the texture already has some life in it. If the hair is freshly washed, it still works, but the curls may read smaller. A little pick at the roots, used carefully, adds lift without making the tail look messy.
Short version: big crown, soft edges, no hard lines. That is the whole charm.
11. Half-Up Ponytail
A half-up ponytail is what I suggest when the top is behaving and the rest of the hair wants to stay full. It gives you control at the crown while leaving the lower section free to show off texture.
This style works nicely on 4A hair because it does not ask every strand to do the same job. The top section gets secured and shaped; the bottom keeps its volume. If your hair is thick, half-up styles can be easier on the scalp than a full ponytail, since there is less weight hanging from one point.
The parting can be straight across, curved, or even slightly diagonal. I like a slight curve because it softens the line and feels less school-uniform. Use a small elastic or clip, but keep the base smooth enough that it does not collapse after an hour. A little root smoothing around the front helps the top section sit cleanly.
This is one of those styles that looks better when it is not overthought.
12. Stacked Double Ponytail
Stacked double ponytails are a smart trick when you want length and lift without adding extensions. The top ponytail creates height, and the lower one supports the shape so the whole style looks longer than one ponytail would.
The placement matters. The first ponytail sits near the crown. The second sits a few inches below it, hidden or partly hidden by the top section. On 4A hair, that stacking helps with density because the lower base takes pressure off the upper one. It also gives the tail more bounce.
Where the Second Ponytail Sits
- Keep it centered, not too low.
- Hide the elastic with the top layer if you can.
- Leave the bottom section a little looser for movement.
- Use the same product level on both sections so the finish matches.
This style is a little more work than a single ponytail, but the payoff is obvious. The profile looks longer from the side, and the top has more lift.
13. Wrapped Ponytail With a Hair-Covered Base
A wrapped ponytail is the difference between a style that looks done and one that looks finished. On 4A hair, hiding the elastic with a strand of hair sharpens the whole thing in a way that plain bands never quite do.
After securing the ponytail, take a small piece from underneath and wrap it around the base until the elastic disappears. Pin the end underneath with a bobby pin. That last step matters. If the pin is loose, the wrap slides by the end of the afternoon and the illusion falls apart.
I like this on sleek styles because the wrapped base creates a polished line at the back of the head. It also helps if the elastic is thick or practical-looking and you want something cleaner for work or a formal event. A touch of gel on the wrap strand keeps flyaways from sticking up.
Tiny detail, big effect. That is why this style keeps showing up.
14. Scarf-Tied Ponytail

A scarf-tied ponytail can change the whole mood of 4A hair in one move. The scarf adds color, hides the elastic, and gives the style a softer finish that feels less severe than a plain band.
Silk or satin works best because cotton catches and dries the hairline. Fold the scarf into a band, place it at the base, and tie it under the ponytail if you want the knot to stay hidden. If you want the scarf to be part of the look, tie the ends to one side or let them trail down the tail.
What to Keep in Mind
- Use a scarf wide enough to stay put, usually 2 to 3 inches folded.
- Match the scarf weight to the hair density.
- Tie it snugly, but not so tight that the base dents.
- Smooth the front before tying so the scarf sits flat.
This one works on high, low, and side ponytails. That flexibility is half the appeal.
15. Curled-Ends Ponytail
Want a ponytail that feels dressed up without demanding a full set? Curled ends do most of the work. On 4A hair, they create a clean contrast: smooth or stretched roots, then soft, springy ends that move.
If the hair is long enough, set the ends on flexi rods or perm rods after gathering the ponytail. Four to eight rods are usually enough, depending on density and length. Let them dry fully before taking them down. If they come out damp, the curl falls fast and the ends get fuzzy instead of defined.
This style looks especially good on ponytails that are otherwise simple. A low or mid-height base keeps the curls visible, while a high base gives them more bounce. I would not overload the ends with heavy oil before setting. That tends to weigh them down and steal the shape.
One clean line at the base. Soft curls at the bottom. That contrast does a lot.
16. Zigzag-Part Ponytail
A zigzag part can rescue the plainest ponytail. On 4A hair, it adds shape at the scalp without asking the ponytail itself to do anything dramatic.
Use the tail of a comb and make the zigzag line slowly. If the lines are uneven, the style looks rushed. The parting should be crisp enough that the pattern shows from a normal viewing distance, but not so tiny that it becomes a headache to create. I like this best on a ponytail that sits high or in the middle of the head, because the design stays visible there.
This style works well for kids, but it is not childish unless you make it that way. A clean zigzag with a sleek base and a full tail can look polished and playful at the same time. Use a little gel along the part and press the sections flat with your fingers before securing the ponytail.
The design is the point. Do not bury it under too much hair.
17. Mohawk Ponytail
A mohawk ponytail on 4A hair looks bolder than it is to create. The sides stay sleek or braided down, and the center section rises into a ponytail that gives the whole head height.
This style is one of my favorites for dense hair because the center strip can hold a lot of volume without the sides competing with it. You can smooth the sides with gel, braid them flat, or twist them back. Each version changes the mood. Braids read more structured. Smooth sides feel sharper. Twists land somewhere in between.
The crown section should sit high enough to create shape, but not so high that it pulls the forehead tight. If the front feels strained, the style will show it right away. I would rather see a slightly looser mohawk with a healthy hairline than a perfect one that hurts.
A quick wrap with a scarf helps the sides lay down before you leave.
18. Crown-Braid Ponytail
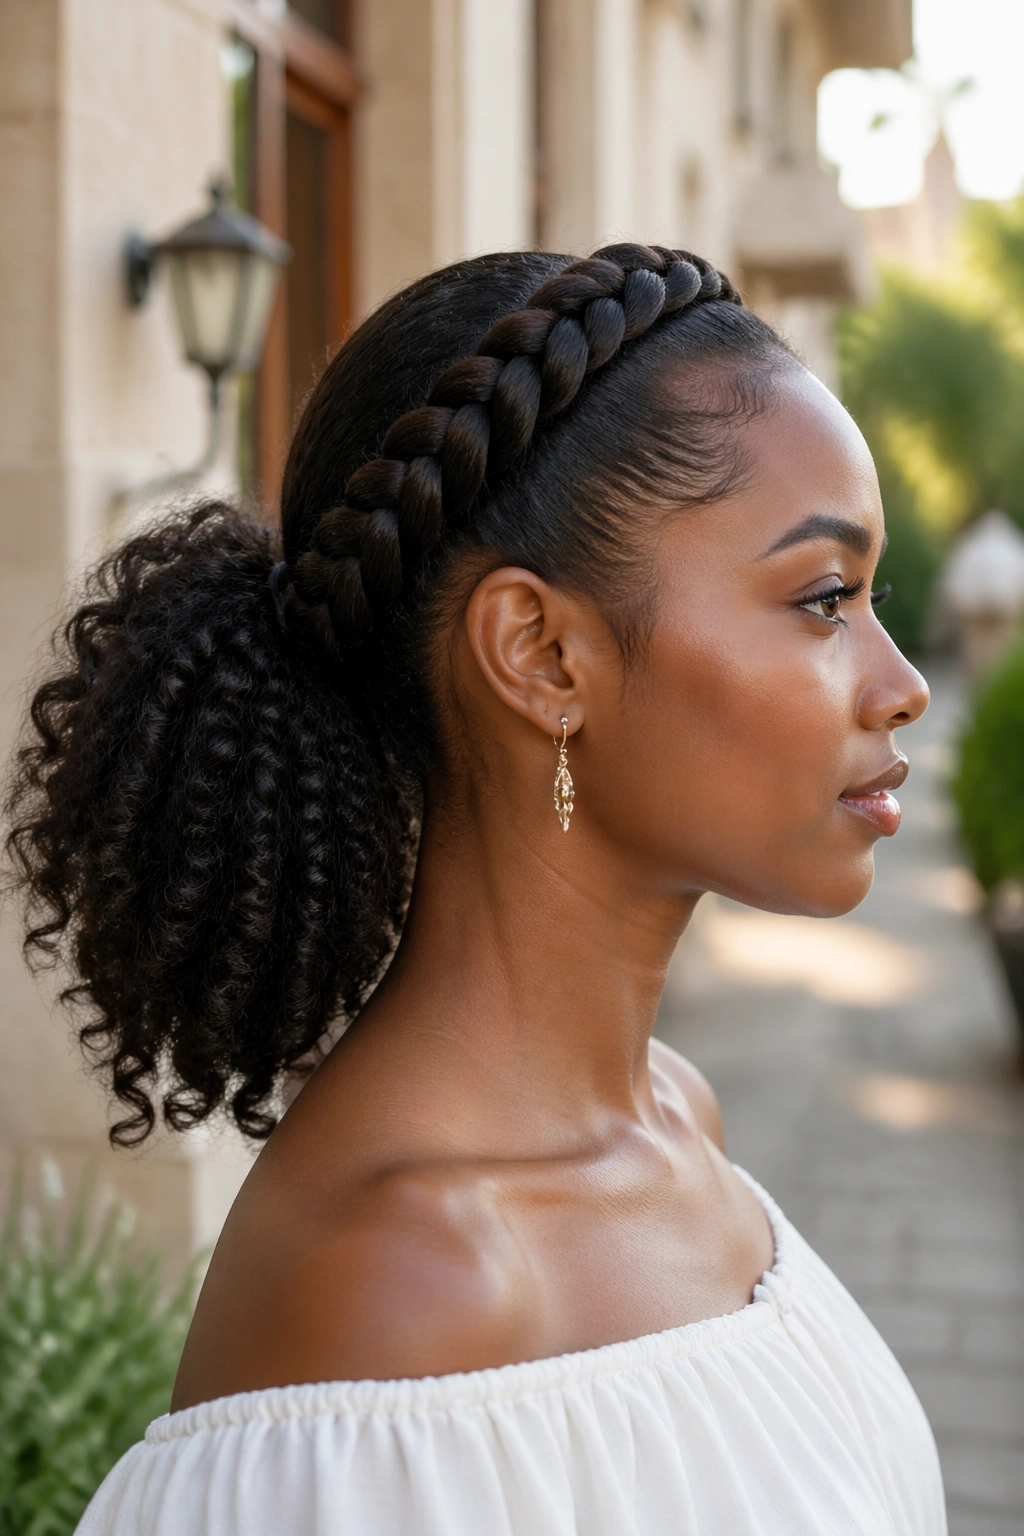
A crown-braid ponytail gives you the face-framing feel of a headband without needing one. On 4A hair, it is especially useful because the braid adds a pretty border while the ponytail keeps the rest of the texture moving.
Start the braid or flat twist near one temple and bring it across the front hairline toward the other side, then gather everything into a ponytail at the back. If braiding across the whole crown sounds tiring, a flat twist can do the same job with less strain on your fingers. I use that shortcut when the hair is thick and I do not want to spend half the morning on the front section.
This style works nicely for events, but it also holds up on ordinary days if the base is secured well. A small amount of mousse on the braided section helps keep fuzz down. If the braid ends are short, tuck them under the ponytail or pin them flat.
It looks more complicated than it is. That is a good thing.
19. Double Ponytail

Double ponytails are built on a simple idea: one ponytail lifts the hair, and the second one helps it look longer. On 4A hair, the stacked effect can be more useful than adding extensions if you want shape without extra weight.
The top ponytail usually sits near the crown. The lower one goes a few inches below it. Keep both bases centered so the silhouette stays neat. If the lower section sits too far down, the style starts to look like two separate ponytails instead of one long shape.
Why It Helps
- It distributes weight better than one heavy ponytail.
- It gives shorter hair a longer line.
- It keeps the top from collapsing.
- It works with stretch or natural texture.
The trick is to blend the two sections so the seam is hidden. A little fluff at the top and a smooth wrap at the lower base usually does it. I like this one when I want the look of a fuller ponytail without pulling the crown too hard.
20. Micro Ponytail Cluster
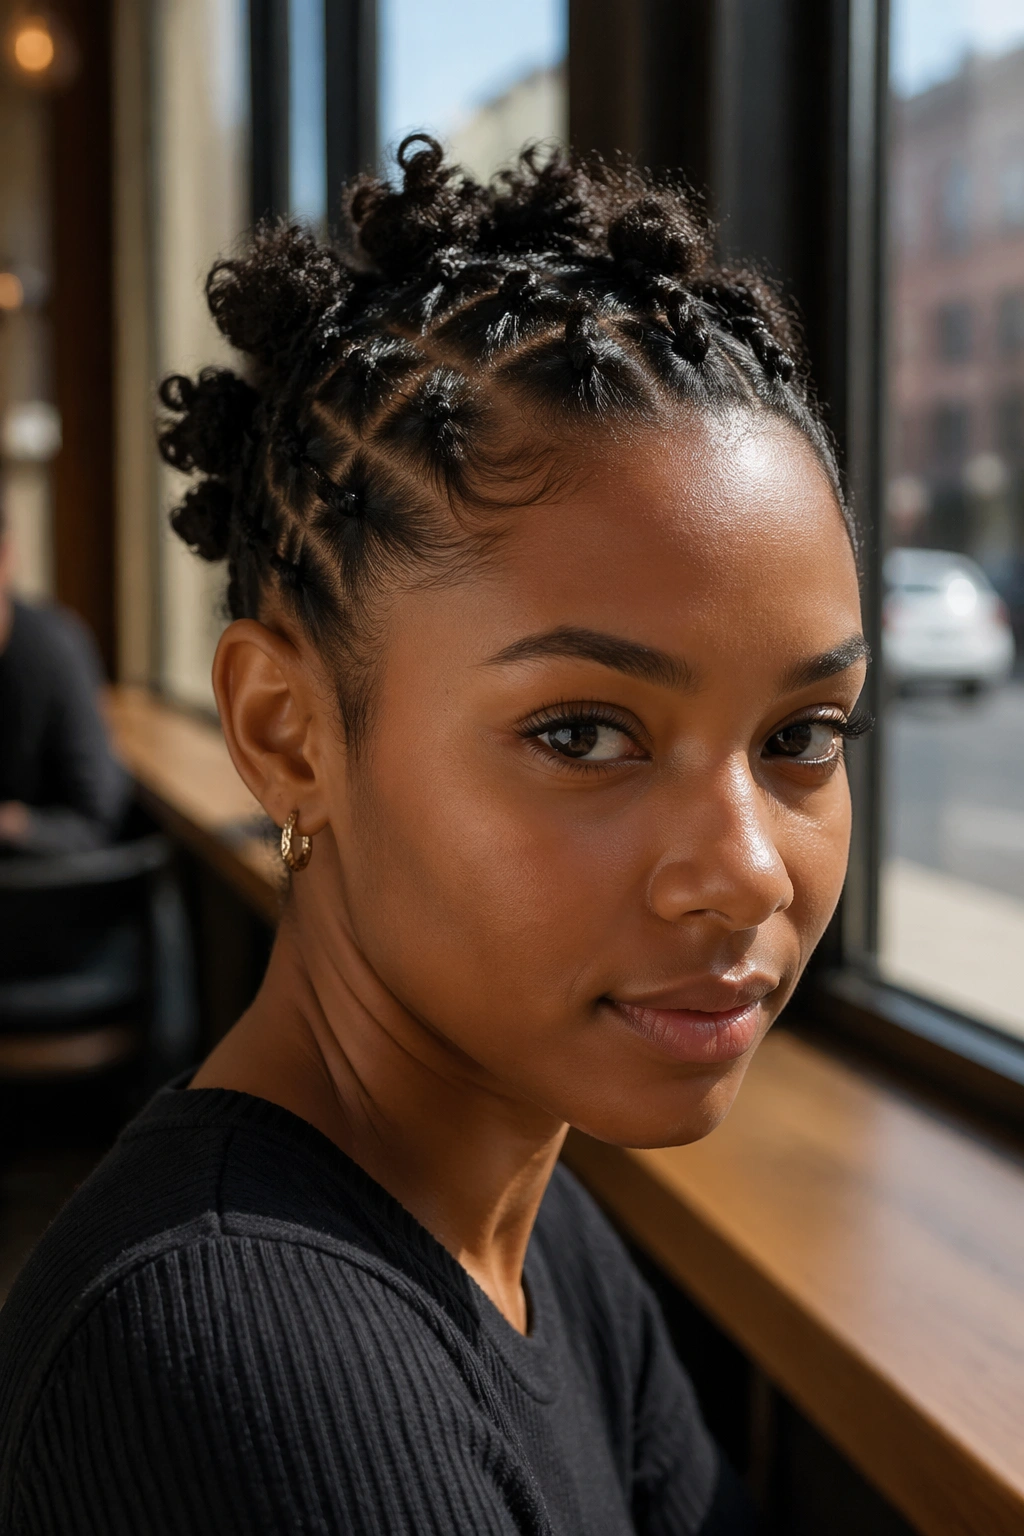
A micro ponytail cluster looks intricate because the scalp work does most of the visual lifting. The style uses several tiny sections gathered into small ponytails, then shaped into one bigger overall look or left as a clustered pattern.
On 4A hair, this works well when the hair is thick and you want more control over the bulk. Smaller sections are easier to secure cleanly, and they reduce the chance of one heavy base dragging everything down. It is also a nice option when the hairline needs a gentler approach, because the tension gets spread around.
This is not the fastest style on the list. No point pretending otherwise. But if you like detail and do not mind parting your hair carefully, the result can be striking. Use the tail of a comb, keep the sections even, and do not skip edge control on the front if you want the pattern to stay visible.
Patience shows here. So does a steady hand.
21. Claw-Clip Ponytail
Some mornings need speed, not ceremony. A claw-clip ponytail gives 4A hair a lifted shape in minutes and keeps the scalp from feeling pinned down by a tight elastic.
Gather the hair into a mid or high ponytail, twist once, and clip it up so the ends spill out. A large clip with a strong spring holds dense hair better than a tiny decorative one. If the teeth are too short, the style slips. That part is not subtle. The clip either grabs the hair or it does not.
This works especially well on stretched hair, puffed hair, or day-old twist-outs. You are not trying to flatten everything into place. You are trying to keep the shape secure while letting the texture stay loose. If the front needs more control, smooth only the hairline and leave the rest alone.
A claw clip makes the whole thing feel less serious. Sometimes that is exactly the point.
22. Twist-Out Ponytail
A twist-out ponytail keeps the definition in the texture while giving the hair a cleaner overall shape. On 4A hair, that makes it one of the easier styles to wear when you want to show the coils but still keep them out of the face.
Gather the hair with your hands rather than a brush so the twist-out pattern stays intact. If you brush it hard, the ridges melt and the style loses its charm fast. A satin scrunchie or a soft elastic works better than a narrow band because it does not crush the curl clumps at the base.
This style can sit high, mid, or low. A high version looks a little bolder. A low one feels softer and keeps the top more controlled. I like a light mist of water on the hands before gathering, not on the whole head, because too much moisture can swell the curls and make the style fuzzy.
The good part is obvious. The ponytail keeps texture. The rest stays tidy.
23. Braid-Out Ponytail
A braid-out ponytail reads a little more structured than a twist-out one. The braid-out pattern lays flatter, so the texture in the tail looks defined but less fluffy, which is handy if you want contrast between the crown and the ends.
This style is useful on 4A hair when the braid-out is already giving you strong wave or ridge patterns. Pulling it into a ponytail lets the texture stay visible while the base looks neat. You do not need to smooth the tail into perfection. In fact, a little looseness makes the braid-out shape easier to read.
I like this for medium-length hair because the tail still has enough body to look full after it is gathered. If the hair is very thick, use your fingers to separate the clumps a little before securing it. That keeps the ponytail from turning into one heavy block.
It is a tidy style with a soft edge. Not flashy. Just solid.
24. Feed-In Braid Ponytail
If you like scalp detail, feed-in braids are hard to beat. The braid starts slim, grows gradually, and can lead straight into a ponytail or a braided tail that hangs off the back.
On 4A hair, the feed-in method helps the front look neat without making the first inch of the braid bulky. That matters. A braid that starts too thick can sit awkwardly at the hairline and feel heavy fast. Feed the added hair in small amounts, keep the parting clean, and stop if the scalp feels stressed. Tight braids are not a status symbol.
Keep These Things in Mind
- Make the parts even before you start.
- Add hair in small, steady sections.
- Use light oil only on the scalp.
- Braid the tail long enough to move, not so long it drags.
This style can stay sharp for a while, which is why people keep coming back to it. It also photographs well without needing much extra decoration.
25. Rope-Twist Ponytail
Why choose rope twists instead of a plain braid? Because they show off texture in a different way and can be faster if your fingers are used to twisting instead of plaiting. On 4A hair, a rope-twist ponytail looks smooth at the base and spiraled through the tail.
You can do one large rope twist down the whole ponytail or create several smaller twists and gather them together. The single-twist version looks clean and long. The multiple-twist version gives more fullness and movement. I prefer the smaller twists when the hair is very dense, because they dry faster and stay neat longer.
Use a little cream or gel on the sections before twisting so the strands do not separate. If the ends want to unwind, coil them around your finger or secure them with a small elastic. The style is sturdy when it is set properly. It gets frizzy when the twist is too loose at the start.
Smooth at the roots, spiral in the tail. That is the shape to aim for.
26. Beaded Ponytail
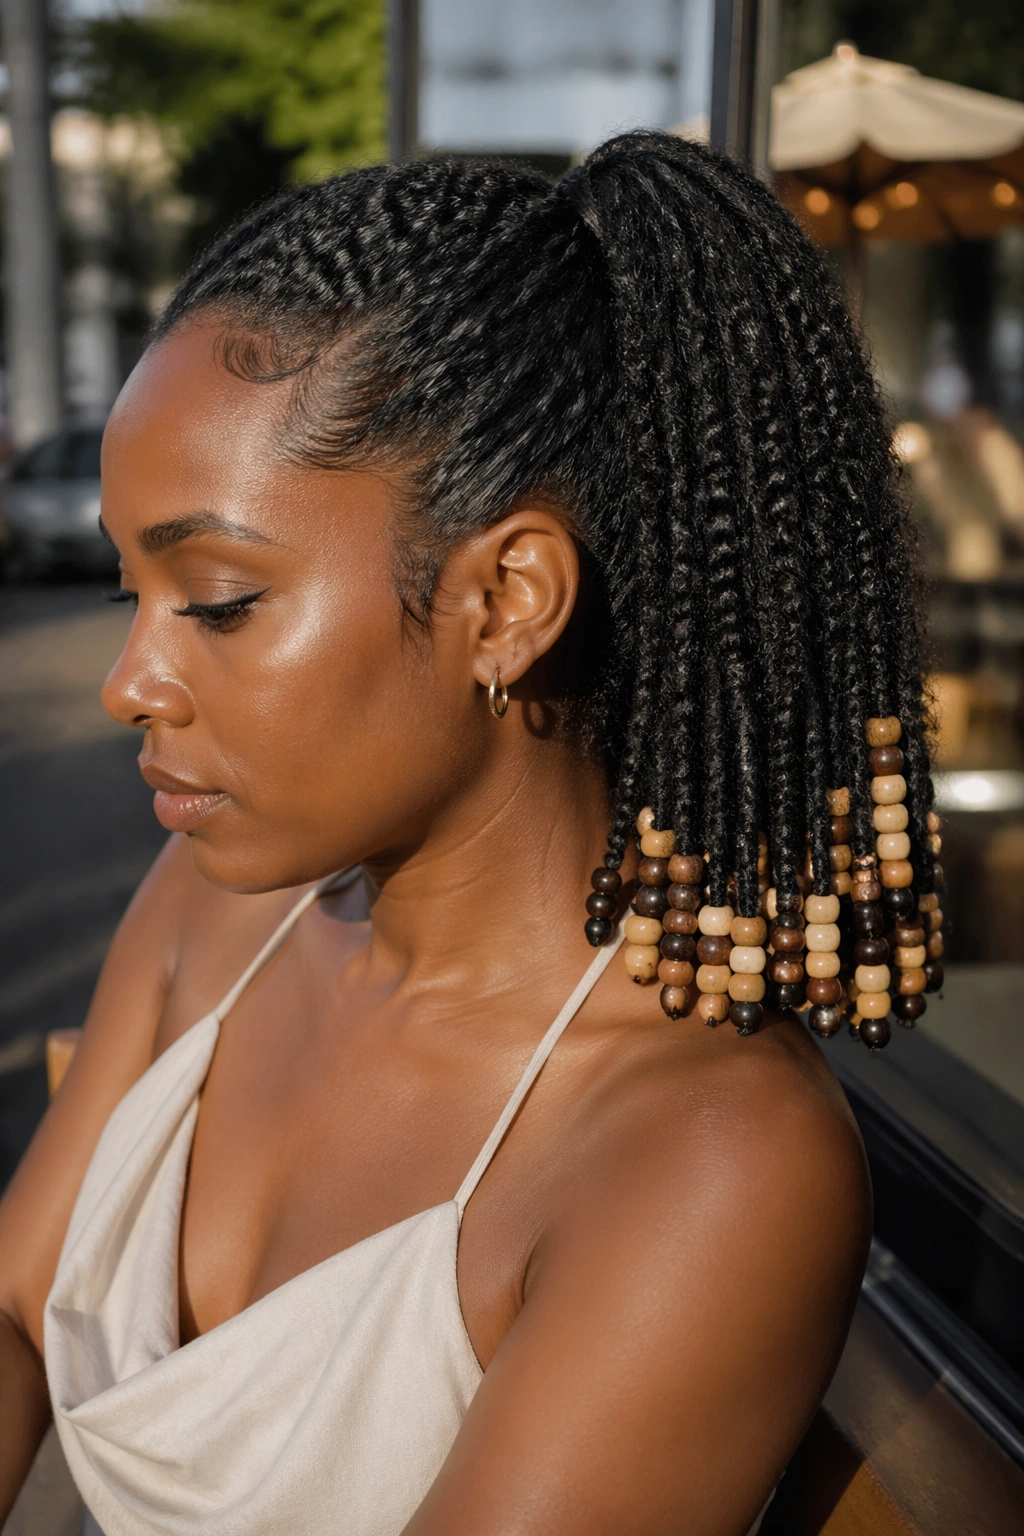
Beads change the sound of a ponytail. They click softly, swing at the ends, and make 4A hair feel festive in a way that does not need much else. A beaded ponytail works especially well on braided or twisted sections, where the beads have something firm to sit on.
Do not overload the ends. That is where people go wrong. Too many beads can make the ponytail drag, especially on finer hair or shorter sections. A few medium beads at the end of each braid or twist are enough to give the style movement and weight. If you want the look to stay balanced, place the heavier beads closer to the bottom, not all over the head.
This style can read playful or polished depending on the bead color and size. Wooden beads feel earthy. Clear or metallic ones look sharper. Bright colors lean younger and more casual. There is no single right answer, just a question of how much attention you want the ponytail to grab.
The right bead makes the finish feel deliberate. The wrong one makes the hair sag.
27. Wash-and-Go Ponytail
A wash-and-go ponytail is what happens when you want the coil pattern to stay visible and the ponytail to feel alive instead of overly controlled. On 4A hair, this can be one of the prettiest ways to wear the texture because the shape is honest.
Use your usual leave-in, define the curls with gel or cream if that is your routine, then gather the hair where it wants to sit. That last part matters. Forcing a wash-and-go into a high, tight base can ruin the definition and make the roots puff strangely. If the hair naturally wants a lower ponytail, respect that. A little stretch at the crown with banding can help if you want more lift without flattening the curls.
This style looks best when the curls are clumped but not crushed. A gentle finger lift at the roots adds height. A satin scrunchie keeps the base from denting. And if you want the front tidier, smooth just the first inch or two of hairline, not the whole head.
It is the most honest style in the bunch. That is why it works.