A baseball cap can either rescue a curly-hair day or flatten it into something you barely recognize. The difference usually has less to do with the hat and more to do with where the curls are allowed to sit, bend, and breathe.
Curly hair has its own memory. If the crown gets crushed, the roots stay bent. If the brim sits too low, the front pieces lose shape fast. If the cap is stiff or shallow, the whole look can go from sporty to awkward in about five minutes.
The styles that work best are the ones that make peace with the hat instead of fighting it. Think low ponytails, loose puffs, side parts, braids, soft buns, and a few face-framing pieces left free on purpose. Those choices keep the cap looking like part of the outfit, not a last-minute fix.
Nope, the cap should not feel like a clamp.
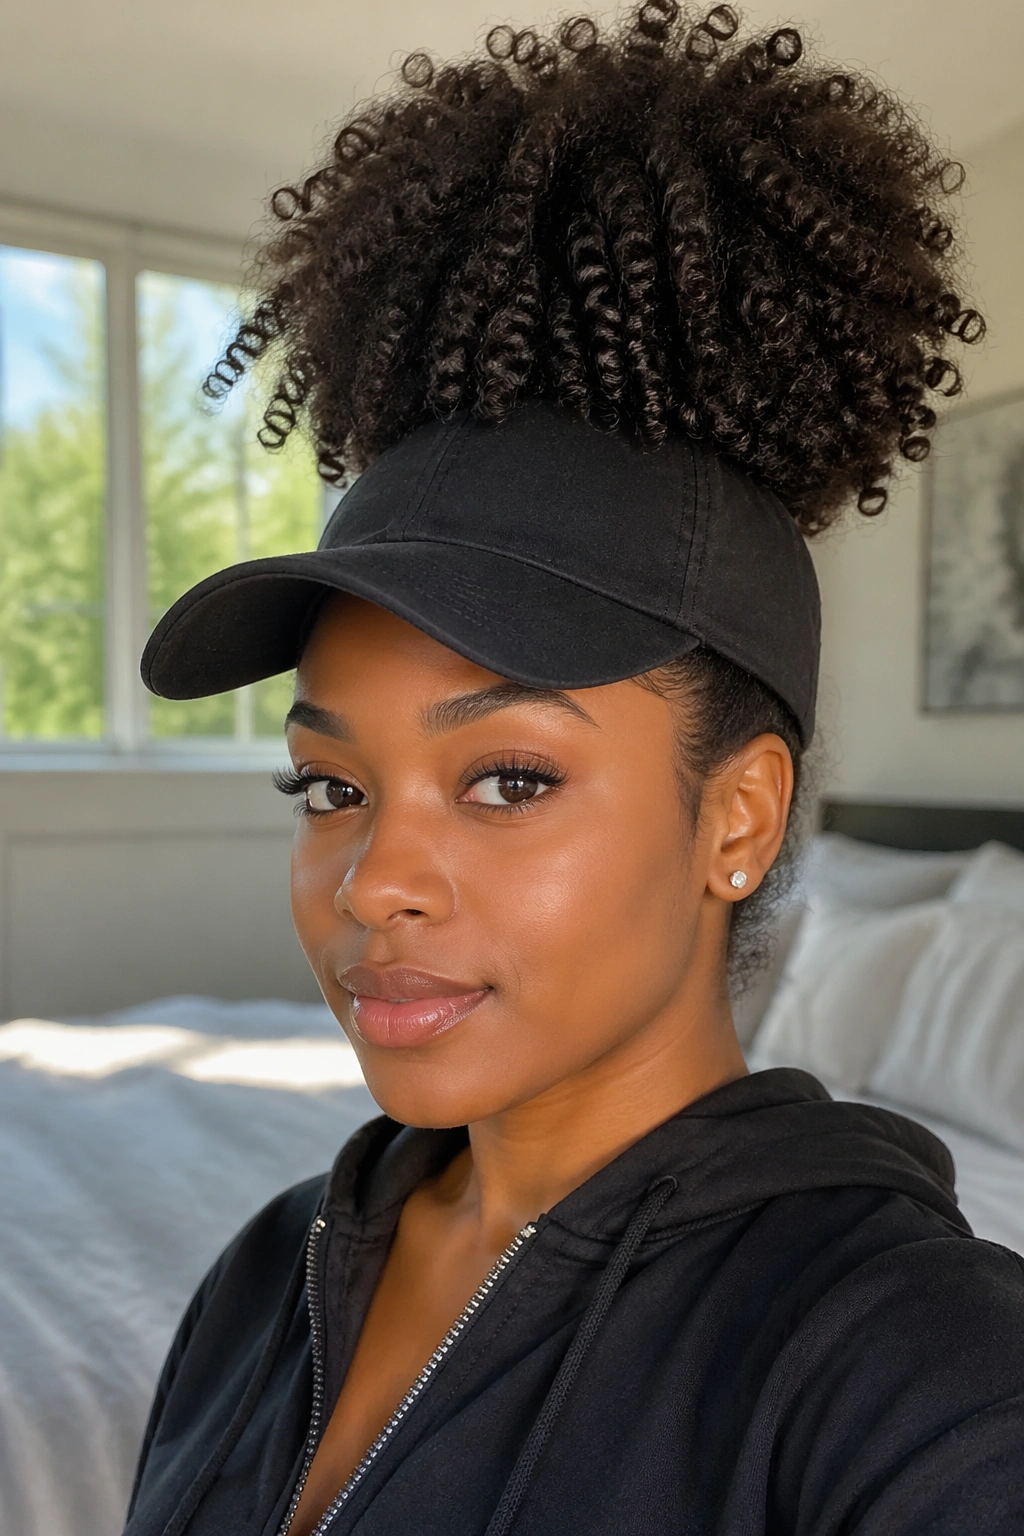
1. The High Puff That Clears the Brim
A high puff is one of the easiest baseball cap hairstyles for curly hair because it keeps the volume where the hat can’t crush it. The curls stay lifted, the shape stays visible, and the brim gets its own space instead of flattening everything at the front.
The key is placement. Gather the curls high on the crown with a soft satin scrunchie, then let the puff stay loose instead of pulling it tight like a ponytail. You want the cap to sit just at the hairline, not on top of the puff itself. If your hair is dense, leave a few curls out around the temples so the style still looks soft.
This works especially well with longer curls and tight coils that naturally want to expand. A little leave-in conditioner or curl cream at the roots helps the puff hold its shape, but don’t load the front with product or the sweatband will pick it up. That’s messy in a way nobody asked for.
The best part? It still looks good when the cap comes off. The puff already has height, so you’re not stuck trying to rebuild the whole shape from scratch.
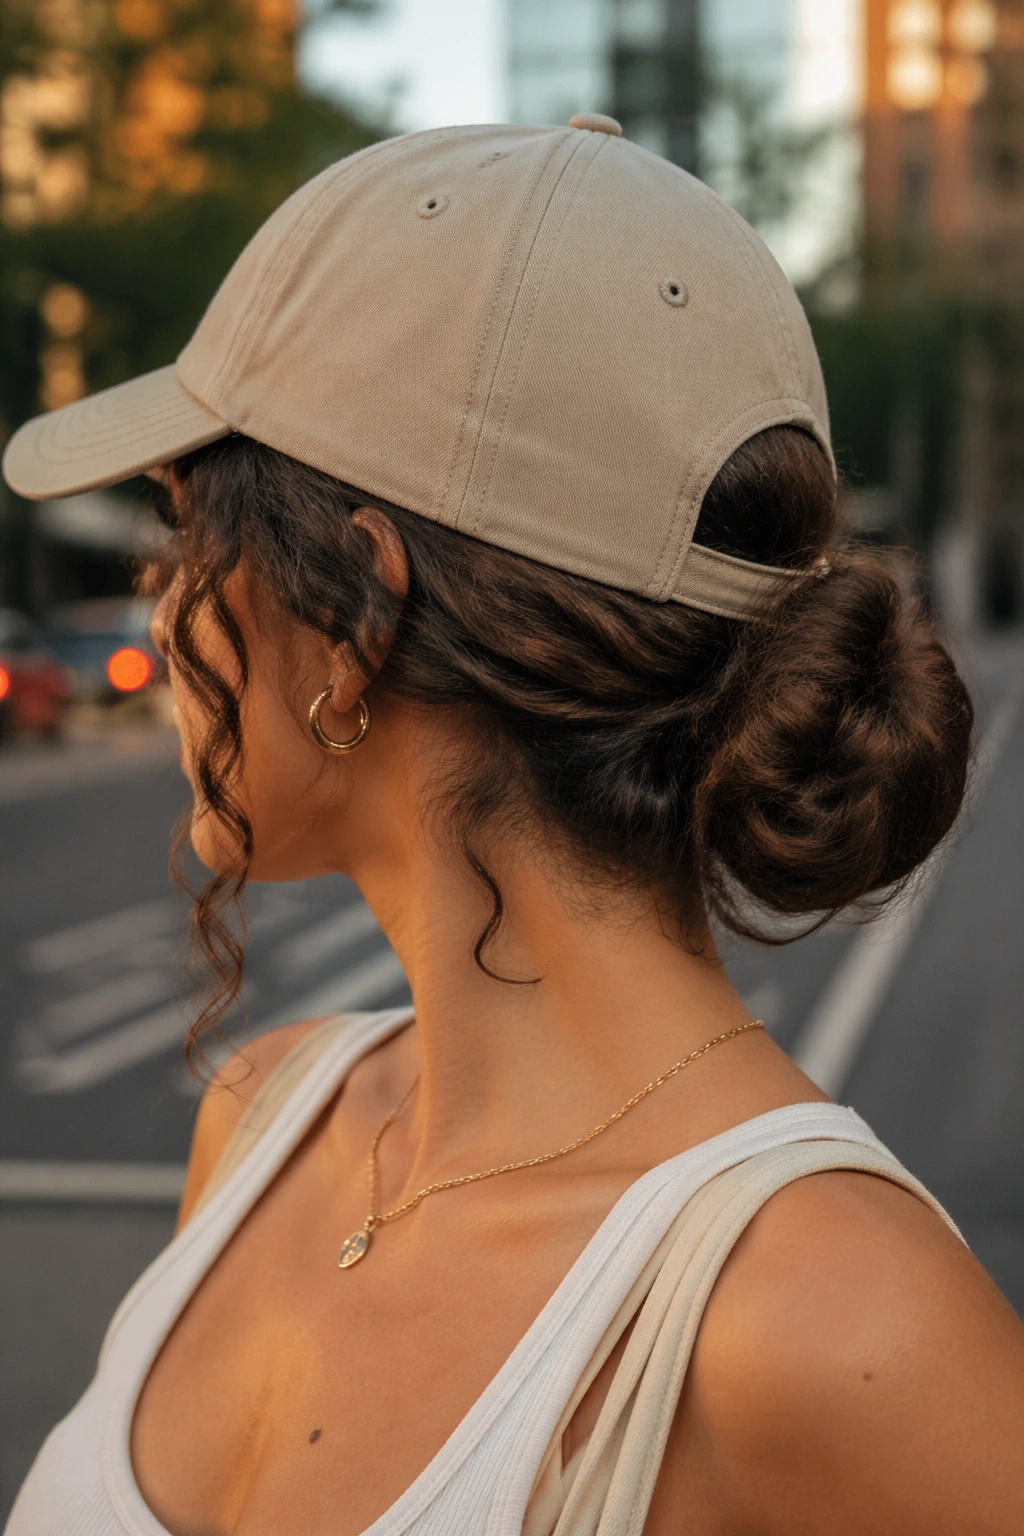
2. The Low Ponytail Through the Back Opening
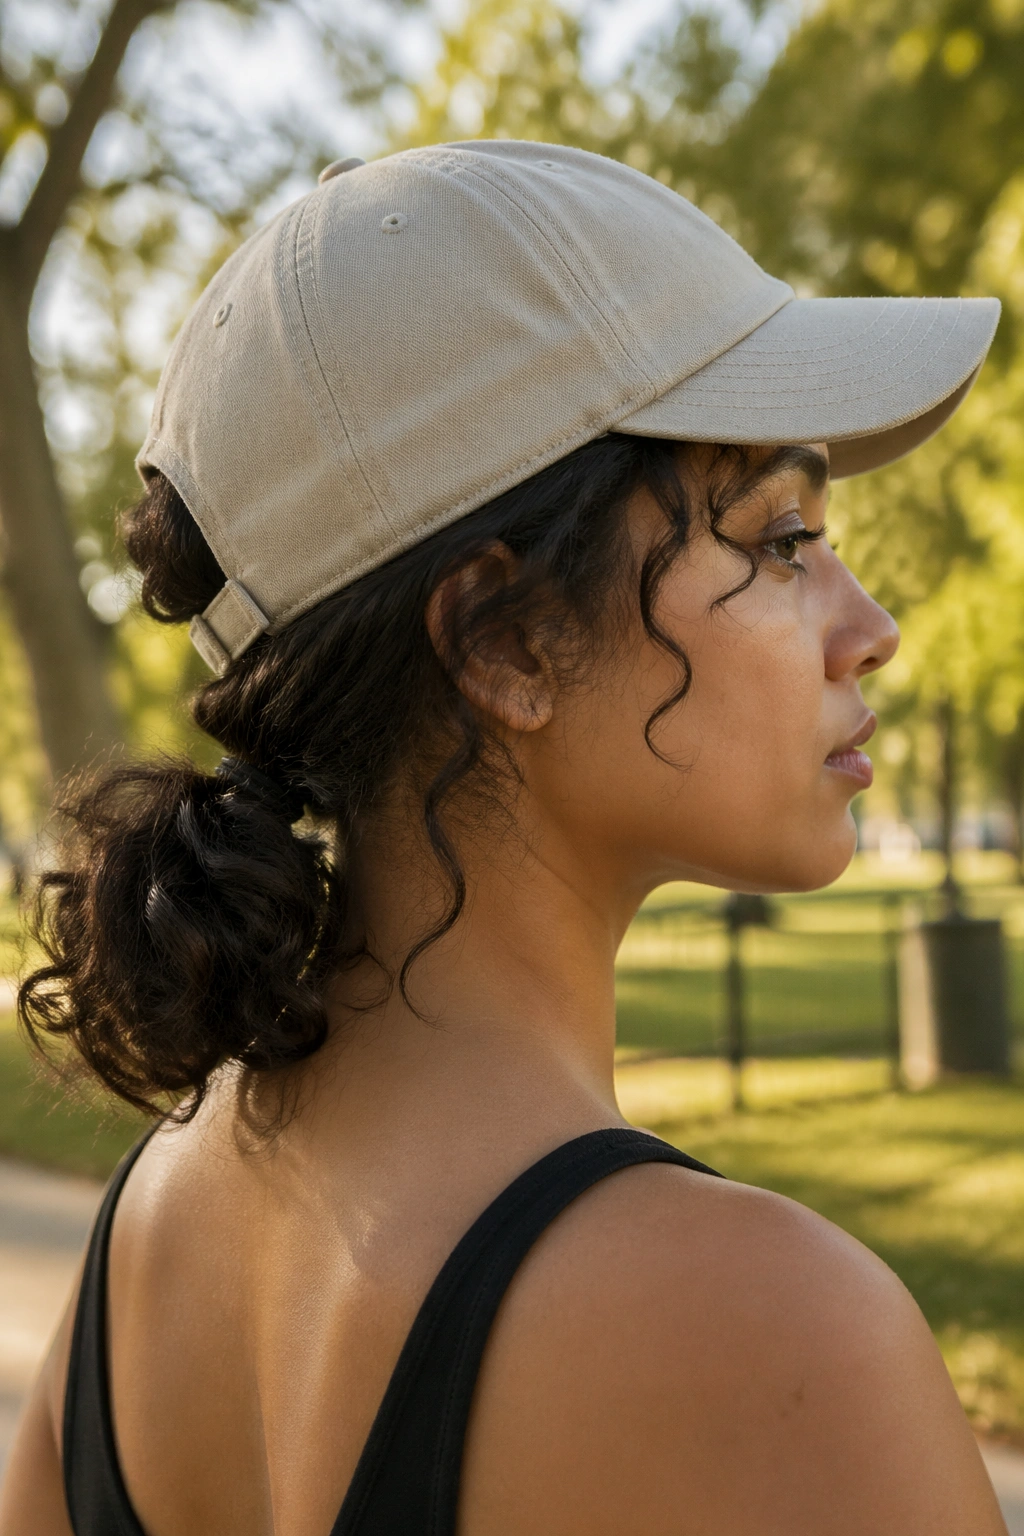
If your cap has a back opening, a low ponytail can be the cleanest option. It keeps the curls controlled, keeps the neck cool, and makes the whole look feel intentional rather than crowded.
Start with a low ponytail at the nape or just above it, depending on where the cap sits on your head. Use a soft elastic, not a tight one, because curly hair dents fast and hates being squeezed. If the ponytail is thick, wrap a small curl-friendly tie around it once or twice and stop there.
Then pull the ponytail through the back opening. If the closure is Velcro or a metal slider, make sure the hair isn’t rubbing against the rough part. That tiny detail matters more than people think. Friction at the back of the head is where curls get frizzy first.
What makes it work
The low ponytail is best for errands, workouts, travel days, and any time you want your curls to stay out of your face. It also works nicely if your hair is day-two or day-three and you don’t want to refresh the whole head.
A small tip I like: twist the ponytail loosely before it goes through the opening. It keeps the ends from tangling and gives the style a little more shape when the cap moves around.
3. The Half-Up, Half-Down Cap Look
Half-up, half-down is the move when you want some volume free and some of it contained. The cap covers the crown, the lower curls stay loose, and the style ends up looking relaxed without feeling unfinished.
Pull the top section back with a small claw clip, a satin scrunchie, or two bobby pins crossed in an X. Keep the top section loose enough that the cap doesn’t press a sharp dent into it. The lower half can stay down in its natural curl pattern, which is nice if you like your lengths to show.
This style works best when the hair underneath has a little definition. If the curls are freshly washed, let them dry enough that they don’t puff up under the hat and misbehave later. If they’re already a little stretched, even better. The cap will sit more smoothly.
It’s also one of the few looks that feels balanced with a structured snapback. The hat gives the top half a cleaner line, and the loose bottom half keeps the whole thing from looking too stiff. That contrast is doing a lot of work.
4. The Deep Side Part With One Side Tucked
A deep side part changes the mood of a cap fast. Instead of flattening the whole front, it gives the curls direction, which makes the hat look more deliberate and less like an afterthought.
Push the part far to one side, then tuck the smaller side behind your ear. Leave the fuller side loose so it can frame your cheek and jaw. The cap should tilt slightly toward the part, not sit dead center like a helmet. Small angle. Big difference.
This is a good choice for shorter curls, shoulder-length hair, and curly bobs that need a little shape around the face. It also helps when one side of your hair has more curl definition than the other. Rather than fighting the unevenness, you use it.
Don’t brush the side that’s out. Finger-shape it. A brush often strips out the bend you actually want to keep. The goal is that the curls look soft and a little messy, but still planned.
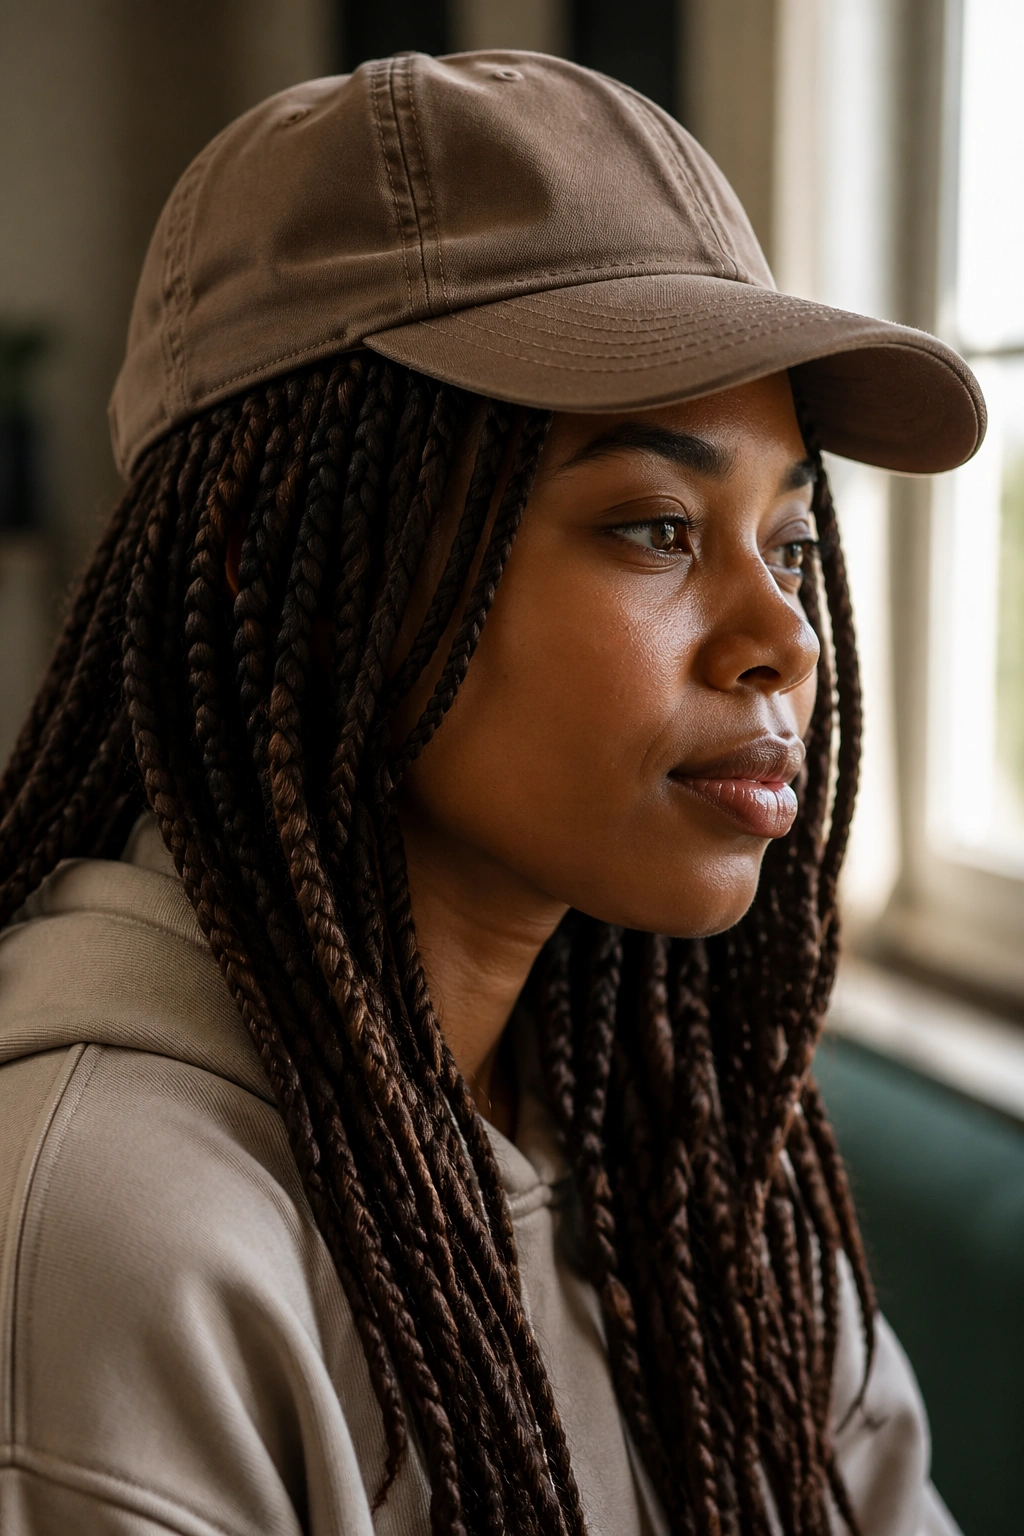
5. Two Low Braids for a Clean, Sporty Shape
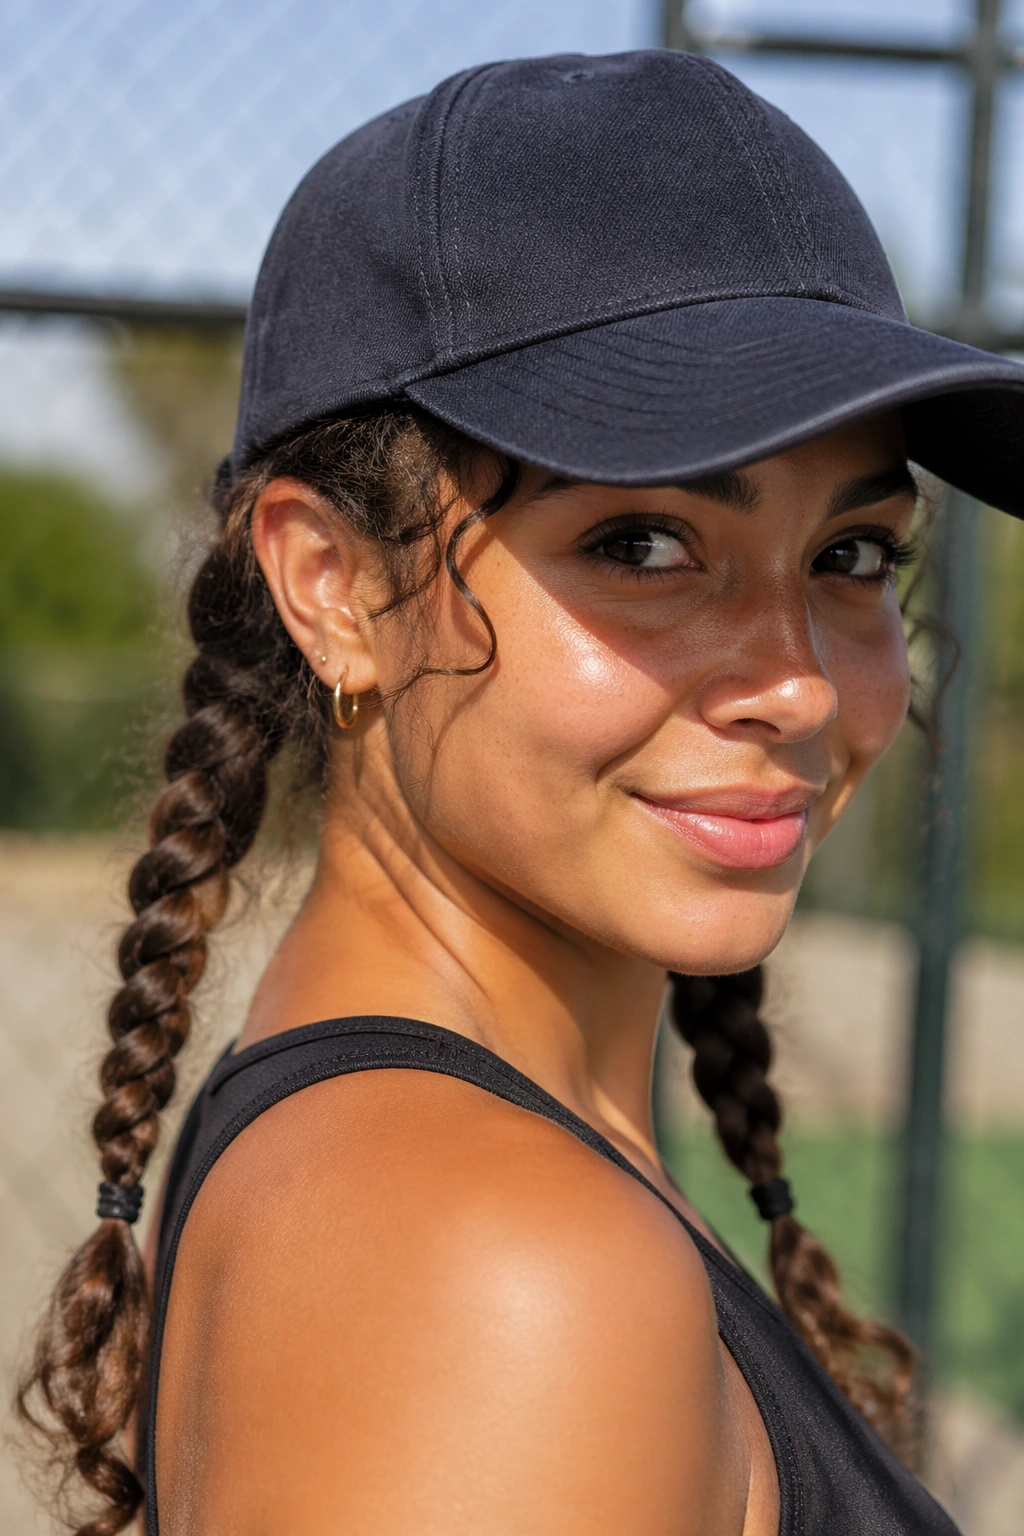
Two low braids are practical, neat, and better for curly hair than people give them credit for. They keep the texture stretched, reduce tangling, and sit well under or behind a cap without creating a bulky crown.
Part the hair down the middle, then braid each side loosely from about ear level to the ends. If your curls are thick, keep the braids a little loose so they don’t feel tight after a few hours. Tight braids plus a cap can make the scalp sore fast. Nobody needs that.
The cap can sit just above the braid roots, or the braids can hang through the back opening if your hat allows it. Either way, the shape stays tidy. This is especially handy for active days, humidity, or second-day curls that need structure more than they need volume.
A small note on finish
Use clear elastics or soft ties at the ends. If the braid ends are dry, smooth a drop of lightweight cream or oil on just the last inch or two. That keeps the tails from looking fuzzy without making the rest of the hair greasy.
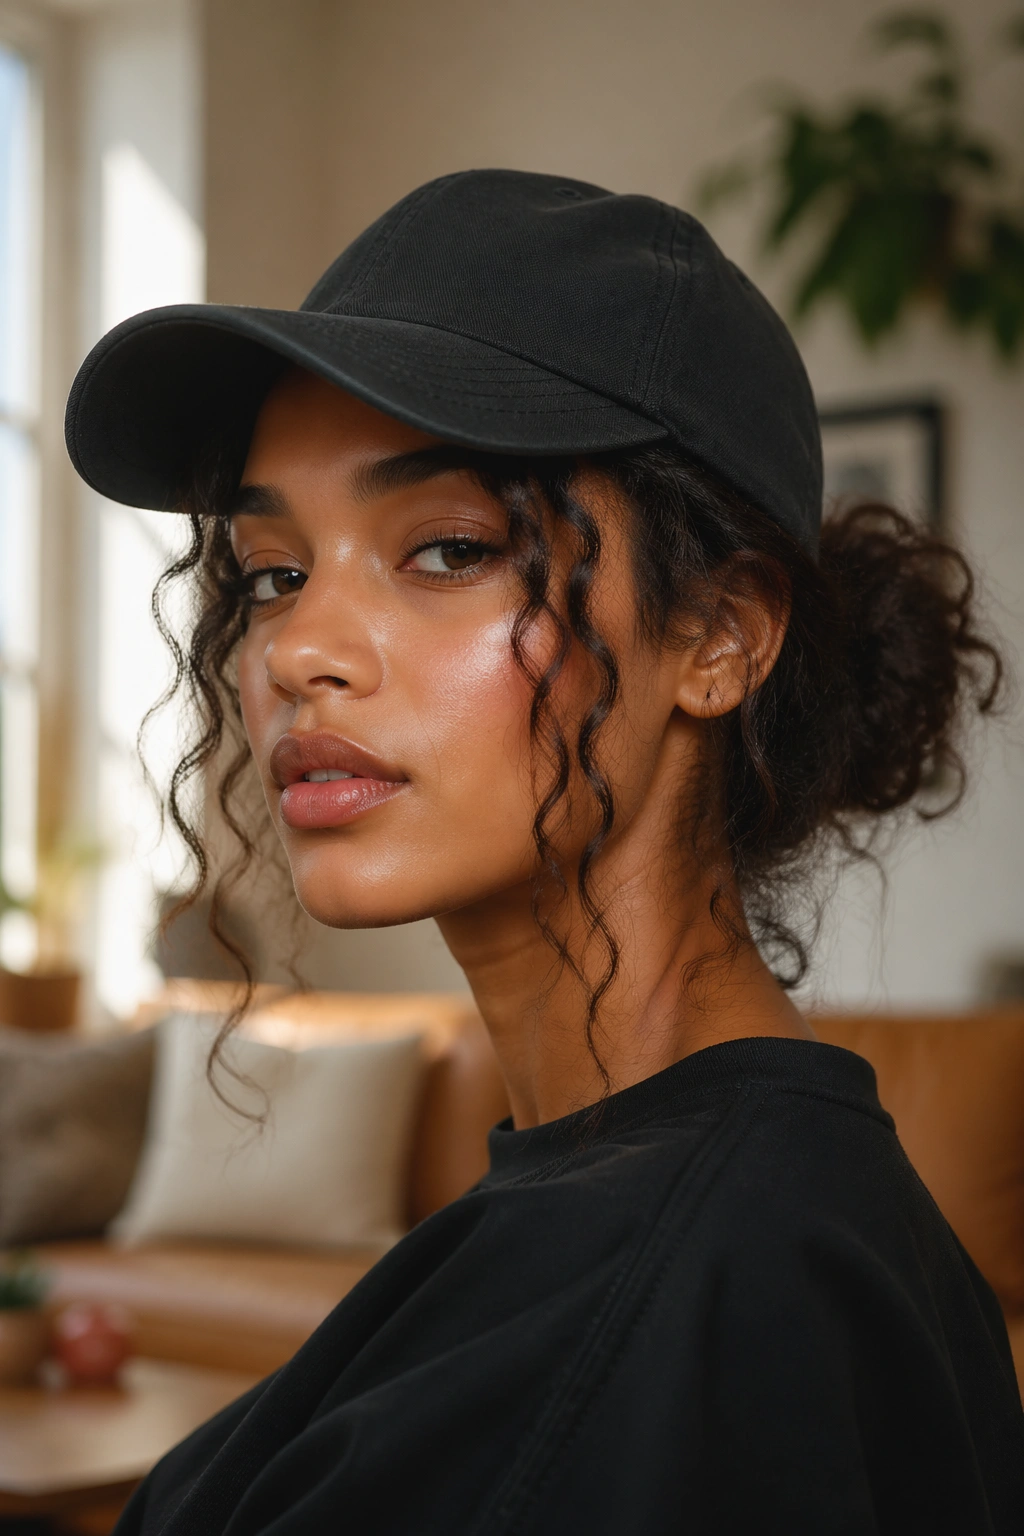
6. The Soft Low Bun at the Nape
A low bun is the more polished cousin of the ponytail, and it plays well with baseball caps when you keep it soft. The bun sits low enough that the hat can rest without fighting a big lump, and the curls stay contained in a shape that feels tidy.
Gather the hair at the nape and twist it into a loose bun, then pin the perimeter instead of cinching the center down. That matters. Curly hair does not need to be pinned into submission. A loose bun gives the curls room to fold naturally, which looks better and feels better.
This style is useful on hot days, long travel days, or when you want the cap to stay put for hours. It also works well if your hair is thick and tends to spread out under a hat. A low bun keeps the shape compact.
If you have a few ends that want to peek out, let them. A tiny bit of curl showing at the edge of the bun makes the whole thing look softer. Just keep the bun low and flat enough that the cap doesn’t tilt forward.
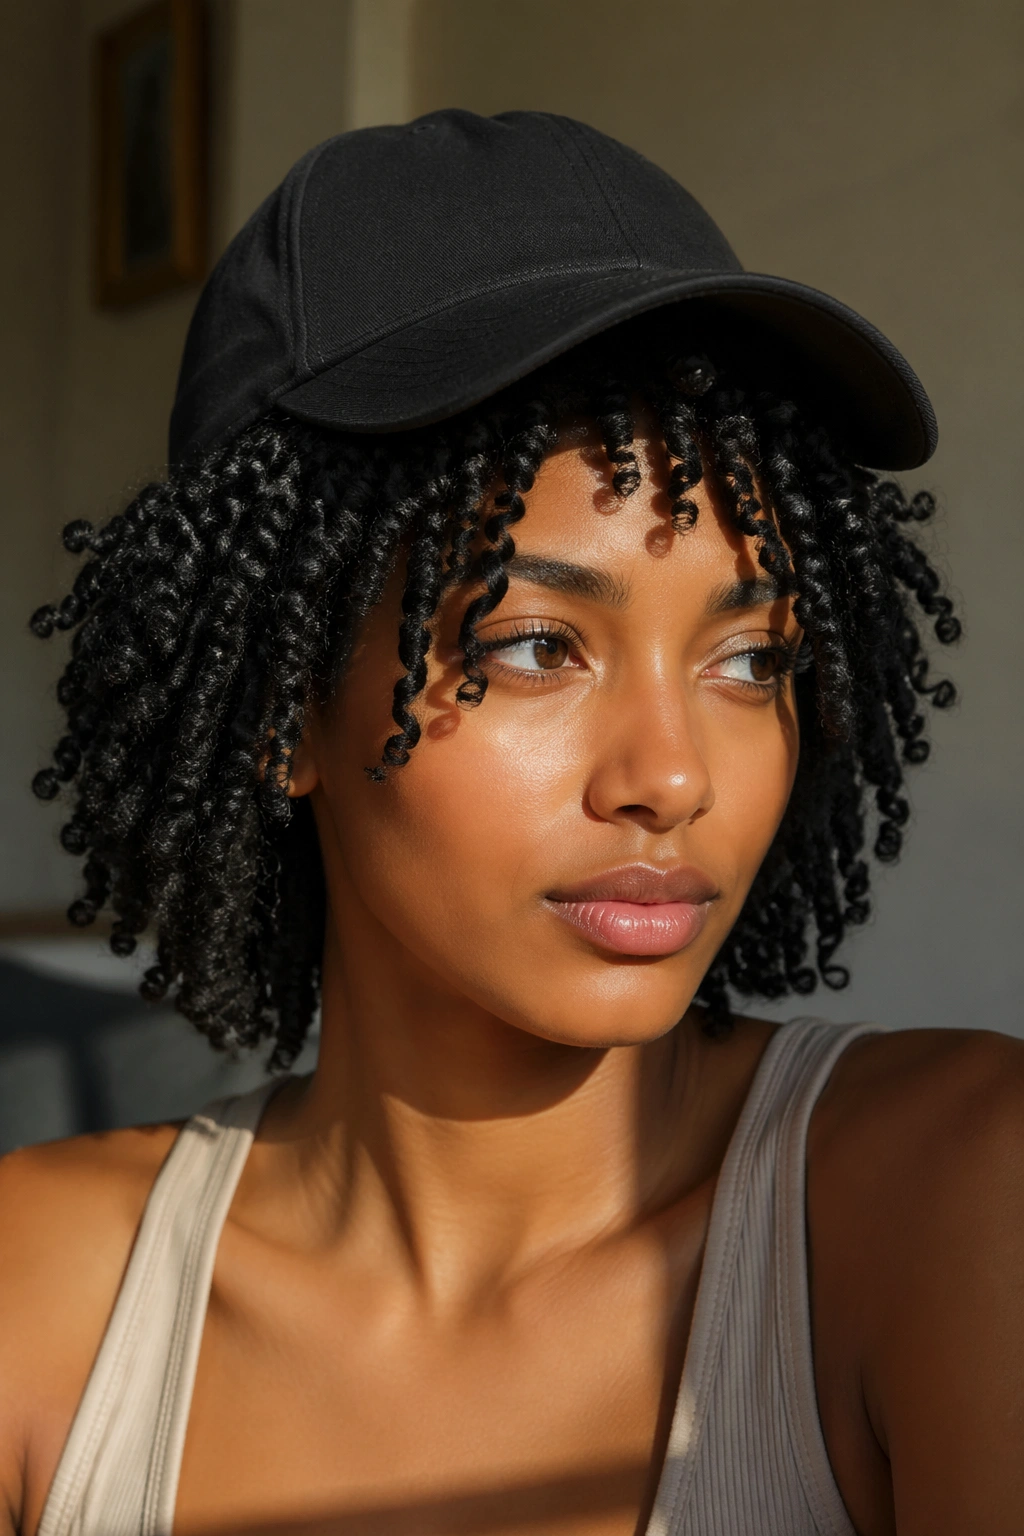
7. Loose Face-Framing Tendrils
Leaving a few front pieces out can change the whole cap look. Suddenly the hat feels lighter, the face opens up, and the curls around the cheeks do some framing work instead of disappearing under the brim.
Pull out two to four tendrils before you put the cap on. Choose pieces that naturally sit near the temples or cheekbones, not random little strands that will frizz the moment they touch the sweatband. A curl cream or light gel helps those pieces keep shape.
This is one of those styles that looks easy because it is easy, but it still needs a little thought. If the tendrils are too short, they spring out in odd directions. If they’re too long and heavy, they get pulled flat. Aim for pieces that can bend a little below the brim and still recover when the cap comes off.
The rest of the hair can be in a ponytail, bun, or left loose. The tendrils are the thing that makes the style feel finished. Without them, the cap can look a bit severe.
8. The Twist-Out or Braid-Out Under the Cap
A twist-out or braid-out gives the cap more texture to work with, and that texture is the whole point. The curls or coils are defined already, so the hat doesn’t need to do anything fancy; it just needs to sit on top without crushing the pattern.
The important part is dryness. Do not put a cap over damp twists or a partly set braid-out unless you want flattened roots and odd bends later. Let the hair dry fully, separate the strands once they’ve set, then place the cap gently over the top.
I like this look when the brim is curved and the hat has a little depth in the crown. A shallow cap can rub the top layer too much. A roomier one lets the definition stay intact at the sides and back, which is where the style gets its shape anyway.
After you take the cap off, fluff the roots with your fingertips instead of a brush. A tiny shake at the crown is enough. More than that and you start undoing the texture you worked for.
9. The Curly Bob Pushed Forward a Little
Short curls and curly bobs are easier to wear with a cap than people expect, mostly because the shape does not have to travel far. The hair stays close to the head, and the cap can frame the line of the cut instead of swallowing it.
For this look, wear the cap a little higher on the forehead than you might with long hair. That leaves space for the bob to sit around the cheeks and jaw instead of getting trapped under the brim. If the front pieces are especially springy, let them sit just below the cap edge and shape them with your fingers.
This style looks best when the bob has some texture, not when it has been flattened into a smooth sheet. A light mist of water and a touch of leave-in are usually enough. Heavy cream can make the front collapse, and then the whole cut loses its bounce.
It’s a nice option when you want your hair to look like a haircut, not just hair under a hat. That sounds obvious, but it matters. A good cap style should still let the cut speak.
10. Braids, Twists, and Locs With Extra Room
Protective styles and baseball caps can get along just fine, but the hat has to make room for the style instead of squeezing it. Braids, flat twists, and locs need a deeper crown and a softer band so the cap doesn’t press edges or leave a hard dent across the front.
A few things help here:
- Choose a cap with a deeper crown, not a shallow fit that sits on top of the hair.
- Look for a soft sweatband or line the inside with a thin satin scarf if friction is a problem.
- Let braid ends hang through the back opening when the cap allows it.
- Keep the cap snug, not tight. A snug fit stays in place; a tight fit starts a fight with your scalp.
This is the style I’d use on busy days when I want the hair protected but still visible. It also works well with medium-size twists or shoulder-length locs, because the texture already gives the hat shape to work around.
A tiny warning: heavy edge control and hot weather do not mix well under a cap. If you want the front to stay neat, use a light hand. Too much product just turns into buildup.
11. Curly Bangs and a Curved Brim
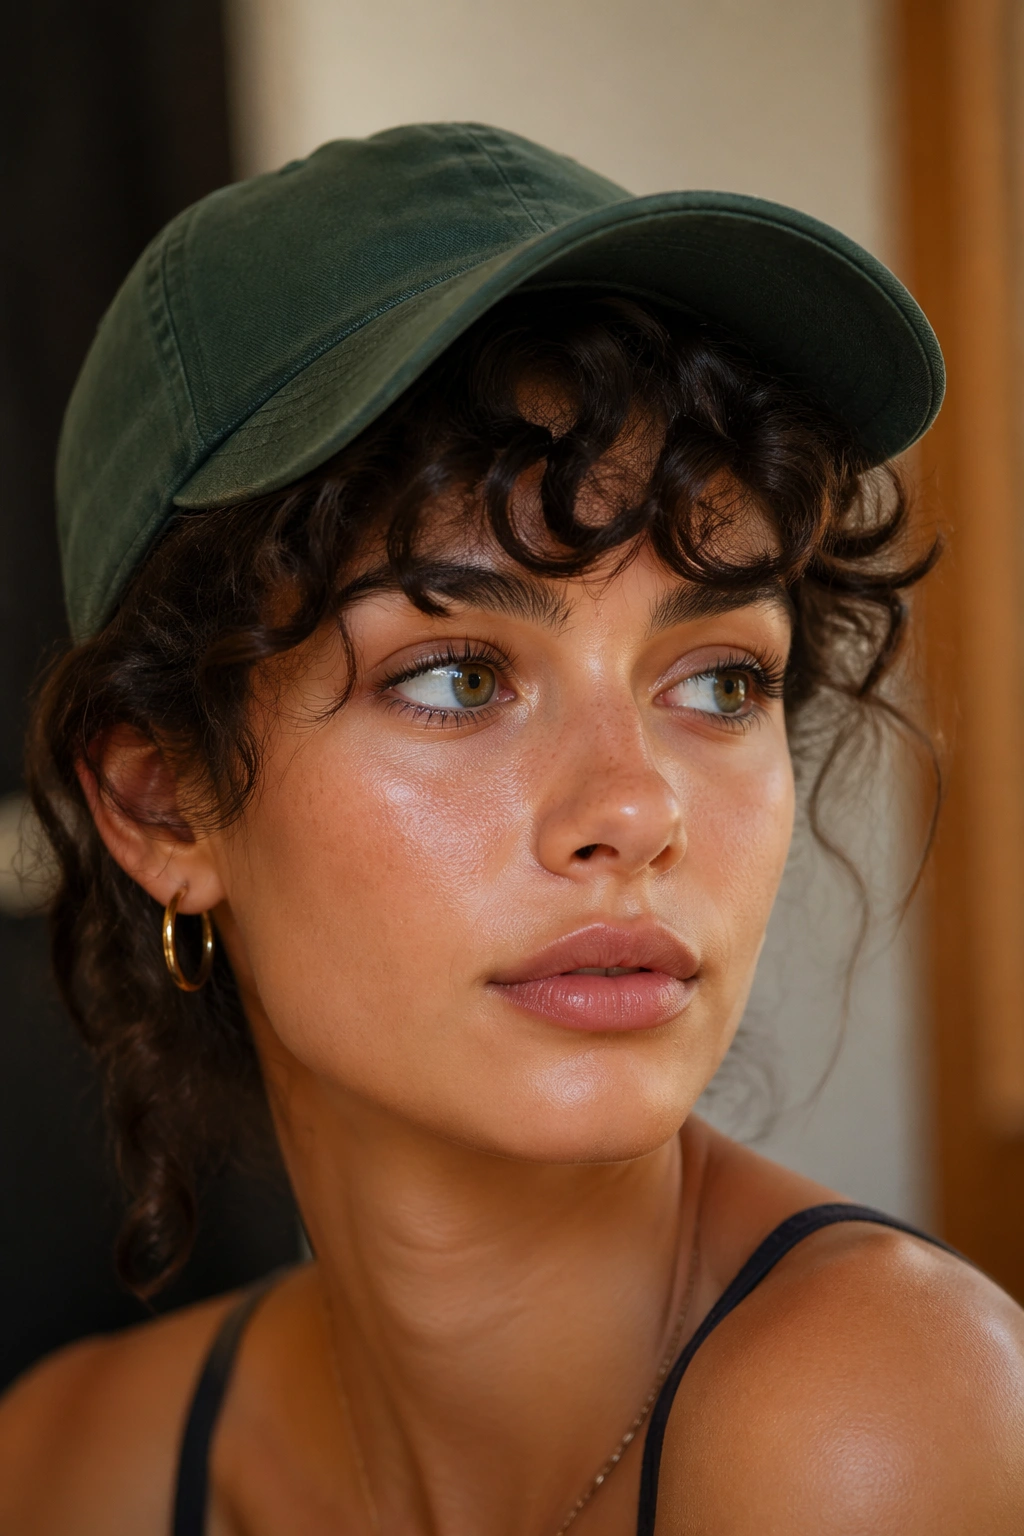
Curly bangs under a baseball cap can look smart, playful, and a little bit unexpected in the best way. The brim gives the bangs a frame, and the bangs soften the hard line of the hat. It’s a good exchange.
The trick is to let the bangs do their own thing instead of forcing them flat. If they’re short, let them sit just above the brows. If they’re longer, let them curve under the brim with a little air around them. A tiny mist of water can help reshape them before you put the cap on.
This works especially well if the rest of your hair is pulled back low or left in loose curls. The bangs become the point of focus, which keeps the cap from swallowing the face. If your curls are dense, a few finger-coiled front pieces can keep the bangs from splitting into odd chunks.
It’s a style with personality. Not loud, not fussy. Just enough shape to make the cap look like part of the haircut instead of a cover-up.
12. The Easy Wash-and-Go You Barely Touch
Some days, the best baseball cap hairstyle for curly hair is the one that asks for almost nothing. A wash-and-go that’s fully dry, lightly refreshed, and left mostly alone can look excellent under a cap because the curls already have their own shape.
Start by misting the hair lightly if it needs a reset. Then smooth a small amount of leave-in or curl cream over the outer layer only, not the whole head. You want enough slip to reduce frizz, but not so much that the cap turns the hair into a soft, sweaty mess. Let it dry before the cap goes on.
The cap should sit comfortably, not buried deep into the curls. If the roots are a little puffy and the lengths stay loose, that balance reads as intentional. The style works well for errands, outdoor plans, and quick days when you want to look put together without making a project out of it.
And honestly, this is the style I reach for when I don’t want to think too hard. A good cap, a clean curl pattern, and a little restraint go a long way. The hair does not have to be perfect. It just has to be shaped on purpose.