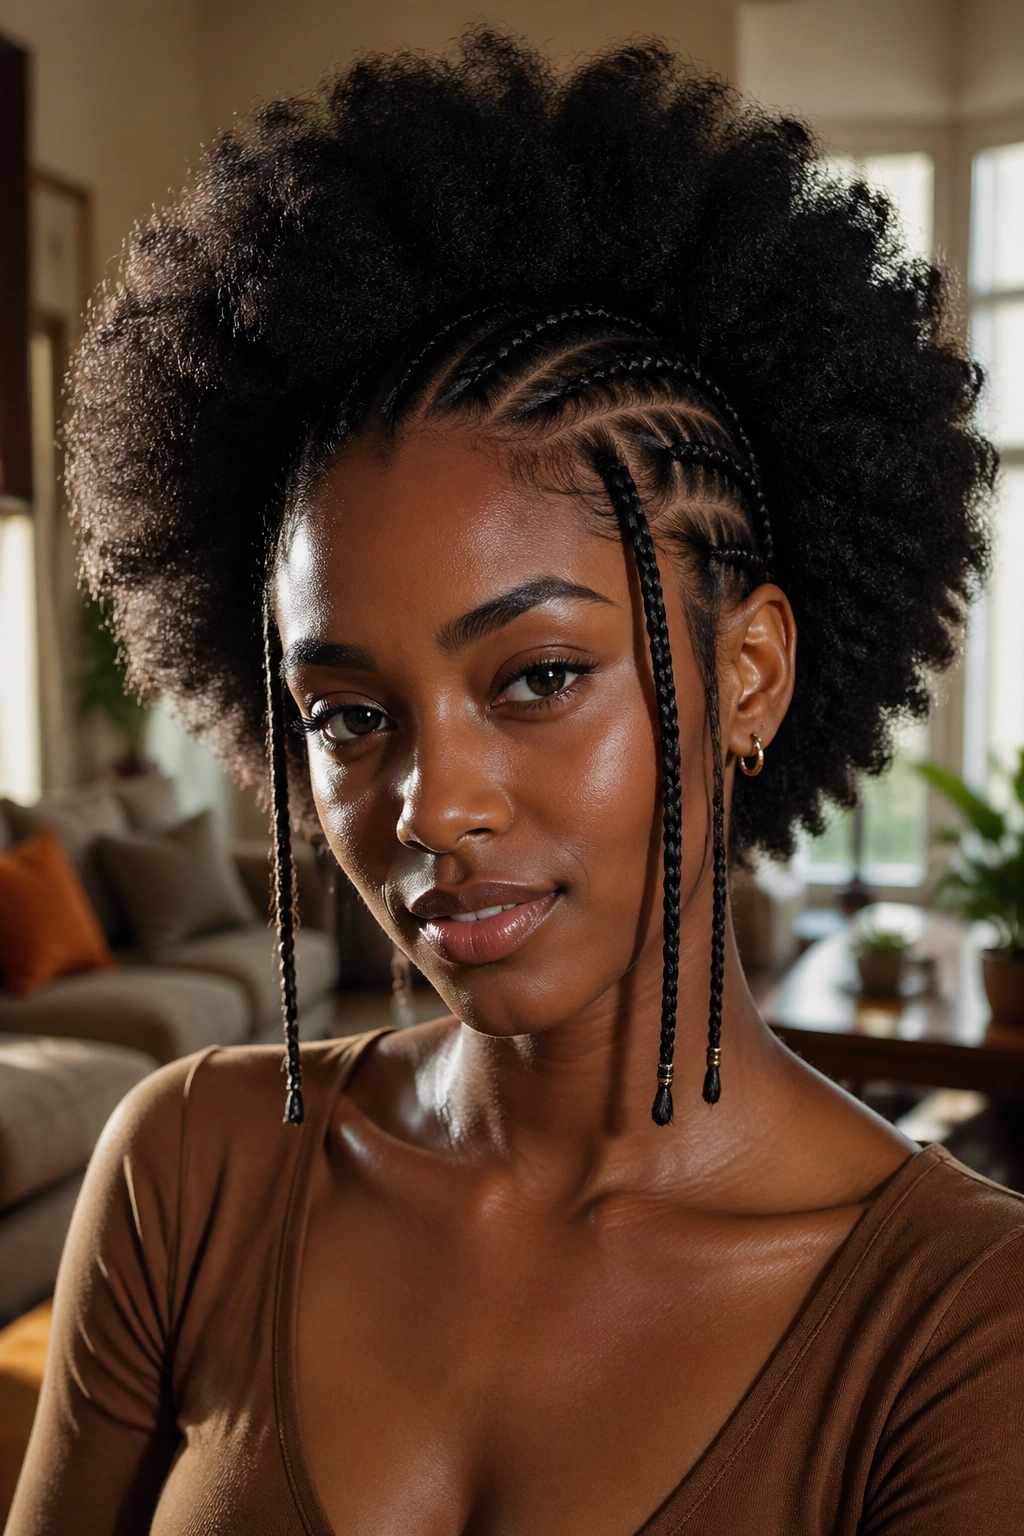
Mixing afro textures with braids is one of those things that looks effortless on Pinterest and then humbles you the first time you try it in your bathroom mirror. I’ve been wearing some version of afro-and-braid combos for years, and the honest truth is that the magic lives in the transition zone — that stubborn inch or two where your tight coils meet the braided section. Get that part right, and everything else falls into place.
This collection of 24 afro and braid combo styles for women leans on real technique, not just pretty pictures. Some of these work better on shorter 4C hair. Some shine on loose afros with more length. A few are weekend commitments. Others you can finger-coil together in twenty minutes while your coffee is still hot.
The goal here isn’t to give you a catalog. It’s to give you options that actually match your hair density, your patience level, and the kind of week you’re walking into. Some days you want a crown braid framing a soft cloud of curl. Some days you want cornrows tight to the scalp and the rest of your hair exploding out like a halo. Both are valid. Both are in here.
One more thing before we dive in. Afro and braid combos aren’t a trend you chase — they’re a technique family that has roots in Fulani, Yoruba, Wolof, Mende, and countless other African hair traditions. Treat the styles with that context in mind. They deserve it.
What Makes an Afro and Braid Combo Work
The single most underrated factor in any combo style is contrast. You want the braided section to look crisp and deliberate, and the afro section to look lofty and alive. If both parts look similar in density, the eye has nowhere to rest and the whole style reads as messy rather than intentional. So plan your contrast before you part a single section.
Think of the braids as the frame and the afro as the painting. The frame needs clean edges. The painting needs room to breathe. When you get that balance right, even a style you threw together in fifteen minutes looks like it took an hour at a salon.
Texture prep also matters more here than in standalone styles. A freshly washed, fully stretched afro sits differently next to braids than one that’s been slept on for three days. Not worse, necessarily — just different. Keep that in mind when you pick your style.
Tools You’ll Keep Reaching For
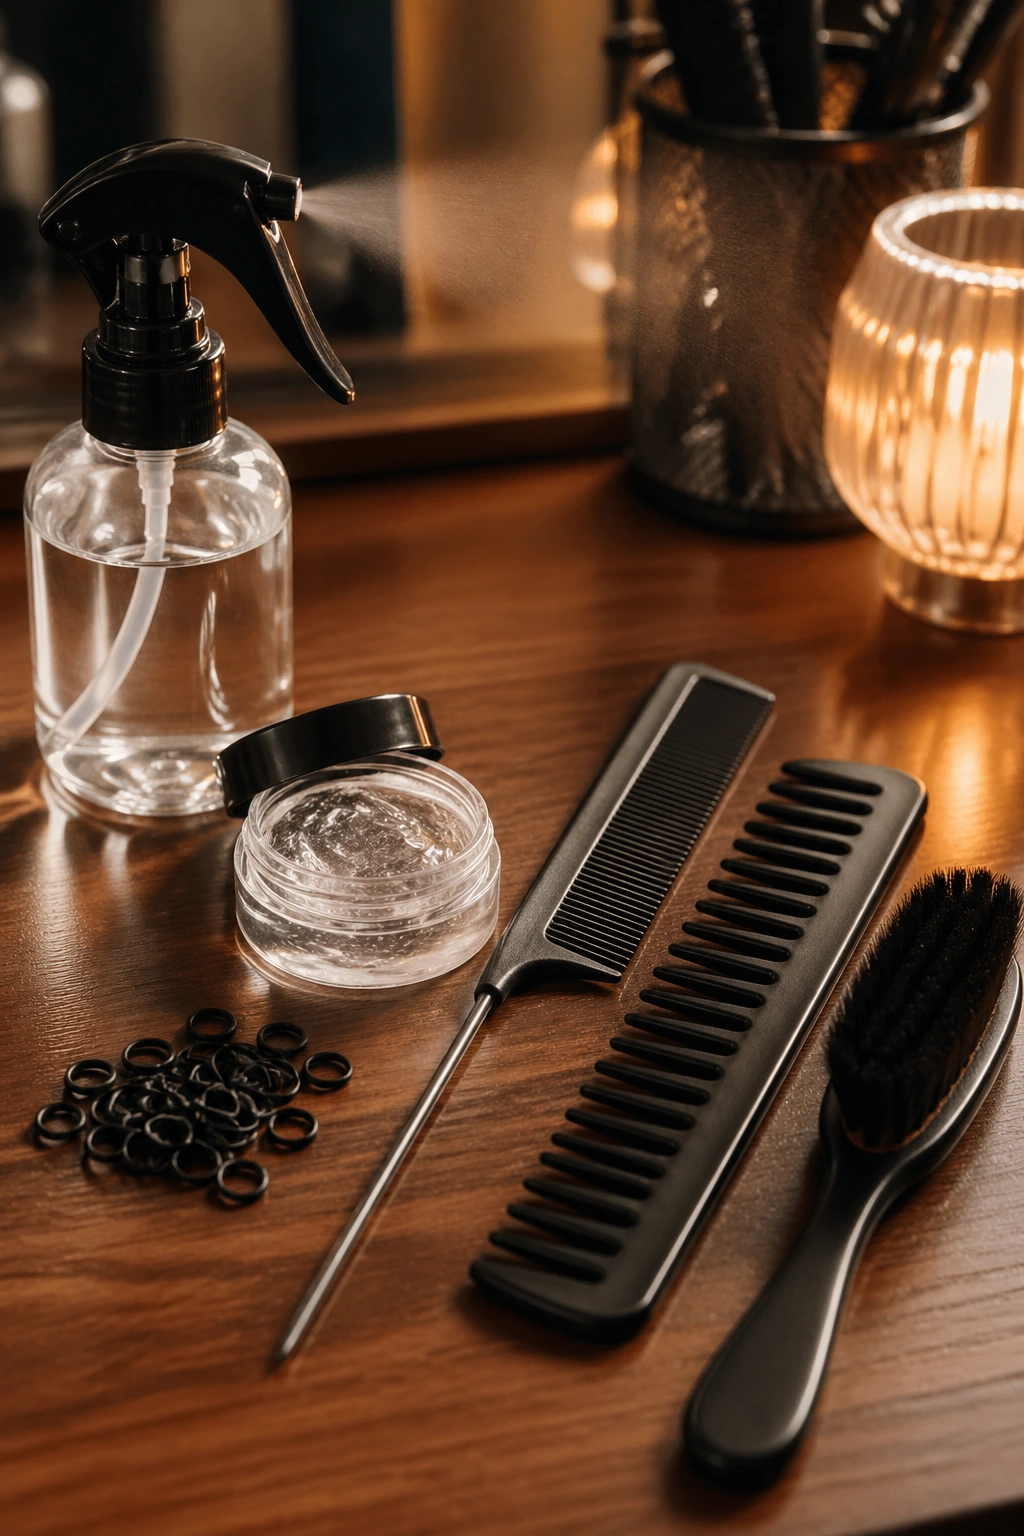
You don’t need a drawer full of gadgets. You need a few reliable tools that won’t let you down halfway through a style. Here’s what I always have within arm’s reach.
A fine-tooth rat-tail comb for clean parts. A wide-tooth comb for detangling. A spray bottle filled with water and a splash of leave-in — roughly four parts water to one part leave-in. Small hair elastics that actually grip (the rubber ones, not the fabric-covered kind that slide out). Edge control that doesn’t flake when it dries. And one good brush — a soft boar bristle or a denman, depending on whether you’re smoothing or defining.
Skip anything plastic that feels cheap. It’ll snap on your third use.
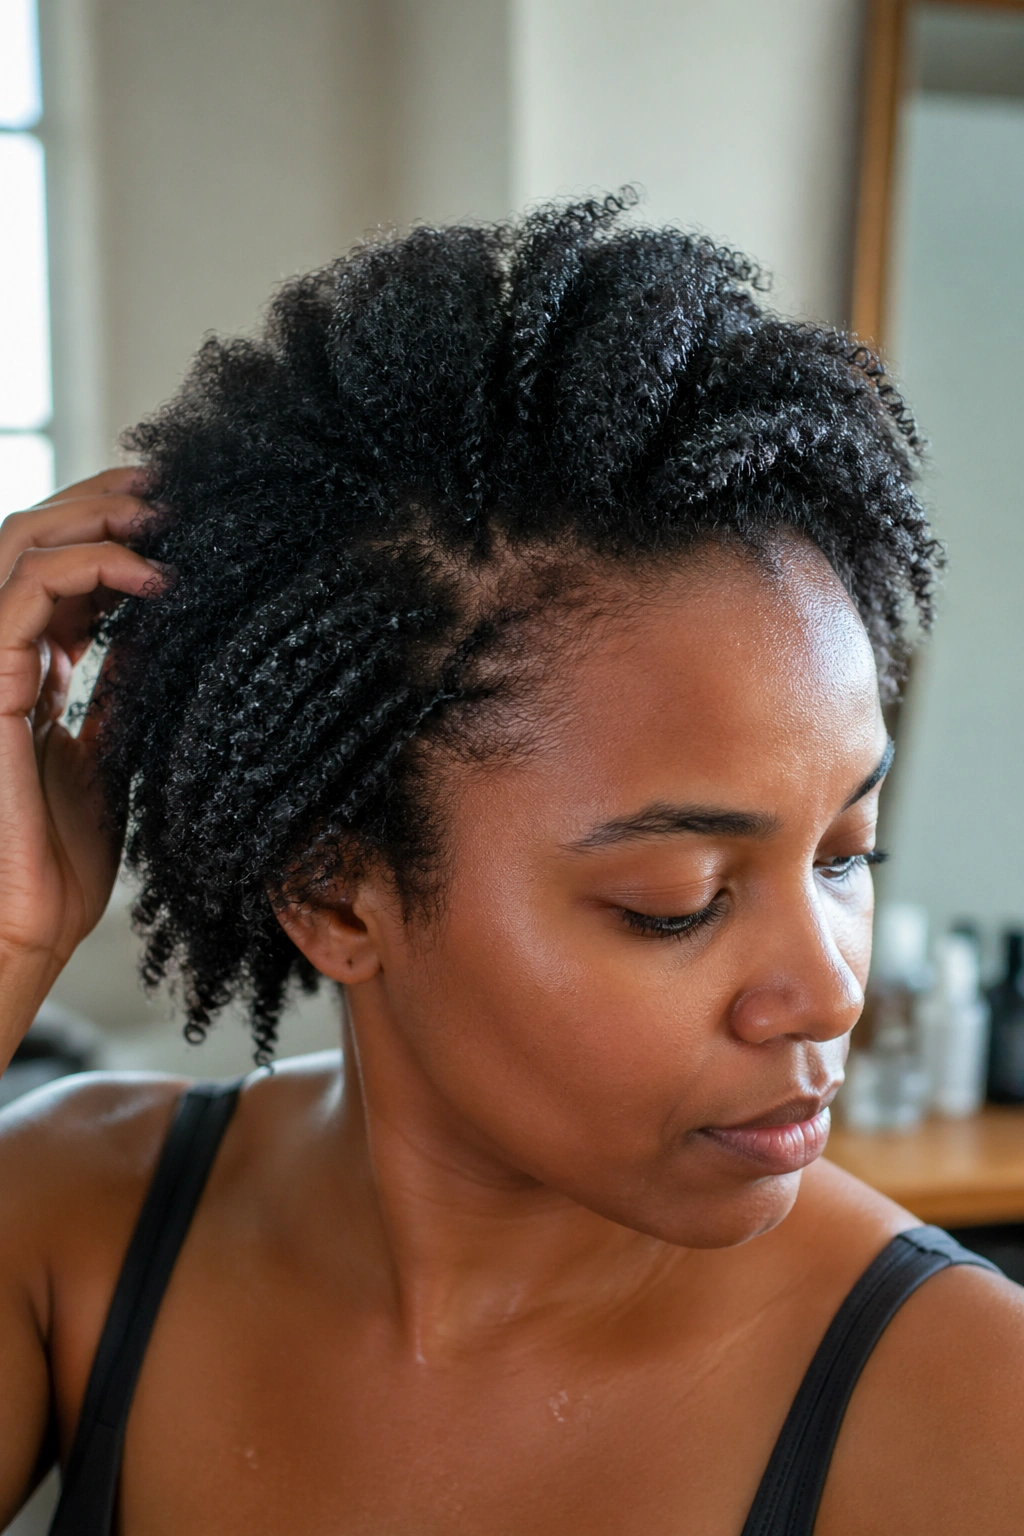
Prepping Your Afro Before You Start
Skipping prep is the fastest way to hate a style by hour three. Always start with detangled, moisturized hair. Dry afros on parched strands snag, snap, and refuse to hold a clean part. Wet hair is easier to manage but dries into unpredictable shapes, so a damp-but-not-soaking state is the sweet spot.
If you’re doing a style with exposed afro sections, stretch that part first. Not flat-iron straight — just elongated enough that the coils show their full length and shape. Banding, African threading, or a loose twist-out the night before all work.
For the braided sections, a light application of a creamy leave-in — about a dime-sized amount per inch of parted hair — keeps strands from frizzing out within an hour. Don’t overdo it. Soggy braids look flat and slip loose.
Parting and Planning the Style
Parts are the skeleton of any combo style. Crooked parts tell on you from across the room. Take your time here. I know it’s tempting to freestyle, but trust me — two extra minutes on your parts saves you twenty minutes of regret.
Use the mirror and a bright light. Natural light is best. Sit somewhere you can see the back of your head reflected in a second mirror if possible. Part in the direction you want the braids to lie, and be decisive. Hesitant parts wander.
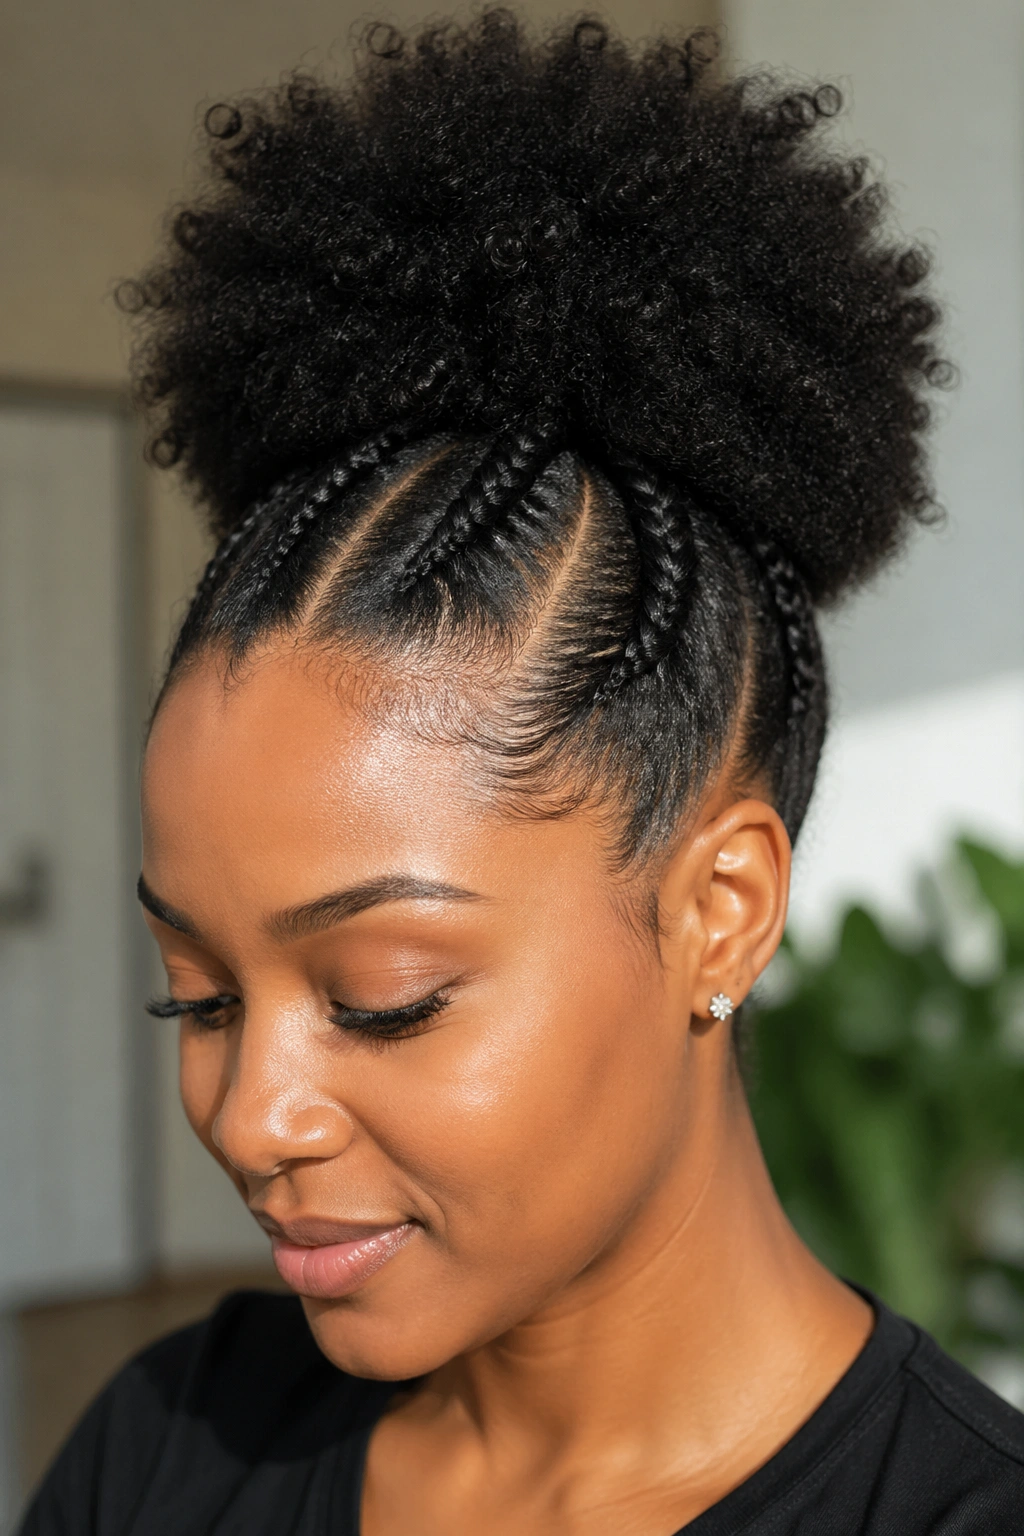
1. Two Cornrows Into a High Puff
This is the gateway combo style — the one most women try first, and for good reason. Two clean cornrows run from your hairline back, and everything past the crown gets gathered into a soft, lofty puff. It’s practical, it reads dressed-up or casual depending on your accessories, and it takes maybe half an hour once you have the technique down.
Why It Works
- The cornrows hold your edges back all day, no re-slicking needed
- Your afro gets to breathe and look full in the back
- Works on almost any hair length past three inches
- Friendly for workouts because nothing swings in your face
Pro tip: Braid the cornrows slightly looser at the crown than at your hairline. That little bit of give lets the puff transition naturally instead of creating a hard ridge where the braid ends.
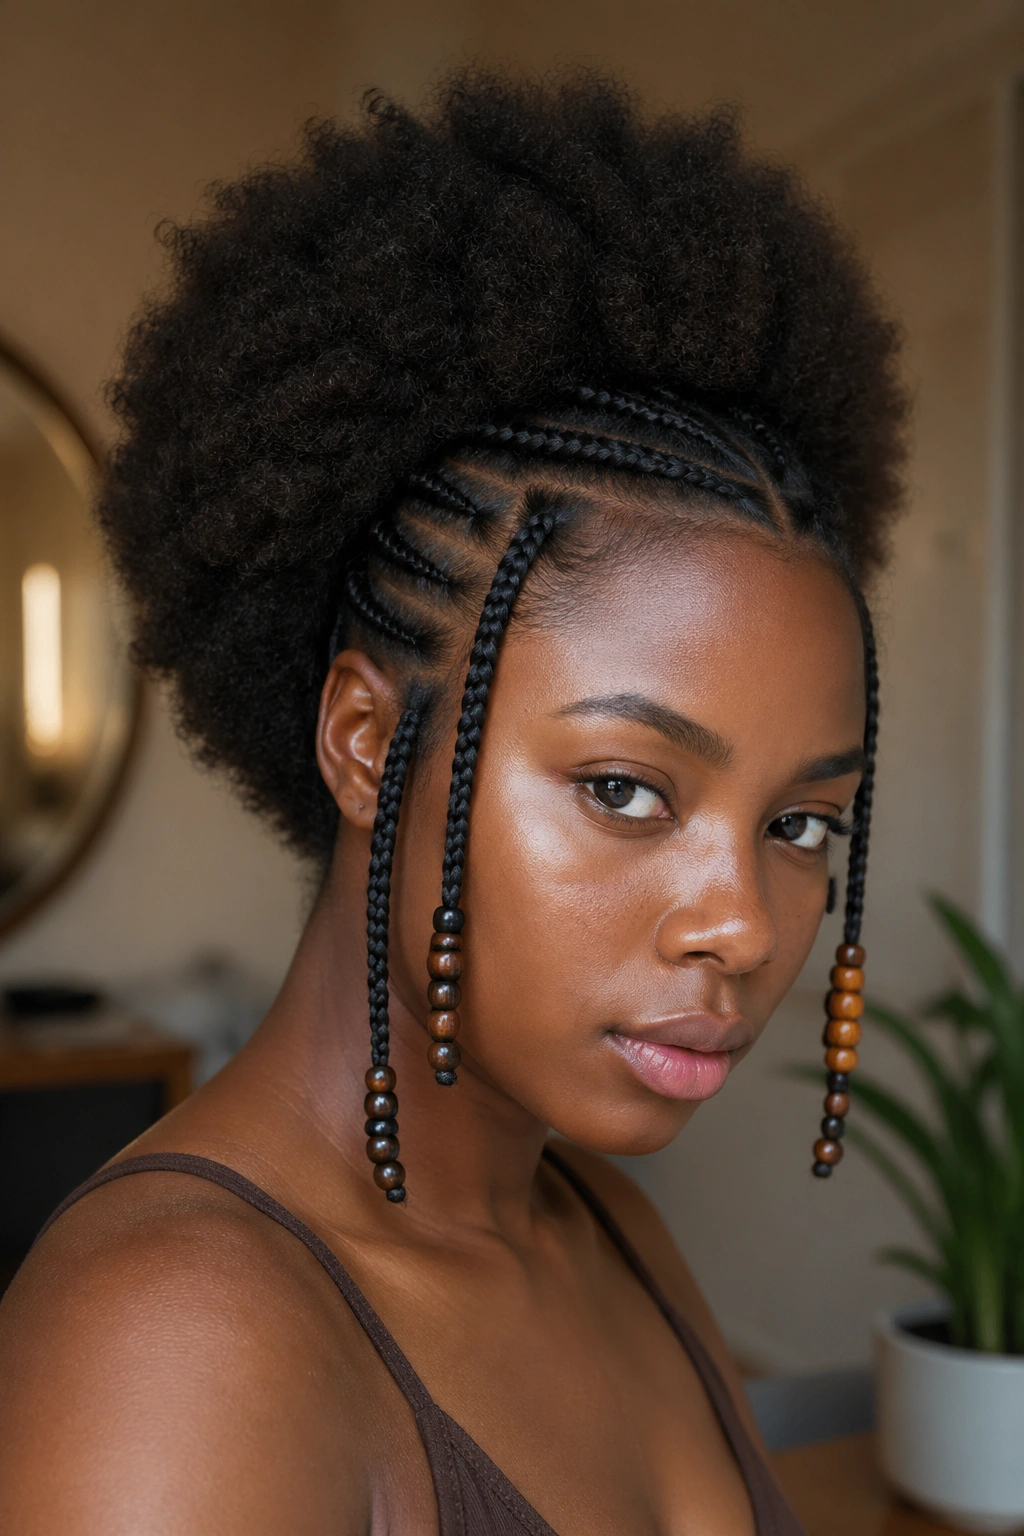
2. Fulani-Inspired Side Braids With a Center Afro
Fulani braiding traditions give us some of the most recognizable combo silhouettes in the world. Three to four thin braids running along each side of the head, often with small beads at the ends, while the crown and back stay in a high, rounded afro. The braids sit close to the temples and frame your face without covering your forehead.
What makes this style stand out is the negative space. The exposed scalp between braids is part of the design, not a flaw. Don’t try to fill every inch.
Beads are optional but historically meaningful. If you add them, keep them tonal — gold or wood for warmth, silver or bone for cooler contrast. Mismatched plastic beads in ten colors cheapen the effect.
3. Halo Braid With a Low Loose Afro
A halo braid done right turns your whole head into a portrait frame. The braid wraps the circumference of your head like a crown, and the remaining hair stays loose at the back and neckline in its natural afro state. The contrast between the tight geometry of the halo and the soft cloud beneath it is what sells the look.
You’ll need enough length along your hairline to braid all the way around — usually at least four inches of stretched hair at the front. If your front is shorter, use added hair. Nothing wrong with that.
A halo works for weddings, graduations, dinners, or just a Tuesday when you want to feel like yourself turned up a notch. That versatility is why it keeps showing up in my rotation.
4. Cornrows in the Front, Twist-Out in the Back
Can you split a style down the middle of your head? Absolutely — and this one proves it works beautifully.
The front third of your hair gets cornrowed straight back from your hairline. The middle and back stay as a defined twist-out, either done the night before or refreshed from an older set. The result is sleek at the front and full in the back, a silhouette that photographs well from every angle.
How to Use It
Do the twist-out first, wrap it up overnight, then cornrow the front the next morning while the twist-out is undisturbed. Reversing that order means you’ll crush your twists while working on the front.
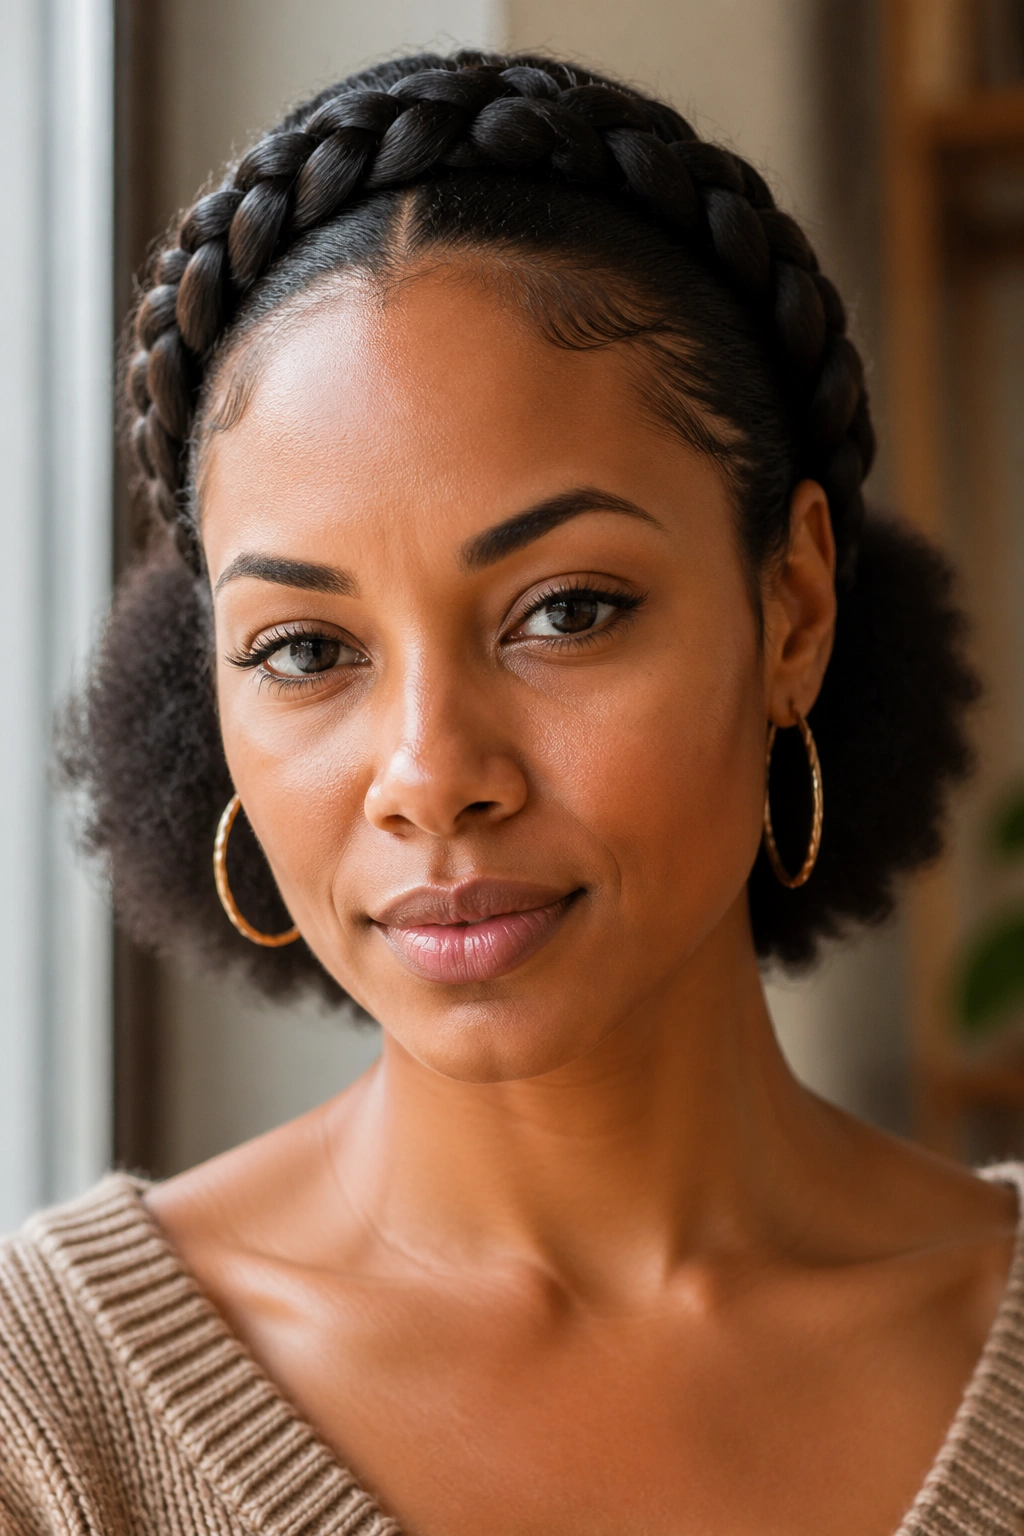
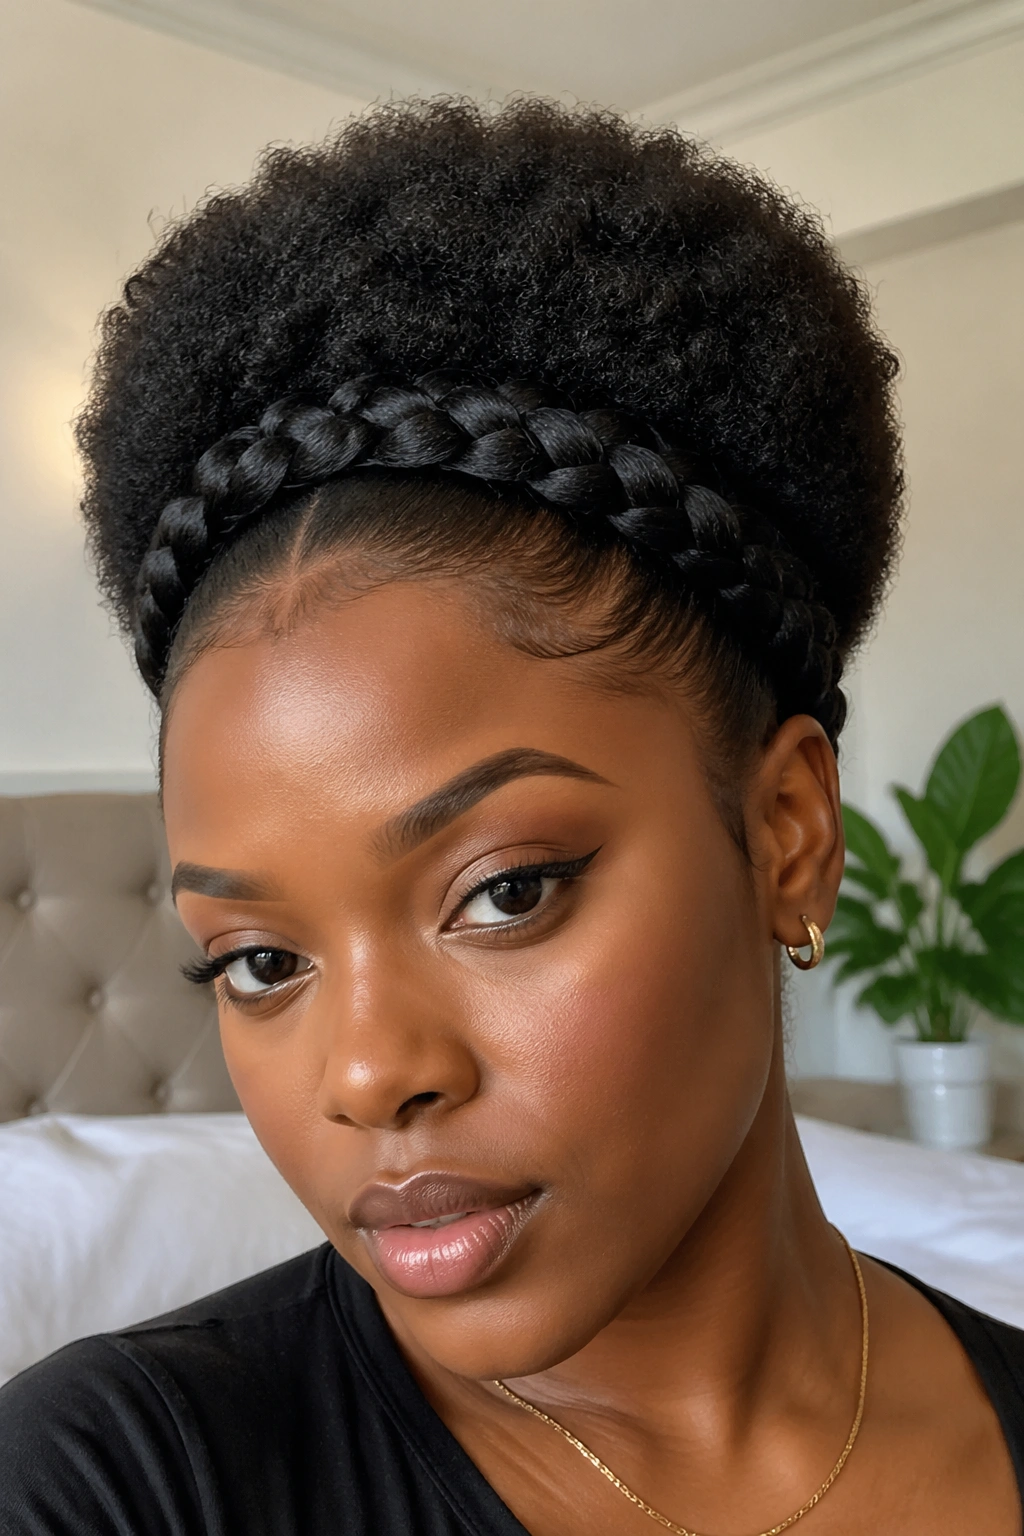
5. Single Braid Crown With a Rounded Afro Top
One thick braid runs along your hairline from ear to ear, almost like a headband made of hair. Above the braid, the afro rises up in a rounded dome. It’s clean, it’s quick once you’ve done it twice, and it doesn’t require added hair if yours is medium length or longer.
The key is the tension at the hairline braid. Tight enough to stay put all day, loose enough not to pull on your edges. That balance takes practice. Your first attempt might feel too tight. Your second too loose. Your third usually nails it.
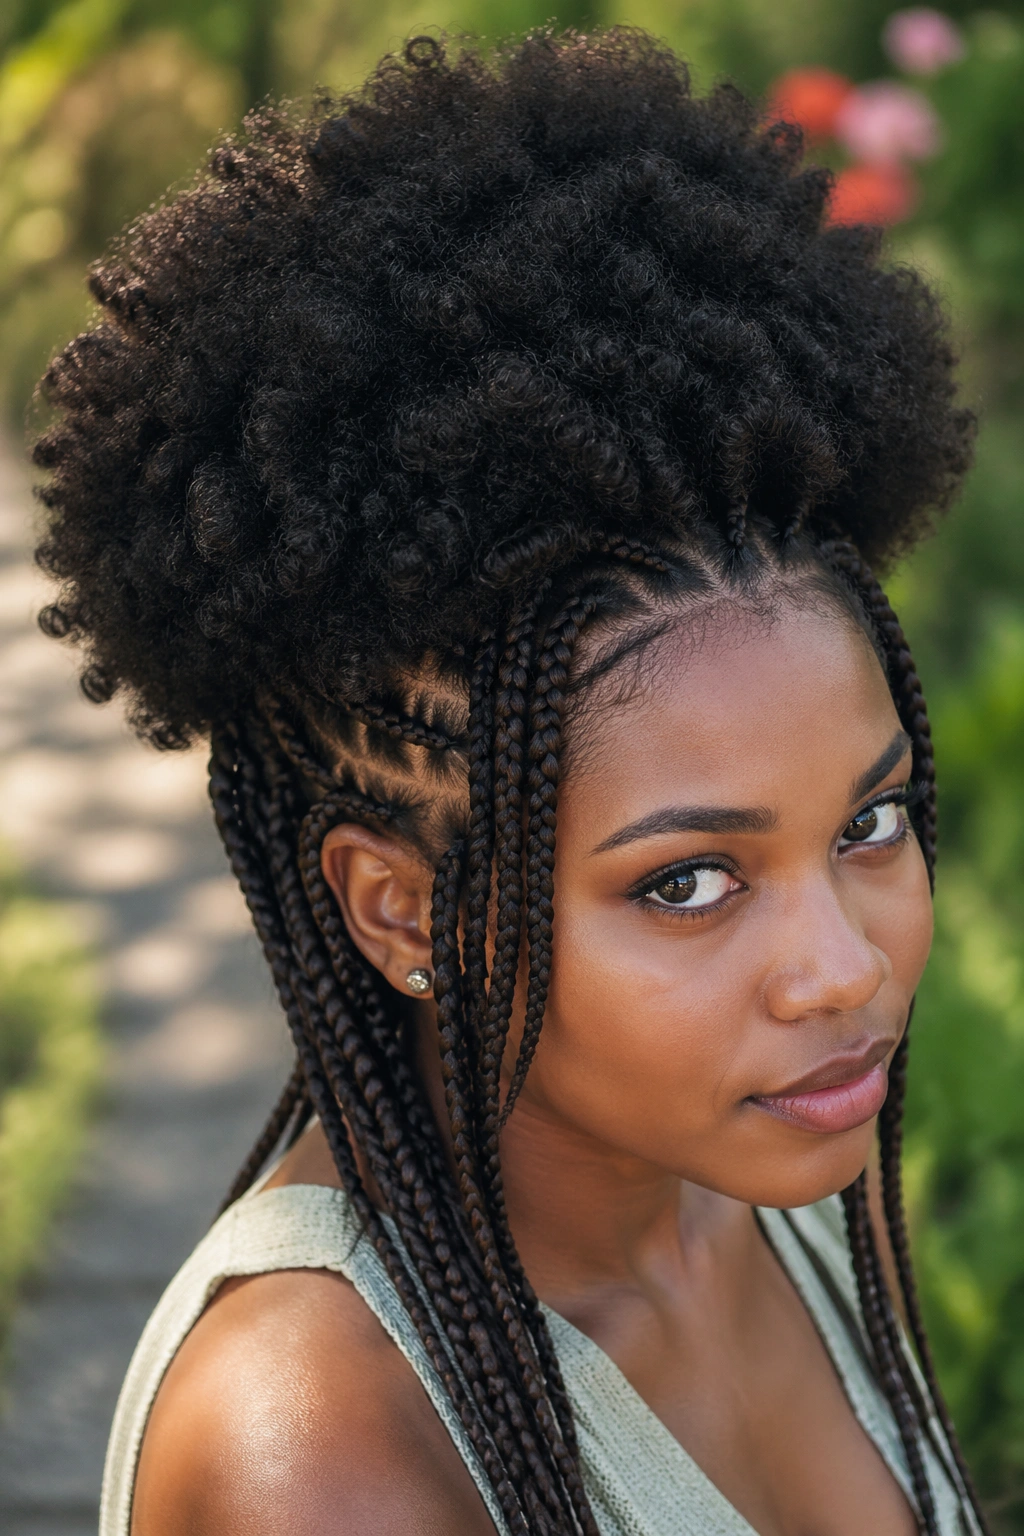
6. Box Braids Framing an Afro Crown
Unlike all-over box braids, this style limits the braiding to the sides and back, leaving the crown as a full, domed afro. You get the longevity and low-maintenance days of box braids without losing the signature shape of natural hair on top.
The transition line matters enormously here. Part a clean horizontal line roughly two inches above your ears on each side and across the back of your head. Everything below that line gets braided. Everything above stays natural.
This is a great style if you’re braid-curious but not ready to commit your whole head. It gives you a taste of the maintenance difference, and you can always extend the braids higher next time.
7. Zigzag Cornrows With a Puff Ponytail
Zigzag parts take a flat cornrow style and turn it into something you can’t stop looking at. Run two or three zigzag cornrows from your hairline back to the crown, then gather everything into a high or mid ponytail and let the ends fan out into a puff.
The zigzag itself doesn’t need to be perfectly symmetrical — in fact, slight irregularity makes it look more hand-done and less stiff. Use the pointed end of a rat-tail comb and work in small segments, about an inch at a time.
Add a satin scrunchie at the base of the puff to avoid snagging. Elastic bands without a satin cover will chew up your edges over a full day of wear.
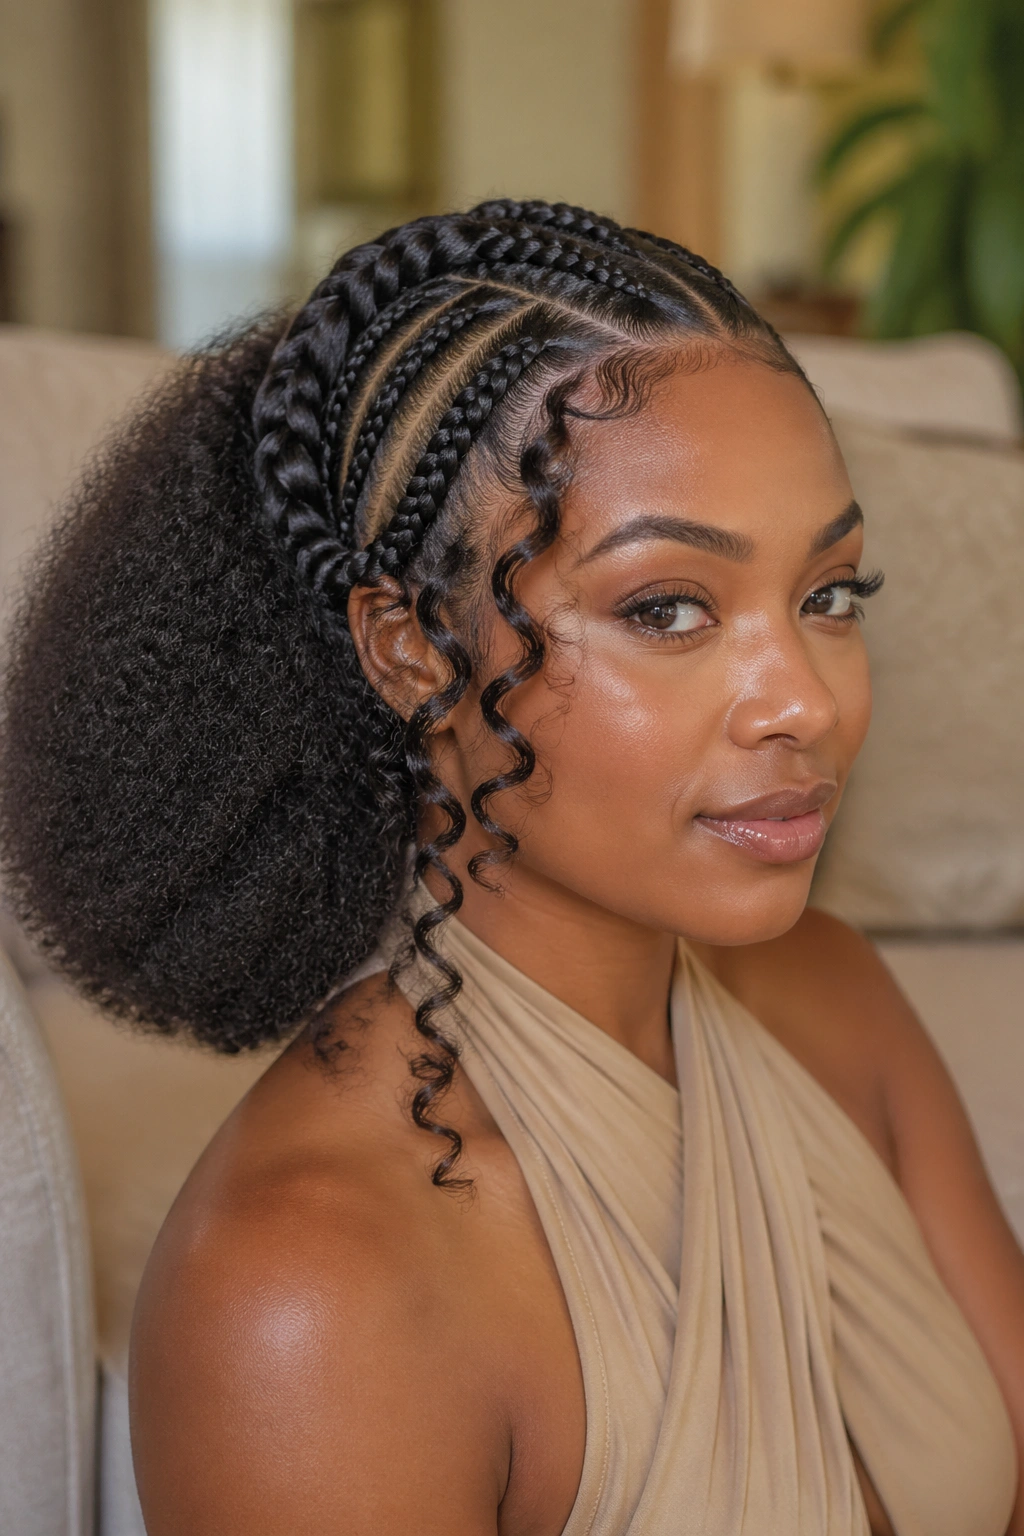
8. Goddess Braids With Tendrils and an Afro Back
Goddess braids are thicker than standard cornrows, often with added hair for bulk, and they curve along the head in sweeping lines. Paired with a loose afro at the back and a few face-framing tendrils pulled free, the overall look feels romantic and polished without trying too hard.
The tendrils are the detail most people skip. Don’t. Pull two or three small sections free at your temples and along the nape, dampen them slightly, and let them coil naturally. Those loose pieces soften the whole face.
Goddess braids can last five to seven days if you wrap them nightly with a satin scarf. The afro back will need reviving sooner — usually day three.
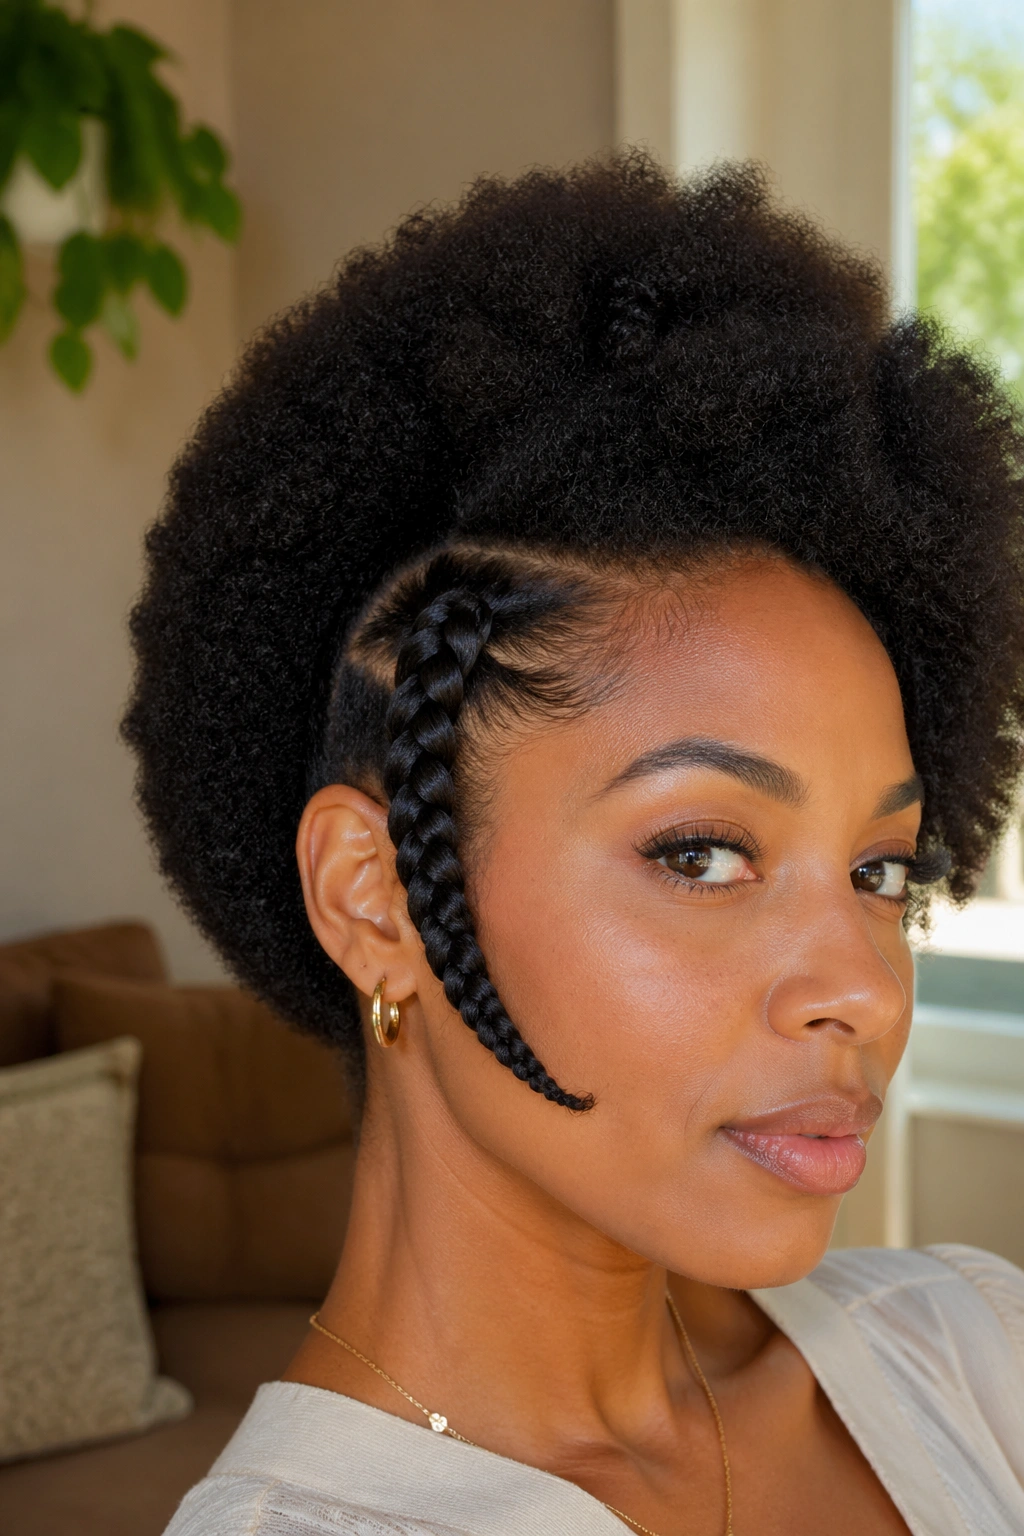
9. Side Braid Over the Ear With a Full Afro Top
A single fat braid that runs from just above one ear, curves down along the temple, and ends near the jawline. Everything else on your head stays as a full, round afro. The asymmetry is the whole point.
This one plays well with statement earrings on the uncovered side. Hoops, studs, a shoulder duster — whatever you like. The braid draws attention to the ear and creates a natural showcase for whatever you put there.
It’s a five-minute style if you know how to braid. Fifteen if you’re still learning. Either way, fast.
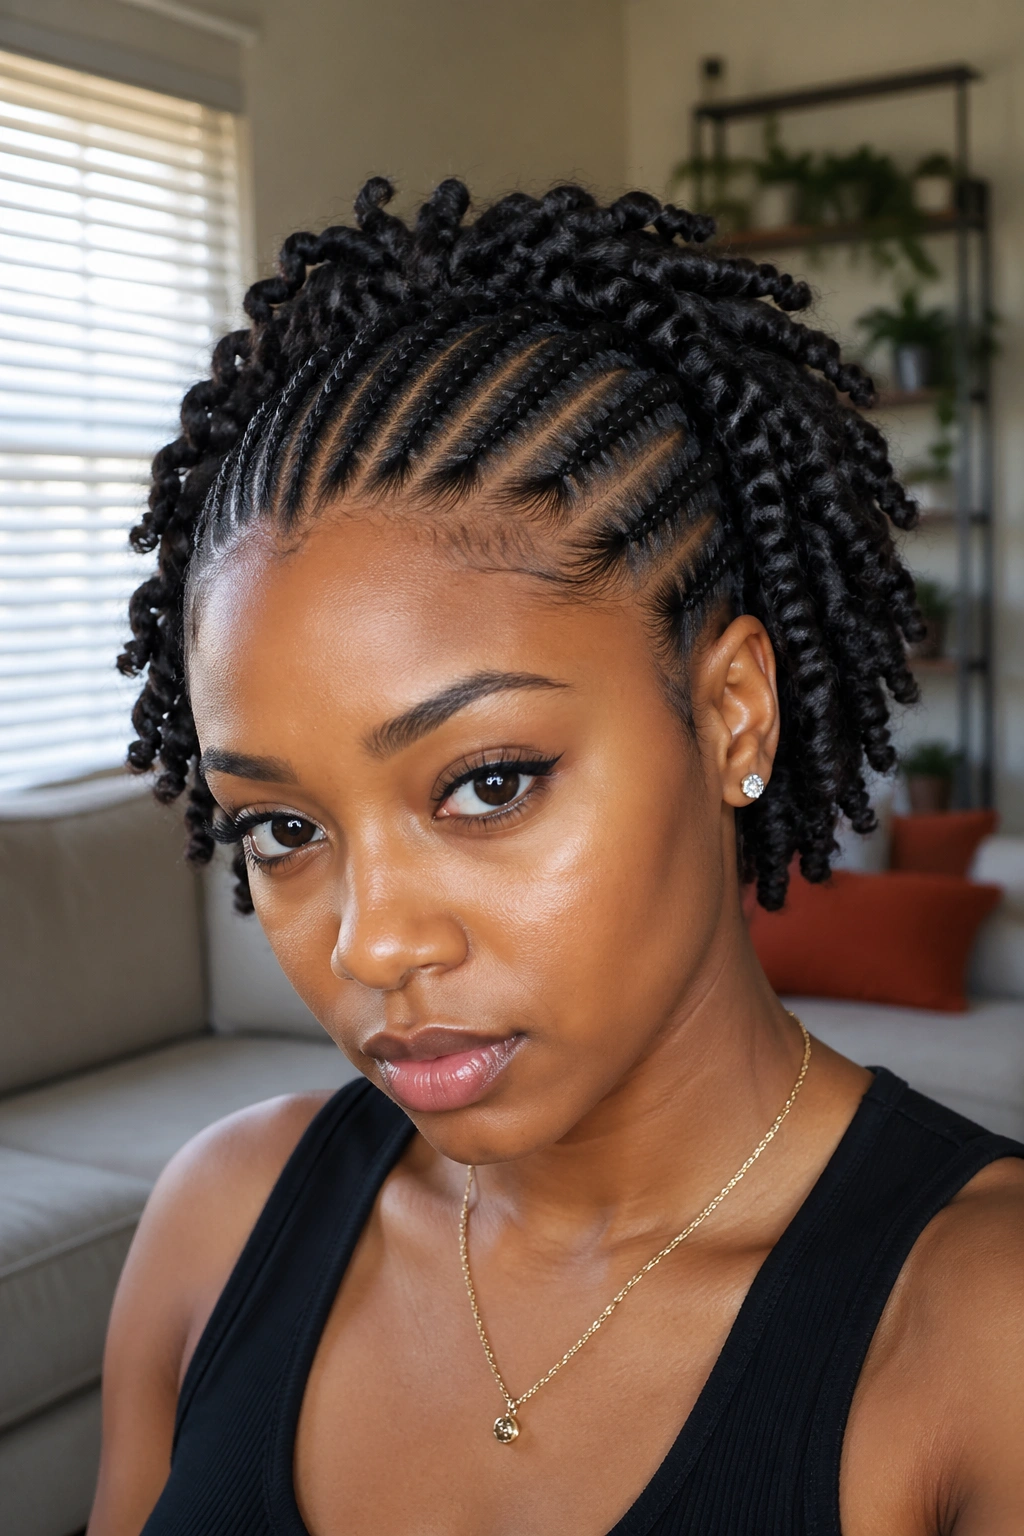
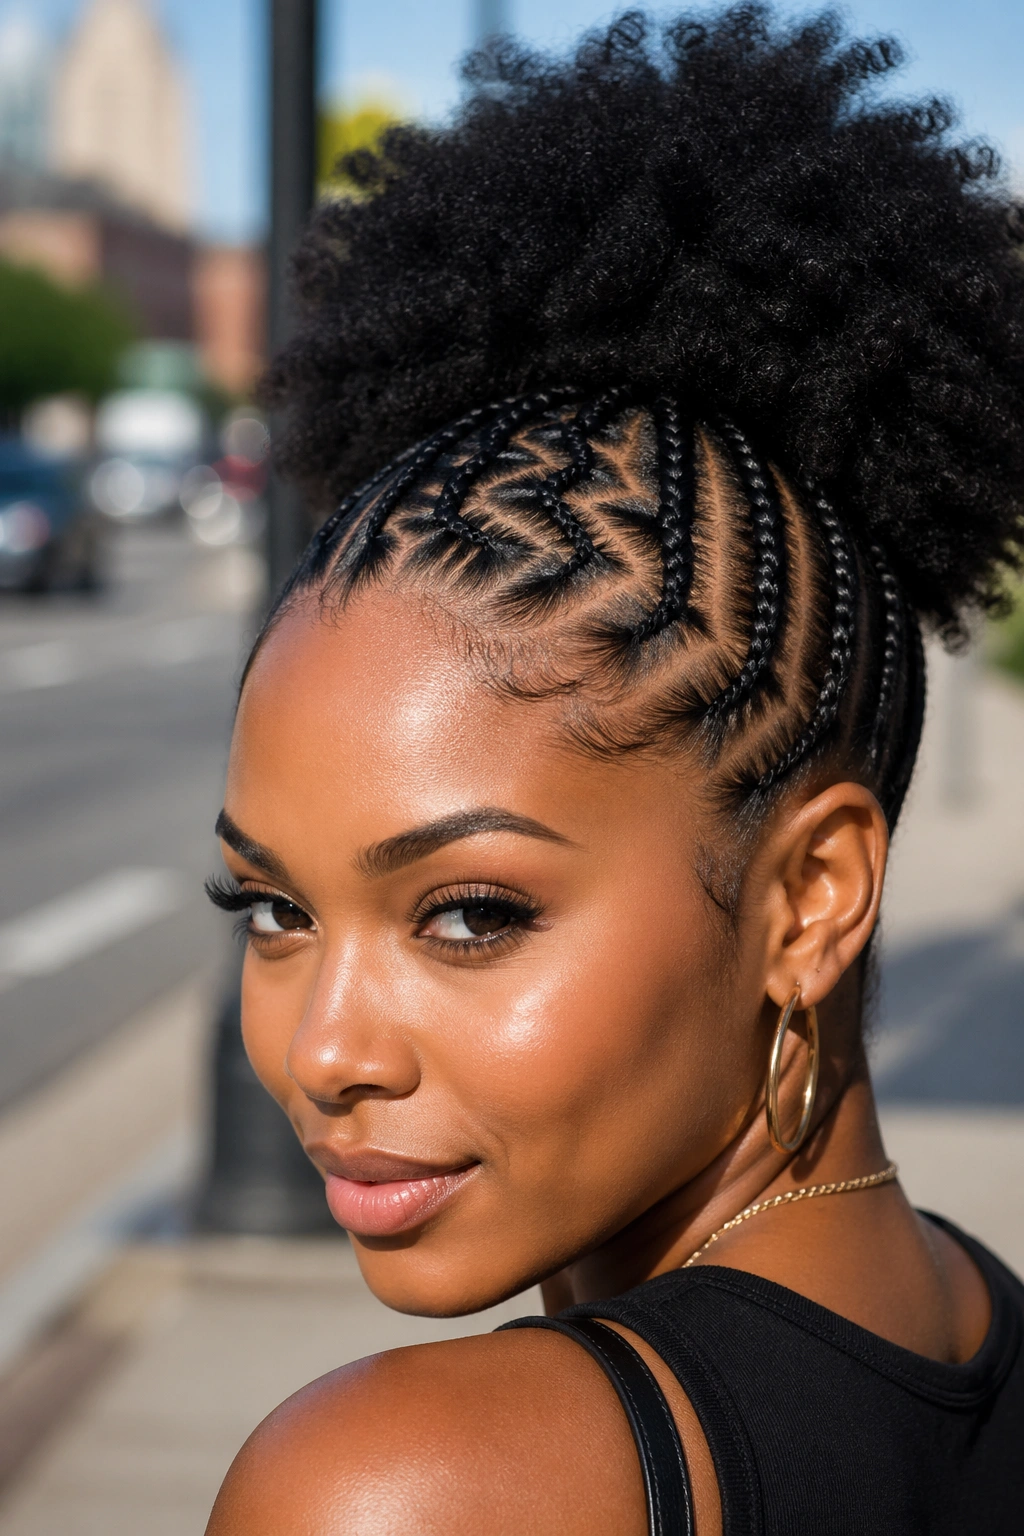
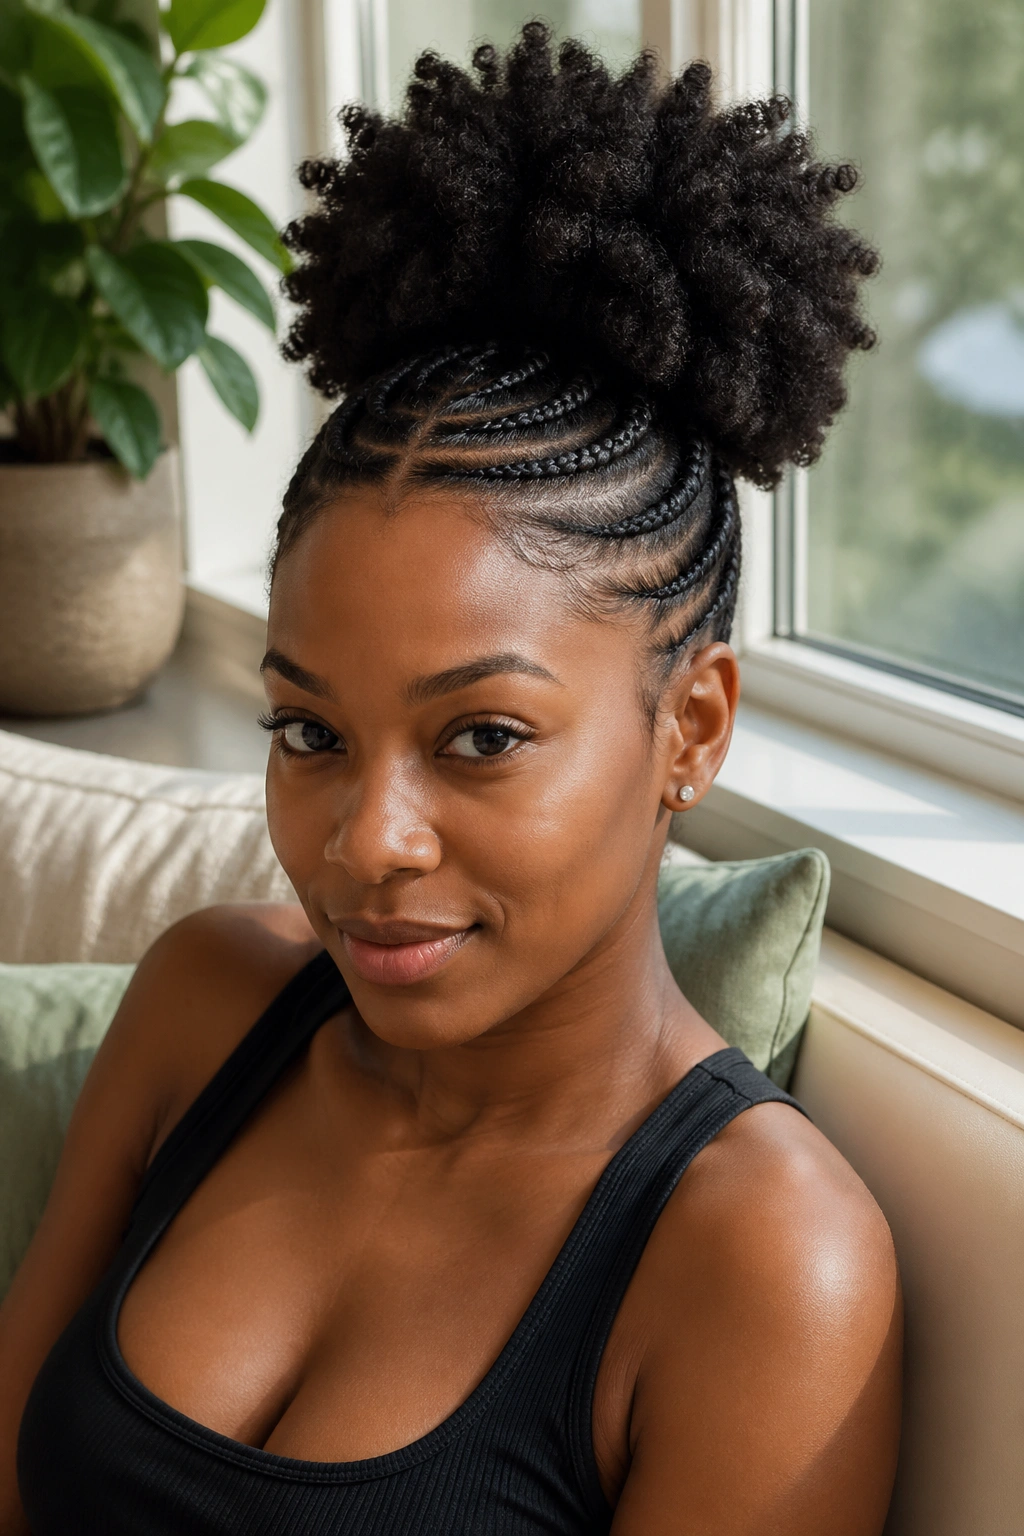
10. Stitch Braids Into a High Afro Puff
Stitch braids are the cornrow family’s most photogenic cousin. Those clean horizontal stripes across each braid? That’s what makes them stitch braids. The technique involves sectioning with tiny horizontal parts inside each braid and using gel to flatten down the scalp between stitches.
Paired with a high afro puff at the crown, stitch braids turn a simple silhouette into something that looks expensively salon-done. The prep is longer than standard cornrows — budget an extra thirty to forty minutes — but the finish is worth it.
What to Watch For
- Use a firm-hold gel, not a light one, or the stitch lines will puff up by lunchtime
- Keep a rat-tail comb in one hand the entire time
- Don’t over-gel, or the braids will look white and flaky when dry
11. Two-Strand Twist Borders Around an Afro Crown
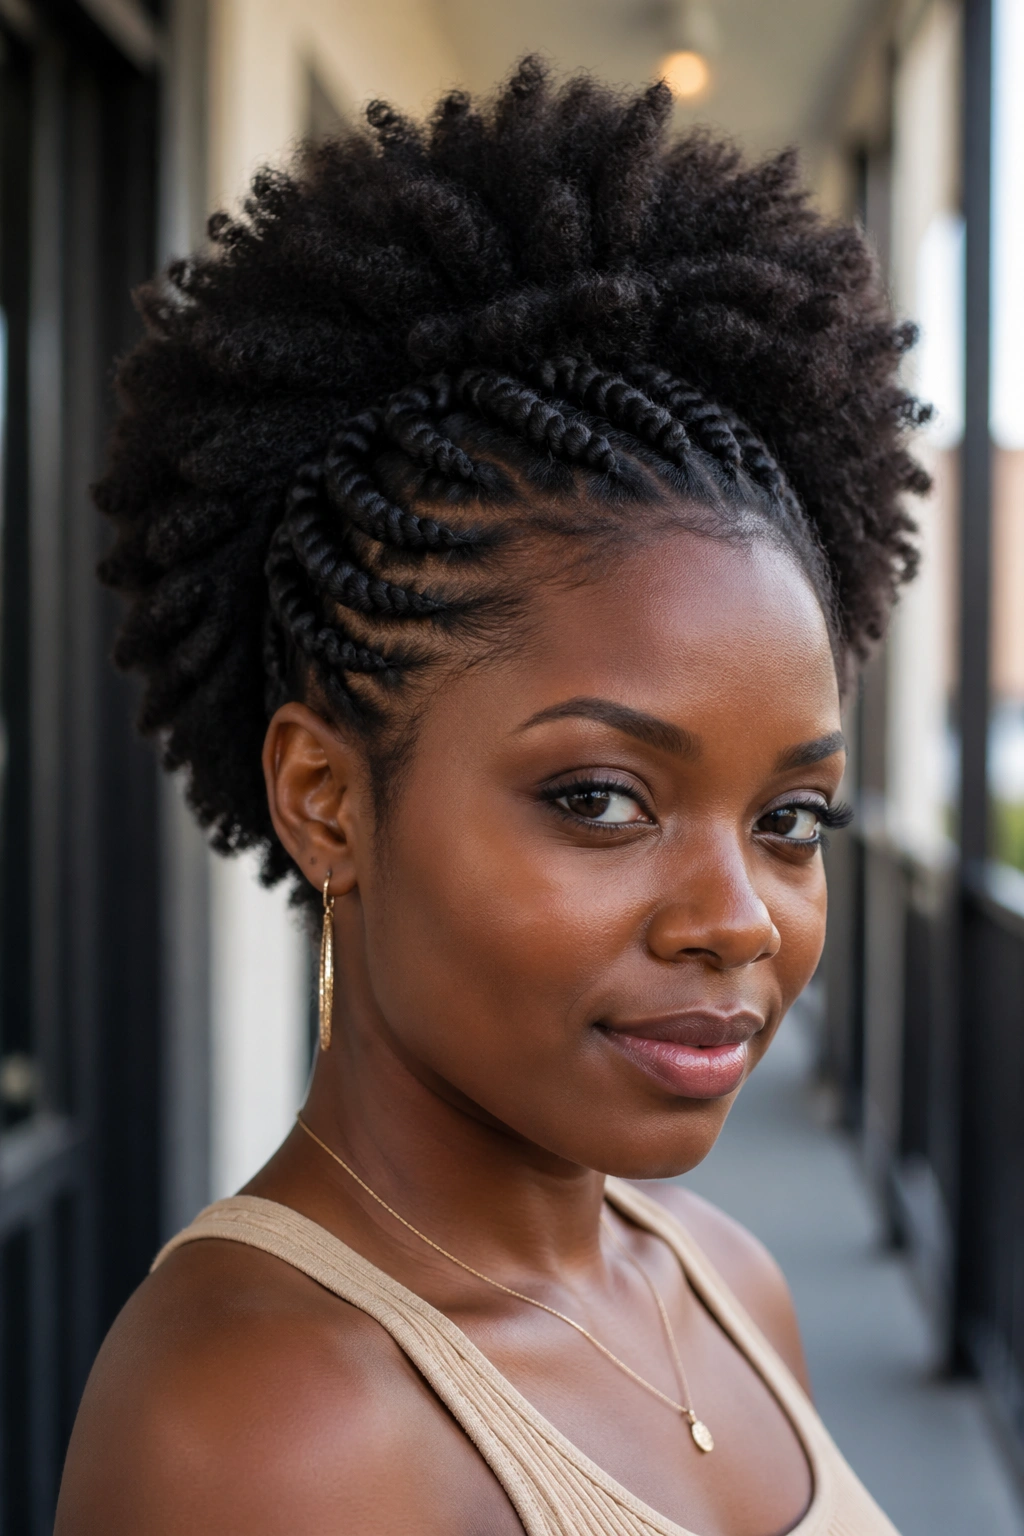
Two-strand twists — not braids, technically — can border an afro beautifully. Twist the front and sides close to the scalp, leave the crown as a full afro, and you get a softer version of the cornrow-plus-afro look. The twists have more volume and texture than tight braids, which balances better with a lofty top.
This combo is especially kind to fine or fragile 4C hair because two-strand twists don’t pull on the scalp the way tight cornrows can. If your edges have been struggling, this is a great recovery style that still looks intentional.
Take the twists down after five to six days and you’ll have a built-in twist-out as a bonus second style.
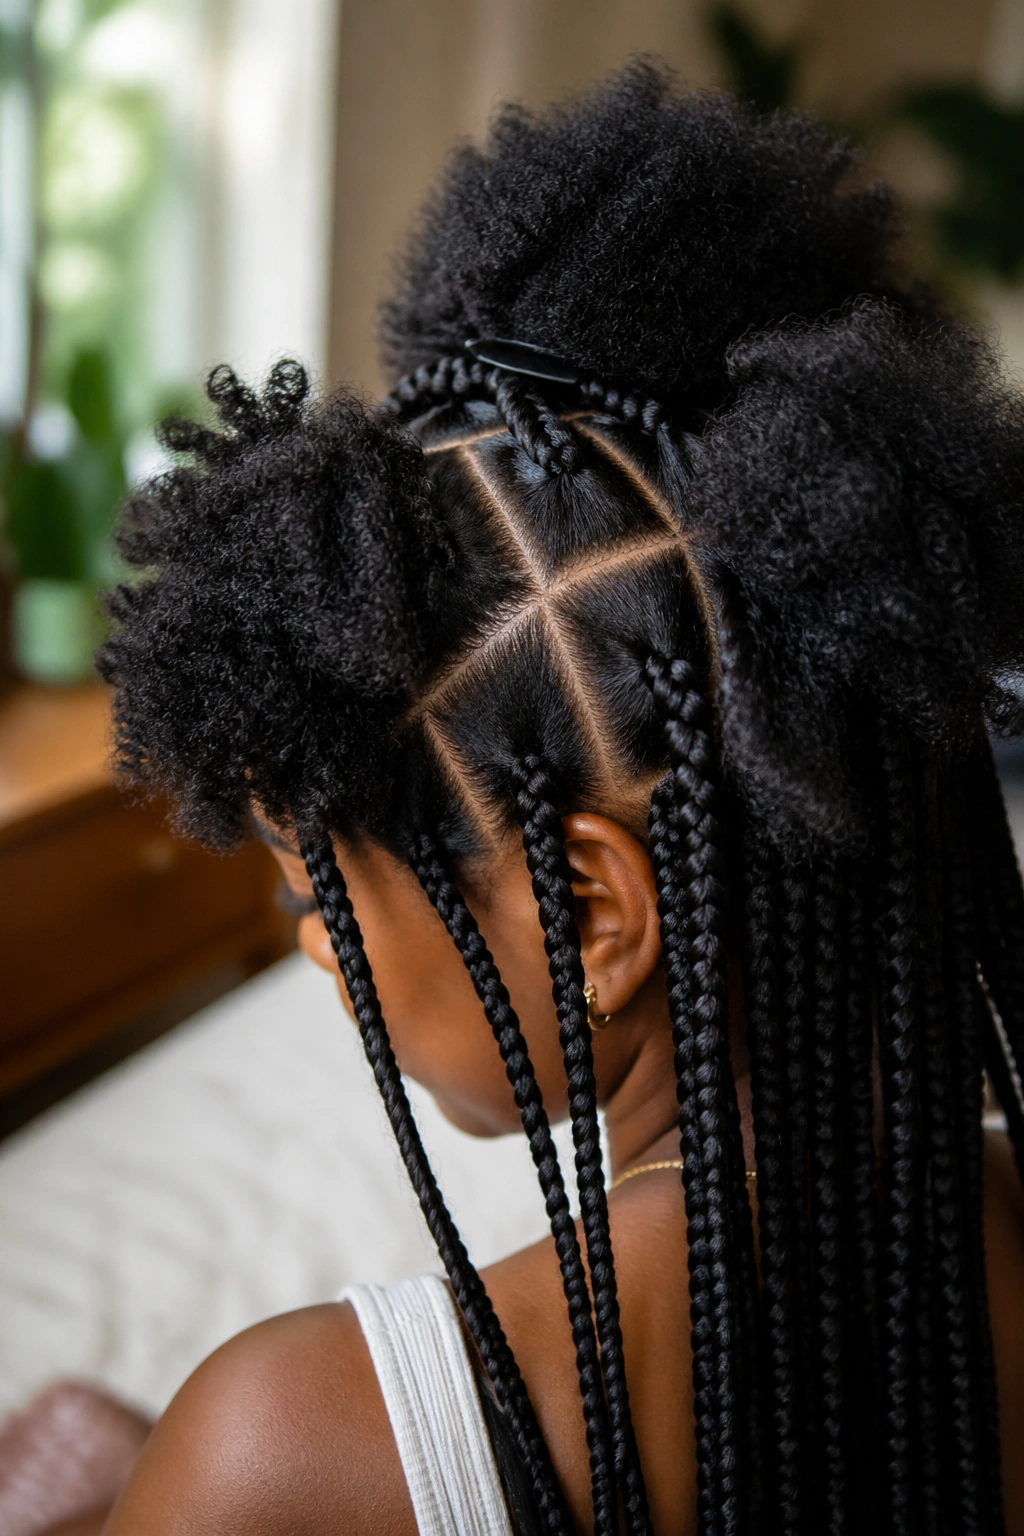
12. Triangular Braided Sections With an Afro Back
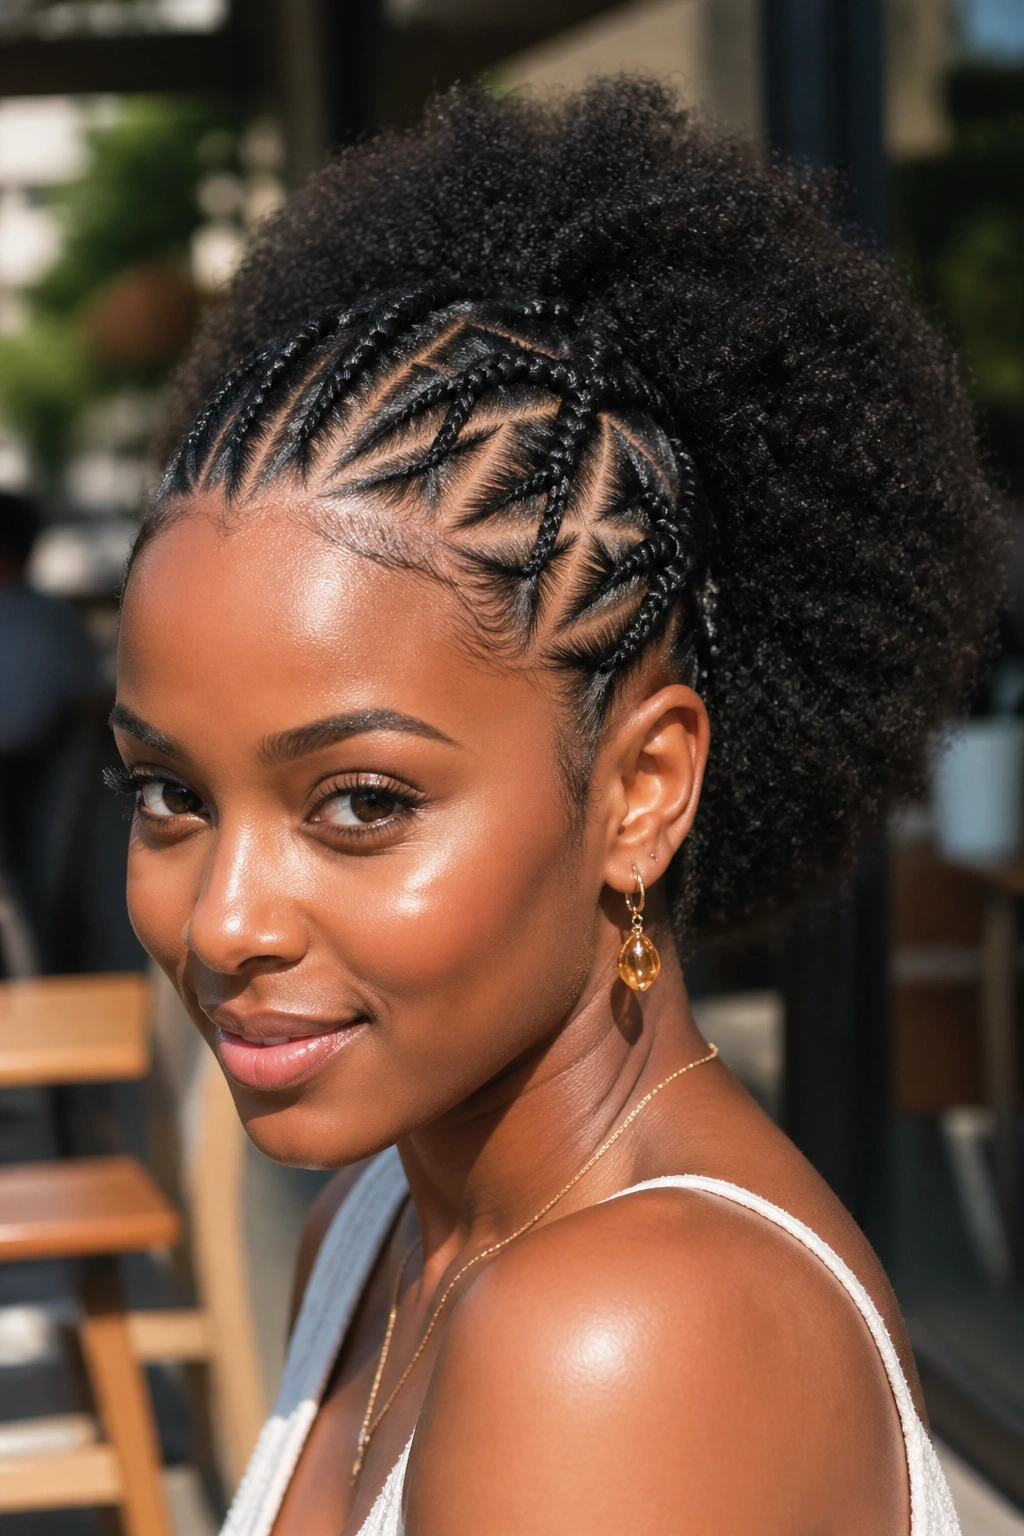
Geometric parting is underrated. Instead of straight parts, try triangular sections across the top third of your head. Each triangle gets its own small braid running back toward the crown. At the crown, all the braids meet and transition into a full afro.
The triangle pattern catches light differently as you move, and it gives your scalp a deliberate, almost architectural quality. This is a favorite of mine for events because it photographs like a custom salon style but only takes about forty-five minutes once you’re comfortable with the parting.
Precision is everything. Rush the parts and the triangles look like random trapezoids.
13. Braided Bangs With a Back Afro
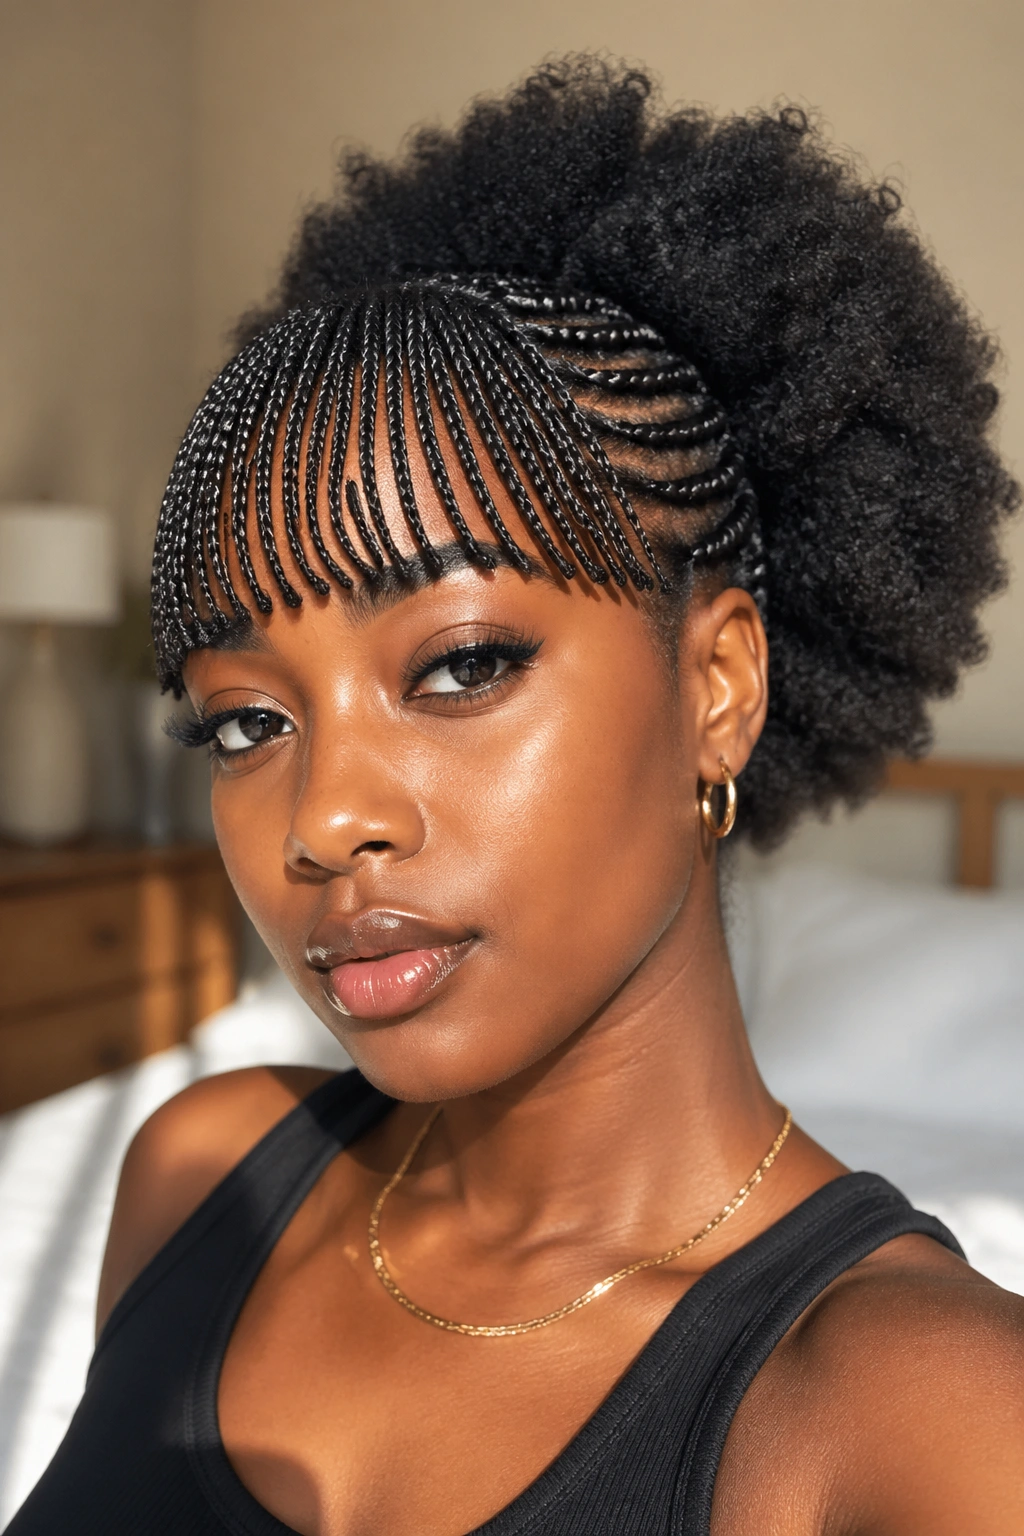
Bangs made of tiny braids. That’s the whole concept, and it’s unlike anything else on this list. Section off a curved bang-shaped portion at the front of your head and braid it into five to eight small braids that fall across your forehead. The rest of your hair stays as an afro.
It’s a bold choice. Not everyone will love how their forehead looks framed this way, and that’s fine — try it once and see. I like it because it borrows from both braid culture and bang culture without fully committing to either.
Keep the braids short enough that they don’t fall into your eyes. Roughly brow-length is ideal.
14. Cornrow Mohawk Into an Afro Crown
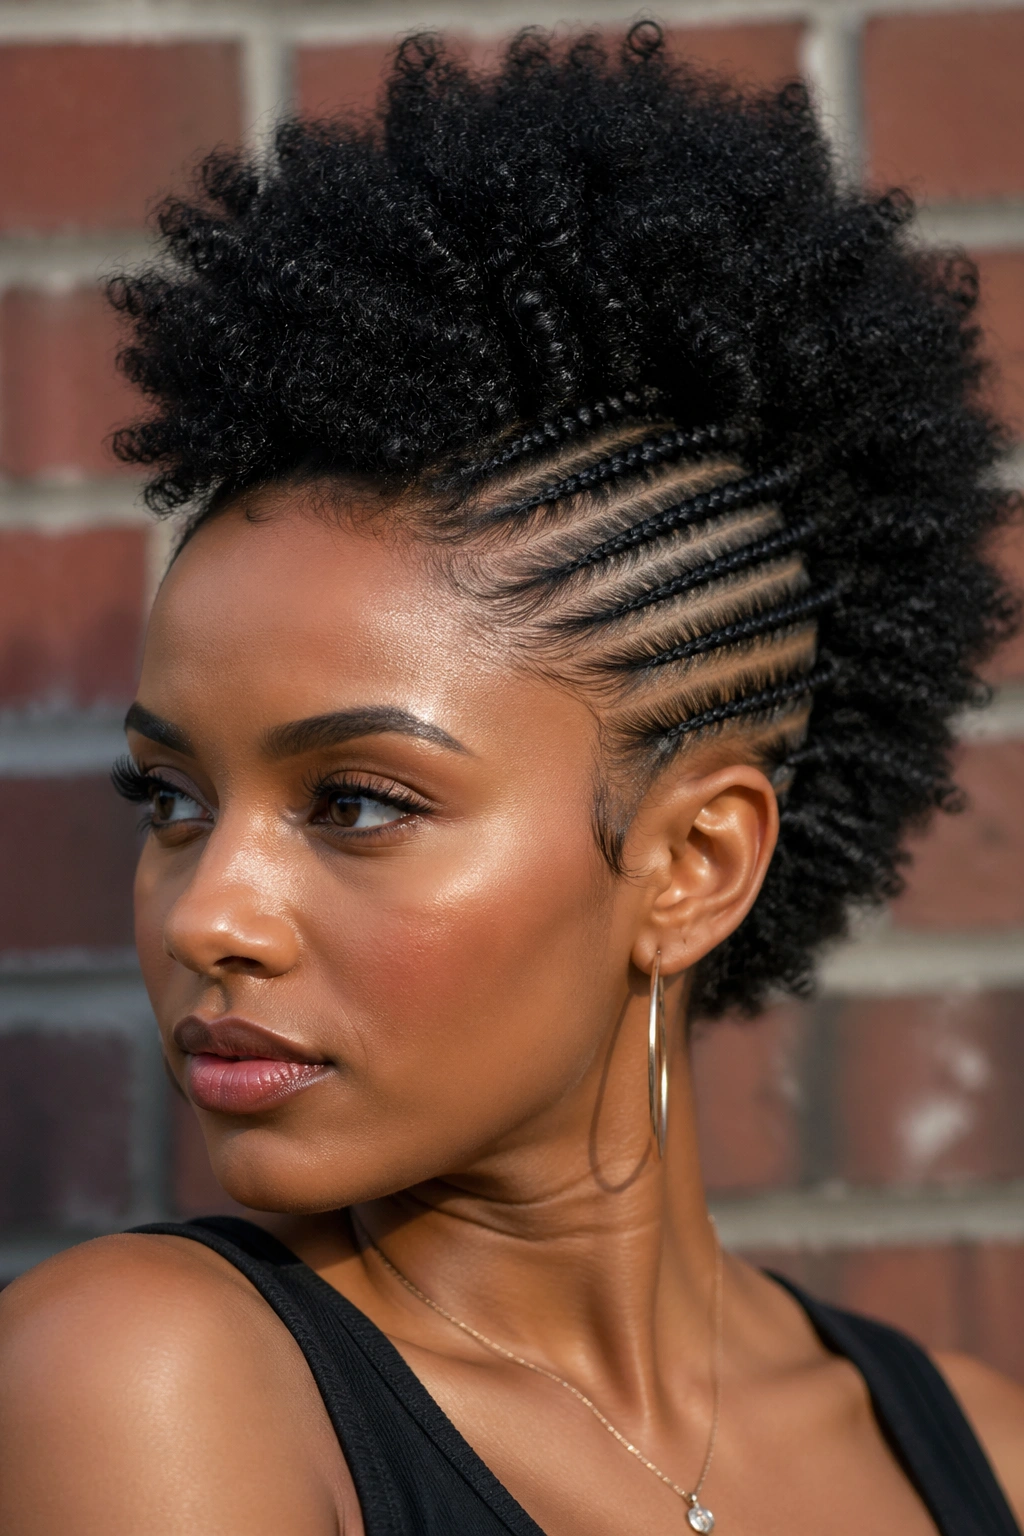
This style runs cornrows along the sides of your head, keeping them tight and close to the scalp, while leaving a central strip of afro running from forehead to nape. It’s the braided cousin of a classic mohawk, and it reads edgy without being too much for everyday wear.
The width of the central afro strip changes the whole feel. A narrow strip — maybe two fingers wide — looks punk-adjacent. A wider strip, palm-width or more, looks softer and more romantic. Pick based on your mood.
Maintenance is easy. The sides stay put for four or five days. The central afro needs a light fluff every morning.
15. Jumbo Side Braid With a Small Afro Crown
One massive braid runs along the side of your head and down past your shoulder. Above it, a compact, tightly defined afro sits at the crown. This combo works best on hair that’s been stretched thoroughly, because the side braid needs enough length to look dramatic.
Added hair is often necessary unless your natural length is already past your shoulders. A kanekalon braid extension in a color matching your natural tone blends seamlessly. Don’t try to pick an exact match — go one shade darker, because your hair shades naturally in the braid.
The weight of a jumbo braid can pull. Take it down before day four to give your scalp a break.
16. Braided Headband With Afro Puffs on Either Side
Two afro puffs, one on each side of your head, with a single braided headband running across the hairline connecting them. This is playful without being childish, and it works surprisingly well on adults if you keep the puffs substantial and the braid clean.
Think of it as the grown-up version of a style you might have worn as a kid. The difference is in the polish. Crisp part down the middle. Tight braid at the front. Puffs stretched to matching fullness. That precision is what separates childish from chic.
17. Micro Braids at the Front, Afro at the Back
Tiny braids — think pencil-width or smaller — across the front quarter of your head, blending into a full afro at the back. The micro braids add a delicate texture layer without weighing anything down, and they work beautifully on fine 4C hair that struggles to hold heavier braid styles.
The time investment is real. Budget two to three hours for the micro braid section alone. But once done, they last a solid week and reshape easily for different looks — pulled back, swept to one side, left loose across the forehead.
This combo plays well with hair jewelry. Small rings, cuffs, or wooden beads at the ends of a few braids add detail without overcrowding.
18. Braided Crown With a Low Afro Bun
A braid wraps around the top of your head like a tiara, and the rest of your hair gathers into a low afro bun at the nape. The silhouette is elegant, workplace-appropriate, and holds up through long days. It’s my go-to when I need something that reads polished in a meeting but doesn’t take more than thirty minutes to create.
How to Get the Most From It
Mist the bun area lightly with your water-and-leave-in mix before gathering it. The slight dampness helps the afro texture compress into a neater bun shape without losing its natural look.
Hold with a large claw clip rather than wrapping with an elastic. The clip gives you a rounder shape and doesn’t create a tight indent that kills the afro texture when you take it down.
19. Braided Updo With an Afro Burst at the Top
Braid the entire bottom two-thirds of your head into cornrows or flat twists running upward toward the crown. At the crown, release everything into a dramatic afro burst. The silhouette is almost like an inverted pineapple — tight and sculpted below, explosive on top.
This style rewards height. If you can stretch your hair before starting, do it. A stretched afro sitting on top of tight braids looks twice as tall as a shrunken one.
Finger-fluff the burst with a little oil on your fingertips. Don’t use a pick. Picks can flatten the burst from the sides while you’re trying to lift from below.
20. Cornrow Patterns With an Afro Fade Transition
Rather than a hard line between braids and afro, this style creates a soft fade. The cornrows gradually decrease in size as they move toward the crown, and the afro gradually increases in volume. Done well, there’s no obvious border — just a smooth gradient of texture.
The technique takes practice. You’re essentially un-braiding a little more of each row as you move upward, letting the hair transition back to its natural shape in stages. It’s the most advanced style on this list, and it looks incredible when executed cleanly.
Patience is your friend. Rushing this one shows.
21. Twisted Cornrows Into an Afro Ponytail
Cornrows twisted with alternating sections — meaning the braid pattern has a slight spiral rather than a flat plait — give the front of your head a rope-like quality. Gather everything at the crown into a high ponytail, and let the ends fan out into a full afro.
This is a good option if flat cornrows feel visually boring to you. The twisted texture adds dimension without adding any extra work — it’s just a small change in how you braid.
Use a satin-covered elastic at the ponytail base. Sharp-edged elastics will snap your hair right at the transition point, which is the last place you want a break.
22. Braided Bun With Afro Fringe
Braid everything except a small front section into a high or side bun, leaving a few inches of natural afro hanging across your forehead as a fringe. The fringe softens your face and creates a playful contrast with the sleek braided bun.
Length matters for the fringe. Too short and it looks accidental. Too long and it covers your eyes. Aim for something that falls between your eyebrows and your eyes when dry.
Who This Is For
- Anyone who finds standard updos too severe
- Faces with high foreheads that benefit from softening
- Women who want a workplace-friendly style with personality
23. Shoulder-Grazing Braids With a Compact Afro Top
Braids that end around shoulder length combined with a short, rounded afro at the crown. The proportions here are deliberate — the braids should feel substantial in length, and the afro should feel compact rather than lofty. That contrast of long and short, flat and round, creates the visual interest.
Think of it like a sculptural hairstyle. Each section has a defined shape and size, and together they form a cohesive silhouette. This is especially flattering on oval and heart-shaped faces because the proportions emphasize the jaw and soften the forehead.
Short enough to be easy, long enough to feel dressed. That’s the sweet spot this style hits.
24. Full Scalp Braids Transitioning Into a Massive Afro Tail
The final combo on this list is the most dramatic. Every inch of scalp hair gets cornrowed tight to the head, and the braids all funnel backward to meet at the nape or low back of the head. There, they release into a massive, unruly afro tail that falls past the braids.
It’s a statement style. Weddings, photo shoots, stage performances — anywhere you want to turn heads and don’t mind committing a couple of hours to the prep. The payoff is enormous. Few combos have this much visual drama.
Invest in a solid pre-poo treatment the day before. Hair this tightly braided benefits from the extra conditioning, and your scalp will thank you by the third day of wear.
Maintenance Between Washes
Combo styles last longest when you treat the braided and afro sections differently. The braids want to stay smooth and dry. The afro wants moisture and gentle fluffing. Trying to treat both sections the same — spraying everything down or touching up everything with gel — shortens the life of the style.
At night, wrap the braid sections with a satin scarf or bonnet. Leave the afro section loose or loosely covered. A silk pillowcase helps either way, but a scarf gives you more targeted protection.
In the morning, refresh the afro with a light mist of water and leave-in. Skip the braids unless they’ve frizzed — overworking them creates fuzz and loosens the plaits.
Common Mistakes to Avoid
The single biggest mistake I see is over-gelling the braid section. Too much gel dries white, flakes off, and makes the whole style look dirty by the end of day two. Use a pea-sized amount per braid, no more.
Second most common: uneven tension. Braiding tightly in some spots and loosely in others makes the style lopsided and speeds up frizz. Use consistent pressure throughout.
Third: ignoring the afro section during prep. People focus so hard on the braids that they start with a shrunken, tangled afro and wonder why it looks flat. Stretch before you start.
Fourth: refusing to use added hair when you need it. Some styles — jumbo braids, long halo braids — require length you might not have. Added hair isn’t cheating. It’s a tool.
Picking the Right Combo for Your Hair Type
4C hair with tight, dense coils works beautifully with styles that feature a pronounced afro section. The volume shines. Pick styles that let the natural texture take center stage — the high puff, the fulani side braids, the mohawk cornrow.
Looser curl patterns like 3C or 4A benefit from styles with more defined braid sections, because the looser afro won’t dominate as strongly. The stitch braids into a puff, the goddess braids with tendrils, and the braided crown all pair well with looser textures.
Short afros — under three inches — work best with styles that braid the sides and top, leaving a small rounded crown. Anything requiring length up top will fight you.
Medium-length afros, between three and six inches, are the sweet spot for most combos on this list. That length is long enough to show afro volume and short enough to style quickly.
Longer afros open up every option, including the dramatic ones. The massive afro tail, the shoulder-grazing braids, the jumbo side braid — these all reward length.
When to Take a Break From Combo Styles
Even styles you love shouldn’t stay in forever. Combo styles put tension on specific spots, particularly the transition zones between braids and afro. If you notice soreness at your edges or along the part lines, that’s your signal to take everything down, wash gently, and give your scalp at least a week of loose natural hair before starting another combo.
Hair grows best when it’s not constantly under tension. Rotating between combo styles and loose natural styles protects your length retention over the long haul. I go about two weeks in a combo, one week loose. That rhythm has worked for me, and it’s a good starting point for anyone figuring out their own cycle.
Listen to your scalp. It tells you when it’s had enough. Styles should feel like freedom, not restriction — and a good combo should leave you feeling like yourself, only dialed up a notch.