



There’s a reason so many natural hair photos that stop scrollers in their tracks feature hair falling forward around the face — because face framing curls for natural hair are one of the most flattering, expressive tools in the natural hair styling toolkit. When curls frame the face deliberately, they soften the jawline, highlight the cheekbones, draw attention to the eyes, and create a complete, finished look that says this style was intentional, not accidental. And on natural curly and coily hair, the effect is even more powerful because the texture itself adds movement, dimension, and personality that straight or wavy hair simply can’t replicate.
What Face Framing Actually Means for Natural Hair
Face framing in hair styling is the practice of positioning hair — or specific sections of it — in a way that draws the eye toward the face and creates visual balance around its features. It’s the same principle at work in portrait photography, makeup contouring, and jewelry placement: frame the focal point, and everything inside the frame looks more intentional, more polished, and more beautiful.
For natural hair, face framing usually means leaving certain curl sections loose at the front while the rest of the hair is styled in a specific way. These loose sections might be deliberate curl tendrils at the temples, a defined section of curls swept over one shoulder, a few ringlets pulled forward from a bun, or a full fringe of styled coils at the forehead.
What makes natural hair face framing so versatile is that the texture of the curls themselves does a significant portion of the work. A single perfectly coiled ringlet at the temple frames the face differently than a loose, large wave section — both are face framing, but they create different moods, suit different face shapes, and work with different curl patterns. There’s no single template.
Why Face Framing Works With Every Face Shape
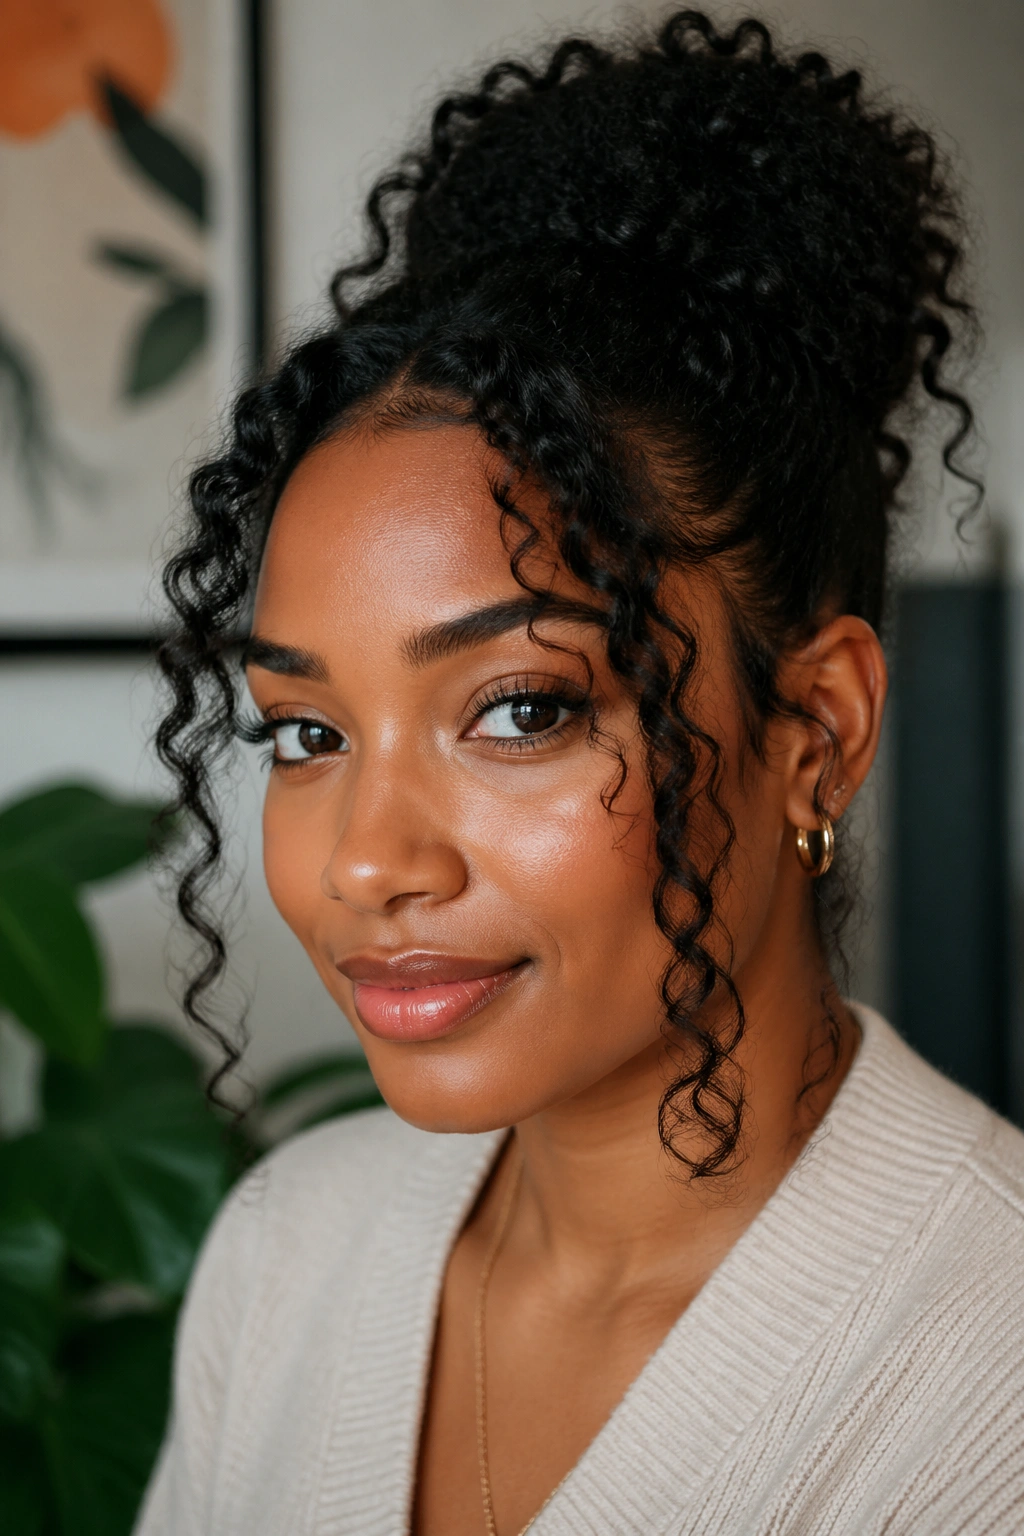
The face framing concept is nearly universal because it can be customized to work with any face shape. The key is understanding what each face shape benefits from and choosing a curl placement that provides it.
Round faces benefit most from face framing that adds vertical elongation — curls that fall downward from the temples rather than curls that spread outward to the sides. A long ringlet hanging from the temple adds length to the face visually, while a wide, bushy section adds width, which a round face typically doesn’t need.
Oval faces are the easiest to face-frame because balanced proportions mean almost any curl placement works. Curls at the temples, a curly fringe, curls swept to one side — all of these flatter an oval face.
Square faces need softness. Face framing curls on a square face should be soft in texture — loose waves or wispy ringlets at the cheekbones and temples, rather than tight, structured coils. The goal is to break up the angular lines of a square face shape.
Long faces benefit from face framing that adds width — curls that spring outward from the sides of the head rather than falling straight down. A full crown of curls or curls pushed forward at the temples adds horizontal dimension that visually shortens a long face.
Heart-shaped faces are beautifully served by face framing curls that add volume and width at the chin and lower cheek area — pulling the eye downward toward the narrower jaw and balancing the wider forehead.
The Role of Curl Type in Face Framing
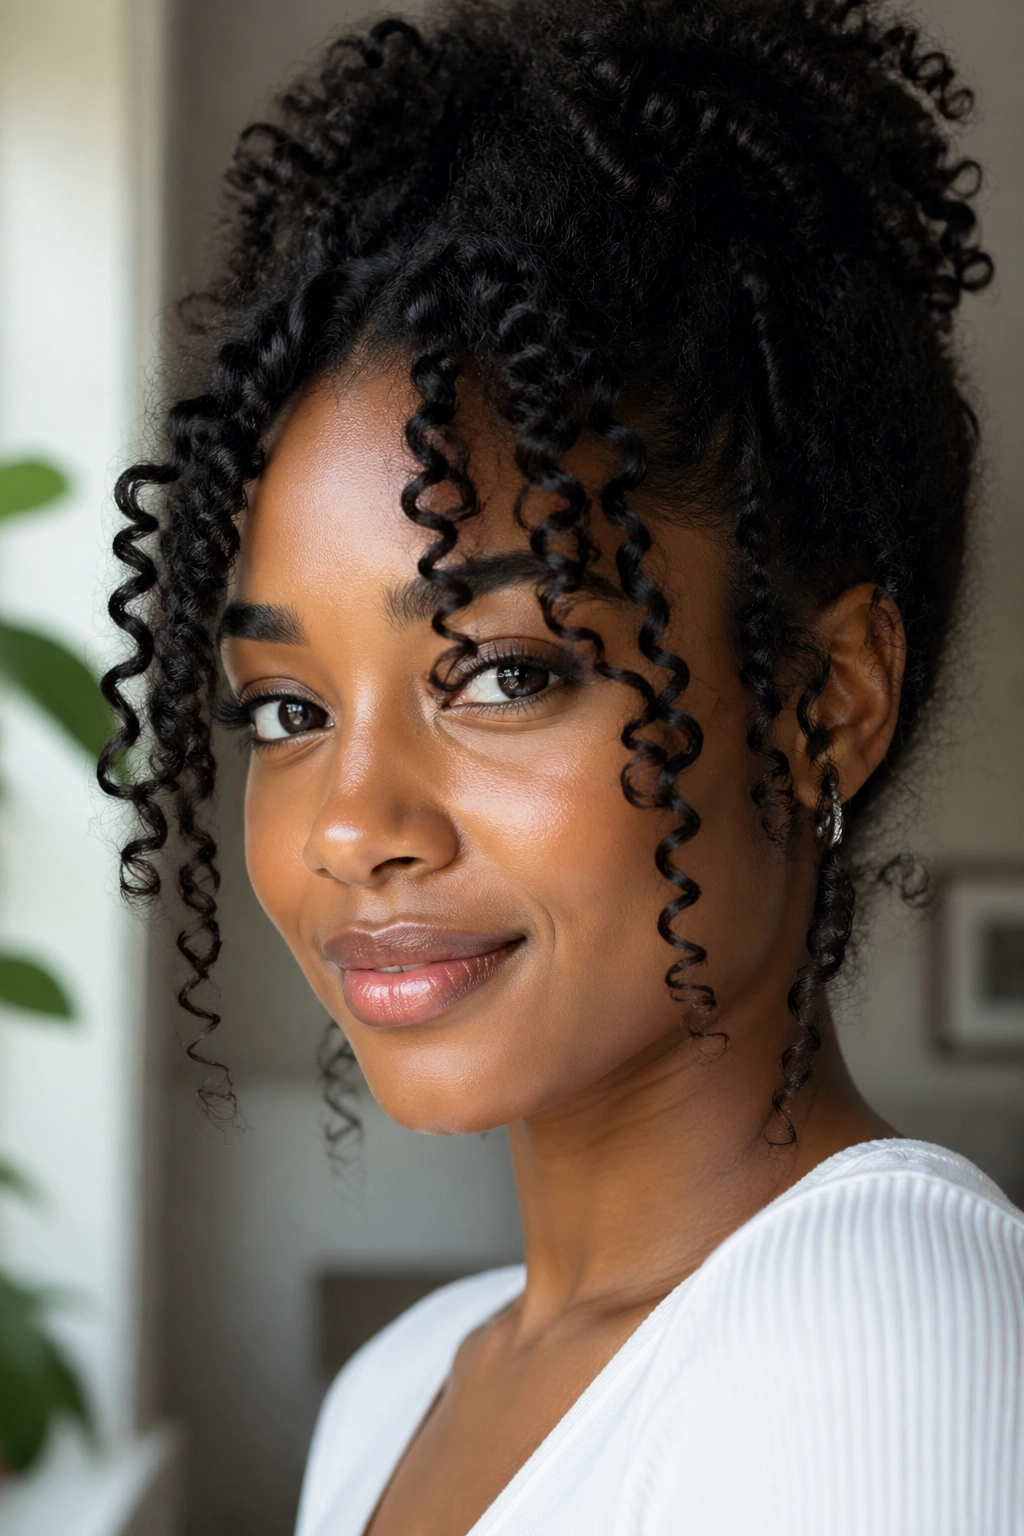
Your natural curl pattern shapes what face-framing looks are achievable and which will work best for you. This is worth understanding before you attempt any of the styles in this article.
Type 3 hair (3A, 3B, 3C) creates face-framing curls that hang, fall, and bounce. The curls have weight and defined spiral or ringlet shapes that are clearly visible against the face. On 3A and 3B hair, face-framing curls tend toward soft, flowing ringlets — romantic and light. On 3C hair, they’re tighter and bouncier with a more dramatic spring.
Type 4A hair creates face-framing curls that are tightly coiled but still hang with some weight. Individual coils are clearly defined, and with moisture and product, they can be elongated slightly to fall more deliberately around the face.
Type 4B and 4C hair creates face-framing sections that spring outward rather than hanging down. The coils are tight enough to defy gravity, which creates a different kind of face framing — the curls frame the face like a halo rather than curtains. This can be absolutely beautiful, but it requires a different styling approach than looser curl types.
How Products Create (or Ruin) Face Framing Curls
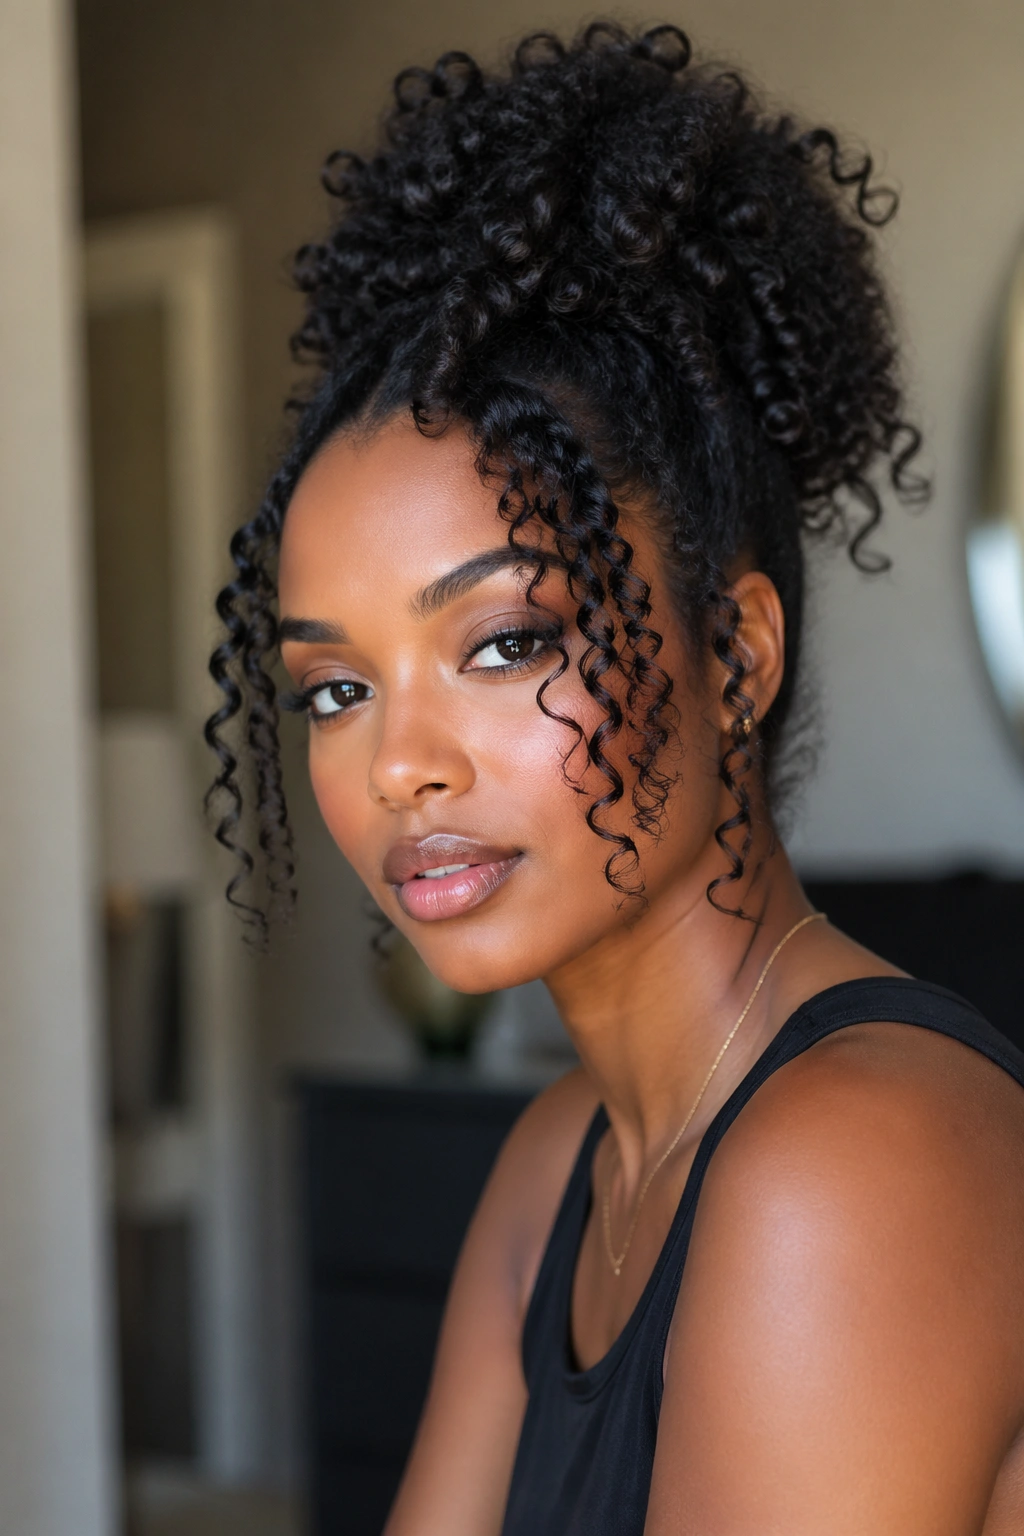
The right products make face-framing curls look defined, intentional, and lasting. The wrong ones — or the right ones applied in the wrong amounts — create frizzy, undefined sections that blur rather than frame the face.
Curl defining cream is the foundation for most face-framing curl styles. Applied to damp hair in the framing sections, it defines each curl, adds moisture, and prevents the sections from separating into frizz as they dry.
Gel adds hold and longevity. For face-framing curls you want to last all day, a small amount of gel over the cream creates a light hold that keeps the curls defined and in position. The curl cast formed by the gel can be broken by scrunching or finger-combing once fully dry for a softer, touchable result.
Shine serum or oil on the face-framing sections adds gloss and definition to the curl tips, making them pop against the skin. Apply sparingly to avoid weighing the curls down or creating a greasy appearance.
Anti-humidity spray is worth considering on days when humidity is high. It creates a barrier on the curl surface that slows the rate at which moisture from the air causes frizz and expansion.
The Technique for Defining Face-Framing Sections Separately
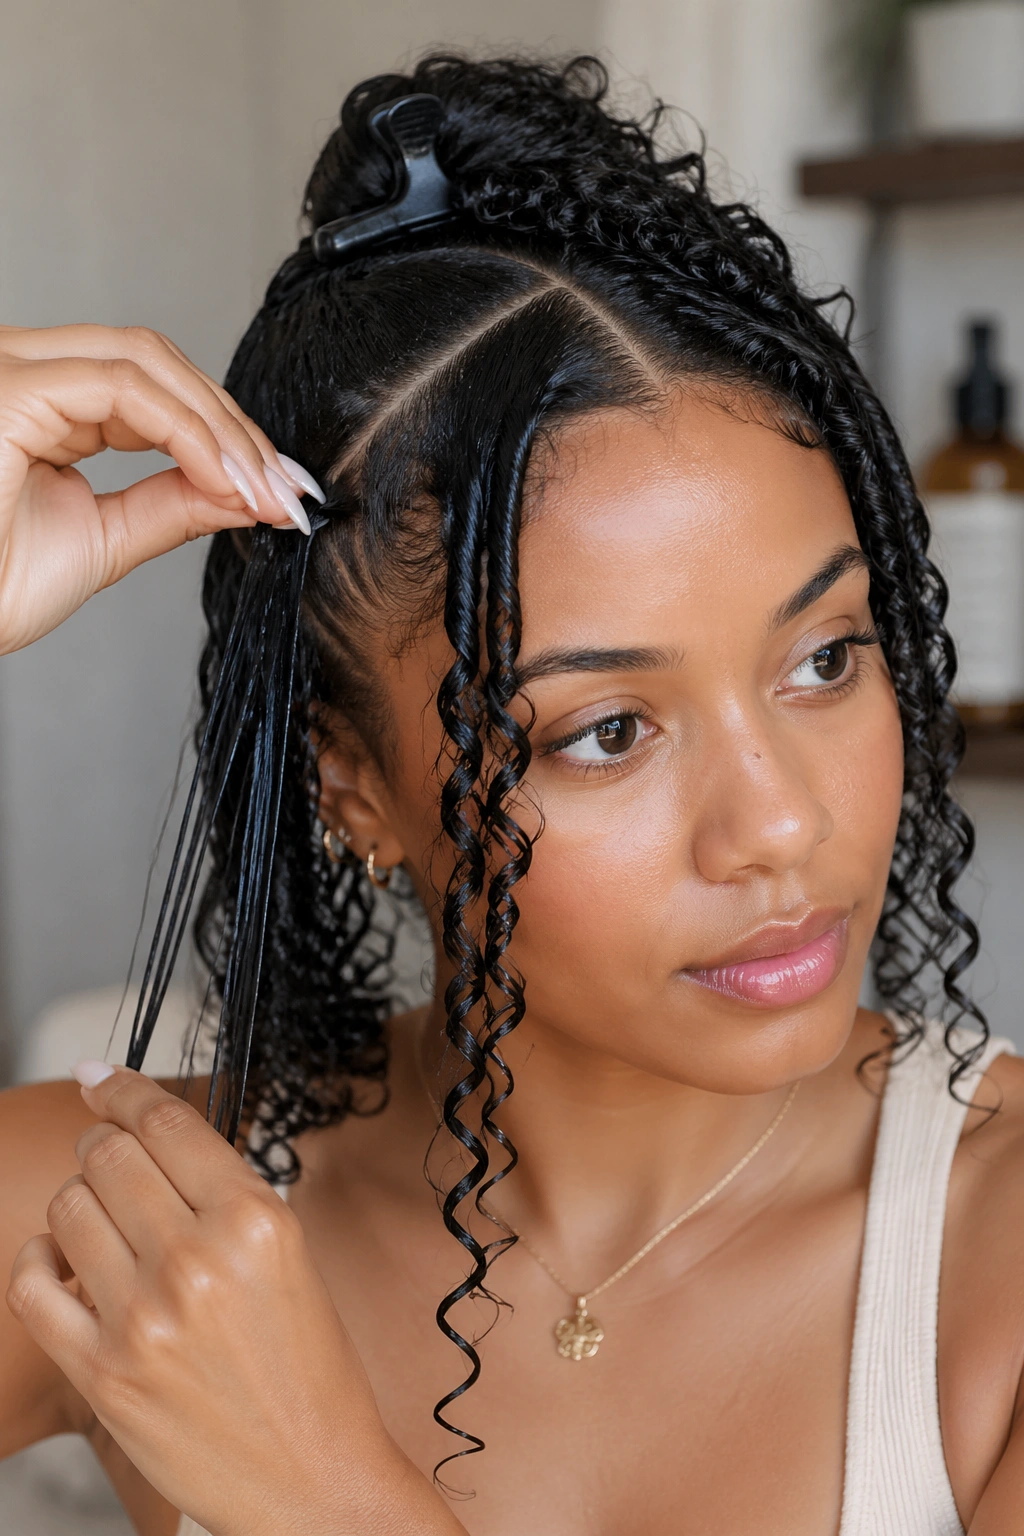
Face-framing curls often need slightly different product application than the rest of the hair. If the body of the hair is in a puff or a bun, the face-framing sections are the only part that’s down — which means they need to look their best independently, not just as part of a larger style.
Apply products to the face-framing sections first, before styling the rest of the hair. Rake or smooth the products through each section while damp, coil any sections that need extra definition by wrapping them around your finger, and let them dry before manipulating the rest of the hair into its final style. This ensures the face-framing curls are fully defined before you start pulling, pinning, or arranging the rest of the hair.
1. Temple Ringlets Against a Natural Updo
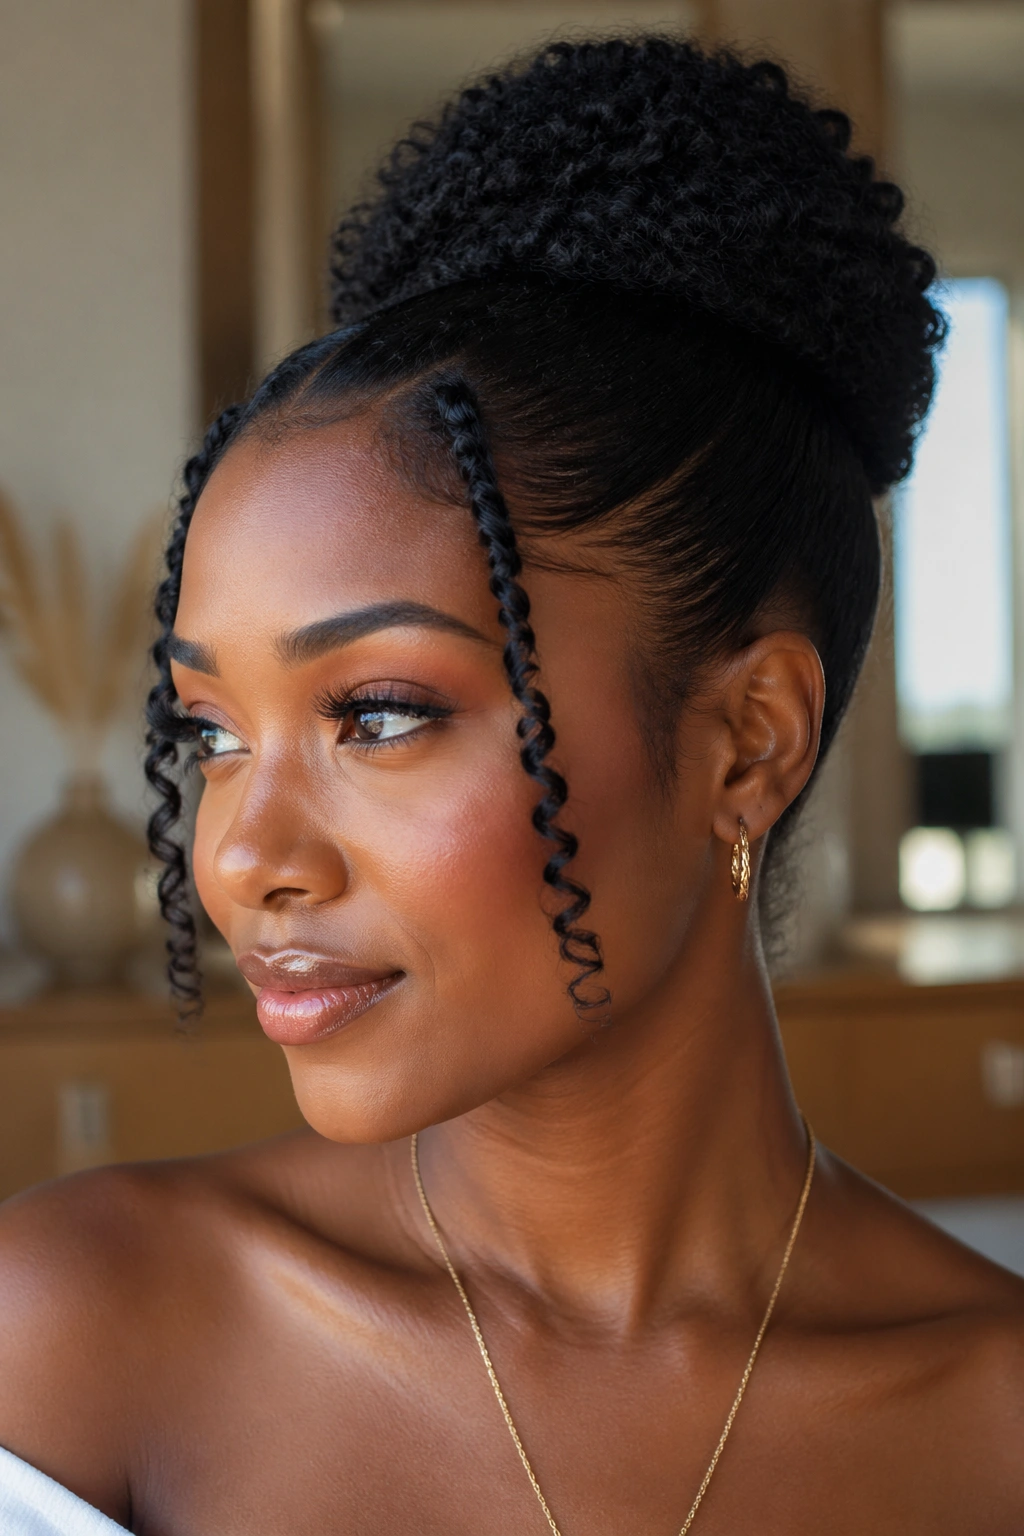
One of the simplest and most effective face-framing techniques: two defined ringlets, one at each temple, left loose against a natural updo. The ringlets can be finger-coiled, rod-set, or simply washed and defined with cream and gel. The updo — a bun, puff, or braided style — keeps the rest of the hair contained and polished, while the ringlets frame the face on each side.
This look is elegant, timeless, and genuinely easy. The contrast between the tidy updo and the loose ringlets is the whole style — no other elements needed. Scale the ringlet size to your curl type: larger spirals for looser textures, tighter coils for type 4 hair.
2. Face-Framing Curl Section From a High Puff
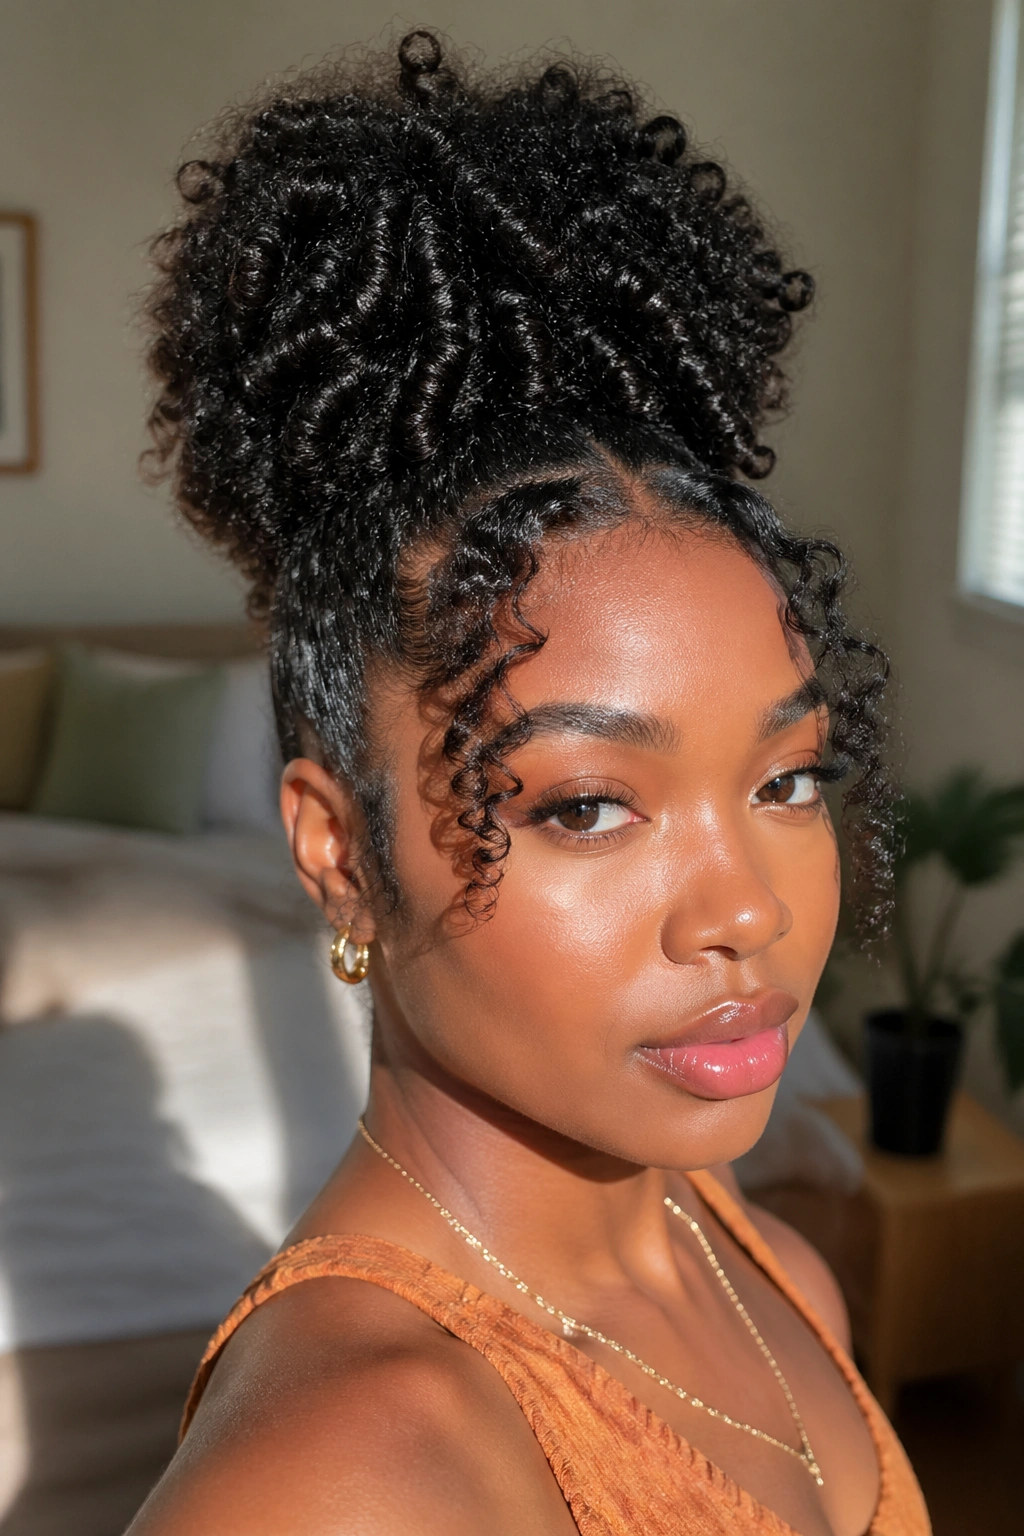
A high puff with a deliberately released curl section at the front. Instead of pulling all the hair up into the puff, leave the very front section — approximately 1–2 inches along the hairline — out of the puff. Define this section with cream and gel, coil any sections that need help, and let them fall forward against the forehead and temples.
The puff provides height and volume at the crown. The face-framing curls at the front add softness and personality below. Together, the look is both full and personal.
3. Single Curl Frame on One Side
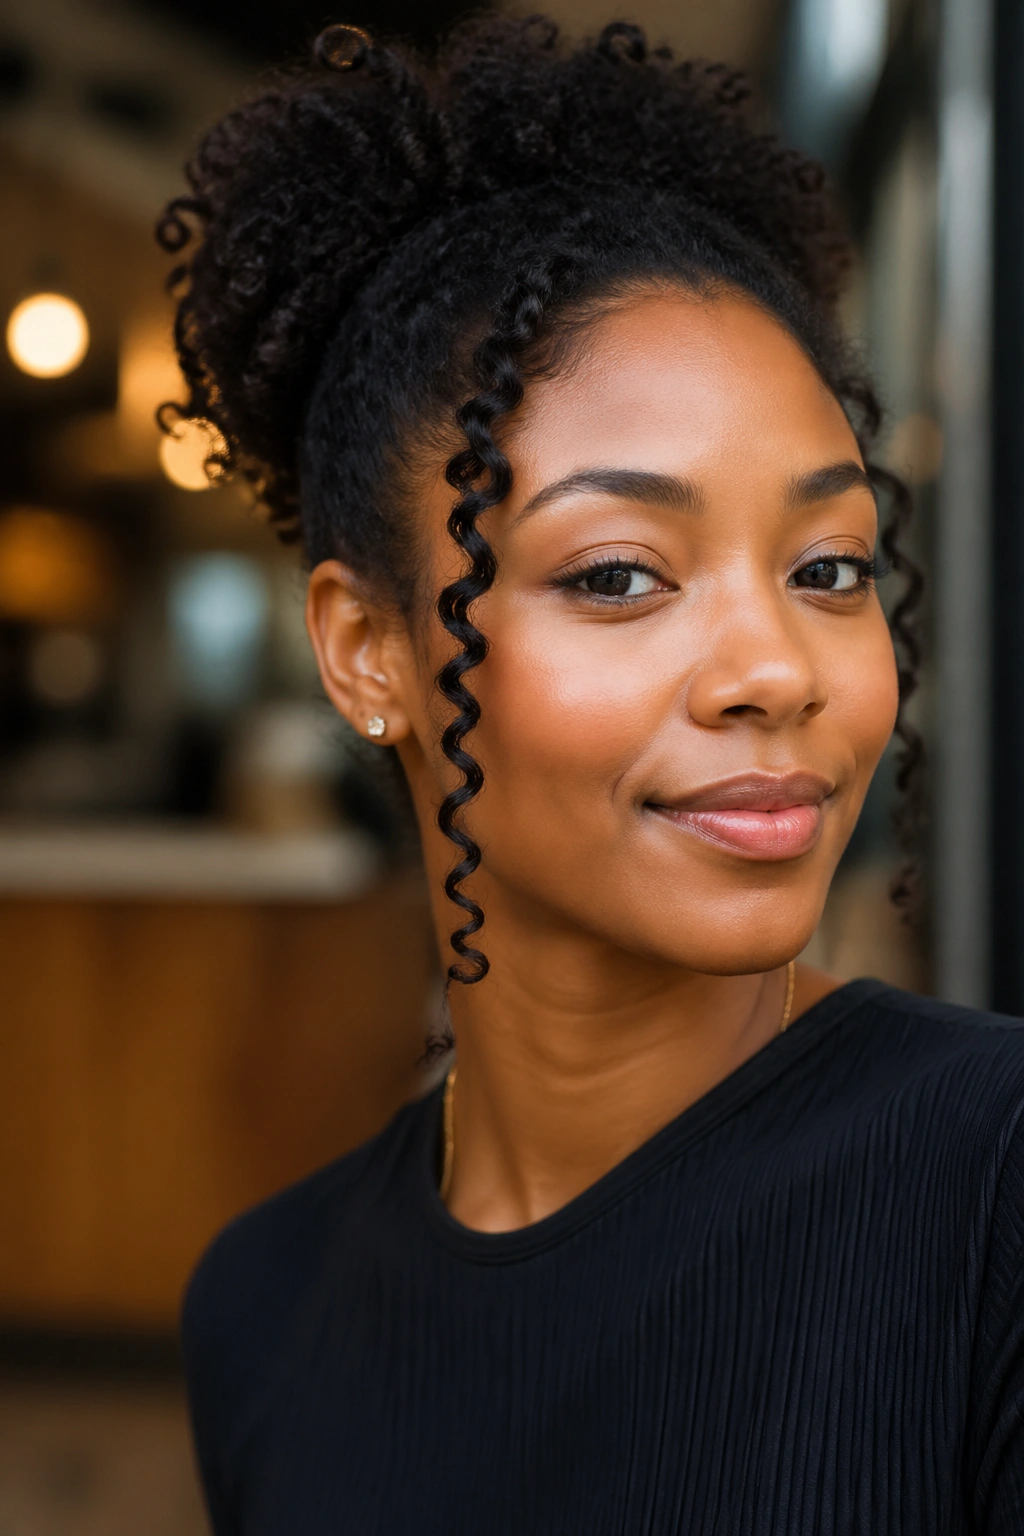
Asymmetric face framing — one defined curl section on one side only. A single coiled ringlet or a small cluster of curls at one temple, while the opposite side is smooth against the head or tucked behind the ear. The single-sided frame draws attention asymmetrically and creates a slightly editorial, fashion-forward quality.
This works on any hair style — a bun, a puff, a half-up, or hair worn down. The single framing element adds personality without requiring symmetry.
4. Defined Curl Tendrils Against a Sleek Style
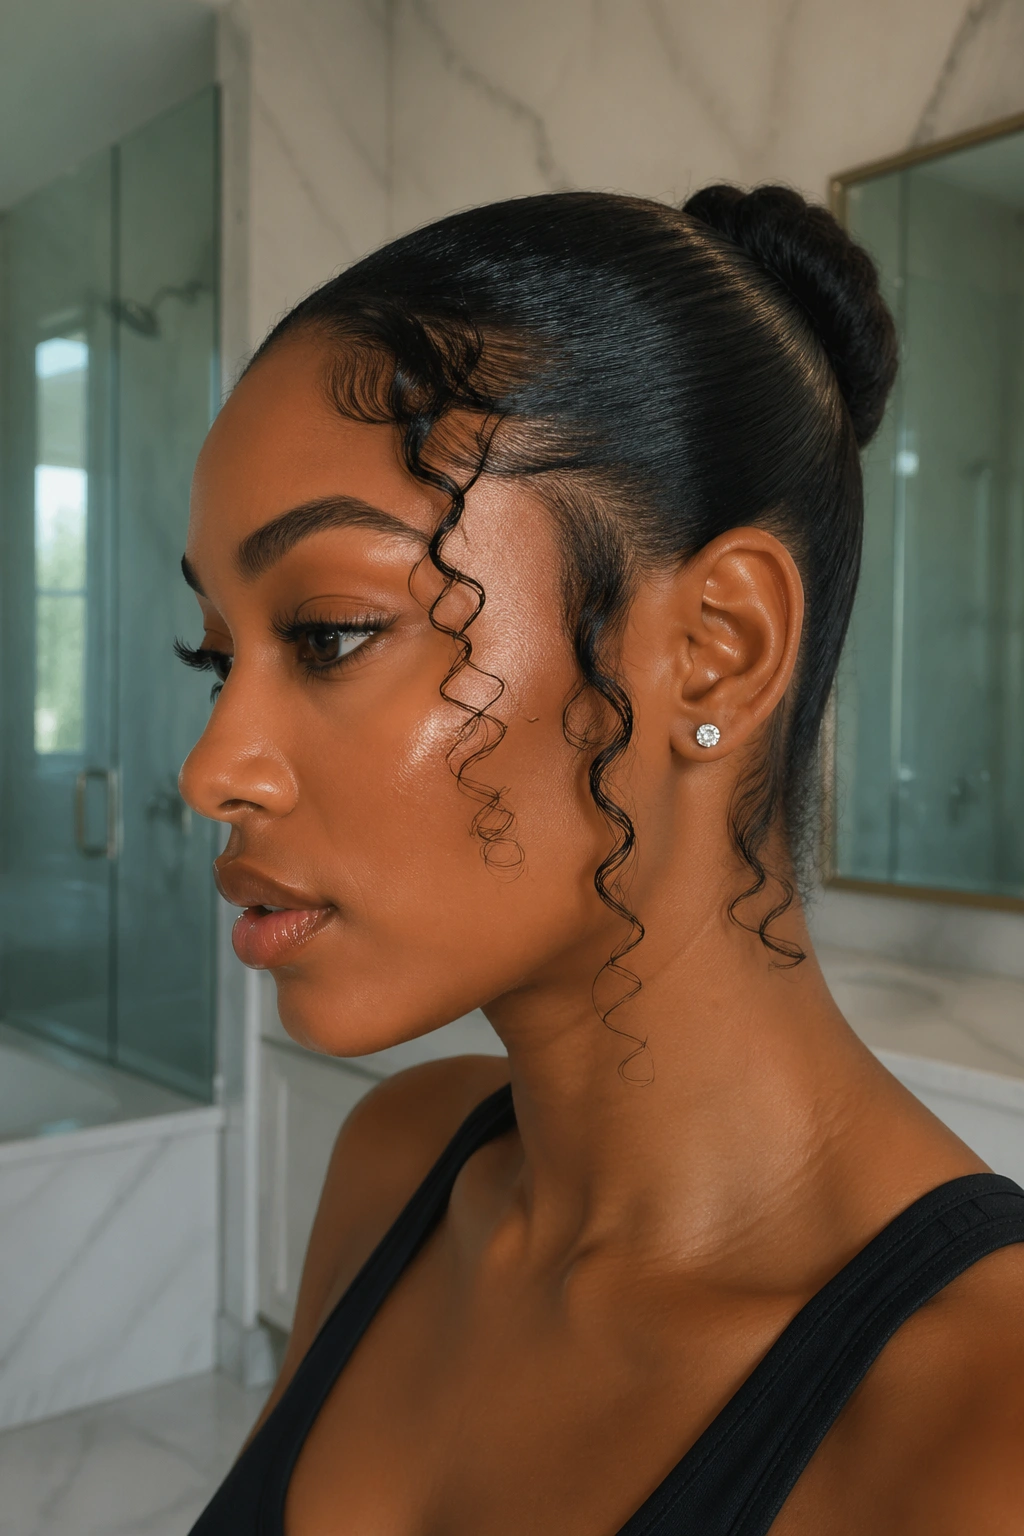
In a sleek ponytail or sleek bun style, pulling a few defined curl tendrils loose at the temples and nape creates a romantic contrast between the smooth, polished base and the textured, natural framing elements. The tendrils should be genuinely defined — not frizzy wisps, but actual curled sections.
Define the tendrils before styling the rest of the hair sleek. Use cream and gel on these sections, coil them with your fingers while damp, and let them set fully before applying gel and edge control to the sleek sections.
5. Long Face-Framing Curls From a Half-Up Style
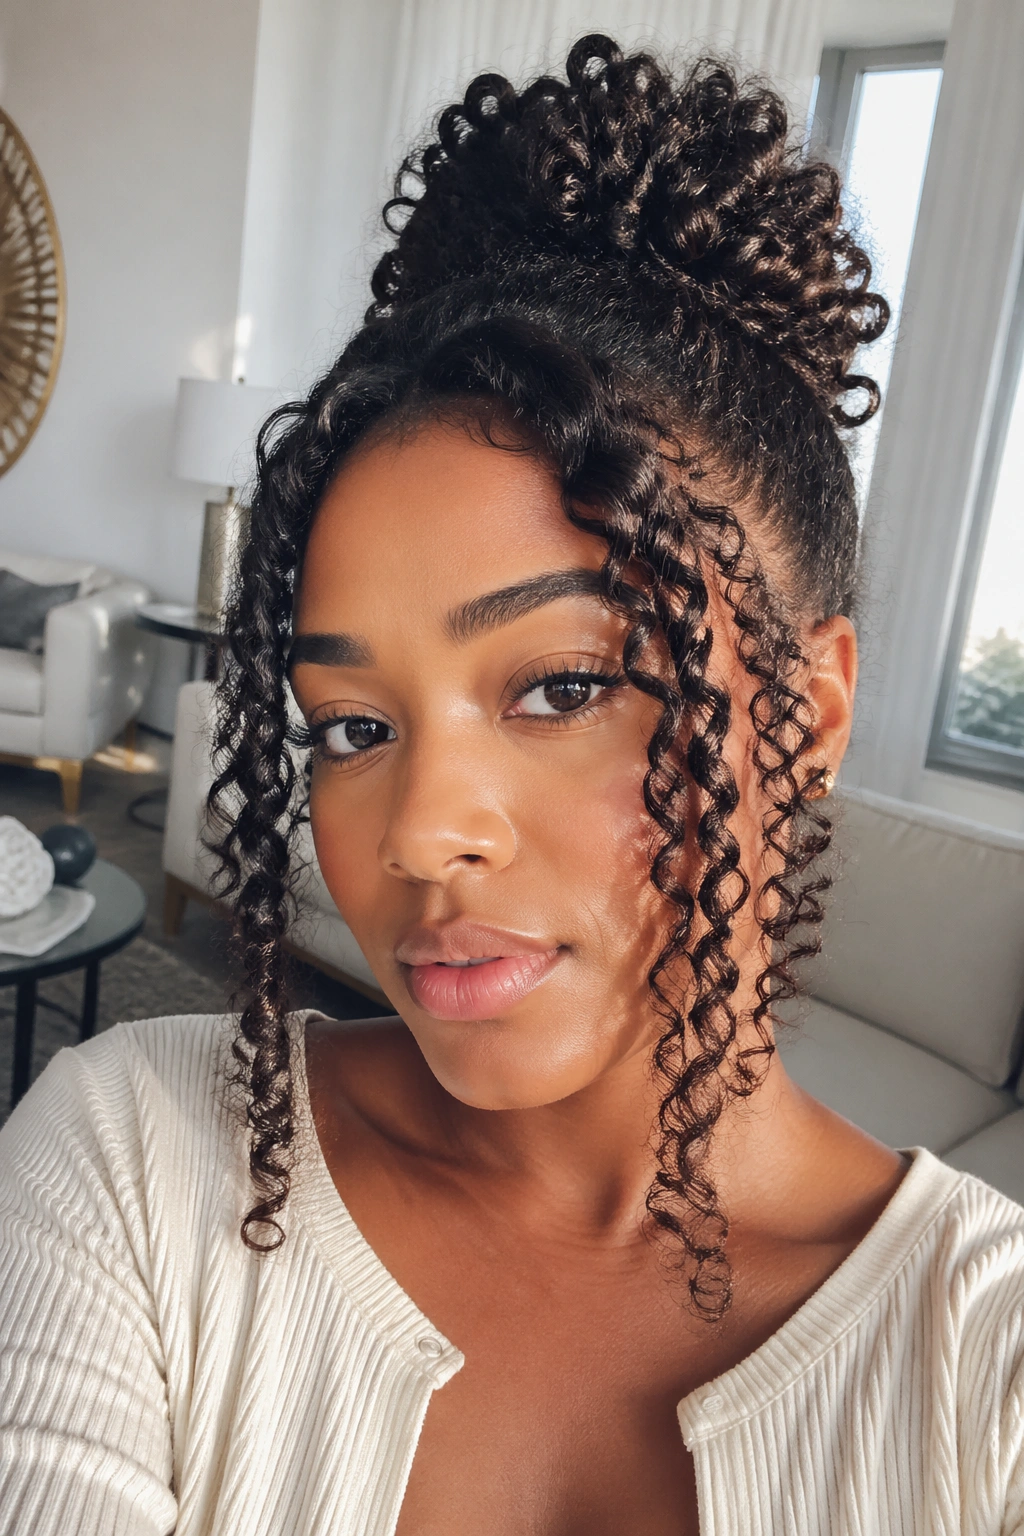
In a half-up, half-down style, the face-framing elements can be drawn from both the free bottom section and deliberately released pieces at the temples. Long face-framing curls — falling past the cheekbones and toward the chin — create a dramatic, sweeping frame that works especially well on medium to long natural hair.
Pull these long framing pieces forward slightly while styling so they fall against the face rather than blending into the rest of the hair at the sides.
6. Braid-Out Waves as Face Framing Elements
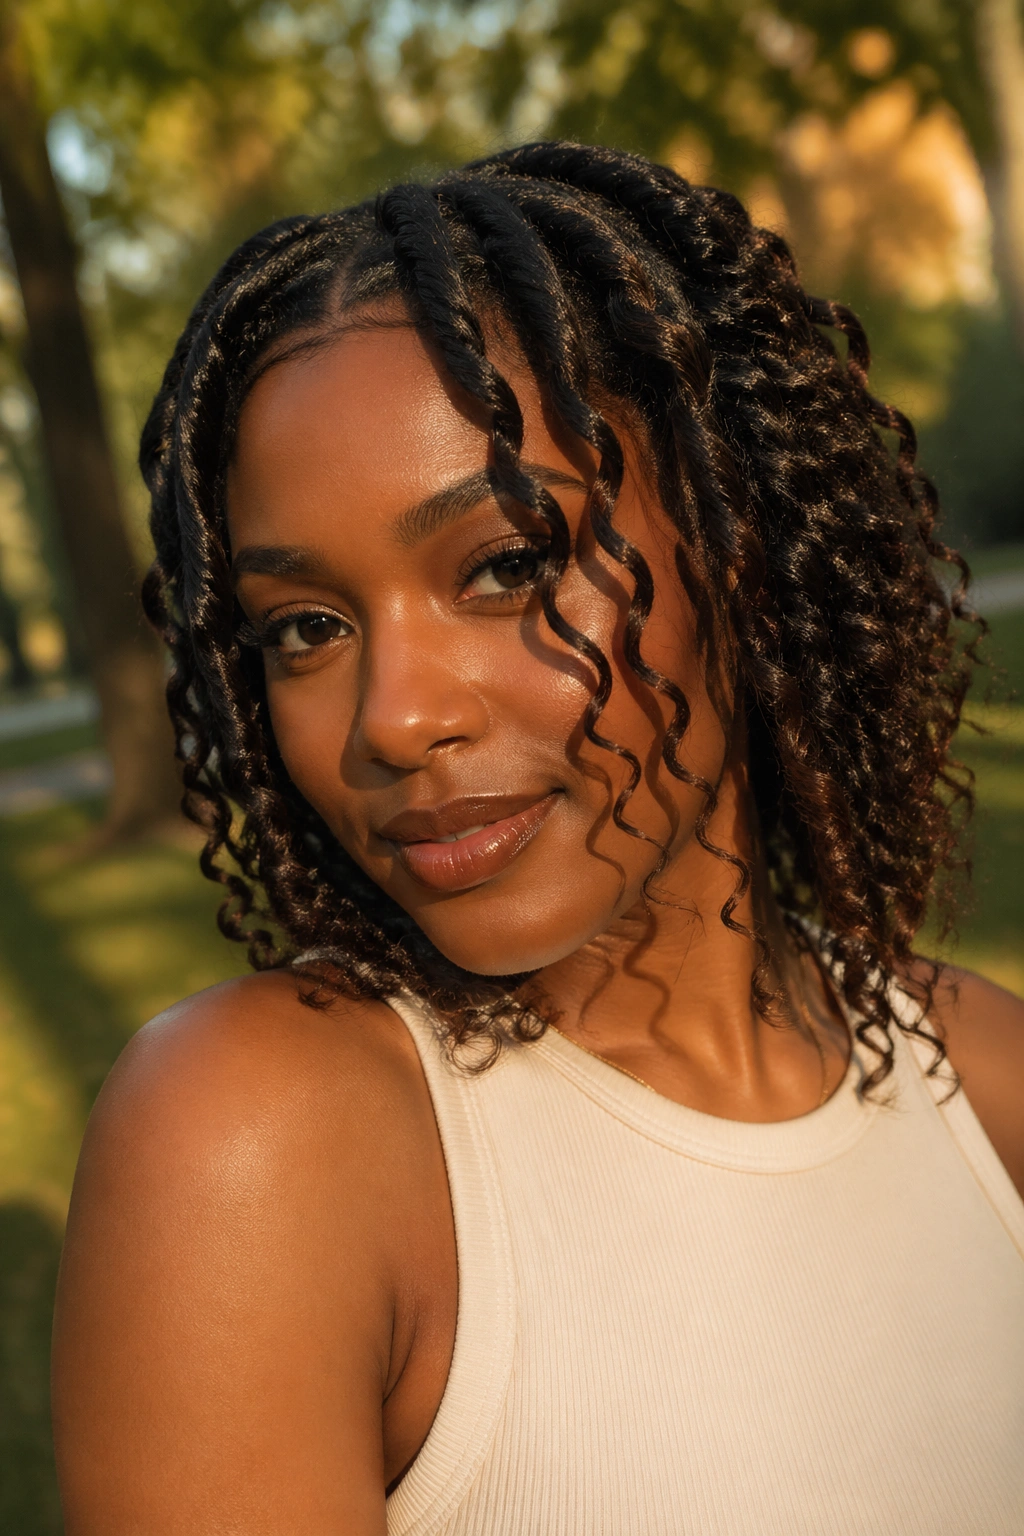
A braid-out worn down, with the front sections of the braid-out positioned and defined to frame the face. The braid-out wave pattern creates a distinct, angular wave that frames the face in a slightly different way than a smooth curl — more textured, more defined, with visible zigzag ridges from the braid pattern.
On type 4 hair, braid-out face framing is particularly effective because it elongates the curl pattern enough to create visible waves that fall against the face rather than spring away from it.
7. Face-Framing Curls With a Silk Press Body
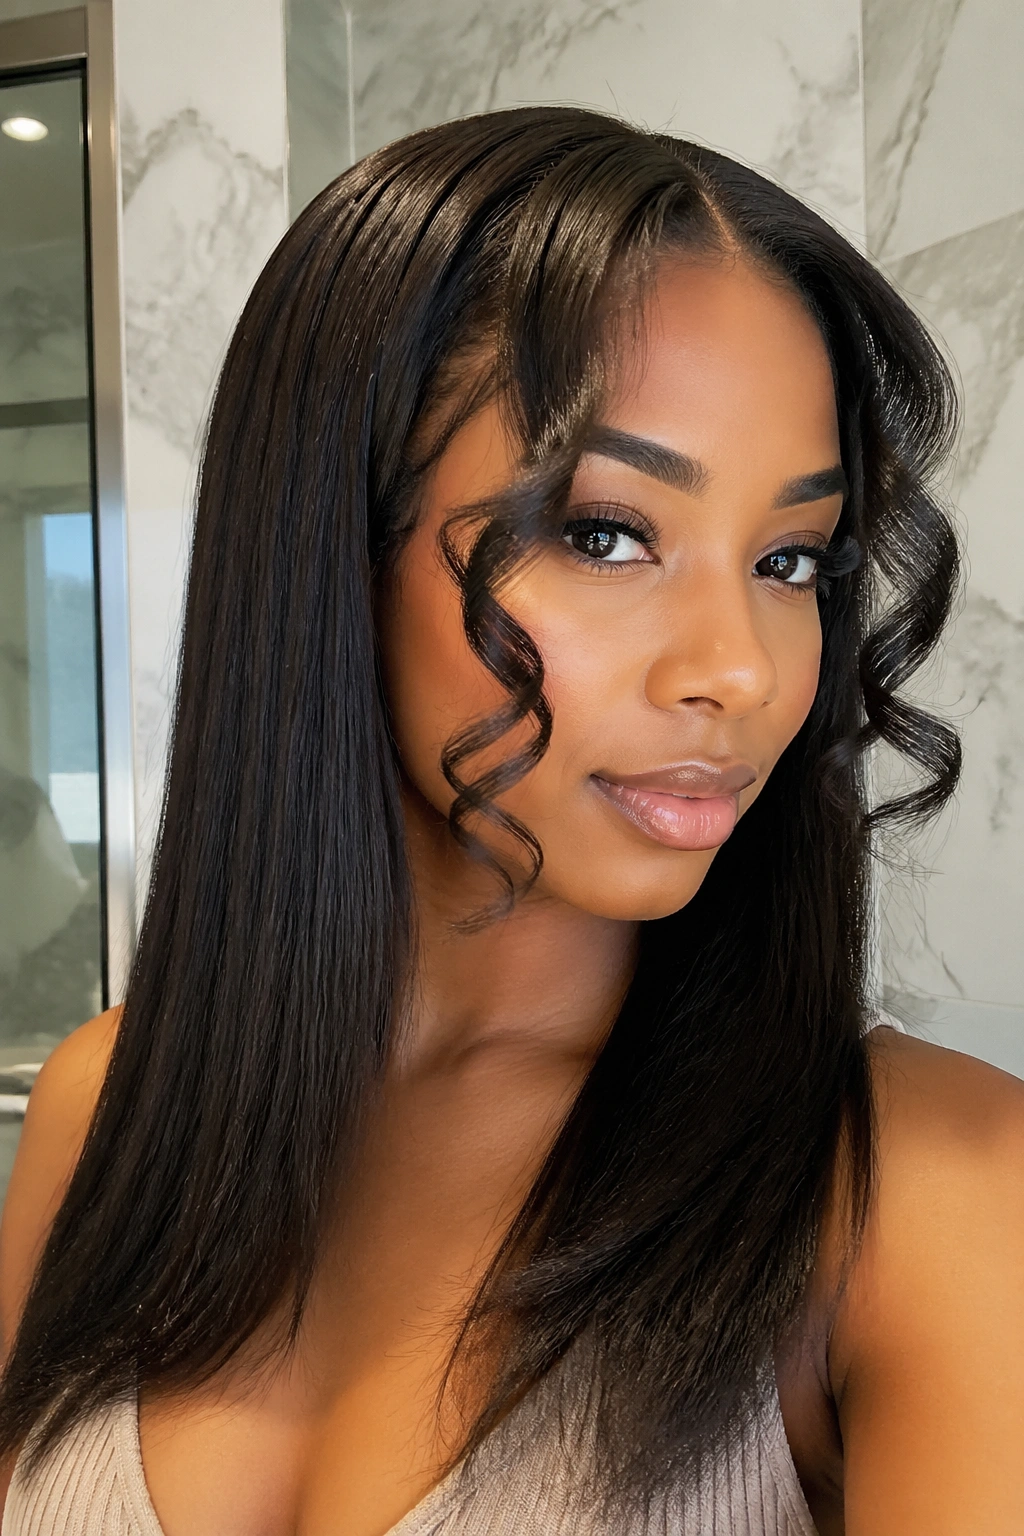
A silk-pressed style where the body of the hair is smooth and sleek, but the front sections are curled in deliberate, defined ringlets that frame the face. The front curls are applied with a curling iron after the silk press base is complete.
The contrast between the silk-pressed body and the deliberate curly front sections is the visual statement. The curls at the front look intentional and styled rather than simply untamed — because they’re juxtaposed with the sleekness behind them.
8. Fluffy Curl Frame on a Type 4 Afro
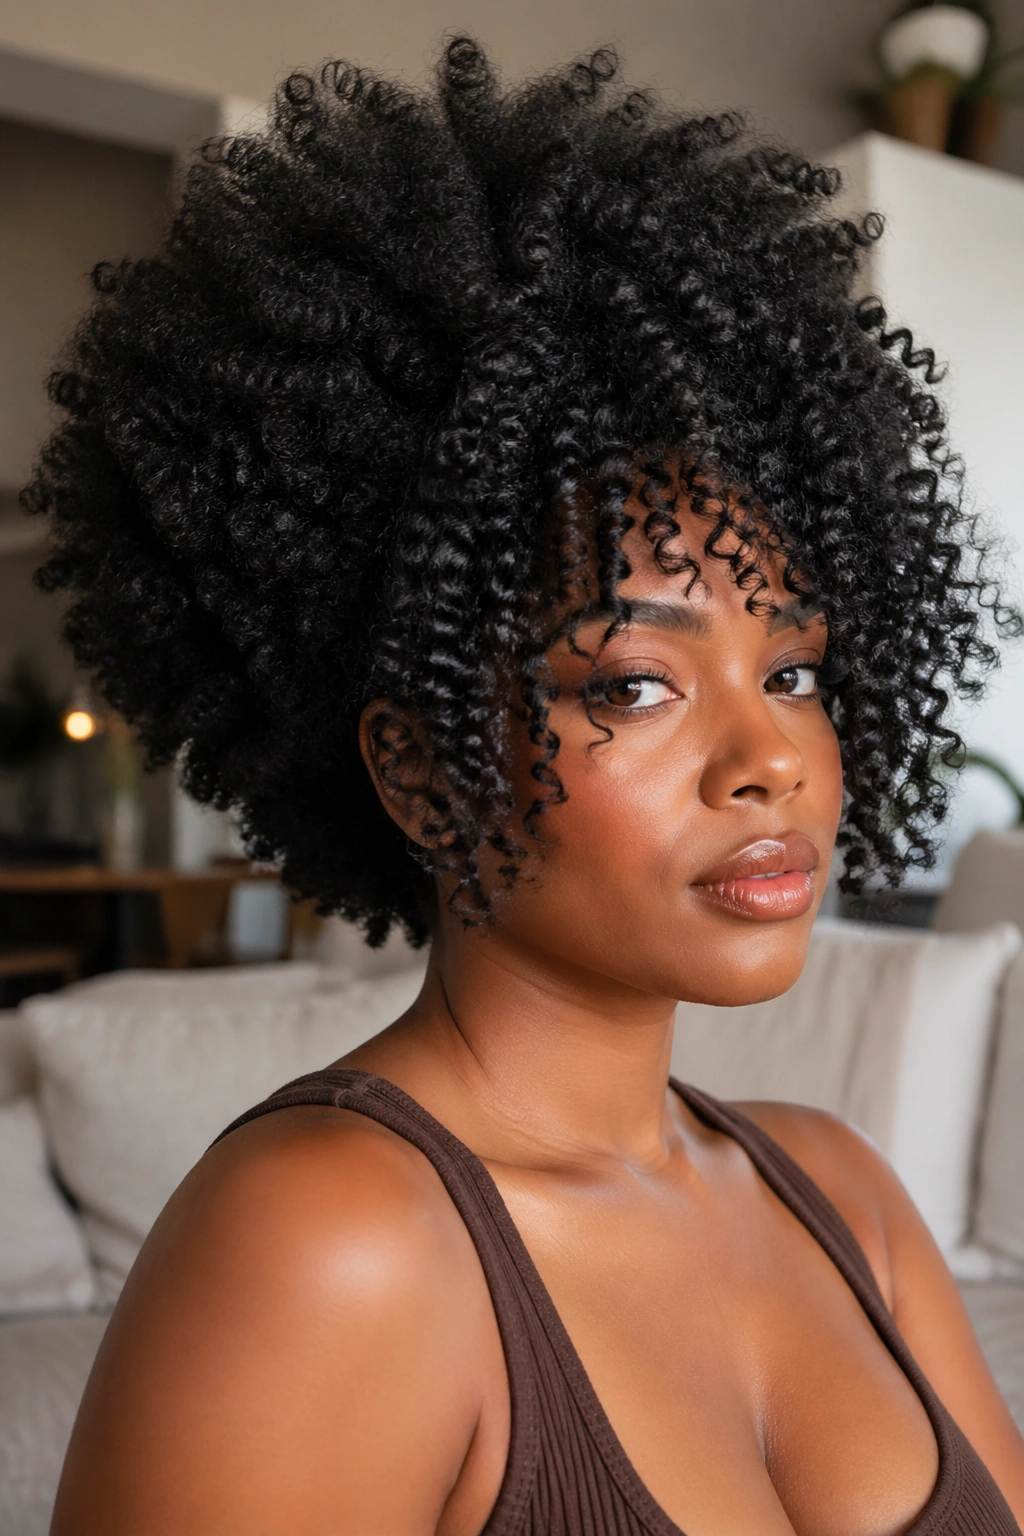
On a full afro, face framing is about directing the front section of the afro forward and downward rather than letting it rise straight up like the rest of the style. Use your fingers to pull the front section of the afro forward and slightly downward, defining the curls with a small amount of curl cream or pomade.
The rest of the afro rises and expands. The face-framing front section flows forward. The combination is full and framing simultaneously. This is a beautiful look on large, dense type 4 afros.
9. Finger-Coiled Face-Framing Sections on Type 4 Hair
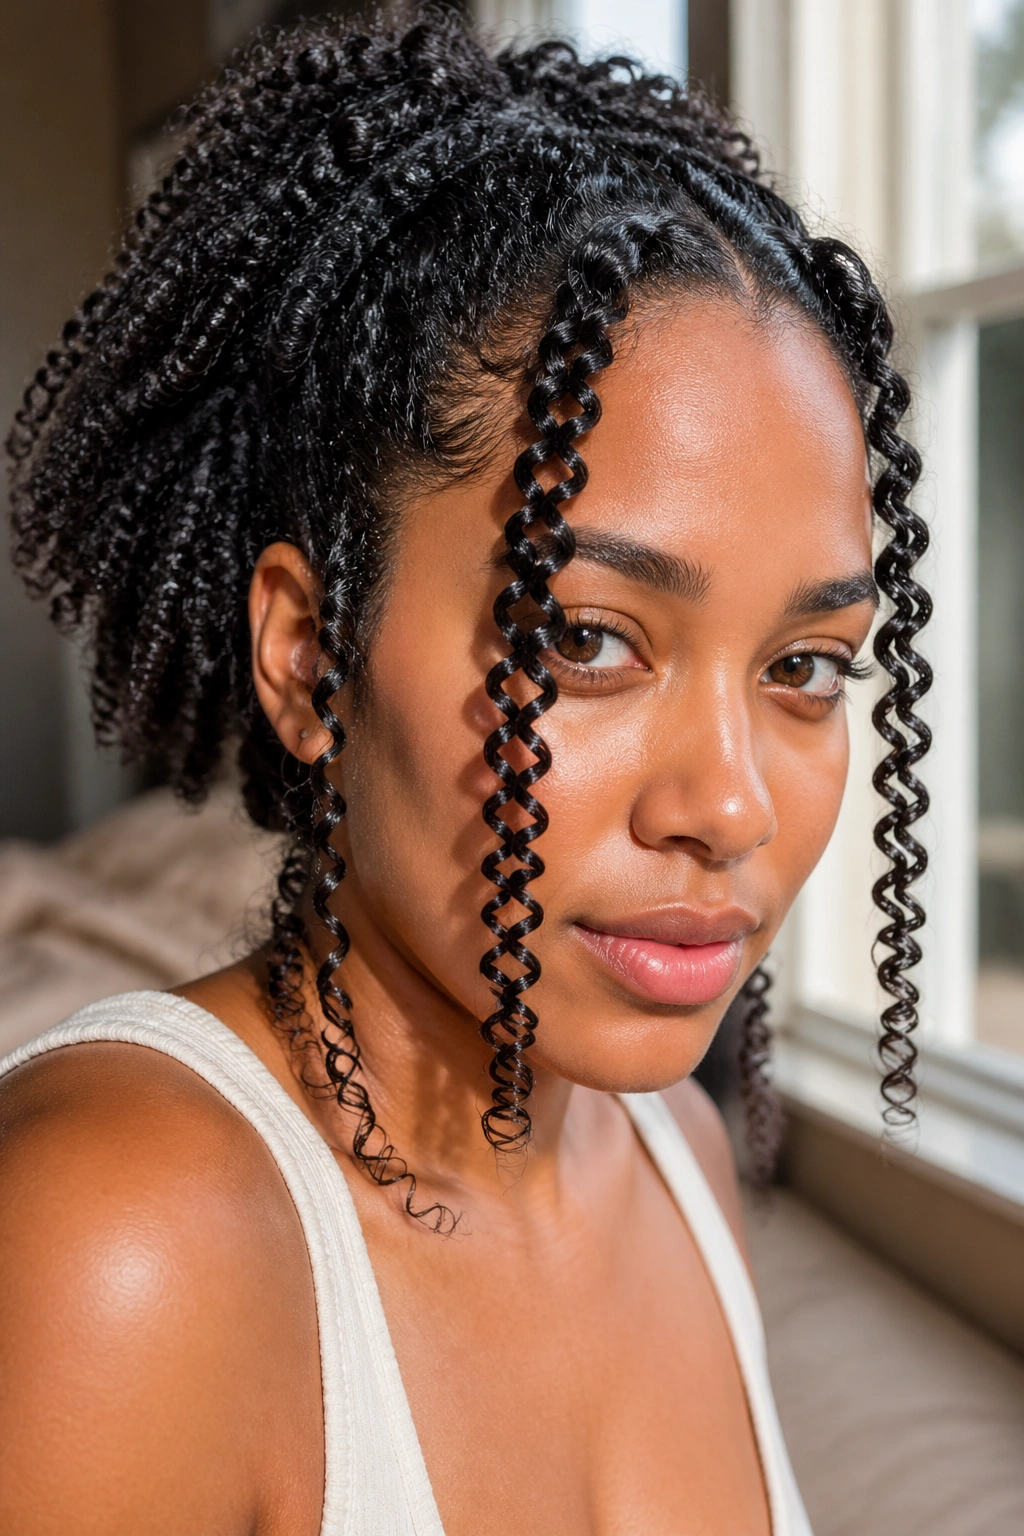
Finger-coiling individual sections of the face-framing area on type 4 hair creates the most defined possible framing for tightly coiled textures. While the hair is damp and product-saturated, wrap small sections of the face-framing area around one finger from root to tip, hold for a moment, then release. Repeat across the entire framing section.
The resulting coils are tight, defined, and spring against the face in a precise, intentional cluster. This technique produces the longest-lasting definition for type 4 face-framing curls.
10. Face-Framing Curls With Color
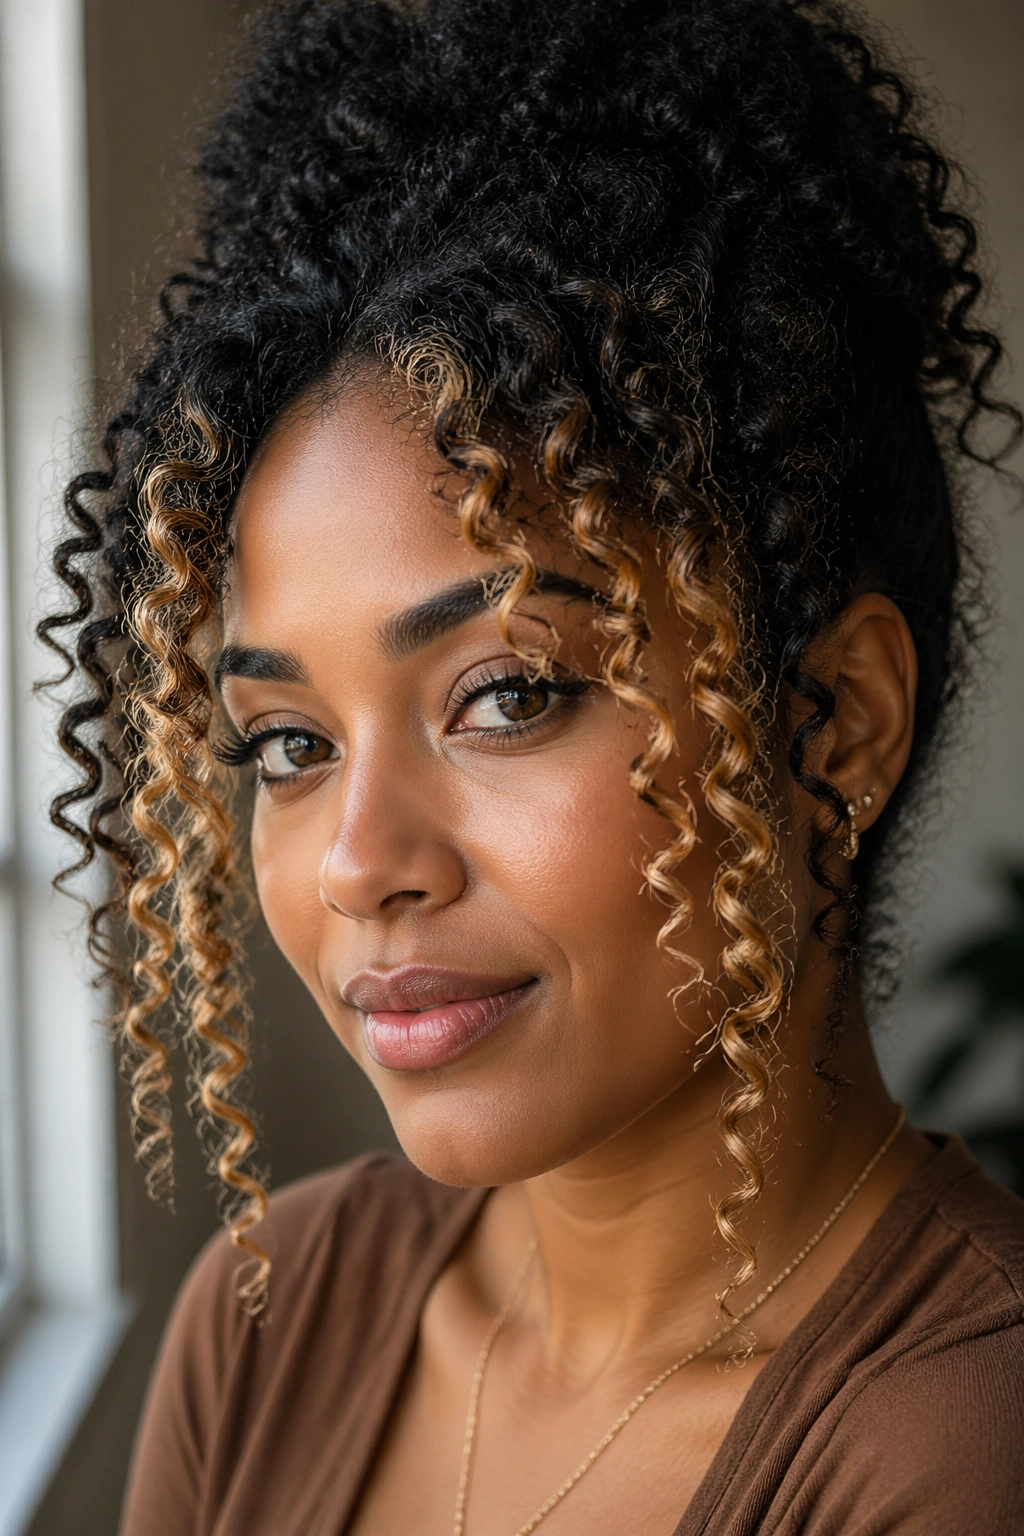
When the face-framing sections are a different color from the body of the hair — highlights, balayage, or colored frontals — the face framing becomes even more visually powerful. The color draws the eye specifically to the framing elements, making them the clear focus of the style.
Honey blonde or caramel highlights in the face-framing sections on natural dark hair is a widely loved combination — the warmth of the highlight color against darker natural hair frames the face in both color and texture simultaneously.
11. Face-Framing Curls in a Wash-and-Go
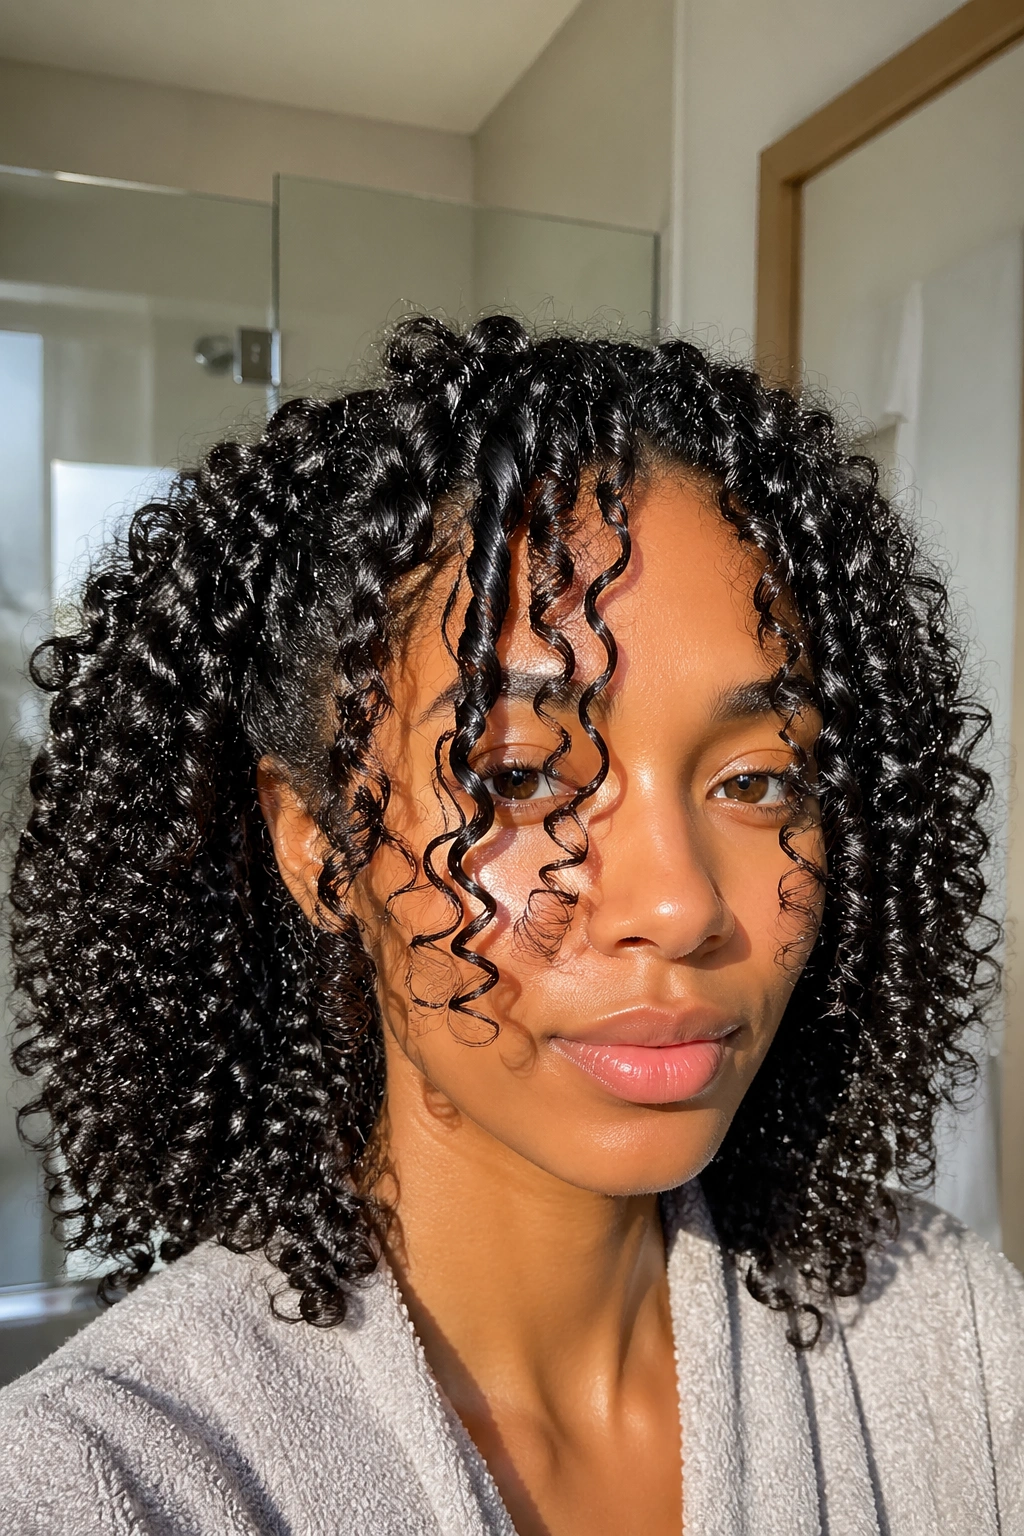
A wash-and-go where the front sections are deliberately pulled forward and defined separately from the rest of the style. Apply extra curl cream to the face-framing sections while wet, comb through with a wide-tooth comb to ensure full distribution, and let those sections fall against the face rather than being tucked back or swept to the side.
This is the most natural, zero-extra-effort version of face framing — you’re just directing the front sections of an already-defined wash-and-go forward rather than backward.
12. Curtain-Style Face Framing
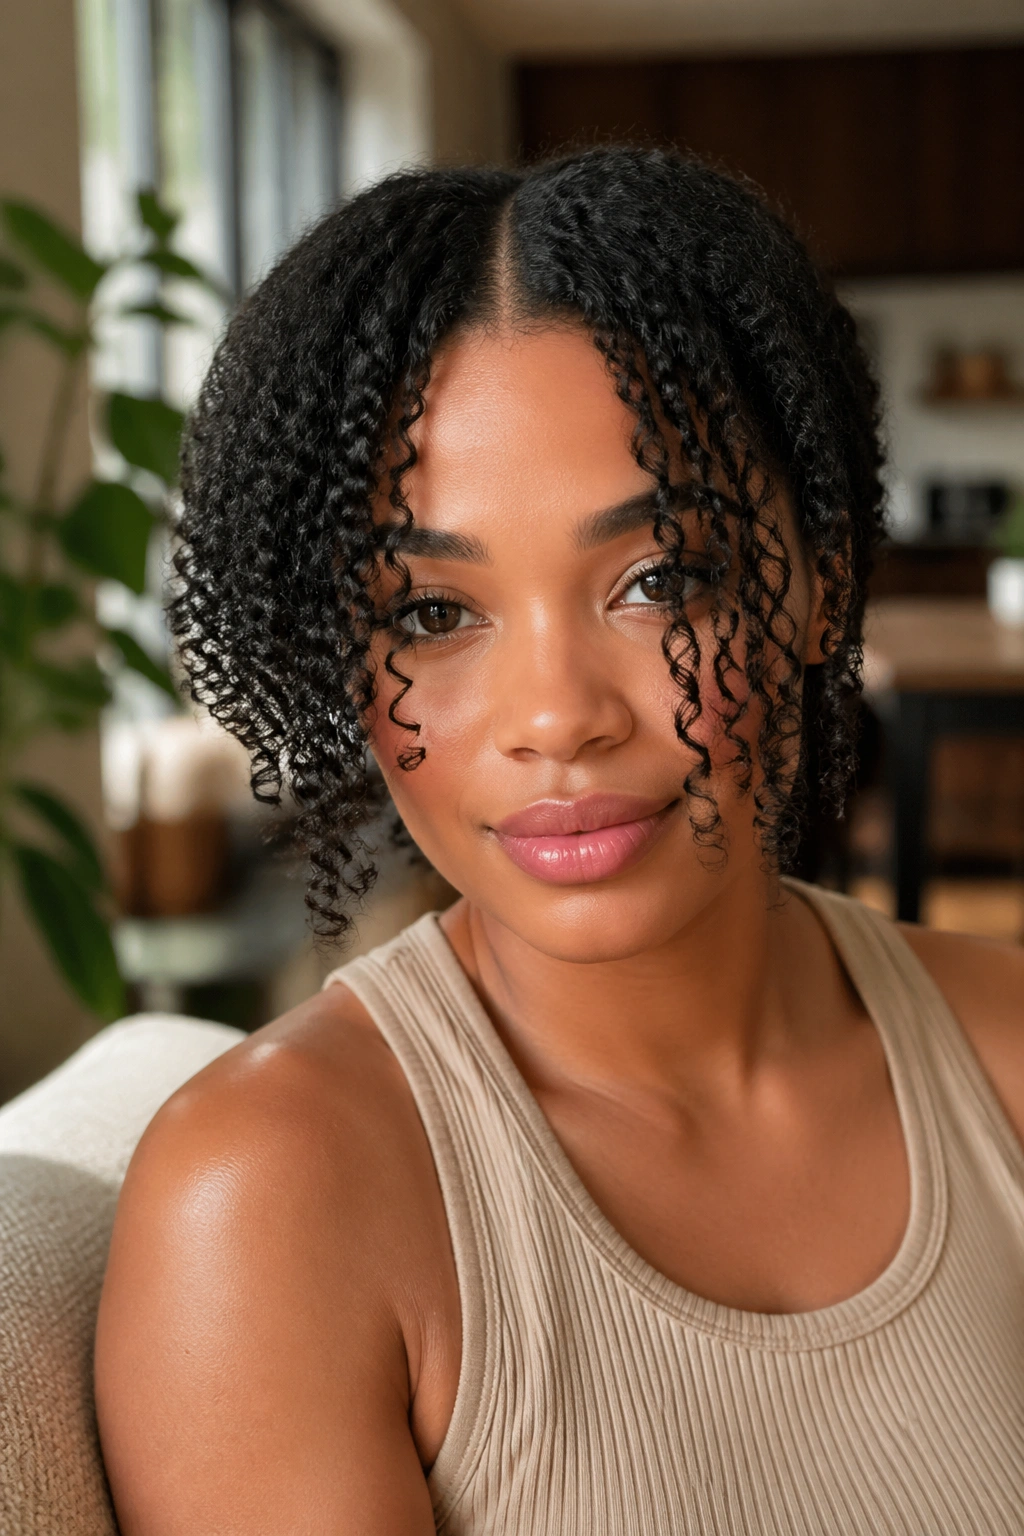
Drawing inspiration from curtain bangs, curtain-style face framing places a center part in the front section of the hair and allows curls to fall on each side of the face — framing both cheeks simultaneously. The curls fan outward from the center, creating a soft, curtain-like frame around the entire face.
This is one of the most universally flattering face-framing approaches because it balances the face on both sides rather than creating asymmetry. The curls on each side can be different lengths or densities based on what the face needs.
13. Shoulder-Cascading Curls From a Pulled-Up Style
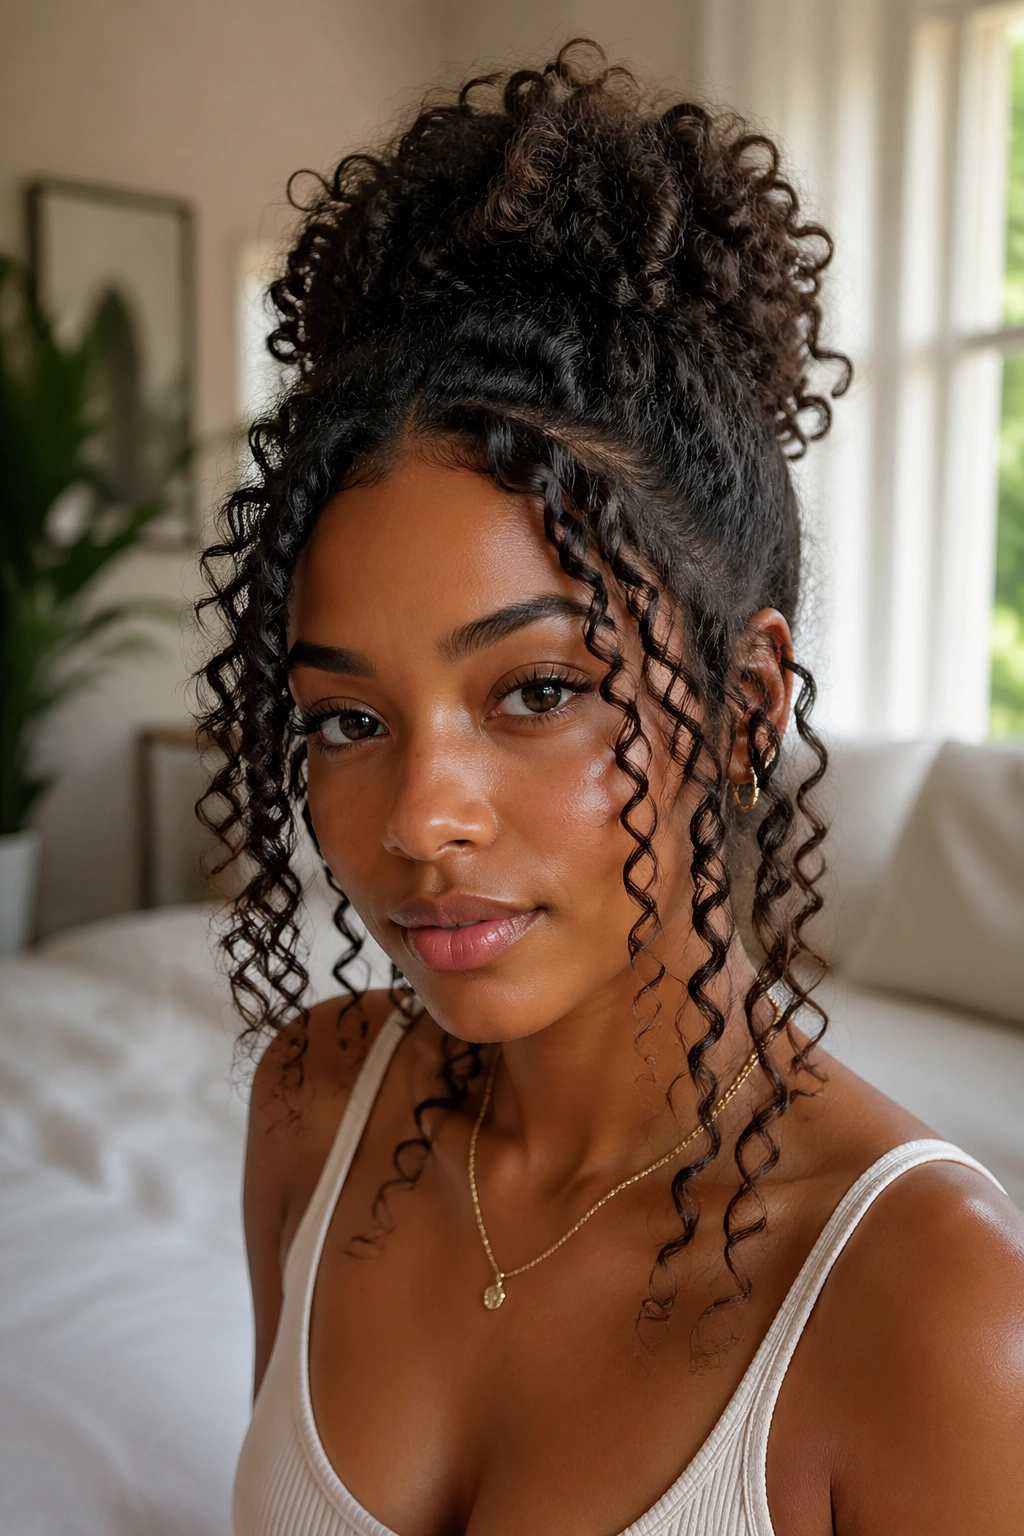
When hair is pulled up into a bun or puff, deliberately allowing long curls at the nape and sides to fall past the shoulders and around the face creates a sweeping, dramatic frame. These long cascading curls — falling over the shoulders and forward toward the face — have serious visual impact on longer natural hair.
The falling curls frame the lower face and neck, creating a softening effect around the jaw and chin while the pulled-up top section keeps the overall style controlled.
14. Defined Coil Frame Against a Flat Twist Style
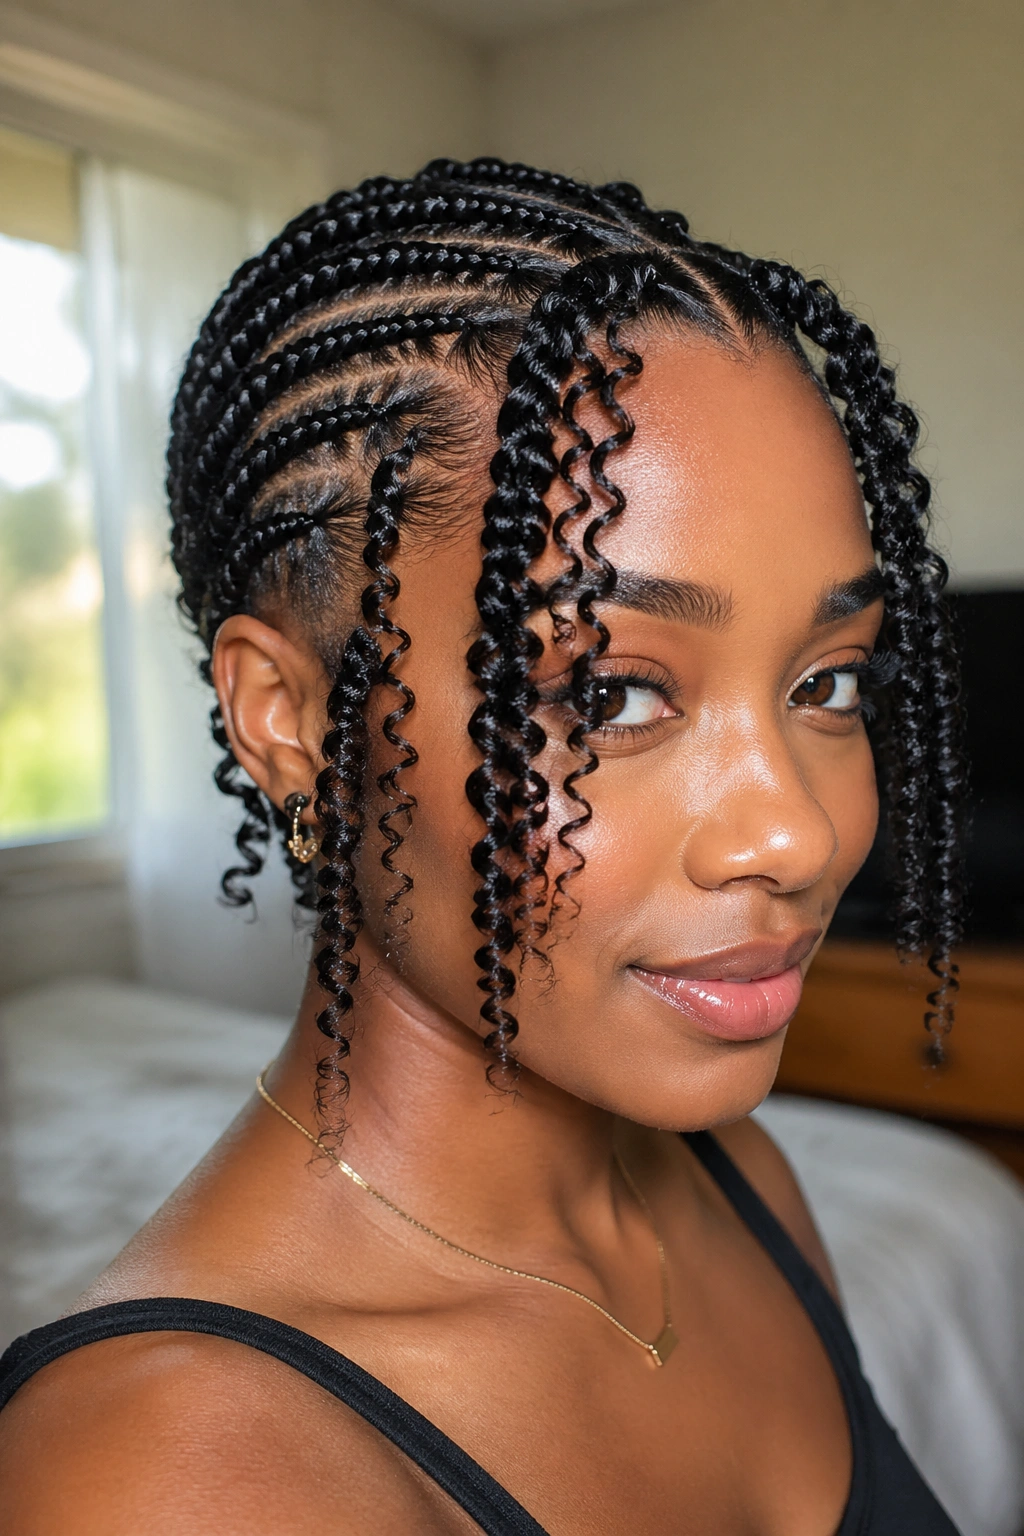
Flat twists styled across the head, with a defined curl section left free at the front to frame the face. The flat twists are smooth and geometric. The face-framing curl section is textured and free. The contrast between these two techniques in the same style is stylish and deliberate.
This is a good option for days when you want protective styling on the majority of the hair but still want natural texture expression at the front.
15. Two Face-Framing Curls — One on Each Side
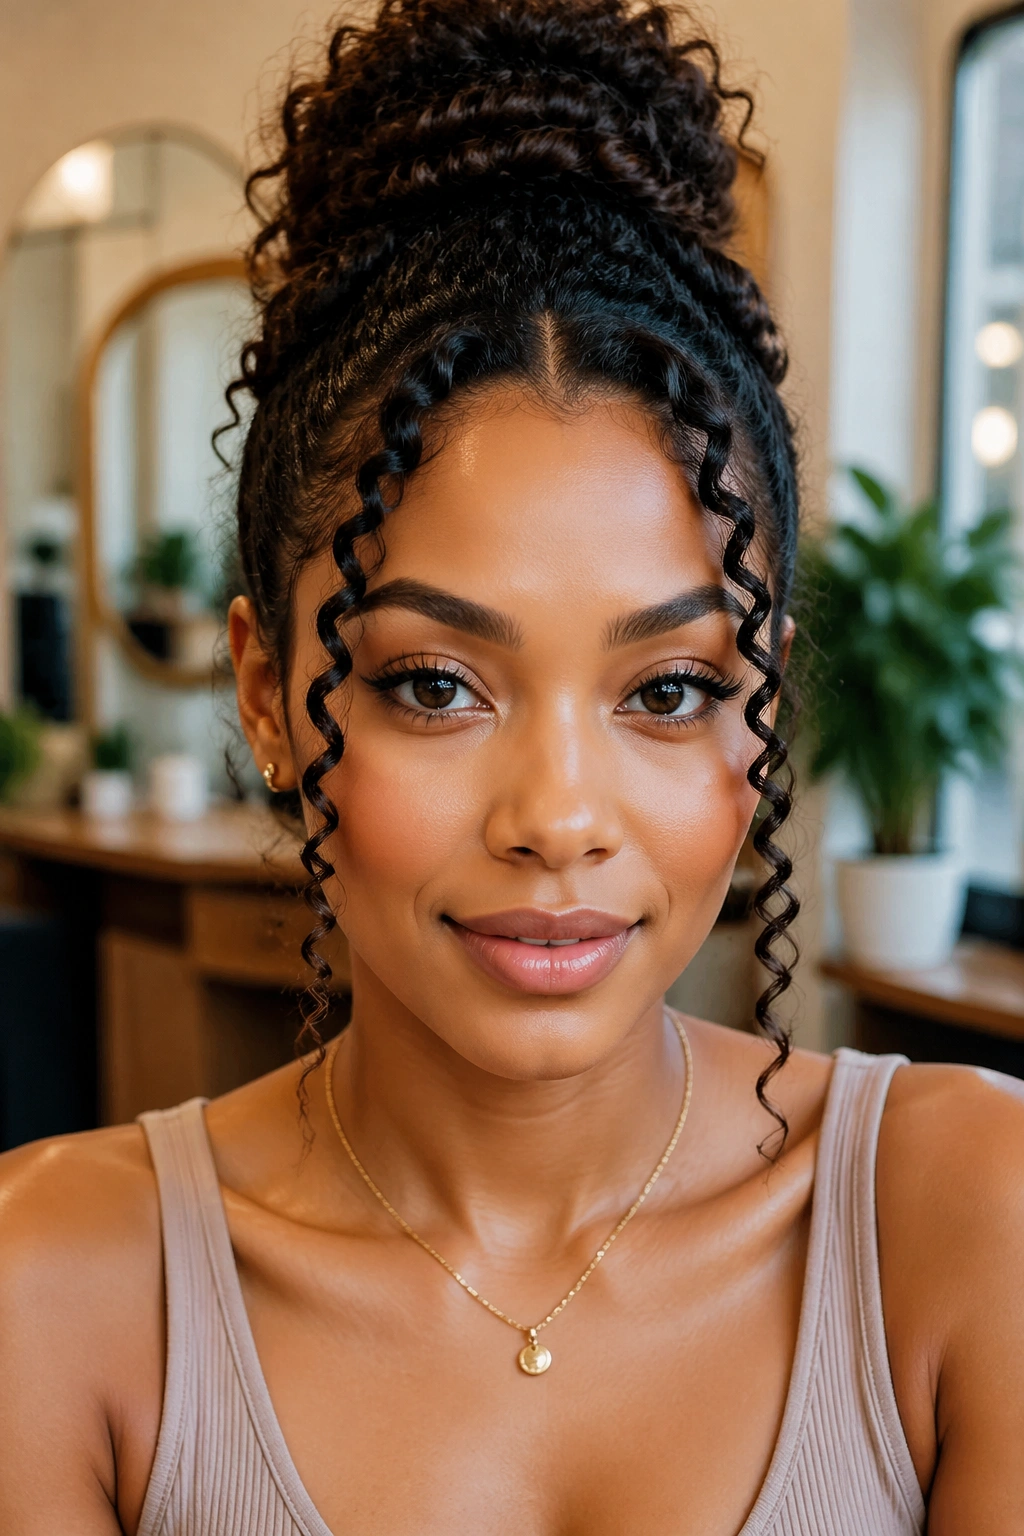
Two deliberately defined curl sections, one at each temple, styled symmetrically to frame the face equally on both sides. These symmetrically placed curls can be any size — from a single large ringlet to a small cluster of coils — but they should match each other in size and definition for the most balanced effect.
Symmetrical face-framing is classic and timeless. It’s the hair equivalent of a matching earring set — balanced, deliberate, and unmistakably styled.
16. Face-Framing Curls Over One Shoulder
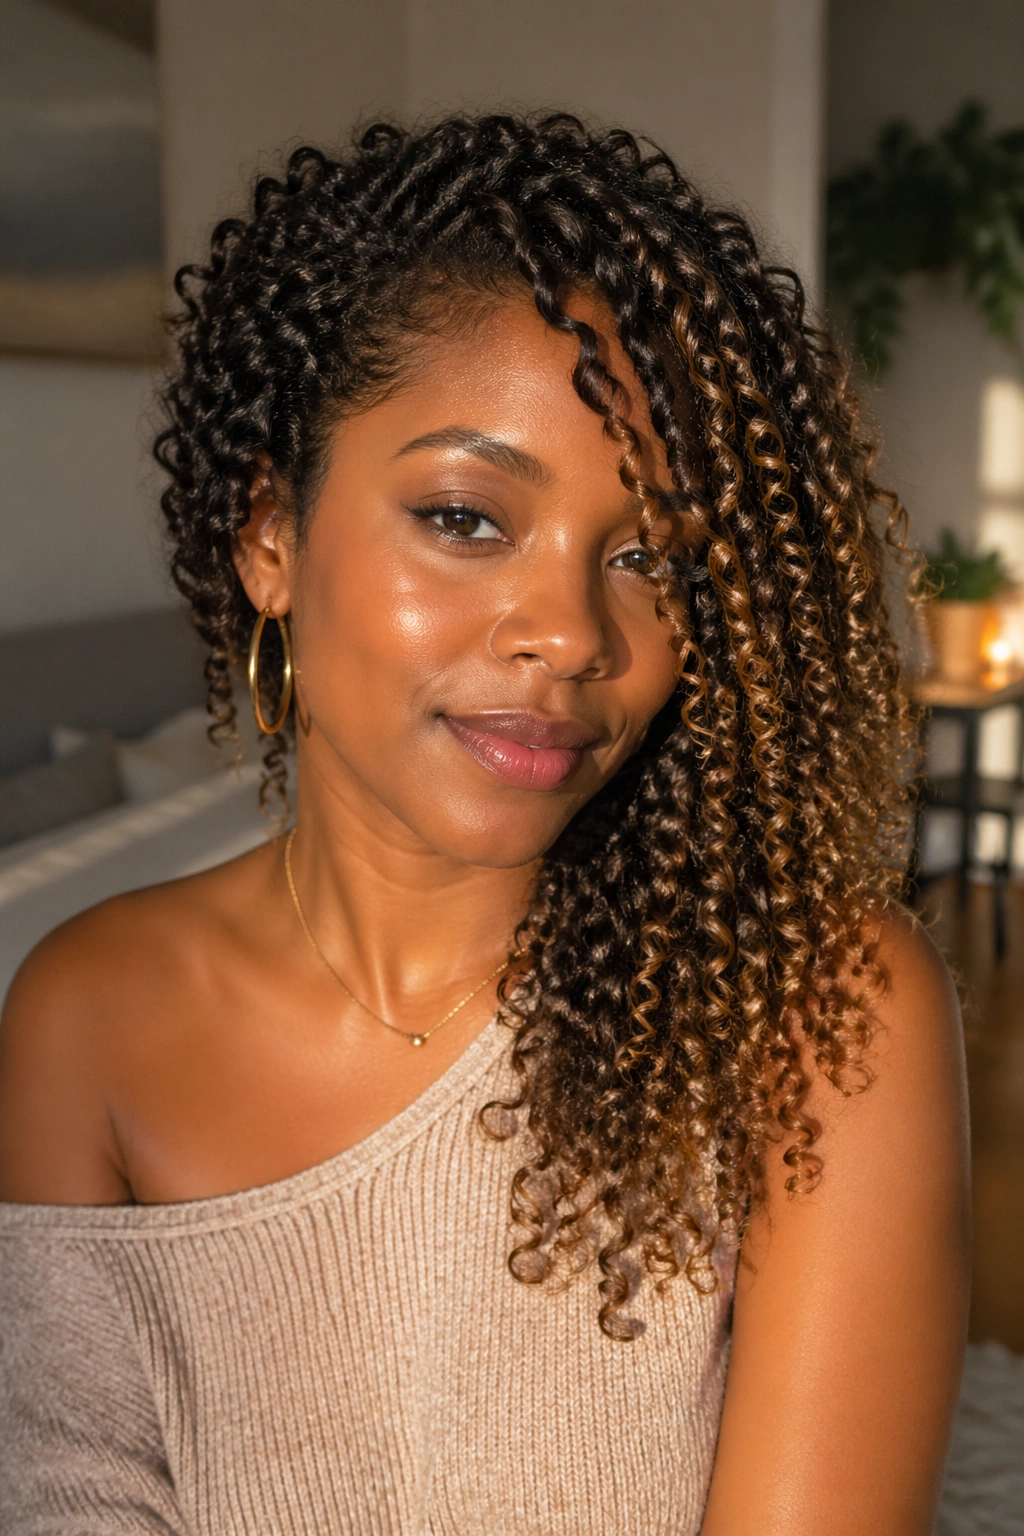
All the face-framing curls swept to one side and draped over one shoulder — a completely one-sided face-framing effect. The opposite side of the face is open and exposed. The framed side is lush, textured, and full of movement.
This is one of the most romantic, photogenic face-framing styles. One shoulder covered in curls, the other bare. The asymmetry creates a visual story — a direction, an energy, an intention.
17. Face-Framing Twist-Out Pieces
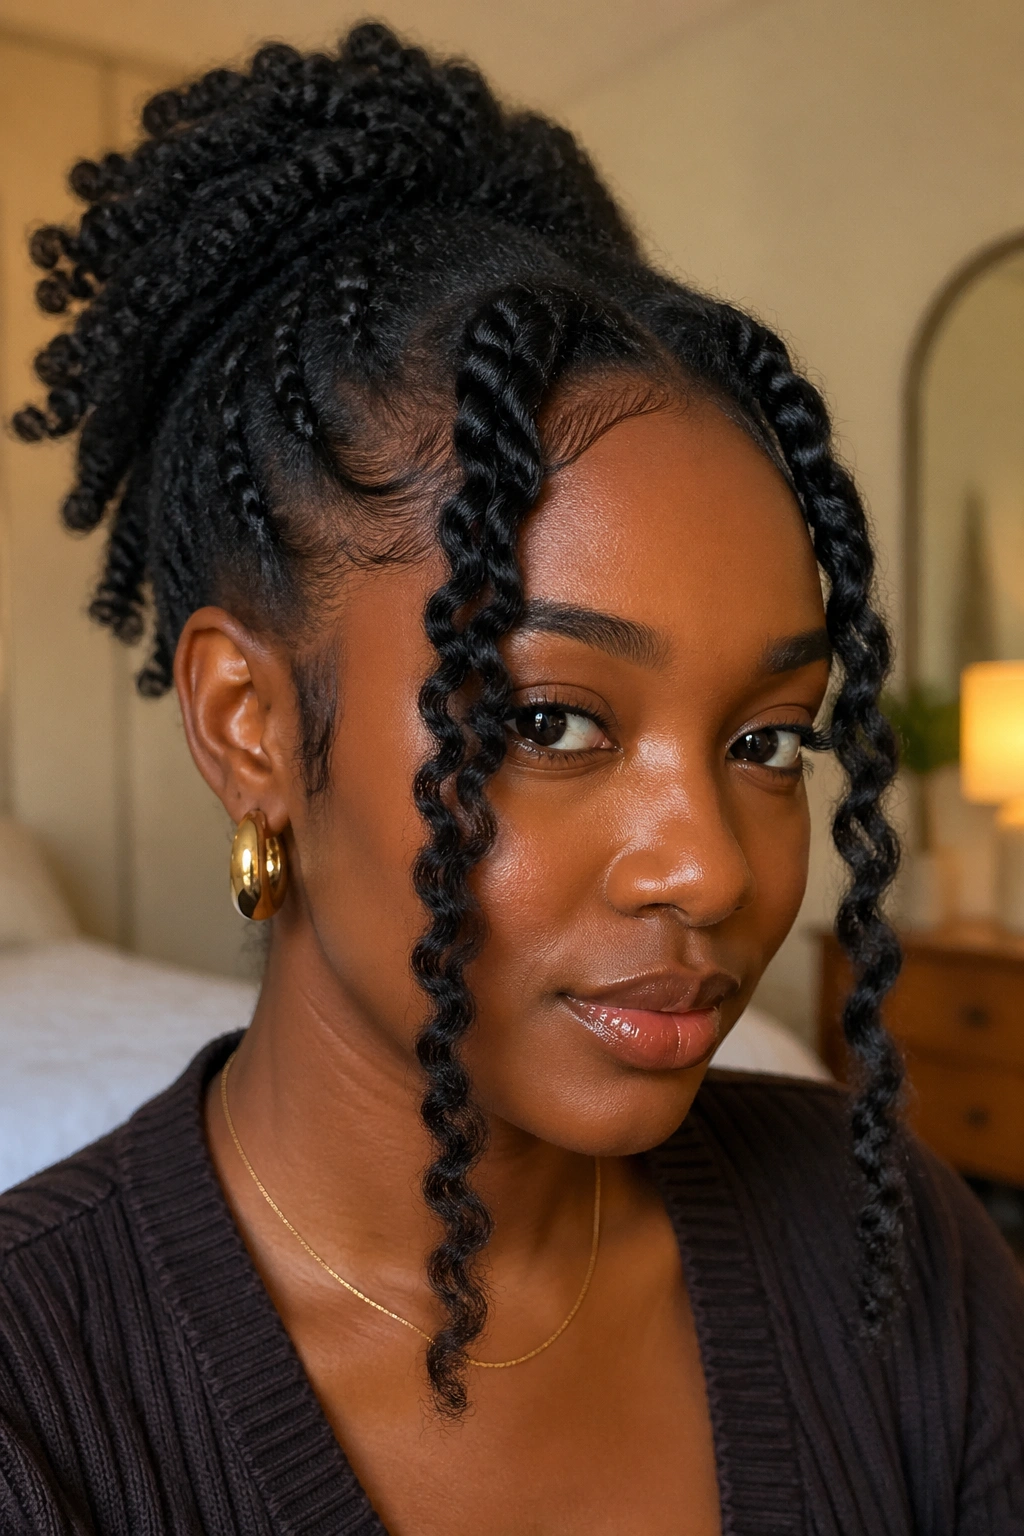
In a twist-out style worn down or half-up, the front sections are defined and positioned to frame the face. Because twist-outs create stretched, wavy sections, the face-framing pieces tend to fall more predictably and at a more consistent length than wash-and-go curls.
This makes twist-out face framing a reliable choice for occasions when you want to predict exactly how the framing will look — events, photos, professional settings.
18. Face-Framing Curls With Added Accessories
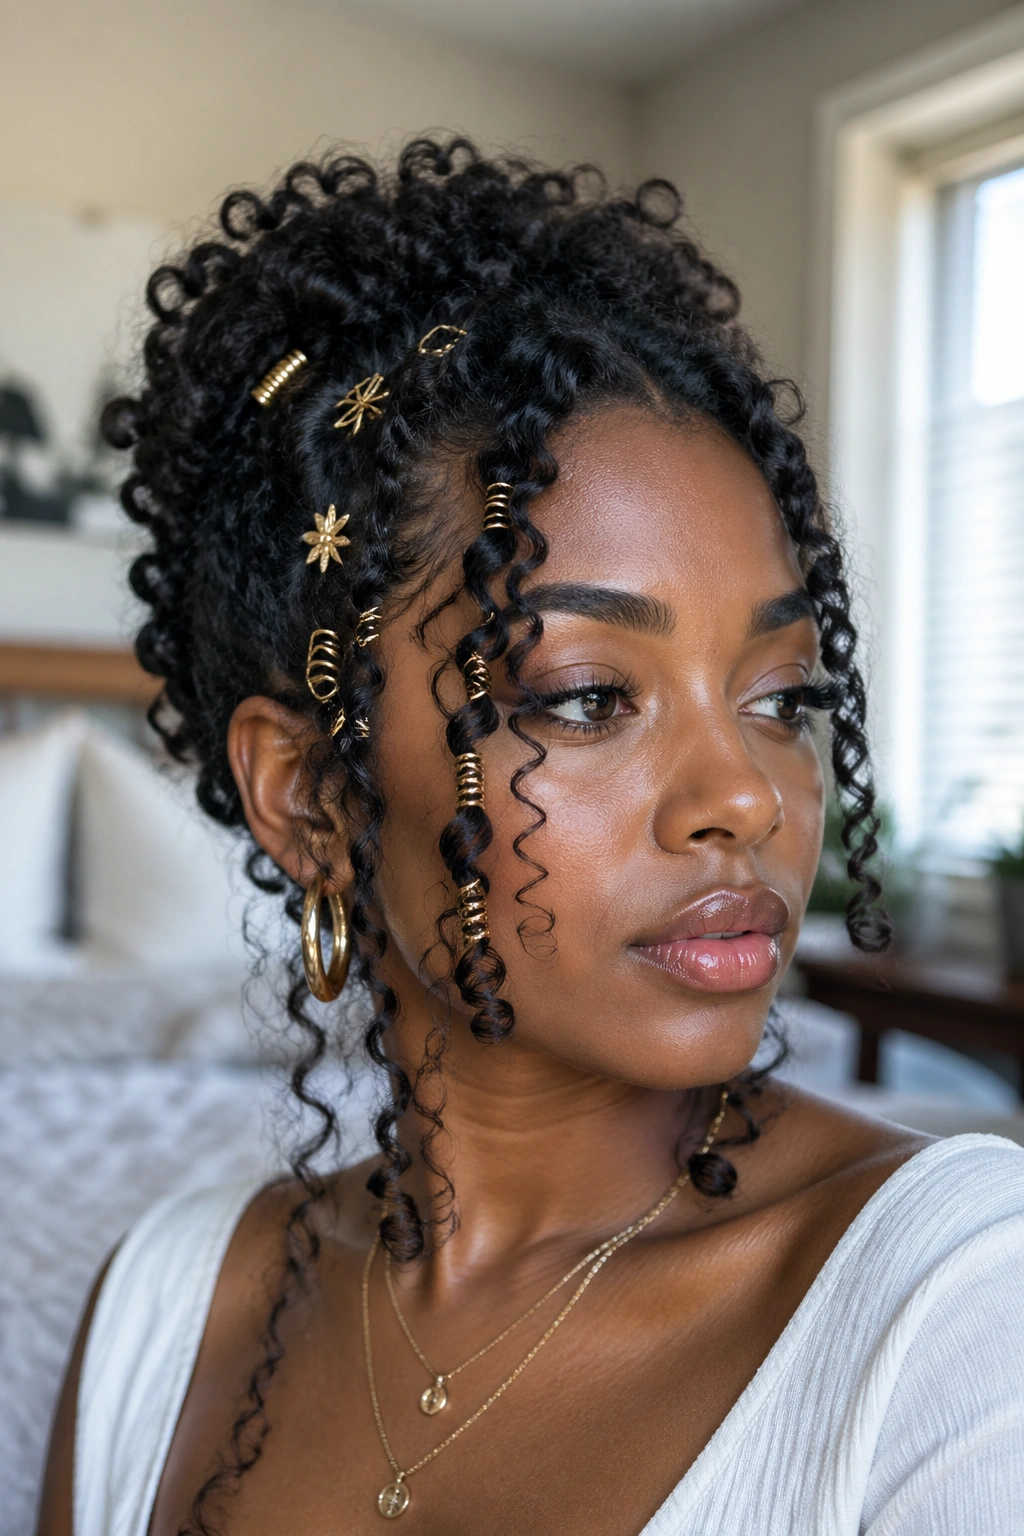
Face-framing curls become even more intentional when enhanced with accessories placed within or around the framing sections. Gold rings slipped onto individual curl sections. Pearl pins woven into the framing curls. A thin gold chain woven through a curl cluster at one temple.
The accessories add a jeweled, editorial quality to the face framing and turn what might be a simple style detail into a complete aesthetic statement. Natural hair accessorizing has a long cultural history — using adornment to emphasize and celebrate the hair’s beauty.
19. Natural Hair Face Framing for Protective Style Weeks
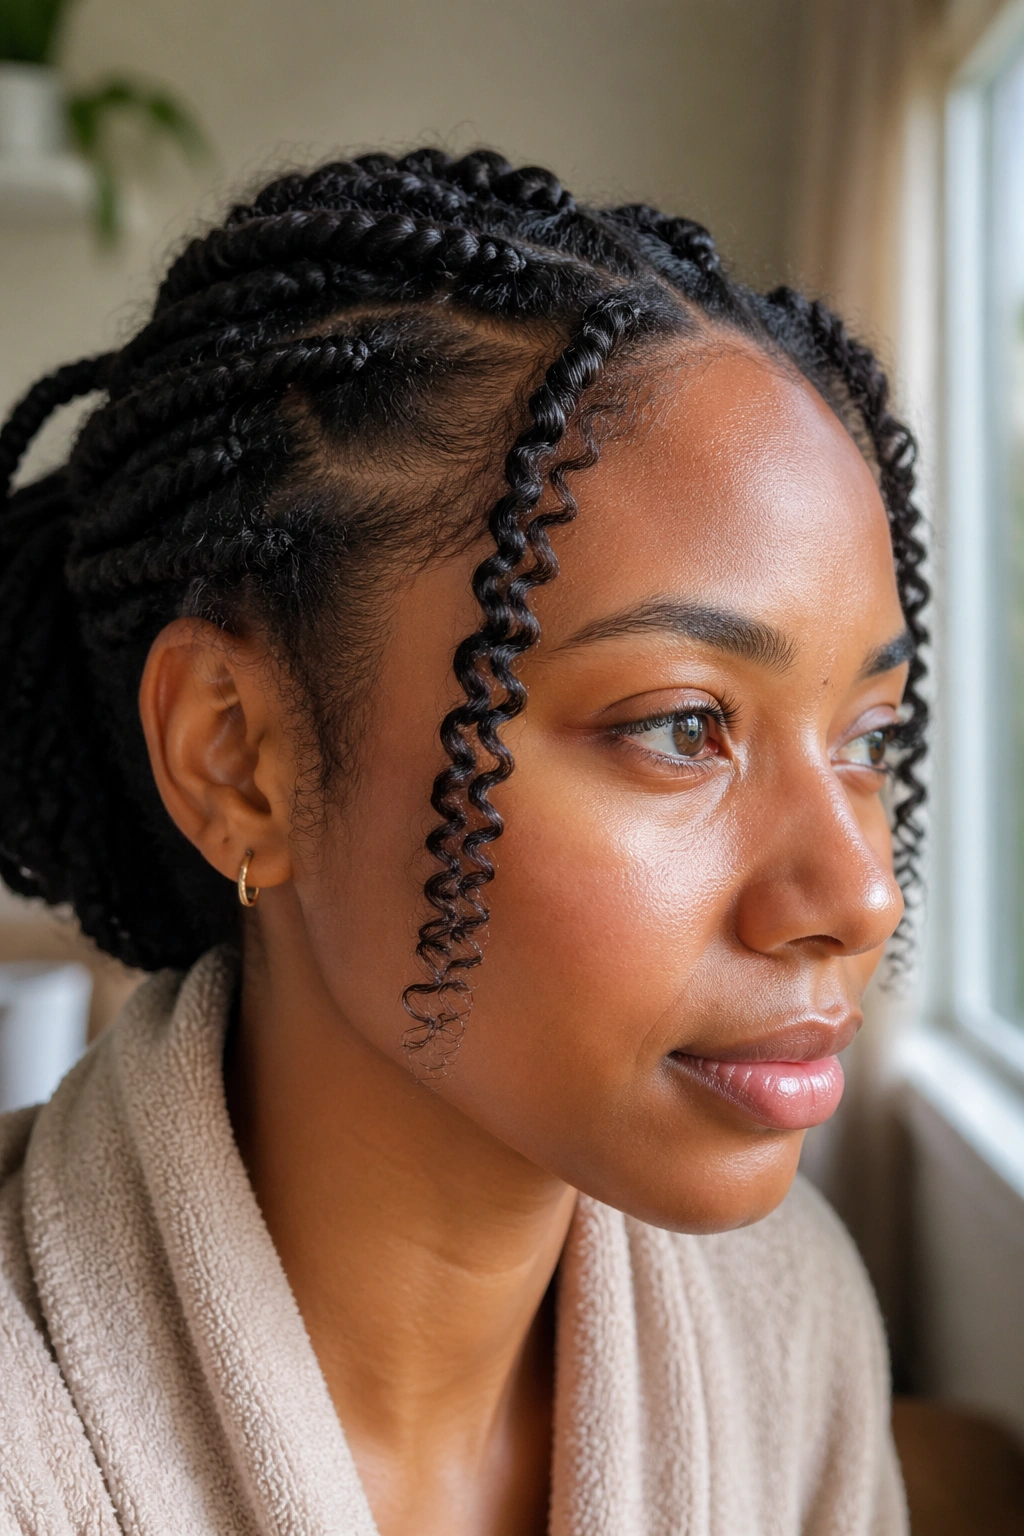
Face-framing curls aren’t just for styles worn fully down. During protective style weeks — when the main hair is in braids, twists, a bun, or another protective configuration — leaving a small curl section at the temples or front hairline free and defined provides styling expression without disturbing the protective style itself.
This section can be a natural leave-out at the hairline, lightly defined with curl cream. It doesn’t need to be long or elaborate — just enough curl at the front to soften the protective style and maintain some natural texture expression.
20. The Full Crown Face-Framing Frame
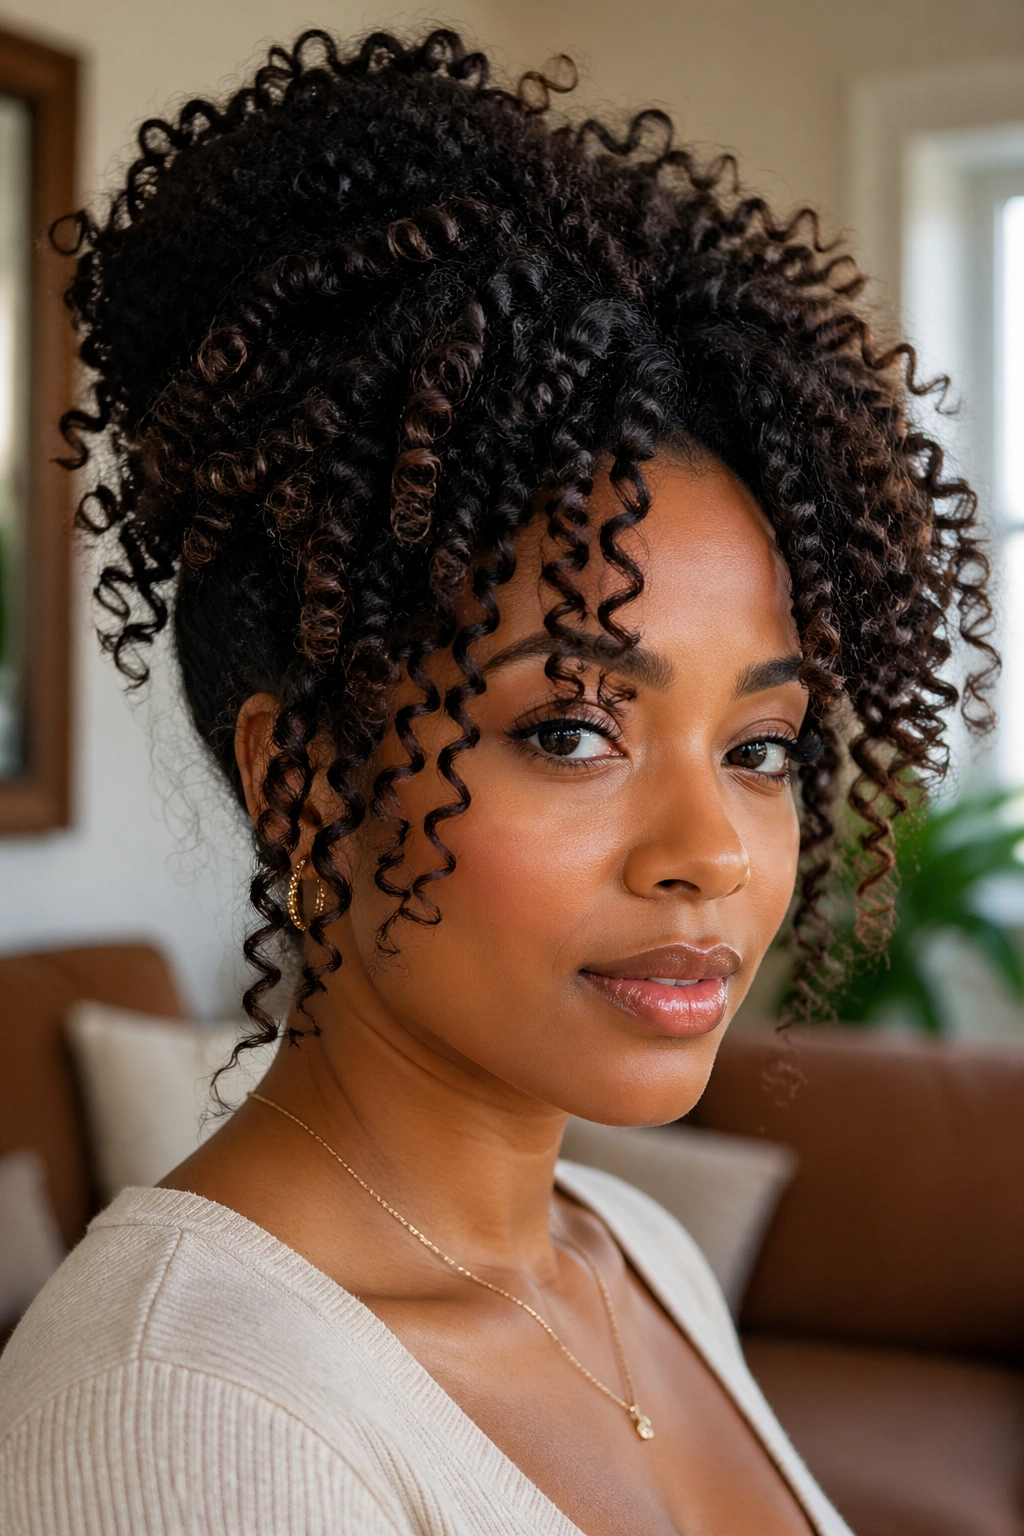
The most dramatic face-framing look: a full crown of defined curls that completely surrounds the face from temple to temple, framing every angle simultaneously. This is achieved by ensuring all the front and side sections of the hair — not just a few pieces, but the entire perimeter — are defined and falling forward toward the face.
On natural hair, this creates a halo effect where the hair forms a full, textured frame around the face. It works best on styles where the back section of the hair is pulled up or back, so the framing curls at the front and sides are the primary textured elements visible from the front.
This is face framing at its most complete. Every angle of the face is softened, highlighted, and framed by defined natural curls. It’s a look that takes the natural hair’s best feature — its volume, its texture, its dimensionality — and uses all of it to serve the face.
Making Face-Framing Curls Last Longer
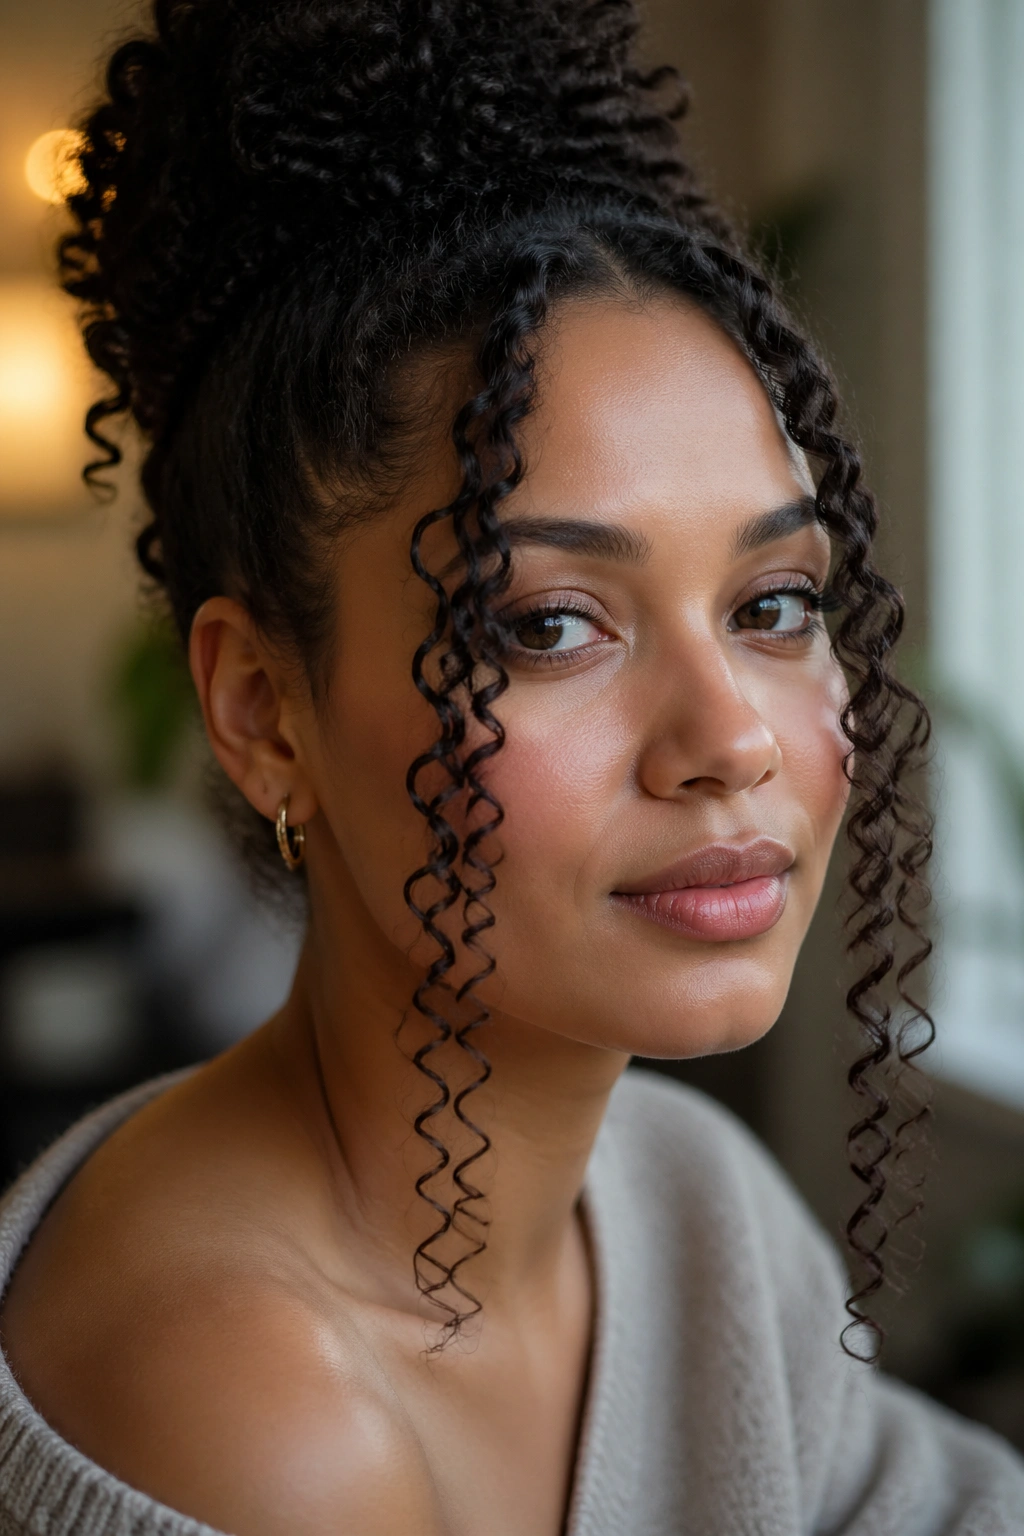
The most common frustration with face-framing curls is that they’re the first section of the style to lose definition. They’re exposed to more environmental factors — wind, humidity, hands — than the rest of the hair, and they’re often the most manipulated section when getting dressed, eating, or moving through the day.
To extend their longevity, apply products more generously to the face-framing sections than to the rest of the style. More cream, more gel, more serum at the ends. These sections need extra hold and extra moisture protection.
At night, wrap the face-framing sections separately. Clip them gently against the head with soft pins or bobby pins, then tie a satin scarf around the hairline specifically covering these sections. In the morning, release the pins and refresh with a small amount of cream and water if needed. Most well-protected curl sections can be refreshed for two to three days before needing rewashing.
The Philosophy of Face Framing Natural Hair
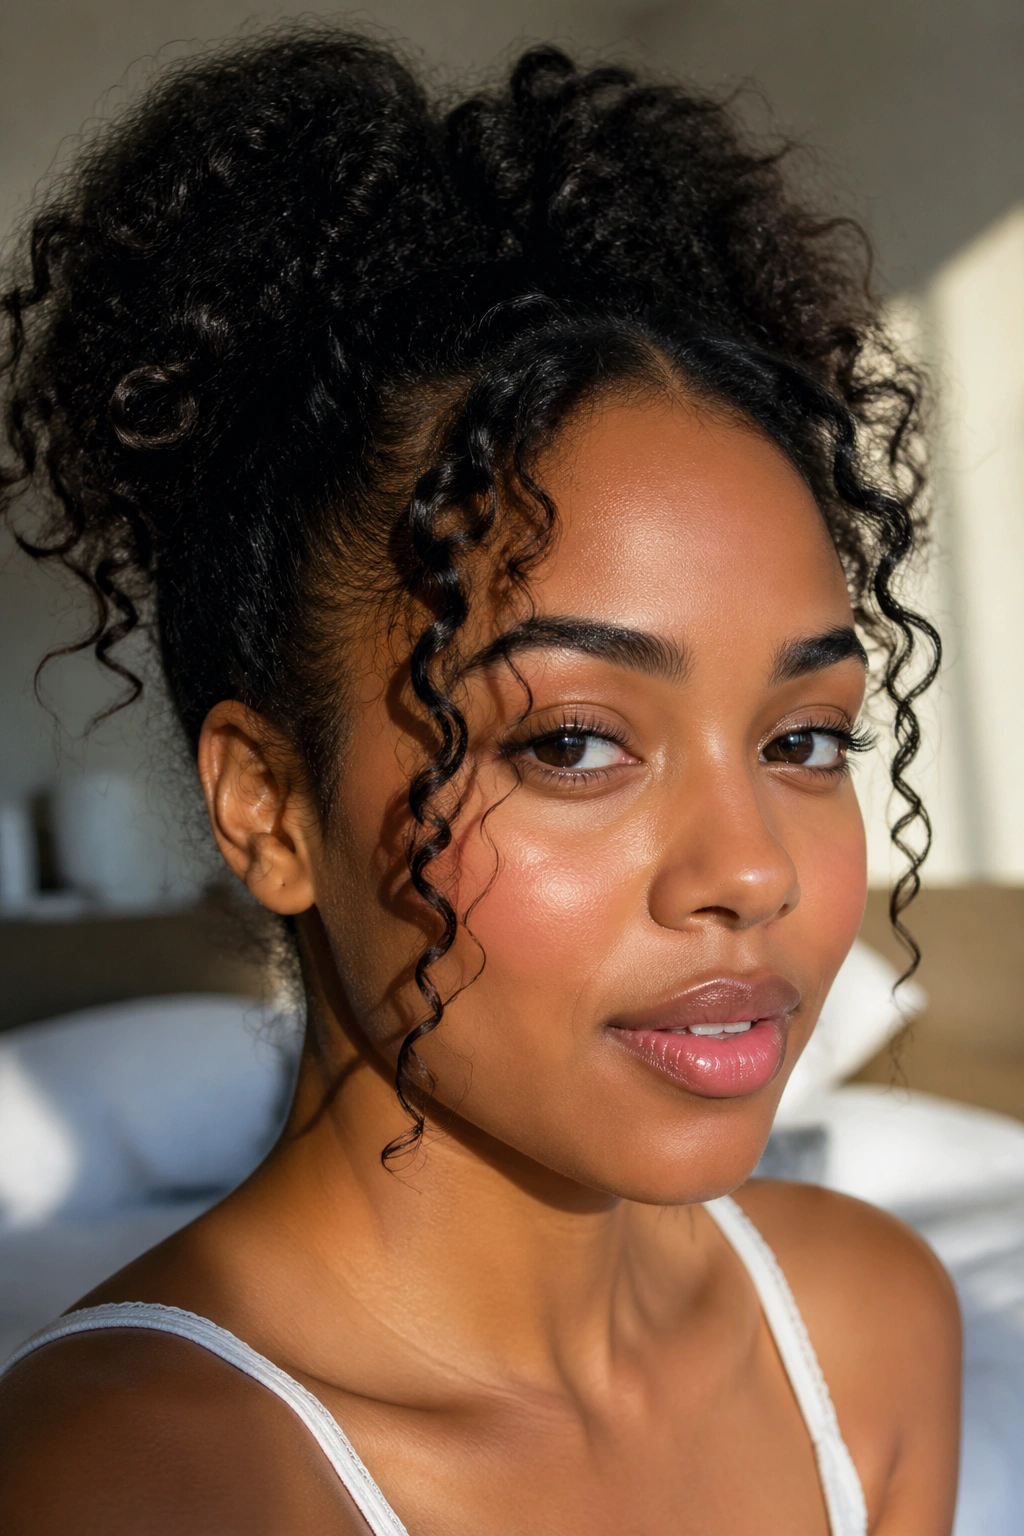
Face-framing curls on natural hair are about more than aesthetics. They’re about allowing the hair to participate actively in how the face is presented to the world — not as a background element, not as something to be managed and contained, but as an expressive, active part of your appearance.
When you frame your face with your natural curls, you’re saying: this texture belongs here. These coils are beautiful against my skin. My hair enhances my features rather than competing with them. That’s a powerful statement about self-acceptance and artistry, and it’s one that natural hair makes possible in a way nothing else can.
