A low ponytail bun can do a lot for natural hair when you want polish without turning your head into a helmet. It sits close to the nape, keeps your length tucked away, and works with coils, curls, stretched strands, twists, and even the days when your hair has its own opinion about the shape it wants to take. That’s the charm of low ponytail buns for natural hair: they can look neat, soft, dramatic, or plain old easy, depending on how much tension, texture, and shine you build in.
Tension is the enemy.
That’s the part people miss.
If you pull natural hair too hard at the hairline, the style may look sleek for an hour and feel miserable for the rest of the day. A better approach is usually to prep the hair with moisture first, choose a hold that fits your texture, and let the bun sit where your nape feels comfortable. A little leave-in conditioner, a touch of gel, and a strong elastic can go much further than brute force.
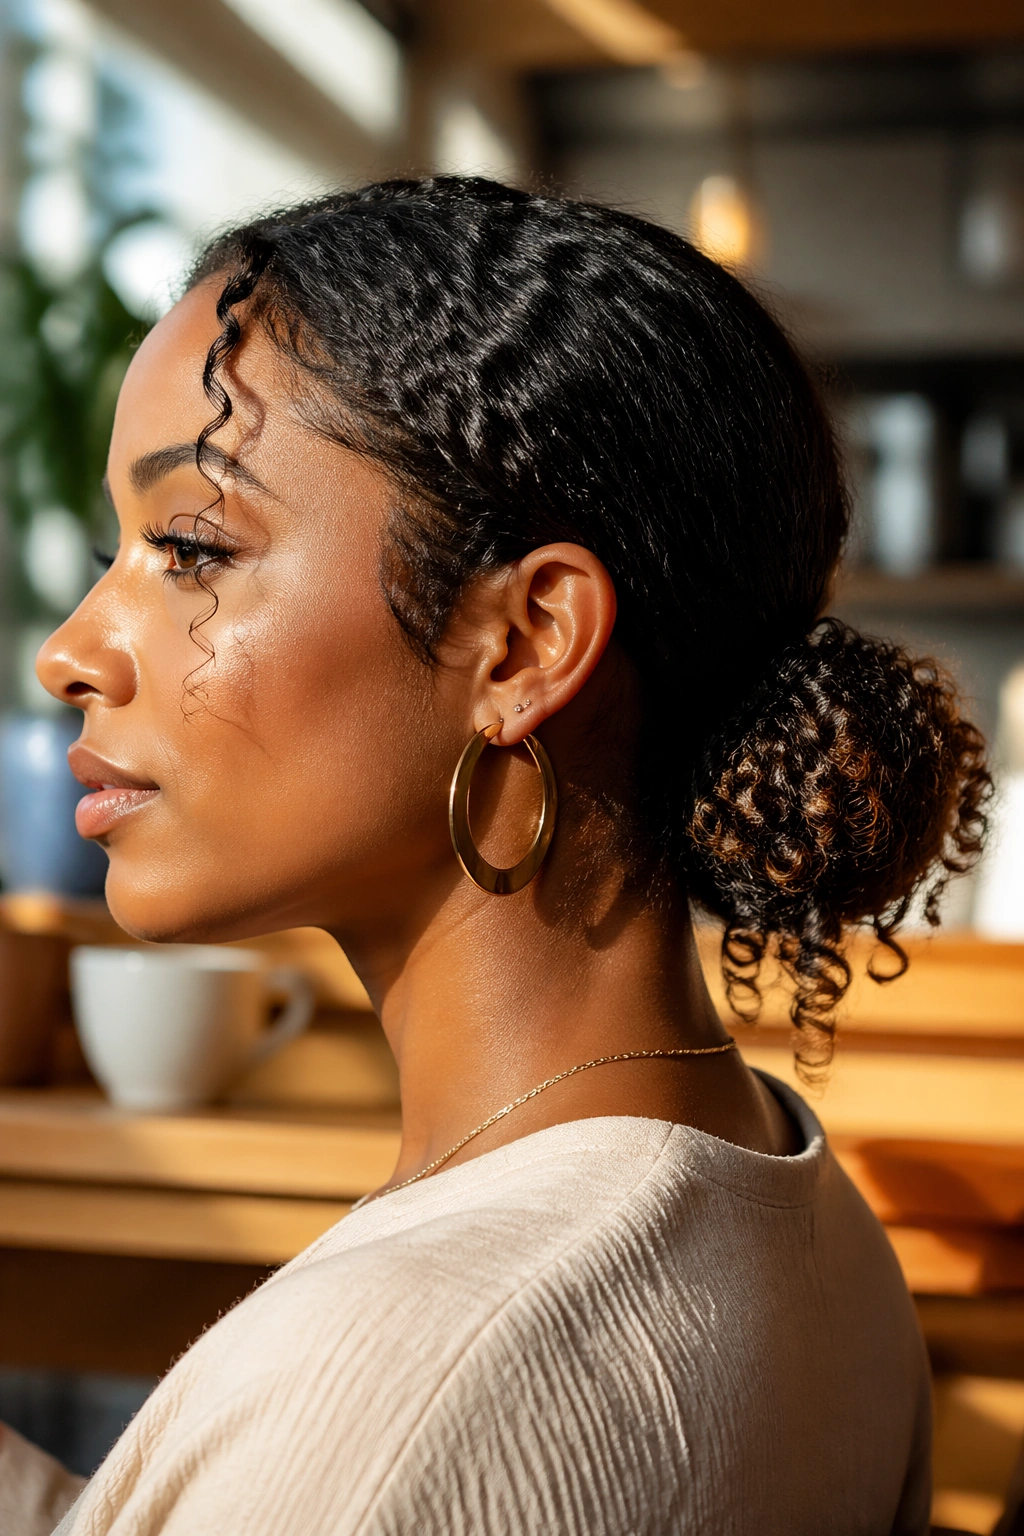
Natural hair also gives these buns a personality that straight hair often has to fake. Some versions should be glossy and tight. Others look better with a soft puff, a braided base, or a few curly pieces left free around the face. The styles below move through all of that, from office-ready looks to low-effort buns you can throw on with a pair of hoop earrings and call it done.
Start with the one that matches your texture, your length, and the amount of patience you have that day.
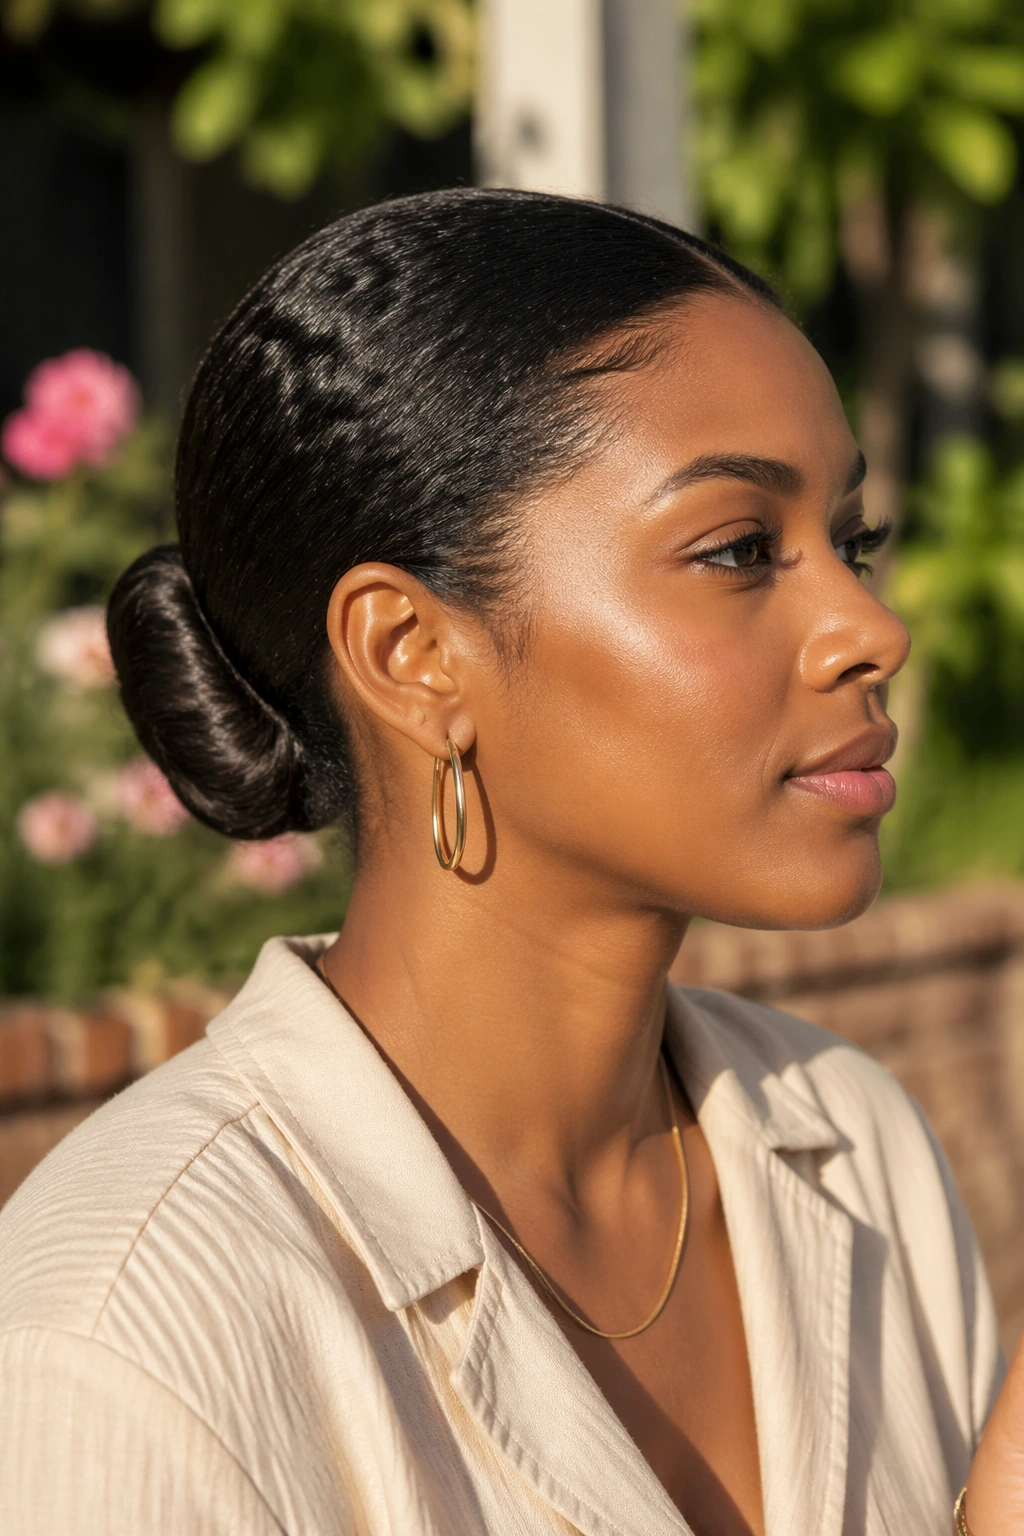
1. Center-Part Sleek Low Bun for Natural Hair
A center-part low bun is the cleanest, sharpest version of the style, and it works especially well when your hair has been stretched first. The middle part gives the face a neat frame, while the low placement keeps the bun elegant instead of bulky. If you like a style that looks deliberate without being fussy, this is the one I’d pick first.
Why It Works
The center part creates balance, which matters more than people think on natural hair. It helps the bun look symmetrical even if your texture is uneven from root to tip. Use a light leave-in, then a strong-hold gel at the perimeter, and smooth the top with a soft bristle brush until the surface lies flat but not stiff.
- Best on stretched curls, blowouts, or twist-outs that have been lightly brushed out.
- Use a no-snag elastic so the base doesn’t catch and frizz.
- Finish with a satin scarf for 10 to 15 minutes before leaving the house.
- Keep the bun low and compact if your hair is thick; that keeps it from jutting out.
Best tip: a tiny bit of shine serum on the bun itself makes the style look finished fast.
2. Deep Side-Part Low Bun
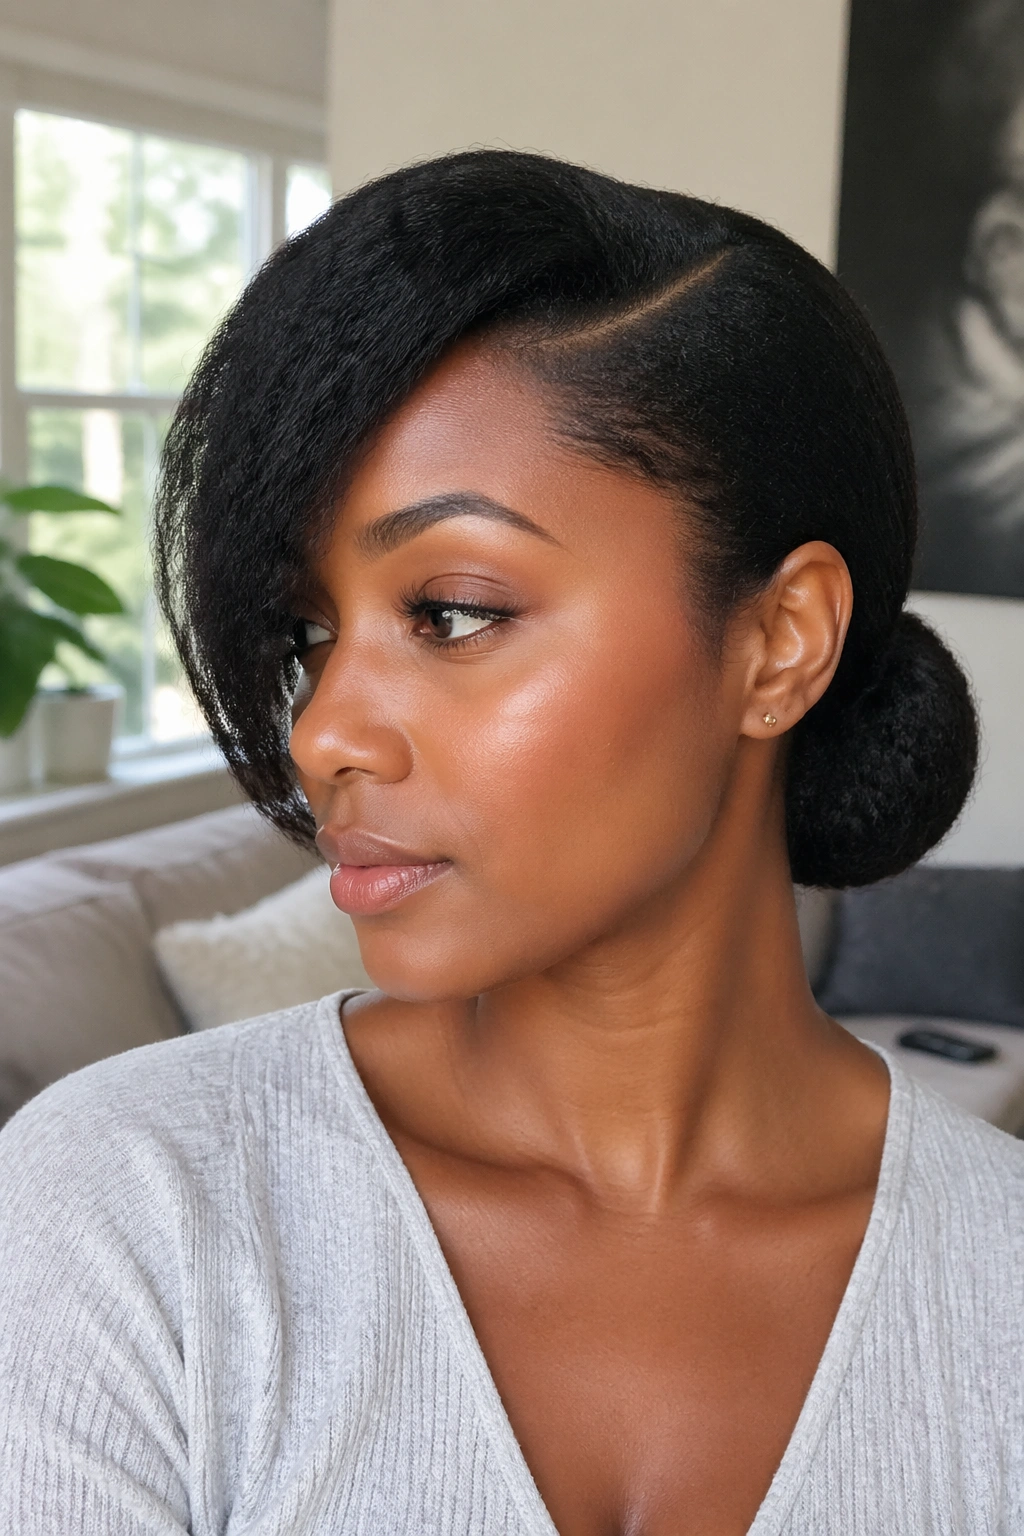
A deep side part softens the whole look in a way a center part sometimes doesn’t. It gives the bun a little drama, which is useful if your face shape feels too square or you want the style to look less severe. This one sits nicely with thick natural hair because the sweep across the front helps control volume without flattening everything.
What I like here is the contrast. The front can be smooth, almost sculpted, while the bun stays a touch fuller and less precious. That mix keeps it from looking like you spent half the day wrestling your hair into submission. Use edge control sparingly along the part, not all over the front, or the style starts to look greasy instead of sleek.
If your hair is coily, stretch the top section first with a blow dryer on low heat or a heatless banding method. The bun will sit lower and cleaner. If it’s already stretched, even better. Pin the side sweep with one or two bobby pins near the temple so it doesn’t lift and poke out by lunchtime.
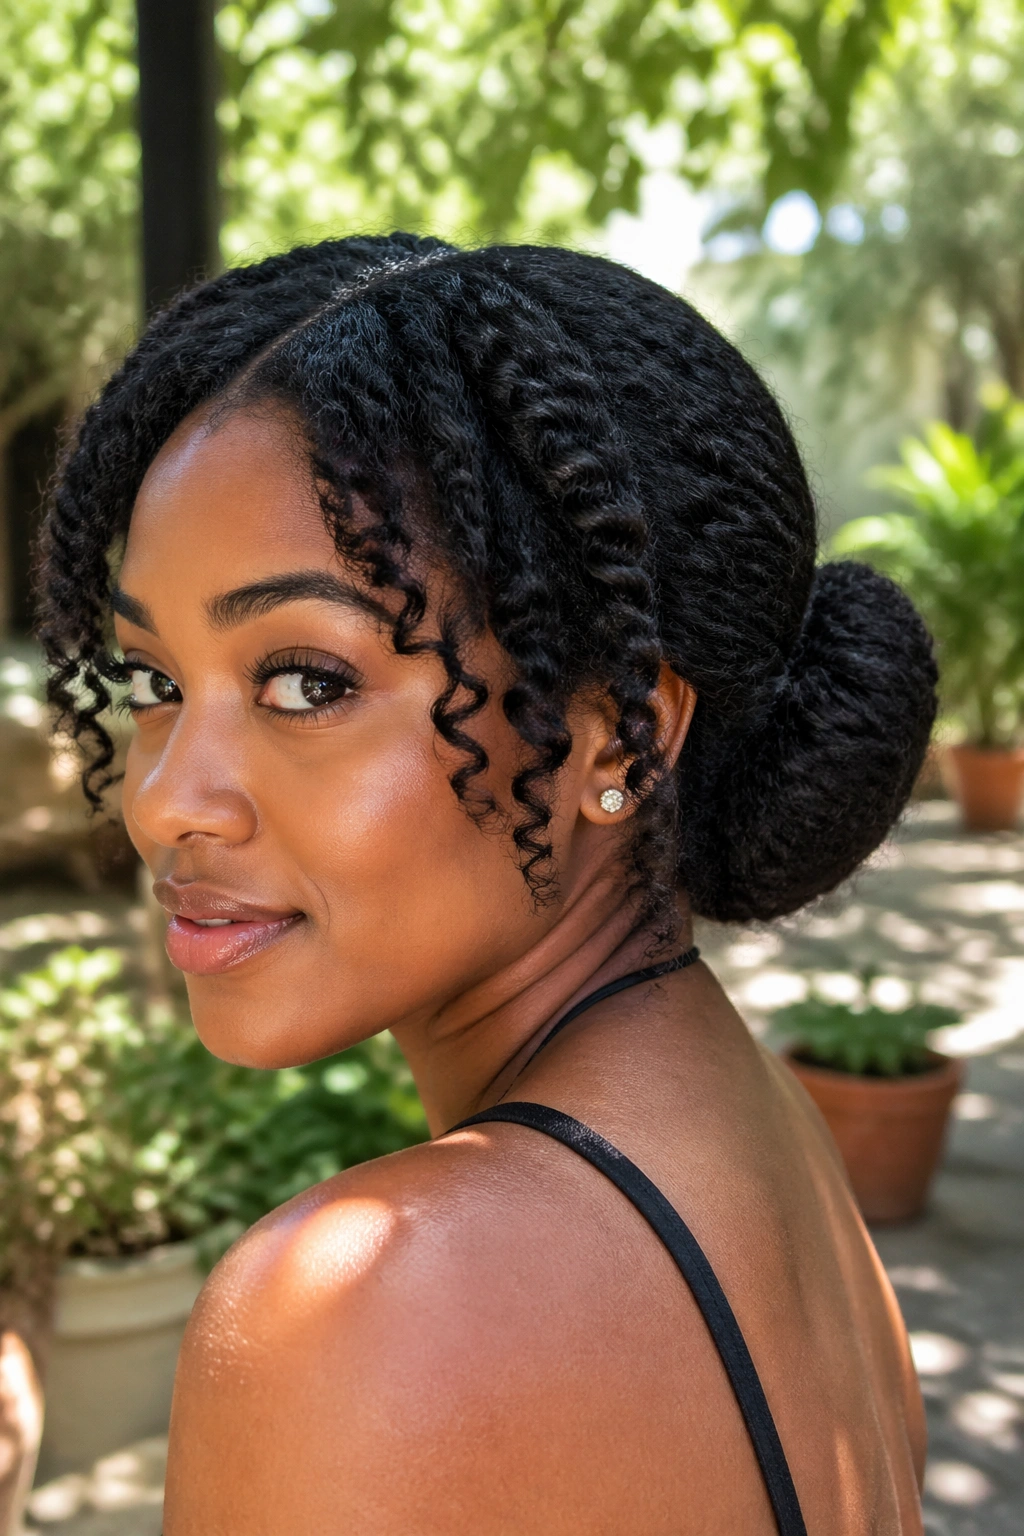
3. Rope-Twist Ponytail Bun
Want something that looks detailed but doesn’t require braiding every strand? A rope-twist low bun is a solid move. You divide the ponytail into two sections, twist them around each other, and coil the result into a bun at the nape. It has texture built in, so even if your ends are a little frizzy, the style still reads as intentional.
How to Wear It
This works well on natural hair that has a little stretch and a little grip. Too silky, and the twist won’t hold; too dry, and it can look rough. A cream with a light gel over it usually gives the best middle ground.
The rope twist also buys you time. Once the sections are twisted, the bun holds its shape better than a plain wrapped ponytail. That makes it a strong choice for busy mornings, humid weather, or any day you know you’ll be moving around a lot.
For a softer finish, leave the twist slightly loose before coiling it. For a more polished look, twist the sections tightly and pin the bun with crossed bobby pins at the base. Either way, it gives the style a little more movement than a plain knot.
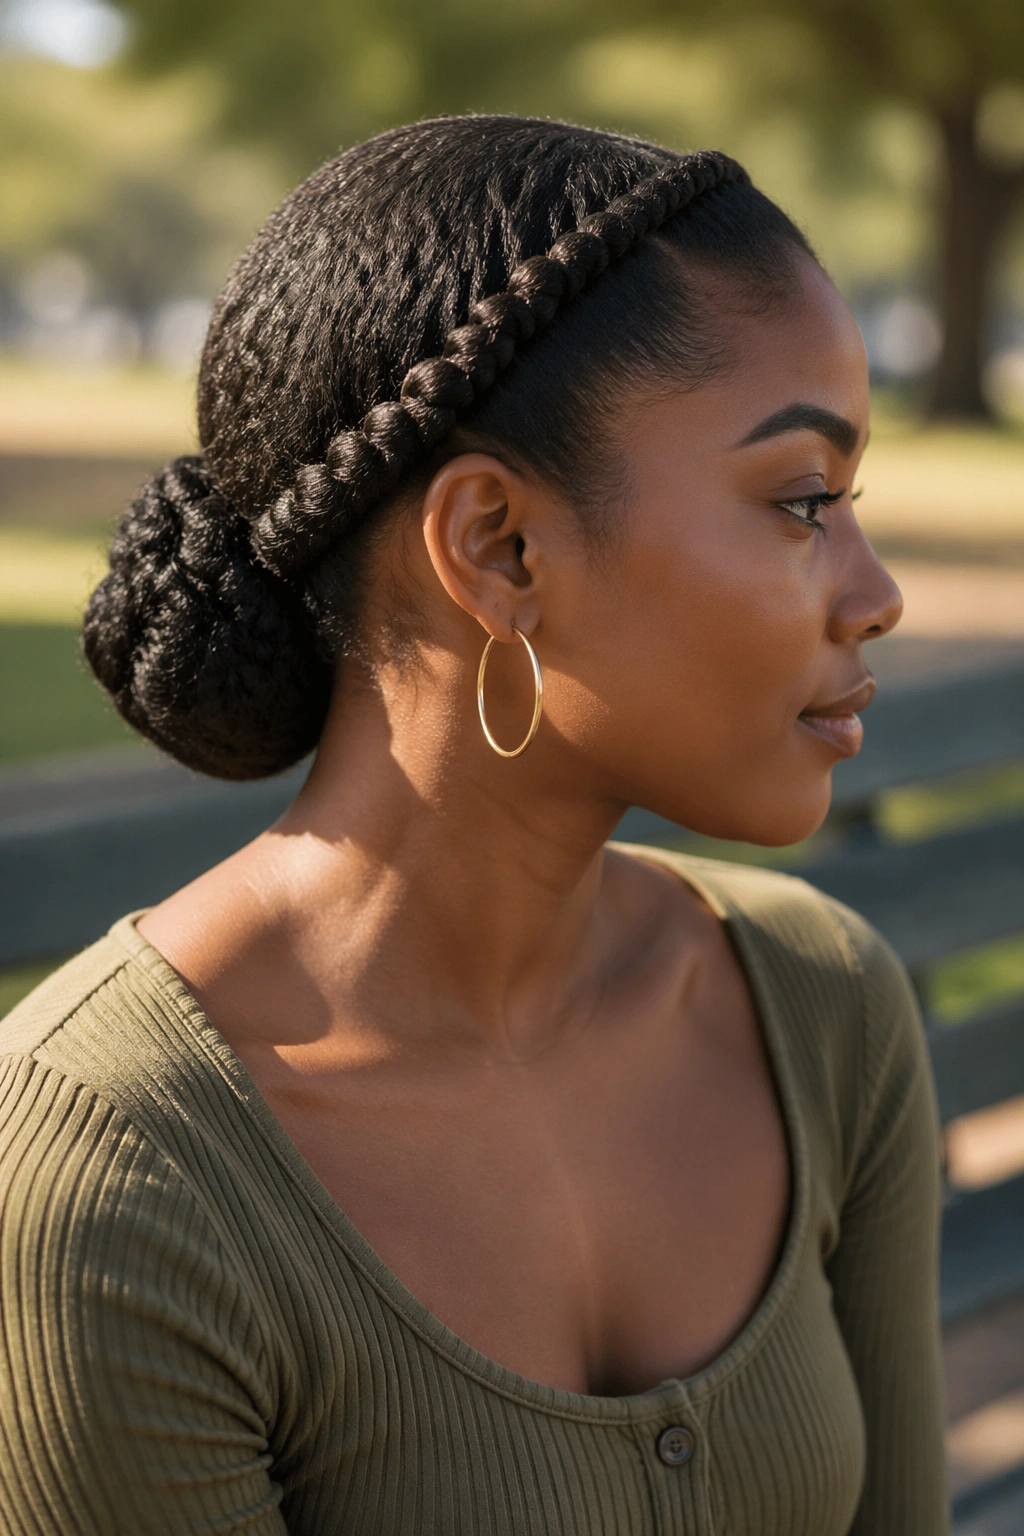
4. Flat-Twist Halo Bun
If your hairline tends to puff up fast, flat twists can save you some frustration. This style uses flat twists along the front or sides, then gathers the rest into a low bun. It gives you texture where you want it and control where you need it. Simple. Practical. Not boring.
The halo effect comes from the way the twists frame the head before they meet the bun. That makes the whole style feel more structured, almost like a built-in headband. It’s a good option for type 4 hair that likes to shrink or frizz at the first hint of moisture in the air.
- Use a moisturizing cream first so the twists stay soft, not crunchy.
- Keep the sections even; uneven flat twists show more than people expect.
- Secure the bun with pins that match your hair color if you want a cleaner finish.
- A satin scarf overnight helps the twist pattern stay crisp.
The style looks especially nice with medium-thick hair because the bun has enough volume to balance the twists.
5. Braided Base Sculpted Bun
A braided base gives the bun grip, and that grip matters. If your natural hair slips out of elastic holders easily, a braid at the foundation makes the whole style last longer. It also lets you shape the bun in a way that feels more sculpted than a loose wrap. I reach for this when I want the style to stay put all day without constant mirror checks.
You can do a single braid from the ponytail and wrap it into a bun, or split the ponytail into two braids and tuck them around each other. The second option creates more texture and usually gives the bun a fuller look. That matters if your hair is fine but dense, or thick but short.
A braided base is also forgiving. If the bun looks a little lumpy, the braid texture hides it. That’s the kind of detail people usually forget to mention, but it makes a real difference when you’re styling at home and don’t have ten mirrors and a stylist’s hands helping you out.
6. Tucked-In Knot Bun
What if you want a bun that looks folded rather than wrapped? A tucked-in knot bun does exactly that. Instead of spinning the hair around and around, you gather it low, fold the length inward, and tuck the ends under the base. It gives a soft, rounded shape that feels neat without looking too formal.
This style tends to work best on stretched natural hair because the ends need enough length to fold cleanly. If your hair is short, use a smaller bun and more pins; if it’s long, you can make the knot larger and looser. Either way, the key is tension control. Pull the base snug, not tight.
I like this bun when I want the back of the head to look smooth from a distance but not flat up close. There’s a little shape, a little volume, and none of the fuss of a braided finish. A mist of water-free curl refresher on the ponytail before tucking helps the hair bend without snapping into weird angles.
7. Voluminous Stretch-Set Bun
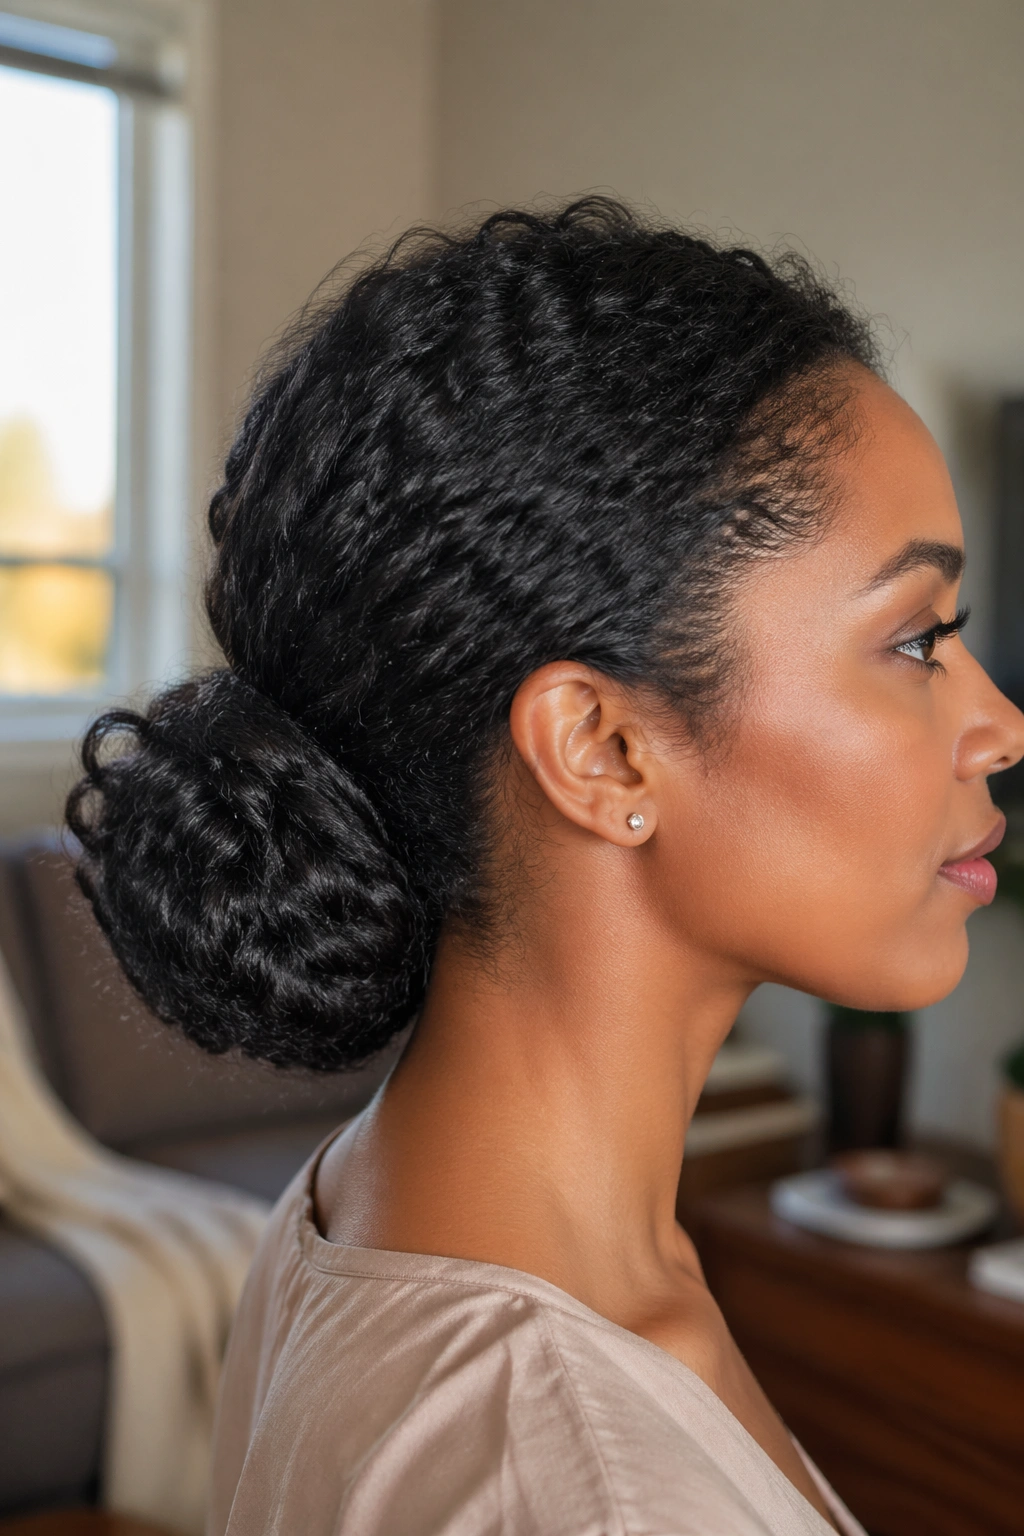
Sometimes the best low bun is the one that doesn’t try to erase your texture. A voluminous stretch-set bun keeps the body of your hair visible, which is a nice change if you’re tired of styles that press everything down to the scalp. It works especially well after a braid-out or twist-out that’s been separated with care.
The trick here is restraint. Don’t smooth the life out of it. Gather the hair low, leave the crown a little fuller, and shape the bun loosely so some texture remains visible. That contrast gives the style movement and keeps it from looking stiff. If your hair is dense, you may need two elastics or a large spiral tie to hold the base without snagging.
This is one of those styles that can look casual in the best way. Not messy. Just lived-in. Add a few bobby pins only where the bun feels unstable, not everywhere. Too many pins flatten the shape, and that defeats the whole point.
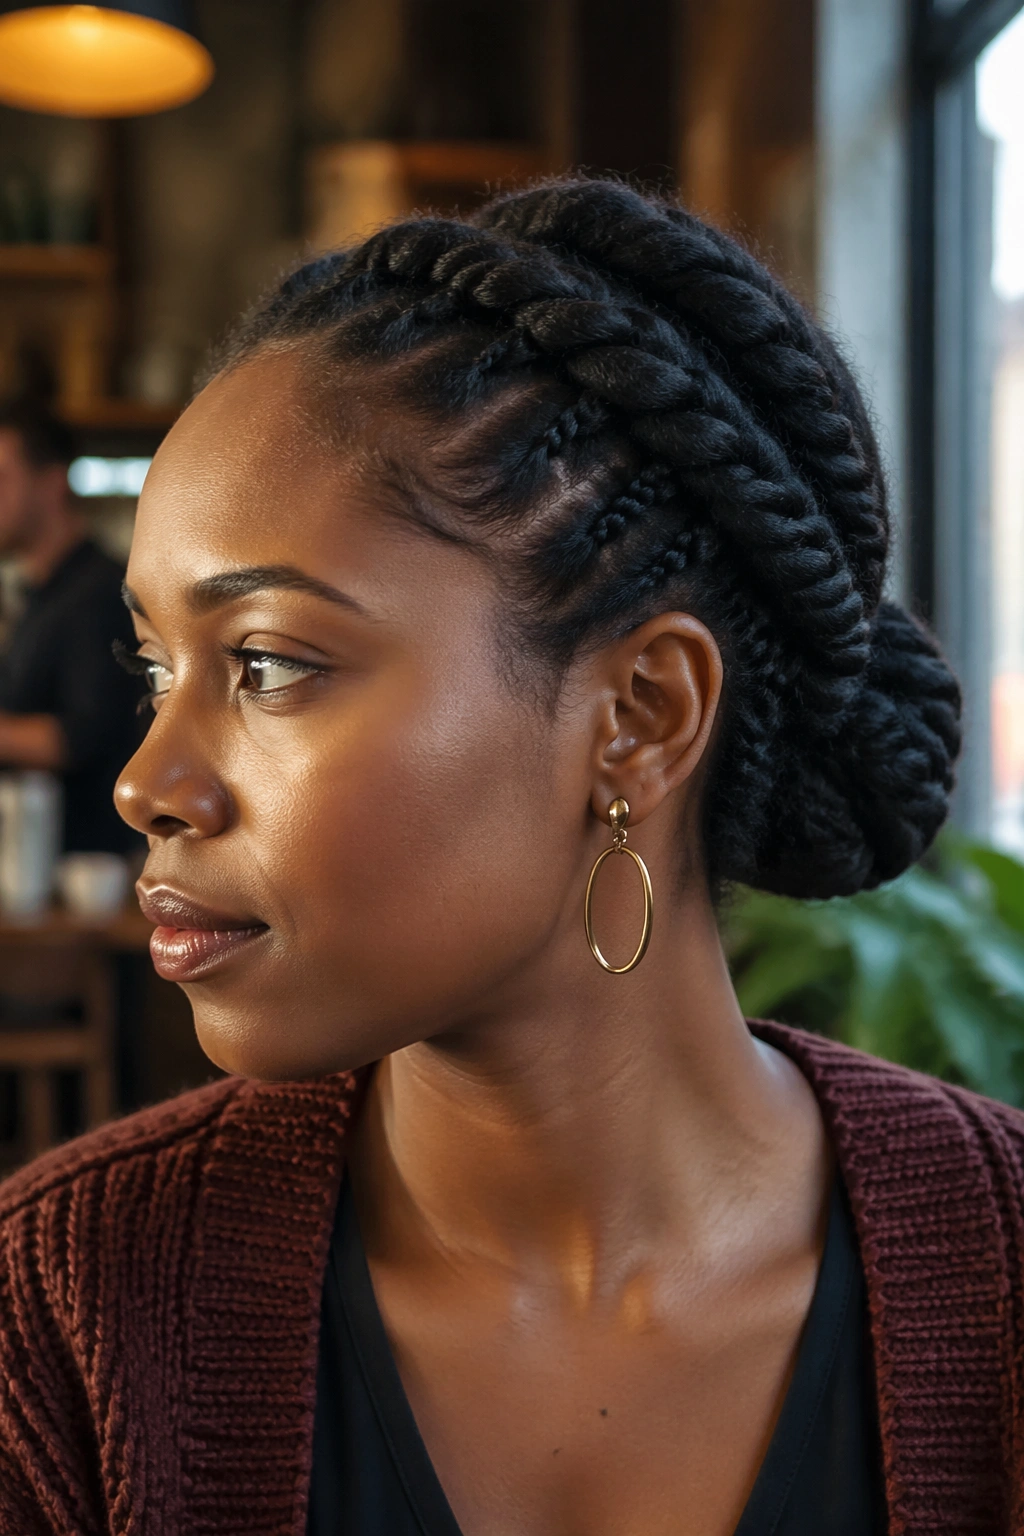
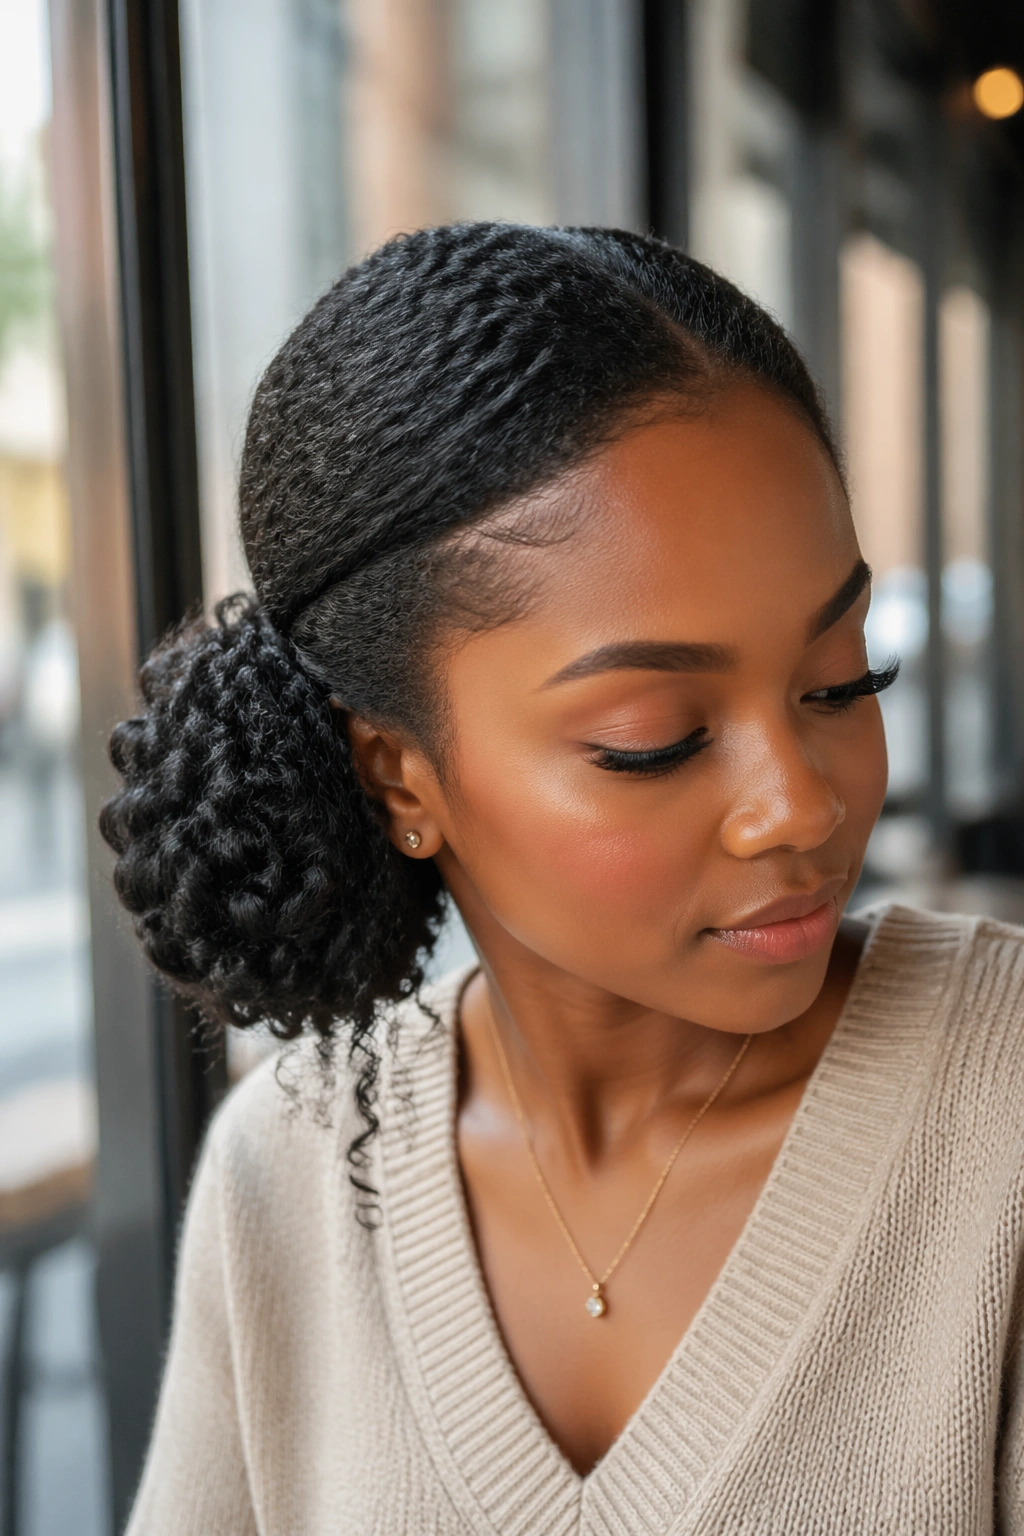
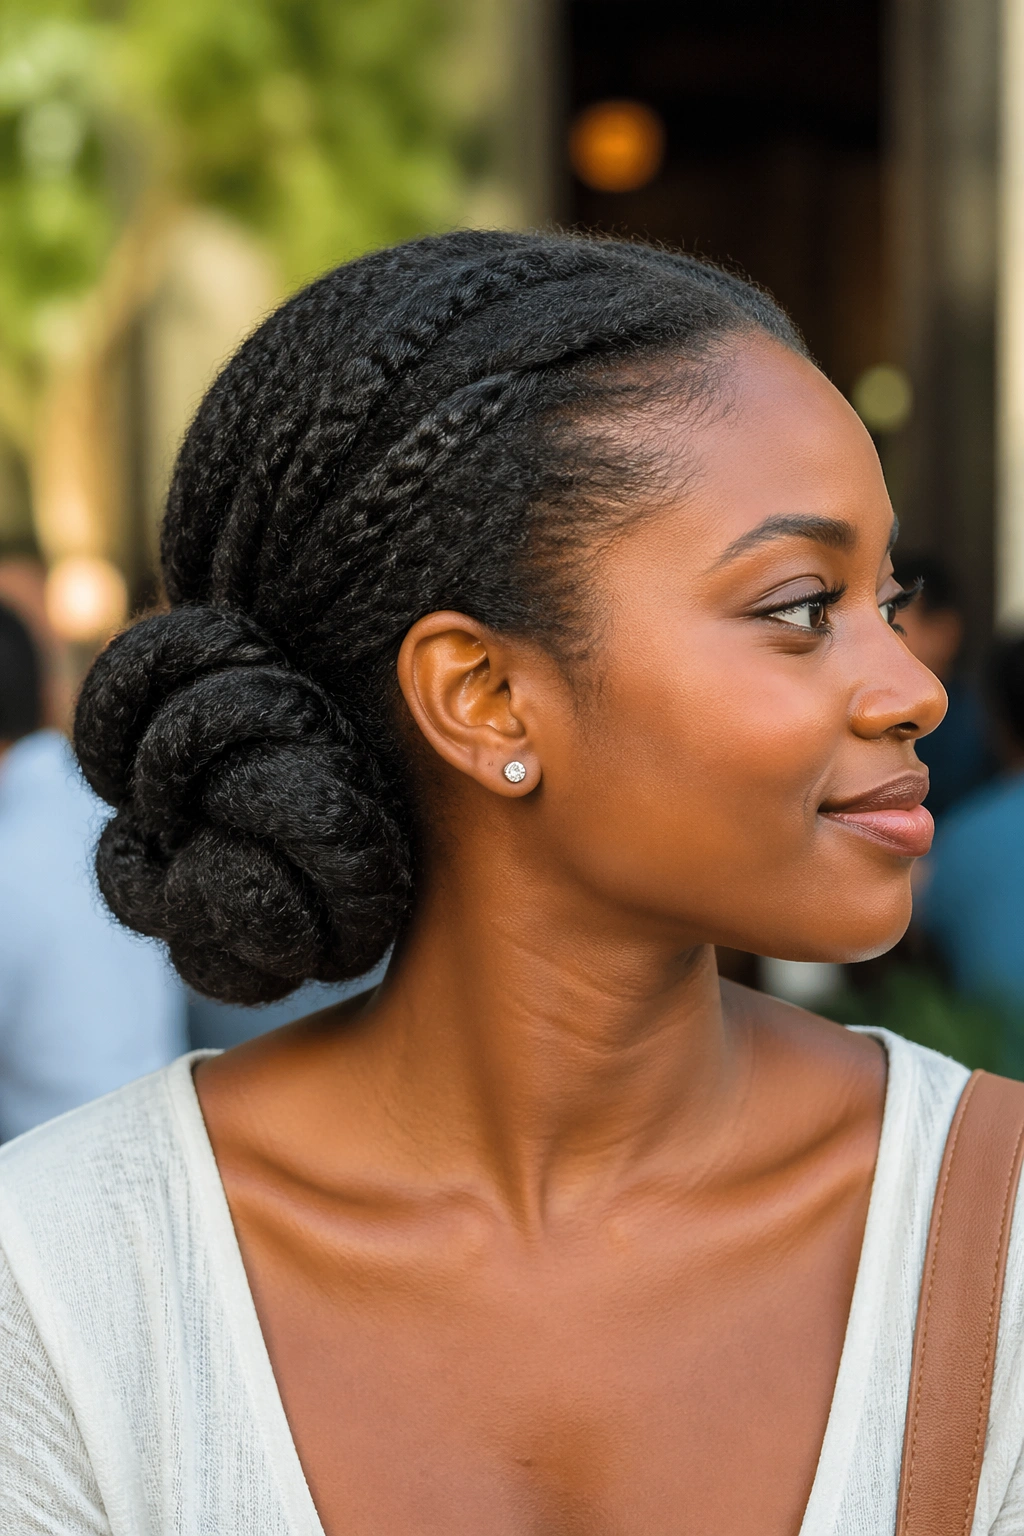
8. Two-Strand Twist Roll Bun
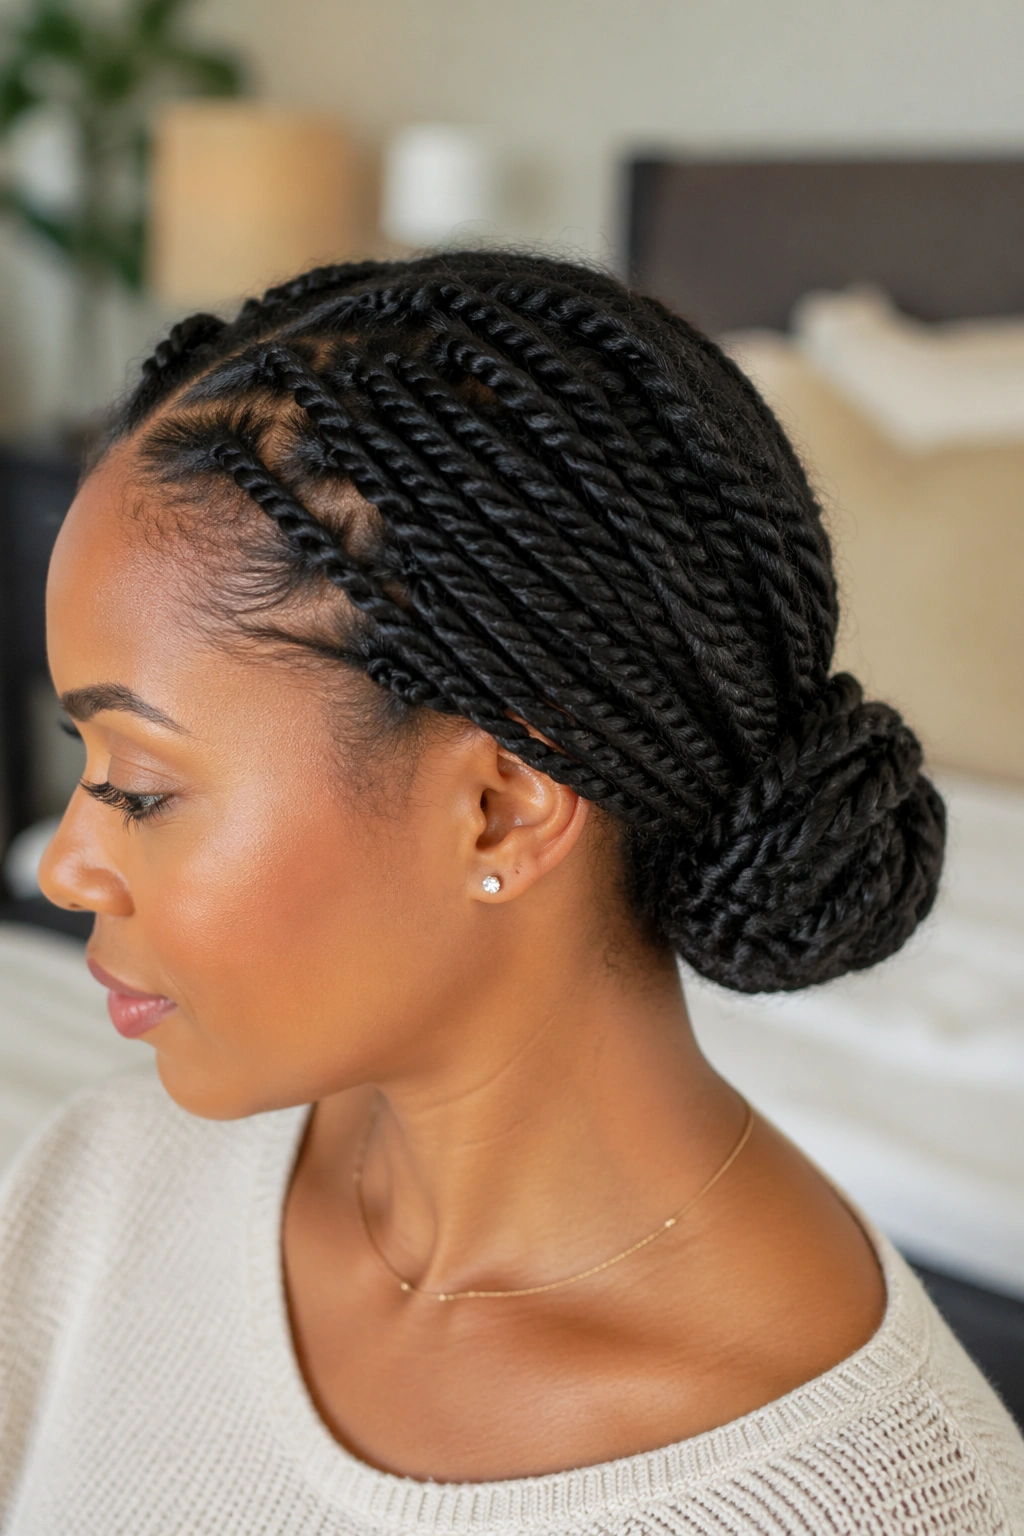
A two-strand twist roll bun gives you the softness of twists and the structure of a wrapped bun in one style. It’s a nice choice when you want something that reads as protective but still polished. The texture of the twists makes the bun look fuller than it really is, which is helpful if your hair is medium length.
Why It Stands Out
Two-strand twists hold up well on natural hair because they create a little friction. That means the bun stays shaped instead of sliding apart the moment you move your head. You can twist the ponytail into one long rope, then roll it around itself, or make several smaller twists for a more detailed finish.
The style also works for almost any density. Fine hair gets more body from the twist pattern. Thick hair gets a better grip because the sections are controlled from the start. If you want a less formal version, leave a few twist ends visible. If you want it neat enough for a polished dress code, tuck every end under the bun and pin them flat.
Best tip: use a little mousse on the twists before rolling them; it helps the pattern stay cleaner.
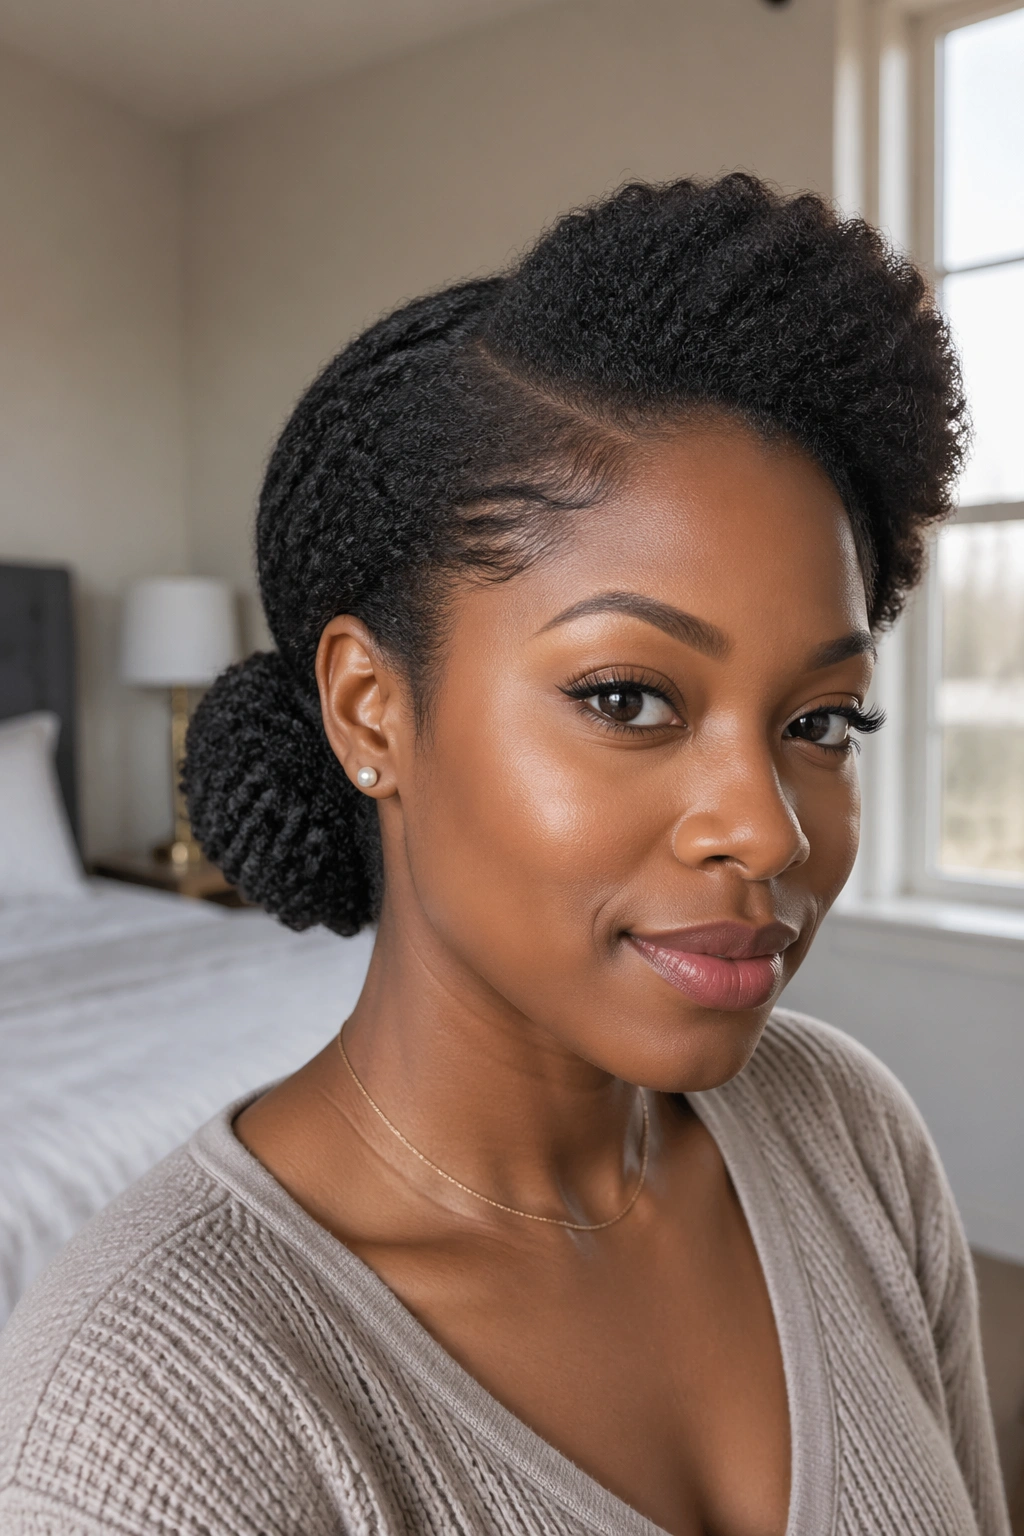
9. Puff Crown and Bun Combo
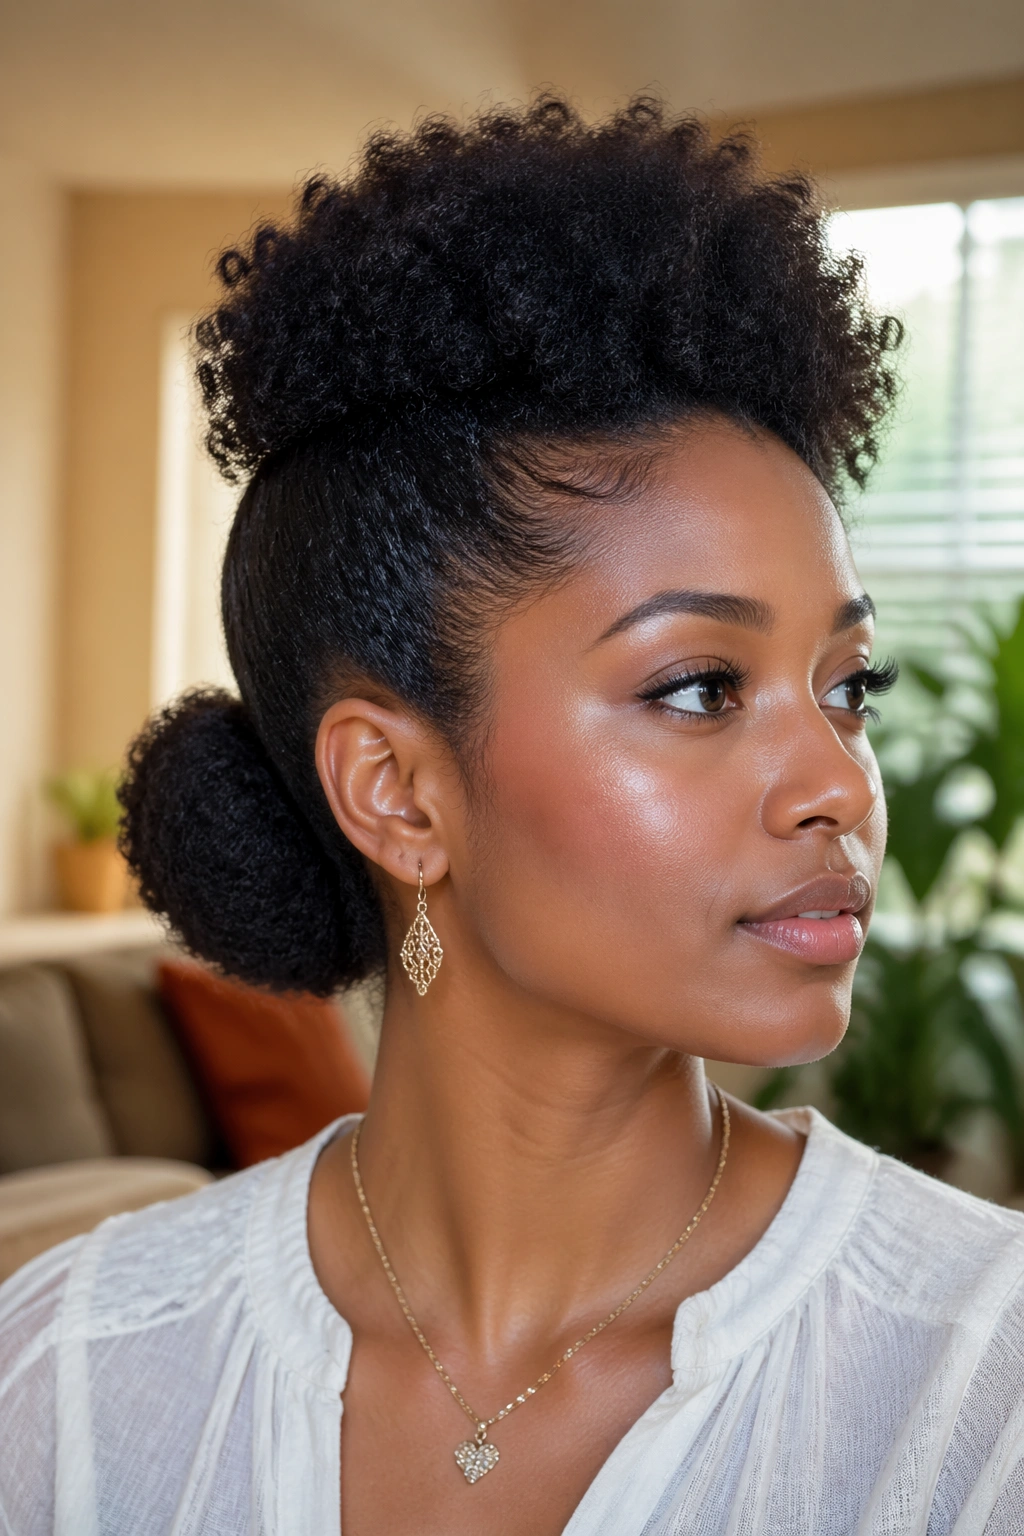
This is one of the few low ponytail buns that really respects shrinkage. Instead of fighting the puffiness at the front or crown, it lets that texture stay visible while the back moves into a bun. The result feels balanced, not overworked.
This style is useful when your hair has a lot of natural volume and you do not want to flatten it all. Create a soft puff at the crown, secure the lower section into a ponytail, then wrap that ponytail into a bun. The front stays full, the back stays tidy, and the whole look feels a little playful without turning childish.
It’s a smart option for medium to long natural hair, especially if the roots have some stretch and the ends still carry curl. Use a satin scarf for a few minutes after styling if you want the crown to settle a bit. Or leave it airy if you like a more rounded silhouette. I’d skip heavy gel here; a light cream and a firm elastic usually do enough.
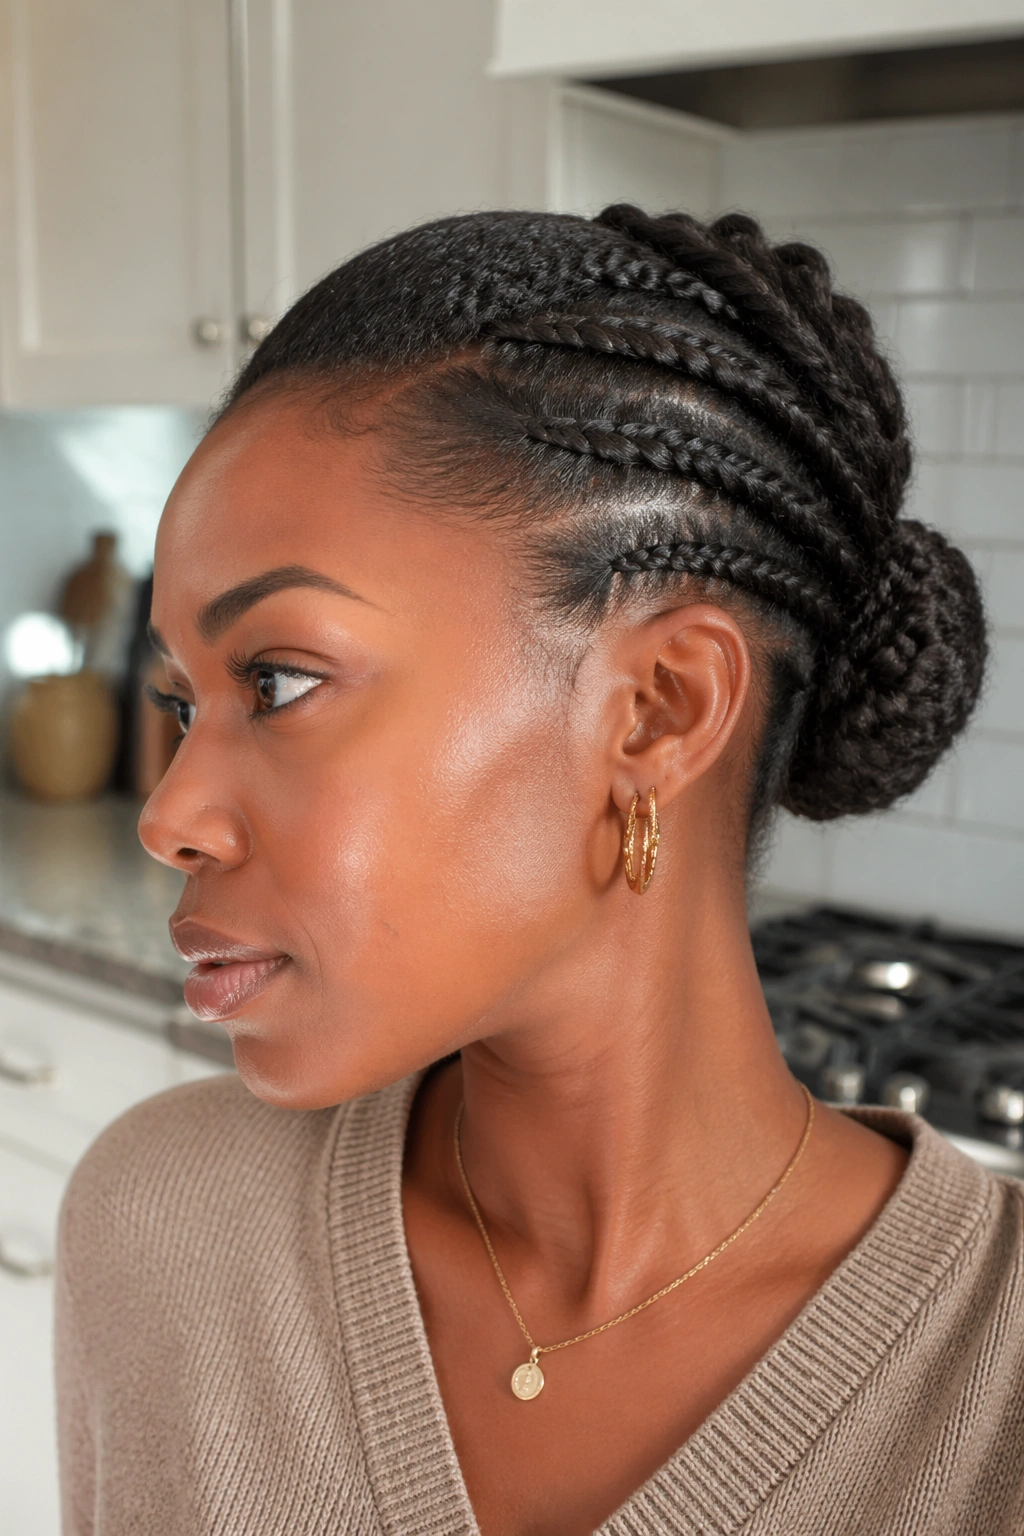
10. Feed-In Braid Low Bun
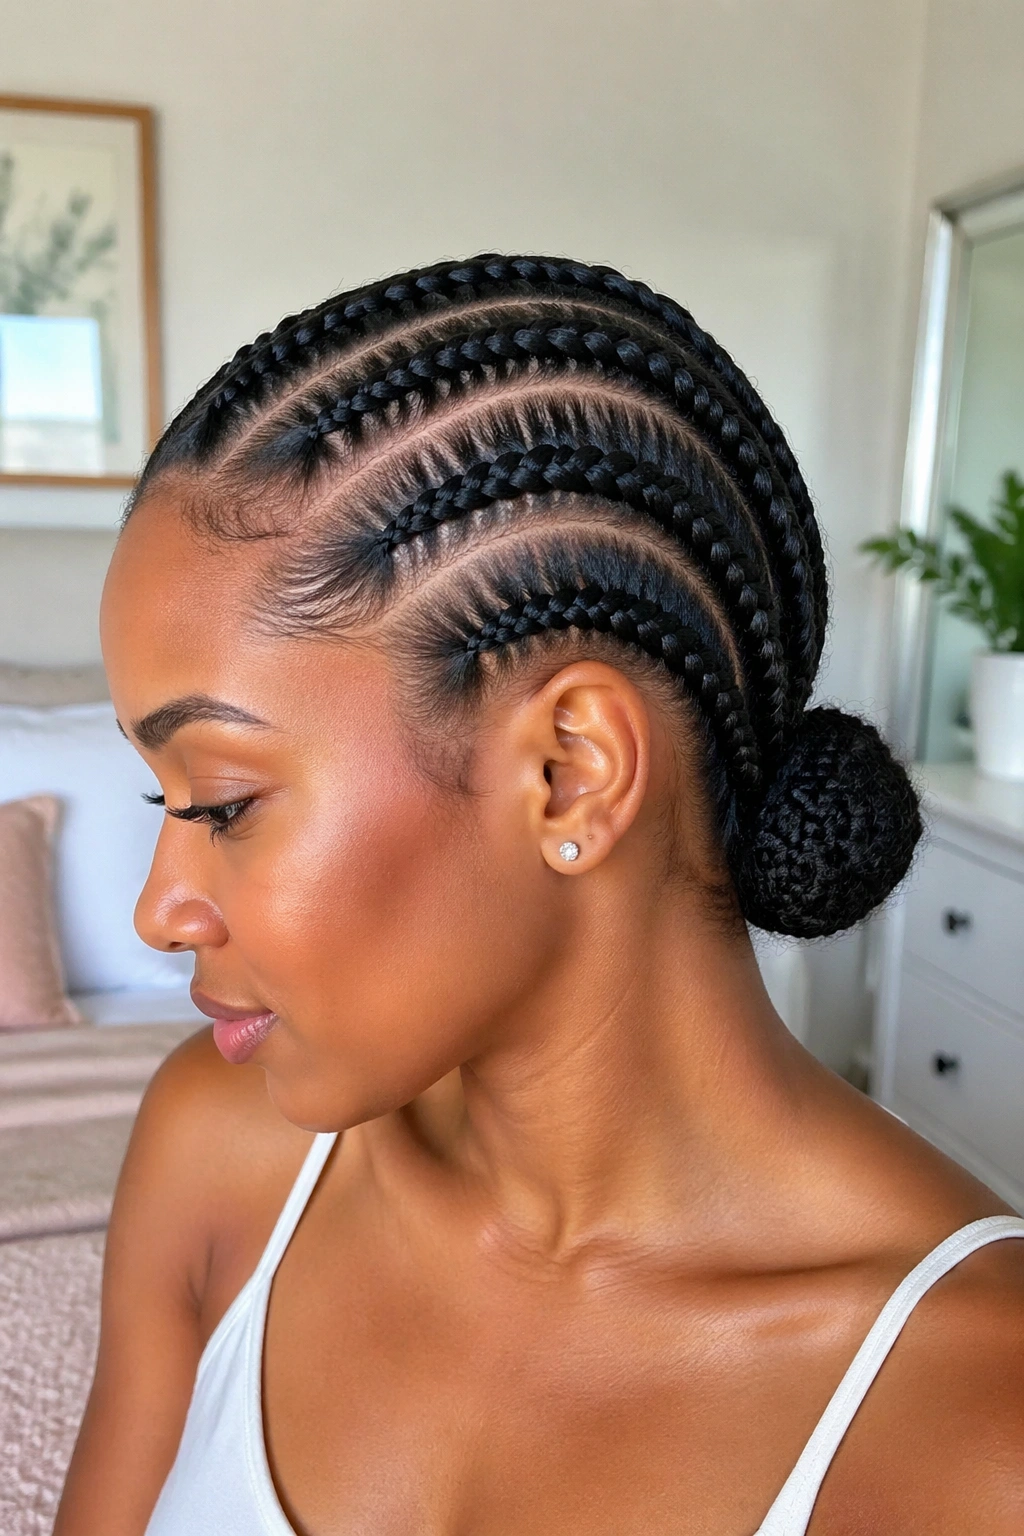
Can a braided style still feel soft? Yes, if the feed-in braids are done with a gentle hand. This low bun starts with braids that get gradually thicker as they move toward the nape, so the scalp looks smooth and the bun has a clean base. It’s one of the better choices if you want definition without the whole style feeling stiff.
The feed-in method helps the braids lay flat, which matters on natural hair because thick roots can make the front look bulky fast. Once the braids meet at the nape, gather them into a bun or twist them into a small knot. You can keep the bun neat and compact, or let the ends loop a little for texture.
This style works well for longer wear, especially if you’re the type who does not want to redo your hair every day. The braids carry a lot of the structure, so the bun itself doesn’t need to work as hard. A bit of shine spray on the braids can help the pattern pop without making the scalp oily.
11. Scarf-Wrapped Satin Bun
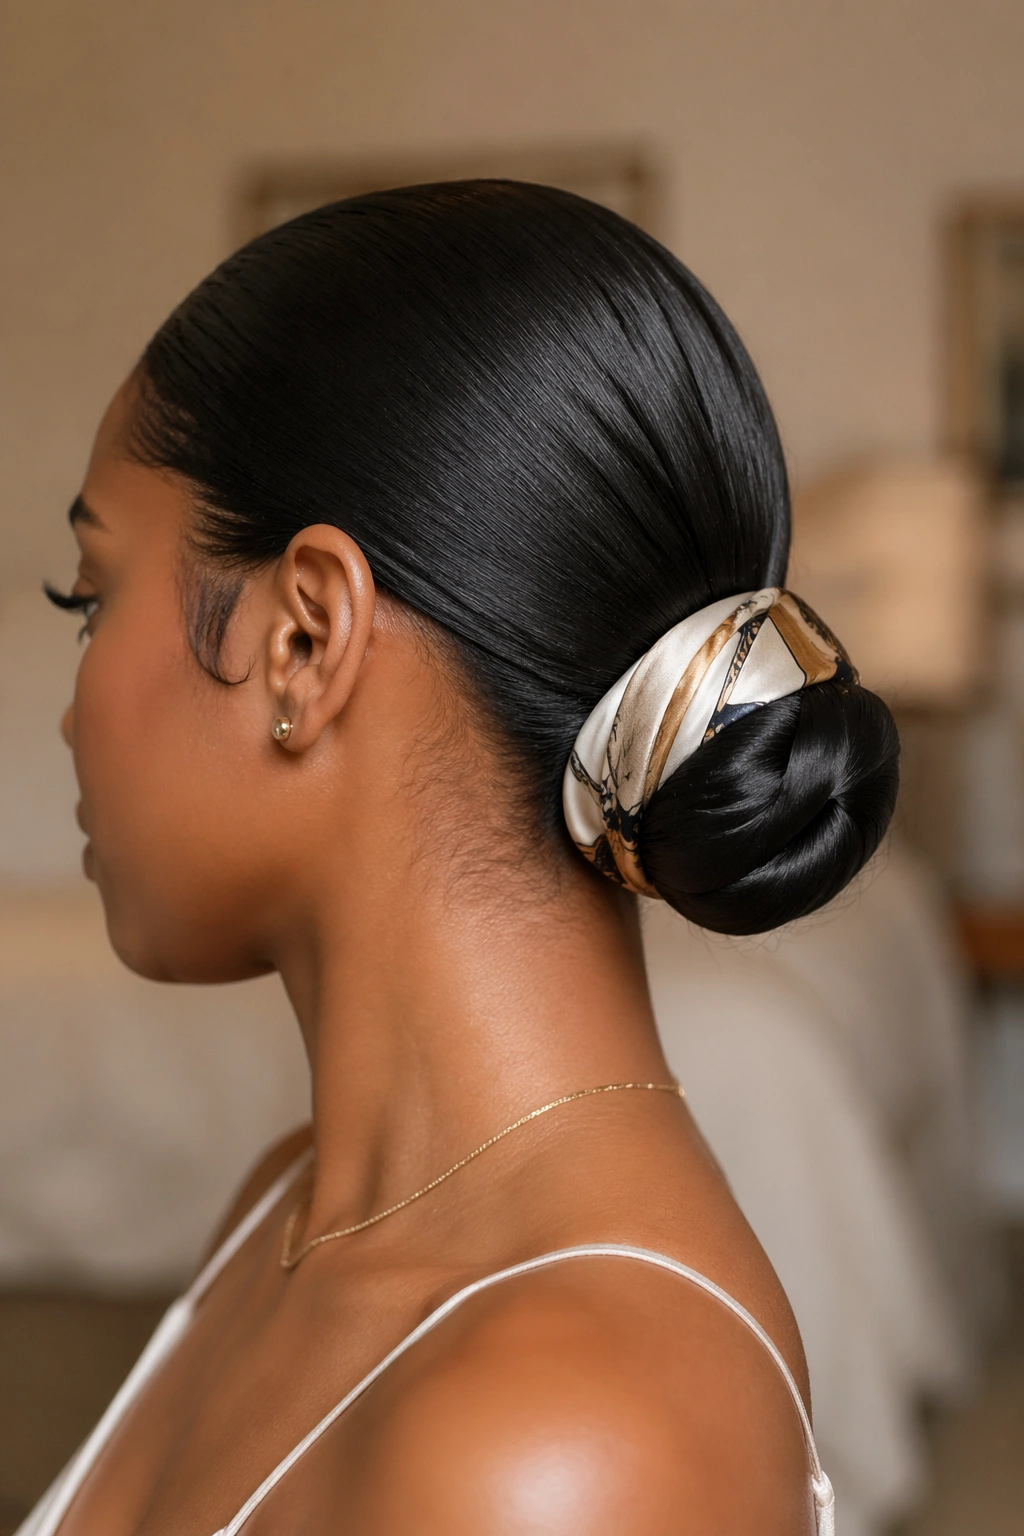
Some days, a scarf is not an accessory. It’s the whole plan. A scarf-wrapped low bun gives natural hair a finished look fast, and it’s forgiving when the bun underneath isn’t perfectly smooth. That’s the appeal for me. It looks styled even when you’re dealing with a slightly uneven part or a few stubborn flyaways.
Use a silk or satin scarf, not a stiff cotton one, if you want the wrap to sit neatly. A wide scarf can cover the elastic and the base of the bun, which is handy when you don’t want the hair tie to show. The bun itself can be sleek, textured, or tucked; the scarf becomes the visual focus.
This style also protects the hairline because the scarf can take some of the tension off the front if it’s tied carefully. Don’t knot it too hard at the temples. That’s where people mess up and get a headache by noon. Keep the bun low, wrap the scarf once or twice, and let one tail hang if you want a softer finish.
12. Bubble Section Low Bun
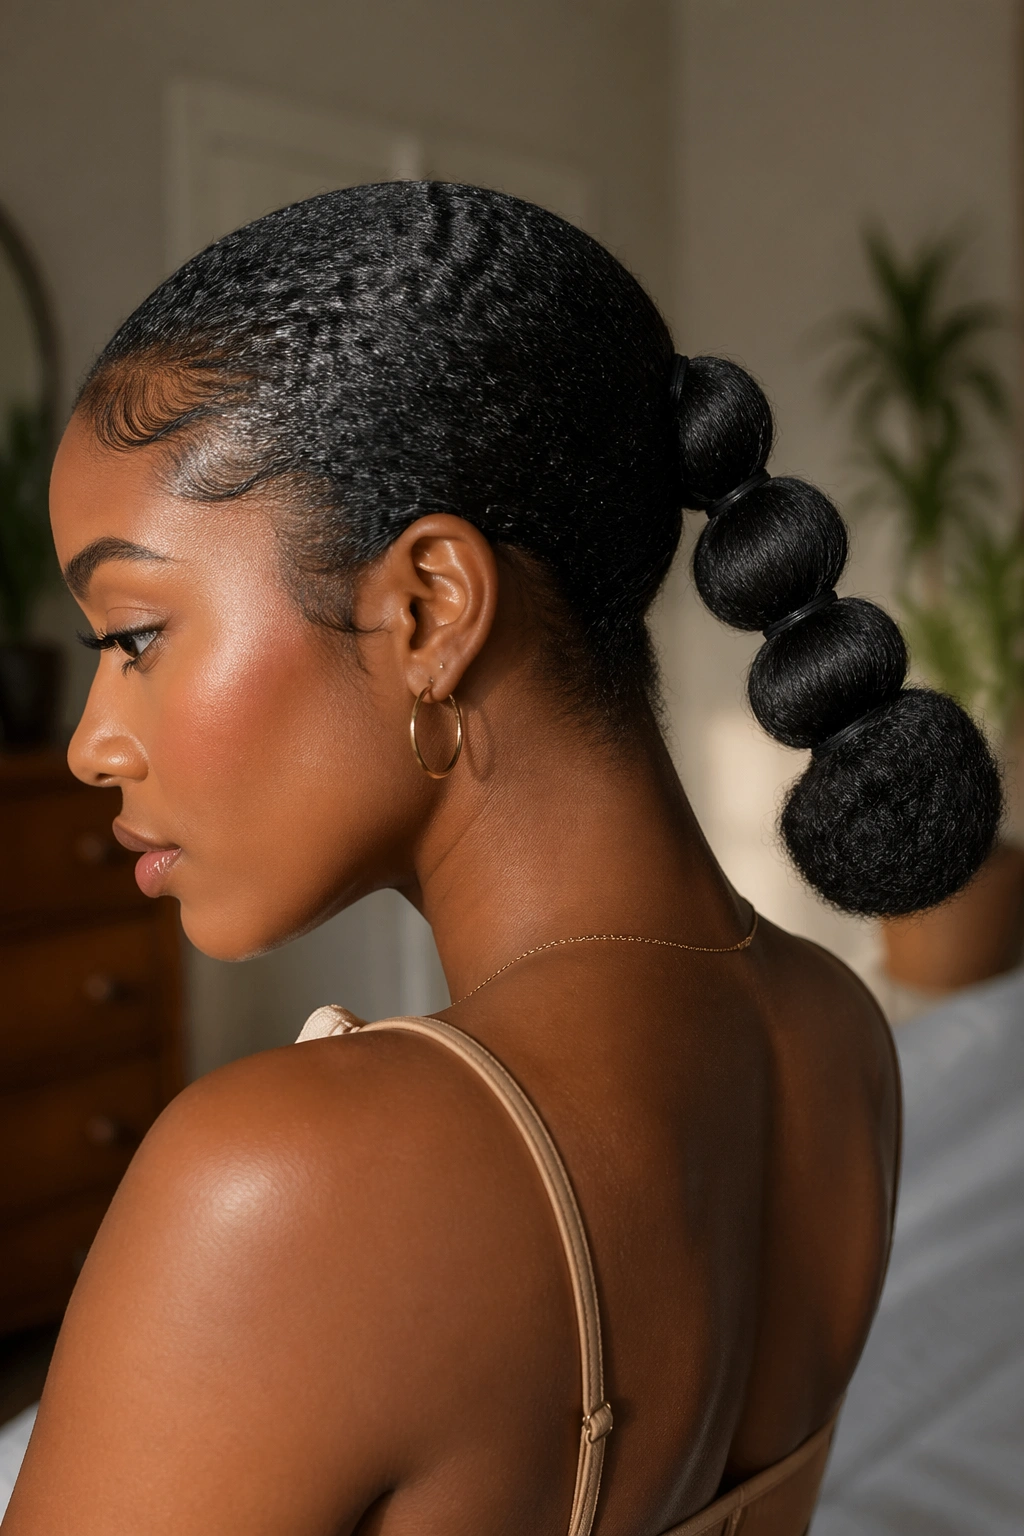
A bubble section low bun has a little more structure than a plain bun, which makes it fun without becoming fussy. You create small bubble shapes in the ponytail before coiling the length into a bun or looping it underneath. On natural hair, the bubbles give the style some visual rhythm, especially if your hair has been stretched first.
Why the Bubbles Matter
The bubbles break up the length so the ponytail looks intentional, not just tied back. That can be a nice fix if your hair is thick at the roots but thinner near the ends. Clear elastics or small snag-free ties work best here, and spacing them about 2 to 3 inches apart usually keeps the bubbles even.
This style can be dressed up or kept casual. For a neater finish, smooth each section before adding the next elastic. For a looser feel, gently pull each bubble outward once it’s secure. Just do not tug too hard or you’ll collapse the shape. A light spray of water-free moisturizer helps the sections bend without getting fluffy in a bad way.
Best tip: place the final bun low and centered, then pin the last bubble underneath so the whole style looks anchored.
13. Faux Loc Wrapped Bun
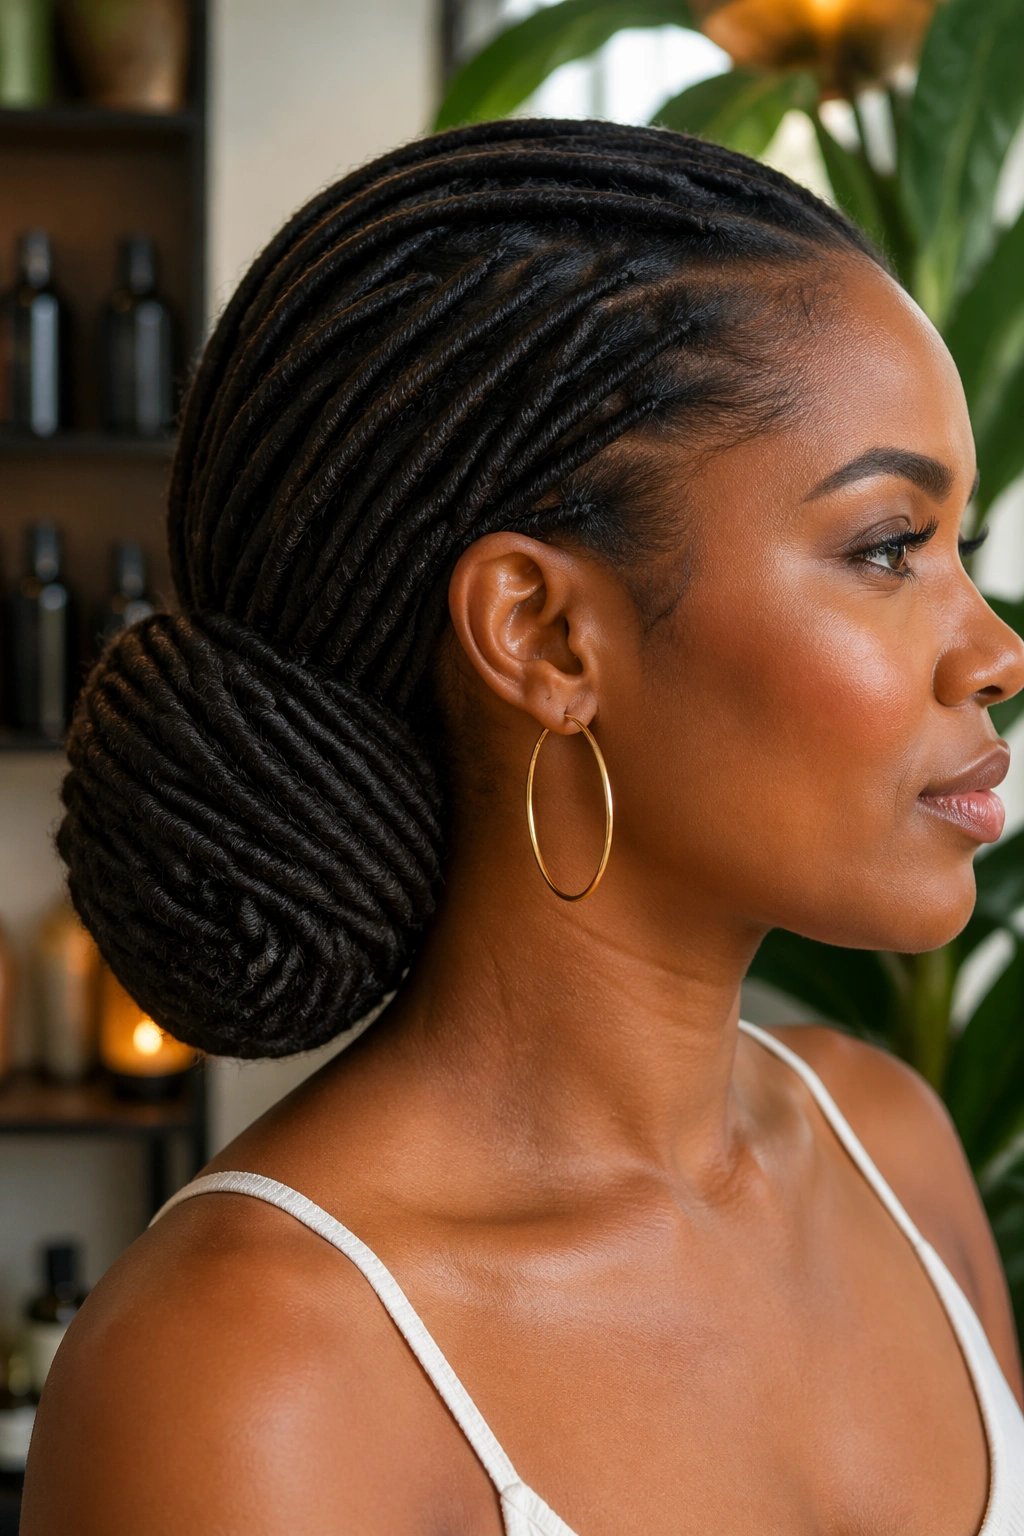
Faux locs bring instant texture to a low bun. They add weight, dimension, and a kind of built-in styling detail that plain natural hair sometimes has to work harder for. If you already wear faux locs, wrapping them into a low bun is one of the easiest ways to change the shape without starting over.
The beauty of this style is the motion in the locs themselves. You can sweep them low, circle them around the base, and tuck the ends in with pins that grip well. Because the strands are thicker, the bun usually looks fuller than a bun made from loose hair. That makes it a smart choice when you want volume without extra teasing.
I like this version for days when I want low maintenance but not plain. Use a few strong pins instead of a dozen weak ones. Weak pins slide. Always. If the locs are fresh, let them settle a little before shaping the bun so they do not fight your hands while you’re styling.
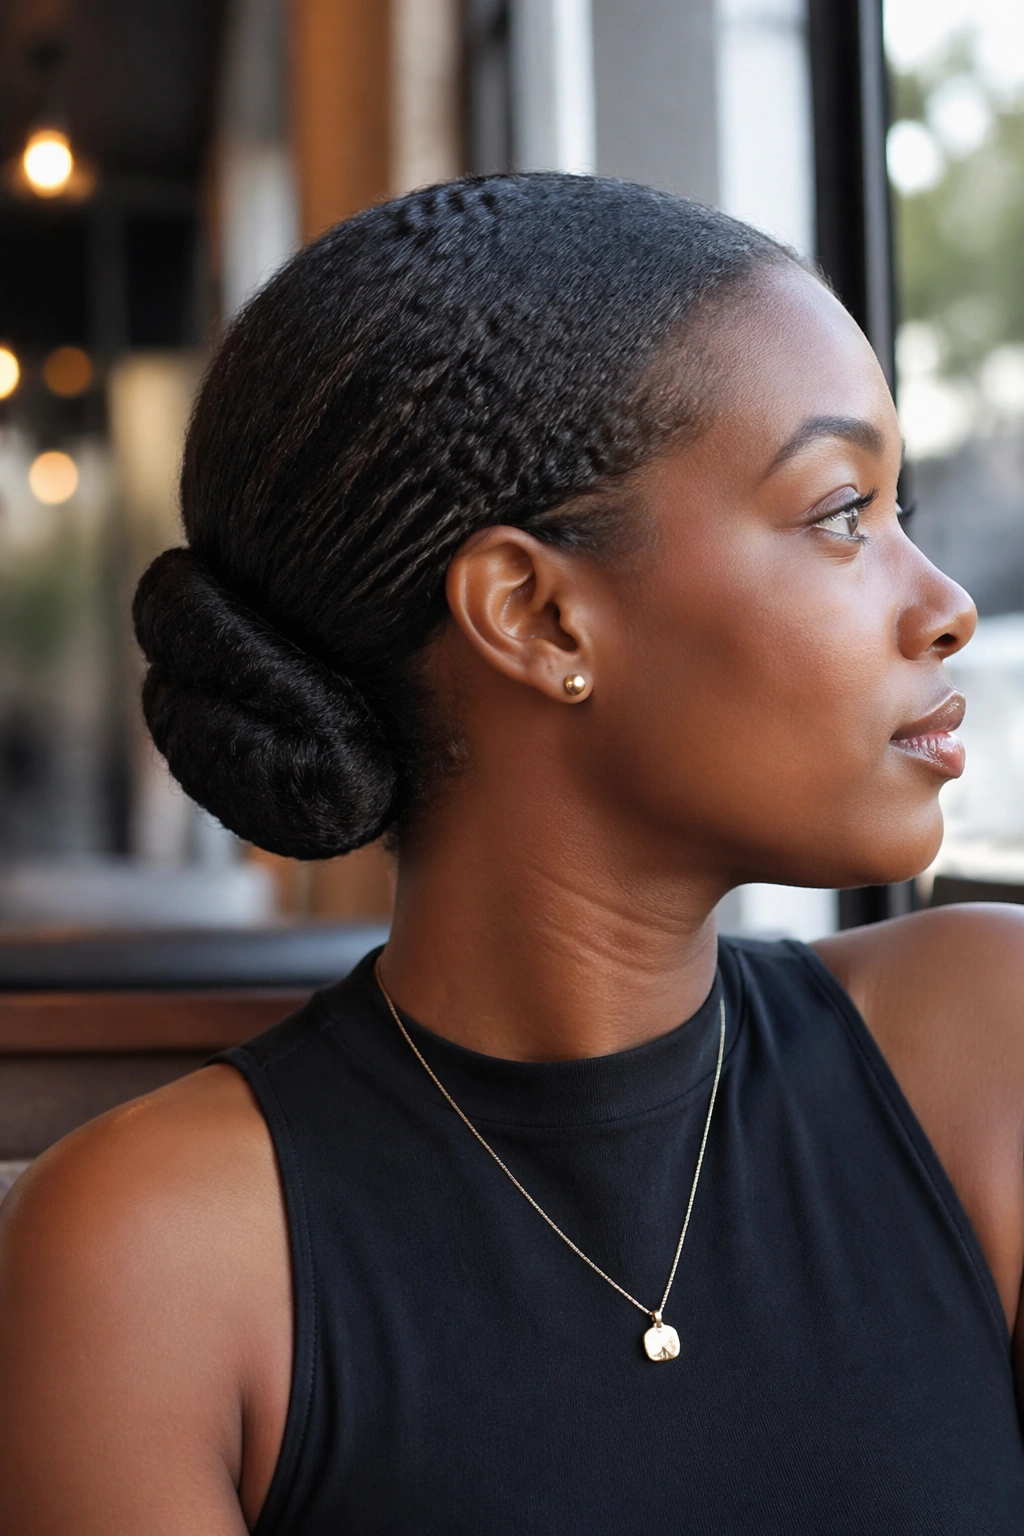
14. Blowout-Length Low Bun for Natural Hair

Do you want your bun to look longer than your actual hair length? A blowout-length low bun is the trick. By stretching the hair first, you give yourself more length to wrap and more control over the final shape. That matters if your curls shrink up fast and your bun keeps coming out tiny when you were aiming for something fuller.
What Makes It Different
The blowout doesn’t need to be bone-straight. It just needs enough stretch to let the hair fold cleanly and hang a little longer before you tuck it in. That gives the bun a smoother line and helps reduce the puffiness that can happen when you try to wrap highly shrunken hair.
This style is a favorite for people who like their buns tidy but not flat. The stretched length lets you make a fuller coil, and the surface still keeps a bit of natural texture. Use heat sparingly if that’s your method, or go with banding or braiding if you prefer no-heat stretching. Either way, the bun will look more intentional if the hair is evenly stretched from root to tip.
Best tip: brush only the outer layer smooth; leave a little bend underneath so the bun holds its shape better.
15. Curly Ends Out Low Bun
A low bun with curly ends out feels relaxed in a way that a fully tucked bun never will. Instead of hiding every strand, you let the ends peek out in a soft curl or coil near the base. That little bit of texture makes the style feel lived-in and personal, not stiff or overdone.
This works especially well after a twist-out or braid-out when the ends still hold definition. Gather the hair low, form the bun, and then leave a small section of ends visible. You can pin them into a loop or let them sit loose if they’re neat enough. The point is not perfection. It’s shape.
This is a nice style for brunch, errands, or any day you want to look pulled together without looking formal. It also gives you a chance to show off the health of your ends if they’re moisturized and defined. Use a small amount of cream on the visible curls so they stay soft instead of puffy by the afternoon.
16. Finger-Coil Bun

Finger coils can turn a low bun into something more detailed without needing braids or accessories. The coils create a tight, defined surface that looks especially good on short-to-medium natural hair. They also add grip, which makes the bun hold better than a plain smooth ponytail.
Why It Stands Out
Each coiled section has its own little spring, and that gives the bun texture from every angle. It’s a slower style, yes, but the payoff is obvious. The bun looks sculpted, and the coils give the hair a neat finish even if the rest of the style is simple.
If you want this look, coil the hair after adding a light styling cream or gel to each small section. Let the coils set fully before you gather them, or they’ll unravel and lose definition. On a low bun, you can coil the ponytail as a whole or coil a few front pieces and leave the back more free. Both approaches work.
- Best for hair that holds curl well when damp.
- Use small sections for tighter definition.
- A hooded dryer or air-dry time helps the coils set.
- Avoid heavy oils before styling; they can make the coils slip.
17. Asymmetrical Side Bun
An asymmetrical side bun is for days when you want the bun to feel a little less traditional. Instead of sitting perfectly centered, it lands off to one side, which changes the mood fast. The style looks softer and more modern without needing extra pieces or complicated braiding.
That off-center placement works well on natural hair because it lets the bun borrow some volume from one side while keeping the other side smoother. If your hair is thick, this can help distribute the weight better. It’s also flattering when one side of your hairline is more cooperative than the other. We all have a side that behaves.
You can make the bun itself loose and textured or polished and tight. I prefer a bun with a little movement here, since the asymmetry already gives it character. Pair it with a side part or a slightly curved front section, and the style starts to look intentional rather than accidental. A single decorative pin near the bun can finish it nicely.
18. Face-Framing Knot Bun

What if you like a bun, but not the fully pulled-back feeling? A face-framing knot bun solves that. You leave out two small front pieces or twists, then gather the rest into a low knot at the nape. Those front sections soften the whole look and keep it from feeling severe.
This style is especially kind to shorter natural hair around the edges. If the front pieces are a little different in length, the face-framing effect hides that. You can curl the pieces with a flexi rod, twist them, or leave them in their natural state. All three work. The knot itself can stay simple and tucked.
I think this is one of the more wearable low bun styles for natural hair because it has a built-in softness. You do not need perfect edges or a perfectly flat crown. The face-framing sections do some of the visual work for you. That means less pressure, less product, and fewer reasons to keep fixing it in the mirror.
19. Beaded Accent Low Bun

A few beads can change the whole mood of a low bun. This version works best when one braid, twist, or wrapped section feeds into the bun and carries the beads as a focal point. The rest of the style can stay simple. That contrast is what makes it interesting.
Use wooden beads for warmth, gold beads for shine, or clear beads if you want something subtle. Just keep the number small. Three to five beads is usually enough. Too many and the bun starts feeling busy. The beads should sit where they can move a little, not jammed so tightly that they drag on the hair.
This style is a good way to dress up natural hair without adding a full set of accessories. It also works well for festivals, casual events, or even a plain outfit that needs one visual point. Secure the beaded section well before shaping the bun, because added weight changes how the hair hangs. A strong elastic at the base helps keep everything steady.
20. Mini Cornrow Bun
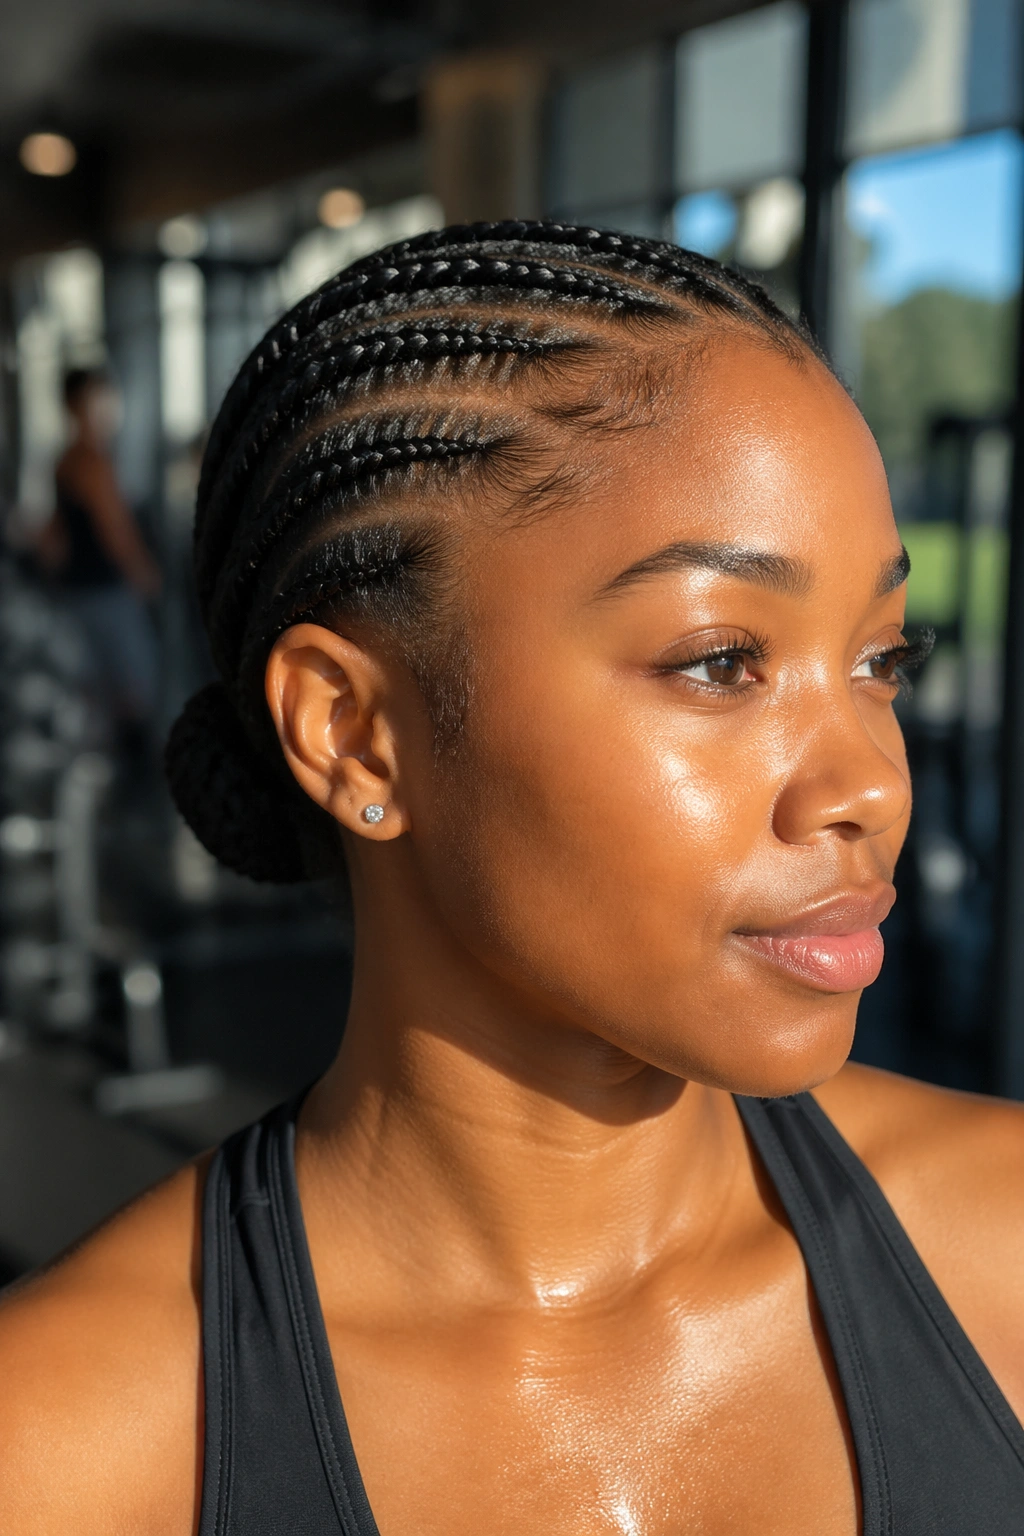
Mini cornrows into a low bun are one of the more practical choices on this list, and I mean that as a compliment. The braids lie flat, the hair stays protected, and the bun at the nape gives the style a neat ending. It’s a solid option for workouts, humid days, or any stretch of time when you do not want to think about your hair.
What Makes It Practical
The small cornrows help distribute tension, which can be easier on the scalp than one tight ponytail. They also create a clean surface, so the bun doesn’t need tons of product to look finished. Once the braids reach the nape, twist or fold them into a compact bun and pin the ends flat.
This style can be made more formal or more laid-back depending on how straight the parts are. Clean parts read sharper. Slightly curved parts feel softer. If your hair is thick, ask for braids that are not too tiny, because micro-sized sections can take longer and may not be worth the extra time unless you love the look.
- Good for longer wear.
- Pairs well with a satin bonnet at night.
- Keep the bun small if you want less weight at the base.
- A little scalp oil between washes can keep the parts from feeling dry.
21. Rolled French-Tuck Bun
A rolled French-tuck bun hides the elastic and creates a neat fold at the back of the head. Compared with a looser looped bun, it looks more deliberate, and it can sit flatter against the nape. That makes it a nice option when you want a polished shape but do not want anything too rigid.
The roll itself starts from the ends of the ponytail and tucks upward under the base. On natural hair, this works best when the length is stretched enough to bend without snapping back. If the hair is too shrunken, the roll gets bulky. If it’s stretched, the tuck sits cleanly and stays put.
I like this style for days when the outfit is doing a lot. A high collar, a statement earring, or a bold lip all pair well with it because the bun itself doesn’t compete. Use a few hidden pins inside the roll so the front stays smooth. If one end pops out, that’s the first thing to fix. It changes the whole line of the style.
22. Twist-Out Low Bun
A twist-out low bun lets your texture stay visible while still pulling the hair away from your face. It’s a good choice when the twist-out has enough definition to look interesting but you don’t want to wear it fully loose. Gather the hair low, then arrange the twists or twist-out sections into a bun that keeps the shape soft.
How to Keep the Definition
The main mistake people make is brushing too much before they bun it. That kills the pattern. Instead, separate the twist-out gently with your fingers, then gather it low and use your hands to shape the bun rather than a brush. The result stays fuller and less frizzy.
This style works well for natural hair that’s been moisturized without being overloaded. Too much cream can make the twist-out collapse. Too little, and the ends look dry. A small amount of lightweight butter or leave-in on the ends usually does enough. If you want extra hold, pin only the points that stick out; don’t pin the whole bun flat, or you lose the twist-out character.
23. Chunky Textured Bun
Sometimes the nicest low bun is the one that looks a little undone. A chunky textured bun keeps visible sections, puff, and thickness instead of trying to smooth every strand into a uniform shell. That makes it a strong choice for thick natural hair, especially when the texture itself is one of the best parts of the style.
This version is less about precision and more about shape. You gather the hair low, divide it into a few larger sections, and wrap them around each other loosely. The bun ends up with visible ridges and a fuller body. That’s the point. It feels less formal, more human.
I’d use a soft brush only at the hairline and leave the ponytail body textured. If you smooth the whole thing, the bun loses its character. A light cream or foam helps the sections stay together without making them sticky. And if a few coils escape around the edges, I’d leave them. They make the style better, not worse.
24. Gold-Cuff Sleek Bun
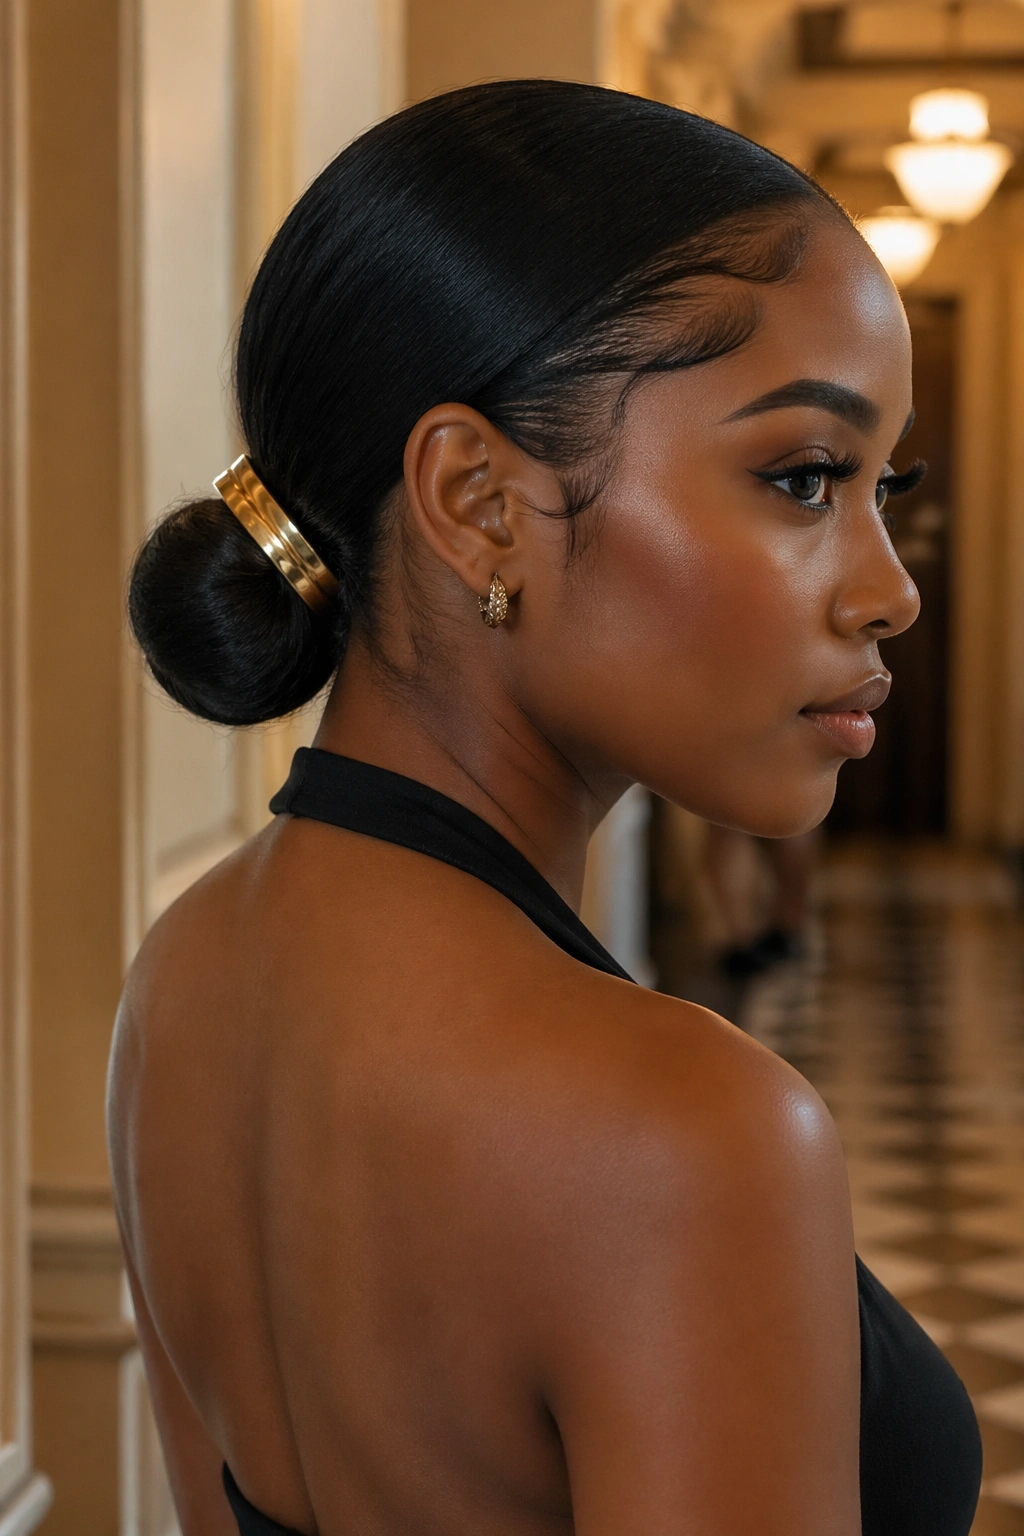
A gold-cuff low bun turns a plain sleek style into something that feels finished with almost no extra effort. The cuff wraps around the bun or sits at the base, which gives you one clean focal point. It’s a nice option when you want a little shine but do not want glitter, clips, or a pile of accessories.
Where the Cuff Belongs
Place the cuff where it supports the shape, not where it fights it. At the base of the bun, it can hide the elastic. Around the bun itself, it can make the style look more polished and intentional. Both work, but the base placement usually feels cleaner on natural hair because the bun has a stronger outline.
This style likes sleekness. A smooth part, controlled edges, and a compact bun let the cuff stand out. If the hair is too fluffy, the cuff can look like it’s floating. That’s why I’d stretch the hair first and use a strong-hold gel just at the perimeter. The gold adds enough detail on its own.
Best tip: choose a cuff that matches the width of your bun; oversized cuffs can swallow smaller styles.
25. Side-Puff Low Bun
A side-puff low bun gives natural hair a bit of lift at the front while keeping the back neat. It’s especially useful if your roots have volume you do not want to flatten and your bun needs some visual balance. The puff keeps the style from looking too tight or too serious.
The side puff can sit on one temple or sweep across the forehead before curving into the bun. Either way, it softens the face and makes the style feel less rigid. That makes it good for everyday wear, but it can also work for dressier settings if the bun itself stays neat. You do not need the puff to be huge. A modest lift does the job.
What I appreciate here is that the style looks better with some imperfection. A little texture at the puff gives the whole look life. Smooth the base, let the puff breathe, and pin the bun in a way that supports the weight. If the front starts to sag, add one hidden pin under the puff instead of redoing the whole thing.
26. Event-Ready Low Bun
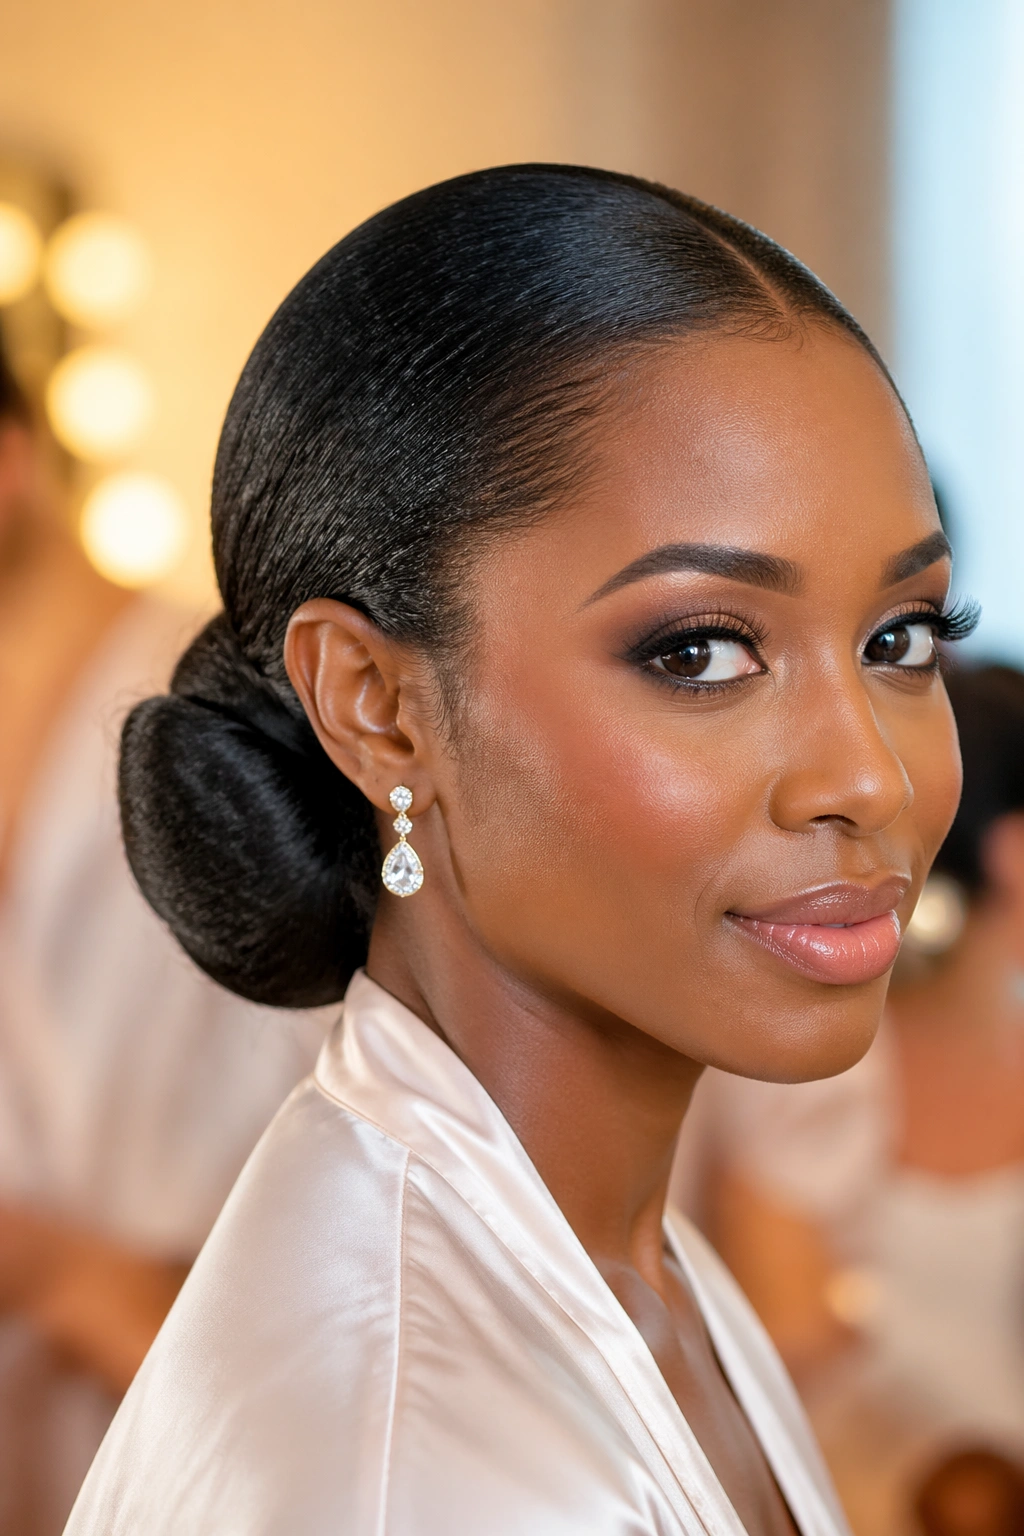
For weddings, dinners, or any moment when you want the bun to look a little more dressed up, an event-ready low bun is the safest bet. The shape is usually smooth at the crown, full enough at the bun to look elegant, and pinned so carefully that nothing shifts when you move. It’s the kind of style that can hold up through photos, dancing, and long conversations.
The trick is to build the bun in layers. Start with a clean part, smooth the sides, secure the ponytail low, then wrap the length into a structured bun with hidden pins. If your hair is natural and thick, do not try to force every strand flat. A little controlled texture at the nape can look better than a shellacked finish that cracks when you smile.
This style benefits from a light shine spray and a satin wrap before you leave the house. That gives the surface a smooth look without making it greasy. If you want to dress it up further, add a small comb, a pearl pin, or a clipped-in accent near one side of the bun. Keep it restrained. That’s where it looks strongest.
27. Everyday Soft Low Bun for Natural Hair
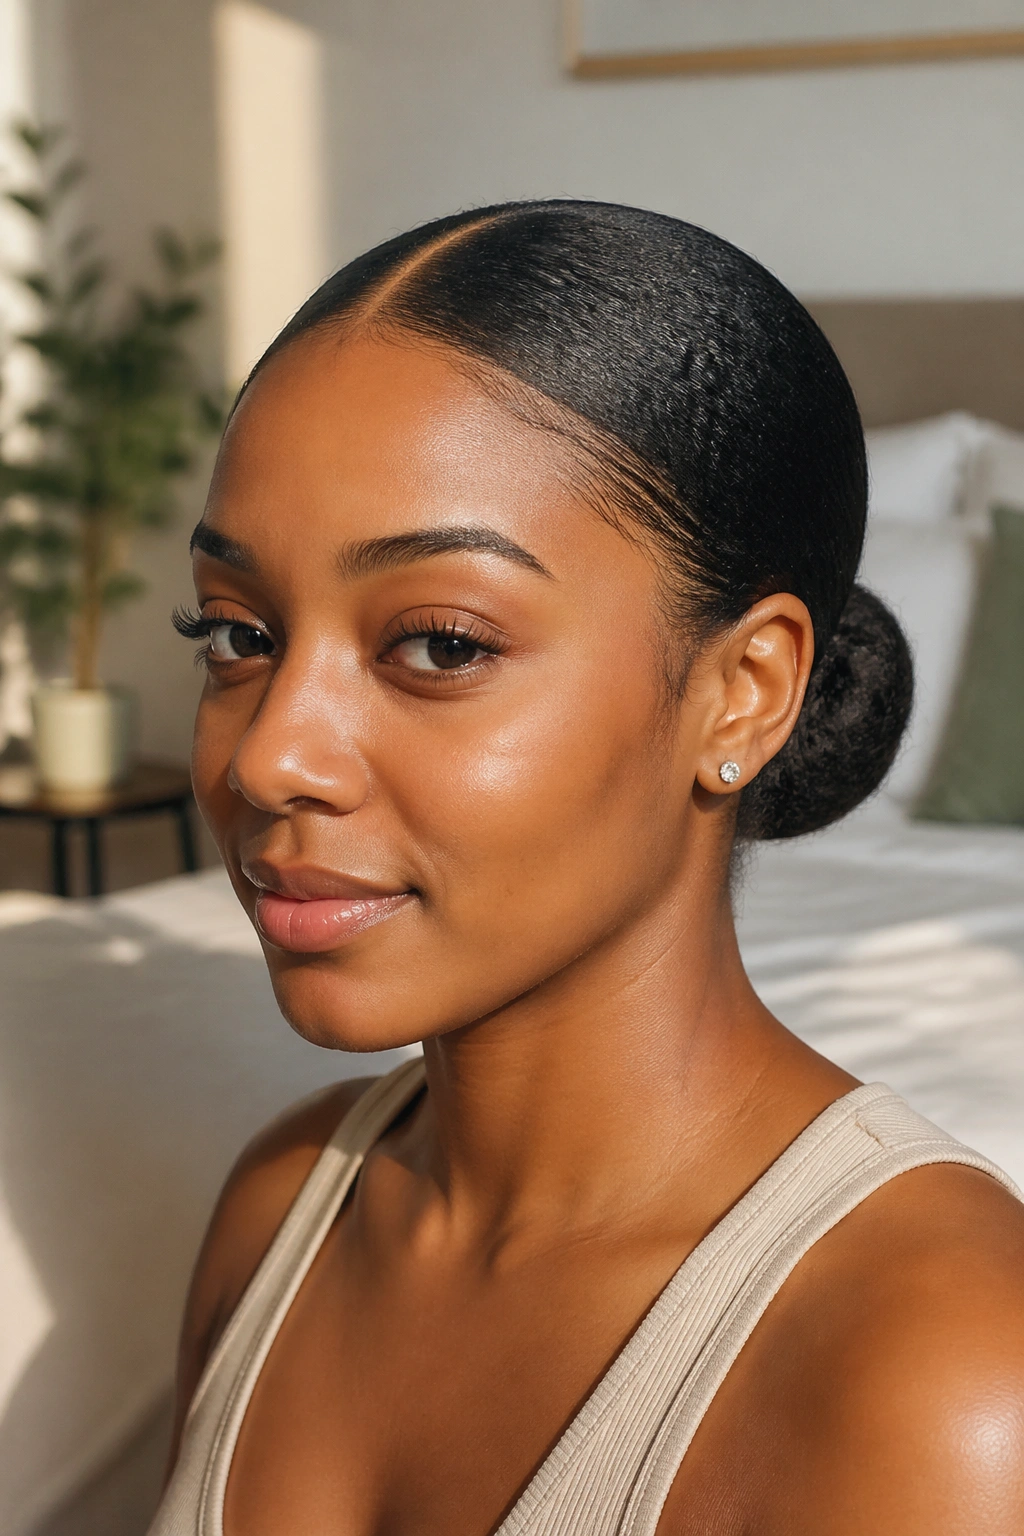
The everyday soft low bun is the one I’d save for the days when you want your hair out of the way but still want to look like you made a decision. It doesn’t need to be tight, glossy, or overbuilt. It just needs to sit low, hold comfortably, and respect the way natural hair moves.
This version works best when you leave a little texture at the crown and let the bun stay slightly loose. The shape should feel easy, not collapsed. Use a moisturizing leave-in, gather the hair with a snag-free tie, and tuck the ends in without pulling the nape too hard. That’s enough. No extra drama.
I like this bun because it’s the one that gets worn the most. The styles above can be gorgeous, and some are worth the extra time, but the soft everyday version is the one that fits real life. Grocery run, work-from-home day, school pickup, last-minute dinner — it handles all of it without asking for a mirror every twenty minutes.
If you only keep one low ponytail bun in your rotation, make it this one.