



Shoulder length hair is the goldilocks zone for cornrows. Long enough to give the braids visible body once they leave the scalp. Short enough to avoid the weight and tension issues that come with waist-length installations. Most cornrow styles look their best in this length range — the proportions just work, and the time investment stays reasonable.
What makes shoulder length cornrows worth their own conversation is how the visual works at this scale. The braids end roughly where the shoulders meet the neck. That means the finished braids interact with collarbones, jewelry, and clothing necklines in a way that longer or shorter styles don’t. The whole silhouette of the head and shoulders becomes part of the styling.
I’ve worn cornrows at shoulder length more than at any other length over the years. Part of that is convenience — my own hair sits there most of the time — but part is genuine preference. Shoulder length cornrows feel current without trying. They suit professional settings, casual weekends, and formal events with minimal adjustment. The same install carries you through the week.
The 22 variations below are organized to give you real options. Some are minimalist. Some lean ornate. A few are unusual takes you don’t see often. The goal is to expand the menu beyond the standard “straight back to the nape” approach that most quick searches return.
Why Shoulder Length Changes the Cornrow Equation
Cornrows are flat against the scalp. But where the cornrow ends and the loose hair starts becomes the visual moment. At shoulder length, this transition happens at one of the most flattering points on the body — right where the neck meets the shoulders.
Hair shorter than this leaves cornrows looking abrupt. The braids end mid-neck and there’s nowhere for the eye to follow. Hair longer creates weight issues — the braids hang past the collar bones and start fighting with clothing and accessories.
Shoulder length is the sweet spot.
Prep Considerations for This Length
Shoulder length hair tends to be in active styling rotation — it’s not as well-protected as longer hair often is, and it’s not as low-effort as shorter cuts. So prep matters.
Wash with a clarifying shampoo 24 hours before. Deep condition the night before, focusing on the ends. Apply a leave-in the morning of, then let it dry fully before the appointment.
Skip heavy butters and oils on braid day. They make the parts slide.
Time Investment to Plan For
A full head of cornrows on shoulder length hair runs faster than the same style on longer hair. Less material to braid through means less time per braid.
Expect:
- 4 jumbo cornrows: 60-90 minutes
- 6 medium cornrows: 2-3 hours
- 10 small cornrows: 4-5 hours
- 15+ micro cornrows: 6+ hours
Plan around the high end of the range. Better to finish early than to feel rushed.
Choosing Braid Size for Shoulder Length
At this length, medium-sized cornrows photograph the best and wear the longest. Big cornrows can look chunky on a smaller head. Tiny cornrows take forever to install and don’t have the visual punch they do on longer hair.
Aim for cornrows that are roughly thumb-width at the root. That sizing works for most face shapes and hair densities at shoulder length.
Tools That Make a Difference
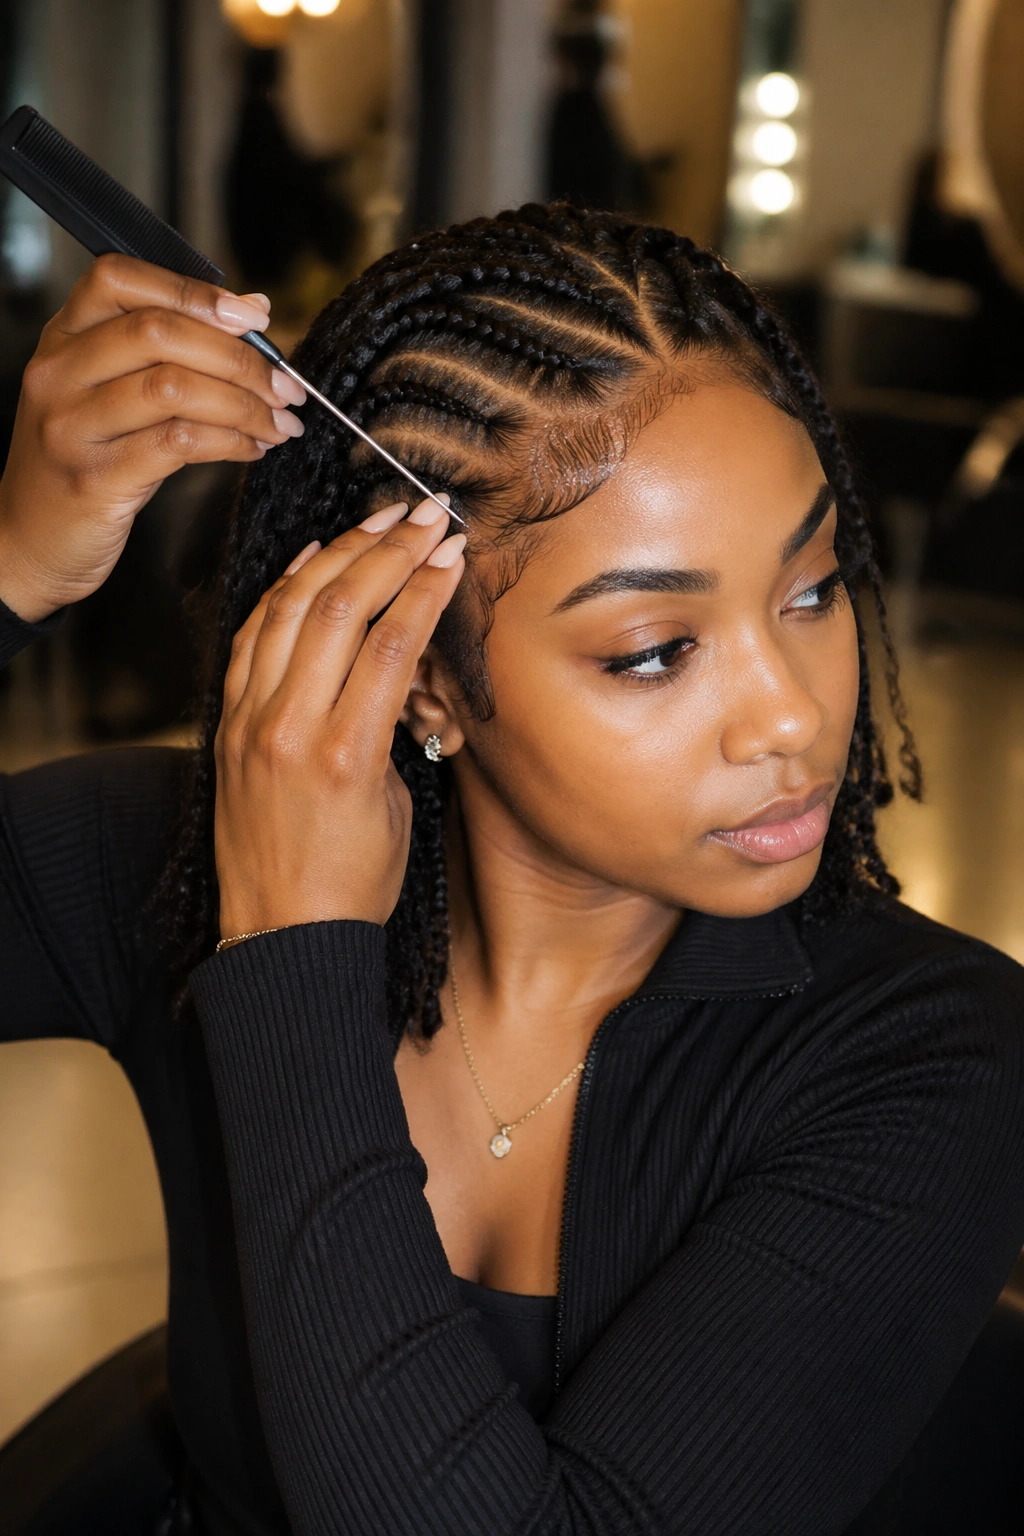
A rat-tail comb. A wide-tooth comb. Strong-hold edge gel. Clear elastics or small beads. A satin or silk bonnet. That’s the working kit.
If you want decoration, add: 3-5 packs of metal cuffs (mixed sizes), wooden beads, or thin satin ribbon for woven accents.
1. Six Cornrows Straight Back to Loose Ends
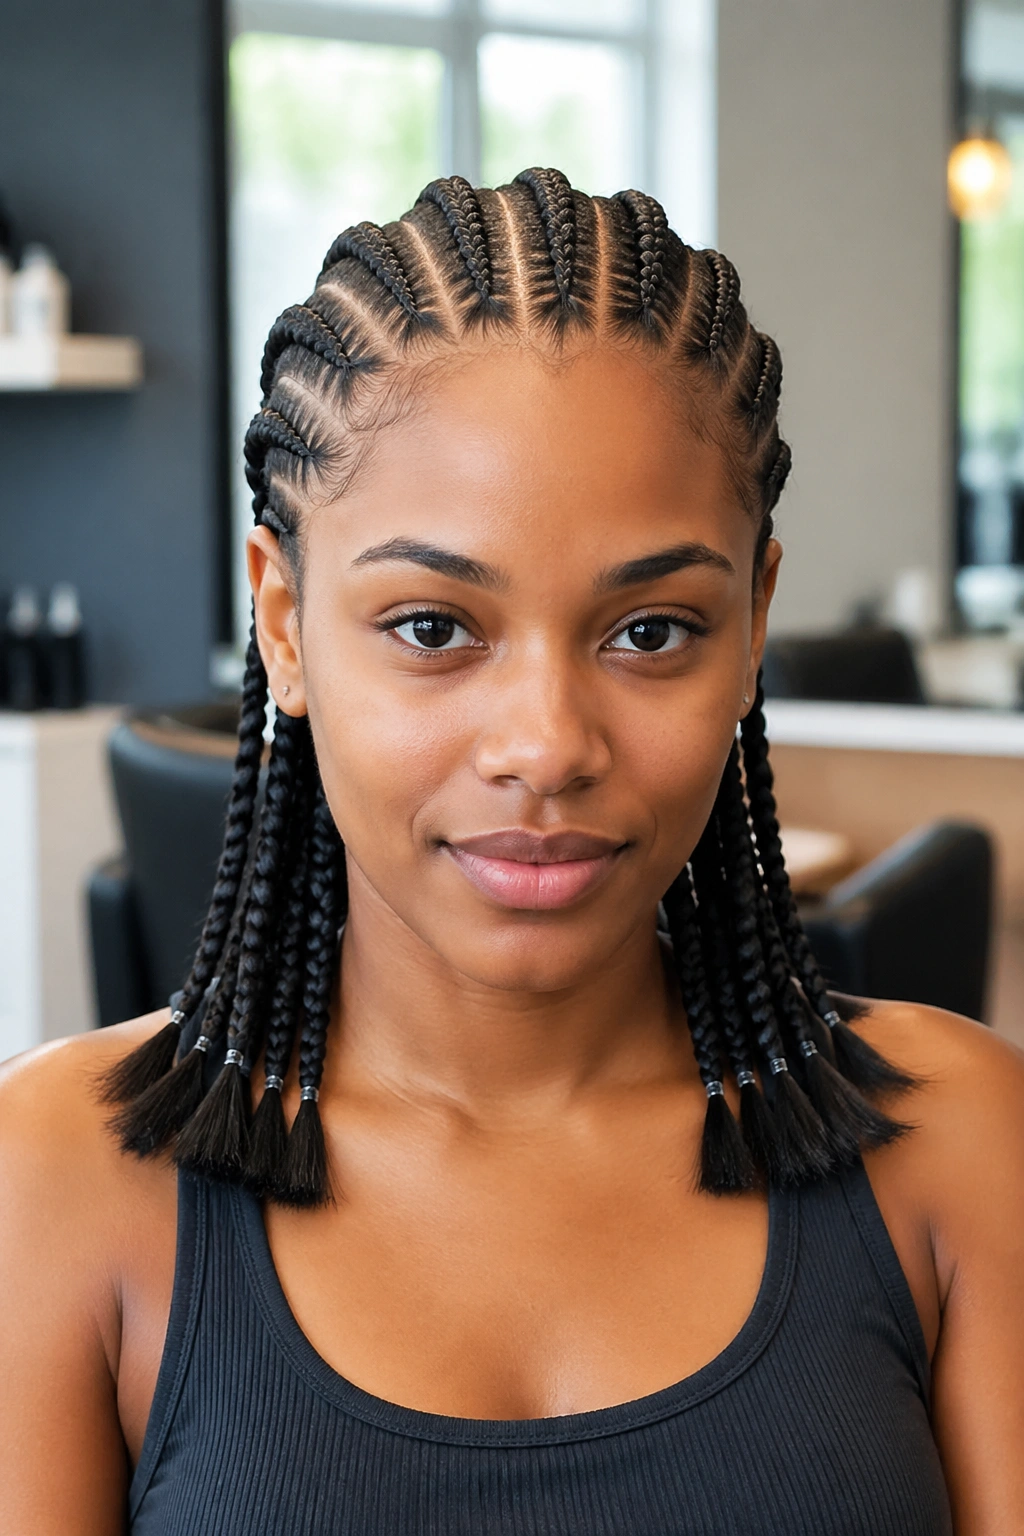
The clean baseline. Six even-sized braids running from the hairline to about 2 inches past the shoulders, finished with small clear elastics.
Why It Works
Six braids at this length give the right balance of structure and movement. The braids end in loose hair that grazes the shoulders and moves with you.
- Part the hair into 6 equal sections from front to back
- Maintain consistent braid width throughout
- Finish each braid with a small clear elastic 1 inch from the natural hair ends
- Apply edge gel to the hairline only
Tip: Have the braider stop the actual cornrow about 4 inches before your shoulders, leaving the rest as loose three-strand braid that hangs naturally. This gives the finished look more flow than tight-to-the-end braiding.
2. Eight Cornrows With Curved Parts
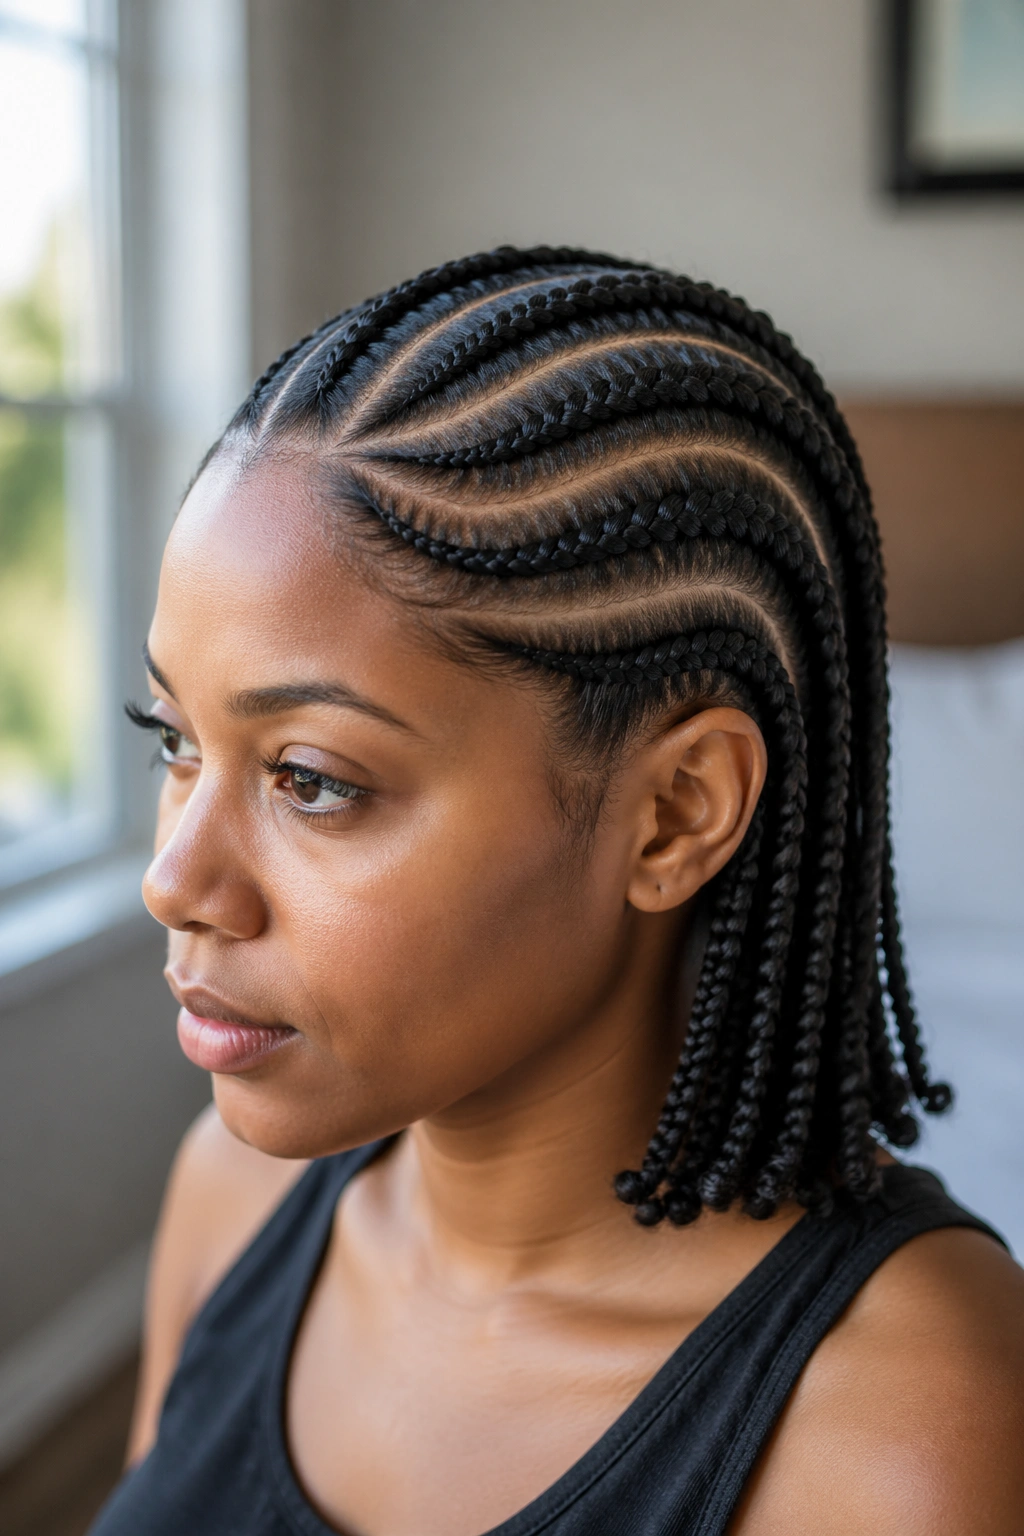
Eight medium cornrows, but the parts curve gently rather than running straight. The braids follow a wave pattern across the scalp.
The curved parts add visual movement to the top of the head. The finished look reads as more dynamic than straight backs.
This works especially well at shoulder length because the loose ends underneath move differently than the structured curves above. The contrast between motion at the top and motion below the cornrows feels intentional.
3. Four Jumbo Cornrows With Beaded Tips
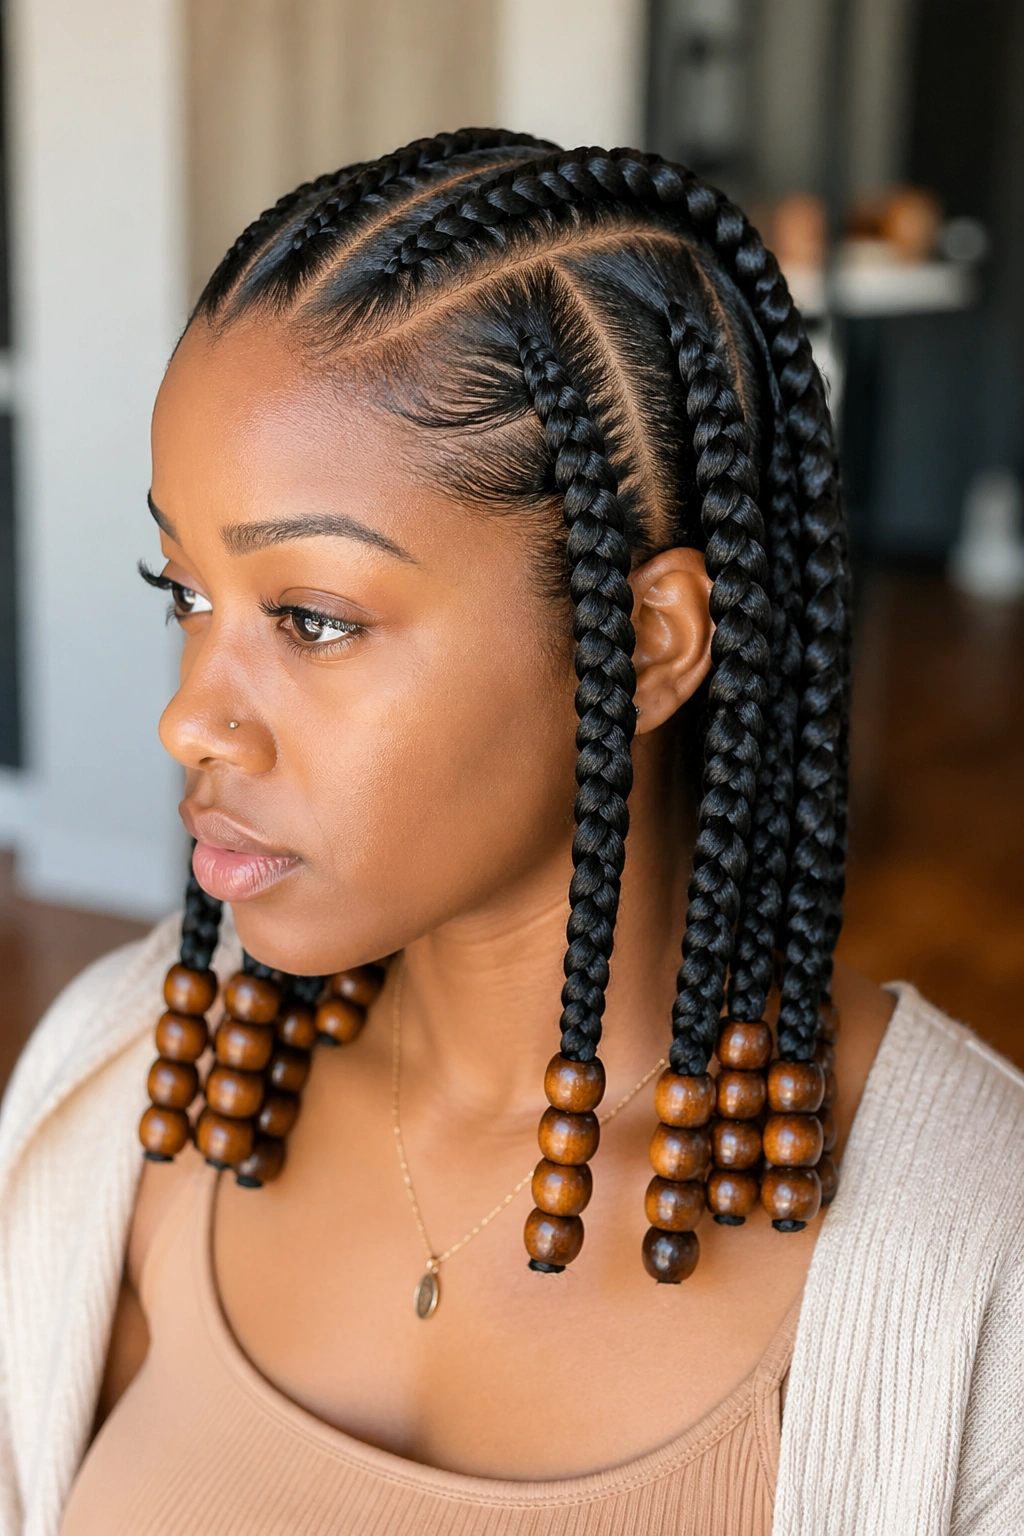
Four big cornrows running back, each finished with 6-8 wooden beads at the tip. The beaded ends sit at shoulder level, making a soft sound when you turn your head.
Wooden beads work better than glass at this length because they’re lighter. Heavy glass beads on shoulder length cornrows hit your collarbones uncomfortably.
Pick bead colors that complement your wardrobe basics — warm browns, neutral wood, or matte black. Bright colors fight with most outfits.
4. Two Front Cornrows Into Loose Hair
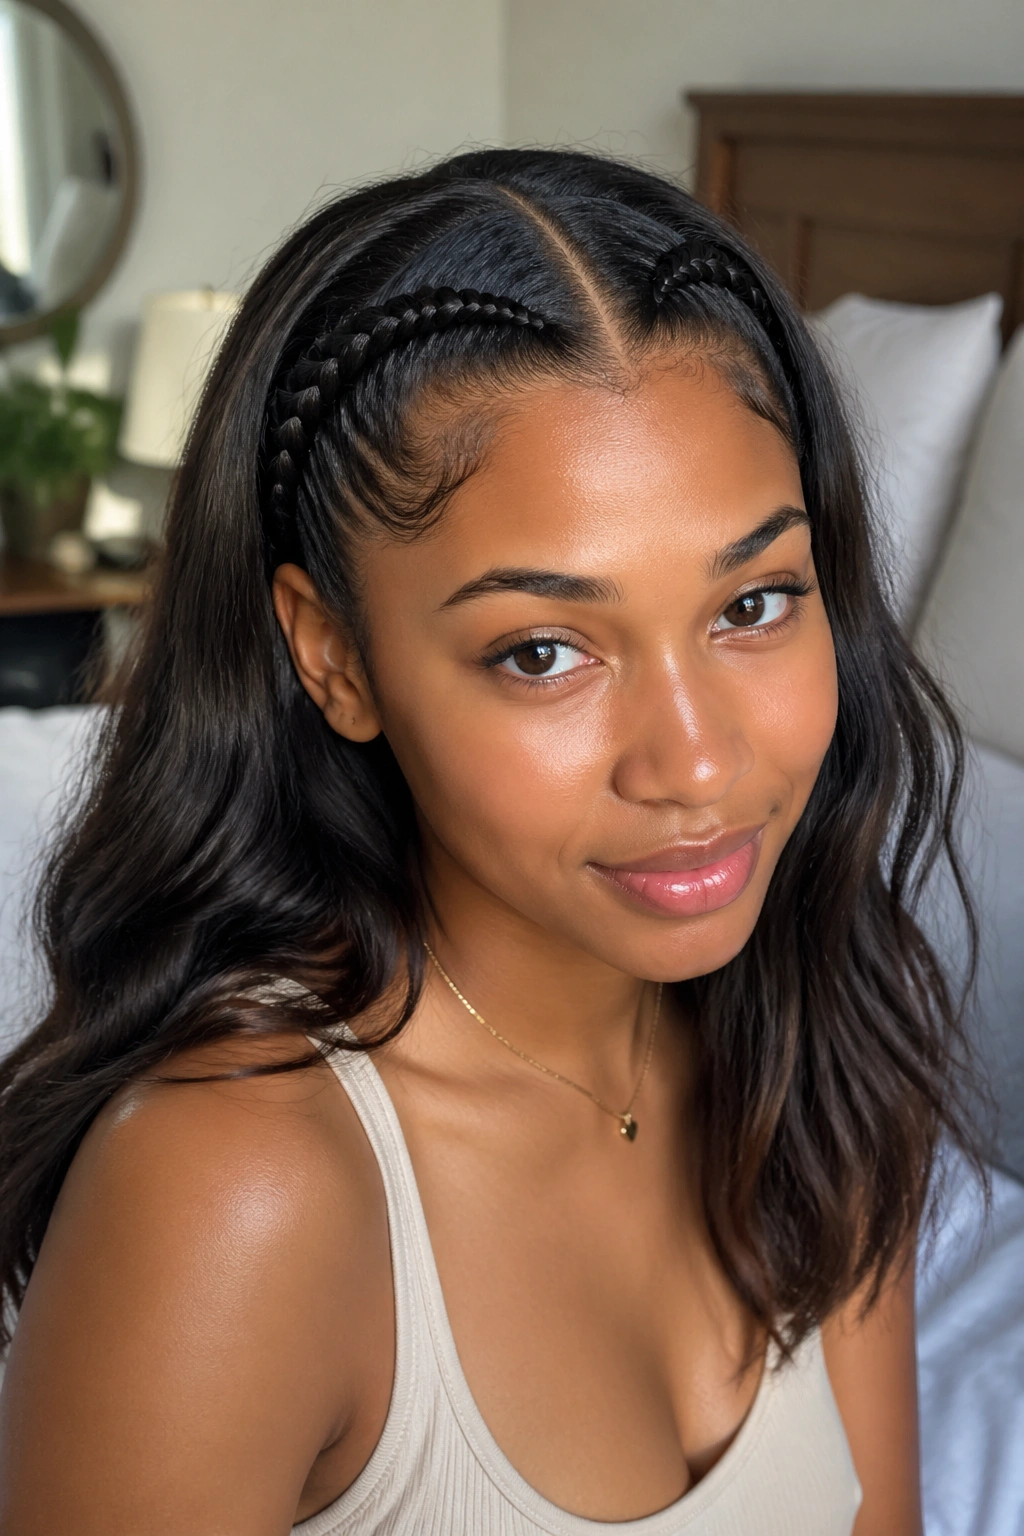
Just two cornrows along the very front of the head — one on each side from a center part — running back about 5 inches before releasing into the loose body of the hair. The rest of the head is unbraided.
The two-cornrow approach is for anyone who wants the look without committing to the full installation. Quick (under an hour), low maintenance, and easy to take down.
The loose hair behind the cornrows can be styled however you’d usually wear it — straight, curly, twisted, in a low ponytail. The cornrows are an accent rather than the whole look.
5. Diagonal Cornrows With a Side Sweep
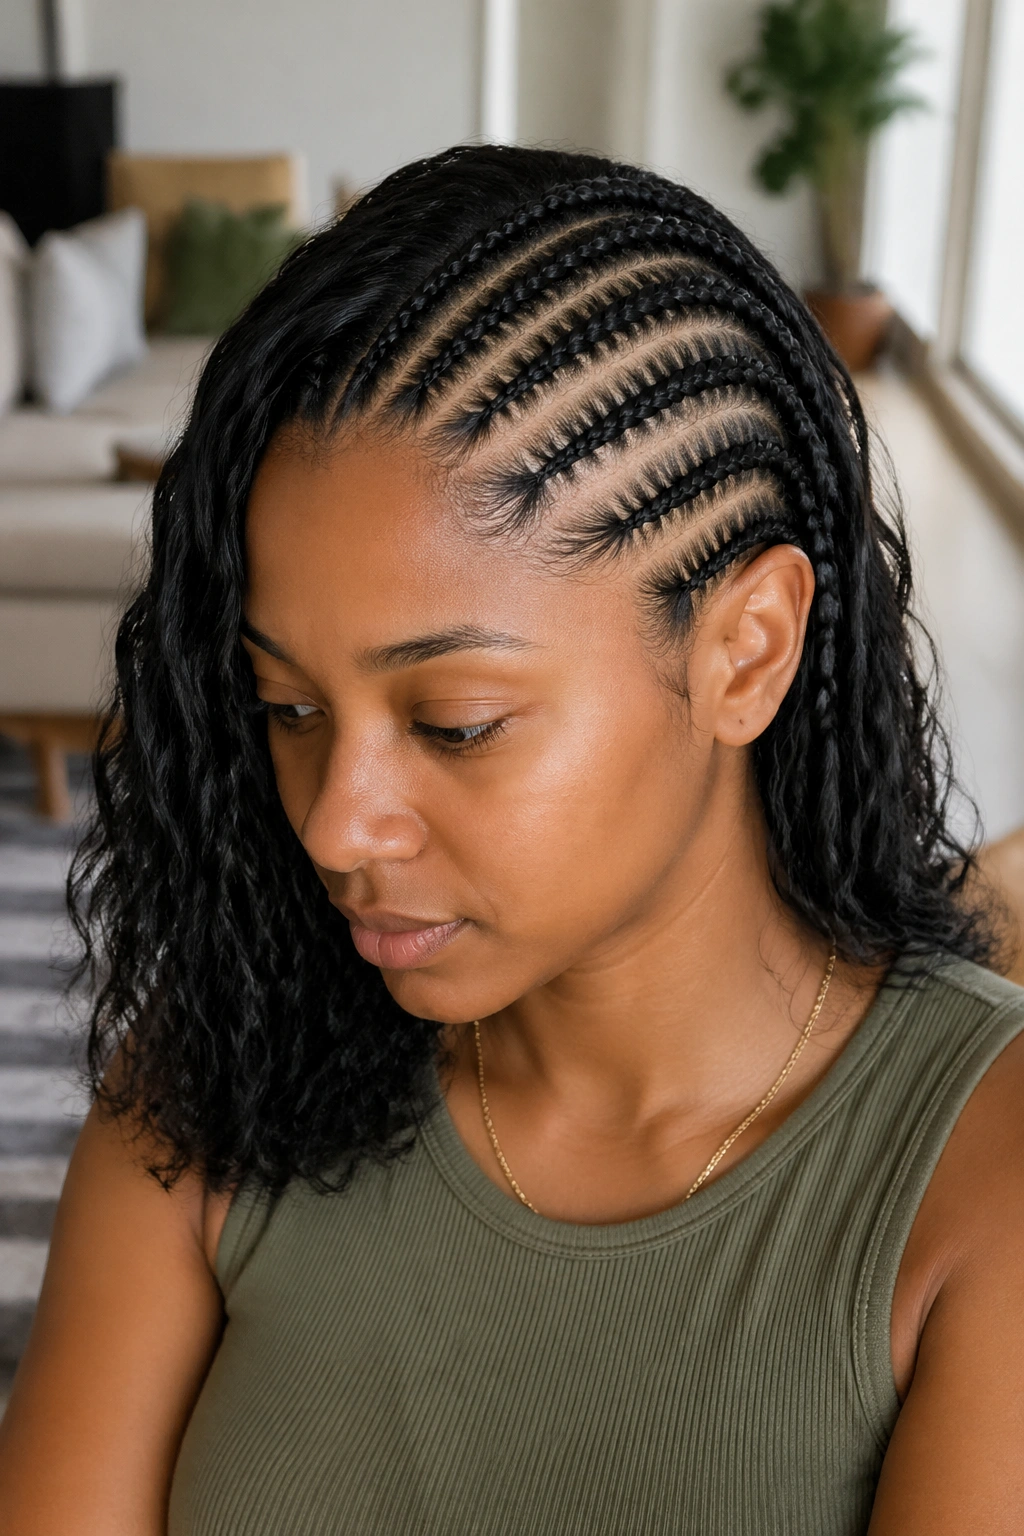
Five or six cornrows running diagonally across the head from one front corner to the opposite back corner. The braids sweep across the scalp at a steep angle.
The diagonal layout creates strong visual movement. From the front, the braids appear to be flowing in one direction.
This style benefits from asymmetric finishing. Let the braids on the longer side hang loose; pull the braids on the shorter side back behind the ear. The asymmetry sells the diagonal energy.
6. Cornrows With Color Underneath
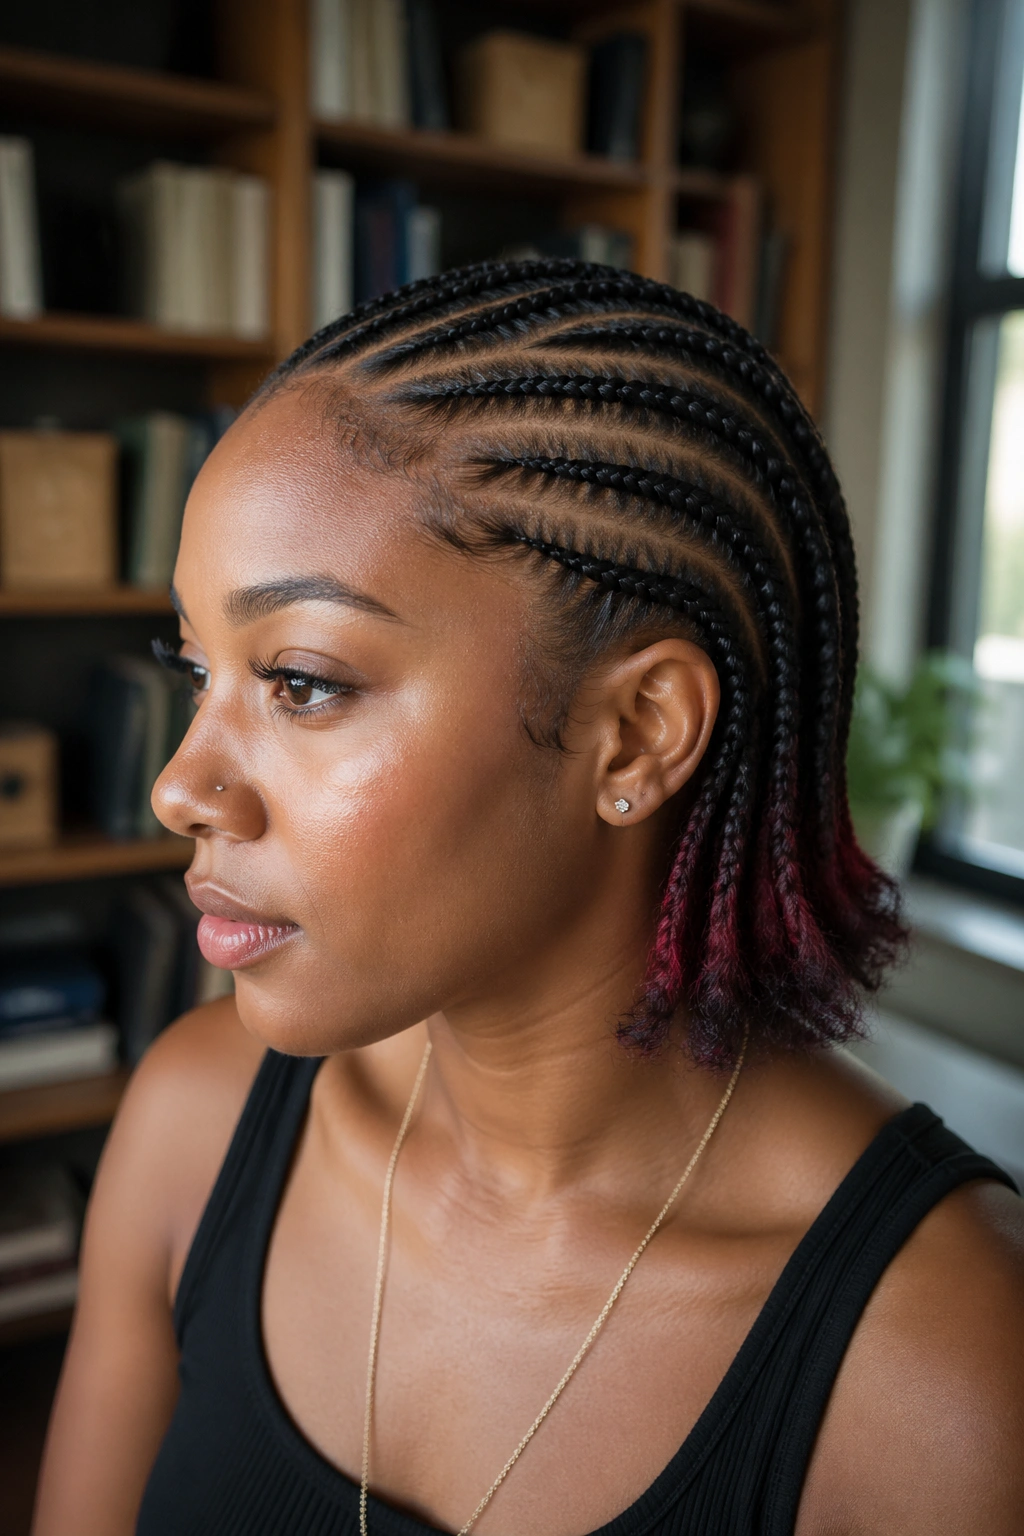
Six cornrows on top in your natural color, plus a hidden underlayer of cornrows in a contrast color (burgundy, honey, or platinum) that peeks out when you move.
How to Style It
The hidden layer should be parted about 2 inches above the nape. The top layer covers it most of the time but reveals it when you tilt your head or pull the top section into a ponytail.
Pick a color 3-4 shades different from your base. Subtle contrasts disappear at this scale.
7. Cornrows With a Center Braid Down the Back
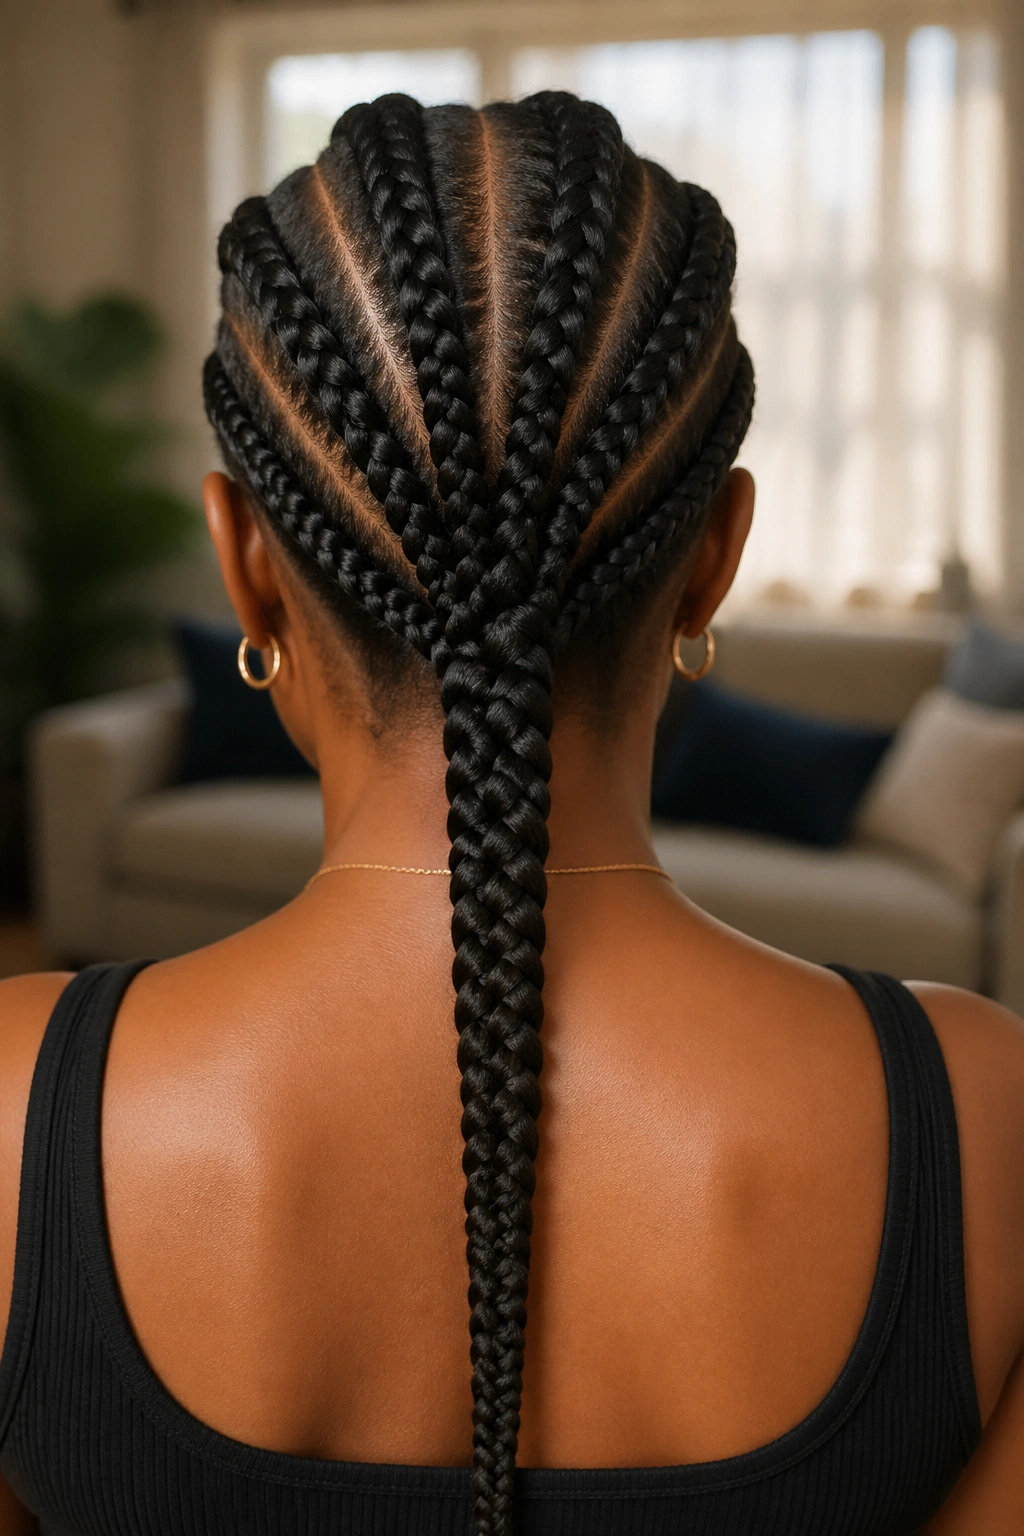
Six cornrows running back, with all the loose ends gathered at the nape and braided into a single thick braid that hangs down the back center.
The center braid creates a strong vertical line. Combined with the horizontal lines of the cornrows above, the whole style has an architectural quality.
Use an elastic to gather the cornrow ends at the nape, then braid the gathered hair into a standard three-strand braid. Secure the bottom with another elastic.
8. Cornrows Into a Half-Up Bun
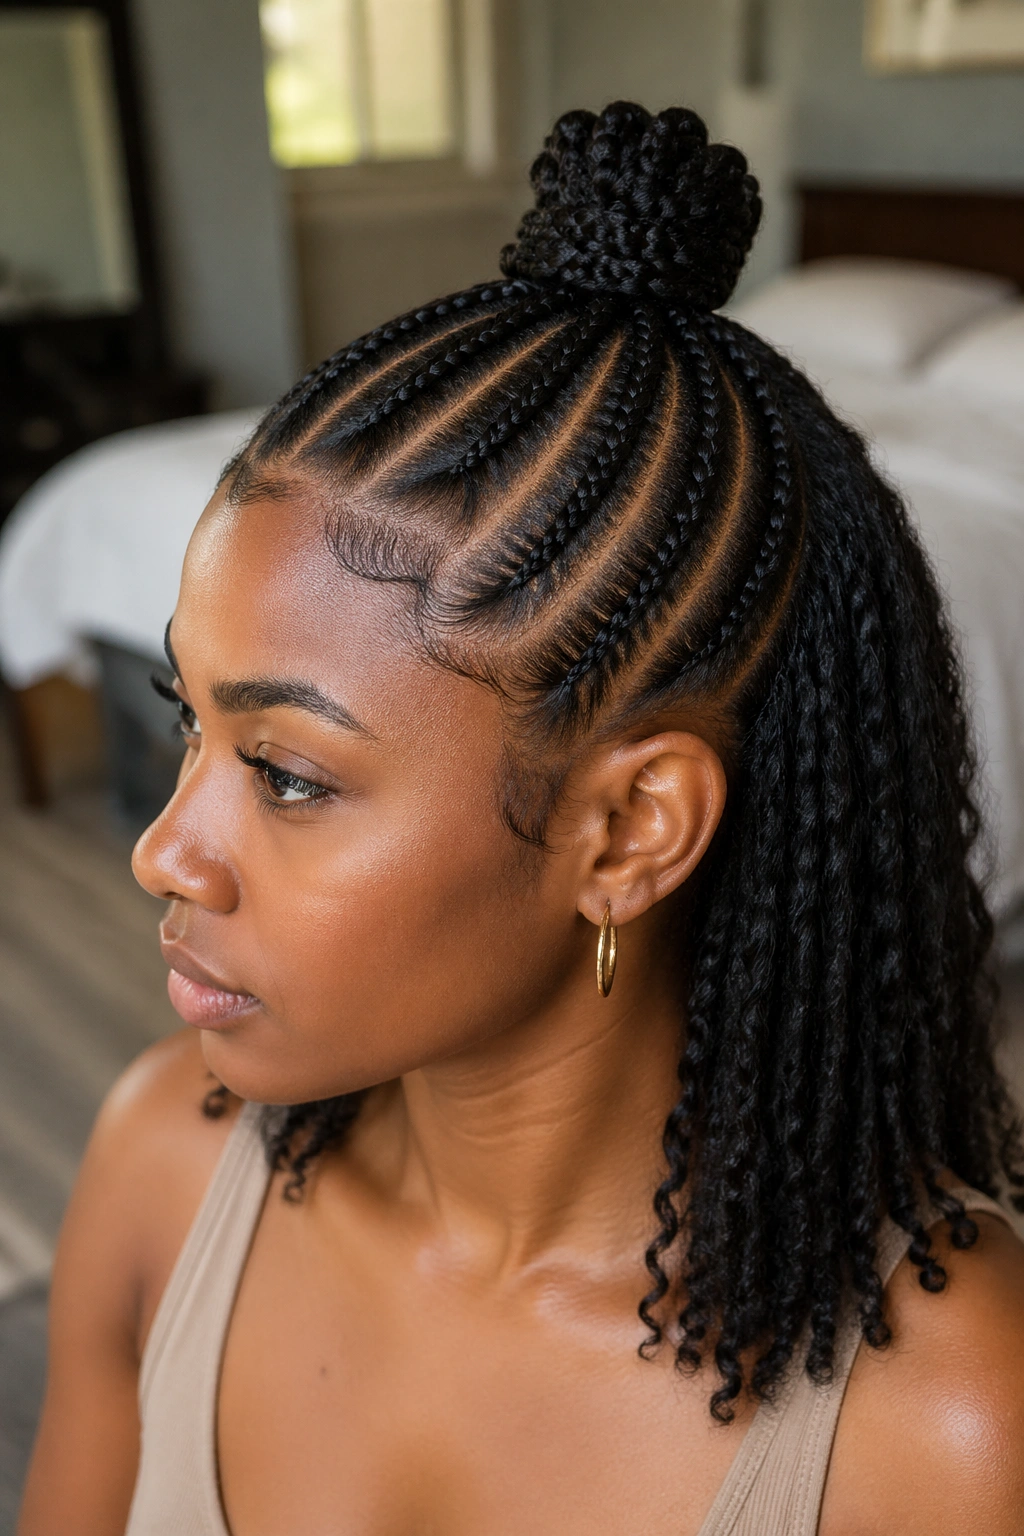
Eight cornrows running back, with the upper half of the loose ends gathered into a small bun at the back of the crown. The lower portion of the loose hair hangs free.
The half-up bun creates a focal point at the top of the head. The loose hair below softens the structured look.
Re-tie the bun every 2-3 days. The hair tie loosens with movement, and the bun can drift downward without periodic adjustment.
9. Cornrows With Front Twist Detail
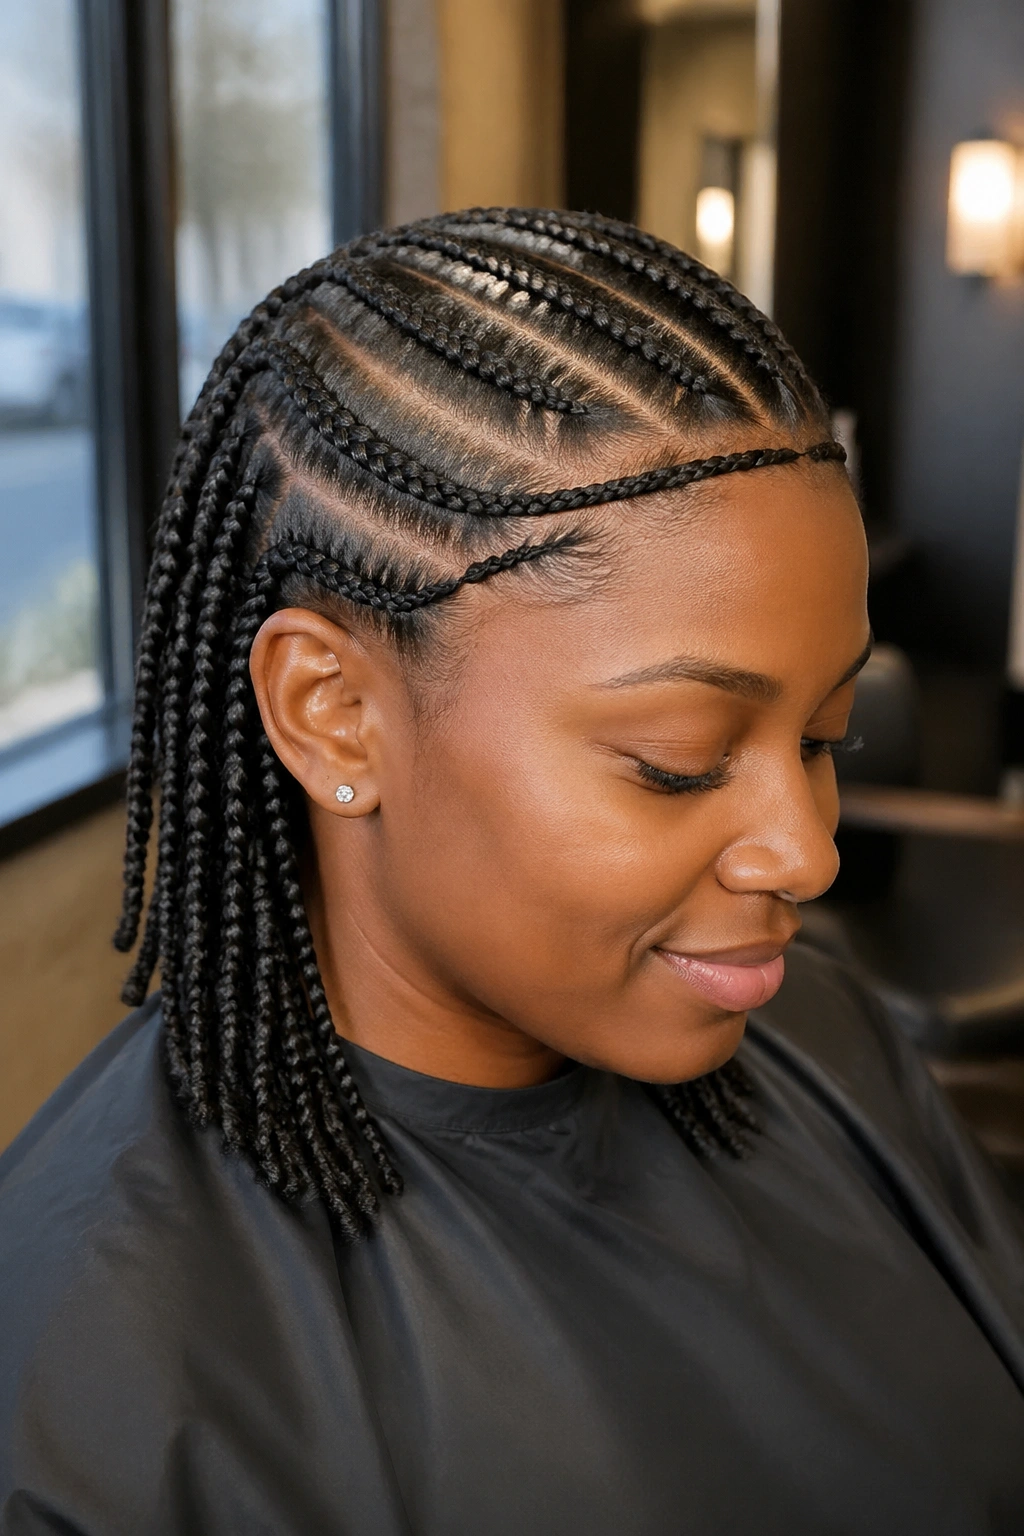
Six straight back cornrows in standard layout, with one or two thin two-strand twists running across the front hairline as decorative accents.
The twists cross perpendicular to the cornrows, creating a contrasting texture and direction at the front of the head. Small visual detail that elevates an otherwise simple style.
The twists can be undone at takedown without affecting the cornrows. Useful for anyone who wants to vary the front detail mid-wear-cycle.
10. Asymmetric Cornrows With Deep Side Part
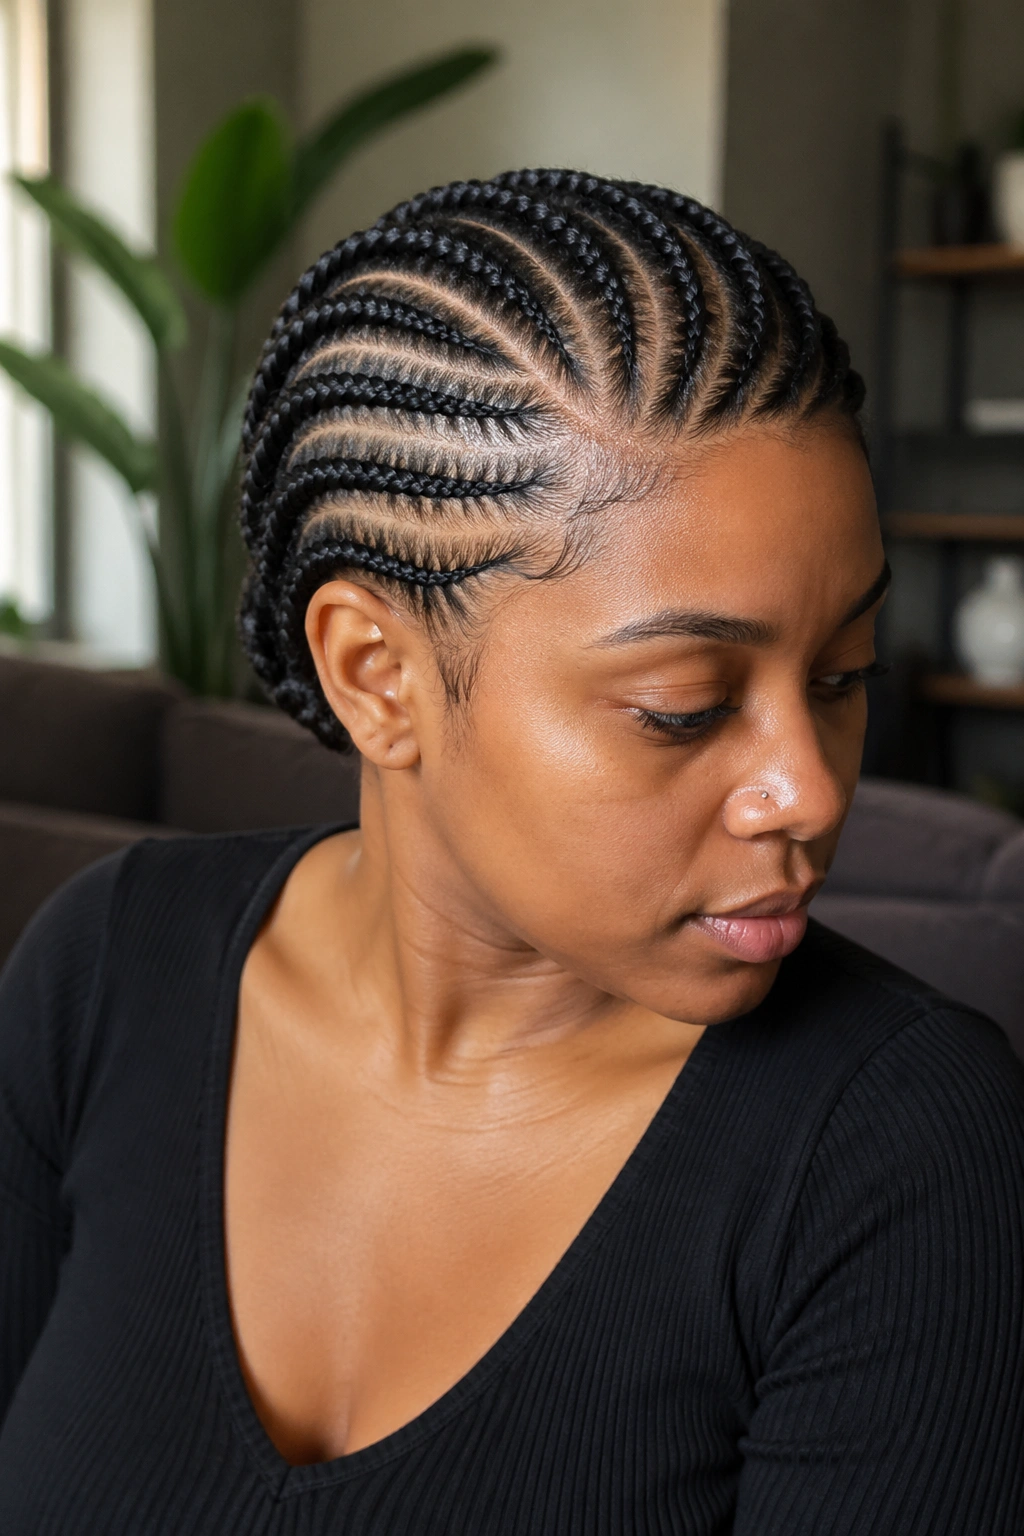
A deep side part — about 2 inches off center — with three cornrows on the smaller side and five on the larger side. All running back to the nape.
The asymmetric count emphasizes the side part. The smaller side reads sleeker; the larger side has more visible braid lines.
Best for oval and heart-shaped faces. Round faces can find the asymmetry exaggerates roundness rather than balancing it.
11. Cornrows With Triangular Front Parts
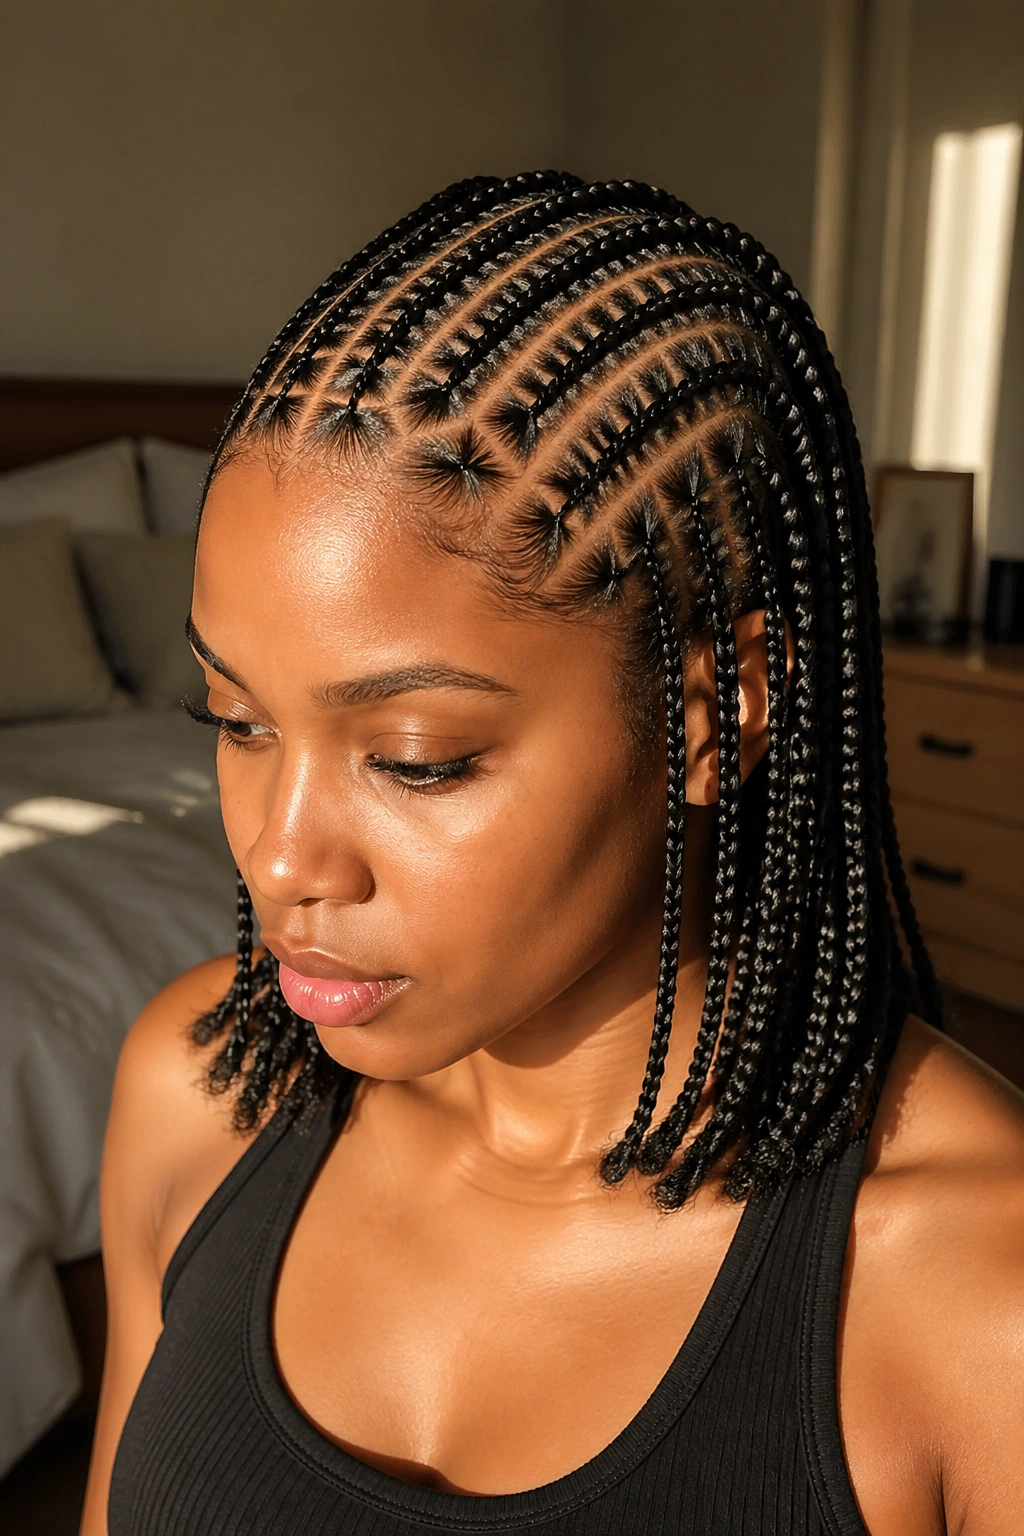
Six cornrows with the front sections starting from triangular bases rather than rectangular ones. The triangular parts create a zigzag visual at the front hairline.
Triangle bases distribute hair more evenly across each cornrow’s starting point. They also reduce tension on any single point, which can help anyone with sensitivity at the hairline.
The triangle pattern reads as deliberate styling rather than as a basic install. Worth the extra 15-20 minutes of parting time.
12. Cornrows With Decorative Ribbon
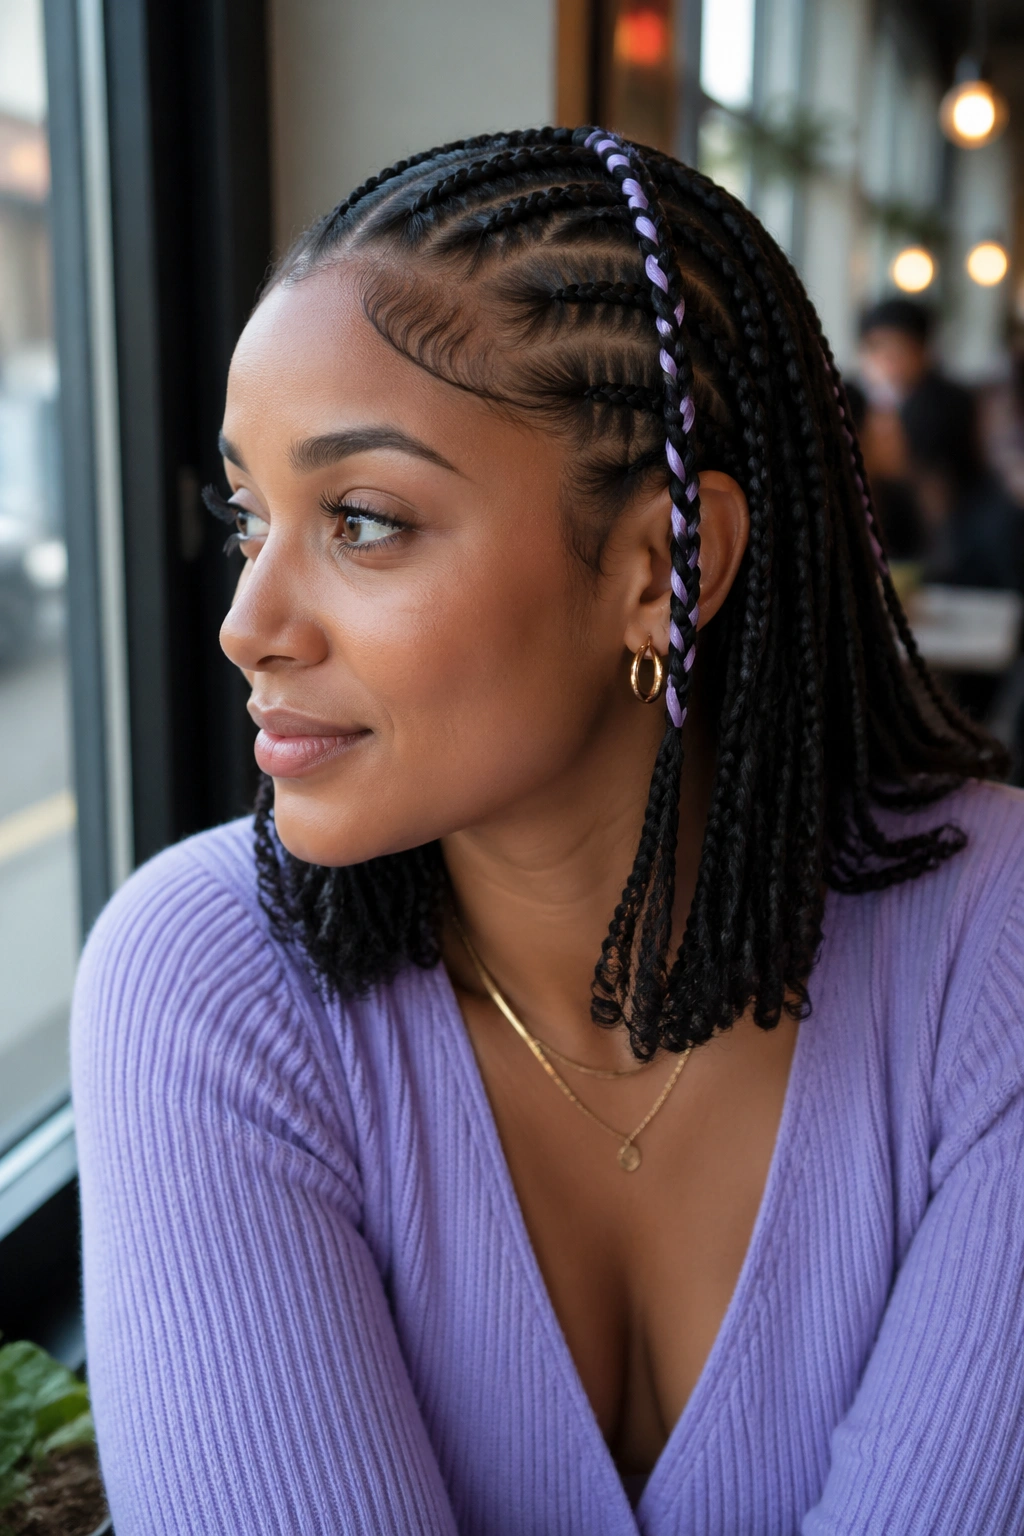
Thin satin or grosgrain ribbon woven into one or two of the cornrows during braiding. The ribbon shows as a colored thread running through the body of the braid.
Use ribbon that’s roughly half the width of the braid. Wider ribbon dominates and obscures the cornrow itself. Thinner ribbon disappears.
Pick ribbon colors that complement your outfit theme rather than your hair color. Black ribbon on dark hair reads invisible. Cream, gold, or jewel tones show up clearly.
13. Cornrows With Loose Ends Curled
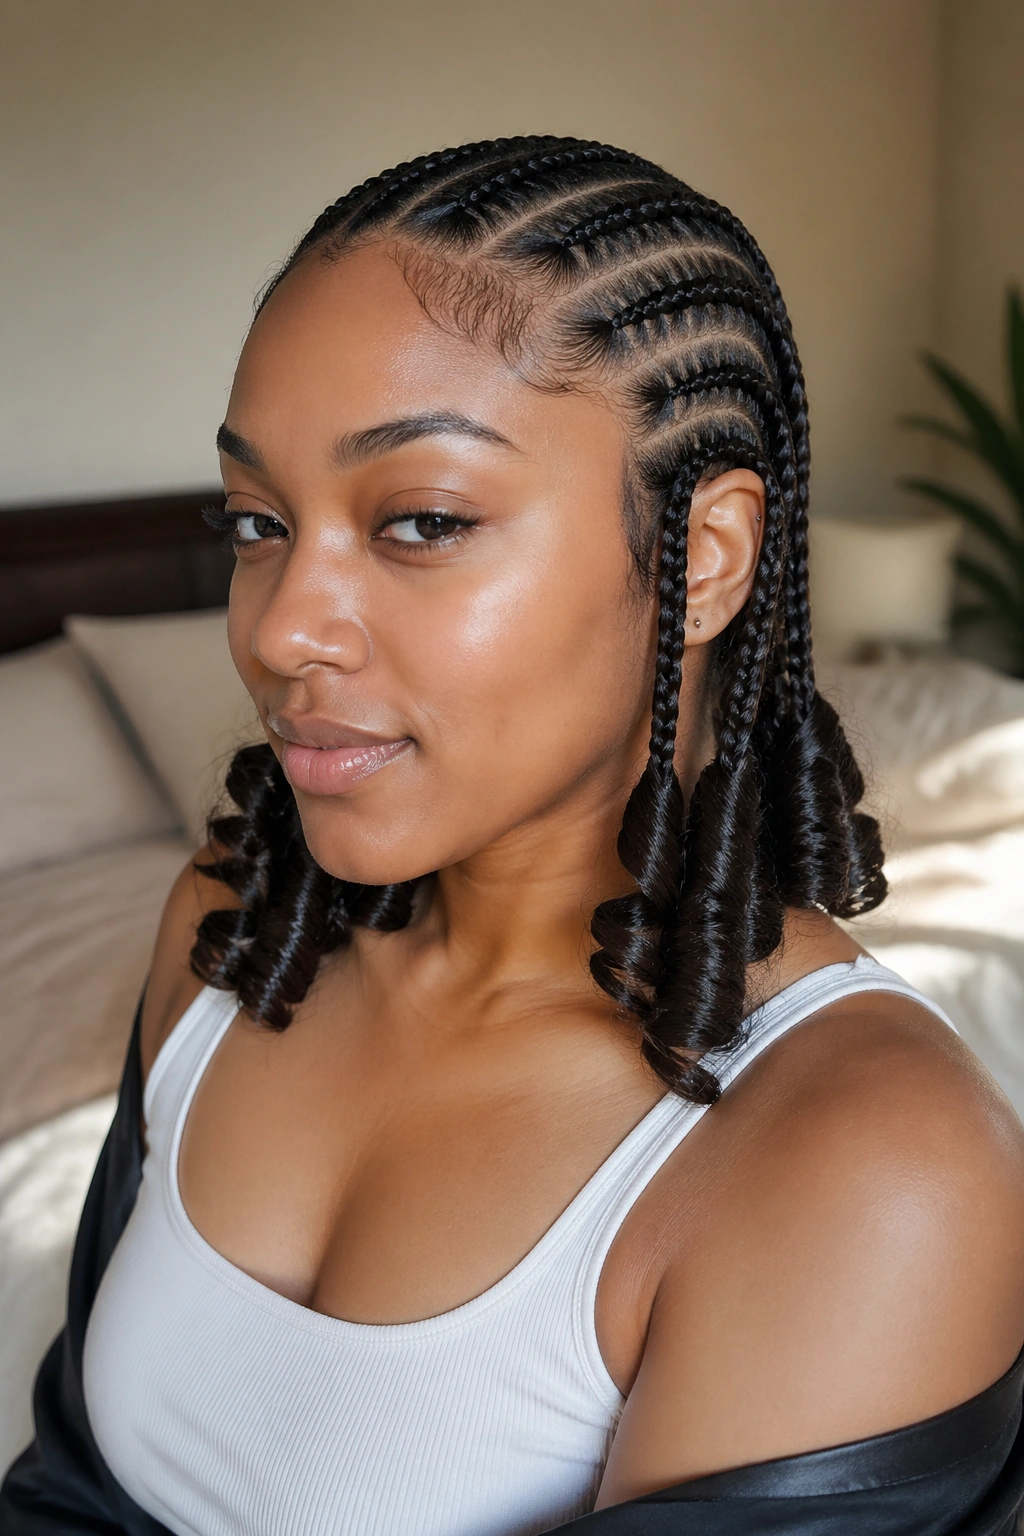
Standard six or eight cornrow layout, but the loose ends below the braids are curled with a flexi rod set or rod set the night before. The braids are sleek; the curls are soft.
The curl-and-cornrow contrast is the entire point. Tight, defined braids meeting bouncy, loose curls creates visual interest at the transition point.
Use foam rollers or flexi rods rather than hot tools. Heat on already-braided hair causes excess dryness and shortens the wear duration.
14. Cornrows With Front Bangs Left Out
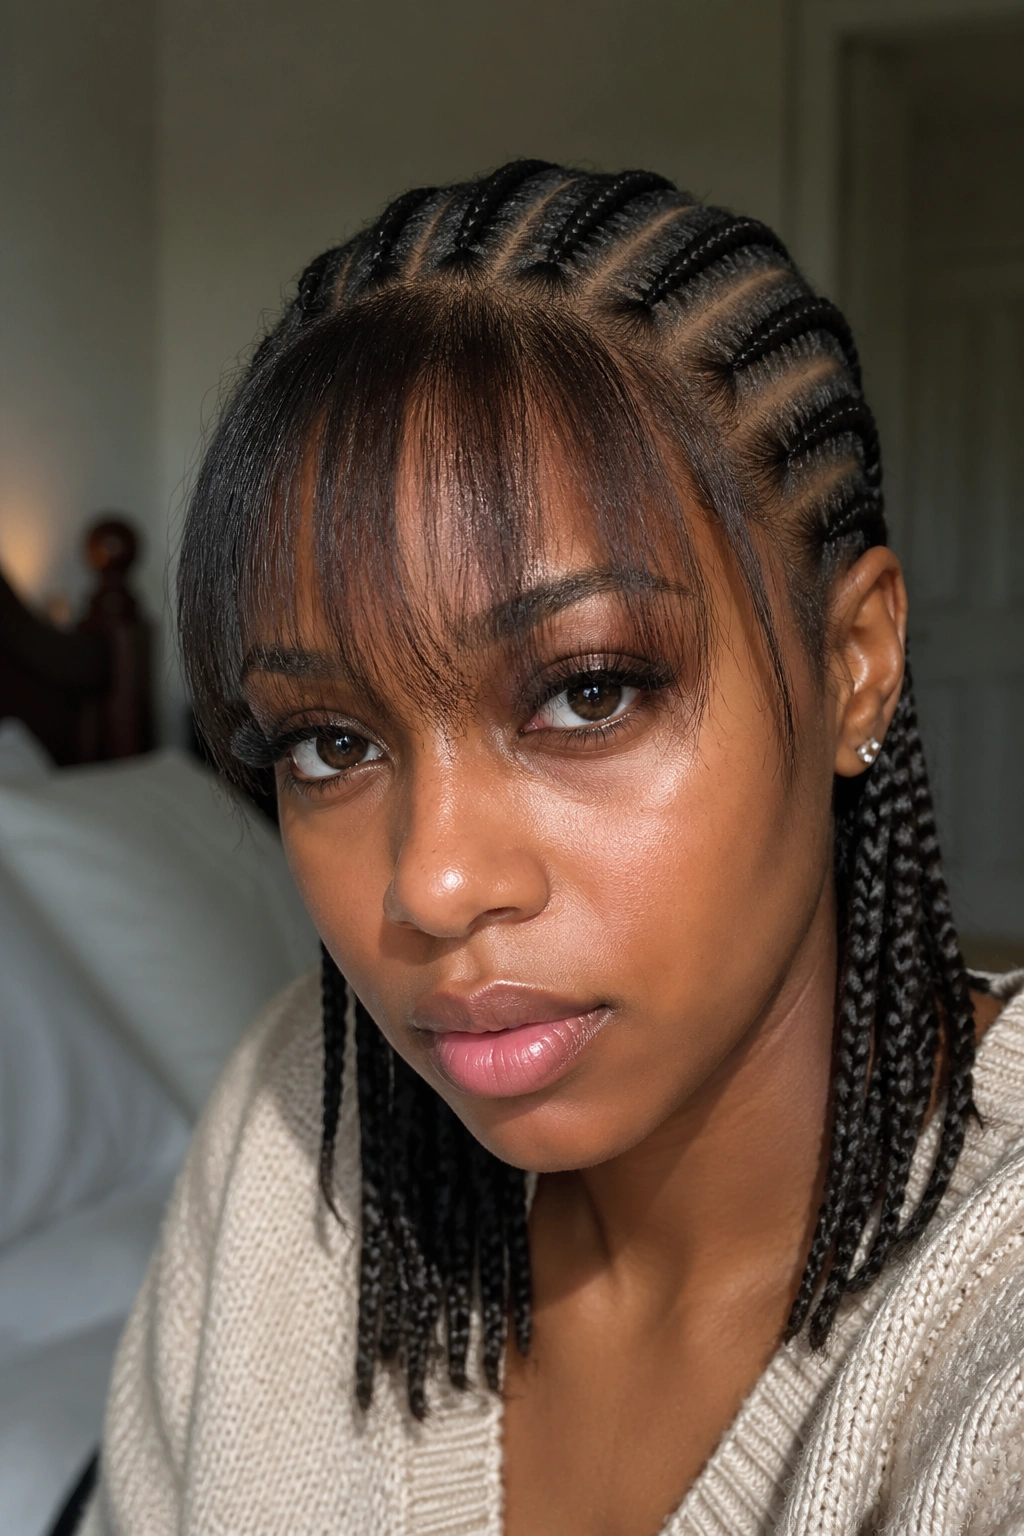
Six cornrows running back, with the very front section of hair left out and styled as a soft bang or fringe across the forehead.
What Makes It Different
The combination feels current and styled. Most cornrows pull every strand back into the braids; leaving a bang creates softness at the front that changes the whole face frame.
The bang section needs styling daily. Plan for 5 minutes each morning to smooth or tousle it depending on the look you want.
This works best on anyone whose face shape suits a bang. Not all face shapes do — wider foreheads usually benefit, narrower foreheads can get overwhelmed.
15. Cornrows With Geometric Edge Designs
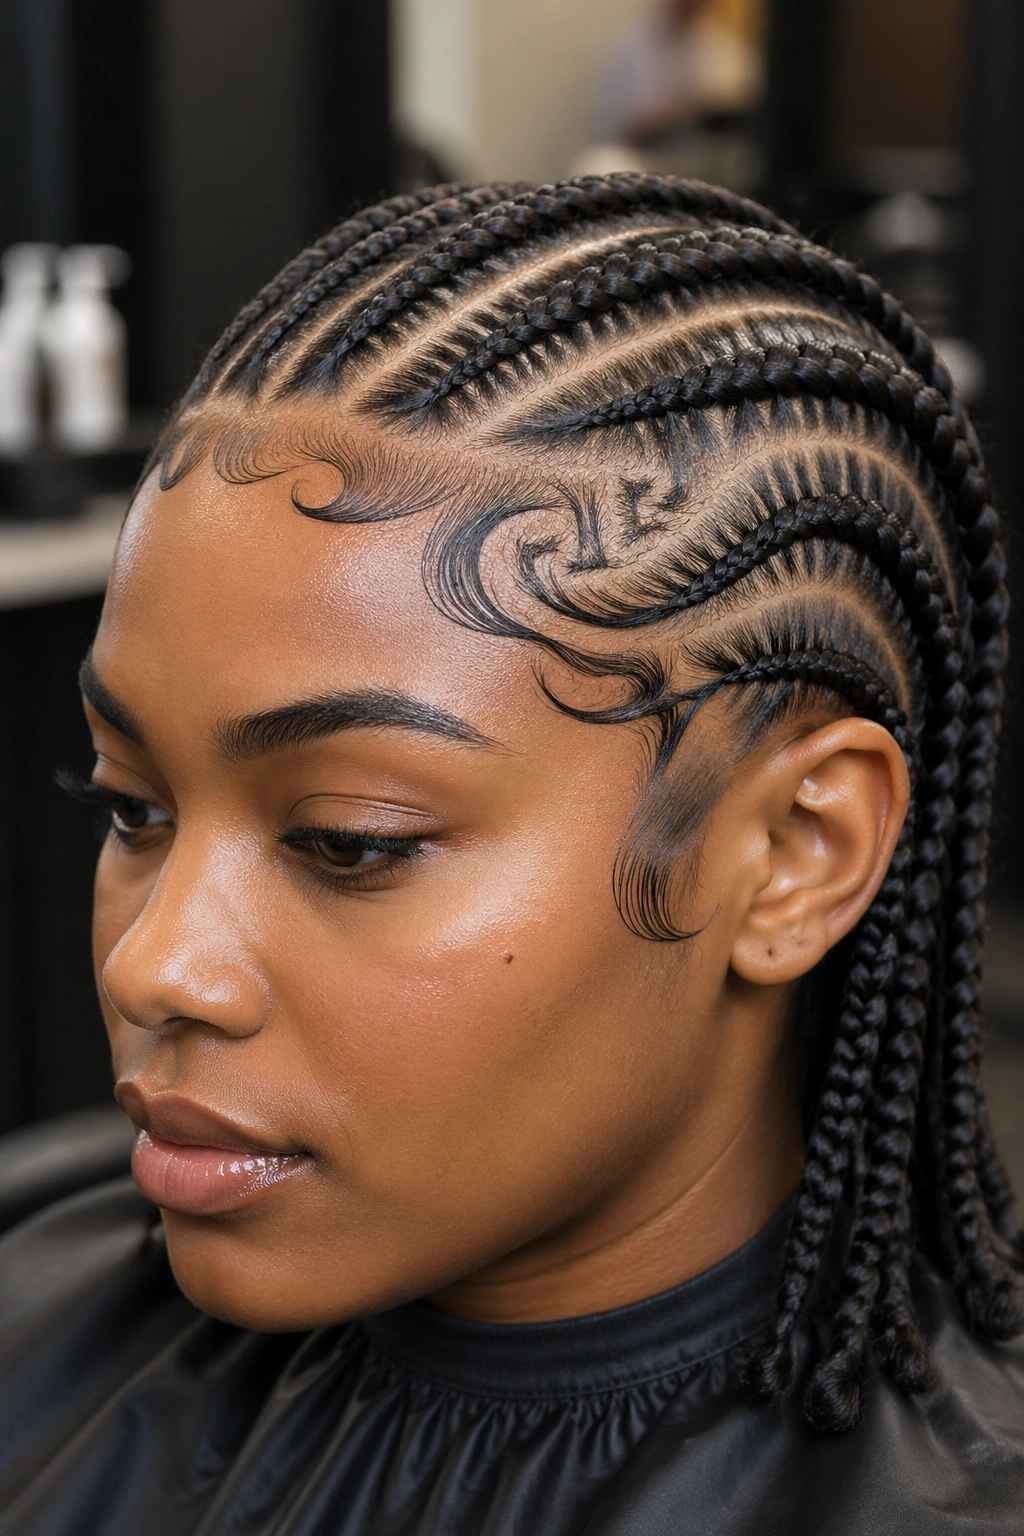
Standard cornrow layout with elaborate edge work along the hairline. Sweeping designs, swirls, and geometric patterns done with edge gel and a fine toothbrush.
The contrast between simple braids and detailed edges shifts focus. The edges become the styling moment.
Edge styling can take 30-60 minutes. Use strong-hold edge gel — anything labeled light hold won’t last. Keep a small spool of edge gel and a clean toothbrush for daily touch-ups.
16. Cornrows With Ponytail Wrap
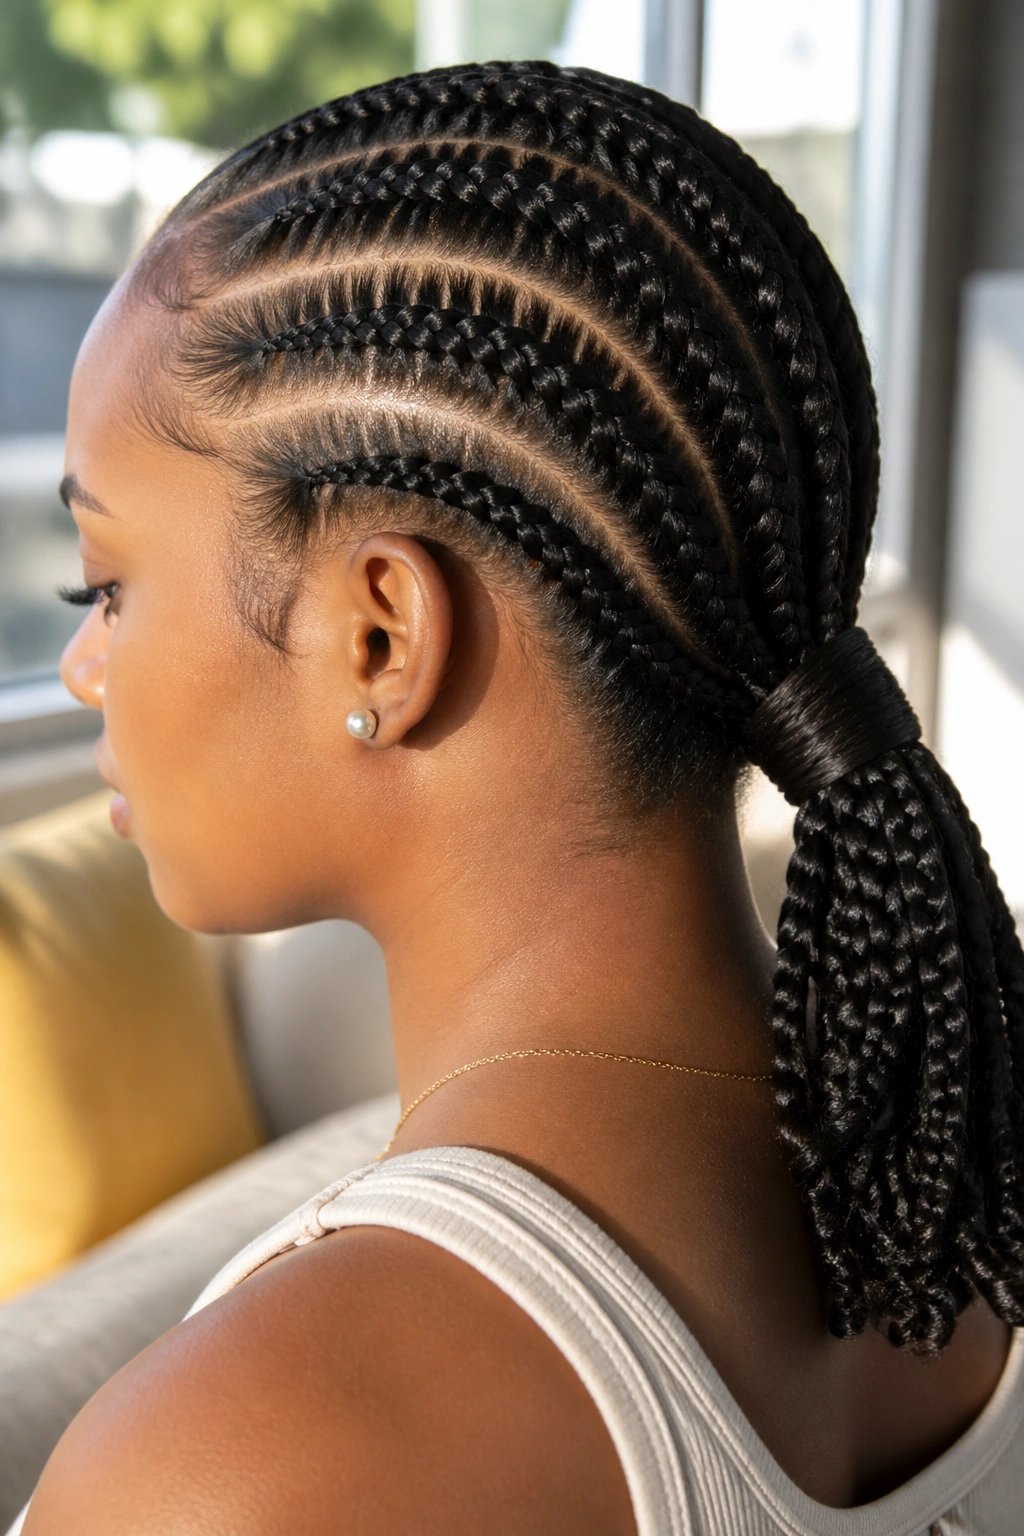
Six cornrows running back, gathered into a single low ponytail at the nape, with a section of hair wrapped around the base of the ponytail to hide the elastic.
The wrapped base looks polished and finished. No visible elastic. The braids appear to flow naturally into the ponytail.
Take a small section of one of the braids (the bottom 2 inches), wrap it around the base of the ponytail, and tuck the end under or pin it in place.
17. Cornrows With Two Braids Pulled Forward
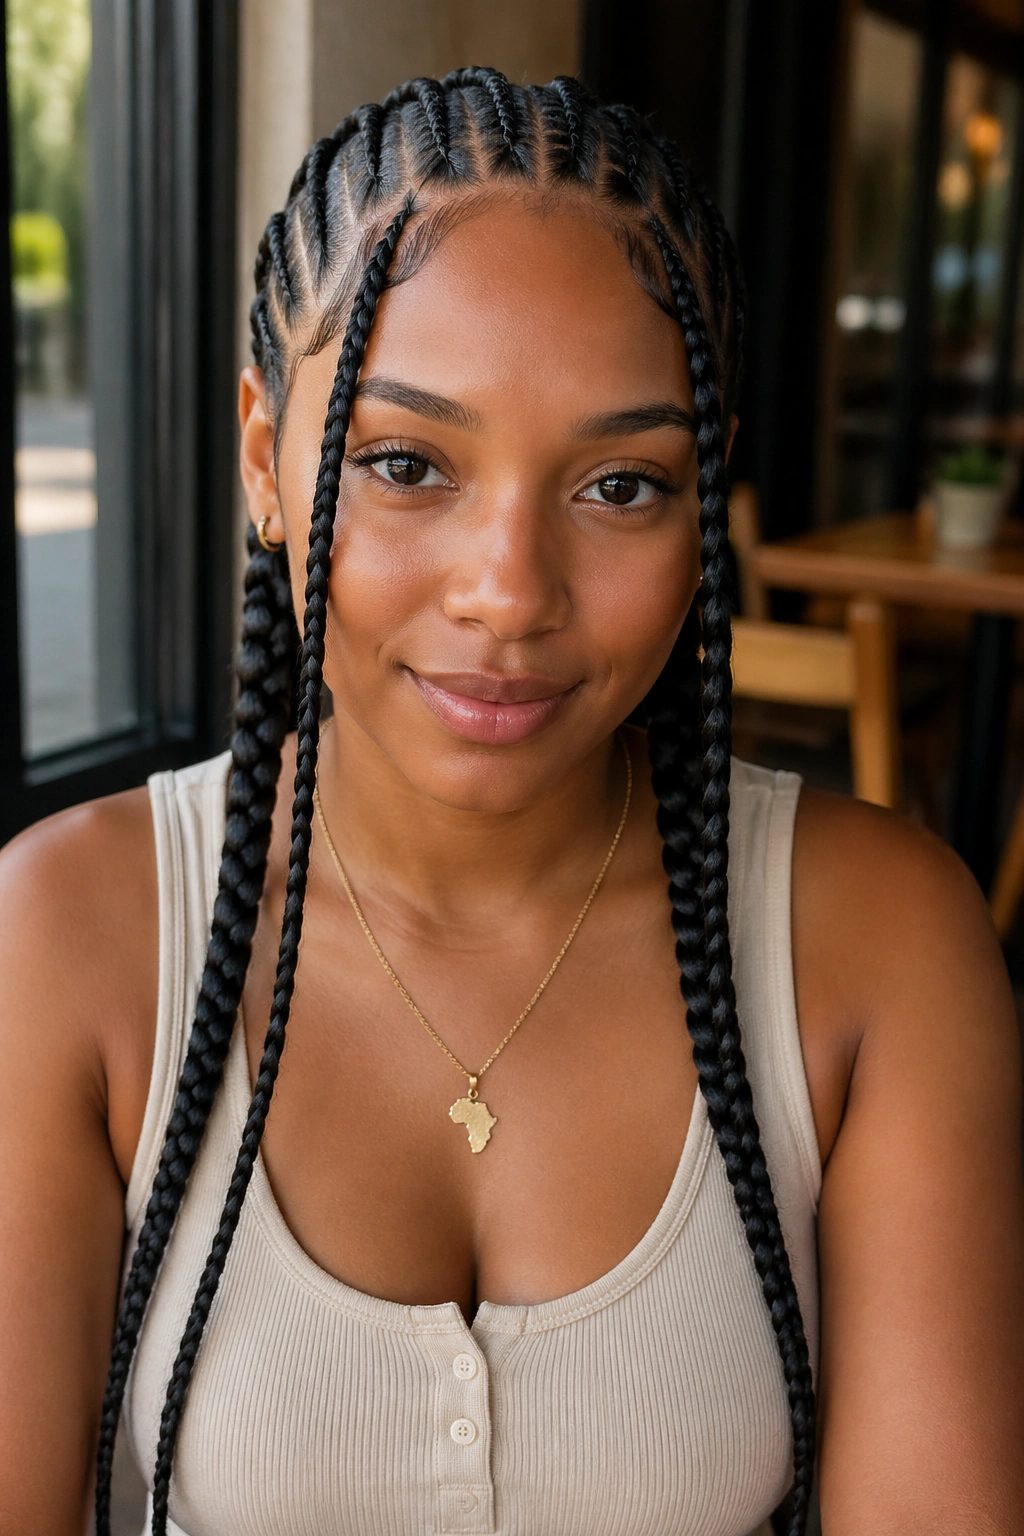
Standard cornrow layout with two cornrows pulled forward over the shoulders rather than left hanging behind. The forward braids frame the chest area visually.
This is a softer, more romantic finish. Useful for photos and formal events where you want the braids to be visible from the front.
The braids should be the same length on each side for symmetry. Asymmetric pulls (one forward, one back) usually look accidental rather than styled.
18. Cornrows With Color Block Stripes
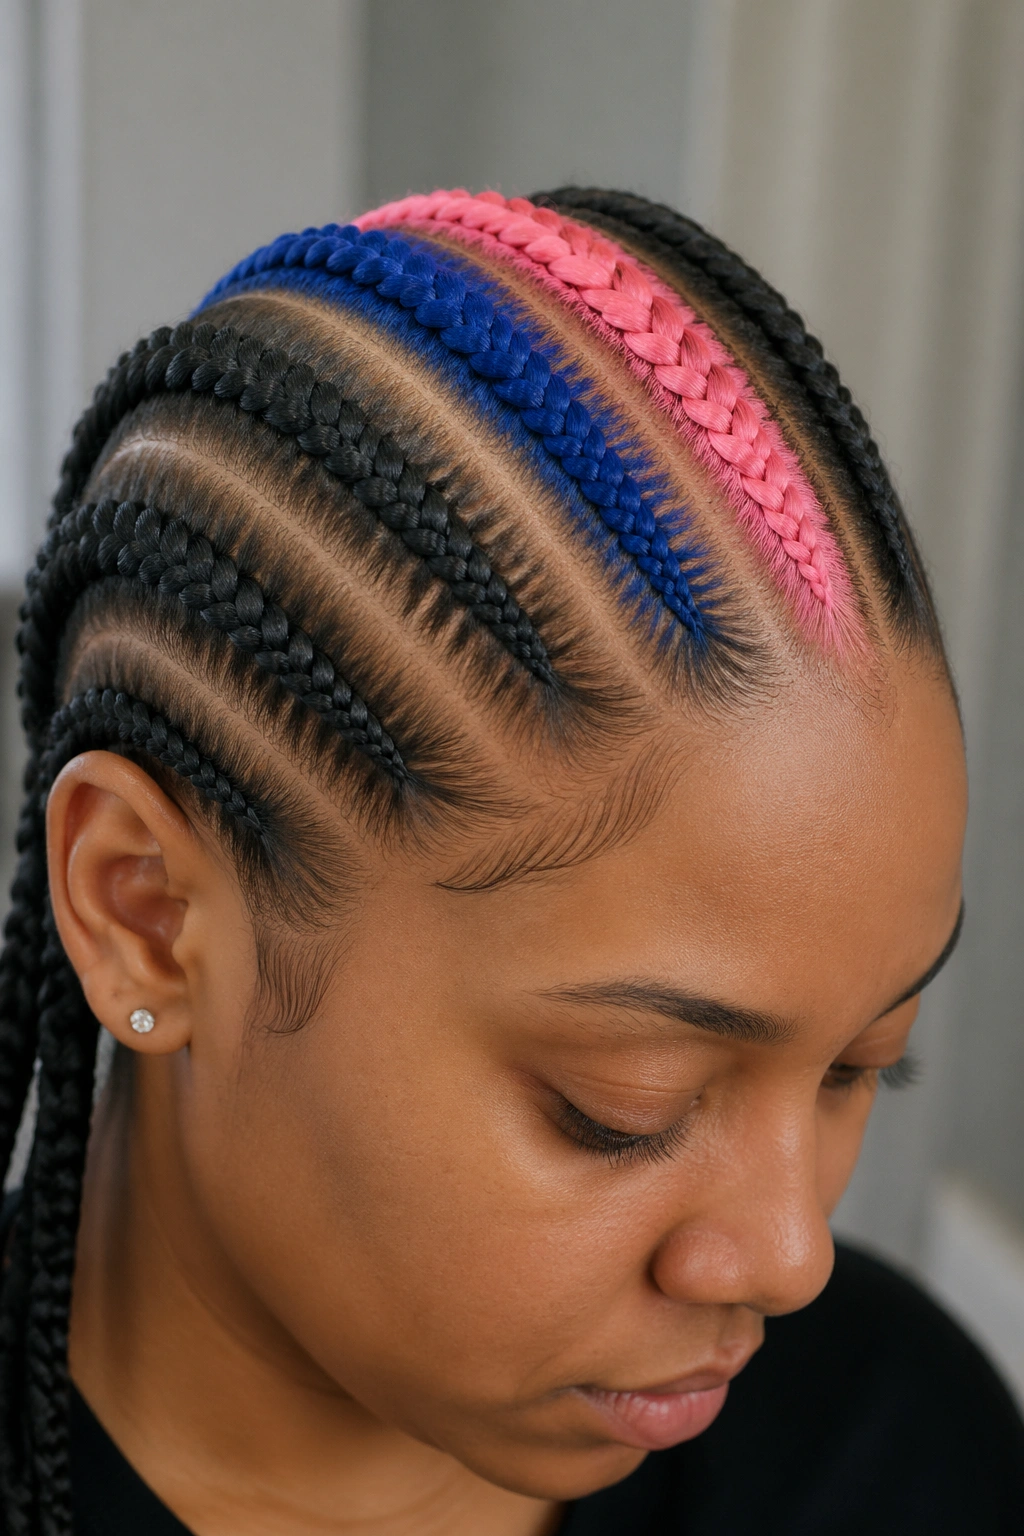
Six cornrows with two adjacent braids done in a contrasting color, creating a stripe of color across the head.
The placement of the color block matters. Two adjacent braids in the center of the head create a strong vertical stripe down the back of the scalp. Two adjacent braids on one side create an asymmetric color moment.
Pick saturated colors that read clearly at this scale. Pastel colors get lost.
19. Cornrows With a Decorative Hair Cuff Cluster
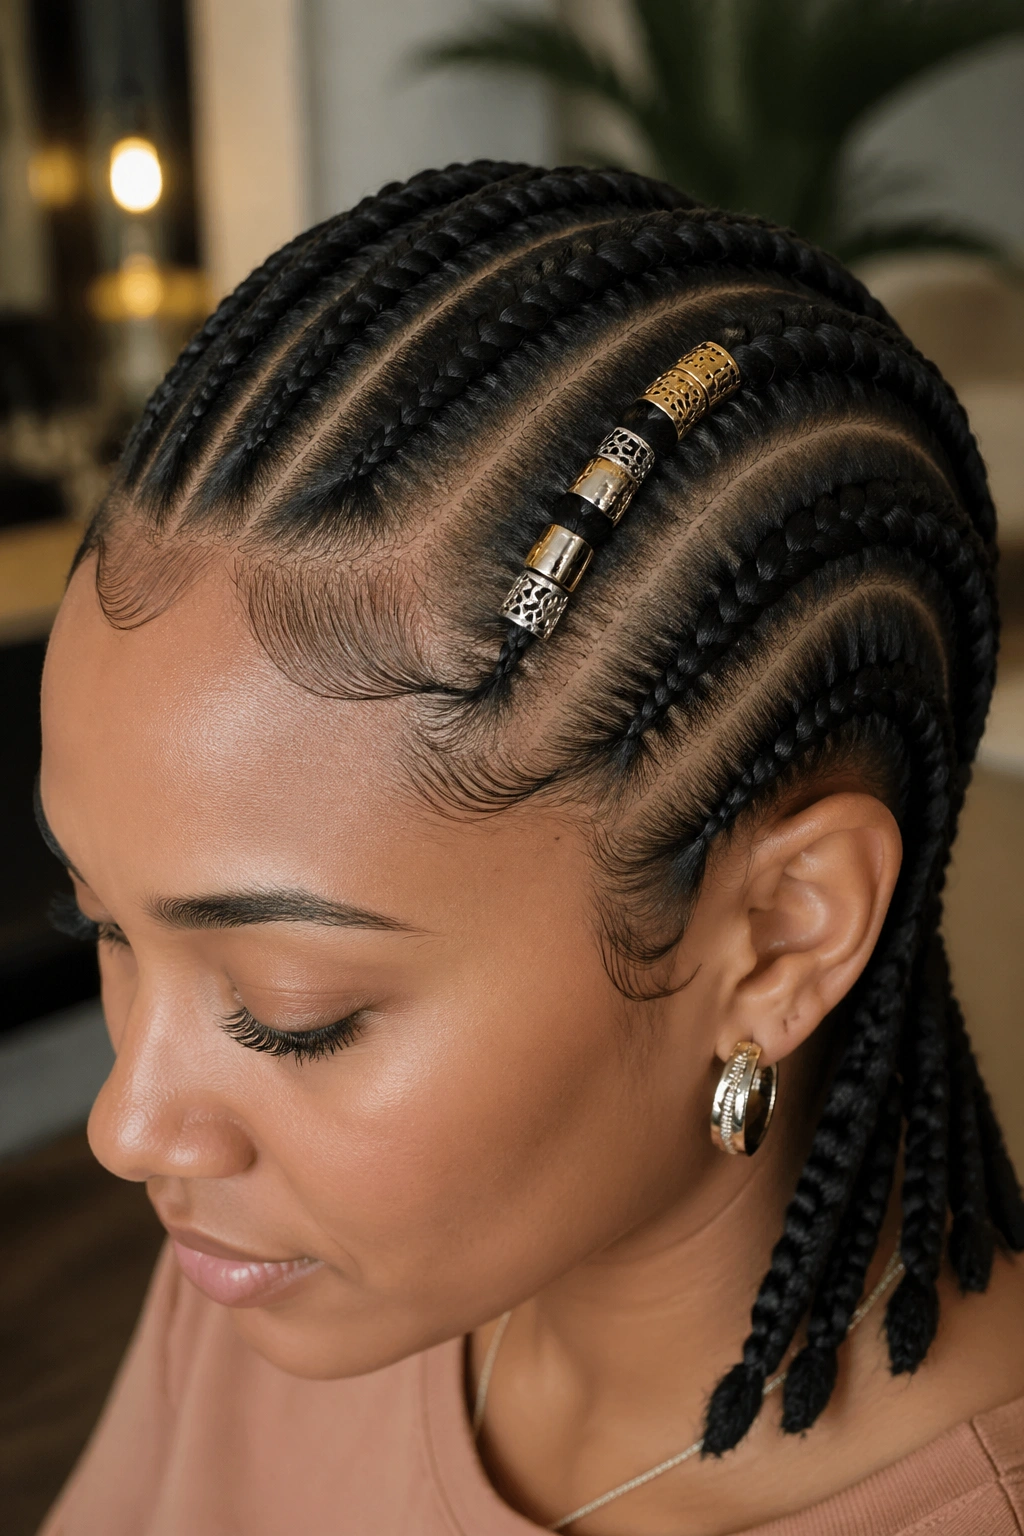
Six standard cornrows with a cluster of 4-5 metal cuffs grouped on one specific braid (usually one of the inner braids, off-center).
The cluster creates a focal point. The other braids are unadorned, letting the cuffed braid stand out.
Mix cuff sizes within the cluster — some larger, some smaller, varied spacing. A cluster of identical cuffs reads as repetitive rather than designed.
20. Cornrows With Beaded Front Sections
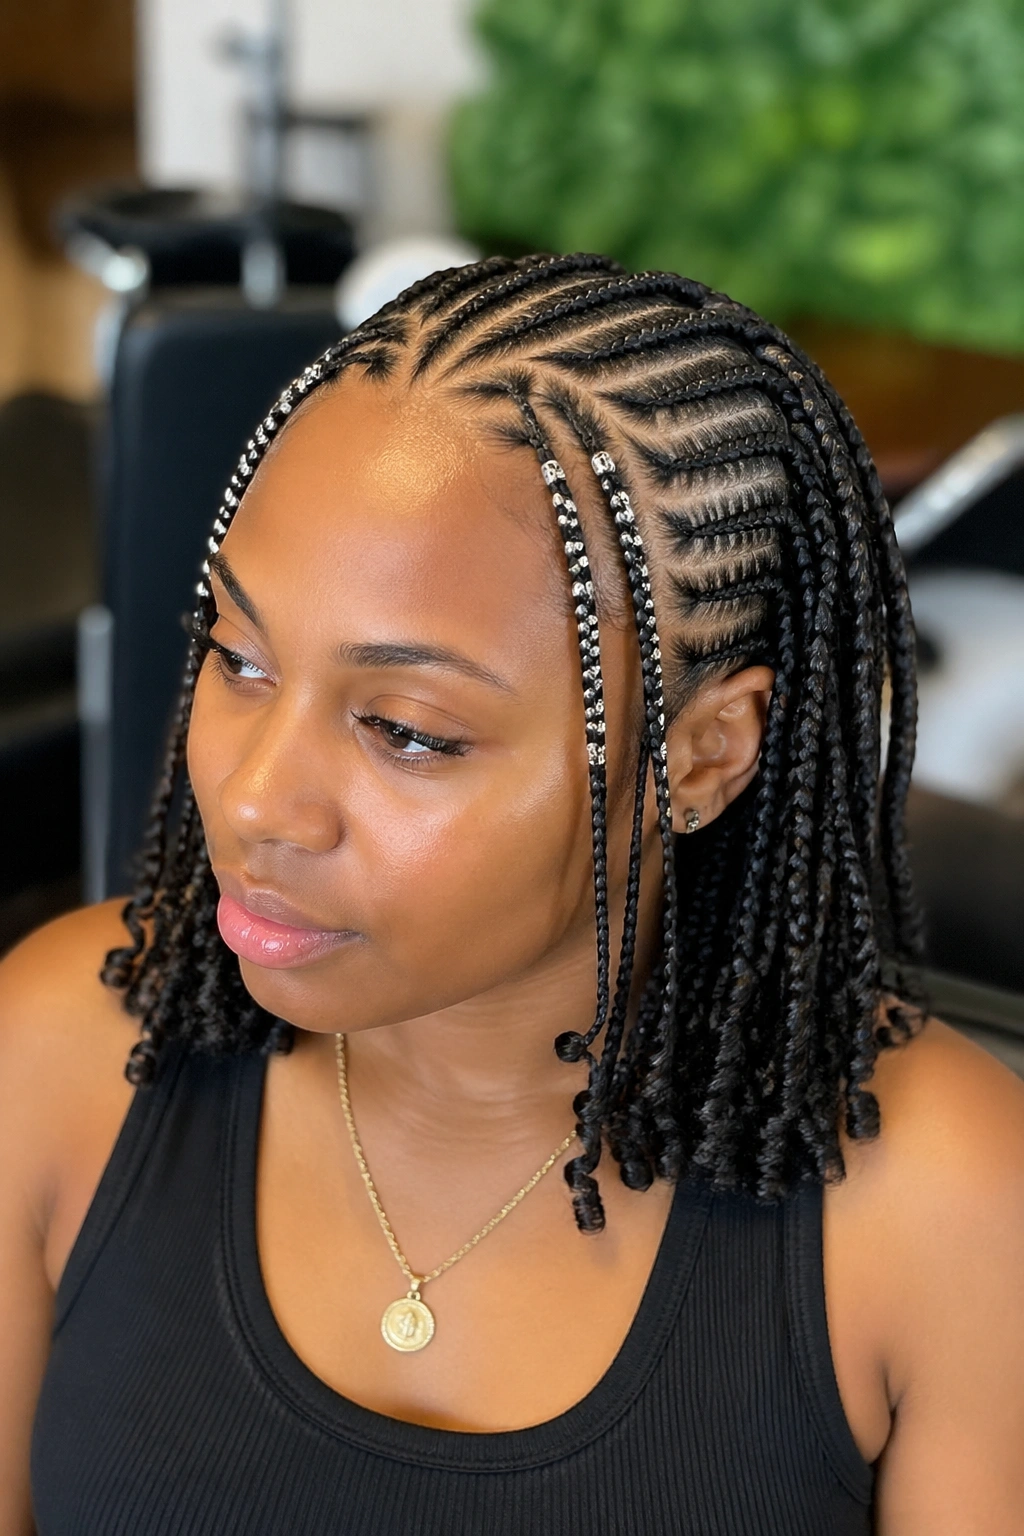
The front 4 inches of each cornrow has small beads or rings woven through the braid pattern. The back portion of each braid is plain.
The beaded fronts create visual interest where the eye naturally goes — the face frame area. The plain backs keep the overall style from feeling overworked.
Use small beads or rings (5mm or smaller). Bigger beads at the front make the cornrow look top-heavy.
21. Cornrows With a Long Loose Tail
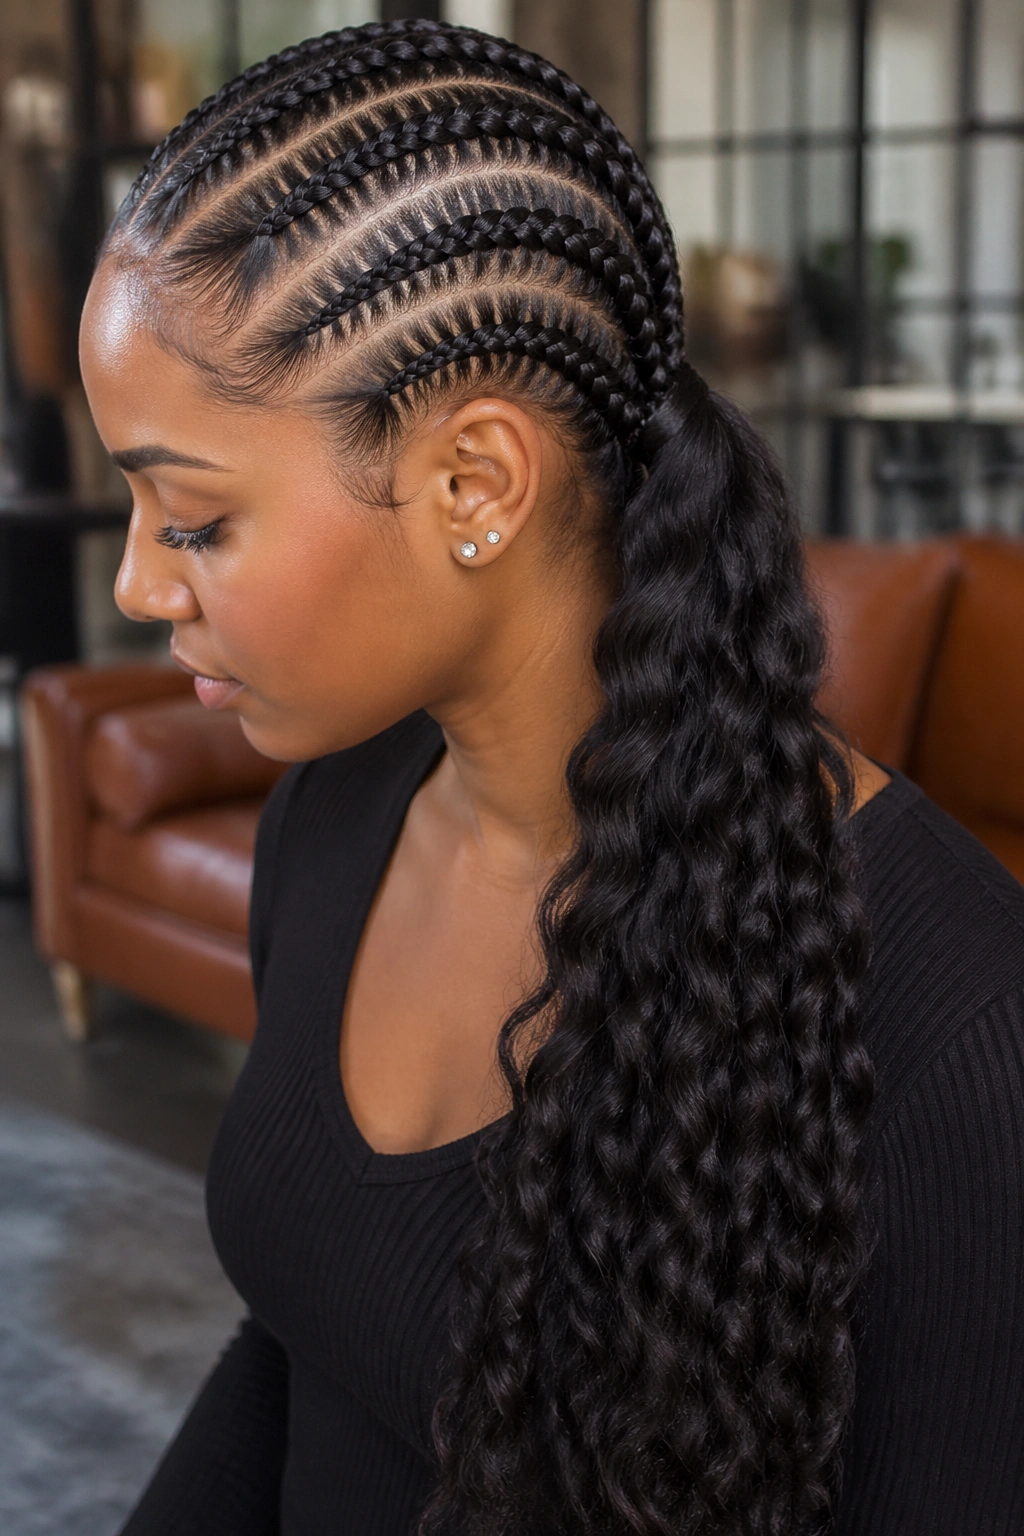
Six cornrows running back, with the loose ends braided together into a single long thick braid that extends past the shoulders, sometimes to mid-back with extensions.
Maintenance Notes
The long single braid needs separate care from the cornrows. Twist it loosely overnight to prevent matting at the body of the braid. Apply leave-in spray to the loose braid more often than to the cornrows themselves.
This is a dramatic finish. The long braid changes the proportions of the entire style and creates a statement element that pure cornrows alone can’t match.
22. Mixed Width Cornrows
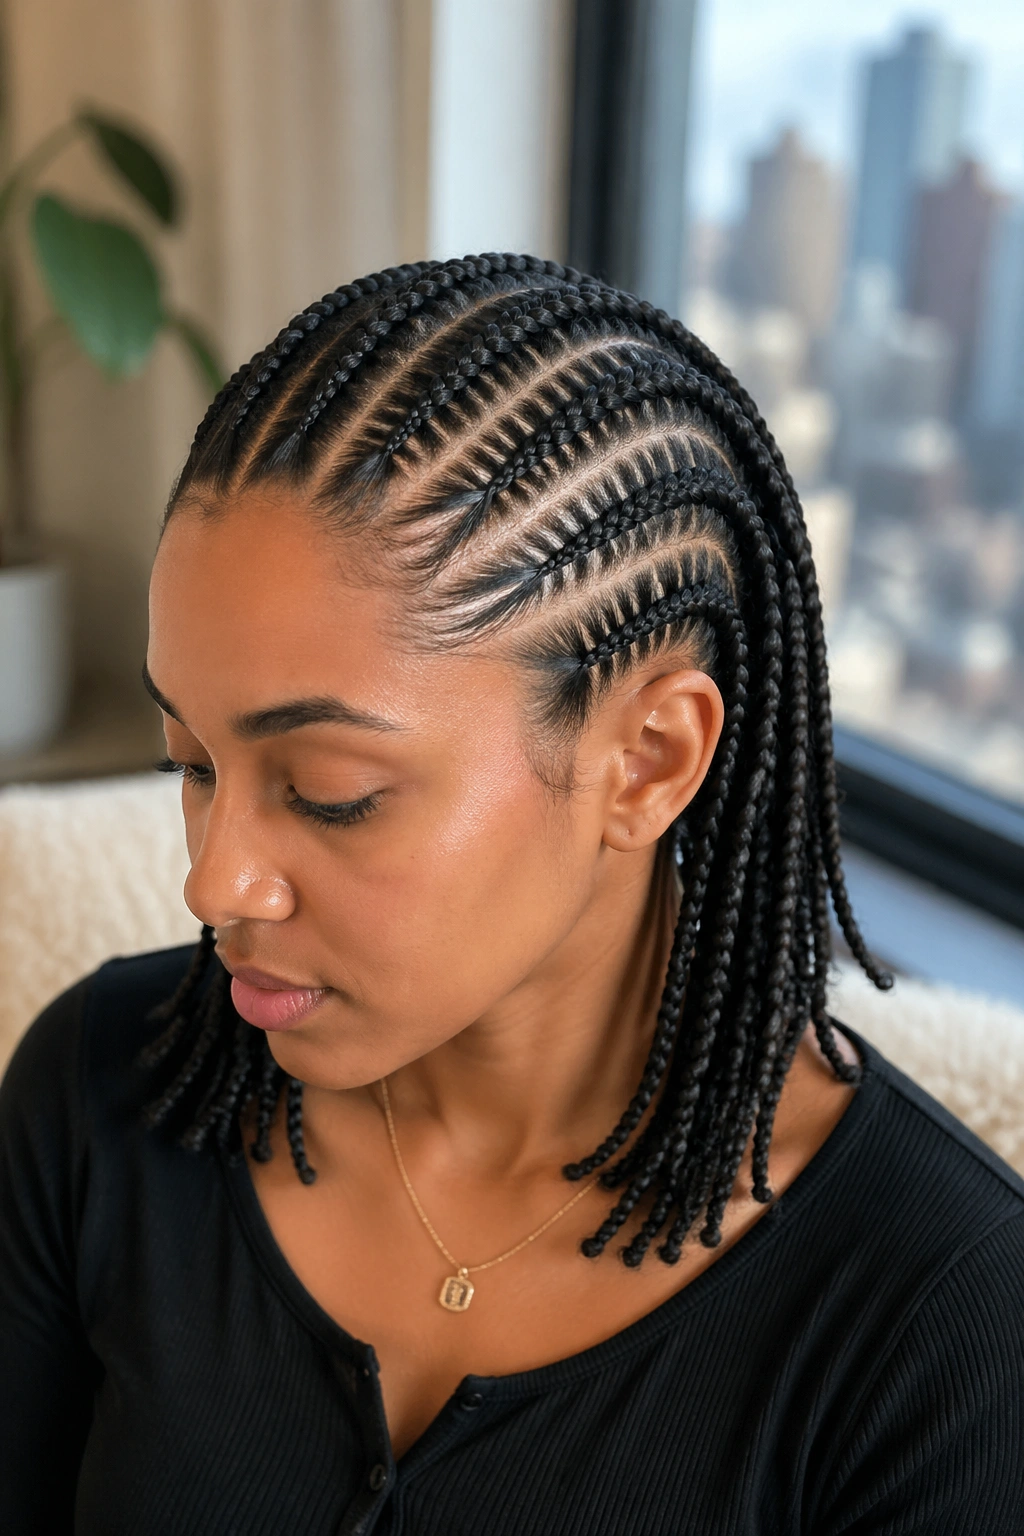
Eight cornrows of intentionally varied widths — some thick, some thin, alternating across the head. The size variation creates visual rhythm.
The pattern can be regular (thick-thin-thick-thin) or irregular (thick-thick-thin-thick-thin-thick). Both work. Irregular patterns feel more organic; regular patterns feel more designed.
Mixed widths take slightly longer to braid because the braider has to plan section sizes carefully. Worth the extra 30-45 minutes.
Daily Maintenance for Shoulder Length Cornrows
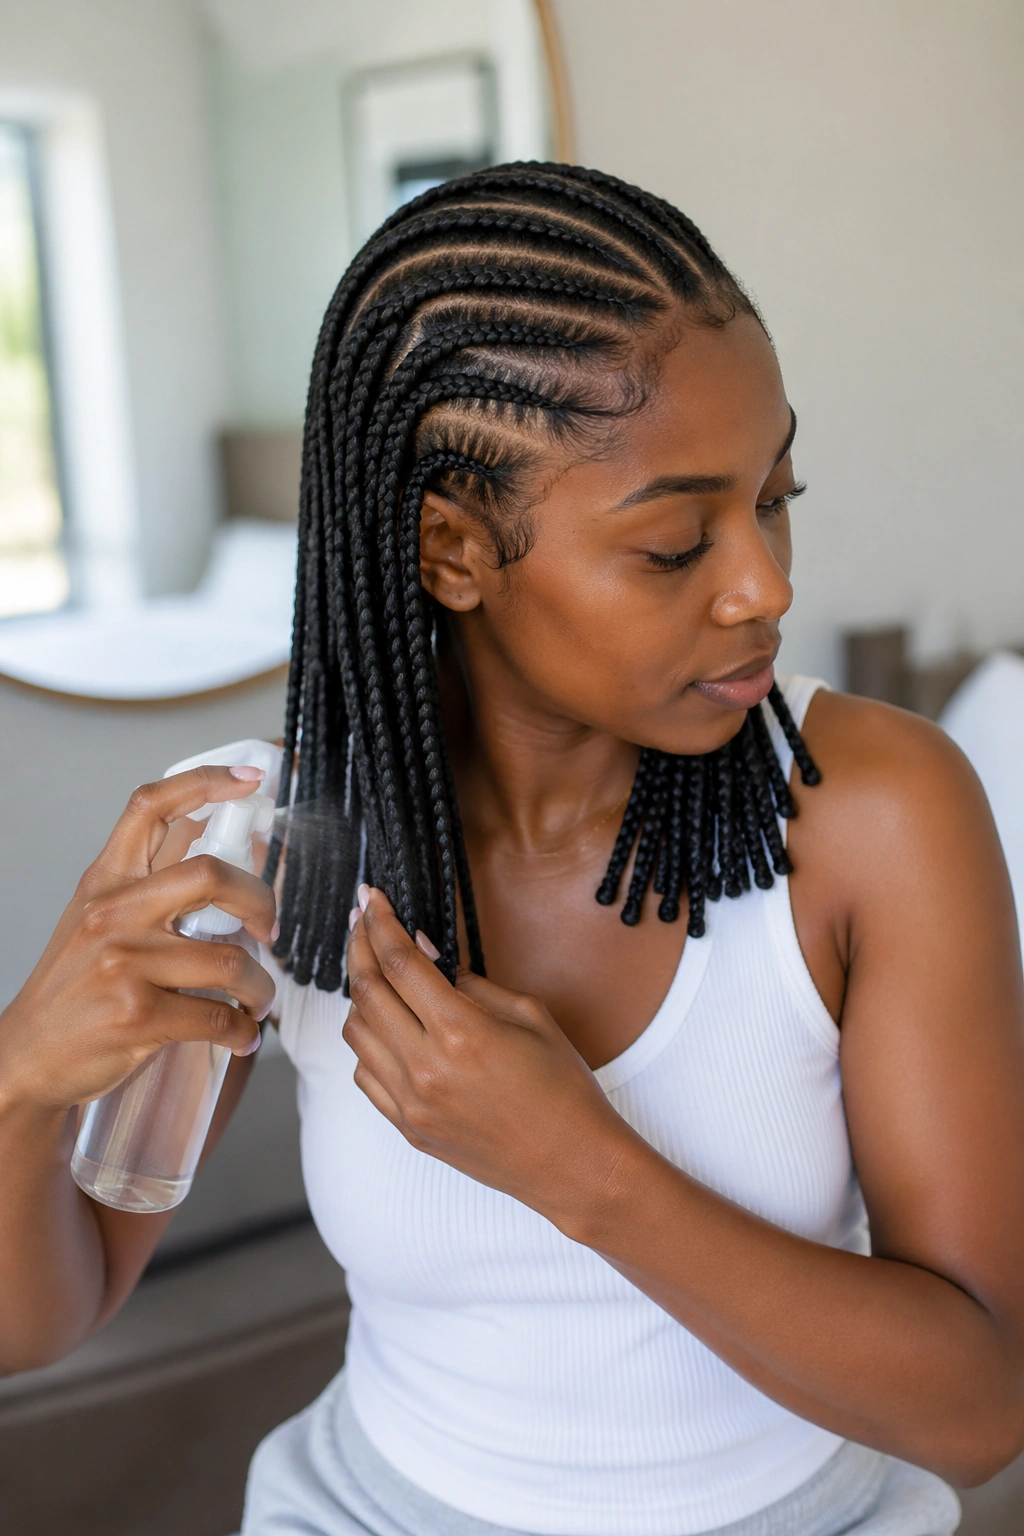
Shoulder length means the braids interact with collars, jacket lapels, and necklines all day. That friction is the main cause of frizz at this length.
A morning mist of water-and-leave-in helps. Mix 1 tablespoon of leave-in conditioner with a cup of water in a spray bottle. Light mist, focused on the body of the braids. Skip the scalp.
Touch up the edges with edge gel and a clean toothbrush every other day.
At night: a satin or silk scarf tied around the head, or a bonnet that covers the cornrows fully. Cotton pillowcases will undo a fresh install within a week.
Scalp Care Through the Wear Cycle
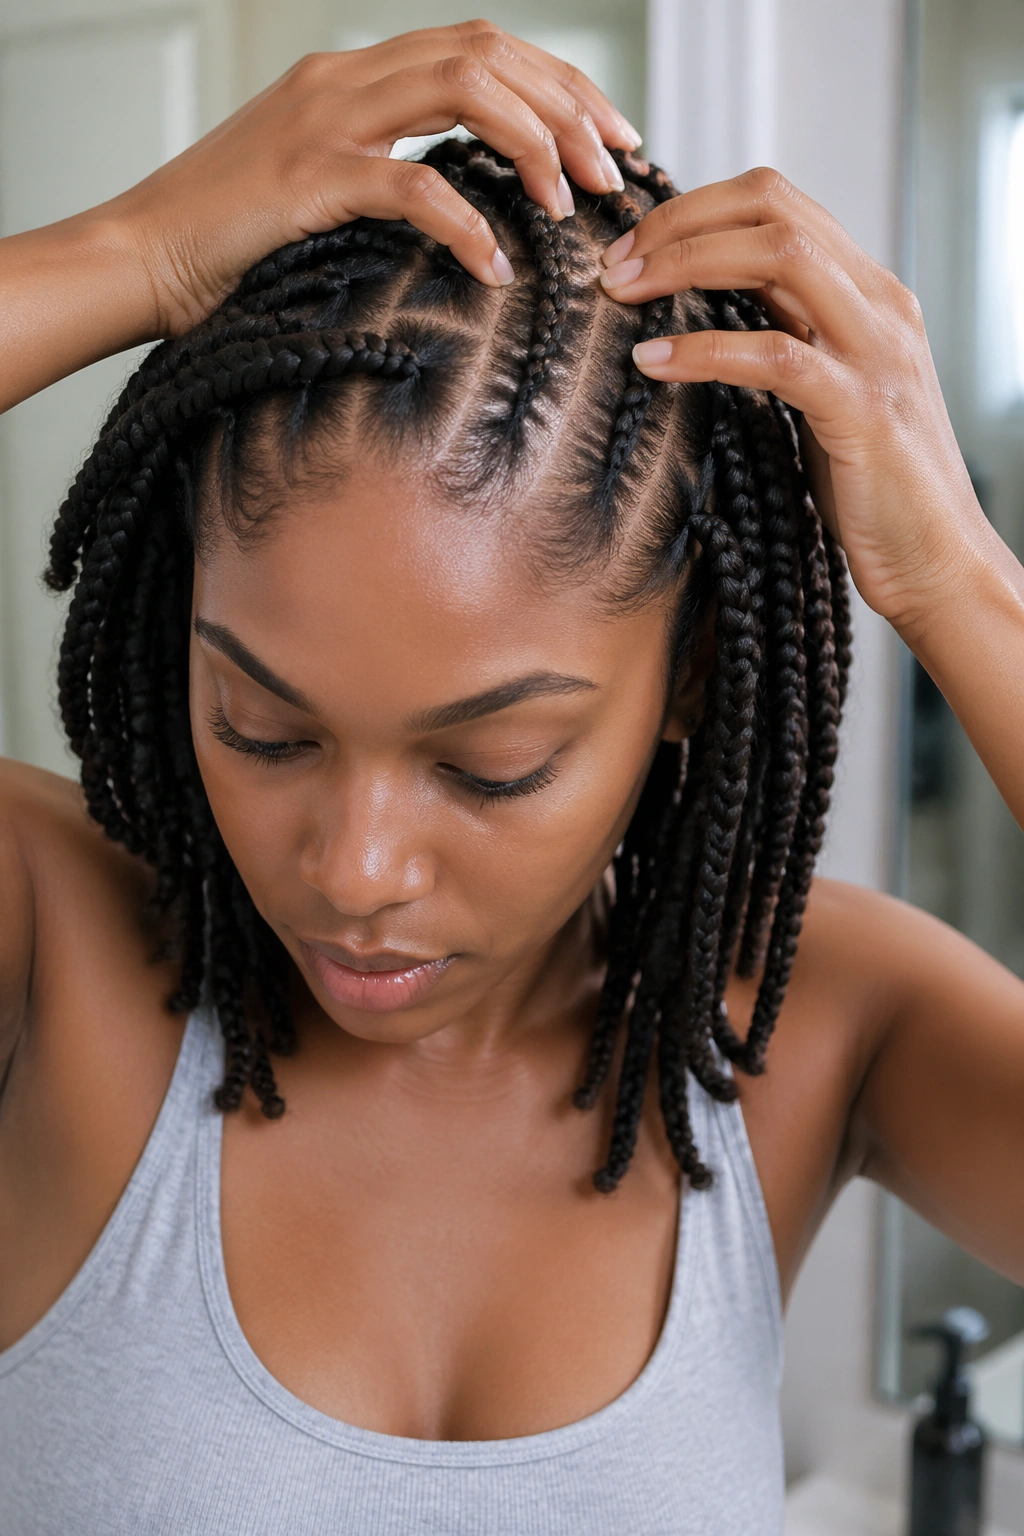
The shoulder length cornrow wear cycle is typically 3-5 weeks. Long enough that scalp buildup becomes an issue if ignored.
Once a week, mix 2 tablespoons apple cider vinegar with a cup of water. Apply along each part line with a squeeze bottle. Massage gently with fingertips for a minute. Rinse with cool water, or wipe with a damp cloth if rinsing isn’t practical.
Follow with a few drops of jojoba oil applied with a dropper to the part lines. Light coverage — too much oil weighs down the braids and looks greasy.
If the scalp itches persistently, the issue is almost always buildup. A second vinegar rinse usually resolves it within a day.
Washing Without Damaging the Style
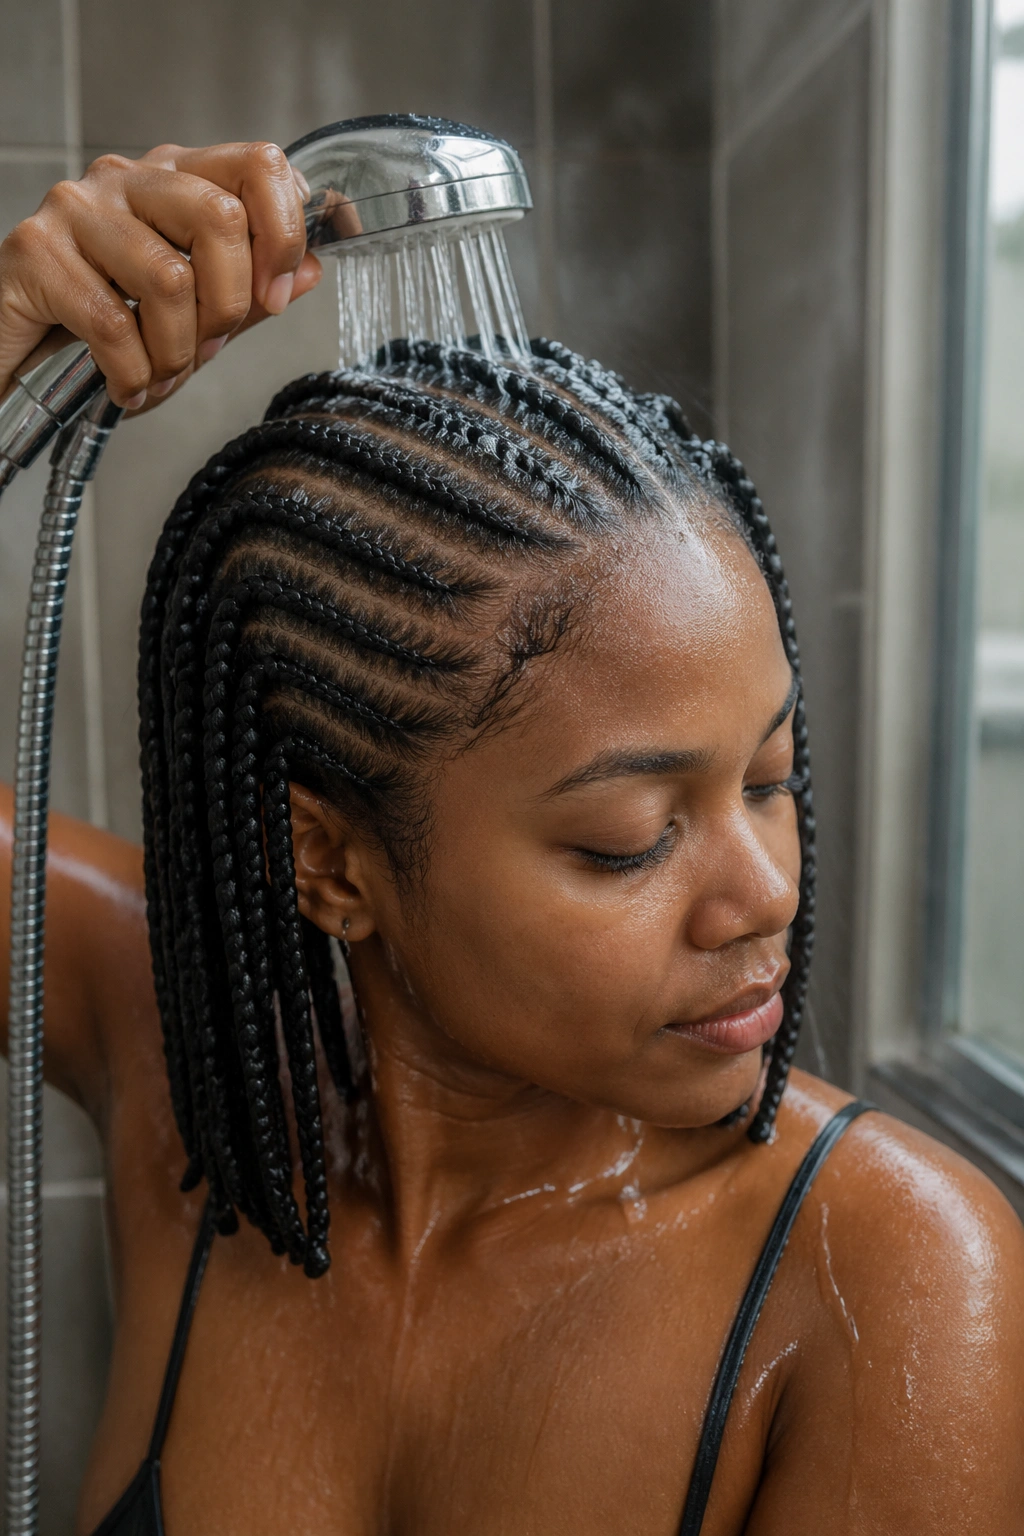
Yes, you can wash cornrows. The technique matters more than the products.
Use a sulfate-free shampoo diluted 50/50 with water in a squeeze bottle. Apply only to the scalp along the part lines. Massage gently with fingertips. Don’t scrub the braids themselves.
Rinse with a handheld showerhead aimed at the scalp. Let water flow down through the braids without active scrubbing.
Pat dry with a microfiber towel. Air dry the rest of the way. Don’t use heat tools on cornrows.
The braids may loosen slightly with washing. That’s normal. Don’t try to “fix” the loosening — it’ll cause damage.
When to Take Them Out
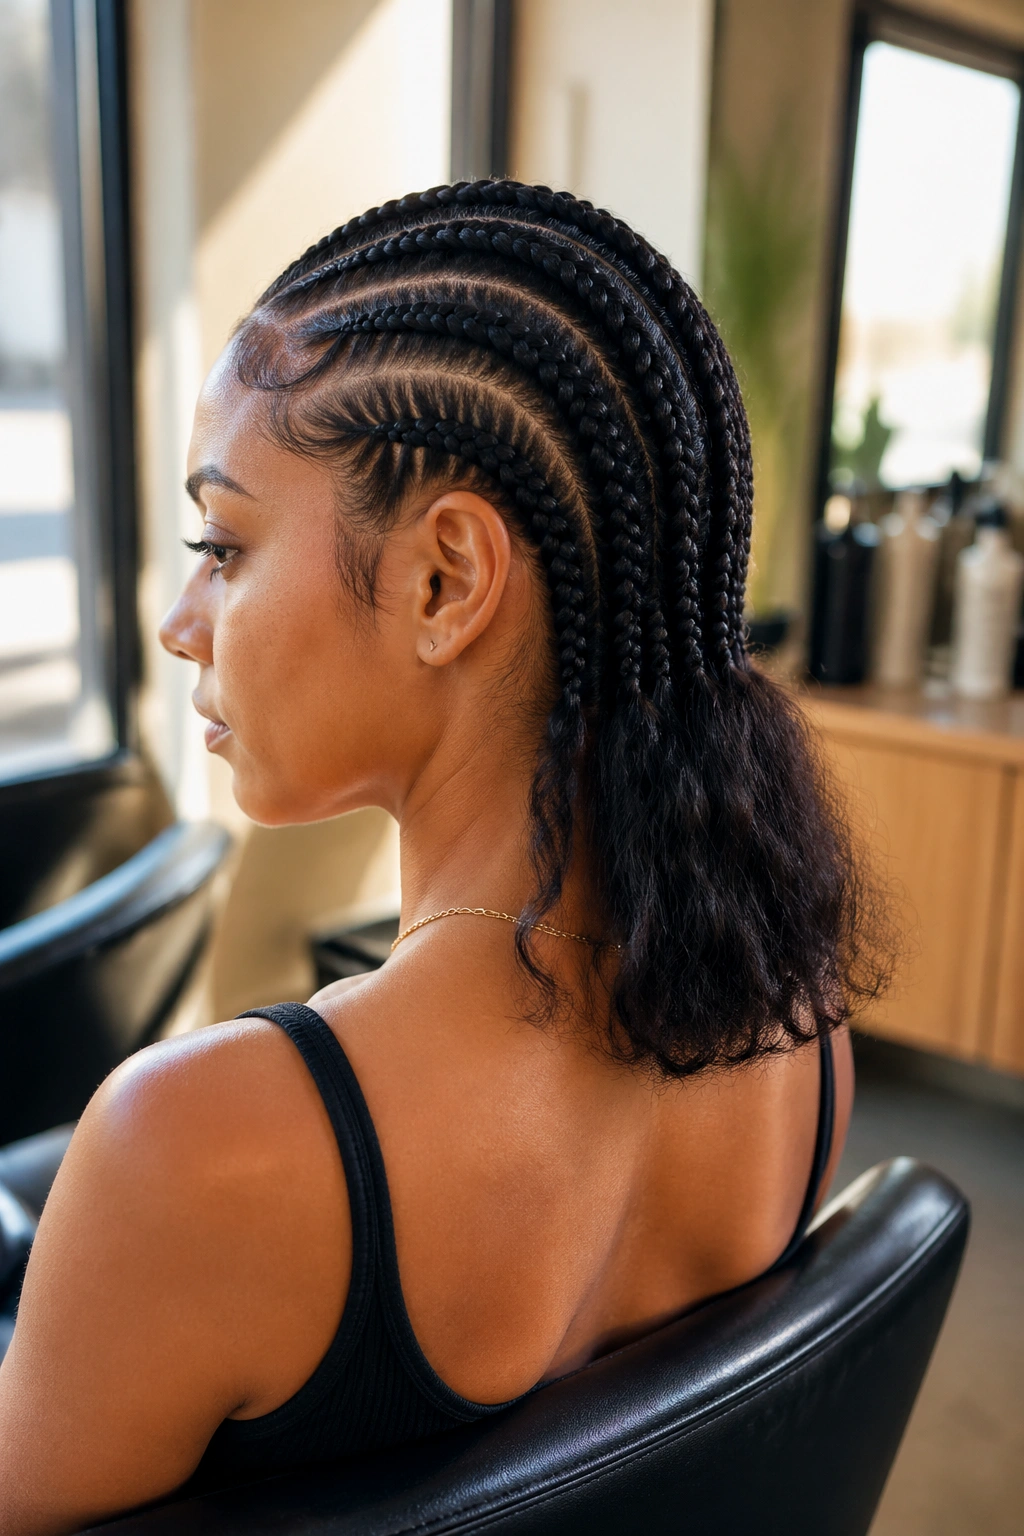
Shoulder length cornrows usually look clean for 3-5 weeks. Beyond that, the style starts looking neglected.
Watch for these signals: persistent itching after vinegar rinses; visible matting at the roots; significant new growth that creates lumps in the braid lines; braids that have visibly loosened.
Don’t push past comfort. Cornrows worn too long damage the hair when you finally take them down.
Taking Them Down Without Breakage
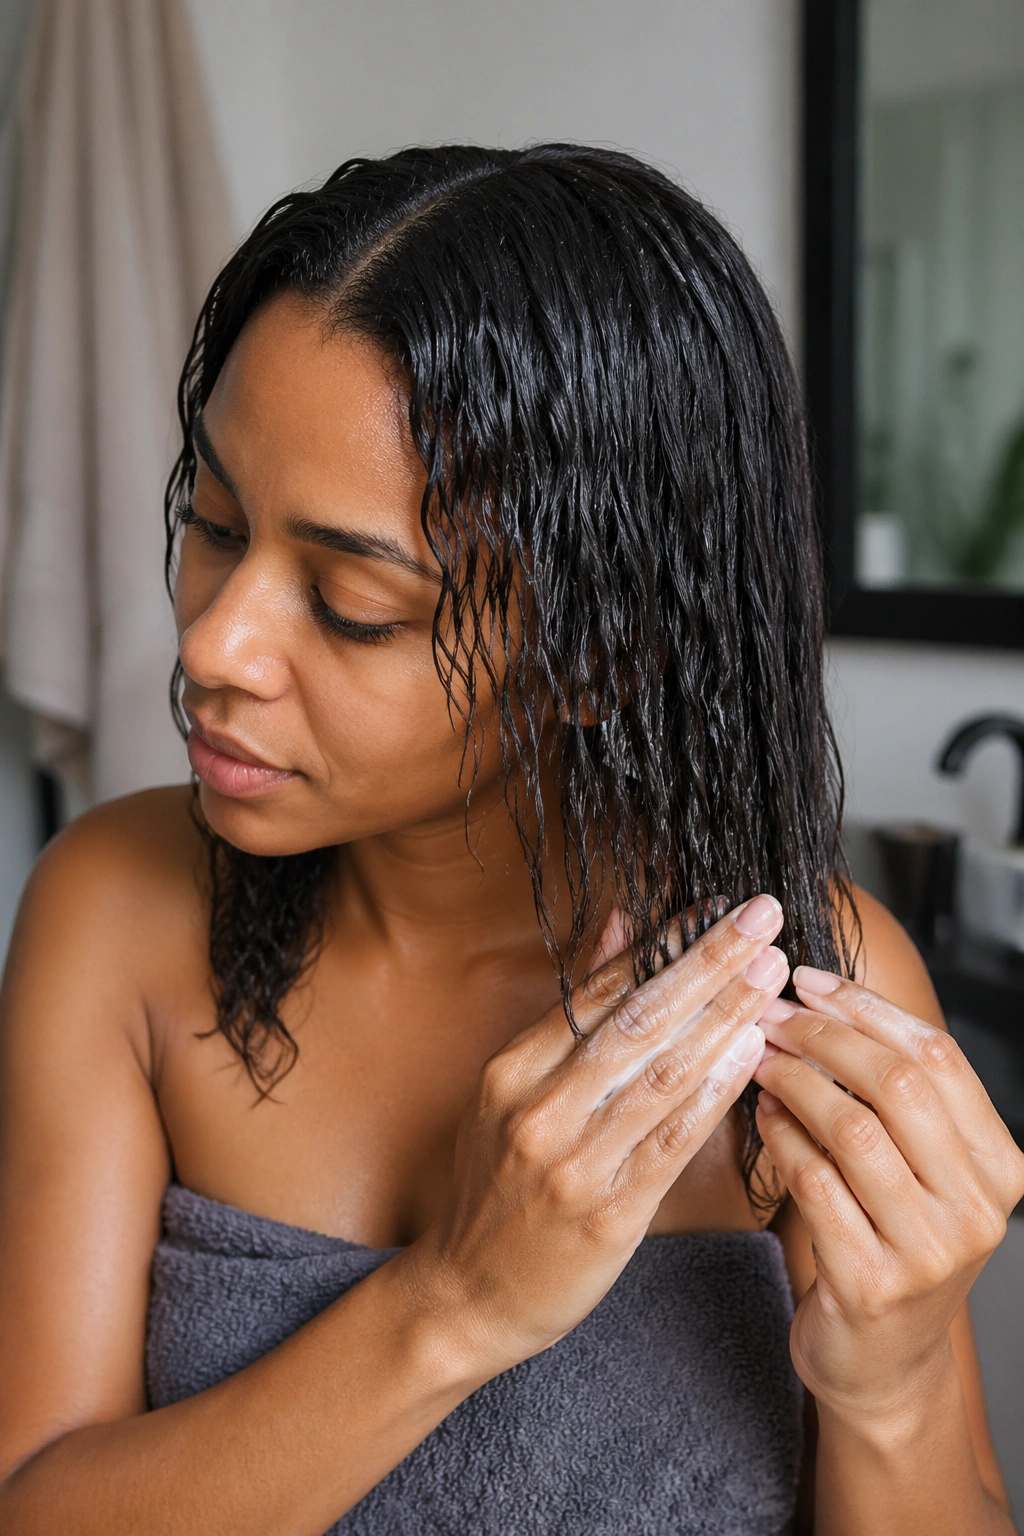
The takedown process at shoulder length is faster than for long hair, but the same care applies.
Remove the elastics. Unravel each braid slowly, fingers only — no comb. Apply conditioner generously throughout the process. The slip prevents tangling.
Once all braids are out, do not comb dry. Wash with a gentle co-wash, detangle in the shower while the conditioner is still in, then proceed with your normal post-takedown routine.
Budget 1-2 hours total for takedown of a full head of medium-sized cornrows.
Picking the Right Style for Your Hair
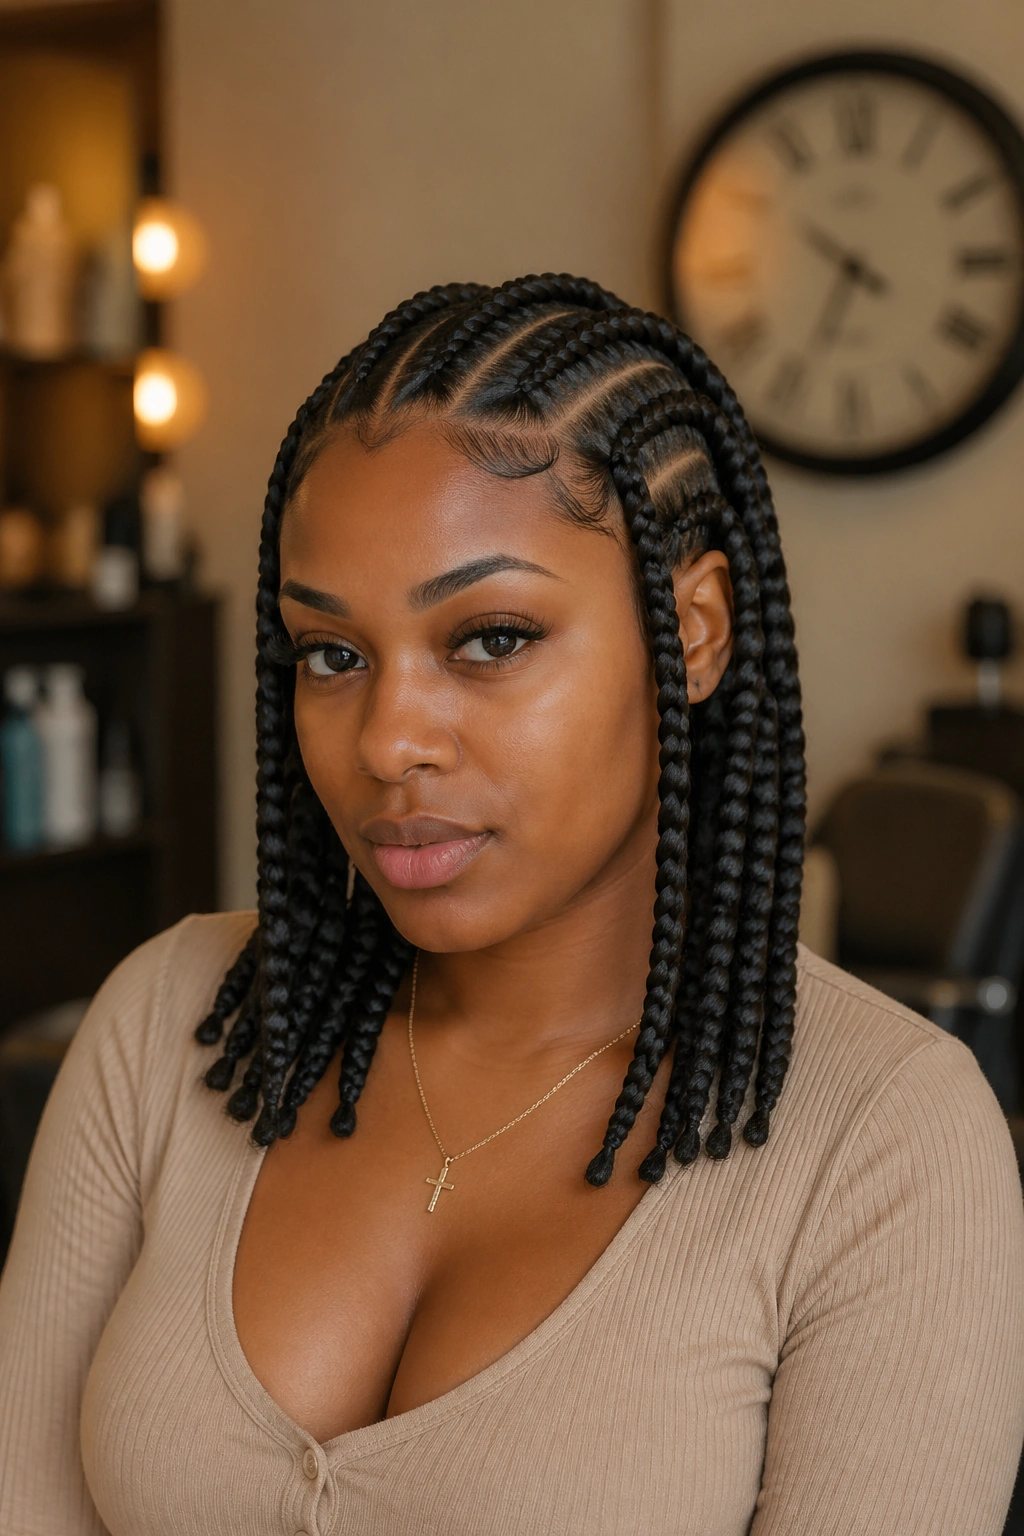
Shoulder length gives you flexibility, but specific variations suit specific scenarios:
For everyday wear with minimal maintenance: 6 medium cornrows straight back, no decoration.
For a special event: cornrows with detailed edges, beaded fronts, or the long loose tail.
For a professional setting: 8 small cornrows with curved parts, or the half-up bun finish.
For a casual statement: 4 jumbo cornrows with beaded tips, or asymmetric cornrows with deep side part.
Match the style to your day-to-day life, not just to the photo that caught your eye. The cornrows that suit your routine are the ones you’ll keep in for the full wear cycle.
Mistakes That Show Up Often
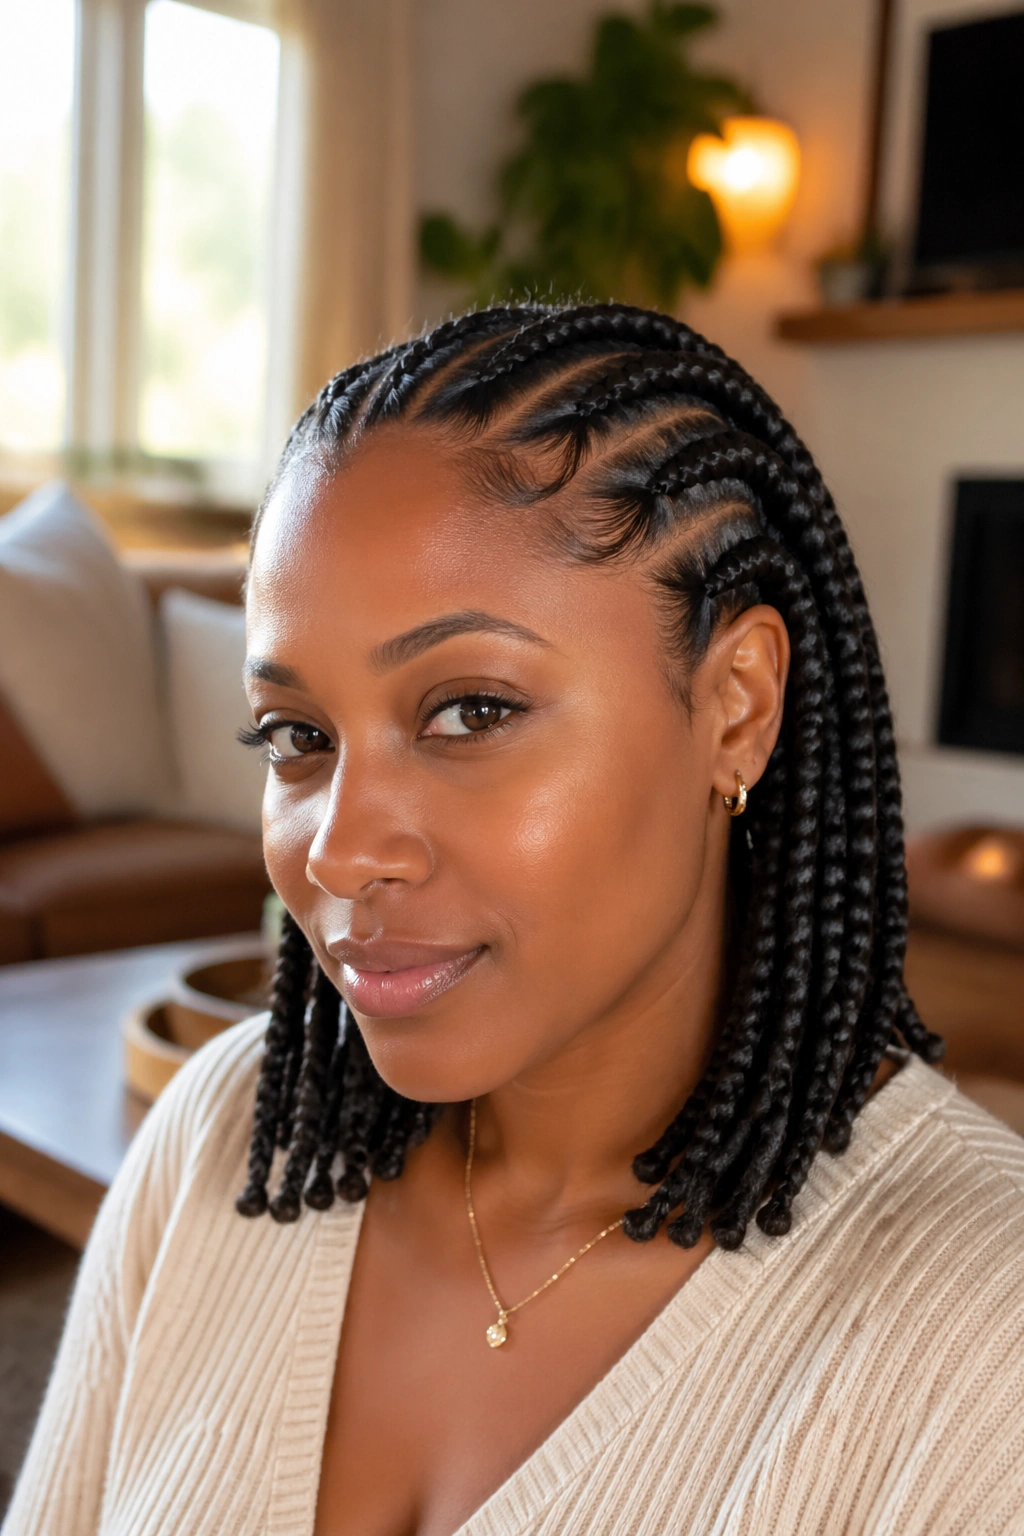
A few patterns repeat across botched installations:
Going too tight at the front. Shoulder length doesn’t add weight to the braids the way longer hair does, so there’s no reason for extra tension at the hairline. Tight fronts cause edge damage over time.
Skipping the prep wash. Product buildup at the time of installation makes the braids slippery and shortens the wear duration.
Choosing the wrong braid size. Big braids on a thin head look chunky. Tiny braids on a thick head look sparse. Match braid size to hair density, not to fashion preference.
Cornrows on shoulder length hair are some of the most flattering and practical styles available. They photograph well, they wear well, and they suit nearly every face shape. Pick the variation that fits your time, your hair, and your week ahead — and the install will pay off through every day you wear it.
