



Short hair gets written off too quickly in the braid conversation. People assume you need collarbone-length strands before cornrows even become an option, which is wildly untrue. Half cornrows for short hair work because they use only the top or front of your head for the braided portion, leaving the back or sides loose, twisted out, or pressed smooth. You get the graphic appeal of cornrows without needing length you don’t have. That’s the trick — half cornrows shift the visual weight upward, so the eye reads the braid pattern first and the length second.
I’ve been wearing braids on short hair for years now, and the half-cornrow style became my go-to somewhere around the point when I got tired of full sets that needed four hours in a chair. Half is faster. Half is more forgiving if your edges are fragile. And half gives your hair breaks from the tension that full protective styles sometimes demand.
This whole piece walks through 22 specific half-cornrow looks built for hair that sits between TWA territory and just-above-the-shoulder. Some need a skilled braider. Some you can absolutely do yourself in front of a mirror with forty minutes and a rat-tail comb.
Why Half Cornrows Suit Short Hair Specifically
Short hair struggles with the weight distribution of full cornrow sets. When every inch of your scalp is gripping braided extensions or tightly plaited natural hair, the hairline takes the brunt. Half cornrows isolate tension to a defined zone — usually the top quarter or front third of the head — which means your edges and nape get left alone.
There’s another reason that often gets skipped. Short hair has less camouflage. On longer natural hair, a lumpy parting line can hide under volume. On a TWA or short fade-grown-out look, every line of every braid shows. Half cornrows give your braider a smaller canvas to perfect. The result is almost always cleaner than a full head.
The styling freedom is the last piece. With the back left out, you can finger-coil it, do a two-strand twist-out, wear a puff pinned low, or leave it in a rough textured crop. Your cornrowed half is structured. Your loose half is soft. That contrast is what makes the whole look read intentional rather than accidental.
Tools You’ll Need Before Sitting Down
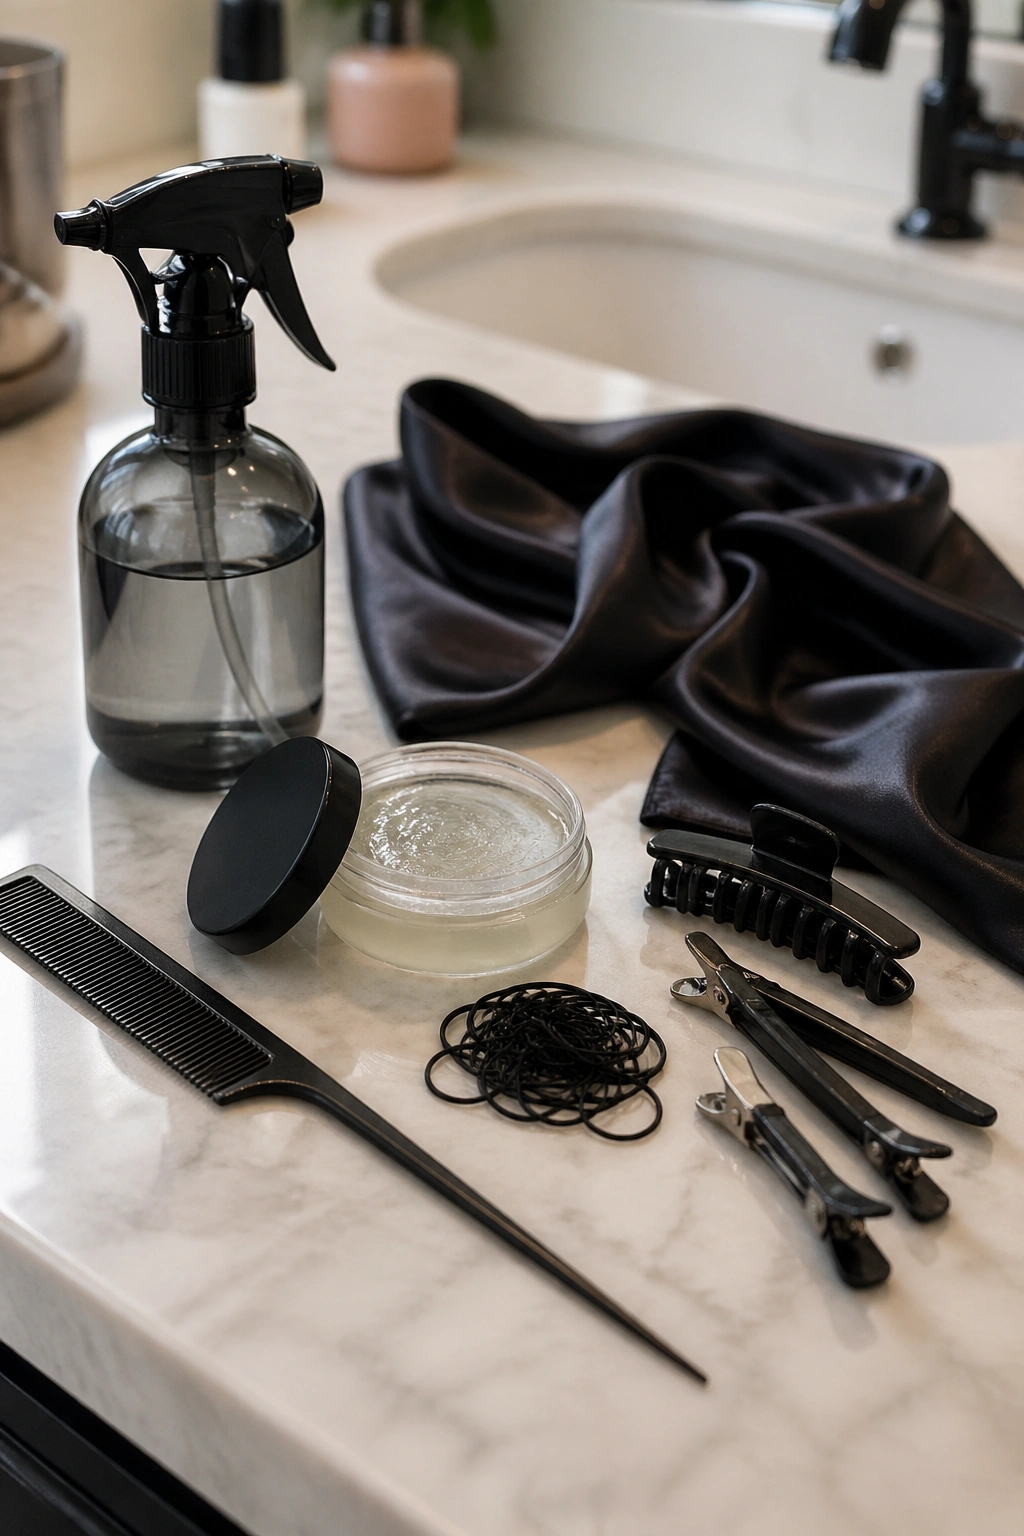
Before any parting happens, line up your materials. A proper half-cornrow session on short hair uses less product than a full install, but what you do use matters.
- A fine-tooth rat-tail comb with a needle-sharp tip for clean partings
- Edge control with medium-to-firm hold — the kind that doesn’t flake after two hours
- A light leave-in spray (water-based, not oil-heavy) for slip during braiding
- Small black rubber bands if you’re anchoring the ends
- A satin or silk scarf for the pressing step after installation
- Hair clips or sectioning jaws to hold loose portions out of the way
- Optional: braiding hair for feed-ins, typically kanekalon in pre-stretched form
The one product I’d skip is thick butter or heavy grease applied before braiding. It slides your strands around and makes the rows lift from the scalp within days. Keep the pre-braid stage light.
Prep That Actually Holds the Style
Short hair braided straight out of a casual wash-day routine will lift, frizz, and loosen within 36 hours. That’s the biggest rookie mistake I see — people think because the sections are small, they can skip prep. The opposite is true.
Wash with a clarifying shampoo if you’ve been using heavy butters or silicone-based gels for weeks. Build-up kills grip. Follow with a moisturizing conditioner, rinse out, and let the hair air-dry to about 80% before starting. Fully wet hair stretches during braiding and snaps back looser once dry. Fully dry 4C hair, on the other hand, resists parting and frays the edges.
Target damp but not soaked. Your comb should glide but the hair shouldn’t drip.
If you’re doing feed-ins with kanekalon, stretch the hair beforehand by dipping the ends in hot water briefly to seal them. Tangled or kinked extension hair will fight you the whole install.
The Parting Logic That Separates Good From Sloppy
Parting is 90% of the visual outcome with cornrows. Braid technique gets the credit, but a razor-clean part is what sells the look. On short hair, since the lines are more visible, you need to be even more precise.
For half-cornrow patterns, decide your divide line first. Will you cornrow from forehead to mid-crown and leave the back out? From one side part to the opposite ear? A diagonal sweep? That master line is what you mark first with a gel-dampened tail comb, then every subsequent parting flows from it.
Keep your fingers off the skin when parting. Use only the comb tip. Fingers smudge gel and blur the line. And use a hand mirror if you’re doing this yourself — looking down never shows you what the back of your head actually looks like.
1. Forward-Flow Half Cornrows With a Low Twist-Out Back
This first look is the one I recommend to anyone trying half cornrows for the first time. You cornrow from the forehead flat back to about the crown, stop the braids, and let the back hair hang in a defined twist-out.
Why It Works on Shorter Hair
The cornrowed portion only needs about 3-4 inches of length to braid into, so you can do this on hair as short as a grown-out TWA. The back needs even less — a two-strand twist-out on an inch and a half of hair still gives texture.
- Part five to seven horizontal rows from the hairline back
- Braid each using a two-inch base width for visual chunkiness
- Stop at the crown and secure with small rubber bands
- Leave the back hair pre-twisted for at least two hours before unraveling
Pro tip: braid slightly looser at the front hairline and tighter through the middle. Loose at the front protects your edges. Tight through the middle keeps the rows sharp.
2. Side-Swept Half Cornrows
Unlike a straight-back pattern, the side-sweep runs cornrows diagonally from a deep side part across the head, terminating above the opposite ear. The hair below that diagonal stays out and gets shaped into a pressed wave or a soft curl.
What’s different here is the angle. Diagonal rows on short hair force the parting to work harder, because you can’t fake the geometry the way you can with a straight-back style. Every row has to stay parallel to the one above it, even as they curve around the head’s natural shape.
Who this is best for: someone with a defined face shape — square, oval, or heart — who wants the braids to draw a deliberate line rather than sit neutrally.
The recommendation I’d make is to have this one done by a braider with a steady hand for at least the first install. Watching someone lay the diagonal is worth more than any tutorial.
3. Half-Up Cornrow Crown With a Loose Crop
Picture it: you’ve got a soft natural crop in the back, and across the top third of your head sits a tight cluster of cornrows meeting at the crown in a small gathered bun. That’s this style. The braids act as a crown, lifted and organized, while the back of the head stays textured and free.
The mechanism is straightforward — you’re only cornrowing the top quarter of the head, bringing every row to a central gathering point behind the ears rather than continuing down the nape.
- Section the top in a U-shape from temple to temple
- Plan 6-8 cornrows angling toward the crown
- Braid each to the gather point, then collect all the braid ends into one small bun
- Leave the remaining hair in its natural crop or shape it with a soft pick
The closing insight here: this style photographs especially clean because the cornrow portion reads almost like a headband, and the back contrast gives the whole look a sculptural feeling.
4. Freehand Cornrow Mohawk Half-Up
This is what happens when you give up on symmetry and let the shape breathe. Three to five cornrows run down the middle strip of the scalp, forehead to crown, and everything on either side stays out. The side hair gets pushed to the sides or shaped into a side sweep for contrast.
If you want drama, this one delivers. It also takes less time than almost any other half-cornrow pattern because the braided section is tiny. Thirty to forty-five minutes tops for the install.
Tight in the center, loose on the sides. That’s the whole formula. A mohawk on short hair plays with dimension without requiring length, which is exactly why it’s landed on every best-of list for TWA-friendly braid styles. The bold center line does the work.
Would I recommend it for a job interview setting? Probably not — it’s a statement look. For a concert, a weekend out, or a photo day, though, it earns its keep.
5. Zigzag Half Cornrows With Flat Twist Back
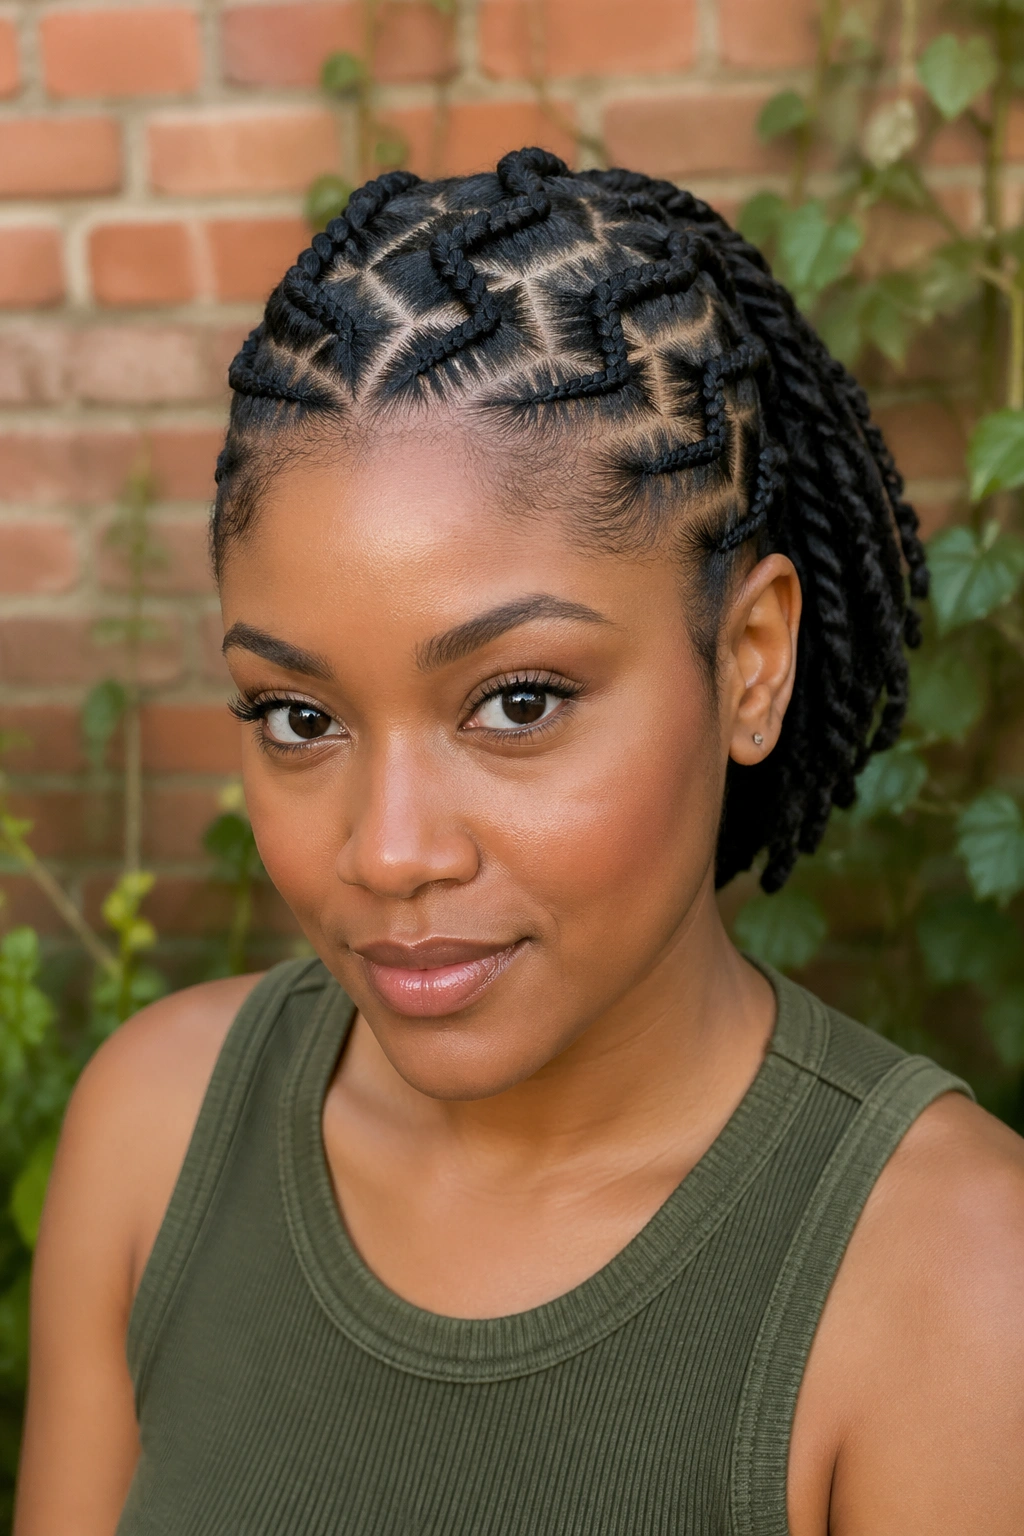
Zigzag partings turn the ordinary into the graphic. Rather than straight rows running front to back, every cornrow zigs and zags through angled partings, creating a chevron or lightning-bolt pattern over the front of the head. The back stays in flat twists.
How to Style It
Start with the parting layout drawn — literally drawn, with gel, on the dry scalp — before you commit to any braid. Short hair doesn’t let you easily redo a zigzag part that went sideways. Sketch the lines, check them from all angles with a mirror, then start braiding along the pre-marked paths.
- Use a pointed rat-tail comb with a metal tip for the sharpest zigzag lines
- Keep zigzag angles between 30 and 45 degrees for a readable pattern
- Braid at the same tension throughout so the pattern doesn’t sag
Zigzag partings exaggerate any frizz, so give yourself a satin wrap the first night to lock the pattern down before you sleep on a regular pillow.
6. Micro Half Cornrows for Sleek Finish
Where chunky cornrows go for drama, micro half cornrows go for refinement. These are braided with tiny base sections — about half an inch wide per row — creating a dense, smooth cap over the top of the head. The back is left completely natural or in a shaped afro.
On short hair, micro cornrows create what looks almost like a woven texture rather than individual braids. You see pattern more than plait. The effect reads dressy — it works for black-tie events, photo shoots, or any setting where you want the hair to feel sculpted.
The catch is time. Micros take two to three times longer than standard-gauge cornrows. A full top-half install in micro scale typically runs 2.5 to 4 hours depending on hair density. Plan accordingly.
And the maintenance is fussier. Micro rows lift faster than medium rows because the tension distribution is less forgiving. A silk scarf every single night is non-negotiable.
7. Half Cornrows Into a High Ponytail
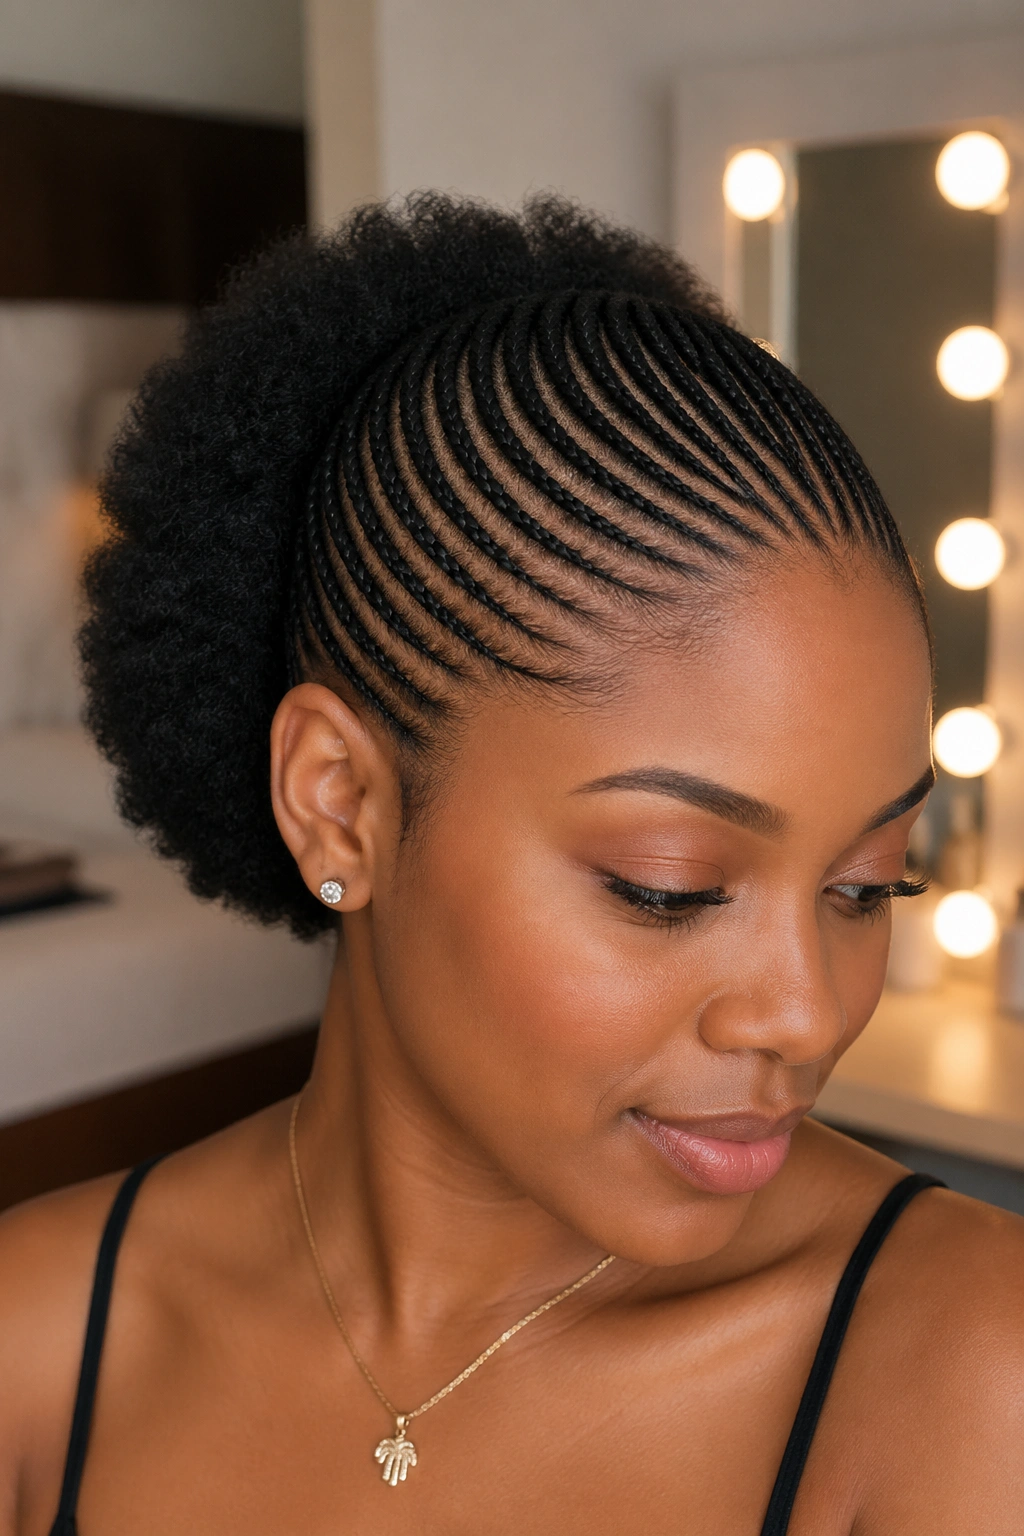
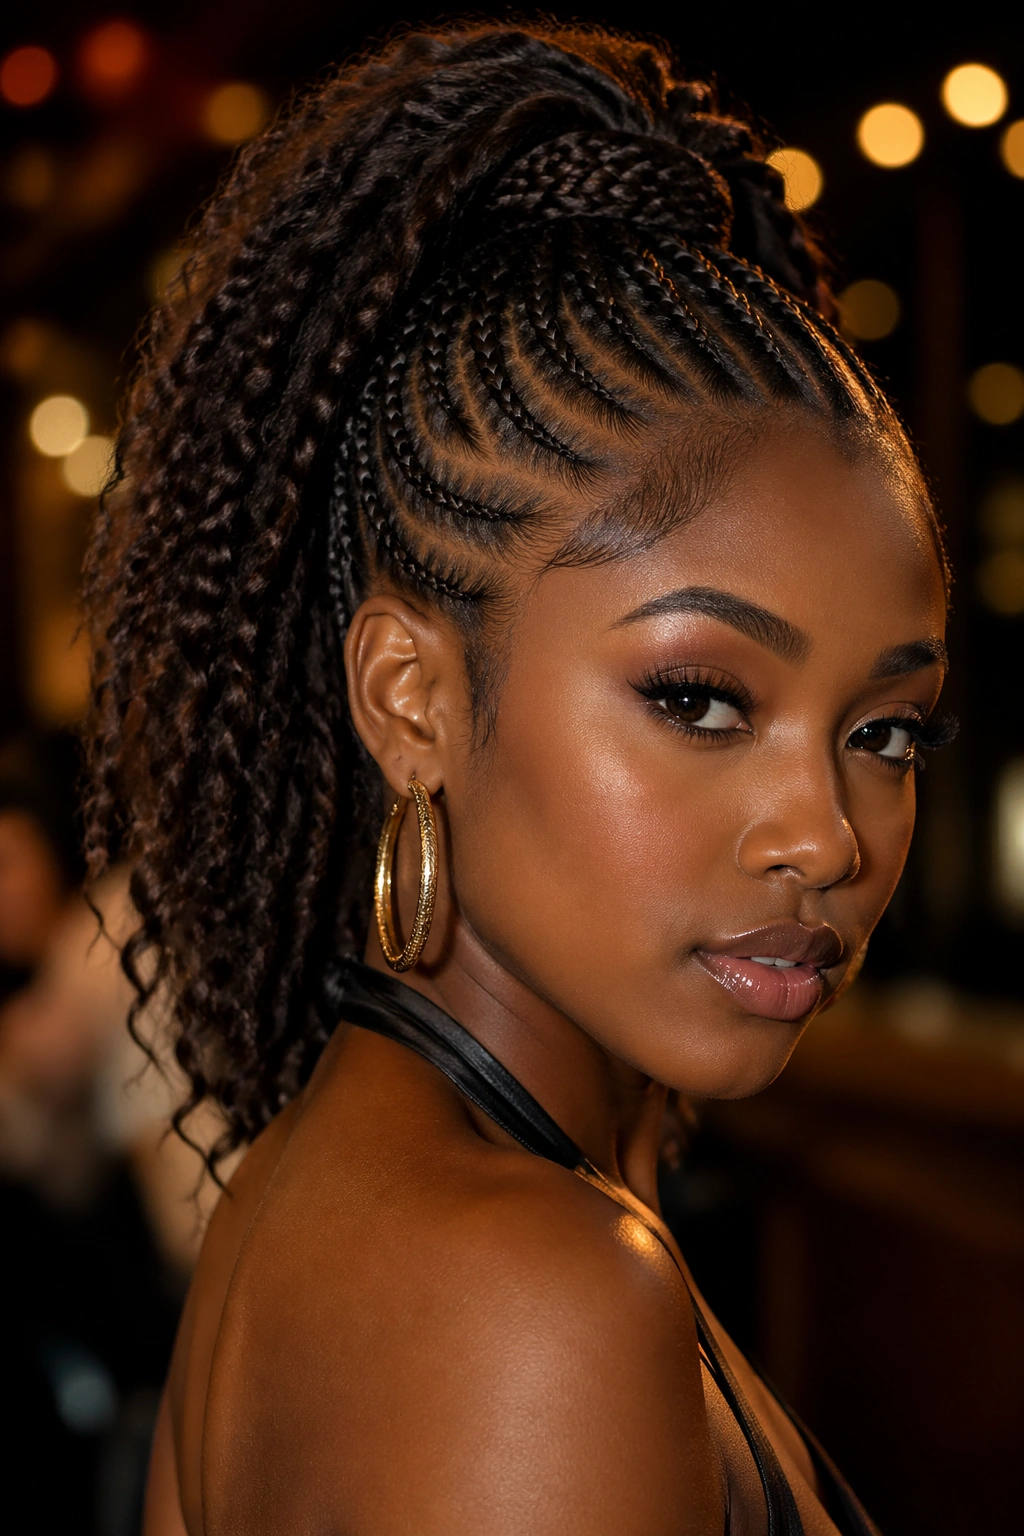
Here’s a question: can short hair hold a high ponytail convincingly? Not usually. But with half cornrows, you can fake the effect beautifully. The front and sides get cornrowed up toward a central crown point, where all the braid ends meet. Then a textured ponytail piece or a puff of loose hair sits on top.
This is probably the most function-forward half cornrow style on this list. The braided portion holds the structure, the gathered end creates the illusion of a ponytail, and you end up with a polished silhouette from maybe two inches of real length.
How to Use It
Buy a kinky or coily ponytail piece in a texture that matches your natural hair. Attach it at the crown point where the cornrow ends meet, using the braid bundles as the anchor. Wrap the base of the ponytail with a small section of the braid ends to hide the attachment.
Practical paragraph: this one reads incredible for date night or a dressed-up daytime event. It’s also a lifesaver on second-day hair when your loose texture won’t cooperate.
8. Half Cornrows With an Accent Braid Border
This style uses seven or eight basic half cornrows across the top, then adds one or two thicker accent braids along the parting edge where the cornrow section meets the loose hair. The accent braid acts like piping on a pillowcase — it defines the boundary.
What makes this different from other half-cornrow patterns is that border detail. Most half cornrows let the natural transition line speak for itself. Adding a larger braid along the divide creates a visual frame.
Who this is for: someone who wants their half cornrows to feel curated and deliberate rather than casual. It suits a round or heart-shaped face because the accent line draws attention along the hairline.
Recommendation: have the accent braid be noticeably larger than the inner cornrows — not twice as thick, but clearly the dominant braid. If the scale is too close, the border reads accidental.
9. Front Cornrows Only, Natural Back
This one is the simplest half-cornrow interpretation. You braid only the front four to six rows — maybe three inches deep into the hairline — and leave everything behind it in its natural texture. The braids tuck behind the ears or into the loose hair.
Why do it this way? Because short natural hair at the front often lays flat and reads shapeless. Cornrowing just the front gives your face a defined frame without committing to a full style.
Think of it as the hair equivalent of wearing a simple gold hoop earring — small, intentional, disproportionately impactful. Morning routine goes from ten minutes of smoothing and shaping to four rows that stay put for a week.
The downside I’d flag: if your front four rows aren’t crisp, the whole look falls flat. Every braid has to be tight, clean, and evenly parted. Precision beats volume here.
10. Half Cornrows With Beads at the Ends
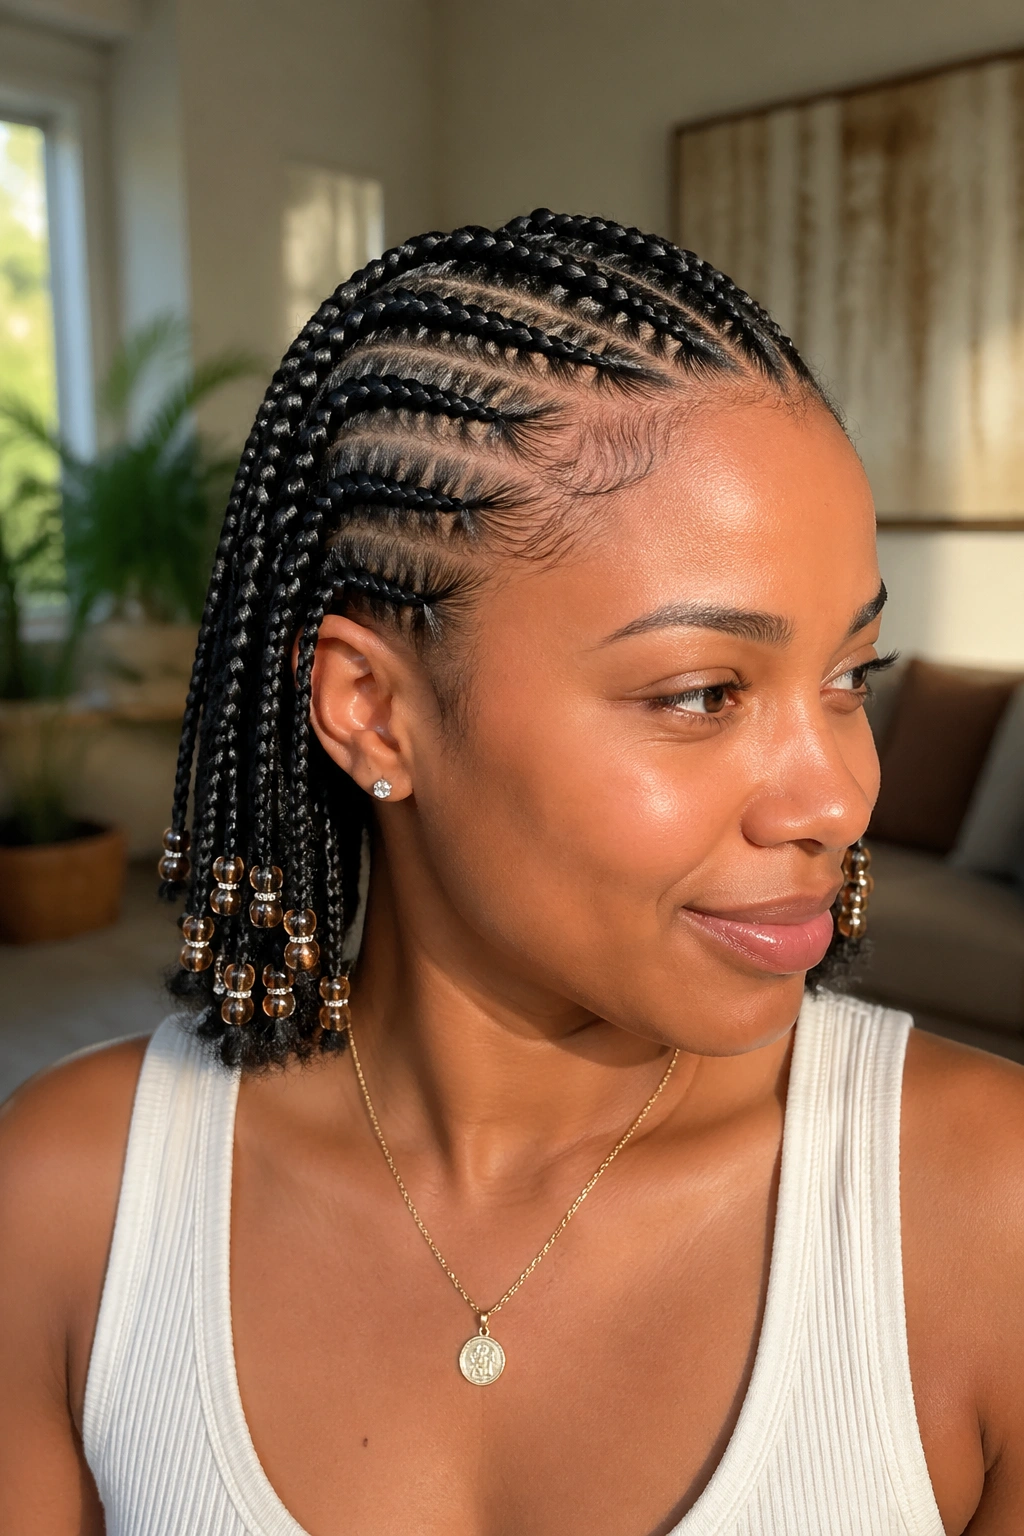
Beaded finishes add sound, movement, and a distinct visual accent. On short hair, beads on half cornrows work because the braid portion is usually the hidden-most part — beads push attention to the ends of the rows, dragging the viewer’s eye toward where they terminate.
Styling Tips
Use wooden beads for an earthy finish or glass beads for sheen. Metal beads can drag and cause breakage, so go sparingly with those.
- Thread 2-3 beads per braid end, not more — short braids can’t support heavy loads
- Secure each bead with a small rubber band looped through and tied
- Distribute beads unevenly across the rows for a less uniform, more styled feel
Watch for: beads knocking against your glasses if you wear them, and the faint sound they make when you turn your head. Not a dealbreaker, but worth noting.
11. Half Cornrows With a Burgundy Tint on the Loose Back
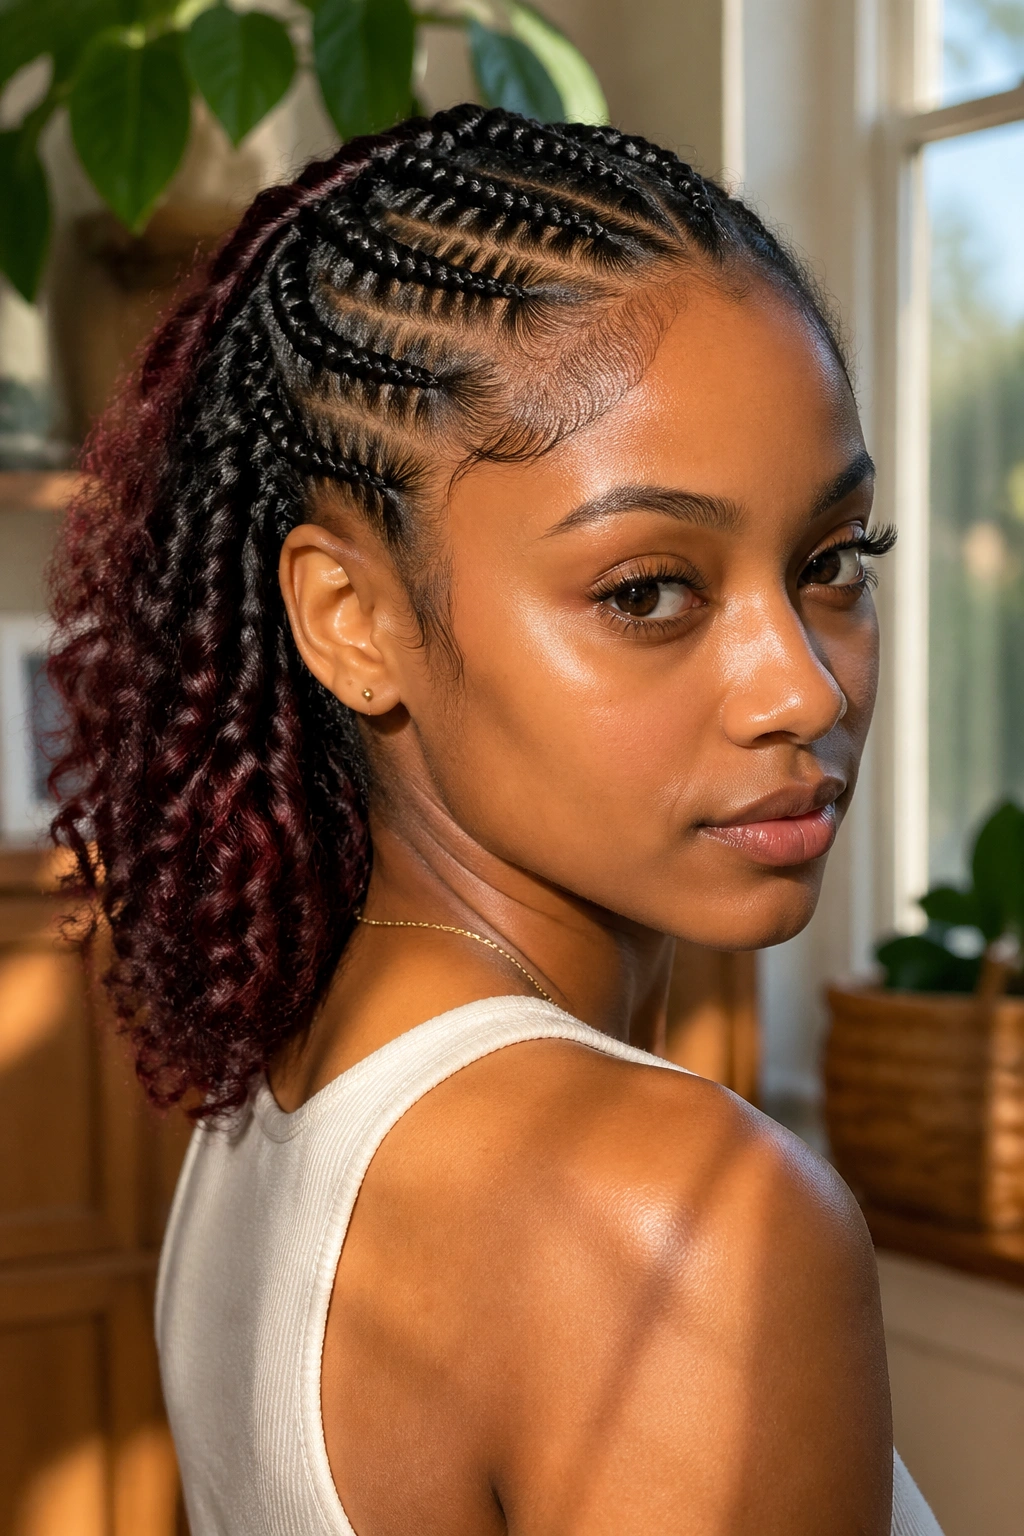
Color adds dimension without changing structure. When the front of the head is cornrowed and the back is left loose, applying a temporary burgundy or deep wine color only to the loose section creates a two-tone effect — natural dark braids on top, rich color contrast below.
The color itself can come from a temporary color wax, a wash-out spray, or a semi-permanent rinse that washes out in a few shampoos. No commitment required.
What’s different about this approach is that you’re using styling rather than technique for visual impact. The braid pattern stays traditional. The punch comes from the loose portion.
Best for: anyone who wants to test color without bleaching their hair. The loose back portion is the only part treated, and because it’s not braided, the color application is straightforward.
Recommendation: always spot-test on a shed strand before committing a whole application. Some textured hair grabs color unevenly, and the loose section is the showcase — uneven results would wreck the look.
12. Deep Side Part With Stacked Half Cornrows
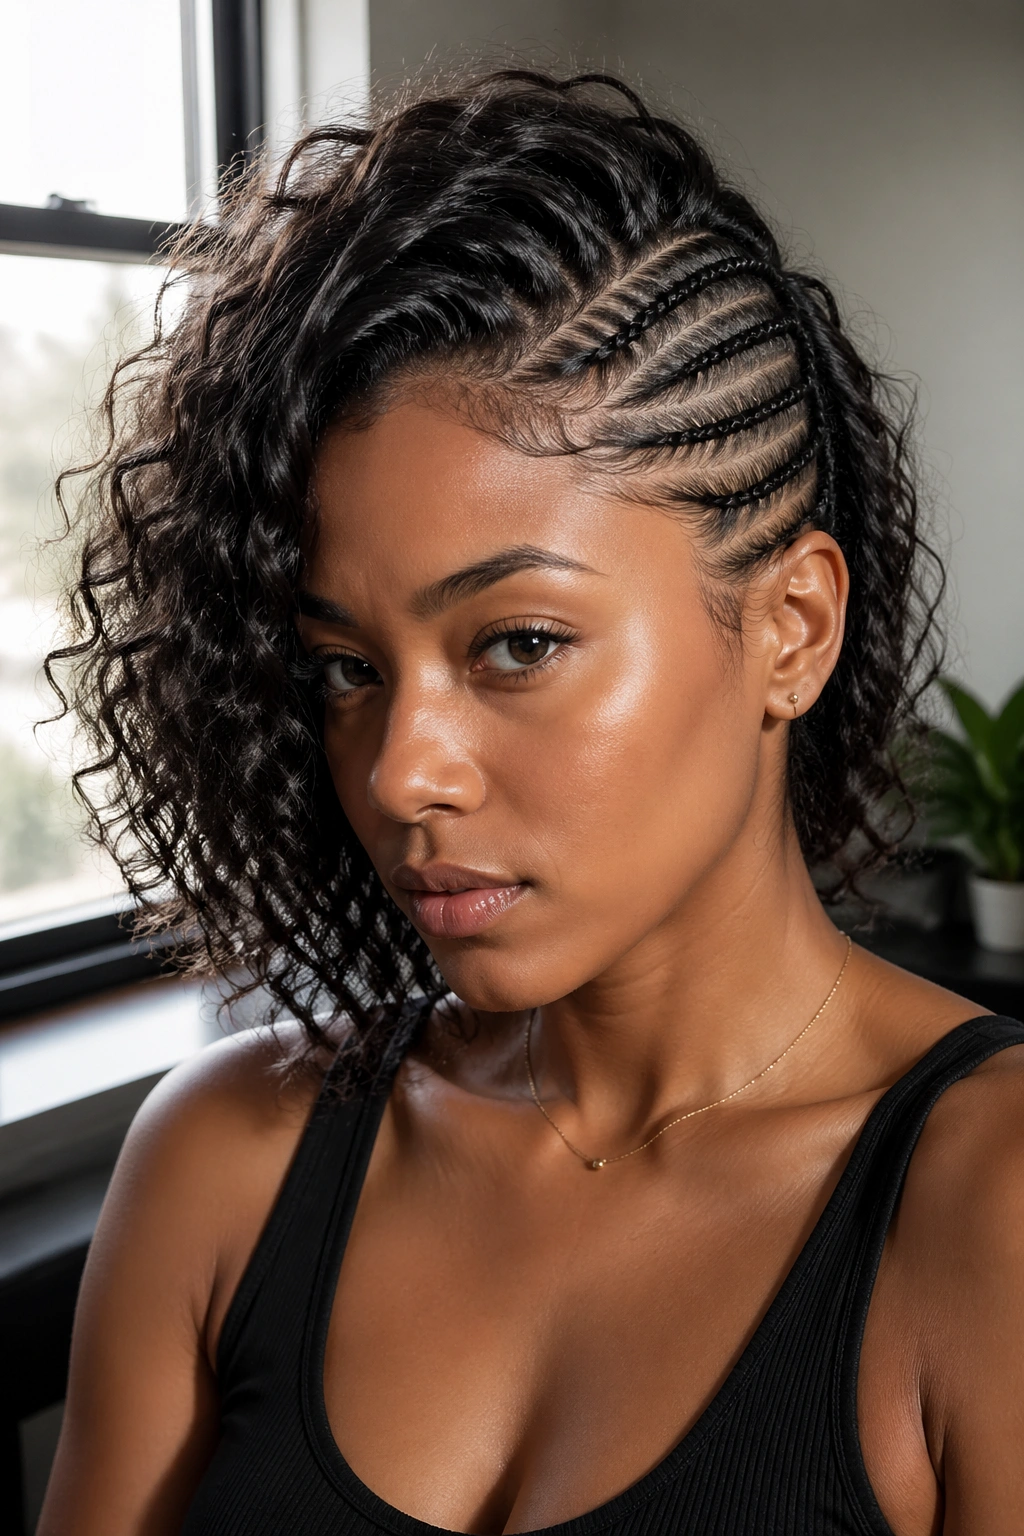
A deep side part flips the whole head’s geometry to one side, and stacking cornrows on the longer side — four to six rows, each tighter than the last — creates a dramatic asymmetrical effect. The shorter side stays loose or slicked flat.
Imagine walking into a room where one side of the head is smooth, structured, and gleaming with edge gel, and the other side is a wild, textured crop. That’s the energy.
The technique question matters here: stacking means each cornrow is positioned slightly overlapping the one below it, like roof shingles. Not literally touching, but close enough that the rows read as a cluster rather than as individual braids. This requires careful planning and tighter partings than a standard parallel set.
One insight from experience: the deeper the side part, the better this style reads. A shallow side part on asymmetrical cornrows looks unfinished. Commit fully or don’t attempt it.
13. Half Cornrows With a Shaved Side
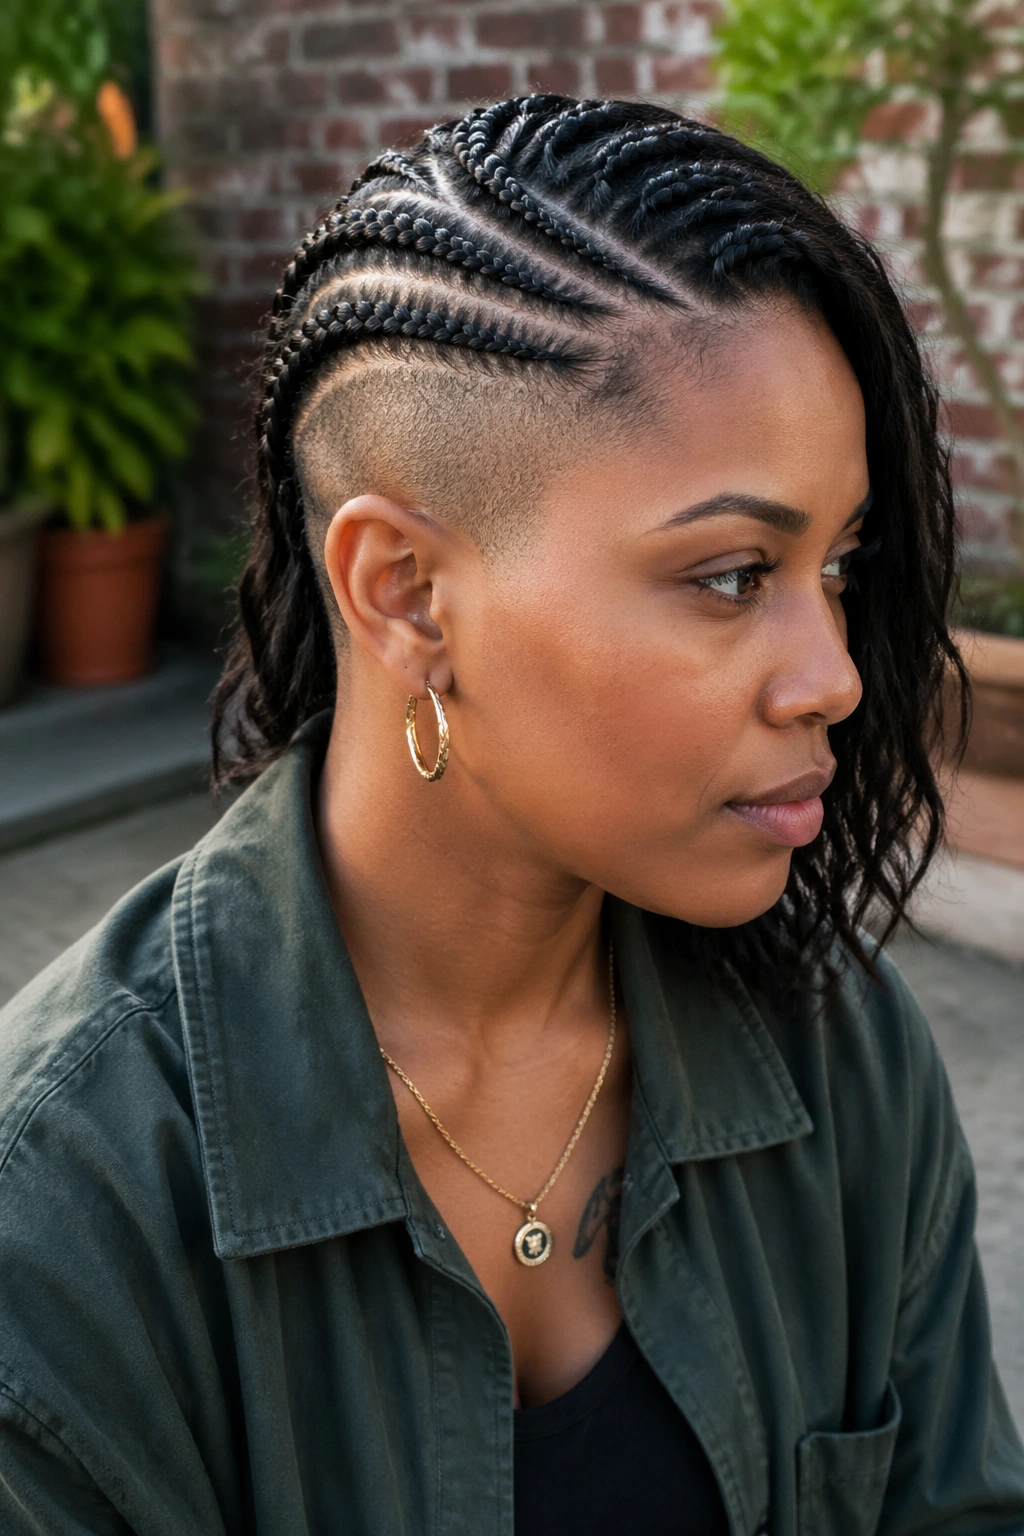
For those with an undercut, shaved temple, or a grown-out fade on one side, half cornrows play beautifully against the exposed scalp. The cornrows go on the longer side of the head, racing from the part line down toward the shaved area.
The contrast is the point. Bare scalp next to braided scalp creates a graphic tension that’s hard to fake with any other style.
The shaved portion acts as negative space. Your eye reads the cornrows more clearly because there’s nothing competing on the opposite side.
Who this is for: someone with existing clipper work who wants to grow it out slowly without losing style along the way. Or someone ready to commit to the look and book the undercut alongside the install.
14. Half Cornrows Meeting at a Decorative Hair Tie
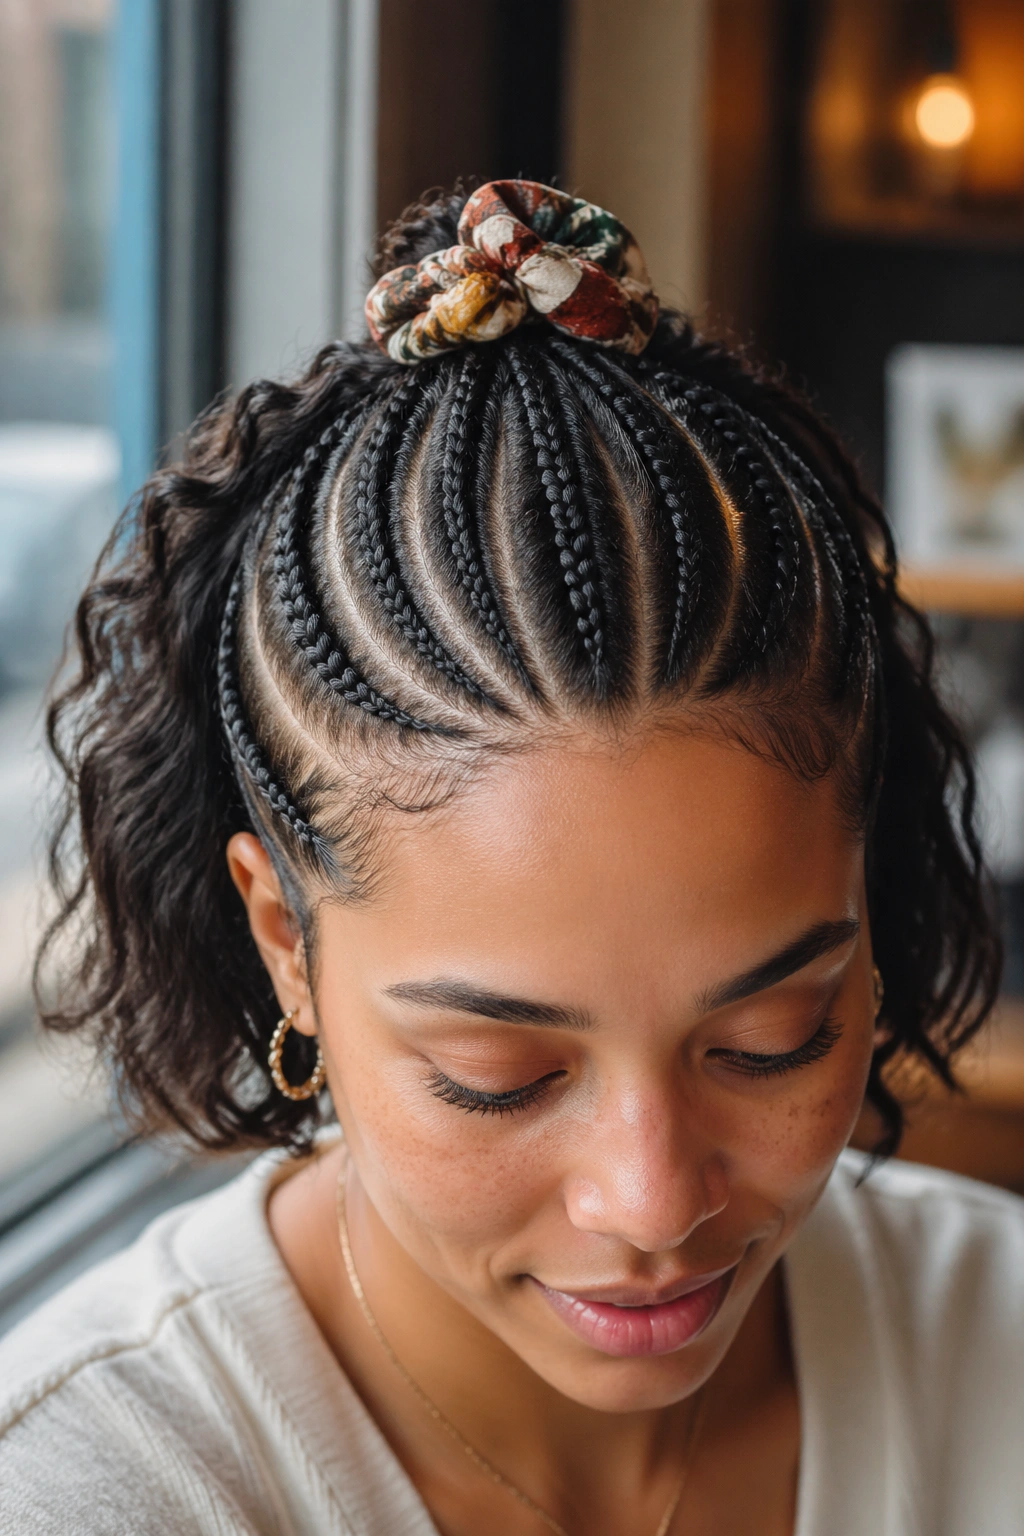
This small detail transforms an otherwise standard half-cornrow set. Instead of ending cornrows in rubber bands tucked under the loose hair, gather all the braid ends at the central crown point and secure them with a fabric hair tie — silk ribbon, velvet band, beaded elastic.
The tie becomes the focal point. All the cornrow lines funnel toward it, which is why it has to be something you actually want people looking at.
What to Watch For
- Heavy metallic ties can pull on the thinnest braids — choose fabric over metal
- Don’t tie too tight at the gather point or you’ll kink the braid bases
- Let the tie sit low at the back of the crown, not high at the top, for a more natural line
The recommendation: match the tie to something else you’re wearing. If you’ve got a particular lipstick color, pick a tie in that shade. It ties the whole look together.
15. Half Cornrows With Feed-In Extensions for Illusion Length
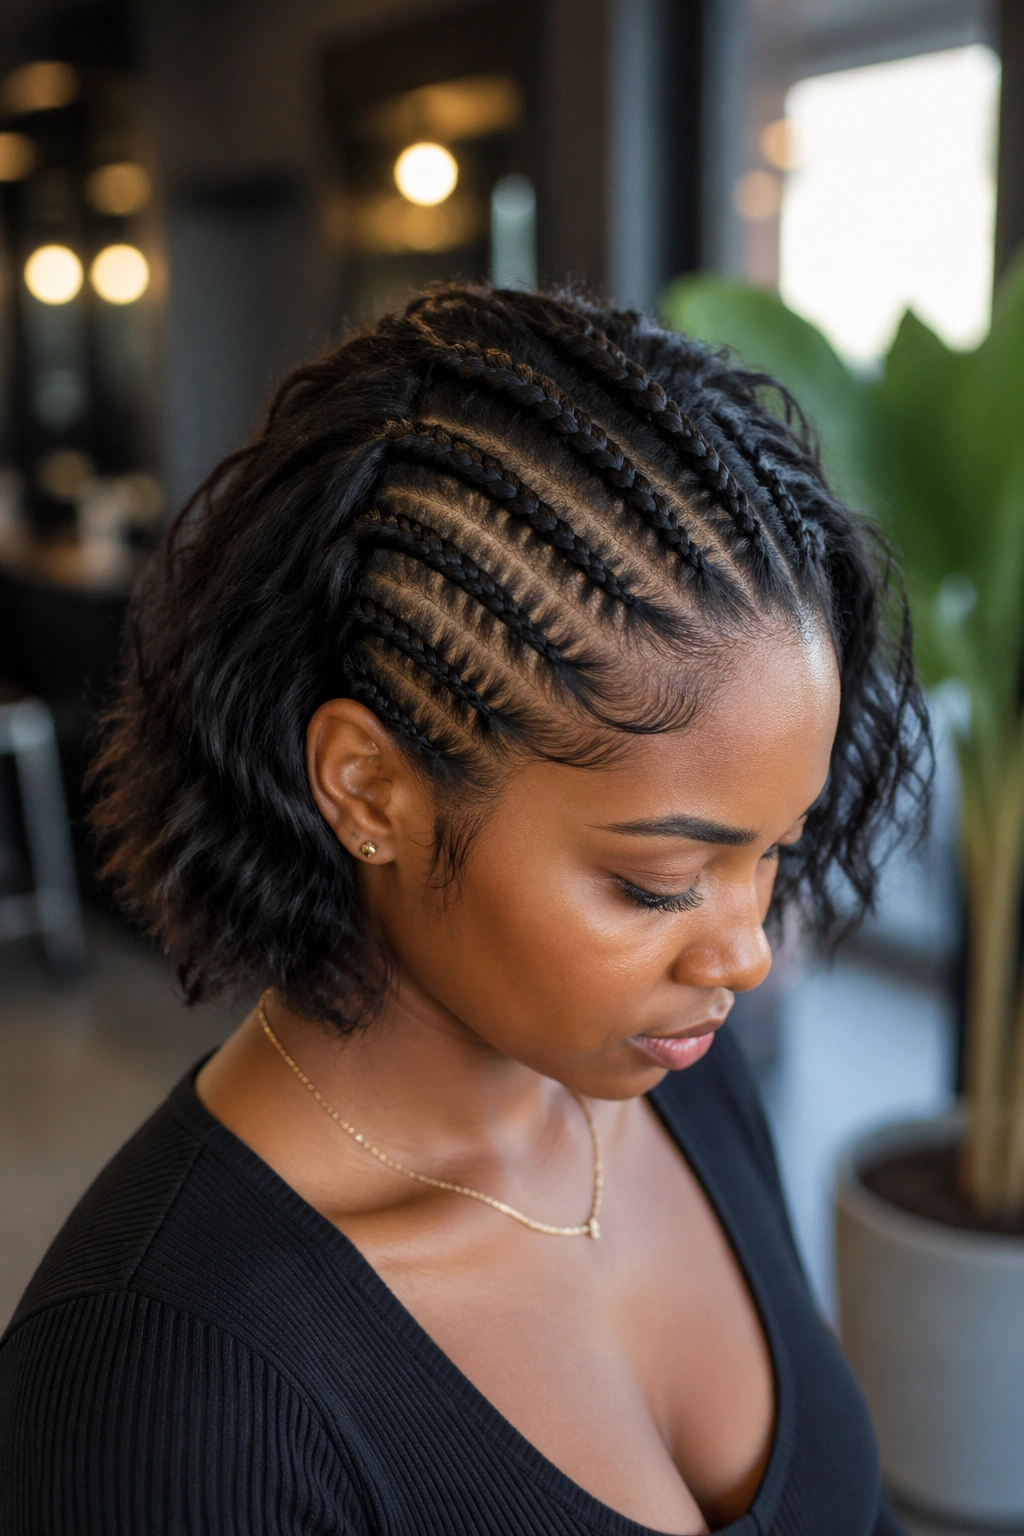
Feed-in extensions gradually blend added kanekalon hair into your natural strands as you braid. On short hair, feed-in half cornrows create the illusion of much longer braids because the kanekalon adds inches of visible length the hair itself doesn’t have.
This was the style that convinced me half cornrows could feel as dramatic as any full install.
How it works mechanically: your braider starts each cornrow with just your natural hair, then adds a small piece of extension hair after the first few stitches. They add another piece a few stitches later, and another after that — gradually “feeding in” length until the braid extends well beyond your actual hair.
- Start with pre-stretched kanekalon in a color matched to your natural shade
- Use small pieces (not huge wads) for smooth feeding
- Expect the installation to take 60-90 minutes longer than a non-extension version
The back can still be left natural, and the contrast between long braided front and short natural back is actually part of the appeal.
16. Side-Part Half Cornrows With a Pin-Curled Back
Pin curls on the loose back portion add a retro texture that plays beautifully against sleek front cornrows. You cornrow four or five rows from the side part toward the opposite ear, then set the remaining short hair in tight pin curls that dry into defined ringlets.
Unlike twist-outs, pin curls give a tighter, springier curl that sits close to the head. That compactness works on short hair because you don’t need length to get the shape — just moisture, setting lotion, and a couple of hours under a bonnet dryer.
What to look for: use setting lotion with firm hold, not a loose mousse. Short pin curls collapse quickly without adequate grip.
Who this is for: anyone going to a dressy event and wanting the hair to look considered. This reads formal without being stuffy.
17. Half Cornrows Into a Protective Bun
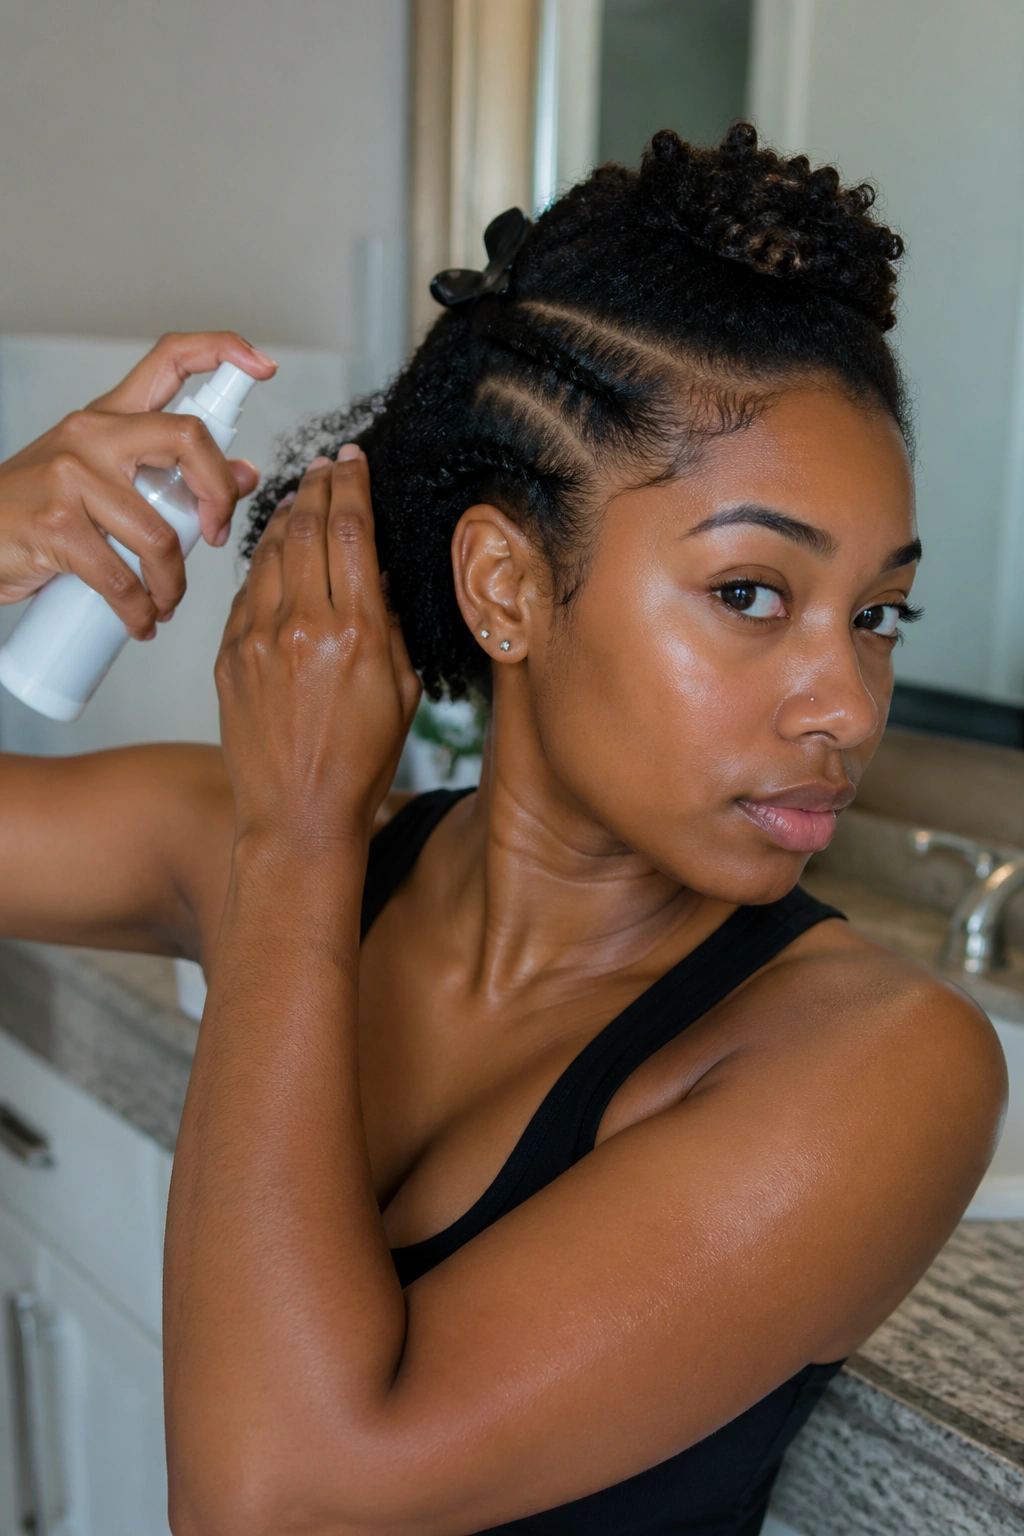
Collecting all the cornrow ends into a low protective bun at the nape works particularly well when you’re trying to extend wear time. The loose hair gets woven into the bun structure so nothing hangs free to frizz or catch.
The difference between this and a standard cornrow gather: the bun incorporates both the braid ends and the loose back hair. Everything gets tucked, wrapped, and pinned in a single low knot.
The payoff is longevity — this configuration easily holds a crisp look for 10-14 days because there’s no loose hair exposed to friction.
I wouldn’t call it the most flattering for every face shape. Low buns on short hair can feel heavy at the back of the head. But for wear time? It’s unmatched.
The mechanics: after braiding, brush the loose back hair with a boar-bristle brush, smooth with gel, and combine it with the cornrow bundle at the nape. Wrap the whole thing with bobby pins around a small donut form if you want extra volume.
18. Half Cornrows With a Bantu Knot Back
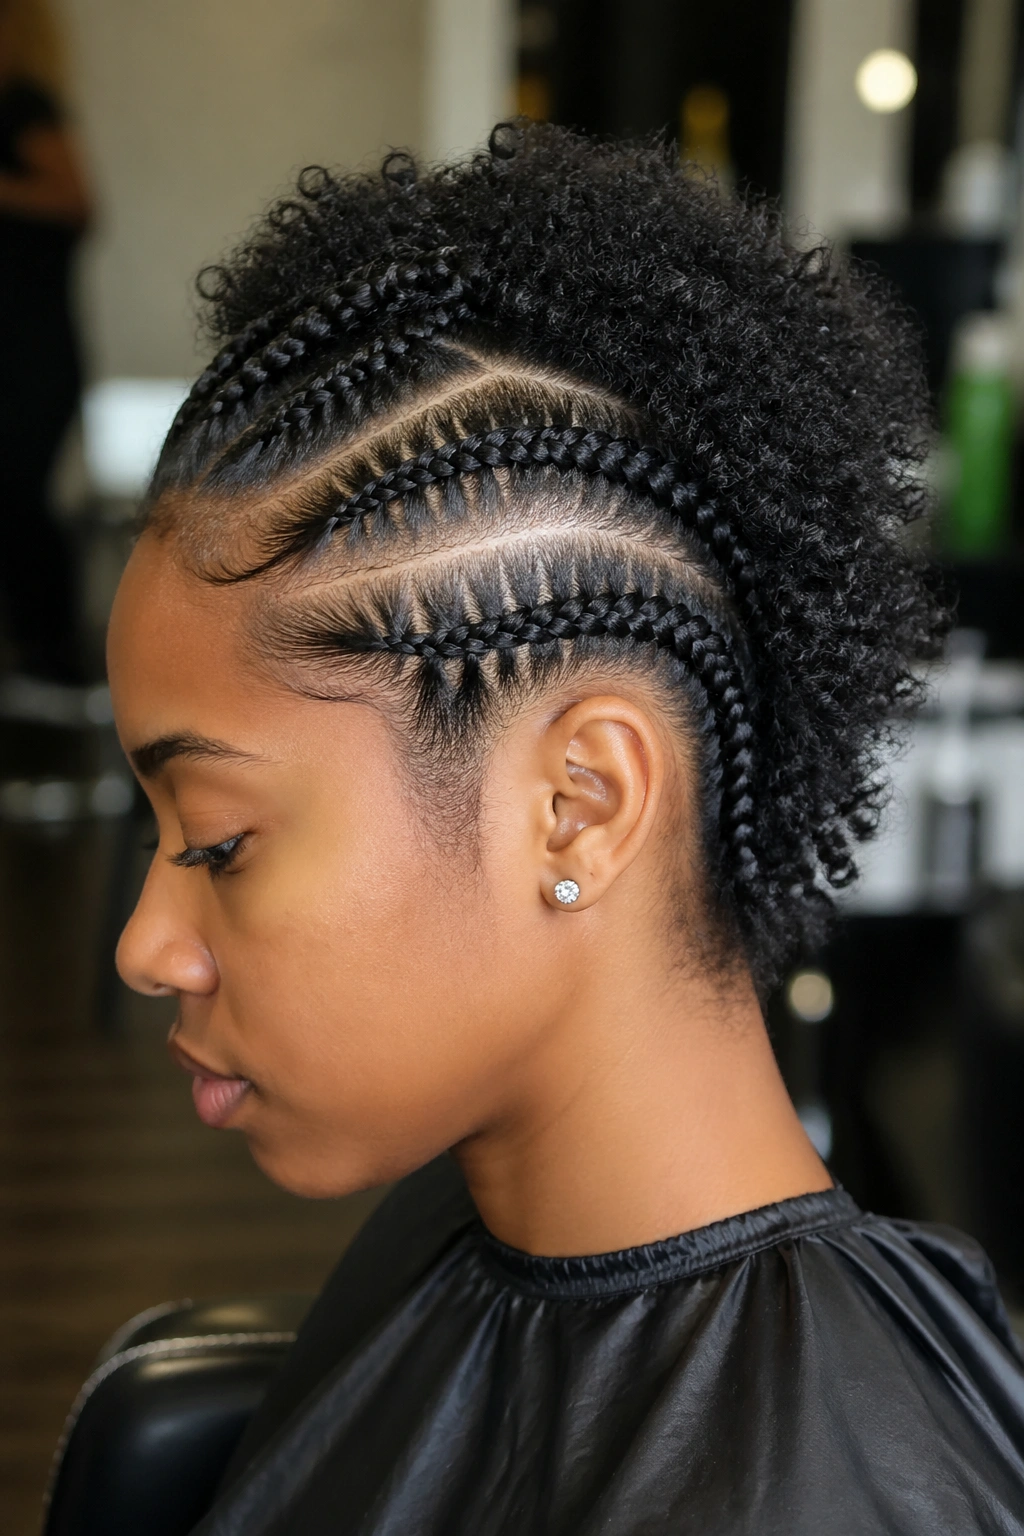
Here’s a combination I’d put in the underrated category: cornrows over the top of the head, and bantu knots covering the back. The bantu knots can stay up as a set, or you can take them down for a second-day wave pattern.
Two techniques coexisting on the same head. Different looks, different energies, held together by the decision to split the head into graphic zones.
The short-hair angle matters because bantu knots on hair that’s only two or three inches long actually look more interesting than on longer hair — the knots are compact, the geometry is tighter, and the scalp pattern reads cleanly between them.
Who this is for: anyone with 4A-4C texture who wants a high-texture finish. This style actively celebrates coily patterns rather than trying to smooth them away.
Recommendation: part the bantu knot grid in squares rather than diamonds. Squares read more crisply on shorter hair and make the knot placement look intentional.
19. Half Cornrows With Gold Thread Wrapping
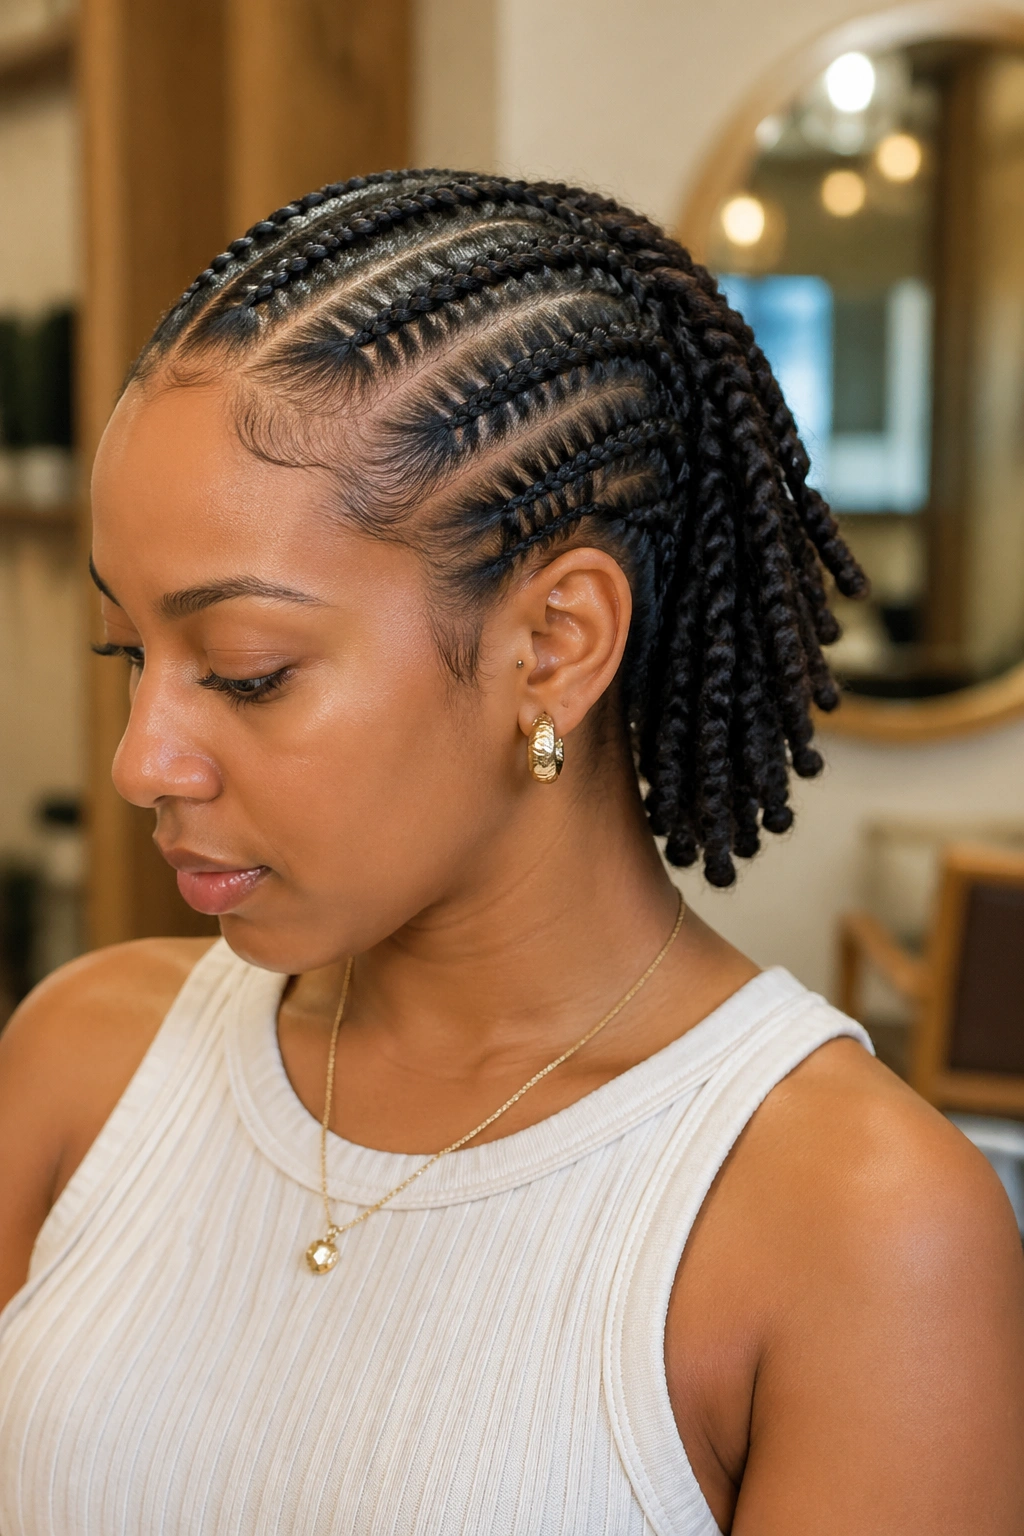
Wrapping sections of the cornrows with metallic gold thread adds a jewelry-like finish without adding weight. Each cornrow can be partially wrapped — from the scalp base down about an inch or two — with thread that glints when you move.
The thread essentially becomes a hair accessory woven into the structure of the style. It’s more permanent than beads, more flexible than cuffs.
- Start wrapping at the scalp, not at the end of the braid
- Secure the thread end with a tiny knot tucked behind the braid
- Use fine embroidery thread rather than heavy craft cord
The thread wrap is one of those techniques that sounds fussy but applies surprisingly fast. A full set of wrapped cornrow bases can be done in 15-20 minutes after the main braiding is complete.
20. Half Cornrows With Negative Space Between Sections
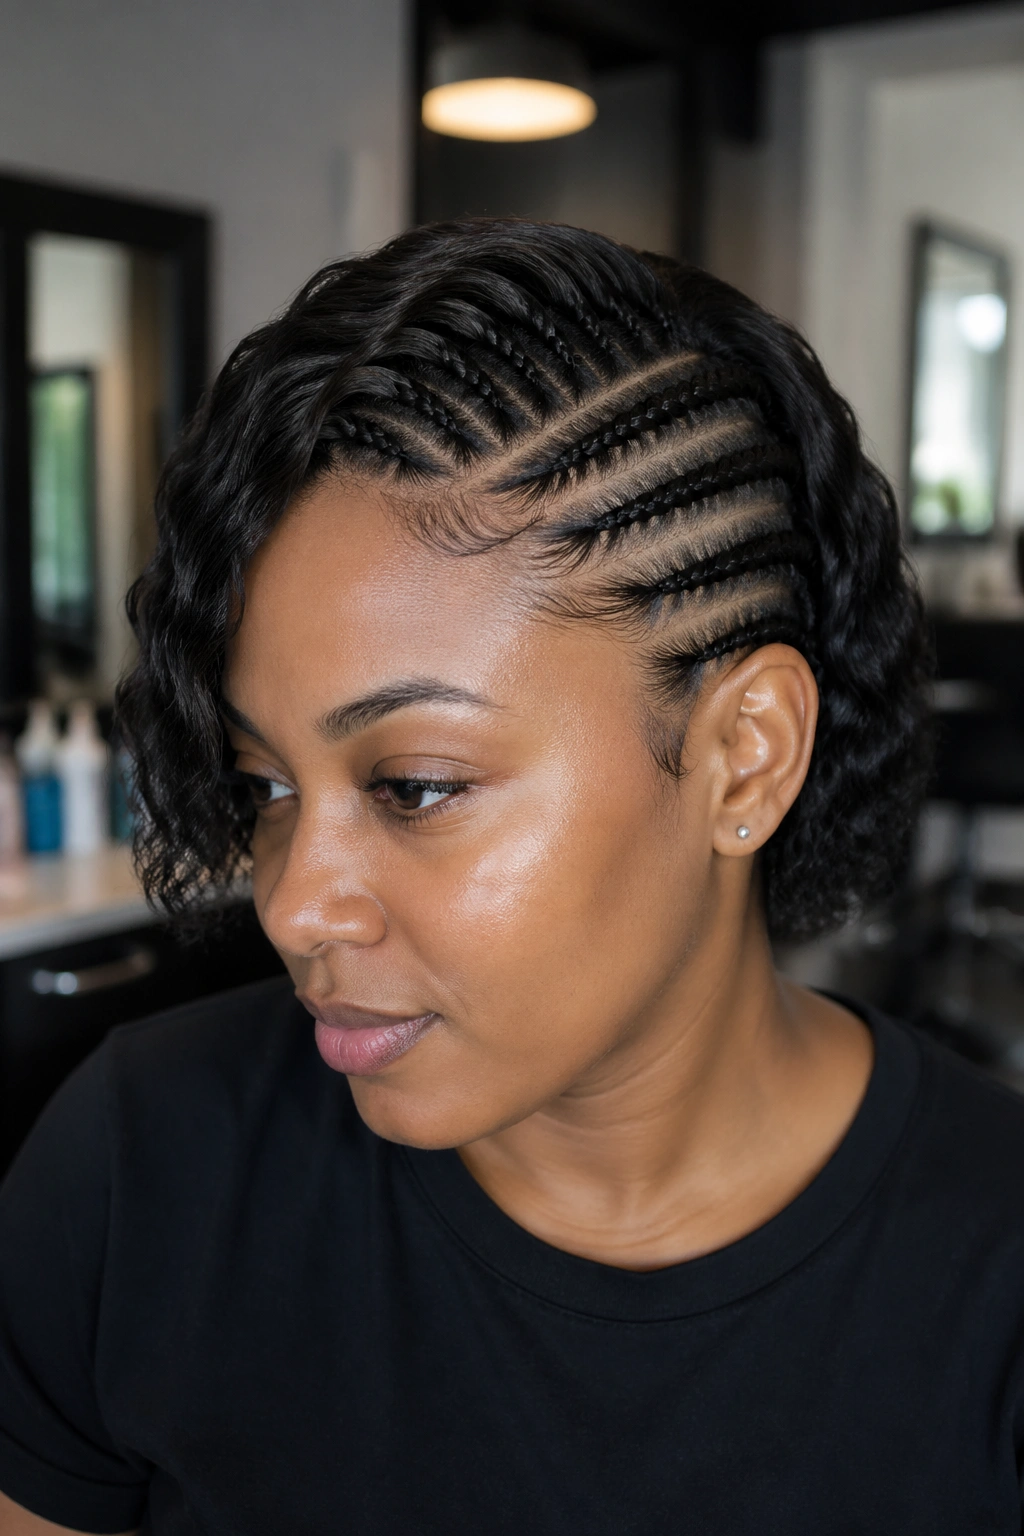
This look is about what you don’t braid as much as what you do. Two or three cornrows sit together, then a gap of unbraided (but sleek and laid) scalp, then another cluster of two or three cornrows, and another gap.
The negative space is the design element. Unlike traditional close-packed cornrows, this style builds rhythm through absence. Your braider has to plan the gap widths carefully so the unbraided strips read as deliberate rather than missed.
What Makes It Different
Most cornrow styles aim to cover as much scalp as possible. This one does the opposite — maybe 50% of the braided area stays uncovered.
The smooth scalp strips need extra attention. Edge gel applied along those strips and smoothed flat gives them a glossy contrast against the braided rows. If the smooth strips are rough or fuzzy, the style falls apart visually.
Best for: anyone who wants an architectural, fashion-forward finish. This pattern shows up on runways and editorial shoots because it reads as intentional design rather than casual protective style.
21. Half Cornrows Paired With a Pressed Straight Back
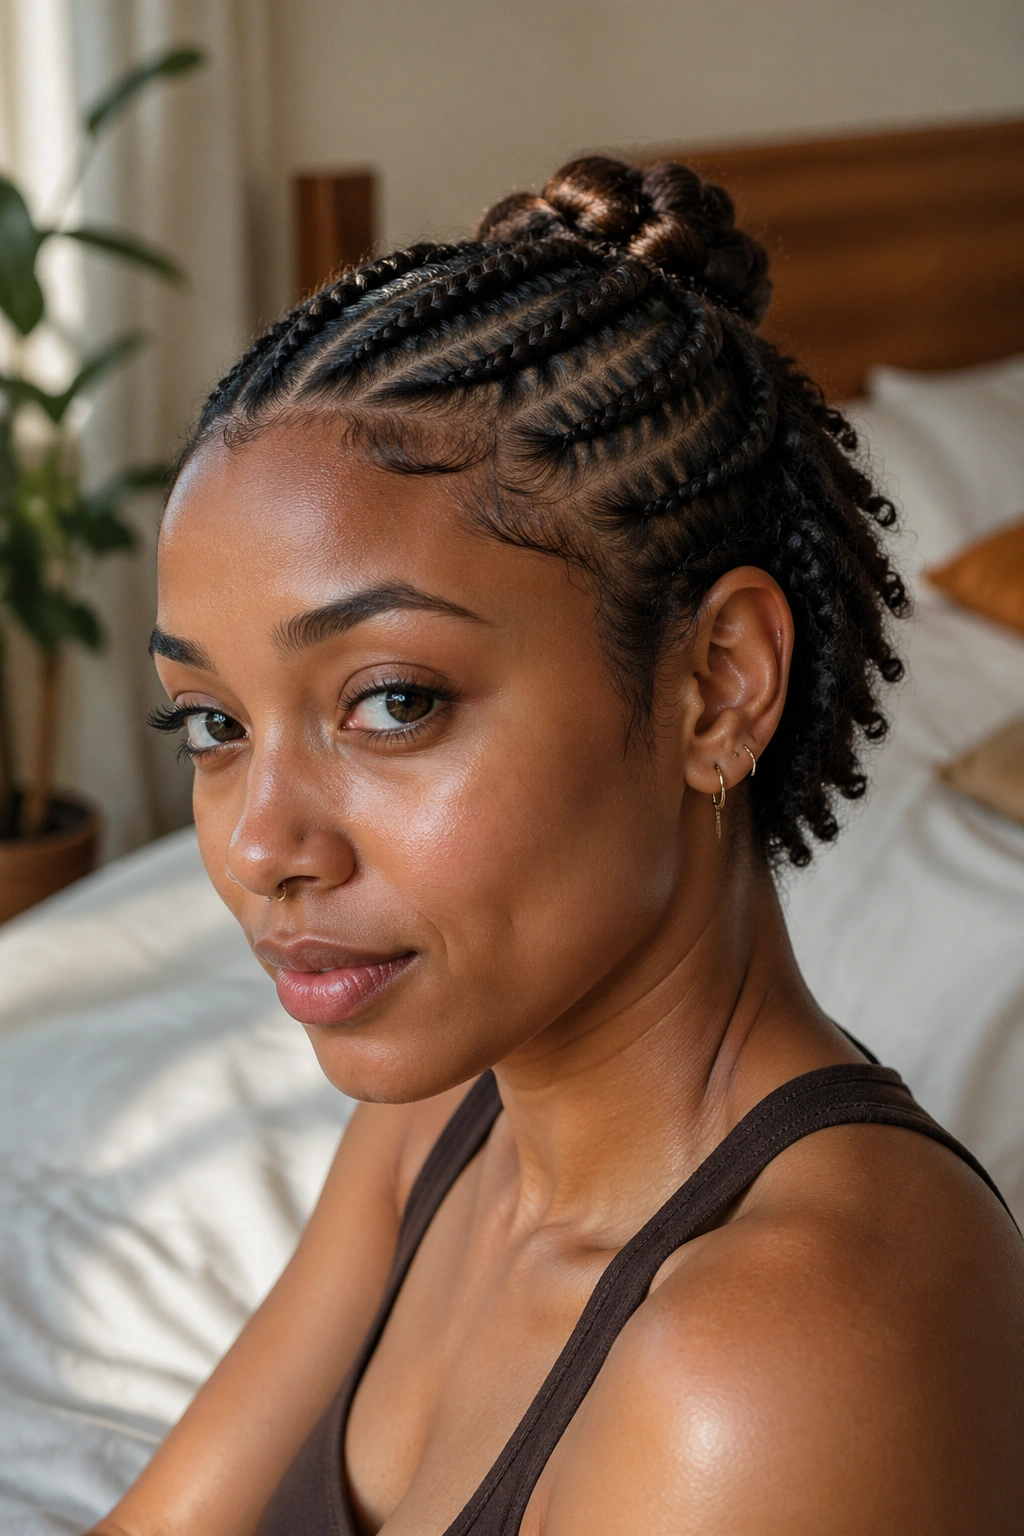
Not every half-cornrow style keeps the loose portion in its natural texture. Pressing the back section straight with a flat iron creates a dramatic textural contrast — rough coily cornrows up top, sleek flat bone-straight hair below.
The two textures coexisting on one head is the draw. It’s a look that says you know how your hair behaves in both states.
What’s different here is the prep. Heat on the pressed section has to happen before the cornrowing, because working around cornrows with a flat iron risks melting braid kanekalon if you’ve used extensions. Press first, cornrow after.
Use a heat protectant on the back section every time, even if you don’t typically press often. Short hair that gets pressed repeatedly without protection breaks at the ends fast.
Who should consider this: someone with healthy hair who occasionally enjoys a blown-out or pressed finish but wants to combine it with a braided element.
22. Chunky Half Cornrows With a Shaped Natural Top
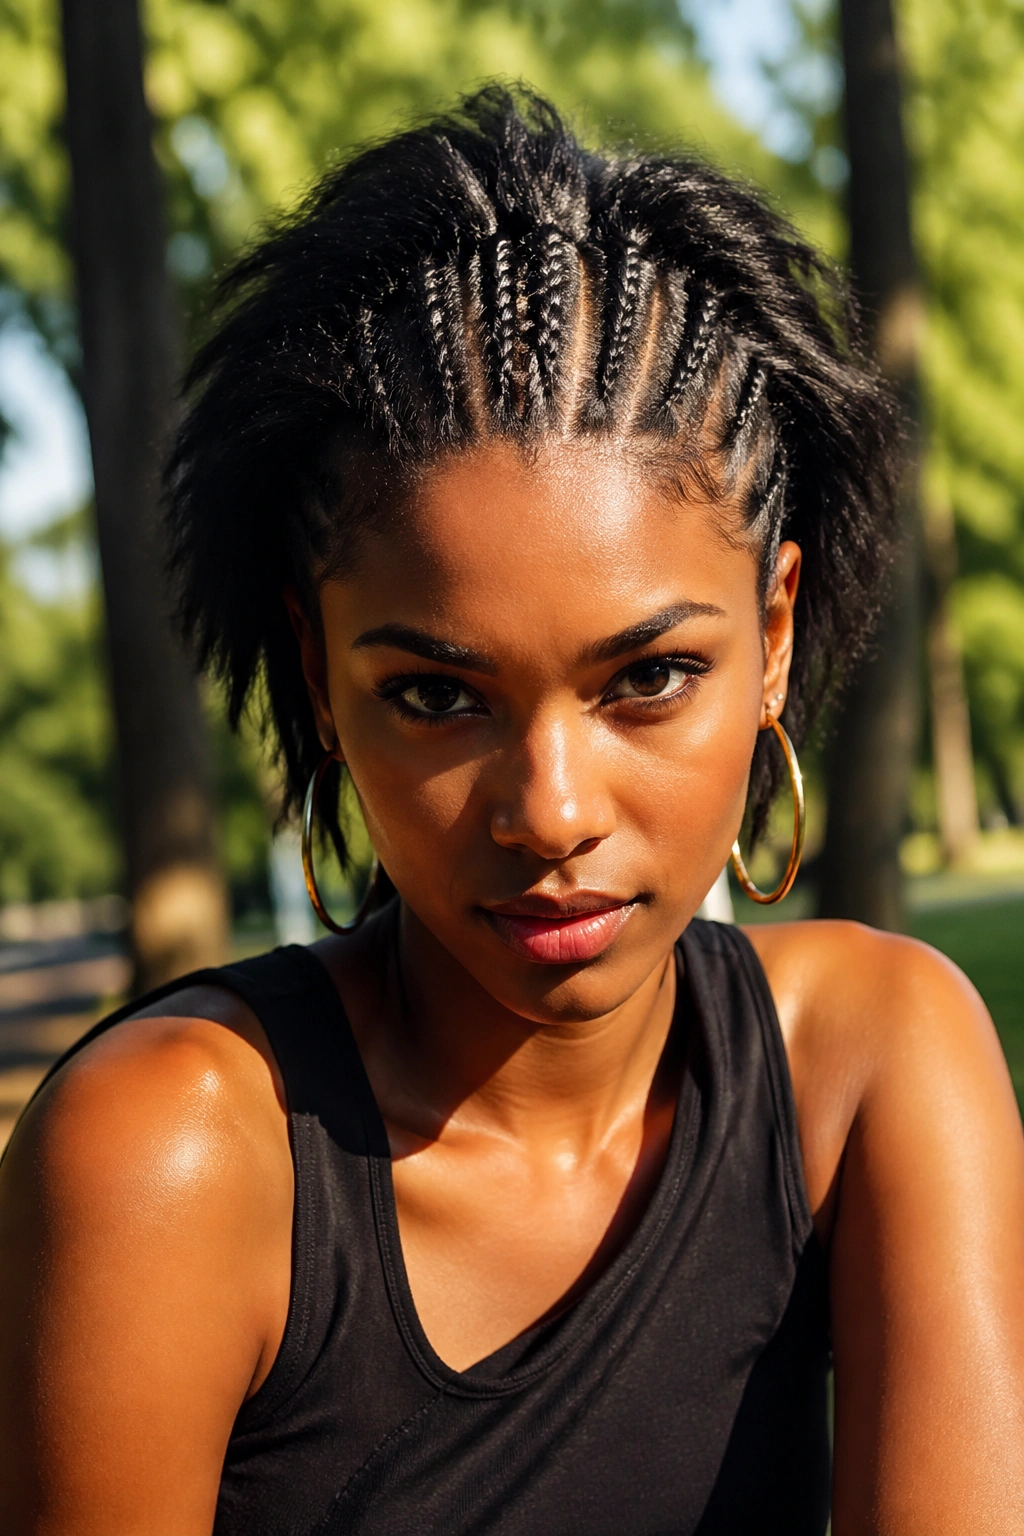
This last one flips the assumption. Most half-cornrow looks put the braids on top and the loose portion at the back or bottom. This version reverses it: chunky cornrows run across the back and sides, and the top stays natural, shaped into a defined afro or curly top.
Four to six thick cornrows handle the back half of the head. The top is whatever texture your natural hair gives you — shaped with a pick, spritzed with water to refresh curls, or molded into a specific silhouette.
The mechanical advantage is that the cornrows do the work of containing the hair that’s hardest to style casually (the back), while leaving the most visible portion (the top) free to be as soft or textured as you want.
Who this is for: people with dense 4B or 4C coils on top whose natural pattern is the best part of their hair. You’re not hiding your texture — you’re framing it with structure.
The closing thought on this one: it’s the most low-maintenance of all 22 looks on this list. Wake up, pick out the top, spritz with water, go.
Sleep Protection for Half Cornrows
Sleeping uncovered shaves days off your install time. A satin or silk scarf, bonnet, or pillowcase is mandatory for extending how long these styles stay crisp.
Bonnets trap the cornrowed portion without touching the loose hair beneath, but a good silk pillowcase offers friction protection across the whole head if you move around in your sleep. I prefer the pillowcase because it doesn’t slip off at 3 a.m.
The product side matters too. Before bed, I spritz a light water-and-glycerin mix on my cornrowed sections to keep the strands pliable. Dry hair inside a dry braid at night is how split ends multiply.
If your edges are the part you’re most protecting, tie a silk scarf around just the hairline over the bonnet. Double layering at the edges reduces frizz by maybe half.
Daily Refresh Without Ruining the Pattern
Day three is when most half-cornrow sets start to look lived-in. That’s not automatically a problem — some lived-in texture gives the style dimension. But uncontrolled fuzz is different from earned softness.
- Spritz cornrows lightly with a rosewater or leave-in diluted in a spray bottle
- Use a clean toothbrush with a dab of edge gel to smooth lifting hairs at the parting
- Avoid heavy oils during refresh — they weigh cornrows down and cause lint buildup
The loose portion of a half cornrow style needs its own refresh. Natural back hair gets re-twisted every few days if you’ve been doing twist-outs. Bantu knots can be unraveled, reshaped, and re-knotted. Pressed hair might need a light flat-iron pass on the roots only.
Edges deserve their own moment. A clean edge reset with a firm-hold gel, a small-bristle brush, and a silk scarf tied over the edges for 20 minutes resets the front in minutes.
Knowing When to Take Them Down
Half cornrows hold for anywhere from 5 days (casual wear) to 3 weeks (protective install with extensions). Past week three, matting starts at the scalp base, and taking them down becomes a project.
Signs it’s time:
- New growth pushing the cornrows away from the scalp by more than a quarter inch
- Fuzz overwhelming the geometric pattern beyond what refresh can fix
- Any itching that doesn’t resolve with a scalp oil or dry-scalp treatment
- Hair shedding that sounds different when you run your fingers along the row — that crackling noise means tangled shed hair needs out
When you do take them down, work slowly. Saturate each braid with a conditioner-and-water mix, unravel gently from the end toward the scalp, and detangle with a wide-tooth comb before rinsing. Rushing takedown is the fastest way to lose length.
Common Half Cornrow Mistakes
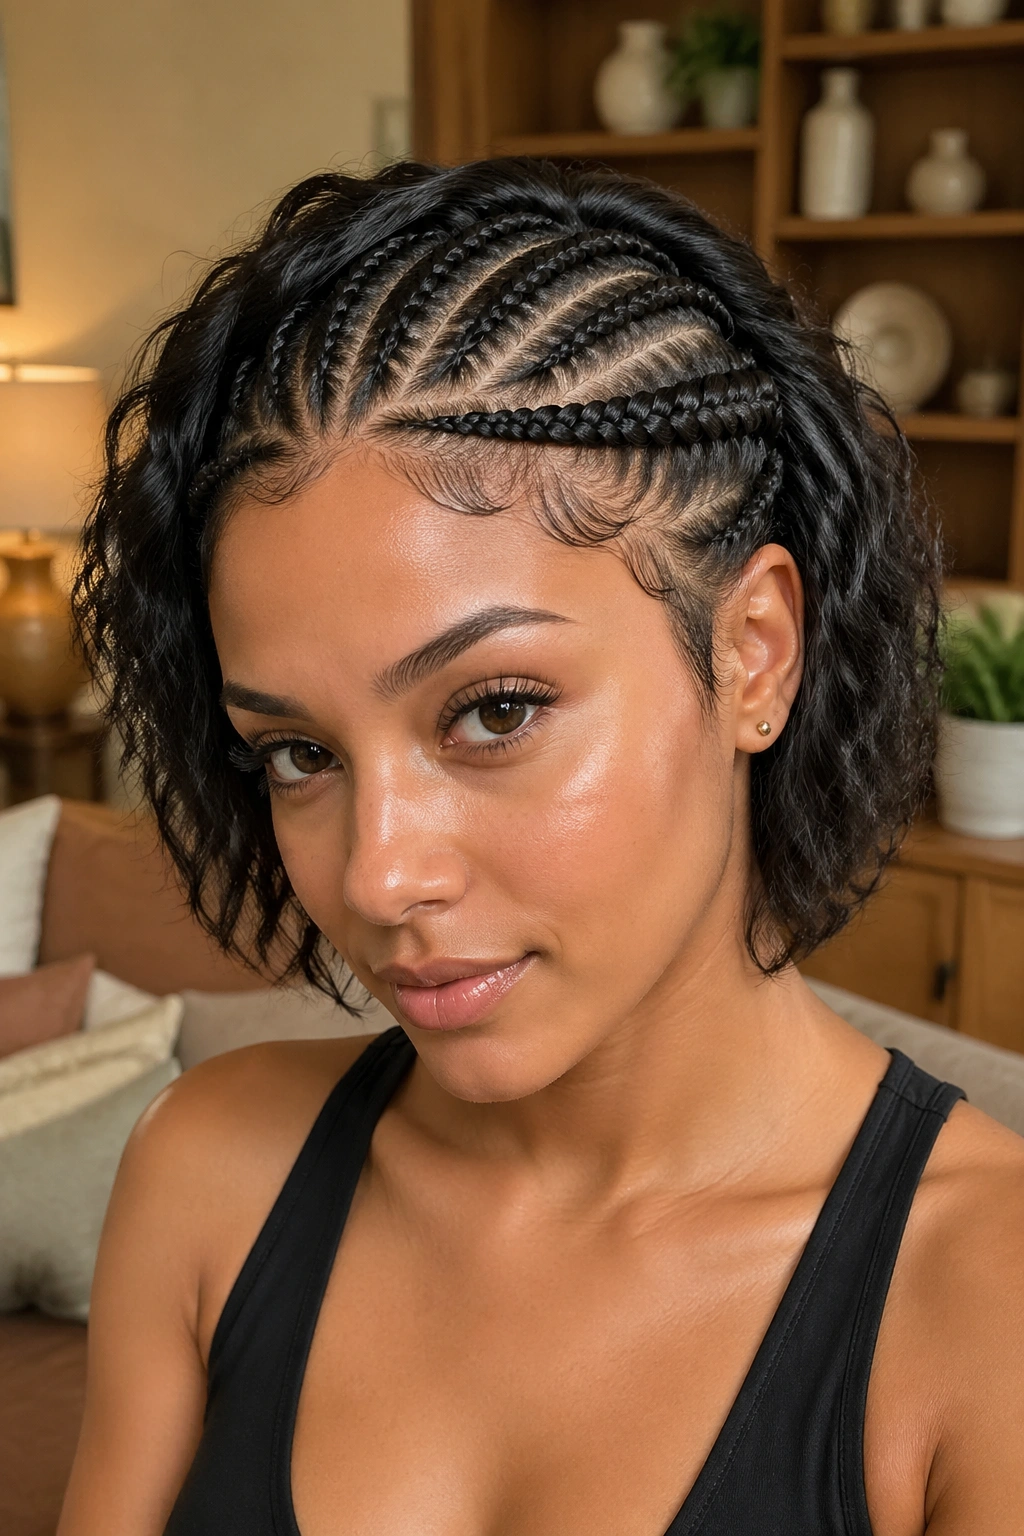
The mistake I see most? Braiding too tight at the hairline. Short hair has less to grip, and braiders sometimes compensate with more tension. That creates the bumpy pimple-like reaction along the edges that signals traction damage.
If your edges feel stretched, tingly, or sore during the install, speak up. You can almost always ask for looser rows without sacrificing the style’s longevity.
Second mistake: skipping the prep wash. Starting on dirty hair with product buildup means your cornrows slide and loosen from day one.
Third: ignoring the loose portion. A half cornrow style is half cornrow — the other half is just as important. Leaving a messy, unstyled back undoes whatever perfection your braider achieved on top.
And finally: expecting half cornrows on short hair to do what full sets on long hair do. They’re a different style entirely. Style them on their own terms and you’ll get the best from them.
Picking the Right Half Cornrow for Your Hair
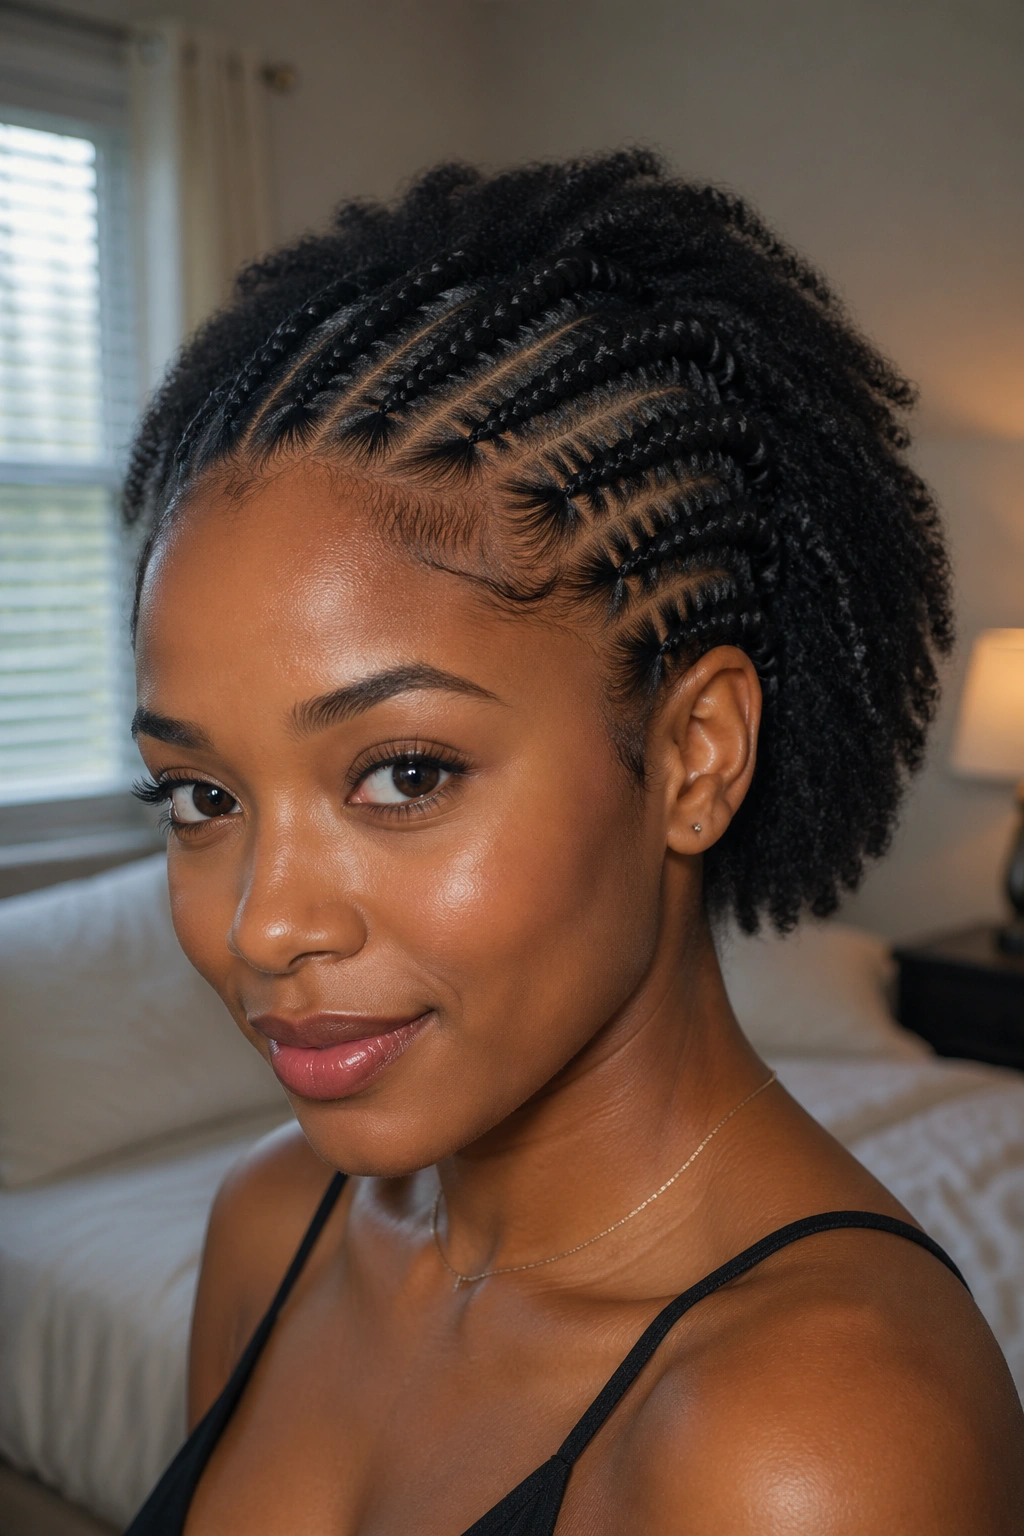
Start with length honesty. If you have less than two inches of hair at the front, micro cornrows and feed-in extensions will serve you better than chunky standard cornrows. If you have three to five inches, almost anything on this list works.
Face shape matters more than people admit. Round faces benefit from patterns that add vertical lines (like the mohawk version). Long faces look balanced under horizontal rows (straight-back or zigzag). Square faces read softer with diagonal patterns that cut the harder angles.
Lifestyle counts. If you swim three times a week, skip any style with loose pressed hair — you’ll fight frizz daily. Pick a bantu knot or twist-out back that handles water better.
Hair density plays in too. Fine-textured, lower-density hair struggles with heavy beading or thread wrapping. Dense 4C hair can carry weight most other textures can’t. Match the style’s visual weight to your hair’s actual weight-bearing capacity.
And trust your braider. If someone who knows your hair well suggests a pattern that wasn’t on your mood board, try it. The best half cornrow style I’ve ever worn came from my braider ignoring my reference photo and doing what she thought would suit my face. Sometimes you have to let the expert expert.
