Criss cross cornrows sit in a different category than standard straight-backs. The braids don’t run in parallel lines — they overlap, weave across each other, or meet at sharp angles to create a woven effect across the scalp. Done well, a criss cross cornrow style reads as deliberate art. Done badly, it looks like someone couldn’t commit to a pattern.
The difference between the two is almost always in the parting. A criss cross braid is only as clean as the lines beneath it. If the parts are wobbly, the whole design collapses. If the parts are sharp, even a simple X-shape across the back of the head looks museum-grade.
These 22 criss cross ideas range from subtle overlapping patterns to full woven grids across the entire scalp. Some are beginner-friendly. Some are two-braider-and-four-hours territory. Each is chosen because the criss cross element does something the regular cornrow pattern can’t — adds geometry, movement, or structure that flat parallel braids just don’t offer.
What Makes a Cornrow Pattern “Criss Cross”
A cornrow is criss cross when two or more braids intersect or travel across each other at some point on the scalp. That’s the simple definition. The intersection can be a single point (two braids meeting at the crown), a repeated pattern (multiple Xs across the head), or a full woven grid that covers every square inch.
The visual effect is what separates criss cross from other complex patterns. Where a swirl cornrow has a circular motion, a criss cross has straight lines that cut across each other. It’s more architectural. More graphic. Less flowy.
Most criss cross styles use thinner braids than straight-back versions. Thin braids give the design precision. Thick braids in a criss cross pattern can look muddled because the braid itself is wider than the gap between intersections.
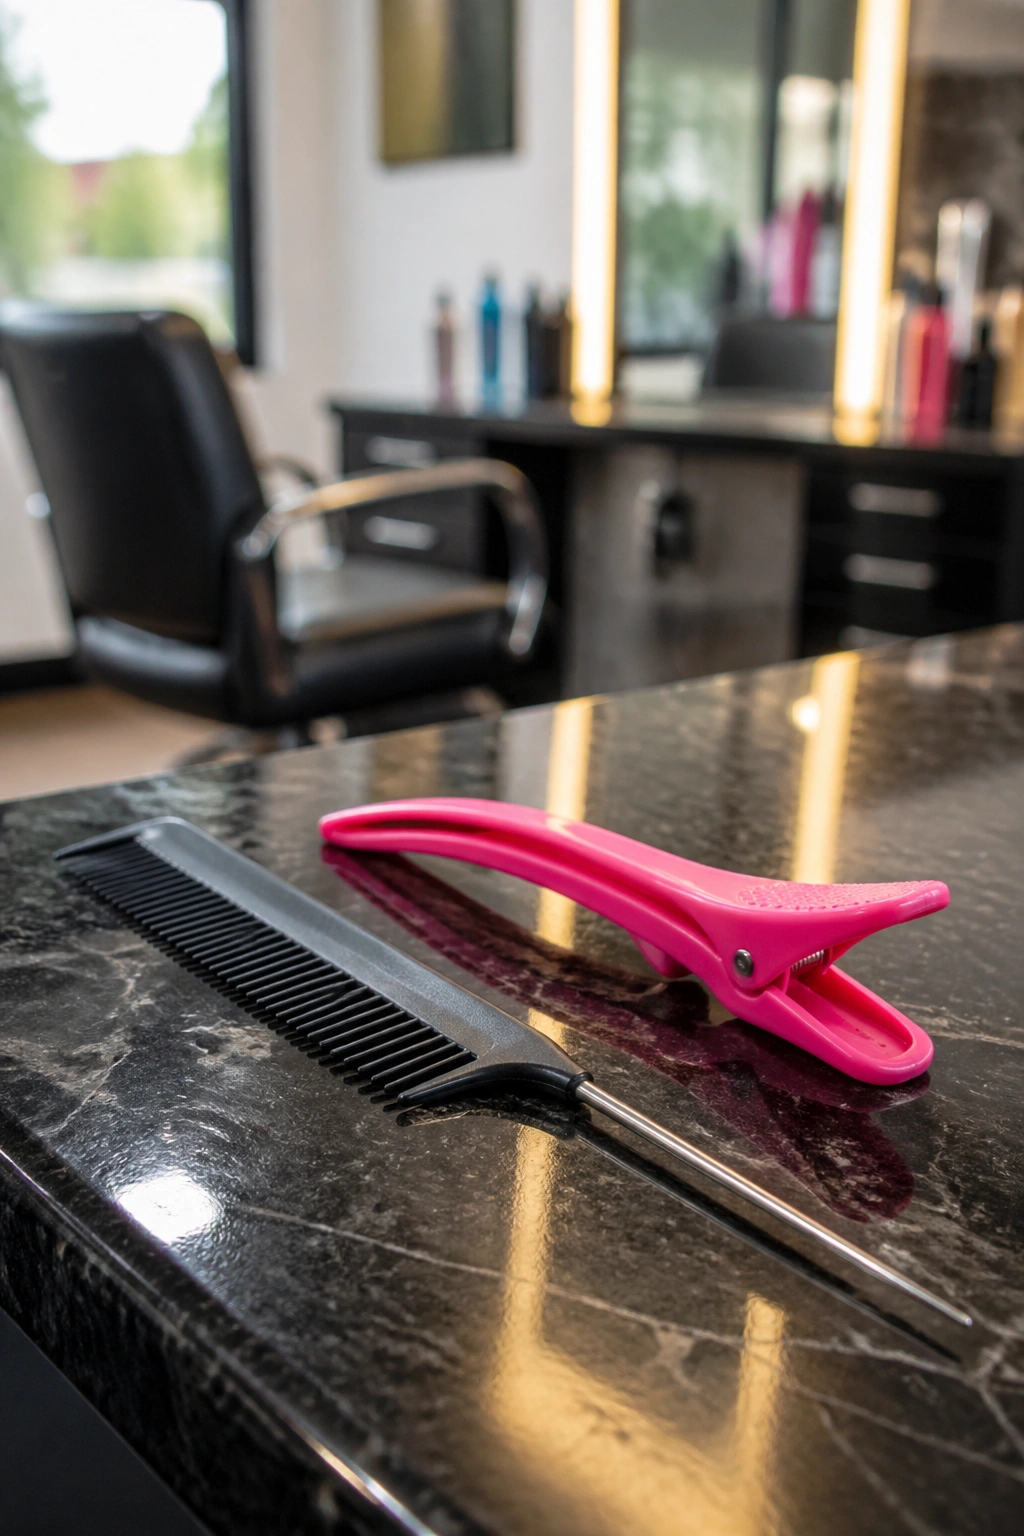
The Tools That Matter for Criss Cross Work
Your rat-tail comb is doing 90 percent of the work before a braid even starts. Look for one with a long, sharp tail and a fine-tooth end. The tail handles the parting. The teeth smooth the section before you grip it.
A bright hair clip or duck-bill clip holds the sections you’re not working on. Braiders working a criss cross pattern often use a different color clip for each “layer” of the design so they don’t lose track of which section goes where.
Good lighting. A proper chair with a headrest or a stool with a mirror. This work is not something you can do with a toddler bouncing in your lap or in dim evening light. Natural daylight or a ring light is worth the setup.
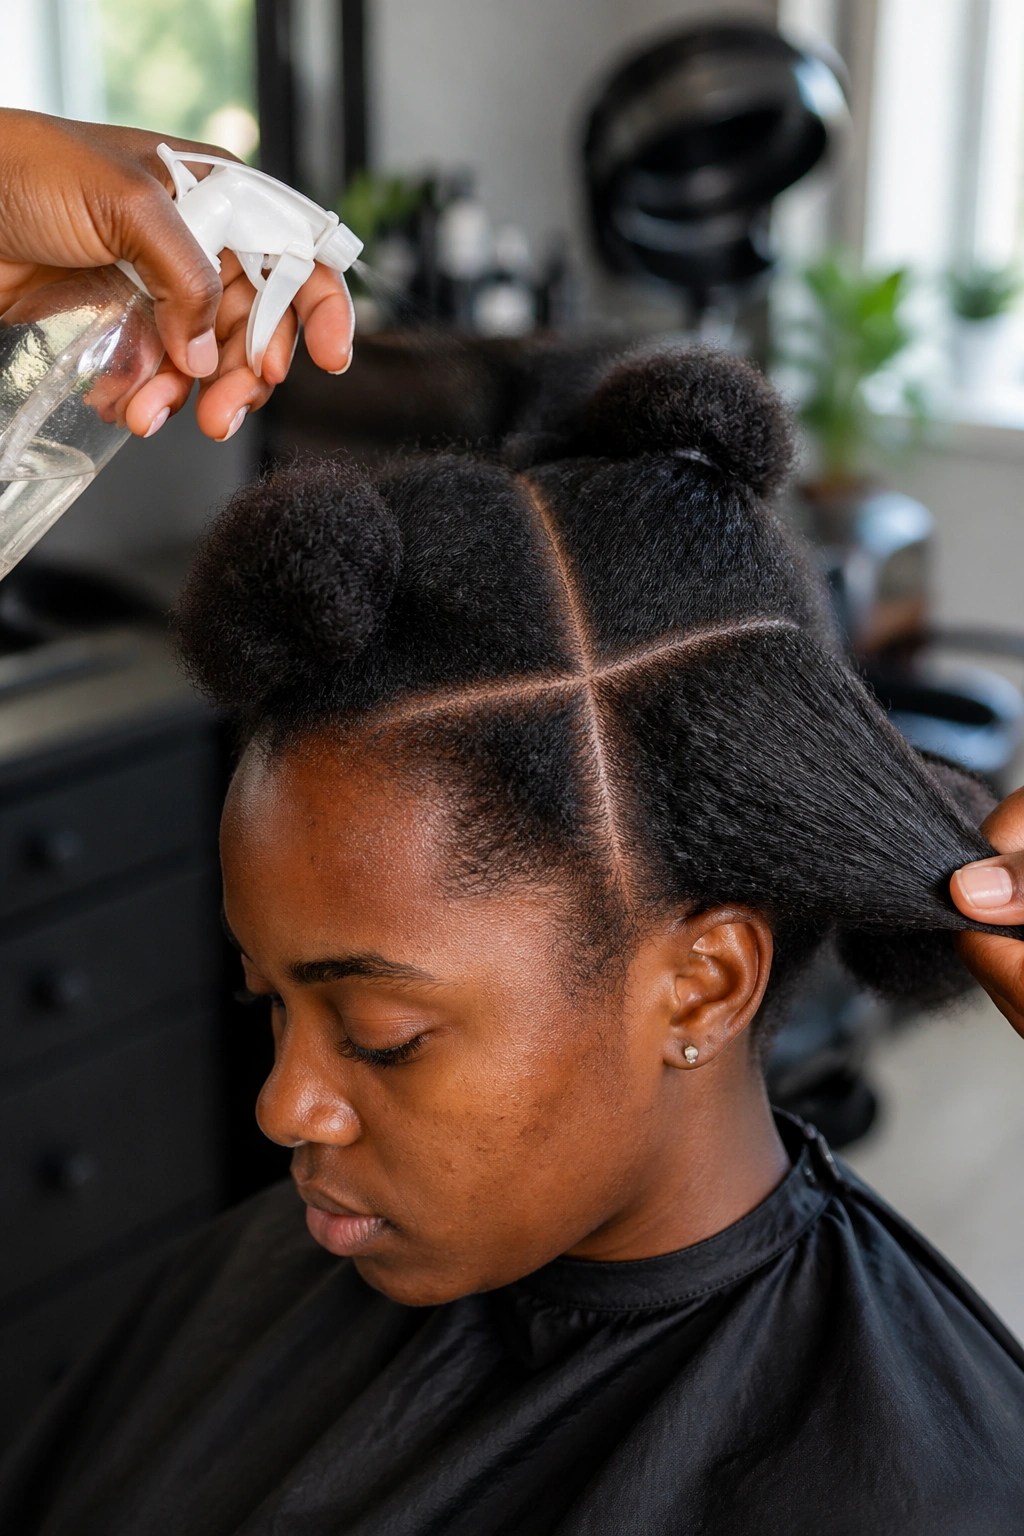
Hair Prep Specific to Criss Cross Styles
Stretched hair is critical. A fully coiled 4B/4C texture doesn’t show a parted line clearly — the shrinkage closes the part within minutes of creating it. Blow out the hair on low heat with a comb attachment, or do a braid-out the night before to stretch the texture.
Moisture without weight is the goal. A light leave-in spray, a thin cream, and a drop of oil. Not heavy product. Heavy product makes the hair slippery, which makes grip fail during tight braiding. Slippery cornrows don’t hold their pattern.
Wash at least 24 hours before. Freshly washed hair is too clean to grip well for tight geometric work. Day-two hair has the right texture for precision parting.
Tip: Section the hair into four quadrants before you even pick up the comb for parting. Front-left, front-right, back-left, back-right. Working within quadrants keeps a complex criss cross design from wandering off-center.
Why Criss Cross Takes Longer
A basic five-braid cornrow takes 45 to 90 minutes depending on hair length and density. A criss cross design doubles that. Some elaborate grid patterns take four to six hours.
The time isn’t in the braiding. It’s in the parting. Every time two braids cross, you have to pause, reset the sections, and re-part the hair below the intersection. That reset adds five to ten minutes per crossing point. A design with eight crossings adds nearly an hour just from those resets.
Plan for it. Block out the full afternoon. Don’t try to squeeze a criss cross style into a 90-minute window.
1. Classic X Across the Back
Two thick cornrows crossing at a single point on the back of the head. One runs from the top-left of the crown down to the bottom-right at the nape. The other runs from top-right to bottom-left. They meet exactly in the middle, creating a clean X.
Simple. Striking. Fast to install — about 75 minutes for most hair lengths.
Why It Works
- Strong graphic shape that reads from a distance
- Only one intersection point to manage
- Works on medium-length hair upward
- Flat enough to sleep on comfortably
The crossing point needs to be precisely centered. Measure from the top of the ear on both sides before you commit to where the X meets. Off-center by even an inch and the X looks tilted in every photo.
Tip: Leave a small section of hair loose at the crown above the X. Tie it into a mini puff or tiny bun. The loose element adds softness to an otherwise rigid graphic shape.
2. Double X With Side Parts
Rather than one X across the whole back, a double X splits the head into two halves and places a smaller X on each side.
Each X uses two shorter cornrows crossing at a point. The left X sits behind the left ear. The right X sits behind the right ear. A central part runs down the middle of the head separating the two designs.
This approach suits shorter hair better than a single large X. A braid doesn’t need to travel the full length of the head, which means hair that’s only shoulder-length can still pull off the pattern cleanly. It also doubles the visual interest without doubling the install time — about 90 minutes total.
The symmetry is what makes it work. Both Xs have to match in size and angle. Use a mirror to check from behind every 20 minutes or so.
3. Woven Grid Across the Crown
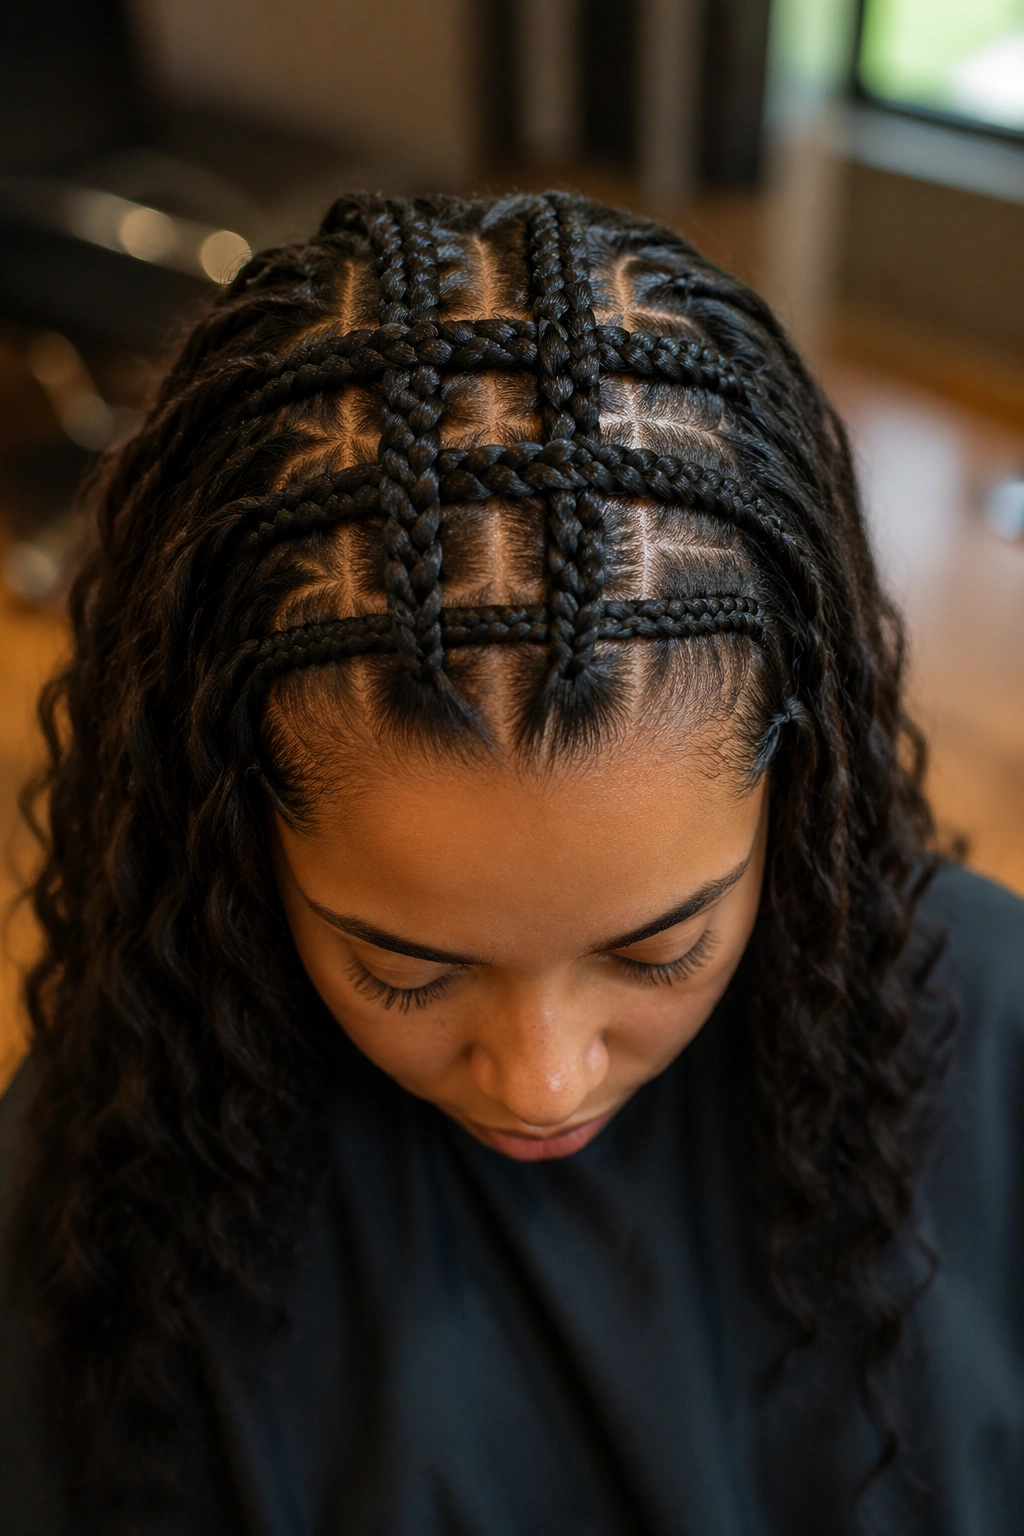
A full woven grid — three horizontal cornrows interlocking with three vertical cornrows — covers the top of the head. The rest of the hair either hangs loose below the grid or feeds into a low ponytail.
The grid itself is roughly four to five inches square. Each intersection is a genuine over-under weave, not just a visual overlap. Braiding a grid means constantly lifting one set of cornrows to pass another set under or over them.
Who This Is For
This isn’t beginner territory. Grid work requires two hands that can hold braids under tension while the other braid is being worked. Most braiders need to practice on a mannequin head before trying this on a client.
Installed well, a woven grid looks like fabric — the kind of effect that stops people in public to ask how it was done. Installed poorly, it looks like a mess of crossing lines with no structure. There’s no middle ground.
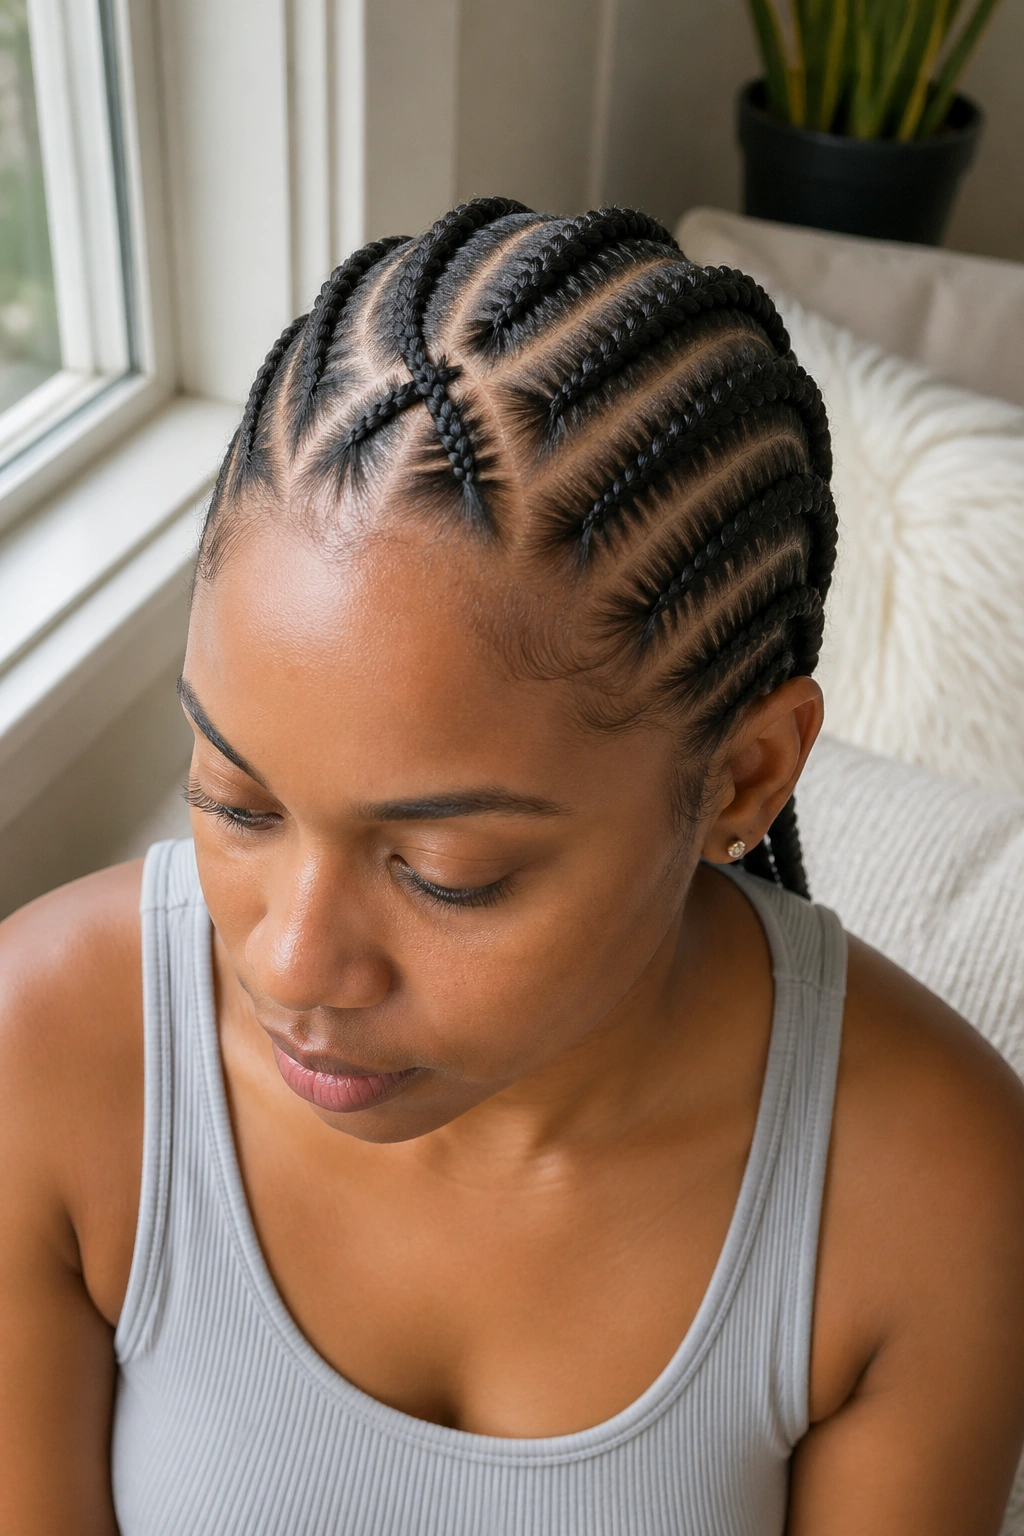
4. Criss Cross Front With Straight Back
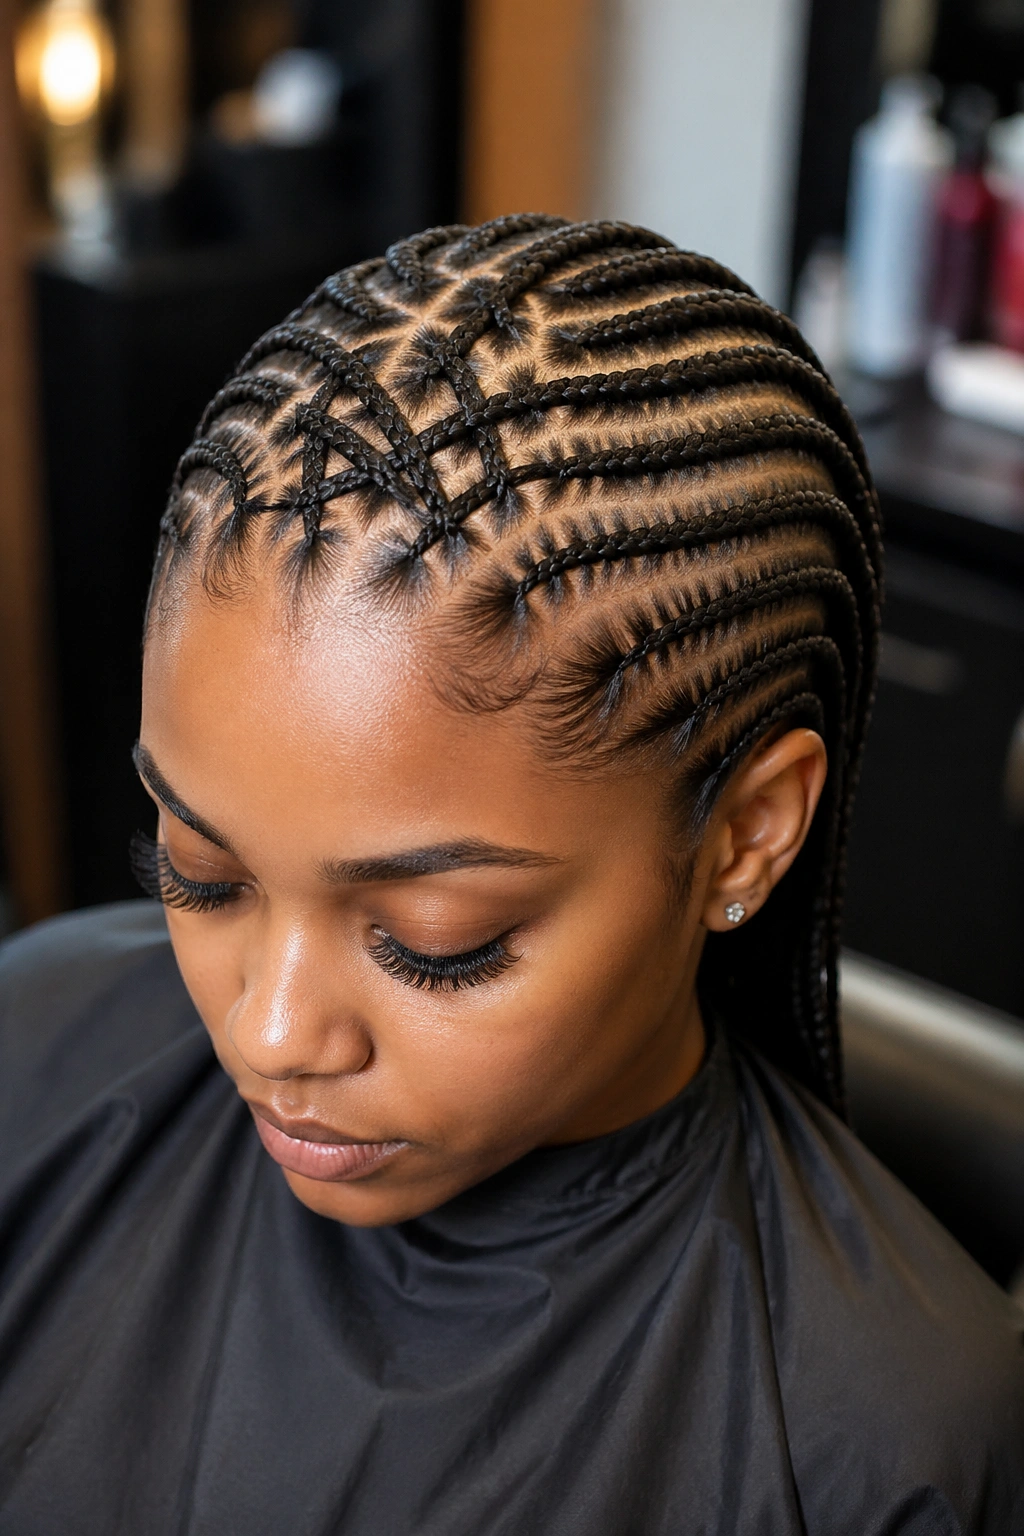
The front third of the head features a criss cross pattern — usually three to four crossings near the hairline. The back two-thirds is simple straight-back cornrows continuing the flow of the criss cross into long, neat braids down the nape.
This hybrid approach is strong for everyday wear because the intricate work is concentrated where people see it most — the front. The back is quicker to install and easier to sleep on.
Transition matters. Where the criss cross ends and the straight-back begins, the sections need to line up so the braids flow smoothly. A jarring transition looks unfinished. Plan the section count in the front to match the back — if you’re running six straight-backs in the rear, the criss cross in front should produce six braids at the handoff point.
5. Lightning Bolt Criss Cross
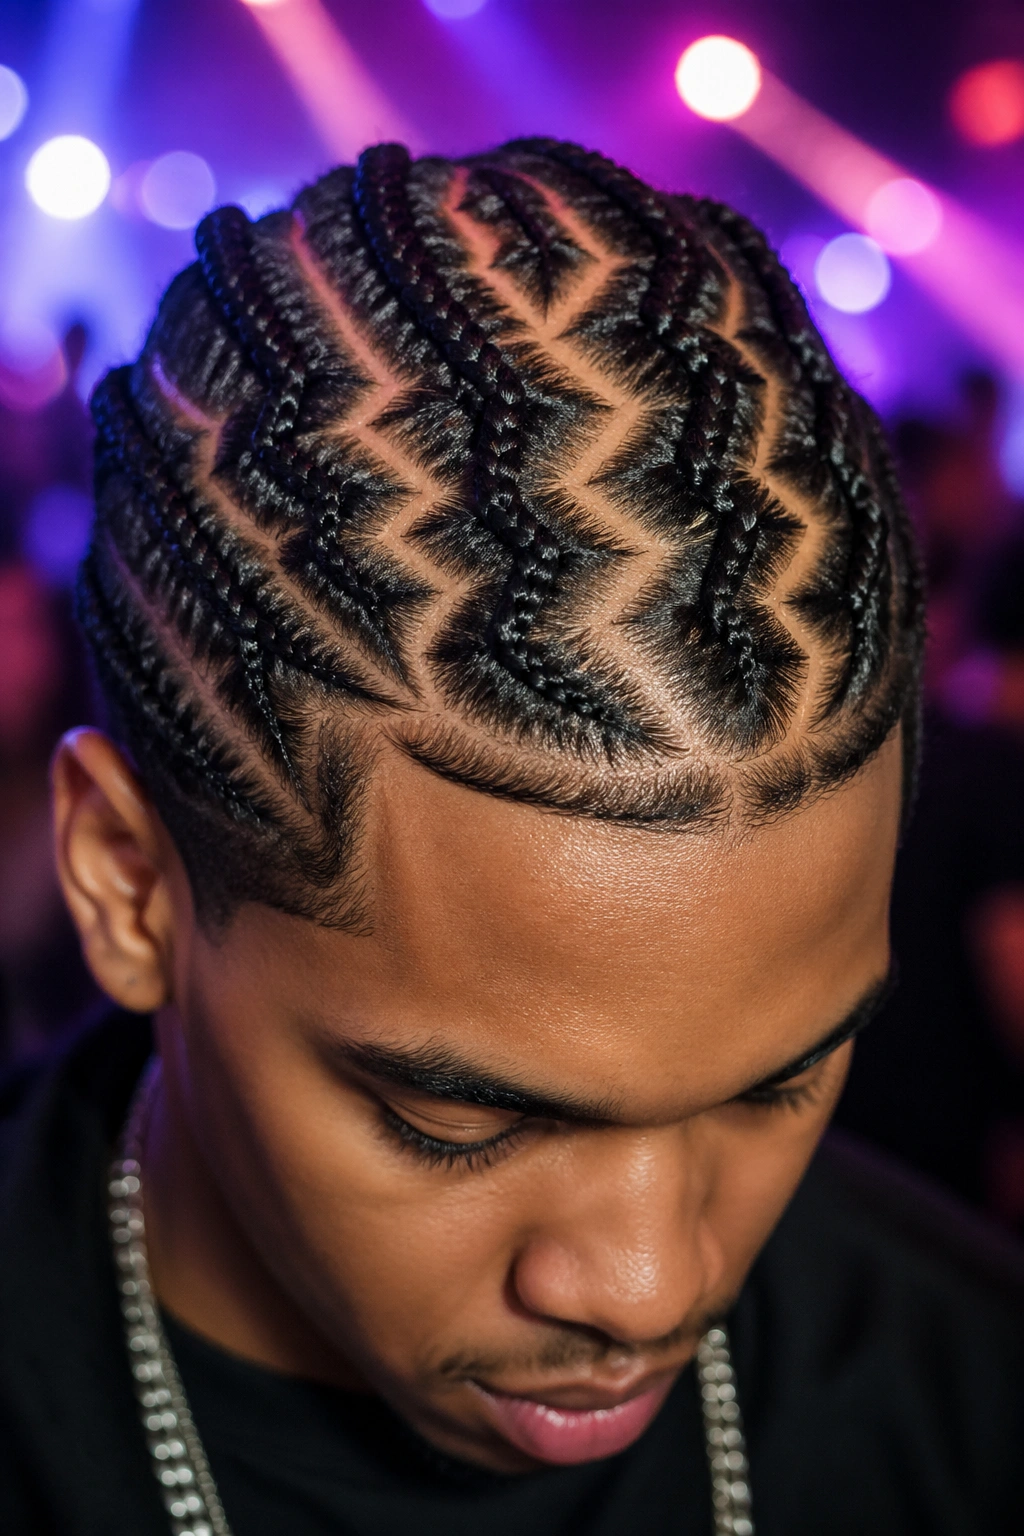
Why settle for clean angles when the pattern itself can be electric?
A lightning bolt cornrow zigs sharply in one direction, then zags sharply in the opposite direction, creating a jagged shape across the scalp. When two lightning bolts run side by side and cross in the middle, the resulting pattern is high-drama.
How to Style It
Plan the bolt direction first — usually top-to-bottom with two or three sharp angles. The crossing point falls where the two bolts’ sharpest angles meet. Braid each bolt segment separately, then handle the crossing with a careful over-under pass.
The sharp angles are the whole point. Soft curves ruin the lightning effect. Use the rat-tail comb aggressively to carve crisp turns.
This style reads well at parties, concerts, photo shoots. It’s not conservative. It’s meant to be noticed.
6. Heart-Shaped Criss Cross
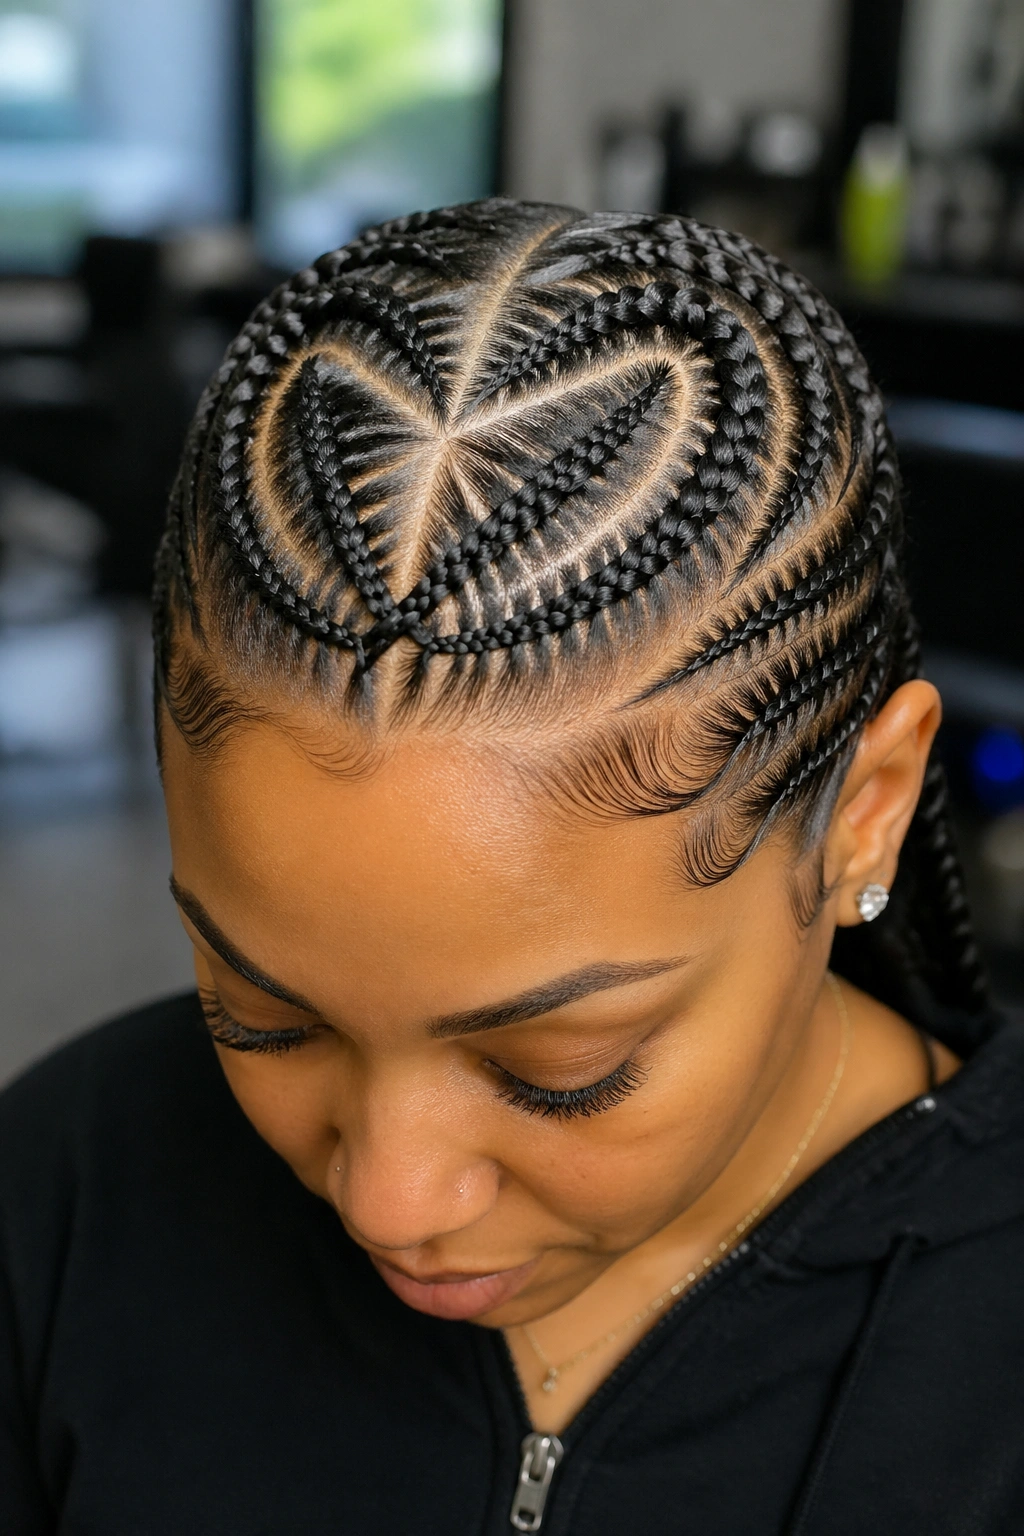
Two cornrows cross near the top of the head to form the V of a heart. The cornrow tails swoop outward and downward along the curve of the heart shape, ending behind the ears.
The heart is outlined by the crossing. The rest of the head can be straight-back cornrows falling behind the heart shape, or the entire head can be filled with smaller straight braids while the heart sits on top as the focal design.
Parting the heart takes more time than the braiding itself. Mark the heart outline with the rat-tail comb in light sweeps first, then refine the lines before any hair gets gripped. A heart that’s too wide looks like a crooked V. A heart that’s too narrow looks like a wedge. The proportions matter.
Hearts work for Valentine-themed occasions, but they also look right on kids and teens as an everyday style.
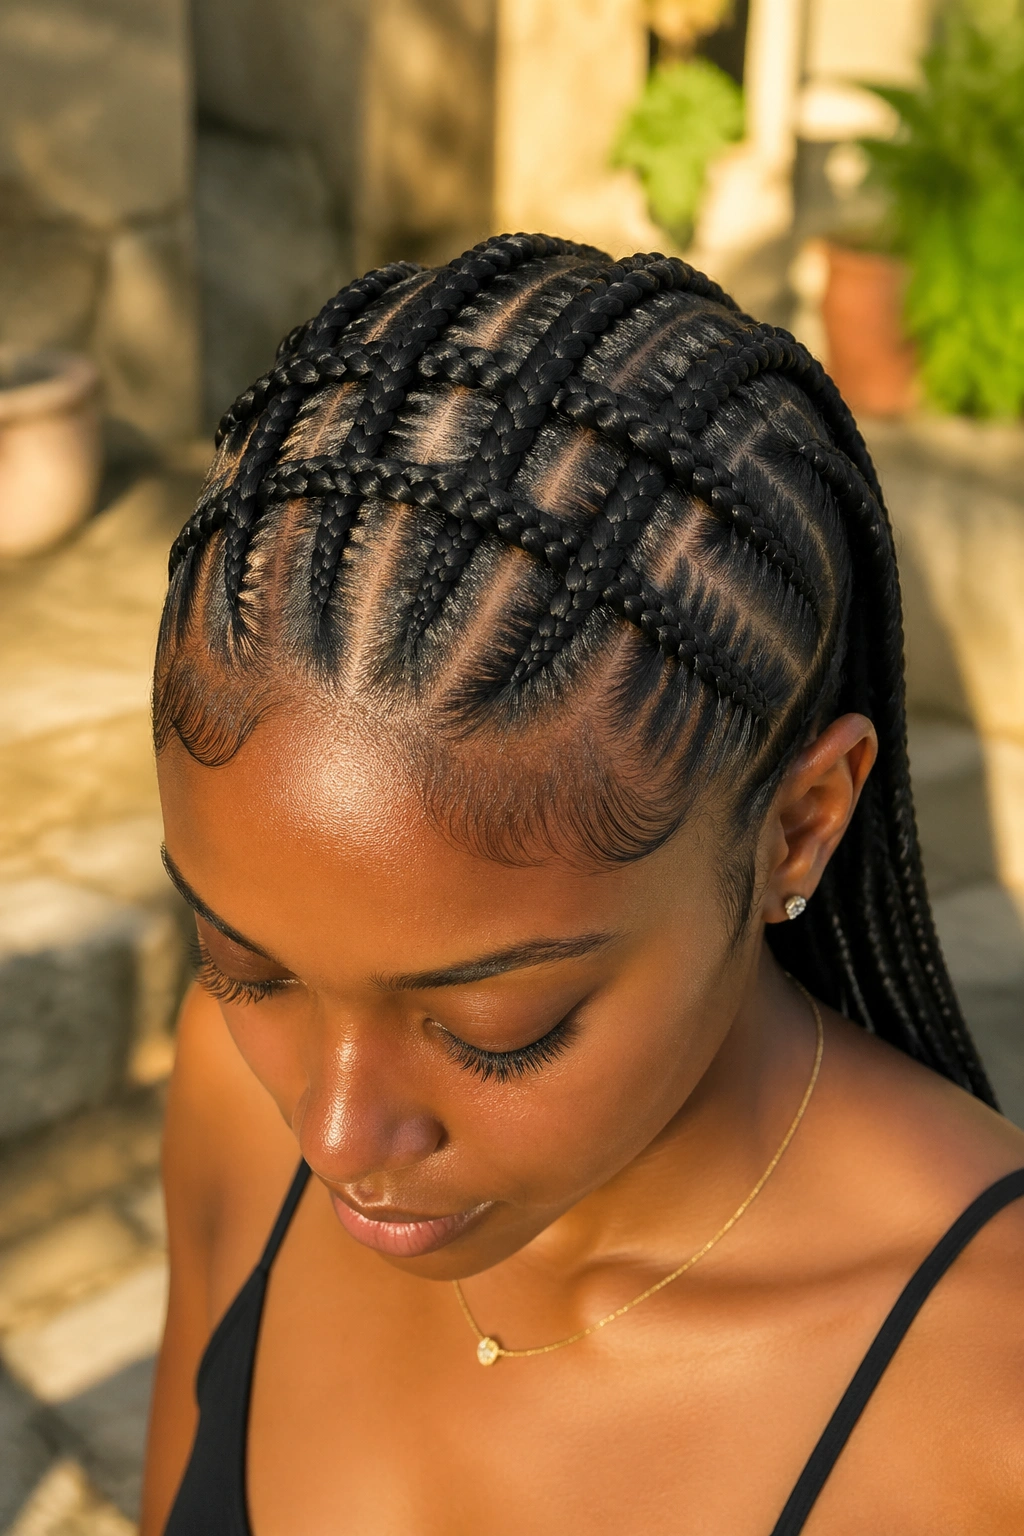
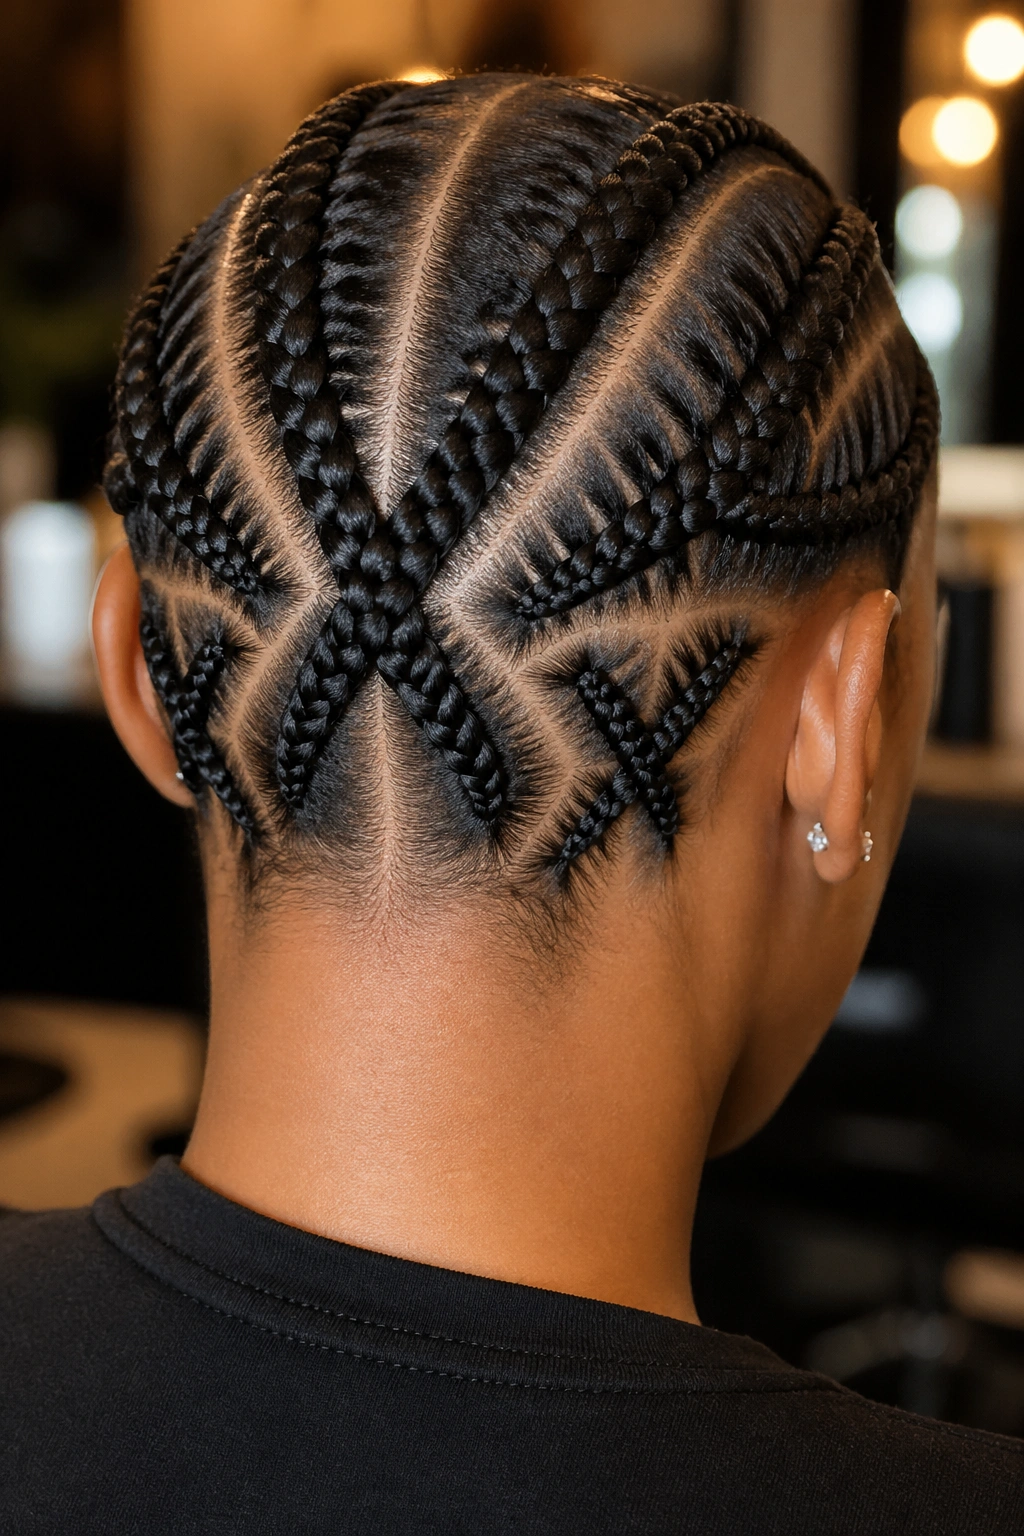
7. Starburst From the Crown
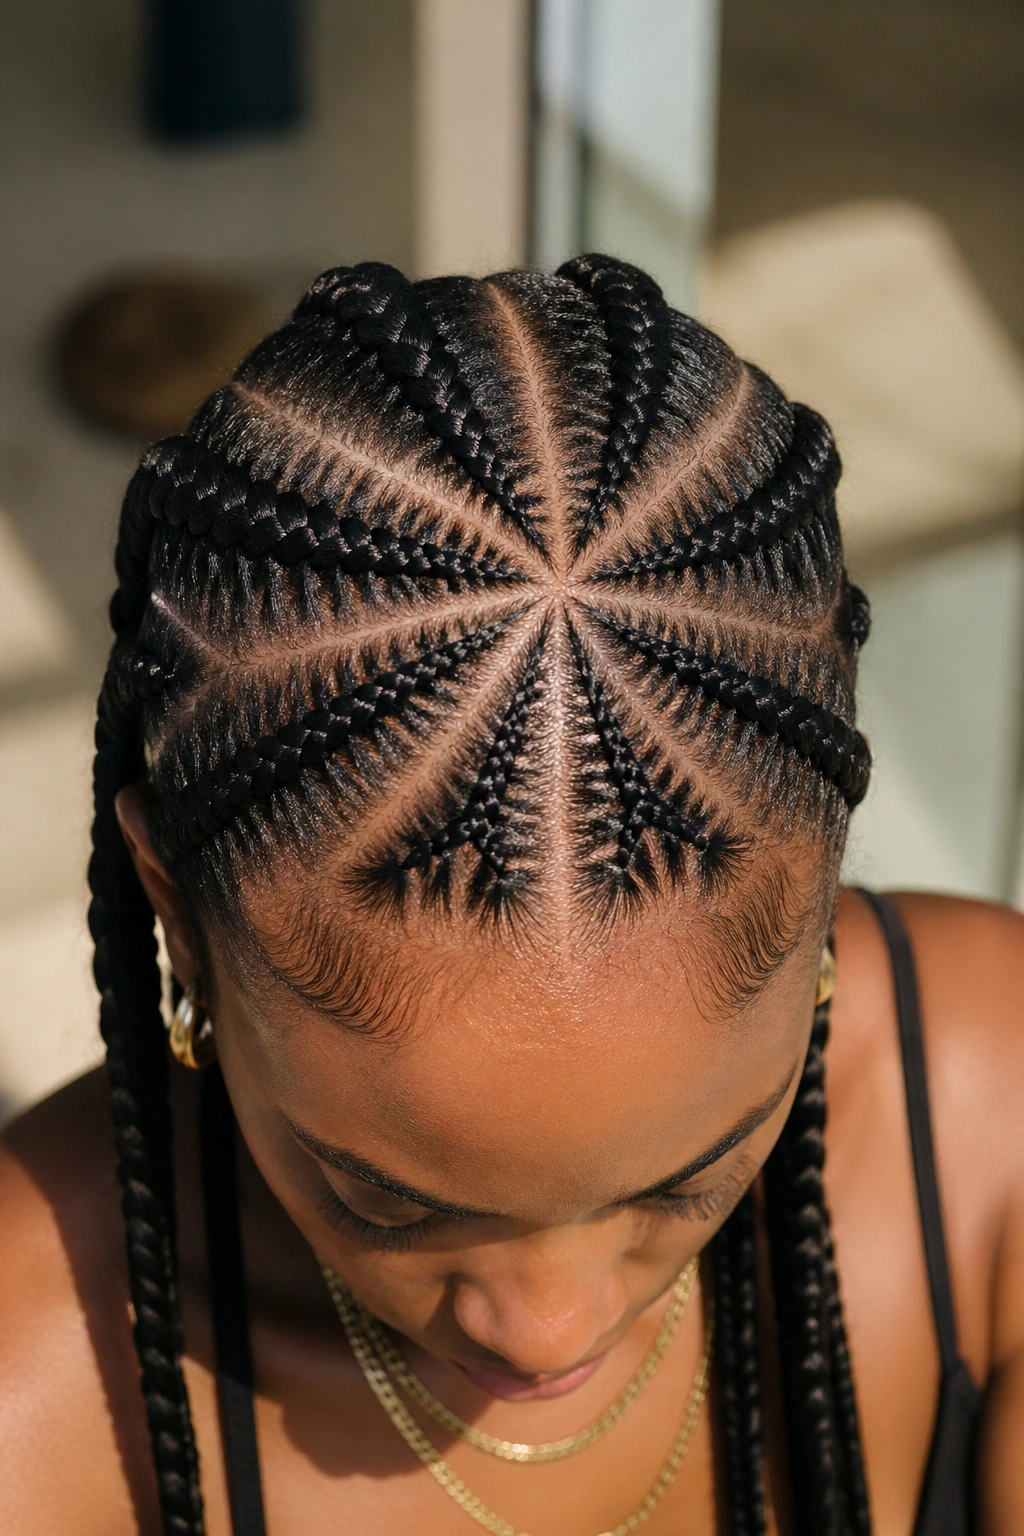
Six to eight cornrows radiate outward from a single point at the crown of the head, running down in all directions like rays of light. Because each braid angles away from the crown at a slightly different direction, they create overlapping criss cross patterns wherever two braids cross on the scalp.
The starburst is both a radial and a criss cross pattern — the radiating shape dominates, but the crossings create the criss cross effect at the mid-head level.
Critical detail: the crown point has to be a single, tiny bud of hair that all braids originate from. If the starting point is even half an inch wide, the braids won’t radiate cleanly — they’ll clump at the origin instead. Use a very small elastic to bind the crown bud before braiding the rays.
8. Interlocking V Patterns
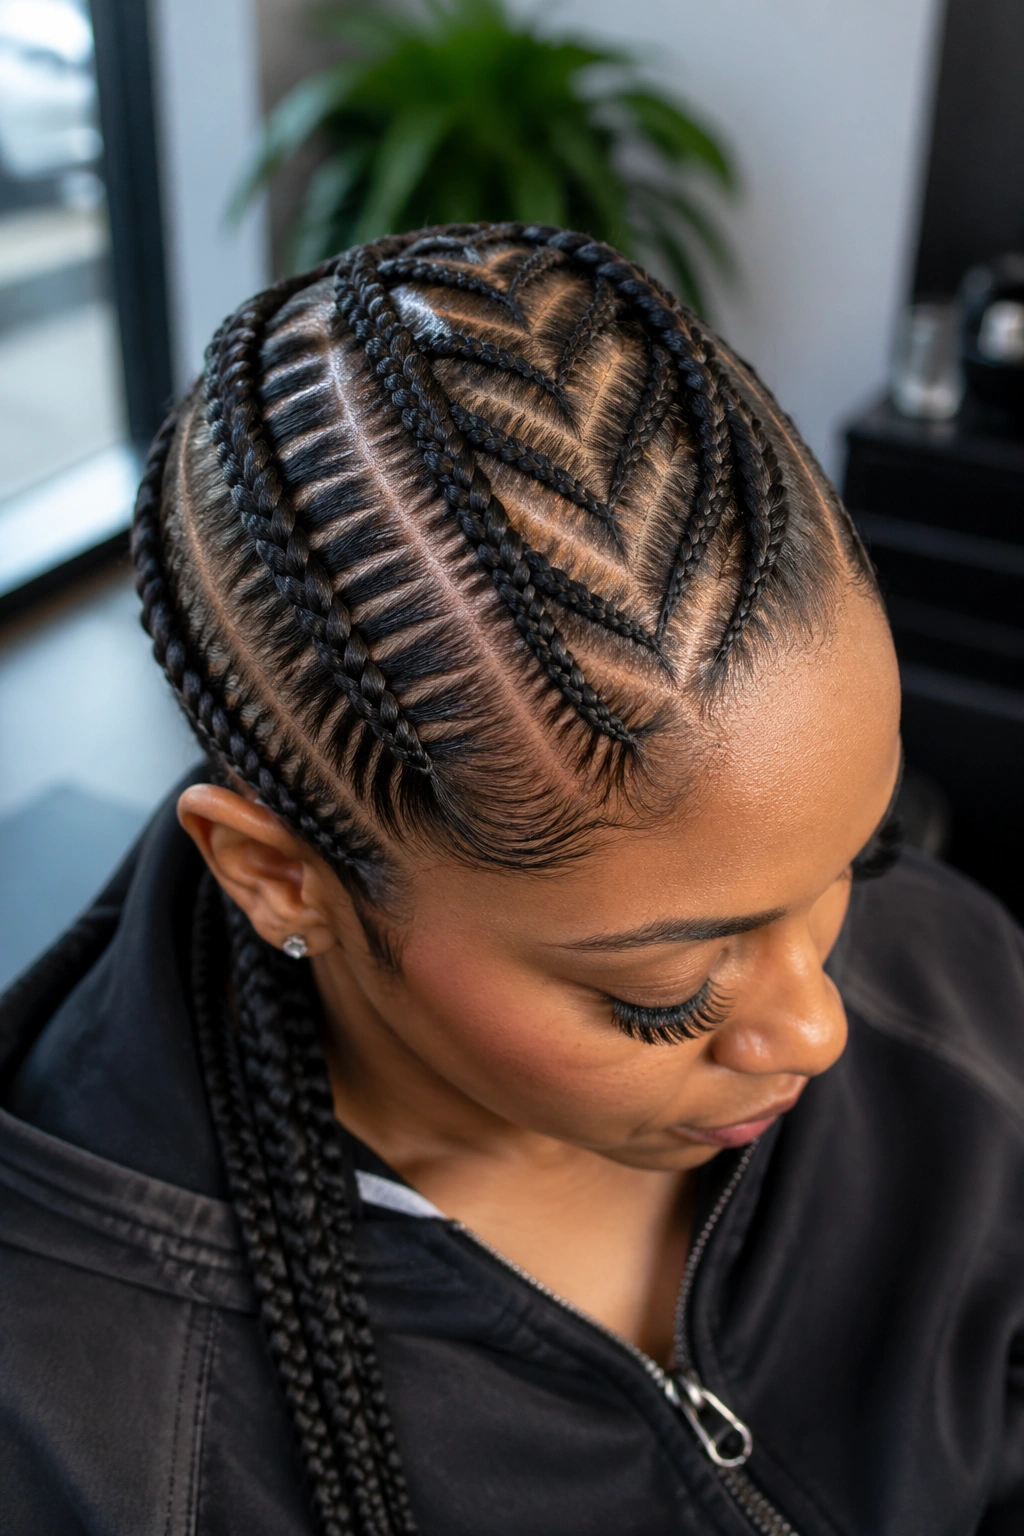
Multiple V-shaped pairs of braids, stacked vertically down the head. The top V points one direction; the V below it points the opposite direction. Each V has two cornrows forming the shape, and the Vs interlock where their tips meet.
Picture a chain of arrowheads pointing alternately up and down. That’s the pattern. It’s one of the most visually distinct criss cross designs — graphic, repetitive, and impossible to mistake for any other braid style.
What to Watch For
Uniform V sizes are critical. If the top V is wider than the middle V, the chain looks broken. Measure each V with the same spacing — usually about 1.5 to 2 inches per V height.
This style takes four to five hours on long hair. Budget the time honestly.
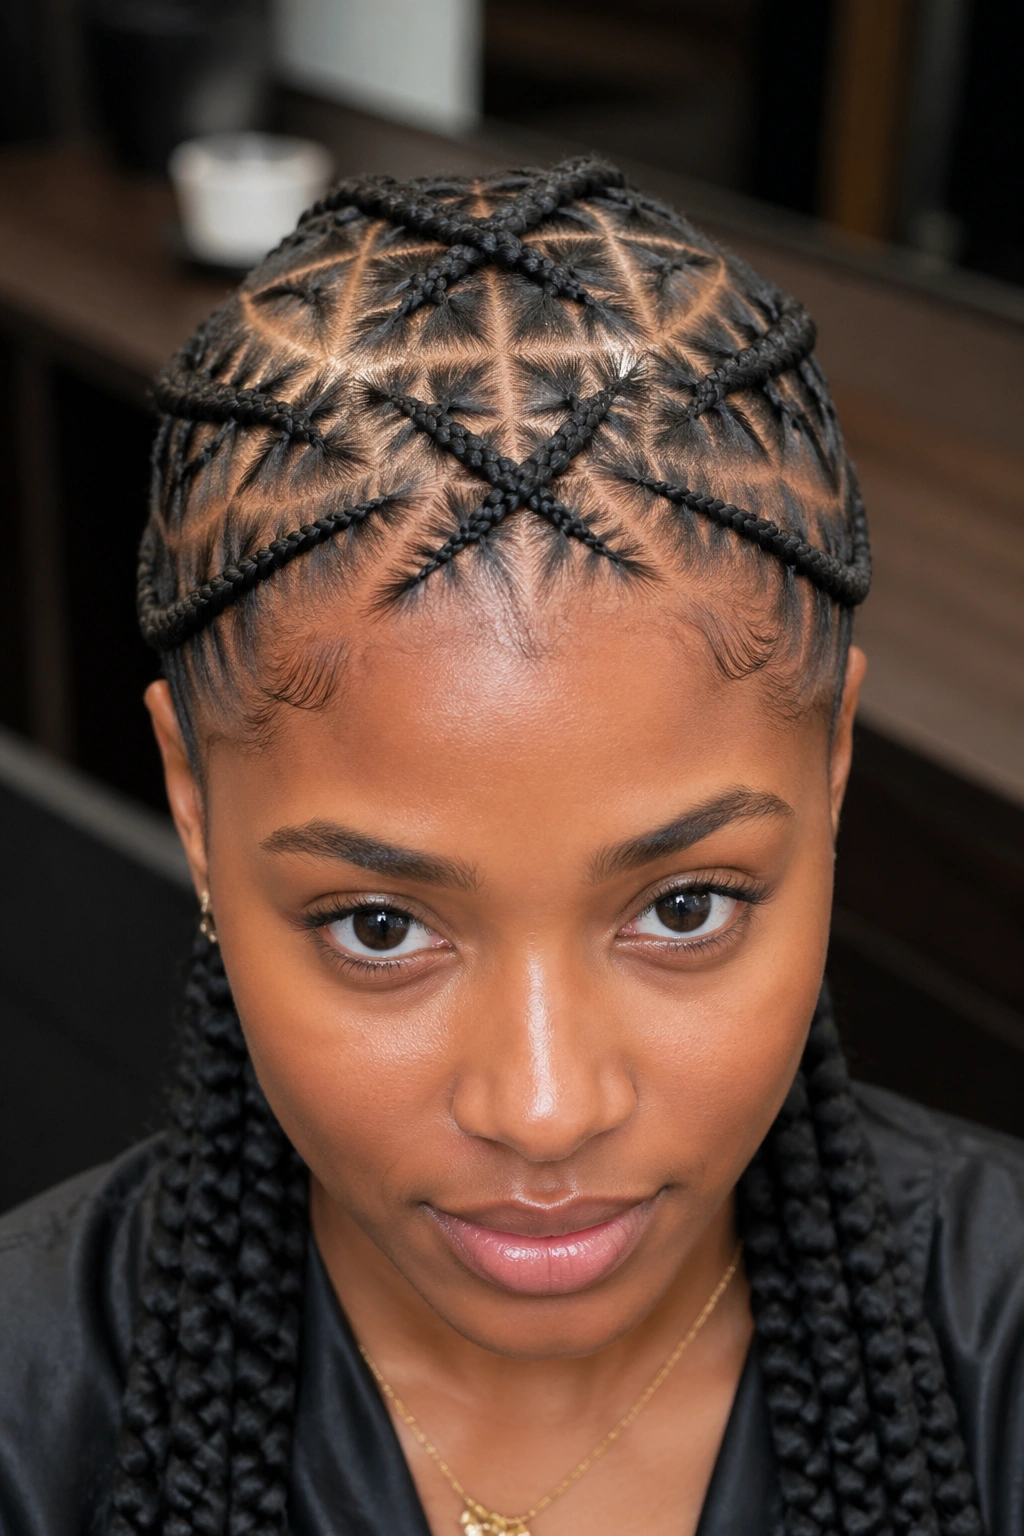
9. Diamond Crossings
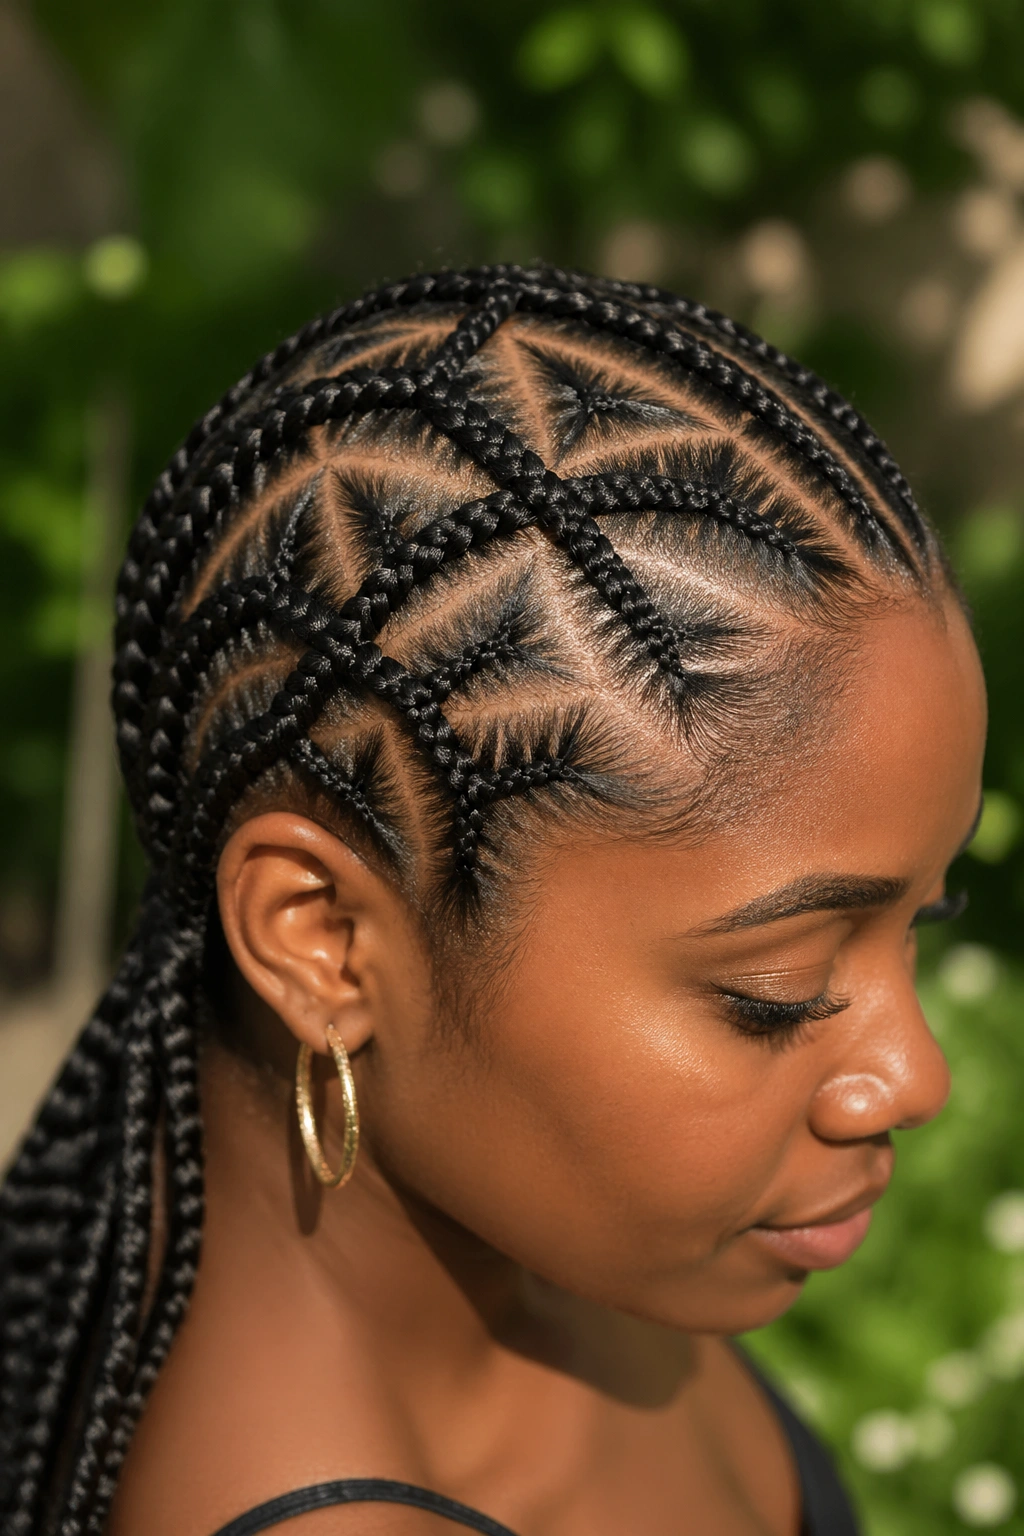
Cornrows are paired and angled so they cross twice — once at the top, again at the bottom — creating a diamond shape between the two crossings. Multiple diamonds stacked down the head create a harlequin-style pattern.
The space inside each diamond stays unbraided — it’s just scalp showing through the design. That negative space is what gives diamonds their visual punch. Fill the diamonds with braids and you lose the pattern entirely.
Diamond work is best on medium-density hair. Very thick hair fills in the diamond spaces with stray strands that blur the pattern. Fine hair doesn’t give enough braid body to outline the diamonds clearly.
10. Criss Cross Side Sweep
All cornrows criss cross along one side of the head only, sweeping dramatically from the opposite side. The left side of the head is smooth with parallel cornrows running rightward. The right side explodes into crossings as those same cornrows converge.
The effect mimics hair blown by wind that catches and tangles into a pattern on one side. It’s asymmetric, bold, and surprisingly flattering on oval or heart-shaped faces.
Choose the criss cross side based on the direction the face naturally presents. If someone tilts their head to the right in photos, the criss cross side should be the left — the one that’s more visible when they tilt.
Tip: The tails of the criss cross braids can fall loose or be gathered into a side ponytail. The side ponytail option makes the pattern read as deliberate rather than messy.
11. Basket Weave Top
The hair on top of the head — roughly the ear-to-ear span — is braided into a true basket weave pattern. Three braids run horizontally, interlocked with three braids running vertically, each genuine over-under passes creating a textured woven surface.
The hair behind and below the basket weave is left in straight-back cornrows that blend into the back of the head.
Basket weave is the most textured criss cross pattern on this list. Up close, you can see the woven strands like a piece of wicker furniture. From a distance, it reads as a dense, structured block of hair on top of the head.
Installation is slow. Six to seven hours for a full-head install with basket weave on top. This is a statement style reserved for big events.
12. Simple Single Crossing
Unlike elaborate patterns, a single criss cross is just one pair of cornrows meeting at one point. Everything else is straight-back or free.
This is the starter criss cross — the style to try if you’ve never worked a cross pattern before. One crossing teaches the technique. Get that single point right, and larger patterns become much easier to attempt.
Who This Is For
Anyone just learning, or anyone who wants criss cross energy without the four-hour sit time. The single crossing takes about 90 minutes on average hair. It’s a functional, wearable style for daily life.
Place the crossing behind the crown, about an inch forward of where a ponytail would gather. That spot is visible from most angles but doesn’t dominate the silhouette.
13. Criss Cross With Braided Accent Color
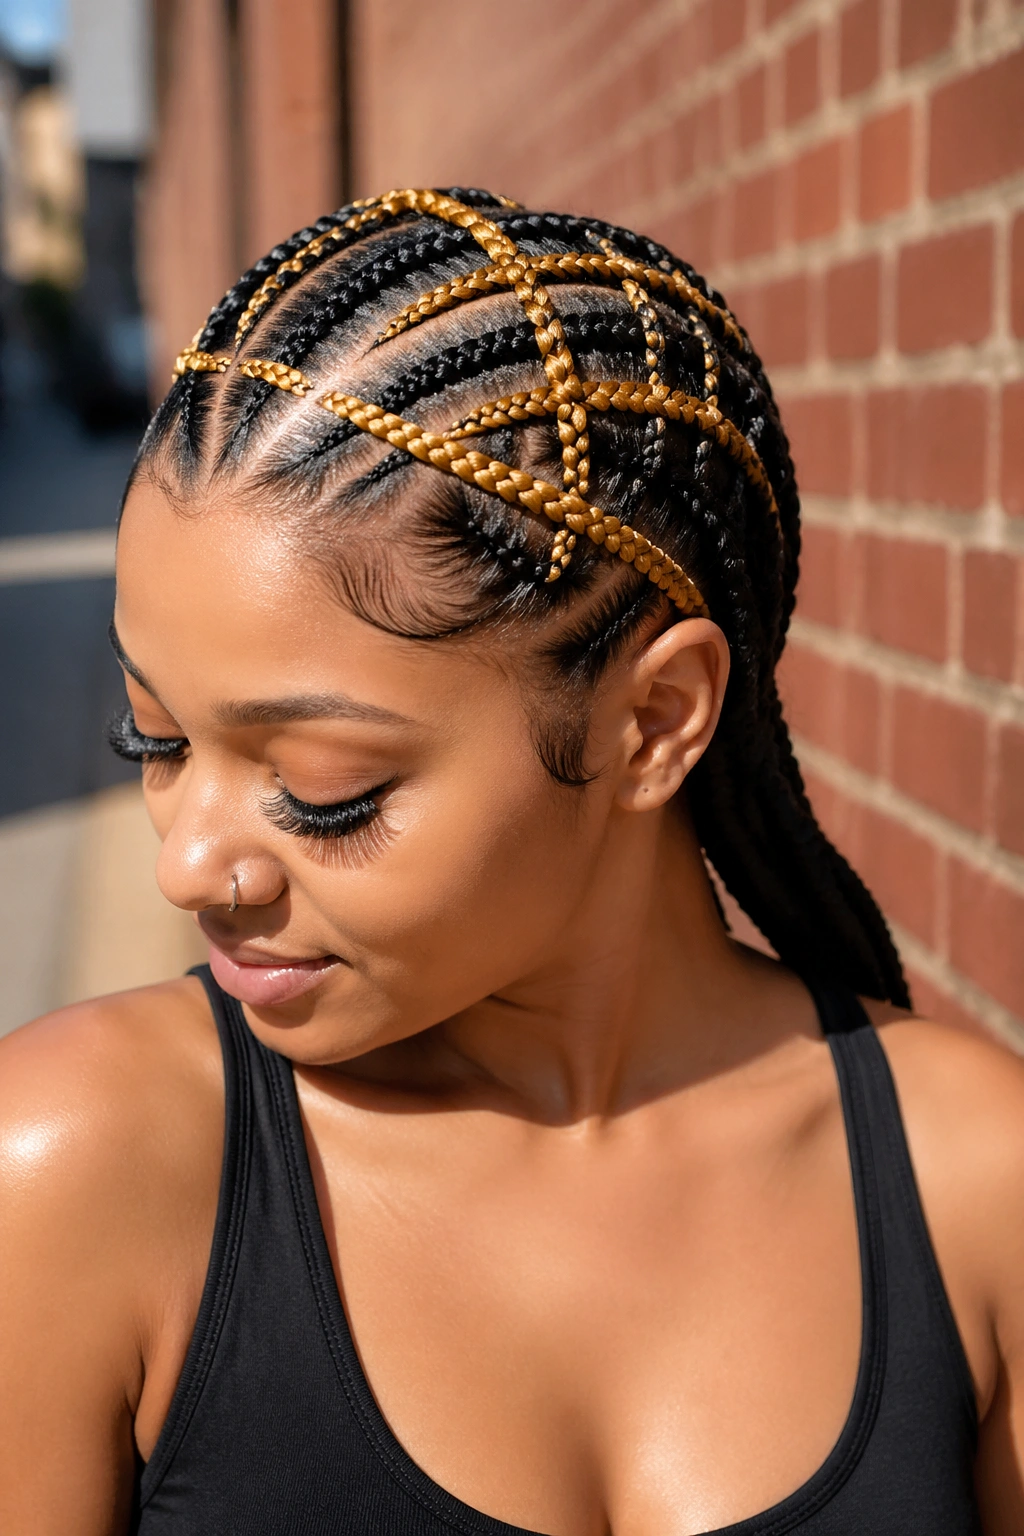
A cornrow style built around two base colors — the natural hair color and one accent color woven in with extension hair. The accent color follows specific criss cross paths while the natural hair fills in around them.
The effect is a highlighted pattern. The criss cross reads even more clearly because the accent color calls attention to those specific braids while the natural hair braids recede visually.
Honey blonde, deep burgundy, electric blue, or soft silver are the strongest accent choices for this approach. Safer with color-matched kanekalon so the accent color stays consistent along the full length of the braid.
Adding extension hair into a criss cross pattern adds complexity but not much time — maybe 30 extra minutes compared to natural-hair-only.
14. Triangle Part With Criss Cross
Triangular parts replace the usual rectangular sections. Each triangle is braided into a cornrow, and the triangles are arranged so cornrows from different triangles cross each other at deliberate points.
Triangle parts create a three-dimensional quality to the scalp pattern — the triangles look like facets. Braids emerging from triangles at different angles naturally set up criss cross crossings.
The shape of the triangle matters. Equilateral triangles (all sides equal) create one kind of pattern. Isosceles triangles (two sides equal, one different) create a more dynamic layout. Experiment on a mannequin head before committing on a live head.
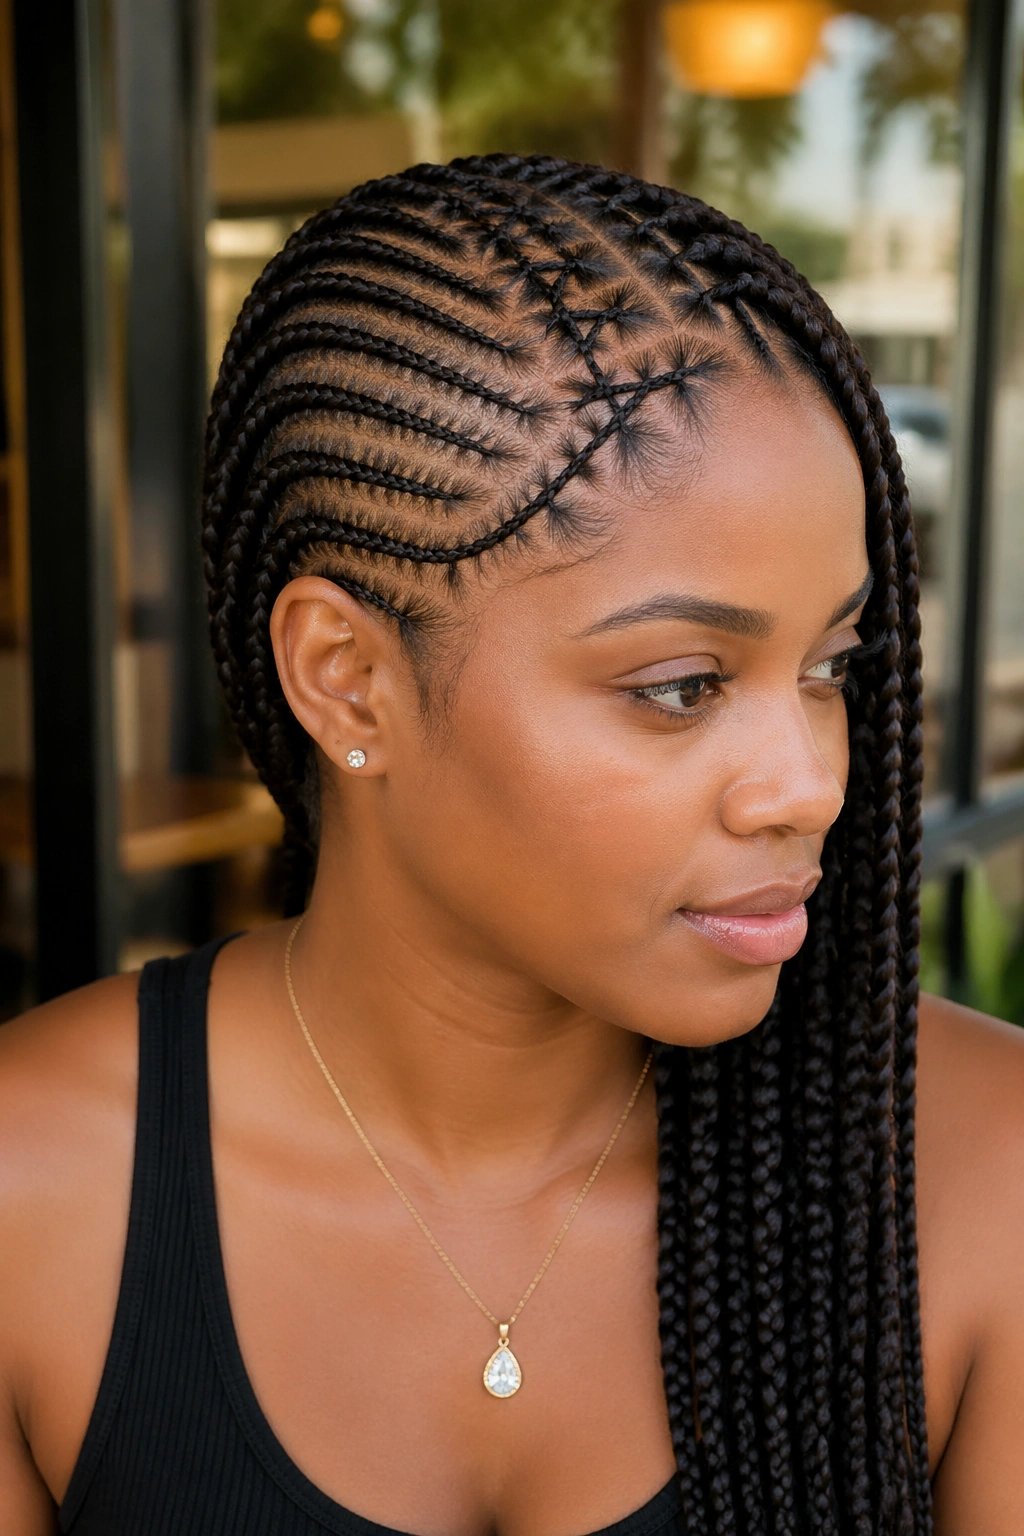
15. Side Part With Diagonal Crossings
A bold side part defines the top of the head. From that part, cornrows angle diagonally — half going one direction, half going the other. The two sets of diagonal braids cross each other on the side of the head opposite the part.
This is a sleek, formal version of criss cross. It reads well in business settings, at weddings, or in any environment where the style needs to look deliberate and controlled.
The cleaner the side part, the better the whole style looks. Use a fine comb to create the part, then hold it in place with a dab of edge gel smoothed along the part line with a toothbrush.
16. Criss Cross Up-Do Crown
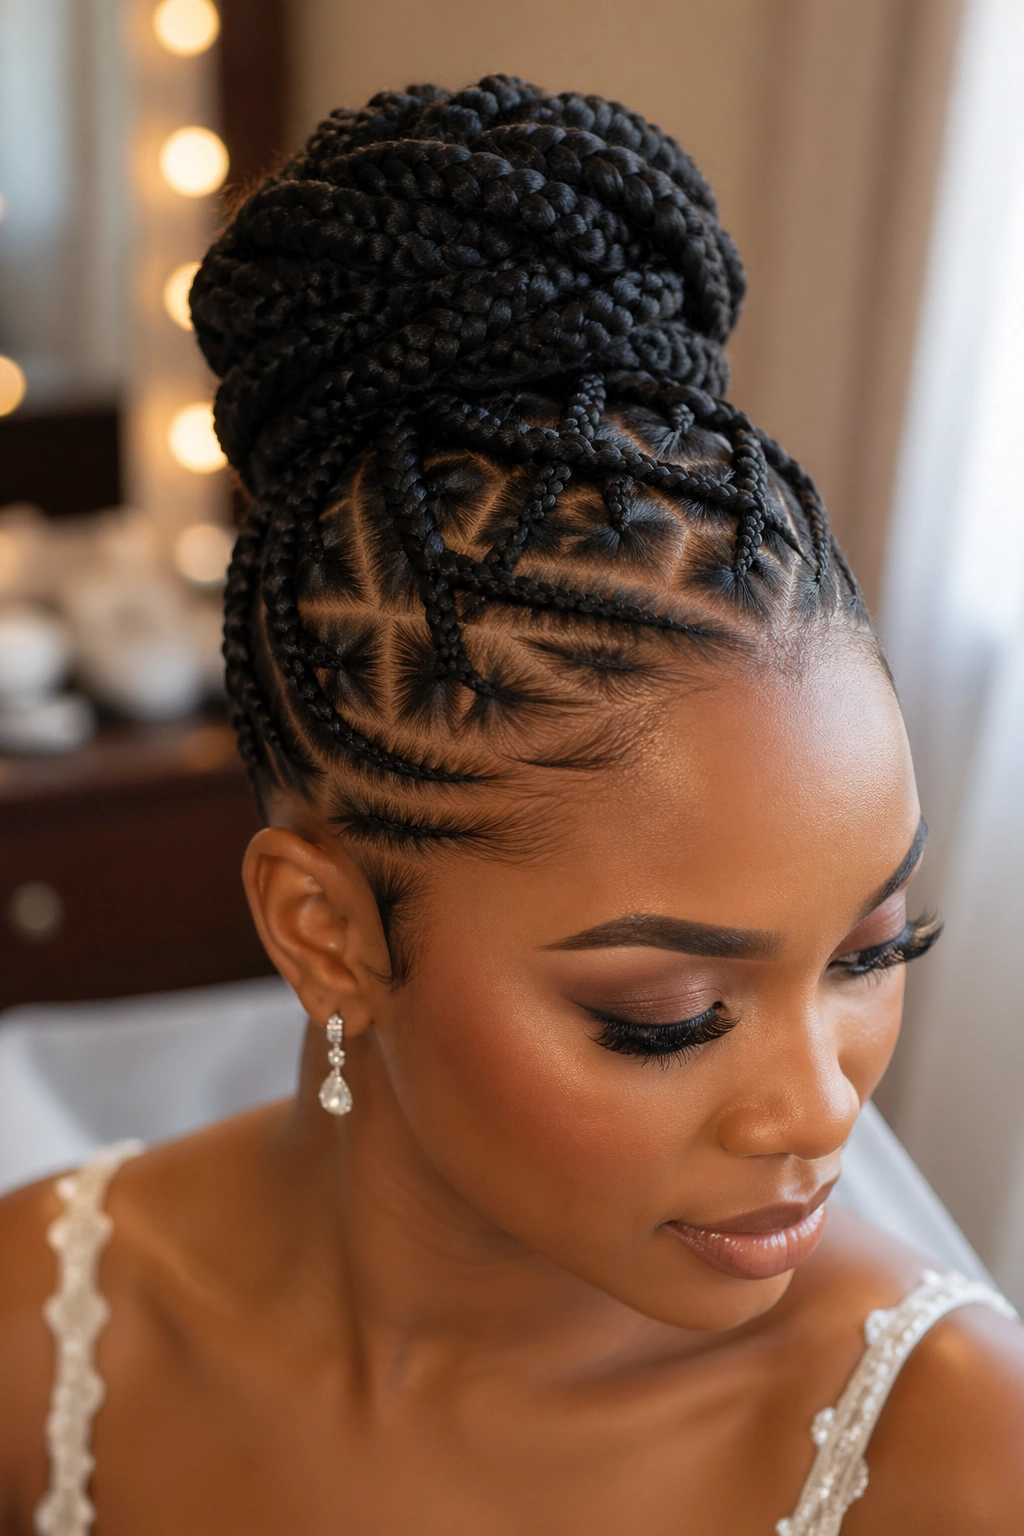
All criss cross braids start at the hairline and travel upward, crossing at points along the way, ending in a single gathered crown at the very top of the head. The final look is a dramatic up-do with a woven base.
This style is exclusively formal. It’s not a sit-around-the-house style. But for weddings, galas, graduations, or big photo sessions, it’s a showstopper.
The up-do part requires securing all braid tails into a bun or tight coil at the crown. A strong fabric elastic or a spiraled wrap of kanekalon handles that job without cutting into the braids.
Budget five to seven hours for this one. It’s complex, physically demanding, and requires a skilled braider.
17. Criss Cross Half Up Half Down
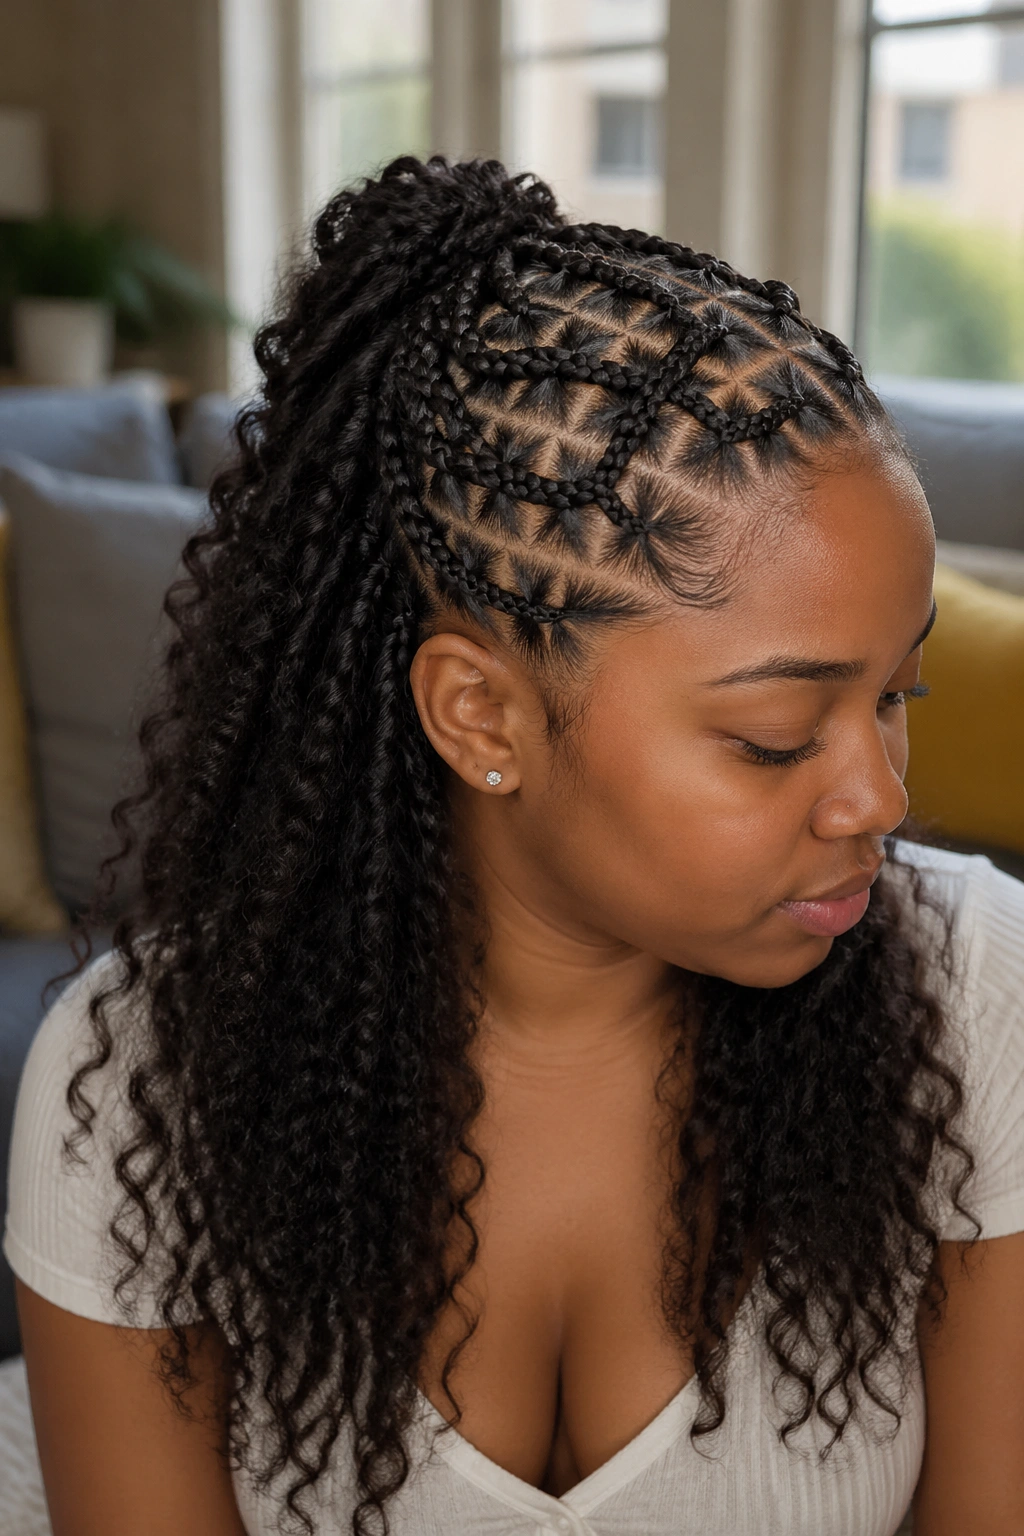
Only the top half of the head is criss crossed. The bottom half stays as loose natural hair, typically styled into a stretched curl or a wash-and-go.
The visual contrast is part of what makes this style work. The structured criss cross sits above, the loose organic curls fall below. Sharp design above, soft texture below.
How to Use It
The transition line should be clean — roughly ear-to-ear at the back of the head. Above that line, the criss cross design is dense and tight. Below, the hair is completely free.
This works best on hair long enough to show noticeable curl pattern below the criss cross. On short hair, the bottom half disappears against the scalp and the effect is lost.
18. Boxer-Style Double Cross
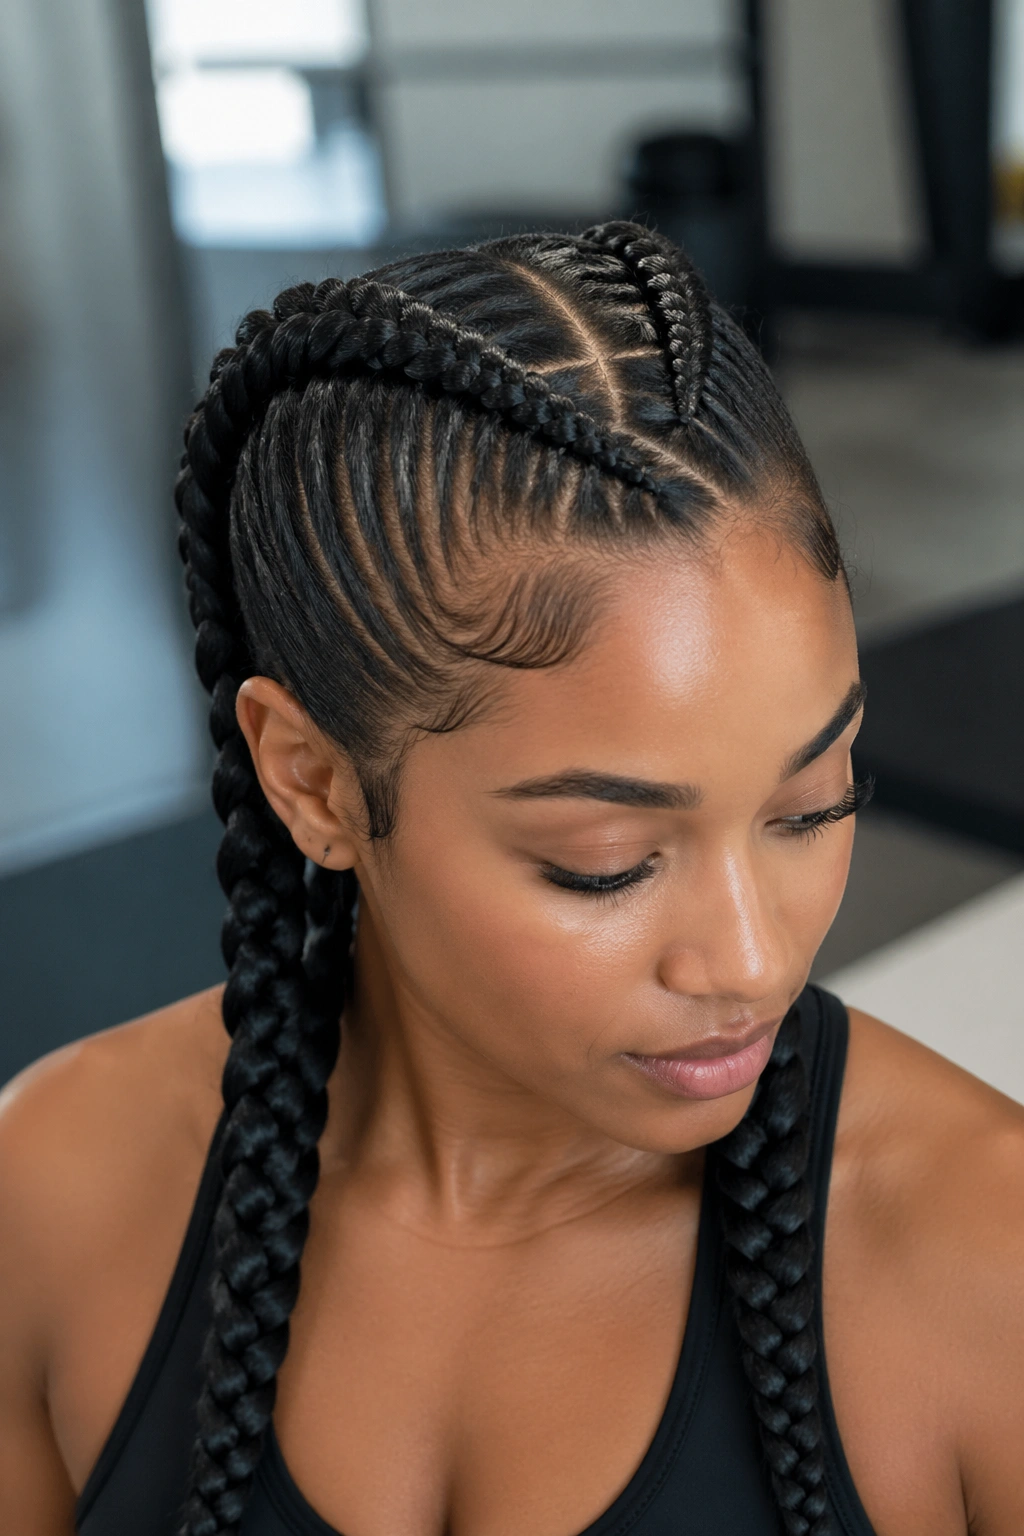
Two thick braids running down the head, crossing once in the middle. It’s a simpler version of the Dutch braid patterns common in sports, adapted for cornrows instead of French braids.
Boxer-style double cross is practical — it’s a style that stays put through exercise, swimming, sweating, and sleep. The single crossing adds visual interest without making the style high-maintenance.
This style also sits flat enough to wear under a helmet or a cap. For cyclists, boxers, swimmers, and active people, the boxer cross is a functional daily option that still looks intentional.
19. Criss Cross With Beaded Intersections
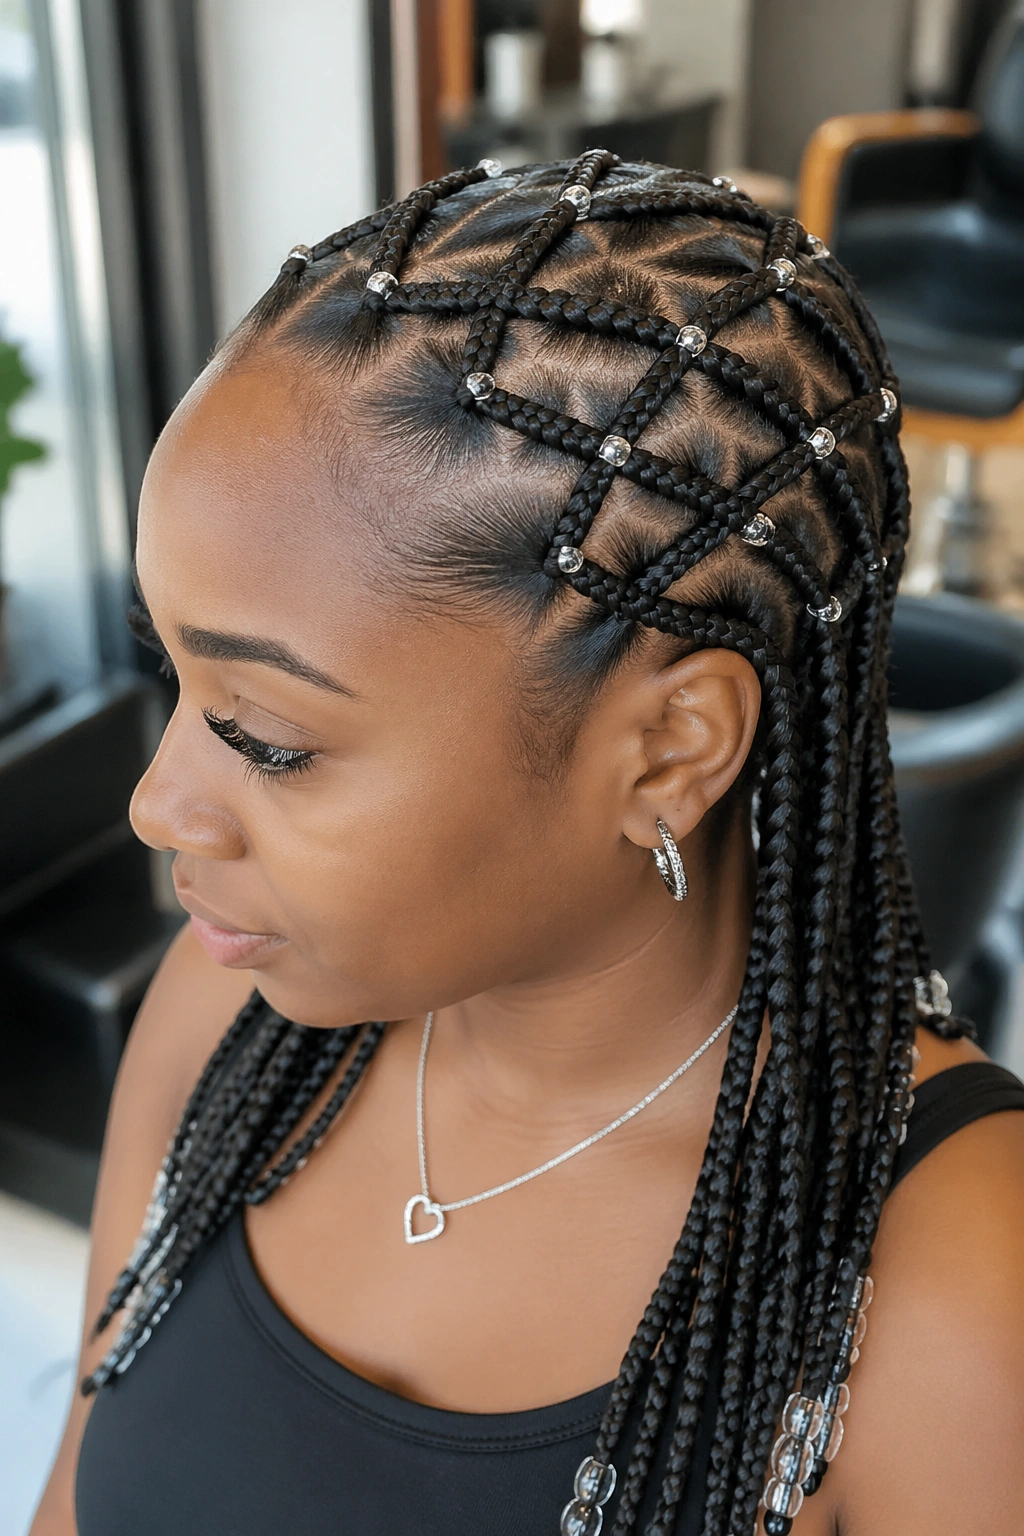
At every crossing point in a criss cross pattern, a small bead or bead cluster is added to mark the intersection. The pattern becomes dotted with beads along every junction.
The beads visually emphasize the crossings — making the pattern more readable from a distance. They also add a tactile element that makes the style feel more elaborate without adding actual complexity to the braiding.
Use small beads for this. Large beads clustered at intersections overwhelm the design and weigh down the braids. Five-millimeter metal or wooden beads are the sweet spot for scale.
Secure beads with fine wire loops or tiny silicone elastics. Standard bead-threading tools work, but the braider has to pause at every intersection to add the bead, which adds about 45 minutes to the total install.
20. Criss Cross Spiral Down the Back
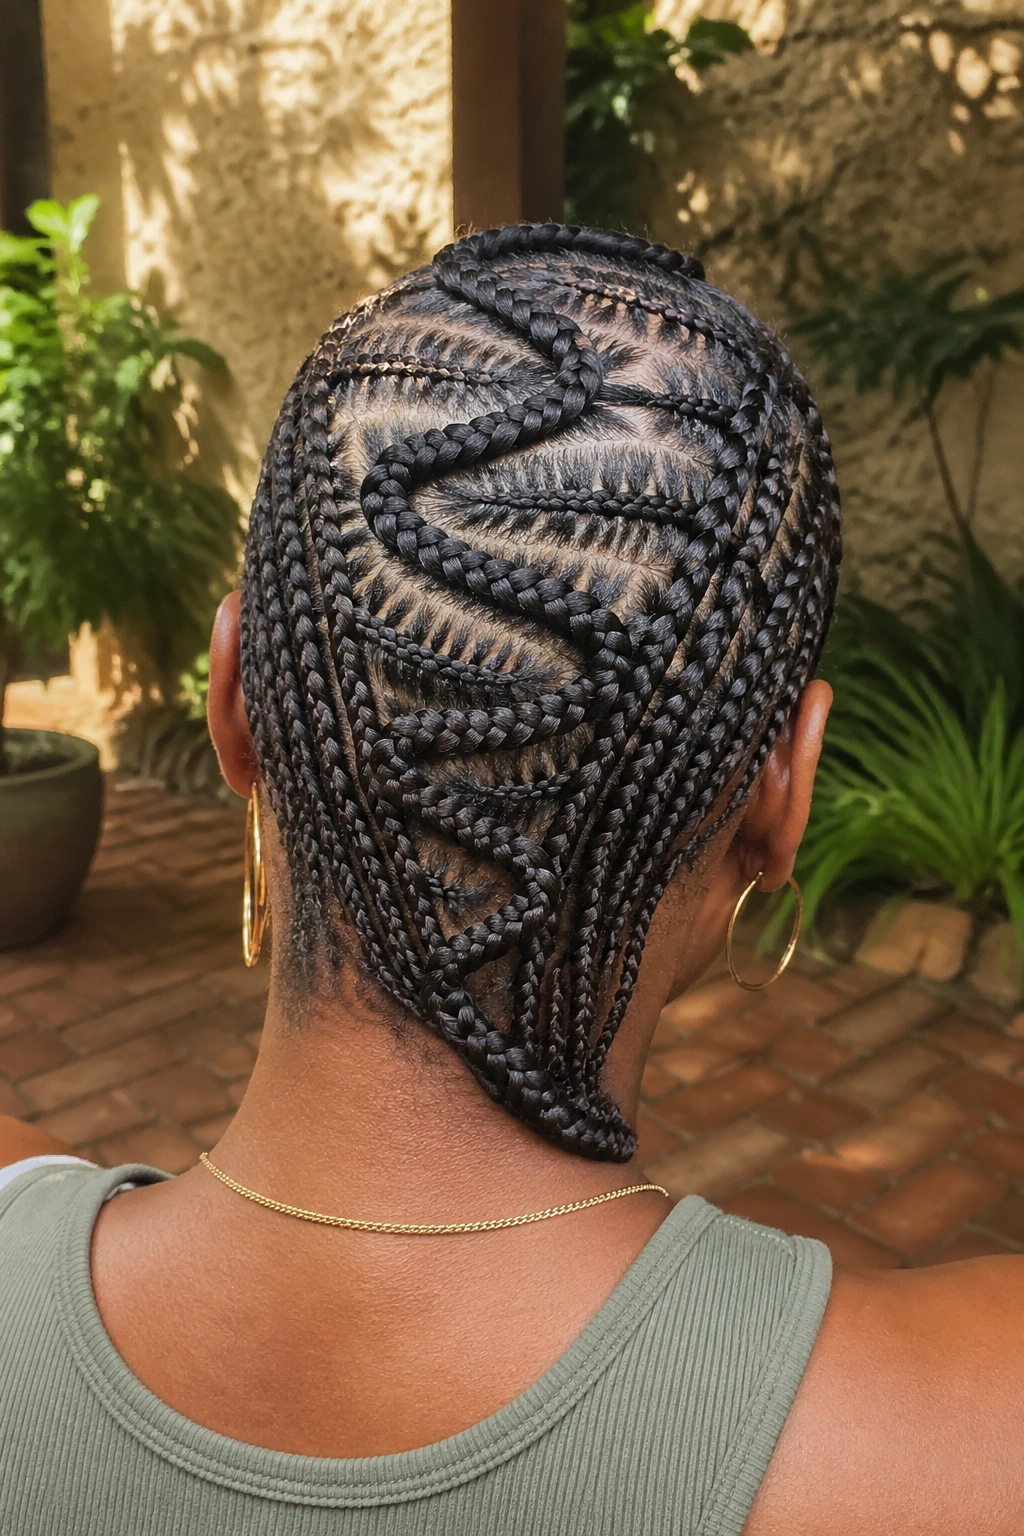
One long cornrow spirals down the back of the head, crossing itself multiple times as it winds. Rather than multiple separate braids creating the criss cross, a single continuous braid does all the crossing work.
This is a technically unusual approach. The braid has to be woven under itself at each crossing point without losing tension, which requires practiced hands. But the result is striking — a single serpentine line that snakes across the head with crossings that look impossibly clean.
A spiraled cornrow needs a base layer of smaller flat cornrows beneath it to give structure. Without a base, the spiral has nothing to grip against and falls flat against the scalp without holding its shape.
21. Criss Cross Crown With Puffs
The top of the head features a criss cross crown design. The rest of the hair — from mid-head down — is styled into two natural hair puffs or mini buns on either side.
This is a playful hybrid approach, good for kids and young teens. The criss cross crown adds the geometric element. The puffs bring a casual, bouncy quality.
Puff size should match the scale of the crown. Big puffs with a tiny crown looks unbalanced. Small puffs with an expansive crown also looks off. Aim for puffs roughly the same diameter as the crown is wide.
Refresh the puffs every other day with a light water spray and a finger-detangle. The crown holds for up to three weeks with nightly satin bonnet care.
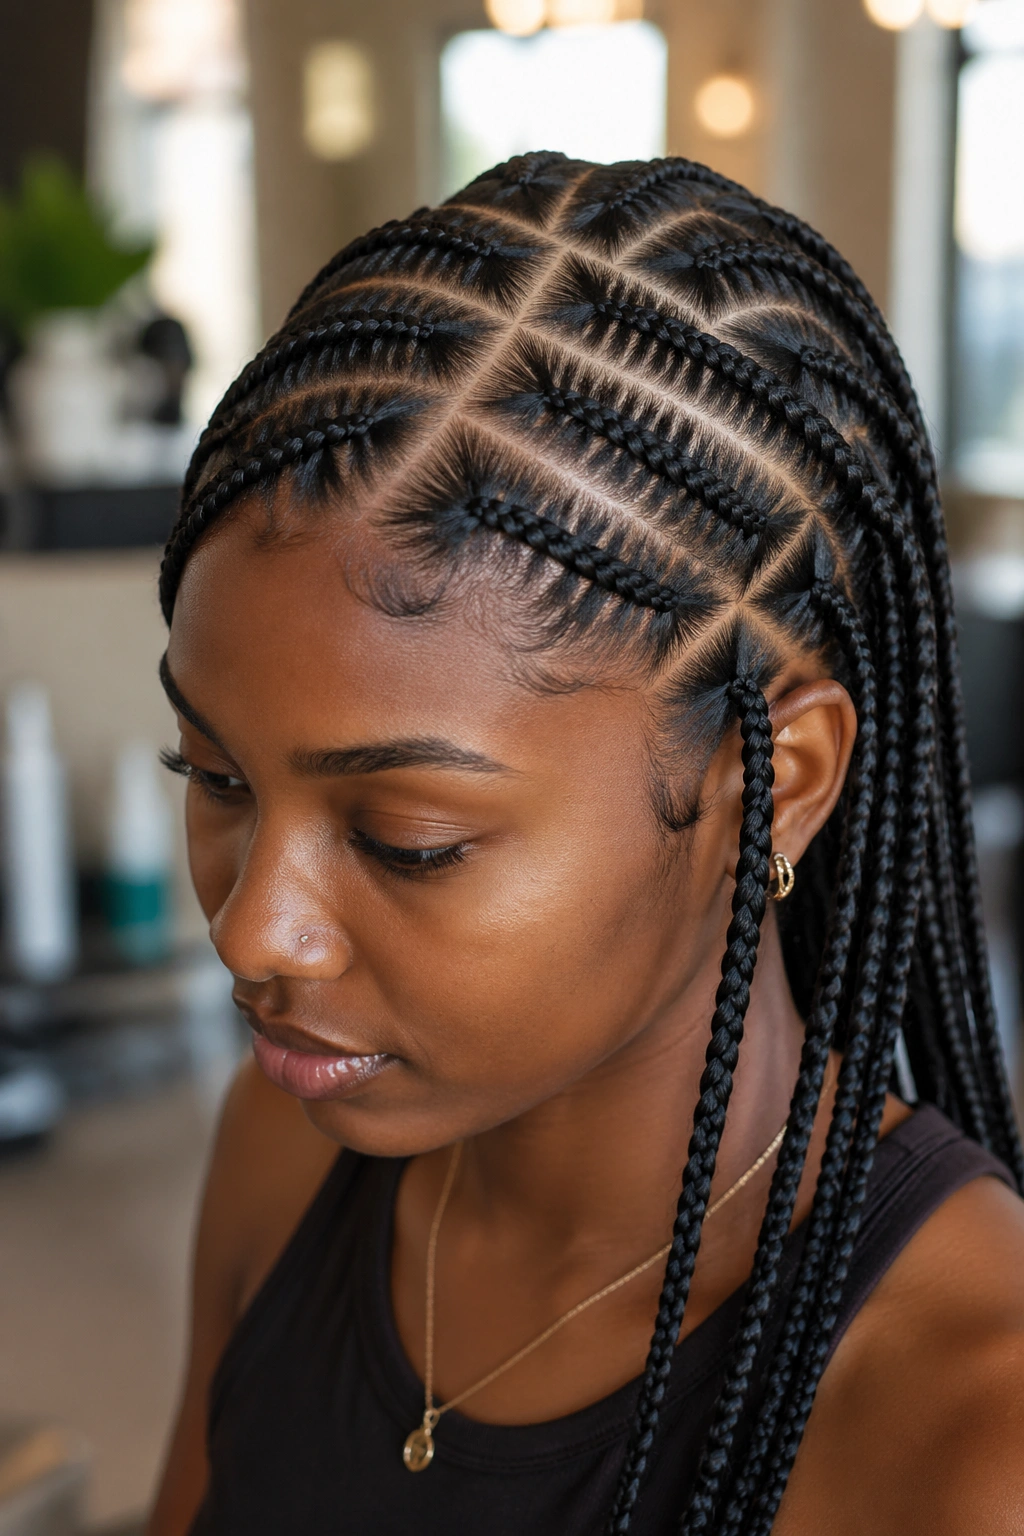
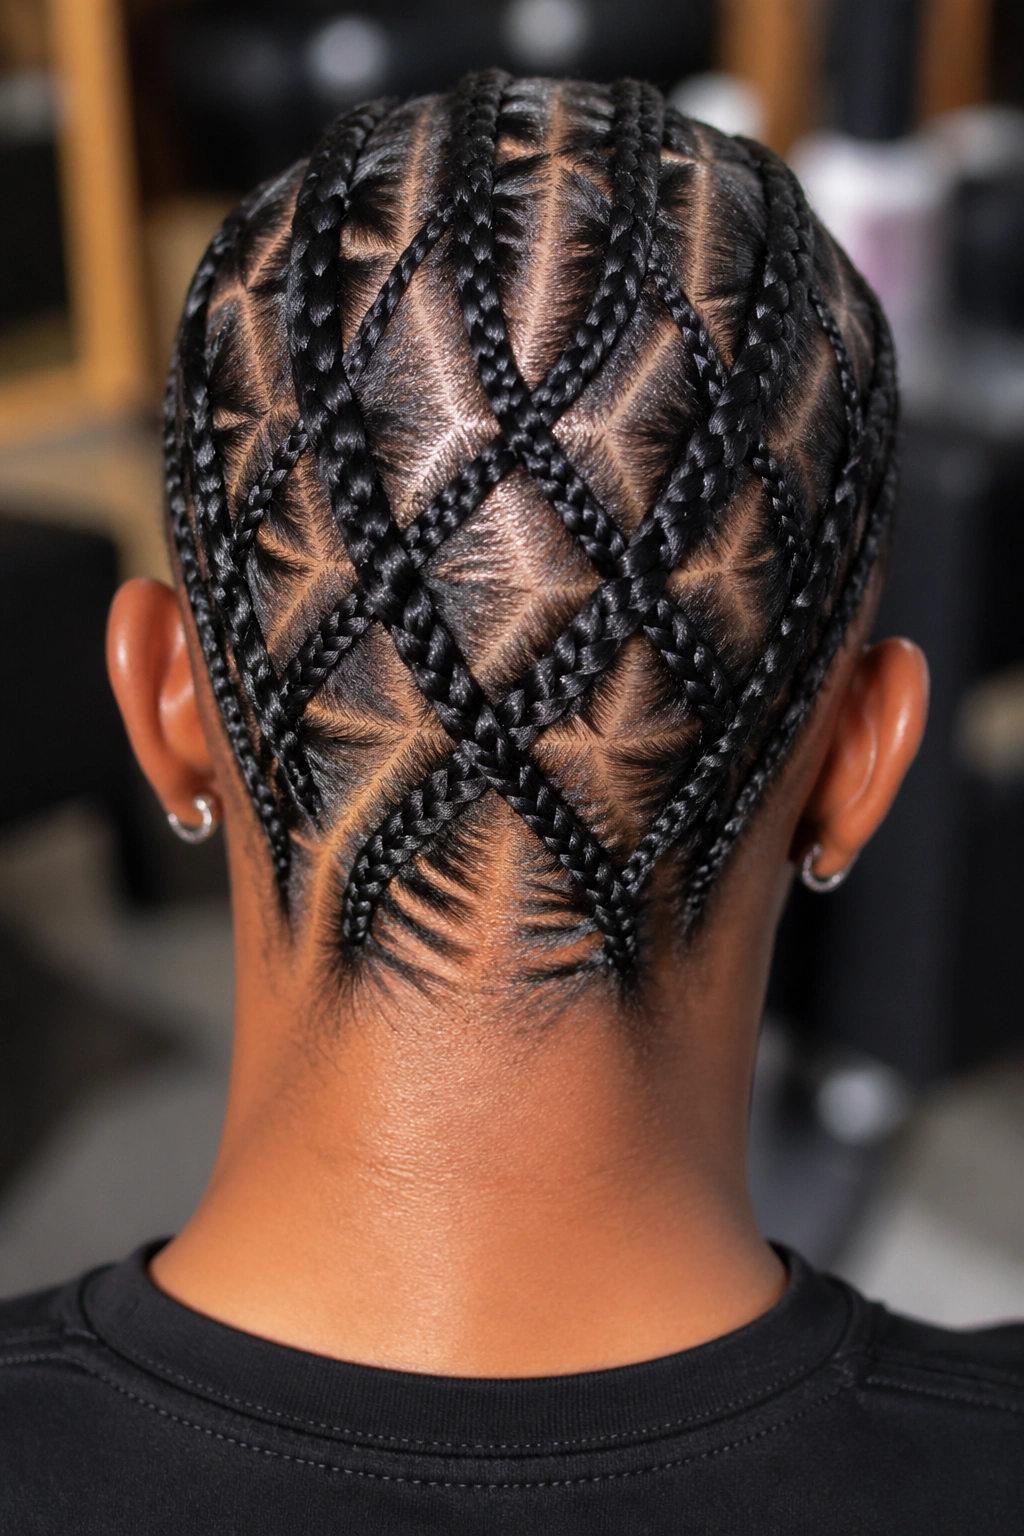
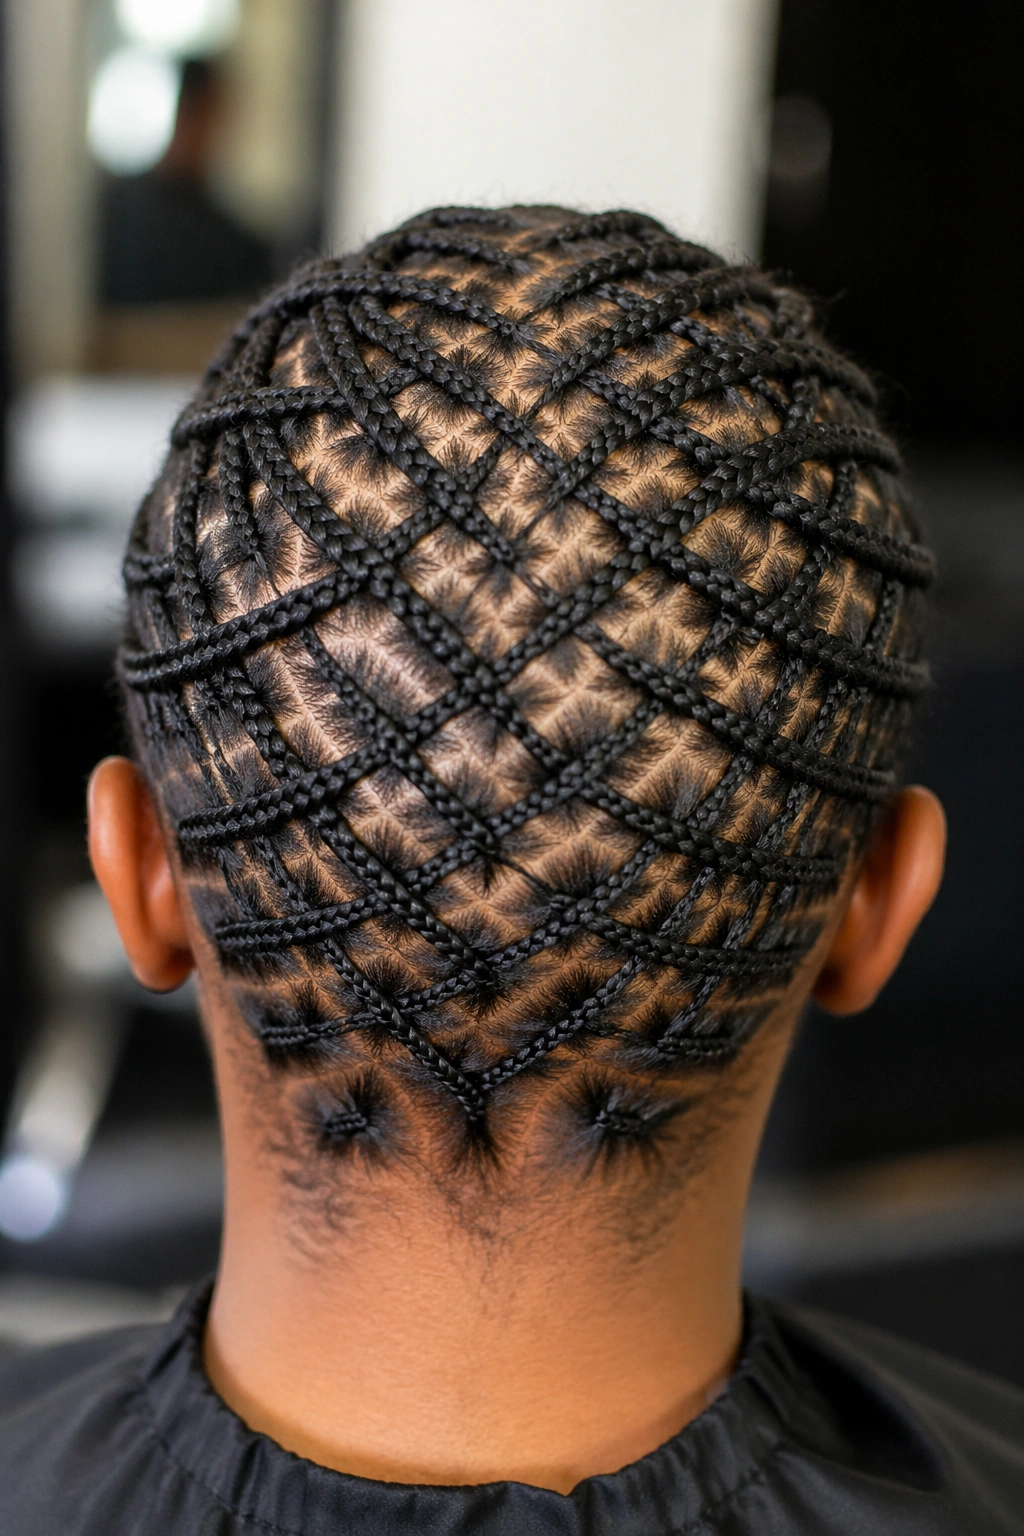
22. Full Head Criss Cross Mesh
The most elaborate style on the list — the entire scalp is covered in a dense criss cross mesh. Ten to fifteen braids weaving across each other in a complex interlocking pattern that covers every square inch.
This is an art-level install. Expect six to eight hours from a skilled braider. Expect careful planning, multiple clip systems to manage sections, and no interruptions during the work.
The Catch
Full mesh sits heavy on the scalp because of the sheer number of braids. New growth lifts become painful faster than in simpler styles. Maximum wear time is two to two and a half weeks before takedown is needed.
Who This Is For
Experienced cornrow wearers who understand the commitment. First-timers should build up through simpler criss cross styles before attempting a full mesh. The install is grueling for both braider and client.
When the style comes together, the result is wearable textile — hair that looks like it’s been hand-woven into a design. Photographs of full mesh criss cross heads routinely go viral because the effect is so distinct from any other braid style.
Sleeping in a Criss Cross Without Wrecking It
Criss cross patterns are more fragile than straight-backs at night. The crossings create pressure points that concentrate friction in small areas. Without proper sleep protection, a criss cross can look rough by day three.
Satin bonnet is the first line of defense. A bonnet that fully covers the head without compressing the pattern. Look for a bonnet with deep, soft elastic that sits at the hairline rather than digging into the edges.
For styles with raised crossings, an additional satin pillowcase beneath the bonnet adds a second layer of slip. The bonnet absorbs direct friction. The pillowcase reduces friction through the bonnet.
Sleeping on your back is gentler than sleeping on your side for criss cross patterns. Side-sleeping compresses the braids where they meet the pillow and can distort crossings overnight. If you’re a confirmed side-sleeper, place a small pillow under the neck to lift the head slightly off the crossings.
Moisturizing Without Destroying the Pattern
Criss cross designs show product buildup faster than simpler styles because the crossings catch and hold any excess product. Use less than you think.
A small spray bottle with water, a teaspoon of leave-in, and a few drops of light oil — shaken well and spritzed lightly along the parts. Not the braids. Just the parts. That targets the scalp where moisture actually matters without soaking the visible braid surface.
Avoid heavy butters. Avoid thick creams. Avoid any product that leaves a white residue. For criss cross wear, light watery products beat heavy sealing products.
Oil the scalp two to three times per week, not daily. Use a nozzled bottle that drops oil directly into the parts without smearing across the braid surface.
Taking Criss Cross Braids Down Carefully

Criss cross patterns take longer to take down than straight-backs because you have to separate the crossings before each braid can be unraveled. Expect 45 minutes to two hours for a full takedown on an elaborate design.
Start with the outermost braids. Unbraid one at a time and clip it out of the way before moving to the next. Trying to unbraid multiple crossing braids simultaneously creates tangles that turn into matting.
Apply a generous amount of conditioner to the hair as you take it down. Conditioner slips the braid apart faster and reduces the breakage that comes from tugging at tangled ends.
After full takedown, the hair needs a clarifying wash, a deep conditioning treatment, and at least 24 hours of rest before the next style goes in. Criss cross takes a toll. Give the scalp recovery time.
Picking a Criss Cross for Your Needs
For a first attempt, start with the single crossing or the simple X. Both styles have one intersection to manage, which teaches the technique without overwhelming.
For everyday wear, the boxer double cross, the criss cross front with straight back, or the half-up criss cross all hold up to normal life — work, school, exercise, errands.
For events, the full woven grid, the criss cross crown up-do, or the full head mesh deliver maximum visual impact. These are big-effort, big-reward styles.
For kids, the heart-shaped criss cross or the criss cross with puffs work best — they read as fun rather than formal, and the install times are more manageable for shorter attention spans.
Match the style to the week ahead. A criss cross that looks beautiful on install Monday but needs daily babysitting isn’t the right style if Tuesday through Friday is a packed calendar. Choose your complexity based on the life around the hair, not just the end photo.