Simple cornrows for kids hit a sweet spot that few other styles manage. They protect fragile hair from constant friction. They keep detangling sessions quick. They survive playgrounds, nap time, splash pads, and everything else a kid throws at them. And when the parting is clean and the braids feel comfortable, a child will actually leave their hair alone long enough for a style to look fresh for more than three days.
The trick with simple cornrows for kids is knowing what “simple” actually means. It doesn’t mean lazy. It doesn’t mean one plain braid straight back with a rubber band at the end. It means the style takes under 90 minutes to install, sits flat enough to sleep on without pain, and doesn’t require hours of maintenance. That’s the real standard.
Below are 22 genuinely different cornrow ideas that work on kids from toddler age up through tweens. Some lean classic. Some add beads or small accessories. A few use feed-in technique for length. Each one has been chosen because it looks neat, lasts well, and won’t leave a child tender-headed by the end of the week.
Why Cornrows Work So Well on Kids
Cornrows protect the ends of the hair — which is the part most prone to breakage in children with curly and coily textures. When the ends are tucked into a braid, they don’t rub against pillows, car seats, or the inside of hoods. That alone cuts breakage by a wide margin.
Cornrows also let the scalp breathe. Unlike wigs or heavy extensions, a clean cornrow style lets air circulate. That matters for kids who sweat a lot during play or who spend time in pools. A sweaty scalp under tight extensions is a recipe for itching and odor. A sweaty scalp under simple cornrows dries out fast.
And cornrows make morning routines bearable. No one wants to wrestle with puffs at 7 a.m. on a school day. A week of pre-installed cornrows buys you that time back.
How Long Kid Cornrows Should Last
Two weeks is the sweet spot for most children. Past two weeks, the new growth at the root starts to lift the braids. That lifting creates tension on the scalp, and the braid base gets fuzzy enough to look unkempt. Past three weeks, you’re risking matting at the roots.
Some parents stretch simple cornrows to three weeks with careful nightly care. That’s fine if the hair is cooperating and the child isn’t complaining. But if the scalp starts to feel tight or itchy, take them down. A matted takedown is miserable for everyone.
One-week styles are fine too — especially for very young children with fine hair. Don’t feel pressured to stretch a style past when it looks good.
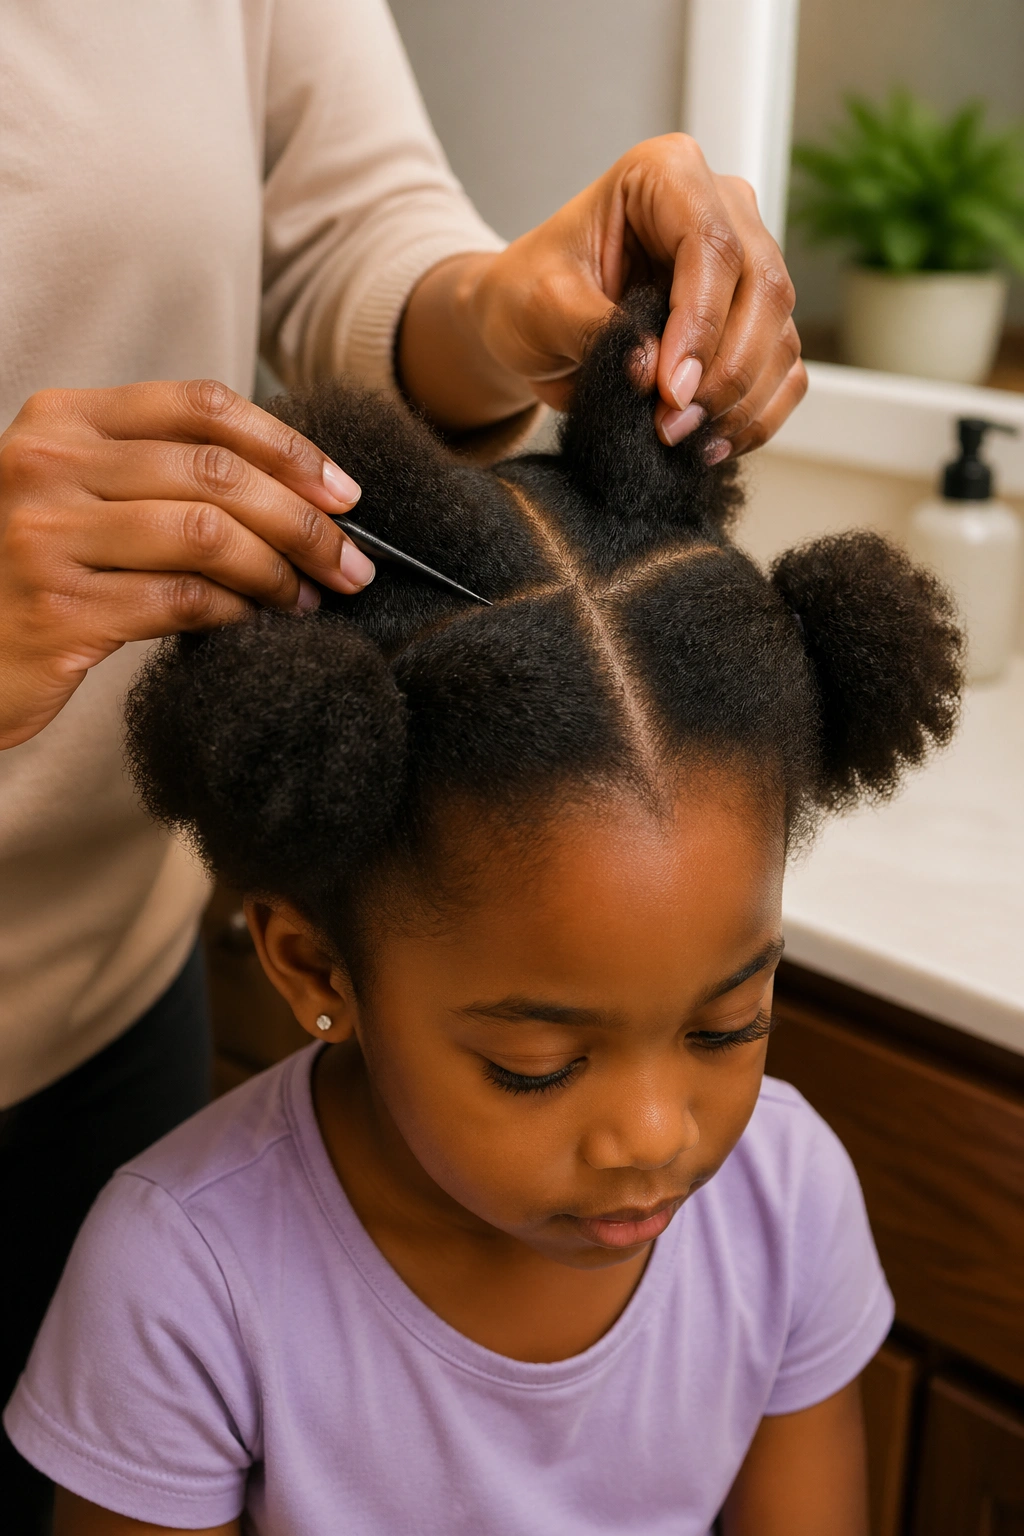
Prep Work That Makes a Difference
Wash day comes first. A gentle sulfate-free shampoo, a rich conditioner left in for at least 10 minutes, and a thorough detangling session under running water. Detangle in four sections. Don’t skip sections. Every tangle left in before braiding becomes a matted knot two weeks later.
Blow-drying the hair on low heat with a comb attachment stretches it enough to braid smoothly without heat damage. Air-drying works too, but fully coiled hair is harder to part and cornrow neatly. A light stretch makes everything faster.
Moisturize before you braid. A leave-in spray, a dollop of cream, and a light oil — applied in that order, to each section, as you work. Dry hair going into braids is dry hair coming out of braids two weeks later. Hydrated hair stays soft for the duration.
Tip: Never install cornrows on freshly washed, soaking wet hair. The hair will shrink as it dries and tighten the braids past what’s comfortable. Wait until the hair is about 70 percent dry before parting.
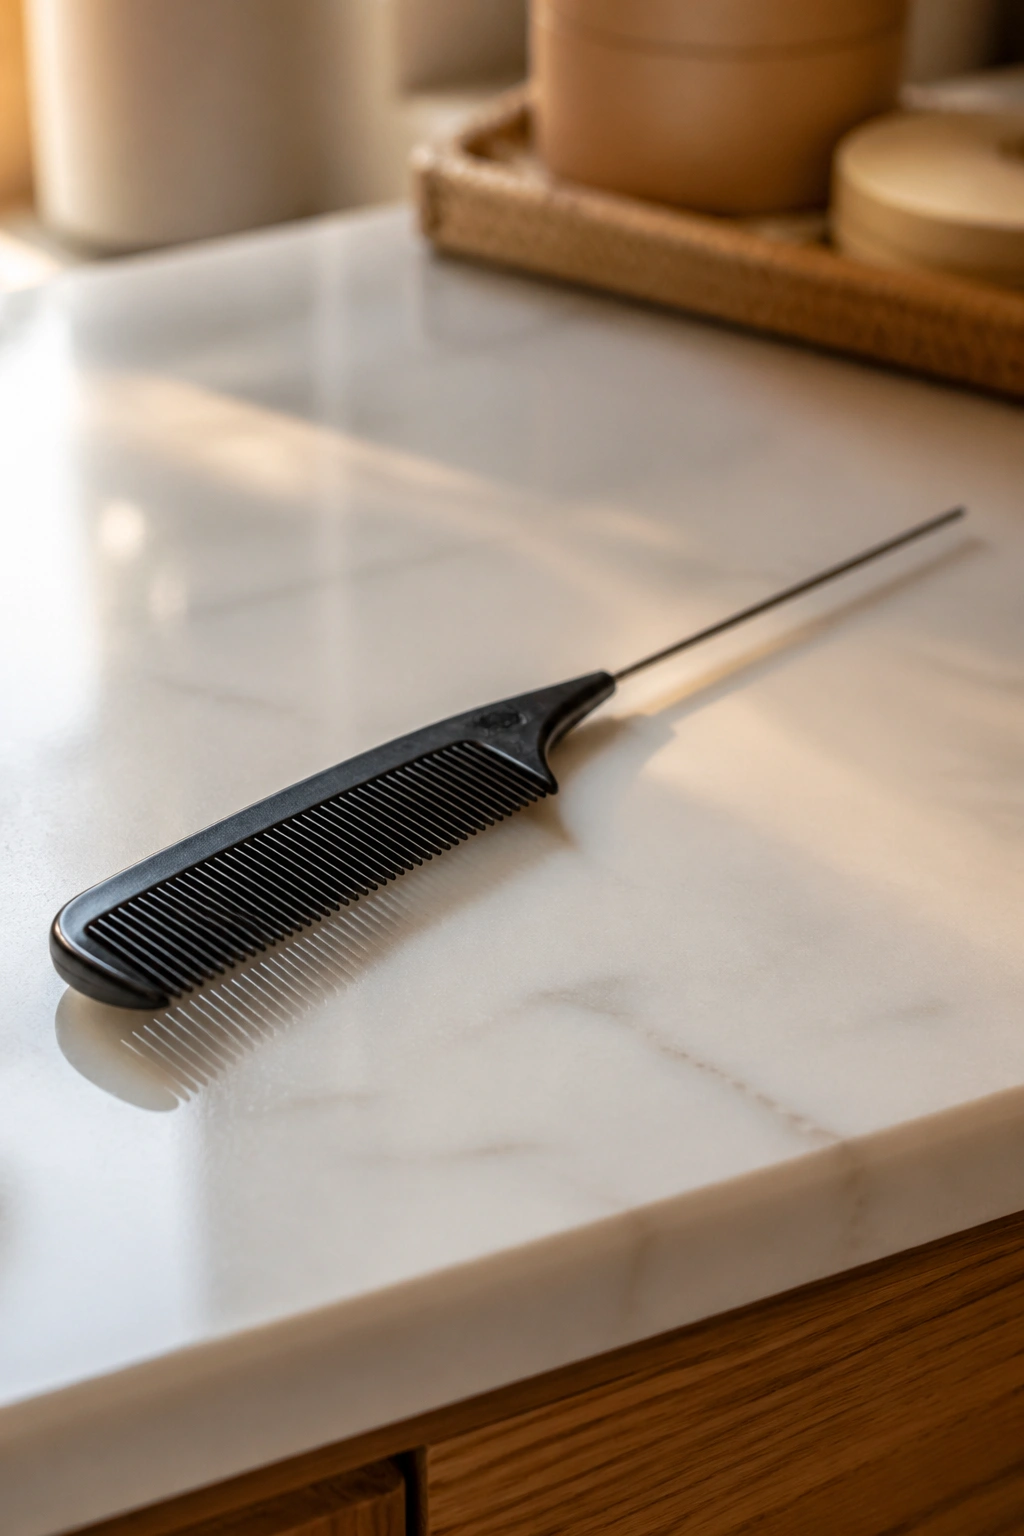
Tools Worth Owning
A rat-tail comb for parting. A wide-tooth comb for detangling. Duck-bill clips or jaw clips for sectioning. A small spray bottle filled with water and a splash of leave-in. A tub of edge gel. Satin-lined pillowcase or bonnet for sleep. Small rubber bands or hair-safe elastics for ends.
That’s it. You don’t need fifteen tools. A kid’s cornrow setup is minimal by design.
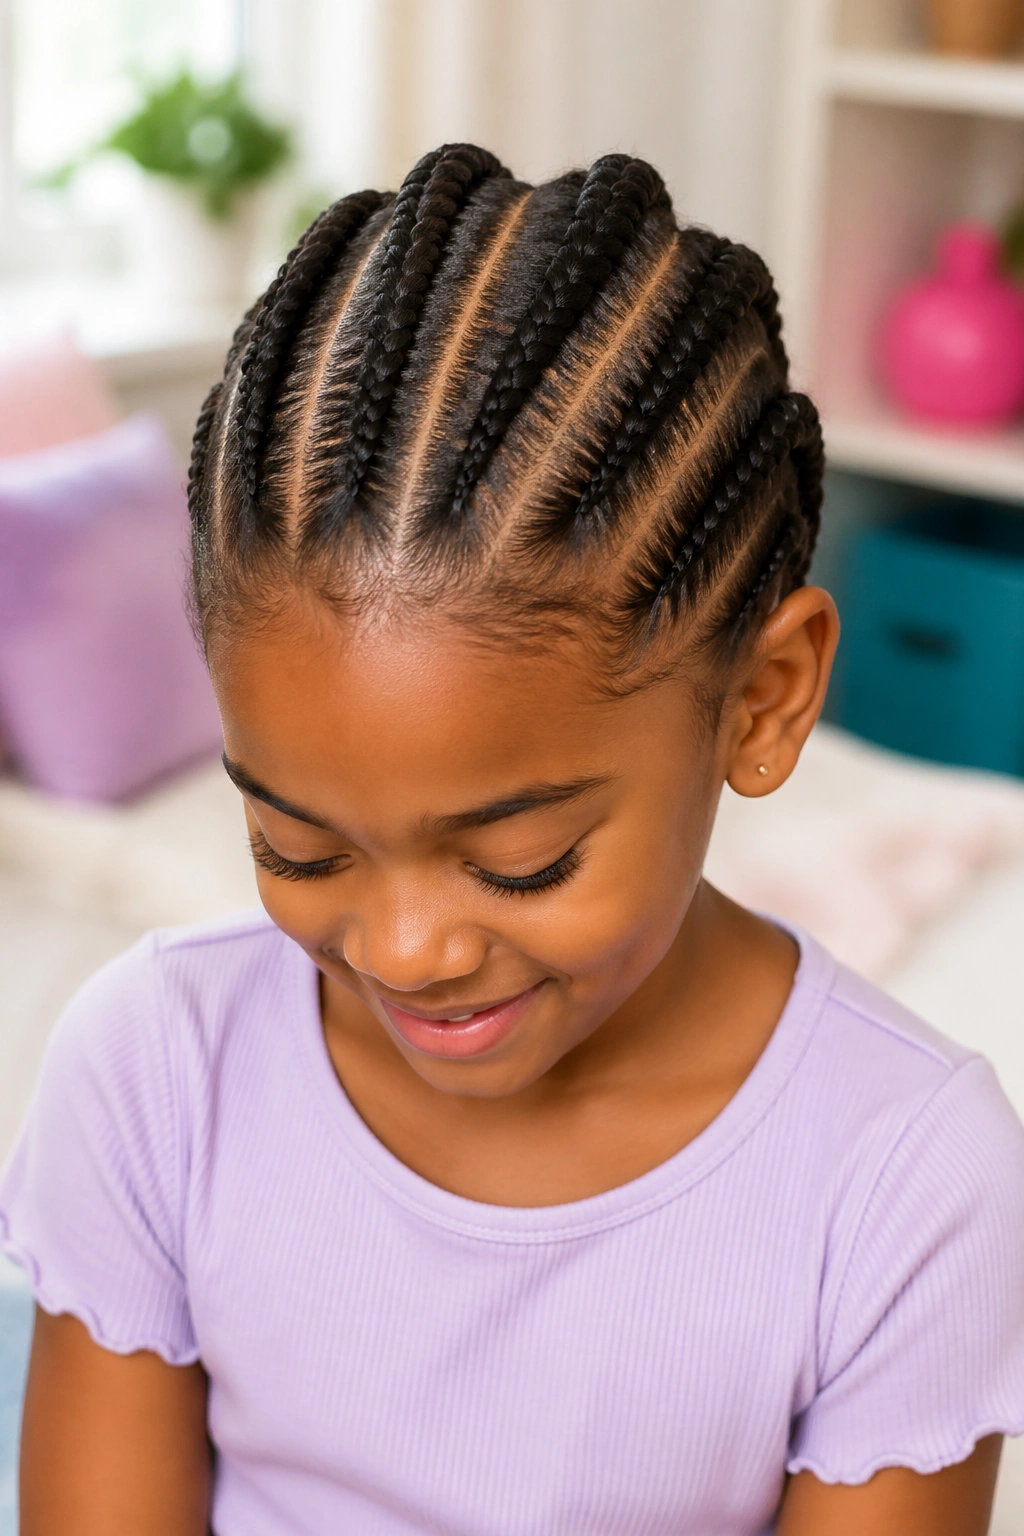
1. Classic Five Straight-Back Cornrows
Five cornrows running from hairline to nape is the gold standard for a reason. It sits flat, looks neat from every angle, and takes about 45 minutes on a cooperative child with shoulder-length hair.
Why It Works
- Even weight distribution across the head
- No pressure points at temples or crown
- Easy to moisturize underneath
- Forgiving if one braid isn’t perfect
The key is making sure the five parts are genuinely even. Measure with your comb — each section should be roughly the width of two fingers. If the center section is wider than the side sections, the finished style will look lopsided from the back.
Tip: Finish each braid with a small clear elastic, then dip the ends in hot water for 10 seconds to seal. No beads, no clips, no fuss.
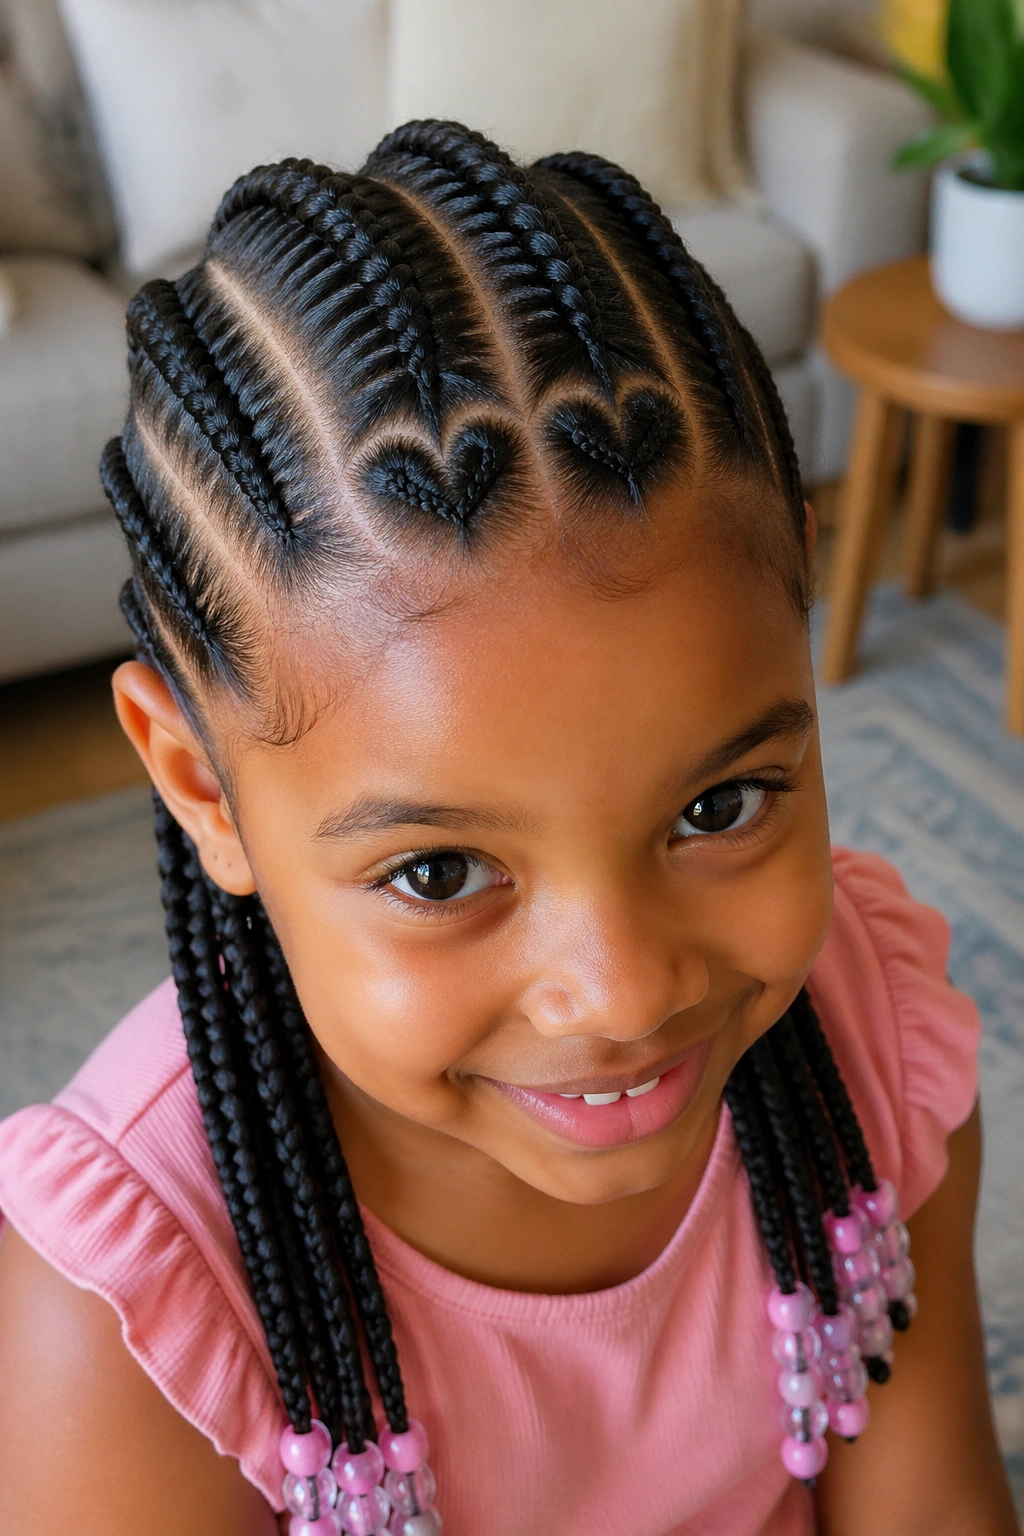
2. Four Cornrows With Heart Parts
A bold claim here — heart-shaped parts are the single best way to make a simple style feel special for a birthday or picture day.
Instead of straight parts running front to back, start with a heart outline on the front section of the head. Two curved parts meet at a dip in the center, then split outward into four cornrows that follow the curve of the skull. The effect is playful without being complicated.
This works best on hair that’s long enough to braid past the occipital bone. Shorter hair makes the heart shape too cramped to read clearly. Medium to long lengths show the shape off best.
The heart takes practice. Draw it first with the rat-tail comb before you commit. Wipe the parts clean with a damp cloth if you mess up, then try again. Once the outline is set, the braids themselves are simple straight-backs.
3. Three Jumbo Cornrows
Why three instead of five? Three jumbo cornrows finish in half the time, read as intentional rather than sparse, and let a child’s natural hair texture show through at the parts.
A jumbo cornrow uses a wider section — about three finger-widths per part. The braid itself ends up thicker and more sculptural. For toddlers with short hair, three jumbo cornrows is often the only realistic option anyway because there’s not enough hair for five.
How to Style It
Run the three parts straight back, same as a five-braid version, but with wider spacing. Finish each with a single bead at the end — something chunky enough to match the scale of the braid. Anything too small gets lost.
This is a good style for the first time a child sits for cornrows. The process is shorter, the child stays patient, and the result looks polished.
4. Side-Part With Six Cornrows
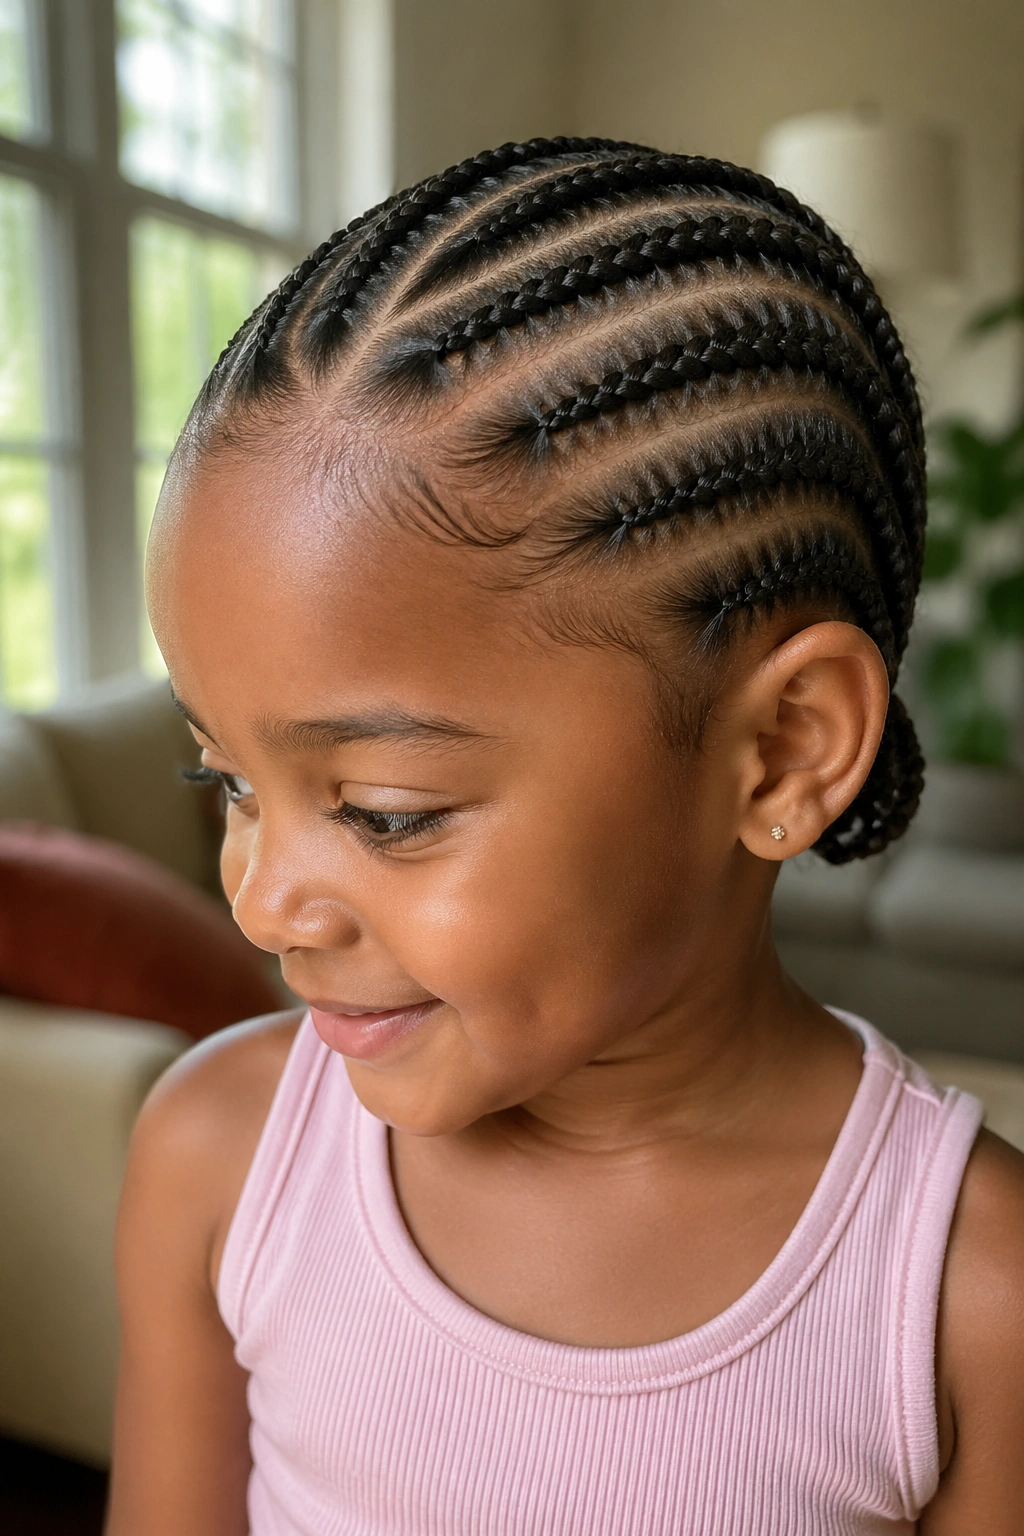
Move the part from the center to about two inches off-center on either side. From that side part, run six cornrows across the head — the longest sweeping from the part down to the opposite ear, the shortest running straight down along the near ear.
The side part gives an asymmetric shape that photographs well. It also solves the problem of kids who fight a middle part because the cowlick won’t cooperate. Work with the hair’s natural fall instead of against it.
Six braids on a kid’s head is a lot. Stagger your pace. Do the front three one evening, the back three the next morning if the child won’t sit for the full install. Nobody says cornrows have to be done in one session.
5. Zigzag Part Braids
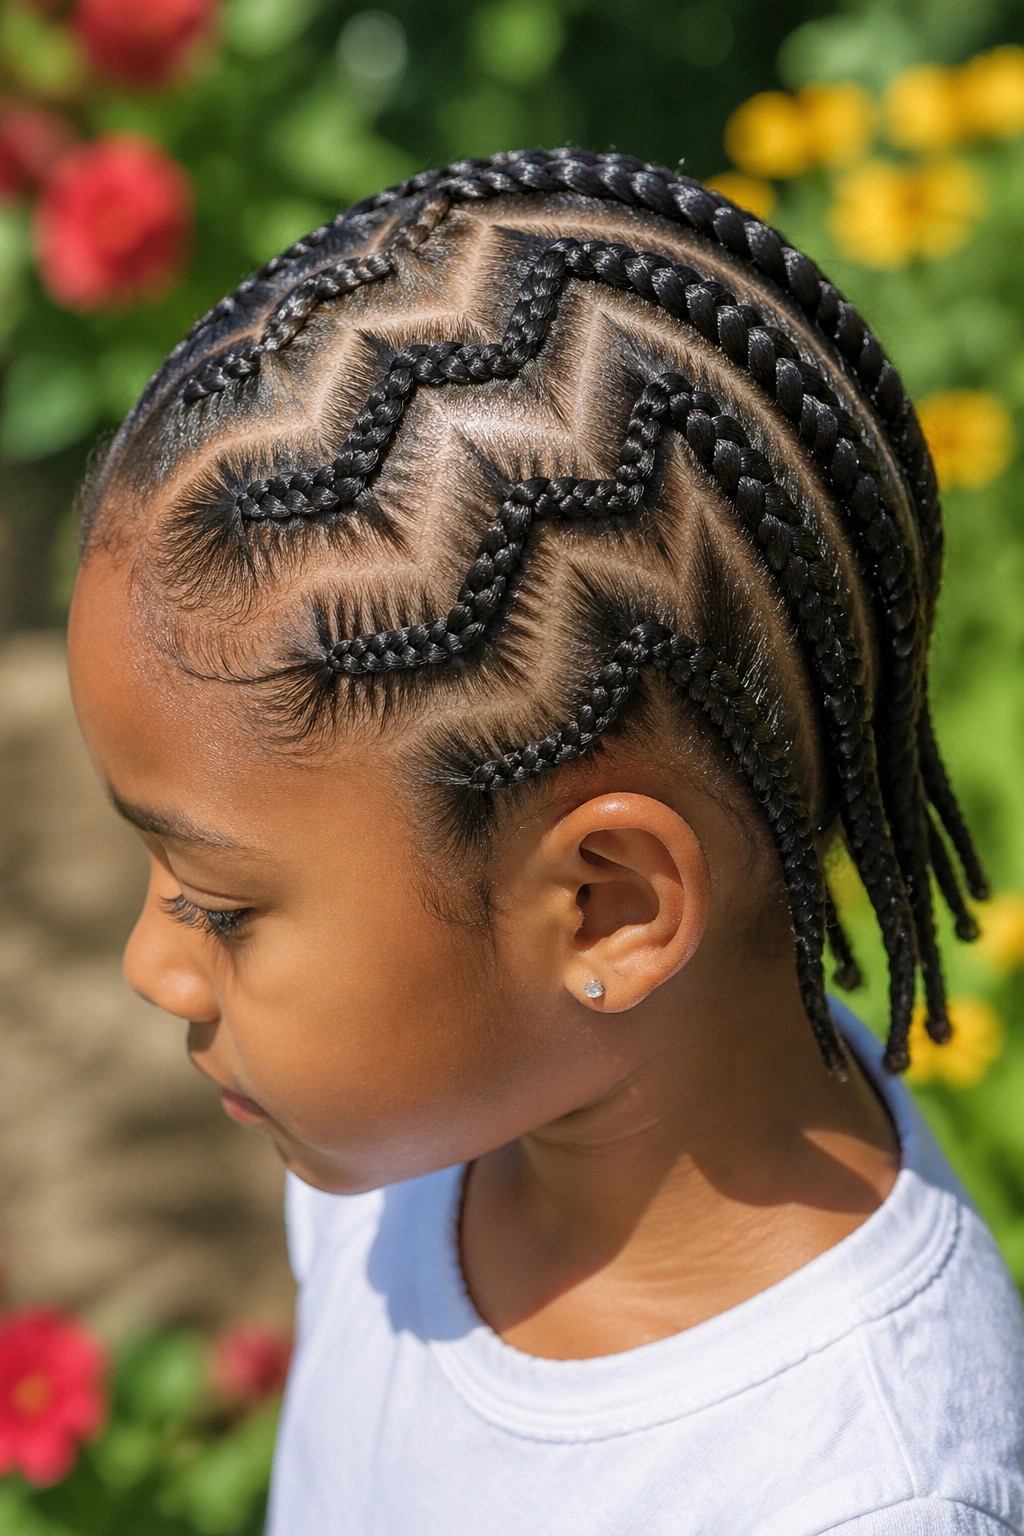
Straight parts are a default. Zigzag parts are a choice.
Using the tail of your comb, carve zigzag lines from the hairline to the nape. Each zigzag creates a wave-shaped section that gets cornrowed along its path. Five zigzag cornrows across the head looks dramatically different from five straight cornrows — more movement, more visual texture, more personality.
The tricky part is keeping the zigzag angles consistent. If the waves get tighter or wider as you move across the head, the finished look goes wonky. Practice on a doll or a mannequin before you try this on a wiggling kid.
Zigzag cornrows look especially good with a light spritz of a finishing sheen. The curves catch the light and the shape reads as intentional.
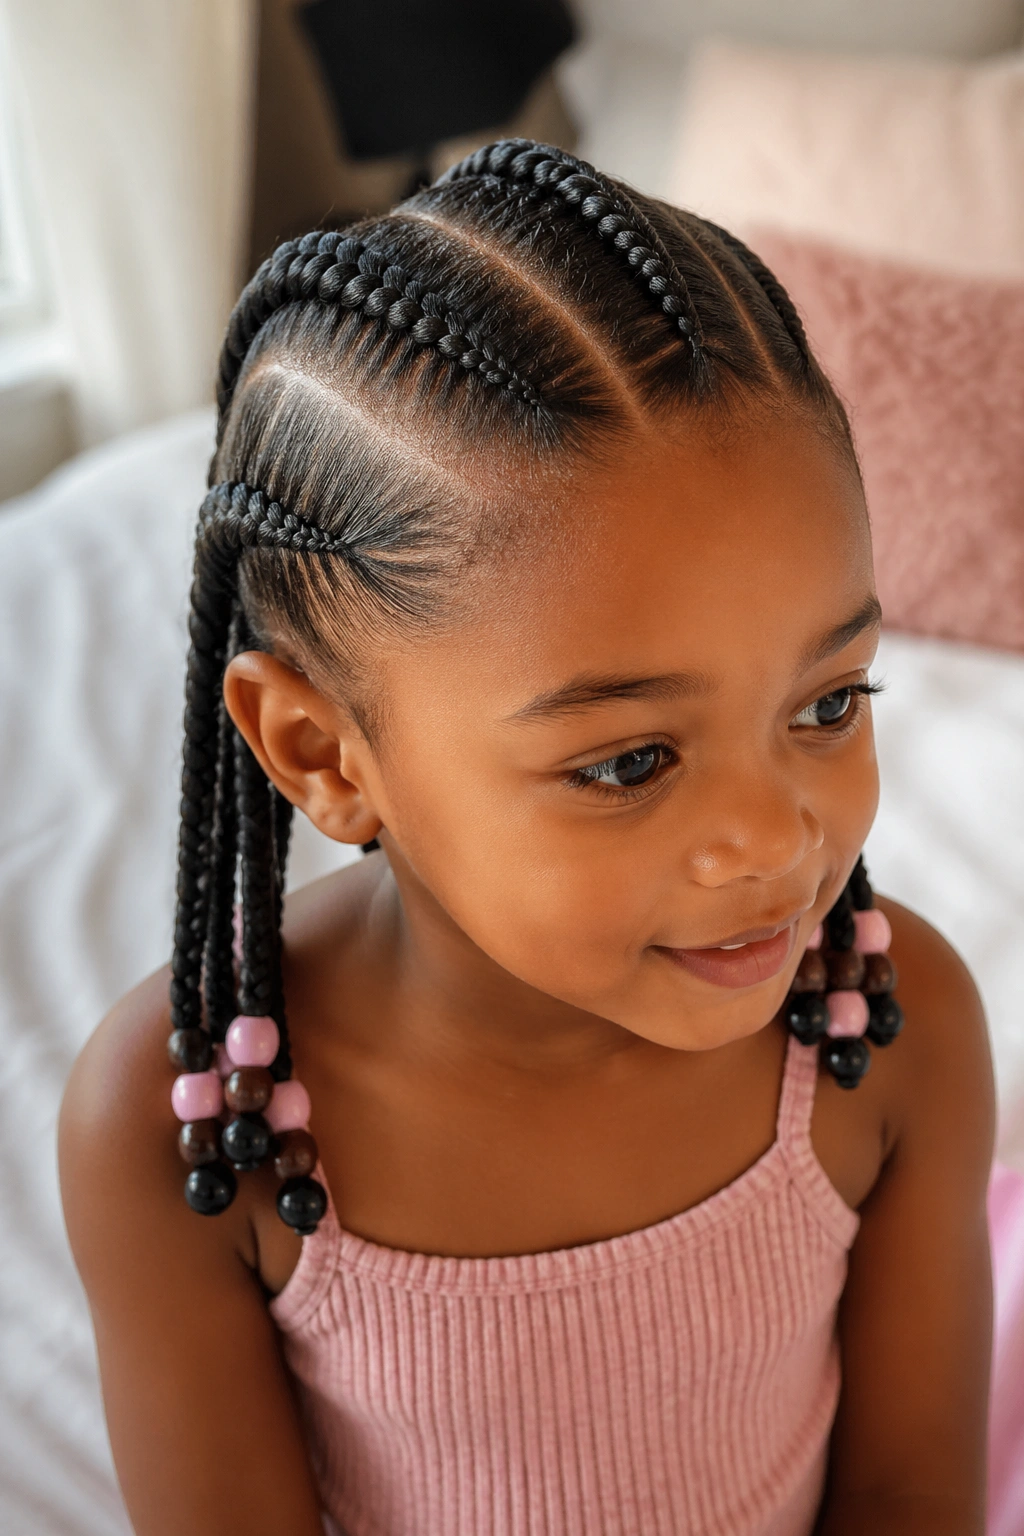
6. Cornrows With Beaded Ends

Beads on the ends of simple cornrows is the oldest trick in the book, and for good reason. Kids love the sound. The weight helps the braids hang straight instead of flipping up. And beads mark the end of the braid cleanly without needing a knot or elastic.
What to Watch For
- Bead size should match hair thickness — heavy beads on thin braids pull and break the ends
- Elastic bands hold beads better than knots
- Plastic beads are lighter than glass and safer for sleep
- Check bead attachment weekly — loose ones fall off and become choking hazards for very small siblings
Two to three beads per braid tip is the right number. More than that turns into a weight problem. A single chunky bead also works and is faster to install than stacking three small ones.
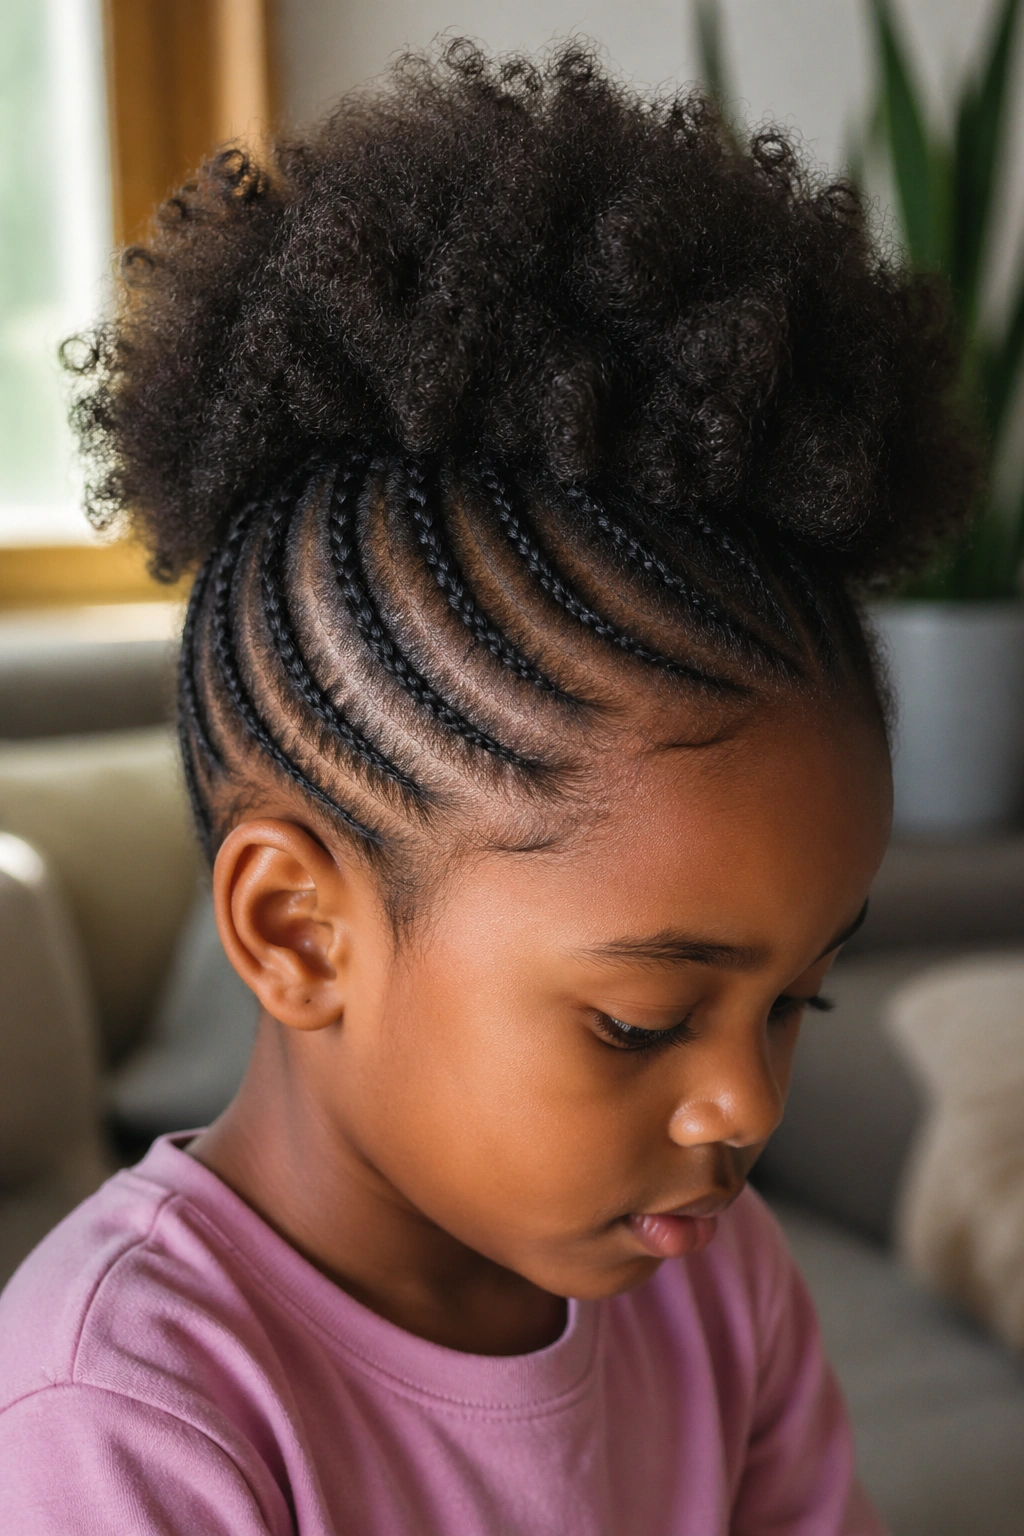
7. Half-Up Puff With Cornrows in Front

Only the front and top sections are cornrowed — six to eight small braids running from the hairline back to about the crown. The rest of the hair is left loose and gathered into a puff or a pineapple at the top of the head.
This style is perfect for kids with hair that’s still growing in patchy. The front cornrows look neat and controlled. The puff hides anywhere the back length isn’t matching. It also takes half the time of a full-head cornrow install.
Secure the puff with a fabric-covered scrunchie — never a rubber elastic directly on the hair. The fabric protects the new growth at the puff base from snapping.
Tip: Refresh the puff every other morning with a spray of water and a little leave-in. The cornrows in front don’t need touching.
8. Cornrows Into Two Low Pigtails
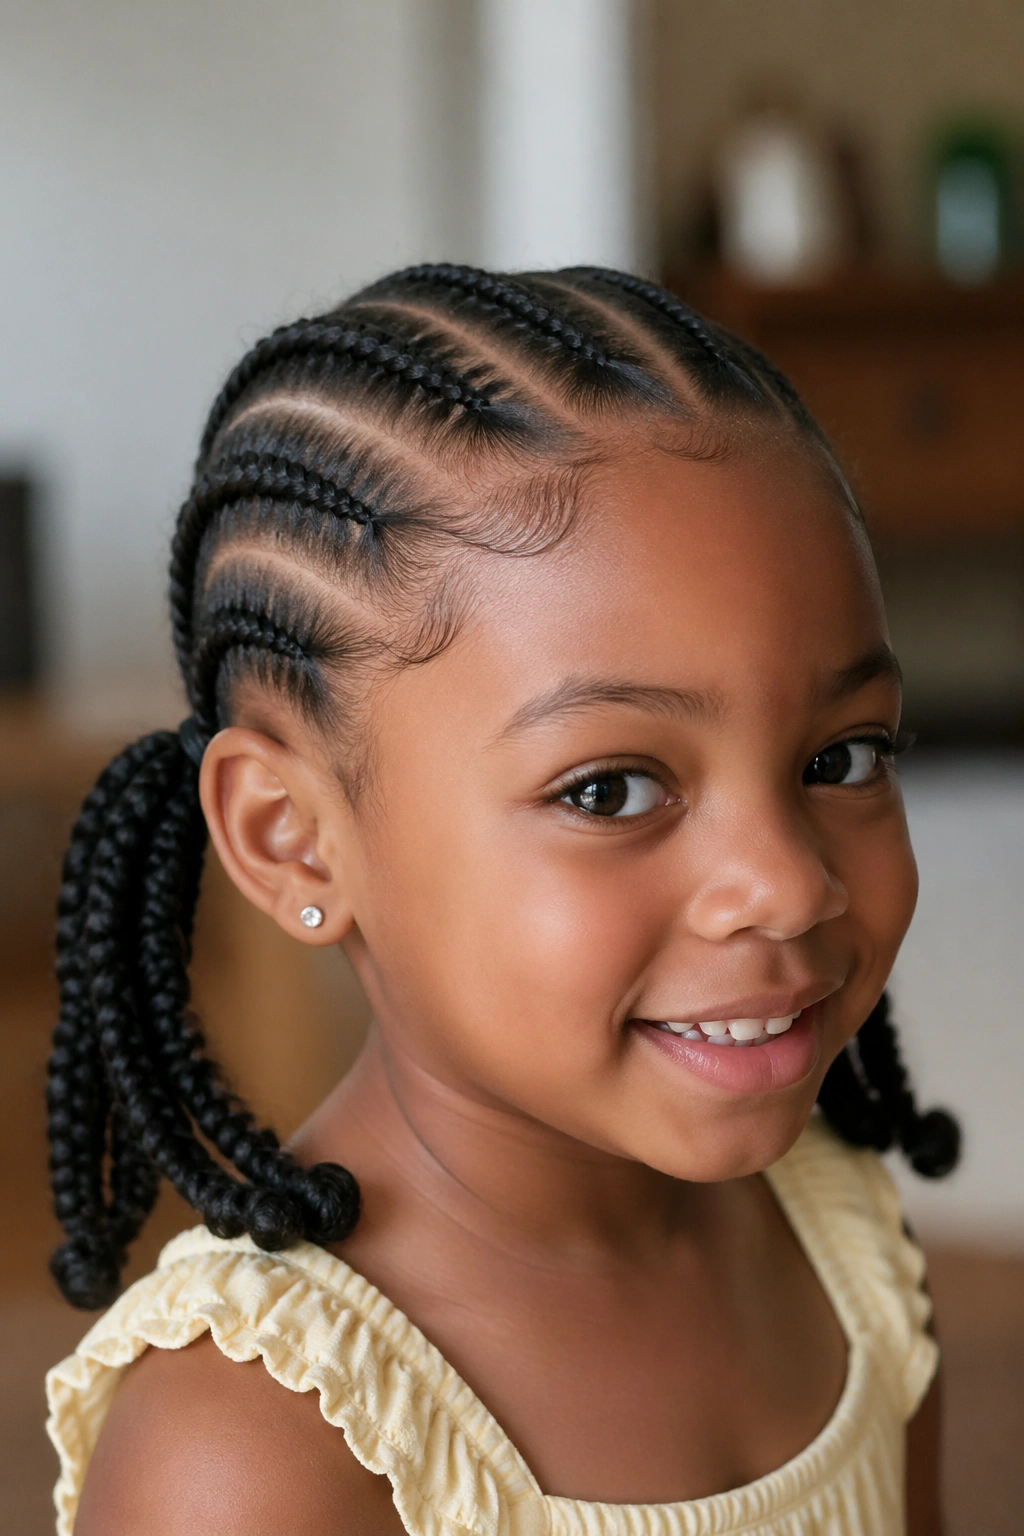
Five to seven cornrows run from the front of the head down to just above the ears. From that point, the braids gather into two low pigtails — one behind each ear.
This works best when the cornrows feed in extension hair near the back so the pigtails have length and weight even if the child’s natural hair is short. Feed-in is optional though. Natural-hair-only versions look sweet on kids with chin-to-shoulder-length hair.
Low pigtails sit below the ears, which keeps them out of the way at school desks and during car rides. High pigtails bump against headrests and get squashed. Low is the practical choice for daily wear.
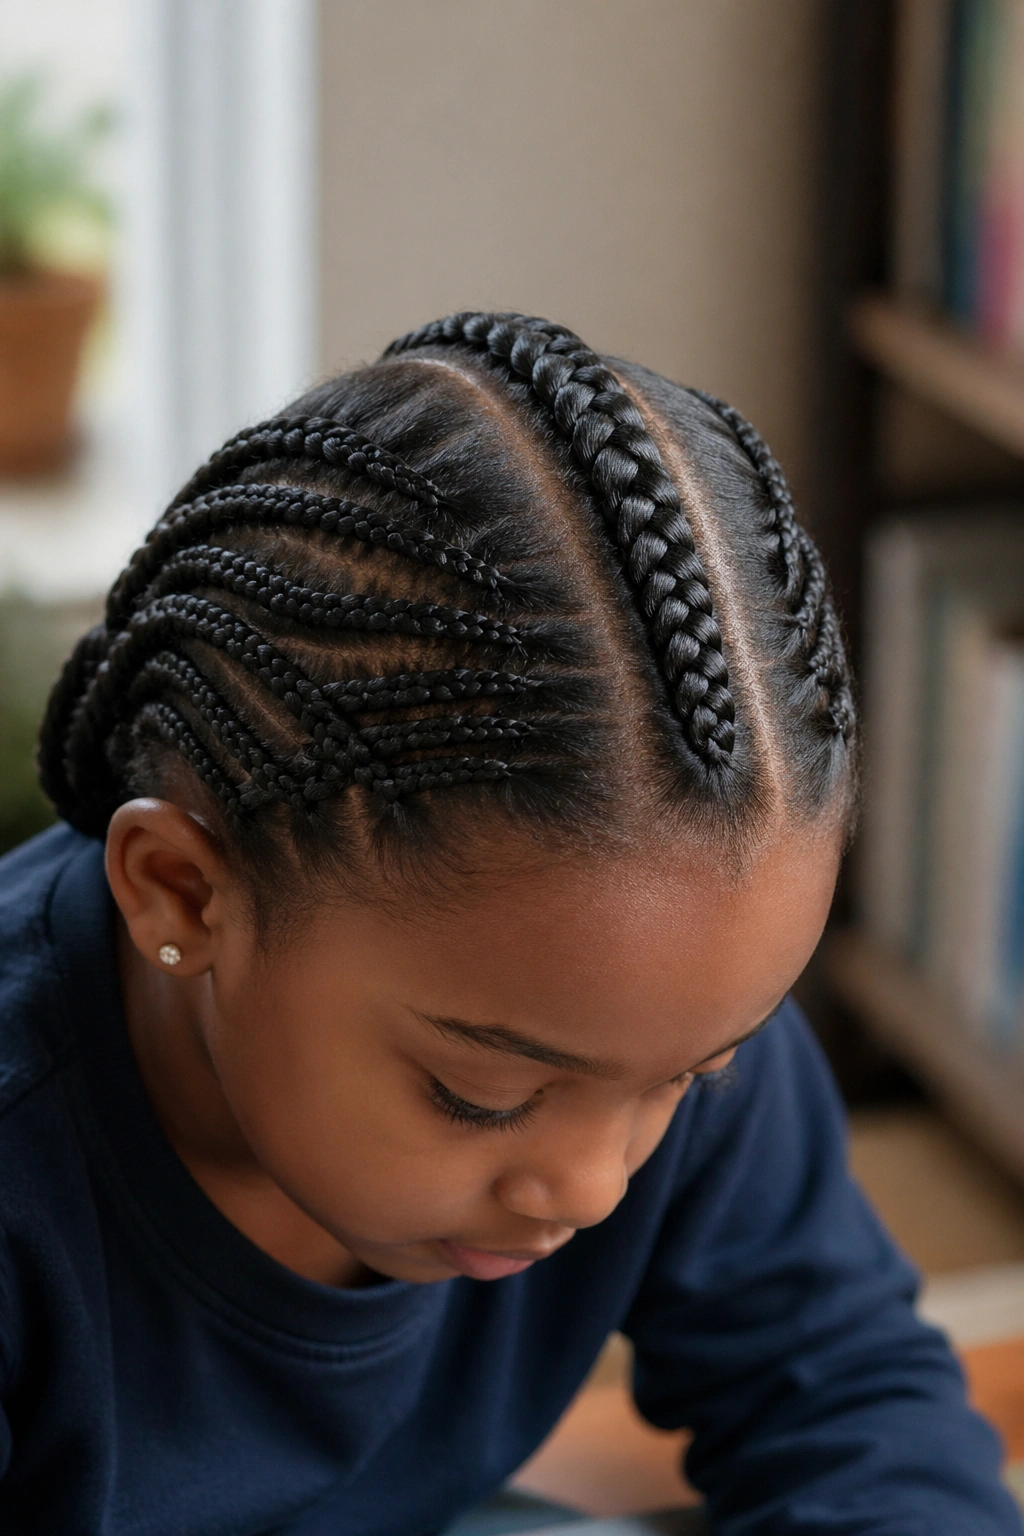
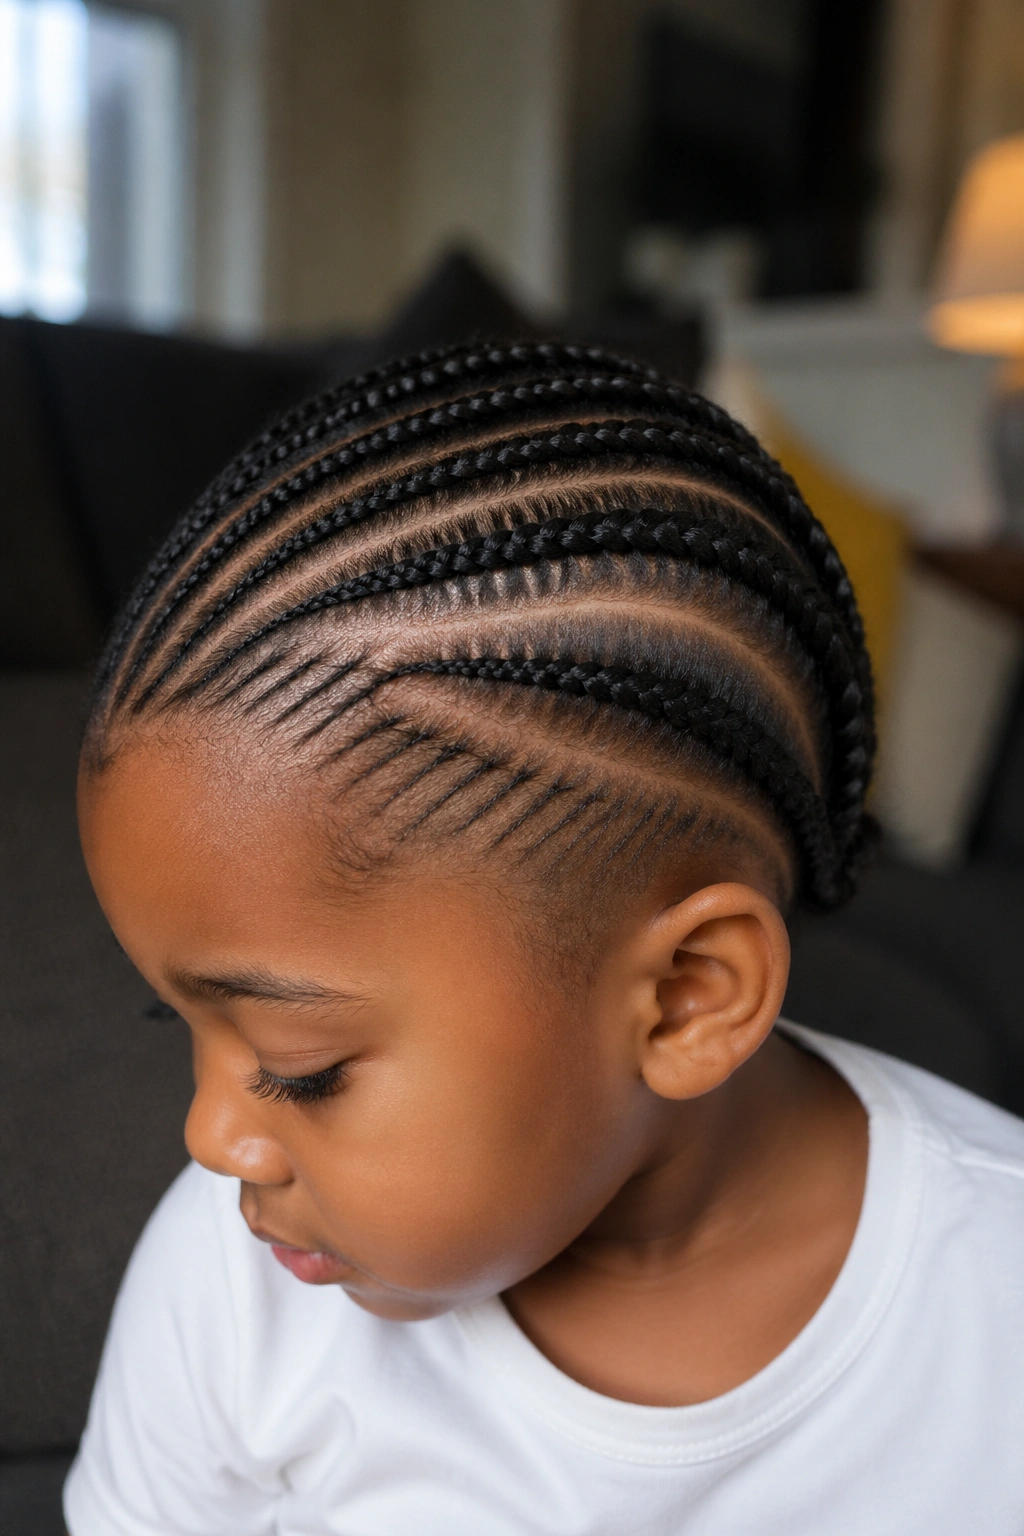
9. Diagonal Cornrows Across the Head
Instead of running front-to-back, the parts angle diagonally across the scalp. Five to seven cornrows travel from the front-right hairline down toward the back-left, or vice versa. The diagonal line creates motion — the style looks like it’s in mid-flow.
The diagonal pattern does something visual that straight-back can’t. It elongates the face shape and draws the eye across the head rather than straight down. For kids with rounder face shapes, diagonal cornrows are a subtly flattering choice.
Technique-wise, diagonal cornrows are trickier than straight-back because the braider has to maintain a consistent angle across every part. A good reference point is to align the first part with the child’s temple and the last part with the opposite ear. Every part in between stays parallel to those two.
10. Cornrows With Curly Ends Left Out
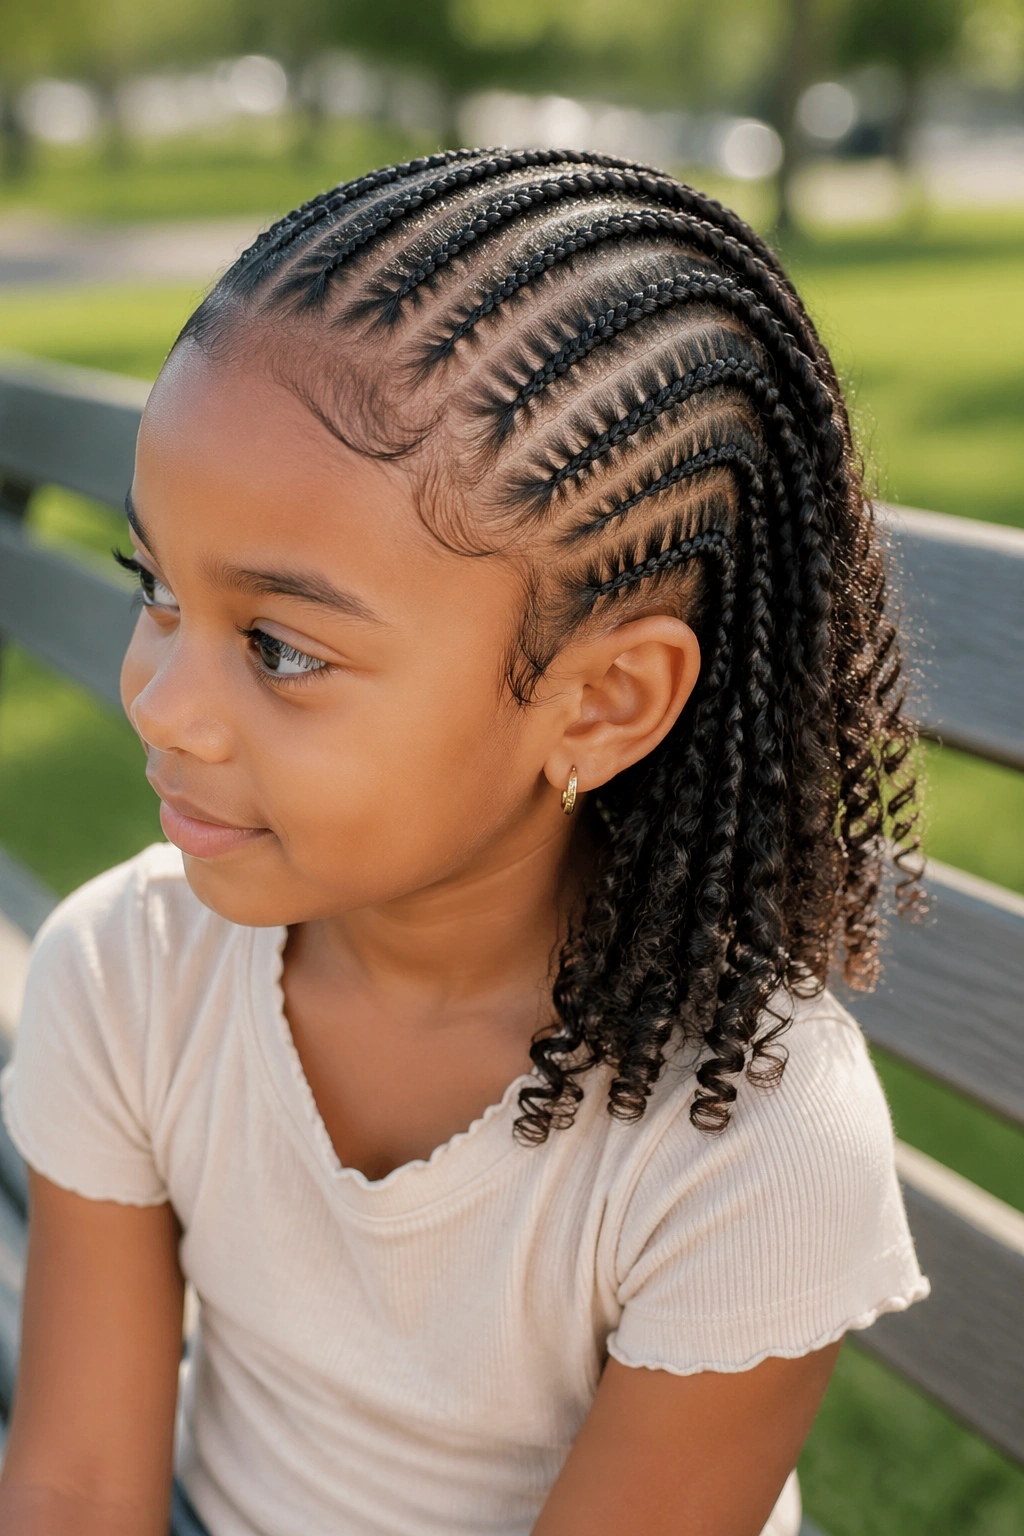
Cornrow the hair from hairline to about two-thirds of the way down. Stop the braid there. Release the remaining third of the length as loose curls.
The effect is cornrows on top, natural curls below — the best of both worlds for kids who love how their curls look but need the scalp protection of braids. The transition from braid to loose hair should sit right around the occipital bone for the most flattering silhouette.
To get the curl pop at the ends, twist the released sections after braiding and let them dry overnight. In the morning, separate gently and fluff. The curl pattern holds for three to four days before it needs a refresh.
11. Single Center Cornrow With Side Twists
One wide cornrow runs down the center of the head like a mohawk line. On either side of that center braid, the remaining hair is divided into flat twists rather than full cornrows.
The flat twists are faster to install than braids — about 40 percent quicker. For a kid who hates sitting, a center cornrow plus twists can be done in under an hour with practice.
Who This Is For
Kids aged four to eight with medium-density hair who need a style that looks put-together but installs fast. This isn’t the style for formal occasions, but it’s a strong pick for the first week back at school when you’re still finding a rhythm.
The center cornrow should be wider than the twists on either side — roughly 1.5 inches versus 0.75 inches. The scale difference is what makes the style feel designed rather than random.
12. Cornrows Shaped Into a Crown
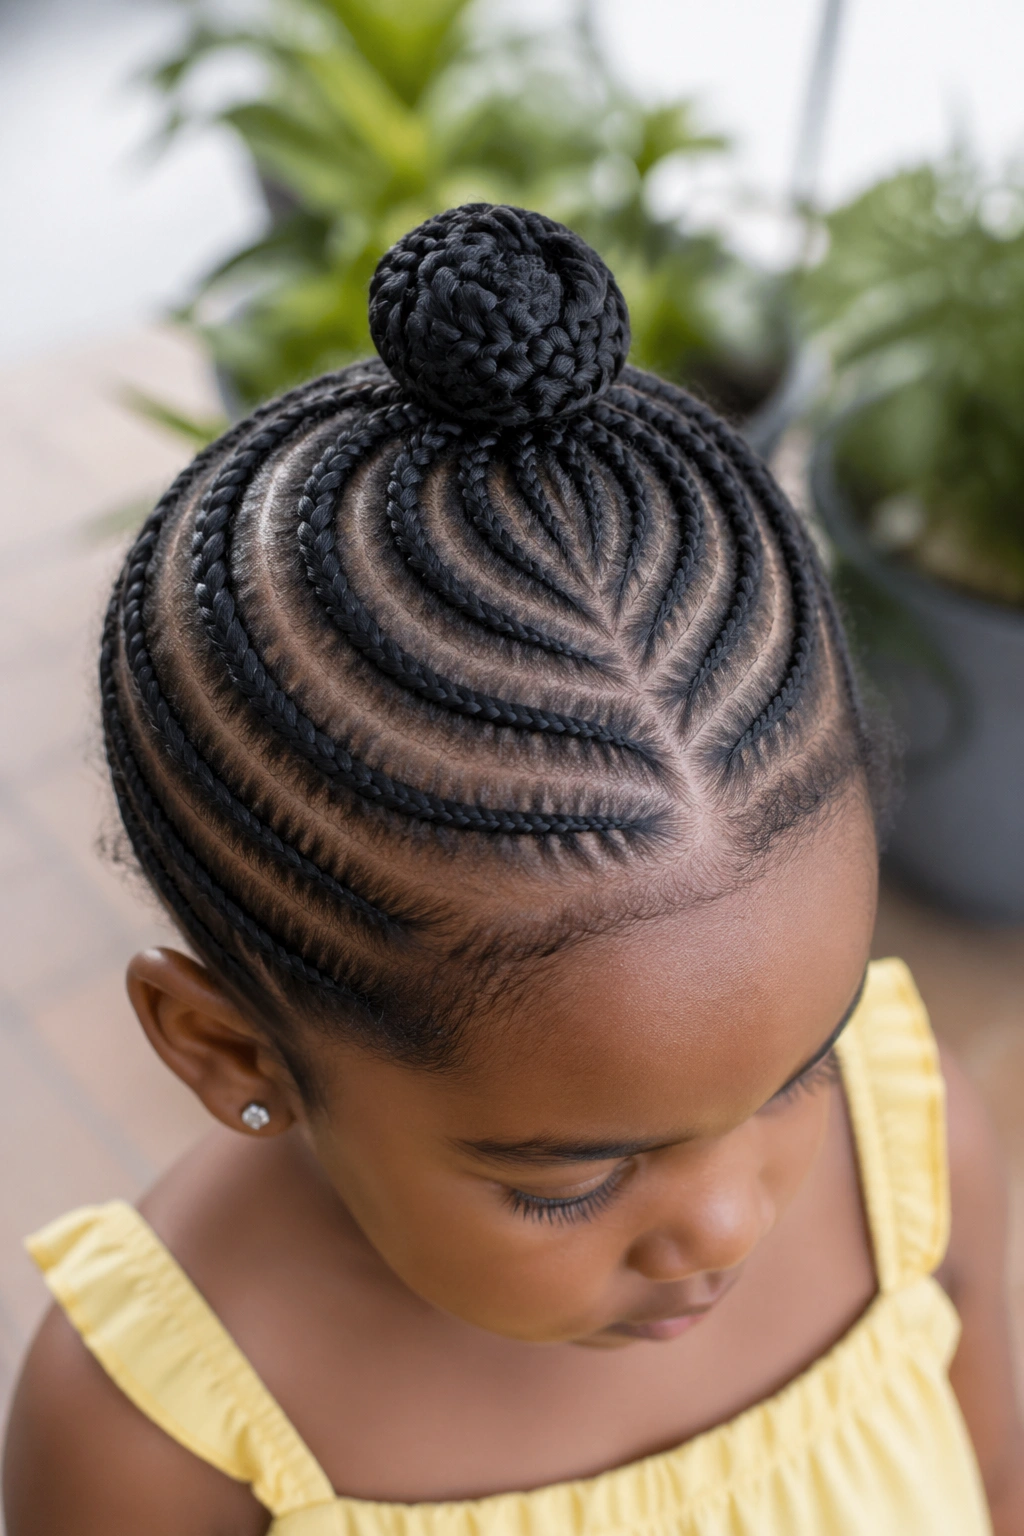
Cornrows arranged in a circle around the top of the head — picture a crown sitting on the scalp. The braids radiate inward from the hairline toward a center point on the crown, where they gather into a small topknot or a coiled bun.
This is a dressier simple style. Great for flower girls, dance recitals, family portraits. The crown shape photographs especially well from above because the pattern is so clearly geometric.
Expect this to take longer than straight-back cornrows — about 90 minutes to two hours depending on the child’s hair length. The parts have to be precise because the circular pattern shows every mistake. But once it’s done, it lasts as long as any standard cornrow install.
13. Two Dutch-Style Cornrows
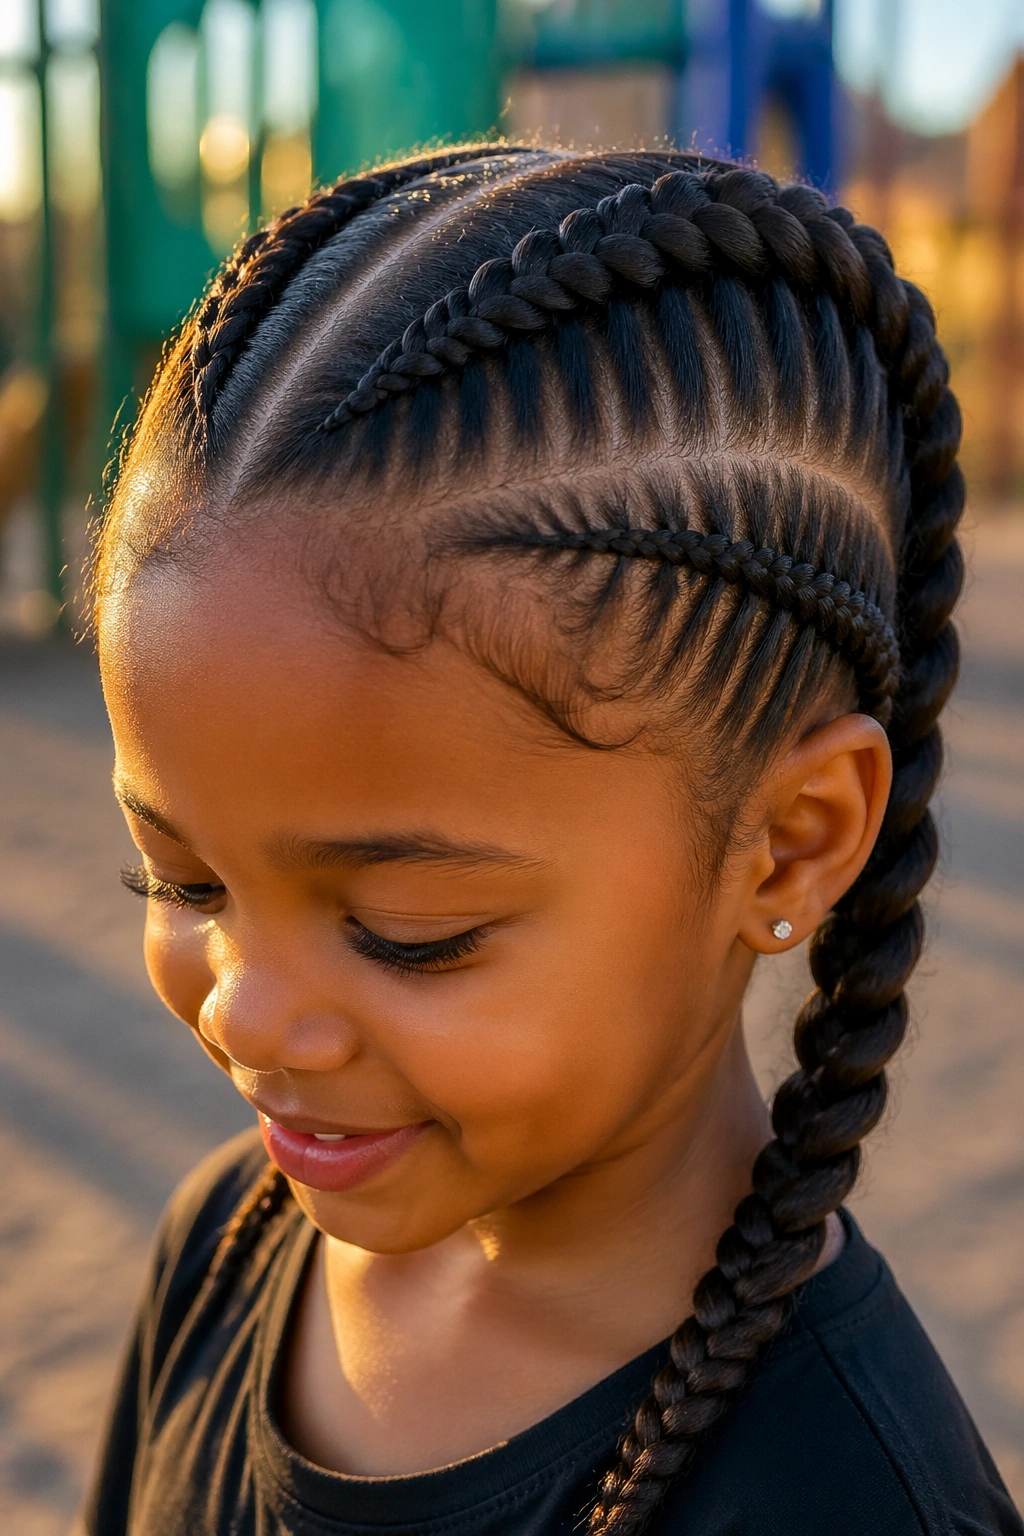
Picture two thick cornrows running side by side down the length of the head, parted right down the middle. The Dutch technique (under-hand braiding rather than over-hand) makes the cornrows raise up off the scalp instead of lying flat.
Raised braids cast shadows. Shadows give the style dimension. Two Dutch cornrows look bulkier and more sculptural than two flat cornrows, and they take the same amount of time to install.
This is a solid pick for kids who wear pigtail styles all the time and want something that reads a little older without losing the two-braid simplicity. It’s also easier to sleep on than many multi-braid styles because there are only two pressure points instead of five or six.
14. Cornrows With Ribbon Woven In
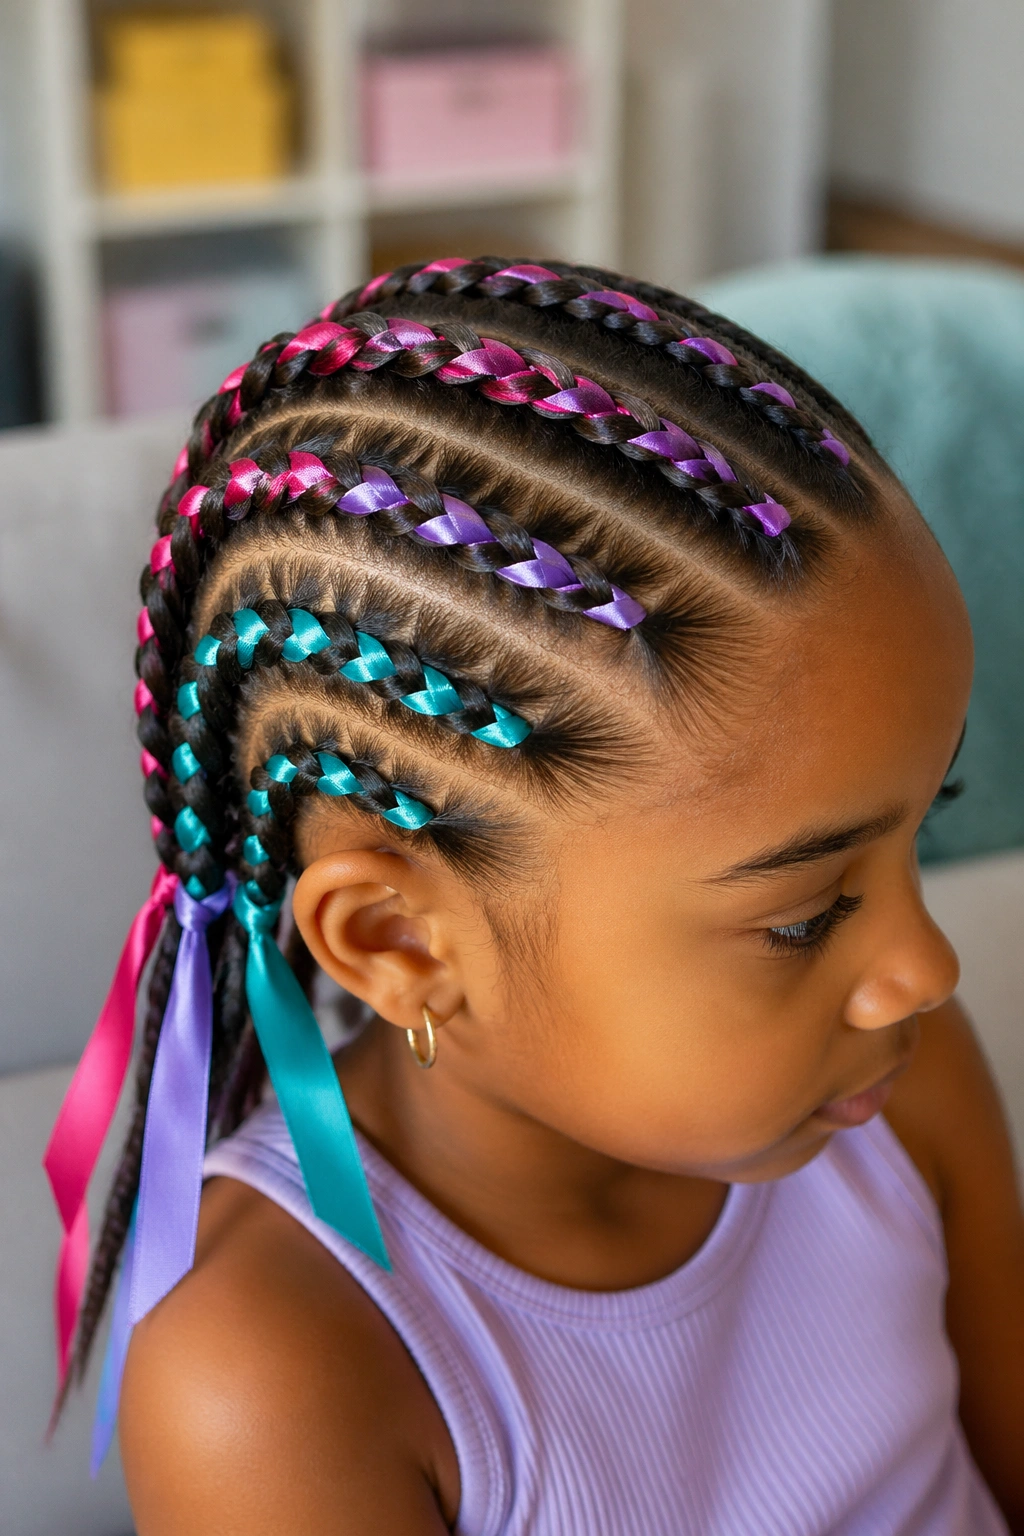
A thin satin ribbon — about a quarter-inch wide — gets woven into each cornrow as it’s braided. The ribbon follows the braid from root to tip, adding a pop of color without bulk or weight.
Three ribbons in three different colors across six cornrows looks festive without going overboard. Matching ribbons across all braids looks more polished and formal.
Cut the ribbon about four inches longer than the braid itself. You need the extra length to tie off the end. And the extra slack lets the ribbon sit flat against the braid rather than pulling tight.
Tip: Remove ribbons before bed every night. Sleeping on ribbons creates permanent creases and rubs the edges of the satin, which then fray and snag in the hair.
15. Short Cornrows for Very Fine Hair
Unlike styles built for thick hair, this approach uses smaller sections and fewer braids. Four cornrows on a child with very fine hair, sized to match the hair’s density, looks appropriate where five or six would look sparse.
What’s Different
Fine hair slips. Tension that works on thick hair will slide a braid right out the back of a fine-haired child’s head. Keep the tension moderate, not tight. Use a leave-in cream with slight hold to grip the strands as you braid.
Who This Is For
Children whose hair is still filling in — typically under age three, or older kids with naturally fine texture. Don’t force a thick-hair approach on fine hair. The style will look lost and feel uncomfortable.
Finish fine-hair cornrows with small elastic bands, never rubber bands. Rubber snags on fine strands and pulls them out at the root when you remove it.
16. Zipper-Part Cornrows
A zipper part is a parting technique where the part line looks like the teeth of a zipper — tiny triangular sections alternating from side to side along the part. When cornrows are braided out from a zipper part, the hair at the base of each braid creates a crisp geometric pattern.
Five cornrows with zipper parts between them turn a basic straight-back into something that looks like it took twice as long to install. The zipper adds maybe 15 minutes to the total time.
Zipper parts only read clearly on hair that’s been blown out or stretched. On fully coiled hair, the parts get lost in the texture. If you want the zipper to show, blow-dry first.
17. Cornrows With a Natural Hair Afro Top
Only the sides and back are cornrowed. The top of the head is left free as a natural afro. The cornrows sit flat along the sides and back like a cushion frame around the top.
This style nods to barbershop fade cuts but keeps everything soft and child-friendly. It looks great on boys and girls alike. Installation is quick because only about 60 percent of the head is being braided.
The top afro needs to be moisturized daily since it’s exposed. A spritz of water and a light cream before bed keeps it from matting during sleep. The cornrowed sides don’t need the same daily attention — every three to four days is enough.
18. Cornrows With a Decorative Headband
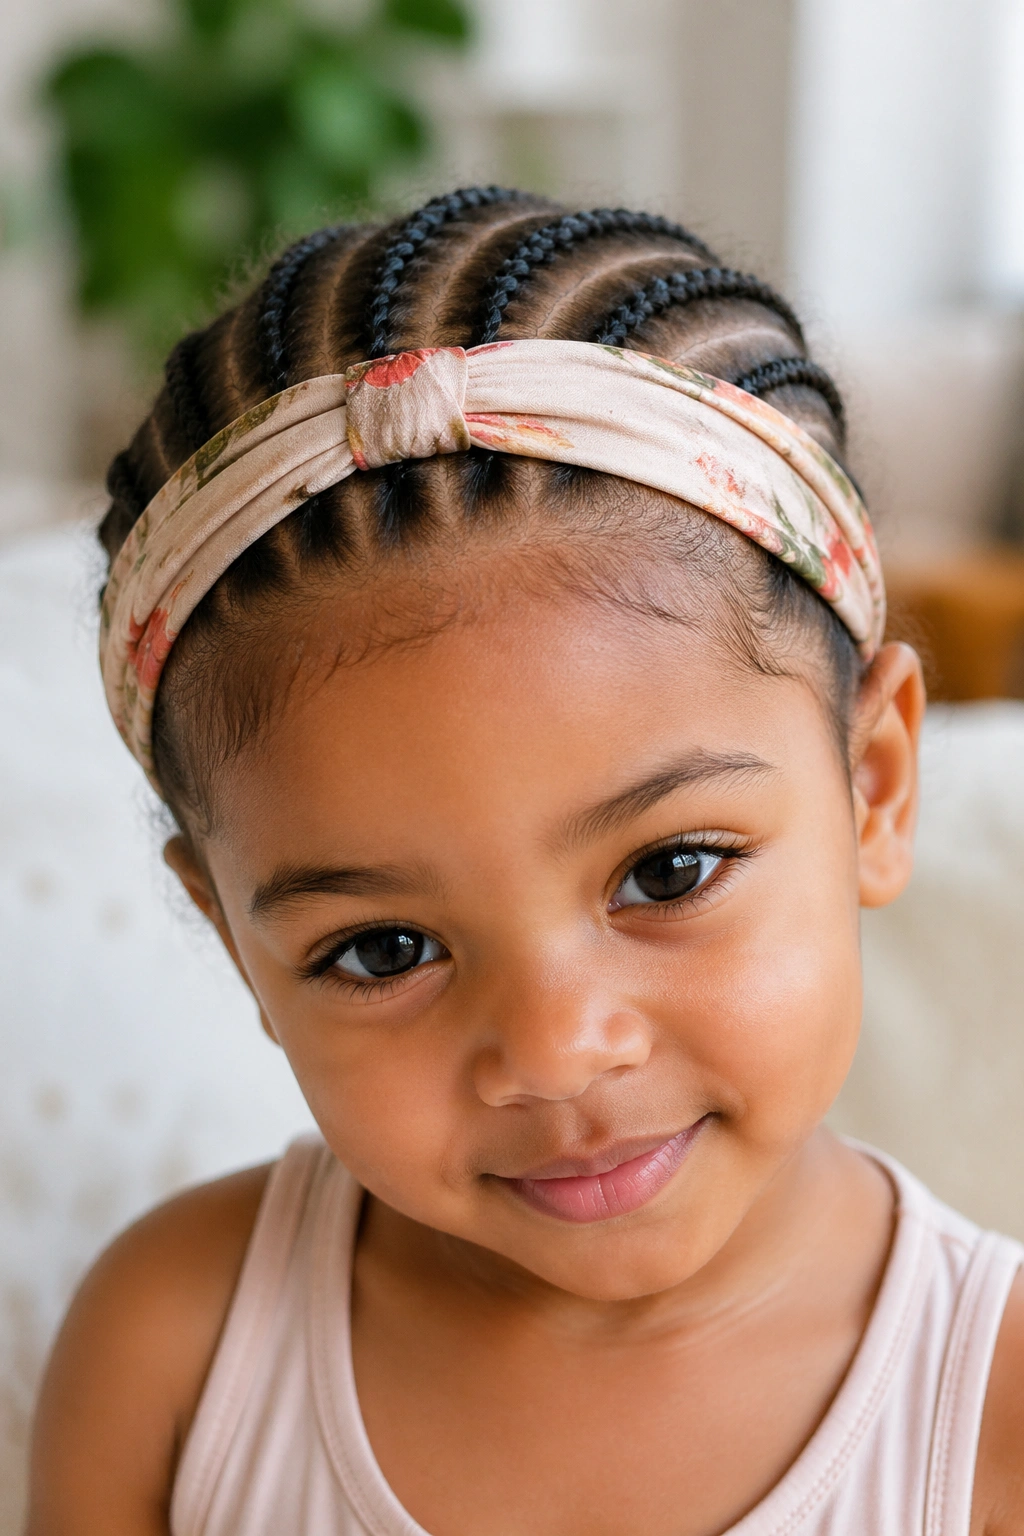
Standard five-braid cornrows plus a fabric headband worn across the hairline. The headband covers any fuzz at the front edges and adds a finished look to an otherwise basic style.
How to Use It
- Elastic headbands work better than rigid plastic ones — less pressure on the scalp
- Silk or satin fabric is gentler on edges than cotton
- Width should be at least one inch so it doesn’t dig in
- Avoid headbands with teeth or metal grips that catch on the braids
A patterned headband in a bold print turns a simple style into something that reads as outfit-ready. For school uniforms where accessories are limited, a headband is often the one splash of color allowed.
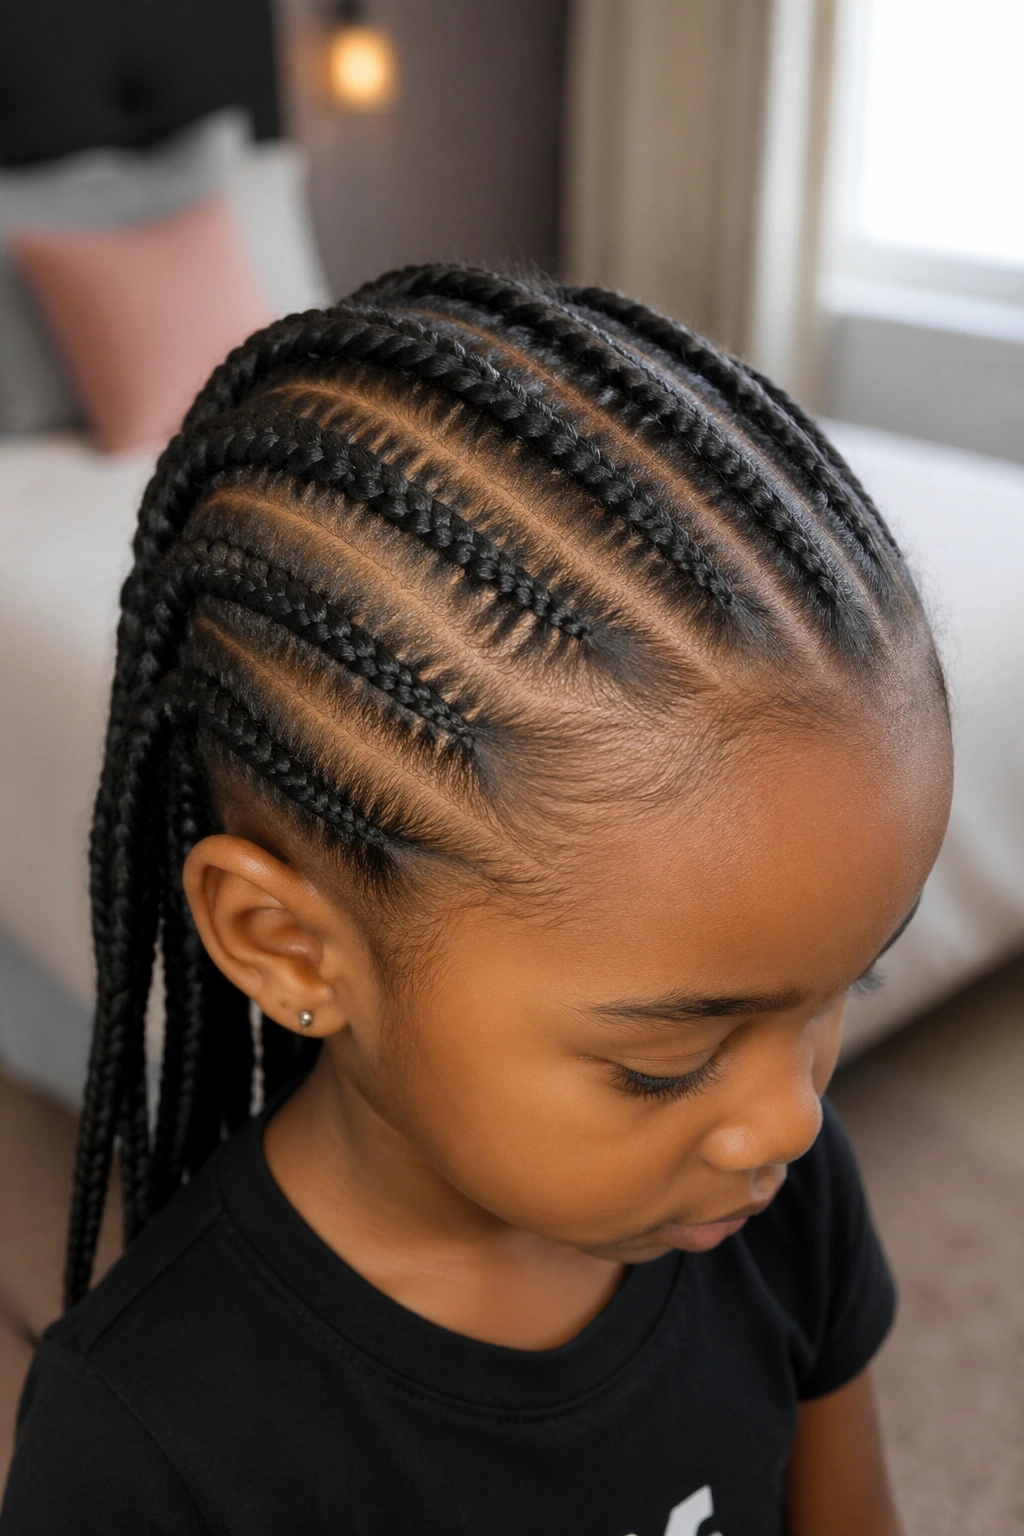
19. Cornrows Styled Into a Low Bun
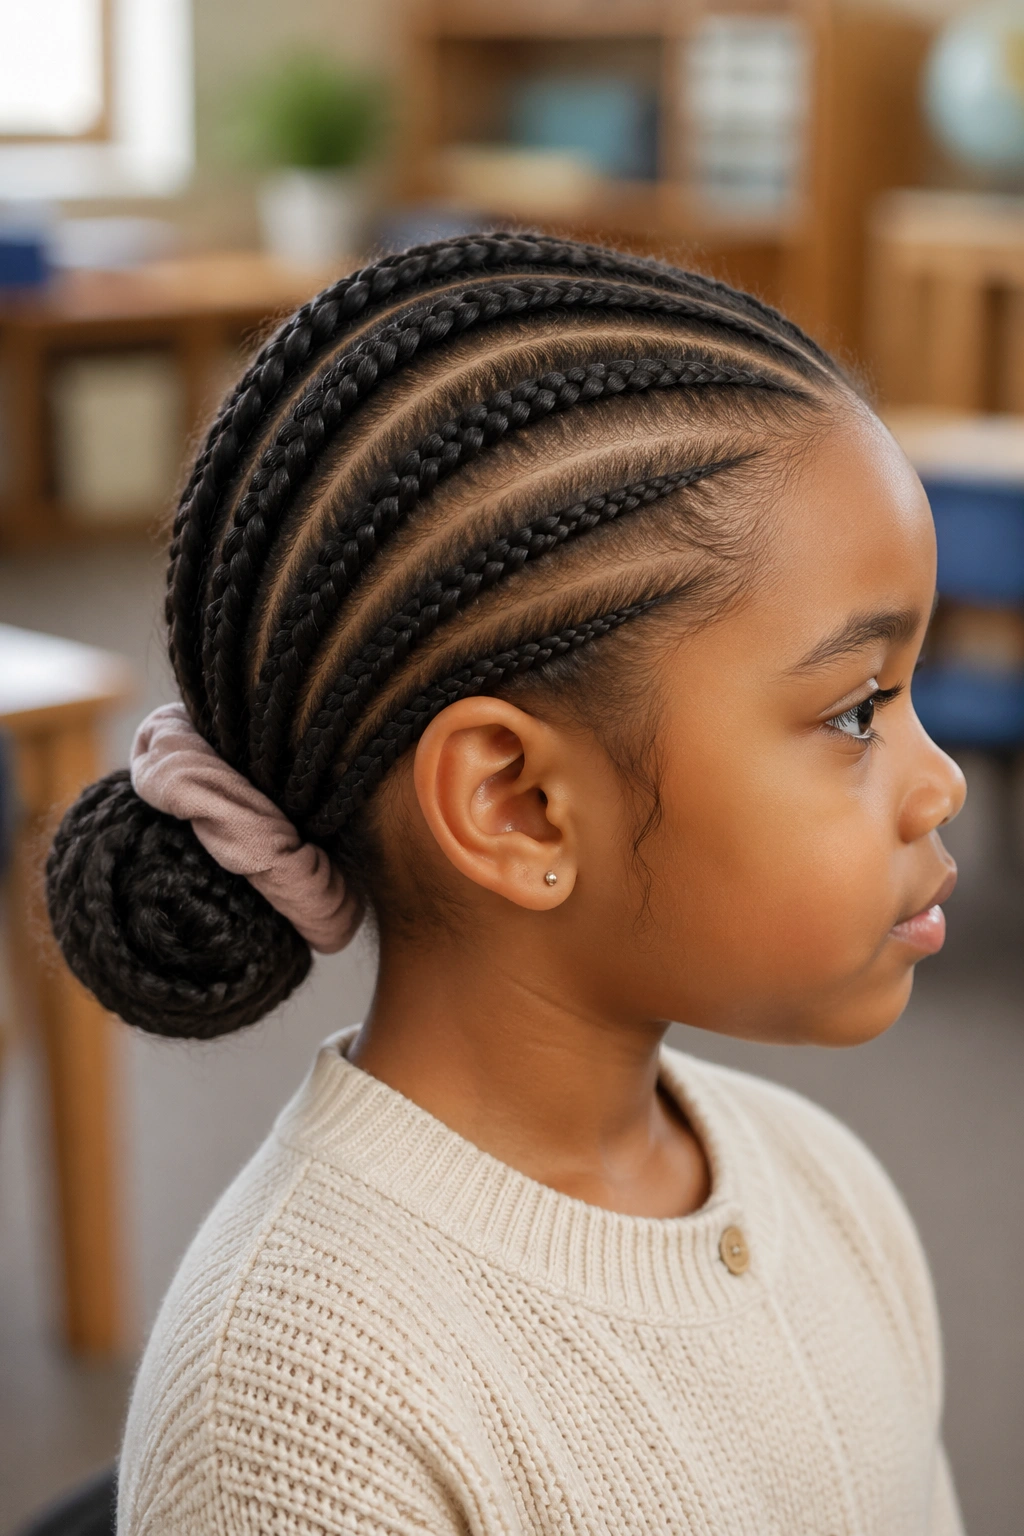
Six to eight cornrows feed into a single low bun at the nape of the neck. The cornrows are the framing. The bun is the focal point.
Low buns sit lower than a standard ponytail — right at the hairline at the back of the neck. They don’t bounce around during PE class. They don’t bump against car seats. They work under hats and hoods.
The bun itself gets wrapped with a fabric scrunchie or a coiled section of the braid ends. Don’t use elastic directly on the braids at the bun base — the elastic will cut into the braid and create a weak point that frays.
Low-bun cornrows are appropriate for ballet, dance classes, swim lessons, or any activity that calls for hair pulled back and out of the way. They’re also the rare simple cornrow style that reads as dressy when paired with a nice outfit.
20. Cornrows With Shaved-Look Undercut
For bolder families, one side of the head gets cornrowed tightly — close and flat — while the opposite side stays fuller with space between the braids. The effect mimics a shaved undercut without actually cutting any hair.
The “shaved” side has five to six very thin cornrows packed close together. The “full” side has three wider cornrows with clear space between. The asymmetry is the whole point.
This is a strong style for kids aged eight and up who want something that reads as edgy without parents committing to an actual shave. It grows out gracefully because no hair was removed — when the style is taken down, the hair is all still there.
Take your time on the tight side. Uneven spacing on the packed cornrows makes the whole asymmetric effect fall apart. The wider side is more forgiving.
21. Cornrows Framing a French-Braided Top
The back and sides are cornrowed in a simple four-braid pattern. The top of the head — from the forehead to the crown — is left out and then French-braided across as a single thick braid.
The French braid on top gives the style a soft, feminine focal point. The cornrows below keep everything neat and scalp-protected. It’s a hybrid approach that combines two techniques, but the install time is surprisingly reasonable — about an hour and fifteen minutes total.
This style is on the dressier end of simple. It works for weddings, holiday photos, or any event where a plain cornrow feels too casual. The French-braided top can be adorned with small clips or a single ribbon tied at the end without looking crowded.
Make sure the French braid on top starts at the hairline and lies flat against the scalp the whole way back. A French braid that lifts off the head halfway through looks unfinished against the flat cornrows below.
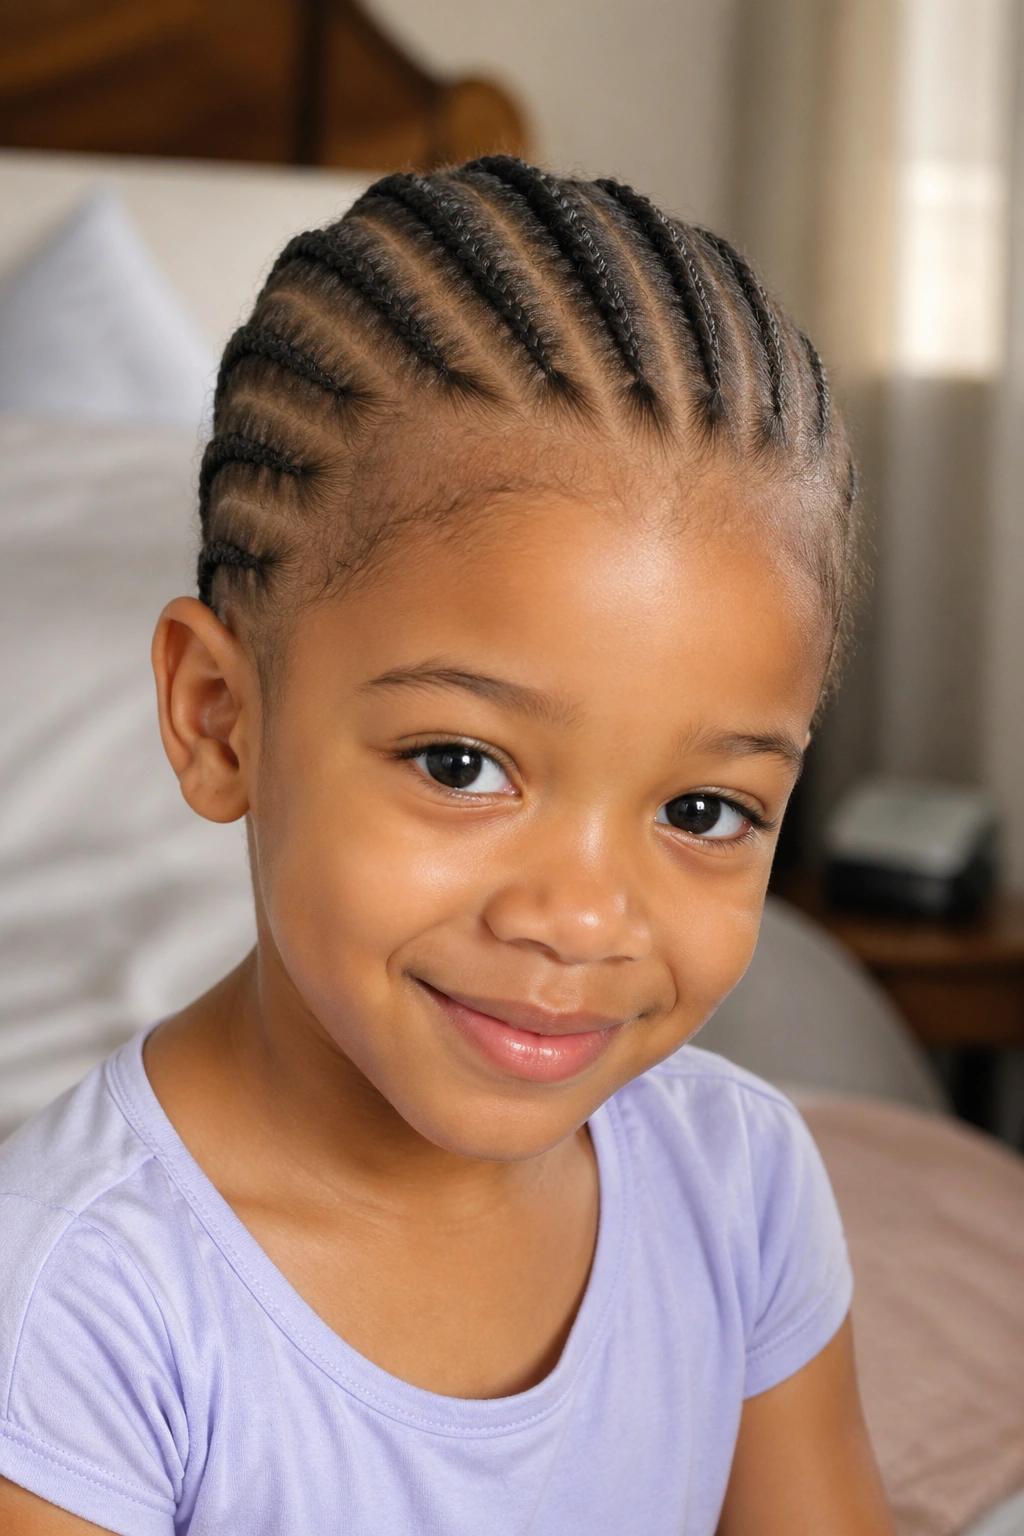
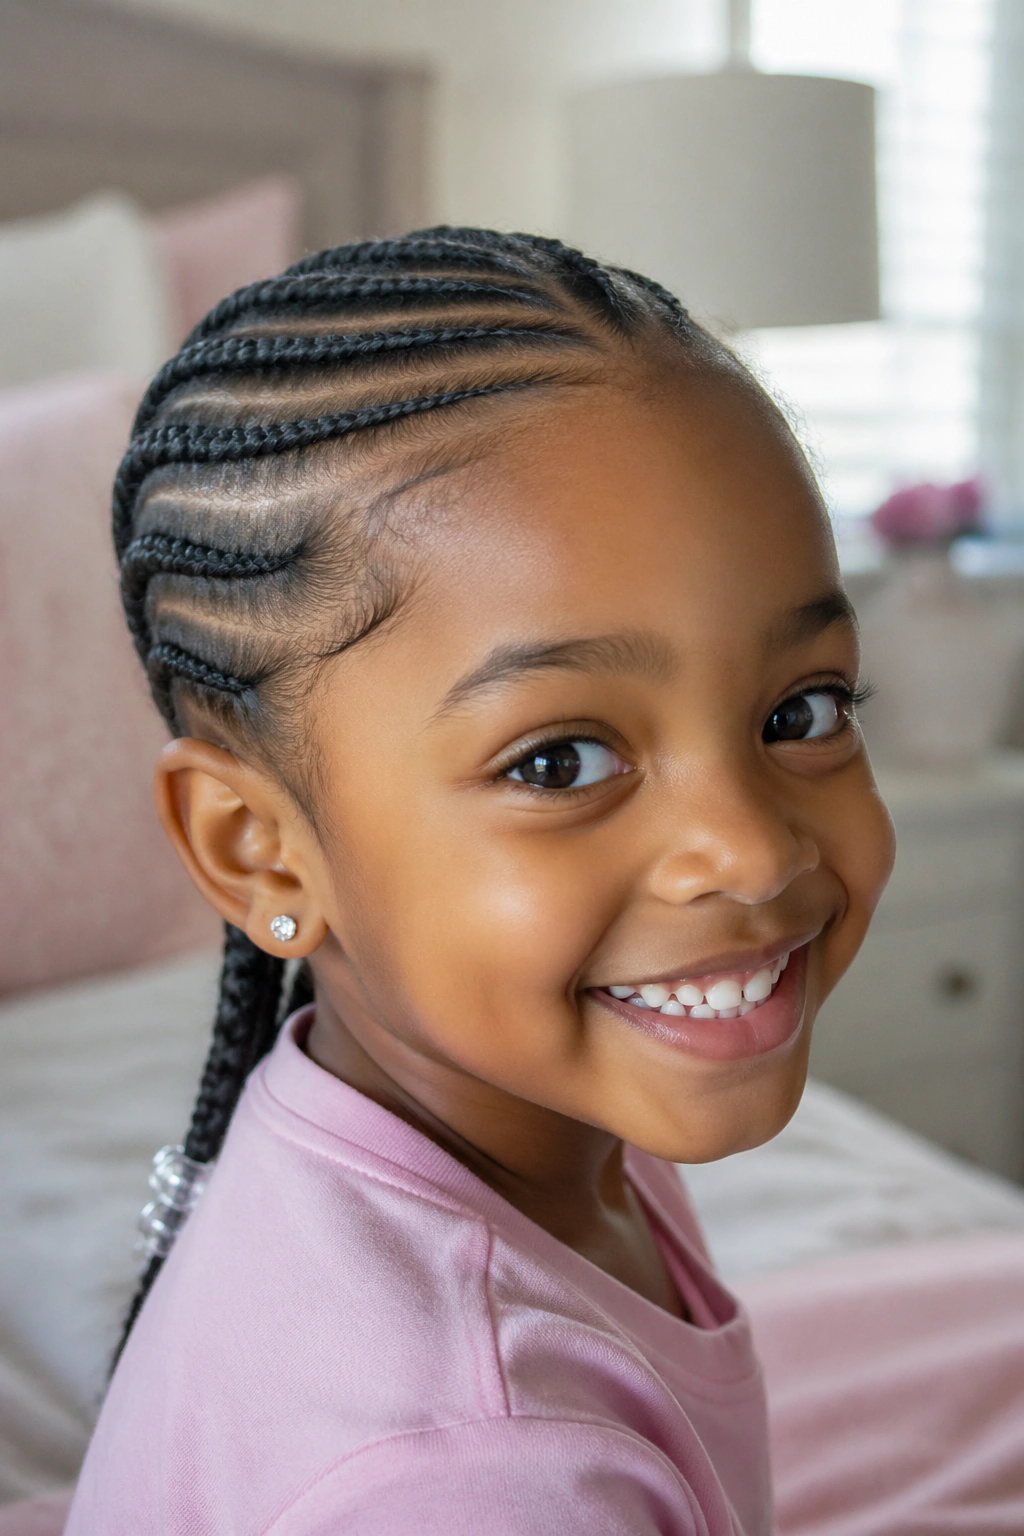
22. Natural Straight-Back With Baby Hair

The simplest style on this list is also a classic. Five or six straight-back cornrows running from a sharp hairline to the nape, finished with carefully laid baby hair at the front edges.
The baby hair is where this style earns its polish. A small amount of edge gel applied with a toothbrush, swirled into soft S-shaped curves at the temples, sealed with a silk scarf for 10 minutes to set. The effect is crisp without being stiff.
Too much edge gel is the main failure point. Thick gel flakes by the end of the day. Cracked edge gel looks worse than no edge gel at all. A thin, even layer is what you’re after.
For kids, keep baby hair work subtle. Very elaborate swoops on young children can look harsh. Simple, flowing curves suit a child’s face better than sharp angular designs.
Maintenance for a Longer-Lasting Style
Nightly care is the secret. Before bed, spritz the scalp lightly with a water-and-leave-in mix. Massage a pea-sized dollop of jojoba oil or a light hair oil into the scalp along the parts. Tie the head with a satin scarf or pull on a bonnet. That’s it.
Morning refresh is faster. A light mist of water on the braids to reactivate moisture, a smooth with the palms to calm any frizz, and the child is good to go. If any single braid is badly frizzed at the root, leave it alone during the week and plan to redo just that braid on the weekend.
Don’t over-moisturize. Too much oil or leave-in every day creates buildup at the scalp, which then gets gummy and itchy. Light daily, heavier every third night.
Washing Without Ruining the Style
Yes, you can wash cornrows while they’re still in. A diluted sulfate-free shampoo (half shampoo, half water in a squeeze bottle) applied along the parts, massaged gently with fingertips, rinsed thoroughly. No scrubbing. No rough towel-drying.
Pat the hair with a microfiber towel or an old cotton t-shirt to absorb water without causing frizz. Let air-dry for at least two hours before putting on a bonnet. Damp hair in a bonnet breeds odor and creates mildew-like smells.
Most parents wash once a week for active kids, every ten days for less active kids. More than that and the braids start to fuzz badly. Less than that and the scalp gets itchy.
Signs It’s Time to Take Them Down

Itching that doesn’t stop after washing. Visible lifting at the roots — more than half an inch of new growth. Matting at the nape or behind the ears. Complaints about headache at the braid base. Fuzziness so bad the pattern is no longer visible.
Any of those signs and it’s time. Forcing a kid to wear braids past their expiration leads to resentment, scalp damage, and worse — a fear of getting their hair done the next time. Take them down on a weekend, give the hair a thorough wash and deep condition, and wait a few days before the next install.
Common Mistakes to Avoid
Braiding too tight is the single biggest mistake. Kids’ scalps are more sensitive than adults’. A tension that feels firm to an adult is painful to a child. If your kid cries during the install or complains of soreness for more than an hour afterward, the braids are too tight.
Skipping the wash and deep condition before installing creates dry, brittle braids that look rough from day one. It also means buildup gets sealed into the braid — you’ll smell it by day four.
Using harsh elastics on the ends breaks hair. Small fabric-covered elastics or specialty kids’ hair bands are worth the slight extra cost.
Forgetting the satin bonnet for sleep is how a fresh install turns fuzzy overnight. Cotton pillowcases pull moisture from the braids and rough up the braid surface. Satin solves it.
Choosing the Right Simple Cornrow for Your Kid
Match the style to the child’s tolerance, hair length, and the occasion. A toddler who can sit for 20 minutes gets three jumbo cornrows. A seven-year-old going to a wedding gets the crown cornrow style. A nine-year-old starting school gets five straight-backs with beads.
Ask the child what they like. Show them a few options. Let them pick between two or three you’ve pre-approved. Ownership matters — a style the child chose is a style they’ll wear with pride and protect at night.
And not every style has to be complicated to be special. The simplest five-braid cornrow on a clean scalp with moisturized hair will always look better than an ambitious design on neglected hair. Prep and care matter more than pattern complexity. That’s the truth after years of doing this — simple and well-done beats fancy and rushed every single time.