Cornrow buns hold a place in Black hair culture that few other styles can match. They’re rooted in traditions that stretch back centuries across West and Central Africa, where braided hair shaped into buns was never decoration alone — it communicated age, status, region, and readiness for specific life moments. That heritage still shapes how we wear cornrow buns today, whether we realize it or not. A well-executed cornrow bun works as a protective style, a cultural statement, and a practical solution to a bad hair day all at once, and the category has expanded into an impressive range of options for Black women with every hair type and length.
I’ve worn cornrow buns for the better part of a decade — through 4C hair in its shortest phase, through a long stretch of locs, through transitions between relaxers and natural. Some buns worked. Some didn’t. What follows is the honest rundown of the ones I keep coming back to, with enough technical detail that you can tell a skilled braider what you want without having to show them a pinterest screenshot every time.
The Hair History That Informs Every Cornrow Bun
Cornrow braiding traces back at least 5,000 years across African civilizations. The patterns carried specific meaning. Young girls wore different parts from grown women. Different tribes braided different shapes. Buns in particular often marked adult status — the protective nature of tucking the ends into a knot was practical, but the shape itself was cultural shorthand.
Understanding that context matters even when you’re picking a bun for brunch. It’s not a trend; it’s a continuation. Every time you wear a cornrow bun, you’re in a chain of women who’ve done the same thing across generations.
Hair Type Matters — Here’s What to Plan For
Cornrow buns adapt to every Black hair type, but the prep and finish change.
- 4C hair: Stretch before braiding. Unstretched 4C shrinks into the braid and creates fuzz at the roots within days. A blow-out on cool or a weekend of banded stretching works.
- 4B hair: Light blow-dry or two-strand twists overnight. 4B braids flatter than 4C without as much prep.
- 4A hair: Minimal stretching needed. Braids cooperate quickly.
- Relaxed hair: Handle gently. Relaxed strands are thinner and more prone to breakage at the braid root.
- Locs: Flat-braided locs into bun shapes work beautifully, but not all locticians offer this service. Call ahead.
Tip: Whatever your texture, skip protein treatments the week before braiding. They stiffen the hair and make it harder for braids to lie flat.
Tools That Separate a Good Install from a Great One
- Rat-tail comb with a stainless metal tip.
- Fine-tooth detangling comb for prep.
- A quality edge gel — slick but not stiff.
- Kanekalon in your chosen color (1B, 2, or custom).
- Bun donut or mesh form for sculpted buns.
- Duckbill clips for sectioning.
- Wide bobby pins for pinning tails.
- A hand-held mirror to check the back of your bun.
The quality of the edge gel matters more than people acknowledge. A cheap gel flakes within an hour. Eco Styler in the gold tub remains reliable; so do the newer, more flexible formulas from Black-owned brands that have come onto the market.
How Long Cornrow Buns Last
Between 1 and 3 weeks, depending on the install quality, how much you sweat, and whether you sleep in a bonnet every single night. Most Black women I know get two weeks out of a good install. Three is the ceiling before it starts to look tired and before the scalp needs air.
If you’re attempting four weeks, you’re asking for traction damage. Don’t do it.
The Style Choice That Starts Everything
Before scrolling through 25 buns, narrow your answer to three questions: High, medium, or low? Sleek or messy? Plain or decorated? Those three axes cover most of the variations. Every bun below falls into a specific answer, and that’s partly how I’ve organized them.
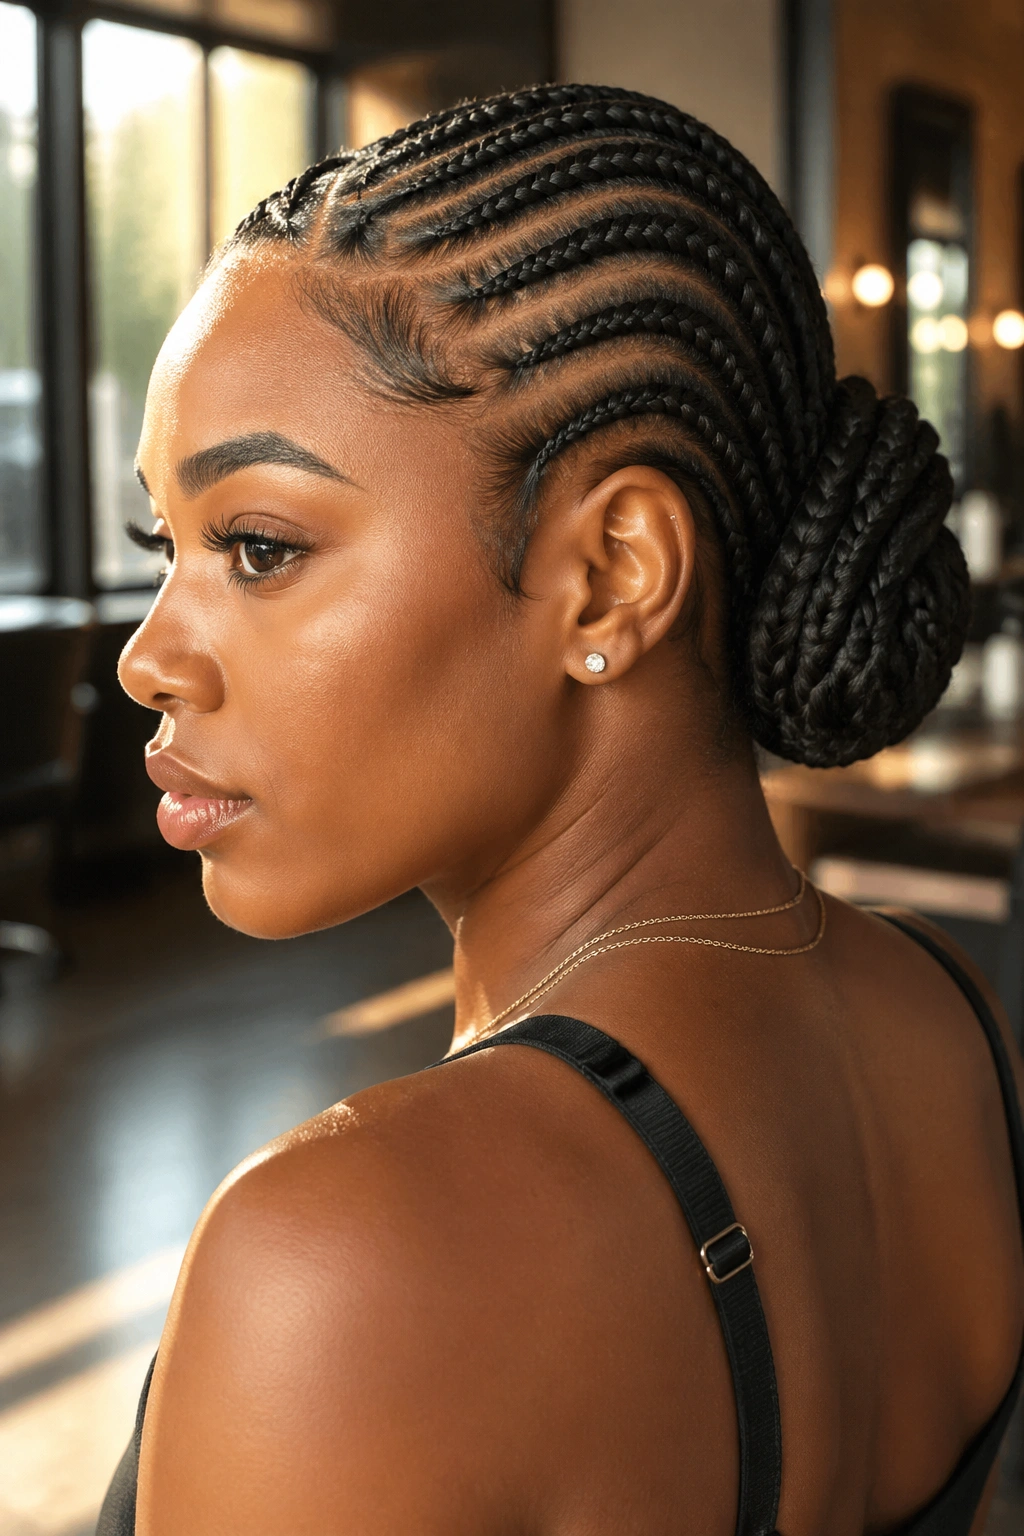
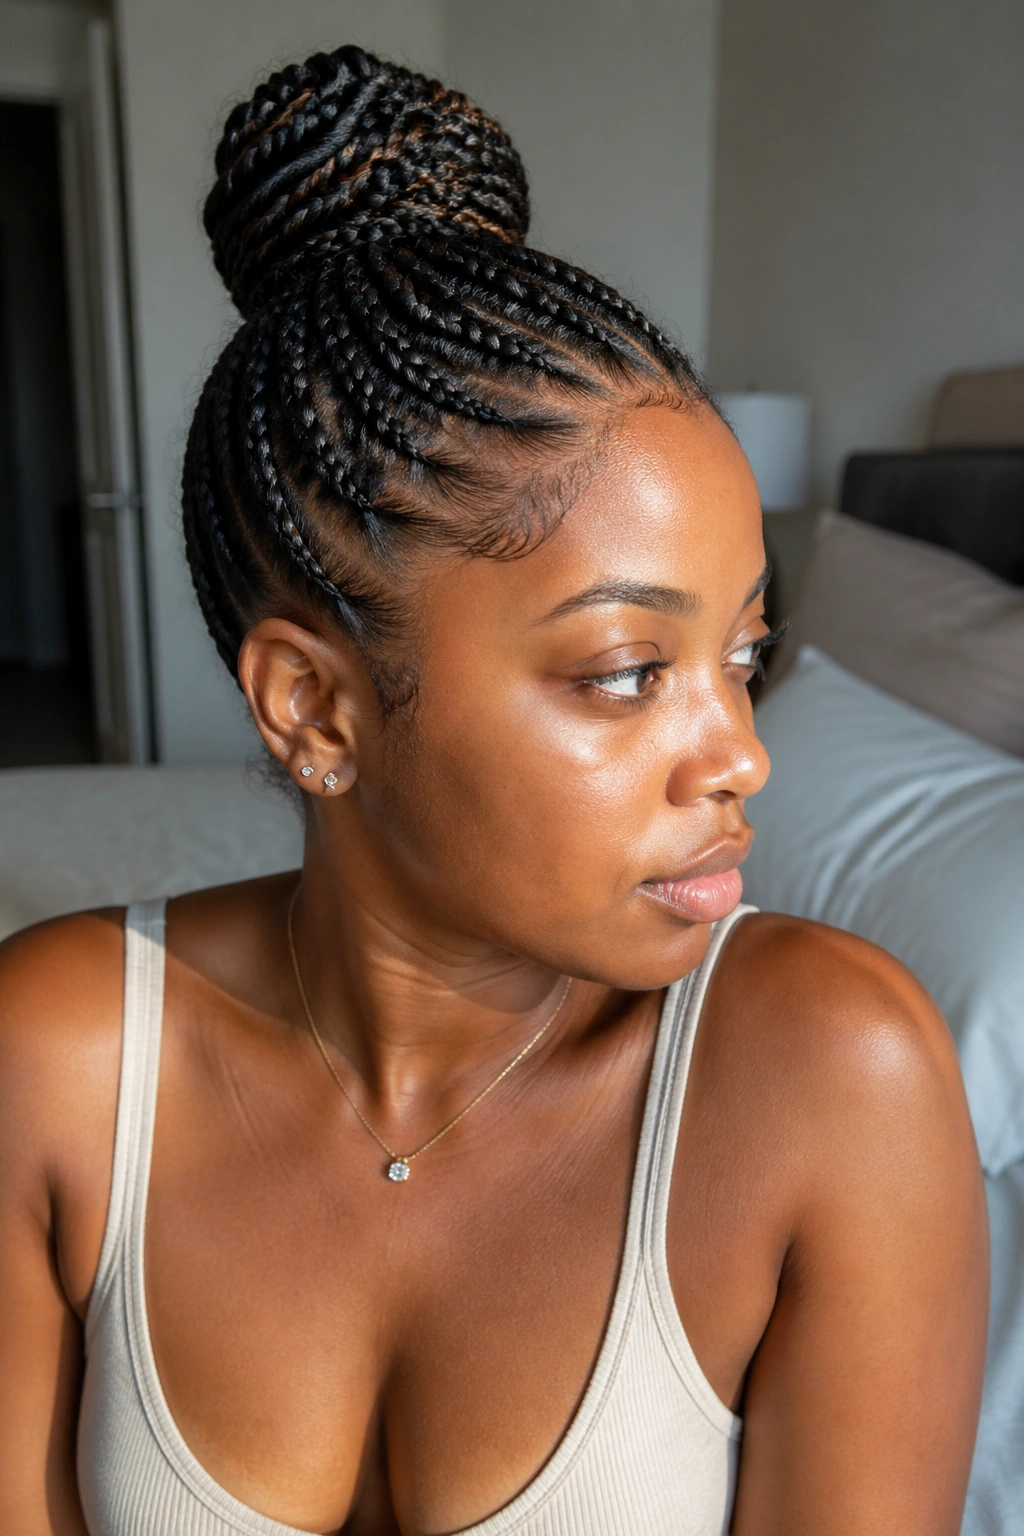
1. Classic Low Sleek Bun
Three or four straight-back feed-ins gathered at the nape into a polished, tight bun. The cornrow equivalent of a little black dress.
Why It Works
You can wear this to a funeral or a job interview without a second thought. Clean lines, no drama, all business.
- Install time: roughly 2 hours.
- Lasts: 10-14 days.
- Best for: professional settings, formal events.
Tip: Finish with a nylon stocking tied around the bun for 10 minutes after install. Flattens any lift.
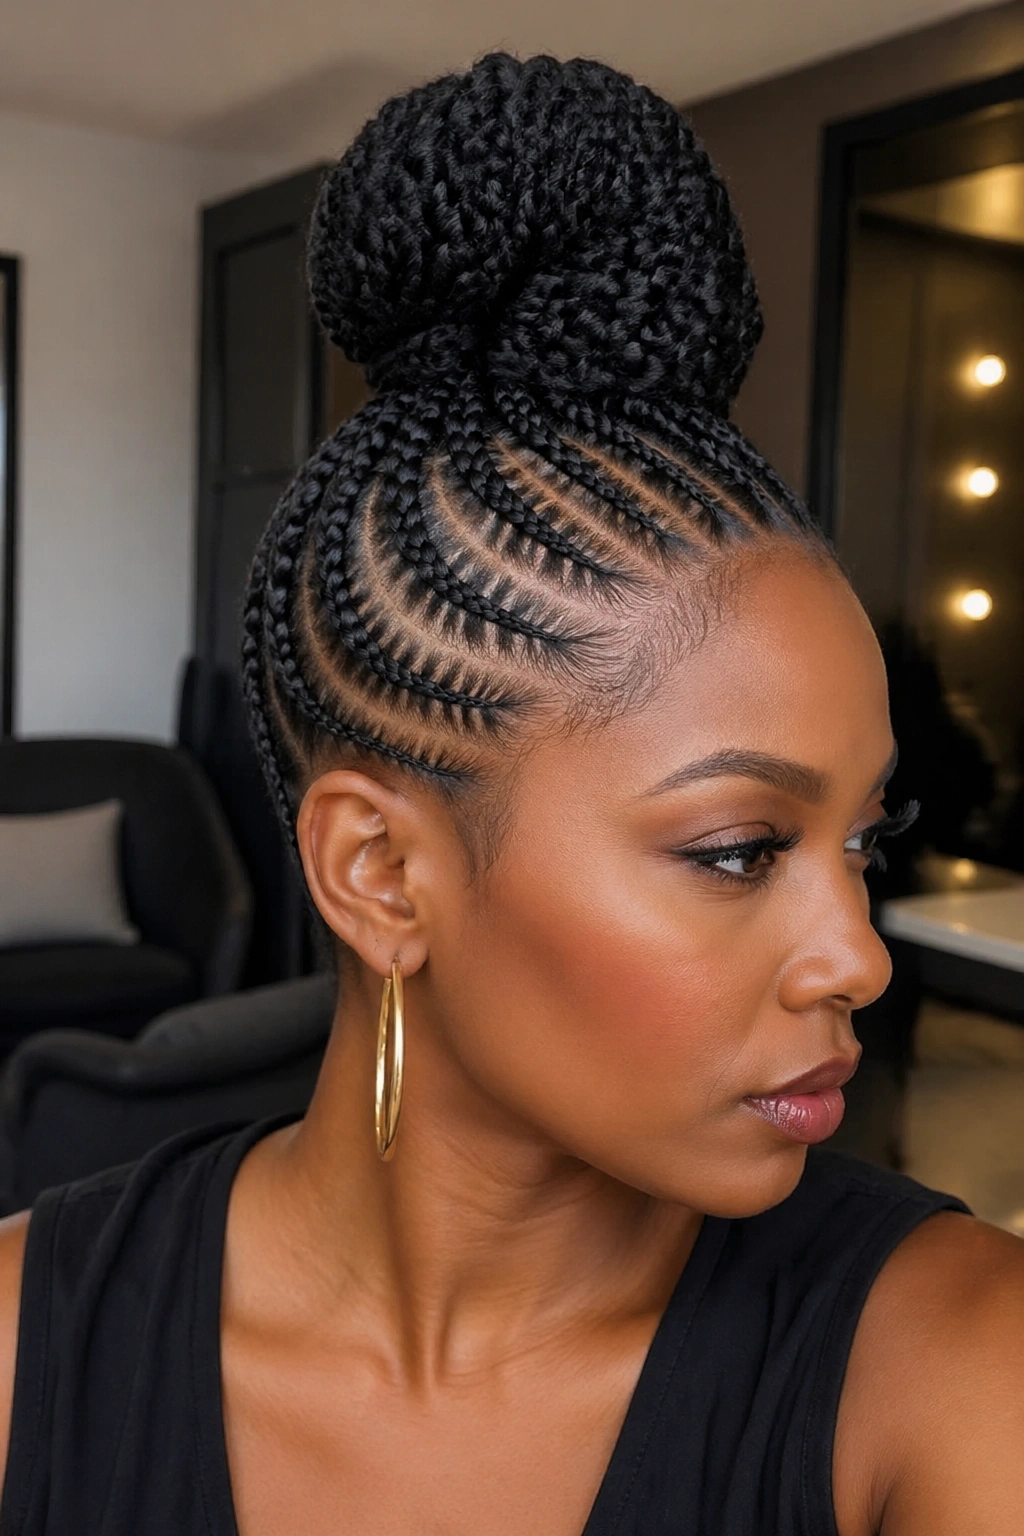
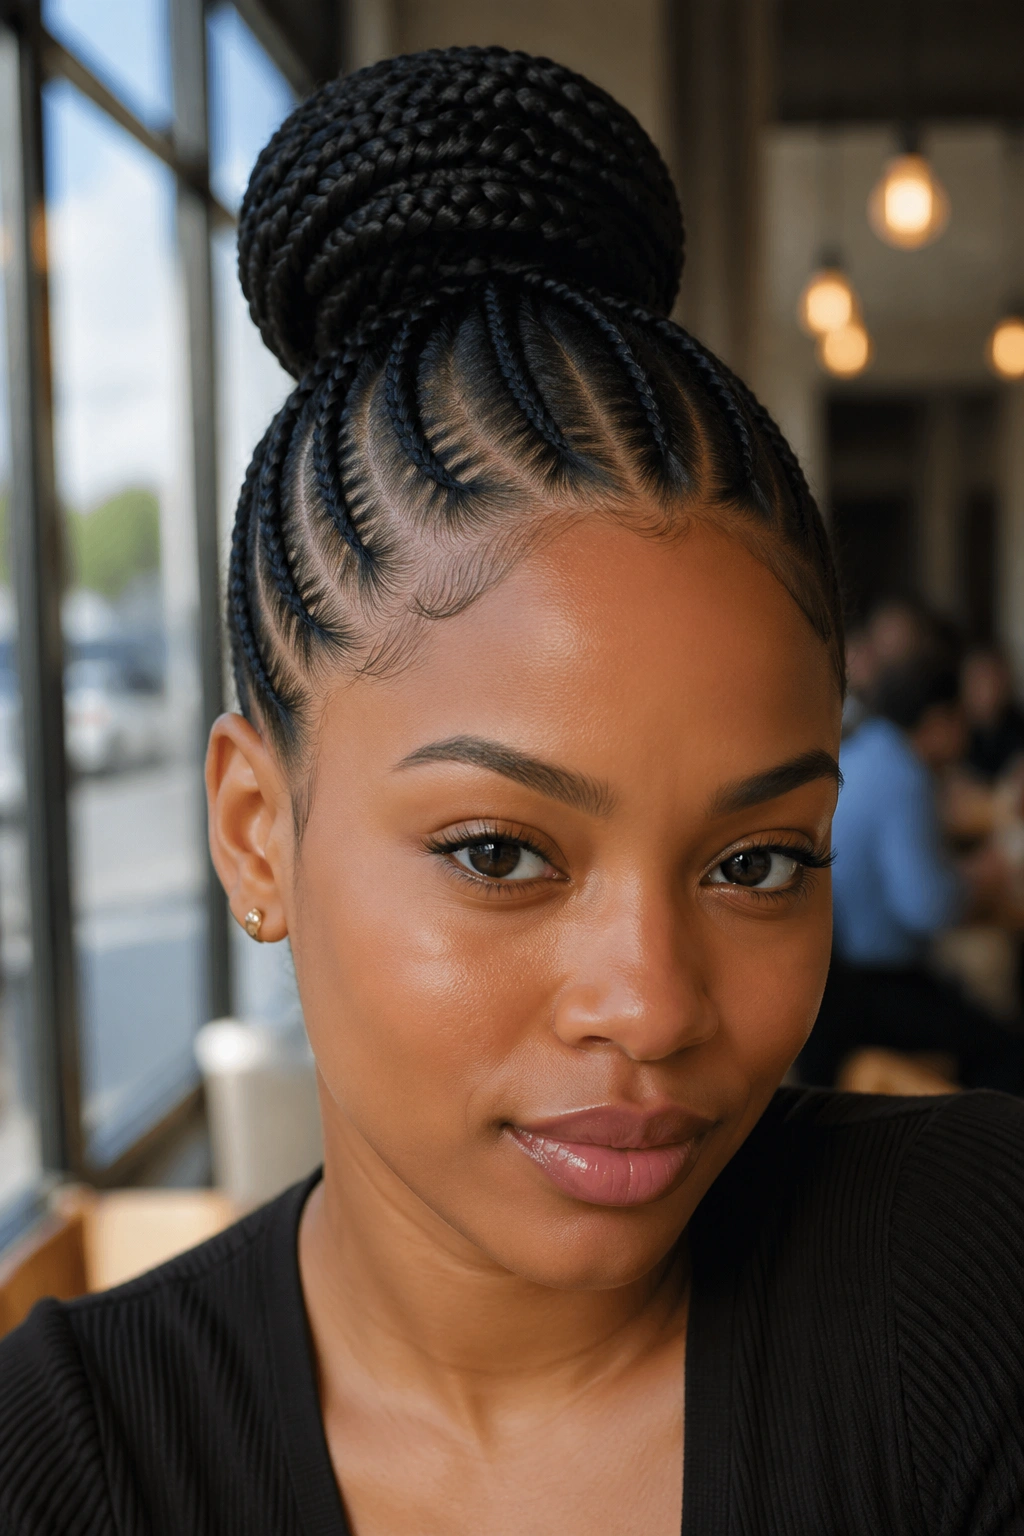
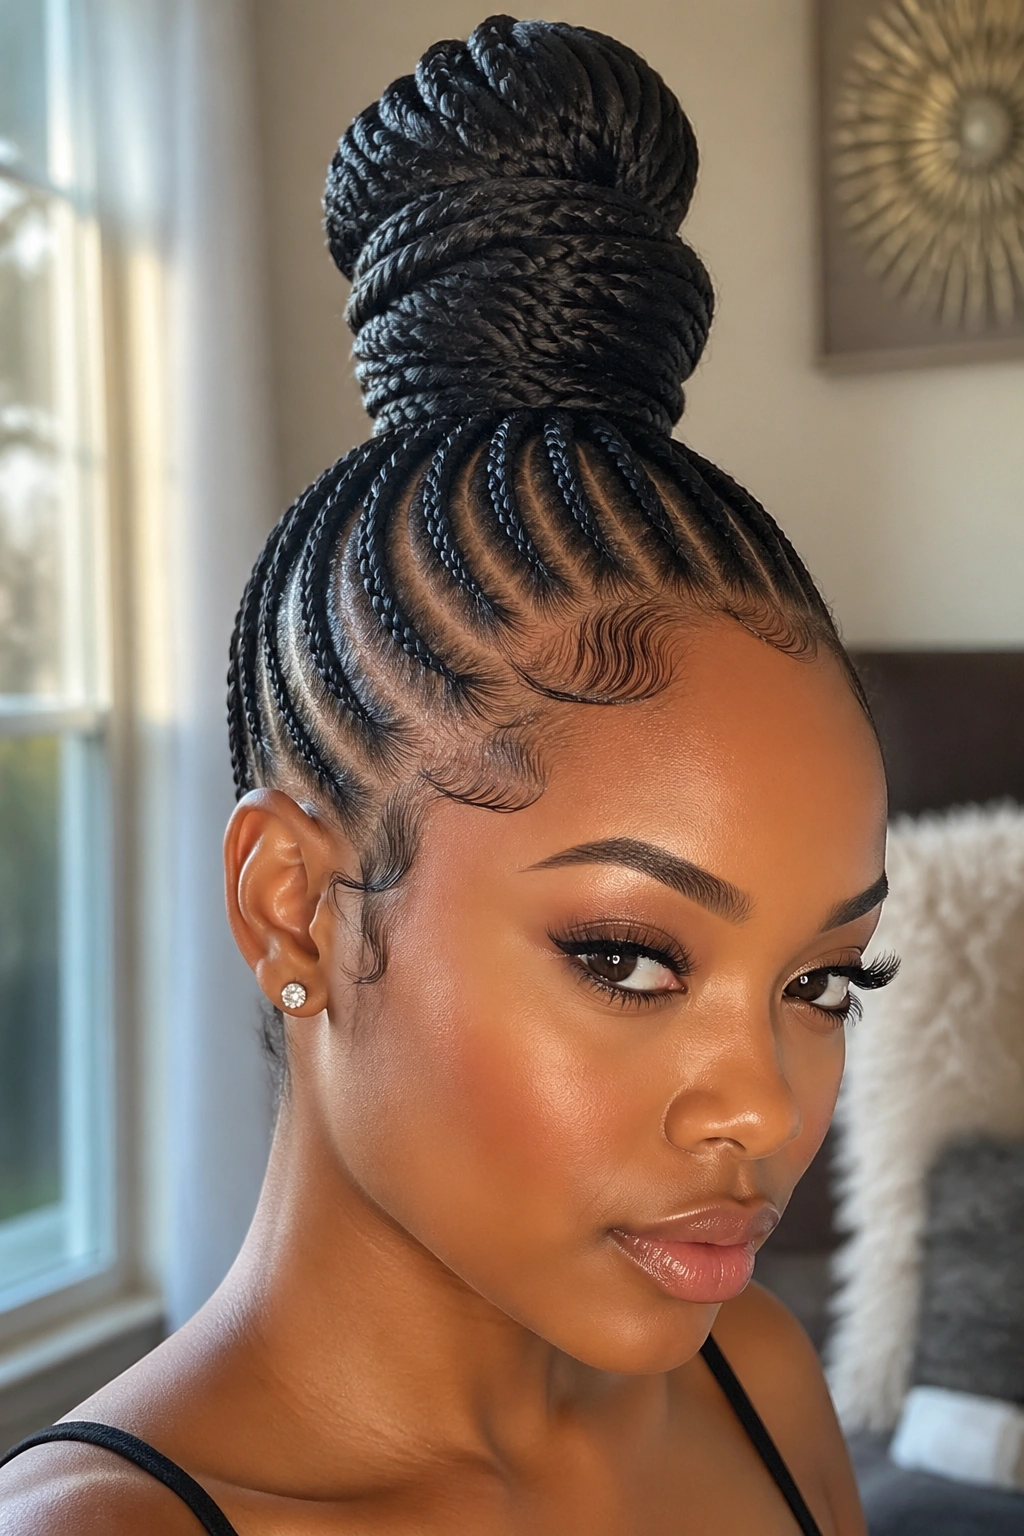
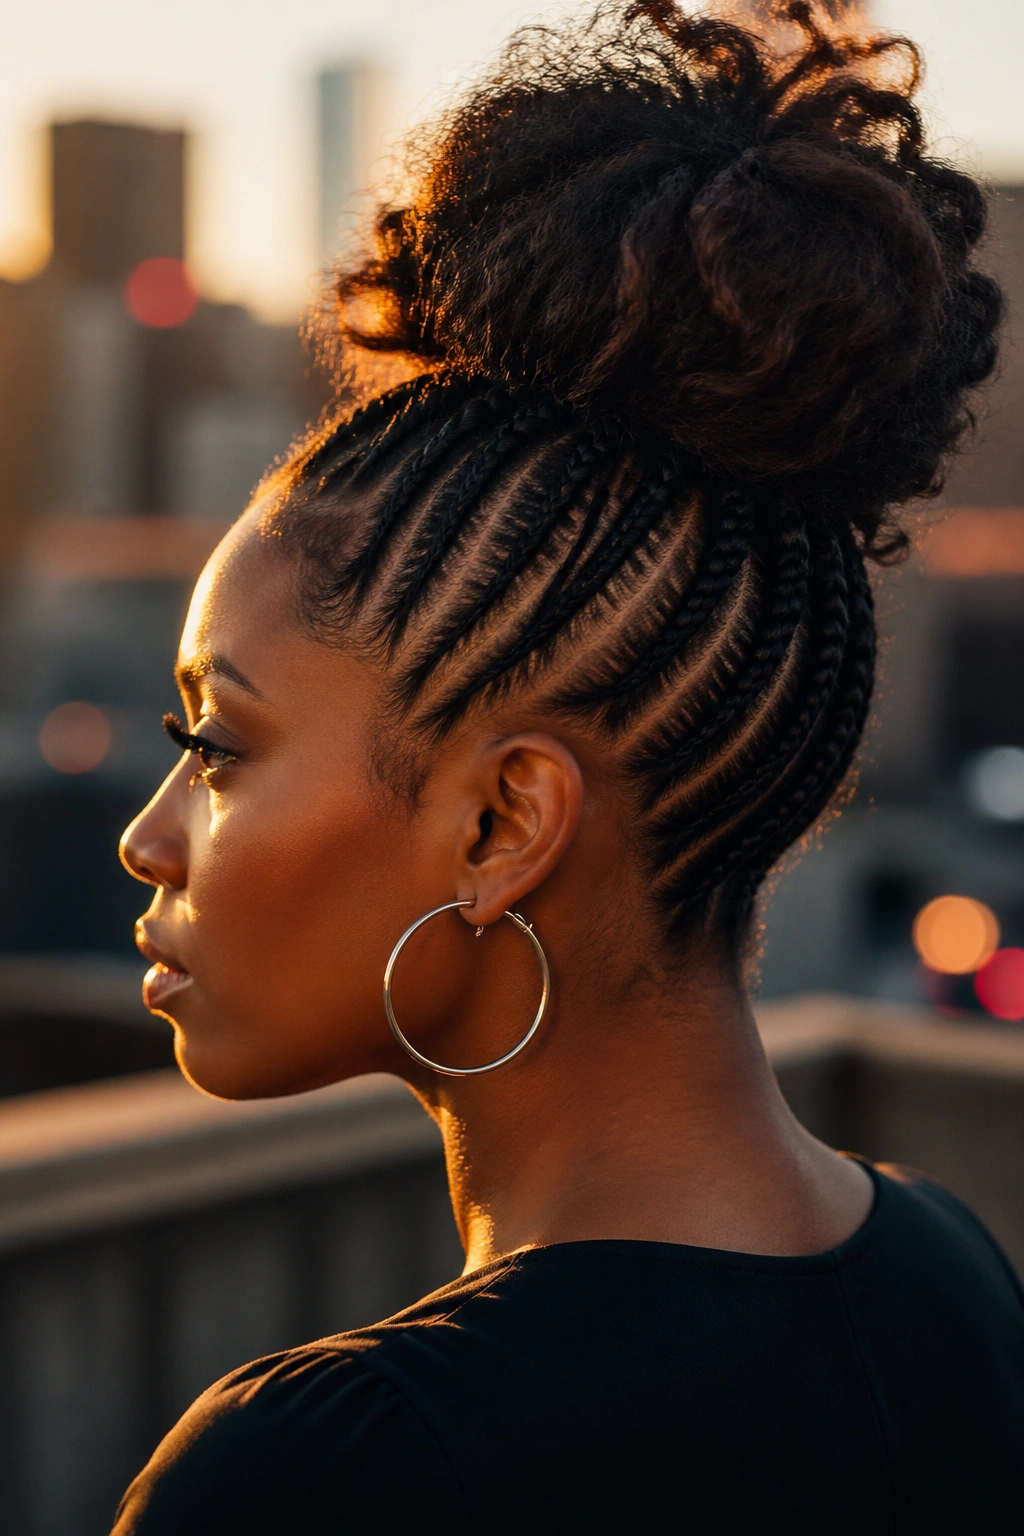
2. High Cornrow Top Knot
All braids pull upward to a tall knot at the highest point of the crown. Dramatic. Elongating. A statement on its own.
Done wrong, this style screams tension headache. The braids at the nape pull backward and up at once, and the back of the neck takes the brunt.
Done right, the edges are laid, the tails gathered loose enough to breathe, and the knot wrapped neatly with kanekalon to look like one solid piece.
The silhouette adds three or four inches of apparent height. Excellent for evening wear. Bad for low doorways.
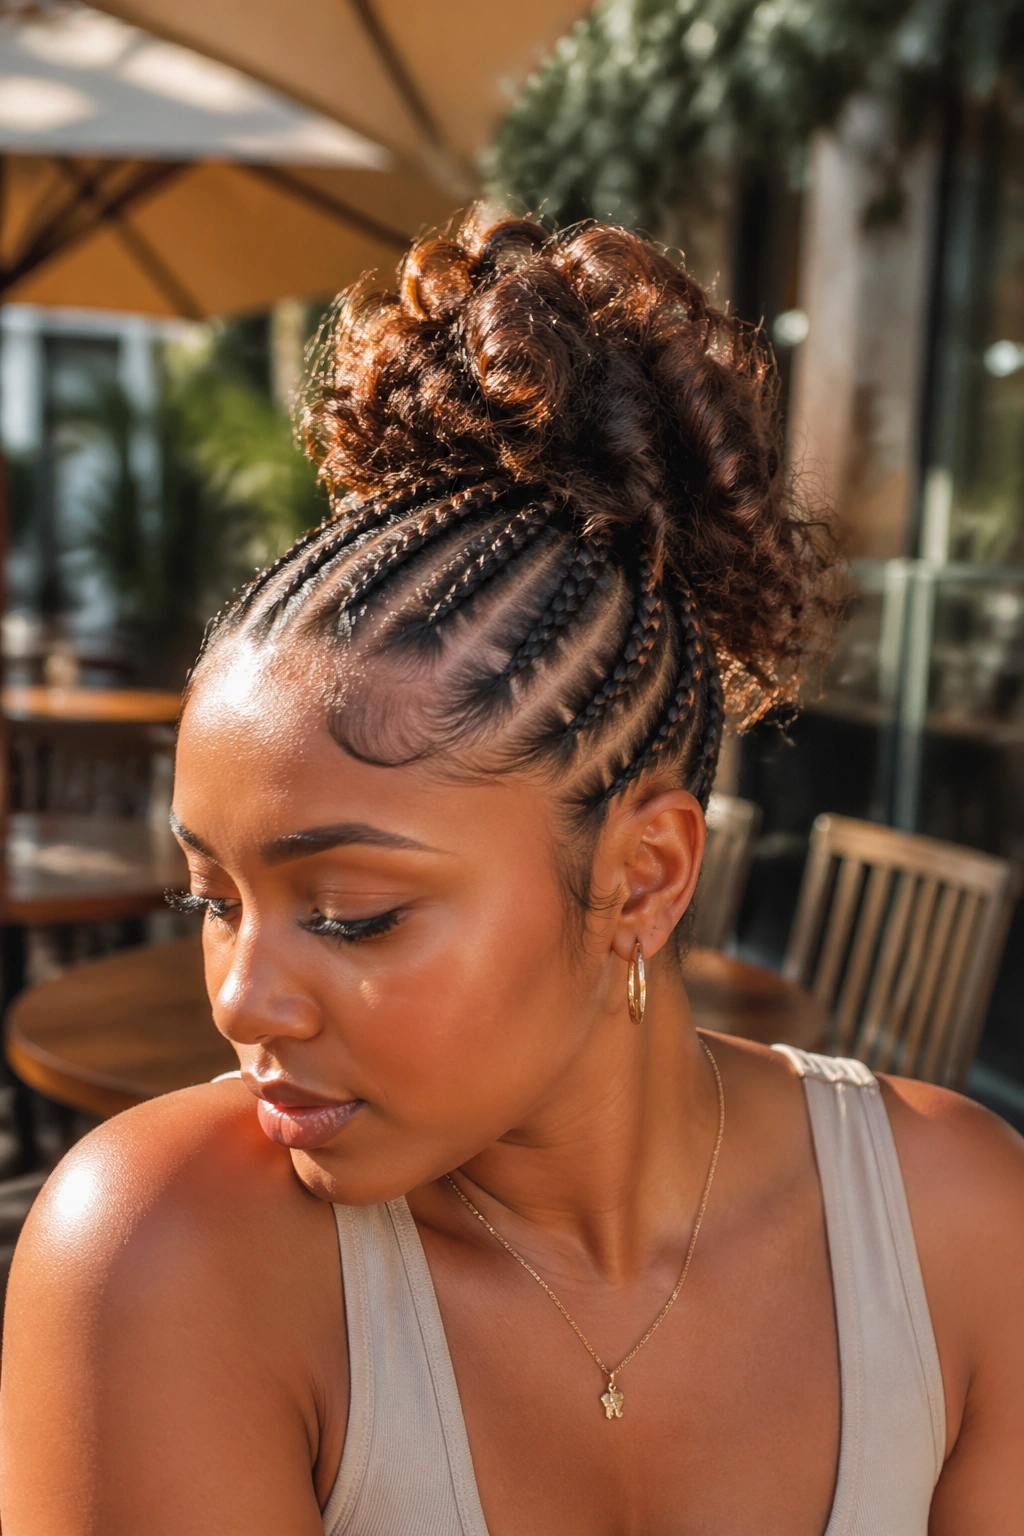
3. Messy Bun with Curled Ends
The feed-ins stay precise up front, but the bun at the back is intentionally loose, with curled ends spilling out. Perm-rod-set tails do this best — they give you bouncy spirals that catch movement.
This is the bun I wear when I want cornrows but don’t want to look too severe. The messy tails soften everything.
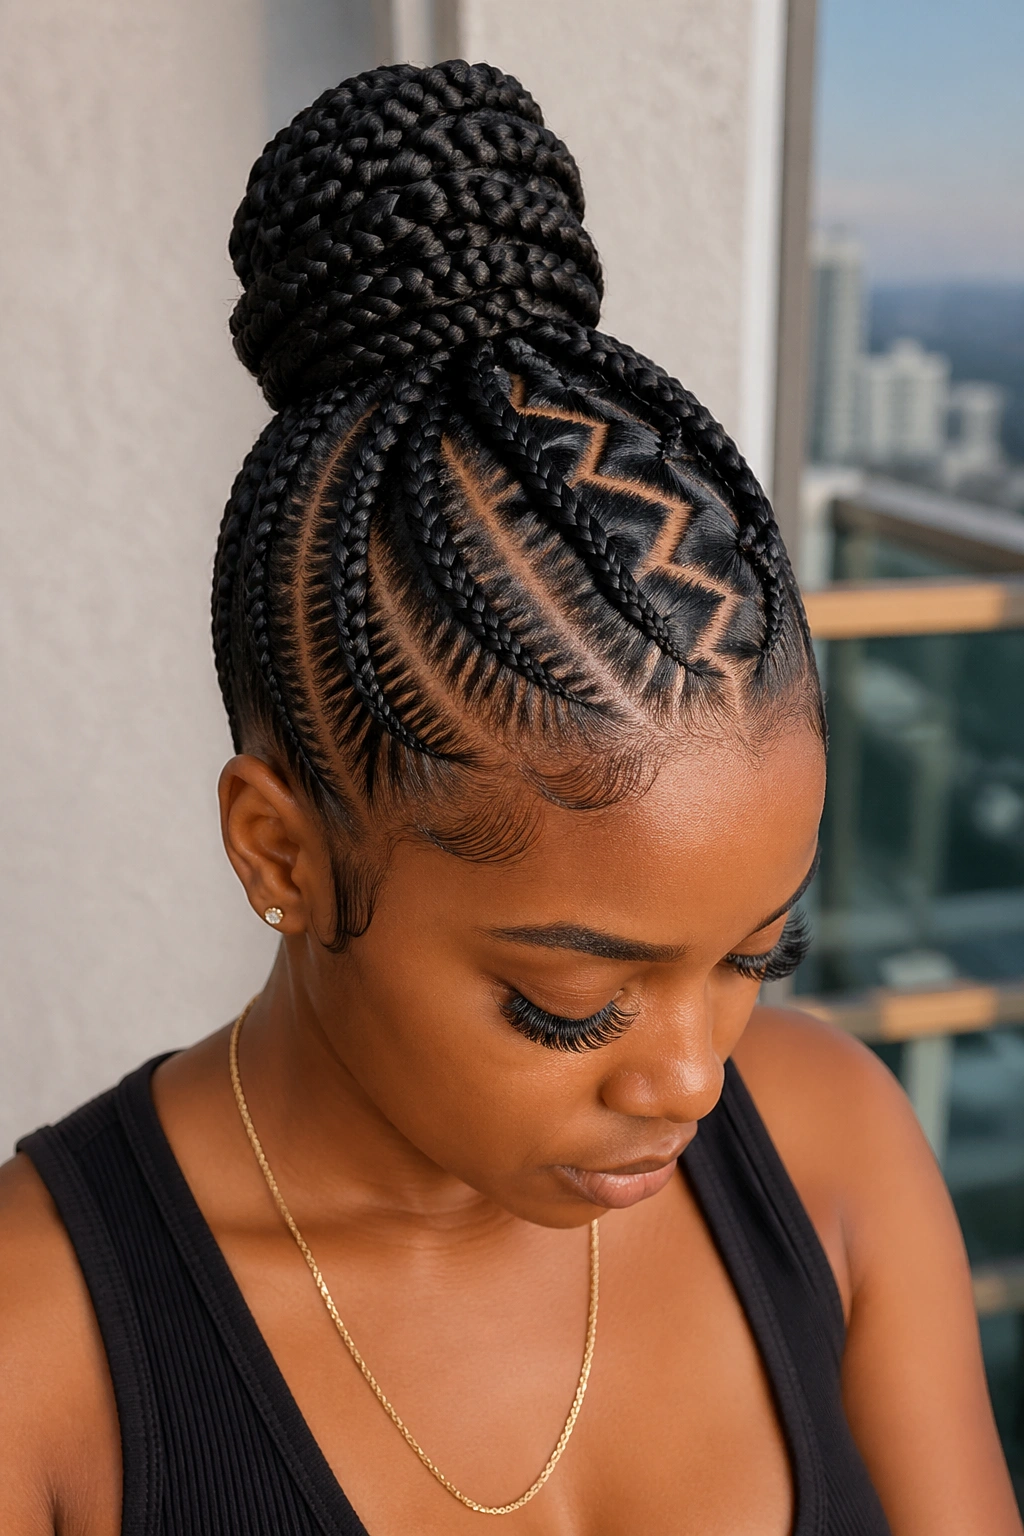
4. Zigzag Parted Bun
Zigzag parts at the front transition into straight feed-ins that gather in a bun. The angular lines at the hairline give a geometric edge that a straight part can’t touch.
Some braiders freehand the zigzag; others measure each point. Measured zigzags look more editorial. Freehanded ones look more organic. Pick based on what you want.
How to Style It
- Have the braider trace the zigzag line with a pencil-tip applicator first.
- Install the braids only after you’ve confirmed the zigzag is what you want.
- Gather tails into a bun at the crown or nape.
- Lay baby hairs in soft swirls that echo the zigzag above.
Tip: Don’t double up on zigzag features. If the hairline has a zigzag, keep the parts beyond it straight. Two zigzags in one install compete.
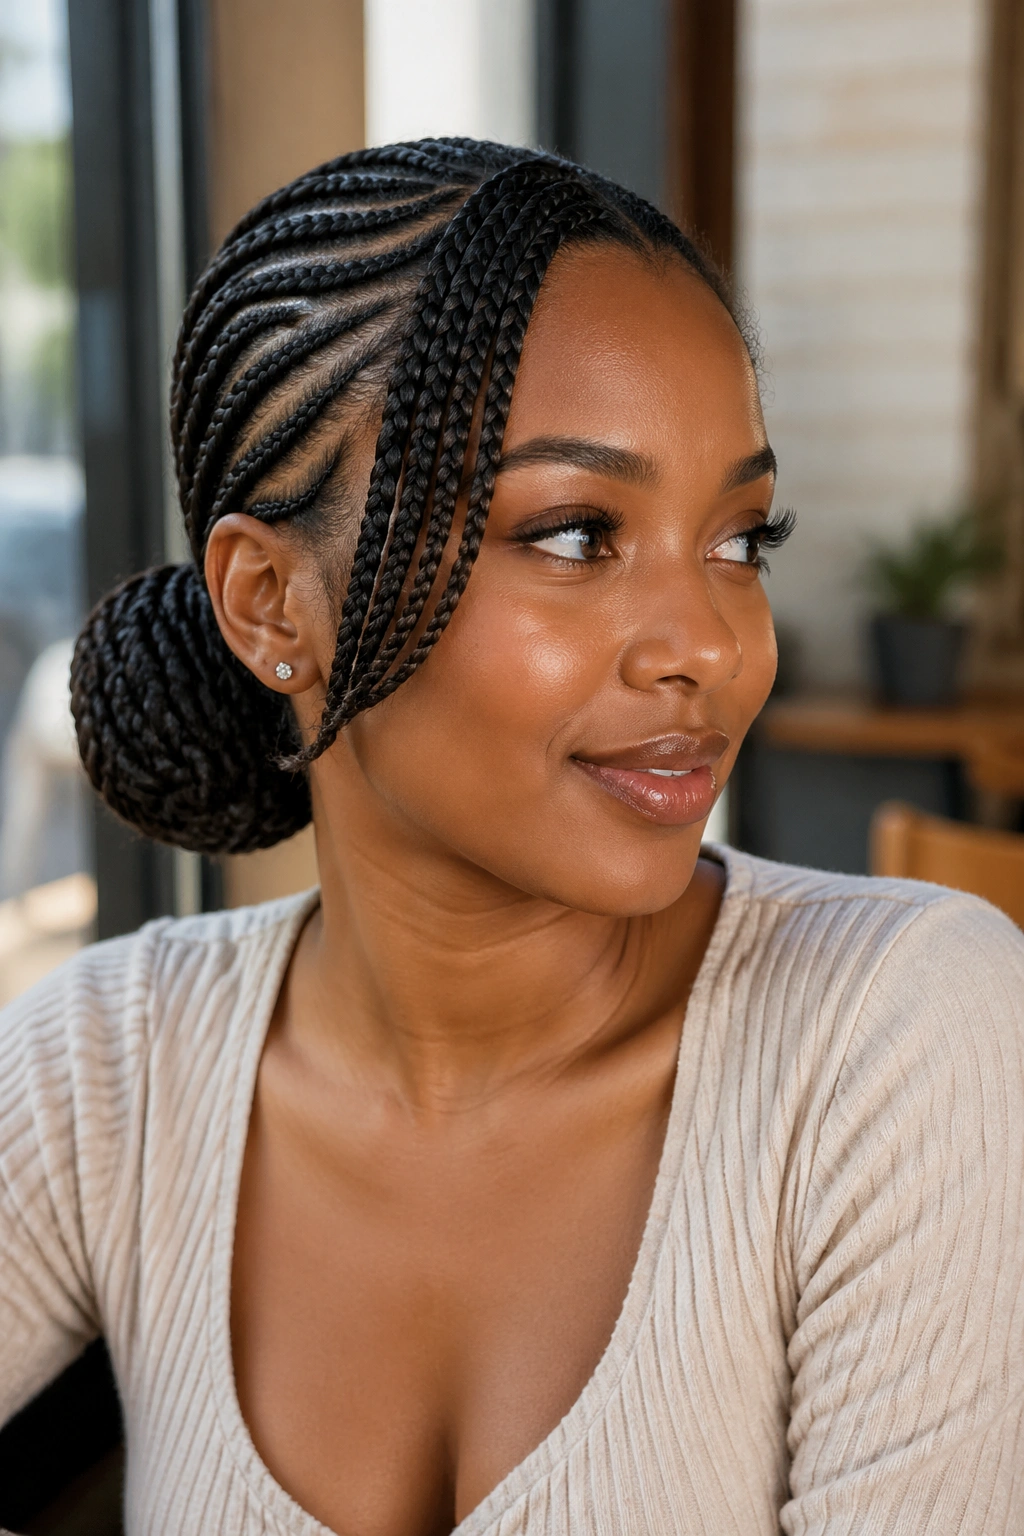
5. Low Side Bun with Swooped Bang
The braids sweep to one side of the head and gather behind one ear, with a small piece of hair left out at the front as a swooped bang. The bang frames the face and softens the severity of a pulled-back style.
Leave out just enough hair for the bang — about the width of two fingers. More than that and you’ve taken away from the cornrow structure. Less and the bang disappears.
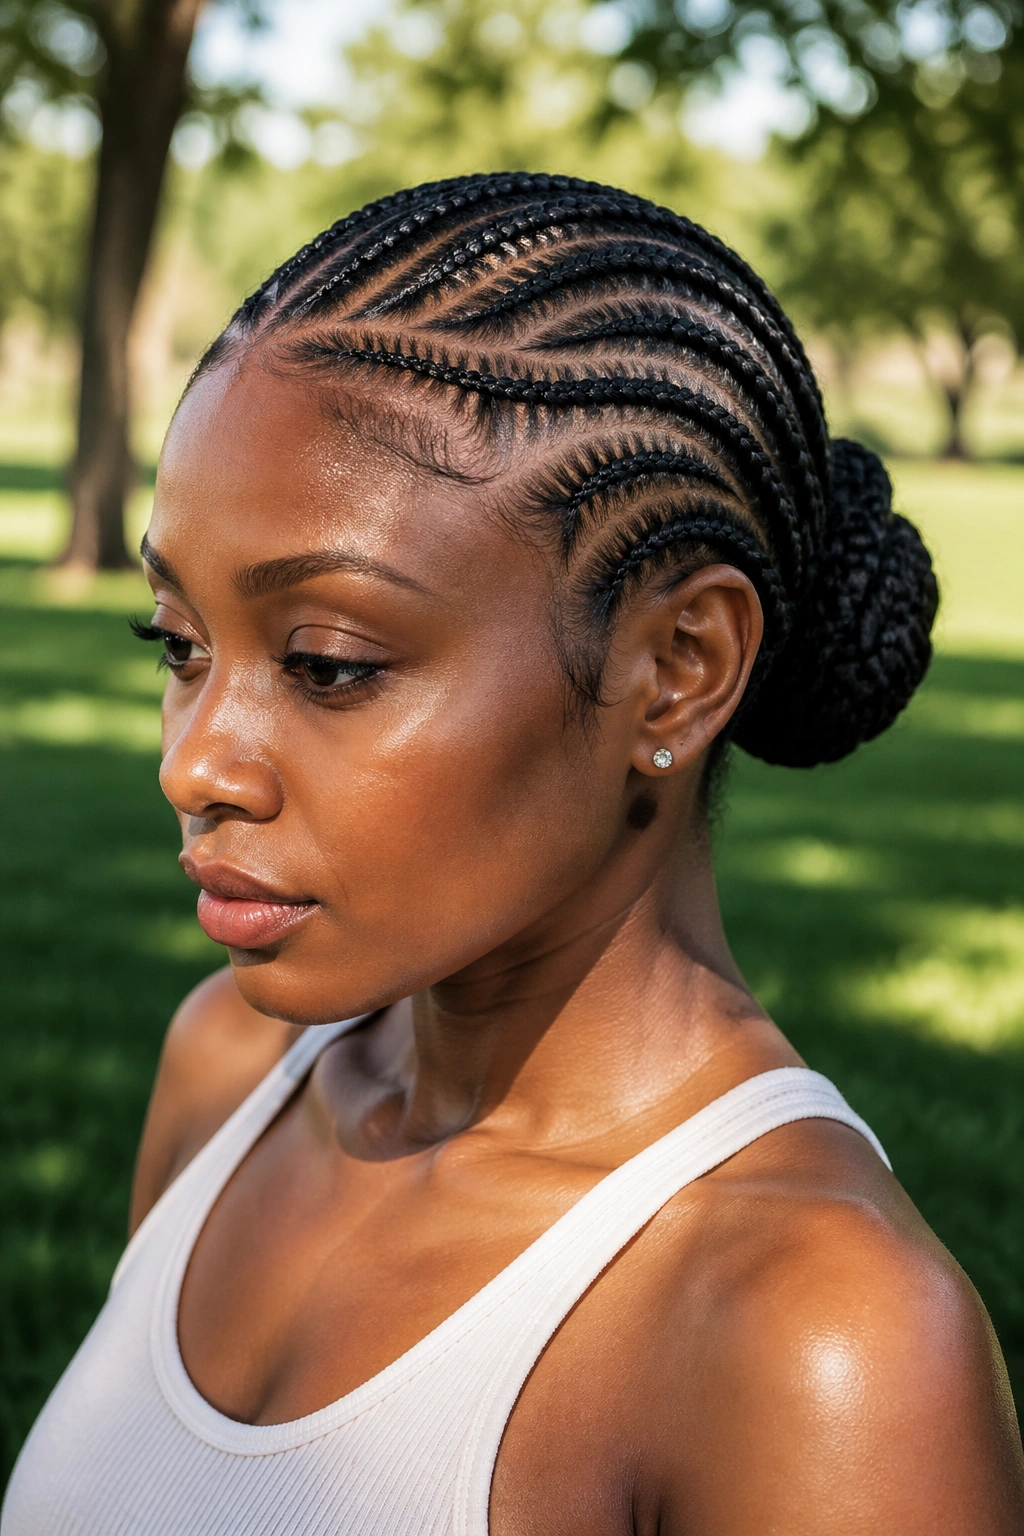
6. Bun with Curved Tribal Parts
Parts that curve like waves or arcs instead of running straight. The curves catch light along the scalp and create a visual rhythm that flat parts never do.
Tribal parts read as tradition, not trend. This is the kind of style that elders notice and approve of. It’s also a technical challenge — braiders charge more for it because it takes longer to measure.
Worth the money. These are the buns that last in your camera roll.
7. Updo Bun with Cornrowed Sides
Only the sides of the head are cornrowed. The top of the hair is left in natural curls, picked out, and gathered on top into a loose bun. The contrast between tight cornrowed sides and fluffy top creates a punk-inspired silhouette.
Popular among women with TWA or short natural hair who want a protective partial style. The loose top can be blown out, twisted, curled, or left wild — each version reads differently.
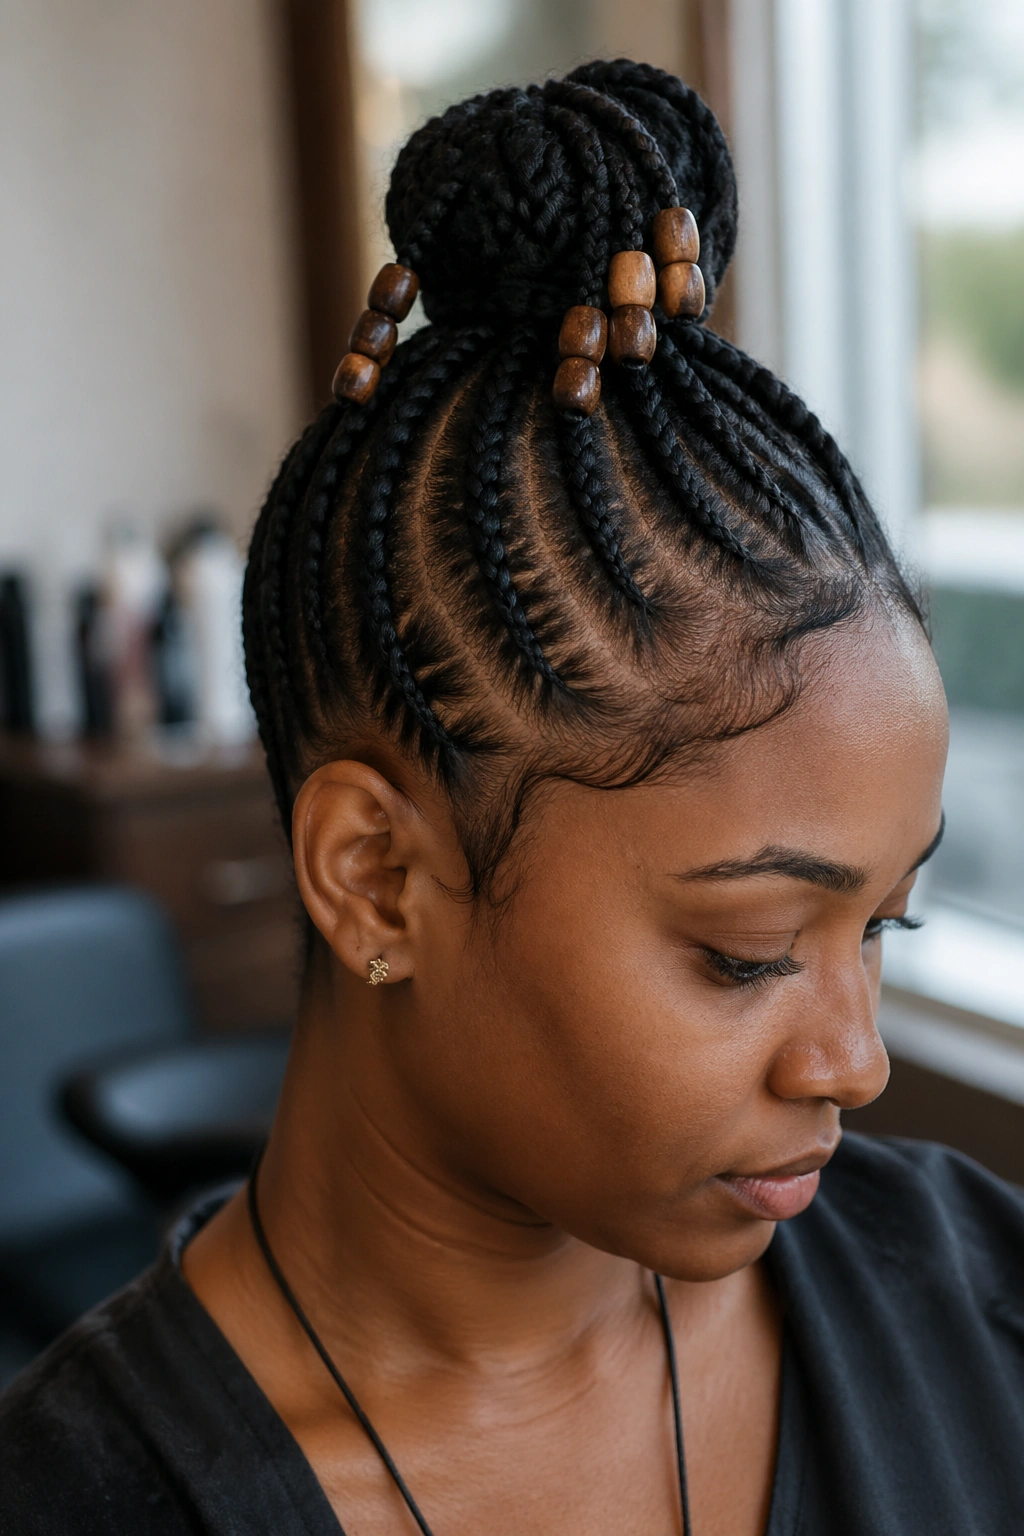
8. Bun with Beaded Ends
Wooden beads threaded onto the tails before they’re wound into the bun. When the bun is finished, a few bead-tipped ends poke out of the top or bottom of the bun intentionally.
Bead weight matters. Too many heavy beads pull the bun downward and stress the scalp. I cap it at about eight beads total across all the exposed ends. That’s plenty.
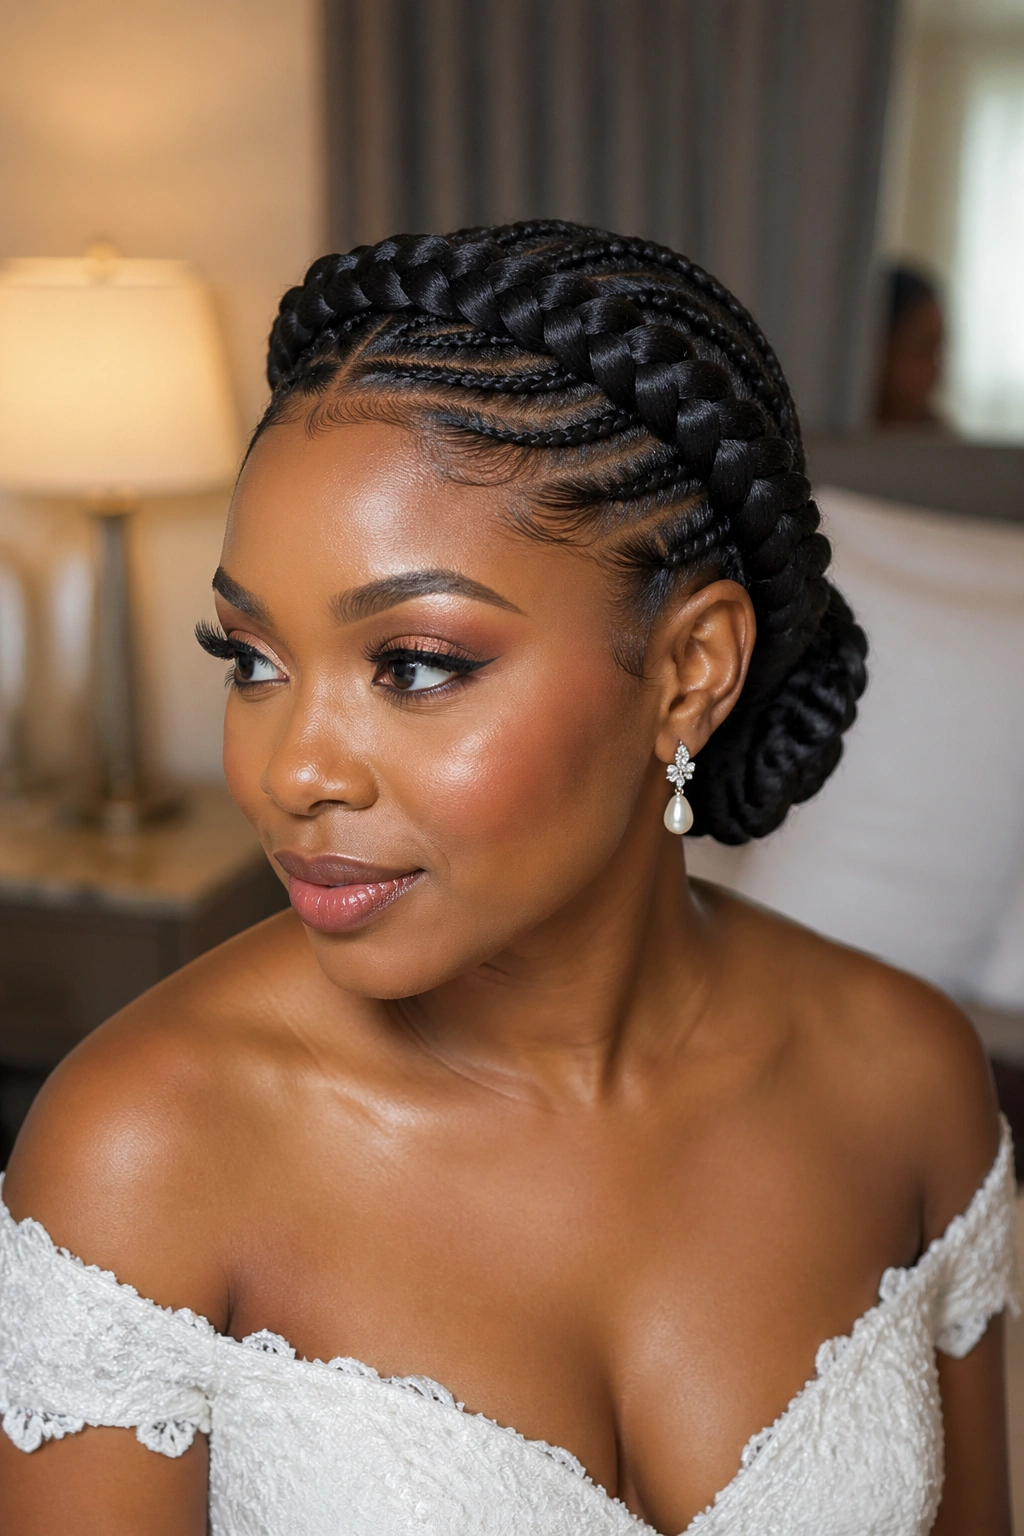
9. Crown Braid Bun
A cornrow wraps the head horizontally like a crown, and a bun sits at the back, fed by braids that run into the crown from the front hairline.
This is one of the more architecturally interesting cornrow buns. The wrap adds apparent height and creates a halo effect around the face.
Excellent for weddings, formal photos, and milestone events. Less practical for everyday wear because the wrap is visible from every angle and needs to stay sharp.
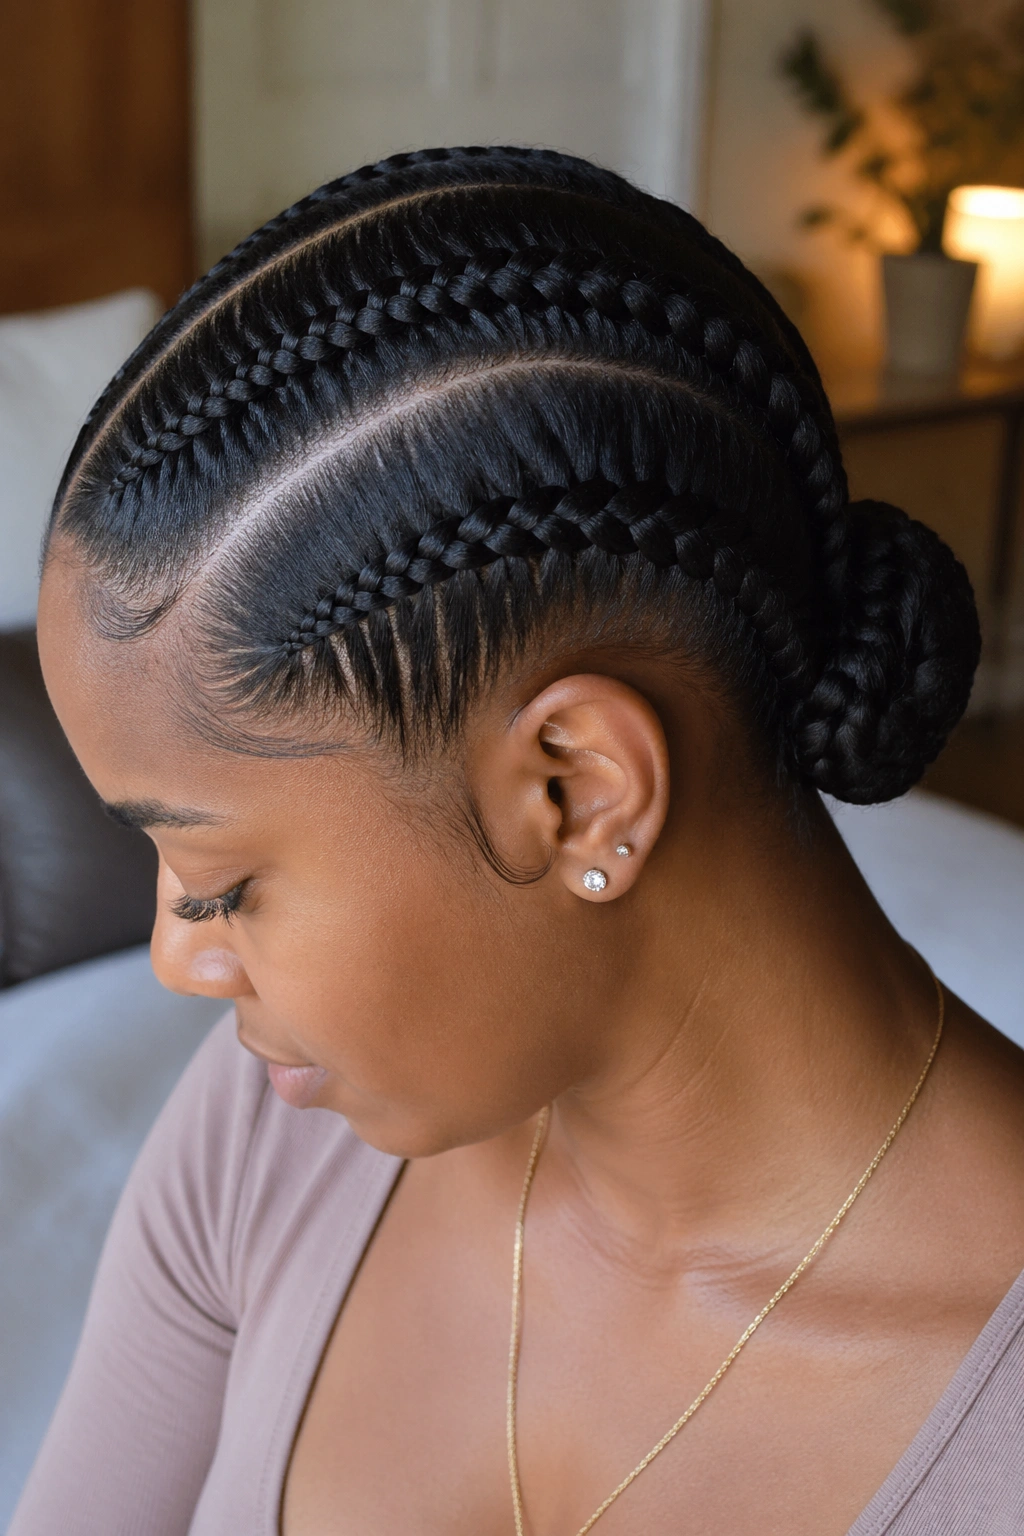
10. Two-Cornrow Low Bun
Just two chunky cornrows, one on each side of a center part, running down to a low bun. The simplest version of a cornrow bun.
Who This Is For
Anyone who wants a protective style without a full braid install. Two cornrows take about 30-45 minutes, compared to 2-4 hours for a full head of feed-ins. The bun itself holds a week to ten days.
- Install time: 30-45 minutes.
- Lasts: 7-10 days.
- Best for: quick protective styling between fuller installs.
Solo-braidable. Most people can manage two cornrows on themselves with practice.
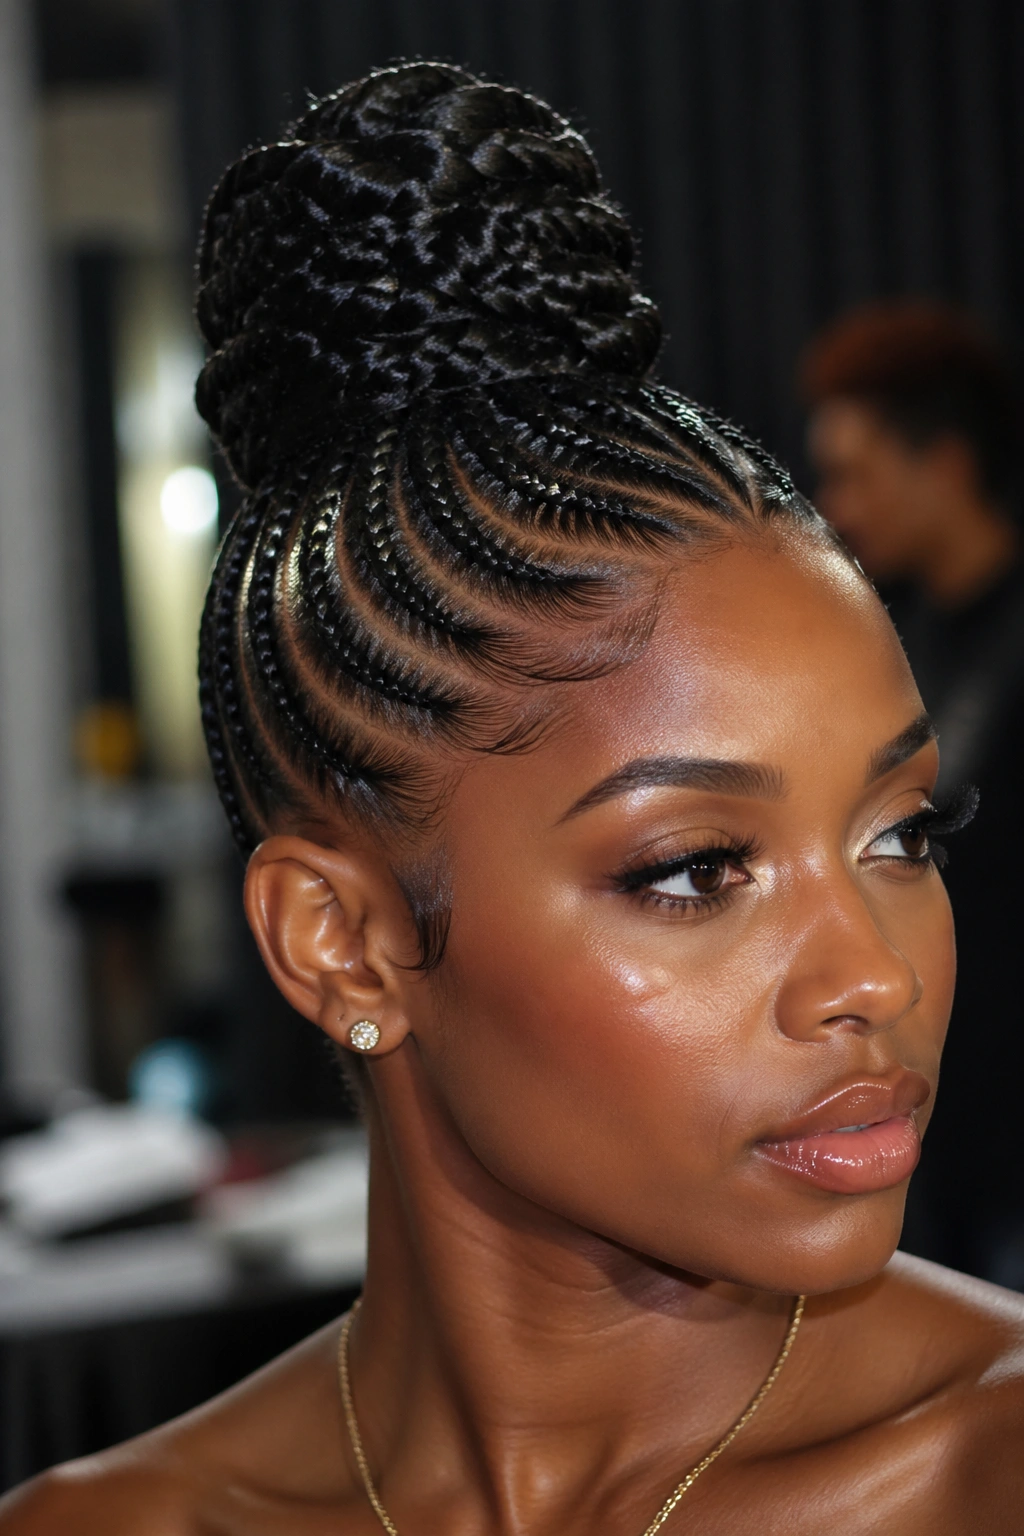
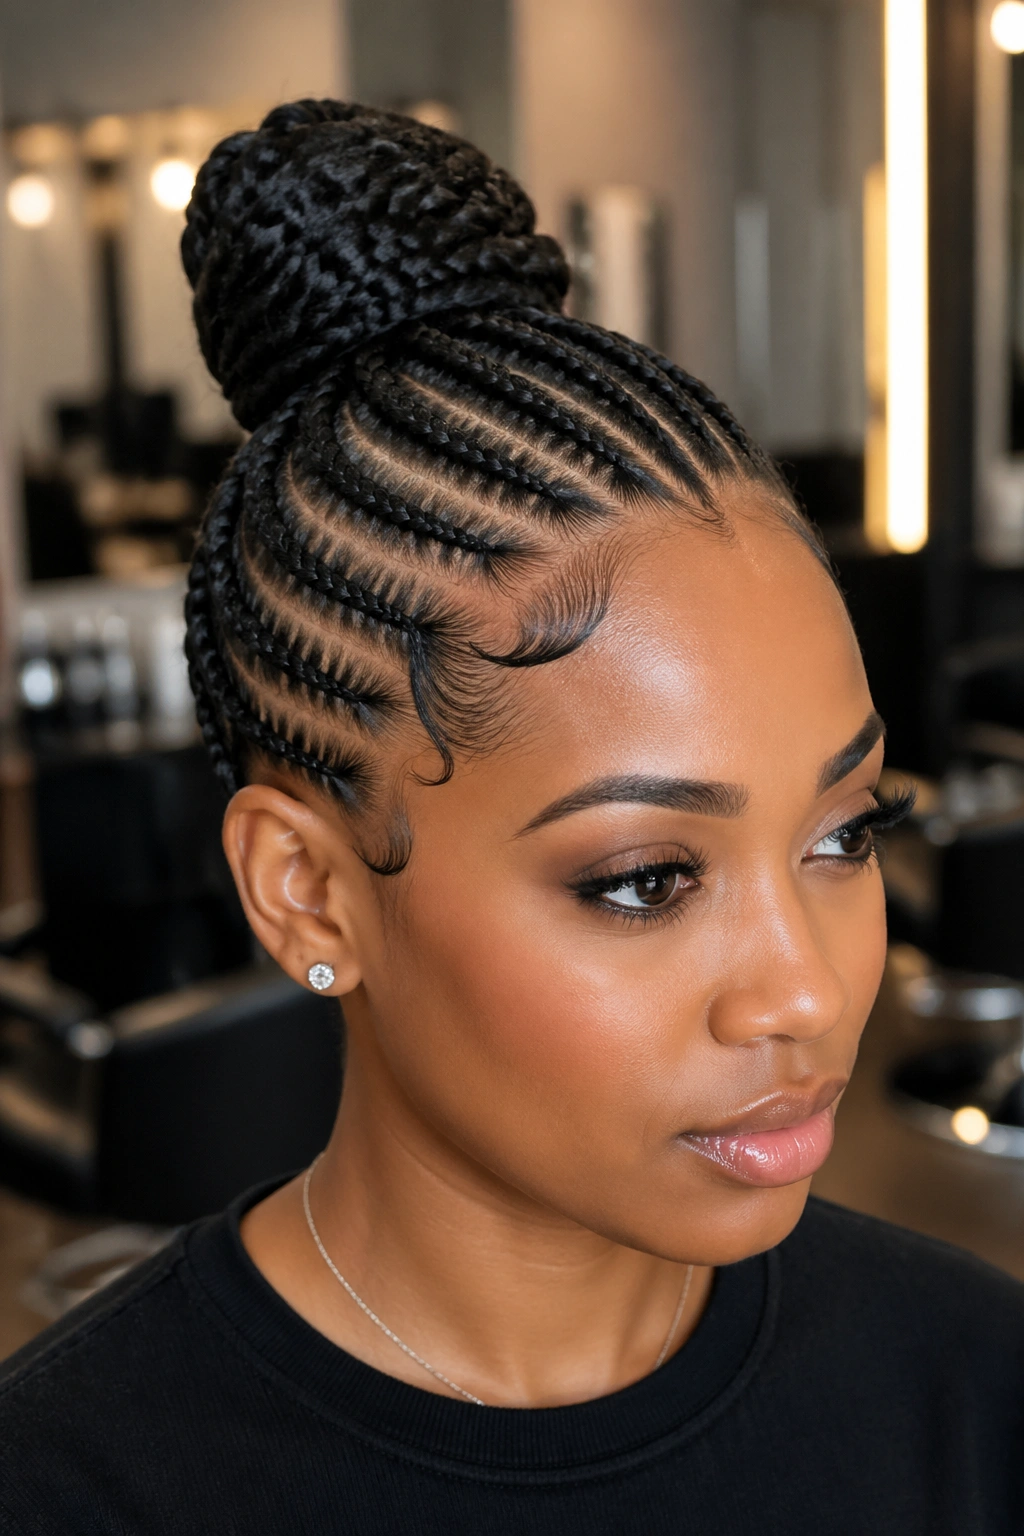
11. Stitch Braid Bun
Stitch braids have horizontal bars of tight braiding every half inch or so, creating a ribbed texture along each cornrow. Paired with a bun, the stitches draw the eye along the length of each braid.
The ribbing is precise braider work. Don’t attempt it unless your braider has a portfolio that shows stitches. The technique is specific.
Lasts slightly longer than standard feed-ins because the stitches add structure that resists fuzz. Worth the extra install time.
12. Bun with Cornrow Faux Hawk
The sides of the head get short cornrows; the center is braided into a tall crest that feeds into a high bun. The silhouette mimics a mohawk without shaving anything.
A bold style. Not for the timid. Works on women with strong features and confidence — those are the ones it suits best. On softer features, it can overwhelm.
13. Feed-In Bun with Wet-Look Finish
The braids and bun are smoothed with a heavy gel or braid spray that gives the whole install a glossy, almost wet sheen. Favored for stage, photoshoots, and red-carpet events.
The Catch
Wet-look finishes don’t last long. The gel dries out or cracks within 24 hours, and maintenance becomes a daily chore. Best for one big event, not a two-week protective style.
- Apply olive oil sheen spray for the initial wet look.
- Refresh before the event, not days before.
- Bring a small bottle of sheen to reapply during the night.
Tip: Avoid this finish in humidity. Sweat mixed with heavy product turns the wet look into a sticky mess.
14. Box Cornrow Bun
Unlike most cornrow buns where braids flow in one direction, box cornrows section the head into geometric boxes — squares or rectangles — and braid each section back independently. The results feed into a structured bun.
The geometric parting makes the install time longer. Each box is measured individually. But the finish is worth it — the bun reads as sculptural rather than flowing.
15. Heart-Shaped Parting Bun
Two curved parts form a heart at the front of the head, with feed-ins on either side of the heart joining into a bun at the back.
Romantic, playful, and photographs exceptionally well. Popular for birthdays, dates, and vacation content.
Precision matters. A sloppy heart looks like a bruise. A crisp heart looks like art.
16. Bun with Half-Up Braids
Only the top half of the head is cornrowed, gathered into a bun at the crown. The bottom half of the hair hangs free — whether braided separately, natural, or extended.
Blend is key. If the loose hair at the back doesn’t texture with the cornrows above, the style reads disconnected. Aim for unified texture top to bottom.
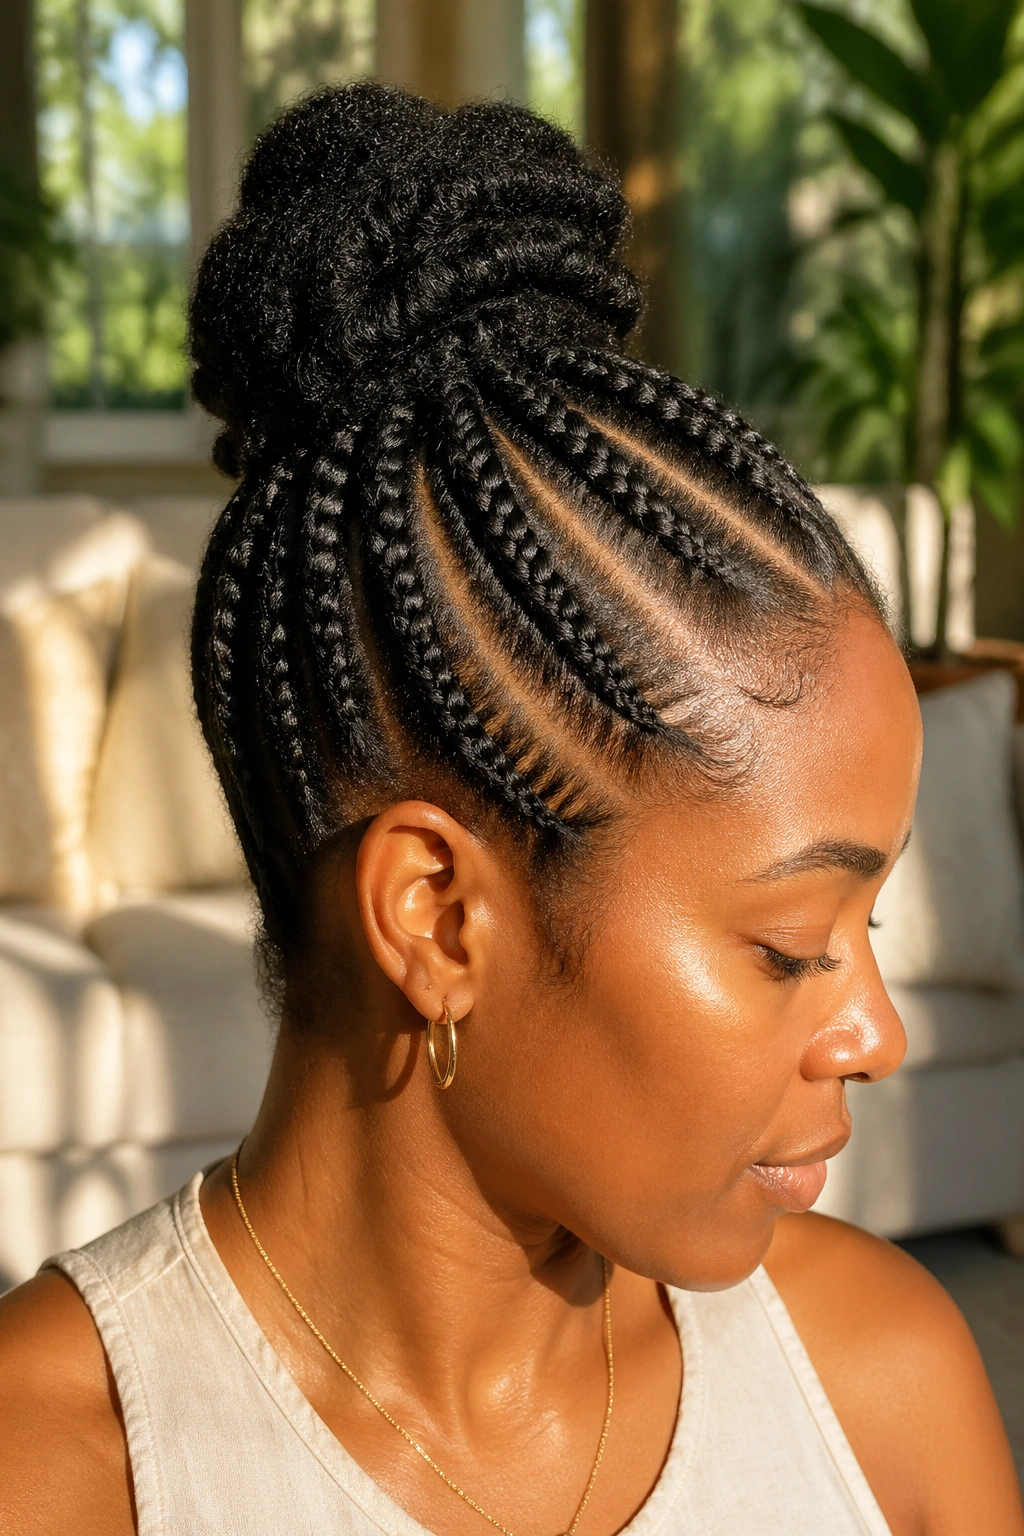
17. Low Bun with Thick Stuffed Feed-Ins
Thicker-than-average feed-ins — stuffed with more kanekalon than standard — sweep down to a thick, full low bun. The density gives the whole install more presence.
The thicker braids sit more obviously above the scalp than fine feed-ins do. If you want dimension, this is your version. If you want a sleek, hugging-the-head look, pick fine feed-ins instead.
18. Cornrow Bun with Faux Loc Tails
The feed-ins gather in a bun, but the tails emerging from the bun are faux locs rather than braids. The contrast between cornrows and locs adds texture variety.
Faux locs are made from loose kanekalon wrapped around braided tails or crocheted in. They give the style a loc aesthetic without committing to actual locs.
Lasts about the same as standard feed-ins. Worth trying if you’re curious about locs but not ready to commit.
19. Bun with Pumpkin-Seed Parting

Oval, seed-shaped sections at the hairline feed into straight cornrows that gather in a bun. The shapes resemble seeds scattered along the forehead.
This is among the more technical parting patterns. Not every braider can do it cleanly. Ask for portfolio proof before booking.
The result reads as heritage — pumpkin-seed parts are among the most traditional patterns in the category.
20. Low Bun with Gold Cuff Detail
A single small gold cuff — the kind that slides onto a braid and clamps shut — placed at the base of the bun where it gathers. One cuff. That’s the whole ornament.
Why It Works
The rule of “one statement piece” applies. A single gold cuff on a clean bun draws the eye without fighting anything else for attention.
- Cuff size: about the diameter of a pinky fingertip.
- Placement: at the junction where tails meet the bun.
- Best in brushed gold or matte brass finishes.
Tip: Skip shiny polished gold — it reads cheap unless it’s real metal. Brushed finishes photograph better.
21. Bun with Loose Natural Hair on Top
Cornrows wrap the back and sides of the head and feed into a low bun. The top crown is left as natural, untouched hair — curly, coily, puffed out, whatever its natural state.
This is a “wearing your natural hair while still protecting the rest” style. Good for transition periods, good for texture days, good when your hair is in an in-between state.
22. Bun with Cornrowed Bangs
Instead of leaving a swoop of hair as bangs, the bangs themselves are cornrowed — short, tight braids across the forehead that stop above the eyebrows. The rest of the head feeds back into a bun.
Unusual and a bit retro. Channels some 90s energy in a way that reads fresh.
Short cornrowed bangs are a commitment. They don’t blend easily with other styles once installed, so plan the full look around them from the start.
23. Bun Wrapped in Thread
The entire bun is wrapped in colored embroidery thread — not just the base, the whole bun surface. The result is a solid-looking sphere of colored thread where the bun should be.
Best in earth tones — red, ochre, ivory — that echo traditional African beadwork colors. Neon threads cheapen the look.
Thread-wrapped buns last about a week before the thread starts to fuzz. Best for short-duration events.
24. Medium-Height Chignon Bun
A chignon sits at the middle height of the back of the head — not at the nape, not at the crown — with feed-ins curving elegantly down from the top of the head and up from the hairline to meet at the chignon.
What Makes It Different
Most cornrow buns sit high or low. A medium-height chignon hits a quieter sweet spot — dignified, mature, flattering across age groups. It’s the bun I’d recommend for a mother of the bride or a keynote speaker.
- Height: roughly even with the top of the ears.
- Shape: folded flat, not round.
- Install: 2-3 hours for a full head of feed-ins feeding into it.
Tip: Support a chignon with a flat mesh pad, not a round donut. Donuts create the wrong shape.
25. Bun with Mixed Braid Sizes
The feed-ins alternate between thick and thin — one fat cornrow, one fine cornrow, repeating across the head. The bun gathers all of them together. The variance in braid size creates a textured, layered visual on the scalp.
This is my current favorite, honestly. Standard uniform cornrow buns can feel repetitive when I’ve worn them a dozen times. Mixed sizes break the pattern and read as intentional design.
The technique takes a skilled braider who can keep the alternating pattern consistent without losing the rhythm mid-install.
Night-Time Maintenance That Saves the Bun
A satin bonnet is step one. A silk pillowcase is step two. Do both and your install lasts a week longer than skipping either.
Tie a silk scarf over the edges before putting the bonnet on if you want the hairline to stay crisp. Layering scarf plus bonnet creates pressure that holds the edges flat overnight.
Never sleep on a freshly installed bun without a bonnet. The first night sets the style’s trajectory. Cotton friction one night adds days of fuzziness you spend the rest of the install trying to fix.
Scalp Routine Under the Bun
Don’t skip scalp care because you can’t see it. Dry, neglected scalp under braids leads to itch, flake, and buildup that wrecks the style from underneath.
Use a light oil — grapeseed, jojoba, or a diluted tea tree mix — in an applicator bottle. Apply directly onto the part lines two to three times a week. Massage in with fingertips, not nails.
For itch breakthrough, a diluted apple cider vinegar spray (one part ACV to three parts water) settles the scalp without stripping. Spritz the parts, let sit for five minutes, blot with a clean towel.
Never use heavy butters like shea or mango while the cornrows are in. They build up, go rancid, and make the takedown miserable.
Takedown That Doesn’t Shred Your Hair
Slow is the whole philosophy. Fast takedowns tear hair.
- Saturate each braid with a conditioning detangler.
- Remove the pins, rubber bands, and any extensions first.
- Unravel from the tip upward, one braid at a time.
- Finger-detangle each freed section before touching a comb.
- Wash in sections with a gentle, clarifying shampoo.
- Deep condition with heat for 30-45 minutes.
Expect shed hair. Two to three weeks of shed held in the braids releases at once. That’s not hair loss; it’s normal shedding that couldn’t fall away while the hair was braided. Don’t panic when you see it in the sink.
Picking the Right Cornrow Bun for Your Life
Lifestyle filter first. Active lifestyle means choosing a bun that can handle sweat and movement — messy buns, medium-height buns, anything with curled or loose tails that absorb frizz instead of showing it.
Work environment second. Conservative workplaces lean toward sleek low buns, stitch braids, and simple chignons. Creative workplaces welcome tribal parts, beads, mixed sizes, and anything with sculptural ambition.
Face shape third. Round faces benefit from vertical height — high top knots or crown buns. Long faces soften with low buns. Oval faces suit anything. Square faces round out with side buns.
Budget last. Simple buns cost little. Intricate parting patterns, stitches, beadwork, and custom colors add up. A braider’s time is the biggest variable — expect to pay $100-$400 depending on complexity and region. Solo installs run the price of a pack of kanekalon and a jar of edge gel.
The best bun for you is the one you can maintain, afford, and feel proud in every morning you look in the mirror. That’s the test. Everything else is secondary.