



Criss cross cornrows with 4 braids combine geometric scalp parting with the streamlined silhouette of just four main braids. The criss cross element refers to the parting pattern at the front or top of the head — diagonal lines that cross over each other before flowing into four primary cornrows. The result is a style that reads architectural without requiring the dozens of braids more elaborate cornrow patterns demand.
The four-braid count makes the style accessible. Install times run 90 minutes to 3 hours depending on the criss cross complexity and whether you’re adding extensions. Maintenance is straightforward because there are fewer braids to manage individually.
What makes this combination particularly compelling — the criss cross detail adds visual interest exactly where the eye lands first (the front and top), while the four large braids handle the bulk of the protective styling efficiently. You get artistry where it matters and simplicity everywhere else.
The Geometric Logic Behind Criss Cross Parting
Criss cross parting works because human eyes are drawn to crossing lines. Two diagonal lines that intersect create automatic visual focus — your brain registers the intersection as a point of interest. Cornrow patterns that incorporate criss cross detail use this principle to anchor attention.
The intersection point is usually positioned at the center crown or slightly forward of center. From there, the four main braids flow back and down in standard cornrow fashion. The crossing happens in the front quarter of the head, leaving the rest of the scalp clean.
The technique itself isn’t complicated. The braider creates two intersecting diagonal parts, then incorporates the resulting four wedge sections into the four main cornrows. Each wedge becomes the starting point for one of the four braids.
What “4 Braids” Actually Means in Practice
Four cornrows total — usually two on each side of a center axis. Each braid carries roughly a quarter of your hair plus, optionally, a quarter of the extensions you’re adding.
The four-braid count sits in a sweet spot. Two braids look stark and minimal. Six or eight braids start to feel busy. Four reads balanced — enough structure to be intentional, not so many that the scalp gets overwhelmed.
This count also distributes weight evenly. Each braid carries the same load, which means the hairline tension stays balanced across the four sections. Asymmetric tension is one of the leading causes of edge damage; equal four-section distribution prevents this.
Why This Style Works for So Many Hair Types
Four-braid criss cross styles accommodate fine hair, medium density, and thick natural hair equally well. The fewer braids mean less individual tension; the criss cross adds visual interest without requiring hair density that could overwhelm thin hair.
For 4C hair, the texture holds the criss cross parts sharp without smudging. For 4A and 4B textures, the same applies. For relaxed and transitioning hair, the four-braid format reduces the stress points that micro braiding creates on chemically treated strands.
The style works for kids too. Four braids are easier for young children to sit through during install, and the criss cross detail reads playful without being overly intricate.
Prep That Sets Up the Cleanest Lines
Wash with a clarifying shampoo to remove all product buildup. Criss cross parts depend on visible scalp lines, and any residue creates flaking that ruins the visual effect.
Deep condition with a moisture-protein balanced product. Aphogee 2-Step is overkill for this — a regular weekly deep conditioner like Camille Rose Algae Renew works well.
Stretch the hair through African threading or chunky overnight twists. Stretched hair takes parting cleaner and the resulting cornrows lay flatter against the scalp.
Tools That Matter for Criss Cross Work
A rat-tail comb with a metal pin tip — the metal allows for precise scalp parting that plastic tips struggle with on textured hair.
Edge gel with strong hold. The criss cross parts need to stay defined throughout wear, which means edge gel application along the parts at install. Got2B Glued Spiking Gel works exceptionally well for this.
Sectioning clips, six minimum. The criss cross technique requires sectioning multiple zones simultaneously, and you don’t want hair falling into the wrong section mid-braid.
Optional but useful — a measuring tape or fabric ruler for ensuring symmetry in the criss cross parts.
1. Classic Front Criss Cross with Four Straight-Back Braids
The simplest version. Two diagonal parts cross at the center forehead, creating four wedges across the front quarter of the head. From those wedges, four cornrows flow straight back to the nape.
The criss cross detail dominates the front view. From profile or back, the style reads as standard four-braid cornrows. This makes it work for environments where minimal styling is preferred but you still want some artistic detail visible.
- Install time: 90 minutes to 2 hours
- Lasts: 2 to 4 weeks
- Best for: First-time criss cross wearers
Tip: Ask your braider to make the criss cross intersection point about 1.5 inches behind the hairline rather than directly at the hairline. This creates breathing room between your edges and the design, which protects the most fragile hair from tension damage.
2. Top Crown Criss Cross
The criss cross intersection sits at the very top of the crown rather than the front. From the crossing point, the four braids angle outward — two toward the front hairline, two toward the back nape.
This creates a starburst silhouette when viewed from above. It’s the criss cross variation I recommend for women who tie their hair up frequently or who wear their cornrows under wraps and headbands. The crown detail stays visible even when the front is covered.
The angling-forward braids require some adjustment to standard cornrow technique. Most braiders default to back-flowing cornrows, so be specific about wanting two braids that flow toward the forehead.
3. Diagonal Criss Cross with Side-Swept Braids
Instead of a symmetric criss cross, the parting forms a directional X that leans toward one side. All four resulting braids angle toward the same shoulder rather than splitting symmetrically.
The asymmetry suits women with strong cheekbones or angular jawlines. The diagonal flow creates visual movement across the face, which softens harder features.
This is the version I pick for editorial photography or styled events where the asymmetry can be featured. For everyday wear, the off-balance silhouette can read sloppy if the styling isn’t sharp.
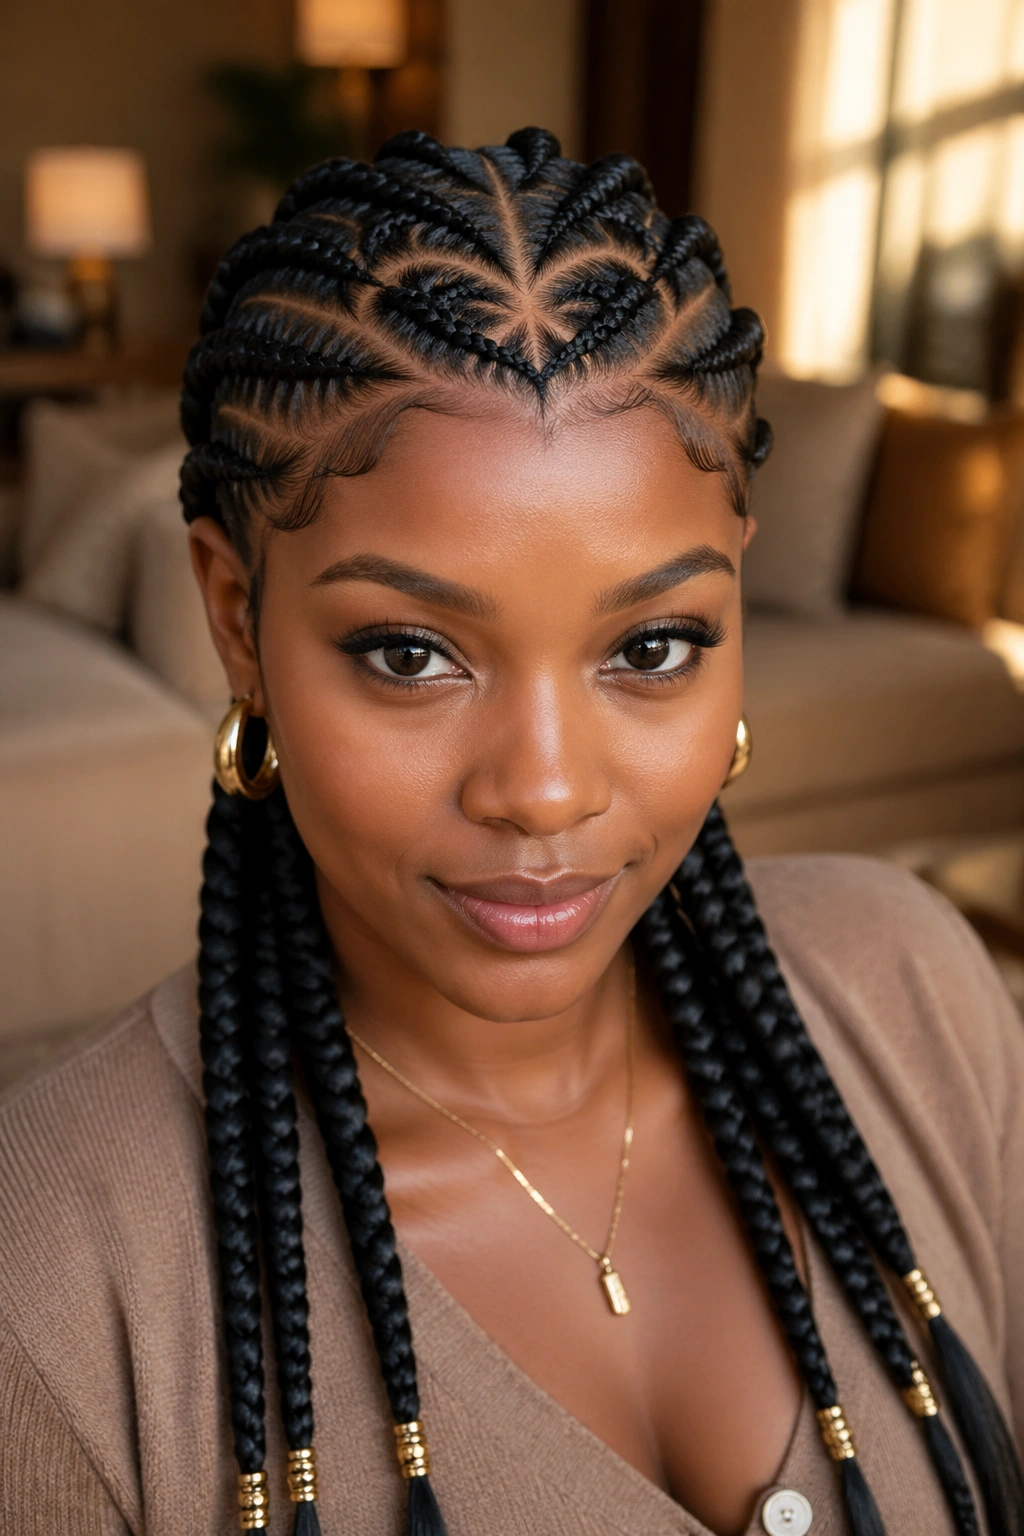
4. Heart Criss Cross at the Front
The criss cross parts curve slightly to form a heart shape at the front of the head, with the four braids flowing back from the heart’s outer edges.
Why It Works
The heart shape reads decorative without being childish. It’s most often associated with little girls’ braiding, but adults can wear it convincingly when paired with mature styling and accessories. Gold cuffs at the braid ends elevate the style into adult territory.
The heart parting is the technically demanding element. Few braiders can curve scalp parting cleanly while maintaining symmetry. Ask for portfolio photos of prior heart parting work before booking.
Best for: Casual events, photoshoots, anyone who wants soft decorative detail in their cornrow style.
5. Criss Cross with Geometric Star Center
The intersection point of the criss cross expands into a small star pattern — usually 4 or 5 points emanating from the central crossing. The four main braids start from the four primary points of the star.
Star detail requires a braider with strong design instincts. The star points need to be approximately equal in length and angled symmetrically. Done well, it’s the most visually striking version of the four-braid criss cross category.
The star design photographs better than it reads in everyday wear. Plan your install around an event or a photo session to maximize the impact.
6. Double Criss Cross with Four Braids
Two separate criss cross intersections — one at the front near the hairline, one at the back near the crown. The four braids start at the front intersection, pass through the back intersection, and continue to the nape.
The double criss cross creates an X-shape running along the top of the head when viewed from above. From the front, the top criss cross dominates. From the back, the rear criss cross takes over.
Install time roughly doubles compared to single criss cross styles. Budget 3 to 4 hours.
7. Criss Cross with Beaded Crossing Point
The criss cross parts get adorned with a single decorative bead or charm placed at the intersection point. The four braids flow plainly from there without further decoration.
This is the minimal-decoration version. The single accent at the criss cross point becomes the focal element. Wooden beads, gold-tone charms, small shells all work depending on the aesthetic.
The bead has to be attached securely. Some braiders glue the bead to the gel base; others wrap thread around the parting at the bead’s location to anchor it. Either method works for short-term wear; for 4-week styles, threading is more secure.
8. Criss Cross with Cornrow Bangs
Two diagonal parts cross at the front, but instead of four braids flowing back, the front portion becomes braided bangs that sweep across the forehead. The remaining hair forms the four primary back cornrows.
What Makes It Different
The braided bangs replace the front view that would normally show the criss cross intersection. The crossing parts are still there underneath, but they’re partially obscured by the bangs themselves.
This works for women with high foreheads who want to incorporate criss cross detail without the full forehead reveal.
Who this is for: Anyone with a forehead they prefer to soften.
9. Criss Cross with Curved Braid Lines
The criss cross at the front creates the four braid starting points. From there, instead of running straight back, the four braids curve along the head — sometimes in an S-shape, sometimes in arcs.
The curved braids add organic movement to what would otherwise be a sharp geometric style. The criss cross provides the structural anchor; the curves provide the softness.
Curved cornrows hold tension differently than straight braids. The curves need to be anchored at the parting points or they’ll lose shape over time. Gel application along the curves helps preserve the lines.
10. Criss Cross with Stitch Detail Braids
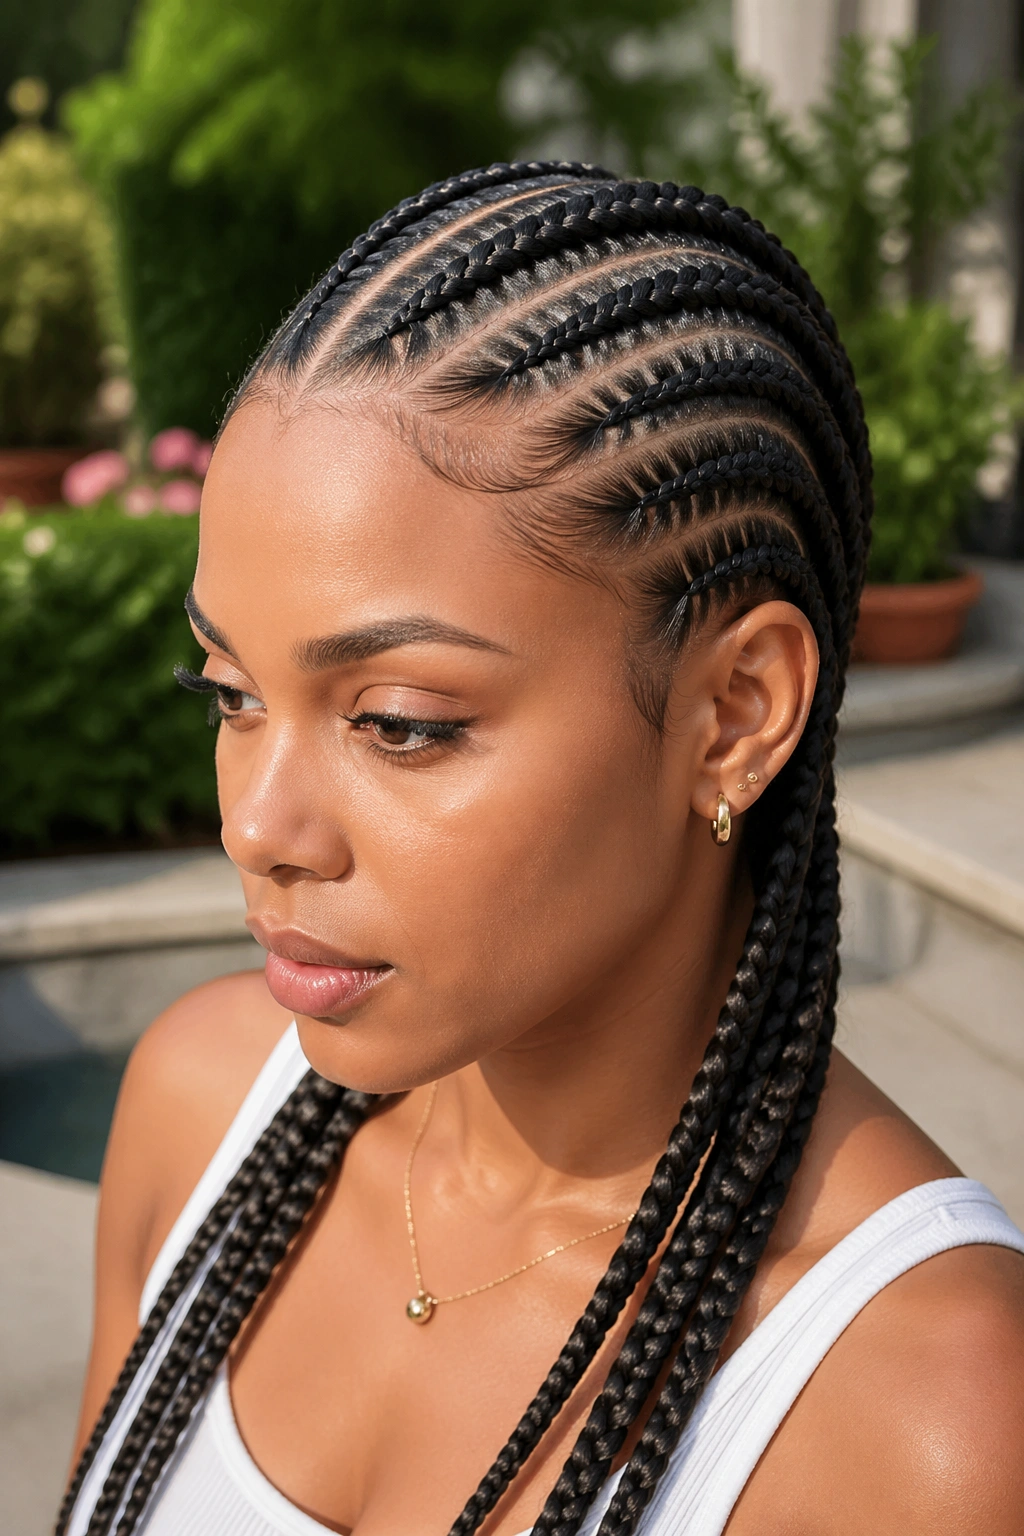
The criss cross parting stays standard. The four braids feature visible stitch lines — small horizontal stitches along each cornrow that create rhythm and texture.
Stitching adds about 60 to 90 minutes to install time. The trade-off is significantly more visual interest in the four braids themselves, which compensates for the simplicity of having only four braids.
This is a popular pick for wedding guest hair — the stitching elevates the style enough for formal events without requiring elaborate updo work.
11. Criss Cross with Cuffed Braid Ends
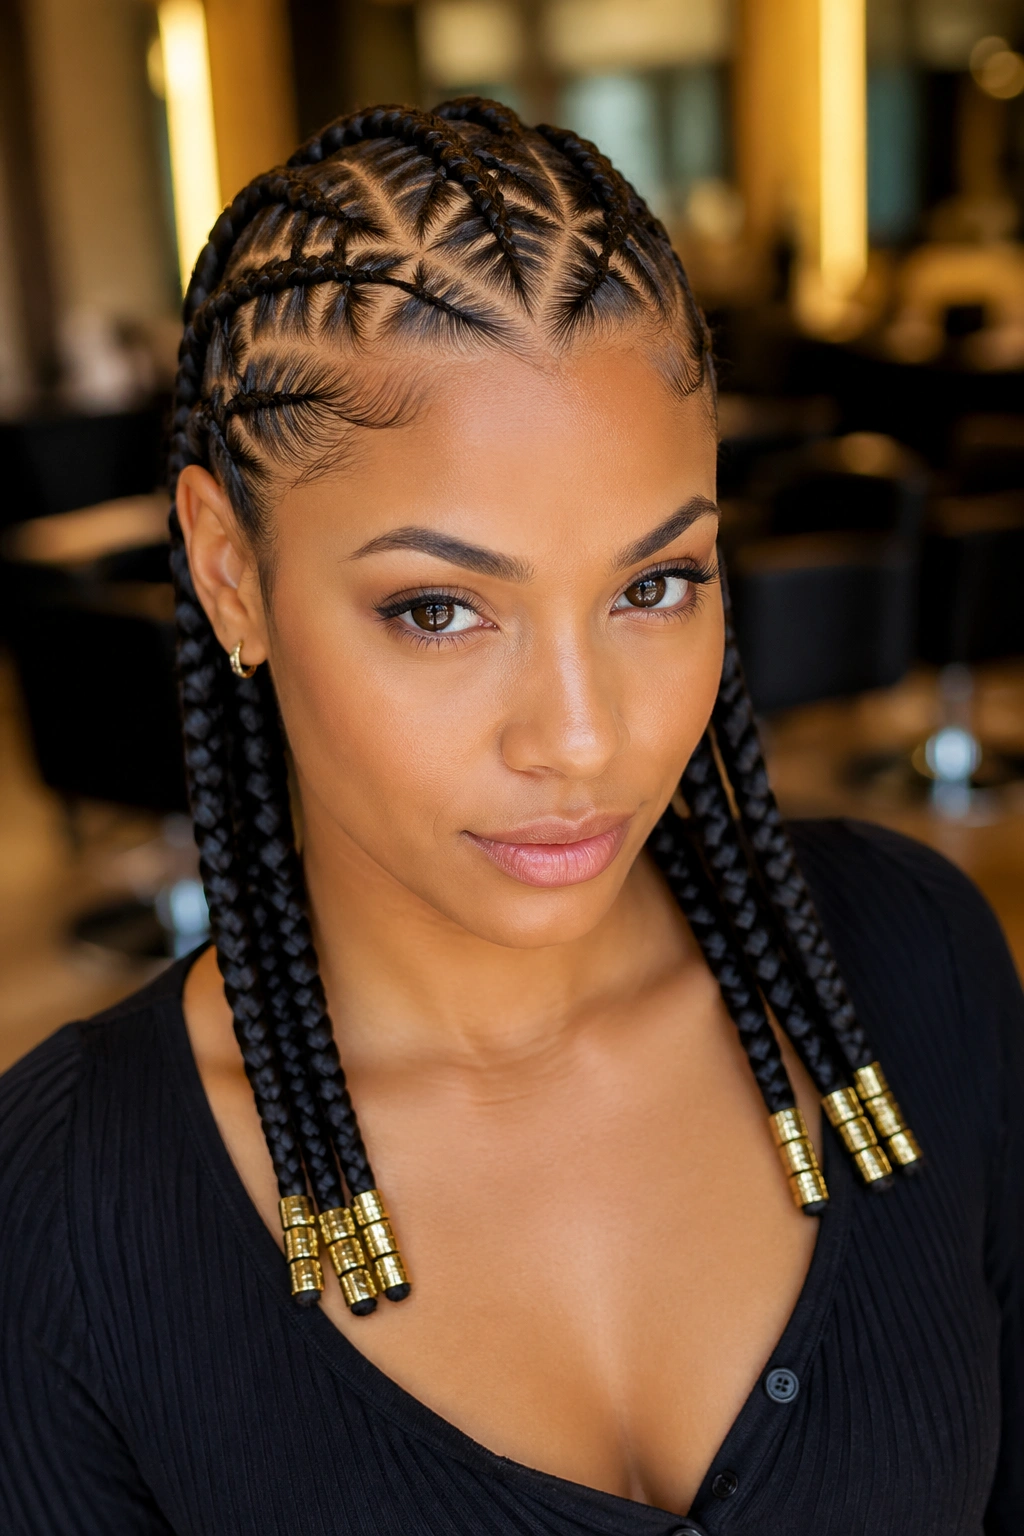
The cornrows themselves are unadorned. The cuffs come at the very ends of the braids — gold tubes or rings slid up the braid tips. Three to four cuffs per braid ending creates a layered finish.
Cuffs add weight at the braid tips. Combined with the natural weight of the braid itself, the cuffed ends pull the cornrows down with extra gravity. This actually helps the cornrows lay flatter against the back, which most wearers consider a positive effect.
Choose cuff size carefully. Too-small cuffs slide off; too-large cuffs look chunky. The cuff should fit snugly on the braid without compression.
12. Criss Cross with Long Feed-In Extensions
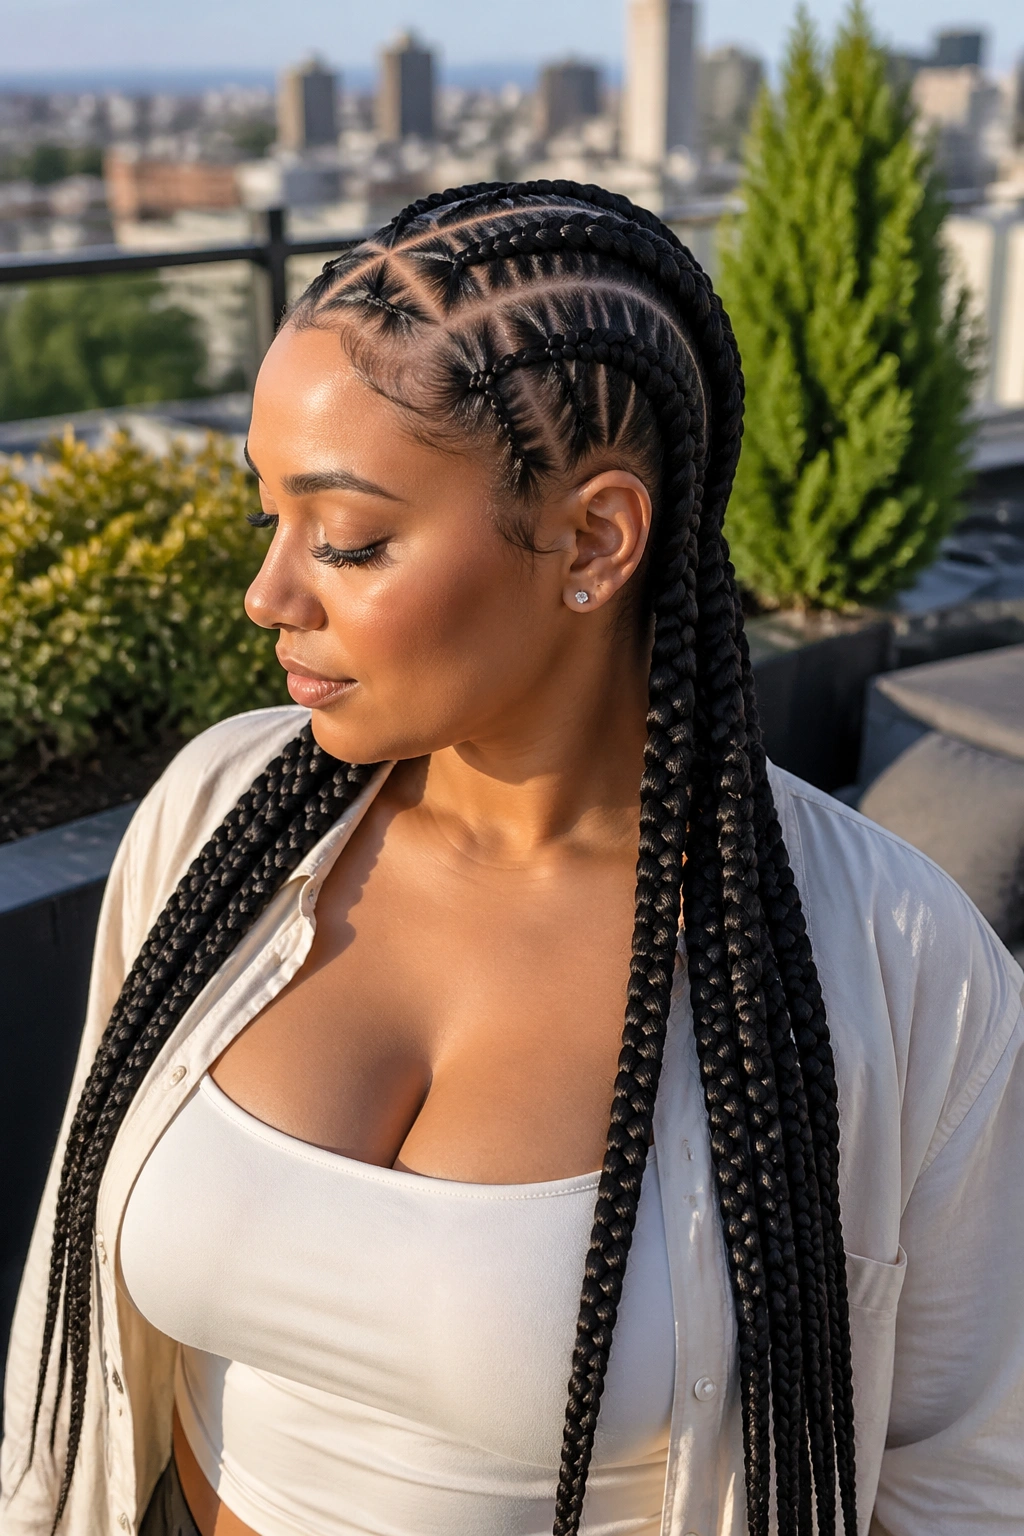
The four braids extend to mid-back or longer using kanekalon feed-in extensions. The criss cross parting at the front anchors the style; the long flowing braids carry the silhouette.
Long extensions require more product and more maintenance. The braid tips will tangle if not wrapped at night, and the weight of long extensions can stress the four-braid base.
For active lifestyles, this version isn’t ideal. The braid length gets in the way of workouts, swimming, sleeping. For everyday wear and styled events, the length is the appeal.
13. Criss Cross with Bob-Length Cut
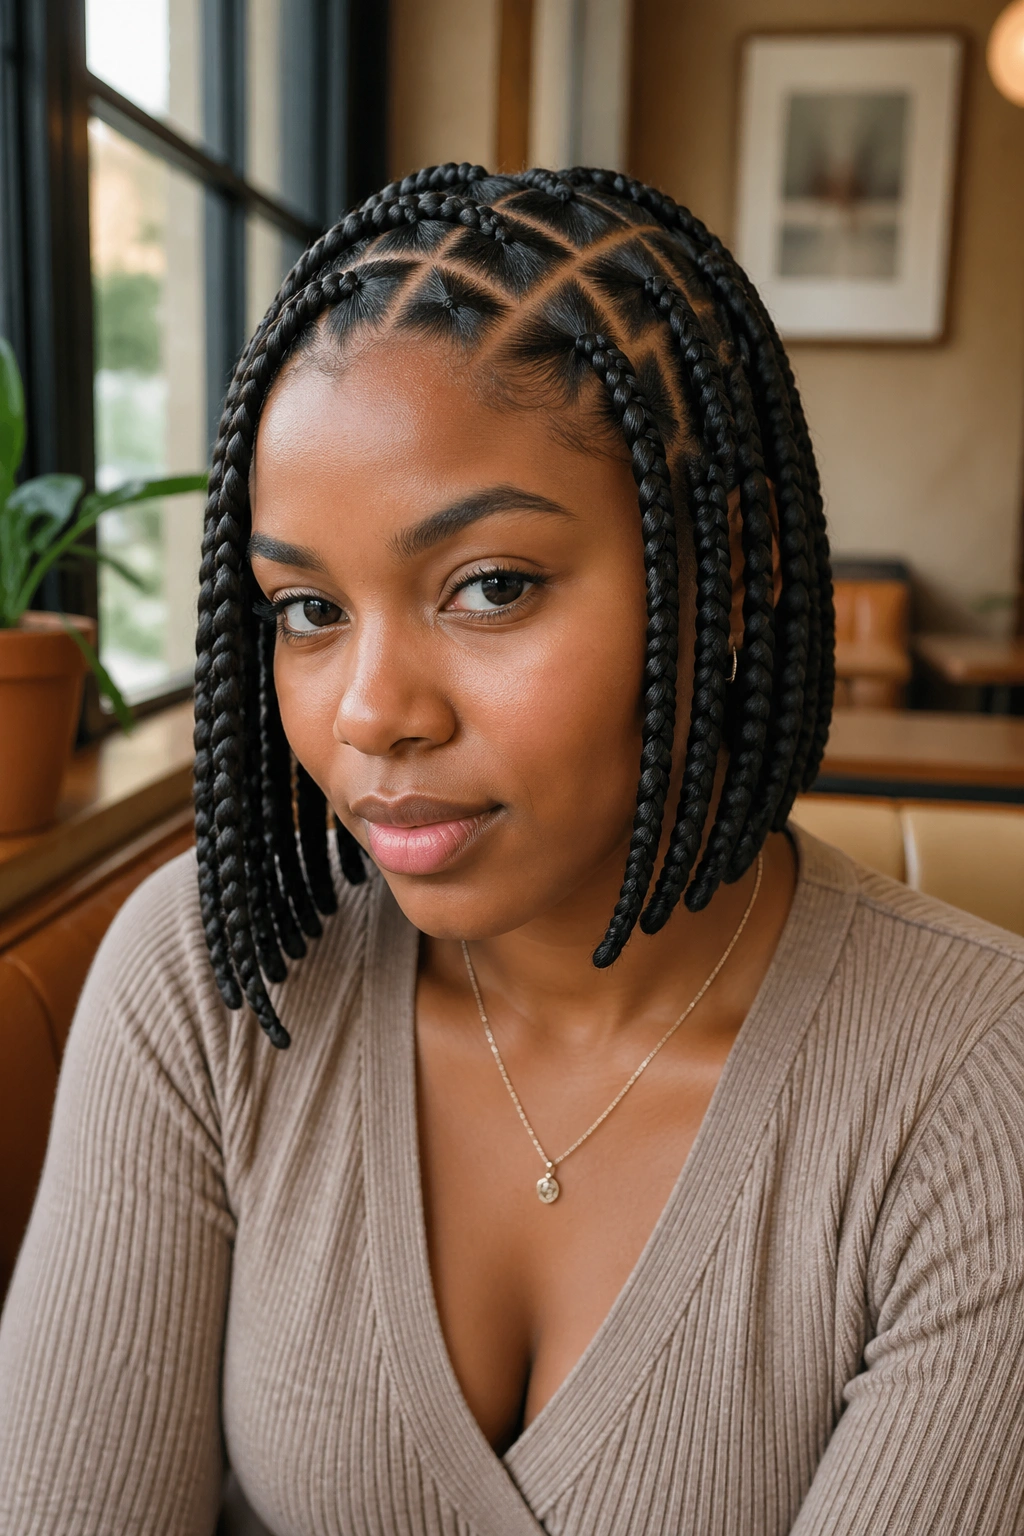
The four braids stop at chin to collarbone level. The criss cross detail at the front pairs with the bob-length silhouette to create a polished, mature look.
Bob-length braids are easier to wear daily. Less weight, less night maintenance, faster wash and dry times. Many women find this length is the sweet spot between protective styling commitment and lifestyle convenience.
The four-braid bob reads particularly well on women with sharp jawlines. The chin-length tips frame and emphasize the lower face.
14. Asymmetric Criss Cross
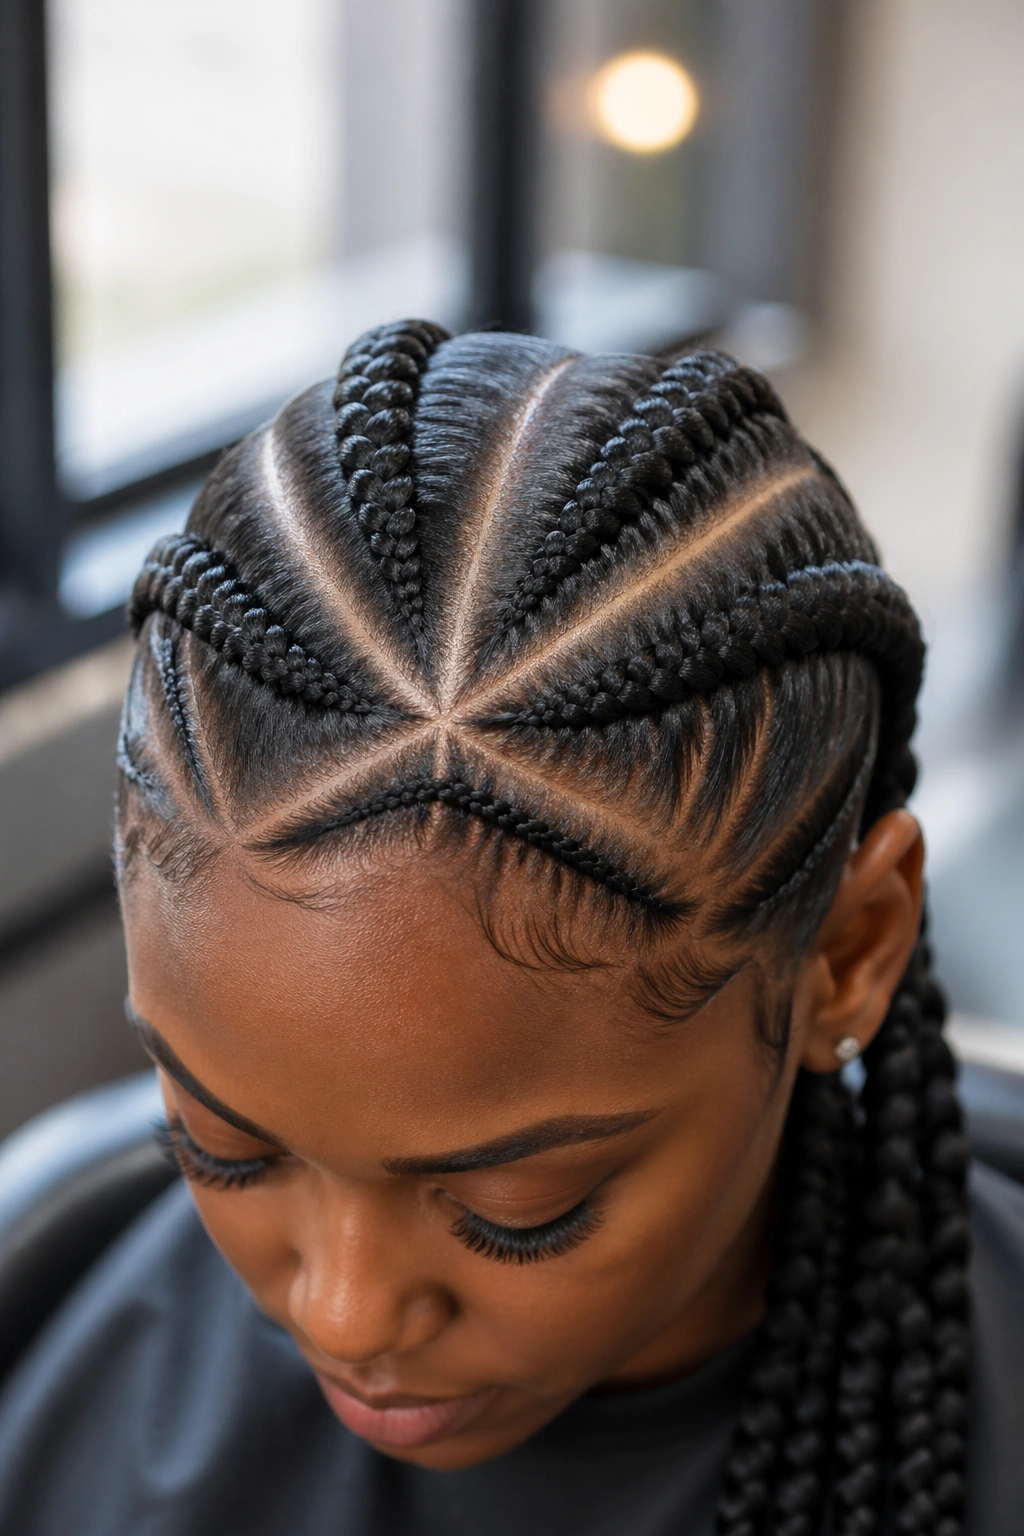
The criss cross parting is intentionally uneven. One arm of the X is longer than the other, or the angles are deliberately mismatched. The four resulting braids reflect this asymmetry — different starting points, different angles, different lengths.
How to Style It
This is design-forward styling. The asymmetry is a creative statement, not a mistake. It works for women confident enough to wear unconventional silhouettes and for events where you want your hair to start conversations.
Pair with asymmetric earrings — one large statement, one small accent — to echo the styling choice across your overall look.
15. Criss Cross with Color Highlights
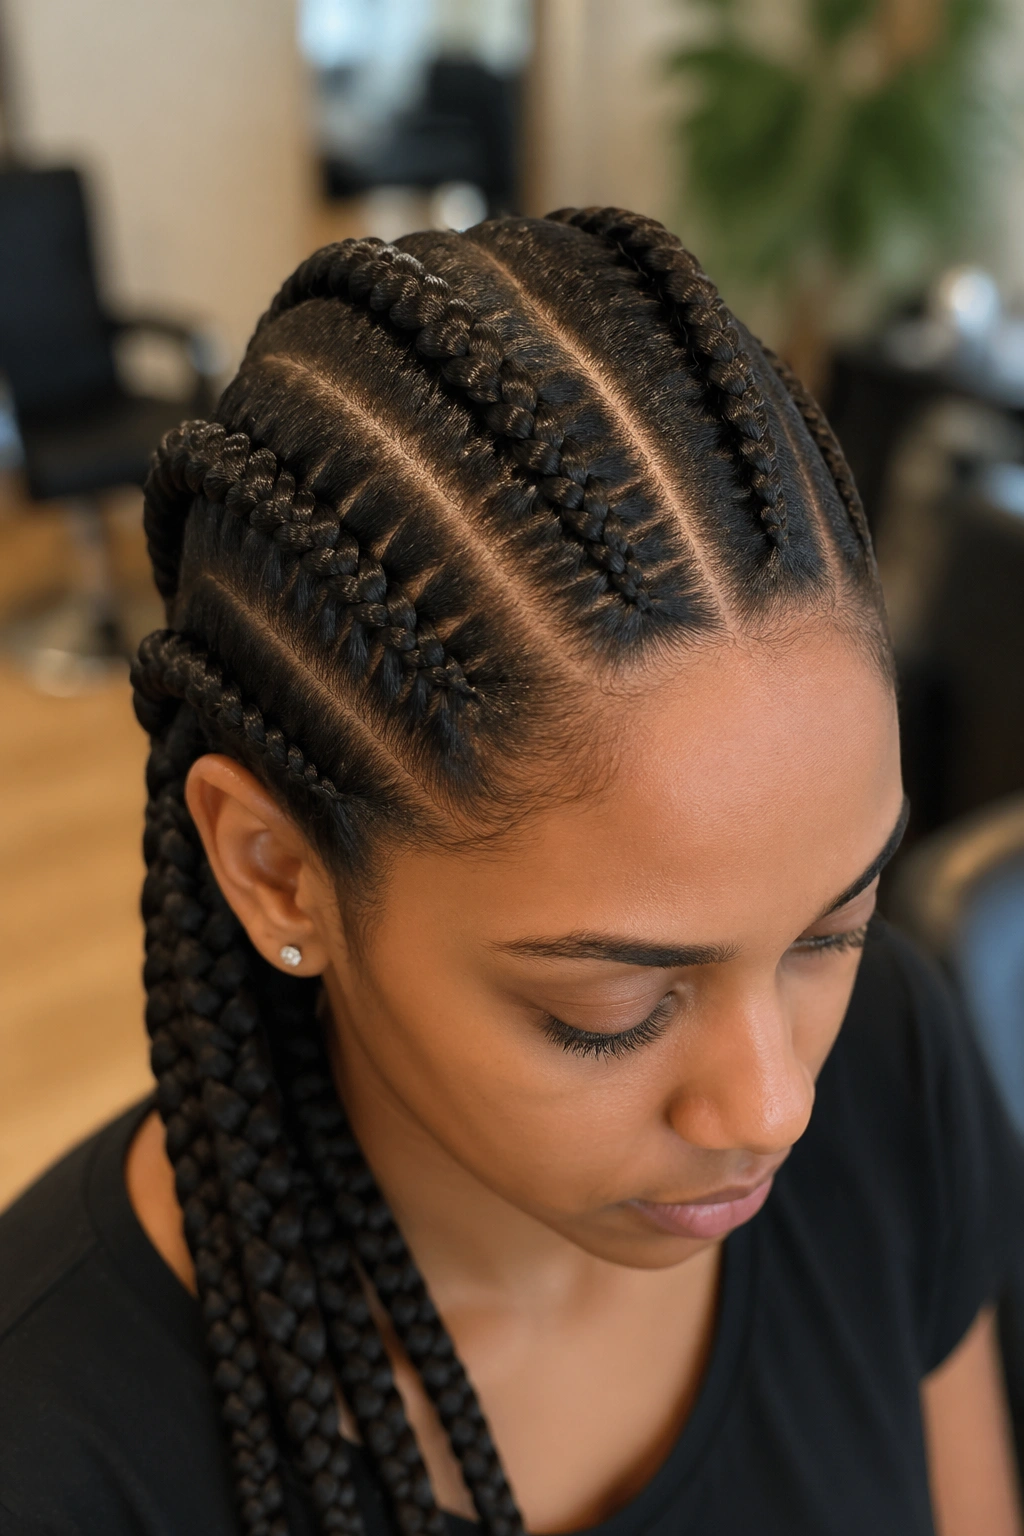
Three of the four braids stay your natural hair color. One braid features a bold contrasting color — burgundy, honey blonde, fire red, deep purple. The criss cross at the front shows the color anchored at the intersection.
The single color pop creates an unexpected focal point. It works for women who want subtle color play without committing to multi-tone styling.
Position the colored braid strategically. The braid that frames your face — usually the second from the side — has the most visual impact. The back-most braid can hide your color choice depending on how you wear the style.
16. Criss Cross with Thread Wrapping
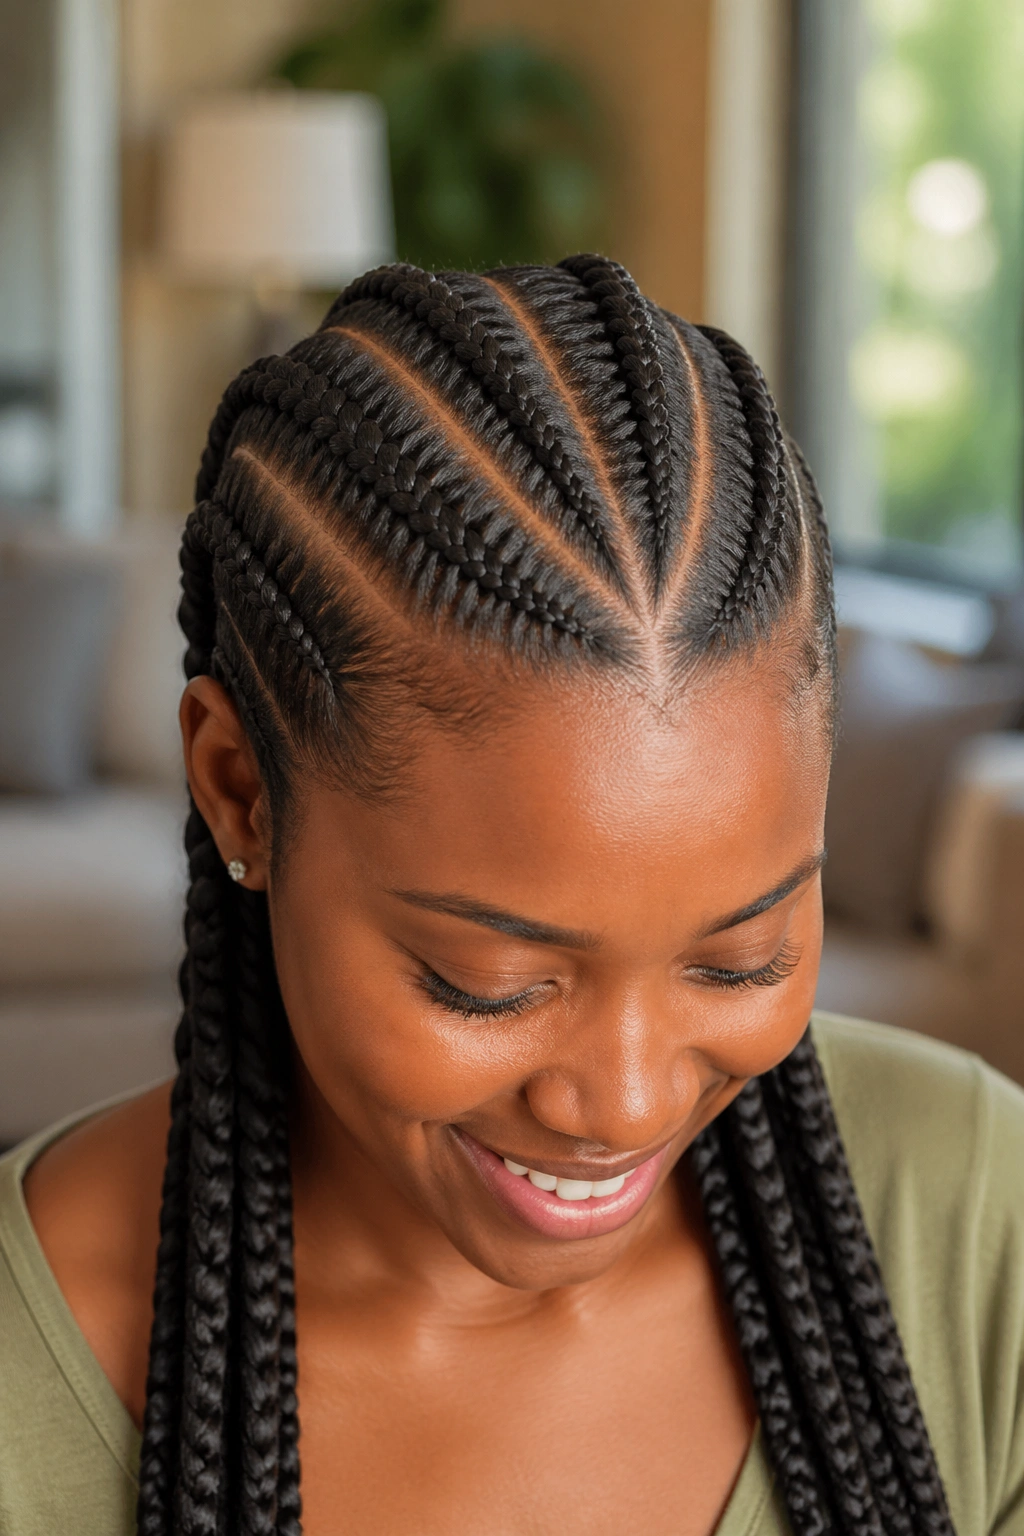
Cotton thread or embroidery floss wraps around the last 4 to 6 inches of each braid in solid color blocks. The criss cross at the front meets thread wrapping at the ends — a contrast between scalp design and tip decoration.
Thread wrapping has West African origins. The original purpose was to seal braid ends; the decorative element evolved over centuries. Choose thread colors with care — the color statement carries the tip styling.
I love rust orange, mustard yellow, deep teal, or cream against dark hair. Pastels fade fast on dark hair and lose their punch within days.
17. Criss Cross with High Pony Finish
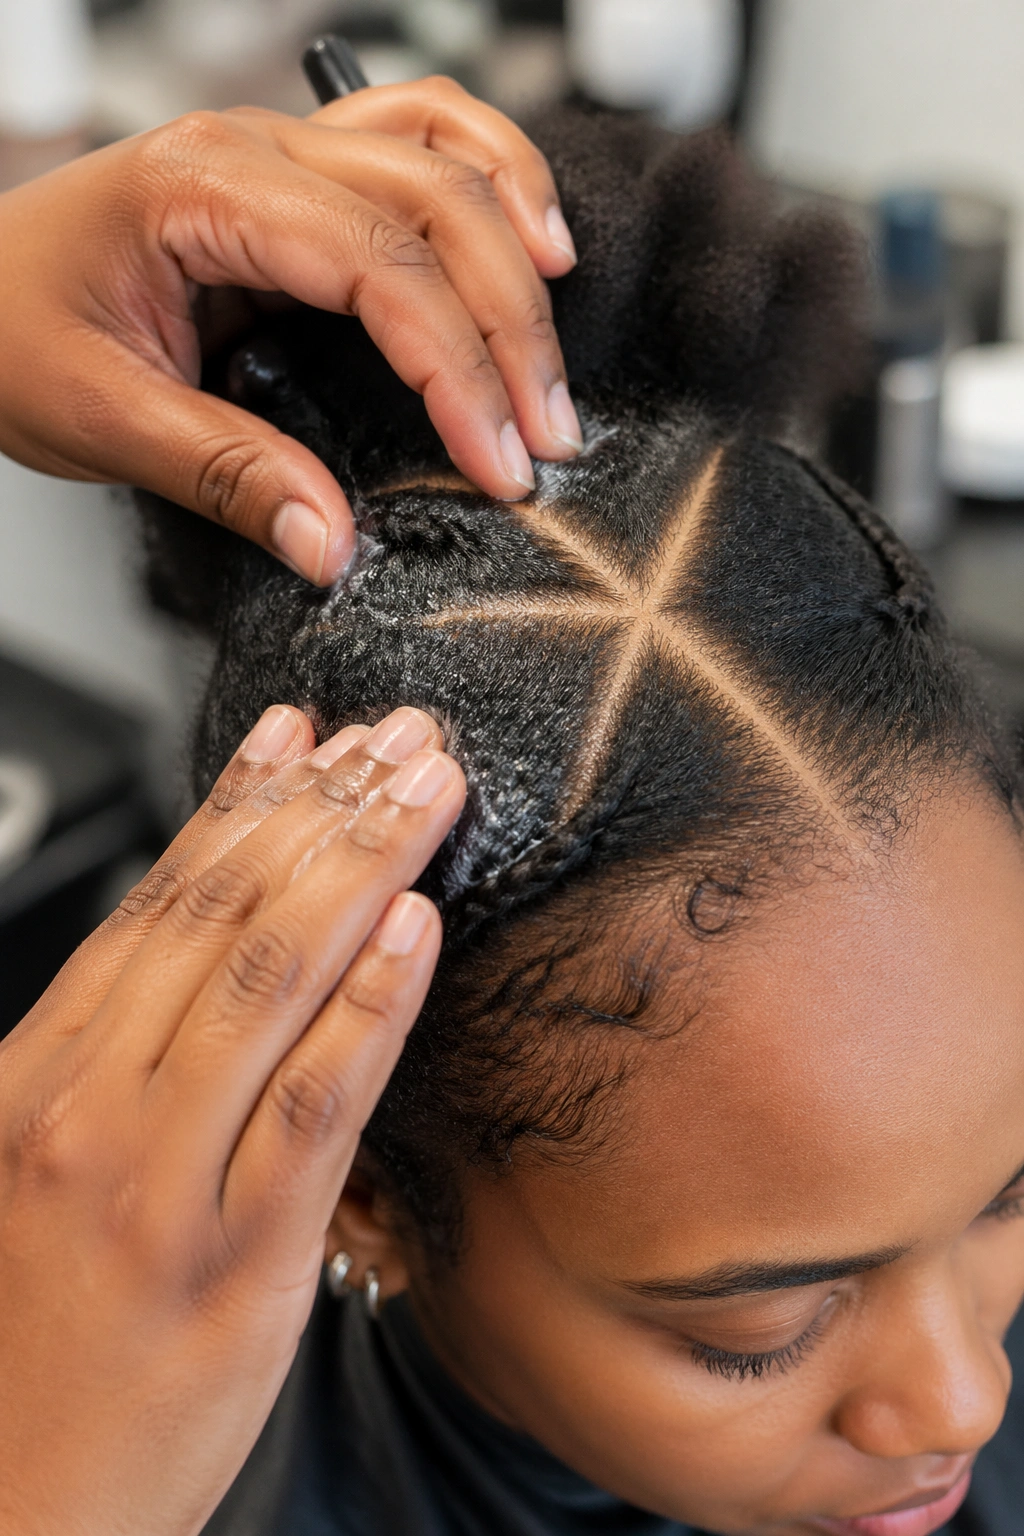
The four cornrows angle up toward a single high ponytail at the crown. The criss cross at the front becomes part of the upward flow into the pony.
The high pony adds height to the silhouette and creates a strong vertical line through the styling. It works for women who want length with face-lifting effect.
Use a piece of natural-textured hair extension for the ponytail itself if your real hair isn’t long enough for the look you want. Drawstring ponytail pieces in 4B or 4C texture work well with cornrow bases.
18. Criss Cross with Low Bun Finish
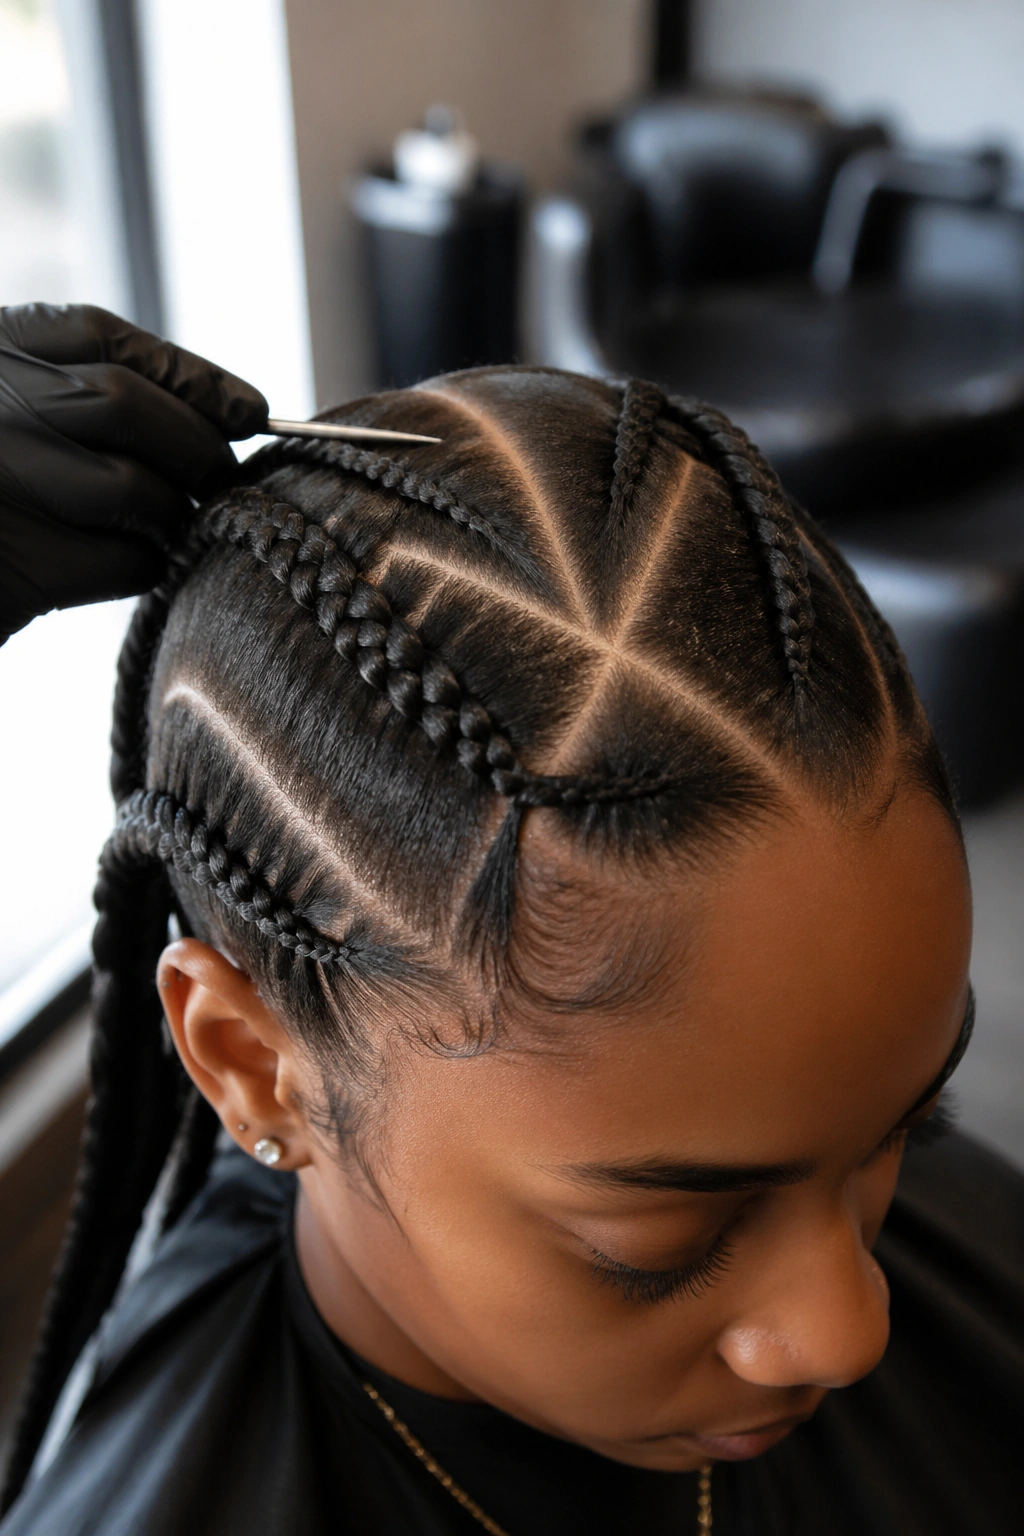
Opposite of the high pony version. The four cornrows angle down toward a low bun at the nape. The criss cross at the front anchors the style; the low bun anchors the back.
Low bun finishes read more formal than ponytails. Wedding guest, work events, dinner parties — the low bun version handles dressy occasions while the cornrow base handles the protection.
The bun can be a real bun built from your braid ends, a wrapped section of extension hair, or a discrete bun piece pinned in. All three work; the wrapping method gives the most polished result.
19. Criss Cross with Half-Up Half-Down
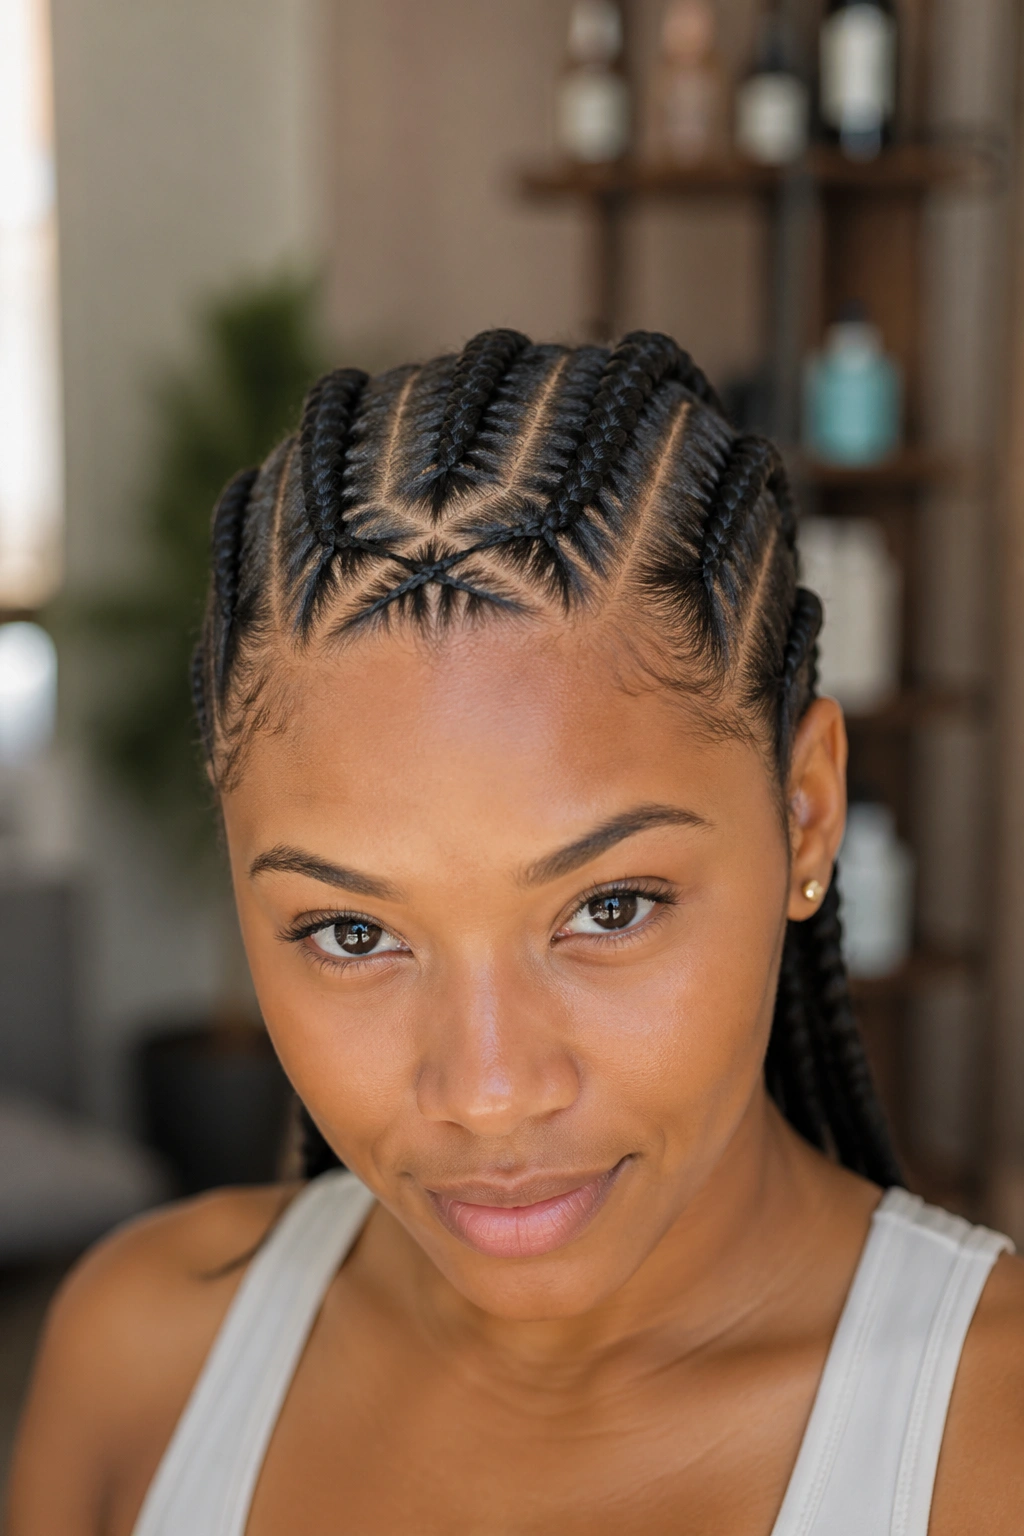
Two of the four cornrows get pulled up into a half-updo at the crown — usually pinned into a small bun or twisted together. The other two cornrows hang loose down the back.
The half-up format creates dimension without committing to a full updo. It’s the styling format I recommend for casual events where you want some structured detail but not full updo formality.
The pinned-up section needs occasional re-pinning throughout wear. Pins can shift as the cornrows settle.
20. Criss Cross with Tribal Detail Patterns
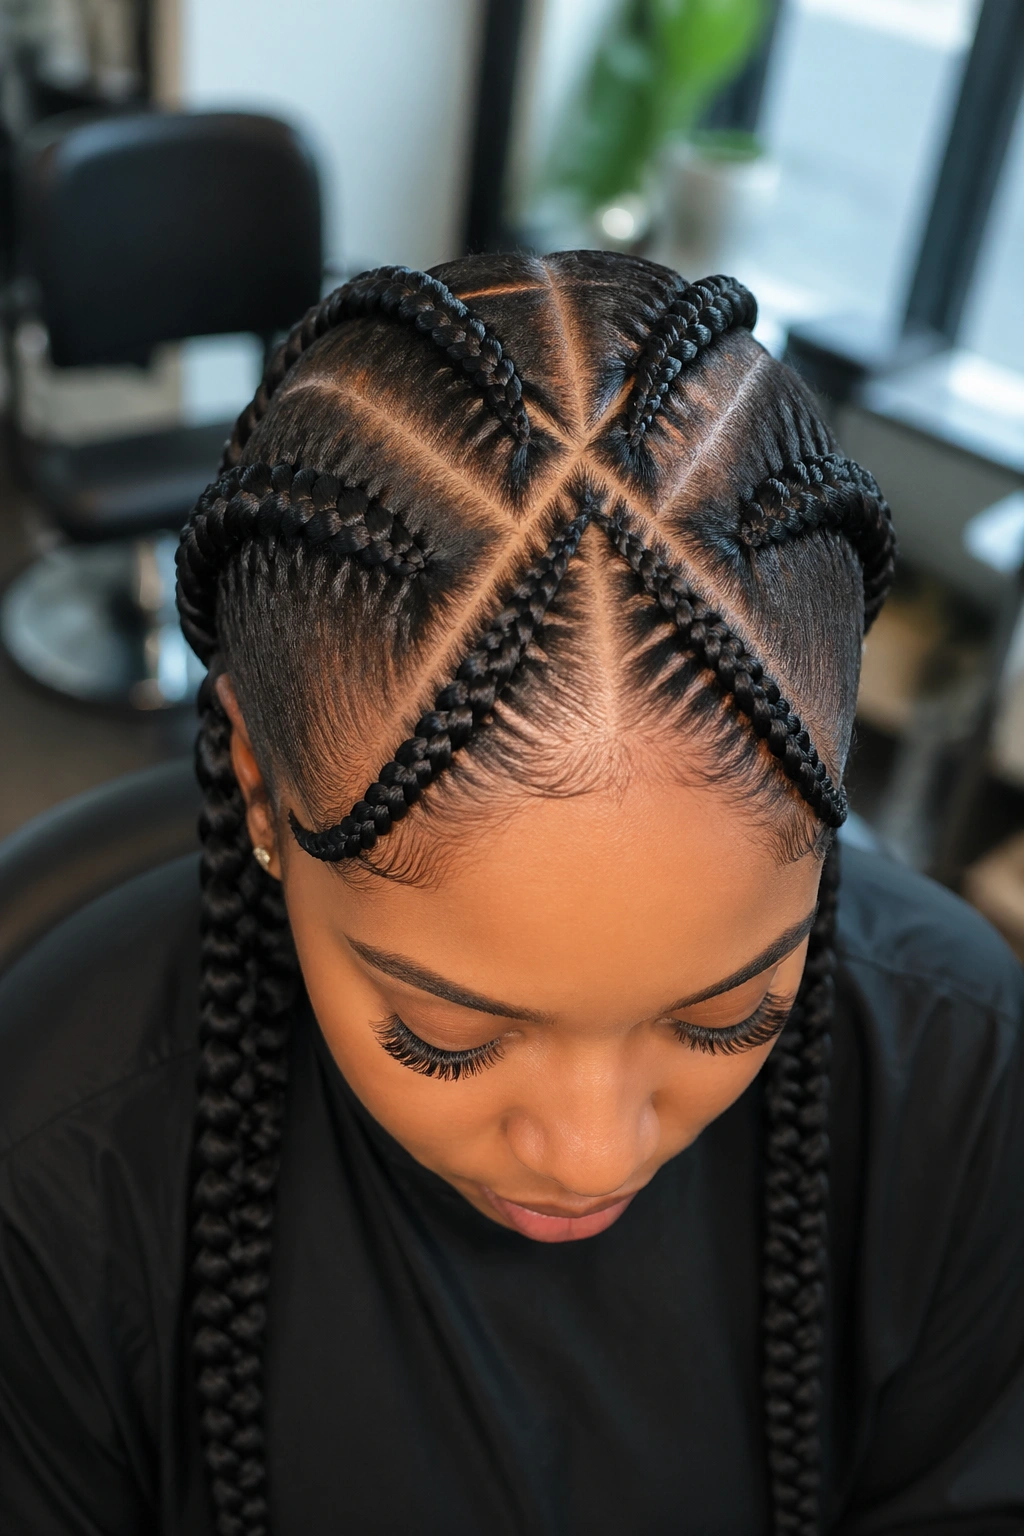
The criss cross at the front incorporates additional decorative parting — small triangular shapes, dot patterns, or small traditional Fulani-inspired motifs around the intersection point. The four braids continue plainly from there.
This version pulls visibly from West African braiding traditions. The detail at the front becomes the cultural anchor; the four braids carry the practical structure.
Research the specific cultural origin of any traditional pattern you incorporate. Wearing tribal patterns thoughtfully — and being able to speak to their origin — distinguishes the styling from mere appropriation.
21. Criss Cross with Edge-Down Detail
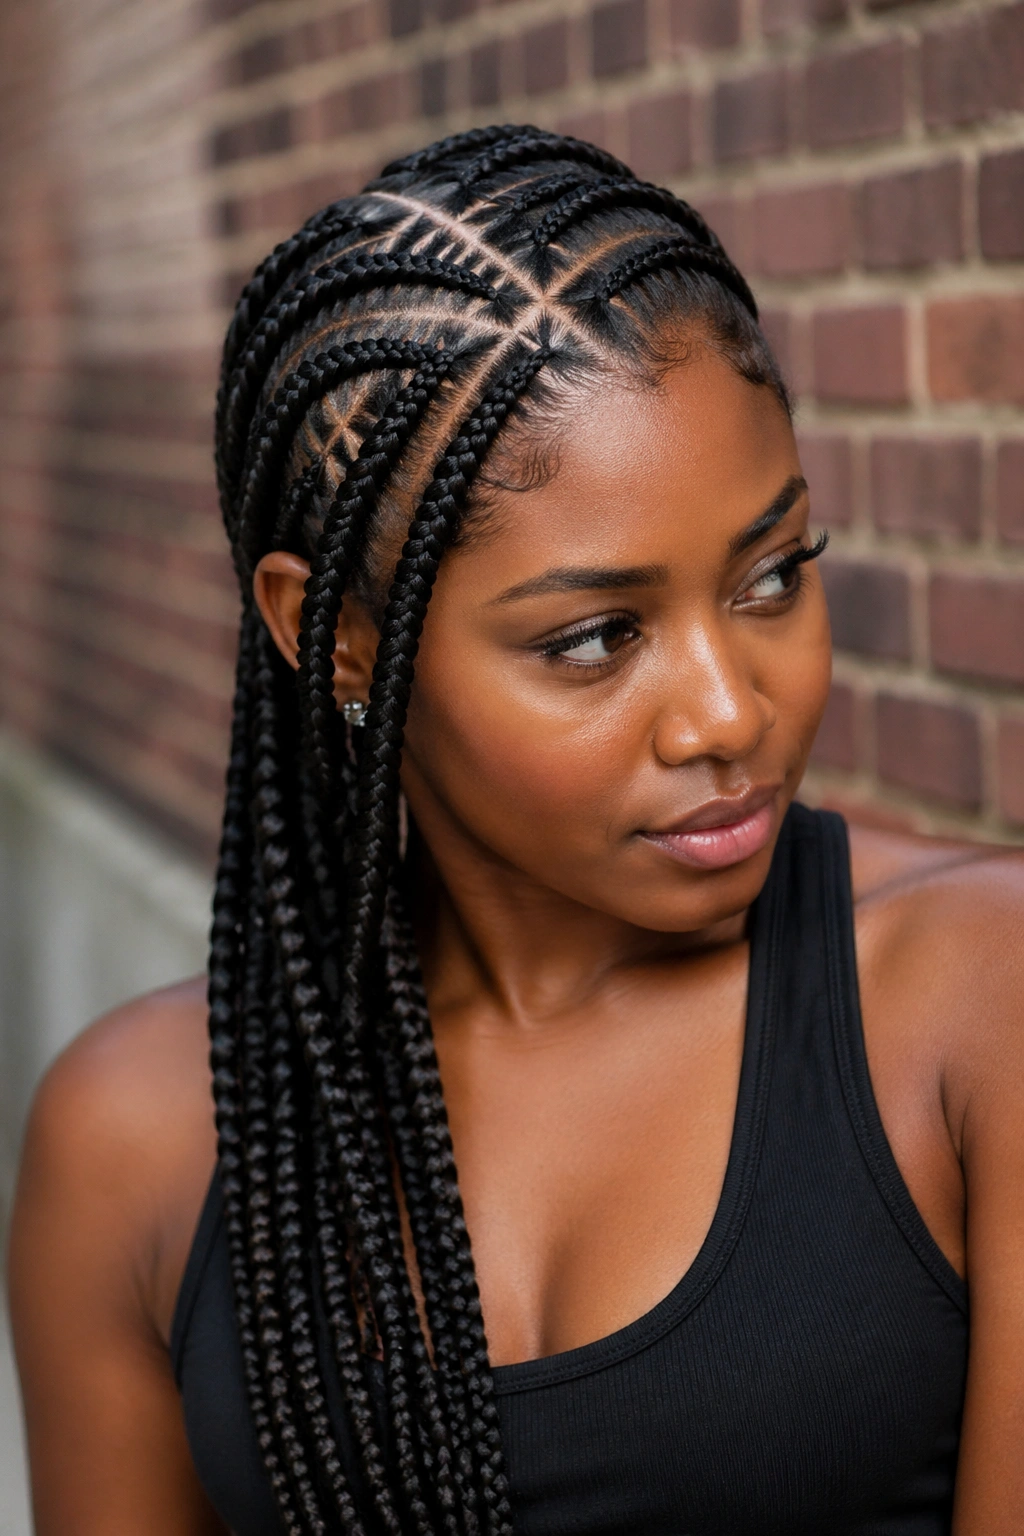
Standard criss cross at the front. Standard four cornrows at the back. The added element — sculpted baby hair edges along the front hairline that complement the criss cross design.
What to Watch For
Baby hair styling is its own skill. Done well, the sculpted edges echo the criss cross lines and create cohesion across the entire front view. Done poorly, the edges fight the criss cross design and create visual chaos.
The edges need re-laying every 2 to 3 days for the duration of the style.
22. Criss Cross with Mixed Braid Sizes
The four cornrows aren’t equal in width. Two are thicker; two are thinner. The criss cross at the front creates four wedges of slightly different sizes, which the braider continues into varied-size braids down the head.
The mixed sizes create rhythm across the back of the head. Instead of four equal lines, you get a varied pattern that reads more organic.
This is the version for women who want the four-braid count efficiency but want some visual variation in the braids themselves.
Maintaining the Criss Cross Detail Through Wear
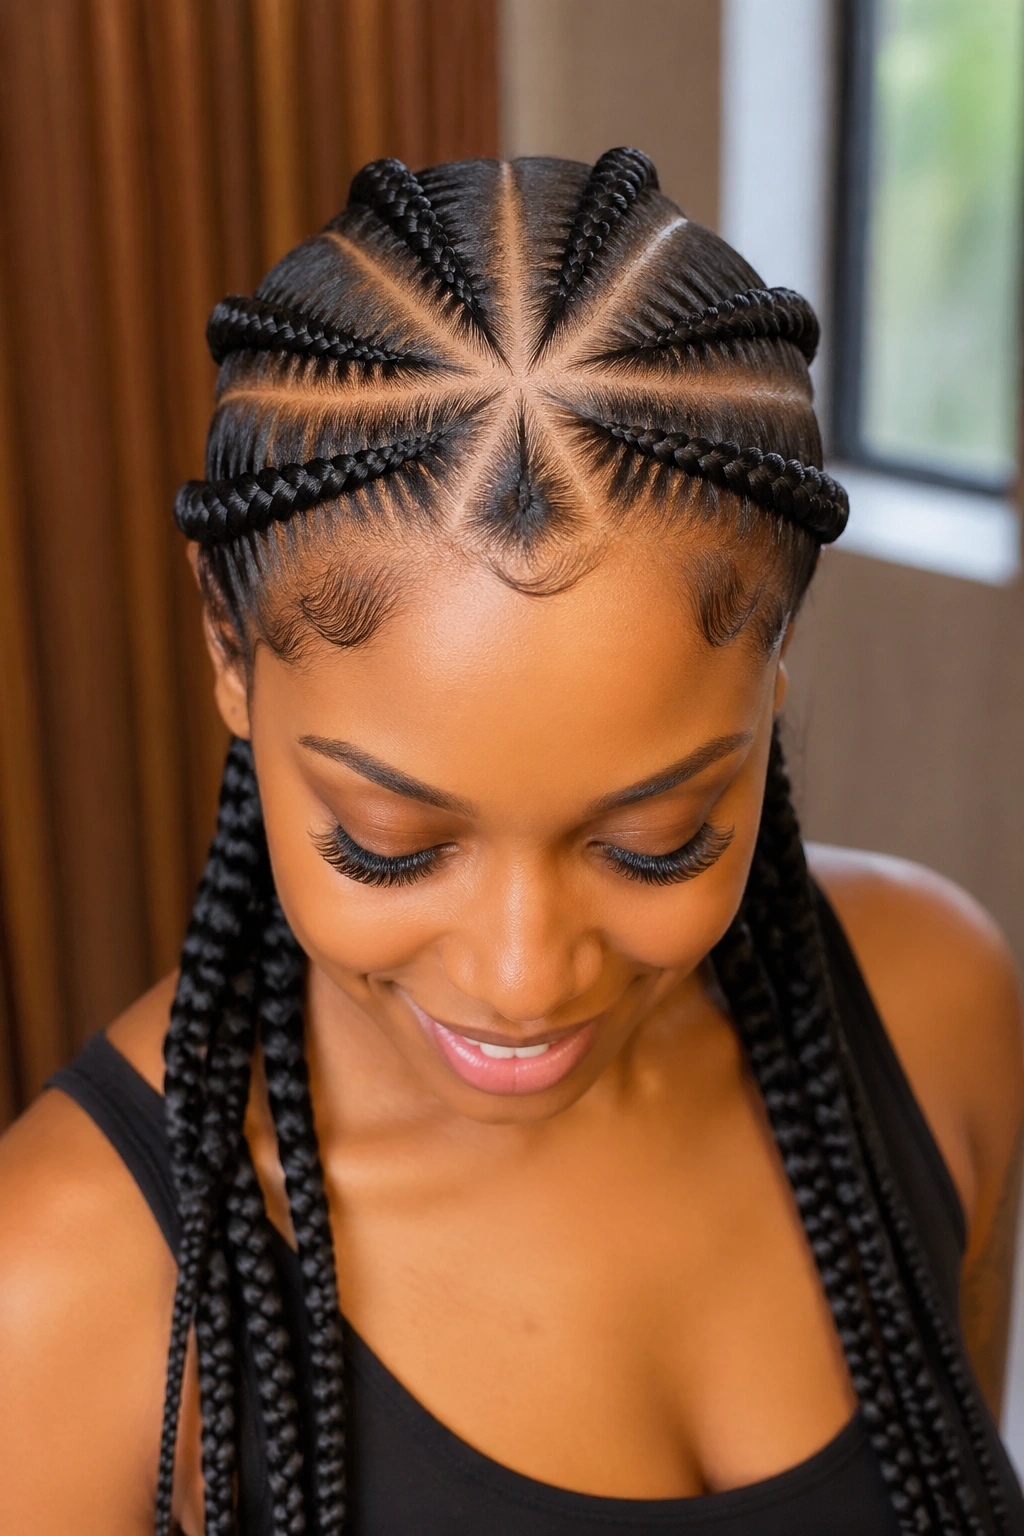
The criss cross parts at the front are the most visible element of the style and the first to lose definition.
Apply edge gel along the criss cross parts every 3 to 4 days. Use a small brush to keep the gel lines clean — bigger brushes spread gel onto adjacent hair and muddy the design.
Sleep on satin or silk. Cotton pillowcases pull at the parting and create frizz that obscures the criss cross detail by morning.
Avoid running your fingers across the criss cross design throughout the day. Hand contact distributes natural oils that flatten the gel hold and dull the part lines.
Washing Without Wrecking the Design
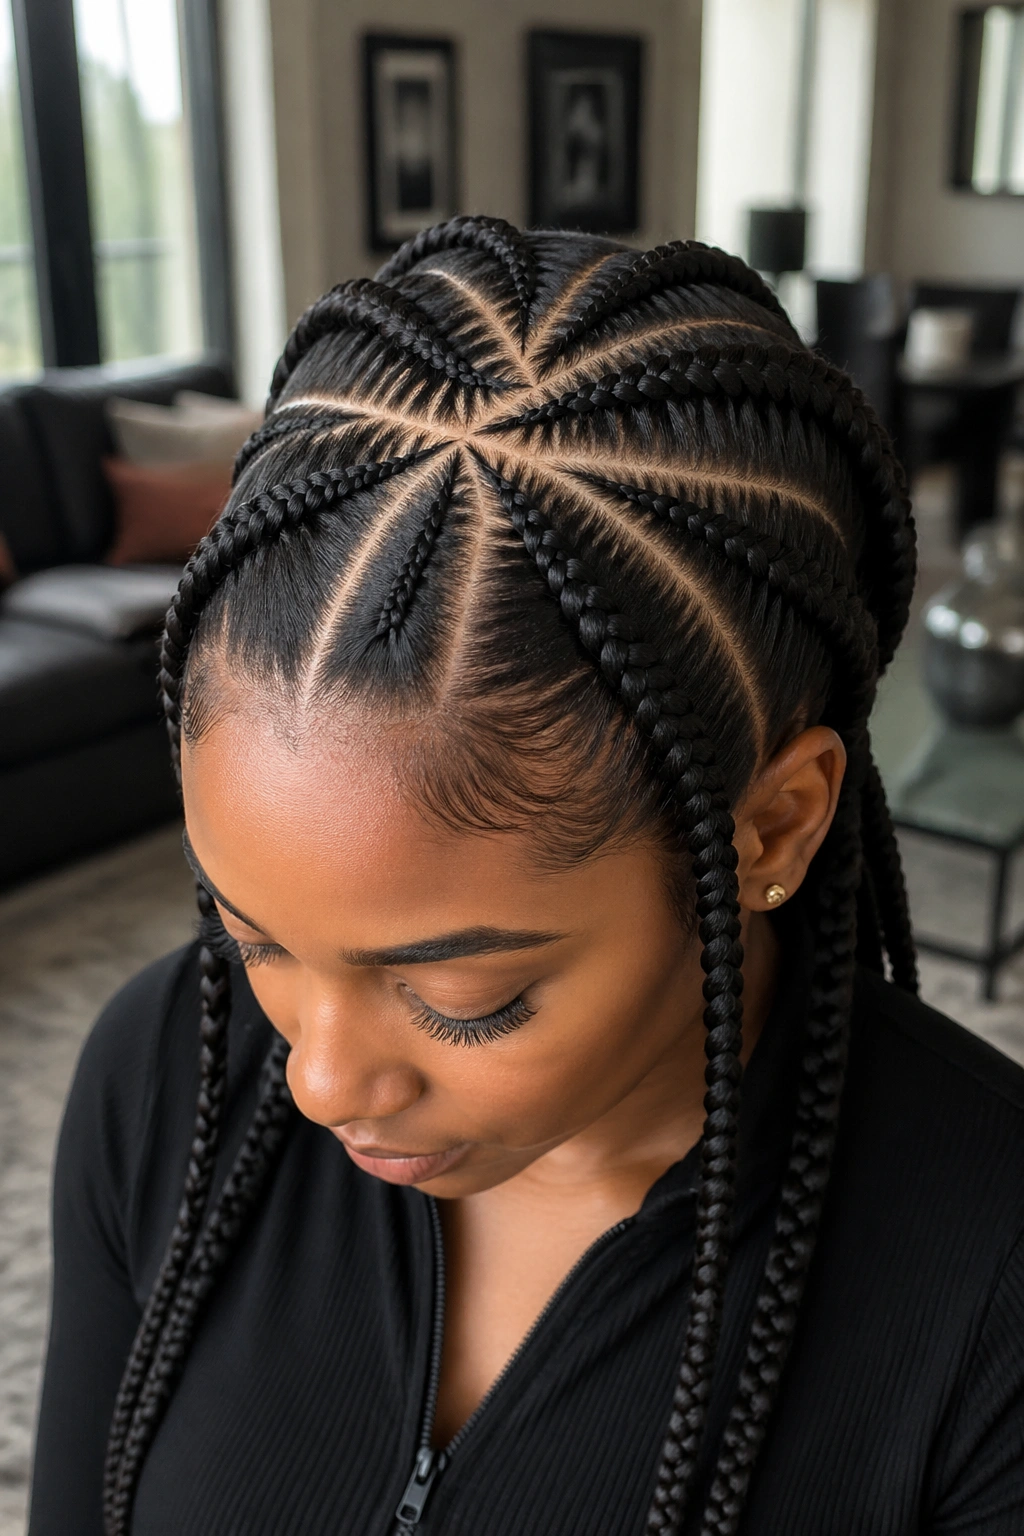
Wait at least 7 to 10 days after install before the first wash. Earlier washing can loosen the criss cross gel hold.
Wash with diluted sulfate-free shampoo. Squeeze through the four braids; massage gently at the scalp. Don’t scrub the criss cross area — friction destroys the parting precision.
After washing, re-apply edge gel along the criss cross parts to restore the visual sharpness. This is essentially a 2-minute touch-up that extends the life of the design by another week.
Dry the cornrows thoroughly before any sleep contact.
Taking the Style Down Without Damage
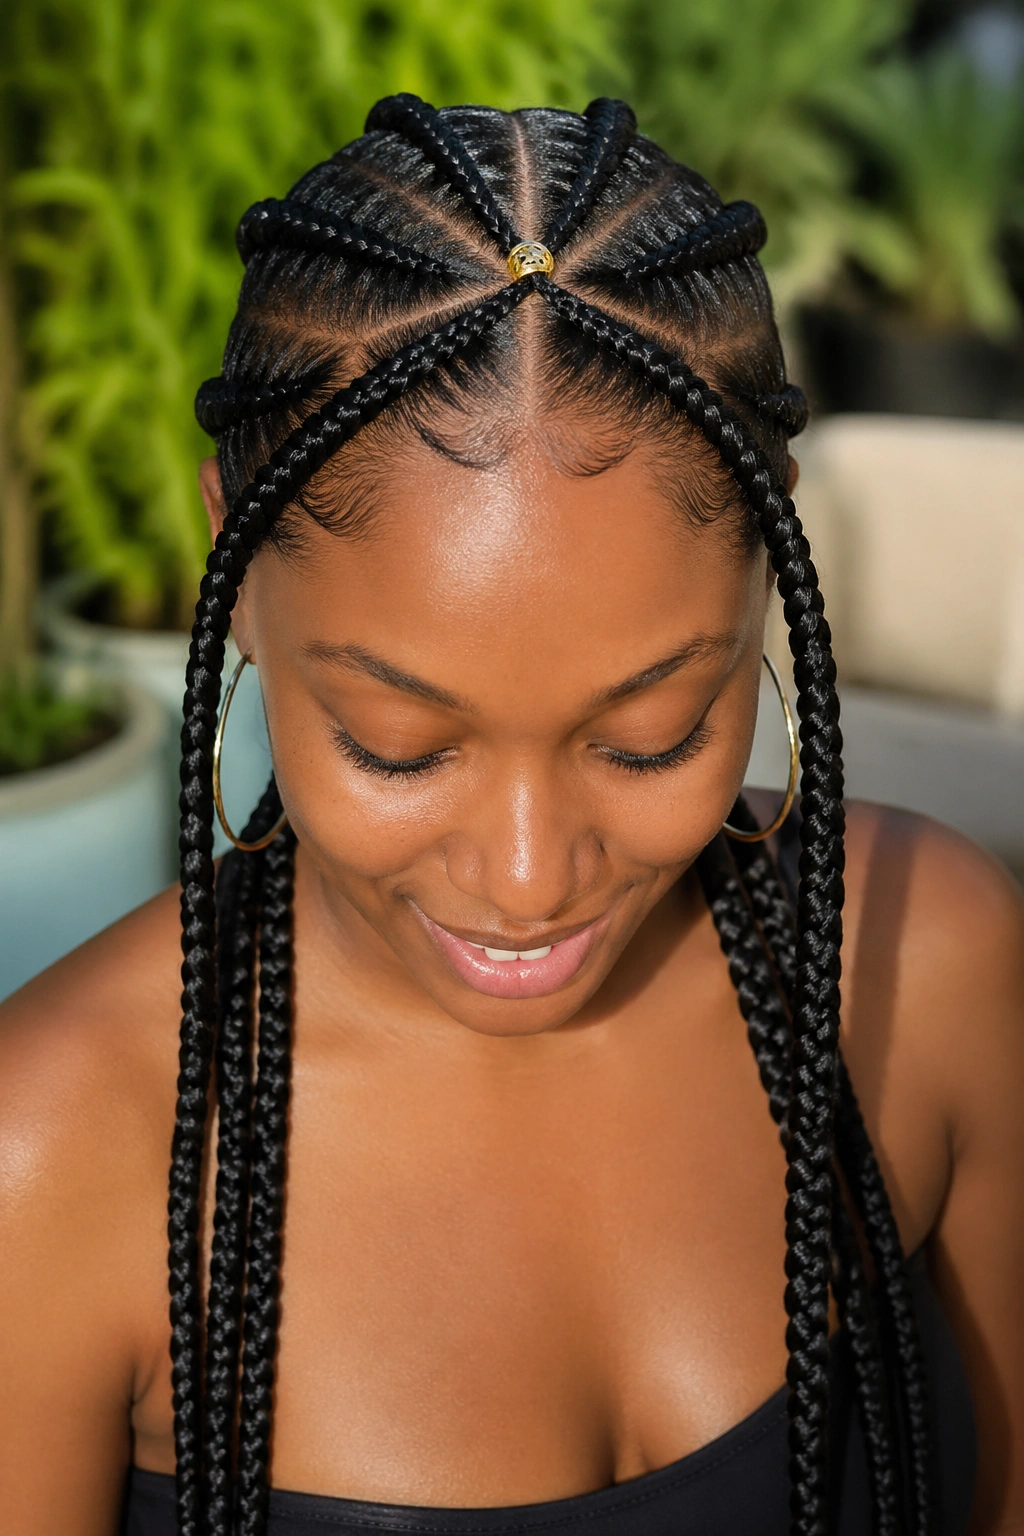
Four-braid styles take down faster than multi-braid styles. The unbraiding goes quickly because there are only four braids to work through.
Saturate each braid with a slip-rich conditioner mixed with warm water. Unbraid from tip to root, working slowly and using fingers first.
Pay extra attention to the criss cross area at the front. The gel buildup there creates more compaction at the roots than other parts of the head. Soak this area longer with conditioner before unbraiding.
Deep condition immediately after takedown. Eight weeks under tension requires recovery time for your natural hair.
Picking the Right Version for Your Life
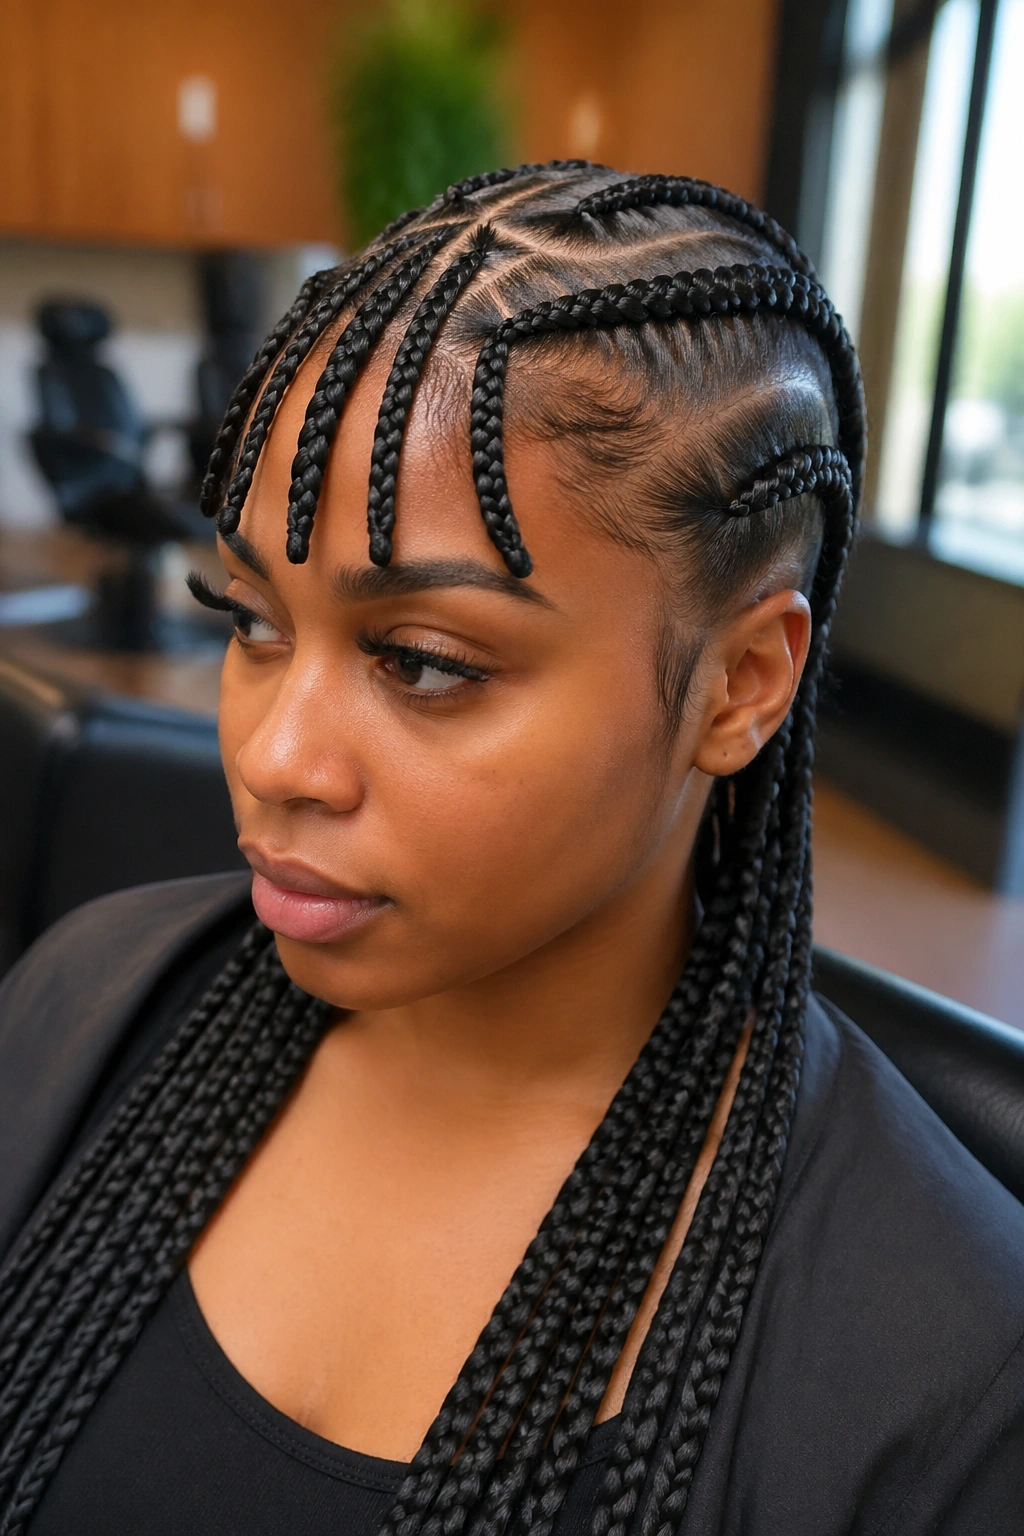
For everyday wear, simpler criss cross variations like the classic front version or the bob-length version work best. They install fast, maintain easily, and don’t draw the scrutiny that more elaborate variations attract.
For special occasions, the geometric star center, double criss cross, or asymmetric versions stand out in photos and read as deliberate styling.
For active lifestyles, avoid the long feed-in versions and the high pony finishes. Both create swing weight that interferes with workouts and movement.
For formal events, the low bun finish, the cuffed ends, or the criss cross with thread wrapping all work well. Each provides enough sophistication to read formal without requiring updo restructuring.
Consider your budget. Basic criss cross with four braids costs 80 to 120 dollars depending on location and stylist. Elaborate variations with star centers, double criss cross, or detailed parting work run 150 to 250 dollars.
Common Mistakes That Diminish the Style
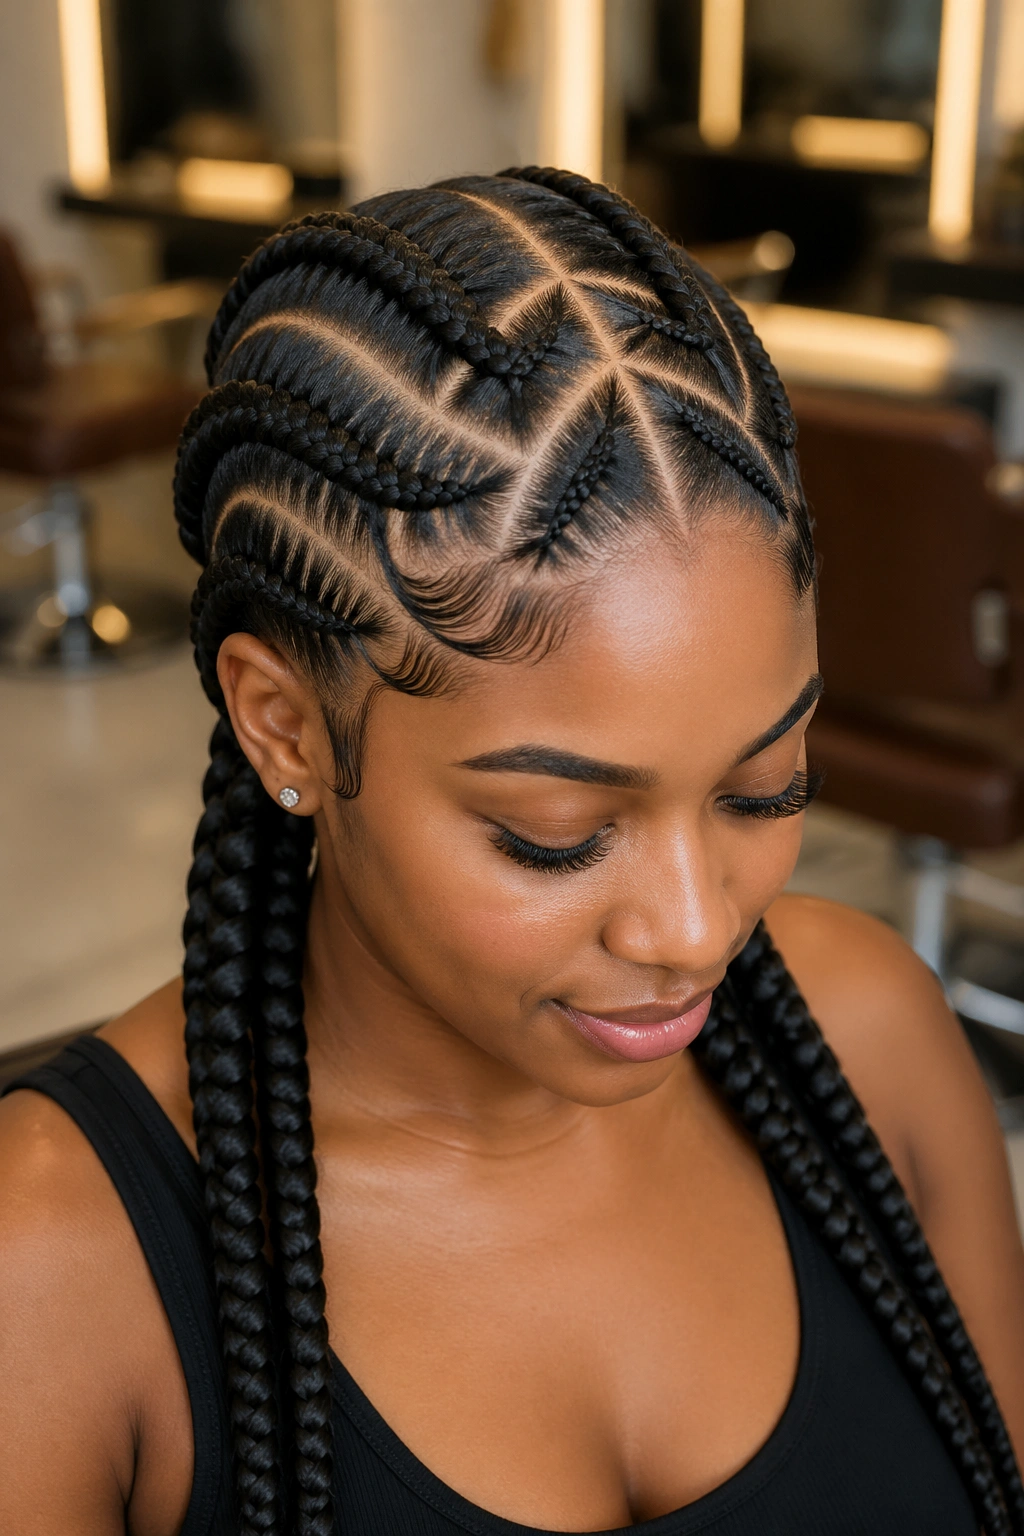
Inconsistent criss cross angles. The crossing X needs symmetry to read as intentional. Asymmetric crosses look like mistakes unless they’re explicitly designed to be asymmetric.
Letting the criss cross dull from neglect. The parting is the focal point — neglecting its maintenance ruins the entire style. Touch up the gel weekly minimum.
Loading the four braids with too much extension hair. The four-braid format works because the braids are proportionally substantial; overloading makes them awkward and heavy.
Sleeping without head protection. Cotton friction destroys the criss cross design within nights.
Choosing a braider unfamiliar with criss cross work. Standard cornrow expertise doesn’t always include geometric parting skills. Ask for portfolio photos specifically of criss cross or geometric work before booking.
Skipping deep conditioning before install. Four-braid styles last 4 to 6 weeks. Your hair needs to be in healthy shape going into that stretch.
Criss cross cornrows with four braids combine accessibility with artistry in a way few other braided styles manage. The four-braid format keeps the style manageable for both braider and wearer; the criss cross detail elevates it beyond the ordinary.
Pick the variation that fits your face, your lifestyle, and your event calendar. Find a braider who specifically advertises geometric or design work. And give the criss cross detail the maintenance it needs to stay sharp through the wear period.
The detail is what makes the style. Protect it.
