



Straight back cornrows are the bones of Black hair history. Before they became a trend, before they appeared on runways, they were a survival language — worn on ships, stitched into scalps as maps, passed between mothers and daughters on Sunday evenings. The style has outlived every fashion cycle that’s tried to claim it. And when someone asks me where to start with cornrows, I always point them here. Not because straight backs are simple. Because they reveal everything a braider does or does not know.
A straight back cornrow is a cornrow that begins at the hairline and runs in a clean, unbroken line to the nape. No curves. No zigzags. No feed-in drama. Just parallel rows — sometimes six, sometimes a dozen — moving in the same direction from front to back. The appeal is in the restraint. There is nowhere to hide a crooked part. Nowhere to disguise a braid that thins in the middle. Which is why a straight back install done correctly is one of the most quietly impressive things you can see on a scalp.
I’ve watched straight backs hold up for four weeks without refresh on one head and fall apart in five days on another. The difference is rarely about the hair. It’s about what the braider understood, what products got used, and what the wearer did on night one. I’m going to walk you through twenty-two versions of straight back cornrows that work specifically for Black women, covering everything from short-hair micros to waist-length knotless-inspired runs. A few will be familiar. A few will surprise you.
Why Straight Backs Endure
The style works because it respects how Black hair grows. The braid follows the natural direction of growth, which reduces the tension that diagonal or curved styles create. Your scalp isn’t fighting the braid. The braid is going where the hair already wants to go.
This is also why straight backs protect edges better than styles that pull forward or sideways. The most fragile hair on your head — the baby hairs around your temples — aren’t being dragged against their grain.
Across generations, straight backs have been the go-to protective style for women who needed something that lasted. Field workers. Athletes. Mothers with three kids and no time for a weekly re-braid. The style earned its place by delivering.
The History in the Pattern
Before going further, it’s worth knowing this: straight back cornrows carried meaning long before they carried a style label. Enslaved women used cornrow patterns to map escape routes. The number of braids, the direction they ran, the presence of a single braid deviating from the rest — these were literacy. When you wear straight backs, you’re wearing one of the oldest visual languages Black women have ever developed.
I don’t say this to make the style feel heavy. I say it because context changes how you wear something. Straight backs are never just a look.
What You’ll Need for a Clean Install
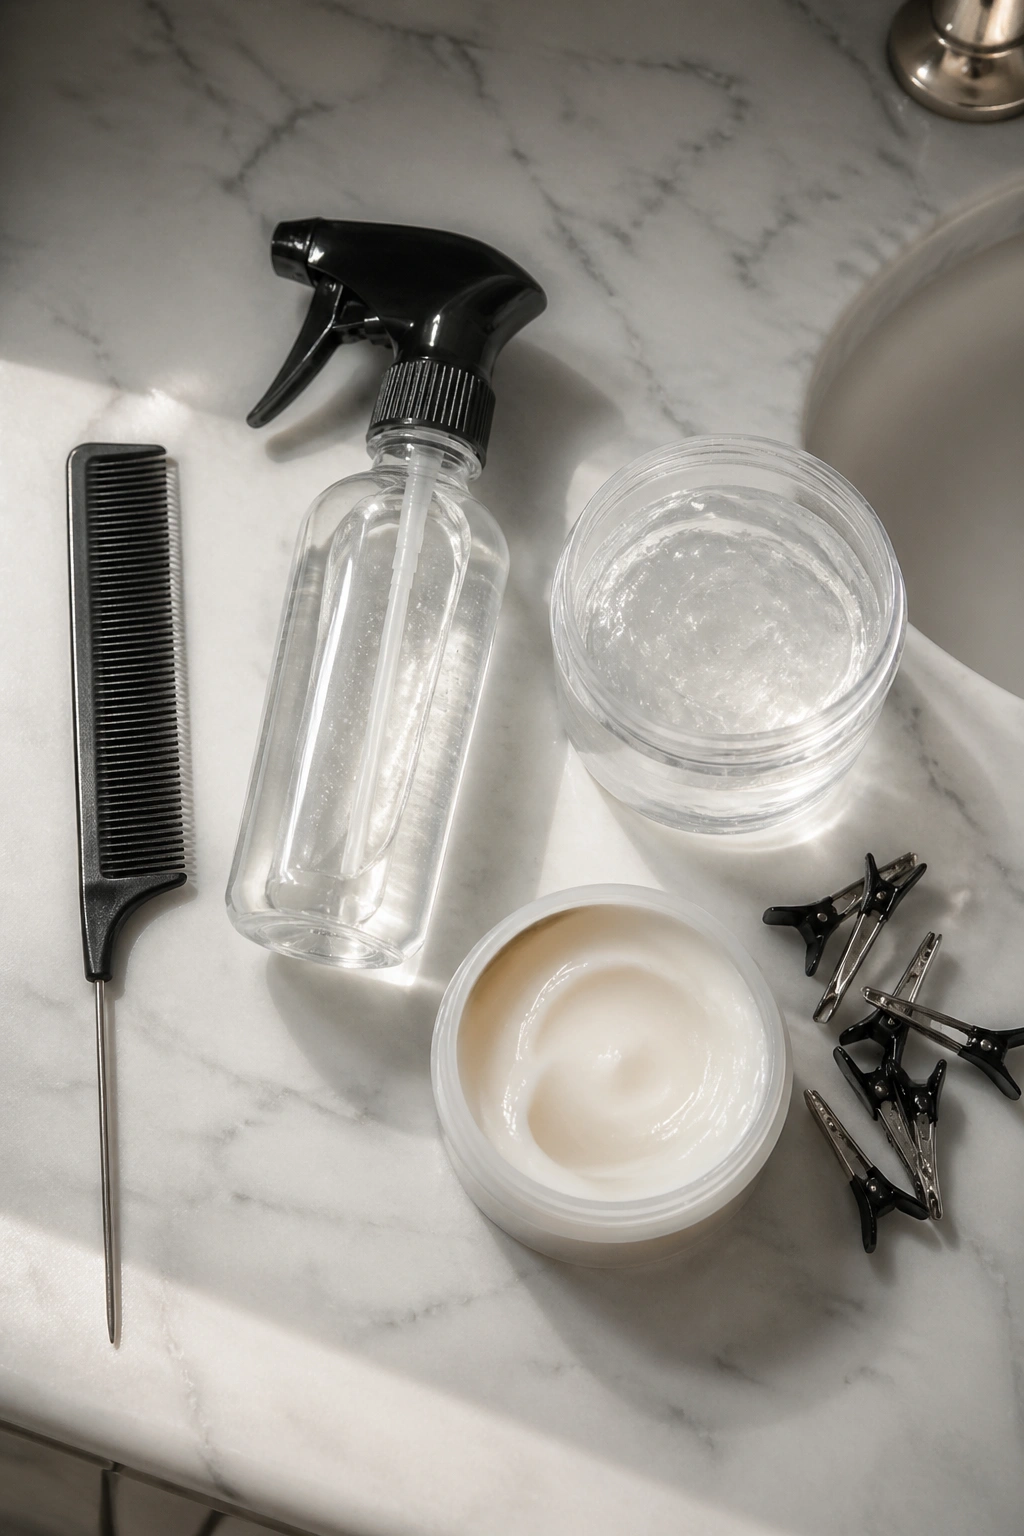
Five items. Nothing more. A rat-tail comb with a firm point. A spray bottle with water and a splash of leave-in conditioner. Eco styler gel or a similar firm-hold gel — clear, not tinted. Edge control. And hair clips for sectioning if you’re working alone.
Optional but useful: a mirror setup where you can see the back of your head without having to crane. A small handheld with a stand works. Your phone on a tripod works too.
Sectioning Is Everything
The number of braids you want decides the width of each section. Six braids means each section is about 1.5 inches wide across an average head. Eight braids narrows the sections to just over an inch. Twelve braids gets you down to a finger-width per section.
Sections must be even. This is the part amateur braiders skip. They eyeball the first two, guess the third, and by the time they’re at row five, the parts are drifting. Take the time. Measure with the comb. Pin each section closed before you start braiding anything.
Prepping the Hair
Wash two days before braiding — not the day of. Stretched hair with a day of natural oil behind it grips the cornrow best. Freshly washed hair is too slick and braids unravel. Hair that’s gone five days without washing is too loaded with product buildup and the parts look dirty by hour two.
Detangle with a wide-tooth comb and a slippery leave-in. Blow-dry on low with a comb attachment if your texture is 4B or 4C. You need length and glide, not a full blowout. Straight backs work best when the hair is stretched but still has some texture memory.
1. Classic Six Straight Back Cornrows
The foundational version. Six medium-width braids running from hairline to nape, evenly spaced, ending in small hair ties or a natural wrap finish.
Why It Works
Six is the magic number for average hair density. Each braid is thick enough to read substantial but not so thick that parts look wide and gappy. The style gives you structure without the high maintenance of a dozen tiny rows.
- Part with a rat-tail comb using a mirror
- Each section should feel equal between fingers
- Braid using under-hand strokes for a raised, defined cornrow
- Secure ends with small clear elastics or dip in hot water
Quick tip: start the braid tight against the scalp for the first three stitches, then ease off slightly. The tightest point should be the start, not the middle. This protects your hairline long-term.
2. Eight Straight Back Cornrows
Bump the count up to eight and the whole visual shifts. The parts read finer. The pattern feels more deliberate.
Eight cornrows suit women with medium-to-thick hair density. Fine hair can look sparse with this count — the scalp shows between braids and creates a “too much sky” effect. Dense hair looks rich with eight braids, almost woven.
This count also extends wear time compared to six. More braids means the tension is distributed across more anchor points, which means less pulling per root. You’ll get roughly 10 extra days of clean wear from eight braids versus six.
3. Twelve Micro Straight Backs
Twelve or more tiny cornrows running straight back. The install takes three to four hours. The result holds for four weeks.
The difference between micro and regular straight backs isn’t just width — it’s the level of craft. Micro cornrows demand consistent tension across every section. One row braided tighter than the others and the finished pattern looks lopsided from above.
Reserved for women with 8+ inches of natural hair. Shorter hair doesn’t have enough length to hold a micro braid’s tension without slipping.
4. Jumbo Four Straight Backs
On the other end: four thick braids running straight back. Each one is nearly an inch wide at the base.
Bold and fast. A full install takes under 40 minutes. The four-braid silhouette reads confident, almost architectural, and photographs beautifully from the side.
A scenario: you have a flight in the morning and want hair that survives two days of travel without needing any fuss. Four jumbo straight backs get you there. Each braid is heavy enough to resist frizz at the edges, and the low count means refreshing takes minutes instead of hours.
- Use feed-in extensions to add bulk if your natural hair is fine
- Dip ends in hot water to seal
- Skip the edge gel on jumbo styles — they don’t need it for structure
5. Straight Backs with Feed-In Extensions
Start with your natural hair at the front, feed in kanekalon as you work backward. The braids get longer than your actual hair allows.
How to Feed In
Divide the braiding hair into small, thin strips before you start. Each strip should be about as thick as three matchsticks pressed together. As you braid, fold one strip into the three-strand rotation every half inch or so until you’ve added the length you want.
The feed should be gradual. Dumping a big chunk of hair into one stitch creates a bump that shows. Small additions disappear into the braid.
This style lets you achieve waist-length straight backs with any starting hair length. The extensions do the length work.
6. Straight Backs Ending in Beads
Glass or wooden beads threaded onto the ends of each braid. Three beads per braid, usually, crimped in place.
Beading at the end of straight backs has been part of Black hair tradition for centuries. The sound is part of the experience — a soft clicking when you move your head. The visual is rhythmic, especially with beads of varying size.
Pick beads wide enough to slide over the braid but tight enough that they don’t fall off. Acrylic craft beads work for lightweight options. Wooden beads give more heft and a quieter sound.
7. Stitch-Style Straight Backs
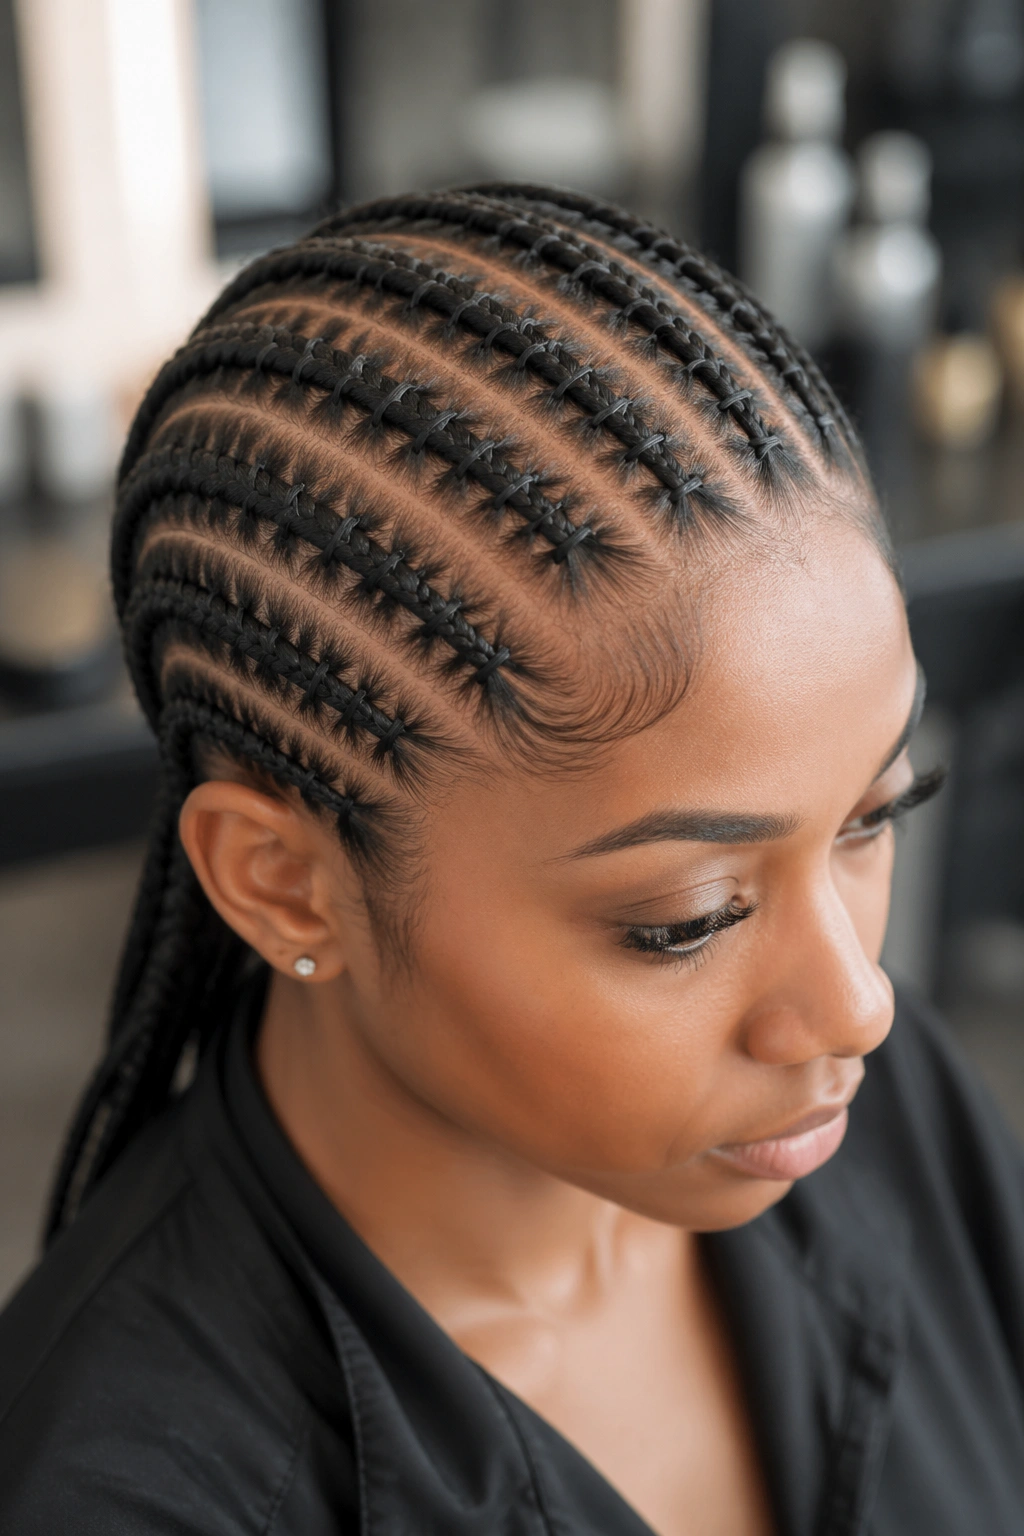
Cornrows with visible horizontal stitches running across each braid. The stitches come from deliberately sectioning each braid into smaller chunks as you go.
Stitch braids extend wear time because the extra detail locks the braid more firmly. Also, the horizontal texture hides regrowth better. A smooth cornrow at week two shows fuzz at the roots. A stitch cornrow at week two looks the same as day one.
The tradeoff: stitch braids take longer to install. About 50% more time than smooth versions. And taking them down is harder — each stitch has to be unpicked individually.
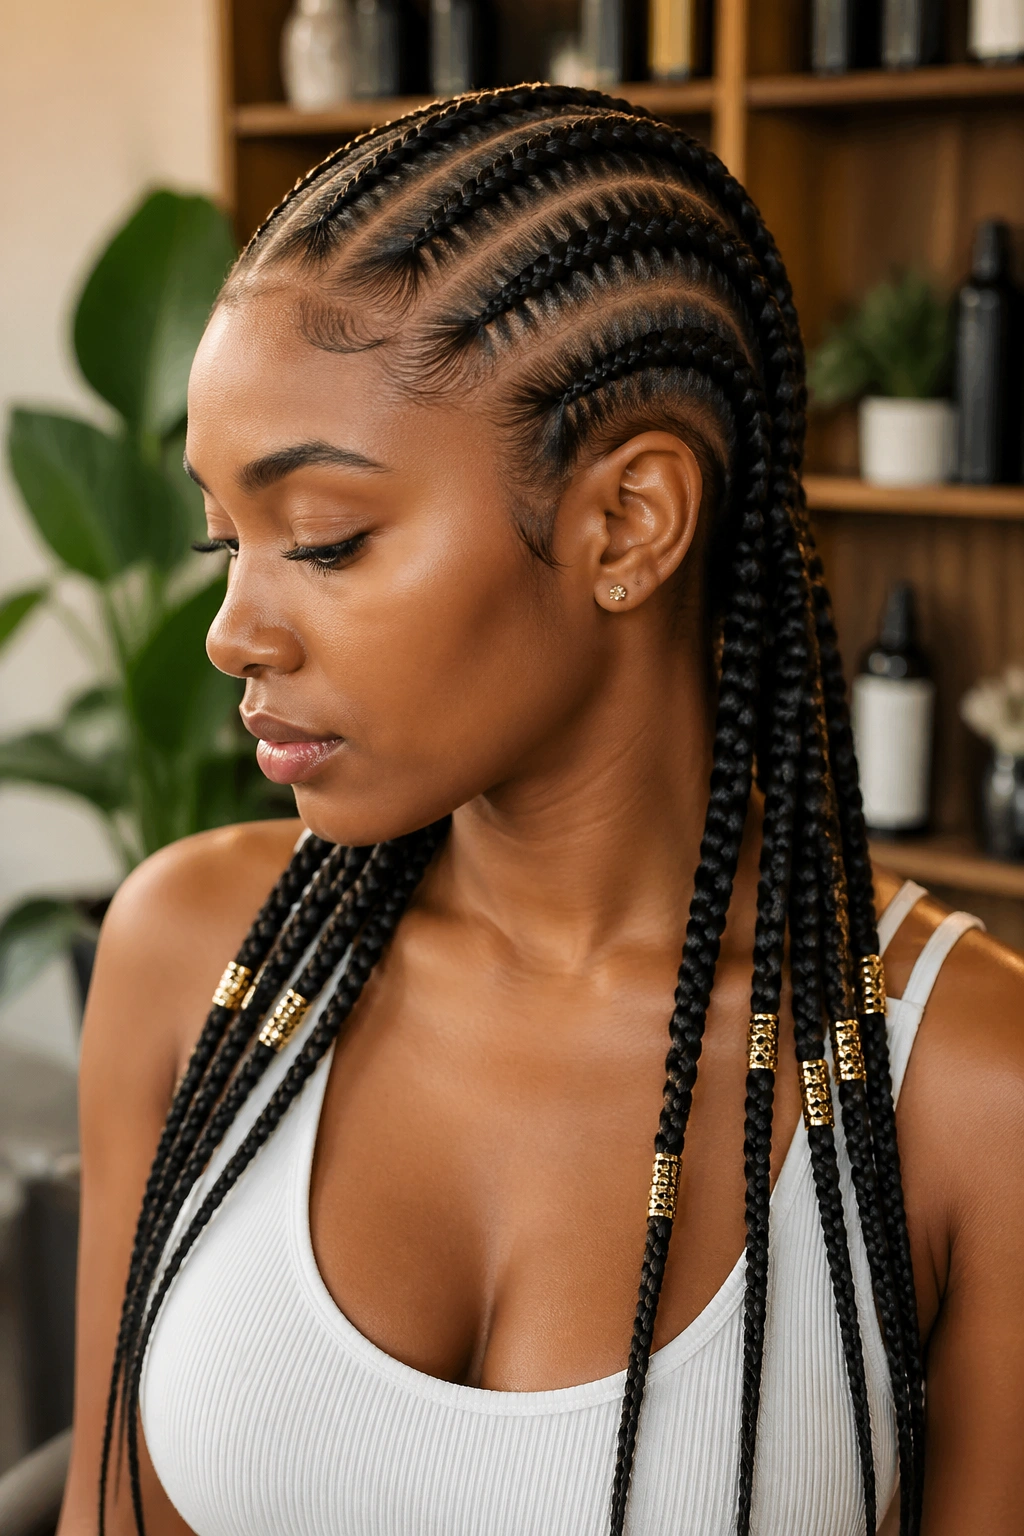
8. Straight Backs with Gold Beads
Small metal beads threaded along the length of each braid, not just at the ends. The gold catches sunlight and creates flashes of shine through the braids.
Unlike end-only beading, threaded-through beads need careful placement. Too close to the scalp and they feel uncomfortable when you lean back. Too close to the ends and they slide off. The sweet spot is roughly two-thirds of the way down each braid.
Use a beading tool — a tiny metal hook — to pull each bead onto the braid. Hand-threading works but it’s slow and kinks the hair.
9. Straight Backs with Shells and Cowries
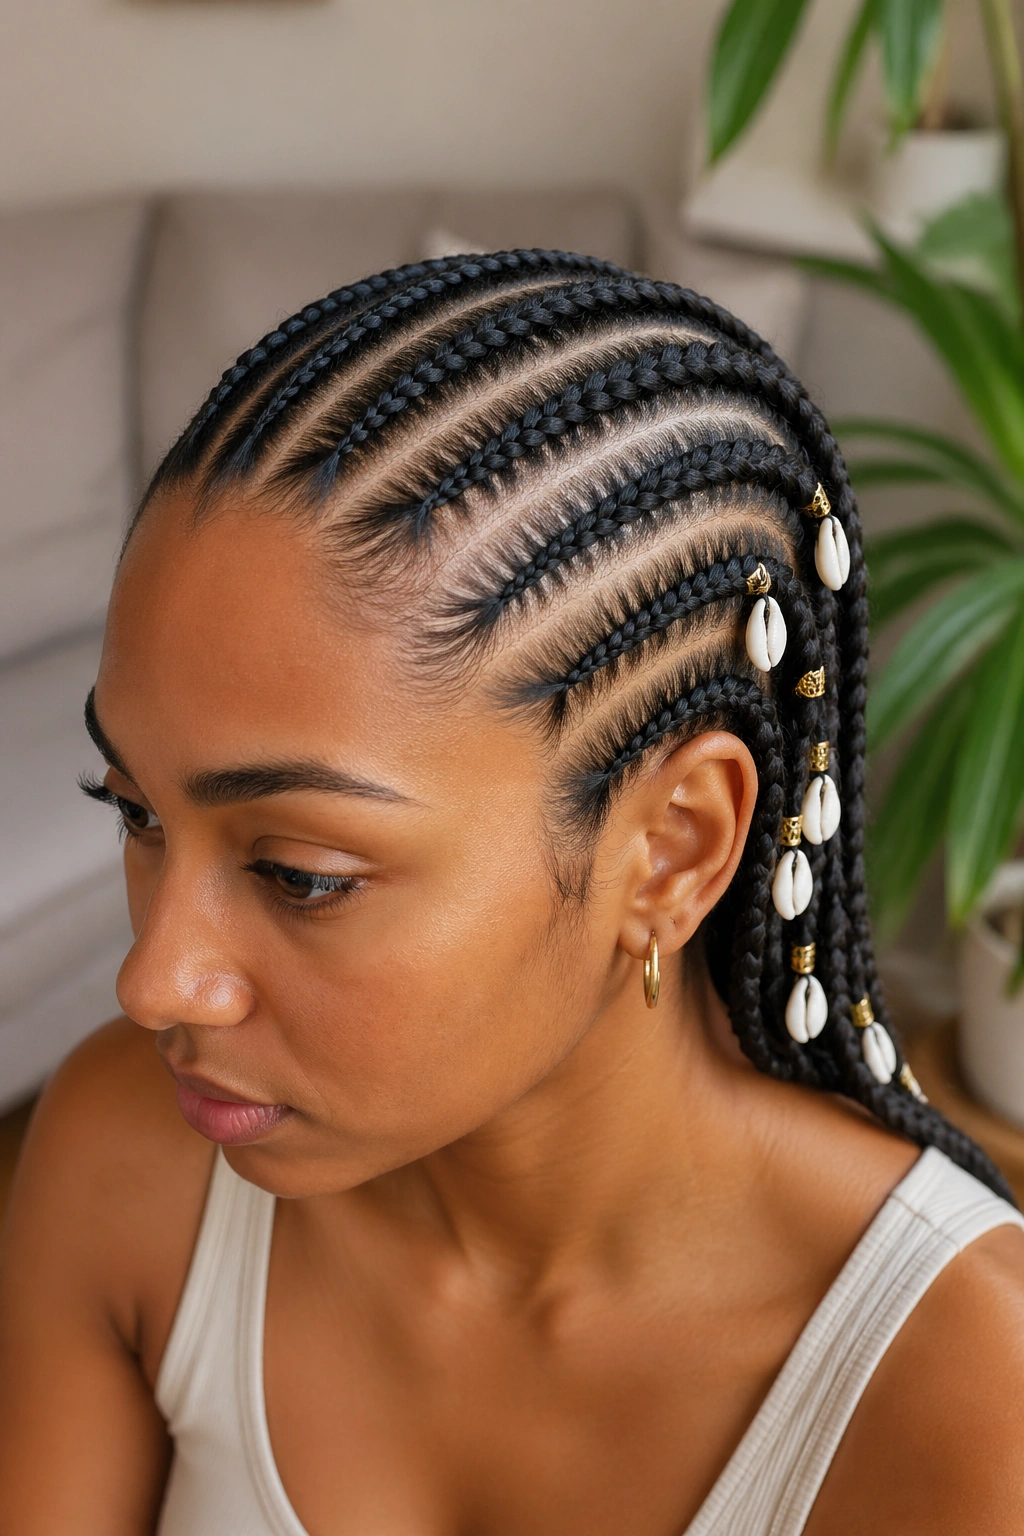
Cowrie shells woven into the lengths of several cornrows, usually not all of them. Pick two or three braids to decorate, leave the others clean.
Cowries have deep meaning across the African diaspora. They were used as currency, as decoration, as spiritual objects. Wearing them in cornrows is a nod to that history.
The shells come with small holes in the back — thread the braid through the hole and tie off. They add a subtle weight to the braid that you feel when you move.
10. Half Up Half Down Straight Backs
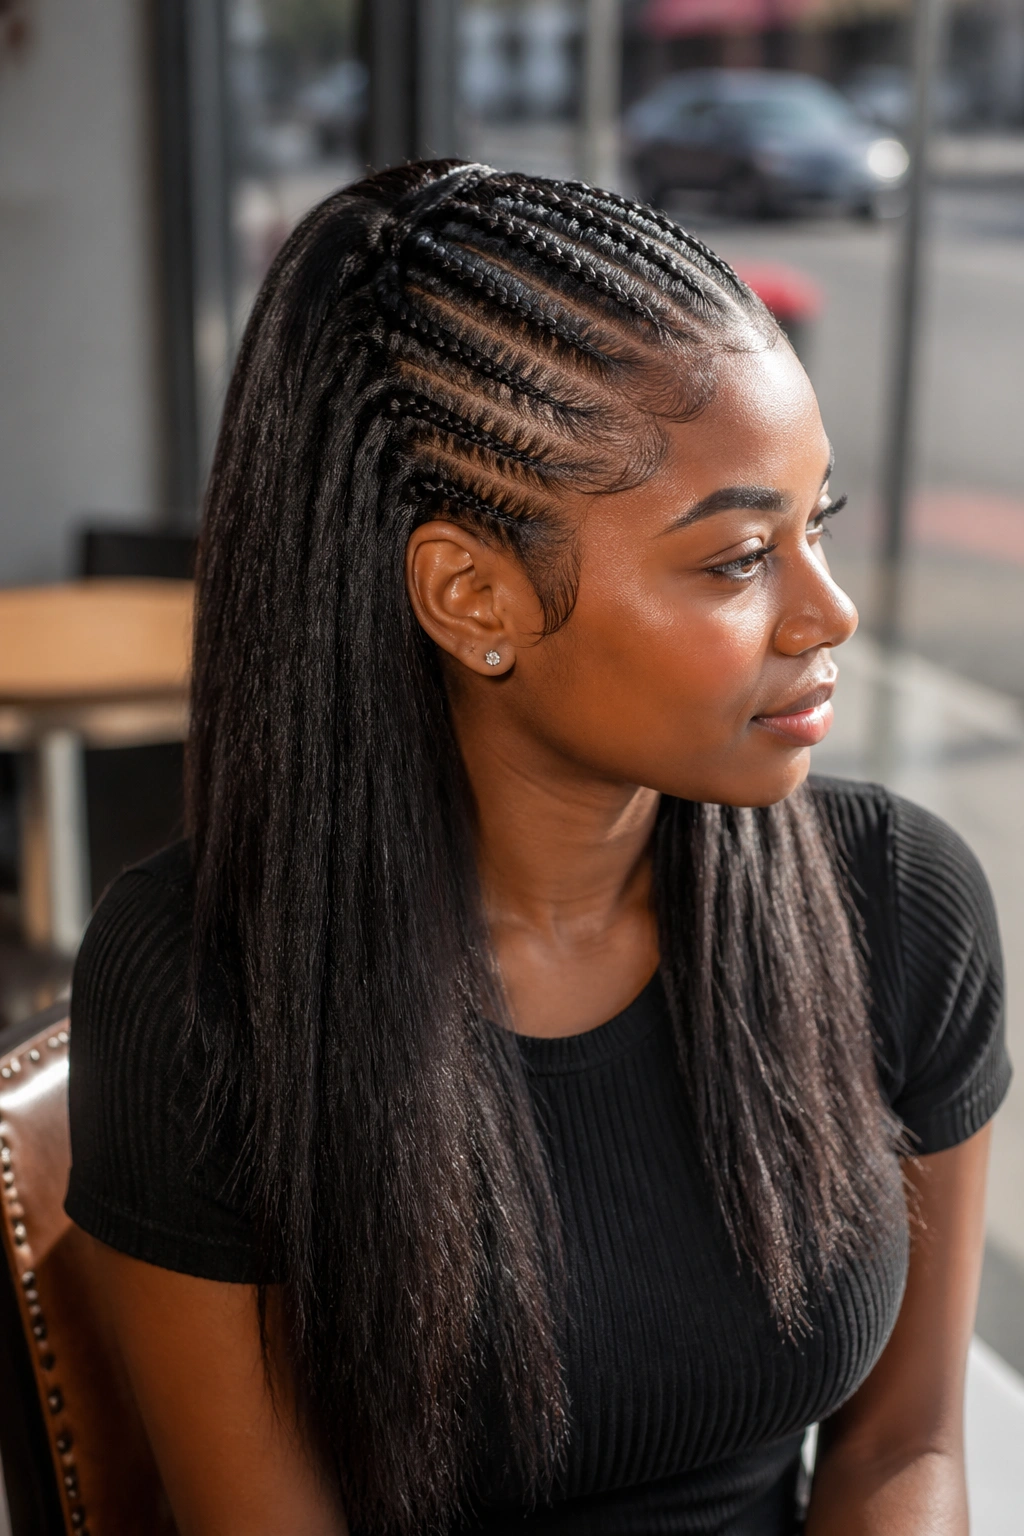
The front half of the head braided in straight backs, the back half left loose or gathered into a puff. The braids end at the crown and transition into natural hair.
This gives you the neatness of cornrows at the face-frame without committing the whole head. It’s a popular choice for women with longer natural hair who want styling options for the back half.
Who This Is For
Women who want to show off length or curl pattern in the back while keeping the face clean. Also women who don’t want a full install commitment — this version takes half the time.
The transition between braid and loose hair matters. Finish each braid cleanly and tuck the ends under the loose hair so they don’t stick out.
11. Straight Backs Ending in a Ponytail
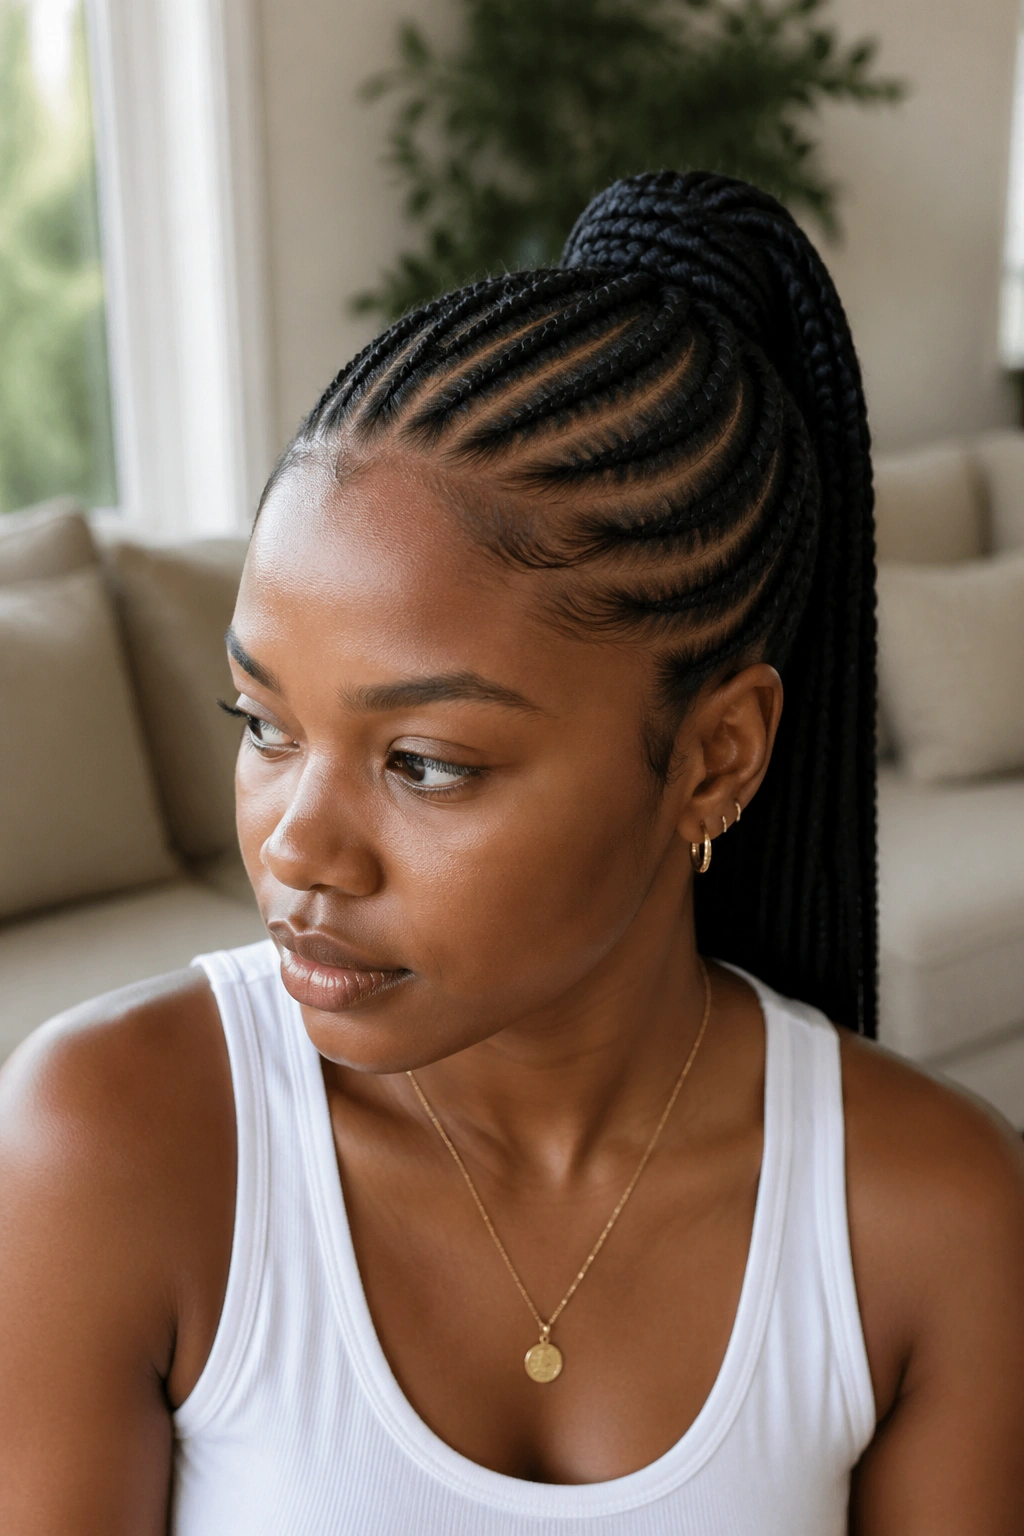
All the braids lead into one low or high ponytail at the crown or nape. The braids themselves make the ponytail — you don’t need a separate band.
Gather all braid ends at the desired ponytail point, wrap one braid around the others as a “holder,” and tuck to secure. The result looks built-in because it is.
High ponytail: modern, youthful, tension-intensive. Low ponytail: softer, easier on the scalp, more wearable for longer hours.
12. Straight Backs into a Bun
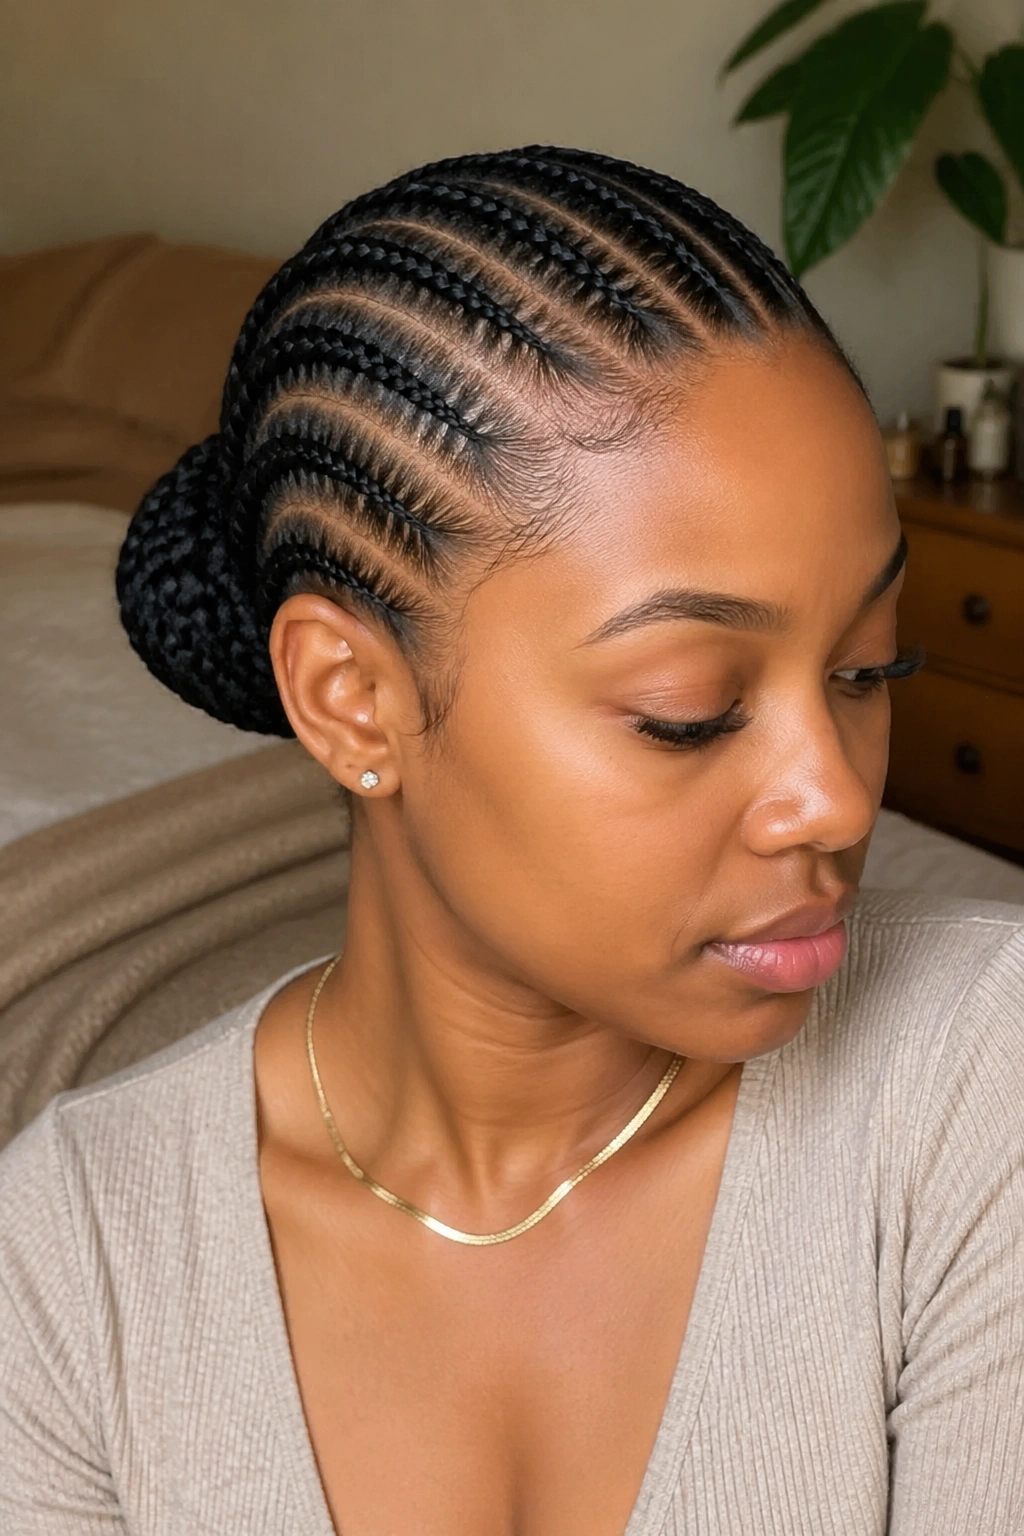
Same idea as the ponytail, but the ends get tucked up into a bun at the back. The full install reads polished even without accessories.
Bun placement matters. High and tight reads like a ballerina. Low and loose reads like effortless elegance. Mid-back bun is the middle ground — suits most occasions.
Pin with U-pins for stability. One pin at each cardinal point — top, bottom, left, right — locks the bun in place without visible hardware.
13. Straight Backs with Colored Strands
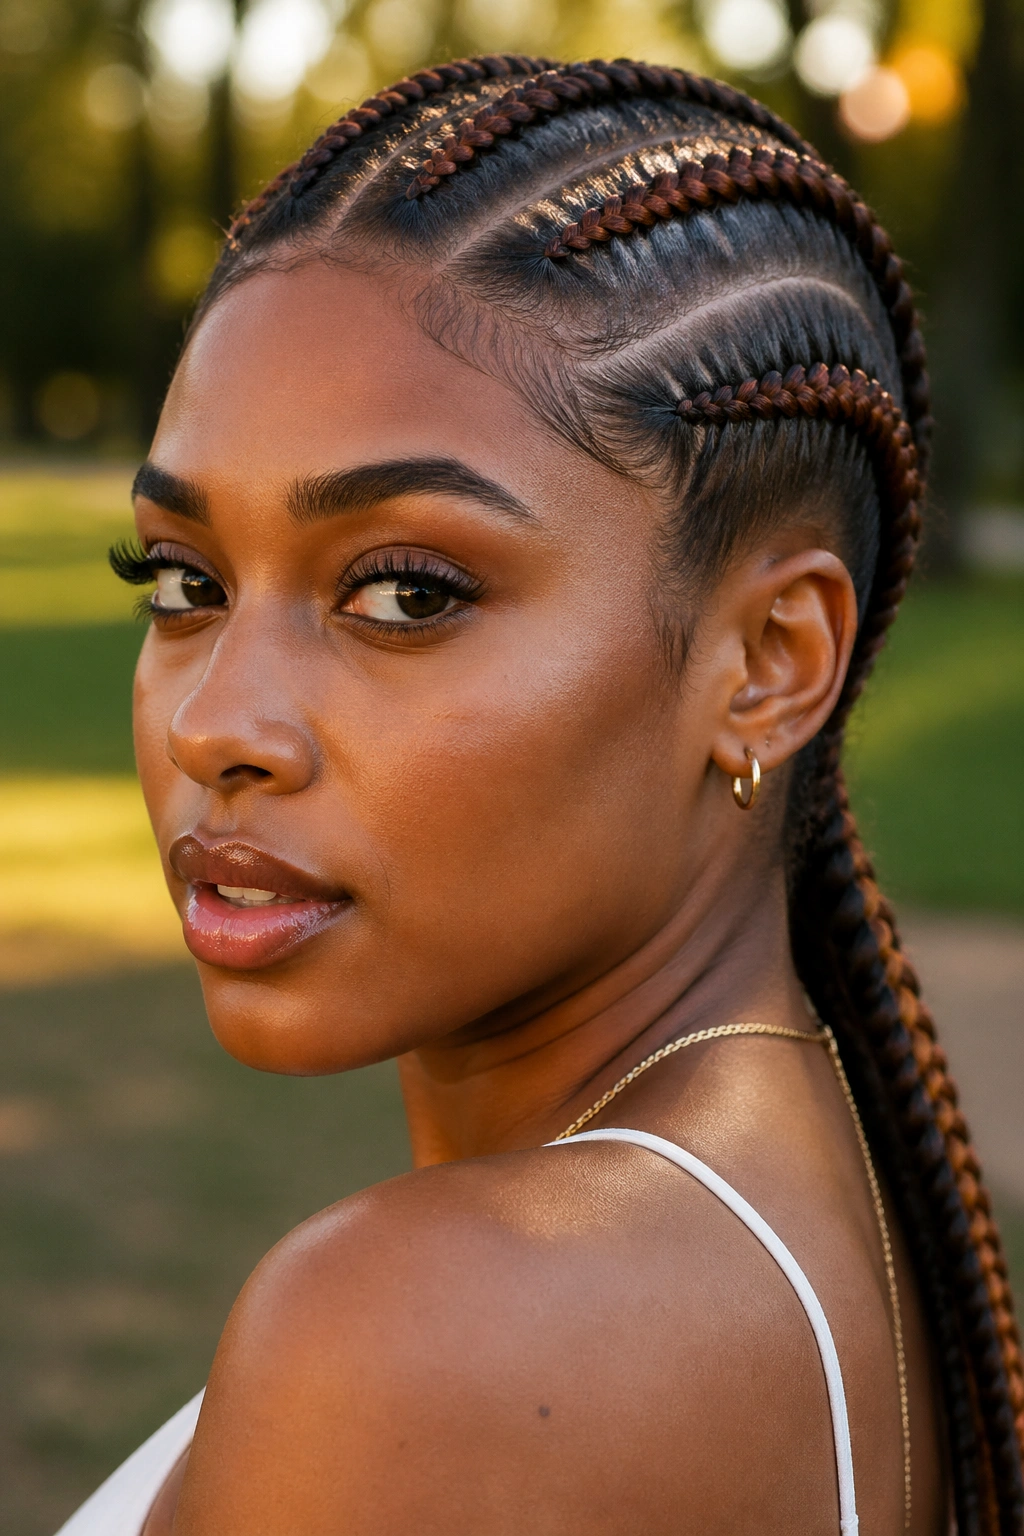
One or two cornrows in a contrasting color while the rest stay natural. The color lines draw the eye across the pattern.
Use kanekalon in a color you love. Pre-braid the colored hair into the chosen cornrows from the start. Don’t try to thread color in after — it always looks stuck on.
Common color choices: honey blonde, copper, burgundy, deep red. For Black women with deep skin tones, copper and honey tend to flatter. Cooler tones like ash blonde can wash out against warmer skin undertones.
14. Short Straight Backs
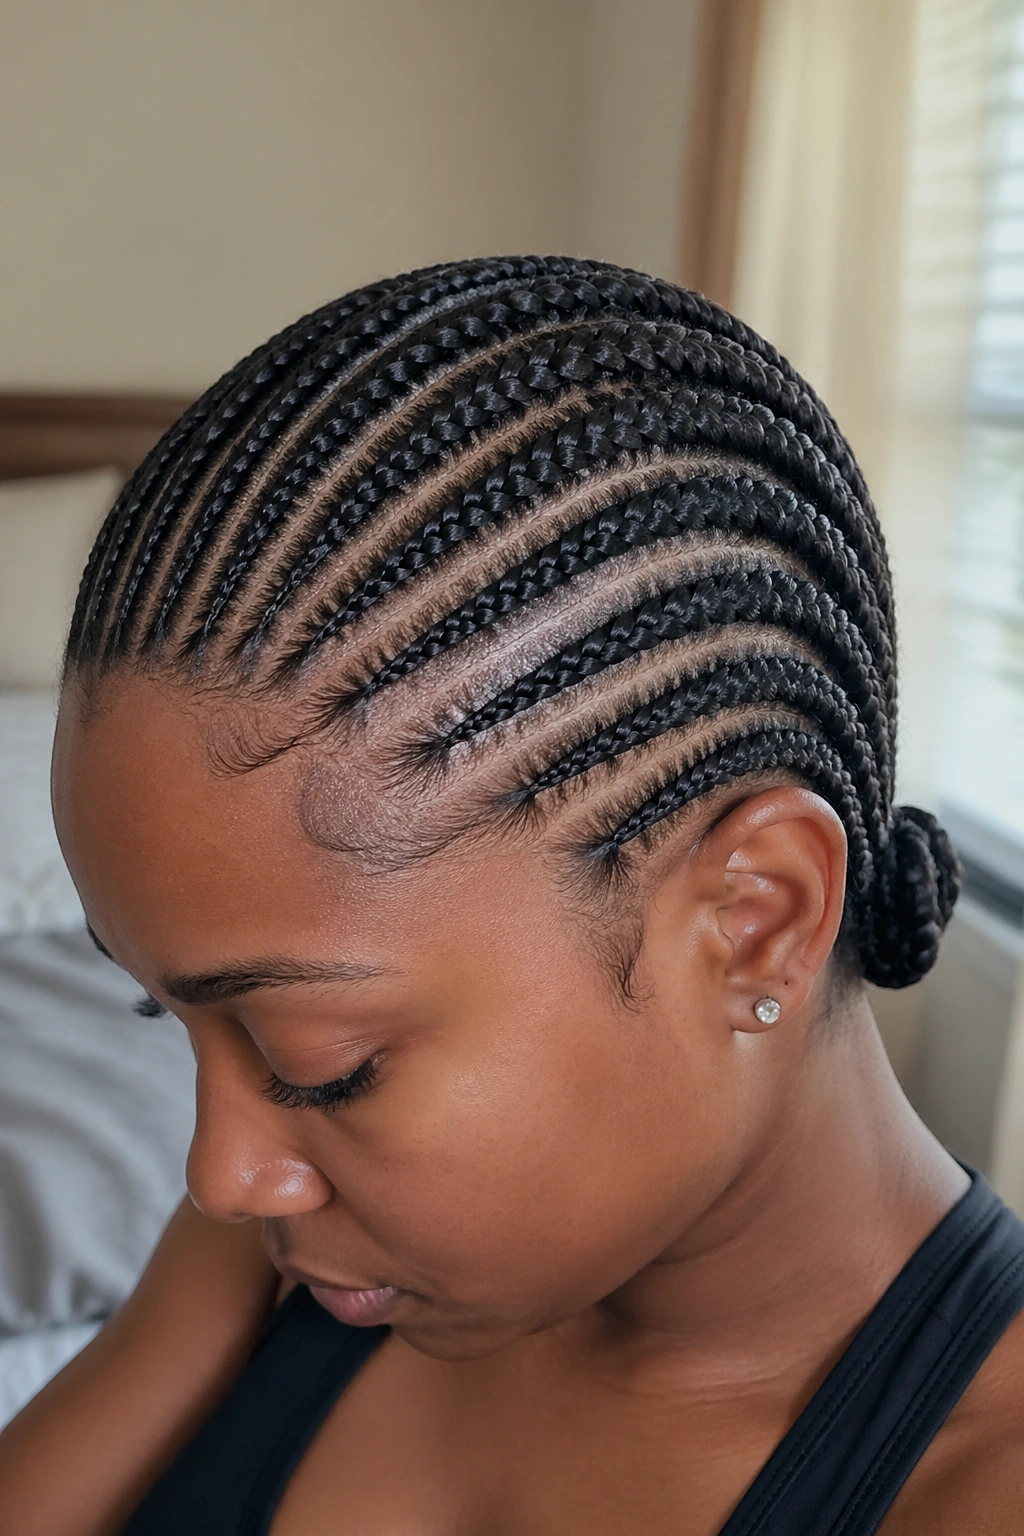
Cornrows done on TWA (teeny weeny afro) length or very short natural hair. The braids might only be two inches long, but they can still be done cleanly.
Short straight backs require a thicker gel and more tension at the base. You don’t have much length to work with, so the first stitch has to anchor everything.
The style suits women who’ve big-chopped and want a transitional look while their hair grows. Also works for athletes — the braids stay out of the face during workouts and don’t require much product.
15. Long Straight Backs Past the Waist
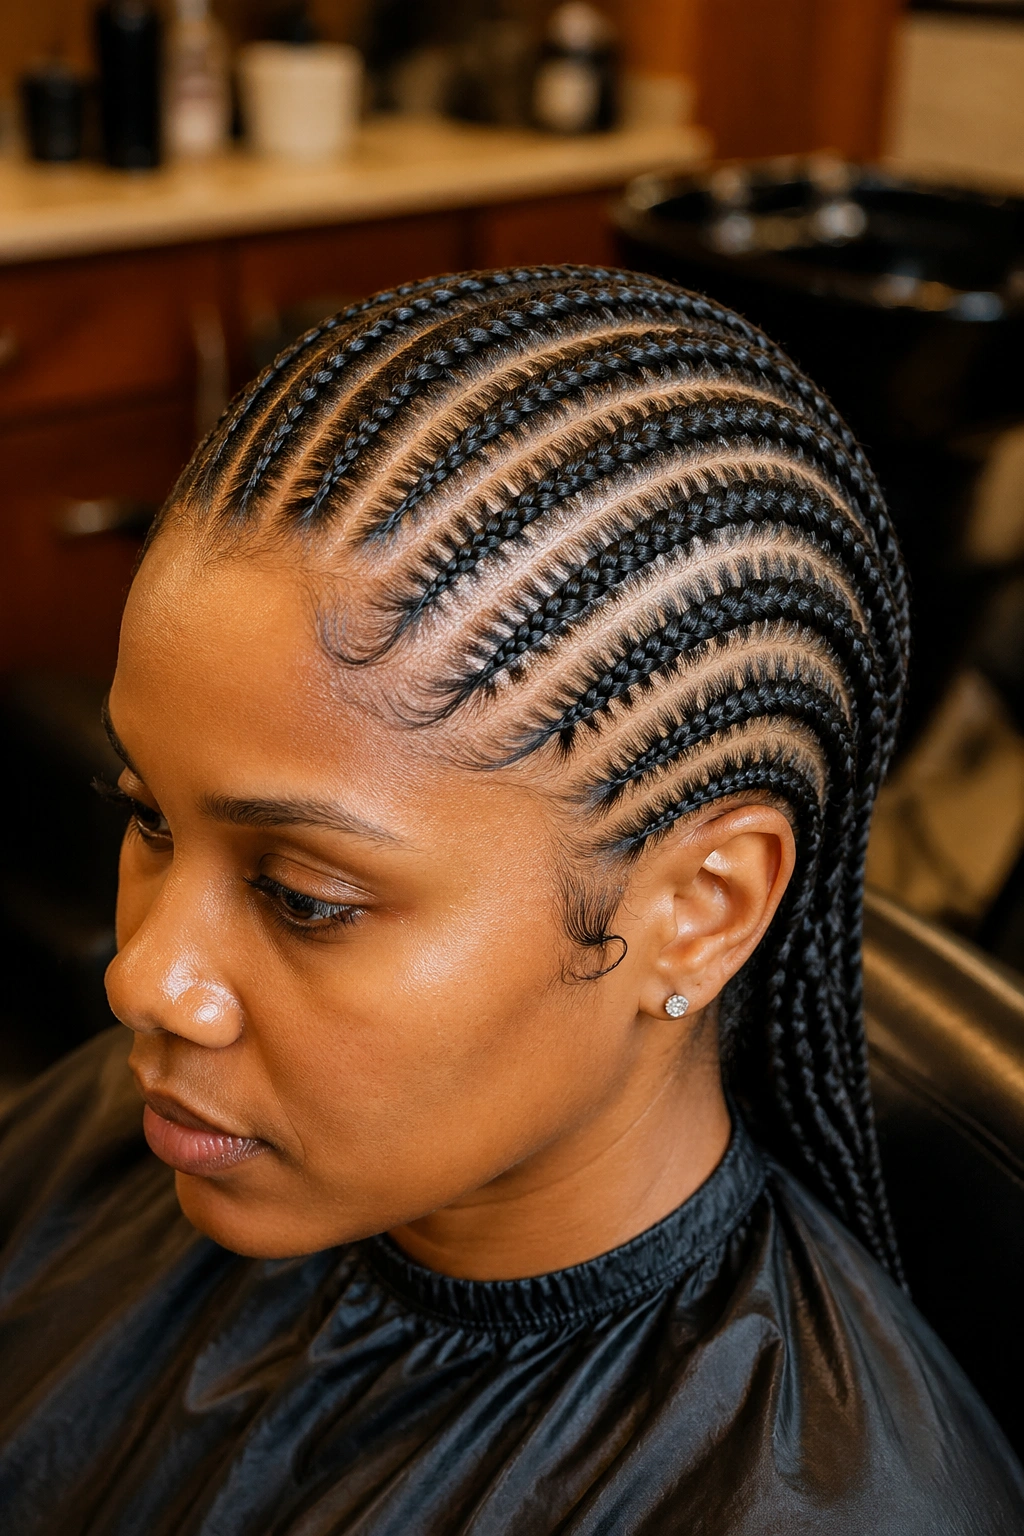
Using extensions, straight backs can reach waist length or longer. Each braid is a single continuous line from front to floor.
The weight becomes a factor. A full install of waist-length cornrows can weigh several pounds total. That weight pulls on your scalp all day. Give yourself a few days to adjust to the sensation — and if your scalp still feels sore after three days, the install was too tight.
Sleeping with long cornrows requires a large satin pillowcase or wrapping all the braids together in a loose bundle at the nape.
16. Straight Backs with Tapered Ends
Instead of blunt, uniform endings, the braids get shorter and thinner at the tips. The overall silhouette tapers toward the nape.
The tapered look softens the geometry of straight backs. Where a blunt-ended install reads sharp and graphic, a tapered version reads fluid. It suits softer face shapes — round, heart, oval.
To taper, stop feeding in extension hair earlier on the inside braids and later on the outside ones. The layering creates the taper.
17. Straight Backs with Rubber Band Base
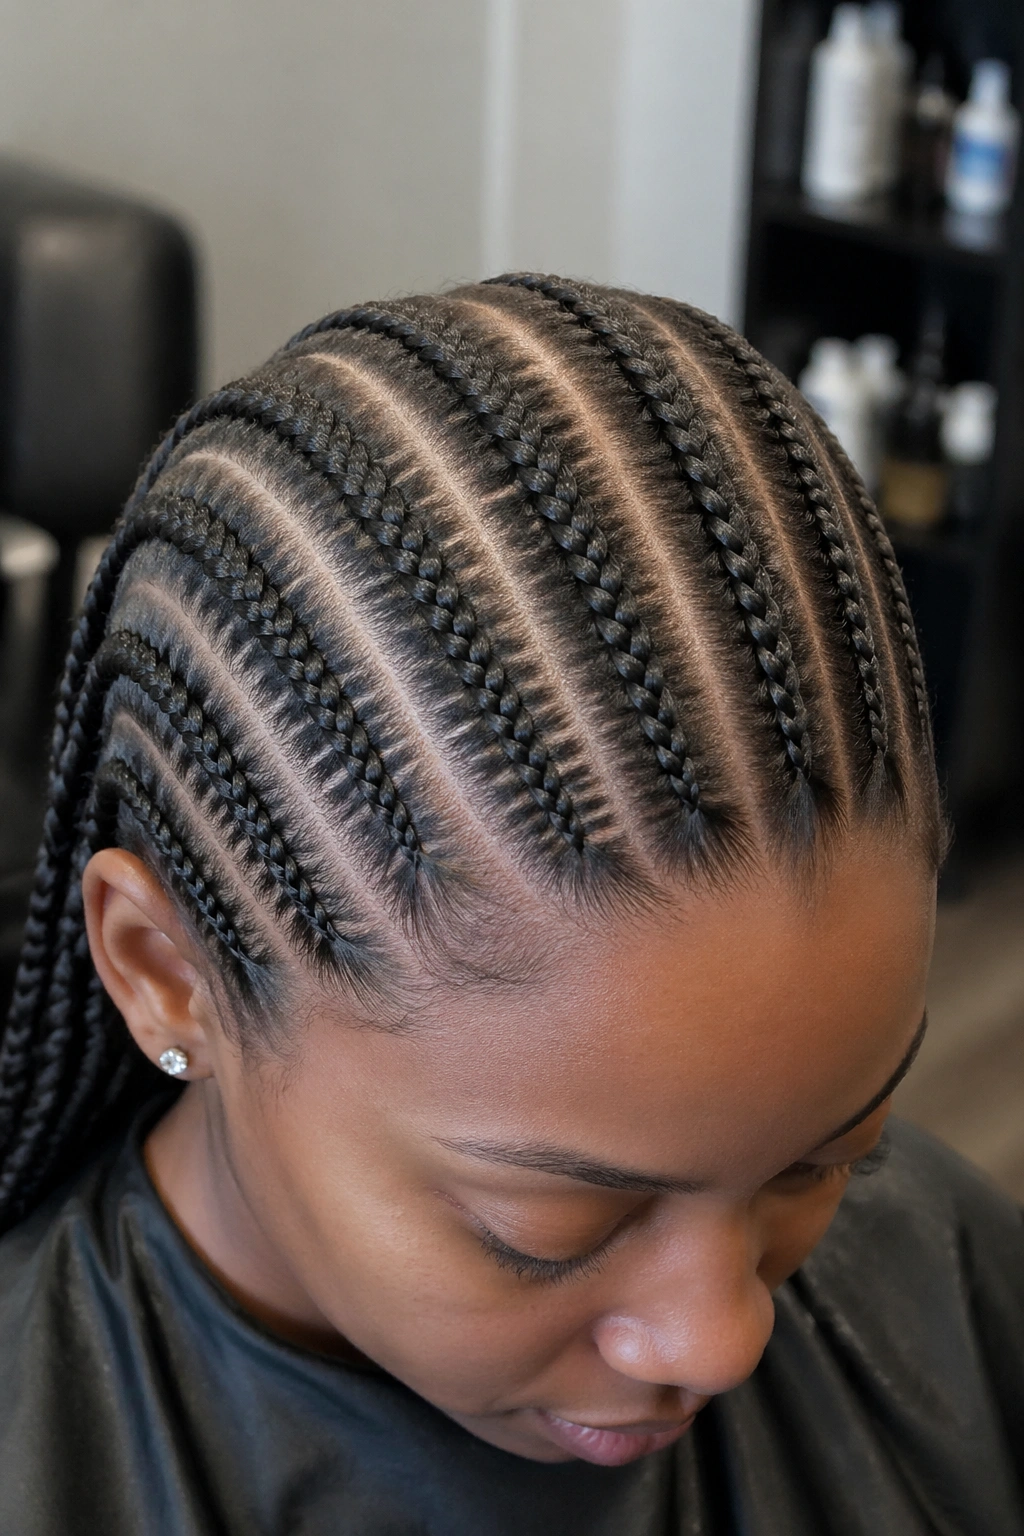
Start each braid with a small rubber band at the root for extra hold at the base. The band disappears into the first few stitches.
Rubber band starts are useful for fine hair that struggles to hold a braid. The band grips where natural tension would otherwise slip.
What to Watch For
The bands need to go in damp, not dry. Dry hair snags against a rubber band and breaks. Spray each section with water and leave-in before slipping the band on. Use cloth-covered bands, never the stretchy rubber-only kind — they shred hair on removal.
A small downside: if the band is visible at the hairline, the style reads unfinished. Hide the band under the first three stitches of the braid by braiding over it.
18. Straight Backs with Decorative Cuffs
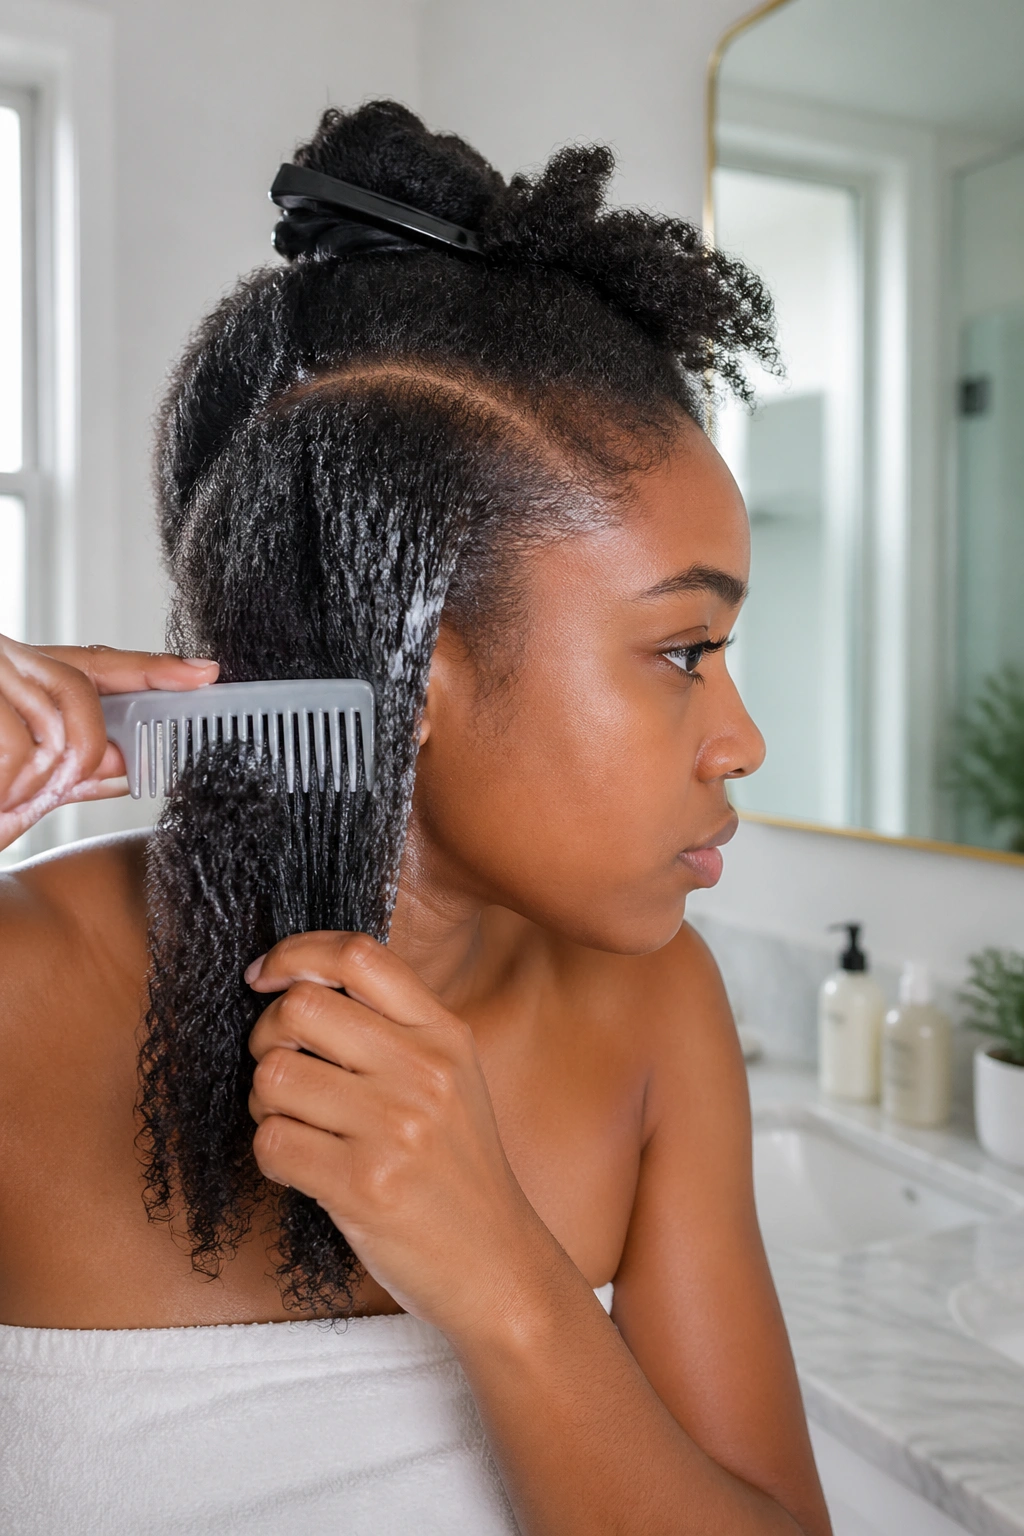
Metal cuffs — gold, silver, rose gold — slid onto random braids and crimped in place. Each cuff is about the width of three braid strands.
Cuffs sit differently than beads. They’re rigid, so they don’t sway. They also reflect more light because they’re solid metal versus individual beads.
Placement: scatter them, don’t line them up. A cuff at the same position on every braid reads too symmetrical. Random placement looks intentional without feeling orchestrated.
19. Straight Backs with a Center Accent Braid
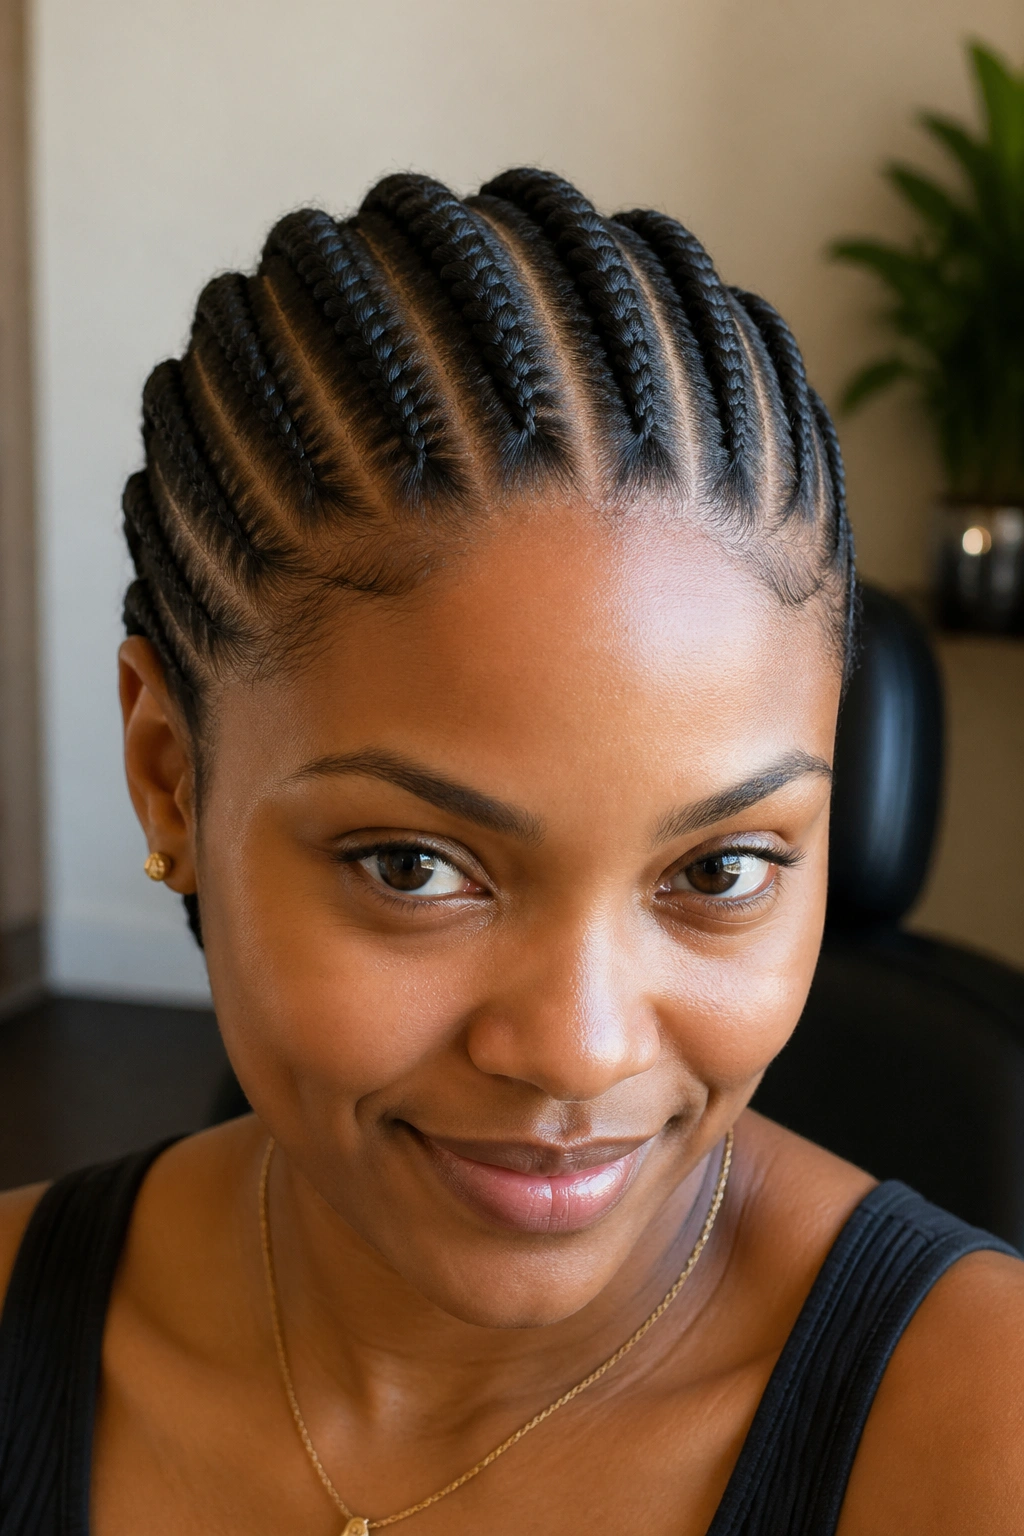
Eleven straight-back cornrows total, but one — the center — is thicker, colored, or decorated differently from the rest. It becomes the focal point.
The accent braid can be a jumbo surrounded by regular cornrows, or a colored feed-in surrounded by natural hair cornrows. The contrast is the design.
Works best on heads where the center of the crown is naturally the face’s focal axis. For round or oval faces especially, a center accent draws attention up and center.
20. Straight Backs with Curly Ends
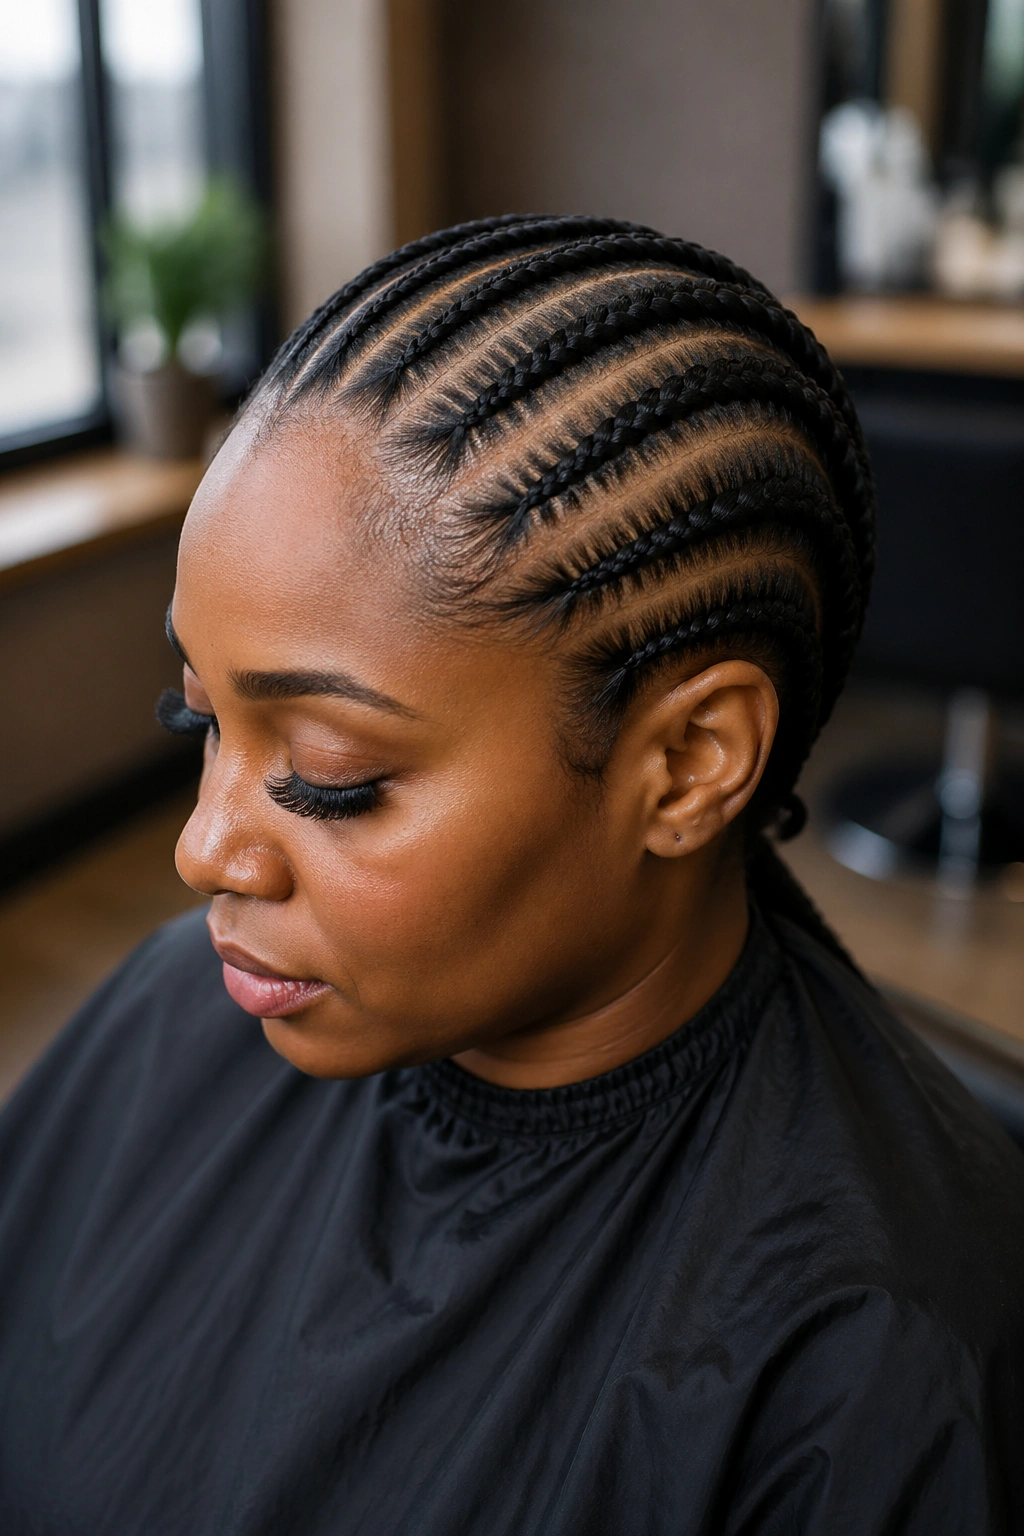
The braids run straight back in classic cornrow pattern, but instead of blunt ends, the extensions are curled — with flexi rods, perm rods, or a hot water dip of pre-curled hair.
This version combines the structure of straight backs with the movement of curls. The braided section reads structured. The curly ends read playful.
Curly ends add visual weight to the back of the style, which balances a face with a strong forehead or square jaw. Take the curls into account when planning the install.
21. Straight Backs with a Side Pull
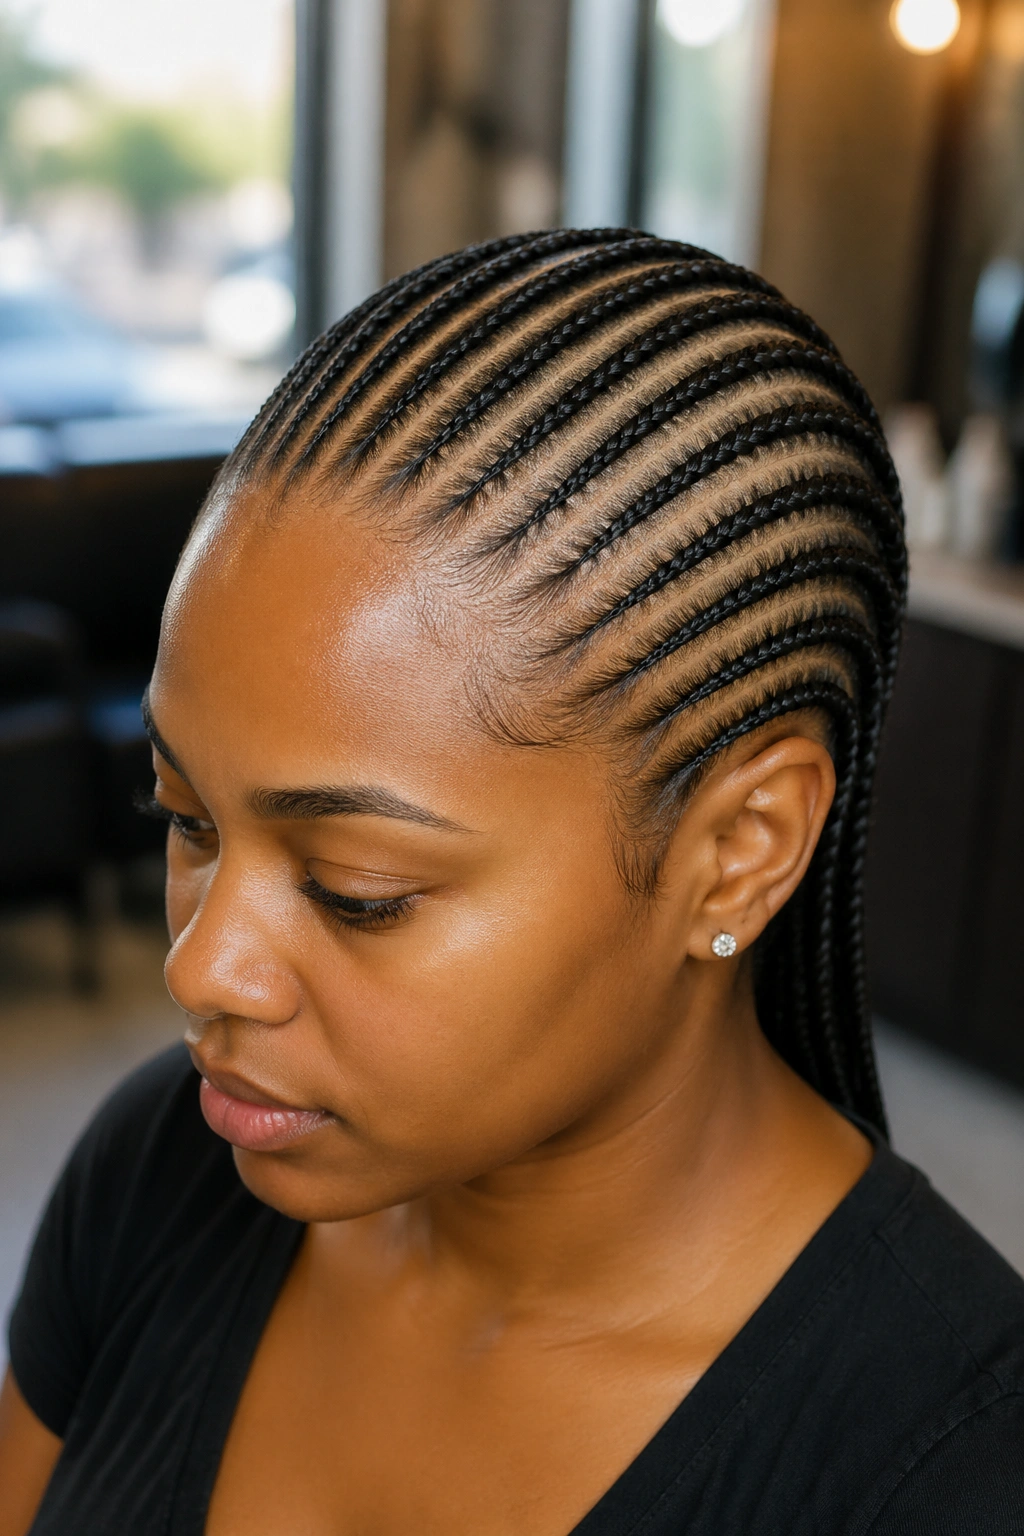
All twelve or so cornrows run straight back, but the entire bundle of ends is pulled to one side at the nape, creating a side-swept cascade of braids.
How to Style It
Finish all braids straight down first. Then gather them at the nape and secure with a hair tie to one side — say, the left shoulder area. The braids will naturally cascade forward over that shoulder.
The effect reads statement without requiring different braiding technique at the front. Same install, different finishing move.
22. Straight Backs with Colored Tips Only
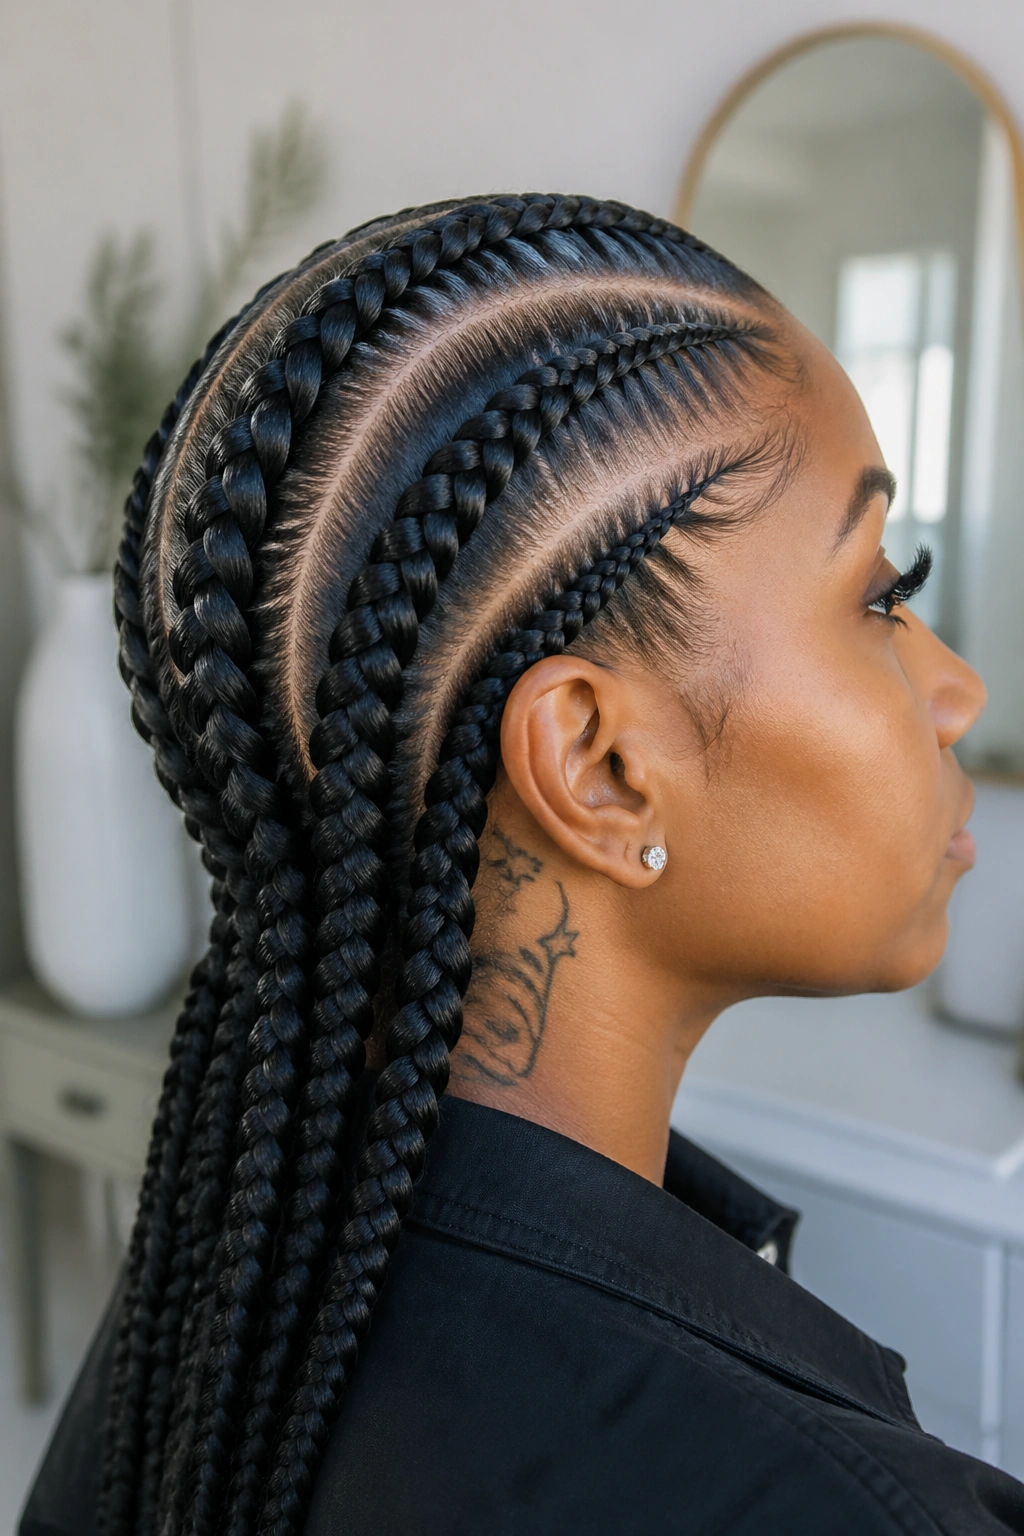
Natural hair at the roots and along most of the braid, but the last three inches of each braid are bright — peach, red, purple, blonde, anything.
Color the braiding hair before you install it. Most kanekalon comes pre-dipped in colored tips, or you can buy color-changing thermal hair that shifts shade when exposed to heat.
The advantage: when the braids sway or when the wind moves them, the color flashes in and out of view. It’s not constant. It’s rhythmic.
And when you’re ready to switch styles, the color is in the extensions only — your natural hair underneath is untouched.
Maintaining Straight Back Cornrows
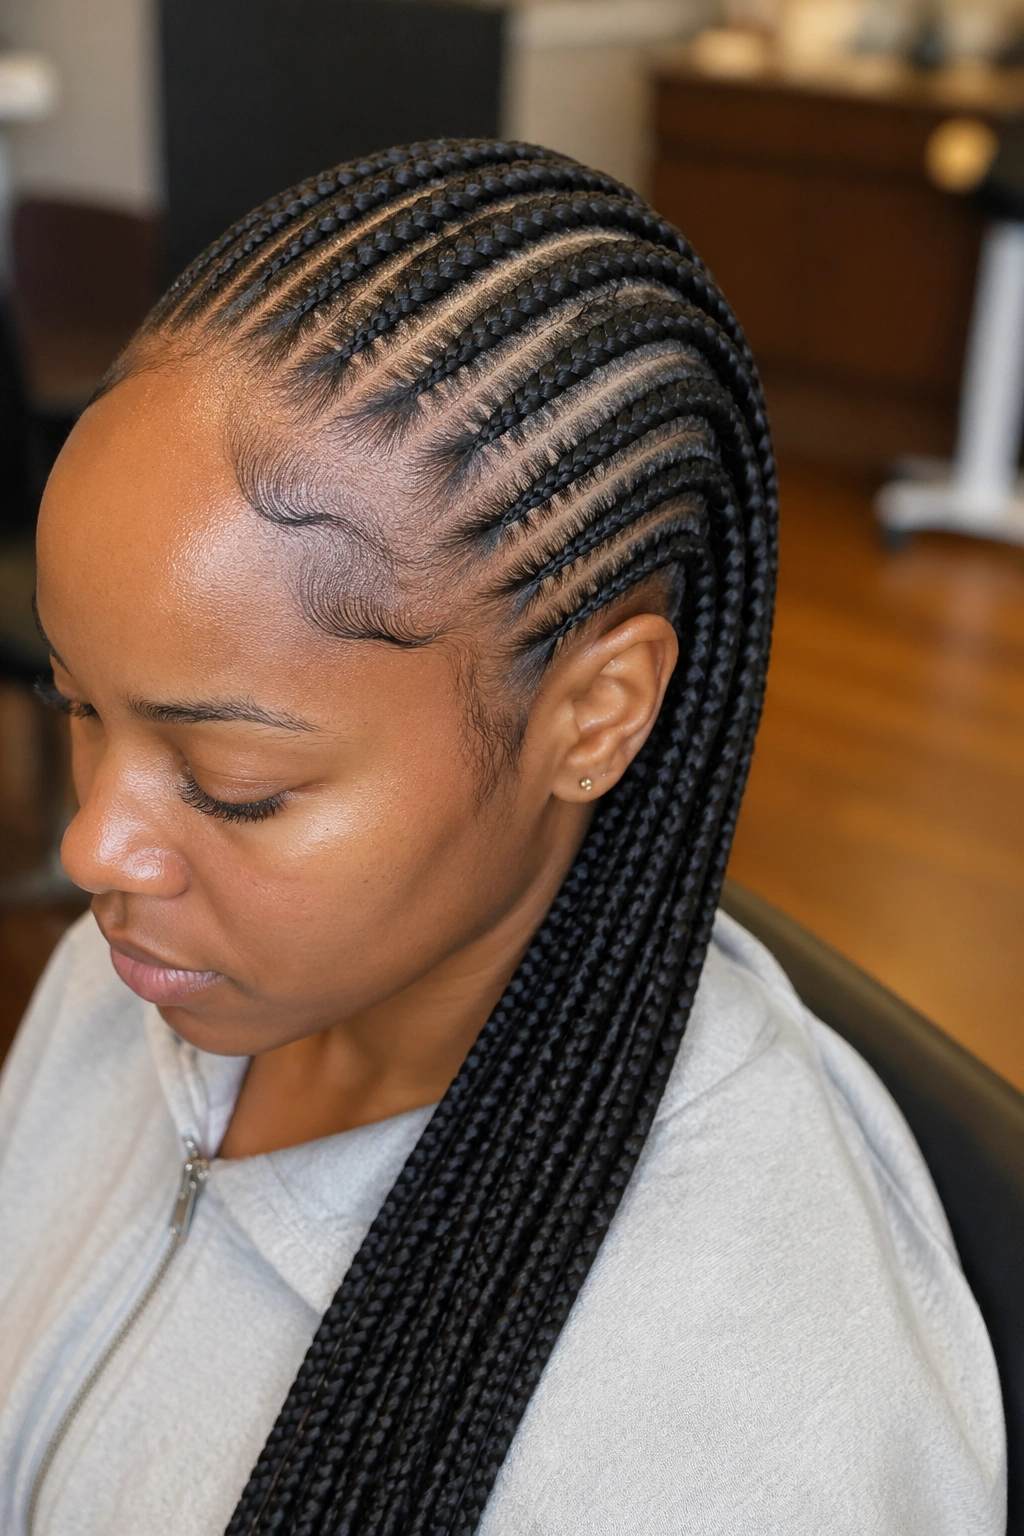
Straight backs hold longer than almost any other cornrow style, but only if you sleep in a satin scarf every single night. Not most nights. Every night.
The scarf should sit snug against the hairline, not loose. A loose scarf slides off during sleep and the friction from your pillowcase frizzes the front braids first. Front frizz is the number one reason straight backs look tired before they should.
Moisturize the scalp every third day with a light oil applied along each part. Rosemary oil is a favorite for encouraging growth under a protective style. Sweet almond oil works for sensitive scalps. Avoid coconut oil for scalp application if your hair gets stiff easily — coconut has a protein-building effect that can make hair feel hard.
Don’t over-wash. A scalp spray with diluted apple cider vinegar once a week is enough for most. A full shampoo of braids usually causes more frizz than it’s worth.
Picking the Right Style for Your Face
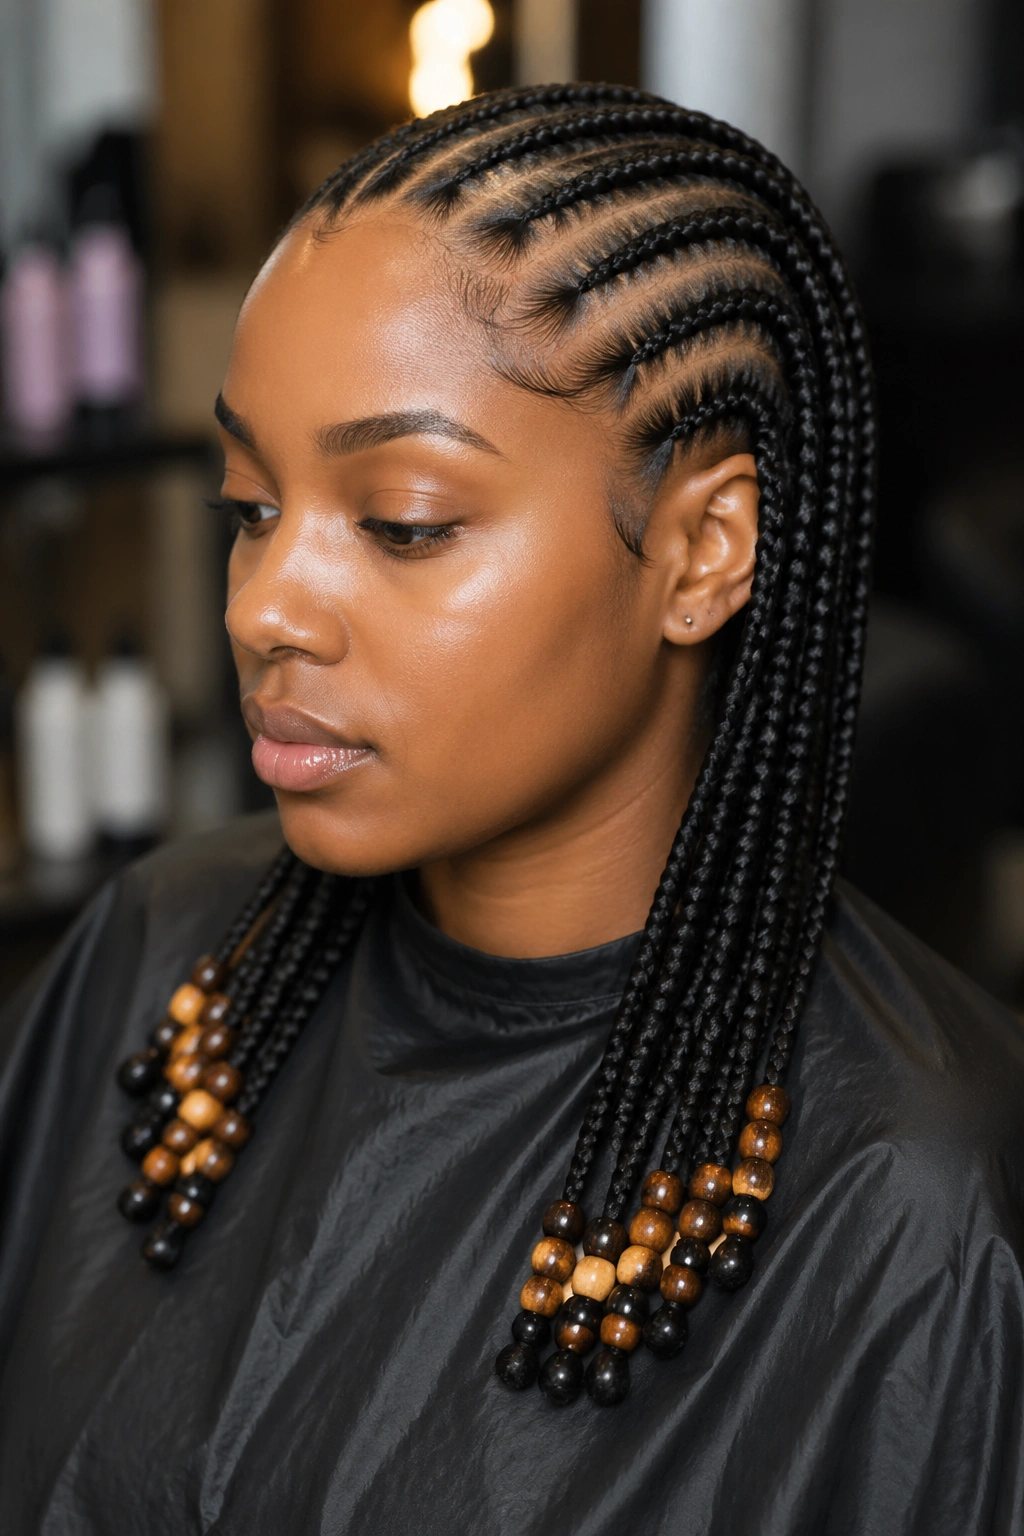
Oval faces handle every version of straight backs without modification.
Round faces benefit from length. Longer braids visually lengthen the face. Ponytails and buns give extra height at the crown.
Square faces soften under tapered ends or side-pulled versions. Anything that breaks symmetry helps.
Heart-shaped faces look balanced when the braids have weight at the nape — curly ends, buns, or beaded finishes all work.
Long faces should avoid high ponytails and buns. Keep the weight at jaw level or lower to avoid vertical emphasis.
Common Mistakes with Straight Backs
Mistake one: braiding too tight at the root. The tightest stitch should be the second or third, not the first. A too-tight first stitch is the leading cause of traction alopecia at the hairline.
Mistake two: letting the parts drift. Once a part starts wandering mid-row, the whole pattern looks crooked. Stop. Re-part. Better to take an extra five minutes than live with the drift.
Mistake three: skipping the pre-braid stretch. If you try to braid shrunken 4C hair without stretching it first, the braid will look stubby and kinky along its length. Blow-dry on low with a comb attachment or band the hair overnight to stretch.
Mistake four: using too much gel at the hairline. Gel cakes. Gel flakes. Gel drips onto clothing. A pea-sized amount per braid at the root is all you need. More is not better.
Mistake five: ignoring the takedown date. Even the best-installed straight backs should come out by week six. Past that and your hair starts matting under the braid. You won’t see it until takedown, and by then, you’re looking at breakage.
Taking Them Down the Right Way
Start at the ends. Spray each braid with diluted conditioner — two parts water, one part slip-heavy conditioner. Let it sit for ten minutes before you start unraveling.
Unravel from the tip up. Don’t start from the scalp — the tension works against you that way. The ends loosen first, then the middle, then the root.
Plan three hours for a full takedown of a full head. Longer if you used decorative elements. This is not a ten-minute job no matter how fast you think you are.
After every braid is out, do not comb dry hair. Shampoo under running water in sections. Follow with a deep conditioner and let it sit under a plastic cap for 30 minutes. Then — and only then — detangle with a wide-tooth comb from the ends up.
Give your hair 72 hours before the next style. Your scalp needs time to recover from two to four weeks of continuous tension. The break is what keeps your edges healthy for the long game.
Straight back cornrows are never going out of style because they never came into style — they’ve always been there. Whether you choose the six-braid classic or the waist-length extended version, the style connects you to a tradition that’s older than any trend. Install clean. Wear it with care. Take it down with patience. That’s the formula for straight backs that last and scalps that thrive.
