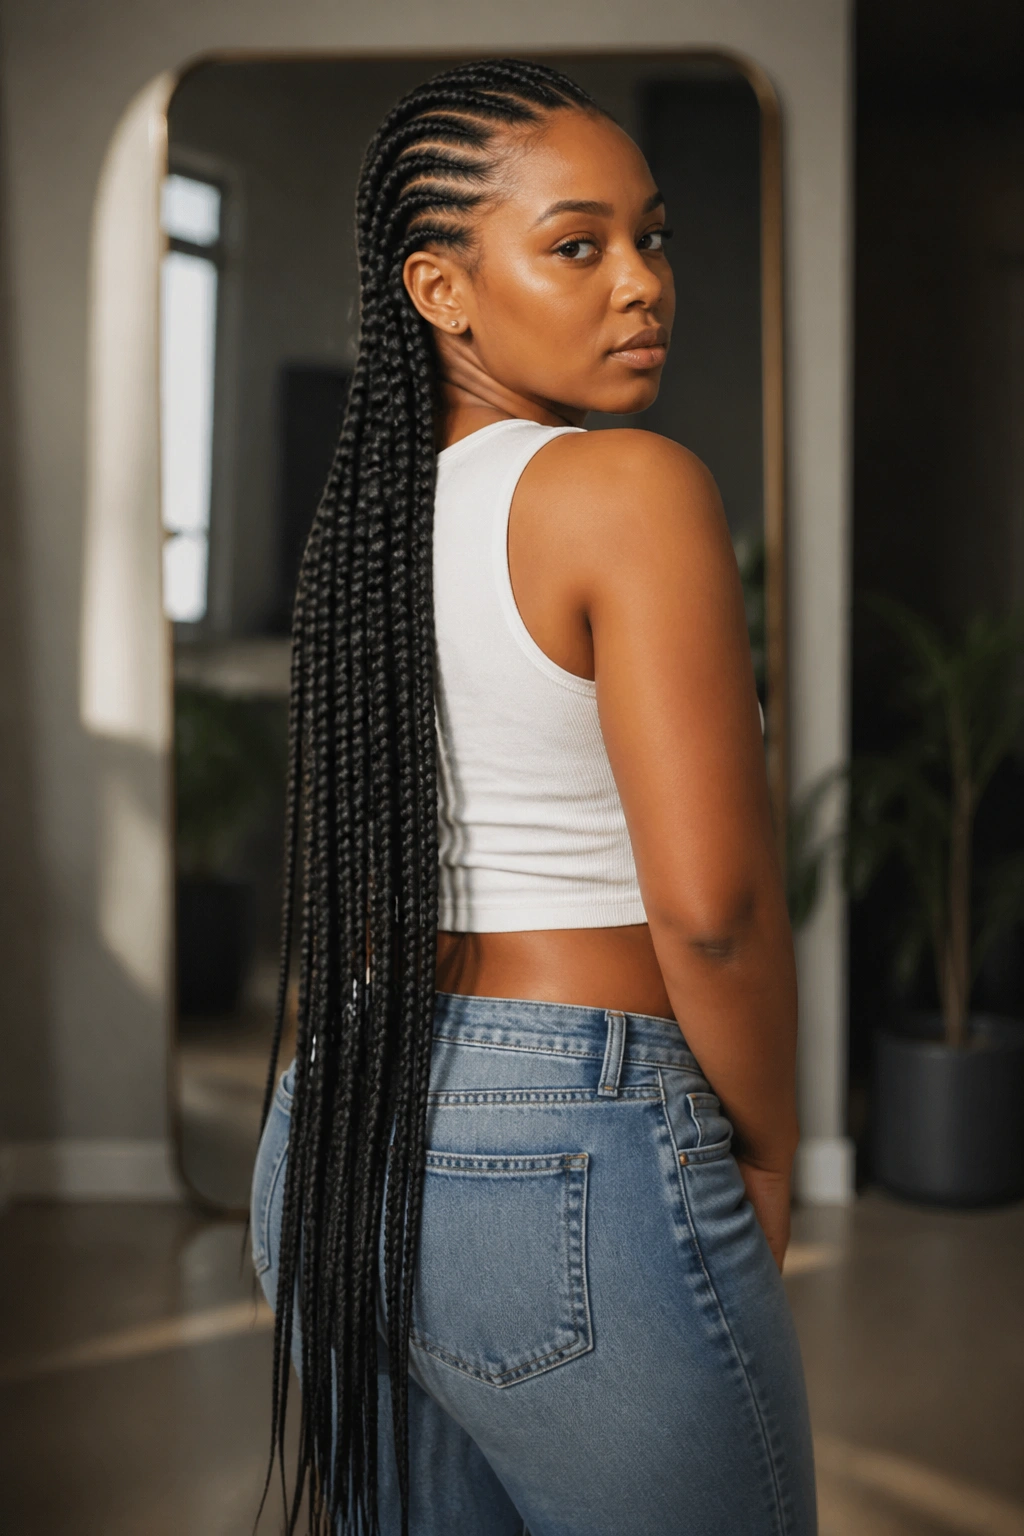
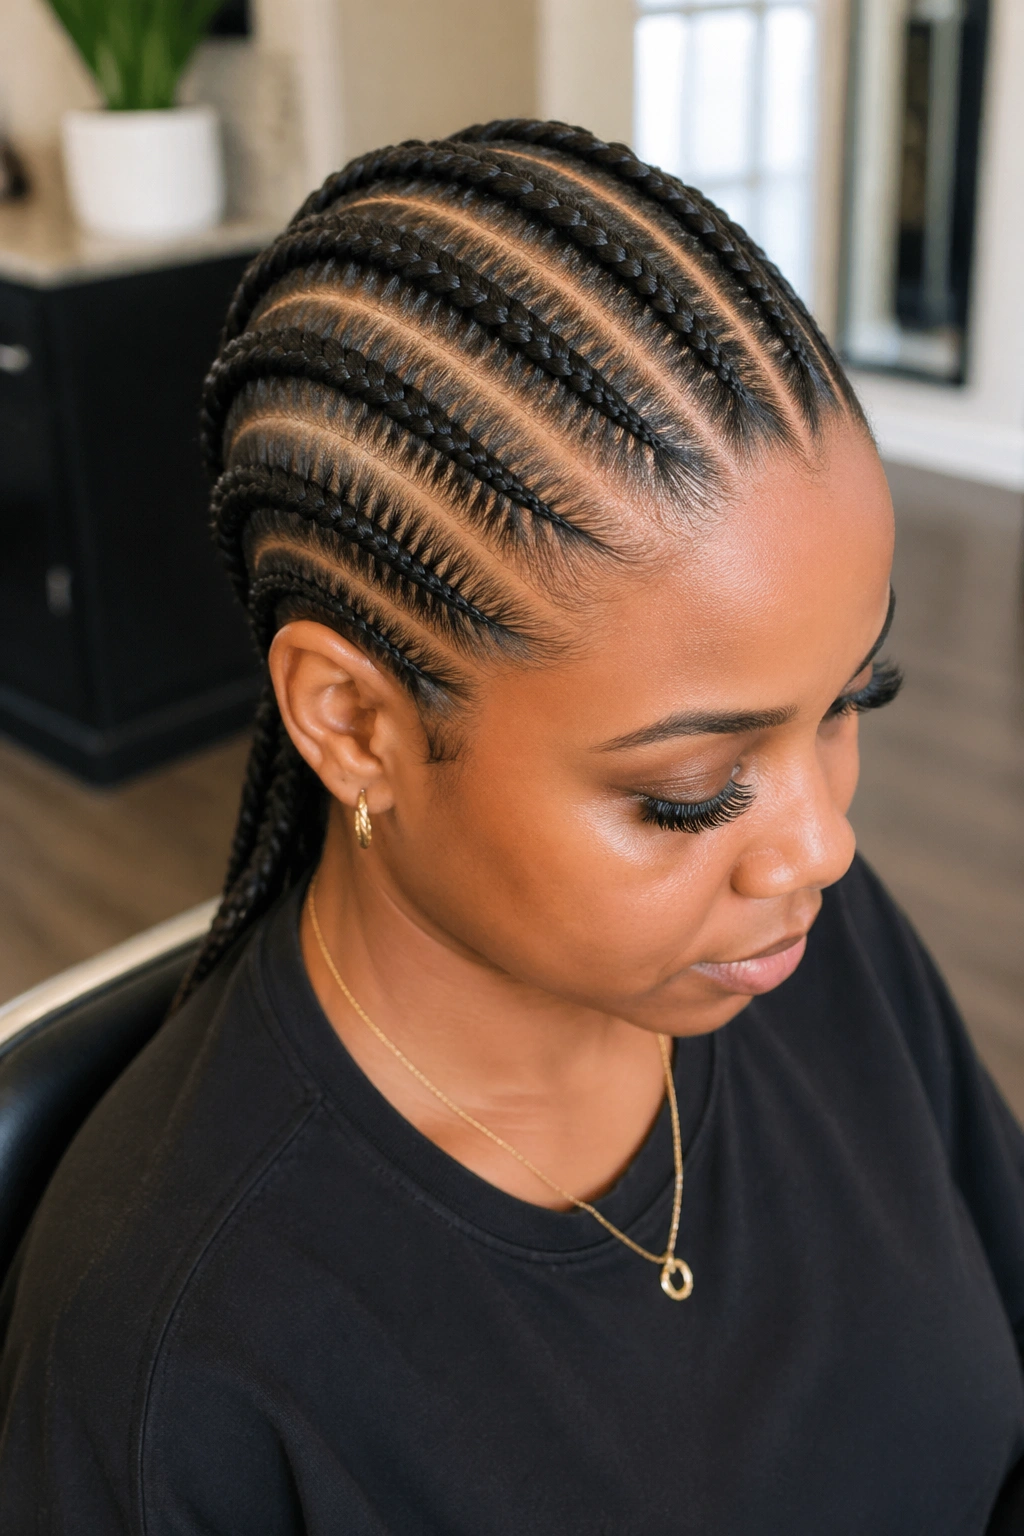
All back cornrow styles run straight from the hairline to the nape, then often down past the shoulders with extensions. The classic approach. The one that reads clean, low-maintenance, and polished from every angle. No swirls, no swoops, no diagonal trickery. Just rows flowing backward.
Within that framework, though, there’s a whole universe of variation. Thickness of the rows. Spacing between them. Extension length. Finish at the ends. Accessories along the way. Each detail changes the final look without breaking the all-back rule.
Below are 25 distinct all-back cornrow styles. Each one offers something different — a specific row count, a particular finish, an accessory pattern, or a length choice that sets it apart from the others.
Why All Back Cornrows Stay Timeless
All back cornrows have been around forever. The pattern predates every trend, survives every fashion cycle, and shows up on runways, school pictures, office photos, and red carpets alike. There’s a reason.
The pattern works with almost any face shape. It shows off the jawline, exposes the ears (so earrings get to shine), and creates clean vertical lines that lengthen the silhouette. Plus, your hair is fully out of your face, which is a practical win most styles can’t claim.
As a protective style, all back cornrows are one of the easiest to maintain. Water hits them evenly during washing. Oil distributes along the shafts without fuss. Sleep care is simple because there’s no complicated pattern to preserve.
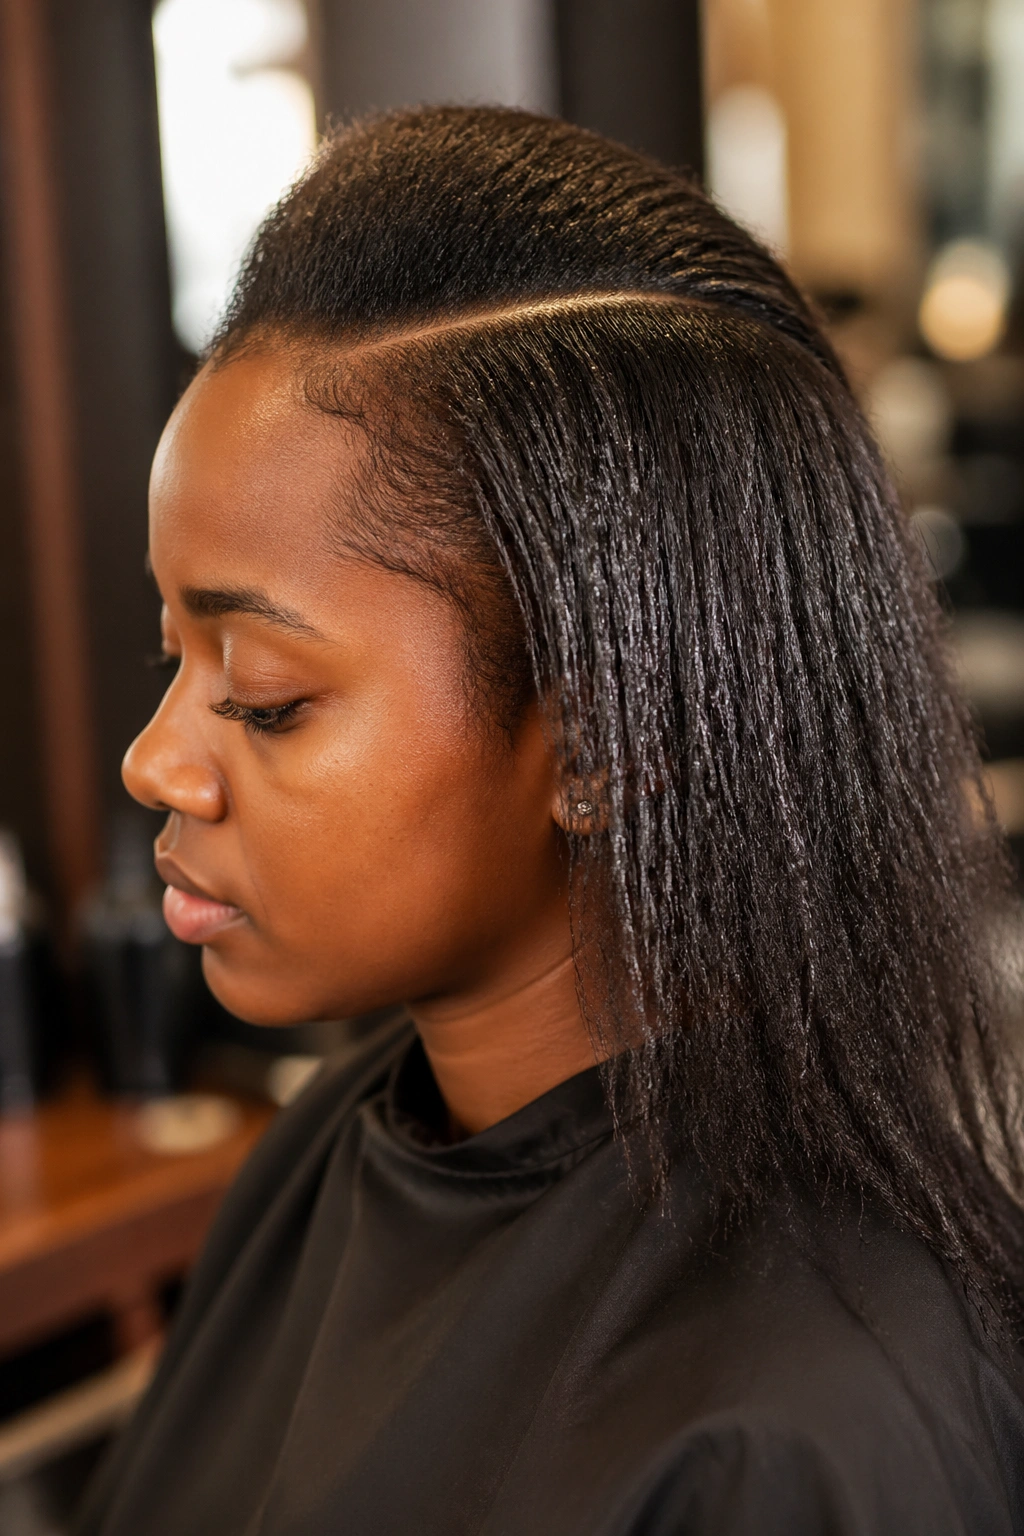
Prep Before the First Row
Clean, conditioned, stretched hair is the starting point. Cornrows installed on dirty or shrunken hair don’t sit flat, don’t hold long, and can itch within days.
Wash with a clarifying shampoo to remove product buildup. Deep condition for 20-30 minutes. Rinse with cool water. Air-dry with hair banded in sections, or blow-dry on low heat until stretched but not fully dry — slightly damp hair grips better than bone-dry hair.
Apply a leave-in conditioner and a small amount of butter or oil to seal. Don’t overload. Hair that’s too slippery pushes out of the braid as the installer works, making each row loose and unstable.
Choosing Row Count and Thickness
The number of rows you pick changes the whole look. Fewer rows = thicker, bolder. More rows = thinner, intricate.
Four thick rows read bold and statement. Six to eight rows hit the sweet spot between bold and balanced. Ten to twelve rows look delicate and intricate but take longer to install. Fifteen-plus rows border on micro territory and can take 6+ hours.
Your hair density matters too. Very thick hair in only four rows might look chunky. Thin hair in twelve rows might show too much scalp. Match your density to the row count.
Adding Extensions Without Overloading Your Roots
Extensions add length, weight, and fullness. They also add stress on your real hair.
Use kanekalon hair in tones that match or blend with your natural color. Pre-stretched kanekalon tangles less. Braid extensions into each row using the feed-in method — adding small sections of extension hair gradually as you braid, rather than anchoring a thick chunk at the base.
Feed-in prevents the bulky base knot that old-school braiders used to create. It also reduces tension on the hairline, which means less breakage at your most vulnerable spots.
Tension Check — Listen to Your Scalp
If your eyes water during the install, it’s too tight. If the skin around your parts lifts, it’s too tight. If you feel a burning sensation after install, it’s way too tight.
Good all back cornrows feel snug, not painful. The braider should check in with you periodically — especially at the hairline, temples, and nape. These areas have thinner skin and are more prone to tension damage.
Don’t grin and bear it. A well-done cornrow style lasts weeks. A too-tight one lasts just as long but takes chunks of your edges with it when it finally comes down.
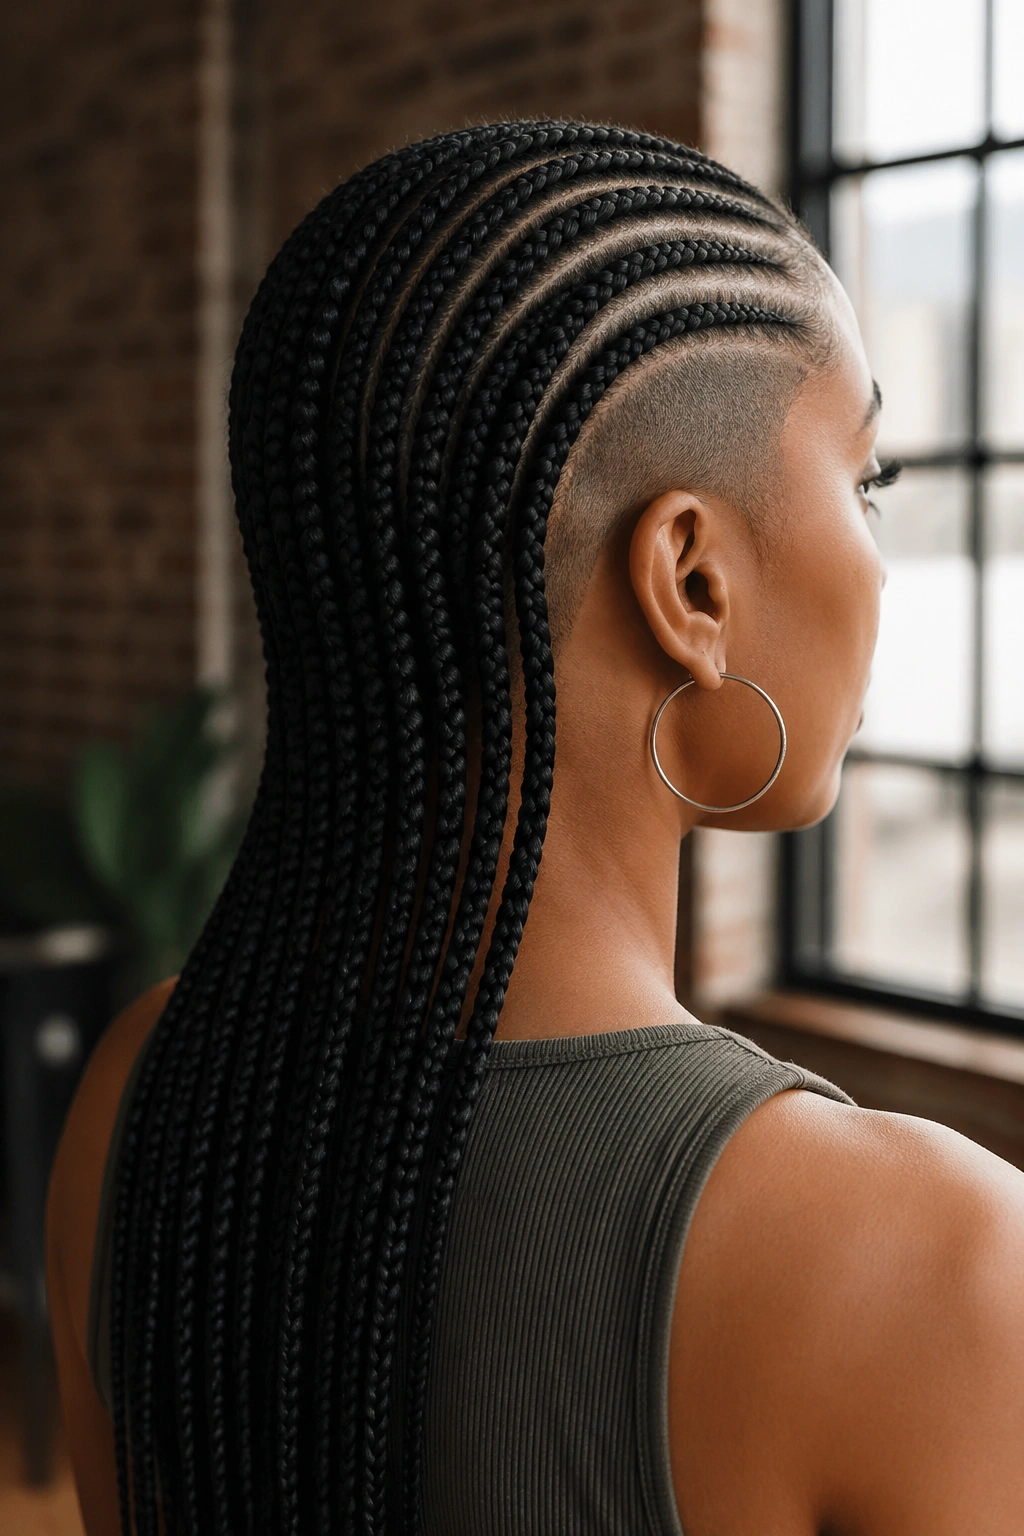
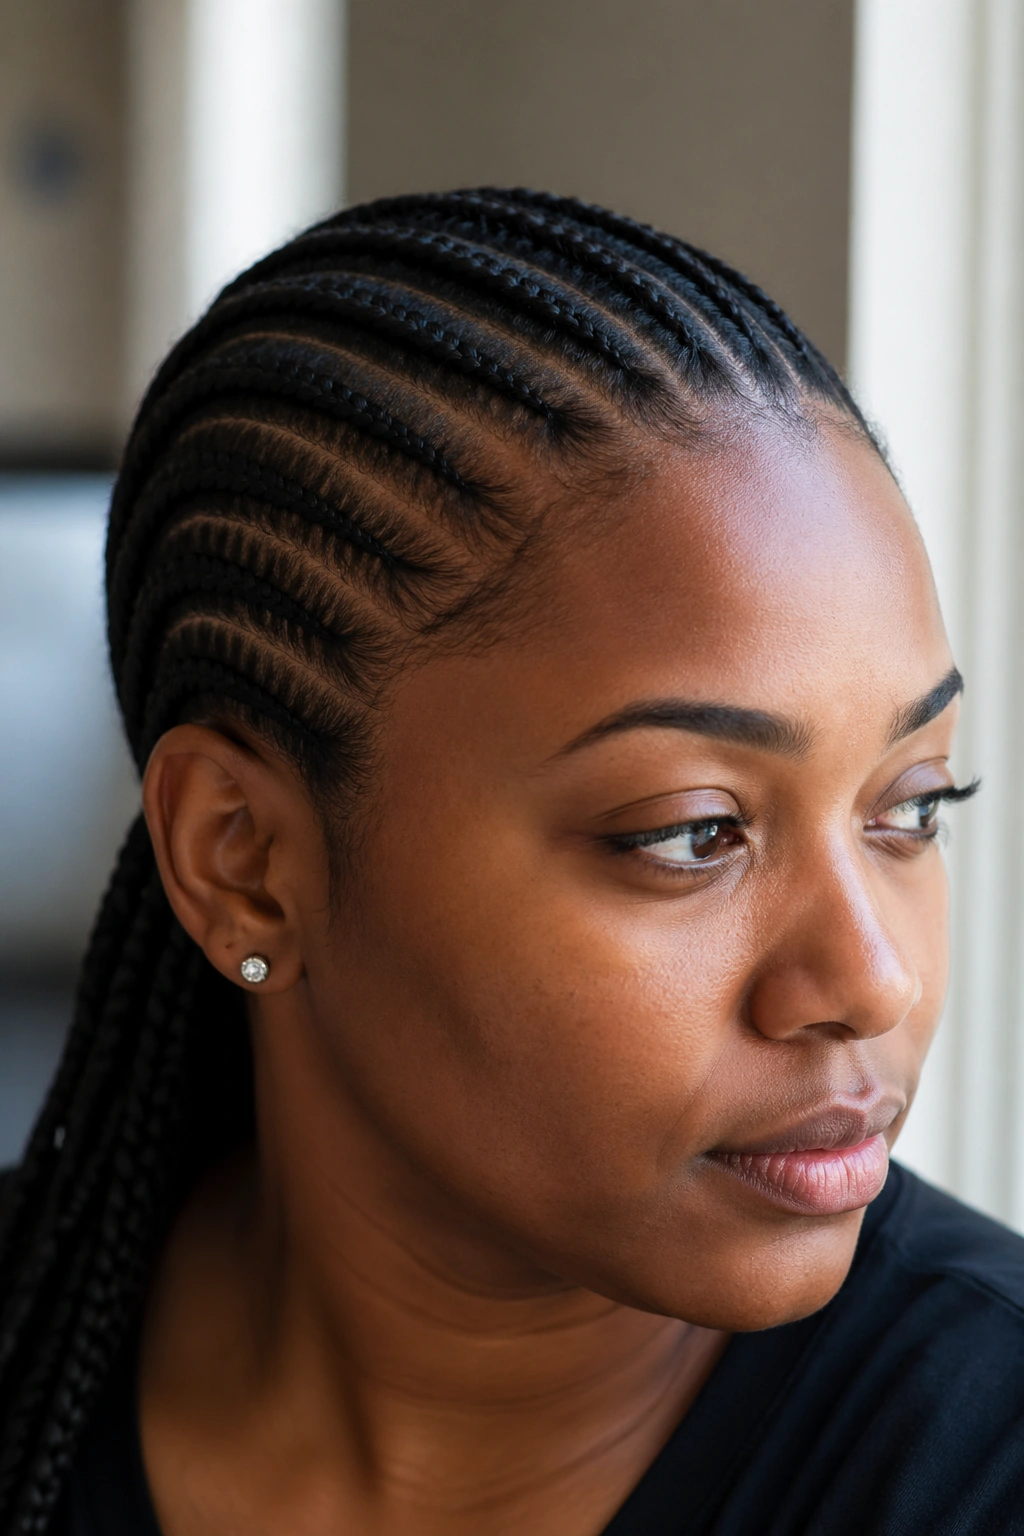
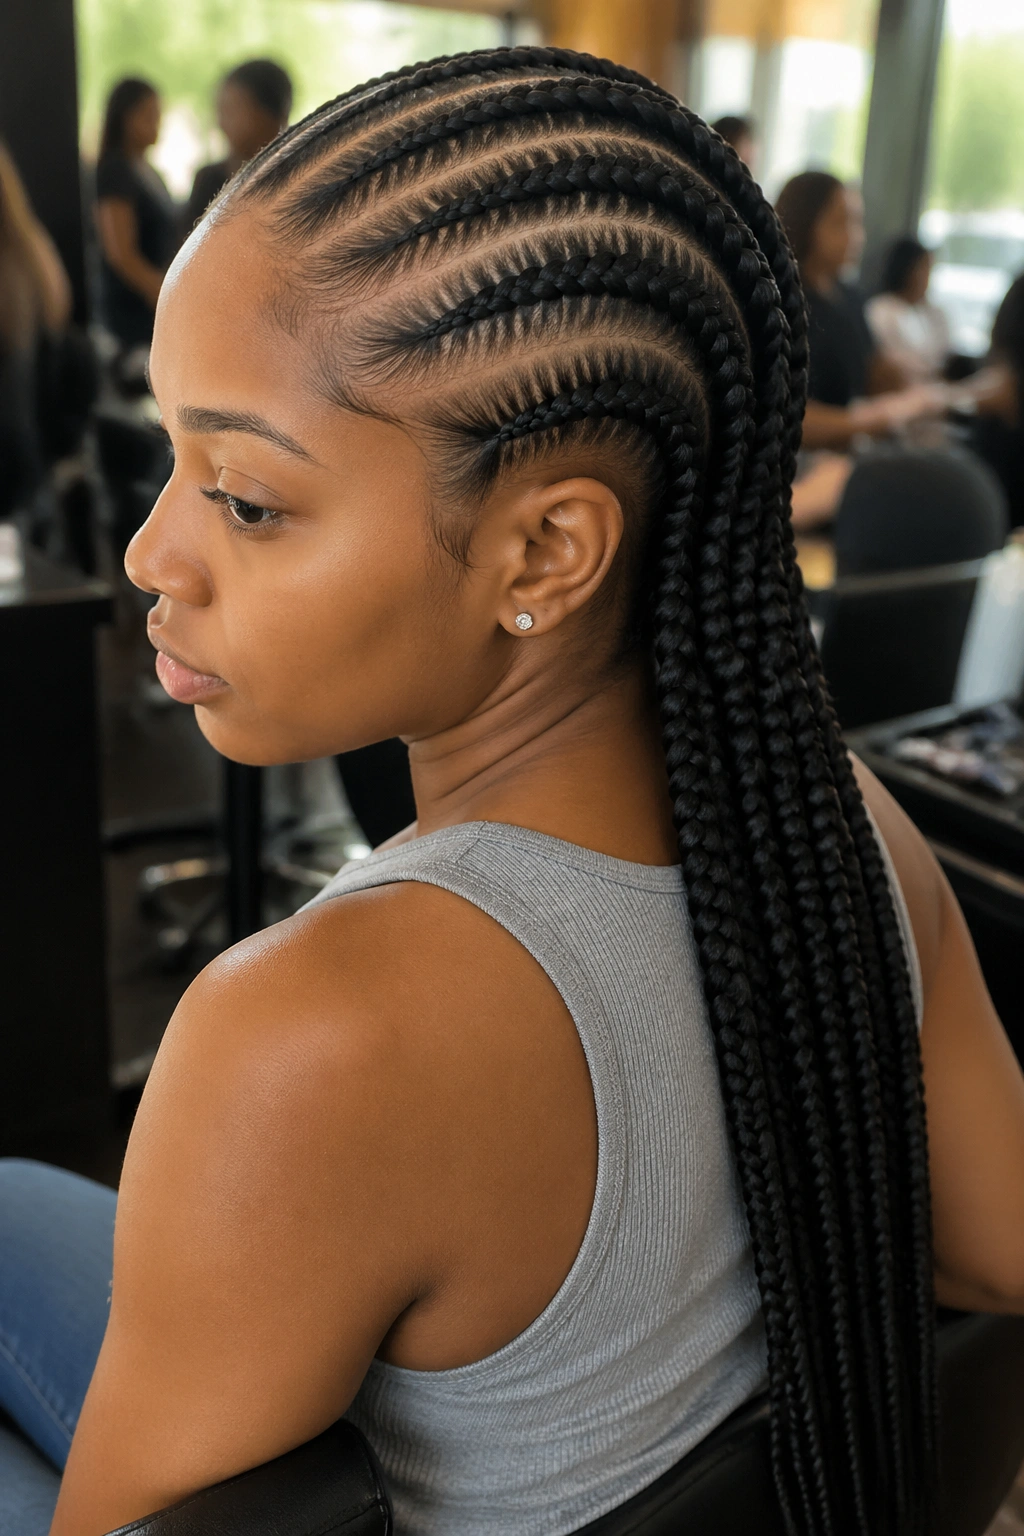
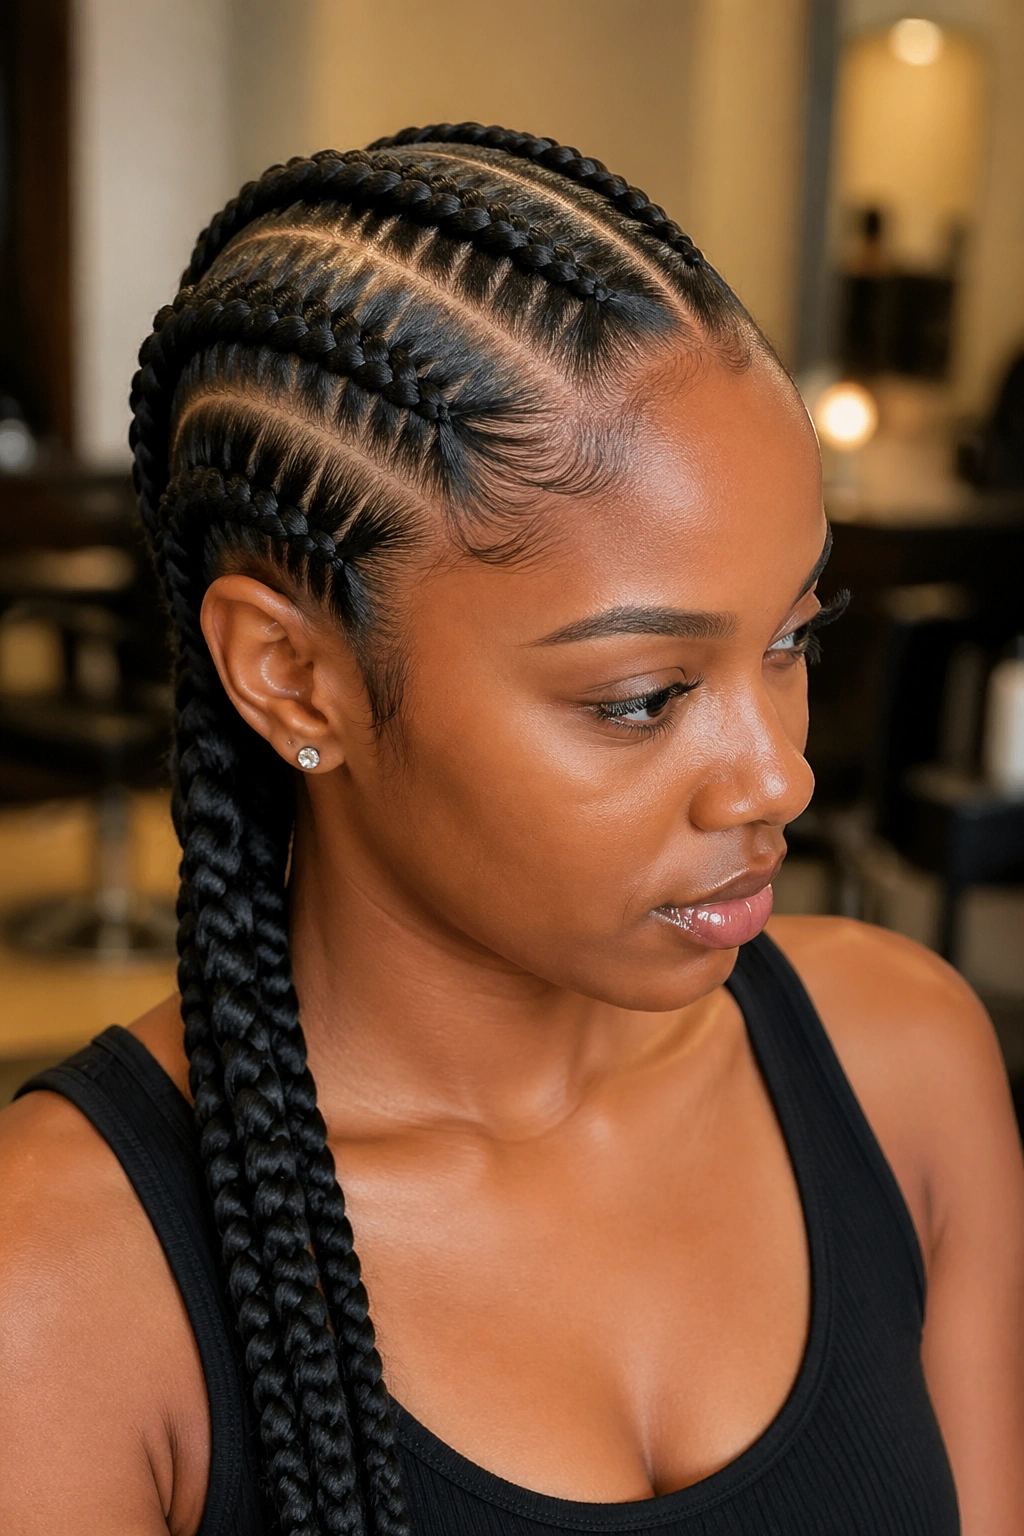
1. Six Rows Straight Back
The classic count. Six parallel cornrows from hairline to nape, each row about an inch wide, no extensions. Your own hair runs the full length of each braid.
Why It Works
- Fast install — under 90 minutes typically
- Shows off the scalp cleanly
- Easy to maintain and wash
- Works for daily life and formal events equally
Tip: Ask your braider to angle the outer rows very slightly outward at the top to match the curve of your skull. Straight-up vertical rows can look stiff.
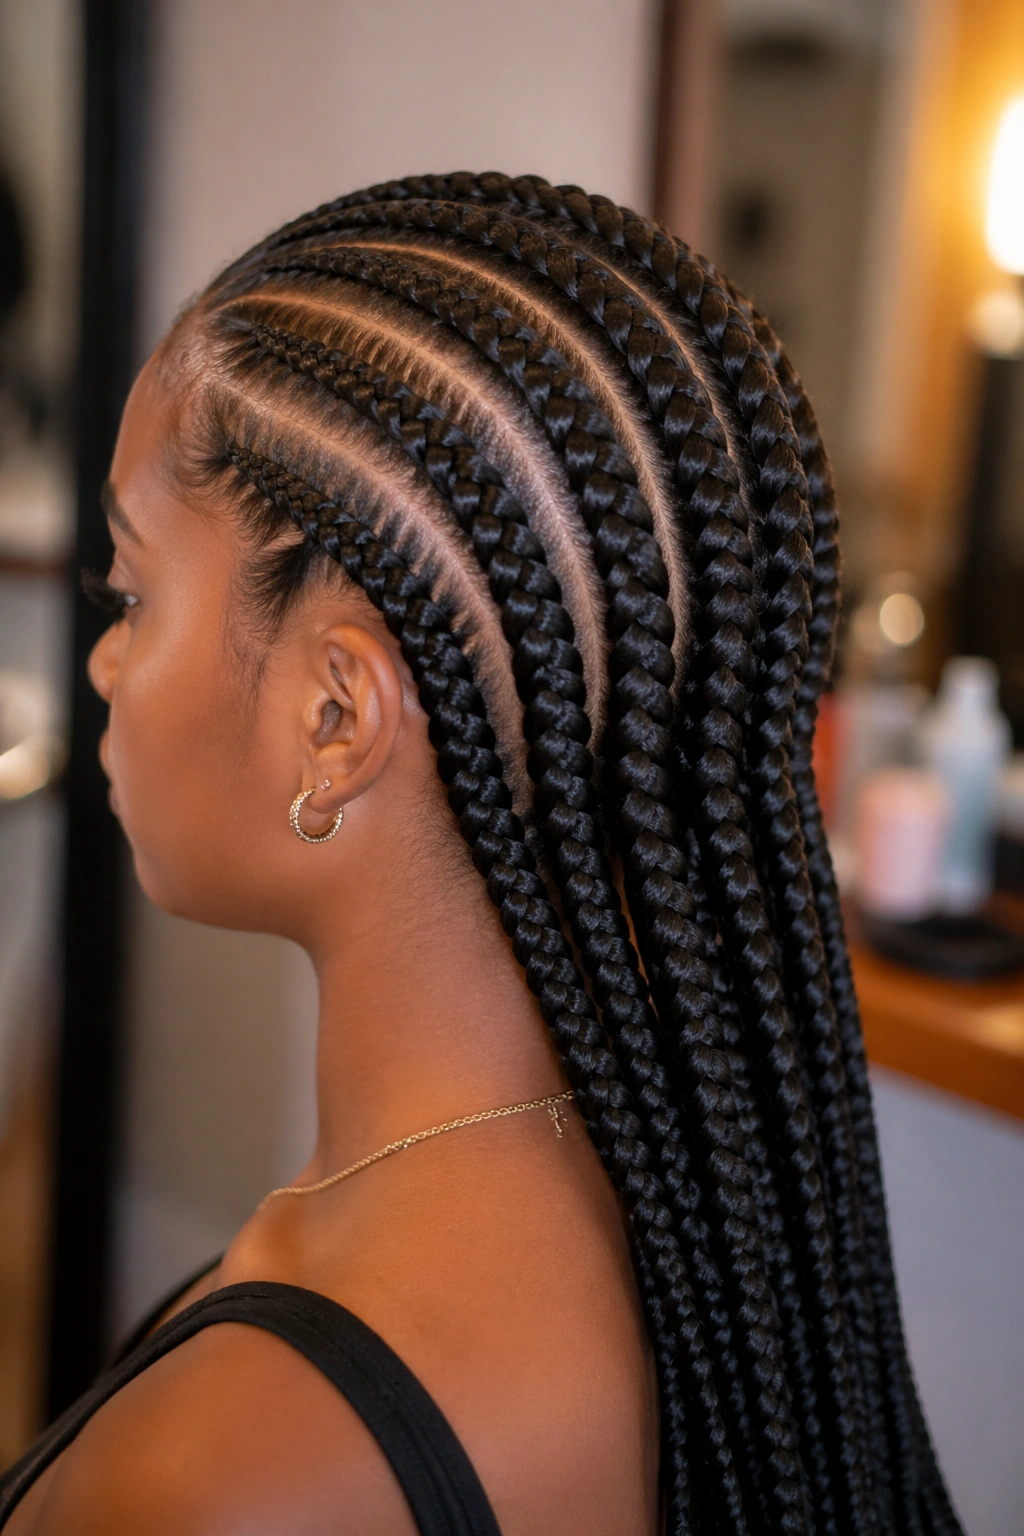
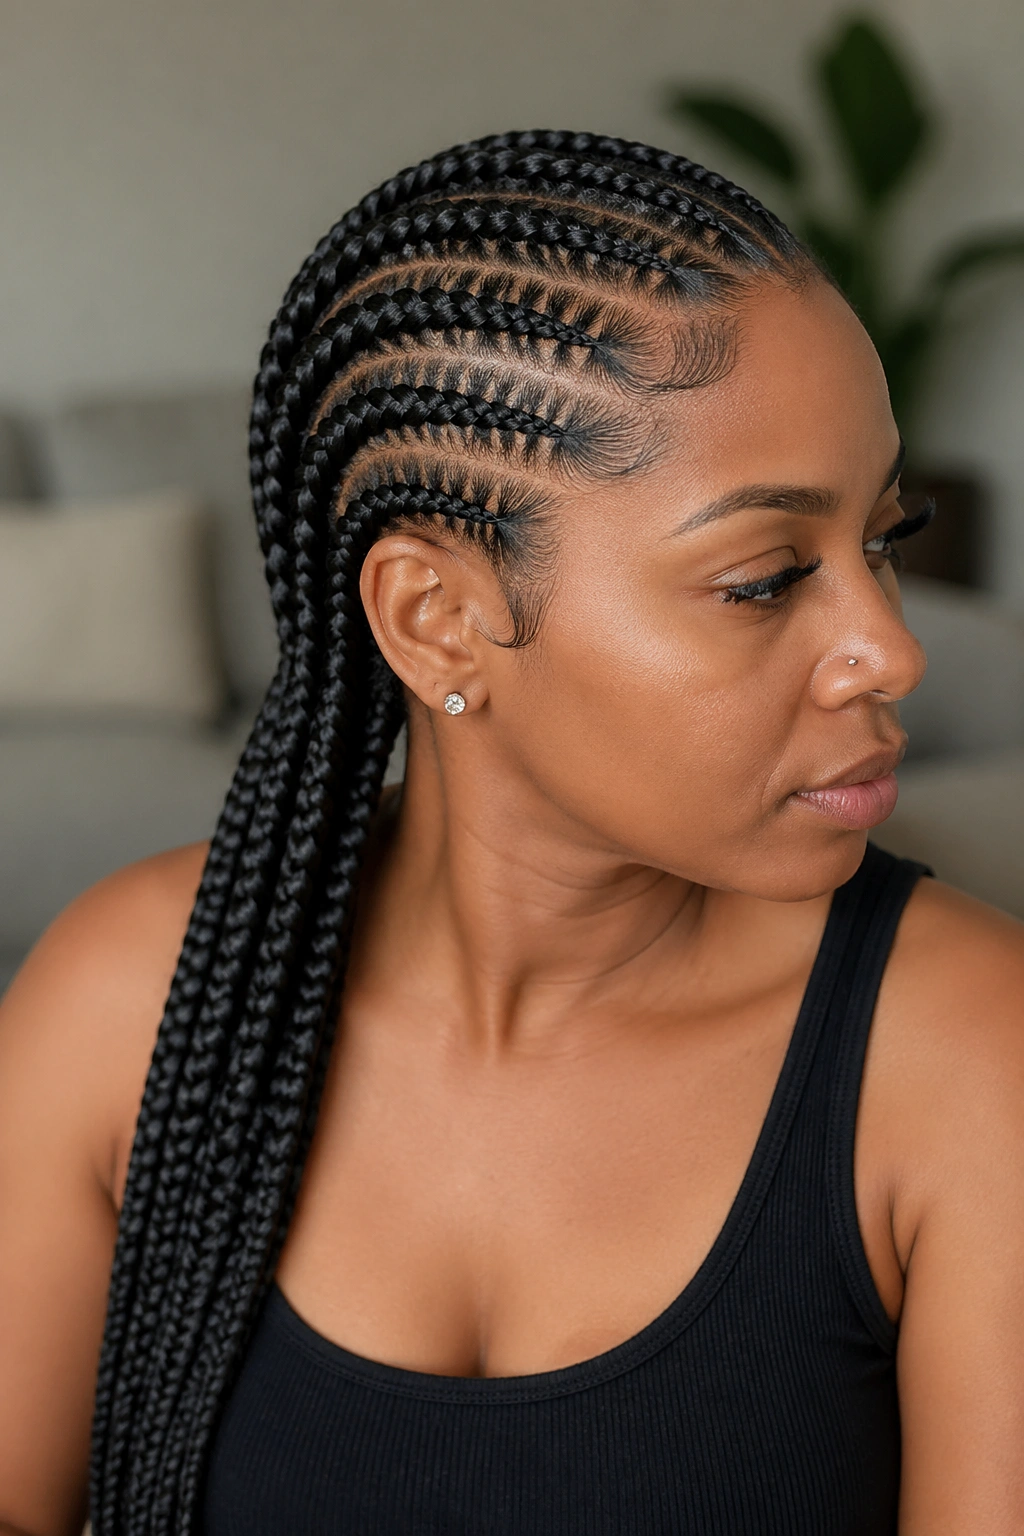
2. Eight Rows With Feed-In Kanekalon
Eight rows, each one starting thin at the hairline and thickening with feed-in extensions as it travels back. The ends hang to mid-back or longer depending on the extension length chosen.
Feed-in extensions from the third or fourth stitch down. That’s the sweet spot where the braid has gained enough structure to hold the added hair smoothly.
The finish reads as fuller than your natural hair without looking obviously braided-in. Length at the ends gives you flow.
3. Twelve Micro All Back Cornrows
Twelve thin cornrows, each maybe a half-inch wide, running straight from front to back. No extensions, or small amounts of kanekalon for extra length.
What makes this different is the density of the rows. Twelve cornrows on most heads creates a delicate, intricate pattern that reads as high-skill work.
The style takes 3-4 hours to install. Holds 3-4 weeks with proper care. Requires a patient braider and a patient client.
4. Four Jumbo All Back Rows
The opposite approach. Only four cornrows running front to back, each one thick and heavy. Extensions can be added for extra length and weight.
Bold, bold, bold. This style makes a statement without needing accessories. The thick rows create strong visual lines down the head that photograph well.
A good call for quick protection — four rows install in an hour or less, and the look reads dramatic enough to carry you through weeks.
5. Stitch Cornrows All Back
What’s a stitch cornrow? It’s a cornrow where each added section of extension hair shows as a visible horizontal “stitch” along the braid shaft. The technique creates tiny ladder rungs of texture on each braid.
All back stitch cornrows take the classic pattern and layer in that stitched look. The finished braids read clean and salon-fresh for weeks longer than standard cornrows.
How to Style It
Pick a skilled stitch braider — not every cornrow installer does this technique. Budget 4-6 hours. Expect 3-4 weeks of holding. Finish with hot water dip to set the ends, or bead the tips for a decorative finish.
6. All Back With Ombre Extensions
Extensions that shift color from root to tip. Dark at the base, fading to honey, caramel, or even light blonde at the ends.
The color gradient plays with light as you move. Depending on the tones picked, the style can read sun-kissed, fiery, or high-contrast.
Pick colors that complement your skin undertone. Warm undertones take caramel and copper. Cool undertones take ash blonde and silver.
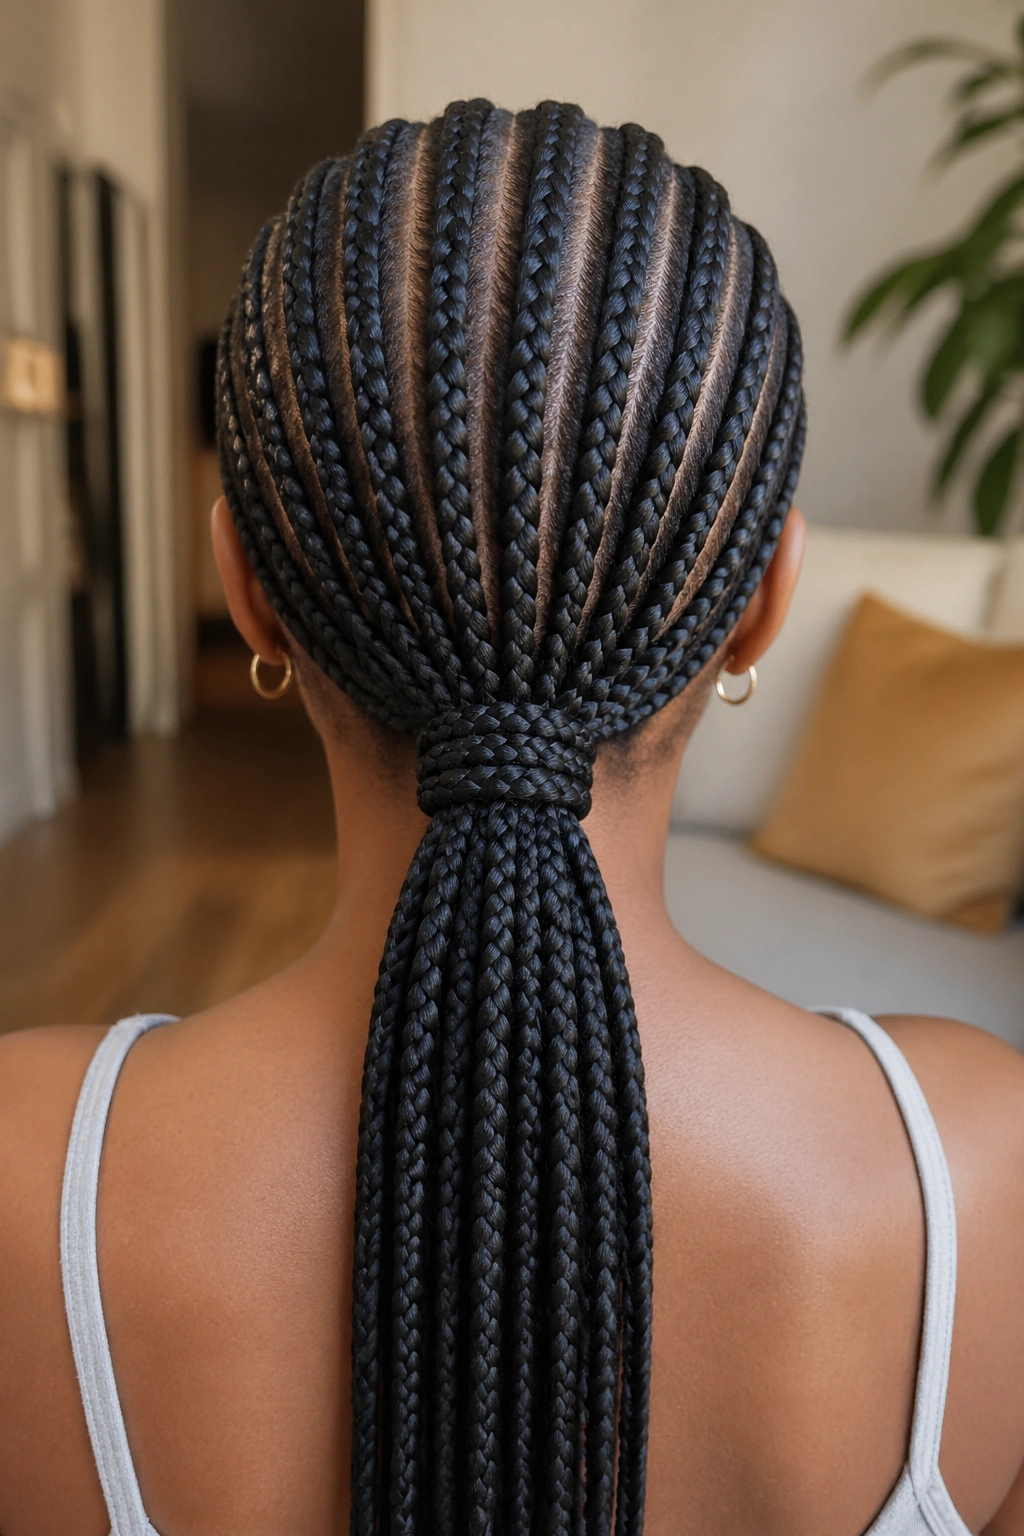
7. All Back Cornrows Into a Low Ponytail
All rows end at the nape, where the extensions gather into a single low ponytail. A scrunchie, ribbon, or braided wrap holds it together.
Clean, low-key, wearable for anything from a workout to a work meeting. The low pony keeps the style grounded while still letting you show off the braided length.
My preference: a braided wrap — a thin section of hair braided and wrapped around the scrunchie — instead of a visible tie. Looks more polished.
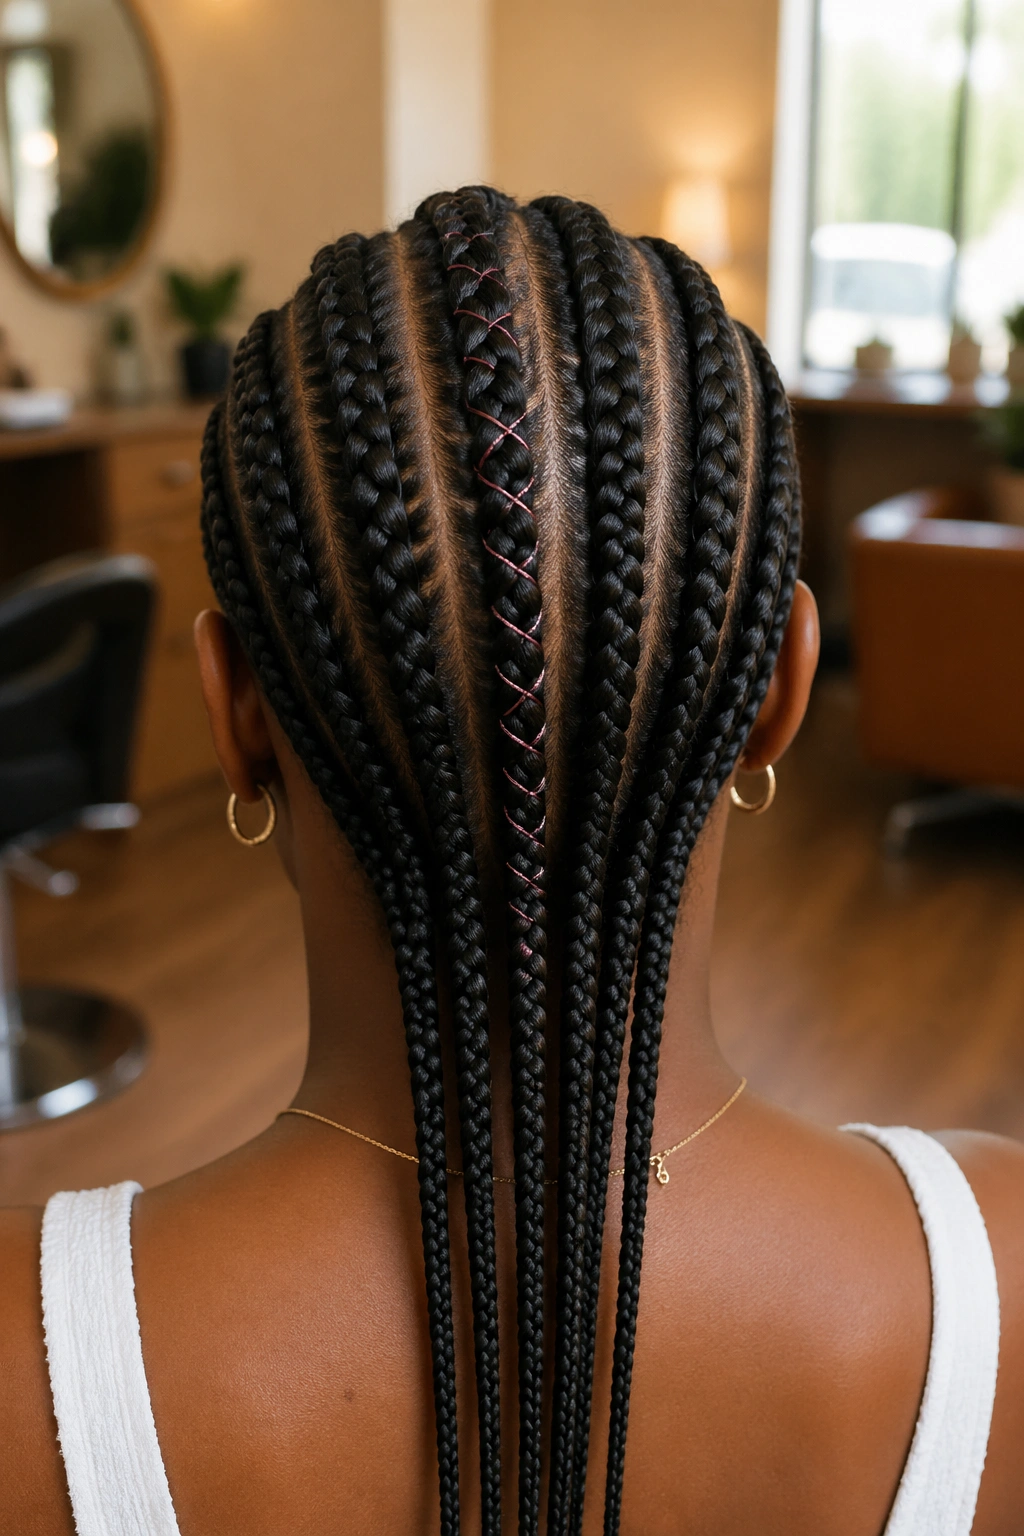
8. All Back With a Single Center Accent
Seven or eight cornrows, all going straight back. One row — the dead center one — gets an accent detail. Could be a thread woven in, a colored kanekalon swapped for the normal tone, or a beaded pattern along that single braid.
The asymmetric focus of one accent row creates a focal point without overwhelming the clean all-back pattern.
Unlike full accent-heavy styles, this one keeps things minimal. One statement, done well.
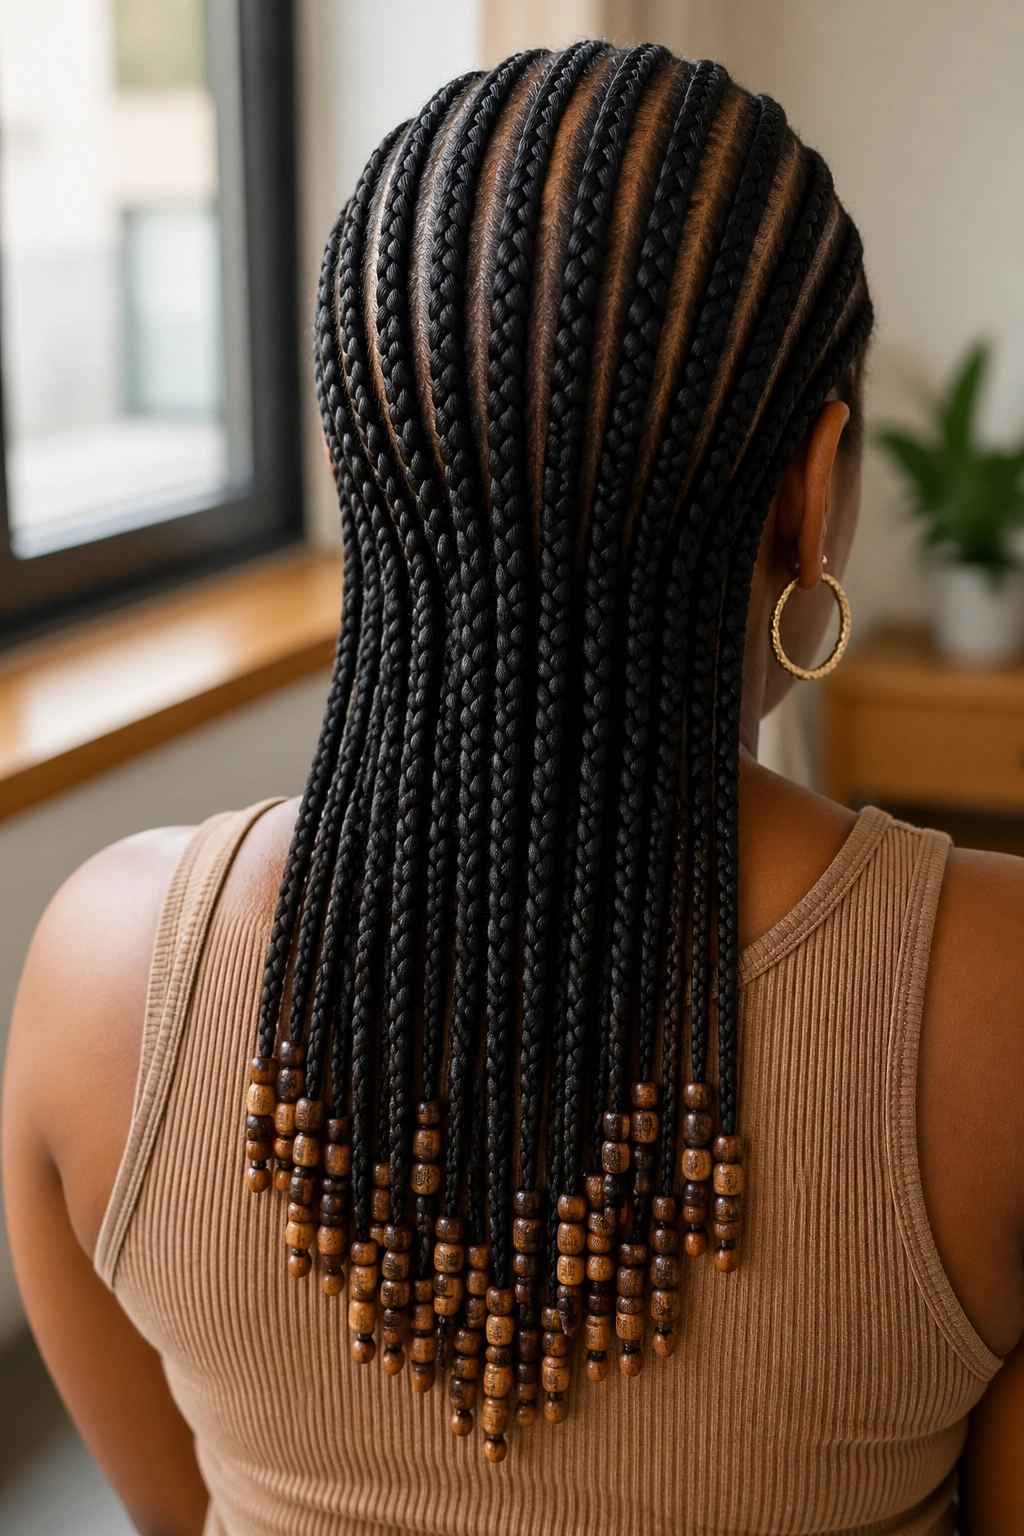
9. All Back Cornrows With Beaded Ends
All rows travel from hairline to nape, with extensions continuing past the shoulders. The very ends of each braid are threaded with wooden or brass beads.
Beads click softly when you move. They catch light. They add heritage-rooted decoration that nods to traditional West African braiding styles.
Bead Placement
- One bead at the tip of each braid for subtle accent
- Three beads per braid for a more decorative look
- Alternating bead colors across rows for pattern
Don’t overload. Ten beads per braid looks heavy and will pull uncomfortably on your scalp.
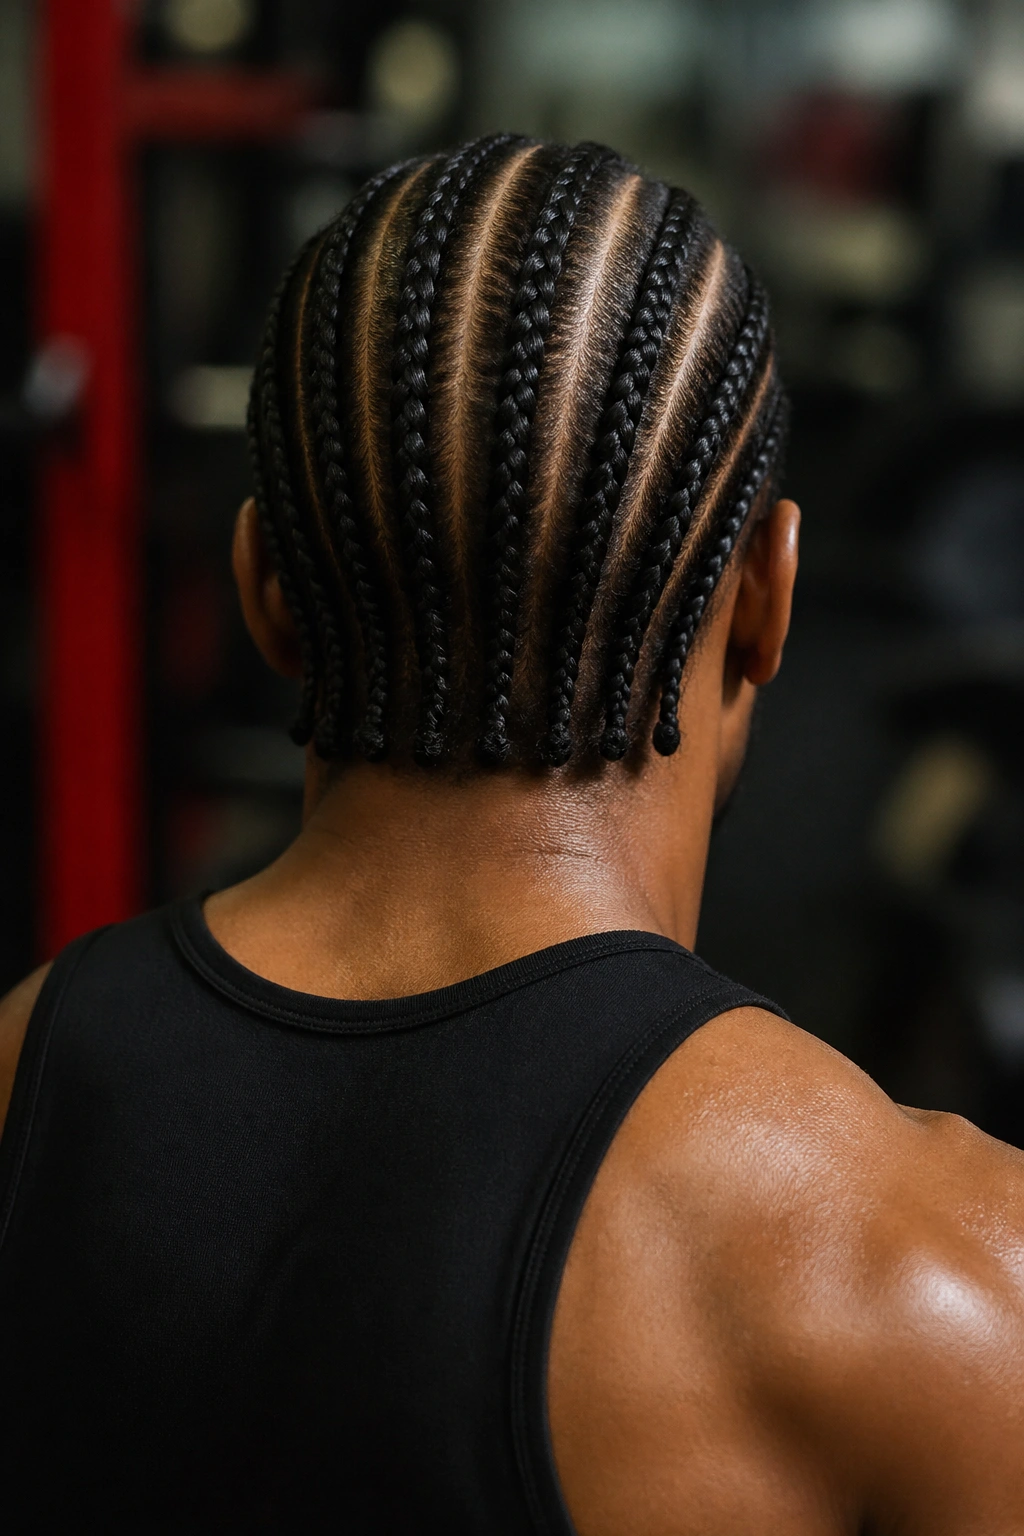
10. Iverson-Style All Back
Named for the iconic basketball player, Iverson-style all back cornrows are tight, medium-width, and often done without extensions. Six to eight rows, crisp parts, no frills.
The style reads sporty, confident, and distinctly urban. Timeless on anyone, not just athletes.
Duration is short-to-medium — 1 to 2 weeks before the roots start fuzzing. Worth a refresh install every couple weeks if you love the look.
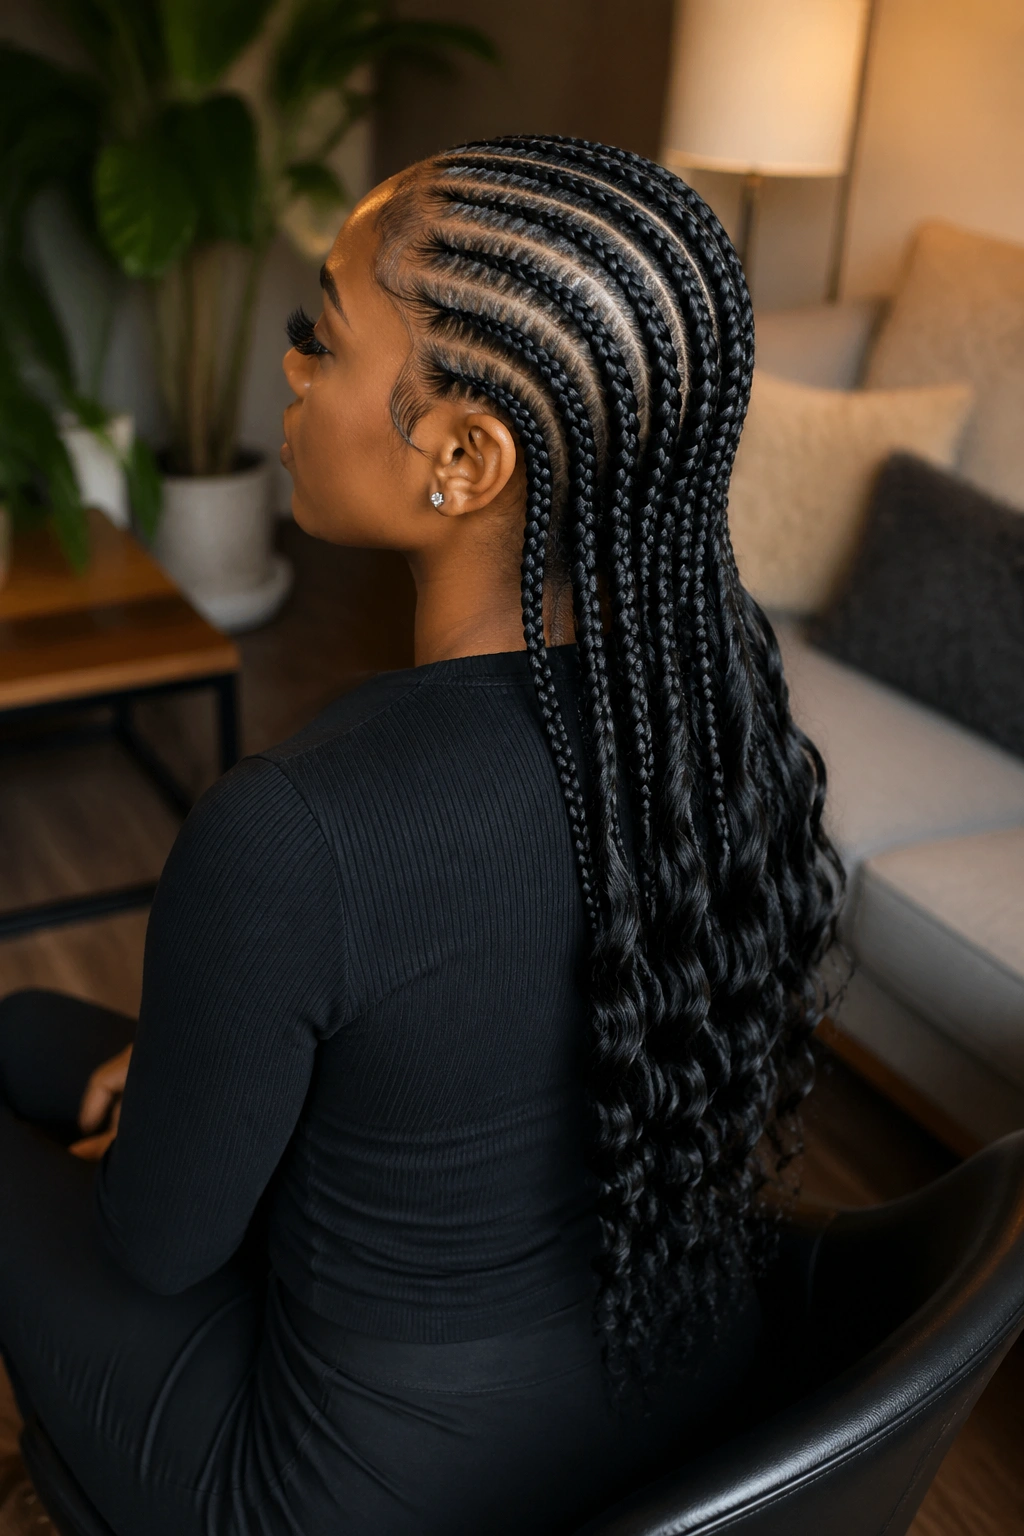
11. All Back Cornrows With Wavy Ends
Cornrow the full length to within 3-4 inches of the ends. Leave the ends loose, then wave them with a flat iron or curling wand.
The wave contrast works on any length. Tight rows at the scalp softening into loose waves at the bottom creates visual dimension.
For natural hair versions, dip the loose ends in hot water after twisting them around a dowel or your finger. The heat sets the curl as the hair cools.
12. Butt-Length All Back Cornrows
Extensions that hang all the way to the waist or hips. Eight to ten rows, each one fed with kanekalon that extends 36+ inches past the shoulder.
The Catch
- Heavy — 4-6 ounces of kanekalon adds strain on the scalp
- Long install time — 5-7 hours minimum
- Requires a silk bonnet and careful sleep setup
Worth the investment for photoshoots, weddings, or any style statement where length matters. Not practical for daily gym workouts.
13. All Back Cornrows With a Side Shave
All rows running back, plus a shaved or undercut section on one side of the head. The contrast between braids and skin creates an asymmetric statement.
The shave lives on the side closest to the parting, usually carved into a design or left simple. Requires monthly fade maintenance to keep the contrast crisp.
Unlike full-head styles, this one commits to an edge. You’ll either love it or regret it — not much middle ground.
14. All Back With Ends Tucked Into a Bun
Rows end at the nape, then get gathered up and tucked into a small bun at the base of the skull. Similar to a low pony but tucked rather than hanging.
The tucked bun reads more formal than a loose ponytail. Works for professional settings, dinner dates, and events where polish matters.
Secure with bobby pins that match your hair color. Use a light-hold hairspray to keep flyaways controlled.
15. Side-Part All Back
Rows all go back, but a deep side part opens up one side of the head. The side with more rows reads fuller. The side with fewer rows reads sleeker.
Why the side part changes everything: it breaks the symmetry of a standard all-back look without changing the direction of the braids. Subtle asymmetry that flatters most face shapes.
Style the part slightly off-center for the best effect. Dead-center doesn’t look like a style choice — it looks accidental.
16. All Back Thin-to-Thick Gradient
Rows start thin at the top of the head and gradually thicken toward the nape. Each row’s width grows slightly as you move back.
The gradient creates visual interest through scale alone. No color changes, no accessories needed.
Best on heads with plenty of hair at the back to support the thicker rows. Thinner hair in the back can make the gradient look sparse.
17. All Back With Color-Blocked Rows
Picture this. Half your rows are natural color. The other half are a contrasting color — burgundy, honey, copper, or even something bold like silver.
The color block doesn’t have to be half-and-half. Could be every third row. Could be just one accent section. Could be a gradient from dark rows on one side to light rows on the other.
Placement matters more than the color choice itself. Strategic color placement reads as design. Scattered color reads as chaos.
18. Feed-In All Back With Curly Tip Finish
Feed-in cornrow extensions where the kanekalon ends are curly rather than straight. You braid the rows straight back, and the tips end in defined coils or curls.
Styling Tips
- Dip curly tips in hot water to refresh the curl shape
- Mist with water and light leave-in to keep tips hydrated
- Pin curly ends to one side for a glam side-swept look
Pre-curled kanekalon comes in tight coils, loose waves, or beachy curls. Pick the texture that matches the vibe you want.
19. All Back With Decorative Wraps

Thread gold or silver wrap around specific braids from root to tip. The wrapped braids become decorative accents among the plain ones.
Don’t wrap every braid. That reads costume-y. Wrap two or three strategic braids — one in the center, one or two on the sides.
The wrap can be thin thread, ribbon, or fabric. Pick texture and color that contrast with the braid tone.
20. Cornrows Into Curly Ponytail
Rows all lead to the nape where they’re gathered into a ponytail, but the pony itself is curly kanekalon rather than straight.
The contrast of straight braids meeting a cloud of curly pony is eye-catching. The curly pony adds visual weight to the back, balancing the clean lines of the all-back rows.
Pick curl pattern based on vibe. Loose beach waves read casual. Tight coils read bold. Water waves read romantic.
21. All Back Cornrows With a Deep Widow’s Peak

Rather than starting rows at a straight hairline, rows start slightly lower in the center to emphasize or create a widow’s peak look.
The widow’s peak effect frames the face differently. It creates a slight point at the top of the forehead, which lengthens round faces.
For women with natural widow’s peaks, this style works with the hairline. For women without, the braider can fake the point with careful parting at the front.
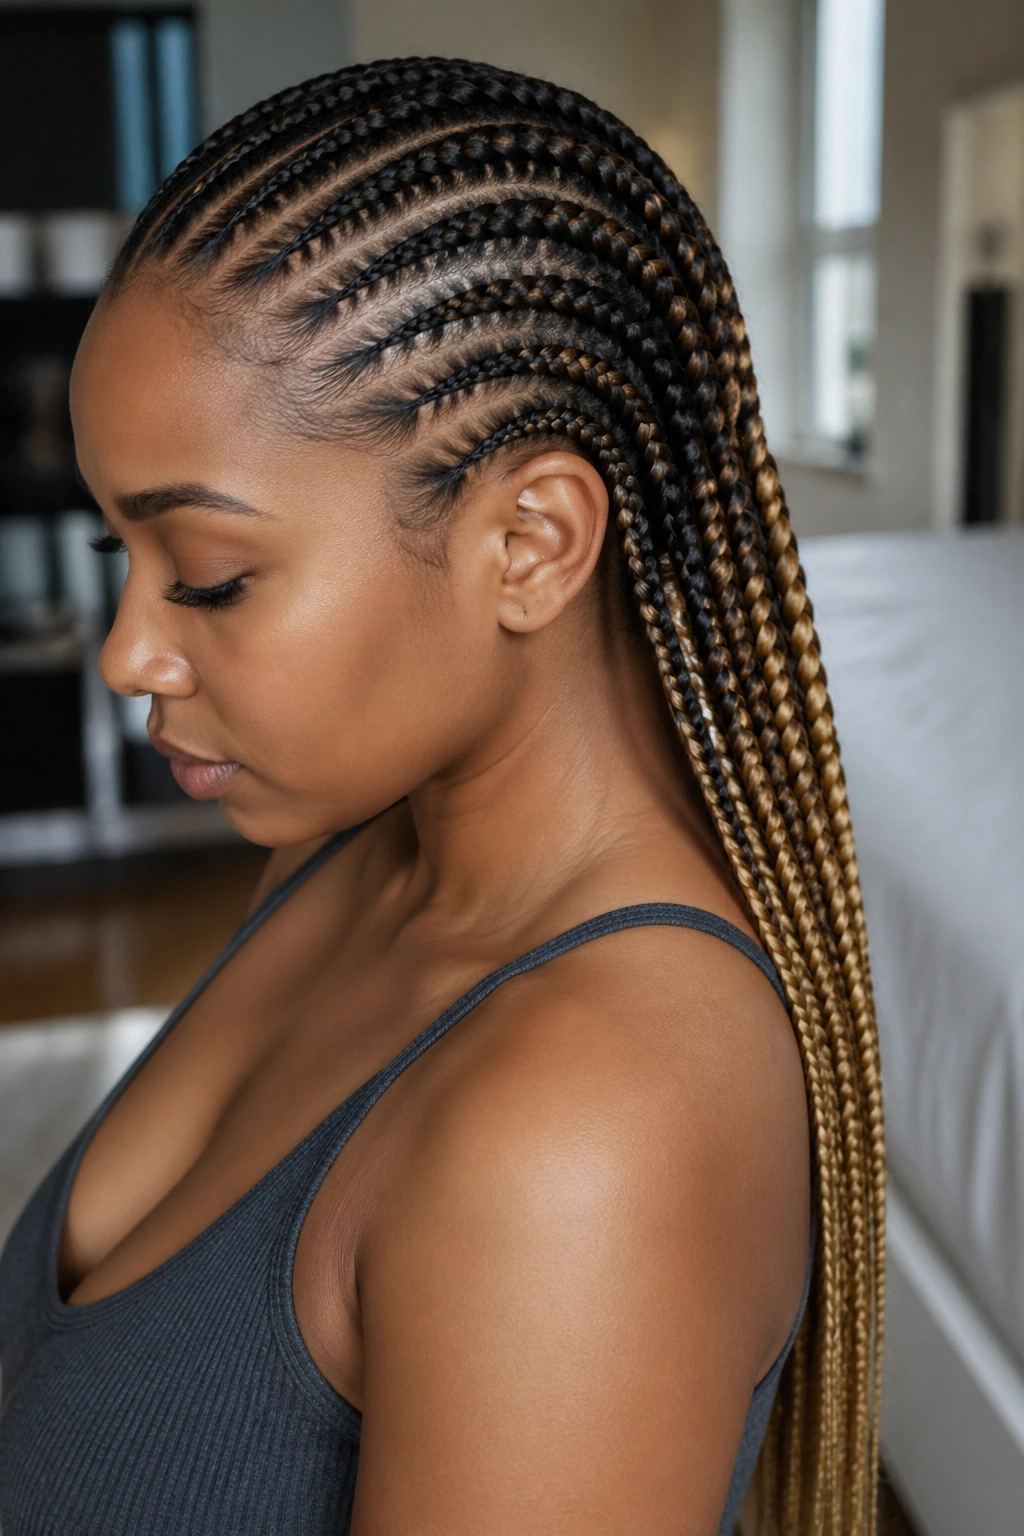
22. Long All Back With Waist-Length Blonde Tips
Natural color at the scalp, transitioning to honey blonde or caramel at the waist-length tips. The blonde ends read sun-bleached without any real color processing.
Pre-colored ombre kanekalon makes this easy. No chemicals touch your real hair — the color lives entirely in the extensions.
Pair with bronze-toned makeup for a sun-kissed look, or go edgy with a deeper lip color for contrast.
23. Ten All Back With Subtle Zigzag Ends
Rows are straight-back for the first two-thirds of the length. Toward the ends, the braids veer into a slight zigzag pattern, like a subtle lightning bolt at the tips.
Unusual. Striking. Requires a braider who’ll commit to the asymmetric ending.
The zigzag ends work best on long extensions where there’s enough length to make the shape visible.
24. All Back Cornrows With Nape Detail
Rows go straight back along the top and crown. At the nape, the ends fan out into a fanned shape, with each braid spreading slightly apart from the others.
Who This Is For
- Anyone wanting all-back simplicity at the front with back detail
- Women who love the nape of the neck as a style area
- Those who photograph from the back often (brides, models)
The fanned nape looks polished from behind — a view most styles don’t consider.
25. All Back Tribal Cornrows
Tribal patterns often mix cornrow widths within a single head. Some rows are thick, others are thin, all in the same all-back direction.
The mixed widths create a textured, intentional-looking design without changing the basic front-to-back flow. Accessories like shells, beads, and threads can add to the tribal aesthetic.
Honor the origin. Tribal braid styles come from specific West African traditions — wearing them means wearing a piece of that heritage.
Moisturizing All Back Cornrows
Water is the first step. Spray along the parts and lightly along each braid shaft every 2-3 days. Don’t soak — dampen.
Follow with a light oil or leave-in. Jojoba, argan, and grapeseed oils absorb well without sitting on top of the braids. Heavy oils like coconut and castor can attract lint.
Focus on the scalp. Healthy scalp = healthy braids. Massage the oil in along the part lines with your fingertips, not your nails.
Washing Cornrows Without Frizz
Yes, you can wash cornrows. Dirty scalps under braids are a recipe for irritation and itch.
Dilute a sulfate-free shampoo with water in a squeeze bottle. Apply along the parts and massage gently with fingertips. Rinse thoroughly. Follow with a light conditioner applied only to the scalp, not the braid shafts.
Air-dry. Blow dryers on cornrows cause frizz that never smooths. Sit under a hooded dryer on low heat if you need speed, or tie a satin scarf around your head and let the braids dry naturally.
Frequency: once every 7-10 days for normal wear. More if you work out daily, less if your scalp tends to dry out easily.
Sleep Care That Preserves the Style
A satin bonnet is non-negotiable. Cotton pillowcases create friction that frizzes the braids and absorbs moisture.
Tie the bonnet snugly but not tightly. Make sure the edges of your hairline are tucked inside — baby hairs sticking out get roughed up overnight.
For extra protection, wrap a silk scarf under the bonnet. Double protection for the braids, extra moisture retention for the scalp.
Signs It’s Time for Takedown
Cornrows need to come down eventually. Pushing past their lifespan damages your hair.
Roots grown out more than three-quarters of an inch. Fuzzy braids that won’t smooth. Persistent itch despite washing. Visible buildup at the parts.
Don’t let pride keep you in tired braids. A fresh install two weeks sooner is better than damaged hair three weeks later.