Braiding a child’s hair is a different job than braiding your own. The scalp is more tender, the attention span shorter, and the hair itself often finer than an adult’s. When you’re choosing cornrow styles for kids, you’re balancing three things at once: how long it takes to install, how much tension the scalp can handle, and whether the style will still look cute after three days of playground tumbles. Get those three right and everything else follows.
The good news? Kids’ hair holds braids beautifully when done right. Their hair is softer, newer, and far more forgiving than adult hair. The trade-off is that their scalps are also more reactive. A braid that feels fine on an adult can leave a child crying by hour two. So the technique matters more than the design.
This collection covers 25 different cornrow styles kids actually wear — not just pretty photos that would take five hours to install, but looks that real parents, aunties, and braiders put in every week.
Why Cornrows Work So Well for Kids
Cornrows sit flat against the scalp. That means they don’t catch on pillowcases, jump ropes, backpack straps, or anything else kids roll through in a day. Unlike box braids, which swing and snag, cornrows stay put.
They also last. A clean set of cornrows on a child can hold 2-3 weeks with decent care. Compare that to twists (4-7 days on an active kid) or puff styles (redone every morning) and you’ll see why cornrows earn their place in the weekly rotation.
The other quiet win? Cornrows protect the ends. Tucking a child’s hair away for two weeks means less manipulation, less breakage, and noticeably thicker length over a year of consistent use. That’s retention without fuss.
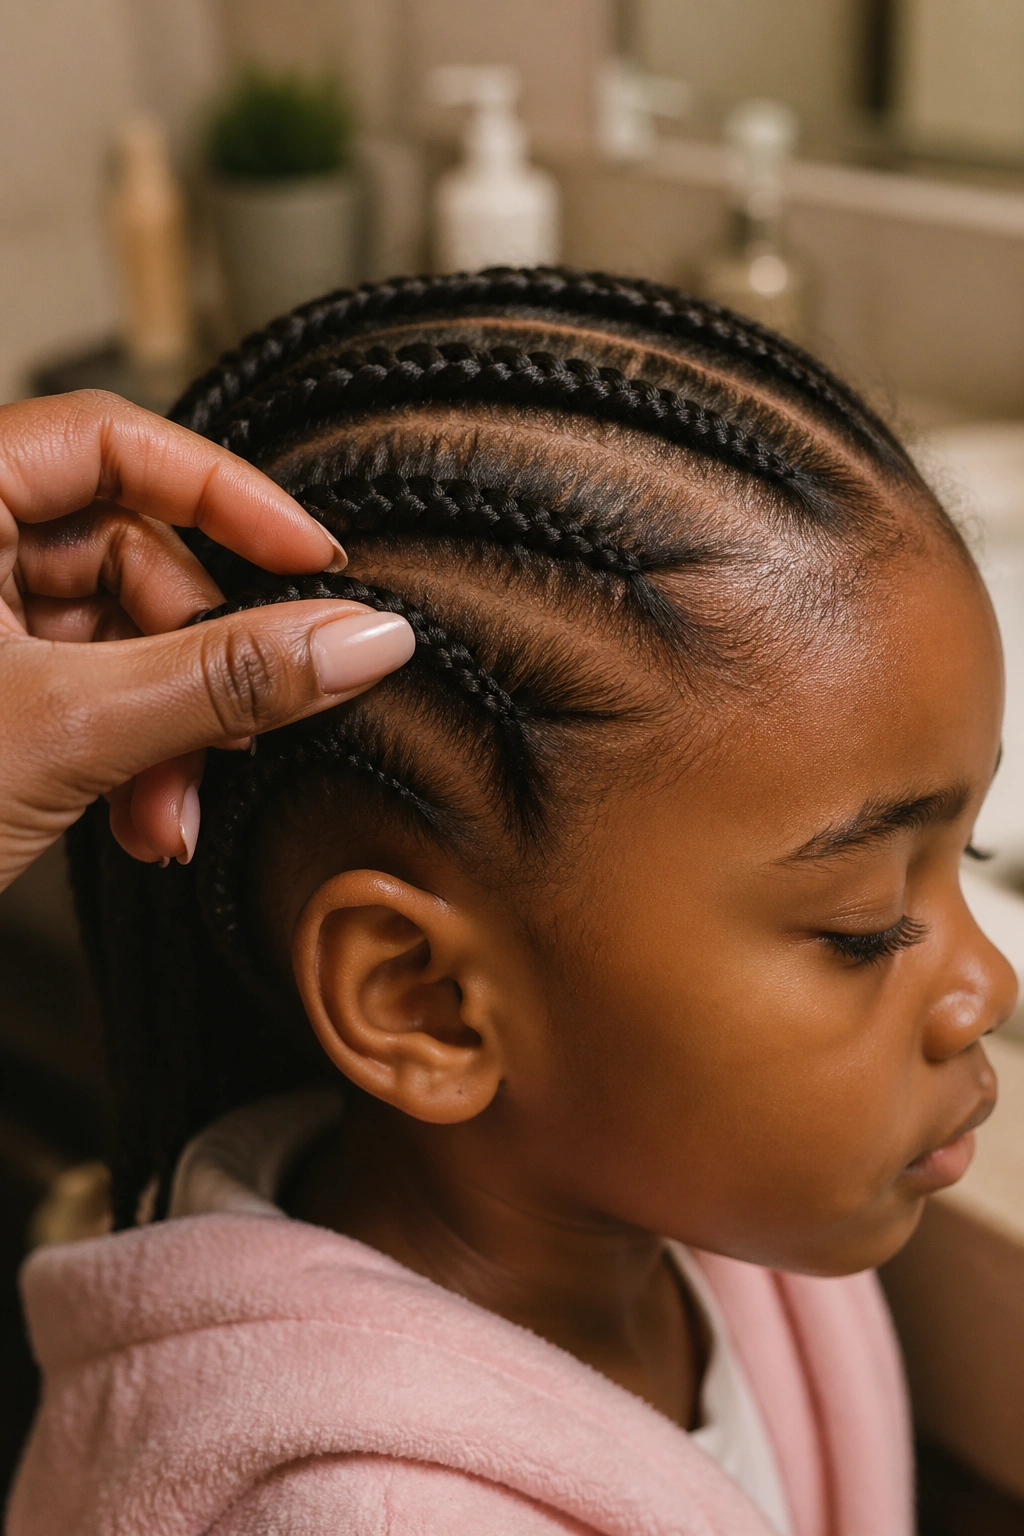
Age-Appropriate Tension Rules
This one matters. Under age 5, braids should feel snug but never tight — if the edges pull visibly upward or the child complains while you’re still braiding, the tension is wrong. Loosen it. You’re not building sculpture; you’re building comfort.
For ages 5-10, moderate tension is fine as long as the child isn’t wincing. Around 10 and up, most kids can tolerate adult-level tension, but their hairlines are still developing. Don’t treat a 12-year-old’s hairline the way you’d treat a 30-year-old’s. That temple hair takes longer to recover at any age, but especially in kids.
A good test: run a finger under the braid near the scalp. It should slide through without catching. If it’s stuck, the braid is too tight.
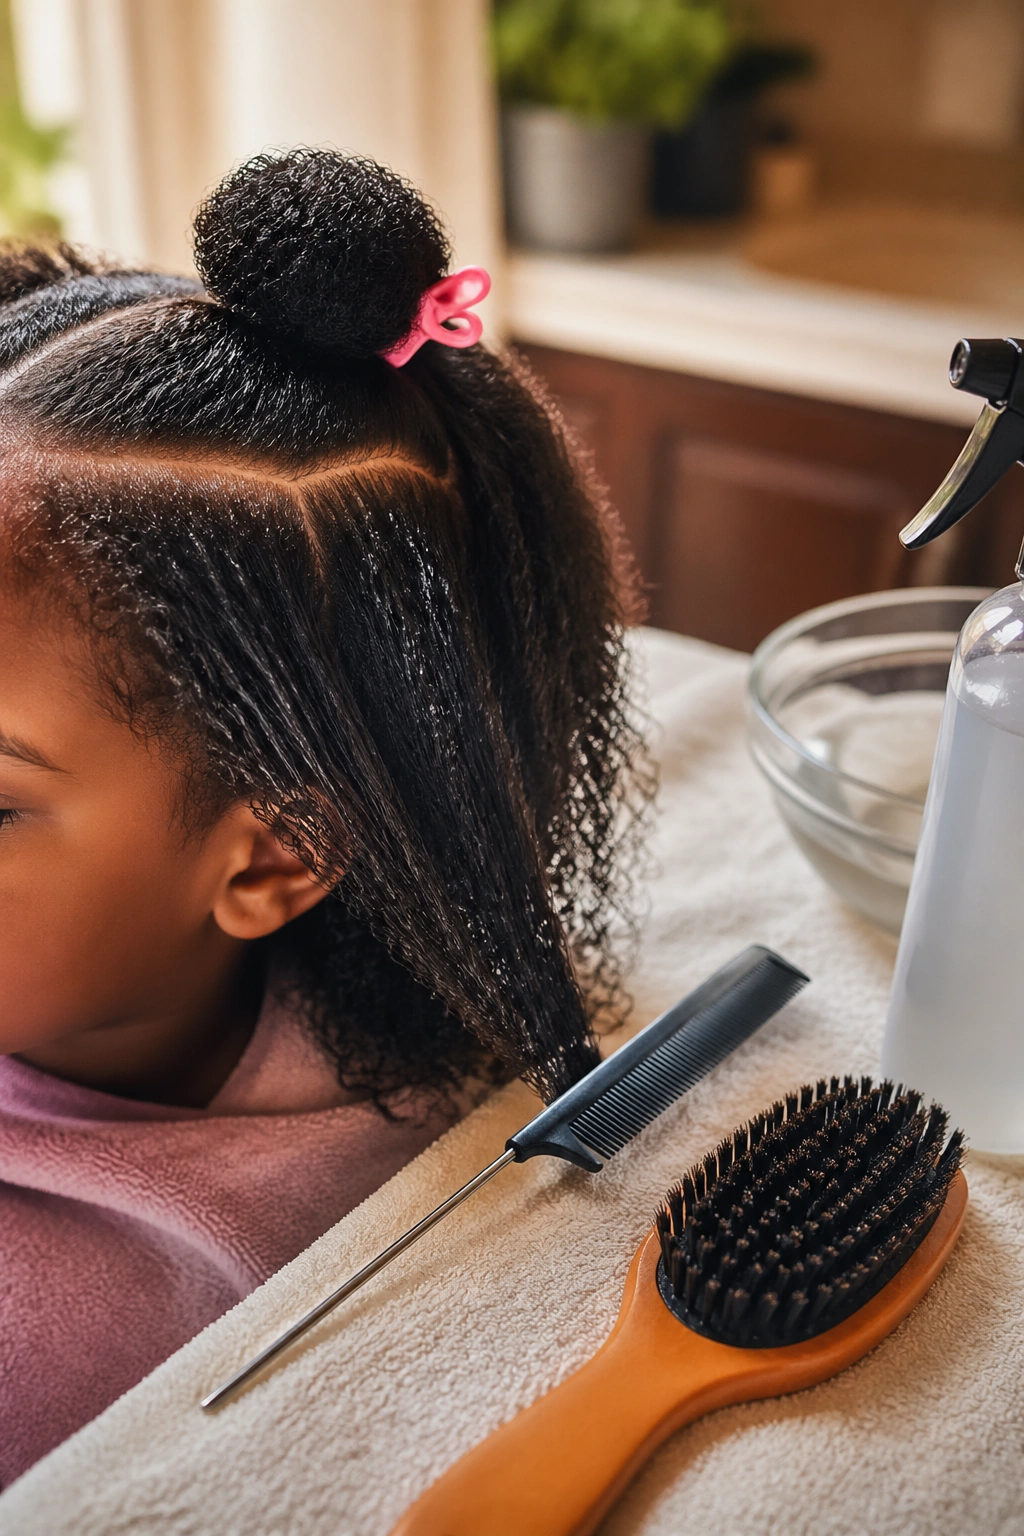
Tools That Make Kid Braiding Easier
A rat-tail comb with a metal pin-tail gives you clean parts without scratching the scalp. A soft bristle brush smooths flyaways without dragging. A wide-tooth detangling comb handles knots during the prep stage. A spray bottle filled with water and a splash of leave-in conditioner keeps hair damp while you work — dry hair on a kid will frizz halfway through your second row.
Snap clips hold sections out of the way. Hair elastics in matching tones finish ends cleanly. And a bowl of candy within arm’s reach keeps the little one still for the last 30 minutes. Don’t pretend you haven’t tried it.
Prep Work Matters More Than the Style
A good cornrow install starts two days before the braider touches the hair. Wash with a gentle sulfate-free shampoo. Deep condition for 20-30 minutes under a plastic cap. Detangle fully while the conditioner is still in. Rinse, moisturize with a light cream, then let the hair dry in loose twists overnight.
When you unravel the twists the next morning, the hair is soft, stretched, and ready to take a clean part. Trying to braid freshly washed, shrunken 4C hair without this prep is setting yourself up for a three-hour fight.
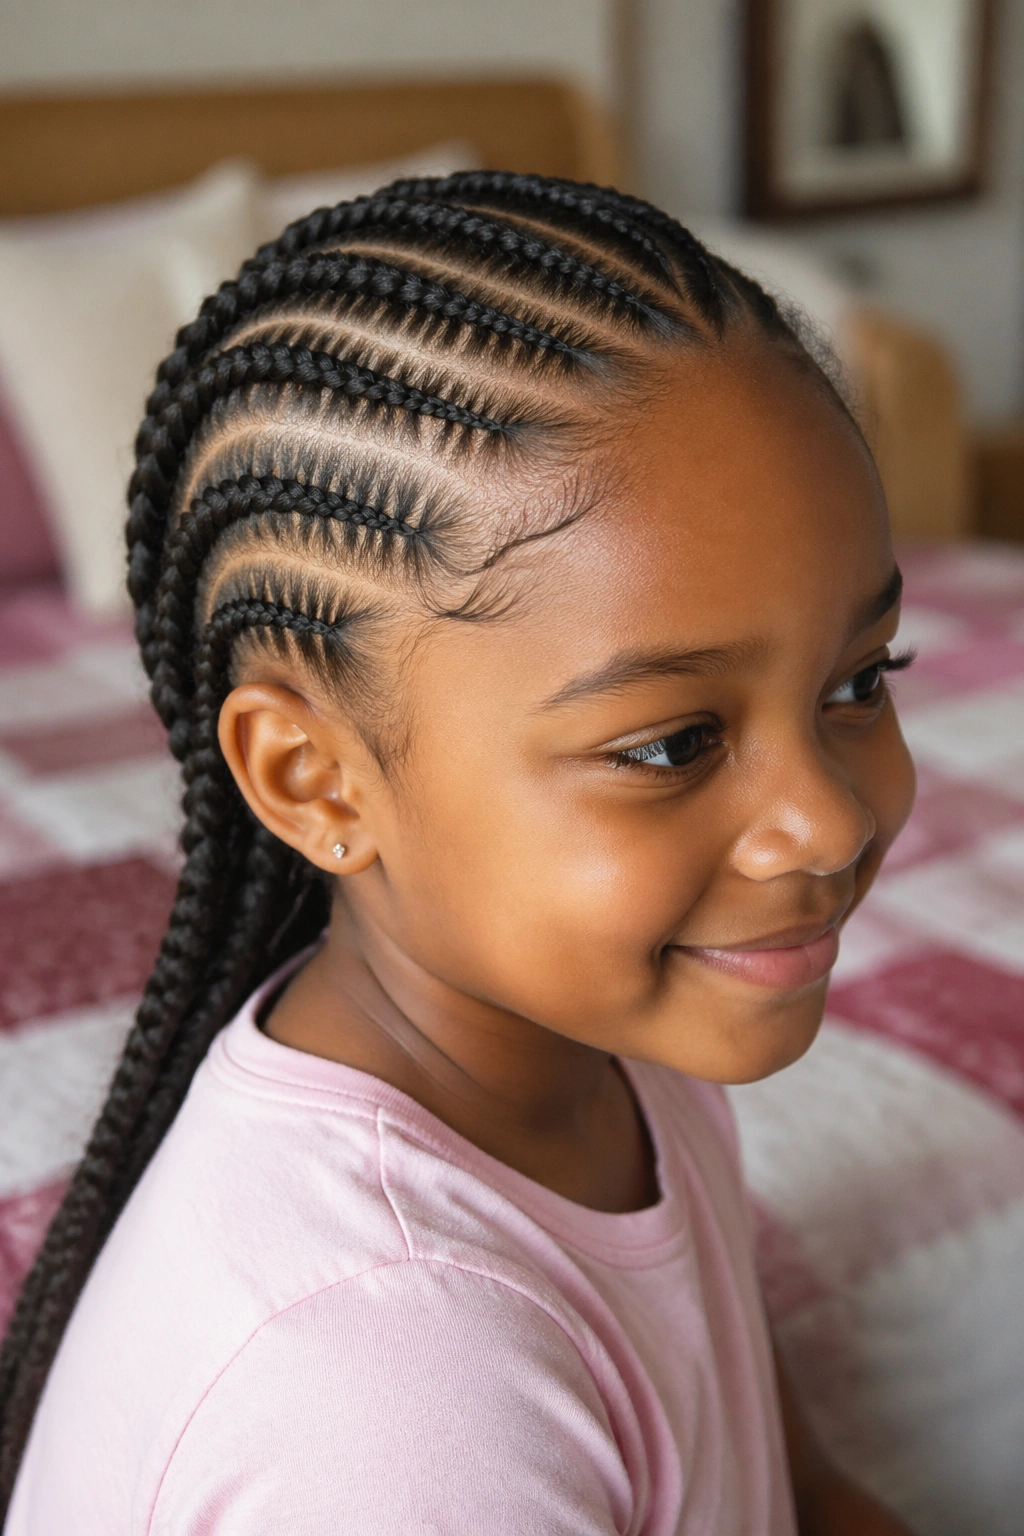
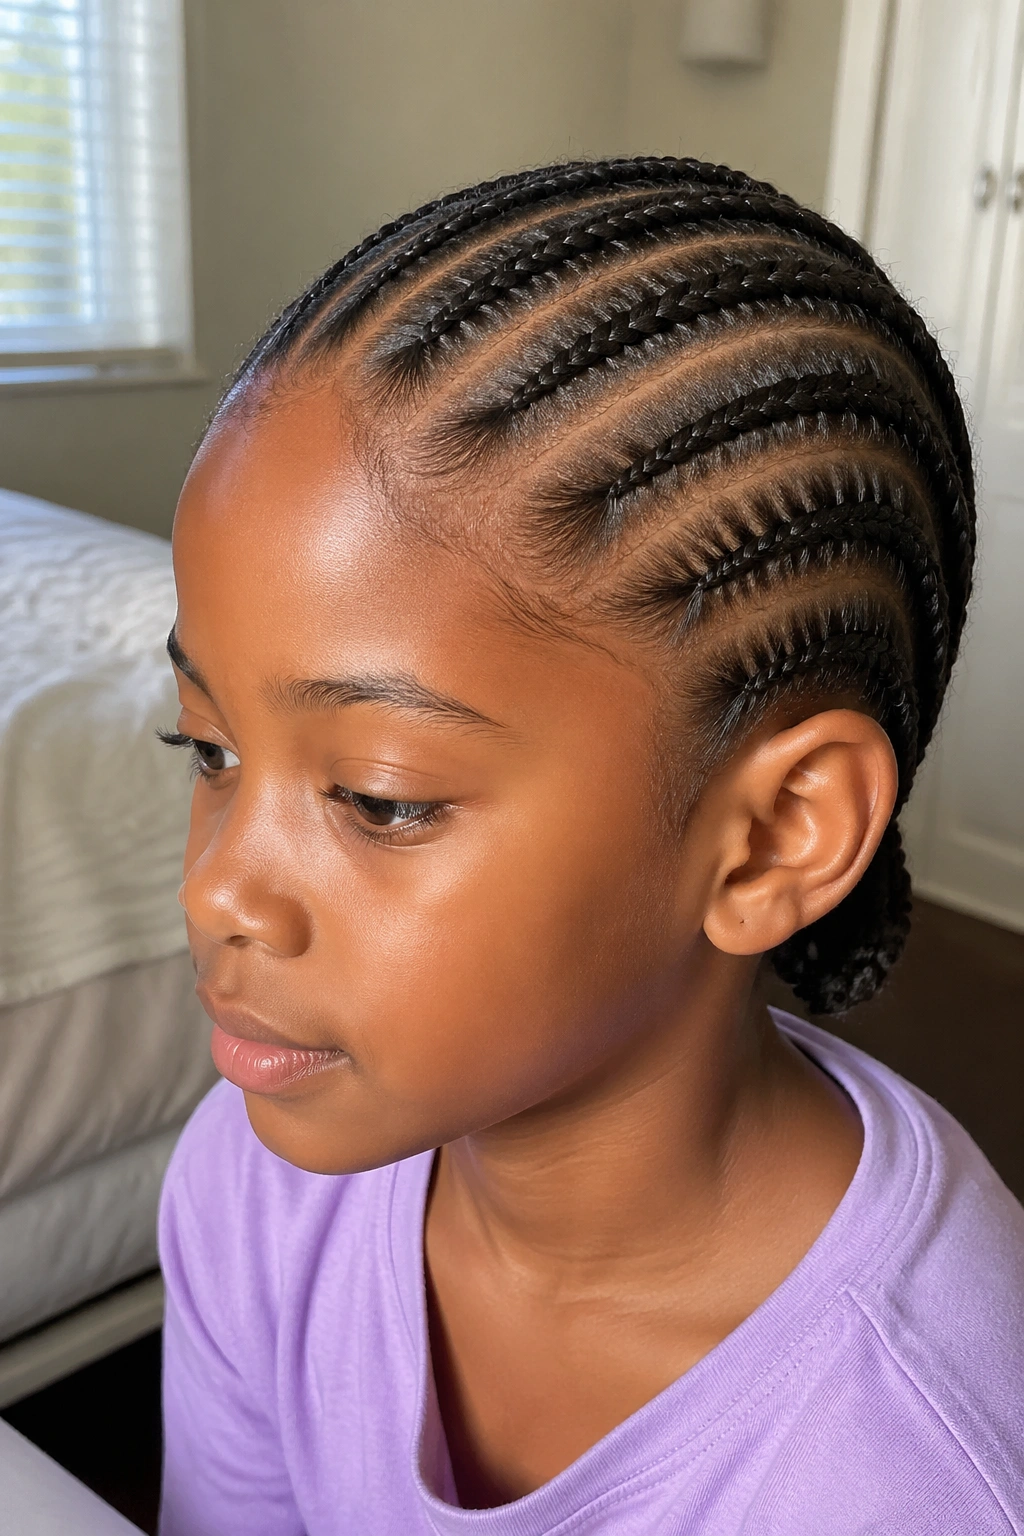
1. Classic Straight-Back Cornrows
The workhorse. Six to eight braids running straight from the hairline to the nape. Nothing fancy, nothing trendy — just the style that’s been doing the job for generations because it works.
Why It Works for Kids
- Fastest to install — 30-45 minutes for a full head
- Easiest to maintain overnight with a satin bonnet
- Grows out cleanly instead of looking messy at the roots
- Forgiving if a braid loosens on day 4
Pro tip: On a child under 6, keep the parts wider. Eight rows is standard for adults, but six rows on a kid’s smaller head looks proportional instead of crowded.
2. Two Big Dutch Braids
These are the fat “boxer braid” style that reads more casual than traditional cornrows. You part the hair down the middle, then do one large braid on each side. Because the parts are bigger, there’s less tension on the scalp.
A lot of parents reach for this when they’re rushing before school. It takes 15 minutes. The finish looks polished enough for school photos, soft enough that the child can sleep in them without waking up with lines on their face.
The downside is they don’t last as long as traditional thin cornrows — about 3-5 days before they start looking fuzzy. Still, for a quick weekday style, they’re hard to beat.
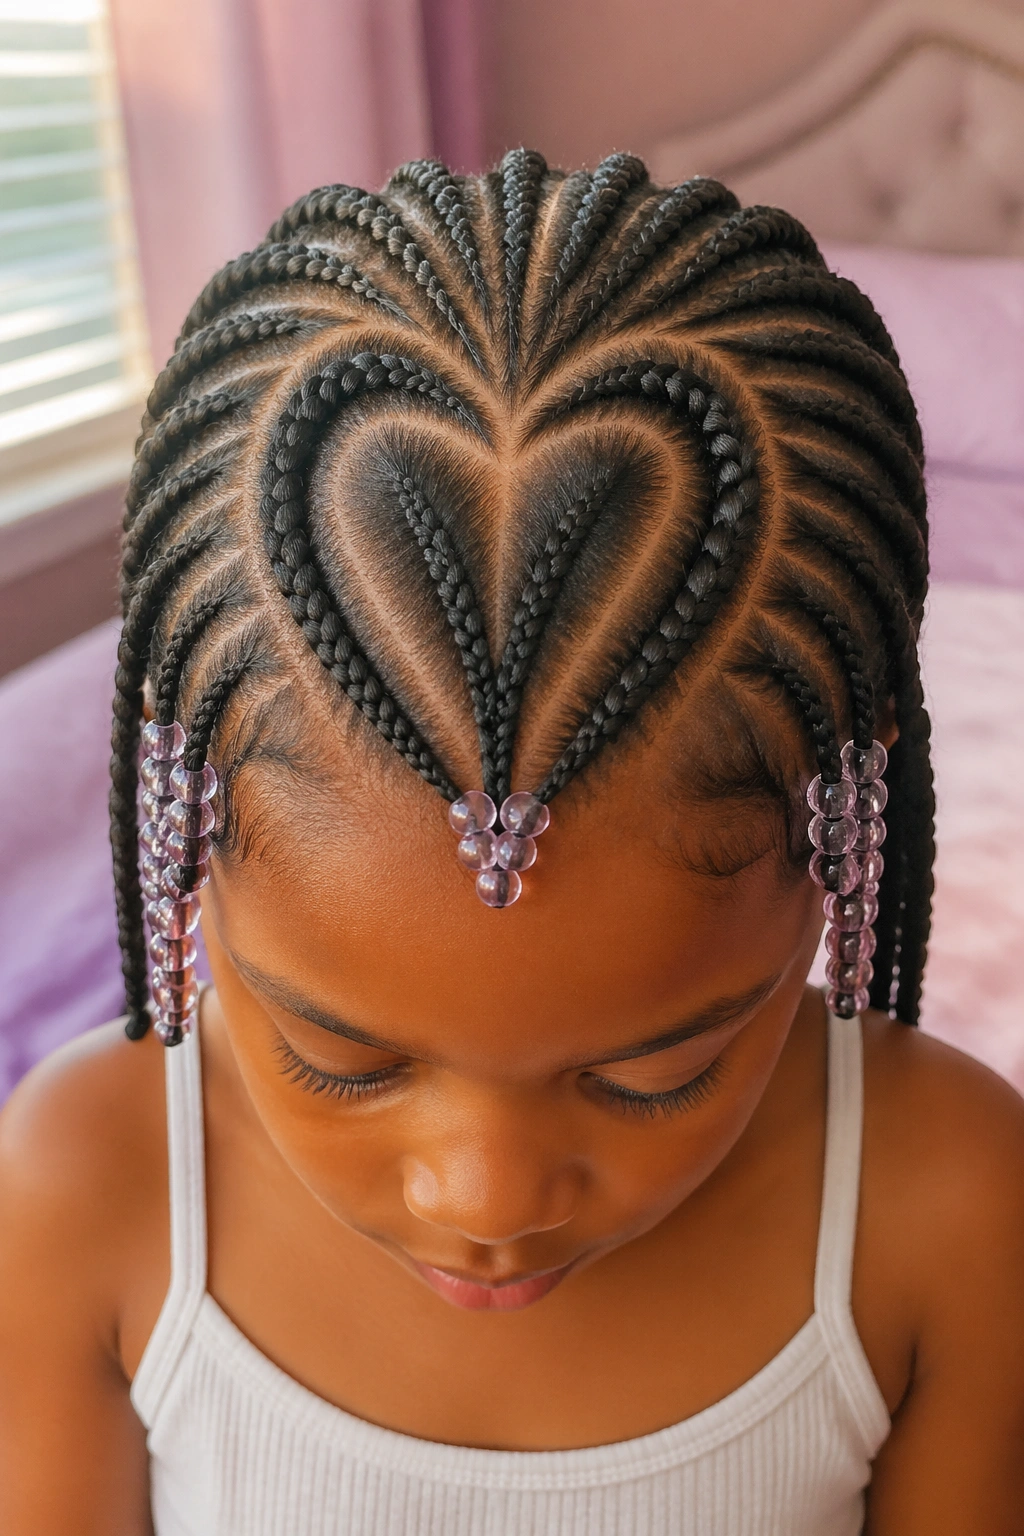
3. Heart-Shaped Parting at the Crown
Here’s a style that turns the crown of the head into a heart, with braids flowing out from the shape. It’s cute enough for a birthday party without being too elaborate for everyday.
You draw the heart with the pin-tail of your comb first. Two curves meeting at a point. Then you braid everything inside the heart into small cornrows that meet at the center bottom. The rest of the head gets standard straight-backs.
How to Style It
Add small beads at the tips of the heart braids only — not on every braid in the head. The focal point stays on the heart shape, and the beads frame it without overwhelming the look. Works beautifully for ages 4-8.
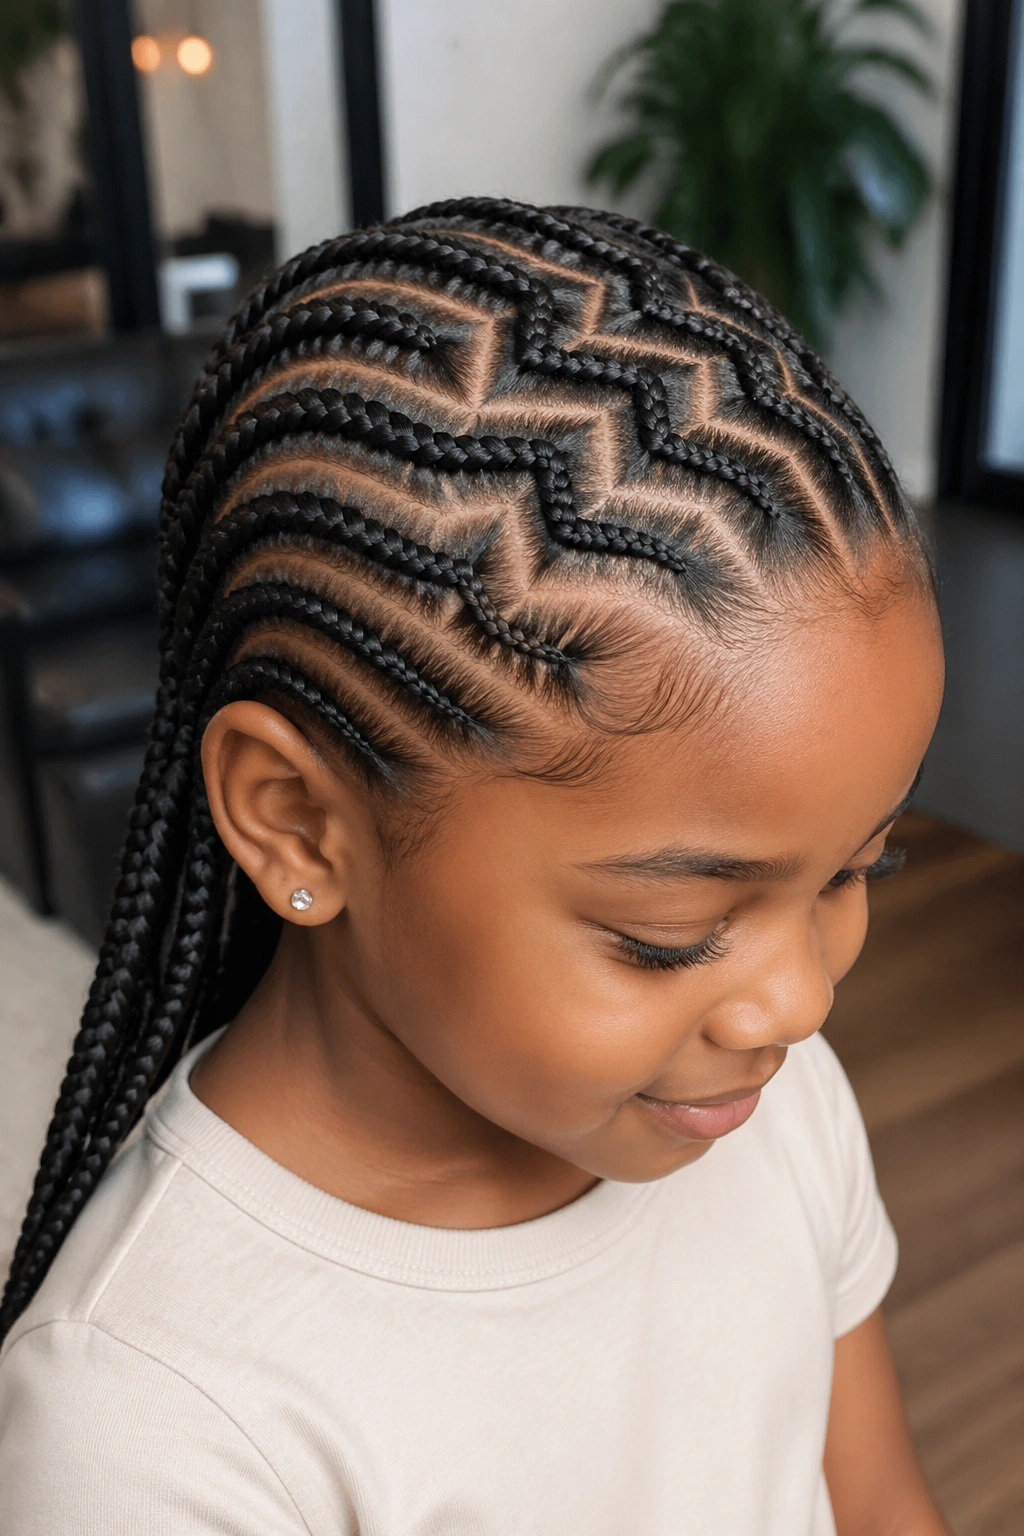
4. Zig-Zag Parted Cornrows
Instead of straight parts, you zig-zag the parts across the head. The braids themselves are standard straight-back cornrows, but the parting gives the style movement and personality.
The trick is keeping the zig-zags even. A lazy zig-zag looks like a mistake; a sharp, symmetrical one looks intentional and expensive. Slow down on the parting. That’s where the whole style lives.
Tip: Use a rat-tail comb and pull each zig segment taut before moving to the next. Eyeballing it never works.
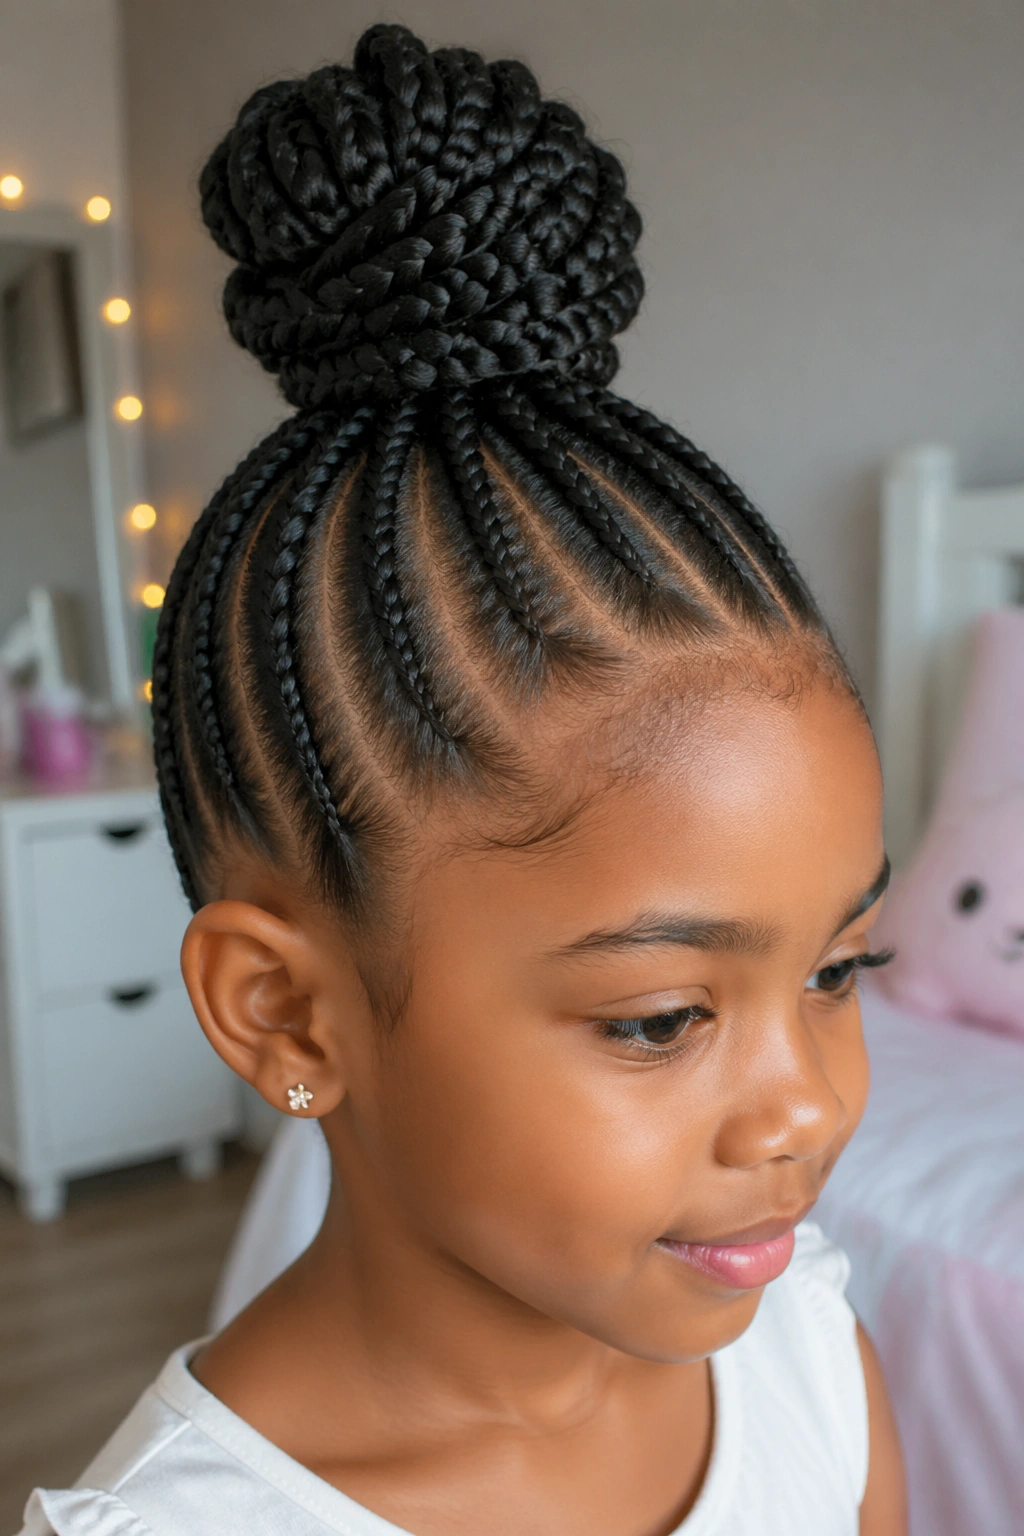
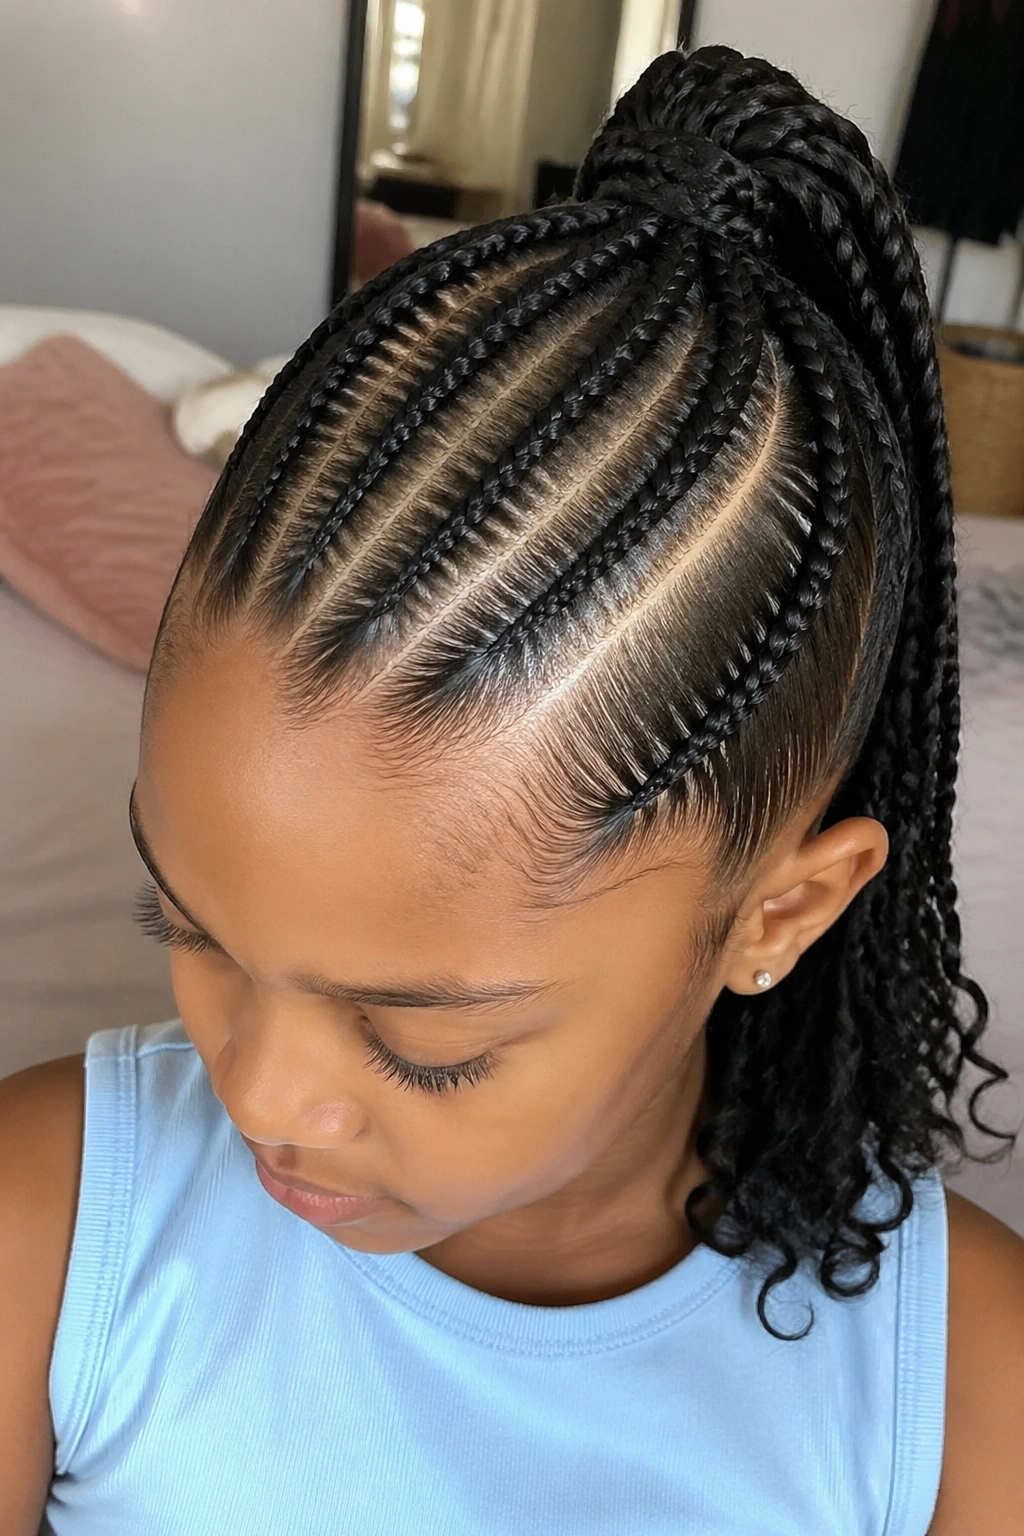
5. Cornrow Bun at the Top
Six to eight cornrows feed upward into a high bun at the crown. The hair extending past the braid gets gathered and wrapped into a neat puff or bun.
This one’s a hair salvage move when a kid’s cornrows have gotten fuzzy on day 6 or 7. You wrap everything up, slap on a ribbon, and the fuzzy roots disappear into the bun. Nobody’s the wiser.
For kids with shorter natural hair, add a small hair doughnut under the bun so the finish is fuller. A thin one, not the adult-sized versions. Otherwise the bun looks top-heavy.
6. Mohawk Cornrows With Puffs on the Sides
The middle section of the head gets tight cornrows running front to back. The sides and nape are left loose and gathered into two low puffs (one behind each ear) or a single back puff.
It’s a style that reads sporty and playful. Great for kids who run around a lot — the puffs soften the look so it doesn’t feel too “done.”
What to Watch For
The part separating the cornrow section from the puff section needs to be sharp. A wavy or uneven boundary here makes the whole style look unfinished. Also, moisturize the loose puff portions nightly or they’ll get rough and tangled.
7. Side-Swept Cornrows With a Curved Front
All the braids angle to one side — usually the child’s dominant side, meaning a right-handed kid has braids sweeping right. The front section curves dramatically across the forehead before joining the rest.
This is a gorgeous style for school pictures. The curve creates visual movement, and the asymmetry feels more styled than plain straight-backs. Takes about 60-75 minutes for a full head.
One catch — the curved section at the front needs tighter parting to hold its shape, but tighter parting on a kid’s temple can be uncomfortable. If your child has sensitive edges, skip this one and go with option 4 (zig-zag) instead.
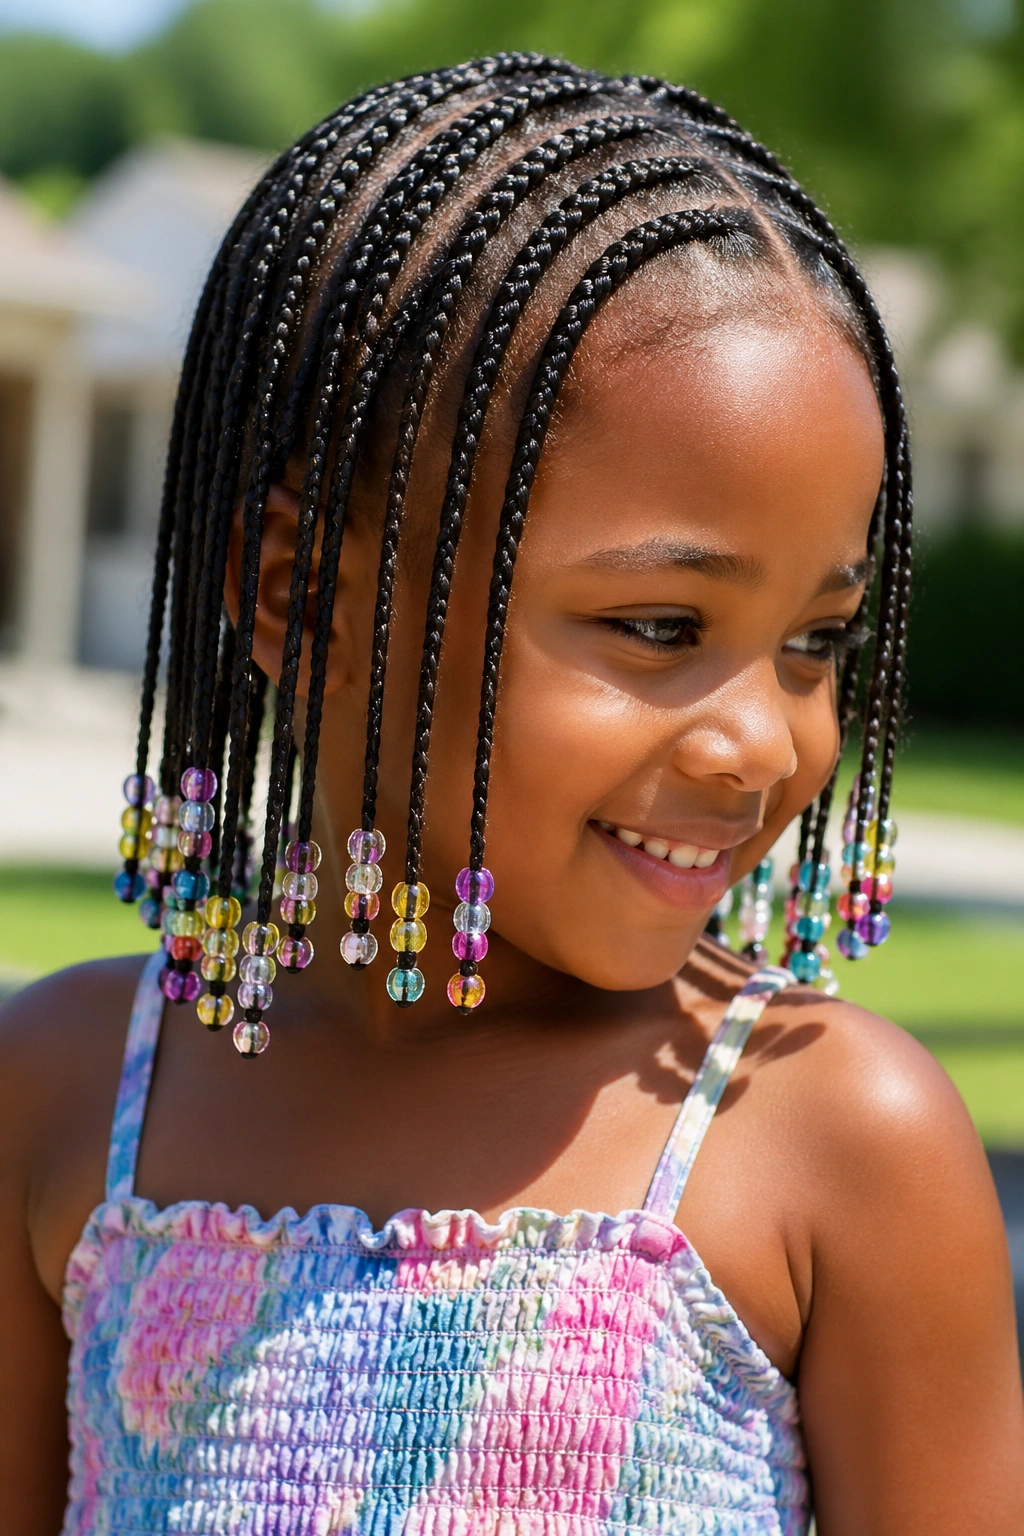
8. Cornrows With Beads at the Ends
A classic for a reason. Small wooden or plastic beads at the tips of each braid add color, sound, and that distinctive click-click as the child moves.
Use a beader tool — a thin wire loop that threads the bead onto the braid end. Then secure with a small elastic or a rubber hair cuff. Never use a knot, because taking out knotted beads means cutting the braid tip off.
Bright bead colors (orange, teal, yellow) work beautifully on dark hair. Keep bead count reasonable — 3-5 per braid is the sweet spot. More than that and the weight starts pulling on young scalps.
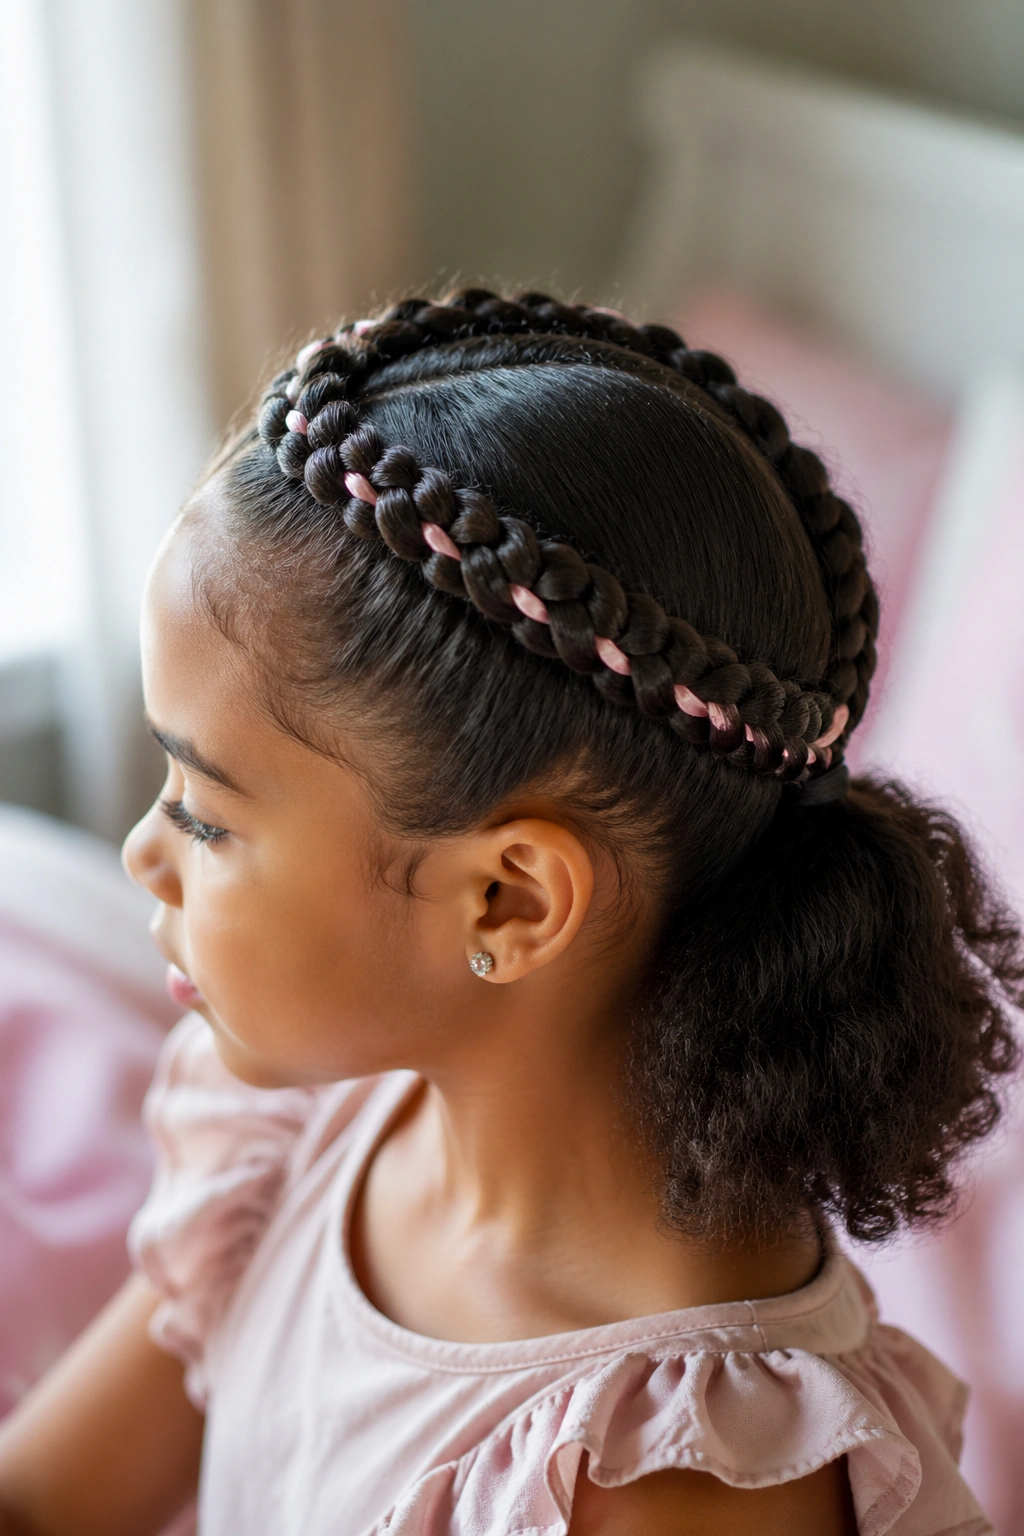
9. Two French-Braid Crowns
Two French cornrows start at the temples and curve around the crown, meeting at the back center. The rest of the hair flows loose or gets a low puff.
Unlike regular cornrows, French braids can be loosened a touch for a softer look. Kids often prefer this because it’s less tight at the temples. The braid sits close to the scalp but doesn’t pull the same way a traditional cornrow does.
A small ribbon woven into each braid adds finish without weight.
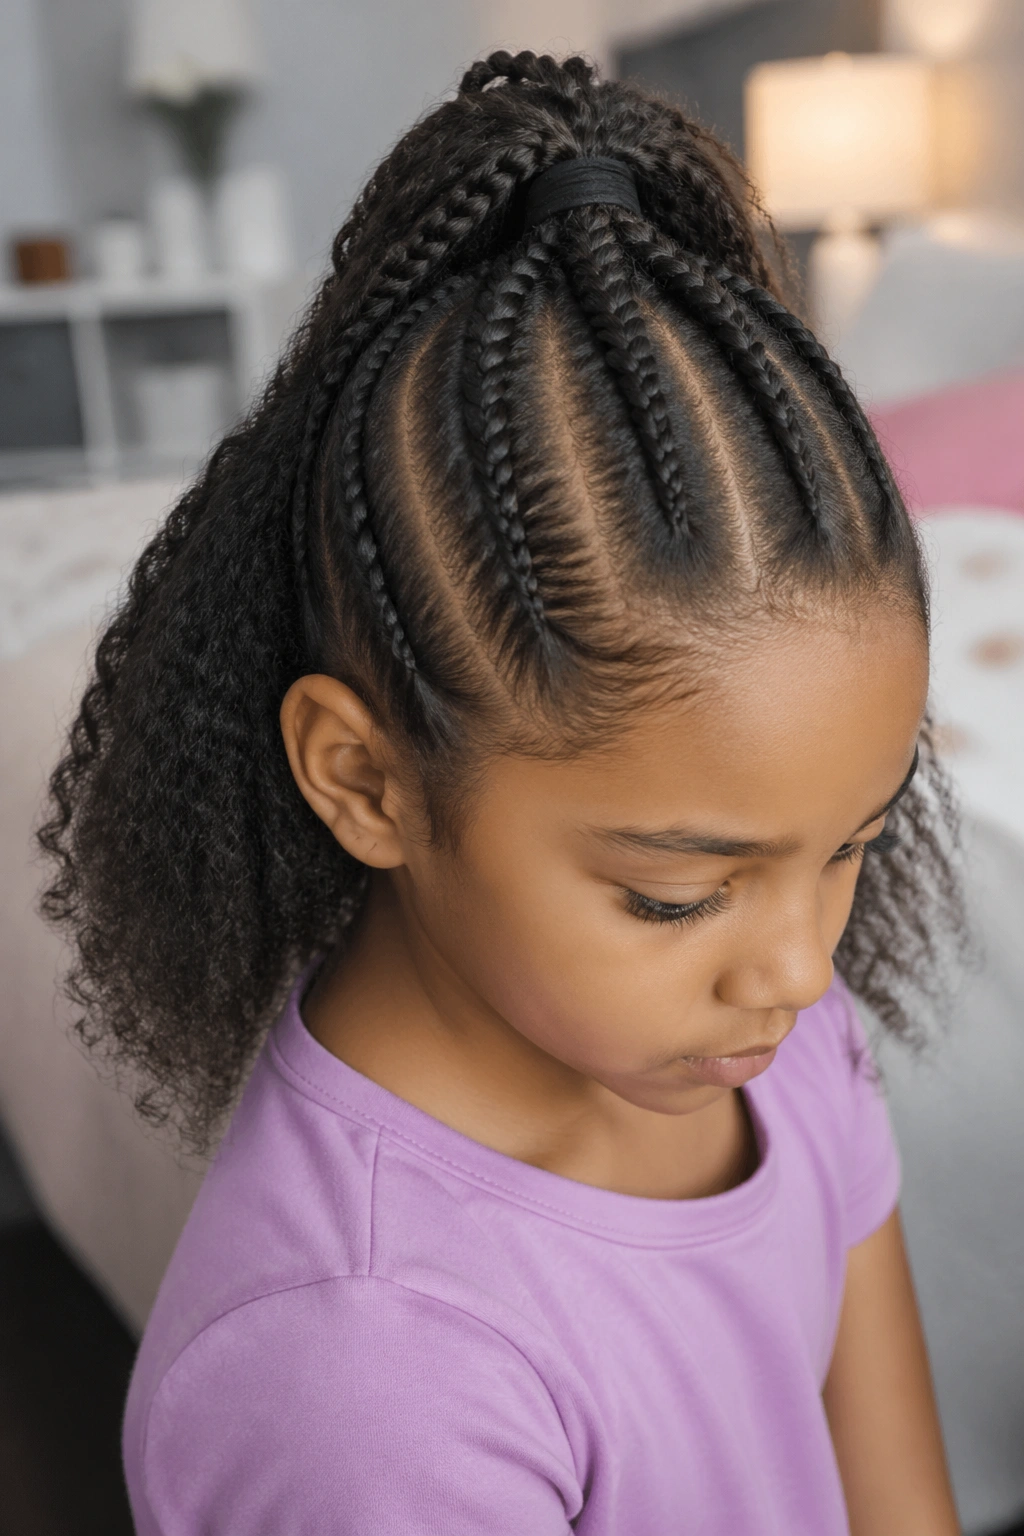
10. Cornrow Ponytail With a Side Part
Part deeply on the side, then cornrow everything back into a single ponytail at the crown or back of the head. The deep side part gives the style asymmetry that reads more mature than centered parts.
For little girls with fine hair, this is the cleanest way to show off the braid pattern without overwhelming a small head with too many individual rows. Usually 4-5 cornrows total, all leading into the same ponytail.
The pony itself can be natural hair, a puff, or a braided extension depending on what length you want. A short puff on a 4-year-old is adorable. A long braided pony on a 10-year-old looks old enough for middle school dances.
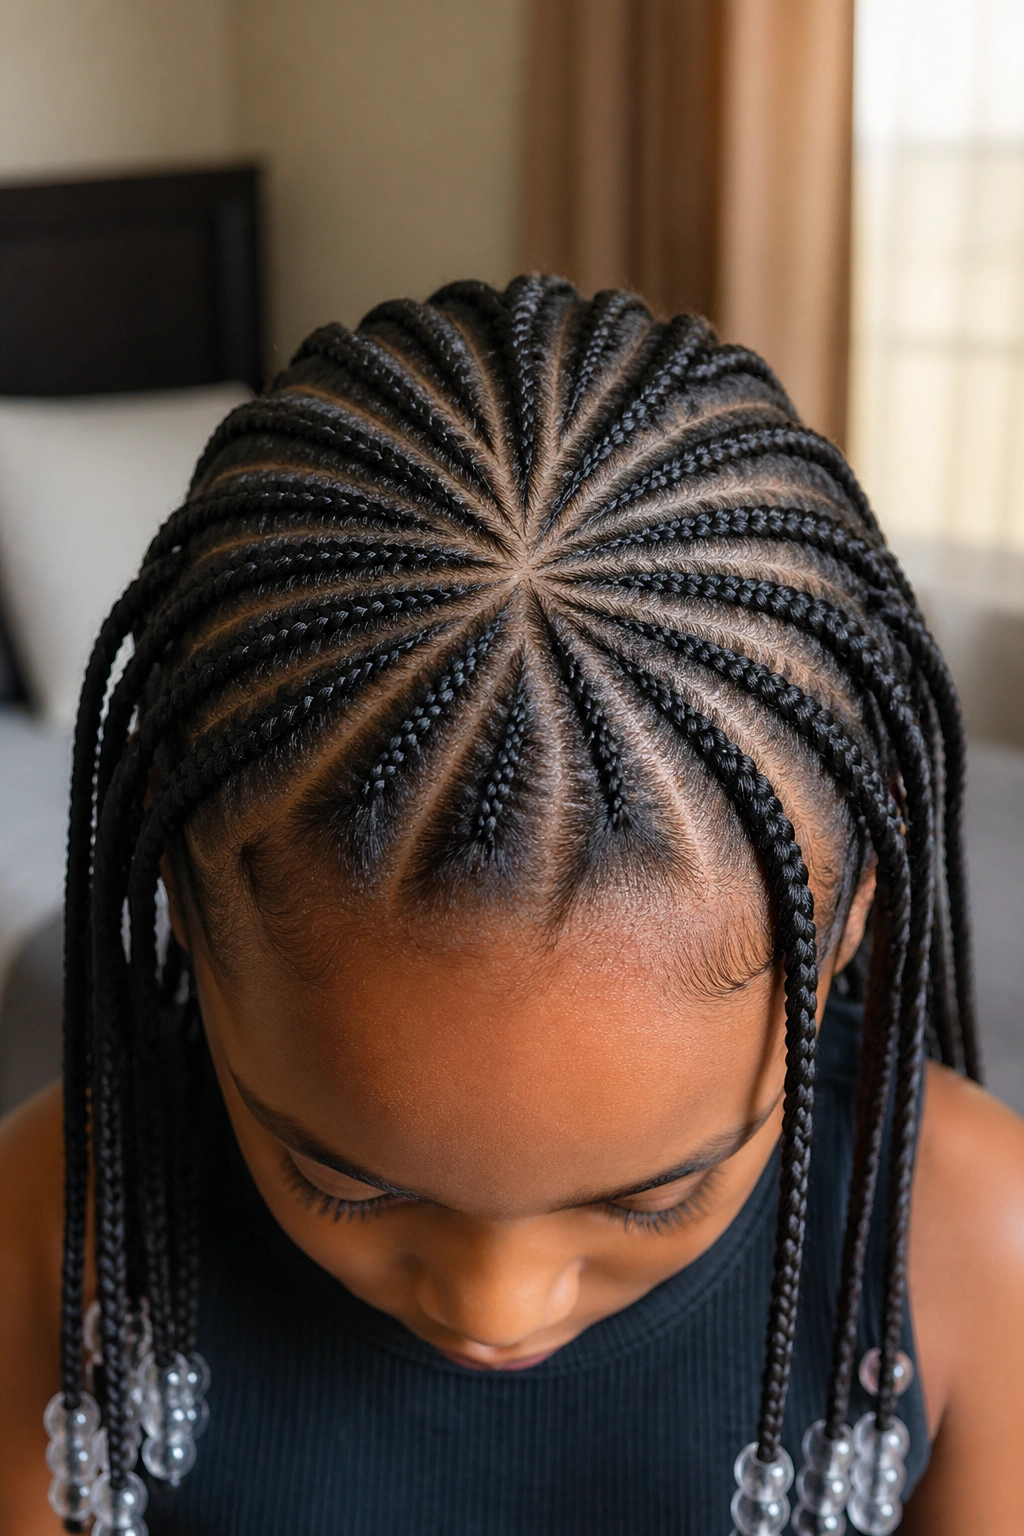
11. Starburst Pattern From the Crown
Every braid radiates outward from a single point at the crown. Looking down at the head, it reads like a sun or star pattern.
This one is pure geometry and takes an experienced braider 90+ minutes to get right. The parts all have to land exactly at the crown point. A single part that’s off by half an inch throws the whole pattern visibly off-center.
Who This Is For
Older kids (8+) with enough patience to sit still for the install. And only for parents who can commit to protecting it — starburst patterns look ragged fast if the crown point gets fuzzy. A small silk scrunchie wrapped right over the crown at bedtime helps.
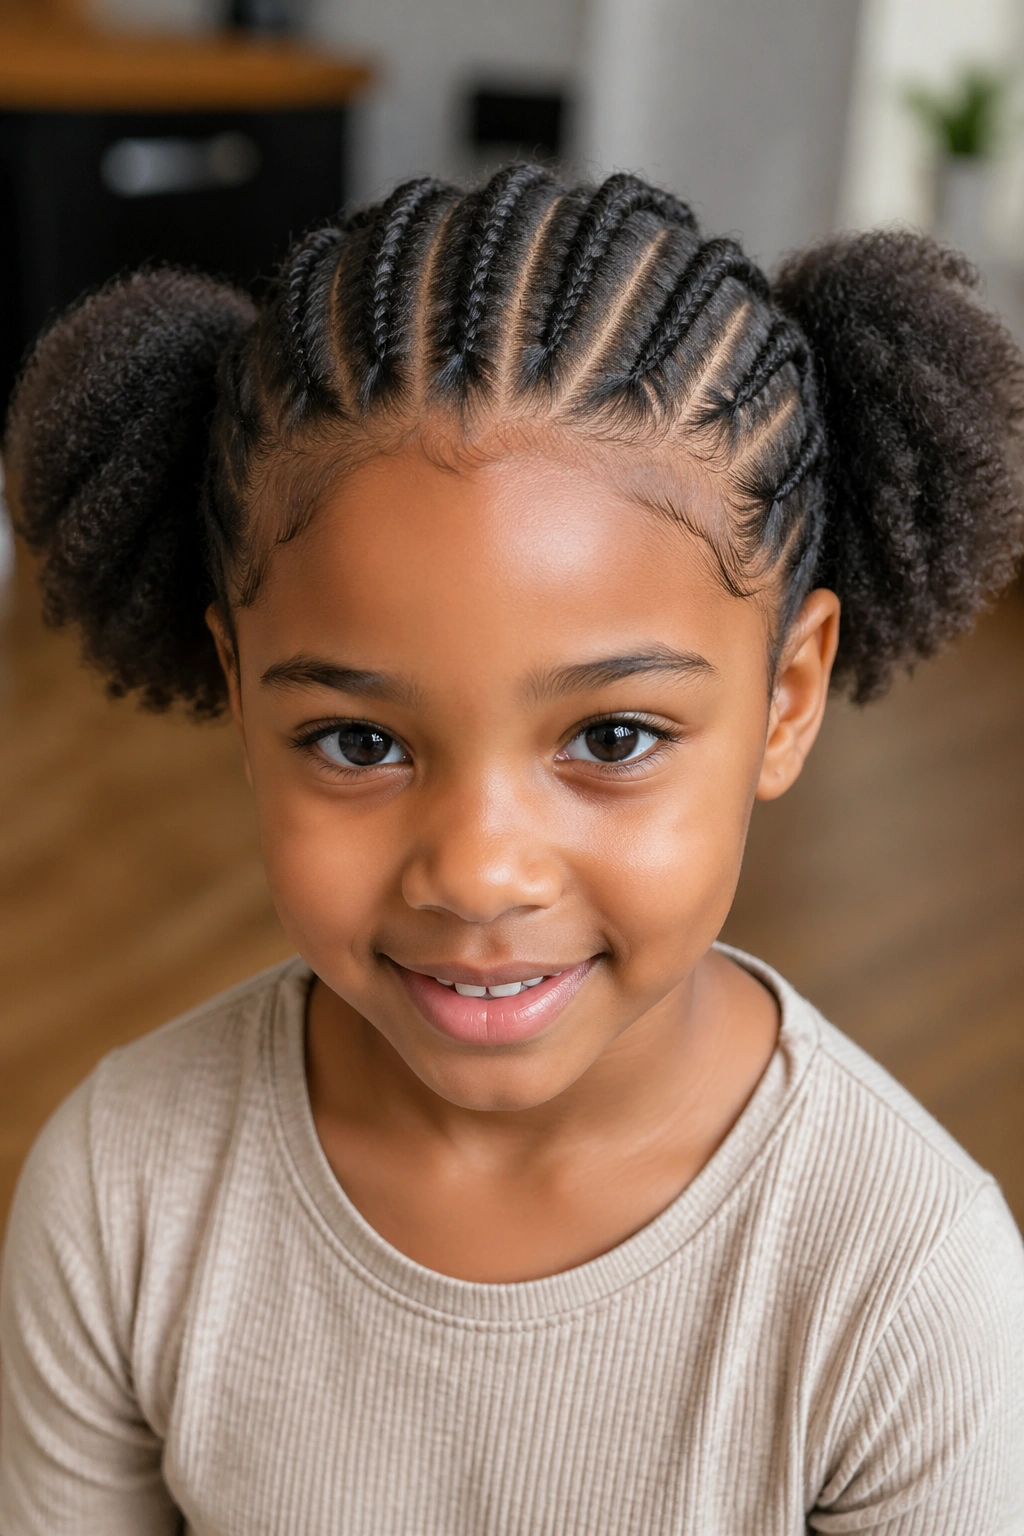
12. Half-Up, Half-Down Cornrows
The top half of the head is cornrowed into 4-6 braids that gather into a ponytail at the crown. The bottom half stays loose as a puff or natural texture.
Kids love this because the loose hair feels normal — less of that “I have to sleep in tight braids” resistance. It’s also fast (30-45 minutes) and forgiving if parts get fuzzy, because the loose hair below softens any imperfection above.
A small satin bonnet over just the cornrowed top section at bedtime keeps everything tidy without suffocating the loose hair.
13. Braided Headband Across the Front

One thick cornrow runs across the hairline like a headband, with the rest of the hair left loose or pulled into a simple puff at the back. The braided “band” is usually thicker than a standard cornrow — maybe twice as wide.
Good for days when you want something cute but don’t have 45 minutes. The single braid takes 10-15 minutes, and the puff at the back takes 2 minutes more. Total install: under 20 minutes.
Note: The braid needs to anchor on both sides of the head with small elastics tucked behind the ears. Without anchoring, it slips up during play.
14. Diagonal Cornrows Across the Head
Instead of straight back or straight forward, the braids run on a diagonal — say, from top-right to bottom-left. The diagonal creates visual flow without requiring complicated parts.
Shaquan braiders love this because it’s easy to install but looks more creative than straight-backs. You pick an angle and every braid follows it. 6-10 braids depending on head size.
A single accent braid running the opposite direction through the pattern adds interest if you want something beyond pure diagonal.
15. Cornrows With Hair Cuffs and Rings
Instead of beads, use gold or silver hair cuffs that slide onto the braid. One cuff per braid, placed about halfway down the length. Much easier on a young scalp than beads because there’s no weight at the very tip.
How to Use Them
Slide the cuff on while braiding, not after. Once the braid is done, the cuff sits where you placed it. To remove, squeeze the cuff gently with your fingers and it’ll slide off without snagging the braid.
Mixed gold and silver on the same head looks intentional and modern. All-gold looks formal. All-silver reads cooler and edgier.
16. Fishtail-Inspired Cornrows
Not true fishtails (those don’t work flat against the scalp), but cornrows with a fishtail appearance along the center. You braid two halves of a three-strand cornrow more loosely and work a thin weave through the middle to mimic the fishtail look.
Takes an experienced braider. It’s showy. For a birthday or special event, it photographs beautifully.
Don’t attempt this on a child under 8 — the technique requires holding the head still for over two hours.
17. Cornrows Going Into Two Side Buns
Four to six cornrows per side, all leading into a high bun above each ear. Like Mickey Mouse ears, but in cornrow form.
Absolutely charming on preschool-age kids. A little theatrical for older kids who might feel self-conscious about the double-bun look. Age matters here.
Use soft scrunchies to wrap each bun rather than hard elastics. The scrunchie gives the bun a softer shape and doesn’t damage the braid tails.
18. Cornrow Swirls at the Crown
The crown has 2-3 spiral cornrows that curve into tight swirls. The rest of the head has standard straight-backs that lead into the swirl pattern.
This is one of those styles where the parts make or break it. A tight, clean swirl looks amazing. A lazy swirl looks like the braider lost her way. If you’re not a confident braider, practice the swirl shape on paper first with a pencil until you can draw it smoothly.
A small rhinestone or metallic sticker placed at the center of each swirl adds sparkle without weight.
19. Lemonade-Inspired Cornrows
Braids that all angle to one side and drape over a shoulder, popularized years ago and still a kid favorite. The angle is consistent — all braids sweep right OR all sweep left, never mixed.
Takes more time than straight-backs because the parts all have to match the angle. 75-90 minutes for a full head.
The braids typically extend past the shoulders when finished with added hair. On a child, you can skip the added length and let the natural hair tips peek out naturally. Either looks right.
20. Cornrows With a Ribbon Weave

A satin or grosgrain ribbon gets braided into the hair along with the natural strands. The ribbon color picks up whatever outfit the child is wearing that day.
Thin ribbons (¼ inch wide) work best. Wider ribbons bunch awkwardly. You weave the ribbon in as a fourth strand during the braiding — two natural strands plus the ribbon doubled up. The braider’s hands need to manage four things at once, which is tricky but learnable.
Tip: Pre-cut ribbon lengths before starting. Nothing disrupts braiding flow like searching for the scissors mid-braid.
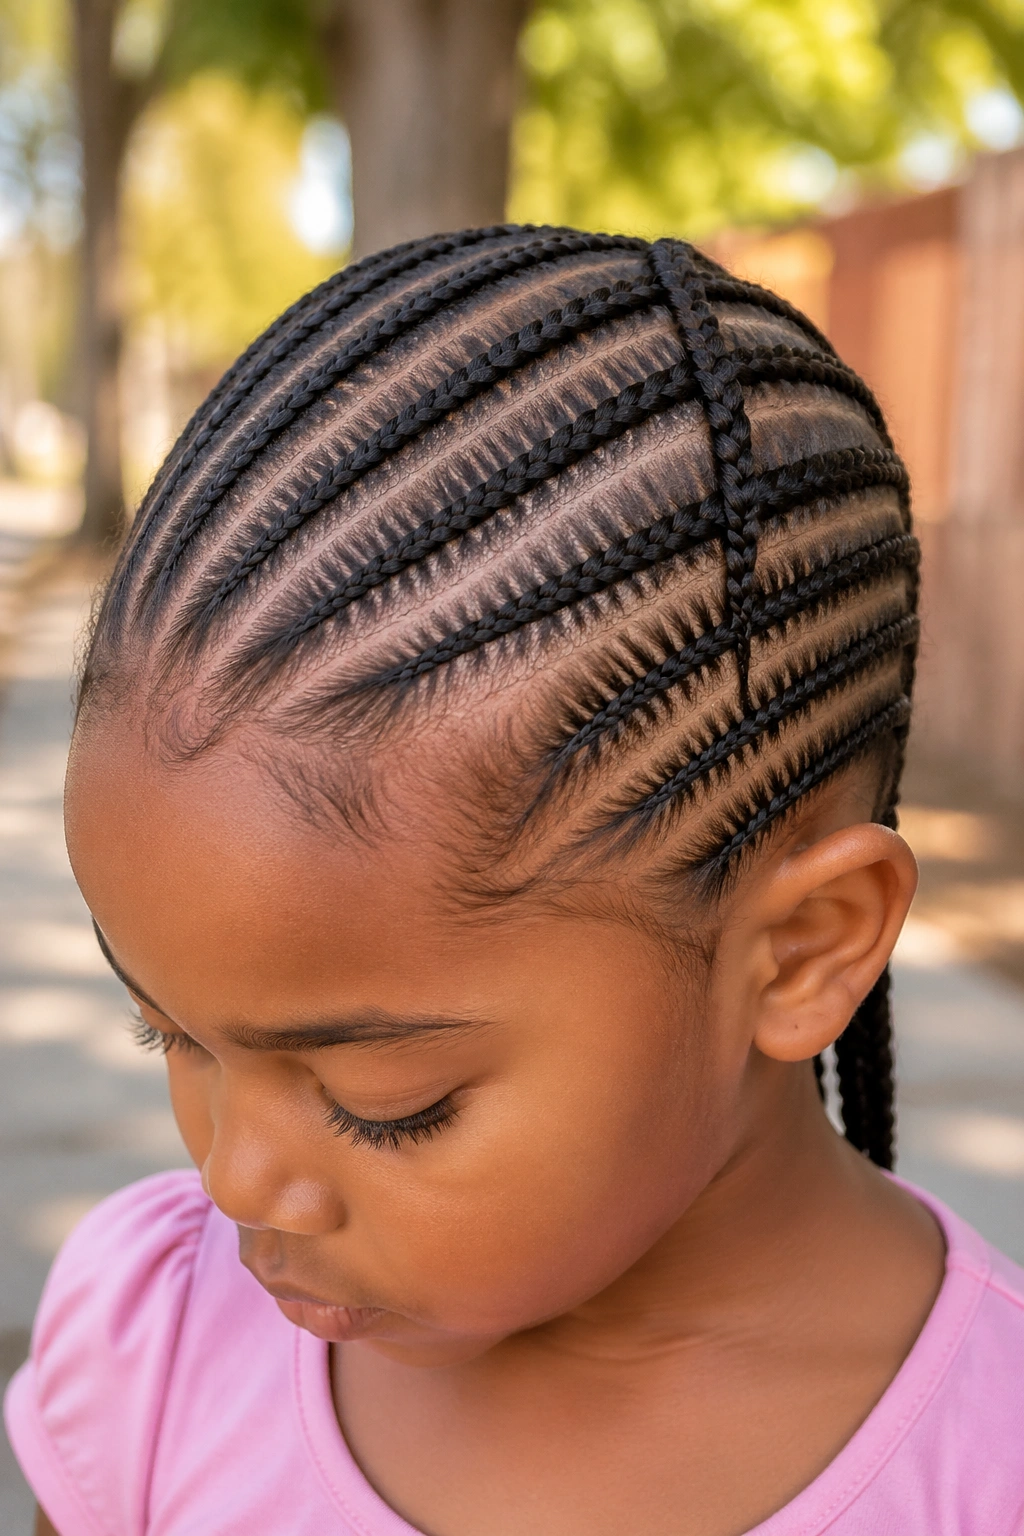
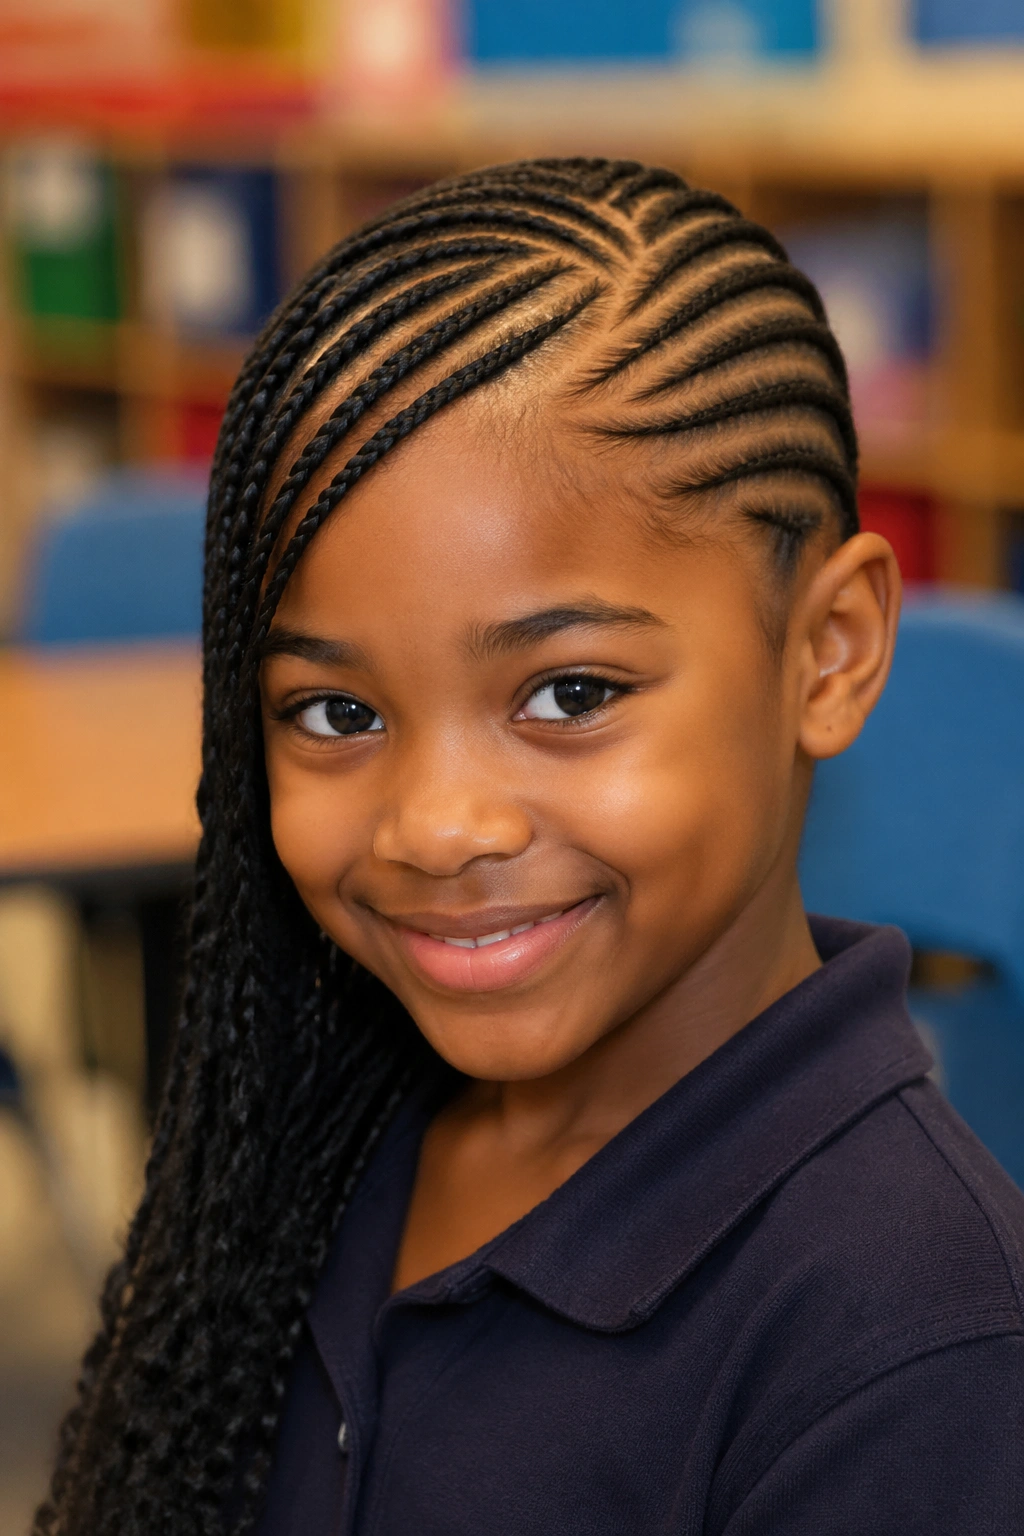
21. Tribal-Inspired Small Cornrows
Fine, thin cornrows in dense parallel rows, sometimes alternating direction or broken by an accent braid. These draw on traditional African patterns without overdoing the complexity.
The appeal for kids is that thin cornrows look delicate and neat. But thin means more parts, which means more tension at each parting. Don’t go thinner than ¼ inch between parts on a child’s scalp.
Total install: 2-3 hours depending on head size and patience level of the child. Not a weekday morning style.
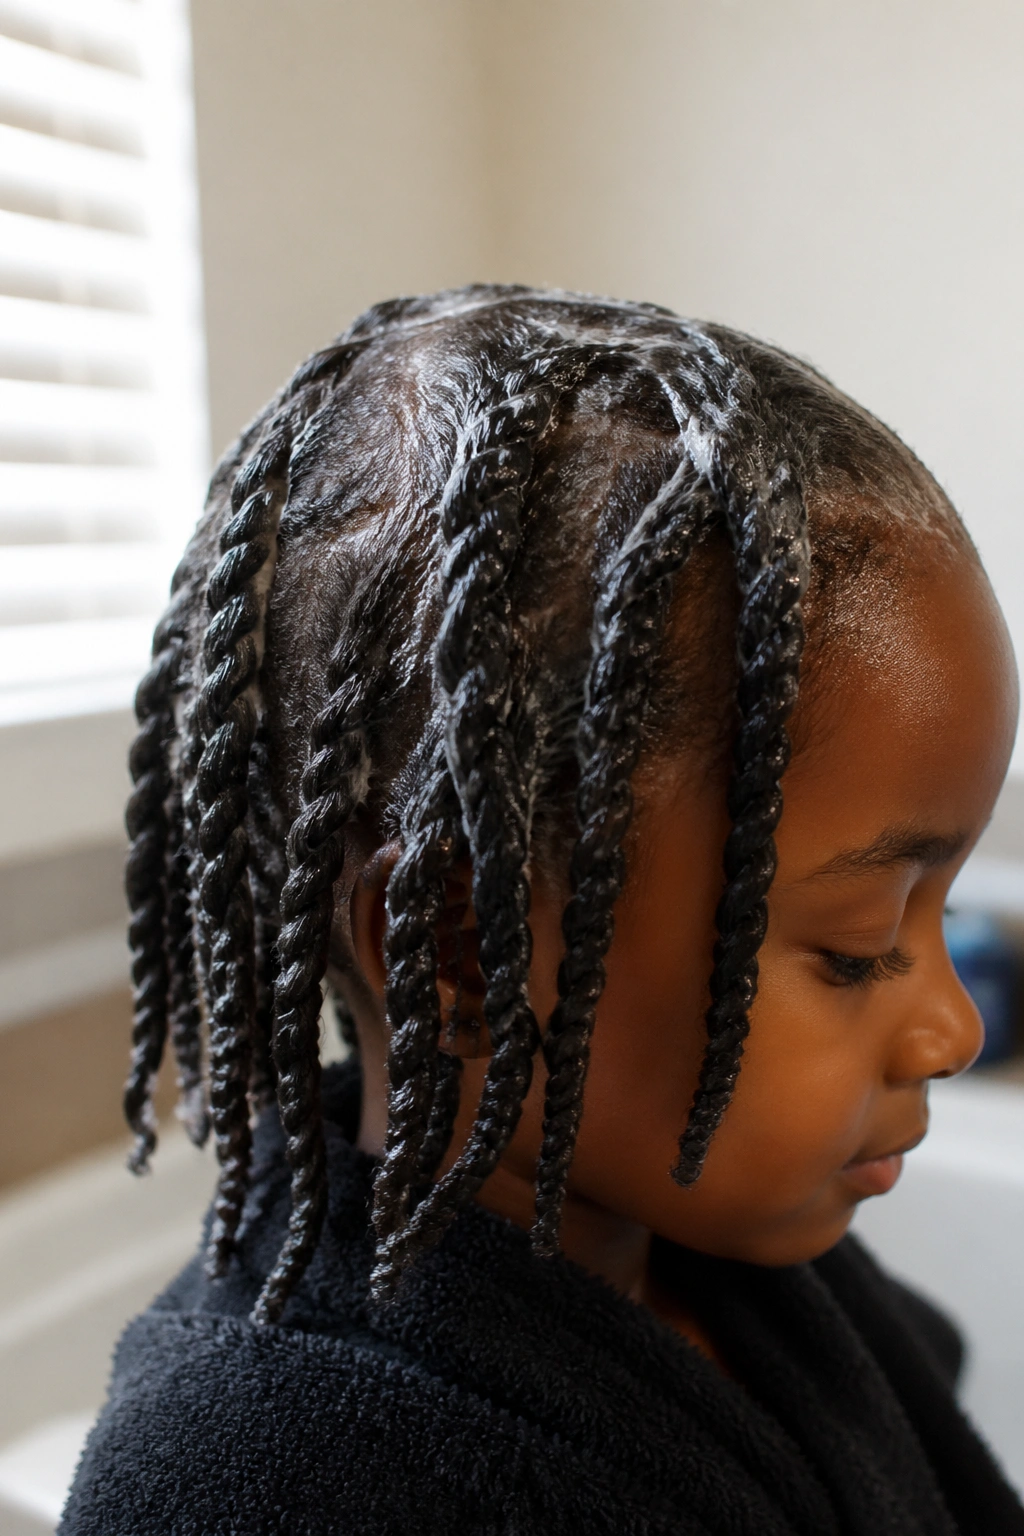
22. Cornrows Ending in Twists
The cornrow holds everything flat against the scalp from hairline to roughly the crown. Then the braid transitions into a two-strand twist for the remaining length. The twists hang loose instead of continuing as flat braids.
It’s a clever hybrid that gives the flat, protected look at the scalp with the movement of loose twists at the bottom. Kids love the “wiggle” of the twisted ends.
The transition point is where most braiders get tripped up. You need to seal the cornrow end before starting the twist — otherwise the braid unravels where they meet.
23. Cornrows With Shaved-Look Sides (Illusion Only)
Not an actual shave — just cornrows on top running into a slicked-down side where no braids exist. The sides get gelled flat against the scalp with edge control, creating a “shaved” appearance without any cutting.
Great for kids who want edgy styles but whose parents are (reasonably) not ready for them to shave anything. The illusion is convincing if the edges are slicked smoothly with a firm-hold gel.
A light dusting of baby powder along the “shaved” line can add to the illusion by knocking down any remaining shine on the slicked hair. Use sparingly.
24. Fulani-Inspired Cornrows for Kids
A single thick cornrow runs down the center of the head, flanked by 3-4 smaller cornrows on each side angled slightly inward. The result reads as traditional Fulani styling softened for kids.
Small beads at the tips complete the look. Go with natural-wood beads or brass-colored beads for the most traditional finish. Plastic neon beads read more playful but stray from the style’s origin.
Styling Tips
Keep the middle braid thicker than the surrounding ones. The contrast is what sells the Fulani influence. Usually the center braid is about double the width of the side braids.
25. Cornrows in a Curved Crown Around the Head
Every braid curves around the head in concentric rings, all flowing toward a single point at the back or side. The overall effect is like a halo of braids.
Incredibly time-consuming (3+ hours) but stunning for graduations, weddings, or formal family photos. Not a casual Tuesday style.
The outer ring of braids tends to loosen first because it has the longest curve to maintain. Retouch the perimeter every 5-7 days if the style has to last more than 2 weeks.
Keeping Kids’ Cornrows Looking Fresh
Nighttime is when cornrows live or die. A satin bonnet is non-negotiable — fleece hats and cotton pillowcases shred the braids and the flyaways show up within 3 days. Get the bonnet to actually stay on through the night by using one with a wide elastic band, not the cheap thin-elastic versions that slide off at 2 AM.
Every morning, smooth the edges with a damp fingertip and a dab of light oil. Just a fingertip’s worth — too much oil attracts lint. And lint is the enemy of neat cornrows.
Spray a water-and-leave-in mix along the scalp 2-3 times a week. The scalp dries out from being hidden under braids, and dry scalp leads to flaking, itching, and the child trying to scratch at the style. A moisturized scalp stays calm.
Scalp Care Under Braids
Oil the scalp — not the braid shafts — with a lightweight jojoba or sweet almond oil. Part the braids slightly to reach the scalp directly. Heavy oils (shea butter, castor oil) build up fast under braids on kids and cause that sour smell after a week. Stick to light oils.
Wash day under cornrows is simple. Apply diluted shampoo to the scalp with a nozzle-tip bottle, massage gently, rinse thoroughly, and follow with a light conditioner rinse. Air-dry fully before bedtime so moisture doesn’t get trapped under the bonnet.
If a child complains of itching at the hairline after day 5, it’s often residual product buildup. A scalp-only wash fixes it in one session.
When to Take the Style Down
Two weeks is the outside limit for most kids’ cornrows. By week three, the new growth at the roots has usually caused enough lifting that the style looks messy and the scalp feels gunky. Earlier is fine if the child wants a change.
Taking down cornrows on a kid is easier when the hair is damp and slick. Spray the braids with water mixed with a squeeze of conditioner, wait 5 minutes, then unravel gently from the tip upward. Never rip.
Detangle section by section with fingers first, then a wide-tooth comb. Rushing the detangle is how you end up with a matted mess. Give yourself 45 minutes for the whole takedown, and let the child watch a movie during it.
Avoiding Common Kid-Braiding Mistakes
The biggest mistake? Braiding too tight because “it’ll last longer.” Tight braids on kids cause traction alopecia at the hairline — and children’s hairlines take years to recover, if they recover at all. Loose is better than lasting.
Second mistake: skipping the prep wash. Braiding over dirty or tangled hair means the style looks fuzzy within 3 days. Spend the extra hour on prep; you’ll save yourself three redos.
Third: ignoring the child’s feedback. If your kid says a braid hurts, it hurts. Take that braid out and redo it. The emotional memory of a painful braid session sticks with children for years and makes every future session a fight.
And finally — don’t assume the style that worked on your niece will work on your daughter. Head sizes, hair density, and pain tolerance all vary. Start with simpler styles and build up as you learn what their scalp can handle.
Final Thoughts on Picking the Right Style
The right cornrow style for a kid isn’t always the prettiest one. It’s the one that matches their age, hair density, activity level, and tolerance for sitting still. A 4-year-old getting a starburst pattern is probably going to cry through hour three. A 10-year-old in plain straight-backs might feel babyish at school.
Match the style to the child in front of you. Watch how they sit during the install. Listen to what they say about how the finished braids feel. And give yourself permission to try something different next time if a style didn’t quite fit.
Cornrows are a tradition passed from hands to hands, mothers to daughters, aunties to nieces, and good braiders to the kids they watch grow up. The best style is the one that makes a child feel seen, pretty, and ready to run outside without thinking about her hair.