



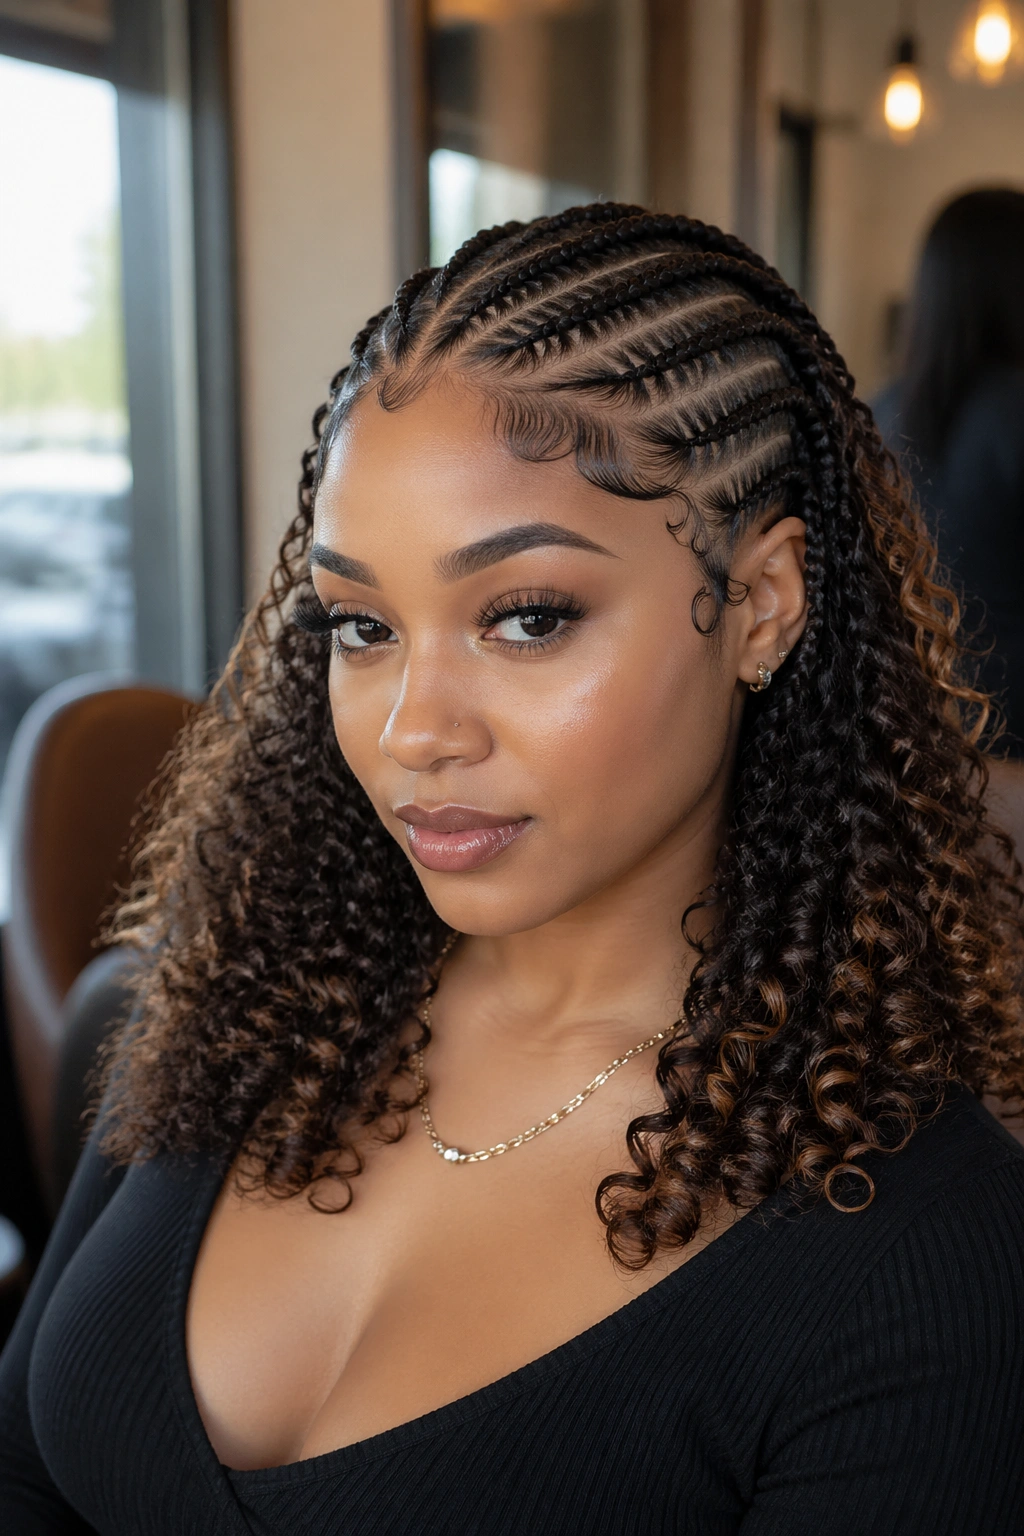
Feed in cornrows with curly ends are the style that refuses to pick a lane. The top is structured — sleek, braided, controlled. The ends are wild — spiraled, voluminous, playful. Most styles commit to one personality. This one refuses. And that refusal is exactly what makes it so consistently popular. When you wear feed-ins with curly ends, you’re wearing both sides of yourself at once.
The combination works because of contrast. Feed-in cornrows give you that long, elegant line from front to nape. Curly ends break up what would otherwise be a stiff silhouette and keep the look from reading too severe. I’ve been installing this style on clients and on myself for years, and the only thing I’d warn anyone about is that the curl method you pick matters more than almost any other choice. A rod set reads different from a wand curl reads different from a crochet-added curl. Each has its place. Each creates a different overall vibe.
Twenty-two variations on this theme. Some use flexi rods. Some use perm rods. Some use pre-curled kanekalon so you don’t have to set anything. Some are jumbo. Some are micro. What they share is the structural integrity of feed-in braiding at the top with the softness of defined curls at the ends.
Why Curly Ends Change Everything
A straight-ended feed-in cornrow gives you a clean, blunt line. A curly-ended version gives you volume at the bottom that visually expands where the style ends. This weight distribution flatters more face shapes than a straight-ended install does.
Curls at the ends also hide extension seams that can show in straight-ended styles. Where your natural hair blends into kanekalon is visible on a smooth braid end. On a curly end, the transition disappears into the curl texture.
Movement is the third benefit. Straight braids swing as a unit. Curly ends bounce independently. The difference is dramatic when you walk, dance, or even just turn your head.
Choosing a Curl Method
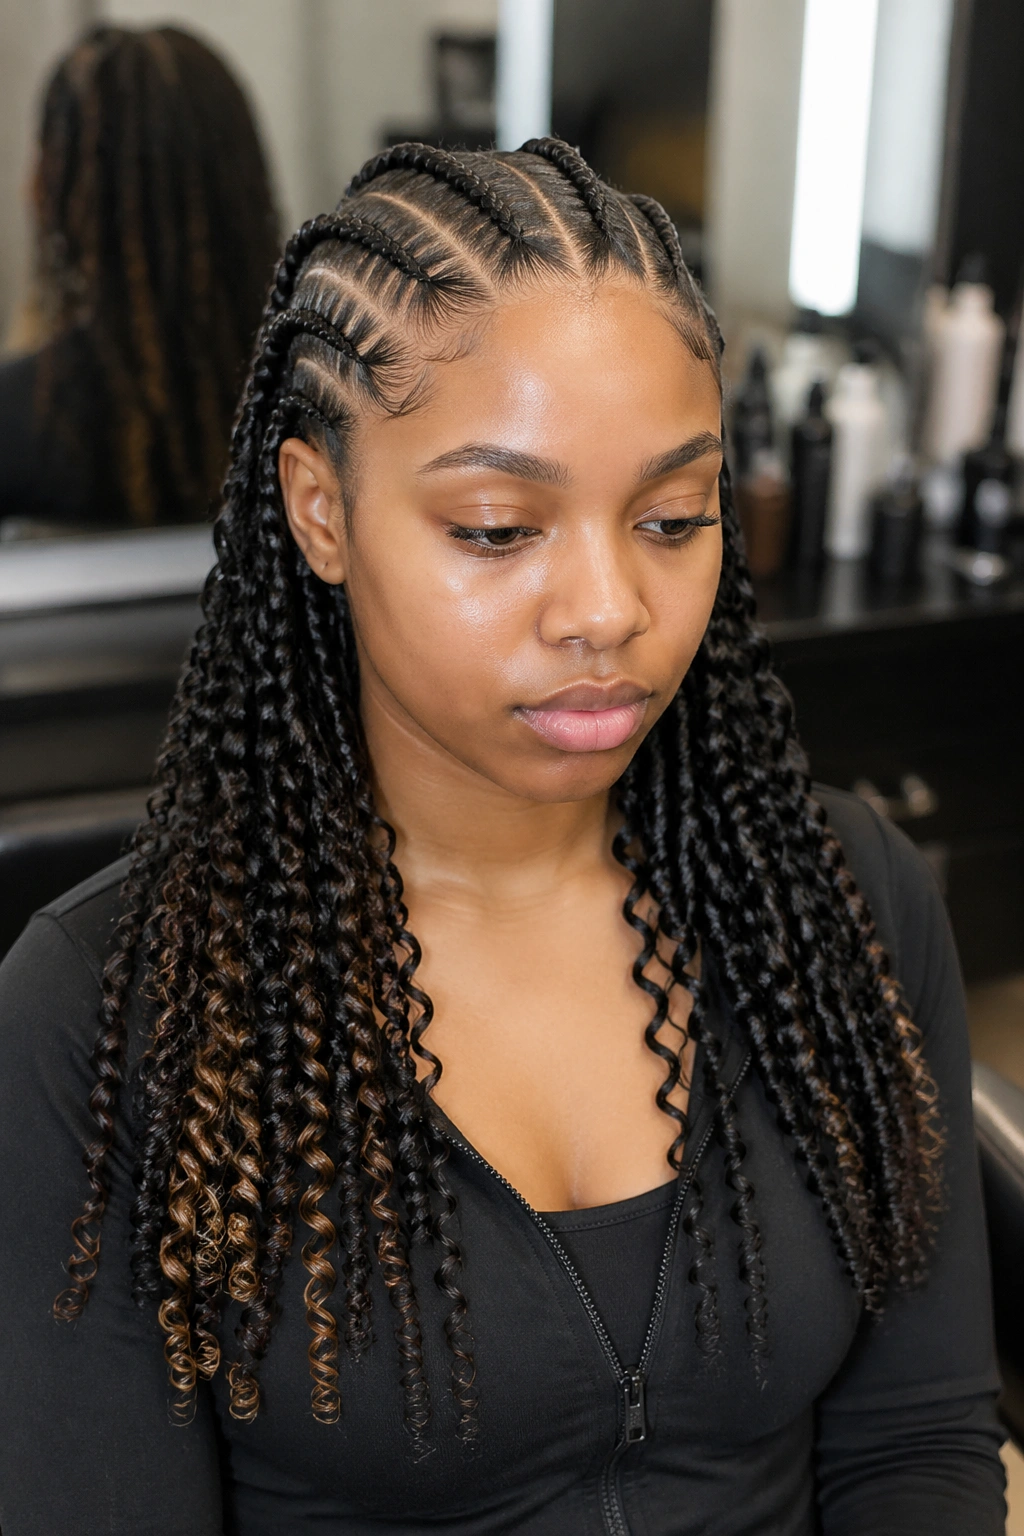
Three main methods. Each gives a different result.
Flexi rods create loose, soft waves. The rods are flexible rubber tubes that you wrap the hair around and bend to hold. Result: big, bouncy, 1990s-style curls.
Perm rods create tight, defined ringlets. The rods are rigid plastic and the resulting curls are small spiral shapes. Result: precise, uniform ringlets.
Hot water dip curls, using pre-curled kanekalon, gives you salon-quality curls without any rod work. The kanekalon comes pre-styled and you just heat-set it. Result: consistent, reliable curls with the least effort.
Pre-Install Prep
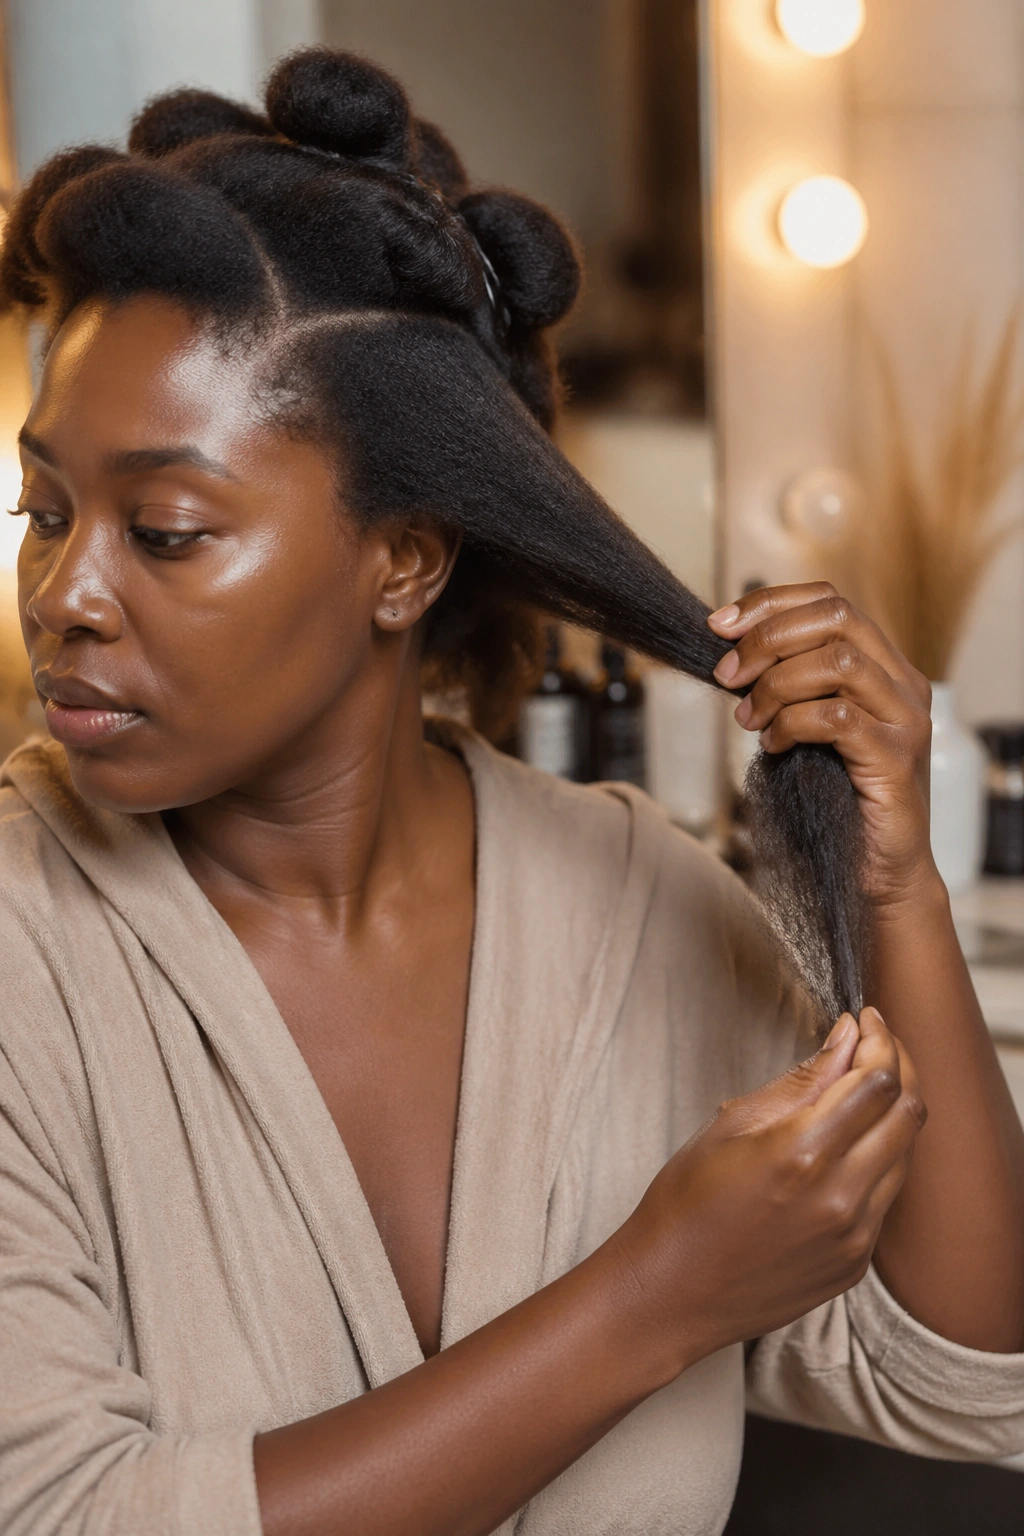
Wash and stretch your natural hair 48 hours before the install. Same as any feed-in install. The stretched hair gives you a clean base that doesn’t shrink under the braiding.
Choose your kanekalon based on your chosen curl method. If you’re rod setting, buy smooth pre-stretched kanekalon. If you’re using pre-curled hair, buy kanekalon specifically sold as “curly” or “water wave” — check the packaging.
Pre-soak smooth kanekalon in apple cider vinegar and water for 15 minutes before installation. Skip the soak for pre-curled kanekalon — the soak can loosen the pre-set curls.
Setting Curls Correctly
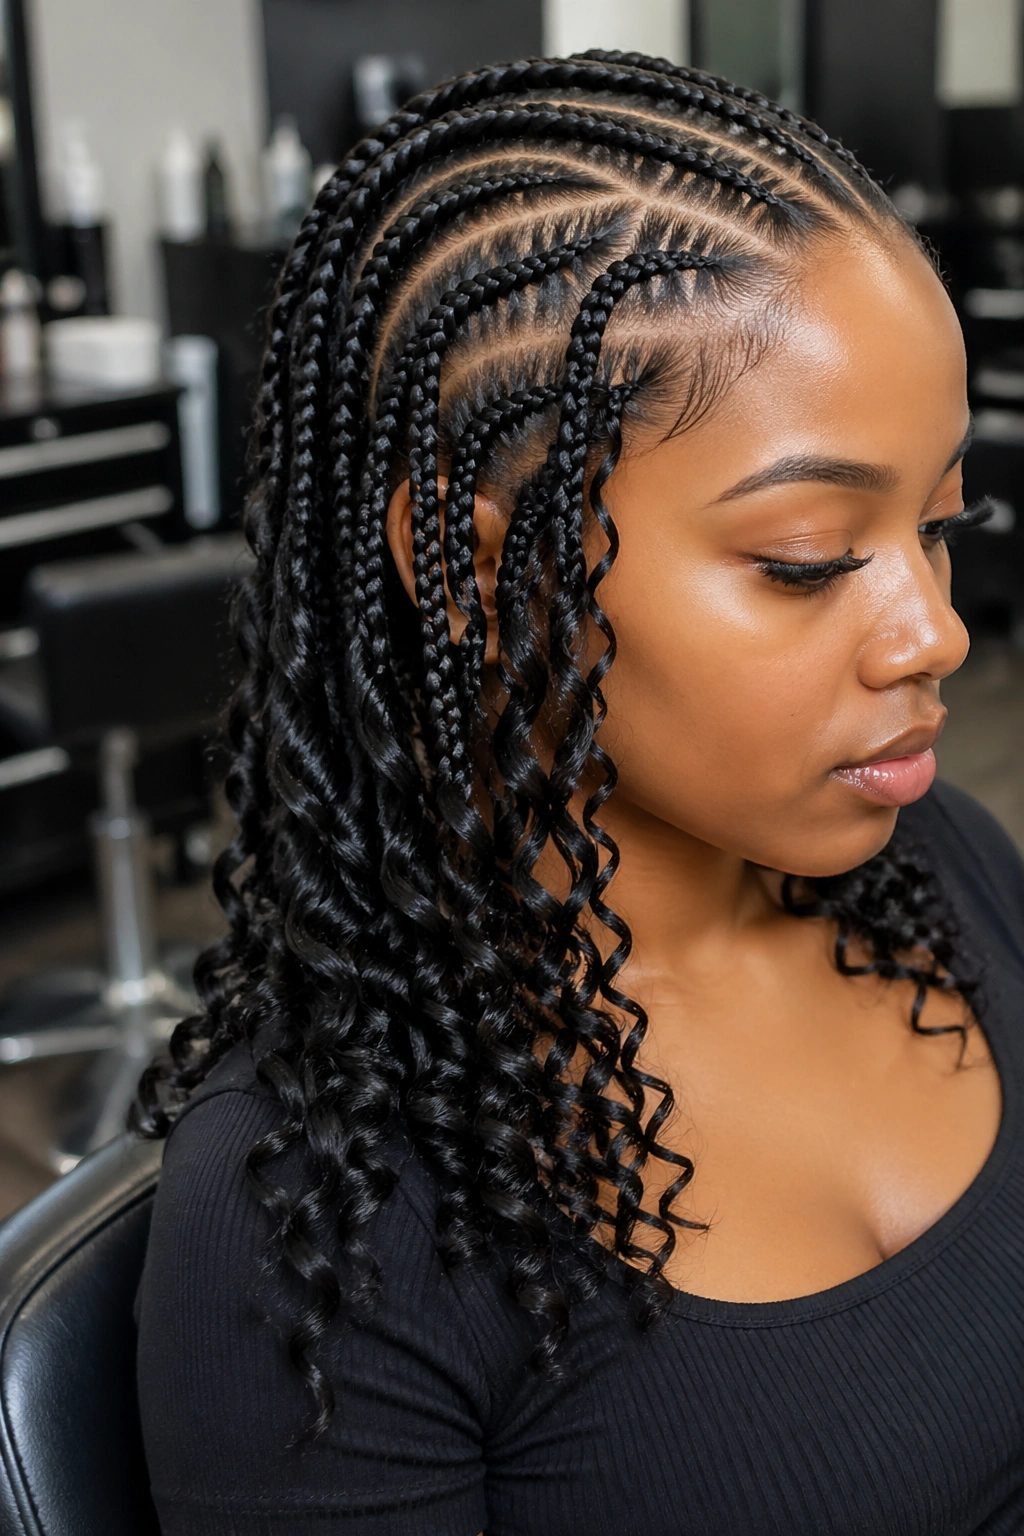
Timing matters. Curl the ends after the braids are installed, not before. A curled end fed into a braid flattens during the braiding process.
For rod sets: spray the ends with a setting foam, wrap around rods, let sit overnight or under a hood dryer for 30 minutes. Don’t remove rods while the hair is still warm.
For wand curls: use a 1-inch barrel for looser curls, a 3/4-inch for tighter. Pass each section through the wand twice for stronger hold.
For hot water dip: prepare water at 160 to 170 degrees. Not boiling. Dip the curled ends for 30 seconds, then pull out and hold upright until cool.
1. Classic Feed-Ins with Flexi Rod Curls
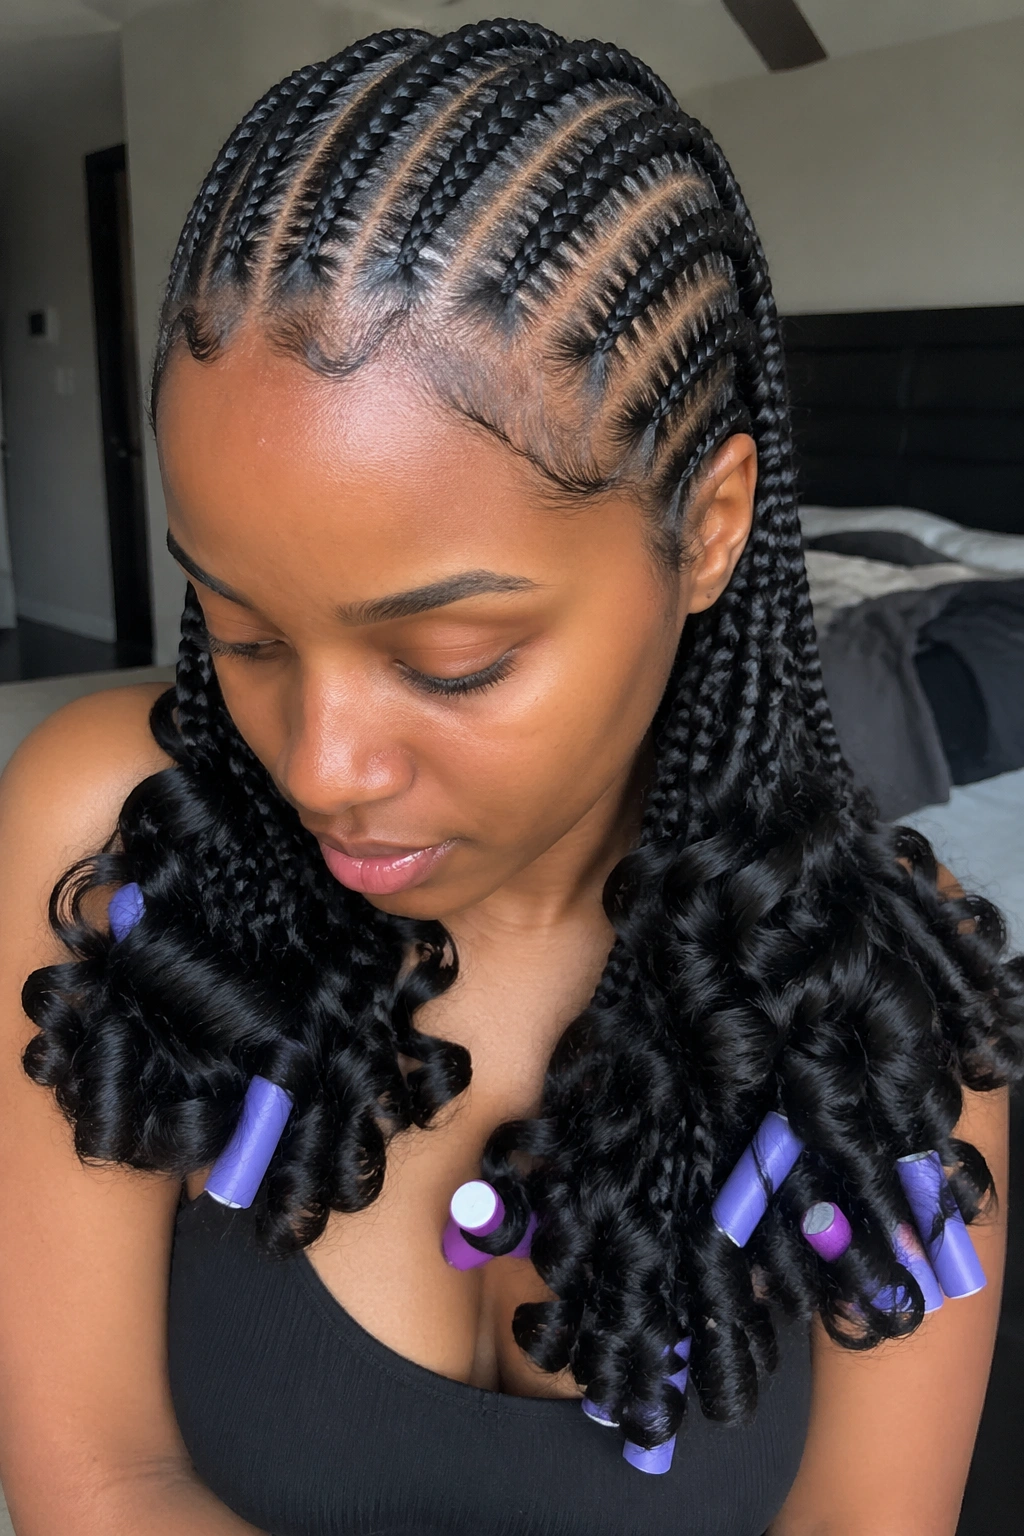
Six feed-in cornrows ending in loose, bouncy flexi rod curls. The go-to version that works on almost everyone.
Why It Works
Flexi rods give you that classic bouncy curl that photographs beautifully and feels versatile. Dressy enough for formal events, casual enough for daily wear. The curls blend seamlessly with the cornrow texture above.
- Use medium-size flexi rods (about half an inch in diameter)
- Section the ends into rod-sized pieces, one rod per section
- Roll from the tip toward the scalp, stopping where the curls should start
- Let sit overnight for deepest curl or use low heat for 30 minutes
Quick tip: spray setting lotion on the kanekalon before rolling. Dry kanekalon holds the curl poorly and falls flat within a day.
2. Jumbo Feed-Ins with Tight Ringlets
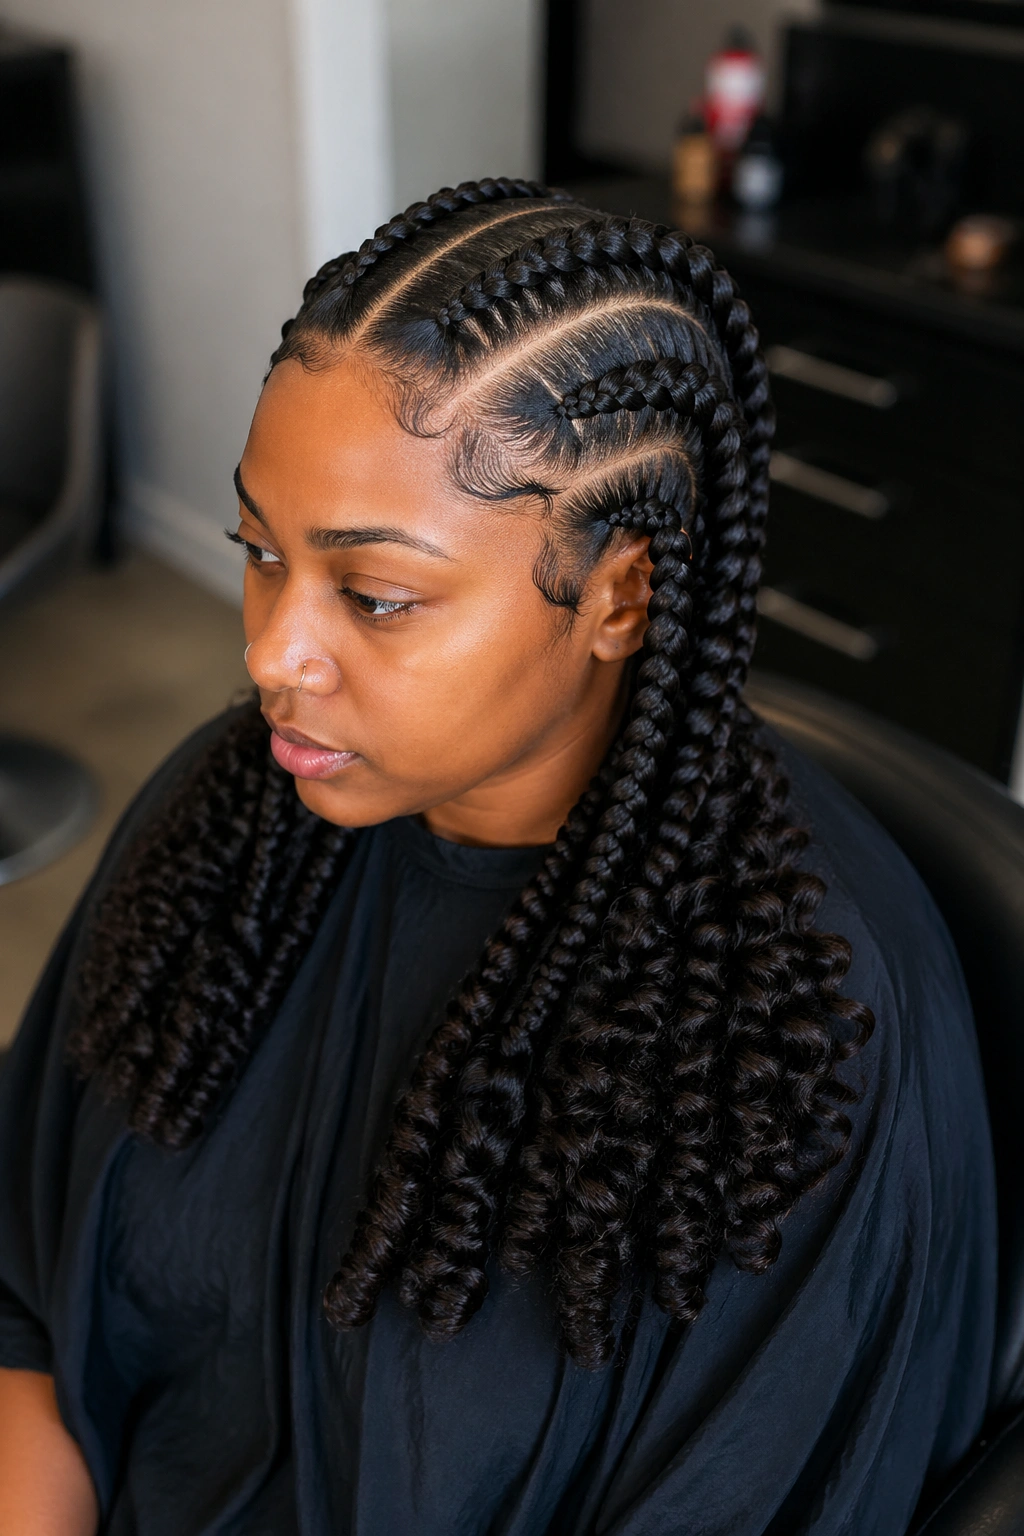
Four thick feed-in cornrows with tight perm rod ringlets at the ends. The contrast between the thick braids and the tiny ringlets is the visual hook.
Perm rods create ringlets that read as almost mechanical in their precision. Every coil the same size. Every spiral tight. When paired with jumbo braids, the two scales emphasize each other.
Best for women who want a high-impact style that reads both structured and feminine. The jumbo braids do the boldness. The ringlets do the softness.
3. Feed-Ins Ending in Goddess Curls
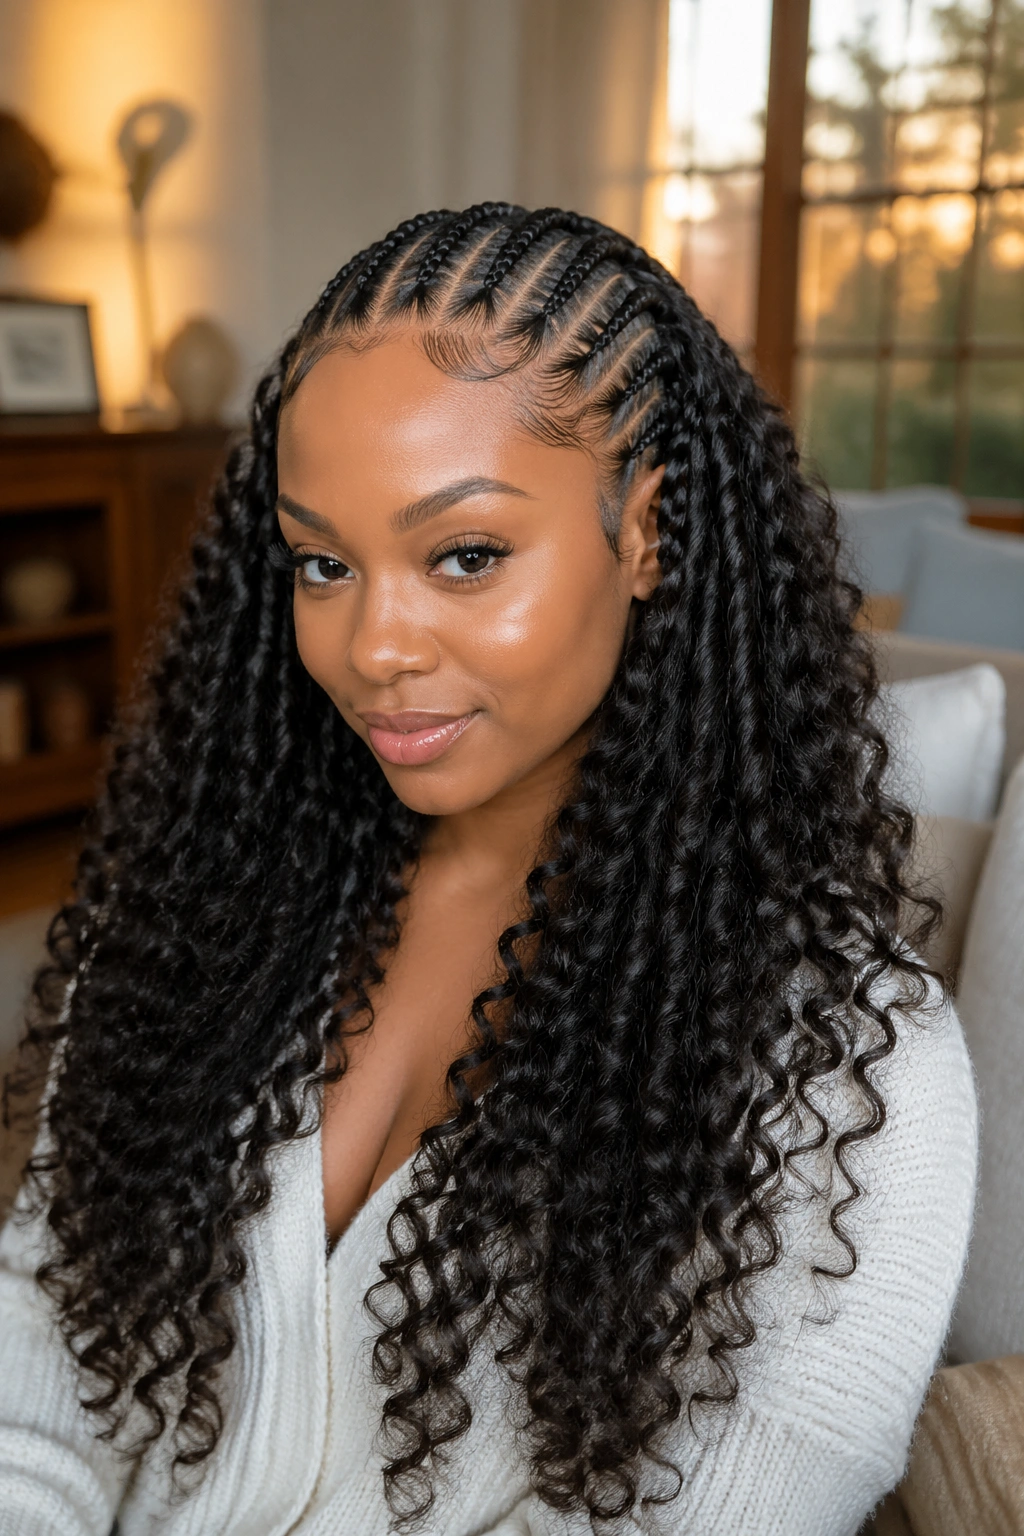
Eight medium feed-in cornrows ending in long, loose, goddess-style curls that flow past the shoulders. The overall length is dramatic.
Goddess curls are looser than typical rod-set curls. Use larger rollers — 1-inch or bigger — to create the soft waves rather than tight spirals. The result reads romantic and dressy.
This is the style for evening wear, date nights, or any occasion where you want to feel put together without being overdone.
4. Micro Feed-Ins with Spiral Curls
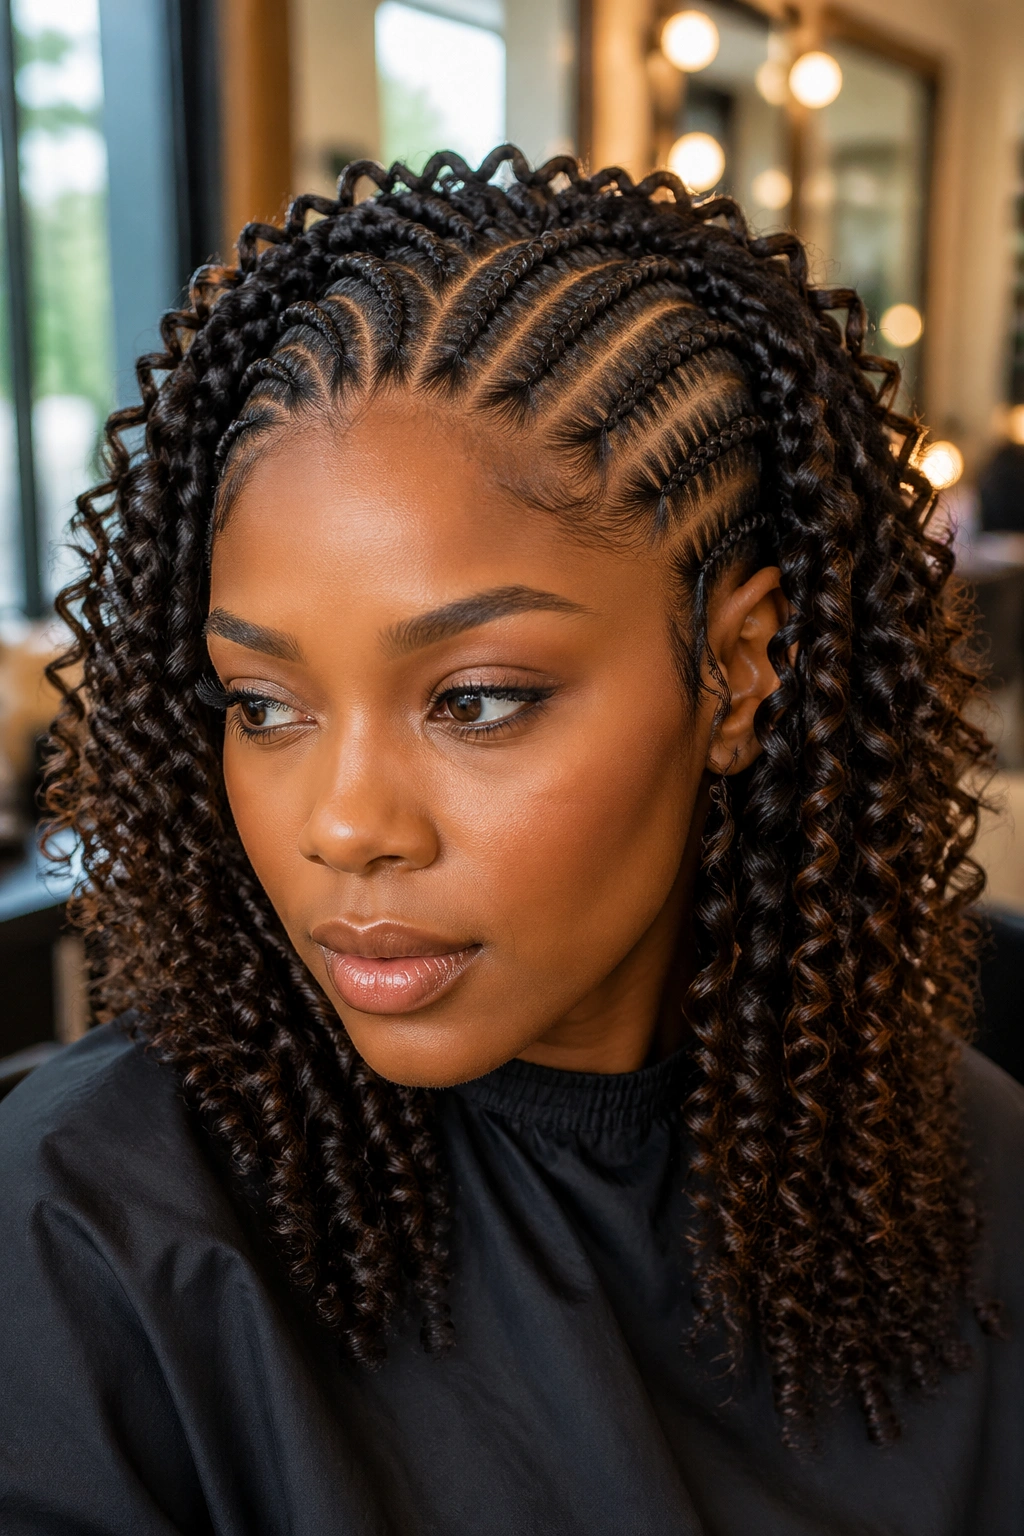
Twelve to fifteen small feed-in cornrows ending in spiraled curls. The high braid count combined with defined curls creates a textured, almost maximalist look.
Micro feed-ins with curly ends take real patience to install — you’re looking at 5 or 6 hours for a full head. The result is a style that holds up for 5 or 6 weeks with proper care.
Sensible investment for women who want protective styling that lasts through a season without needing reinstalls.
5. Feed-Ins with Loose Water Wave Curls
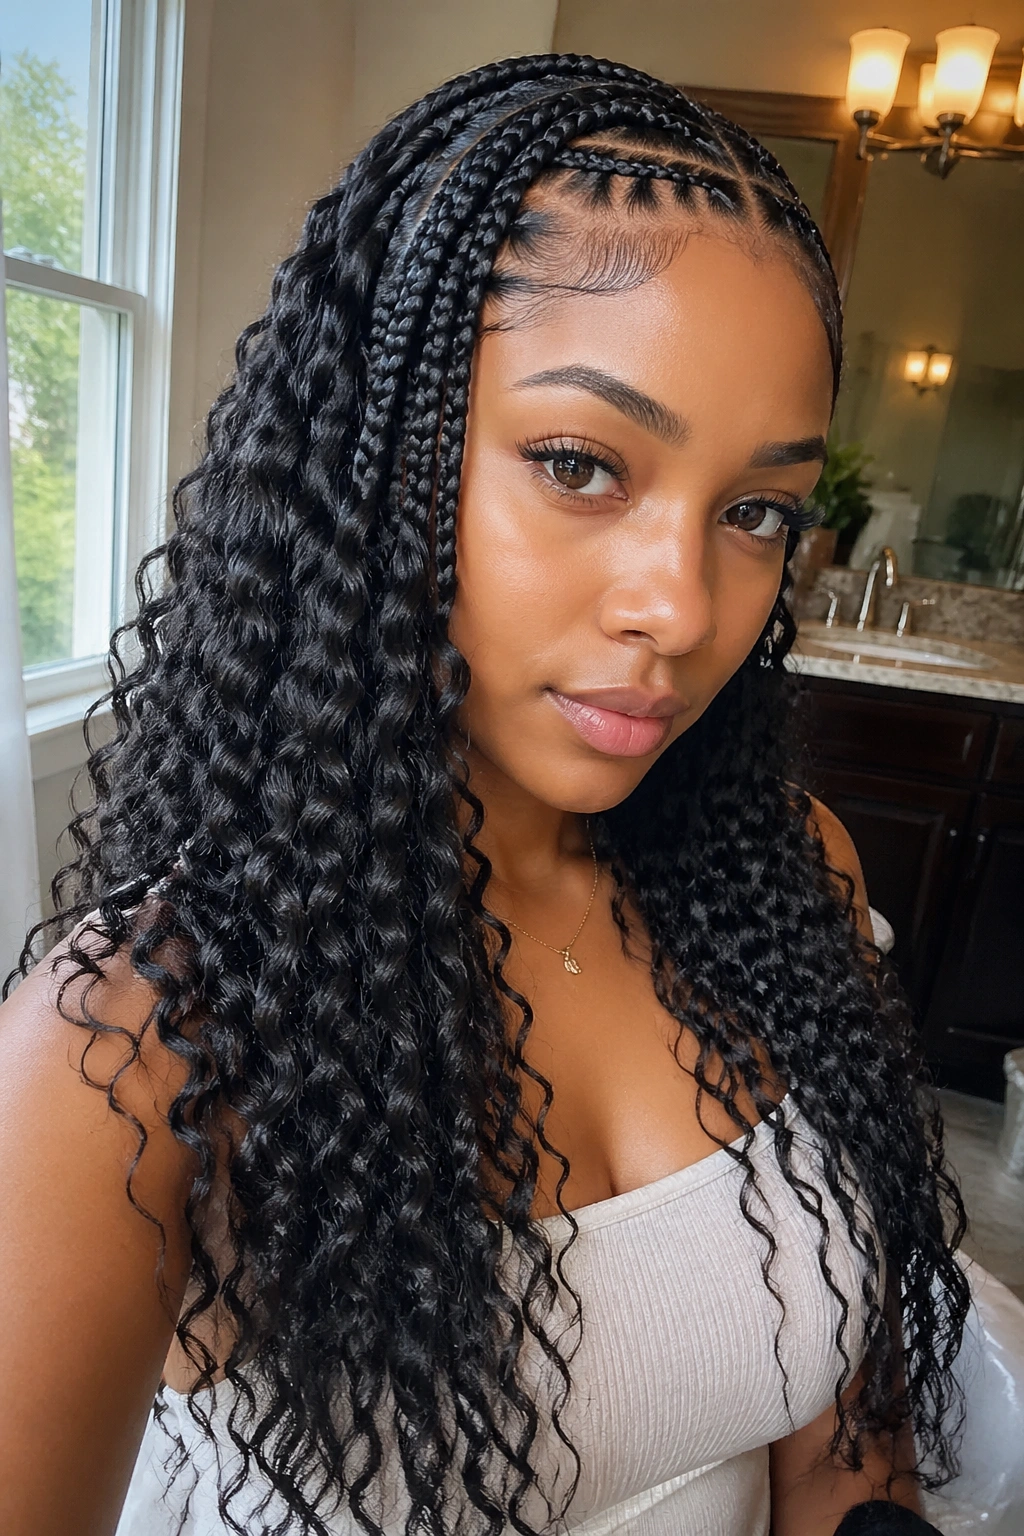
Use pre-packaged water wave kanekalon for the curl ends. The ends come out of the pack with the curl pattern already set — no rods needed.
Water wave hair has a looser, more natural-looking curl pattern than tightly-set rod curls. It reads as “my hair naturally does this” rather than “I curled my hair.”
This is the easiest version to install. No overnight drying. No rod management. Just braid in the pre-curled kanekalon and you’re done.
6. Feed-Ins with Kinky Curl Ends
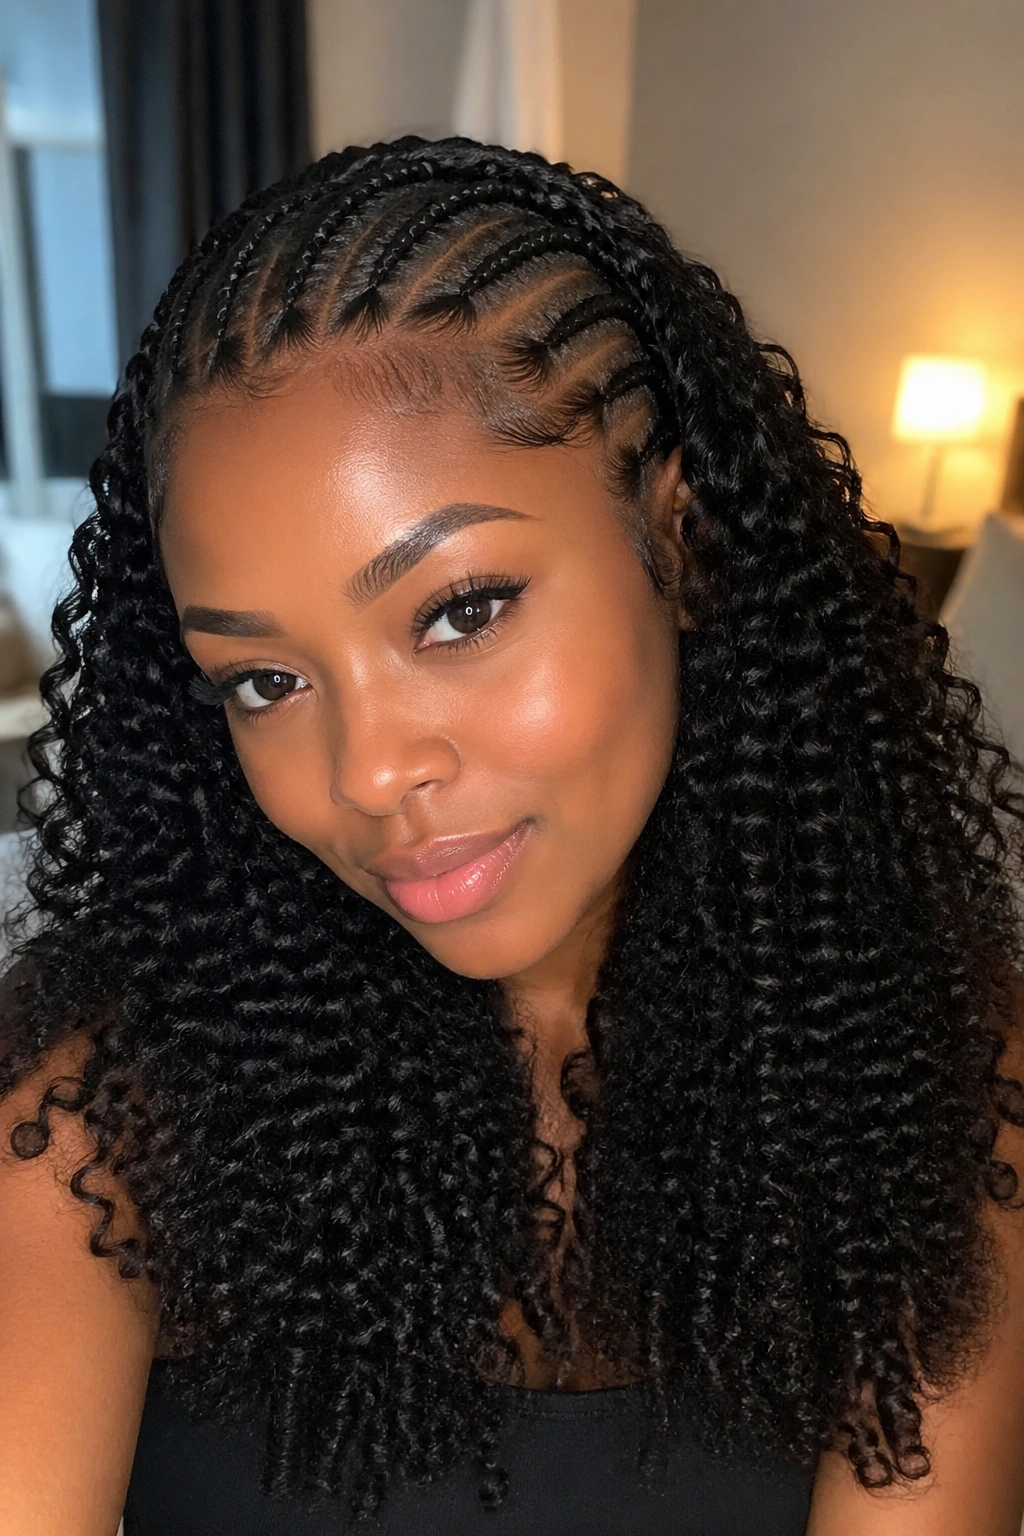
Pre-curled kinky kanekalon mimics a natural 3C-4A curl pattern. The ends look like your own hair would if you had a loose natural curl.
The kinky curl end is the one that passes as “real” hair best. People who see you won’t immediately clock that there are extensions involved. The blend between your natural hair and the kanekalon is nearly invisible.
Reserved for women who want the cornrow structure but don’t want to announce that extensions are involved.
7. Feed-Ins into Waterfall Curls
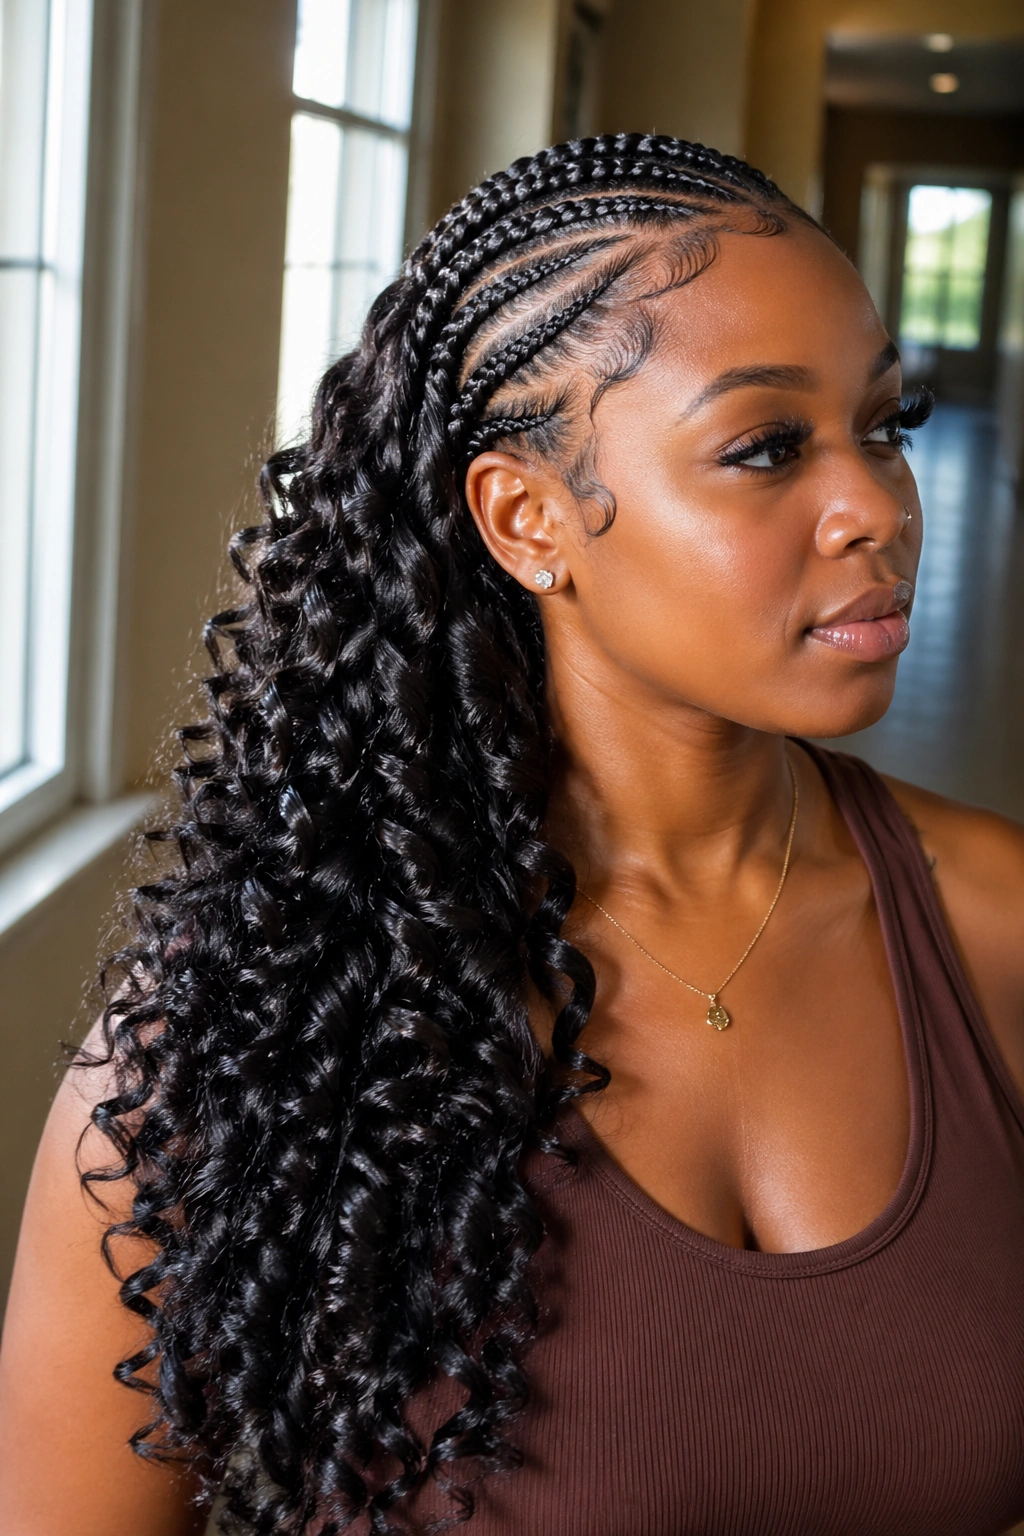
Feed-ins that end in curls cascading in long, flowing spirals — the “waterfall” effect. The curls flow in one direction, usually toward the back or one shoulder.
Achieve the waterfall effect by rod-setting the ends in the direction you want them to flow. Roll rods horizontally for straight-back flow. Roll diagonally for over-one-shoulder flow.
This style requires forward planning for the curl direction. Once set, you can’t easily redirect the curls.
8. Feed-Ins with Color at the Curl
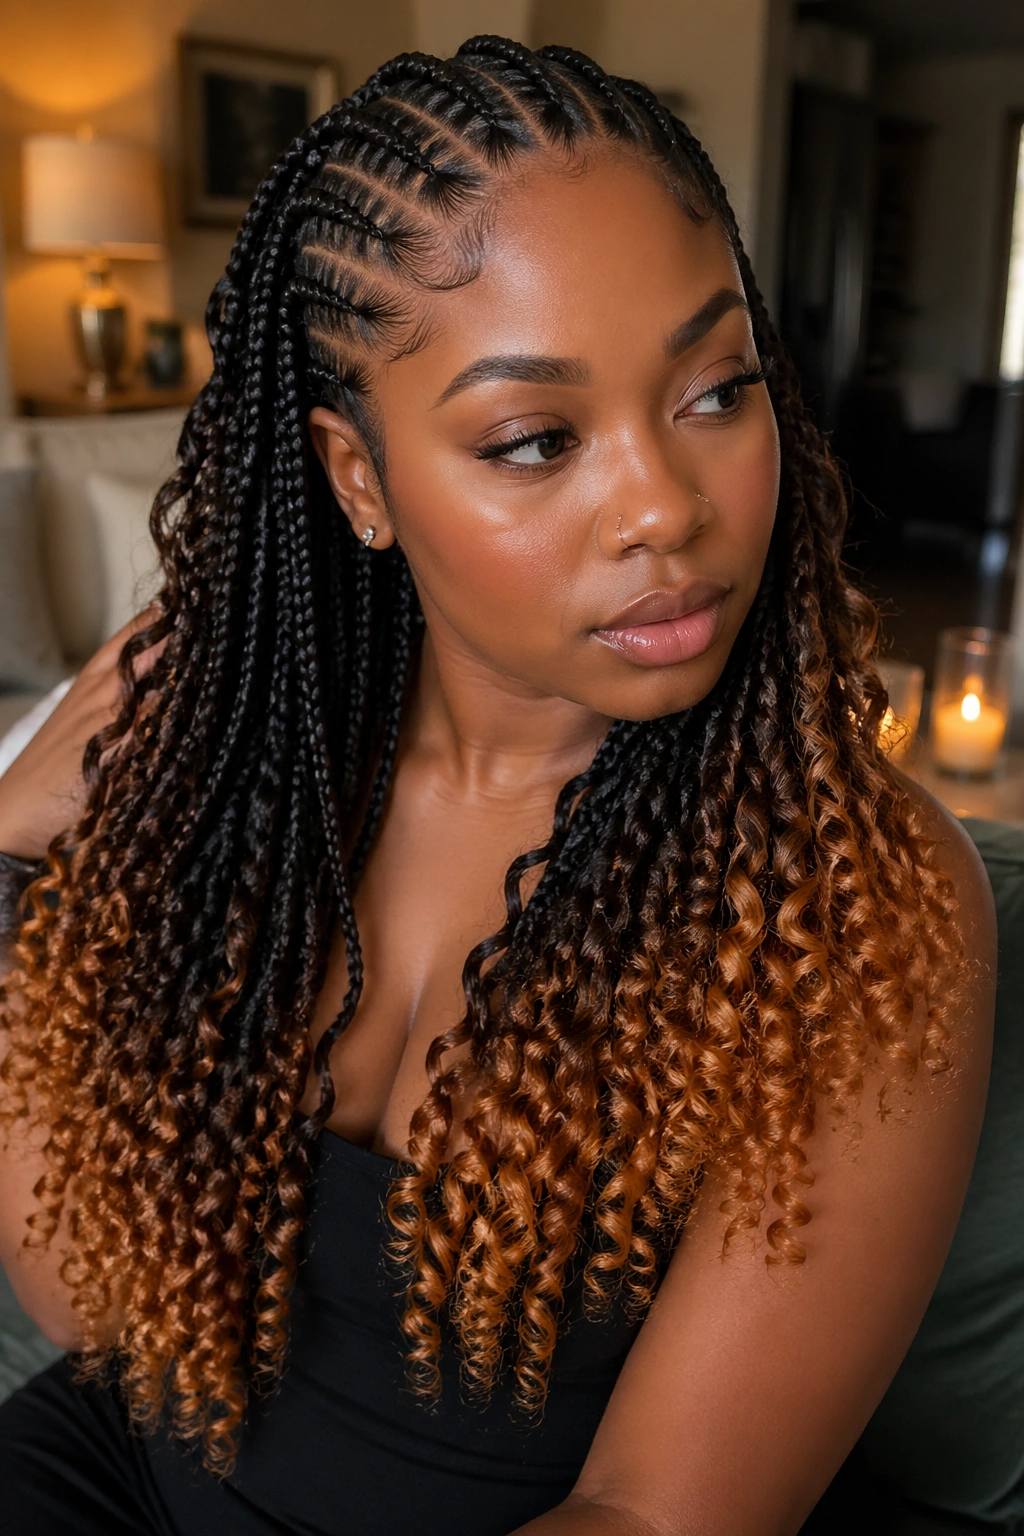
The braided portion stays natural. The curled ends are in a contrasting color — copper, honey, red, or burgundy. The color appears only where the curl begins.
Use ombre kanekalon — black at the root transitioning to the accent color by the tip. Cut your own lengths from a standard pack or buy pre-blended.
The color is concentrated where it has the most movement. When the curls bounce, the color flashes in and out of view. That’s the appeal.
9. Feed-Ins with Beaded Transition
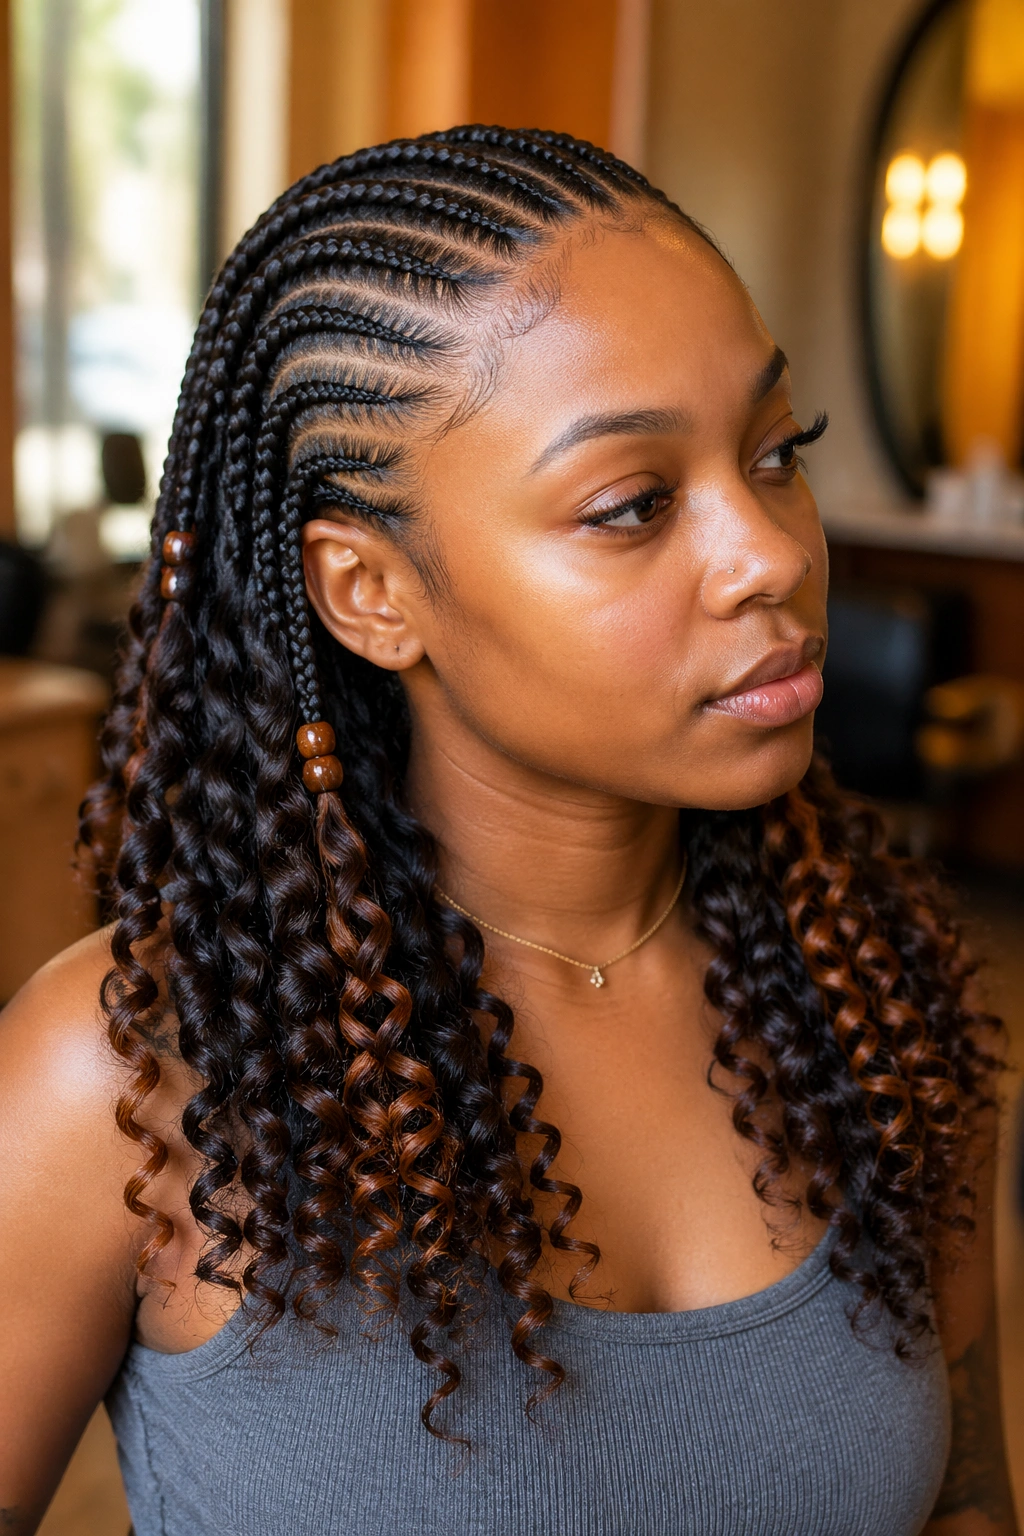
The point where the braid ends and the curls begin is marked by a single decorative bead. Each braid has one bead at the transition.
The beads act as punctuation. They stop the eye at the exact moment the texture shifts, highlighting the transition rather than letting it blur.
Pick beads that coordinate with either your natural color, the curl color, or both. Metal beads — gold, silver, rose gold — tend to work with every color.
10. Feed-Ins with Wand-Curled Ends
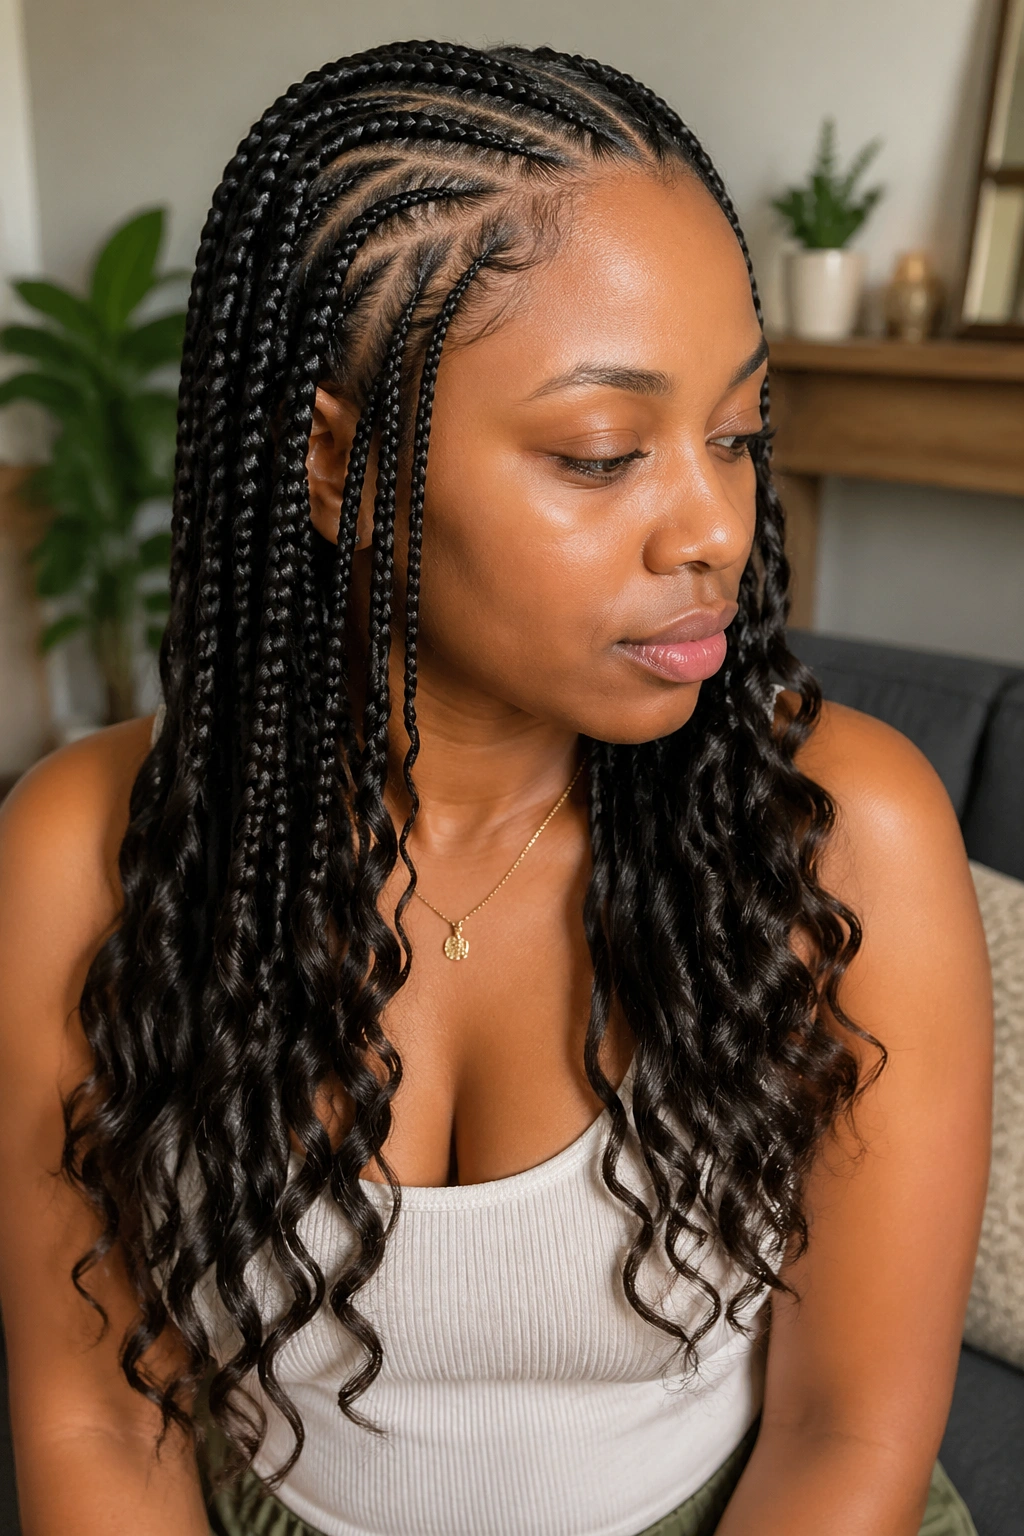
Instead of rod sets, use a 1-inch curling wand to create soft, loose curls at the ends of each braid. The wand-curl texture reads slightly looser than rod sets.
Wand curls set faster than rod sets — about 30 seconds per section versus overnight for rods. Trade-off: heat exposure, which can affect the kanekalon fiber over time.
Use heat protectant on the kanekalon before the wand touches it. The same principle as with natural hair.
11. Feed-Ins with Finger-Coiled Curls
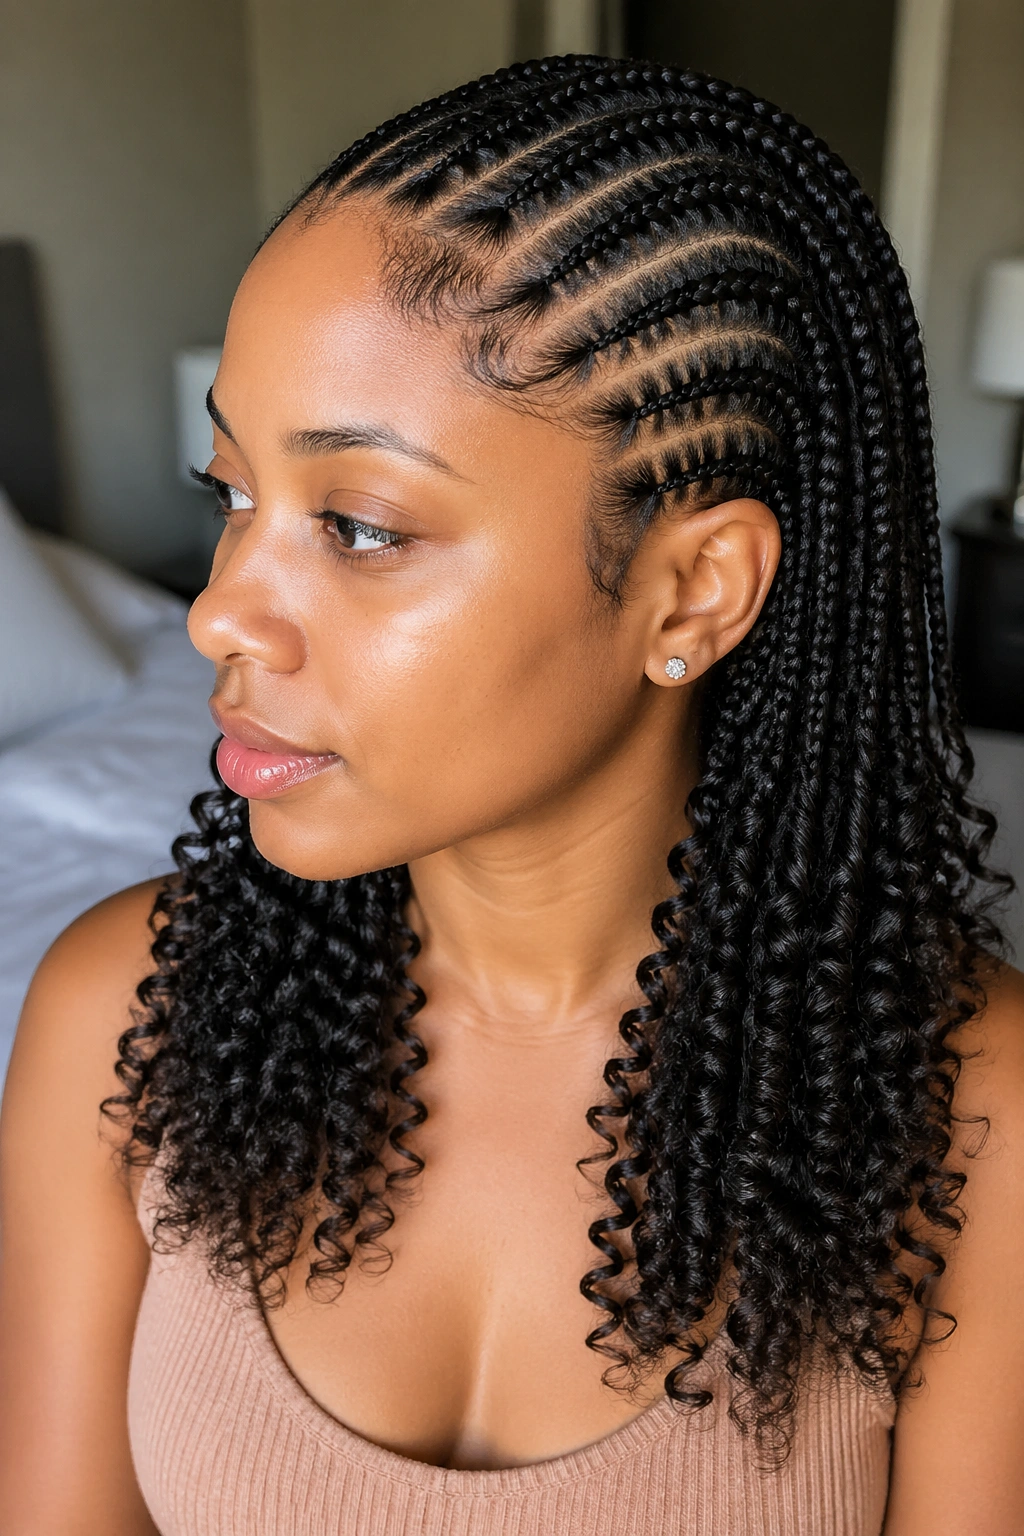
Instead of rods or wands, finger-coil each end section. Take the section, wrap it around your finger, hold for 30 seconds, release. The coil pattern is set.
What Makes It Different
Finger-coiling creates a smaller, more organic curl pattern than rods or wands. The curls look like they formed naturally rather than being set by a tool.
Time-intensive per section — 30 to 45 seconds per coil adds up. Plan an extra 45 minutes beyond a standard install.
Works best with water-activated kanekalon or human hair. Dry synthetic hair doesn’t finger-coil well.
12. Feed-Ins with Springy Afro Curls
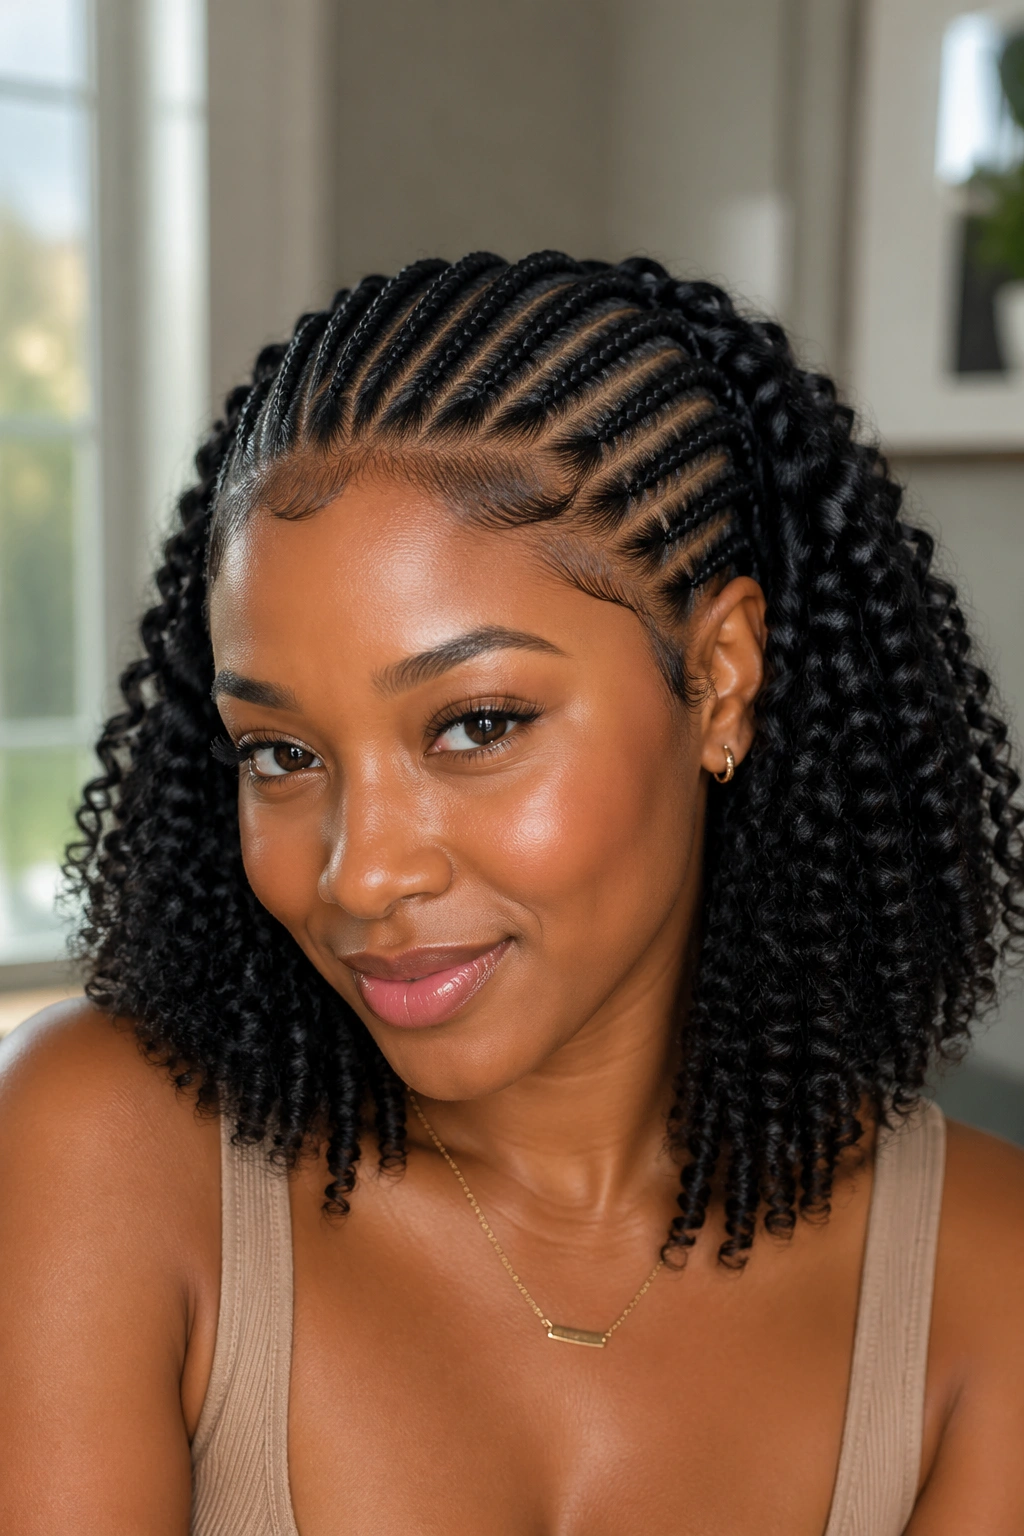
Use afro-textured pre-curled kanekalon for the ends. The curl pattern is a dense, springy, almost 4B texture.
The afro curl ends read as natural texture in a way that smoother rod-set curls don’t. You can even blow out the curls slightly to create more volume and mimic a textured puff at the ends.
Ideal for women who want the style to celebrate natural hair texture while still gaining the structure and length of cornrows.
13. Feed-Ins with Silky Straight Curl Blend
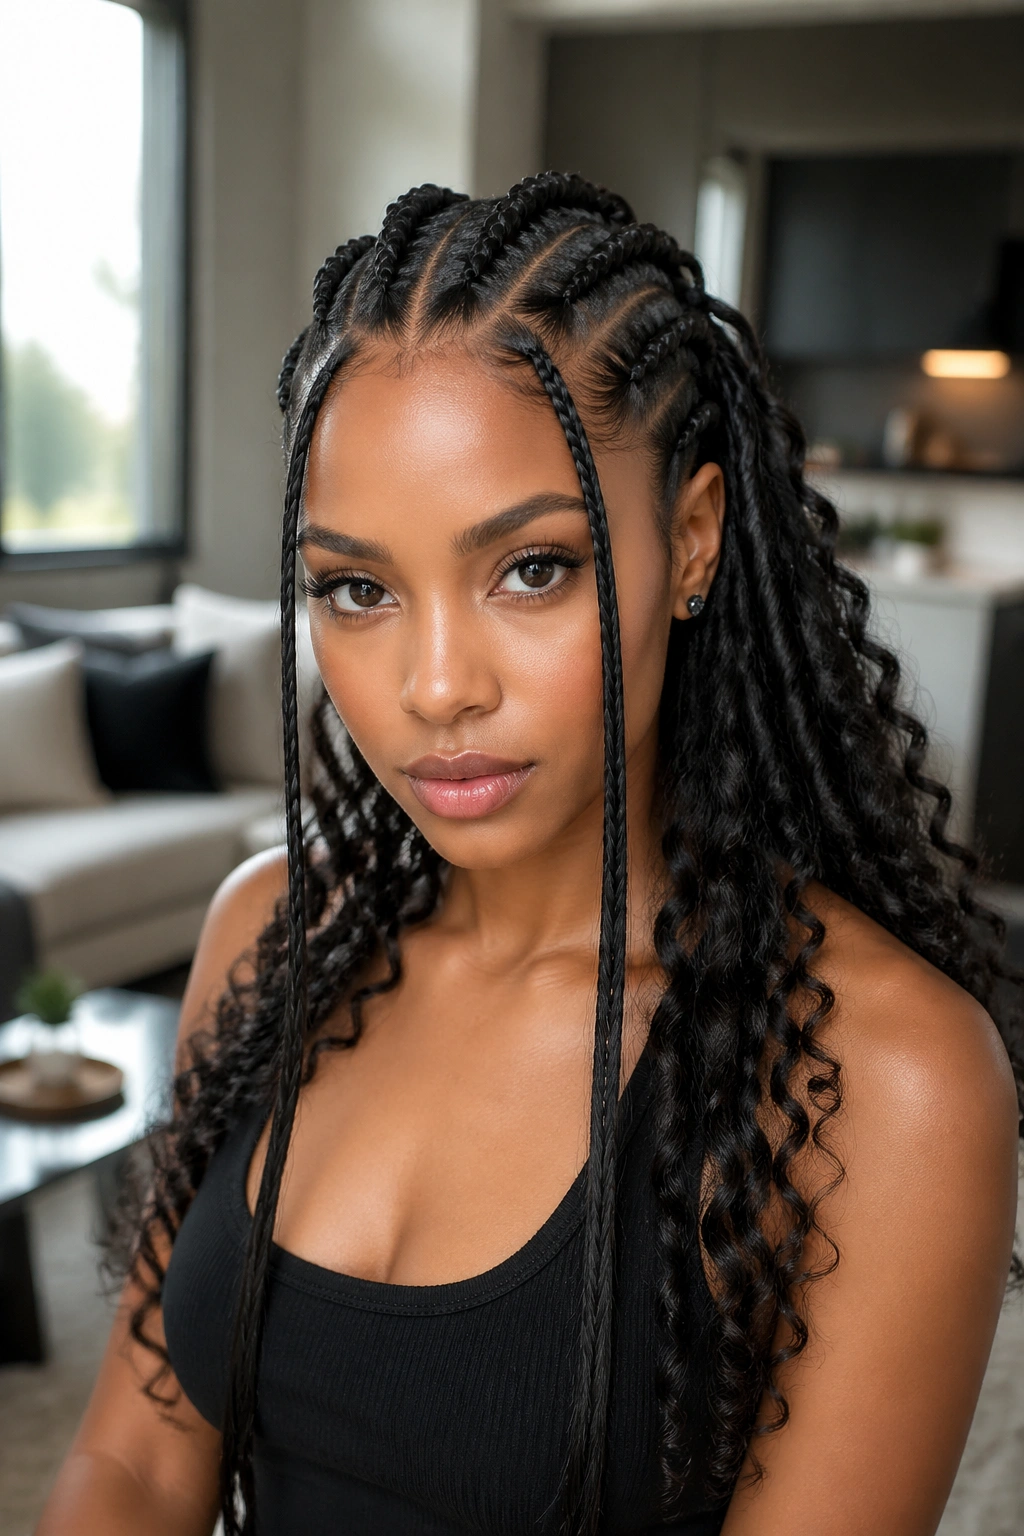
Most ends are curled, but a few are left straight. The mixed-texture finish gives the style an unexpected edge — most of the braids bounce, a few fall straight.
Place the straight braids strategically — say, the two front braids frame the face as straight while the rest of the curls flow behind. The straight pieces create face-framing lines.
This version reads modern and unexpected. People can’t always pinpoint why it feels different from standard all-curly ends, but they notice.
14. Feed-Ins with Half-Curled Ends
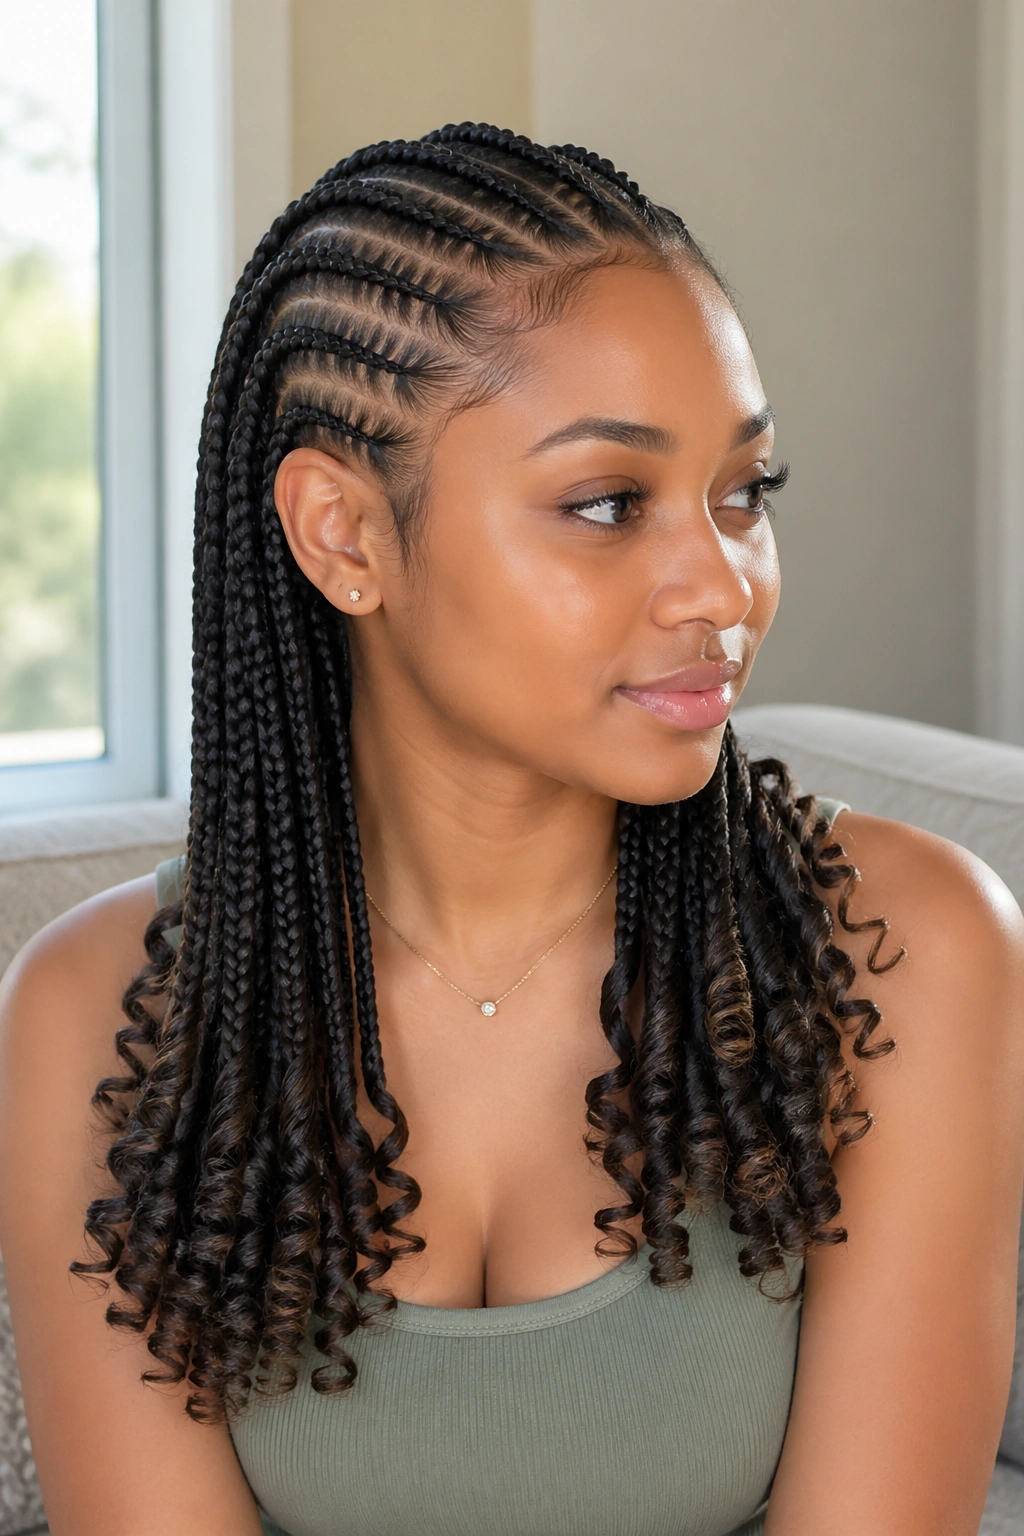
Only the bottom half of each end is curled. The top half where the braid meets the extension remains straight. The curls start a few inches below where the braid transitions.
This creates a different visual rhythm. You see: braid, smooth transition, curl. Rather than: braid, immediate curl.
The half-curl effect reads elegant and dressy. It’s also easier to refresh day-to-day because you don’t have to manage curls near the braid.
15. Feed-Ins with a Single Pulled-Out Curl
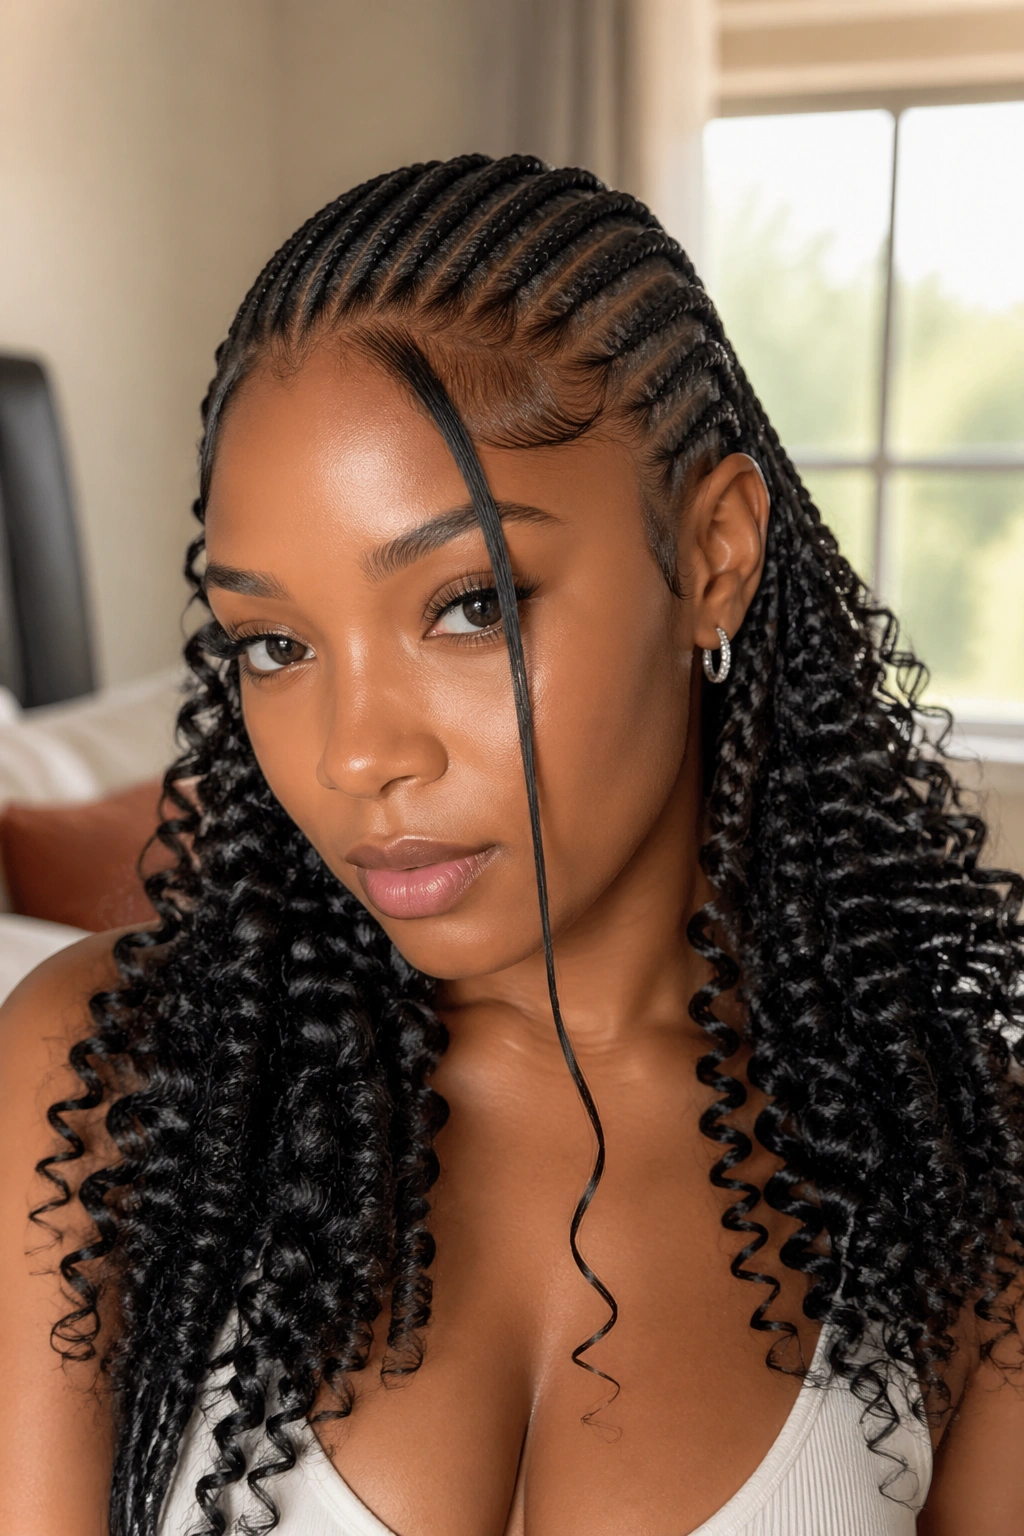
Most braid ends are curled, but one — usually at the front — is pulled out into a single long, straight strand across the face. The strand frames one eye or cheek.
The face-framing strand is a technique borrowed from editorial styling. On a full head of curly ends, it reads intentional and artistic rather than messy.
A scenario: you want your style to feel personalized for a photo shoot or special event. The single pulled-out strand gives the install that styled-just-for-today quality.
- Skip rod-setting the chosen front strand
- Leave it straight while all other ends get curled
- Apply a tiny amount of hair wax to keep it smooth
- Position to frame your face at the desired angle
16. Feed-Ins with Curly Pony
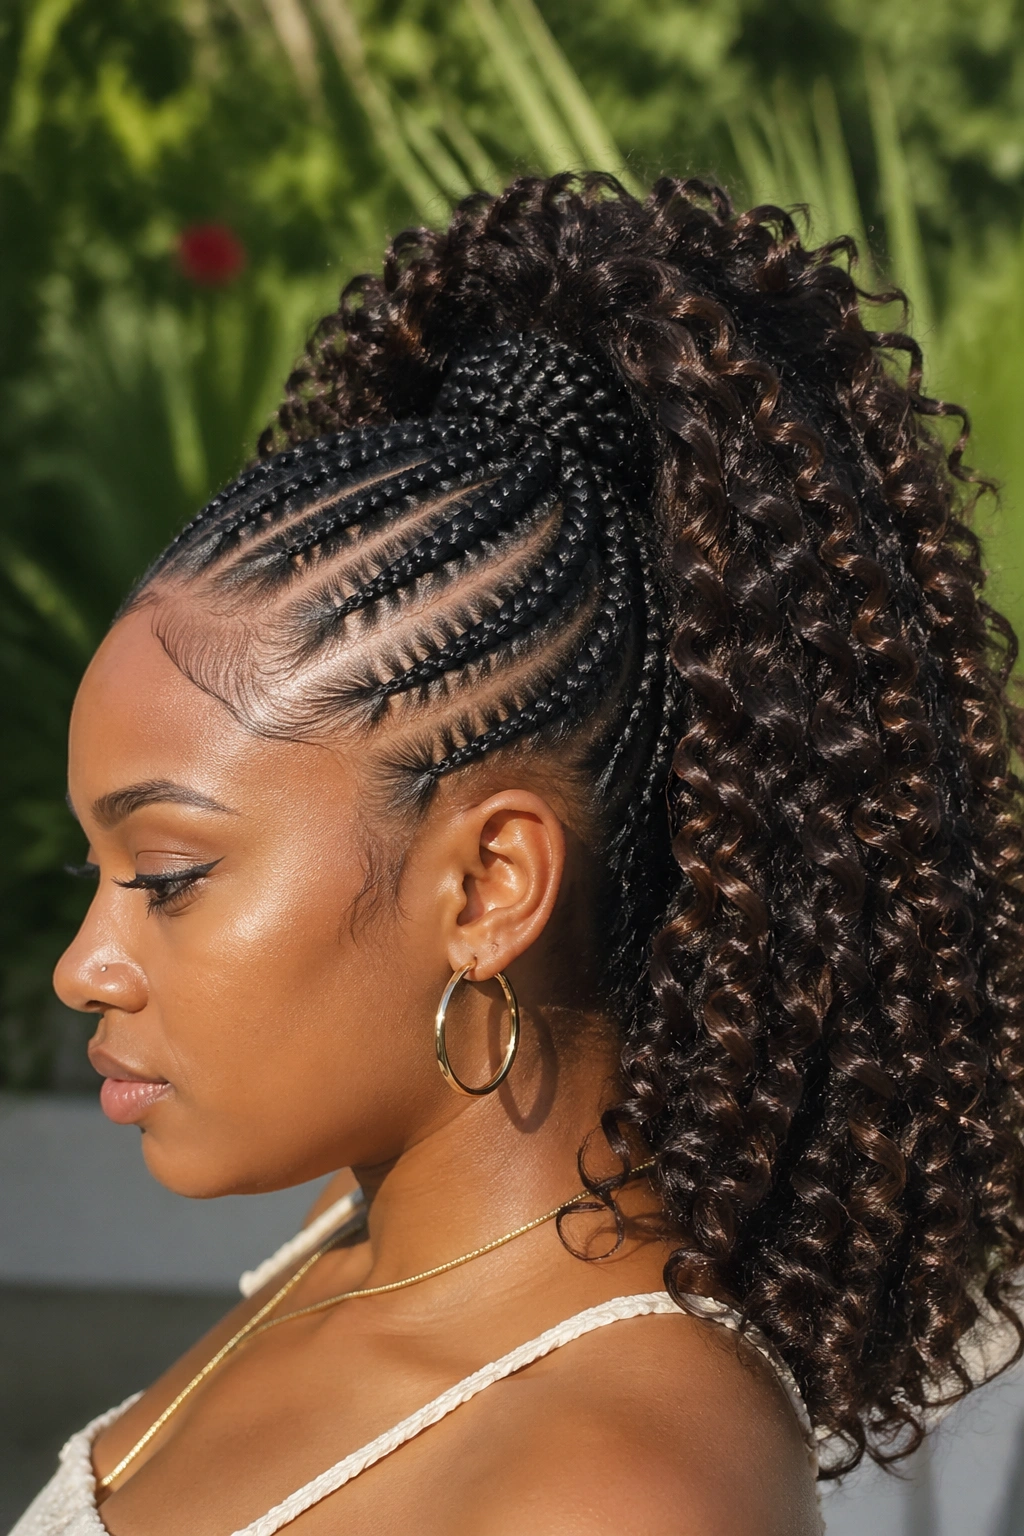
All feed-in cornrows gather into a single high ponytail at the back, where the curly ends fan out in a cascade. The braids run straight to the ponytail point, then the curls take over.
This version combines the cornrow structure with a completely different silhouette at the back. The ponytail reads as one design element. The curls read as another.
Secure the ponytail with a hair tie, then wrap a braid around the base to hide the elastic.
17. Feed-Ins with Low Curly Bun
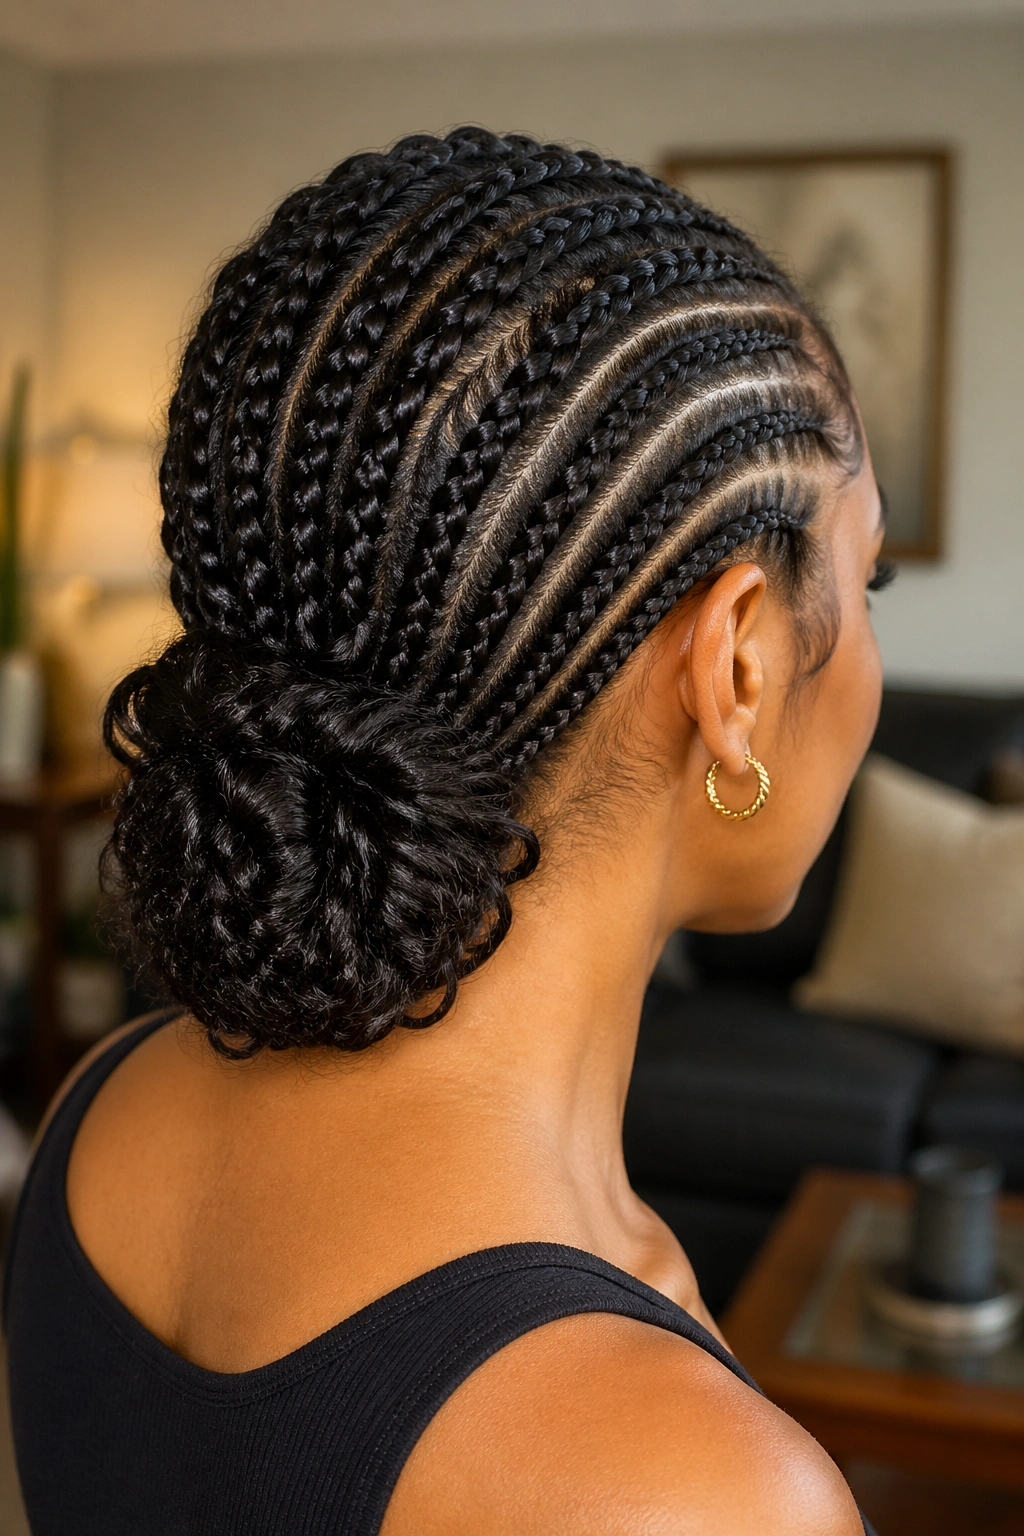
Same idea as the pony, but the curly ends are bundled into a low bun at the nape. The curls form the bun structure itself.
The curly bun has a textured, deliberately undone quality. Not a smooth updo. Rather, a bun where you can see the curl pattern clearly.
Secure with U-pins inserted perpendicular to the scalp at the four cardinal points of the bun.
18. Feed-Ins with Side-Pulled Curls
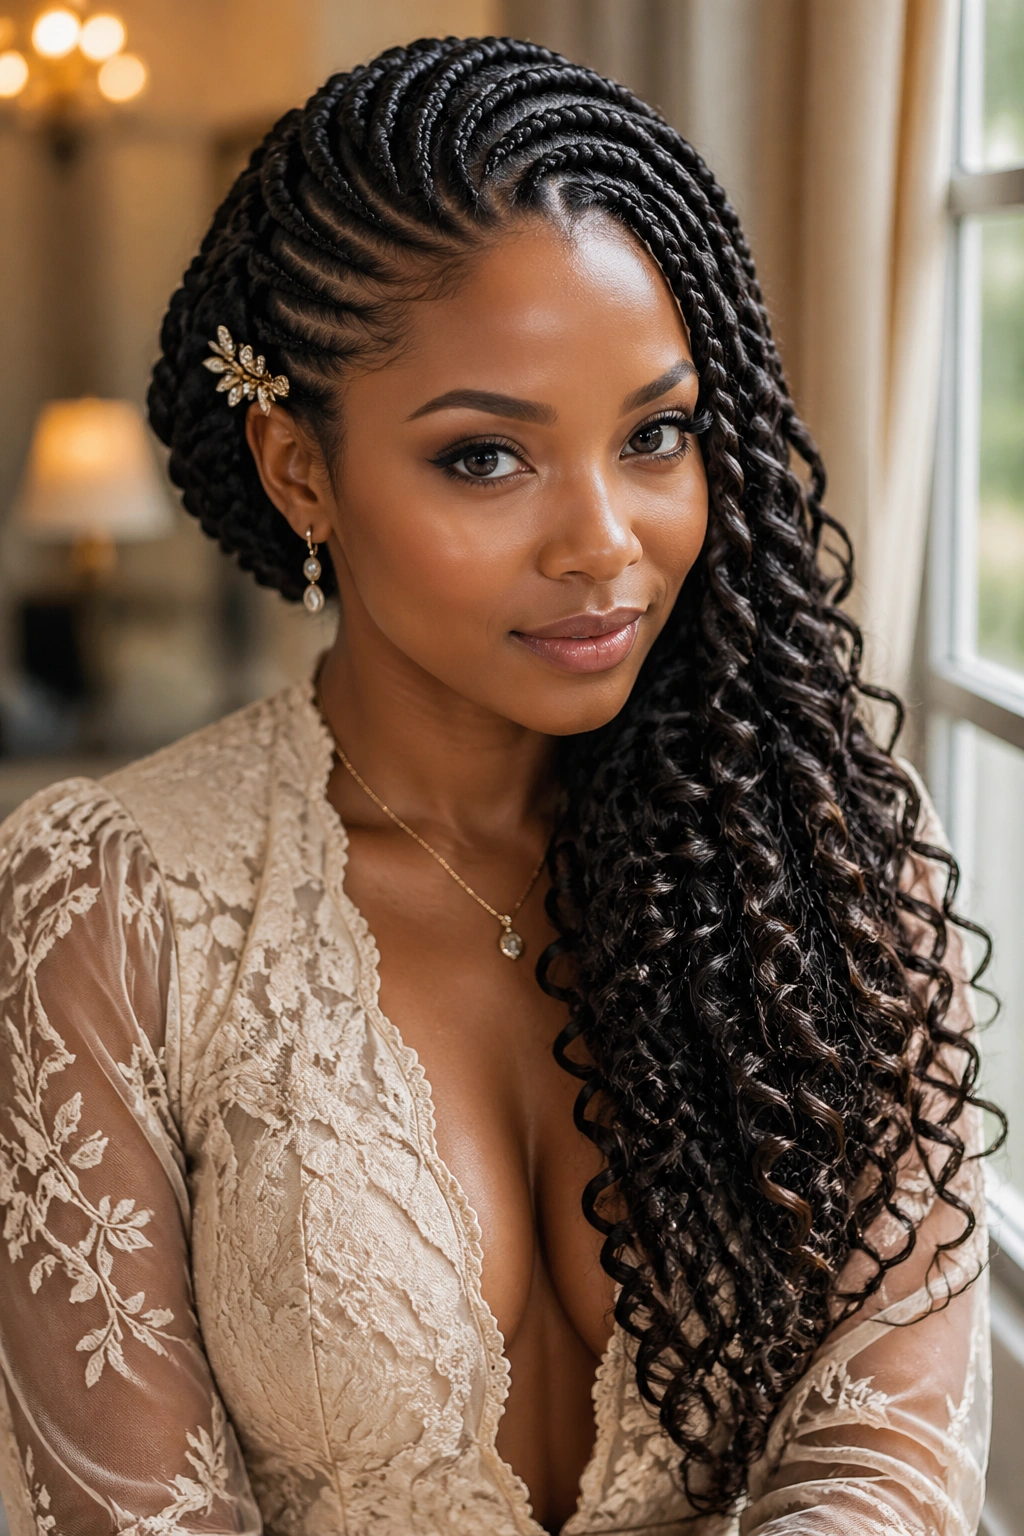
Braids run straight back. At the nape, all braids are gathered and pulled to one side, where the curls cascade over one shoulder.
The side-pulled version reads romantic and somewhat retro. It evokes a style from an era of elegant parties and old films.
Secure the side bundle with a decorative pin or small hair clip that shows as part of the design.
19. Feed-Ins with Layered Curl Lengths
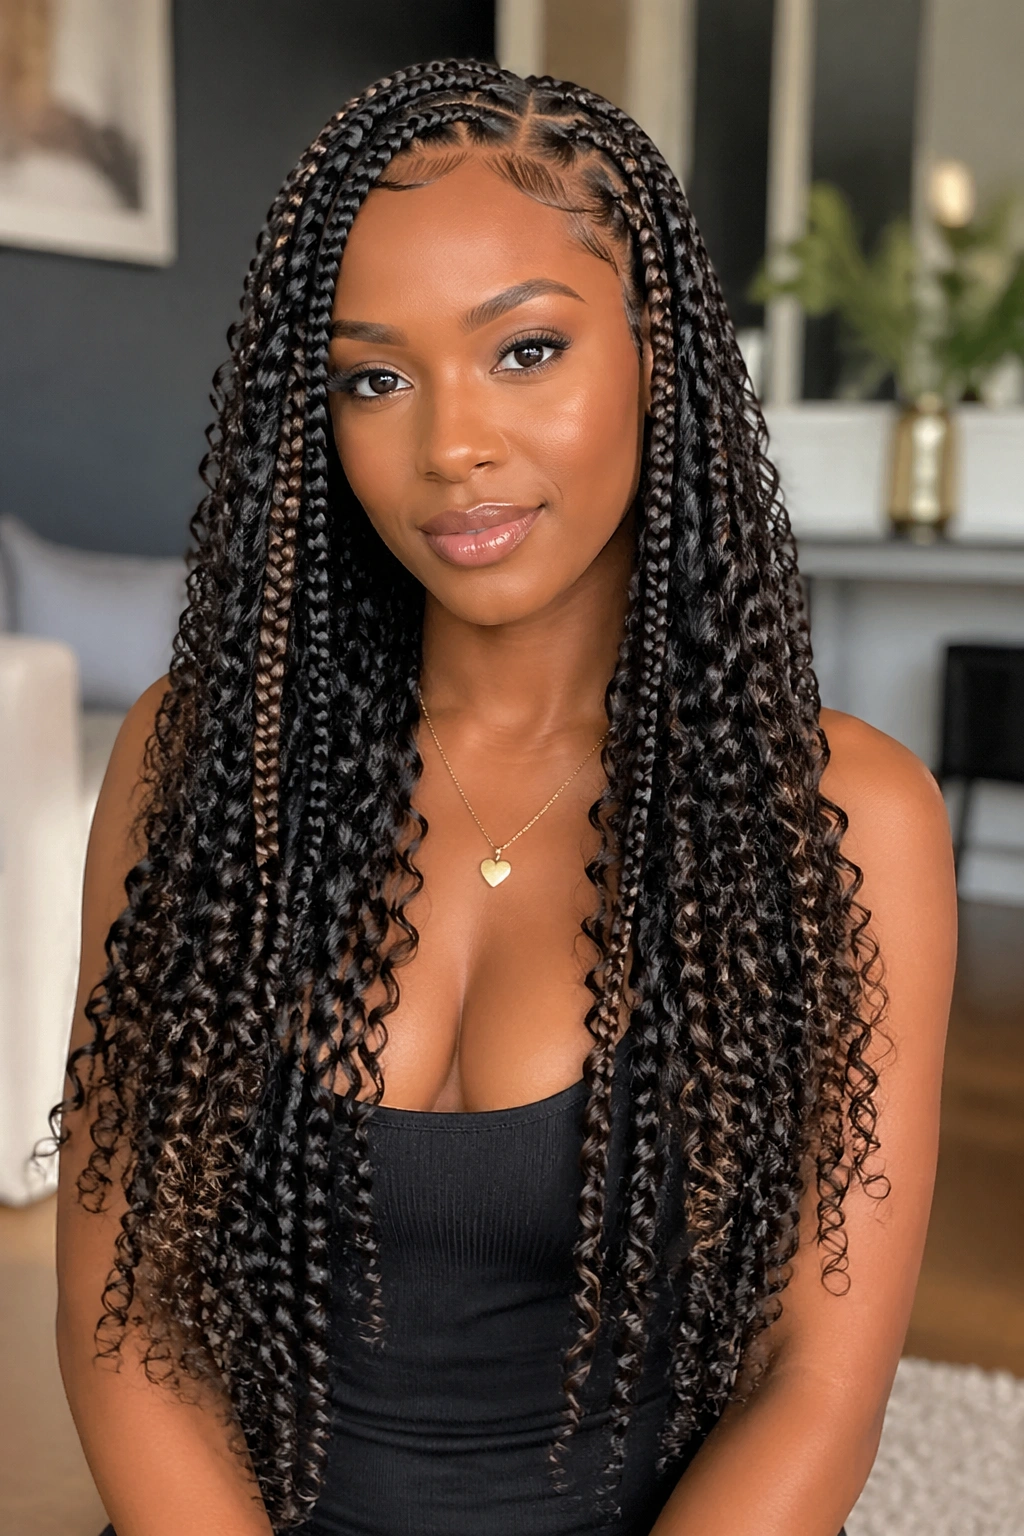
Curls at varying lengths rather than uniform. Some braids end at shoulder-length curls, some at mid-back, some at waist. The layered lengths create depth.
Layered lengths require planning the extensions before you install. Cut the kanekalon at varying lengths before starting, assigning the longer pieces to specific braids.
This version reads more organic than uniform-length curls. The variation mimics how natural hair grows at slightly different rates.
20. Feed-Ins with Curled Sides Only
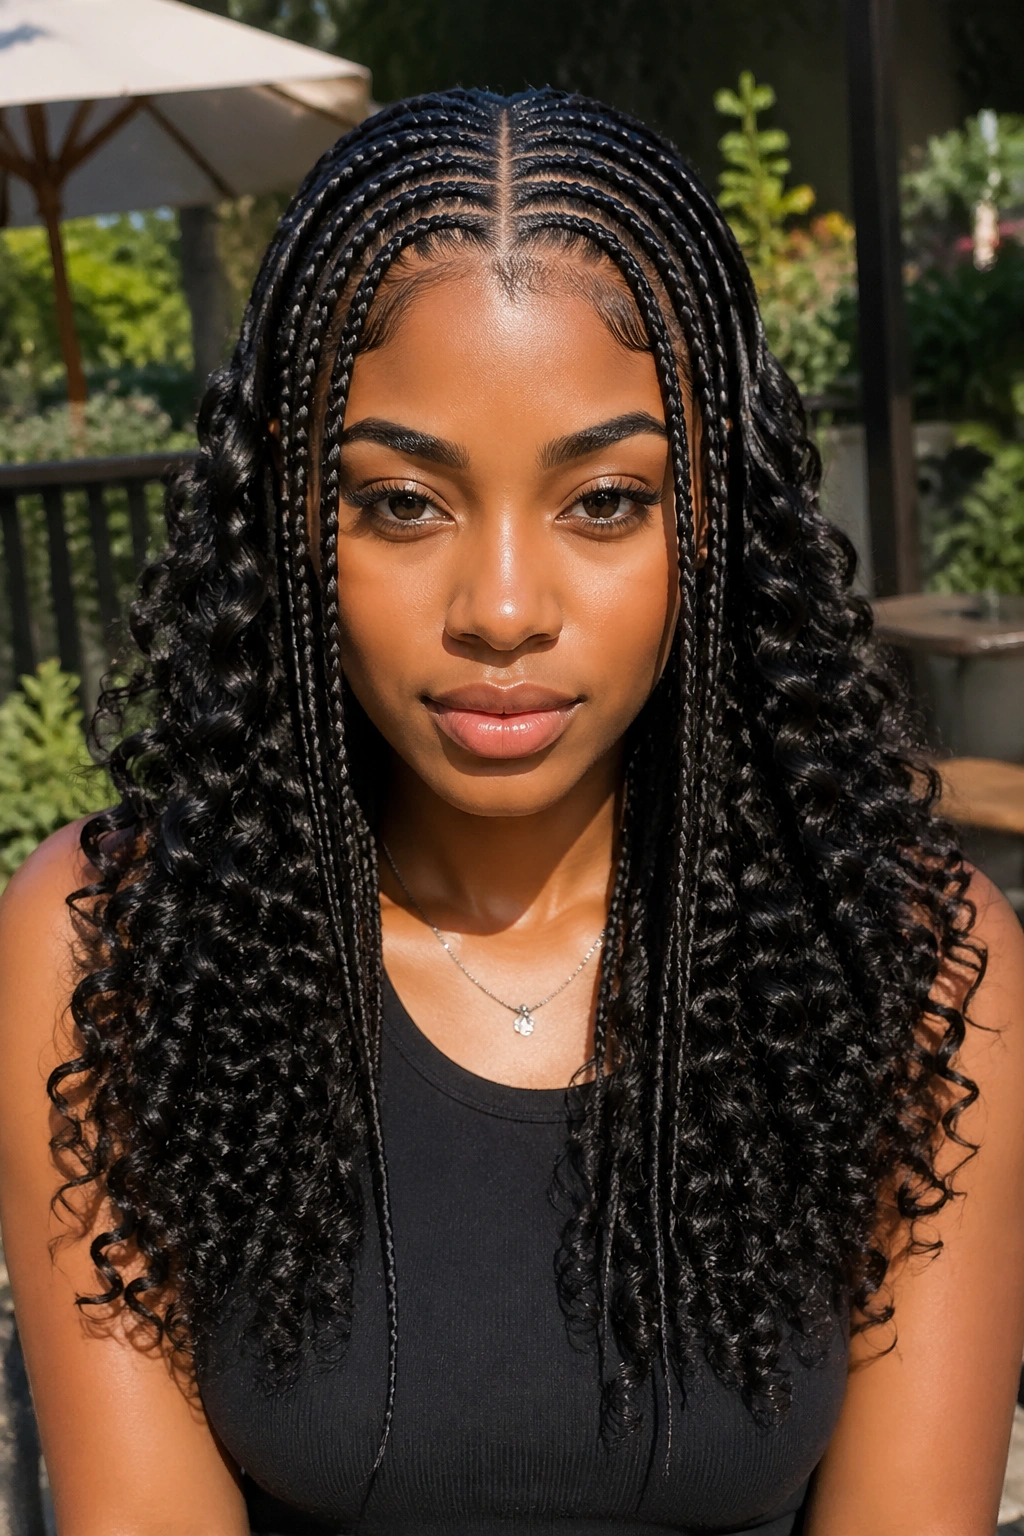
The center braids end in smooth straight ends. The side braids end in curls. Straight center, curled sides.
The effect creates a face-framing halo of curls around a straight central section. The straight pieces ground the style. The curls soften the perimeter.
This version especially flatters women with strong central features — a defined nose bridge, a prominent forehead — because the straight center emphasizes the facial vertical.
21. Feed-Ins with Crochet Curl Add-On
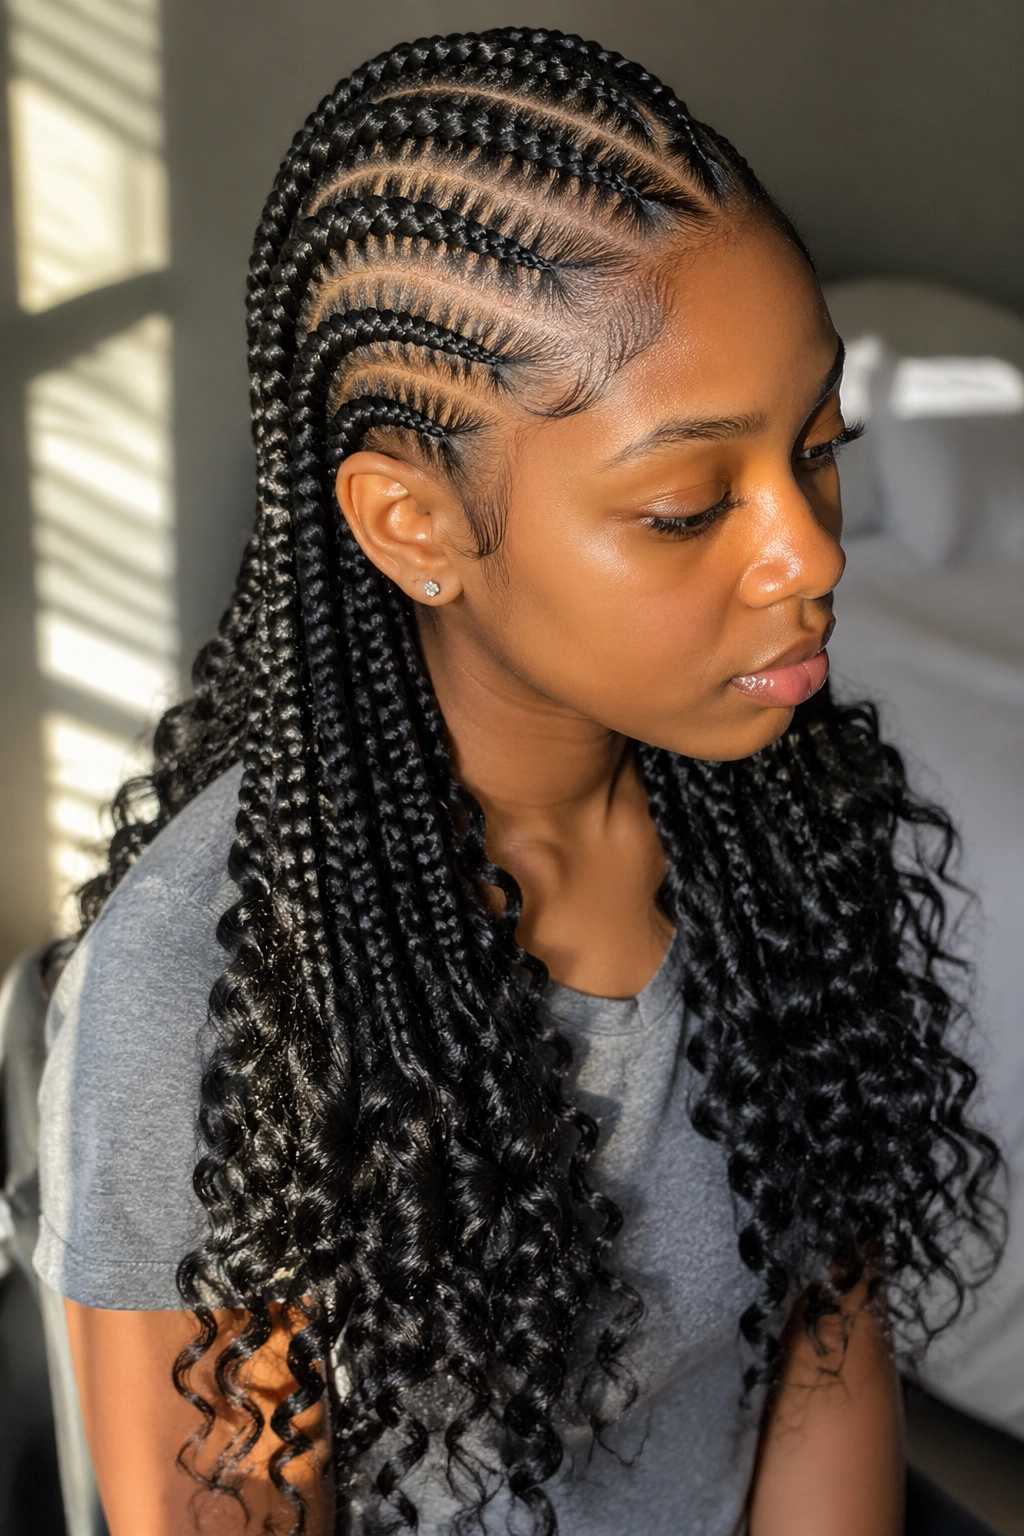
Instead of setting the kanekalon into curls, install standard straight feed-ins and then crochet pre-curled hair into the ends. The crochet hair provides the curl.
How to Install It
Braid your feed-ins to within three inches of where you want them to end. At that point, leave the braid loose rather than sealing it. Use a crochet latch hook to pull curly hair through the unsealed end and tie off.
The advantage: you can change the curl type without redoing the whole install. Swap crochet curls weekly if you want variety.
The result reads as one cohesive style with curly ends, but the flexibility is built in.
22. Feed-Ins with Mermaid Curls
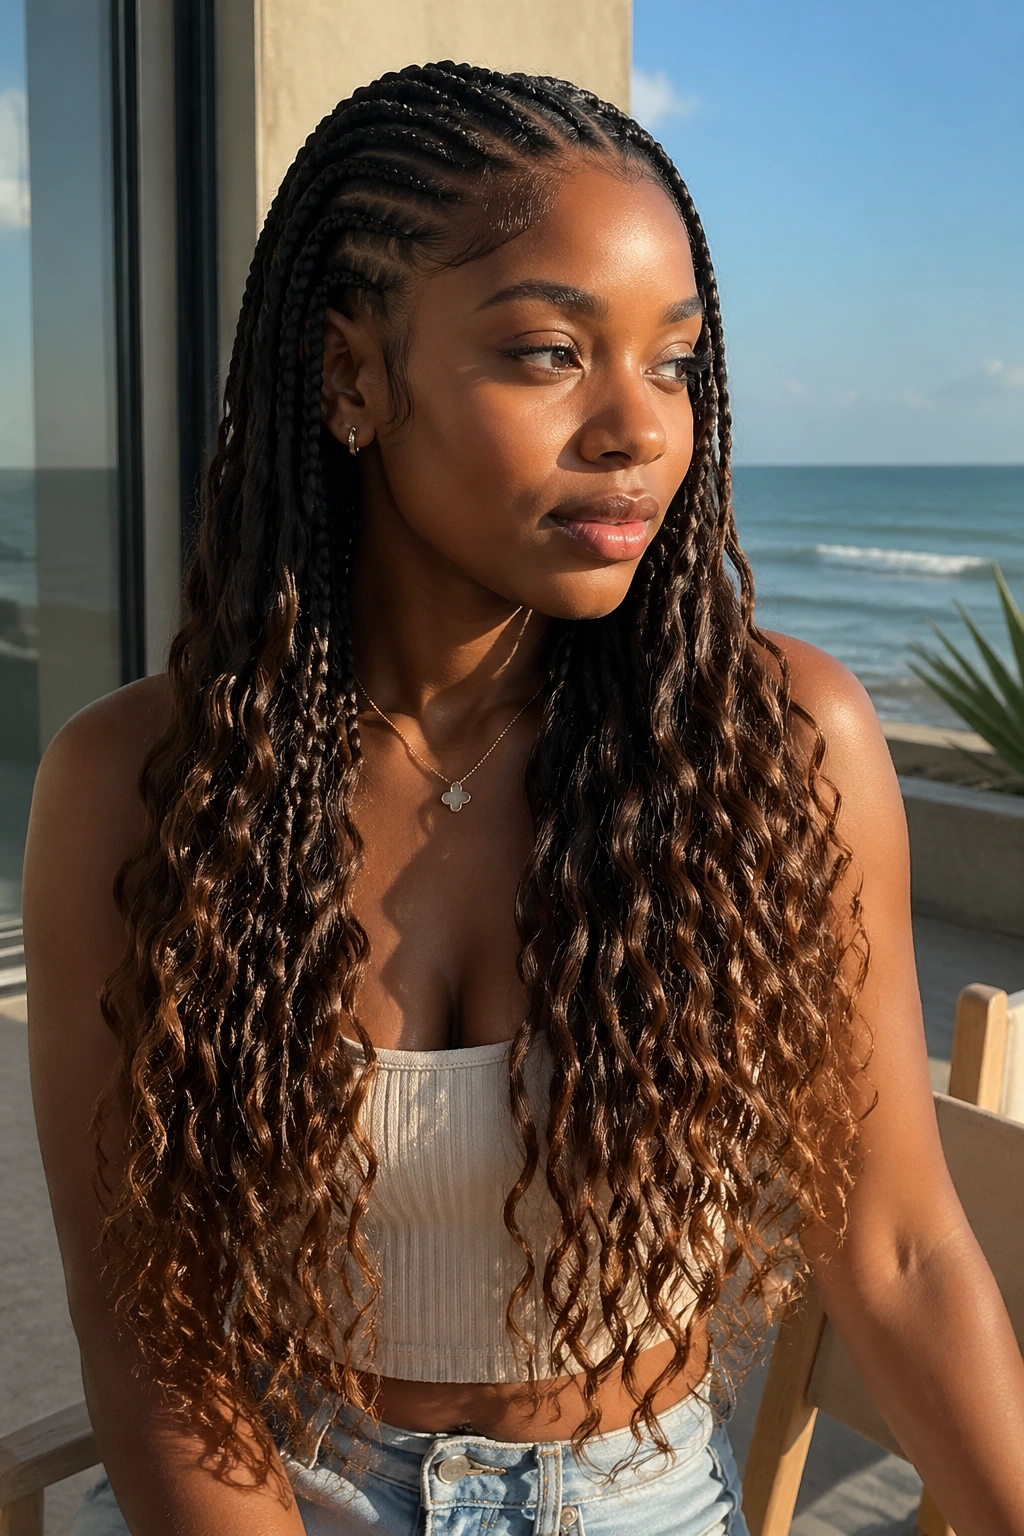
Long, loose, beachy waves at the ends of feed-ins. Not tight curls. Not rigid ringlets. The kind of undone waves that look like they happened after a day at the ocean.
Create mermaid curls with a large-barrel wand — 1.5 inches or larger — and hold each section for only 10 seconds. The brief hold creates a loose wave rather than a formed curl.
This is the style for women who want texture without commitment. The waves read effortless, like you didn’t try, even though you definitely did.
Maintaining Feed-Ins with Curly Ends
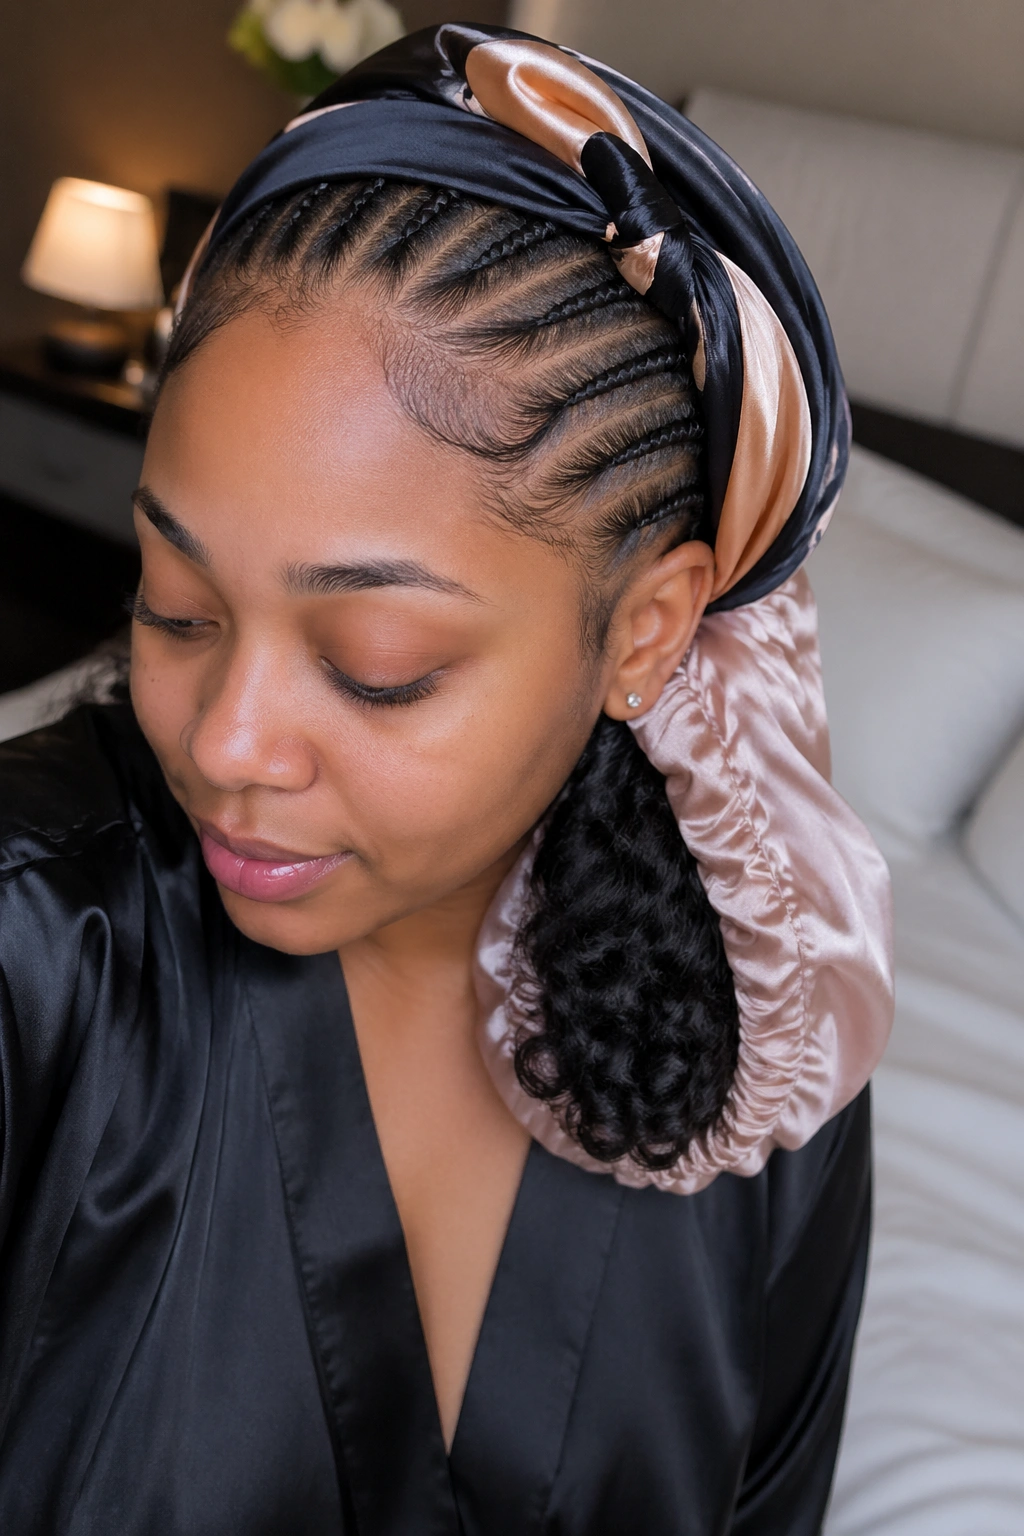
Two textures, two sleep strategies — just like side cornrows with curls. The braided top gets a satin scarf. The curly ends get a separate bonnet or they get gathered loosely in a pineapple fashion under a larger bonnet.
Refresh the curl definition every two to three days with a water-glycerin mist. Spray lightly, scrunch the curls gently, let air dry.
Avoid brushing the curls. Brushing breaks the curl pattern. Finger-separate for volume instead.
The braided portion gets an edge refresh weekly — small dab of edge gel, soft brush along the hairline. Don’t add fresh gel on top of old gel buildup.
Curl Longevity Tips
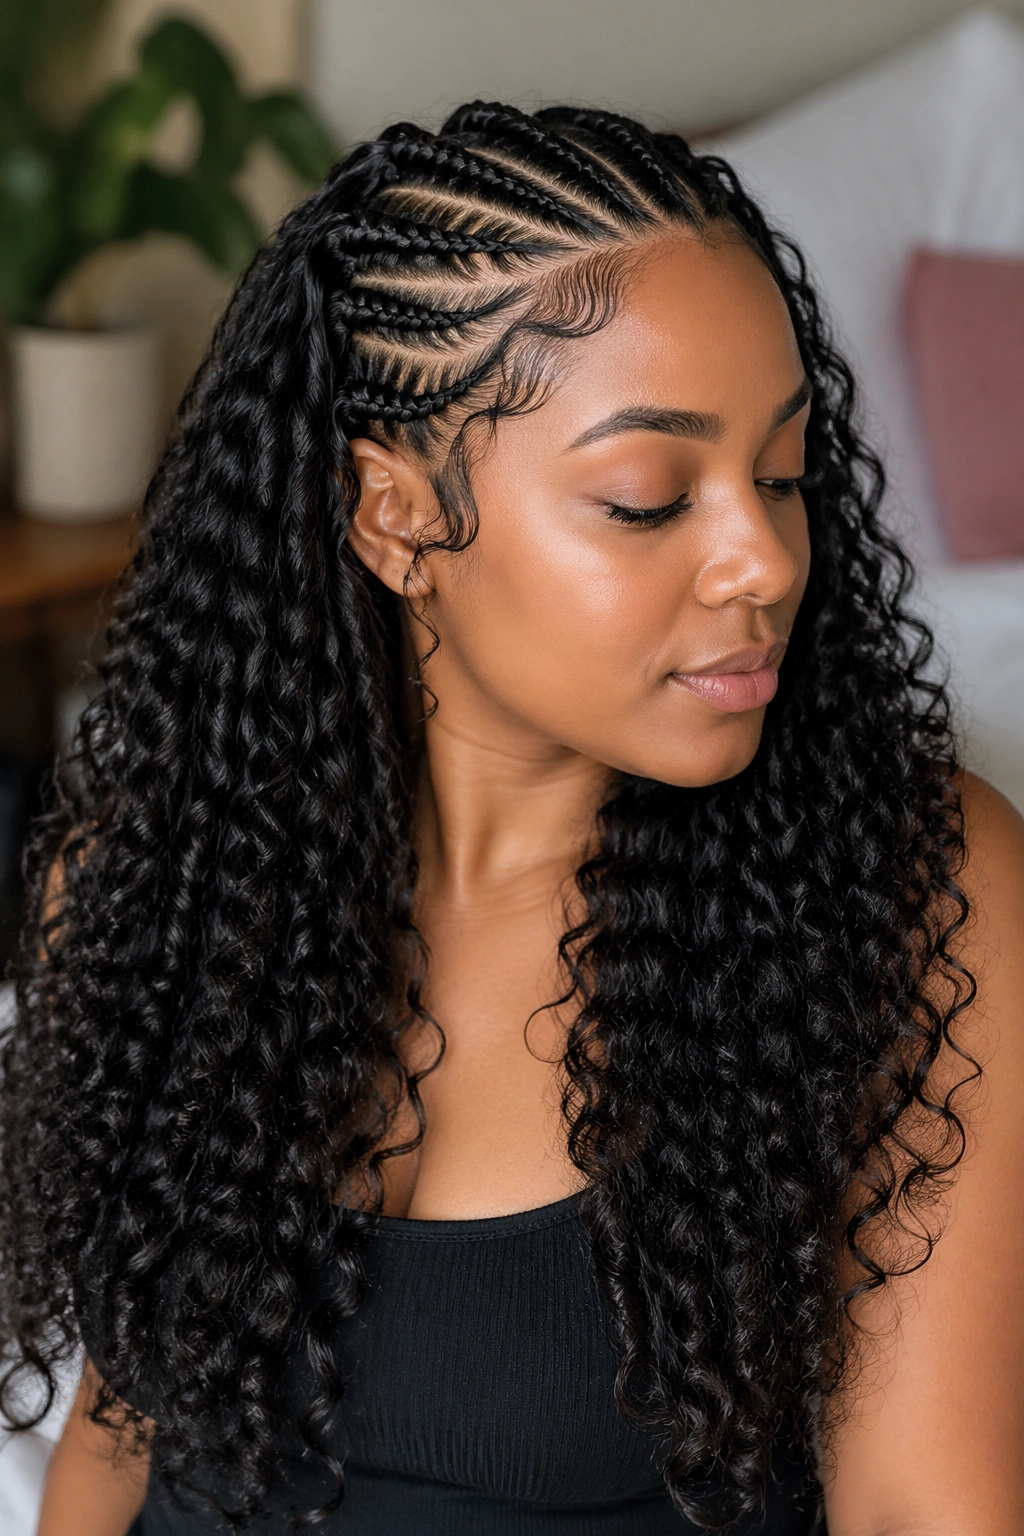
Rod-set curls start to loosen by day three. Rod-set curls will loosen to a wave by week one and may need re-rolling if you want to keep them tight.
Perm rod ringlets hold longest — up to three weeks of definition with proper care.
Wand-curled ends hold about a week of definition, then soften into waves.
Pre-curled kanekalon holds definition for the life of the install, as long as you don’t over-brush or over-wet the curls.
Picking a Curl Type by Face Shape
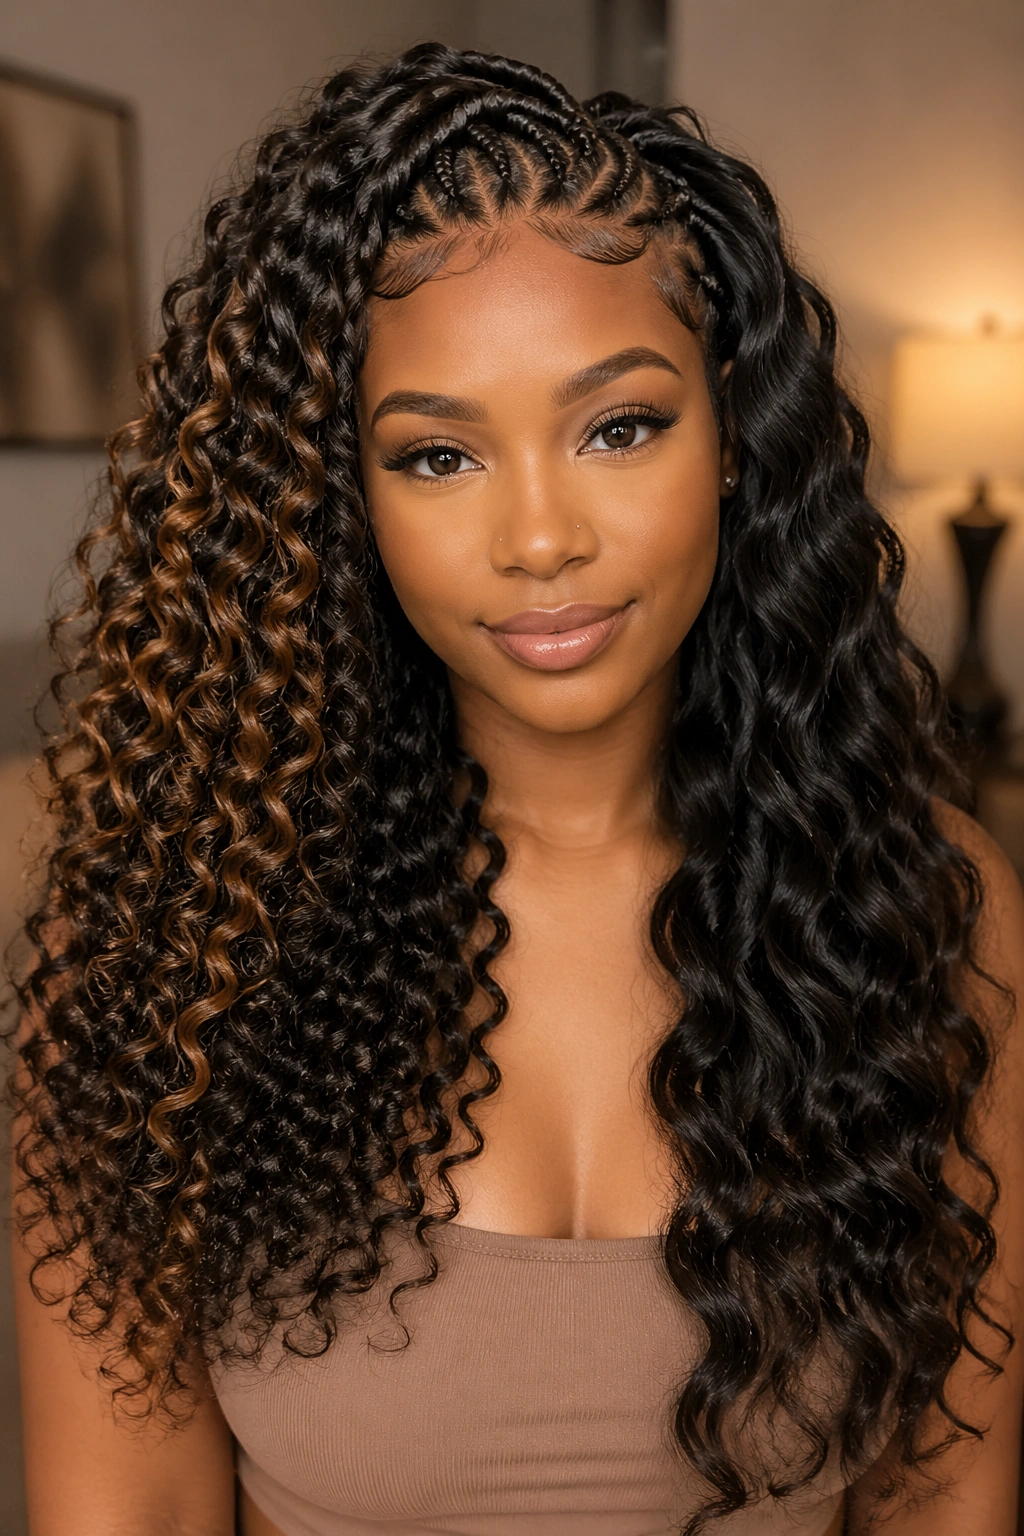
Round faces: longer, straighter curls that add vertical length. Goddess curls work. Tight ringlets don’t.
Oval faces: all curl types work. Pick based on personal preference.
Square faces: softer, looser curls that break up angular jaw lines. Mermaid waves or flexi rod curls suit well.
Heart faces: curls with volume at the chin level. The curl weight balances a wider forehead.
Long faces: curls with horizontal volume rather than vertical drop. Bigger, bouncier curls work. Tight vertical ringlets can make the face look longer.
Common Mistakes
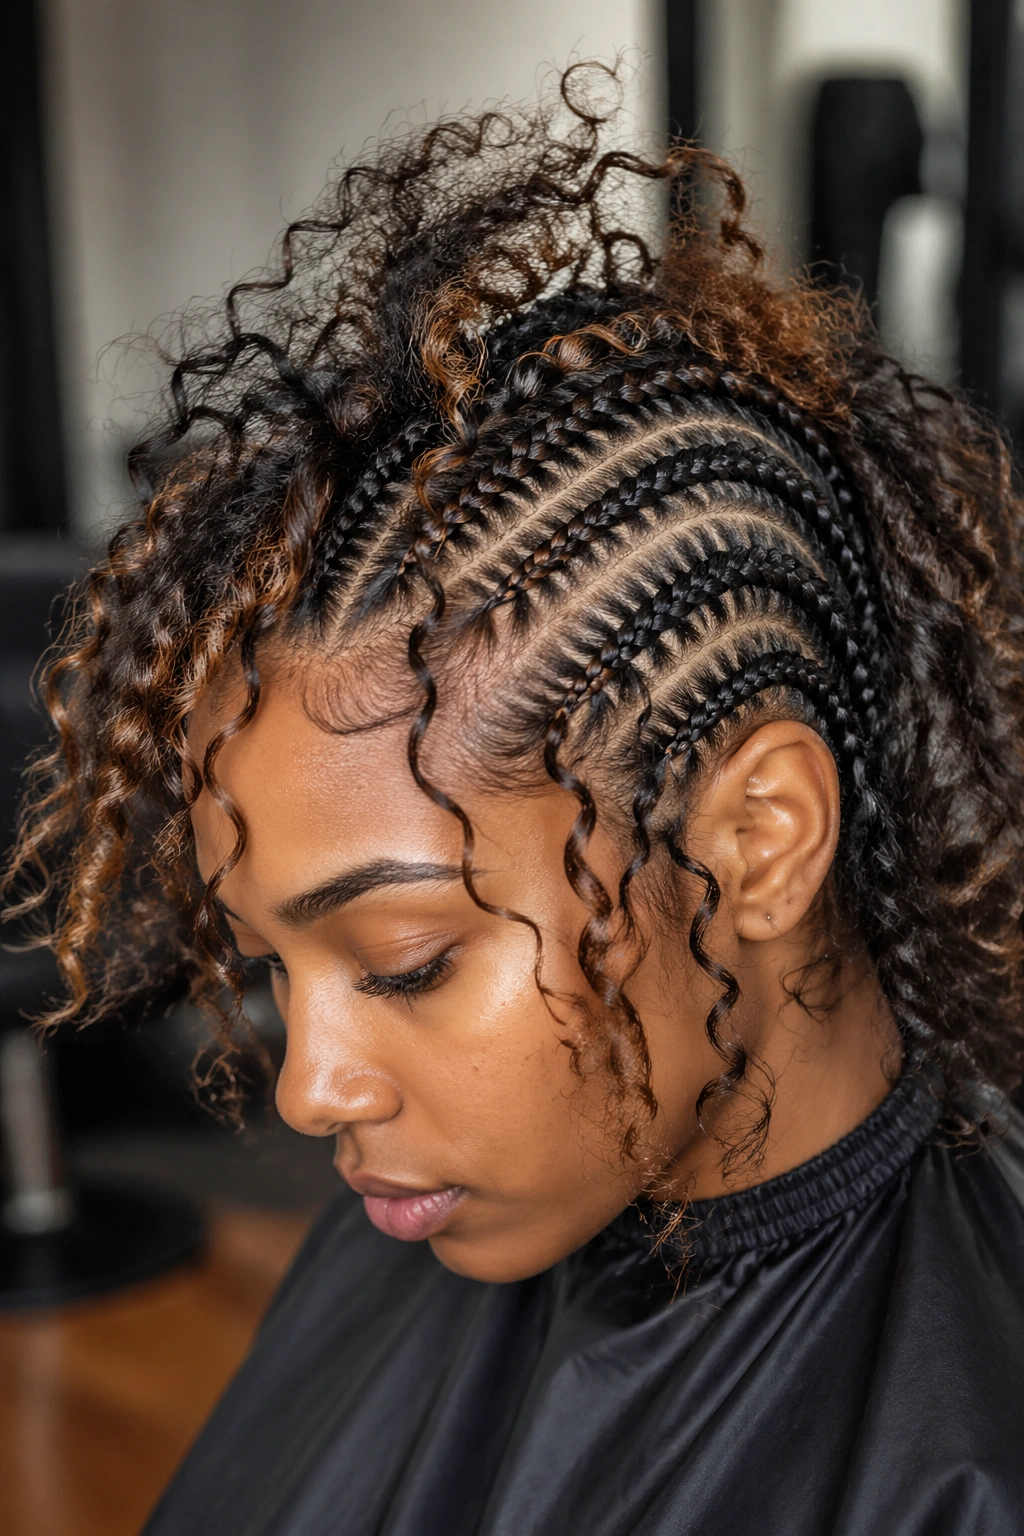
Mistake one: curling before braiding. Curls flatten during the braiding process. Always install first, curl after.
Mistake two: skipping the setting lotion. Dry kanekalon holds curl poorly. A light setting mist is essential.
Mistake three: over-curling. Holding a rod for 12 hours when 8 would have worked fine. Over-set curls become stiff and unnatural.
Mistake four: brushing the curls daily. Every brush breaks the curl pattern a little more. Finger-separate only.
Mistake five: ignoring the braided portion. The curls are showy, but the braided top is what holds the style together. Neglect the top and the whole install falls apart.
Takedown
Takedown for feed-ins with curly ends is standard feed-in takedown with one extra step at the start. Remove the curl first.
Spray each curly end with diluted conditioner — 50/50 mix. The curls loosen within minutes.
Finger-separate the curls gently. Don’t force them. If a curl resists, spray more conditioner and wait.
Once the curls are relaxed, proceed with regular feed-in takedown. Work from the ends up, unraveling each braid with fingers. Never cut unless absolutely necessary.
Expect an extra 20 to 30 minutes for the curl removal step. Total takedown time for a full head: about two hours.
After takedown, shampoo, deep condition, and detangle in that order. Give your hair 48 hours before the next install.
Feed in cornrows with curly ends give you the best of two worlds. The structure of braided hair from the crown down through the length. The movement and softness of curls at the finish. Pick your curl method based on the vibe you’re going for, set everything correctly with the right products, and the style will photograph beautifully and wear comfortably for weeks.
