



Cornrow styles for beginners need to hit a particular balance. The pattern has to be simple enough that you can actually finish the install without losing your grip halfway through. The braid itself has to forgive small mistakes — uneven sections, slightly loose tension, a missed feed-in here or there. And the finish has to look intentional enough that you’d actually wear it out of the house, not just practice with. That’s a narrow band of styles, but it’s wider than most tutorials admit.
I still remember the first time I tried to cornrow my own hair. My arms ached. My sections looked like a toddler cut them. I got about four braids in before I gave up and pulled everything out. The second try was better. The third was passable. By the tenth, I had something I could actually wear. What nobody told me at the start was which styles to try first — and which ones to save for when my hands had more experience. This roundup is the guide I wish I’d had. Twenty-five cornrow styles arranged from most forgiving to more challenging, each with honest notes about what makes it approachable and what to watch for along the way.
What Makes a Cornrow Style Beginner-Friendly
Beginner-friendly cornrows share a few key traits. Wider sections mean fewer braids to finish and more hair to grip. Straight-back directions are easier than angles because you don’t have to fight the hair’s natural growth pattern. Natural-length installs skip the extra step of adding extensions, which is a separate skill on top of the braiding itself.
What’s NOT beginner-friendly: shaped parts (hearts, stars, spirals), tight stitch braids (which require extreme precision), freehand patterns (which require planning), and heavy extensions (which add weight and complexity).
Start simple. Master the basic motion. Build up from there. Trying to replicate a complex shape before you can do clean straight-backs is a path to frustration.
The Core Braiding Motion — The Only Thing You Need to Master First
Every cornrow on this list uses the same core motion. Smooth a section flat. Divide into three even strands. Hold two strands in one hand and the third in the other. Cross the right strand under the middle. Cross the left strand under the new middle. With each pass, pick up a small piece of hair from the scalp and add it to the outer strand before crossing under.
That pick-up is the entire secret of a cornrow. Without it, you’re just doing a regular three-strand braid that sits on top of the hair. With it, the braid attaches to the scalp and stays flat.
Practice on a doll head or on a willing friend’s hair before you touch your own. Muscle memory takes 20-30 attempts to build.
Prep Work That Makes Beginner Cornrows Easier
Stretched hair is forgiving. Shrunken coils are not. Wash and deep condition the day before you braid, then stretch the hair with the banding method overnight or a tension blow-dry on medium heat.
Detangle thoroughly in four sections with plenty of leave-in. Snags slow you down and make sections come out uneven.
Have all your tools ready before you start. Nothing kills momentum like stopping to find your rat-tail comb mid-braid.
The one tip I’d share with every beginner: section the entire head first, before you braid any single section. This gives you a visual map of what you’re working toward and helps you keep section sizes consistent.
Tools Every Beginner Needs
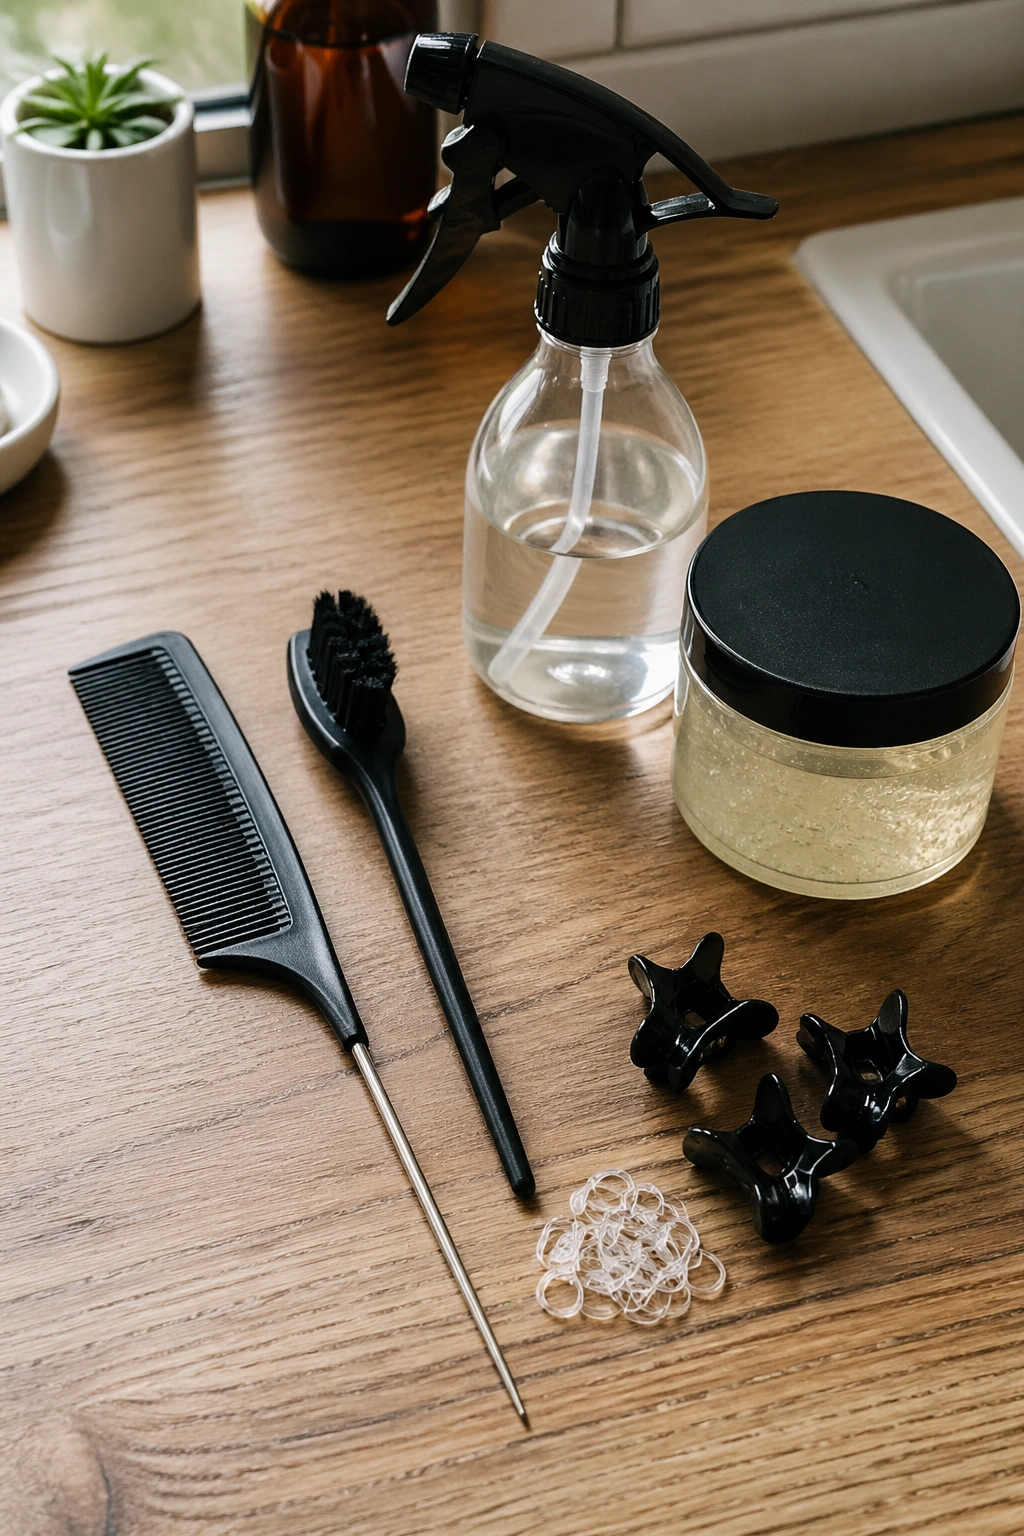
A rat-tail comb with a metal point. A soft edge brush. A medium-hold gel. A water-and-leave-in mister. Butterfly clips for sectioning. Small clear elastics.
That’s it. You don’t need bead applicators, feed-in hair, specialty scissors, or anything else for the styles in this list. Keep the kit minimal so you’re not distracted by tools you don’t yet know how to use.
If you’re braiding your own head, add a three-way mirror. You need to see the back of your head to check for lumps, uneven sections, and missed pieces.
Understanding Tension Before You Start
Tension is the most common mistake beginners make. Too tight and you’ll give yourself a headache and damage your hairline. Too loose and the braids won’t hold.
The right tension feels firm but comfortable. You should be able to feel the braid gripping the scalp, but you shouldn’t feel pulling or pain. If your eyes feel tight or your scalp burns, the tension is wrong.
Adjust as you go. If the first braid feels too tight, loosen your grip on the next one. The hair doesn’t mind — it’s your hands that need training.
A Note on Practice Before You Commit
Before trying any of these styles on your own head for a real outing, do at least one practice run. Braid, check the result, take it out, and try again. Each practice round teaches your hands something the previous round couldn’t.
Video yourself from different angles. You’ll spot mistakes you can’t see in the mirror — uneven section sizes, inconsistent tension, and missed pick-ups along the length.
1. Two Jumbo Cornrows
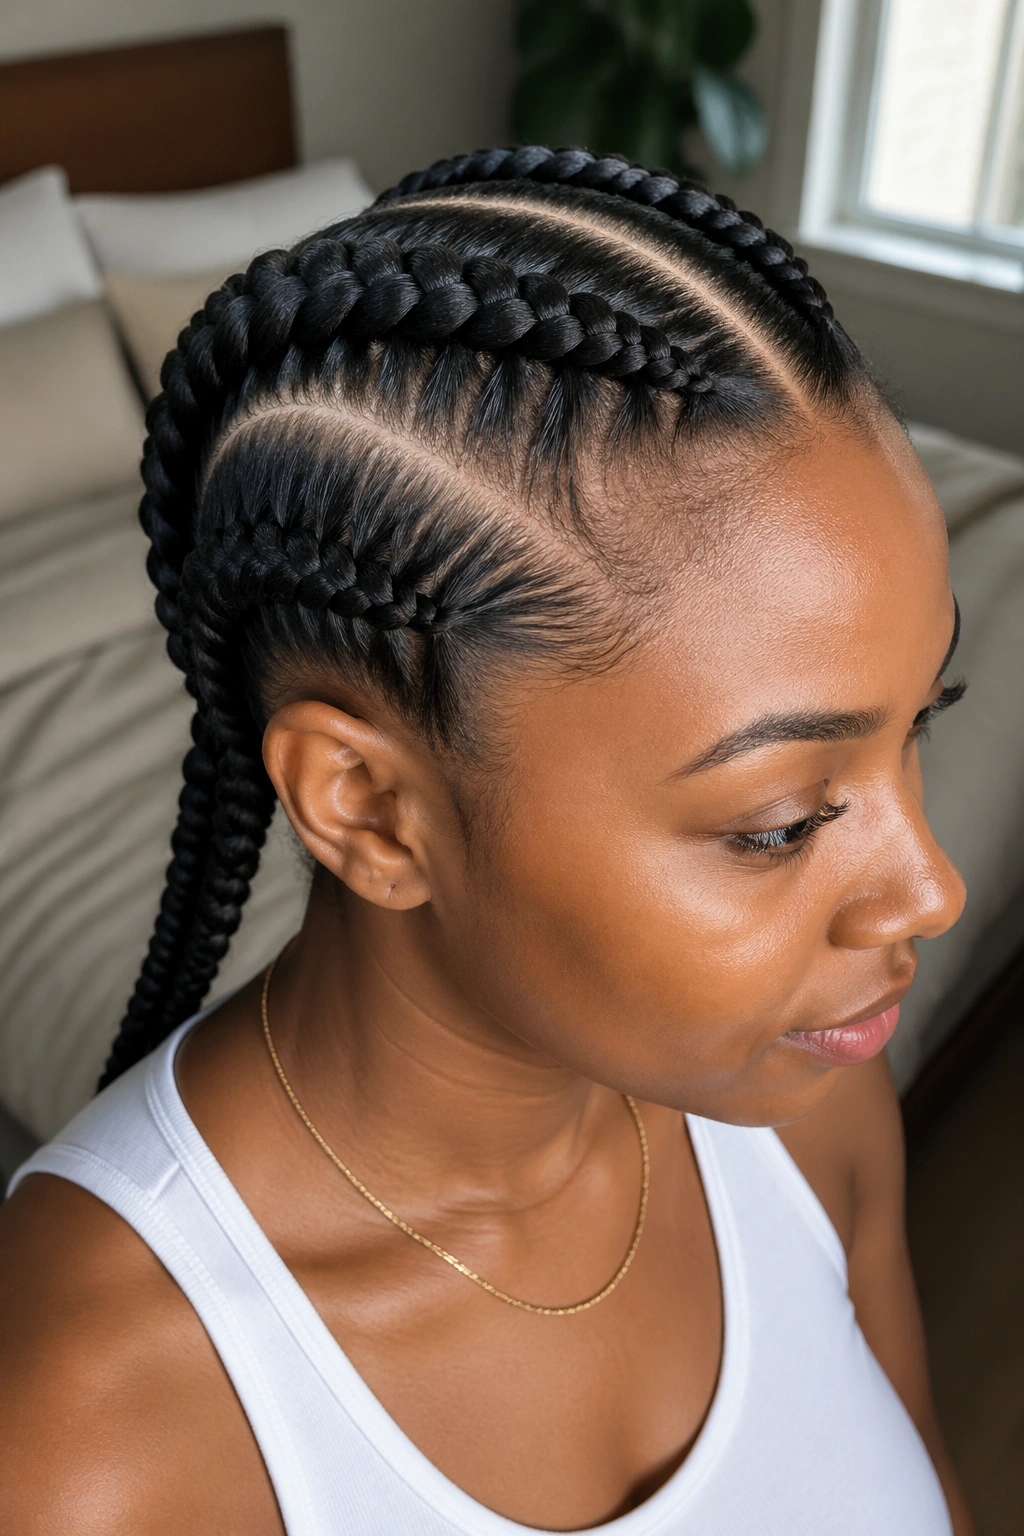
The simplest cornrow style on the planet. Part down the middle. Braid each half straight back. Done.
Why It Works
Two braids means you only have to master the motion twice. You can dedicate all your focus to tension and direction without worrying about uniformity across 15 braids.
- Best on natural hair 3+ inches long
- Holds 1-2 weeks
- Pairs with any outfit
Honest note: this is the style I learned on. Two big cornrows let your hands build muscle memory without overwhelming you. Don’t skip past this one to something fancier.
2. Three Straight-Back Cornrows
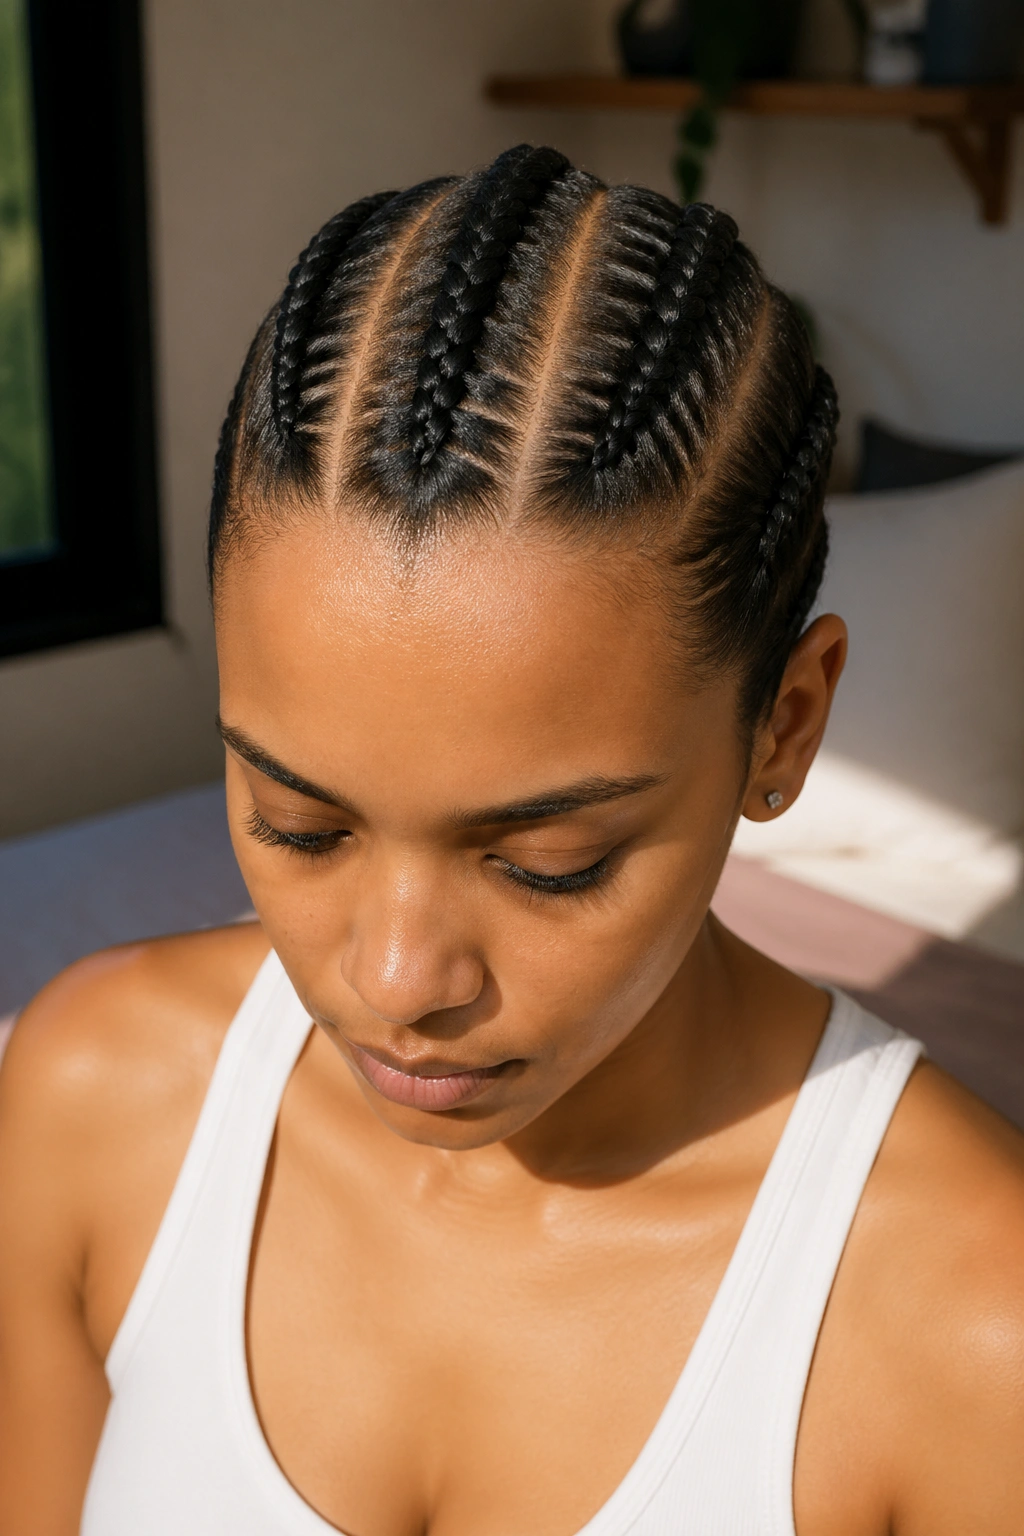
Part the head into three even sections with two parallel vertical parts. Braid each section straight back.
Three braids adds a small complexity — you have to keep the middle section even with the two outer ones. But the overall install is still fast and forgiving.
The middle cornrow is the hardest because you’re reaching over the other two to braid it. Do the middle one first while your hands are freshest.
3. Four Cornrows With Center Part
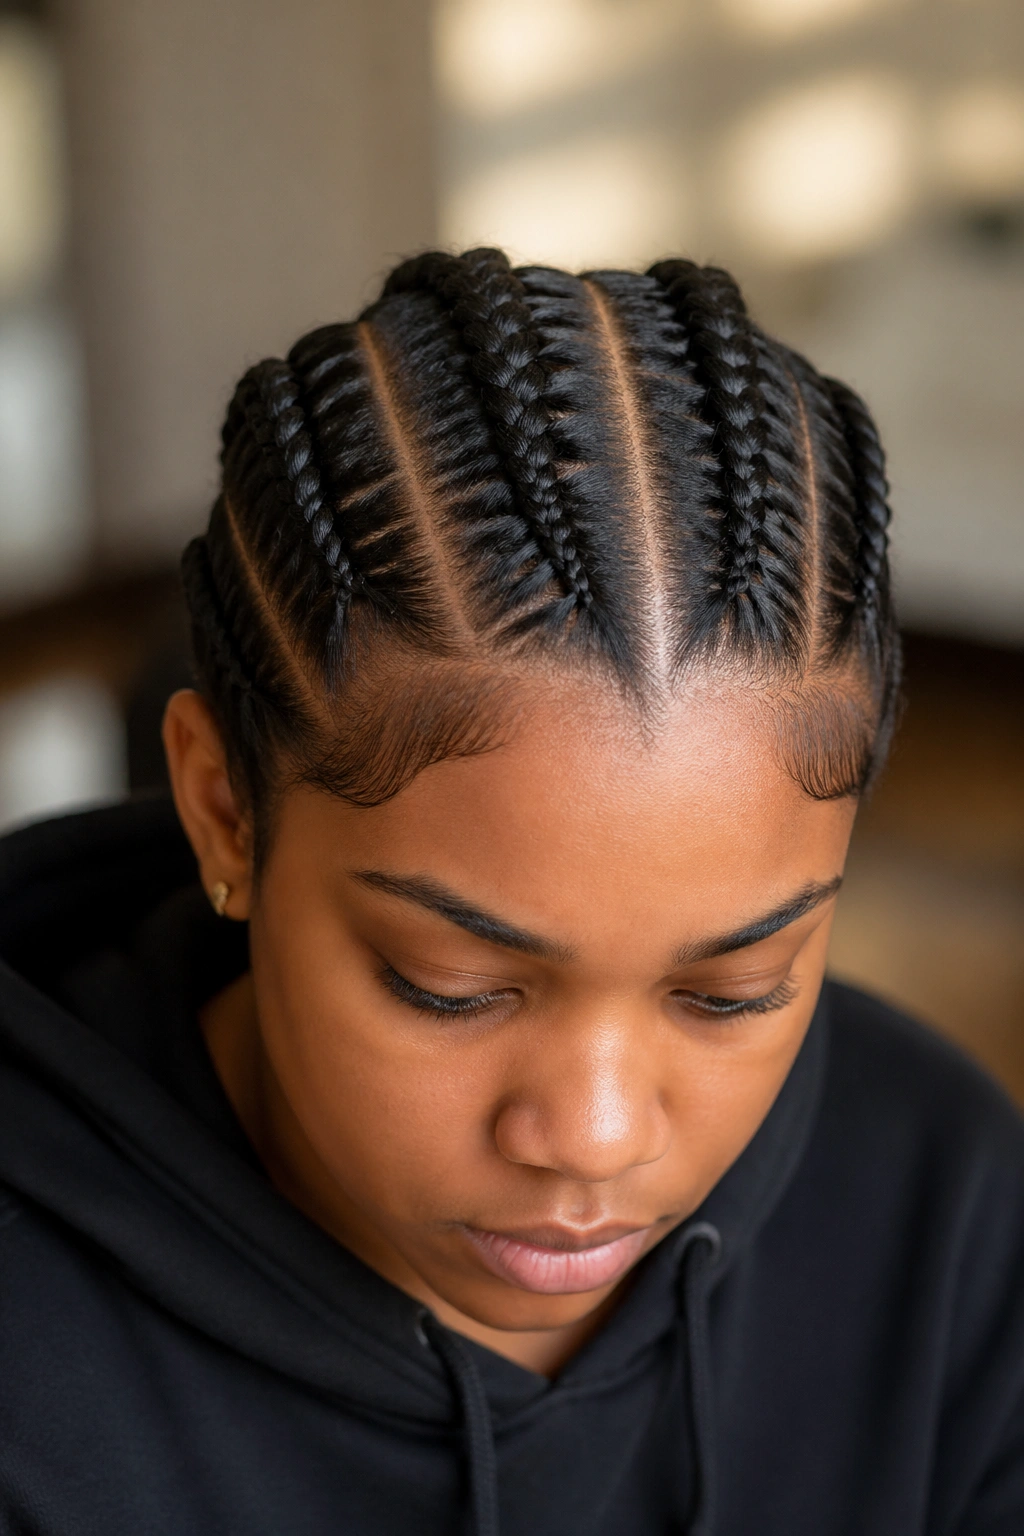
A deep center part down the middle, then two cornrows on each side running straight back. The center part does half the styling work for you — it creates the visual structure and all you have to do is braid.
This is a good next step after two and three cornrow styles. You learn to work with a symmetrical pattern without the pressure of matching many braids.
Keep the two sides as mirror images. Check after the first braid on each side to make sure they match in thickness and direction.
4. Five Cornrows Straight Back
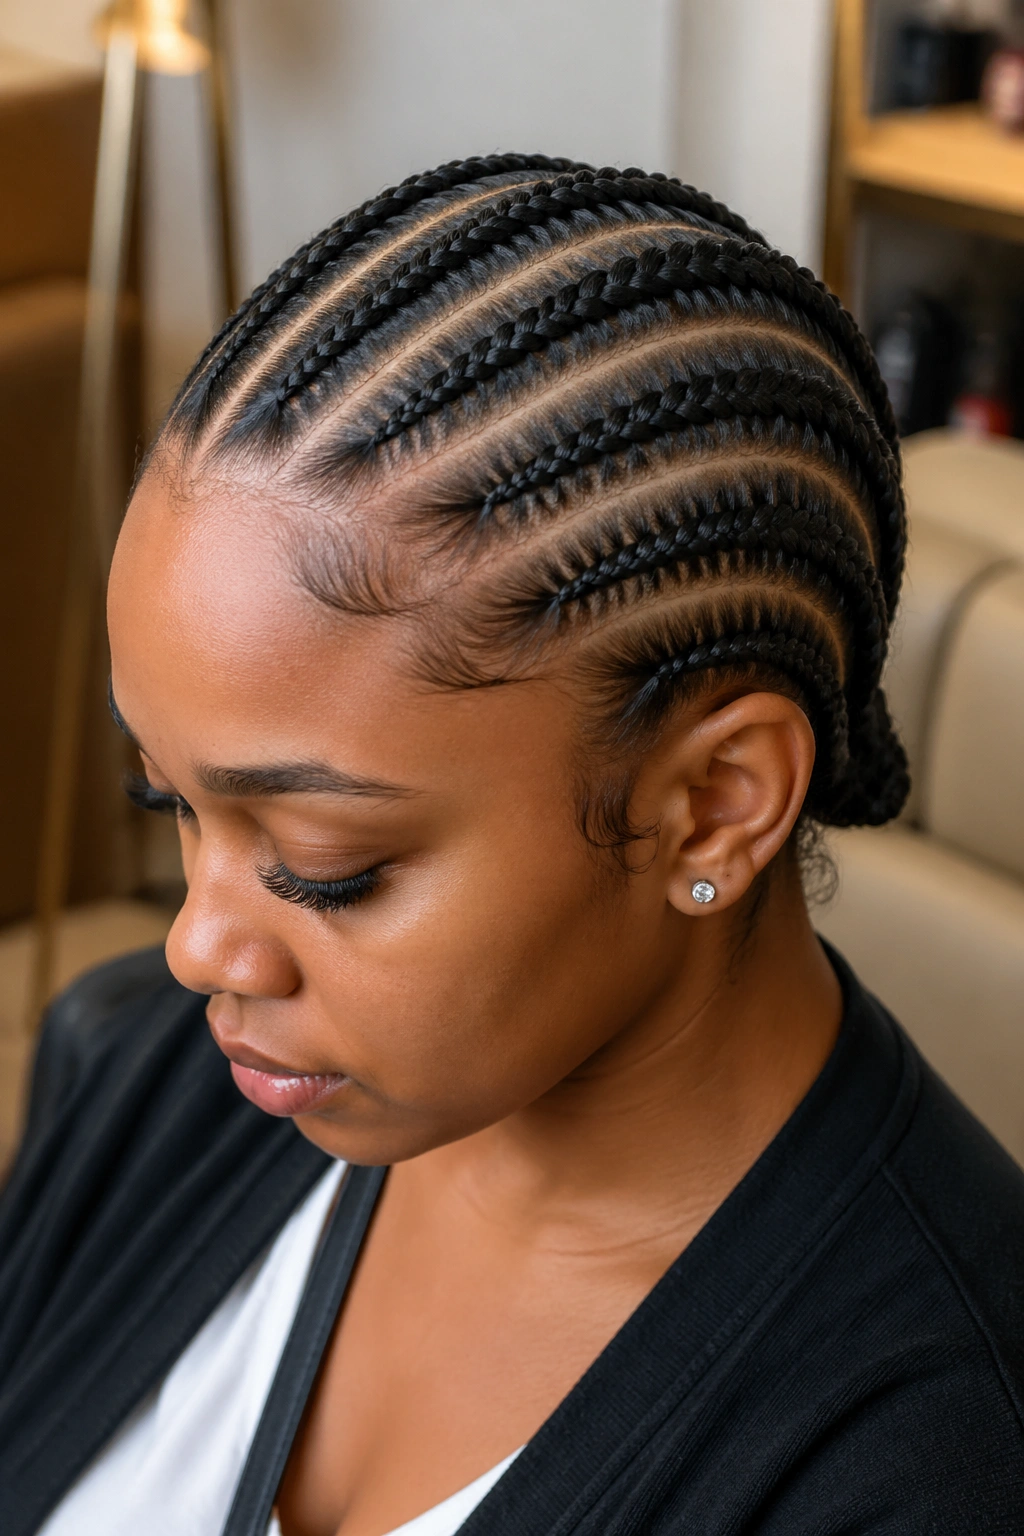
Five evenly-spaced cornrows running from the hairline to the nape. A classic beginner style because the math is simple — divide the head into five equal sections and go.
The fifth braid is where most beginners run out of hand strength. Take a break after the fourth braid. Stretch your fingers. Hydrate. Then finish.
Five is also a number that looks deliberate. Four can look sparse, six starts to feel crowded. Five is the sweet spot for a first all-back style that reads intentional.
5. Cornrows With a Side Part
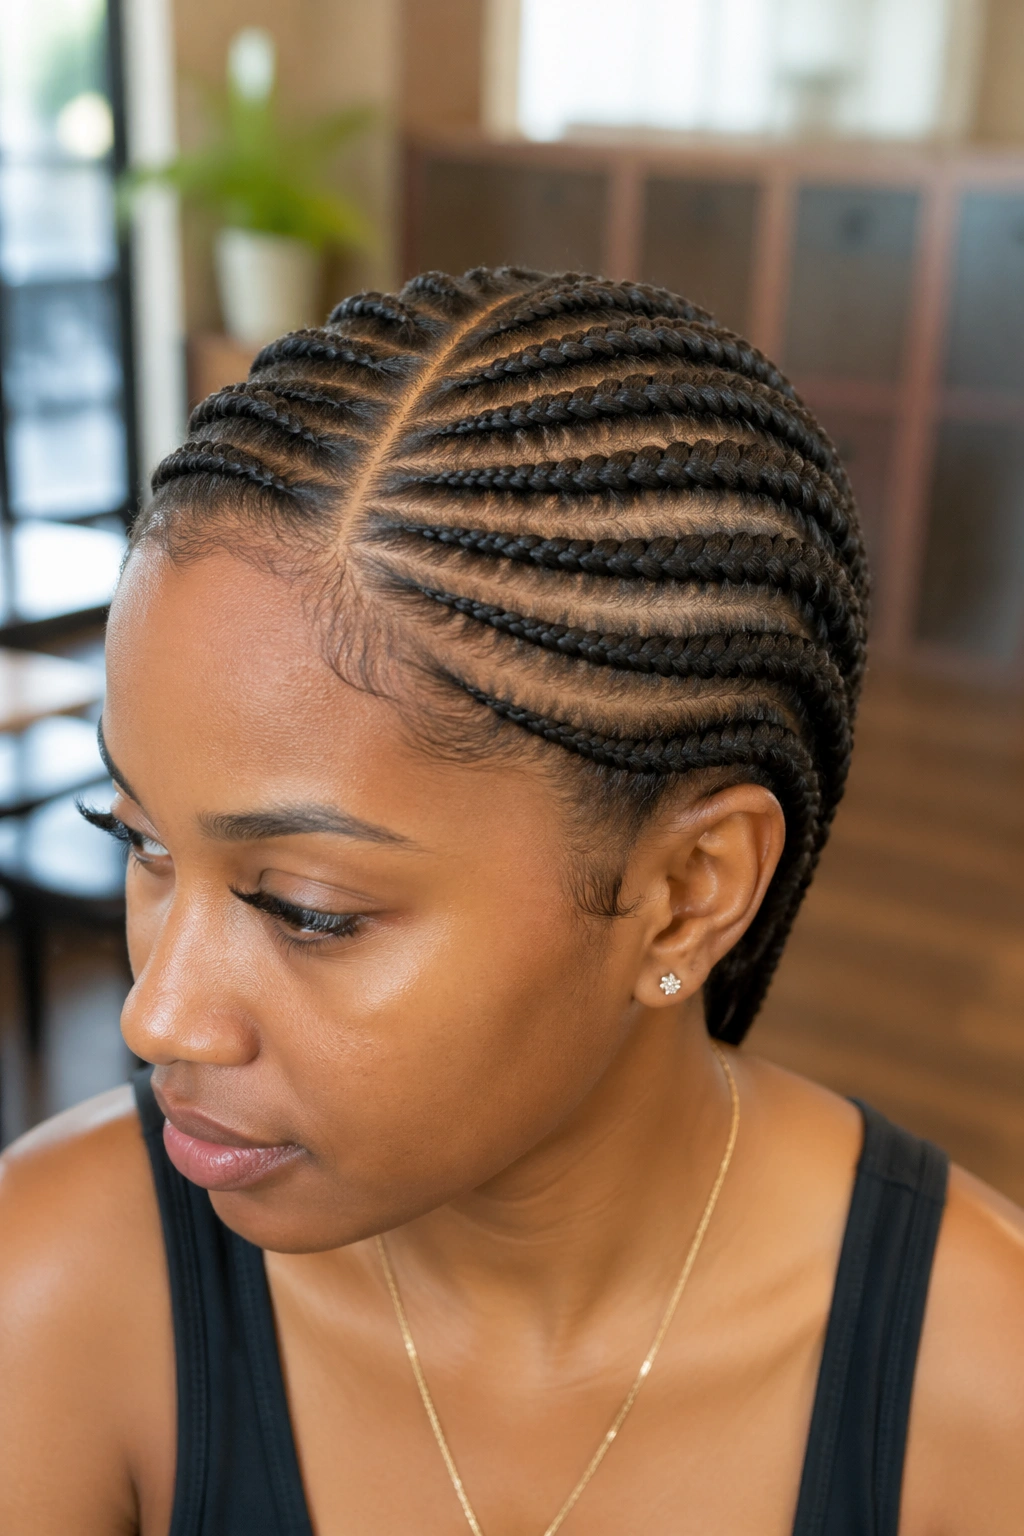
A deep side part with all cornrows running diagonally toward the opposite ear. The side part gives the style a more styled look than a center part.
This introduces the concept of diagonal braiding, which is a small step up from pure straight-back. The angle means you’re working slightly against the natural grain of the hair.
Start with the top-most braid right at the part. Work downward from there, each braid slightly angled more toward the back.
6. Cornrows With a Single Ponytail Finish
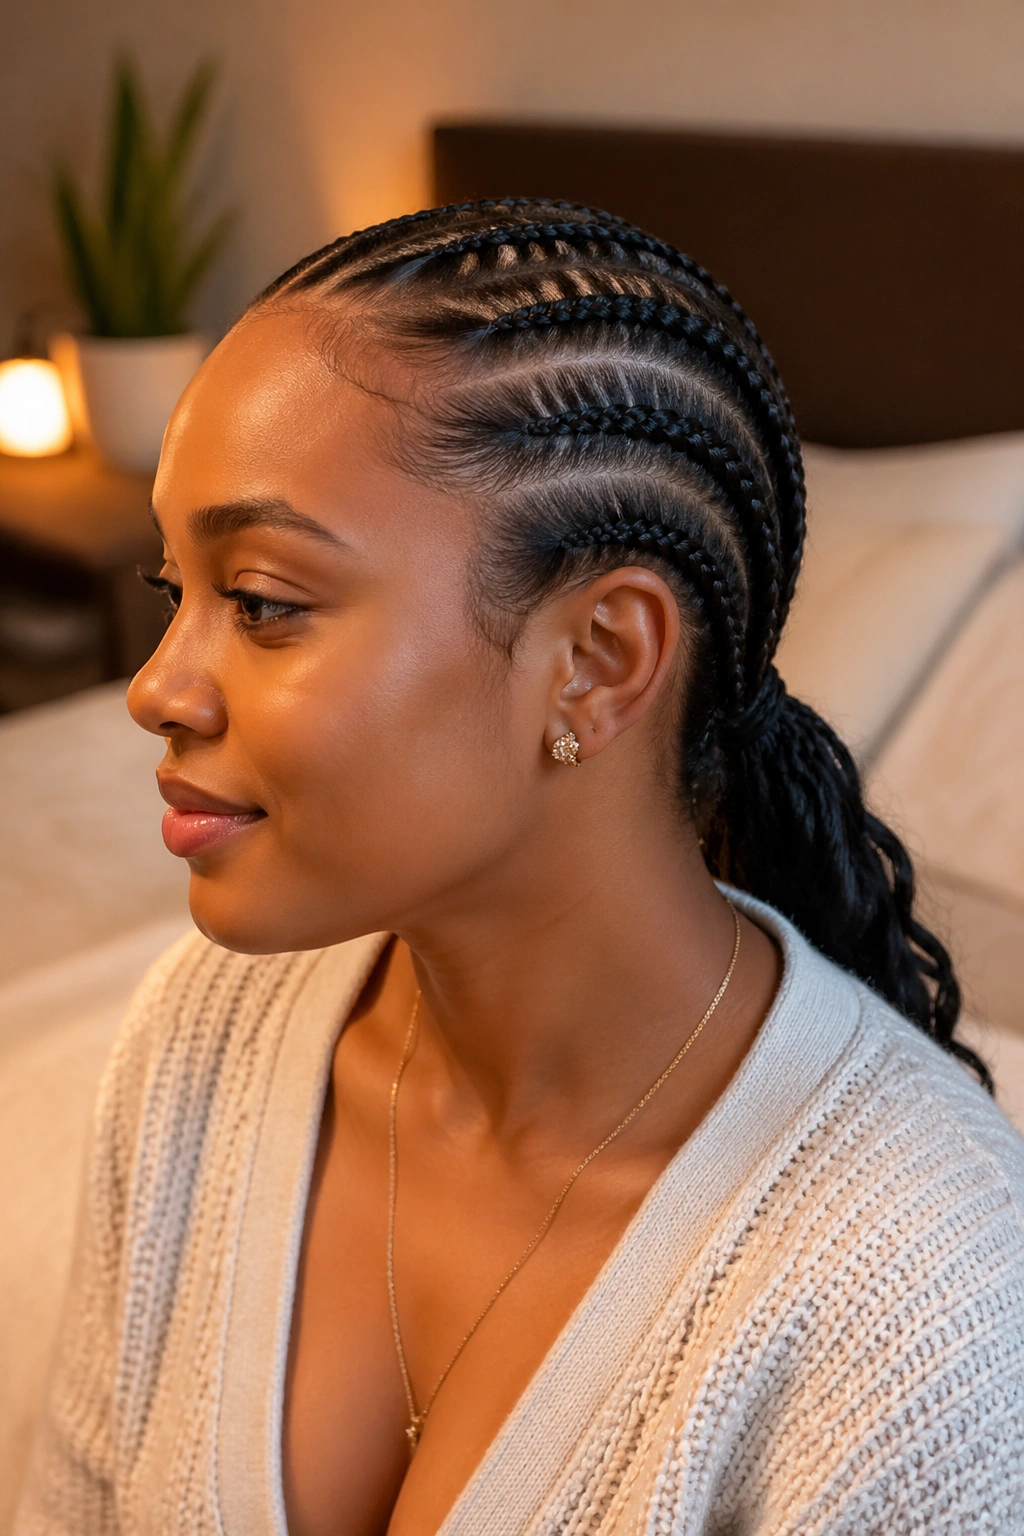
Braid the whole head in straight-back cornrows, then gather all the ends into a single low ponytail at the nape.
The ponytail forgives a lot of sins. Uneven ends? Hidden in the ponytail. Slightly different braid lengths? Gathered together and disguised.
It’s a beginner style because the focus is on the cornrow install, not the finish. The ponytail wraps everything up cleanly.
7. Cornrows Into a Bun
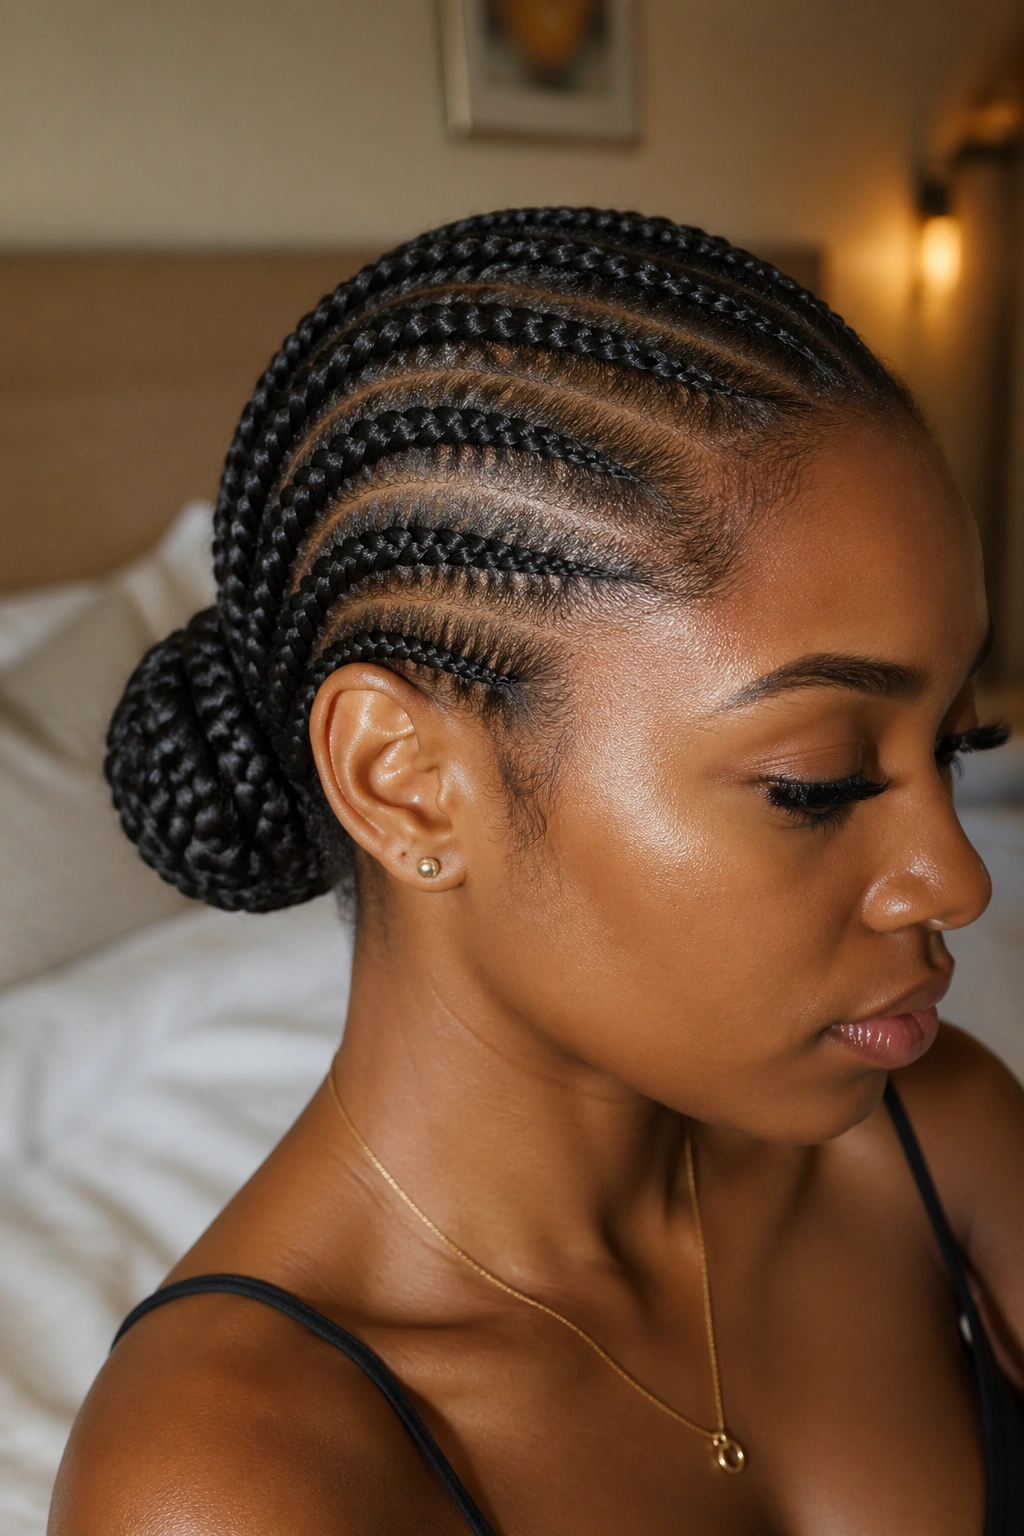
Same concept as the ponytail, but the gathered braids are wrapped into a low bun instead of hanging loose.
The bun is another forgiving finish. Small braids of varying lengths disappear inside the bun, so perfect uniformity isn’t needed.
Use a few bobby pins to secure the bun. Invisible ones if you can find them — they blend into the braids.
8. Two-Braid Halo Wrap
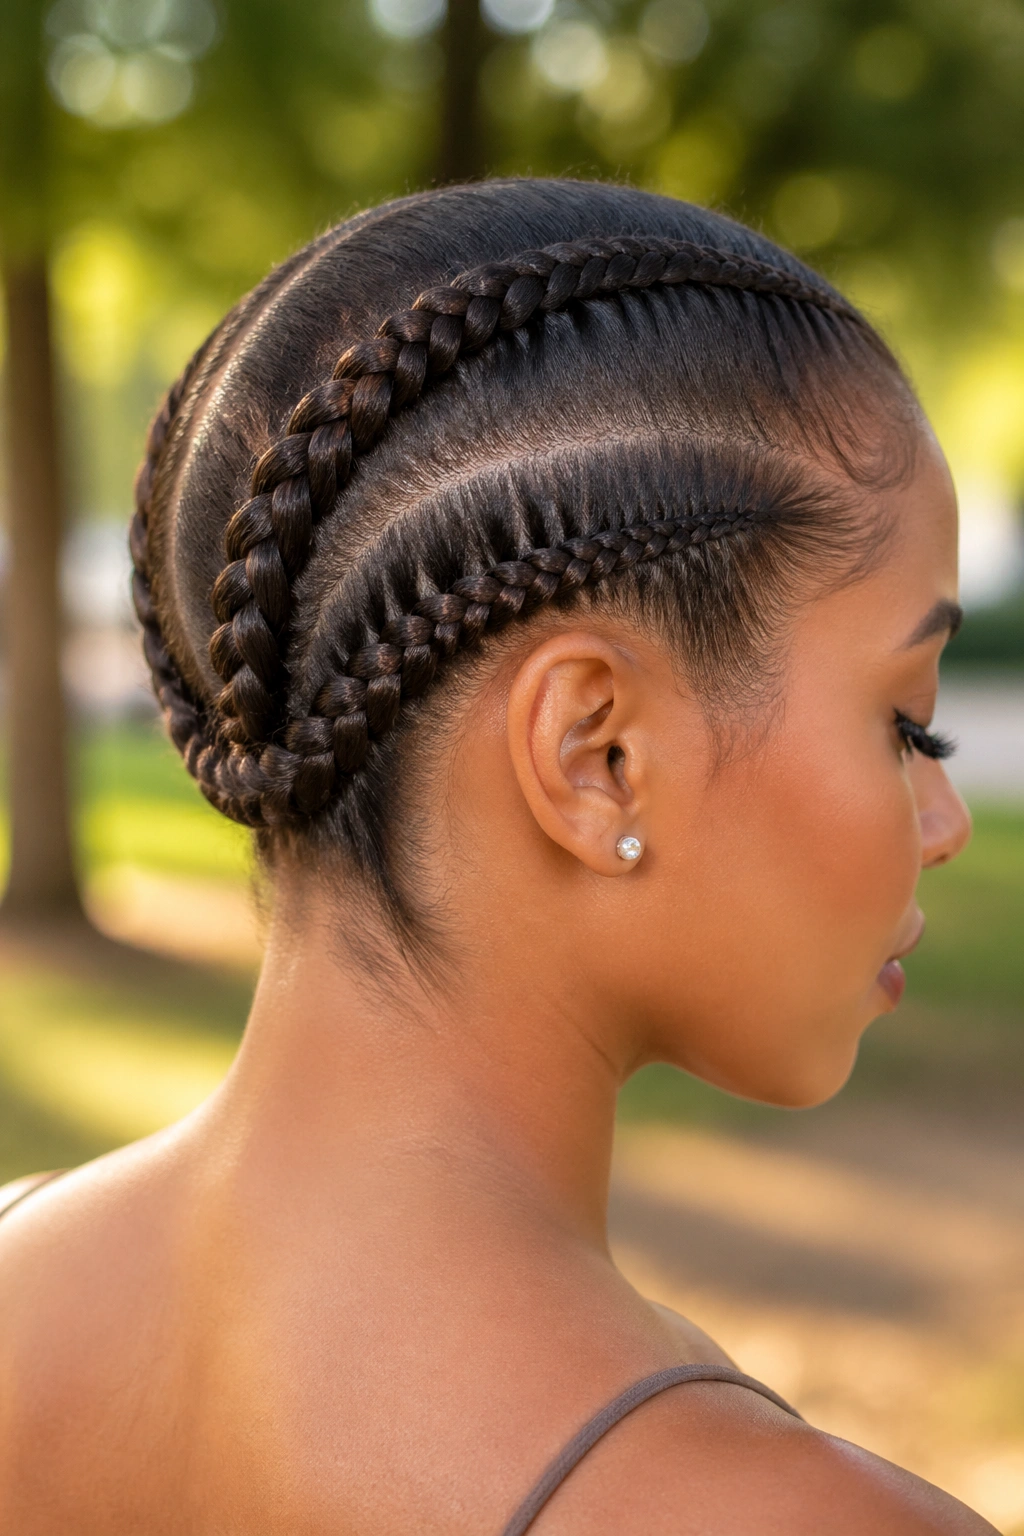
Two cornrows starting at the nape, running up and over the crown, wrapping around the head to meet at the opposite ear. The braids form a crown across the top of the head.
This is a step up from basic straight-back because you’re directing the braid upward and around. But it’s still only two braids, so the complexity stays manageable.
Use bobby pins to secure the ends behind the ears. The weight of the braid may want to sag — the pins hold everything in place.
9. Four Cornrows Into a Low Bun
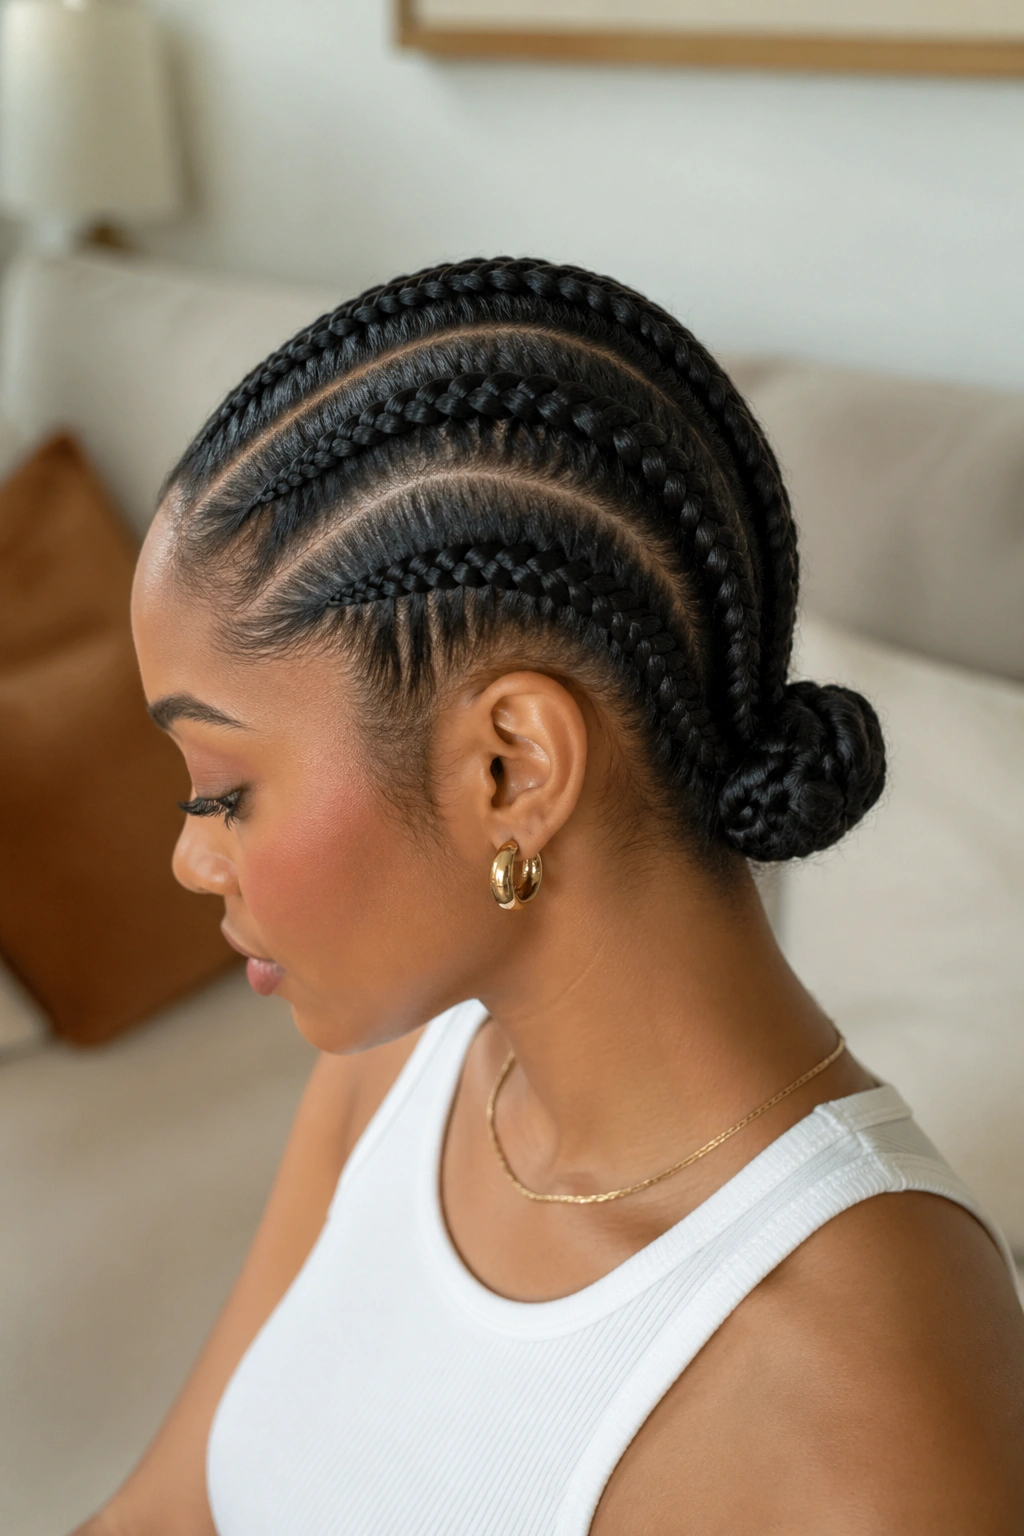
Four cornrows running straight back, with the ends gathered into a low bun. Slightly more detailed than five-cornrow all-backs because the thicker sections give a more deliberate finish.
The bun forgives uneven lengths. If one braid is longer than the others, it just gets tucked into the bun.
A good option for beginners who want a style that reads dressed-up without demanding perfection.
10. Cornrows With a Half-Up Finish
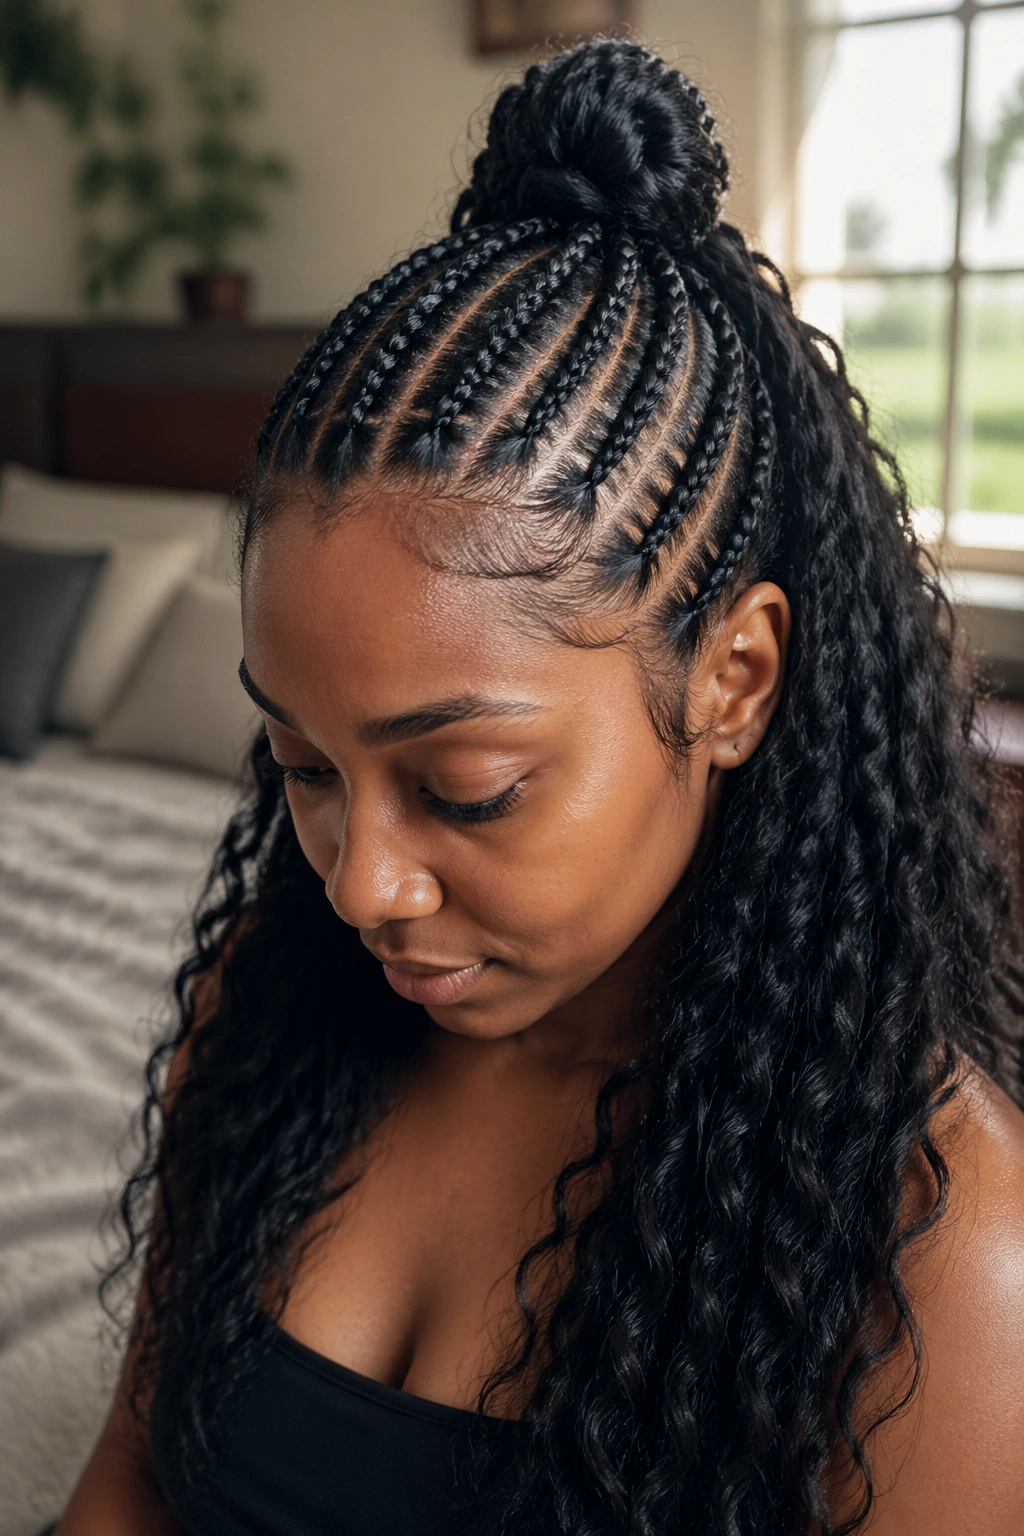
Only the top half of the head gets cornrowed — usually three to four braids from the hairline to the crown. The bottom half stays loose.
Half-up styles are beginner-friendly because you’re only braiding half the hair. Less time. Less hand fatigue. Fewer chances for errors to accumulate.
The loose hair below can be left natural, blown out, or curled — whichever you prefer and can manage.
11. Simple Side-Swept Cornrows
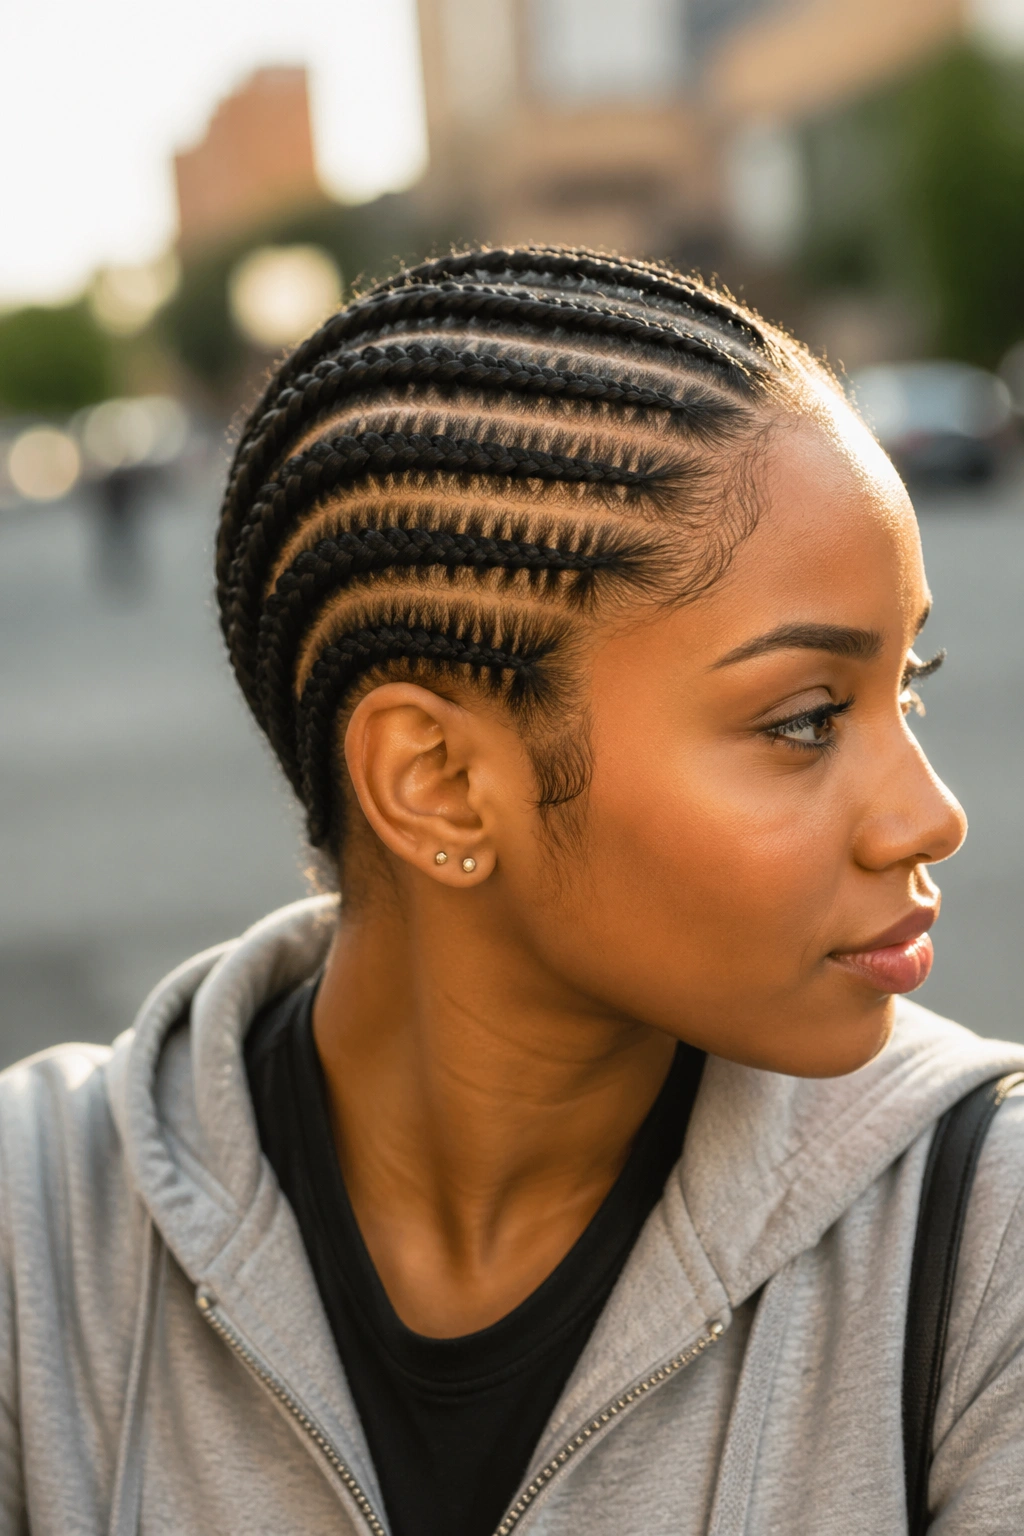
Five to seven cornrows all running diagonally from one side of the head to the opposite ear. No center part, no symmetry — everything flows in one direction.
The unilateral direction is easier than a symmetric pattern because you don’t have to match both sides. You just keep the same angle across the whole head.
This style suits beginners who want something more polished than plain straight-back but aren’t ready for complex parting.
12. Two Cornrows With Curly Ends
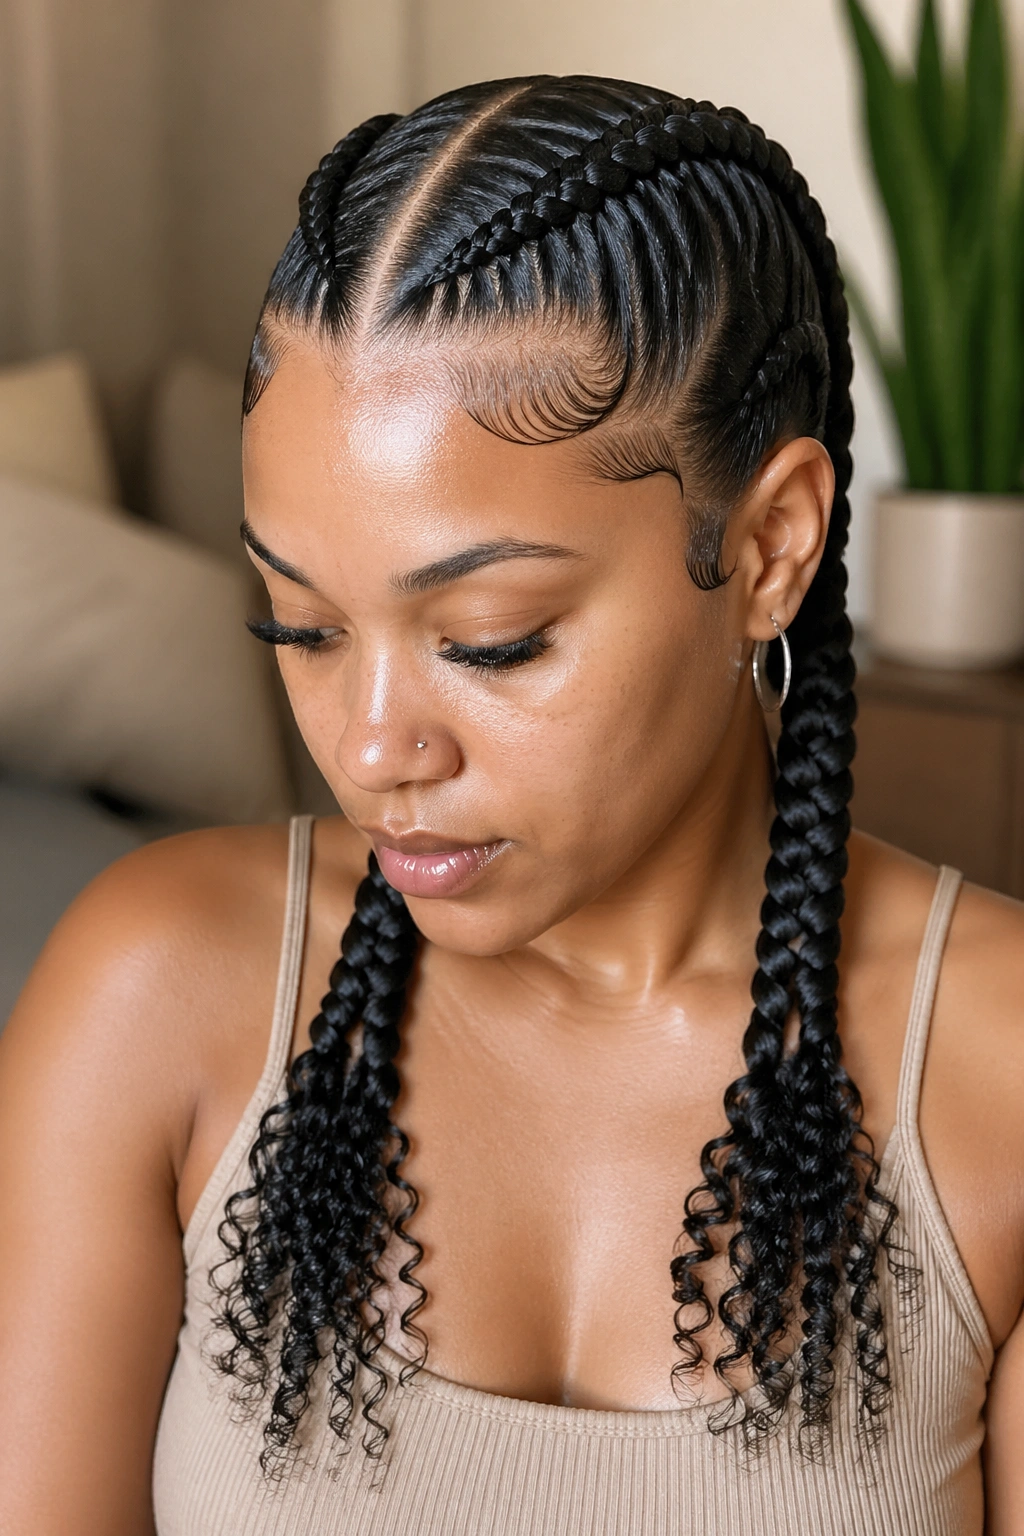
Two big cornrows with the ends left loose and curled — either with the natural curl pattern or with flexi-rods.
This adds a styling element without complicating the braid itself. You still only have to braid two cornrows. The curls add visual interest at the bottom.
Apply leave-in and a curl cream to the ends before braiding. The product will hold the curl pattern once you take the cornrow ends out of their elastic.
13. Cornrows With a Wrapped Bun
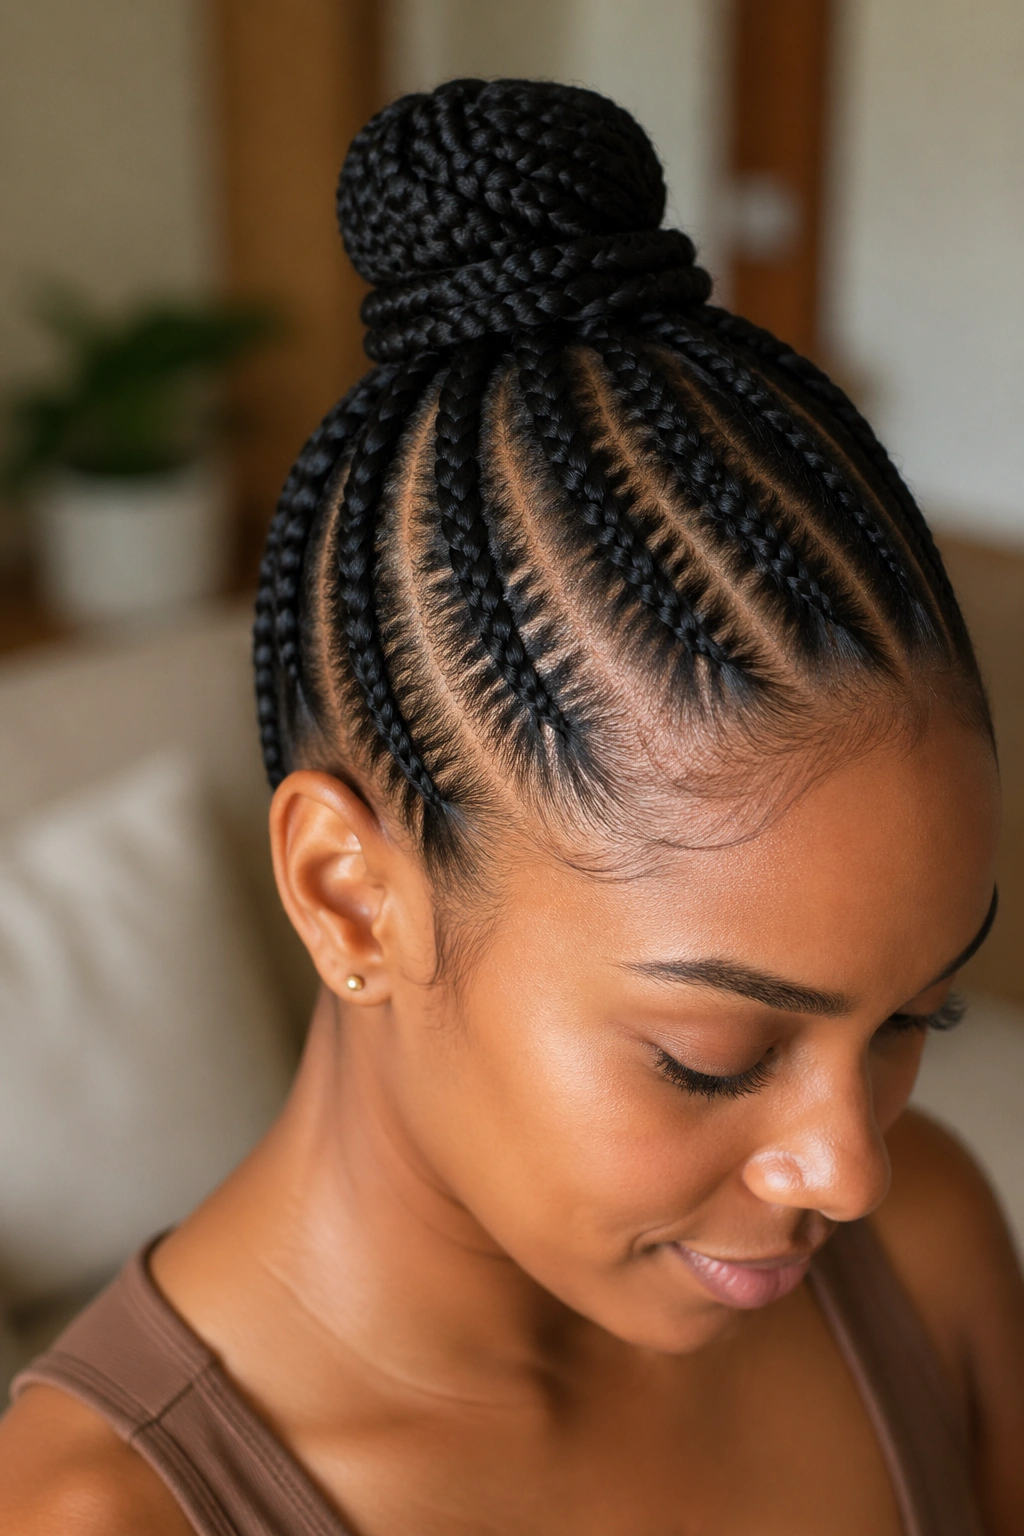
Same as the basic bun finish, but instead of a plain bun, you wrap a single extra braid around the bun’s base to hide the elastic.
The wrap adds polish without adding difficulty. You’re still braiding the same base cornrows. The wrap is just a finishing step.
Use a bobby pin to secure the end of the wrap braid to the bun. Tuck it under so it doesn’t show.
14. Six Cornrows Straight Back
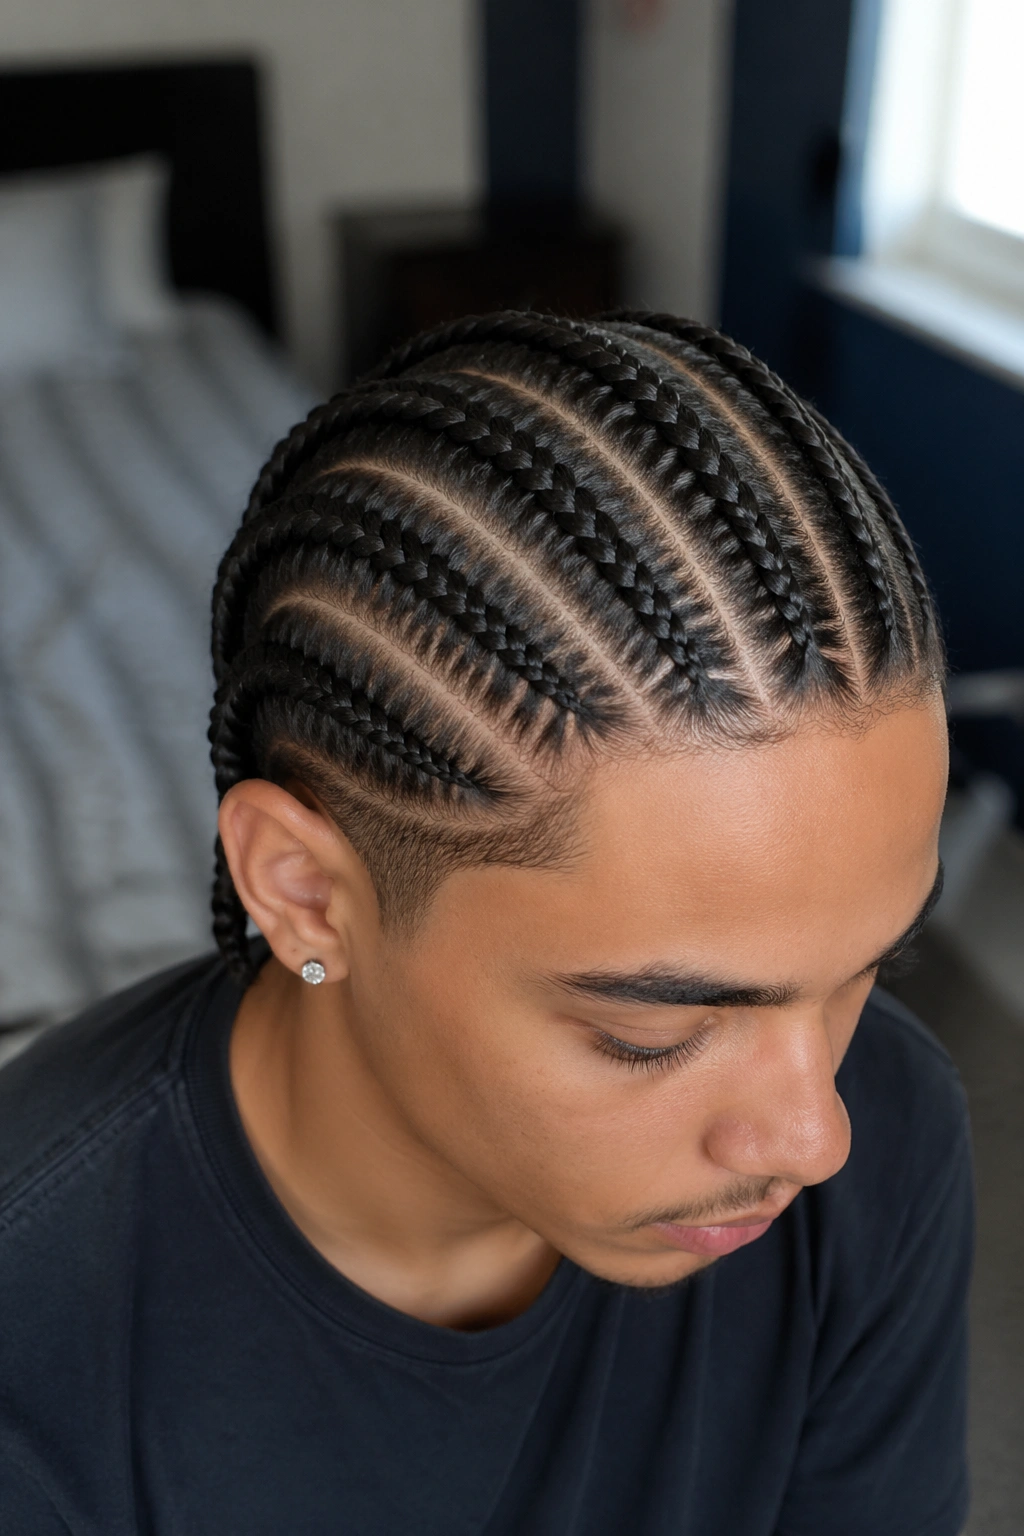
Six cornrows running from hairline to nape. Slightly more complex than five because you have to keep even section spacing across an odd number versus even number.
Six is a common count in real salon work. Learning it at home prepares you for typical install experiences if you eventually visit a professional.
Check section widths with the comb handle as a measuring tool. A consistent distance between each cornrow is what makes the finish look clean.
15. Cornrows With a Low Side Bun
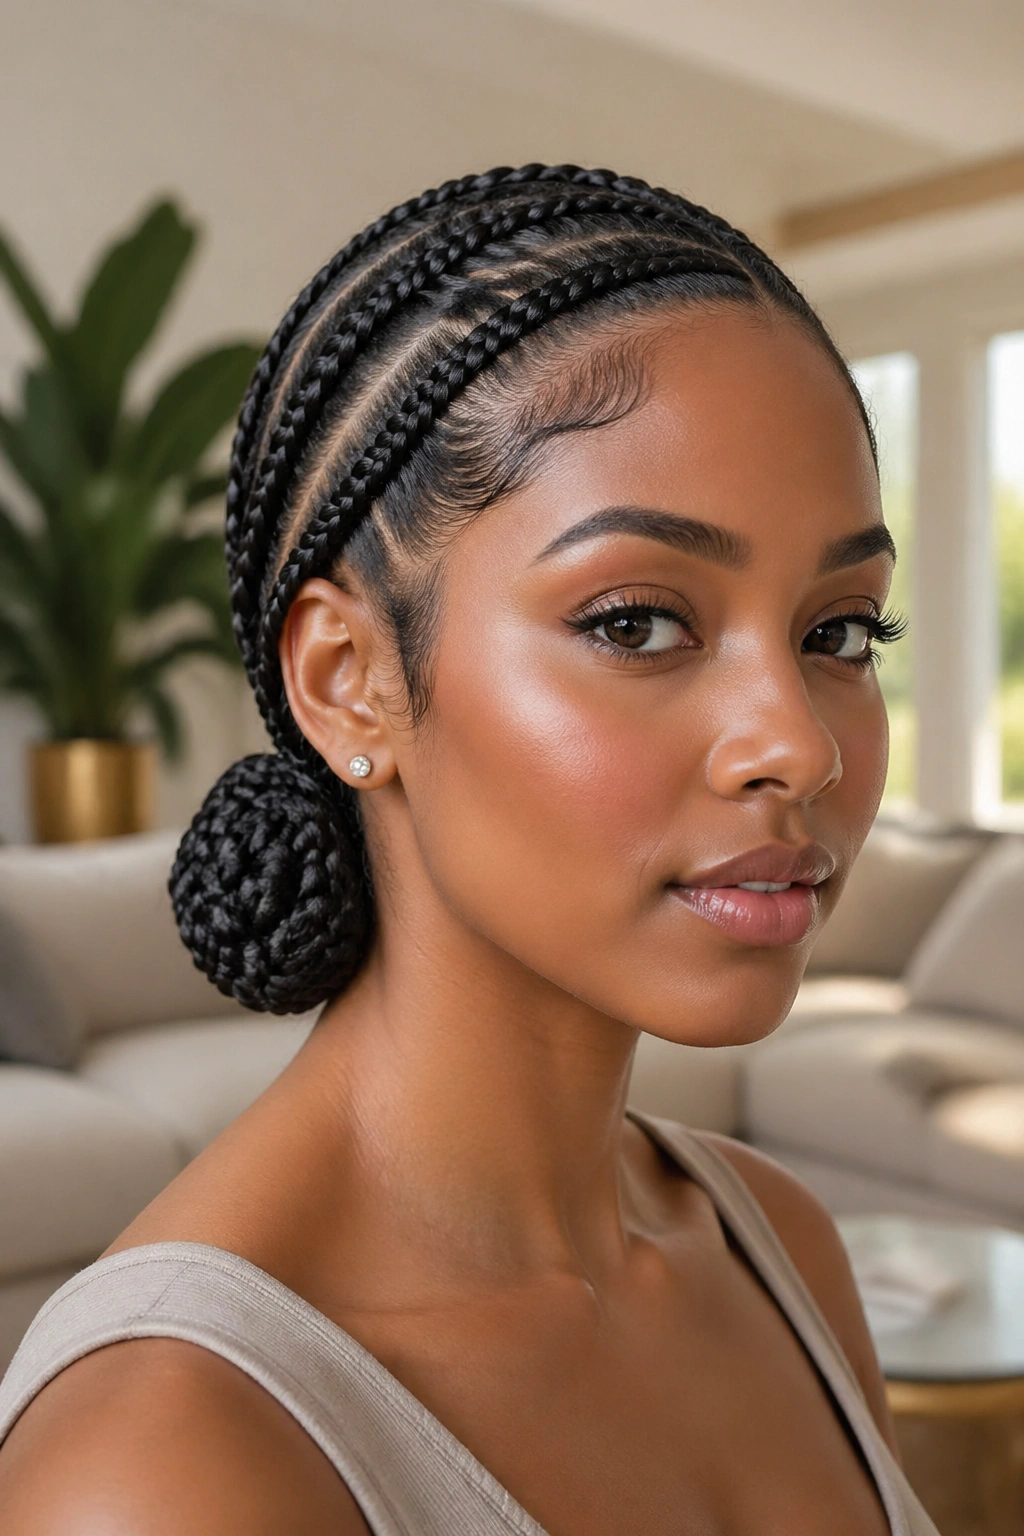
All cornrows sweep to one side of the head and gather into a low bun behind the ear on that side. The asymmetry adds a dressy touch.
This style is the combination of a side-swept pattern and a bun finish — two techniques you’ve probably already tried individually.
Pin the bun well. Side buns tend to slip throughout the day if not secured properly.
16. Cornrows With a Scarf Accent
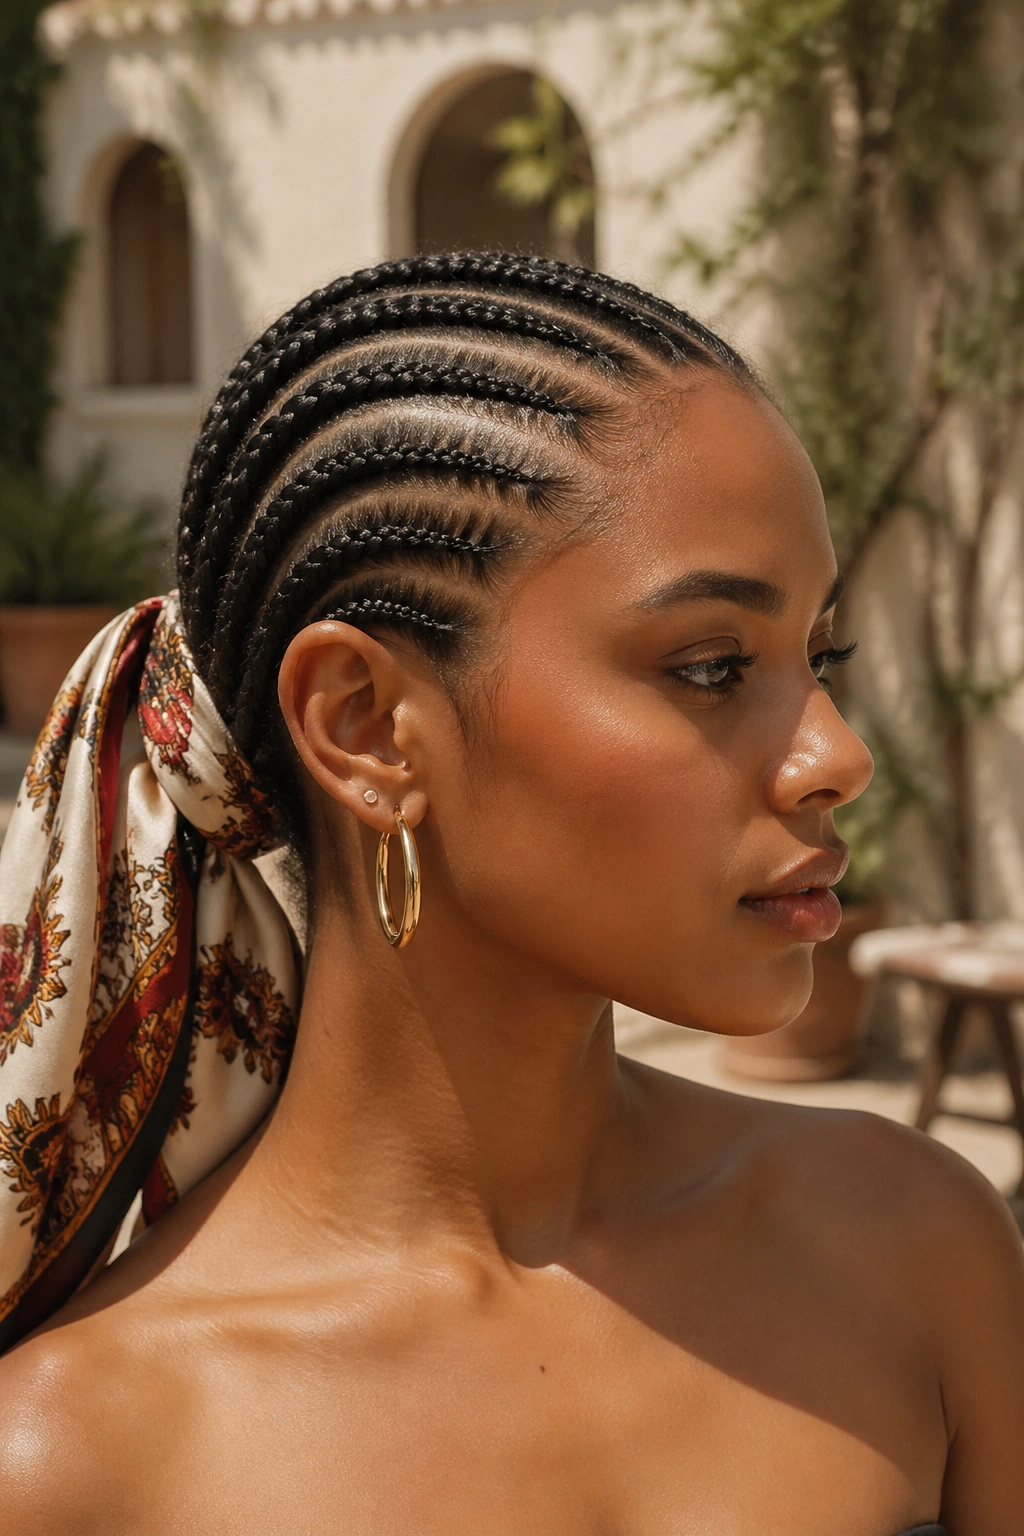
Any basic cornrow pattern finished with a silk or satin scarf tied at the base of a ponytail or bun. The scarf does the styling work.
The scarf is the focal point, so the cornrows can be simple. A basic three or four cornrow pattern with a bright scarf reads more styled than an intricate braid pattern without one.
Pick a scarf color that contrasts with your braid color — warm scarf on black hair, cool scarf on honey-fed hair.
17. Cornrows With Beaded Ends
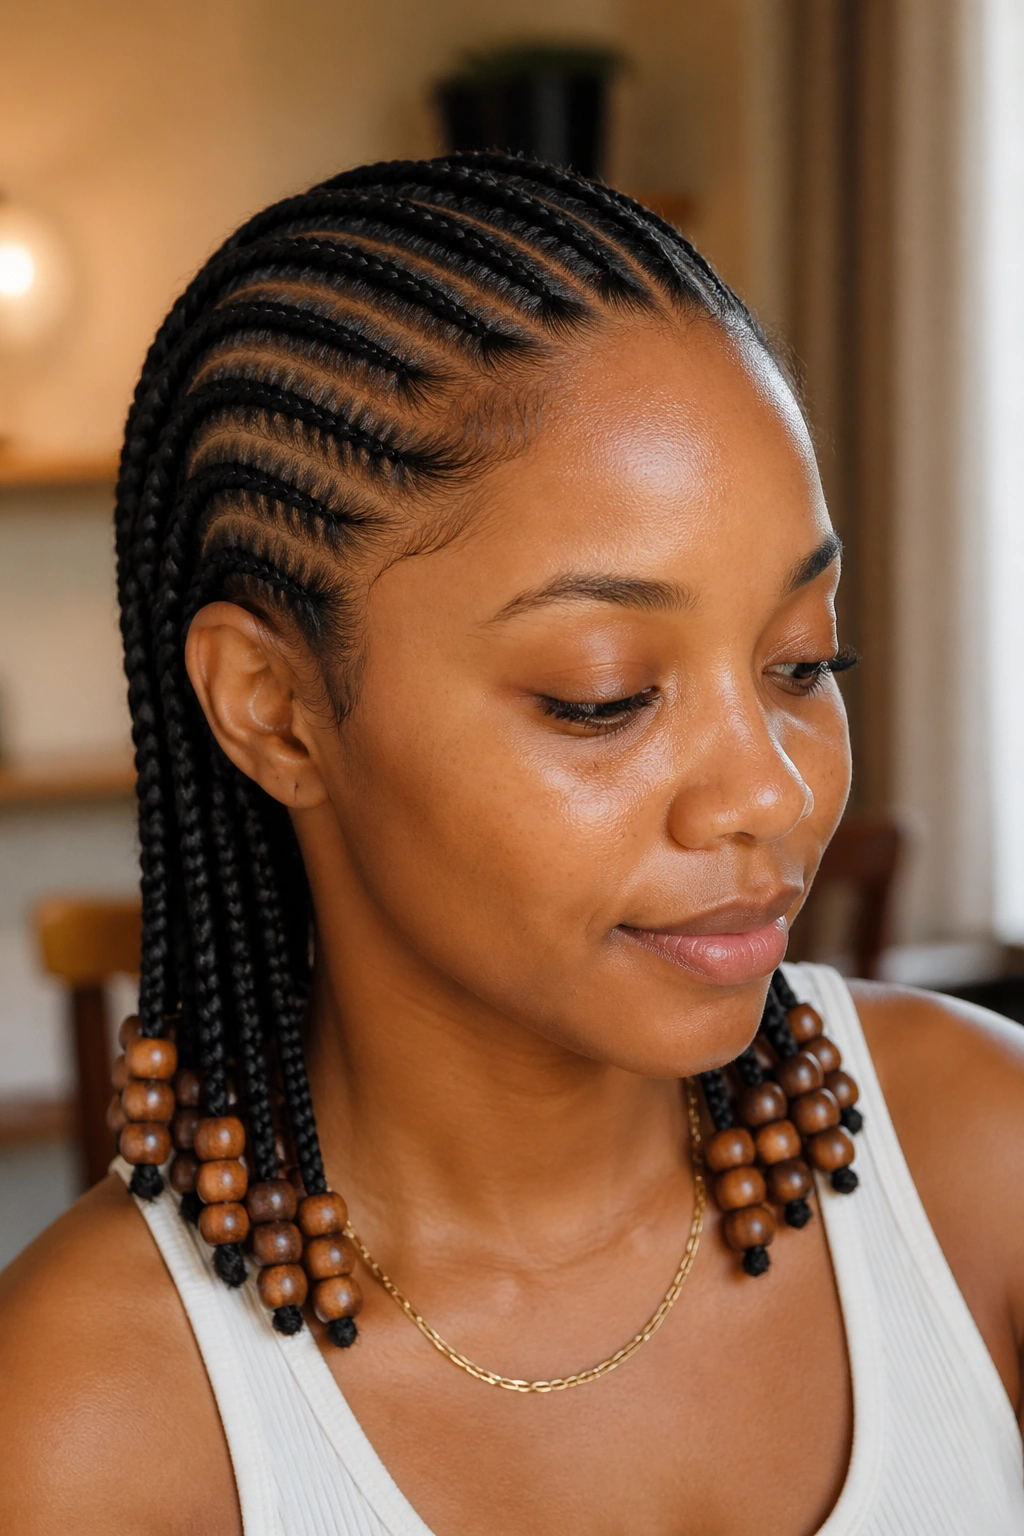
Any of the simple patterns above finished with three wooden beads at each braid end.
Adding beads is easy once the cornrows are done — thread with a beader tool, slide into position, secure with a small elastic. The install is standard; the finish is new.
Start with wooden beads for beginners. They’re lightweight and easy to slide onto the braid.
18. Cornrows With a Single Accent Braid
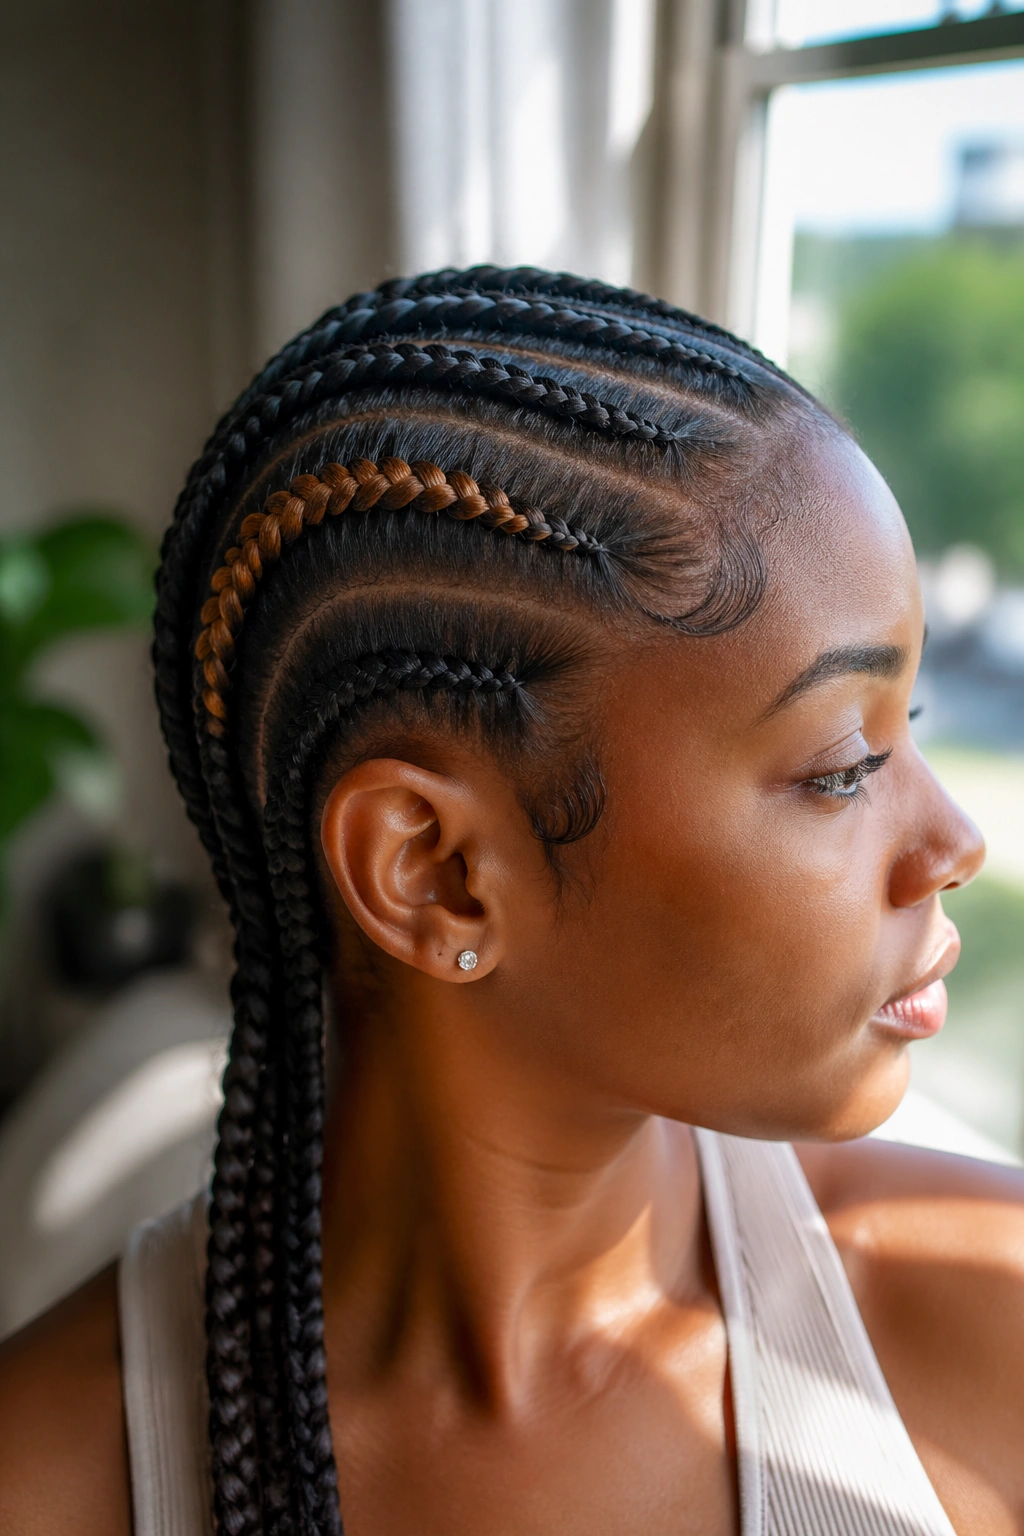
A basic five or six cornrow pattern with one braid added in a contrasting color — a small, thin extension fed into a single braid for a pop of color.
The accent braid is a first experiment with feed-ins. You only have to manage one feed-in, not many. It’s a small skill builder.
Use pre-stretched kanekalon for the accent. The tapered ends are easier to feed in cleanly.
19. Cornrows With a Twisted Accent
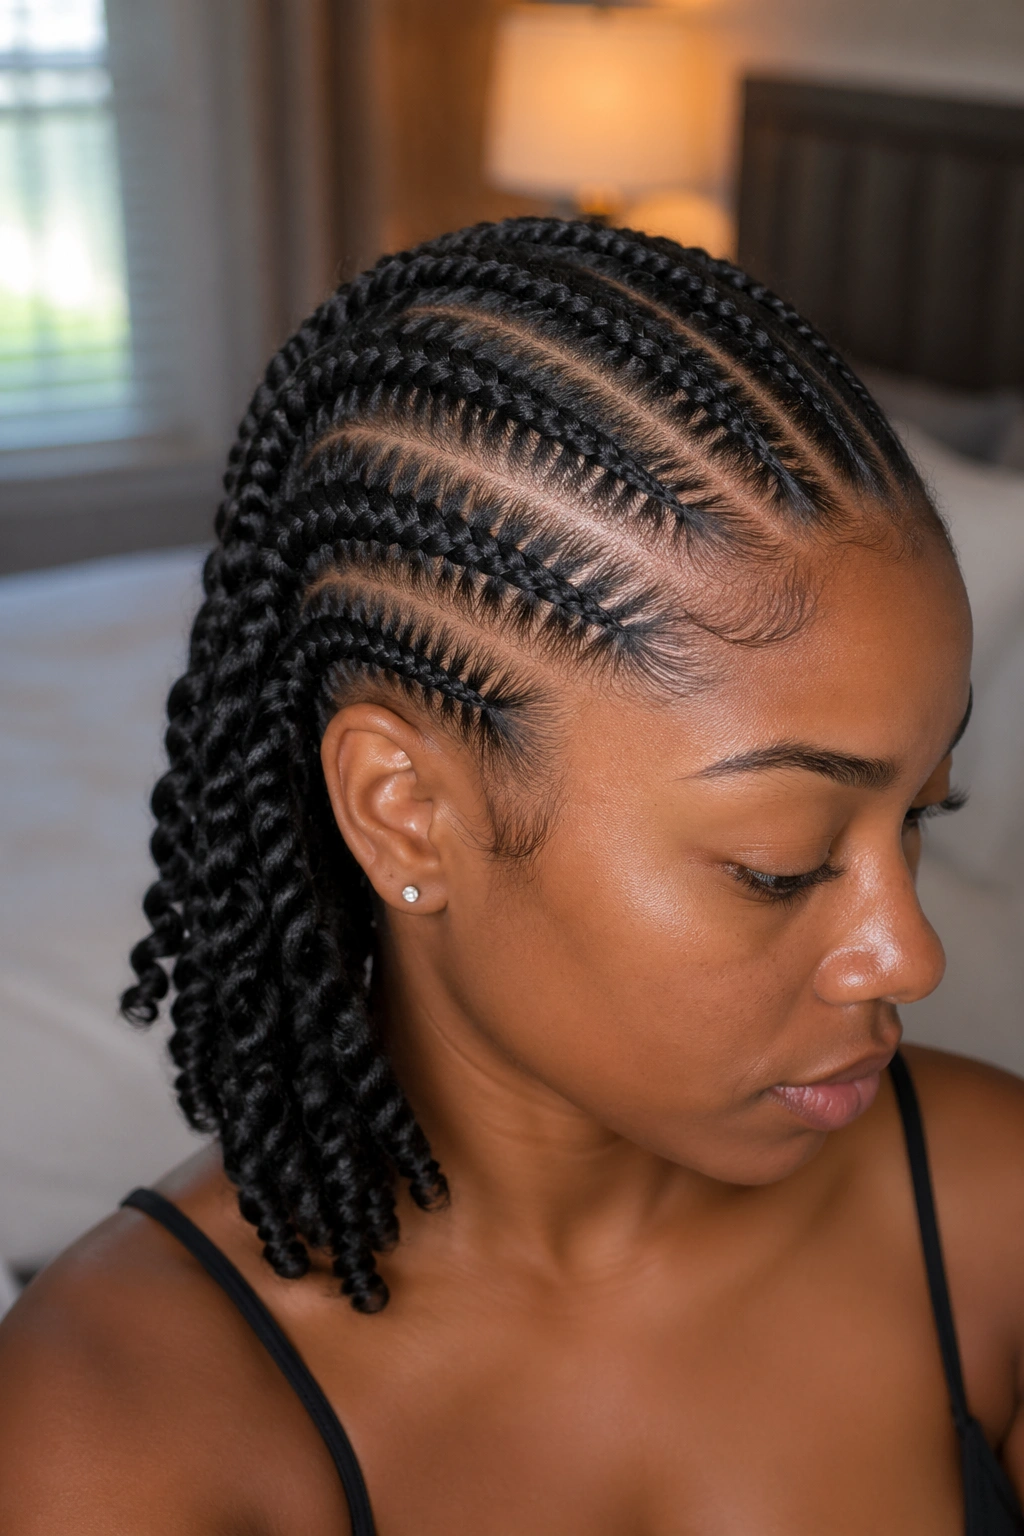
A few cornrows at the front, with the rest of the hair twisted — either two-strand twists or flat twists — for contrast.
This style combines two techniques: cornrowing and twisting. Both are beginner-accessible, and doing them together on one head is a good skill-building exercise.
The twist section doesn’t need to be perfect. Twists have a softer, more forgiving finish than braids.
20. Cornrows Stopping at the Shoulder
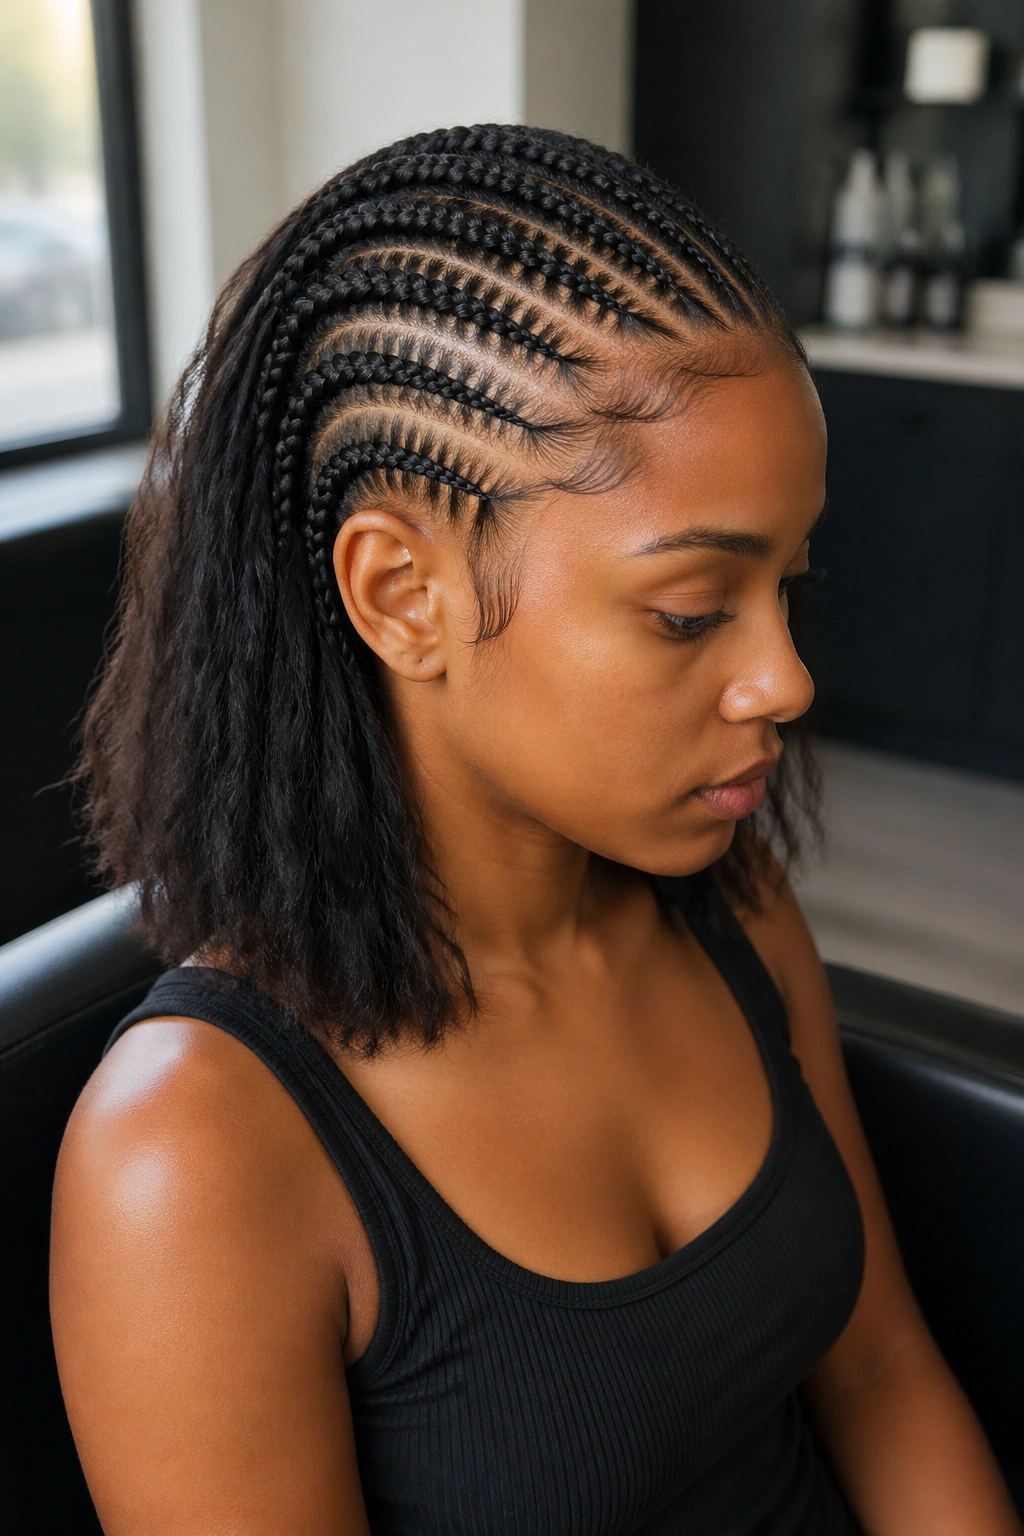
Cornrows braided only to shoulder length, with the rest left loose. This gives you practice ending a cornrow cleanly mid-braid.
Ending a cornrow early is a skill. You have to stop picking up hair from the scalp at a specific point, then finish the last few inches as a free-hanging braid before sealing with an elastic.
Use this style to practice the transition from cornrow to free braid smoothly.
21. Heart-Inspired Curved Parts
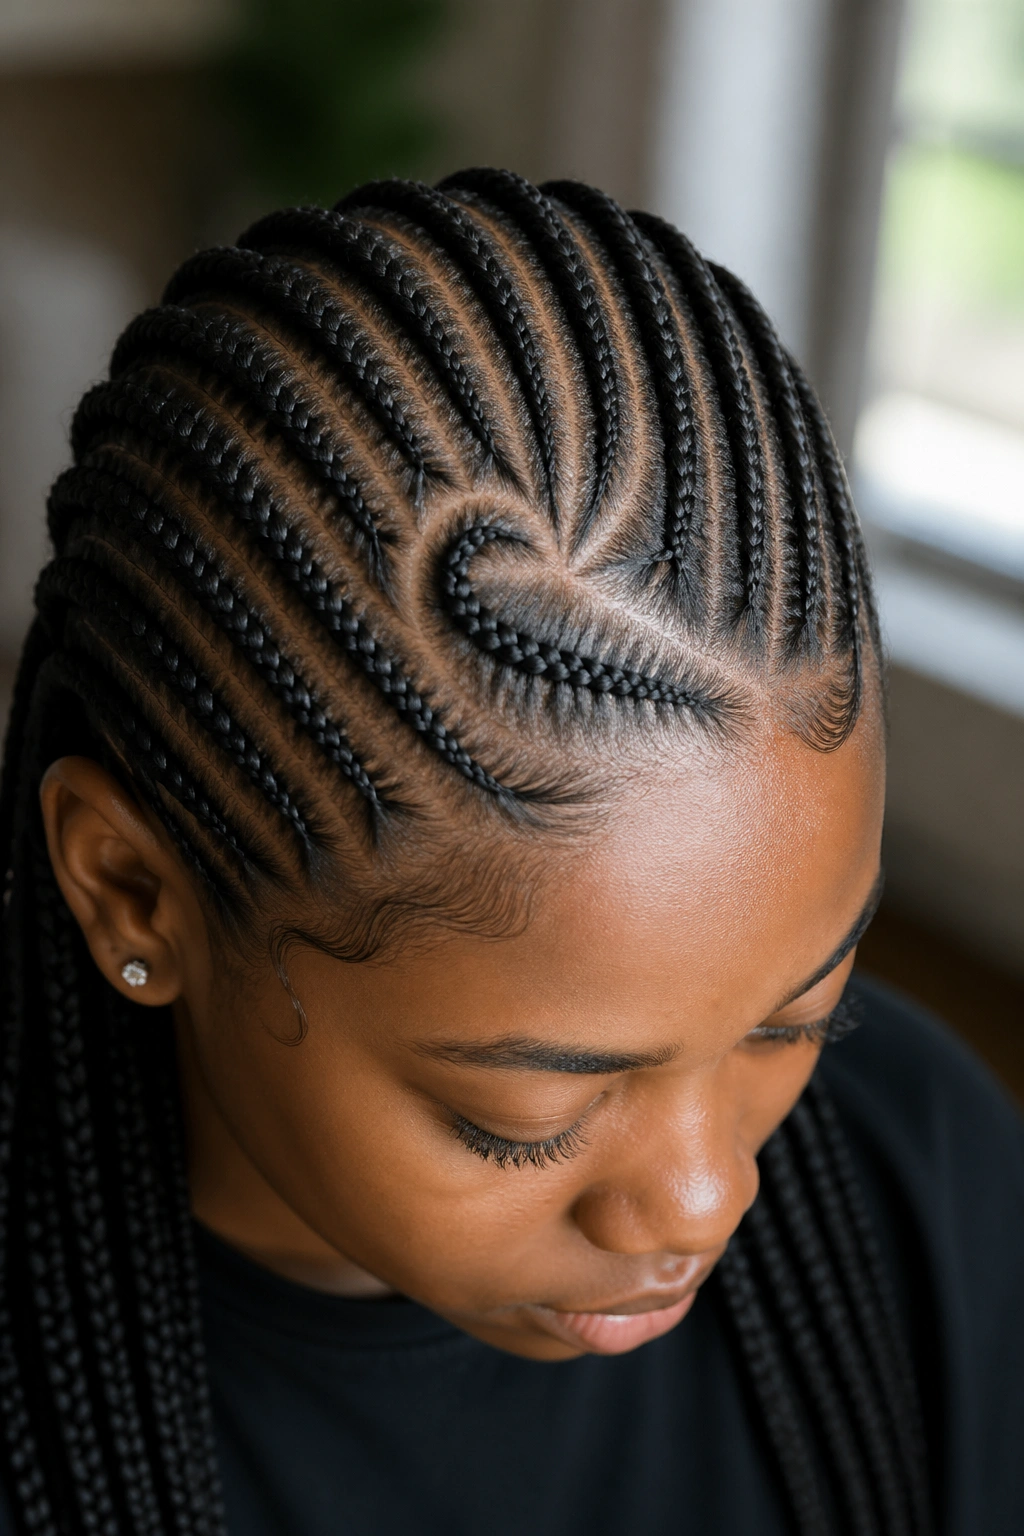
Not a full heart shape — just one or two gently curved parts at the crown, with the rest of the cornrows running straight back.
A single curved part is a beginner-accessible intro to shaped parting. You’re not trying to cut a full heart; just curving the part line slightly.
Use the rat-tail comb tip dipped in gel to cut the curve. A dry comb will drag and the curve won’t be clean.
22. Cornrows With Simple Feed-Ins
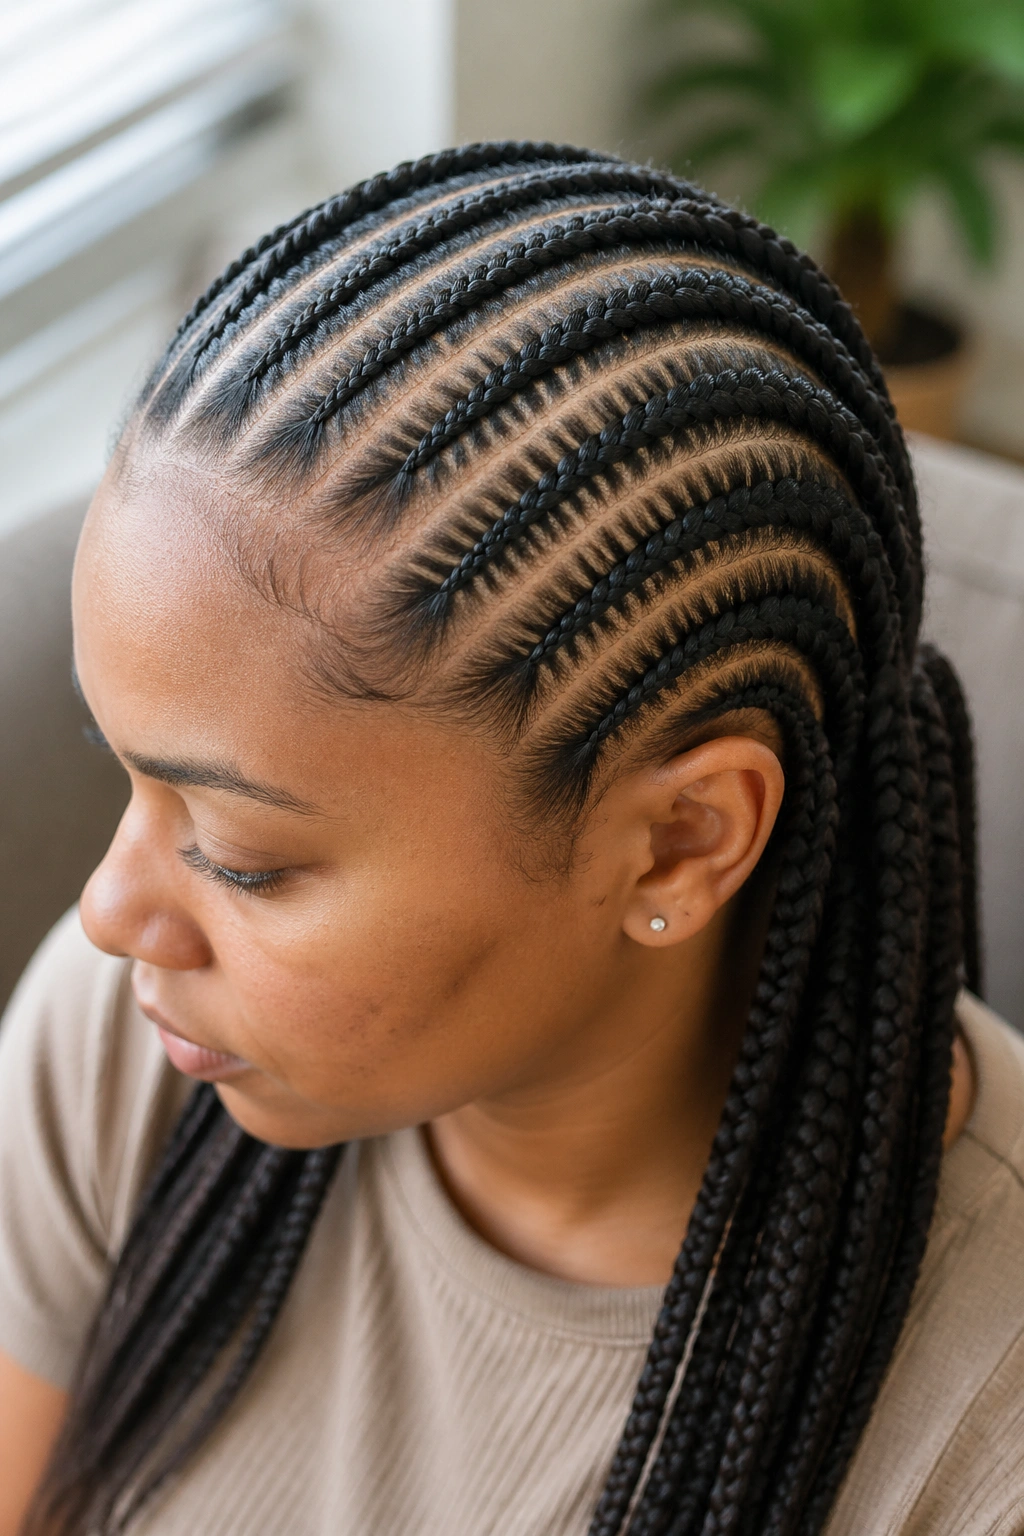
Basic straight-back cornrows with a small amount of feed-in hair added at the bottom half of each braid. The feed-in doubles the length of the braid without demanding a complex install.
Start with pre-stretched kanekalon. Add only one small piece per braid, about halfway down. Practice the feed-in motion on one braid before committing to all of them.
This is the stepping-stone to full feed-in installs. You learn the feed-in motion without the complexity of staggered feeds or multiple additions per braid.
23. Seven Cornrows in a Fan Pattern
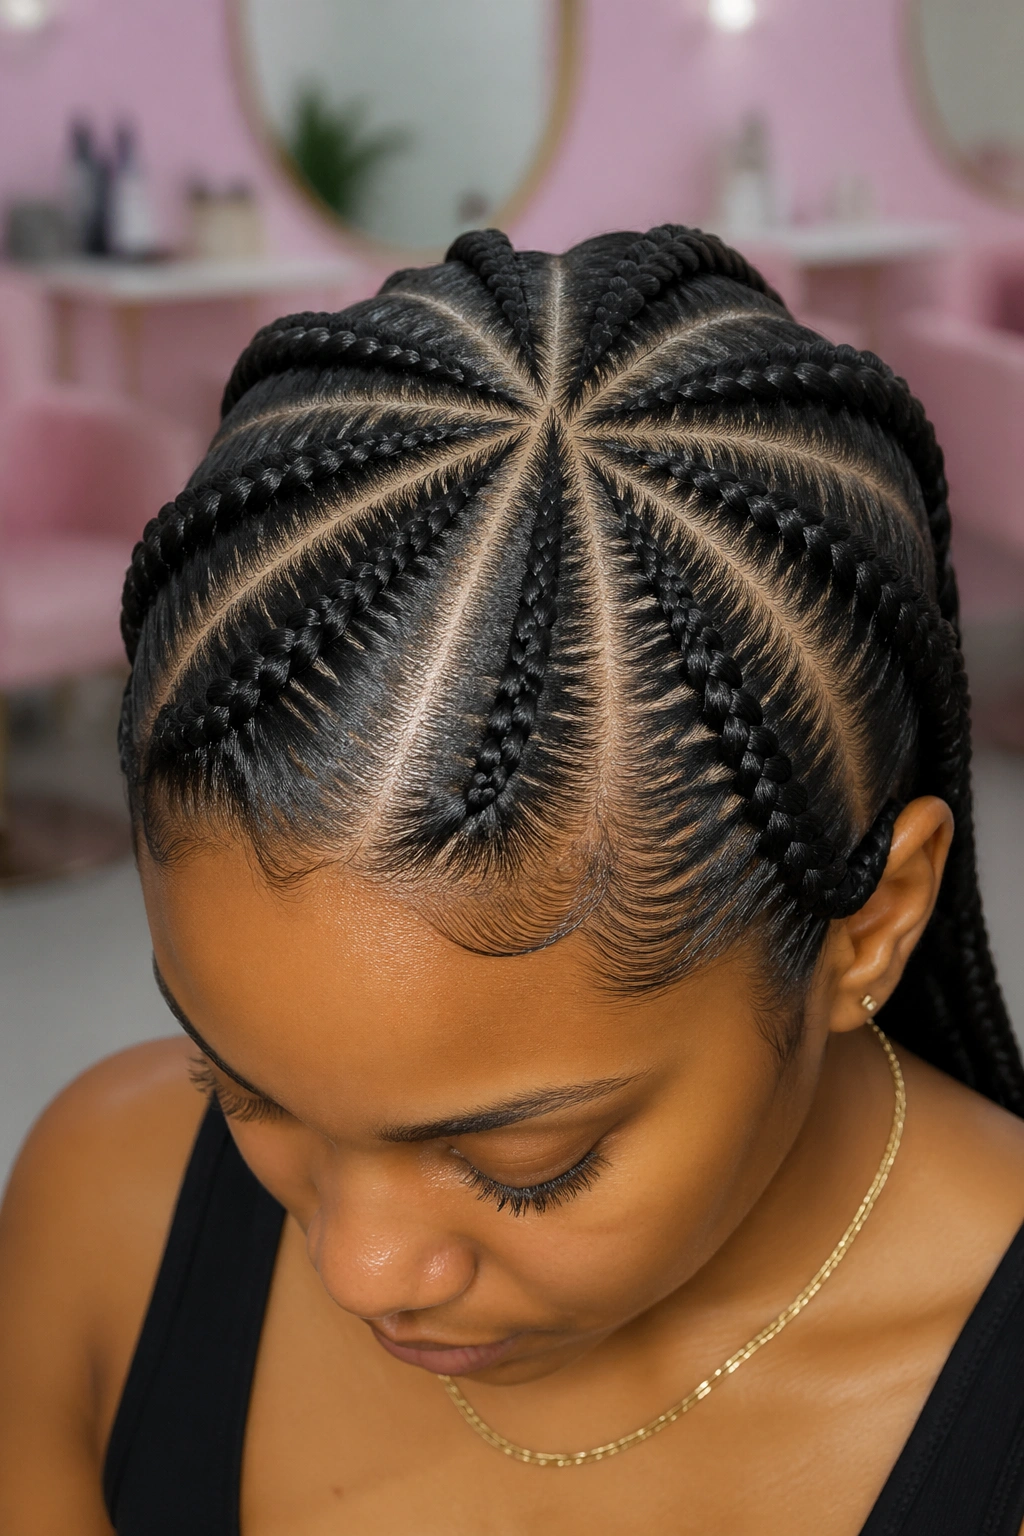
Seven cornrows fanning out from a single central point at the top of the head, like rays from a sun. The braids all start close together and spread as they travel down.
The fan is a first experience with a non-parallel pattern. You’re practicing how to direct each braid slightly differently while maintaining consistency in braid thickness.
Start the middle braid first — it sets the vertical axis for the whole pattern. Then work outward from there.
24. Cornrows With a Twist Out Below
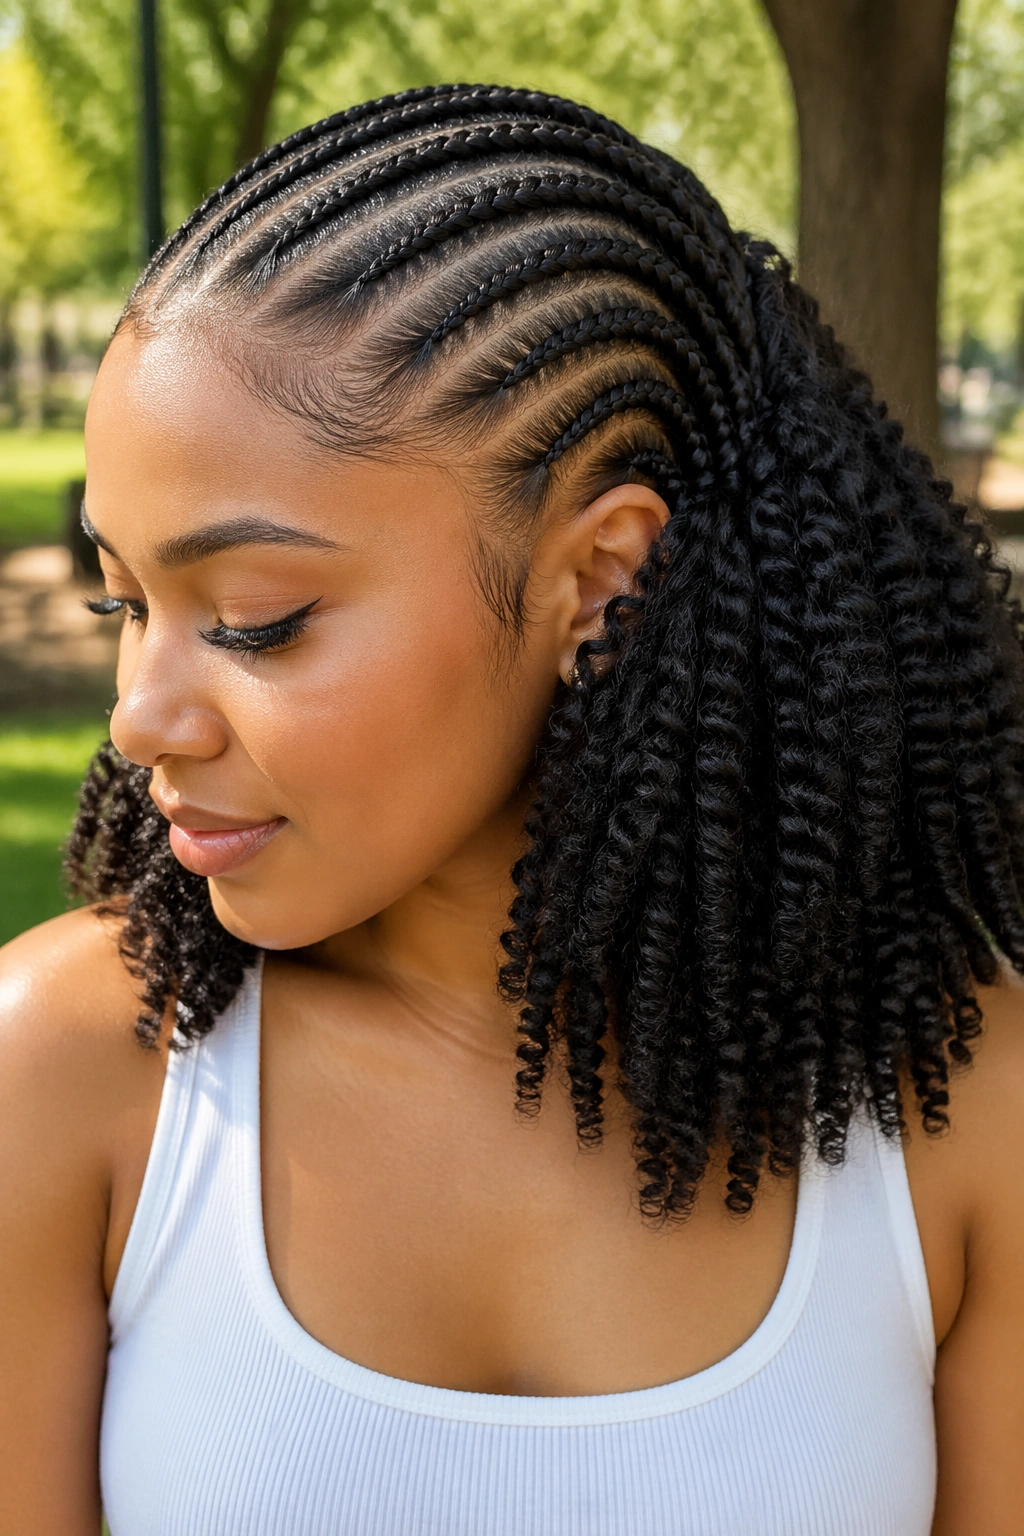
Cornrows from the hairline to mid-head, with the rest of the hair left loose in a twist-out pattern. The braids frame the face while the twist-out provides volume and texture below.
This is a hybrid style that showcases both techniques. It’s also a practical one-day look — you can install it in an afternoon and wear it out the next day.
The twist-out requires an overnight set. Plan for this ahead of time.
25. Cornrows With a Low Ponytail and Wrap
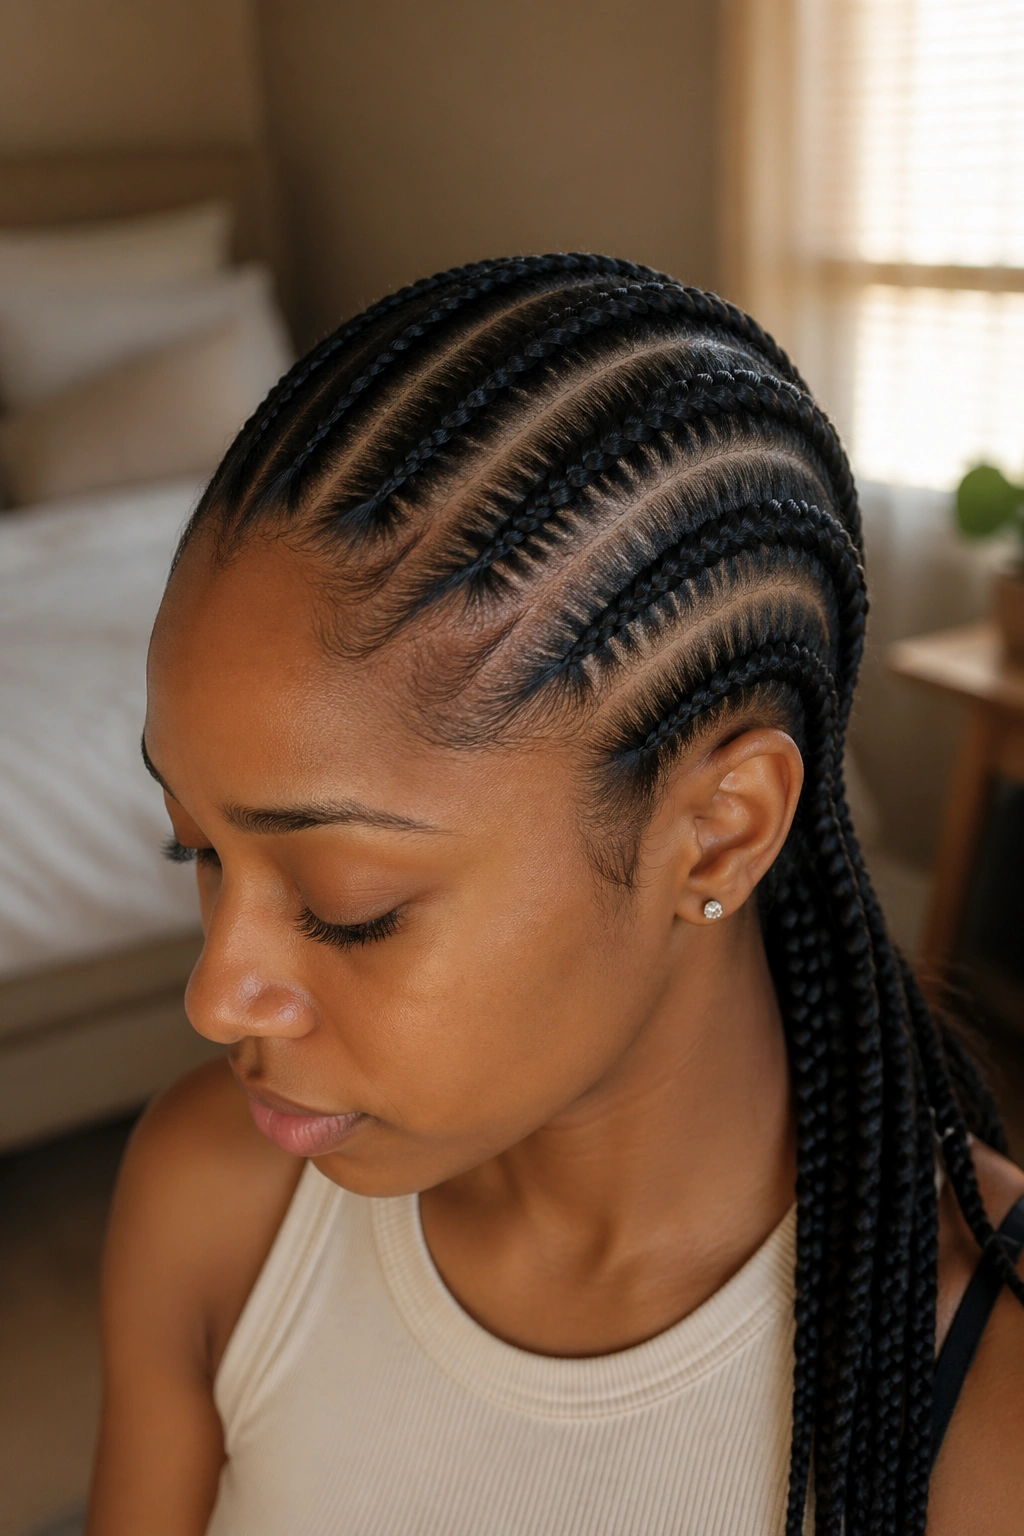
Cornrows gathered into a low ponytail, with one extra cornrow wrapped around the ponytail base to hide the elastic. Simple base, polished finish.
The wrap is the last detail that separates a beginner finish from a styled one. It’s small, but it makes a visible difference.
Practice the wrap on a practice head first. Getting the tension right takes a few tries.
Common Beginner Mistakes and How to Avoid Them
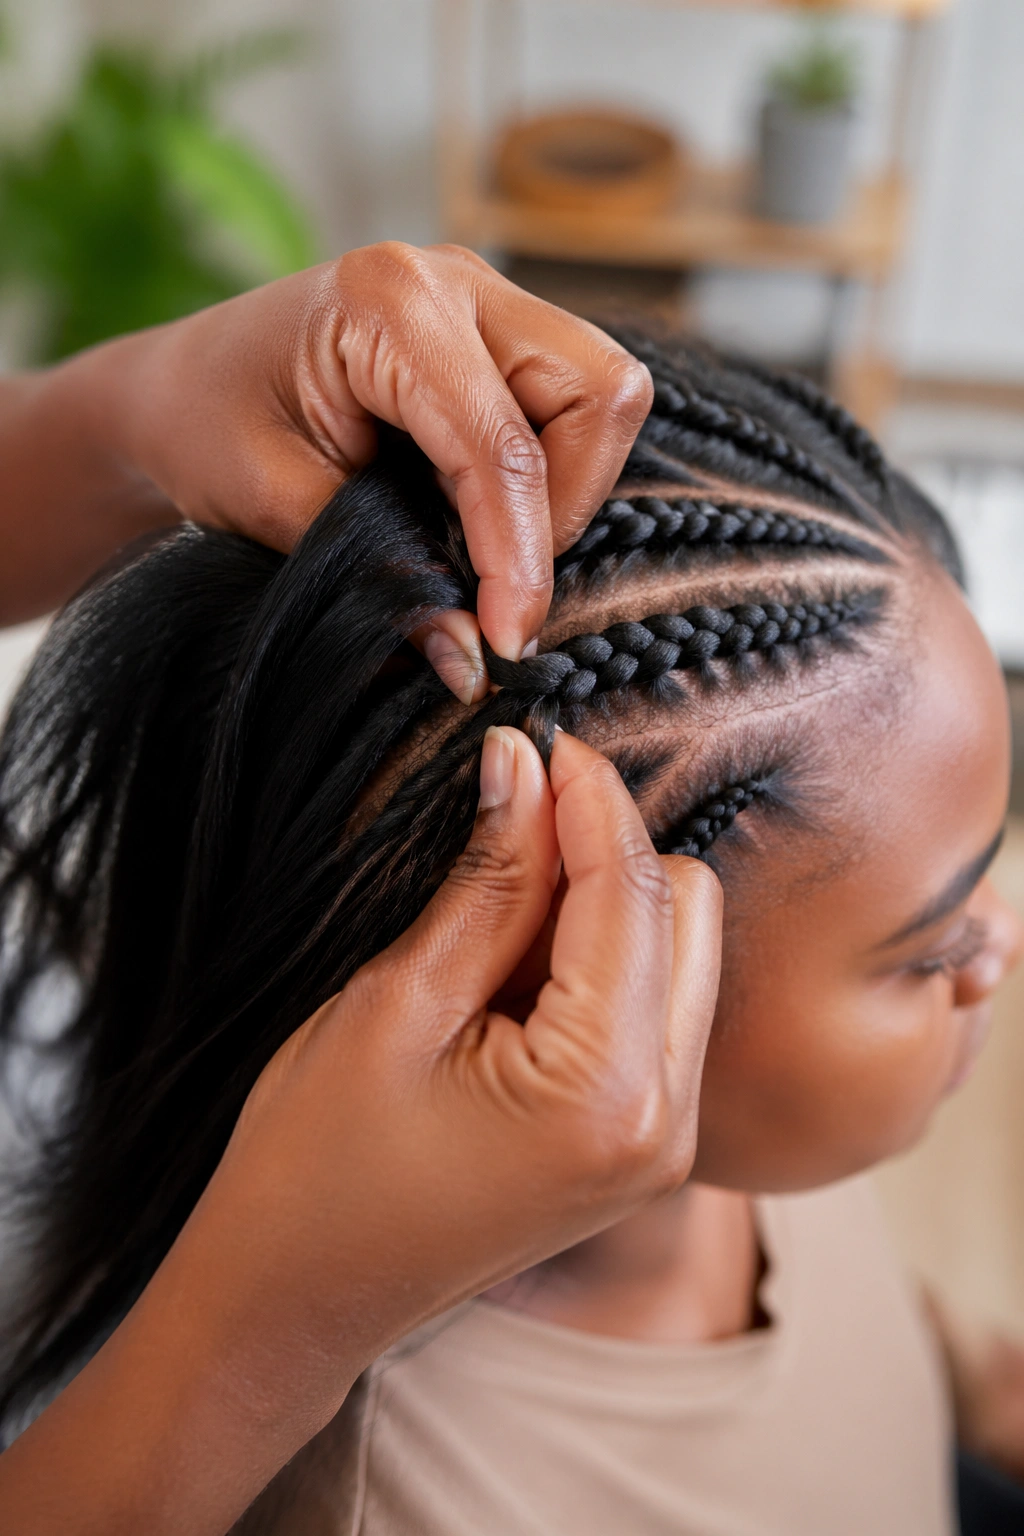
Too tight. Every beginner over-grips. If your scalp burns, loosen the braid immediately. You can always tighten; you can’t undo tension damage.
Uneven sections. Use the rat-tail comb handle as a measuring tool to space cornrows consistently. Measure once, braid once.
Missed pick-ups. Each cross-under should include a small piece of new hair from the scalp. If you forget, the braid won’t grip the scalp and will slide around.
Inconsistent braid thickness along the length. Keep your finger positions the same on each pass. Switching grip mid-braid is what causes the braid to thin out or bulge unexpectedly.
Skipping the scarf at night. Even after a beginner install, cotton pillowcases will frizz the braids overnight. Tie down with satin.
Aftercare for a First-Time Beaded or Simple Install
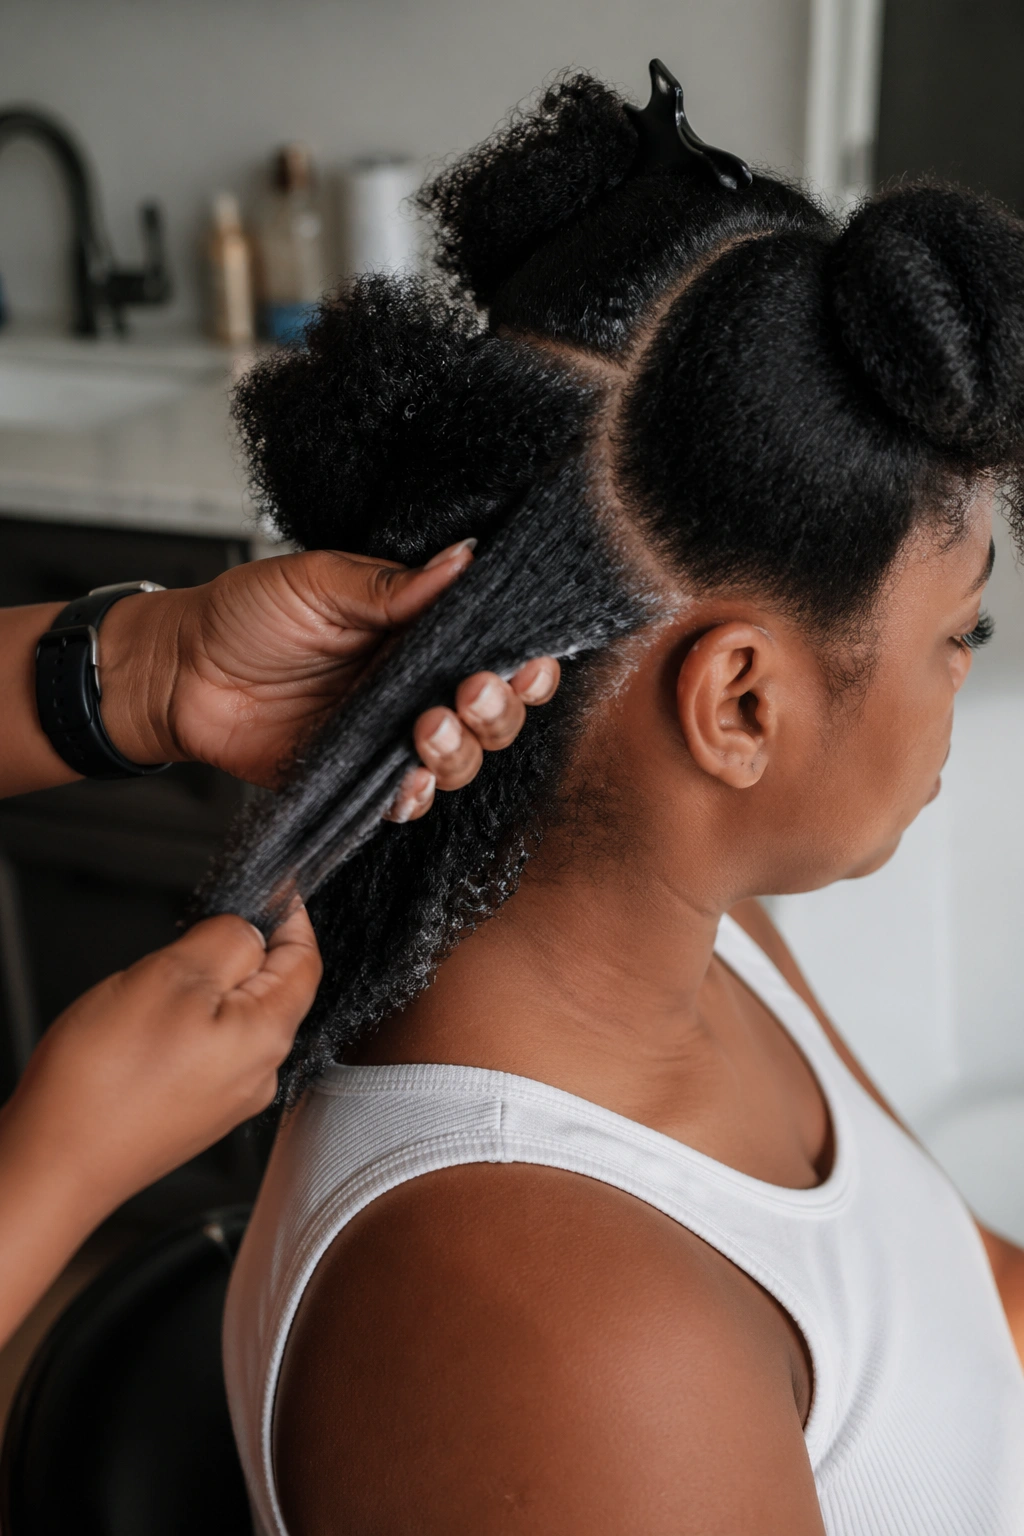
Mist with water and leave-in every other day. A light spray along the parts is enough.
Apply a light oil to the scalp twice a week — jojoba, grapeseed, or a dedicated braid oil. Avoid heavy butters that trap lint.
Wash every 10-14 days with diluted sulfate-free shampoo applied with a squeeze bottle. Massage on the scalp only, rinse thoroughly, dry completely.
Tie down with a satin scarf every night. Sleeping on satin pillowcases is a backup, but the scarf is more reliable.
When to Take Down a Beginner Install
Give yourself permission to take down early. If you don’t like how it came out, you don’t have to wear it.
Take down before two weeks if the braids are loose, fuzzy, or uneven enough that you notice. Your practice skills will improve with each install — early takedowns are part of the learning curve.
Always saturate the braids with detangling spray before unraveling. Never pull a cornrow out dry.
Building Skill From One Style to the Next
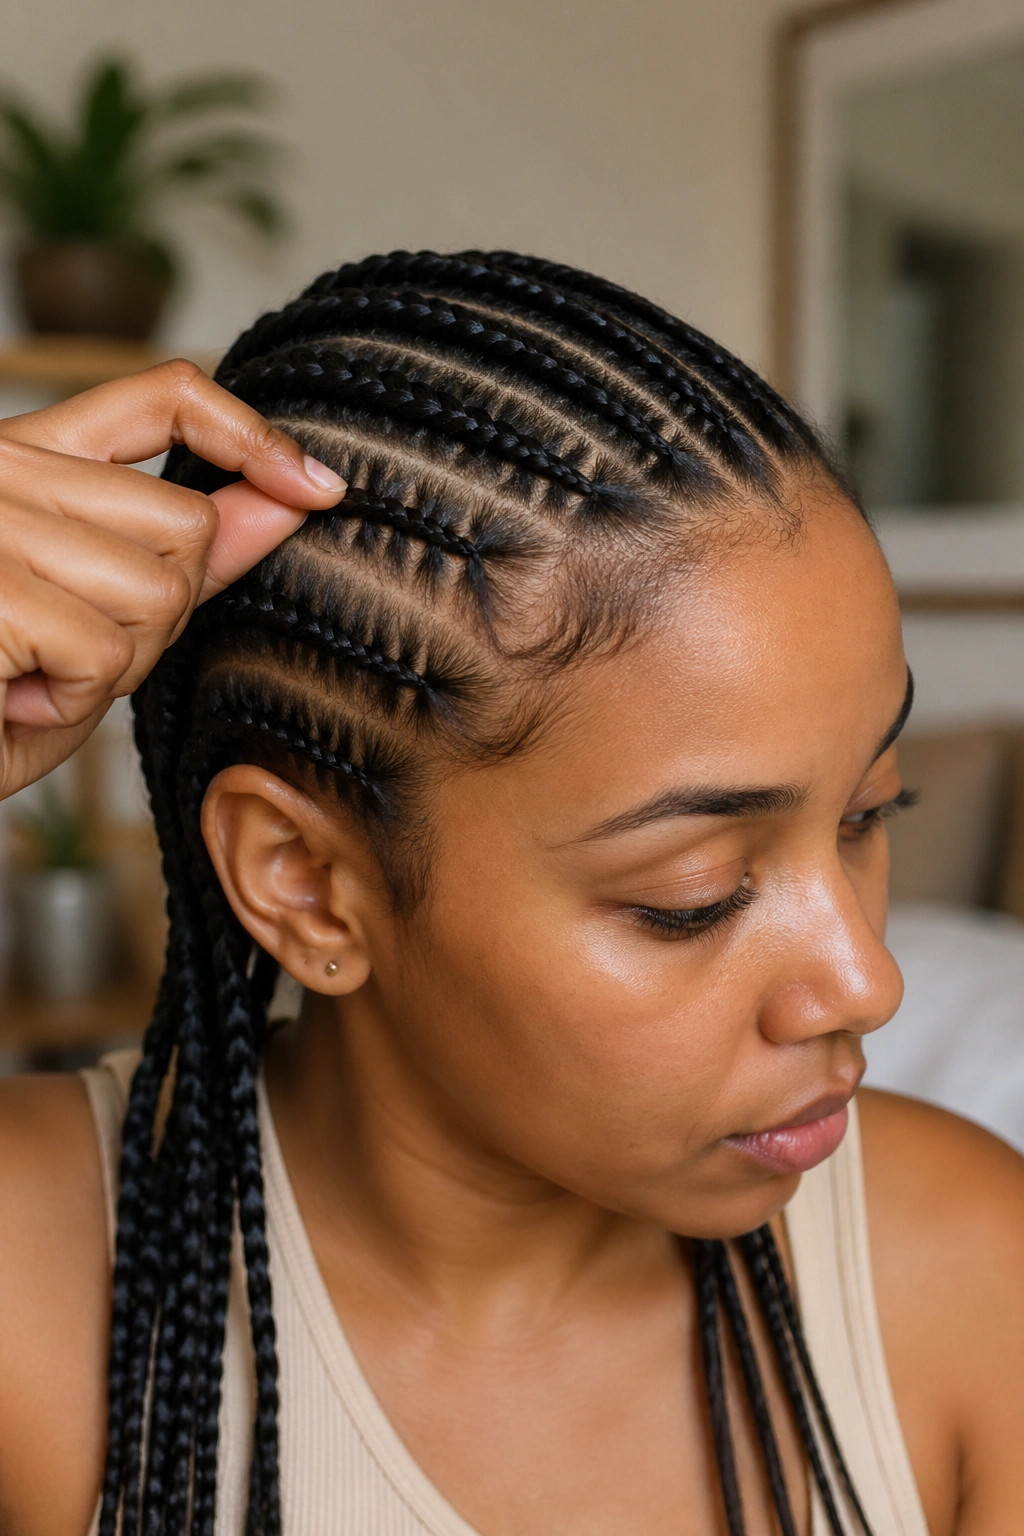
Start with two cornrows. Move to three, then four, then five. Each increase in braid count builds hand strength and pattern awareness.
Once you can do a clean five-cornrow install, try side-swept variations, then feed-ins, then shaped parts.
The progression isn’t linear for everyone. Some people find diagonals easier than symmetric patterns. Some find feed-ins natural and shaped parts frustrating. Pay attention to what feels easiest for your hands and build from there.
Picking the Right First Style for Your Hair
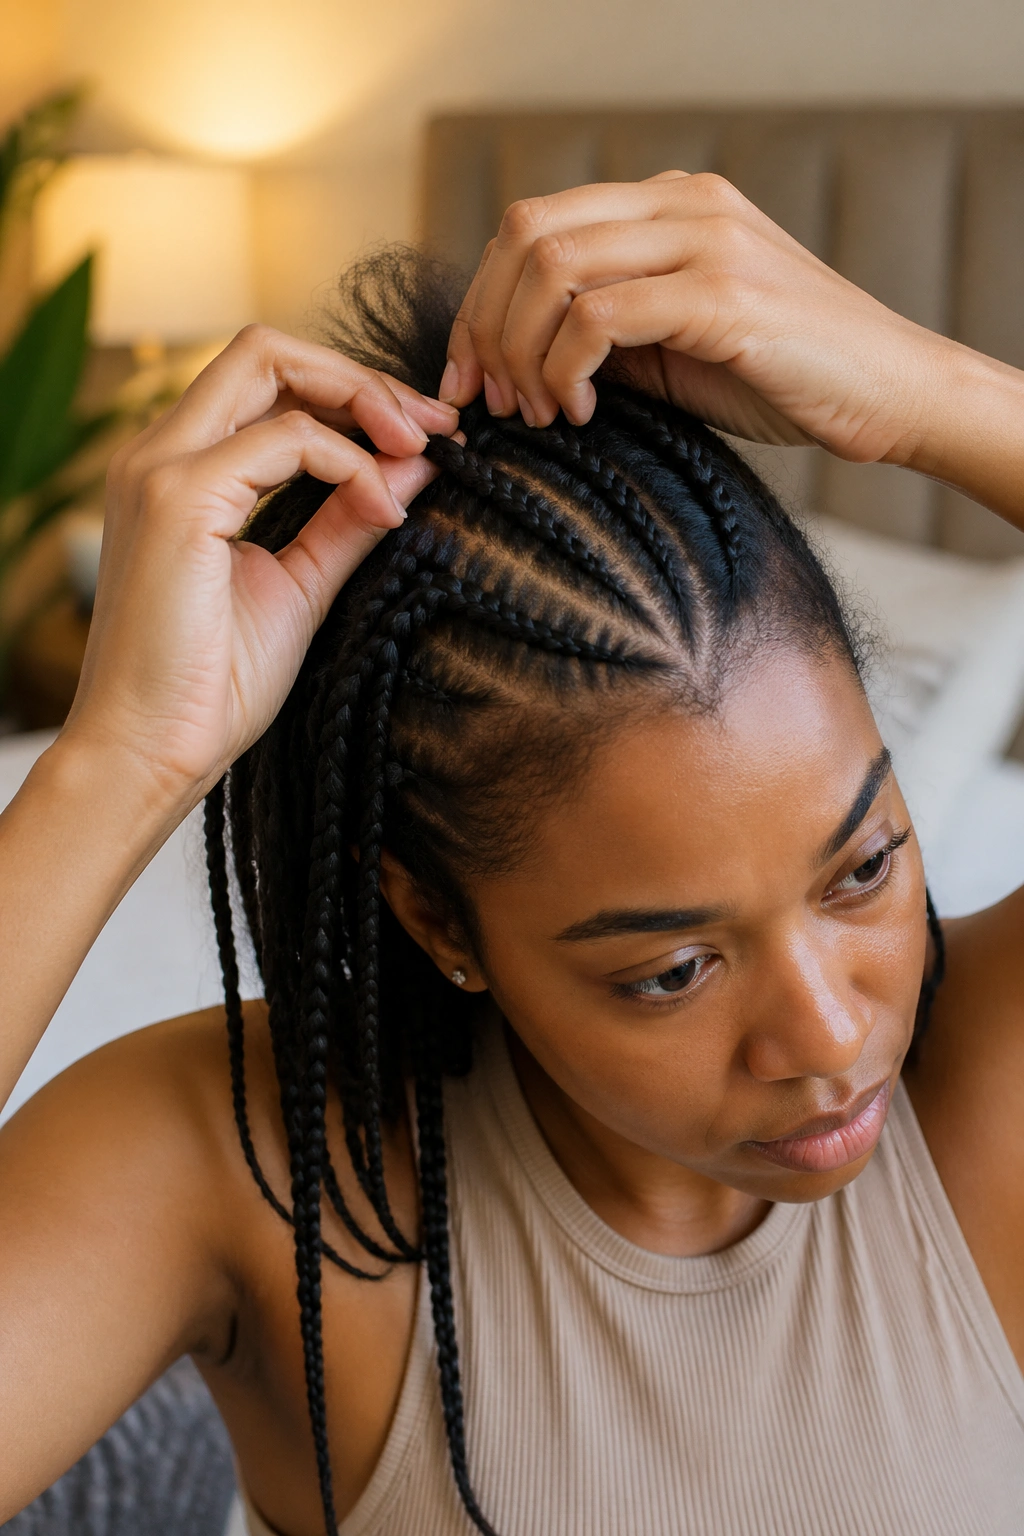
Start with your natural length. If you have 3 inches, a two-braid style is your friend. If you have 8+ inches, you have more options — any of the basic multi-braid styles will work.
Factor in your available time. A first-attempt two-cornrow install takes 20-30 minutes. A first-attempt six-cornrow install can take 2-3 hours.
Match your ambition to your reality. Trying to do a seven-braid stitch install on your first attempt is how beginners get discouraged. Start small. Finish cleanly. Build from there.
The best beginner cornrow style is the one you can finish, wear confidently, and take down without damaging your hair. Pick the simplest option on this list that matches your length and your time, practice it twice before wearing it out, and trust that skill comes with repetition. Every experienced braider you admire started exactly where you are. The only difference is they kept going.
