



Marley cornrows combine the grip of traditional cornrow braiding with the coarse, natural-looking texture of Marley hair extensions. The result is a protective style that reads unmistakably organic — the kind of finish that looks like it grew out of your head rather than getting glued on. Named after the dreadlocked legacy of Bob Marley, Marley hair mimics the matted, voluminous texture of locs and kinky 4B/4C hair, which is what gives these cornrows their distinctive character.
Unlike kanekalon, which has a slight sheen and smoother strand, Marley hair is dull, coarse, and fibrous. It blends seamlessly into textured natural hair. When you cornrow with it, you get fuller braids, a matte finish, and a silhouette that holds better over time without the plasticky shine of synthetic kanekalon.
The style has become a staple for women who want length and protection without looking obviously “extensioned.” It works beautifully for transitioning hair because the texture match is almost seamless. Marley hair also tends to be lighter weight than kanekalon by volume — a factor that matters when you’re wearing braids for 4 to 6 weeks at a time.
Where Marley Hair Actually Comes From
The name traces to Jamaica, where Marley Braids brand hair first gained popularity for use in loc extensions during the roots reggae era. The original product was designed to mimic natural locs for women who couldn’t or didn’t want to commit to growing out actual locs.
Over the decades, the hair evolved. Brands like Femi, FreeTress, and Outre refined the texture. The product most braiders now use is technically “kanekalon Marley” or “toyokalon Marley” — chemically engineered synthetic fibers textured to mimic kinky natural hair. Pure animal-hair Marley extensions exist but are rare and expensive.
What matters for the braider and the wearer is the feel. Good Marley hair feels like thick cotton thread. Bad Marley hair feels like plastic string. Price usually sorts this out — the 4 to 6 dollar packs are fine for short-term wear; the 10 to 15 dollar packs from established brands hold texture through multiple wears.
Why Marley Hair Changes the Cornrow Game
The coarseness of Marley hair creates natural friction during the braiding process. This friction means the braid grips itself without heavy product, and it means the roots don’t slip down the natural hair shaft the way slick kanekalon can.
Cornrows made with Marley extensions hold their pattern even after multiple washes. That’s not true for most synthetic braid hair. The texture also means you can get away with less tension at the root — the friction holds the braid in place where kanekalon would require a tighter base to prevent slippage.
One downside — Marley hair tangles faster than kanekalon if left unwrapped at night. The same coarseness that grips the natural hair also grips itself. A satin bonnet or scarf is not optional with this style.
Prep Work That Sets the Foundation
Your natural hair needs to be clean, deep conditioned, and stretched before the first braid goes in. Marley cornrows can stay in for 6 to 8 weeks if done right, so your starting point matters.
Use a clarifying wash with something like Kinky-Curly Come Clean or a sulfate-free version of ACV rinse. Follow with a protein-moisture balance conditioner — Shea Moisture Jamaican Black Castor Oil Masque is a solid pick if your hair tends toward dry. Stretch the hair through African threading or Bantu knots overnight. Avoid heat stretching if you can — the prolonged braided style will already stress the strand.
Gather your Marley packs before you sit down. Three packs minimum for a full head of medium-length braids. Four to five packs for waist-length feed-ins. Pre-separate the hair into workable sections and lay them across a chair arm.
Technique Tips Specific to Marley Cornrows
Dampen the Marley hair slightly with water and leave-in spray before braiding. This softens the fiber and makes it less itchy against the scalp.
Feed the hair in gradually — add small amounts with each crossover rather than attaching a single large chunk at the root. This creates a natural taper and lets the cornrow transition from your real hair to the extension without a visible bump.
Keep your thumbs tucked close to your palms during the braiding motion. Marley hair catches on long nails and loose jewelry. Work slowly.
1. Classic Four-Cornrow Marley
The simplest version, and the one I recommend for first-timers. Four straight cornrows run from forehead to nape — two on each side of a clean center part, each section roughly 2 to 3 inches wide.
The Marley hair adds bulk to each braid without requiring the precision parting of more complex styles. You get a fuller look than standard cornrows with natural hair alone, and the finished braids hang well past the shoulders.
- Install time: 2 to 3 hours
- Lasts: 4 to 6 weeks
- Packs needed: 2 to 3
Tip: Ask your braider to stop the feeding-in process about 4 inches from the ends, leaving the last stretch as braided extension only. This creates a thinner, more elegant tip rather than a chunky blunt end.
2. Jumbo Marley Cornrows
Just two cornrows — one on each side of a center part. Each braid contains massive amounts of Marley hair, creating thick rope-like braids that hang down the back.
The style reads bold and assertive. It also installs faster than any multi-braid style — often under 2 hours for a full head.
Because the braids carry so much weight, your scalp will feel the pull for the first 48 hours. Sleep propped on an extra pillow to take some load off the hairline during the adjustment period. After that, the weight distributes and becomes comfortable.
Who this is for: Women with healthy hairlines who want maximum protection with minimum design work.
3. Five to Six Narrow Marley Cornrows
A middle ground between classic four and the micro styles below. Five or six narrower cornrows spread across the scalp, each built with less Marley hair than the jumbo version but more structure than standard cornrows.
Why It Works
The narrower parts show more scalp, giving the style breathing room visually. The Marley texture fills in each braid enough that you don’t look “stripey.” And the smaller sections mean each braid is lighter individually, reducing strain on any single section of your hairline.
This version photographs particularly well in profile. The braids stack neatly against the side of the head.
4. Marley Cornrows into a High Bun
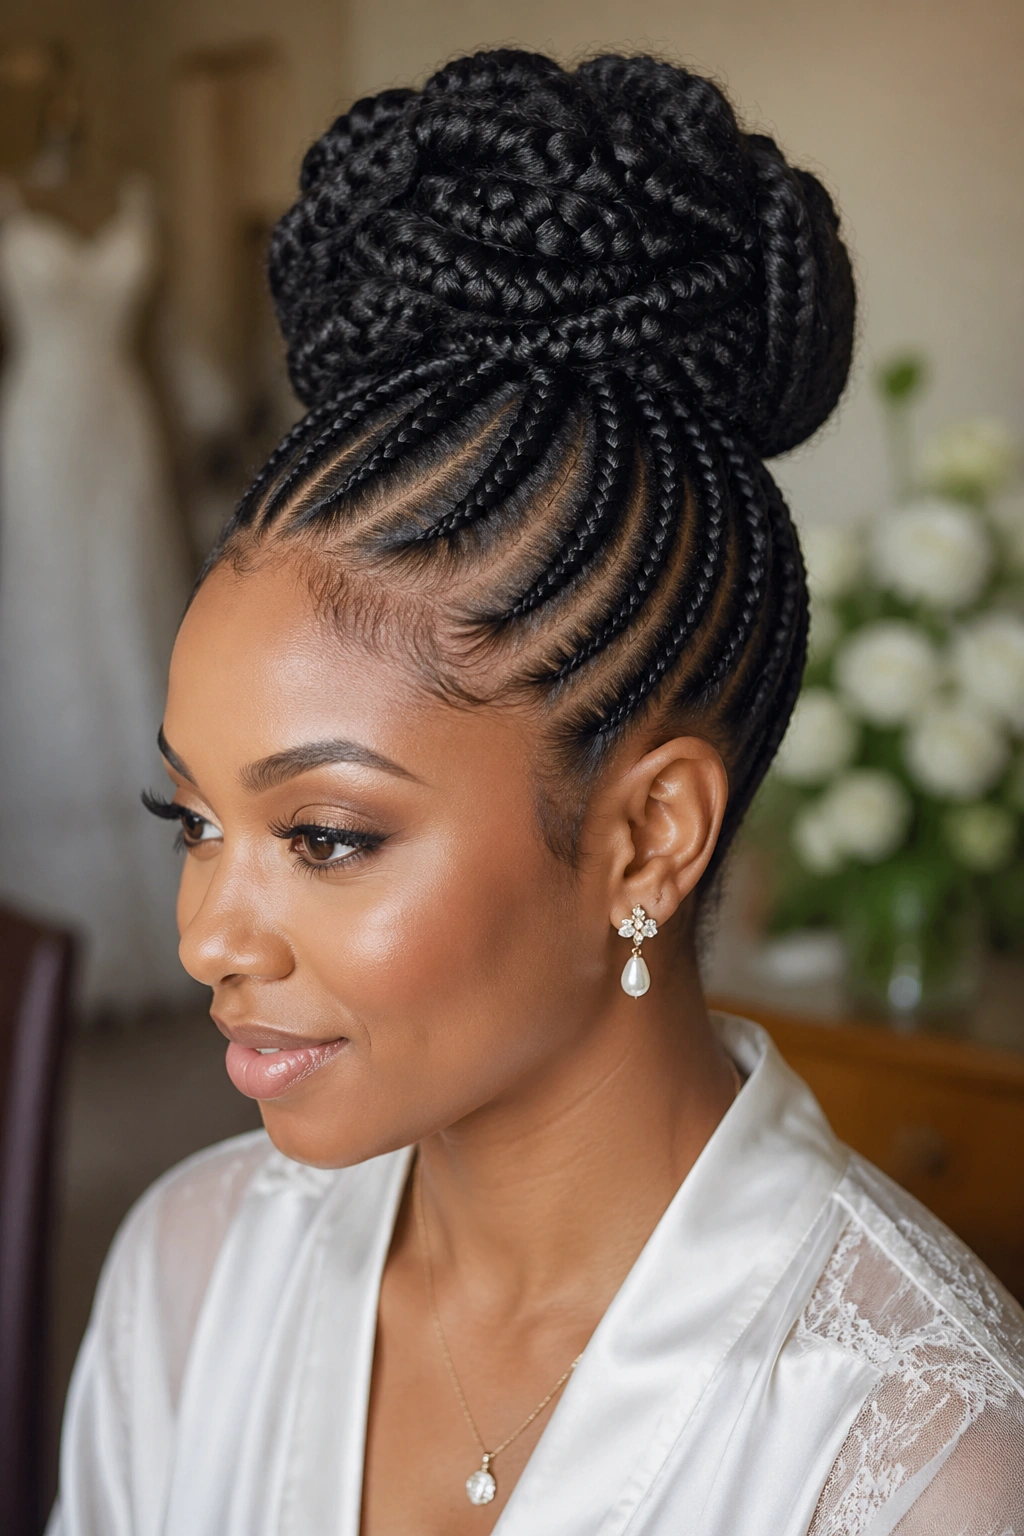
All cornrows angle up toward the crown, where the Marley hair gets coiled into a large bun. The bun itself can be wrapped tight, wrapped loose, or styled to look like an oversized loc knot.
The bun creates a halo effect around the top of the head — I love this for any event where you want height and presence. It’s the updo version of Marley cornrows and it reads particularly well for weddings, graduations, or any formal occasion.
Use hair pins designed for thick hair — bobby pins bend under Marley weight. Roller pins or banana clips work better for securing the base.
5. Side Part Marley with Pulled-Back Bangs
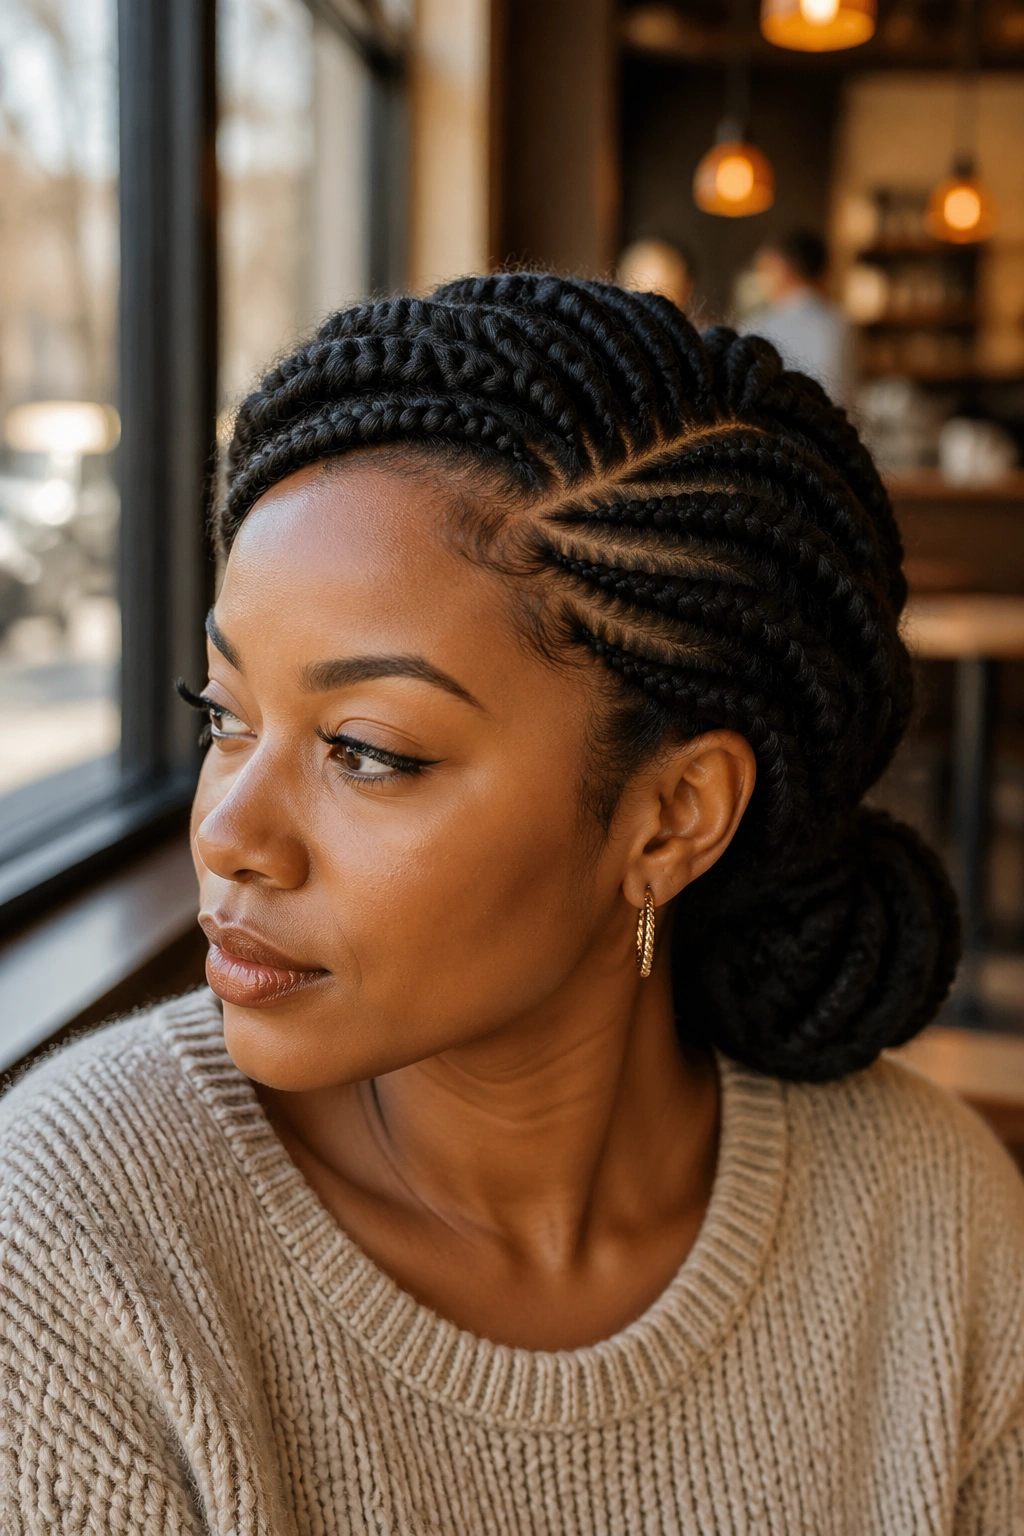
A deep side part at the front, with one section angled back sharply to create a bang-like sweep across the forehead. The rest of the cornrows flow into a thicker bundle at the back.
This is a sophisticated version of Marley cornrows — more bone structure, less wild spirit. It suits women who want the texture and protection of Marley braids without the heavy loc-like aesthetic.
The angled bang requires precise parting. A rushed braider will end up with an uneven bang line that looks like a mistake rather than a design choice. Take your time.
6. Marley Cornrows with Loose Afro End
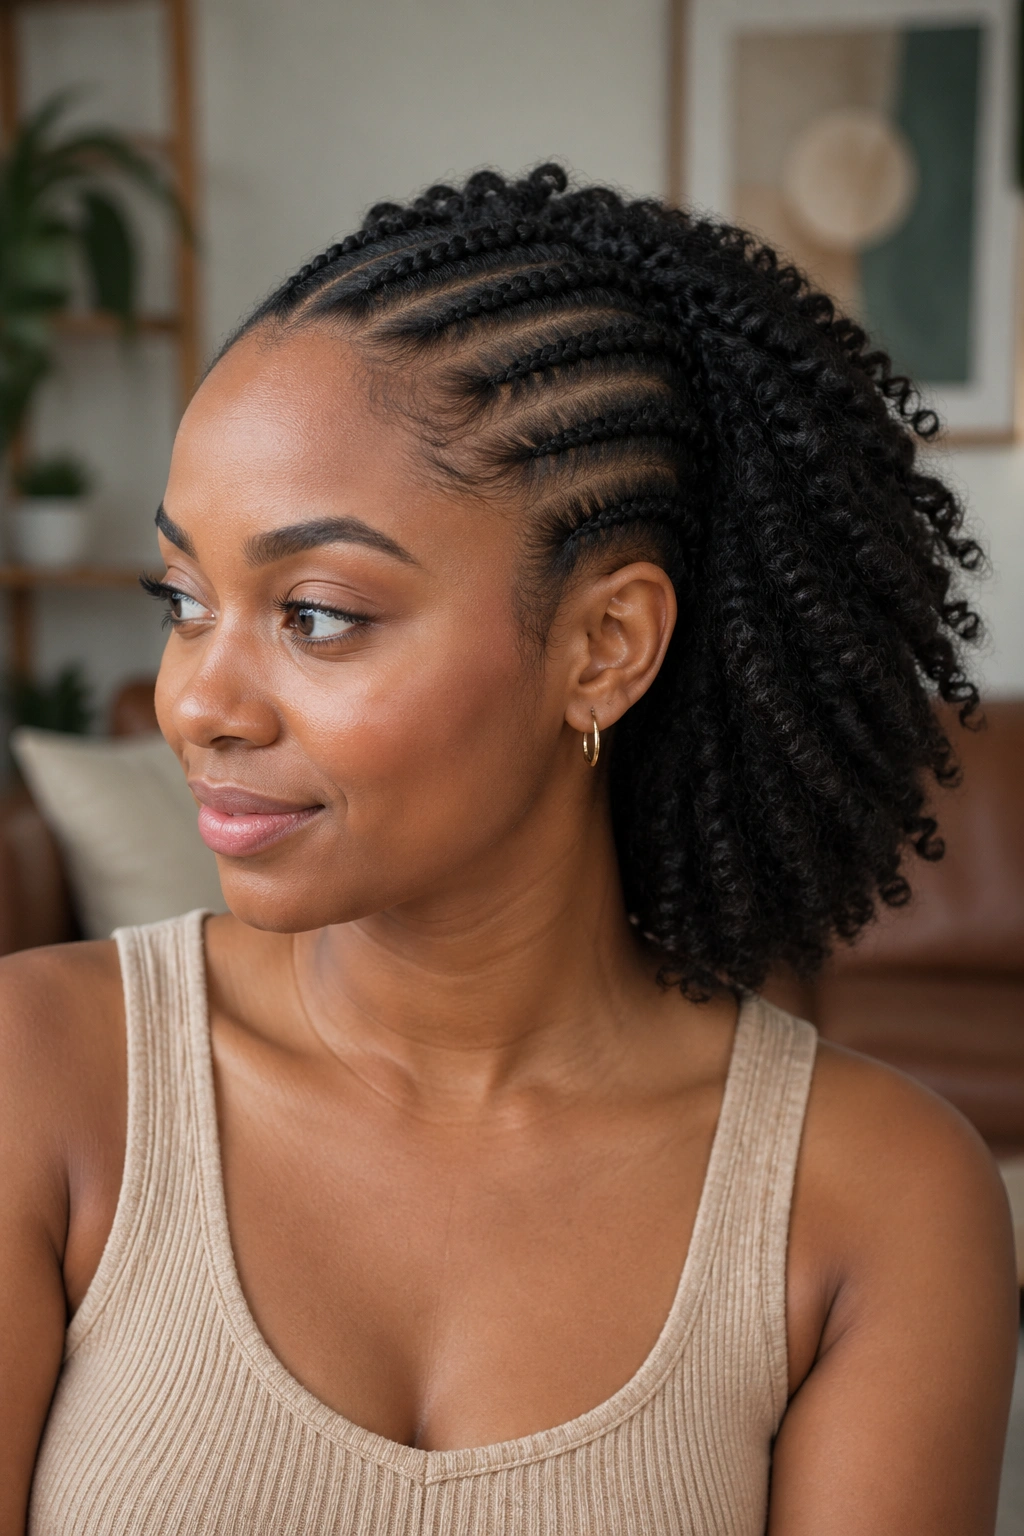
Braid the cornrows about halfway down the length. Leave the last half as unbraided Marley hair, shaped into a curly afro-style puff at the back or sides.
How to Style It
The contrast between tight cornrow structure and loose textured hair below is the visual draw. The Marley hair holds an afro shape well because the fiber is designed to mimic kinky texture.
Pick each piece of the loose section apart with your fingers after the braider finishes. Spray with a light texture mist to define the volume. Avoid heavy products on the afro end — they weigh it down and kill the poof.
Styling Tip: Sleep with the afro section tied up separately from the cornrow base. A second smaller scarf around just the loose portion keeps the volume intact.
7. Marley Cornrows with Diagonal Parts
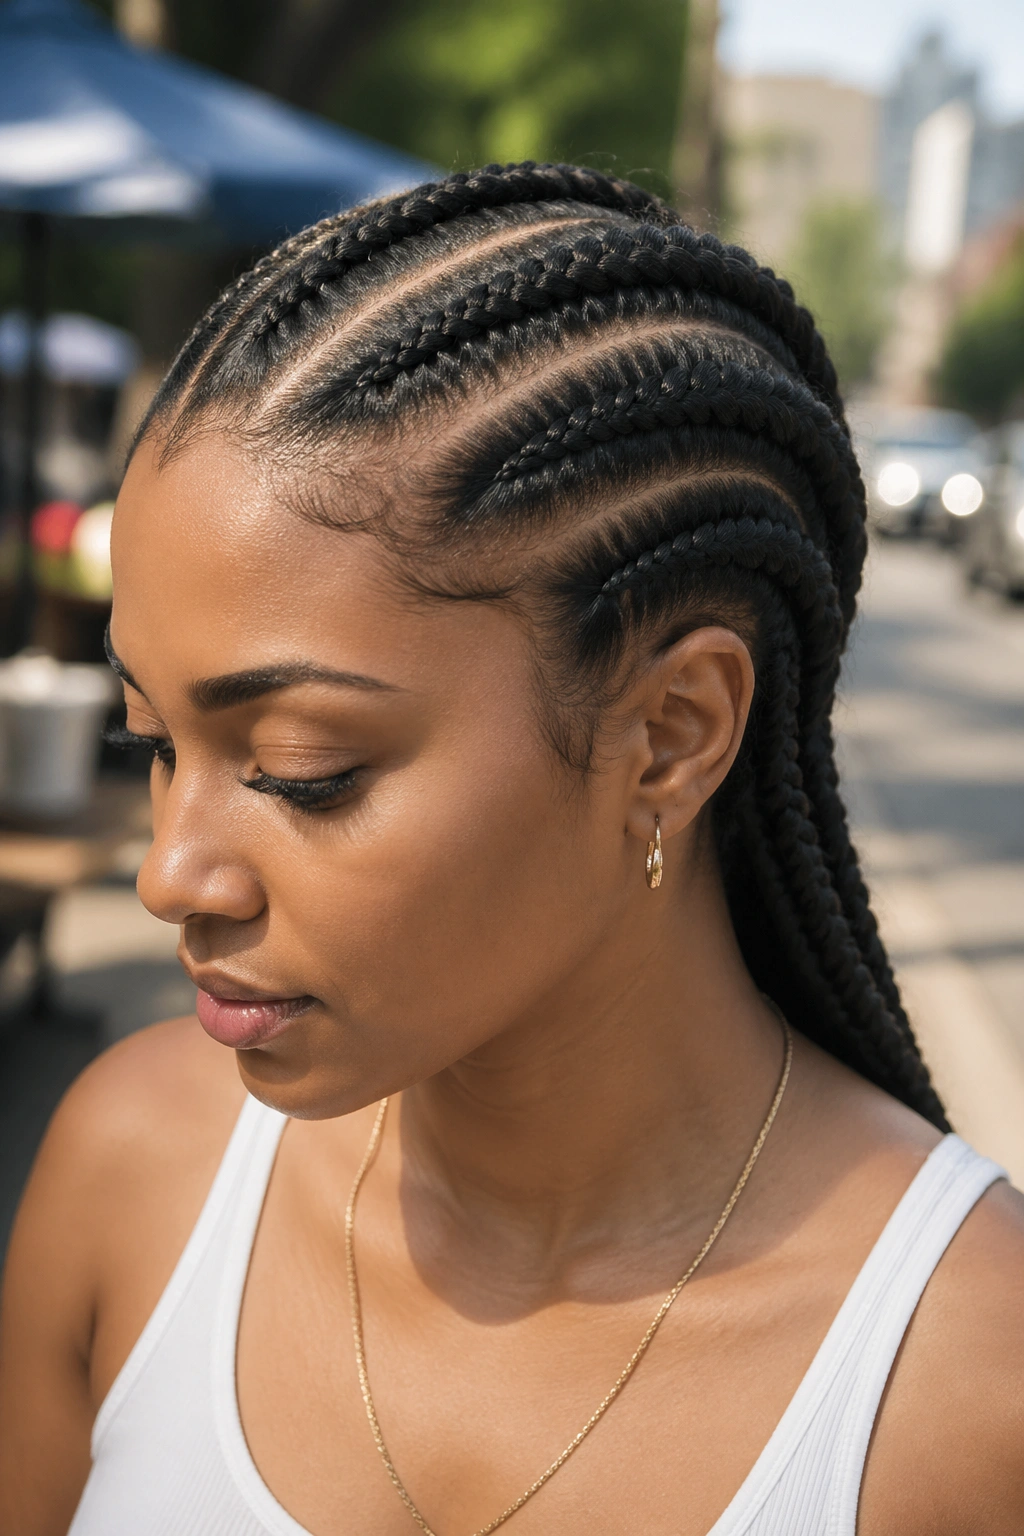
Instead of straight front-to-back parting, the cornrows run diagonally across the head — either corner-to-corner or in a cascading step pattern.
Diagonal parting adds visual complexity without requiring extra braids. The same 6 to 8 cornrows suddenly look far more intentional when they angle across the head rather than running parallel.
This is the style I recommend when someone wants something “different from regular cornrows” but doesn’t want to commit to elaborate feeder patterns or color work.
8. Marley Cornrows with Gold Wire
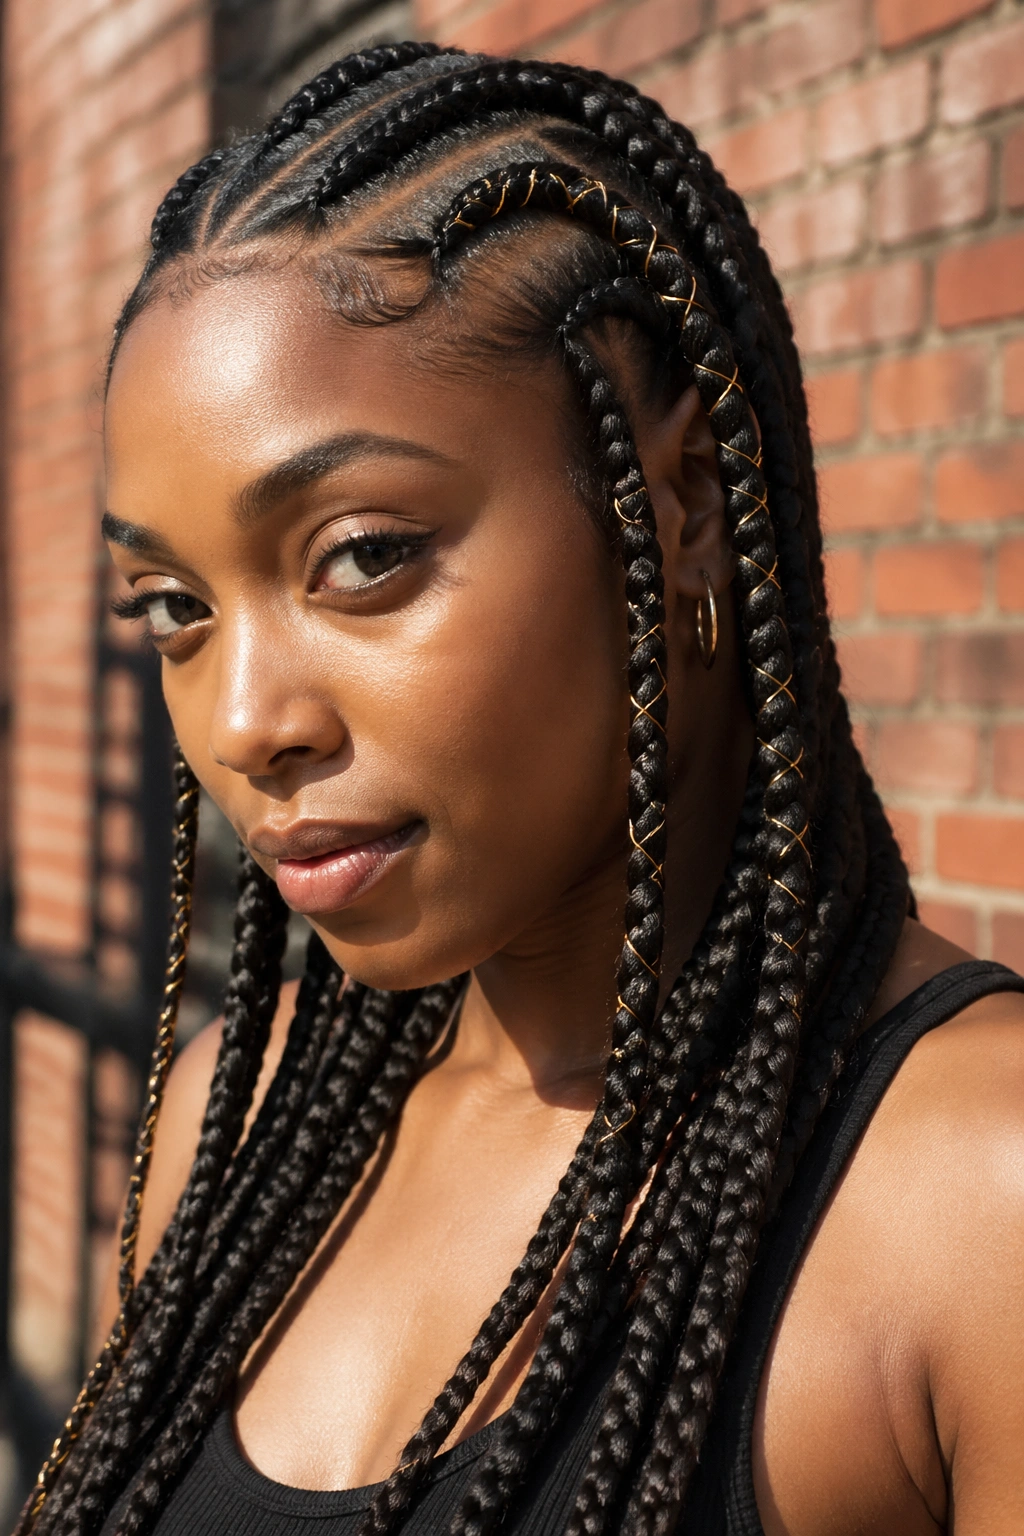
Thin gold-tone wire gets wrapped around random cornrows along the length — usually 3 to 5 braids get wired, leaving the rest unwired.
The metal catches light differently than gold cuffs or beads. You can shape the wire into loose spirals, keeping it clean and straight, or bending it into small decorative shapes mid-braid.
Use jewelry-grade wire, 20 to 22 gauge. Cheaper craft wire oxidizes fast and leaves green marks on the braids.
9. Bohemian Marley Cornrows
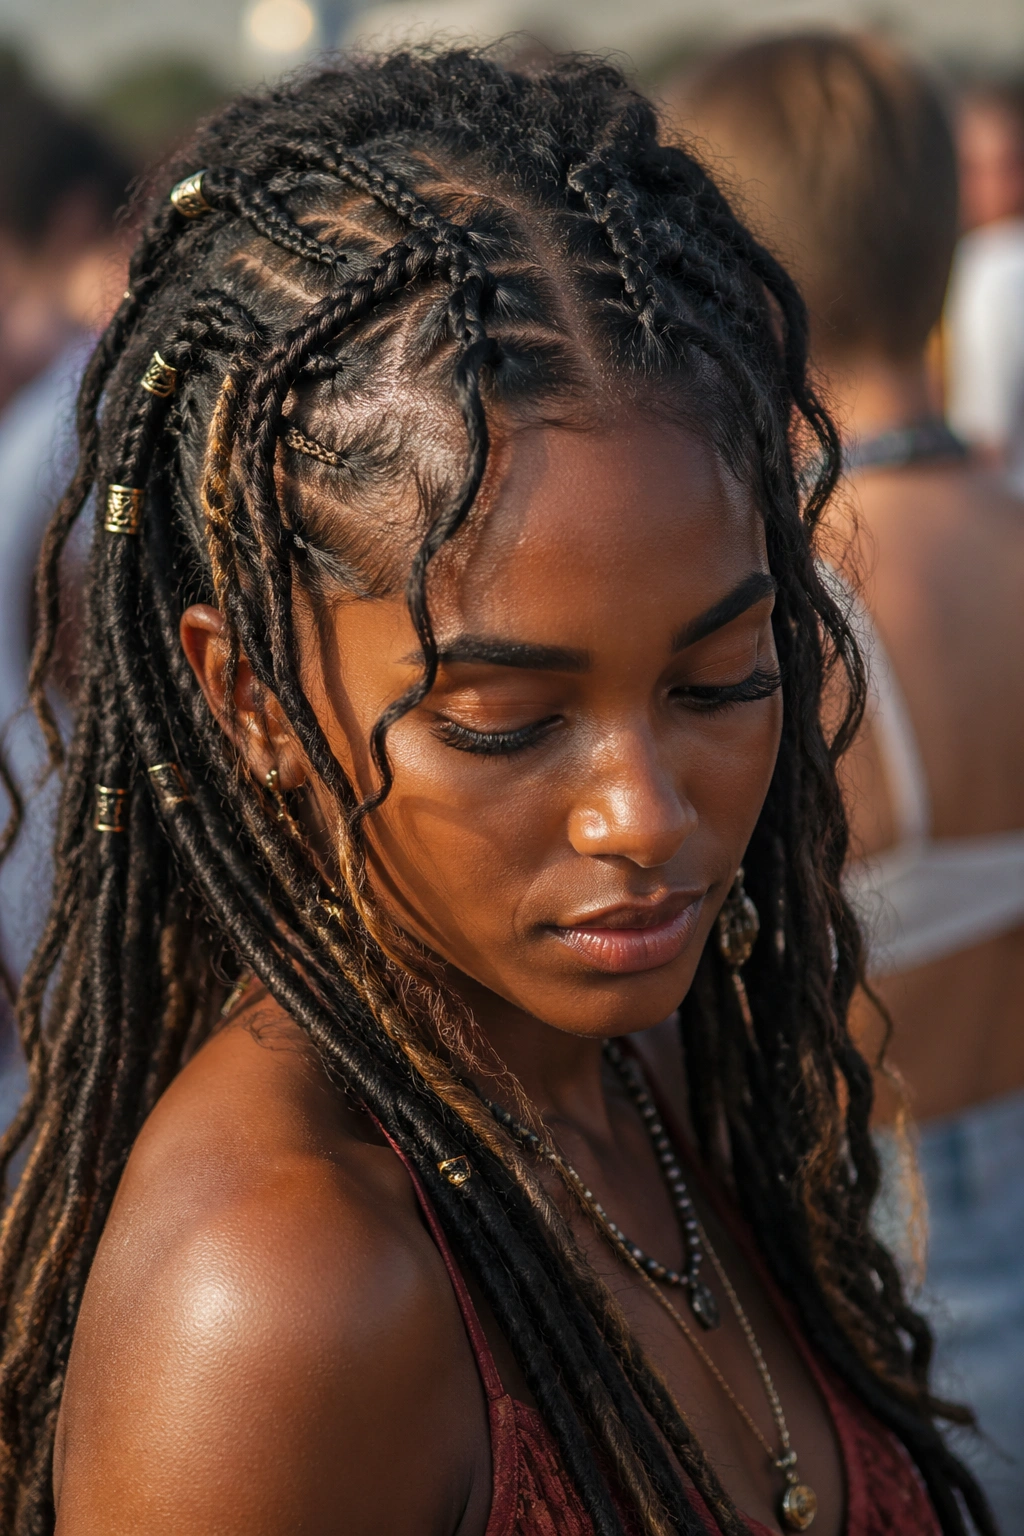
Loose, messier parting. Cornrows don’t all run the same direction. Some angle slightly, some have curves, some end higher than others. The overall effect is deliberately undone — like someone slept on cornrows for a week and they settled into their natural lines.
What Makes It Different
Traditional cornrow braiding prizes precision. Bohemian Marley cornrows reject that entirely. The look is organic, wild, and slightly unruly. It works for women who want the protective benefits without the salon-polished aesthetic.
Install is faster because parting precision isn’t required. Expect 2 hours or less for a full head.
Best for: Festival settings, creative events, casual everyday wear.
10. Waist-Length Marley Cornrows
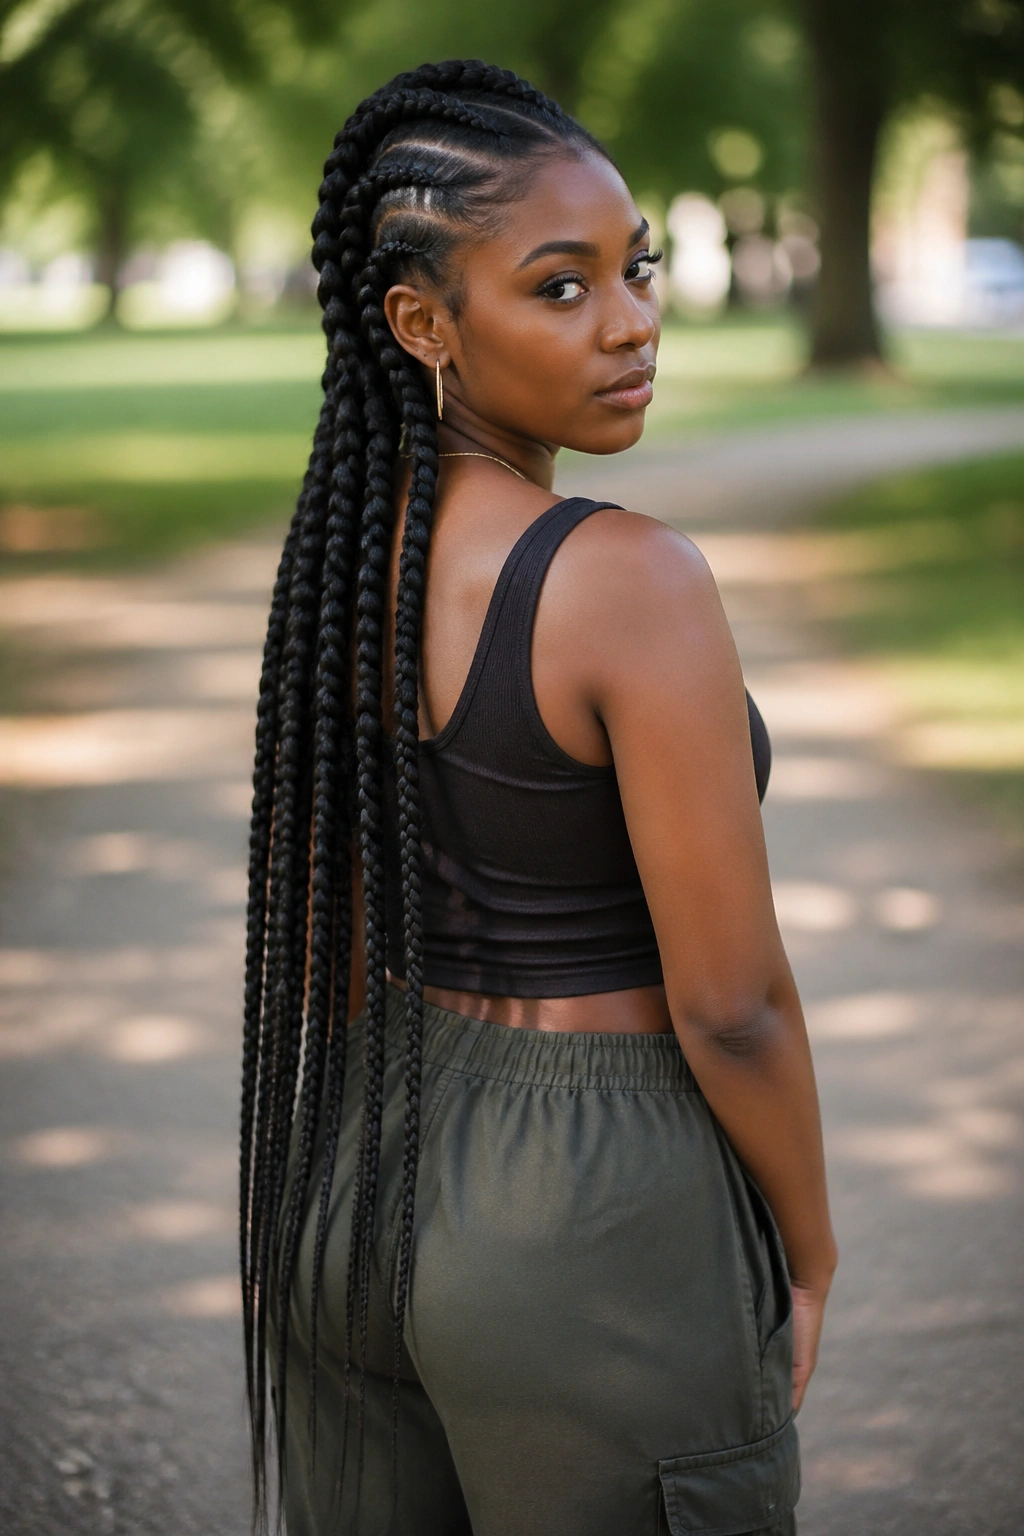
Long feed-in cornrows that extend to waist level. Four to six primary cornrows, each containing enough Marley hair to reach the small of the back.
The length is impractical for some lifestyles — gym, water sports, anywhere you’re moving fast. But for everyday wear, waist-length Marley cornrows frame the whole silhouette beautifully.
The sheer length means the braid tip will curl up naturally over time. Some women hate this; others treat it as a feature. If you want a sharp tip, seal the ends with hot water dipped briefly.
11. Marley Cornrows with Beaded Tips
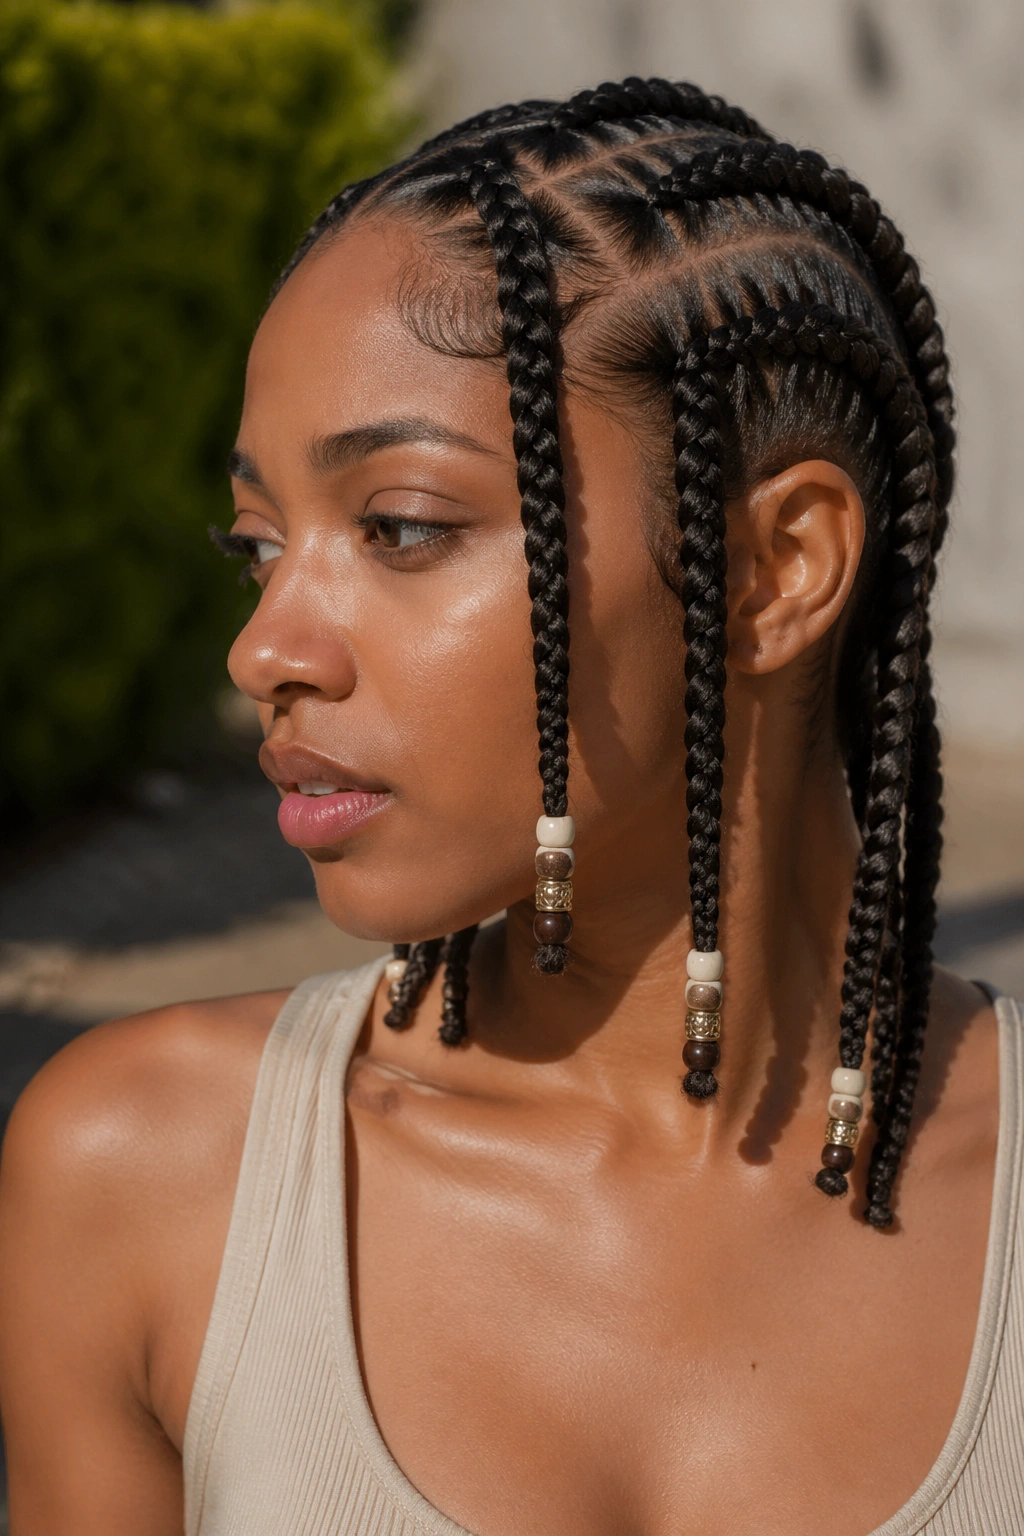
Wooden or silver-tone beads threaded onto 4 to 6 of the braid ends. The beads should be proportional — bigger braids carry bigger beads without looking top-heavy.
Unlike kanekalon braids where beads often sit as the main decoration, Marley braids are already visually heavy with their texture. Beads here read as accents rather than centerpieces.
Place beads asymmetrically. One braid with a cluster, another with a single, skip the next. Random feels more like real personal styling than symmetry ever does.
12. Marley Cornrows with Shaved Undercut
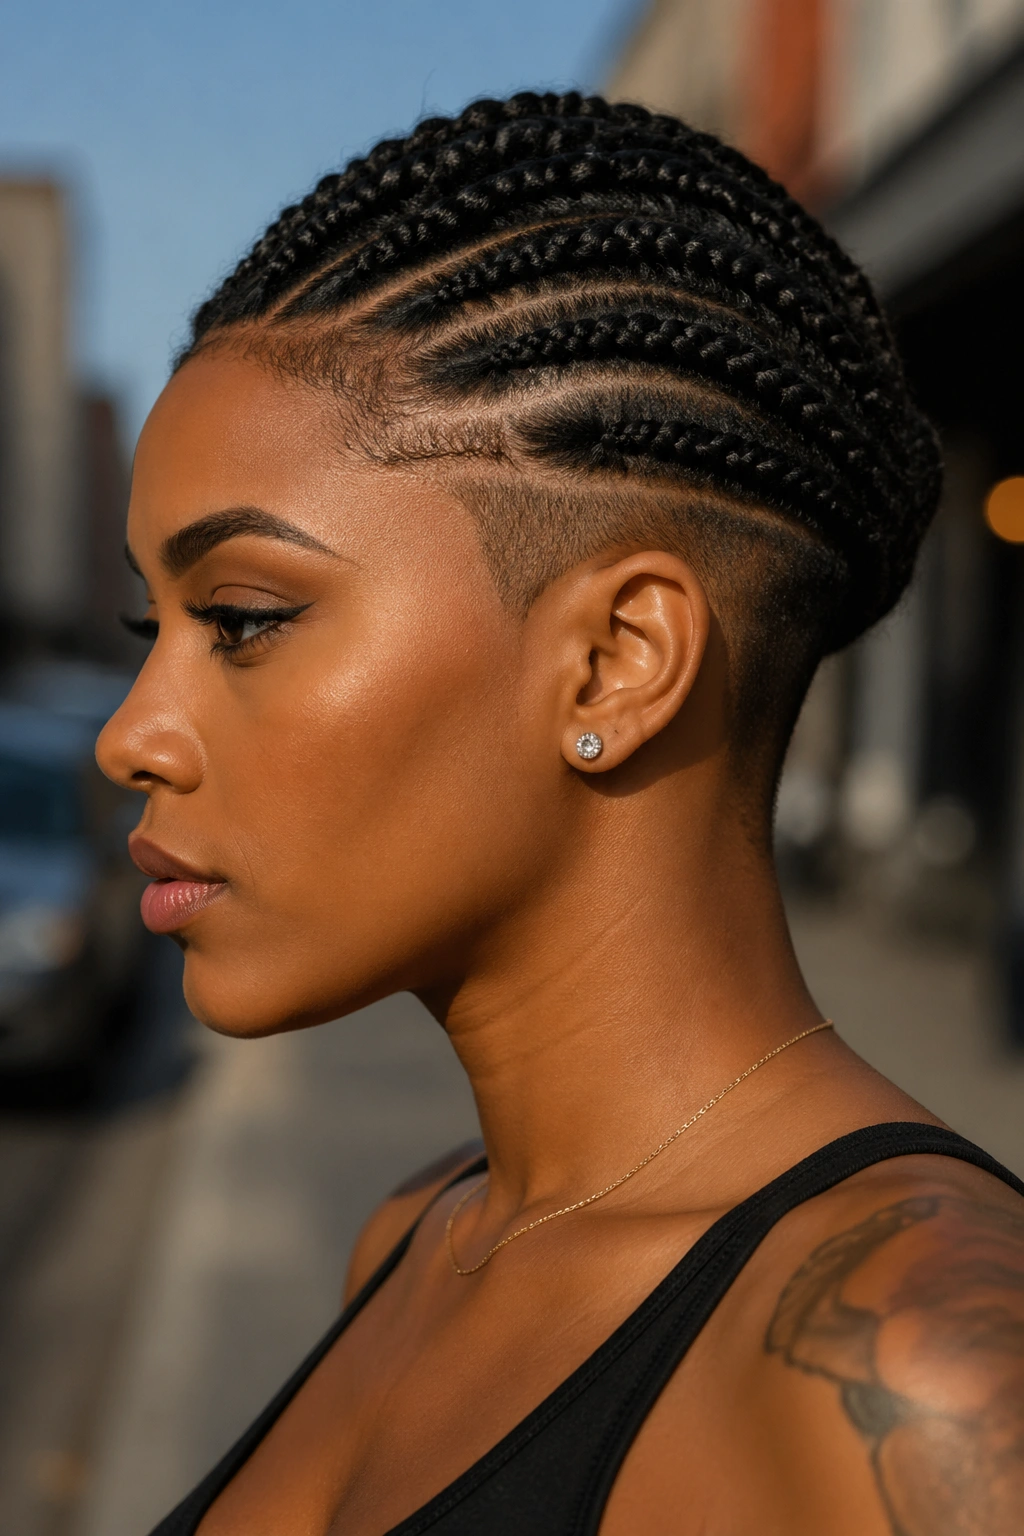
Cornrows only cover the top of the head. The sides and back are cut short — faded or fully shaved — creating a dramatic contrast between the textured braided crown and the smooth sides.
This is one of the boldest Marley style choices. It requires the wearer to be comfortable with a clipper cut and the maintenance that comes with it. Sides need touch-ups every 2 to 3 weeks.
The Marley cornrows on top can be any variation — classic straight-back, diagonal, into a bun. The undercut serves as the frame.
13. Marley Cornrows in Twin-Strand Finish
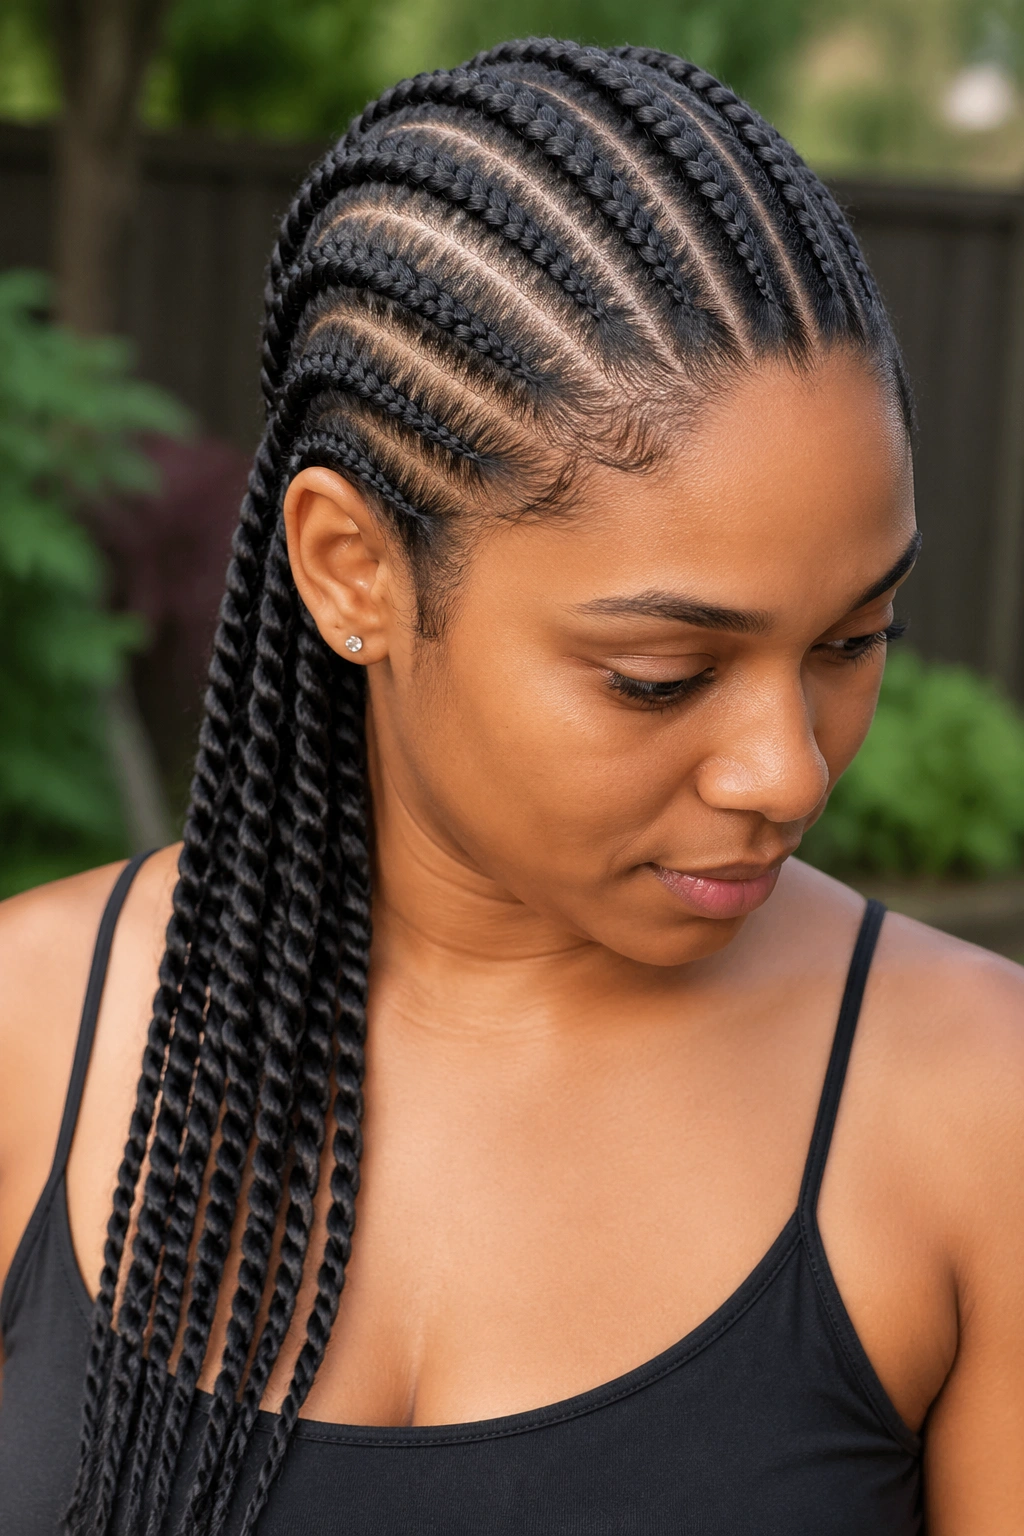
Braid the first 8 to 12 inches as traditional three-strand cornrow. For the last stretch, switch to a two-strand twist finish. The cornrow base flows into rope-like twists at the tail.
The change in braid pattern creates visual interest without adding bulk. It also makes the ends easier to detangle during takedown — twists unravel faster than braids.
Use a bit more water on the twist portion during install. Marley hair twists tend to frizz faster than braids, and moisture helps them set cleanly at the start.
14. Marley Cornrows with Color Pop
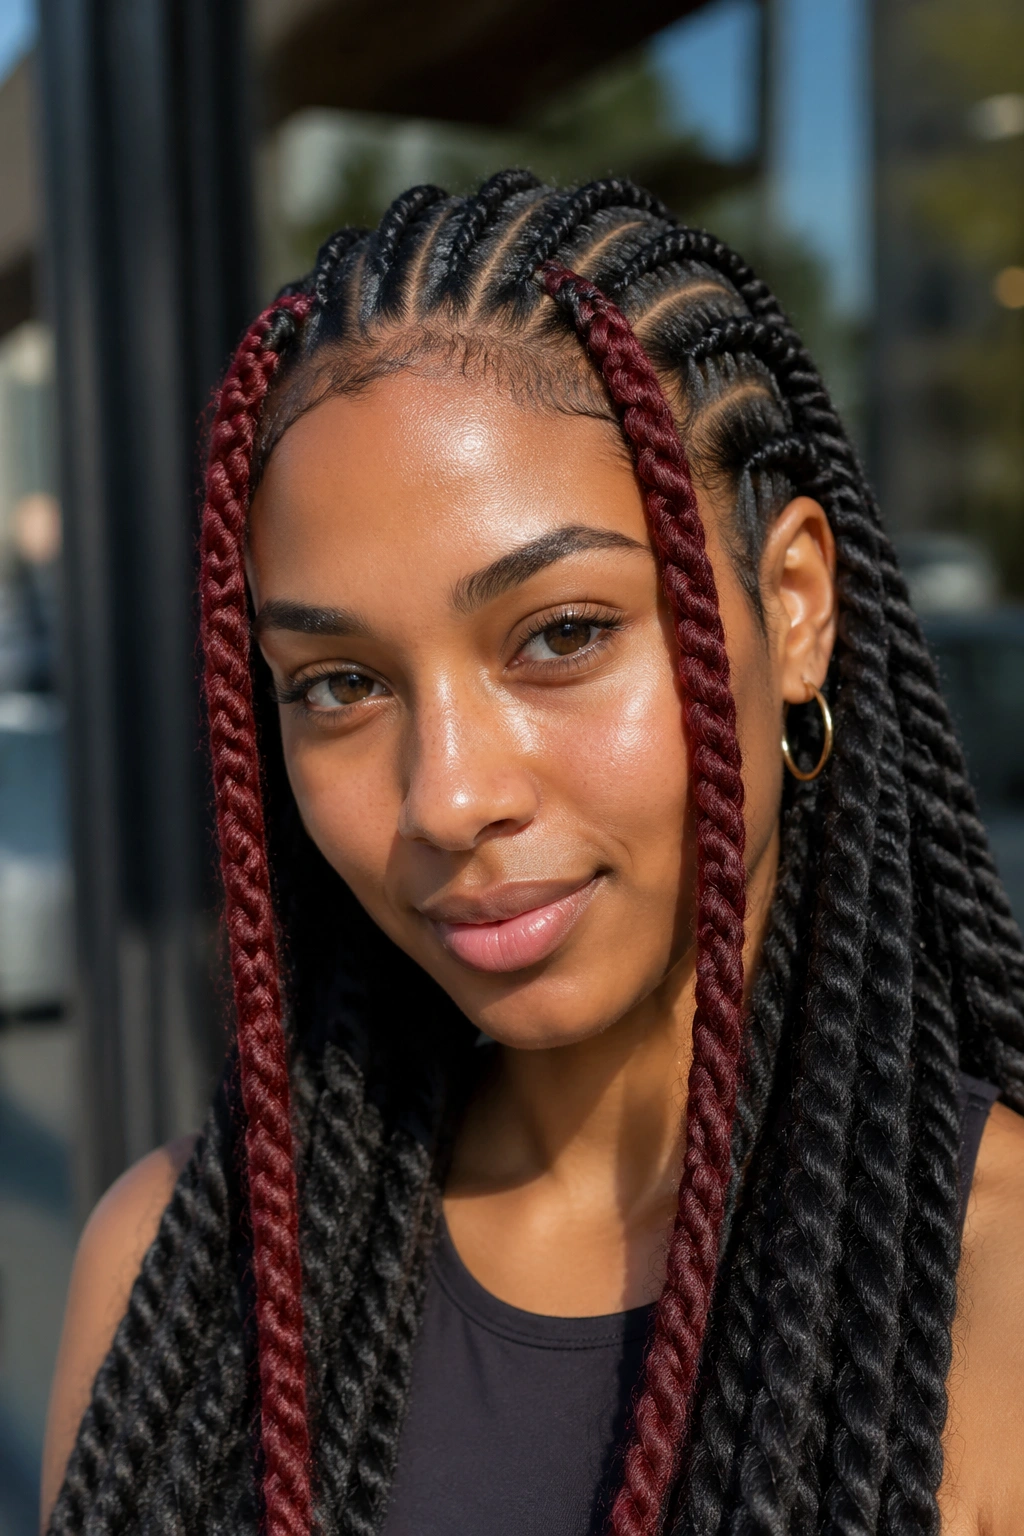
Most of the cornrows stay natural dark brown or black. One to three braids get built with a bold color pack — burgundy, honey blonde, fire red, deep purple.
The color pops are positioned strategically. One on each side of the face for a framing effect. Or three clustered on one side for asymmetrical boldness. Random distribution works too but requires a braider with design instincts.
Ask for pre-stretched colored Marley. Pre-stretched means the fiber has been pulled to reduce frizz at the root, which keeps the color line crisp right from the first braid.
15. Fulani-Style Marley Cornrows
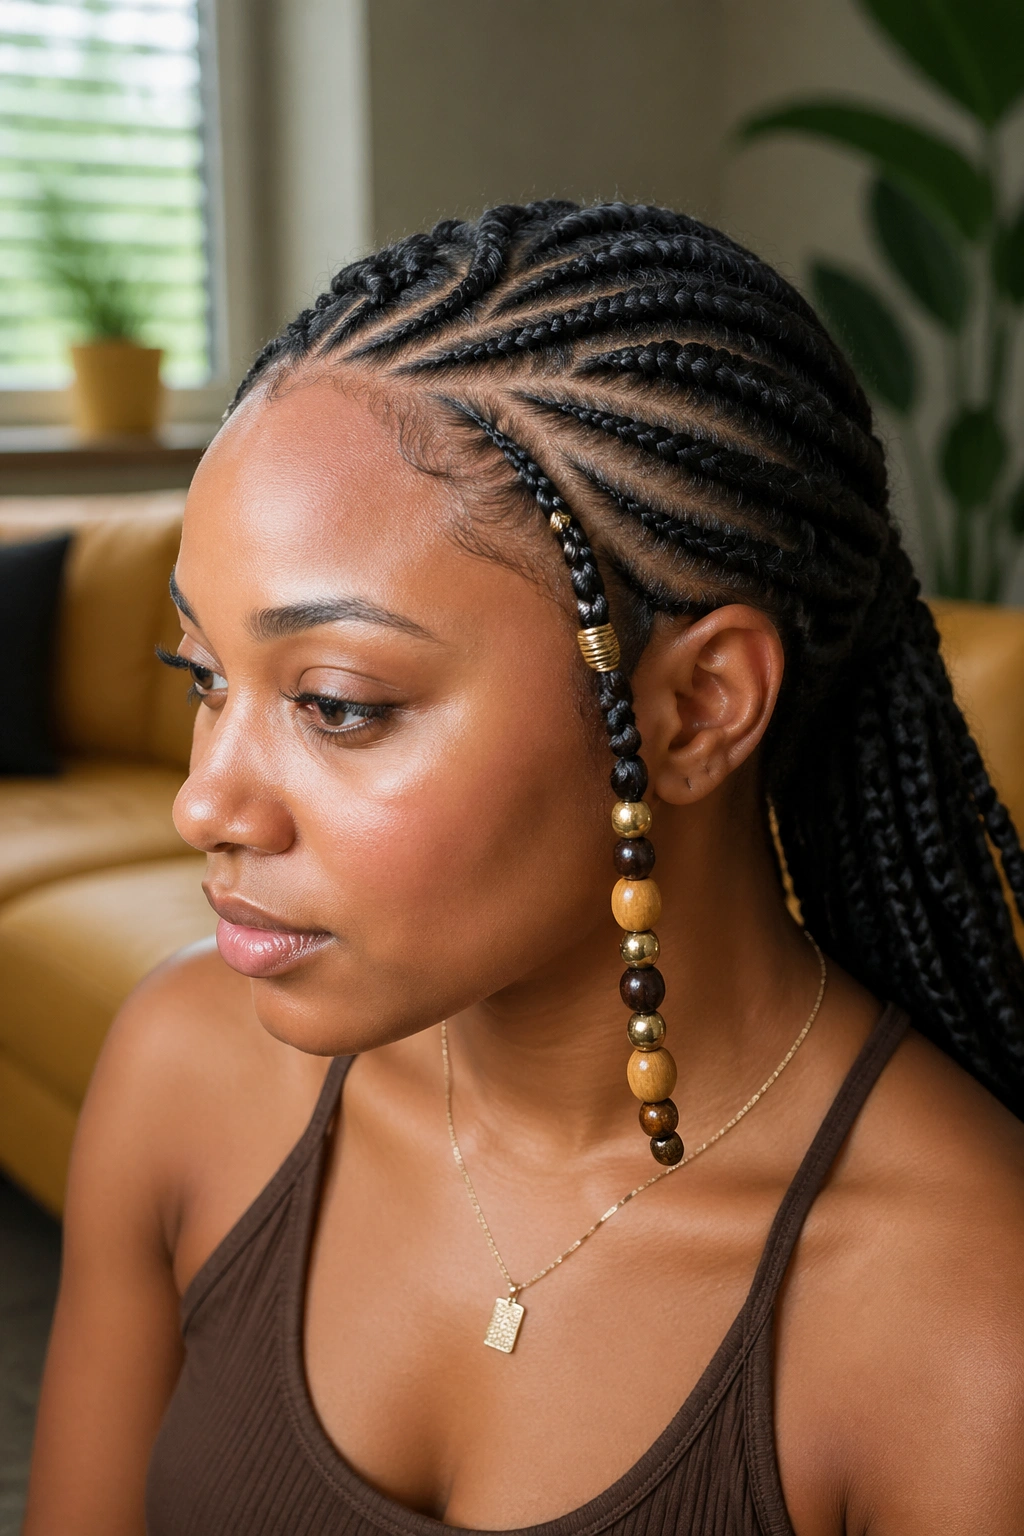
A traditional Fulani pattern adapted to Marley texture. The key element is a single braid running along the hairline across the front, with the main cornrows flowing back into a central collection point.
How to Use It
Fulani braiding has been worn for centuries by the Fulani people of West Africa. The style historically signaled marital status, age, and tribal affiliation. Adapted to Marley hair, the pattern gains bulk and loses some of the intricate precision of traditional Fulani — but the cultural shape and silhouette remain.
Cowrie shells, silver rings, or beaded accents complete the style authentically. Skip the accents and you’ve essentially just made diagonal Marley cornrows.
16. Marley Cornrows with Stitch Details
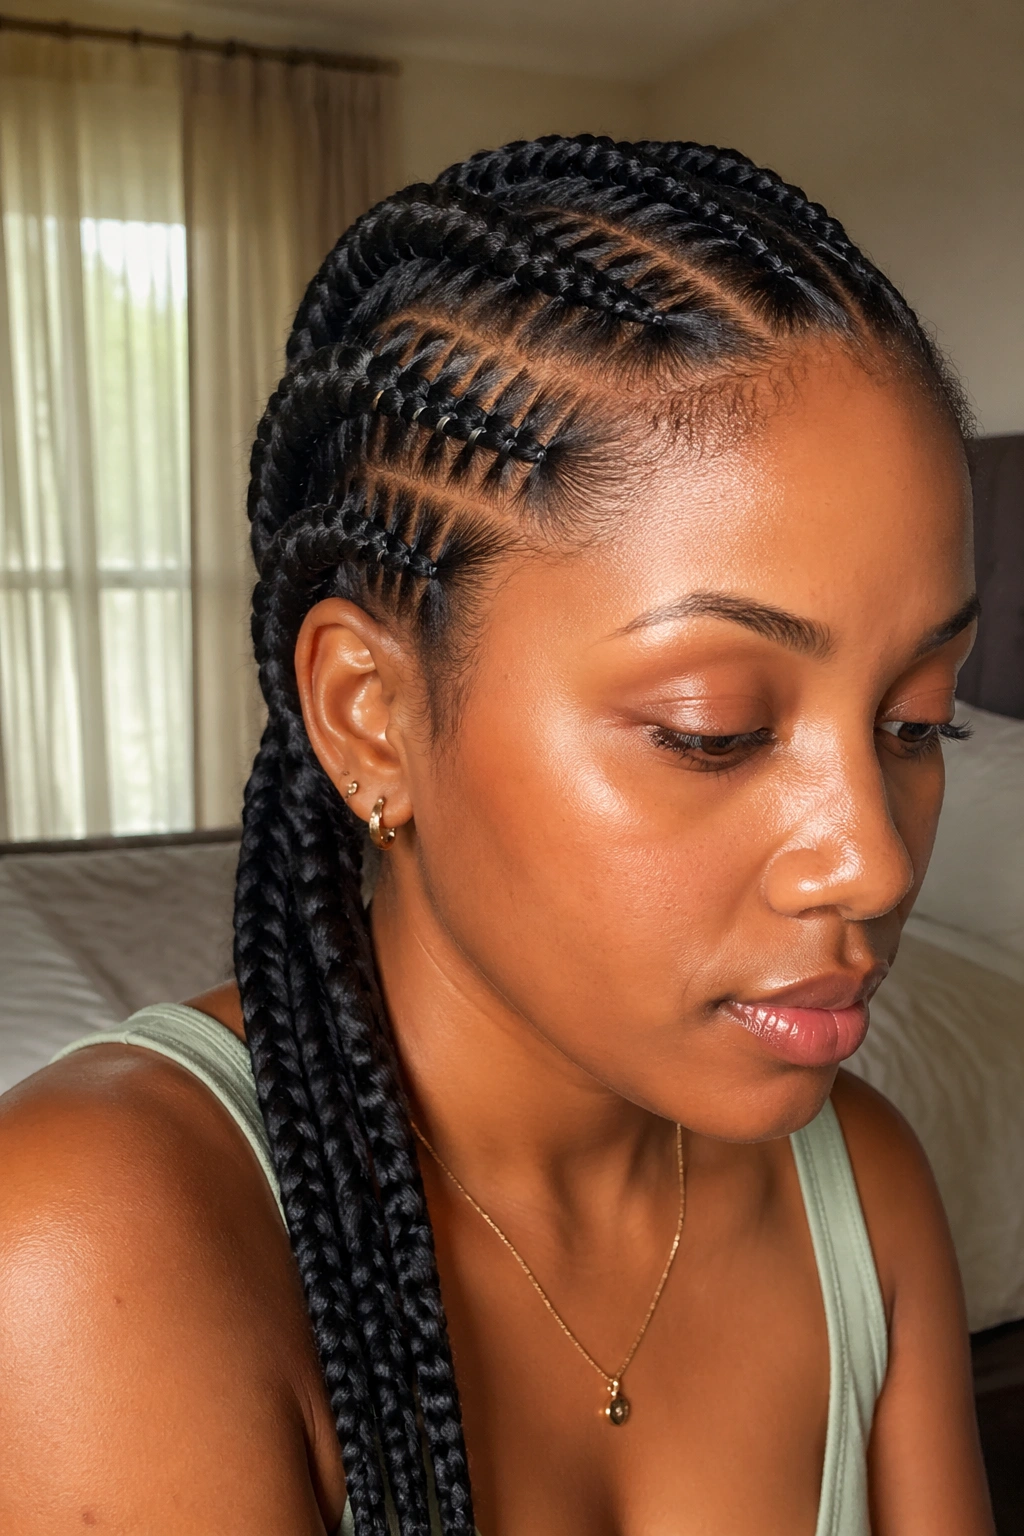
Subtle horizontal stitches on select cornrows — not every braid, just 2 to 4 of them for accent. The stitching creates visible horizontal bumps on the scalp portion of those braids.
Stitching takes extra time and real skill. Your braider is essentially doing double work — maintaining the cornrow pattern while adding perpendicular texture. Budget an extra hour for stitching work.
The detail photographs beautifully up close. For anyone who posts content heavily or cares about close-up looks, this is worth the extra investment.
17. Marley Cornrows into Braided Cap
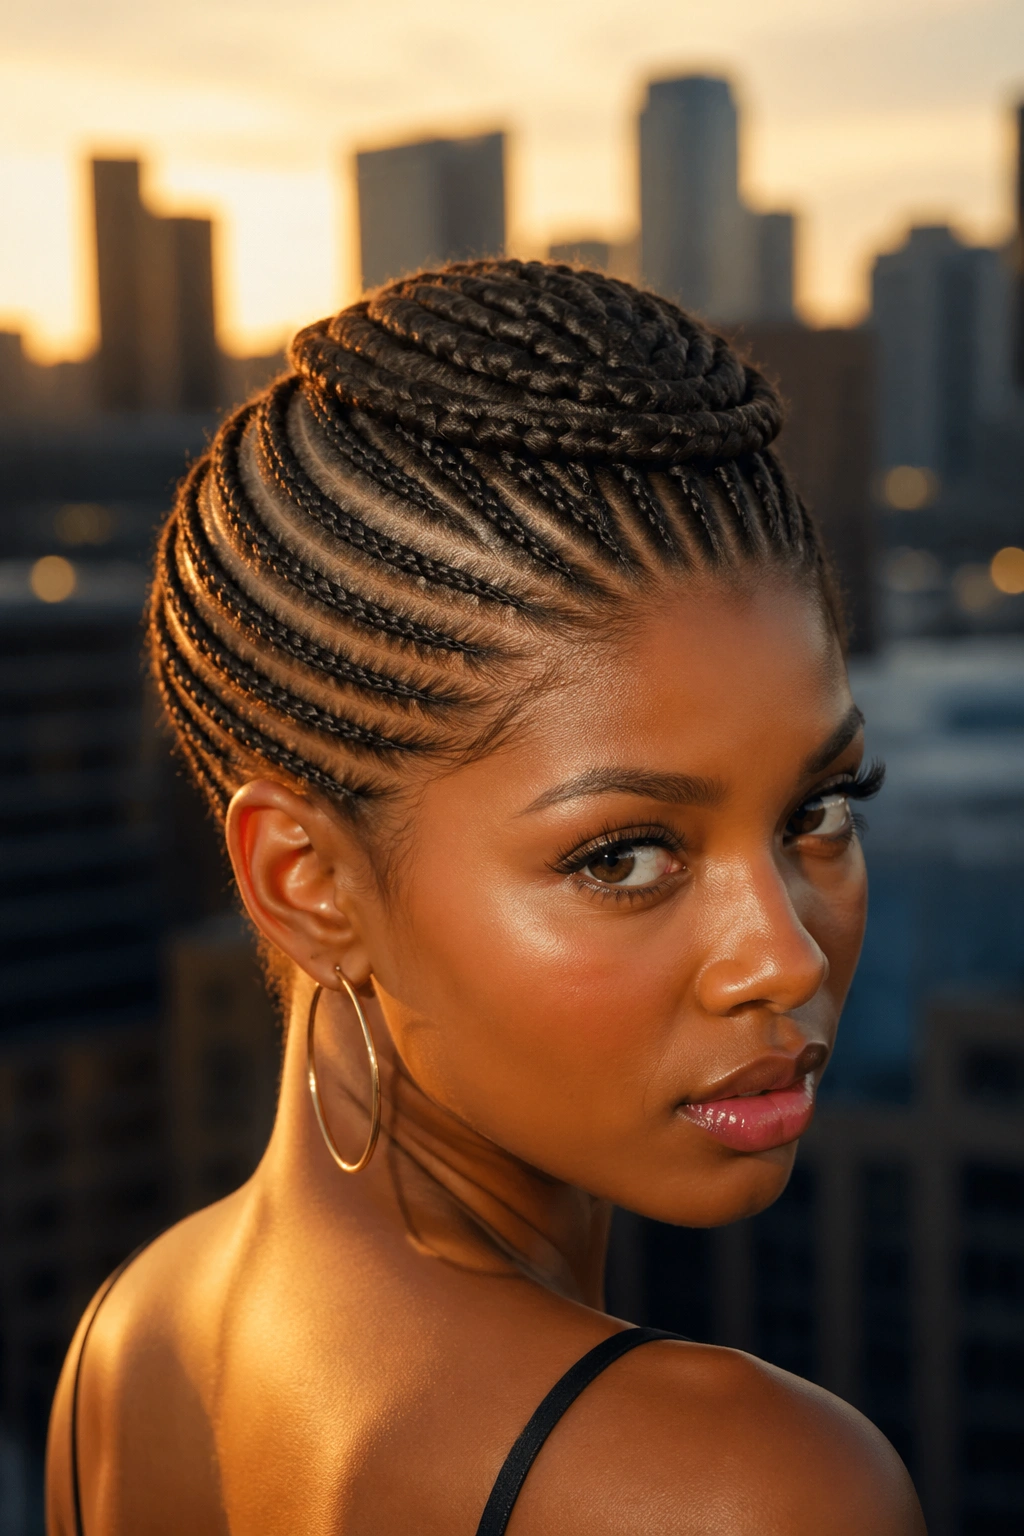
All cornrows feed into a circular braided structure at the crown, which is then wrapped into a tight cap shape. The cap can be worn alone or pinned with decorative accents.
This is a theatrical version of Marley cornrows. It reads as statement headwear — like a braided crown. Works beautifully for photoshoots, themed events, or anyone who wants maximum visual impact.
The cap requires ongoing maintenance. Pins shift over time, and the crown shape needs reshaping every 3 to 4 days.
18. Marley Cornrows with Wrapped Ends
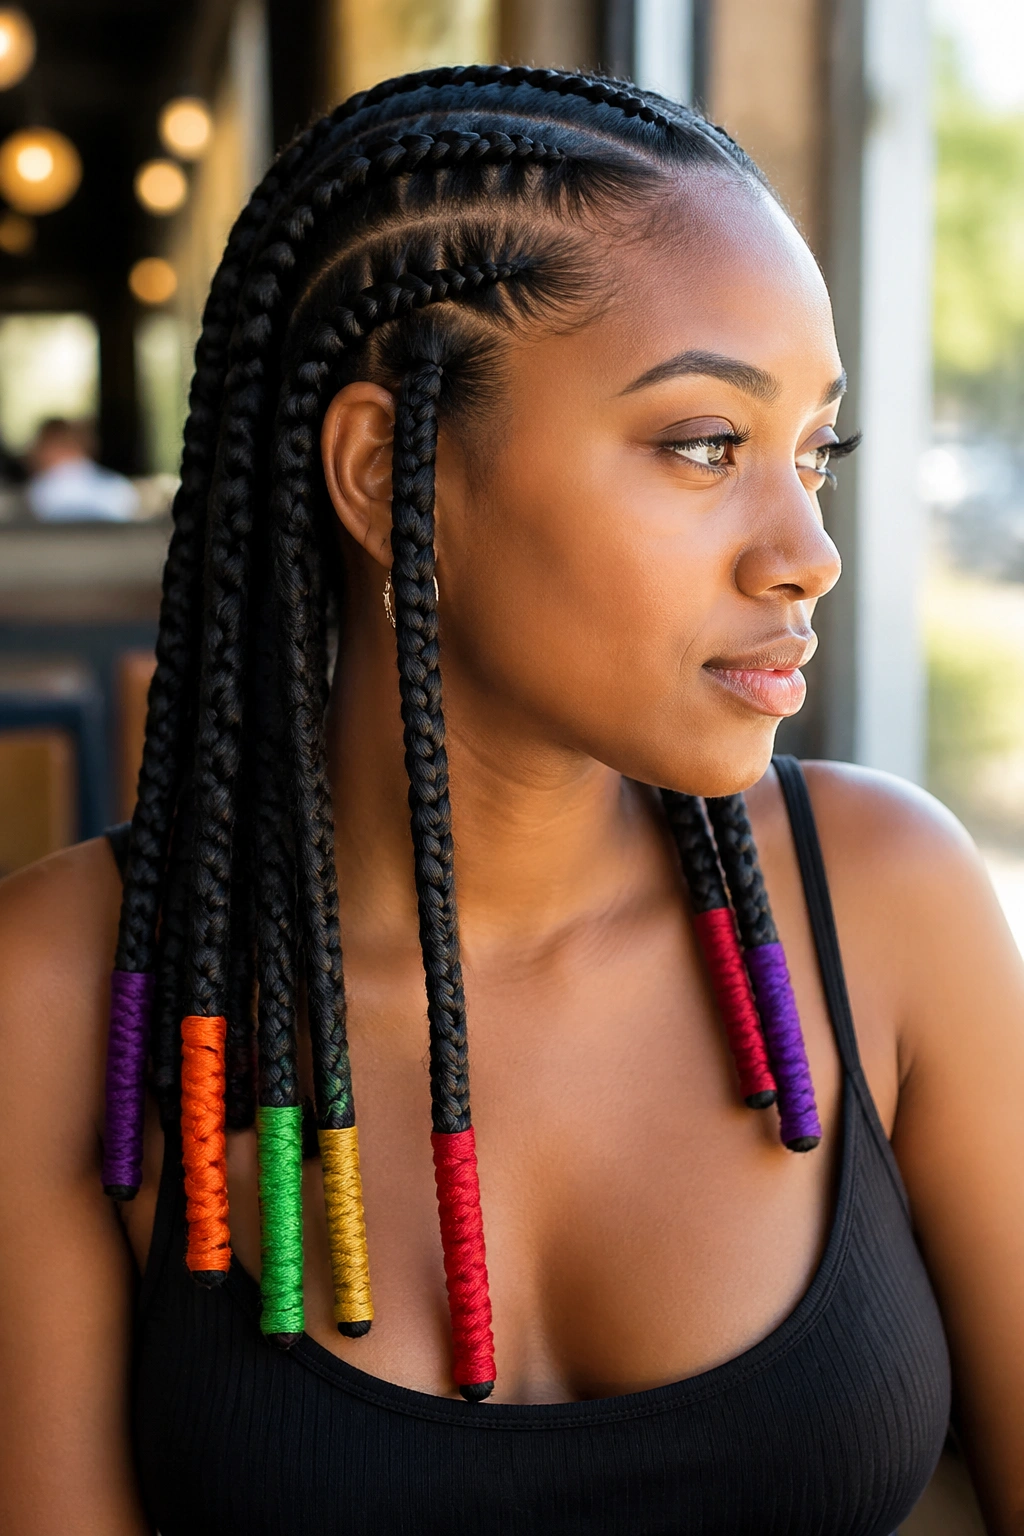
Cotton thread or embroidery floss wrapped around the last 3 to 6 inches of each braid. The wrapping creates solid color blocks at the tips — usually in bold colors that contrast with the dark Marley.
Wrapping ends dates back to West African braiding traditions. The original purpose was to seal the braid tip and prevent unraveling. The decorative element came later.
Pick thread colors that speak to your personality. I love rust red, mustard yellow, deep teal, or cream against dark Marley. Skip anything too pastel — pastels fade fast on dark hair and lose saturation within days.
19. Marley Cornrows with Mohawk Top
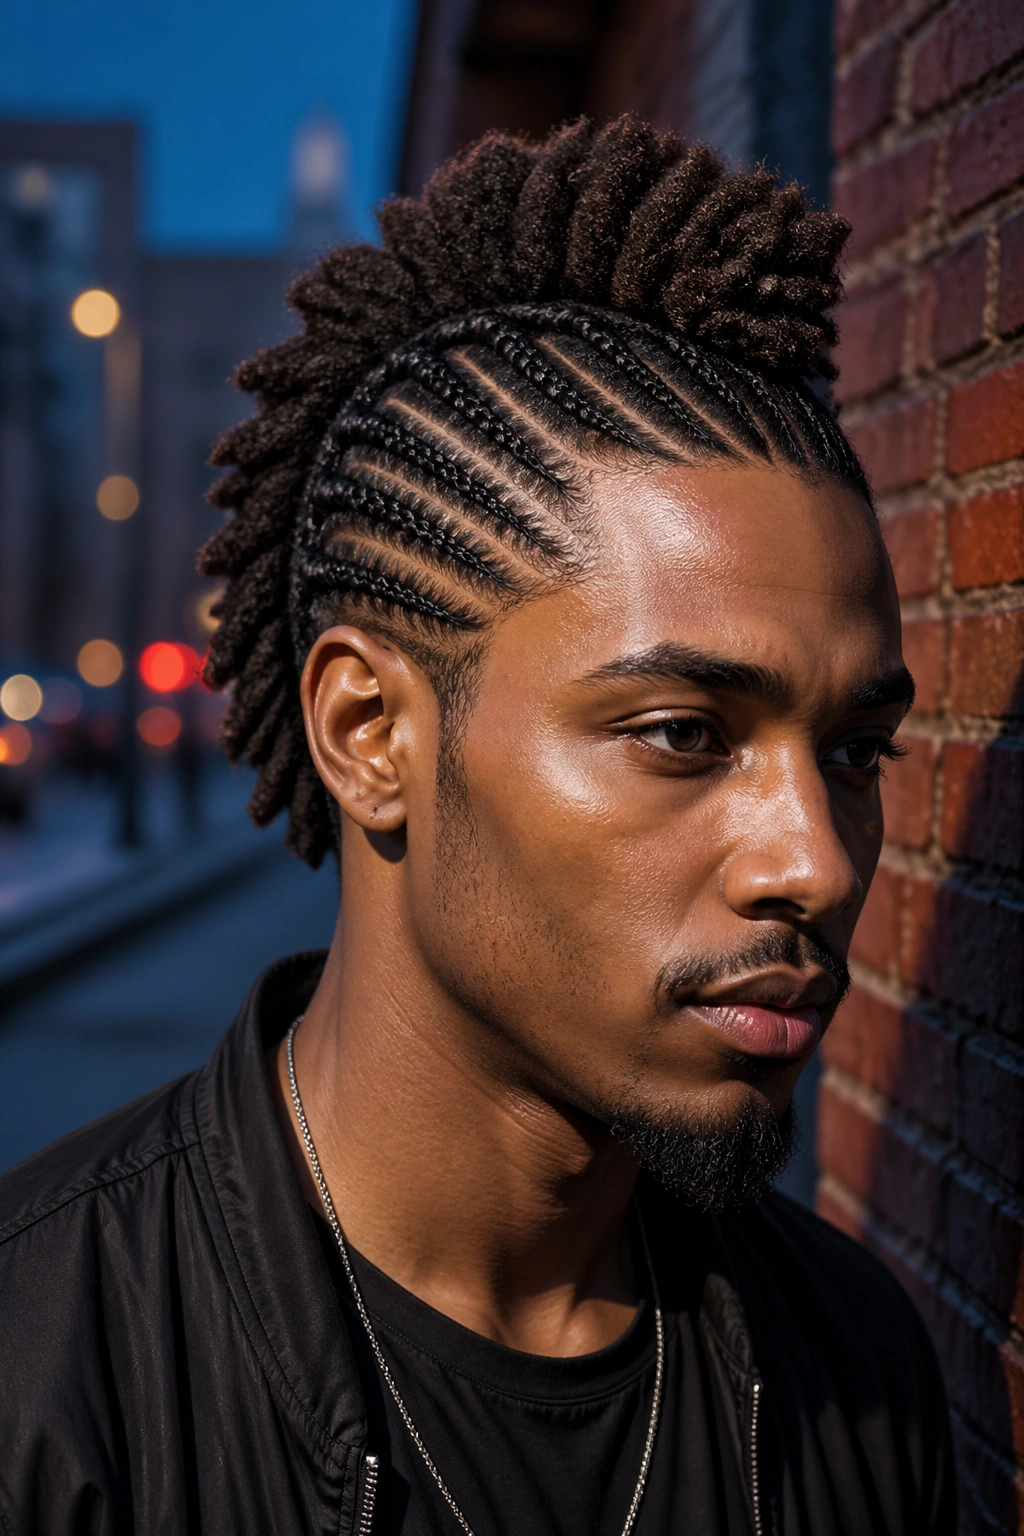
The center strip of cornrows stands visually raised — either through actual height of the braided center or through the sides being braided tight and flat. The Marley texture gives the mohawk a natural-looking ridge rather than a shiny plastic one.
What to Watch For
A mohawk cornrow style can easily skew aggressive or costume-y. The Marley texture softens that. The kinky, natural-looking fiber reads more organic and less punk, which is exactly what most wearers want.
Keep the sides very clean. The contrast between sharp side cornrows and the raised center is what makes the style work.
20. Marley Cornrows with Braided Belt
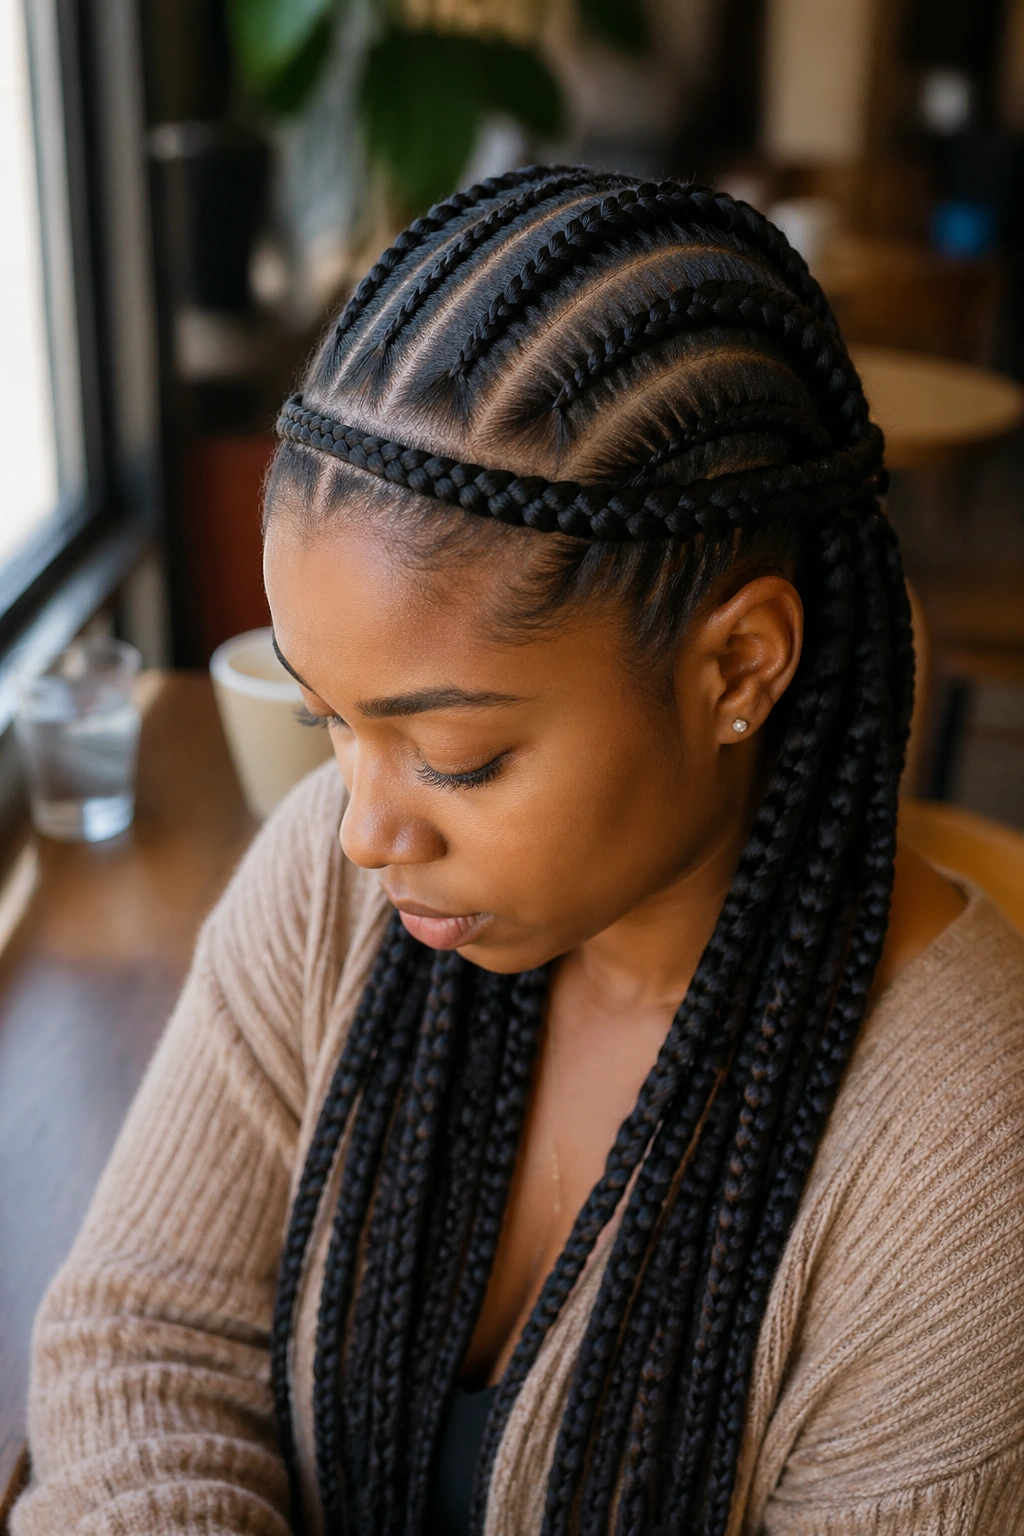
A horizontal “belt” of braids runs across the middle of the head, perpendicular to the main cornrows. It looks like a braided band wrapped around the crown.
The belt is actually a horizontal cornrow — or sometimes a single thick twist — that crosses over or through the main pattern. It serves as a structural accent.
This takes planning. The braider has to build the main cornrows first, then weave the horizontal band in without disrupting the pattern. Not every stylist can do this cleanly. Ask for photos of prior belt work before booking.
21. Marley Cornrows with Free-Fall Side Section
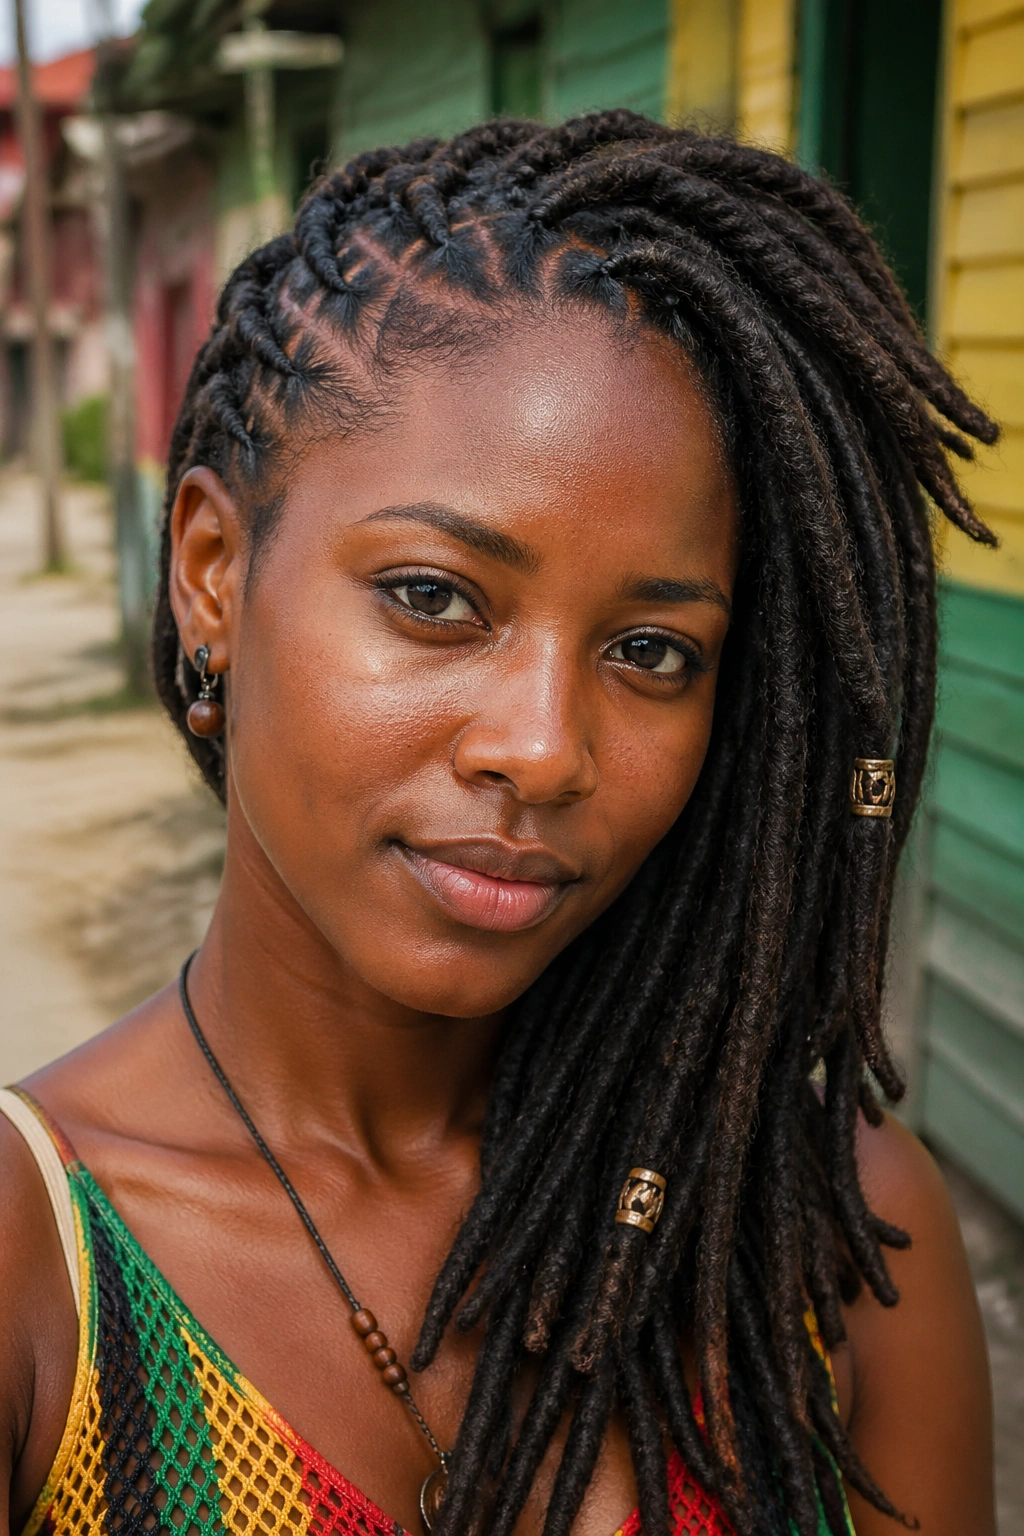
The main cornrows flow back in a clean pattern, but one section at the side of the head is left unbraided. The loose section falls free, framing the face with textured Marley hair.
This is flirtatious, soft, and unexpected. Most cornrow styles commit fully to the braided look. Leaving a section loose adds unpredictability.
The free section needs more maintenance than the braided portion. Spritz with a light mist each morning and finger-style it into place. It will frizz by day 3 — treat that as a feature, not a flaw.
22. Large Stitch Marley Cornrows
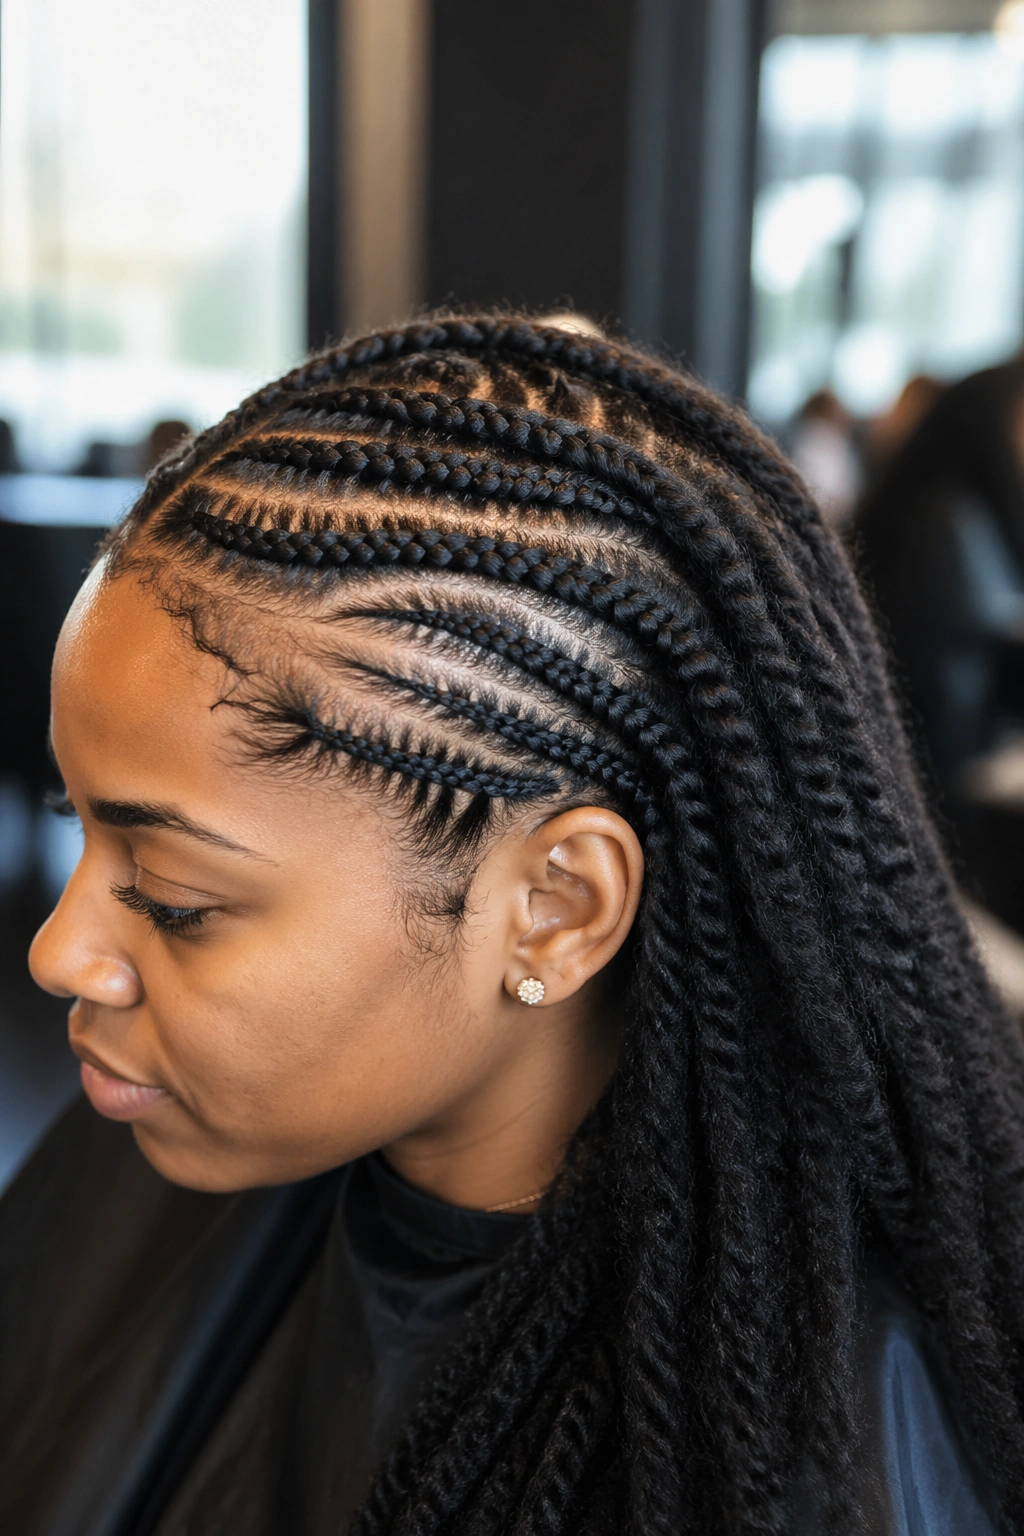
Visible large stitching on every cornrow — not accent stitches like in item 16, but full stitched cornrows across the whole head. Combined with Marley texture, the stitching creates deep horizontal bars across the scalp portion of each braid.
This is the most technically challenging version on the list. Few braiders can do stitch braiding cleanly on Marley hair because the coarse fiber fights the tight parting precision stitching requires.
When done well, it’s stunning. The horizontal stitch lines create rhythm across the head, and the Marley texture softens what would otherwise be a very rigid pattern.
Tip: If your local braider hasn’t done this before, skip it. The style depends entirely on stitch precision.
Maintaining Your Marley Cornrows Over Time
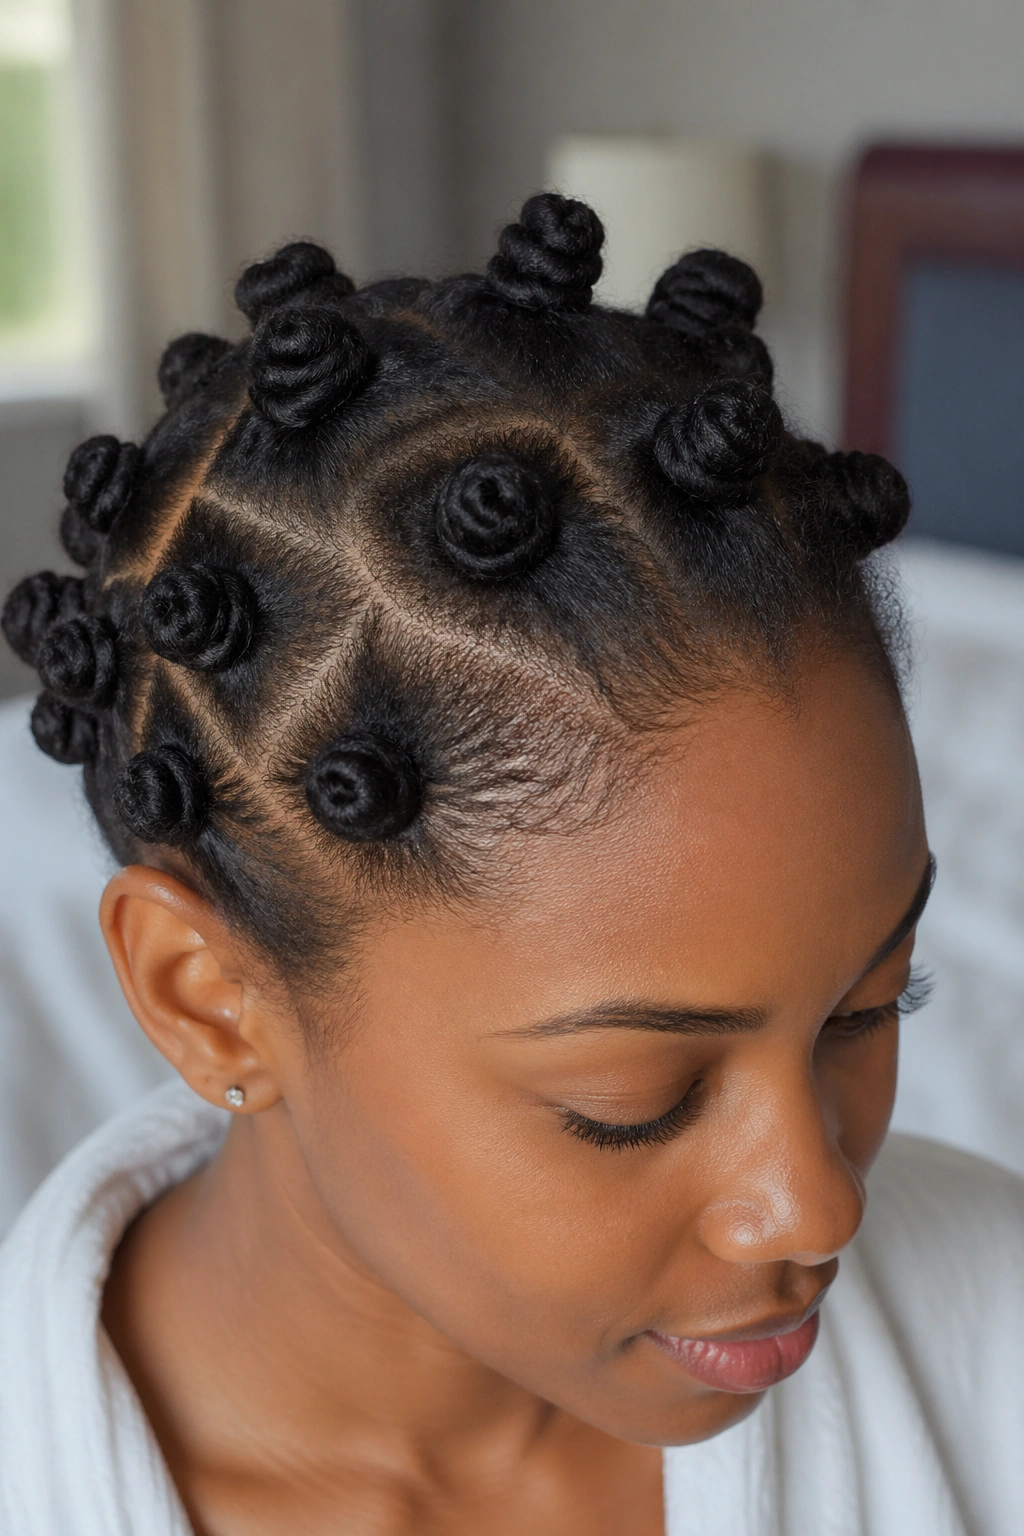
Marley hair doesn’t hold moisture the way natural hair does. You can’t overload it with leave-in products expecting the hair itself to absorb them — everything sits on the surface.
Spritz with a diluted mix of water, aloe vera juice, and a light carrier oil every 2 to 3 days. This maintains moisture at the scalp without saturating the Marley fiber.
Cover with a satin bonnet every single night. Without exception. Marley tangles fast when left loose on any surface, including satin pillowcases.
Edge gel lightly around the hairline weekly. Don’t overdo it — buildup at the front of Marley cornrows becomes visible fast because the coarse fiber doesn’t reflect light enough to mask product residue.
Washing Marley Cornrows Without Wrecking Them
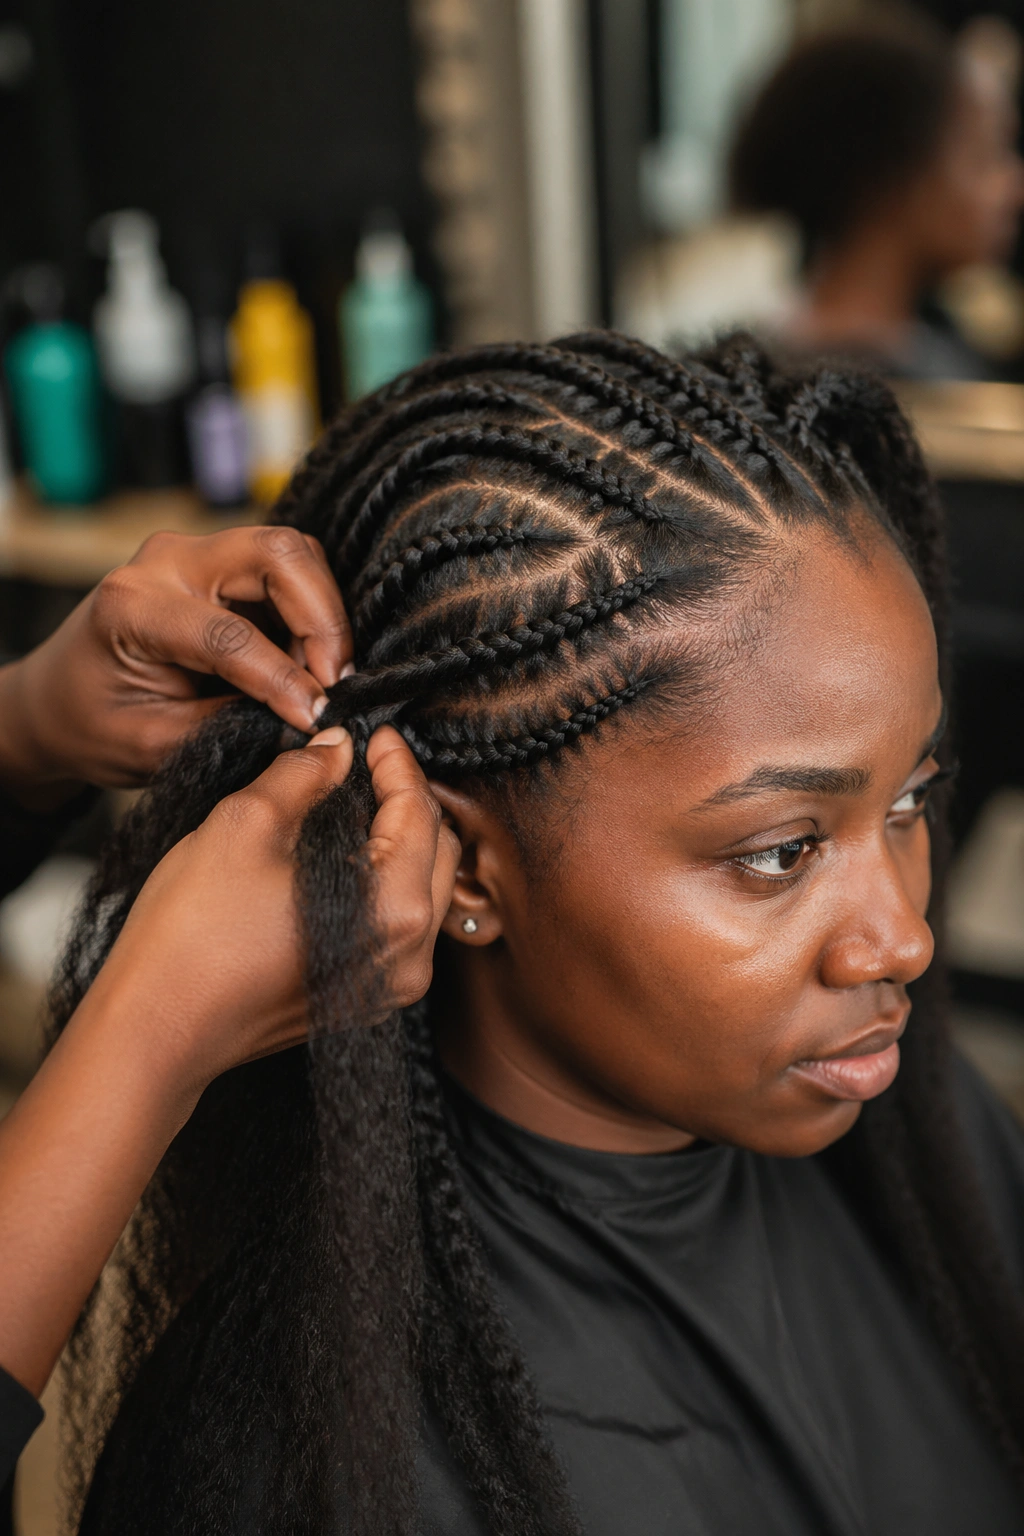
Wait 10 to 14 days after install before the first wash. Marley hair needs time to settle into the cornrow pattern before any water exposure.
When you wash, use diluted shampoo squeezed through the braids rather than massaged in. Rub only at the scalp in gentle circular motions. Rinse with cool water to prevent the Marley fiber from swelling.
Dry thoroughly. Wet Marley cornrows mildew faster than kanekalon versions because the coarse fiber holds water longer. A hooded dryer for 45 to 60 minutes or a full day of air drying with a scarf.
When and How to Take Them Down
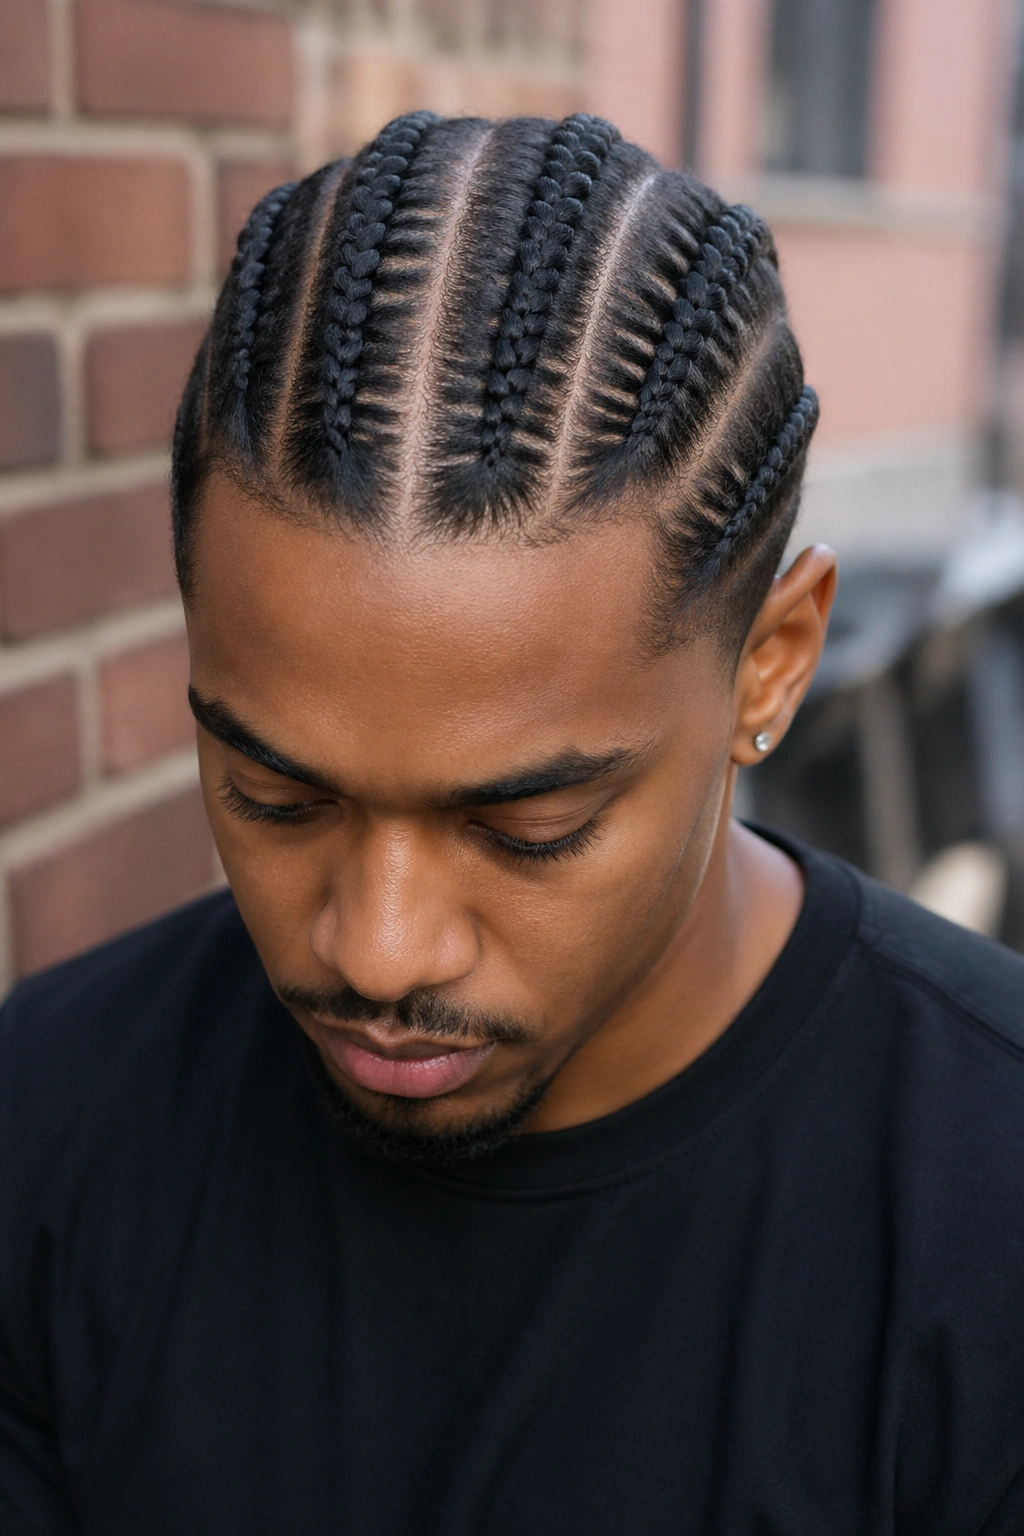
Six weeks is the sweet spot. Eight weeks is the hard ceiling — beyond that, matting at the roots becomes nearly impossible to comb out without significant breakage.
Saturate each braid with a heavy slip conditioner before unbraiding. Unlike kanekalon takedown where you work from tip to root, Marley takedown goes faster if you first cut the extensions off about 2 inches from your natural hair ends. That removes most of the weight and lets you focus on safely detangling the real hair.
Wide-tooth comb and patience. No rushing. Every shed hair that comes out is a hair that would have come out during normal daily shedding over 6 weeks — it’s not loss, it’s accumulated normal shedding.
Deep condition for at least an hour after takedown. Your natural hair has been under compression for weeks and needs serious moisture replenishment.
Picking the Right Marley Style for Your Hair
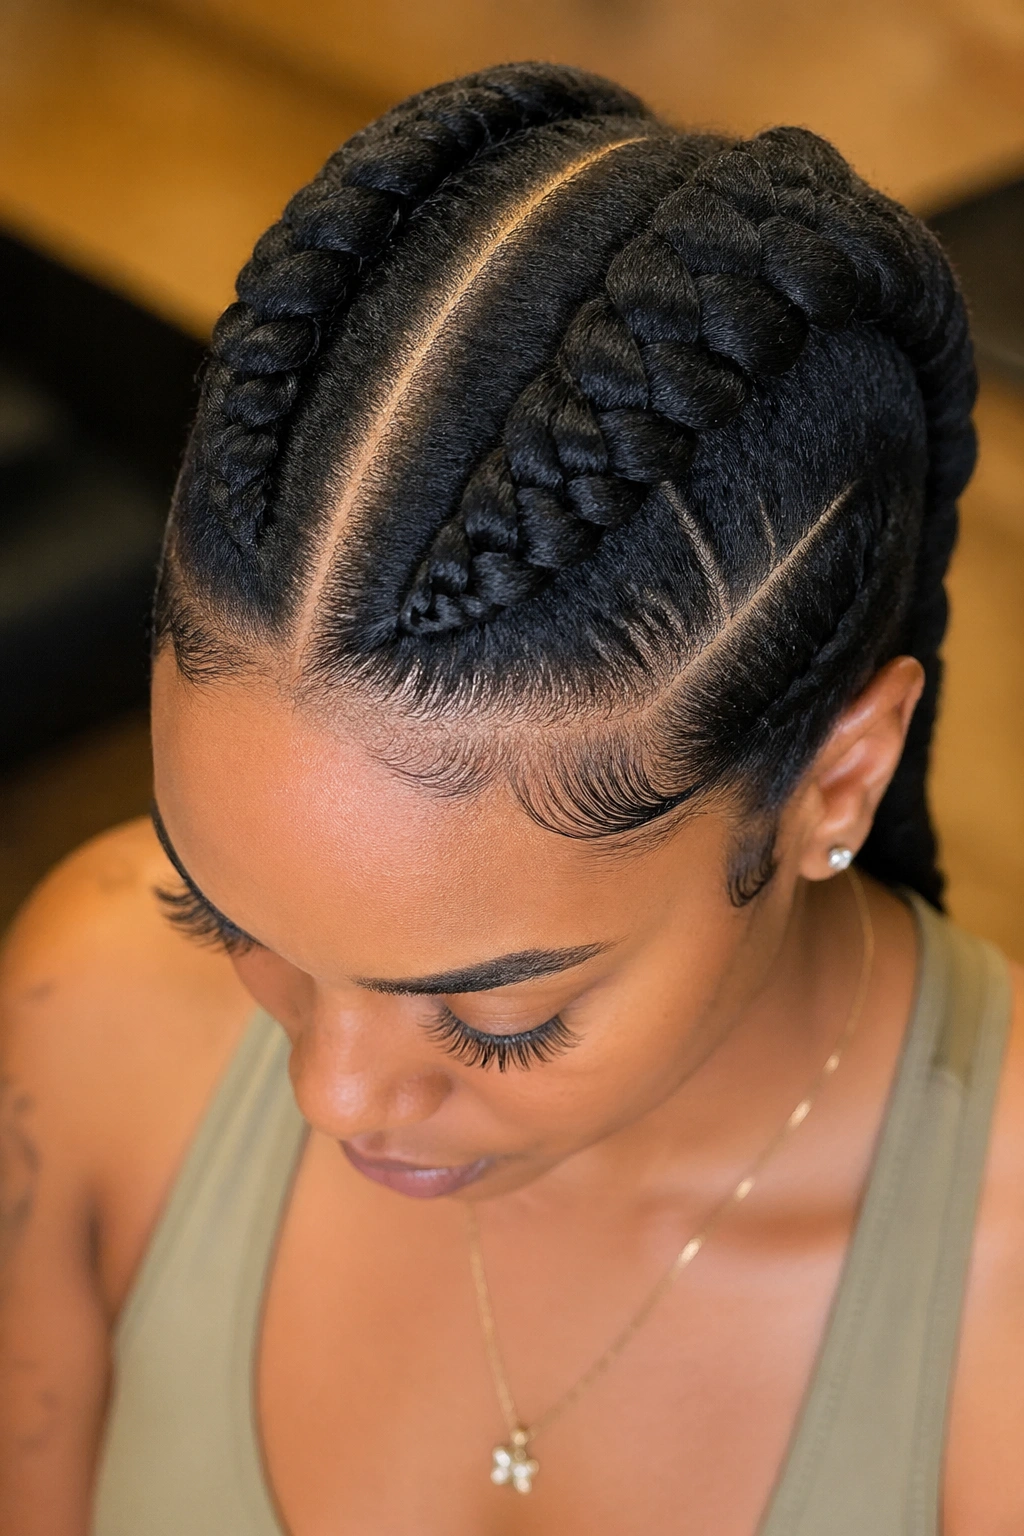
Fine or thin hair does best with fewer, larger Marley cornrows — the jumbo version or the classic four-cornrow style. Smaller sections mean more tension per strand, which fine hair can’t handle.
Coarse, thick 4C hair supports almost any Marley variation. The natural density matches the Marley texture seamlessly, and the hairline can handle tighter parting.
Transitioning hair loves Marley cornrows because the coarse texture hides the line of demarcation between new growth and relaxed ends. The blend is close to invisible once installed.
Consider your scalp sensitivity. Marley fiber can itch initially — some women find this intolerable, others barely notice. A light apple cider vinegar spritz at the hairline during install reduces the initial itch response.
Think about work environment. Some industries still have unfortunate biases about natural-textured styles. Know your environment before committing to a 6-week install. That said — your hair is your hair, and policies about natural textures are losing ground more and more.
Common Mistakes with Marley Cornrows
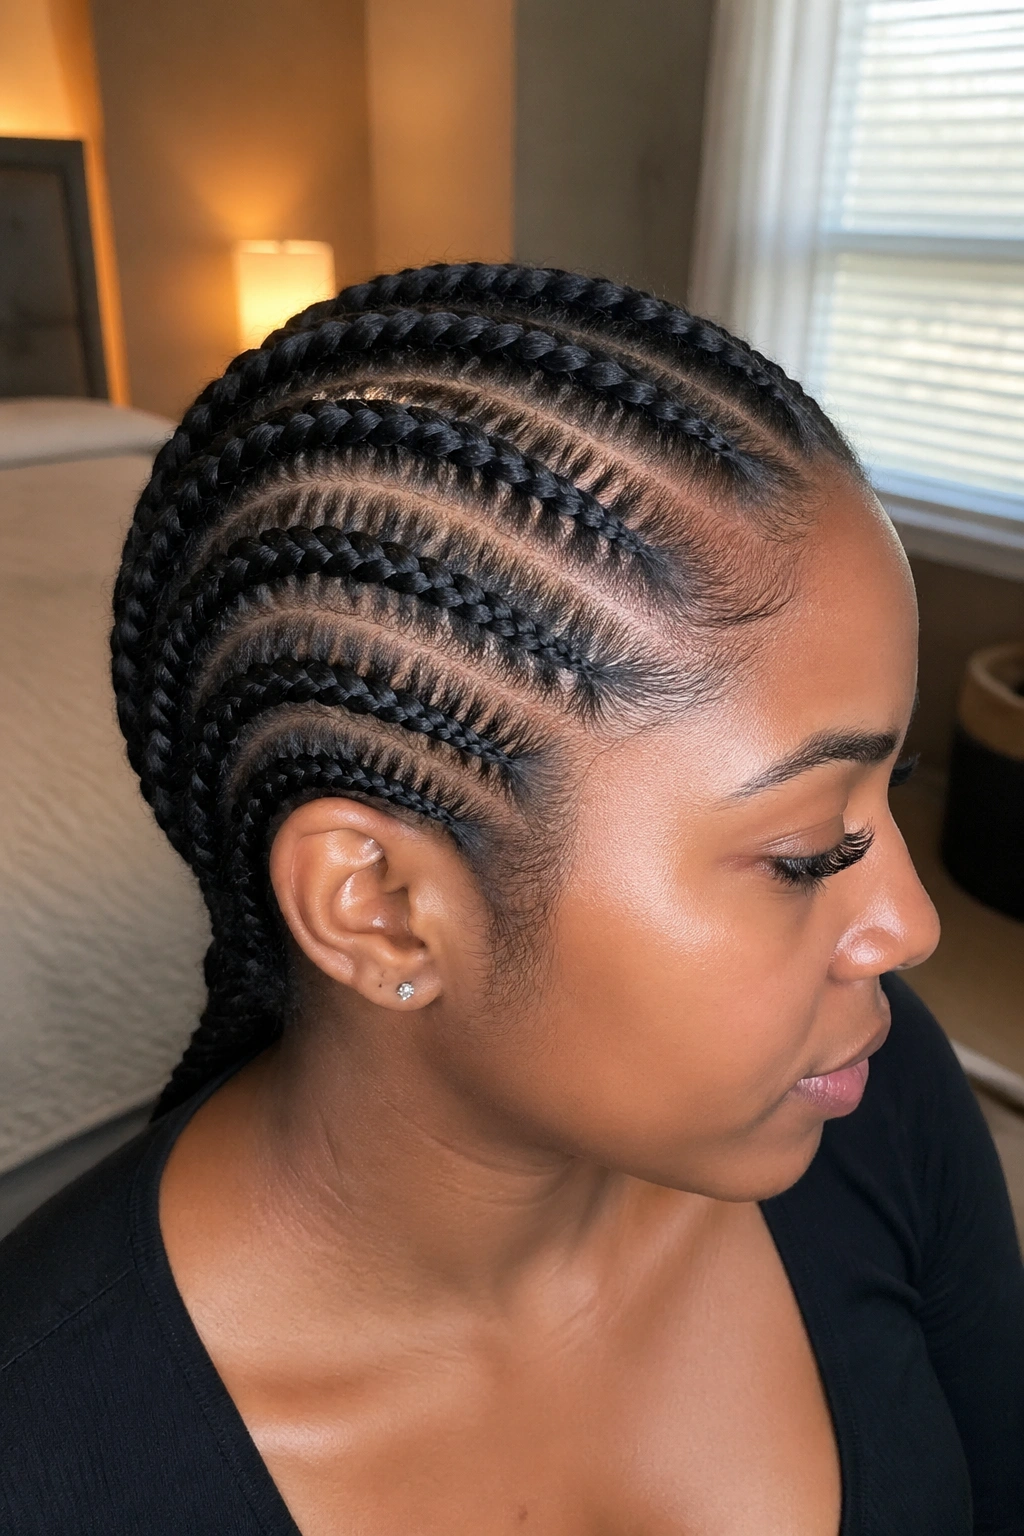
Using too much gel at the base. Marley fiber doesn’t absorb gel well, so it sits on top and attracts lint. Small amounts only.
Skipping the bonnet. Marley hair tangles overnight faster than any other synthetic braid material. Bonnet non-negotiably.
Washing too soon. I said 10 to 14 days earlier — stick with it. Early washing loosens the base and shortens the life of the style by weeks.
Leaving the braids in past 8 weeks. Matting starts around week 5 and becomes severe by week 8. Schedule your takedown before you install.
Cheap Marley packs. The price difference between 4 dollar Marley and 12 dollar Marley is real. Coarser, better-engineered fiber holds texture through multiple washes and doesn’t pill. Cheap packs pill into knots within days.
Over-styling the ends. Marley hair doesn’t like heat styling, flat ironing, or aggressive brushing. Treat the ends gently and they’ll hold their shape for the life of the style.
Marley cornrows deserve a place in any braid rotation. The texture lets you wear a style that looks grown rather than installed. The protection lets your natural hair rest for weeks at a time. And the cultural weight — the link to Jamaican reggae roots, to West African braiding traditions, to generations of Black women doing Black women’s hair — makes every install a small act of continuity.
Pick your version based on lifestyle, face shape, and maintenance tolerance. Find a braider who understands Marley specifically — not every cornrow expert works this fiber well. And commit to the bonnet, the light scalp oil, the slow takedown, and the deep condition after.
The style rewards the care you put into it.
