Medium hair sits in that sweet spot for cornrow styles. Long enough to braid without fighting every section, short enough to move fast without needing hours under the hands of a braider. If you’ve got shoulder-length to collarbone-length hair and you’re ready to explore cornrow styles for medium hair, the range of options opens up in ways that surprise people who assume you need waist-length strands to pull off anything interesting.
The truth sits closer to the opposite. Medium hair braids clean. It parts crisp. It doesn’t drag down the crown the way thick, waist-length hair sometimes does, and it doesn’t require the extensive extensions that shorter hair needs for structure. You can go sleek. You can go voluminous. You can add beads without the weight pulling at your edges. You can swap patterns every few weeks without breaking down your whole hair routine.
What follows runs through 25 cornrow approaches that work beautifully on medium-length natural hair — from tight straight-backs to curved, sculptural patterns to hybrid styles that pair cornrows with twists, bantu knots, or loose ends.
A Quick Word on What Counts as Medium Hair
Medium hair, for our purposes, lands somewhere between the bottom of your ears and the top of your shoulder blades. Think collarbone length. Think bra-strap length on someone with a longer torso. It’s not cropped. It’s not waist-grazing. It moves.
This matters because styling approach shifts with length. Short hair needs more extensions for length illusion. Long hair needs careful weight distribution. Medium hair gets to play the middle — and that middle is where some of the cleanest cornrow work happens.
Why Medium Hair Holds Cornrows So Well
Shorter strands tuck neatly into each braid without the constant slipping you get with super-short coils. Longer strands at medium length still give the braider something to grip, but not so much that tension becomes a problem. The weight stays manageable through the crown. The braids lay flatter against the scalp because there’s less excess hair trying to push them up.
Medium hair also takes down faster. A full head of small cornrows on mid-length natural hair? You’re looking at maybe 40 minutes to take down carefully, versus double that on long hair. For anyone switching styles every two to three weeks, that math matters.
Prep Work That Makes or Breaks the Install

Clean hair braids better than freshly washed, soft-bouncy hair. Give yourself two or three days between wash day and braid day. The hair stretches more evenly. The parts hold crisper. The gel grips without slipping around.
Stretch the hair first. A blow-out on low heat, a braid-out the night before, or even banded stretching — any of these opens the cuticle direction and makes the cornrow lay flat against the scalp instead of bumping up from shrinkage. Skipping this step is where most DIY cornrow attempts fall apart.
Edges need their own prep. A good edge control, applied to damp edges with a soft-bristle brush, sets the foundation for a clean hairline that will hold for a week before needing touch-up. Don’t cake it on — a thin, even layer beats a thick glob every time.
Tools Worth Owning Before You Braid
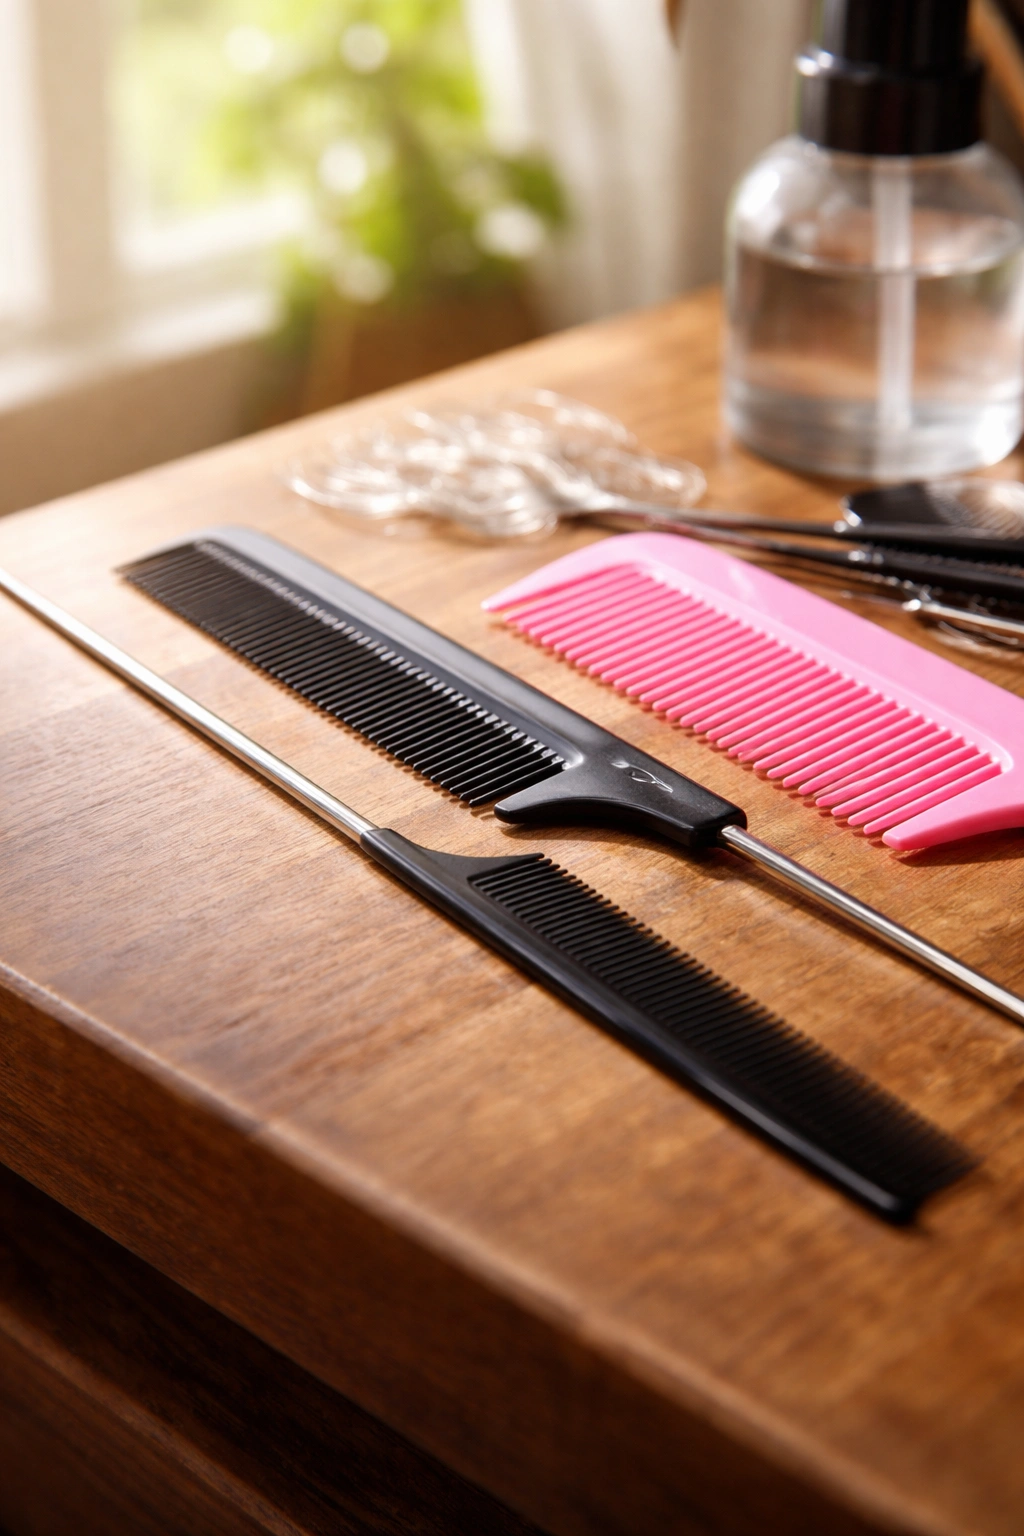
A rat-tail comb. The sharper the point, the cleaner the parts. Dull tips drag and fuzz the line. A sectioning comb with a fine-tooth end for smoothing. A spray bottle with water and a touch of leave-in conditioner mixed in — for dampening stubborn sections without drenching them. Small clear elastic bands for securing ends. Duck-bill clips to pin finished braids out of the way while you work on new sections.
If you’re going the freehand route without extensions, that’s your kit. If you want feed-in thickness, add kanekalon hair in small 1-inch pieces ready to grab. If you want ends hanging loose, you’re skipping the bands entirely.
Parting Patterns — The Silent Hero of Cornrows
Most people fixate on the braid itself and forget the part is 70% of the finished look. A sloppy part on a beautiful braid still reads sloppy. A knife-edge part on a basic cornrow still reads sharp.
Practice your parts. Start from the hairline and drag back in one smooth motion. Don’t correct mid-stroke — if you wobble, re-dampen the section and try again from scratch. A perfect part is worth the extra thirty seconds.
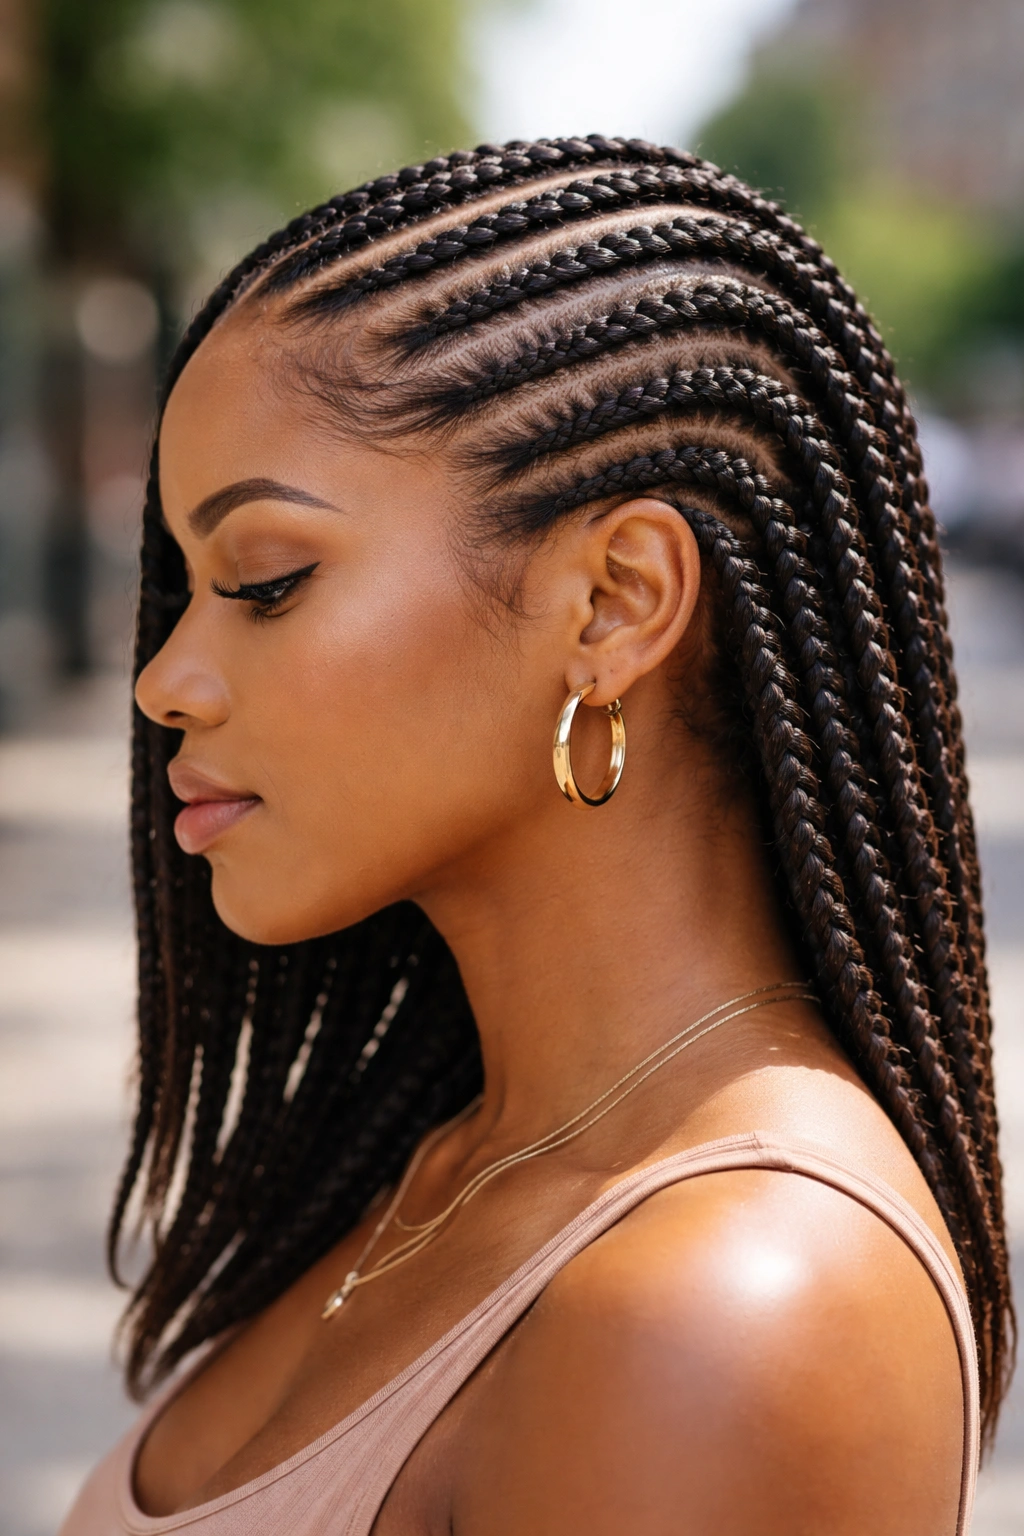
1. Classic Straight-Back Cornrows
This is the foundation. Seven to nine straight cornrows running from the hairline to the nape, evenly spaced, all flowing in the same direction. On medium hair, this reads clean and polished without needing a single extension. The braids lay close to the scalp because there’s just enough hair to fill them without excess.
The trick here is even spacing. Measure from ear to ear along the hairline and divide by your target braid count. Mark each part with the rat-tail comb before you start braiding — this prevents the drift that happens when you’re two-thirds through and realize the last three parts are crammed together.
Medium hair finishes this style with braids that fall just past the shoulders. You can leave the ends loose or slip a clear band on each. Either way, the silhouette stays tight to the head.
2. Side-Parted Cornrows With Sweep
What Makes It Different
A deep side part changes the entire energy of a cornrow style. Everything flows diagonally across the crown instead of straight back, giving the style visible movement without any added length.
- Start the side part at the deepest point of your eyebrow arch
- The first two cornrows on the heavy side curve slightly toward the back of the opposite ear
- The lighter side gets 3-4 small cornrows running diagonally
- Ends meet at the nape and can be gathered into a low bun or left loose
Tip: The sweep works best when the first cornrow on the heavy side is slightly thicker than the others — it anchors the diagonal motion and keeps the eye moving across the head rather than stopping halfway.
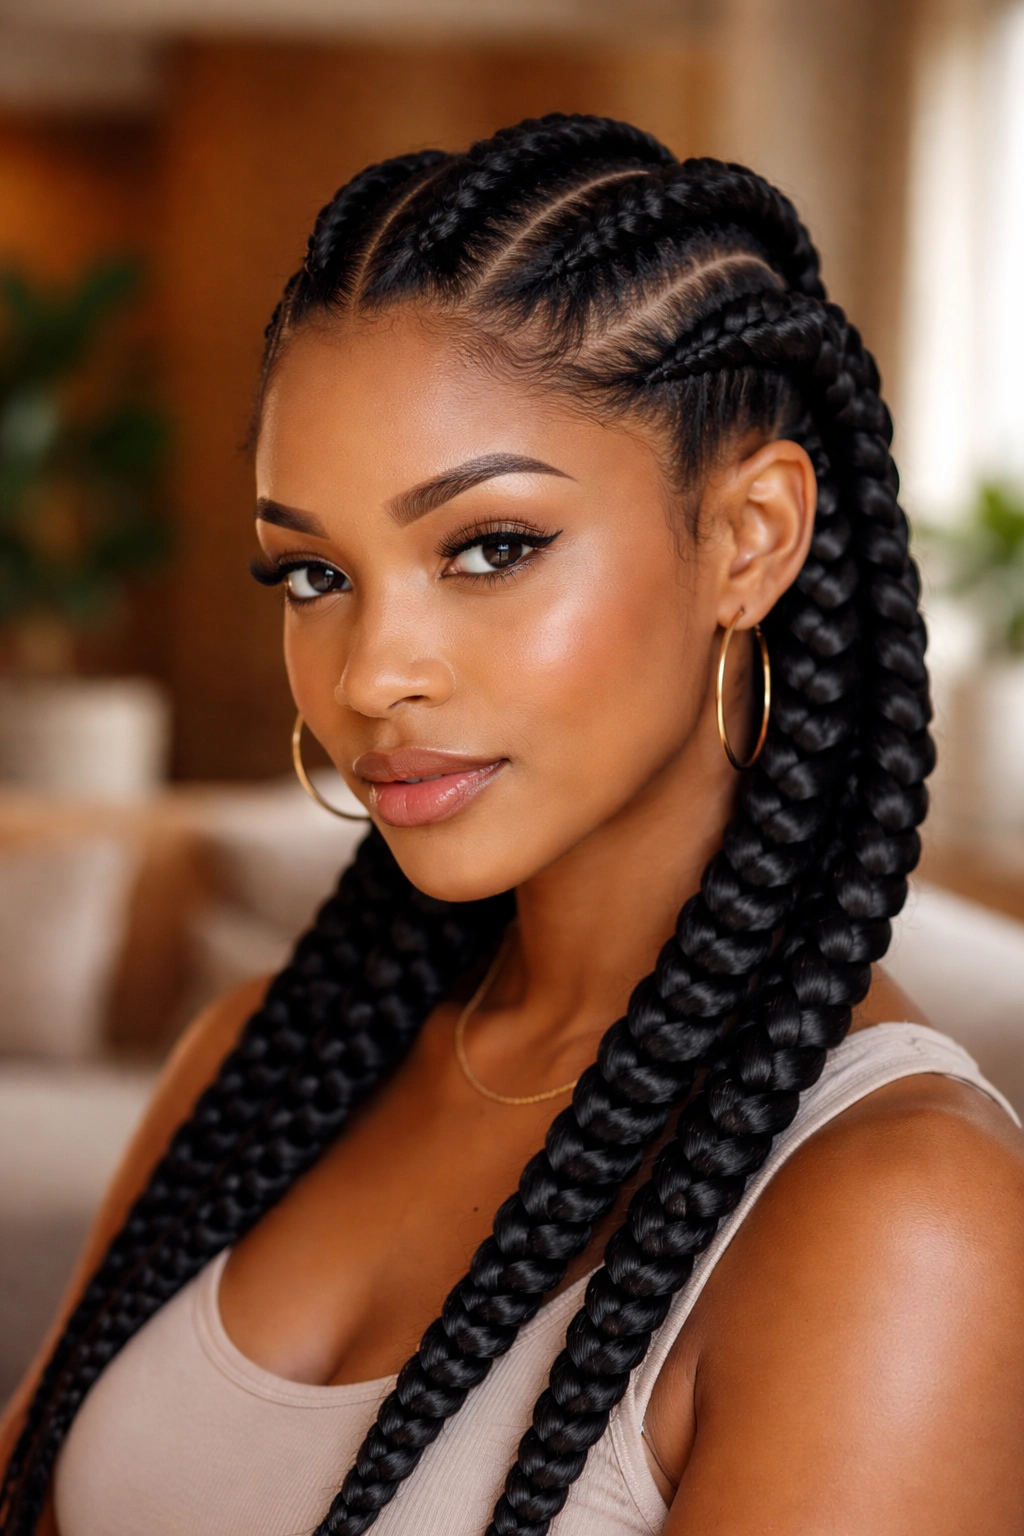
3. Lemonade Braids
Named for the music-video moment that made them widely recognized, lemonade braids are cornrows that curve from one side of the head to the other, usually swept across the forehead before cascading down the opposite shoulder.
On medium hair without extensions, you get a subtle version of this look — six to eight curved cornrows flowing from right to left (or reversed), with ends just long enough to rest on one shoulder. With a bit of kanekalon added to each braid at the hairline, you can extend them past the bra line while still maintaining a medium-hair base.
How to Style It
Sleep on a satin pillowcase with a silk scarf tied loosely around the hairline. The curve pattern is the most fragile part of this style — any pillow friction undoes the flow.
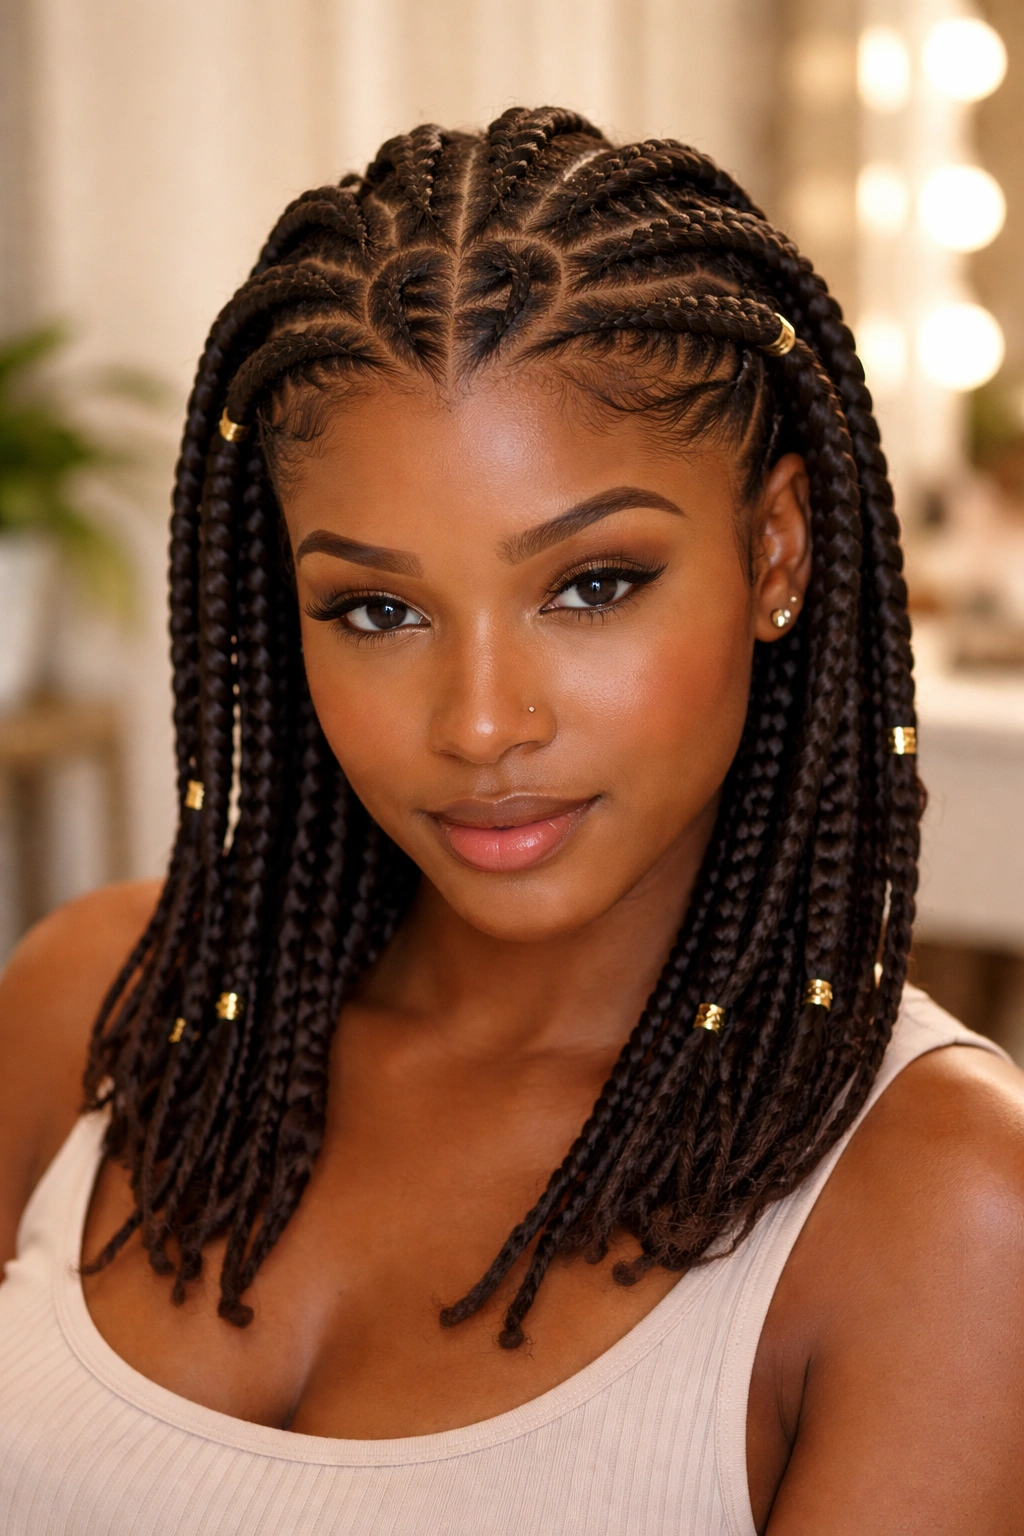
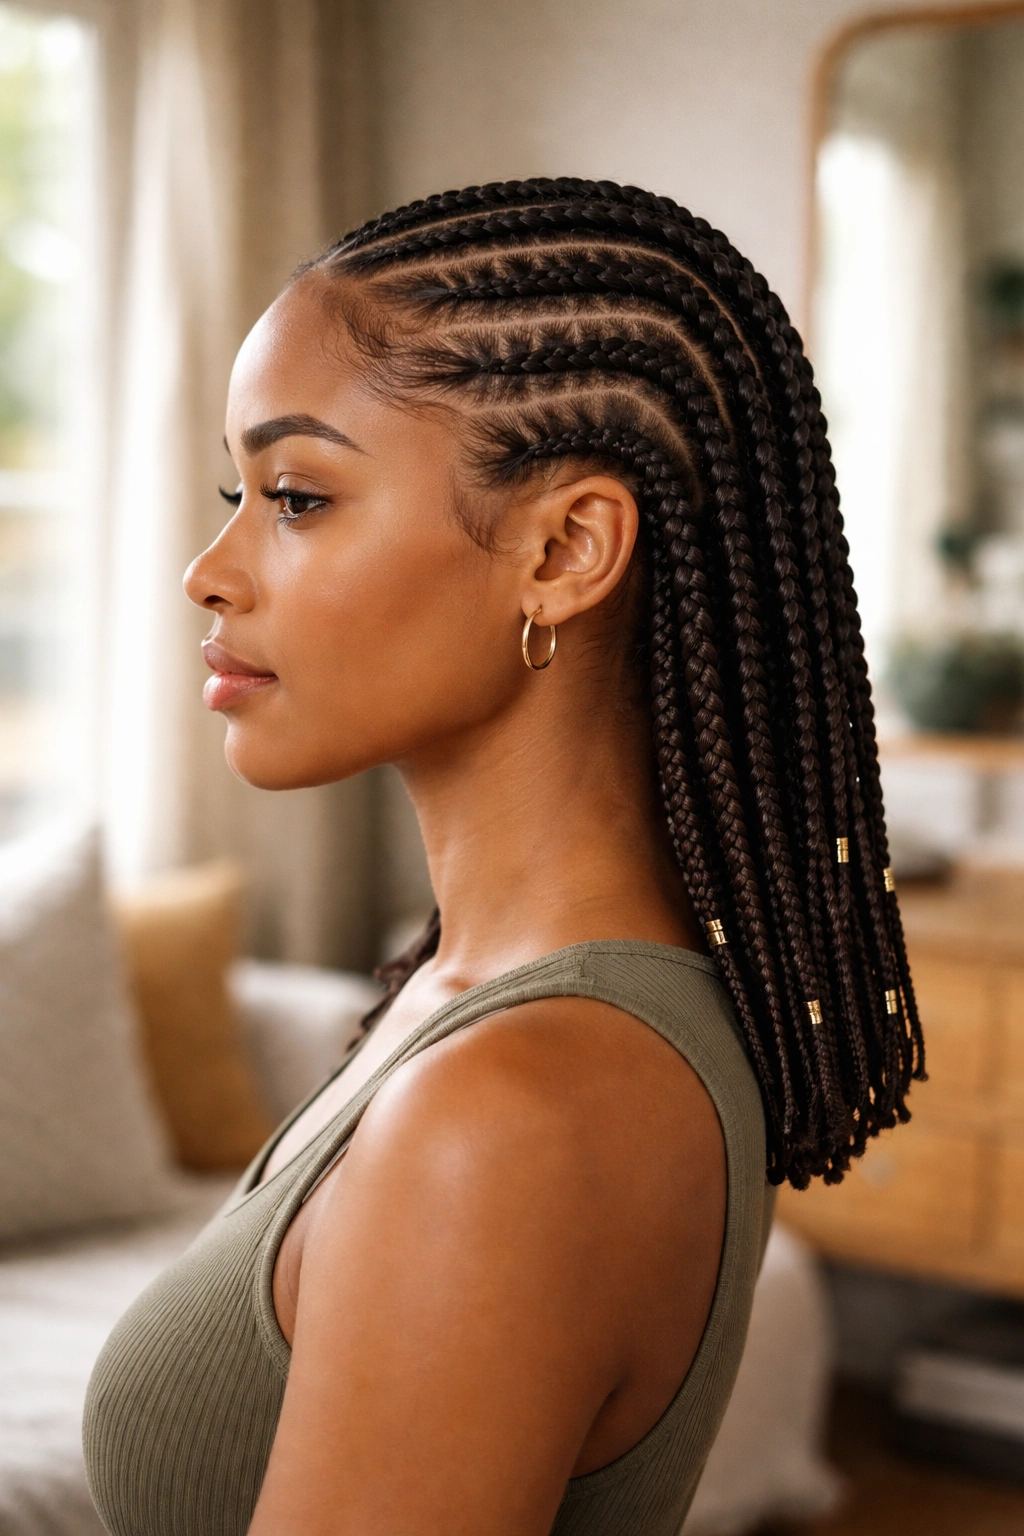
4. Cornrows With Beads at the Ends
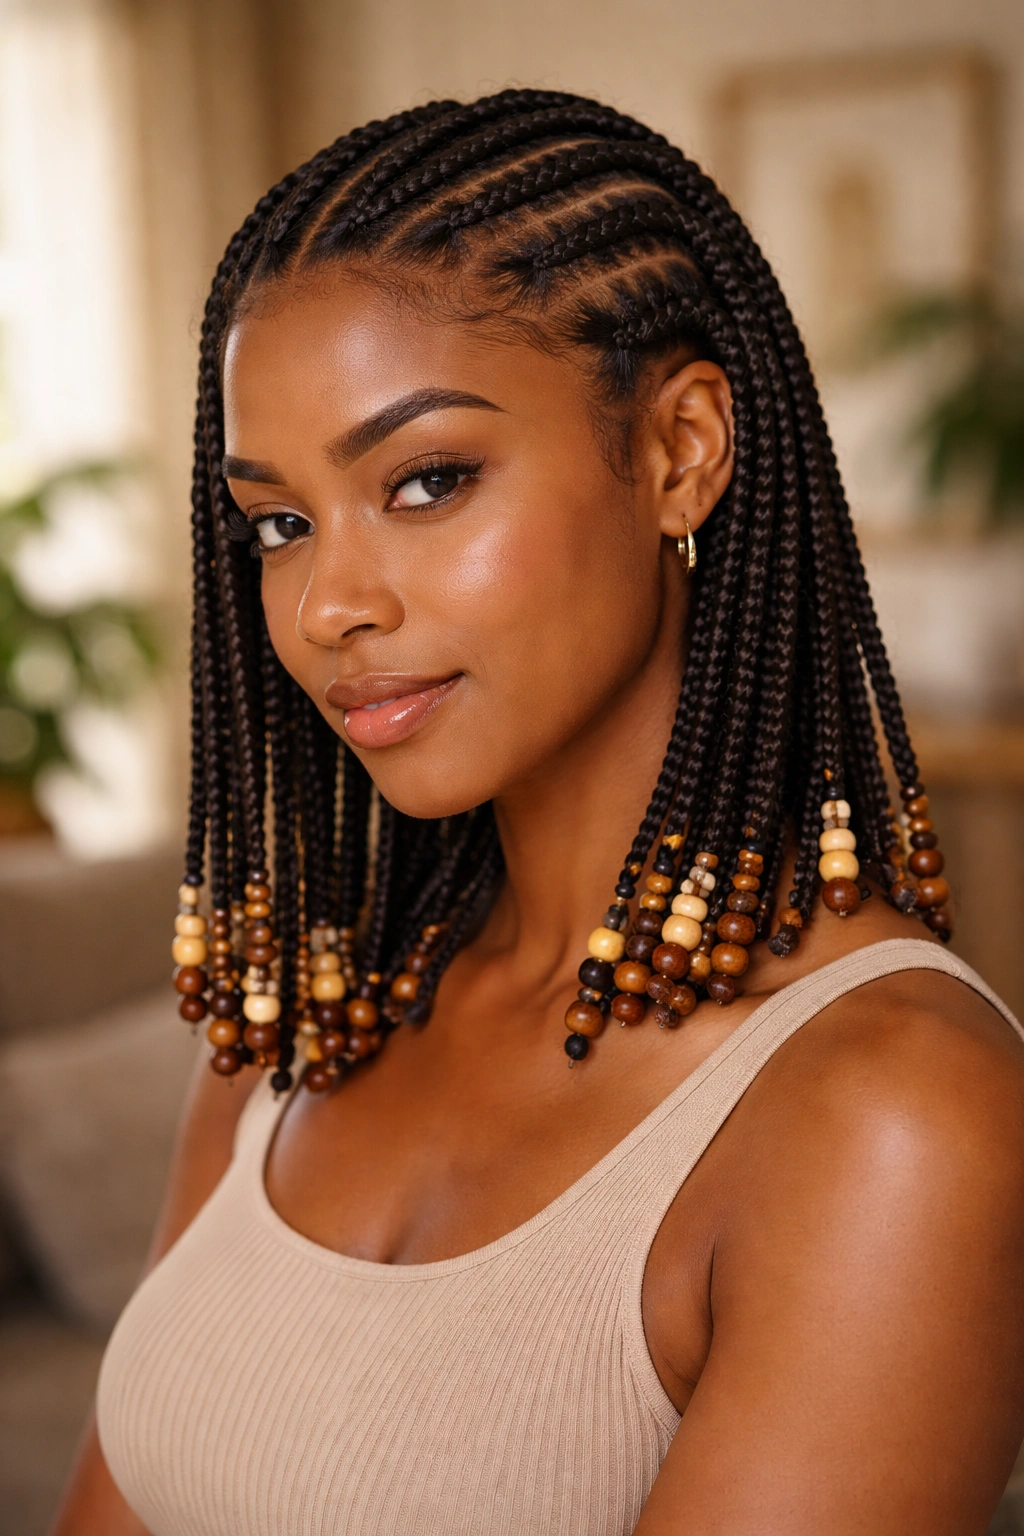
Medium-hair cornrows benefit from beads because the ends are at a comfortable weight. Heavy wooden beads on waist-length braids pull. Delicate glass or plastic beads on medium-length braids dangle without dragging.
Pick beads with holes slightly larger than the braid diameter for easy threading. Gold-tone metal beads on dark hair give high contrast. Wood beads soften the look. Multi-colored glass reads playful and young without trying too hard.
Secure each bead with a small elastic band at the bottom — or tuck the braid tip inside a larger bead and fold it back through. The second method holds longer but takes more patience during install.
5. Zigzag Parted Cornrows
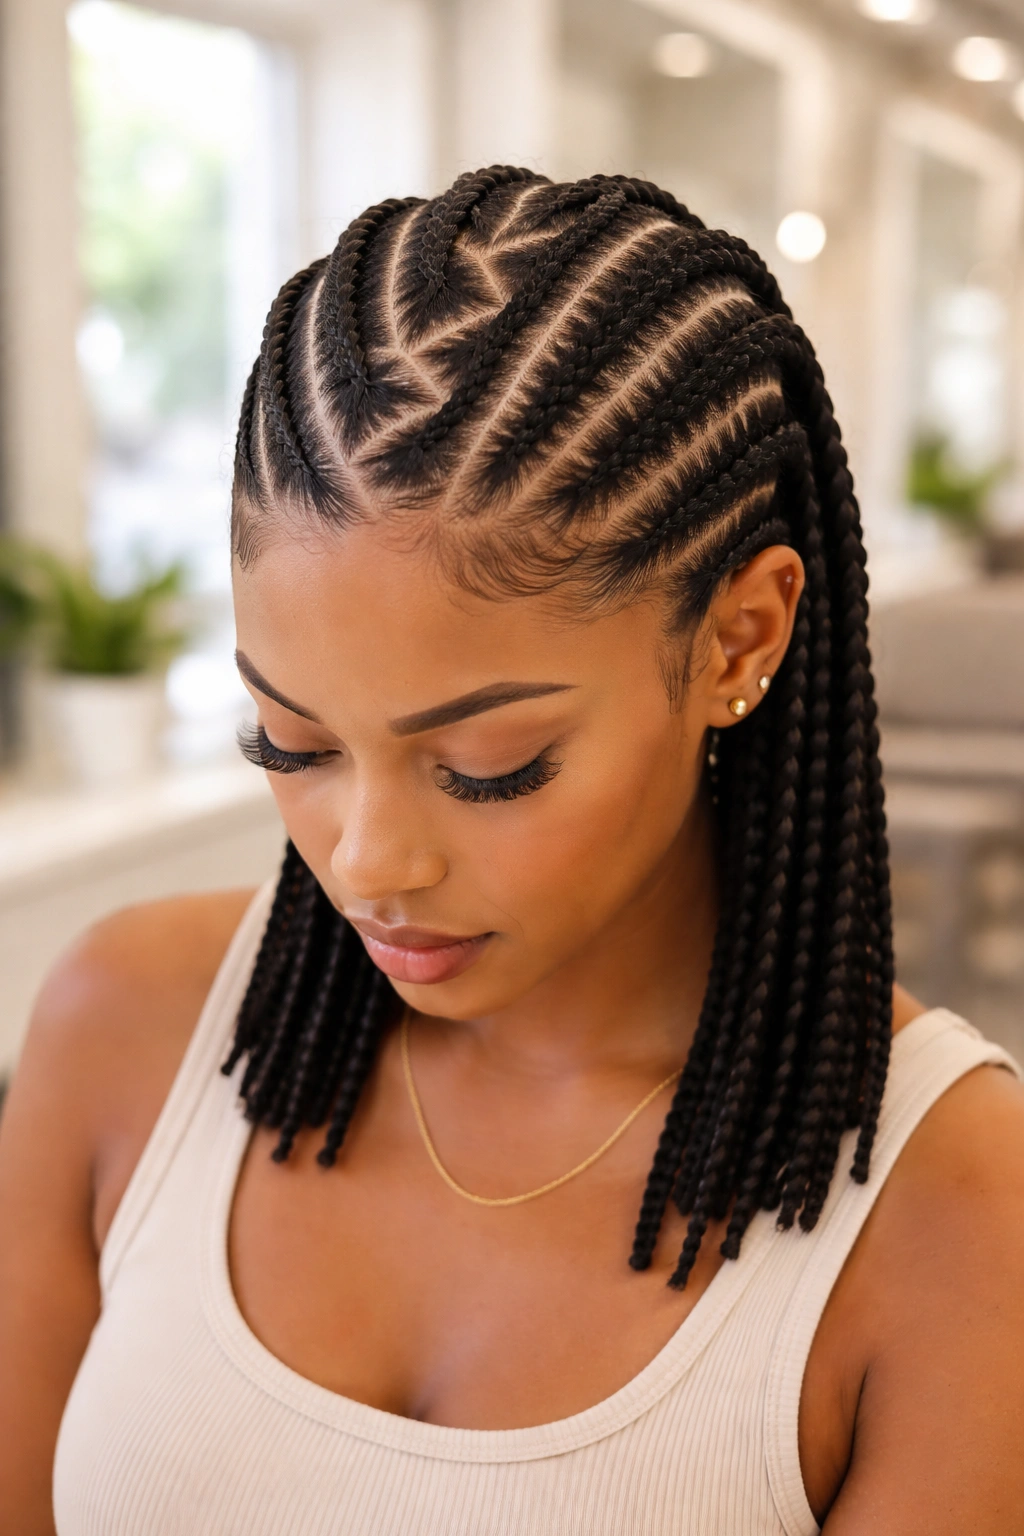
Is there a style that looks more intentional than straight-backs without requiring extensions or added complexity? Zigzag parts are the answer.
The cornrows themselves run straight back, but the parts between them zigzag horizontally — creating a wave pattern on the scalp that reads bold and graphic. This works because the scalp itself becomes part of the design, not just the hair sitting on top of it.
How to Use It
Dampen the hairline thoroughly before starting. Use the rat-tail comb to create sharp, small V-shaped zigzags rather than loose curves. Small, tight zigzags look precise. Large loose zigzags look like mistakes.
6. Halo Cornrows
Picture a crown of cornrows running around your head in a full circle, meeting at a central gathering point or spiraling inward. That’s the halo. On medium hair, you get a compact, close-to-the-scalp halo that lays beautifully and shows off the parting work.
Start at the nape and braid one continuous cornrow that curves around the entire perimeter of your head. The second row follows inside it, then the third, until everything spirals to the crown. This is patience work — a single halo can take 2-3 hours to install properly — but the result reads sculptural in a way no other cornrow style matches.
7. Cornrows Into a Ponytail
Unlike freehand cornrows where the ends dangle, this version collects every braid into a single high or low ponytail. The effect cleans up the silhouette and adds versatility — you can wrap the pony with a cuff, twist it into a bun, or let it hang as a thick rope of braids.
Medium hair creates a substantial ponytail without extensions because all the braid length stacks into one point. Eight to ten cornrows flowing into a high ponytail at the crown gives serious polish with minimal tools.
Who this works for: anyone who wants protective styling without the commitment of hanging braids everywhere, and who likes the option to secure everything up and out of the way on hot days.
8. Cornrow Mohawk
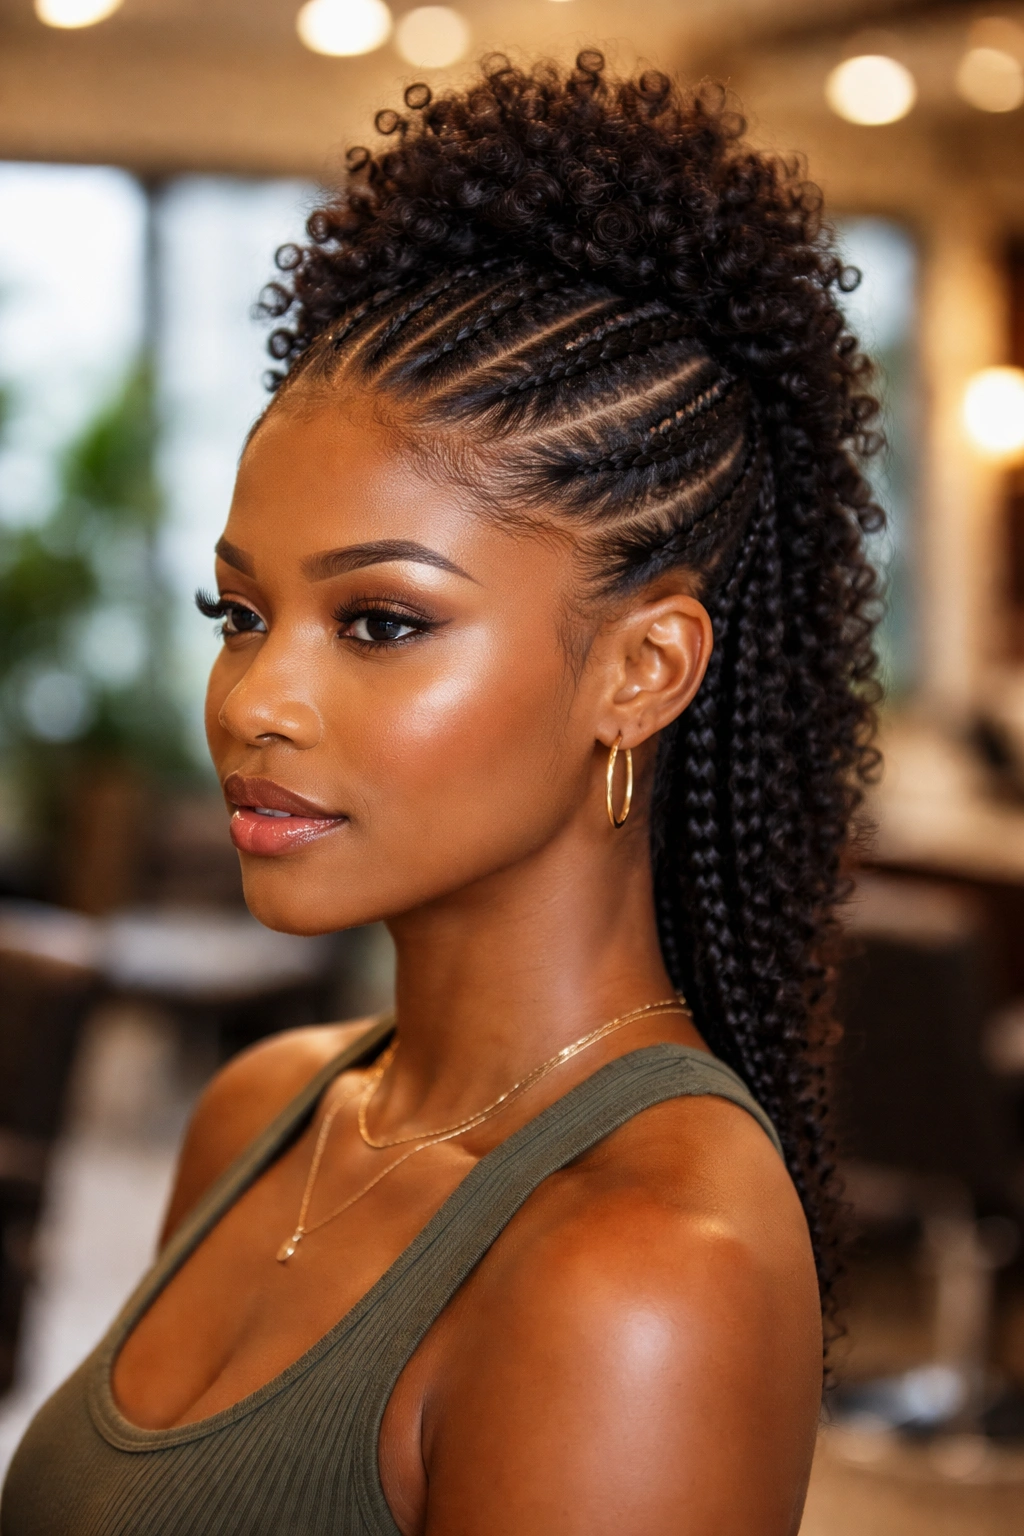
Two braids run down each side of the head, tight and low. Between them, a stripe of free hair is twisted, puffed, or styled into a mini afro-hawk. The cornrowed sides create the fauxhawk illusion without any actual shaving.
On medium hair, the center stripe has enough length to pull into a series of bantu knots, a flat twist mohawk, or just a picked-out puff that runs from forehead to nape. The key is keeping the side cornrows tight and flat so the center gets all the visual weight.
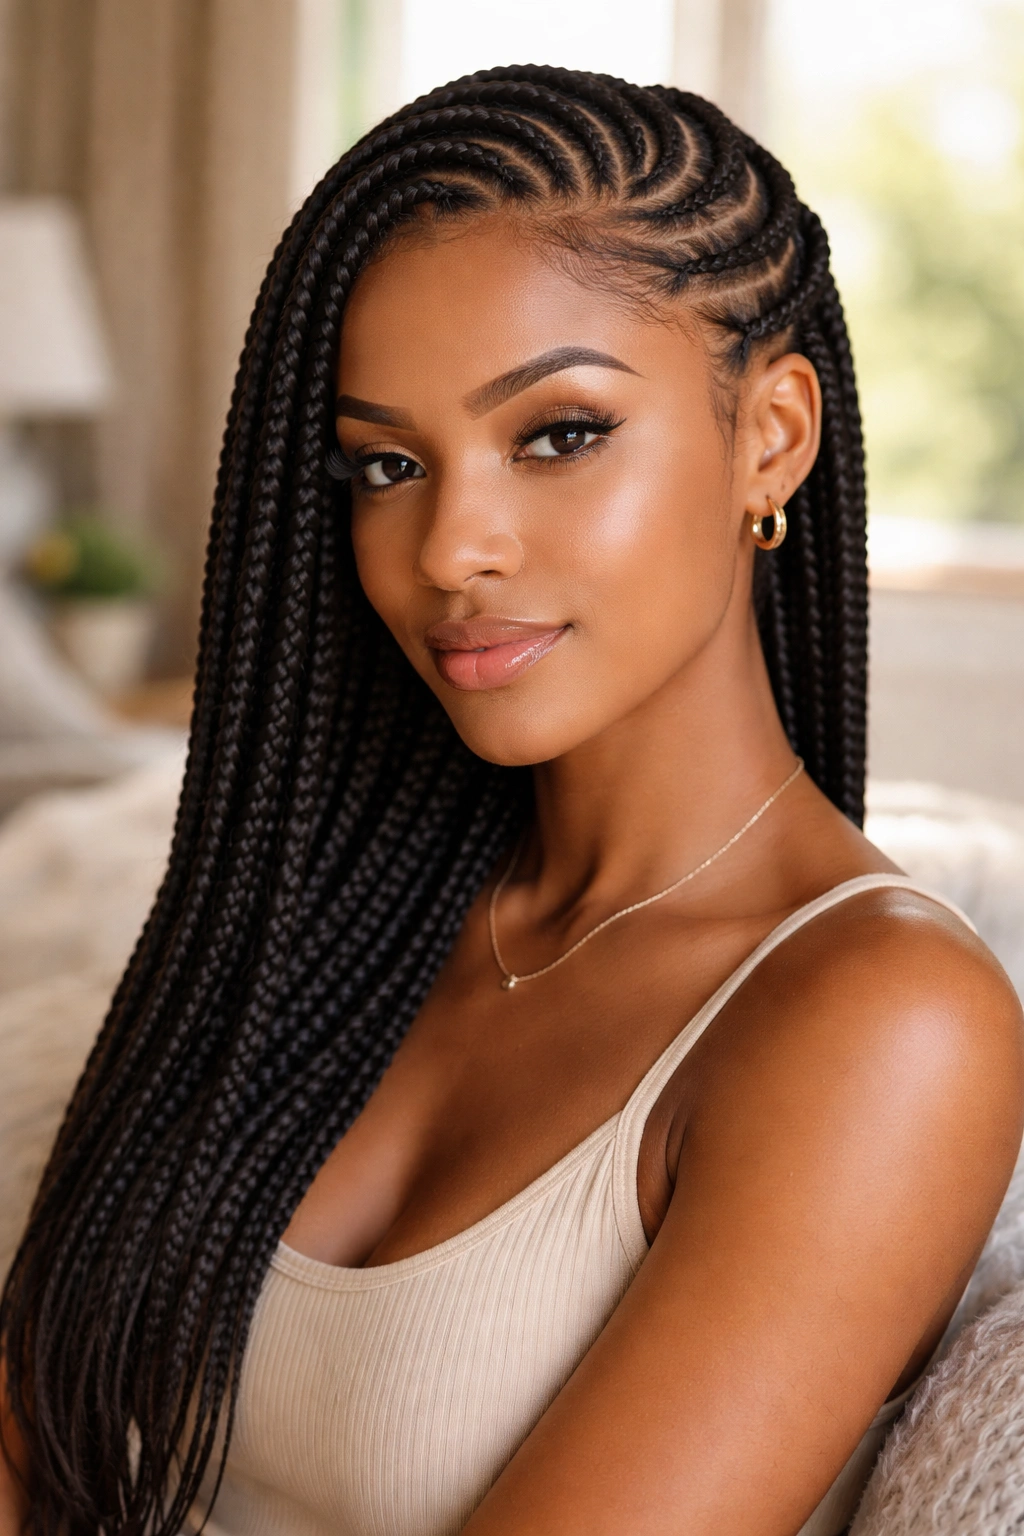
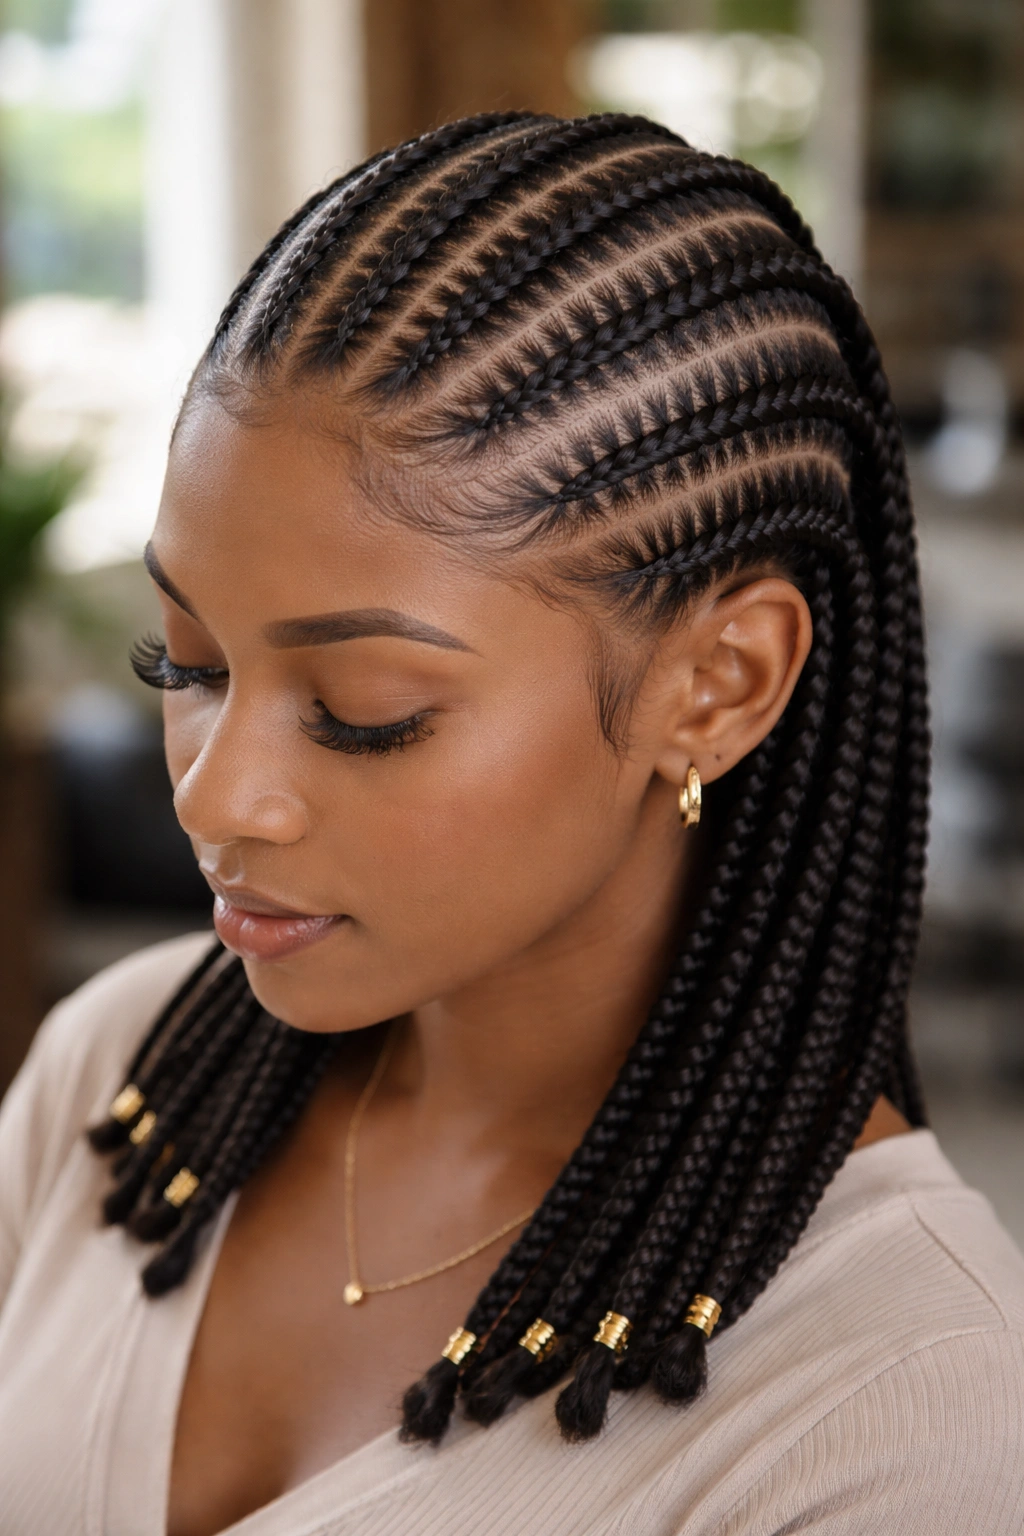
9. Ghana Braids (Banana Cornrows)
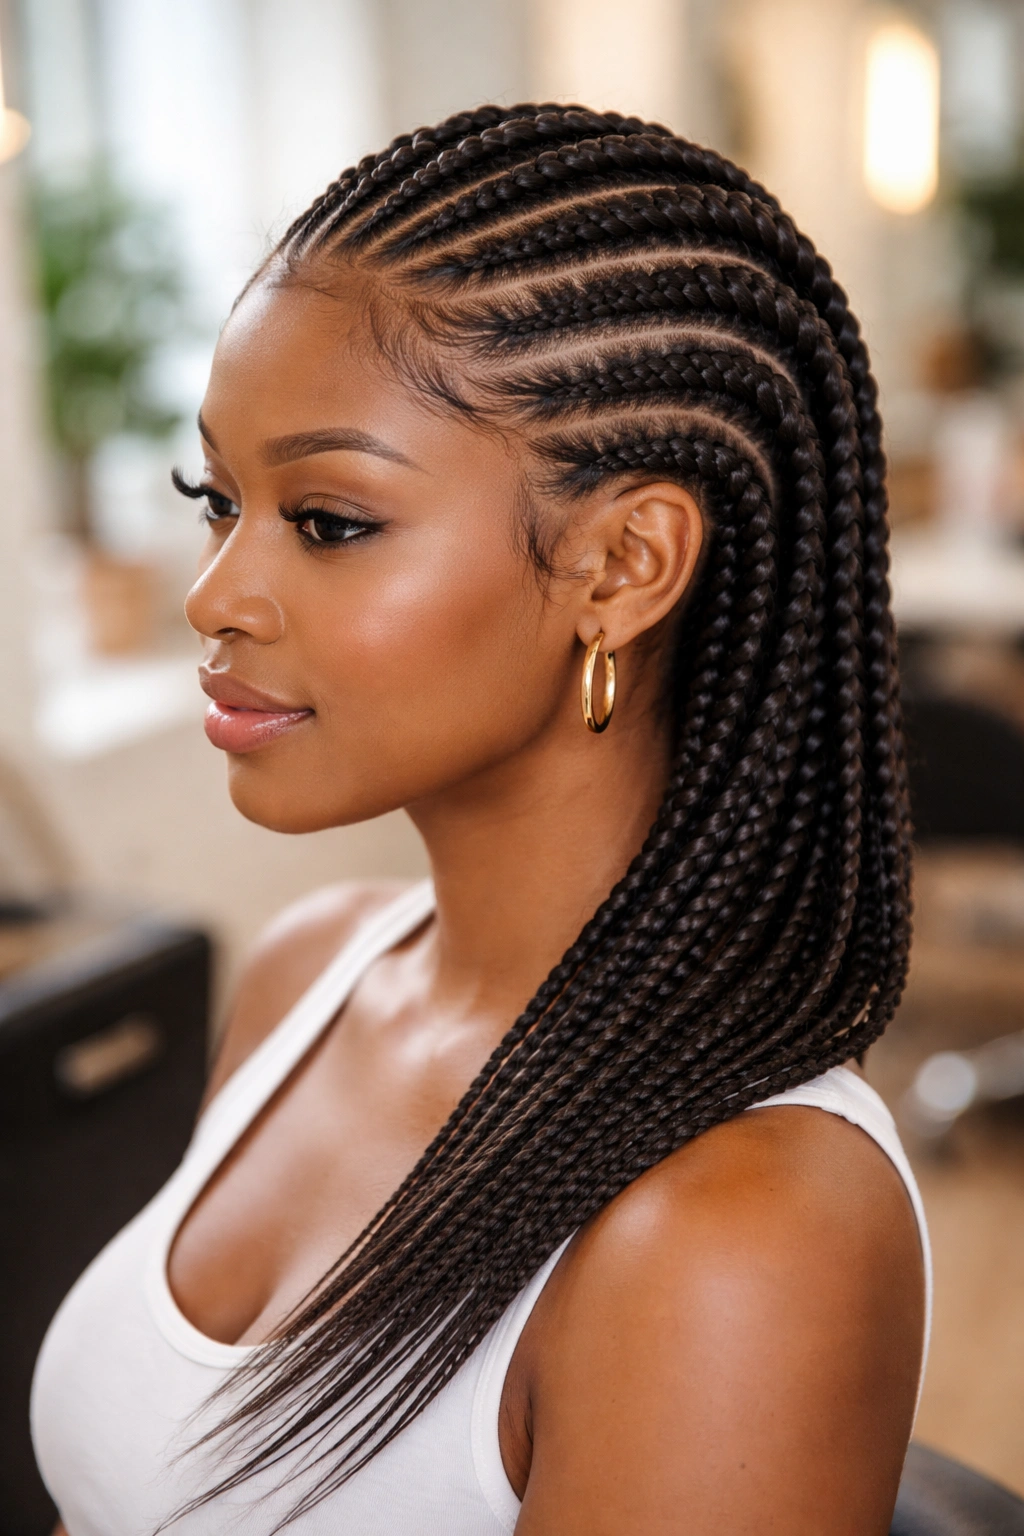
Ghana braids are feed-in cornrows that grow in thickness as they travel back. They start thin at the hairline, then gradually incorporate more kanekalon until they’re substantial ropes by the time they hit the nape. The banana shape (thin-thick-thin) gives them their nickname.
This is arguably the most foundational feed-in style in the whole cornrow family. It’s the base that many other braided looks build on, and for medium hair specifically, it lengthens and thickens the braids in a way that natural hair alone cannot match.
Feeding technique matters here. Add only a few strands of kanekalon at a time, braided in over 2-3 crossings, before adding the next small bundle. Dumping large amounts of extension in at once creates bumps.
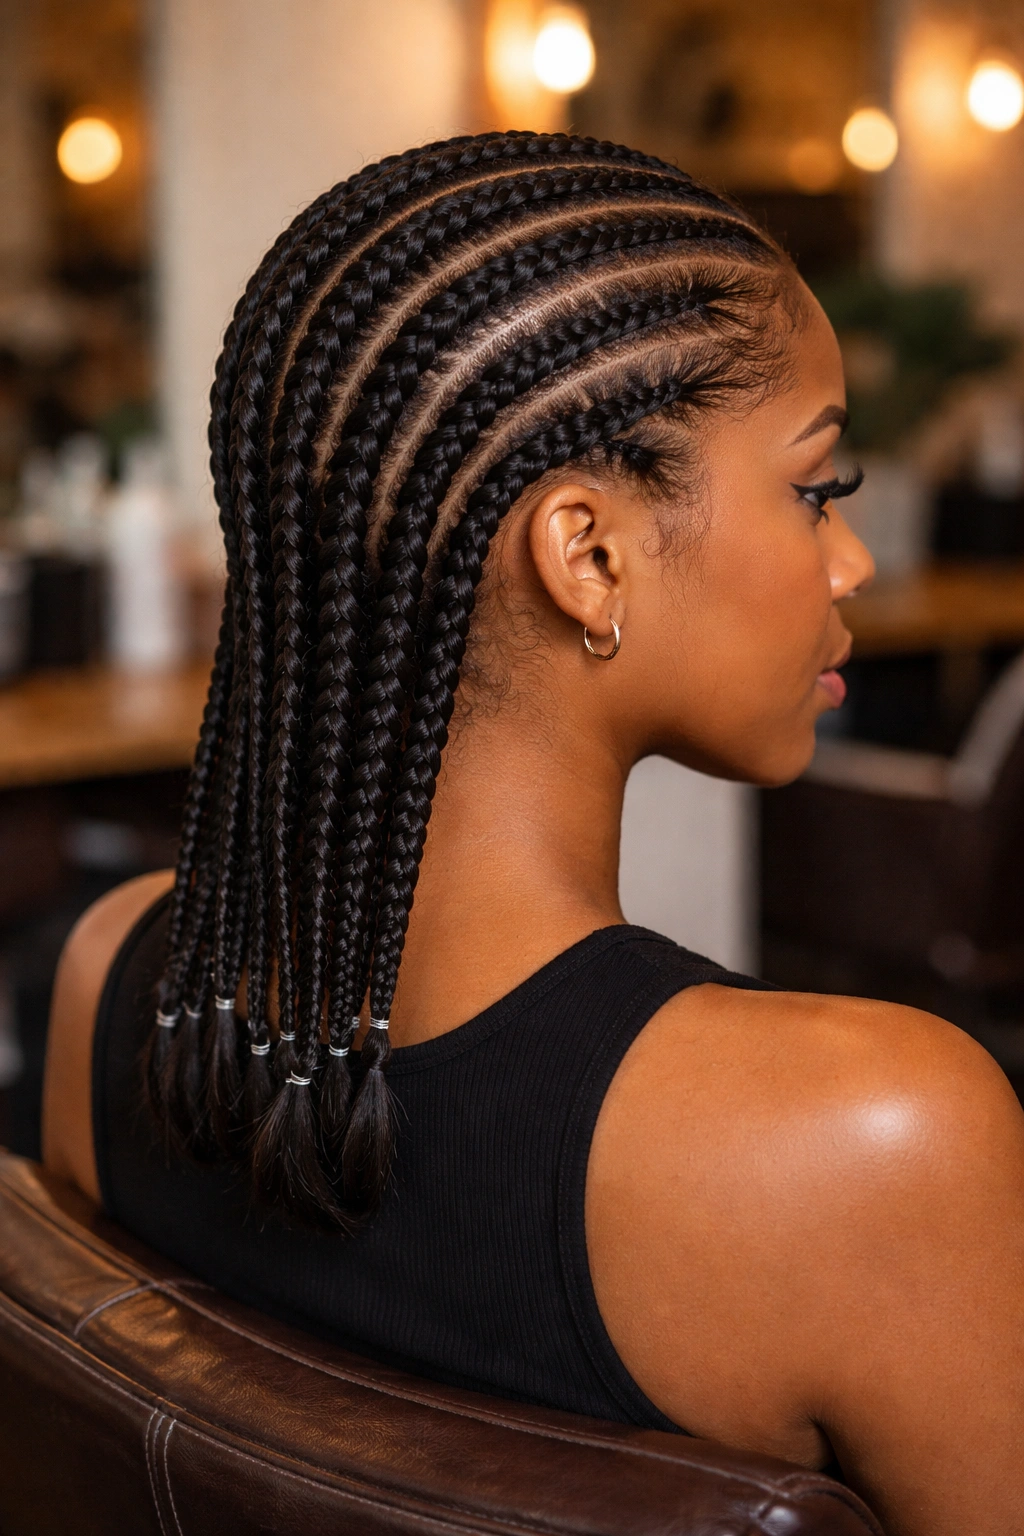
10. Jumbo Cornrows
Four to six thick cornrows running from hairline to nape. That’s the entire style. What makes it distinctive is the scale — each braid is wider than most people instinctively part, giving the head a bold graphic quality that small cornrows don’t.
Who This Is For
Anyone who loves protective styling but hates the 6-hour install time of small braids. Jumbo cornrows go in fast — 45 minutes to an hour for a full head — and they give your scalp breathing room between the wider parts.
The catch: they last slightly less than smaller cornrows because there’s more loose hair within each braid to migrate out over time.
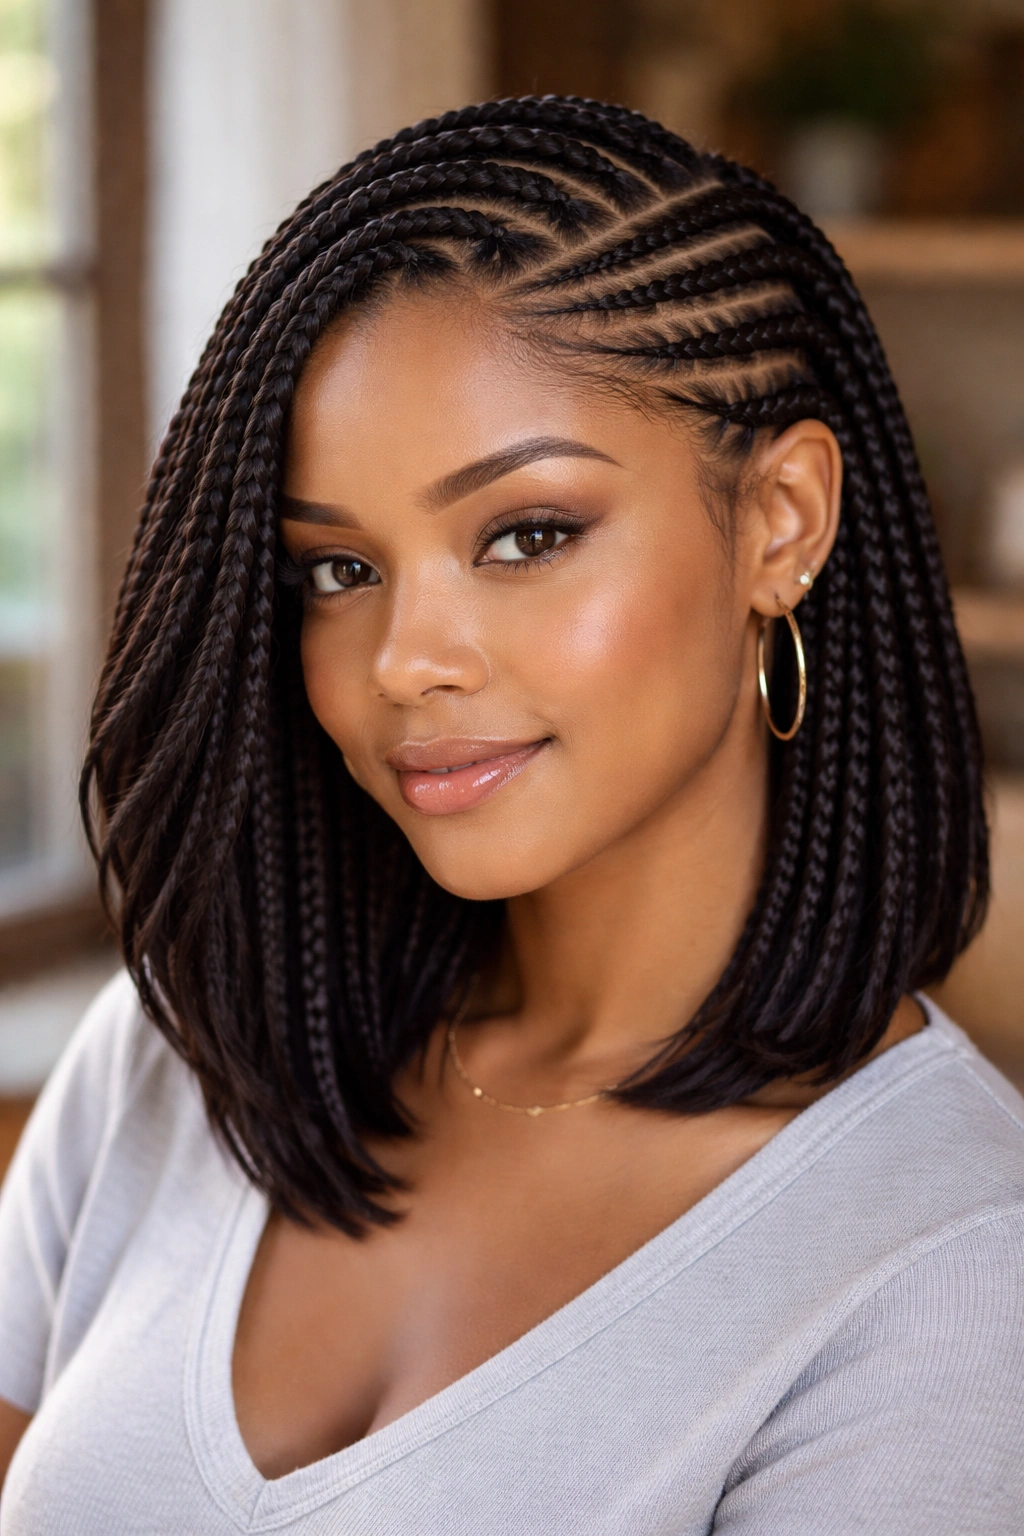
11. Side Cornrows With Loose Curls
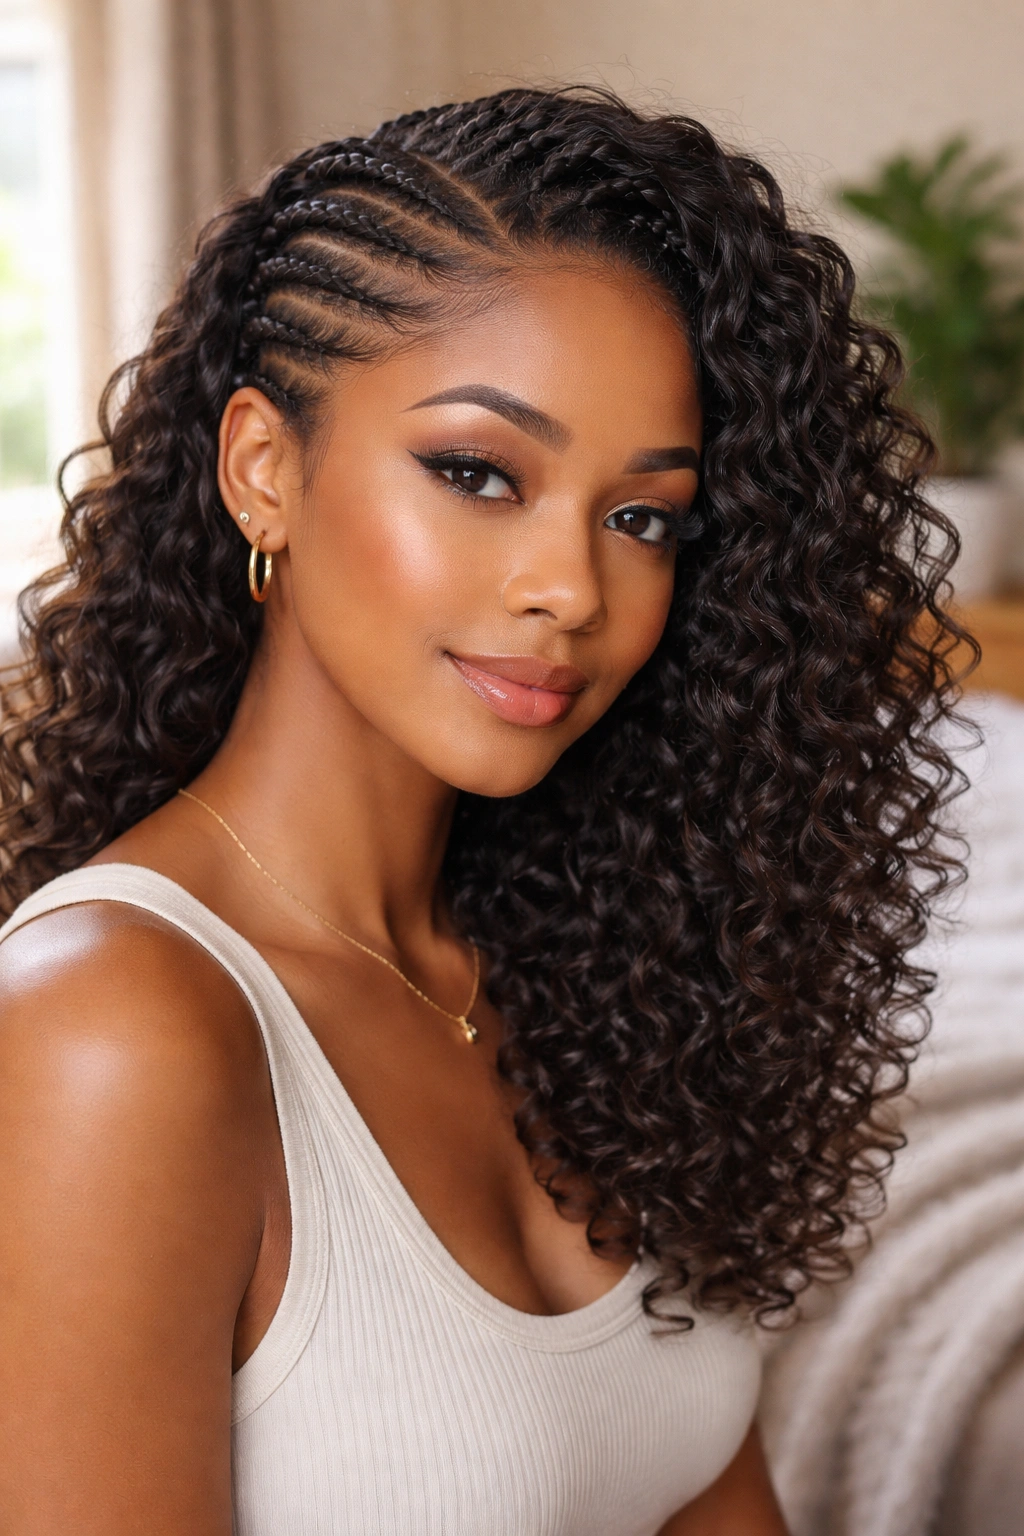
Half the head gets cornrowed — usually from a deep side part to behind one ear, in three to five small cornrows. The other half hangs loose, typically stretched and set in curls or a twist-out for defined texture.
The contrast sells this look. Sleek braided side meets textured loose side. Medium hair makes this easy because the loose side has enough length to read as intentional styling rather than accidental asymmetry.
Sleep with the braided side against the pillow and the loose side protected in a pineapple wrap at the top of the head. Rewrap fresh each morning to keep the curls from flattening.
12. Cornrows With Heart-Shaped Parts
The parting pattern forms small heart shapes across the scalp — usually three to five hearts running down the center of the head, with cornrows flowing out around them. This is detail work. The hearts are the focal point.
Each heart requires curved parts on both sides meeting at a point at the top and bottom. Practice on a mannequin head or even on paper before attempting on yourself or someone else. A slightly crooked heart reads worse than no heart at all.
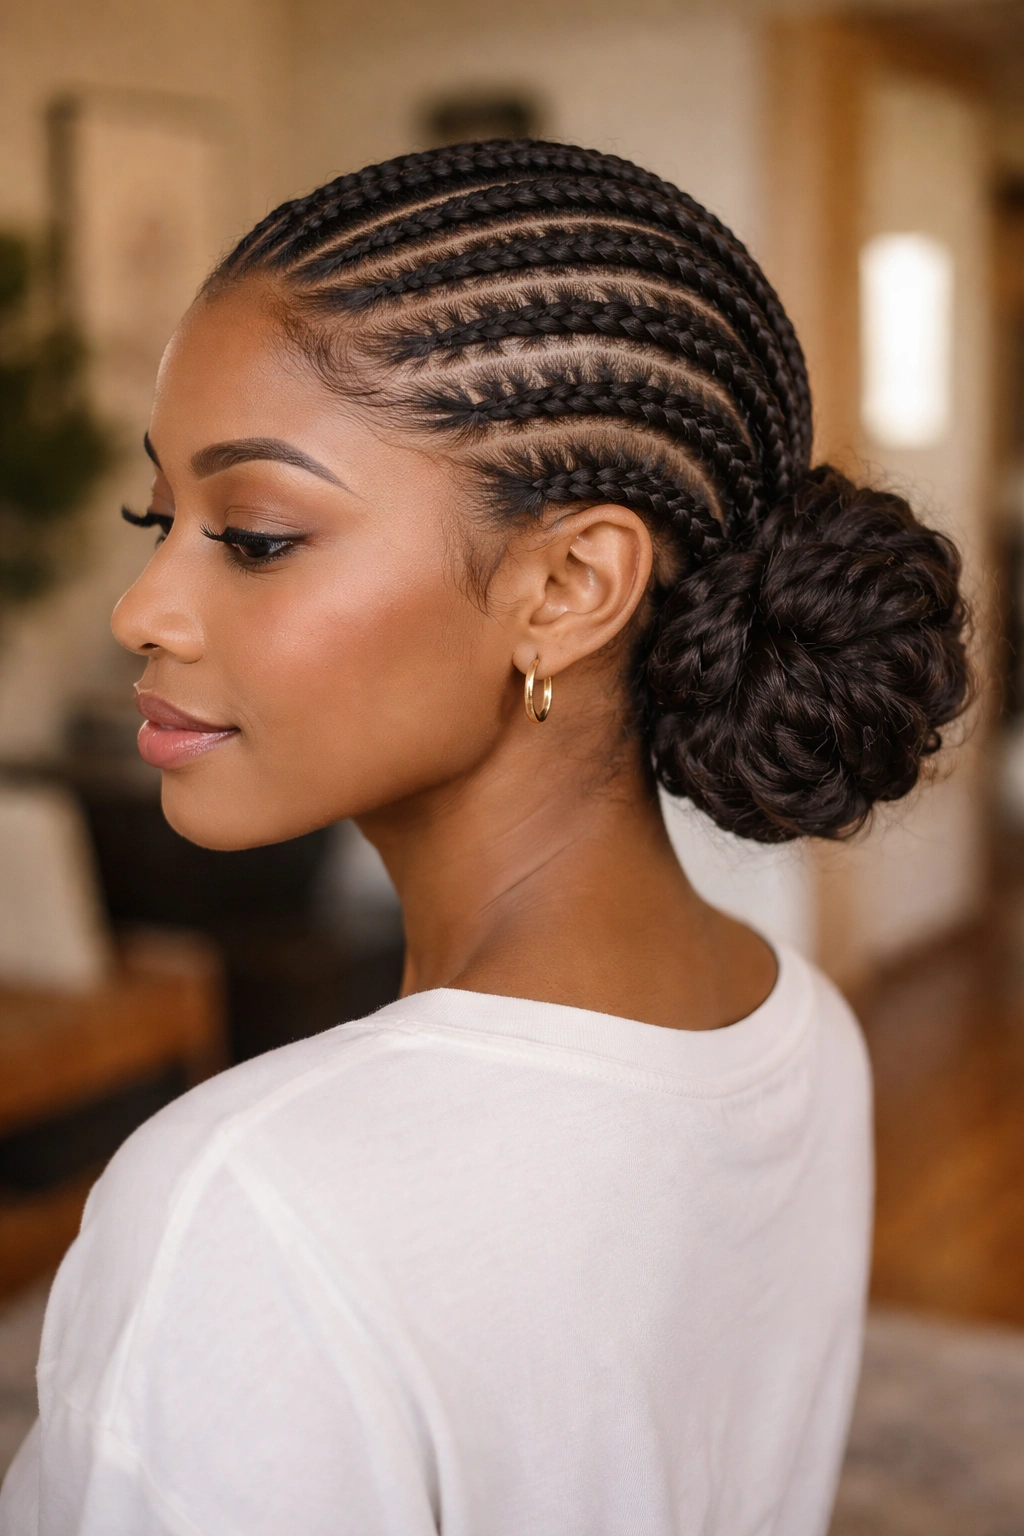
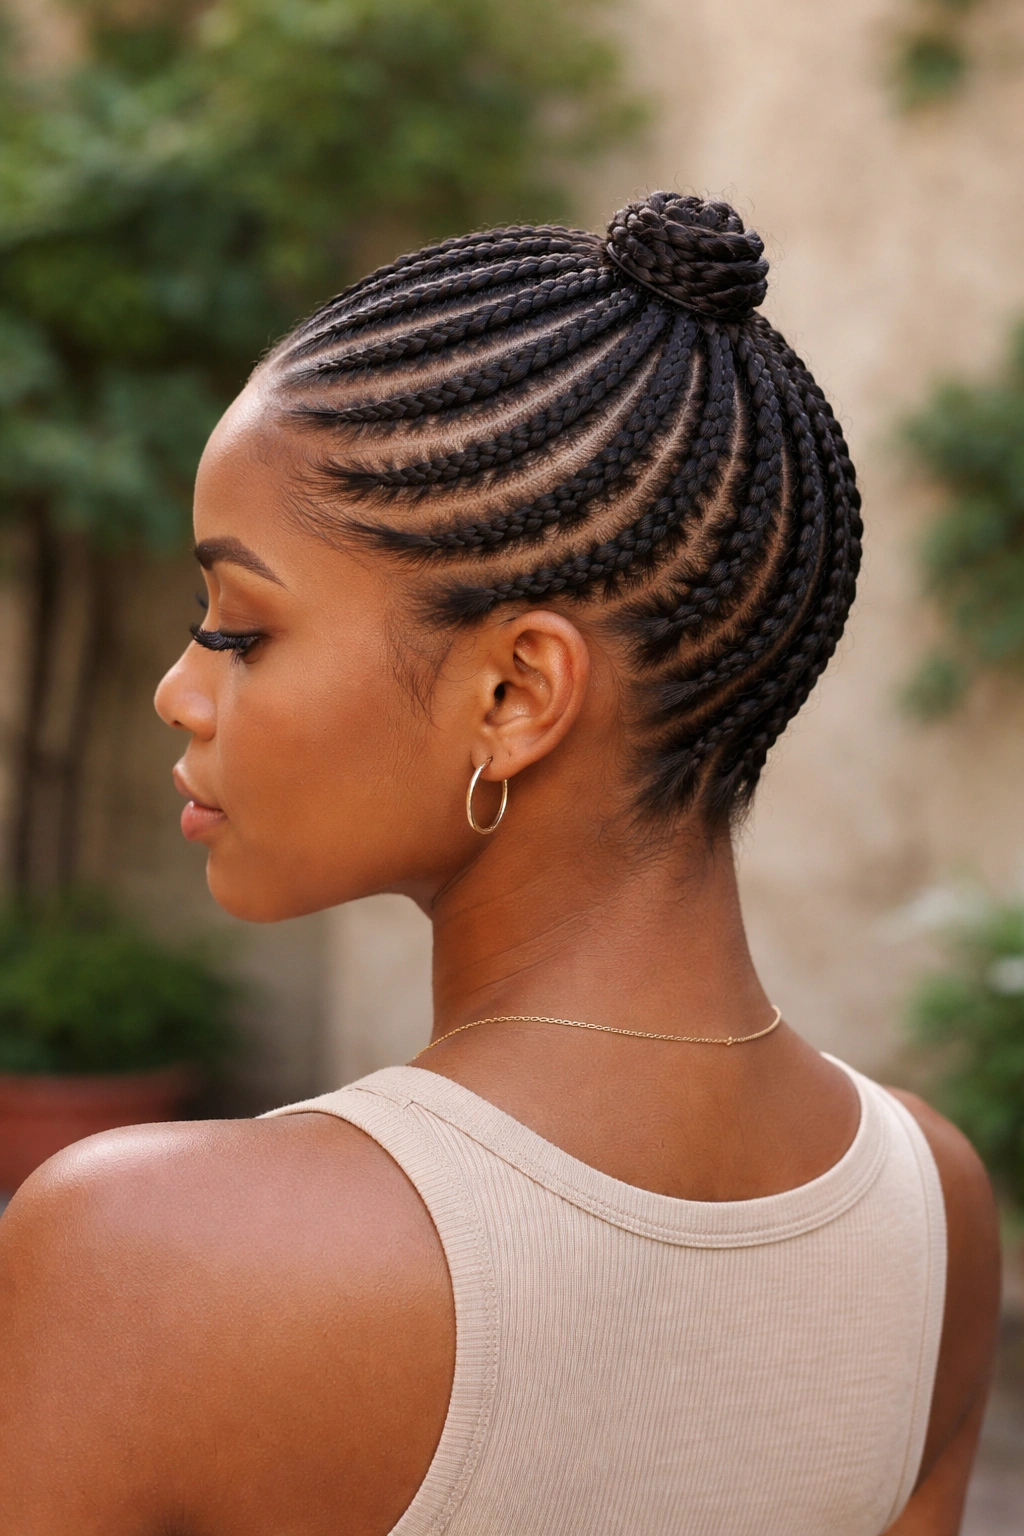
13. Cornrows Leading Into a Bun
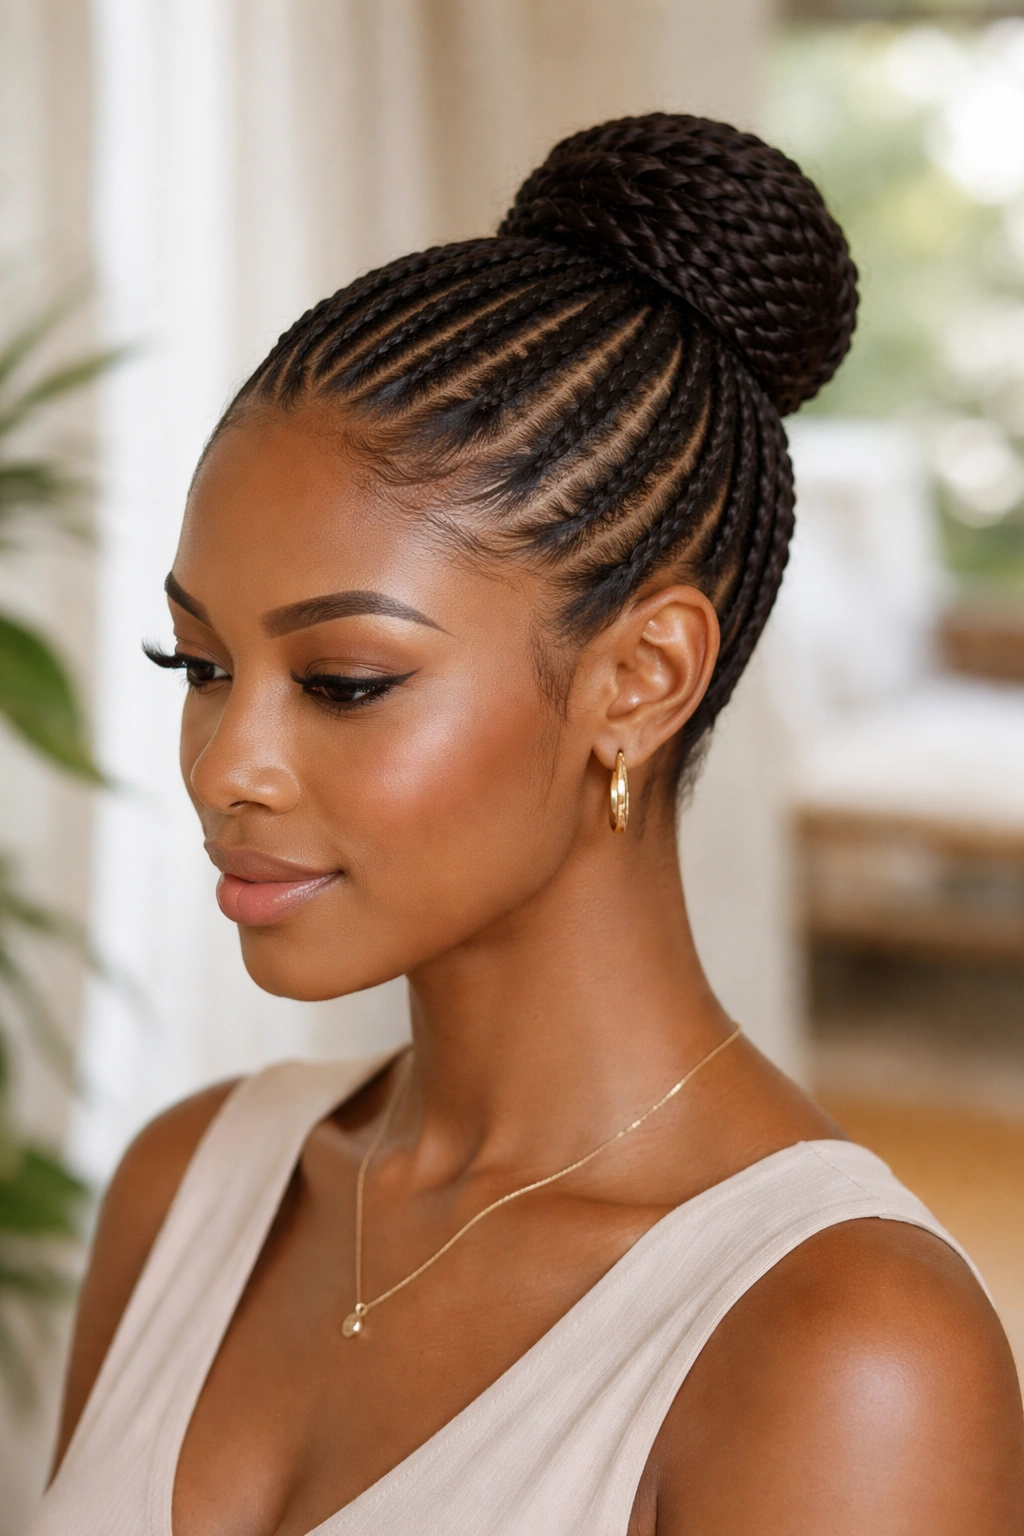
Start with cornrows across the scalp, then gather all the ends at the crown, back, or nape and twist them into a bun. The finished look reads polished and bridal-adjacent when done cleanly — suitable for weddings, professional settings, and events where you want structure without looking overly braided.
Medium hair creates a modest but substantial bun without extensions. For bigger bun volume, add a donut form underneath or braid in a small amount of extension hair just at the ends of each cornrow.
14. Cornrows With Curly Hair Extensions

The cornrow portion runs from forehead to about the mid-scalp, then the ends release into curly bundle extensions that hang loose. You’re getting the sleek-at-the-top, voluminous-at-the-bottom look that has been a mainstay of protective styling for generations.
Styling Tips
Curly bundles need to be rinsed and re-curled every 4-5 days to maintain shape. Use a spray bottle with water and a leave-in conditioner, then finger-coil the curls back into definition. Air dry or sit under a hood for 20 minutes.
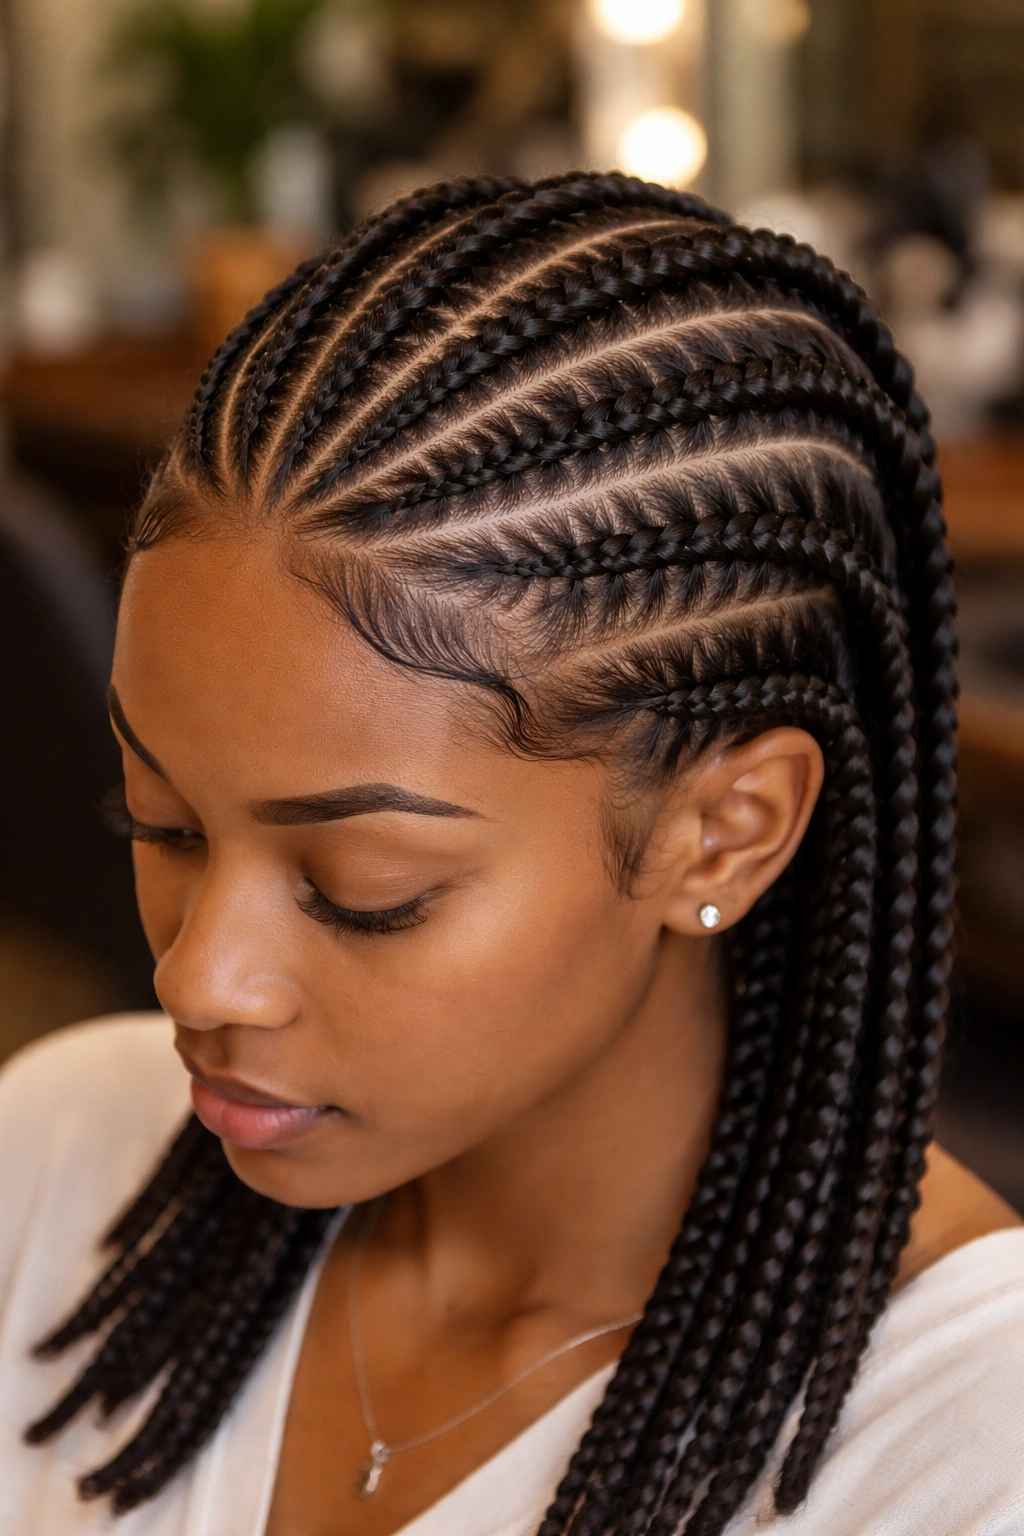
15. Diagonal Cornrows Across the Head
Every braid runs at a 45-degree angle rather than straight back. The cornrows start at the right hairline near the temple and travel down to the left shoulder — or reversed — creating diagonal flow that reads visually dramatic from any angle.
This style photographs well from the side because the angles create natural leading lines. Face-forward, it reads as an asymmetrical braided helmet. Medium hair handles the diagonal angle cleanly because there’s enough length to show the direction but not so much that the ends bunch awkwardly at the shoulder.
16. Cornrows With Color Blocking
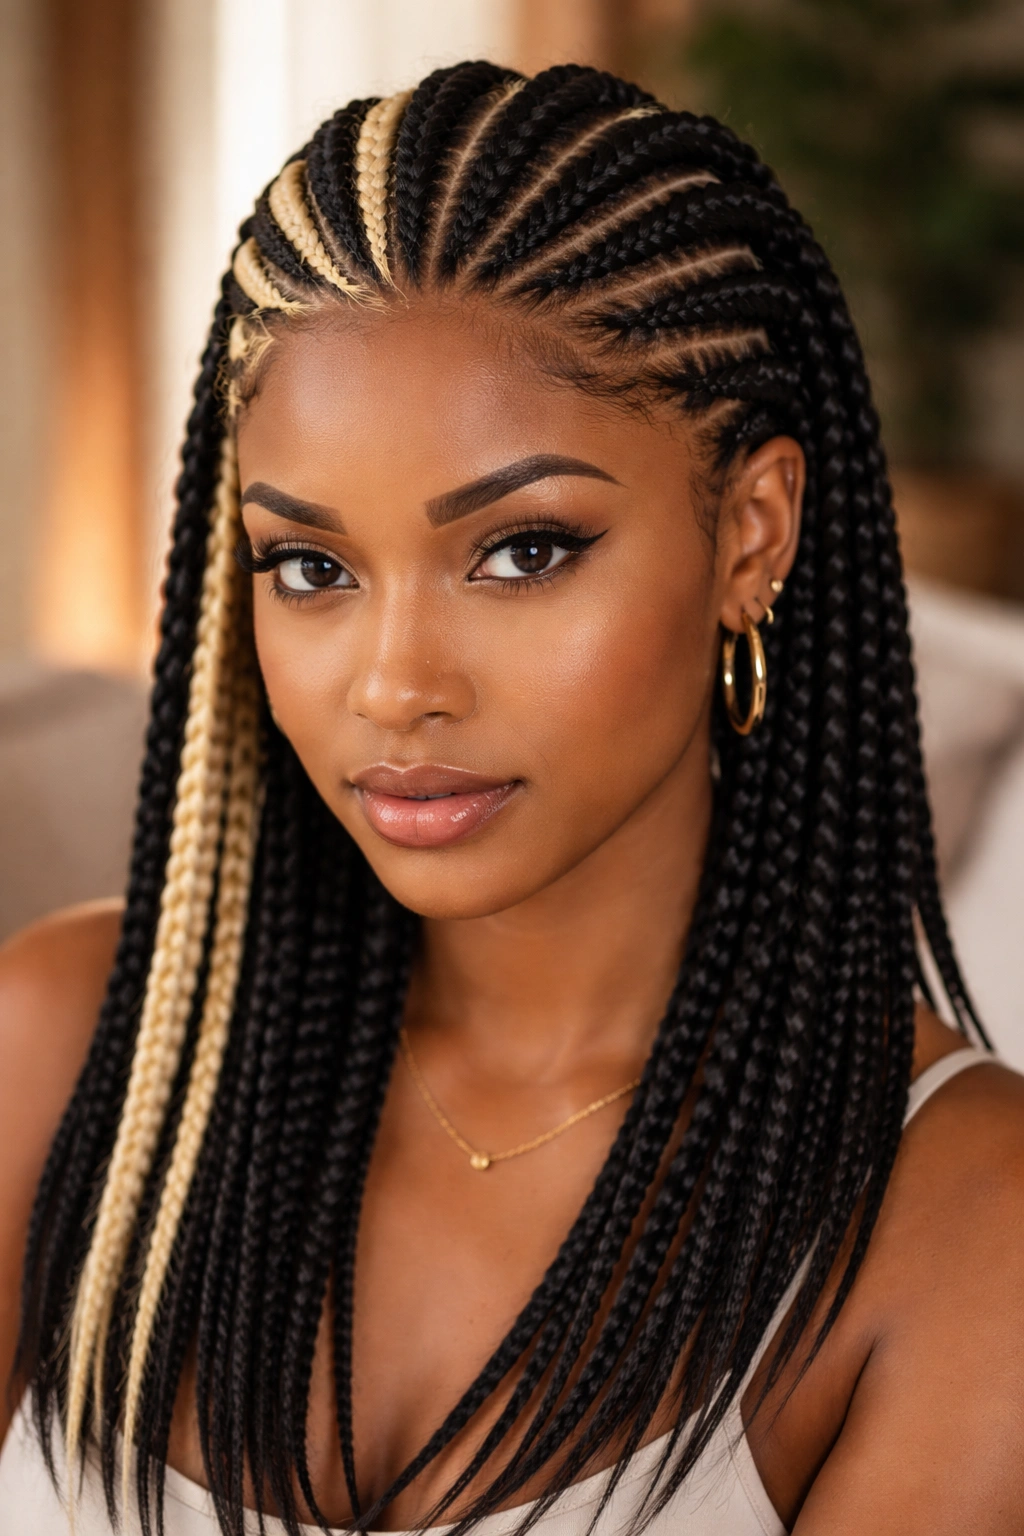
Two-tone cornrows where sections are braided with different colored kanekalon. Common approaches: a full head of black cornrows with one or two blonde or burgundy highlight braids positioned at the front, or a half-black, half-colored split with the color concentrated on one side.
Color placement matters. A single blonde cornrow on the crown draws the eye up. A cluster of three colored cornrows framing the face brightens complexion. A bottom layer of color visible only when the braids are pulled up gives a peekaboo effect that changes the look depending on styling.
17. Fulani Braids With Cornrow Base
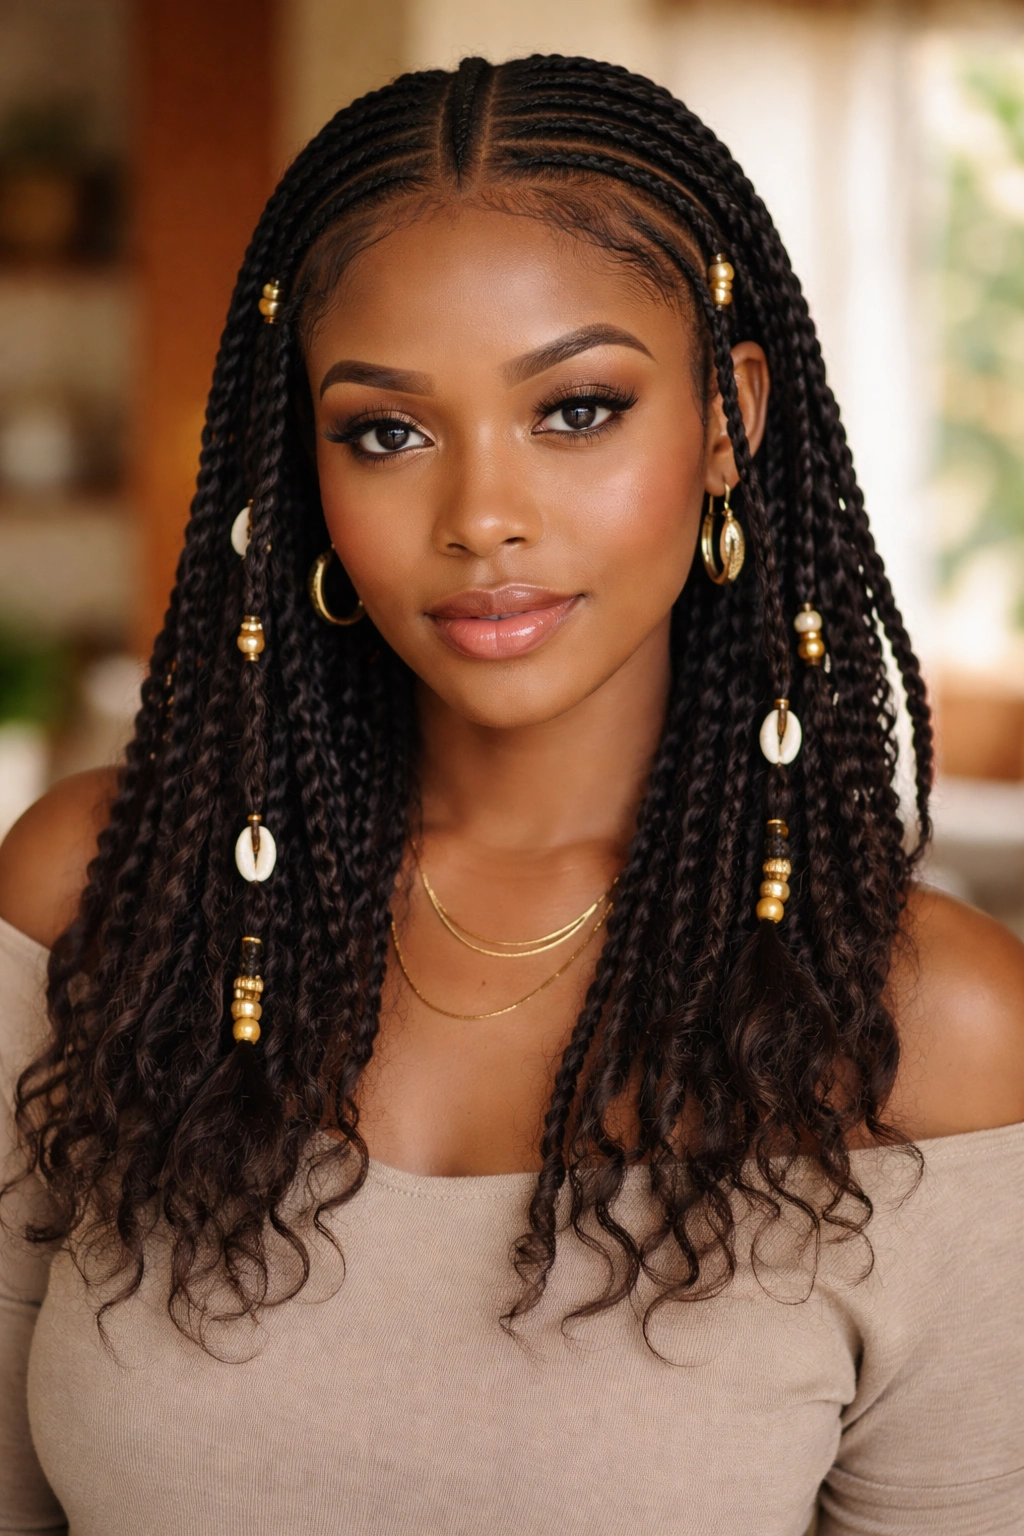
Fulani braids combine straight-back cornrows along the center of the head with looser side braids framing the face, often decorated with cowrie shells, beads, or metal cuffs. The style has roots in the Fulani people of West Africa and carries cultural weight that goes back centuries.
On medium hair, a few small kanekalon additions along the center can give the style its signature length without overloading the head. The beads and cuffs do most of the visual work — the braids themselves stay simple.
18. Cornrows Braided Into a Low Side Bun
All braids flow into a low side bun sitting behind one ear. This reads soft and romantic in a way that most cornrow styles don’t usually aim for, making it a solid option for formal events where you still want the protection of braids.
The bun itself should be just loose enough to have shape without being floppy. Pin with U-pins color-matched to your hair. Mist with a light hold spray only — too much product flattens the bun.
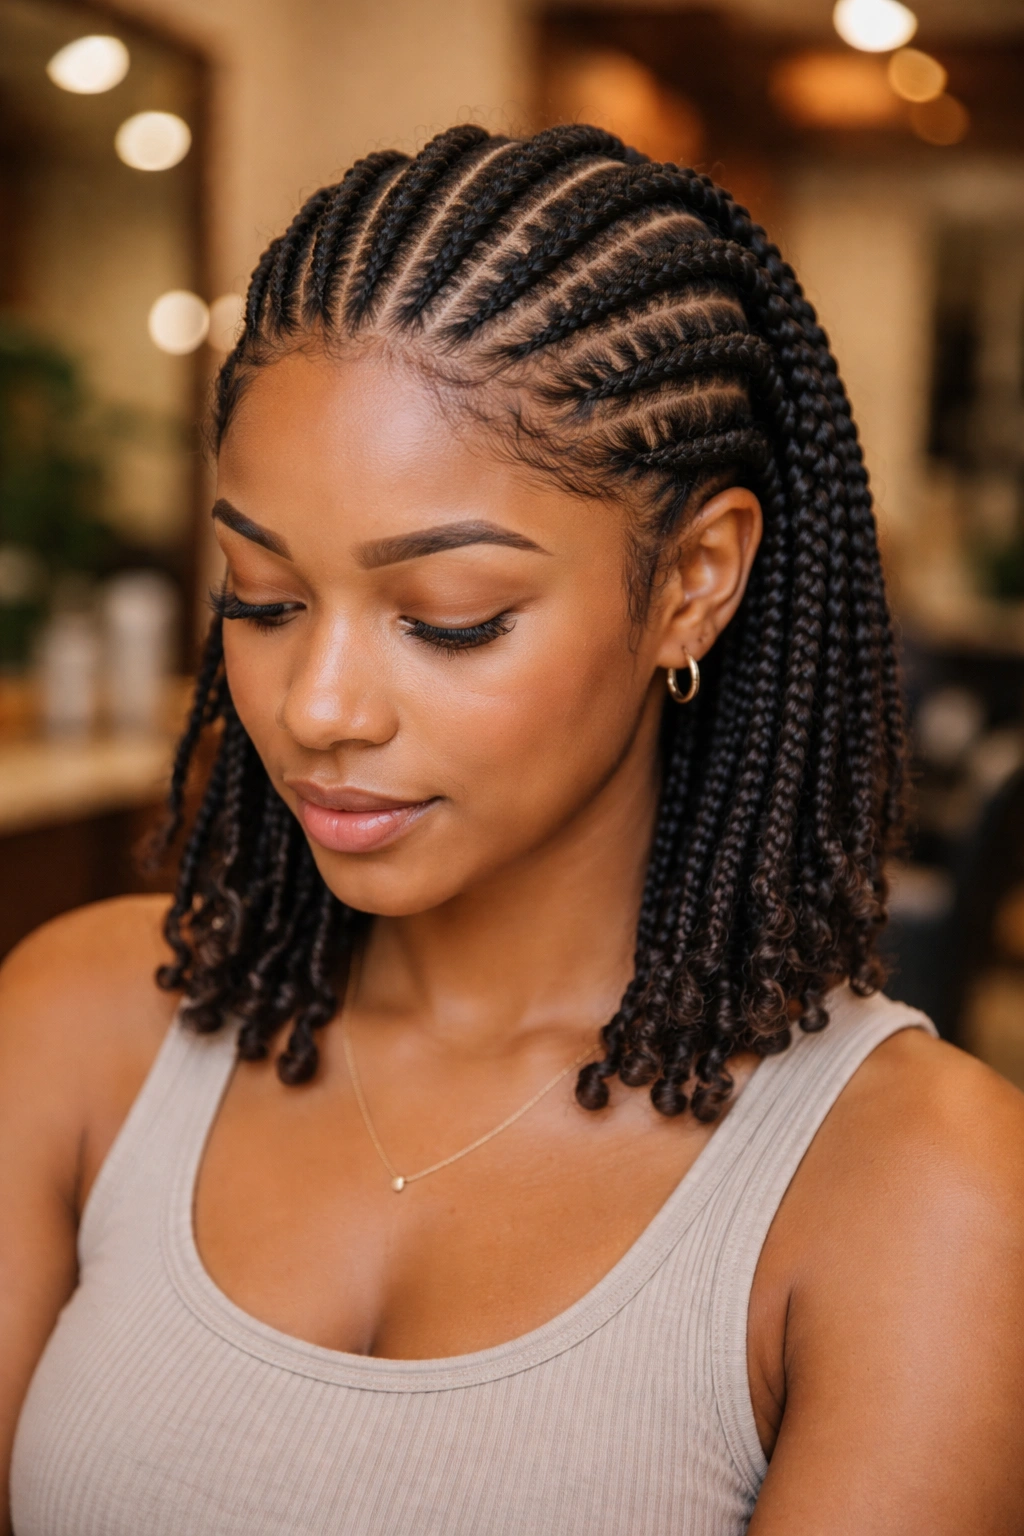
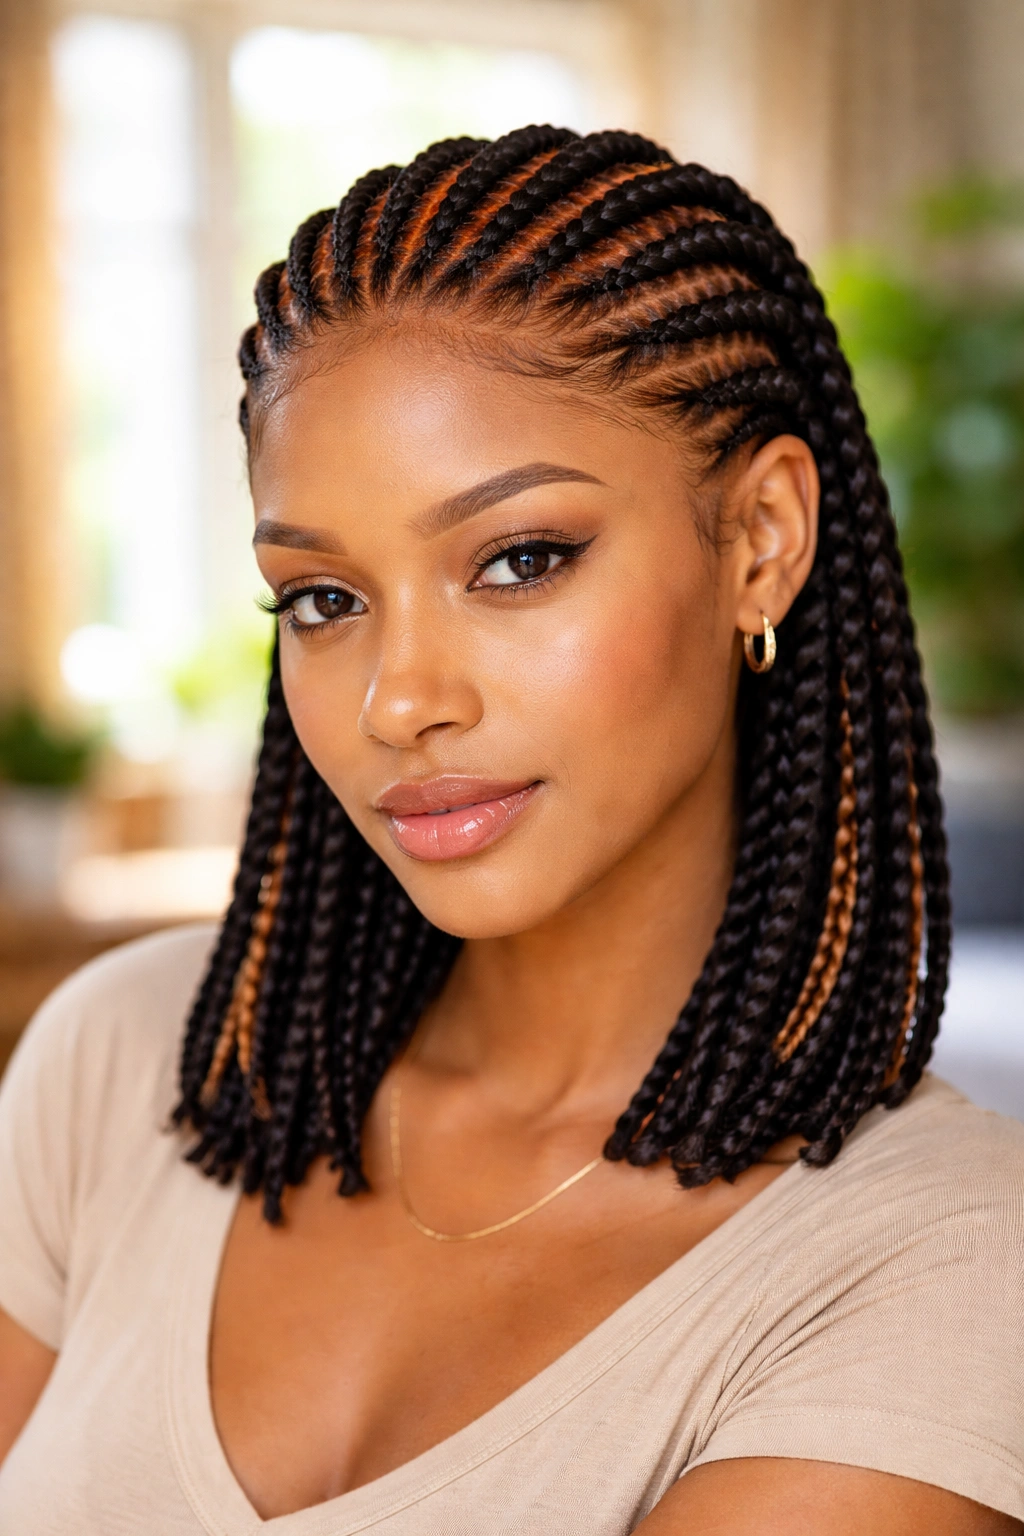
19. Cornrows With Loose Ends
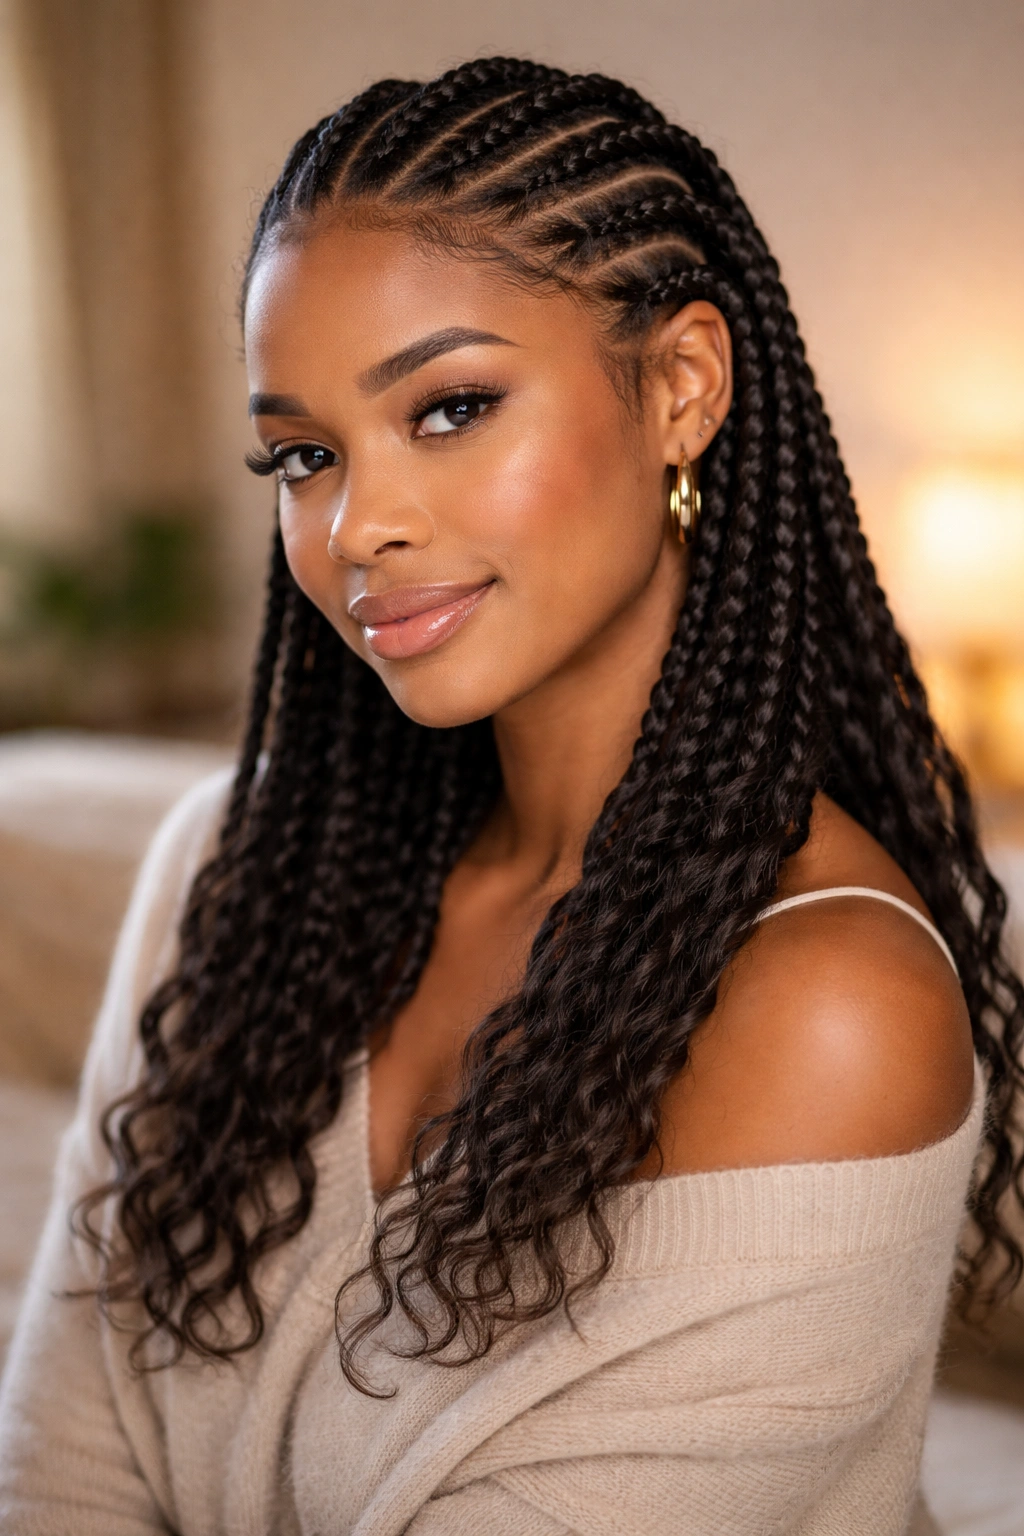
Here’s where medium hair shines. The cornrows stop about 2/3 of the way down and the remaining hair hangs loose, either in its natural texture or styled into waves, curls, or a straight finish.
The Catch
The loose ends need protection. Satin bonnet at night, non-negotiable. If you’re using heat to style the ends, use a heat protectant and keep the iron at the lowest setting that actually shapes the hair. Repeated heat damage on loose ends defeats the protective purpose of the cornrows above.
20. Stitch Cornrows
Also called ridge braids or stitch braids. The braider adds small “stitch” details along the length of each cornrow by pulling out tiny sections of hair and re-braiding them — creating horizontal stitch lines that run perpendicular to the braid direction.
The effect reads textural and intricate. Done well, stitch cornrows have a knitted or woven quality that elevates basic straight-backs into something more art-directed. Done poorly, the stitches look fuzzy and uneven.
Stitch work adds roughly 30-50% to install time. Budget 4-5 hours for a full head of medium stitch cornrows.
21. Tribal Cornrows With Cuffs
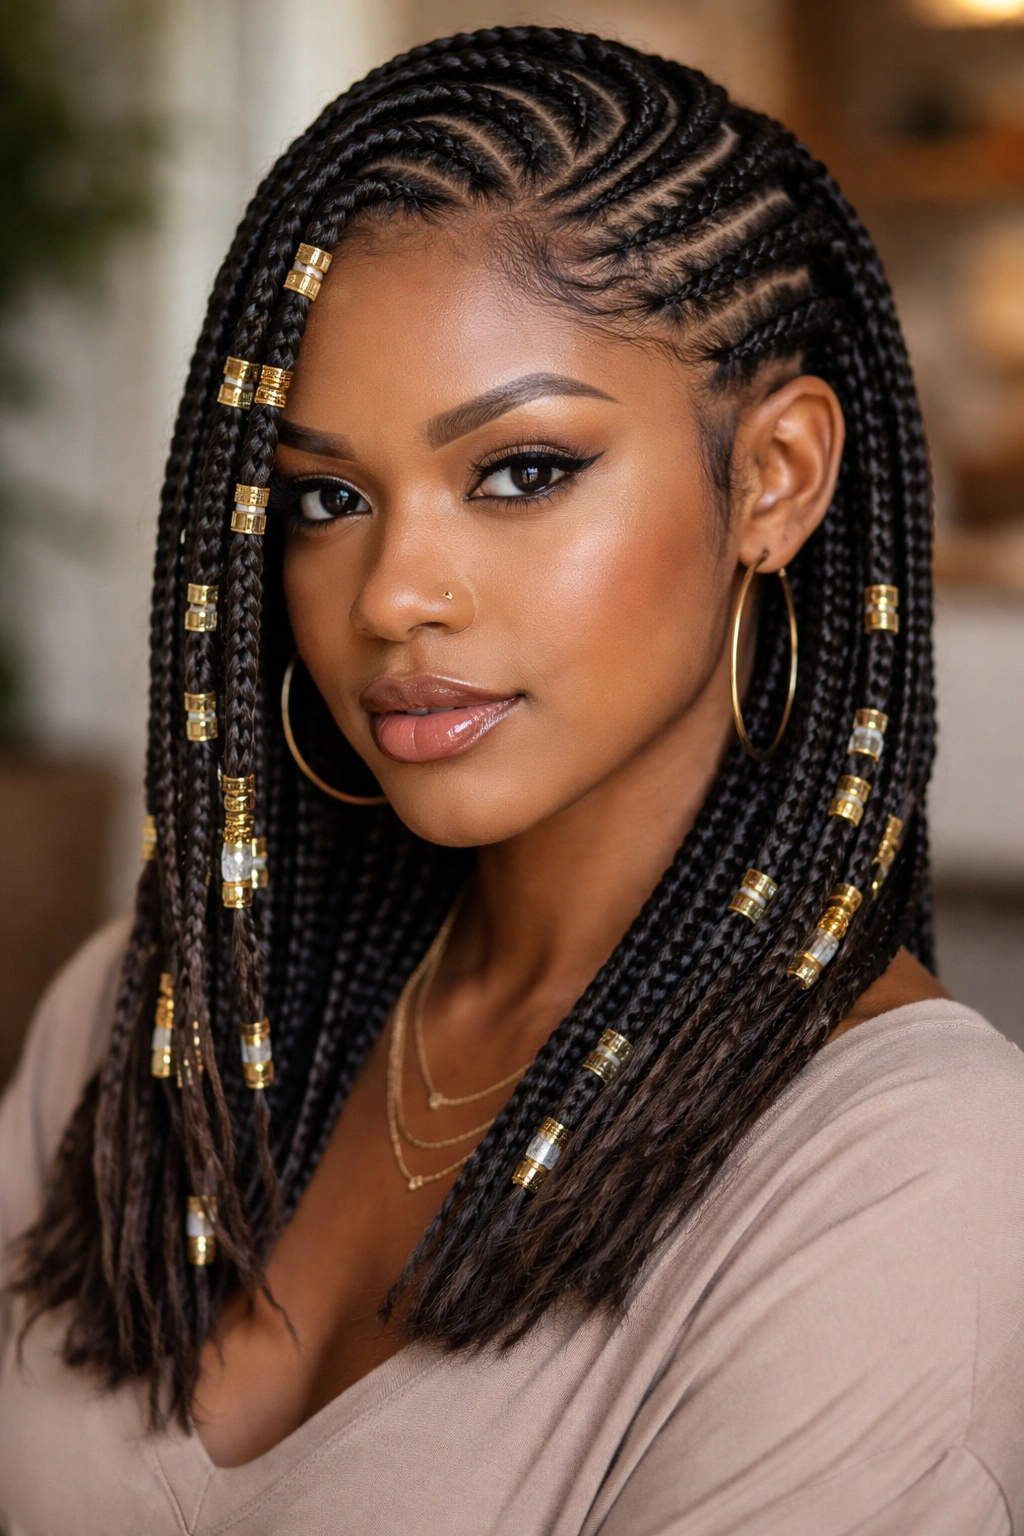
Tribal style means a mix of braid sizes — some jumbo, some medium, some small — arranged in a deliberate pattern across the head. Metal cuffs, beads, and accent braids scatter through the install, usually concentrated at the front and along one side.
What sets tribal apart from other cornrow styles is the intentional asymmetry. Most cornrow patterns aim for even spacing. Tribal leans into uneven sizing and irregular placement as a design choice.
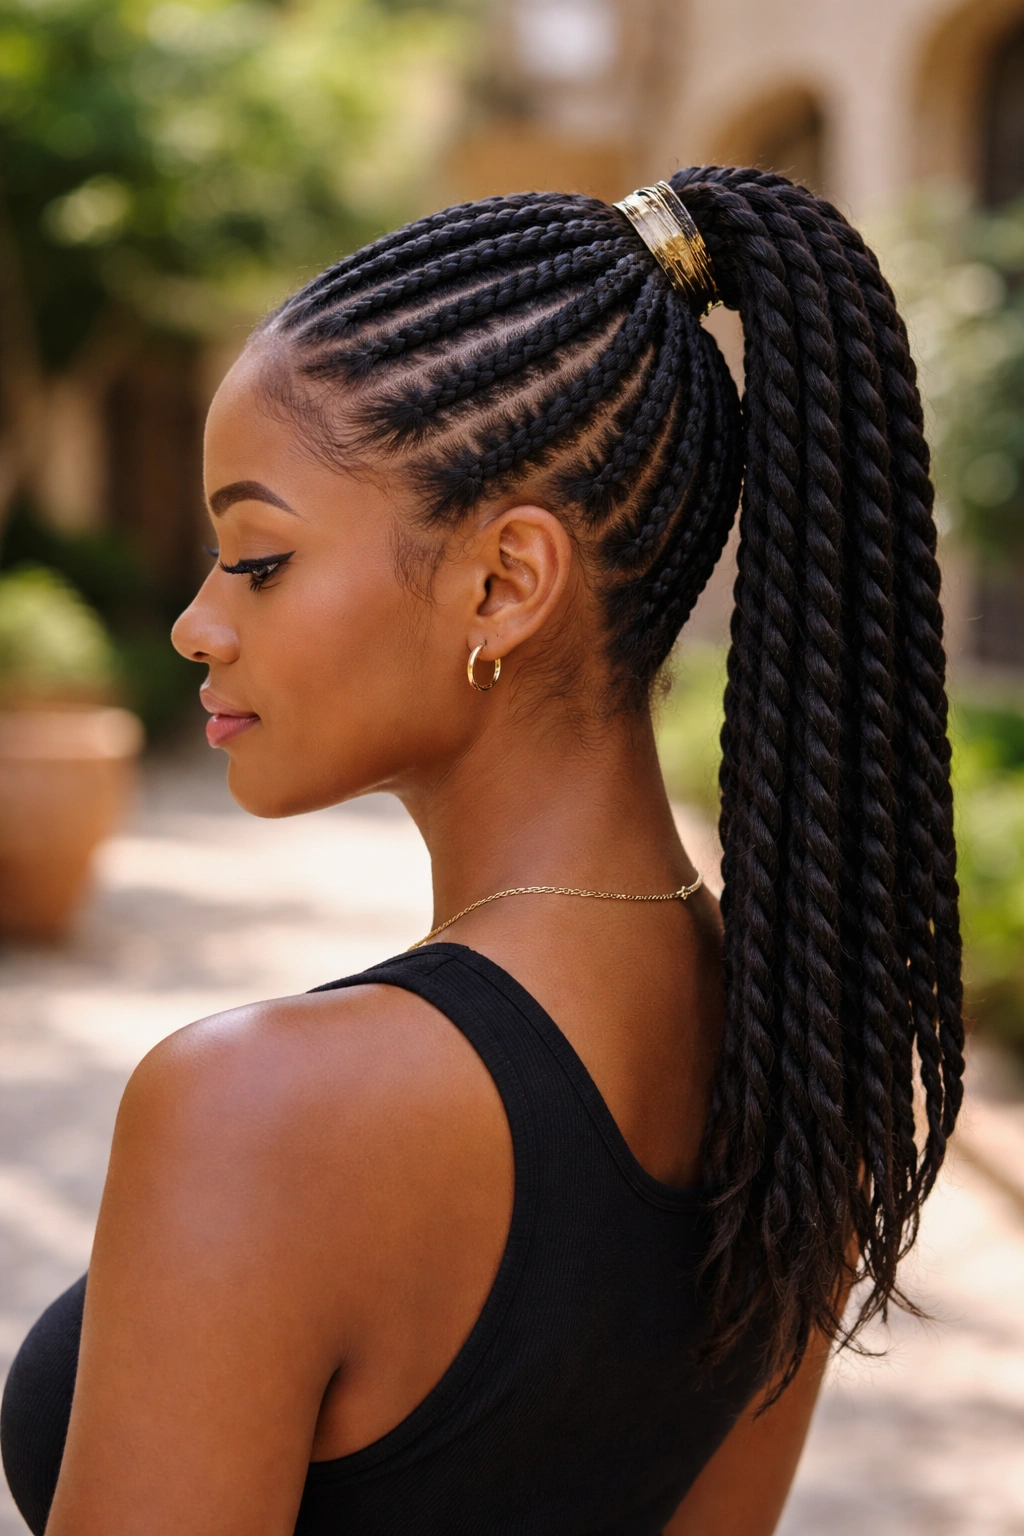
22. Cornrows Into Senegalese Twists

The top half is cornrowed tight to the scalp. The ends release into Senegalese twists that hang loose — usually with kanekalon or similar fiber added for length and smooth finish.
This hybrid gets you the scalp-flat coolness of cornrows with the movement and length of hanging twists. It’s also one of the longer-wearing styles on this list — the cornrow base doesn’t frizz nearly as fast as full-head twists, and the loose twists can be redone in 30 minutes when they start to look rough.
23. Cornrows With Shaved Side Detail
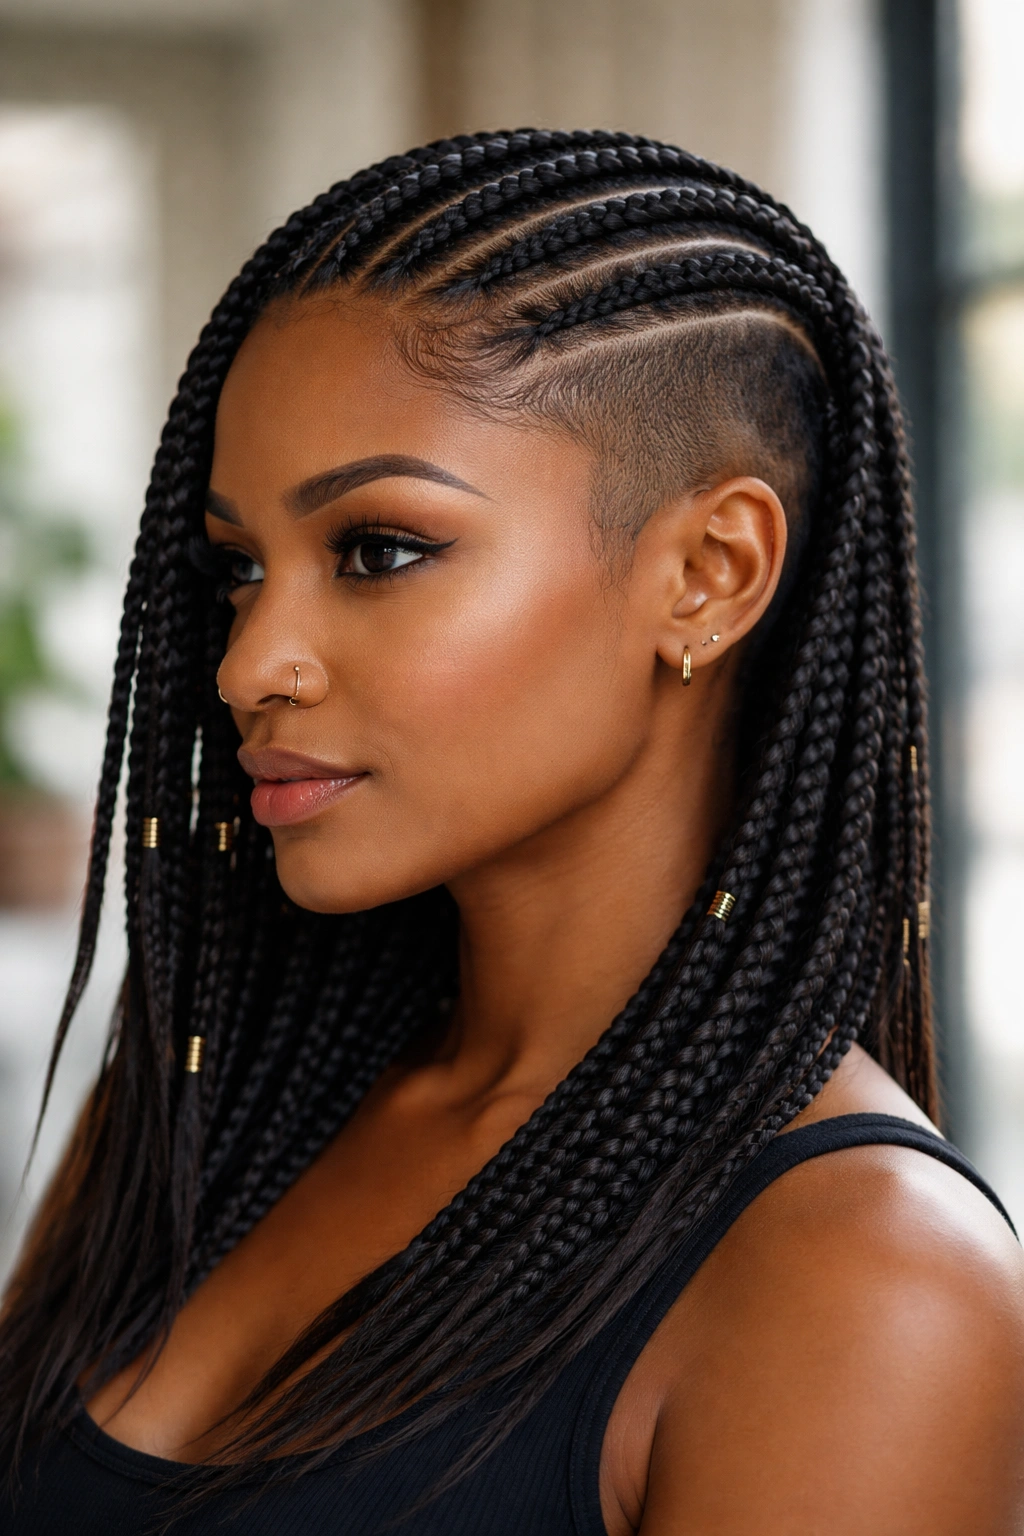
A small shaved strip on one side of the head, with cornrows flowing over the top and opposite side. The shaved section creates hard-edge contrast against the soft parallel lines of the cornrows.
Maintenance Notes
The shaved area needs upkeep every 1-2 weeks to stay sharp. Let it grow out and the contrast disappears — the style relies on the shaved portion staying visibly bare.
Keep the shaved section clean with a moisturizer rubbed in after washing. Dry skin on a shaved scalp shows up fast and visibly.
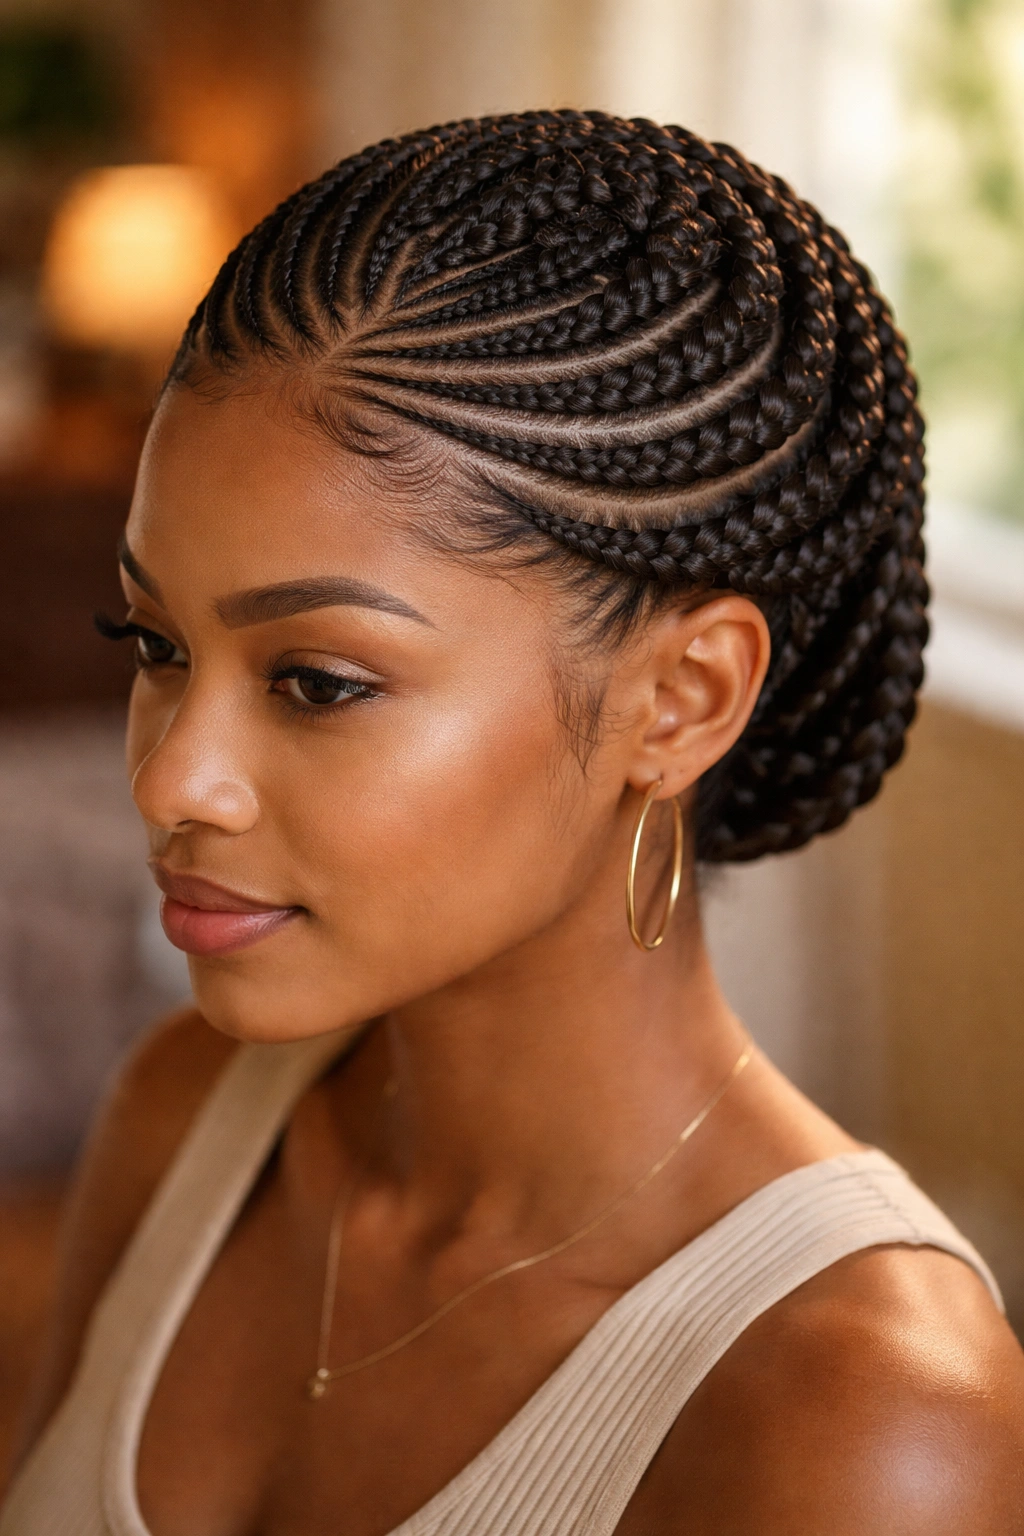
24. Cornrows Spiraling to a Crown Point
Every cornrow begins somewhere around the perimeter of the head and spirals inward to meet at a single point on the crown. Done well, the finished look resembles a sunburst or an unfolding flower — each braid becomes a ray.
The center point can be secured with a single elastic, finished with a bantu knot, or capped with a decorative cuff. The difficulty sits in keeping the curves even as they travel to the center. One off-angle cornrow breaks the symmetry.
25. Cornrows With Accent Color at the Roots
A tonal treatment where the roots of the braids show a different shade than the lengths. Some achieve this with root shadow color, others with feed-in extensions that are slightly different in tone from the natural hair base.
The finish reads like an expensive highlighting job without any actual chemical color. It’s a low-commitment way to try a new tone against your skin before committing to full dye — and it takes down with the braids whenever you’re ready for a change.
Maintenance Through the First Two Weeks
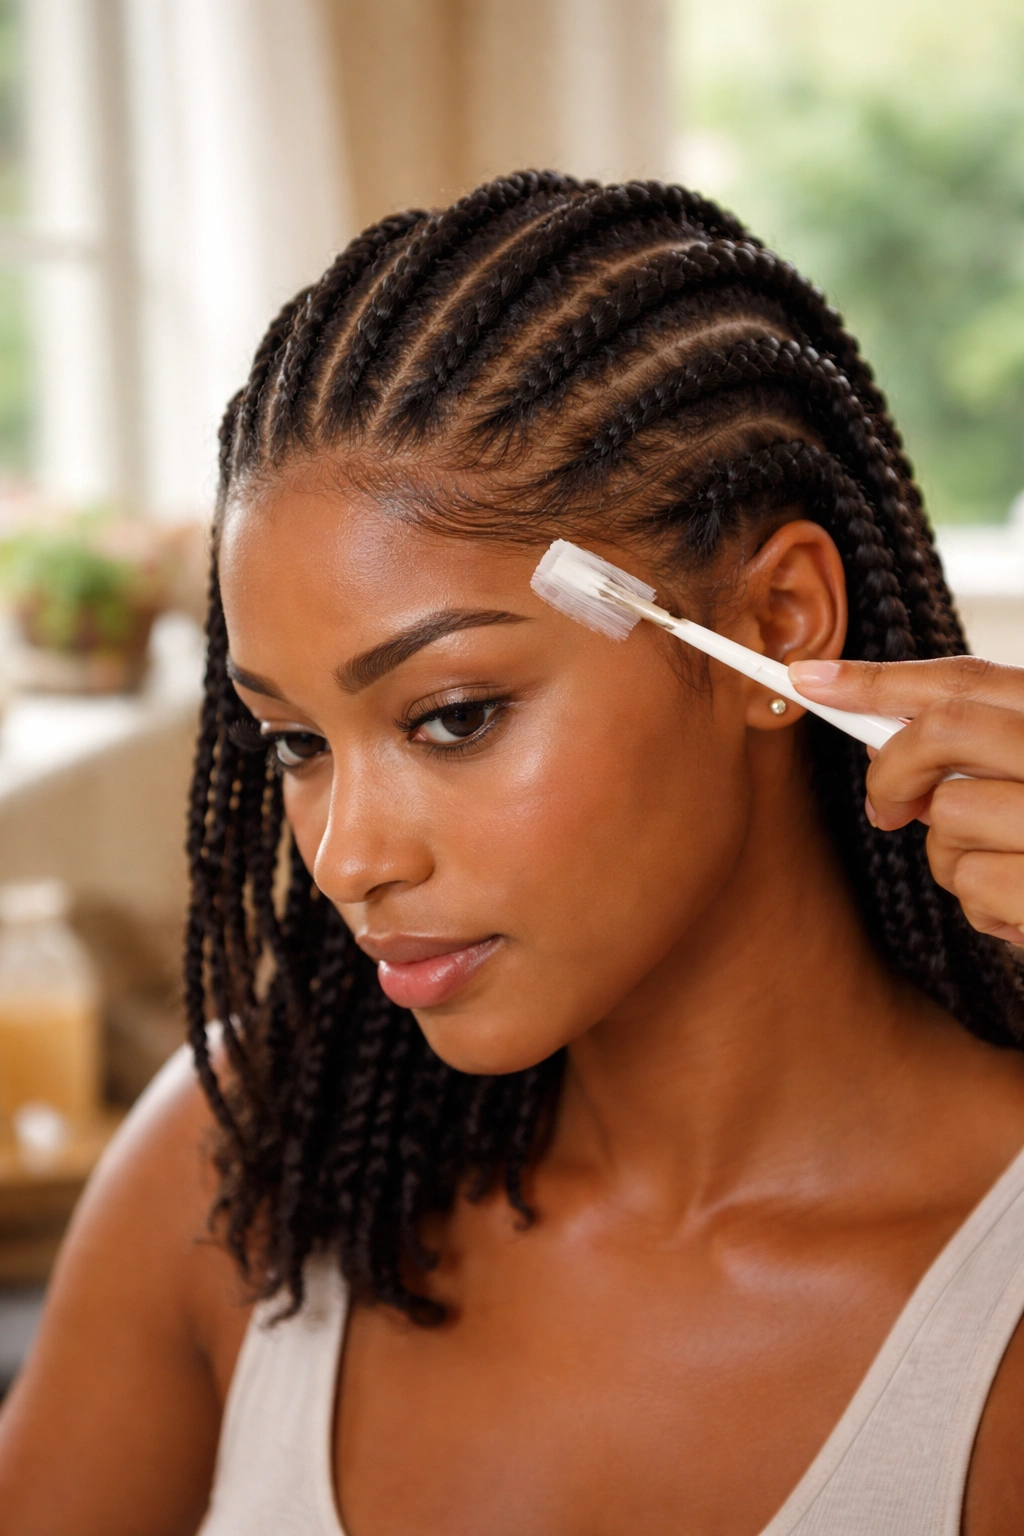
The first 48 hours are the most important. Avoid heavy manipulation. Don’t wrap too tight. Don’t pull hair back into a tight ponytail that stresses the parting work. The hair needs to settle into the braids.
By the end of week one, you’ll notice some frizz at the hairline and around the ears. This is normal. Lightly smooth with a tiny amount of edge gel on a soft toothbrush — not the entire edge, just the fuzzy spots.
Week two is where scalp care becomes non-negotiable. A dry scalp applicator filled with a light oil-and-water mixture (jojoba, peppermint, water, aloe juice) applied directly to the parts refreshes everything without weighing down the braids.
Scalp Care That Protects Long-Term Hair Health
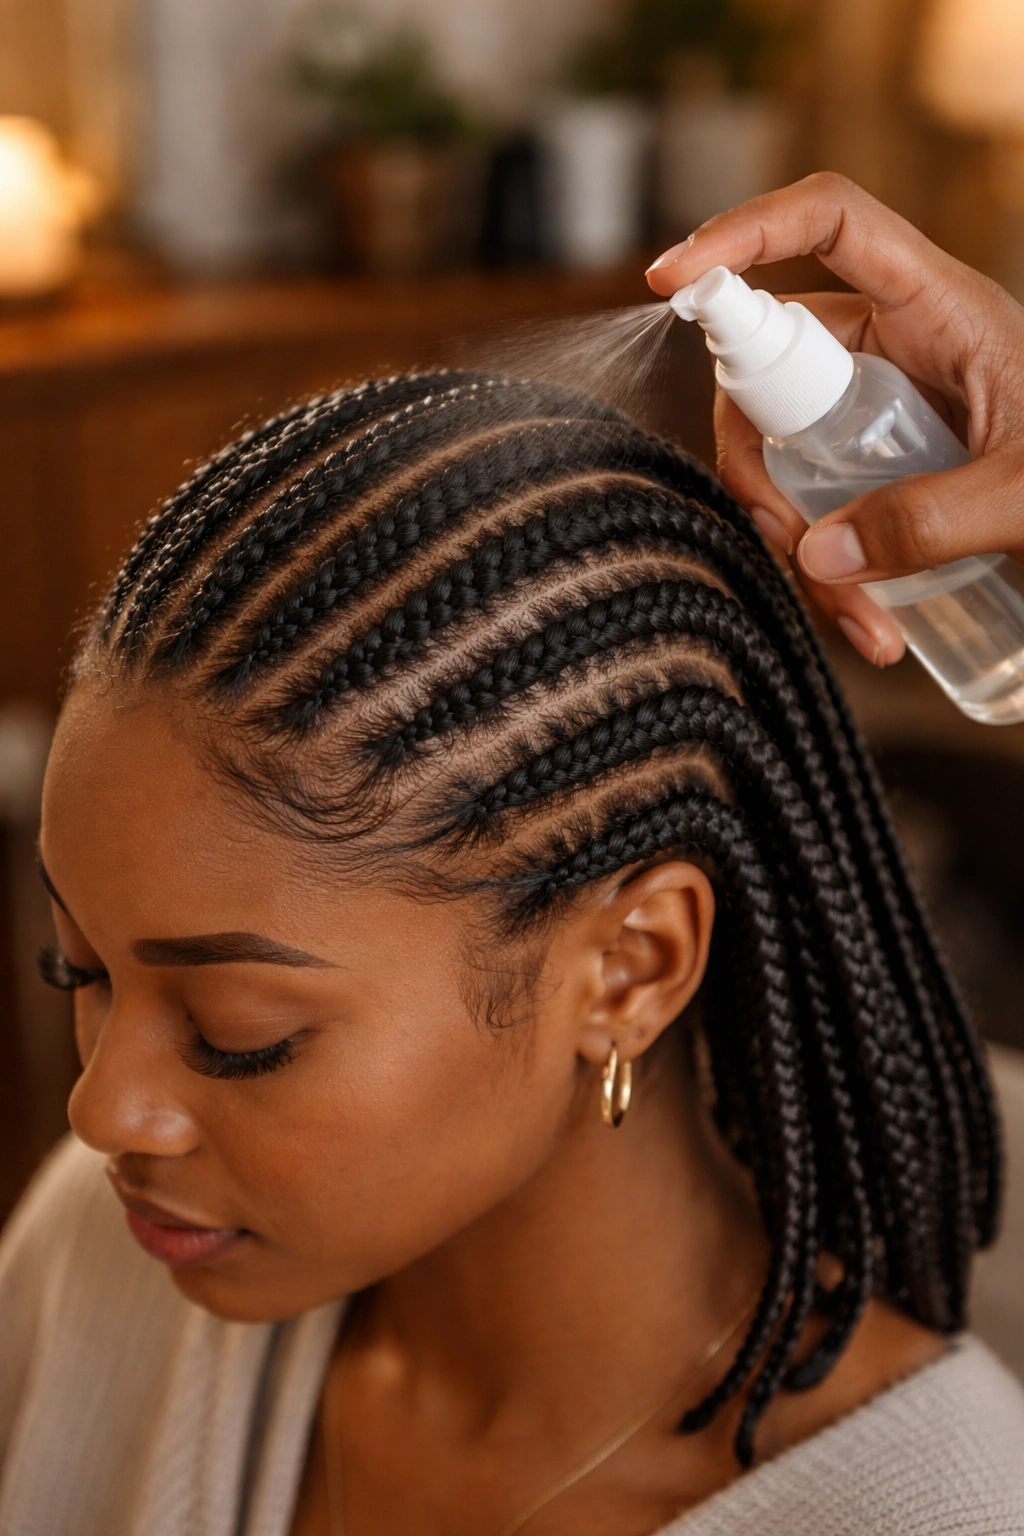
Cornrows can sit for 2-4 weeks on medium hair before they start to look rough. The scalp underneath, though, still needs attention throughout. Dry scalp under braids leads to flaking, itching, and — if ignored — the kind of buildup that makes takedown painful.
Mix a scalp spray once a week: 2 oz witch hazel, 2 oz distilled water, 5-8 drops tea tree essential oil, 5 drops peppermint essential oil. Spritz directly into the parts. The witch hazel clears oil and sweat. The tea tree addresses any bacterial buildup. The peppermint feels cool on the scalp and stimulates blood flow.
Pat the parts dry with a clean microfiber towel after spraying. Don’t rub — rub creates friction and frizz.
Takedown Without the Breakage

When braids come out, they come out with a tangle of shed hair. That’s expected. On medium hair, shed hair has less distance to work through to exit, which is why medium hair cornrows take down faster than long-hair cornrows.
Work from the ends up. Never rip from the roots. Saturate each braid with a conditioner-and-water mix in a spray bottle before unraveling. Unravel with fingers first. Only switch to a wide-tooth comb once the braid is fully loose.
Shed hair is normal. A full head of medium cornrows worn 3 weeks can release a visible handful of hair at takedown — this is 2-3 weeks of normal daily shedding that had nowhere to go. It’s not breakage.
Picking the Right Style for Your Head Shape and Lifestyle
Round face? Avoid halo styles that add width at the sides. Stick to vertical flows like straight-backs and sweeps that add visual height.
Oval face? Most styles work. Play with asymmetry and curves.
Long face? Lemonade braids and side-parted cornrows add horizontal interest that balances the length.
Lifestyle-wise: if you’re active and sweat regularly, smaller cornrows hold up better than jumbo ones. If you travel a lot, stitch cornrows photograph well but can fuzz under hats. If you want maximum duration, feed-in styles with kanekalon outlast freehand by 1-2 weeks consistently.
Common Mistakes to Avoid

Installing on dirty, oily hair. The gel slips. The braid migrates. The hold doesn’t last.
Installing too tight. Pain is not a sign of a good braid. If your scalp throbs or you get little bumps along the hairline within 24 hours, the tension is causing damage that will show up as traction alopecia months later.
Skipping scalp care. Two weeks of neglect and you’ll have buildup that takes an entire wash day to clear.
Waiting too long to take down. Past the 4-week mark on medium hair, braids start matting at the base. Beyond 6 weeks, you risk permanent tangle damage that can’t be combed out without cutting.
Cornrow styles for medium hair offer one of the best ratios of flexibility to effort in natural hair care. The length works with you. The install goes fast. The range of pattern options covers everything from sleek professional looks to bold sculptural statements. Find your two or three rotation favorites and you’ve got a protective styling system that carries you through every season of your hair journey.