



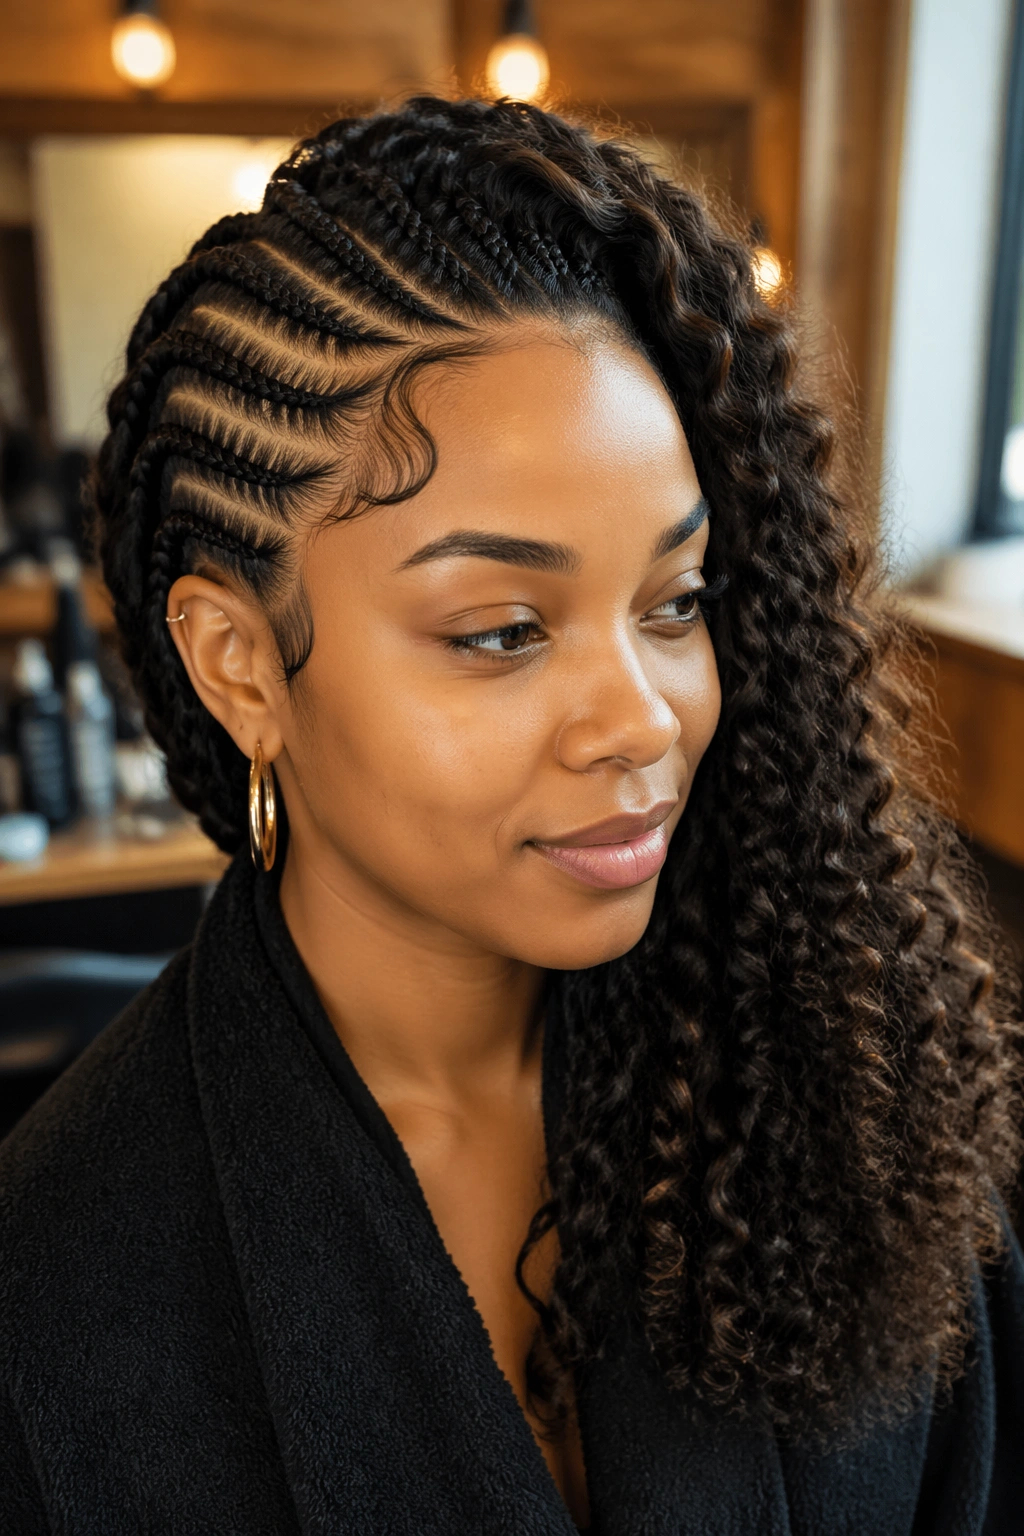
Side cornrows with curls sit at this strange crossroads of sculpted and soft. The braided half is pulled tight, parted clean, finished with that glassy edge work. The curly half is loose, bouncy, almost rebellious in how much volume it brings. And when you get the balance right, the contrast is what makes the whole style sing. I’ve worn some version of side cornrows with curls for years now — long before the style had a proper name circulating in salon chairs — and I can tell you the difference between a version that reads polished and one that reads half-finished comes down to three or four specific choices most people skip.
This isn’t the kind of style you pick because you want something “easy.” It photographs like it’s simple. It is not. The braided side needs to hold for at least a week without fuzzing at the part. The curly side needs to keep definition through night two without collapsing into a flat triangle. Getting both halves to cooperate for the same stretch of time is the real trick, and once you understand what each side actually needs, you stop fighting the style and start enjoying it.
I want to walk you through twenty-two versions I’ve either worn, installed on someone, or watched hold up beautifully across different hair types. Some are quick. Some take three hours. A few are bold enough to turn heads in a parking lot. All of them solve the cornrow-and-curl puzzle in their own specific way.
What Makes Side Cornrows with Curls Work
The whole look hinges on tension distribution. When cornrows run along one side of the head and curls flow from the other, your scalp is being pulled in one direction while gravity works on the opposite side. Get the anchor points wrong and the braided section starts creeping backward within three days. Get them right and the style can coast for two full weeks.
Parting matters more than braiders admit. A clean side part — I mean knife-straight, not that wandering scribble most people settle for — is what separates a professional install from a rushed one. The part line is the first thing anyone sees. It’s also the most forgiving seam if you nail the geometry.
Curl prep happens before the braiding, not after. Most people flip the order and regret it.
Tools You Actually Need
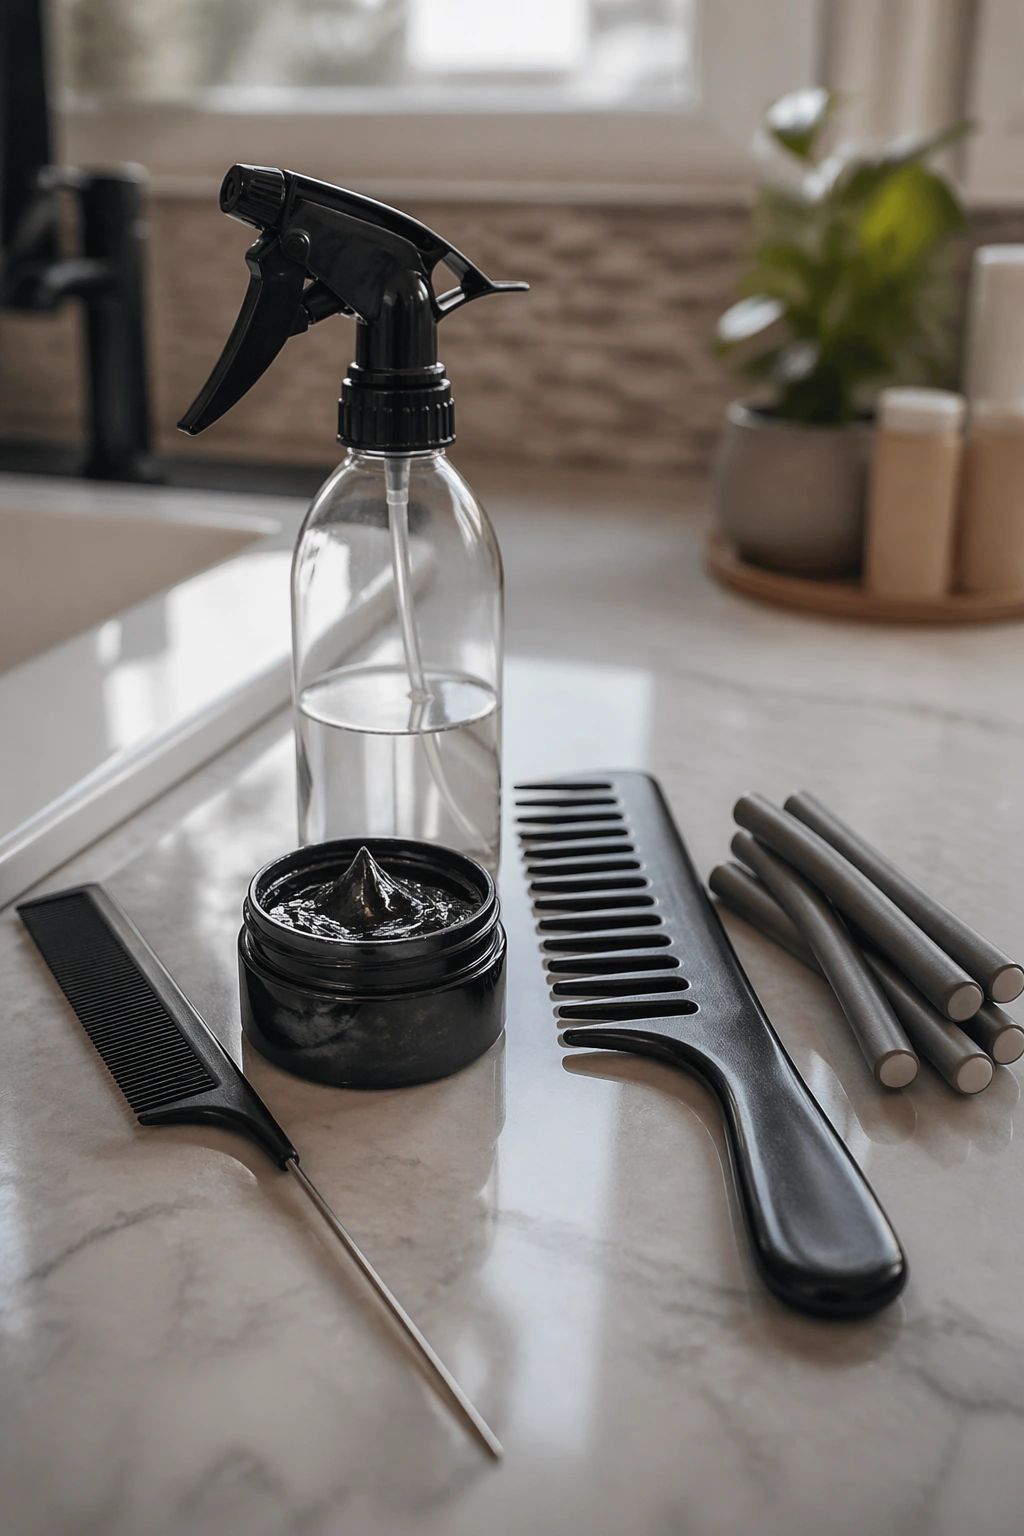
You don’t need a full salon kit. You need the right five items. A rat-tail comb with a metal end for parting. A water-alcohol spray (roughly 70/30) for section control. A thick edge gel — the kind that stands up in the jar, not the runny drugstore version. A wide-tooth comb for detangling the curl side. And flexi rods, perm rods, or a curling wand depending on how you want the curls to behave.
A satin scarf for the braided side while you sleep. A pineapple bonnet for the curl side. Two different sleep strategies for two different textures — that’s the secret almost nobody tells you.
Prepping the Hair Before You Start
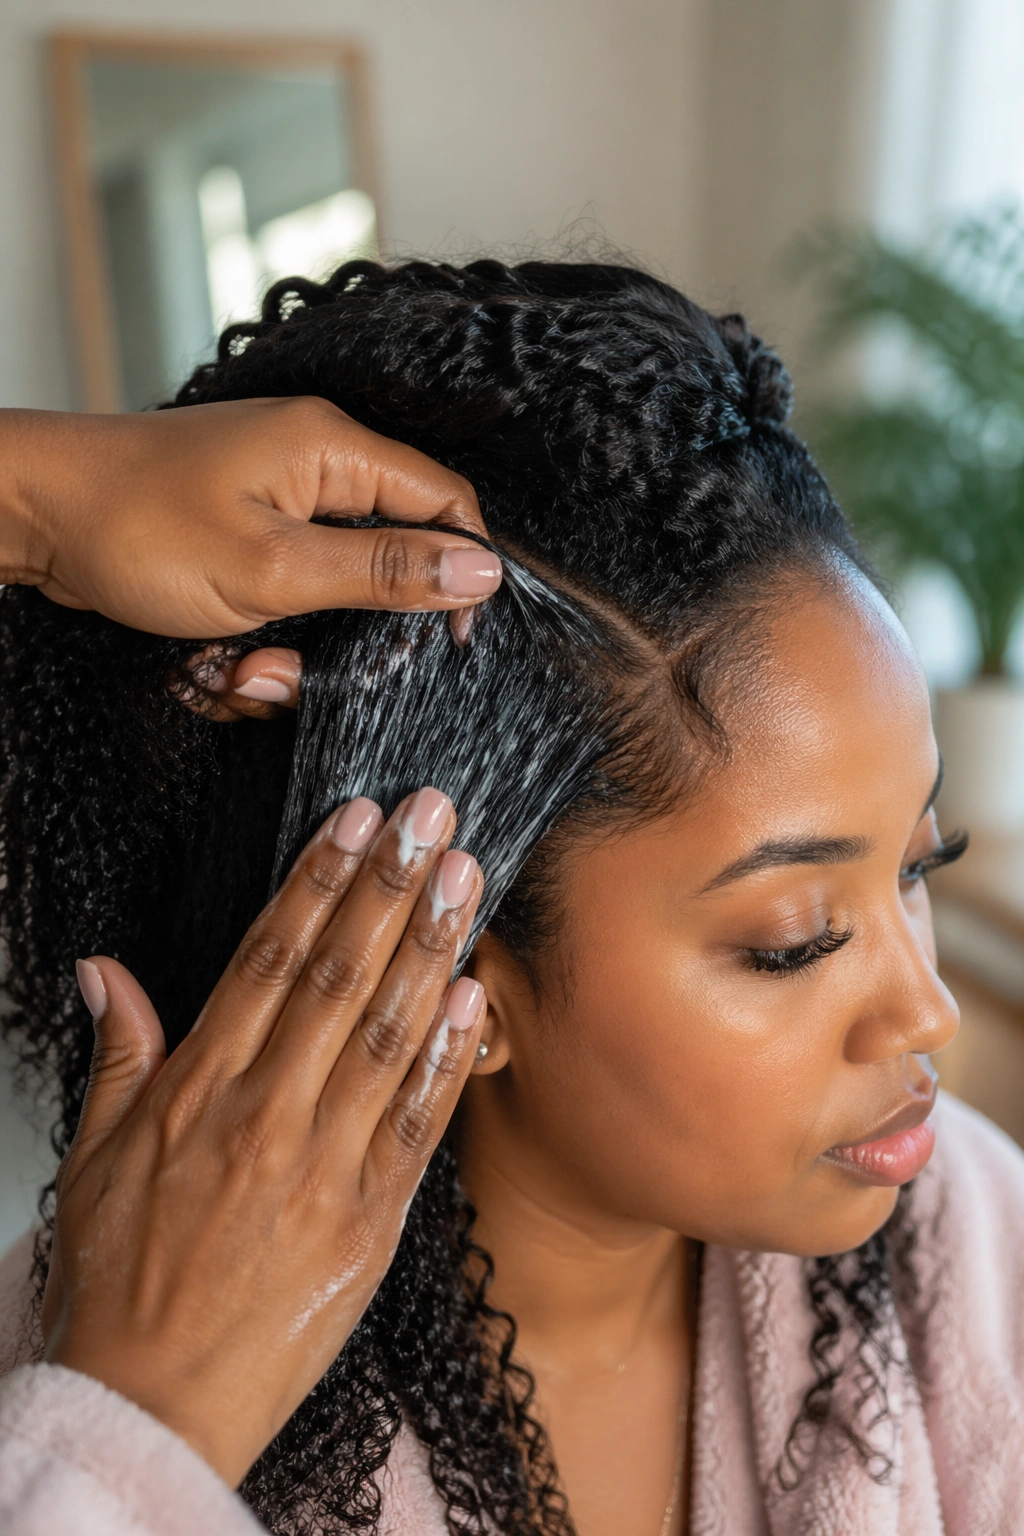
Wash day starts 48 hours before braiding, not the morning of. Hair that’s freshly washed is too slippery. Braids slide. Parts fuzz within hours. You want hair that’s clean but has one day of natural oil regulation behind it.
Detangle in sections. Apply a light leave-in, not a heavy butter — heavy products make the braids dirty faster and dull the sheen of the curl side. Let the hair air-dry to about 80% before you start. Damp hair grips. Wet hair slips.
If you’re using added hair for the braided side, soak it in apple cider vinegar and warm water for fifteen minutes. Cuts the itch. Softens the fiber. Skip this step and you’ll be scratching by day two.
Choosing Your Curl Method
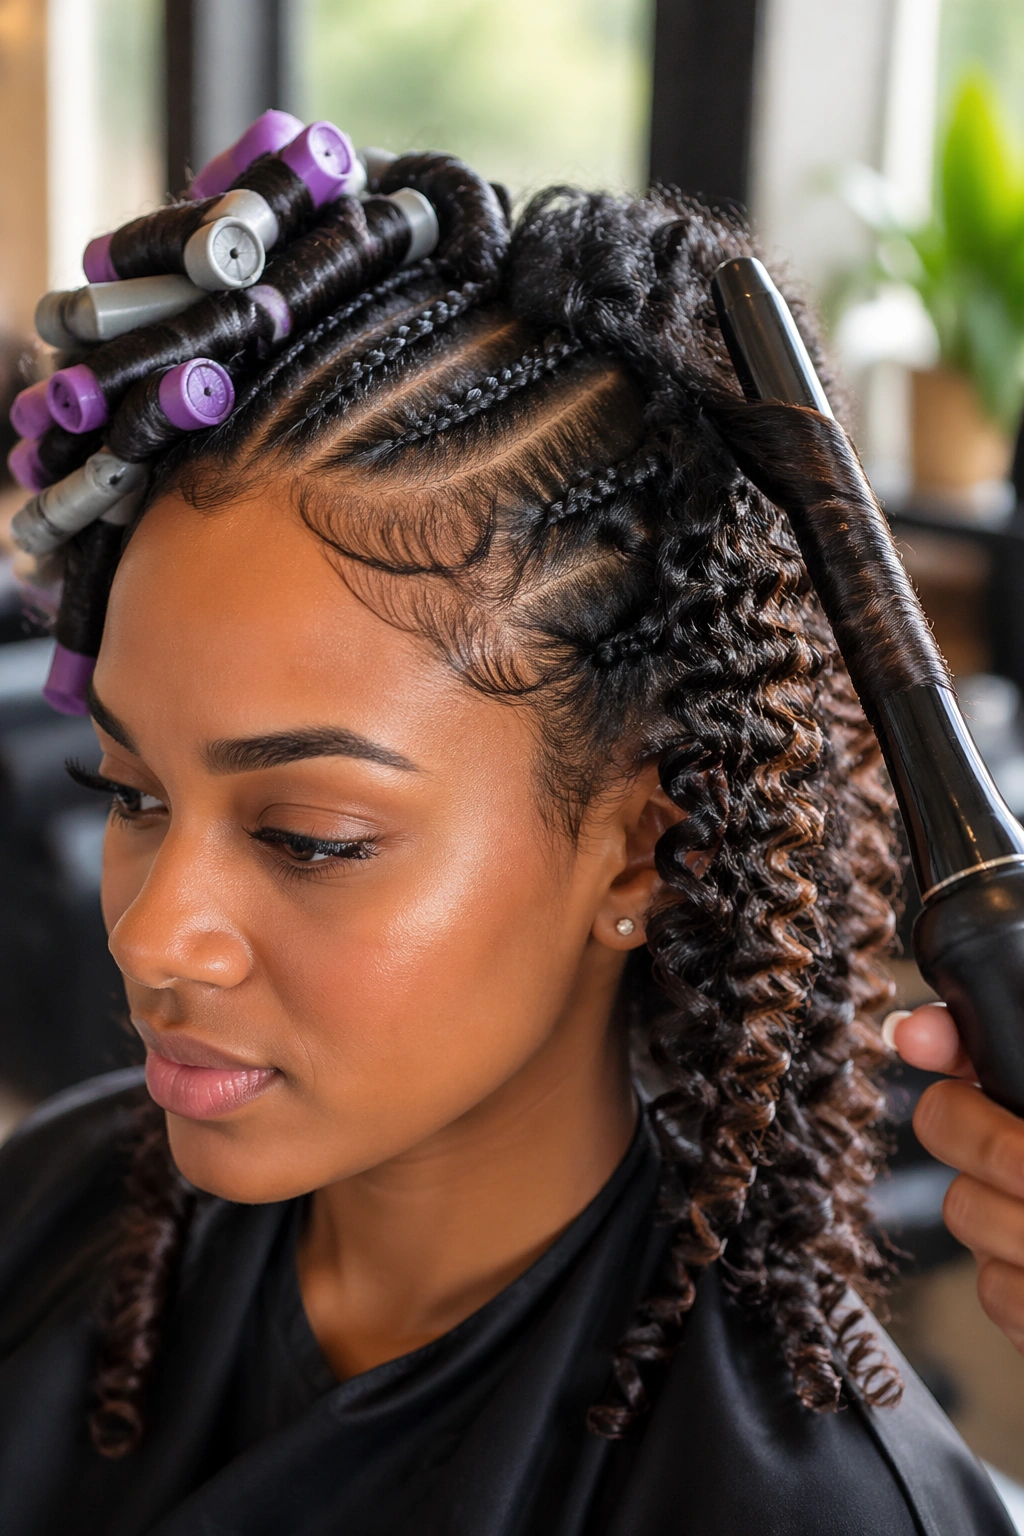
Flexi rods give you a loose, 1990s music video bounce. Perm rods give you tight, defined ringlets. A wand gives you control but also heat exposure, so if your hair is fine or chemically treated, the rods win every time. Rod sets take overnight. Wand curls take 20 minutes. Your schedule decides.
One more thing before the list starts: the curl side should be slightly shorter than the braided side looks when laid flat. Curls eat length. A 16-inch stretched strand bounces back to maybe 11 inches once set. Plan accordingly.
1. Classic Six-Braid Side with Wand Curls
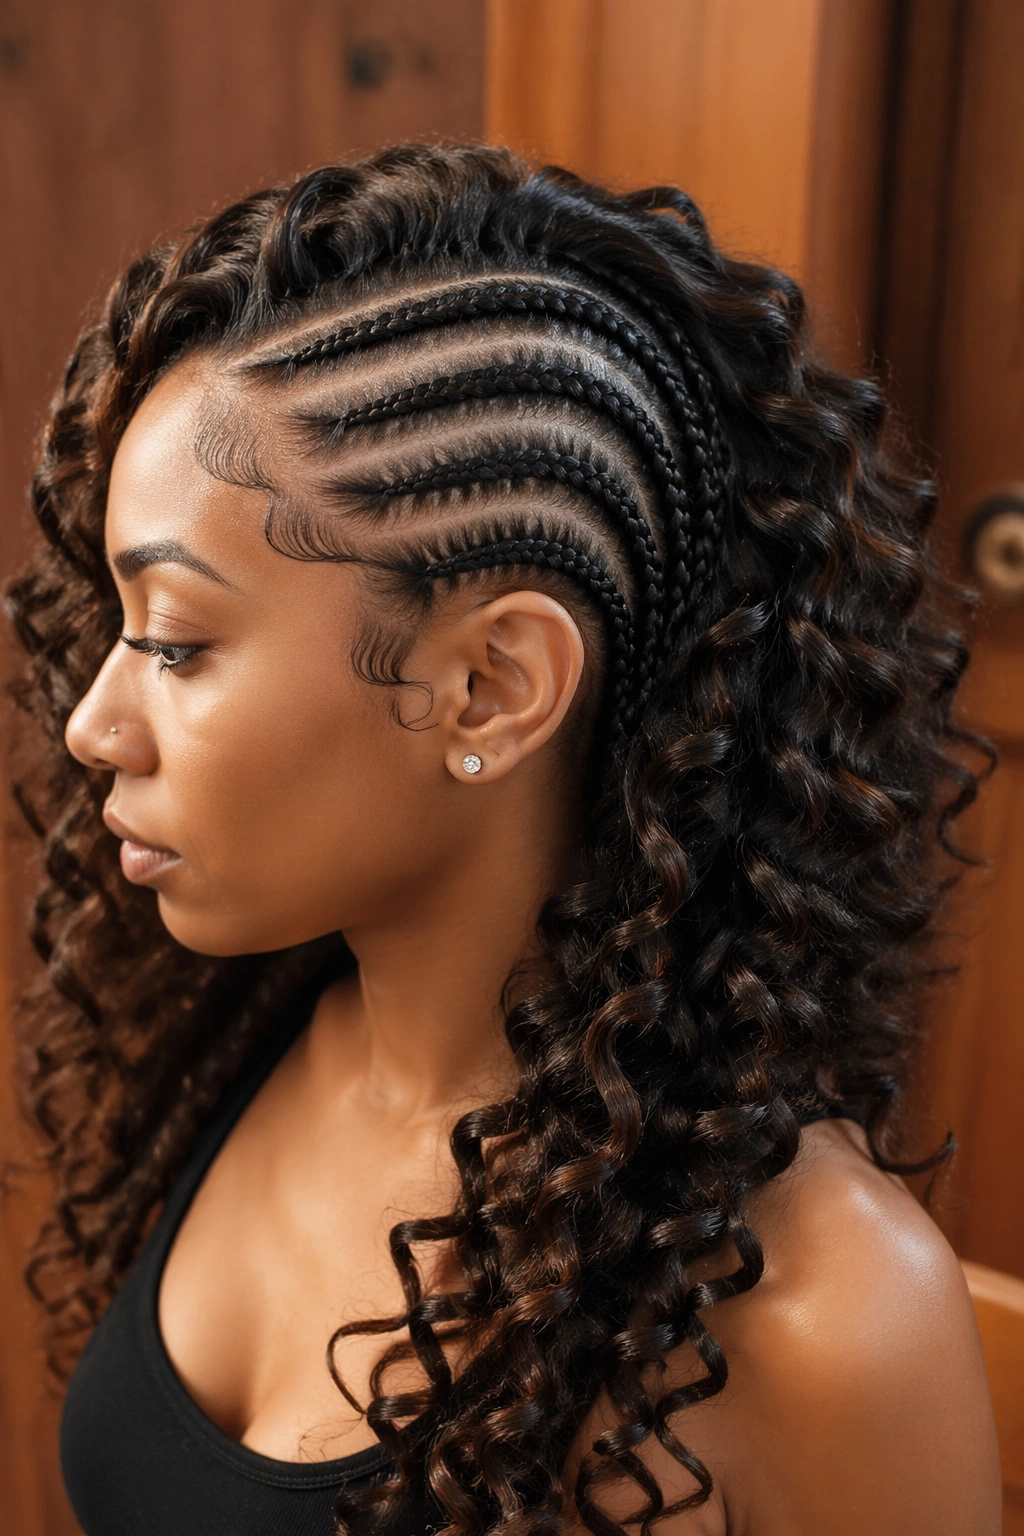
This is the version most people see and assume is “the” side cornrow with curls look. Six medium braids run from a sharp left part down to the nape, while the right side falls in loose wand curls with soft separation.
Why It Works
The count matters. Six braids is the sweet spot — fewer looks chunky, more looks crowded. The braids are wide enough to show the parts cleanly but narrow enough to hug the head instead of sitting up.
- Use a 1-inch wand for loose waves or a 3/4-inch for tighter curls
- Pass each section through the wand twice for stronger hold
- Pin-curl each curl as it cools for 10 minutes, then release
Quick tip: spray each section with a heat protectant before the wand touches it — not optional, especially if you plan to keep the style for more than a week.
2. Jumbo Two-Braid Side with Rod Curls
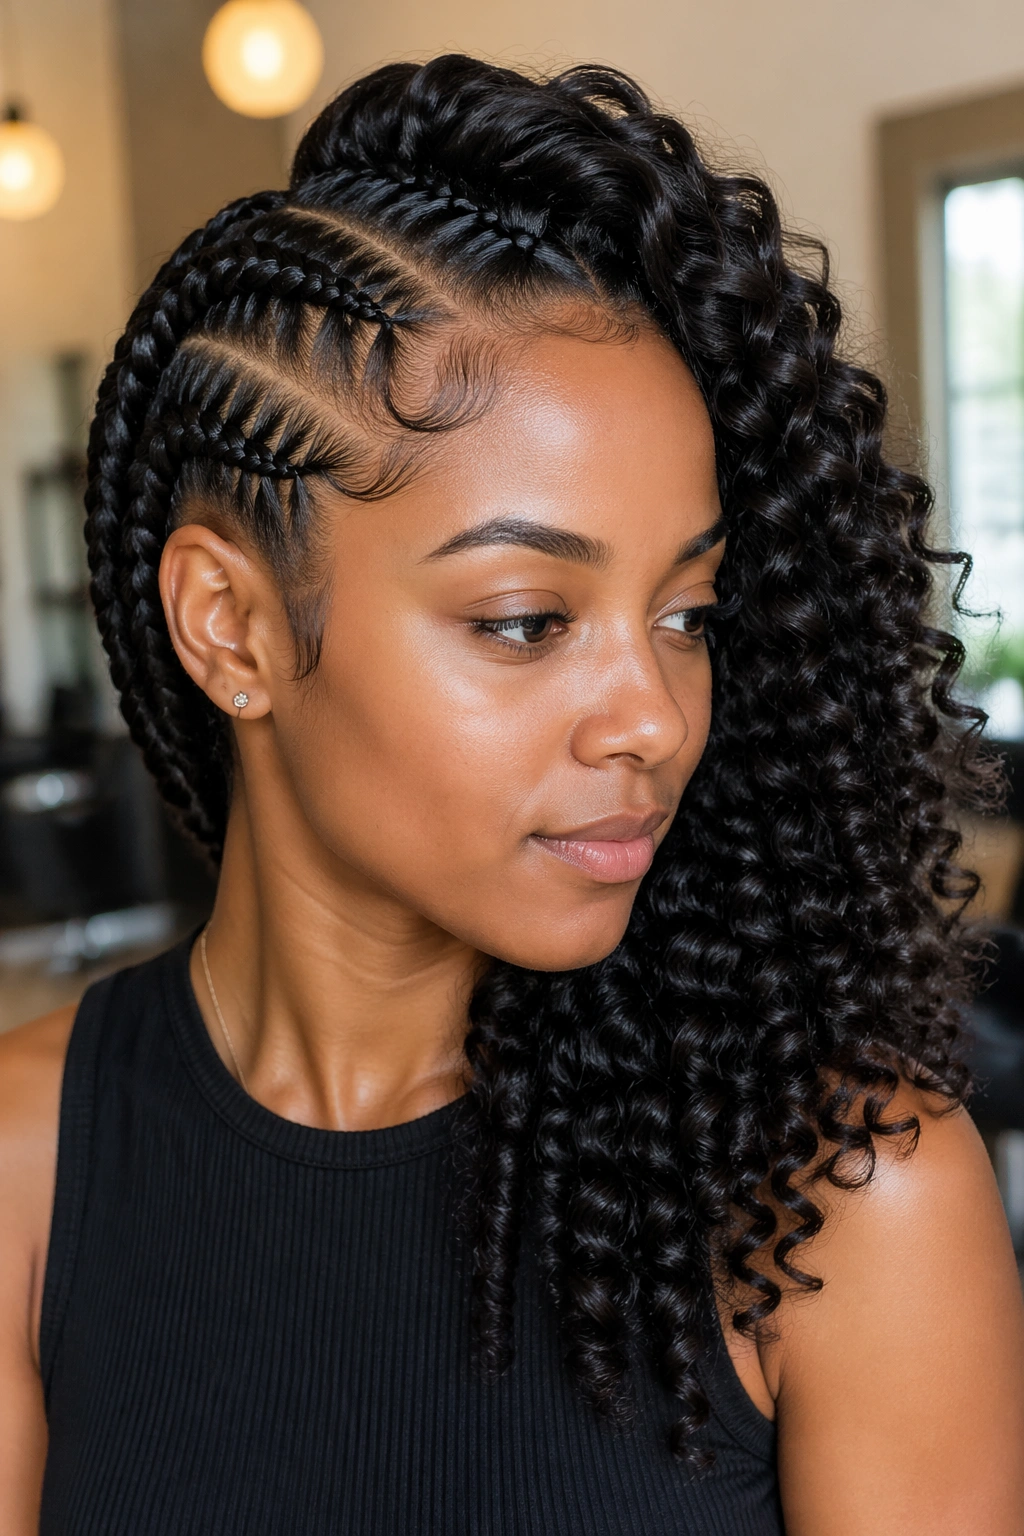
Only two braids on the cornrow side? It works, and it works well when both braids are substantial — think thumb-thick with feed-in extensions for weight.
The contrast here is dramatic. Two fat braids on the left, a full waterfall of tight perm rod ringlets on the right. The scale difference is the point. You’re not trying to make the braids blend with the curls. You’re making them argue.
This version holds up for people with fine hair because the two braids take less tension than six or eight thinner ones would. Your edges get a break. Your scalp breathes. And the curl side reads voluminous because there’s more actual hair left unbraided on that side.
Best for women with shoulder-length hair or longer who want impact without four hours in a chair.
3. Micro Cornrow Side with Flexi Rod Curls
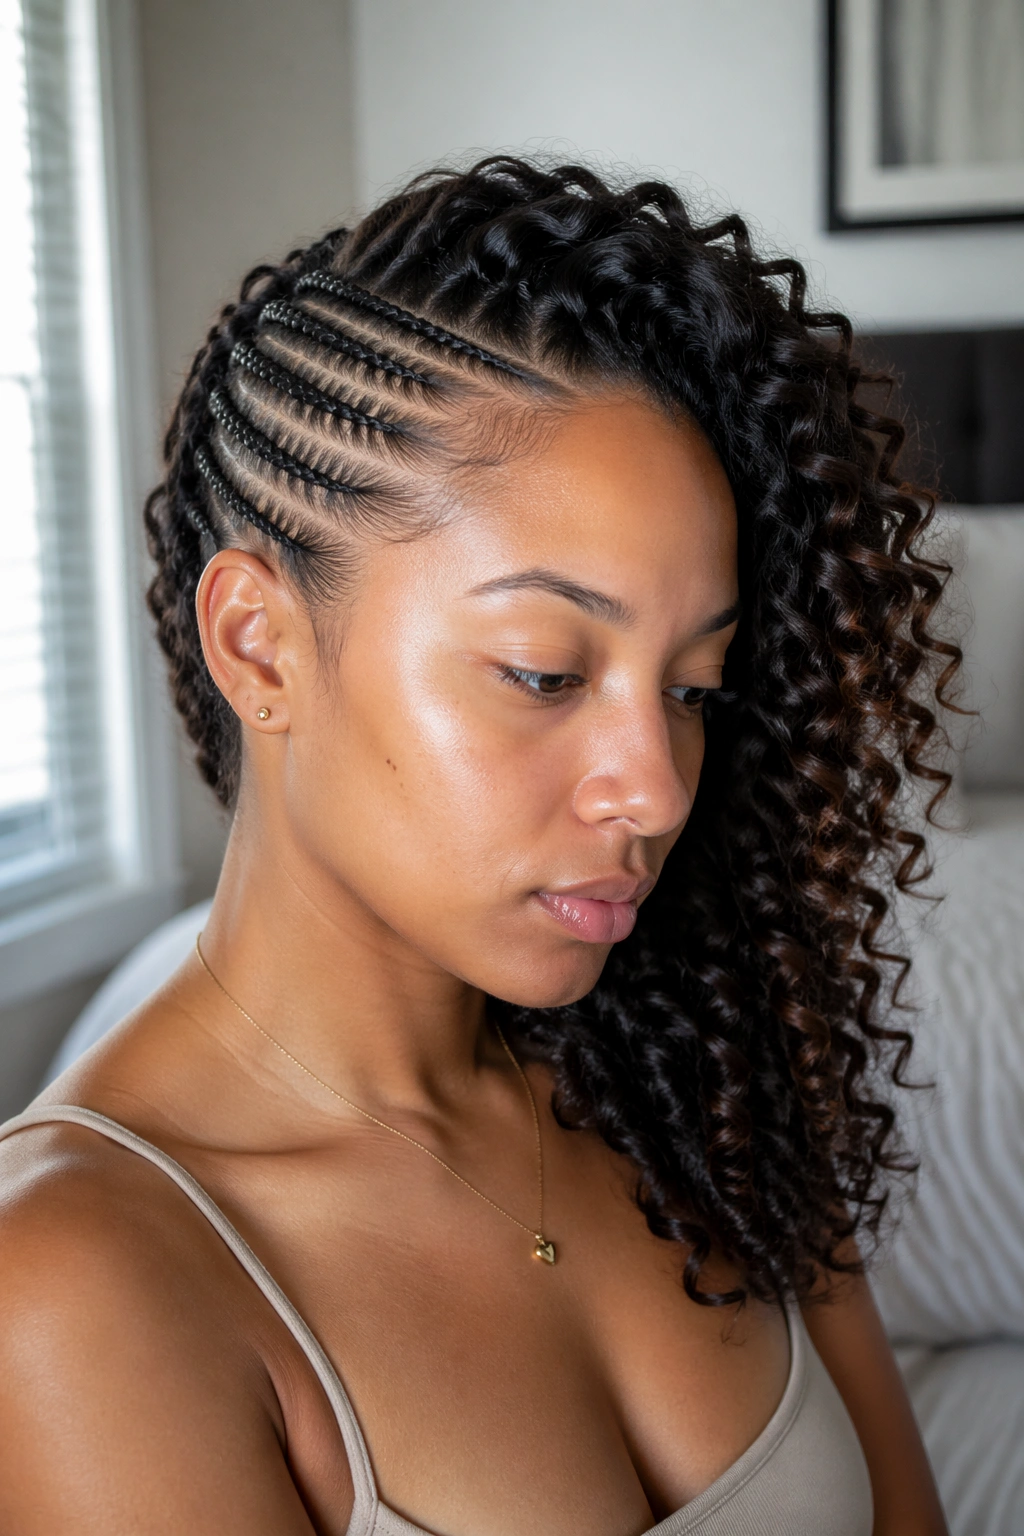
Micro cornrows on one side, flexi rod waves on the other. This is the version for women who want detail work.
Eight to twelve tiny braids running along the side, each no wider than a pinky finger. The curl side gets flexi rods overnight for that loose, almost undone wave pattern.
What Makes It Different
Most cornrow-and-curl combos rely on contrast in texture. This version adds contrast in scale — the tiny braids make the loose curls read even bigger. And because the braids are small, they sit flat against the scalp and don’t interrupt the curl’s natural movement.
The catch is time. Micro cornrows on one side still take 90 minutes minimum. If you rush them, the lines wander. And wandering lines on a micro install are visible from across the room.
4. Zigzag Part with Curly Pineapple
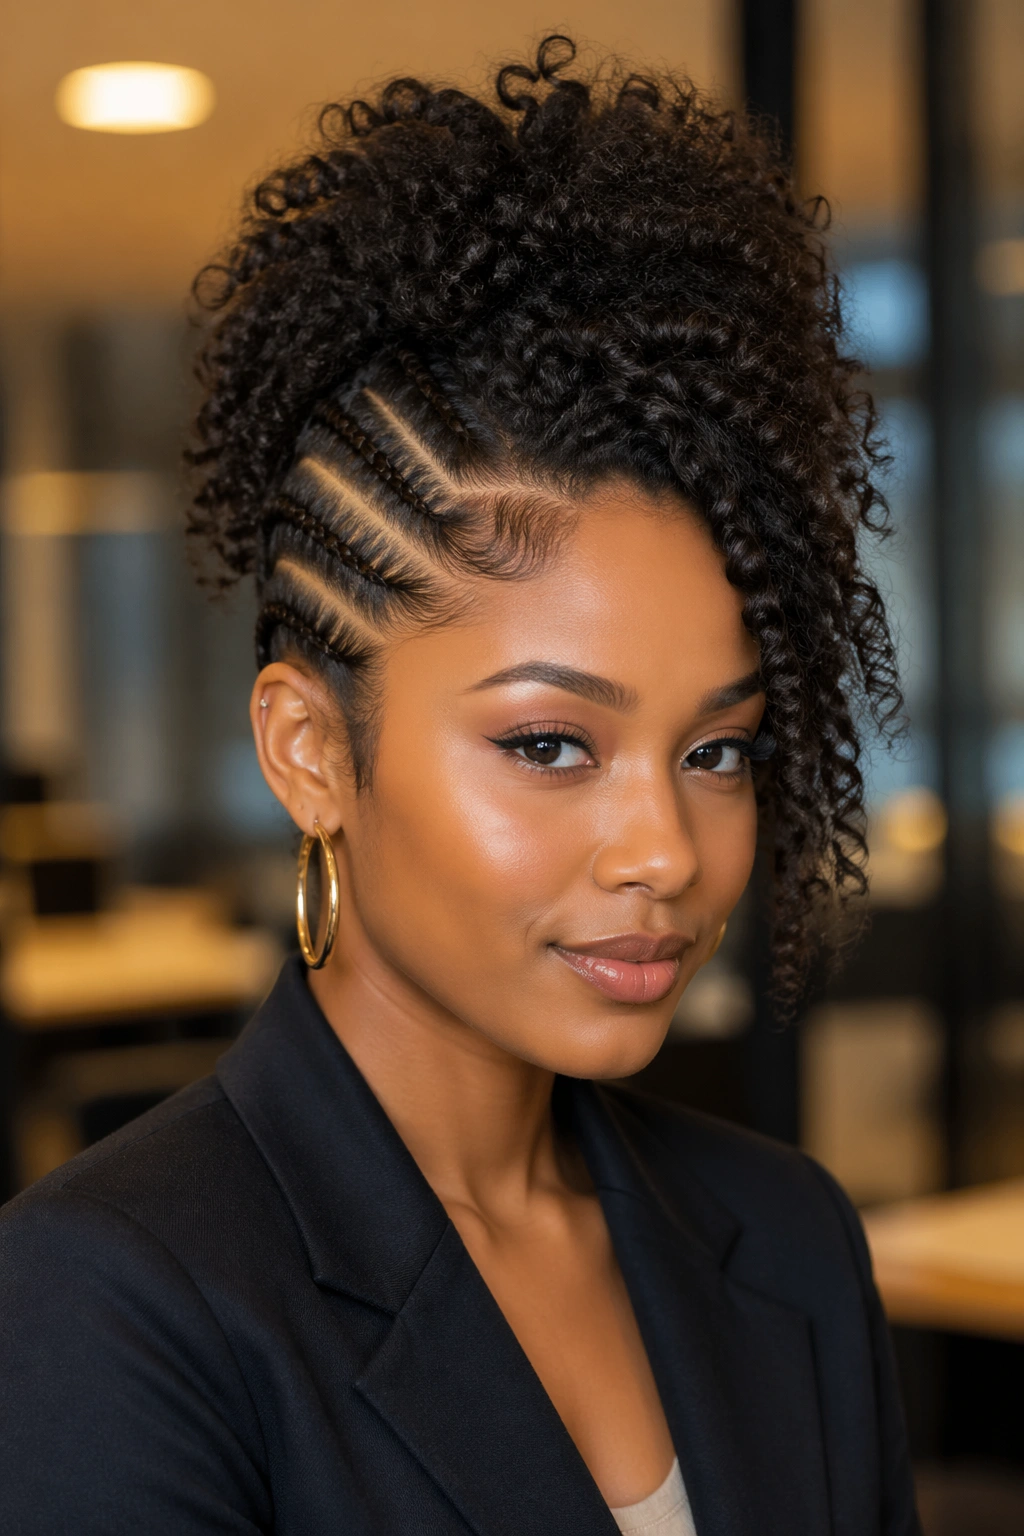
Skip the straight part. Cut a zigzag instead.
The parting does most of the visual work in this version. Three or four cornrows follow the zig pattern down the side, while the right side is pulled into a high pineapple of natural curls.
A scenario: you’ve got a work event at 4 PM and a dinner at 8. The zigzag reads professional under office light. The pineapple can drop down for dinner or stay up. Same install. Two different moods.
Mechanism-wise, the zigzag hides regrowth better than a straight part does. On day ten, a straight part looks fuzzy. A zigzag looks intentional.
- Use a rat-tail comb to cut the zig — aim for 1-inch peaks
- Don’t over-correct if your angles aren’t identical; slight variation reads natural
- Lock the part down with edge gel along the seam, not just at the hairline
Works for natural hair from 4A through 4C without modification.
5. Side Cornrows with Defined Curl Pattern Highlighted
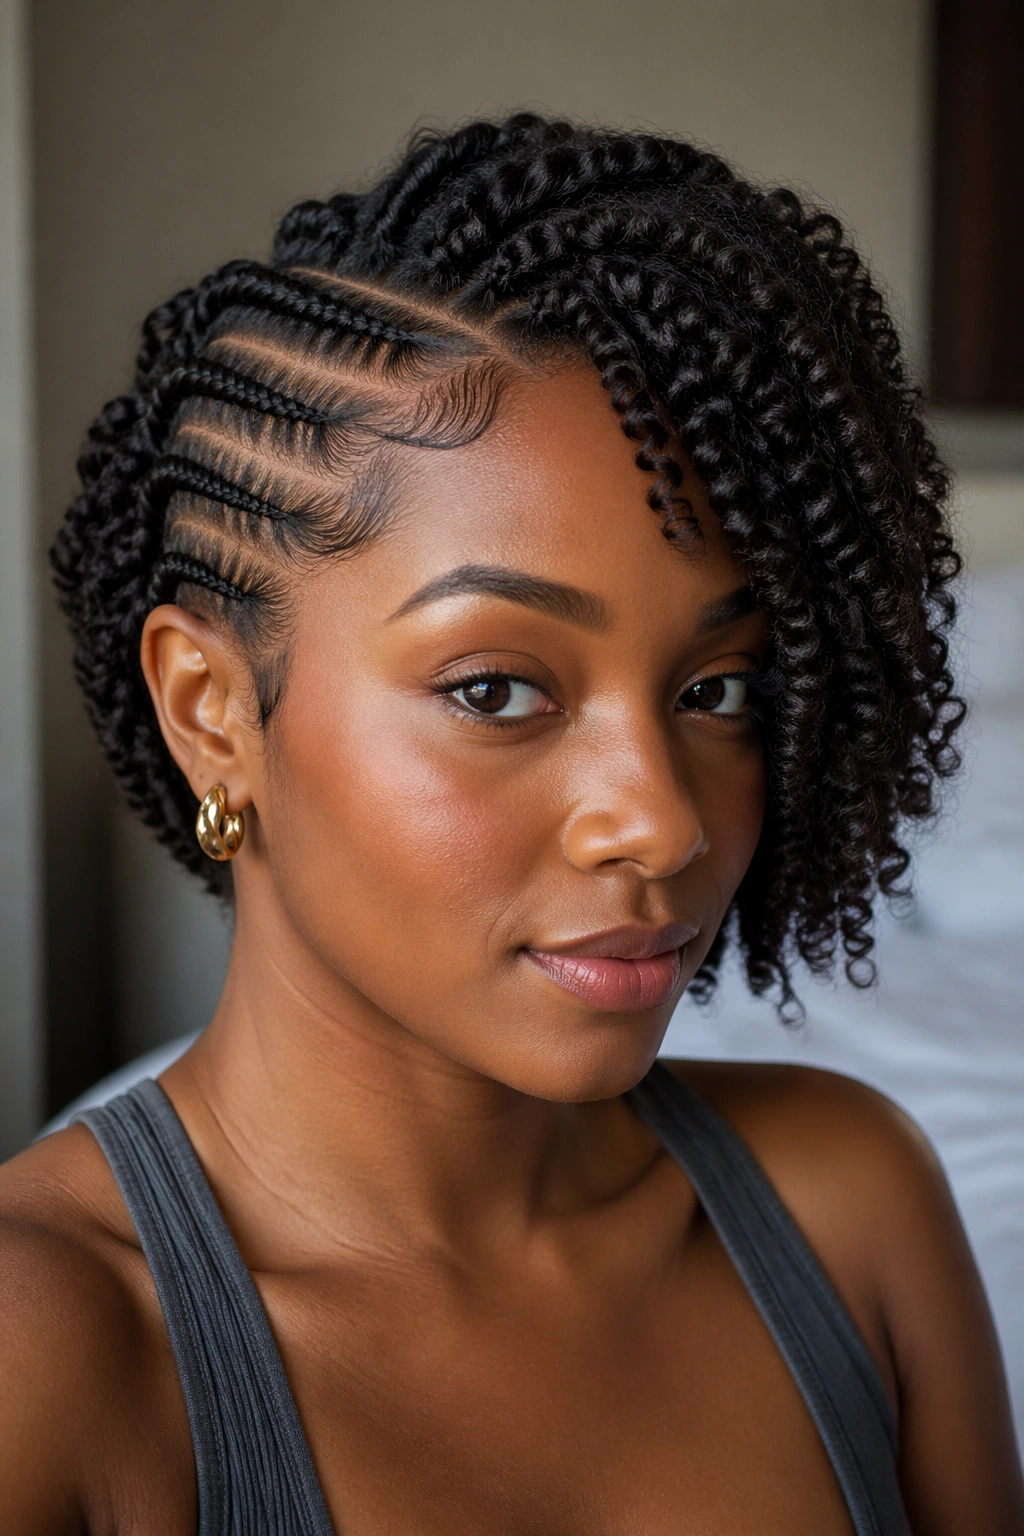
This is the version for 4C hair where you want your actual curl pattern to show off instead of being hidden under a wand set.
The braided side is standard — four to six cornrows, clean parts. The curl side is washed, conditioned, and finger-coiled with a creamy definer to bring out the natural spiral pattern.
Unlike wand or rod sets, this version looks different on every head because your curls are doing the work. No two installs look identical. And that’s the whole appeal.
Best for: women with well-moisturized natural hair who want to celebrate the texture they already have.
6. Side Cornrows with Bantu Knot-Out Curls
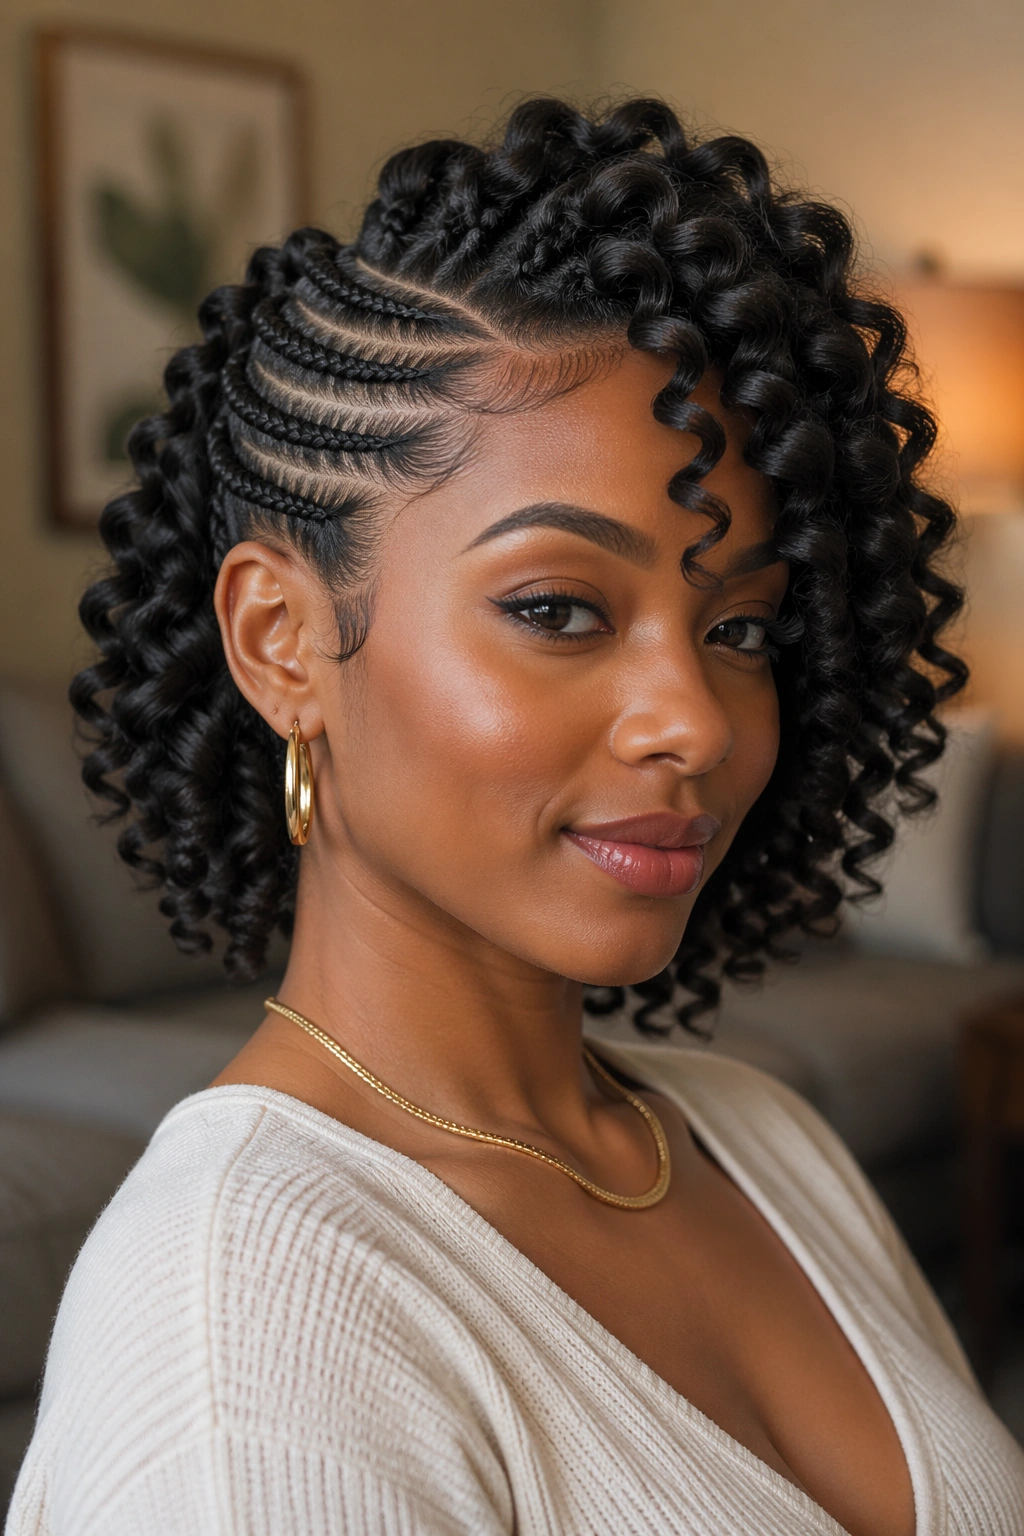
Set the curl side with bantu knots the night before, unravel in the morning, and the result is a chunky, shampoo-commercial wave pattern that pairs beautifully with tight side braids.
Bantu knot-outs give you a different curl shape than rods. Rods give you ringlets. Knots give you springs — bouncier, fatter, with more character at the root. You’ll know the knot was tight enough if unraveling takes some effort.
Seven knots on the curl side is plenty. Any more and the pattern gets busy. Any fewer and you end up with chunks instead of waves.
7. Cornrow Side with Crochet Curls
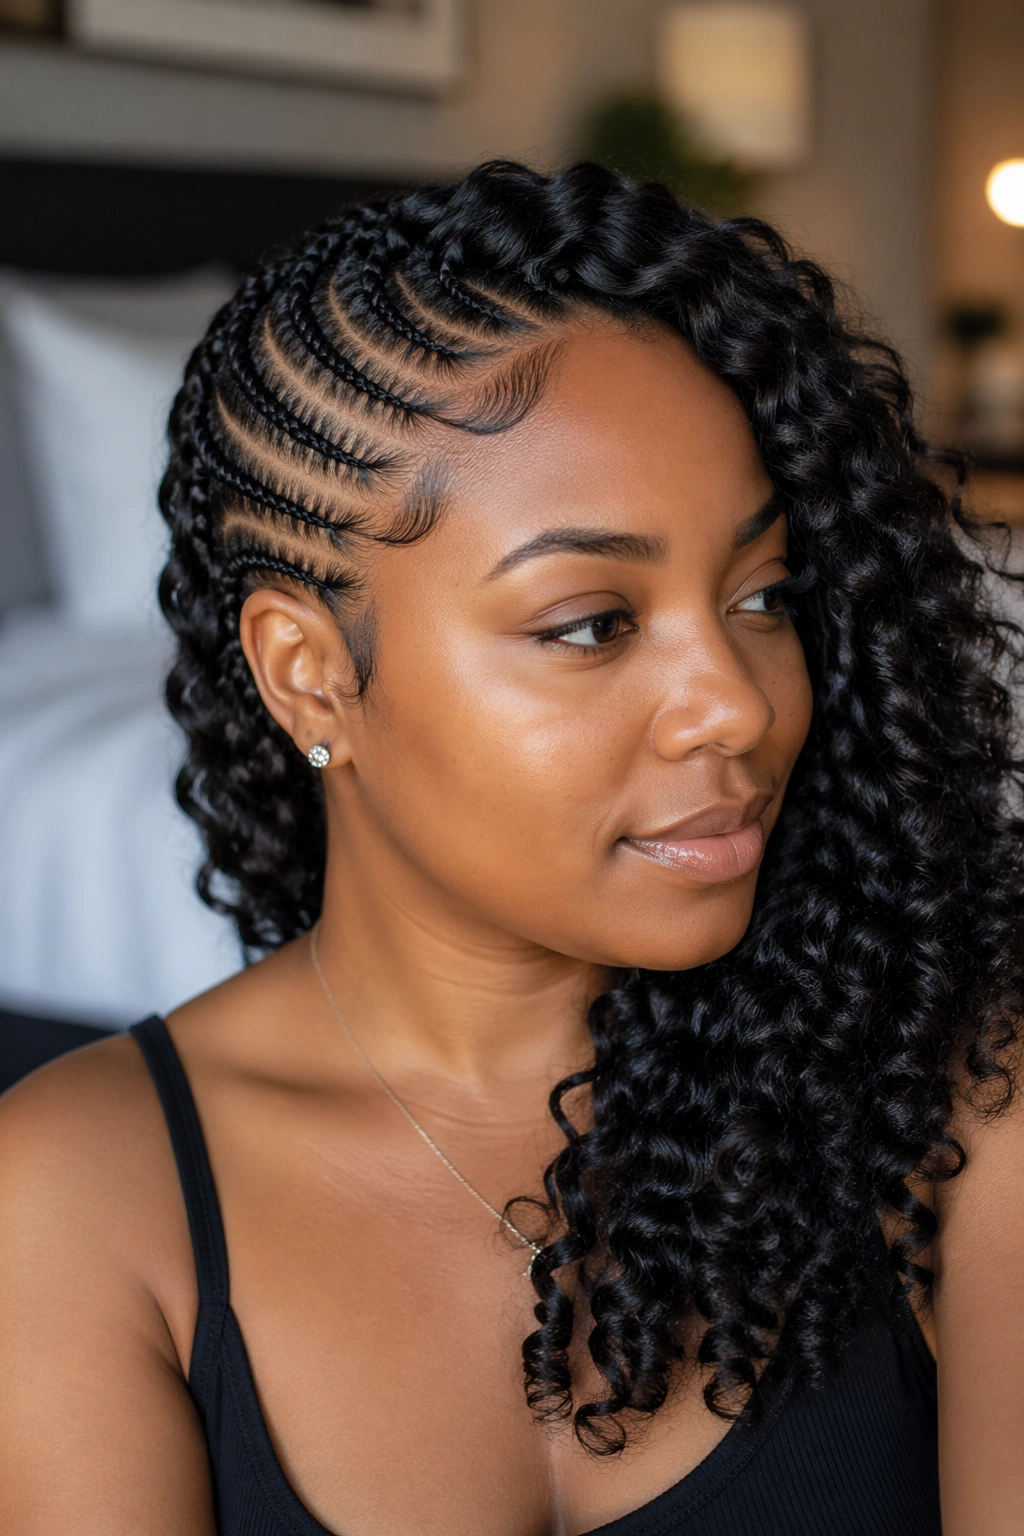
Using crochet curls on the unbraided side lets you keep your natural hair tucked away under a mesh or flat-twist base. Protective for both sides.
The cornrow side is visible. The curl side uses pre-curled crochet hair installed into a flat twist foundation. No heat. No rod sets. Full curl definition from the box.
How to Install It
- Flat twist the curl side into a small grid pattern
- Pull crochet curls through with a latch hook, one at a time
- Distribute for volume, avoiding clumps at the crown
- Dip the ends in hot water briefly to seal any fraying
The whole install takes about two hours if you’re practiced. It holds for three to four weeks with proper night care.
8. Side Cornrows with Colored Curl Ends
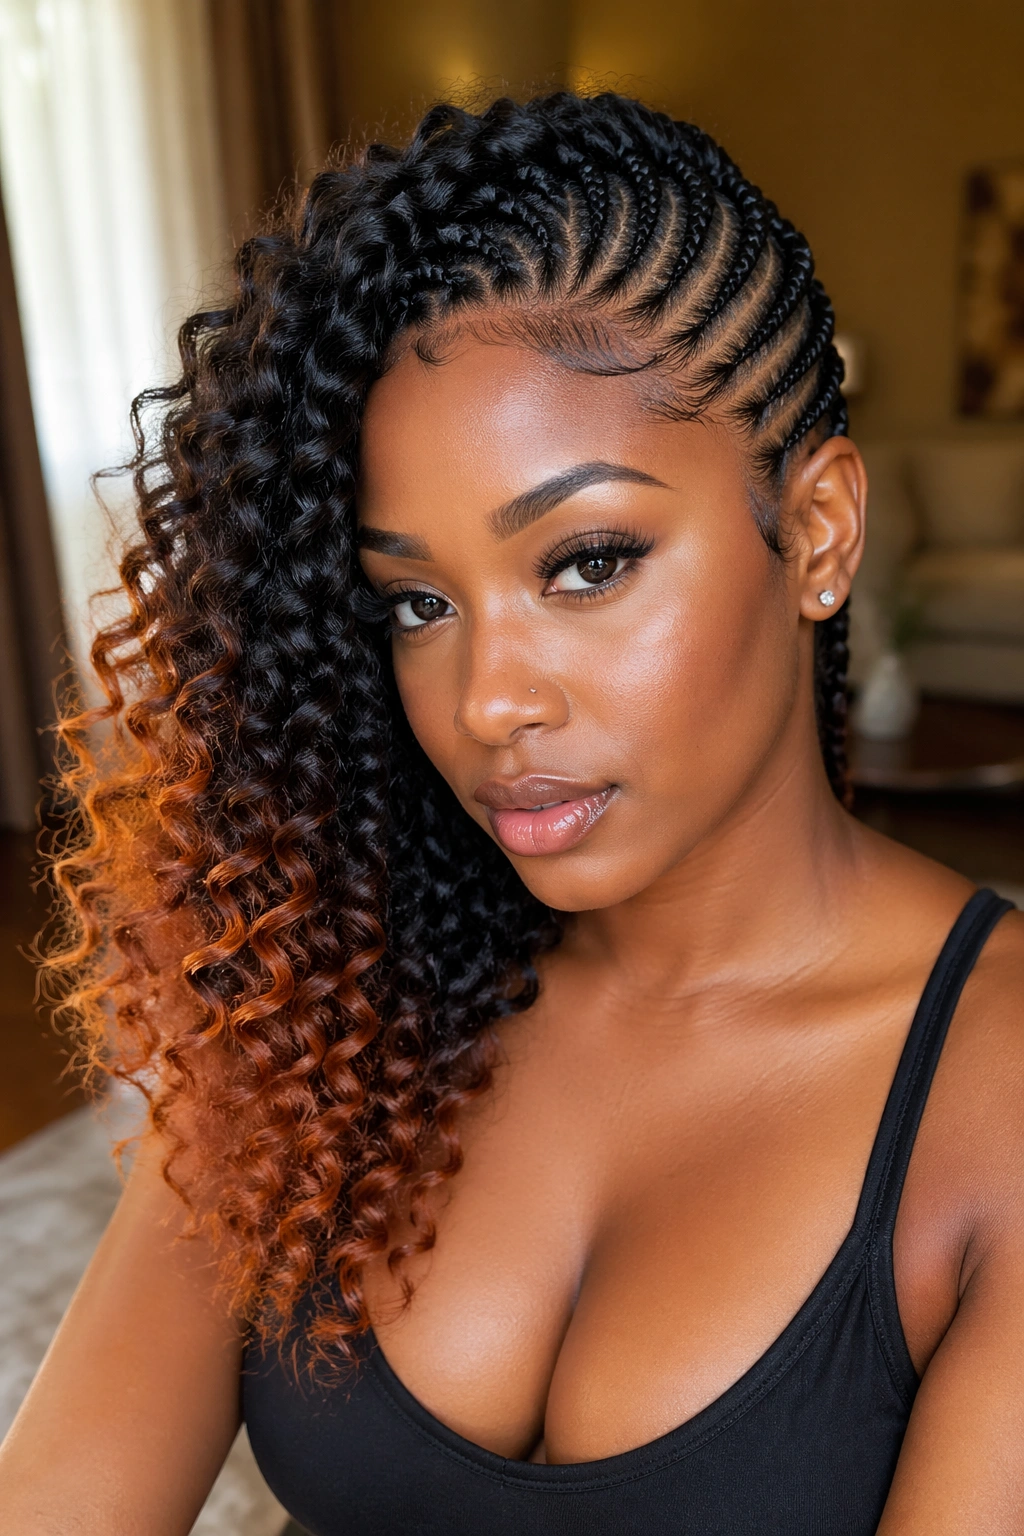
Black braids on one side, curls that fade into a copper or honey tone on the other. The color does the heavy lifting.
If you already color your hair, this is where you let that show off. The braids stay your natural shade — darker, grounding. The curl side picks up whatever tone you’re wearing. The gradient between them is what makes the style feel designed rather than thrown together.
People with virgin hair can fake this with temporary hair wax or colored mousse on the curl side only. Washes out in one shampoo. Good for trying the look before committing.
9. Side Cornrows with Stitch Braid Detail
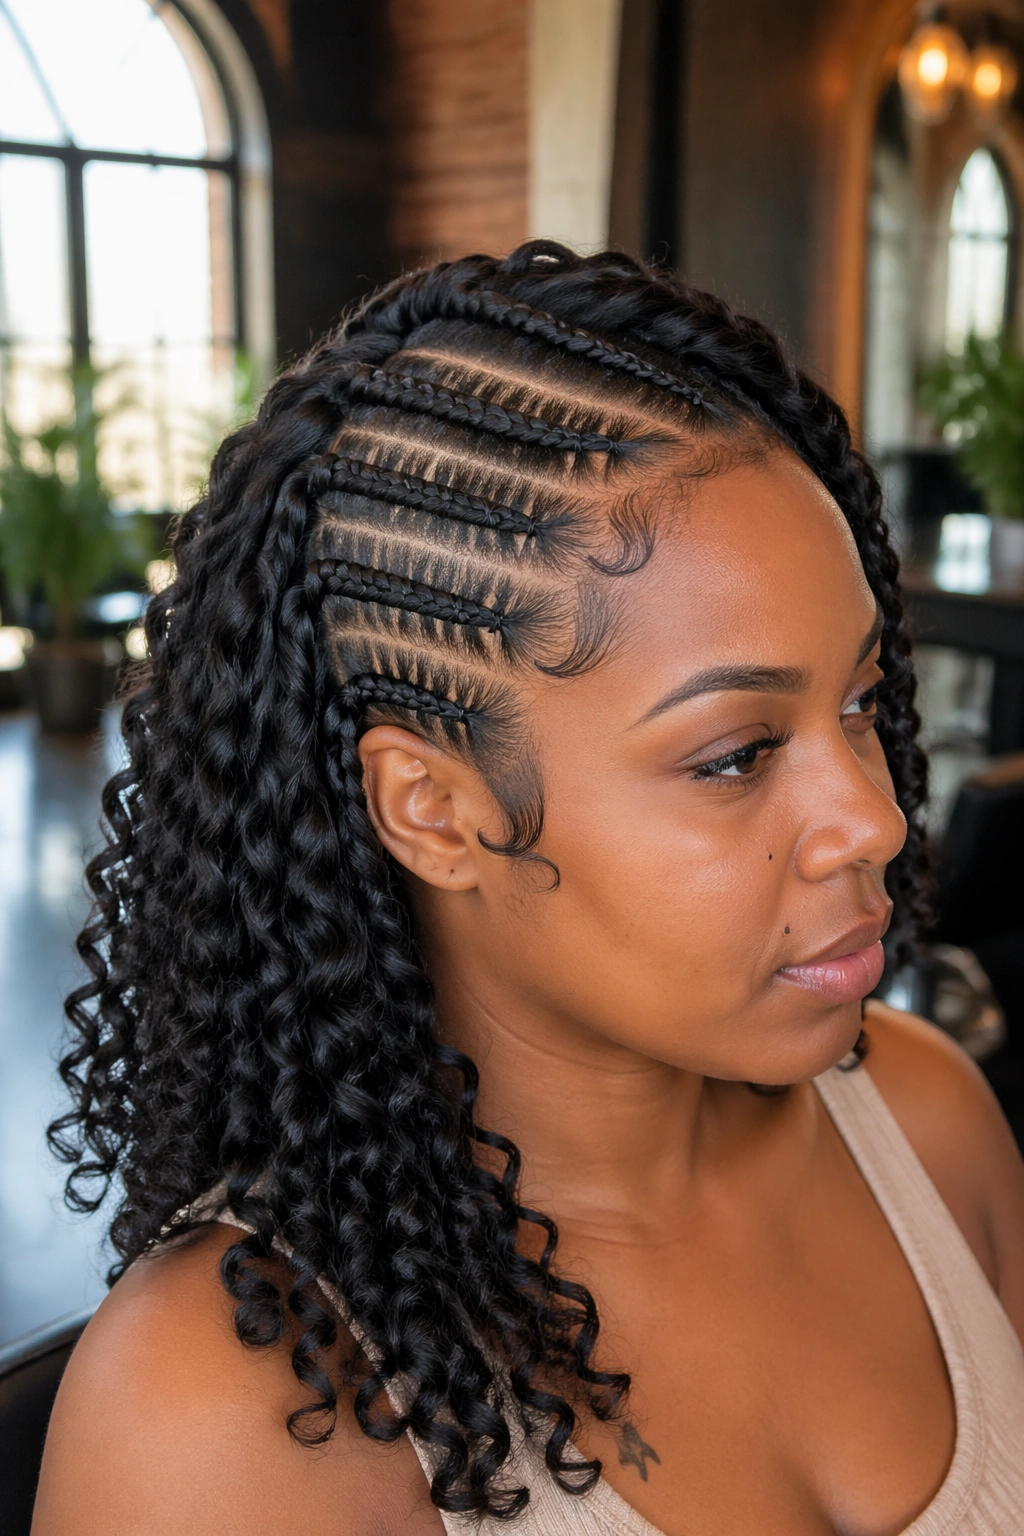
Stitch braids are the ones with the horizontal lines running across each cornrow. Think of them as cornrows with texture built in.
Three or four stitch braids run down the side, each showing the small horizontal divisions. The curl side stays classic — whatever curl method you prefer. The stitch detail is doing all the ornamental work.
Stitch braids hold up longer than smooth cornrows because the tension is distributed across multiple anchor points per braid. You get maybe five extra days of wear before fuzzing starts.
A drawback worth mentioning: stitch braids are harder to take down. Expect an extra 20 minutes on removal day compared to regular cornrows.
10. Asymmetric Cornrow Side with Long Wand Curls
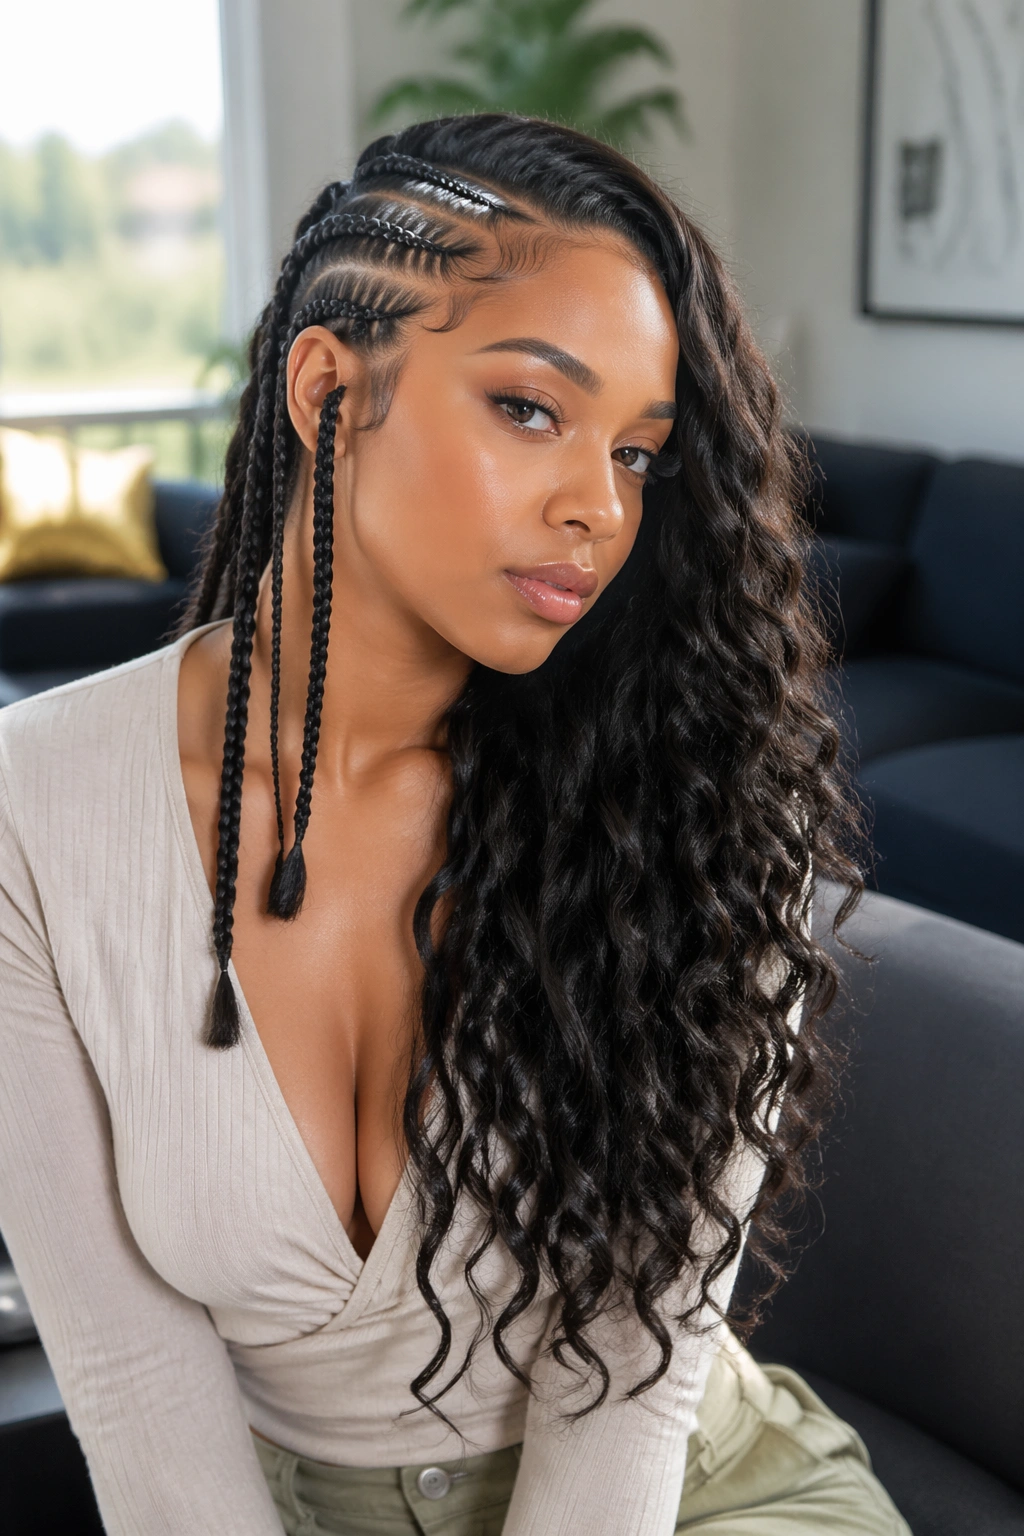
Three braids on the side, but they’re uneven in length — one stops at the jaw, one at the shoulder, one continues down with added hair. The curl side is long, wand-set, and falls past the chest.
The Asymmetry Logic
The eye naturally moves from short to long, which means this style guides the viewer toward the curl side. That’s intentional. If the curls are the star, the braids should act like stage direction — leading attention, not competing for it.
The curls need to be at least four inches longer than the longest braid for the asymmetry to read as deliberate.
11. Side Cornrow Bob with Bouncy Curls
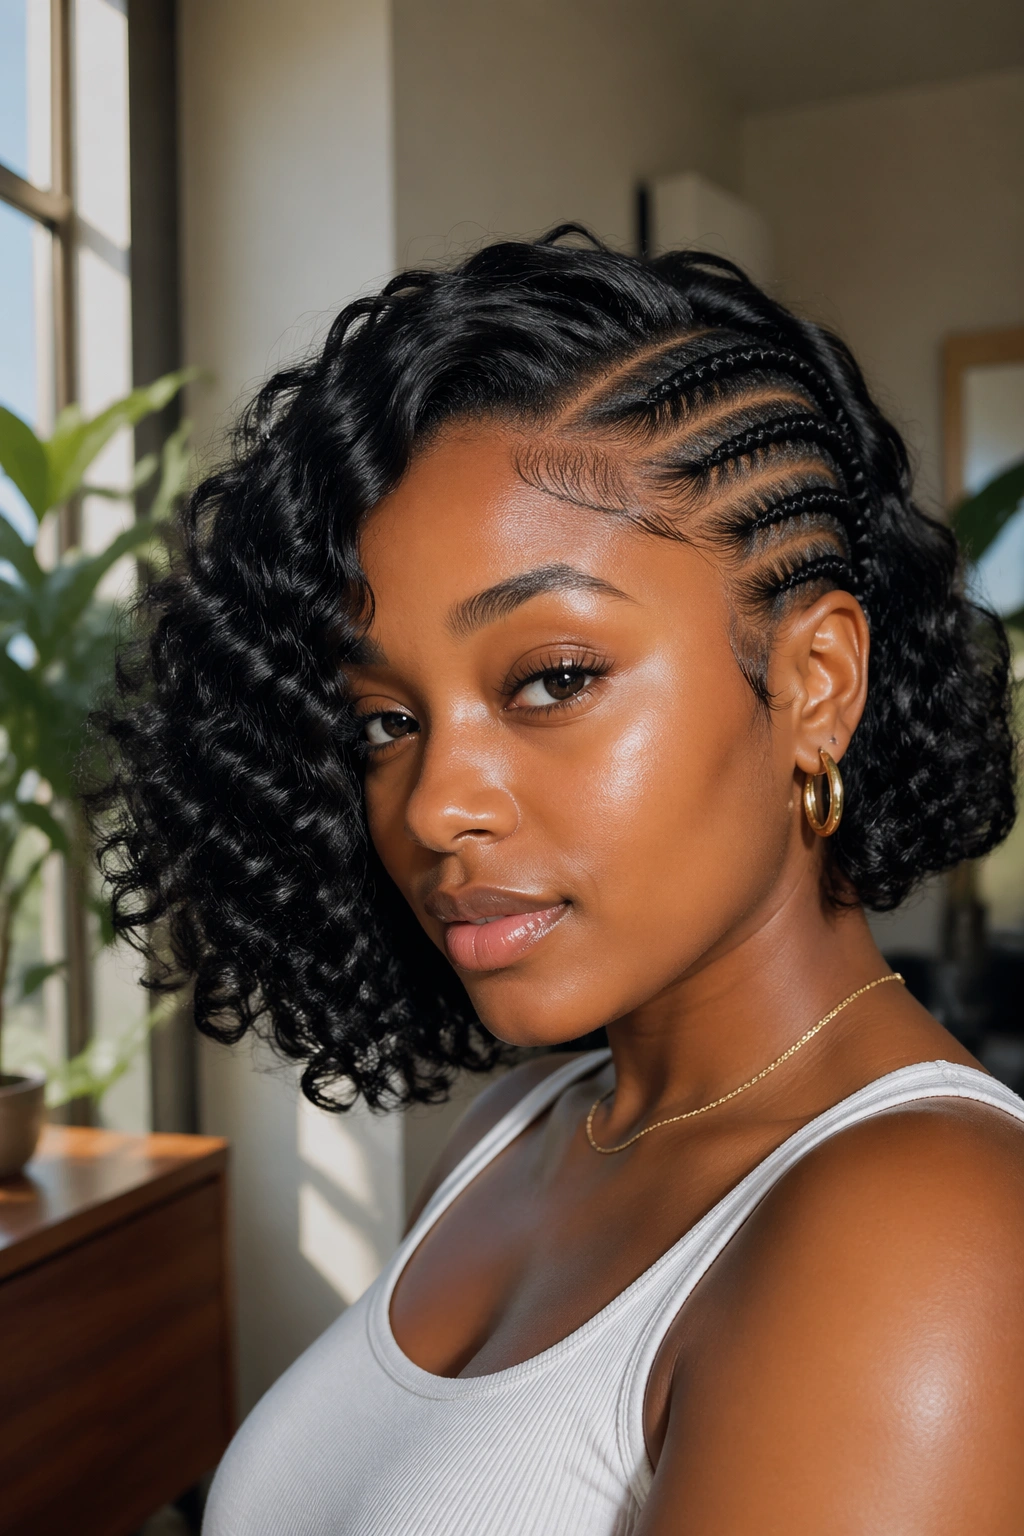
Cut, or illusion-cut, your hair into a bob before starting. Braid one side into four to five cornrows ending at the bob line. The other side falls in loose, bouncy curls that barely graze the jaw.
This version suits women who already wear a bob or want the appearance of one without cutting. You can achieve the illusion by tucking the curly ends under with pins.
The proportions feel different from longer versions. Everything is condensed. Which means small details — the sharpness of the part, the neatness of the braid finish — carry more visual weight.
12. Cornrow Side with Silk Press Curls
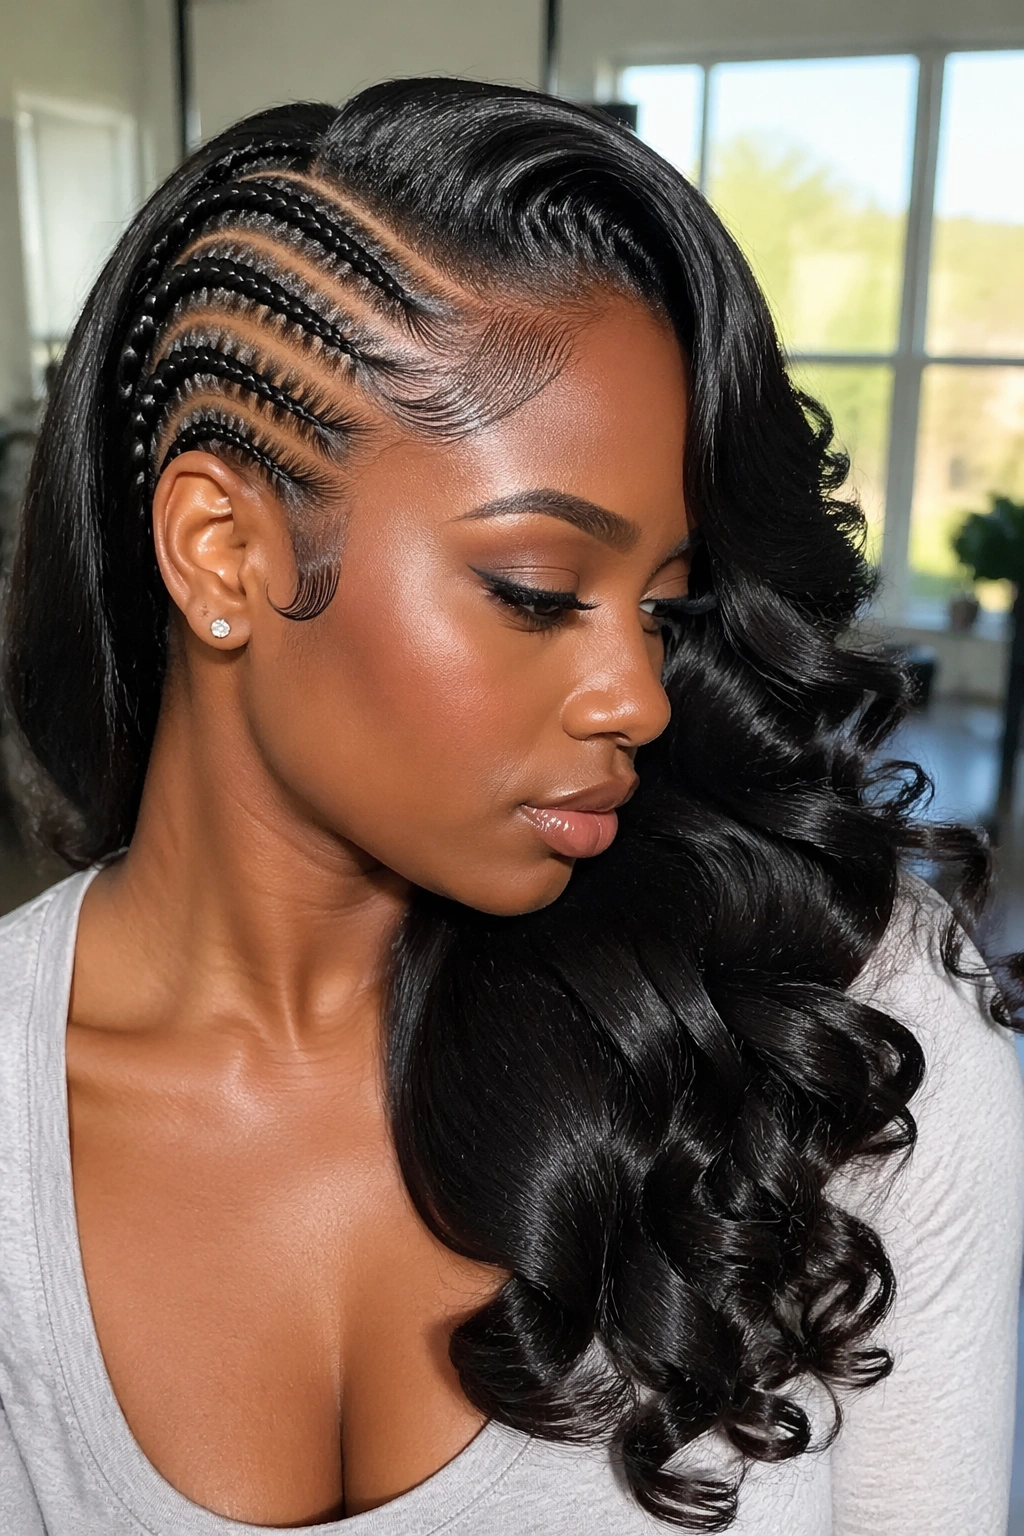
For heat-styled women: silk press the unbraided side into pin-curled waves. The shine from a silk press is unmatched, and it pairs beautifully with matte, gelled cornrows.
The contrast here is shine-based. Gel-finished cornrows are slick but matte. Silk-pressed curls are reflective and glossy. Two different kinds of polish. And the difference reads on camera.
Reserved for women who use heat regularly and have heat protection dialed in. Not for hair that’s already showing heat damage.
13. Side Cornrows with Wet-Look Curls
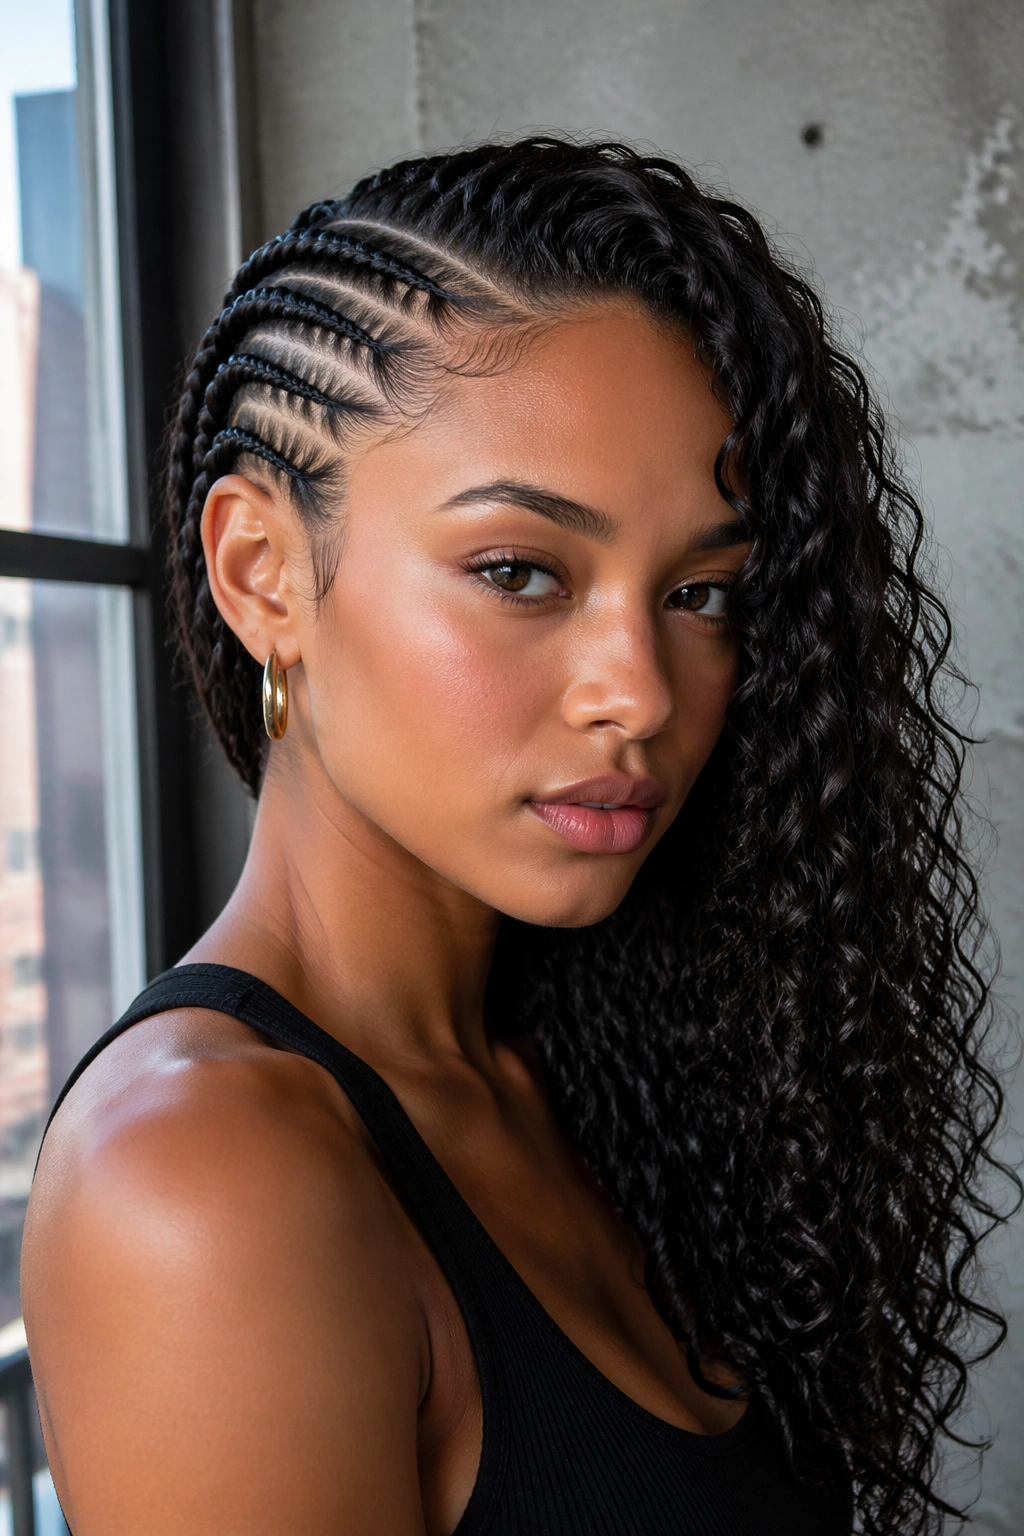
Apply curl cream heavy enough that the curl side looks wet, then let it air-dry without touching. The braided side stays matte. Wet curls next to matte braids is a strong contrast.
Unlike dry, fluffy curls, wet-look curls hold their shape longer and don’t frizz as quickly. They also reflect light differently — almost liquid. The downside: the hair feels sticky to the touch and product transfer to clothing is a real risk the first day.
Who this is for: women who like a dramatic, editorial finish and don’t mind the tackiness in exchange for longer curl definition.
14. Side Cornrows Meeting Curls in a Side Bun
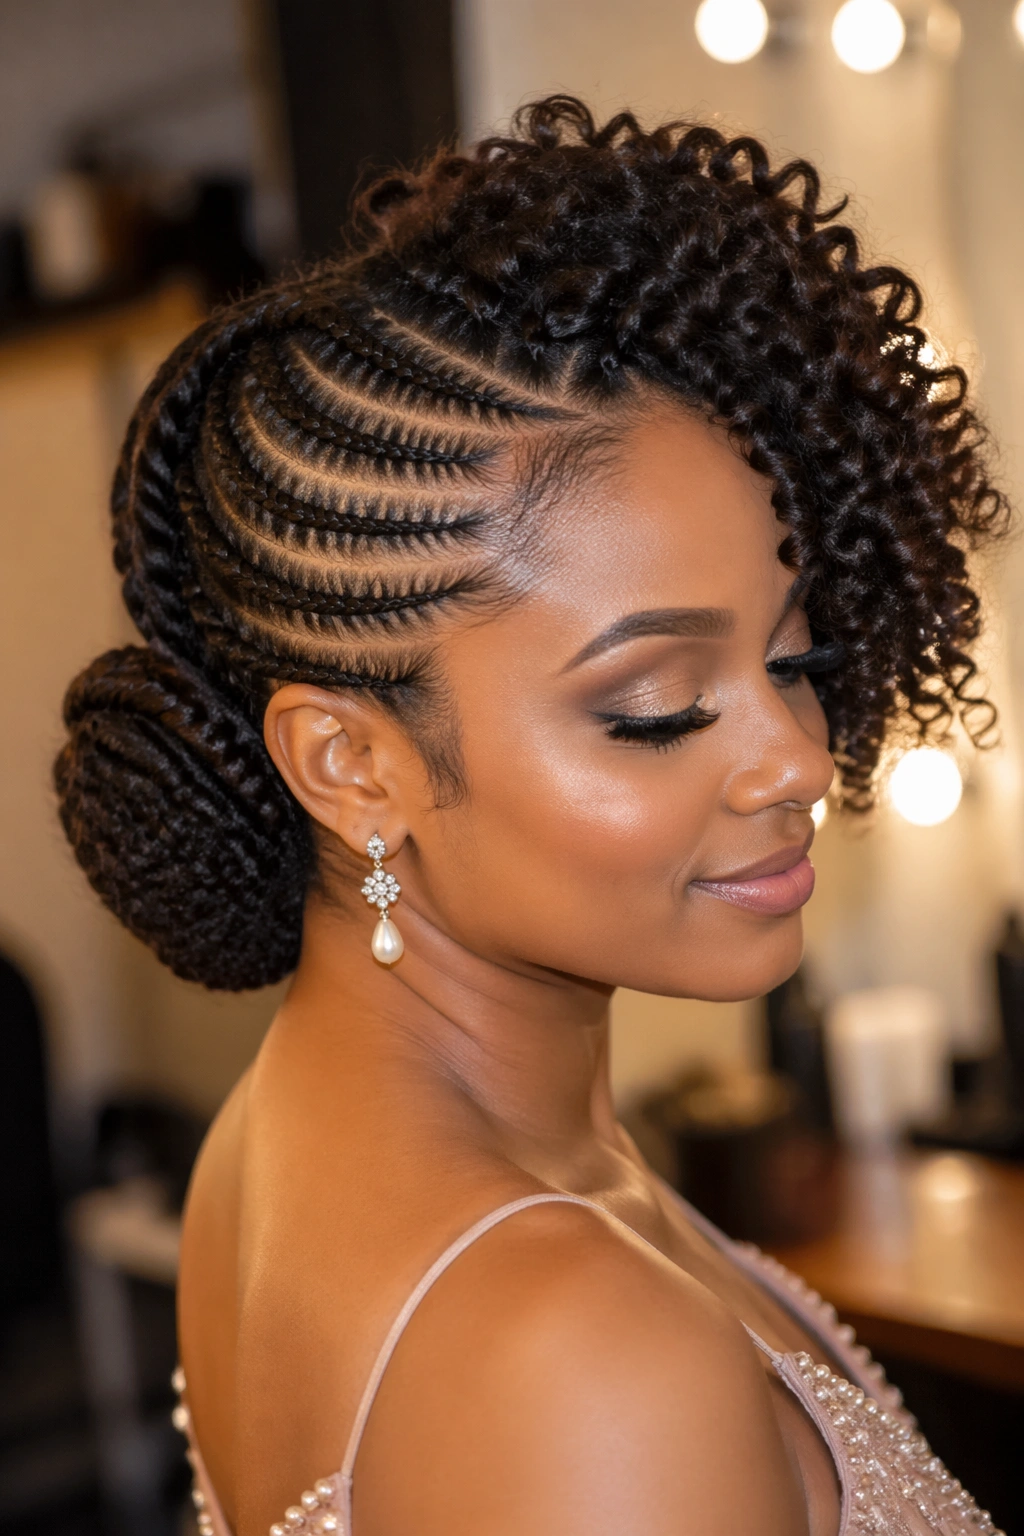
Instead of letting both halves fall loose, gather everything — braids and curls — into a low side bun on the opposite side of the parting. The braids wrap around the bun base. The curls explode out of the top.
This works for formal events. Weddings, galas, anything black-tie. The bun gives the style structure. The bursting curls give it drama.
Anchor with three to four U-pins placed perpendicular to the scalp, not parallel. Perpendicular pins hold through full nights of dancing.
15. Ghana Braid Side with Loose Curls
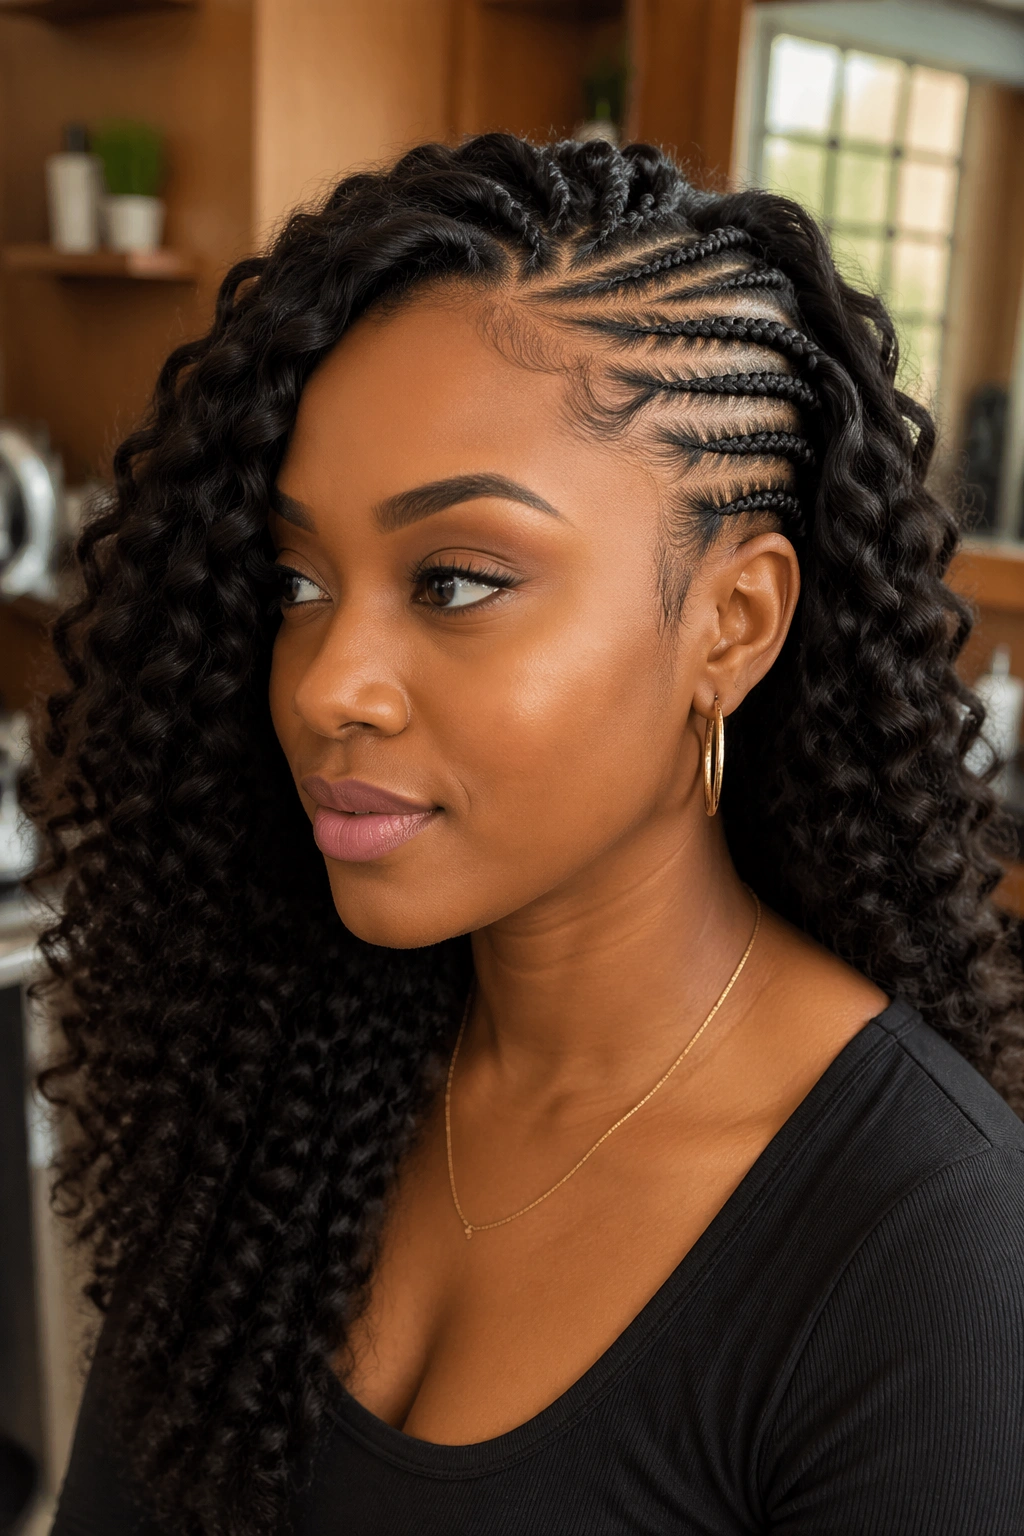
Ghana braids — the ones that start thin and get thicker as they go — give the side a sculptural shape that regular cornrows don’t. Paired with loose, barely-defined curls, the braided side looks almost architectural.
A handful of Ghana braids, three or four, running from the part down past the ear. The thickening effect happens because the braider is feeding in extra hair as they go.
- Start with your natural hair only at the part
- Feed in kanekalon in small sections every half inch
- Reduce feed-in amount as you approach the end for taper
Quick tip: the taper is what sells Ghana braids. If the braid is the same thickness from top to bottom, it reads as a regular cornrow with bad finishing.
16. Side Cornrows with Beaded Curl Tips
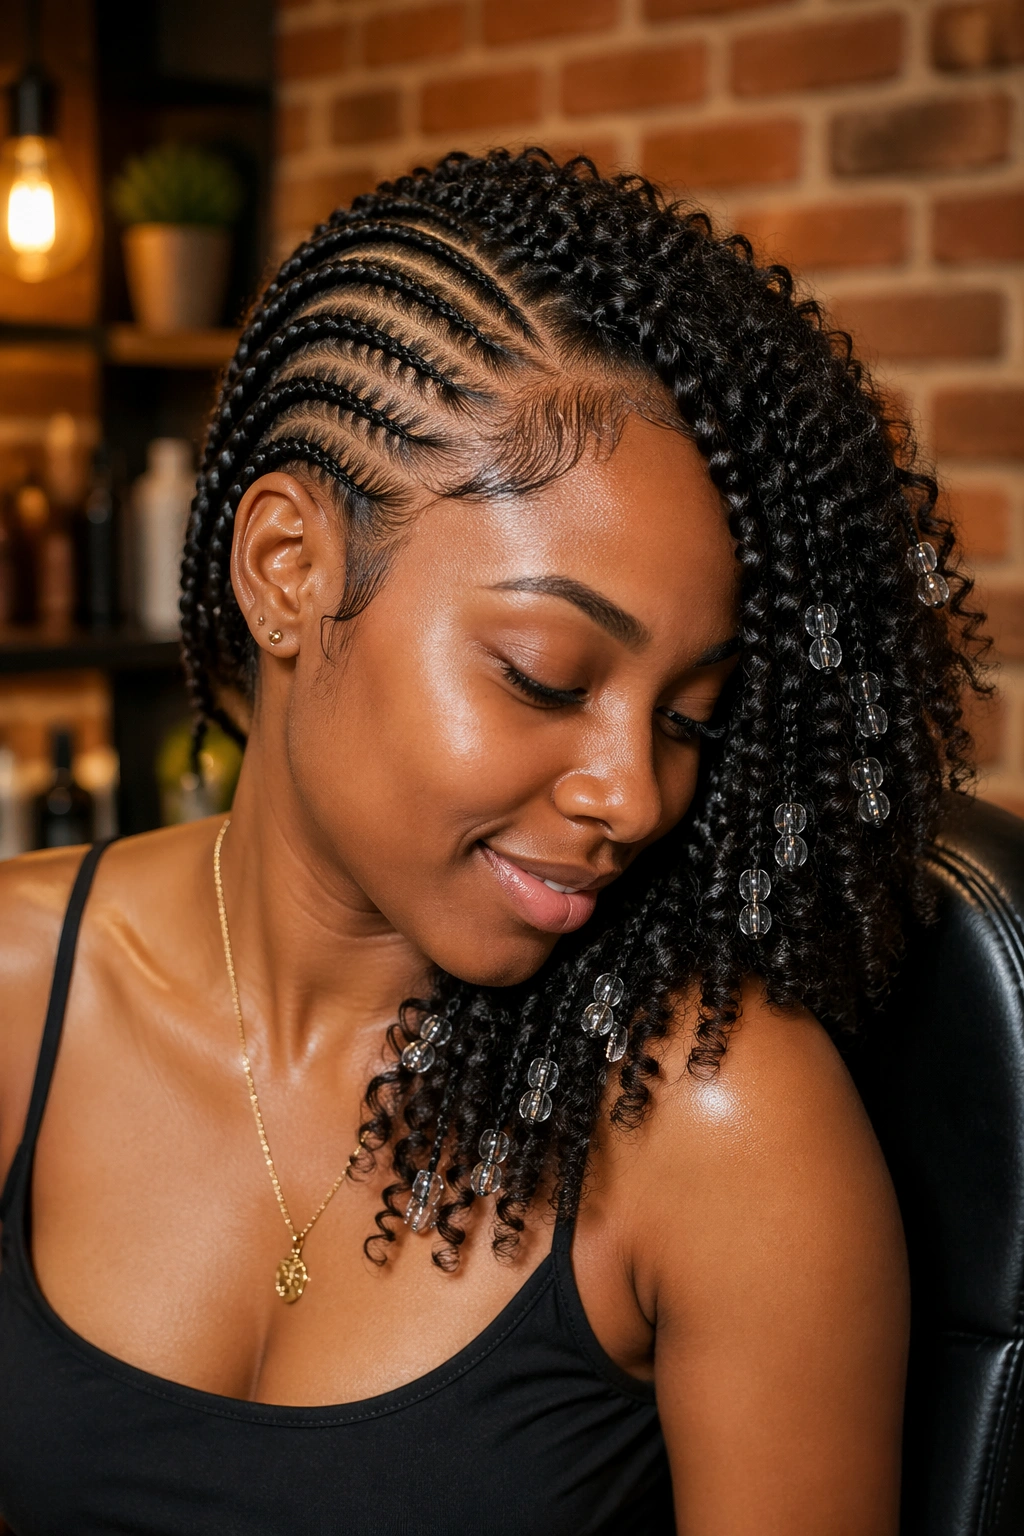
Glass beads threaded onto individual curls on the unbraided side. Not beads on the cornrows — beads on the curls.
Pick spots where a tight curl coils naturally. Thread a single bead. Crimp with a small metal clamp. The bead stays put without damaging the curl. You’ll get maybe six to ten beads scattered across the curl side.
The sound matters almost as much as the look. Beads clicking when you turn your head is a sensory detail the style is known for.
17. Cornrow Side with Half-Up Curl Ponytail
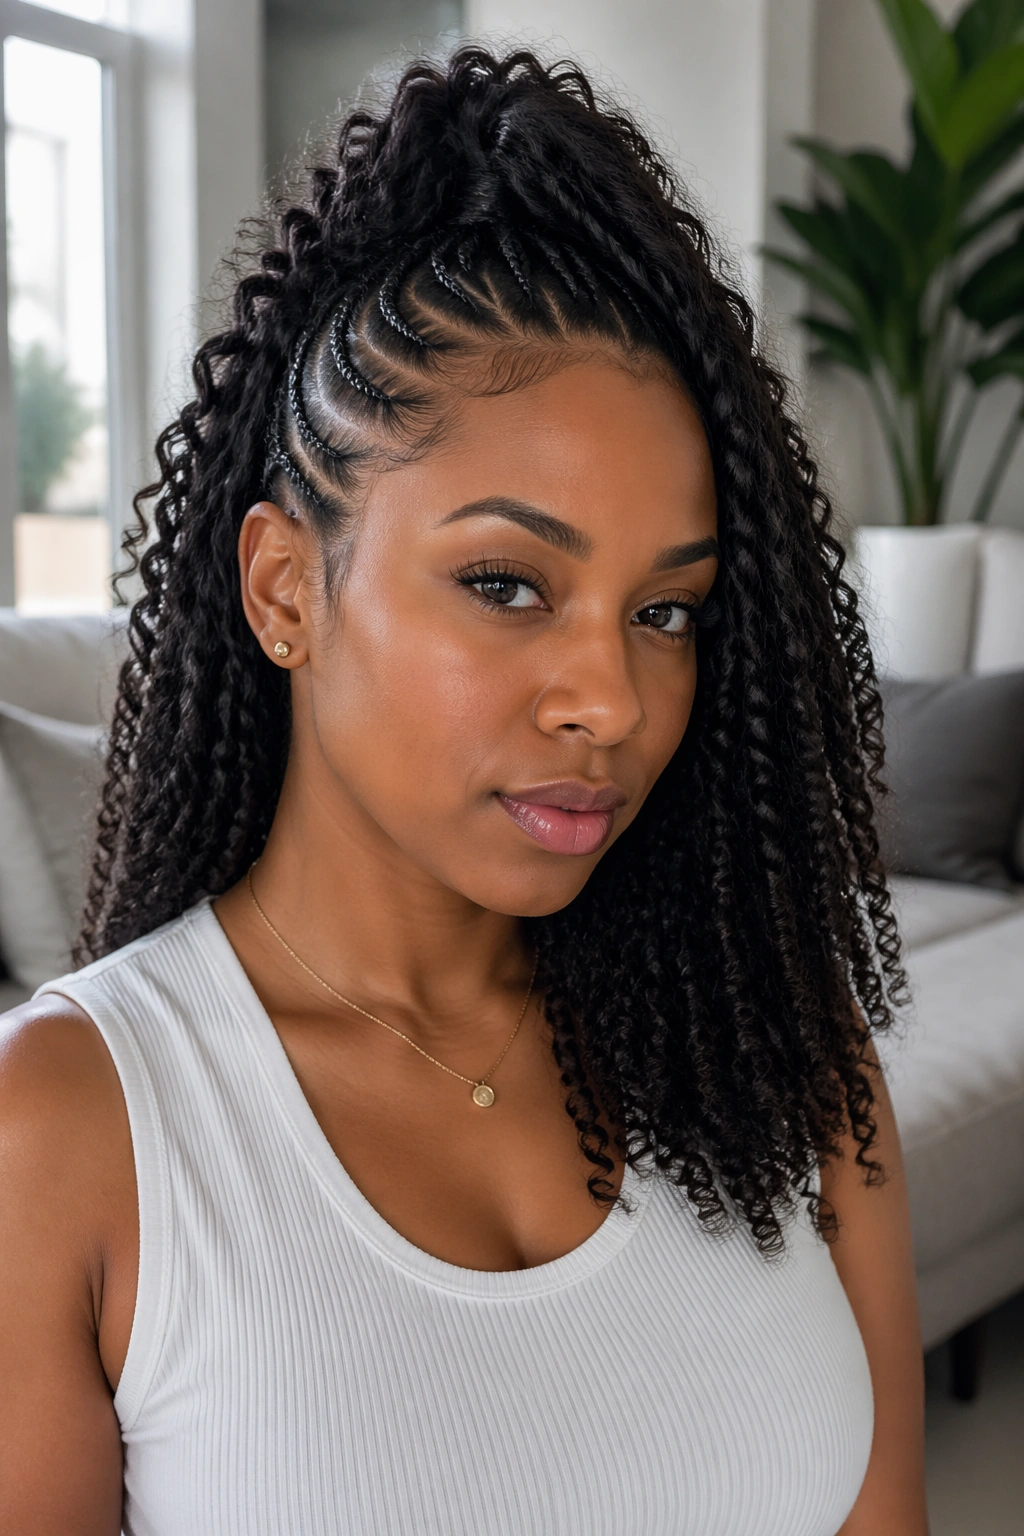
Gather the top half of the curl side into a high ponytail, letting the bottom half fall loose. The cornrow side stays entirely down. You get three different heights in one style — braids low, ponytail high, loose curls medium.
Who This Is For
Anyone who gets bored with styles that don’t have multiple “moods.” The ponytail can come down for a different look without having to redo anything. The cornrows act as the base the whole style pivots around.
This version also keeps curls off the face, which is huge if you’re working out or working in a kitchen or just hate hair touching your cheeks.
18. Side Cornrows with Voluminous Afro Curl
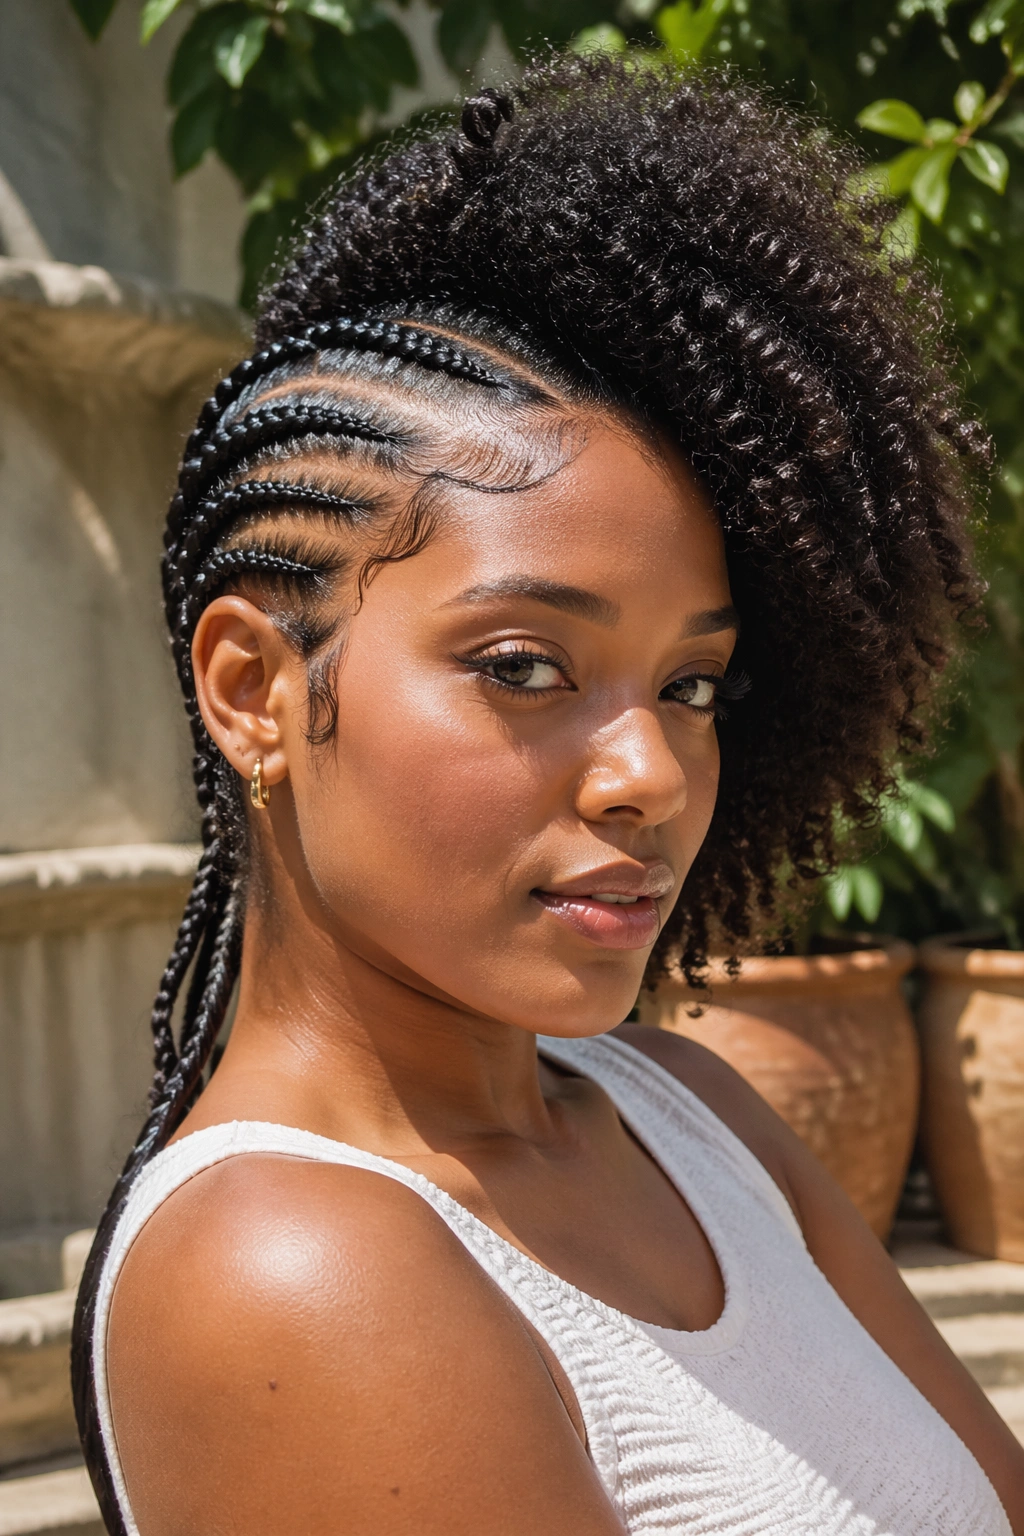
Skip the defined curl pattern entirely on the unbraided side. Fluff the natural texture into a full, lifted afro shape. The contrast between slick braids and free-form afro is pure.
An afro pick is essential. Work it from the scalp outward in small lifts. Don’t pick straight through — you’ll flatten the curl pattern and end up with a cloud instead of an afro.
The afro side ages well. Day one: defined. Day three: more volume. Day five: full halo. A style that improves with time is rare.
19. Side Cornrows with Finger-Coiled Curls
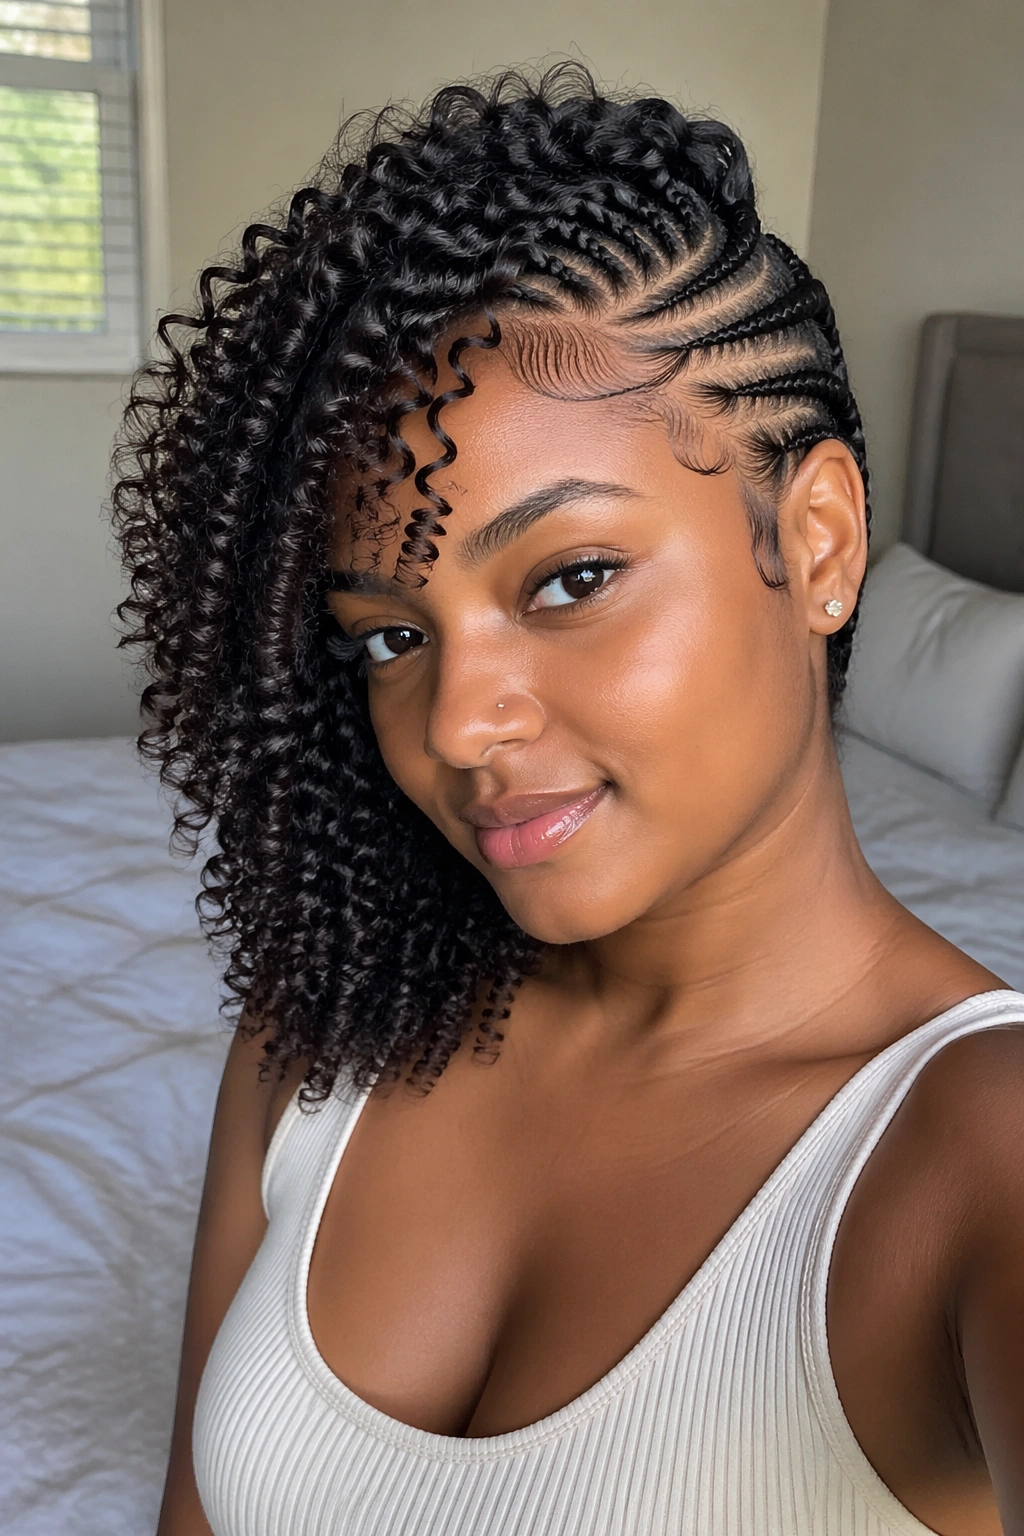
Tight finger coils on the unbraided side give you a defined, uniform curl pattern that matches in density with the tight braids on the opposite side.
Finger coiling takes time — about 30 seconds per coil, which adds up. For a full curl side, plan on 90 minutes. The result is a polished, almost architectural curl that holds shape for a full week if you sleep on it right.
Use a curl definer with slip. Twist-out creams are too heavy. Pure gel dries too crunchy. You need the middle — something that defines without crusting.
20. Side Cornrows with Twist-Out Curls
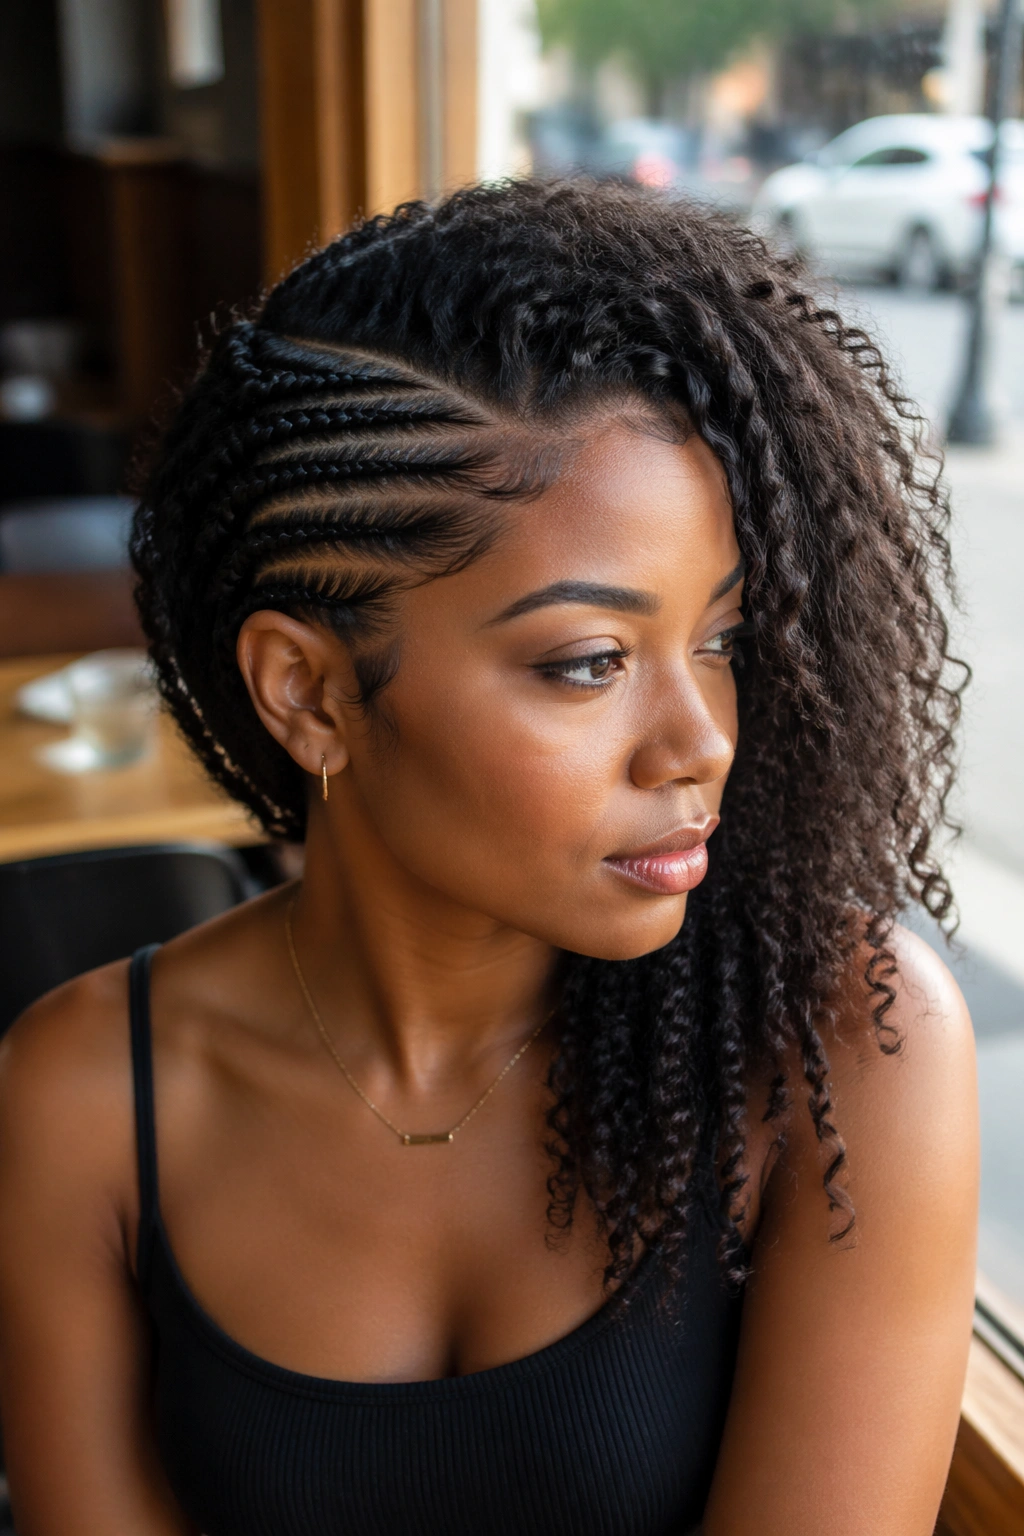
Two-strand twists set the curl side overnight. Unravel in the morning. The result is a crimped wave with natural movement that pairs easily with the braided side.
Unlike wand curls, twist-outs have a zigzag quality that reads more natural. They don’t look set. They look like your hair does this on its own. Which is kind of the point — an intentional style that doesn’t announce itself as intentional.
This version is the lowest maintenance of all twenty-two. Re-twist at night. Release in the morning. That’s it.
21. Cornrow Side with Curly Clip-In
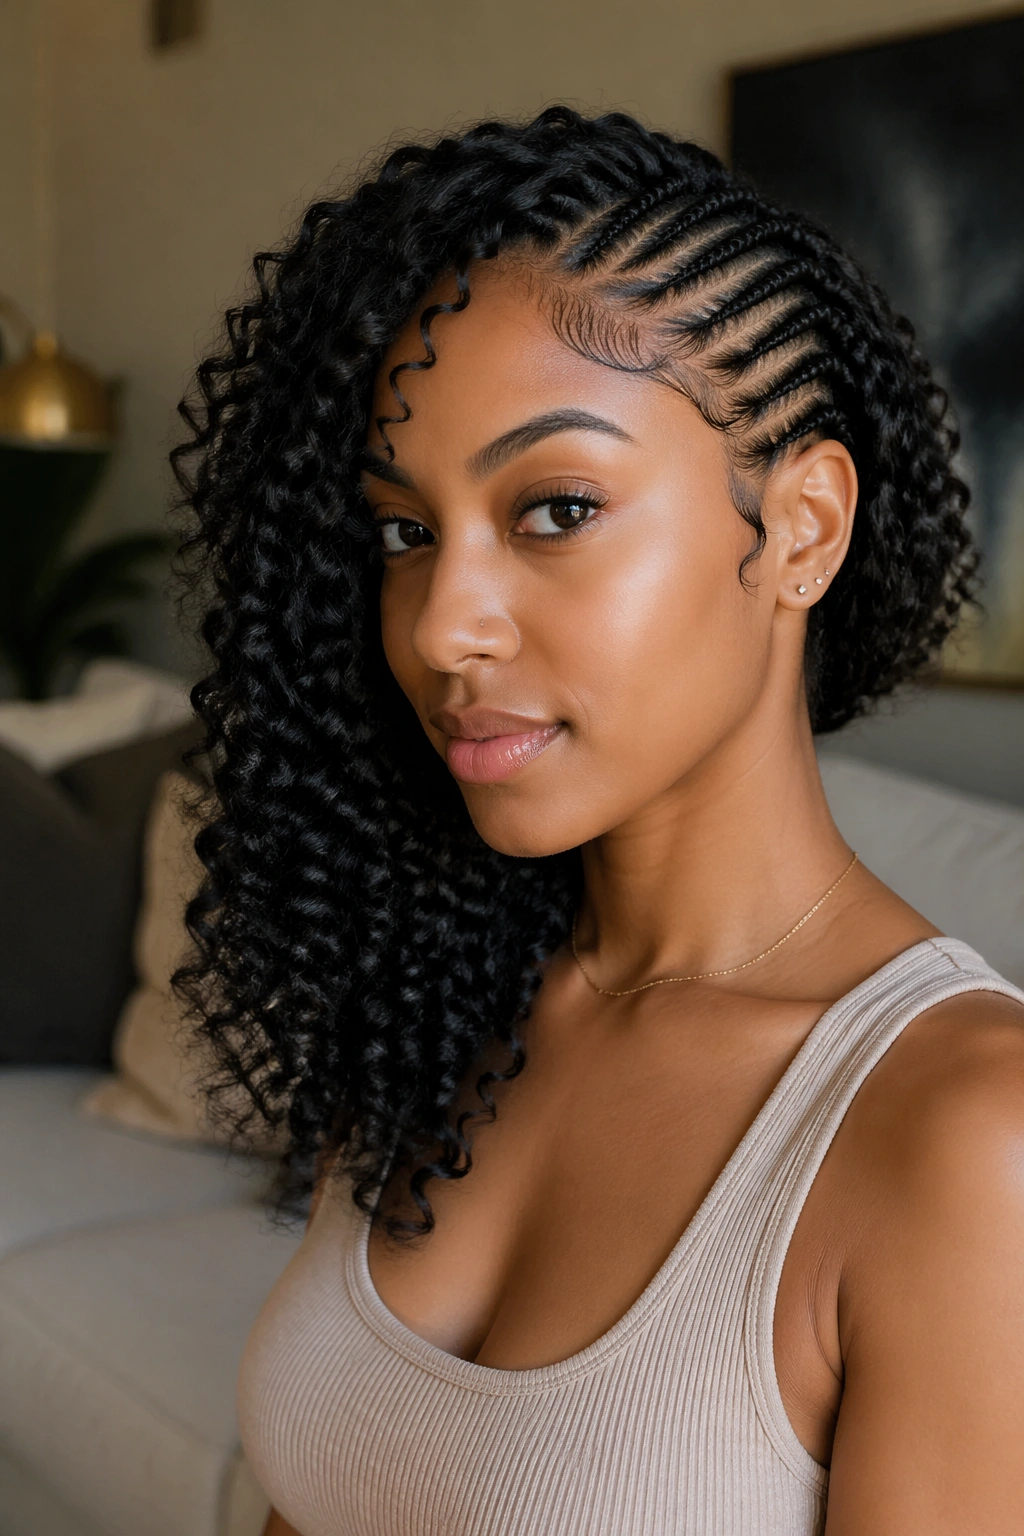
Keep your own hair tucked in a low bun on the unbraided side, then clip in curly extensions over the bun base. The cornrows stay natural. The curls are wefted hair.
Useful when you want to try curl density that your natural hair can’t produce. Also useful if you’re growing out a previous chemical treatment and your natural curl pattern is inconsistent.
Clip-ins come off at night without damaging the install. The cornrow side can last two weeks. The curly clip-in only needs to be worn on days you want the full look.
22. Side Cornrows with Roller-Set Old Hollywood Curls
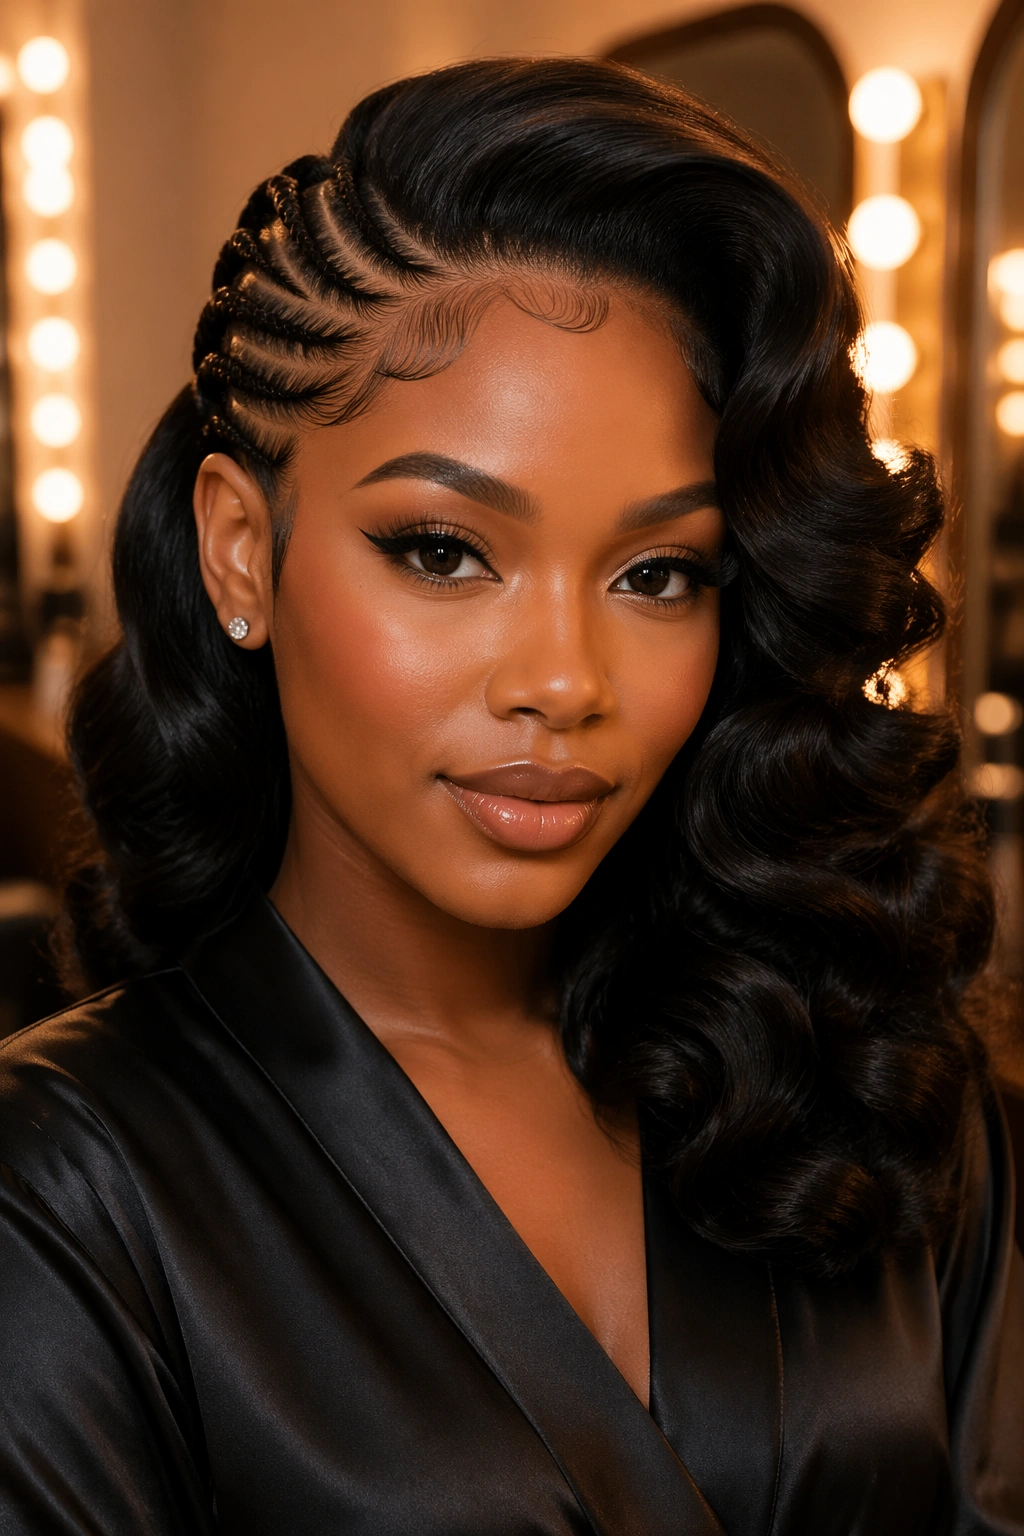
Finish the curl side with a full roller set the night before, then brush it out into soft, swept waves with a paddle brush the next morning. The curls don’t read as tight ringlets — they read as classic film-star waves.
Why It Works
Brushing out a roller set is what transforms it from a tight curl into a soft wave. The hair still has shape, but the ringlet boundaries are smoothed away. Paired with sharp cornrows, the look reads timeless rather than trend-based.
- Use foam or magnetic rollers for a softer finish than rubber rods
- Roll while hair is damp, let dry completely before removing
- Brush out with a boar-bristle paddle for smooth waves
- Finish with a light hold hairspray, not a firm one
This is the version I recommend when someone says they want to feel “dressed up” without wearing anything over-the-top.
Maintenance for Side Cornrows with Curls
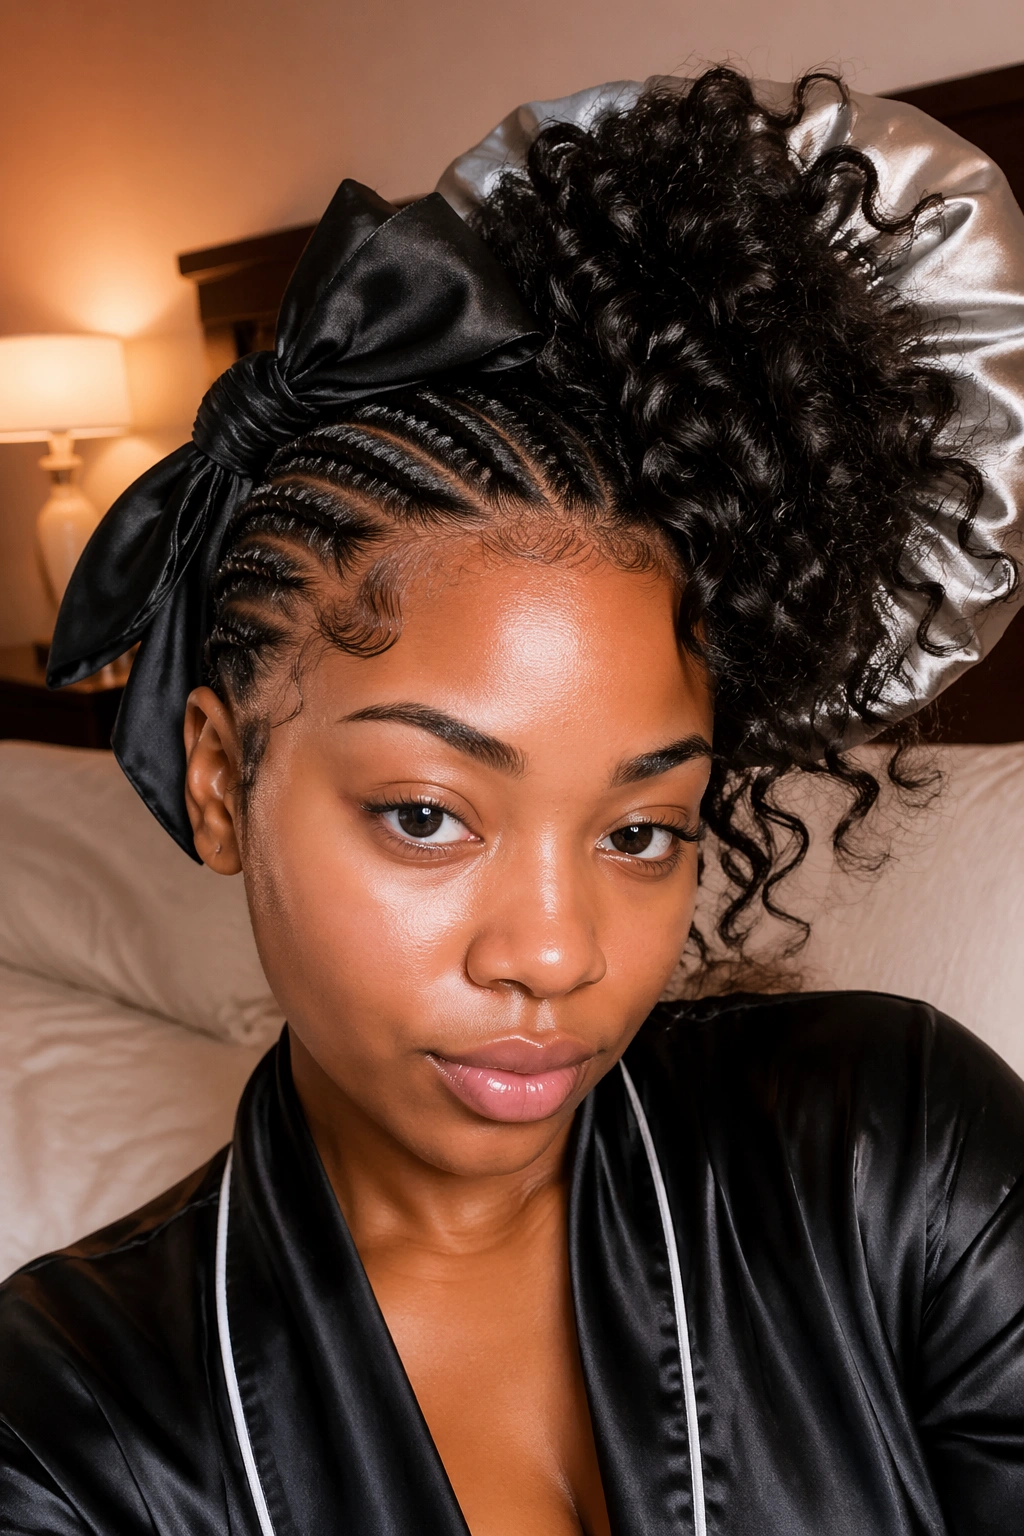
Two textures. Two sleep strategies. The braided side gets a silk or satin scarf tied down firmly. The curl side gets a loose pineapple under a bonnet. Trying to cover both with one cap or scarf flattens the curls and loosens the braids.
Moisturize the scalp along the part line every third day with a light oil — jojoba, grapeseed, or a peppermint-infused scalp oil. Avoid heavy butters near the braids. They attract lint and dull the finish.
Refresh the curl side every two or three days with a water-glycerin mist, scrunched gently with a microfiber towel. Don’t spray the braided side. Moisture there leads to frizz and slippage.
Edge gel should be refreshed once a week, maximum. Over-applying leads to buildup that flakes within days.
Picking the Right Version for Your Face Shape
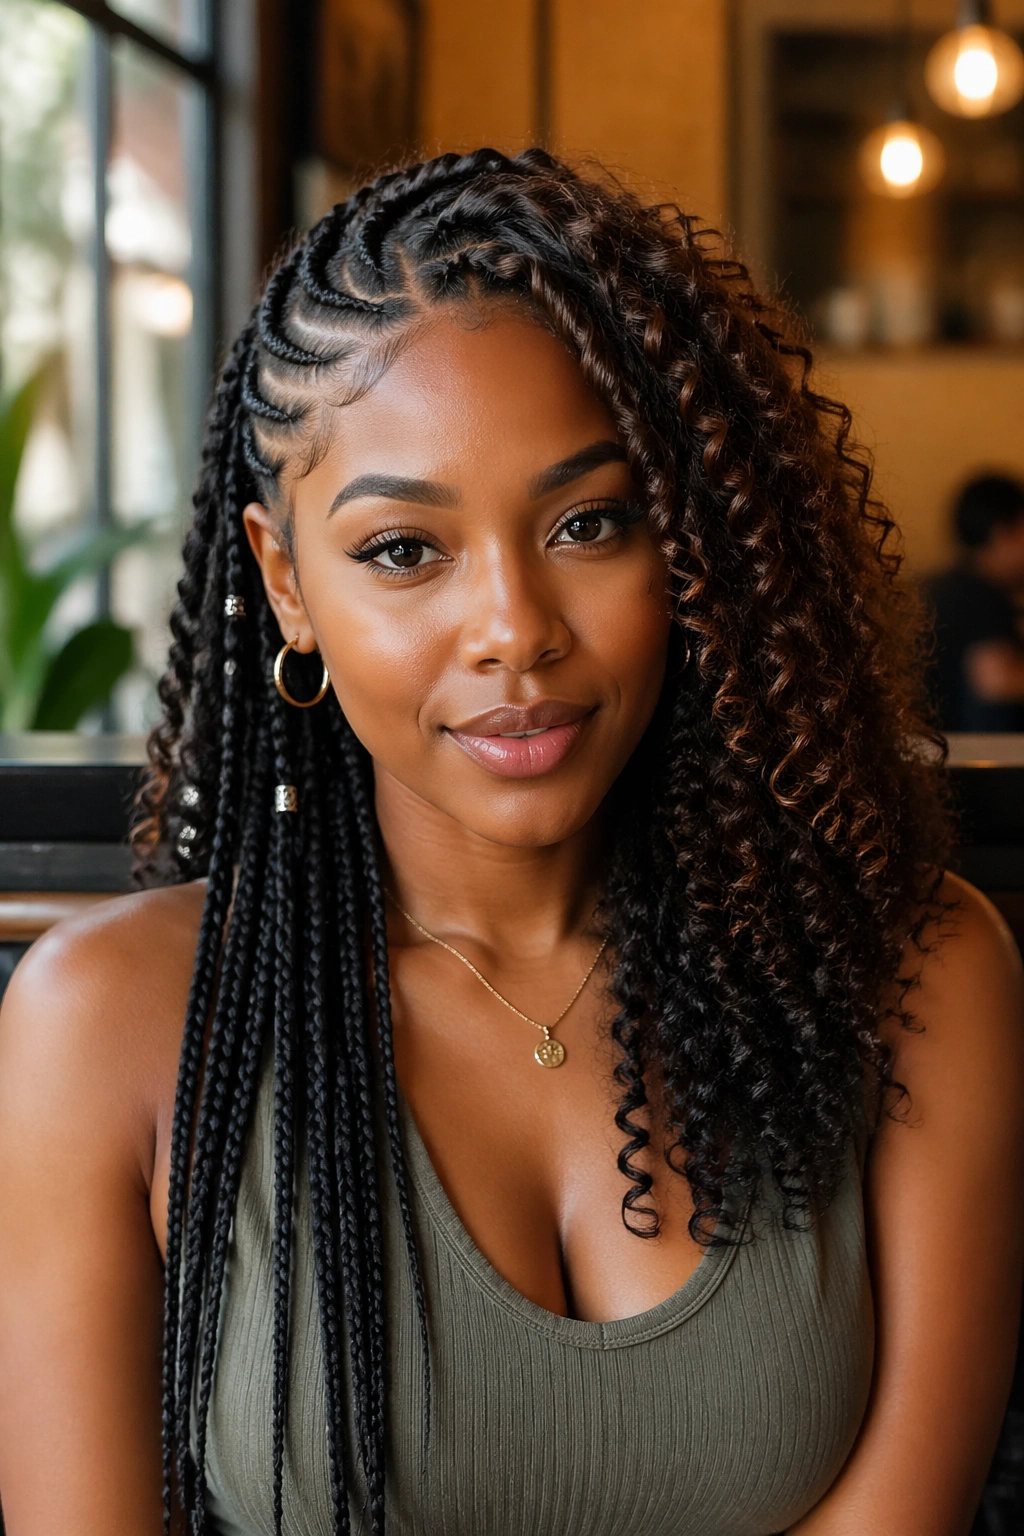
Round faces: longer braids, loose curls. Vertical line matters.
Oval faces: almost every version works. Try bolder parts.
Square faces: softer curl pattern, less structured braids. Softening the jawline is the goal.
Heart-shaped faces: pick versions where the curl side has more volume at the chin level than at the crown. Balance the forehead width.
Long faces: avoid high curls. Keep volume at cheek height.
The pairing matters more than most people realize. A sharp six-braid side with tight ringlet curls on a long face makes the face look longer. The same person in loose waves with wider-spaced braids looks balanced.
Common Mistakes with Side Cornrow Curls
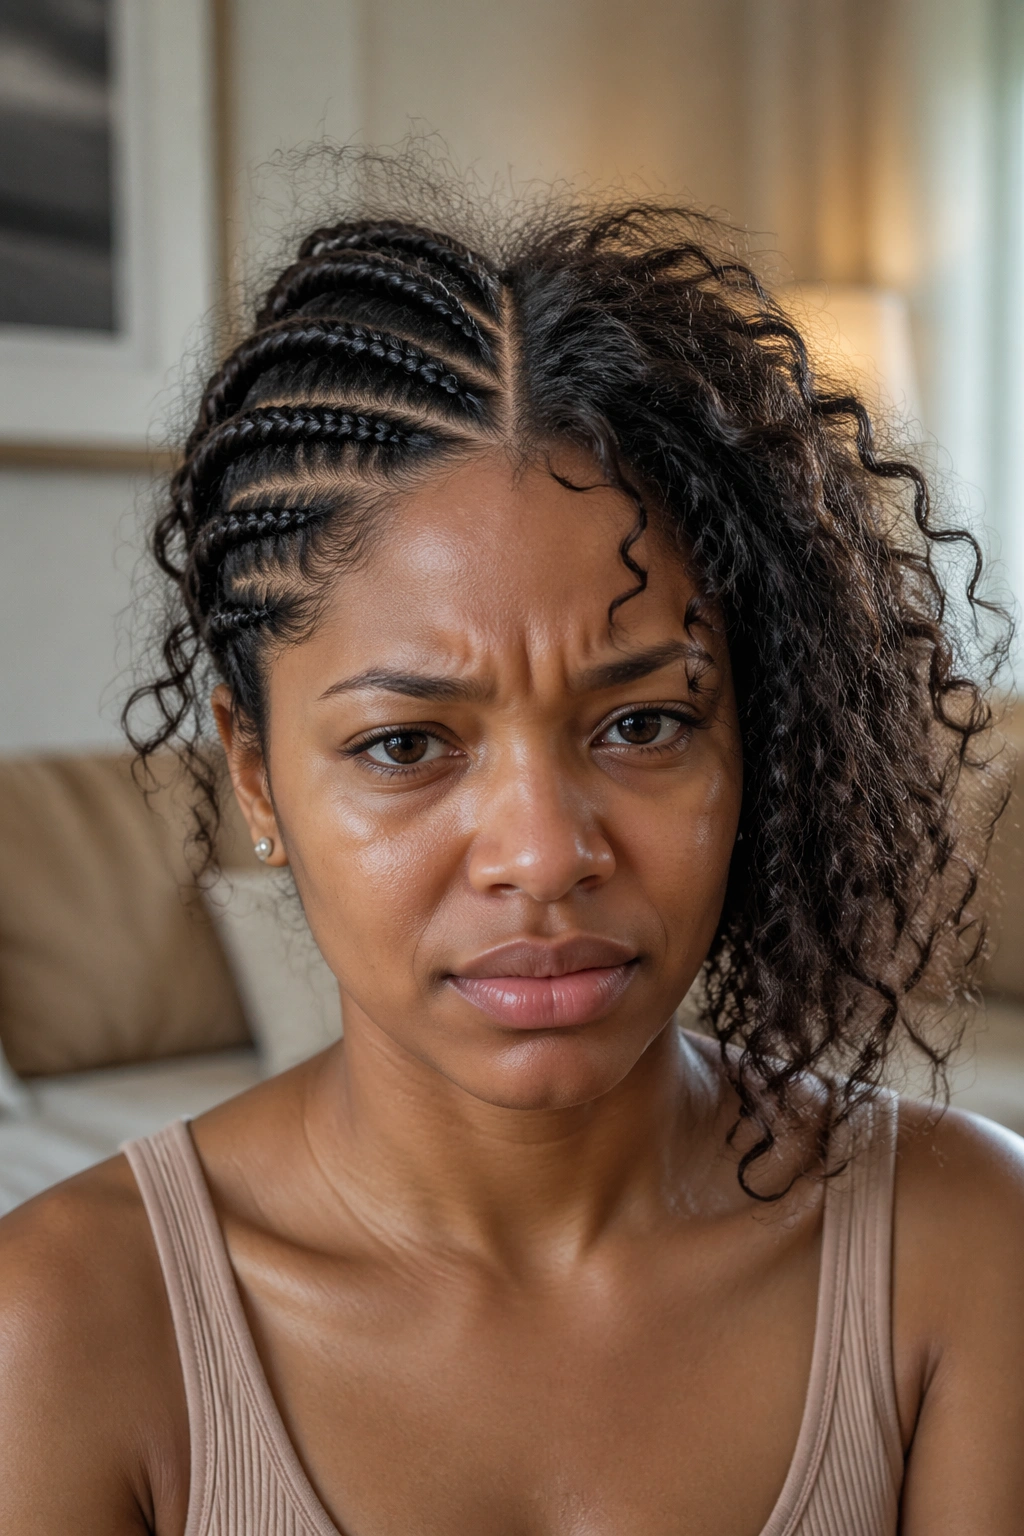
Mistake one: wetting the curl side too close to the part line. Water migrates. The braided side frizzes within hours.
Mistake two: using the same product on both sides. The braided side needs a heavy gel. The curl side needs a light, moisturizing cream. One product can’t serve both.
Mistake three: sleeping without a scarf the first night. Friction during hours five through seven of sleep is what causes the biggest day-one disturbance. That first night sets the tone for the whole two weeks.
Mistake four: skipping the pre-braid detangle on the curl side. You save 15 minutes and pay for it with tangled curls by day four.
Mistake five: ignoring the part line. The part is the bridge between the two halves. If the part wanders, the whole style reads sloppy no matter how clean each side is on its own.
Takedown Without Breakage
Takedown is where a lot of people damage hair they kept healthy for two weeks. Rushing is the enemy.
Start with the curl side. Detangle gently with fingers, then a wide-tooth comb. If you used crochet or clip-ins, remove those first.
The braided side comes next. Spray each braid with a water-conditioner mix — 60/40 — until the gel loosens. Unravel from the ends up, never top down. The tension comes off gradually that way.
Expect one full hour for a thorough takedown, longer if you used extensions. Plan it on a day when you can follow with a full wash and deep condition. Your scalp and your curl pattern will both thank you.
After takedown, do nothing with your hair for 48 hours beyond washing and conditioning. No new style. No heat. Let the roots settle. This single pause is what separates women who wear protective styles for years without damage from those who end up with thinning edges.
Side cornrows with curls have staying power because the style works across ages, hair textures, and occasions. Whether you pick the six-braid classic or the asymmetric long wand version, the principle holds — one side sculpted, one side free. Get the ratio right and every version of this look will photograph like a magazine cover and feel like the easiest thing you own.
