



Zig zag cornrows are what happens when you look at standard all-back cornrows and decide “straight lines are boring.” Those sharp V-cuts in the parting, the angular peaks and valleys, the way the scalp catches light between the braids — zig zag cornrows turn the parting pattern itself into the main event. For Black women wearing textured hair, the style is a chance to wear geometry on your head. It’s art, protection, and statement in one install.
The appeal of zig zag cornrows for Black women is practical on top of the visual drama. The zigzag parts interrupt the flat read of straight cornrows, which means the scalp has rhythm instead of monotony. Photos hit differently. Angled lighting catches the ridges. Even a simple six-row zigzag install commands more attention than fifteen perfectly straight rows.
I’ve watched zig zag cornrows hit mainstream recognition in Black hair spaces over the course of a decade, moving from specialty salon service to a technique stylists expect clients to ask about. The 22 variations below cover the span — simple beginner zigzags, elaborate signature-braider zigzags, zigzag-plus-color combinations, and unexpected hybrid takes.
Start here.
What Defines a Zig Zag Cornrow
Not just “angled parts.” Real zig zag cornrows have specific visual markers. The parts zigzag but the braids themselves stay as cornrows — low, close to the scalp, running along the zigzag path rather than crossing over it.
The braid follows the zigzag. That’s the technical rule. If the braid is straight and only the part wiggles, you don’t have a zigzag cornrow — you have a zigzag-parted straight cornrow. Different style, different install.
True zig zag cornrows require the braid itself to turn at each peak. Which is why the technique takes more skill than any equivalent straight-line style. The hand has to change braiding direction mid-row, without the tension breaking, without the braid raising off the scalp.
The Parting Is the Whole Project
Spend more time on the parting than on the braiding. That’s backwards from how most people approach cornrows, but for zigzags it’s correct.
A 40-minute parting session for a full head of zigzag cornrows is normal. Rushed parting leads to uneven V-cuts, wandering lines, and a finished style that looks like a mistake.
Use a rat-tail comb with a firm plastic pin. Draw each zigzag section slowly — peak, valley, peak, valley — and clip each section with a small rubber band before moving to the next. Consistent section width is everything. Inch-and-a-half sections across the whole head. Not an inch-and-a-quarter here and two inches there.
Drawing the zigzag on your own head is hard. A second set of hands helps. If you’re solo, use two mirrors and your phone camera to check symmetry every few sections.
Prep That Holds the Zigzag
Zigzag cornrows hold only as long as the parting stays sharp. Product choices decide whether the parts still read clean on day five or fuzz into obscurity by day two.
- Edge gel with real hold (olive oil, flaxseed, or aloe-based) applied at the hairline and along each zigzag peak.
- A small amount of styling mousse or foam worked into each section BEFORE braiding to give the strand tackiness without stiffness.
- Dry, stretched hair before install — wet hair doesn’t hold a sharp zigzag.
Heavy butters are the enemy. They slick the hair so much that the zigzag can’t grip into place. Save butters for the ends of braids, not the roots.
Tools That Matter for Zigzag Precision
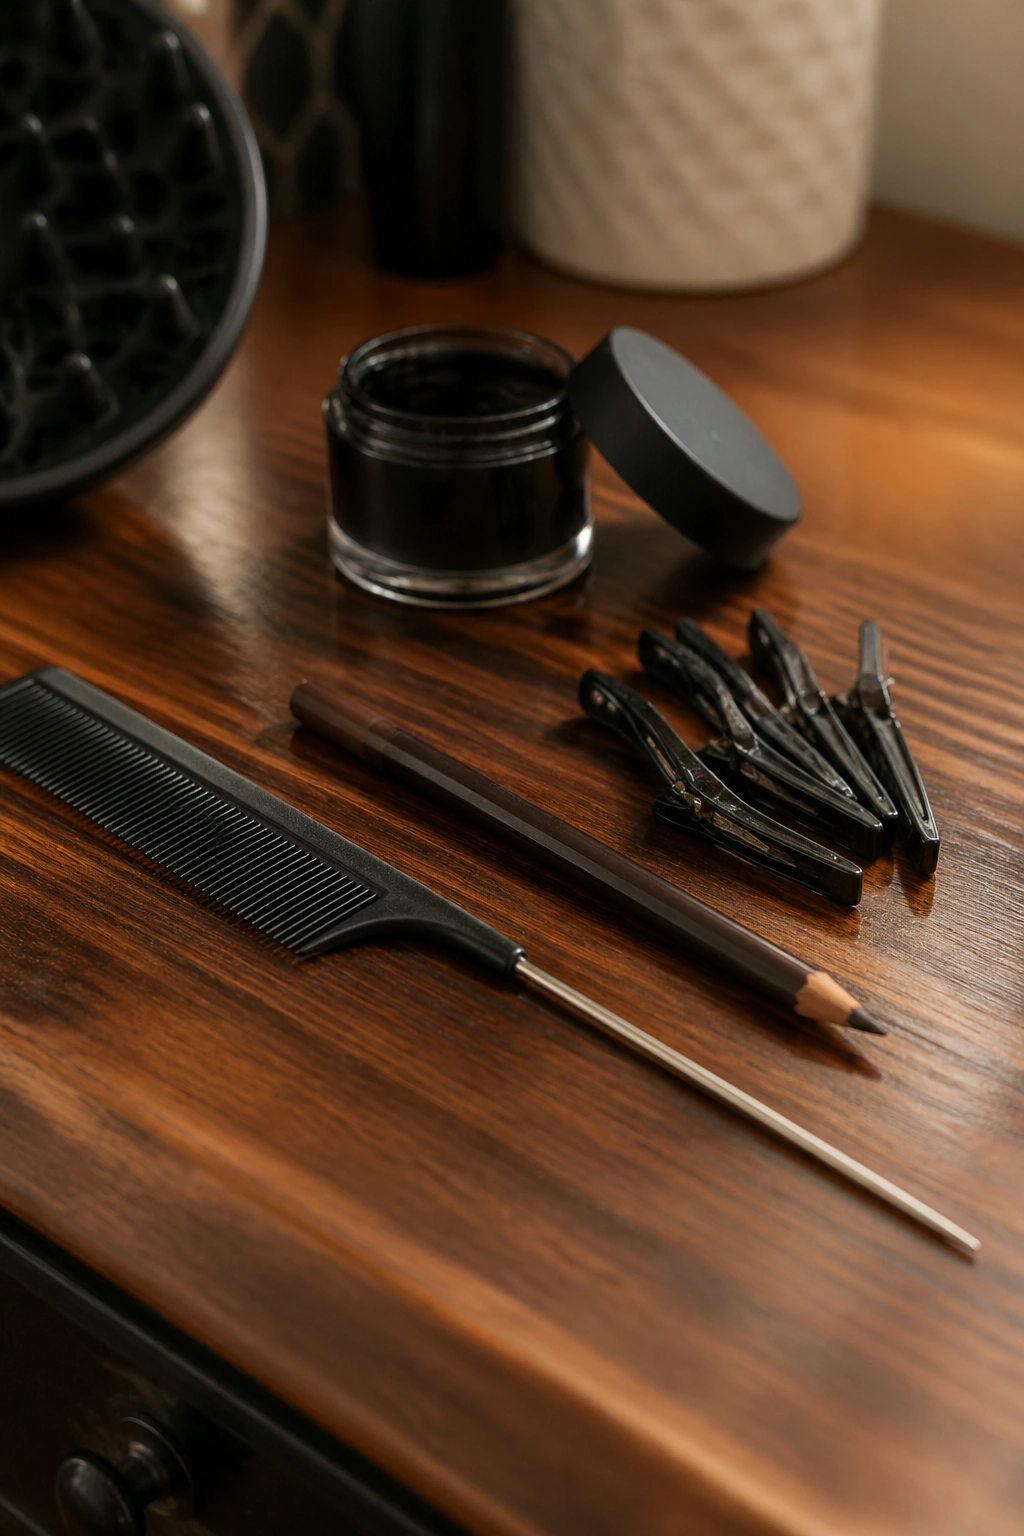
A fine-point rat-tail comb. A mirror with no distortion (check by drawing a straight line on paper held at the mirror — any wobble in the reflection means the mirror is warped). A pencil or washable eyeliner for sketching the zigzag peaks on the scalp before parting. Small metal or plastic clips for holding divided sections. Edge gel. A fan or a cool setting on a blow dryer to set edges after.
That pencil-on-scalp trick sounds odd. It works. A washable brow pencil marks the intended peak locations without parting, letting you see the pattern in full before committing. Wipe off with a damp cloth after the parts are cut.
Symmetric vs Asymmetric Zigzag Patterns
Symmetric zigzags — mirrored peaks on both sides of a center line — are the classic look. Regal, organized, photogenic. The downside: any slight asymmetry in parting becomes obvious because the eye expects mirror image.
Asymmetric zigzags — peaks in irregular positions — forgive more. The eye doesn’t expect mirroring, so small variations don’t read as mistakes. For self-installs, asymmetric patterns are genuinely easier despite looking more complex.
Pick based on your comfort with precision parting, not based on which pattern looks harder.
1. Classic Five-Row Symmetric Zigzag
The starting point for zig zag cornrows. Five braids running from hairline to nape. Each braid path follows a symmetric zigzag with three peaks and two valleys per row.
What Makes It Work
- Five rows is enough to showcase the zigzag pattern without becoming overwhelming.
- Symmetric parts read classic and flattering on most face shapes.
- Install time of 2-3 hours is manageable.
Stylist note: Start the zigzag about an inch behind the hairline, not directly at the edge. Starting at the edge puts tension on the front hairs where it does the most damage.
2. Seven-Row Tight Zigzag
Bolder than the five-row. Seven braids mean smaller sections, tighter zigzags, and more visible geometry across the scalp. The pattern reads denser. The style reads more intentional.
Seven rows requires more precision because the smaller sections amplify parting mistakes. A wobble that hides in a 2-inch section becomes obvious in a 1-inch section. Worth the extra effort for the payoff — seven-row zigzag styles photograph like scalp jewelry.
Install time jumps to 3-4 hours. Budget accordingly.
3. Zigzag Cornrows With Beaded Ends
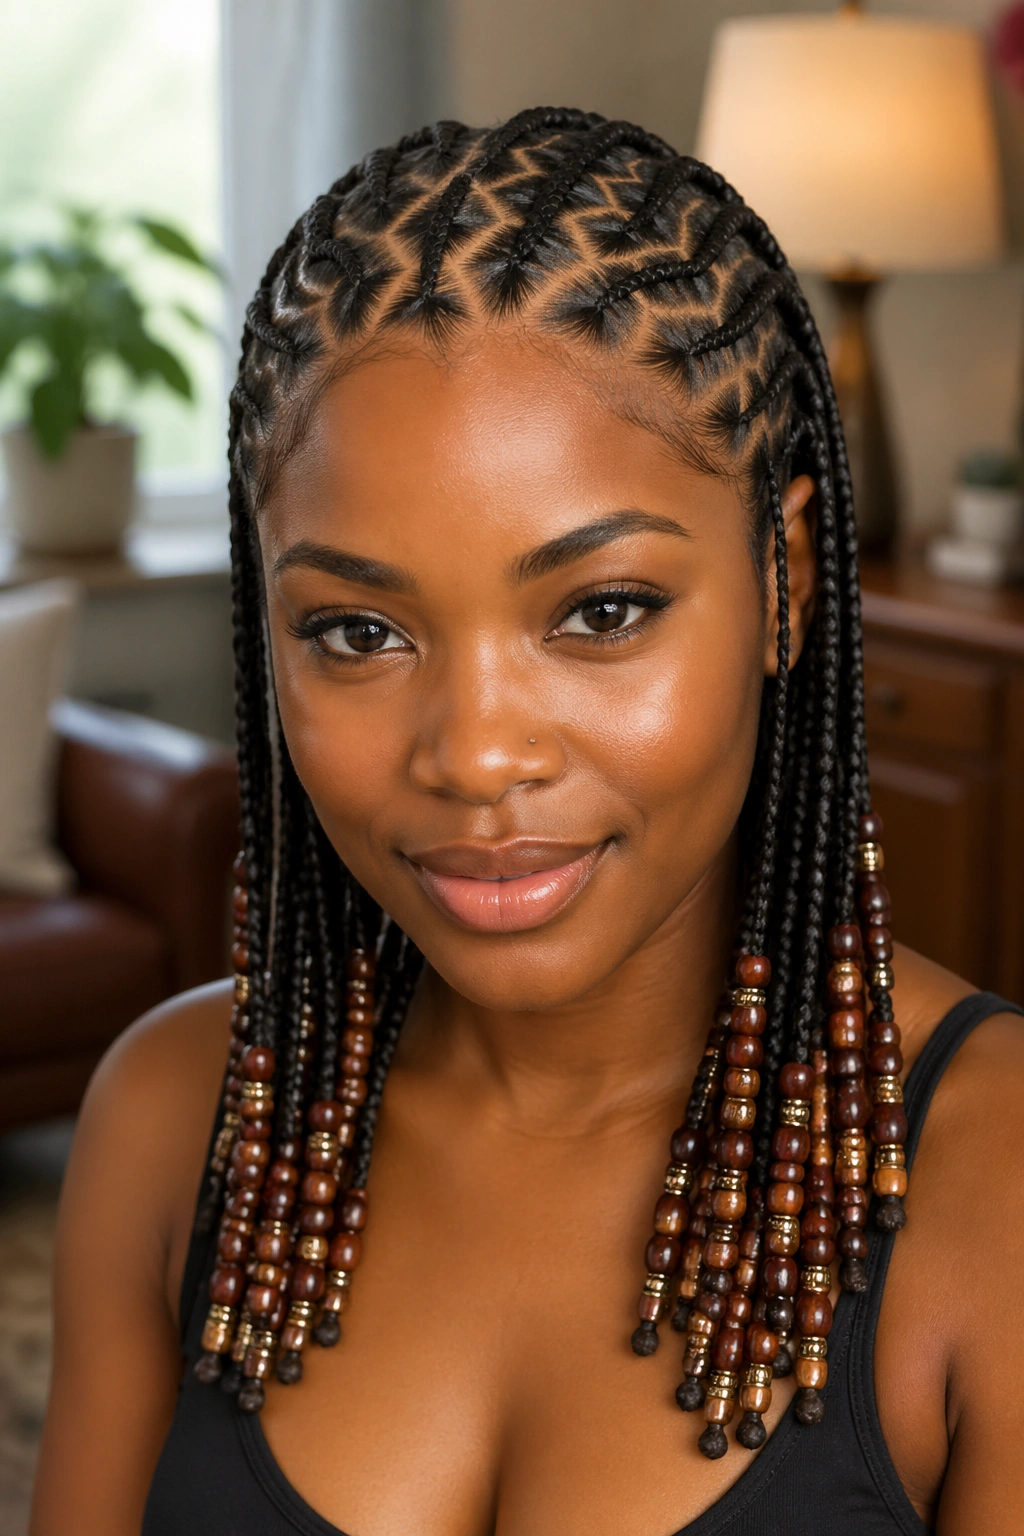
Standard zigzag cornrows finished with beaded ends. Wooden beads, brass beads, or glass beads threaded onto the last two inches of each braid and secured with a small rubber band.
The beads add weight to the braid ends, which keeps them hanging rather than curling up. They also introduce sound — a soft clack with movement. The combination of geometric top and decorated ends makes the style read as a curated outfit, not just a hairstyle.
Bead colors: match to your skin tone for cohesion, contrast with your skin tone for statement.
4. Zigzag Cornrows Into a High Bun
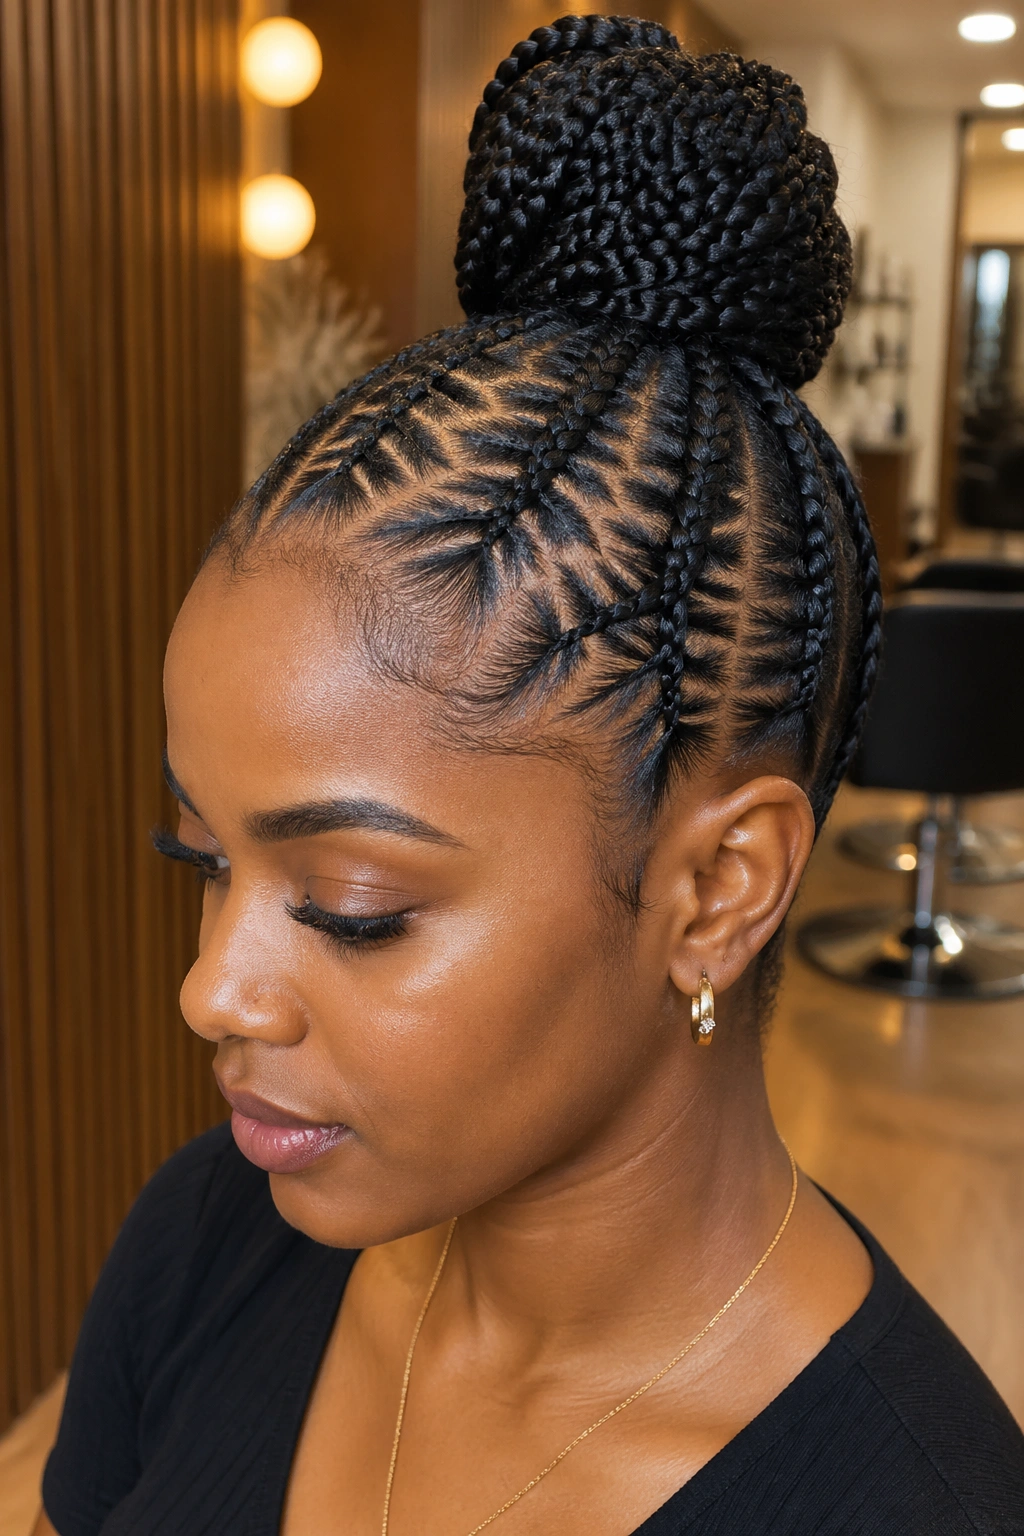
Zigzag cornrows all the way from hairline to crown, where all rows converge at a central point and coil into a high round bun.
Combining the zigzag base with an updo finish doubles the impact. The zigzag shows the scalp pattern from every angle. The bun on top adds height and sculpture. Together they read as one complete silhouette rather than two separate ideas.
For shorter natural hair, kanekalon feed-in at the ends provides enough length to form a proper bun.
5. Asymmetric Zigzag With Side Sweep
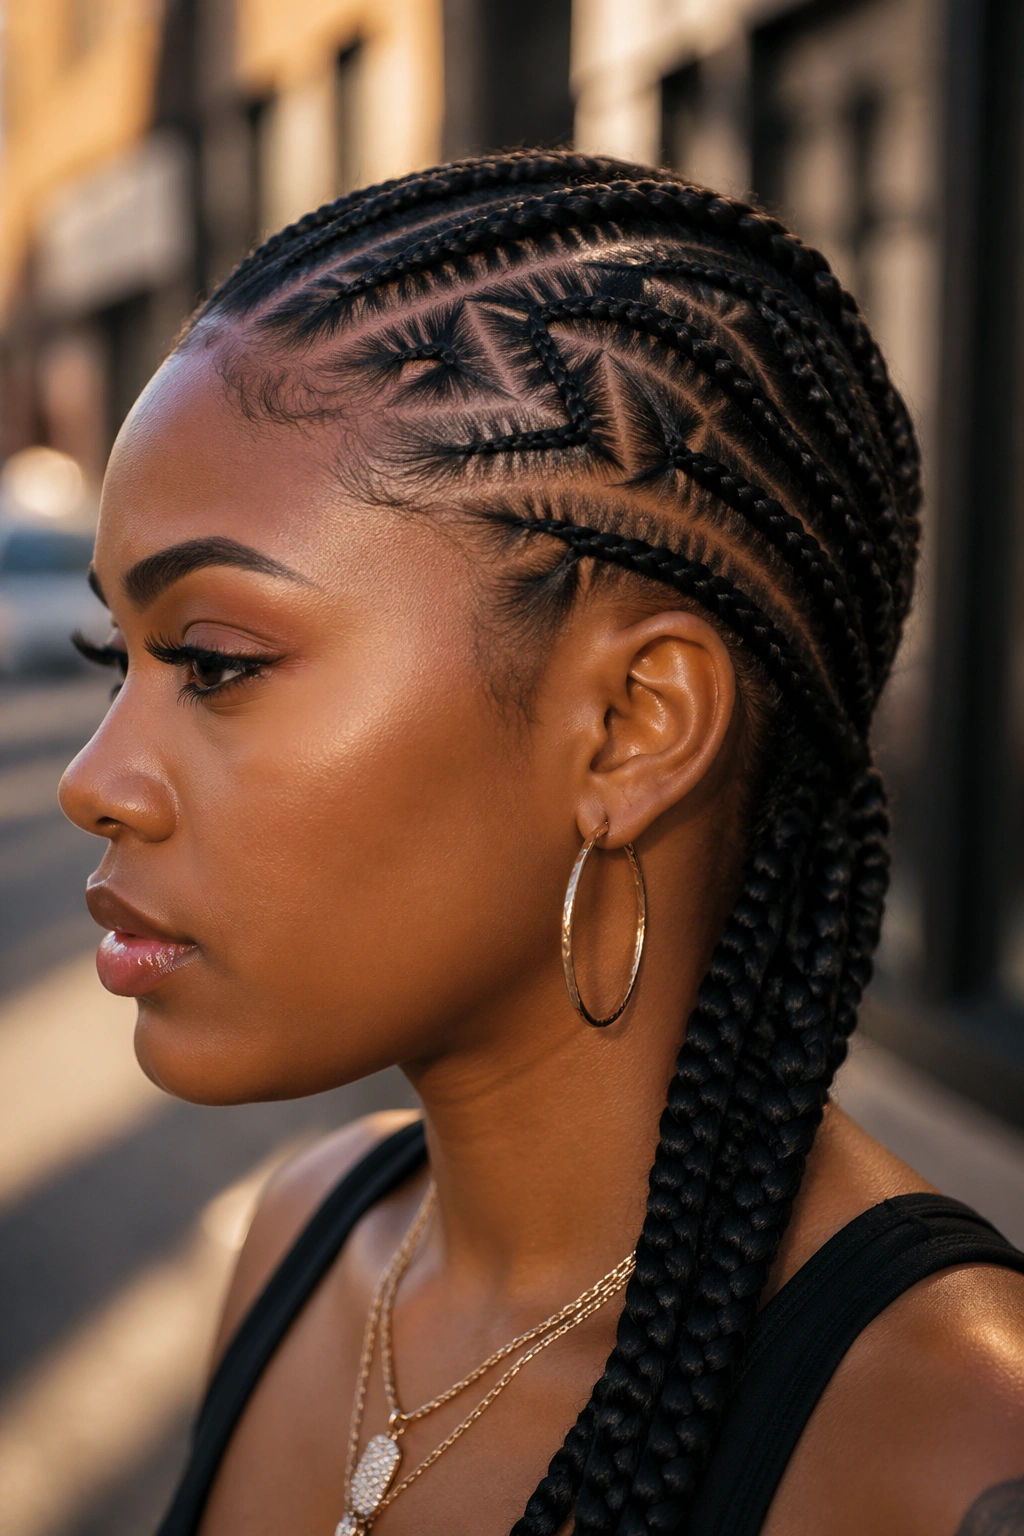
The zigzag peaks aren’t mirrored. They travel diagonally across the head, sweeping from one temple down toward the opposite ear. The asymmetry gives the style dramatic directionality.
Unlike symmetric zigzags, this one photographs best from the side angle your peaks point toward. The sweep direction becomes the dominant visual line.
Good for people who always pose from one preferred angle. The zigzag sweep reinforces that angle.
6. Thick Chunky Zigzag (Three Rows)
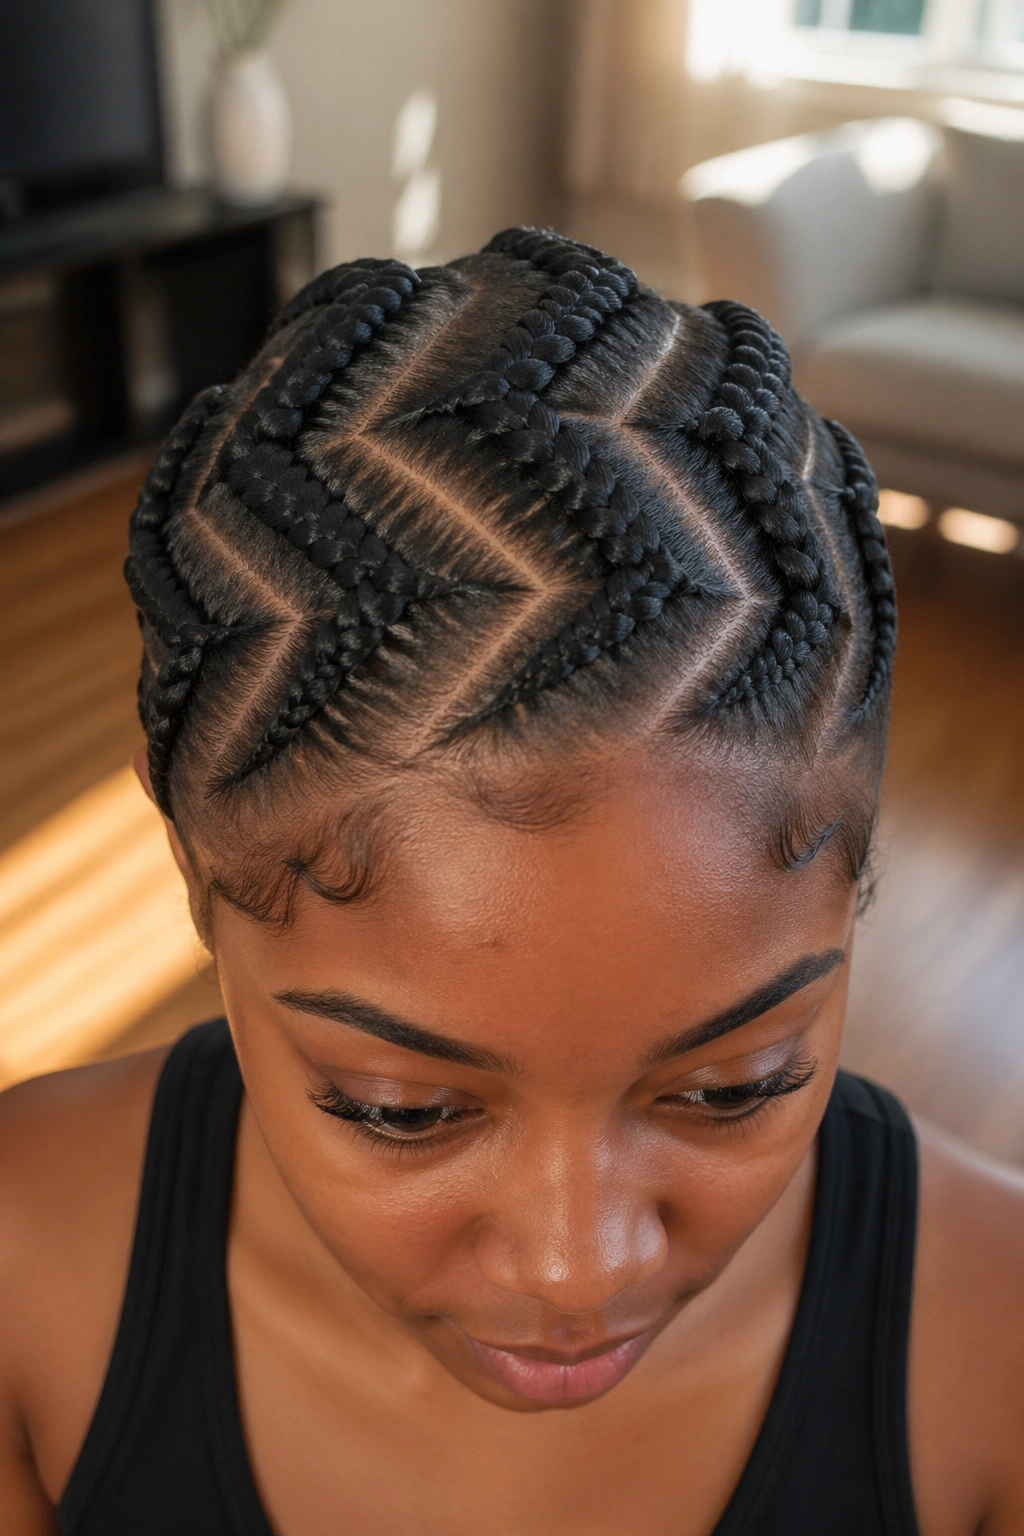
Just three enormous zigzag cornrows. Each section is 3-4 inches wide. The zigzag path is exaggerated — big peaks, big valleys, wide amplitude.
The chunky version trades refinement for impact. Three rows is the minimum to still look like a zigzag pattern rather than random parts. The install is faster than any other zigzag style — under 90 minutes — because of the massive sections.
Best for weekends, casual wear, or as a base style for protective wig cap installations.
7. Micro Zigzag Cornrows
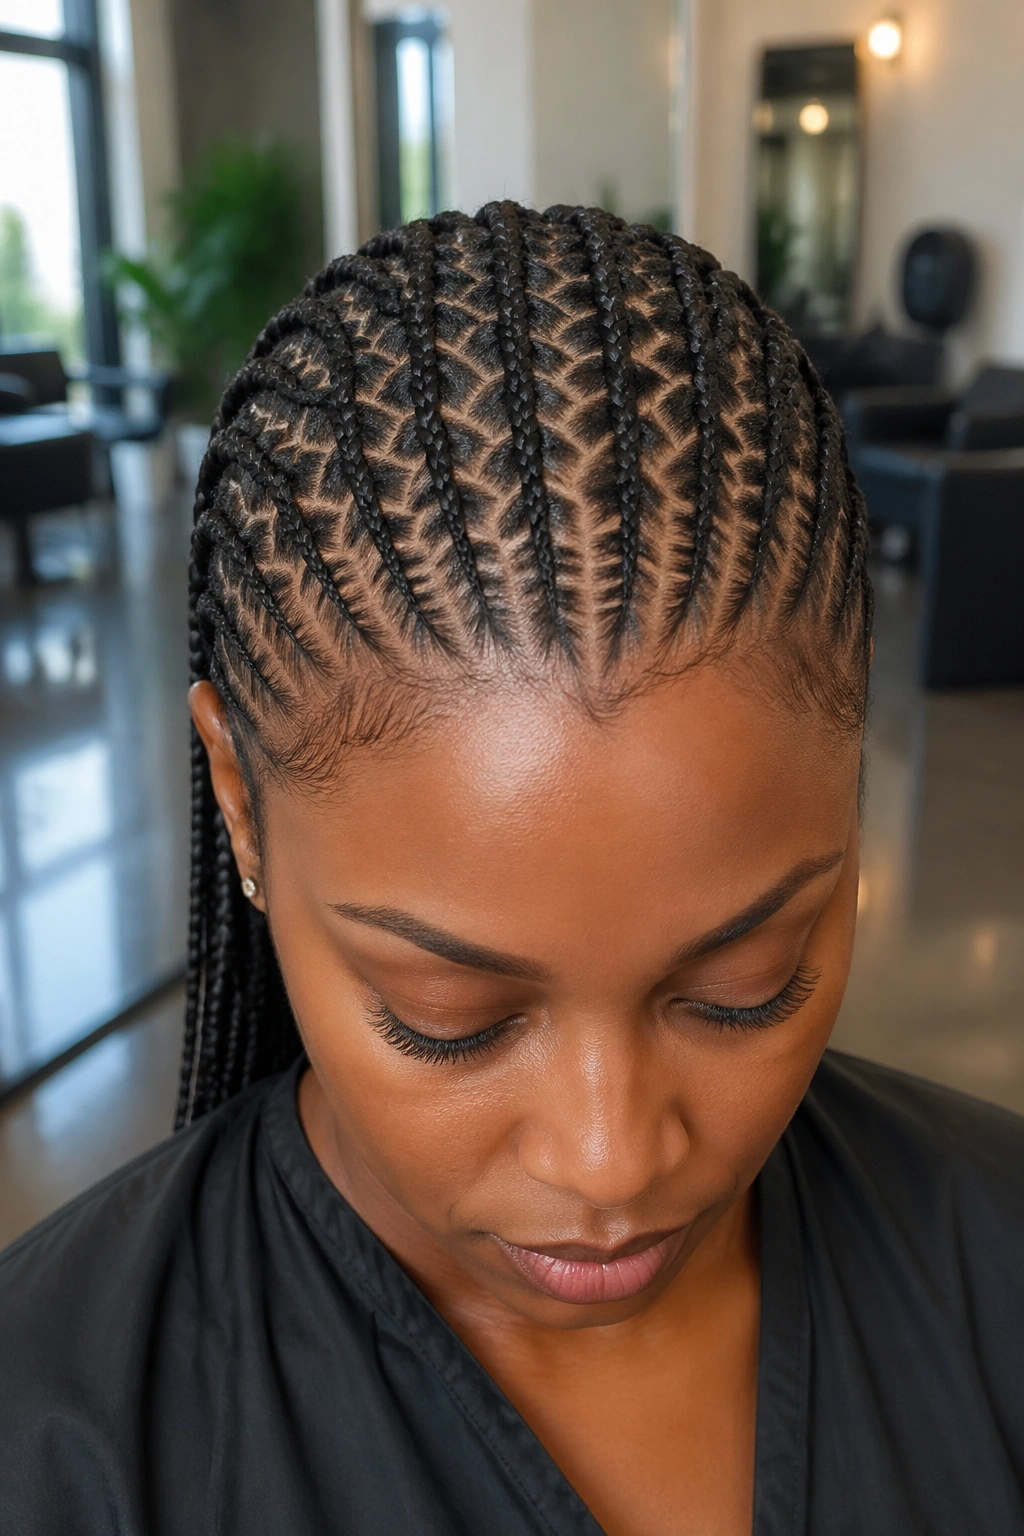
The opposite extreme. Twelve or more tiny zigzag cornrows with tight, small-amplitude zigzag patterns. Each section is half an inch wide. The parts form a dense scalp pattern.
This is the ornate, dressy-event version of zigzag cornrows. It takes 4-6 hours to install and requires real skill. But the finish is architectural — like scalp lacework.
Requires a professional in most cases. Self-install at this scale is for experienced braiders only.
8. Zigzag With Feed-In Extensions
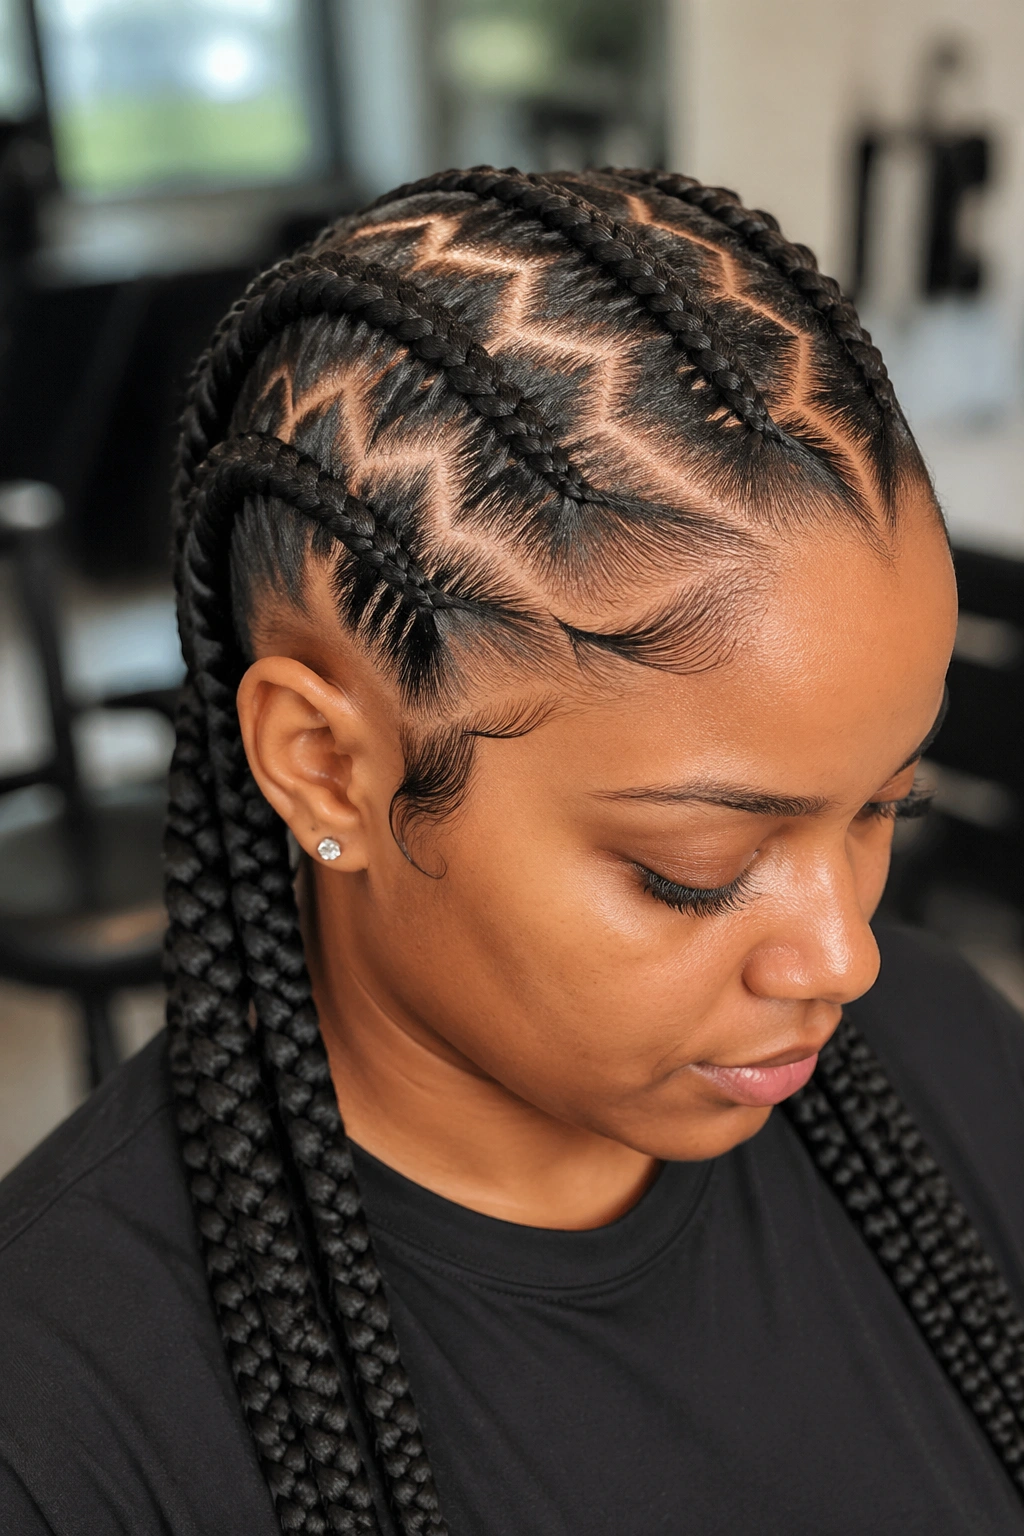
Zigzag cornrows built with kanekalon or synthetic braiding hair fed in as the braid progresses. The feed-in adds length and thickness while maintaining the zigzag scalp pattern.
- Start each braid with natural hair only for the first 2-3 inches.
- Begin adding small amounts of braiding hair once the first zigzag peak is complete.
- Continue feeding in through the remainder of the row.
Important: Don’t add too much hair too quickly. A gradual feed-in keeps the zigzag peaks visible. Over-stuffing with extension hair early flattens the pattern.
9. Zigzag Cornrows With Color Accents
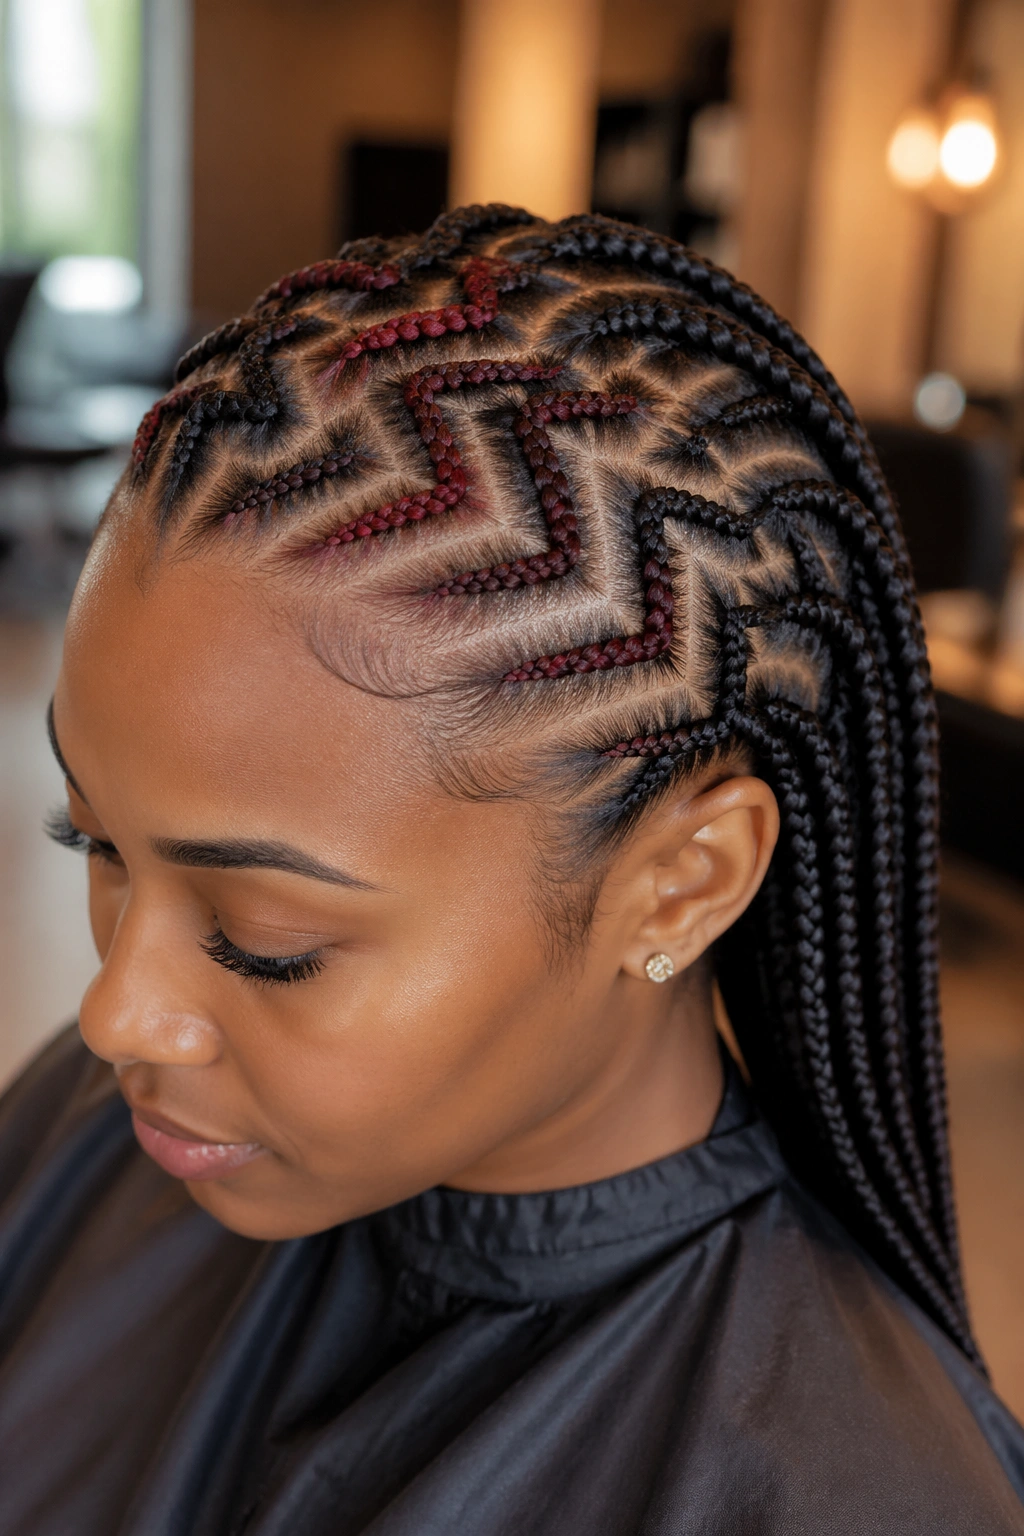
Two or three cornrows in the zigzag pattern get color — either with pre-colored kanekalon feed-in or with hair chalk applied after the install. The rest of the braids stay natural.
Color placement: usually the middle row or a single side row, not every other row. Restraint makes the color read intentional. Too much color overwhelms the zigzag pattern.
Burgundy, honey blonde, copper, and deep plum all flatter most natural-hair tones. Bright neon colors (pink, blue, green) read costumey on zigzag styles — the geometric base already has a lot going on visually.
10. Zigzag Ponytail Cornrows
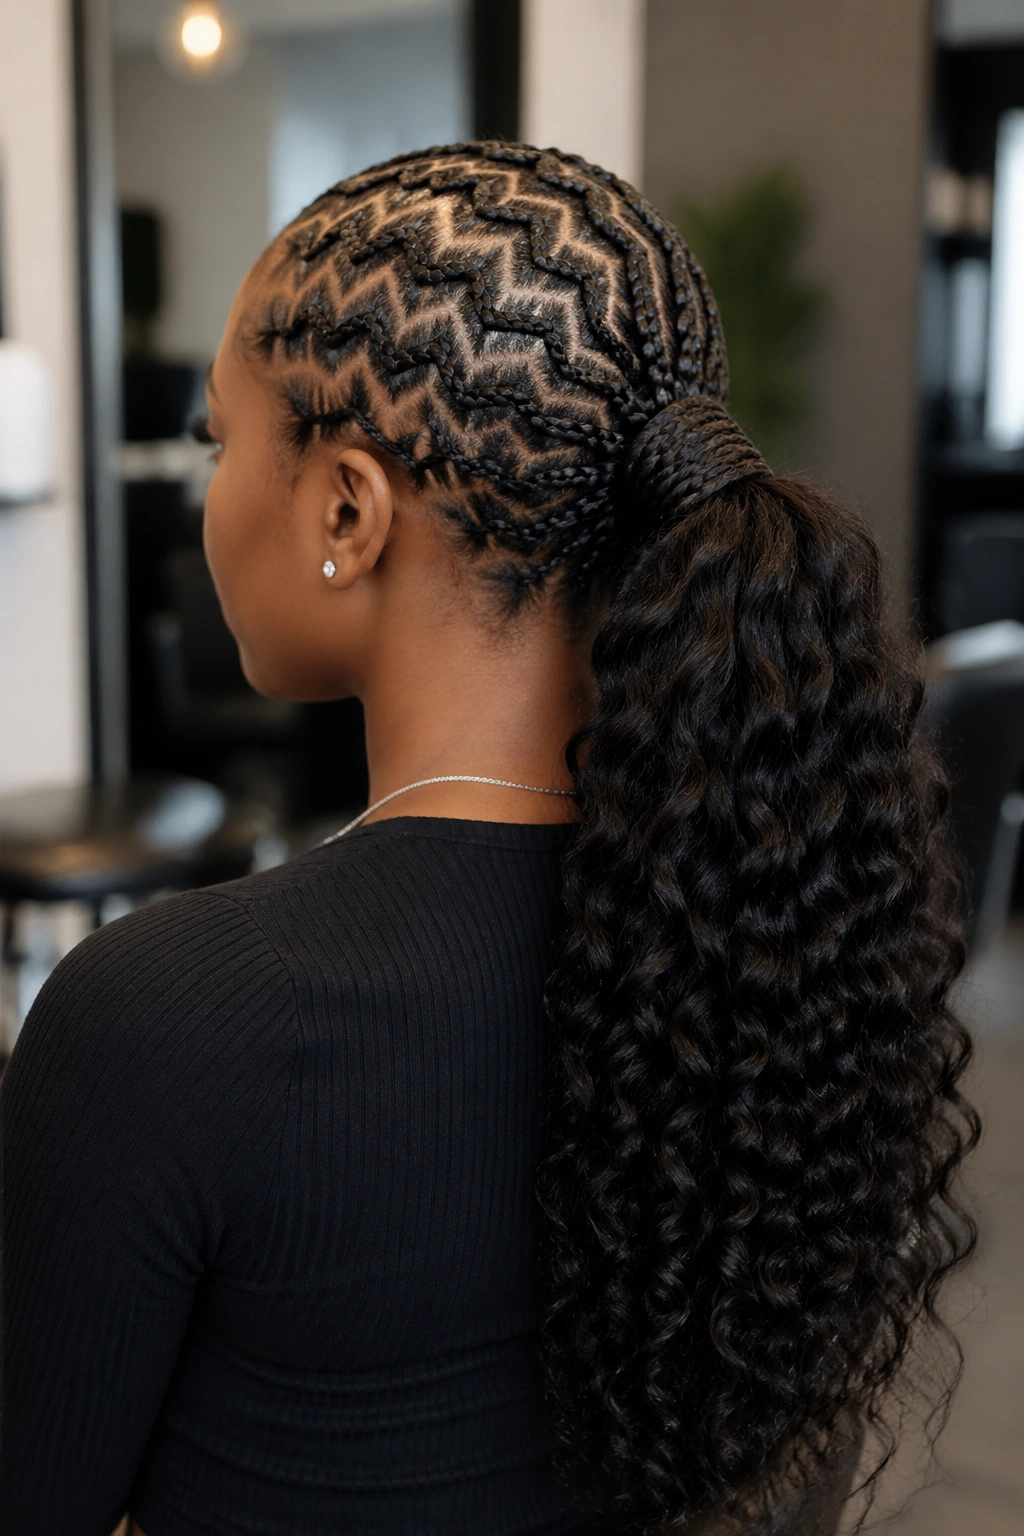
Zigzag cornrows all feed into a single ponytail at the back of the head. The tail itself is left loose, curled, or wrapped with thread.
The ponytail is the simplest finishing choice but it does real work. Without a finishing element, zigzag cornrows can read unfinished at the back. The ponytail provides visual closure.
Pair with a thick rubber band wrap or a small beaded scarf around the ponytail base for extra polish.
11. Cornrows With Zigzag Only at the Front
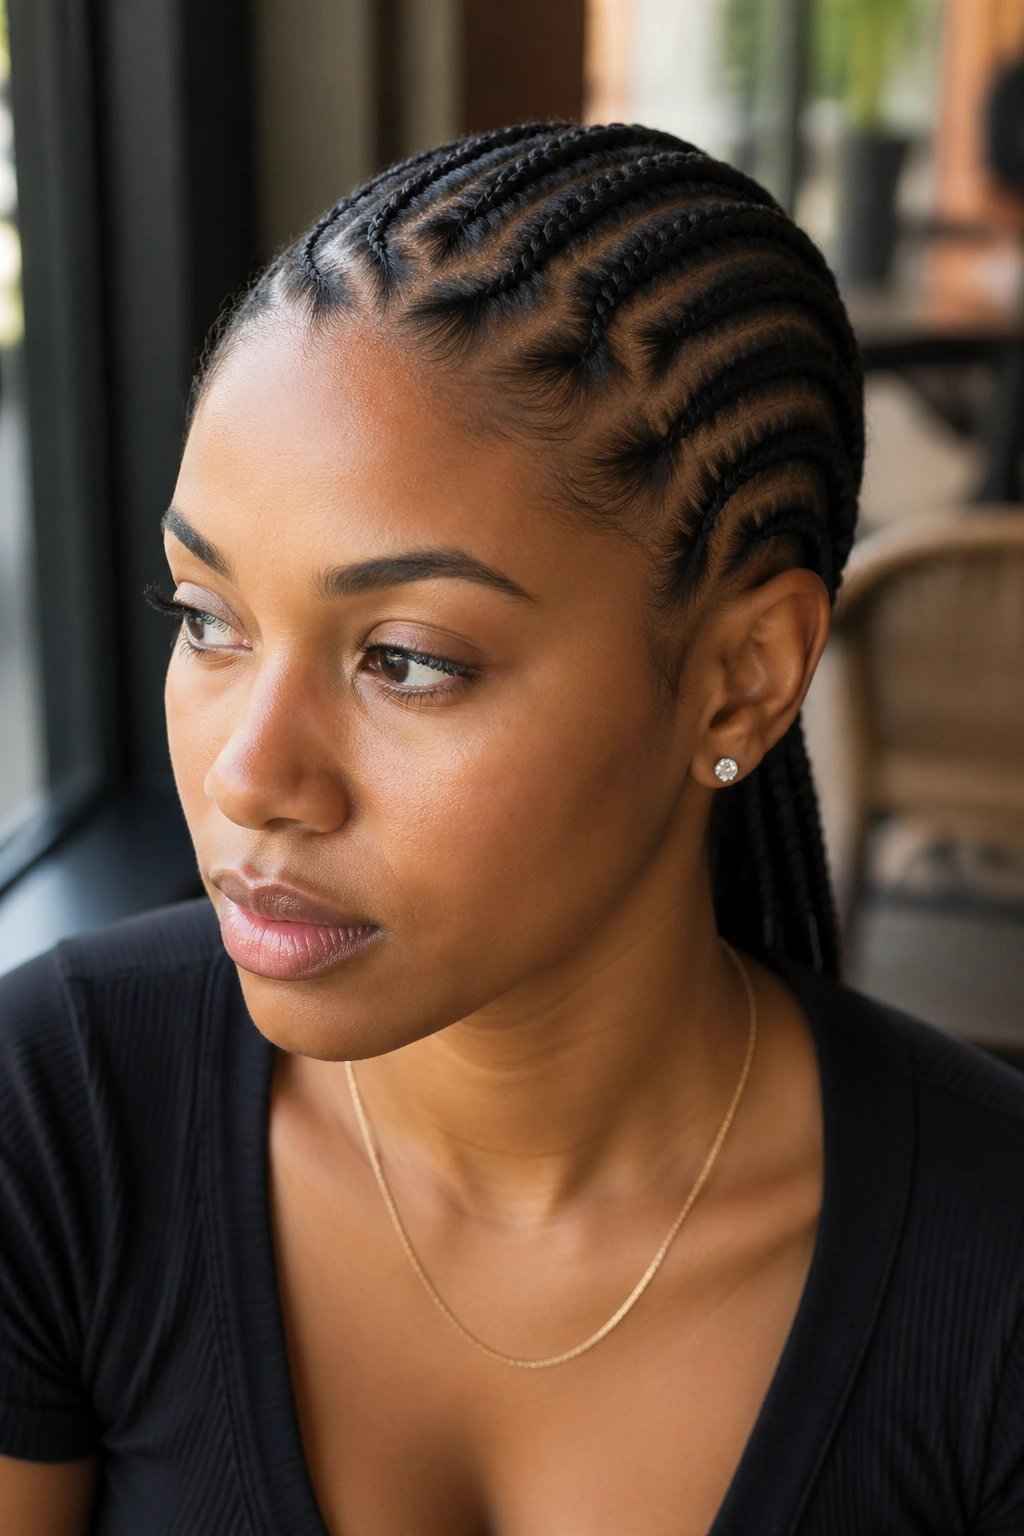
The first three to four inches of each cornrow — from hairline back — features zigzag parts. After that, the rest of the braid runs straight to the nape.
This is the compromise version. You get the zigzag visual where it matters most (the face-framing front) without committing to the full install time of head-wide zigzags. The back of the head reads as standard cornrows.
Install time: 90 minutes to 2 hours. Halfway between straight cornrows and full zigzag.
12. Zigzag Cornrows With Stitch Detail
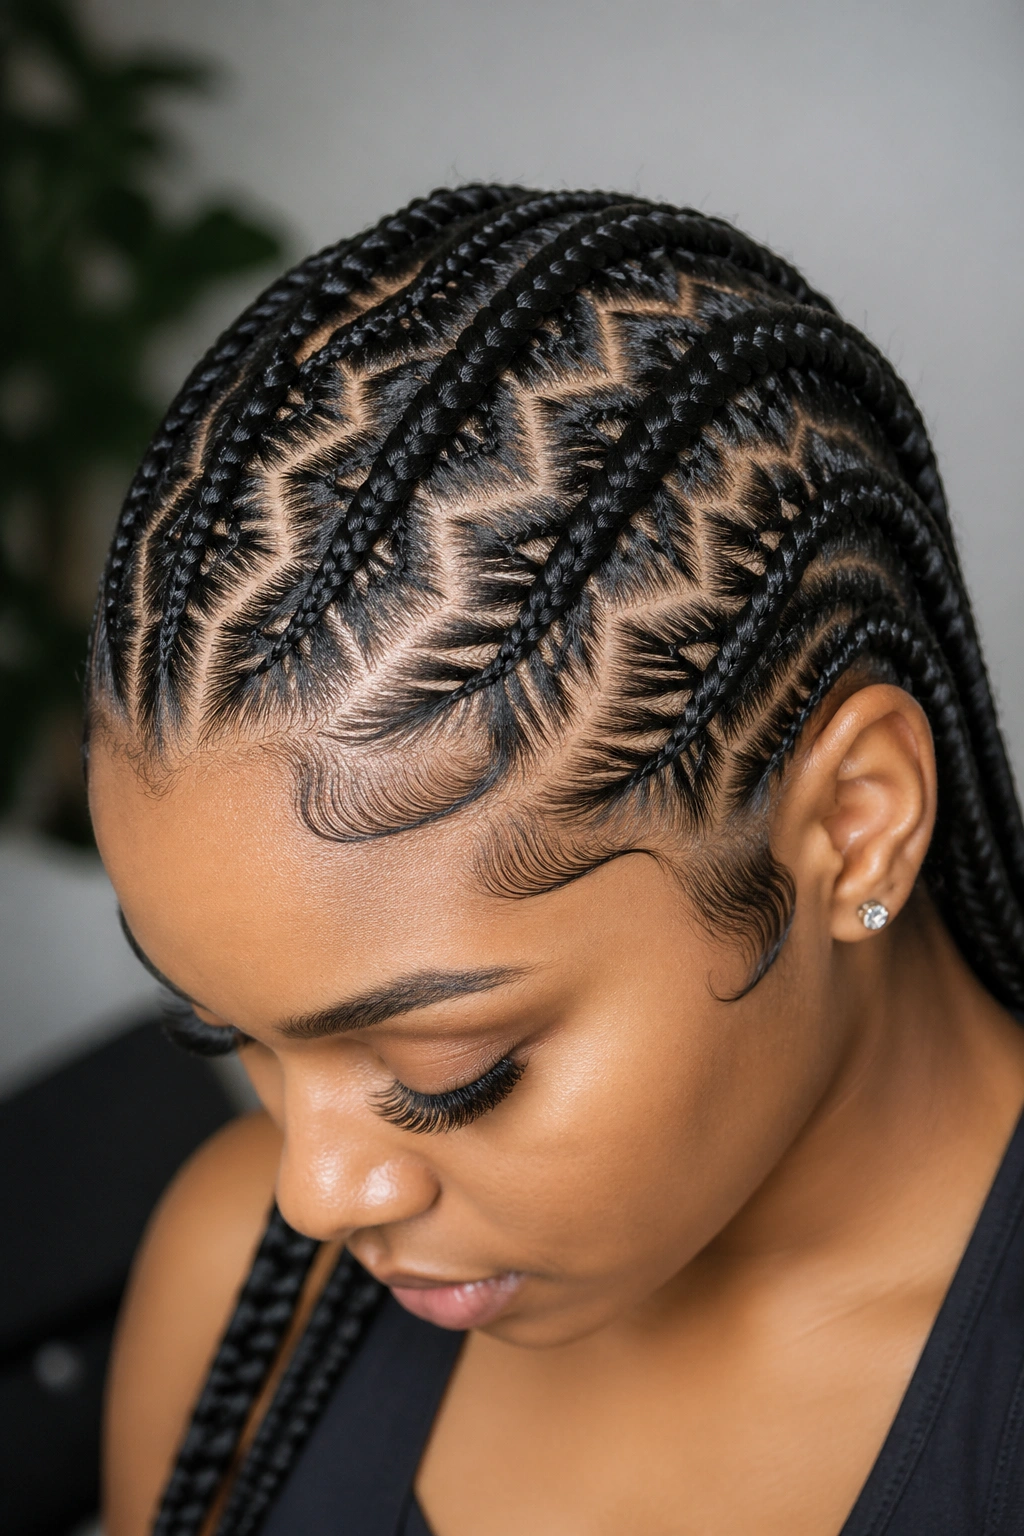
The zigzag parts are combined with stitch cornrowing — the segmented, ridged technique where each section of the braid shows as a visible notch. Stitch zigzags create a double geometric pattern: zigzag from above, stitches down each braid.
This is a signature-level install. Real skill required. Real time required — 4-6 hours for a full head.
The finish photographs like no other cornrow style. The stitch ridges and zigzag peaks interact visually in ways that flat cornrows simply can’t.
13. Half Zigzag Half Classic
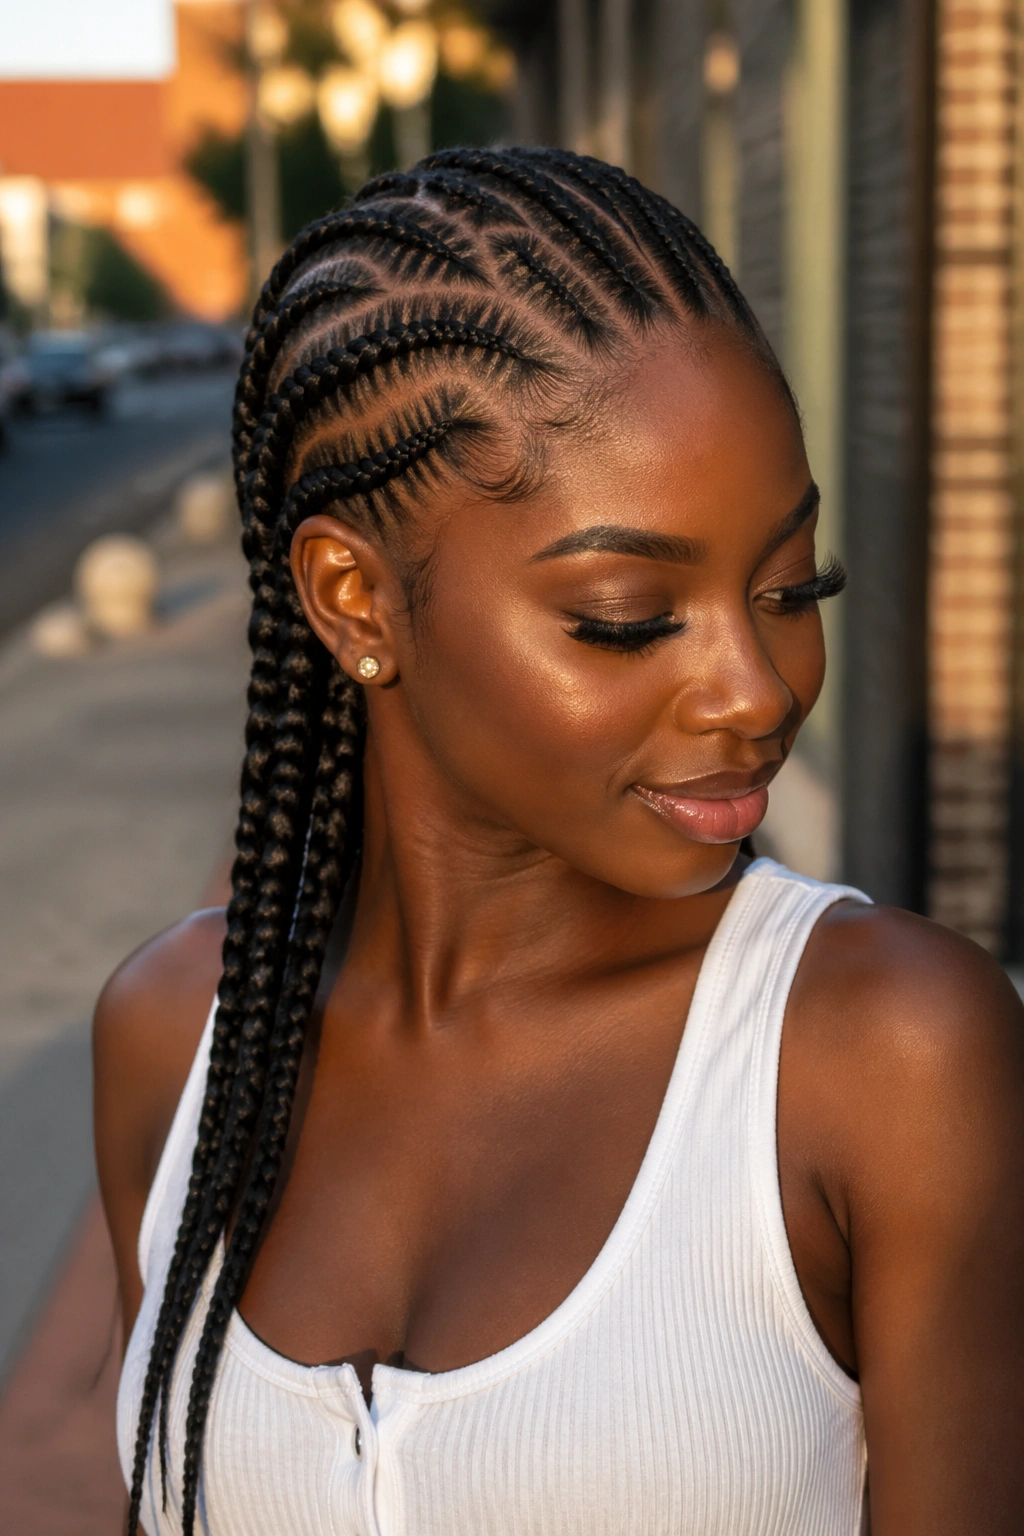
One side of the head wears zigzag cornrows. The other side wears straight cornrows. The split runs down the center or along a side part.
The contrast is the style. The zigzag side reads bold. The classic side reads calm. Together they create visual interest that neither side would generate alone.
Good for: creative workplaces, photo shoots, events where a standout style is welcome.
14. Zigzag With Low Messy Bun
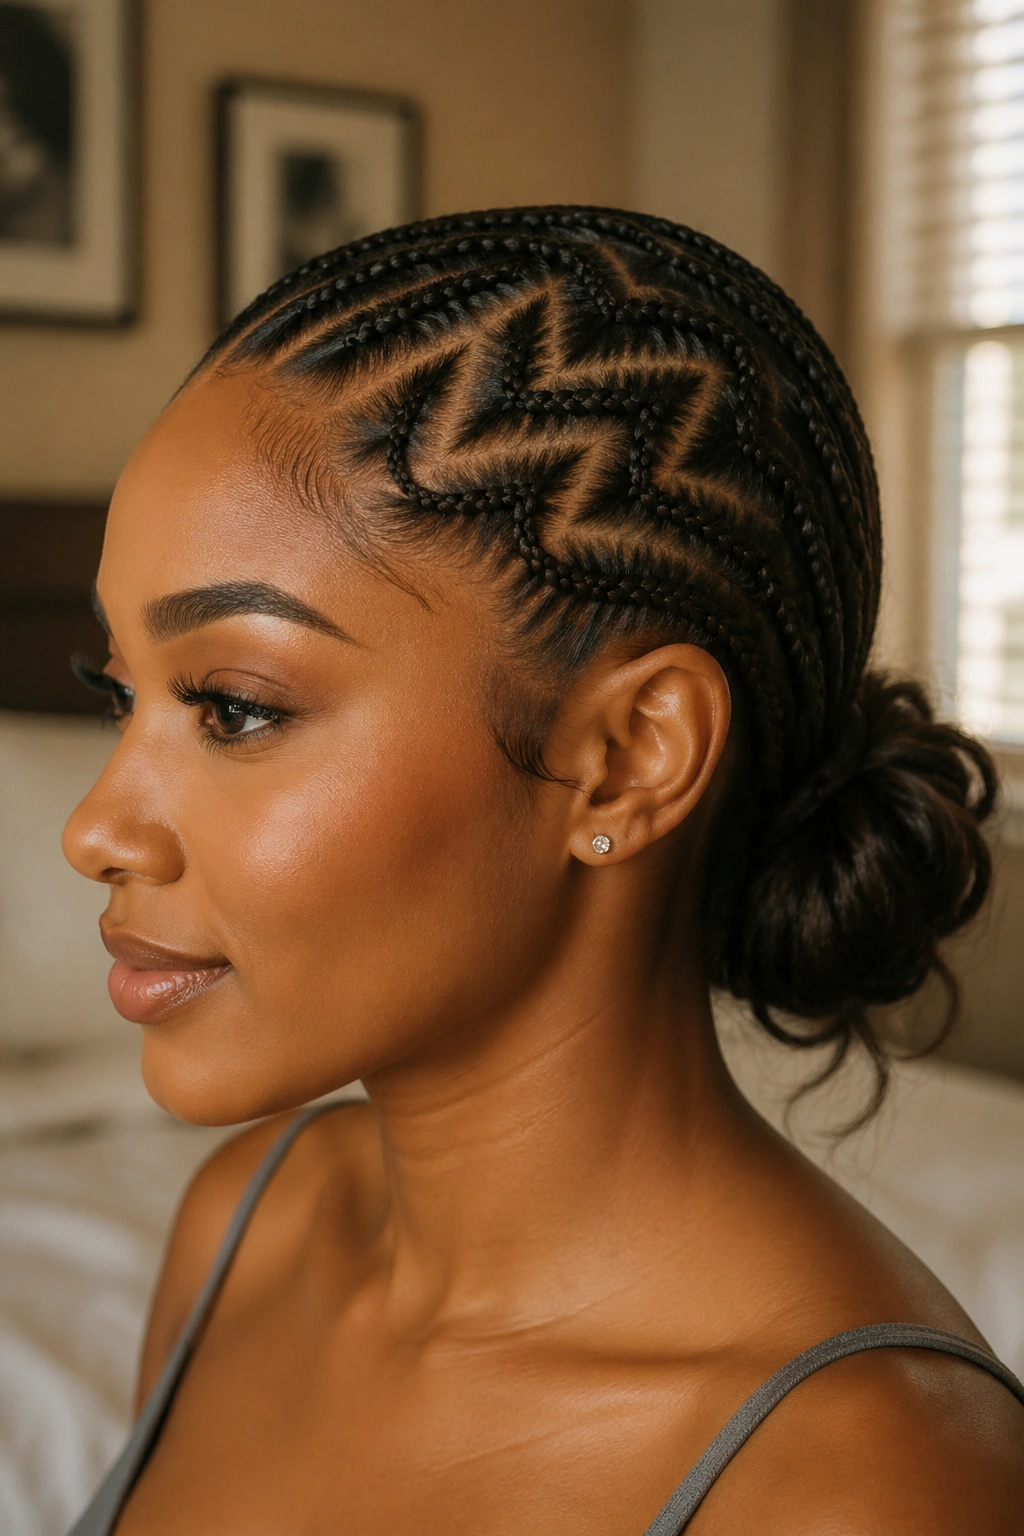
Same zigzag base as the classic five-row. The ends gather at the nape into a low, intentionally messy bun rather than a tight coiled bun.
The contrast between precise zigzag top and loose messy bottom is what makes it work. All precision reads cold. All mess reads unkempt. The balance creates visual interest.
The messy bun should look somewhat controlled — loose loops secured with a few bobby pins, not literal chaos.
15. Zigzag Cornrows With Cuffs
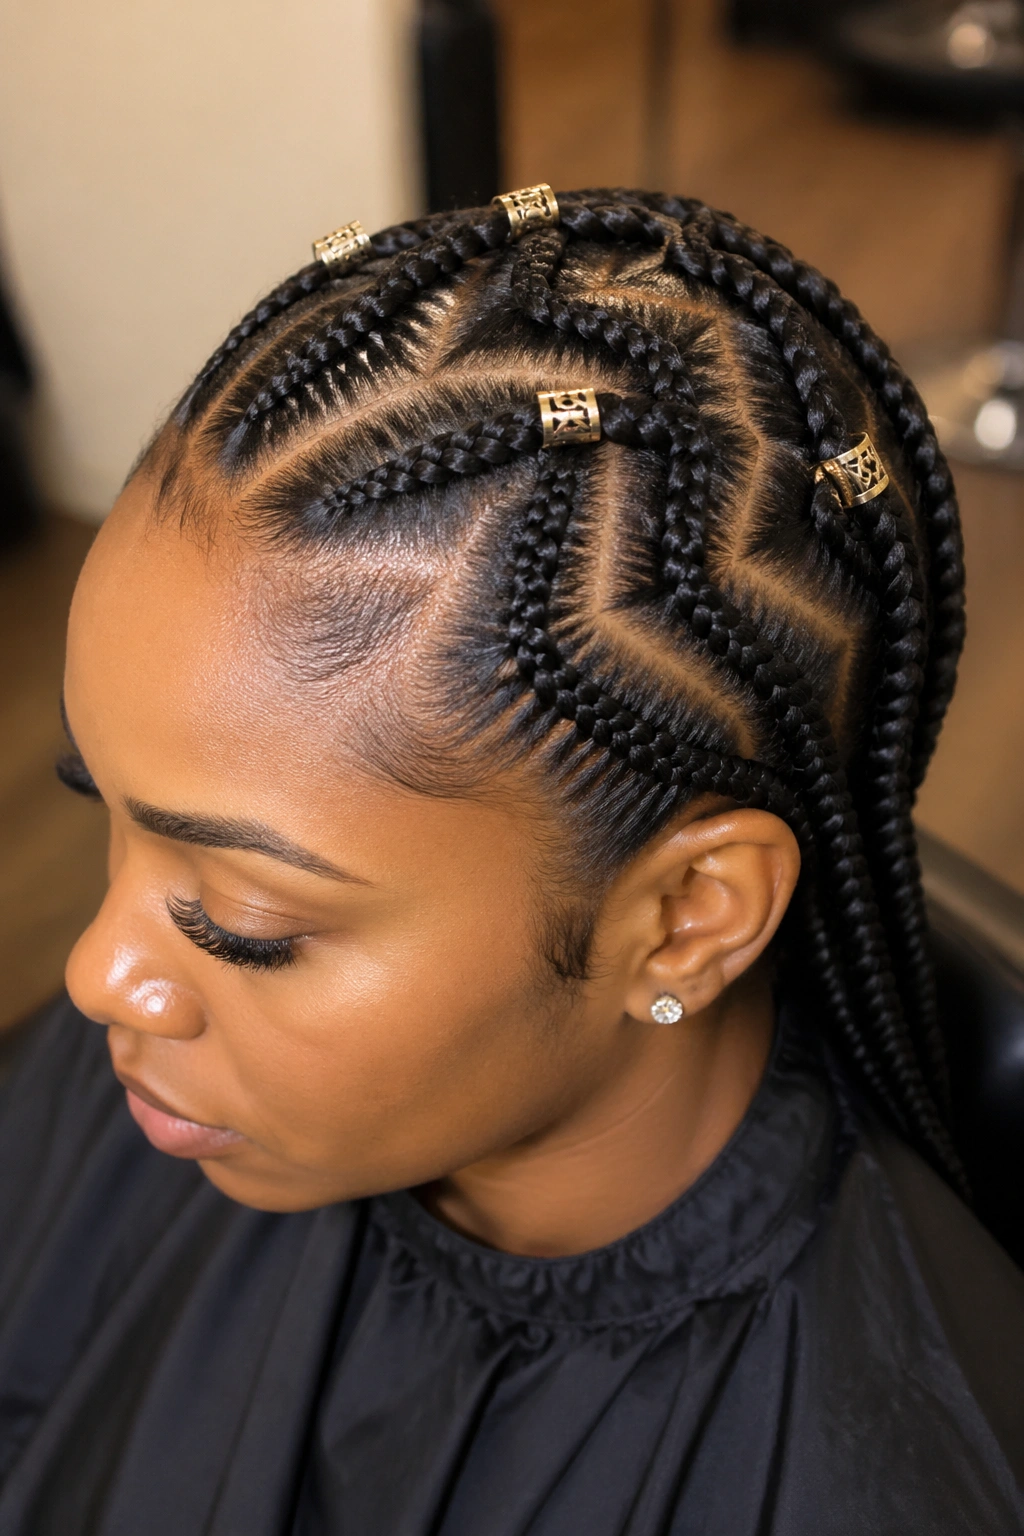
Instead of beads, decorate with metal cuffs — gold, silver, or brass — clipped onto the braid ends or at the zigzag peaks where cornrows meet.
Cuffs stay in place better than beads and are easier to add or remove mid-install. Three to five cuffs across the finished style is the right number. Fewer reads accidental. More reads overstyled.
Place cuffs at the peak points for maximum visual payoff.
16. Zigzag Halo Cornrows
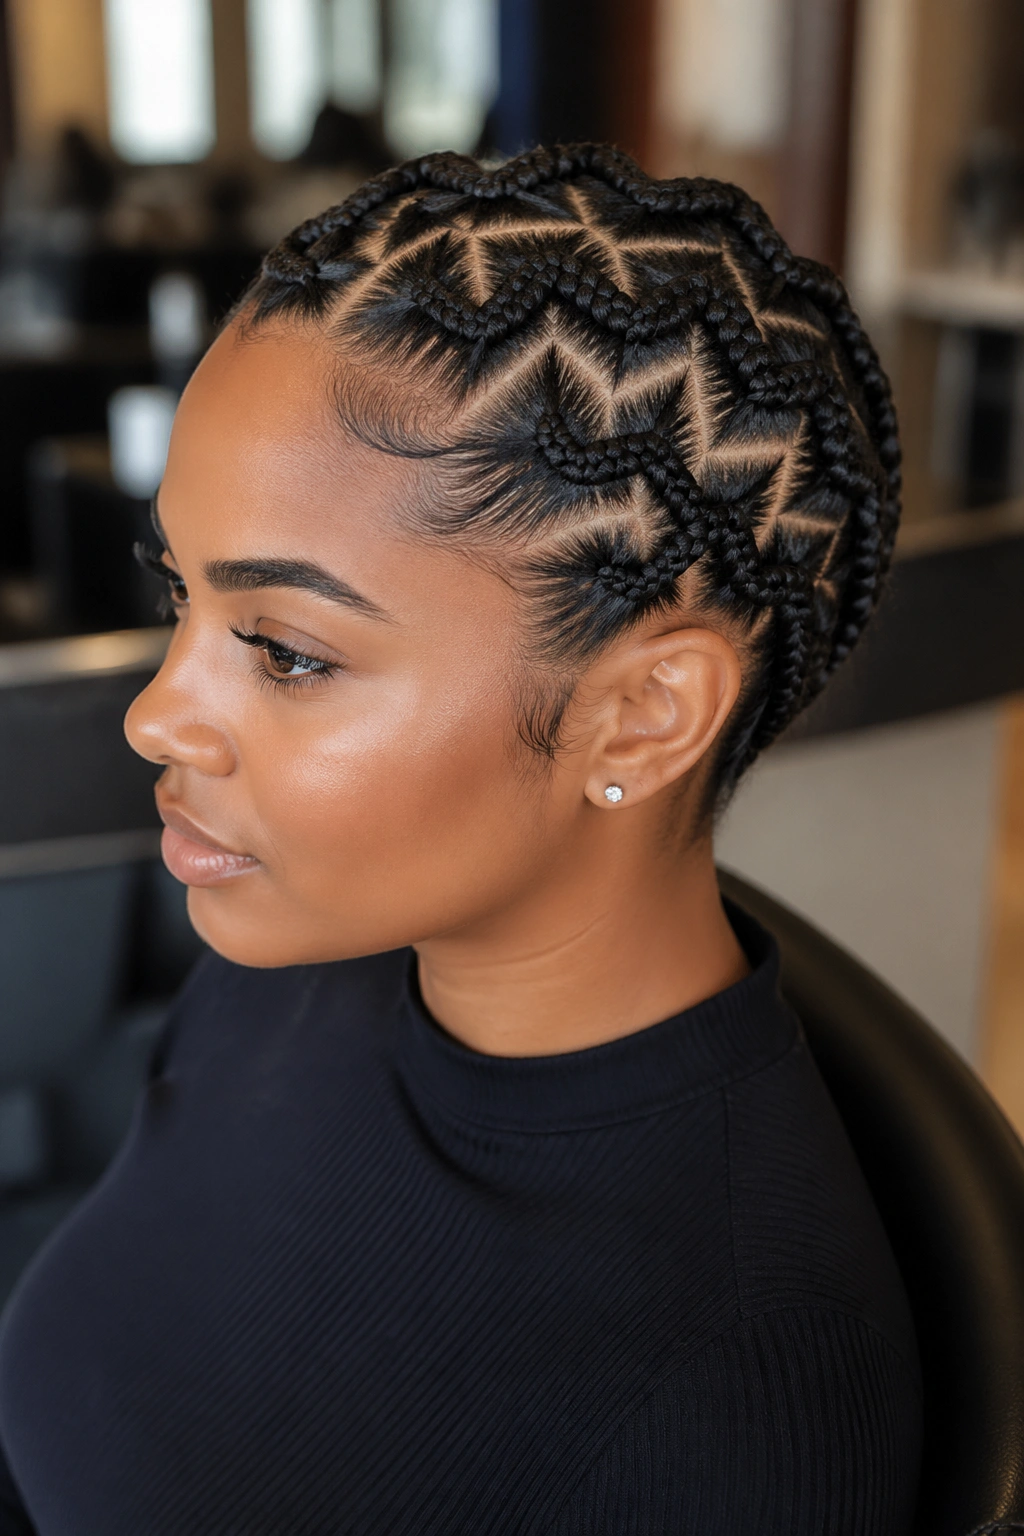
The zigzag pattern forms a ring around the head — following the hairline around the full perimeter. The braids curve in an approximate circle, zigzagging as they go, before all meeting at the crown.
This is the technical showpiece. The zigzag has to maintain consistent amplitude all the way around the head despite the curved path. Any stretch or compression of the pattern shows.
Requires professional install. Self-attempts produce lopsided halos 90% of the time.
17. Zigzag Into Curly Leave-Out
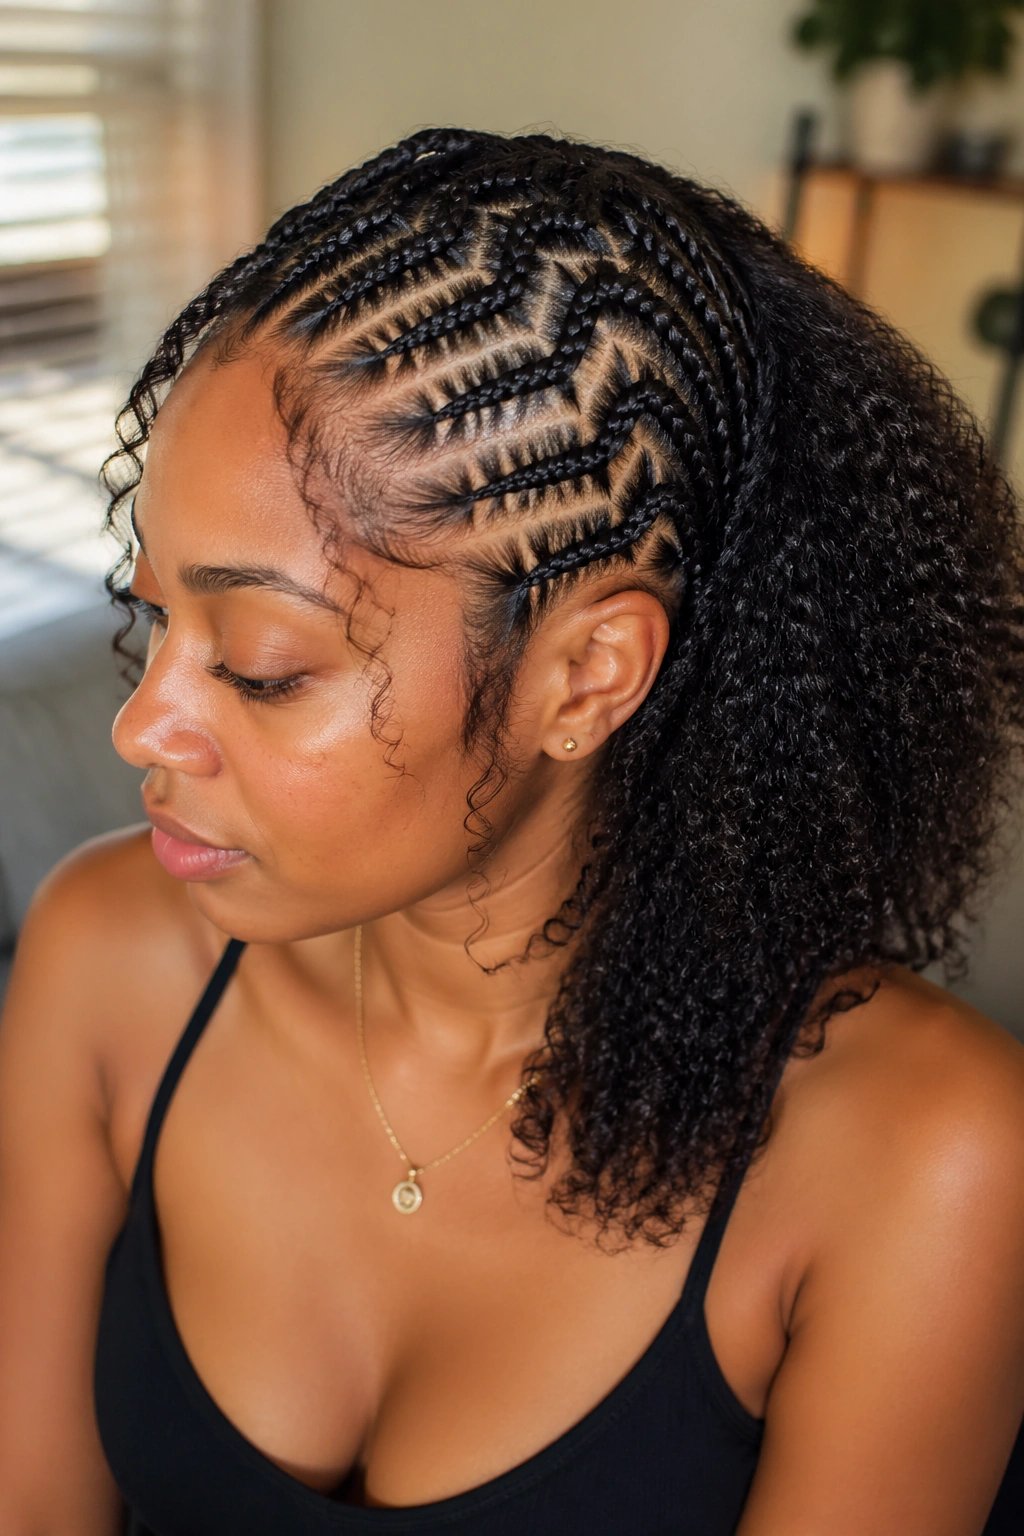
Zigzag cornrows in the front half of the head. The back half stays loose in natural texture — twist-outs, wash-and-go, or braid-out curls.
The combination showcases both geometric braid work and natural texture. The zigzag provides structure. The loose curls provide softness. Face-framing zigzags with back-of-head natural curls is one of the most balanced looks in the category.
18. Zigzag Cornrows With Undercut Illusion
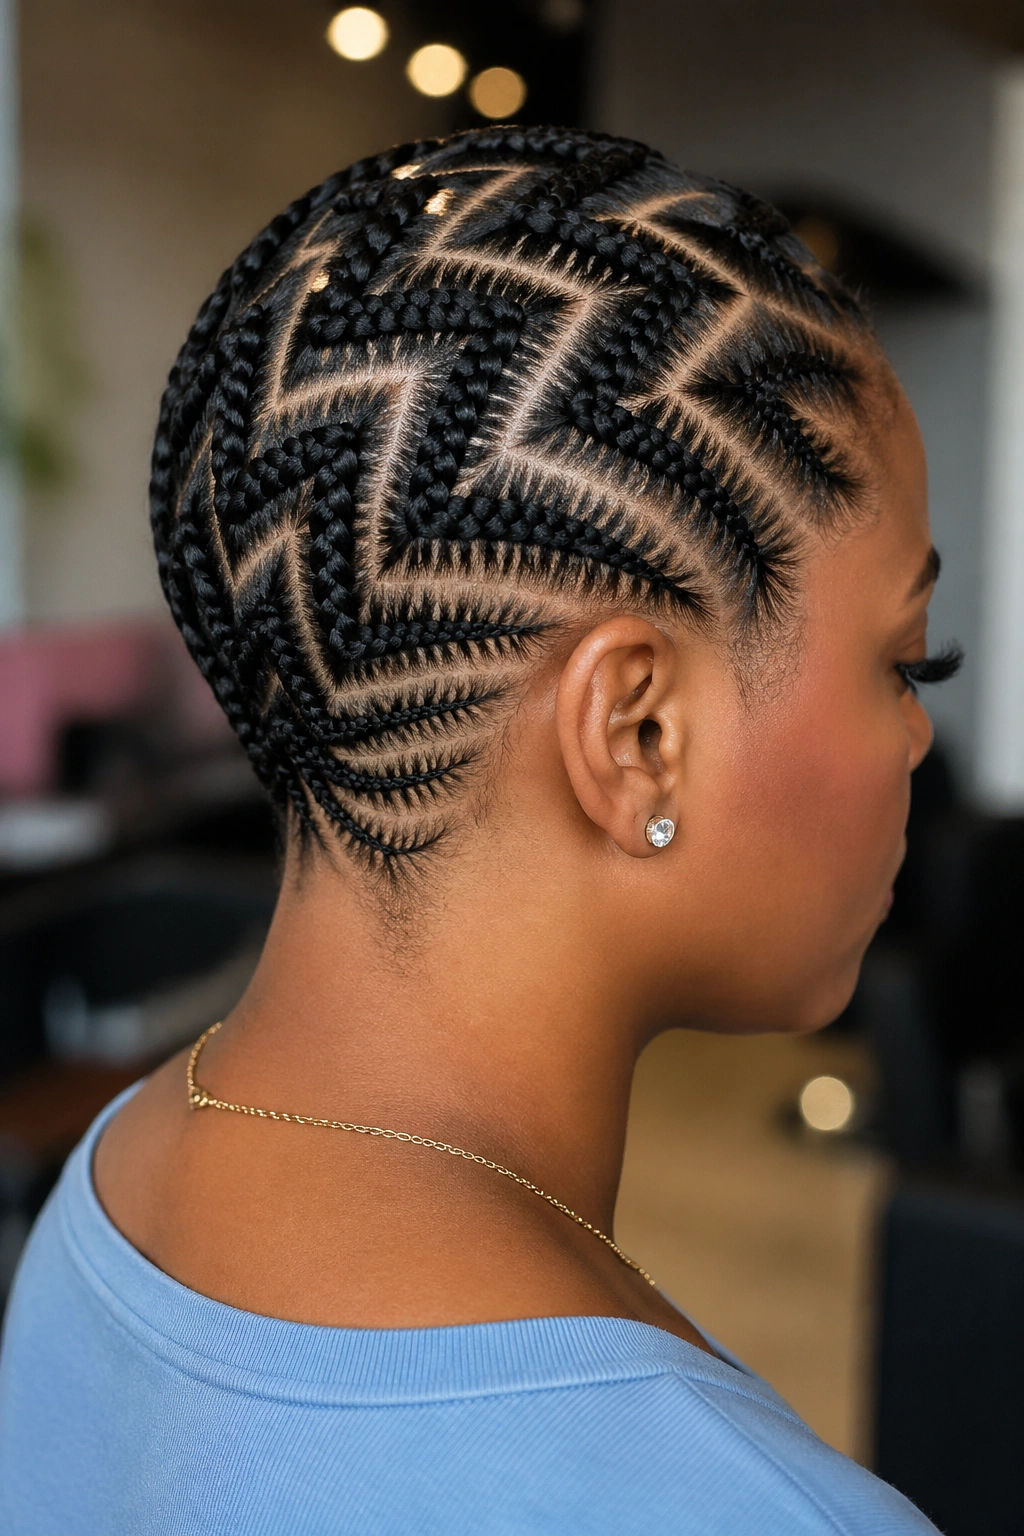
The lowest few rows — at the nape and behind the ears — are braided smaller and tighter than the rest. From a distance, the small tight rows read as an undercut. No hair is actually cut.
The illusion works on certain head shapes — mostly those with naturally fuller top sections. Thinner hair at the nape doesn’t produce the contrast needed.
Best for: people curious about edgier looks without committing to an actual cut.
19. Zigzag Cornrows With Scalp Glitter
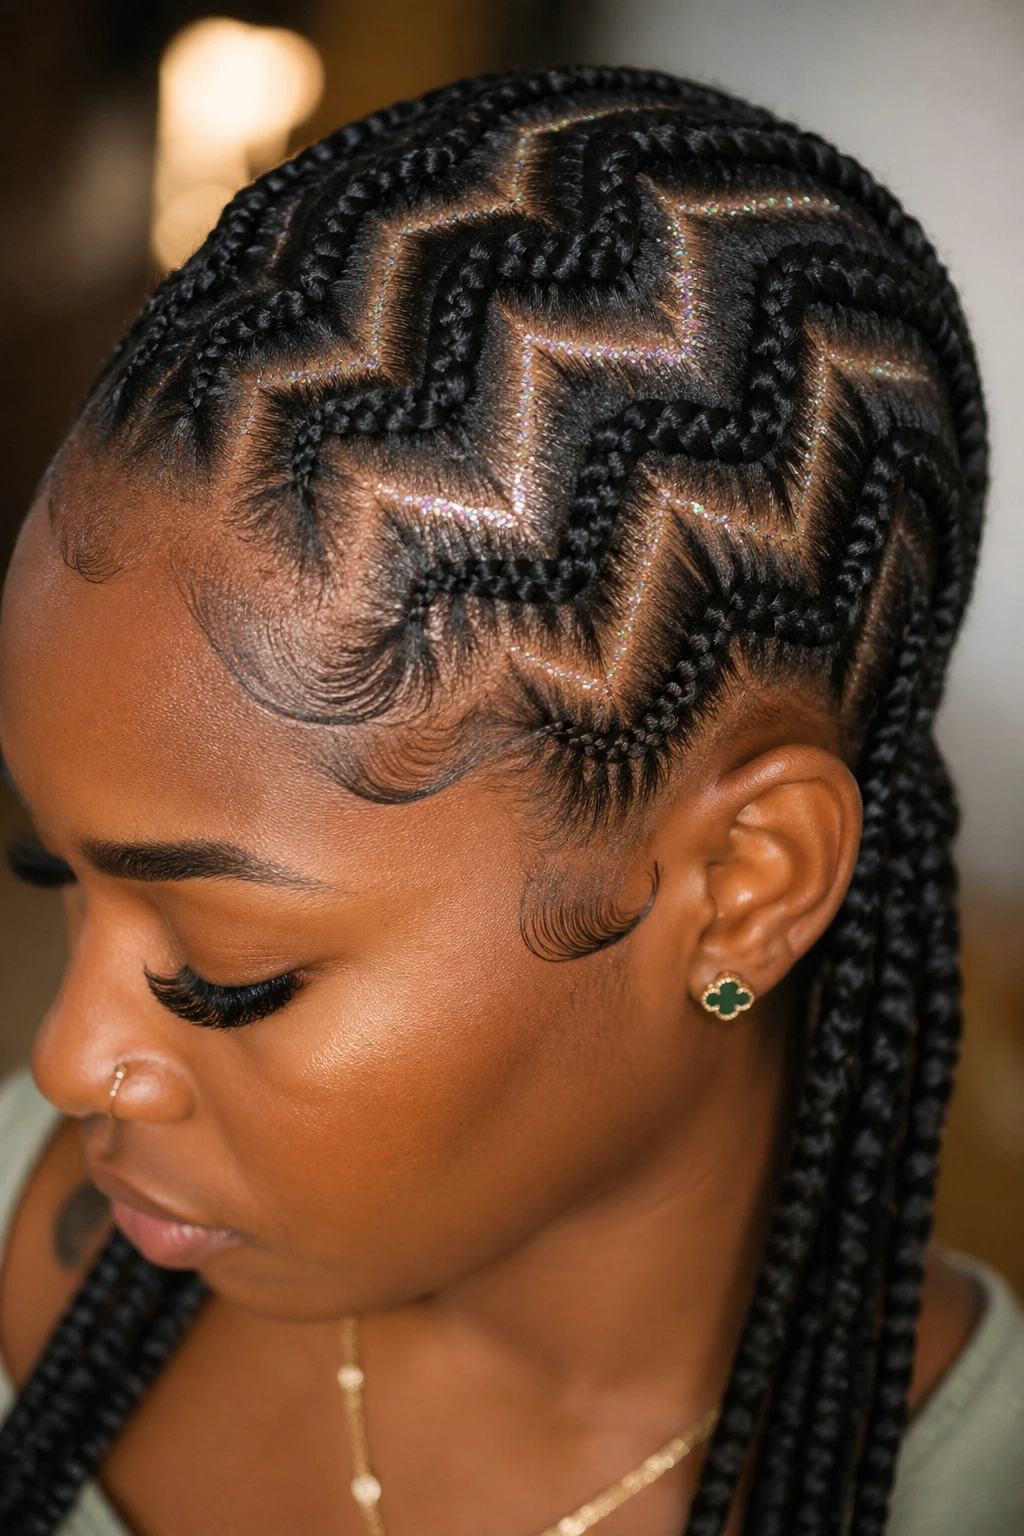
For photoshoots or special events: after the zigzag install, a small amount of cosmetic glitter is applied along the scalp parts using a thin brush and clear hair gel as adhesive.
The glitter catches light in photos and on camera. In person, it reads as shimmer rather than obvious glitter. The zigzag parts provide the canvas for the shimmer to sit on.
Remove with micellar water on cotton rounds. Don’t use regular shampoo on scalp glitter — it can push particles into the hair and create a persistent residue.
20. Two-Direction Zigzag Cornrows
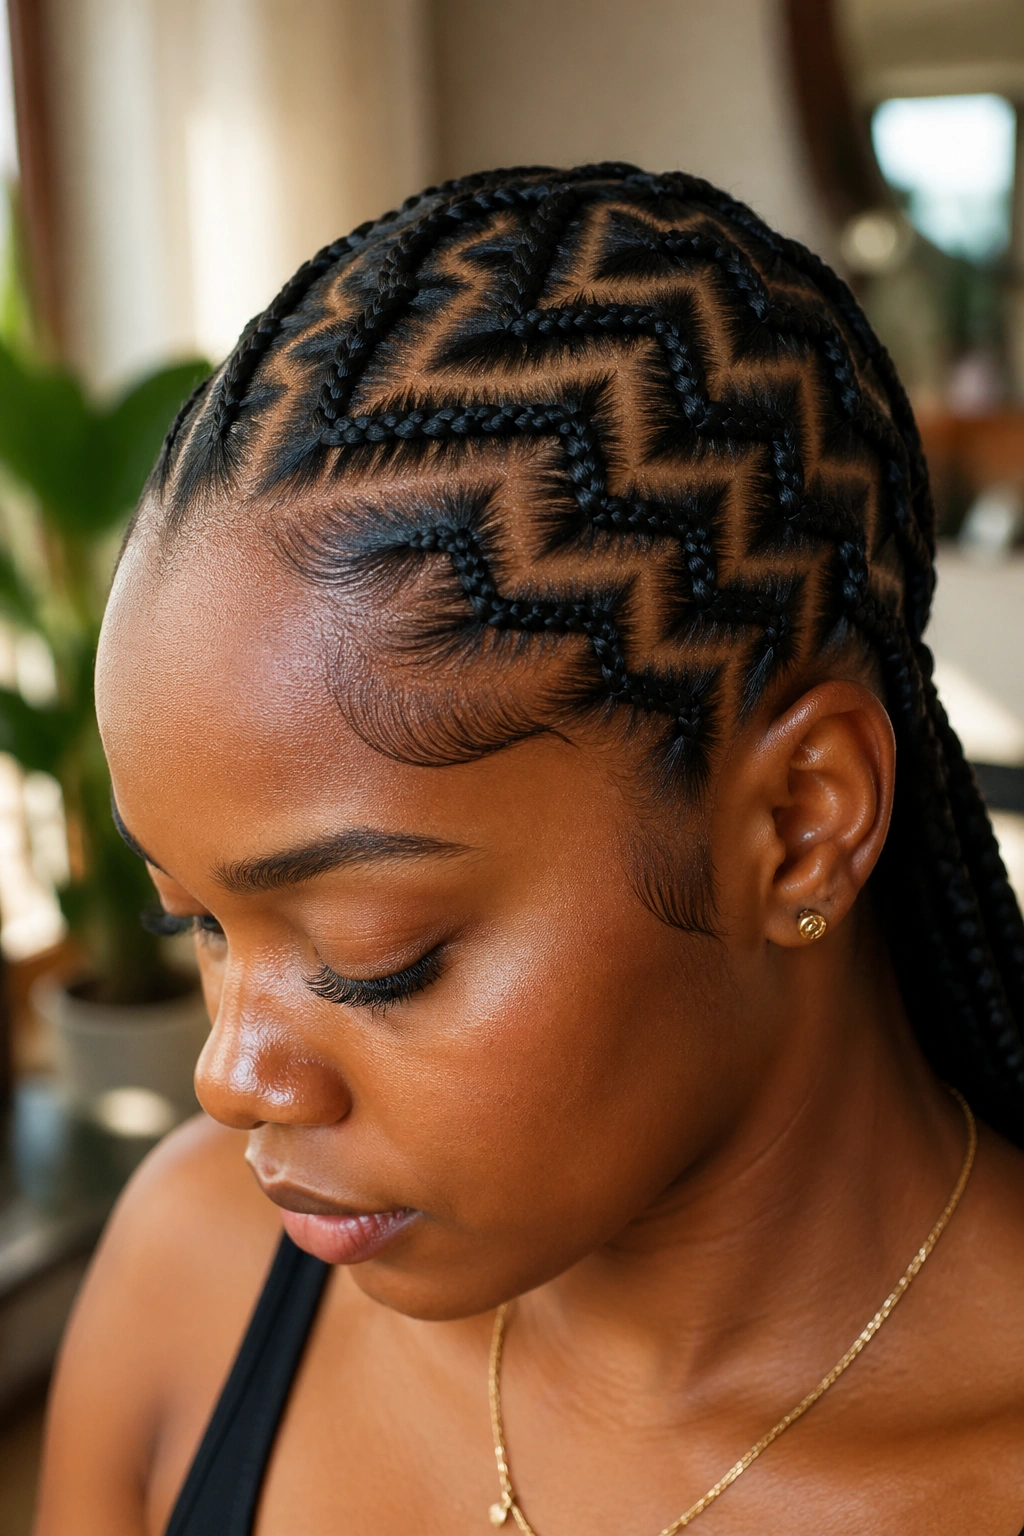
Half the cornrows zigzag in one direction. The other half zigzag in the opposite direction. The two sets meet in the middle or at a central point.
This produces a chevron-like overall pattern when viewed from above. The interlocking zigzags create a sense of motion.
One of the harder layouts to execute cleanly. The meeting points have to be precisely aligned or the whole pattern looks disorganized.
21. Zigzag Cornrows With Diamond Peaks
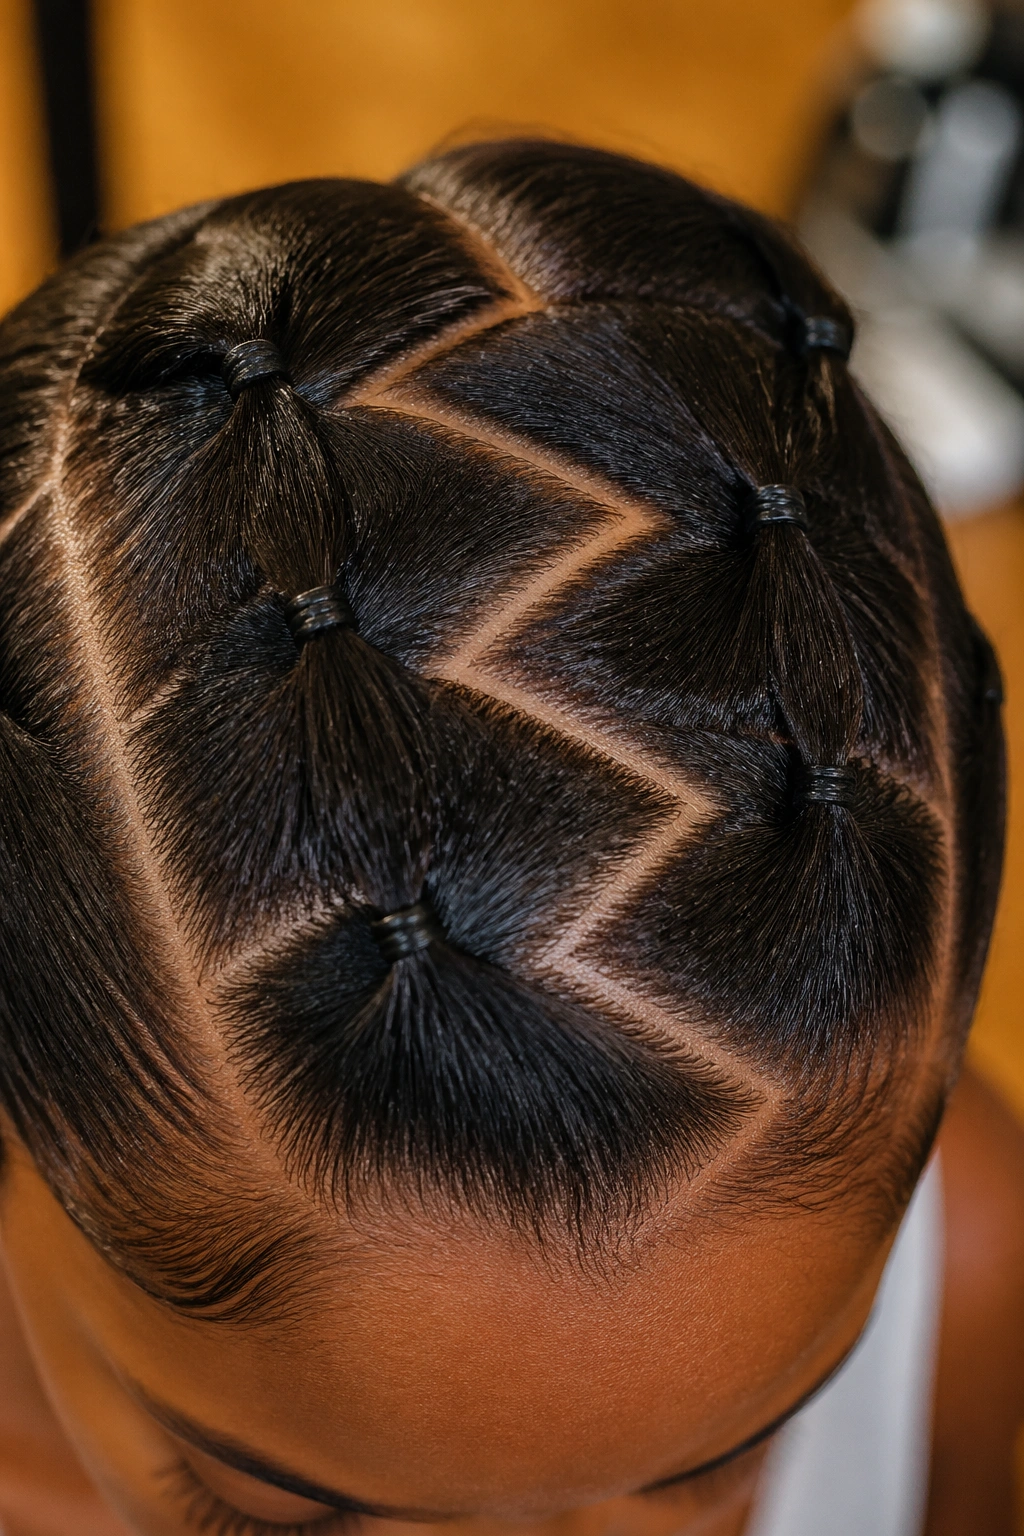
Variation on the symmetric pattern. Instead of simple V-shaped peaks, each peak is a small diamond shape. The parting draws diamonds with four sides instead of sharp V-shapes.
The diamond version reads more ornate than V-shaped zigzags. It takes longer to part because each diamond requires four precise lines instead of two.
Reserved for occasions and photos where the extra installation effort is justified.
22. Zigzag Cornrows With Curly Bangs
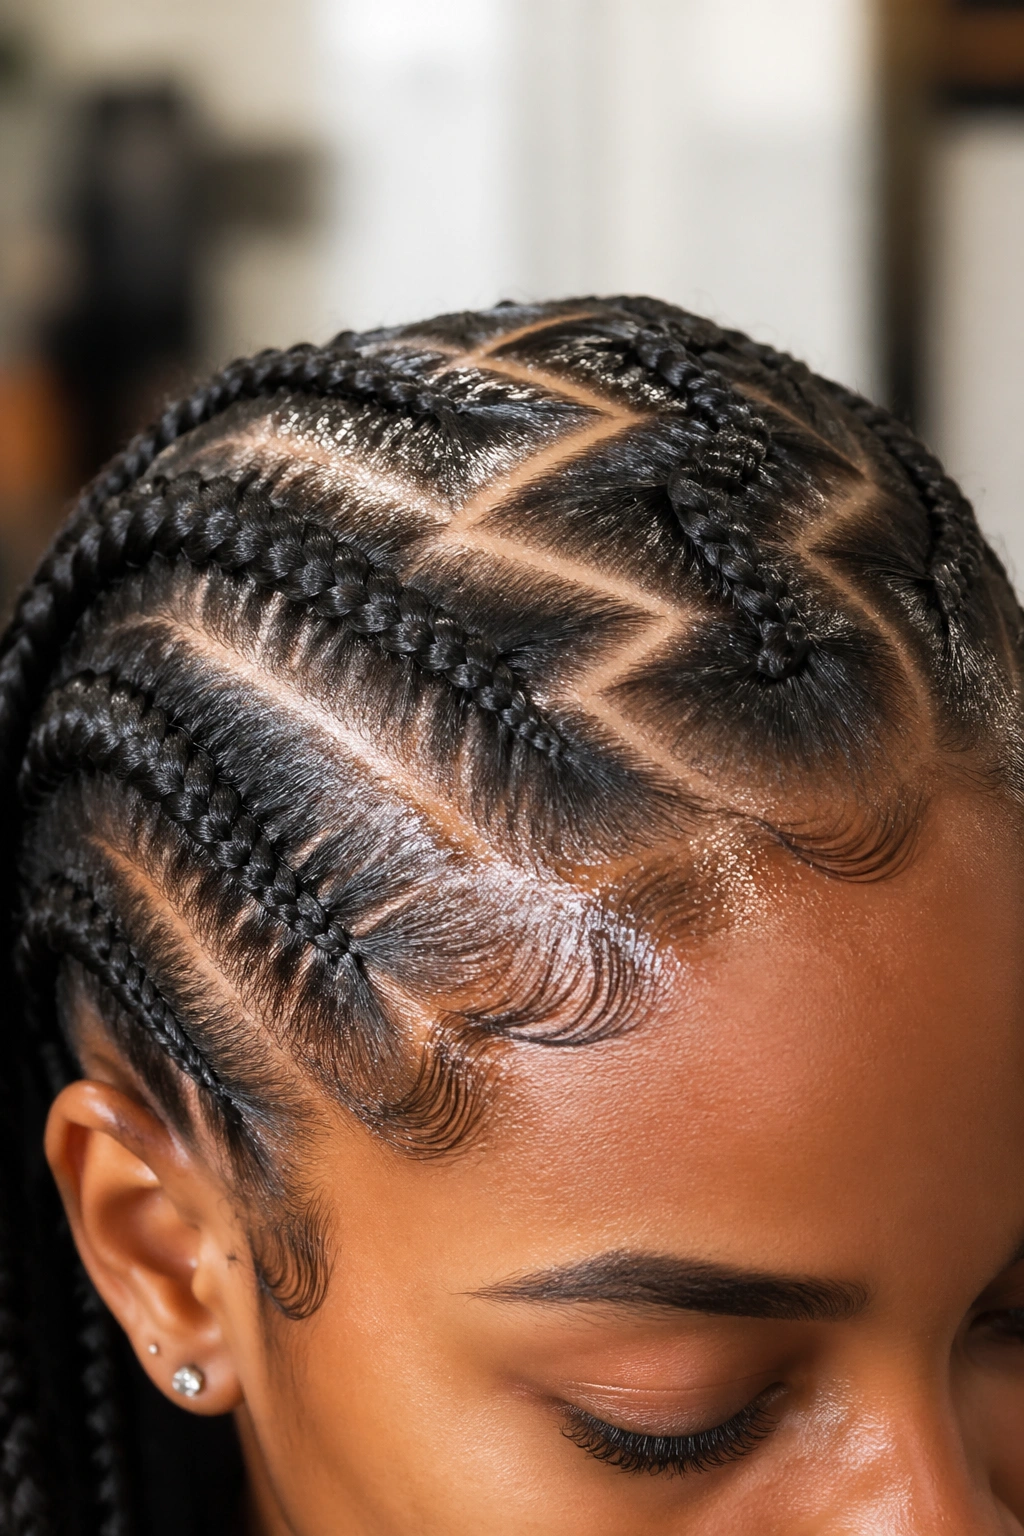
Zigzag cornrows everywhere except a small section at the front hairline — about 2 inches wide — that’s left loose as bangs. The bangs are curled or wand-set into defined curls that fall across the forehead.
The curly bangs soften the zigzag pattern exactly where it would be most severe: right at the face frame. The bangs also offer a face-flattering option for people who don’t love bare foreheads.
Install time: 2-3 hours for zigzags, plus 15-20 minutes on the bangs.
Maintenance to Keep Zigzags Sharp
The zigzag pattern fuzzes faster than straight cornrows. Protecting the parts overnight is non-negotiable.
Satin bonnet every night. A silk scarf tied along the hairline to protect edges. Avoid any oils or products applied directly to the zigzag peaks — the peaks are the style. Product drags them out of shape.
A light mist of water-and-leave-in every 2-3 days rehydrates the scalp without soaking the style.
Refreshing Between Installs
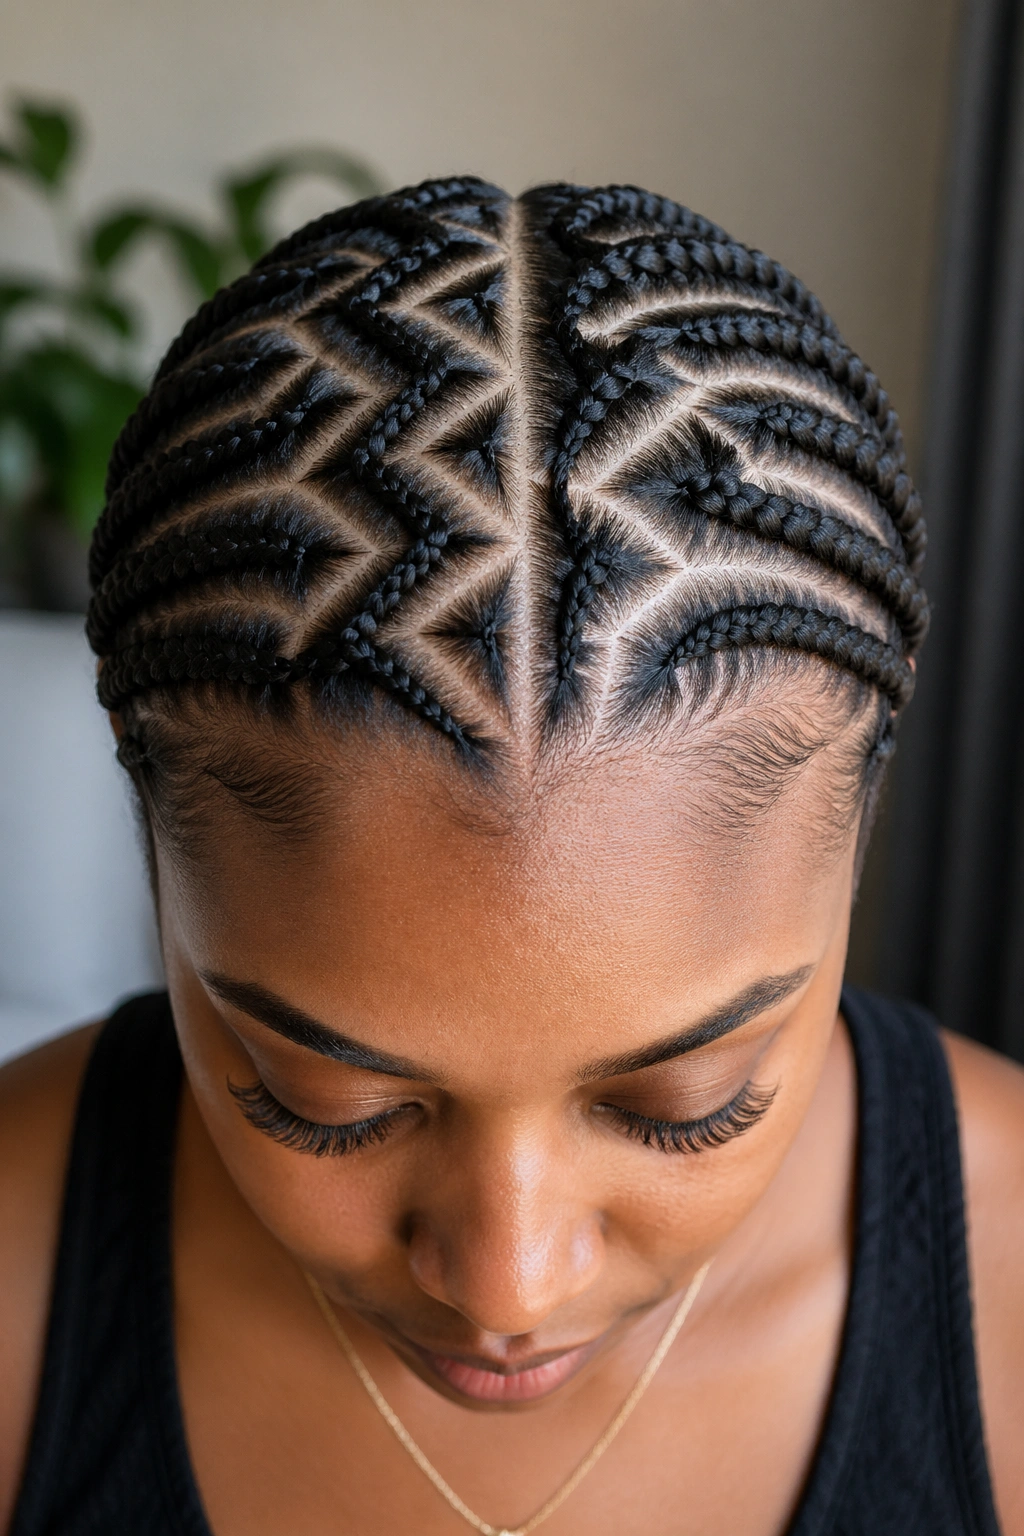
Zigzag cornrows start looking less sharp around day 5-7. Refresh tactics:
A toothbrush or mascara-style small brush dipped in edge gel, used along the zigzag peaks to re-smooth lifted hairs. Focus on the front and sides — the back holds better on its own.
A small drop of lightweight oil to the scalp between the peaks, applied with a dropper bottle to avoid touching the braids themselves.
Re-laying edges at the hairline once or twice between install and takedown. The edges frame the zigzag pattern — fresh edges make the whole style read renewed.
Takedown Without Losing Hair
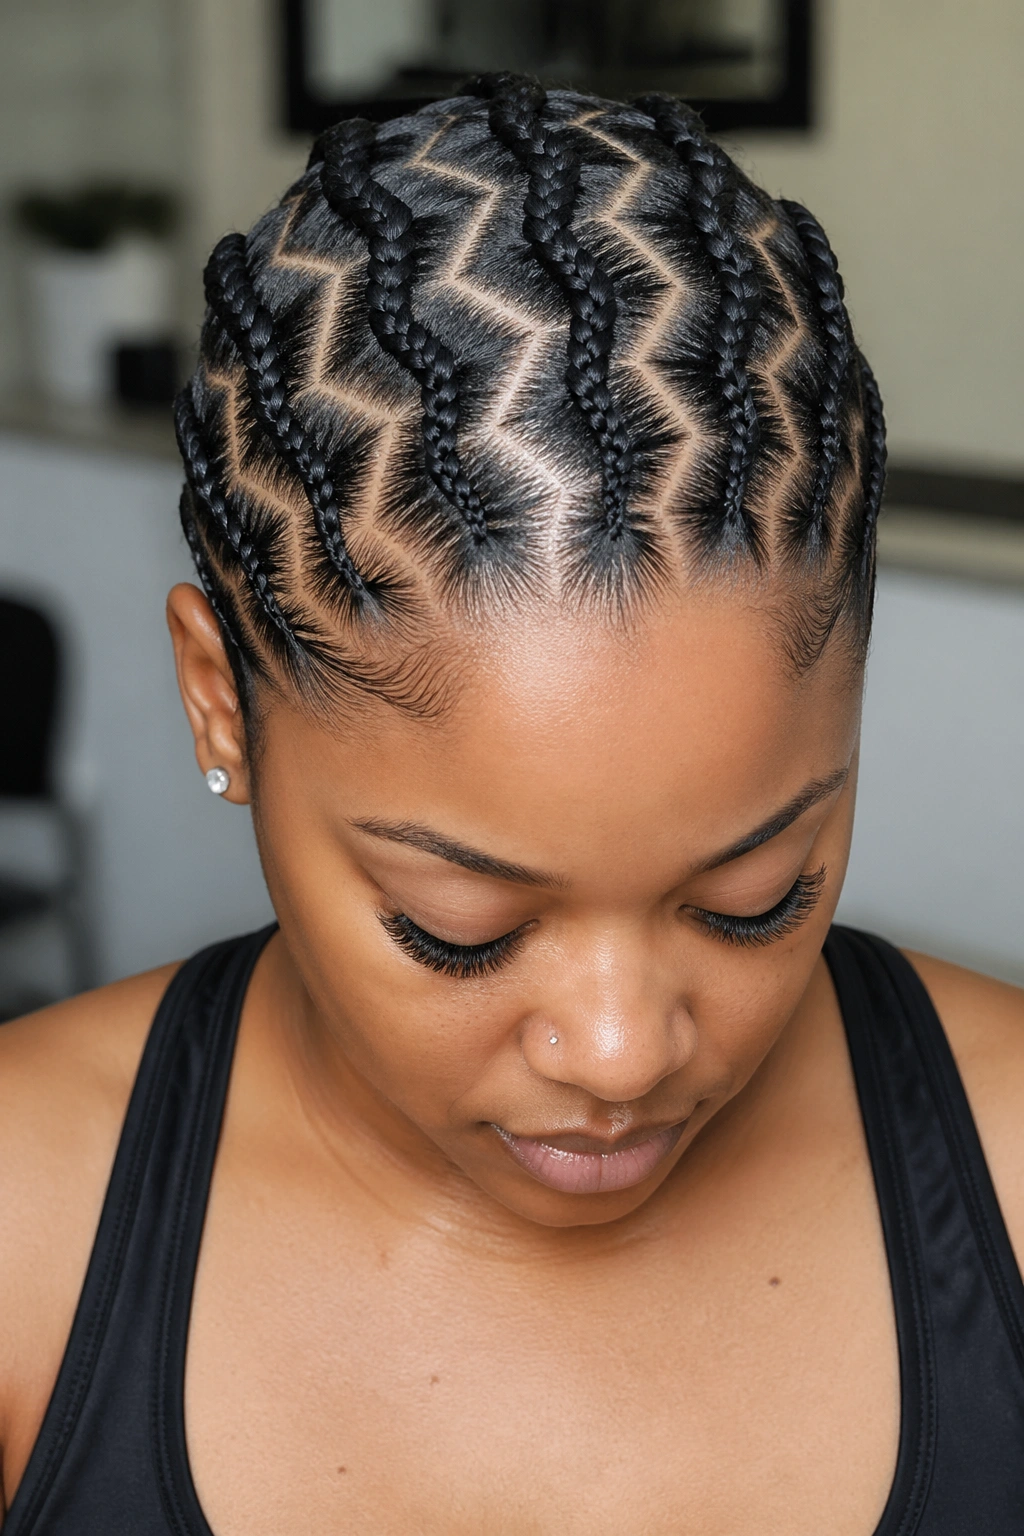
Zigzag cornrows take longer to unbraid than straight cornrows because the braid path turned at each peak. Set aside 90 minutes to 2 hours for a full takedown.
Oil or conditioner saturation first. Unravel from the tip toward the root. Don’t rush the turns — where the braid changed direction at each peak, the strands are more tangled than in a straight cornrow.
Dry detangle only if necessary. Wet detangling with lots of slip saves hair that dry detangling would break.
After takedown, wash with clarifying shampoo to remove product buildup. Deep condition for a full 30 minutes. Let the hair and scalp rest at least 48 hours before the next install.
Common Mistakes to Avoid
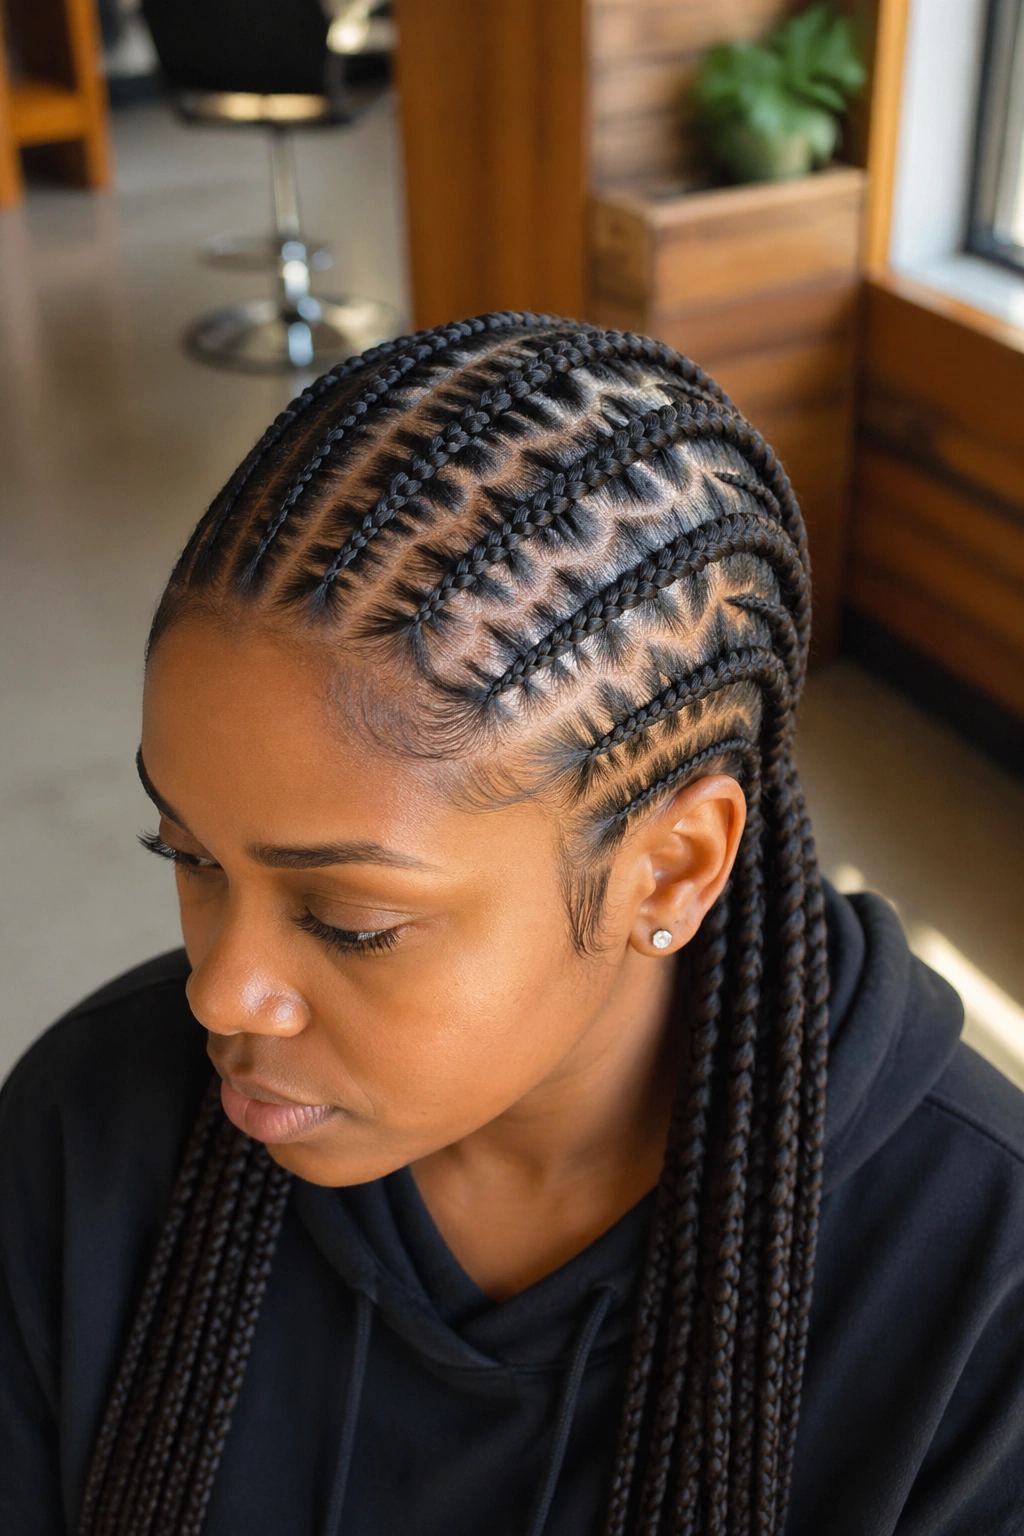
Rushing the parting. A sloppy zigzag part can’t be fixed without starting over. Slow down at the front where mistakes are most visible.
Inconsistent section widths. Some sections at 1 inch, others at 2 inches. The eye sees inconsistency and reads the whole install as poorly done even when the braiding is fine.
Braiding too tight at peaks. The corners of each zigzag put extra tension on the hair at the peaks. Pull less tight there than in the straight portions of the braid path.
Applying heavy products to the parts. The parts are the visual feature. Weighing them down with thick pomades or butters collapses the zigzag into smoothness.
Sleeping without protection. One cotton pillowcase night blurs the zigzag peaks beyond repair.
Leaving in too long. Zigzag cornrows read best at weeks 1-2. By week 3, the patterns soften and the sharp geometry fades. Take them down on schedule — zigzags aren’t a style to extend.
Pick a zigzag cornrow pattern that matches your skill, your patience, and the occasion, then protect it properly — you’ll get the full photographic and protective payoff the style is designed to deliver.
