



Zig zag cornrows with beads break the rules of straight braiding on purpose. Where most cornrow styles march in disciplined parallel lines from front to back, zig zag rows lurch left, then right, then left again — creating sharp angled segments that turn the scalp into a graphic pattern. Add beads at the tips and along key bends, and you’ve got a style that catches eyes from across a parking lot.
The zig zag isn’t a beginner technique. The parts have to be precise. The angles have to mirror across the head. And every bend point is a place where tension can shift unevenly if the braider rushes. But for anyone willing to put in the chair time, zig zag cornrows with beads deliver something almost no other style does: a sense of motion built directly into the part lines themselves.
Why Zig Zag Parts Look So Different
A standard cornrow part is a straight line. Predictable. Calming, even. The eye traces the line from hairline to nape and registers order.
A zig zag part fights that order. Each angled segment forces the eye to pivot — left, then back right, then left again. Because the brain reads angles as motion, the entire scalp seems to move even when you’re standing still.
This is why zig zag cornrows photograph so well from above. Bird’s-eye angles show the full geometry, and the angles register as deliberate design rather than wild patterning. Beads at the tips give those zig zag rows a clear endpoint, anchoring the chaos with weight.
How Beads Interact With Zig Zag Geometry
Beads add weight where you place them, and that weight pulls the braid in the direction of the bead. On straight cornrows this is invisible — the braid is already going in one direction. On zig zag cornrows, bead weight at the tips changes how the angled braid swings.
Place beads only at the tip and the entire row swings as a unit. Place beads along the length at each angle bend, and each segment swings independently — almost like a hinged tail. Both look striking. They behave differently against the back when you walk.
Bead choice matters more on zig zag styles than on straight ones. Heavy ceramic beads exaggerate the swing motion. Light wood or seed beads keep the geometry clean. Pick based on whether you want the zig zag to read as static (light beads) or dynamic (heavy beads).
What You Need Before Starting a Zig Zag Install
The supplies overlap with any cornrow install, but a few items deserve special attention for zig zag work:
- A flexible measuring tape — for marking exact angle points along the scalp before parting begins
- A pointed-tip rat-tail comb with a SHARP metal tail (not plastic) — sloppy parts ruin zig zag
- Edge gel with maximum hold — the bend points lift more than straight parts
- Mousse or foam — calms flyaways at the angle joints where hairs tend to escape
- Beads in graduated sizes — 6mm, 8mm, 12mm — so you can place smaller beads at bends and larger ones at tips
- Two mirrors — one front, one back — to check angle symmetry during install
A braider who’s never done zig zag work shouldn’t be your first choice. Ask for portfolio shots. Specifically ask if you can see the back of the head — most braiders only photograph the front, and zig zag only reads correctly from above and behind.
Prep Work That Makes Or Breaks the Zig Zag
Zig zag parts require freshly stretched hair. Not freshly washed — washed two or three days before, then blown out on cool to remove curl pattern without flattening the hair completely.
Curl pattern fights zig zag parts. Every kink and coil pulls the part line off-true, and trying to braid through curl-resistant sections at sharp angles creates uneven tension that you’ll feel by hour two. Stretching the hair first lets the parts sit clean.
If your hair is dense, sectioning matters. Have your braider section the entire head into the planned zig zag pattern with clips BEFORE starting any braiding. Once you can see the full pattern in clipped sections, adjust angles before any braid is locked in. Mid-install adjustments are painful and rarely correct.
Mapping Out Your Zig Zag Pattern
Not all zig zags are equal. The angle of each bend, the spacing between bends, and the direction of the first bend all change the final look.
Sharp zig zags (45-degree or sharper bends, segments 1-2 inches apart) read as bold and aggressive. Best for short to medium braids.
Wide zig zags (15-30 degree bends, segments 3-4 inches apart) read as soft and flowing. Best for longer extensions where the angle doesn’t compete with braid length.
Mixed zig zags (varying bend angles down a single part line) read as organic and freeform. Hardest to execute correctly but most striking when done well.
Pick a pattern that matches your face shape. Round faces benefit from sharp angles that add visual structure. Long faces benefit from wider zig zags that don’t elongate further. Heart-shaped faces work with either, but lean toward symmetrical patterns.
A Brief Note on Cornrow History and Pattern Innovation
Patterned cornrows have a long history in West African cultures, where geometric scalp braiding carried meaning about community, status, and identity. The zig zag specifically appears in styles documented across Mali, Senegal, and parts of Nigeria — sometimes called “lightning braids” or “river braids” depending on the region.
The patterns weren’t decoration alone. Some communities used specific geometric arrangements to communicate readiness for marriage, mourning status, or membership in particular groups. When you wear zig zag cornrows with beads, the visual language draws from a tradition that predates most modern hair styling by centuries.
1. Sharp Triple-Zig Across the Crown
Three zig zag rows run across the top of the head — each bending at sharp 45-degree angles three times before reaching the nape. Beads cluster at the tips in matching wood tones.
Why It Works
The triple-zig at the crown turns the top of the head into a focal point, drawing eyes upward rather than letting them drift down the length of the braids. Sharp angles make the geometry unmistakable from any viewing angle.
- Bend count per row: 3
- Bend angle: 45 degrees
- Best bead size: 12mm matching wood
Pro tip: The first bend should sit roughly two inches behind the front hairline. Closer than that and the zig zag looks crowded against the face; farther back and the front hairline reads as straight cornrows with zig zag added later.
2. Wide-Angle Zig Zag With Cascading Beads
Four wide-angled zig zag rows fall down the head with gentle bends at 20 degrees, ending in cascades of small beads strung along the bottom 6 inches of each braid.
The wide-angle approach softens the zig zag aesthetic considerably. The bends are visible but not aggressive — the rows still appear to flow rather than pivot sharply. Bead cascades down the length amplify the soft, almost liquid feel of the geometry.
This is the version to choose if you love zig zag as a concept but find sharp angles too intense for your wardrobe or workplace. It still photographs as zig zag, still reads as patterned, but doesn’t compete for attention with everything else you wear.
3. Asymmetrical Zig Zag With Beaded Focal Point
The left side of the head carries traditional zig zag rows; the right side stays straight back. A single bead-weighted braid sits at the dividing line as the focal point.
Asymmetry is hard to wear. It works only when one side commits hard to its style choice and the other side stays restrained. The single divider braid — heavy with beads, possibly in a contrasting bead color — gives the eye a place to land between the two sides.
The asymmetrical look flatters faces that are themselves slightly asymmetrical (most faces are). The pattern can be positioned to draw the eye toward your stronger profile, away from features you’d rather de-emphasize.
4. Lightning-Bolt Zigs With Metallic Beads
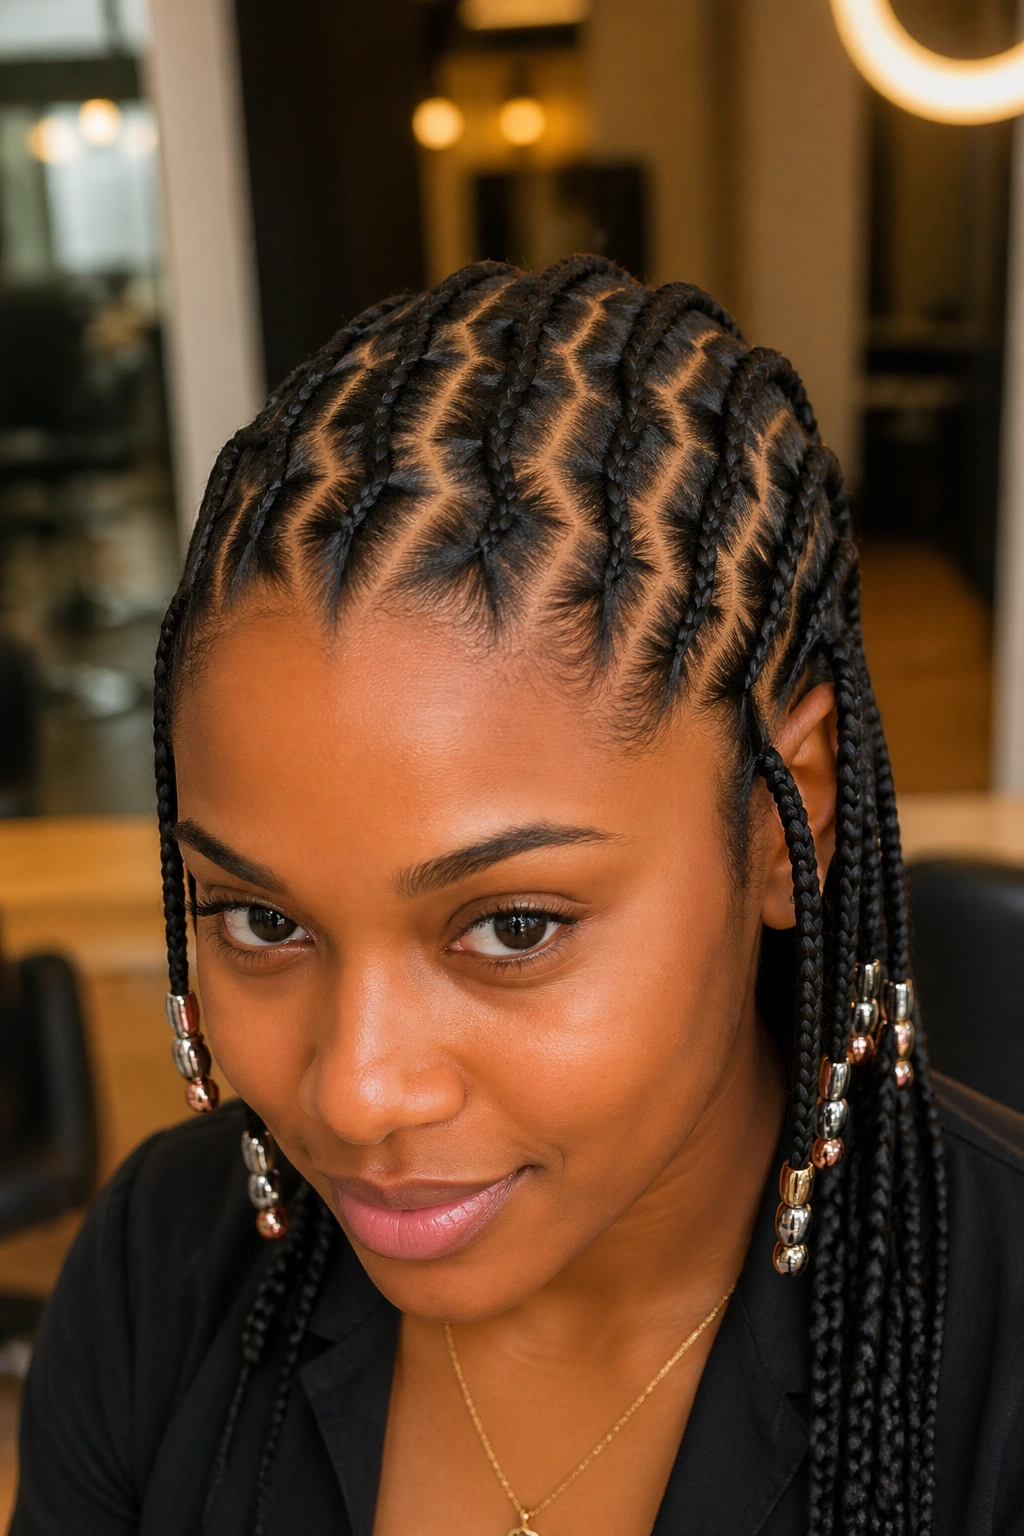
Six narrow zig zag rows run from the hairline to the nape, each bending at sharp angles that mimic the shape of a lightning bolt. Beads at the tips are silver, gold, or copper metal.
Metallic beads on zig zag braids amplify the electric, kinetic feel of the lightning-bolt pattern. The bead metal catches light at every angle — and because there are angles everywhere, the bead reflections shift as you turn your head.
Pick one metal and stick with it across all braids. Mixed metals on zig zag styles read as confused; matched metals read as deliberate jewelry. Copper flatters warm skin tones; silver flatters cool tones; brushed gold works on both.
5. Diagonal Zig Zag Cascade With Beaded Tips
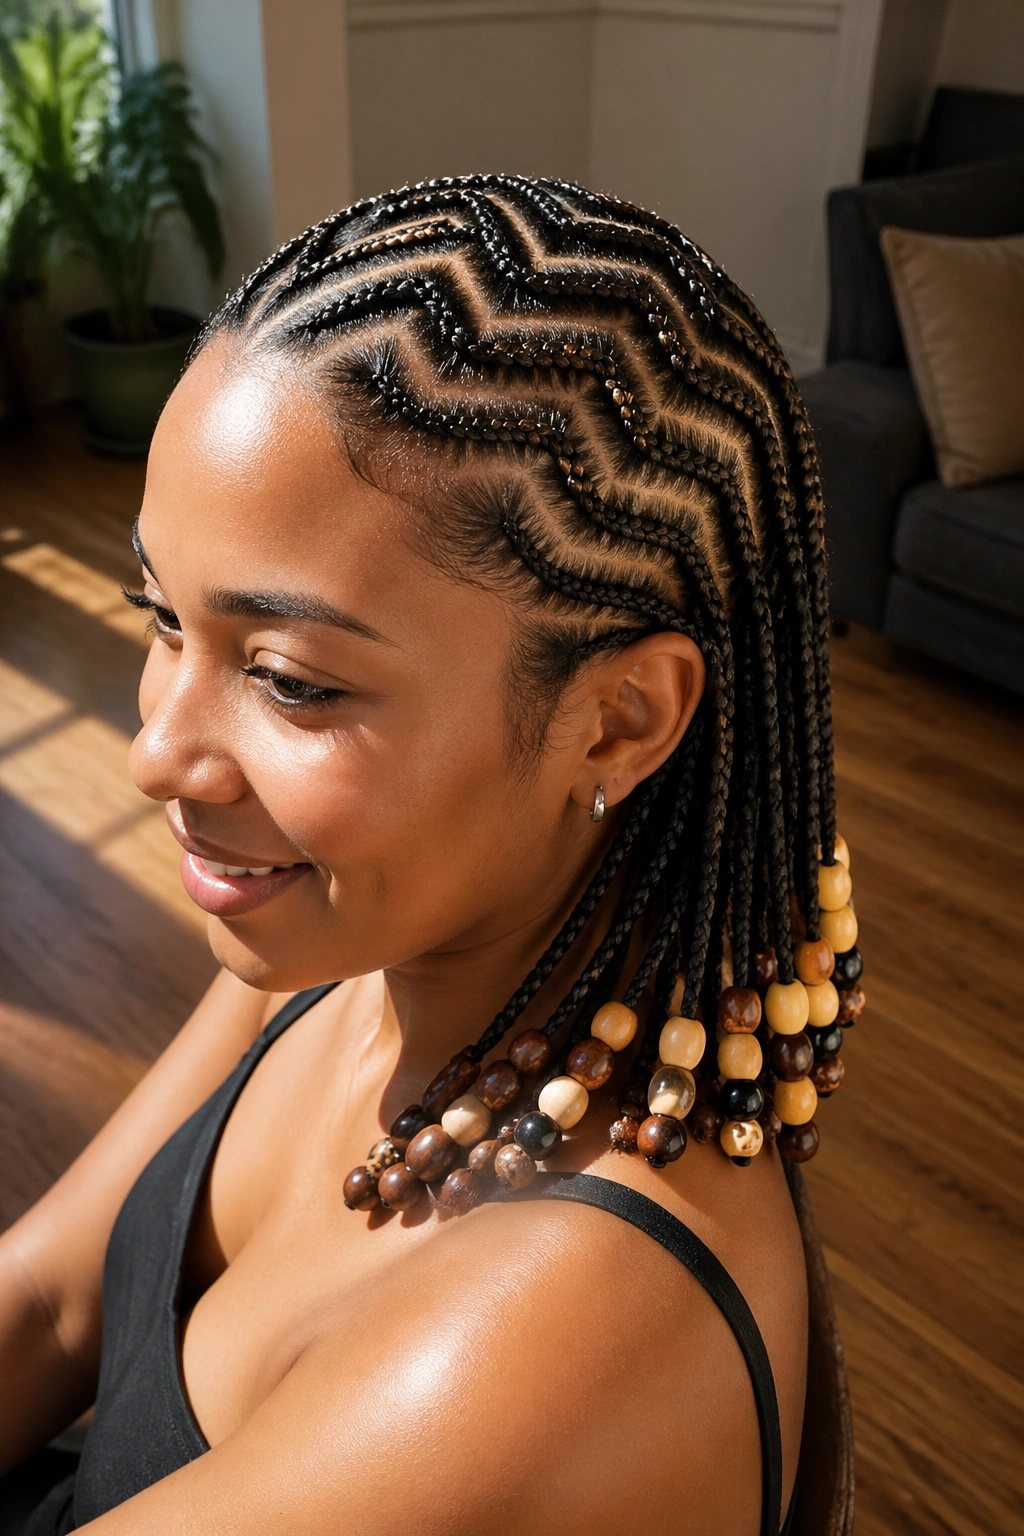
The zig zag isn’t horizontal across the head — it angles diagonally from the upper left of the forehead down to the lower right of the nape. Beads at each tip in graduated sizes from small to large.
A diagonal zig zag is geometrically complex. Each row has to follow the diagonal axis while still bending at zig zag angles, creating a layered geometry that’s hard to describe and easier to see.
The graduated bead sizes — small at the front, large at the back — emphasize the diagonal direction by adding visual weight where the braids end. Eye travels naturally from the upper-left starting point down to the lower-right finish.
6. Mini Zig Zag With Tiny Seed Beads
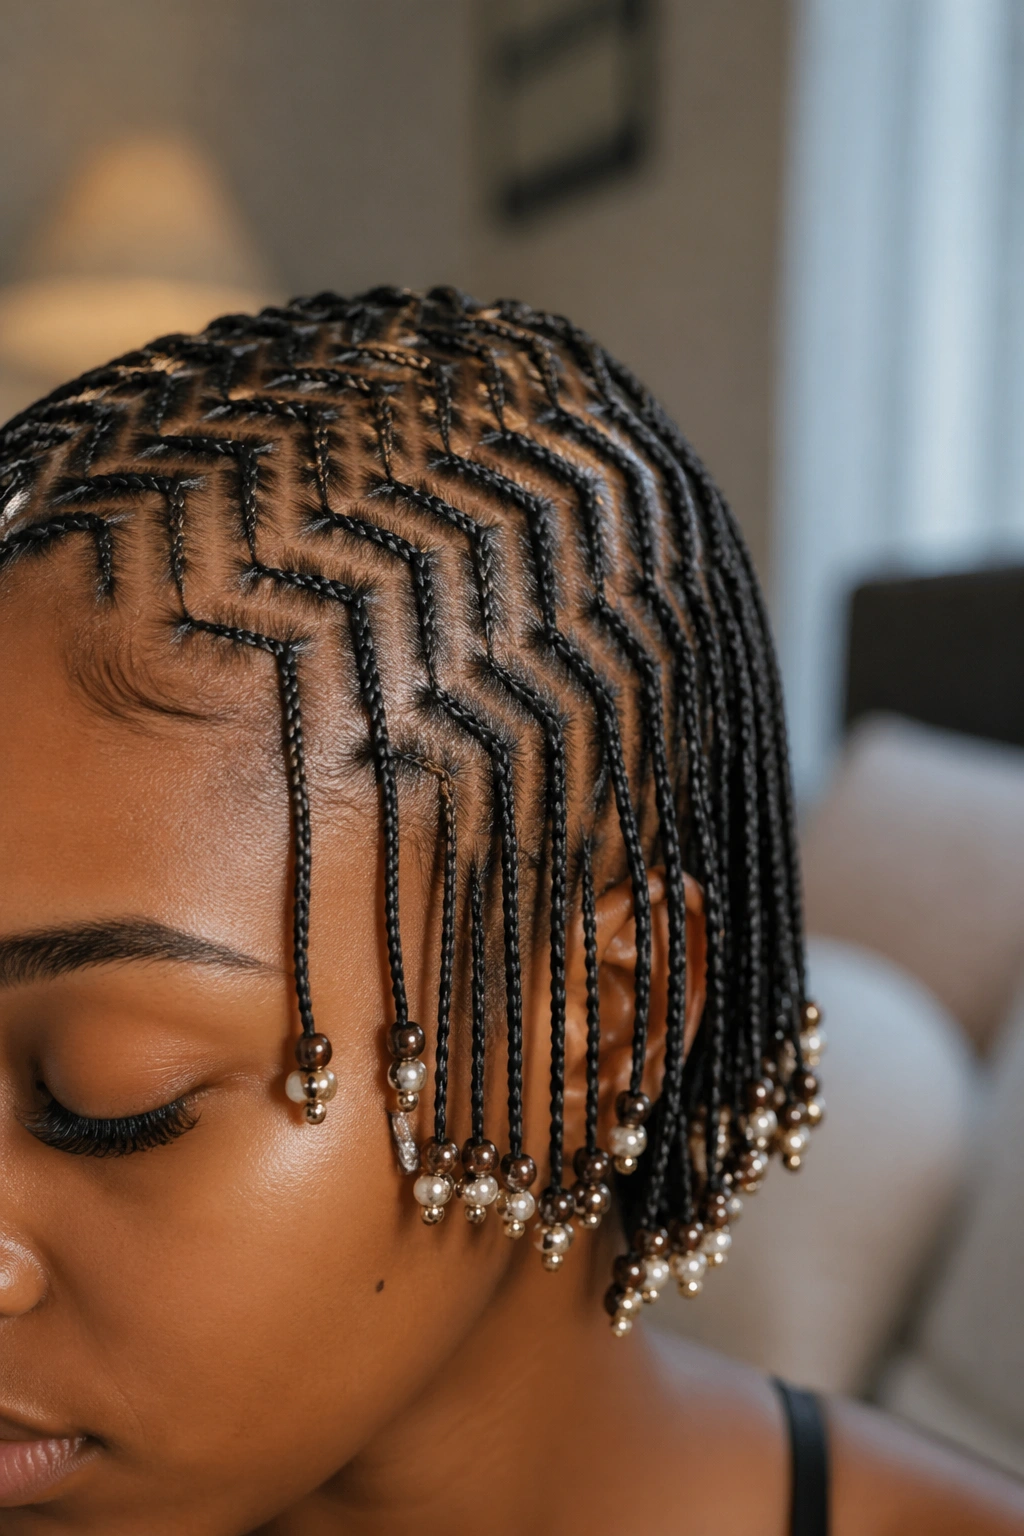
Twenty very thin zig zag cornrows with tight, compressed angles (segments only an inch apart) end in clusters of tiny 4mm seed beads.
Mini zig zag is detail-intensive. The braider has to maintain part precision at very small scale, and the bend angles can blur if the braids are too thick. Thin braids — the width of a pencil eraser at most — keep the pattern readable.
Seed beads at the tips work because anything larger would dwarf the thin braids. Cluster 6-8 seed beads per tip in a single color or a tight color blend. Mother-of-pearl, brushed silver, or matte black all photograph well at this scale.
How to Style It
- Keep clothing simple — busy patterns clash with mini zig zag detail
- Show the hairline; pulled-back front sections highlight the bend pattern
- Avoid earrings larger than studs; the bead clusters need their own visual space
7. Bold Three-Bend Zigs With Wooden Statement Beads
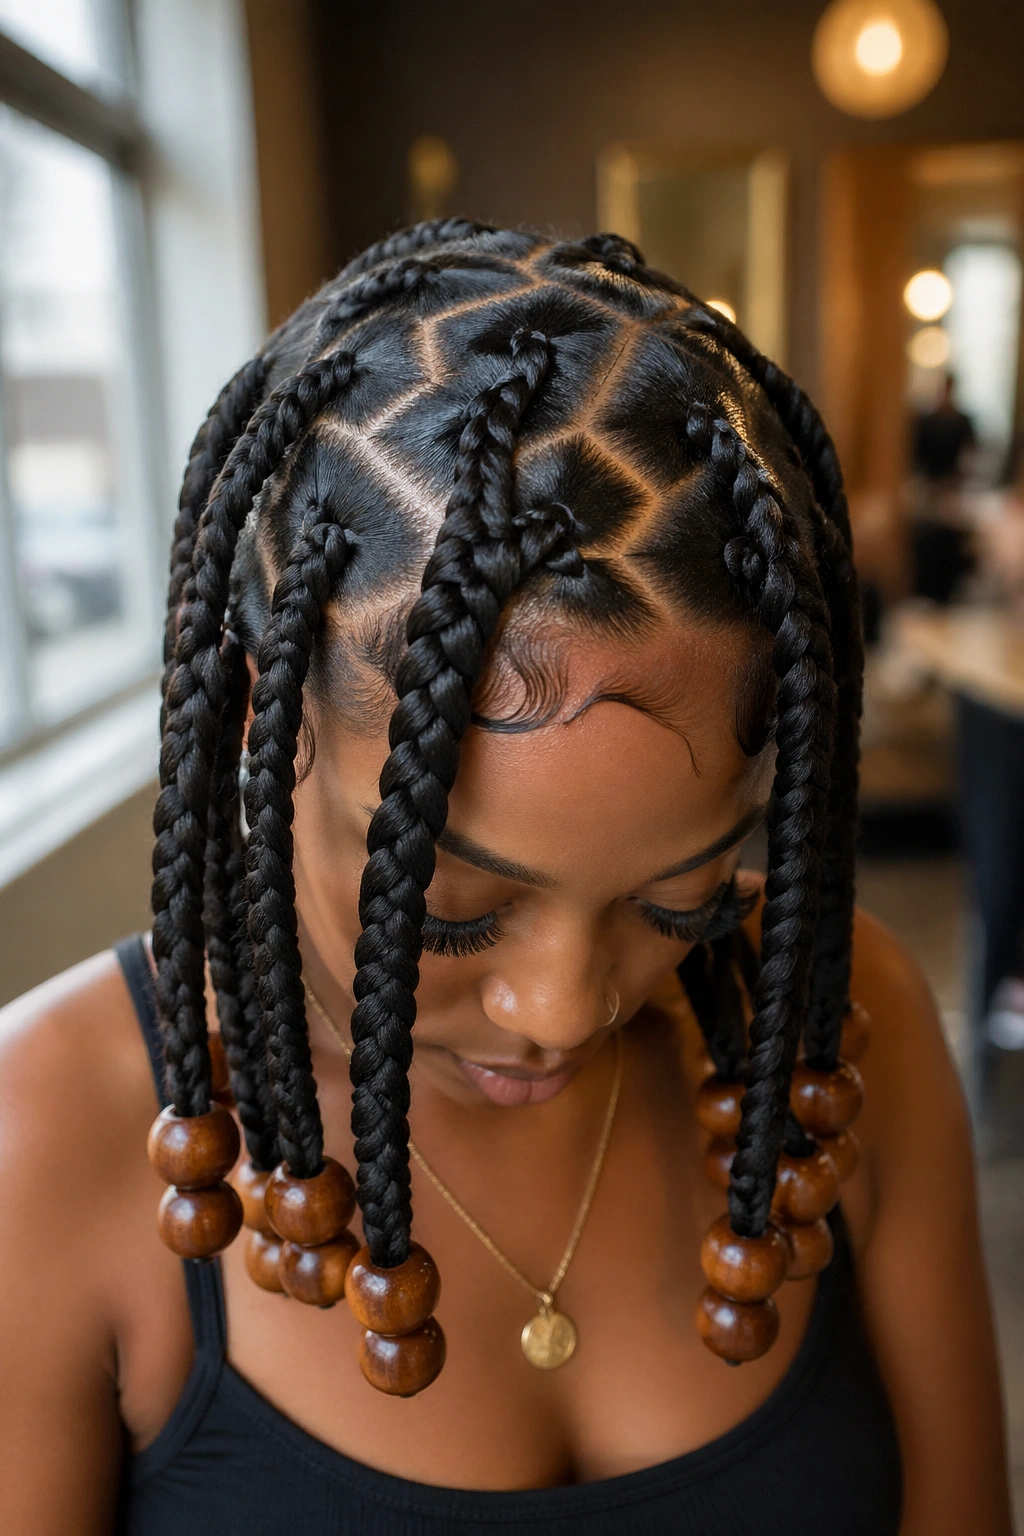
Eight thicker zig zag braids with exactly three bend points each, finished with statement-sized 16mm wooden beads at the tips. The braids themselves are jumbo width.
Going bold at every level — thick braids, sharp angles, large beads — creates a unified statement style. Nothing in the look apologizes for itself. This is wear-it-with-confidence territory.
The downside is install time and weight. Eight jumbo zig zag braids with three bends each take about 4 hours of skilled braider time, and the wooden beads add real heft to your neck load. Plan your daily activities around the install for the first 24 hours.
8. Curved Zig Zag With Bead Trail Down the Length
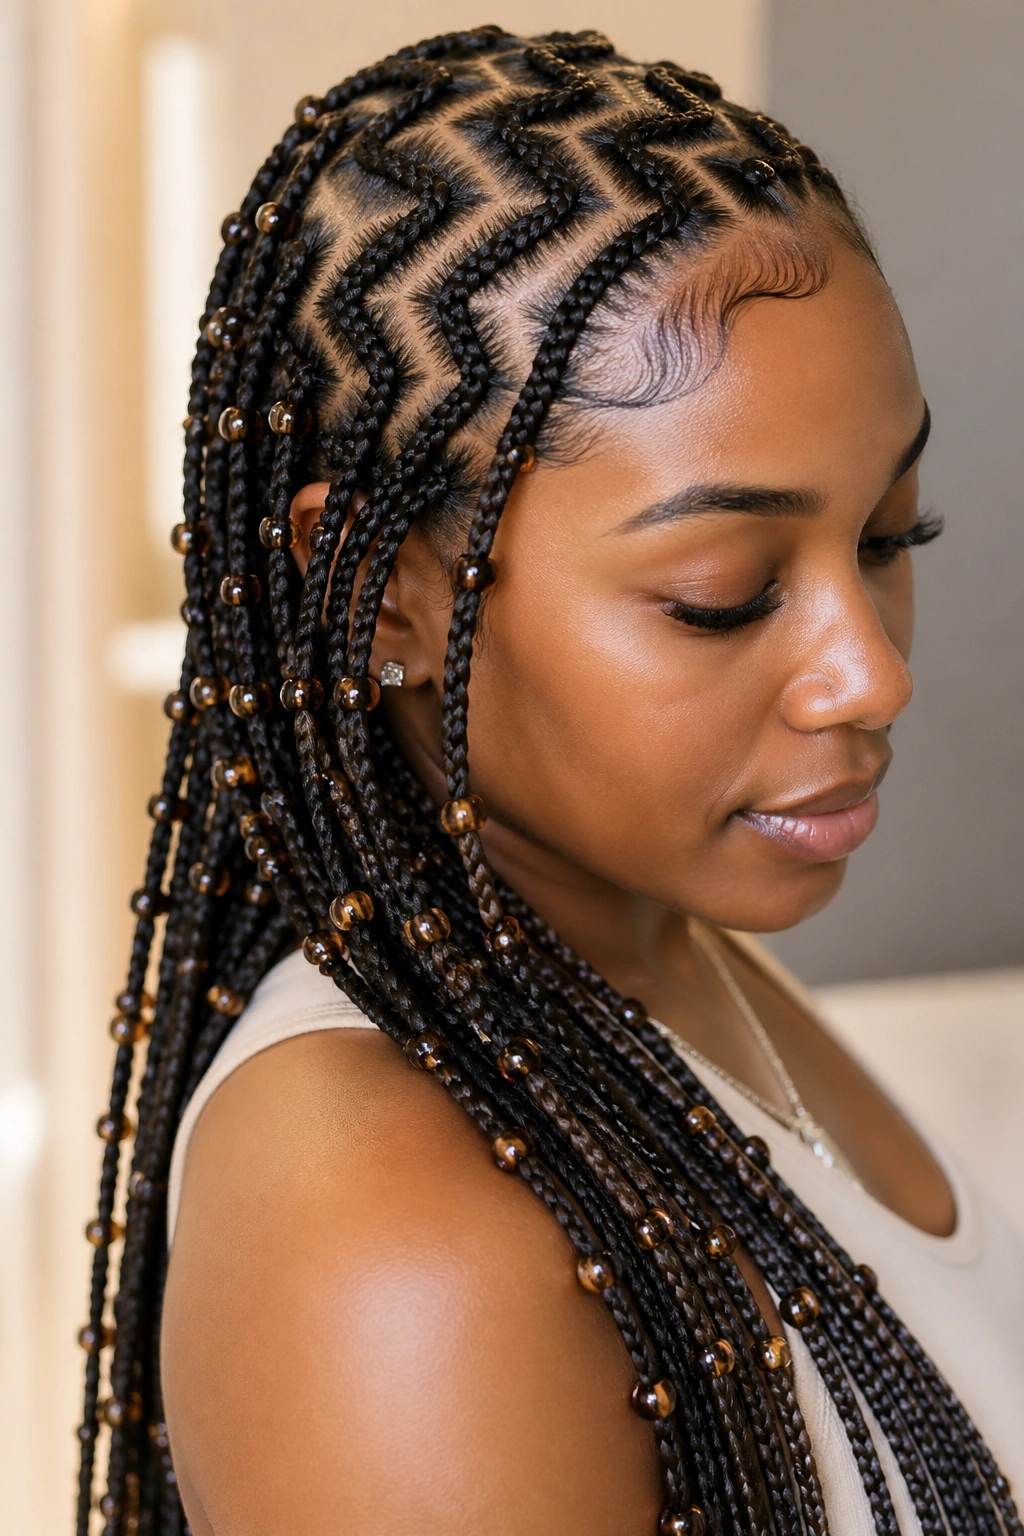
The “zig zag” here is more of an undulating curve than sharp angles — gentle S-shaped bends with no hard corners. Beads thread along the entire length of each braid at one-inch intervals.
The curved interpretation removes the angularity of traditional zig zag while keeping the directional change. The result reads as serpentine, flowing, almost like calligraphy strokes on the scalp.
Beads spaced along the full braid length — rather than clustered at tips — emphasize the curved movement. Each bead acts like a station mark, letting the eye trace the curve from root to tip.
9. Half-Zig Half-Straight With Single Bead Accents
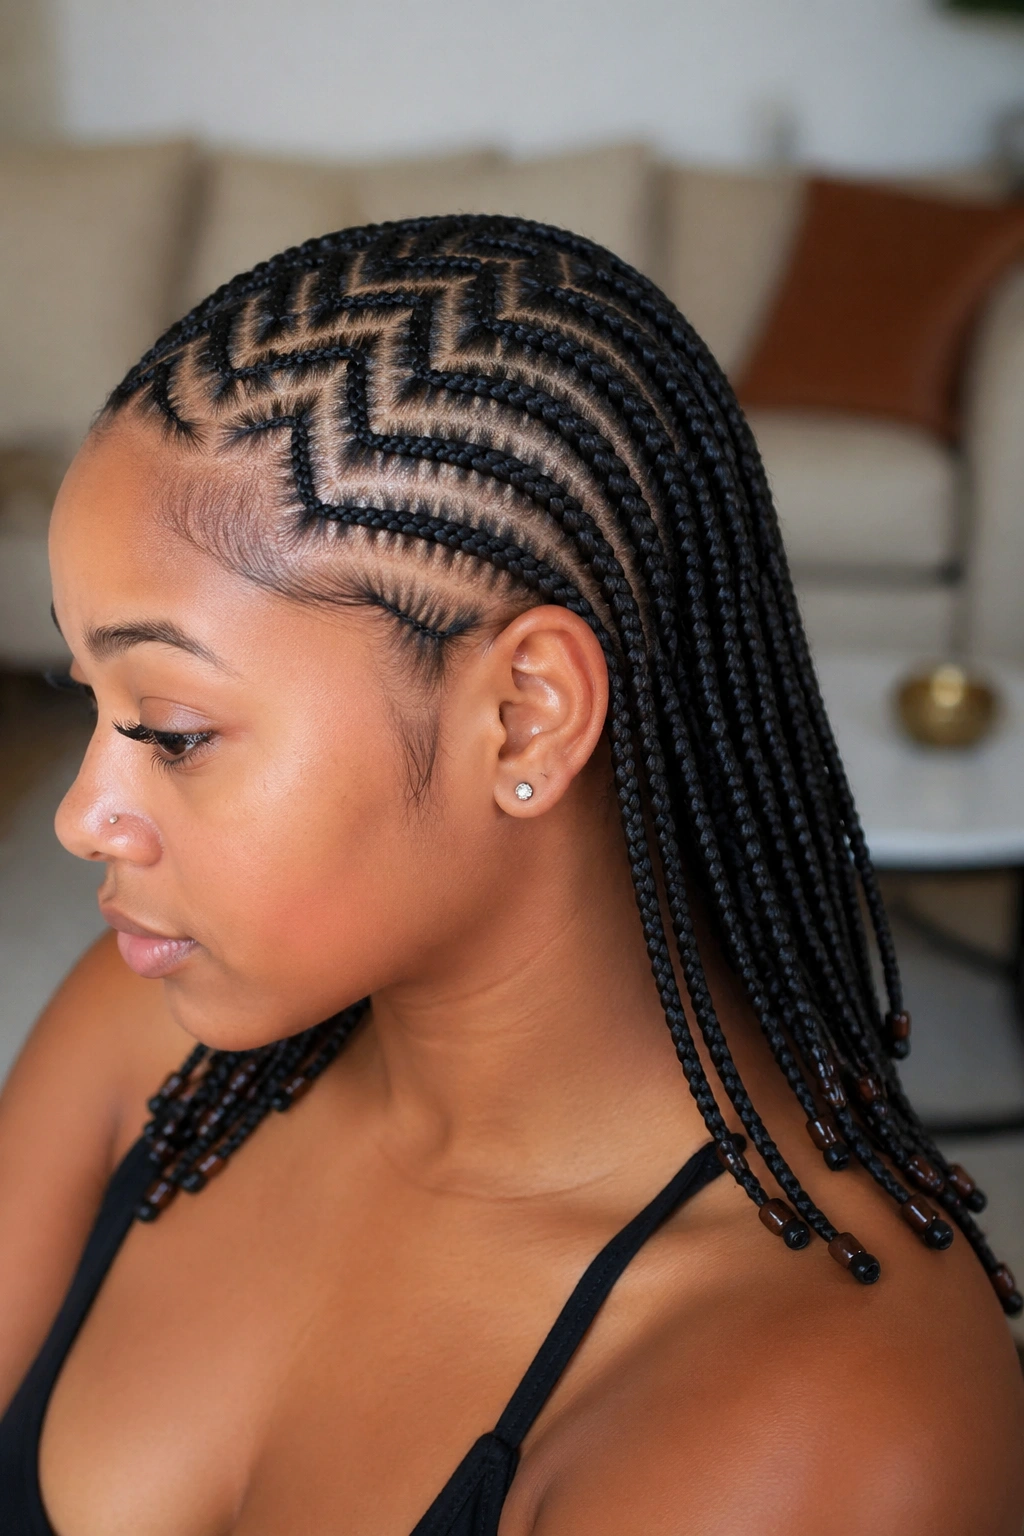
The front half of the head (from forehead to crown) is zig zag; the back half (crown to nape) reverts to straight back. A single small bead sits at each tip — matching color, no clustering.
The half-and-half approach reduces the visual chaos of full-head zig zag. People looking at you front-on see the pattern; people behind you see clean straight braids. Useful for environments where bold patterning isn’t appropriate but you still want the front-facing impact.
The transition from zig zag to straight has to happen on a clean line at the crown. A jagged transition looks like a mistake. Discuss the exact transition point with your braider before installation begins.
10. Concentric Zig Zag Spirals With Beads
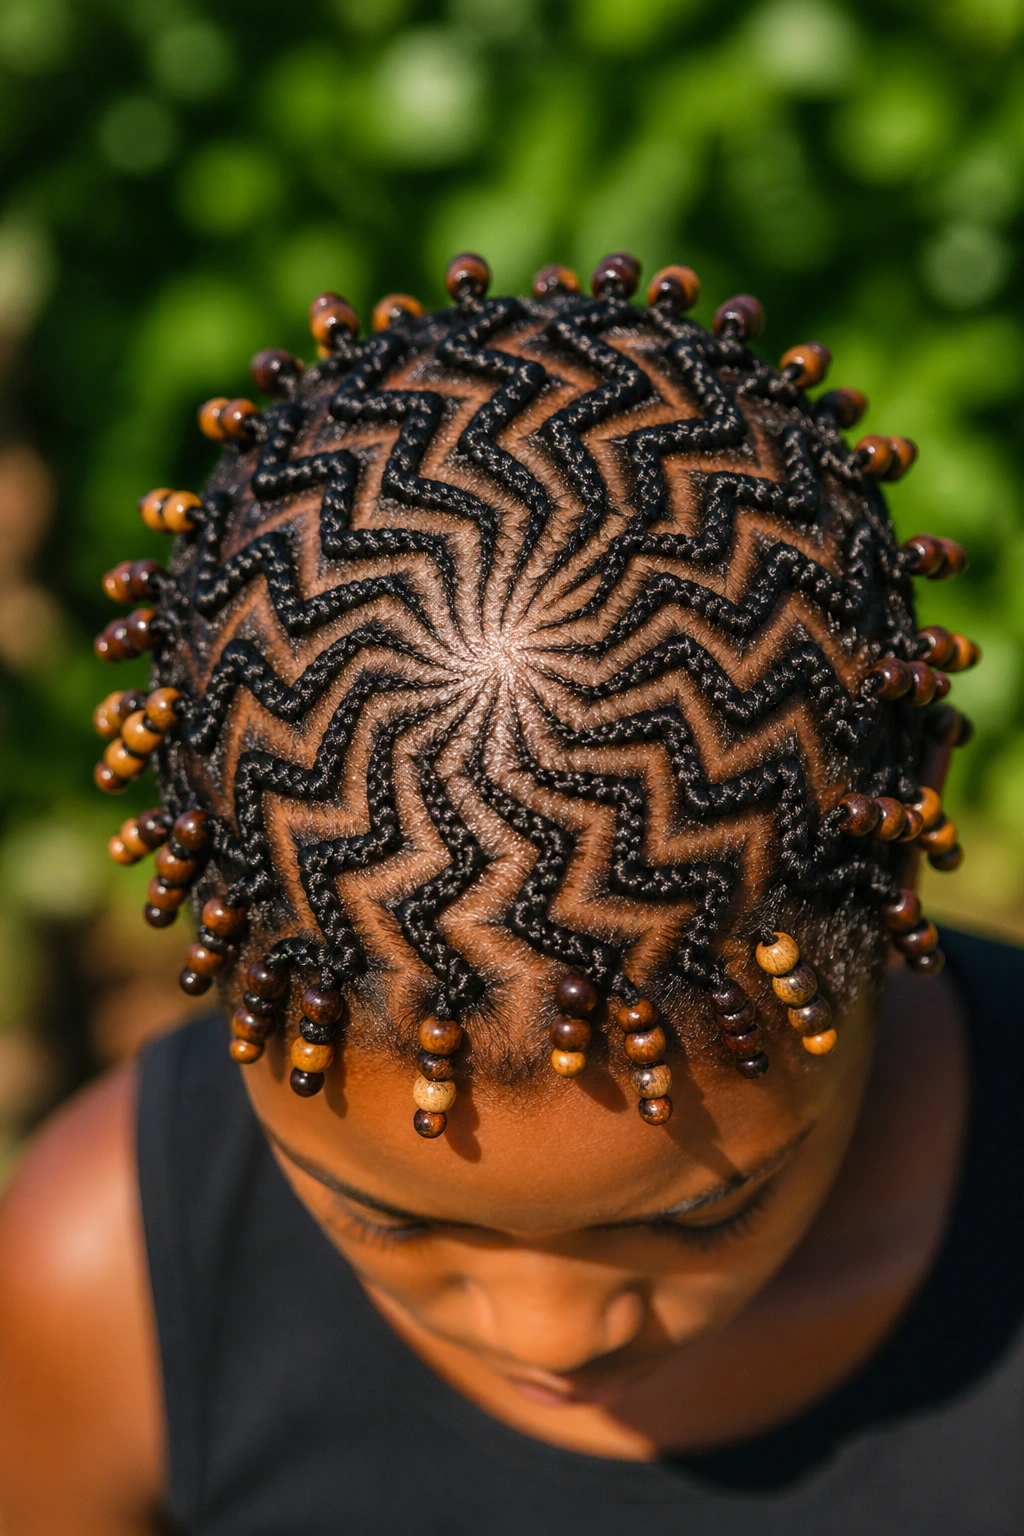
The zig zag rows don’t run parallel — they form concentric rings that spiral outward from the crown. Bead clusters at each tip in matched wooden tones.
Concentric zig zag is unusual and requires significant braiding skill. The geometry has to work radially around the crown point, with each bend angled to maintain the spiral logic. A braider who’s never done it will struggle.
When done well, the concentric pattern creates a hypnotic visual effect. The eye is drawn into the crown rather than tracing down the braids. Excellent for events where photos from above will happen — high-angle wedding photos, for instance.
11. Zig Zag Crown With Long Beaded Extensions
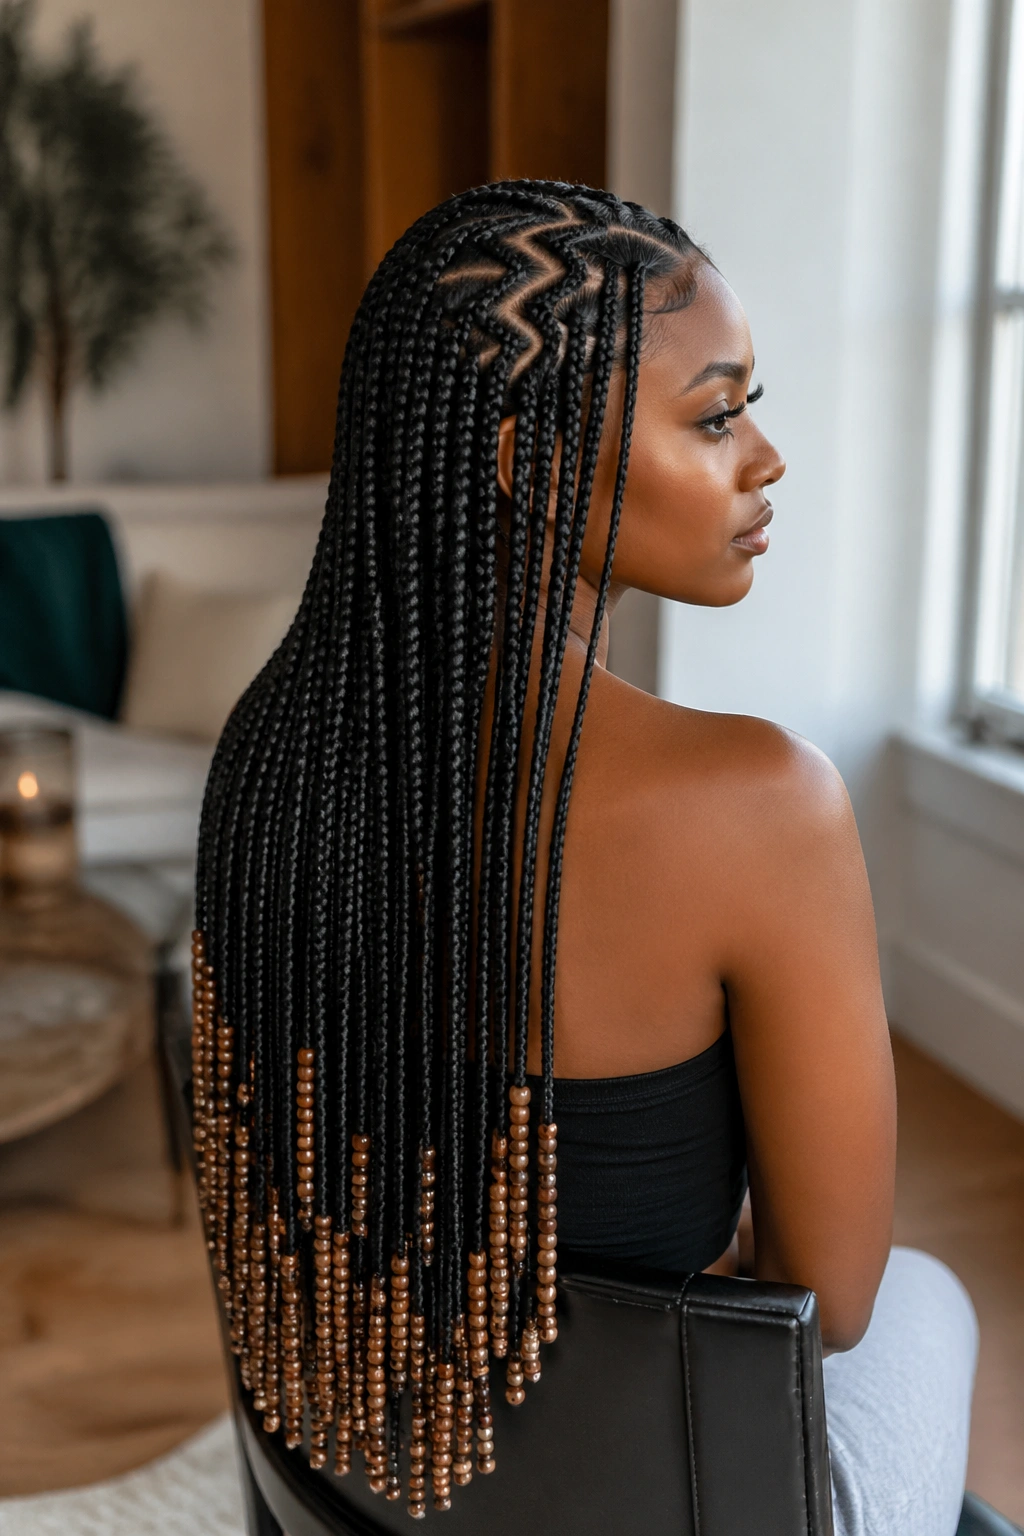
Sharp zig zag rows occupy only the crown area, then transition into long, straight extensions that fall to the mid-back. Beads run along the lower half of the extensions.
Combining patterned scalp work with smooth length is one of the most photogenic cornrow approaches. The detail at the crown gives the look its identity; the long beaded extensions give it drama and movement.
The transition point — where zig zag ends and straight extension begins — should sit at the crown or just behind it. Lower transitions make the zig zag look like an isolated decoration rather than an integrated design.
12. Reverse Zig Zag With Beaded Halo
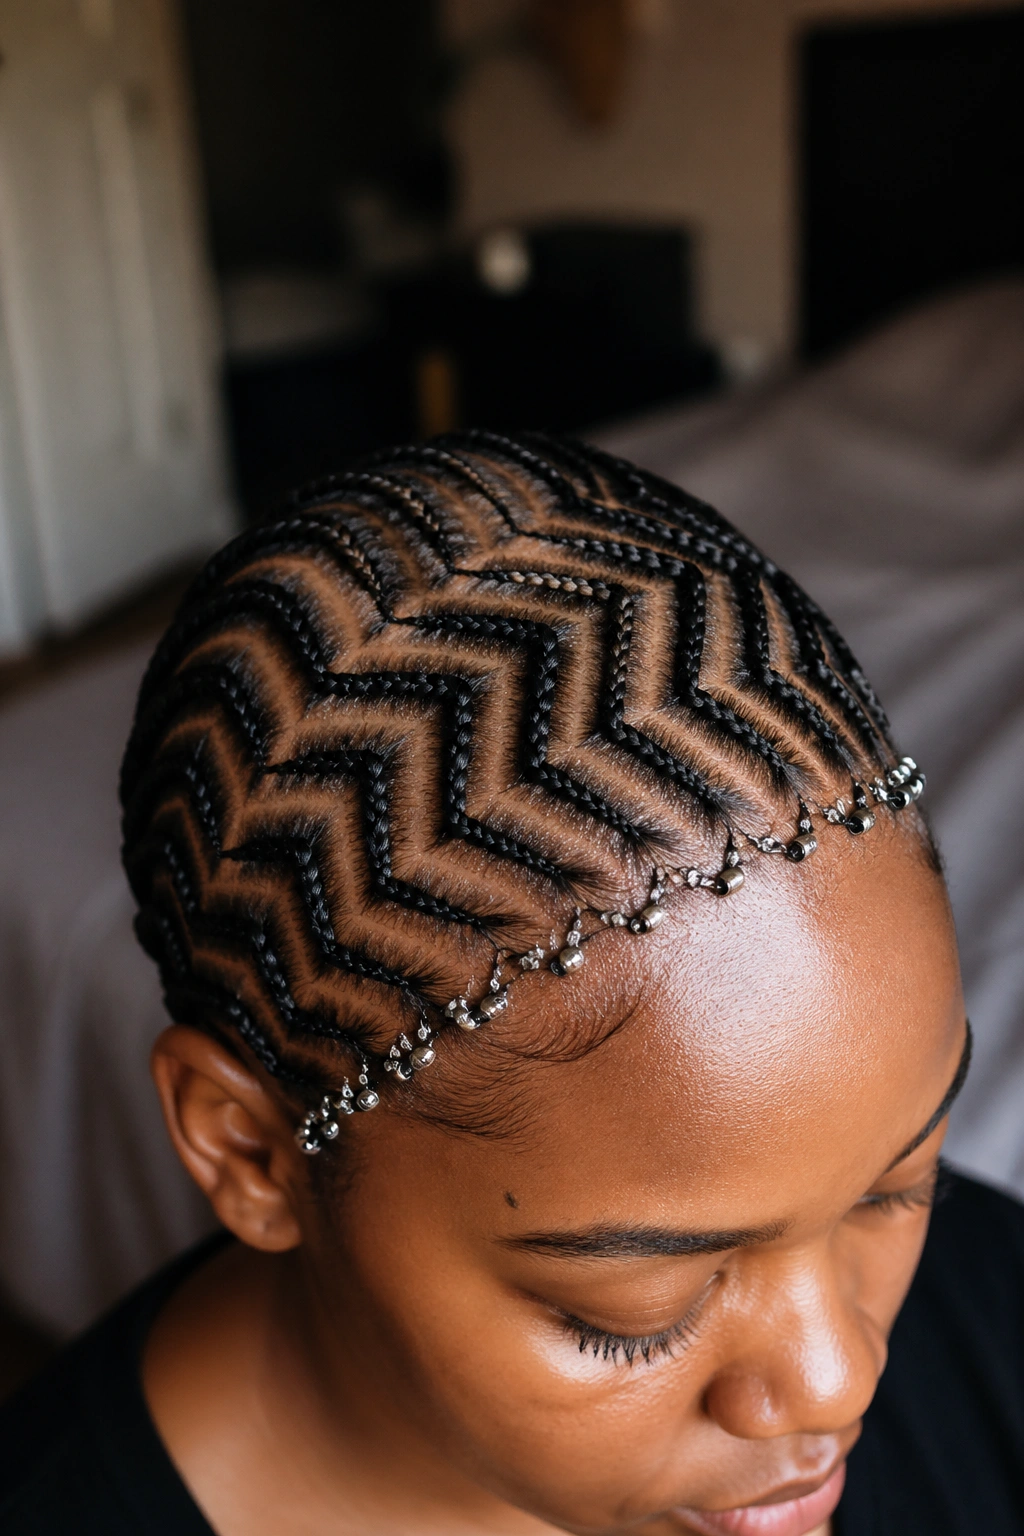
Zig zag rows that start at the nape and travel forward toward the hairline (reversing the typical direction). A halo of beads ringed around the front sections.
Reverse-direction braids are visually disorienting in a good way. Most cornrows go front-to-back, so back-to-front reads as immediately different even before the zig zag pattern registers.
The beaded halo at the front draws focus to the face and counterbalances the unusual direction. Use small beads packed close together for a halo that reads as an accessory rather than as scattered tip beads.
13. Zig Zag With Color-Blocked Bead Sections
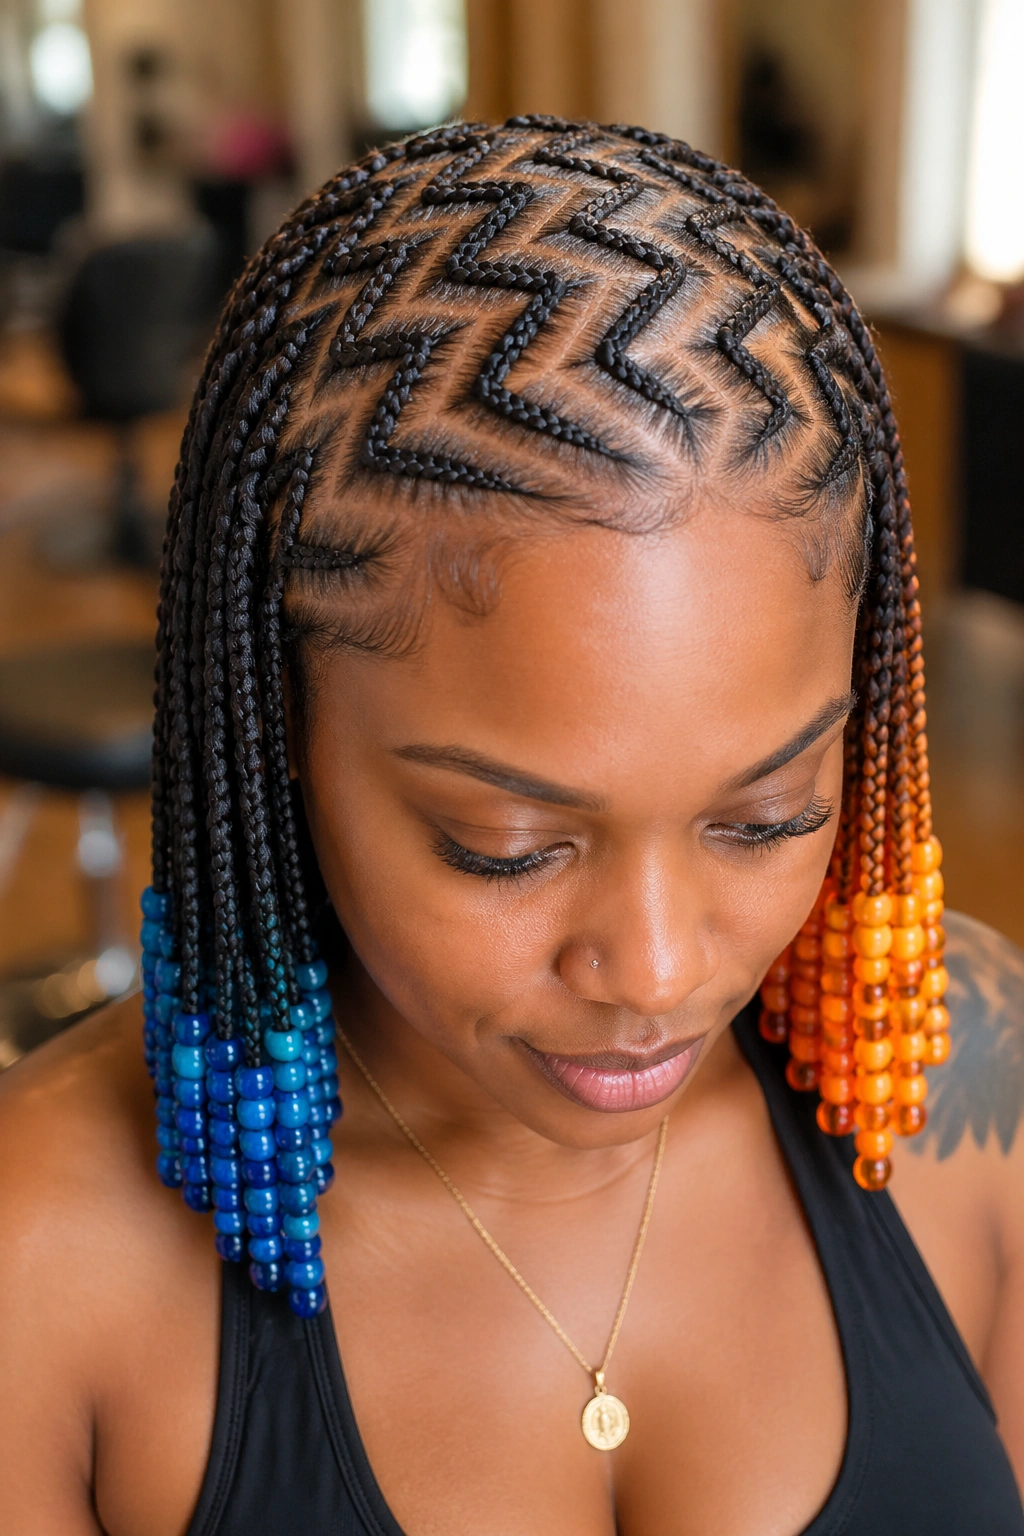
Three zig zag rows on the left side carry blue beads; three on the right side carry orange beads. Center rows carry no beads at all.
Color blocking the beads creates visual segments across the head. The viewer reads the head as three distinct zones — left blue, center neutral, right orange — which adds complexity without adding more braiding work.
Pick complementary colors (blue and orange, purple and yellow, red and green) for high contrast, or analogous colors (blue and teal, yellow and orange) for softer contrast. Match the bead colors to your wardrobe for the day if possible.
14. Wavy Zig Zag With Pearl Bead Tips
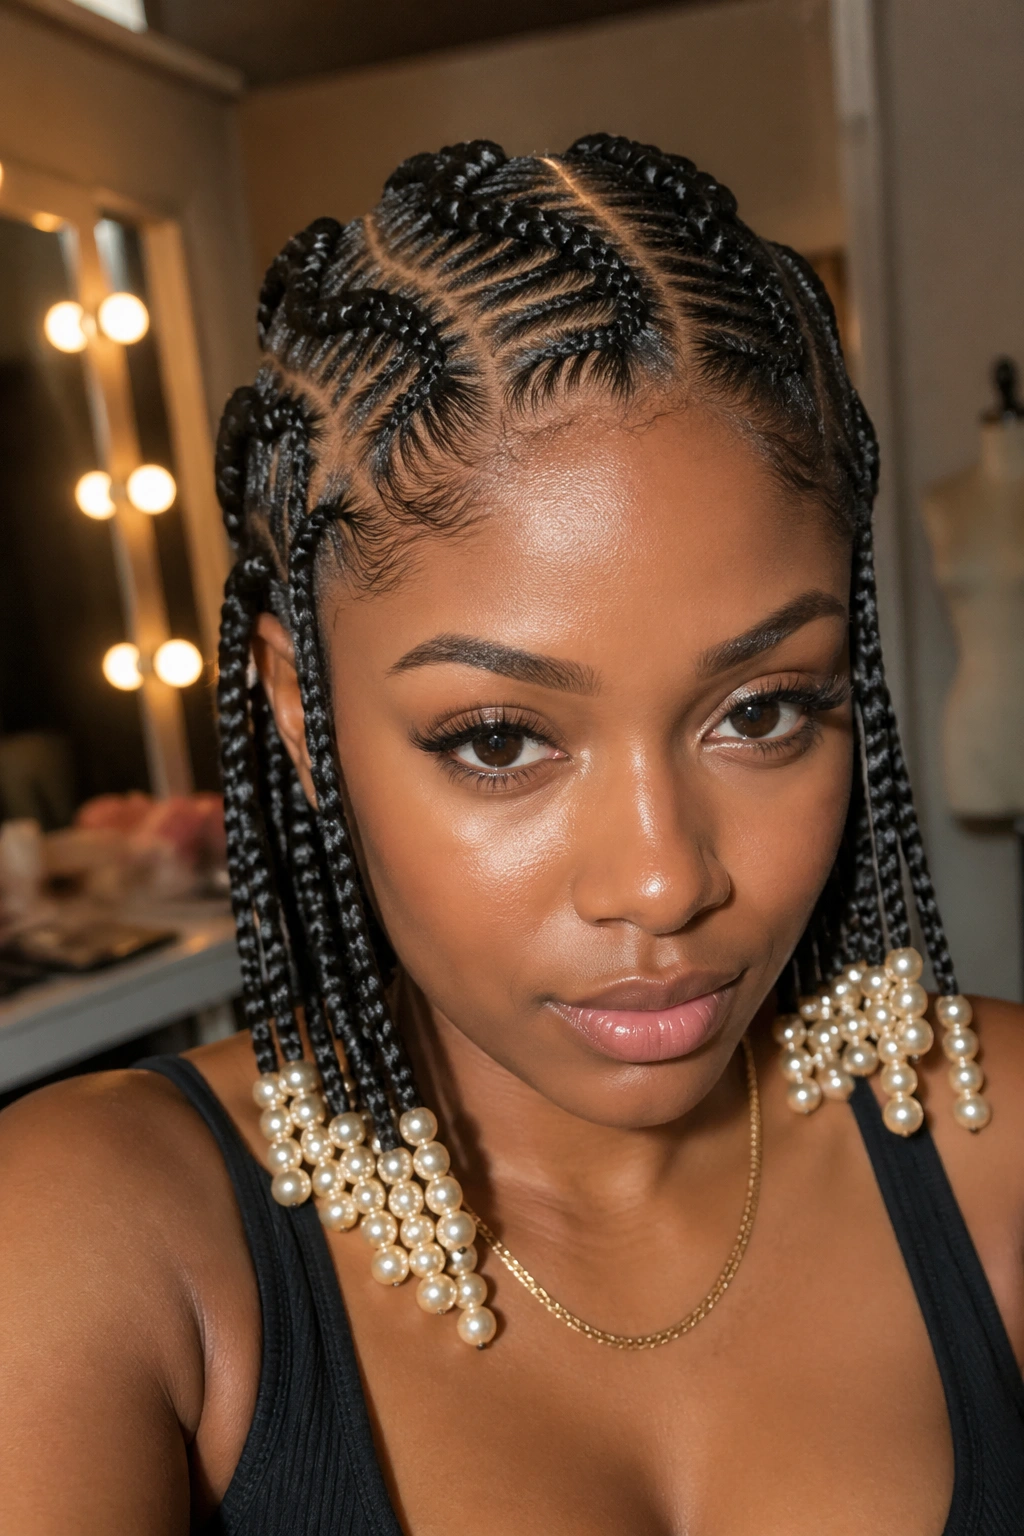
The zig zag has gentle wave-like curves rather than hard angles. Tips are weighted with single pearl-finish beads in cream or champagne.
The pearl finish is the secret here. Pearl beads carry a subtle iridescence that complements the soft wavy zig zag without competing for attention. The overall effect reads as feminine, dressy, almost bridal.
Champagne pearls flatter warm skin; cream pearls flatter cool skin; rose-gold-pearls work on both. Match the pearl tone to your overall jewelry on the day you want to wear the style.
15. Heavy Zig Zag With Shell Bead Accents
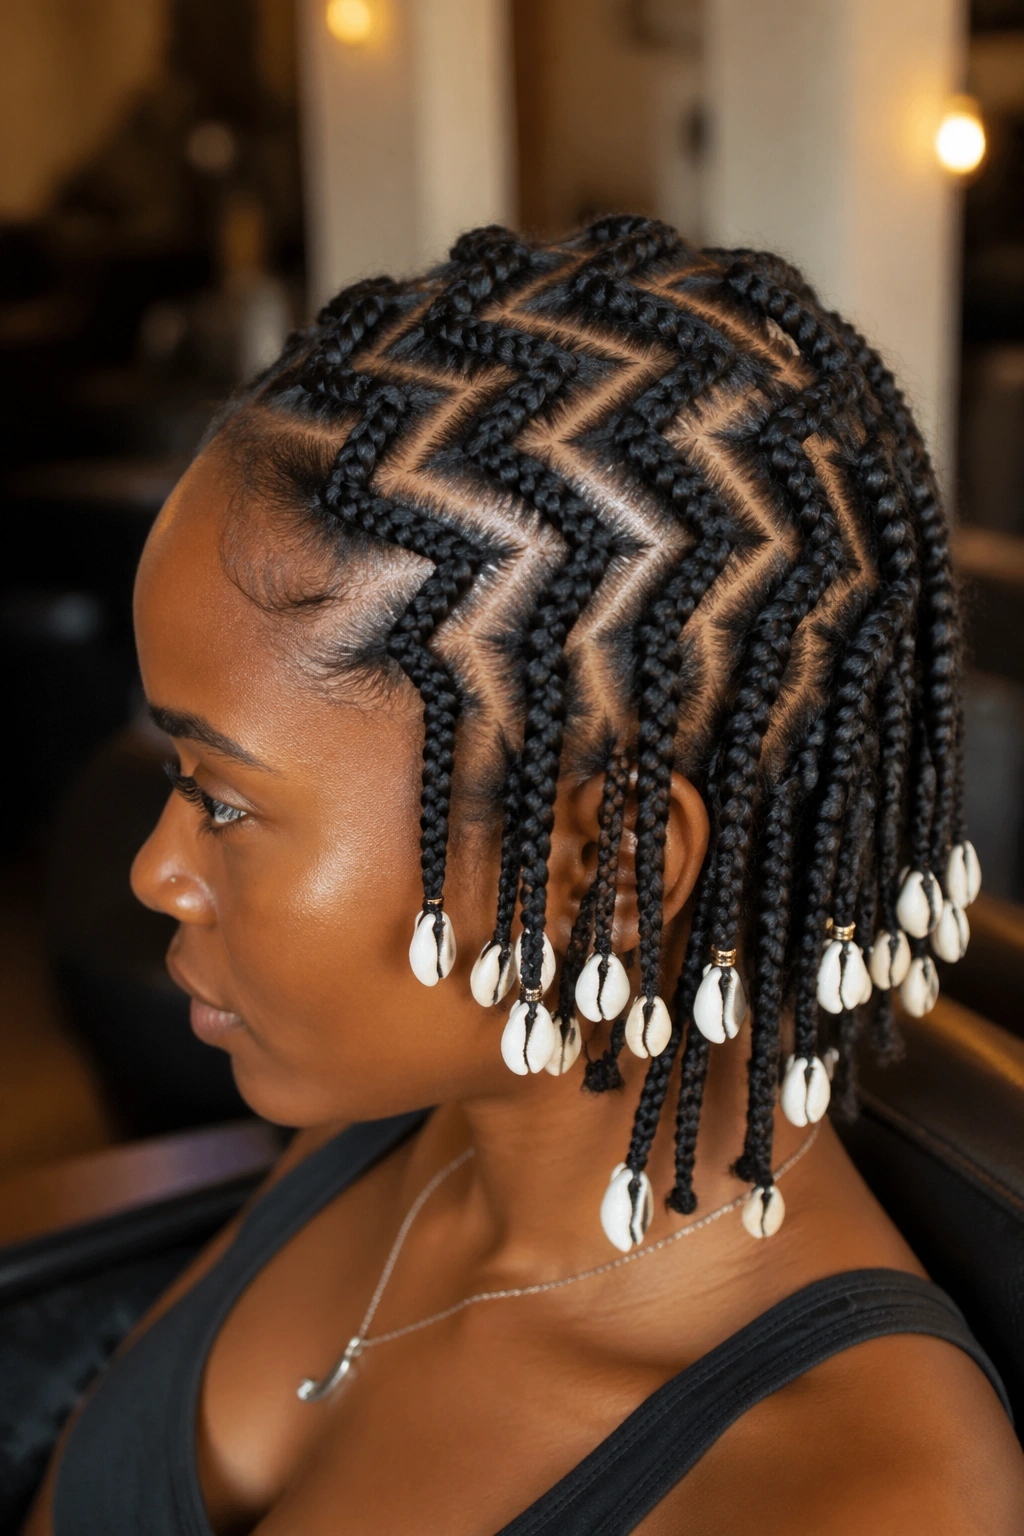
Sharp, defined zig zag rows finished with cowrie shells or other natural shell beads instead of standard round beads.
Shell beads have asymmetrical shapes and sit differently than round beads. They naturally face outward (cowries) or hang at varied angles (other shells), which adds organic visual variety to the precision of the zig zag rows.
What to Watch For
- Shells chip when banged — be careful around hard surfaces
- Shell beads carry cultural weight in some traditions; wear them with awareness
- Mix shell types if you want variation, but stay within a single color palette
16. Diagonal Zig Zag With Beaded Side Pony
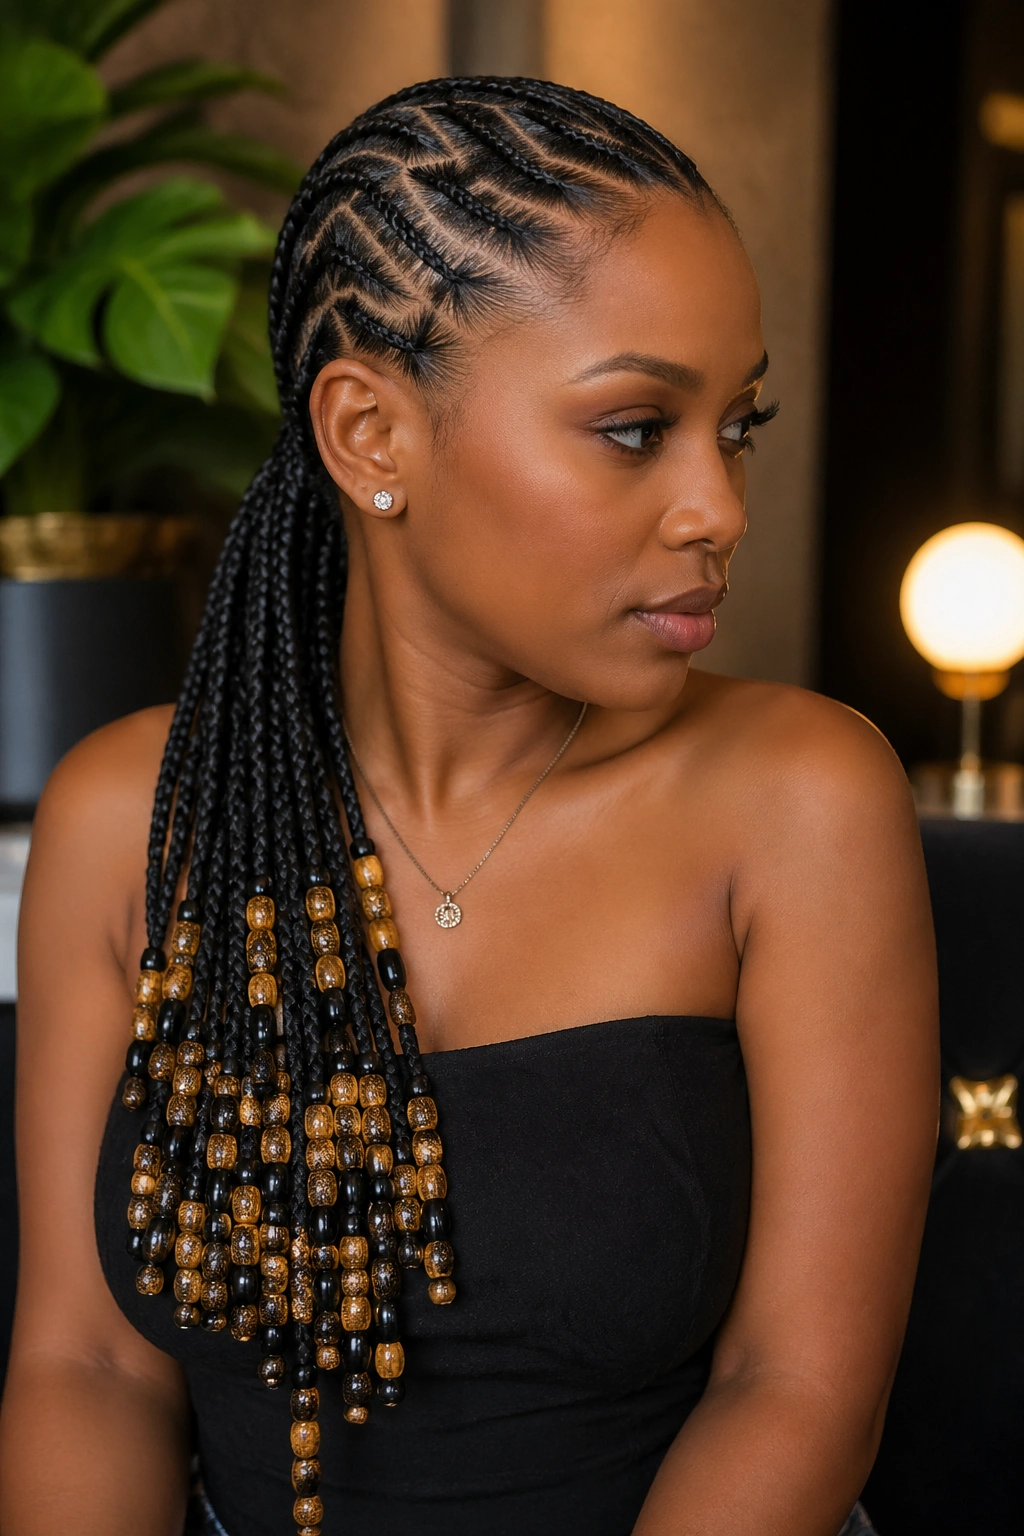
Diagonal zig zag rows gather at one side and form a low side ponytail loaded with beads.
The side-gathering creates a single dramatic focal point — a heavy beaded pony falling over one shoulder. The zig zag rows feed into the pony like rivers feeding a delta.
The weight of a beaded side pony pulls more on one side of the scalp than the other, so the install has to be slightly looser on the gathering side to compensate. A skilled braider does this automatically; an inexperienced one creates pulling discomfort by day three.
17. Geometric Zig Zag With Triangular Bead Arrangements
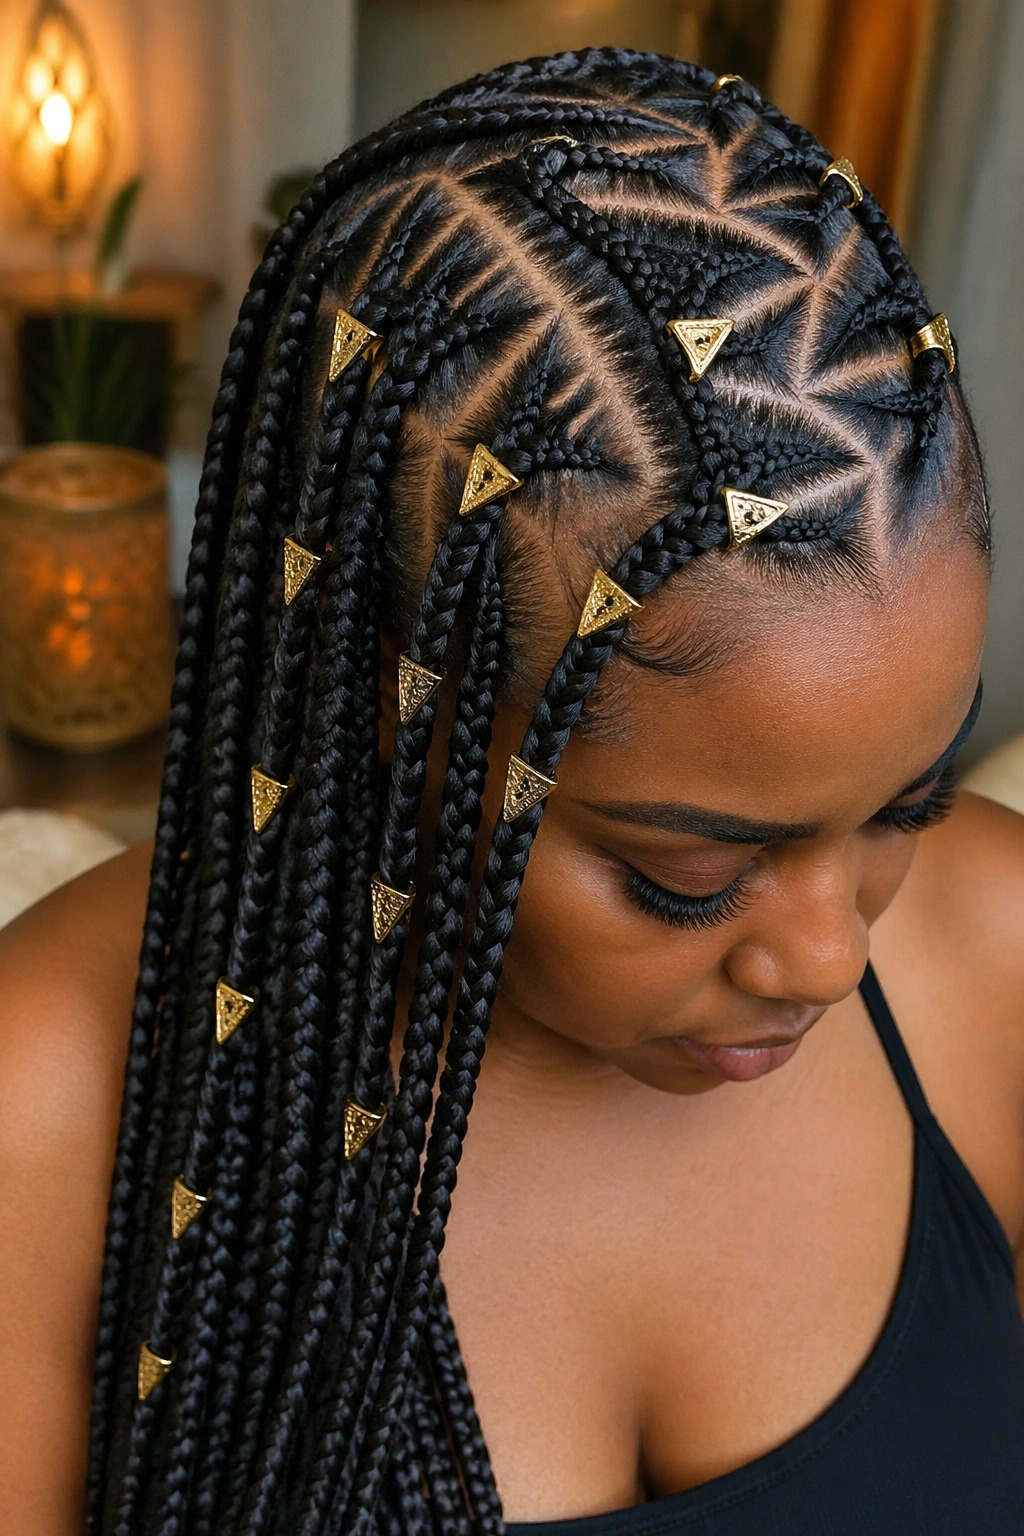
The zig zag pattern creates triangular shapes between the rows, and beads are placed to emphasize each triangle — three beads at the apex of each triangular section.
Geometric beadwork takes the zig zag concept further by treating the negative space between rows as part of the design. Triangles of scalp become design elements, and beads frame those triangles like markers at the corners.
This is intricate styling. Plan for a long install and bring snacks. The result is one of the most distinctive cornrow looks in the entire bead-and-braid category, but it’s not a quick or casual style.
18. Soft Zig Zag With Beaded Spiral Endings
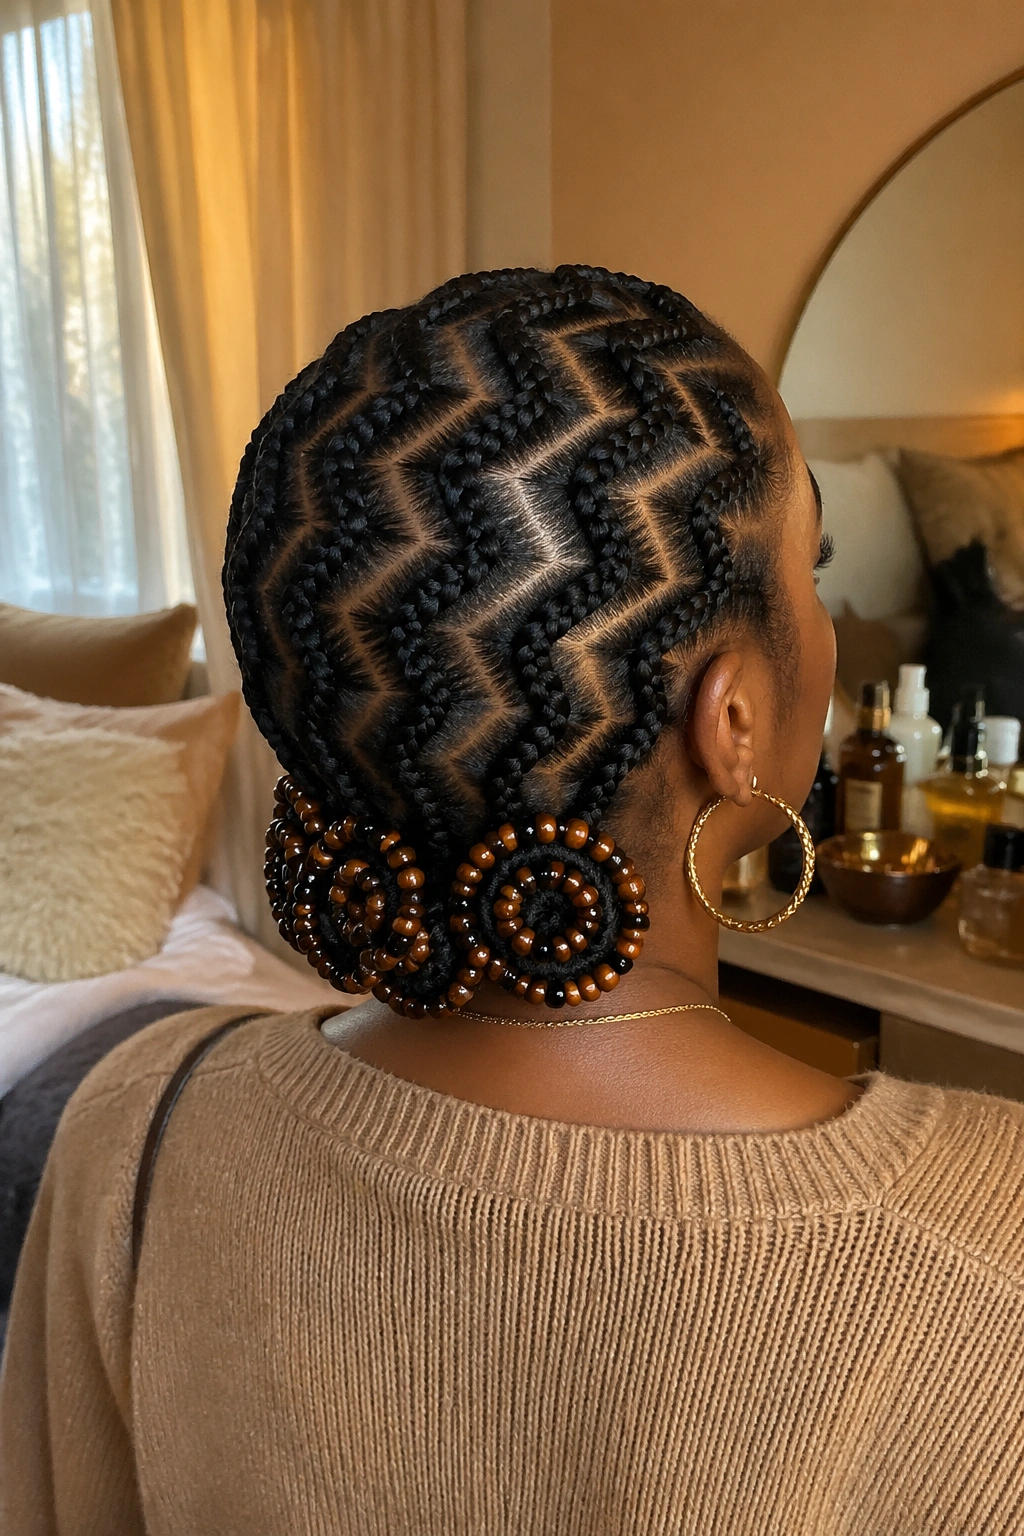
Wide-angle zig zag rows finish in spiraled bottom ends, with beads woven into the spiral coils.
Spiraled endings are an unusual finish for any cornrow style. Instead of straight tips or beaded clusters, the bottom 4-6 inches of each braid coils into a flat spiral disc, secured with a beaded pin or threaded with beads through the spiral itself.
The spiral endings create a different silhouette than typical cornrows. Behind the head, you see a row of spiral discs rather than a curtain of braids. Striking from the back.
19. Mini Zig Zag With Beaded Headband Effect
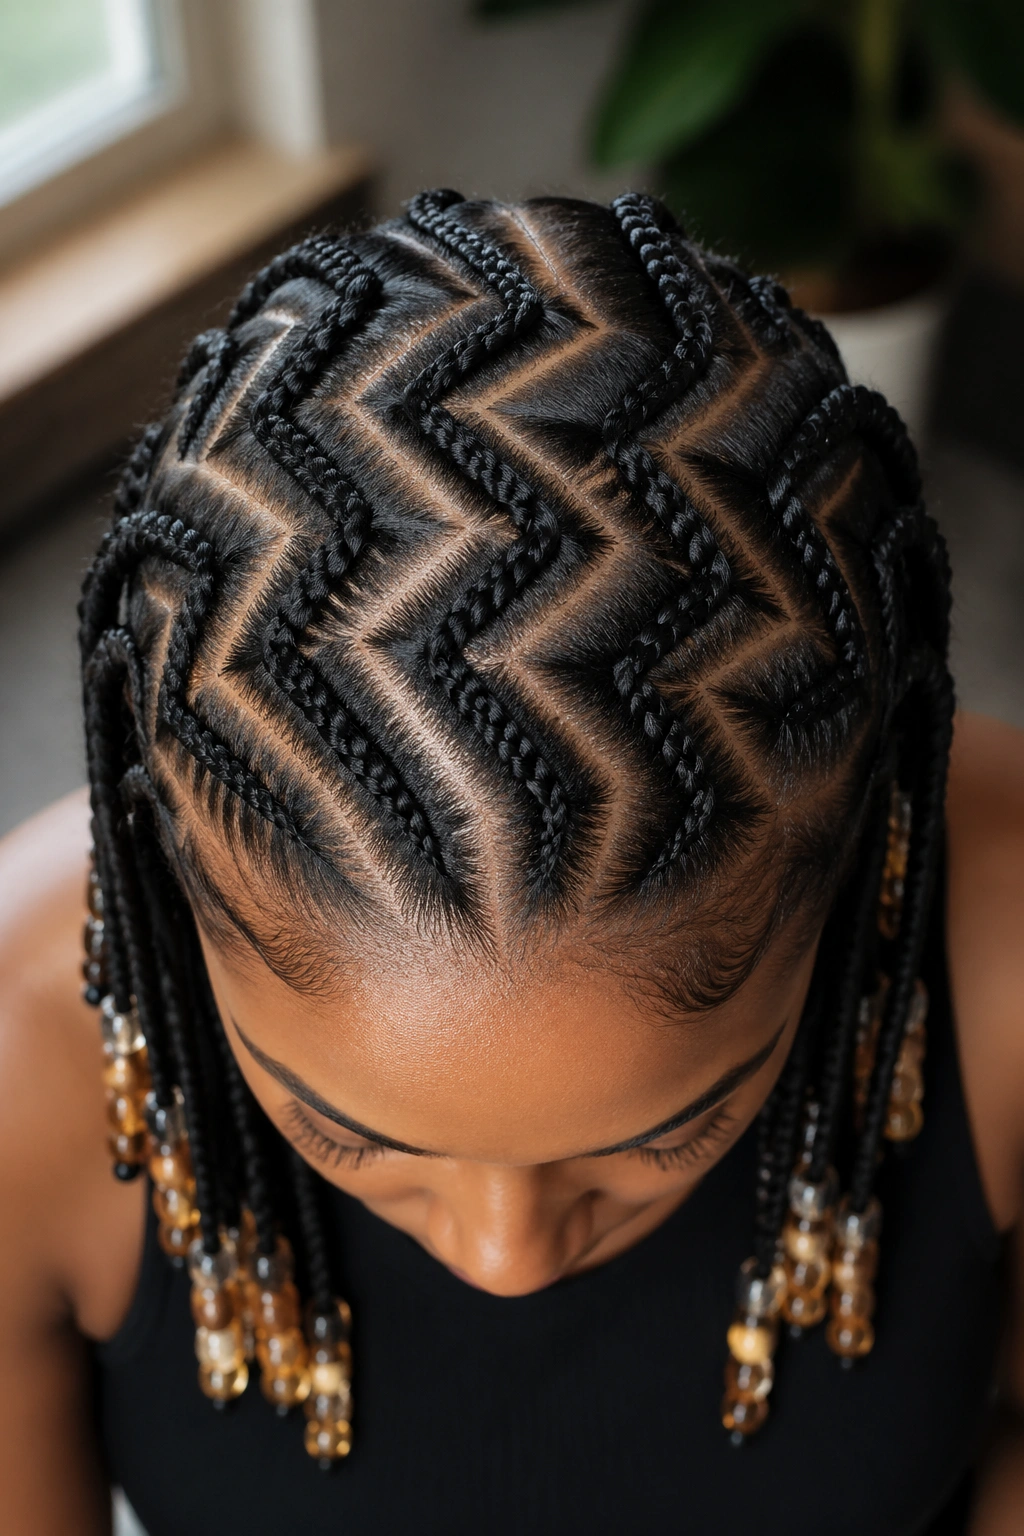
Tiny zig zag rows across the front of the head with bead-decorated front edges that mimic a headband. The back of the head reverts to standard cornrows.
The bead-headband effect is created by stringing tiny beads horizontally across the front zig zag rows just behind the hairline. The beads sit on top of the braids like a beaded crown, while the actual hairline stays clean.
Useful for events where you want hair detail at the front but don’t want to commit to all-over patterning. The headband effect shows up in face photos and reads as elaborate without overwhelming.
20. Bold Zig Zag With Two-Tone Bead Stacks
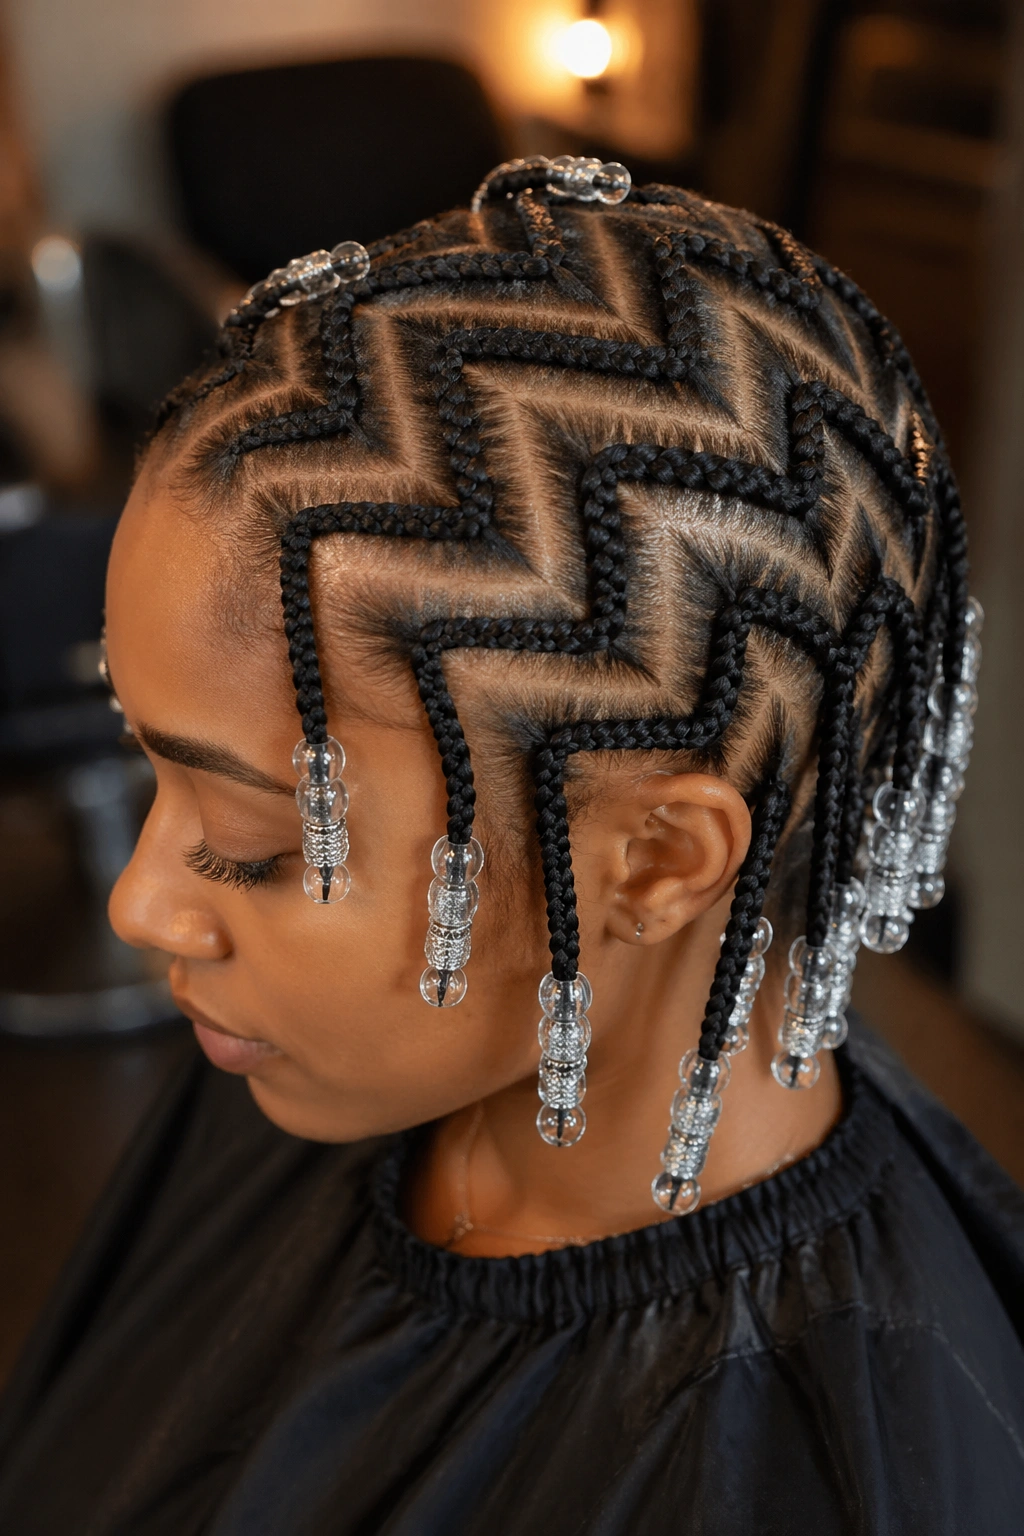
Sharp zig zag rows end in stacked beads — three different colors per stack — that run down each braid tip in matched columns.
Two-tone stacking turns each braid tip into a vertical color statement. The colors stack in repeating patterns: dark wood, then gold, then dark wood, then gold. Or three different colors in a fixed sequence.
The visual effect is most striking when all braids carry identical stacks. Different stacks per braid look chaotic; matched stacks look intentional.
21. Zig Zag With Tribal-Inspired Bead Patterns
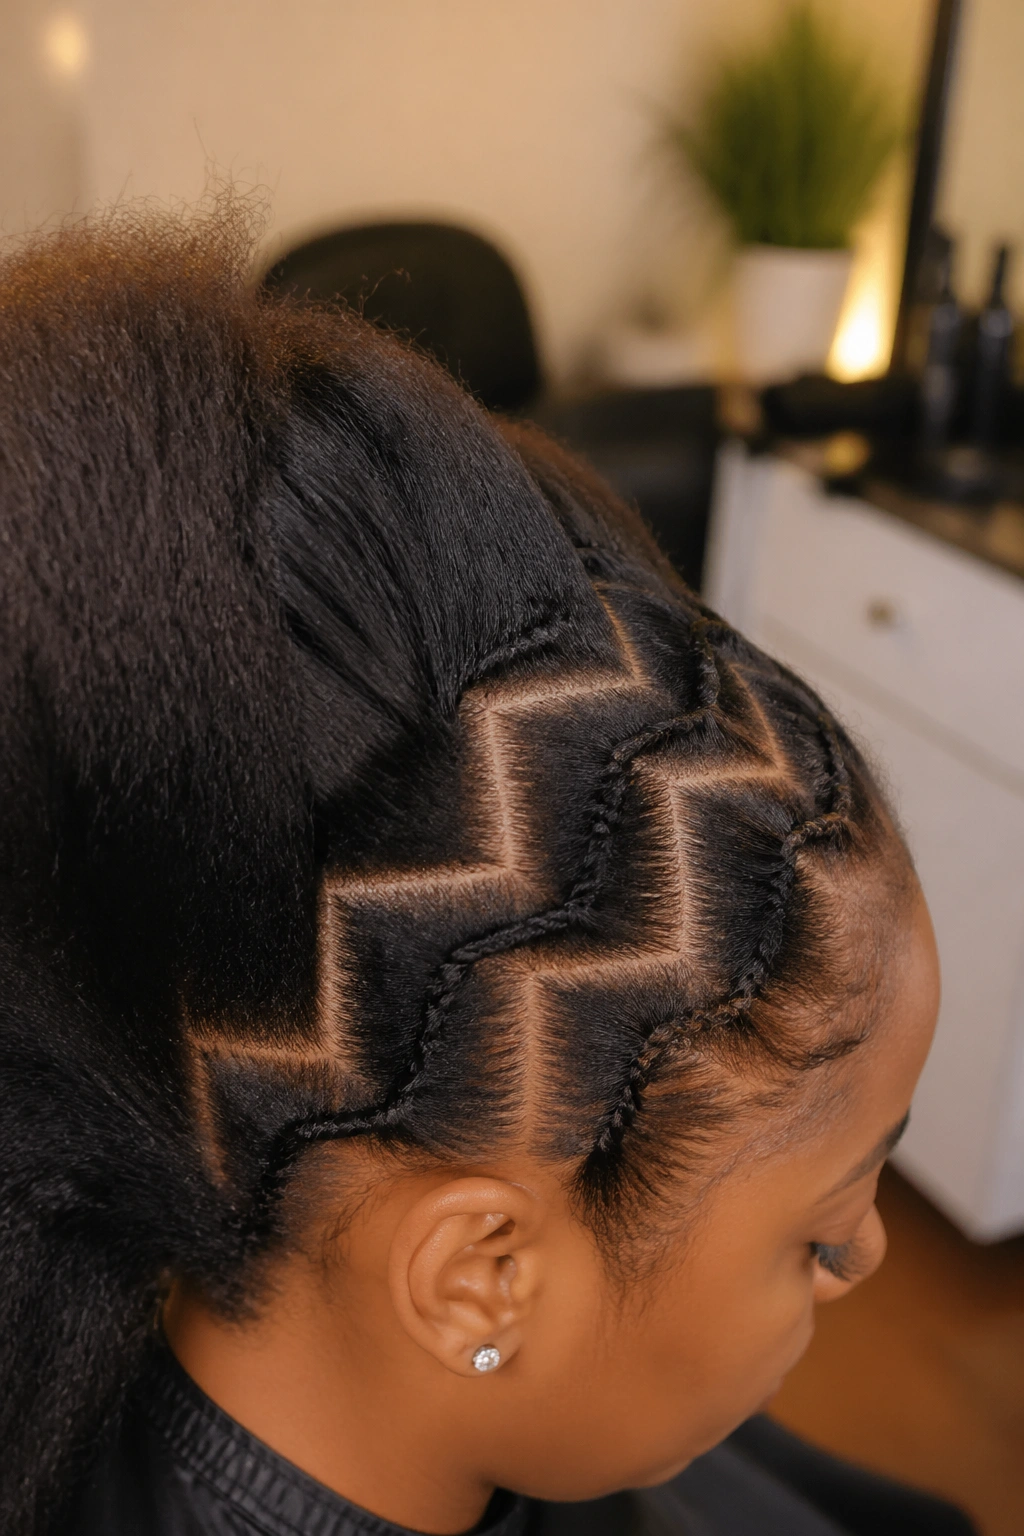
Traditional zig zag rows carry beads arranged in patterns inspired by specific African beading traditions — Maasai-influenced color sequences, for instance, or Yoruba-influenced layered placements.
Pulling from specific traditions deserves research. The patterns aren’t arbitrary in their original contexts; certain color combinations or arrangements carry meaning. If you’re going to reference a tradition, learn enough about it to wear the references with respect.
The visual payoff is significant. Pattern-rich beadwork reads as art rather than decoration, and braids built around traditional bead arrangements have depth that purely aesthetic styling lacks.
22. Zig Zag With Beaded Tassel Tip Finish
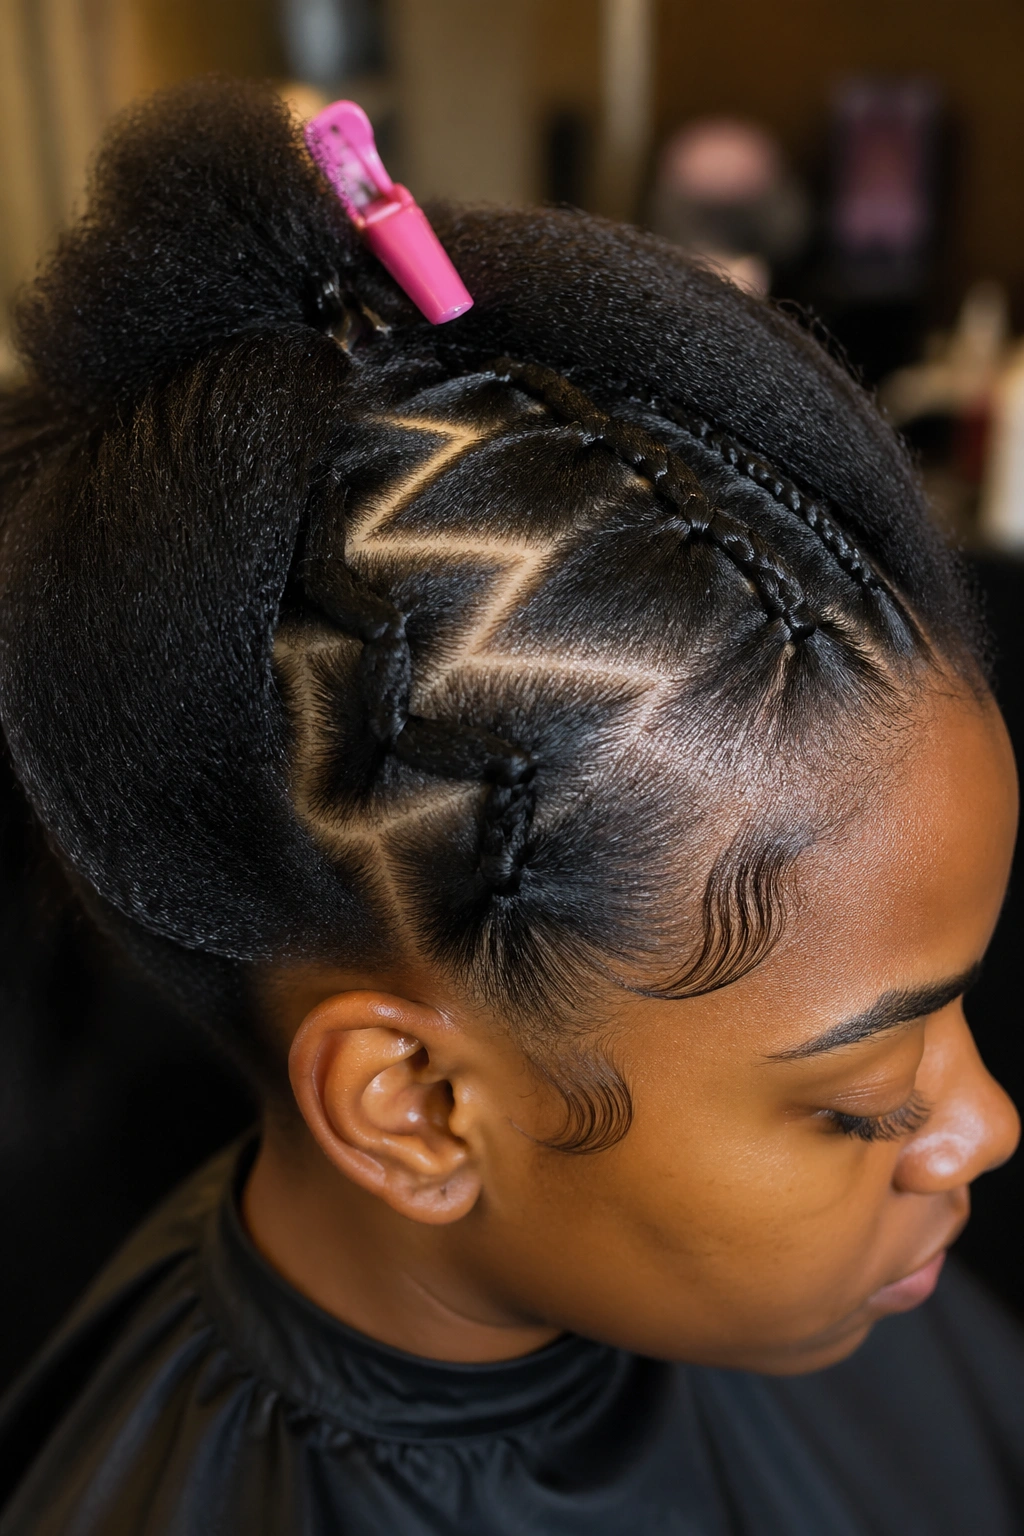
Each zig zag braid ends in a small tassel of 8-10 beads on individual short threads — like fringe rather than a single beaded tip.
Tassel tips create movement at the very end of each braid. Walking, turning, even slight head movement makes the tassels swing independently. The visual effect is delicate and lively.
Tassels are also swappable. Tie each tassel onto the braid tip with a small jump ring or jewelry clasp, and you can change tassel sets for different events. Black tassels for work, gold tassels for evening, colored tassels for festivals.
Maintaining Zig Zag Definition Over Time
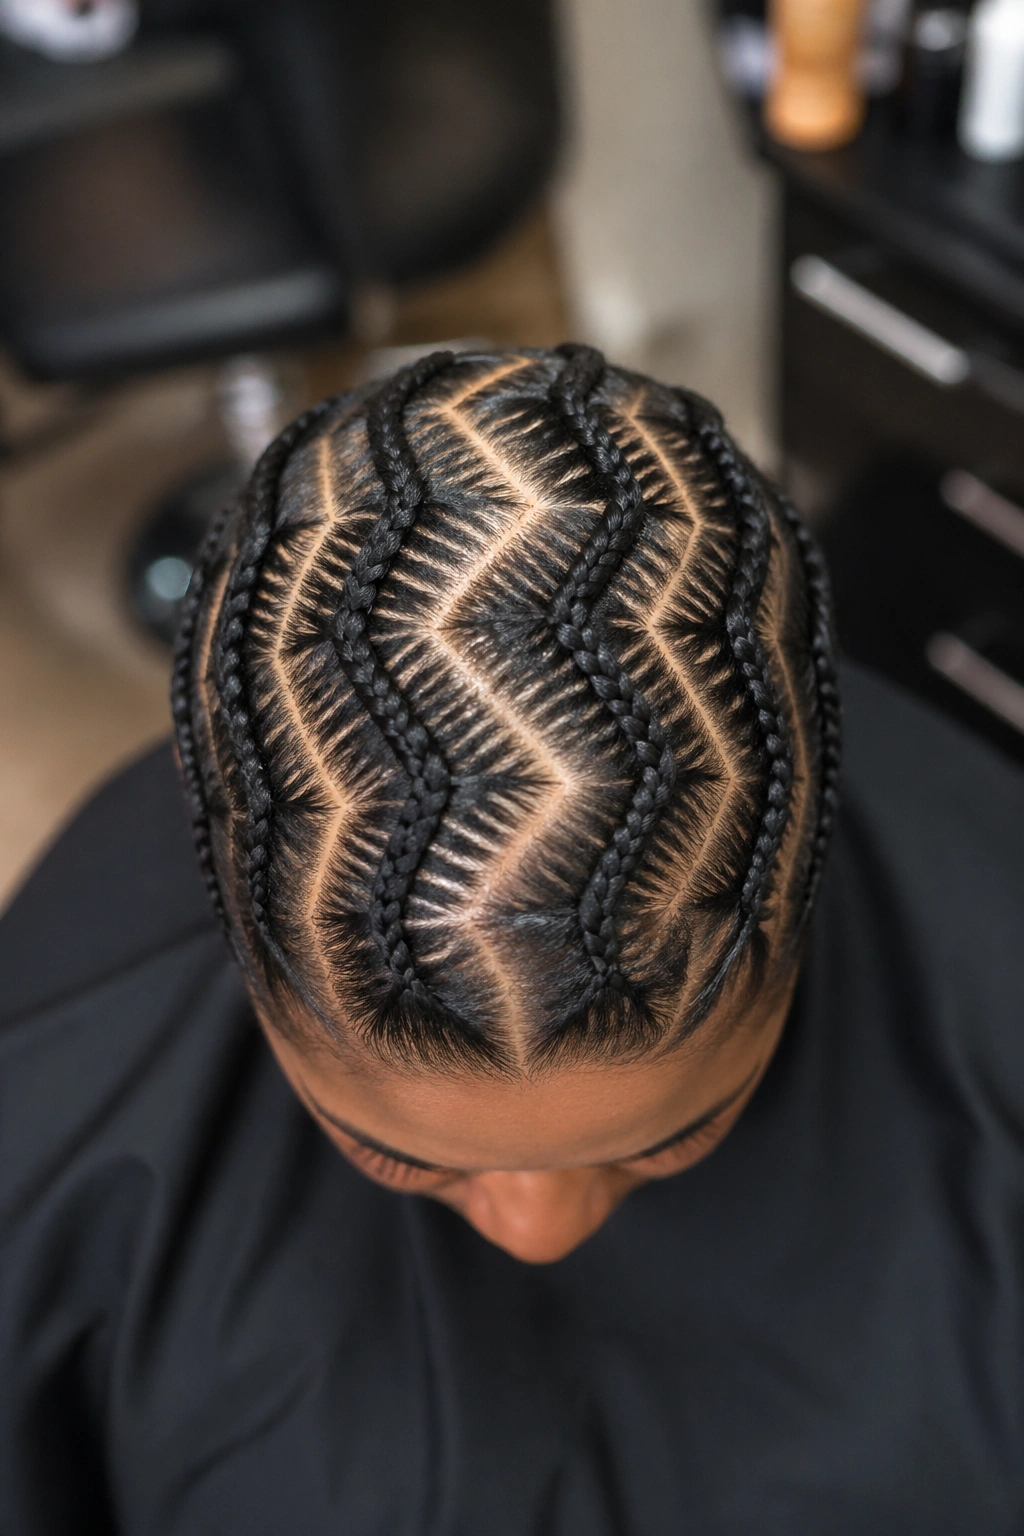
Zig zag parts blur faster than straight parts. The angled bends accumulate flyaway hairs at each pivot point, and by day five the sharp angles start to soften unless you maintain them.
To extend the life of zig zag definition:
- Apply edge gel to the bend points every 2-3 days using a small angled brush
- Smooth the part lines with a soft-bristle toothbrush dipped lightly in mousse
- Avoid touching the bend points with your hands during the day — finger oils break the gel hold
- Sleep with a silk scarf wrapped firmly enough to hold the bends in place
Skip washing for the first week if you can. Water softens the gel that holds the angles crisp, and the zig zag pattern goes from sharp to fuzzy almost overnight.
Bead Care Through the Wear Cycle
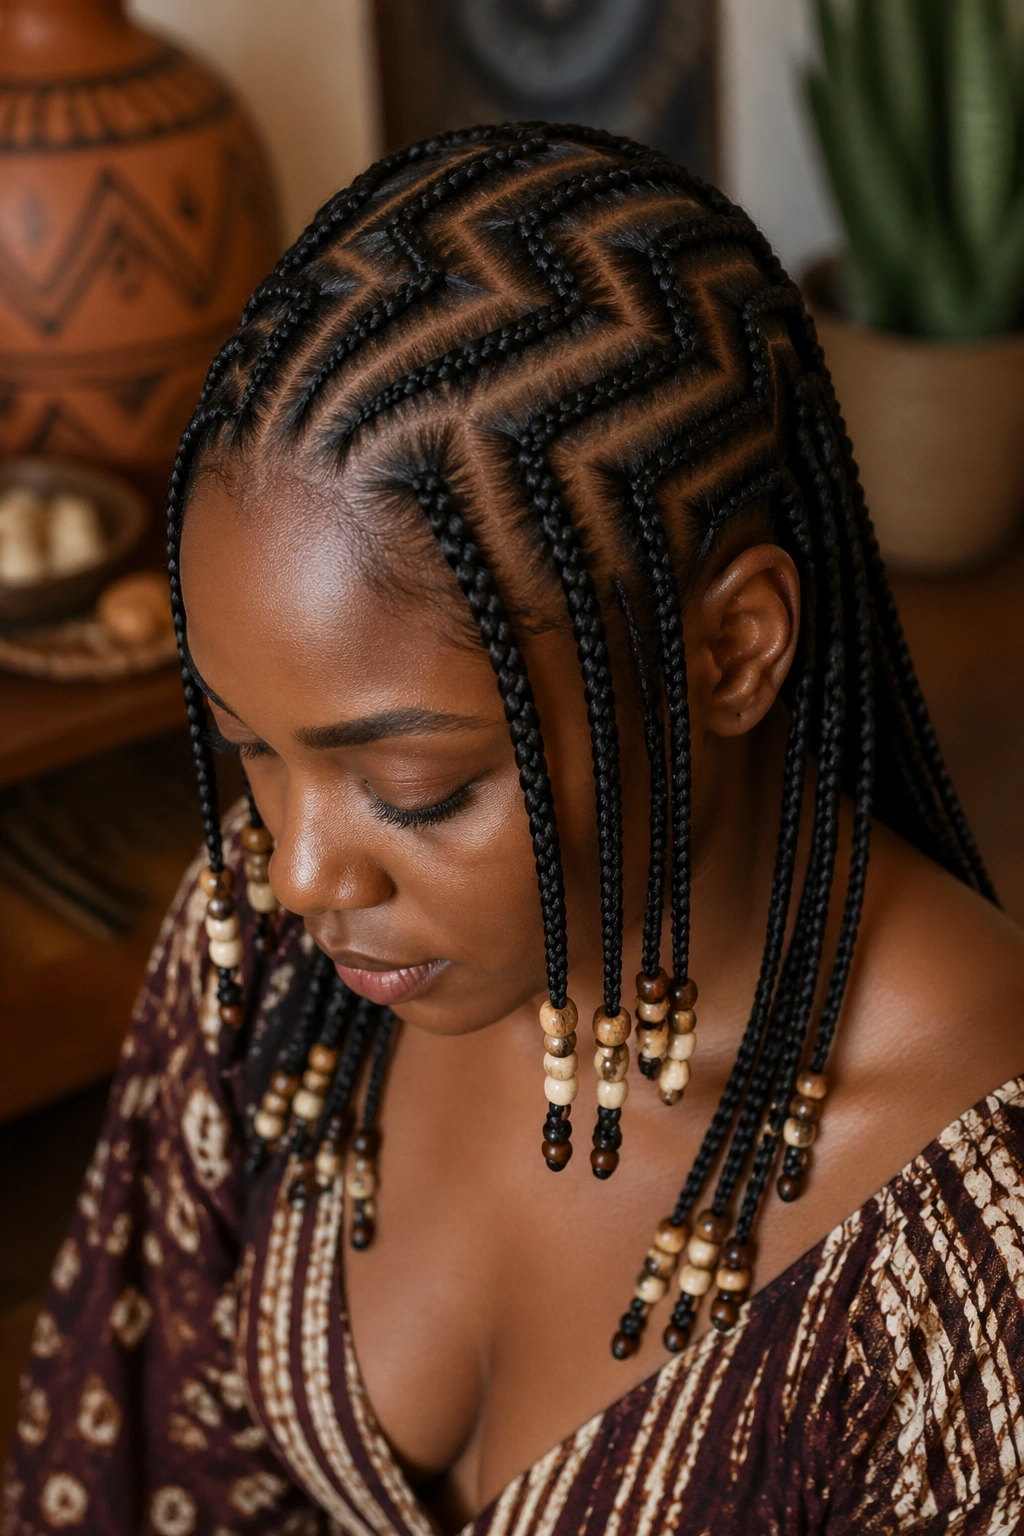
Beads on zig zag styles take more abuse than beads on straight styles because the angled braid movement bangs beads against beads more often. Check bead condition every few days.
Wood beads can chip at the rim if they bang against hard surfaces. Wrap them gently before going into car seats or against hard chair backs. Ceramic beads can crack if dropped — and yes, beads do come off braids occasionally and bounce on tile floors.
Replace damaged beads as they appear. A single chipped bead in a row of clean ones reads as carelessness; replacing it takes ten minutes.
Takedown and Scalp Recovery
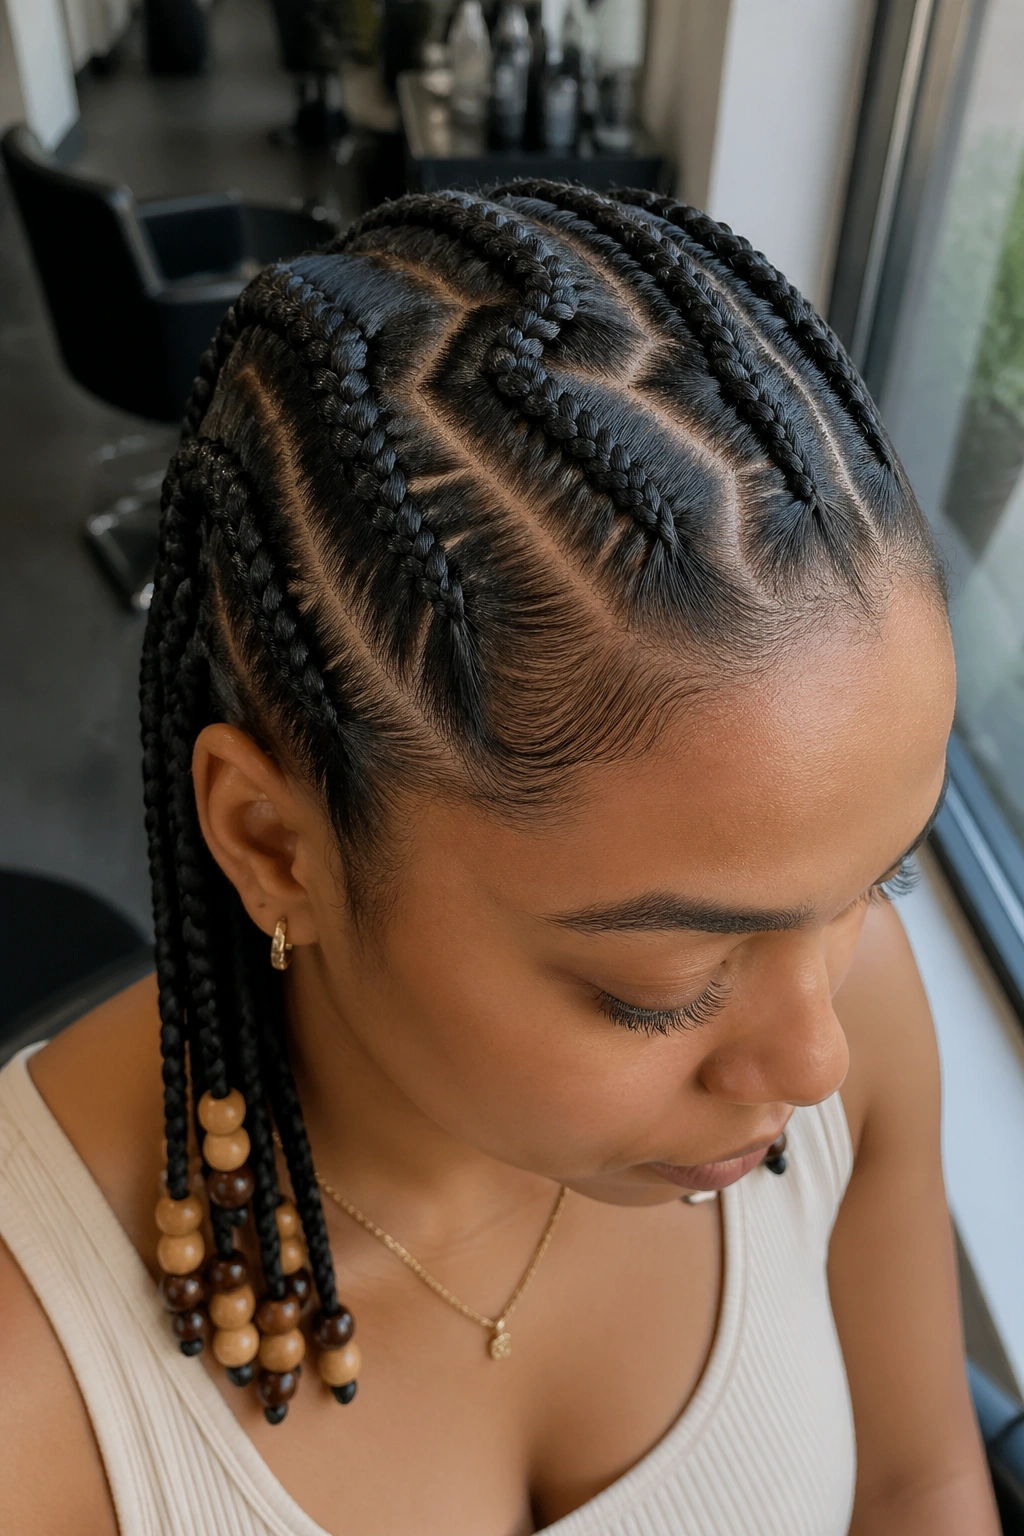
Plan three hours minimum for takedown of a full zig zag bead install. The angled braids unravel at slightly different rates than straight ones, and rushing causes hair breakage at the bend points.
Remove all beads first. Then unbraid each row from tip to root, spraying detangling spray or diluted conditioner as you work. The bend points may have small tangles where flyaway hairs accumulated during wear — work these out gently with fingers, never with a comb.
After takedown, give your scalp two to three days of rest before installing another style. The bend points took more sustained tension than straight cornrows, and the scalp needs recovery time.
Picking Zig Zag Styles for Your Face and Lifestyle
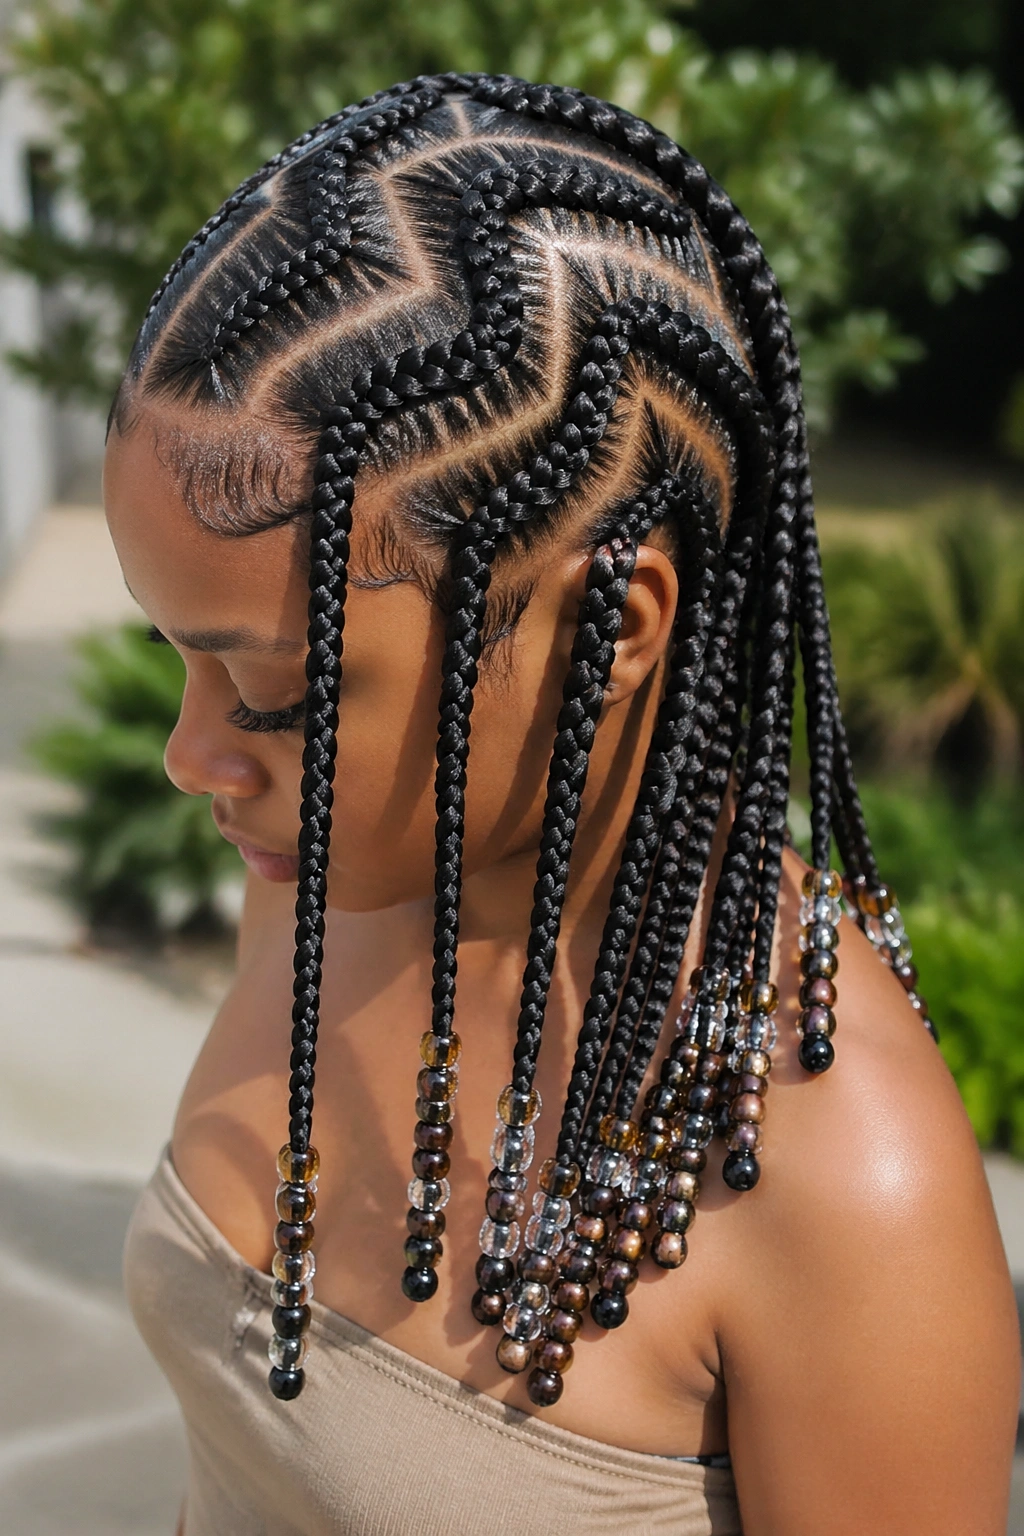
Zig zag cornrows aren’t for every situation. Conservative workplaces sometimes raise eyebrows at heavily patterned hair, even though they shouldn’t. Athletic activities benefit from simpler styles that don’t catch on helmets or athletic headbands.
That said, zig zag cornrows excel at:
- Events where you want to be visually memorable
- Photo-heavy occasions (weddings, parties, professional shoots)
- Casual to mid-formal social settings
- Self-expression and identity statements
Match the pattern boldness to the situation. Sharp angles for bold events, soft curves for daily wear, mixed approaches when you want one style to carry you through varied days.
Common Zig Zag Mistakes Worth Knowing
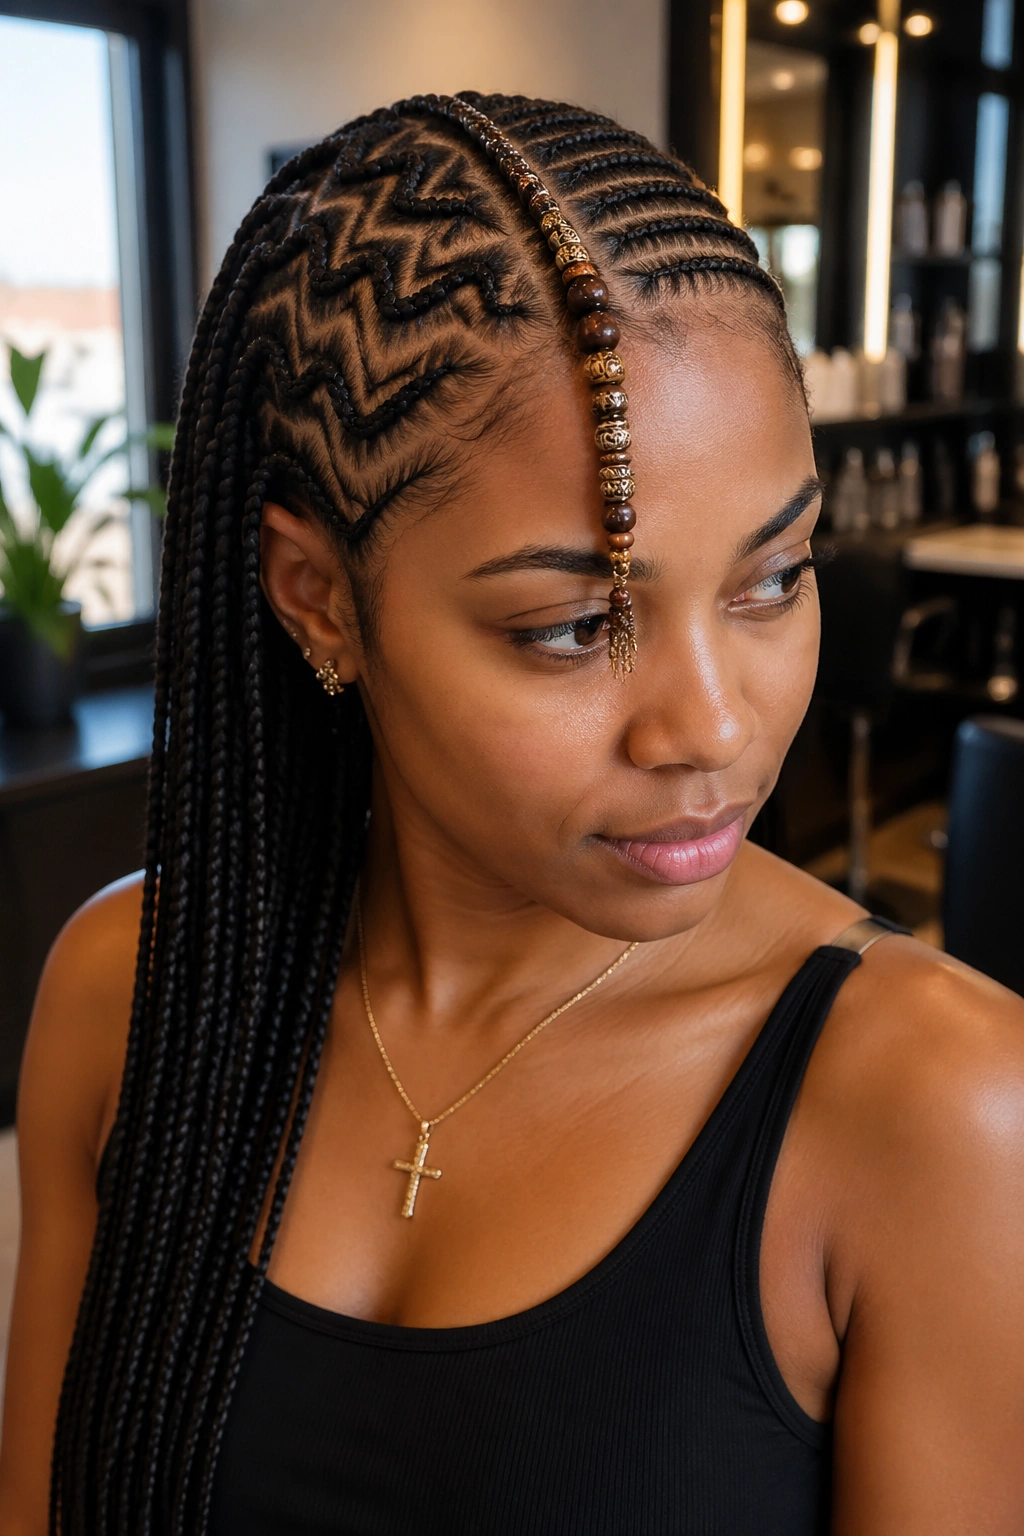
The biggest mistakes with zig zag bead styles are: angles that don’t mirror across the head, beads too heavy for the braid thickness, and bend points that wander from the planned pattern.
Mirrored angles are a precision issue. If the left side bends at three 45-degree angles, the right side should bend at three 45-degree angles in matching positions. Asymmetry in zig zag work reads as sloppy unless it’s clearly intentional.
Bead weight mismatched to braid thickness creates discomfort and visual imbalance. Thin braids with heavy beads pull at roots; thick braids with tiny beads look unfinished. Match weight to width.
Wandering bend points happen when braiders rush. The first bend on row one should sit at the same distance from the hairline as the first bend on row twenty. If your braider is moving fast and not measuring, expect uneven results — and speak up before the second row goes in.
One more thing. Zig zag styles look more painful than they are. The angled parts can give the illusion of severe tension because the visual sharpness suggests pulling. Actual pain isn’t the goal. If the zig zag bends feel uncomfortable rather than just snug, ask the braider to redo any segment that hurts. Cosmetic precision shouldn’t cost you scalp comfort.
