



Cornrow updos sit at this sweet spot where function meets style. You get the low-manipulation protection your strands need, plus the polished look that reads as deliberate rather than thrown-together. The cornrow updo has been doing this for centuries, long before anyone slapped the word “protective” on it.
A good protective cornrow updo keeps the ends tucked away from friction, locks moisture into the hair shaft, and spares your edges the daily tension of bunning and re-bunning. That’s the baseline. What separates a truly protective style from one that just looks cute for a week is how it distributes weight, how small the partings are, and whether the cornrows themselves are laid with the right tension.
I’ve worn cornrow updos through hot summers, humid studios, and long stretches where I couldn’t touch my hair for work reasons. Some styles held up beautifully for three weeks. Others started slipping by day five. The 22 styles below are the ones that actually deliver on the protective promise — not just the ones that photograph well for ten minutes.
Before we get into the list, it’s worth covering what makes a cornrow updo genuinely protective versus just pulled up. Because they’re not the same thing.
What Makes a Cornrow Updo Actually Protective
Protection comes down to three things: ends tucked, scalp accessible, and tension balanced. The ends are where breakage shows up first. When they’re loose and rubbing against your shirt collar or pillowcase, you lose length fast. A cornrow updo that tucks those ends into a bun, roll, or hidden loop solves that problem.
Scalp accessibility matters because you still need to moisturize during the style. If the updo is so tight you can’t get a nozzle between the cornrows, you’ll end up with a dry, flaky scalp within ten days. Good cornrow updos leave breathing room along the partings.
Tension balance is the one most stylists miss. Too loose at the crown and the cornrows unravel. Too tight at the hairline and you’re looking at traction alopecia within a few installs. The best cornrow updos are firm at the root but slack enough at the ends to move naturally.
Prep That Makes the Difference
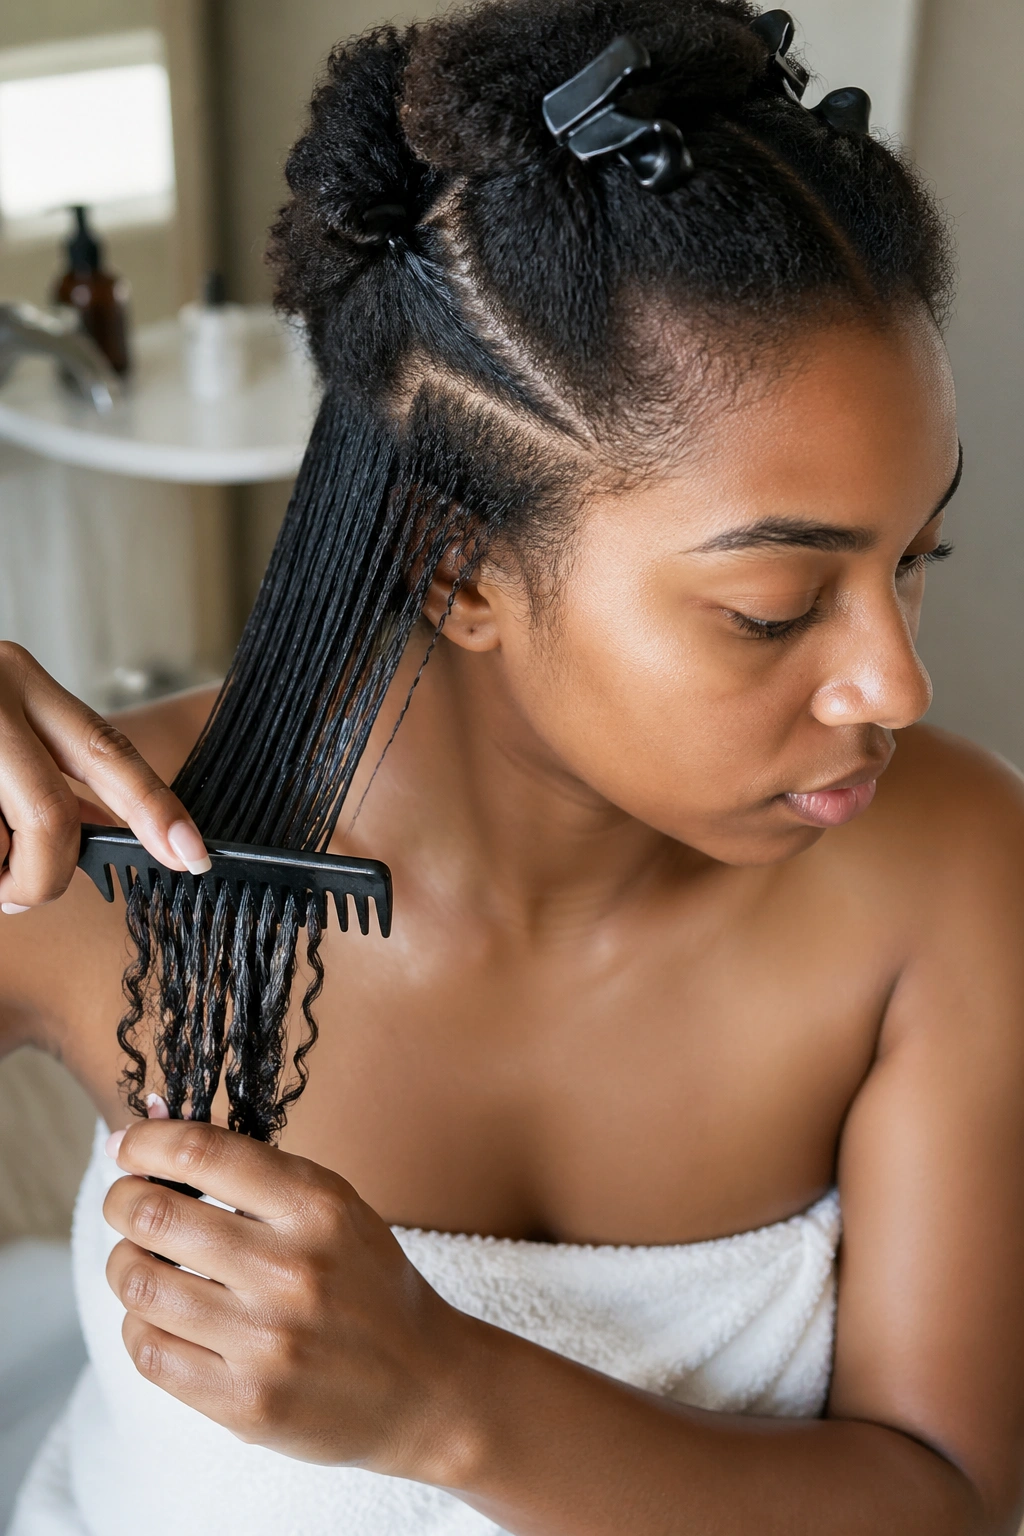
Wash day matters. A clarifying shampoo every third or fourth install clears out product buildup that otherwise creates slippage. Follow with a deep conditioner under heat for at least 20 minutes. Your hair should feel soft but not limp when you rinse.
Detangle section by section with a wide-tooth comb before you even think about parting. Matted hair under cornrows is a recipe for disaster at takedown. Blow-dry on medium heat using a tension method — holding the section taut while the dryer moves over it — so your strands lie flat against the scalp.
Edge prep gets its own moment. A quarter-sized dollop of a gel that dries soft, not crunchy, smoothed with a boar bristle brush gives you a clean canvas. Don’t go overboard here. You’ll have weeks to build up edge styling; day one just needs your edges tamed.
Tools That Earn Their Keep
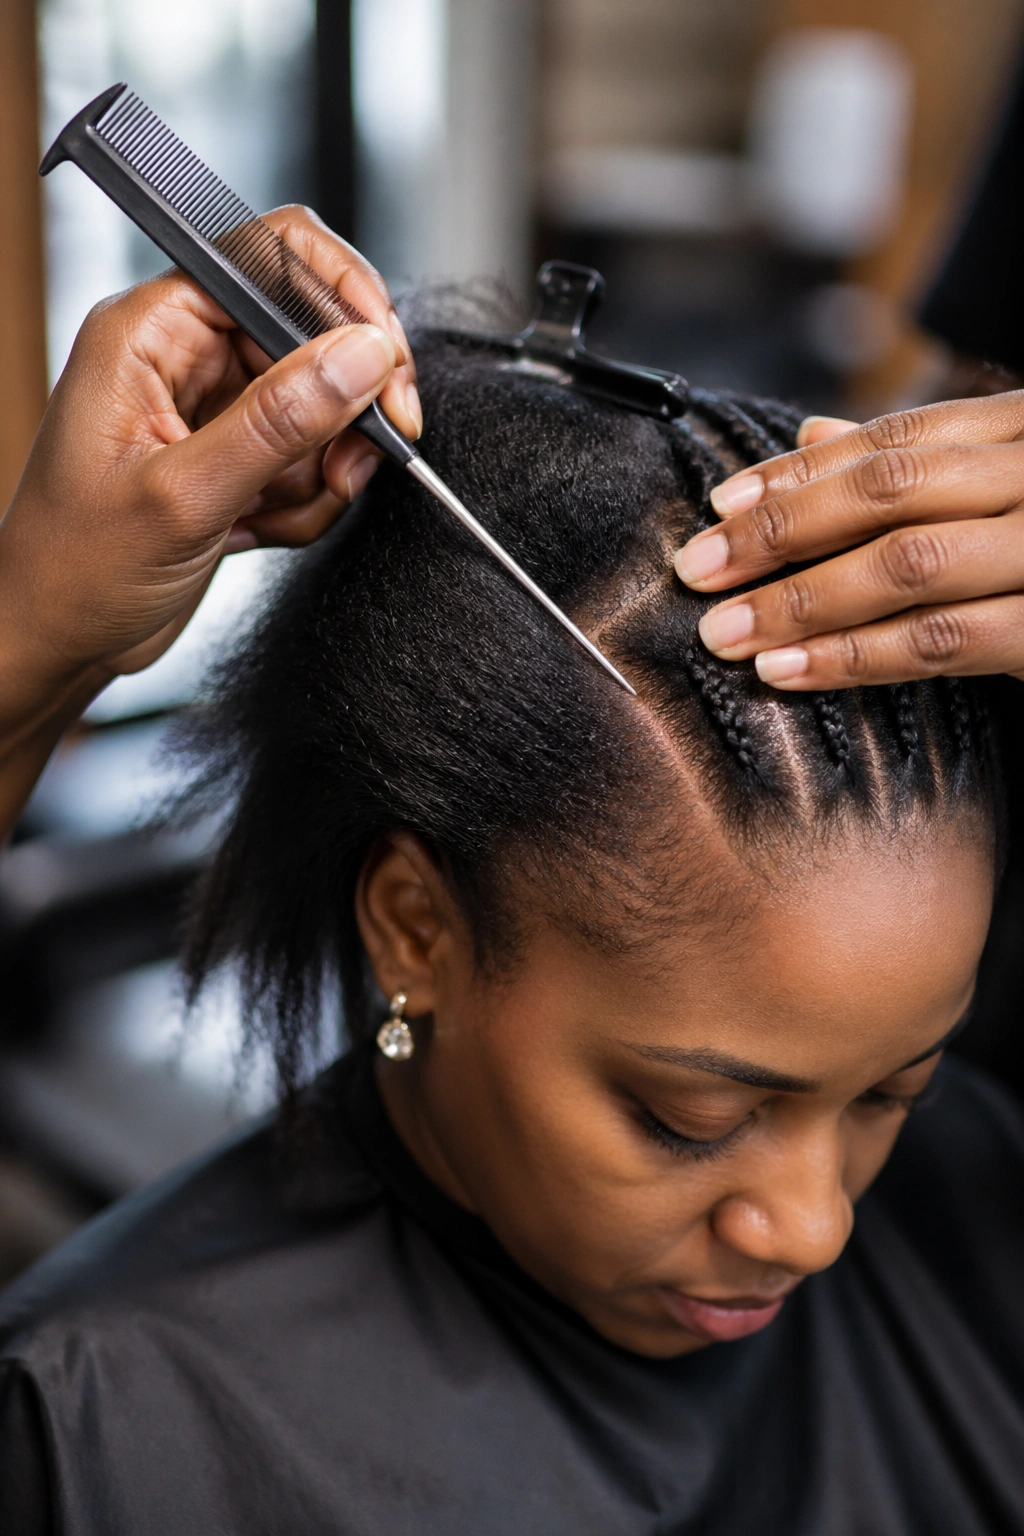
A rat-tail comb is non-negotiable. You need that fine point for clean parts. Metal tips last longer than plastic, but plastic is fine if you’re careful. Hair clips — the butterfly kind with the gripping teeth — hold sectioned hair out of the way while you work.
Edge gel goes in a small container close to your workspace. A water spray bottle with a fine mist setting keeps the hair damp without soaking it. Kanekalon braiding hair in two or three colors matched to your natural tone handles feed-ins cleanly.
For updo finishing, small bobby pins in your hair color, hair pins (the U-shaped ones, which grip better than bobby pins for thick sections), and a satin bonnet or scarf for nighttime. Don’t skimp on the satin. Cotton eats your style.
Timing and Session Planning
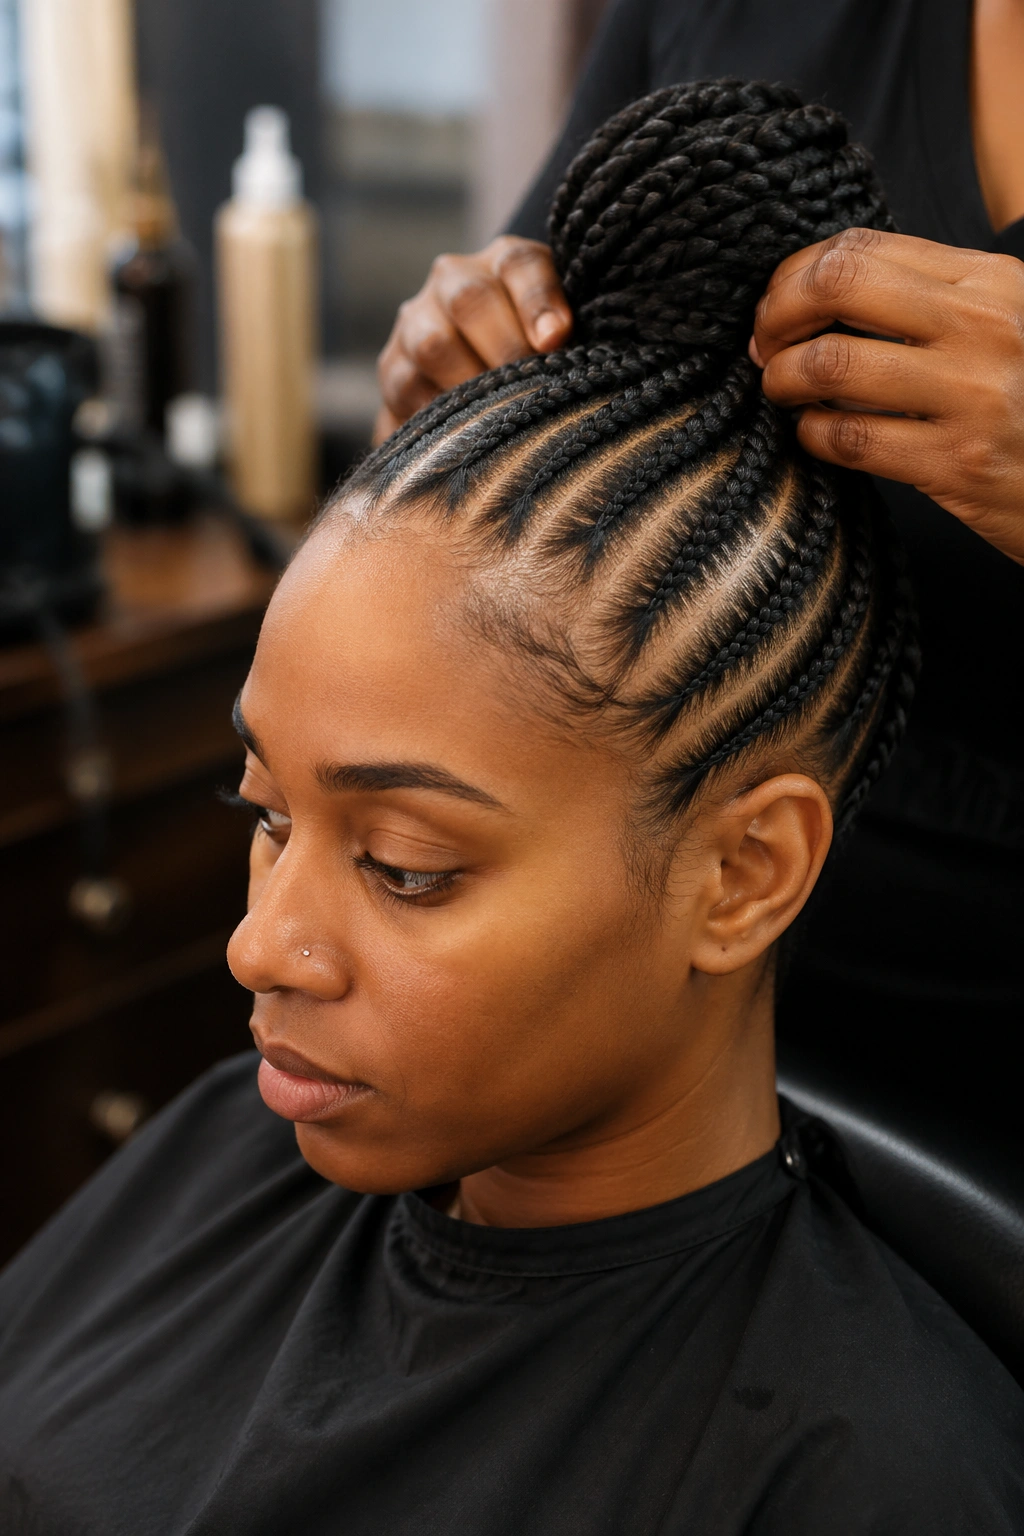
A full head of cornrow updos runs three to six hours depending on complexity. The styles with intricate partings or added hair sit on the longer end. Plan for one long session rather than splitting across two days — cornrows done in two sessions don’t lay the same.
Eat beforehand. Hydrate. Sitting still for hours affects your blood sugar more than people expect. A podcast queue or a long film keeps your mind off the scalp tension. If tension ever crosses into actual pain, speak up. Pain isn’t the price of a good braid.
1. Halo Crown With Tucked Ends
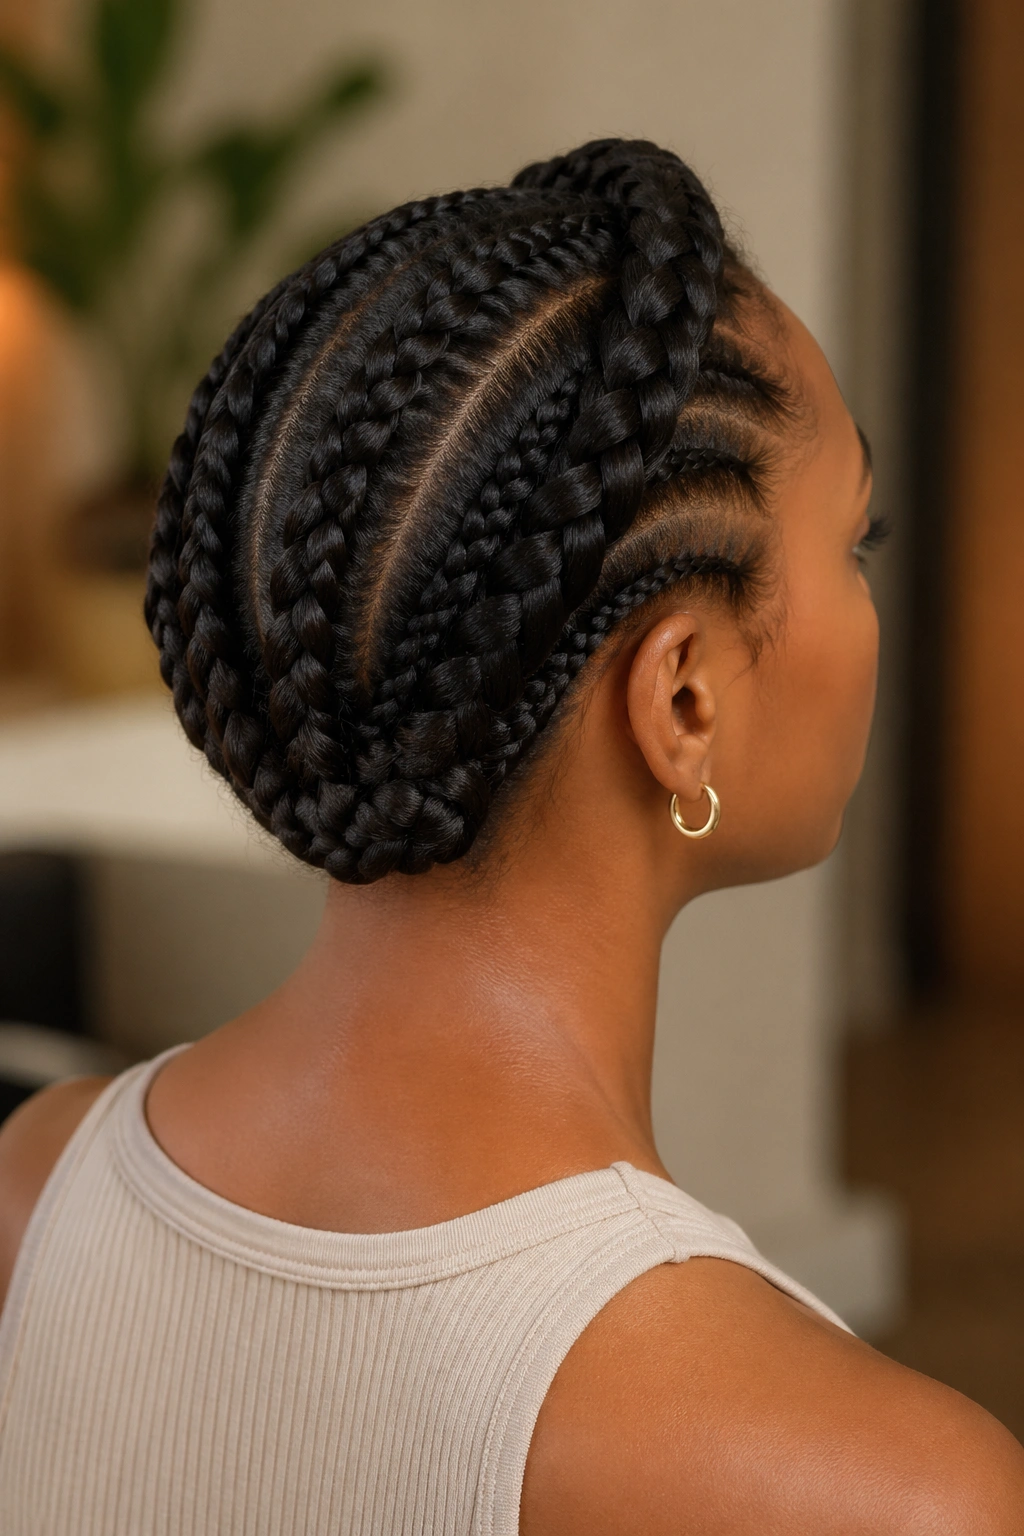
A halo cornrow updo traces the circumference of your head with a single wrapping braid, then tucks the ends underneath so the whole thing reads as continuous. It’s clean. Regal, even.
Why It Works for Protection
The tucked-ends design means nothing is hanging to catch on fabric or dry out at the tips. Your hair essentially becomes a closed loop.
- Pick a side to start — typically the left nape — and take a 1-inch section at the beginning
- Feed in kanekalon as you move around the crown, following your natural hairline
- When you come back to the starting point, continue past it for another 4 inches, then tuck under the beginning braid
- Secure with 3-4 hair pins placed at angles into the braid itself, not just the scalp
Tip: Keep the halo slightly higher at the front than the nape. A perfectly level crown looks flat. A tilt of maybe half an inch at the forehead gives it dimension.
2. Stacked Zigzag Bun
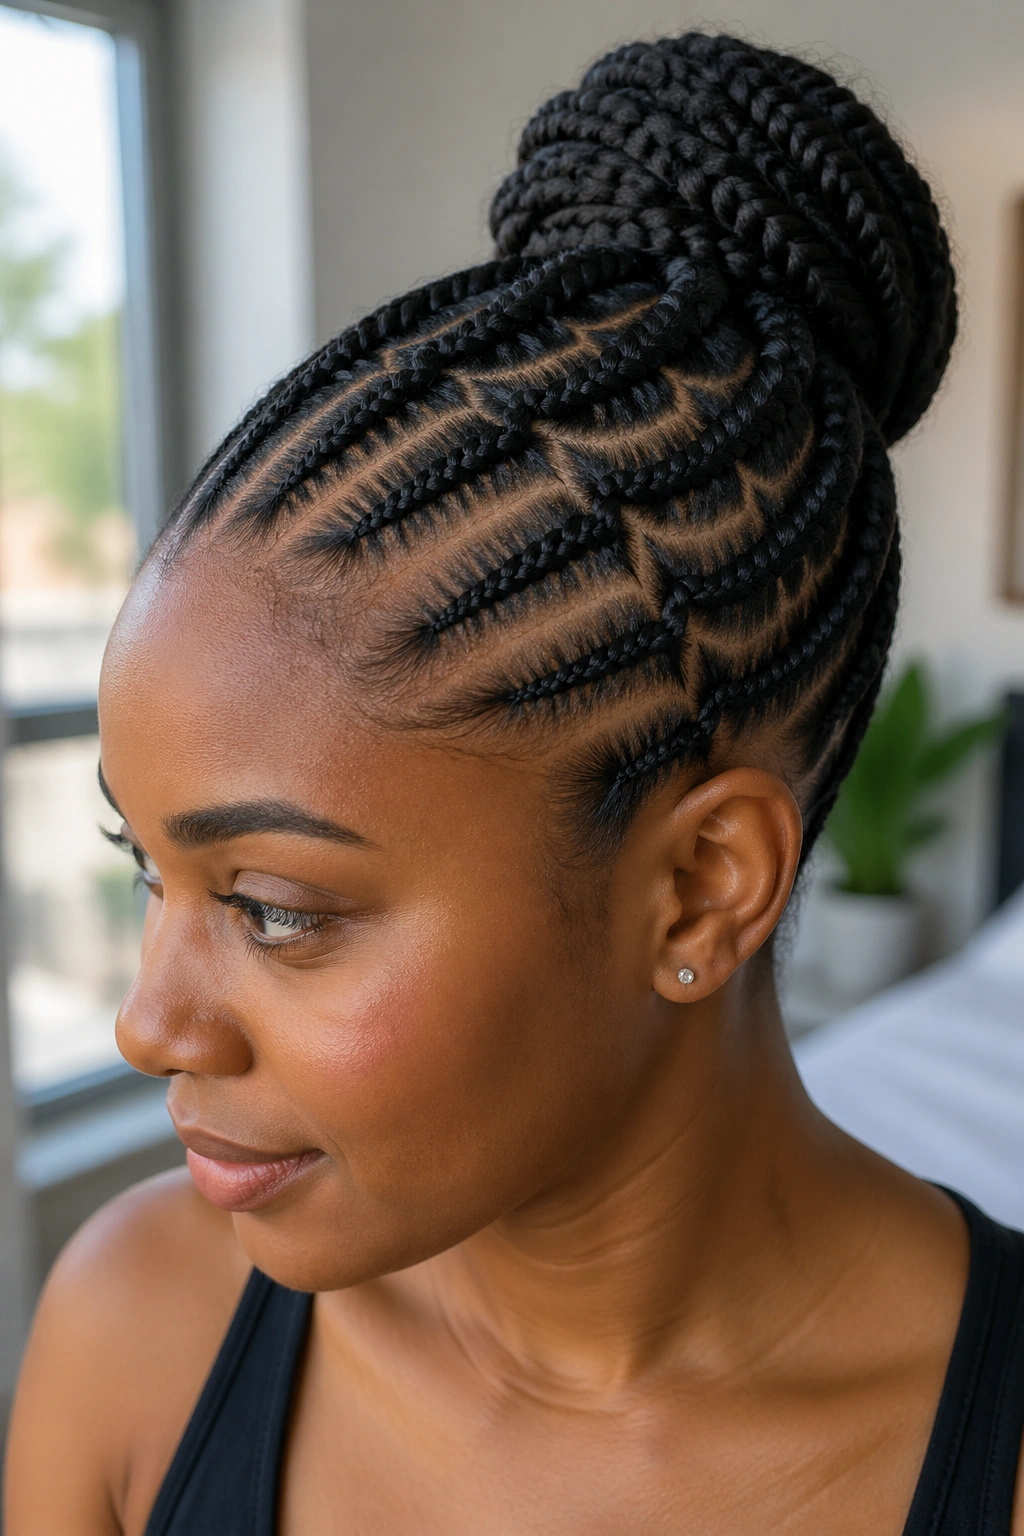
Stacked zigzag cornrows create a woven look across the crown, all feeding into a high bun at the back. The zigzag pattern breaks up the visual weight and hides new growth for longer than straight-back cornrows can.
The zigzag is the protective feature here, not just decoration. When you part in a wavy pattern, the stress points shift between strands rather than concentrating on a straight line. That means less breakage at the partings around weeks two and three. The bun itself holds tension low and centered, so your edges barely feel the style’s weight.
You’ll want six to eight zigzag cornrows, each roughly 1 inch wide at the base. Feed them all into a high ponytail holder first, then wrap the loose ends around themselves in a bun shape. Pin generously. This style reads best when the bun is neat but not slick — a little texture on the bun itself balances the sharp partings below.
Best worn 2-3 weeks with moisturizing between. After that, the zigzags start looking fuzzy and the protection drops.
3. Side Swept Basket Weave
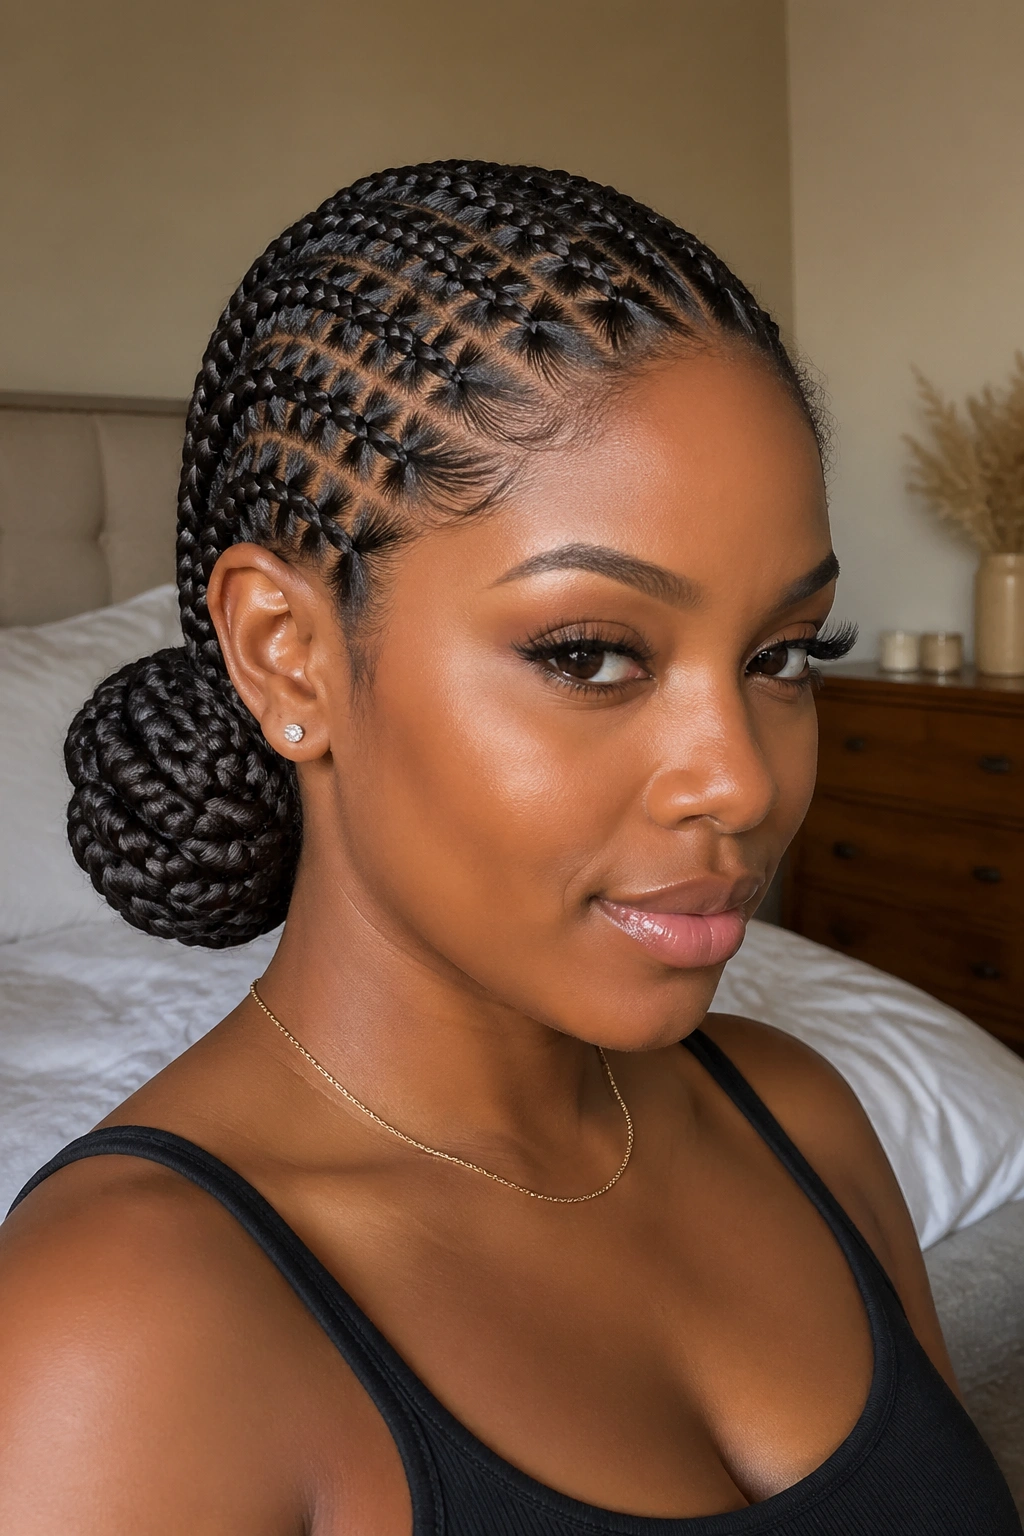
What happens when you take traditional basket-weave cornrowing and sweep it diagonally across the head instead of running it straight? You get one of the most photograph-friendly protective styles that still works for daily wear.
The basket-weave pattern involves cornrows going in two directions that intersect — usually at 45-degree angles — creating small diamond or square spaces between them. When swept to one side, the whole design cascades toward the opposite shoulder, where the ends gather into a low side bun or roll.
How to Style It
Part a clean diagonal from the right temple to the left nape. On the larger side, lay five cornrows following the diagonal. On the smaller side, lay three going perpendicular. Where they meet, the braids should cross over rather than beside each other — this is what creates the weave effect. Gather all ends into a single low bun behind the left ear.
4. Double Bun Milkmaid
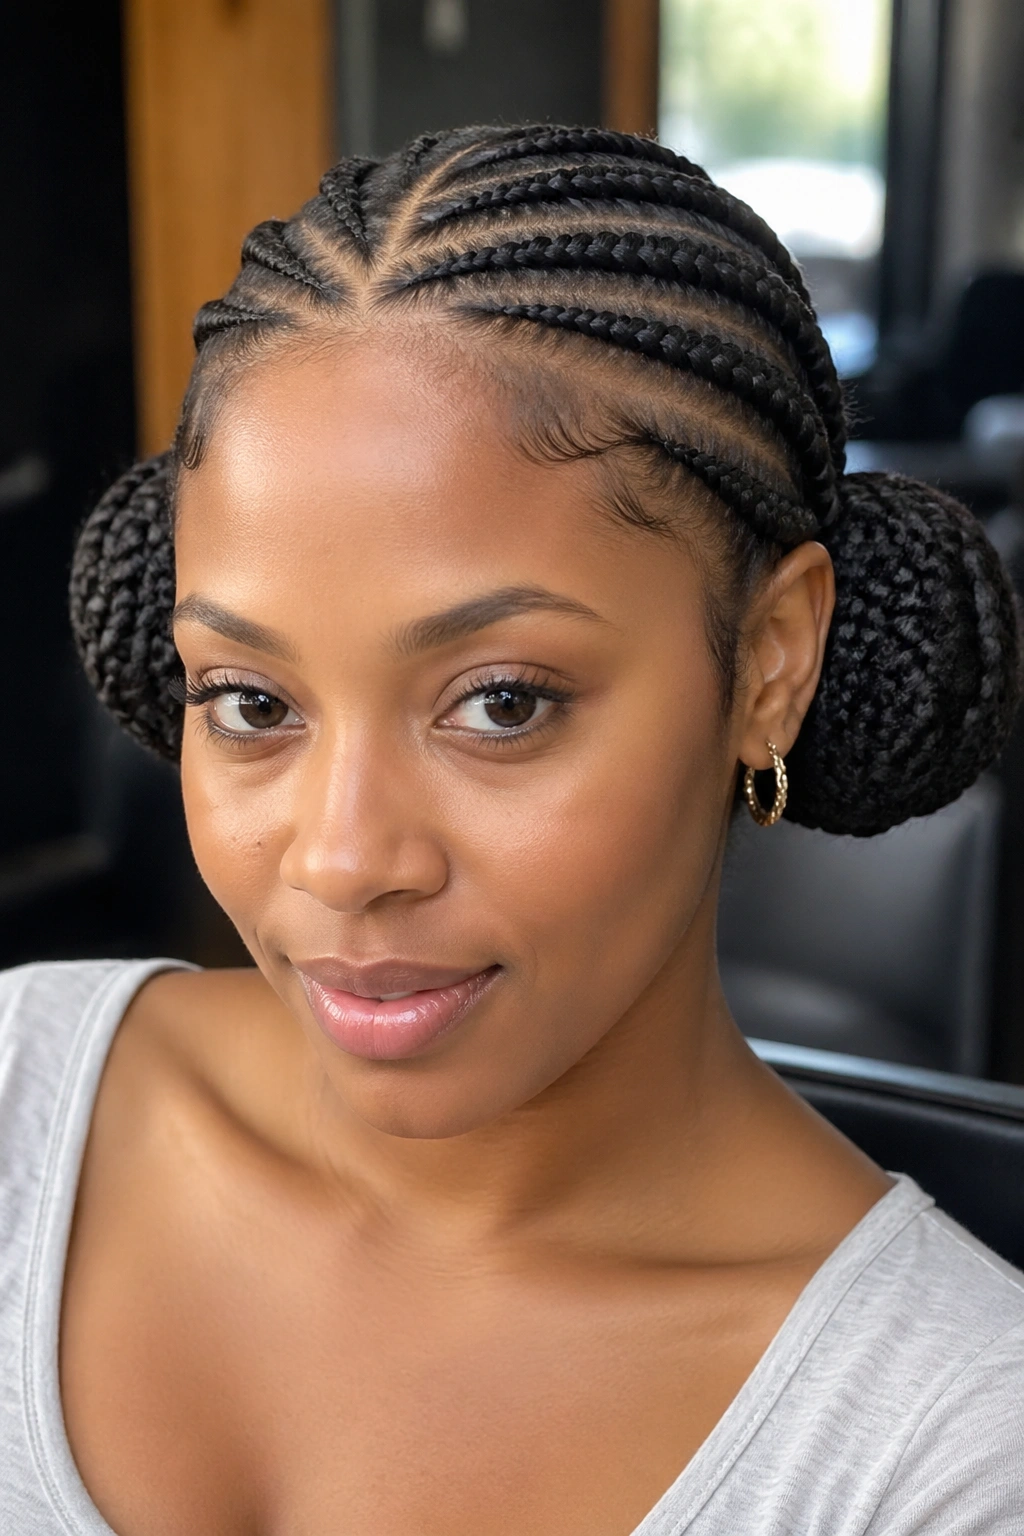
Two buns positioned behind the ears, connected across the top of the head by cornrows running ear to ear. The milkmaid shape is ancient — references to this general form appear in hair traditions across continents — but the cornrow execution makes it functional for textured hair.
Each bun sits just below and behind the ear, held by a small elastic and then wrapped with the tail of the cornrow feeding into it. From each bun, three to four cornrows run up and across the crown, meeting at the center part that runs front to back. The effect is symmetric without being stiff.
Wear time on this style hits a genuine three weeks if you maintain it. The buns take almost no abuse since they sit close to the scalp and out of the path of collars, backpacks, and pillowcases.
One downside worth naming. The partings across the top of the head can start looking scalp-heavy by week two if your hair grows quickly. A dry scalp oil applied with a dropper along the parts keeps things looking fresh without weighing the cornrows down.
5. Low Bun With Center Part
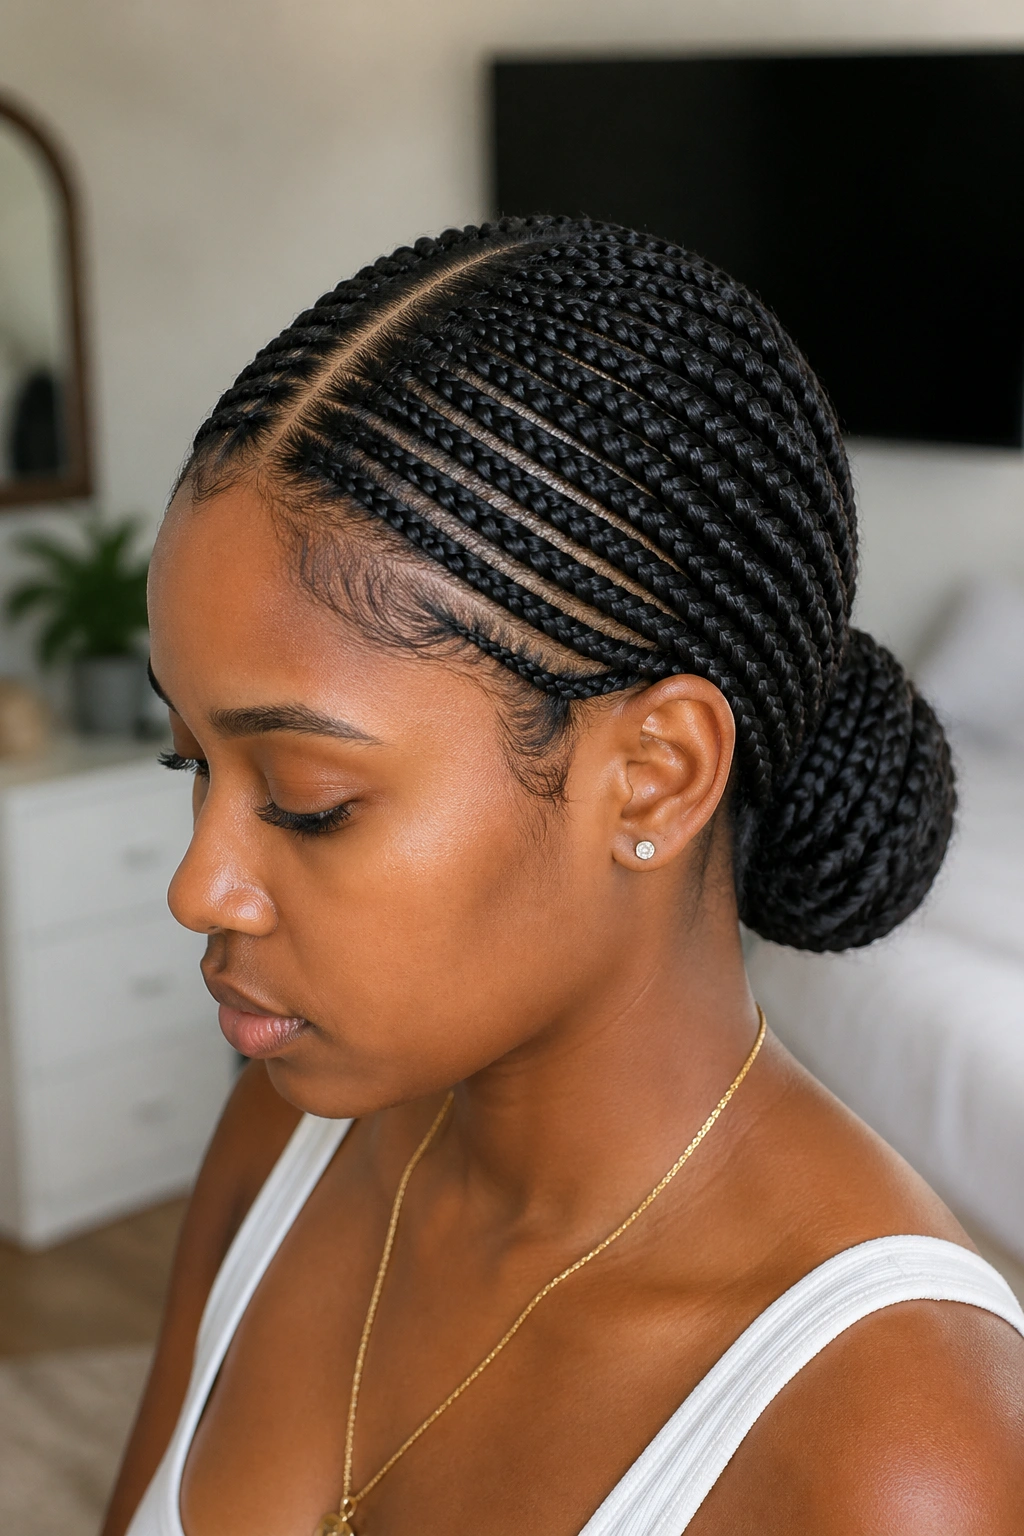
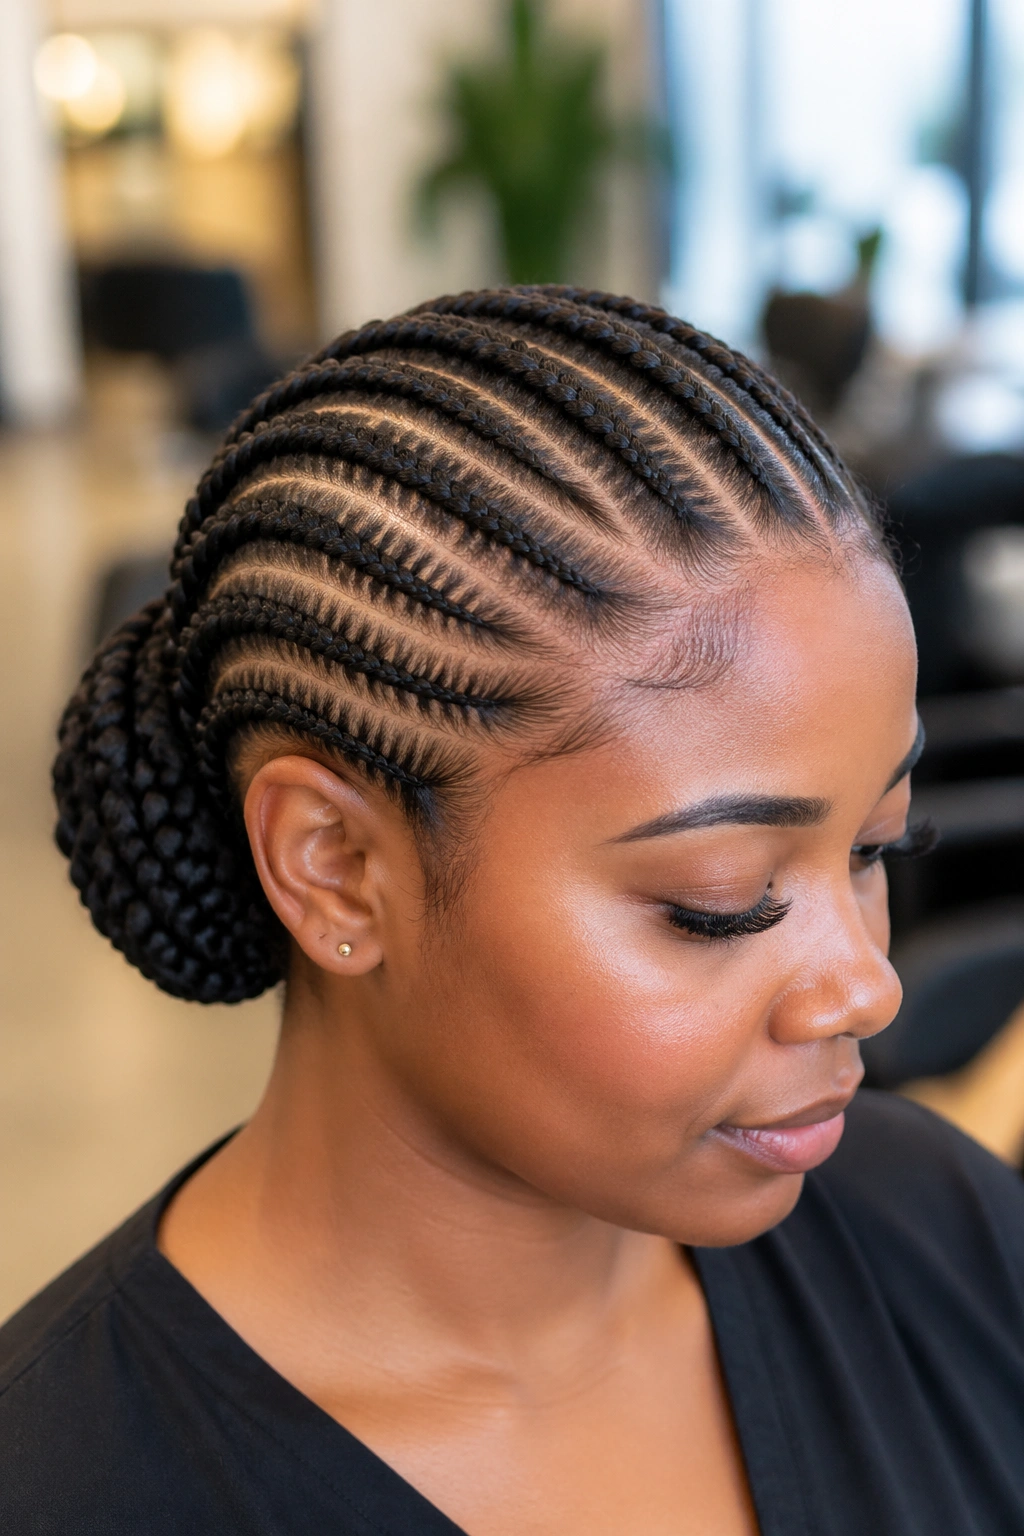
A center part running from forehead to nape, with cornrows feeding symmetrically into a low bun at the base of the skull. This is the workhorse of protective cornrow updos — simple enough to do yourself with practice, clean enough for professional settings, and durable enough to last a month if you treat it right.
Eight cornrows total, four per side. Each starts at the part and curves slightly outward before bending back toward the nape. The symmetry is what makes this style read as intentional rather than lazy. If one side has five cornrows and the other has four, the whole thing looks off-balance.
The low bun is wrapped, not pinned. Gather all ends, twist them into a thick rope, coil the rope into a flat bun, and tuck the tip under. Then pin around the outside edge for hold. A wrapped bun stays smoother than a pinned one.
6. Crown Twist With Cornrow Base
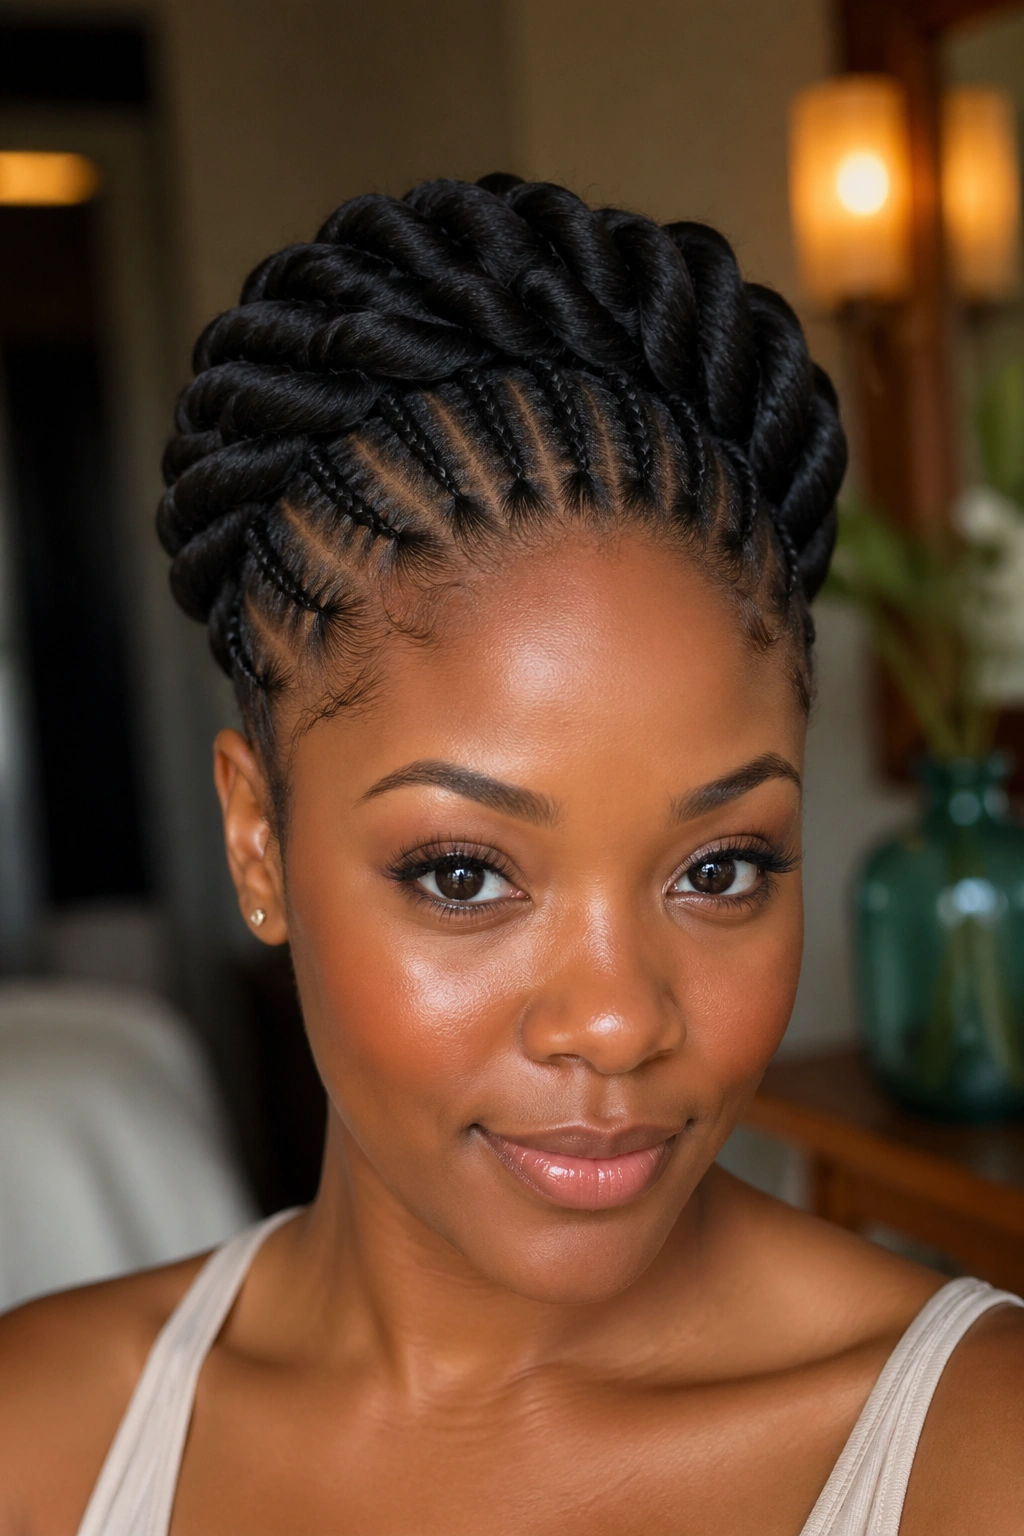
Cornrows at the base, flat against the scalp from hairline to crown, then transitioning into a twisted crown that wraps around the head’s top. The twist uses the loose ends of the cornrows as its foundation, so there’s no separate attachment.
The crown twist adds height without bulk, which flatters round or oval face shapes especially. If your natural hair has enough length to reach from crown to temple when stretched, you can do this without added hair. If not, kanekalon feed-in works fine.
The twist tension here matters more than with braids. Twists don’t grip themselves like three-strand braids do, so a too-loose twist will unravel within a few days. Test each section by gently tugging. A well-twisted crown pulls back into shape; a weak one starts coming apart.
7. Heart Shape Bun
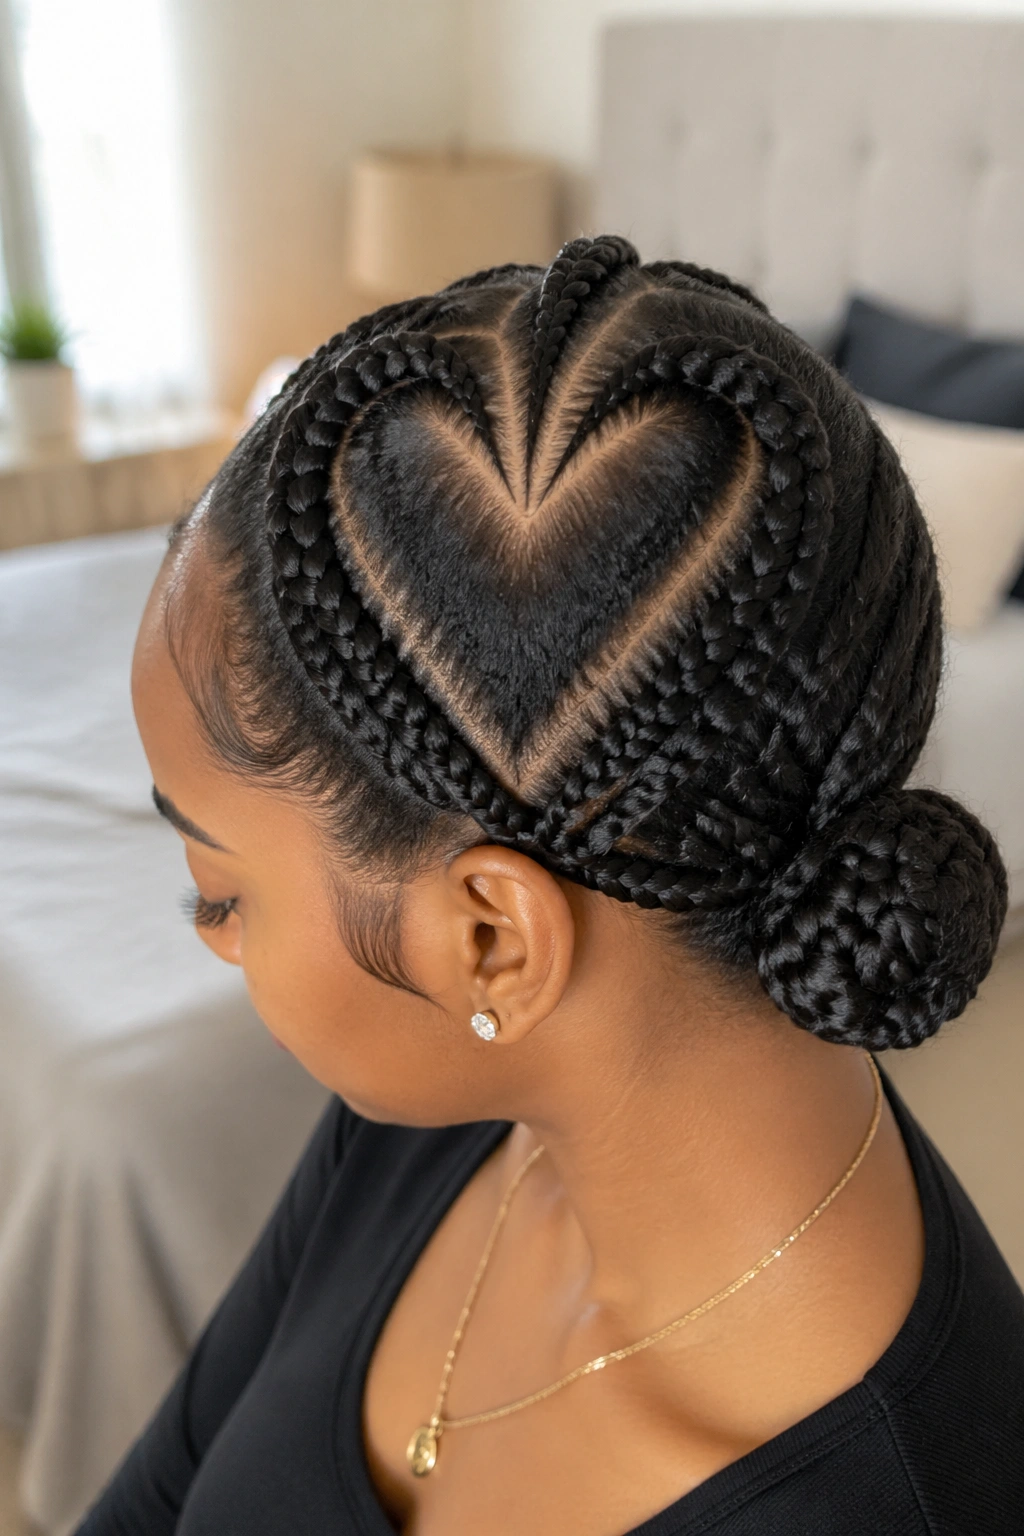
A stylized heart outlined on the crown through cornrow placement, with the ends meeting at the base of the heart and forming a small bun at the nape. Decorative, yes, but the protective structure holds up.
The heart is drawn through two cornrows starting at the front center, curving outward over each ear, then sweeping back inward to meet at the crown. From there, additional cornrows feed straight down the back of the head to the bun.
Who This Is For
This style fits best on people with a defined forehead and wide cheekbones — the heart shape echoes those features. On a narrow face, the heart can look disproportionate. It’s also a better style for someone with straightforward edges; the heart’s outline depends on clean, visible partings.
8. Full Pompadour Roll
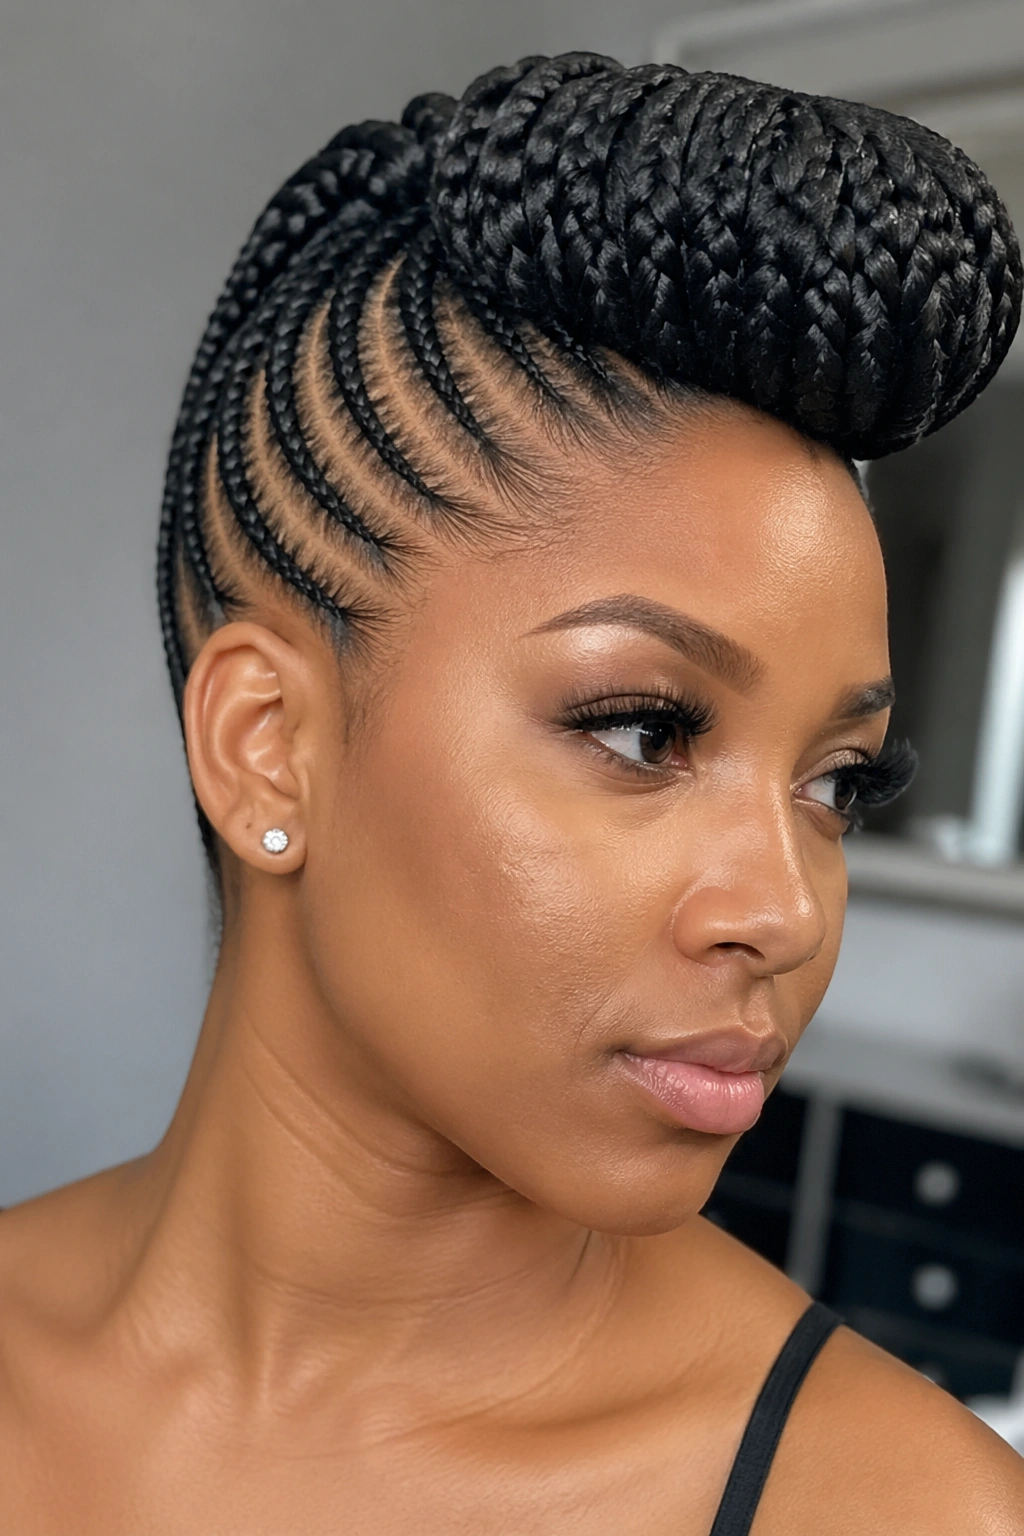
The pompadour roll is pure confidence. Cornrows start at the nape and travel upward to the front, where the ends fold back on themselves into a rolled bump positioned along the forehead hairline. It creates dramatic height.
Unlike straight-back cornrows that end in a simple ponytail, the pompadour roll requires careful length management. The cornrows need to finish at a specific point along the front to roll cleanly. Measure twice before you cut the kanekalon.
Who this is best for: anyone who wants presence. The style adds visible height and draws attention upward. For formal events, add a decorative pin or small accessory at the roll’s base. For daily wear, the roll alone reads as statement enough.
Takedown is more tedious than with simpler updos. The folded-back section near the forehead has extra layers of braid stacked on each other. Work patiently and don’t yank.
9. Chunky Side Bun
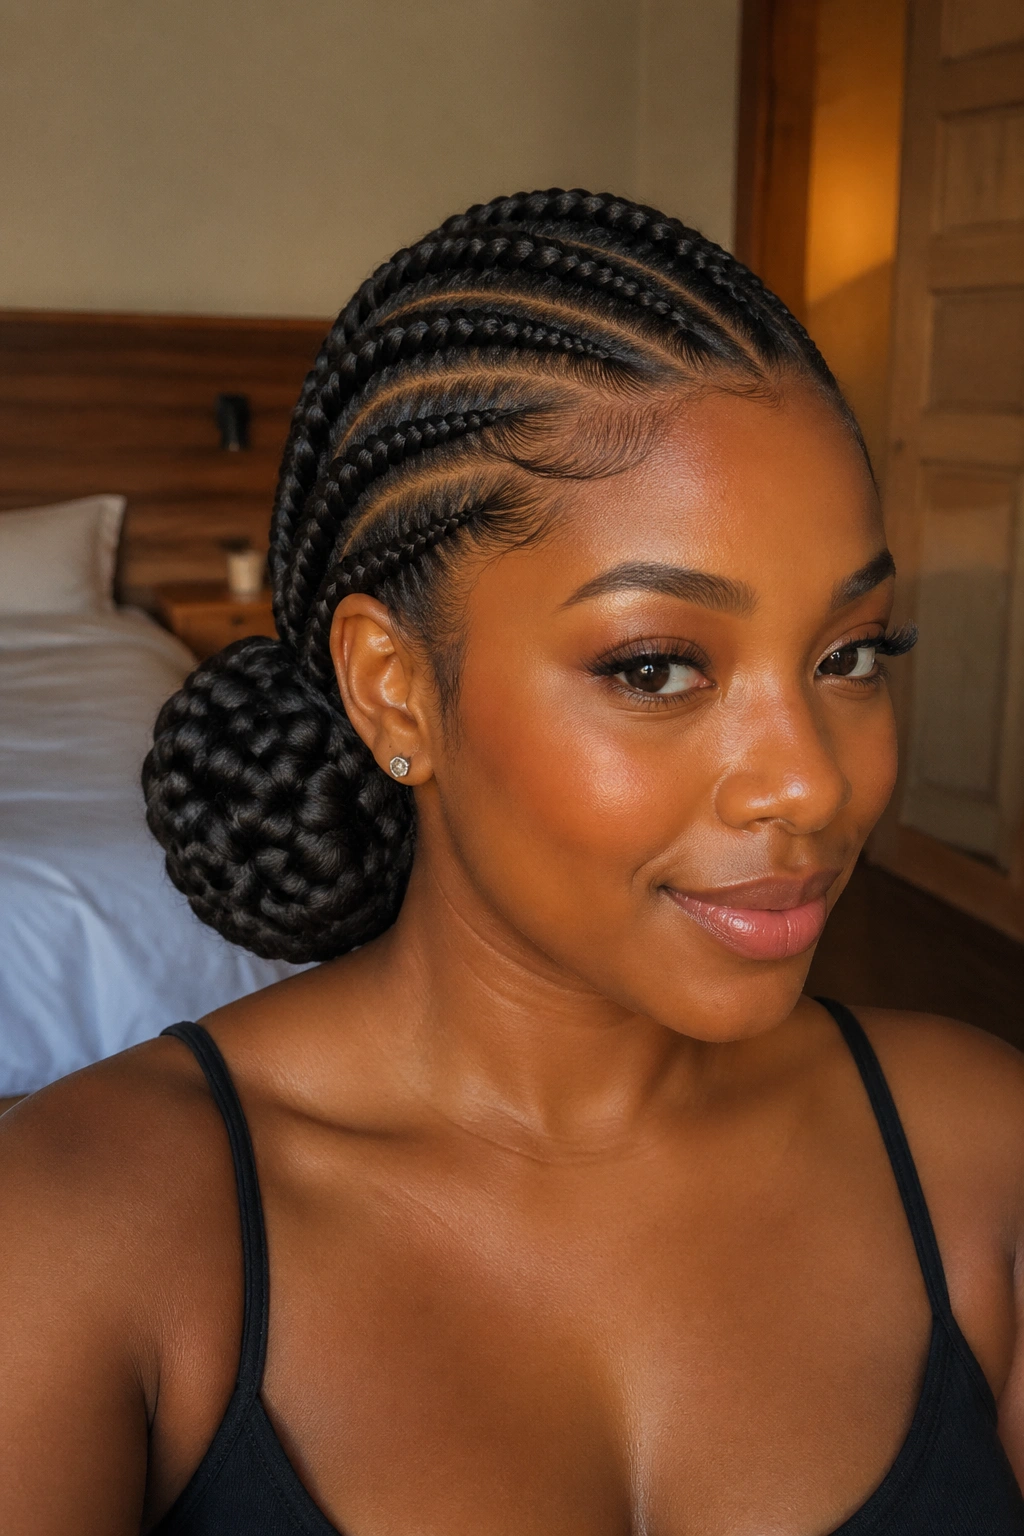
Not every protective updo needs delicate partings. Sometimes you want fewer, thicker cornrows — maybe four to six total — all sweeping dramatically to one side and coiled into a chunky, textured bun. This style takes less time than the intricate patterns and reads as casual-polished.
Chunky cornrows run 1.5 to 2 inches wide at the base. They’re forgiving on new growth and hide fuzz better than fine cornrows do. The trade-off is that they’re visually heavier, which either works for your face shape or doesn’t.
The side bun should sit just behind and above the ear, not directly beside it. A too-low side bun pulls the style’s weight downward and loses the intentional feel. Pin with five or six U-pins placed around the bun’s perimeter, not jammed through its center.
The real test: Can you sleep on it without destroying the shape? A well-pinned chunky side bun survives a night under a satin bonnet with minimal reshaping in the morning.
10. Tribal Inspired Knot
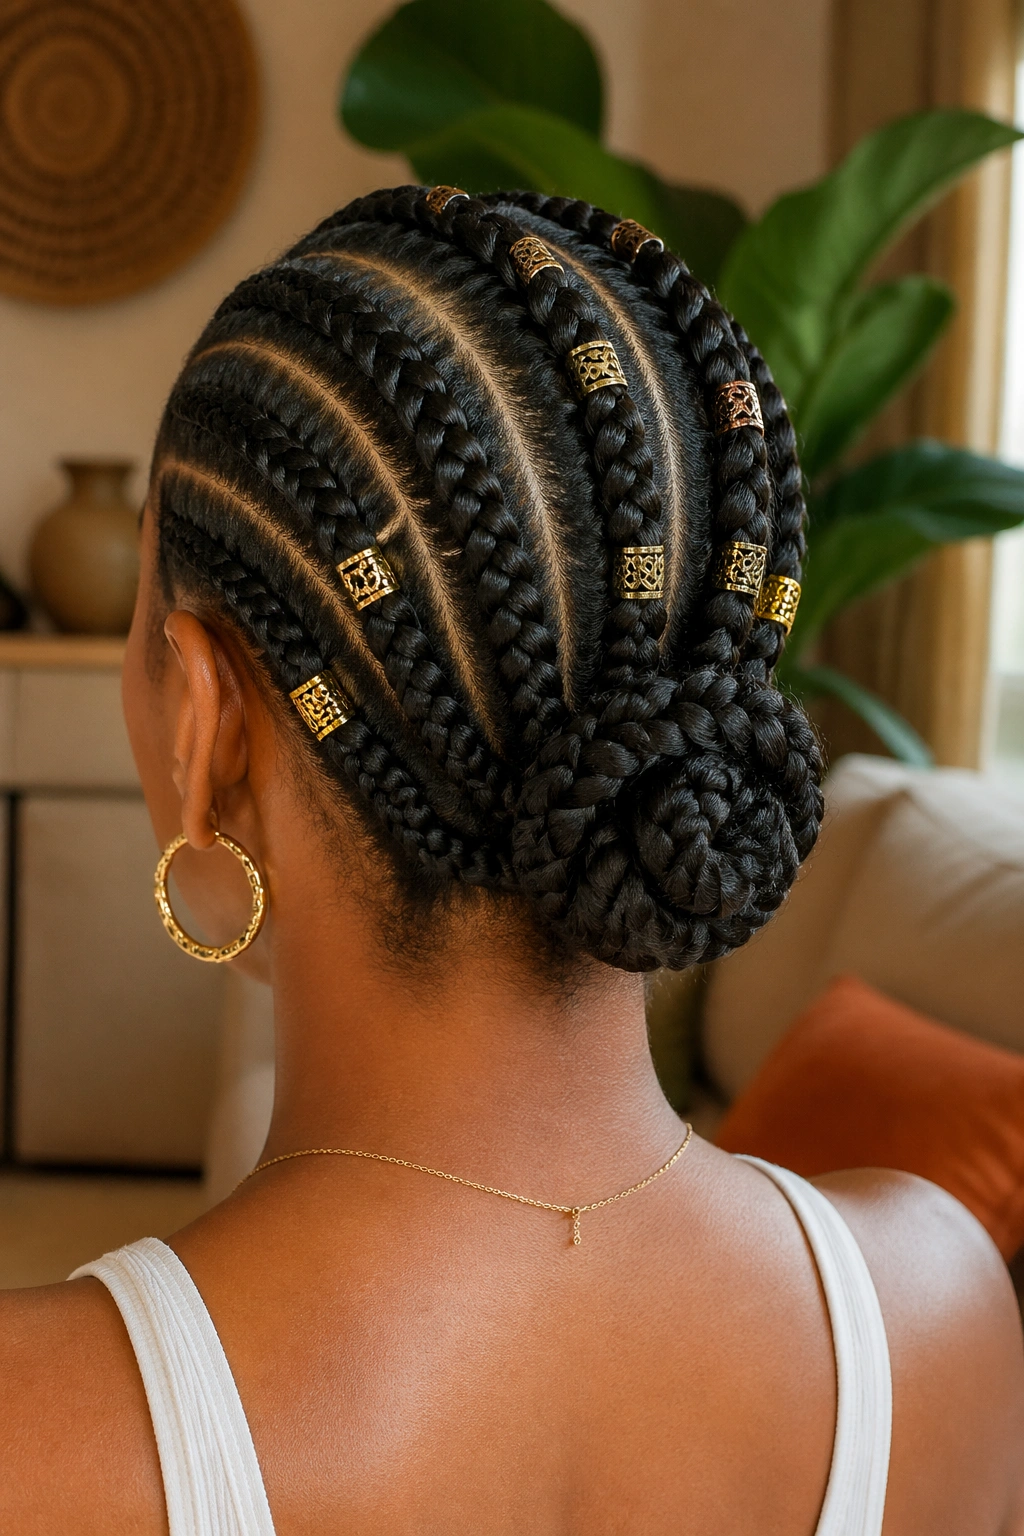
Rooted in West African styling traditions, the tribal knot features thick cornrows that converge at a knotted arrangement at the back of the head. The word “tribal” gets used loosely — what we’re describing is a specific structural approach with deep cultural history.
The knot itself is formed by looping the ends of two main cornrows through each other and pulling tight, creating a three-dimensional focal point. Decorative beads, cuffs, or cowrie shells often accent the cornrows running into the knot.
If you choose to add cuffs, place them along the cornrow’s length rather than crowded near the knot. A cuff every 2-3 inches on two or three selected cornrows reads deliberate. A cuff on every braid reads chaotic.
11. Front-to-Back Waterfall
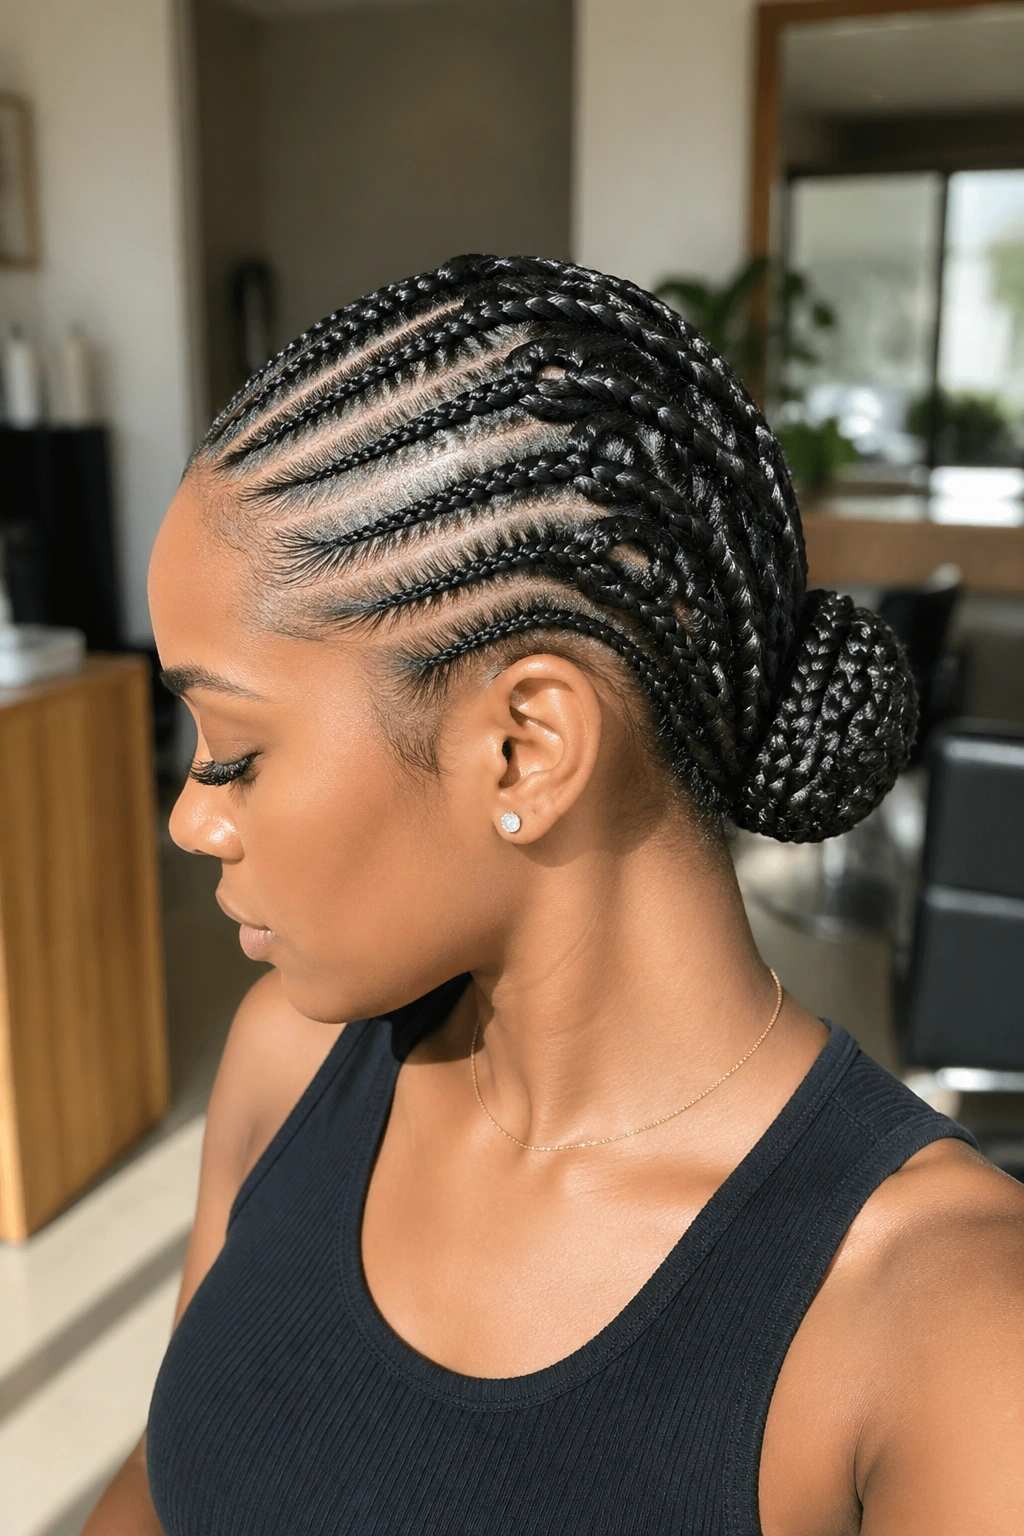
A waterfall cornrow updo features a series of cornrows that start at the hairline and flow backward, with a few sections pulled down partway through the braid to create a cascading ripple effect, all gathered into a nape bun.
What Makes It Different
Most waterfall styles use loose hair or twists. The cornrow version is more durable and more protective — the cascading sections are still braided, just intentionally shorter, so they tuck against the scalp as textural interest rather than hanging free.
The ripples are created by splitting off a small strand partway through the cornrow, letting it hang as a decorative loop, and continuing the main cornrow without that strand. You need at least three of these ripples per cornrow for the effect to read. Fewer looks accidental.
12. Goddess Updo With Accents
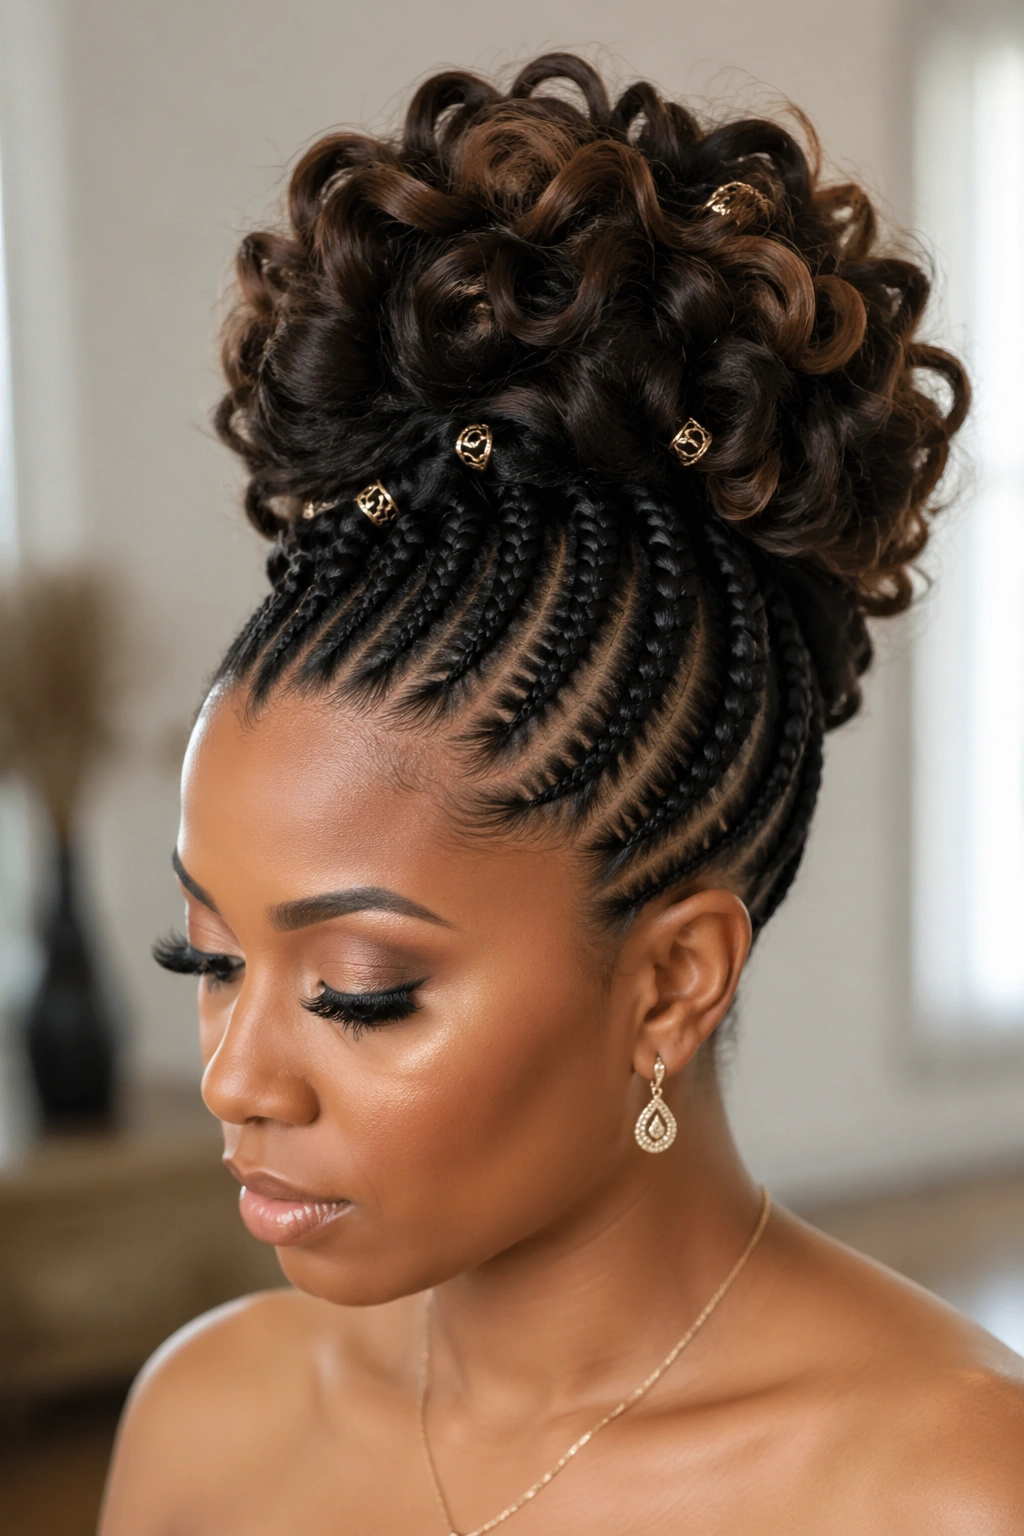
The goddess updo pairs tight cornrows at the base with intentionally loose, wavy ends integrated into the updo’s shape. Added curly hair — pre-stretched or loose wavy extensions — gets woven into the bun or crown to add volume without more braiding.
You get structure from the cornrows below and softness from the curly volume above. It’s a balanced approach that suits occasions where straight cornrows alone might feel too severe.
Picking the right curly hair matters. Match the curl pattern to your natural texture when it reverts — this is the part people get wrong. Extensions that are too straight next to 4C hair create an obvious mismatch. Kinky bulk hair with a defined curl pattern blends better than glossy wavy hair.
The goddess updo doesn’t last as long as pure cornrow styles. Plan for 10-14 days of good wear, then takedown. The added curly sections get frizzy faster than braided hair does.
13. Fulani Inspired Crown
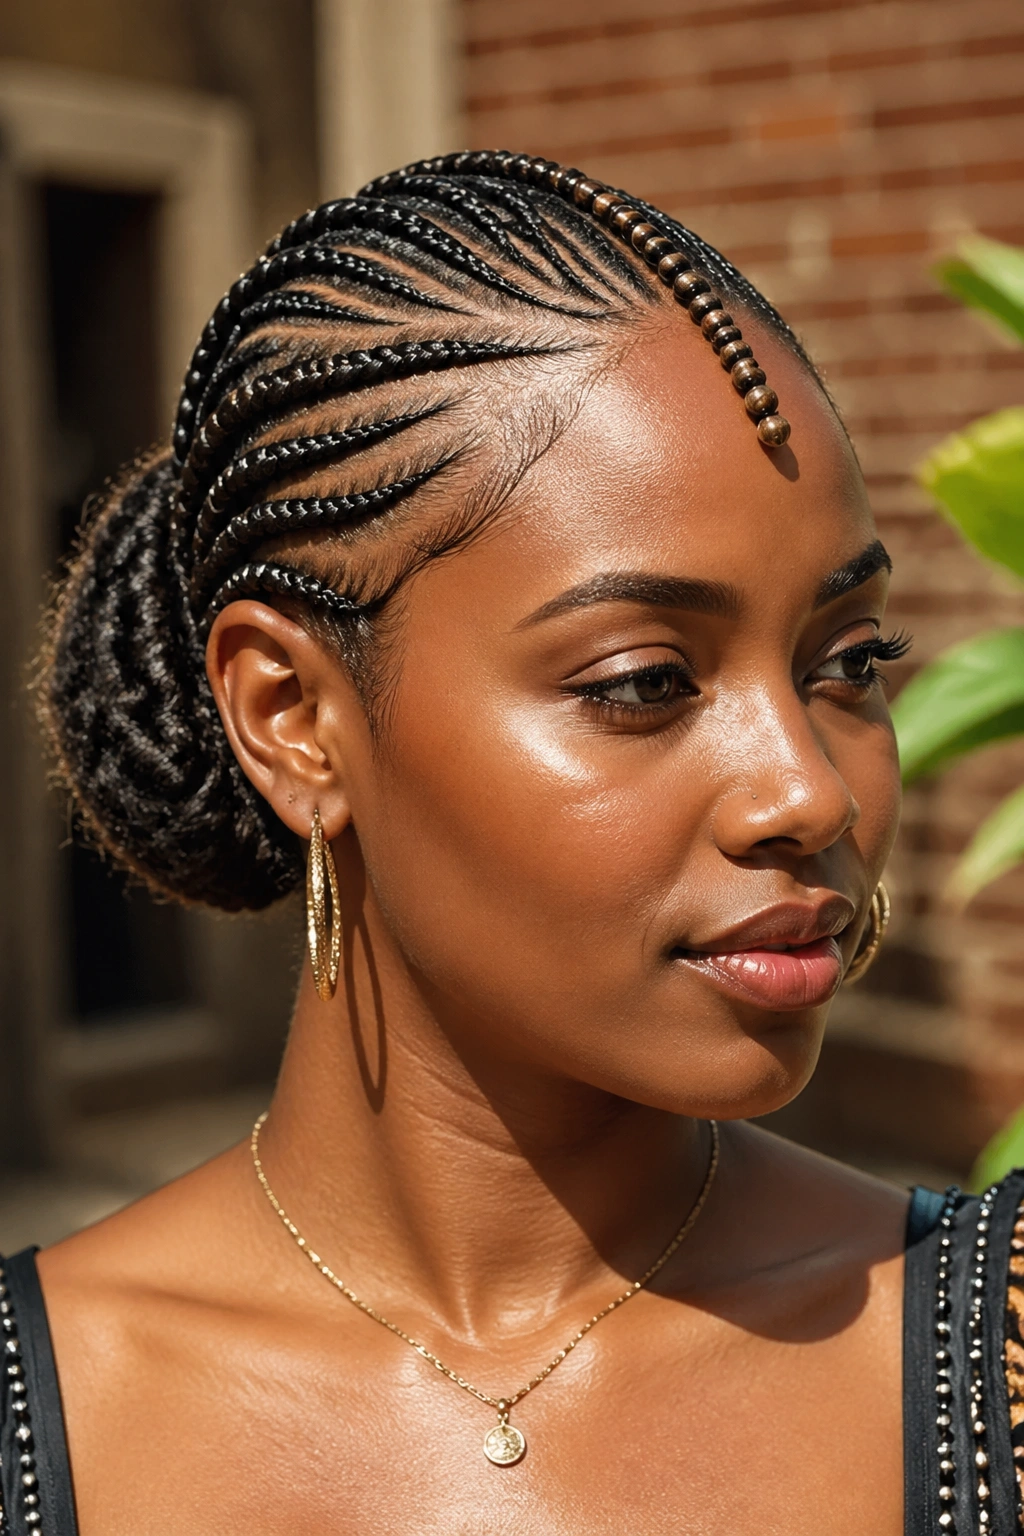
Fulani styling draws from the rich braiding heritage of the Fulani people across West and Central Africa. A Fulani-inspired cornrow crown features a center braid from forehead to crown (often beaded), paired with side cornrows angling toward the ears and a structured bun or knot at the back.
The center beaded braid is the signature element. Three to five beads, typically wooden or metal, spaced along the length. The beads should match the cornrows’ color family — natural wood on black hair, brass on auburn, and so on.
Protective wear with Fulani updos works well because the structure distributes tension evenly. The center braid bears less stress than the outer ones; the outer ones carry the weight of the bun. The balance creates a style that can go three-plus weeks without significant breakdown.
14. Half-Up Half-Down Hybrid
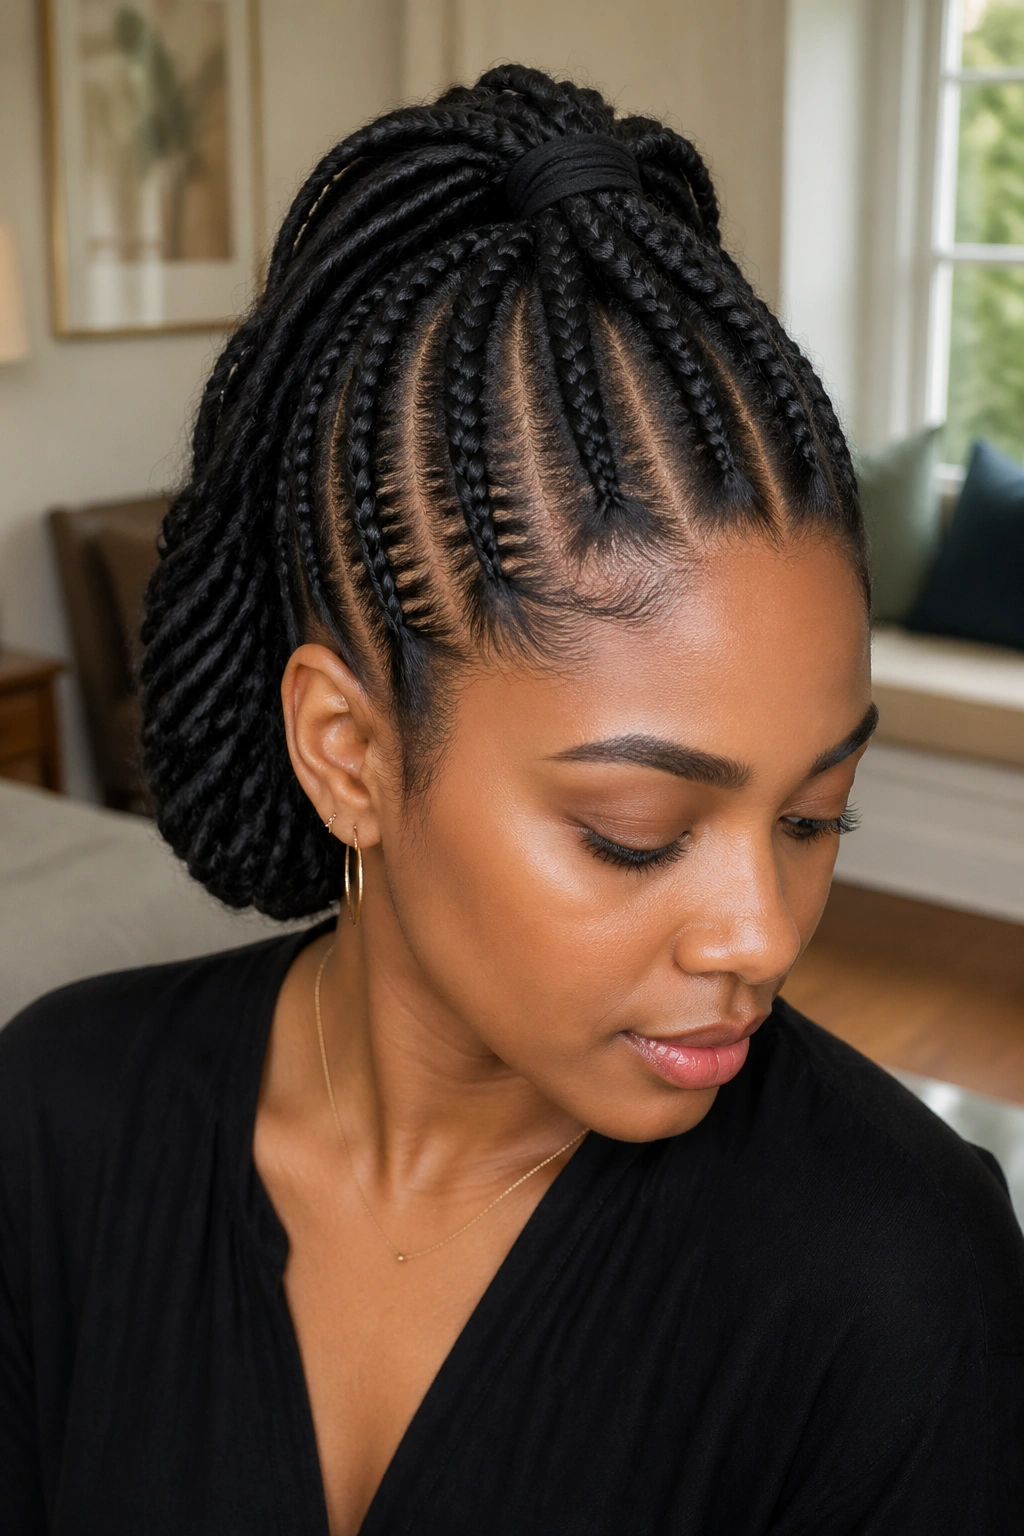
Not strictly an updo, but close enough to qualify when the half that’s up is structured with cornrows and the half that’s down is tucked, rolled, or twisted away from the shoulders. The hybrid solves a common protective styling problem: you want your hair off your neck but don’t want a full updo all day every day.
Six cornrows run from the hairline to the crown, where they’re gathered with a small elastic. The loose hair below the elastic can stay braided, be twisted into a low bun, or be styled into curly extensions for a softer look.
The advantage here is flexibility. When you want full protection, tuck the bottom half up. When you want the look of loose hair, release it. Cornrow tops last through multiple styling changes of the bottom section without loosening.
15. Mohawk Updo Style
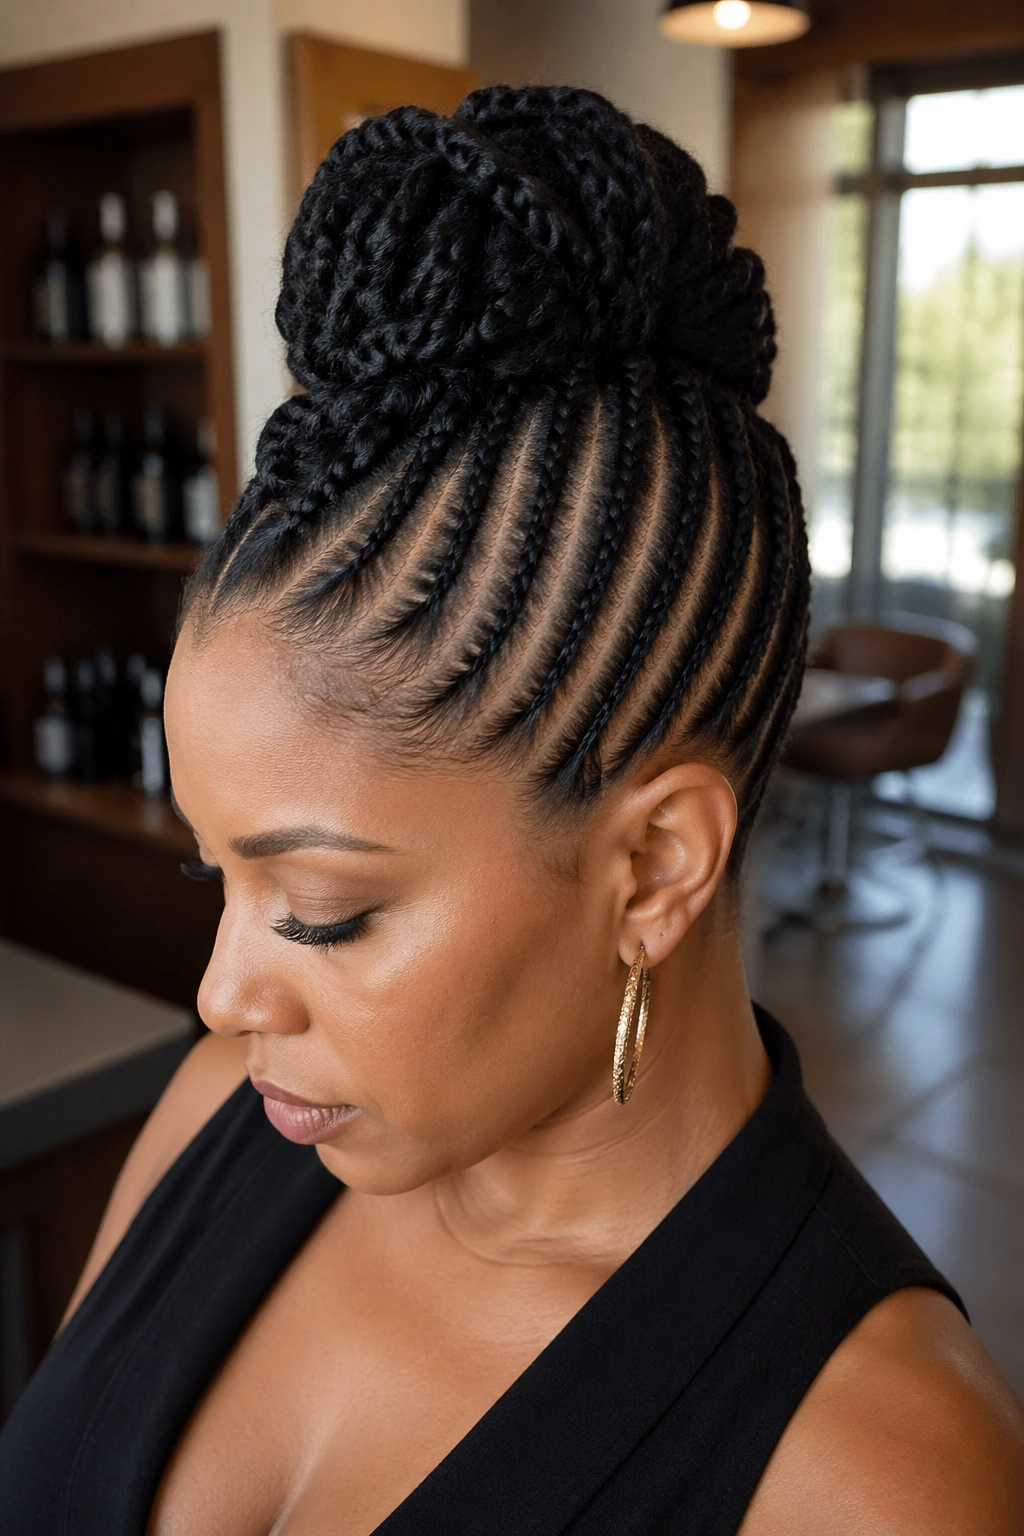
Mohawk cornrows concentrate volume along the center strip of the head with the sides pulled back or cornrowed flat. The “updo” element comes from the raised or curled center strip that acts as the focal point.
Styling Notes
The center mohawk section can be a large freestanding bun, a series of bantu knots, a roll of curly extension hair, or even a stack of small buns. Each creates a different silhouette.
- Side sections: 4-6 small cornrows on each side, all running toward the center
- Center strip width: 3-4 inches at its widest point, narrowing toward the back
- Focal point height: 3-6 inches above the scalp depending on look preference
- Edge work: Keep edges soft and slightly textured; sharp edges fight the mohawk’s volume
16. Triangle Part With Top Knot
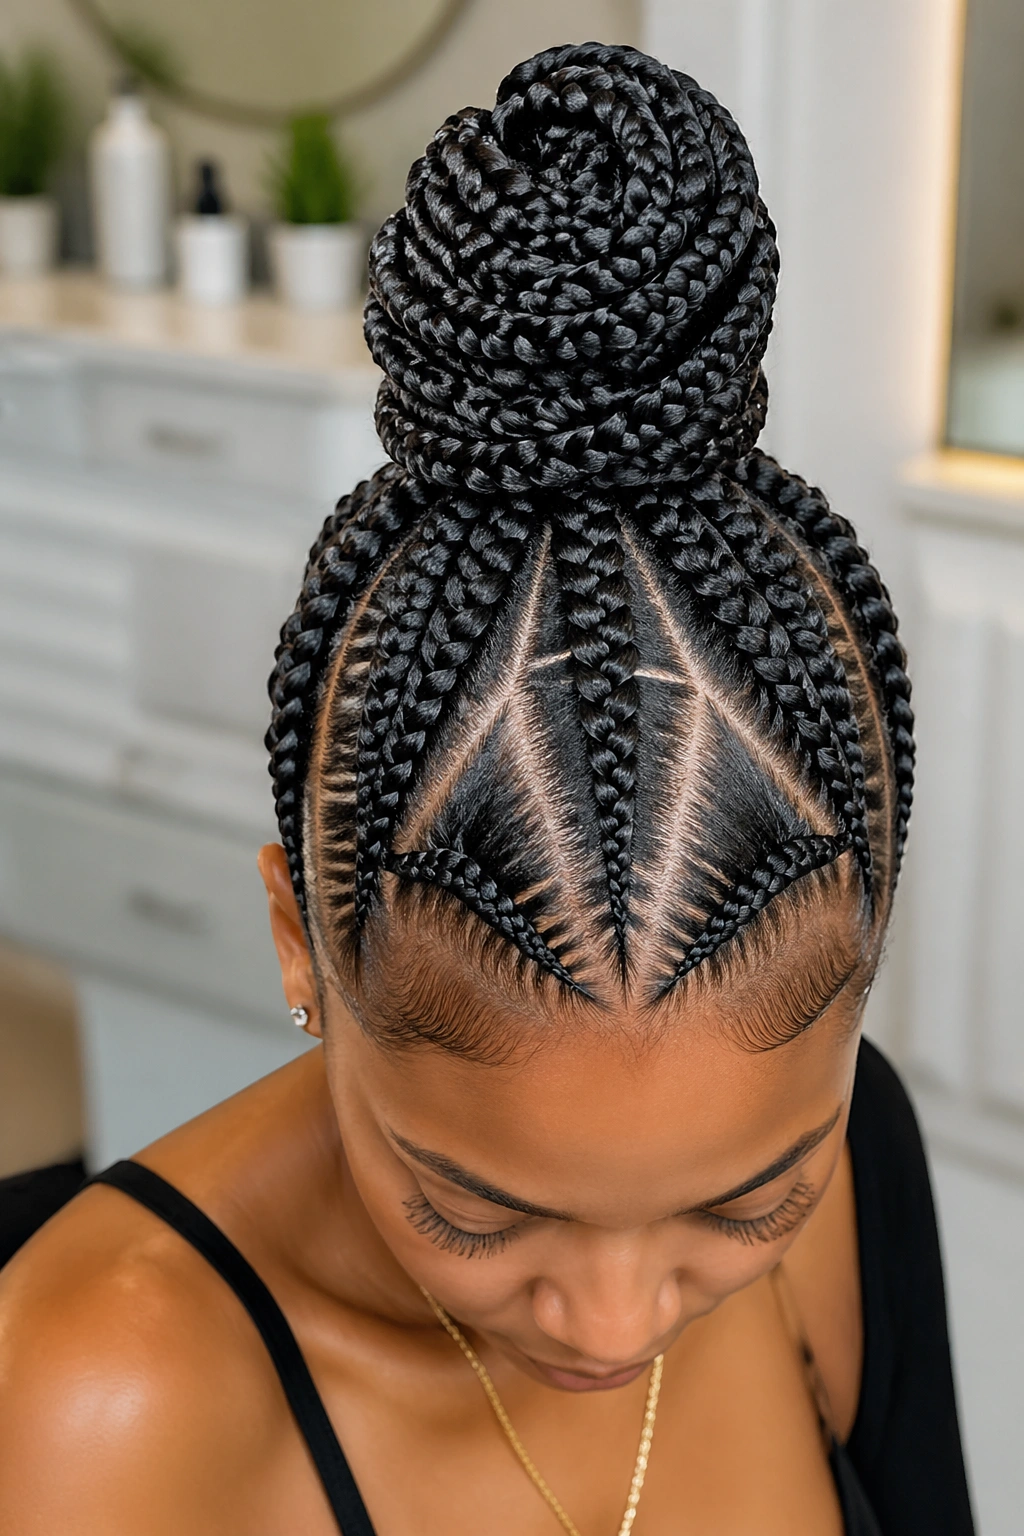
Triangle parting divides the scalp into geometric segments — typically 6-8 triangles arranged around the crown. Each triangle gets its own cornrow that feeds into a single top knot at the crown.
The geometry is the visual draw. Unlike curved or straight parts, triangles create sharp angular interest that photographs striking from above. On video or in motion, the triangle parts catch light differently than curved ones, giving the style dimension.
The top knot itself should be proportional — tall, sculpted knots work with small triangles; wide, flat knots work with larger ones. A mismatch between triangle scale and knot shape makes the whole style read awkward.
17. Updo With Beaded Accents
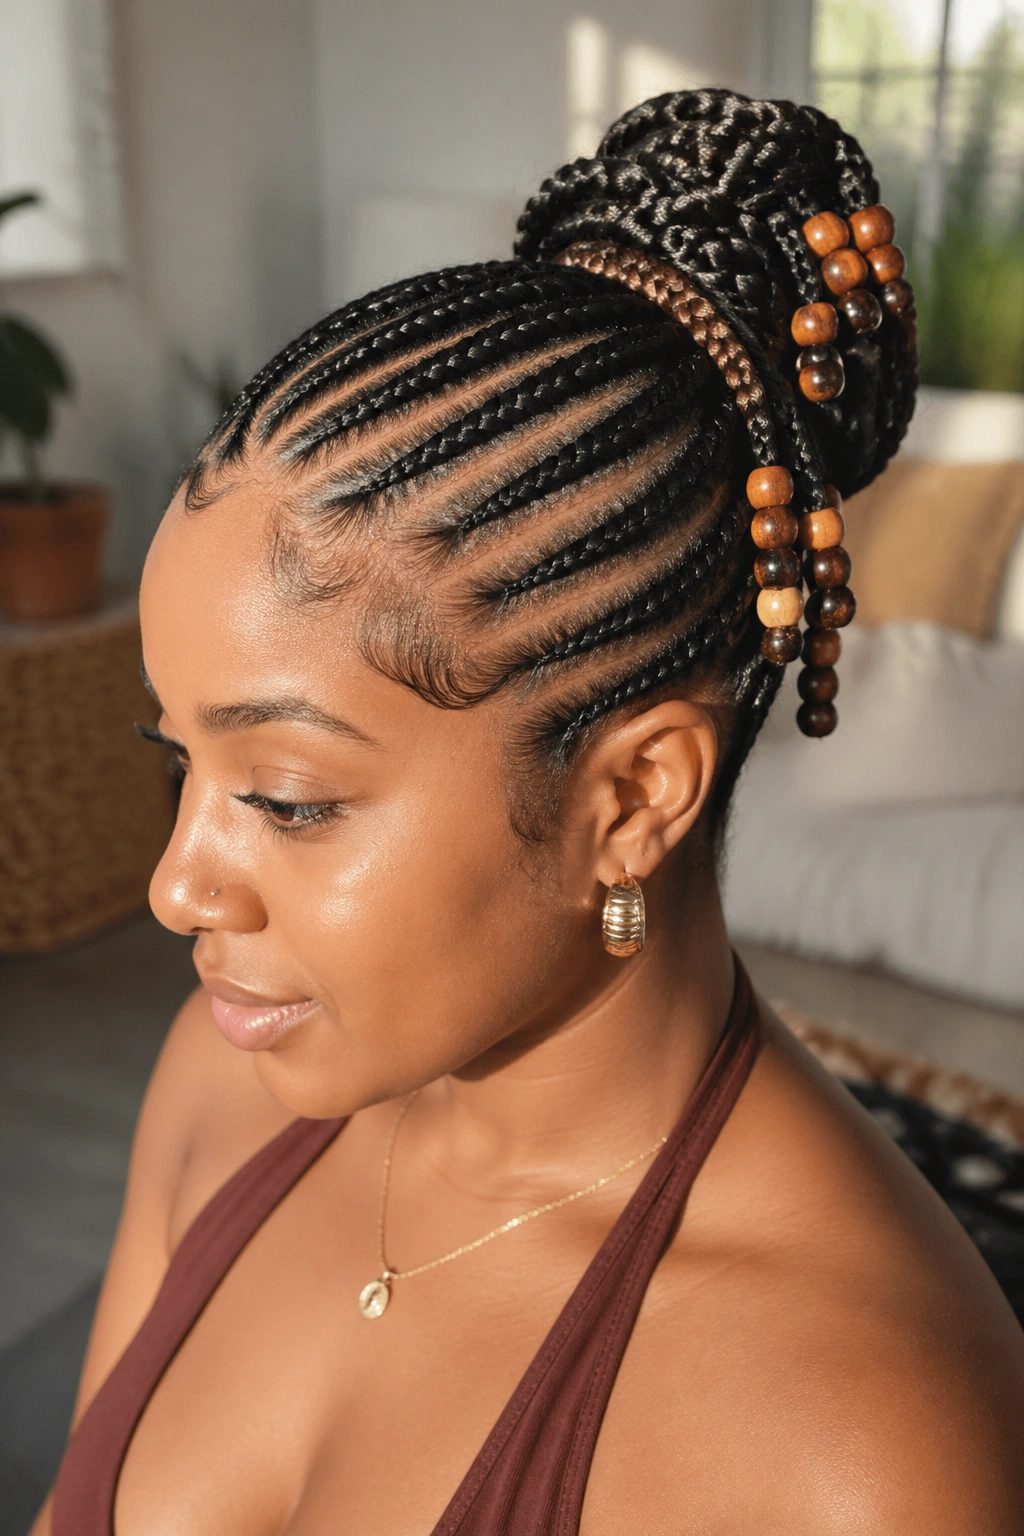
Beads add weight and decoration, but they also serve a protective function. Well-placed beads keep cornrow ends closed and secured without needing small rubber bands, which can snap strands over time.
Use wooden beads for minimal weight, metal beads for sturdier finishes, and glass beads sparingly — they can be heavy enough to cause tension over long wear. Thread beads onto the loose ends of cornrows feeding into an updo, then fold the tip back through the bead and secure with braid twisting itself.
Don’t bead every cornrow. Five to eight selected beaded ends per updo is plenty. When every cornrow is beaded, the weight adds up and the style pulls on your scalp.
18. Structured Bouffant Roll
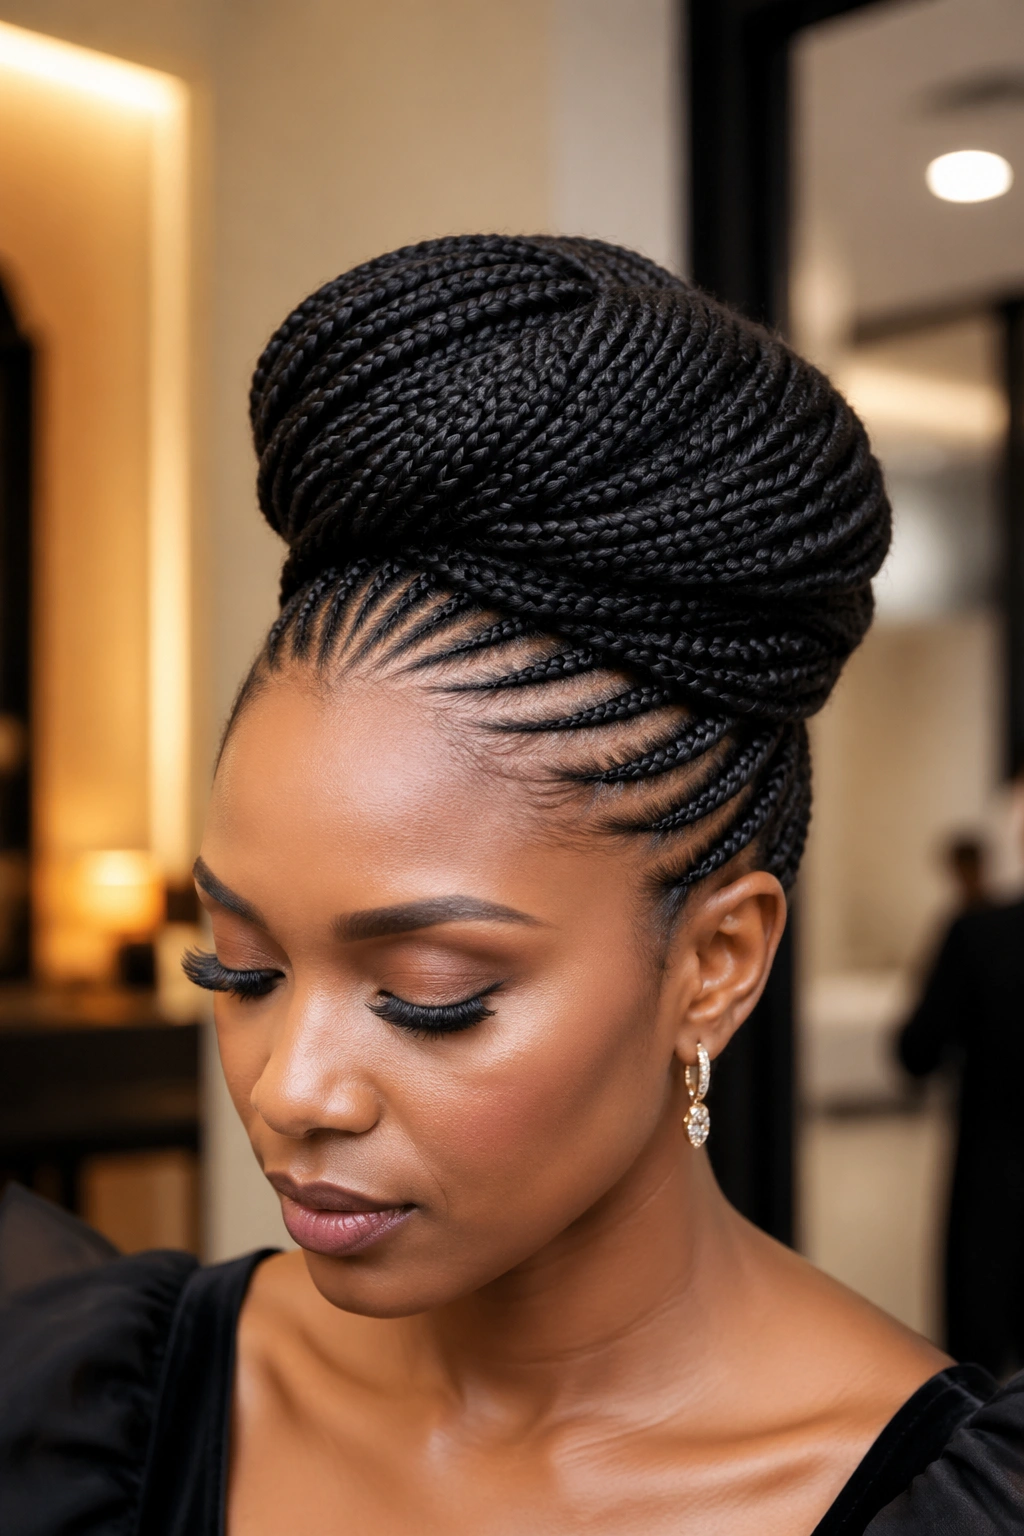
The bouffant roll sits at the top of the head, wide and sculpted, with cornrows running from the nape upward into the rolled structure. It’s a formal-leaning style that photographs well and holds its shape for events.
Built on a base of cornrows that cover the lower two-thirds of the head, the bouffant itself is formed by rolling extra kanekalon hair around a padded form or foam donut, then weaving the ends of the cornrows over the form to hide it. The finish is smooth and architectural.
Wear time is shorter than other cornrow updos — plan for 7-10 days before the bouffant starts looking deflated. The internal padding stays in place fine, but the wrapped cornrow coverage loosens.
For event styling, this is unbeatable. For everyday wear, pick something simpler.
19. French Twist With Cornrow Sides
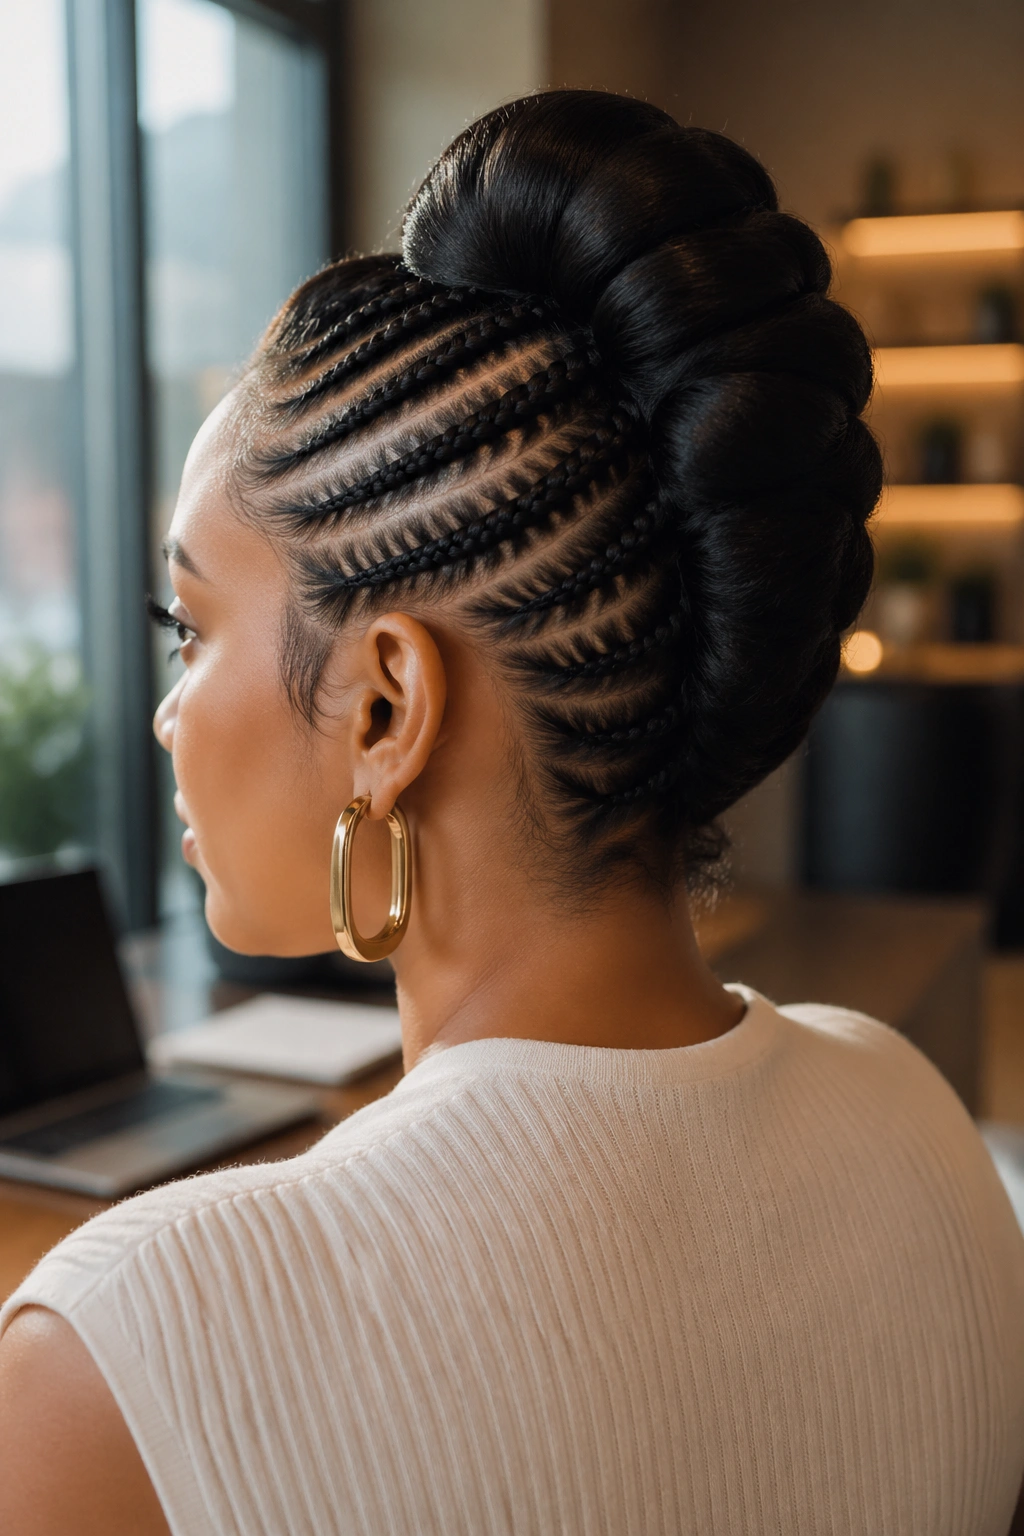
The French twist is a classic bun shape where hair is gathered and rolled vertically into itself, creating a slim, elongated bun at the back. Pair that with cornrows along both sides of the head, and you get a hybrid that works for formal and professional settings alike.
The cornrow sides balance the smooth French twist structure. Without them, a French twist on textured hair reads as too minimal. With them, the style has visual layers.
How It Comes Together
Start with four cornrows on each side, running from the hairline backward to meet at the vertical center of the back of the head. Gather all the ends plus the loose hair from the top of the head (if not cornrowed) and roll upward into the twist. Pin along the twist’s seam. The tuck at the top hides the ends cleanly.
20. Feather Braid Updo Pattern
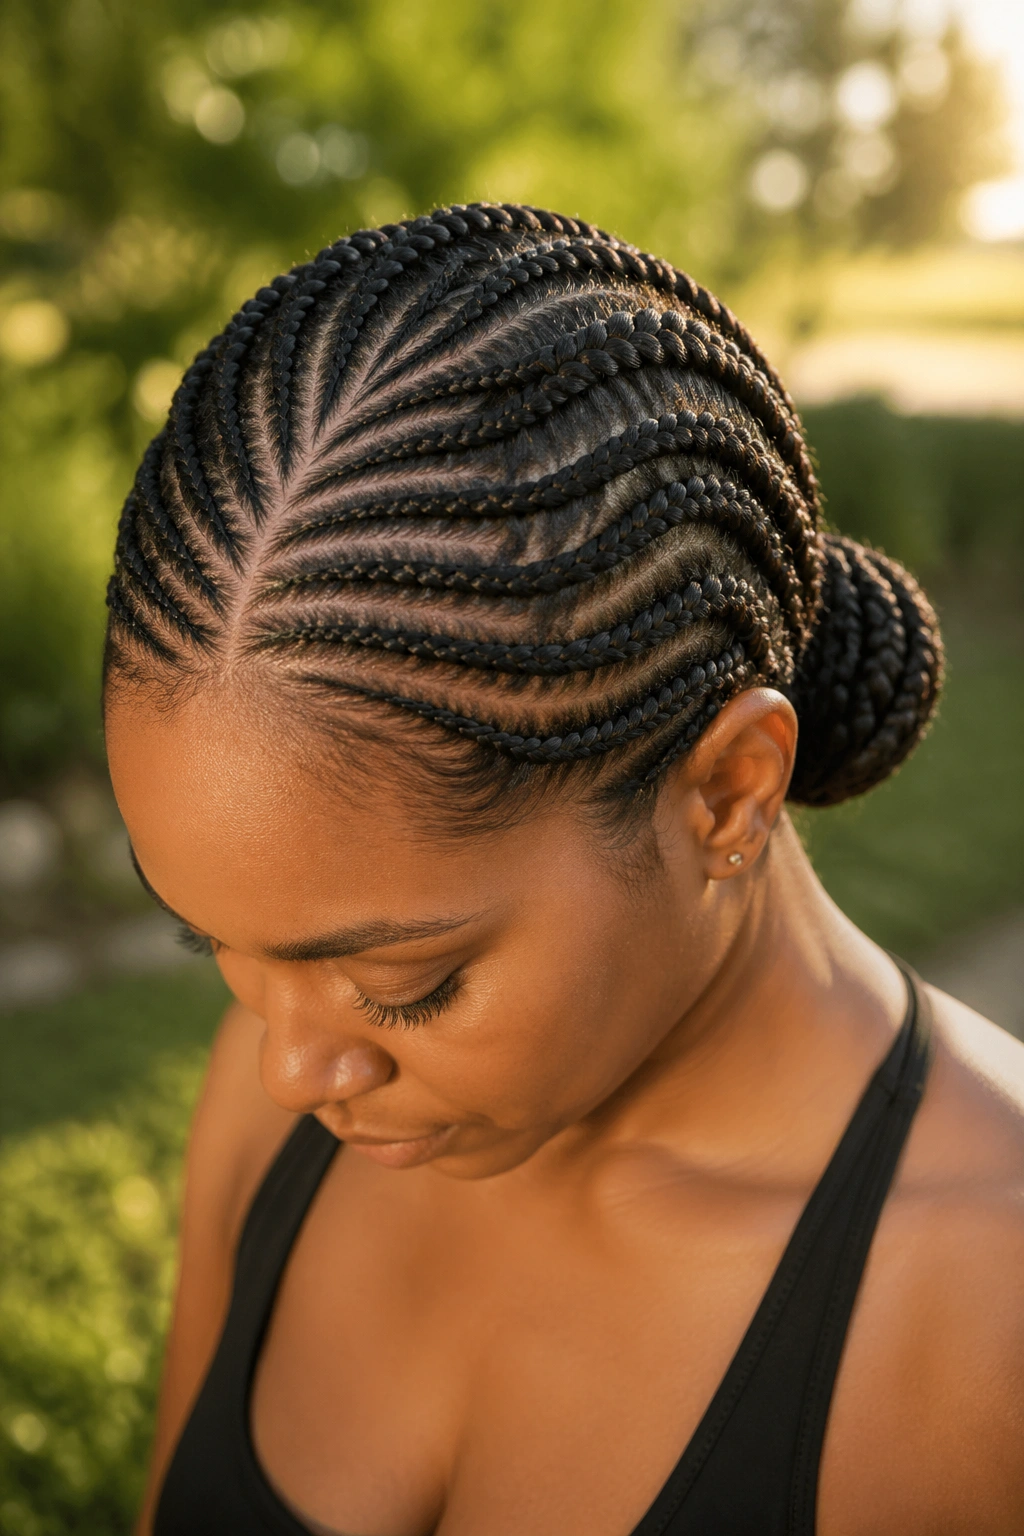
Feather-pattern cornrows feature a central parting with symmetrical cornrows angling away from it like the veins of a feather. Gathered into a bun or roll at the nape, this creates an updo with pronounced visual rhythm.
Each “feather vein” cornrow starts at the center part and curves gently outward and downward before looping back toward the nape. The curvature matters — straight diagonal cornrows don’t create the same effect. Practice the curve on one side first before committing to both.
Feather styles look best with 10-14 cornrows total (5-7 per side), each about 1 inch wide. Fewer and the pattern loses definition. More and the feather effect gets muddied.
21. Intricate Loop Design
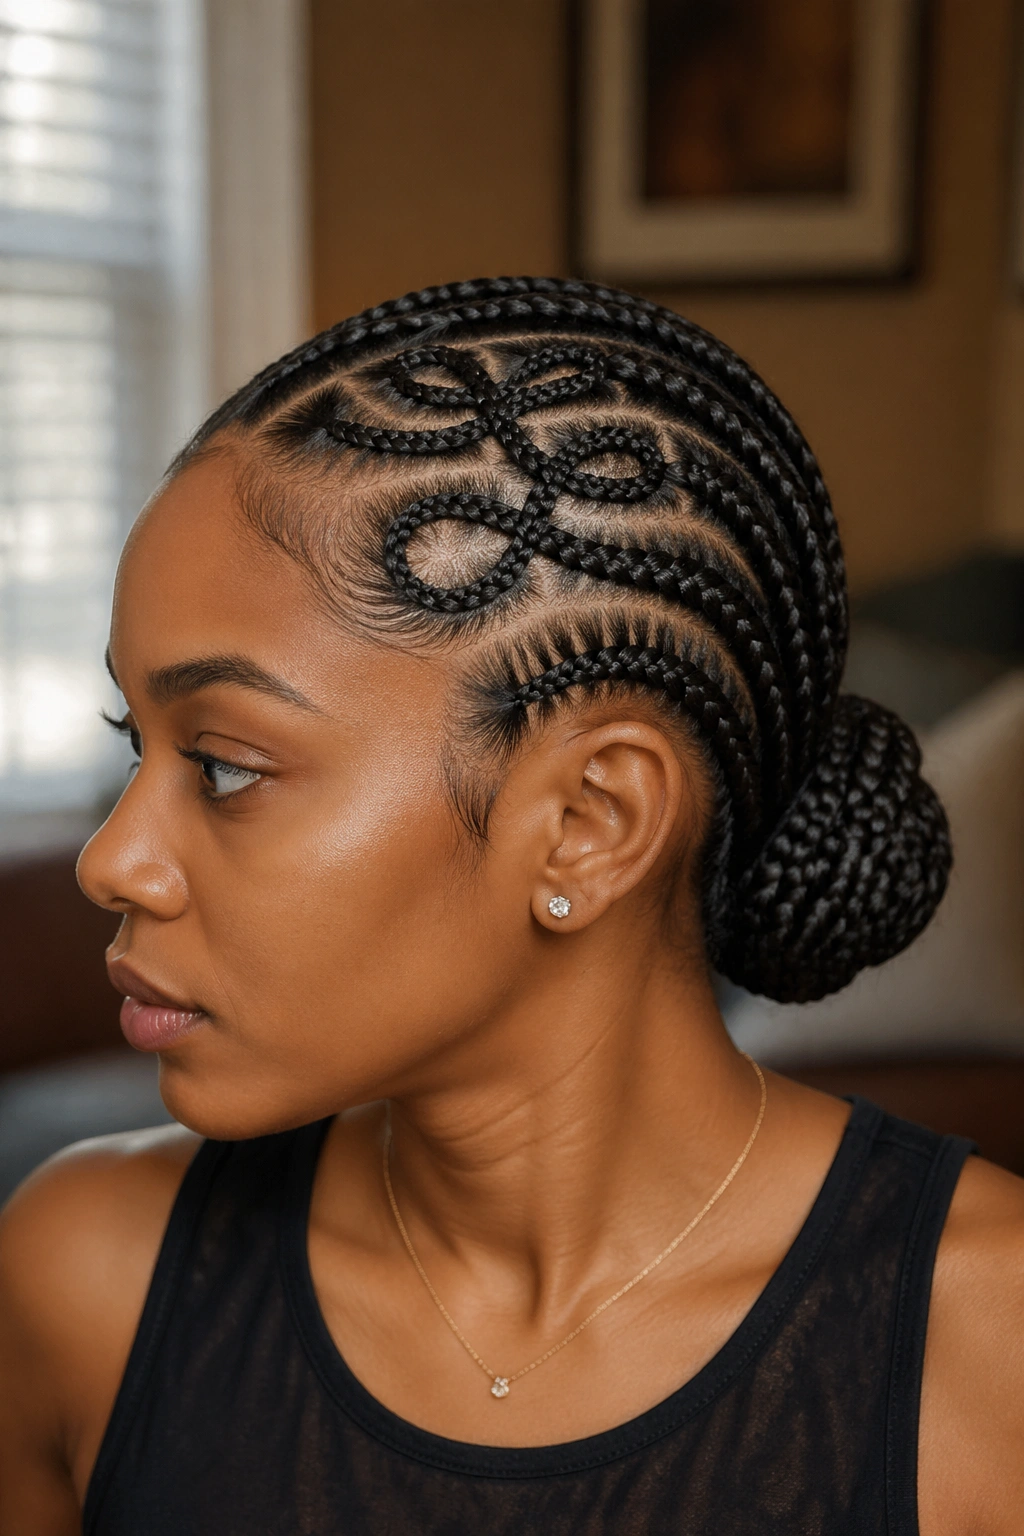
Loop designs incorporate cornrows that curve back on themselves, creating visible loops or circles embedded into the style before the hair gathers into a back bun or roll. This is a more advanced approach — the loop shapes require experienced hands, so self-styling is harder than straightforward cornrowing.
The loops are decorative but don’t compromise protection. Each loop is still a continuous cornrow, just shaped into a curved path across the scalp before rejoining the main pattern. The ends still tuck into the updo’s main structure.
For first-time wearers of this style, start with two or three loops and see how the scale works with your face. Too many loops on a small head turn busy fast.
The style lasts as long as standard cornrow updos — two to three weeks of good wear with maintenance — since the loops are part of the underlying braid structure, not added ornamentation.
22. Simple Elegant Chignon
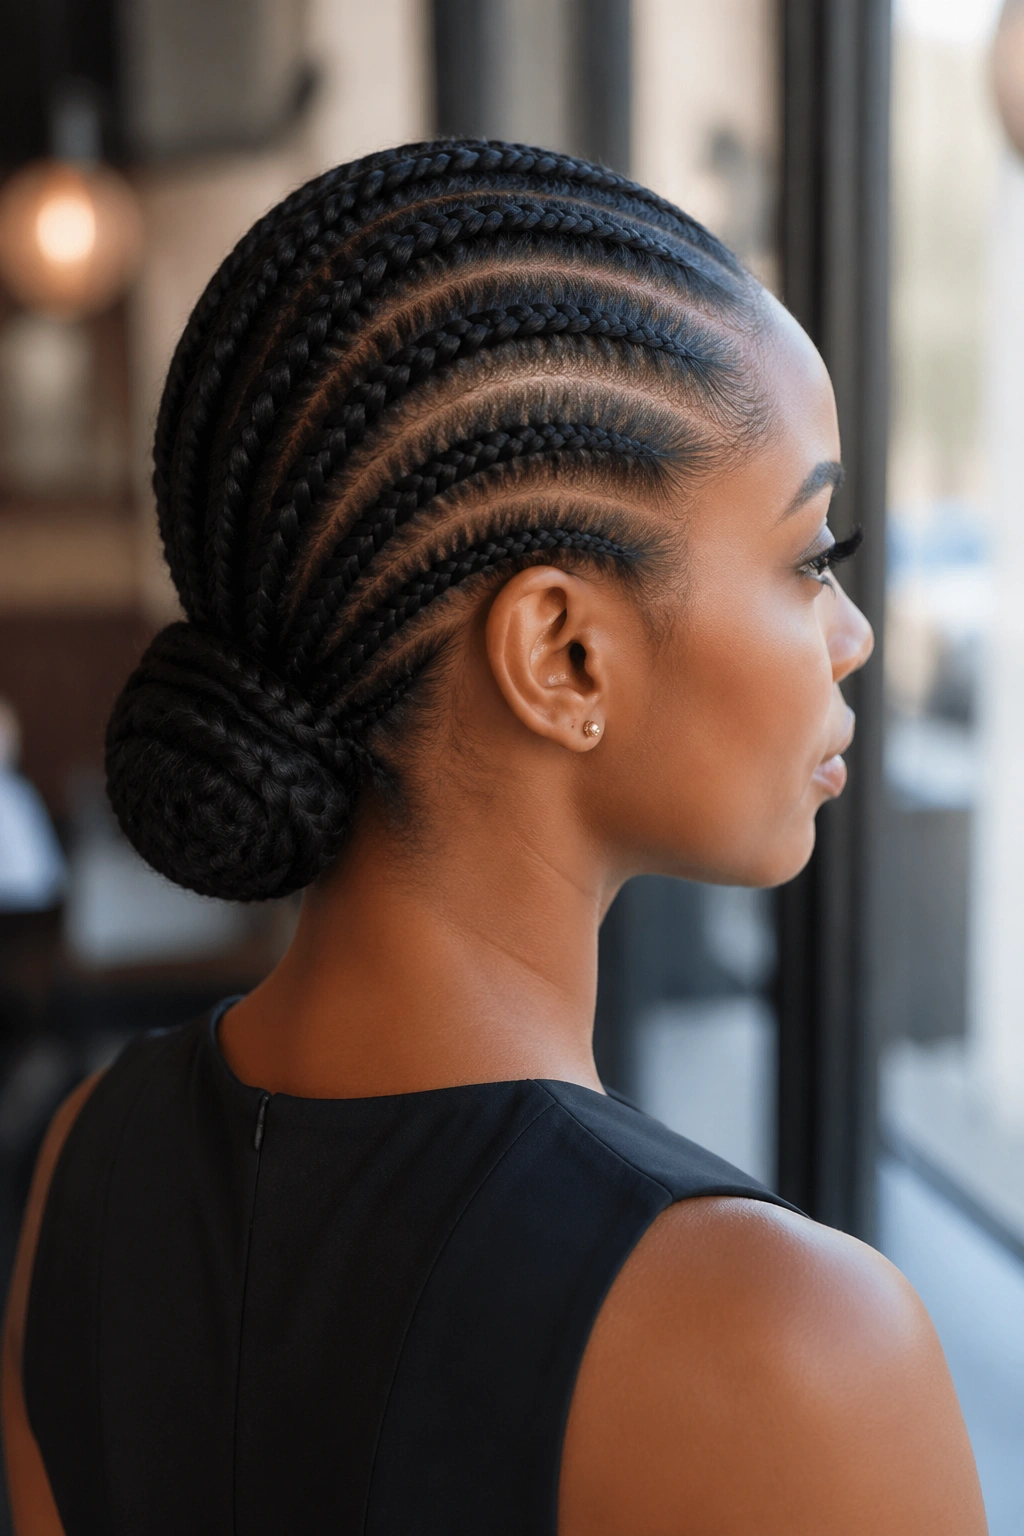
Simplicity has its place. A chignon-style cornrow updo features six to eight cornrows swept into a low, flat, twisted bun at the nape. No elaborate parting, no beads, no added hair necessarily. Just clean structure.
The chignon earns its place on this list because it’s the style that works when you have limited time, when you want something you can wear to any setting, or when you’re coming out of a more complex style and want to rest your hair in something gentle.
Wrap the bun rather than pinning it — a wrapped chignon lays flatter against the head and distributes tension across the whole bun rather than on individual pins. Secure with two or three hair pins placed along the wrapped bun’s perimeter.
This style is the one I return to after wearing heavier updos for weeks. It lets my scalp breathe while still looking put-together.
Keeping the Style Looking Fresh
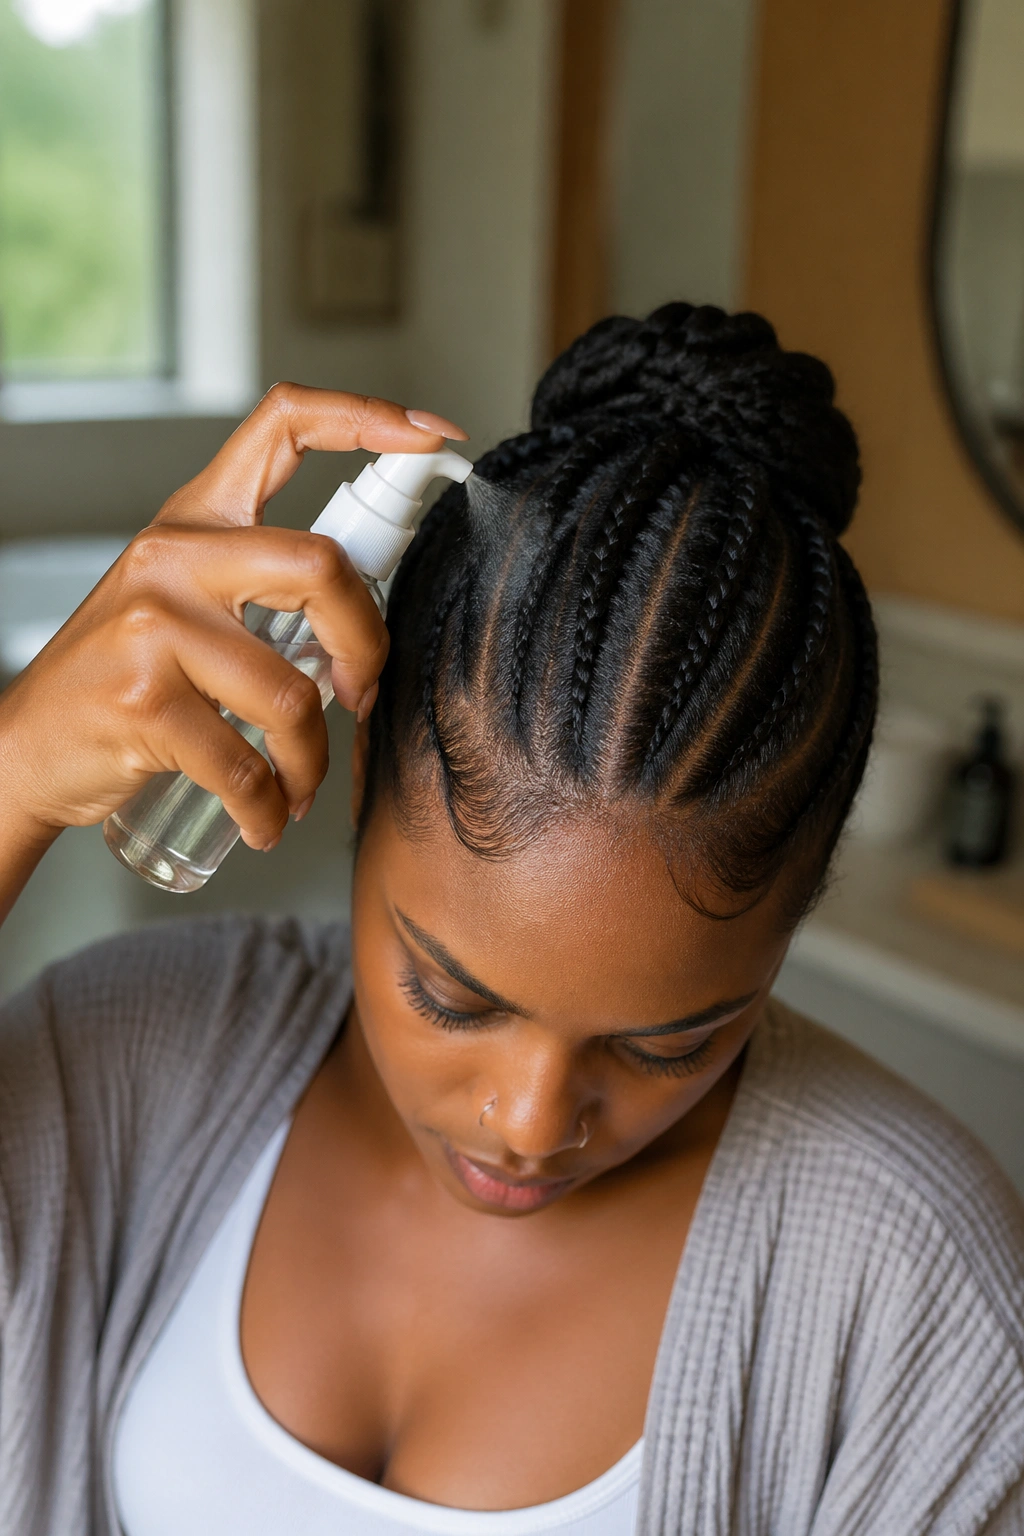
Weeks two and three are where most cornrow updos start looking rough. The fix is maintenance, not reinstall. Mist the scalp with a diluted leave-in spray every second day. Not soaked — just damp enough to refresh the cornrow texture.
A scalp oil applied with a nozzle bottle (not rubbed from fingers, which spreads unevenly) goes between the cornrows and keeps the scalp from flaking. Use a jojoba, castor, or tea tree blend, depending on your scalp’s tendencies. Oily scalps prefer jojoba. Dry scalps respond to castor.
For fuzz at the hairline, a quick edge touch-up with gel and a small brush every four to five days maintains the look. Don’t over-gel. Buildup at the hairline looks worse than fuzz.
Takedown Without Breakage
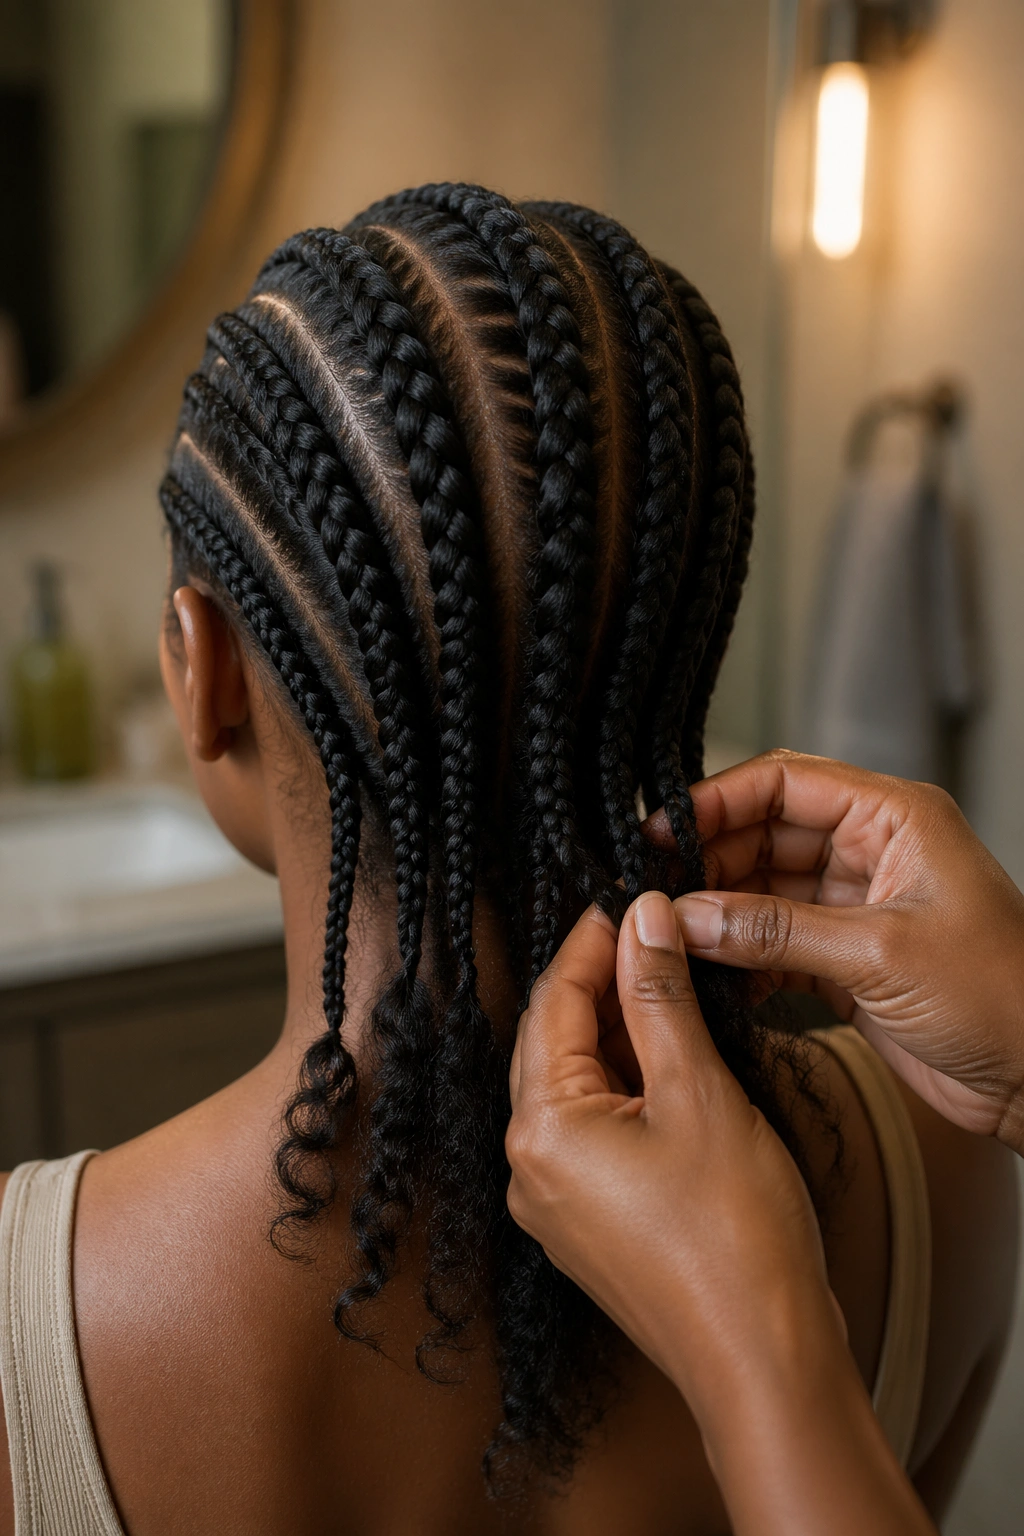
When it’s time to take the style out, work in sections from the back forward. Use a seam ripper or blunt needle to unpick the end of each cornrow, then unravel by hand rather than combing through. Combing braided hair is how you tear it out.
Pre-shampoo with an oil rinse — coconut or olive, warmed slightly and massaged through the cornrows before unraveling. The oil loosens shed hair trapped in the braids and softens the whole structure for easier takedown.
Once fully unraveled, detangle with your fingers first, then a wide-tooth comb, then a detangling brush. Never skip the finger detangling. It’s where you find and work through the matted spots before mechanical combs make them worse.
Wash with a sulfate-free shampoo, deep condition under heat for at least 30 minutes, and air dry before deciding on the next style. Your hair needs a rest day between heavy protective styles, even when you’re tempted to reinstall immediately.
When to Choose a Cornrow Updo Over Other Styles
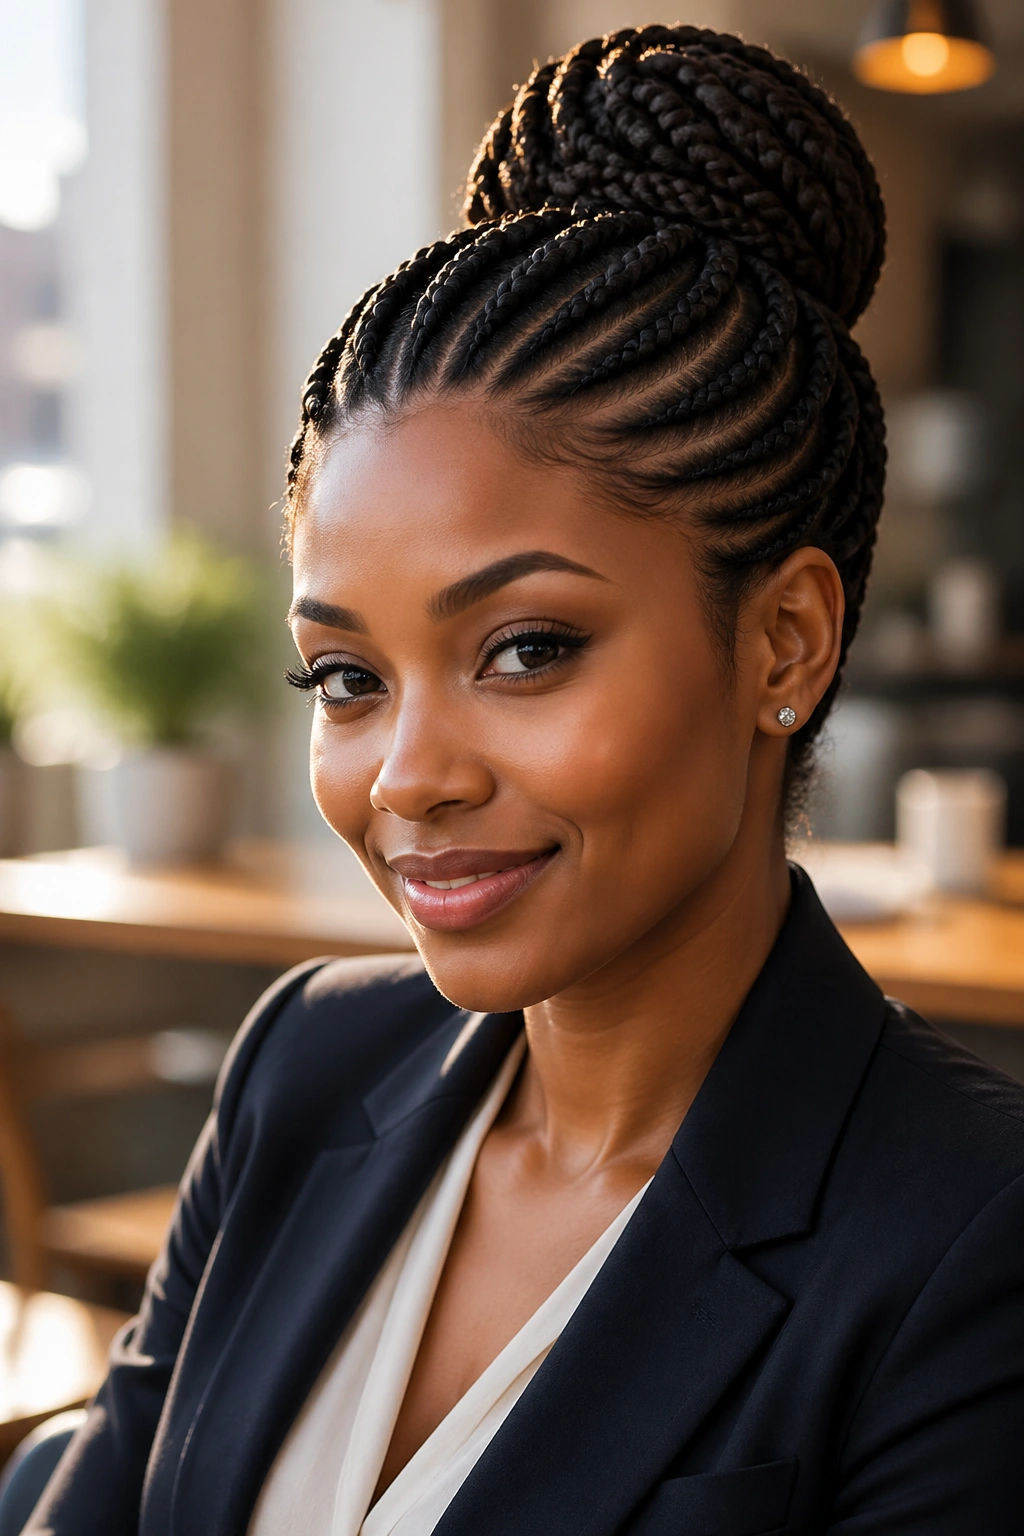
Cornrow updos beat loose braids for professional settings, athletic periods, and travel. They beat twists for longevity — a well-installed cornrow updo outlasts twists by a week or more.
They’re less flexible than box braids. You can’t take a cornrow updo “down” partway and wear the hair loose; the whole style is a commitment. For someone who likes changing up their look every few days, box braids or crochet braids might fit better.
But for someone who wants low-maintenance, high-protection wear for a defined period, cornrow updos are hard to beat. The style sits close to the scalp, protects the ends completely, and gives you a polished look you don’t have to think about every morning.
Mistakes That Cost You Wear Time
Starting with damp hair instead of dry. Cornrows installed on damp hair loosen as the hair dries and settles, leading to slippage within the first week. Always fully dry before braiding.
Over-tightening at the hairline. The tension should feel firm but not painful. Pain is a sign you’re damaging the follicles, and you’ll pay for it in thinning edges.
Skipping the satin. A single night sleeping on cotton can add visible fuzz and frizz to even the cleanest cornrow updo. Bonnet or pillowcase — pick one and commit.
Waiting too long to take down. Past four weeks, most cornrow updos start matting at the roots with shed hair. Takedown gets harder, breakage gets worse, and the whole point of protective styling gets undermined.
A cornrow updo done right is one of the best tools in a protective styling rotation. The 22 styles above cover a range of formal, casual, simple, and intricate — enough variety that you can rotate through without repeating for months. Pick the one that fits your next few weeks, prep properly, and let the style do its job.
