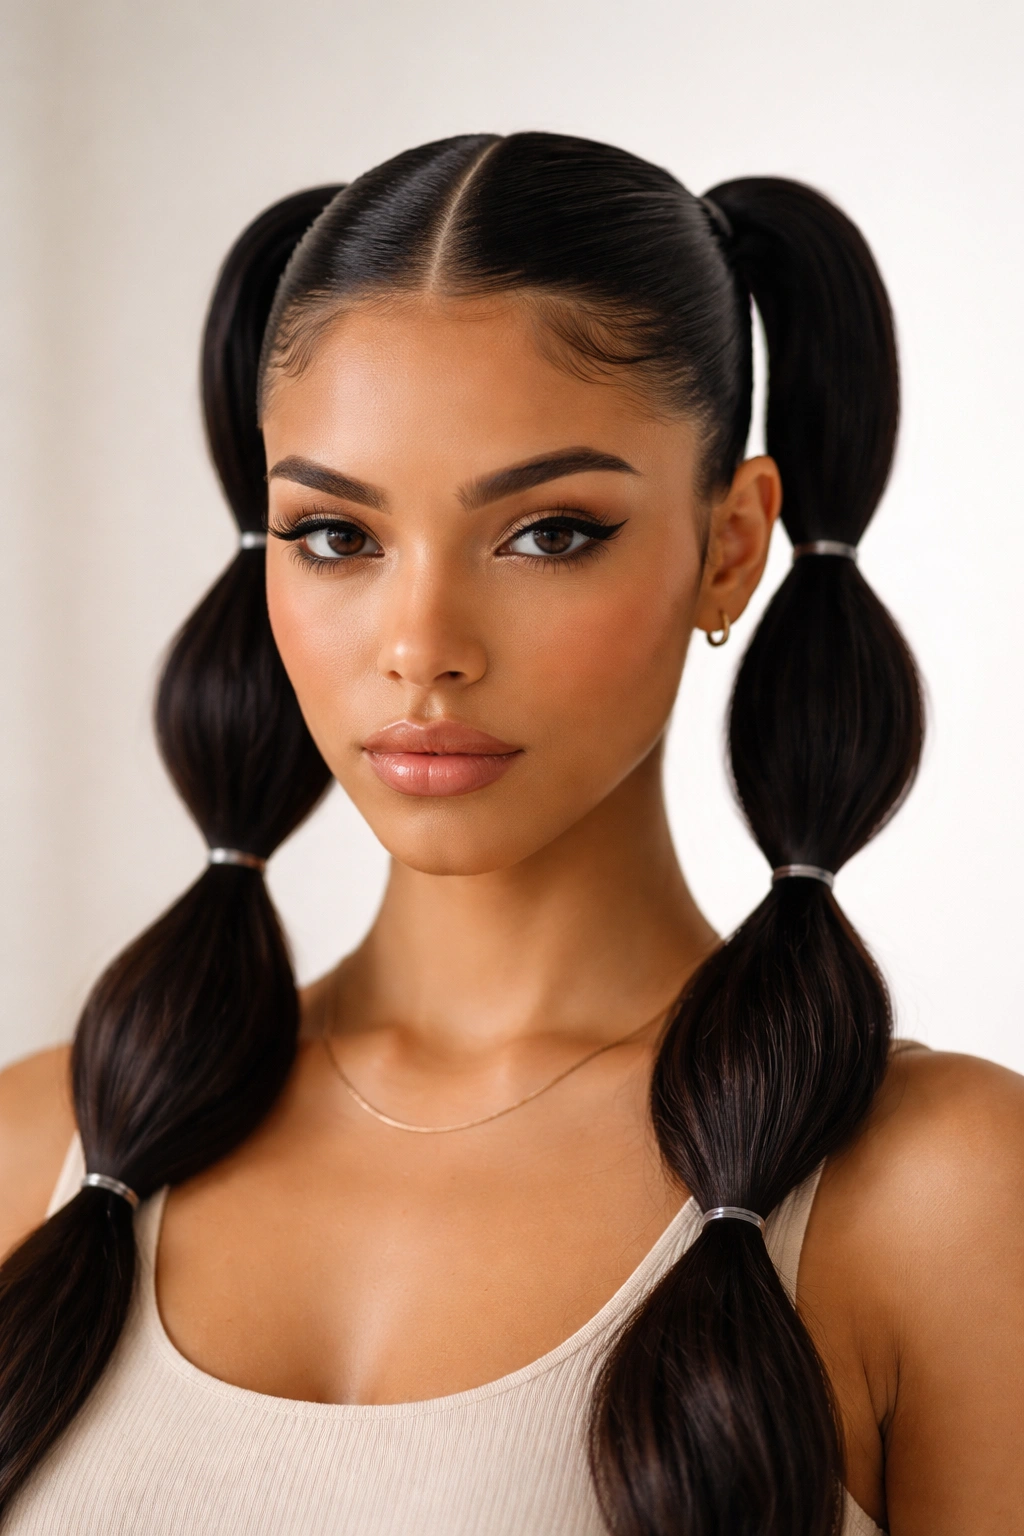
Double bubble braid ponytails have a funny habit of looking more put together than the effort they actually take. Two or three elastics, a little sectioning, and suddenly a plain ponytail has shape, bounce, and a playful edge.
That’s the charm.
What makes the style so useful is the way it changes with tiny adjustments. Slide the first elastic a little higher, and the whole ponytail feels sharper. Leave more room between the bands, and the bubbles look fuller and softer. If you’ve ever wanted a braid-inspired ponytail that doesn’t demand perfect hands or a long salon mirror session, this is a smart place to start.
The best part is how forgiving it is. A bubble section that isn’t perfectly even can still look intentional once you tug it out a little, and that makes these styles friendly for straight hair, wavy hair, thick hair, fine hair, and pretty much anything in between. The look can be sporty, girly, sleek, loud, or low-key, which is why I keep coming back to it when a ponytail needs a little more life.
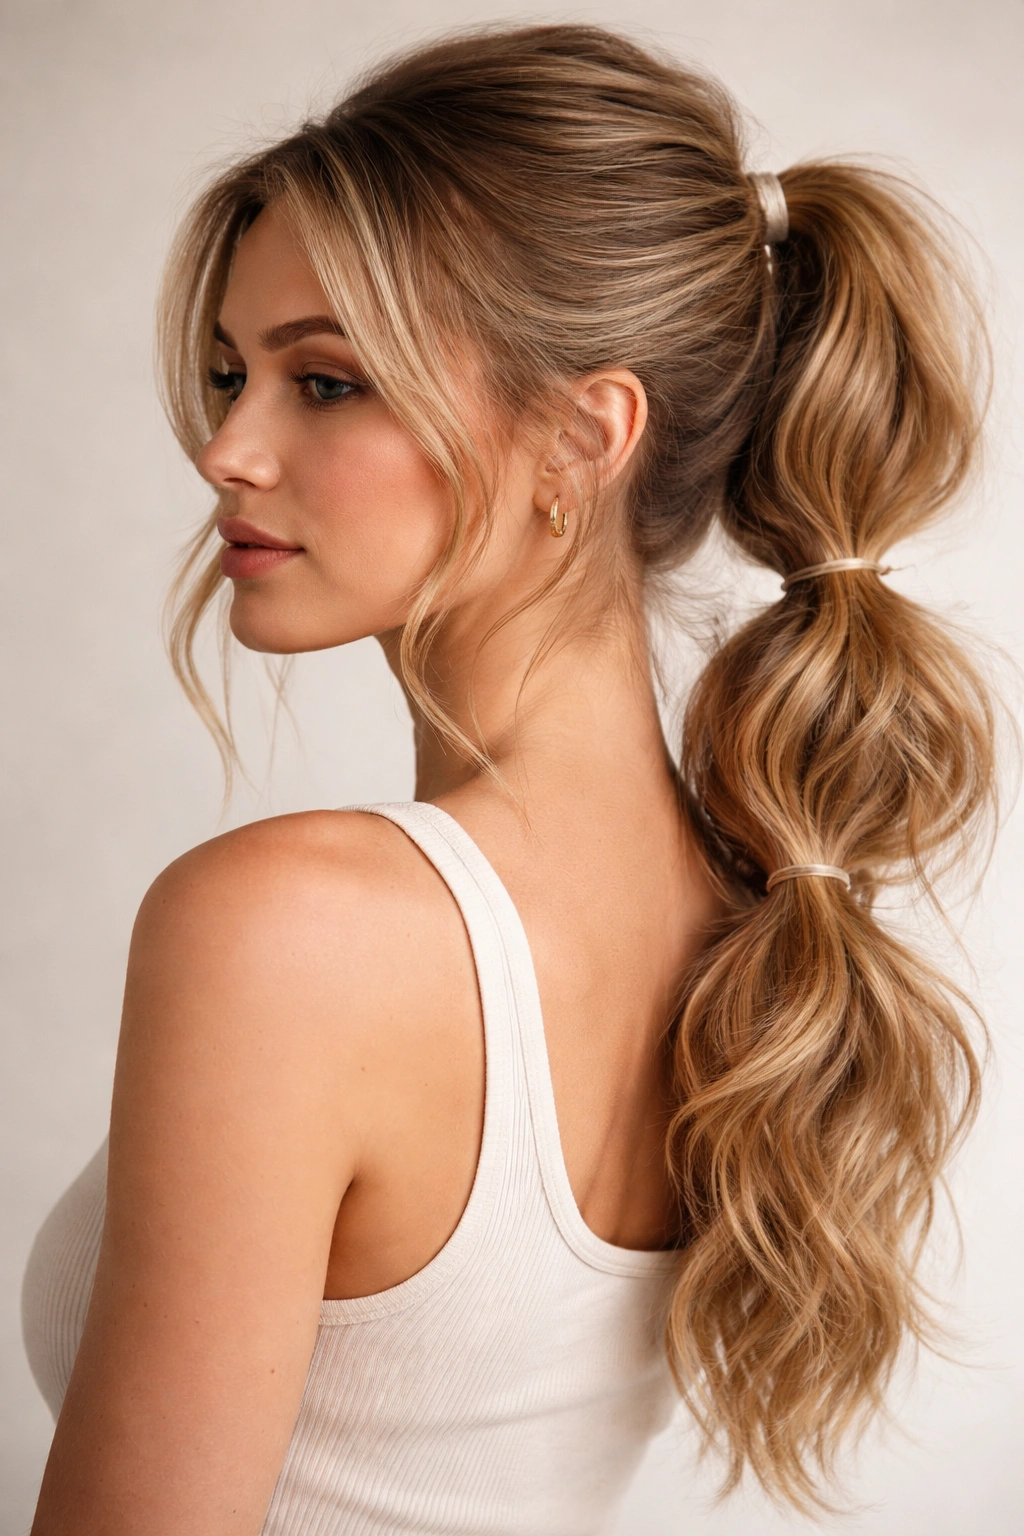
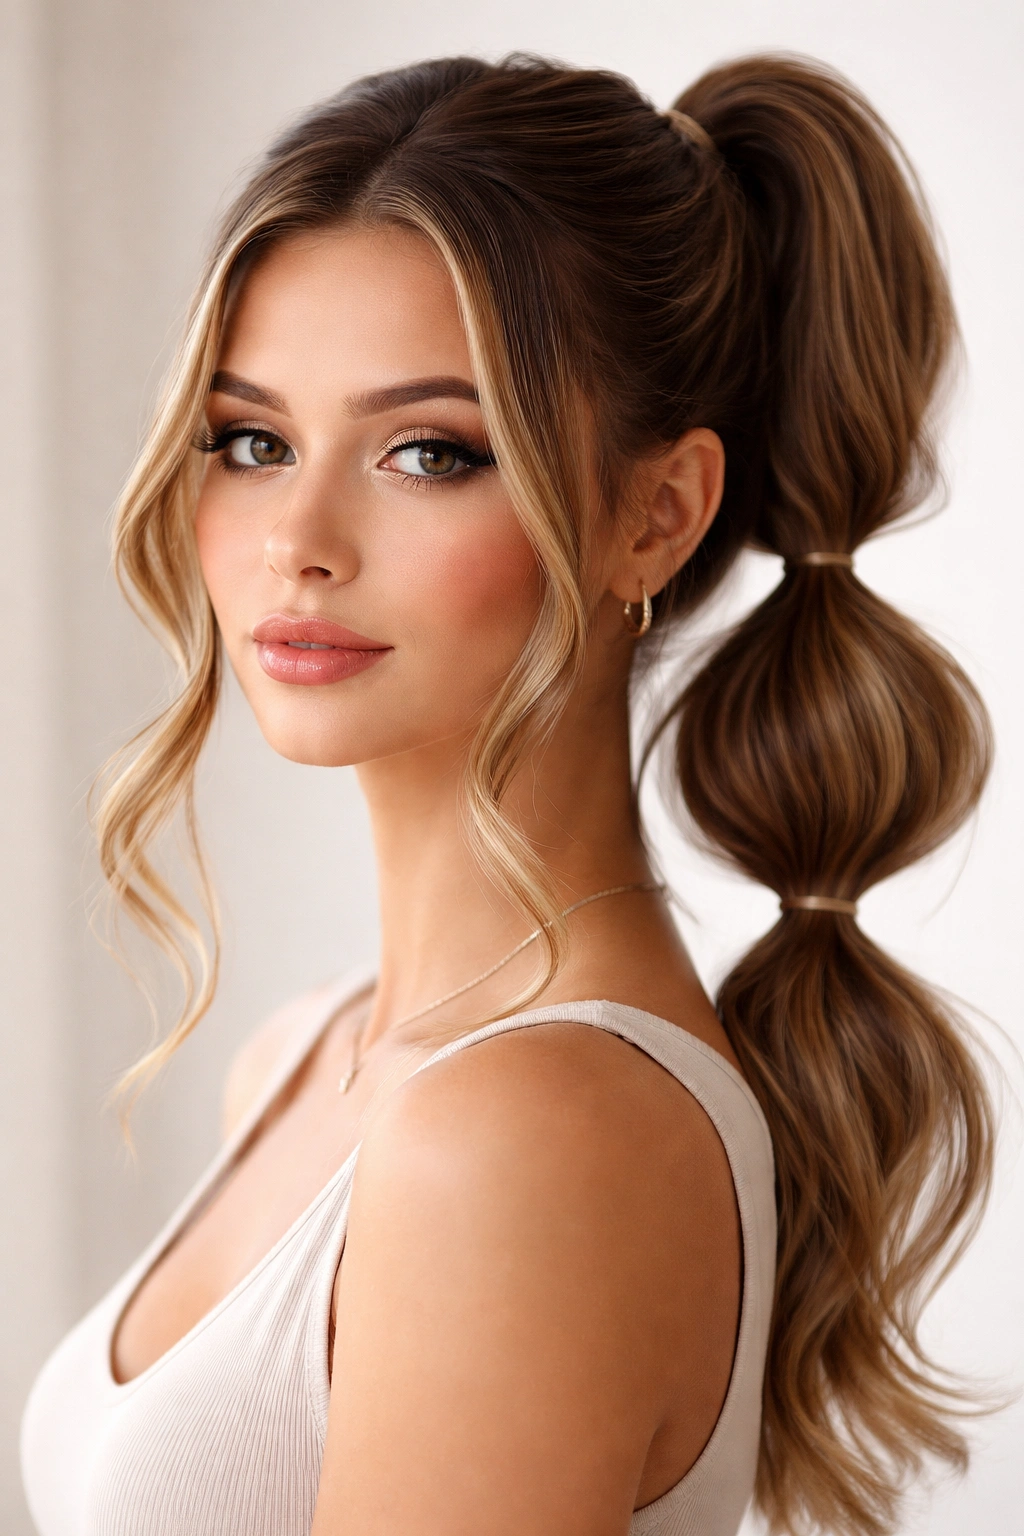
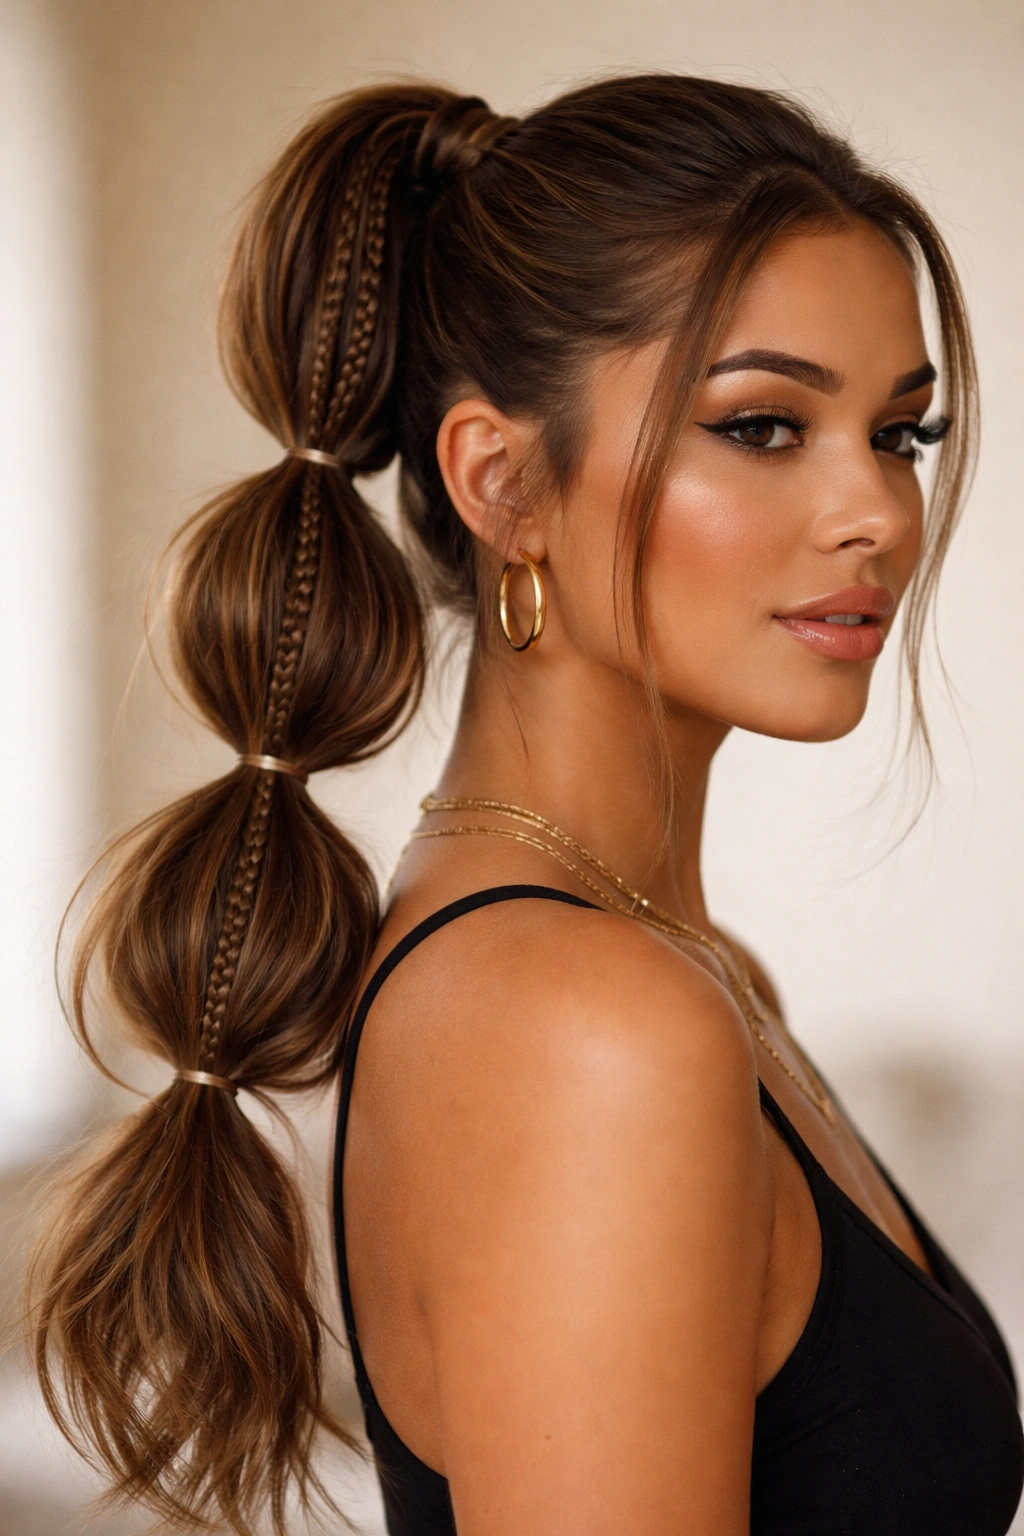
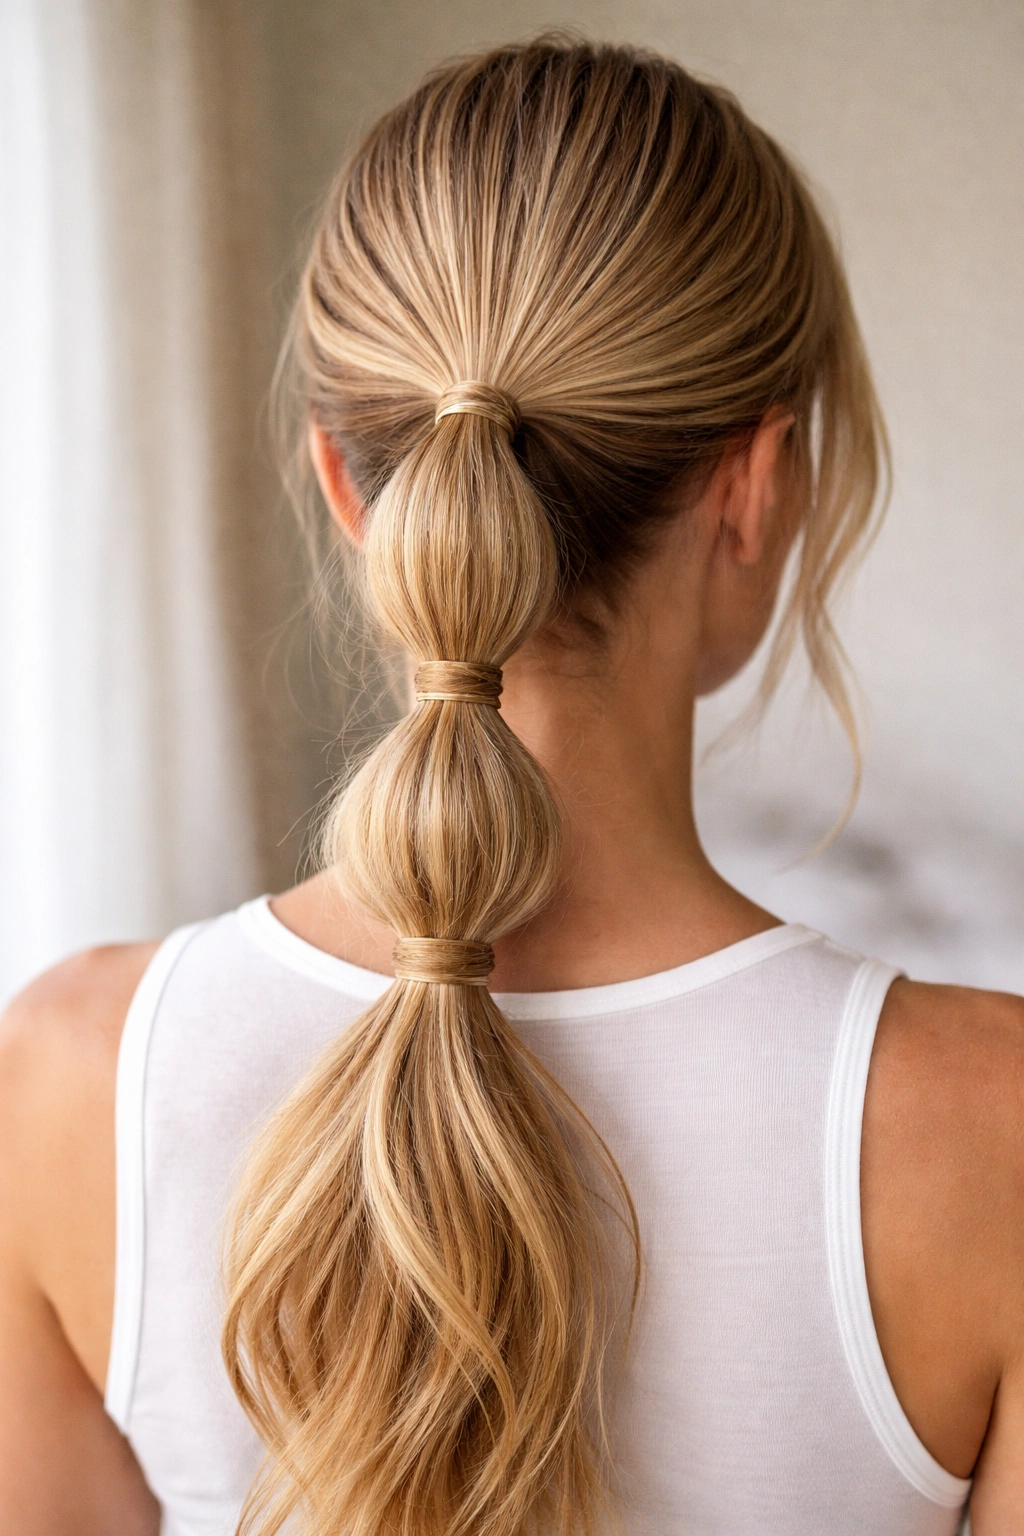
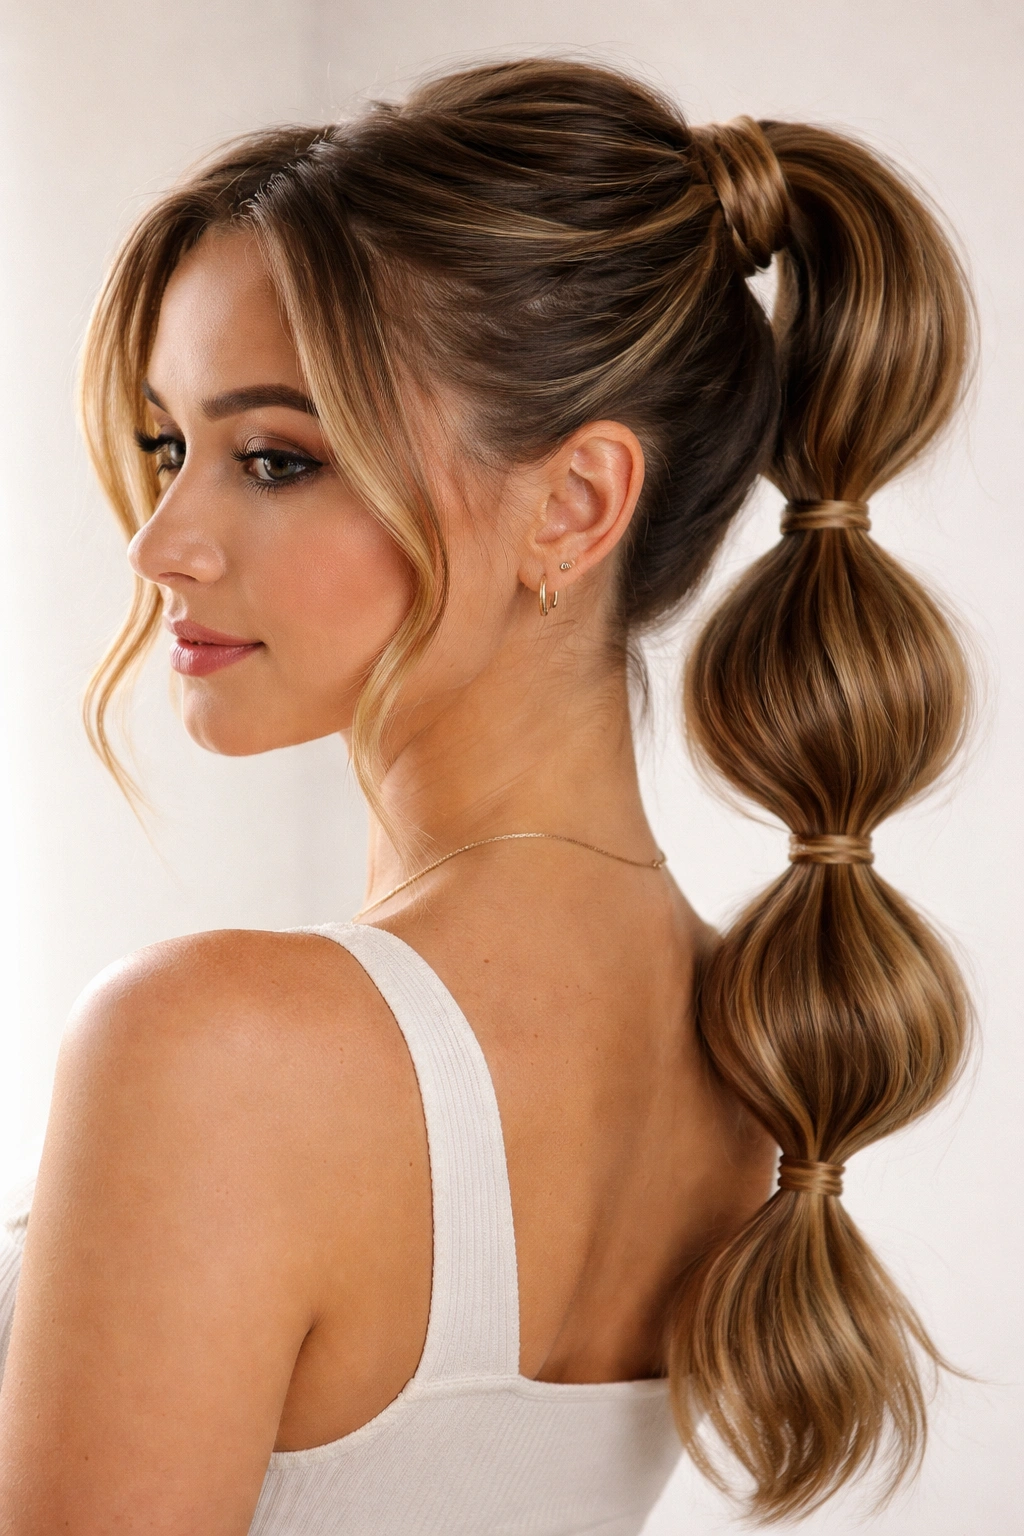
1. Sleek High Double Bubble Ponytail
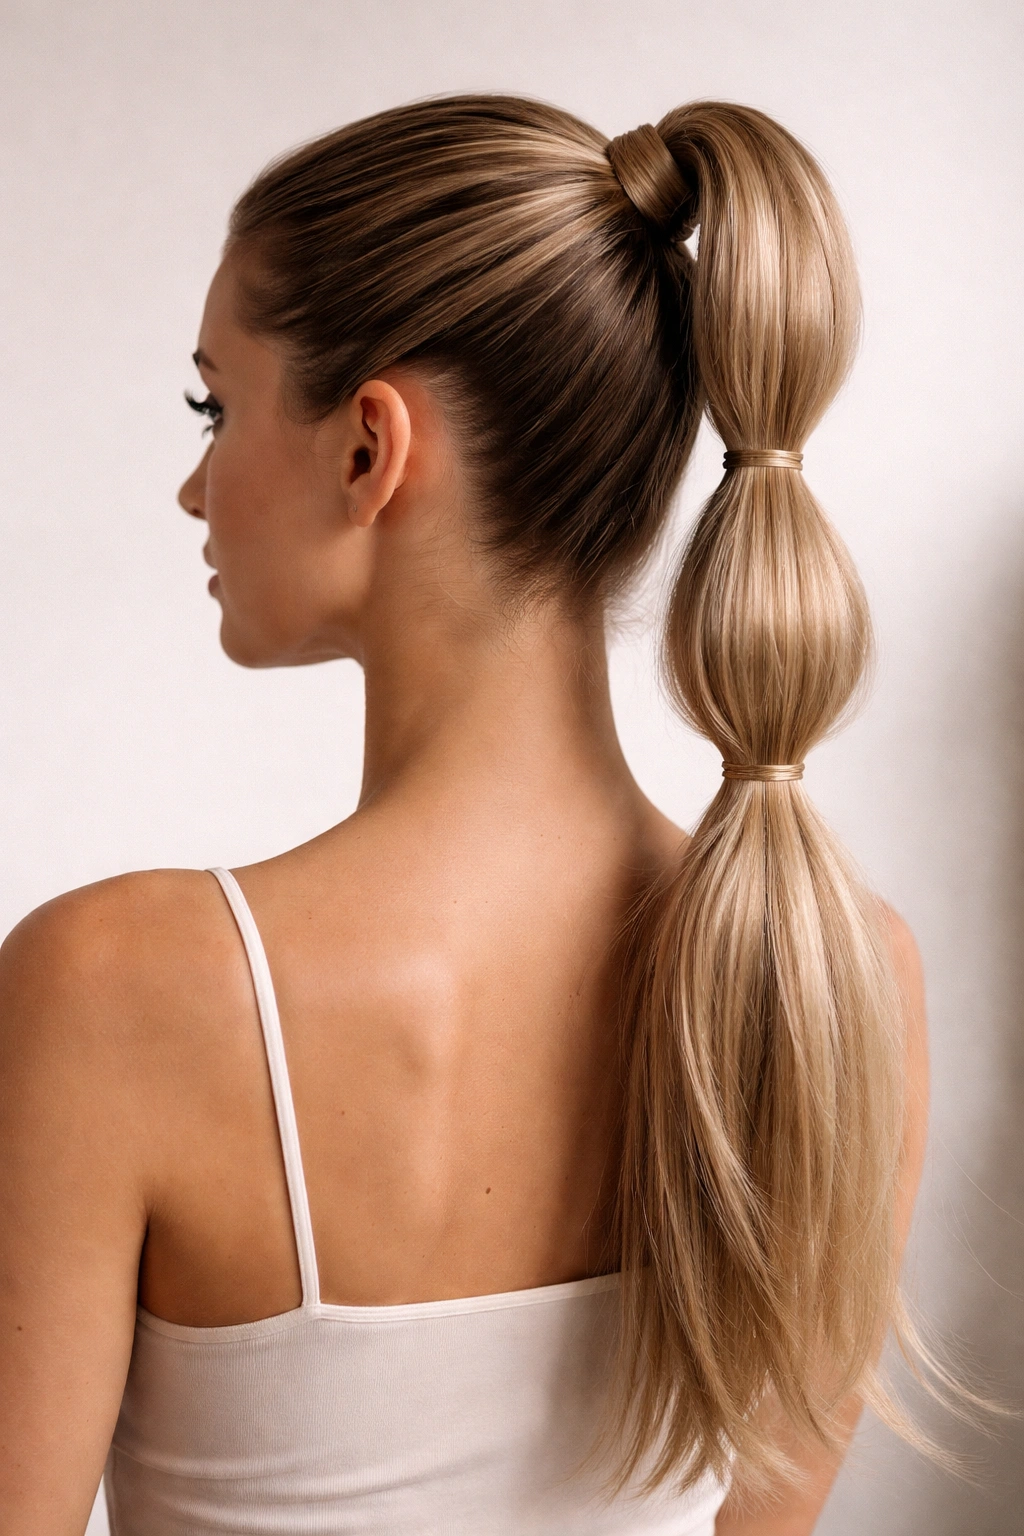
A sleek high double bubble braid ponytail is the version I reach for when I want the style to look sharp from the front and playful from the back. Pull the ponytail up near the crown, smooth the roots with a boar-bristle brush, and use a light gel or cream only at the hairline so the finish stays clean instead of stiff.
Why the high placement works
The higher base gives the bubbles room to show off. If you place the elastics about 1½ to 2 inches apart, the bubbles stay rounded without drooping, and that spacing also keeps the ponytail from looking crowded. A thin strand wrapped around the first elastic makes the whole thing look neater.
- Use 3 to 5 clear elastics for shoulder-length hair.
- Add a fifth or sixth elastic if your hair is long and heavy.
- Keep the first section tight; the lower bubbles can be a touch looser.
- Finish with a mist of shine spray, not a heavy hairspray cloud.
My favorite detail: leave the ends straight instead of curling them. The contrast makes the shape look cleaner.
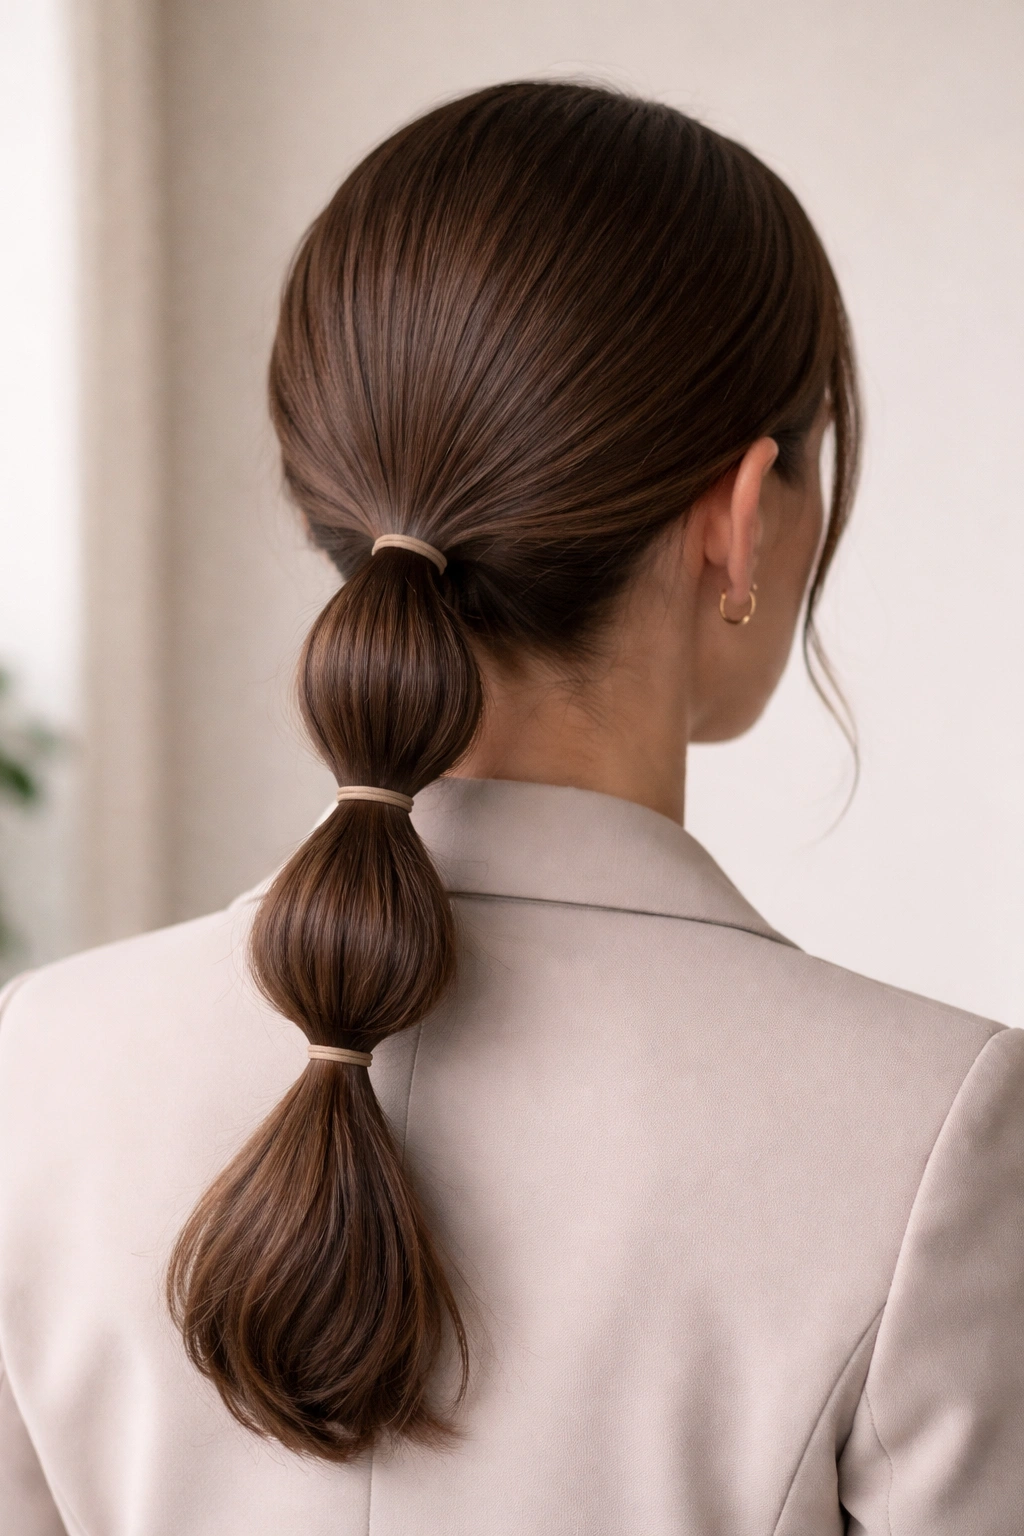
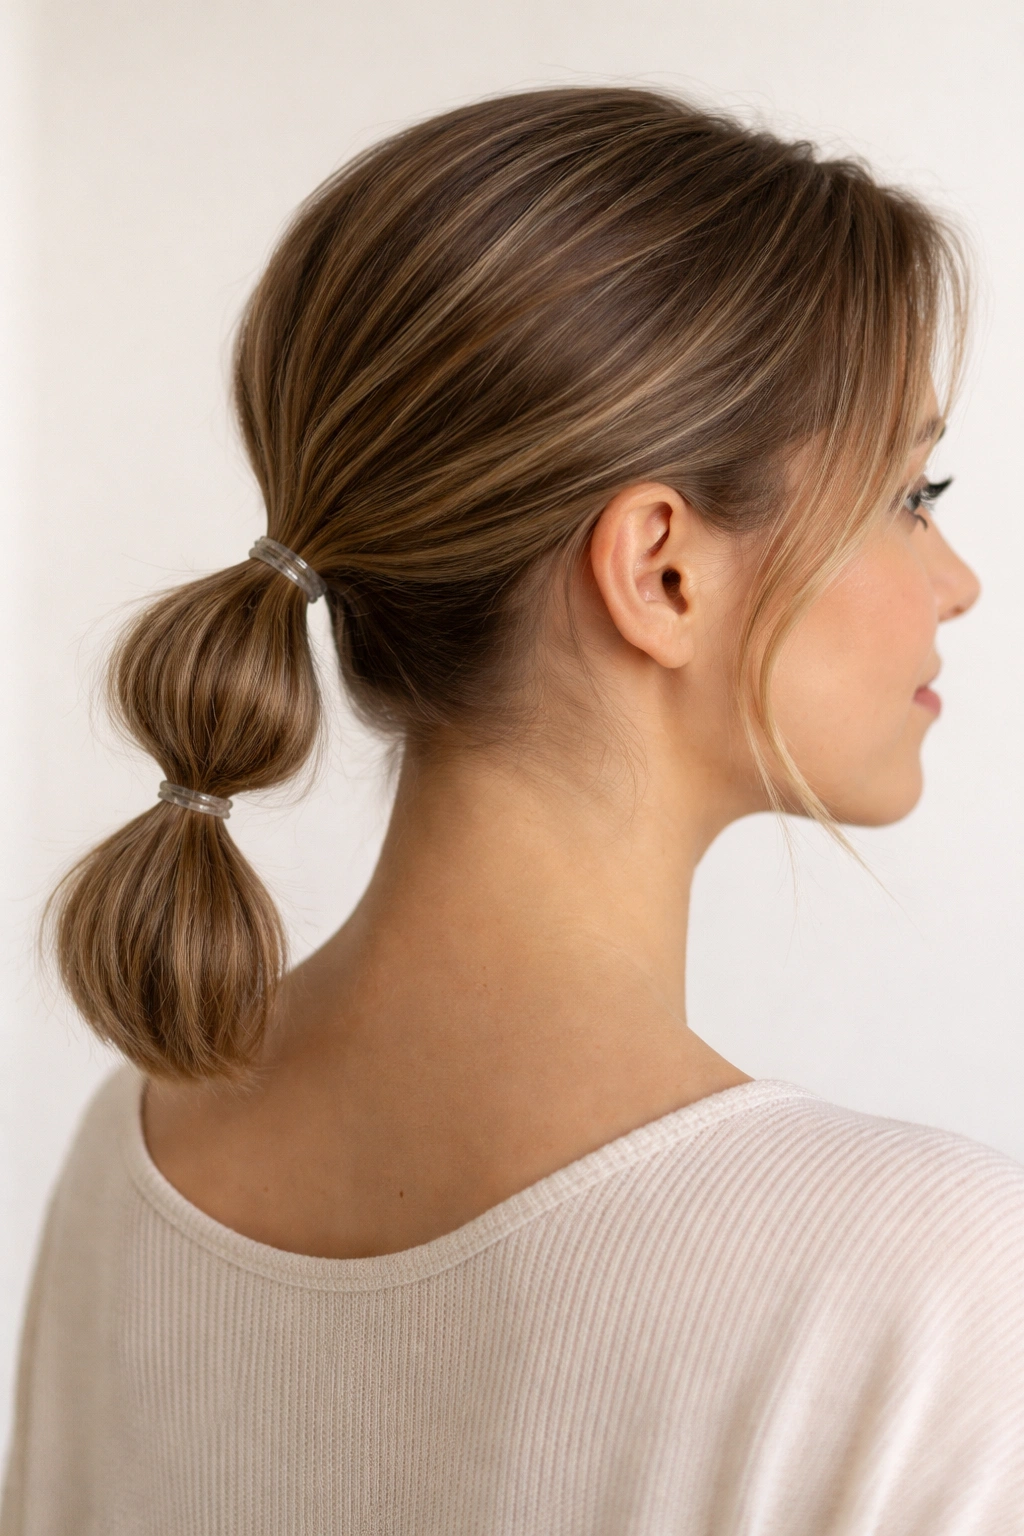
2. Low Double Bubble Ponytail at the Nape
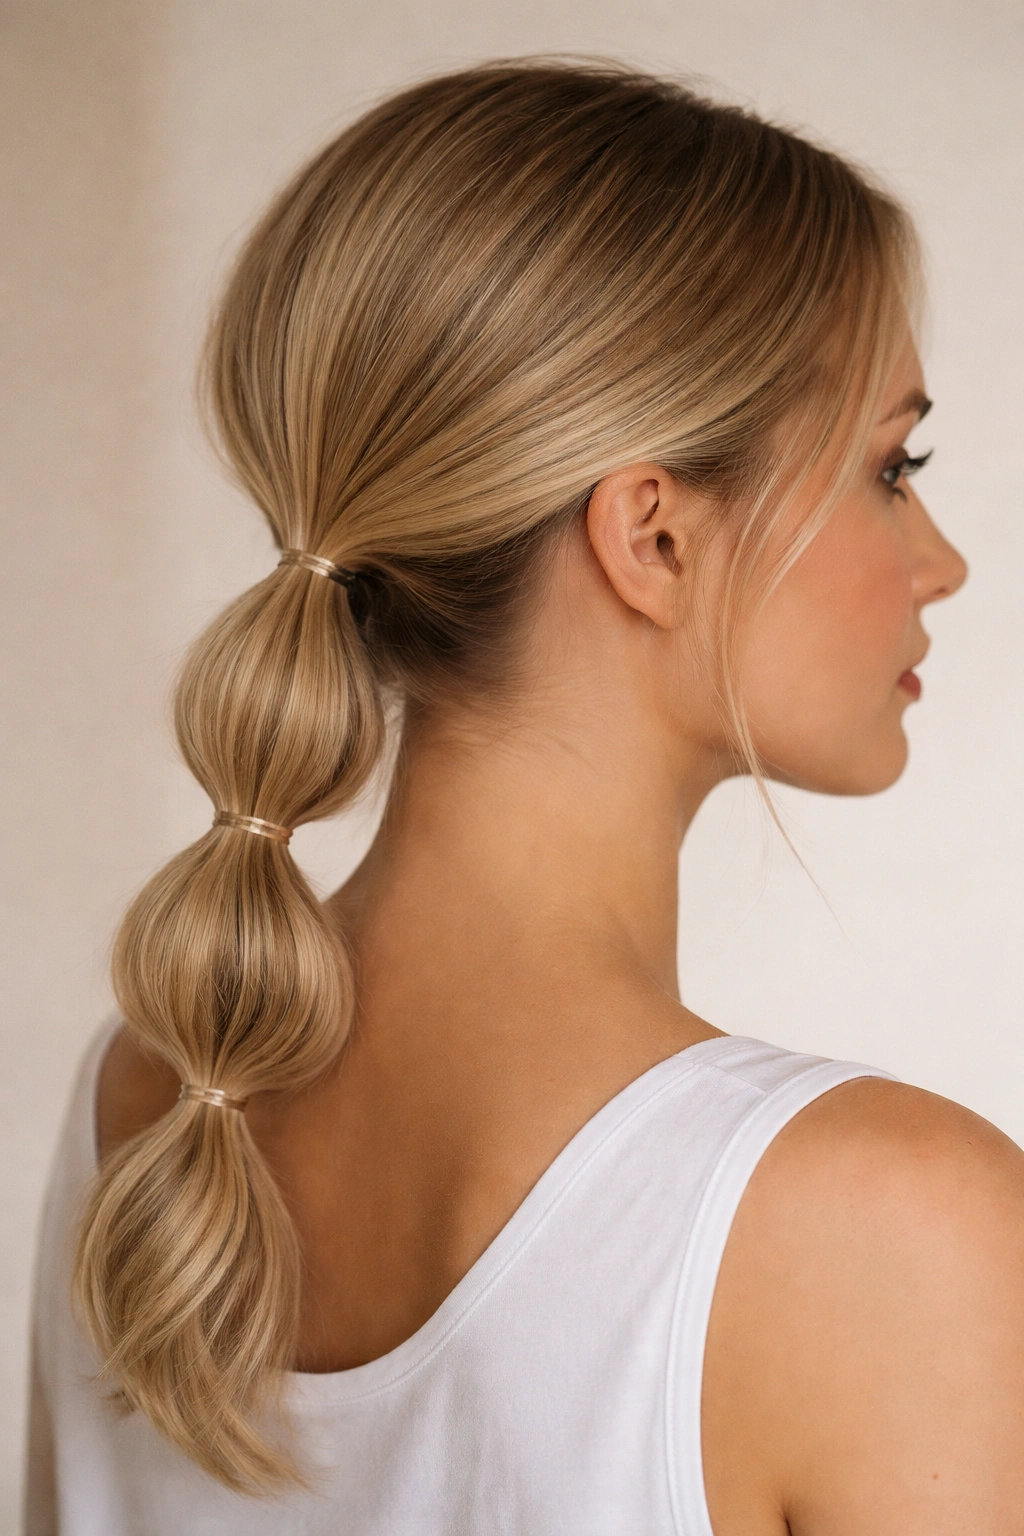
Want something softer at the nape? A low double bubble ponytail sits close to the neck and feels calmer than the high version, which is handy when you want the bubbles to show without shouting for attention. It also works well with turtlenecks, collared shirts, and jackets that would fight a higher ponytail.
A center part gives this style a tidy line, but a deep side part can make it feel a little less formal. Either way, keep the bubbles compact and place the elastics about 2 inches apart so the tail doesn’t puff out too quickly.
The low position is also kinder to fine hair. There’s less gravity pulling on the base, so the ponytail tends to hold its shape longer. If your hair slips, rough up the roots with dry shampoo first and then secure the ponytail with one small hidden pin under the elastic.
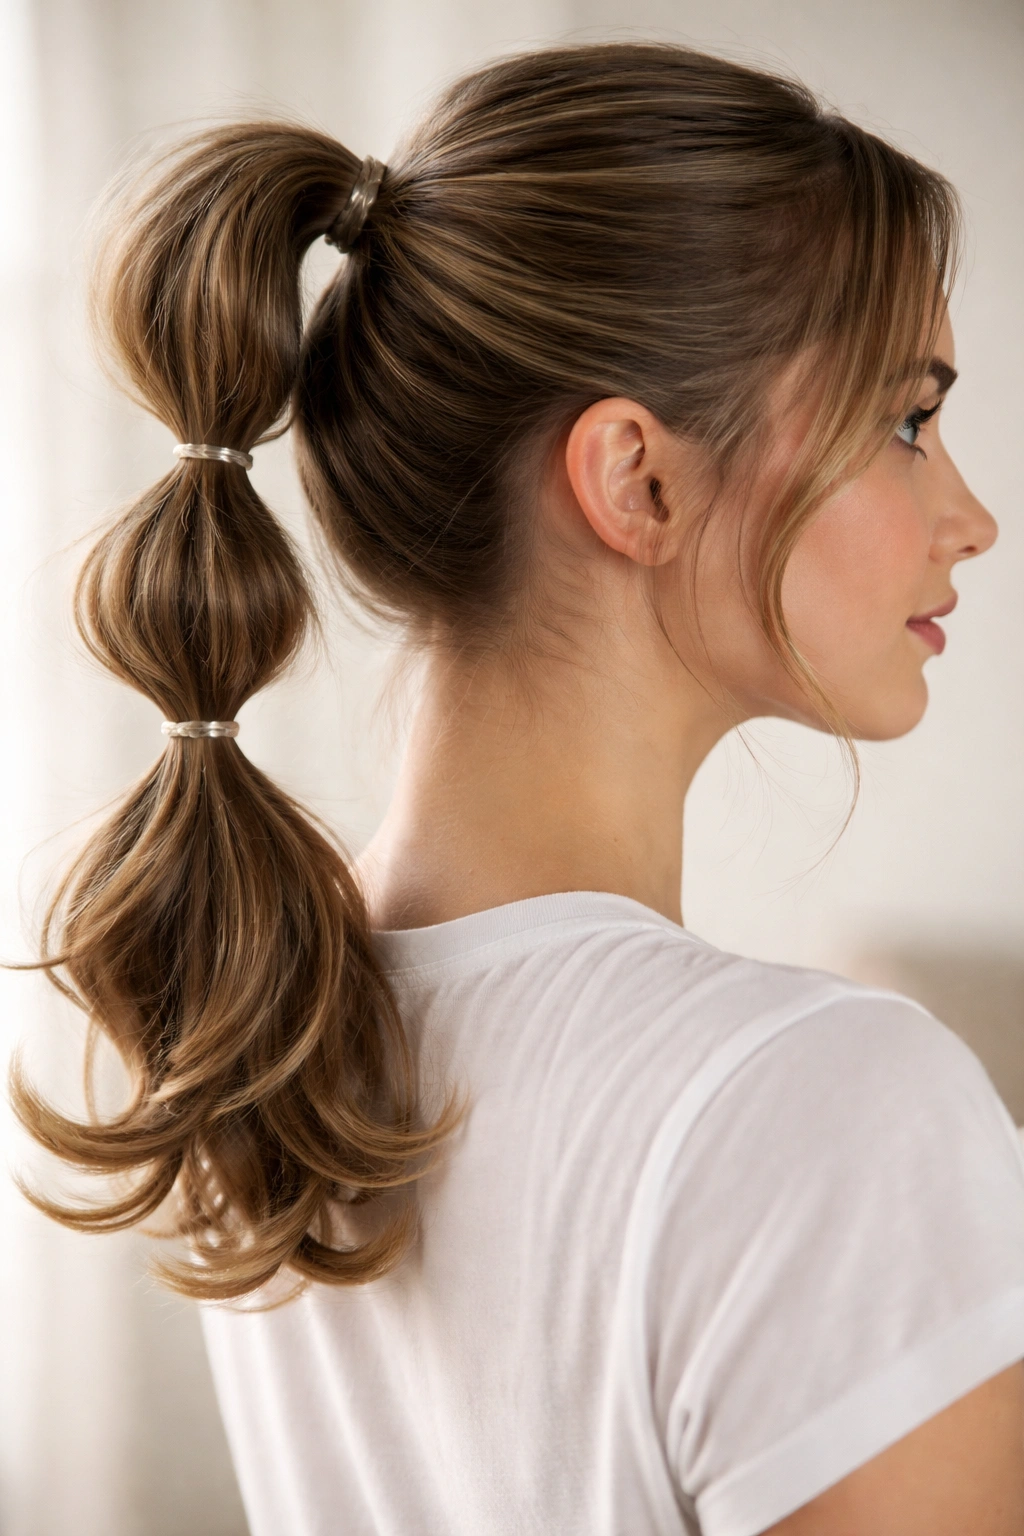
3. Half-Up Double Bubble Ponytail for Medium Hair

Half-up bubble braids are a good trick when your hair is too short for a big full ponytail but long enough to look awkward hanging loose all the time. Pull back the top section from temple to temple, secure it, then add two or three bubble sections down the tail while the rest of the hair stays down.
It’s a nice balance. The top half gives structure, and the loose lengths below keep the style from looking boxy or overworked. On medium hair, this version usually looks best when the first bubble starts about 2 inches below the elastic and the lower bubbles are slightly smaller.
If you want the finished look to feel softer, curl the loose hair at the bottom with a 1-inch wand. If you want it cleaner, keep the lower half straight and let the texture come only from the bubbles. Both options work; the mood shifts fast.
4. Textured Double Bubble Ponytail with Soft Waves
The textured version is the one I’d choose if your hair already has a bend or if you don’t want to fight it into sleek submission. A little wave gives the bubbles a fuller outline, and the style tends to look less rigid than the polished versions. That matters.
Prep with a dry texturizing spray or a light mousse, then rough-dry the roots before you tie in the ponytail. Don’t smooth every strand flat. That’s the mistake that makes bubble ponytails look too engineered.
You can even make the sections slightly uneven on purpose. One bubble can be a hair wider than the next, and the style still reads as deliberate if the overall line stays straight. I like this version for second-day hair because the texture holds the shape without needing much teasing.
5. Side-Swept Double Bubble Braid Ponytail
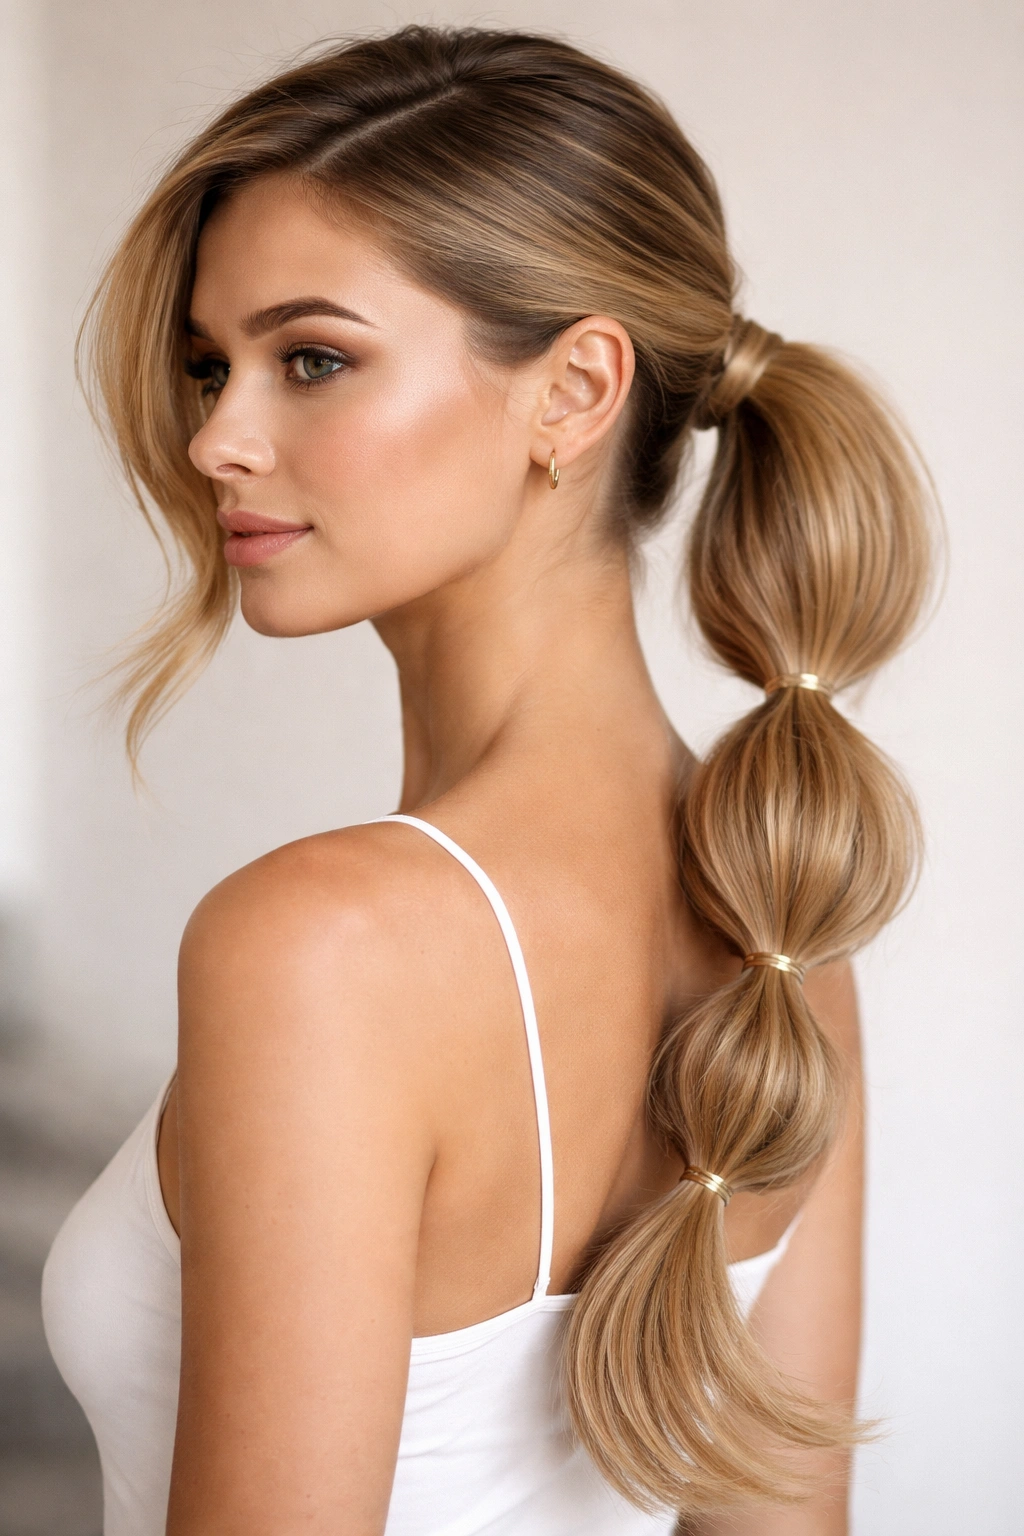
A side part changes the whole story. With a side-swept bubble braid ponytail, the tail falls diagonally instead of straight down the center, which makes the style feel a little more energetic and less expected. It’s especially good if you wear one statement earring or a collar with an angled edge.
What makes the side sweep stand out
The movement starts before the ponytail even begins. Brush the hair toward the side part, gather it low and off-center, and let the bubbles follow that line. You do not need a dramatic sweep; even a small offset makes the shape look more interesting.
A few people overdo the asymmetry and end up with a lopsided tail. Keep the base clean, then let the visual shift come from the part and the ponytail direction, not from pulling the whole head of hair sideways.
6. Sporty Double Bubble Ponytail for Busy Days
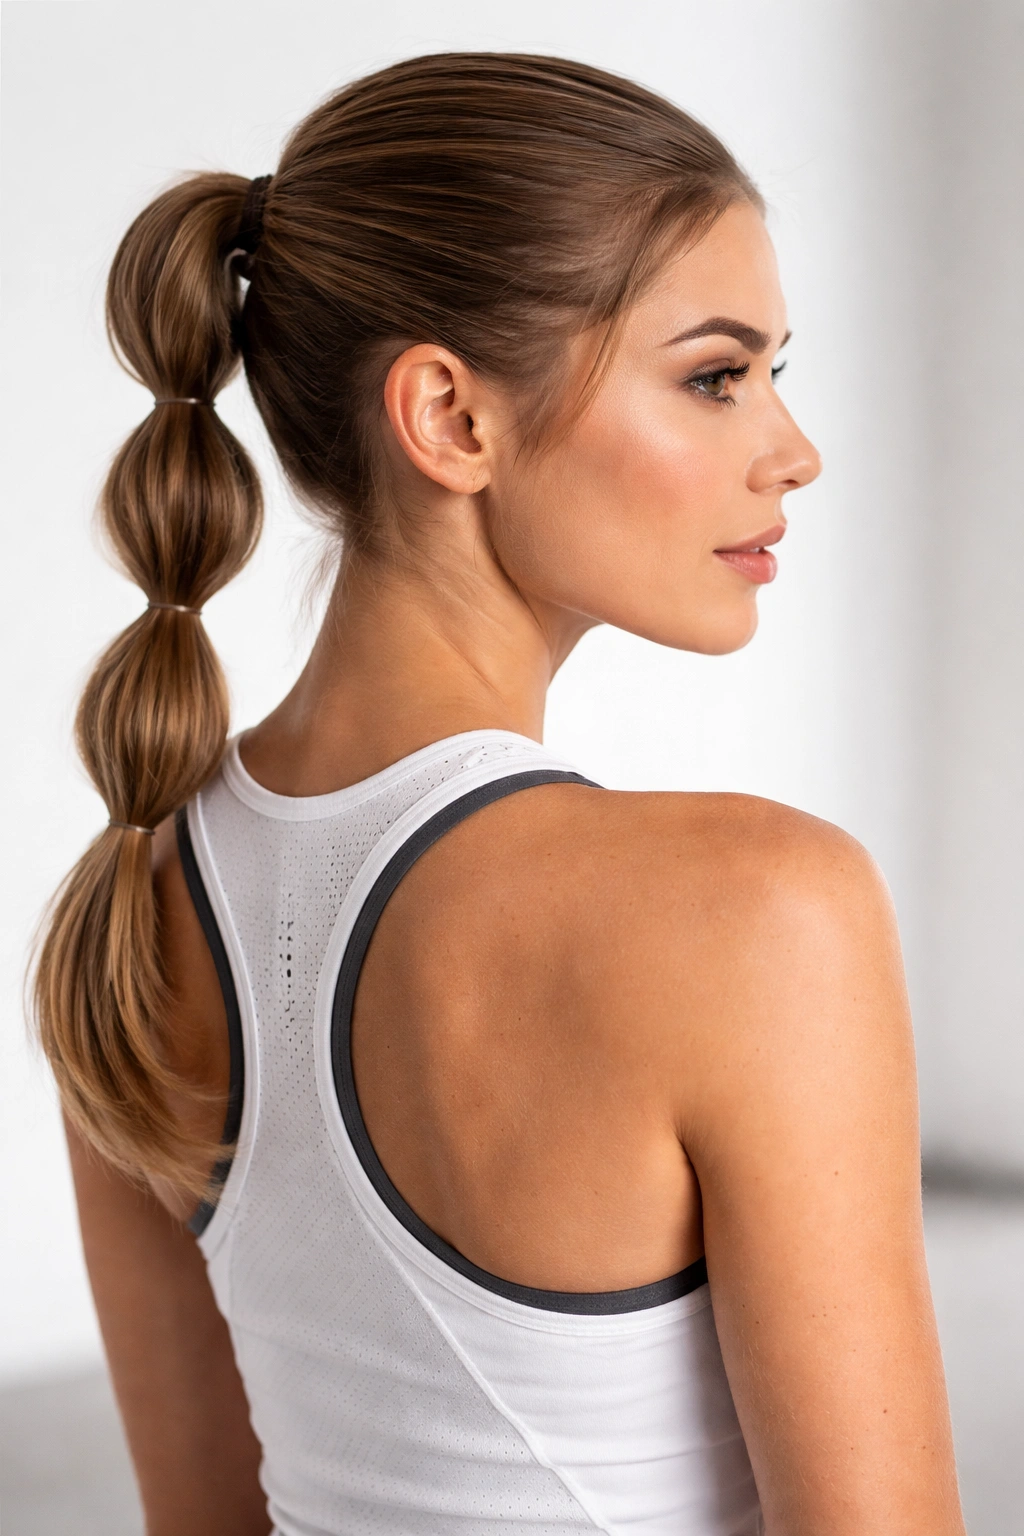
Gym hair can still look good. This sporty double bubble ponytail is tight, neat, and fast, which is exactly what you want when you’re moving around a lot or when the weather makes loose hair annoying. Use a strong snag-free elastic for the base and smaller bands for the bubbles so the tail stays put.
A low or mid-height base works better here than a high one. It sits flat against the head, doesn’t bounce around as much, and pairs easily with a cap or visor. Keep the bubbles compact, about 1 inch apart, so they don’t swing around while you walk.
Skip the shine oils and heavy creams. A little dry shampoo at the roots and a brush through the surface usually does more good than a pile of product. Clean, firm, and simple. That’s the whole point.
7. Face-Framing Double Bubble Ponytail with Loose Pieces
Face-framing pieces can soften a bubble ponytail fast. Two slim sections left out in front — usually about ½ to 1 inch wide on each side — keep the style from feeling too pulled back. If you curl those front pieces away from the face, the whole look opens up.
This version is a good match for round or square face shapes because the loose strands break up the outline near the cheeks. But it’s not only about face shape. Sometimes you just want the ponytail to feel a little less strict, and this is the easiest way to do it.
The rest of the ponytail can stay sleek or textured. I like the contrast when the front pieces are soft and the bubbles are smooth. It feels intentional without being fussy, which is probably why this version gets worn so often.
8. Crisscross Elastic Double Bubble Ponytail
Two small elastic crosses can make a plain bubble tail look far more detailed than it really is. The trick is to split a small section of hair before the first bubble, cross it over the base, and then secure the next section so the lines overlap slightly. You get a little lattice effect without adding a full braid.
How to place the crosses
Start with a clean ponytail, then work in 2 to 3 tiny crisscrosses before you move down the tail. Keep the sections slim, or the style starts looking bulky instead of sharp. I’d use clear elastics here unless you want the bands to show as part of the design.
- Best on medium to long hair.
- Looks strongest when the base is smooth.
- Needs a tailcomb for clean sectioning.
- Works well with a single ribbon tied near the end.
Small warning: too many crosses make the tail look crowded. Two or three is enough.
9. Crown Braid into Bubble Ponytail
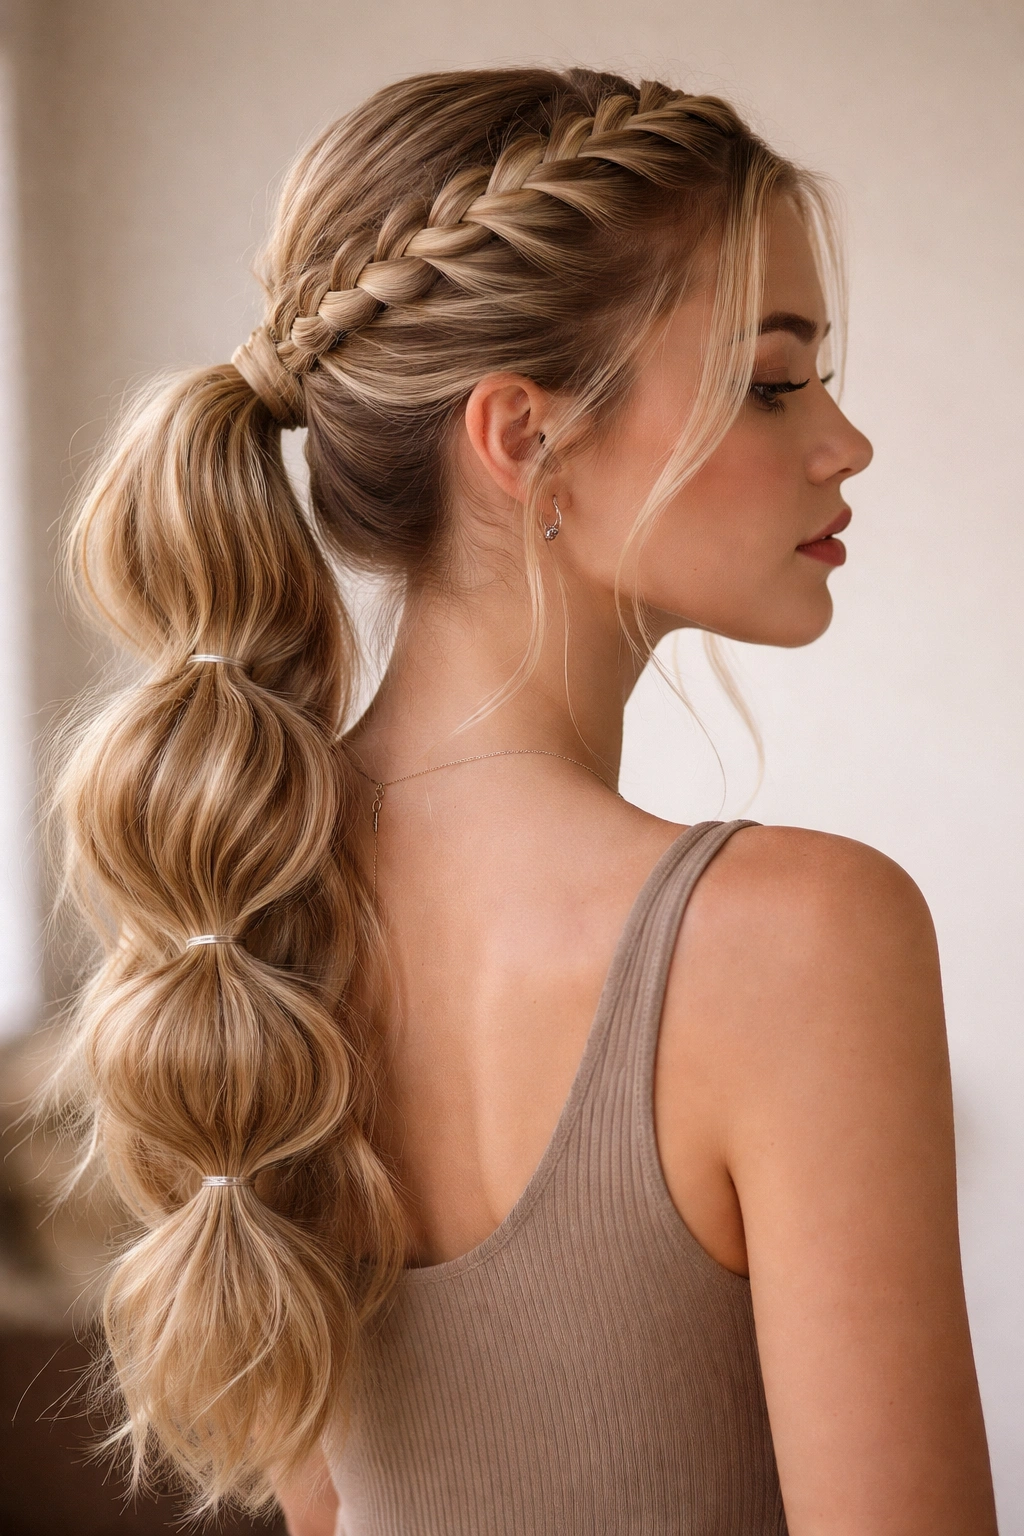
A braid at the crown shifts the whole shape before the bubbles even start. French braid or Dutch braid the front section from the hairline to around the ears, then tie it into a ponytail and continue with bubble sections down the tail. The braid gives the front half some structure, while the bubbles keep the back playful.
This is a smart style for windy days or long events because the braid does half the work of holding the hair in place. It also helps when you want the top of the head to look finished, not just the ponytail itself.
If your hair is thick, stop the braid at the point where it starts feeling heavy. The goal is a clean transition, not a dense rope of hair sitting on your scalp.
10. Color-Pop Double Bubble Ponytail with Bright Elastics
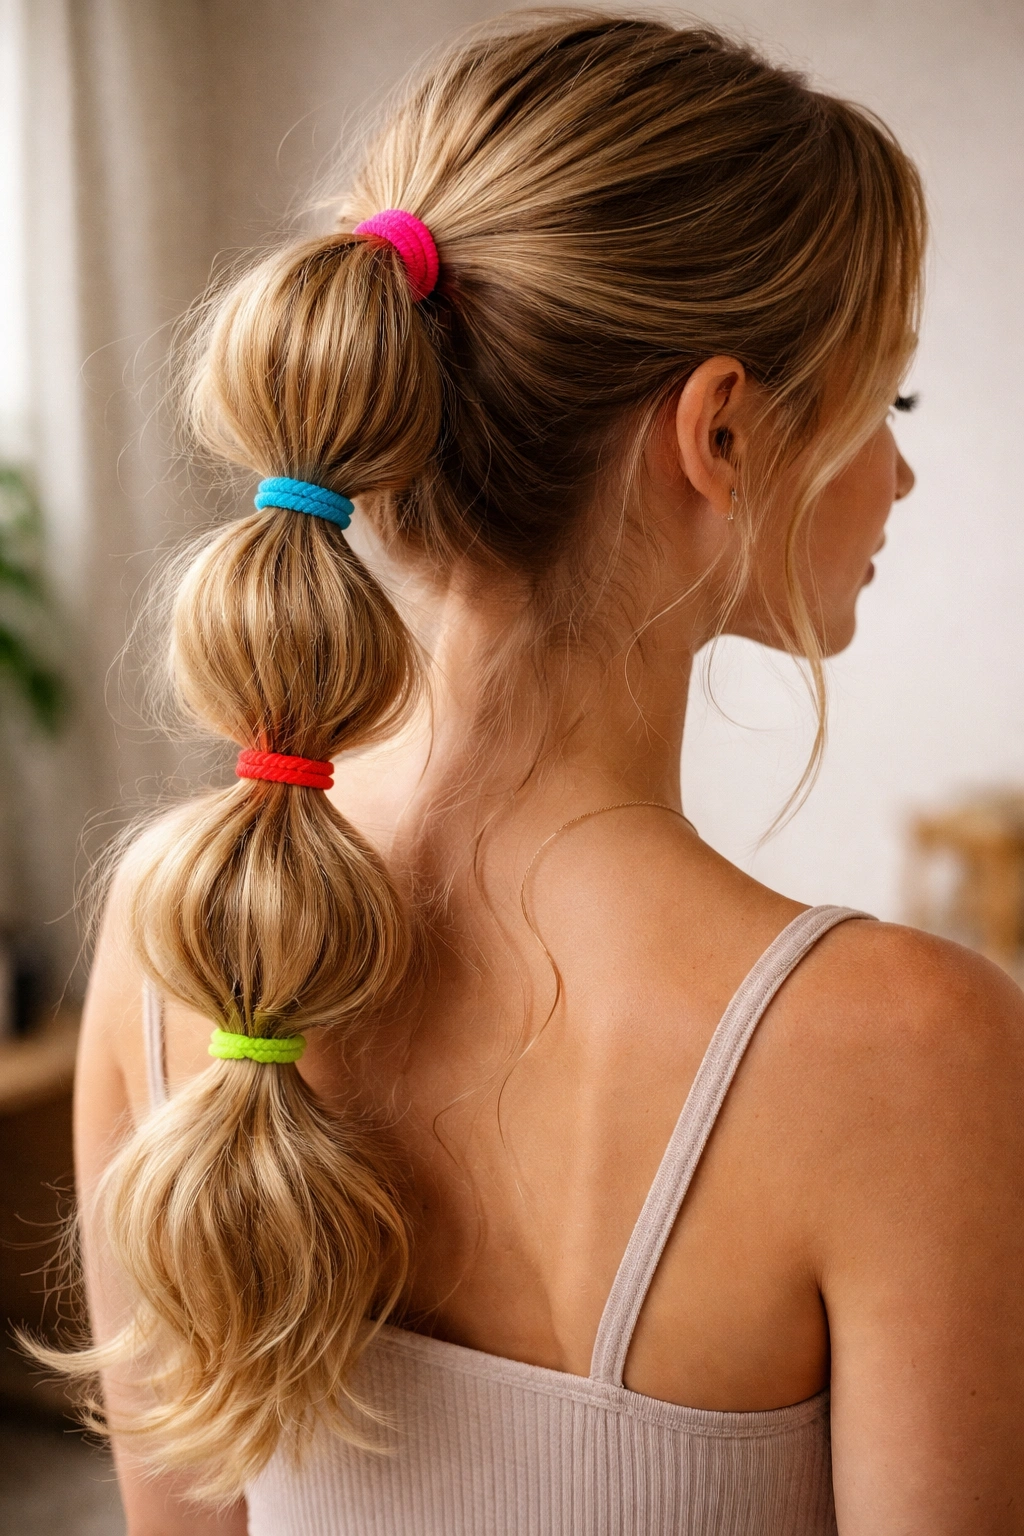
Color is the quickest way to make bubble braids feel fresh. Swap out clear bands for soft pink, cobalt, red, or neon elastics, and suddenly the ponytail reads more playful even if the shape stays simple. I like this best when the bands are the only loud thing in the look.
Picking colors that don’t fight the hair
Brunette hair can handle bolder elastics because the contrast shows up fast. Blonde hair often looks better with softer shades unless you want the bands to pop hard. Red elastics on dark hair look crisp. Pastels on light hair feel gentler.
You can also alternate colors down the tail. Try two matching bands near the base and one brighter band near the end, or repeat every other section in the same color. It keeps the eye moving without making the ponytail look busy.
11. Micro-Braid Mixed Double Bubble Ponytail
Tiny braids mixed into a bubble ponytail give the style more texture without changing the basic shape. Braid one slim section near the temple, or add two micro braids into the tail itself before the bubbles begin. Even a braid no wider than ¼ inch can change the feel of the whole hairstyle.
I like this version because it doesn’t need much perfection. The micro braids can be a touch uneven and still look nice once they’re folded into the tail. That’s helpful if you don’t want a rigid finish or if your hair has layers that never sit exactly where you tell them to.
The look lands somewhere between casual and styled. It’s especially nice for concerts, weekend plans, and days when plain ponytails feel too plain but a full braided updo would be overkill.
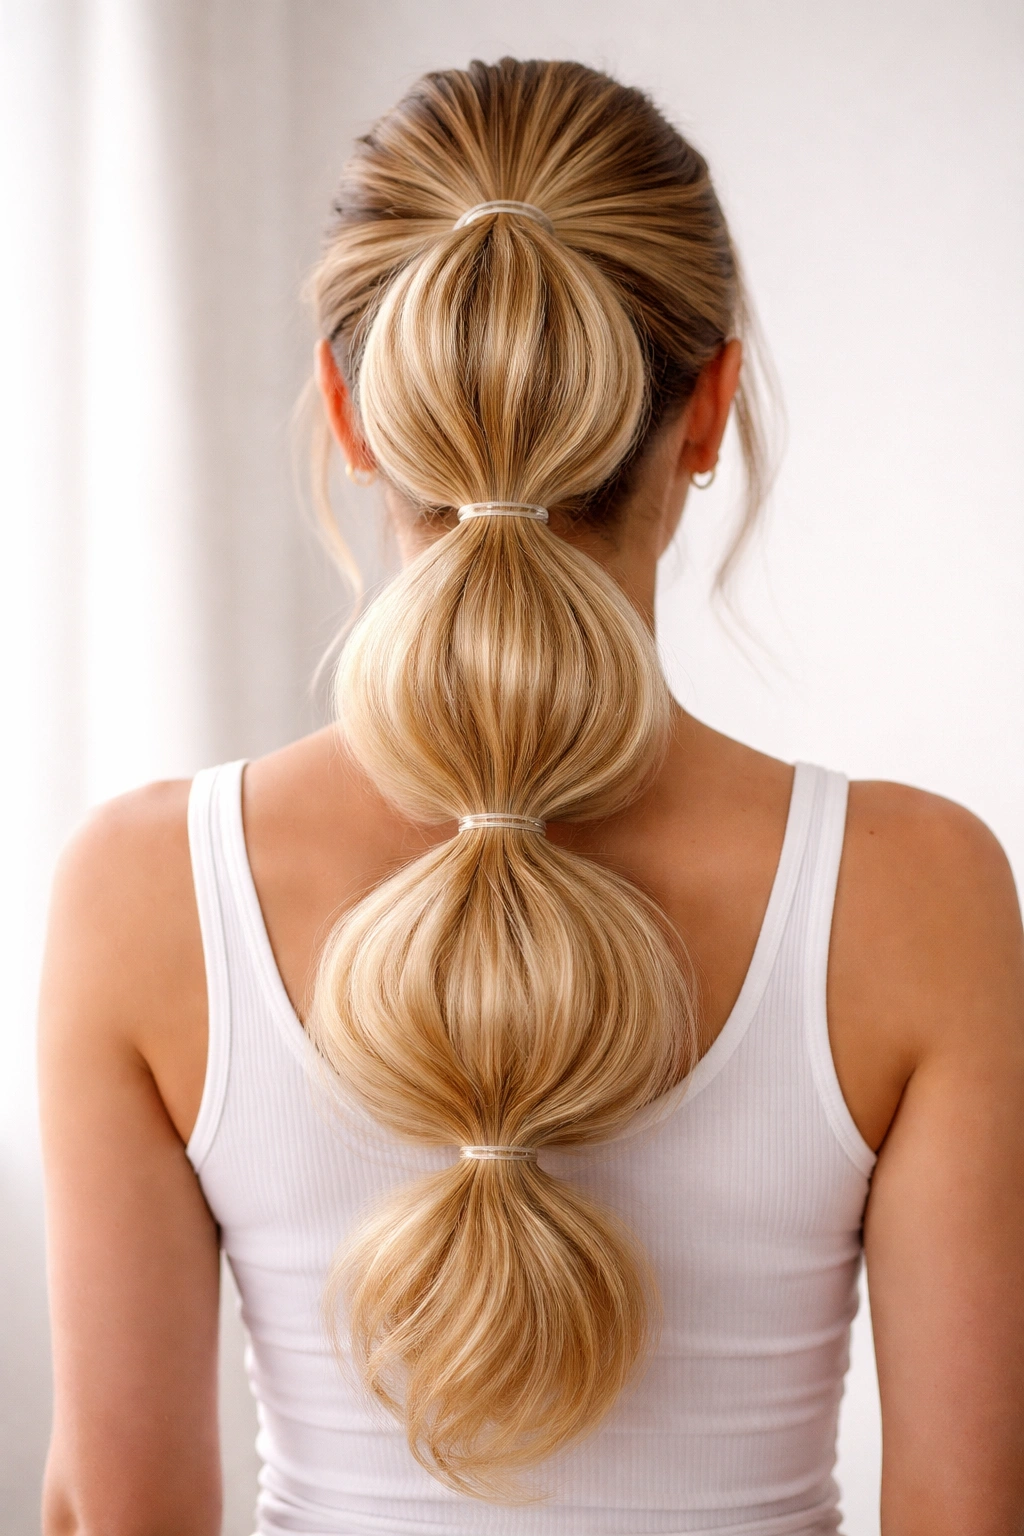
12. Extra-Long Glam Double Bubble Ponytail
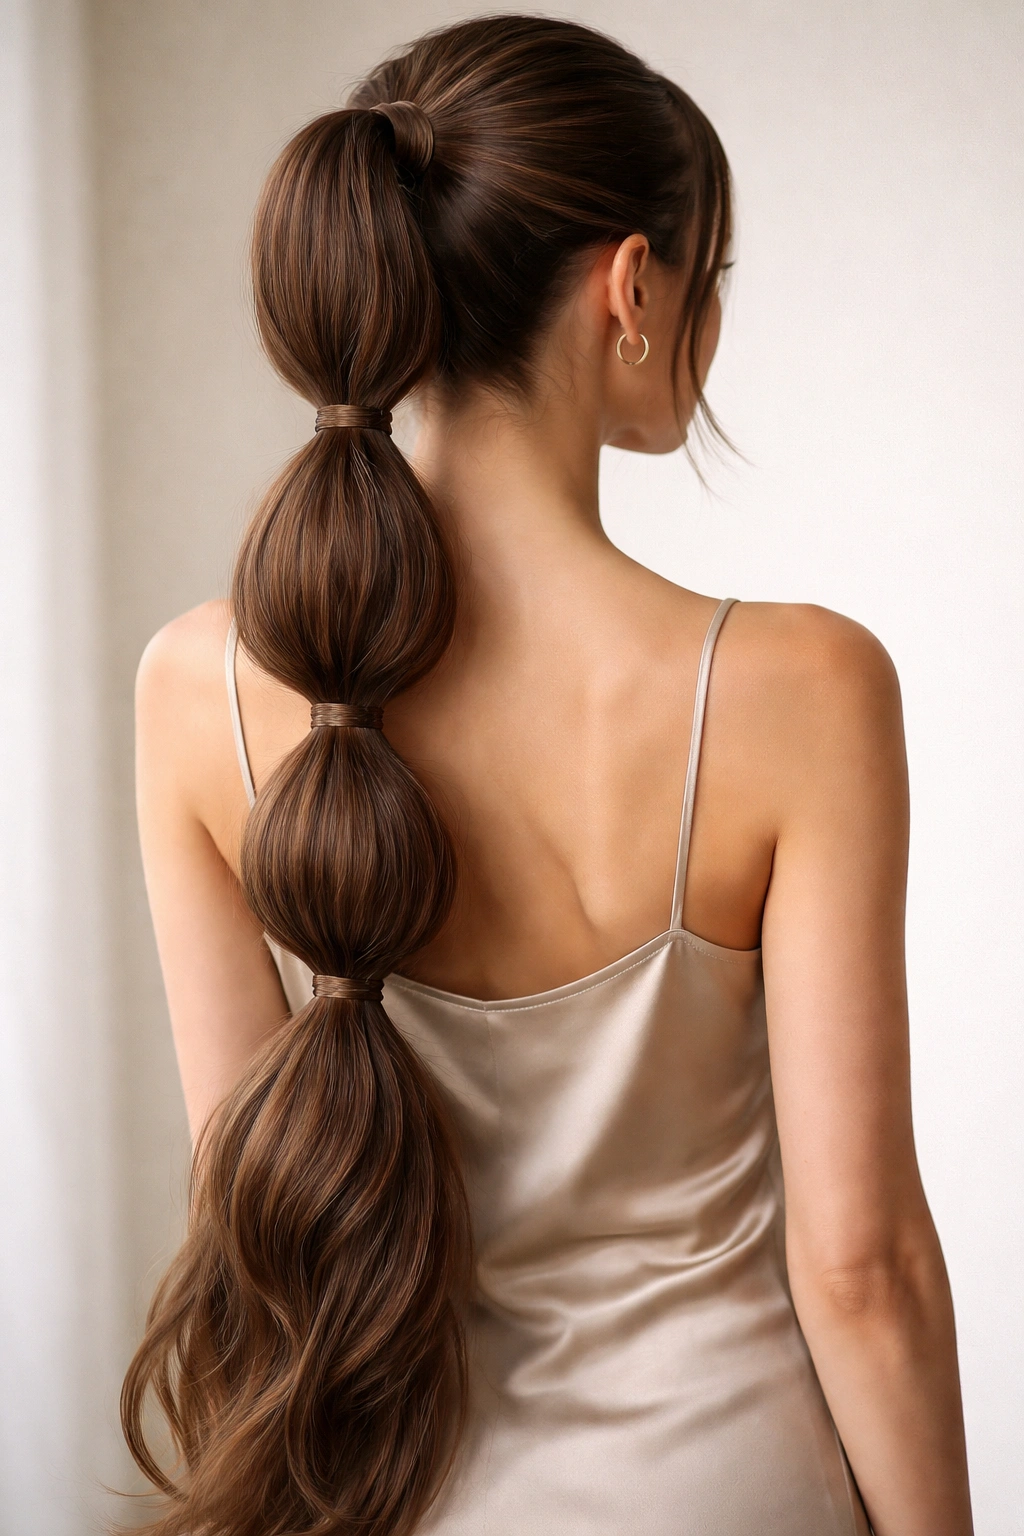
Long hair and bubble braids are a good match. Once the tail has enough length, the bubbles look stacked in a line, almost like little lanterns, and that creates a bigger visual impact than the same style would on shorter hair. If your hair reaches past the shoulder blades, this version has room to breathe.
Keeping long bubbles from sagging
Use stronger elastics and keep the ponytail base high enough that the tail doesn’t drag against your back too early. For very long hair, place the bubbles about 3 inches apart near the top, then close the distance a little toward the ends if the tail starts to feel too stretched out.
A thin strand wrapped around each elastic helps the whole look feel more polished, especially if your hair is layered. And if the ends look a little dry, a pea-sized bit of serum on the last 2 inches is enough. More than that and the tail can turn greasy fast.
13. Messy Weekend Double Bubble Ponytail
A rougher finish can look better here than a polished one. Second-day hair, a little dry shampoo, and a few uneven bubbles often produce a better result than spending twenty minutes forcing every strand into place. The style feels relaxed instead of staged.
Pull the bubbles out with your fingertips, not a comb. Let the spacing drift a little — maybe 1½ inches on one section and 2 inches on the next. That unevenness reads as texture, which is exactly what makes the messy version charming.
There is a line, though. Too much mess and it looks unfinished. Keep the ponytail base secure, smooth the top only a little, and leave the rest alone. That’s enough.
14. Claw-Clip Base Double Bubble Ponytail
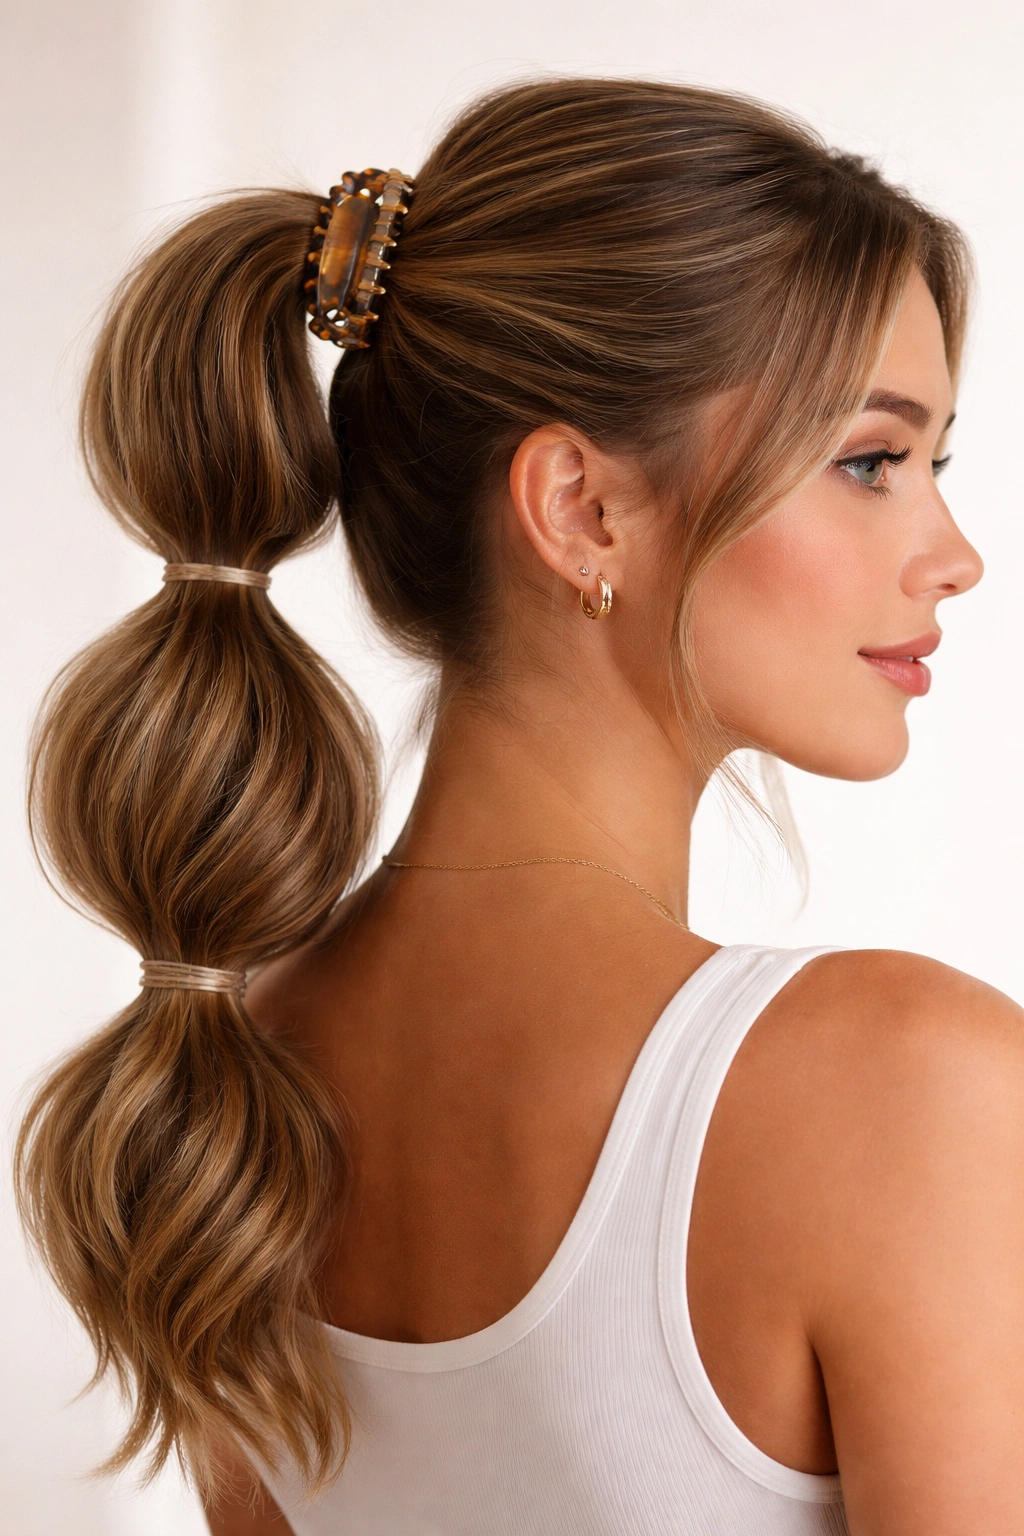
A claw clip changes the whole setup before the first elastic even goes in. Instead of going straight to a tight tie, clip the top section of hair first so the crown has lift, then gather the rest into a ponytail beneath it. That small move makes the bubbles sit higher and look fuller.
This is a good option for thick hair that gets heavy fast. The clip holds some of the weight, and the ponytail doesn’t have to do all the work. Choose a medium-sized clip with strong teeth so it grips without slipping.
I also like this style when I’m in a hurry. It gives the illusion of a planned look, even if the actual styling took less than ten minutes. Not bad for one accessory and a few bands.
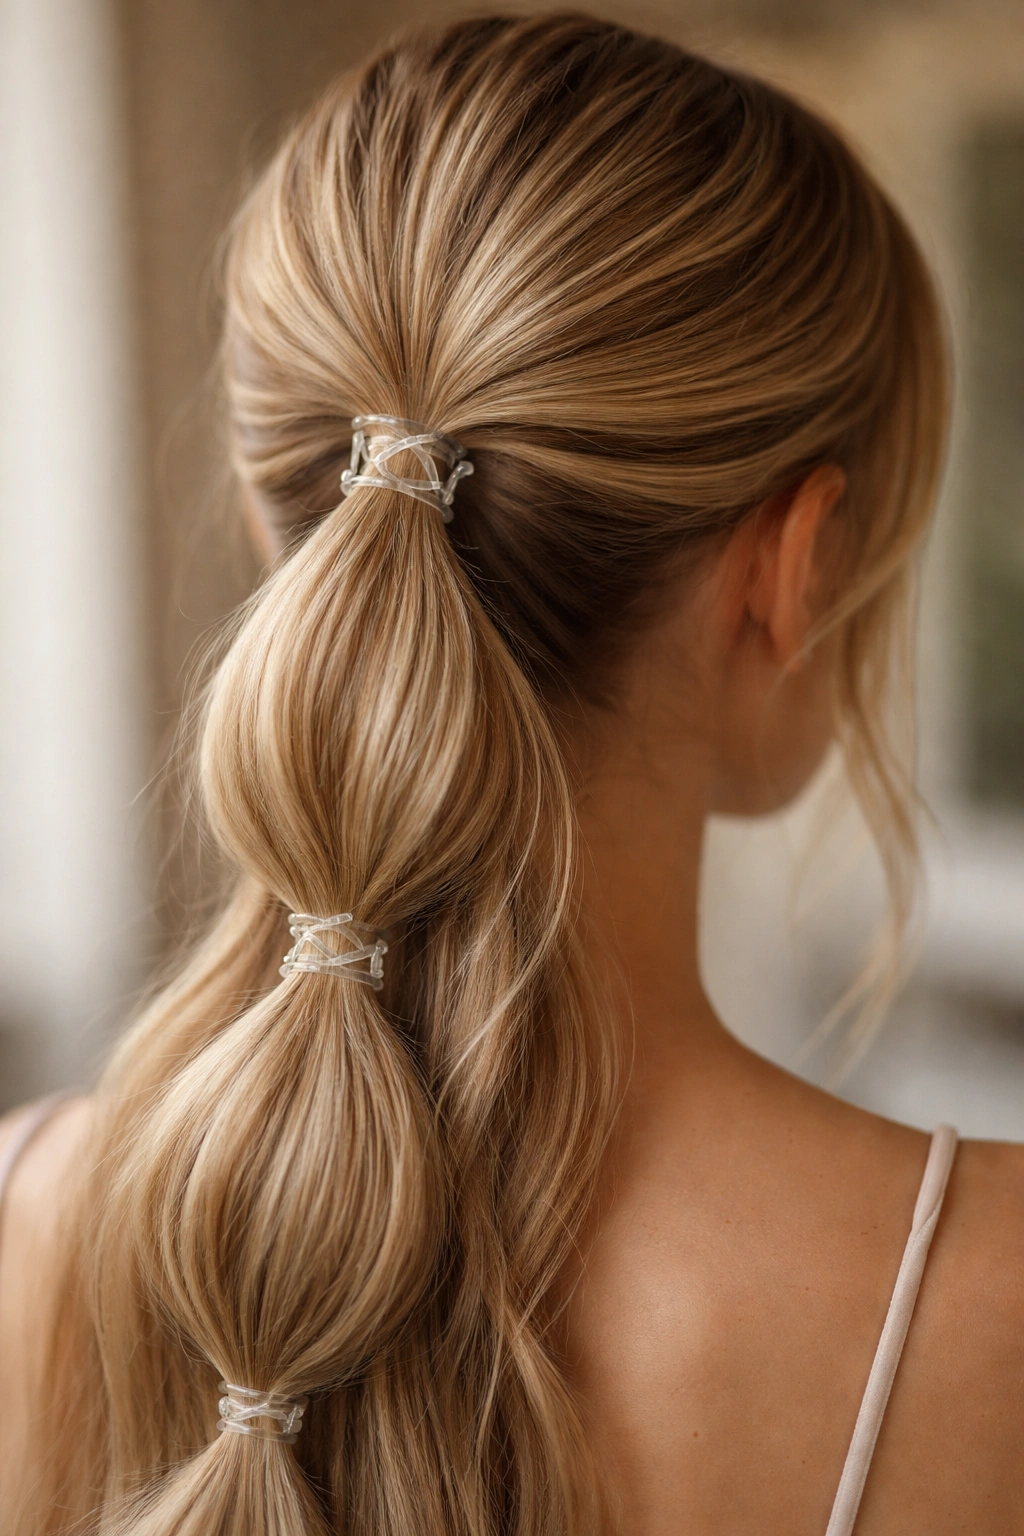
15. Wrapped-Elastic Double Bubble Ponytail
Wrapped elastics are the difference between a ponytail that looks thrown together and one that looks finished. Take a thin strand from underneath each bubble, wrap it around the elastic, and pin it hidden underneath with a bobby pin. That extra minute matters more than people think.
The cleanest version uses ¼-inch sections for wrapping. If the strand is too thick, the wrap looks clumsy and the elastic bulges underneath. If it’s too thin, the pin doesn’t hold. There’s a sweet spot.
I’d pick this style for dinners, photos, or any moment when you want the ponytail to look planned. It is a little more work, yes. Worth it? Usually.
16. Curled-Ends Double Bubble Ponytail
Curls at the ends keep the style from looking boxy. After you finish the bubbles, curl the last few inches with a 1-inch curling iron or bend the ends under with a flat iron if you want a softer finish. That one detail makes the tail feel lighter.
This version pairs well with smaller bubbles because the shape at the end needs room to show. If the bubbles are too big and the ends are also curled, the style can start looking crowded. Keep the bubble sections tidy and let the curls do the softening.
It’s a good look for events where you want movement. When you turn your head, the curled ends swing a little differently than straight ones, and the whole ponytail feels less severe.
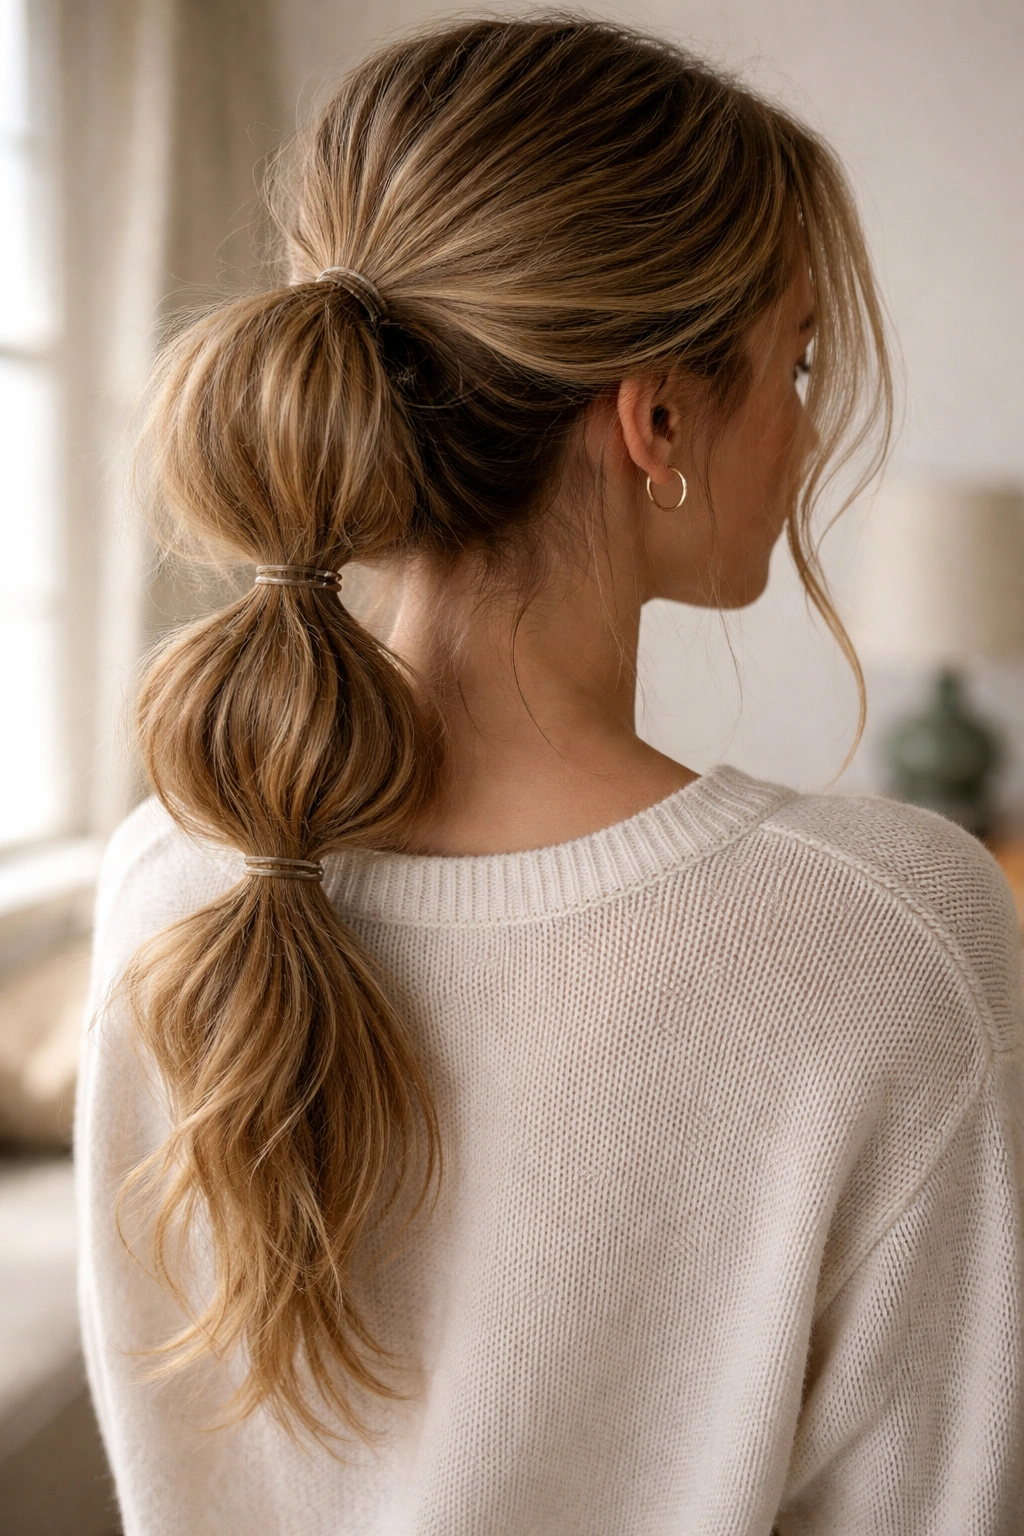
17. Low Double Bubble Ponytail for Work or School
A low bubble ponytail is the quiet one in the group. It sits under the collar line, stays out of the way, and still gives you a little shape so the style doesn’t disappear into the back of your head. For work or school, that balance matters.
Keep the bubbles simple — three sections is usually enough. A matte elastic looks more subdued than a shiny one, and a smooth center part keeps the front tidy without making the style feel stiff. If you wear glasses, this version also avoids the constant tug around the temples that high ponytails can cause.
I’d call this the most practical version for busy days. It’s neat enough for a presentation, casual enough for class, and easy to redo if one bubble droops halfway through the day.
18. Beaded Double Bubble Braid Ponytail
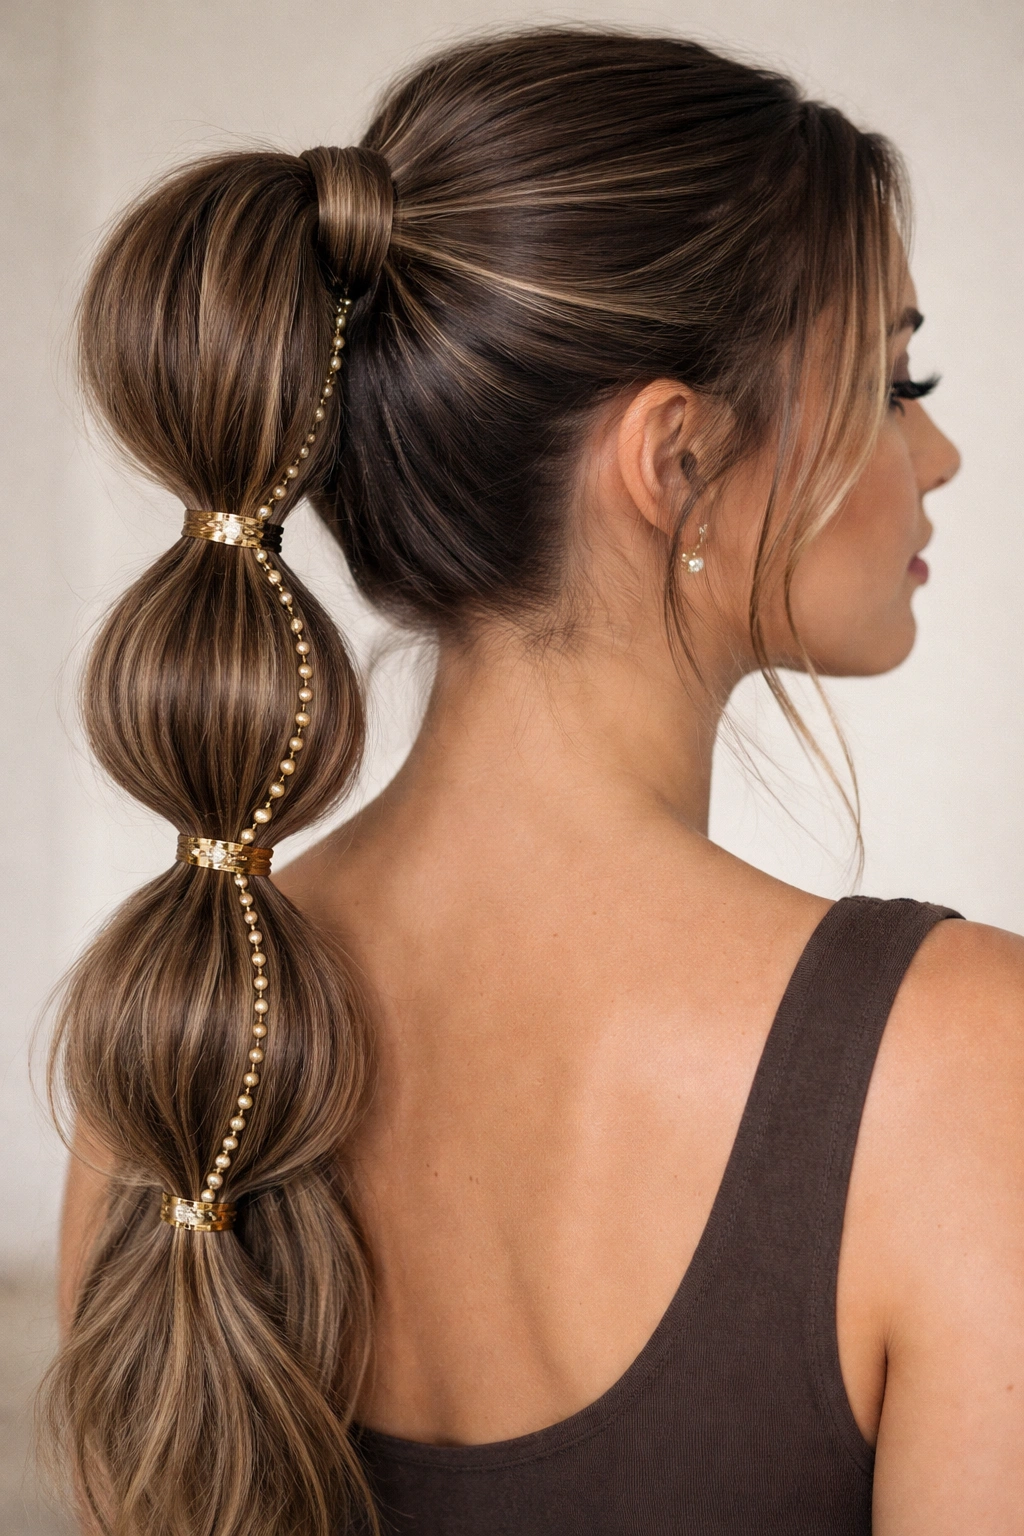
Beads and cuffs turn a simple bubble braid into something louder. A few small metallic cuffs near the elastics or a line of lightweight beads threaded through slim side sections can change the mood fast. The trick is restraint. Too many pieces and the ponytail starts clinking around like jewelry for hair.
Where to place the accents
Put the brightest detail near the middle of the tail, not right at the base. That keeps the top from looking crowded and gives the eye a clear place to land. If you use cuffs, choose ones that sit snugly over the elastic instead of sliding around.
- Use lightweight beads so the ponytail still moves well.
- Keep cuffs in the same metal tone for a cleaner finish.
- Limit the extra hardware to 2 to 4 pieces unless you want a festival look.
- Works best on medium to thick hair.
My rule here: if the accessories are the star, keep the bubbles simple.
19. Center-Part Double Bubble Ponytail with Sharp Edges
A center part makes the bubbles line up like a path down the head. Add clean edges with a little gel and a soft brush, and the ponytail suddenly feels more graphic than playful. That sharper finish is good when the rest of your outfit is minimal and you want the hair to carry some of the shape.
The bubbles themselves should stay symmetrical. Use the same spacing on both sides of the ponytail and keep the base tight so the part doesn’t drift. If the hair is very curly, don’t force it into helmet-slick smoothness. A softer center part still works; it just needs control, not flattening.
This is one of those styles that looks strongest in bright light because the clean lines show clearly. It’s neat. A little strict, even. That’s the point.
20. Short-Hair Friendly Double Bubble Ponytail
Shorter hair can still pull this off. If your hair doesn’t reach past the shoulders, make the bubbles smaller and closer together so the tail doesn’t flop between bands. A mini elastic every 1 inch or so usually gives enough shape without swallowing the length.
How short is short enough?
If the hair can reach a low ponytail at the nape, you can usually make a bubble version work. The tail may only have two or three bubbles, and that’s fine. A half-up version is even easier because the top section gives you a little extra length to play with.
- Use mini clear elastics.
- Keep the bubbles compact.
- Stop before the tail gets too thin to hold shape.
- Add a light curl at the end if the bottom looks sparse.
The style reads best when you respect the length you have instead of pretending it’s waist-long. That honesty makes it look better.
21. Pancaked Voluminous Double Bubble Ponytail
Pancaking is what gives bubble braids that puffy, rounded shape people notice from across a room. After each section is tied off, tug the sides out gently with both thumbs and forefingers until the bubble widens by about ½ inch to 1 inch on each side. Go slowly. Too much pulling exposes the elastic and ruins the shape.
How to pancake without wrecking the ponytail
Start at the bottom bubble and work upward. That order keeps the tail from collapsing while you’re still shaping it. If your hair is slick or very fine, a little texturizing powder at the roots helps the bubbles hold their width.
- Pull from the outer edges, not the center.
- Stop as soon as the section looks round.
- Use a mirror if you’re shaping the back of your head.
- Keep the bands hidden under the puff, not stretched across it.
This version has more drama than the others, and I like that it still doesn’t require advanced skill.
22. Twisted Base Double Bubble Ponytail
Twists at the base make the ponytail feel less rigid than a straight pullback. Take two slim sections from the front, twist each one toward the back, and secure them into the ponytail before you start the bubbles. The effect is softer than a braid but still more interesting than a plain tie.
That twist gives the front hair a little movement without eating up too much length. It also works well if your layers are slipping out of braids all the time, because a twist is easier to control. I’d call it the friendliest version for people who like a little detail but hate fuss.
You can stop the twists right at the ears or carry them farther back. Either way, the bubbles stay the star and the base just gives them a better frame.
23. Easy Everyday Double Bubble Ponytail
The simplest version is often the one that gets worn the most. A center part, a low or mid ponytail, three evenly spaced bubbles, and no extra wrapping or accessories — that’s enough when you want the look without the morning drama. It still counts. It still looks styled.
For everyday wear, keep the bubbles soft and stop before the ponytail gets too precious. A little texture is fine. A few flyaways are fine too. If the shape is there, the style reads well from the front and side, and that’s usually all you need.
I always think the nicest ponytail is the one you don’t have to babysit. Some days call for beads, twists, or a clean high crown. Other days call for three elastics and five quiet minutes, and this version handles that job without complaint.