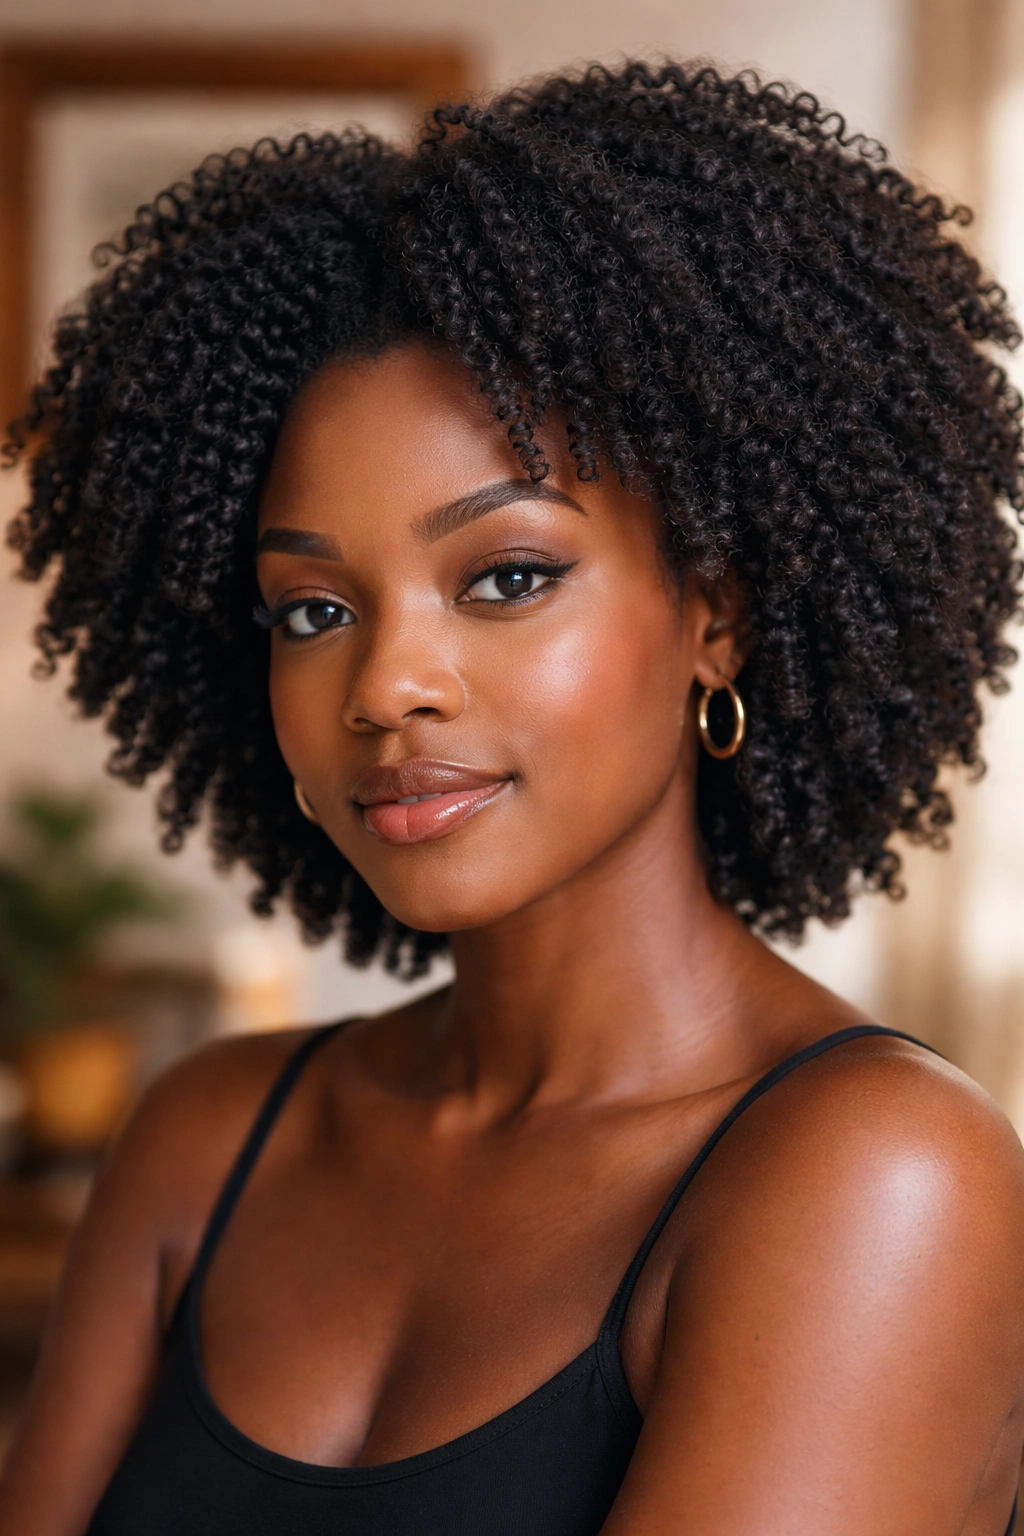
Kinky twist styles for afro hair types occupy a specific space in the natural hair world — they’re not quite Senegalese twists, which are sleek and smooth, and they’re not quite two-strand twists on your own natural hair. They’re their own thing: a two-strand twist installed using kinky or Marley extension hair that blends so seamlessly with 4B and 4C textures that the result looks genuinely natural. Like your hair decided to grow long and thick overnight.
What makes them worth talking about seriously is exactly that blending. For naturals with very coily, low-luster, densely packed hair — the textures where smooth, shiny extension hair looks obviously fake — kinky twists are the answer. The matte, rough-surfaced extension hair mimics the way natural 4C hair moves and reflects light. The style works because it doesn’t try to smooth over what your hair is. It works with it.
What Makes Kinky Twists Different from Other Twist Styles
The distinction matters because it determines which styles and products work and which don’t. Senegalese twists use kanekalon or similar smooth synthetic fiber. Spring twists use pre-looped, fluffy fiber that creates a springy, almost coily texture. Passion twists use water wave hair for a more wavy, bohemian look.
Kinky twists use Marley hair — sometimes called Afro kinky hair or Cuban twist hair — which is deliberately textured to mimic 4B and 4C coil patterns. When you hold a section of good Marley hair next to a natural 4C curl, the surface texture is very close. That’s the whole point.
The installation technique is a standard two-strand twist — you take two sections and wrap them around each other — but the extension hair is added in during the twisting process using the feed-in method. The result is a long, thick, textured twist that blends at the root and reads as natural hair rather than synthetic fiber.
Hair Types That Benefit Most
Kinky twists look best on hair that falls in the 4A to 4C range — coily, densely packed, low-luster hair. The reason is simple: the extension hair is designed to match that aesthetic. If you have looser, shinier curls — 3A or 3B — the contrast between your root texture and the Marley hair will be more visible, not less. The style will still work, but the blending won’t be as seamless.
4C hair in particular benefits because it has the most texture similarity to Marley hair. At the scalp, where the twist starts, the transition from natural root to extension fiber is almost invisible when done by an experienced stylist. That’s the ideal scenario.
Hair length at installation matters less than you’d expect. Kinky twists can be installed on hair as short as 2-3 inches — enough to anchor the extension hair at the root. Any shorter and there’s not enough natural hair to hold the twist base securely.
Sizing and Length Options
You have more sizing options than most people realize. Thin kinky twists — roughly pencil width — take significantly longer to install but create an incredibly detailed, almost braided-looking result. They last longer because the smaller, tighter twist resists unraveling better than a larger one.
Medium twists — the standard — are roughly the diameter of a finger. They install in 4-6 hours, last 4-6 weeks with proper care, and are versatile enough for most styling options: updos, puffs, half-ups, worn loose. This is the default for most people and the right starting point if you’ve never had kinky twists before.
Jumbo twists install in 1-2 hours and create a maximally bold, thick look. The trade-off is that they’re heavier at the scalp and tend to unravel faster at the tip because the larger twist has more torque trying to undo itself. Sealing the ends carefully — either with hot water if the hair tolerates it, or by threading the tip back into itself — helps them last.
For length: shoulder, bra-strap, and waist are the most common installs. Shoulder length is easiest to manage. Waist-length creates maximum impact but also maximum weight and the most maintenance overhead. Start at shoulder length if you’re new to wearing long kinky twists and add length in future installs once you know how you handle the daily weight.
The Prep That Determines Longevity
Here’s the honest truth: kinky twists installed on hair that’s been freshly deep conditioned and properly moisturized last noticeably longer than twists installed on dry, unprepared hair. The moisture in your natural hair strands helps the extension hair grip more securely during the installation process. Dry hair is stiffer and more brittle, which affects both the installation technique and the condition of your hair when you take the twists down.
Deep condition 1-2 days before your install appointment. Don’t skip this. Come with your hair clean, detangled, and lightly moisturized — not soaking wet, not slathered in heavy product. A spray leave-in applied right before your stylist starts is ideal.
Avoid any heavy butter or oil on the hair the day of installation. Slippery hair is hard to braid and twist. Products that coat the hair shaft reduce friction, and friction is what holds the twist together at the root. Let your scalp’s natural oils do the work instead.
Maintaining Kinky Twists Between Washes
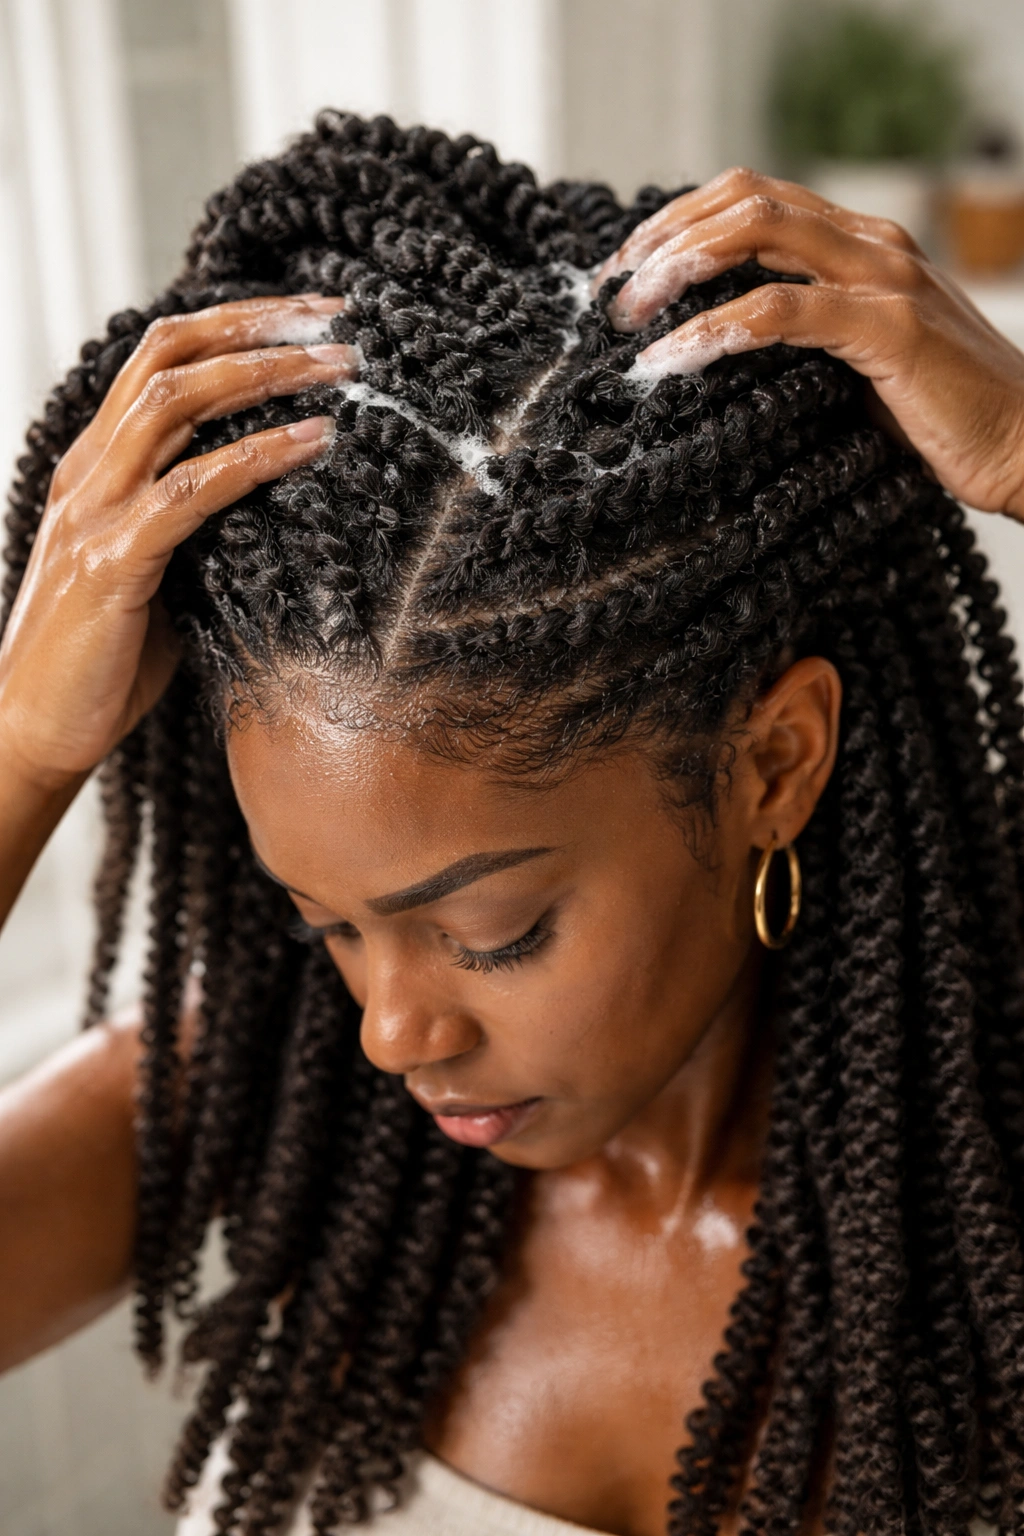
Your scalp needs cleaning every 2 weeks at minimum. Kinky twists can be rinsed or washed without undoing them — the key is to wash in sections, work the shampoo or diluted cleanser directly onto the scalp (not through the length of the twist), and rinse thoroughly before moving to the next section.
After washing, squeeze each twist gently to remove water — don’t wring or pull, which can cause the twist to unravel or stretch the root. Sit under a hooded dryer for 30-40 minutes or air dry in sections to prevent mildew smell, which is a real risk if you leave kinky twists damp for too long.
Between wash days, apply a light scalp oil every 4-5 days. Keep the twists themselves moisturized with a light water-based spray — not heavy creams, which build up on the Marley hair and make the twists feel tacky. Keep it simple.
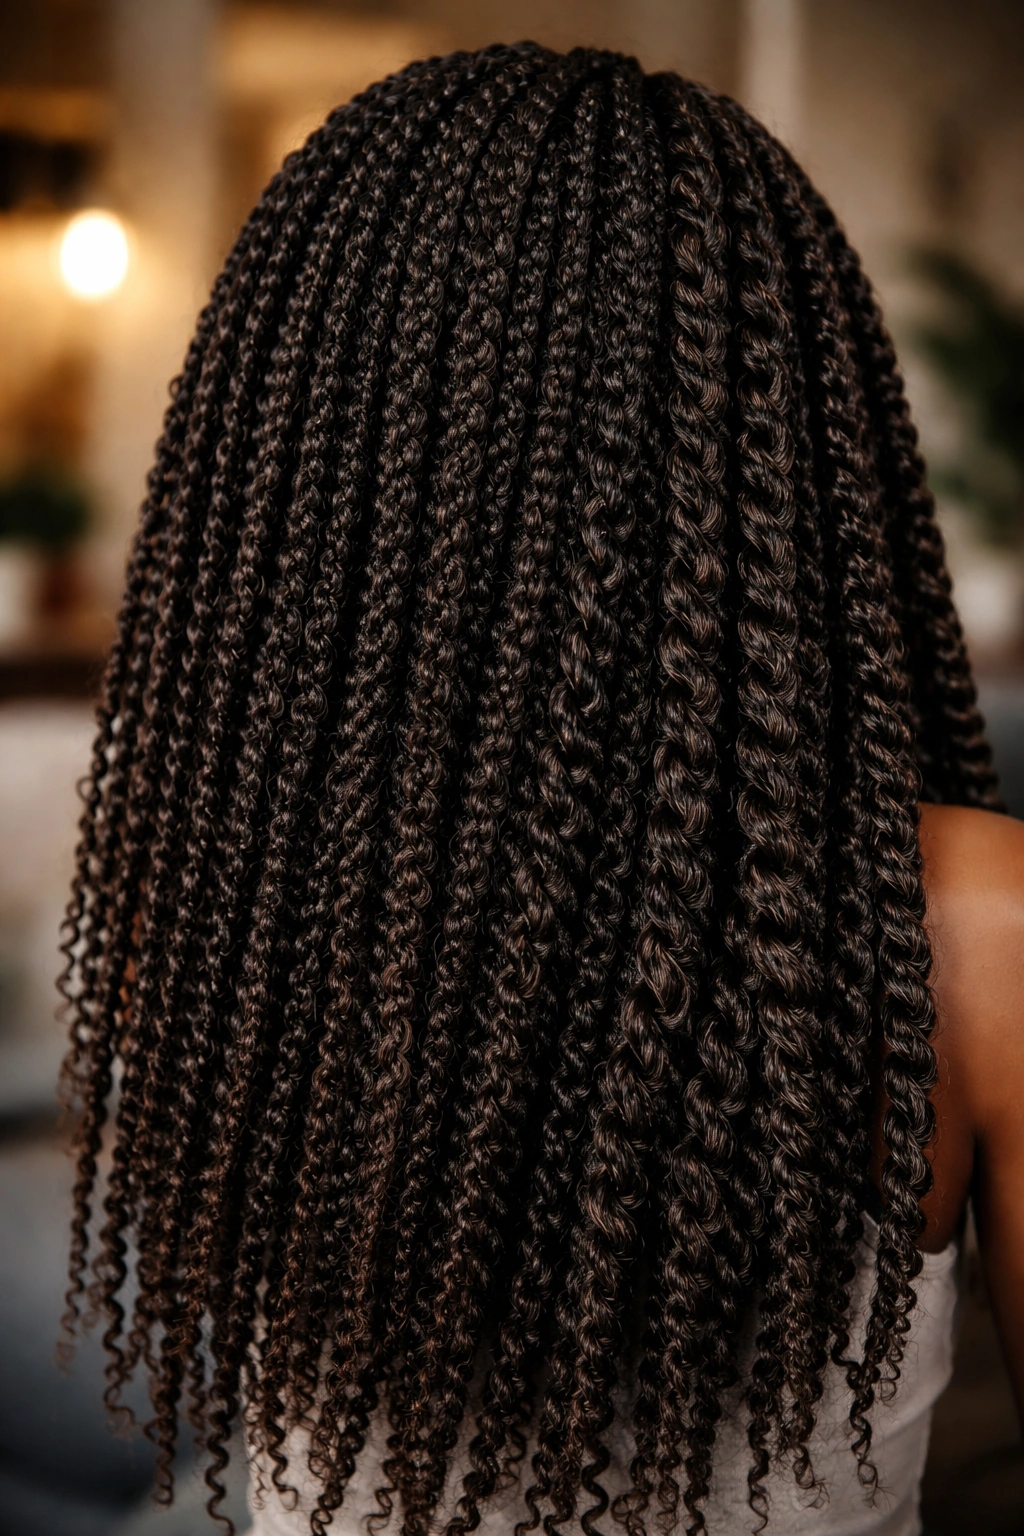
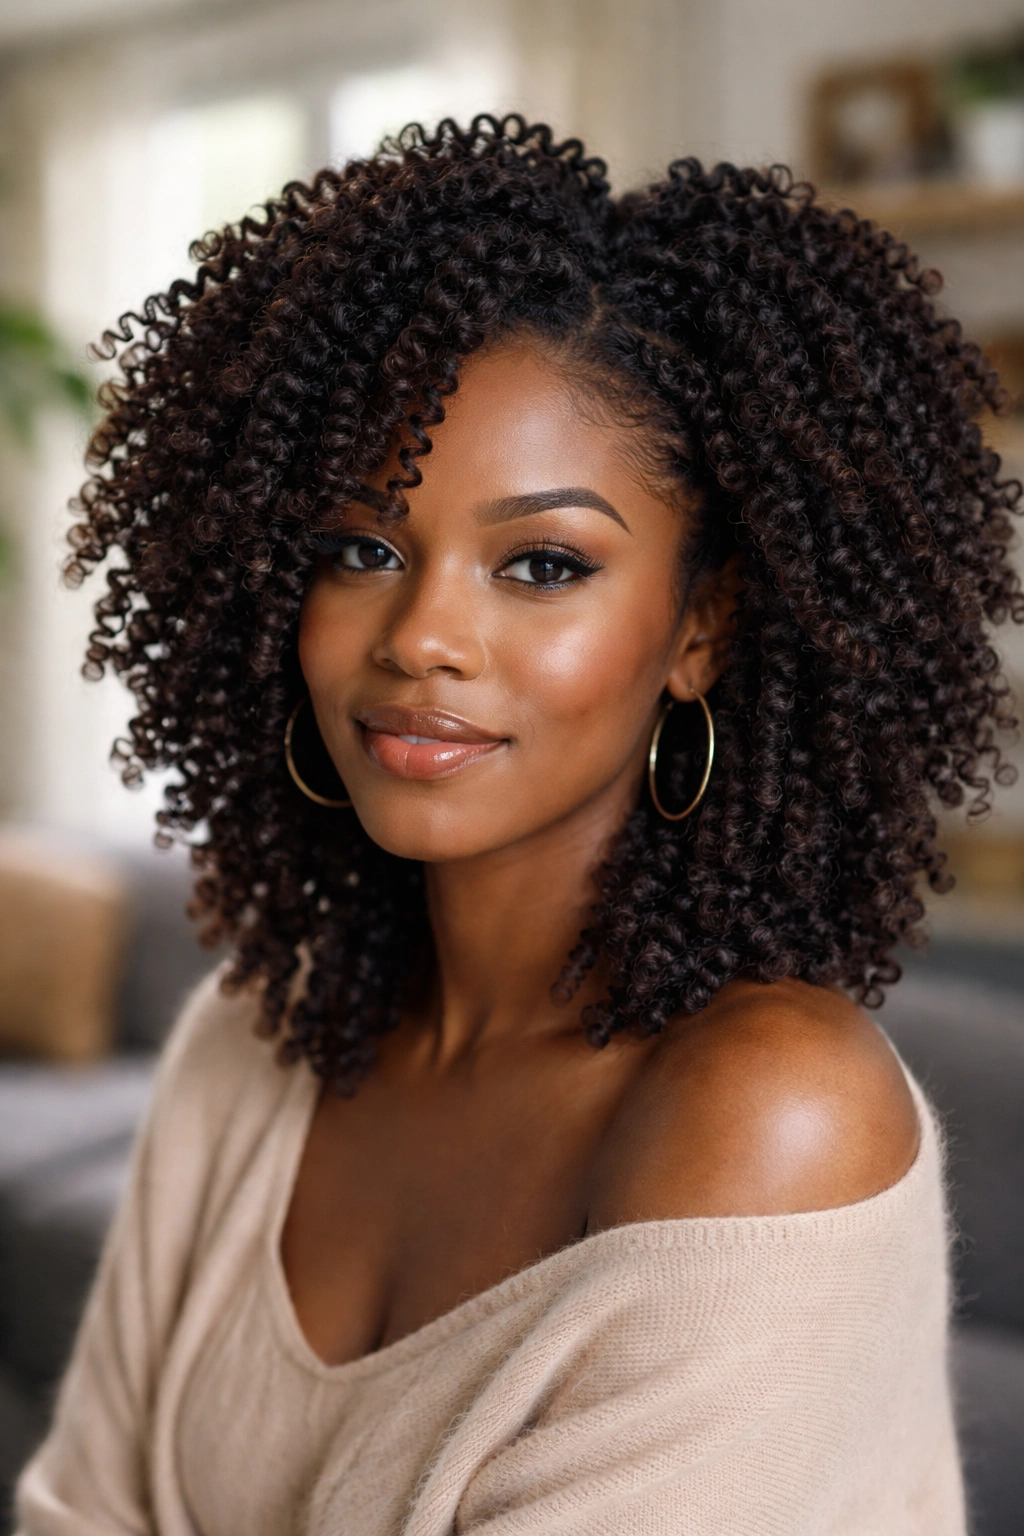
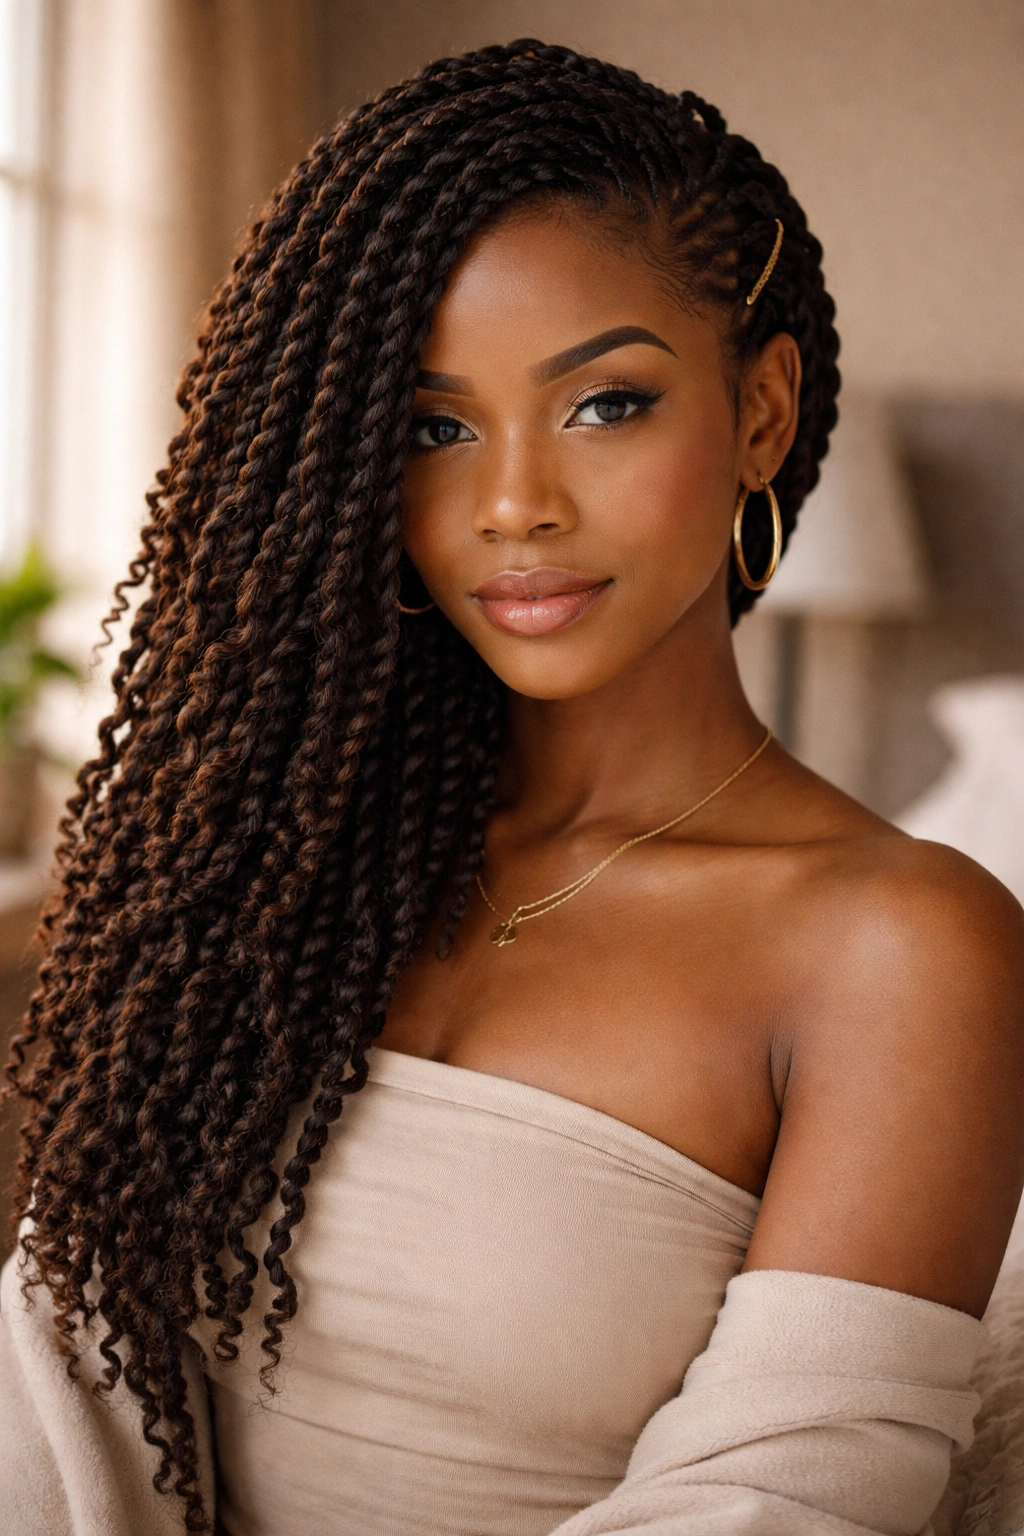
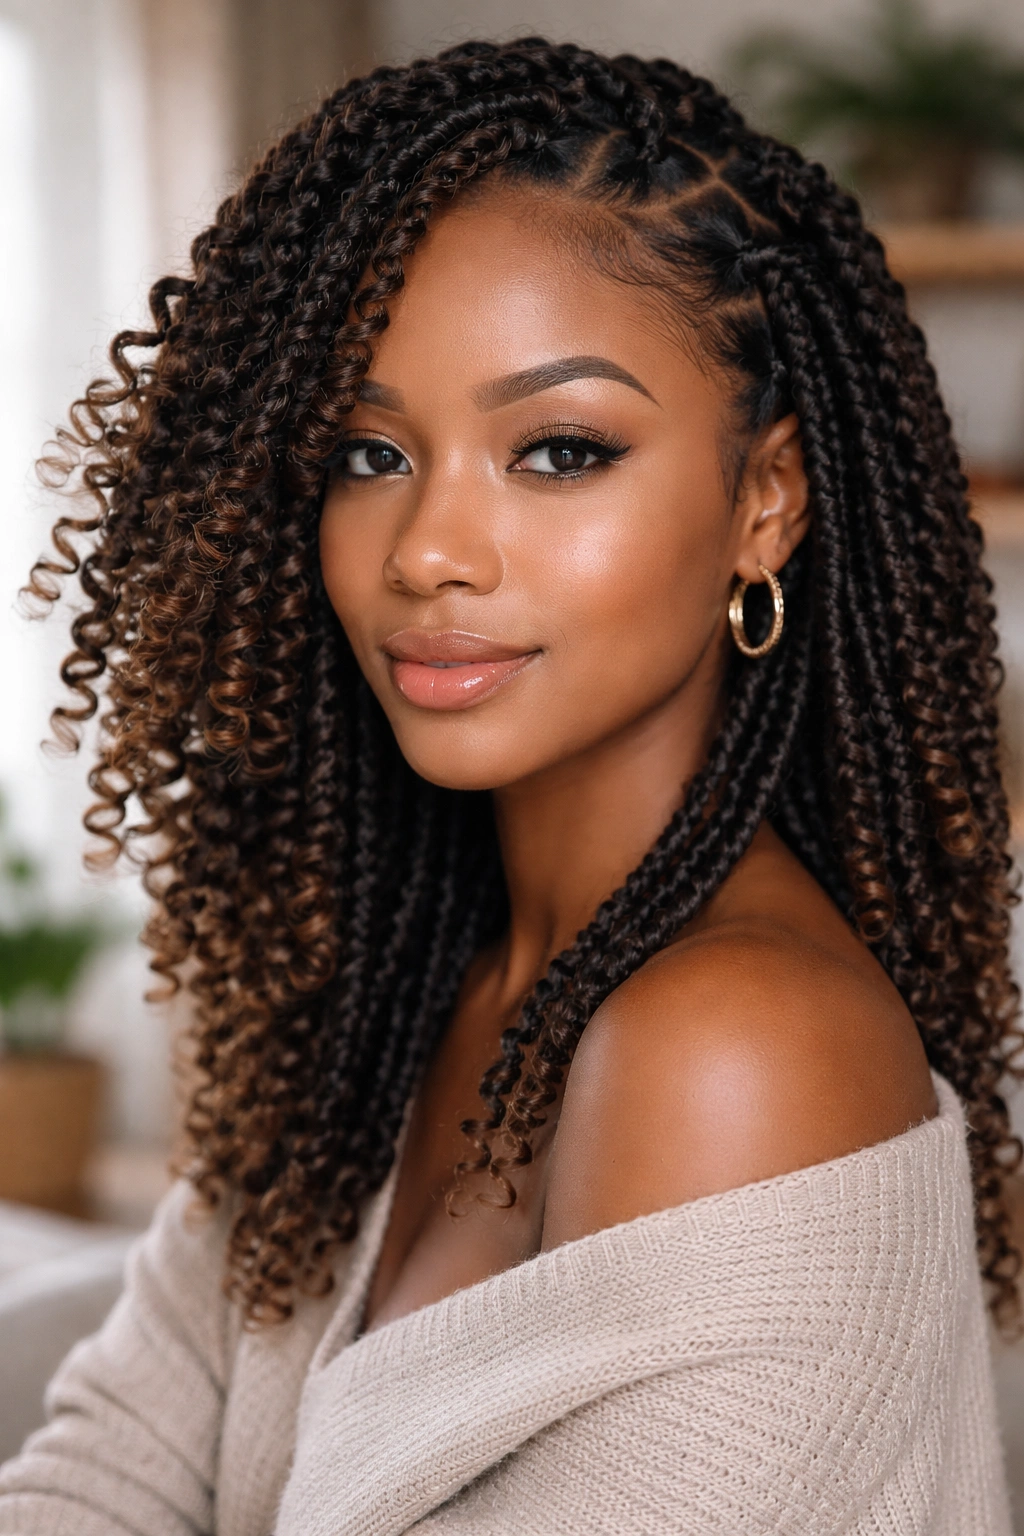
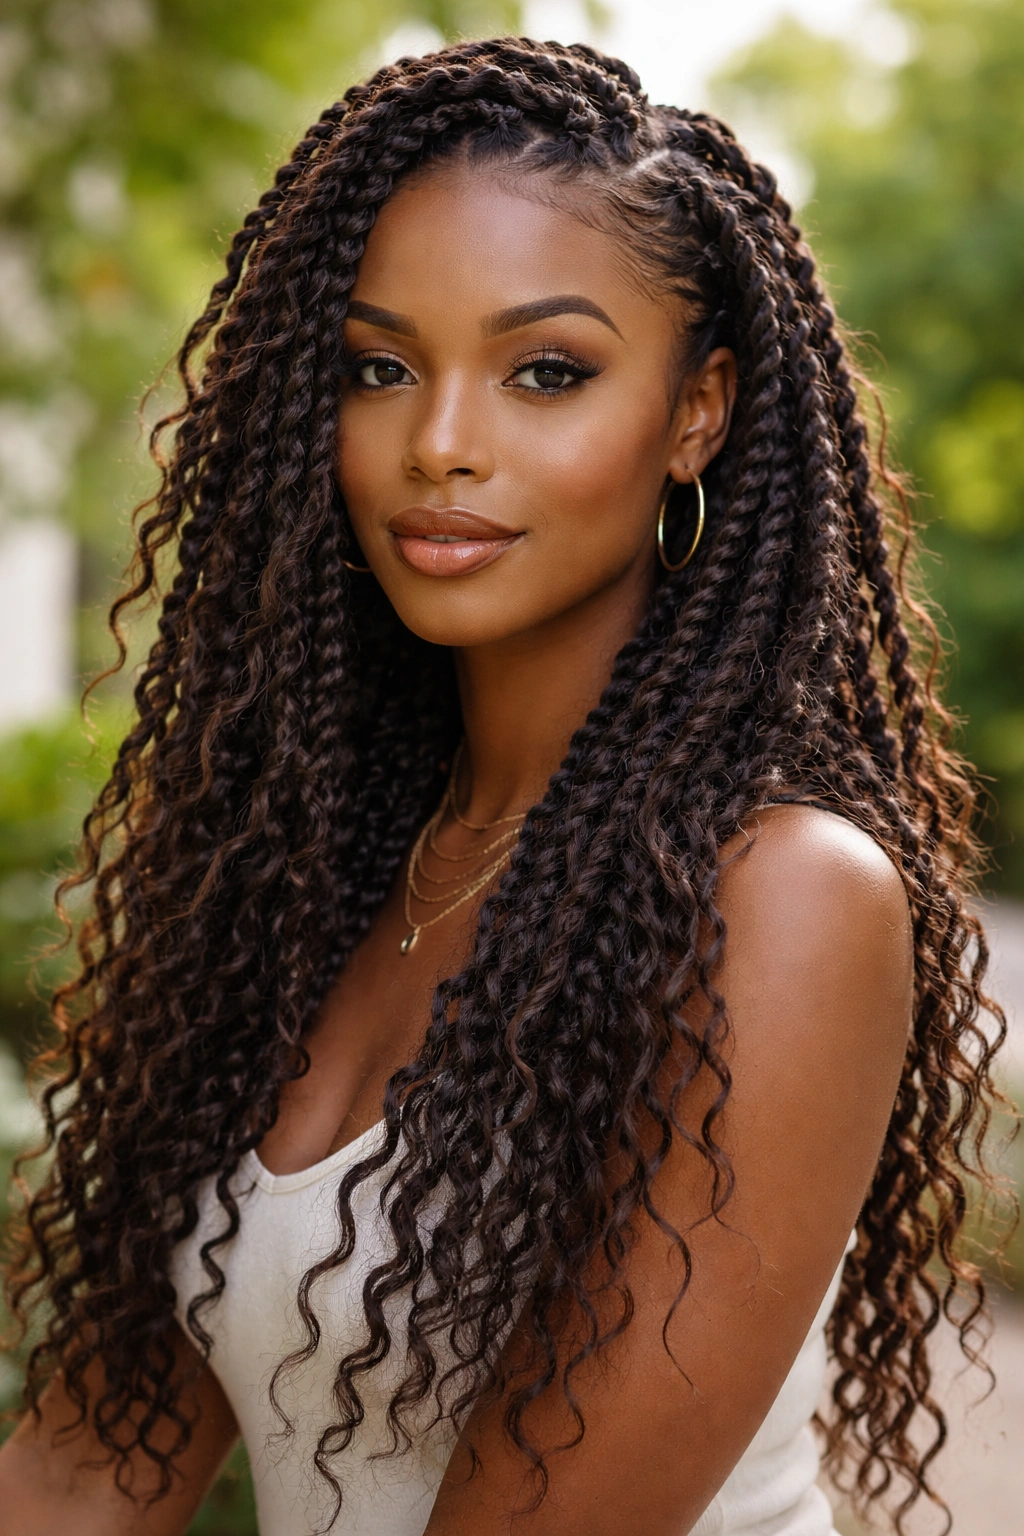
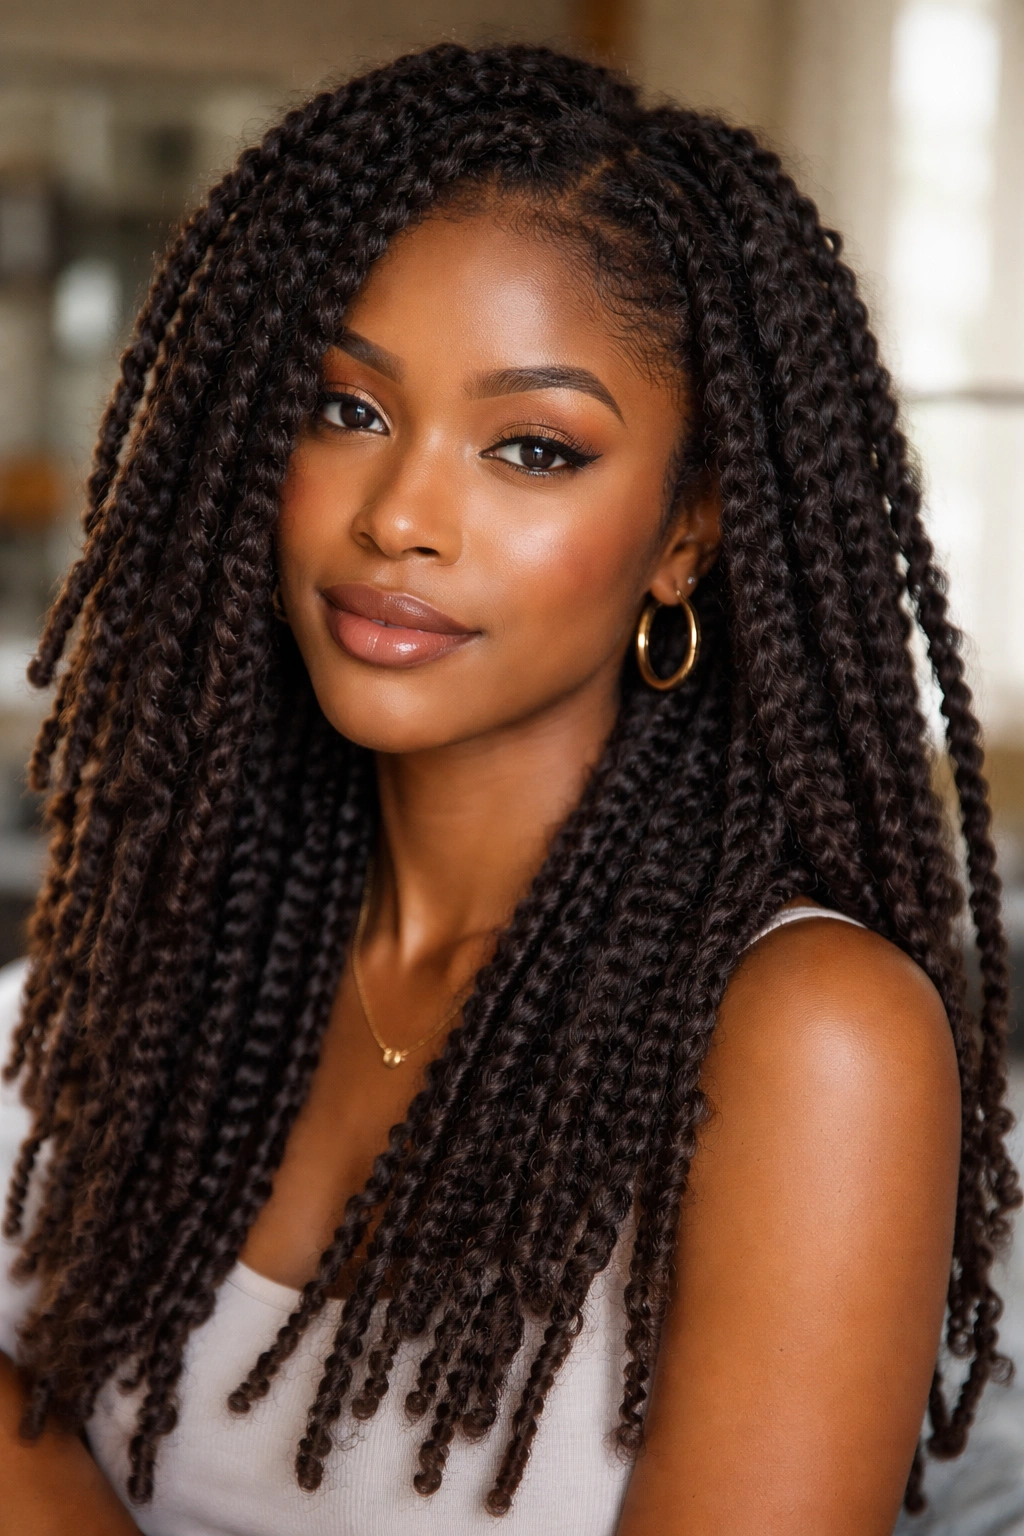
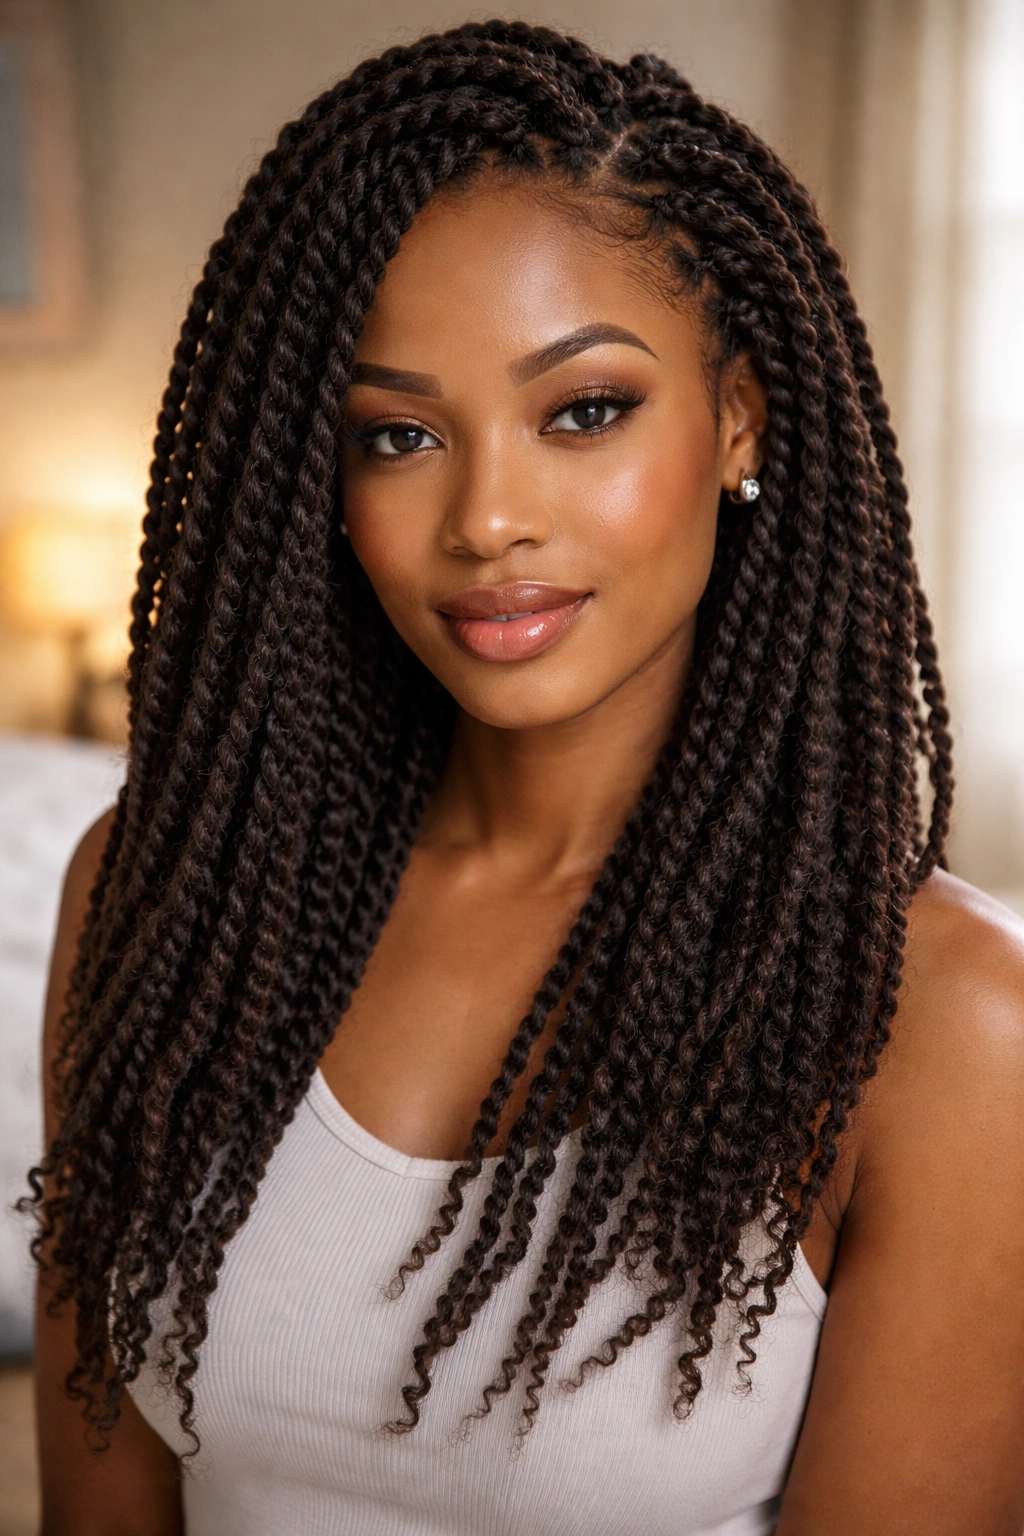
1. Classic Kinky Twists Worn Down
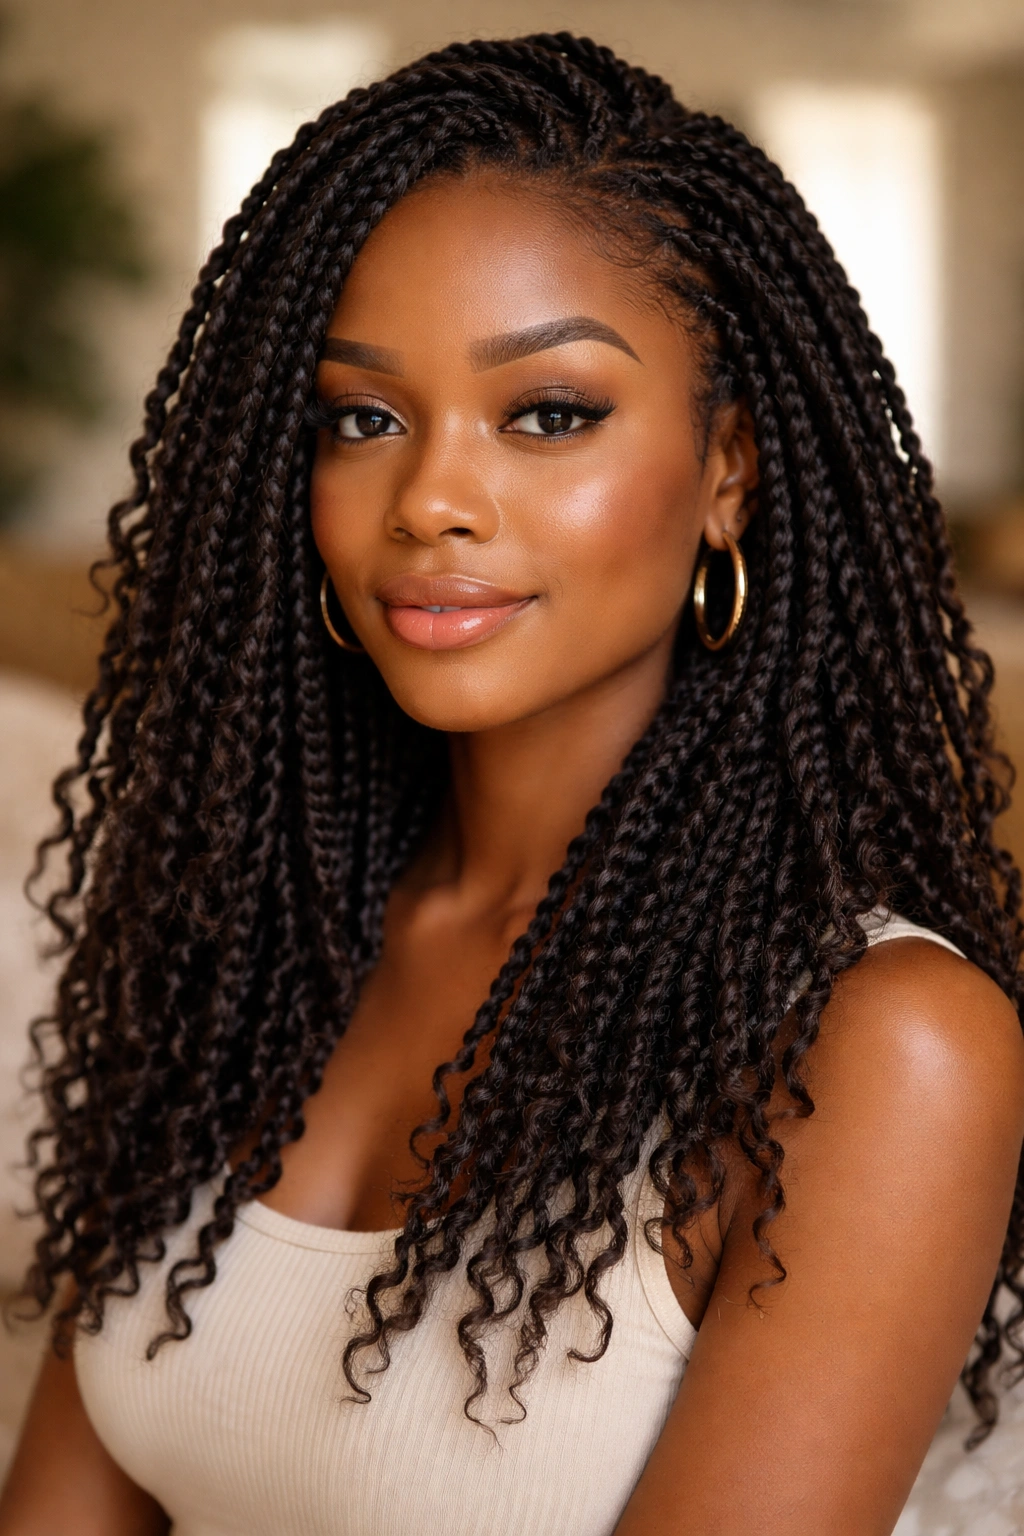
Medium-thickness kinky twists, all one length, worn fully loose. No styling, no gathering — just the twists as installed.
Why It Works
There’s a depth and movement to kinky twists worn loose that you don’t get with smoother twist styles. The textured surface catches light differently at every angle. The individual twists move independently but collectively create the impression of a full, thick natural hair moment. It reads effortless even though the installation was anything but. This is your daily default look and genuinely one of the strongest.
2. High Puff of Kinky Twists
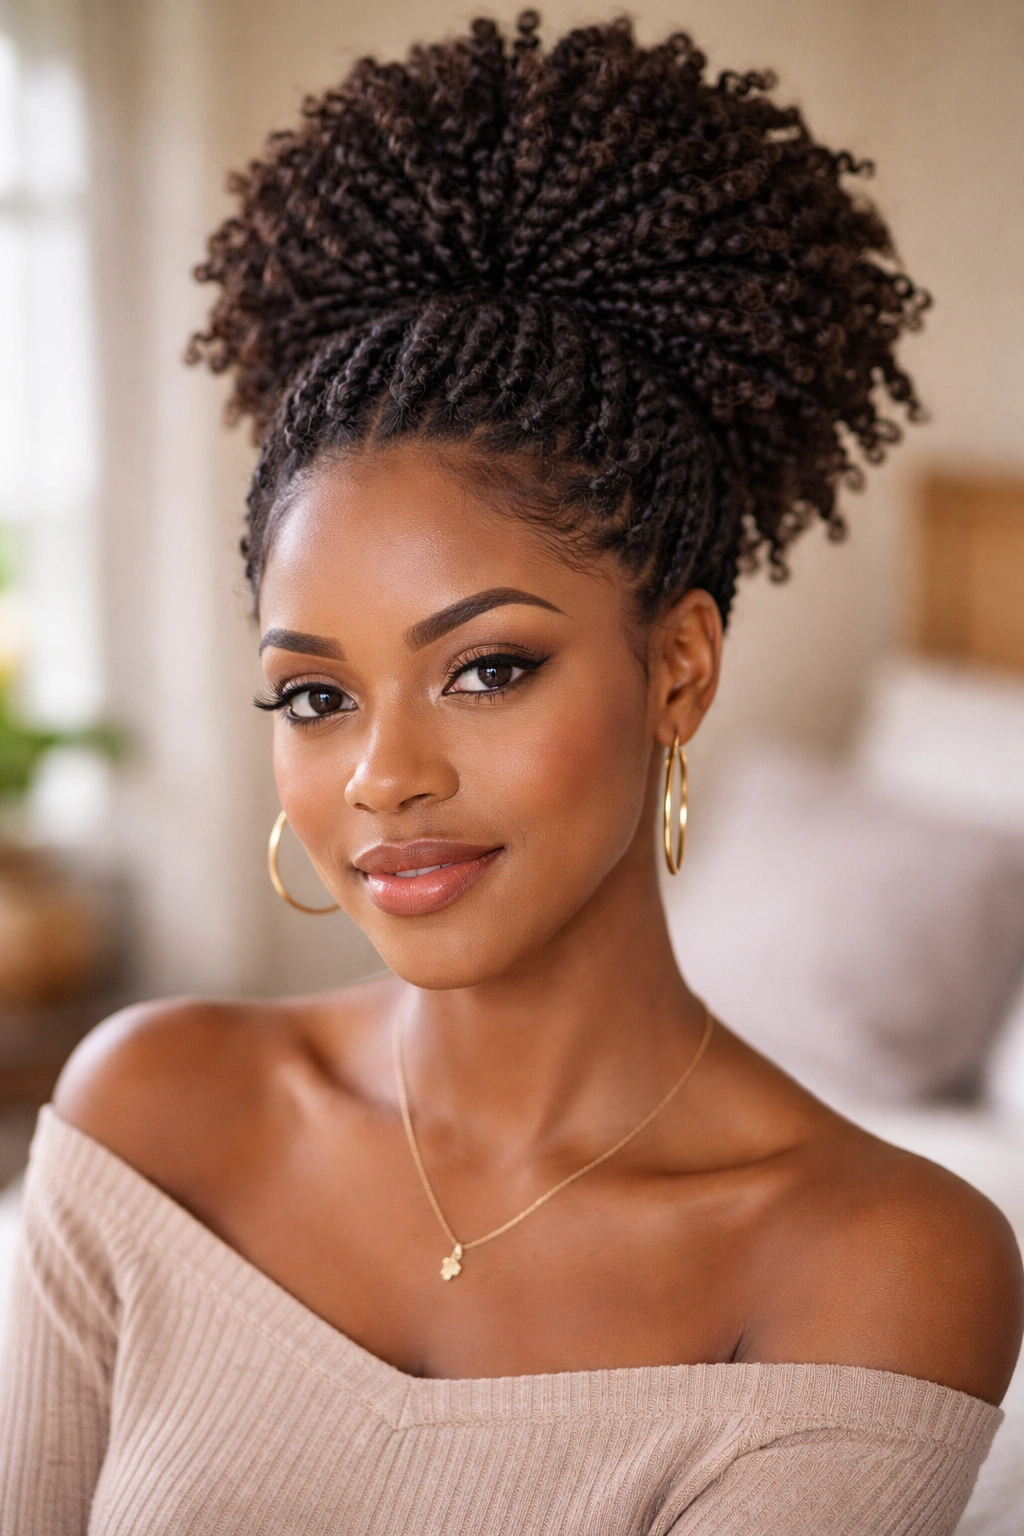
Gather all your twists up to the crown with a fabric-covered elastic and fluff them into a puff shape. The textured surface of kinky twists means the puff will have visual interest — the twists stack and spread against each other rather than lying flat like straight hair would in a bun.
Unlike a puff of natural hair, a puff of kinky twists holds its shape extremely well throughout the day. The weight and stiffness of the extension fiber keeps the shape intact rather than deflating or spreading as the day goes on. The one thing to watch: don’t pull the elastic too tight. The weight of longer twists gathered into a puff puts strain on whatever section of your hairline is supporting all that weight. Loose but secure is the goal.
3. Kinky Twists Half-Up
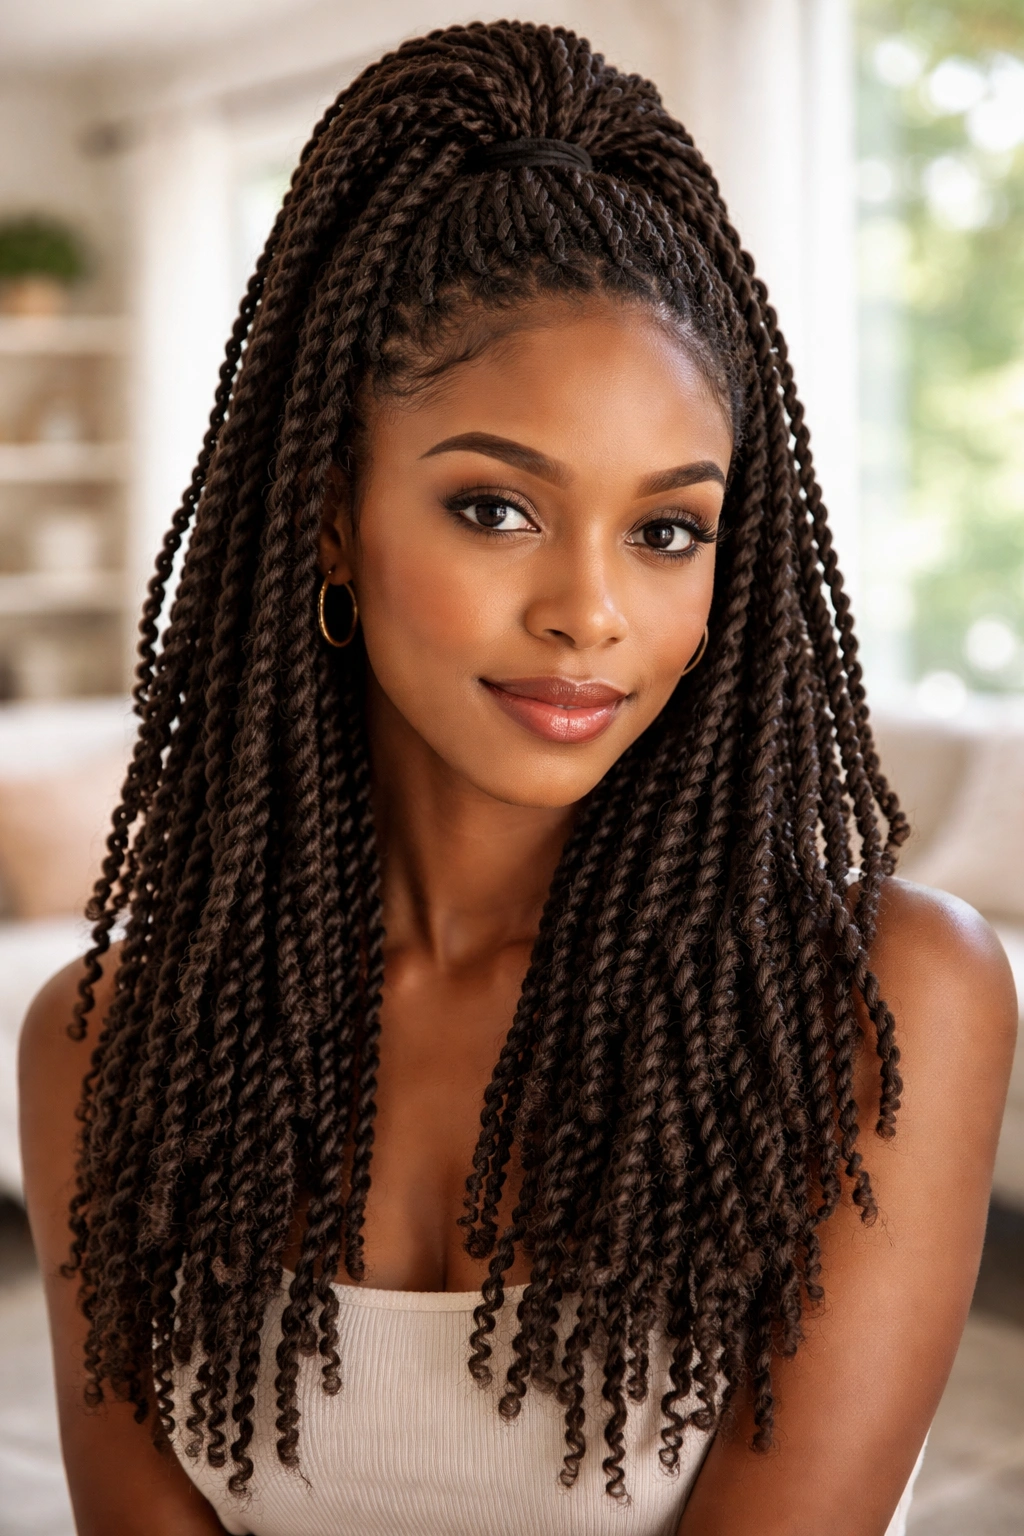
Top half gathered and secured, bottom half loose. Exactly as described for box braids, but the textured twist surface changes the aesthetic significantly — more organic, less architectural. The gathered top section shows the contrast between gathered and loose twists beautifully.
This is one of those styles you can do in 60 seconds and it reads as deliberately styled. Keep the elastic at crown level, leave a few twists deliberately loose around the face, and you’ve got a look that works anywhere from a casual outing to a work meeting.
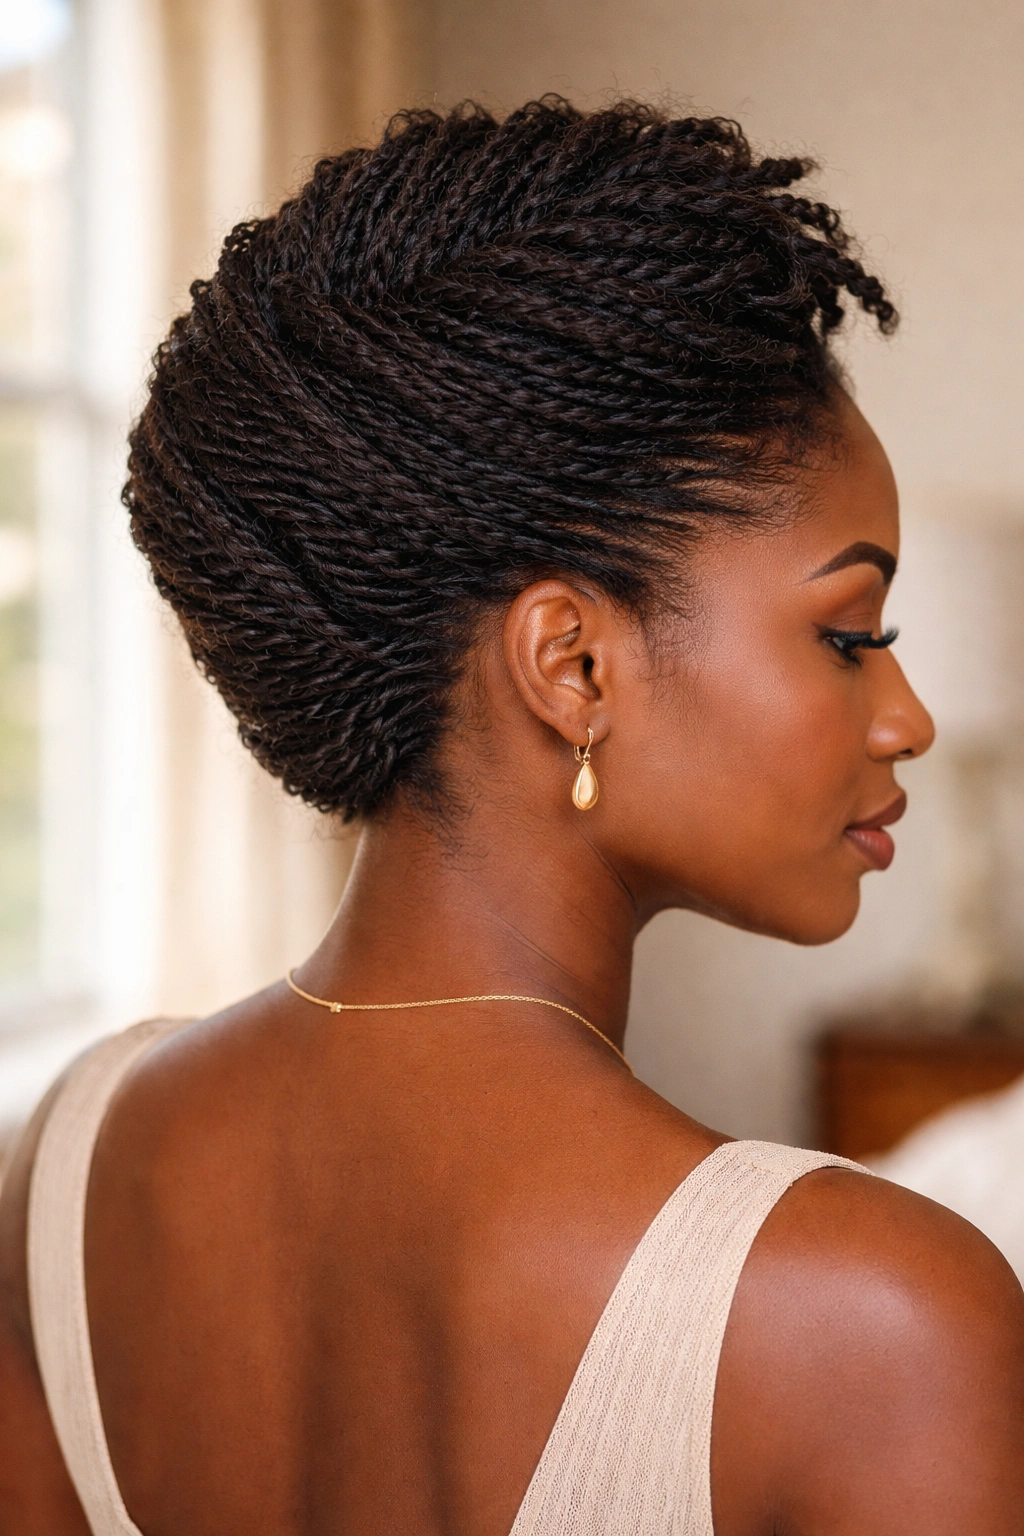
4. Kinky Twist Updo with Pinned Coils
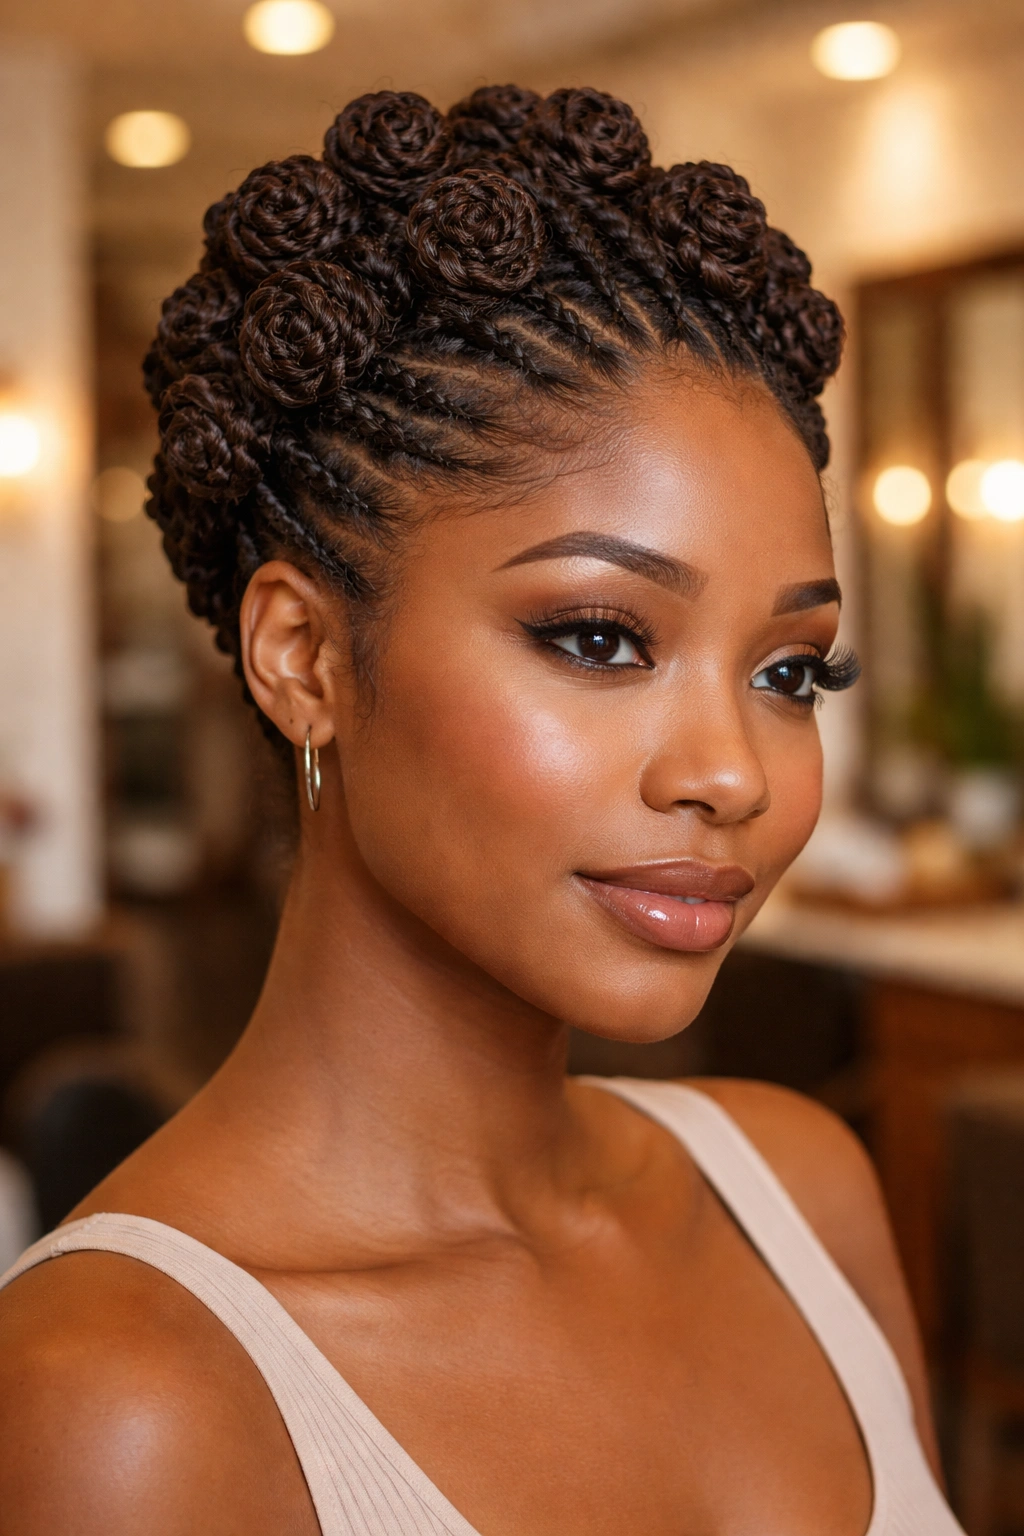
Take individual twists and wrap each one into a small coil — wrapping around itself in a circular motion — then pin each coil to the head. Work in sections across the entire head until all twists are coiled and pinned. The result is a textured updo that looks like a collection of small pinwheels or rosettes across the scalp.
How to Get the Most From It
The smaller and tighter you coil each twist, the more intricate the final look. Work from the back forward so you can see your progress. Use U-shaped pins rather than straight pins — they grip the coil and the hair underneath simultaneously without pulling. Take the coils down in reverse order, starting from the front. The more carefully you unpin, the less disturbance to your twist roots.
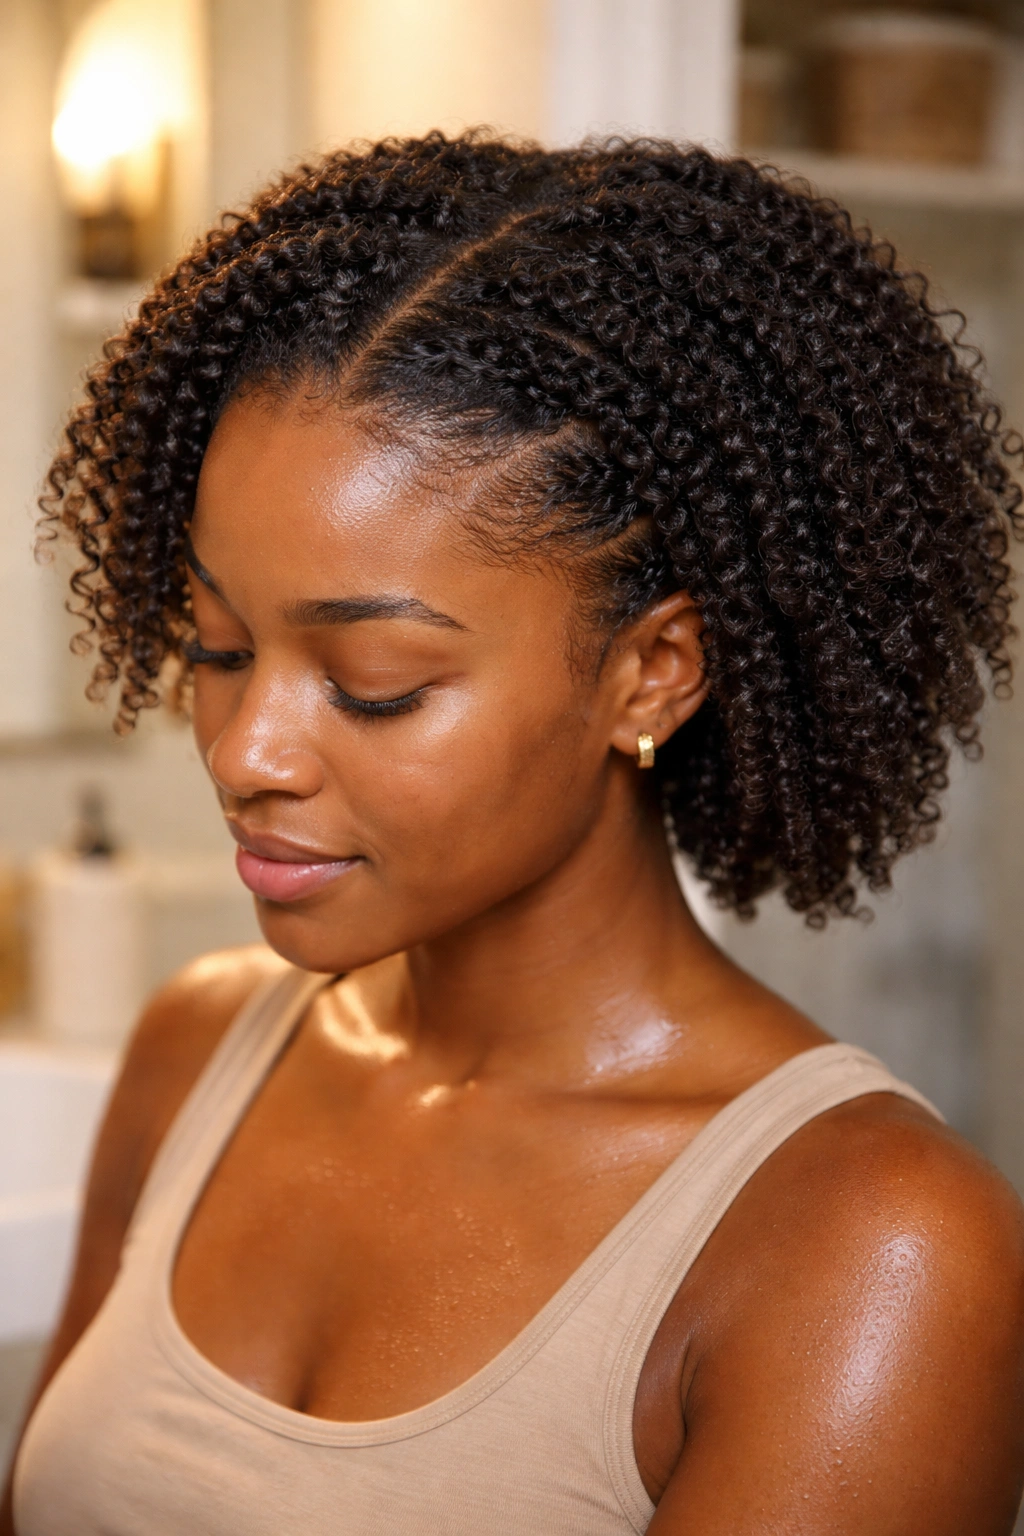
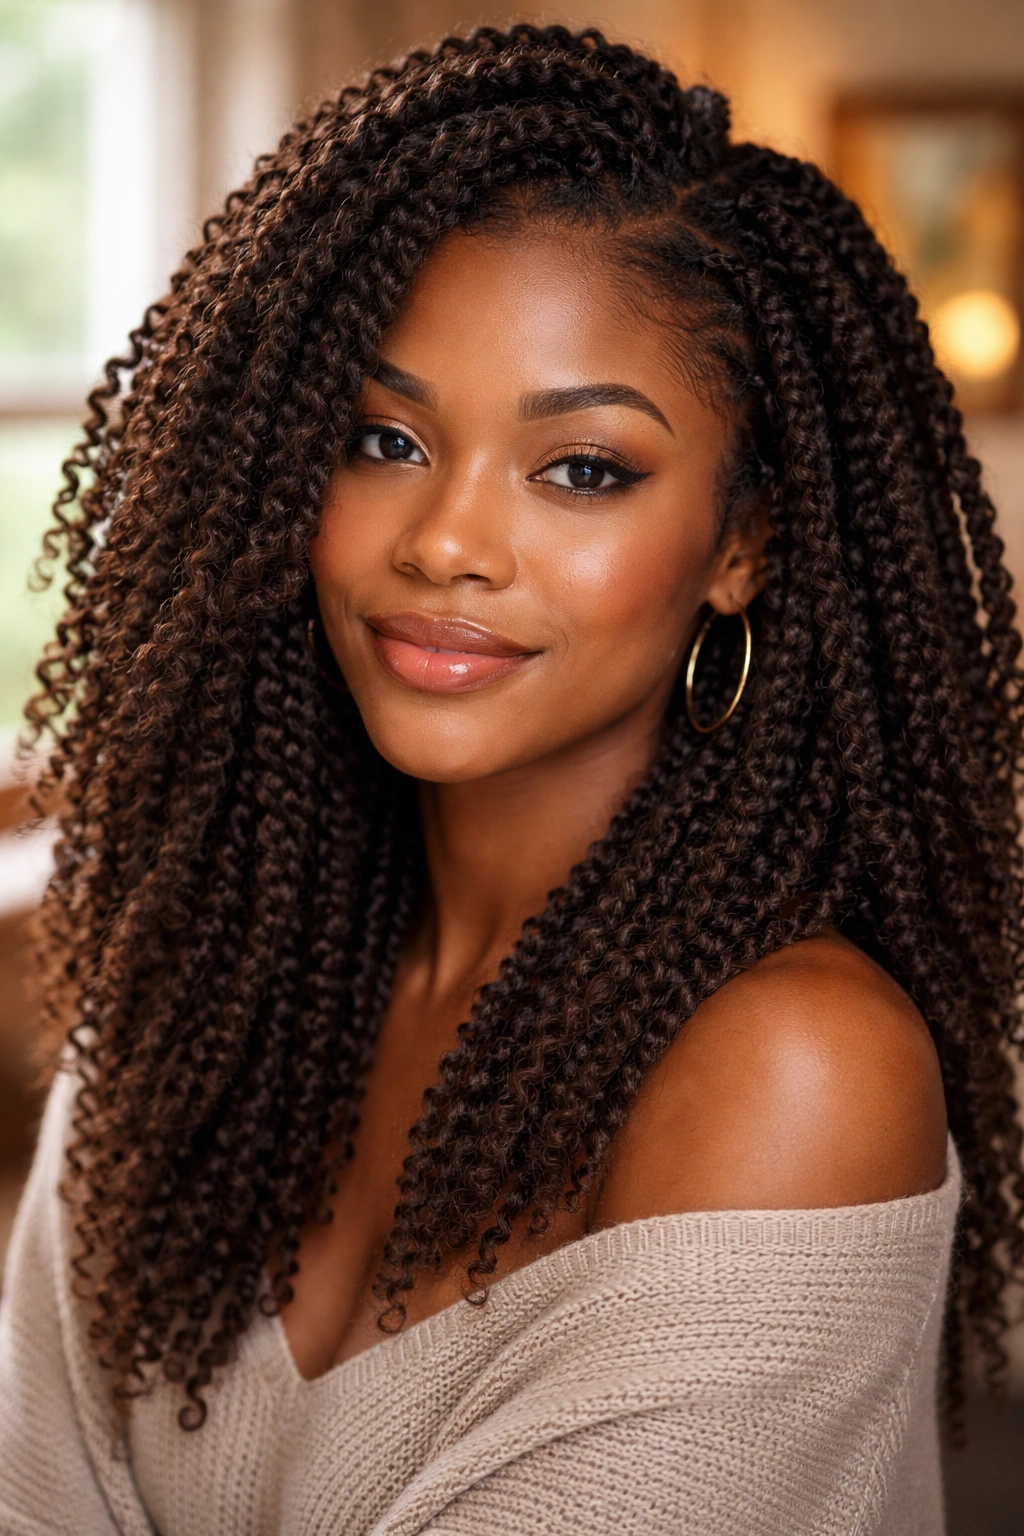
5. Twist Out on Kinky Twists
After 2-3 days of wear, remove the kinky twists — unravel each one carefully — and you’ll be left with a deeply textured, highly defined look that combines your natural curl pattern with the memory from the twists. This isn’t quite the same as a twist-out on your own natural hair; the extension fiber adds bulk and the twist memory is more pronounced.
What goes wrong here: leaving twists in longer than 3-4 days before doing this produces results that are more “matted” than “textured.” The sweet spot for a kinky twist twist-out is the 2-3 day mark. Any earlier and the twists haven’t had time to set the shape. Much later and the fibers start to mat together.
The result of a properly timed kinky twist twist-out can be absolutely stunning — and it looks completely different from both the twists and from a standard twist-out on natural hair.
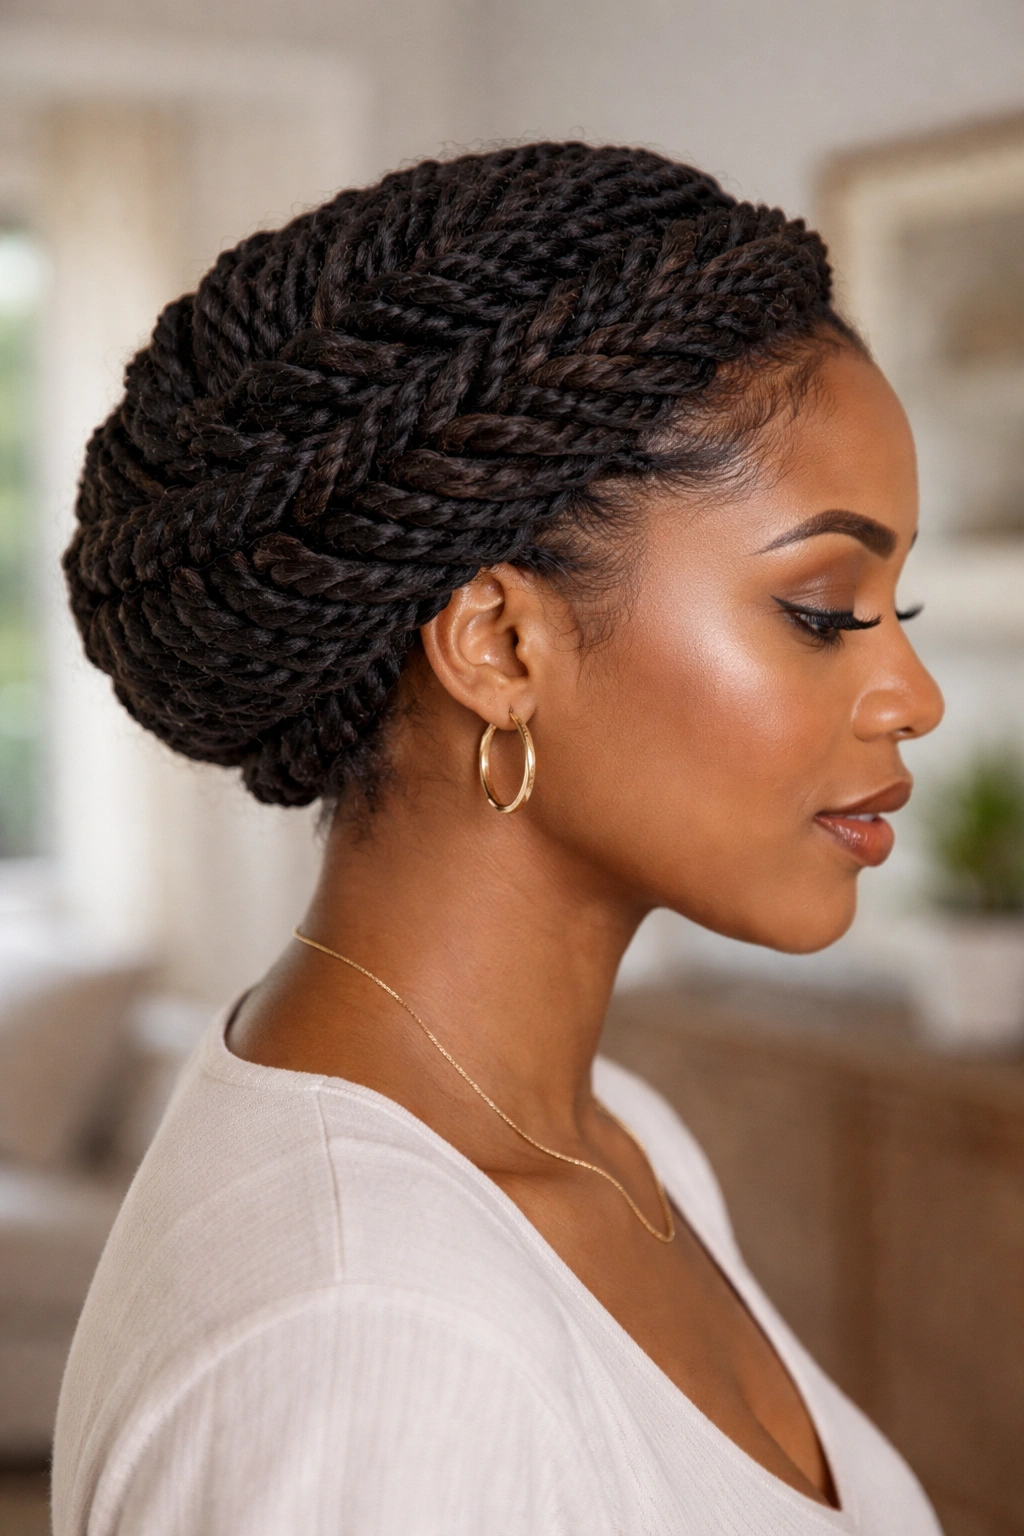
6. Low Bun of Kinky Twists
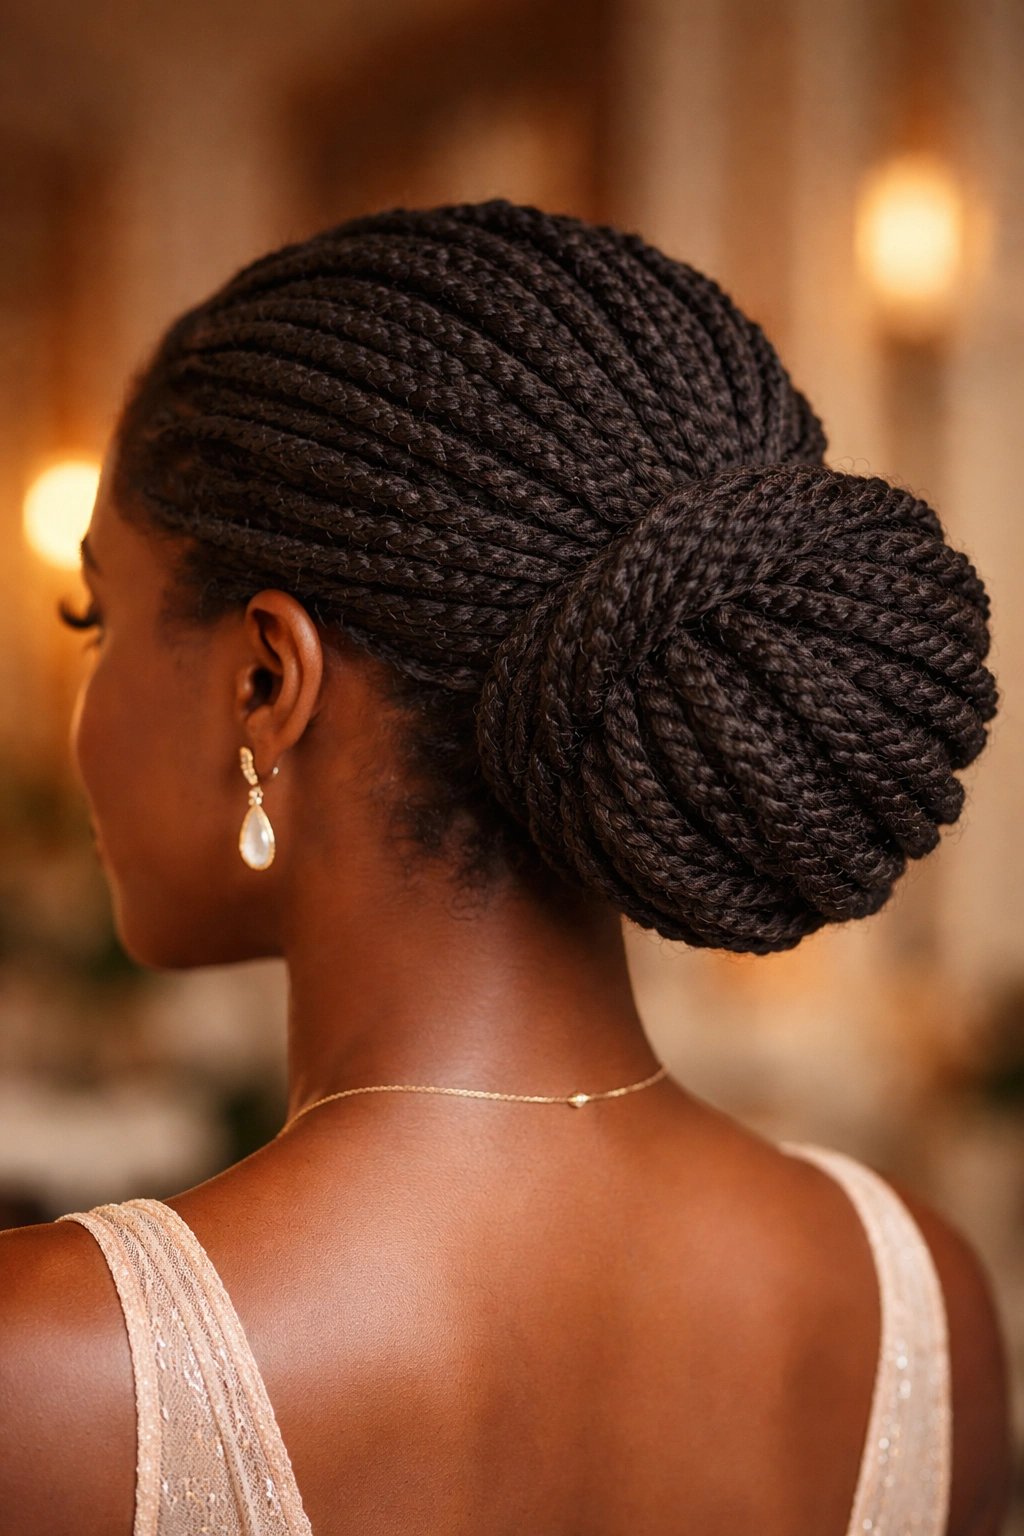
Gather all your twists to the nape of the neck, fold them over themselves — not wrapped, just folded — and secure with pins. The folded, stacked twists create a thick, textured bun that sits low and heavy at the nape. The texture reads like a sculptural feature rather than just a gathered bun.
This style is appropriately elegant for formal settings. It’s also genuinely comfortable because the weight of the twists is supported at the nape rather than pulling from a higher point. The fold-and-pin technique is easier than it sounds: gather at the nape, hold the gathered section, fold the free-hanging length back up toward the scalp, and pin along the fold.
7. Half-Crown Kinky Twists
Sweep the twists from one temple across the crown and pin them on the opposite side — like a half-crown braid but made of individual loose twists rather than a cornrow. Leave the rest of the twists loose. The swept section creates a band across the head that reads as deliberately designed without being fussy.
What Makes It Different
Unlike a tight pinned updo, the individual twist texture is still visible in the swept section. It doesn’t compress into a smooth shape — it retains the kinky, textured quality even when pinned. This is precisely what makes it look like a thought-out hairstyle rather than a rushed tuck-and-pin.
8. Kinky Twists with Patterned Scalp Parts
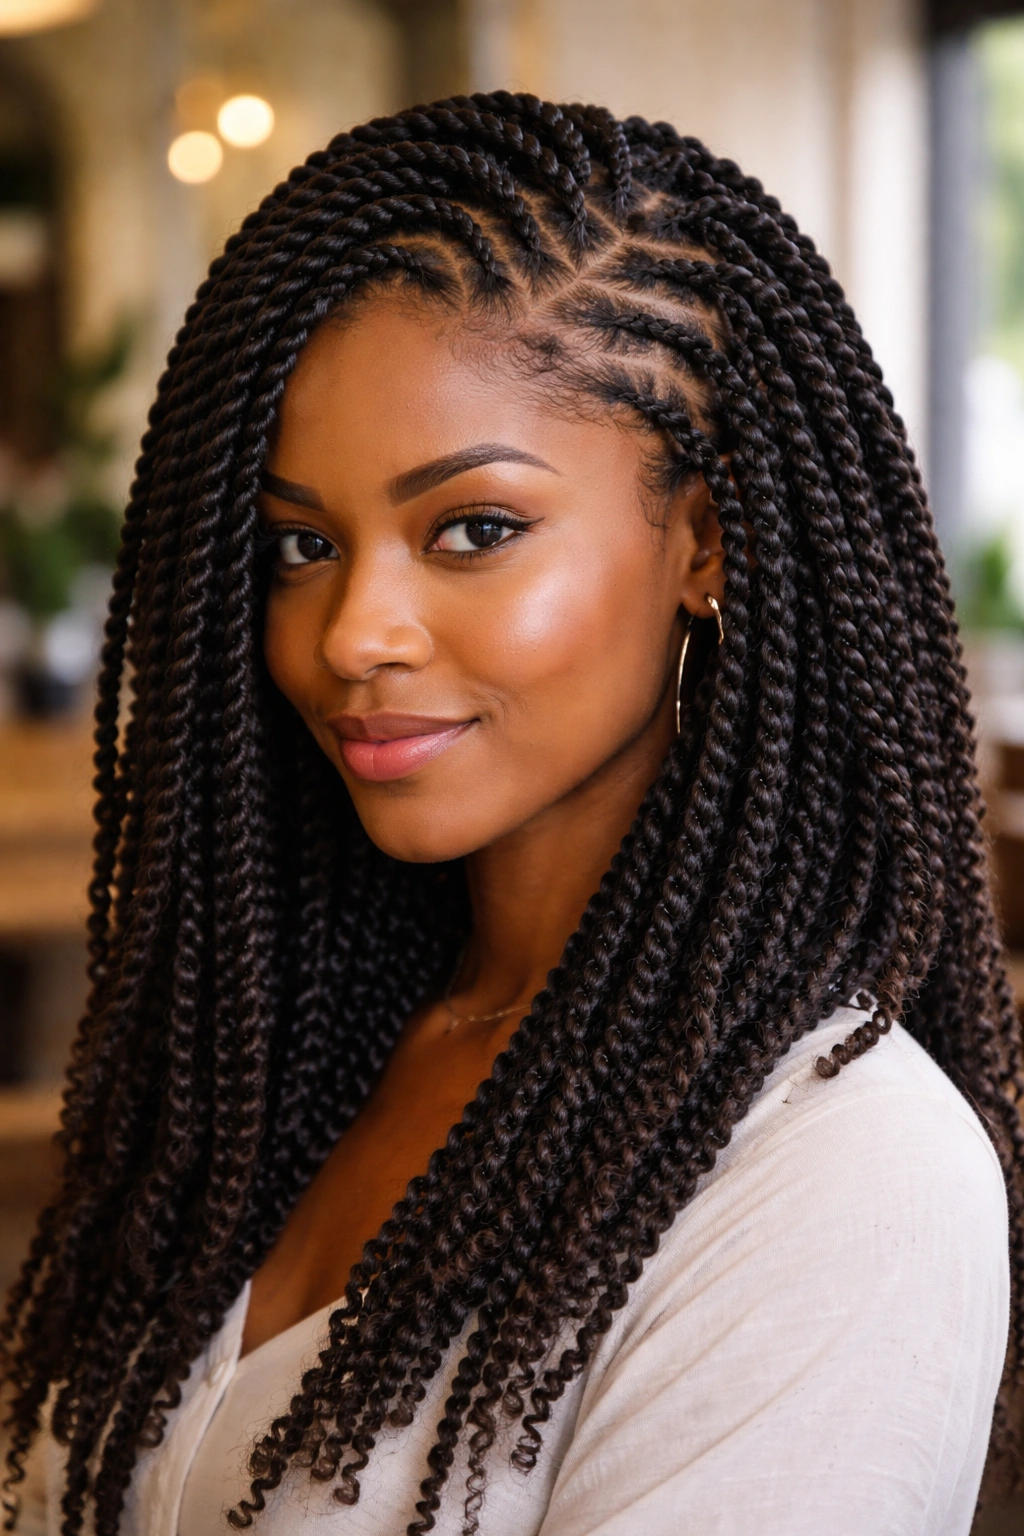
Ask your braider to create a specific parting pattern during installation — a zigzag center part, diagonal parts, or a honeycomb pattern. The pattern becomes a design element visible whenever the twists are pulled back or to the side.
This is a detail that most people don’t see unless they’re looking for it, but it changes the character of the style significantly for those who do notice. Geometric scalp parts are an understated form of hair artistry — they turn the installation itself into part of the design.
9. Kinky Twists with Bright Color Pieces
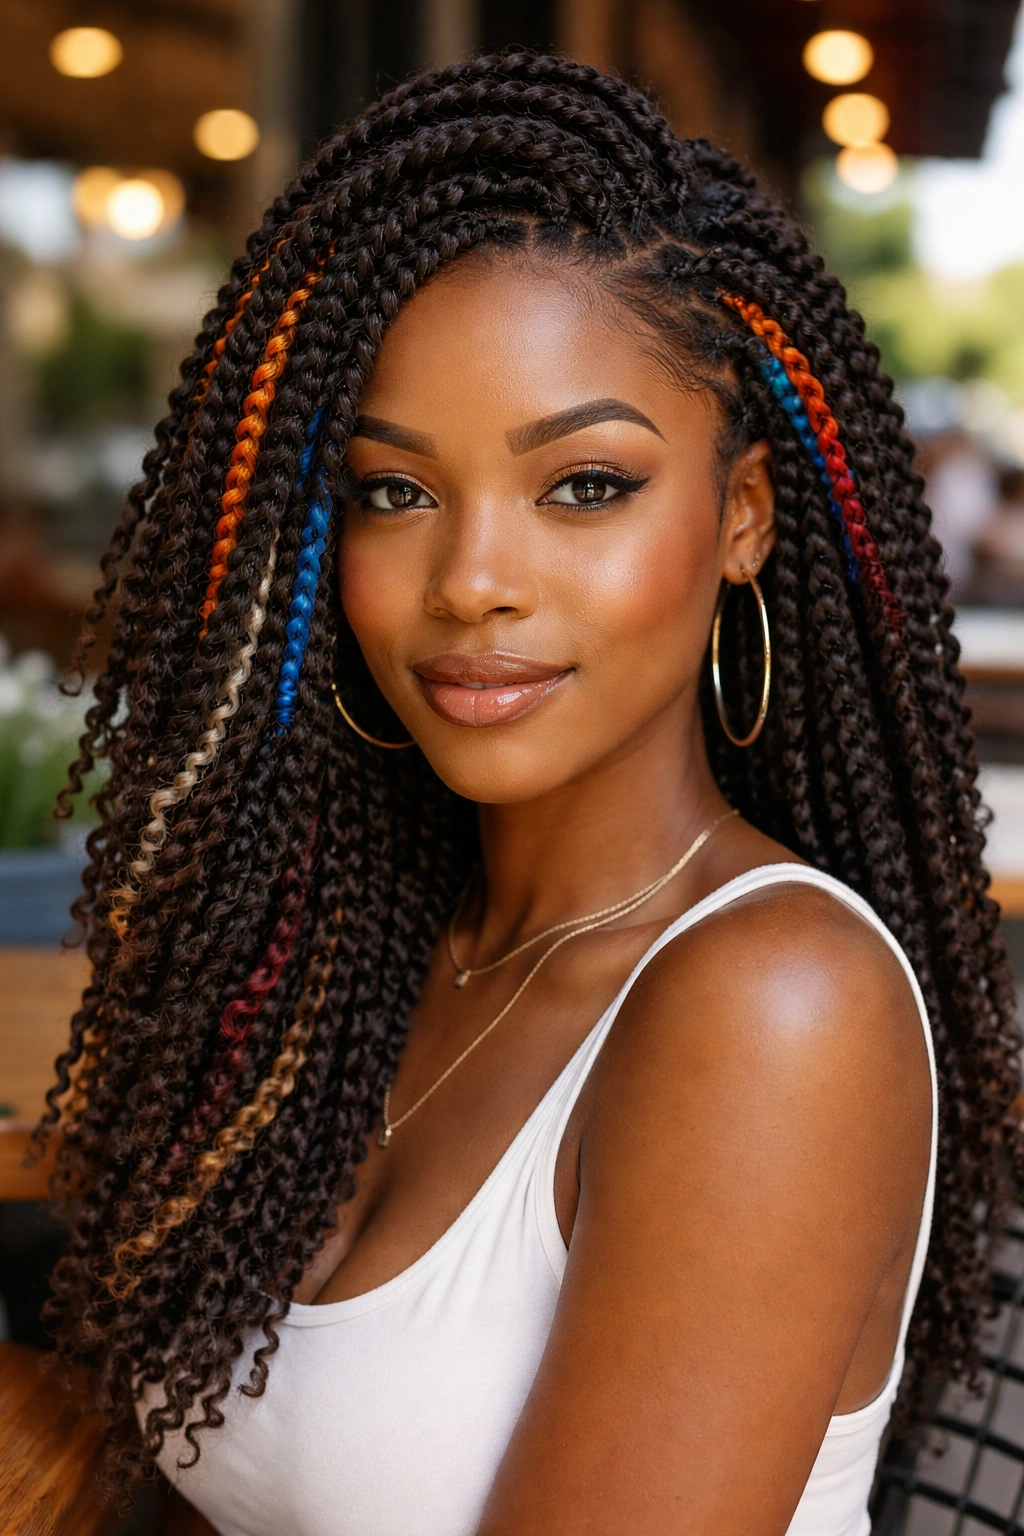
Rather than a full-head color, add 4-6 brightly colored kinky twists placed strategically through the style — at the front, at the temples, or scattered throughout. Because Marley hair comes in an enormous range of colors, the color options are virtually unlimited.
Bright orange, vivid blue, burgundy, and blonde are the most commonly requested pops of color. The colored twists blend into the overall look when your hair is down but become the focal point when you gather your twists into a puff or updo. It’s color placement that works with your styling choices rather than independent of them.
10. Kinky Twists in a Low Ponytail
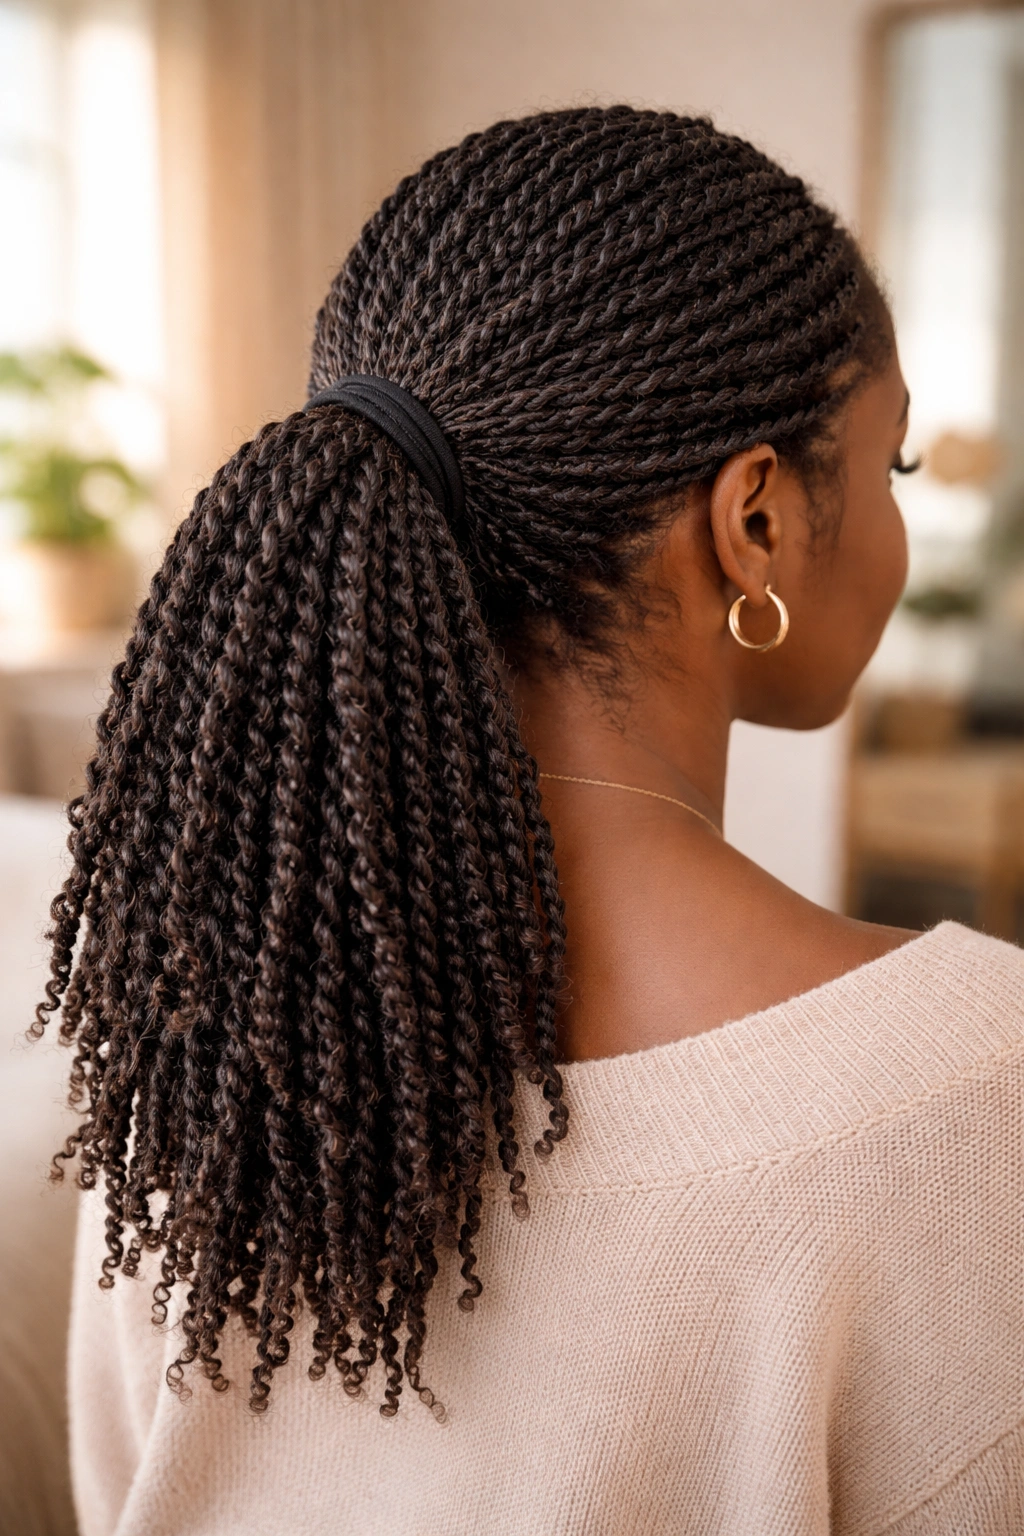
All twists gathered at the nape or below, held with a large elastic, and hanging free from there. Longer twists will cascade down the back. Shoulder-length twists will create a full, compact bundle at the neck.
This reads understated but never boring — the kinky texture of the twists gives visual depth that a smooth ponytail of straight hair could never achieve. It’s the style you reach for when you want your hair contained and out of the way without losing the visual impact of the twists.
11. Kinky Twist Space Buns
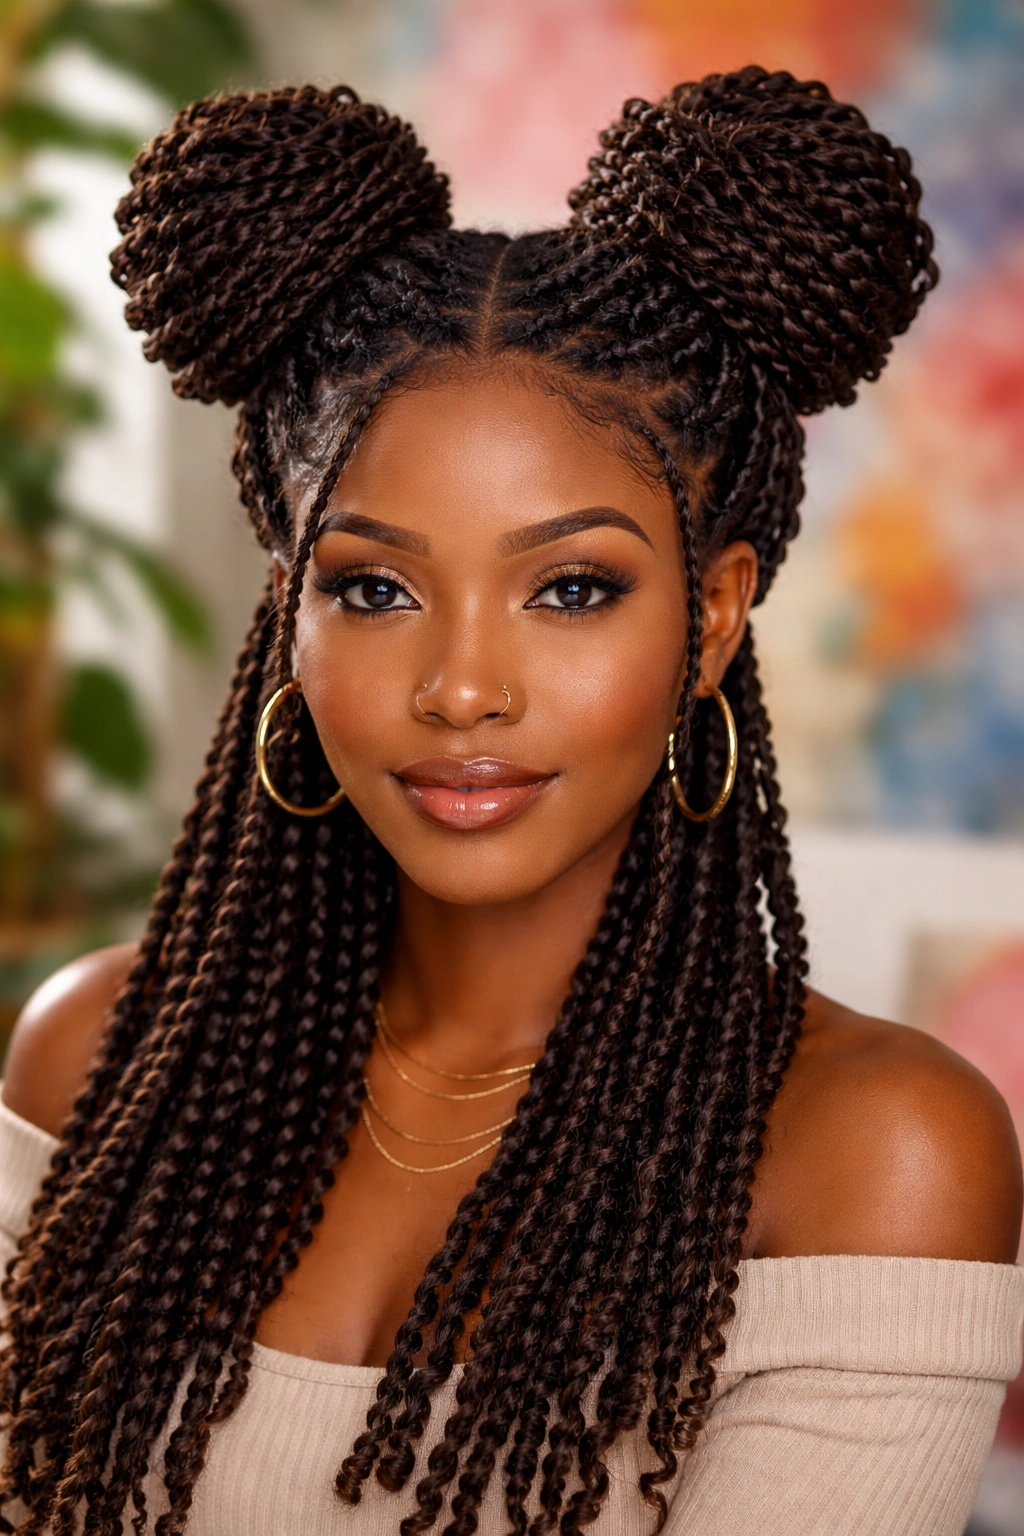
Two high, matching buns — one on each side of the head — made from kinky twists rather than natural hair. The textured surface of the twists means these space buns have visual weight and depth that straight-hair space buns don’t.
These are deliberately playful. No apologies. But they work at any age, in any creative environment, and they take under 3 minutes to create once your twists are installed. Split your twists down the center, gather each side into a high bun, secure, and pin any loose ends.
12. Kinky Twists with a Headband

A simple accessory transformation. A thick fabric headband — especially a knotted or wrapped one — worn across the front of the head while your twists hang loose dramatically shifts the styling of the look. The headband cinches the front twists slightly and frames the face.
The rule here: the headband should be secure enough not to slide but not so tight that it pulls on your hairline. Fabric headbands work better than hard plastic ones for this. Satin-lined headbands protect the hairline best. And the accent color of the headband can either blend with your twists or contrast deliberately — both approaches work, just for different effects.
13. Kinky Twists Wrapped in a Scarf
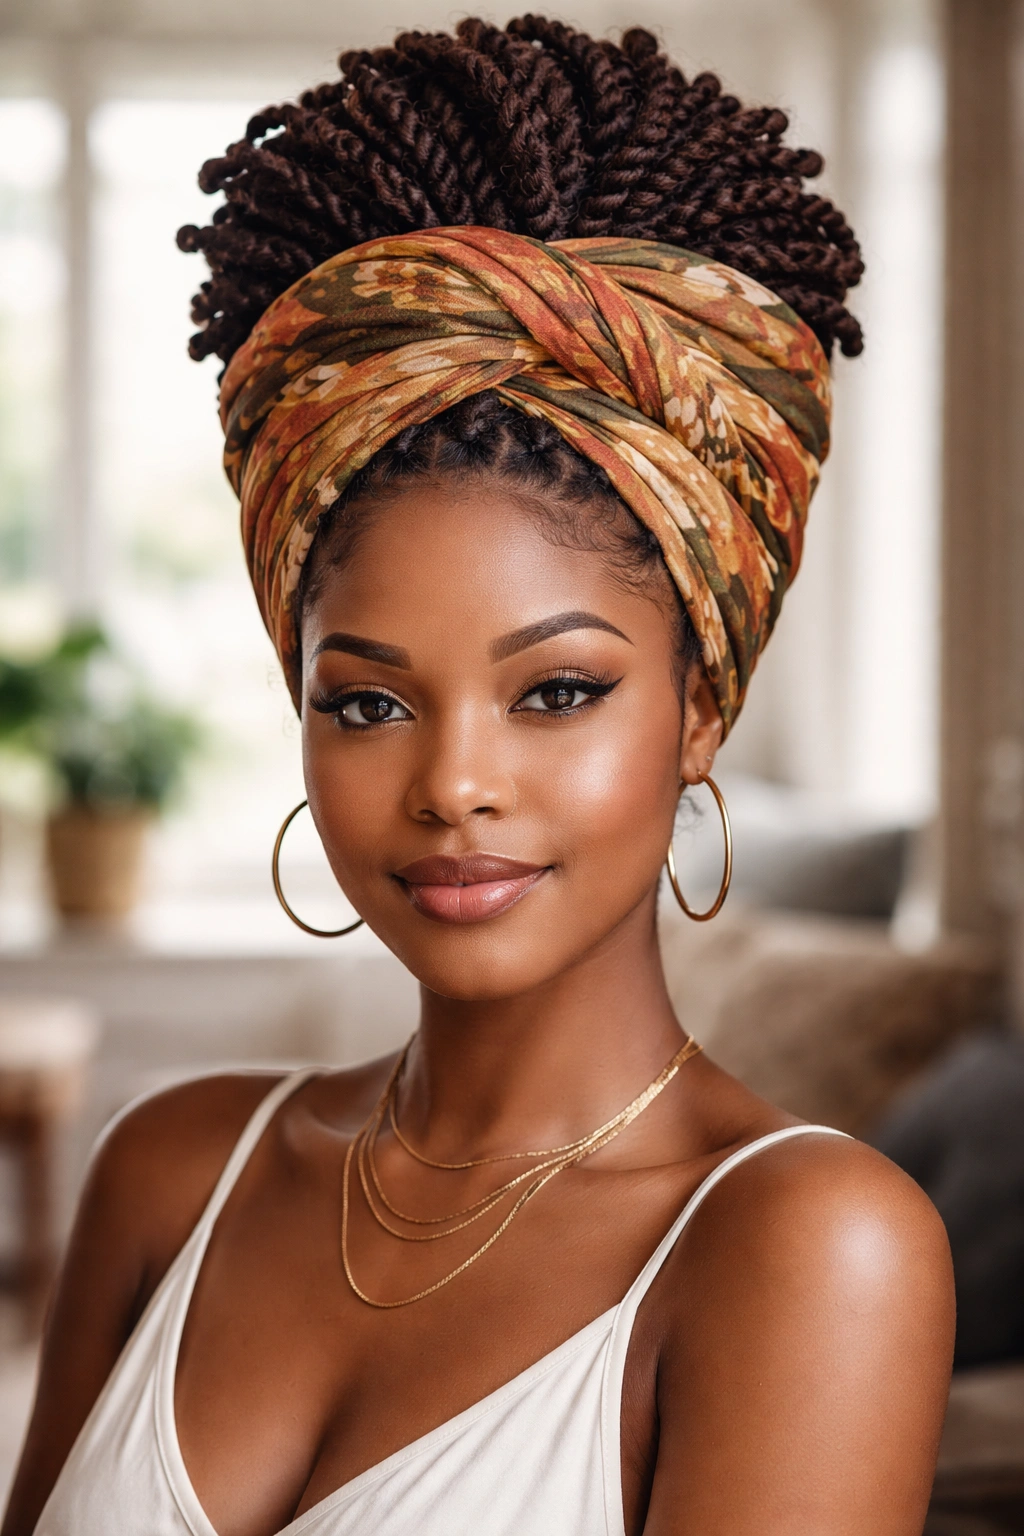
Gather all twists into a high puff or bun and wrap a large satin or cotton scarf around the entire thing — head wrap style. The puff might peek out above the wrap or be fully enclosed depending on the wrapping technique you use.
Unlike a scarf worn at the hairline only, a full head wrap completely transforms the silhouette. You’ve gone from a twist style to a wrapped crown look. This works as a style choice but also as a practical refresh technique on days when your scalp needs a break from being visible or when your twists are starting to look worn but you’re not ready to take them down yet.
14. Kinky Twists in a French Twist
Gather all your twists and sweep them up into a French twist shape — that vertical roll that sits at the back of the head with the ends tucked inside. Because kinky twists have more body and grip than straight hair, a French twist made of kinky twists requires fewer pins and holds together more easily.
Who This Is For
Naturals who want a clean, sleek updo for a formal occasion without heat styling. The kinky twist French twist reads elegant while still being clearly natural. The texture peeking out at the top where the twist is tucked is a feature, not a flaw. It’s what distinguishes this from a standard French twist and makes it distinctly yours.
15. Two-Puff Kinky Twist Style
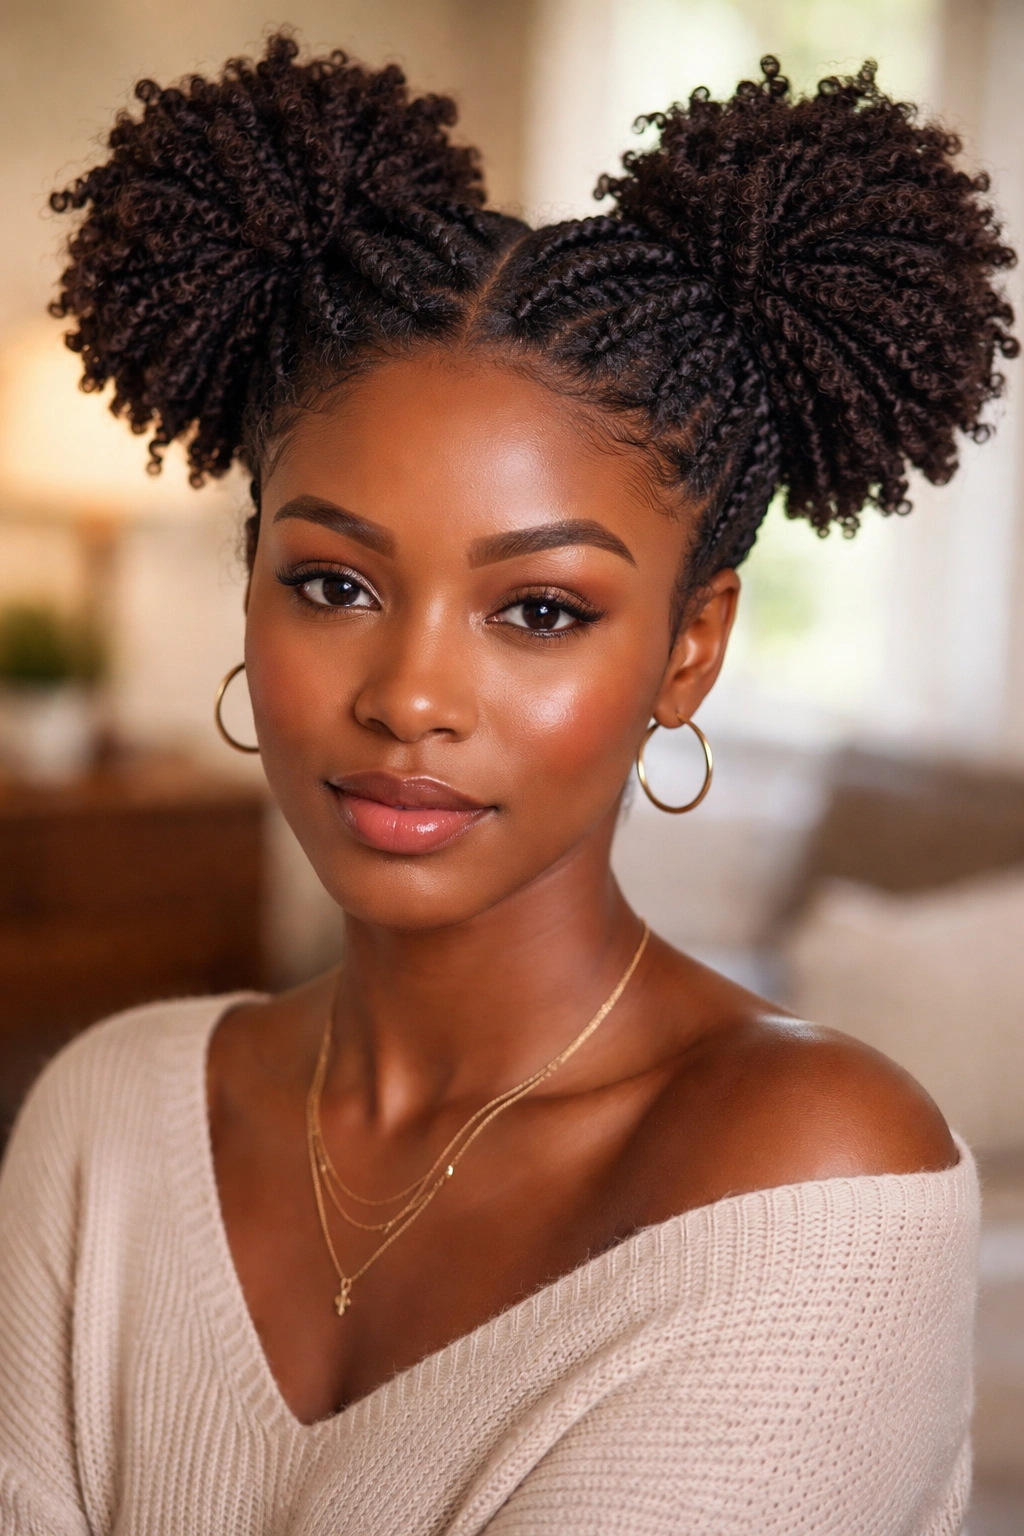
Split your twists down the center, gather each side into a high puff. You’ve seen this on box braids and natural hair — it works equally well with kinky twists, and the thick texture of the Marley hair makes each puff fuller and rounder than the same style would be with finer-textured extension hair.
This is a style that works from toddlers to adults and it refuses to age out. The puffs are symmetrical, fun, and take about 2 minutes. On a day when every other decision feels hard, this one is easy.
16. Kinky Twists in a Crown Braid Style
Rather than braiding a crown, you’re creating the visual of a crown by tucking your kinky twists in a circular arrangement around the head and pinning them in place. Work in sections — take a group of twists, lay them along the circumference of the head, and pin every 2 inches. Continue until the whole head is pinned into the crown shape.
The volume that kinky twists add makes this crown look significantly more substantial than the same style done with finer hair. The textured surface grips pins better and holds the circular shape without needing constant reinforcement.
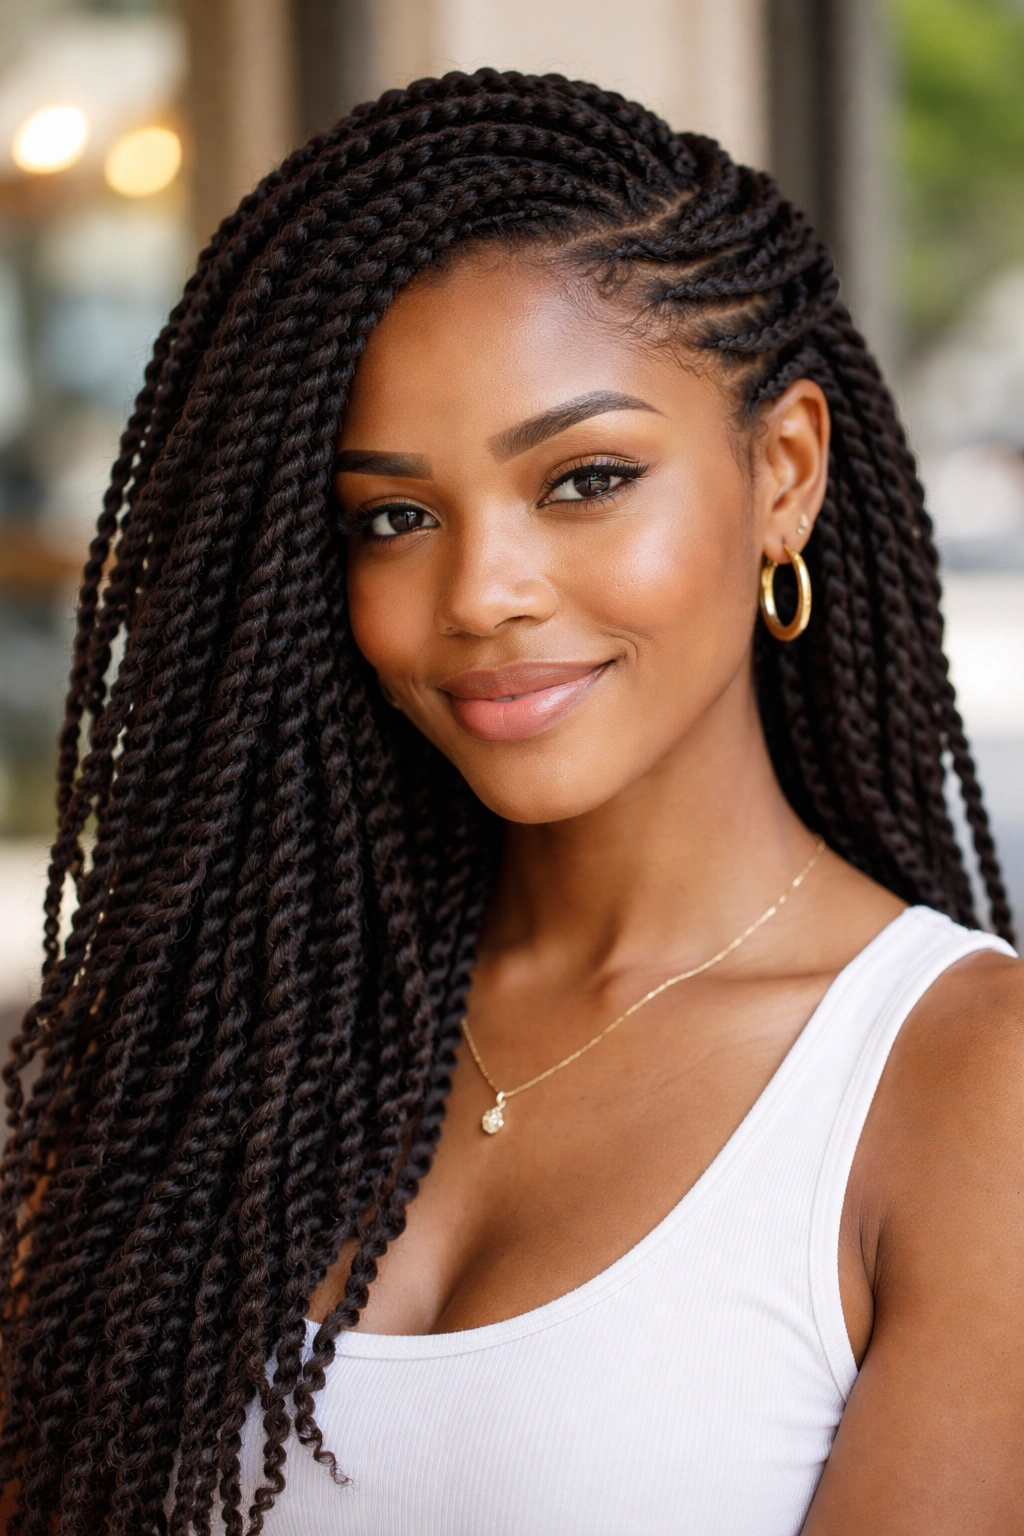
17. Kinky Twists with a Side Sweep
Pull all your twists to one side — let them drape over one shoulder — and secure them loosely with a single pin at the opposite temple to keep them from shifting back to center. The effect is a one-shoulder, dramatic sweep that emphasizes the length and volume of your twists.
For this to work, your twists need to be at least shoulder length. Shorter twists pulled to the side just bunch awkwardly rather than draping. The longer they are, the more dramatic the drape. Accessorize on the opposite side — an earring, a cuff, something — to balance the visual weight.
18. Individual Kinky Twists Mixed with Curls
Leave some sections of your natural hair untwisted — gathered into coils or loose curls — while the majority is kinky twisted. The contrast between the textured twists and the freer natural sections creates a layered, mixed-texture look that’s genuinely difficult to categorize.
The practical consideration: the untwisted natural sections will need regular moisturizing and manipulation throughout the wear period. They don’t have the protection of the twist. But if you keep them in looser two-strand twists on your natural hair only — no extension added — you get the visual contrast without exposing those sections to excessive manipulation.
19. Kinky Twist Updos for Special Occasions
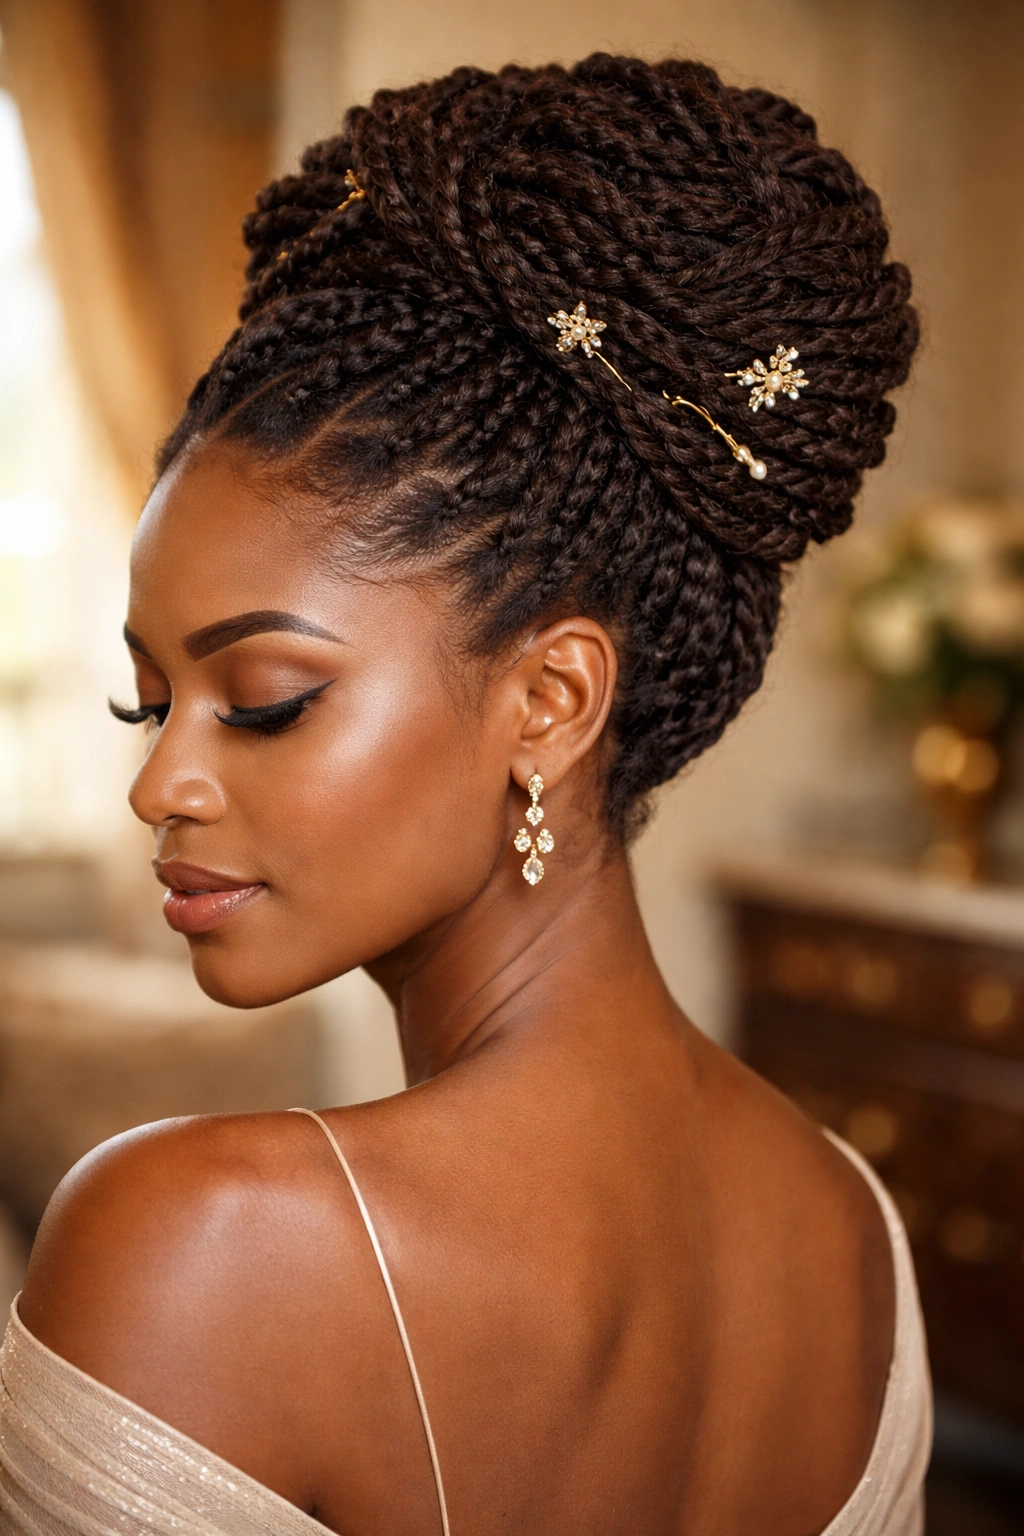
For formal events, kinky twists can achieve updos that look complex but aren’t. The key is using the weight and grip of the extension hair to your advantage. Gather twists into a large bun, then tuck individual shorter twists back over the bun surface and pin them — they’ll sit on top of the bun like decorative elements. Add a few gold pins or small accessories into the bun itself.
The full process takes about 15 minutes and the result looks like something a salon took an hour to create. This is a legitimate strategy for formal occasions.
20. Kinky Twists with Ombre Color
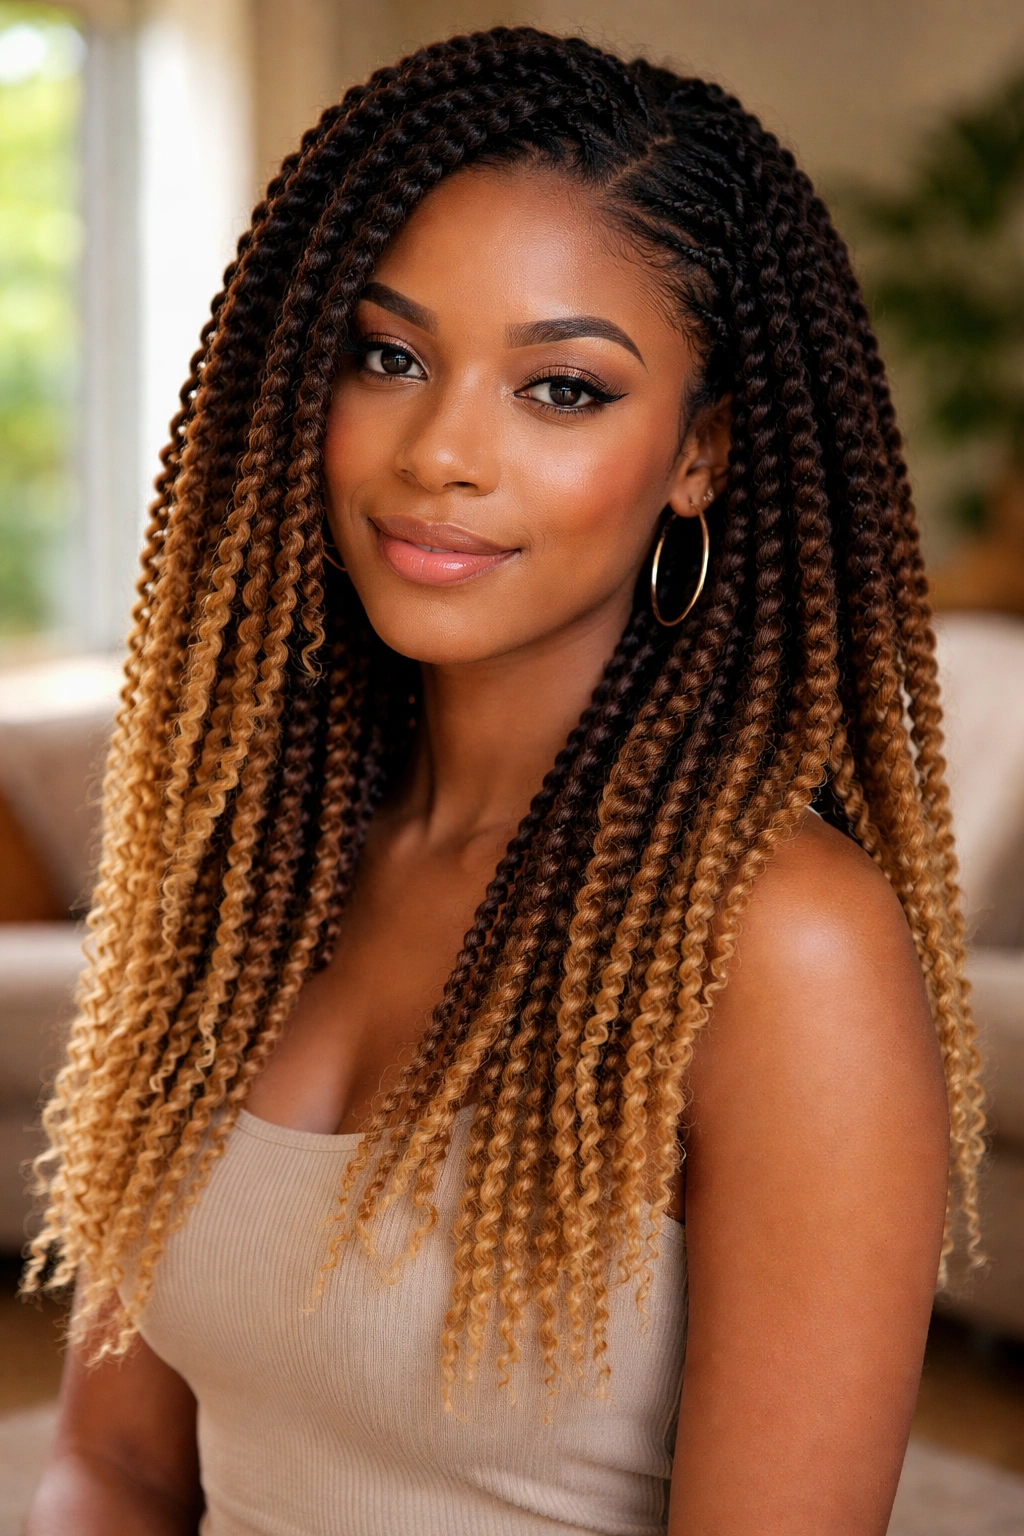
Start the installation with dark fiber at the root and transition — about midway down each twist — to a lighter color. Blonde, copper, honey, or auburn are the most flattering transitions for natural-looking ombre. The gradient should be gradual rather than sudden; a skilled braider does this by blending a small amount of lighter fiber in before fully transitioning.
When worn down, ombre kinky twists look like natural sun-lightened hair. When gathered into a puff, the darker roots are visible against the lighter flowing length. Both presentations are strong.
21. Kinky Twists Cut Short
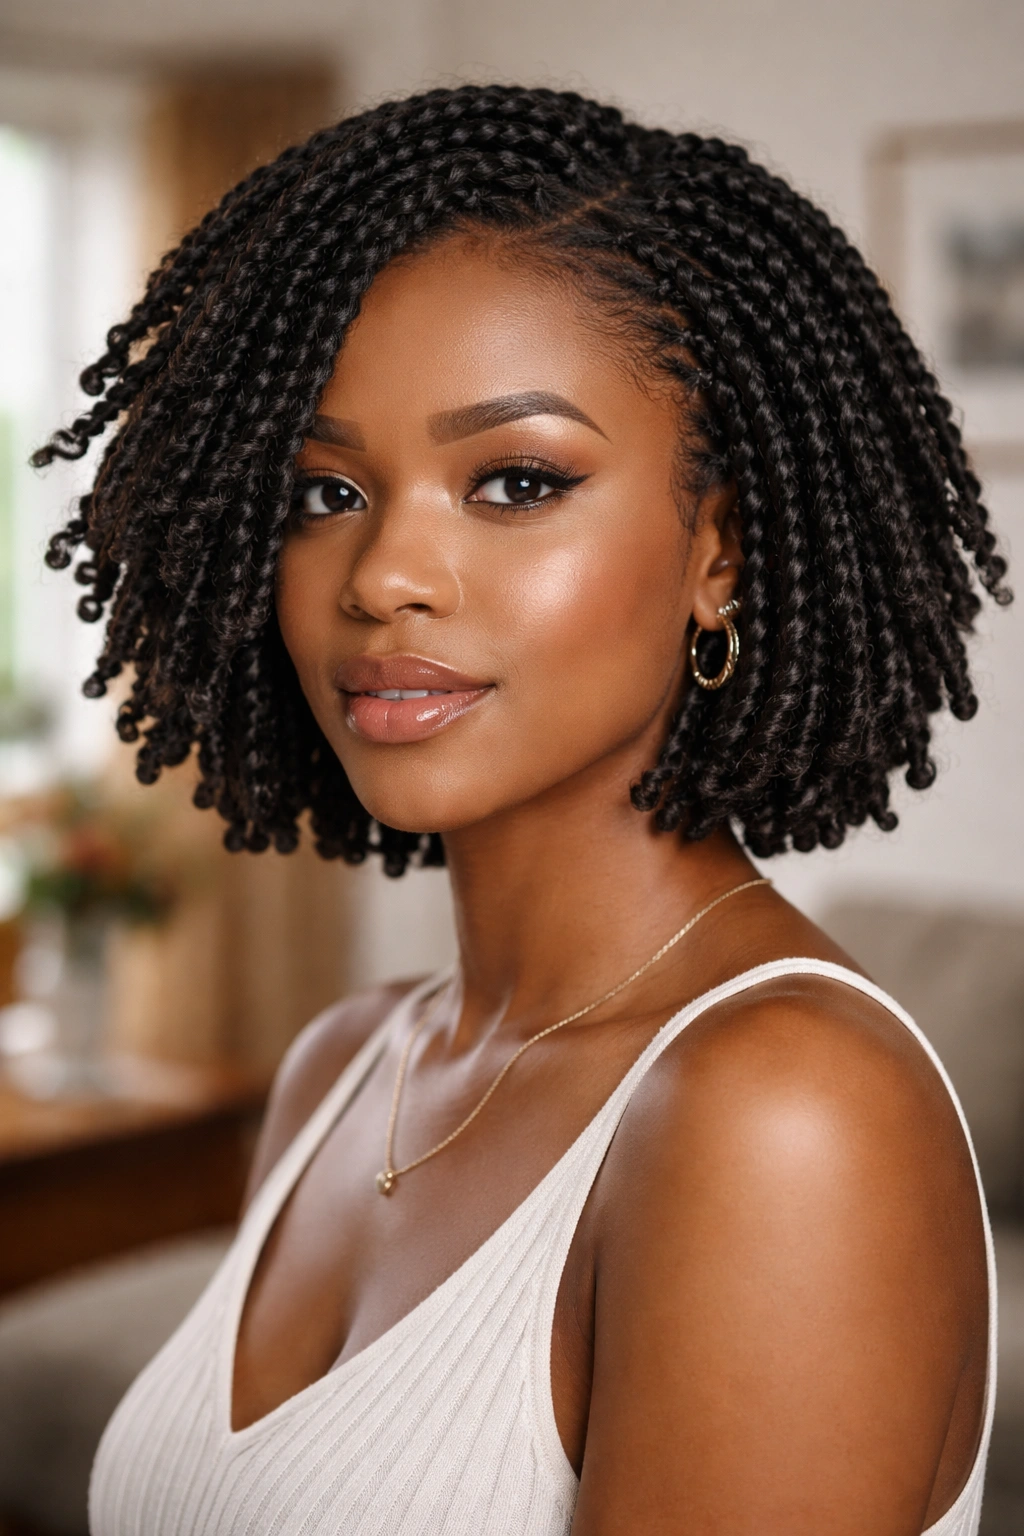
Mid-installation or after wear, cut your kinky twists to a shorter length — bob, lob, or shoulder. The cut creates a very different look than installing at that length from the start because the twists will have some character and movement developed from wear. They won’t look uniform and new; they’ll look lived-in.
This is an option if you installed long and want a change without taking everything down. Cut carefully and in small increments — you can always cut more, you cannot cut back. And cut each twist individually, not in a gathered bunch — scissors through gathered twists will cut unevenly.
22. Goddess Kinky Twists
Pull a few strands of Marley or natural hair out from the body of each twist at random intervals along the length. These loose pieces float around the twist itself, giving the style a softer, more organic look. The technique is identical to goddess box braids — you’re creating the same floating, wispy effect but with kinky texture instead of smooth braided fiber.
The end result softens what is ordinarily a very structured style. Goddess kinky twists read more artistic and organic than standard kinky twists. They’re also harder to maintain because the floating pieces tend to tangle slightly — a light spritz of detangling spray every few days keeps them manageable.
23. Kinky Twists Tied Back with a Single Ribbon
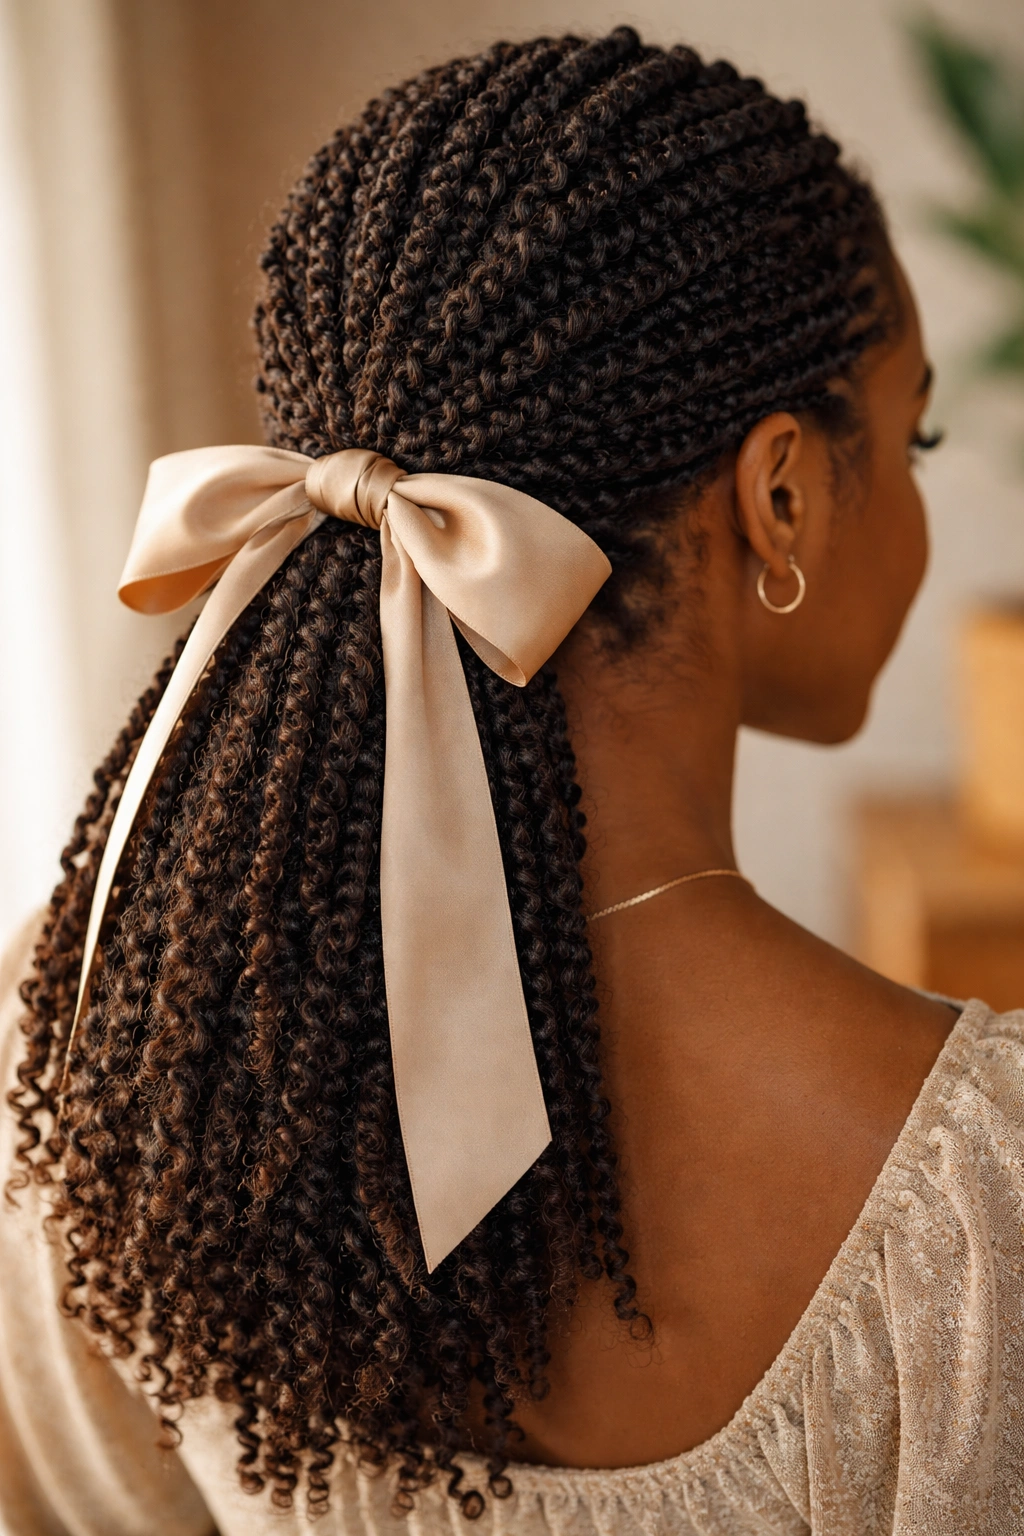
The simplest variation on this list. Gather your kinky twists at the nape of the neck and tie a wide ribbon — silk or satin, 1-2 inches wide — around the gathered section. Tie it in a bow or knot at the front or back. Let the twists fan out or hang below the ribbon.
This is not about the styling complexity — it’s about what a single deliberate accessory does to the look. The same twists that look casual when loose become a considered, complete look when ribbon-tied. Keep a few ribbons in your bag on days you’re wearing twists. You have a styling option available at any moment.
How Long Kinky Twists Actually Last
The honest timeline: 4-6 weeks for medium twists installed and maintained properly. Thin twists can sometimes push to 8 weeks. Jumbo twists often start to look rough at the 3-4 week mark because the larger twist loosens from the root faster.
What shortens longevity most: sleeping without a satin scarf (friction frizzes and loosens the twists), excessive water exposure without drying properly, and skipping scalp oil so the roots dry out and the twist base becomes fragile. What extends it: a satin bonnet nightly, regular light moisturizing spray on the length, and not over-manipulating the style daily.
One thing worth saying plainly: the first two weeks always look better than the last two. That’s not a reason to take them down prematurely — it’s just the reality of wearing extension styles. You get the crisp, fresh look at the beginning and the lived-in, organic look toward the end. Both are valid. Work with where you are rather than mourning what week one looked like.
Refreshing Kinky Twists Mid-Wear
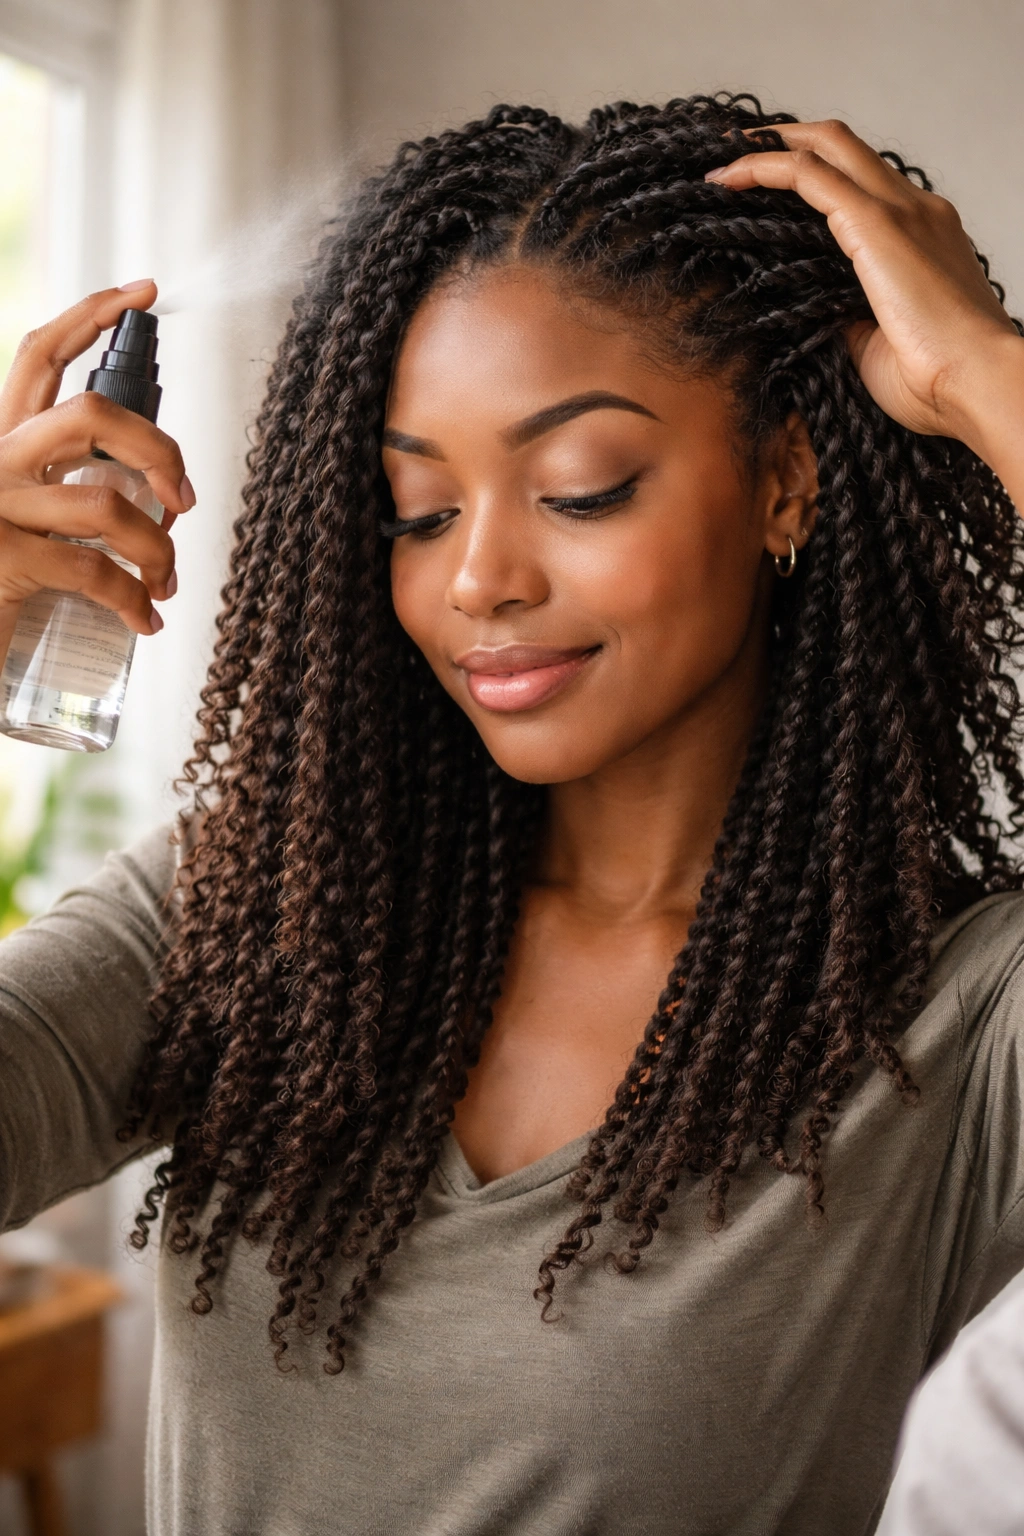
Around the three-week mark, most kinky twist installs start to show some root growth and a bit of frizz along the length of each twist. This doesn’t mean the style is done. It means it needs a refresh.
For frizzy twist lengths: a light water-based misting spray — just water with a drop of aloe vera gel — smoothed over the outside of each twist reduces the surface frizz without adding heavy product buildup. Don’t drench the twist. A light mist and a smooth of your hand down the length is enough.
For root growth: if you installed with the standard knot method and roots are getting fuzzy, a very small amount of edge gel or holding cream applied just at the base of each twist — then tied with a silk scarf for 20 minutes — can re-lay the roots temporarily. This is not a retwist. You’re just pressing the fuzz back toward the scalp. It extends the fresh look by another week without adding tension.
For ends that have started to unravel: seal them again. Dip in hot water if the hair is Kanekalon. For Marley hair that doesn’t respond well to hot water, use a small clip at the end to gather the unraveling strands back together, or simply cut the unraveled portion below the point where the twist is still intact.
Common Kinky Twist Mistakes Worth Knowing
Installing on dry hair. This is the most common and most damaging error. Kinky twists installed on hair without adequate moisture cause breakage when you eventually take them down — the dry, brittle natural hair snaps where it’s been enclosed. Always moisturize before your install appointment.
Choosing the wrong hair weight for your texture. If your natural hair is fine, jumbo twists made with an excessive amount of extension fiber will be too heavy for your follicles to support comfortably. The result is tension headaches and potentially traction alopecia at the root. Match the extension weight to what your hair can actually hold — a good stylist will guide you on this, but it’s worth asking specifically about fiber weight when you’re discussing your install.
Skipping the satin bonnet at night. One night on a cotton pillowcase isn’t ruinous. A week of it is. Cotton absorbs the moisture from both your natural hair and the extension fiber, dries the scalp, and creates friction that unravels the tip of each twist faster than any other single factor. A satin bonnet or pillowcase is a $10-15 investment that extends your install by weeks.
Over-moisturizing the length. There’s a balance. Too little moisture and the Marley hair becomes dry and brittle, the twist loses its shape, and the ends fray faster. Too much — especially with heavy cream products applied to the full length of the twist — creates buildup that makes the twists feel sticky, attracts lint and debris, and eventually causes the extension fiber to separate from the natural hair at the root. Light misting and scalp oil. That’s the balance.
Taking Down Kinky Twists Safely
Cut or untie any sealed ends first. Then gently unravel each twist from the bottom upward — not pulling from the root, which strains the natural hair. Keep a bottle of detangling spray nearby. As you unravel, saturate the natural hair at the base of each twist with the spray before pulling the extension hair out. This prevents dry, tangled natural hair from snapping.
Expect shed hair. The density of Marley hair means shed strands can get trapped in the twists during wear. When you unravel, those shed strands come out at once — it looks alarming but is usually just accumulated daily shedding.
Work on small sections at a time rather than trying to take the entire head down in one go. Take down 10-15 twists, detangle and moisturize that section, then move to the next. This prevents the shed hair from tangling across different sections of your natural hair as you work.
Deep condition immediately after removal. Your natural hair has been enclosed for weeks. It needs moisture and protein depending on what condition it’s in — if it feels mushy or extremely elastic when wet, focus on protein. If it feels dry and rough, focus on deep moisture. Give it what it needs before you consider any other styling.
Wait at least a week before re-installing. Your scalp and strands need that breathing room. Immediately re-installing over hair that hasn’t recovered is how breakage accumulates over successive installs until the damage becomes visible and significant.