



Feed in cornrows changed the game for anyone who wanted long, full braids without the tension headaches that come with loading hair onto the scalp all at once. The technique is simple in theory. You start braiding with your own hair, then gradually add small pieces of extension hair as you go, which creates that seamless tapered look at the hairline. No bulky knot at the root. No painful pulling. Just smooth braids that lay flat and last for weeks.
For Black women with 4A, 4B, or 4C hair, feed in cornrows have become one of the most reliable protective styles out there. They tuck your natural hair away from daily manipulation, they work with any length from short TWAs to waist-grazing lengths, and they give you that low-maintenance rhythm where you can wash, moisturize, and go.
The styles you can create with feed-ins are honestly endless. Straight-back classics. Zig-zag parts. Ponytails stacked on top of your head. Stitch patterns that look like architecture. What follows is a run-through of 25 different feed in cornrows that each bring something different to the table — not 25 variations of the same braid with different accessories glued on.
Let me walk you through each one with the honest pros, the real prep work, and what actually holds up past day 10.
The Mechanics of Feed-In Braids
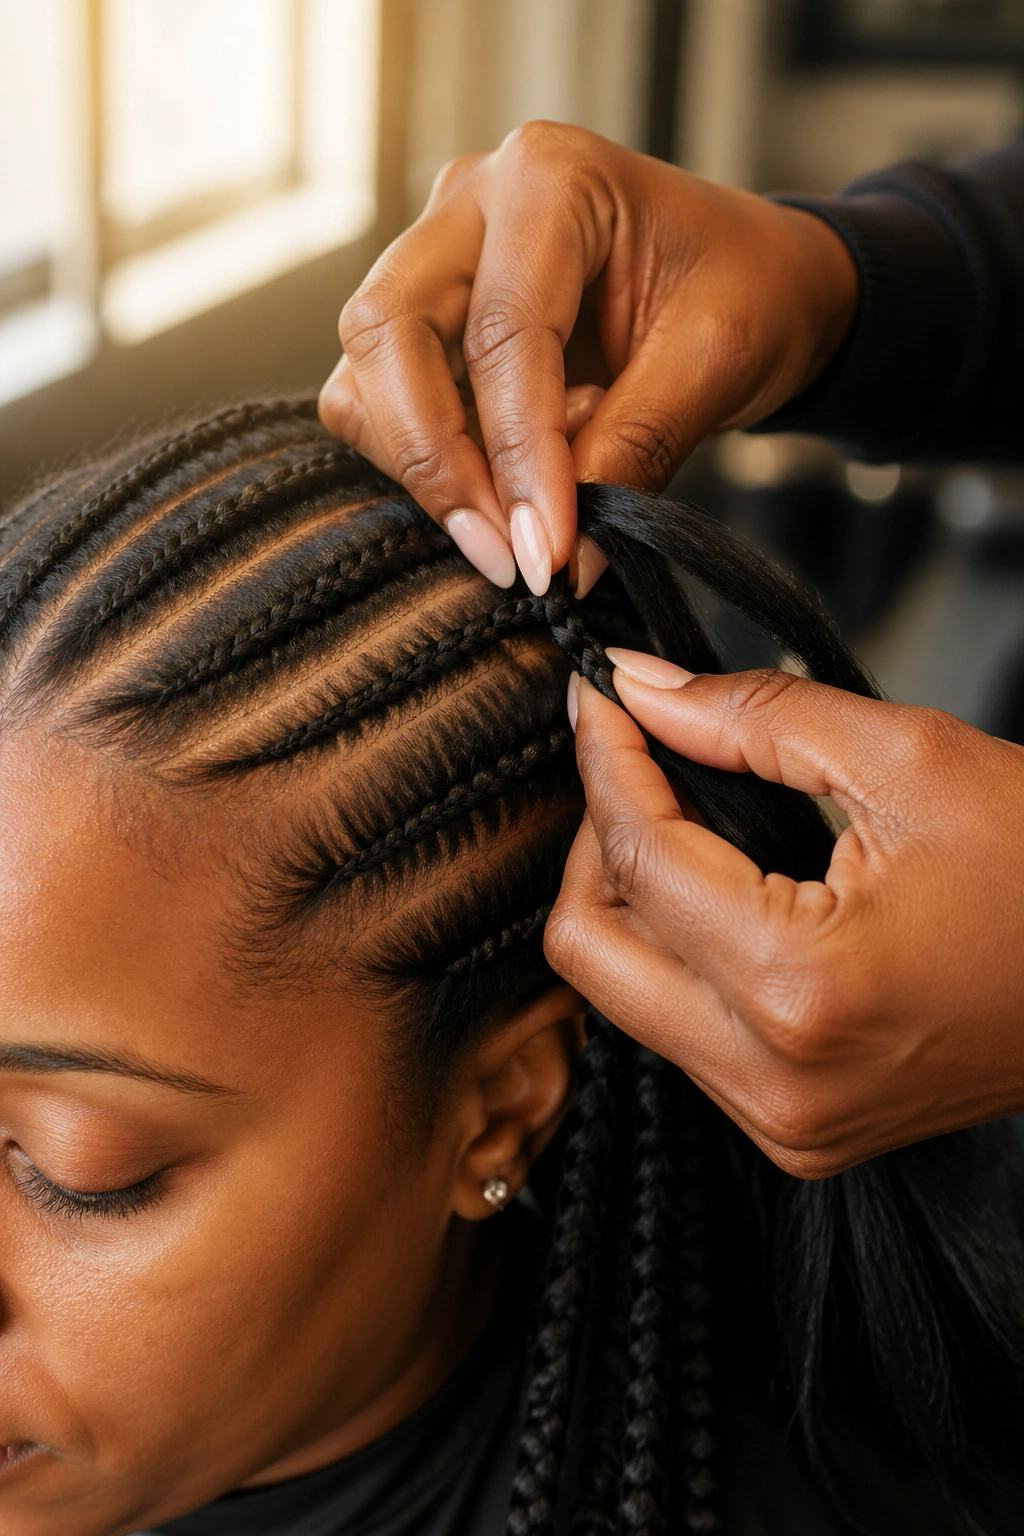
Feed-in cornrows are built on one core skill. You start with your natural hair only. After two or three passes, you introduce a small sliver of extension hair — usually kanekalon or a synthetic braiding hair — and weave it in with your next stitch. Another few passes, another feed. The braid gets thicker gradually, which is why the root looks thin and tapered instead of chunky.
The whole point is weight distribution. Traditional add-on braids dump all the extension hair at the base, which pulls on your edges and causes that throbbing scalp pain by hour three. Feed-ins spread the weight across the entire length of the braid. Your follicles thank you for it.
The feeding rhythm matters more than people realize. Feed too often and your braid looks chunky near the root. Feed too little and you get a lumpy, uneven braid. Most braiders aim for a feed every 1-2 inches in the first third of the braid, then taper off as they move down the head.
What You Need Before You Start
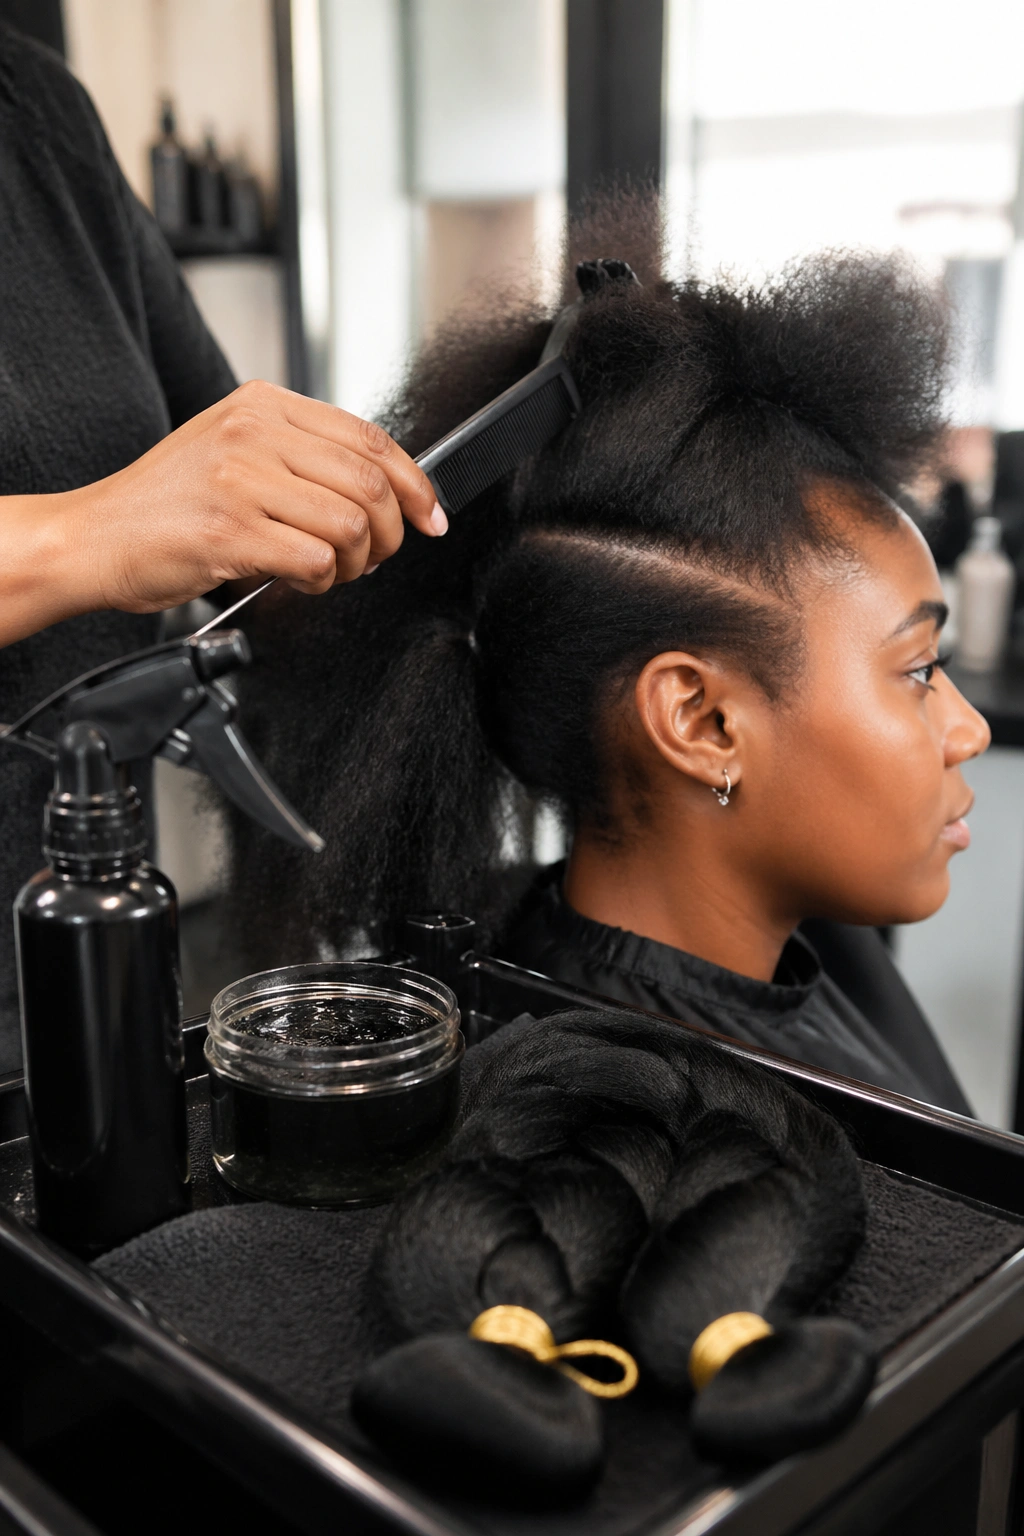
Equipment can make or break a feed-in session. The rat-tail comb is non-negotiable — that sharp pointed end is how you get clean, even parts that don’t look like a toddler drew them. A good edge control gel with slight hold (not the crunchy rock-hard kind) smooths flyaways without leaving white residue. Keep a spray bottle of water mixed with a bit of leave-in nearby. Dry, brittle hair fights you the whole time.
Kanekalon is the standard braiding hair for a reason. It’s lightweight, it holds its shape, and it comes in every color you could want. Pre-stretched kanekalon is even better because the ends are already tapered, which saves you cutting time.
A braid spray with water, glycerin, and a drop of oil keeps the style flexible for weeks. And a satin bonnet at night. Always.
Parting Technique Separates Beginner From Pro
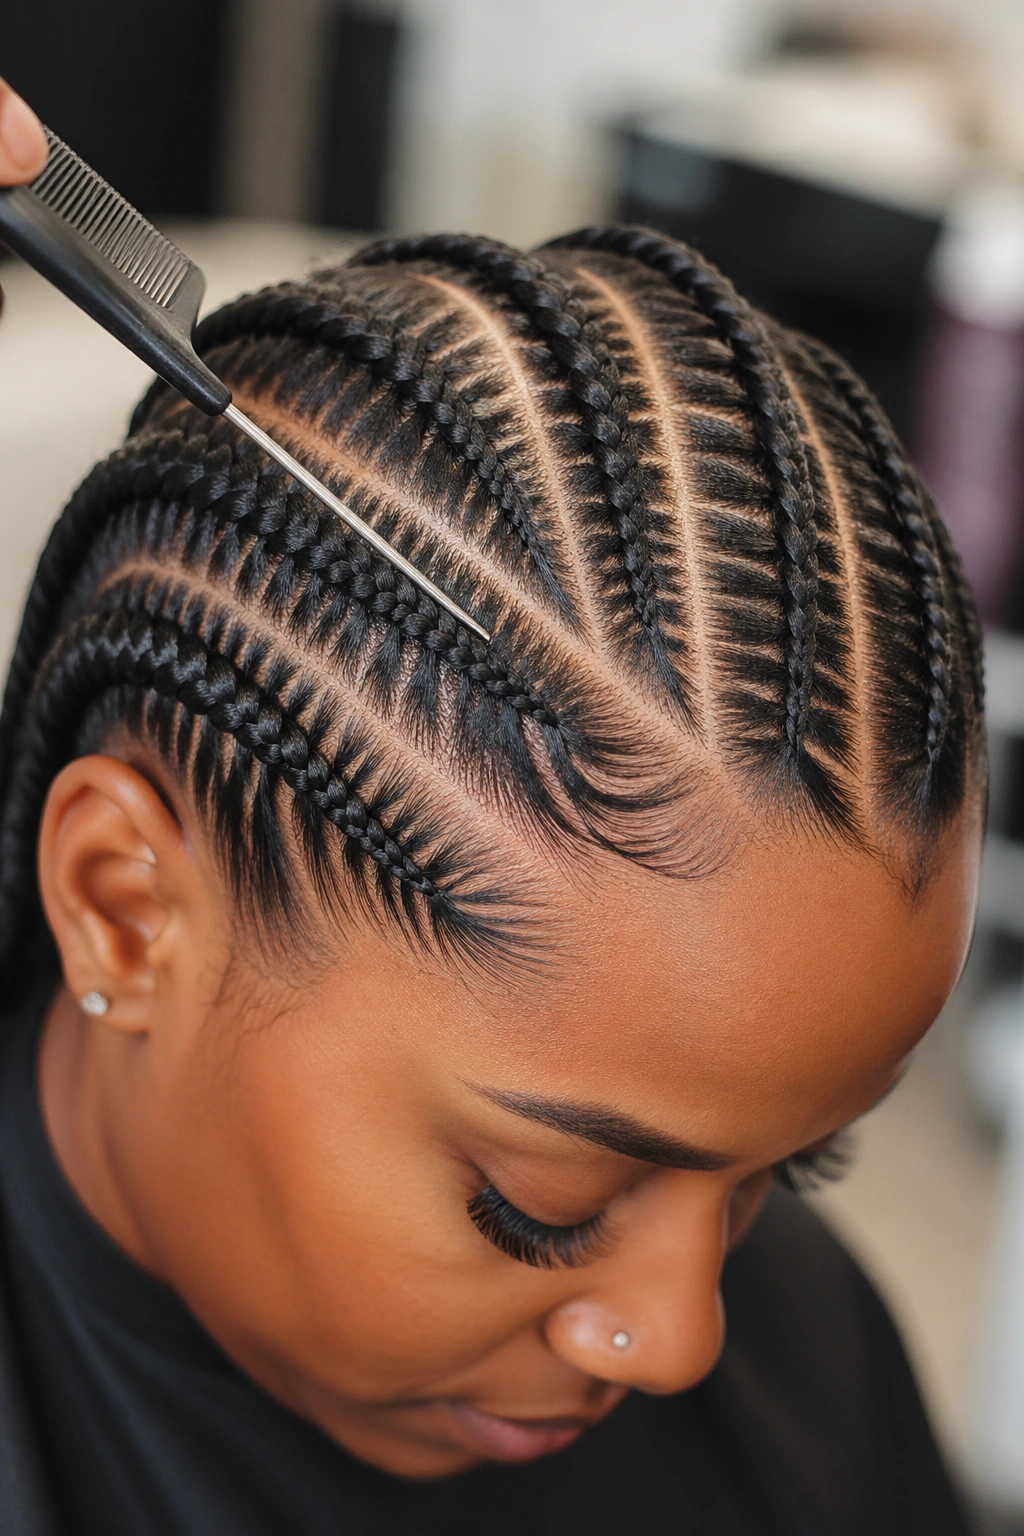
Clean parts are what make feed-in cornrows look expensive. The part line should feel sharp under your fingertip when you run it. If the scalp looks blurry or if hairs are escaping into the neighbouring section, the whole style loses its polish.
Use the rat-tail comb to draw the part from front to nape, then clip each section away with duckbill clips. Never try to braid with adjacent sections loose — they’ll tangle into your working section and you’ll lose the clean geometry.
For curved or diagonal parts, slow down. Work in one-inch increments rather than trying to draw the whole part in one sweep. Curves are where beginners get sloppy. Take your time on this step and the rest of the style falls into place.
Prepping Your Hair the Night Before
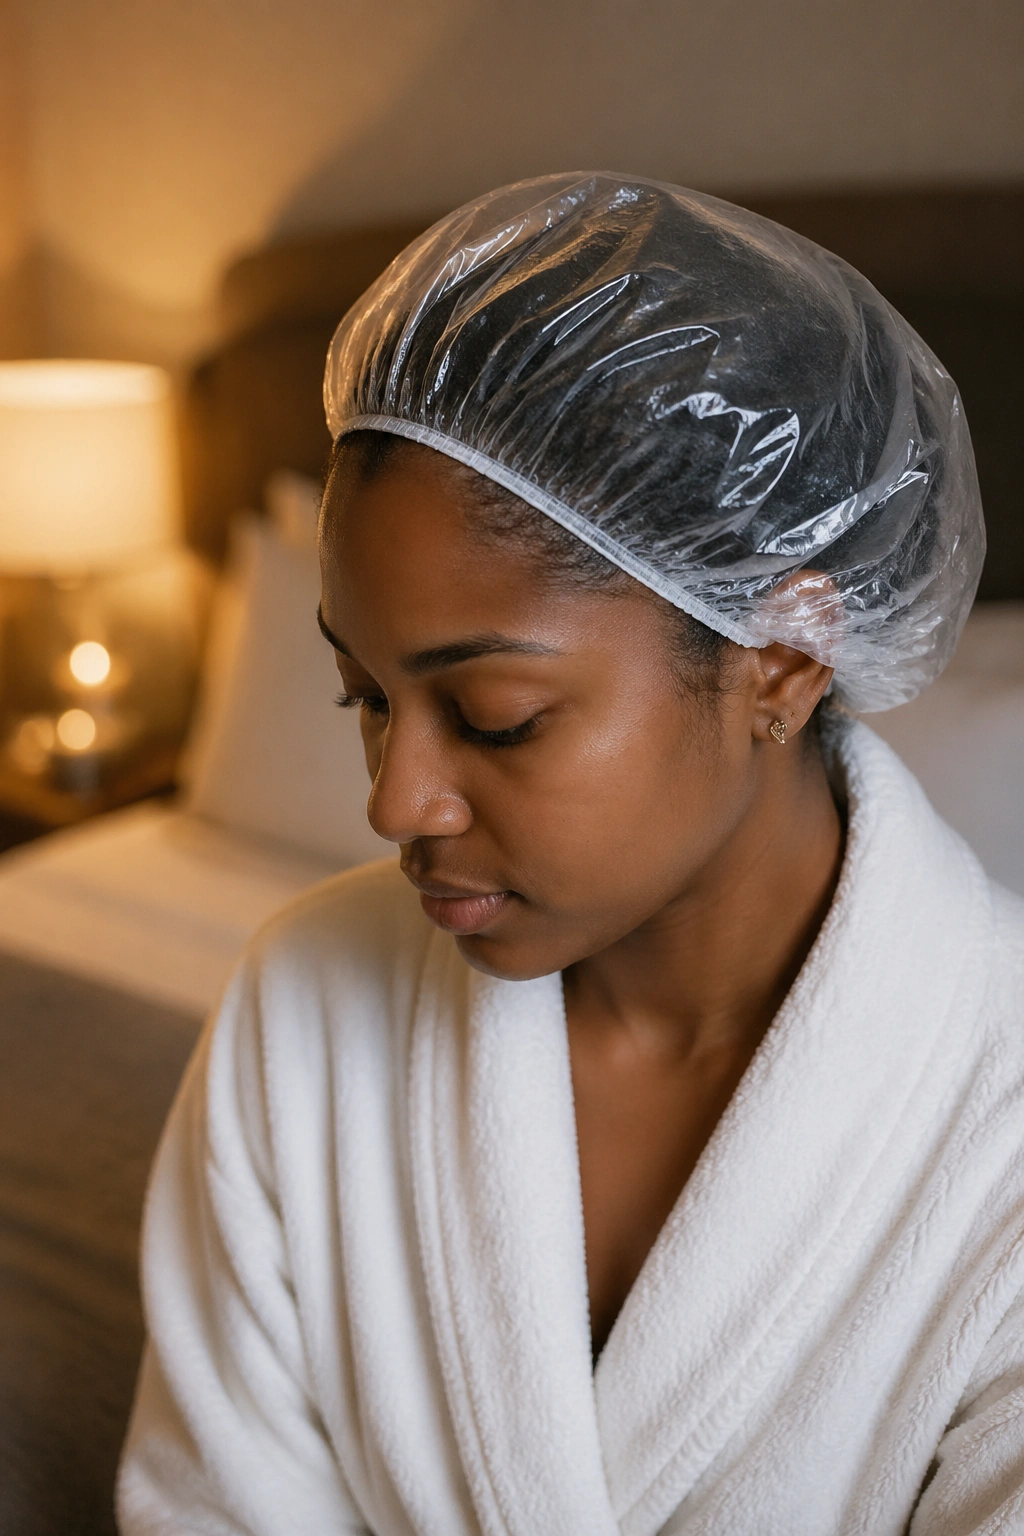
Clean, detangled, moisturized. That’s the holy trinity before any long-term braid style. Wash with a clarifying shampoo to strip any buildup — feed-ins sitting on top of product residue will slip and fuzz up within days. Deep condition for at least 30 minutes under a plastic cap. Blow-dry on low heat with a leave-in applied section by section, then stretch the hair with a paddle brush so it’s not coiled up and fighting the braider.
Skip the oil the day of installation. Oily hair is slippery, and slippery hair doesn’t grip the extensions. You want your natural hair dry but still soft.
Trim split ends before you braid. They’ll only get worse hiding under extensions for three weeks.
1. Classic Straight-Back Feed-Ins With Tapered Ends
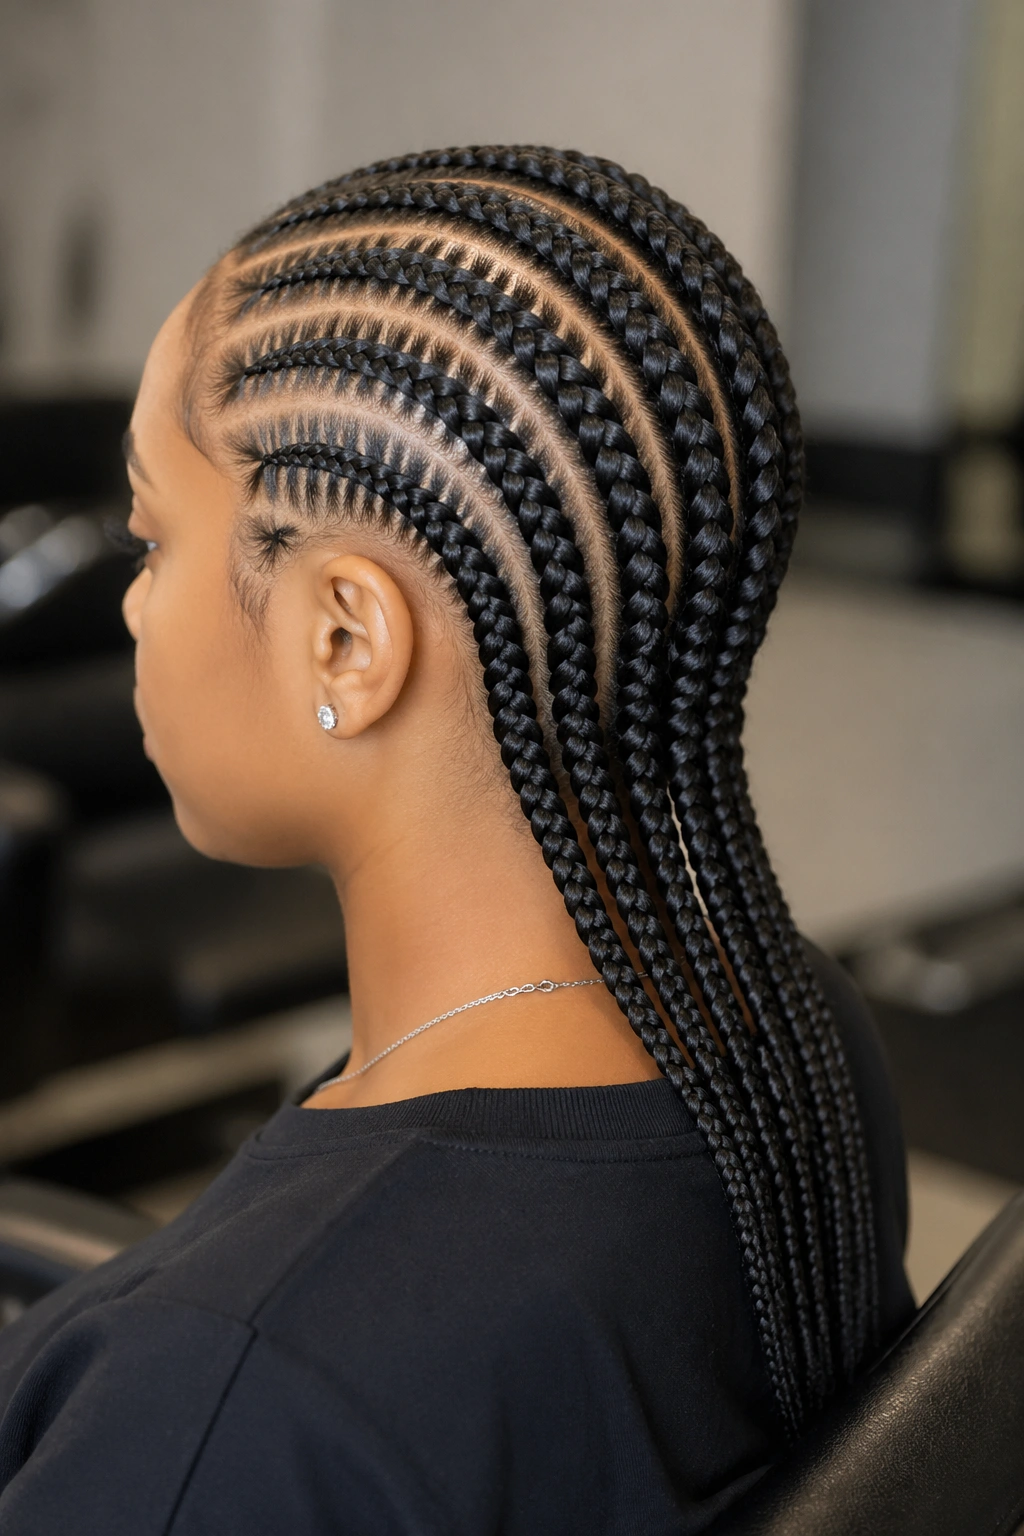
The OG. Six to eight braids going straight from the hairline to the nape, each one starting thin and building to a full thickness about halfway down. This is the style you want when you need something that reads as polished in any setting — work, a flight, a wedding — without needing to explain it.
Why It Works
The straight-back layout shows off the tapering better than any other style. Because the braids run in clean parallel lines, your eye can see exactly how the braid transitions from thin root to full body.
- Six braids for thicker natural hair, eight for finer textures
- Aim for 24-30 inches of finished length so the braid falls between mid-back and waist
- Keep parts about 1.25 inches wide for balanced thickness
Pro tip: Ask the braider to feed more aggressively in the first 4 inches if your natural hair is very short — this builds up the base thickness faster and prevents a stringy-looking root.
2. Jumbo Feed-Ins With Just Four Braids
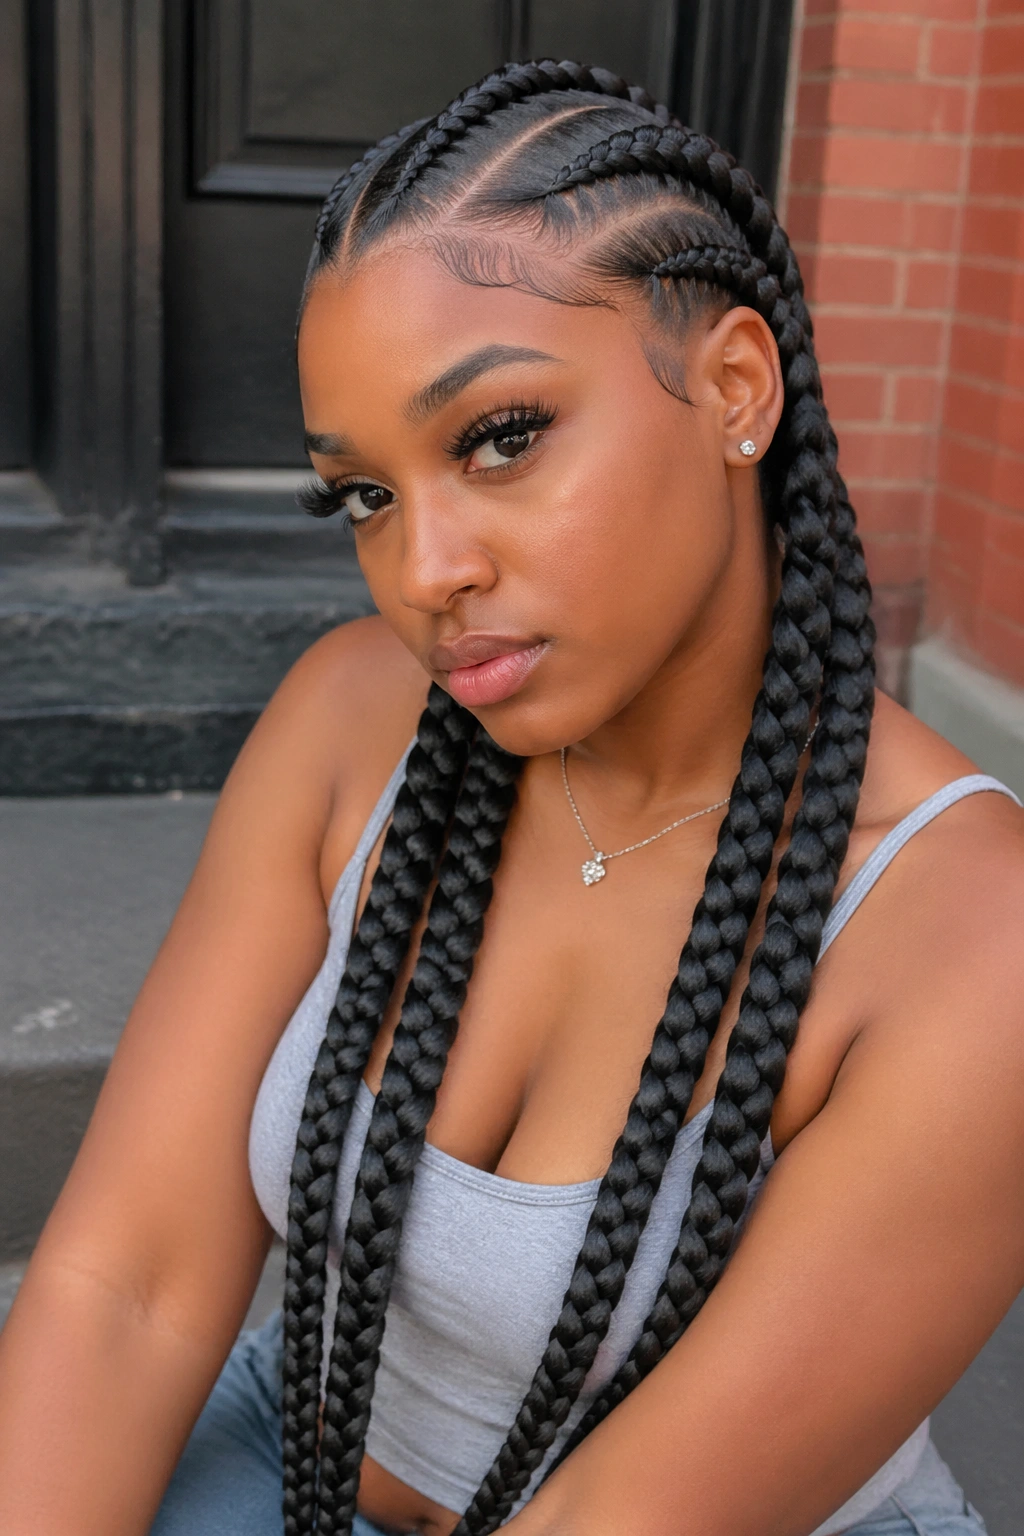
Four braids, chunky and bold, each one running the full length of your head with serious volume. This isn’t subtle. It’s a statement style — the kind that makes people do a double-take on the subway.
The four-braid layout means each section carries a lot of hair, so the feed-in has to be more generous throughout. You’re using maybe 2-3 packs of braiding hair per braid depending on length. It sits heavier than the classic straight-back, but the weight is still managed well because of how the feeding distributes it.
What I love about the jumbo version is the sleek, clean front. With only four parts, the geometry reads like sculpture. The scalp shows between braids in bold stripes. People with strong features look incredible in this style because it doesn’t compete with your face — it frames it.
Be warned though: jumbo feed-ins are harder to sleep on than smaller braids. The thickness can put pressure on one side if you’re a side sleeper. A silk pillowcase plus a bonnet is the only way to avoid morning frizz.
3. Feed-In Cornrows With A Zigzag Middle Part
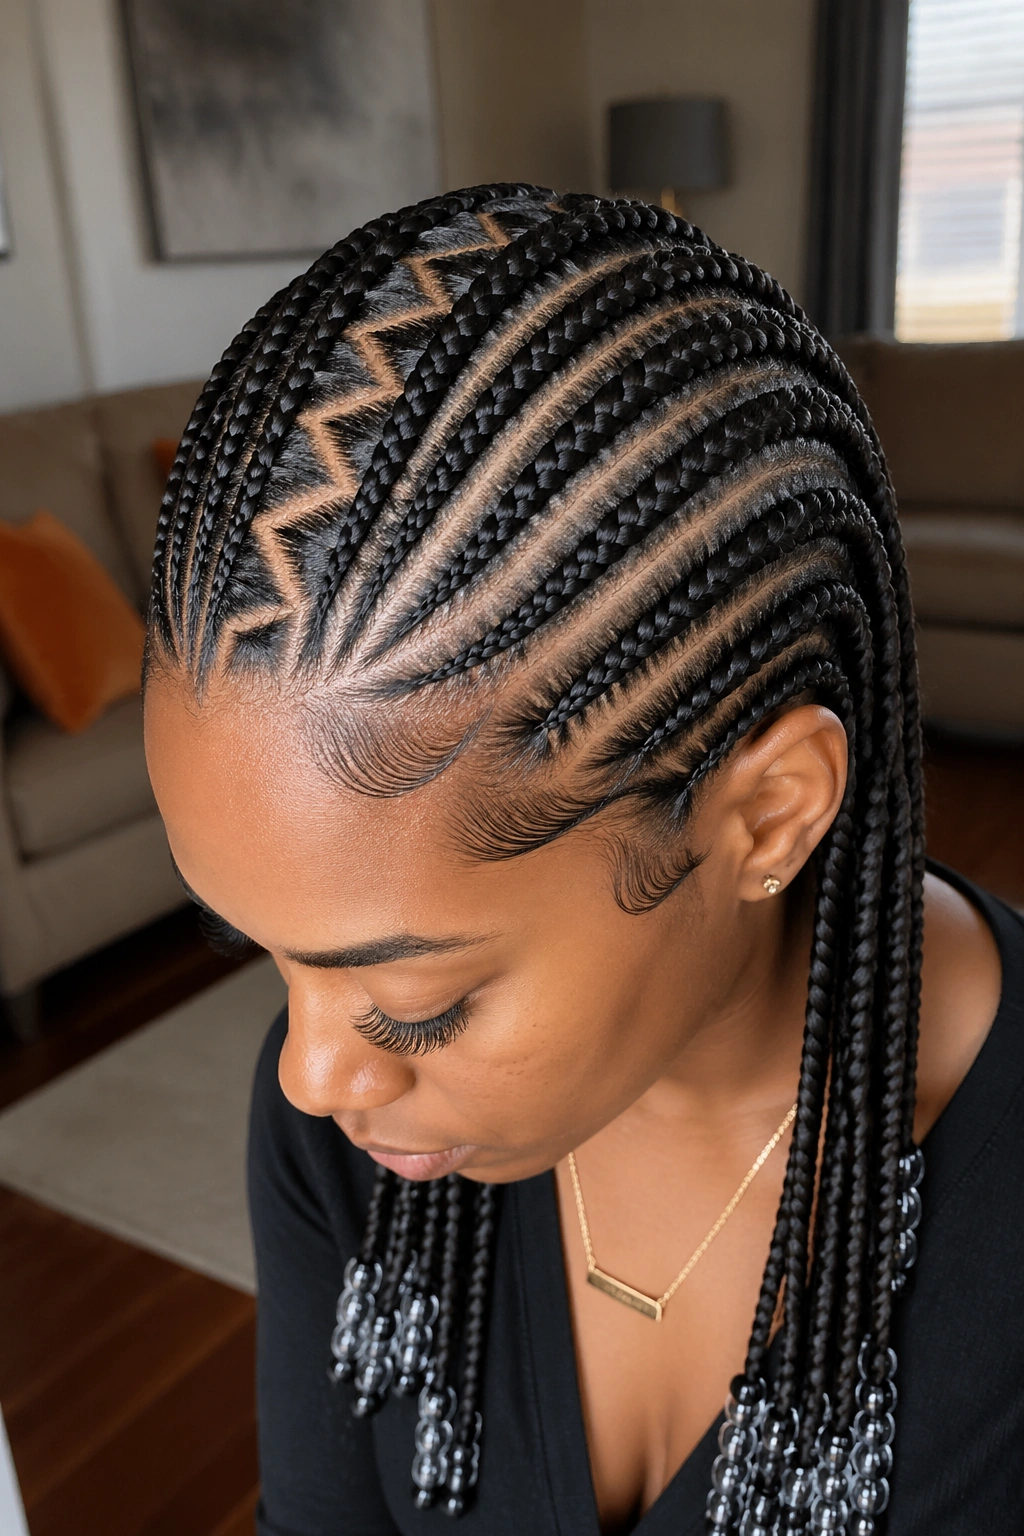
Tired of the standard middle part straight down the center? A zigzag part runs down the middle but snakes side to side in clean triangular peaks. It’s a simple visual twist that instantly elevates the whole look without adding any real complexity to the braid itself.
How to Style It
The zigzag is created by the parting, not the braiding. Once you have the zigzag drawn in with the rat-tail comb, the braids on either side run normally back toward the nape.
Plan for three to four “peaks” in the zigzag depending on the length of your head from forehead to crown. Each peak should be roughly the same size — two inches apart is a good benchmark. Too many peaks and it looks cramped. Too few and it just reads as a wavy line instead of a zigzag.
This style pairs especially well with beads at the ends. The movement of the zigzag at the top balances the clinking, swinging motion of beads at the bottom.
4. Stitch Braid Feed-Ins With Visible Horizontal Lines
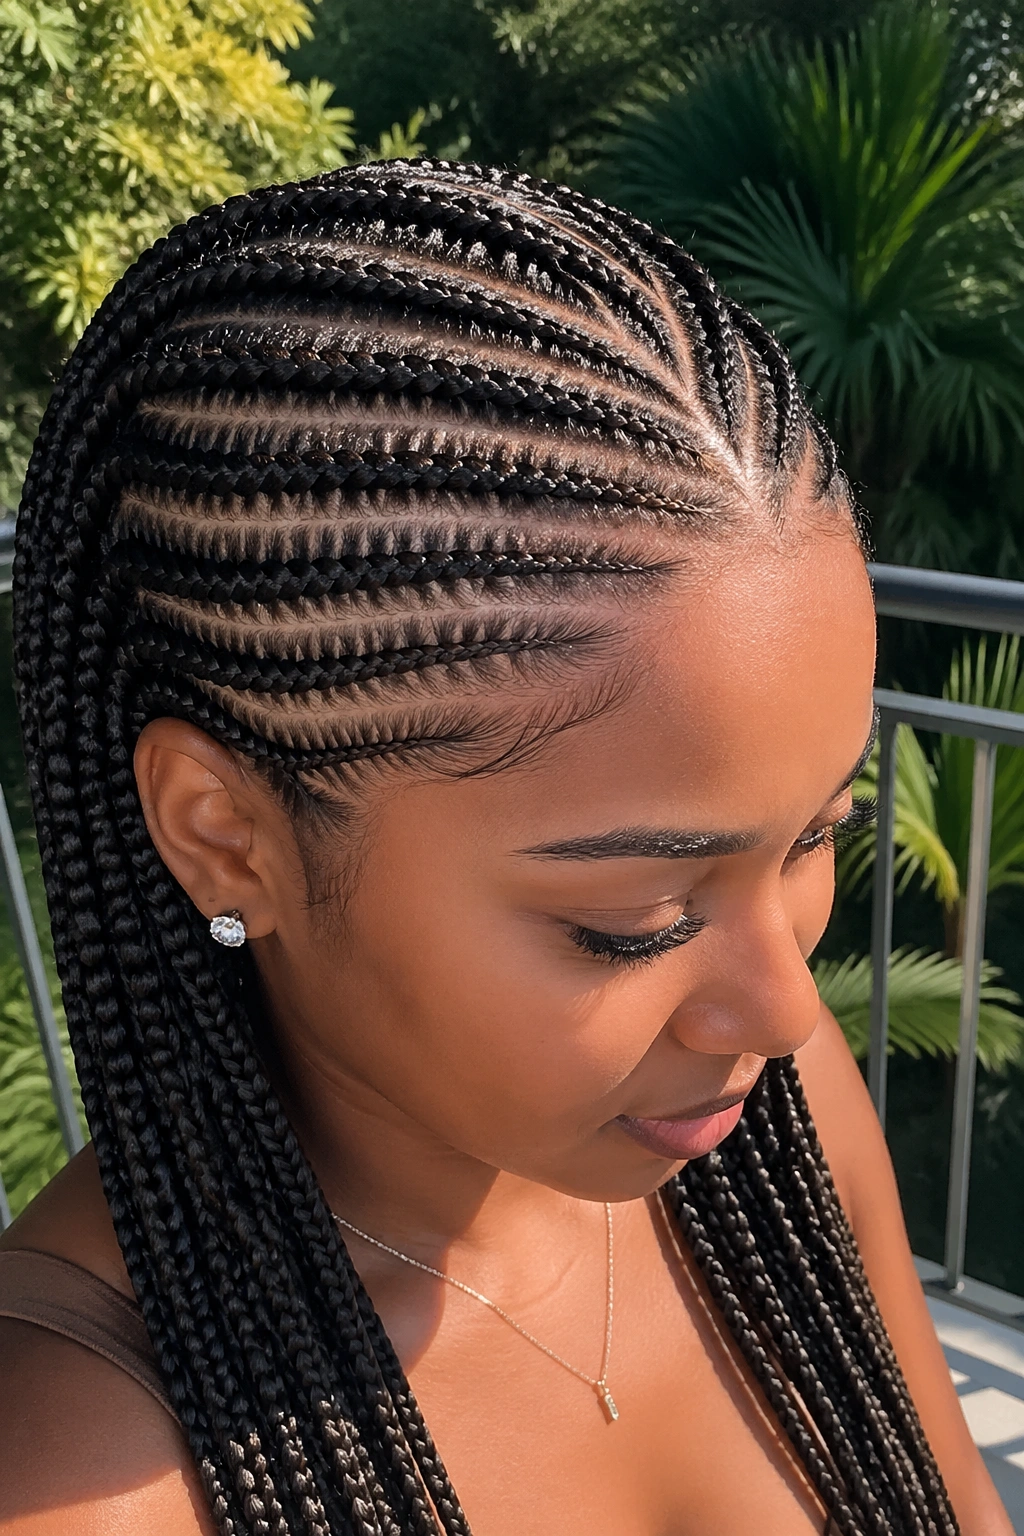
Stitch braids are cornrows with horizontal lines etched into the braid pattern, creating that ribbon-like, textured look. When you combine them with feed-ins, you get the clean taper at the hairline plus the textural interest running down the length.
The stitches are created by pulling the hair tighter at specific intervals as you braid, which creates little valleys and ridges. It takes longer — add 1-2 hours to a standard feed-in session — but the result looks intricate in photos and videos, and stitch braids photograph incredibly well.
The tighter pull in stitch work means your braider needs a lighter hand at the hairline. Aggressive stitching at the edges is what causes that throbbing pain and the tiny white bumps along the part. If you feel any sharp pain in the first hour of install, speak up immediately. Tension that hurts at hour one will hurt infinitely worse at hour six.
5. Two Feed-In Braids Going Down The Back
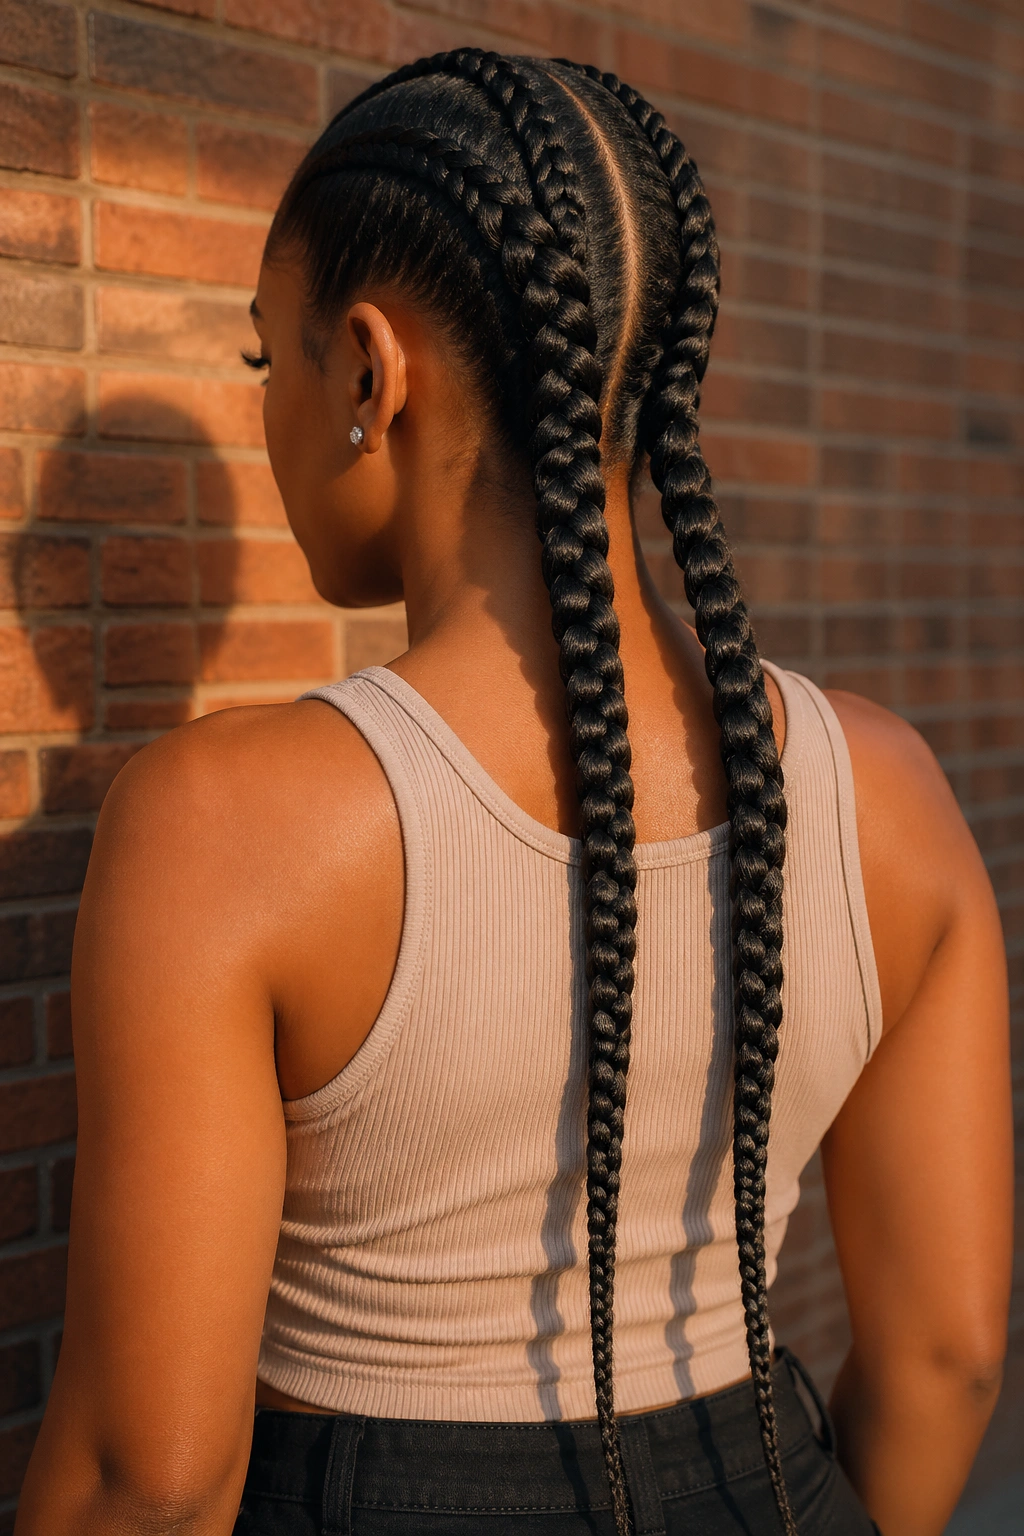
Two braids. That’s it. One on either side of a clean middle part, each one thick with feed-ins and running all the way down the back. It’s the style every Black woman has rocked at some point — from Solange to your cousin in high school.
What Makes It Different
Two braids hit a sweet spot between low-maintenance and stylish. The install takes maybe 2 hours max, which is half the time of a full head of smaller cornrows. And because you’re only working with two sections, the parting is simple and the feed-in pattern is uniform.
- Part straight down the middle, or offset slightly to one side for asymmetry
- Each braid gets about 2 packs of braiding hair for fullness
- Finish with small rubber bands or wrap the ends with extension hair
Tip: Two-braid styles are the best for working out. Pull them into a low bun, wrap a silk scarf around your hairline, and you’re good to lift weights or run without the braids whipping around.
6. Small Feed-Ins In An Intricate Boxed Pattern
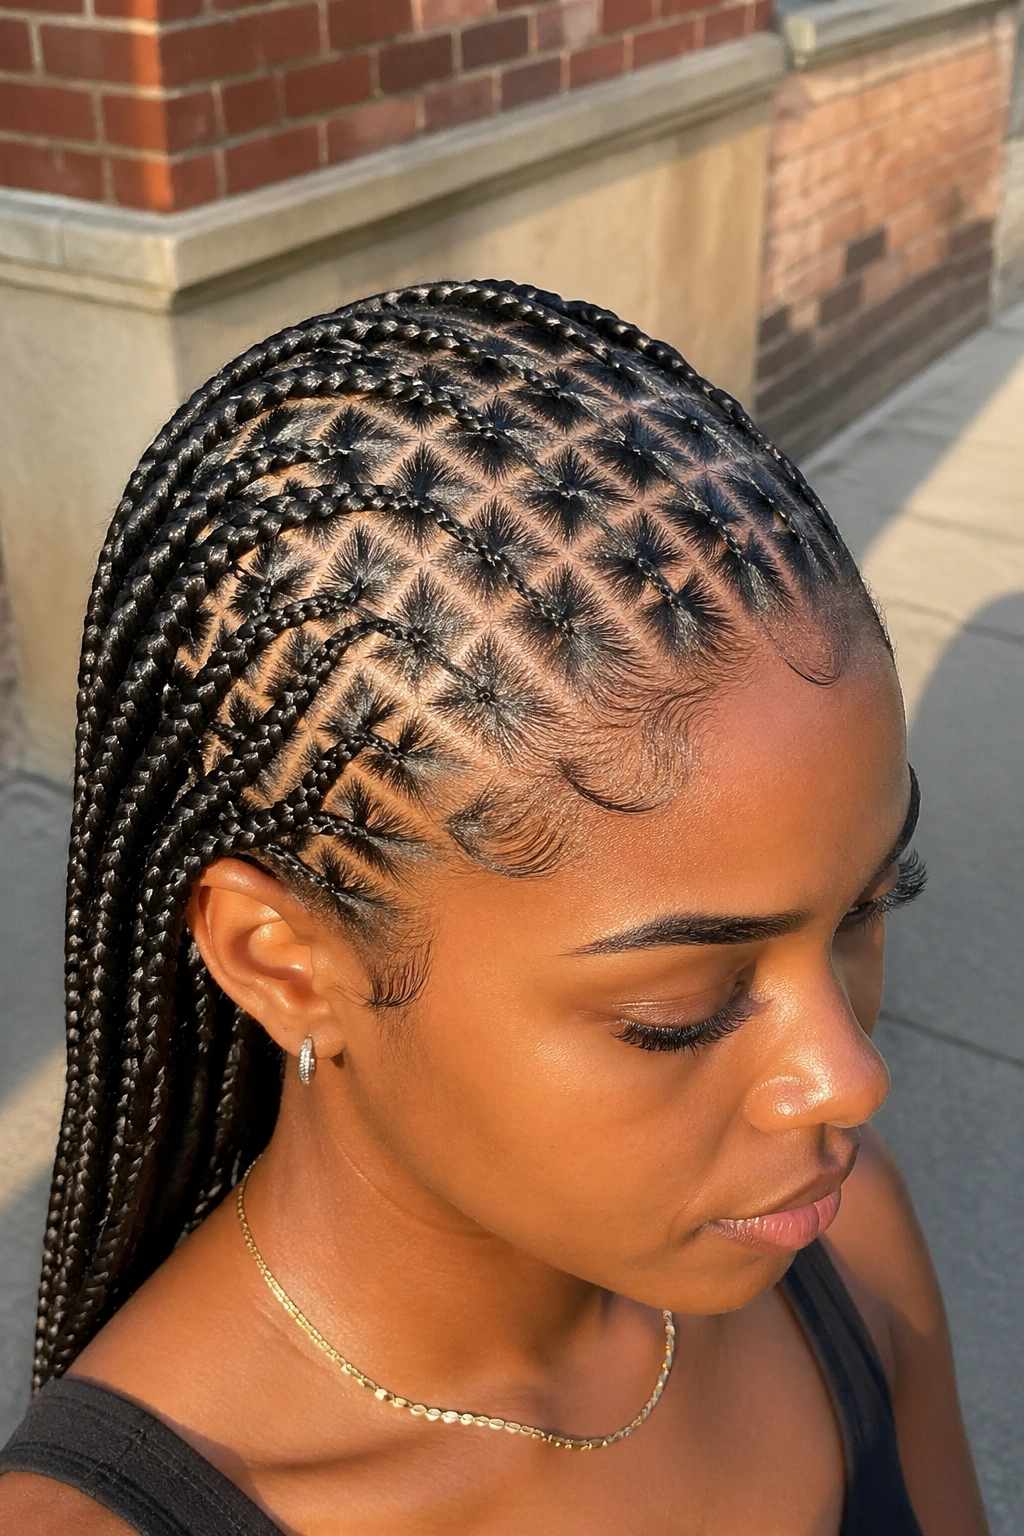
Instead of parallel braids running front to back, imagine a grid. Small feed-in braids going down the head, but the parting creates small rectangular sections — like tiles on a floor. The braids then get collected or styled into a pattern.
This is detail-work territory. A full head of small boxed feed-ins can take 6-8 hours because each braid is only about half an inch wide. Count on 30-40 individual braids depending on head size.
The payoff is a style that looks totally different from standard cornrows. The grid pattern shows off the braider’s skill and gives the whole head a sort of patterned-fabric look. Small braids also tuck more easily under wigs or into updos later.
One downside: small braids take longer to wash and dry. Plan on a full afternoon for maintenance every two weeks. Not a style for people who want wash-and-go simplicity.
7. Feed-In Cornrows Styled Into A High Ponytail
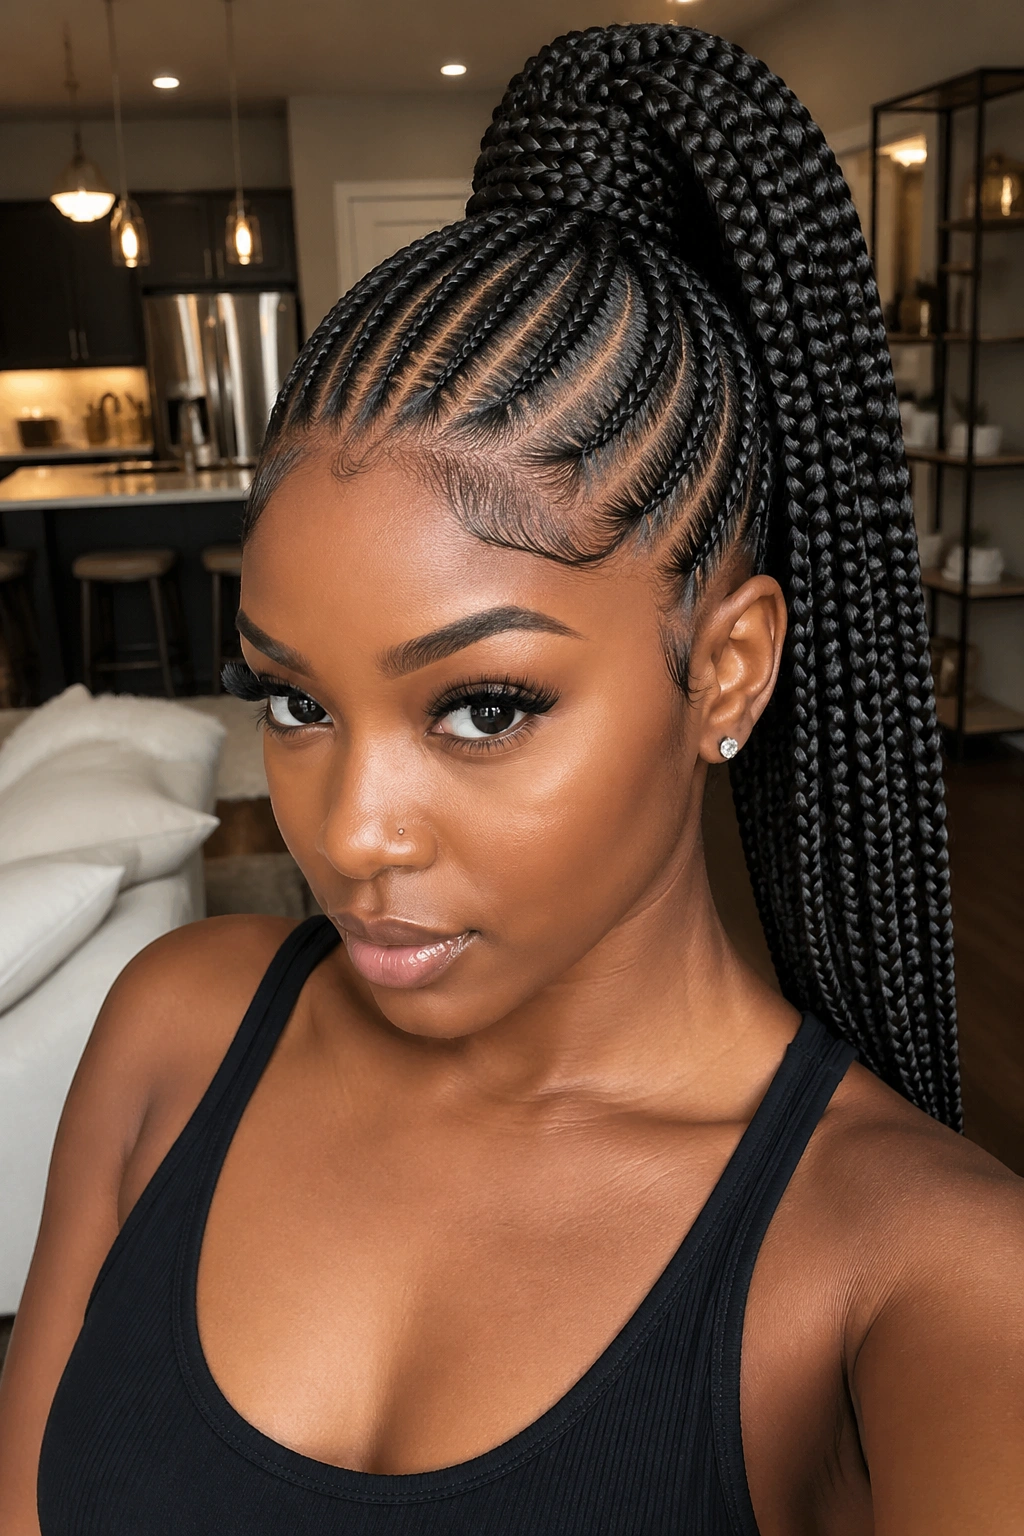
The install is classic straight-back feed-ins — but instead of letting them hang loose, the braider gathers all the braids at the crown and wraps them with extension hair to create a thick, bold high ponytail.
Picture a sleek sculpted base with six or eight cornrows flowing smoothly into a towering ponytail, the ends hanging free or plaited further into a single thick braid.
Why does this work better than just pulling cornrows into a ponytail? Because the feeding at the install stage is done with the ponytail in mind. The braider adds more hair near the crown so when everything gathers up top, it looks full and intentional, not scraggly.
The high pony puts a lot of weight on the top of the head. If you have sensitive edges, ask for a slightly lower pony — mid-crown instead of top-of-crown — to ease the tension.
8. Side-Swept Feed-In Cornrows
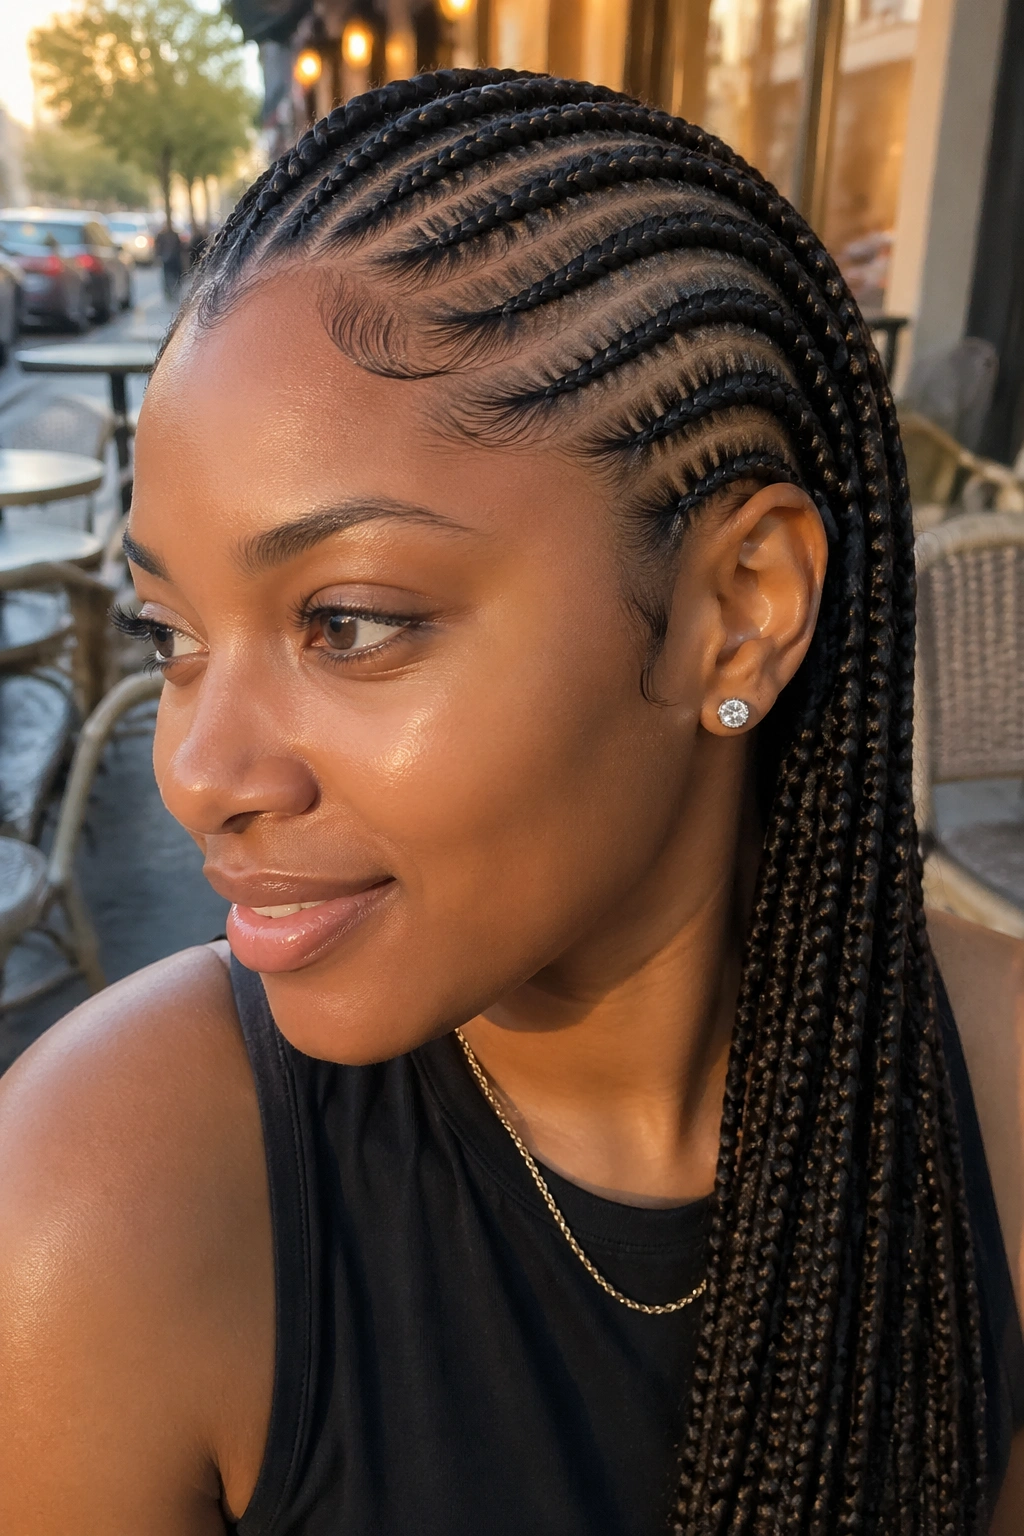
Instead of all braids pointing straight back, imagine them sweeping diagonally from one side to the other. The parting curves across the head, which sends the braids in a diagonal direction that ends behind one ear.
Who This Is For
Side-swept cornrows are a great choice for anyone who wants soft, flattering lines around the face. Because the hair isn’t pulled straight back, it doesn’t have that severe “pulled tight” look. The diagonal lines create a slimming effect that mimics how hair drapes naturally.
It’s also a good pick for people with high foreheads who feel exposed by straight-back styles. The sweep creates a partial cover over one side of the forehead without the need for actual bangs.
You’ll want about five to seven braids for a balanced side-sweep. Too few and the diagonal lines look empty. Too many and you lose the flowing effect.
9. Feed-Ins With Curved Parts That Frame The Face
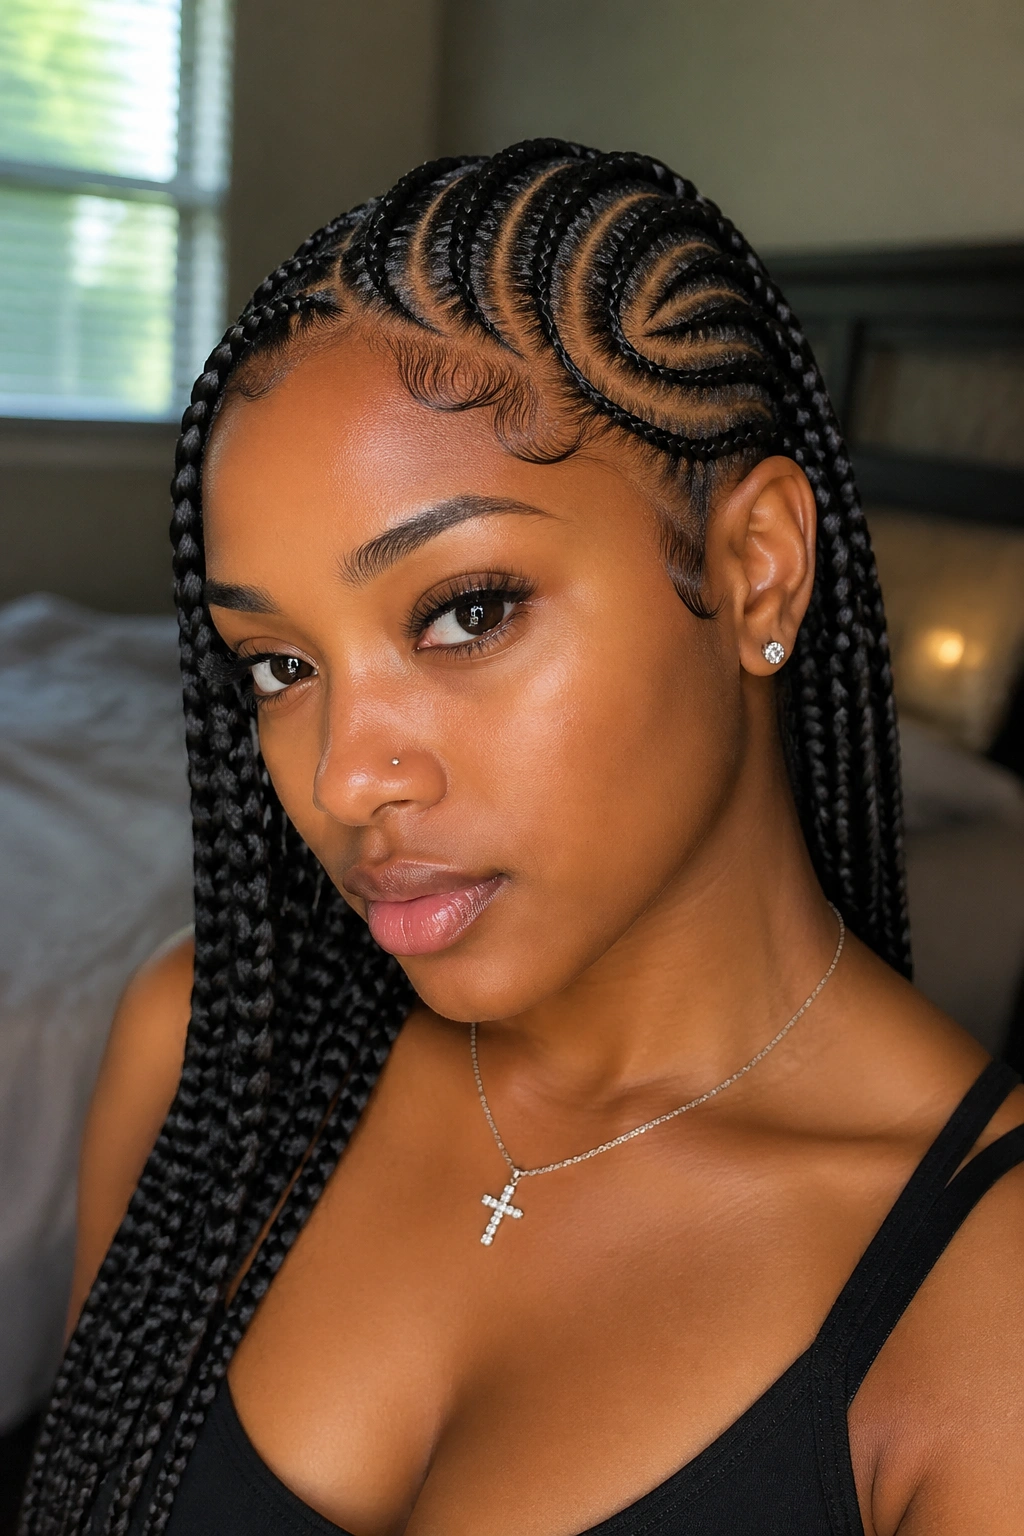
Forget straight lines. These feed-ins use curves — gentle C-shapes or S-curves that arc around the head, following the shape of the skull. Instead of the braids running in rigid parallels, they flow like water around the scalp.
This style is hard to do. Really hard. Most braiders charge 20-30% more for curved parts because they require constant adjustment as the braid follows the curve. But the result is unmatched for elegance.
The braids might start at the hairline, curve gracefully back along the side of the head, then drop down at the nape. Or they could loop into a spiral pattern at the crown. Each braider has their signature curves, so if you’re booking someone new, ask to see their curved work specifically — freehand curves don’t translate from stitch braid skill alone.
Curves also hold up differently over time. Because the braid isn’t following the natural growth pattern of your hair, there’s slight tension variation. Expect a little more frizz at the curves by day 10 compared to a straight-back style. Worth it for how sharp the install looks.
10. Feed-In Cornrows With Beads At The Ends
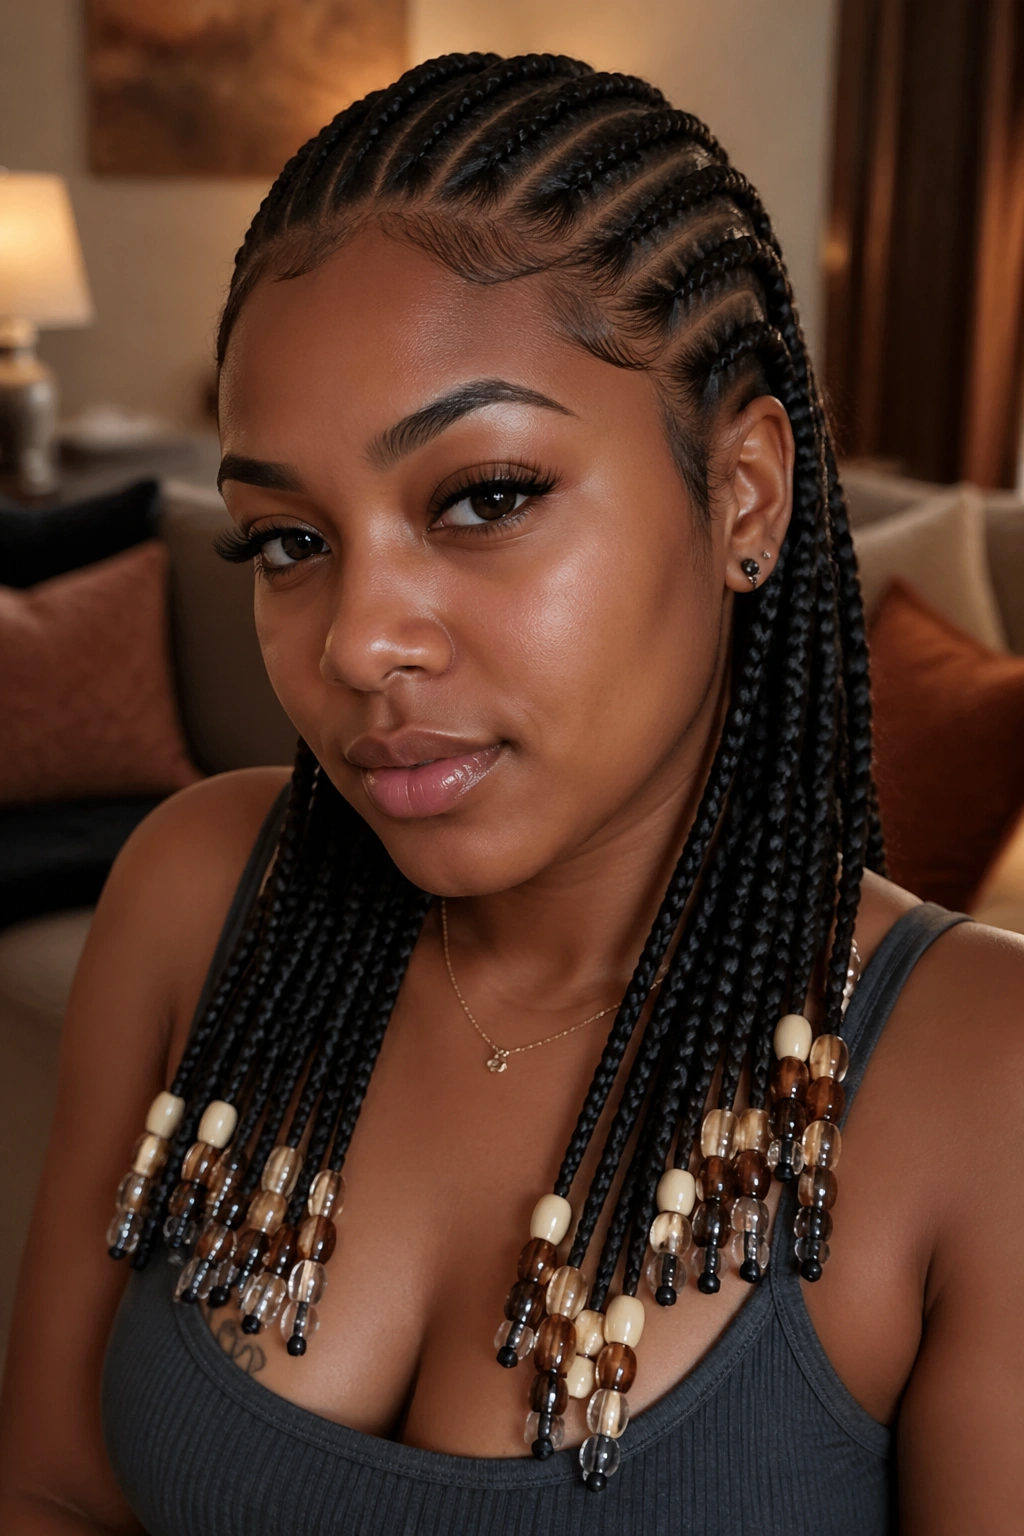
Wooden beads. Metal charms. Glass beads with gold accents. Beaded feed-ins bring a clink-clink musicality to the style that reminds you of home, of childhood, of every Black hair tradition rolled into one.
Beads work best when they’re added after the braid is fully installed, using small elastic bands or heat-sealed with a lighter (carefully). The weight of beads depends on material — wood is lightest, metal is heaviest. If you’re going for a lot of beads, stick to wood or plastic to avoid adding too much pull on the braid.
Let me talk about sleeping with beads. It’s an adjustment. The clink on your pillow takes a few nights to get used to. Wrap the ends in a silk scarf if the noise bothers you — it also protects the beads from scratching on cotton sheets.
Beads on kids need way more attention. Loose beads become choking hazards, so always double-check the elastic is tight before sending a child to sleep. For adults, the occasional bead falling off is just part of the style’s rhythm.
11. Asymmetric Feed-Ins With One Side Shaved
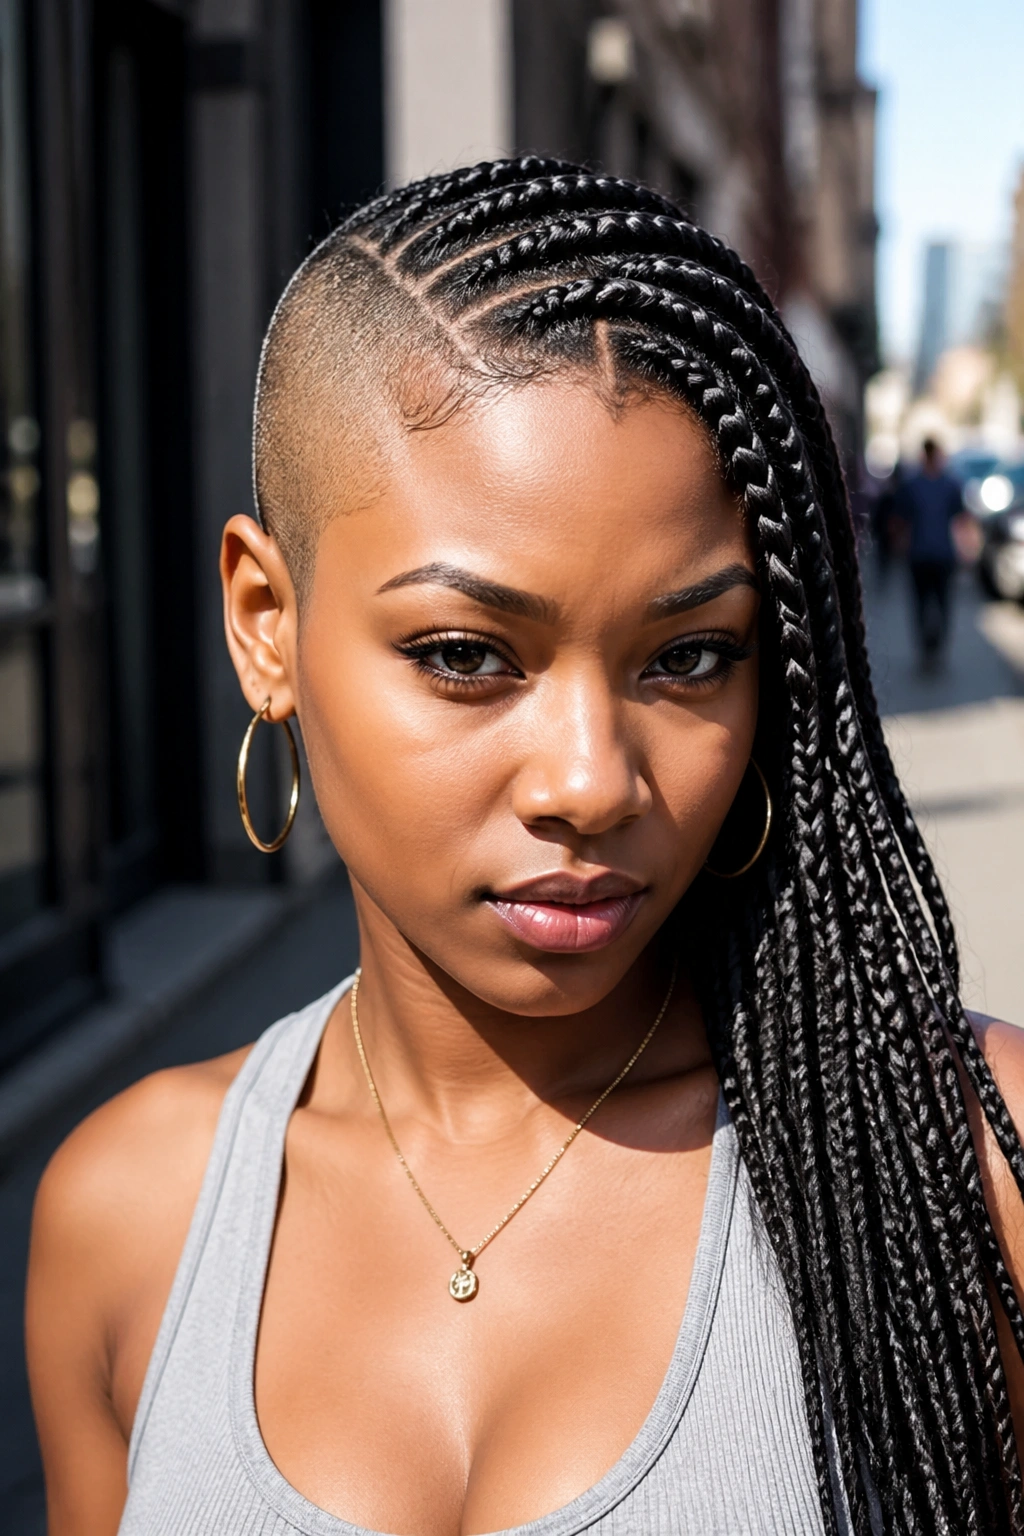
Bold move. One side is shaved close or kept in a low fade, while the other side holds a full head of feed-in cornrows that cascade down. The contrast between shaved skin and braided fullness is the whole point.
The Catch
This style requires real maintenance on the shaved side. You can’t just install and forget — the shaved portion grows back at about half an inch per month, so you’ll need a touch-up every 2-3 weeks to keep the contrast sharp.
Feed-ins on the braided side need to start at the line where the shave ends, which means the front sections face a different angle than they would in a standard style. Good braiders will adjust the feeding to build up fullness near that shave line so the transition looks intentional.
Rihanna made this style iconic. Janelle Monae has worn variations. It’s a high-confidence look that makes people stop mid-sentence to stare.
12. Feed-In Cornrows With Two Ponytails
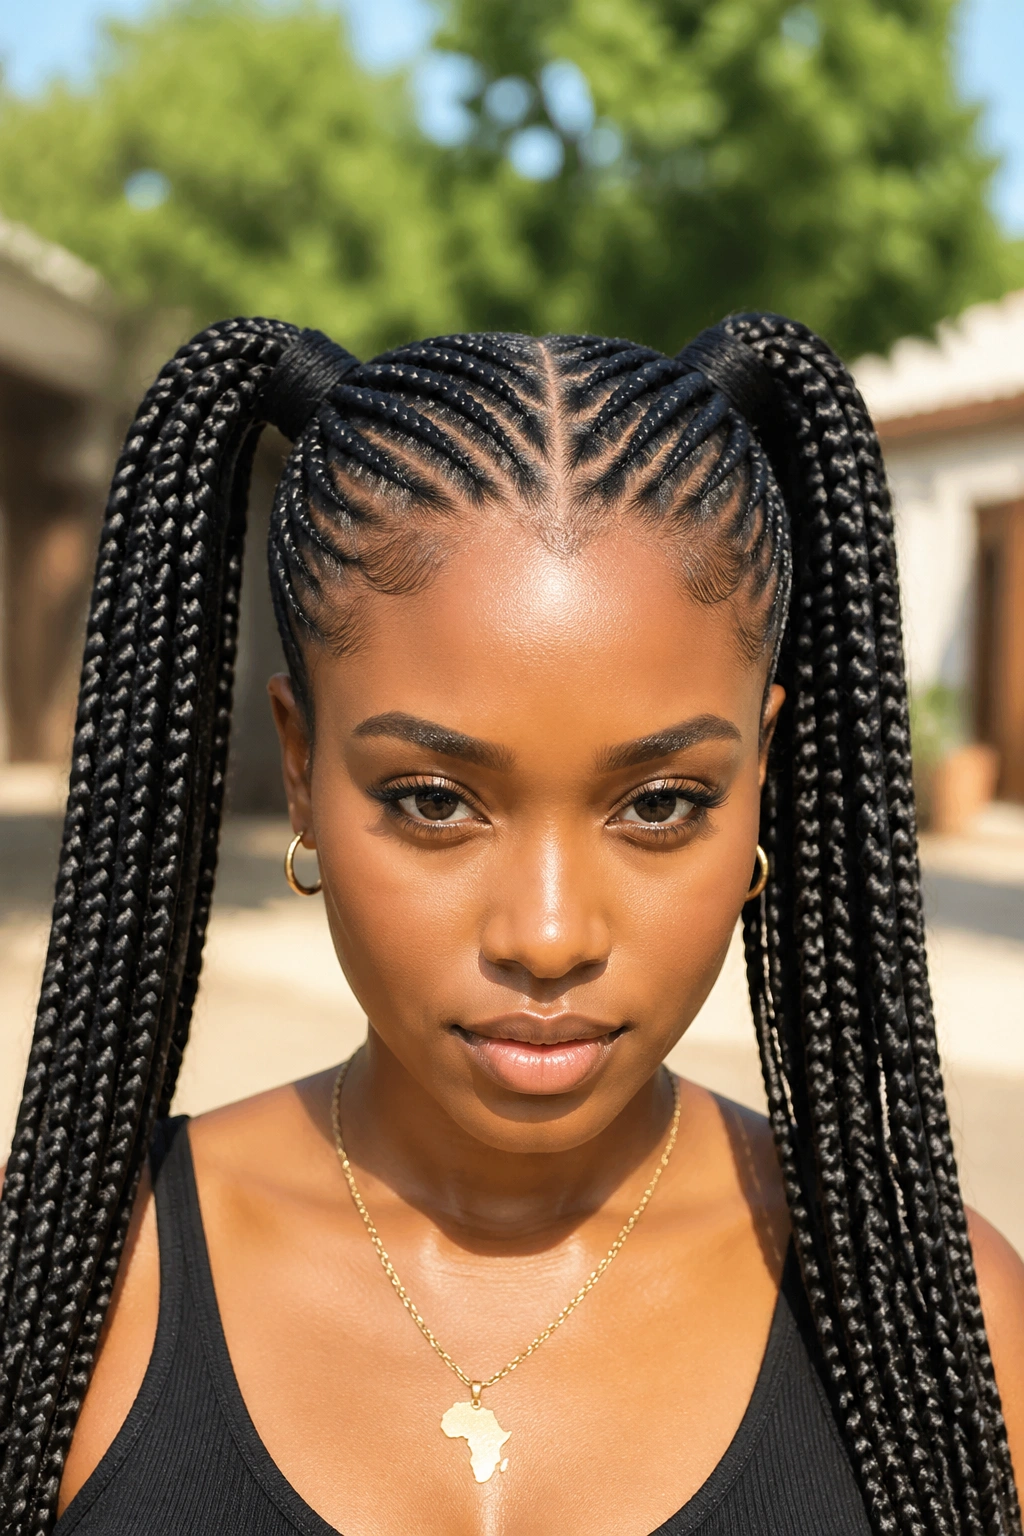
Two ponytails, one on each side of the head, each fed with a full set of cornrows feeding into them. Think of it like Bjork’s space-bun energy but rendered in long flowing braids instead of loops.
The braider divides the head down the middle and creates two sets of cornrows that each terminate at one ponytail on each side of the crown. From there, the hair can hang loose, be plaited into a single long braid per side, or wrapped into twisted buns.
This style photographs well because the symmetry hits the eye hard. Perfect for events where you want something that screams “I planned this.” Also surprisingly good for hot days because you can pull both ponytails up into buns when you’re sweating.
Watch the parting at the top. The line down the middle of the head has to be arrow-straight or the whole style reads as sloppy. Take the time to get that part right.
13. Tribal Feed-In Cornrows With Accent Braids
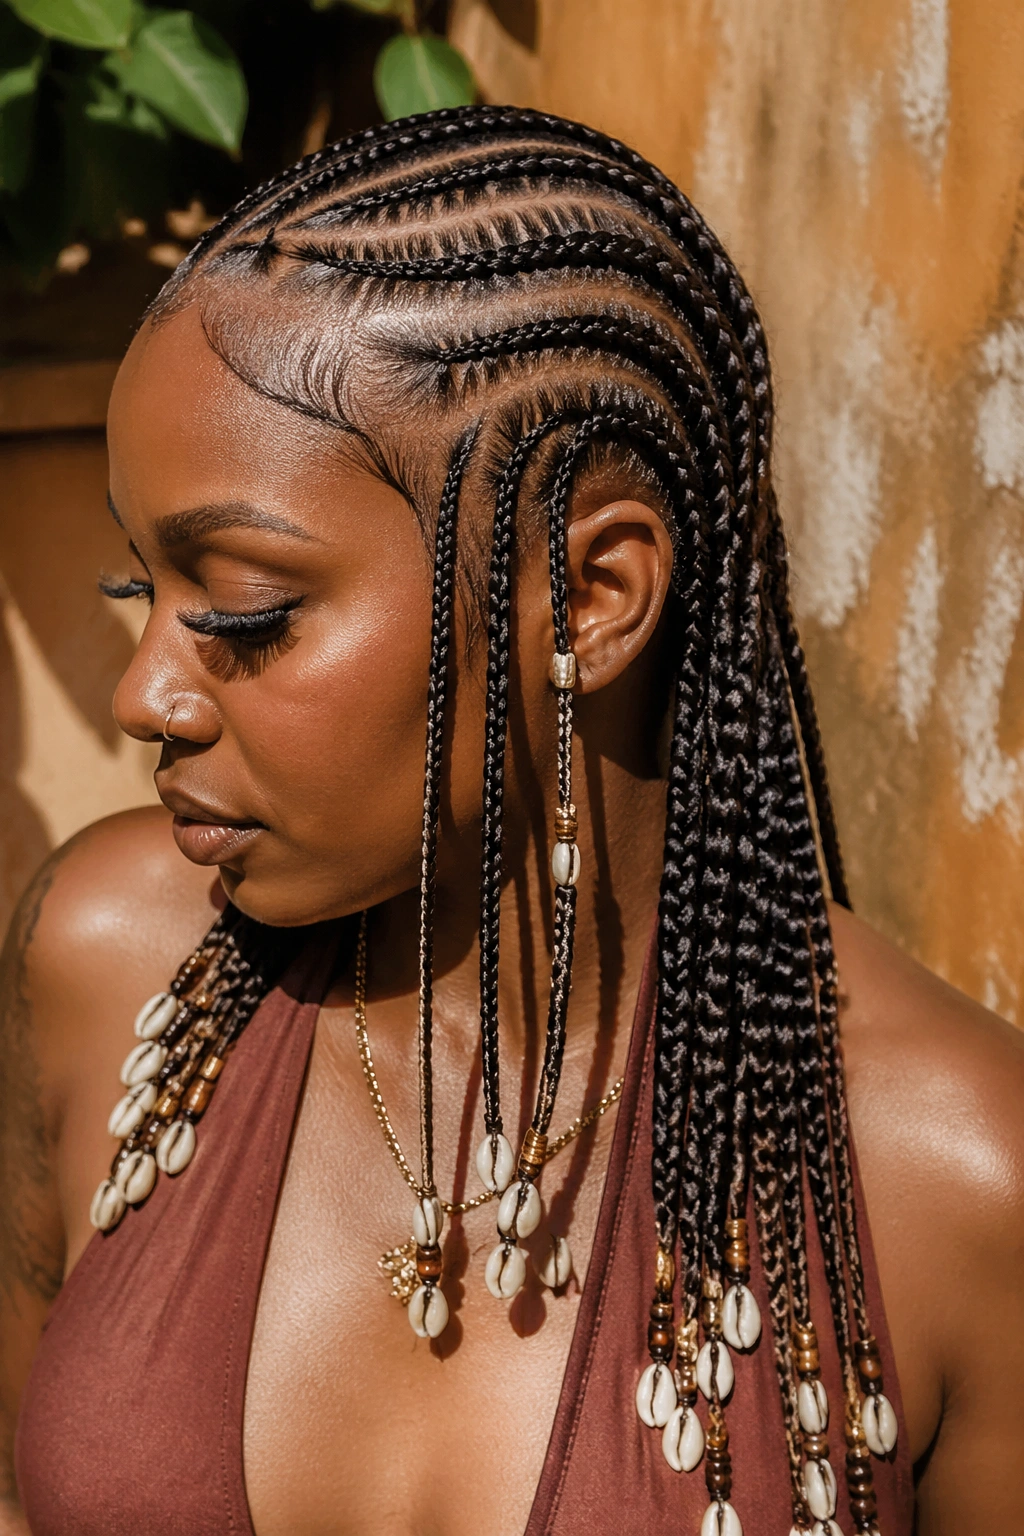
Tribal braids combine larger feed-in cornrows with smaller micro-braids sprinkled between them, plus shell or cowrie accents woven into certain braids. The whole effect is a tribute to West African braiding traditions.
The micro-braids aren’t fed — they’re small pieces of box braiding between the main cornrows. They add texture variation and give the scalp sections their own rhythm. Accents like cowrie shells, wooden rings, or gold cuffs slide onto specific braids to draw the eye.
What makes tribal feed-ins distinct from a standard feed-in with beads is the rhythm of thick-thin-thick-thin across the head. The braids aren’t uniform in size or spacing. Some stretches have five thick cornrows in a row, then three micro-braids, then another run of cornrows. Good braiders have a real aesthetic eye for how to pace this.
This style takes the longest of all the options on this list. Plan for 8-10 hours in the chair, and bring snacks.
14. Low-Bun Feed-In Cornrows With A Sleek Nape Finish
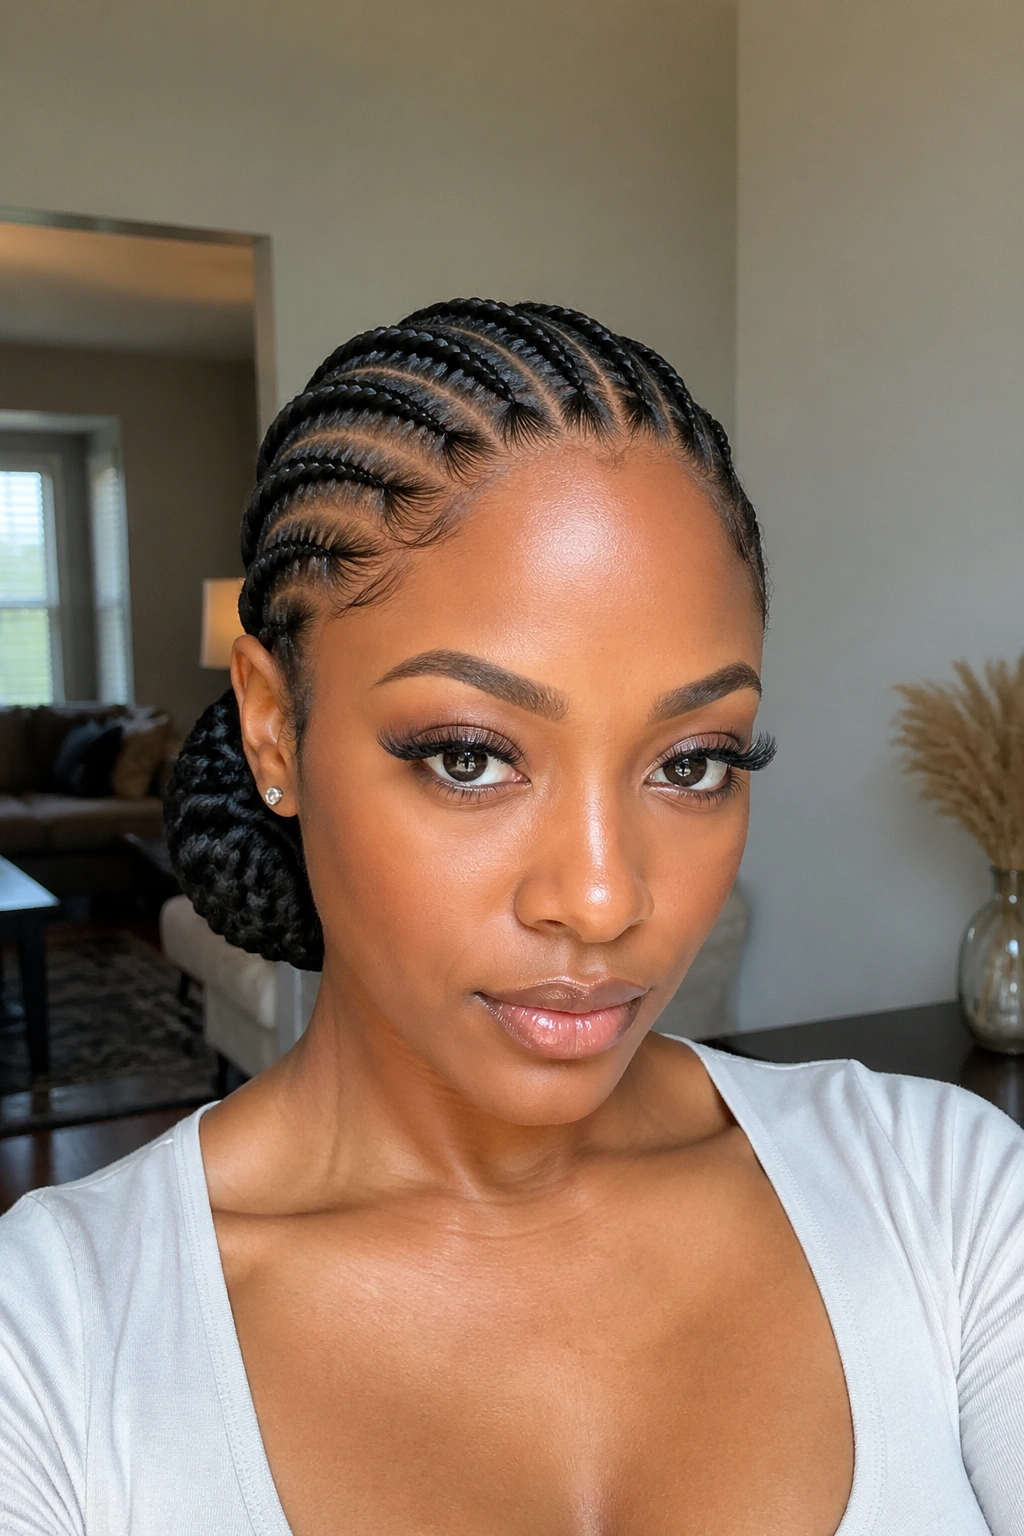
Classic feed-ins going straight back, all collected into a thick low bun at the nape. The bun is wrapped with extension hair to give it bulk and shape, creating that polished “ballerina” finish on a protective style.
Low buns are underrated for feed-ins. They give you the elegance of an updo without the tension of a high pony, and they work for literally any setting — office, date night, gym, sleep.
The bun works best when the braids are all the same length. If some braids are longer, ask the braider to trim them to match before wrapping the bun. Uneven lengths peeking out of a bun kills the clean look.
For a sleek finish at the nape, apply edge control along the base of the bun before wrapping. A few drops of serum smooth stray hairs. The goal is a glassy, polished finish where the individual braids disappear into the bun shape.
15. Feed-In Cornrows In A Mohawk Pattern
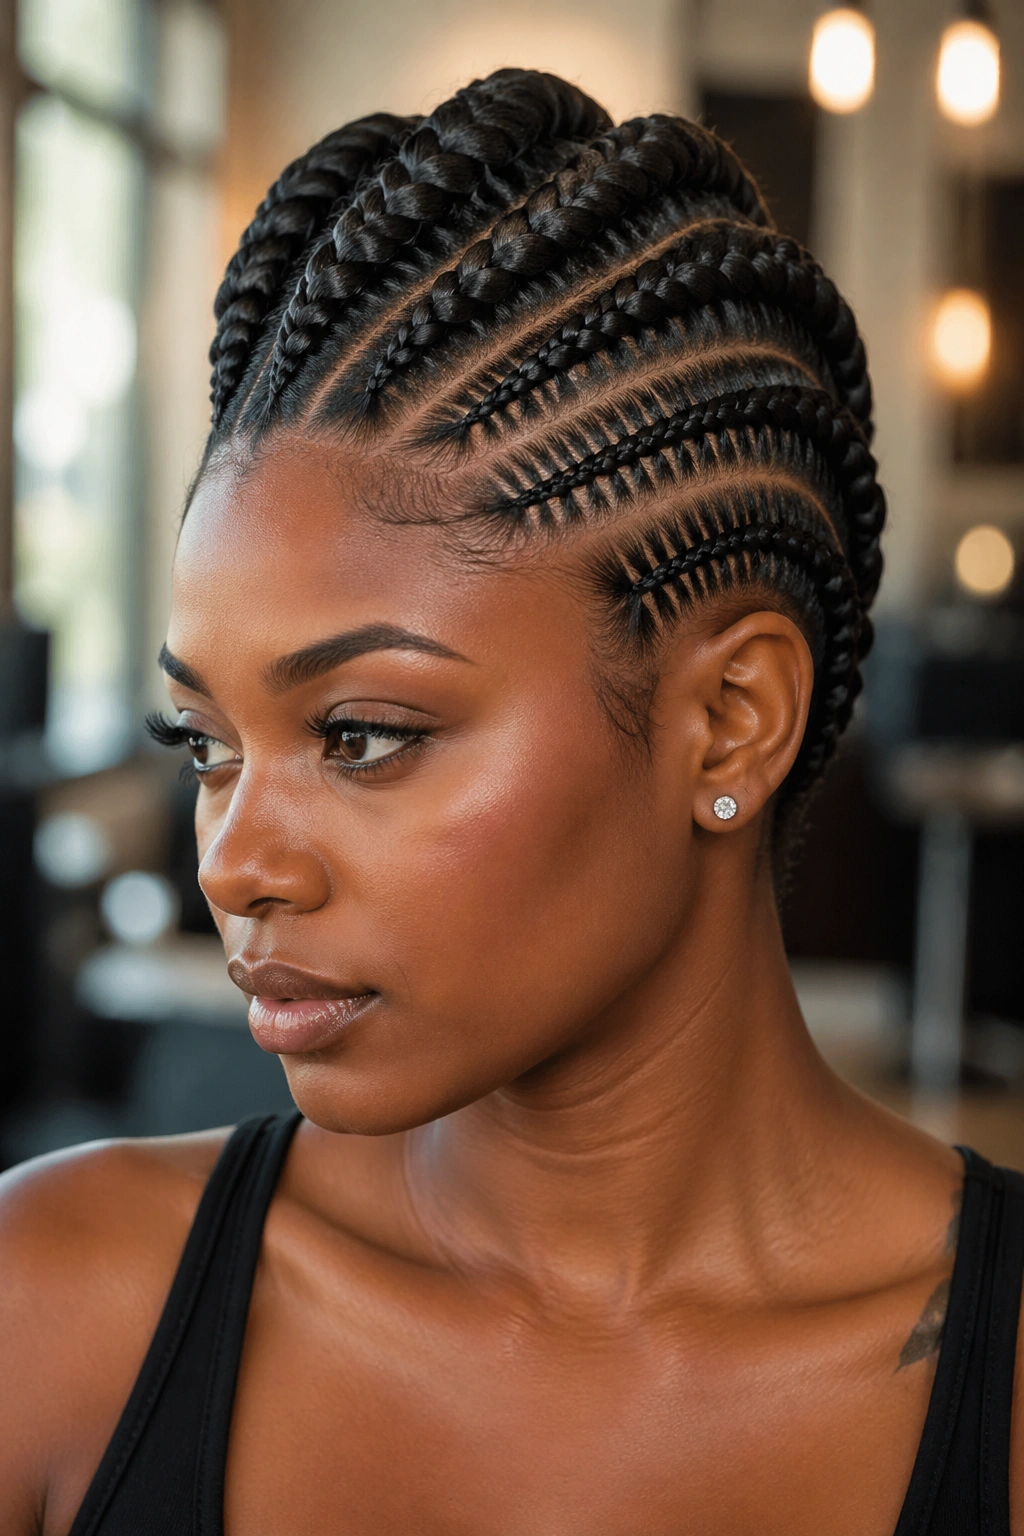
The mohawk feed-in pushes all the braids toward a central strip running down the middle of the head. Side sections are braided short and close to the scalp, while the center strip is built up with chunky feed-ins that stand taller than the surrounding hair.
Styling Tips
The mohawk effect comes from the parting strategy. The sides have tight, small cornrows that run down toward the ear. The center strip has four to six thick feed-ins that get progressively longer as they run from front to back. When the whole style comes together, the center looks lifted and the sides look pulled in.
For extra drama, some people add a bit of gel to the center braids to make them stand slightly upright, creating a faux-hawk rather than a lying-flat mohawk.
This style is bold enough that it doesn’t need accessories. Don’t add beads or cuffs — they compete with the architecture.
16. Feed-Ins With Wrapped Thread Or Ribbon Details
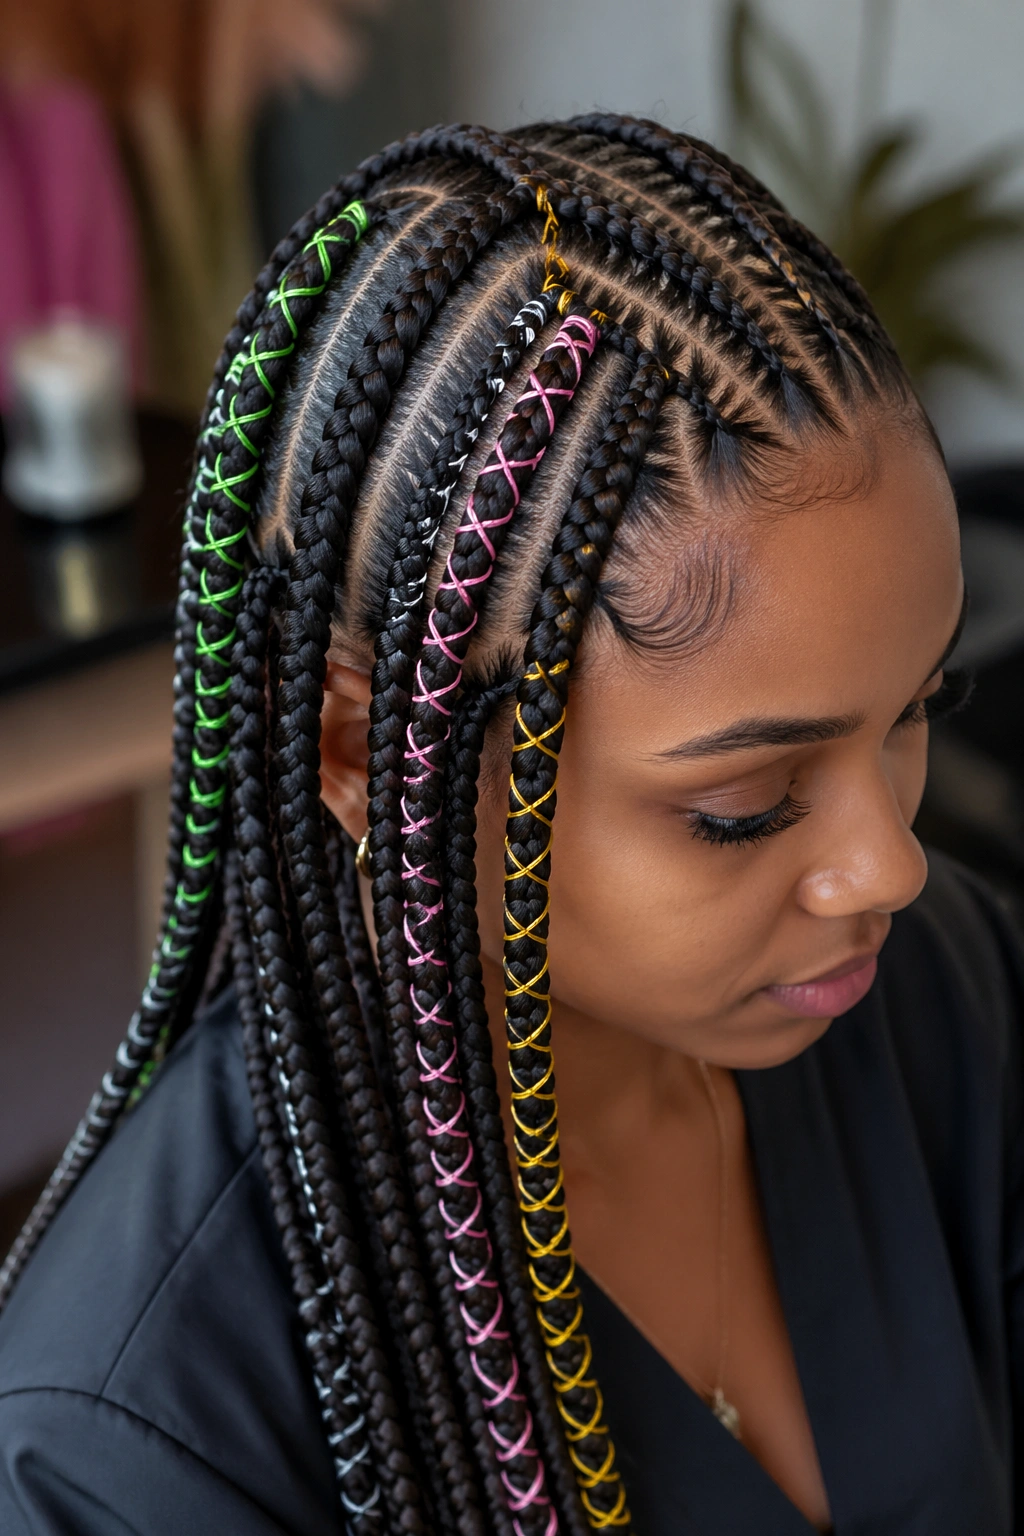
Colored thread wrapped around sections of the braid adds a woven, textile-like detail that catches the eye. The thread can be gold, red, deep green — whatever color works against your base braid color.
Here’s the mechanic. After the braid is installed, the thread is tightly wound around the braid for anywhere from half an inch to several inches, creating banded sections. You can wrap the top third of every braid, or just a few chosen braids, depending on how much visual density you want.
The thread adds almost no weight, which is a nice feature. But it does require securing — the wrap can loosen after a week if it wasn’t tied off properly. Ask the braider to tie a knot with a dab of clear gel to lock each wrap in place.
Thread wraps age well. Even after two weeks when the braid itself starts to show some fuzziness, the thread sections stay crisp and pull the eye away from any frizz.
17. Feed-In Cornrows In Honey Blonde Color
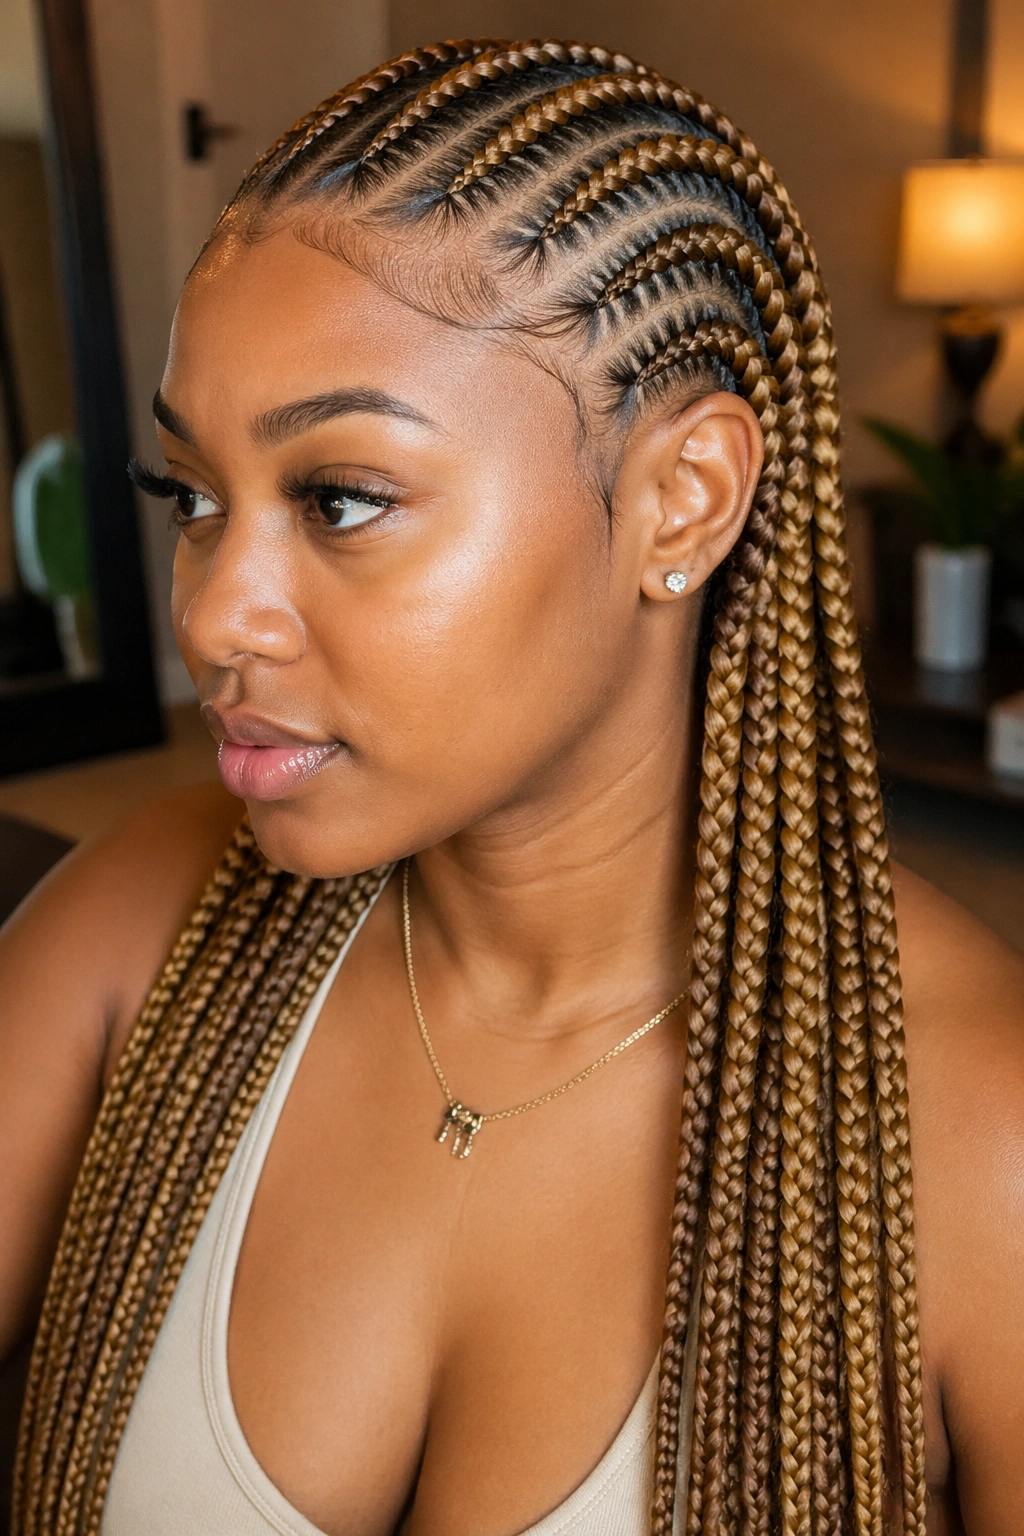
Honey blonde kanekalon. The shade between caramel and light brown, with just enough warmth to flatter most skin tones. Feed-ins in this color give you a completely different energy than your natural dark braids.
The thing to know about colored kanekalon is the weight and feel. Honey blonde synthetic hair is sometimes slightly stiffer than black or brown kanekalon because of the dye process. It holds its shape well, which actually helps the feed-in stay crisp, but it can feel less soft to the touch.
Layering colors within one braid creates dimensional honey blonde. Mixing a slightly darker caramel with lighter blonde pieces gives the braid a sun-kissed, multi-tonal look rather than flat yellow. Ask your braider to mix shades rather than using a single-pack color.
Honey blonde shows every flyaway. A darker top layer plus lighter feed-ins hides stray hairs better, while pure blonde from root to tip requires more diligent edge control throughout the install’s lifespan.
18. Short Bob-Length Feed-In Cornrows
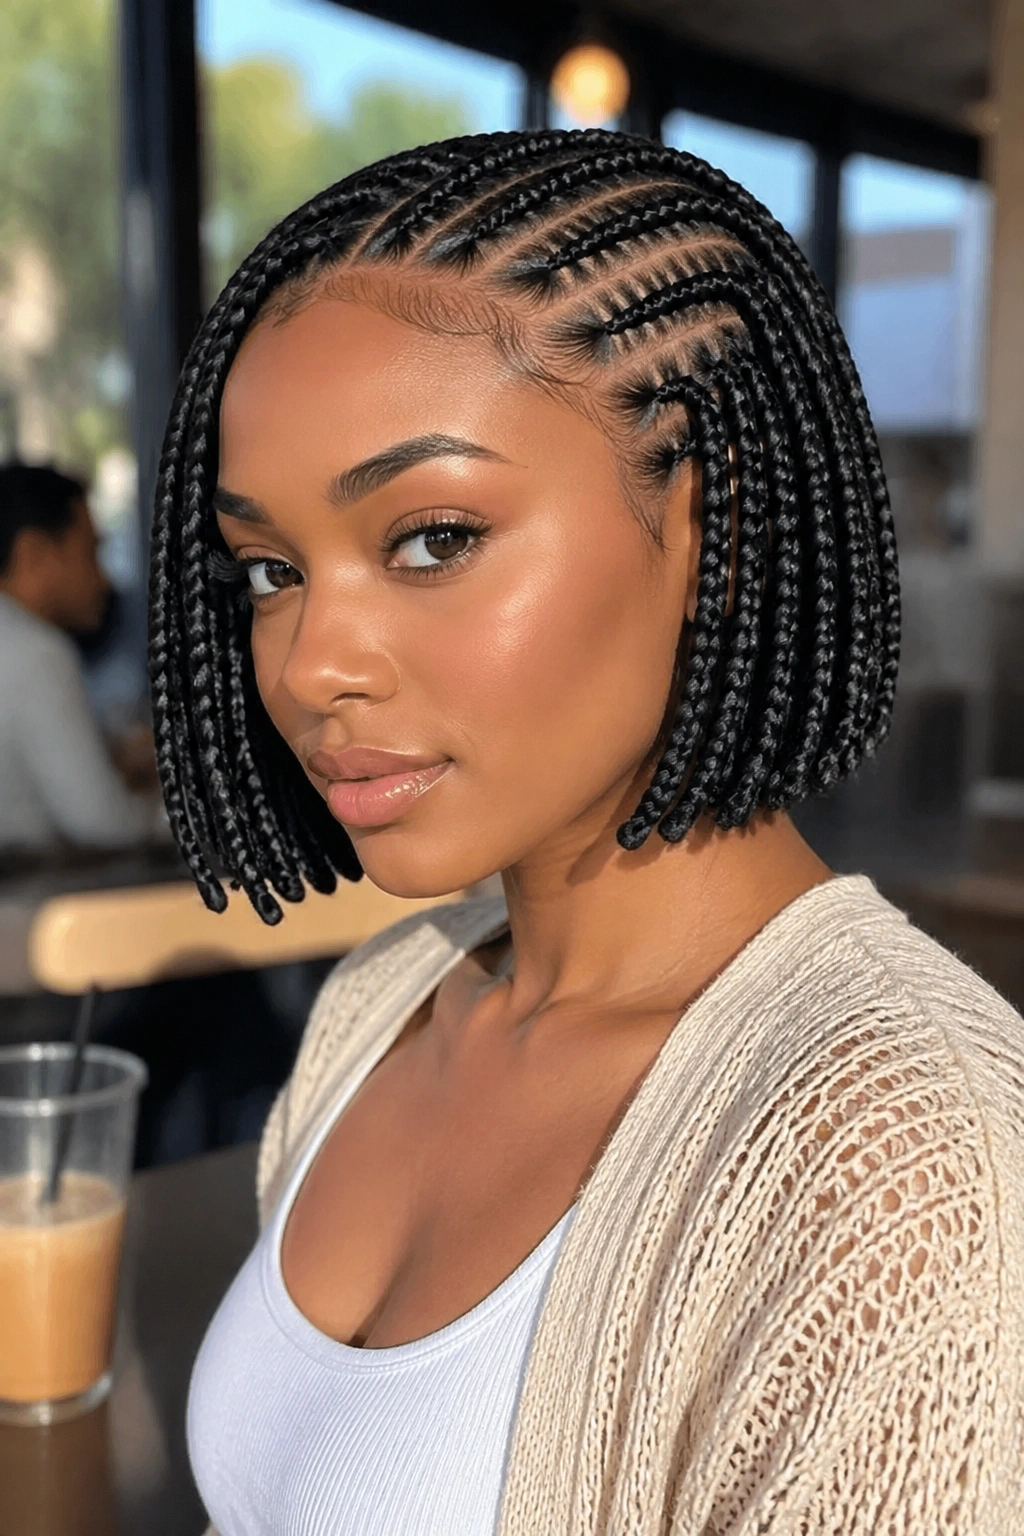
Not every feed-in needs to hit your lower back. Bob-length feed-ins finish at the jaw or shoulder, creating a sharp, chic look that ages forward rather than back.
Who This Is For
Bob-length feeds are great for people who don’t want the maintenance of long braids but still want the polish of a professional protective style.
- 2-3 packs of braiding hair total — way less than long styles
- Perfect for summer heat when long braids feel heavy
- Easier to sleep on because there’s less length to manage
Pro tip: A blunt finish at the ends makes the bob feel sharper, while tapered ends make it look softer. Decide which vibe you want before the install because the cutting happens at the end.
19. Feed-In Cornrows With A Bang Or Fringe Section
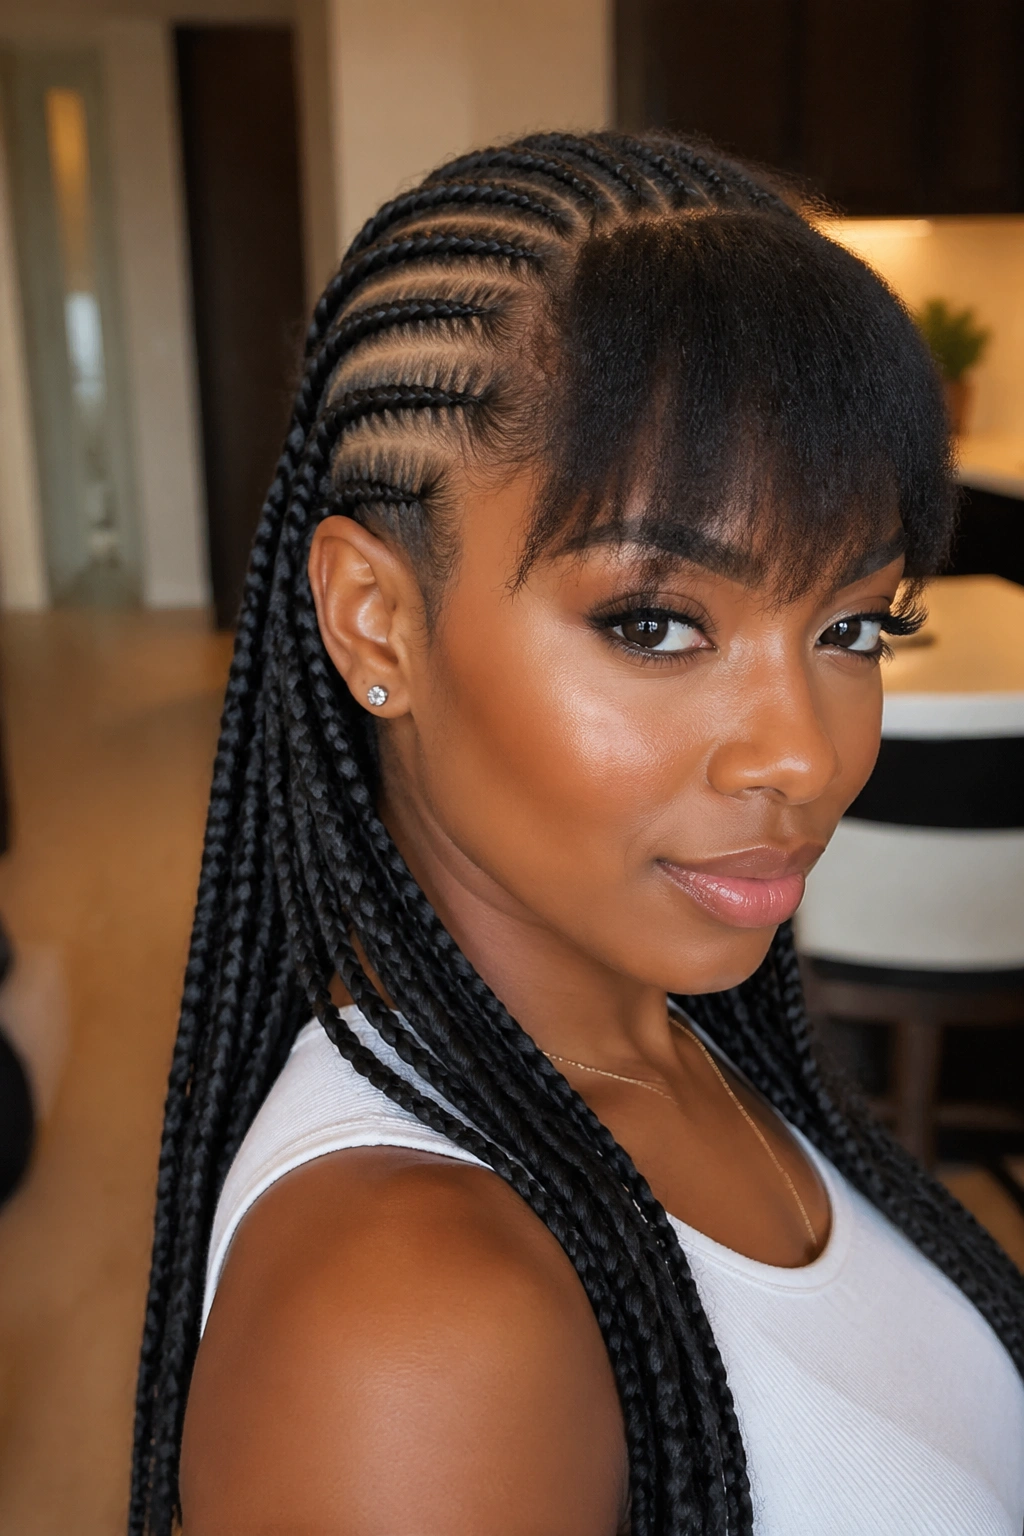
Feed-in cornrows running back from the crown, but the front section is styled as a bang — either short and choppy or longer and swept.
The bang can be created in a few ways. Option one: leave a section of your natural hair out at the front and style it as a bang. Option two: use a bit of the same kanekalon to create a synthetic bang that matches the braids. Option three: use a clip-in bang piece installed under the top of the cornrows.
Bangs change face shape perception. They bring the eye to the eyes, soften a high forehead, and give the style a more youthful feel. They’re especially flattering with longer face shapes because they cut vertical length visually.
The main downside is bang maintenance. Synthetic bangs don’t move like real hair, so they need constant smoothing. Real-hair bangs need daily styling. Choose based on how much time you want to spend in the mirror each morning.
20. Feed-Ins With Thick And Thin Alternating Braids
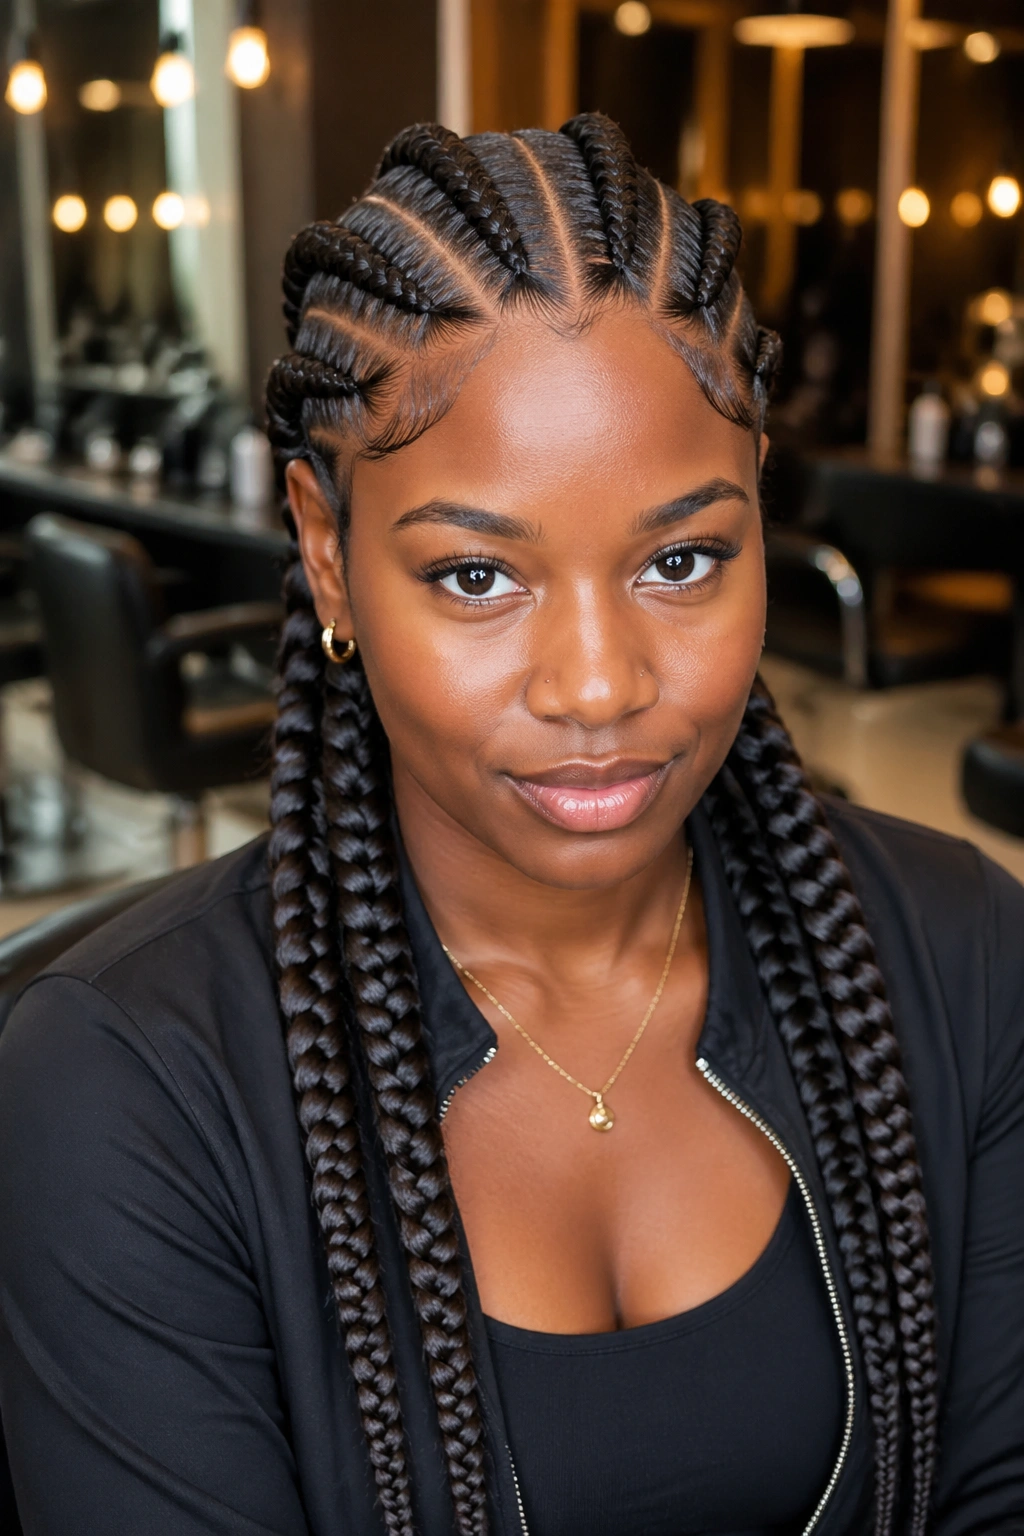
Typical feed-in sets use uniform braid thickness. This variation alternates — one thick braid, one thin braid, one thick, one thin — creating rhythmic visual variation across the head.
Imagine six braids total: braids one, three, and five are fed heavily with lots of extension hair for bulk. Braids two, four, and six are kept thin with minimal feed-in. The result looks layered, like a complex textile rather than uniform plaits.
This pattern photographs beautifully because the light hits the thick and thin braids differently. Thick braids cast shadows between them. Thin braids reflect light more uniformly. In good lighting, the style has real depth.
Execution matters. The thick and thin braids need to be precisely placed — random alternation looks messy. Plan the pattern in advance with your braider and mark the part lines clearly.
21. Feed-In Cornrows Styled Into A Crown Braid
The crown braid wraps the head like a halo. Feed-ins are installed in a circular pattern, starting at the hairline and spiraling around the head until they meet at the back, forming a braided wreath or crown shape.
What Makes It Different
Most feed-ins go front-to-back in straight or curved lines. The crown braid moves around the head in a circle, which is a different skill set entirely.
The braider starts at one temple, feeds into a cornrow that runs along the hairline to the other temple, continues around the back of the head, and meets back at the starting point. Multiple rings of braids can be stacked — an inner crown and an outer crown — for a thicker halo effect.
Crown braids are perfect for weddings, brunches, or any event where your hair should feel ceremonial. They also work well under veils or hats because the braids sit close to the scalp and don’t add much height.
22. Feed-Ins With Heart-Shaped Parts Near The Hairline
Parting isn’t limited to straight lines. A skilled braider can draw a heart shape at the hairline, then braid around that heart, making it the focal point of the whole style.
The heart is usually placed to one side of the forehead — either left or right of center, about two inches back from the hairline. The two curved halves of the heart meet at a point, and braids flow away from the heart in all directions, radiating outward.
This design requires really precise parting. The heart has to look balanced — not lopsided, not too stretched, not too squat. Ask your braider to draw the heart first with gel or a washable marker before they start braiding. It’s much easier to redo a drawn line than to redo a braided one.
Kids absolutely love heart designs. If you’re braiding a daughter’s hair, this parting adds a magical touch that feels like jewelry.
23. Feed-In Cornrows With Different Textures Mixed In
Mix smooth kanekalon with curly or wavy braiding hair for a dimensional, multi-texture finish. Some braids are braided with straight synthetic hair, others use curly pieces that give the braid a lived-in, bohemian vibe.
The curly hair is braided normally — it just adds natural-looking volume and a less rigid feel. The effect is like a gradient: some braids feel polished and structured, others feel relaxed and soft. Together, they create a textured head of hair that doesn’t read as “just braids.”
Expect the curly-textured braids to frizz slightly faster. Curly synthetic hair is more prone to tangling and catching on clothing, especially around high-friction areas like the back of the neck. Bonnet at night is critical for these.
This style is a good bridge between feed-in cornrows and boho braids for people who want something in between.
24. Oversized Feed-Ins With Only Three Braids
Three thick feed-in braids running front to back. One on each side and one down the middle. This is feed-in cornrows taken to their most minimalist extreme.
Maintenance Notes
Three jumbo braids redistribute weight differently than six or eight smaller ones. The weight concentrates on just three parts of the scalp, which can feel heavier initially. Once you adjust over the first two days, it’s generally not an issue.
- Each braid uses about 3 packs of braiding hair
- Total install time: 2-3 hours tops
- Easier to accessorize with oversized cuffs or wraps because the braids are large
Pro tip: When a braid is this thick, make sure the braider checks tension at the scalp level. Chunky braids can hide tension by distributing weight across a wider section, making it harder to tell if the hair is pulled too tight until hours later.
25. Feed-In Cornrows With Baby Hair Styling
Feed-in cornrows look completely different when you style the baby hairs at the front with intricate swoops and swirls. The technique takes the install from “neat” to “sculpted” — the curly flicks of baby hair frame the face and add a layer of detail.
Use a fine-tooth brush and a heavy edge control gel. Start with damp hair at the hairline after the install is done. Small sections get directed into curves, swirls, or zigzag shapes depending on your style preference. Let each section set before styling the next.
Baby hair swirls only last as long as the gel holds. Typically 8-12 hours before they need a refresh. That means touch-ups every morning if you want the style looking tight.
Stiff gel works better than soft gel for this purpose. Soft gel lets the baby hair curl back up within an hour. Stiff gel gives you crisp, sharp swoops that hold for the whole day. Eco Styler Olive Oil gel is the classic choice — inexpensive, effective, widely available.
Maintaining Feed-In Cornrows Day To Day
Day-to-day maintenance is way easier than it looks, but there’s a rhythm that matters. Lightly mist braids with a water-glycerin-oil spray every other morning. Don’t soak — dampness sitting in braids for hours creates mildew. A few pumps of spray, worked in with your fingertips, keeps the kanekalon flexible.
Avoid heavy oils. Coconut oil or shea butter feels great but builds up quickly on synthetic hair, creating dark oily spots near the scalp. Stick to light oils like jojoba or argan if you need extra moisture at the roots.
Wash braids every 10-14 days with diluted shampoo applied at the scalp with a squeeze bottle. Don’t lather the braids themselves — just focus on cleaning the scalp. Rinse thoroughly and let air dry as much as possible before going to sleep.
Scalp Care Underneath The Braids
Your scalp matters more than the braids. A healthy scalp produces healthy hair, which grows out under the braids whether you pay attention or not. Use a scalp serum with tea tree, peppermint, or rosemary oil twice a week. Apply directly to the scalp between braids using a pointed applicator bottle.
Itching is normal for the first 2-3 days after install. Persistent itching after that can mean product buildup, fungal growth, or an allergic reaction to the kanekalon (rare but possible). Don’t scratch — dab the scalp with a cotton pad soaked in diluted apple cider vinegar for relief.
Dryness at the scalp is the number one complaint from people with feed-ins. Counter it with light hydration at every scalp-care session. Don’t skip this step.
How To Take Down Feed-In Cornrows
Takedown is where many people damage their hair without realizing it. Start by cutting off the extension tails above where your natural hair ends — saves you hours of unraveling kanekalon you’re just going to toss.
Work from the ends up. Spray each section with a detangling spray or a diluted conditioner mix. Gently separate the braid using your fingers first, then a wide-tooth comb for the remaining shed hair. Go slow. Ripping through takedown causes breakage.
Expect to shed. A lot. You’re releasing 2-4 weeks of hair that would normally shed daily but has been trapped in the braid. The shed pile looks alarming — it’s normal.
Follow up with a clarifying wash, a deep conditioner, and a protein treatment if your hair feels weak. Give your scalp 48 hours of rest before installing any new style.
Common Mistakes To Avoid
Overloading the front with extension hair is the most common install mistake. If the feed-in starts too heavy at the hairline, you get that “stuffed” look where the braid bulges at the root instead of tapering smoothly. Ask to see the first two braids before committing to the full install — if the fronts look bulky, speak up early.
Leaving braids in too long. Four weeks is the max for feed-ins. Beyond that, your natural hair starts matting at the roots, and takedown becomes a nightmare. Three weeks is safer.
Ignoring the scalp. Feed-ins look effortless, but your scalp needs active attention. Skipping scalp care for the full three weeks creates buildup, flaking, and sometimes fungal issues that require medicated shampoos.
Sleeping without a bonnet. Cotton pillowcases absorb moisture from the kanekalon and create frizz by morning. A silk or satin bonnet solves 80% of the frizz problems people complain about.
And finally, trying to save money on synthetic hair. Cheap kanekalon sheds more, tangles faster, and doesn’t hold color as well. Spend the extra few dollars per pack for a decent brand. Your style will look better and last longer.
