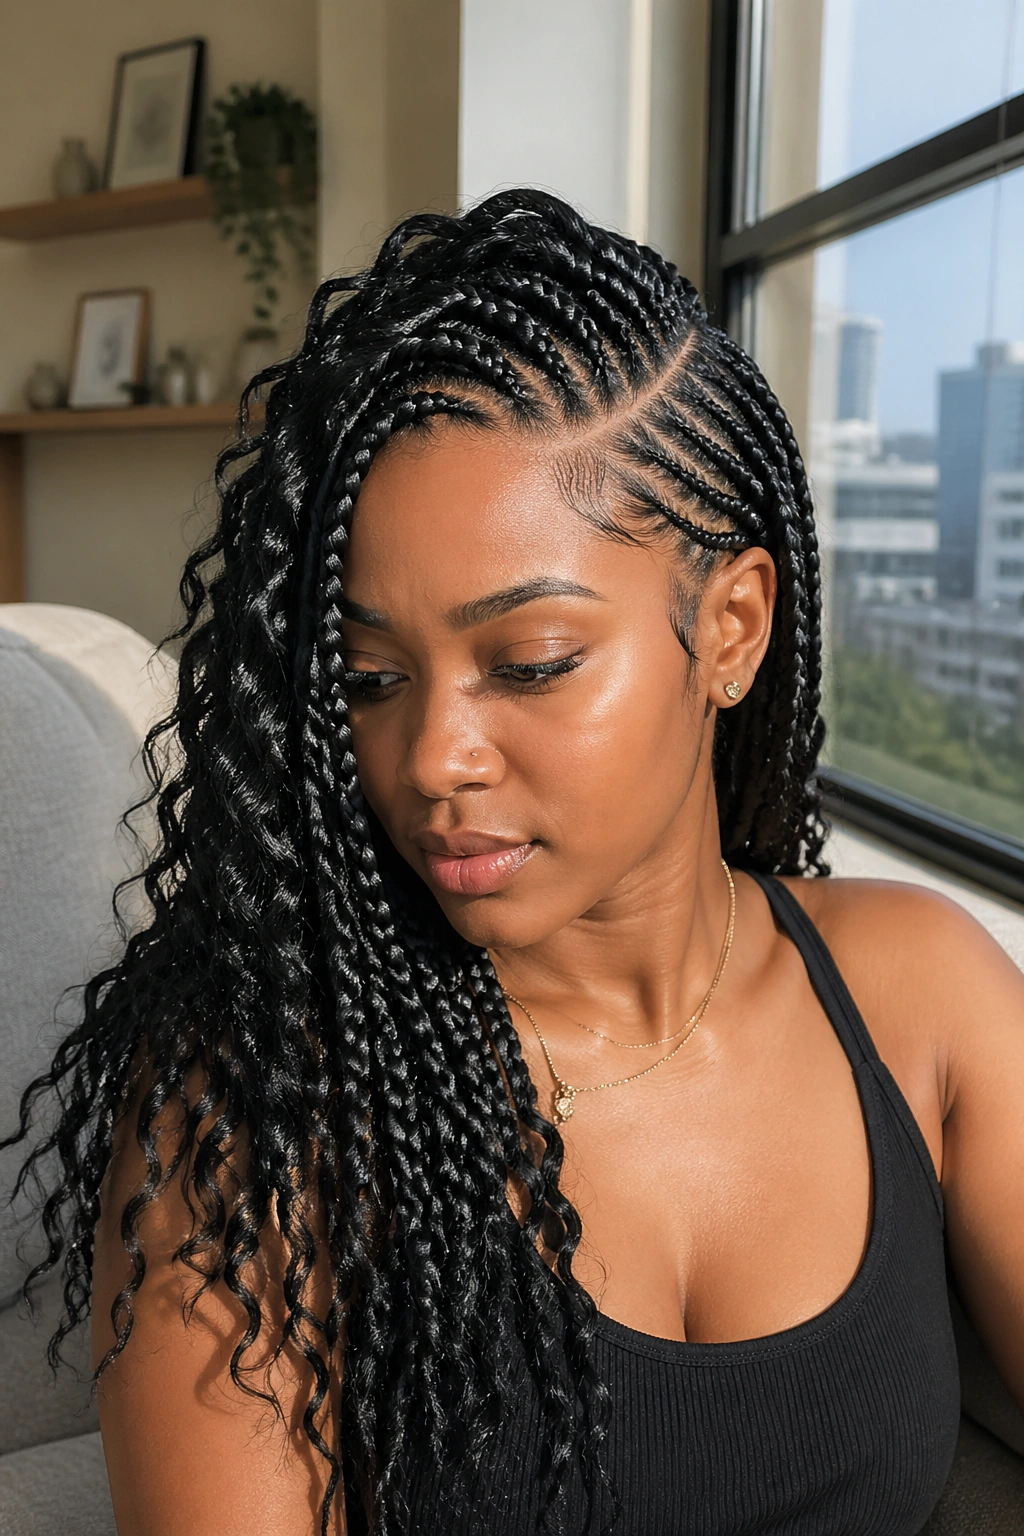
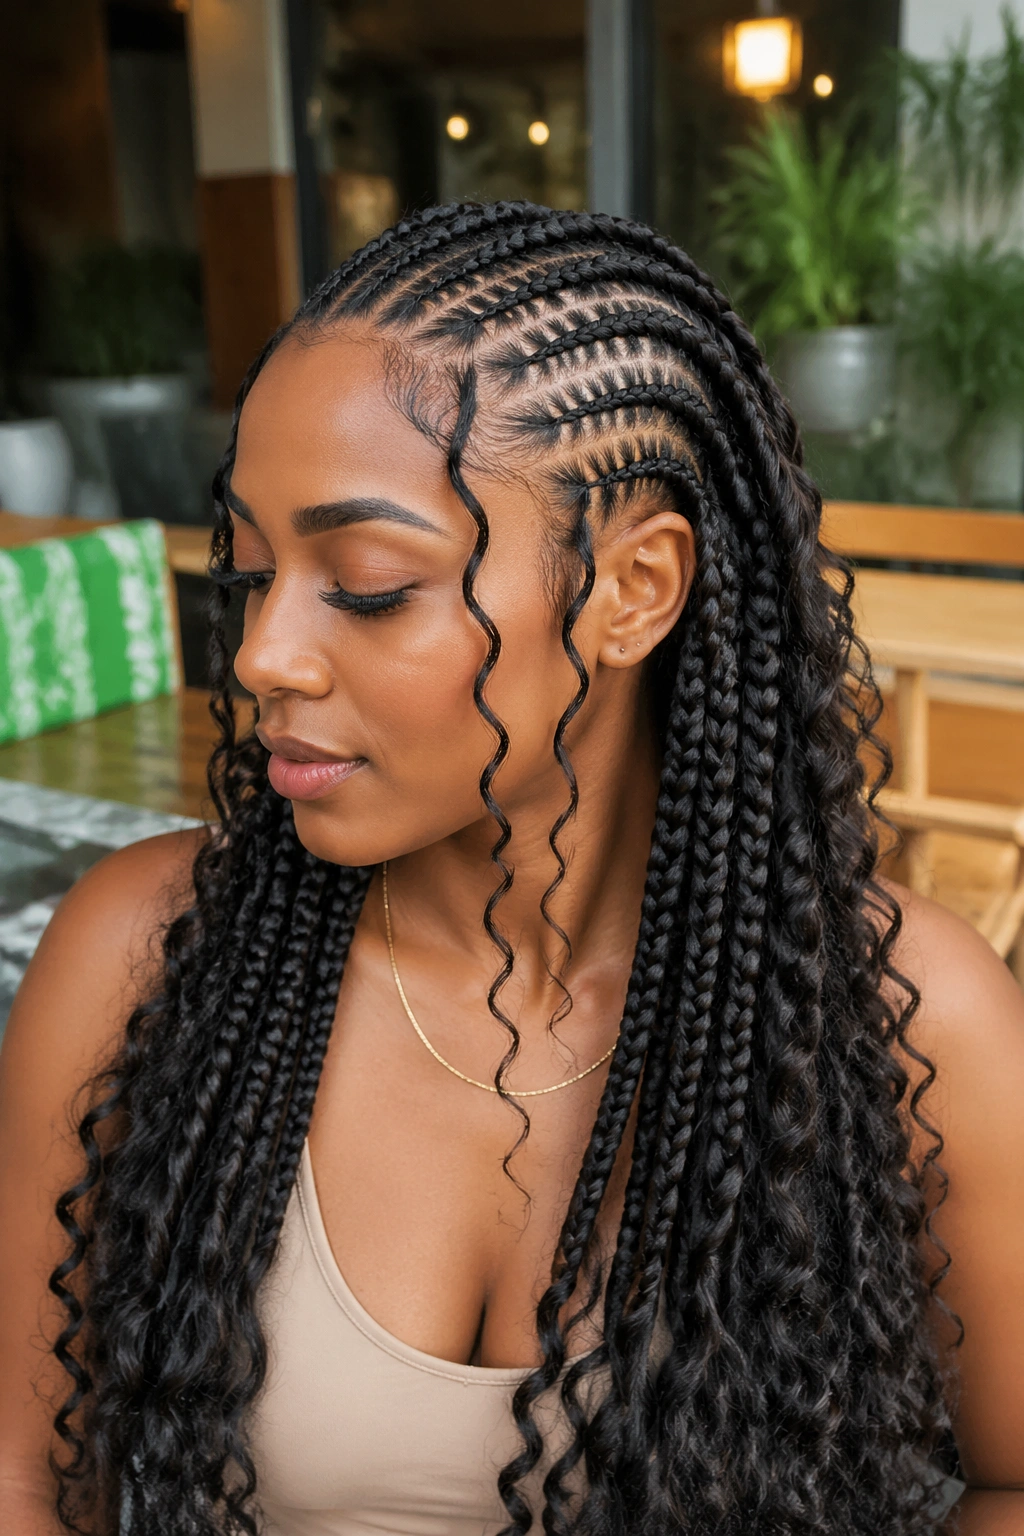
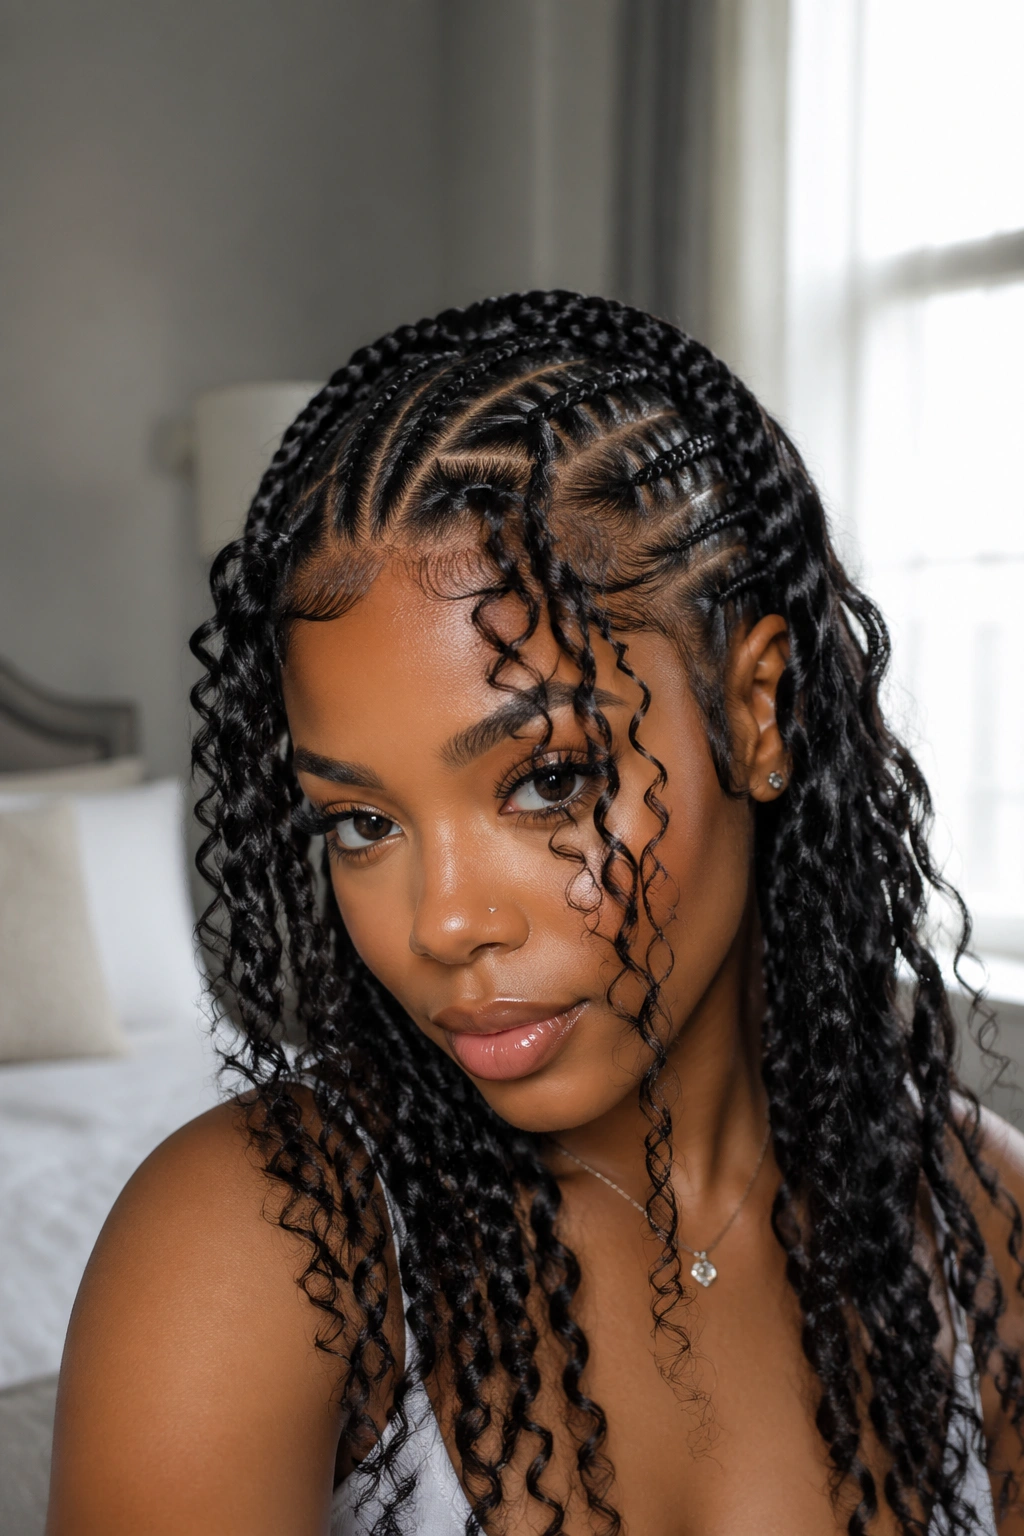
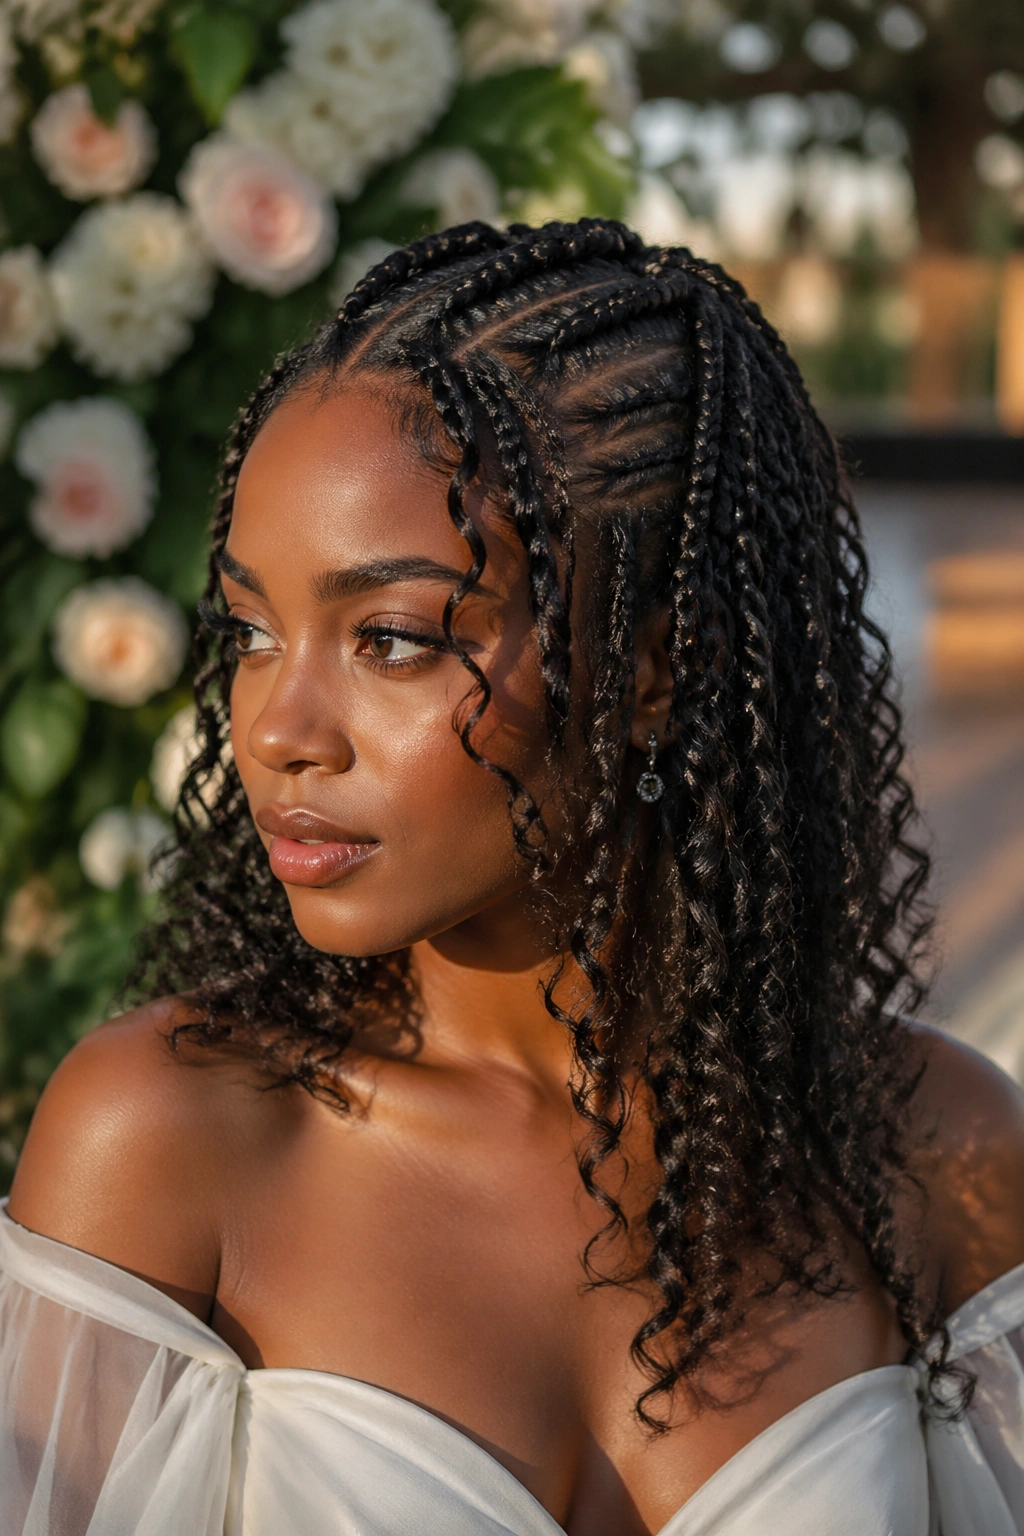
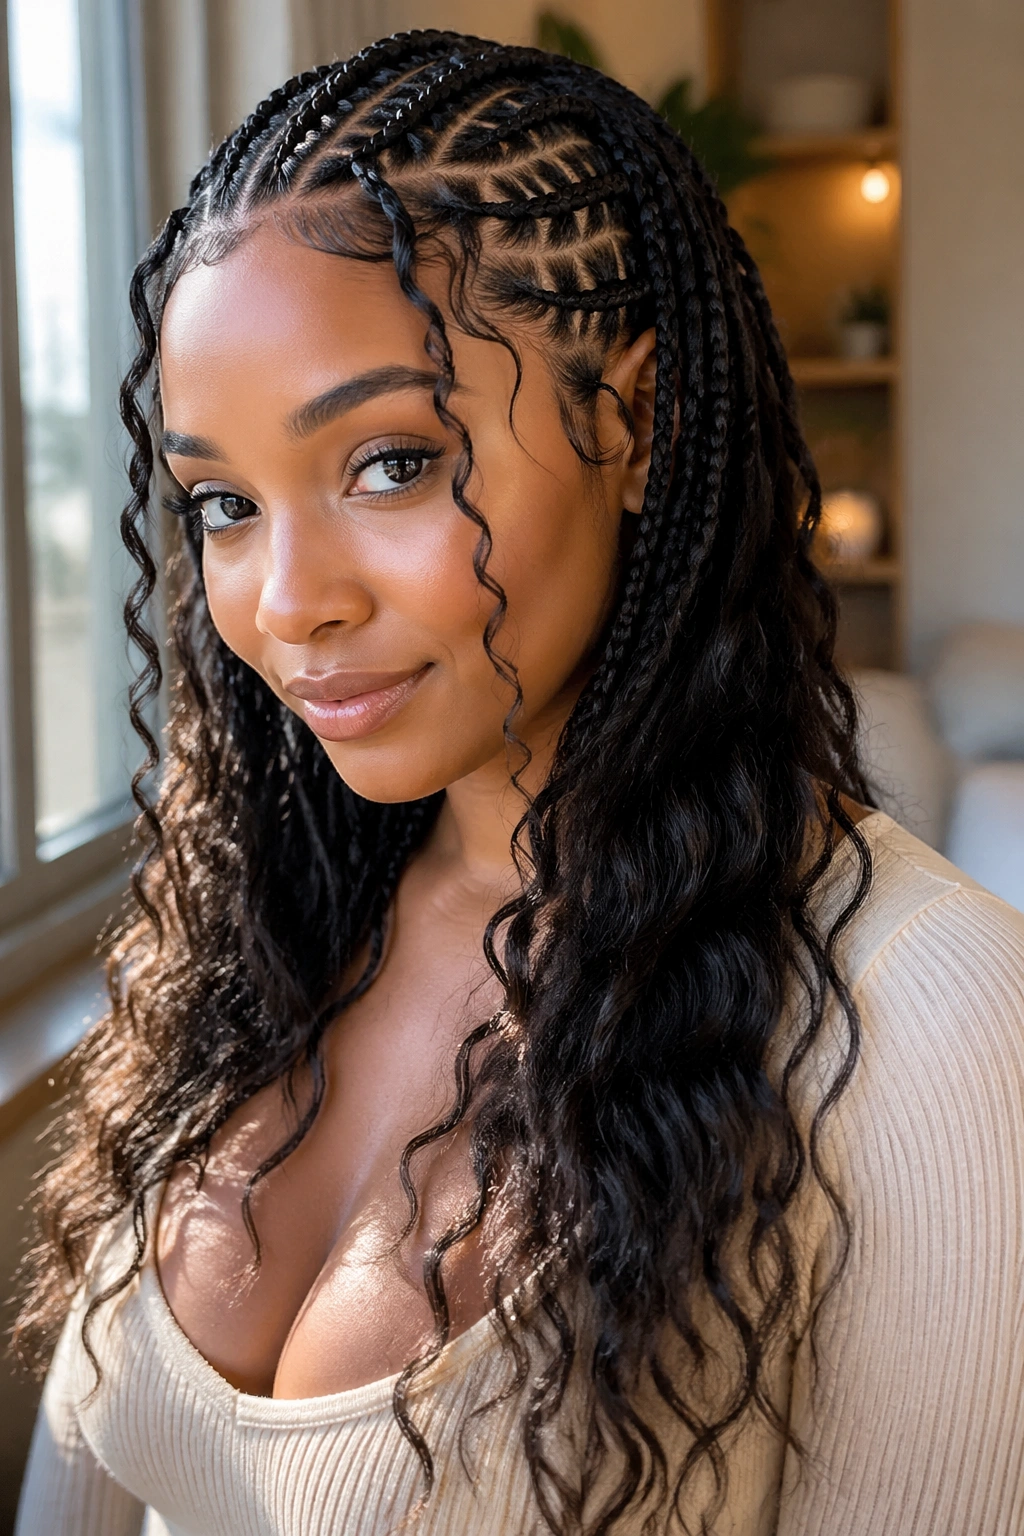
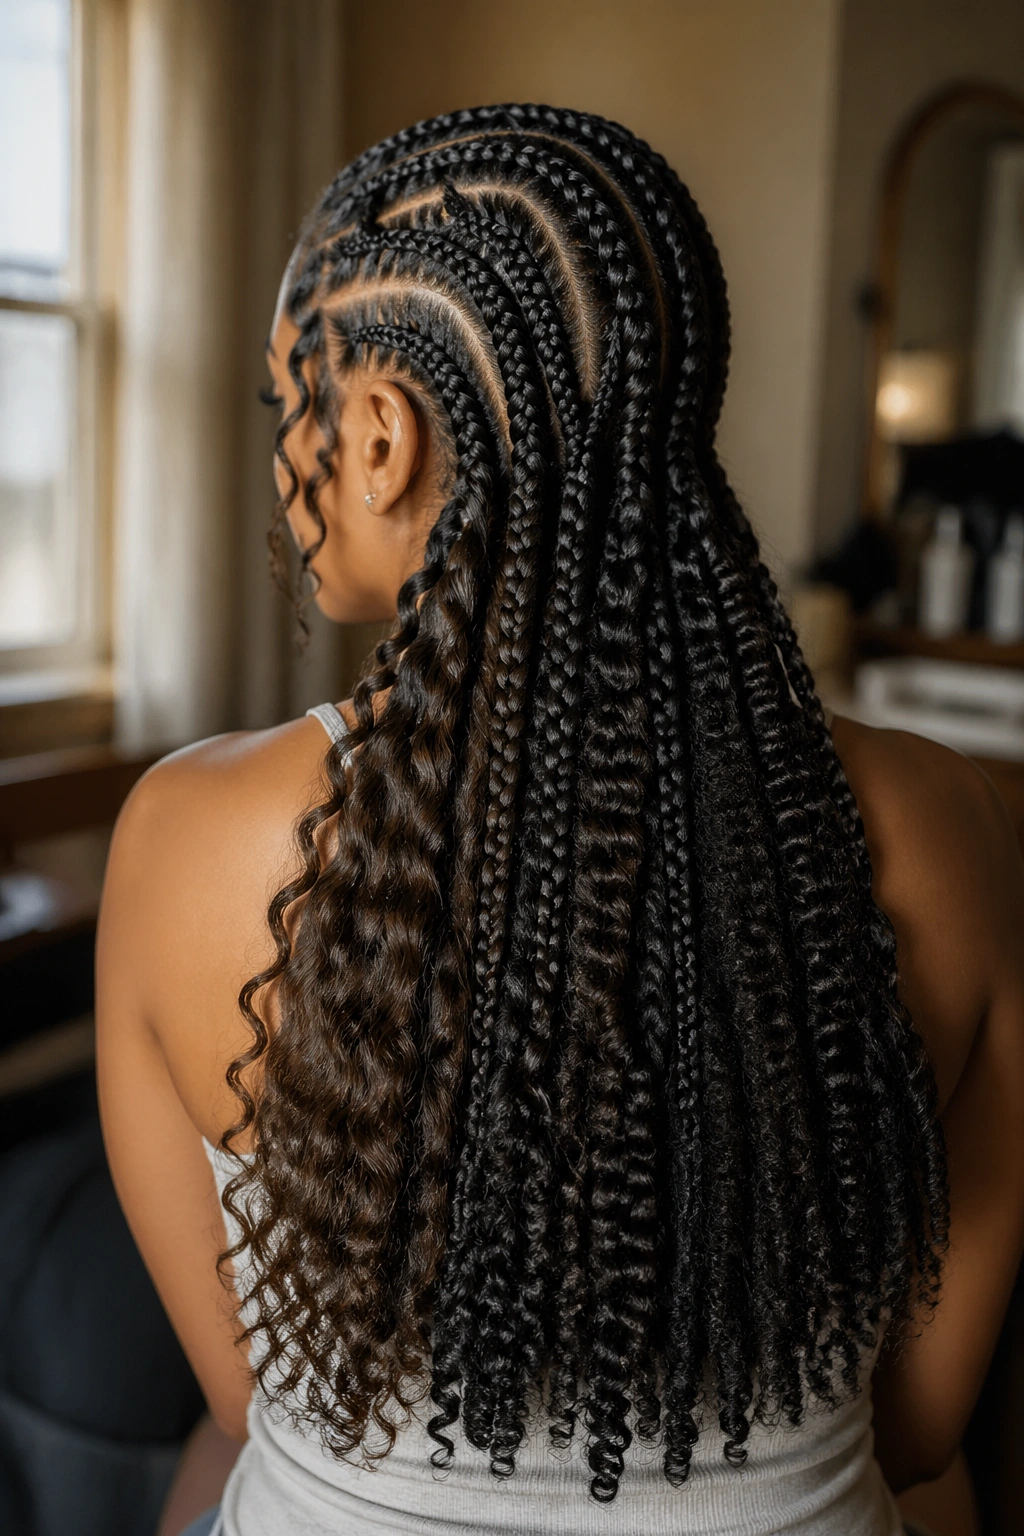
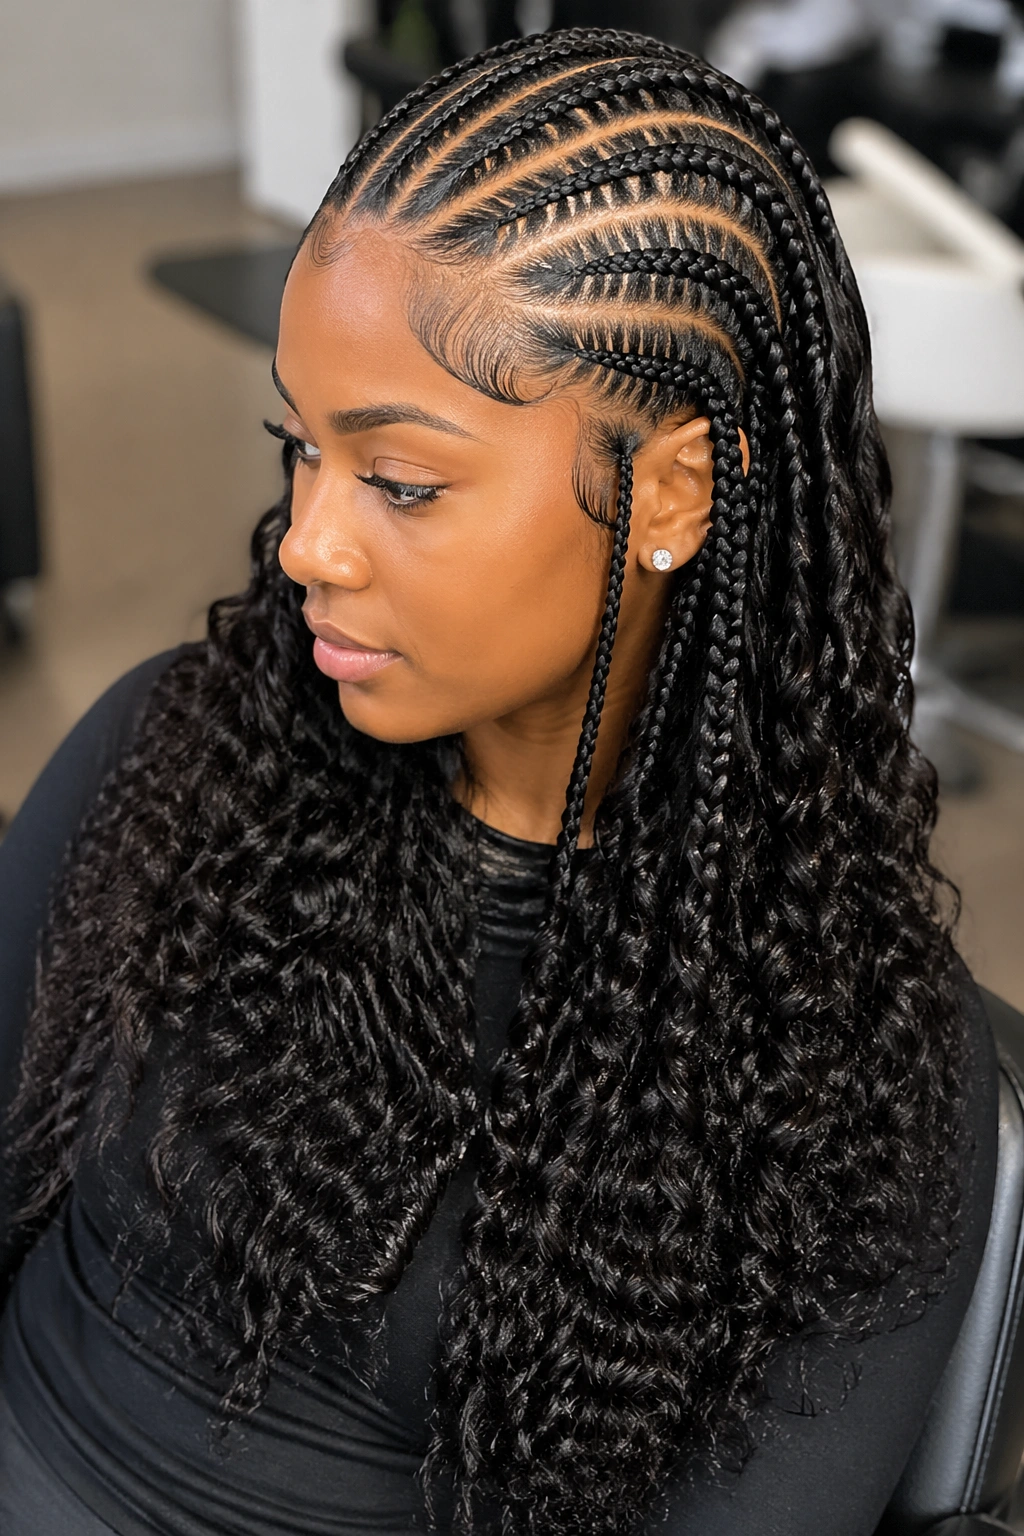
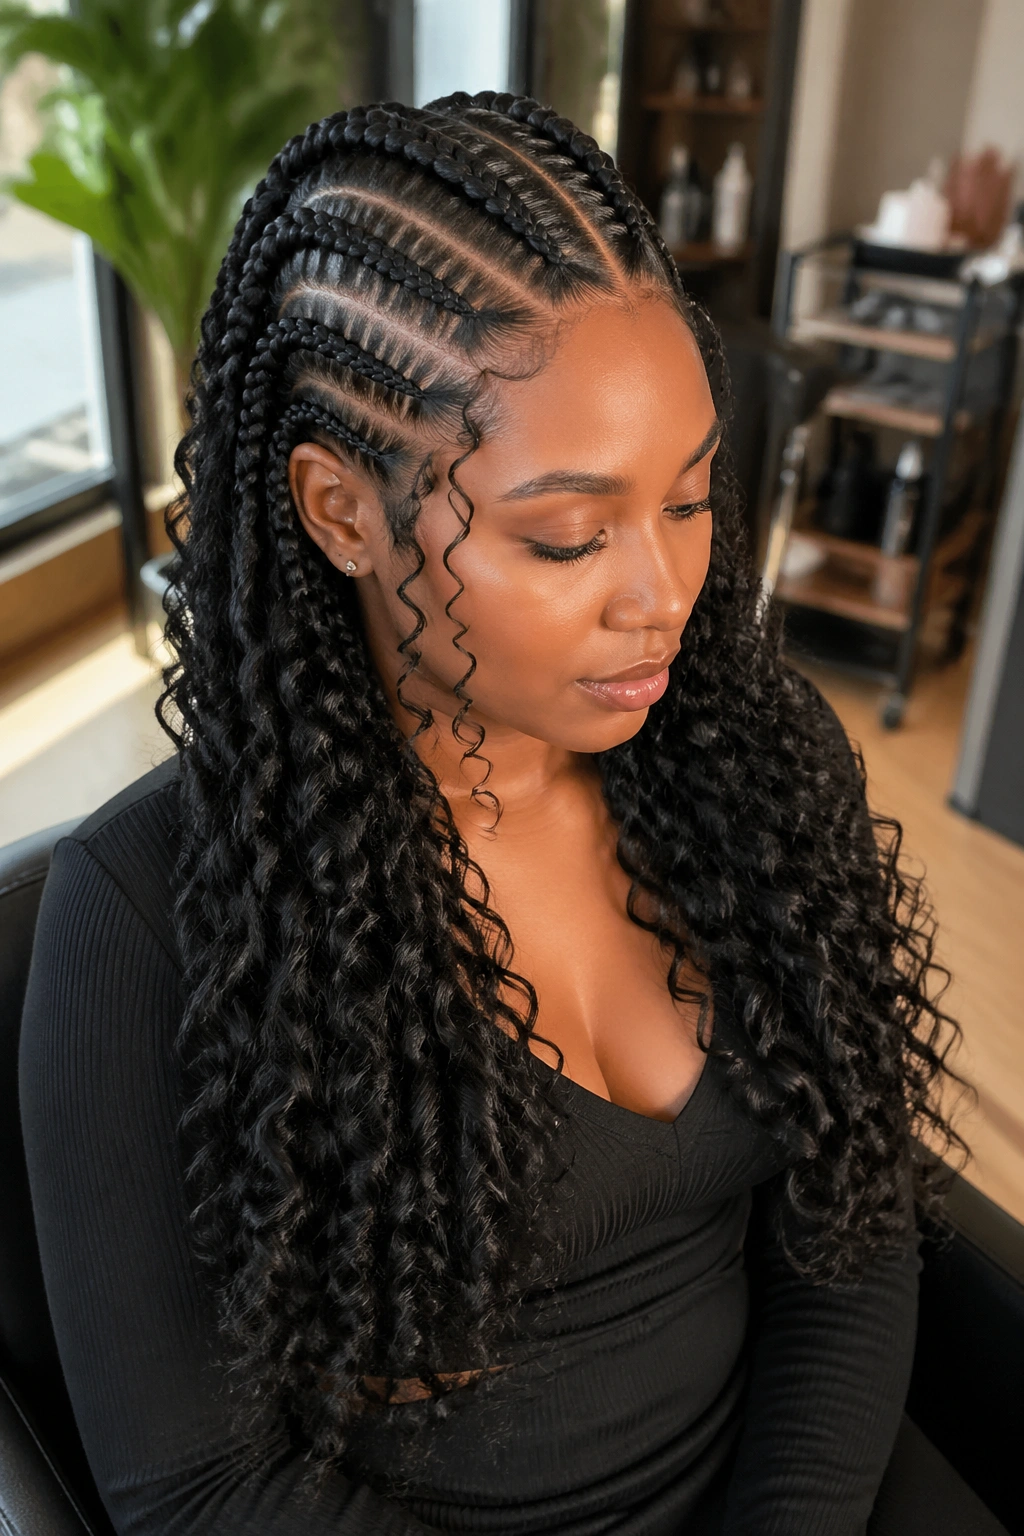
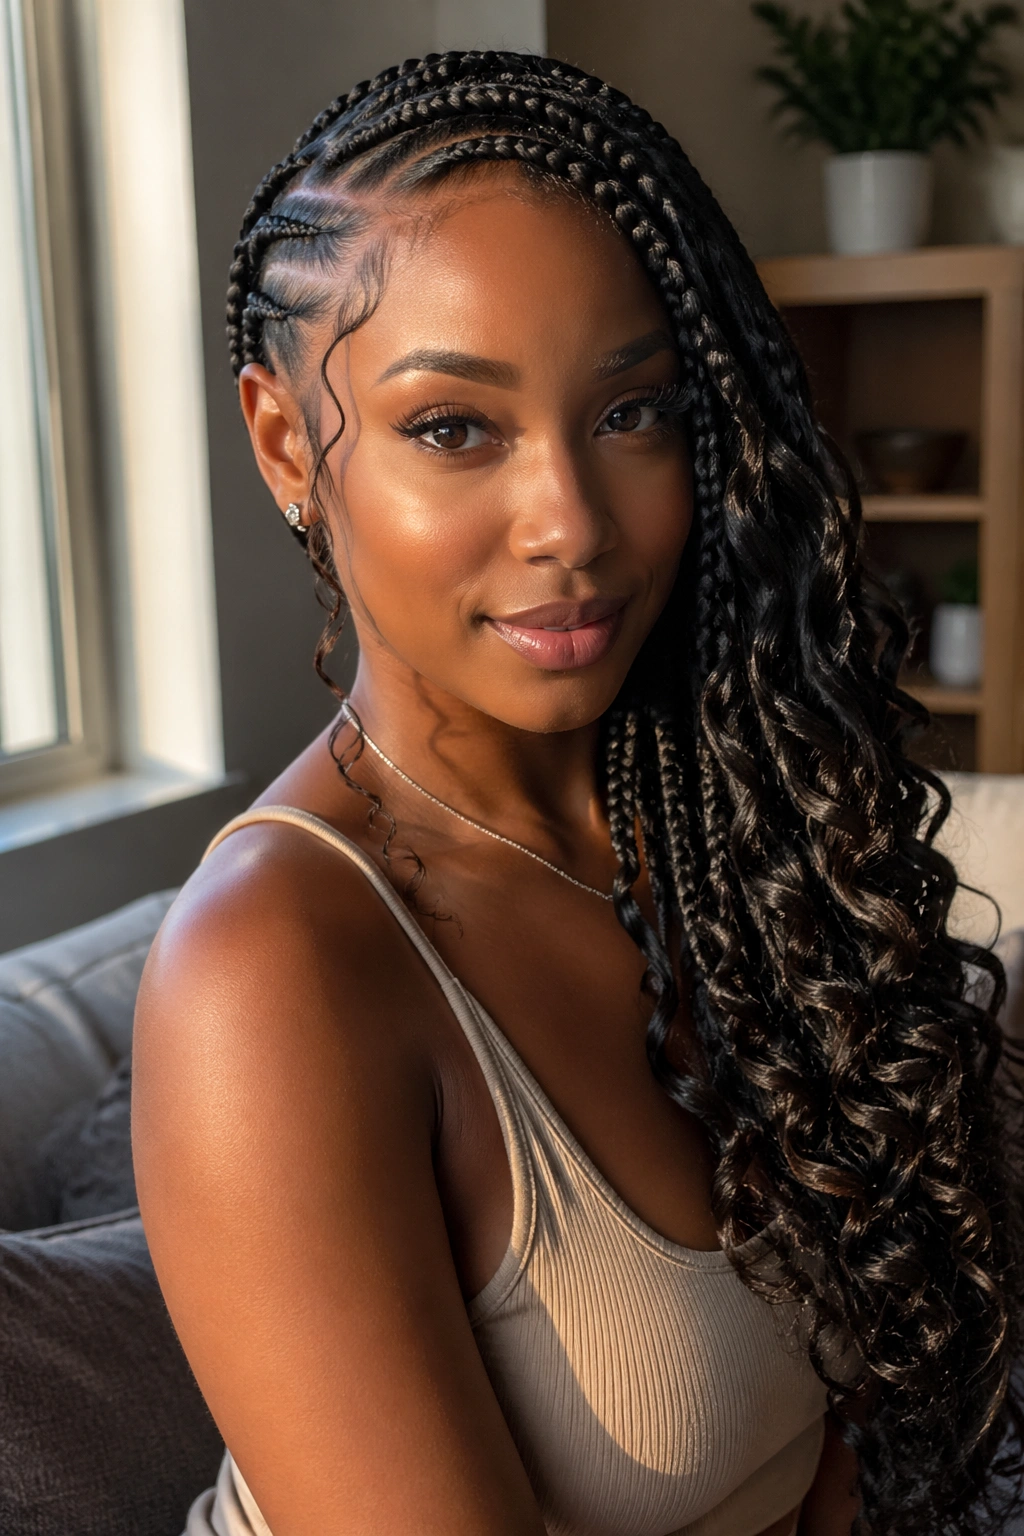
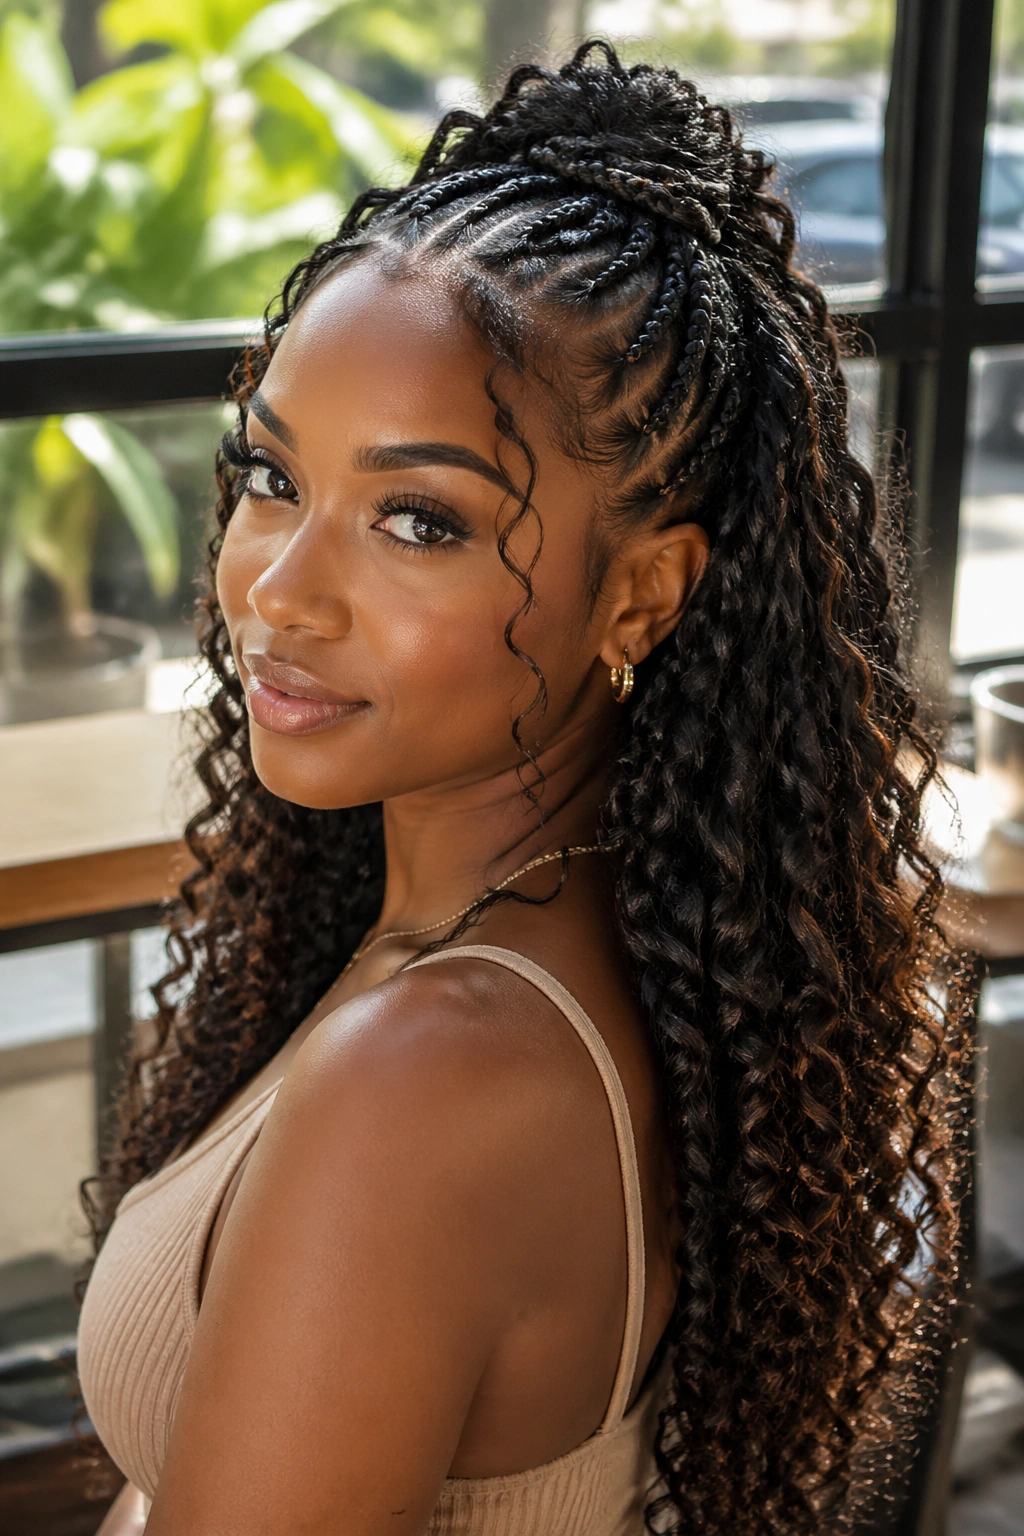
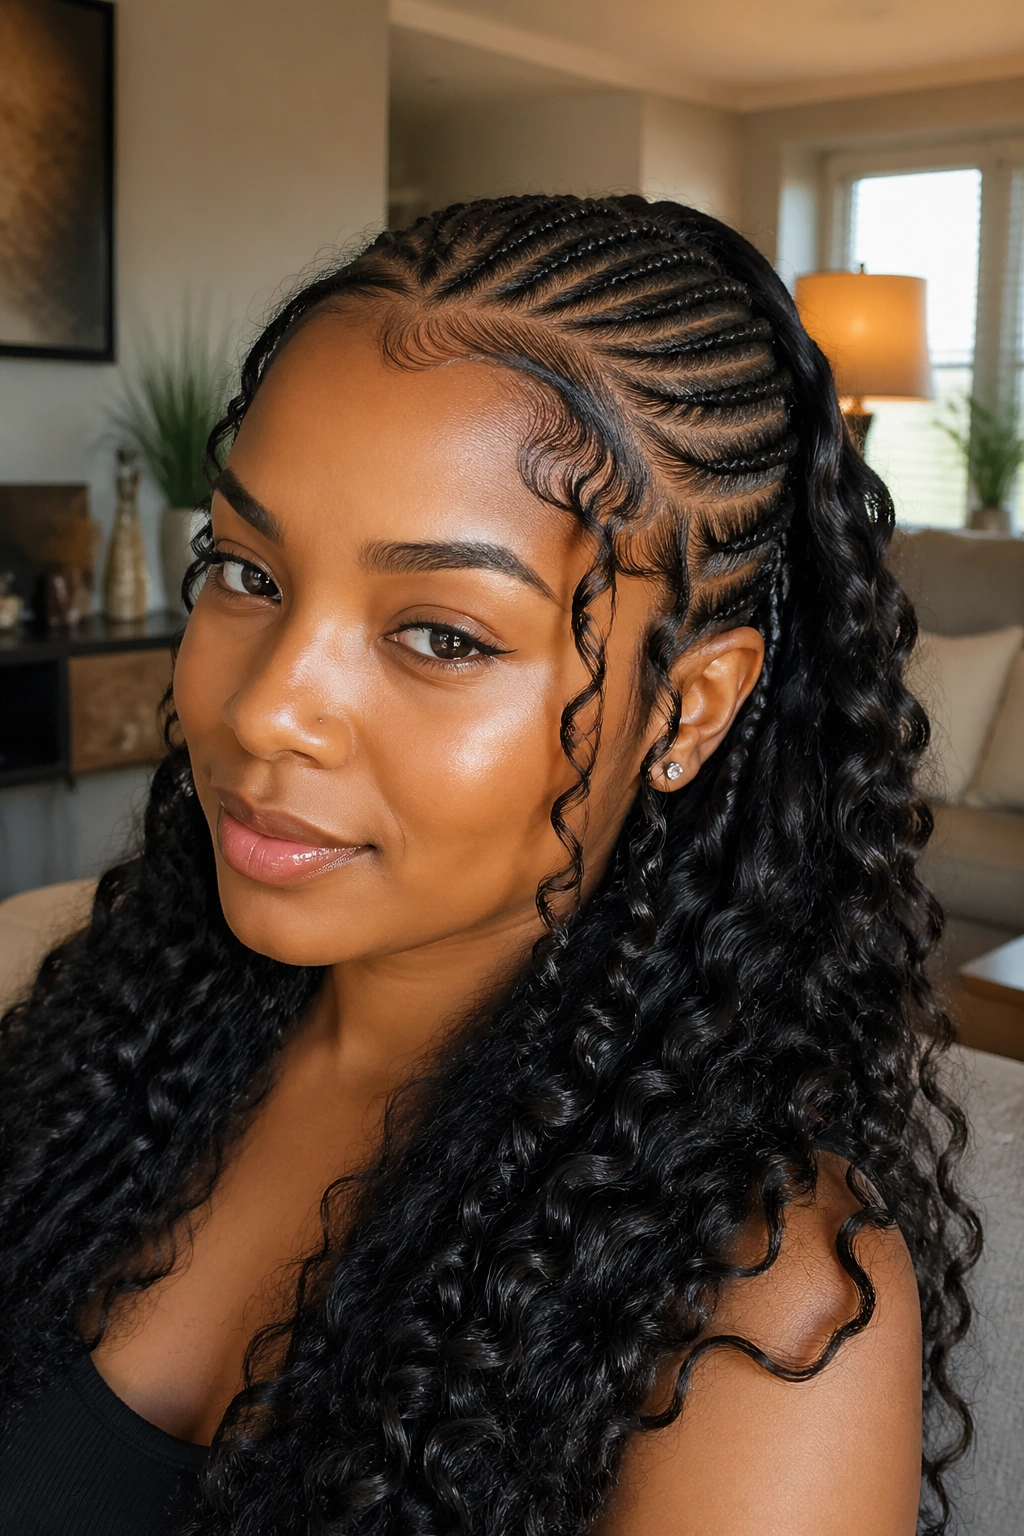
Goddess cornrows are where structure meets softness. Traditional cornrows give you tight, controlled patterns against the scalp. Box braids give you length and movement. Goddess cornrows pull both together — flat braided bases up top, loose curls or waves flowing at the ends, with strategic face-framing pieces that shift as you move.
That middle-ground quality is what’s made goddess cornrow styles so sticky. You get protection for your natural hair, a finish that reads effortless instead of stiff, and enough variation to wear them to work, to brunch, or to your own wedding.
The 25 styles here each hit the goddess brief differently. Some lean heavily into soft curls. Others play up the cornrow structure and let subtle face-framing do the softening. All of them should look gorgeous for weeks, not days.
What Makes a Cornrow Style “Goddess”
Two things, really. First, the hair at the braid ends isn’t hidden, sealed, or tucked — it’s visible and loose, usually as curls, waves, or kinky texture. Second, there’s intentional softness somewhere. Face-framing pieces left out, wavy strands pulled free at the hairline, or a softer finish at the bun or ponytail.
Without those two elements, you have standard cornrows. With them, the style reads goddess — feminine, flowing, and deliberately romantic.
The word “goddess” got attached to these styles because of that flowing, waterfall quality. Done right, they photograph like something off a Nile relief carving. Done lazy, they just look like regular braids with some curls at the bottom.
The Texture Debate: Wavy vs. Curly vs. Kinky
Goddess cornrows live or die by the end texture. Three main options:
- Wavy ends: smooth, loose beach waves. Softer, more romantic, lighter in weight.
- Curly ends: defined spiral curls, usually looser than 3c. More volume, more drama.
- Kinky ends: loose afro-kinky texture that matches natural 4a-4c patterns. Most authentic blend with natural hair.
Which one you pick depends on your natural hair texture and how blended you want the finished style to look. Wavy blends best with 3a-3b hair. Curly blends best with 3c. Kinky blends best with 4a-4c.
Mixing textures rarely works. Pick one and commit.
Kanekalon Selection Matters
Not all braiding hair is made the same. For goddess cornrows, you want pre-curled or water-wave textured kanekalon rather than straight kanekalon you curl yourself. Pre-curled holds its pattern longer — weeks versus days — and doesn’t unravel in rain or humidity.
Colors matter less than texture. Black or the darkest brown blends most naturally. Highlights and ombre work for goddess styles as long as the transition is subtle.
Buy an extra pack. You’ll always want more than you think, and running out halfway through an install means inconsistent curl patterns once you resume.
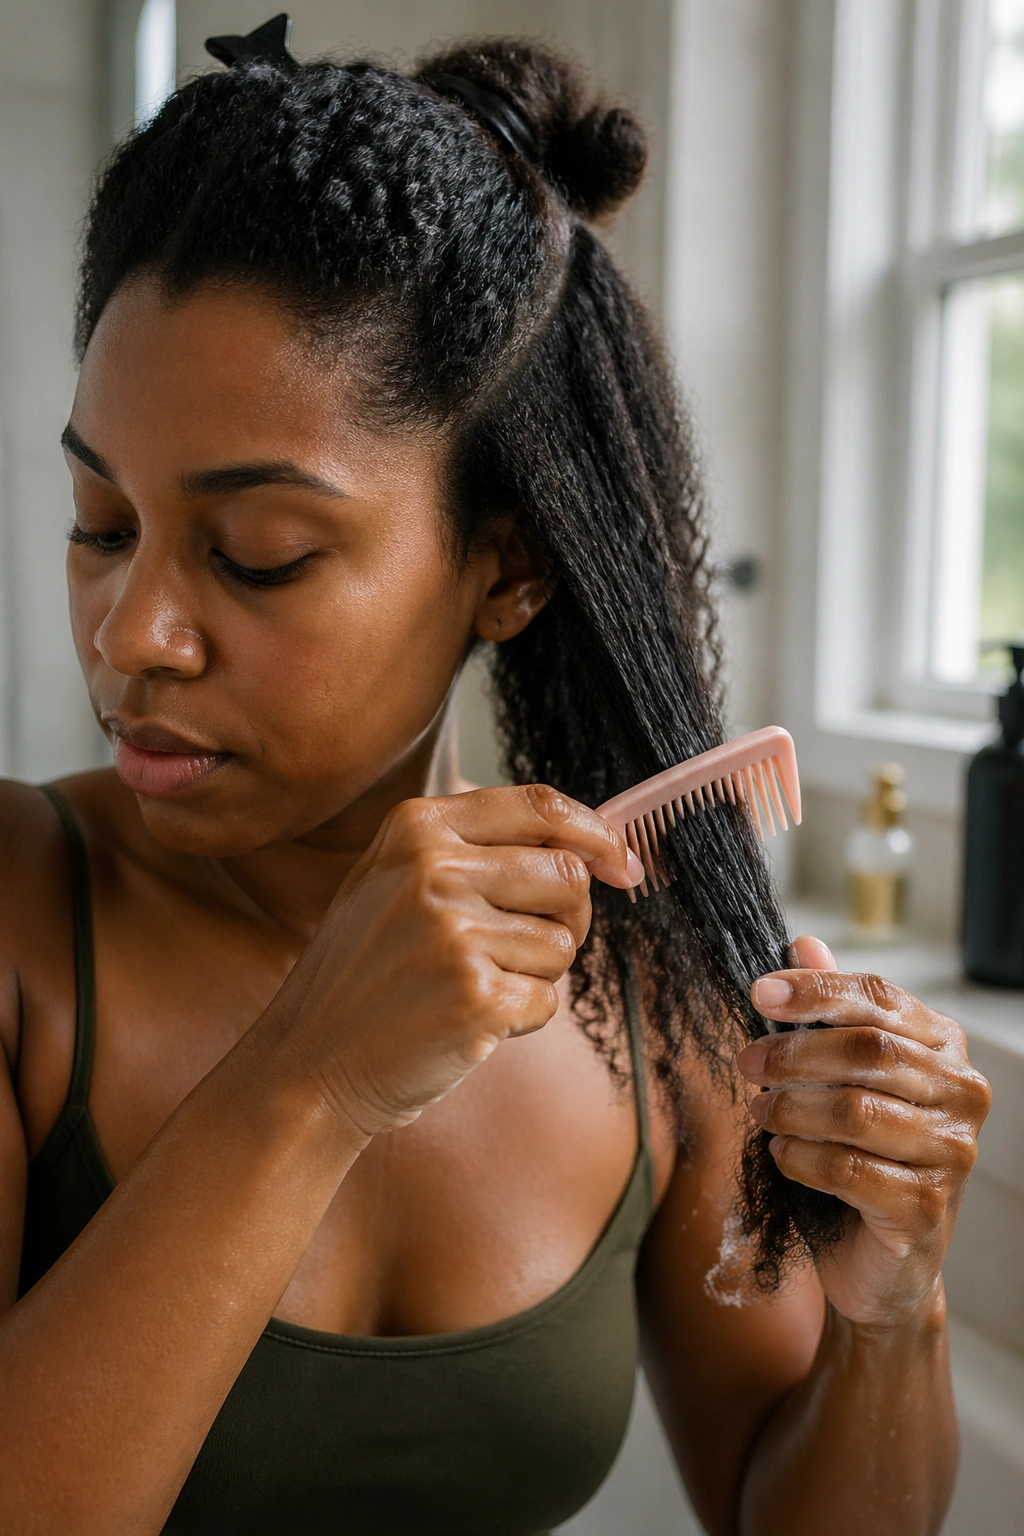
Prep: Don’t Skip It
Goddess cornrows take 4-6 hours to install. You don’t want to add time because your hair isn’t ready. Wash 1-2 days before with a clarifying shampoo. Deep condition for at least 30 minutes. Detangle thoroughly — every knot makes the install slower and uneven.
Stretch the hair overnight before install day. A banded ponytail stretch or loose twists work. Braiders can part shrunken hair, but the finished braids end up looking crooked once the hair stretches to its natural length within the braid.
Apply a lightweight leave-in the morning of install. Nothing heavy — you’ll be working oils and edge gel in throughout the day, and heavy leave-in compounds with everything else.
Tension Management
Goddess cornrows involve added hair, which means added weight. Tension at the scalp is the difference between braids that last 6 weeks and braids that cause edge damage.
Test the tension at the front hairline first. If your edges lift visibly, or if it hurts while the braider is still working, speak up. A good braider won’t get offended. Bad edges don’t grow back overnight.
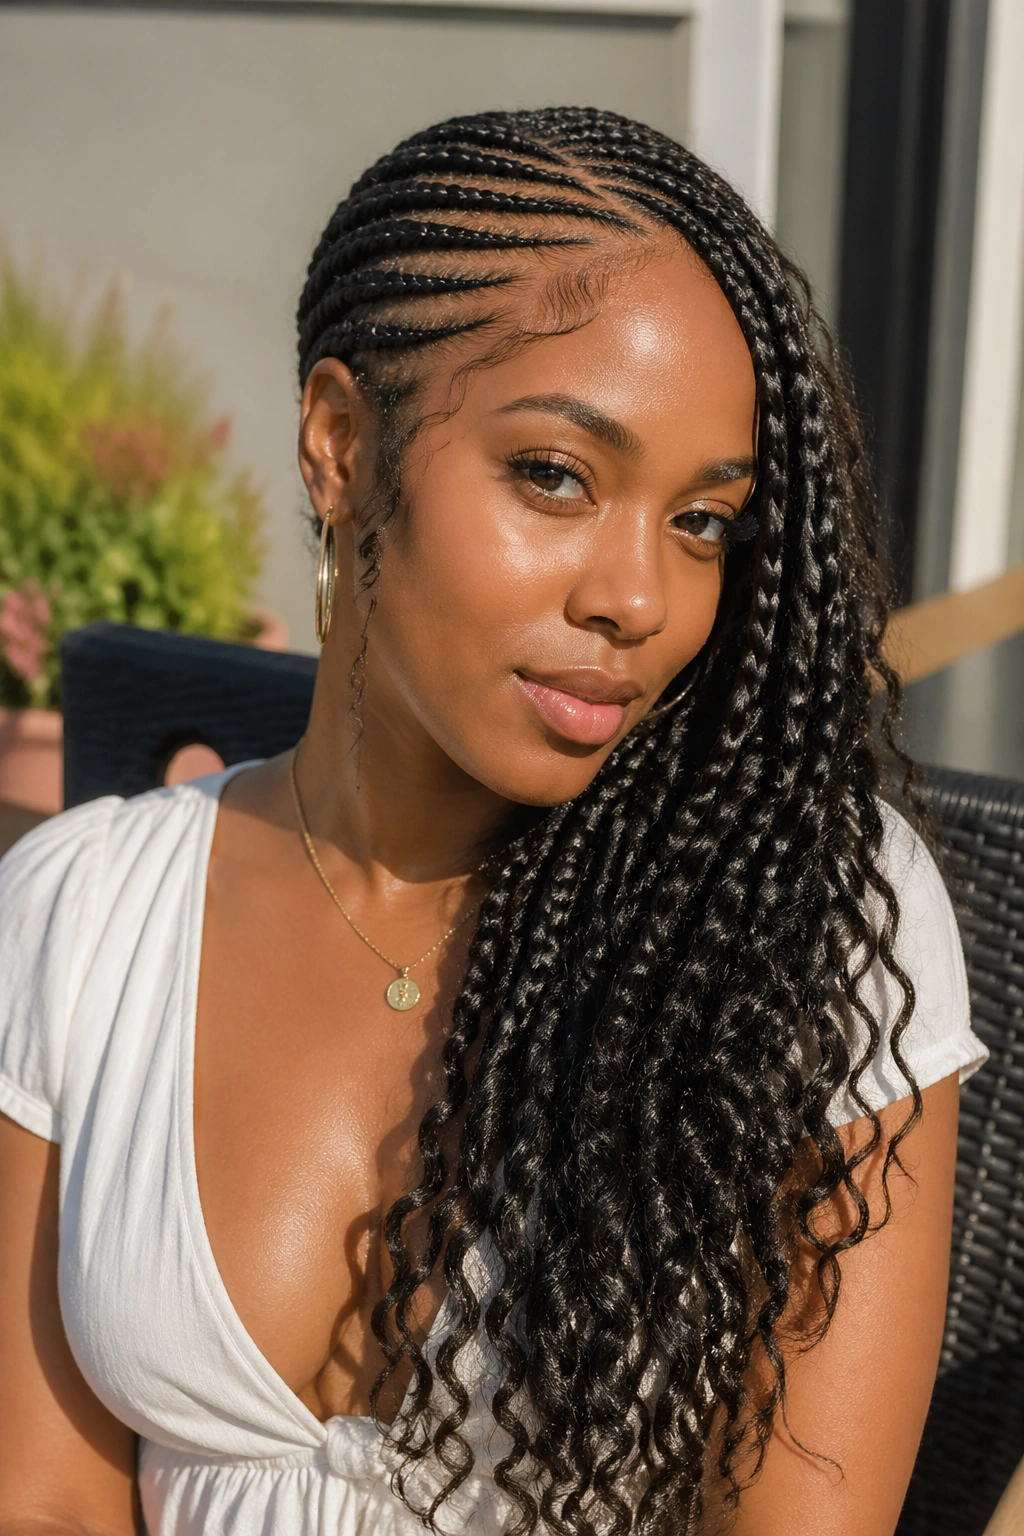
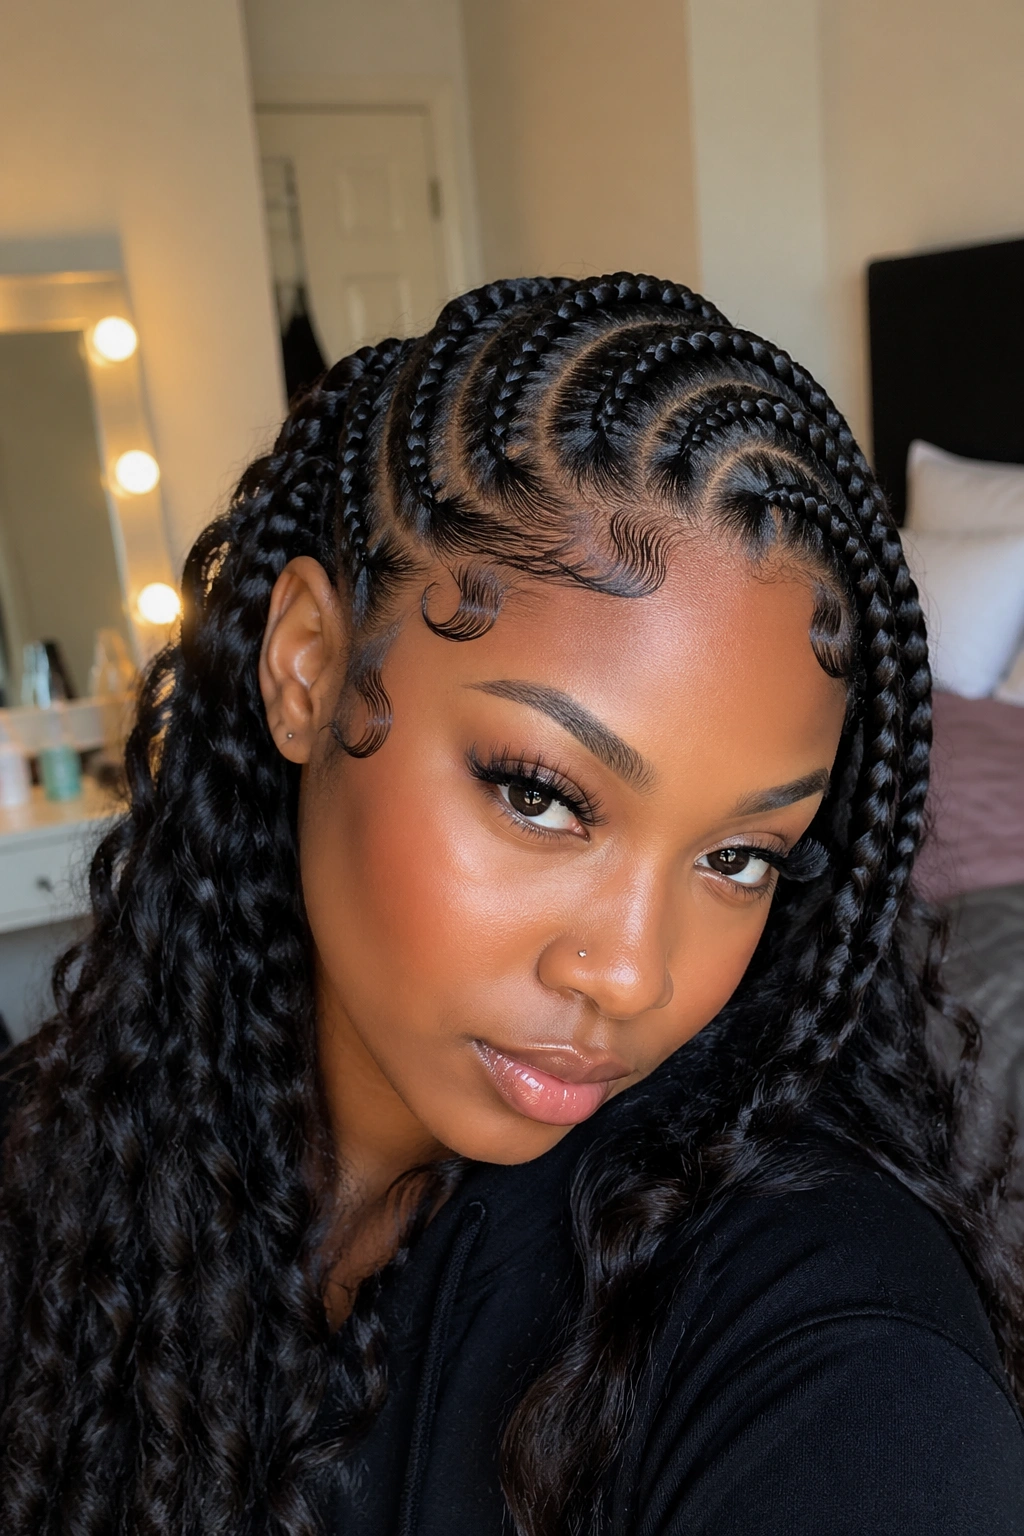
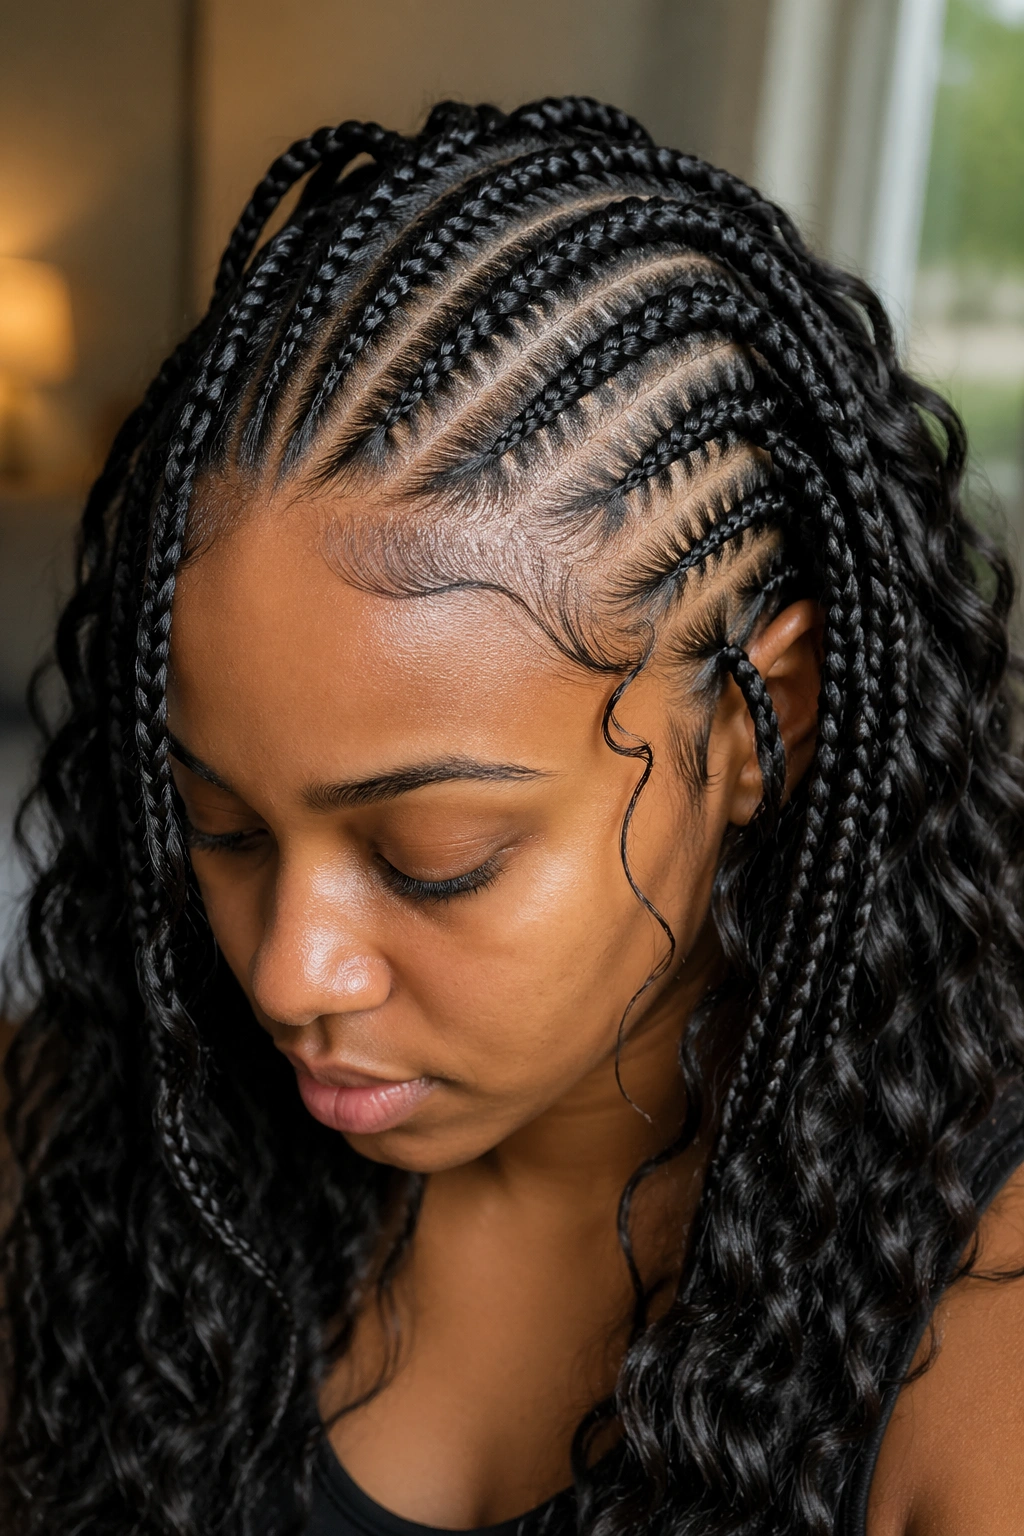
1. Classic Goddess Cornrows With Curly Ends
The baseline. Six to eight cornrows running straight back, transitioning into loose curly kanekalon at the ends. The curls hang past the shoulders. Face-framing pieces pulled out at each temple soften the front.
Why It Works
- Clean, symmetrical, easy to wear anywhere
- Takes about 3-4 hours for a full head
- Looks polished at work, looser at home
- Flattering on most face shapes
Tip: Ask your braider to not seal the curls tightly at the transition point. The cornrow-to-curl spot should feel soft, not hard, or the curls won’t move naturally.
2. Side-Swept Goddess Braids
All the braids angle to one side, cascading over a single shoulder. The curls at the ends multiply the drama.
The angle needs to be committed. A half-hearted sweep looks accidental. A full 45-degree angle sweep reads intentional and confident.
The shoulder side carries more weight, so anchor the base cornrows extra well with a small amount of edge gel at the transition. Otherwise they’ll start shifting back to center within a week.
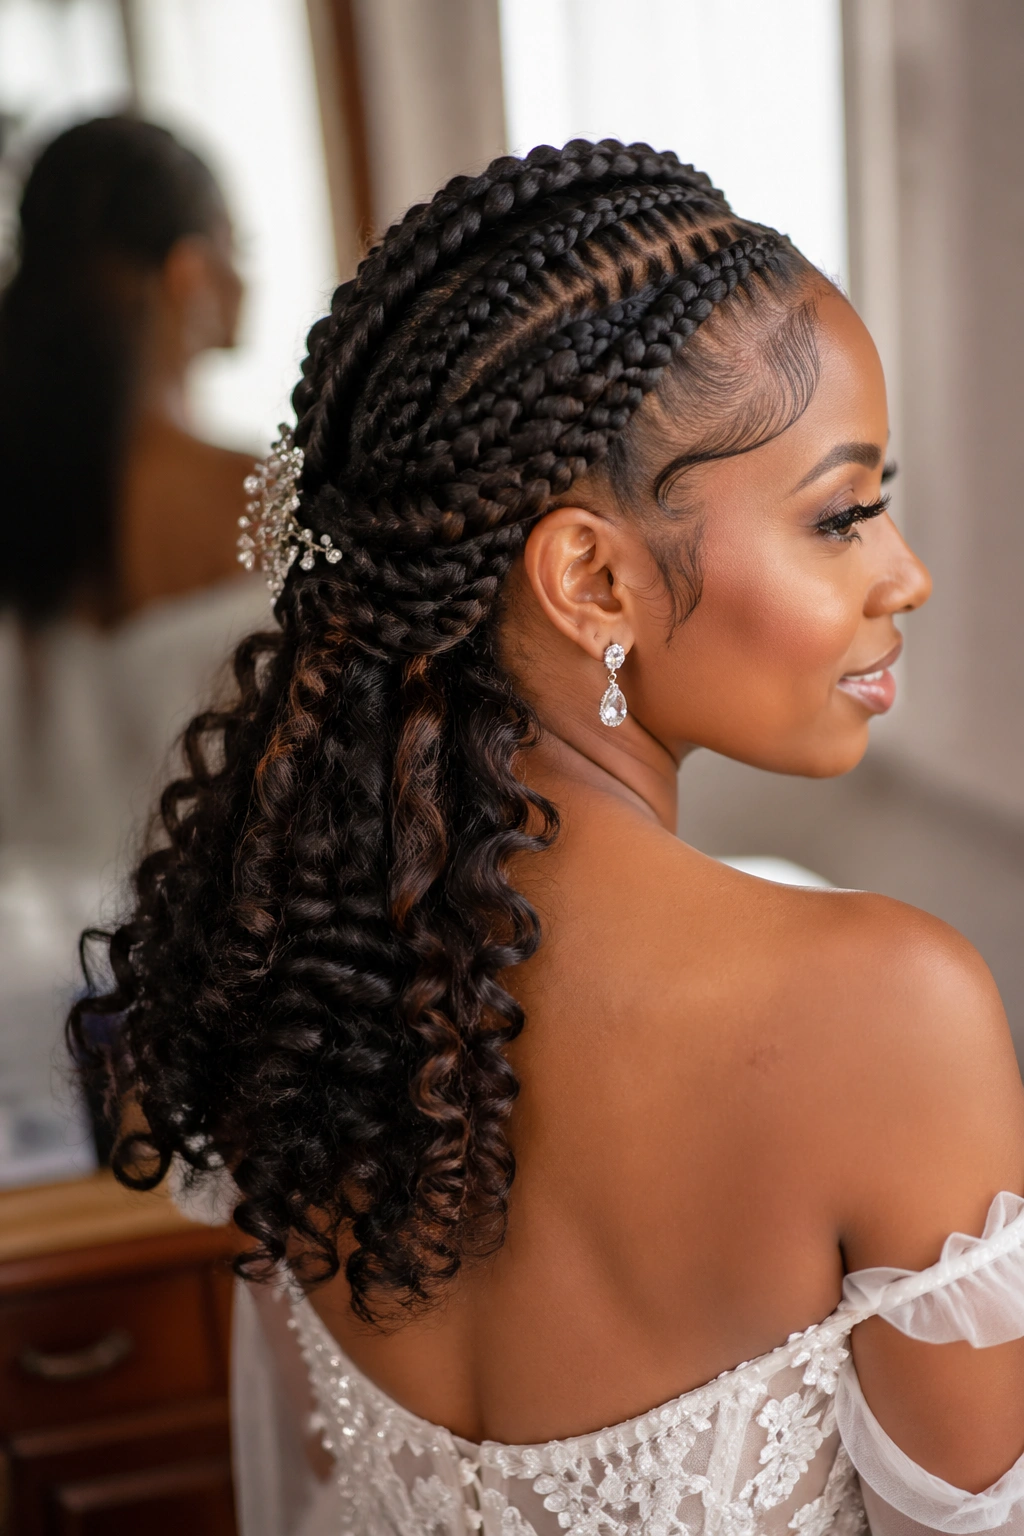
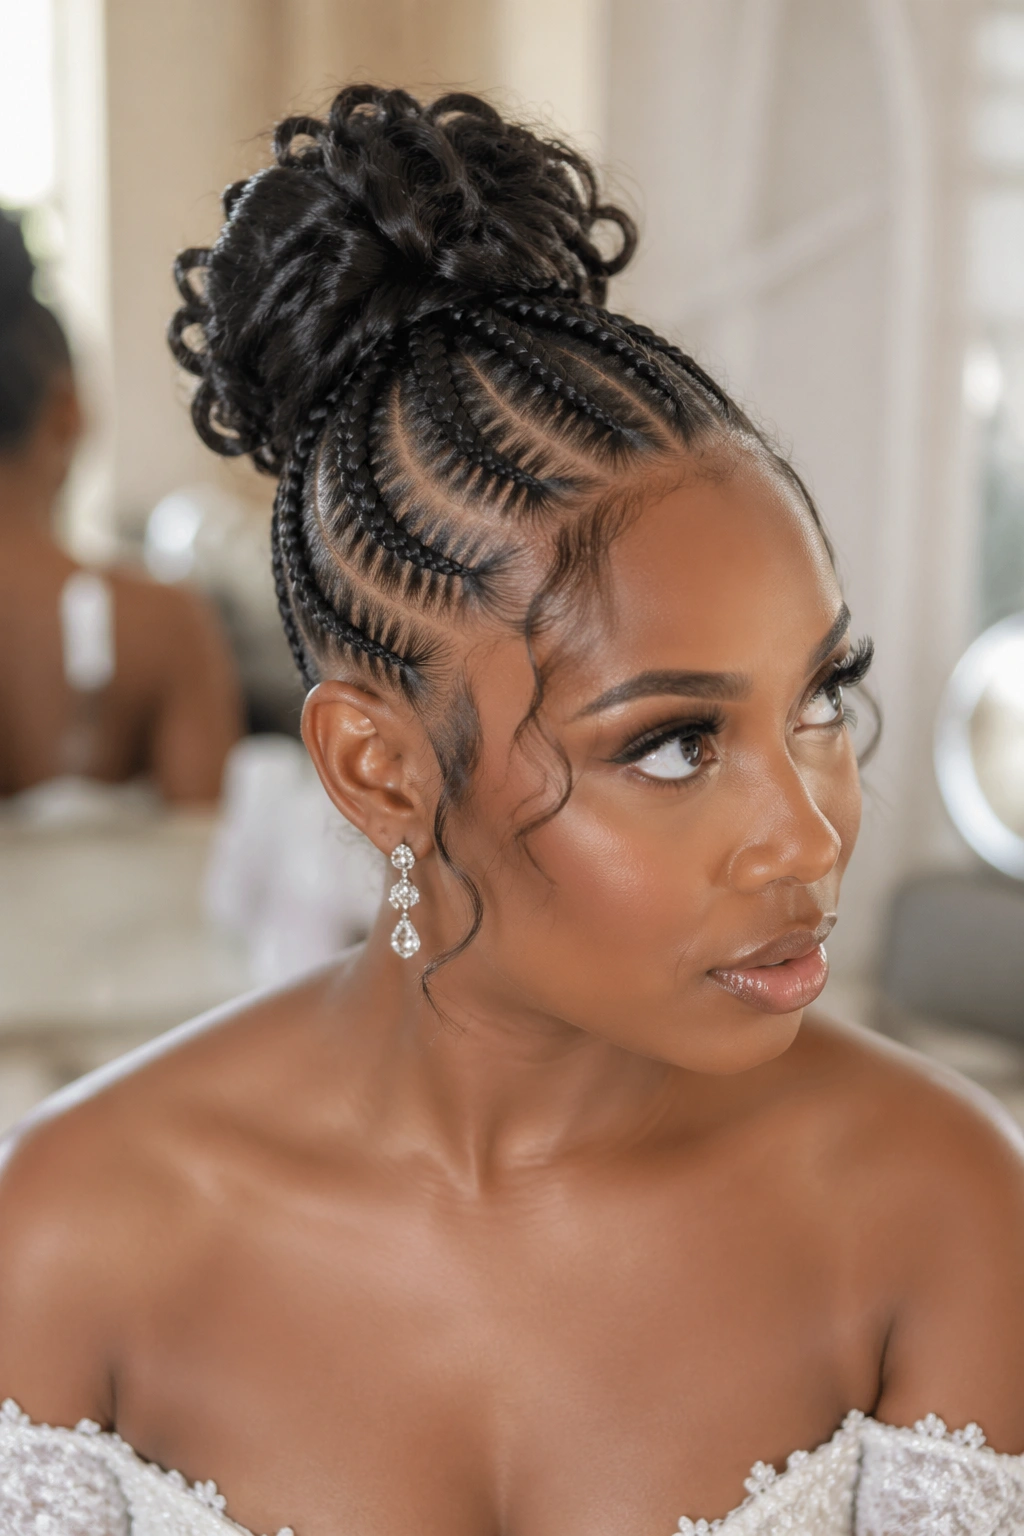
3. Goddess Cornrows Into a High Bun
Seven to nine cornrows lead up to a high bun at the crown. The bun uses the cornrow ends plus the curly kanekalon — wrapped and pinned into a soft, wide shape.
Unlike a tight ballerina bun, this one’s meant to look a little undone. A few wavy pieces pull out around the bun. A couple of curls frame the face at each temple.
Works beautifully for weddings, formal events, or any occasion where you want braids that read elegant rather than casual.
4. Half-Up, Half-Down Goddess Style
The top half of the cornrows gather into a half-pony or half-bun at the crown. The bottom half flows loose as curls cascading down the back.
This is one of the most-requested goddess styles for a reason — it gives you up-do structure and down-do movement in one look. Photos from the front show the pony; photos from behind show the curl wall.
Anchor the half-pony loosely enough to slide a finger under the hair tie. Too tight and you’ll have a headache in 3 hours.
5. Goddess Cornrows With a Curved Hairline
The front cornrows angle to follow a curved hairline — arcing around the forehead rather than going straight back. Face-framing curls pull out along this curve, echoing the arc.
Beautiful on heart-shaped and oval faces. The curve softens angular features without adding width.
Takes a braider with good spatial sense. The arc has to be even on both sides or the style looks lopsided.
6. Lemonade Goddess Braids
All braids sweep to one side (classic lemonade style), but end in loose curls instead of sleek braid tips. Face-framing curls pulled out for softness.
The curl ends change the feel of traditional lemonade braids from sharp and edgy to romantic and flowing.
A statement style. Wear it where you want to be noticed.
7. Goddess Cornrows With Two Front Braids Only
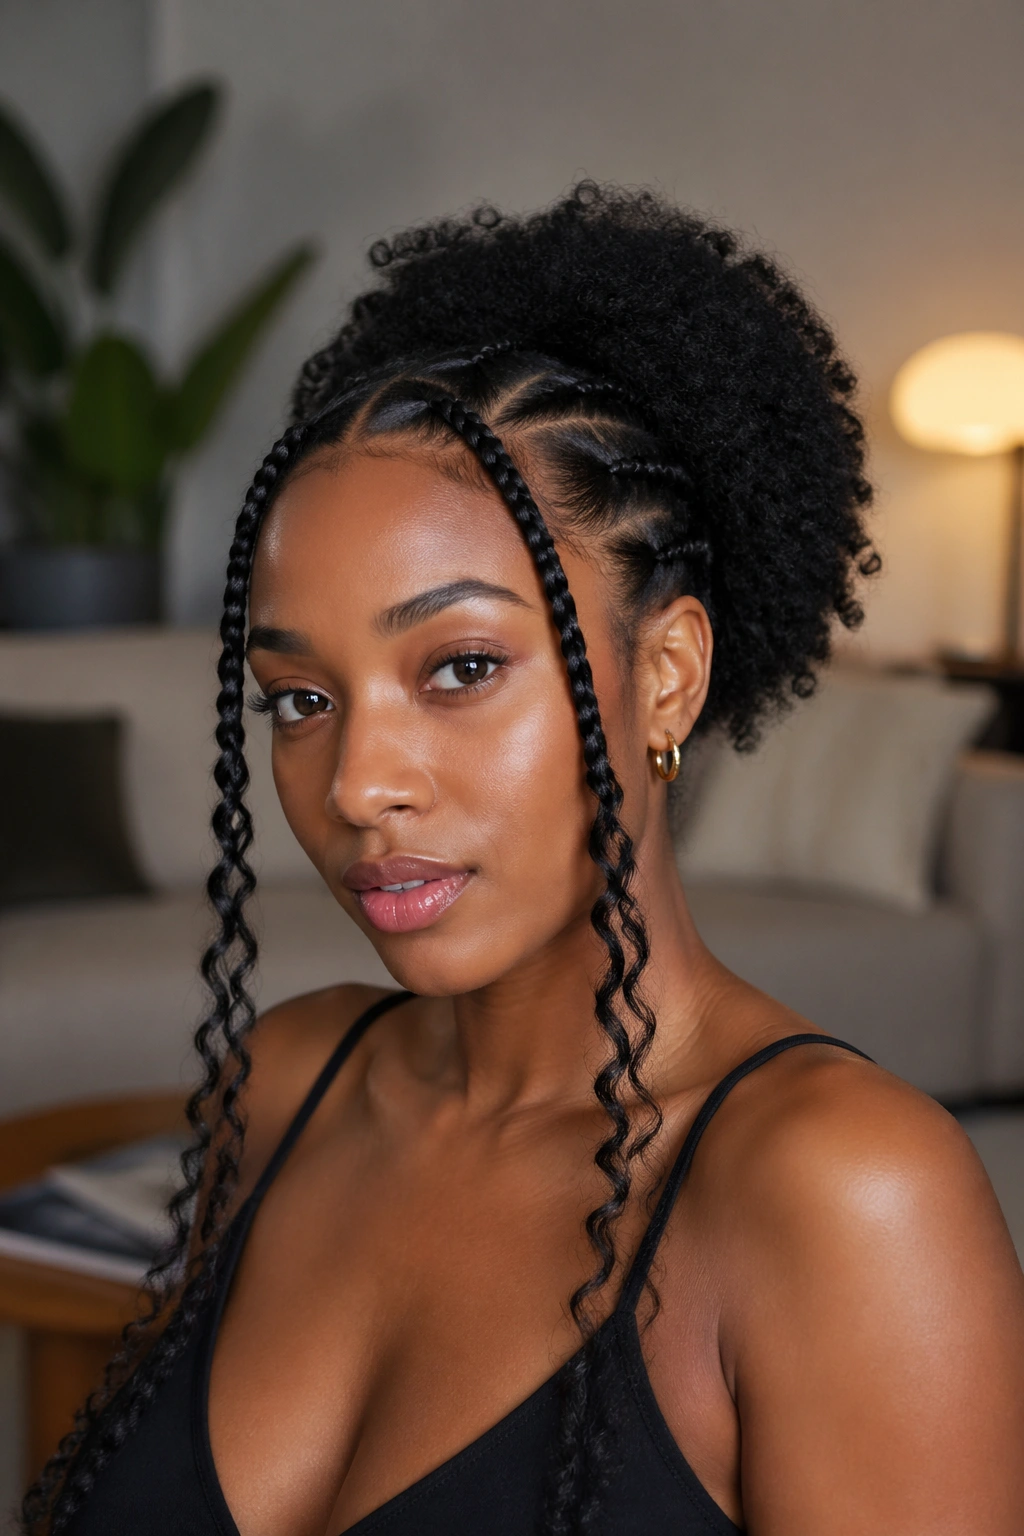
Most of the head is natural hair or a sleek puff. Just two cornrows — one on each side at the front — extend into long curly ends that flow back.
Minimalist goddess styling. Not about volume or drama; about adding structure selectively.
A great first goddess style for someone who doesn’t want a full head of extensions. Quick install (90 minutes), easy takedown.
8. Crown Braid With Goddess Ends
Cornrows wrap around the crown of the head in a halo. The ends release into curls that cascade down the back.
Think wedding-ready. The halo reads formal; the curls soften it into something human instead of stiff.
Pins and clear elastics hold the crown in place. Don’t trust the braid alone — the crown shape needs structural support, especially if you’re dancing.
9. Goddess Cornrows With Color-Blocked Ends
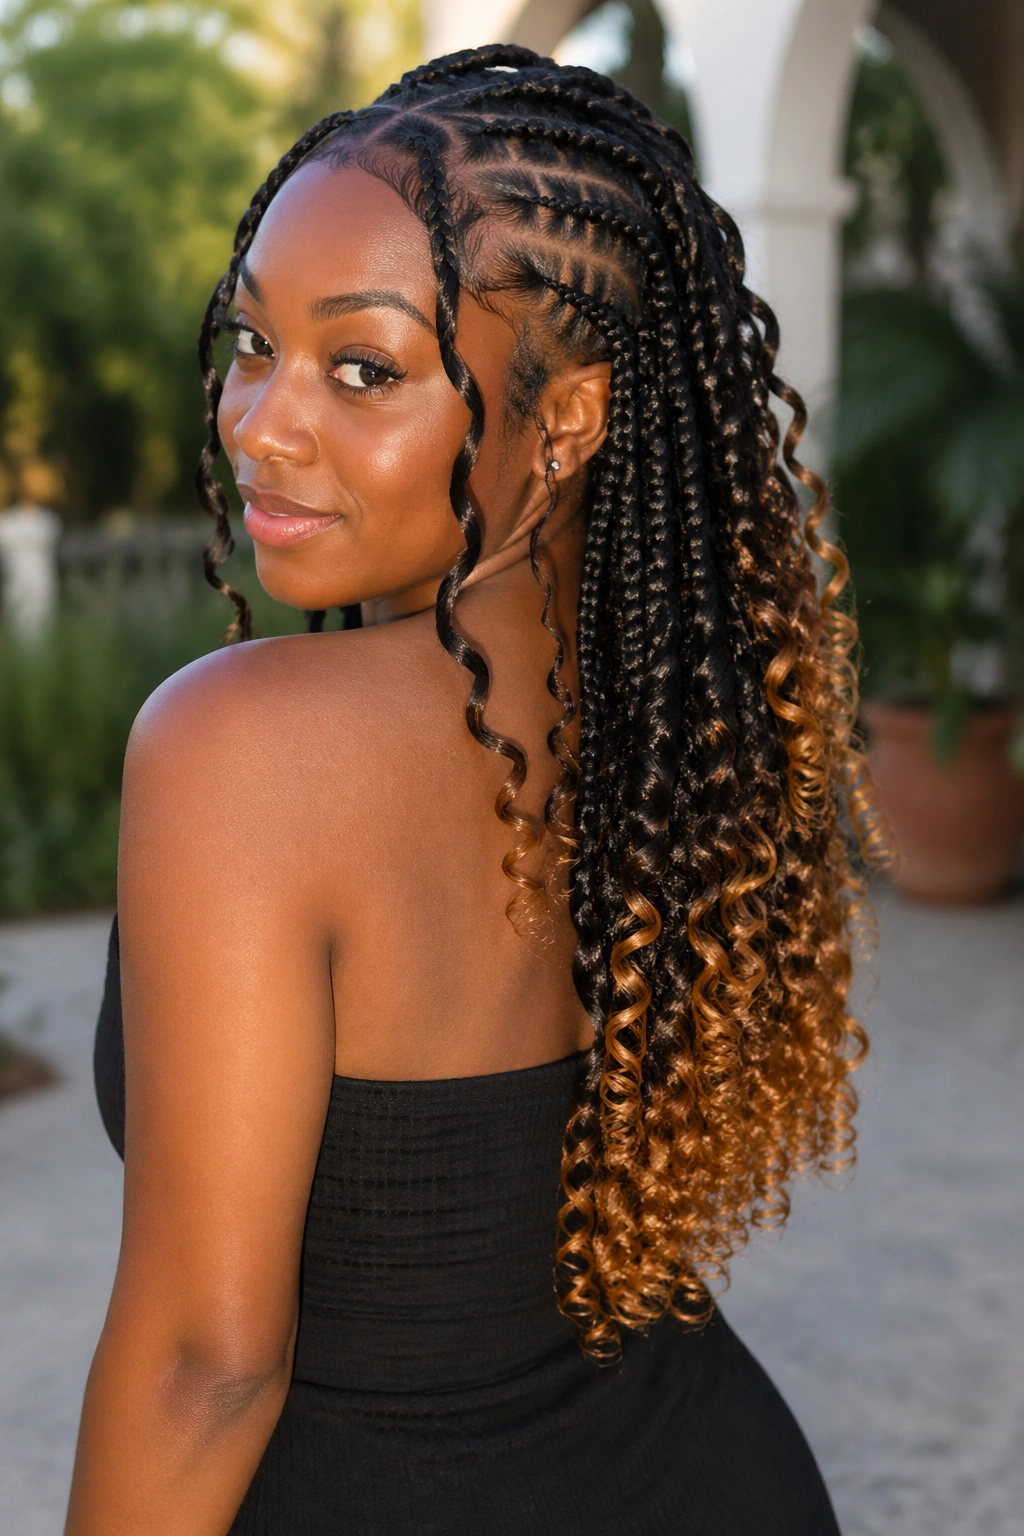
The cornrow section stays natural black. The curly ends are a contrasting color — caramel, honey blonde, burgundy, even bright copper. The color change happens only in the loose section.
How to Style It
- Use two different packs of kanekalon — natural black for the braid shafts, colored for the loose ends
- Your braider ties the color pack in at the transition point so only the ends show the color
- Skip highlights that run through the whole braid — that reads less goddess, more generic
The color should feel intentional. Caramel on dark skin. Honey on warm undertones. Burgundy on anyone who wants drama.
10. Deep Side Part Goddess Braids
A deep side part — off-center by a solid 3+ inches — creates asymmetric cornrows. One side has more braids and more volume, the other side has fewer and sits flatter against the scalp.
The asymmetry adds sophistication without requiring fancy parting work. Just a deep part and straight-back cornrows does most of the work.
Good for round or square faces. The asymmetry breaks up symmetry that flatters other features.
11. Goddess Cornrows With Baby Hairs Laid
Traditional goddess braids with edge styling that takes center stage. Swooped baby hairs frame the hairline in intentional patterns — sometimes a simple S-curve, sometimes more elaborate swirls.
The edges are doing half the visual work here. Plan time for laying them properly, not as an afterthought.
Use a firm-hold edge gel with a fine brush. Work in small sections. And don’t overdo it — 2-3 curves is enough. Six curves looks busy.
12. Low Goddess Ponytail

All cornrows lead into a single low ponytail at the nape, which then flows into long curls. Simple, elegant, and deceptively chic.
This is date-night styling. Low ponies photograph beautifully because they show off the face without hair blocking anything.
Use a hair wrap (a small piece of kanekalon) to cover the ponytail base instead of a visible elastic. Cleaner finish.
13. Goddess Feed-In Cornrows
Feed-in technique means extensions are added gradually along the braid length instead of attached at the base. The braid starts thin at the hairline and thickens as added hair gets fed in.
This technique puts less stress on edges because there’s no single heavy attachment point. The whole braid carries the weight evenly.
For long-term wearers, feed-in is the gentler choice. For one-time events, it doesn’t matter as much.
14. Big Goddess Braids

Fewer, thicker cornrows — maybe 4-5 total instead of 8-12. The chunkier size creates a more casual, less formal feel. Loose curls at the ends balance the chunky braid shafts.
Faster to install (2 hours or less) and easier to take down. Also less stylish for formal events because the thickness reads everyday rather than elevated.
Great for travel. Big goddess braids survive humidity, beach days, and pool swims better than fine braids.
15. Goddess Cornrows With Beads
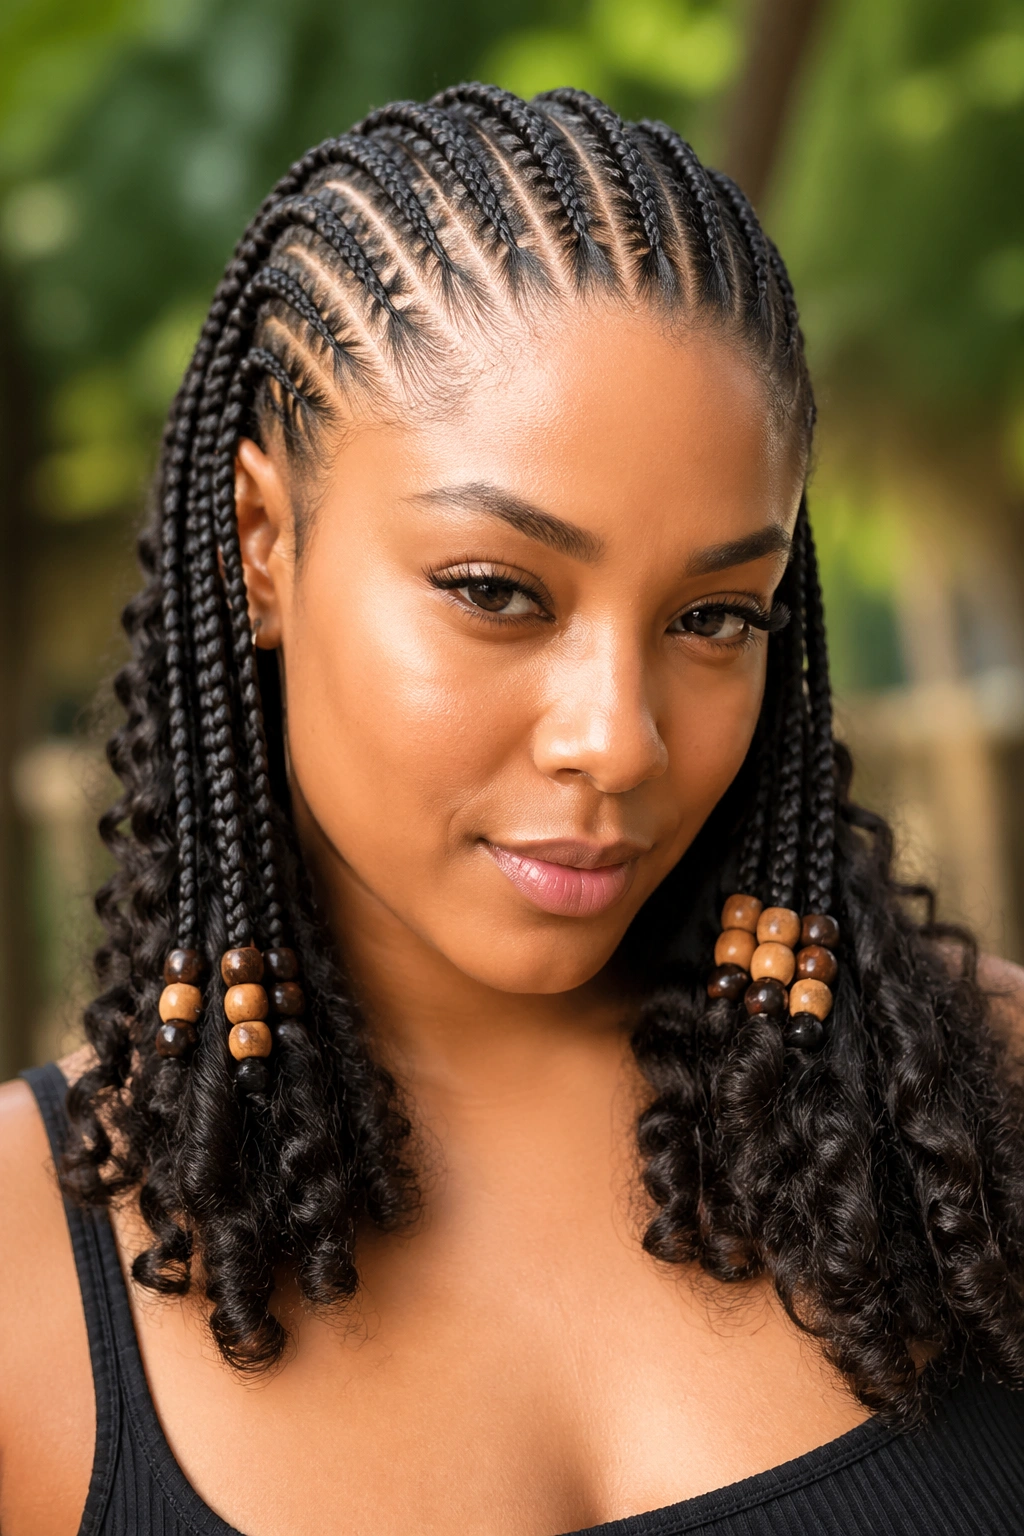
Beads placed where the cornrow meets the curls — at the transition point rather than at the very ends. The beads mark the boundary between structure and softness.
Use 2-3 beads per braid at most. More becomes decorative overload.
Wooden or glass beads in natural tones blend with the overall look. Avoid neon plastic beads — they fight the goddess aesthetic.
16. Front-Curl Goddess Style
The cornrows sit sleek and smooth across the entire head. The only loose hair is a dramatic curtain of curls across the front — almost like a curly bang that cascades past the ears.
Bold and modern. Reads editorial.
Requires face-confident wearers — the curtain of curls draws the eye directly to your face, with no hiding behind the sides.
17. Goddess Cornrows With a Swooped Bang
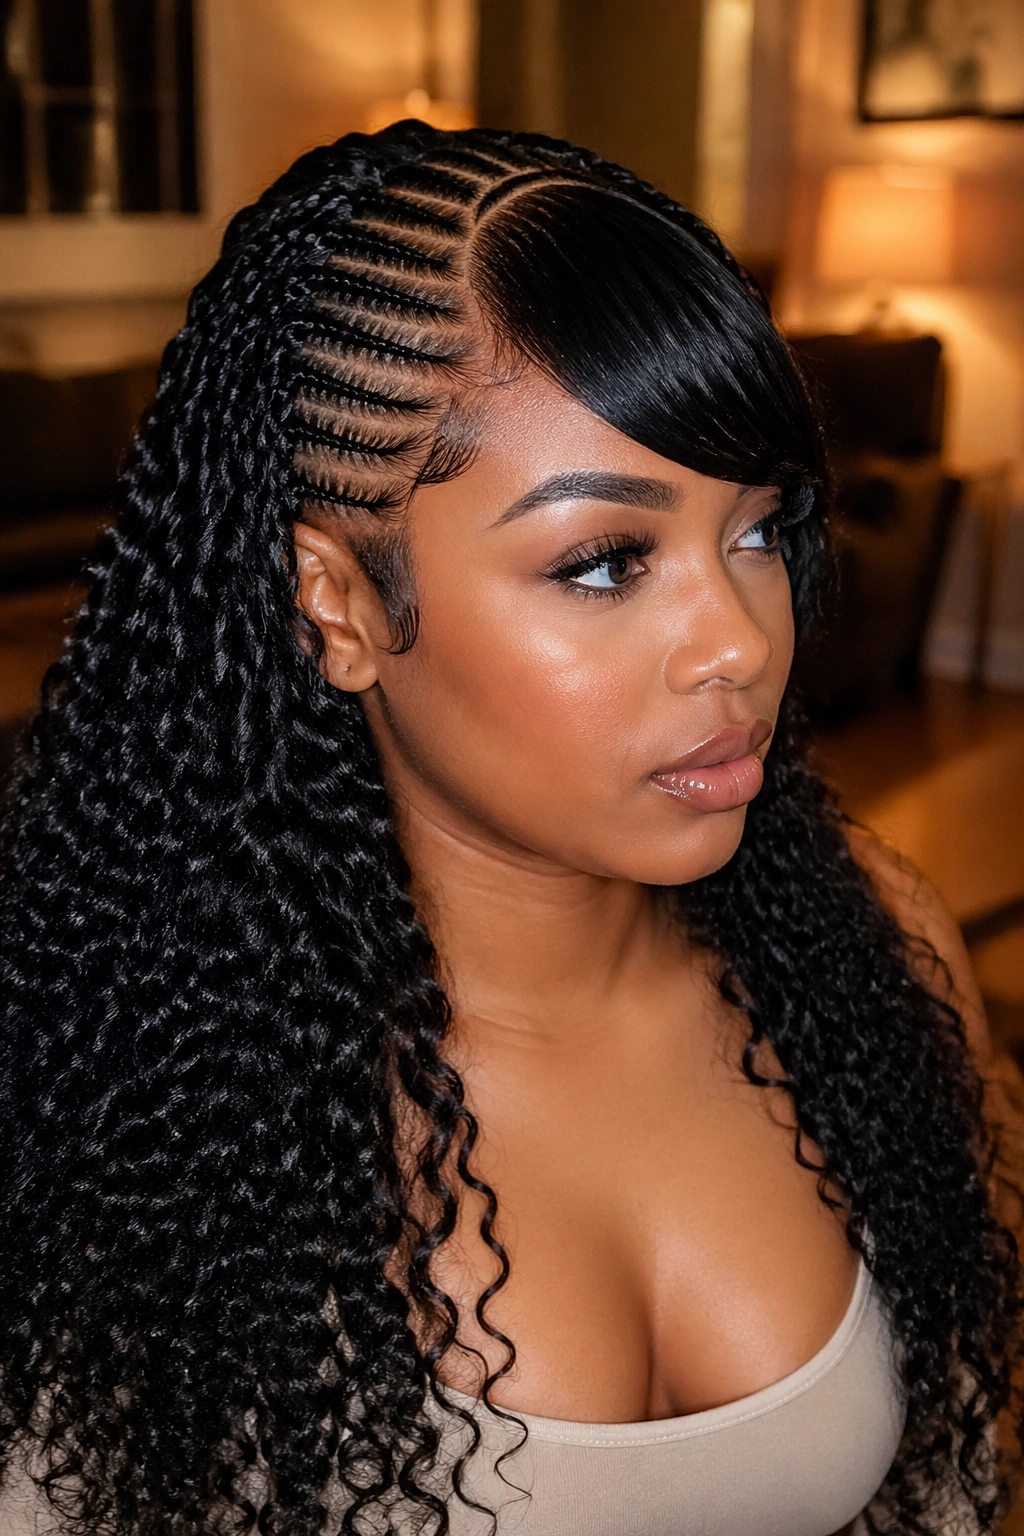
A traditional side-swept bang (like a 1920s flapper finger wave) sits at the forehead. Behind the bang, cornrows run into long curly ends.
The bang is all styling — typically finger-waved with gel and pinned flat against the forehead. It photographs beautifully and hides forehead features if that’s a concern.
Not a style for active days. The bang needs touch-ups after any significant movement.
18. Waterfall Goddess Braids
The cornrows curve downward from the crown in a waterfall pattern, with curly ends falling free at designated “drop” points. Instead of one long braid, you have multiple short braid sections with loose curls between them.
Advanced technique. Looks ornate and intentional. Usually reserved for weddings or photoshoots.
The “waterfall” drops need to be evenly spaced. Uneven drops look sloppy.
19. Goddess Cornrow Mohawk
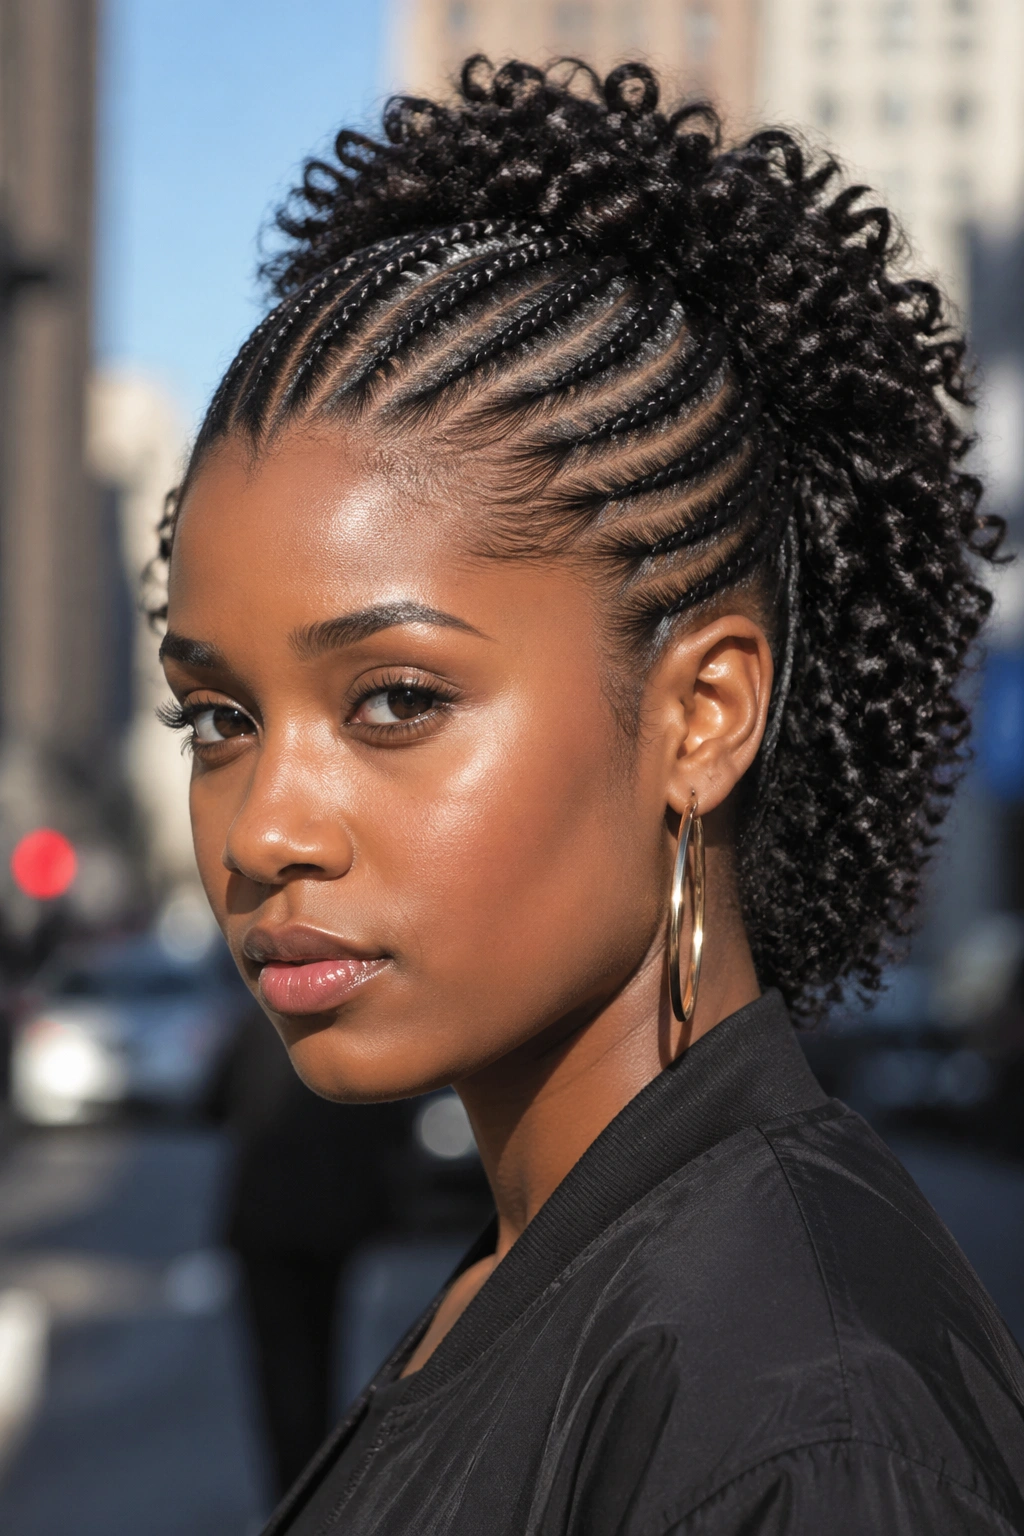
Dense cornrows run in a center strip from hairline to nape, with curls exploding at the back. The sides are slicked flat — no actual shaving — creating a mohawk silhouette.
A bold style. Softer than a traditional mohawk because of the curly volume at the back, but still edgy.
The slicked sides need firm-hold gel reapplied every 2-3 days. Otherwise they puff up and the mohawk illusion dies.
20. Goddess Cornrows With a Beaded Crown
Five to seven cornrows encircle the crown in a halo, each ending in a beaded section. Below the crown halo, cornrows continue down and transition into curls.
The crown halo is the focal point. The curls are supporting cast.
Use small, uniform beads — gold or matte black — for a refined finish. Chunky mixed beads overwhelm the halo shape.
21. Goddess Cornrows With Clipped-Up Section
Most of the cornrows and curls hang loose, but one section at the side is pinned up with a decorative clip. Could be a gold hair clip, a velvet bow, or a vintage barrette.
The clip adds polish without requiring elaborate styling. Change the clip and you change the entire feel of the style — velvet bow for romantic, gold clip for polished, silver barrette for minimalist.
22. Curtain Bang Goddess Cornrows
Cornrows with long, curly curtain bangs framing each side of the face. The bangs aren’t part of the cornrow structure — they’re pulled out and styled separately.
The curtain bang plus cornrow combination is one of the most flattering goddess options for round faces. The curtains elongate and angle the face visually.
Keep the curtain bangs slightly shorter than the rest of the curly ends so they fall distinctly in front.
23. Goddess Cornrows With Ombre Curls
The cornrow section is natural black. The curly ends transition through ombre — darker at the transition, lighter toward the tips. Colors might go black-to-caramel, black-to-rose, or black-to-silver.
Ombre kanekalon is sold pre-colored. Don’t try to dye your own — the results are patchy.
Ombre works best with longer goddess styles (mid-back or longer). Shorter goddess lengths don’t have enough visual space for the color transition to read properly.
24. Low Curly Goddess Chignon
Cornrows pulled into a low chignon at the nape. The curls wrap around and through the chignon base, creating a loose, textured shape.
Bridal styling. Works beautifully with veils, tiaras, or floral accessories.
The chignon should feel soft under your hand — not stiff. If it’s stiff, there’s too much product or the pins are too tight.
25. Goddess Cornrows With Tendrils
Standard goddess cornrows with intentional curly tendrils pulled out at the face — at each temple, at the nape, and sometimes one in the middle of the forehead. The tendrils are long enough to move when you walk.
Romantic. Slightly disheveled in the way that looks styled, not accidental.
Each tendril needs enough length to actually drape. Short tendrils look like flyaways.
How to Maintain Goddess Cornrows
Night care is where goddess cornrows thrive or fail. A large satin bonnet over the whole style at night — including the curly ends — prevents frizz and preserves curl pattern. Cotton pillowcases will dry out the curls and flatten the braid bases within a week.
For the curly ends, spritz with a water-and-leave-in mix every morning to refresh. Don’t drench — just enough to re-hydrate. Finger-fluff gently to reshape any squashed curls.
Edge gel and a soft brush fix the hairline each morning. One minute of edge maintenance keeps the whole style looking fresh for days longer.
Keeping the Curls Defined
Curly goddess ends lose their pattern fastest. A weekly curl refresh helps: mist the curly section with water, apply a small amount of curl cream, then scrunch in small sections to re-define.
Avoid over-handling. Every time you finger-fluff or run your hands through the curls, you introduce frizz. Hands off unless you’re actively refreshing.
If a section goes truly flat (fights re-shaping), you can dip just that section in warm water, squeeze out excess, and let it air-dry while re-defining. The water-reset works on synthetic curls better than any product.
Scalp Care Under Braids
The scalp gets hot, sometimes itchy, and occasionally flaky under goddess cornrows. Use a scalp oil with tea tree or peppermint to calm irritation and discourage buildup. Apply via a nozzle-tip bottle directly to the scalp, massage gently with fingertips, and avoid the braid lengths.
Wash the scalp every 10-14 days. Diluted shampoo applied to the scalp only, rinsed thoroughly, followed by a scalp rinse conditioner. Air-dry the scalp fully before putting on a bonnet.
Don’t skip wash day just because the braids still look okay. Scalp buildup causes flaking, itching, and eventual dandruff — and the longer you skip, the worse it gets.
When to Take Them Down
Goddess cornrows last 4-6 weeks. The limiting factor is usually the scalp, not the braids themselves. Once the scalp starts itching persistently, once buildup resists washing, once the edges show new growth lifting — it’s time.
Wait past the right takedown point and you’ll have tangled natural hair at the roots that takes hours to comb out. Take them down before the tangle sets in.
Damp takedown works best. Spray each braid with a conditioner-water mix, wait 10 minutes, then unravel from the tip upward. Give yourself 2-3 hours for a full takedown on a long goddess style. Then detangle the natural hair in sections before shampooing.
Goddess cornrows reward patience. The install takes time, the maintenance takes consistency, and the takedown takes care. But you get weeks of beautiful, protected hair in exchange — and the kind of style that turns heads from any angle.