Natural curly hair looks best when the style works with the bend, not against it. That sounds obvious, but plenty of people still spend half a morning trying to flatten, stretch, or over-brush hair that wanted shape all along. The smarter move is to pick a style that respects shrinkage, keeps the roots from puffing out in the wrong places, and still looks good after a car ride, a nap, or a damp walk from the train.
Some curls want to fall into a soft cloud. Others want structure, a clean part, or a pin that keeps one side from doing its own thing. And once you stop treating every textured head the same way, the options open up fast. A high puff can look sharp. A twist-out can look polished. A scarf can rescue a day when the front section has decided to rebel.
The styles that work best tend to share one trait: they don’t ask for a fight. They ask for shape, moisture, and a little patience while the hair dries or sets. That’s the real trick with curly hair styling. Not control. Cooperation.
Shrinkage is not the enemy.
Volume is the point.
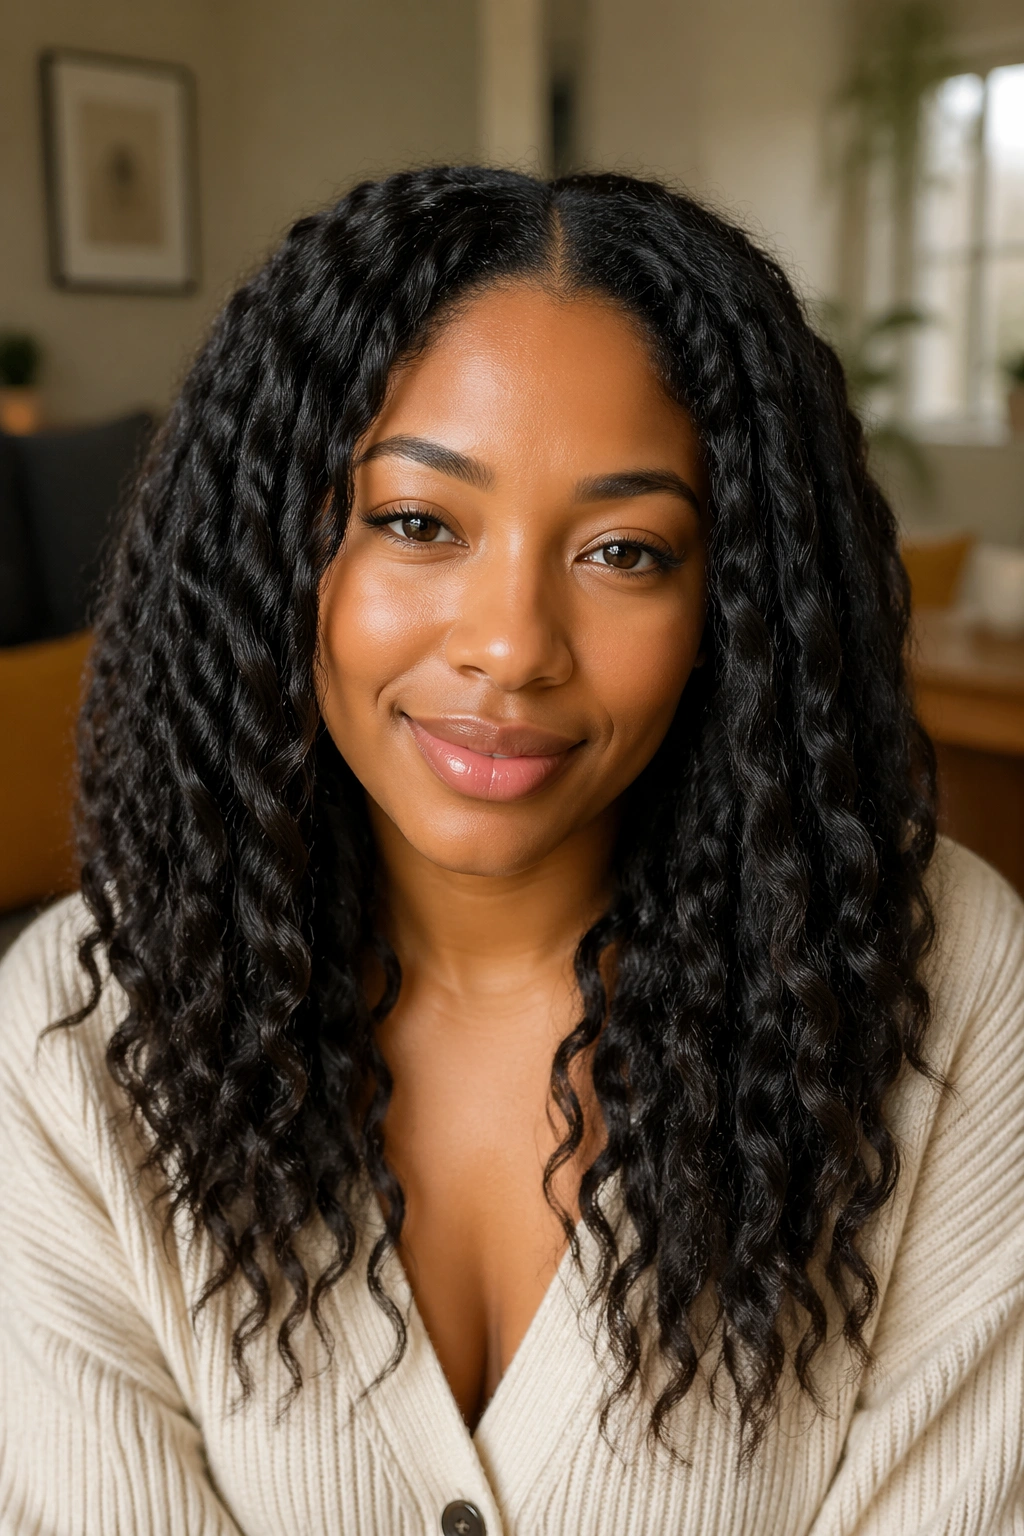
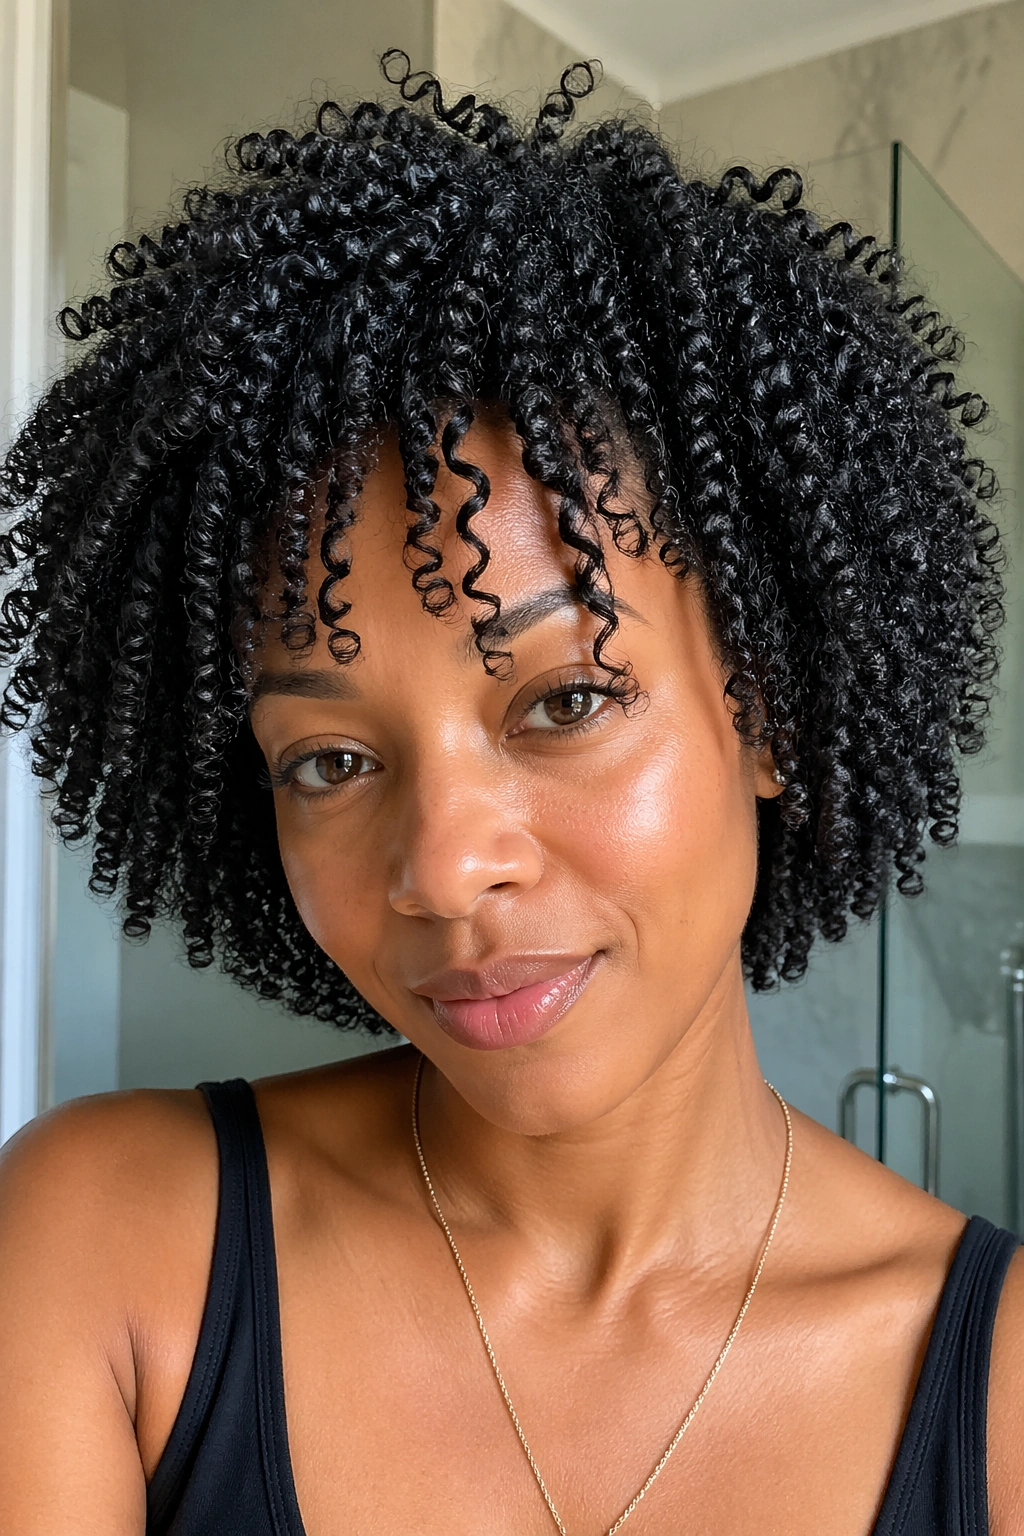
1. Defined Wash-and-Go on Natural Curly Hair
A wash-and-go earns its place because it lets the curl pattern do the heavy lifting. When the coils are clean, evenly coated, and left alone long enough to set, the result can look soft at the edges but still crisp at the root. It is one of the few styles that can feel casual and finished at the same time.
How to get the clumps right
Start on soaking-wet hair and work in sections. Use a leave-in, then a curl cream or gel, and smooth it through with praying hands before scrunching once or twice. The key is even coverage, not a pile of product sitting on top. If your crown frizzes fast, give that area smaller sections than the rest.
- Use a wide-tooth comb only if you need it.
- Let the cast form before touching the curls.
- Diffuse on low heat if you want lift.
- Separate only when the hair is dry.
Do not rush the drying stage. Half-set curls are where the fluff starts.
2. High Puff for Natural Curly Hair
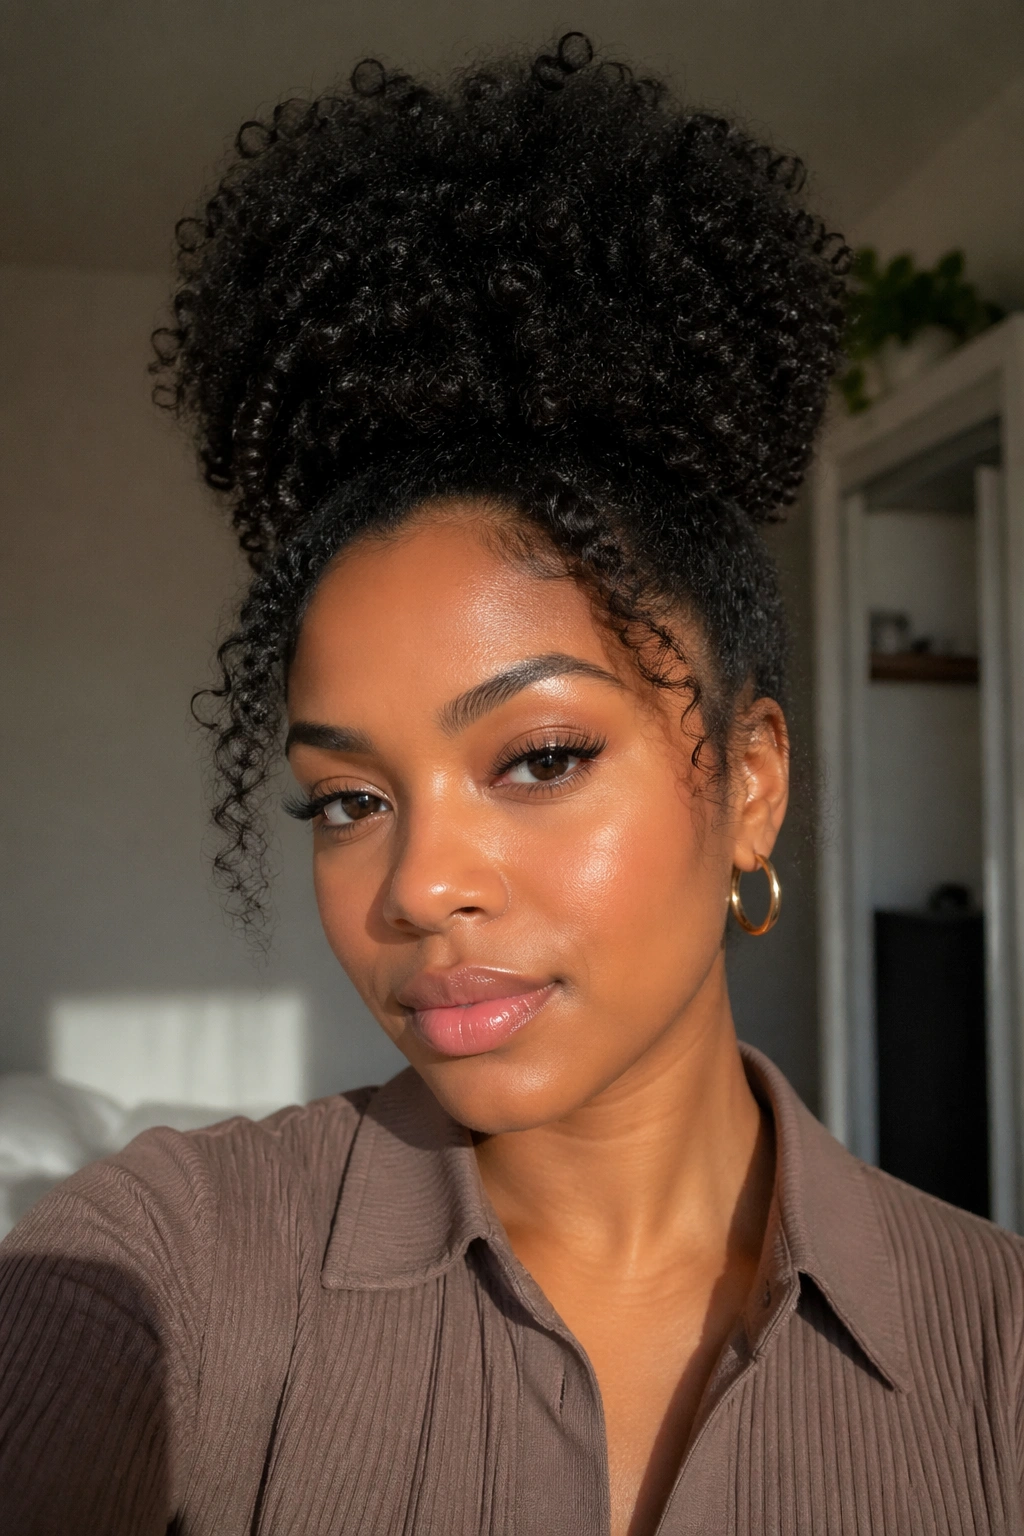
A high puff is the blunt answer for a bad root day. It pulls the hair up and forward, gives you height at the crown, and turns uneven curl days into a style that looks intentional. There’s a reason people keep coming back to it. It’s fast, it lifts the face, and it doesn’t care if the back section is a little flatter than you wanted.
Brush the perimeter gently with a soft brush or your hands, then gather the hair with a satin scrunchie or stretchy band. Keep the puff centered, not too far back, so it has shape instead of looking like a loose ponytail. A small amount of edge control can clean up the front, but heavy gel often makes the hair stiff.
This one works especially well when your roots need refreshment but the ends still have bounce. It also plays nicely with bold earrings and simple makeup, which is probably why it keeps showing up in real life instead of just photos.
3. Low Puff at the Nape
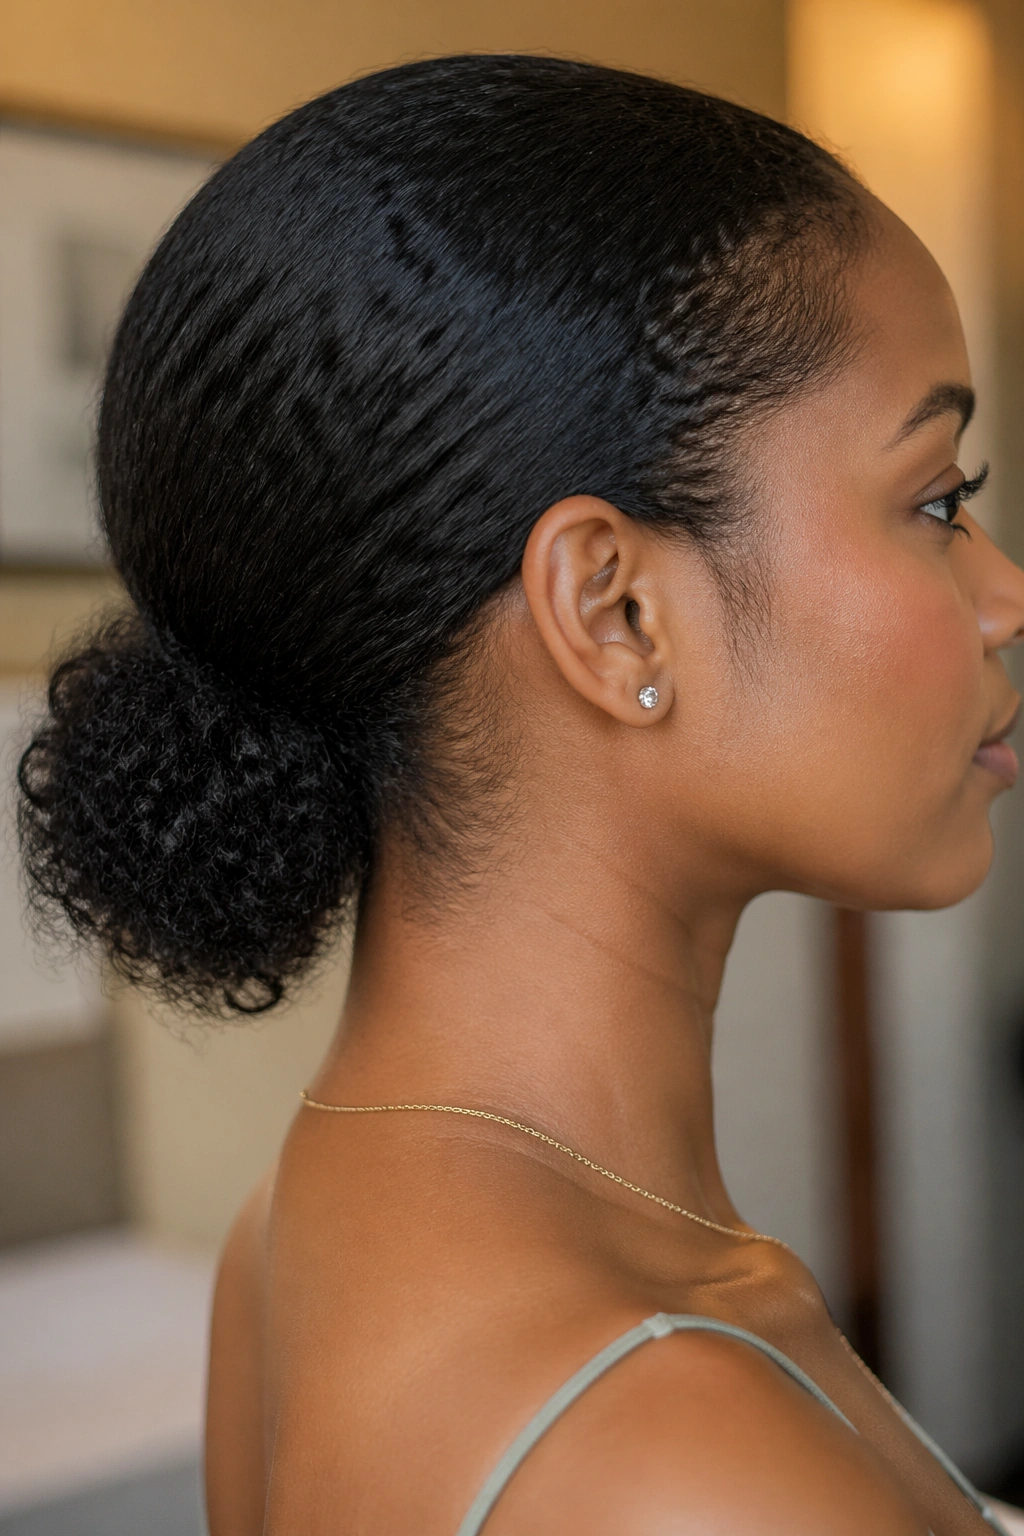
Why does a low puff feel so polished? Because the volume sits low, the neck stays open, and the whole shape reads as tidy without looking severe. It’s one of the easiest ways to make natural curls look dressed up without forcing them into a slick bun that fights the texture.
The best version starts with stretched hair, even if it’s only a little stretched. A ponytail placed at the nape lets the curls keep their body, while the top section stays smoother than it would in a high puff. I like this style for days when the front needs calm more than drama. It’s quiet. In a good way.
A satin scarf laid across the hairline for five or ten minutes can help the top stay flat. If the puff itself is too tight, the whole style loses its ease, so leave some give at the base. That small bit of slack matters.
4. Pineapple for Long Curls
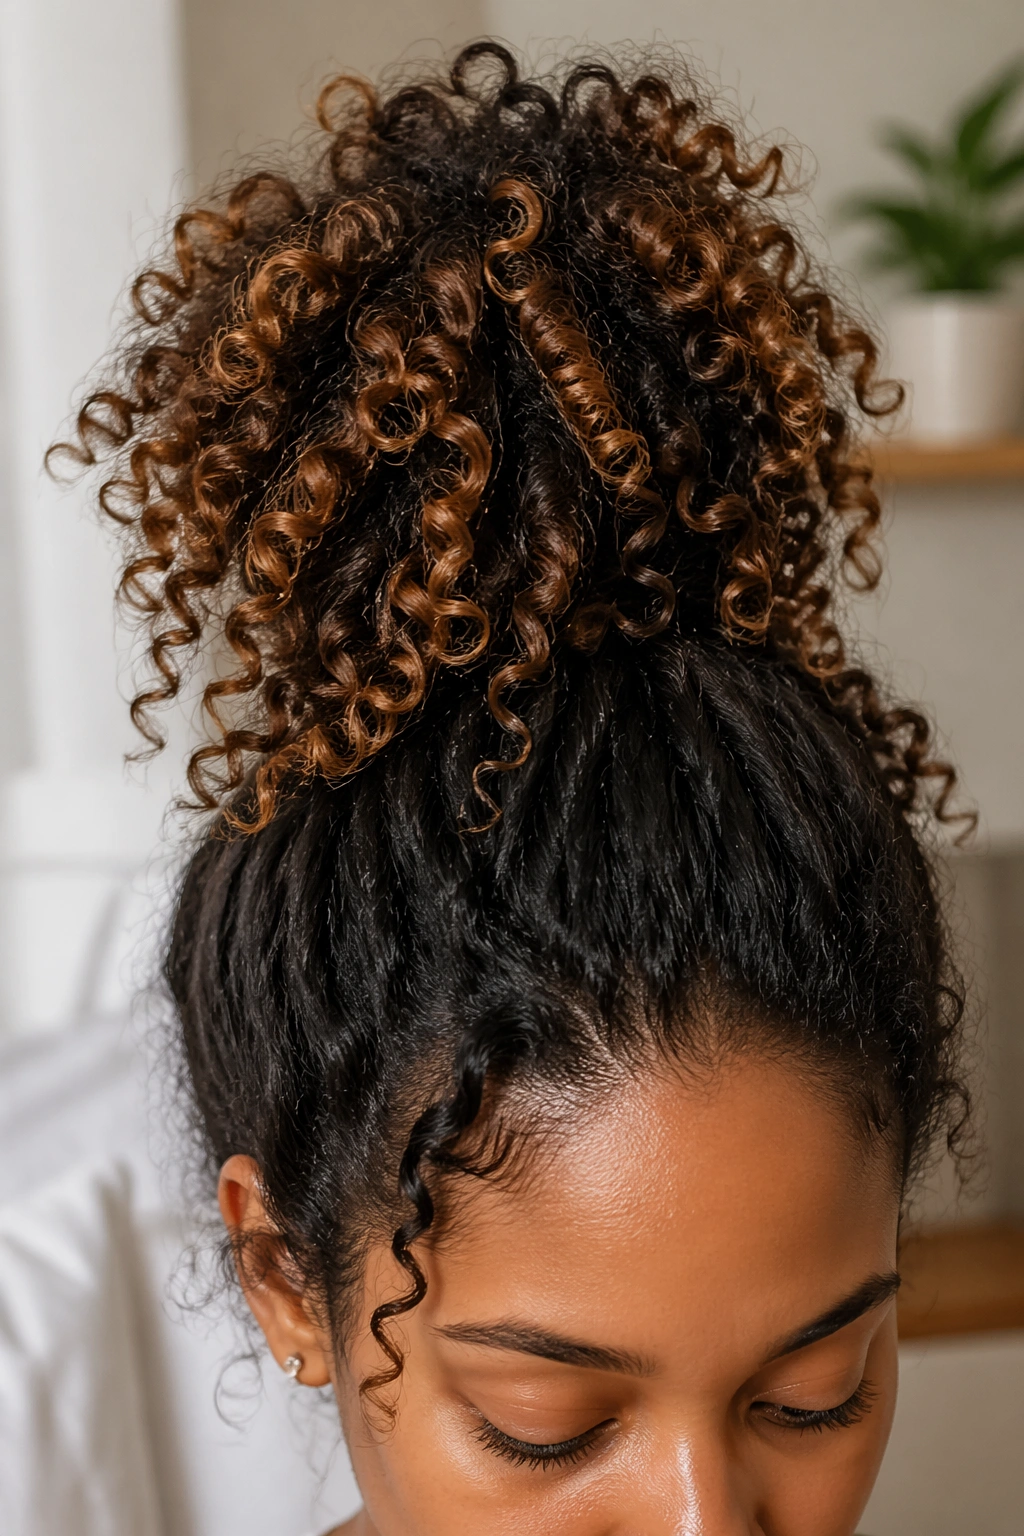
If your curls collapse the second they touch a headrest, the pineapple is the rescue move. It gathers the hair at the very top of the head, keeps the shape loose, and protects the length from getting crushed. Long curls especially love this one, because the ends can fall over the top instead of being tucked and bent every which way.
The trick is to use a loose scrunchie and stop before you drag the hair too tightly upward. You want a soft pile, not a painful little knot. Some people wear it as a daytime style on second- or third-day hair. Others use it as an overnight shape keeper and then take it down in the morning with a little finger fluffing.
Quick details that matter
- Best on shoulder-length hair and longer.
- Works on stretched or defined curls.
- Use a satin scarf or bonnet at night.
- Leave the crown loose enough to avoid dents.
It’s not fancy. It works.
5. Half-Up Top Knot With Loose Curls
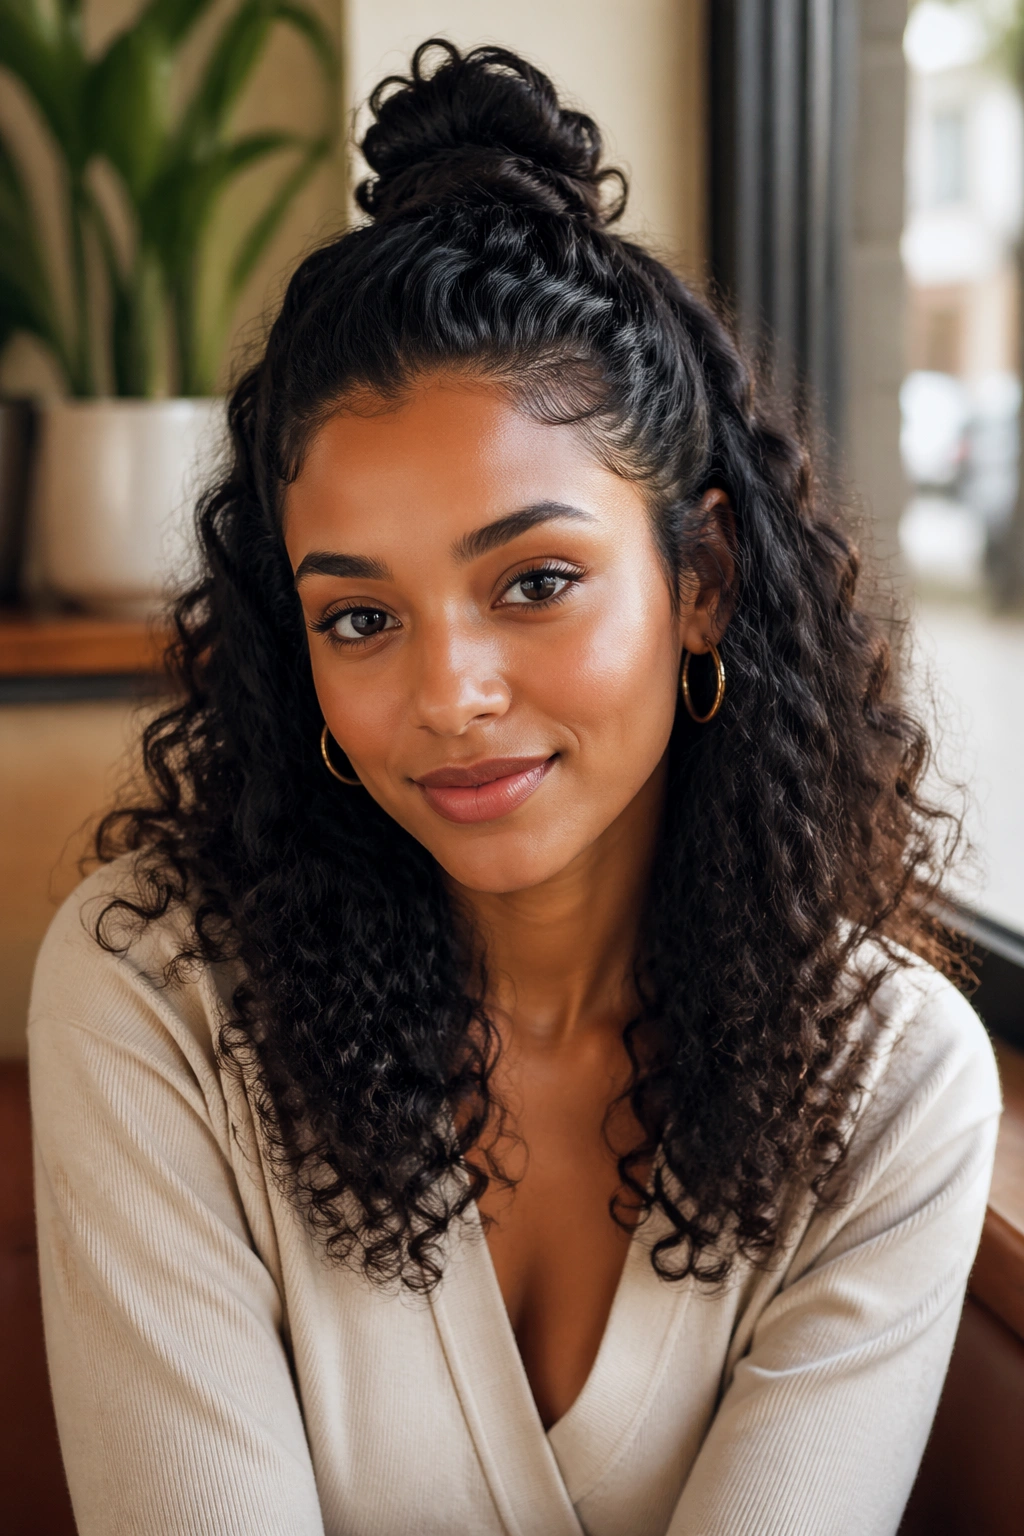
Half-up styles earn their keep because they solve two problems at once. The top section gets out of the face, and the bottom section still shows off length, volume, and curl pattern. A half-up top knot is the version I reach for when I want structure without losing the whole shape.
Pull the top third of the hair into a small ponytail, twist it once or twice, and pin or wrap it into a knot. Don’t over-tighten it. If the knot is too polished, the bottom curls can look separate and flat. A little looseness keeps the whole style from feeling stiff.
This one works on medium to long hair, but shorter curls can fake it by taking a smaller top section. It’s good for coffee runs, dinner, or any day that needs a little more shape than a full puff can give. And yes, a few face-framing pieces make it look better. They usually do.
6. Twist-Out With Soft Definition

A twist-out is the style people use when they want stretch, shape, and that soft, separated curl look that sits between polished and relaxed. It starts with two-strand twists on damp hair, then turns into a set of elongated coils once the twists are dry and taken down. The result has memory. Not stiffness.
Section size changes everything. Smaller twists give you more definition and tighter curls. Bigger twists give you a looser pattern and a little more volume. I’d rather see someone use eight clean sections than twenty messy ones. Clean parting makes the whole style look better when it comes down.
Take the twists apart with a drop of oil on your fingertips so the strands glide instead of catching. Then stop. The moment you keep separating and fluffing, the style loses its shape. A twist-out is generous, but it does not love being fussed with.
7. Braid-Out With a Longer Wave
A braid-out gives you a different kind of texture from a twist-out. The strands flatten into a more ropey wave, with a little more stretch and a little less spring. On thicker curls, that can be a gift. The finished style often lasts longer because the braid pattern sets more firmly.
If your hair tends to puff up fast, braid-outs can be a smart choice. They hold shape better around the edges and create that glossy, stretched look people notice right away. Twists can be prettier for some curl patterns, sure, but braids usually bring more length.
This is the style I’d pick if I wanted a softer silhouette without losing movement. Use a medium-hold cream, braid on damp hair, and let the sections dry all the way through before taking them down. Half-dry braids unravel into fuzz. No one needs that headache.
8. Flat-Twist Crown on Curly Hair
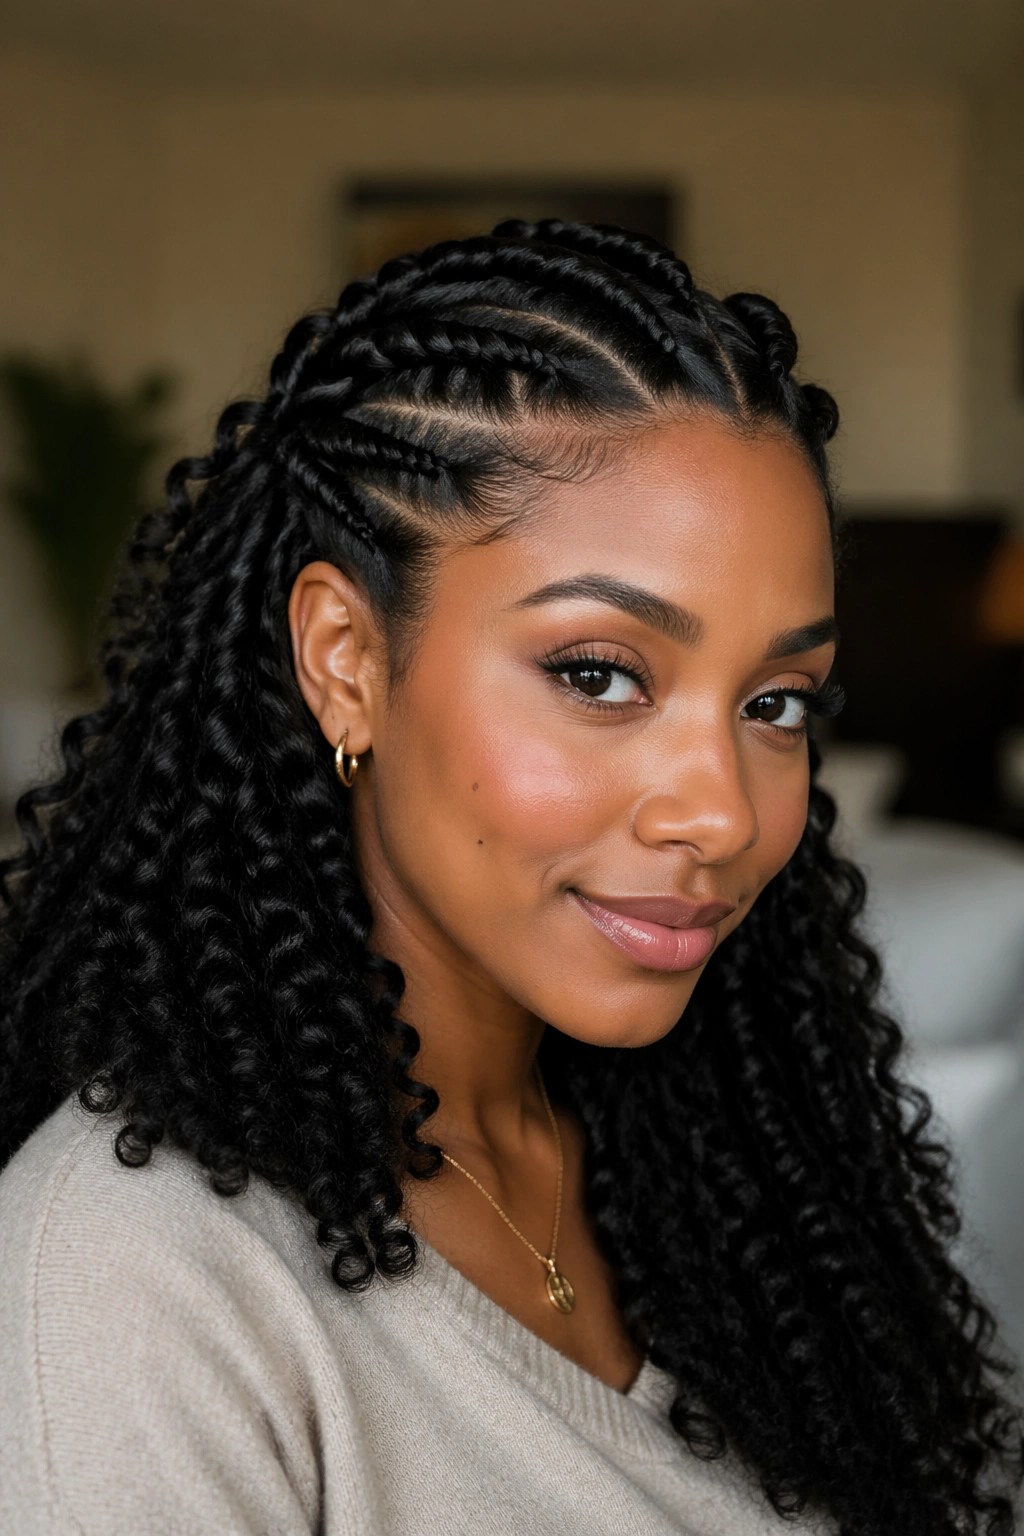
Flat twists around the hairline turn curly hair into a crown without asking for a full braid job. They sit close to the scalp, keep the front tidy, and let the rest of the hair stay loose or tucked into a bun. The shape feels neat, but not fussy.
Small choices that keep it neat
- Part the sections evenly on both sides.
- Keep the twists flat against the head.
- Use a fine-tooth comb only where needed.
- Pin the ends under the back section.
- Smooth the hairline with a tiny bit of gel, not a heavy layer.
Flat twists look especially good when the center has some volume. That contrast is the whole point. The crown frames the face, and the curls do the rest. If your hair is very dense, a little oil on the fingers helps the twists slide without puffing up before you even leave the house.
9. Side-Part Frohawk
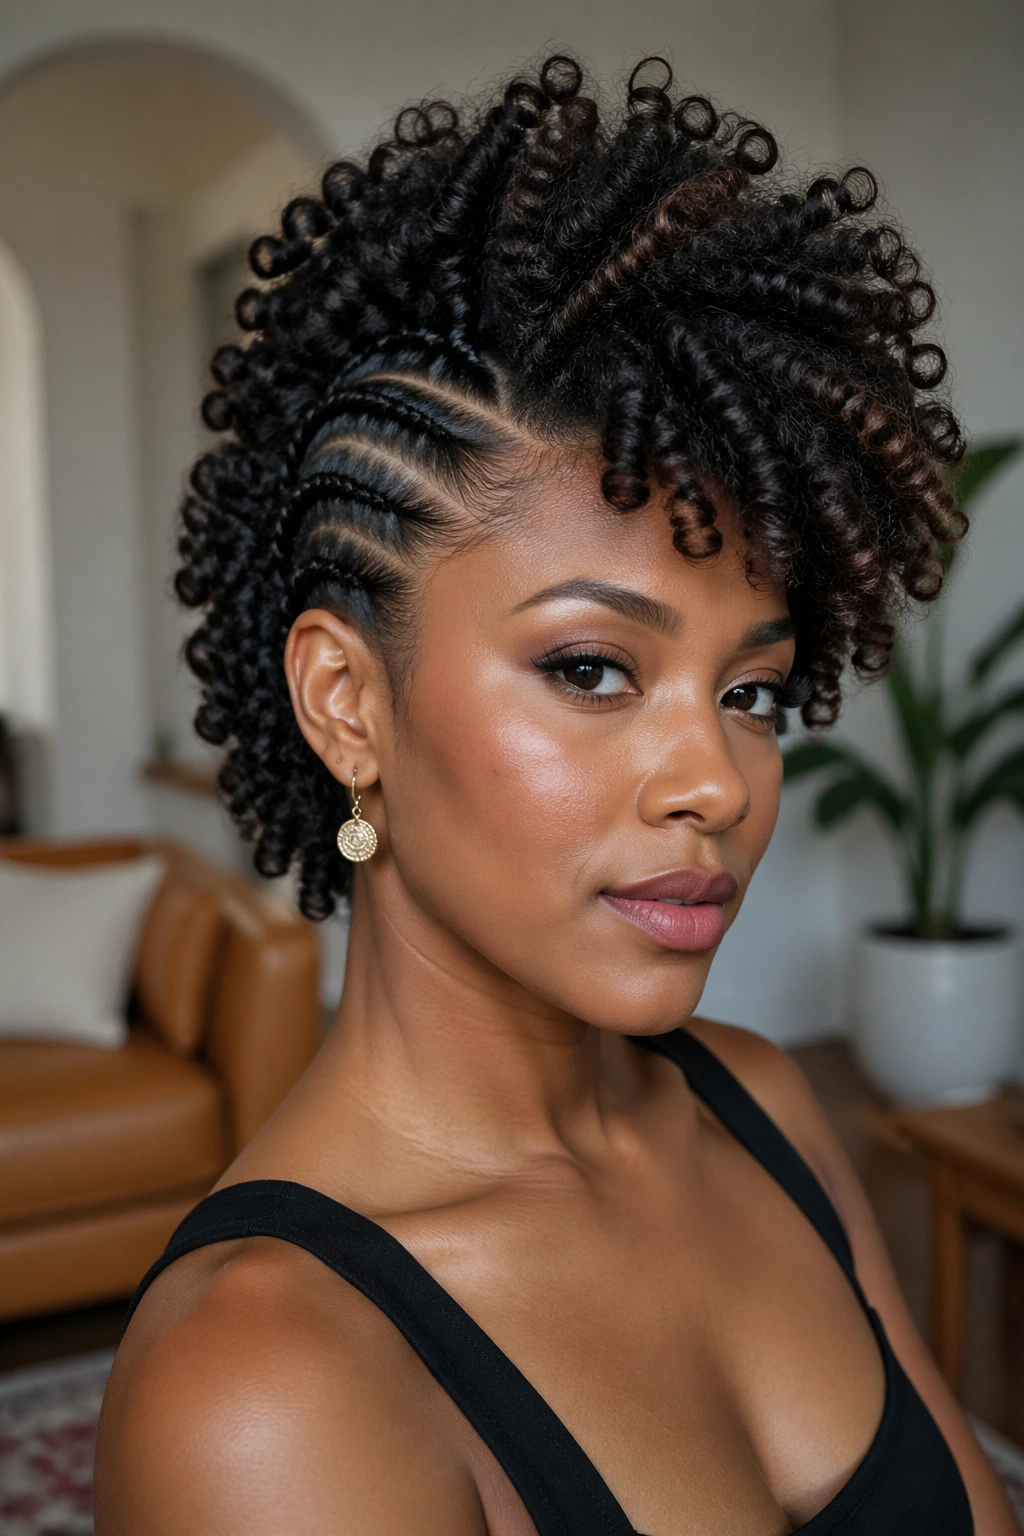
A side-part frohawk is for the days when you want height and attitude in the same style. The sides get pinned or braided back, while the center strip stays full and lifted. It creates a narrow, strong line through the middle that makes the whole head look longer.
There’s a reason this style shows up at parties, photo shoots, and anywhere a plain ponytail would feel boring. It has shape. It has drama. And it works with curls instead of flattening them. Use bobby pins that actually grip, not the slippery kind that slide out after twenty minutes.
I like it best on medium-length hair with enough density in the center to stand up on its own. Shorter hair can do a mini version with twists pinned close to the scalp. Leave the center loose and a little imperfect. The charm is in the lift, not the precision.
10. Mini Twists for Long Wear
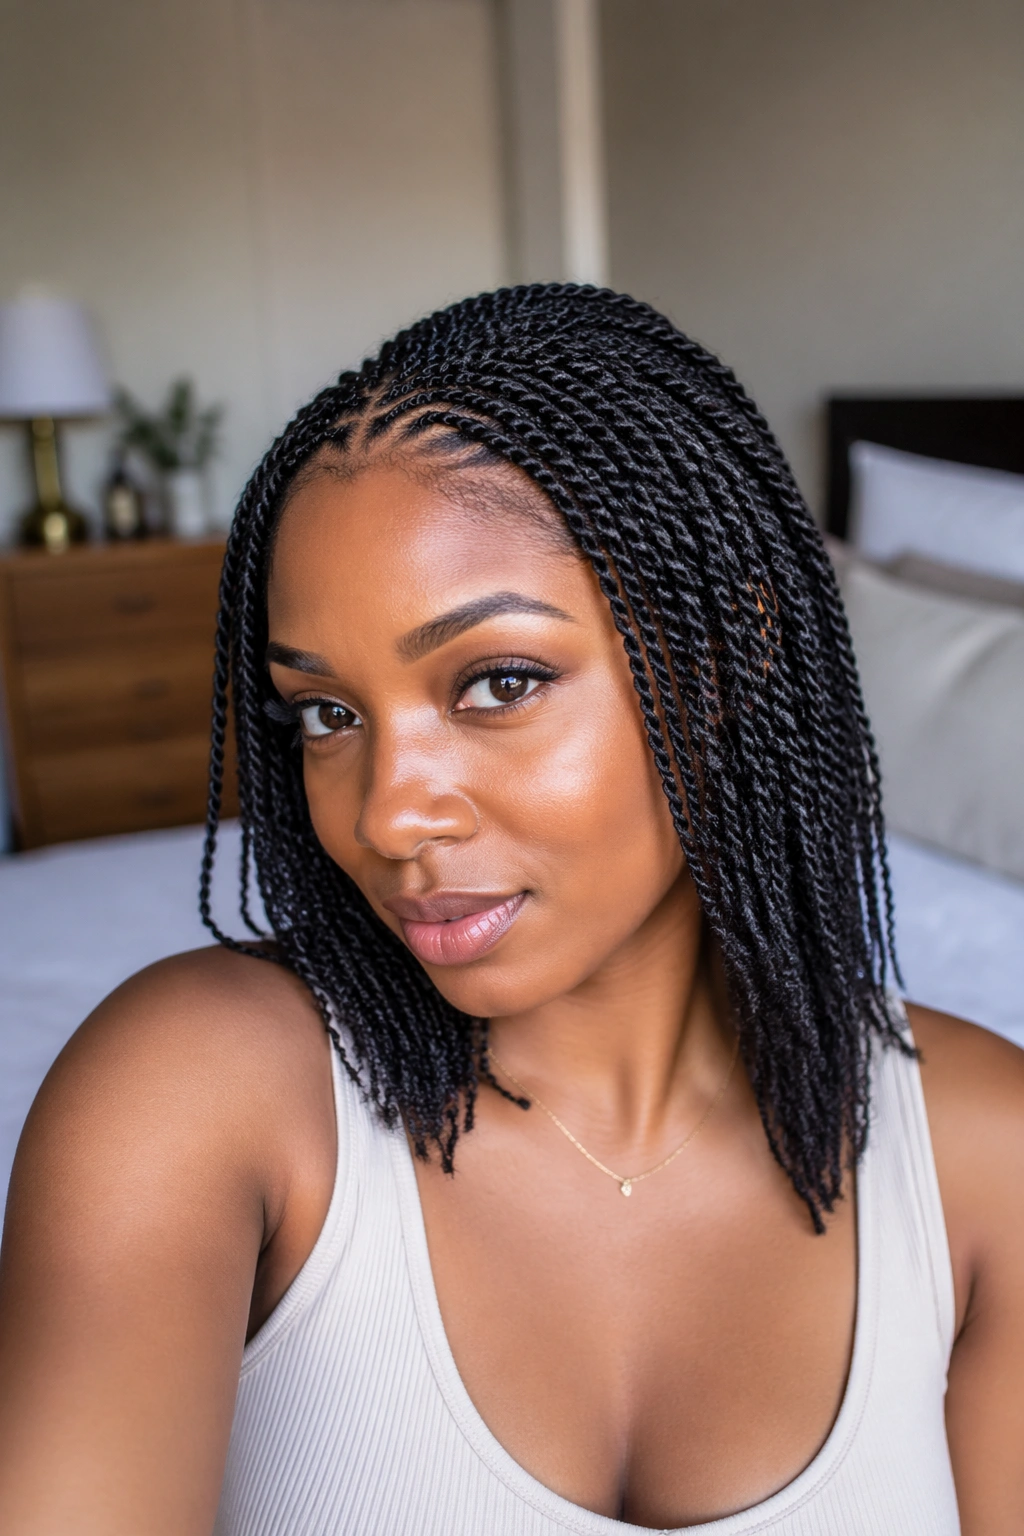
Mini twists are the low-drama style that keeps paying you back. They take time to install, yes, but once they’re in, they can be worn down, pinned up, tucked into buns, or split into half-up shapes. That flexibility is why people stick with them.
The size matters. Pencil-width sections give a neat, detailed look. Slightly bigger sections save time and still look clean if the parts are tidy. Use a lightweight cream or butter on each section, then twist from root to end with even tension. No yanking. The hair should feel secure, not pulled.
Mini twists are a smart pick when you want to give your strands a break from daily manipulation. They’re not flashy, which is part of the appeal. They just sit there, looking useful and put together, while you get on with the week.
11. Bantu Knot-Out With Springy Texture
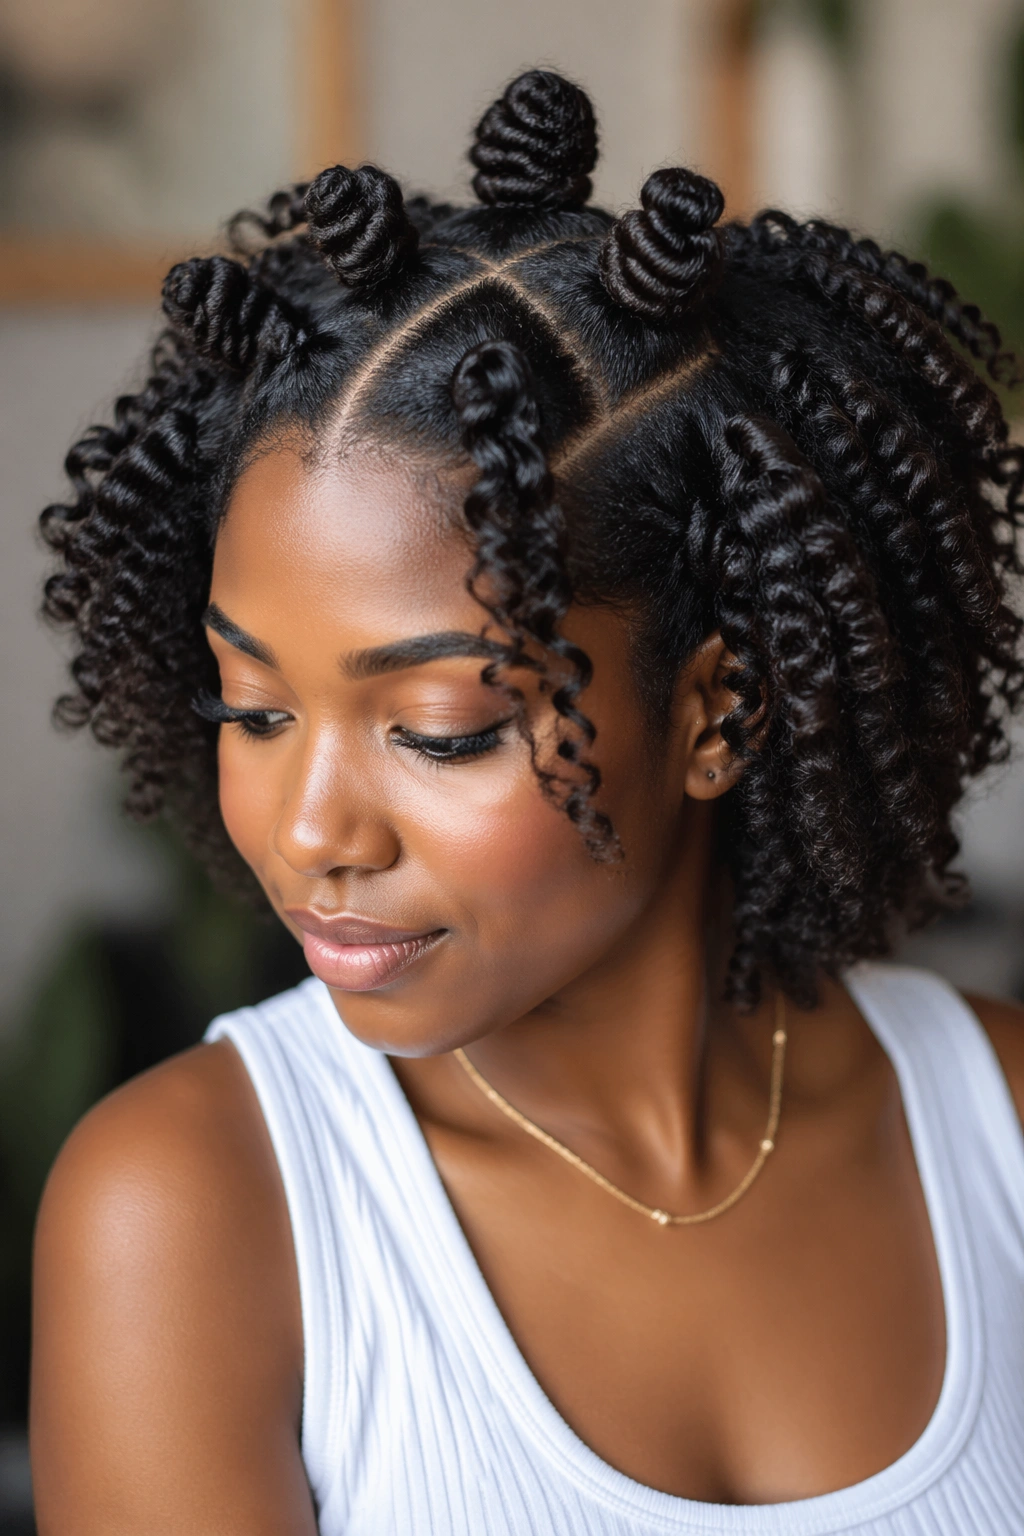
If you want curl groups that look bouncy and a little playful, a Bantu knot-out does the job. The knots themselves are neat little coils, and the take-down creates rounded, springy texture that sits differently from twists or braids. It has more punch in the shape, less softness in the waves.
What the knot size changes
Smaller knots create tighter curls. Larger knots give you broader bends and more volume at the root. That choice matters more than people think. A bad knot size can leave you with either too much puff or a curl pattern that looks uneven.
Set the knots on damp hair, let them dry all the way through, then unravel with a small amount of oil on your hands. If the center still feels cool or damp, leave it alone. That little bit of patience saves the style. Half-dry knots frizz fast.
This is one of those styles that looks simple from the outside and a little more technical once you start doing it. Worth it, though. The finish has real personality.
12. Finger Coils for Crisp Definition
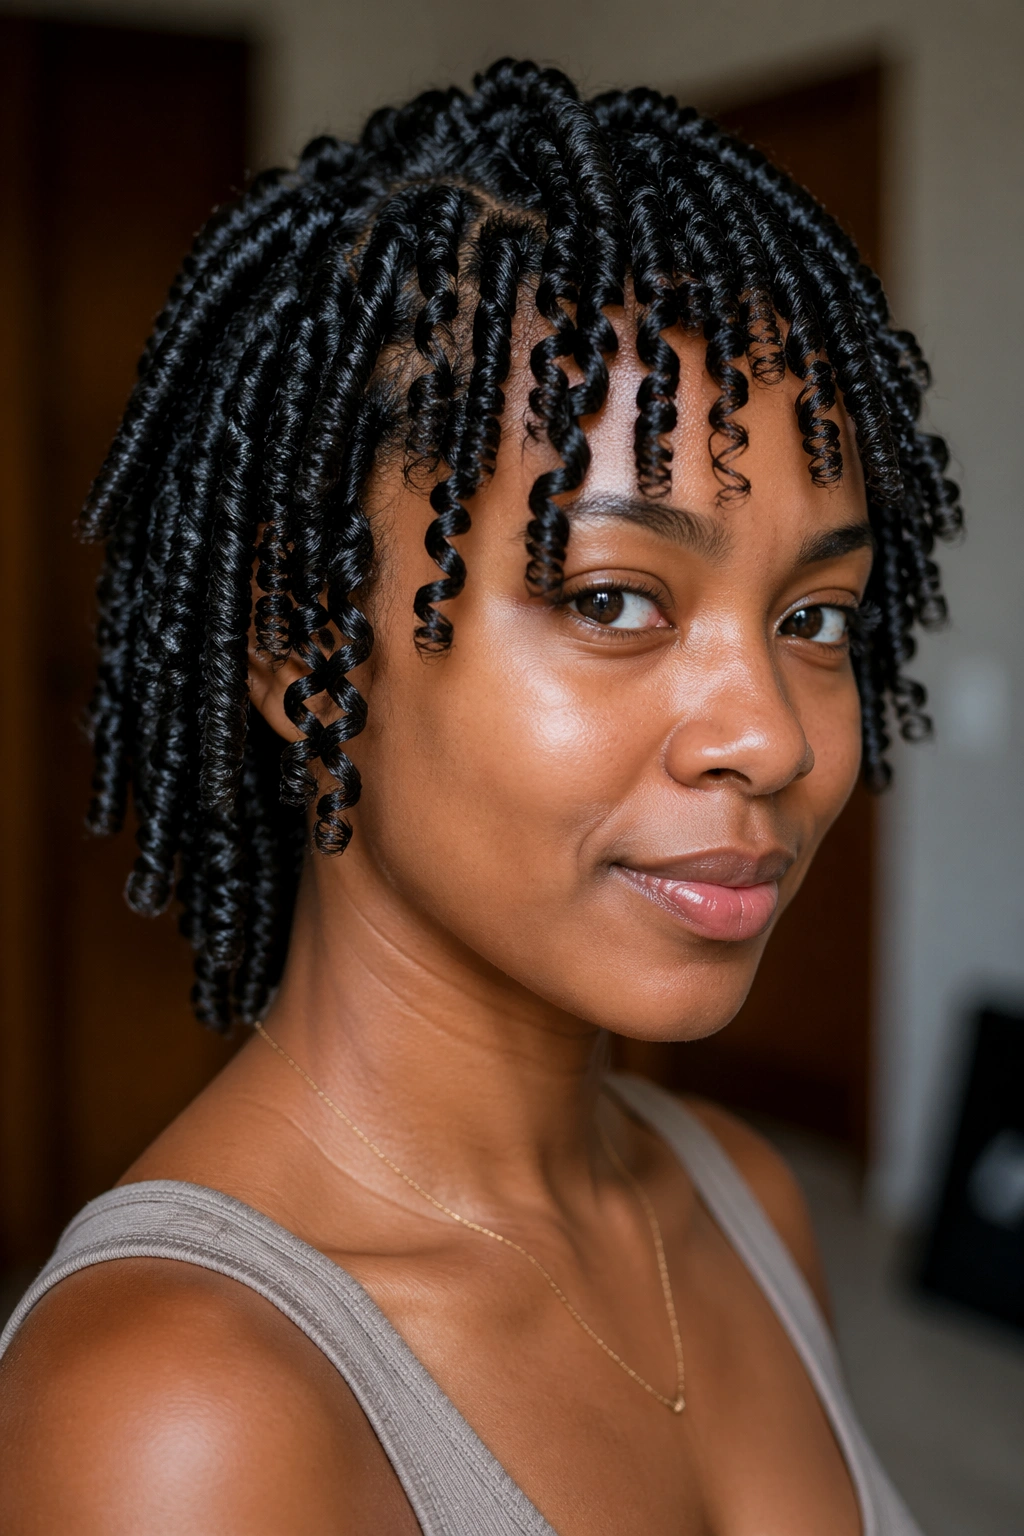
Finger coils are one of the most precise ways to shape natural curls. Each section gets wrapped around a finger until it forms a neat little spring, and the result is a style that looks deliberate from every angle. It takes time. No getting around that.
The payoff is the definition. Short hair, tapered cuts, and tighter curl patterns often look especially good in coils because the shape stays visible instead of getting lost in bulk. Use a small amount of gel or cream on each section, then coil in the same direction each time so the pattern stays consistent.
This style works when you want the curls themselves to be the feature. Not volume. Not a big updo. Just neat, clean coils with enough shine to catch the light. If you separate them too much after drying, you lose the point, so handle the finish gently.
13. Claw-Clip French Twist
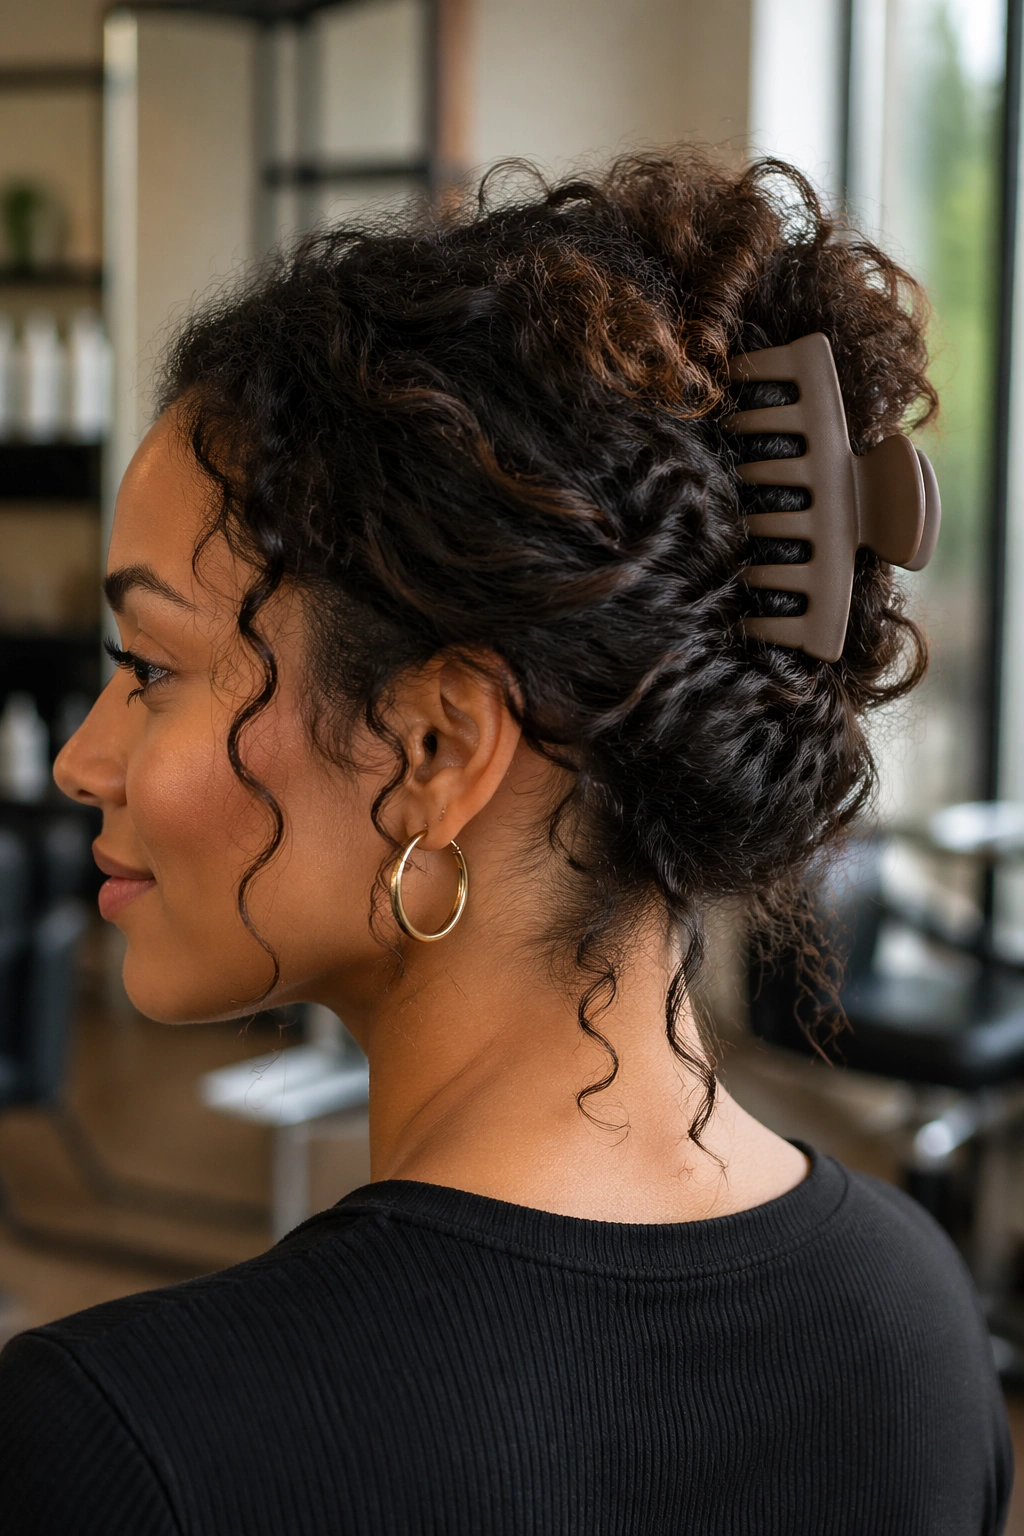
A claw-clip French twist is one of those practical styles that looks better than it has any right to. You gather the hair at the back, twist it upward, and let the ends spill out a little over the clip. The shape is neat at the base and soft at the top, which keeps it from feeling too strict.
The clip matters. A small, flimsy clip will struggle with curly texture, especially if your hair is dense. A larger clip with teeth that actually hold is worth the trouble. If the clip slides, the whole style slides with it.
I reach for this when I want my curls up and off my shoulders but do not want a plain bun. It works for workdays, dinners, and those odd in-between plans where you need to look presentable without overdoing it. Leave a few curls loose around the face if the style feels too sharp. That softens it fast.
14. Space Buns With Curly Ends
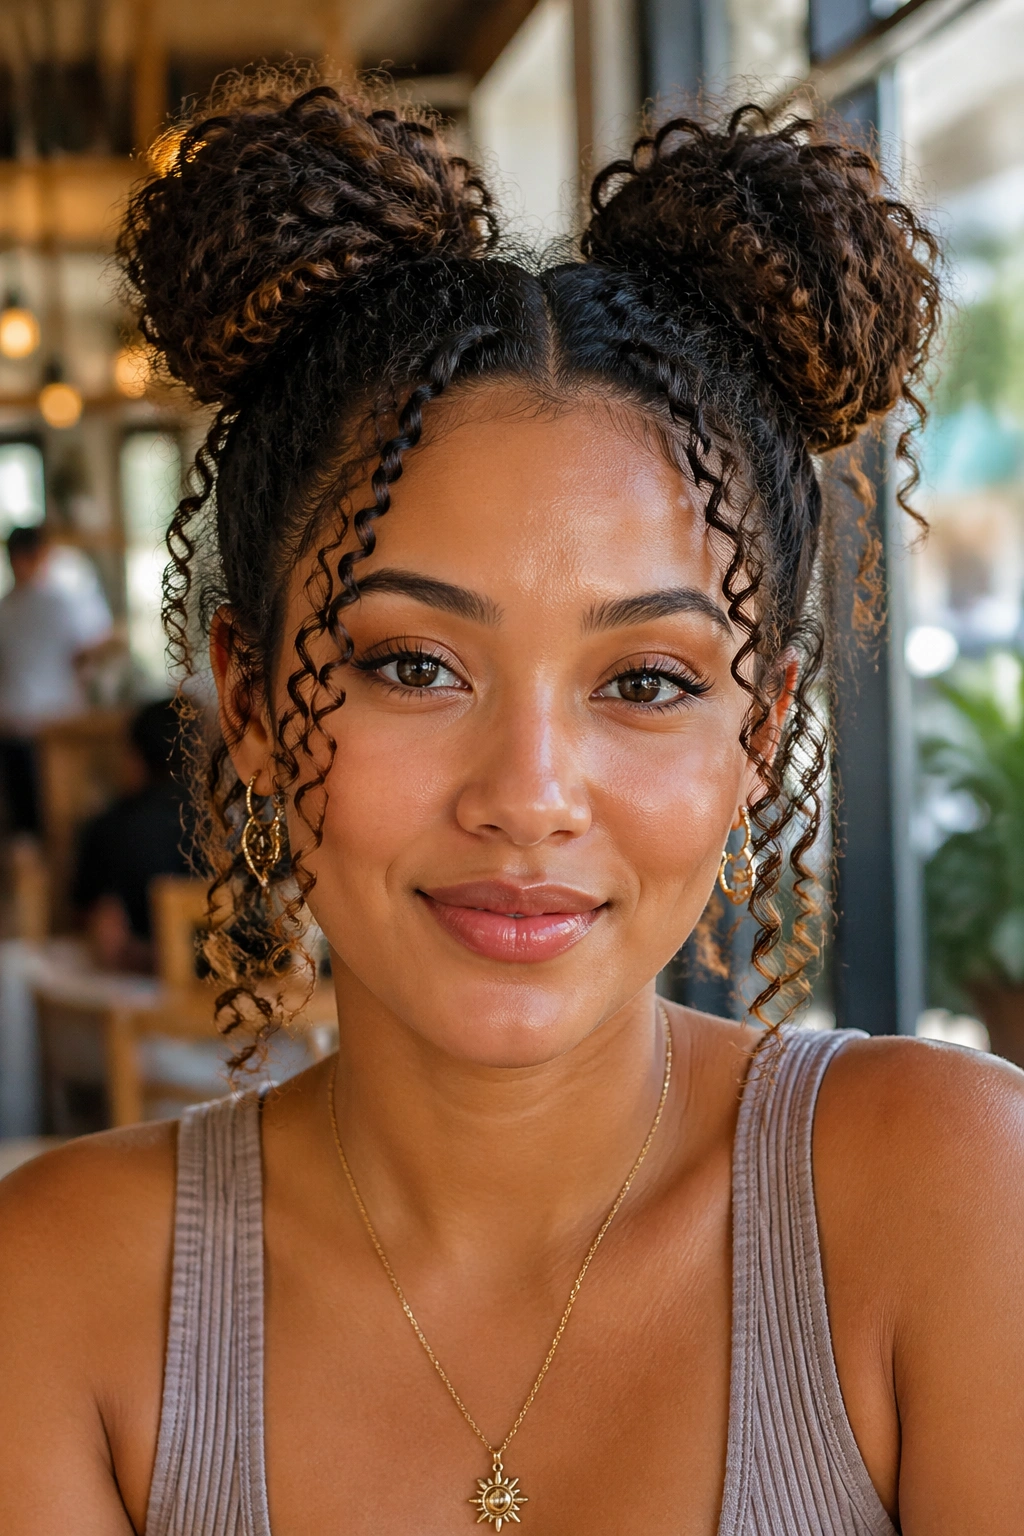
Space buns can look playful or neat, depending on how tight you make them. The style splits the hair into two sections and stacks them high, which keeps the shape lively and a little cheeky. It’s a fun choice when you want the curls up but don’t want a single bun pulling everything back.
You can keep the ends tucked for a cleaner finish or let them spill out for a messier look. Both work. The important bit is balance. If one bun is twice the size of the other, the style stops looking intentional and starts looking rushed. A tail comb helps here, though your fingers do most of the work.
This style is especially useful when the crown needs a break. It takes tension off the edges and still leaves enough texture to make the look feel like curly hair, not a costume. That distinction matters more than people admit.
15. Headband Tuck for a Quick Shape
A headband tuck is the sort of style that saves a morning when you have five minutes and no patience. Slip a stretchy headband over the hair, tuck the ends under in sections, and let the curls fold into a soft rolled shape. It can land somewhere between a faux bob and a tucked updo.
The trick is to tuck in small chunks instead of trying to shove all the hair under at once. Smaller sections sit flatter, and flatter sections tend to stay put. A wide headband works better than a narrow one because it spreads the pressure across the scalp instead of digging in.
This style loves second-day curls and stretched texture. If the hair is too fresh and slippery, the tuck may not hold. Add a few pins under the band if needed. Nobody needs to know they’re there.
16. Side-Swept Curly Ponytail
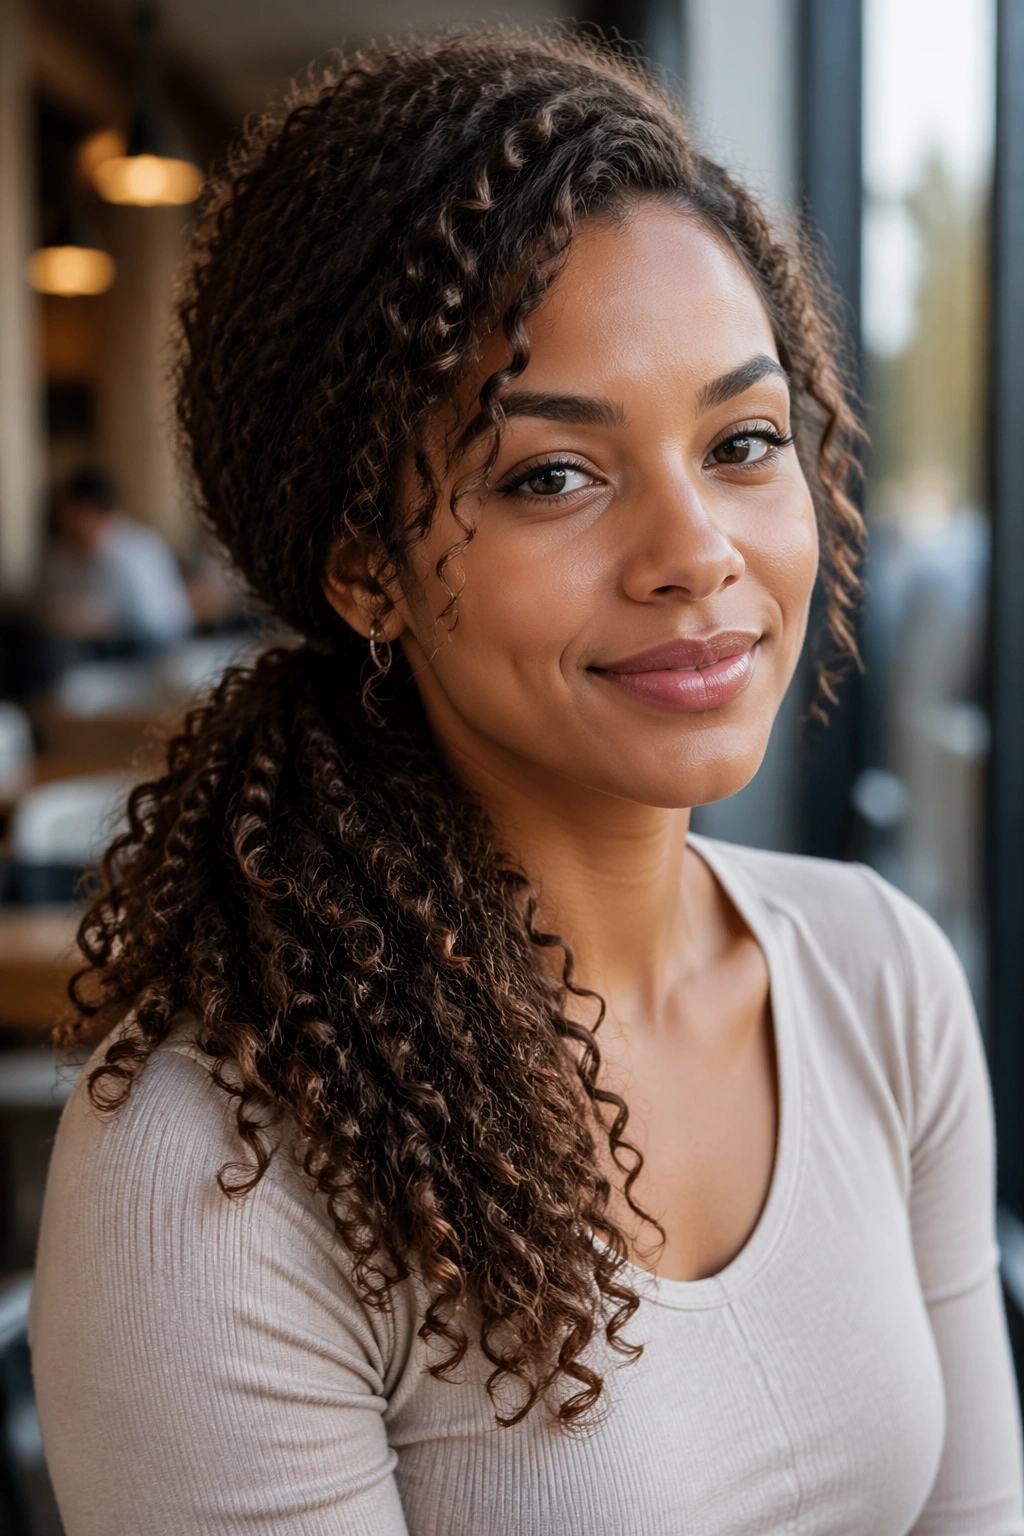
A side-swept ponytail changes the whole mood of curly hair with one move. The hair gathers low or mid-height and sits over one shoulder, which gives the style a soft line and a little more movement than a straight-back ponytail. It also shows off the length in a way that feels less formal than a bun.
The base should be secure but not crushed. Use a band that won’t snag, then wrap a small curl or ribbon around the tie if you want the finish to look cleaner. Keep the ponytail itself full. Brushing the curls too much flattens the shape and takes away the point.
This is a good option when you want the neck open but still want the curls visible. It pairs well with earrings, collared shirts, and off-the-shoulder tops because it leaves room around the face and shoulder line. Simple. Useful. Done.
17. Halo Braid With Loose Ends
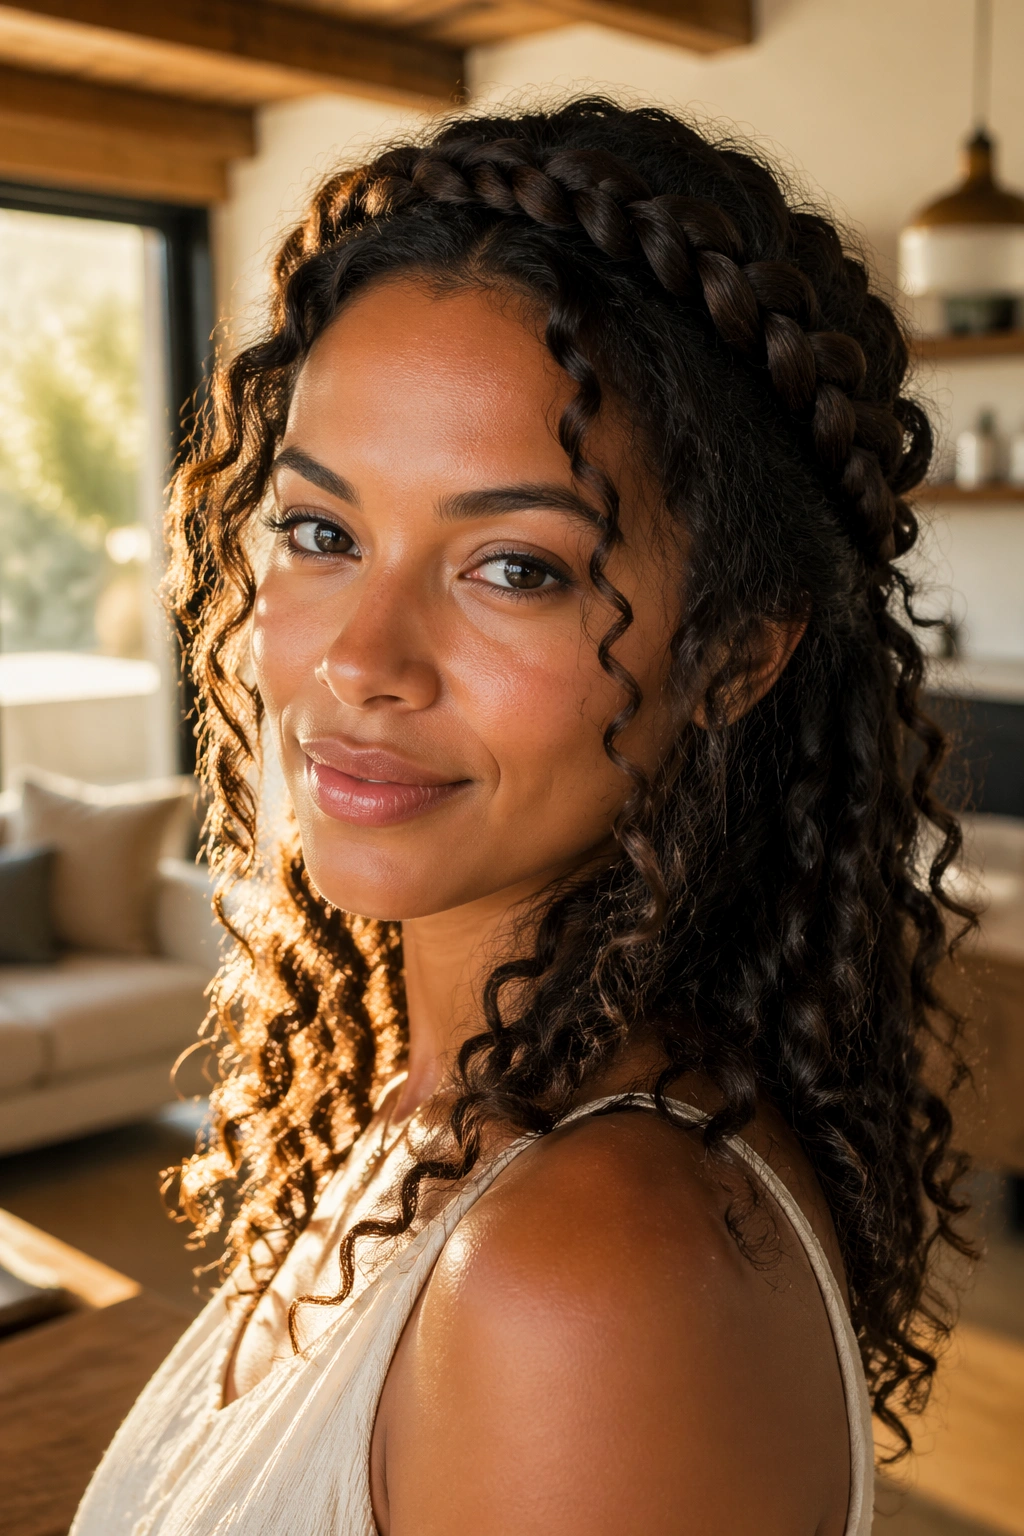
A halo braid wraps around the head like a ring, which gives curly hair a clean frame before the rest of the texture takes over. It’s more substantial than a flat-twist crown and usually reads a little more dressed up. There’s something satisfying about the shape. It looks finished from the front and controlled from the back.
This style works best when the hair has a bit of stretch or enough length to braid cleanly along the perimeter. If the sections are too small, the braid can disappear into the curls. If they’re too thick, the crown gets bulky fast. Somewhere in the middle feels right.
You can tuck the ends under the braid or leave the rest loose in a puff or curly cascade. That choice changes the whole mood. Tucked ends feel formal. Loose ends feel softer and more lived-in. Same base, different read.
18. Stretched Curly Blowout for Natural Curly Hair
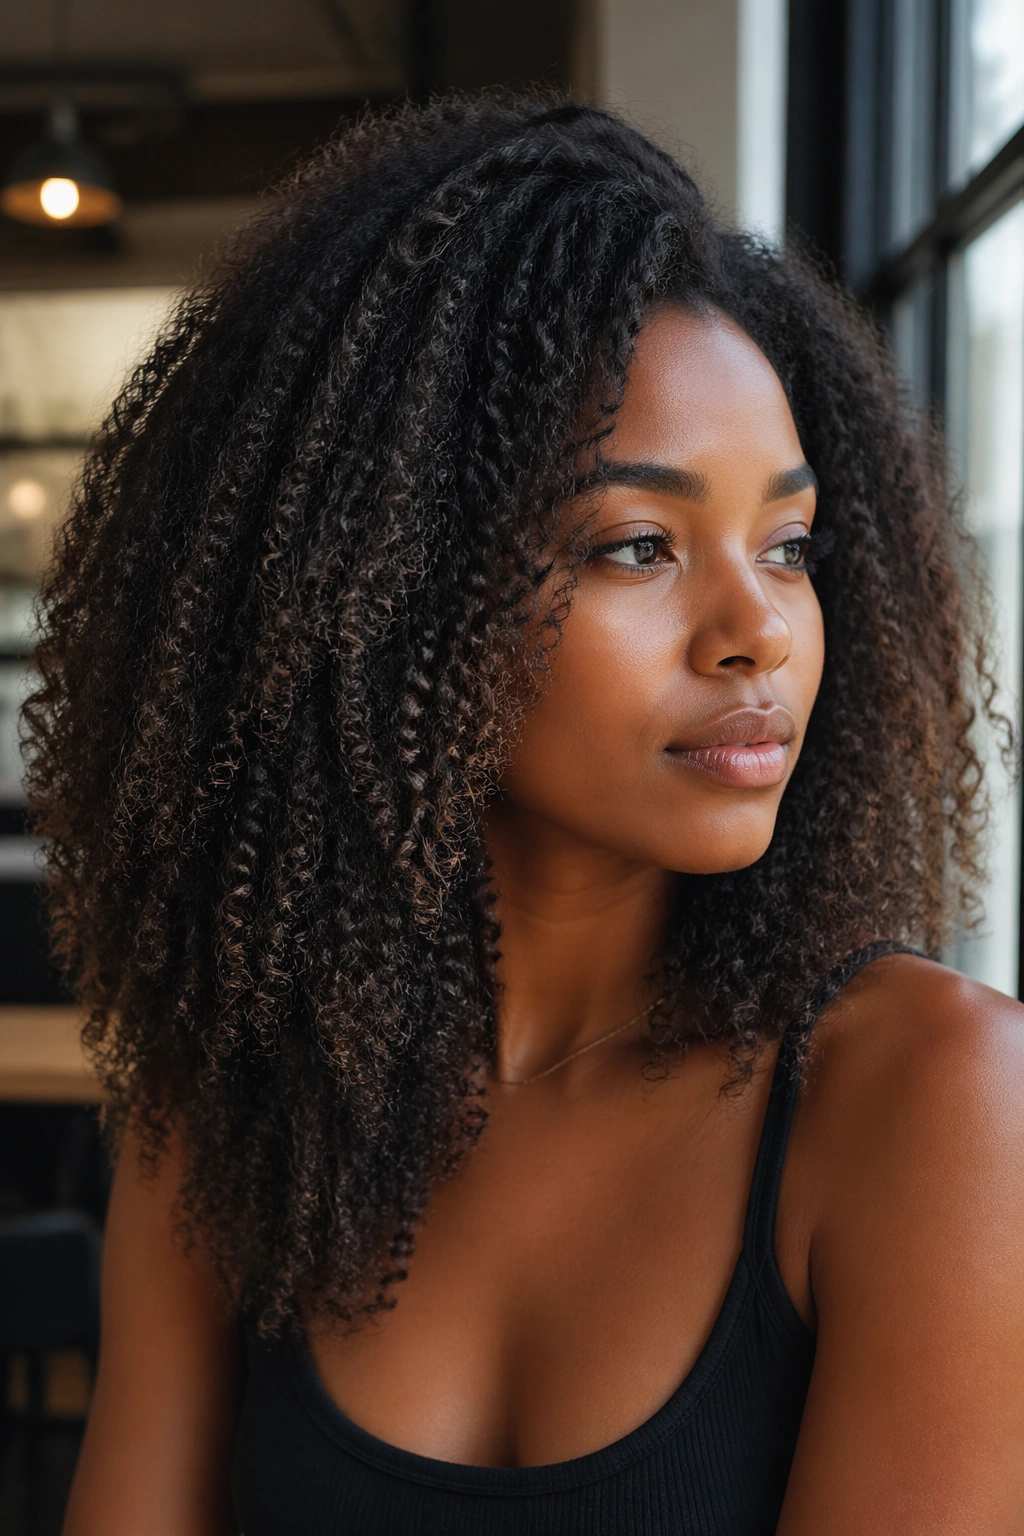
A stretched blowout is not straight hair pretending to be curly. It’s just elongated curls with enough body left in them to keep the texture visible. That makes it a smart middle ground when you want length, shape, and less shrinkage than a wash-and-go gives you.
Use low heat and a diffuser, or stretch the hair with banding after washing. The goal is to smooth the root and lengthen the curl, not to blast every bend out of it. If the hair feels hot enough to steam, the setting is too high. Back off. Your curl pattern will thank you later.
This style gives you more room to work with buns, braids, ponytails, and pinned looks because the strands are longer and easier to gather. It also changes how the haircut sits, especially if you have layers. Some styles look better stretched. This is one of them.
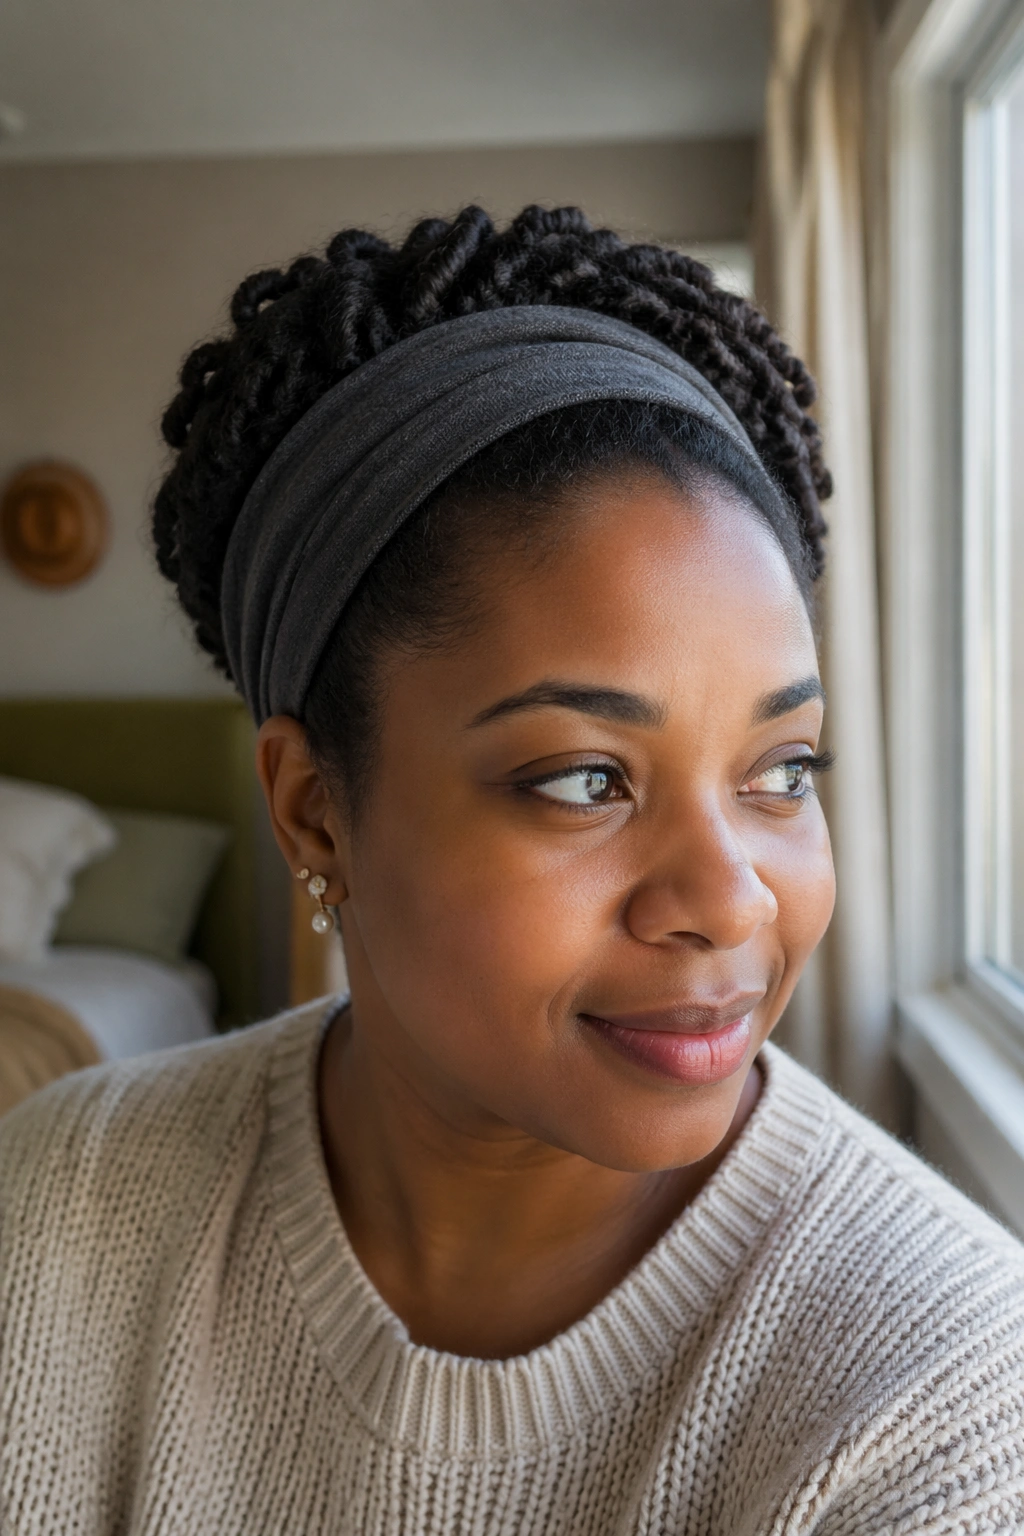
19. Scarf-Wrapped Puff
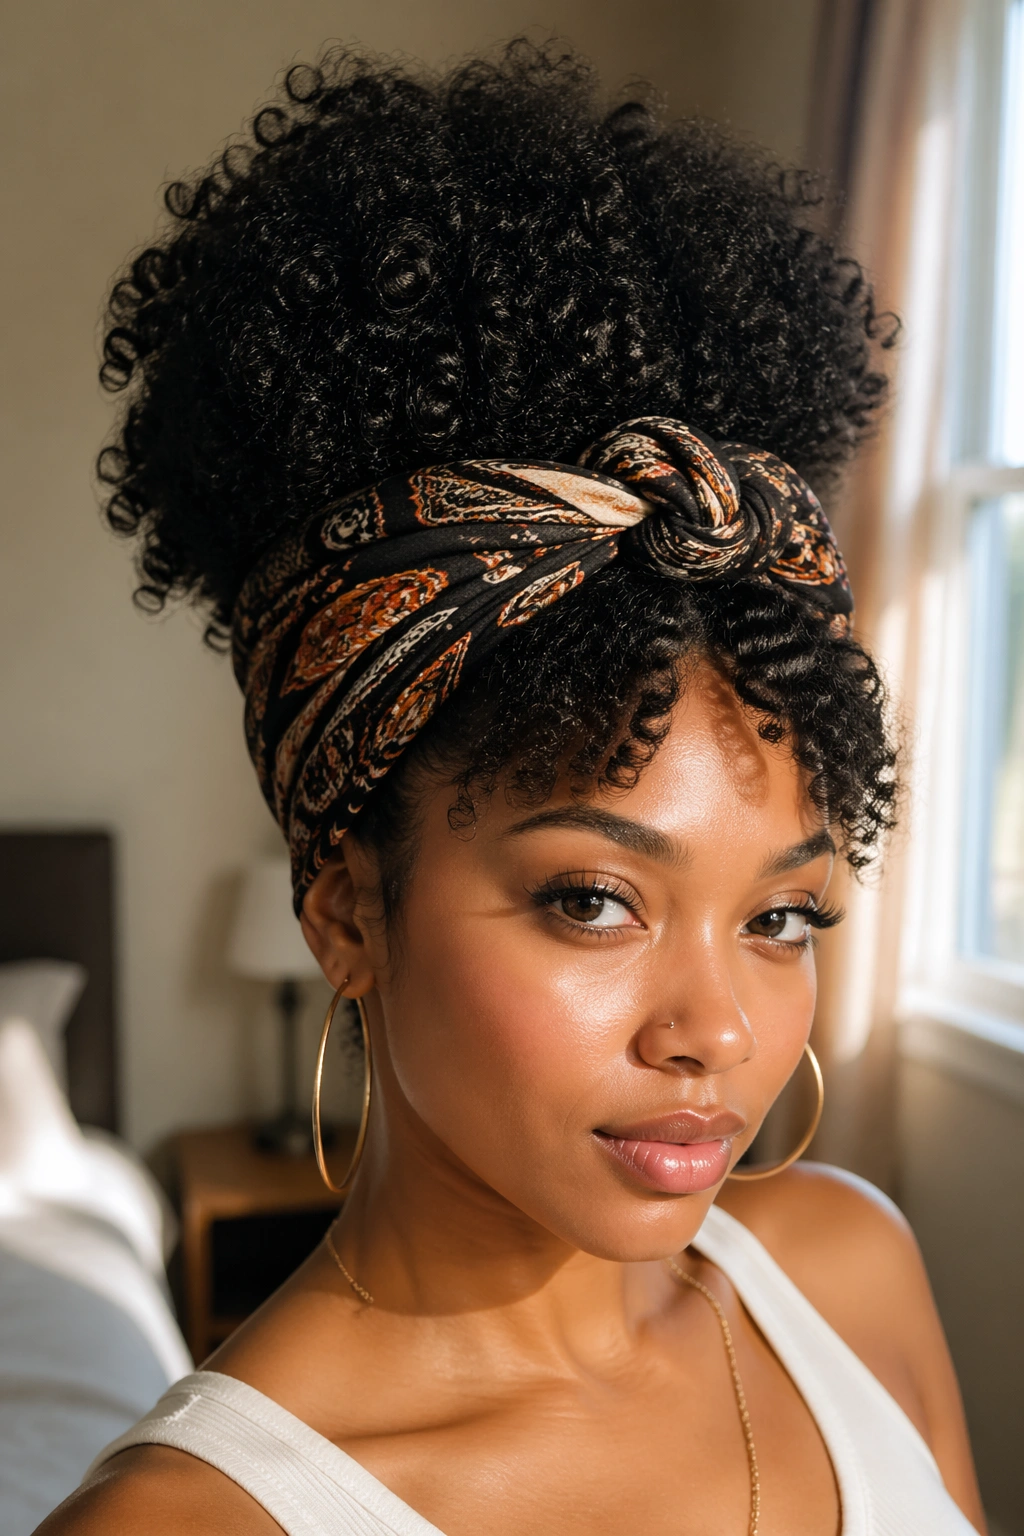
A scarf-wrapped puff does two jobs at once. The puff keeps the volume, and the scarf gives the front a clean frame. It’s a simple style, but simple doesn’t mean dull. A printed scarf or a plain silk one can change the whole mood in ten seconds.
Tie the scarf around the hairline after gathering the puff, then let the knot sit slightly off-center or right at the top, depending on how much shape you want. If the front section has frizz or short curls that won’t stay down, the scarf covers that without turning the whole look into a fix-it job.
This one is nice on days when you want your face open but your hair still visible. It also works well when the roots need help and the ends are doing fine. That combination shows up more often than people think.
20. Curly Shag With Face-Framing Layers
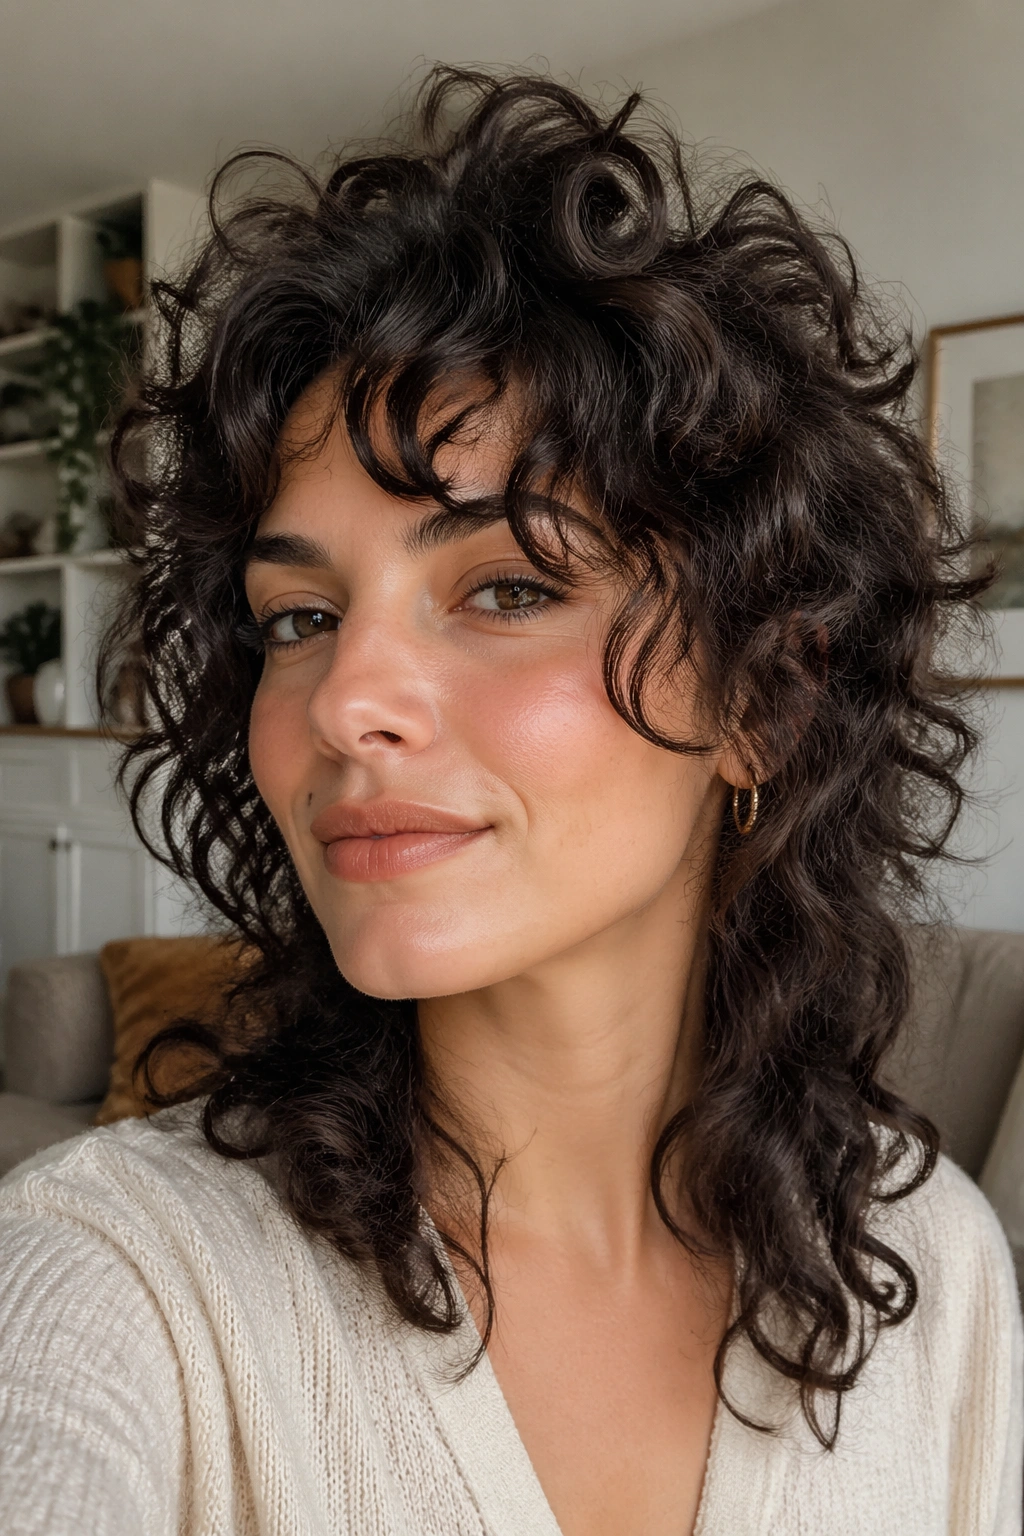
A curly shag changes the whole balance of the head. The layers take weight off the bottom, the crown gets lift, and the front pieces sit in a way that makes the face look framed instead of swallowed. It’s one of the few cuts that can make curls feel lighter without making them look thin.
The style matters most when the haircut itself is doing the shaping. If your curls always make a triangle, layers help break that up. If your hair tends to hang flat at the top, the shorter pieces in a shag bring the crown back to life. It does not need a lot of styling to look good, which is the part I like best.
Diffusing the roots for a few minutes can help, but the cut does most of the work. A little cream and a little scrunching is enough. Anything fancier is usually extra.
21. Tapered TWA With a Side Part
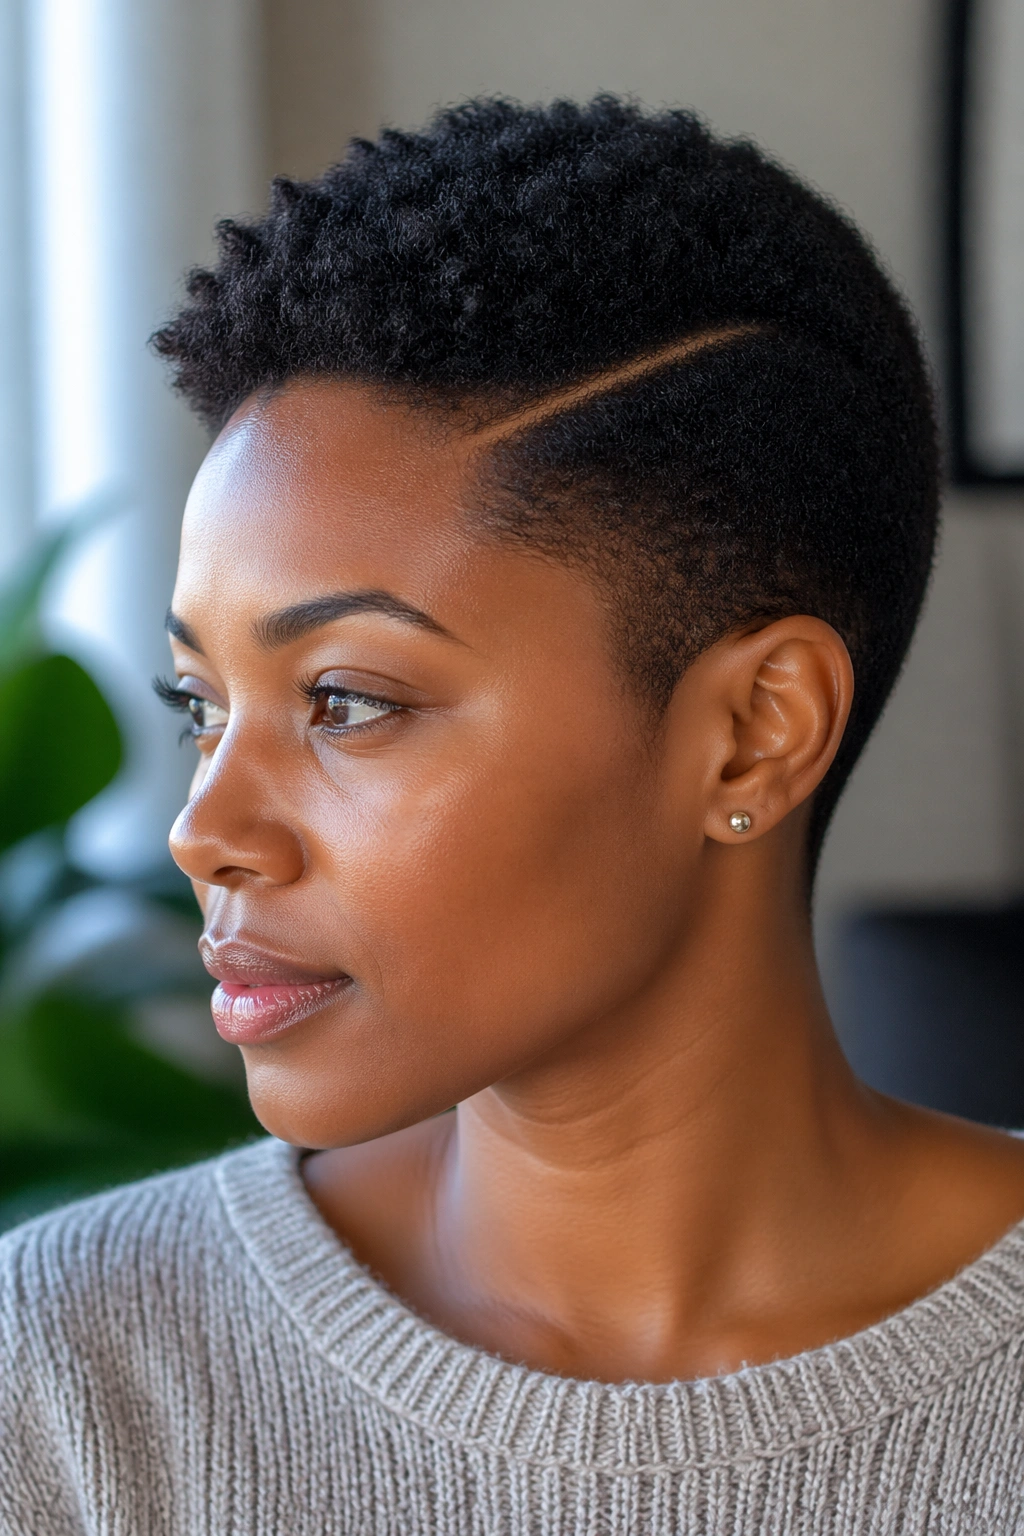
A tapered TWA with a side part has a clean, direct look that works because it doesn’t try to fake length. The shorter sides make the crown stand out, and the side part gives the cut direction. It is one of the neatest options for short natural curls.
Use a small amount of curl cream or butter to define the top, then trace the part with a fine comb while the hair is damp. If the curls are tighter, a sponge can help the top sit evenly. If they are looser, finger styling is usually enough. Both routes work. The haircut does the heavy lifting.
One thing I like about this shape is that it feels sharp without looking precious. It can be dressed up, but it also survives a plain T-shirt and no makeup. That is a real skill in a hairstyle.
22. Two-Strand Twist Bun
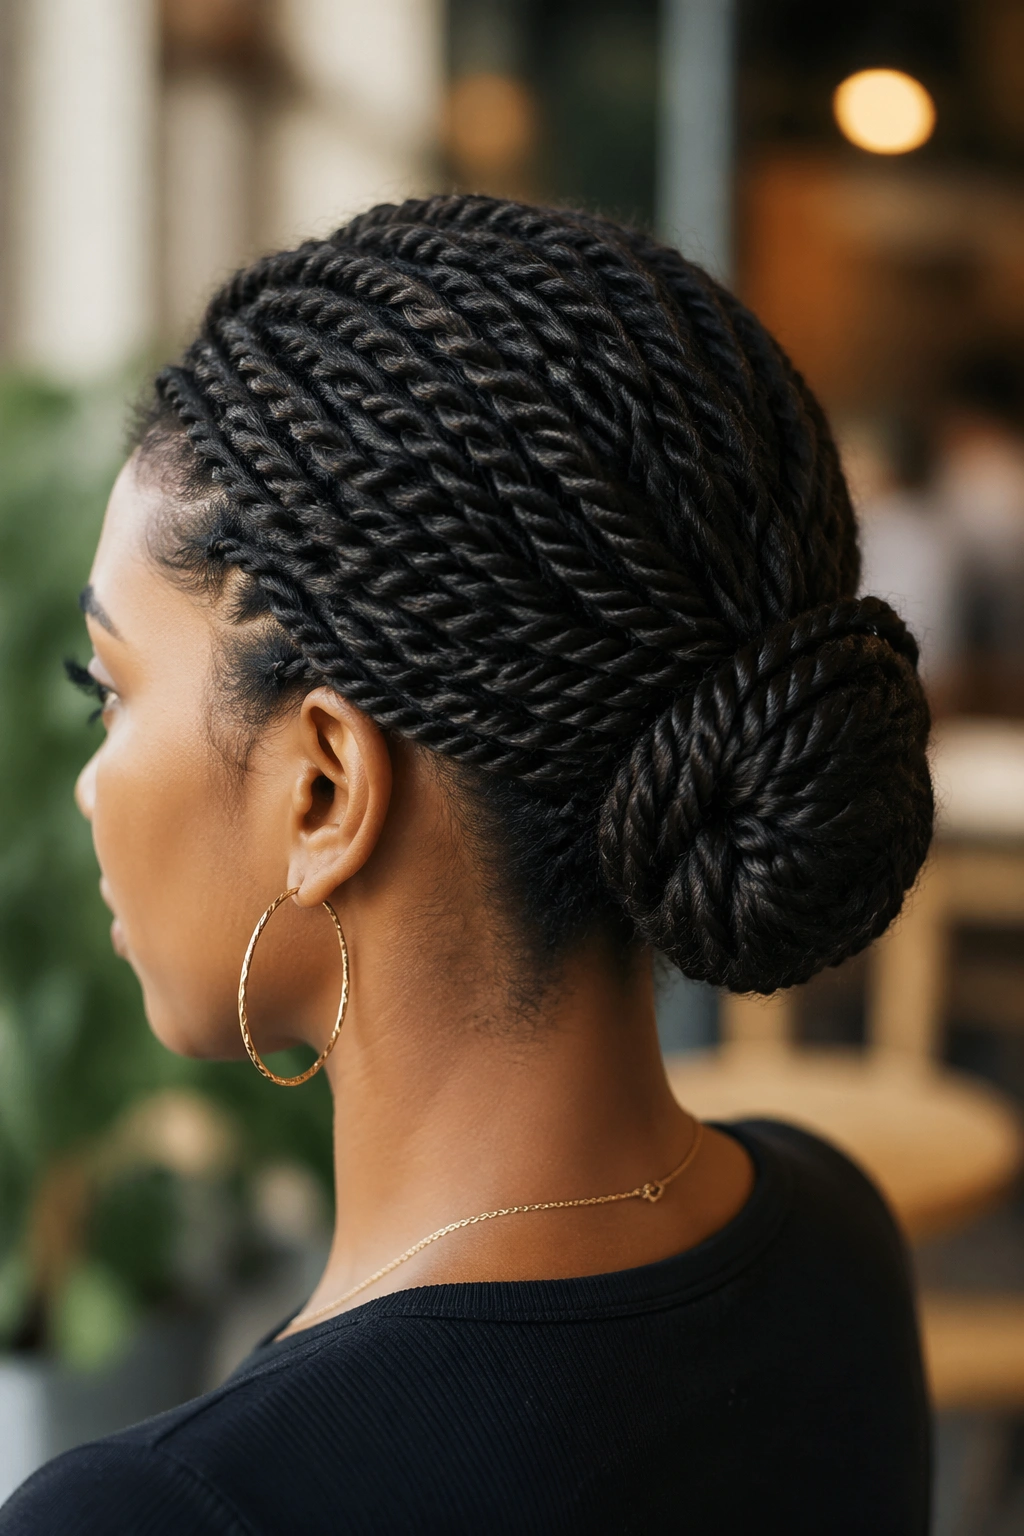
A two-strand twist bun starts with a bit of texture and ends with a bun that looks more interesting than a plain wrapped knot. Twist the hair in sections first, then gather those twists at the back or crown and coil them into a bun. The texture stays visible, which keeps the style from feeling too slick.
What makes it hold
- Section the hair evenly before twisting.
- Keep the twists snug at the root.
- Pin the bun in more than one place.
- Tuck the ends under the coil instead of leaving them loose.
- Use pins that match your hair color if you want a cleaner look.
This style is good when you want the hair off your neck but still want movement in the finish. It can read casual with a few loose twists or more formal if everything is tucked neatly. Either way, it’s kinder to the hair than a hard-pulled bun.
23. Rope-Twist Crown
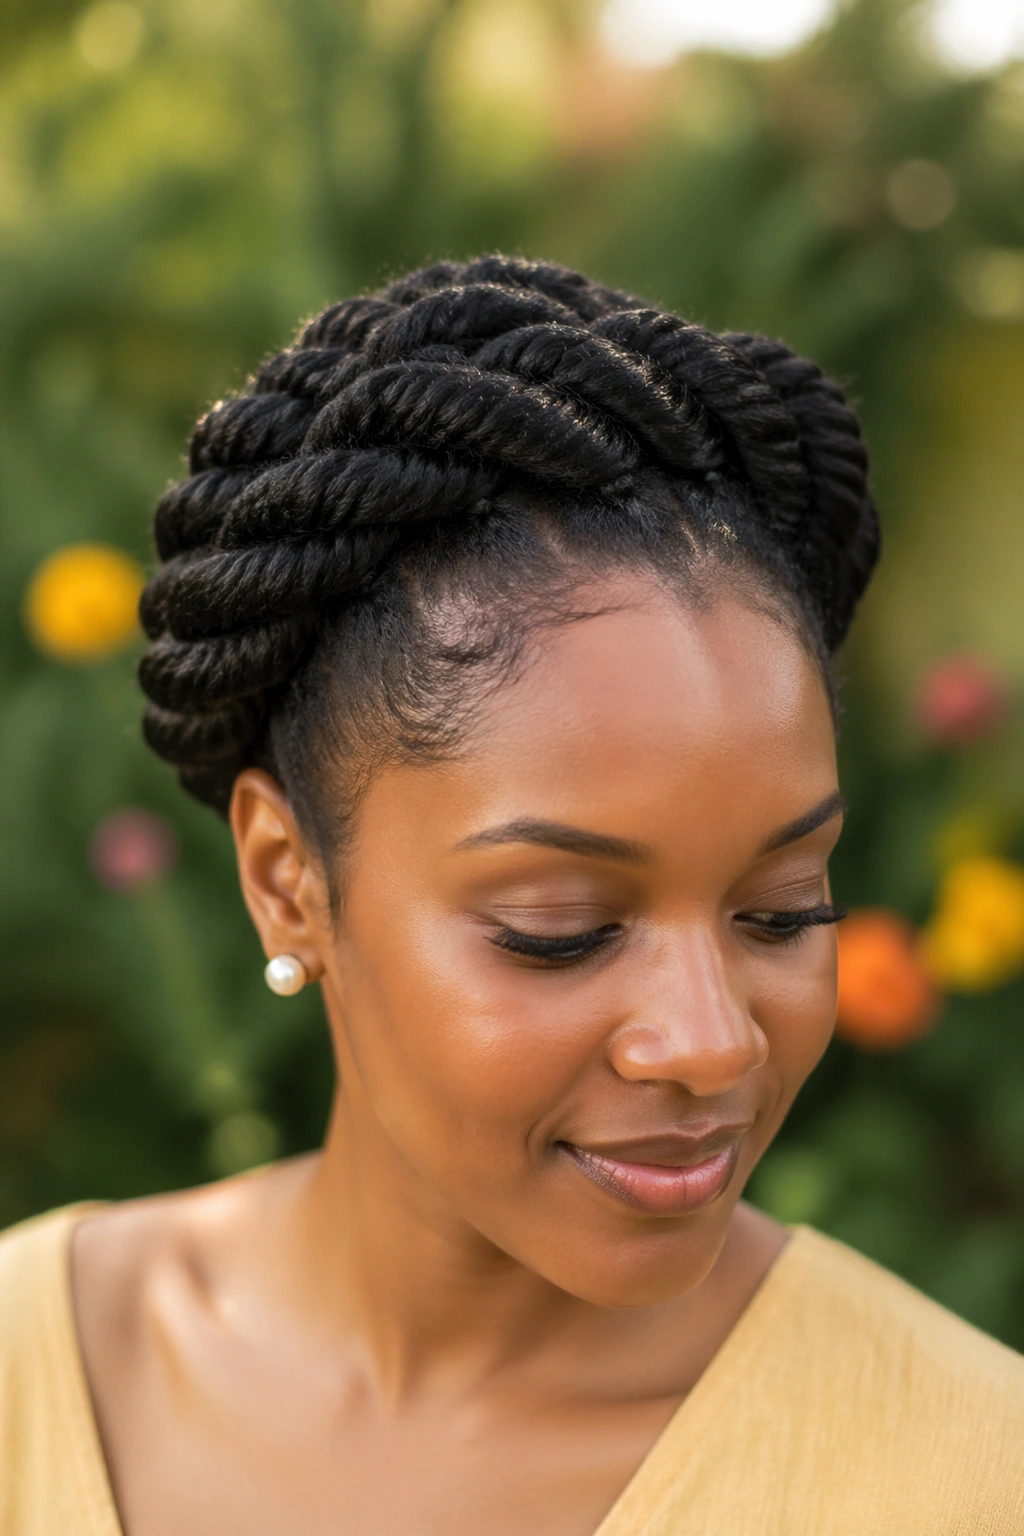
A rope-twist crown gives you a rounded frame without the bulk of a braid crown. The twists wrap around the head in a smooth line, and because rope twists have a little twist-and-turn movement of their own, the finished style looks more detailed than it does complicated. It’s a nice trick.
This style works best when the hair is medium-length or longer, and it helps if the texture has a bit of stretch. You can pin the crown into place underneath the twists so the clips disappear. That part matters. Visible bobby pins can spoil an otherwise clean finish.
I’d call this a good choice for weddings, dinners, and any day when you want the curls controlled but not flattened. The crown gives structure; the back can stay tucked, curly, or half loose. There’s room to make it yours.
24. Half-Up Braided Mohawk
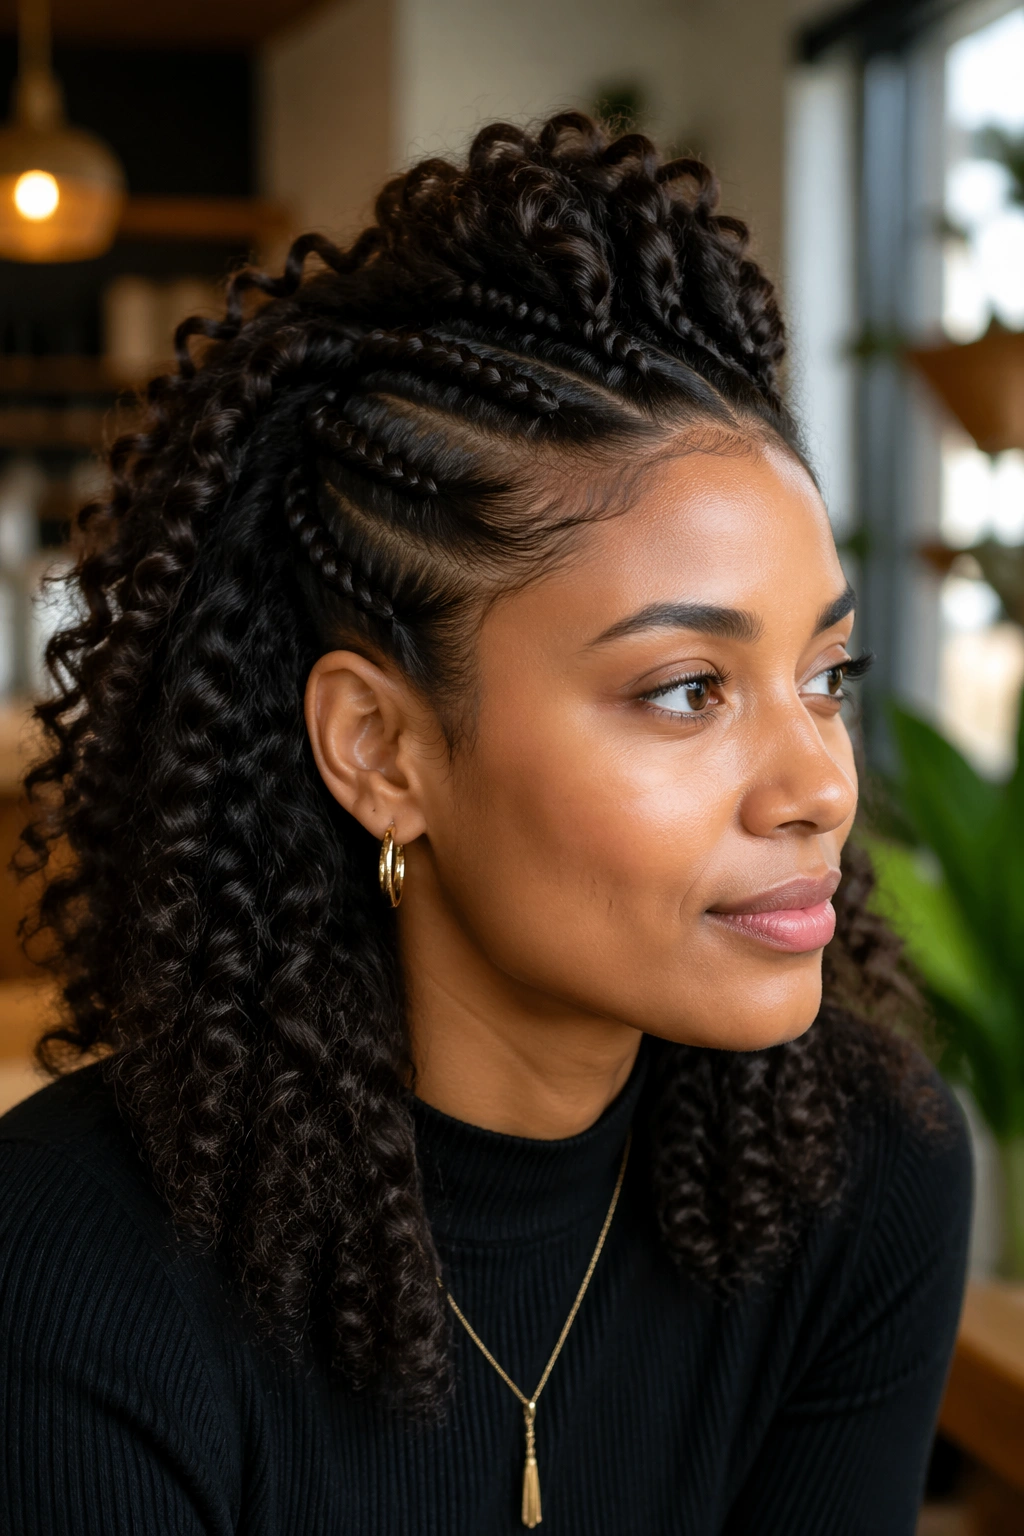
A half-up braided mohawk has a little more edge than a standard half-up style. The sides are braided or tightly twisted back, and the center section stays high and full. The contrast is the whole appeal. You get lift in the middle and clean lines along the sides.
This style is a strong choice when you want height without committing to a full updo. It keeps the face open, shows off the curl texture, and looks especially good with defined roots. A few bobby pins hidden under the braids keep the side sections from slipping loose halfway through the day.
If you want to soften it, pull out a couple of curls near the temples. If you want it sharper, keep the side sections flatter and the center taller. Either direction works. The style has enough structure to handle both.
25. Barrette-Sprinkled Side Part
A side part with barrettes is one of the easiest ways to make curly hair look deliberate in a hurry. You part the hair deeply to one side, let the curls fall naturally, and pin the smaller side back with two or three clips. It sounds simple because it is. That is part of why it works.
The best version uses clips that actually grip the hair instead of slipping off after ten minutes. Small metal barrettes, resin clips, and snap pins can all work if they’re strong enough. Put the clips in a line or cluster them near the temple for a cleaner shape. Scatter them randomly and the style starts to look accidental.
This is the kind of hairstyle that saves a morning and still feels styled. It doesn’t hide the curls. It just gives them direction. And honestly, that’s usually the win with natural curly hair: a little guidance, not a wrestling match.