Short hair doesn’t shut the door on bubble ponytails. It just changes the shape of the game.
A chin-length bob can still hold a bubble chain if you stop trying to force it into a long, swinging tail. The move is smaller sections, tighter elastics, and a little respect for the pieces that want to slip free around the nape and temples. Clear bands, a tail comb, a few bobby pins, and a bit of texture spray usually do more than a heavy blast of hairspray.
I like bubble ponytails for short hair because they give a cut structure without asking for inches you don’t have. They can look sleek, playful, sporty, or dressed up, which means the same basic idea can work for a workday, a night out, or a blunt lob that needs shape. The sweet spot is choosing the version that fits your length and texture instead of fighting both.
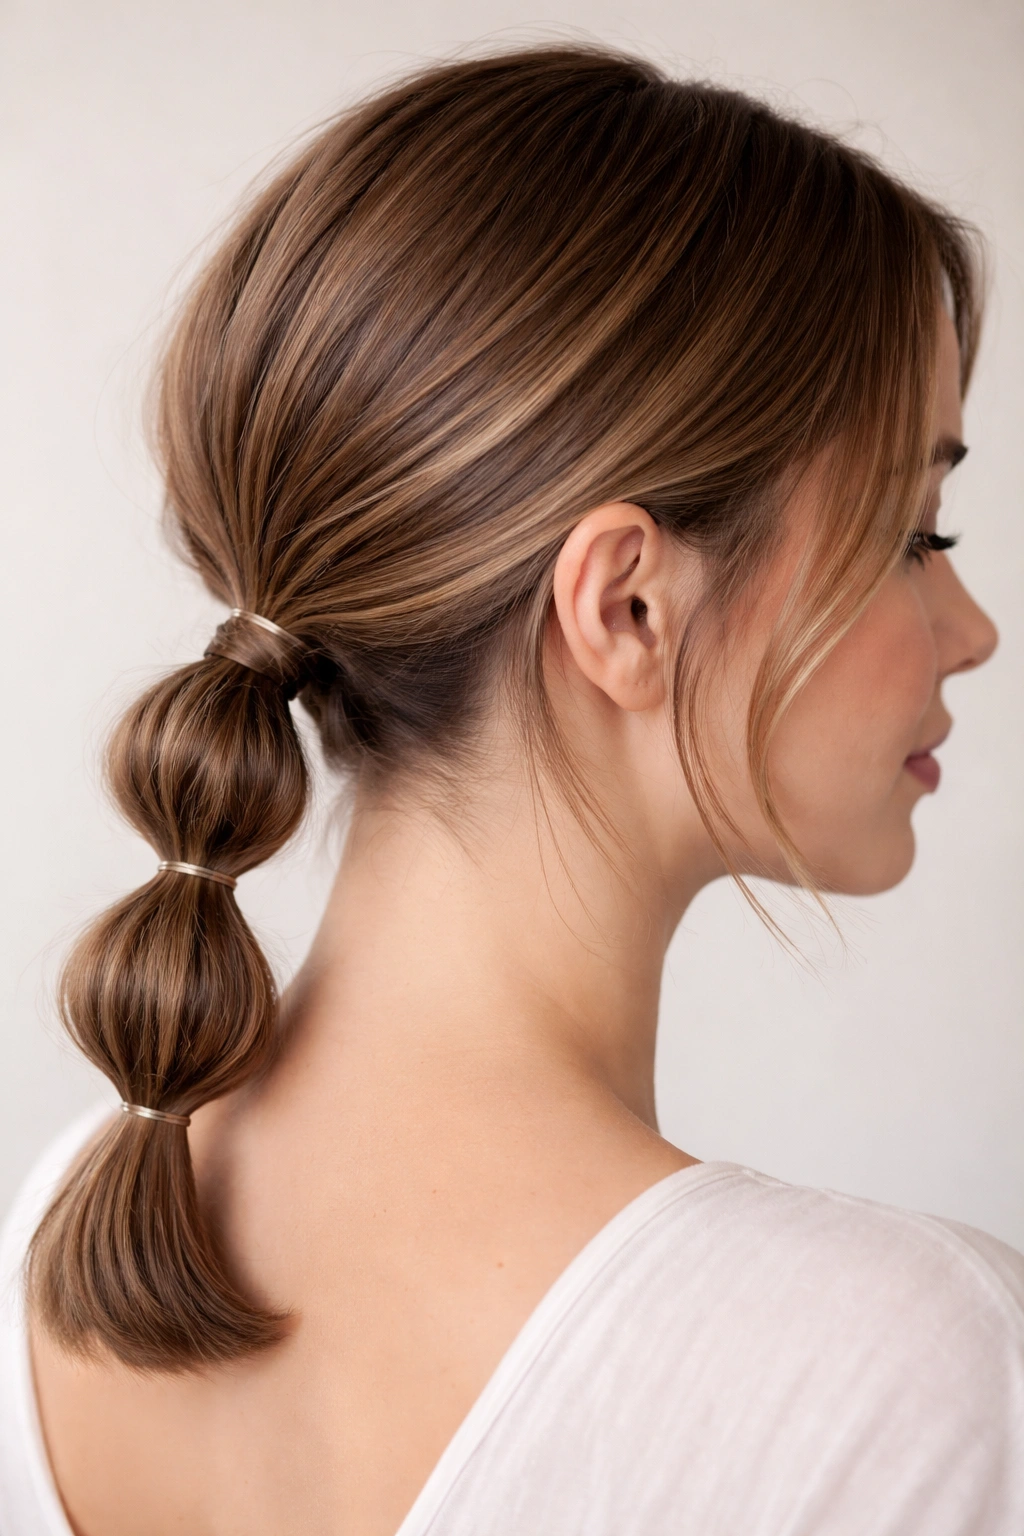
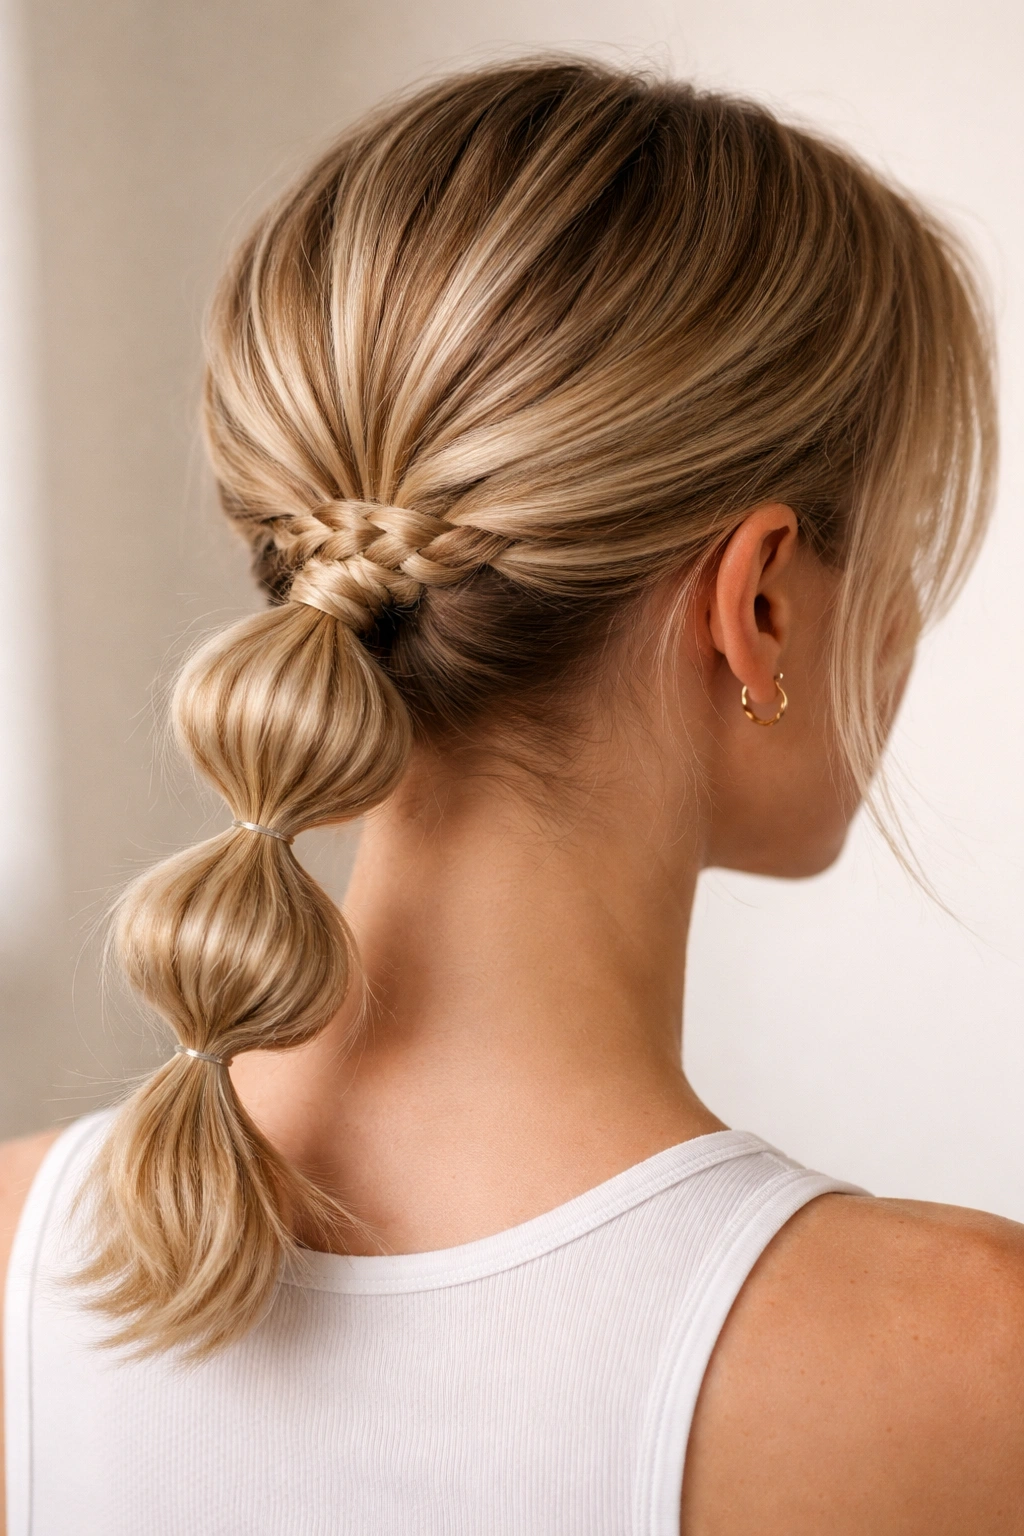
1. Classic Low Bubble Ponytail for a Lob
A low bubble ponytail is the easiest place to start if your hair sits anywhere from the jaw to the collarbone. The nape gives you the most control, and the bubbles read cleanly even when the tail itself is short. On a lob, three bubbles usually look stronger than five tiny ones, which can start to feel fussy fast.
Why It Works on Short Hair
The first elastic sits close to the base of the neck, where shorter layers can be tucked in without screaming for attention. From there, each bubble only needs about 1 to 1.5 inches of space. That small gap is enough to create shape without making the style collapse under its own weight.
A blunt lob looks especially good here because the ends fall into the bubble instead of sticking out in odd directions. If your cut is layered, pin the shortest pieces under the first section before you start pulling the bubbles out.
Best move: keep the top smooth, then loosen each bubble just a little so it looks full but not overworked.
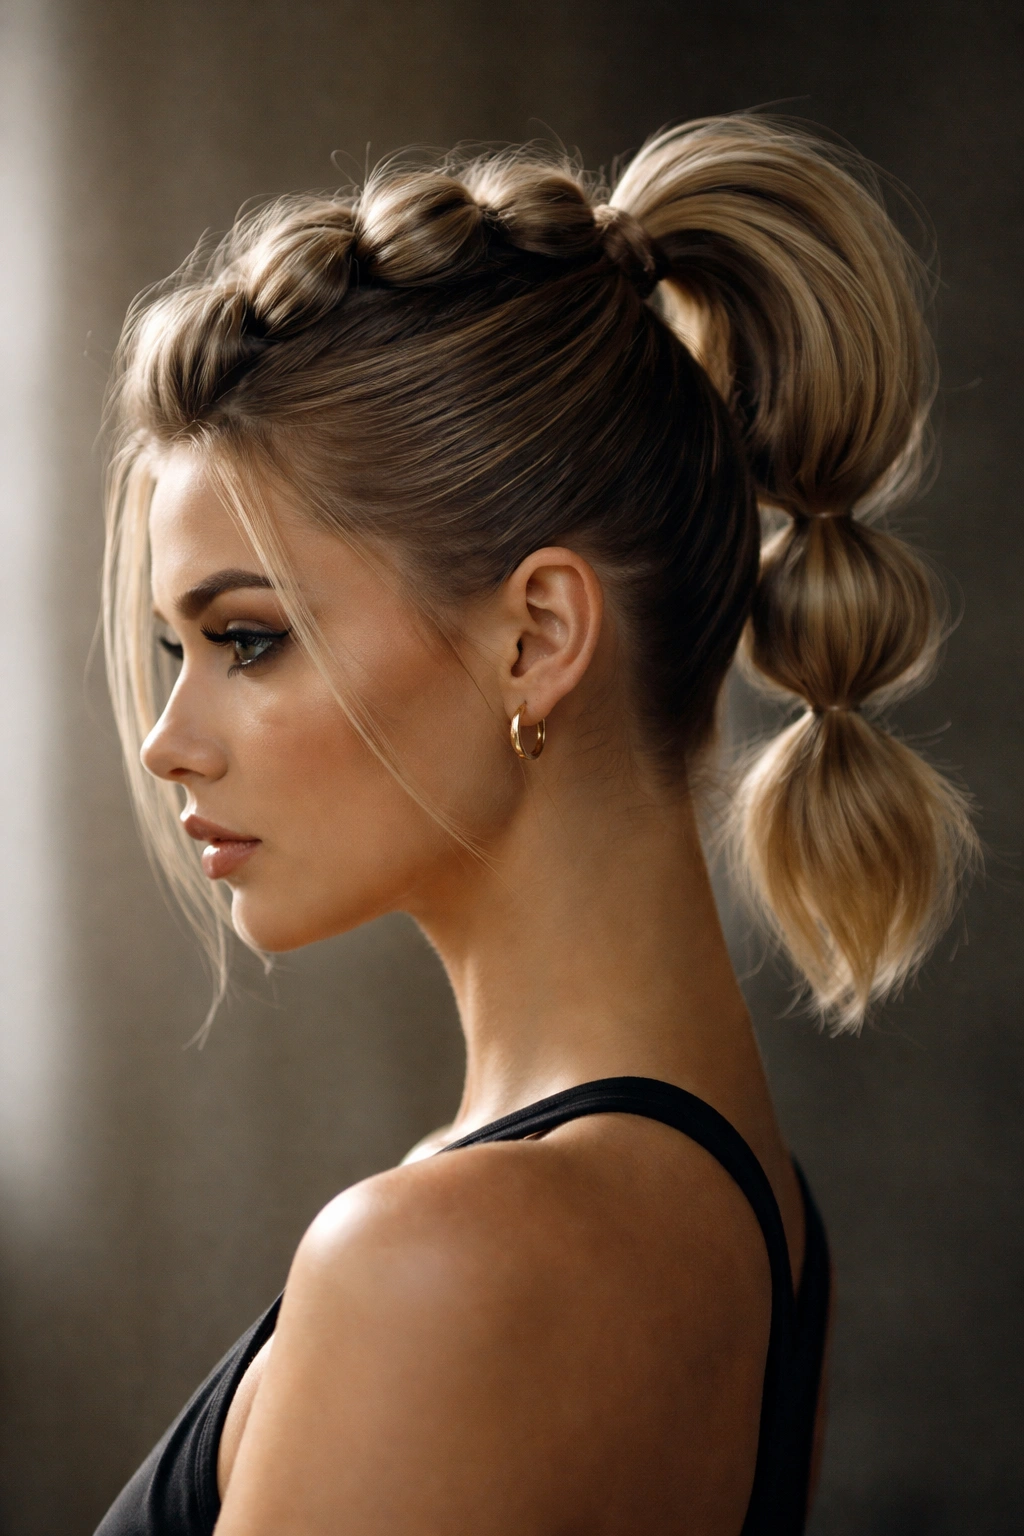
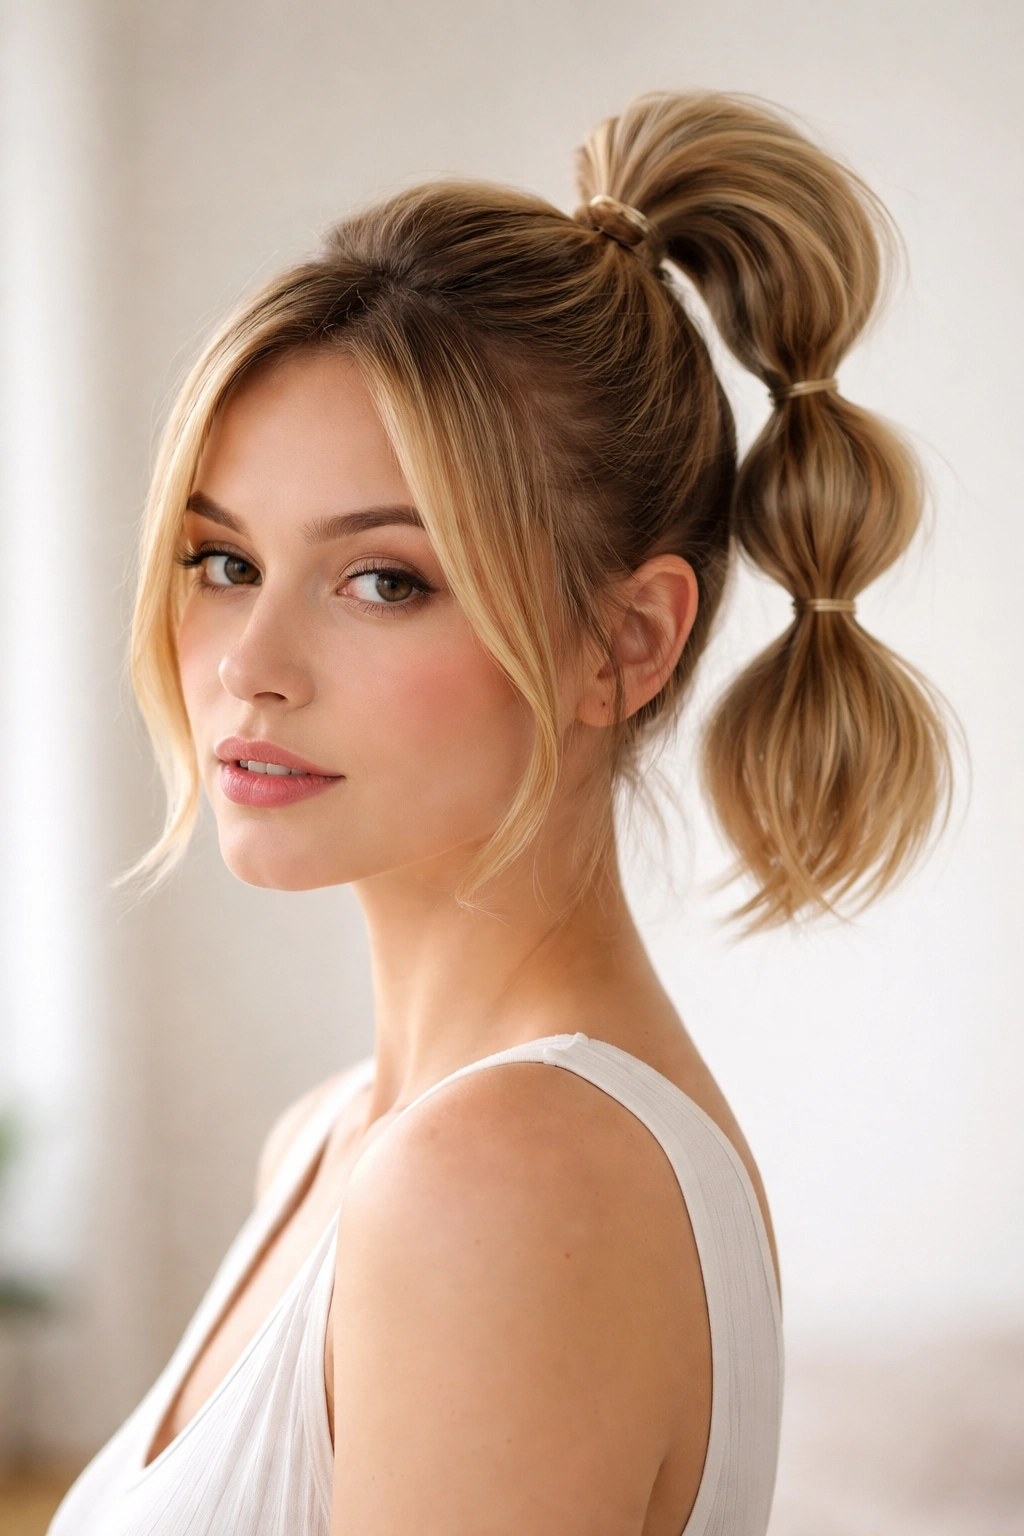
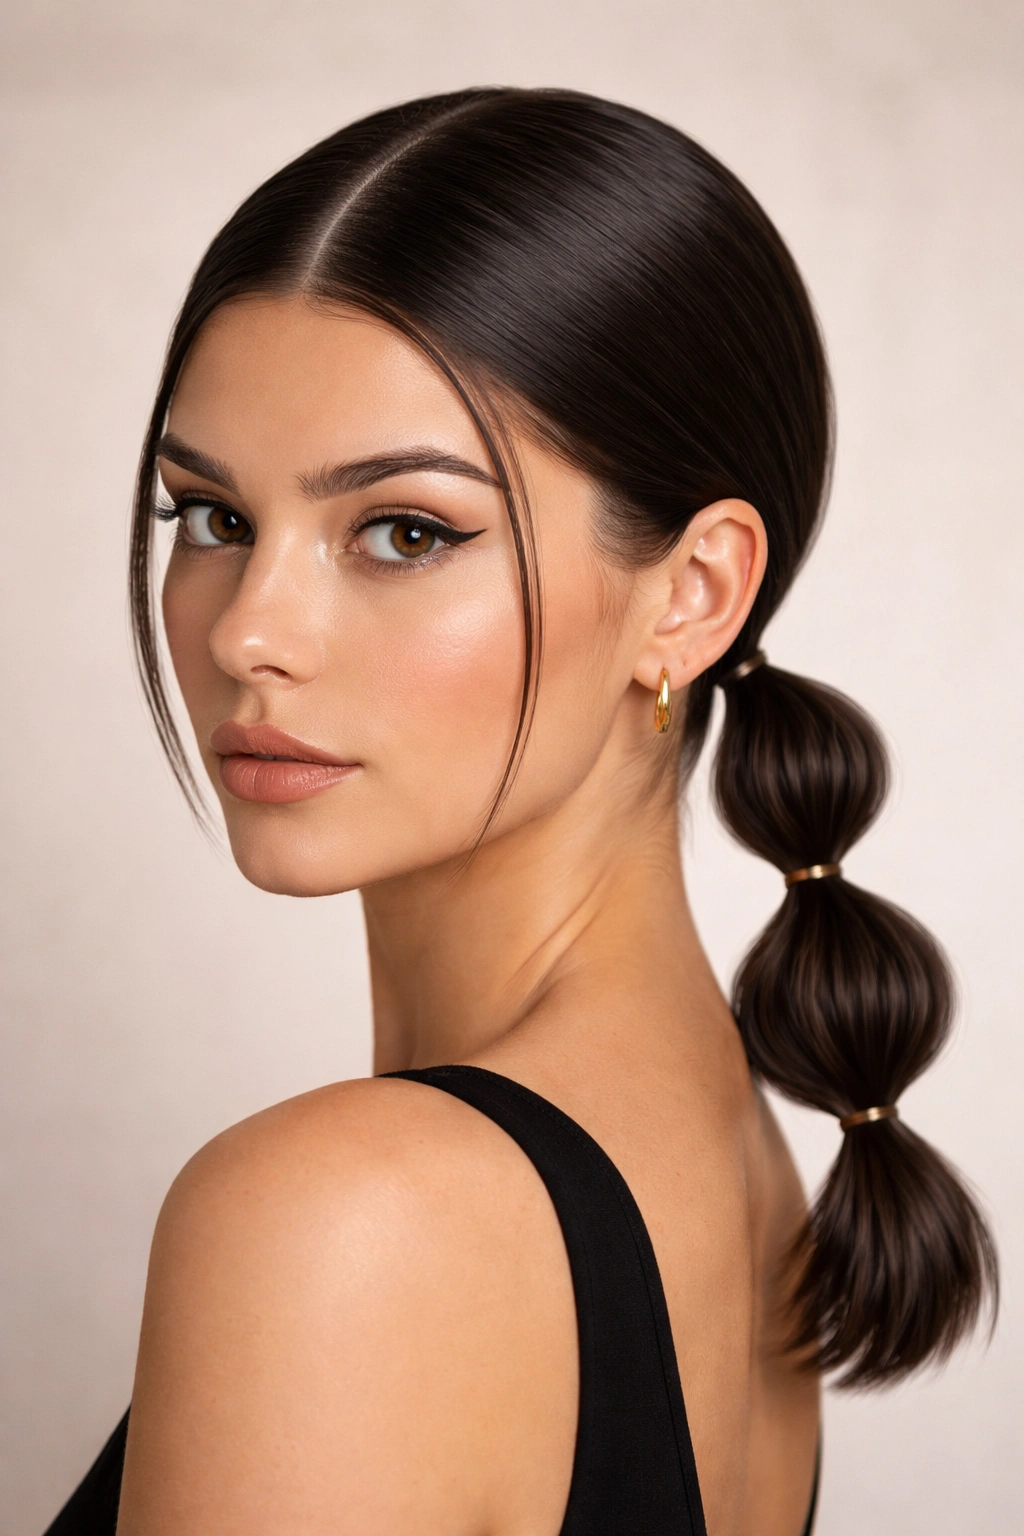
2. High Bubble Ponytail That Cheats the Length
Height buys you length. That’s the whole story here.
When short hair barely reaches a regular ponytail, moving the base up to the crown gives you a cleaner line and a longer-looking tail. The bubbles hang more freely, and the style suddenly feels intentional instead of like a compromise. I prefer this on chin-length bobs that need lift at the roots and a little attitude around the crown.
The catch is tension. Pull the top too tight and the shorter pieces around the hairline pop loose in the worst way. A light tease at the crown, a smoothing brush at the front, and two or three small elastics are usually enough. Keep the bubbles compact, then tug them outward just a touch.
It’s a sharp look. Clean. Slightly bold. And on short hair, that matters more than length.
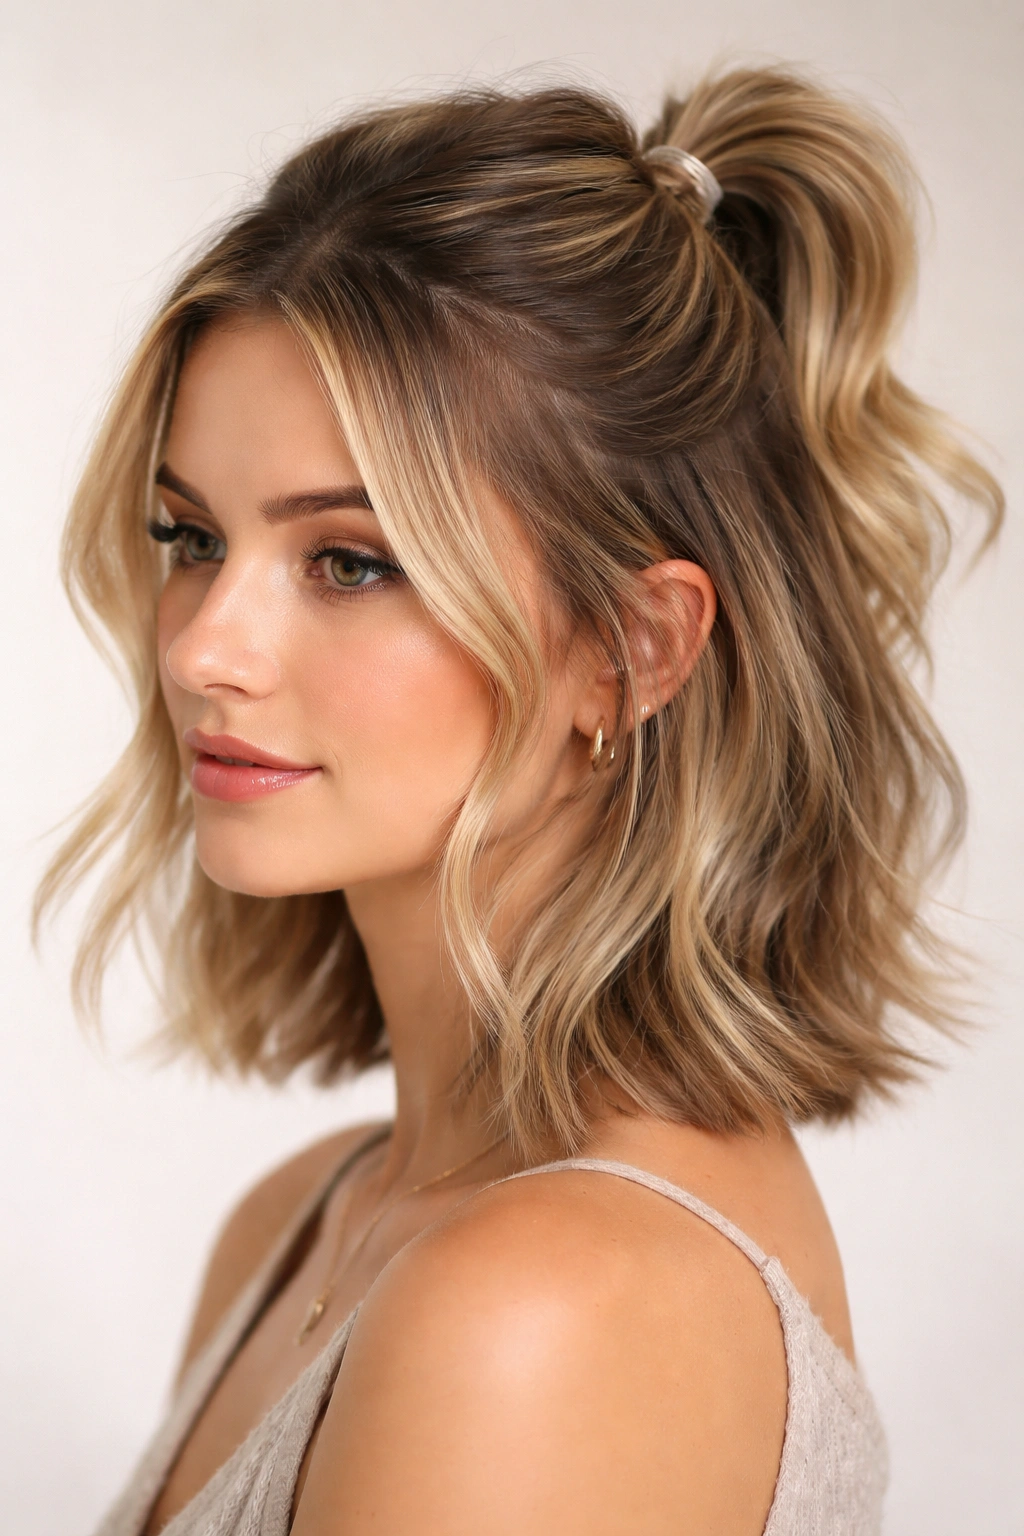
3. Half-Up Bubble Ponytail for Short Layers
Want to keep your hair out of your face without dragging every strand into one pony? This is the one.
A half-up bubble ponytail works because it only gathers the top section, which is usually the part short layers can manage best. The lower half stays loose, so the cut still moves and the ends don’t have to pretend they’re longer than they are. On layered bobs, that makes the whole thing feel easier.
What to Leave Out
Keep a little softness around the temples and near the ears. Too much face-framing hair can make the style droop, but a few loose pieces keep it from looking stiff. If your hair is fine, a mist of texture spray at the crown before you tie the first section helps the half-up piece hold its shape.
How to Anchor It
Use a small clear elastic for the base, then add one or two bubbles only. That’s enough. More than that and the top section starts looking crowded.
4. Side-Swept Bubble Ponytail Over One Shoulder
If your bob flips out on one side and refuses to behave, use it.
A deep side part shifts the eye line, and that alone makes the bubble ponytail feel more styled. Pull the pony low and off-center, then let the bubbles fall over one shoulder. The asymmetry hides uneven ends and gives short hair a little drama without trying too hard.
The Small Details Matter
- Place the first elastic just behind the ear on the heavier side.
- Smooth the opposite side tighter so the part looks deliberate.
- Pin the shortest layers underneath the first bubble.
- Pull the outer edges of each bubble a touch wider than the center.
The nice thing about this version is that it forgives awkward growth around the chin and jaw. You don’t need every piece to cooperate. You only need the side sweep to look like it was planned.
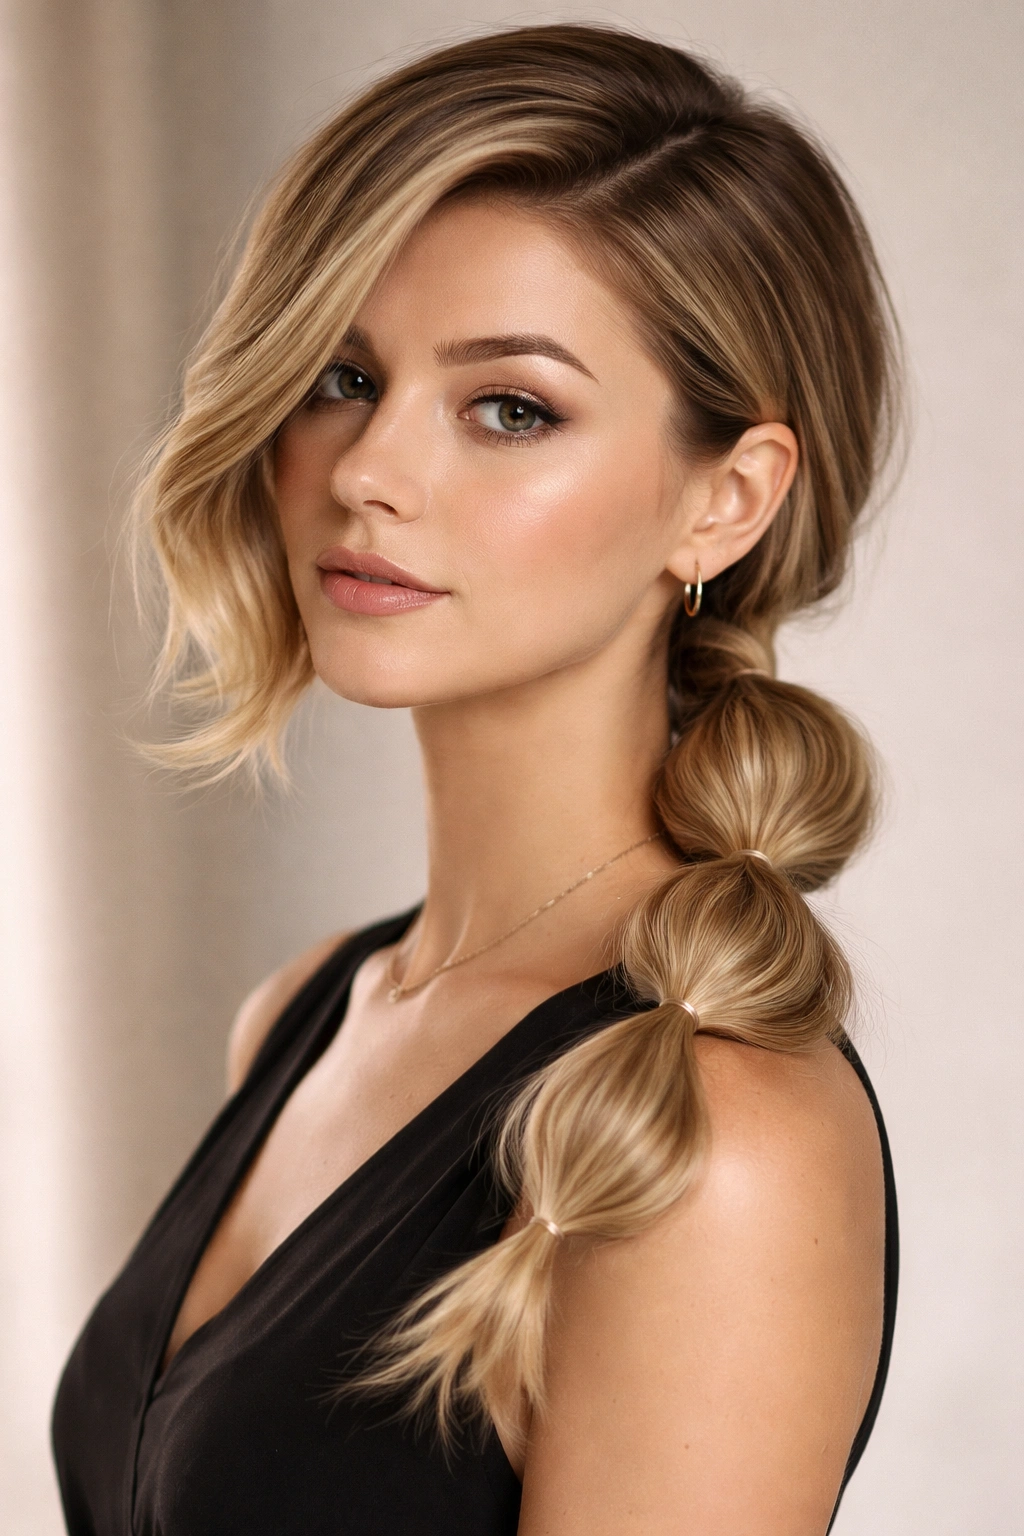
5. Sleek Center-Part Bubble Ponytail
A center part changes the entire mood of a bubble ponytail on short hair. It makes the face line look sharper, and it gives the style a little more polish than a side part usually does.
Start with a straight part down the middle, then smooth the roots with a light cream or gel. I like a flat brush here because it presses the hair in without making it look stiff. The pony can sit low or mid-height, but on short hair I usually keep it closer to the nape so the bubbles stay balanced.
The clean finish is the point. Shorter pieces around the ears should lie flat, and the bubbles should be neat, almost architectural. If you want a softer edge, pull out the tiniest bit of hair at the temples after you finish. Just a little. Too much and the shape loses its line.
This is the version I reach for when I want short hair to look sharp, not fluffy.
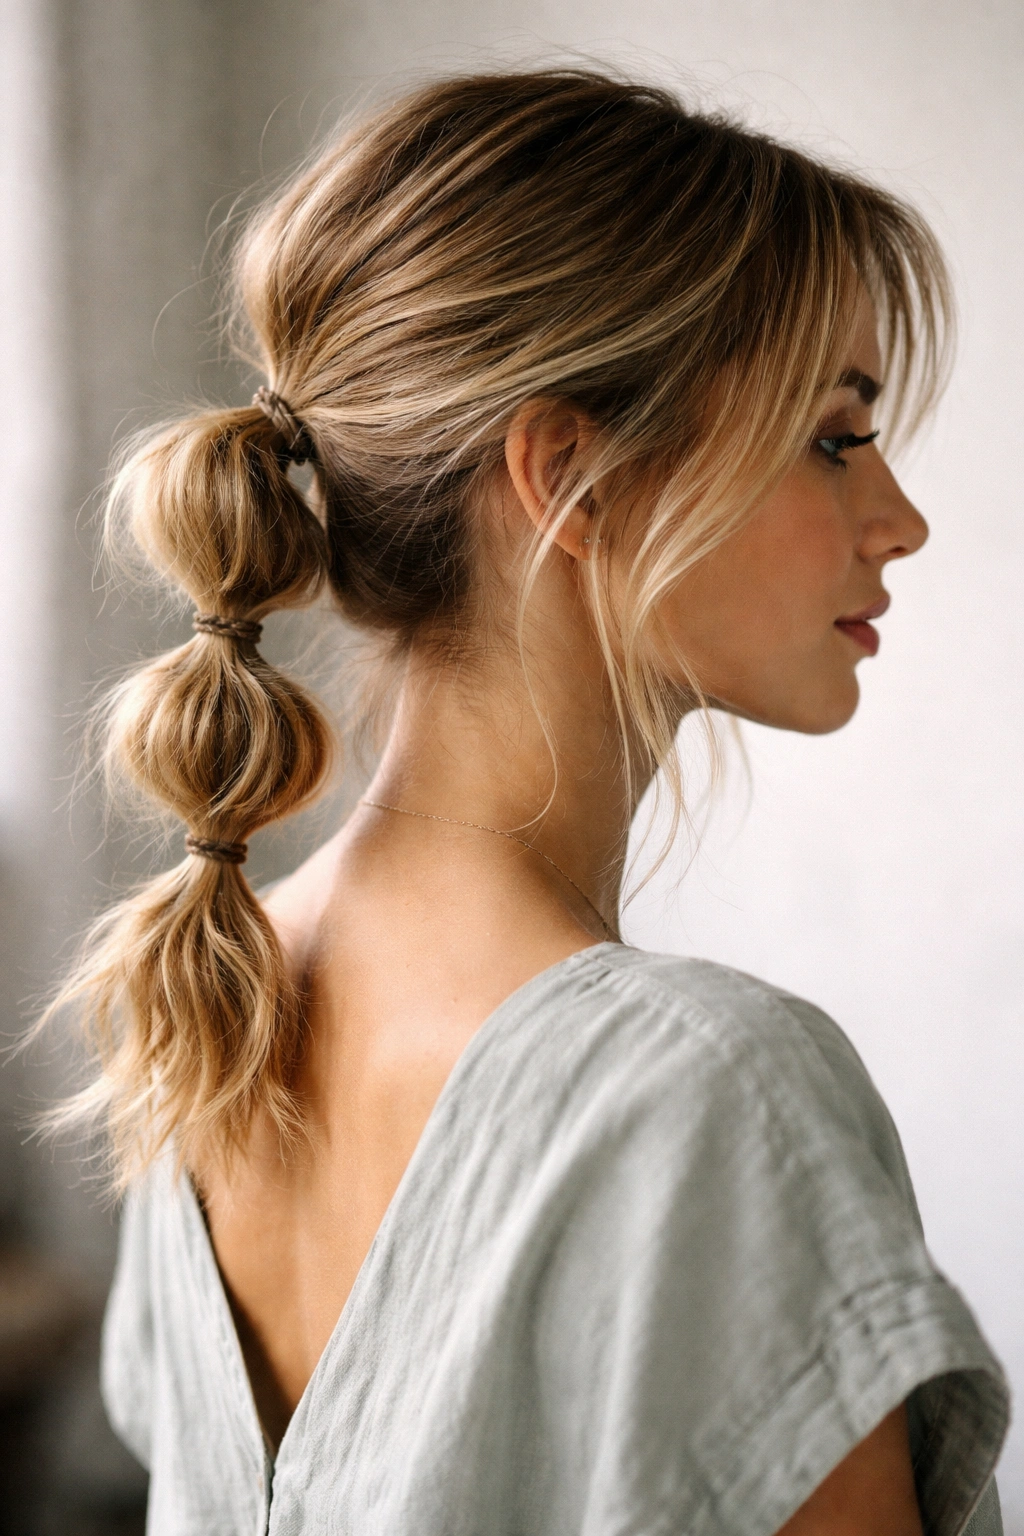
6. Textured Bubble Ponytail With Loose Ends
Messy works here. It actually helps.
A textured bubble ponytail gives short hair more grip, which means the style can survive layers, bends, and bits that refuse to stay tucked. Rough-dry the hair, mist in texture spray, and gather it into a pony without chasing every flyaway. The point is shape, not perfection.
Unlike the sleek versions, this one likes bubbles that are slightly uneven. One bubble can be a bit fuller than the next, and the style still reads right. That looseness is useful on short cuts because the ends often need help blending into the sections anyway.
This is also the easiest option if your hair has a little wave. You do not need to iron it flat first. In fact, that can make the style look thinner than it really is.
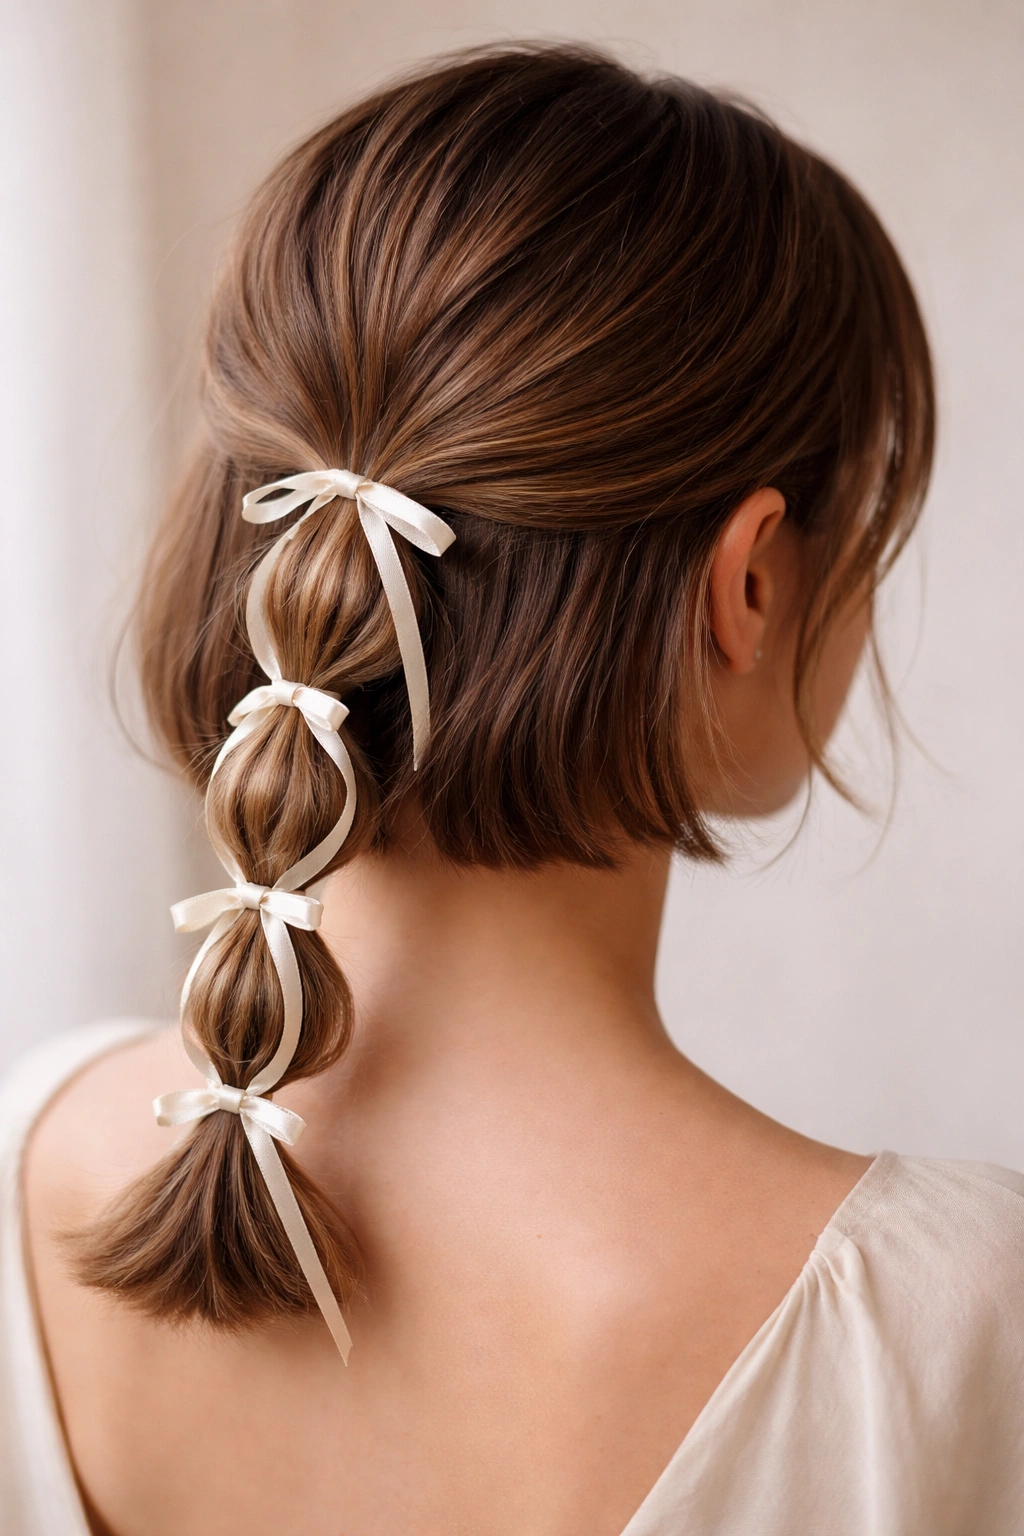
7. Ribbon-Tied Bubble Ponytail
Take the same bubble ponytail and swap a few elastics for ribbon, and the whole thing changes.
A skinny satin or grosgrain ribbon softens the look fast. It also helps hide short ends if your hair is too short to wrap neatly around clear bands. Tie the first section with a tiny elastic, then knot the ribbon at each bubble so it becomes part of the style instead of a separate decoration.
Small Ribbon Rules
- Use ribbon that’s about 1/4 to 1/2 inch wide.
- Keep the tails long enough to show, usually 3 to 5 inches.
- Choose satin for smoother hair and grosgrain for hair that slips.
- Avoid bulky bows if your cut is very short; they overpower the bubbles.
I like this version for softer outfits and dressier days. It feels gentler than a plain pony, and it doesn’t need a lot of extra styling to look finished.
8. Braided Base Into Bubble Sections
A little braid in the base does more than decorate. It gives short hair grip.
Start with a small braid along the crown or braid the top section straight back, then secure it into a pony and build the bubbles from there. The braid helps shorter layers stay put, which is a real gift if your hair tends to slip out of elastics by lunchtime. It also adds texture before the bubbles even begin.
Where the Braid Helps Most
On layered cuts
The braid keeps the shortest top layers from floating loose around the crown.
On fine hair
It creates a thicker-looking base before the ponytail starts.
On blunt bobs
It breaks up the flatness and makes the style feel less boxy.
Keep the braid loose enough that the ponytail still has room to breathe. A tight braid can make the whole head look pulled back in an unkind way. A soft one gives the bubbles a better landing spot.
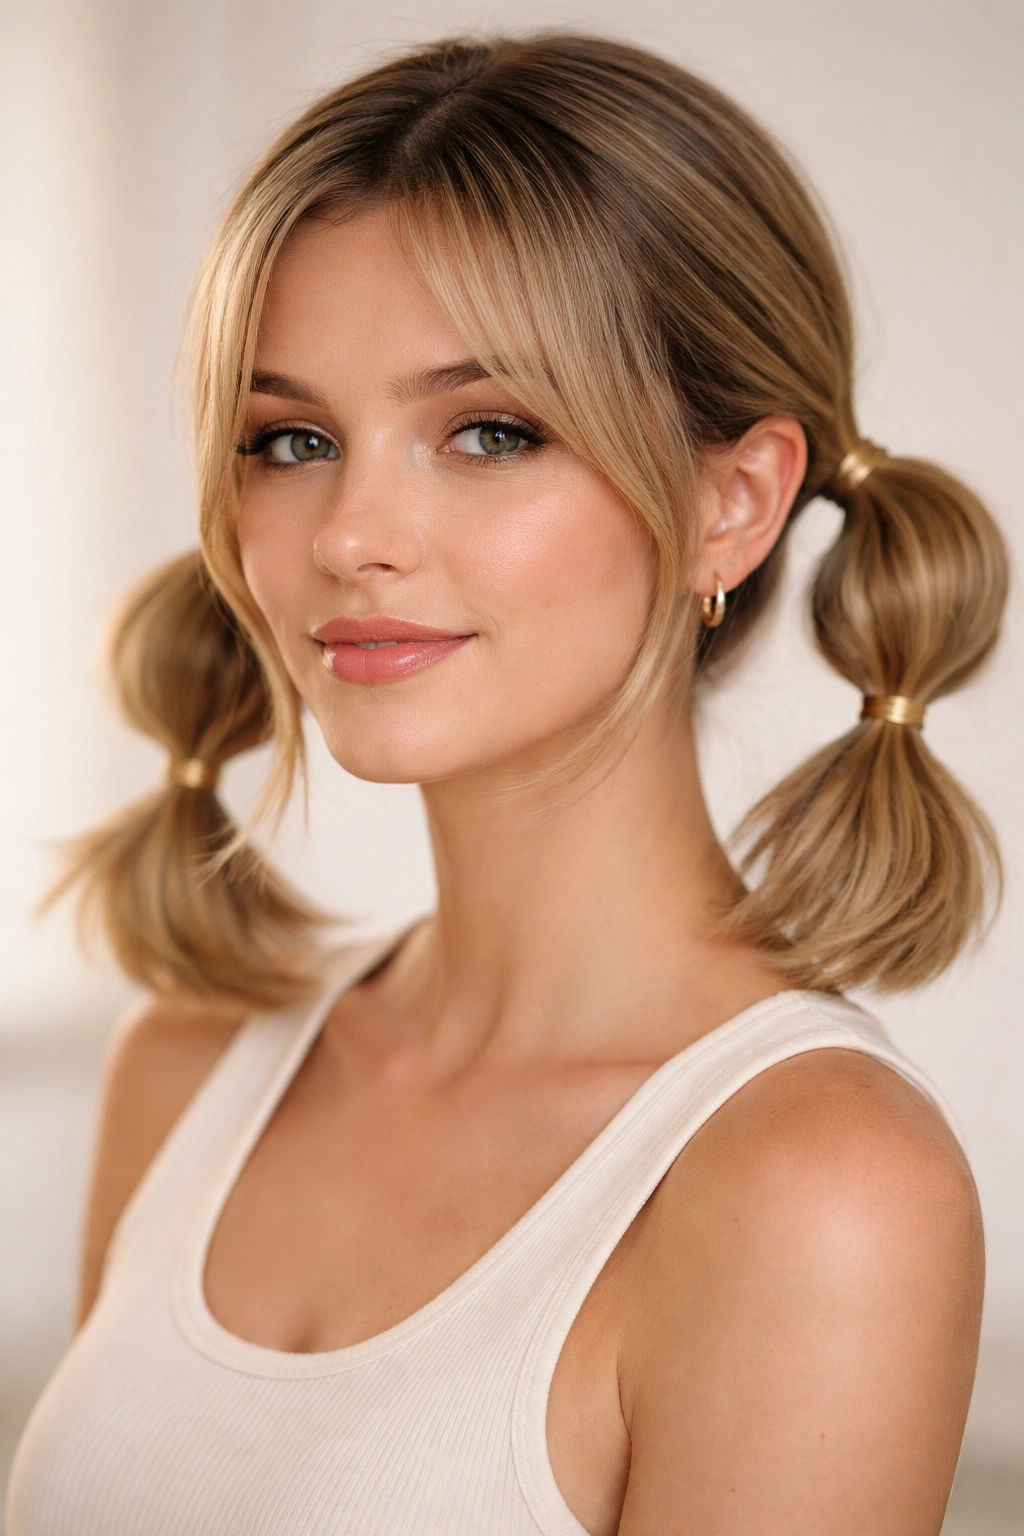
9. Twin Bubble Ponytails for a Playful Finish
Two bubble ponytails are often easier than one when the hair is short. That sounds odd, but it’s true.
Splitting the hair into pigtails means each side has less length to carry, so the bubbles can sit higher and stay neater. On jaw-length cuts, twin bubbles can look more balanced than a single long pony that barely makes it past the neck. I like them slightly low and a little behind the ears, not perched too far up the head.
This style works especially well when you want a playful look without a lot of fuss. If the part is clean, the pigtails can feel fresh rather than childish. If the part is messy, the whole thing leans more casual and relaxed.
And short hair handles that mix better than people think. The bubbles do the visual work, not the length.
10. Mini Bubble Ponytail for Pixie Grow-Out
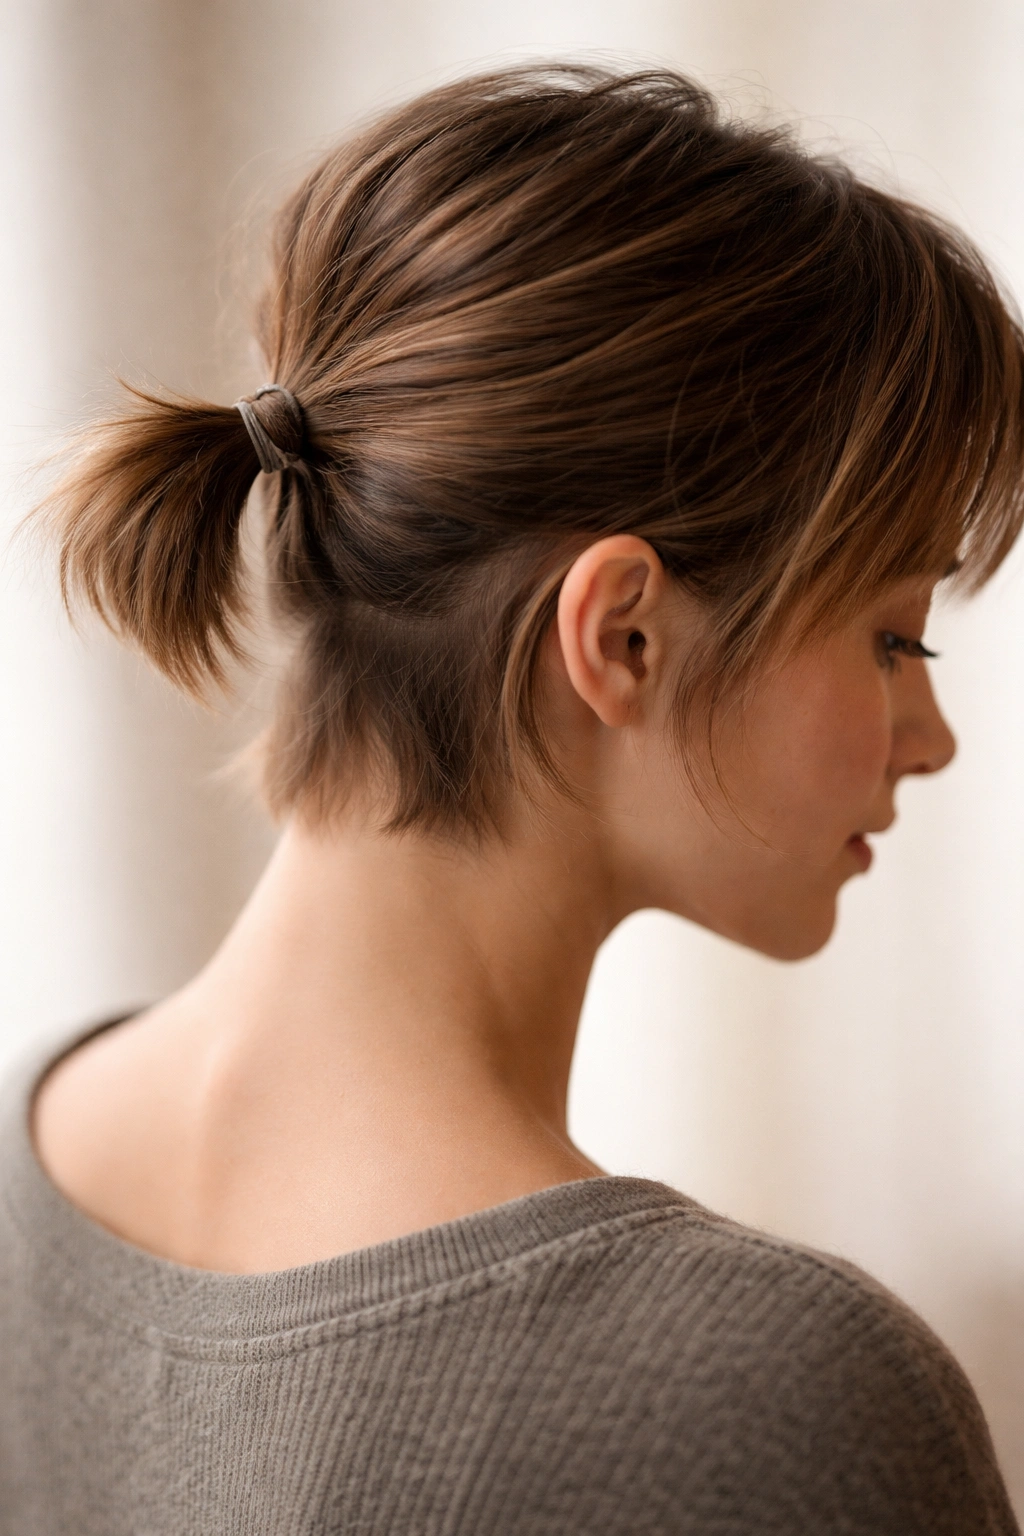
Pixie grow-out hair has a special kind of stubbornness. This style makes peace with it.
A mini bubble ponytail uses only the length you actually have, which means you can stop waiting for a dramatic tail to appear. Gather a small section at the crown or nape, secure it tightly, then add one or two tiny bubbles. That’s often enough for a style that feels finished on a very short cut.
The secret is not forcing every strand into the elastic. Let some pieces stay loose around the ears and the hairline. Trying to trap everything usually makes the style look strained, and strained hair is never flattering.
This is one of the few looks that makes awkward grow-out lengths feel deliberate. Not hidden. Deliberate.
11. Claw-Clip Bubble Ponytail
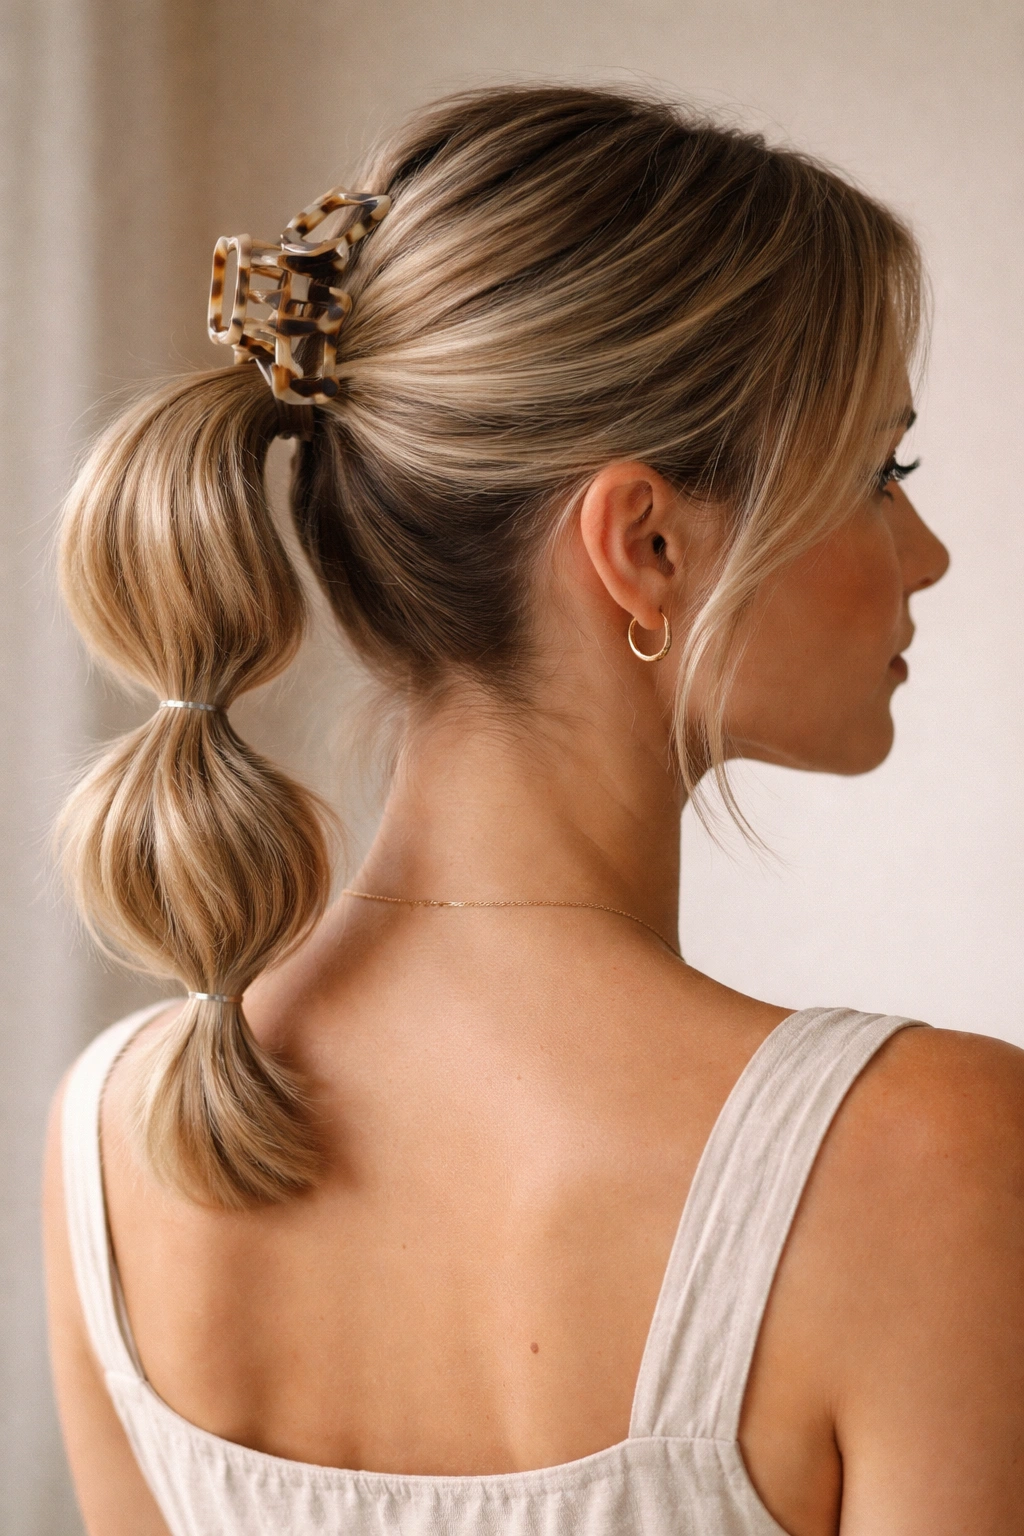
A claw clip and a bubble tail sound mismatched until you try them together.
The clip holds the top section in place while the bubble ponytail takes over below it, which is useful when short layers want to escape the back of the head. It also gives you a little lift without needing a lot of teasing. If your hair is slippery, that extra anchor helps more than another can of spray.
How to Place the Clip
Put the clip where the crown meets the back of the head, not too high. Then gather the remaining hair into a low ponytail and build two or three bubbles beneath it. The result looks layered in a good way, almost like two styles sharing the same job.
When It Falls Apart
If the clip is too bulky, it will fight the ponytail instead of supporting it. Medium clips usually sit better on short hair. Tiny clips, by the way, are mostly decorative here.
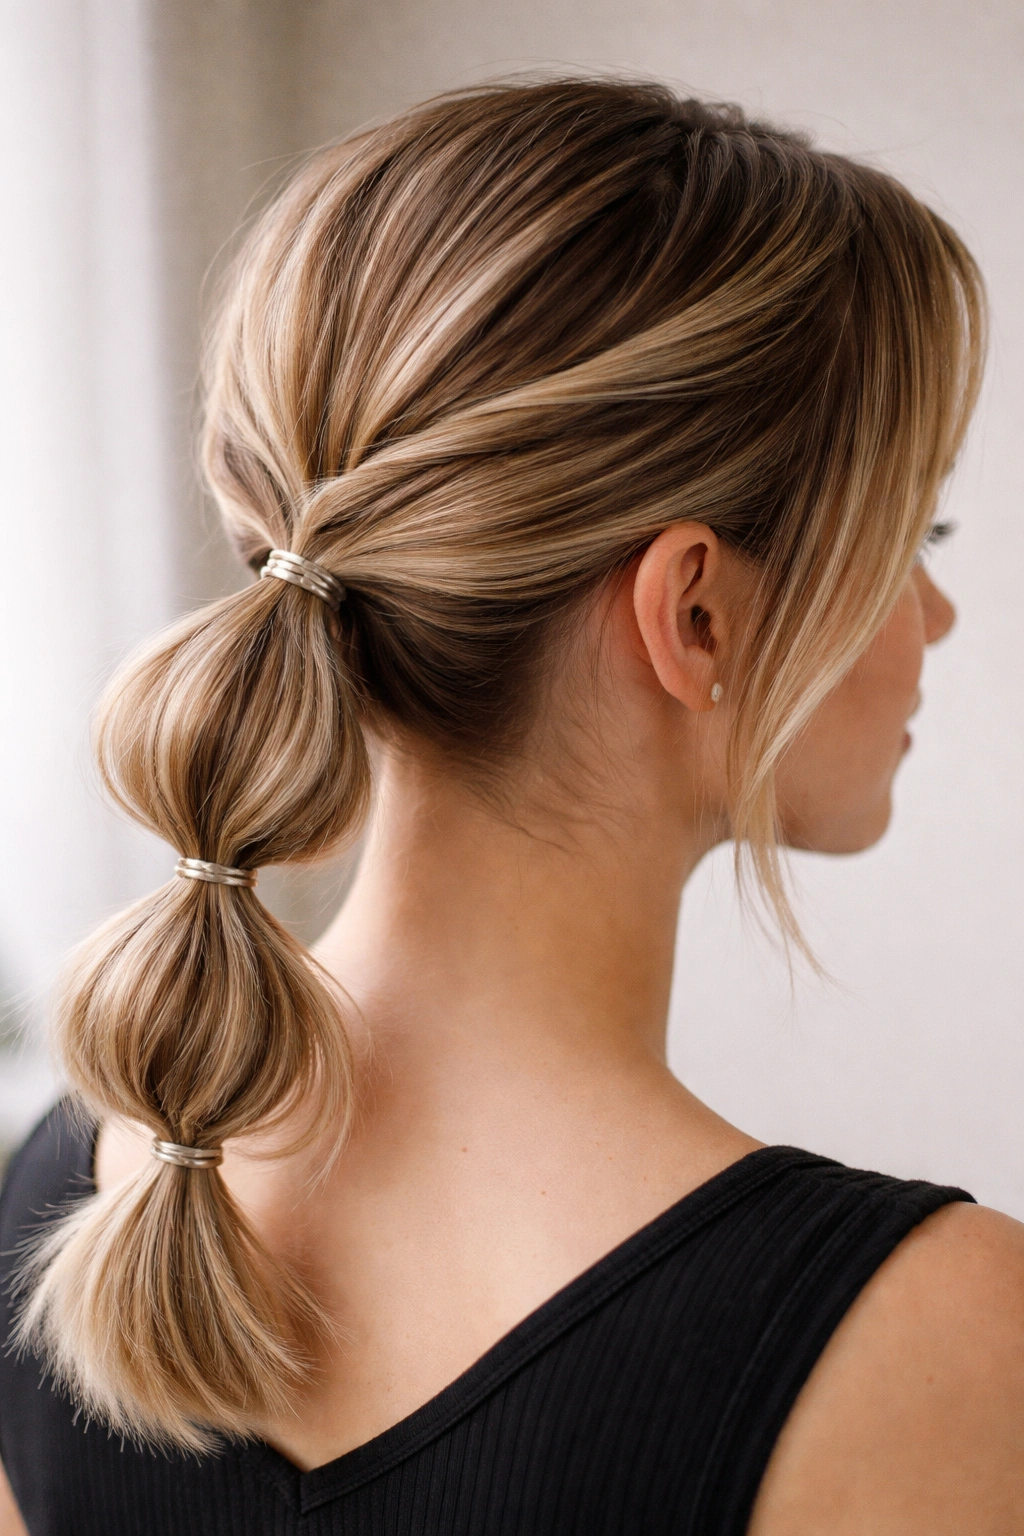
12. Wrapped-Elastic Bubble Ponytail
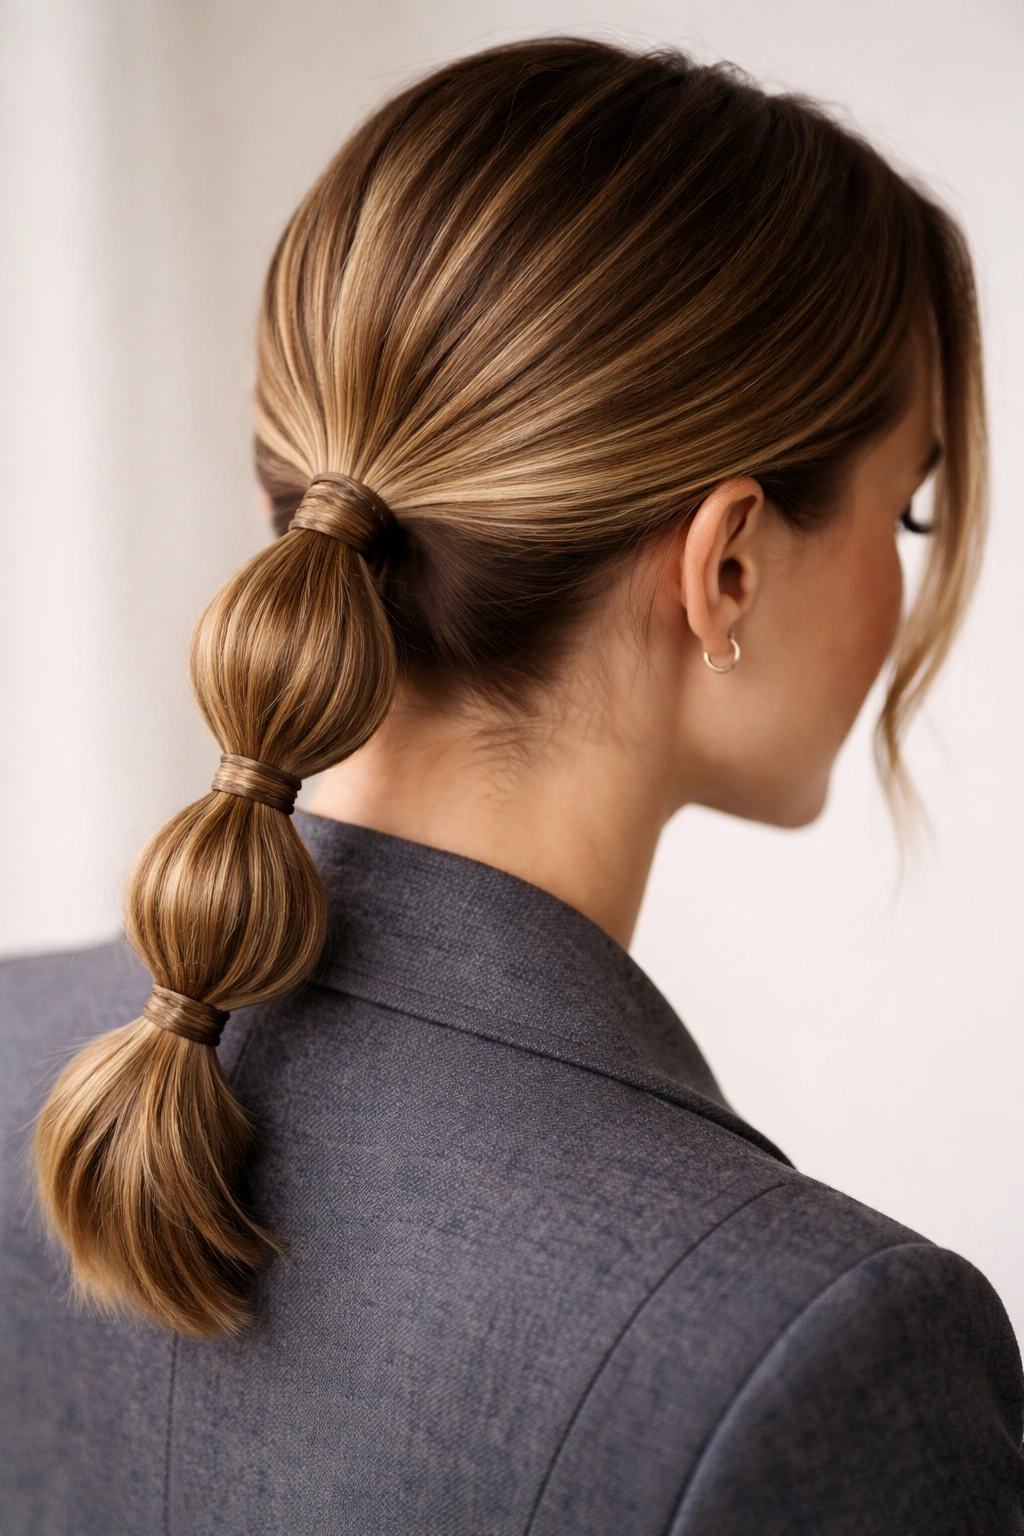
Hide the hardware. That’s what makes this version feel more polished.
Instead of leaving the elastics visible, wrap a small strand of hair around each one and pin it underneath. On short hair, that can make the bubbles look cleaner because there’s less visual clutter at the base of each section. The style reads smoother, even if the hair itself is not perfectly sleek.
This works best on blunt bobs, lobs, and other cuts that already have a tidy edge. The wrapped bands keep the eye moving down the ponytail rather than stopping at every tie. If you have layers, keep the wrap strand thin so you do not shorten the bubbles too much.
It takes a little more time than clear bands. Worth it. Especially if you want the style to feel dressed up without adding heavy accessories.
13. Curled-End Bubble Ponytail
Why leave the ends straight when a small curl changes the whole shape?
Curling the last 2 to 3 inches of each bubble softens the lines and makes short hair look fuller at the bottom. A 1-inch curling iron is enough for most lobs and bobs. You do not need a perfect spiral. A bend and a soft flip are usually enough to keep the ends from looking blunt or thin.
Heat and Spacing
Use heat only on the exposed ends, not the whole tail. Hold each piece for about 6 to 8 seconds, then let it cool in your hand before you touch it. That tiny pause helps the shape last.
The style works especially well if your cut has a strong edge. The curl breaks up that harsh line and gives the bubbles a little movement. It’s a small change, but it makes the whole ponytail feel less flat.
14. Curtain Bangs With a Bubble Ponytail
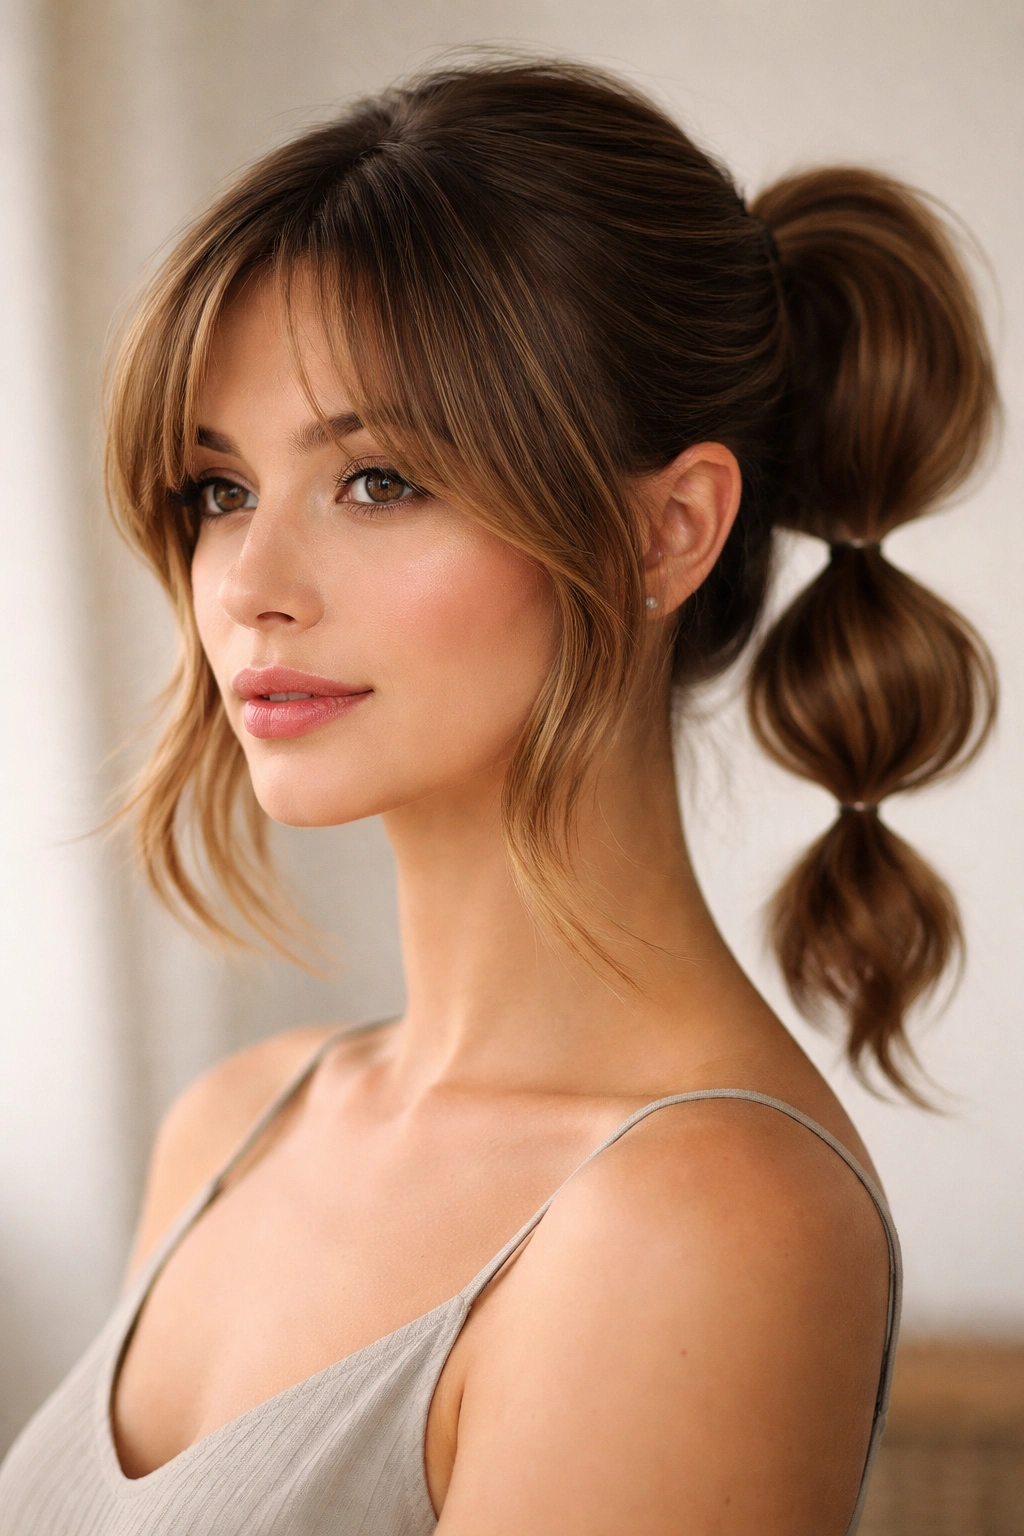
Curtain bangs change everything. They soften the face before the ponytail even starts.
With short hair, a bubble ponytail and curtain bangs make a nice pair because the bangs carry the softness while the back keeps the shape. Part the fringe down the middle, blow-dry it away from the face, and let the bubbles begin just behind the bang line. That keeps the front pieces loose and the rest of the hair controlled.
The thing I like here is balance. The bangs bring motion near the cheeks, and the bubble chain keeps the back from disappearing into the cut. If your layers are short, this is one of the easiest ways to make the style feel intentional rather than over-styled.
Keep the front pieces light. Heavy bangs can swallow the whole look.
15. Sporty Bubble Ponytail With a Headband
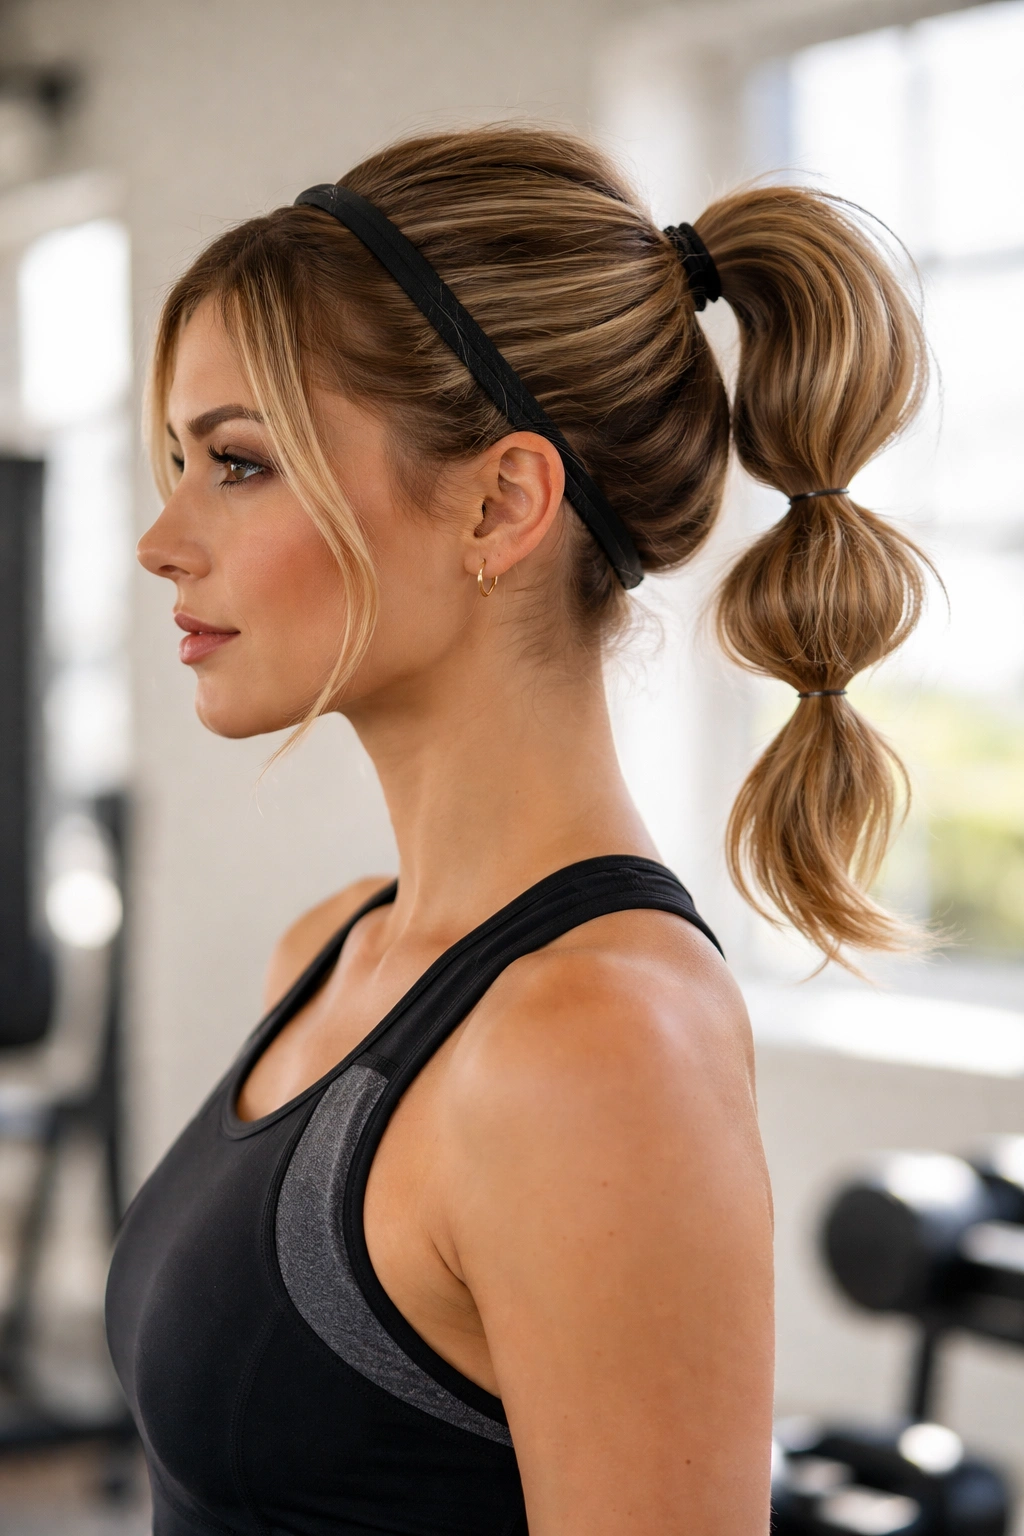
If you want hair off your face and still want it to look finished, this is the straightforward answer.
A thin headband gives the short front layers a place to live while the bubble ponytail handles the back. It’s a good setup for gym days, errands, or any time you need the style to stay put. The headband also helps tame the little pieces near the temples that love to spring loose.
What to Reach For
- A headband about 1/2 to 1 inch wide.
- Snag-free elastics for the bubbles.
- A light mist of hairspray at the hairline.
- A pony height that sits high enough to clear the neck.
Skip thick padded bands unless your hair is dense. On fine or short hair, they can overpower the bubbles and push the whole style backward. A slim band does the job better.
16. Bubble Ponytail for Curly Short Hair
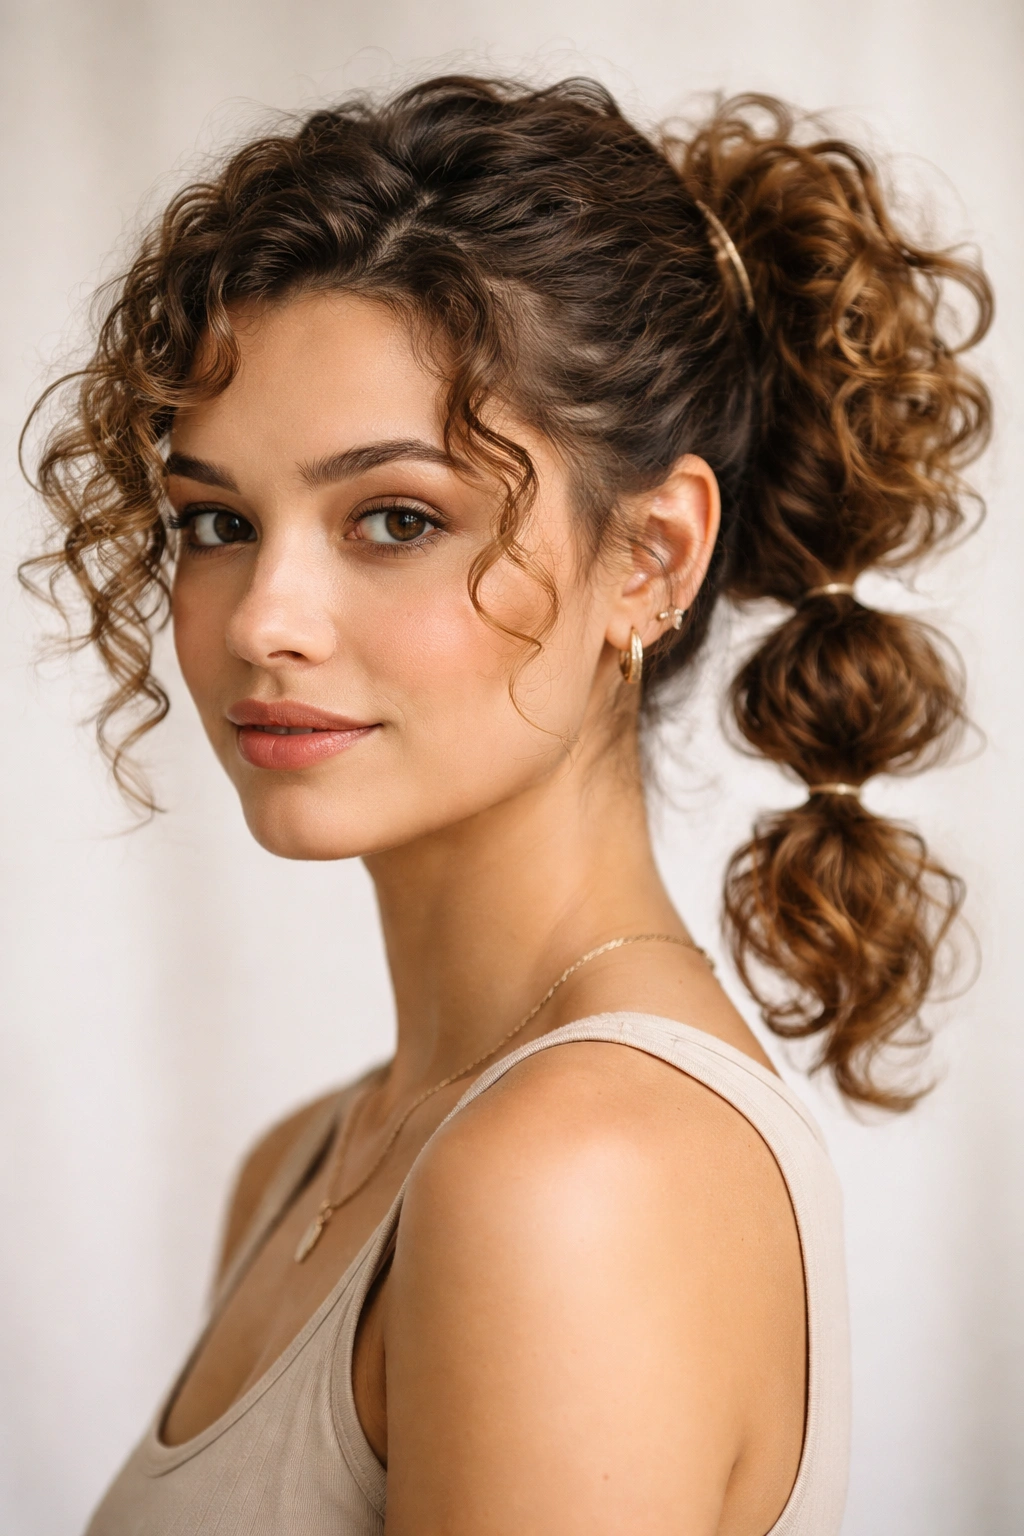
Curly hair does not need to be flattened to join the bubble ponytail party.
In fact, the texture can make the style better. The bubbles look fuller, the sections have more shape, and the shorter pieces around the crown blend into the rest without needing a lot of extra help. Use cream or gel first, then stretch the curls gently into a ponytail so the pattern stays soft.
Keep the Texture, Don’t Fight It
On looser curls
Let the bubbles stay a little rounder and less tight.
On tighter curls
Use smaller sections so the ponytail doesn’t bunch up too much at the base.
On layered curls
Tuck shorter pieces near the neck into the lower bubble with a pin.
The key is restraint. Brush too hard and you’ll break the curl pattern. Smooth enough to gather, but not so much that the hair loses its own shape. That balance matters more here than anywhere else in the list.
17. Crisscross Bubble Ponytail
The crossing sections are the trick.
Instead of pulling the hair straight back, divide the front into two side sections and cross them behind the head before you tie the ponytail. That little bit of movement gives short hair more visual length and makes the base feel more detailed. After that, add your bubbles as usual.
I like this on short hair because the crisscross creates structure before the ponytail even begins. It also helps cover sparse spots near the crown if your cut is layered or a bit grown out. The shape looks more elaborate than it actually is.
Use bobby pins under the crossing point if the hair slips. A little support there keeps the whole style from falling apart later in the day.
18. Faux-Hawk Bubble Ponytail
This is the bold one.
A faux-hawk bubble ponytail keeps the sides slicked close and builds height through the center, which makes short hair look sharper and more deliberate. The bubbles sit like a ridge down the middle of the head. It’s clean on the sides, fuller in the center, and a little bit dramatic in the best way.
What Makes It Different
The style depends on contrast. Flat sides, lifted middle, compact bubbles. That contrast is what makes short hair stand out instead of disappearing into the shape of the head. If your hair is thick, the look gets even stronger. If it’s fine, a touch of backcombing near the crown gives the ridge enough body to stay upright.
Keep the bubbles fairly small. Large ones can make the middle section look heavy, and that defeats the point. A faux-hawk should feel sharp, not slumped.
19. Bubble Ponytail for Thick Short Hair
Thick hair changes the rules a little. You need more space, not more force.
With dense short hair, the bubbles should sit farther apart so each section has room to expand without popping the elastic. Two-inch spacing is often better than one-inch spacing because it keeps the ponytail from looking cramped. The base also needs a firmer hold, usually with stronger elastics and a smooth top layer.
What Thick Hair Needs
- A strong first elastic at the base.
- More room between bubbles.
- A smoothing cream that controls puff at the crown.
- Pins tucked under the lower section if the ends kick out.
Don’t squeeze the style into tiny sections. Thick hair gets bulky fast, and the bubble shape looks better when it has room to breathe. If you try to make the ponytail too small, it just mushrooms in the wrong places.
20. Bubble Ponytail for Fine Short Hair
Fine hair likes structure, not weight.
A bubble ponytail can work on short, fine hair if you keep the sections small and the bubbles light. Start with dry shampoo or texture powder at the roots, then tease the crown a little before the first elastic goes in. That gives the ponytail something to hold on to without making it stiff.
What Fine Hair Needs
A smaller base
A low or mid ponytail usually stays cleaner than a very high one.
Fewer bubbles
Three bubbles often look better than six on fine hair.
Gentle puffing
Pull each bubble just enough to give it shape. Too much tugging makes the style collapse.
I prefer clear elastics here because they stay discreet. Heavy accessories can flatten fine hair fast. The style works best when it looks airy but still controlled.
21. Scarf-Wrapped Bubble Ponytail
A scarf changes the whole feel of a short bubble ponytail.
Wrap a narrow silk or satin scarf around the base, then let it trail down the bubbles or knot it around one section near the middle. The fabric gives the style motion and hides the fact that short hair sometimes needs a little extra help at the bottom. It’s also useful when you want something softer than metal clips or beads.
The texture matters. Silk slides and feels light. Cotton can grip more, but it can also fight the bubbles if the hair is fine. I usually keep the scarf slim so it doesn’t overpower the ponytail.
This version works best when the rest of the look is simple. Plain top, clean neckline, maybe one earring. Let the scarf do the talking.
22. Twisted Bubble Ponytail
Braids not your thing? Twists are faster and kinder to short layers.
Twist the front sections back from the temples, secure them into the ponytail, and then build the bubbles from there. Twists hold shorter pieces better than a plain gather, and they soften the line around the face without adding a lot of bulk. That matters when your hair barely reaches the nape.
Why Twists Beat a Plain Pullback
The twist gives direction to the hair. Short layers know where to go. Without that, they often separate at the sides and leave the style looking unfinished. Two loose twists are usually enough for a neat base, and they can be pinned flat if your hair is very short.
If you want the style to feel softer, pull a few strands loose around the temples after the bubbles are set. Don’t overdo it. A couple of wisps are charming. A cloud of flyaways is not.
23. Tucked-End Bubble Ponytail
Short hair often betrays itself at the ends. This style handles that problem head-on.
Instead of leaving the tail to hang raw, tuck the shortest pieces under the last bubble and pin them out of sight. That way the eye sees a finished shape instead of a bunch of ends poking out where they don’t belong. It’s especially helpful for blunt bobs that sit just at the jaw.
The trick is to build the bubbles a little tighter than you think you need, then loosen them after the ends are secured. That gives you room to hide the shorter bits without making the ponytail look flat. A pea-sized amount of styling cream on the ends helps them slide into place.
This is one of those small fixes that makes a hairstyle look like it belongs on your head. Not borrowed from a longer cut. Belongs.
24. Pearl-Accented Bubble Ponytail
Pearls can be sweet or cheesy. The difference is scale.
On short hair, keep the accents tiny. One pearl pin near the base of each bubble, or a few scattered bead clips, is enough to turn a plain bubble ponytail into something dressier. The bubbles themselves should stay simple so the accessories don’t take over.
Quick Styling Notes
- Choose small pearl pins, not oversized clusters.
- Place them on one side of the ponytail for a cleaner line.
- Keep the first bubble closest to the head the neatest.
- Use only one type of accent; mixing too many finishes gets messy fast.
I like this version for dinners, parties, and any time the outfit needs a little shine. The pearls give the ponytail a soft edge without making it look heavy.
25. Wedding-Ready Bubble Ponytail
This version needs to feel calm, clean, and a little soft around the edges.
A wedding-ready bubble ponytail on short hair usually starts low, with the front brushed smooth and the bubbles kept evenly spaced. Wrap one strand around the first elastic, pin it underneath, and let the last bubble open just a bit wider than the rest. That small change makes the style feel more elegant without changing the whole shape.
What Keeps It Polished
A smooth base
Any bumps near the crown show fast in photos and under bright lights.
Soft face framing
A few loose pieces around the cheeks keep the style from looking severe.
Secure pins
Use pins that match your hair color so the finish stays clean.
I wouldn’t load this version with too many ornaments. One comb, one pin, maybe a tiny crystal detail. That’s enough. The shape should carry the look, not a pile of decorations.
26. Workout Bubble Ponytail
When you need it to stay put, make it boring in the best possible way.
A workout bubble ponytail on short hair should sit high, feel snug, and leave no room for loose ends to whip around your neck. Use a secure elastic at the base, then add compact bubbles with no-slip bands. If your hair is layered, a bit of gel at the hairline helps keep the front from breaking apart when you move.
This is not the place for big, fluffy sections. Small bubbles hold better and bounce less. If your hair is very short, two bubbles might be enough. Three is fine if the tail has enough length, but don’t force a fourth just to make the style look more complete.
Practical wins here. That’s the whole appeal.
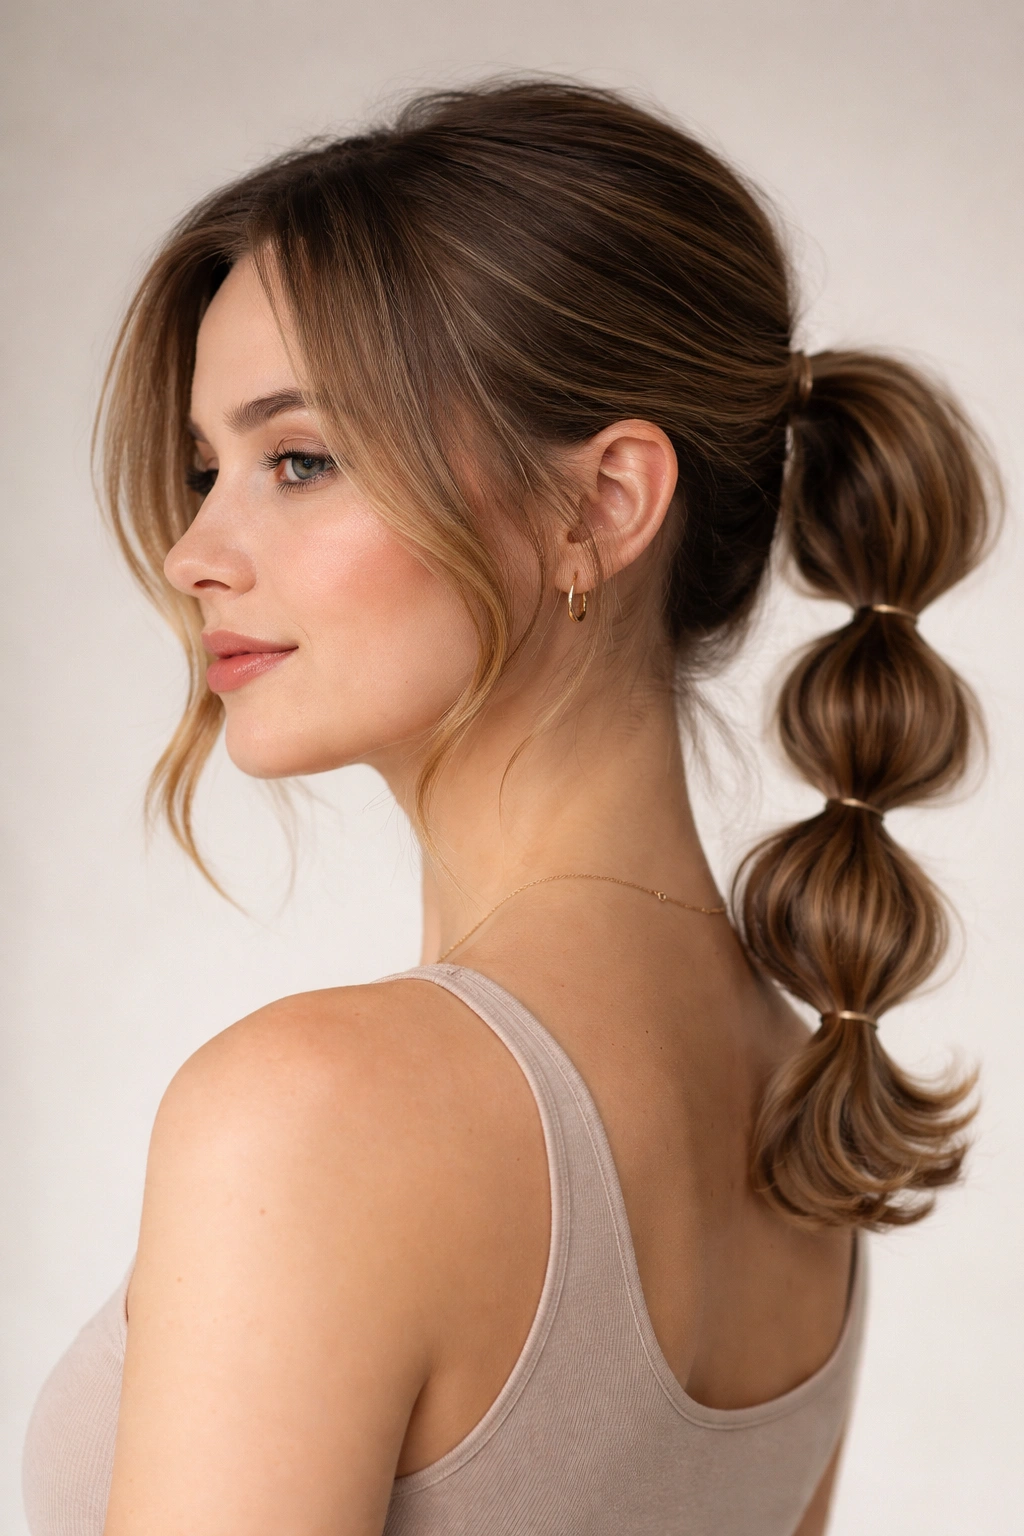
27. Soft Bubble Ponytail With Face-Framing Pieces
A soft bubble ponytail is what I reach for when short hair needs shape and a little ease at the same time.
Start with a low or mid ponytail, leave two slim face-framing pieces out, then build three gentle bubbles down the back. The front pieces should sit loose near the cheekbones, not flop into your eyes, and the bubbles should be soft enough to move when you turn your head. That balance keeps the style from looking too hard.
This version works for a lot of short cuts because it doesn’t demand perfect symmetry. A lob, a grown-out bob, even a short layered cut can handle it if the base is anchored well. And if the ends are stubborn, tuck them into the last bubble instead of pretending they’ll lie flat on their own.
It’s the kind of style that feels finished without being fussy. Short hair likes that. A lot.